Search
Close
  • The Pattern Shop
  • Our Free Patterns
    • Browse All Our Free Patterns
    • Our Free Knitting Patterns
    • Our Free Crochet Patterns
  • Blog
    • All Blog Posts
    • All Free Patterns
    • Dibble Dabble Inspiration
    • Giveaways
    • Make-Alongs
    • Product Reviews
    • Roundups
    • Tips, Tricks, Techniques for Knitting and Crochet
Stylized bird with pink and gray swirling tail above elegant โ€œMarlyโ€ text, logo for crochet accessories and home decor.
  • Marly Bird House
  • Learn to Knit & Crochet
    • Newbie? Start Here
    • Video Tutorials
    • Knitting Definitions
    • Crochet Definitions
    • Common Techniques
    • Size Charts for Knitting and Crochet Projects
  • About
ร—
  • The Pattern Shop
  • Free Patterns
  • Blog
  • Marly Bird House
  • Learn to Knit & Crochet
    • Newbie? Start Here
    • Video Tutorials
    • Knitting Definitions
    • Crochet Definitions
    • Common Techniques
    • Size Charts for Knitting and Crochet Projects
  • About
Stylized bird with pink and gray swirling tail above elegant โ€œMarlyโ€ text, logo for crochet accessories and home decor.
Search
Close

New Patterns NOW Available in Ad-Free PDF! Check out The Pattern Shop

Almond Brittle Knit Wrap: Free Beginner-Friendly Bulky Knit Lace Pattern

May 27, 2026 By Meg Leave a Comment

”

The Almond Brittle Knit Wrap is a free bulky-weight knit lace wrap pattern designed for confident beginners and easy knitters who want a real lace project they can actually finish in 1 to 2 weeks. Worked back-and-forth in rows on US 10 (6 mm) circular needles using a simple repeating 10-row Lace Bands stitch pattern, the finished wrap measures 80 inches wide by 18 inches deep with tassels on each corner. The pattern uses 2 cakes of Caron Macchiato Cakes (80% acrylic, 20% wool, CYCA #5 bulky). Originally a fan favorite from the Truthful Threads 2023 release, this wrap is the bulky-yarn cousin of my popular Know Your Worth Knit Cocoon Cardigan.

If you've been dreaming about a lace wrap but the thought of fingering-weight yarn on size 4 needles for the next six months makes your eyes glaze over… bestie, I made this one for YOU.

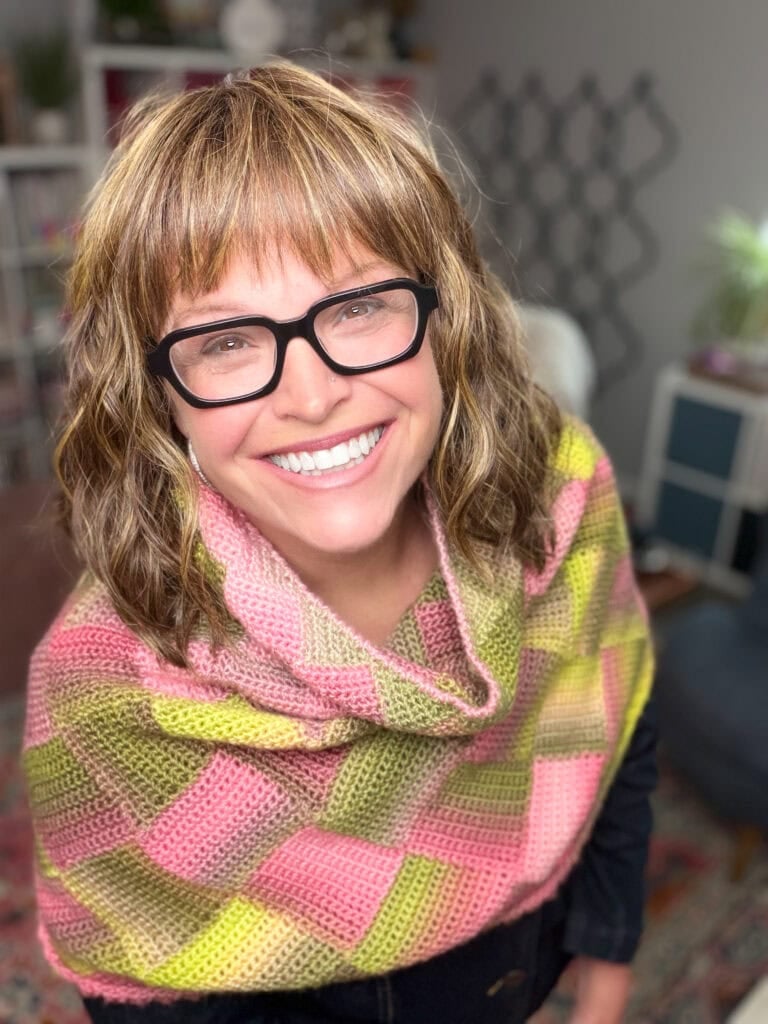
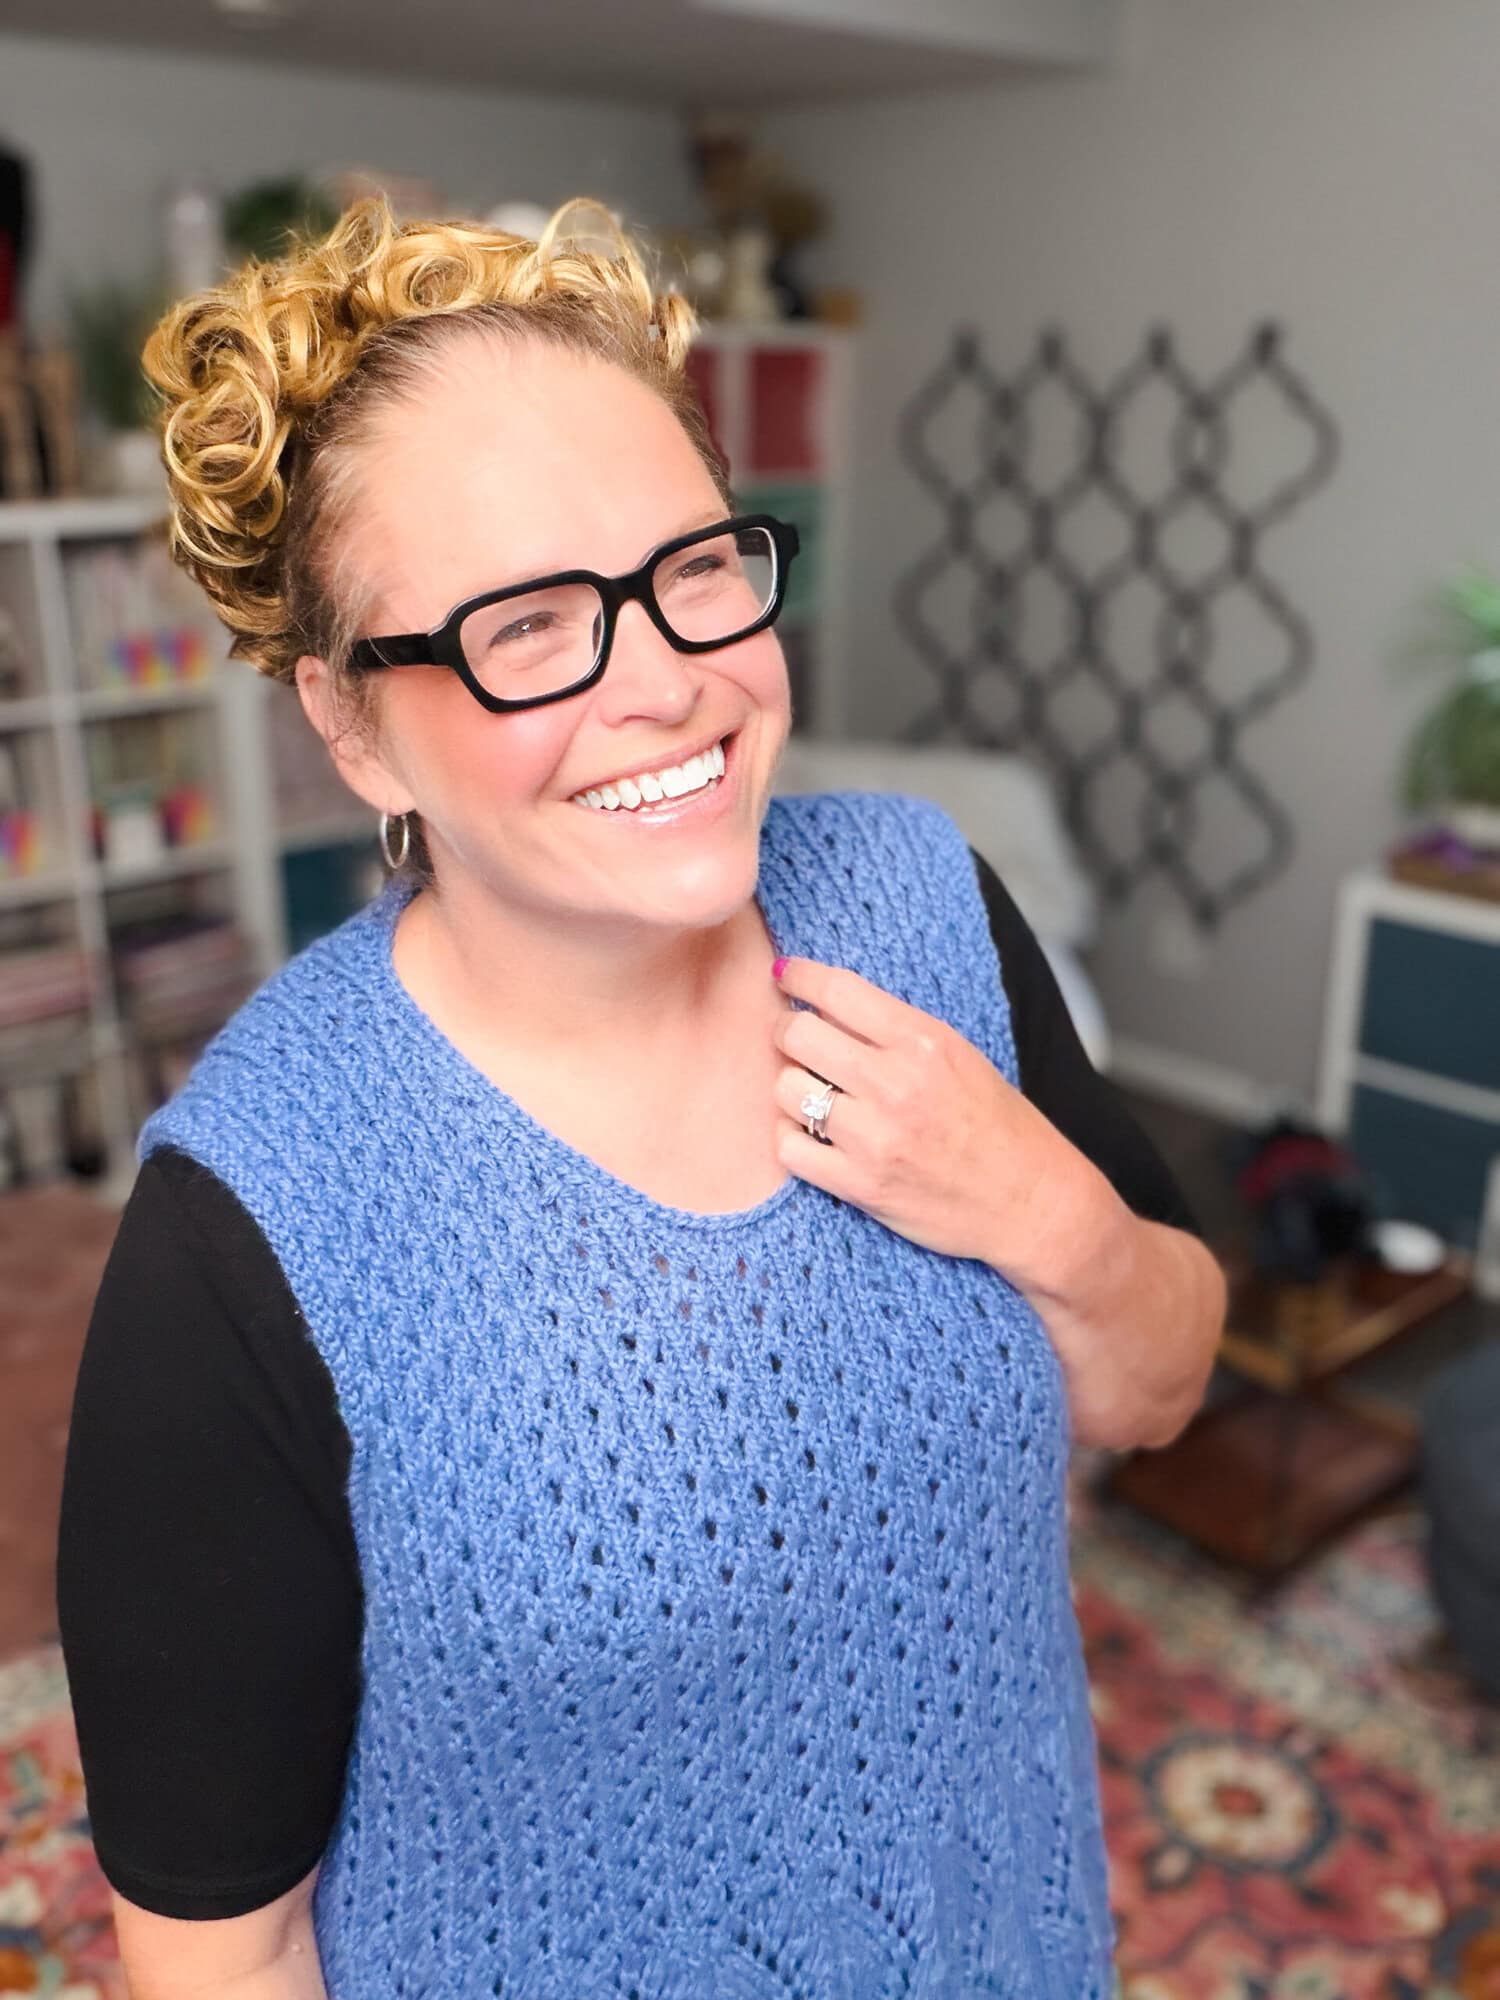
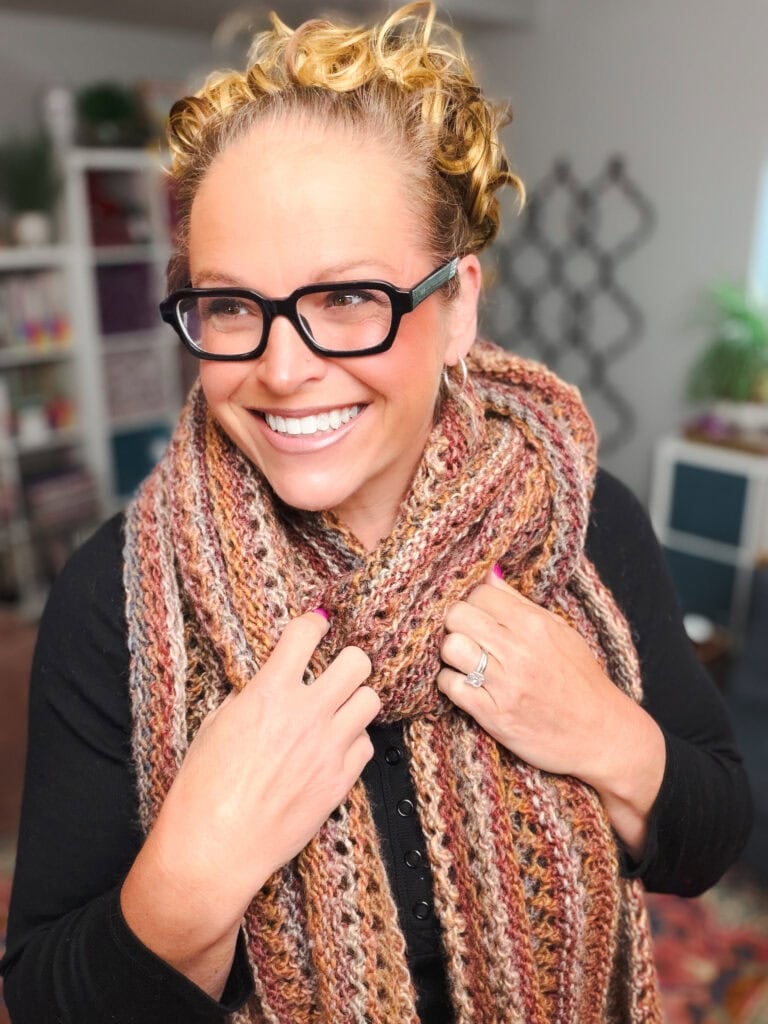
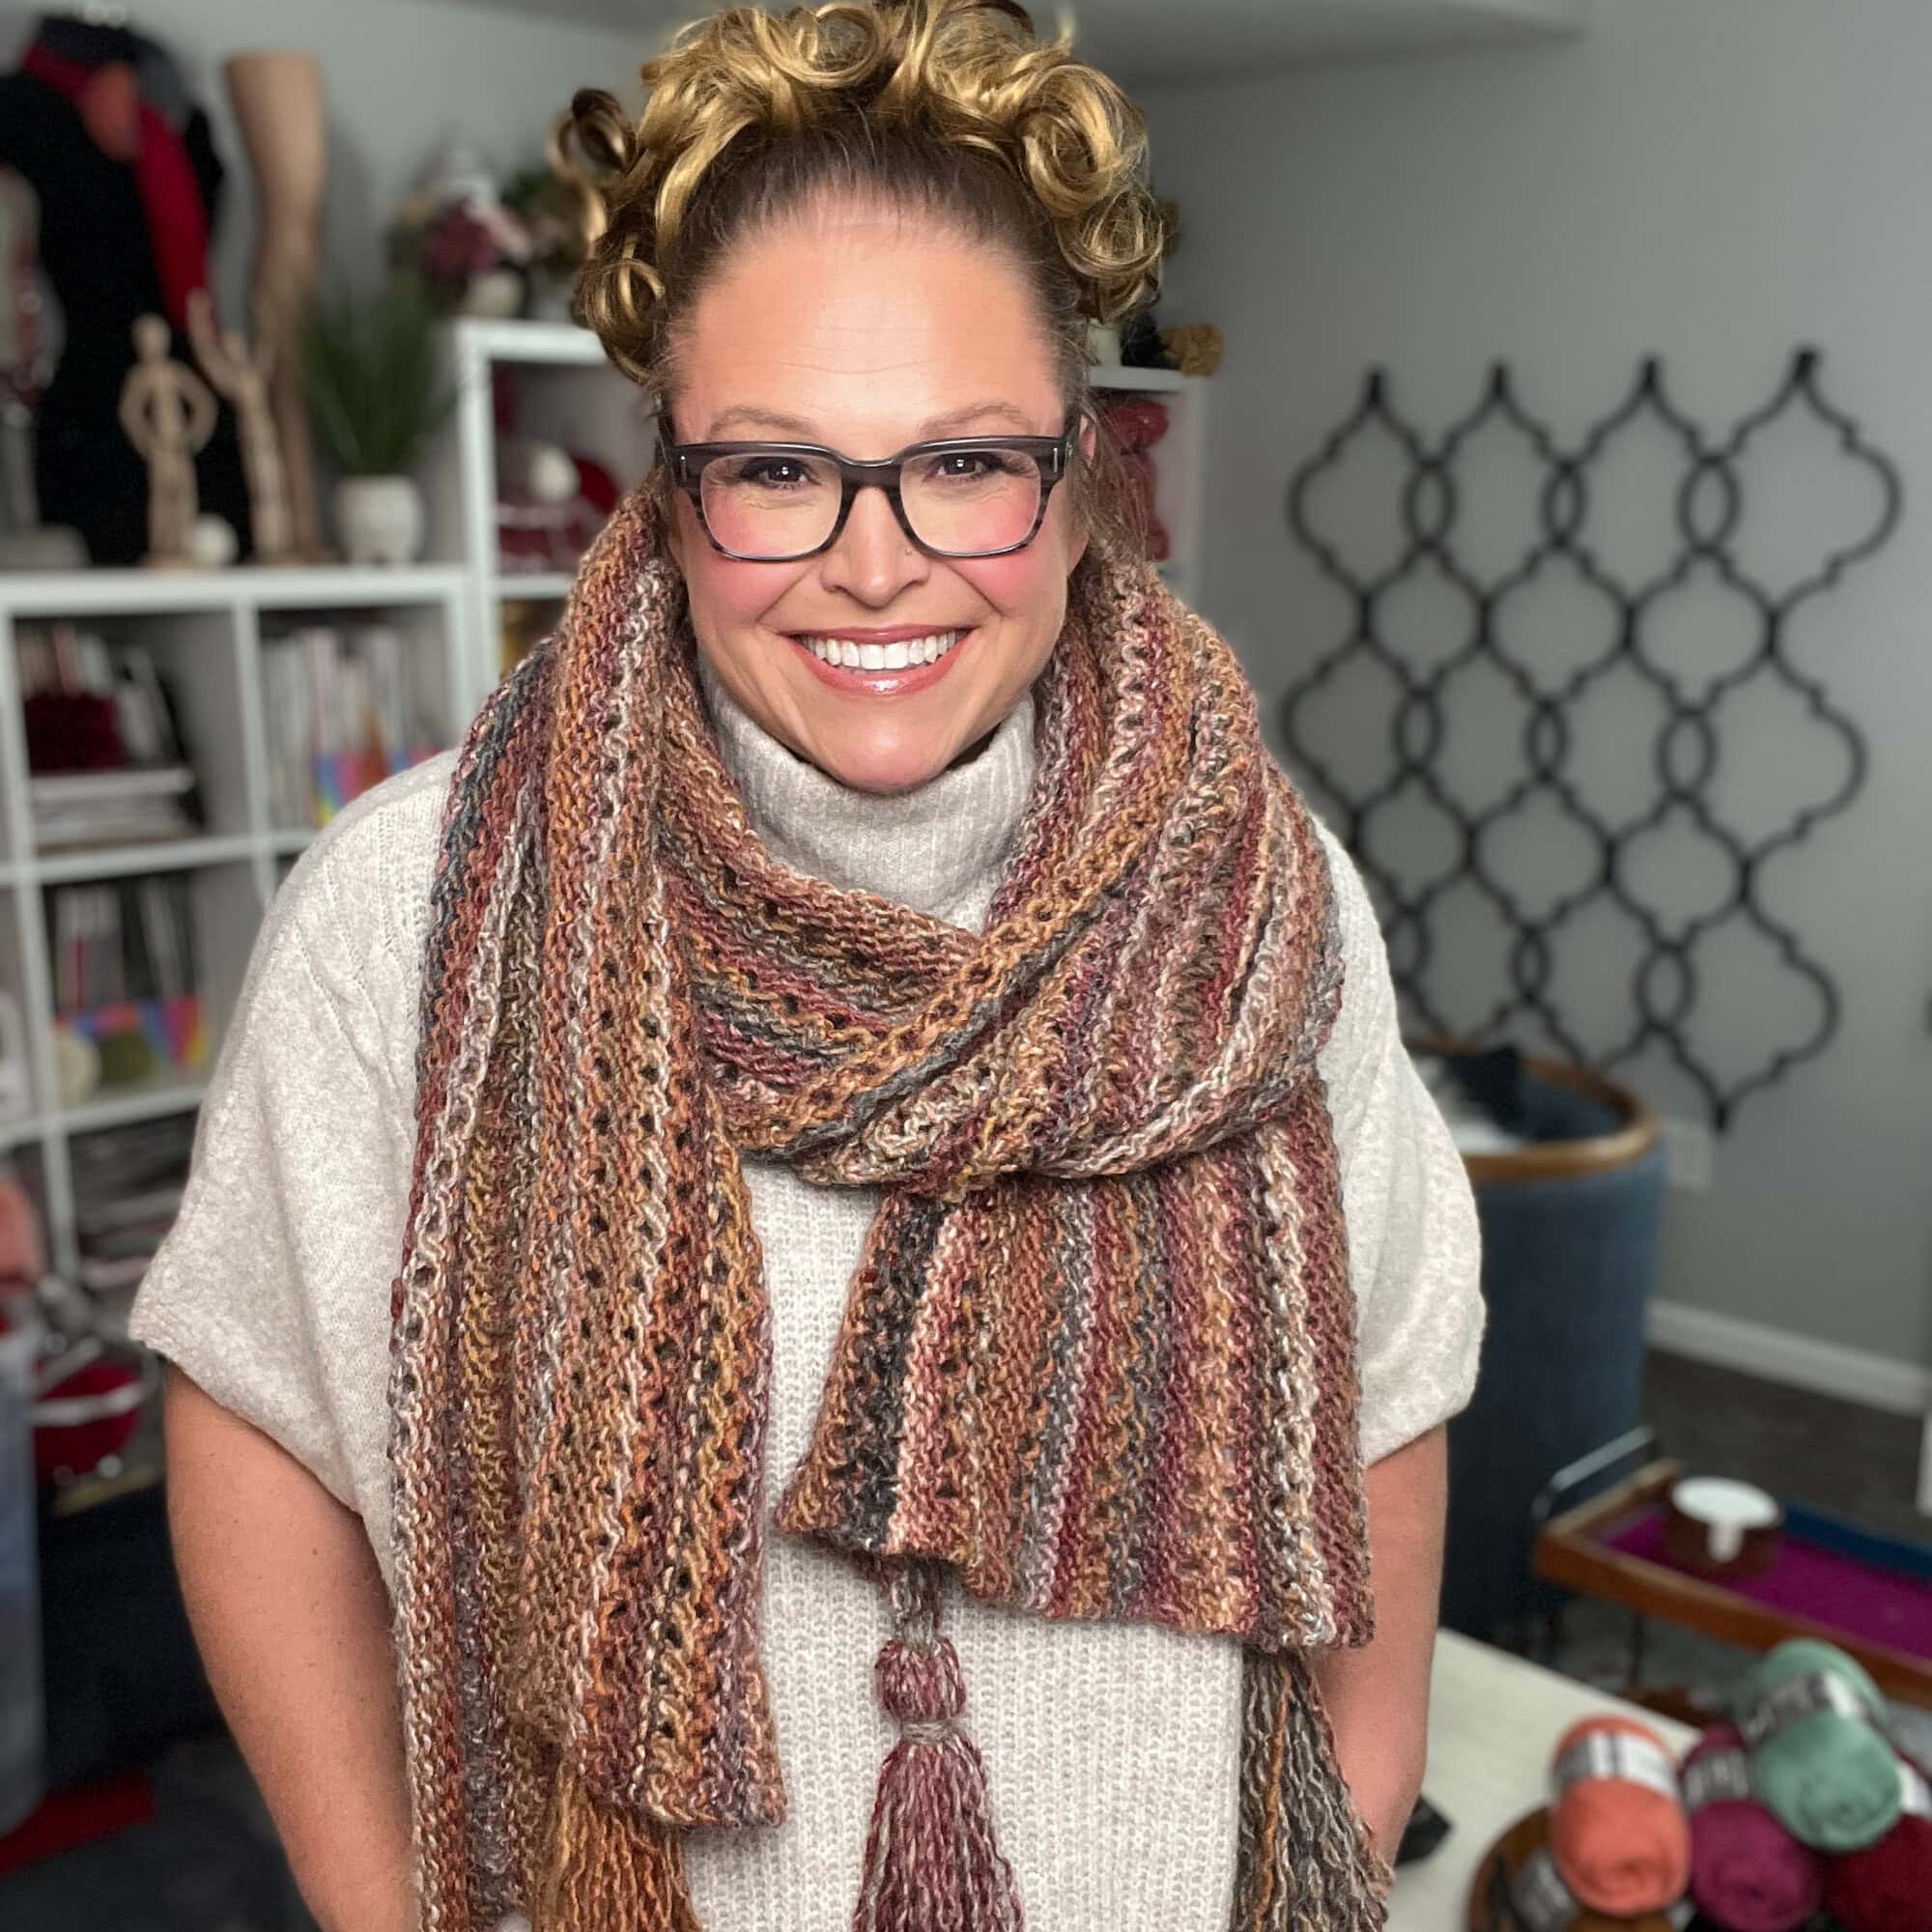
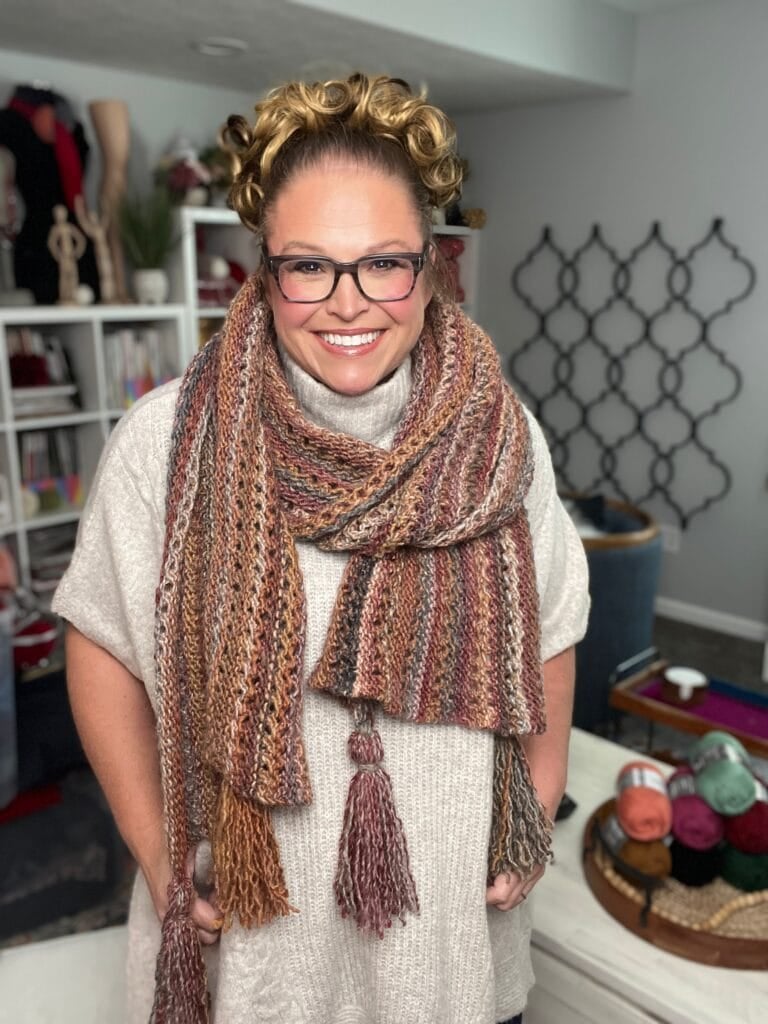
A person models a chunky, multicolored Almond Brittle knit wrap in Caron Macchiato Cakes bulky yarn, showing the Lace Bands stitch pattern and tassel corners

The Almond Brittle Knit Wrap is a free bulky-weight knit lace pattern that proves lace knitting does NOT have to be a marathon. Worked on US 10 needles in 2 cakes of Caron Macchiato Cakes, with a simple repeating Lace Bands stitch pattern, this wrap goes from cast-on to bind-off in about a week or two of evening knitting. The finished piece is a generous 80 inches wide by 18 inches deep… that's “wrap yourself up in it on the couch” dimensions, not a fussy little neck scarf.

This pattern was a fan favorite the moment it released, and I'm bringing it back here on the blog as a free pattern because it's still one of the best “first lace project” wraps I've ever designed. It's an easy knit you can work on at Stitch Night with your friends, or while sipping a glass of wine on the couch with your favorite show… and just a heads-up: pay attention to the actual stretch of the lace. The Lace Bands open up DRAMATICALLY when you block this wrap. It'll surprise you in the best way.

Hey, bestie ๐Ÿ’›

This wrap is one of my favorite “I just want a finished project I can actually wear” designs. I knit the original sample during the Truthful Threads 2023 season specifically because so many of you told me you LOVED the idea of lace knitting but couldn't commit to a fingering-weight, months-long project. The Lace Bands stitch pattern uses just three simple lace rows separated by garter and reverse-stockinette breathers… it's the kind of rhythm you'll memorize after the first repeat and then knit on autopilot while you binge your favorite show.

And those tassels on the corners? Pure joy. Optional, of course, but they take a project from “nice handknit” to “she made this and it's GORGEOUS” in about fifteen minutes of finishing work. I'll show you my favorite tassel-making shortcut later in the post too.

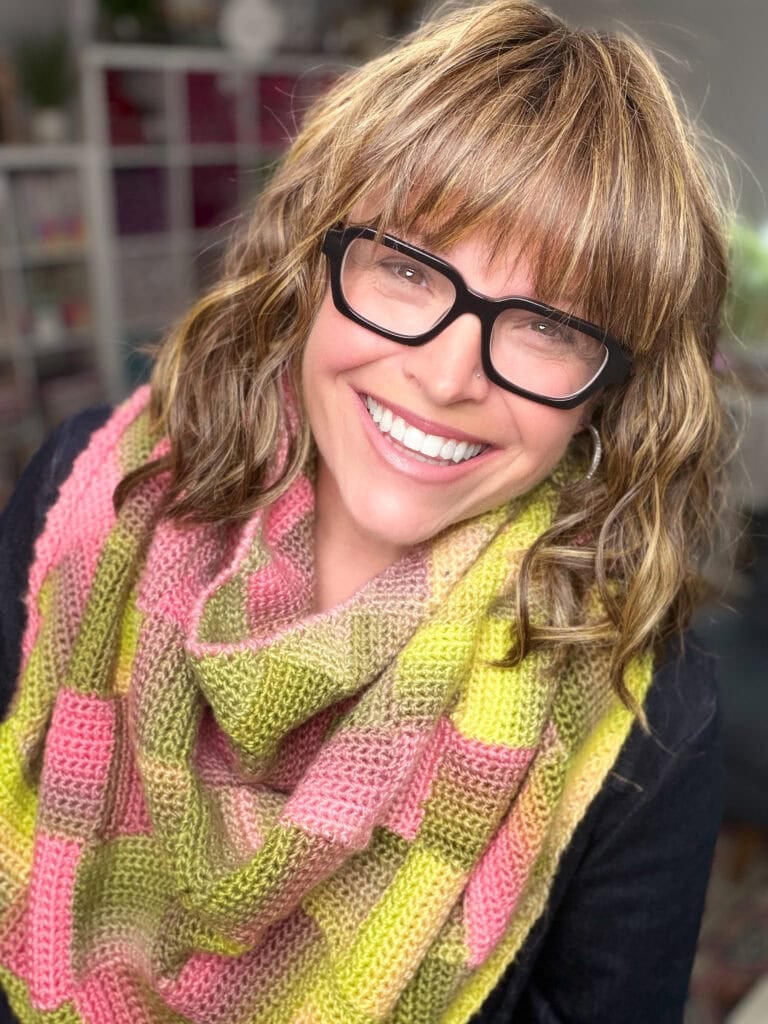
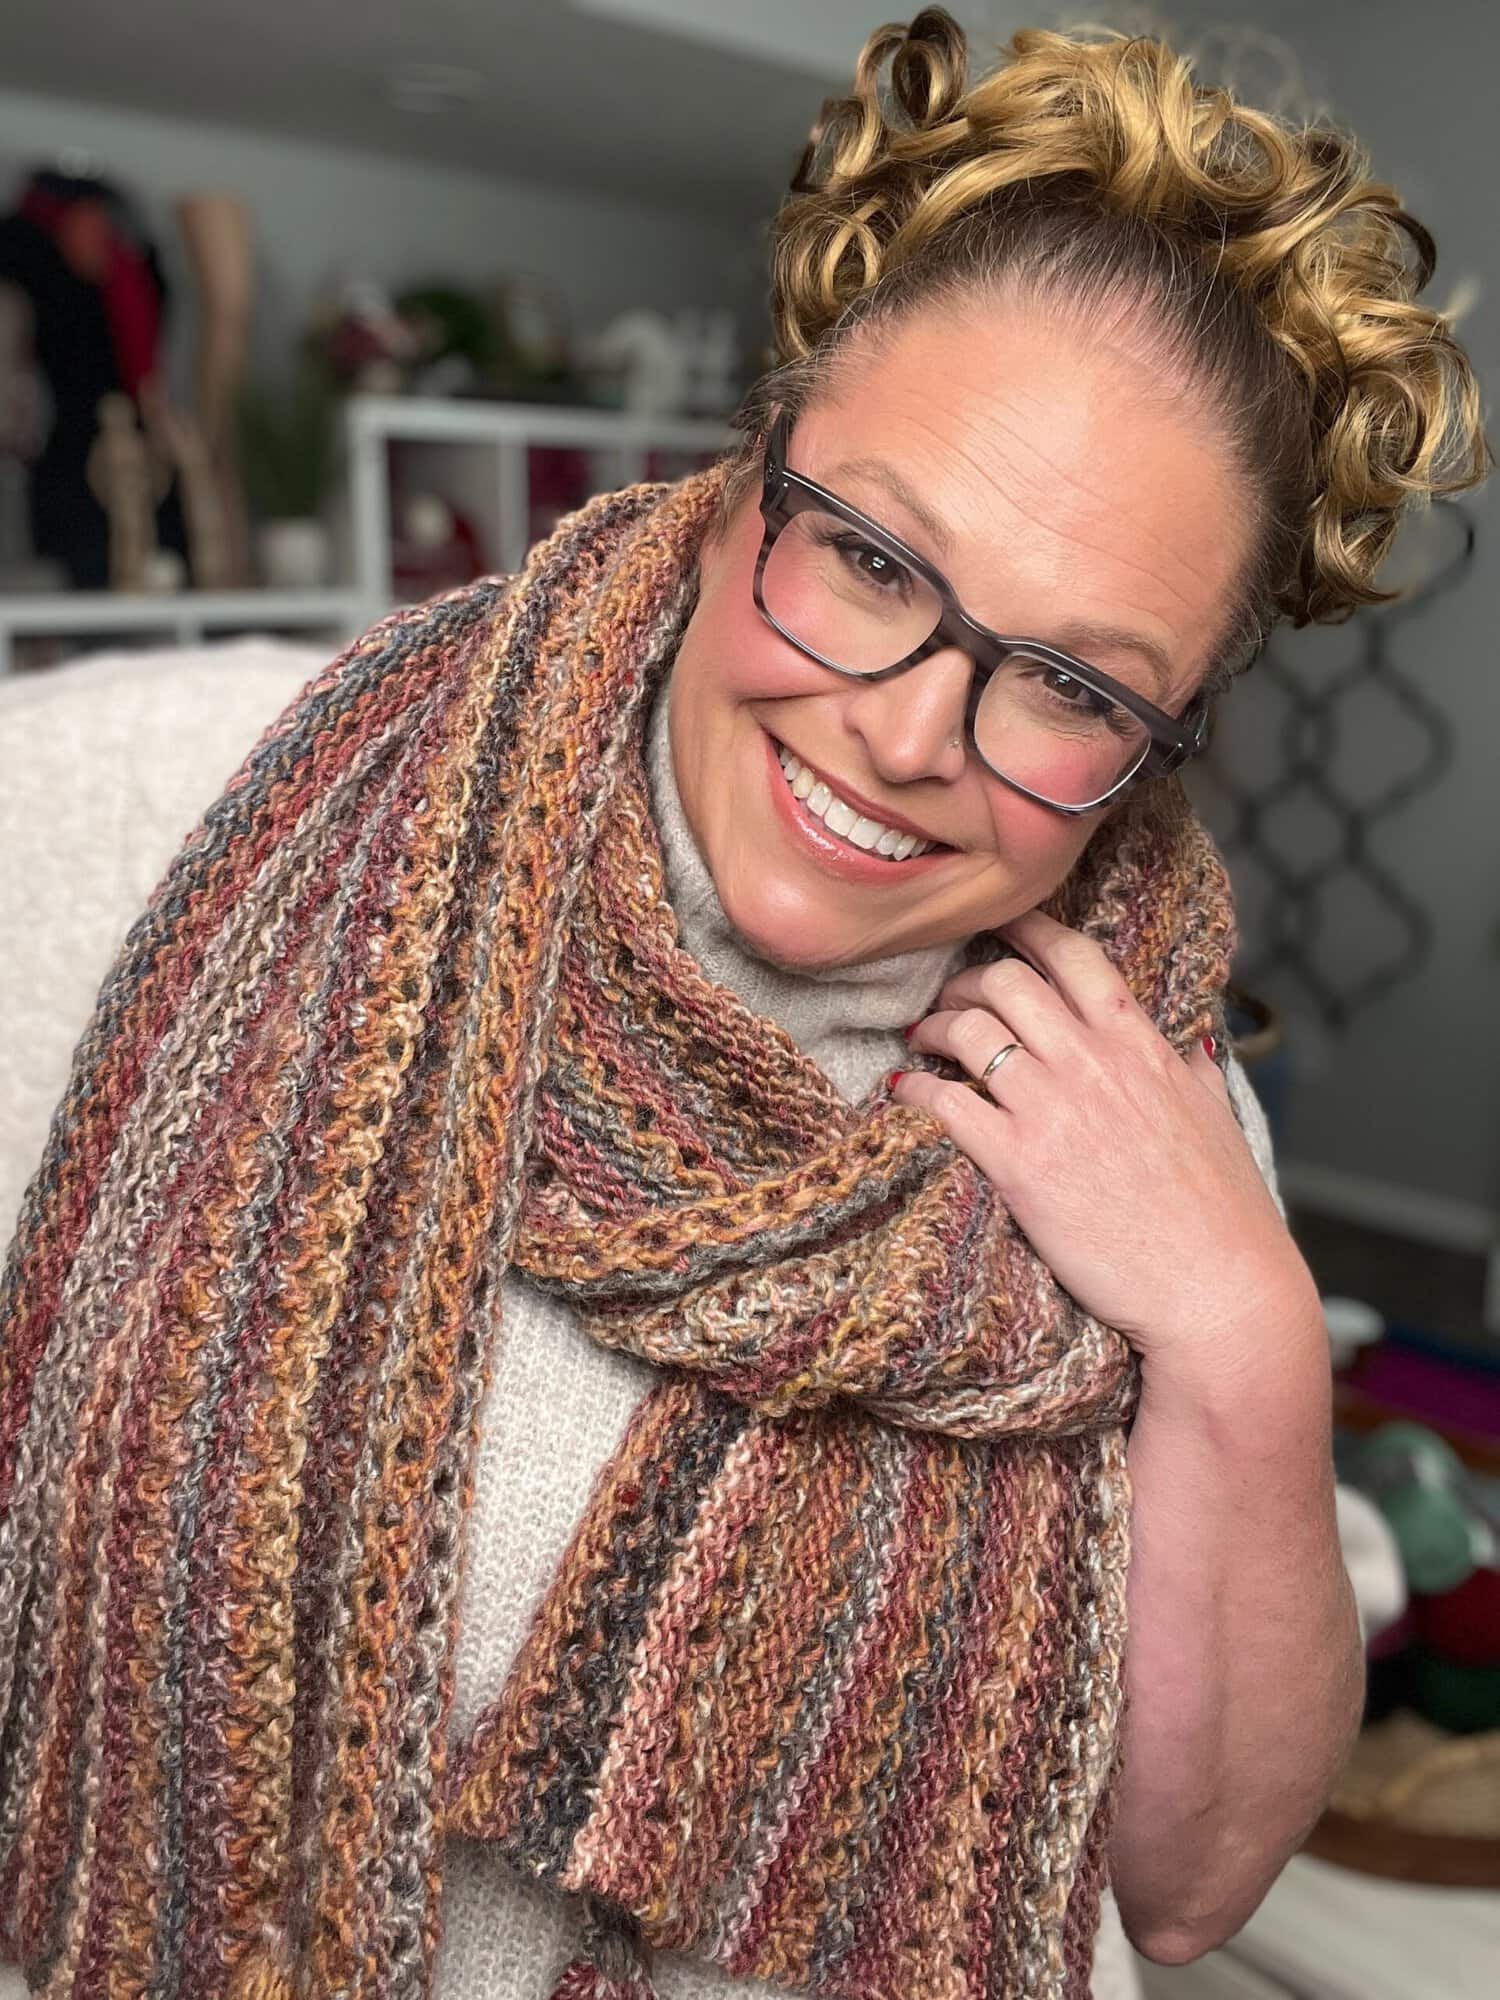
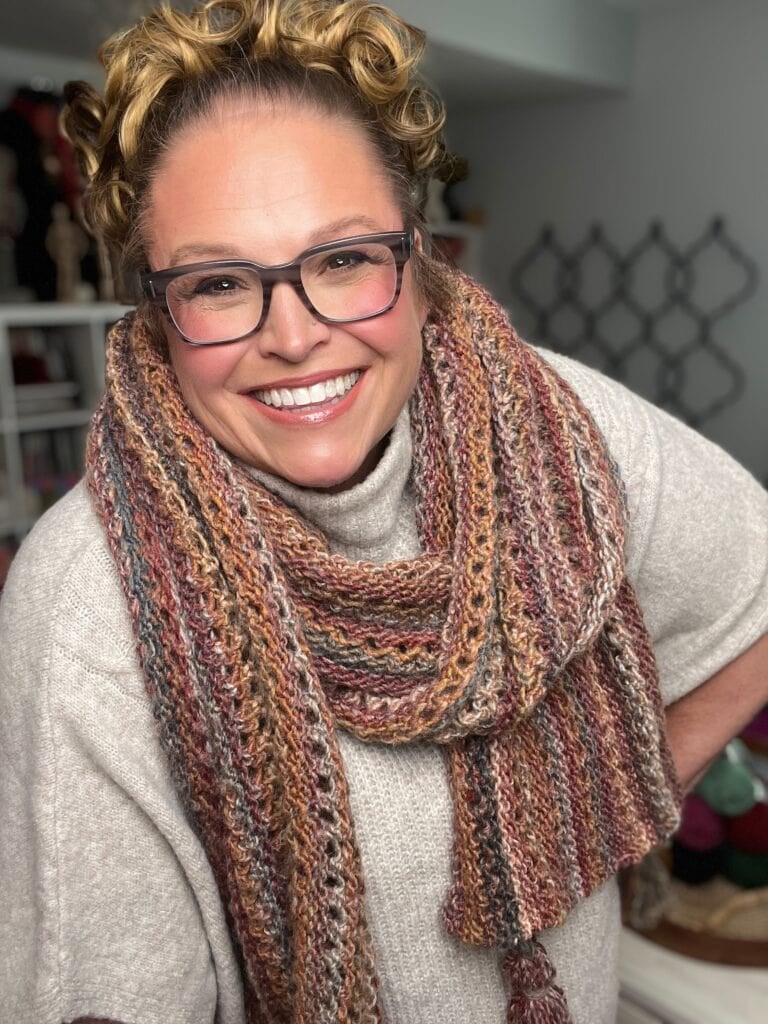
A woman models a cozy multicolored Almond Brittle knit wrap with visible Lace Bands stitch detail and corner tassels
๐Ÿงถ Affiliate Disclosure: This post contains affiliate links. If you purchase through them I may earn a small commission at no extra cost to you… and it helps support free patterns and content from my yarn-loving heart ๐Ÿ’› See my privacy policy here.

๐Ÿ’– What You'll Love About the Almond Brittle Knit Wrap

  • ๐Ÿ’› Real lace… without the months-long commitment. Bulky yarn + US 10 needles + a 10-row pattern repeat = a finished wrap in 1 to 2 weeks of evening knitting.
  • ๐Ÿ’› The stitch pattern is genuinely beginner-friendly. Only 3 of the 10 rows have any lace at all (just a yarn over plus a basic decrease), and even those are separated by easy garter and reverse-stockinette rest rows.
  • ๐Ÿ’› The dimensions are wrap-yourself-up generous. 80 inches wide by 18 inches deep means it's a full-coverage wrap, not a fussy little shawlette.
  • ๐Ÿ’› The tassels are pure joy. Optional but recommended… they take maybe 15 minutes total and add so much personality.
  • ๐Ÿ’› You only need 2 cakes of yarn. A finished wrap from just 2 cakes is unbeatable value for a piece this big.
  • ๐Ÿ’› It's a Stitch Night dream project. Easy enough to chat through, simple enough to sip wine through, rhythmic enough to lose yourself in.

๐Ÿงต Quick Pattern Overview

  • ๐ŸŽฏ Skill level: Easy
  • ๐Ÿ“ Finished measurements: 80″ wide ร— 18″ deep [203 cm ร— 45.5 cm]
  • ๐Ÿงถ Yarn weight: Bulky (CYCA #5)
  • ๐Ÿงถ Yarn used: Caron Macchiato Cakes (80% acrylic, 20% wool, 481 yds / 440 m, 8 oz / 227 g per cake)… 2 cakes in Boundless
  • ๐Ÿชก Needles: US 10 (6 mm) 60″ [152.5 cm] circular needle and double-pointed needles in the same size, or size required for gauge. (Wrap is worked back-and-forth in rows… the circular is just to hold the full width of stitches.)
  • ๐Ÿ“ Gauge: 11 sts ร— 23 rows = 4″ ร— 4″ [10 cm ร— 10 cm] in Lace Bands pattern
  • ๐Ÿงท Notions: Stitch markers, tapestry needle, scrap cardboard or a tassel maker (for the corner tassels)
  • โฑ๏ธ Estimated knitting time: 15-25 hours total (1-2 weeks of evening knitting)

๐Ÿ’Ž Love the Pattern but Want an Ad-Free PDF?

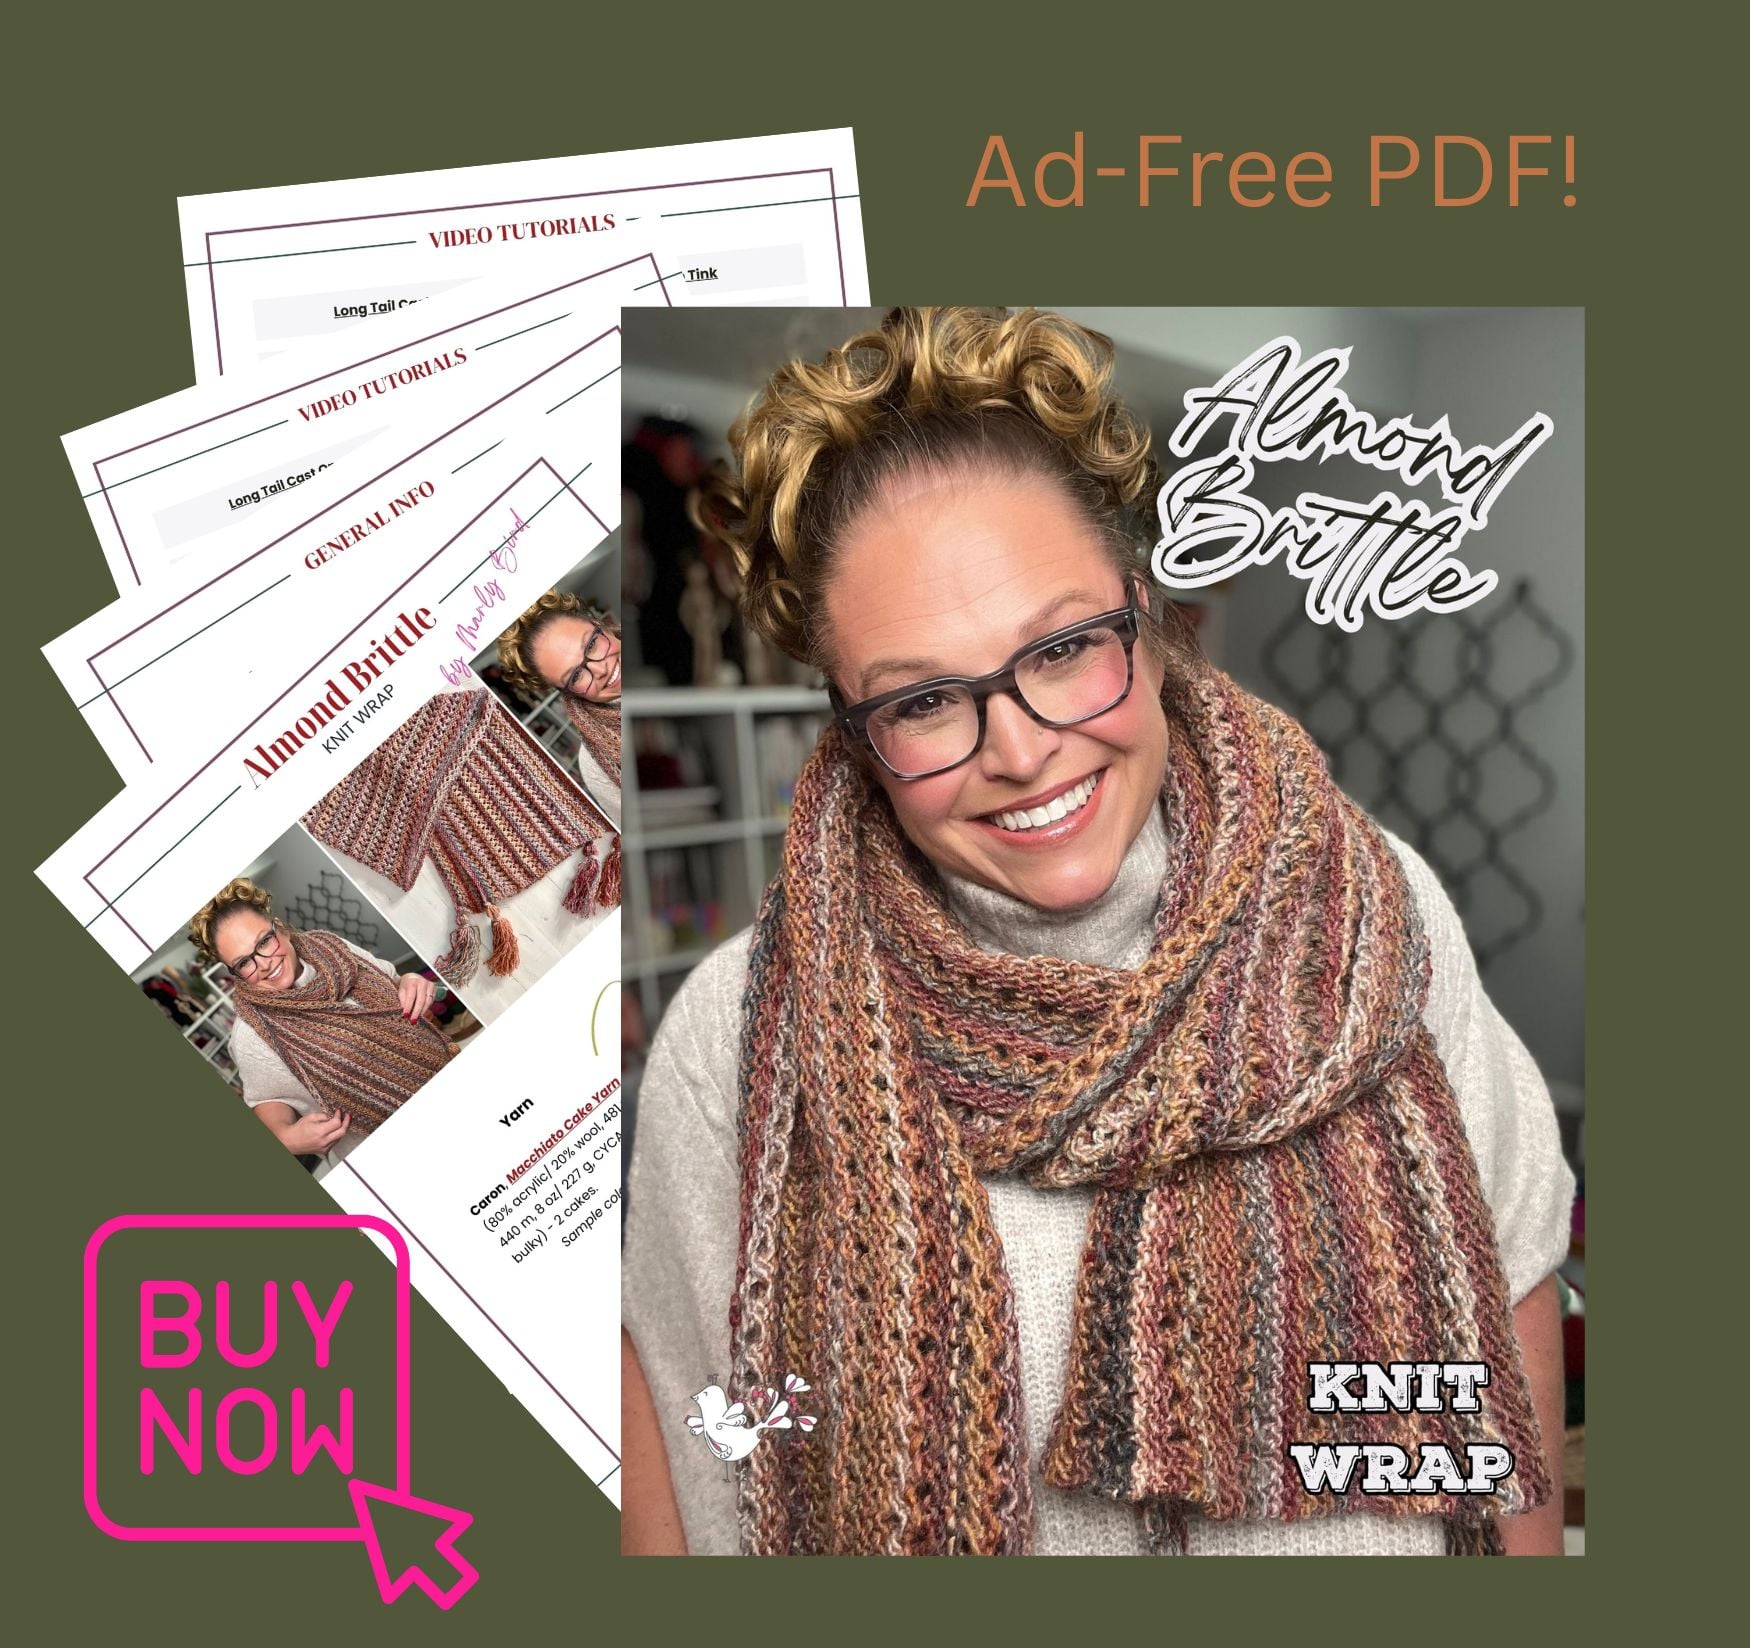
Mockup of the Almond Brittle Knit Wrap ad-free printable PDF pattern

โœจ The full Almond Brittle Knit Wrap pattern is right here on the blog, completely free. But if you'd love a clean, printable, ad-free version you can take with you to the yarn store or pin to your project bag, you can grab the ad-free PDF below… and your purchase directly supports my free pattern library here on the blog.

Grab the Ad-Free Printable PDF

Skip the ads. Print clean. Pin to your project bag. Support free patterns on marlybird.com ๐Ÿ’›

Etsy
Shopify
Ravelry

And while you're here… pop your email in the box below so I can send you brand-new free patterns the moment they hit the blog ๐Ÿ’Œ

Join our Newsletter

Get Free Crochet & Knitting
Pattern Links & Coupons!

Hand-drawn bird with curling, detailed feathers and pink accents; cheerful pose showcases fine line and texture work.
>> Become An Insider <<
A woman with glasses and curly hair models a colorful crocheted scarf, showing textured stitches and vibrant yarn.

๐Ÿชก Why Bulky Lace? (And Why This Pattern Matters)

Here's the thing about traditional lace knitting: most patterns are designed for fingering or laceweight yarn on tiny needles, which means a finished shawl can take months. And while a delicate cobweb-lace heirloom is gorgeous, it's also intimidating, slow, and frankly, not the project most knitters can squeeze into a real life with jobs and kids and Stitch Night and naps.

Bulky lace flips that whole equation. Bigger yarn means bigger holes… which means the lace pattern shows up dramatically without requiring a single chart. The Lace Bands pattern in Almond Brittle is just a single, repeating yarn-over-and-decrease row, with plain rest rows in between. That's it. On US 10s in bulky yarn, every yarn over becomes a clean, visible hole the moment you block the finished wrap.

This is why Almond Brittle is the wrap I recommend to every knitter who's curious about lace but scared to commit. It gives you the satisfaction of “I MADE LACE” without the steep learning curve. You'll come away from this project with new skills (yarn overs, k2tog, ssk, blocking lace) AND a beautiful finished wrap you'll wear for years.

If you fall in love with the Lace Bands stitch pattern, you'll also adore my Know Your Worth Knit Cocoon Cardigan… it uses this same Lace Bands stitch in a cocoon-cardigan construction, and it's been one of my most popular patterns for years. Once you've knit Almond Brittle, you've already learned everything you need to make the cardigan version too. (More on that pairing below.)


๐Ÿค” Is This Pattern Right for You?

The Almond Brittle Knit Wrap is your match if…

  • โœ… You're a confident beginner or easy knitter who has done basic knit + purl + a few simple decreases.
  • โœ… You've been intimidated by lace knitting and want a “lace lite” project that gives you a real lace finished look without months of charts.
  • โœ… You love generous, full-coverage wraps you can actually curl up in.
  • โœ… You appreciate budget-friendly yarn that still has enough wool to block beautifully.
  • โœ… You want a relaxing knit you can work on at Stitch Night, on the couch, or with a glass of wine in hand.

This pattern is probably NOT for you if…

  • โŒ You're specifically craving fingering-weight, complex lace charts (try Lehabah or Blood of My Blood instead).
  • โŒ You want a small, neck-scarf-sized accessory (Almond Brittle is wrap-around-yourself big).

๐Ÿง  Build Your Skills: The Lace Bands Stitch Pattern

The Almond Brittle Knit Wrap is built on a single repeating 10-row stitch pattern called Lace Bands. It's the kind of stitch I love teaching because it gives knitters a “real lace” finished look without the steep learning curve of traditional lace charts. Once you've worked the pattern through once, you'll have it memorized.

Here's the architecture: 4 rows of plain garter stitch (knit every stitch, both sides), then a single lace row (yarn over + k2tog), a rest row (purl on the wrong side with garter borders), another single lace row (this time yo + ssk for a mirror-image hole), another rest row, and one final lace row to close the band. That's it. The rest of the pattern is just repeating those 10 rows until your wrap is 18 inches deep.

What you need to know how to do before casting on:

  • ๐Ÿงถ Knit and purl stitches
  • ๐Ÿงถ Yarn over (yo)… if it's new, that's totally fine, the video tutorials below have you covered
  • ๐Ÿงถ Knit two together (k2tog)… a basic right-leaning decrease
  • ๐Ÿงถ Slip-slip-knit (ssk)… a basic left-leaning decrease
  • ๐Ÿงถ Long-tail cast-on (or your favorite stretchy cast-on)
โœจ Designer Tip: Add a lifeline every 10 rows (after each Lace Bands pattern repeat). A lifeline is just a piece of smooth, contrasting thread threaded through every live stitch… it gives you a safety net so if you make a mistake 12 rows down the road, you can rip back to the lifeline and pick the stitches up cleanly. Honestly, lifelines are the difference between “I love this project” and “I'm frogging this whole thing.”
โš ๏ธ Pay Attention to the Stretch: Knit lace stretches A LOT when you block it. The Almond Brittle wrap will look smaller and tighter coming off your needles than the finished 80″ ร— 18″ measurements suggest. Don't panic. When you wet-block this piece, the Lace Bands will open up dramatically and the wrap will grow into those final dimensions. The stretch is part of the magic… but it WILL surprise you the first time you see it.

๐Ÿงถ Yarn and Materials

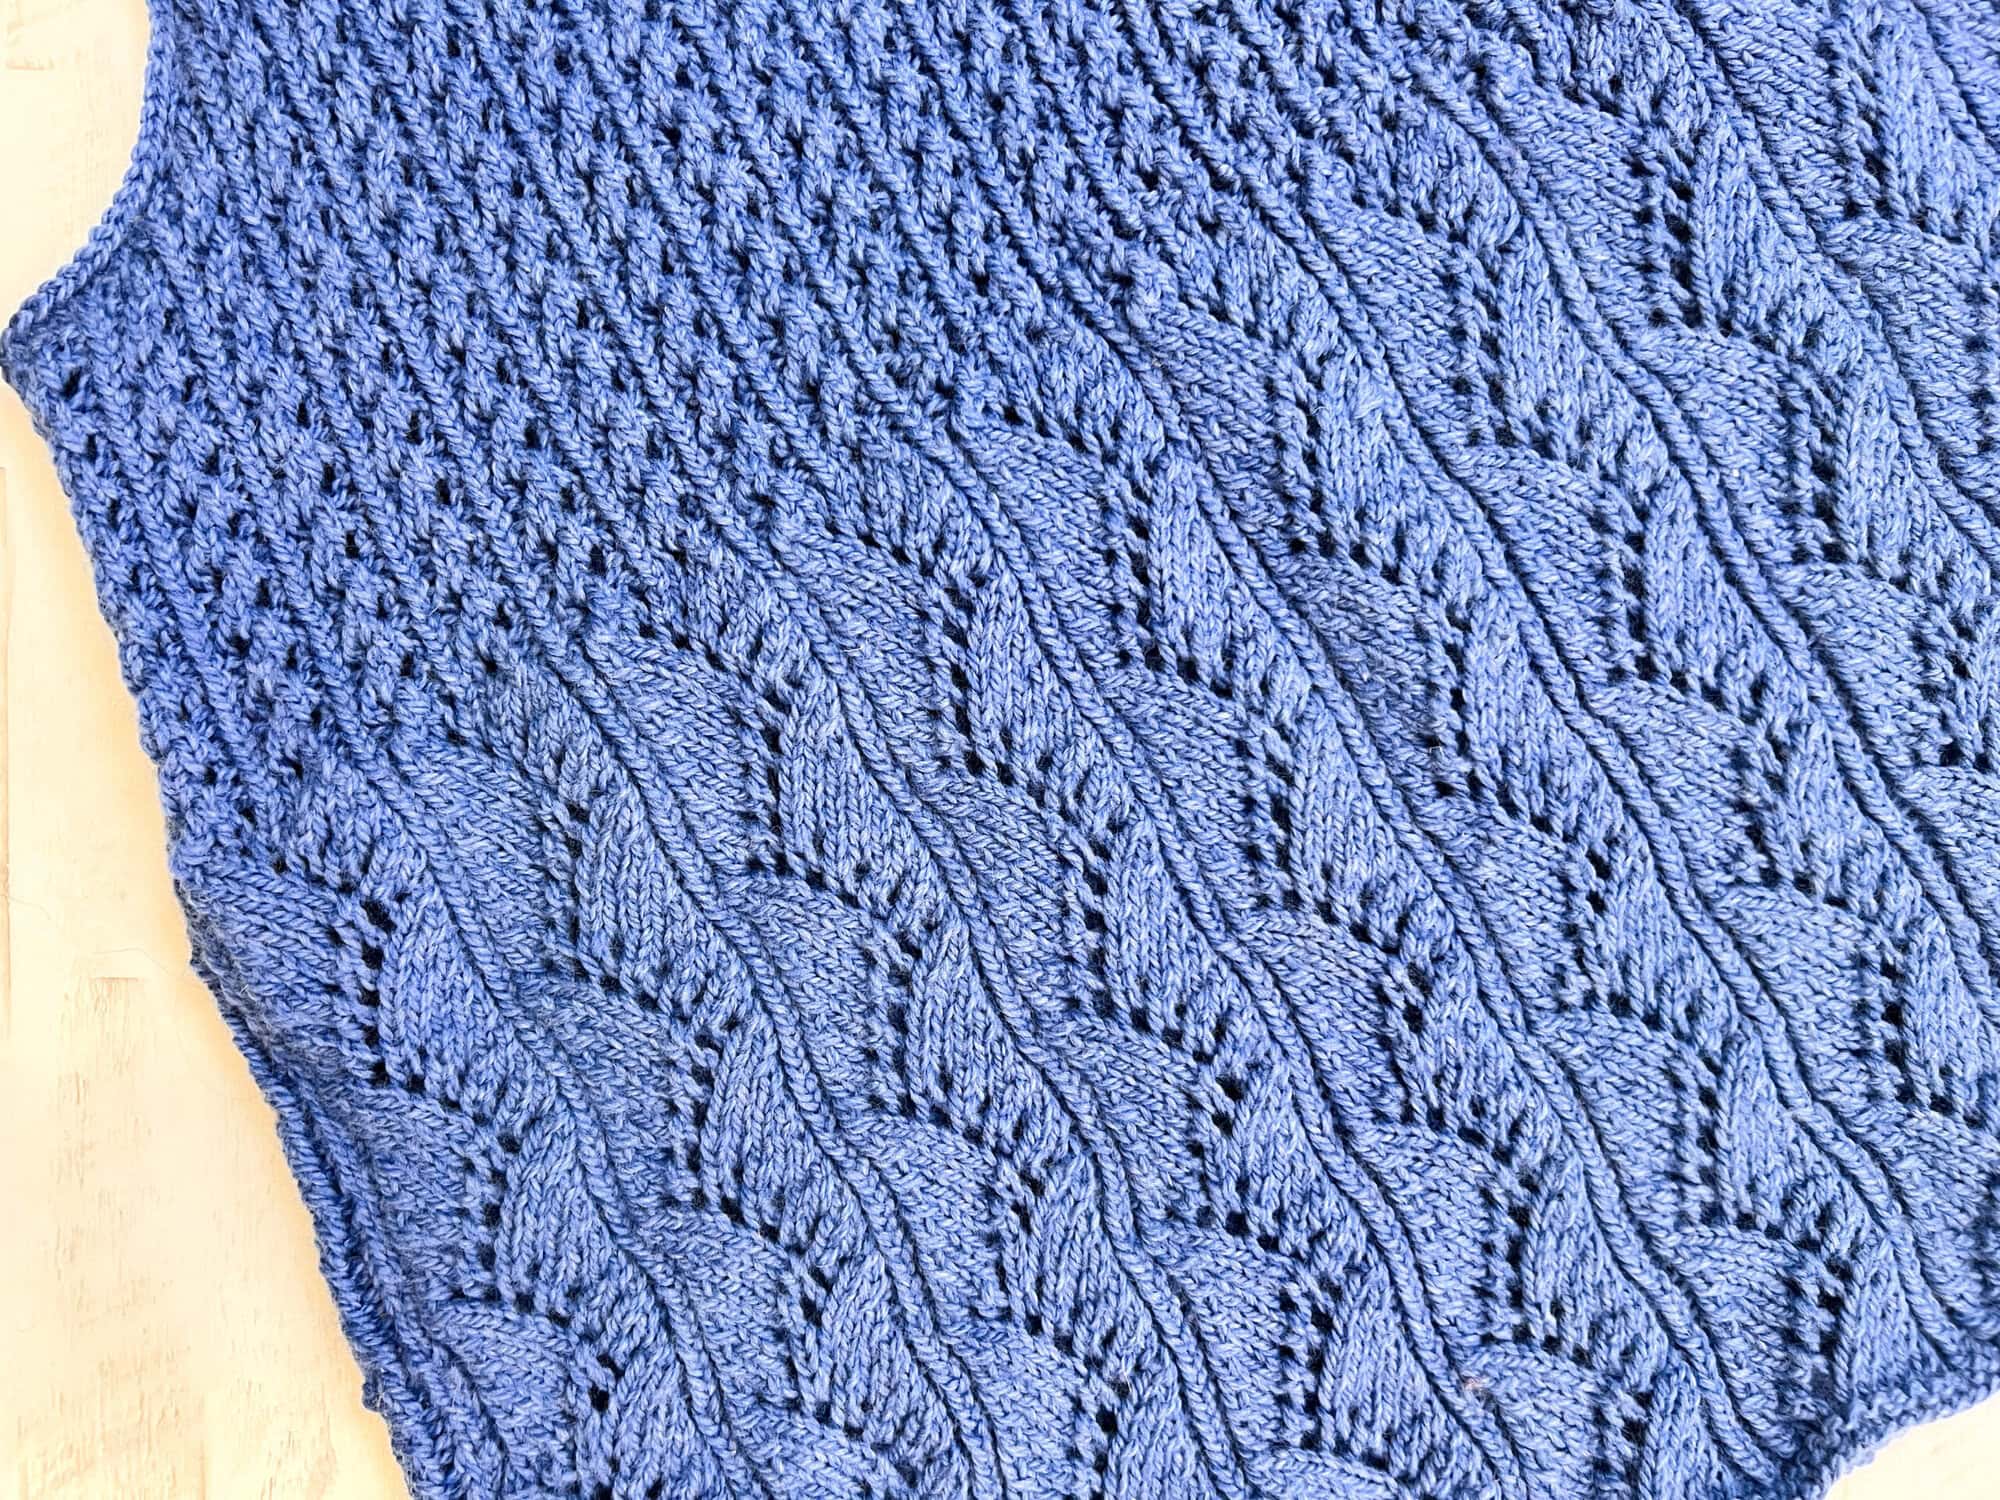
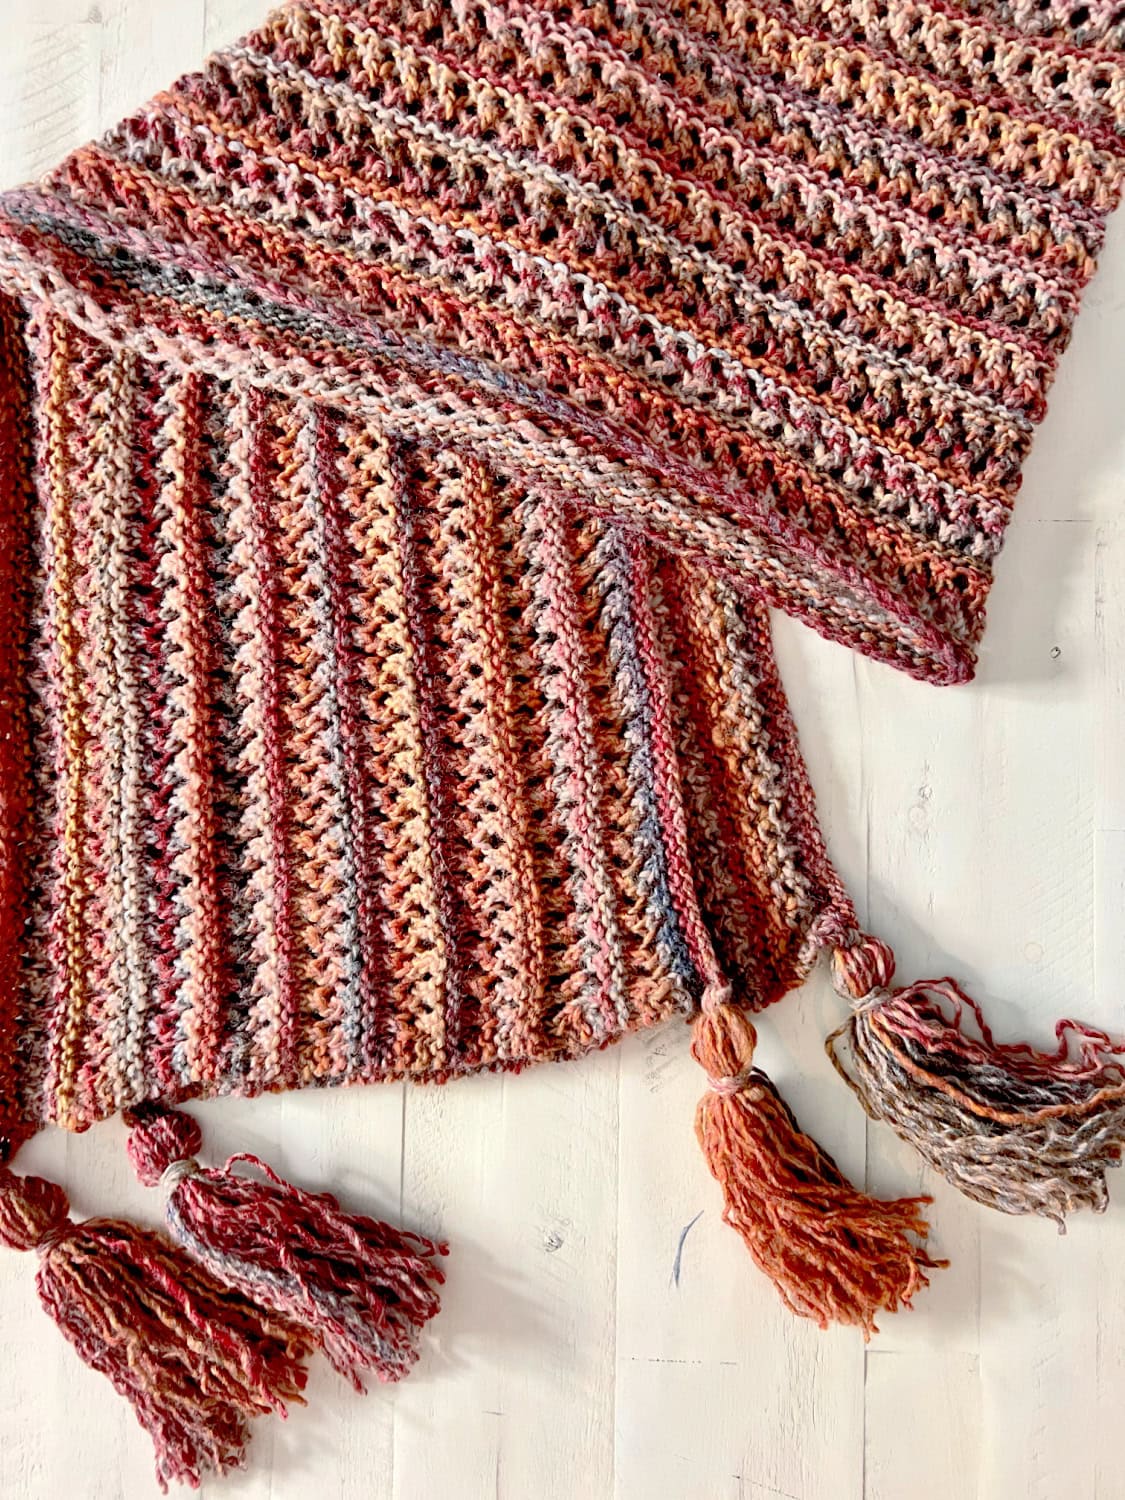
Close-up of the Almond Brittle Knit Wrap in Caron Macchiato Cakes, showing the textured striping in warm pink, peach, and brown colorway and the open Lace Bands stitch pattern

The Yarn I Used: Caron Macchiato Cakes

The Almond Brittle sample is knit in Caron Macchiato Cakes, color Boundless. Macchiato Cakes is a CYCA #5 bulky weight yarn, 80% acrylic / 20% wool, with 481 yards / 440 meters per 8 oz / 227 g cake. You need 2 cakes total for the wrap.

Here's why I picked this yarn for this specific pattern:

  • ๐Ÿงถ The 80/20 acrylic-wool blend. Just enough wool (20%) to block beautifully and open the lace… but acrylic-dominant, which means the finished wrap is machine washable and crazy easy to live with.
  • ๐Ÿงถ The cake format. No center-pull mess, no caking yarn yourself before you cast on. Just pop the cake on the floor next to your chair and knit from the outside.
  • ๐Ÿงถ The yardage. 481 yards per cake means just 2 cakes covers the entire 80″ wrap with comfortable margin. That's exceptional value for a piece this size.
  • ๐Ÿงถ The budget. Macchiato Cakes is widely available at Michaels and Yarnspirations and tends to land at the friendly end of the price spectrum. A whole wrap for the cost of dinner out… yes please.
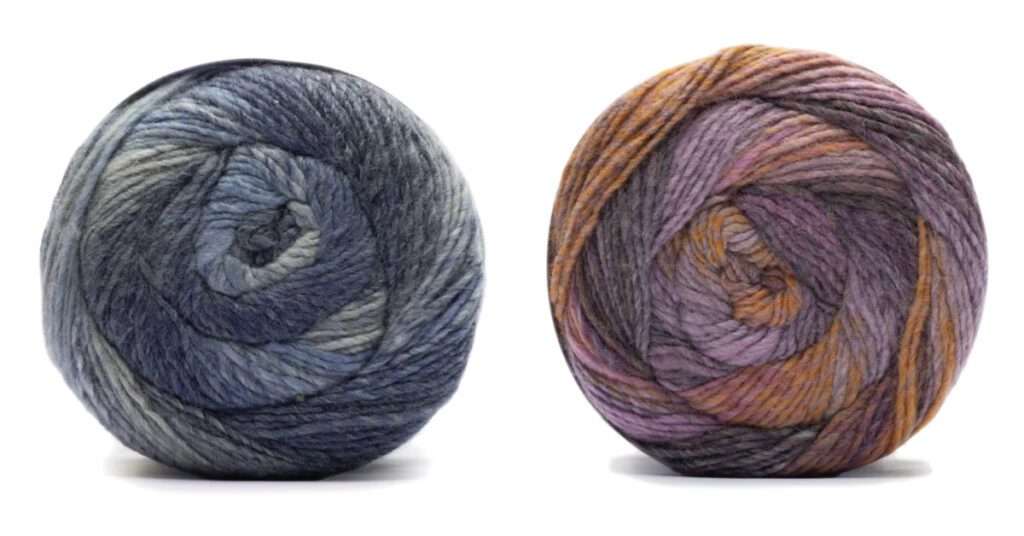
Two cakes of Caron Macchiato Cakes bulky yarn, the sample yarn used in the Almond Brittle free knit lace wrap pattern, shown in two colorways: Soulful (marled blue and gray) and Bewitch (purple, orange, and gray).

Yarn Substitutes

Any CYCA #5 bulky weight yarn that gets gauge will work beautifully. A few smart substitutes to consider:

  • ๐Ÿงถ Lion Brand Mandala Thick & Quick (3-pack at Michaels)… gorgeous gradient cake. Heads-up: Thick & Quick is CYCA #6 super bulky (one weight up from Macchiato Cakes), so you'll want to size up to US 11 or 13 needles and check gauge before committing… the lace will be a touch more dramatic and the finished wrap a bit wider per stitch.
  • ๐Ÿงถ WeCrochet Mighty Stitch Worsted… not technically bulky, but knit at a slightly looser gauge it makes a softer, drapier version of the same wrap (you'll need extra yardage)
  • ๐Ÿงถ Bernat Softee Chunky… 100% acrylic, fully washable, budget-friendly. The lace will be a touch less open than wool-blend versions but still gorgeous.
  • ๐Ÿงถ Bernat Super Fluffee… an extra-soft, lofty acrylic option if you want a snugglier, plushier hand on your finished wrap. Beautiful for cozy winter wrapping.
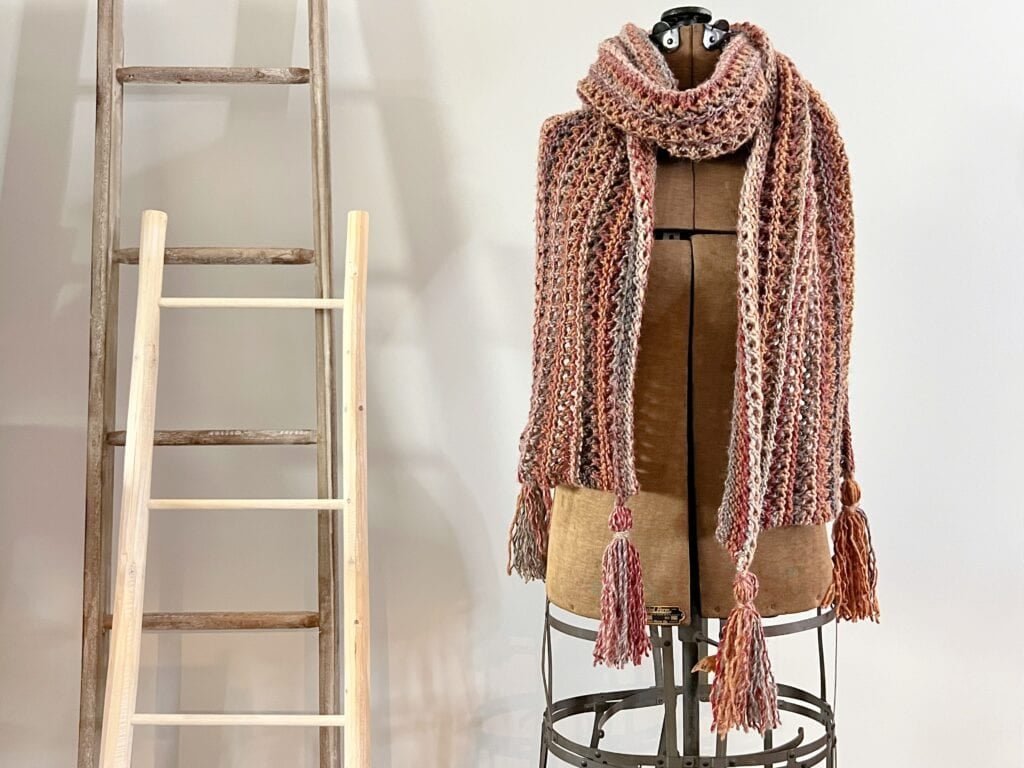
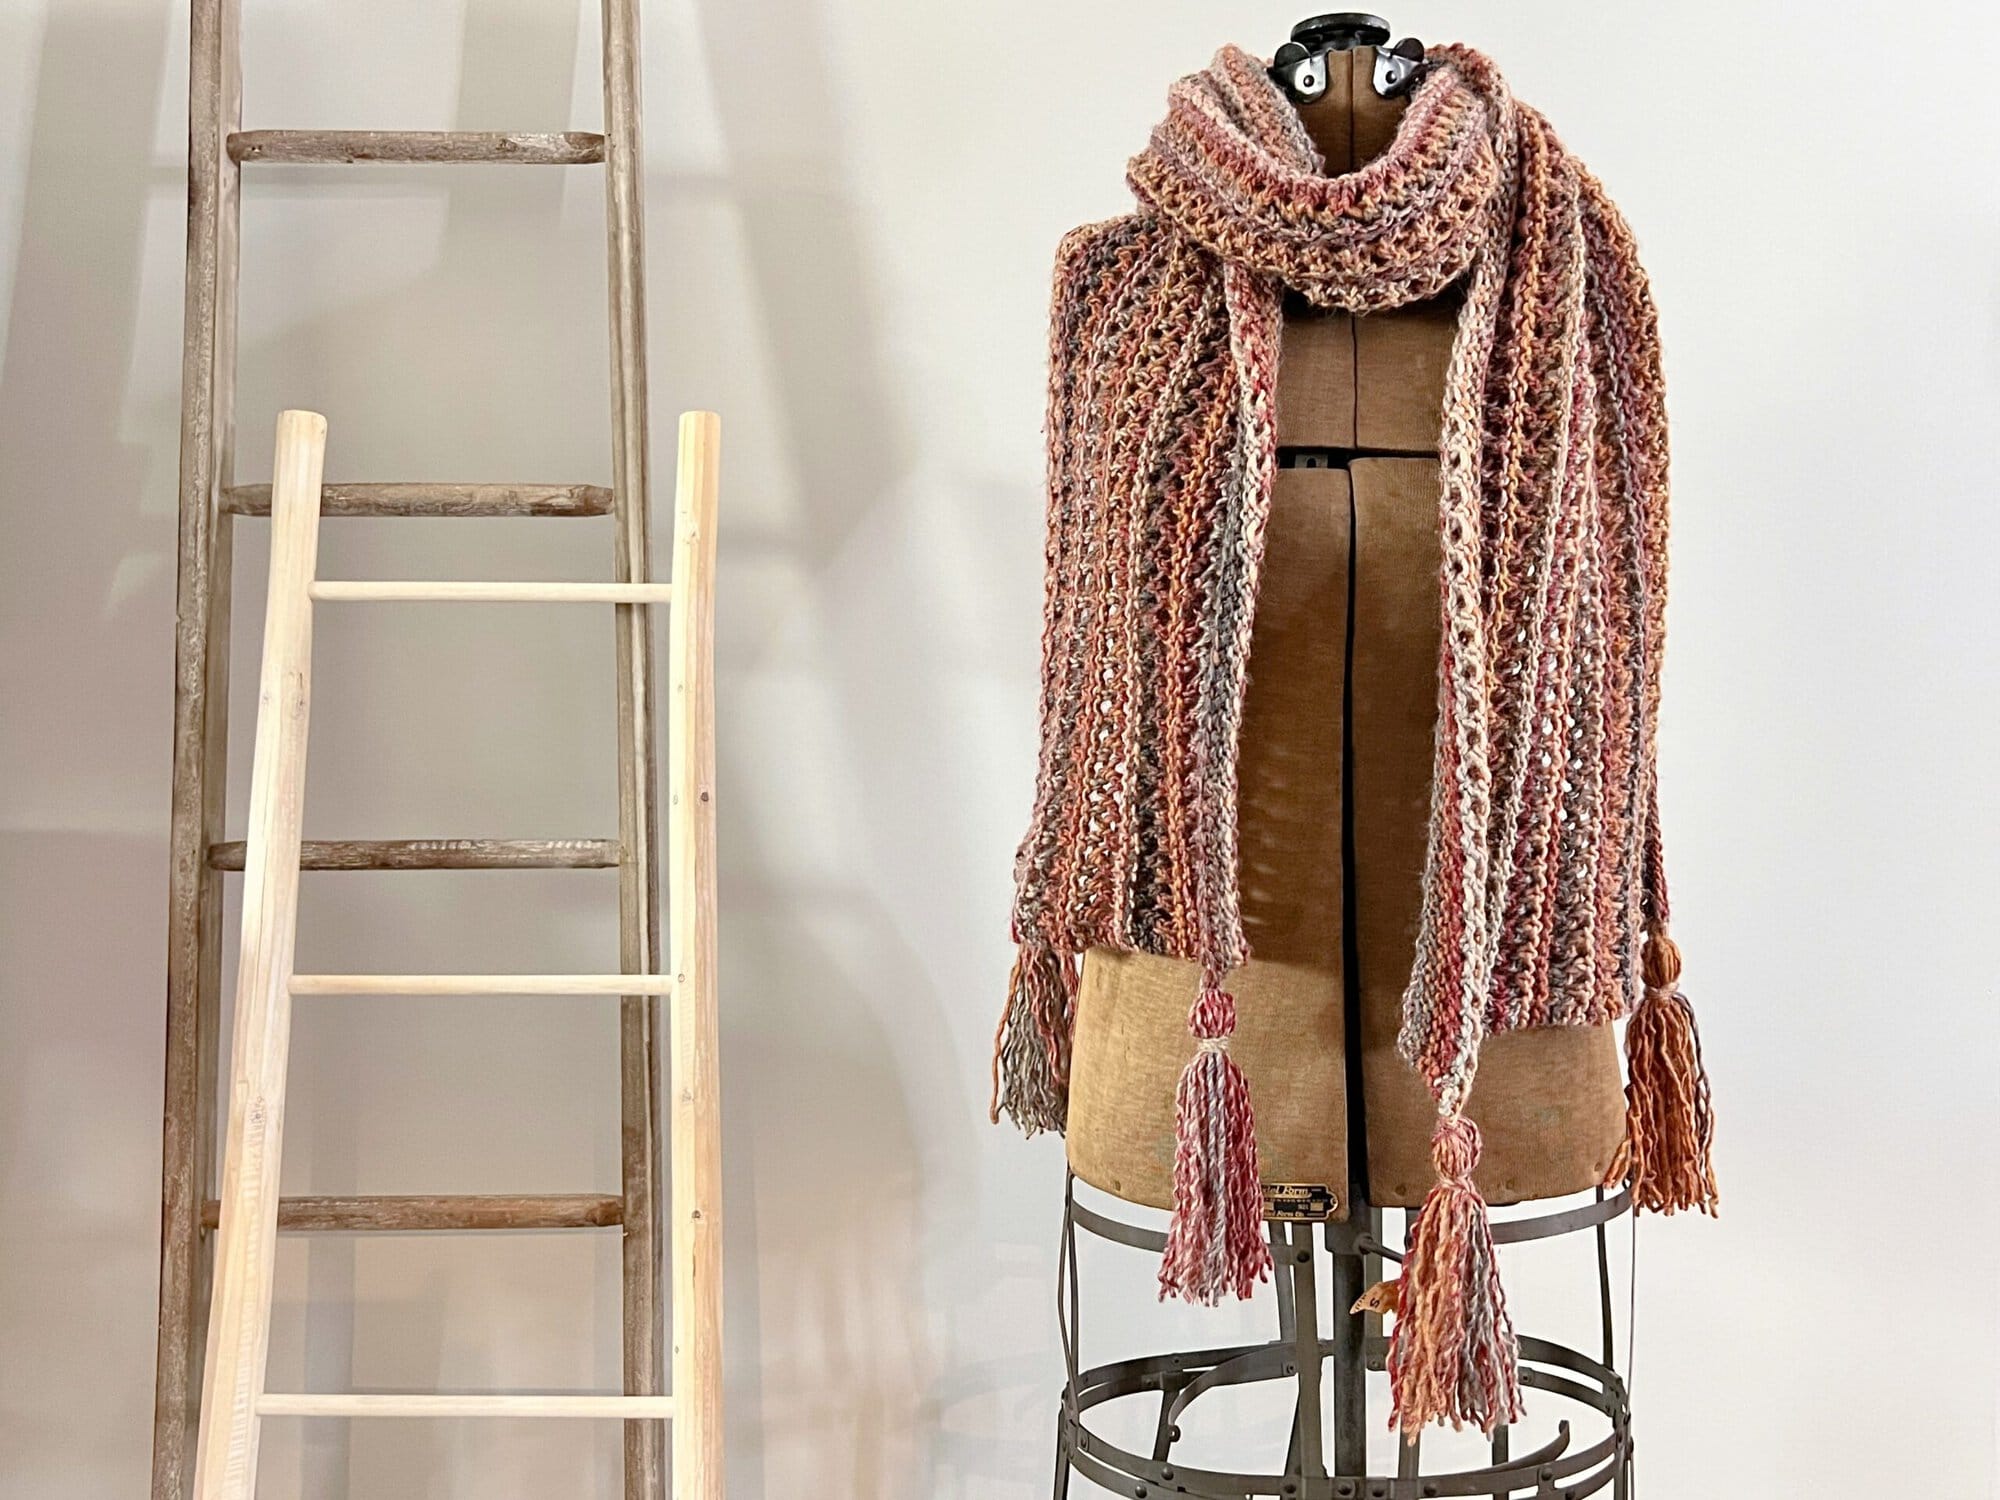
Bulky knit lace scarf with tassels displayed on mannequin, highlighting its openwork texture and drape.

๐ŸŽฅ Video Tutorials

If any of the techniques in this pattern are new to you, I've got you. The two videos below are the most useful ones for THIS pattern specifically… and there's a full library of beginner technique tutorials waiting on my YouTube channel if you want more.

๐ŸŽฅ Lace Bands Stitch Pattern Walkthrough (from the Know Your Worth Cardigan Tutorial)

The Almond Brittle Knit Wrap uses the same Lace Bands stitch pattern I teach in my Know Your Worth Cocoon Cardigan tutorial. The full video walks you through every row of the Lace Bands repeat in real time, with close-ups of the yarn over and decrease rows. If you're a visual learner, watch this BEFORE you cast on Almond Brittle and you'll be in great shape.

๐ŸŽฅ Watch the Lace Bands stitch walkthrough on YouTube (from the Know Your Worth Cocoon Cardigan tutorial).

๐ŸŽฅ DIY Tassel Maker (How to Make the Corner Tassels)

The tassels on the corners of Almond Brittle are 8 inches long and they're easier than you think. In this short video I'll show you my favorite DIY tassel-maker trick using scrap cardboard. You'll be knocking out matching tassels in about 15 minutes total once you've got the technique down.

๐ŸŽฅ Watch the DIY Tassel Maker video on YouTube… a quick walkthrough using scrap cardboard to make four matching 8-inch tassels for the wrap corners.

๐ŸŽฅ Supporting Knit Technique Videos

If any of these techniques are new to you, here are my free video tutorials covering each one:

  • ๐ŸŽฅ Long-Tail Cast-On
  • ๐ŸŽฅ Knit Stitch (Continental)
  • ๐ŸŽฅ Purl Stitch (Continental)
  • ๐ŸŽฅ How to Knit Lace (yarn overs + decreases explained)
  • ๐ŸŽฅ Tinking (un-knit one stitch at a time when you catch a mistake)
  • ๐ŸŽฅ Burying Ends
โญ๏ธ Marly Bird Amazon Storefront โญ๏ธ

Marly Bird wearing the Almond Brittle free bulky knit lace wrap pattern in Caron Macchiato Cakes, with corner tassels and yarn supplies visible in a cozy crafting room background.

๐Ÿงถ Almond Brittle Knit Wrap: Pattern Details

Skill Level

Easy / Confident Beginner

Finished Measurements

80″ wide ร— 18″ deep [203 cm ร— 45.5 cm], after blocking. Lace knit fabric stretches significantly when blocked… your wrap will look smaller off the needles than the finished measurements suggest. That's normal and expected.

Gauge

11 sts ร— 23 rows = 4″ ร— 4″ [10 cm ร— 10 cm] in Lace Bands pattern, after blocking.

Gauge is not essential for this item, but may affect amount of yarn required. To measure your gauge in Lace Bands pattern, cast on 4 extra sts beyond the pattern multiple, and keep 2 sts at each edge in garter stitch (knitting them on every row).

Materials

Yarn: Caron Macchiato Cakes (80% acrylic, 20% wool, 481 yds / 440 m, 8 oz / 227 g per cake, CYCA #5 bulky)… 2 cakes. Sample color: Boundless.

Needles: US 10 [6 mm] 60″ [152.5 cm] circular needle and double-pointed needles in the same size, or size required for gauge. Note: The wrap is worked back-and-forth in rows; a circular needle is used to hold the full width of the stitches.

Notions:

Stitch markers
Tapestry needleย 
Scissors
Tape measure
Notions Bag for Supplies
Supplies for Tassels

โญ๏ธ Marly Bird Amazon Storefront โญ๏ธ

Abbreviations

  • K … Knit
  • K2tog … Knit two stitches together (1 stitch decreased)
  • P … Purl
  • PM … Place marker
  • RS … Right side
  • Sl … Slip
  • SlM … Slip marker
  • Ssk … Slip, slip, knit (see Special Stitches)
  • St(s) … Stitch(es)
  • WS … Wrong side
  • Yo … Yarn over

Special Stitches

Ssk (Slip, Slip, Knit): Slip 2 stitches, one at a time, as if to knit. Insert the left-hand needle into the front of these two stitches and knit them together from this position (1 stitch decreased).


Stitch Pattern: Lace Bands

Worked over an even number of stitches (minimum 8).

  • Rows 1-4 (begin RS): Knit.
  • Row 5 (RS): K2, * K2tog, yo; repeat from * to last 2 sts, k2.
  • Row 6 (WS): K2, p to last 2 sts, k2.
  • Row 7 (RS): K2, * Yo, ssk; repeat from * to last 2 sts, k2.
  • Row 8 (WS): K2, p to last 2 sts, k2.
  • Row 9 (RS): K2, * K2tog, yo; repeat from * to last 2 sts, k2.
  • Row 10 (WS): K2, p to last 2 sts, k2.

Repeat Rows 1-10 for Lace Bands pattern.


GROW

To Unlockย Exclusive Subscriber Contentย click the Box below and join for free by simply adding your email and creating a password! If you are having troubles, clear your cache or reset your password or login to the Grow Publisher Portal.

>> Learn More About Grow Here <<

I'm thrilled to share this amazing pattern with you, many patterns on my blog are absolutely free! I kindly request that you don't copy and paste or distribute this pattern. Prefer an ad-free experience? Buy a digital PDF pattern for a small fee from one of my online stores for a seamless crafting journey. 

I appreciate your support and readership. You are the reason I can keep doing what I love and sharing it with others. So, thank you from the bottom of my yarn-loving heart! Disclosure: This post contains affiliate links, meaning I get a commission if you decide to make a purchase through my links at no cost to you.

Person wears a handmade chunky knit scarf with multicolored yarn and tassels, showing varied stitches and cozy texture indoors.

๐Ÿงถ Almond Brittle Knit Wrap: Pattern Instructions

Cast On

Using US 10 (6 mm) circular needle and your preferred stretchy cast-on (long-tail recommended), cast on 220 sts.

Body

Work in Lace Bands pattern (see Stitch Pattern above) until piece measures 18″ [45.5 cm] from cast-on edge, ending after a pattern Row 4 (one of the all-knit rows).

Tip: Add a lifeline every 10 rows (after each Lace Bands pattern repeat). Your future self will thank you.

Bind Off

Bind off all stitches loosely in knit. (A loose bind-off matters here… it prevents the top edge from pulling in and gives the wrap room to block out to full width.)

Finishing

Tassels. Make 4 tassels about 8″ [20.5 cm] in length (see the DIY Tassel Maker video above). Sew one tassel to each corner of the wrap using a tapestry needle.

Weave in ends. Use a tapestry needle to bury all loose yarn tails through the wrong side of the fabric.

Wet block. Soak the wrap in lukewarm water with a splash of wool wash for 20 minutes. Gently squeeze out excess water (do not wring). Lay flat on blocking mats and pin out to 80″ ร— 18″. Let dry completely (12-24 hours) before unpinning. Blocking is non-negotiable for lace… this is the step that opens those yarn-over holes into the beautiful Lace Bands pattern you fell in love with.


Shoop Shoop Shoop knit pattern by Marly Bird in Caron Macchiato Cakes bulky yarn, a textured striped accessory with lace sections and decorative buttons on the edge.
Trifle Tunisian crochet sweater pattern by Marly Bird in Caron Macchiato Cakes bulky yarn, short-sleeve top in blue and gray with lacy textured stitches, shown flat on a white wooden surface.
Trifle
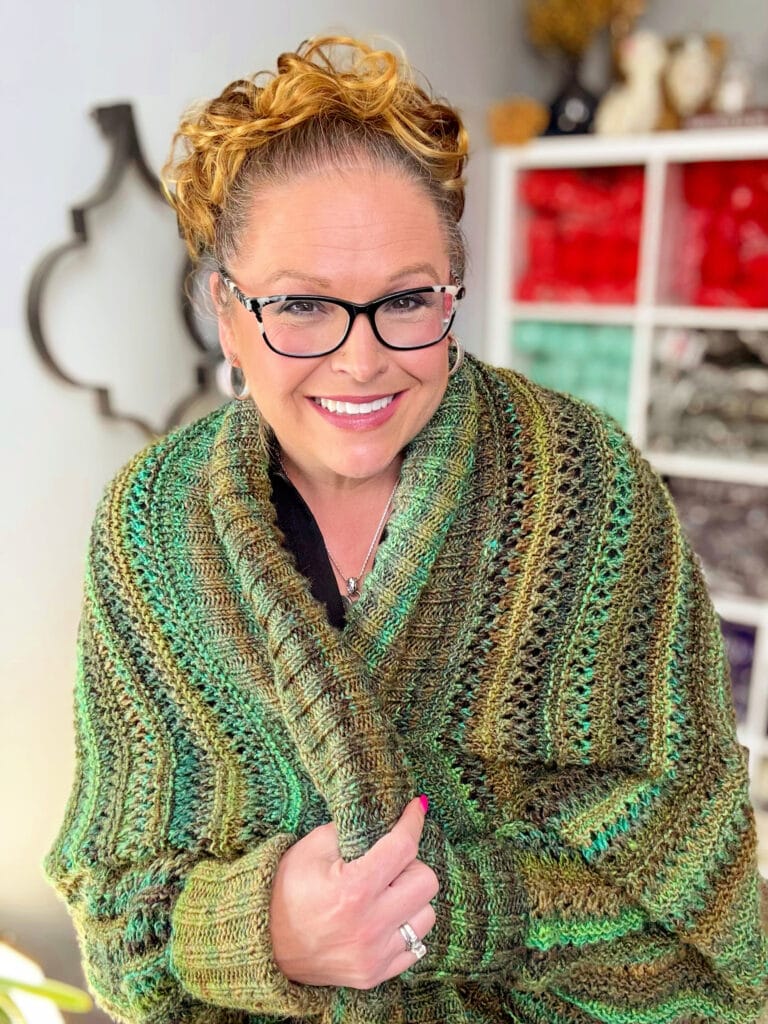
Marly Bird modeling the Know Your Worth Knit Cocoon Cardigan in the Lace Bands stitch pattern, the cocoon-cardigan companion to the Almond Brittle Knit Wrap, with yarn-filled shelves in the background.
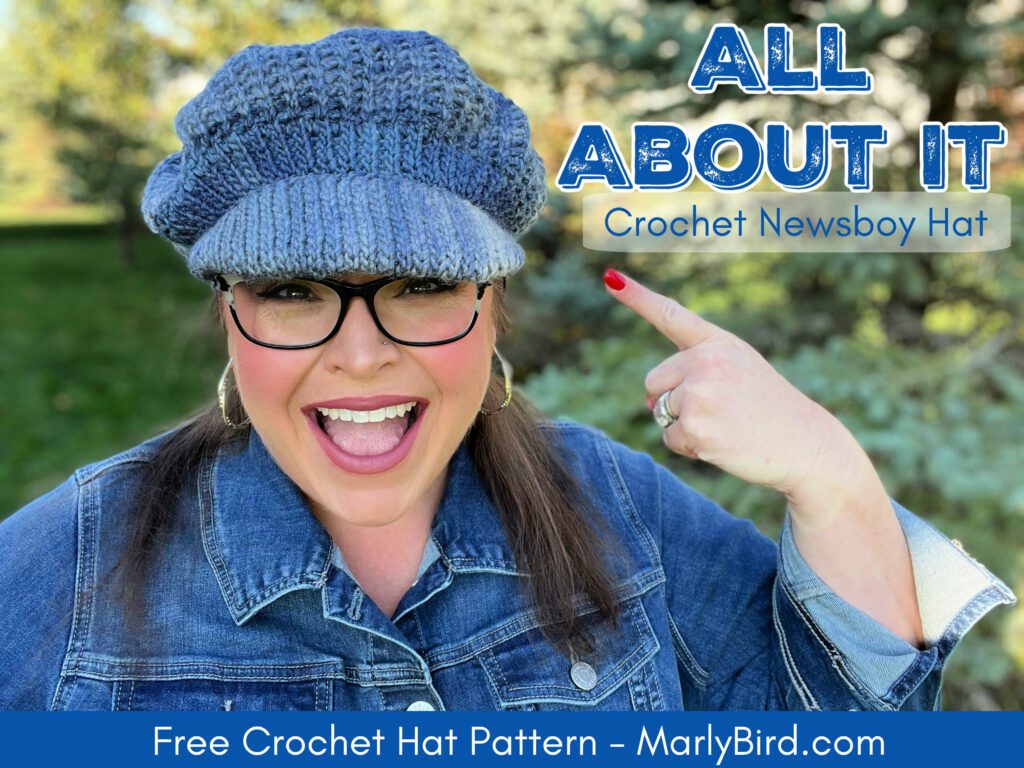
All About It crochet newsboy hat pattern by Marly Bird in Caron Macchiato Cakes bulky yarn, a textured blue crochet hat with visible stitch detail, modeled outdoors.

๐Ÿงถ Love These Yarns? More BiCrafty Patterns Using Caron Macchiato Cakes & Red Heart Roll With It

One of my favorite parts of being a designer is reusing my favorite yarns across multiple patterns… when a yarn is THIS good, why not? Both Caron Macchiato Cakes and Red Heart Roll With It (and its tweed cousin) are workhorse cake yarns I've used across knit AND crochet patterns. Here are some of my other designs you might love, in both crafts.

Other Patterns I've Designed with Caron Macchiato Cakes

  • ๐Ÿงถ Trifle… a cozy bulky-yarn favorite
  • ๐Ÿงถ All About It… another Macchiato Cakes design
  • ๐Ÿงถ Shoop Shoop Shoop… bulky cake-yarn fun

BiCrafty Patterns Using Red Heart Roll With It (and Roll With It Tweed)

These designs use Red Heart Roll With It, the worsted-weight self-striping cousin to Macchiato Cakes. Both knit AND crochet patterns below.

  • ๐Ÿงถ Sookie Crochet Cardigan (crochet)… free blog pattern, sizes XS to 5X
  • ๐Ÿงถ Giovanni Crochet Tweed Scarf (crochet)… free blog pattern
  • ๐Ÿงถ Roy G. Biv Knit Hat (knit)… free blog pattern
  • ๐Ÿงถ Cozy Sideline (knit)
  • ๐Ÿงถ Sunday Chill
  • ๐Ÿงถ Lorelai
  • ๐Ÿงถ Sugar Biscuit Mosaic Knit Hat (knit)
  • ๐Ÿงถ Sugar Biscuit Fingerless Mitts (knit)
  • ๐Ÿงถ Farrago
  • ๐Ÿงถ Check Me Out
  • ๐Ÿงถ Check It Out
  • ๐Ÿงถ One Ball Shawl
  • ๐Ÿงถ Crochet Swancho CAL (crochet)
  • ๐Ÿงถ Hooded Sedge Stitch Scarf
  • ๐Ÿงถ Roy G. Biv Revised

๐Ÿงถ Pair Almond Brittle with the Know Your Worth Cocoon Knit Cardigan

The Know Your Worth Knit Cocoon Cardigan is the cocoon-cardigan cousin of Almond Brittle. It uses the same Lace Bands stitch pattern you'll learn here, in a wearable cardigan construction… and it's been one of my most popular patterns for years. If you knit and love Almond Brittle, the cardigan is your natural next project. You've already learned every technique you need.

  • ๐Ÿ“– Read the Know Your Worth Cocoon Cardigan blog post
  • ๐Ÿ’œ Favorite the Know Your Worth pattern on Ravelry
  • ๐Ÿ›๏ธ Buy the ad-free Know Your Worth PDF on Etsy (size-inclusive, includes video tutorial)

๐Ÿ’› Meet the Designer

About Marly Bird
Marly Bird is a professional yarn artist and designer who has been designing knit and crochet patterns since 2007. She's the BiCrafty designer… the only creator who teaches BOTH knitting and crochet together. Follow her free pattern library at marlybird.com, her YouTube channel @marlybird, and her premium education community at Marly Bird House.
Marly Bird smiling, wearing the Almond Brittle free knit lace wrap pattern draped around her shoulders, showing the Lace Bands stitch and tassel corners.

โ“ Frequently Asked Questions

What skill level is the Almond Brittle Knit Wrap?

Easy. Honestly, if you can knit, purl, do a yarn over, and work a basic decrease (k2tog and ssk), you have everything you need to make this wrap. The bulky weight yarn + the simple repeating 10-row pattern means it's one of the most beginner-friendly “real lace” projects I've designed.

How much yarn do I need?

Two cakes of Caron Macchiato Cakes (each cake is 481 yds / 440 m). So you're looking at roughly 962 yds total. If you substitute a different bulky weight yarn, plan for about 900-1,000 yards.

How long does it take to knit the Almond Brittle Wrap?

About 15-25 hours of knitting time, depending on your speed. For most knitters, that translates to 1-2 weeks of evening knitting. Bulky weight + simple rhythm means this is one of the fastest “real lace” projects you can make.

Can I substitute a different yarn?

Absolutely. Any CYCA #5 bulky weight yarn that matches gauge (11 sts ร— 23 rows = 4″ ร— 4″ in Lace Bands pattern) will work. Lion Brand Mandala Thick & Quick (super bulky, size up your needles), Bernat Softee Chunky, and Bernat Super Fluffee are all great choices. The acrylic/wool blends will be most similar to the original Caron Macchiato Cakes. If you go 100% acrylic, the lace will block slightly less dramatically but the wrap will still look gorgeous.

Do I have to add the tassels?

Nope… the tassels are optional. The wrap is gorgeous without them, but the tassels add a fun, playful finish that takes about 15 minutes total. If tassels aren't your style, try a simple knotted fringe instead, or just leave the corners clean. (Watch the DIY tassel maker video above for the fastest way to make them.)

Do I have to block the wrap?

Yes. Always. Blocking is what transforms knit lace from a scrunched-up tangle into the airy, drapey piece you envisioned. Wet block the finished wrap (soak in lukewarm water with wool wash for 20 minutes, squeeze gently, pin flat to 80″ ร— 18″, let dry 12-24 hours) and you'll watch the Lace Bands open into their beautiful finished form.

How much does this lace stretch when blocked?

A lot. Like… it'll surprise you. Coming off the needles, your wrap will likely measure 65 to 70 inches wide and 13 to 15 inches deep. After a thorough wet block and pinning to the final 80″ ร— 18″ dimensions, the Lace Bands open up dramatically. This is by design… pay attention to the stretch when you're knitting and don't panic if your unblocked wrap looks smaller than you expected. The blocking step is where the magic happens.

Can I make the wrap larger?

Yes! The pattern is worked over an even number of stitches (minimum 8), so you can cast on any even number to adjust the width. To make it longer, just keep knitting until you reach your desired depth, ending after a pattern Row 4. Plan for extra yarn if you go bigger… approximately 6-7 yards per inch of additional width or depth.

Is this a good Stitch Night / social knitting project?

Honestly? It's one of the BEST Stitch Night projects I've designed. The Lace Bands pattern is rhythmic enough to memorize after one repeat, the rows are long enough that you don't have to count too often, and 6 of the 10 rows are pure knit-on-autopilot. Bring it to Stitch Night, bring it to your favorite chair with a glass of wine, bring it on a long Zoom call. You'll love how easy it is to live with this pattern.


๐Ÿงต More Free Knit Shawl & Wrap Patterns from Marly Bird

  • ๐Ÿงถ 11 Free Knit Lace Shawl Patterns… the full roundup including this wrap and 10 others
  • ๐Ÿ“š Knit Shawl Patterns: Free Designs for Every Shape, Season & Skill Level… master hub for every free knit shawl on the blog
  • ๐ŸŒŸ Lehabah Fire Sprite Knit Shawl… fingering-weight right triangle lace shawl
  • ๐ŸŒณ Eowyn Free Cable Knit Shawl… textured right triangle with cables
  • ๐ŸŒธ Pear Sorbet Knit Lace Shawlette… fingering-weight shawlette with garter tab cast-on
  • ๐Ÿงฅ Know Your Worth Cocoon Knit Cardigan… the cocoon cardigan in the same Lace Bands stitch pattern

๐Ÿก Want to Go Deeper with Knit Lace? Join Marly Bird House

If you finished Almond Brittle and you're hungry for more lace… I teach guided knit-along classes, deep-dive workshops on lace construction, and live coaching inside Marly Bird House. Whether you want to take on a fingering-weight lace shawl as your next project or you'd love a friendly community to knit alongside, we'd love to have you. Come check it out.


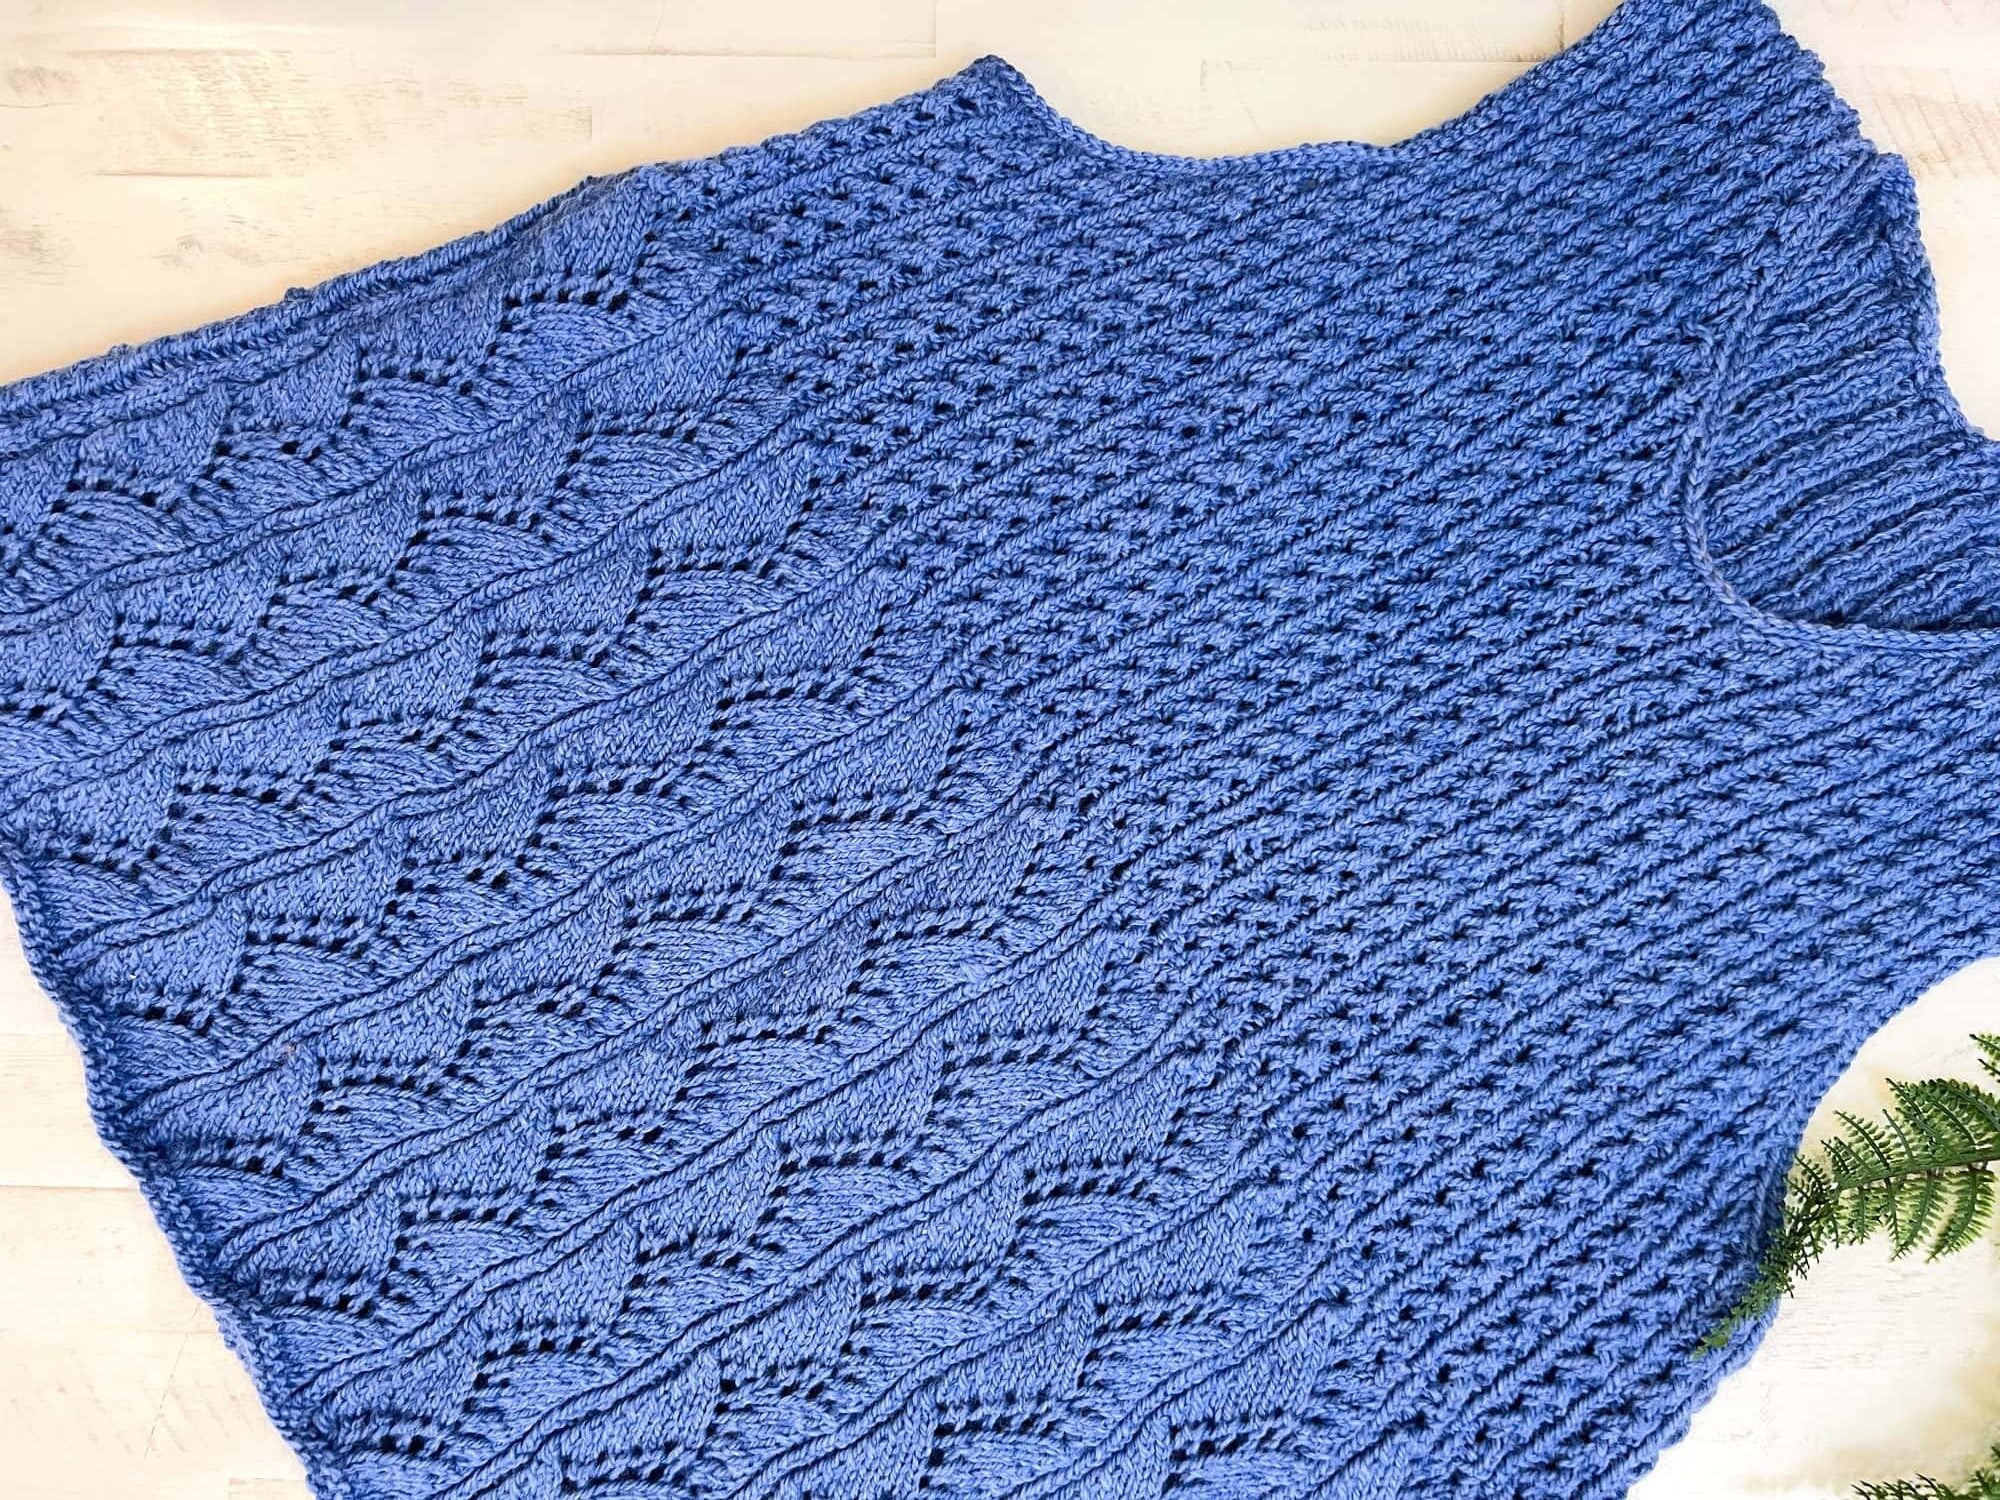
The finished Almond Brittle free bulky knit lace wrap pattern displayed flat on a mannequin, showing the full 80-inch width and the corner tassels.

๐Ÿ’› Final Thoughts

The Almond Brittle Knit Wrap is the project I hand to every knitter who tells me lace knitting feels too daunting. It's bulky, fast, generously sized, and uses one of the simplest “real lace” stitch patterns you can find. You'll finish it in a week or two, you'll wear it CONSTANTLY, and you'll surprise yourself with how much you genuinely loved the lace rows once you got into the rhythm. Pour a glass of wine, bring it to Stitch Night, and don't forget to block it… that's when the magic happens.

I'd love to see your finished Almond Brittle Wrap! Share your project on Instagram with #MMMDI and #MarlyBird so I can find you and cheer you on ๐Ÿ’›

Pin this pattern for later, share it with a knitting friend, and happy knitting, bestie! ๐Ÿ’›

โค๏ธ Your BiCrafty Bestie,
Marly Bird

A cartoon avatar of a person with glasses and a brown bun smiles warmly. Their green shirt and black jacket add a stylish touch, while colorful hearts surround them like loving temperature blankets, stitching together an aura of love and positivity. -Marly Bird
“

Filed Under: Free Patterns, Knit Shawl Patterns, Knitting, Marly Bird Premium Patterns, Our Free Patterns, Pattern Tagged With: badge-beginner-friendly, badge-new-pattern, beginner lace knitting, bulky knit lace, Caron Macchiato Cakes, easy knit lace, free knit pattern, free knit shawl pattern, free knit wrap, knit lace pattern, knit wrap pattern, Marly Bird, Marly Bird knit pattern

Shangri-La Scarf or Shawl: Free Knit Lace Pattern

May 27, 2026 By Meg Leave a Comment

”

๐ŸŒธ Spring Fling 2026… Day 18 Pattern ๐ŸŒธ

This pattern debuted as Day 18 of Spring Fling 2026 (Wed May 27, 2026). The free pattern stays free forever right here on the blog.

๐Ÿ‘‰ See the full Spring Fling 2026 lineup on the Hub

Share your finished Shangri-La with the hashtags #SpringFling2026 + #ShangriLaShawl ๐Ÿ”๏ธ

The Shangri-La Scarf or Shawl is a free knit lace pattern that gives you two finished pieces in one design. Worked flat in lace weight yarn on US 7 circular needles, this rectangular wrap features a 12-row Offset Lace stitch pattern, garter stitch edges, and three sizes… narrow enough to wear as a scarf, wide enough to wrap as a shawl. Finished piece measures 14ยพ to 26ยผ” wide and 60ยฝ to 81ยผ” long, depending on the size you choose.

Shangri-La free knit lace scarf or shawl pattern by Marly Bird, collage showing the three sizes worn as a scarf and as a shawl in soft gray lace weight yarn.

You know how some patterns make you choose… “do I want a scarf or a shawl?”… and you spend an hour scrolling Ravelry trying to decide? The Shangri-La doesn't make you choose. Three sizes. Smallest reads as a long, lacy scarf. Middle and largest read as a true wrap-around shawl. One pattern, three finished pieces, all gorgeous. This is one of those rare knits that earns its place in your wardrobe and your gift list at the same time.

Hey, bestie ๐Ÿ’›

The original Shangri-La was knit in Bijou Basin Ranch's “Shangri-La” yarn… a dreamy 50/50 silk and yak down blend that felt like knitting with a cloud and looked like spun moonlight. That yarn has since been discontinued (I know, I know ๐Ÿ˜ญ), but the pattern lives on. The Offset Lace stitch is too good to retire, and I'm going to walk you through exactly which yarns to grab instead so your finished piece has the same airy, drapey, silky-soft hand as the original.

Whether you're new to lace knitting and ready for your first big lace project, or you're a seasoned lace knitter looking for a meditative TV-knitting companion, this one is for you. Cast on.

This post contains affiliate links. If you purchase through them, I may earn a small commission at no extra cost to you… and it helps keep these free patterns coming straight from my yarn-loving heart to yours. ๐Ÿ’›

Marly Bird laughing and holding the ends of the Shangri-La free knit lace shawl scarf pattern in soft gray.

What You Will Love About This Pattern ๐Ÿ’–

๐ŸŒธ It's free here on the blog. The full pattern is right here, thanks to the ads. If you'd rather have an ad-free, printable PDF, you can grab one from Shopify, Etsy, or Ravelry.

๐Ÿงฃ It's a scarf AND a shawl. Three sizes mean you can knit the narrow size (14ยพ”) for a long, drapey scarf, or scale up to 26ยผ” wide for a true wrap-around shawl. Same stitch pattern, completely different finished pieces. Honestly the most versatile rectangular wrap in my catalog.

๐Ÿชก The Offset Lace stitch is gorgeous and approachable. It looks like advanced lace… it's actually a 12-row repeat using only three lace moves you already know… k2tog, yo, and ssk. The “offset” comes from how those moves shift position each repeat. Anyone who's worked a few basic lace projects can absolutely knit this.

๐Ÿ’Ž It's the perfect home for a luxury lace skein. The pattern was designed for silk-yak. Silk-blend lace weights, fine merino, alpaca-silk… any drapey luxury fiber will sing in this pattern. This is the project for that gorgeous indie skein you've been hoarding.

๐ŸŽ It's a stunning gift project. Lightweight, packable, fits any size recipient, and the customizable length means you can knit a quick small one or a heirloom-worthy big one without changing patterns.

Close-up of the Offset Lace stitch pattern in the Shangri-La free knit lace shawl scarf pattern, sunlight through the lace.

Quick Pattern Overview

๐ŸŽฏ Skill Level: Adventurous Beginner. You need knit, purl, yarn over (yo), k2tog, and ssk. If you've finished a few projects and want to try your first real lace pattern, this is the one.

๐Ÿ“ Finished Size: 14ยพ (20ยฝ, 26ยผ)” wide ร— 60ยฝ (70ยพ, 81ยผ)” long. Length is customizable… work more or fewer repeats to suit you.

๐Ÿงถ Yarn: Lace weight (CYCA #0). 2 to 3 skeins of approximately 400 yards each. Original yarn (now discontinued) was Bijou Basin Ranch Shangri-La… 50% silk, 50% yak down.

๐Ÿชก Needles: US 7 [5.5 mm], 24″ circular needle (worked back and forth… the circular cord holds the full width).

๐Ÿ“ Gauge: 14 sts and 23 rows = 4″ [10 cm] in Offset Lace pattern, after blocking.

A woman models a lacy knitted shawl with intricate stitch details. Pattern pages are displayed beside her. Pattern name: Shangri-La.
Etsy
Shopify
Ravelry

Love the Pattern but Want an Ad-Free PDF?

The full pattern below is 100% free… thank you for supporting the site by reading through the ads! But I totally get it… sometimes you just want a clean, printable, ad-free PDF you can take to your knitting chair (or to the beach, or to the LYS, or to 30,000 feet).

๐Ÿ›’ Buy the ad-free PDF on Etsy
๐Ÿ›๏ธ Buy the ad-free PDF on Shopify
๐Ÿงถ Buy the ad-free PDF on Ravelry

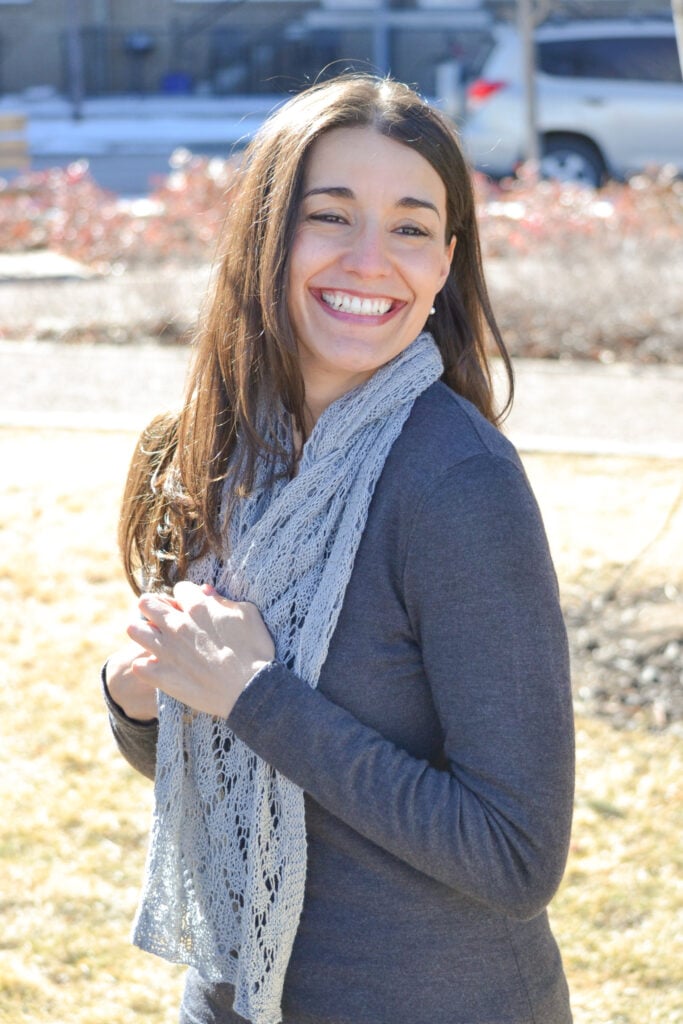
A woman models a light gray lace shawl, showing its delicate stitchwork and airy texture while standing on dry grass.

Is This Knit Lace Pattern Right for You?

This pattern is a perfect fit if you've finished a few simple knit projects and you're ready to try your first lace. You don't need to be experienced with lace at all… you just need to know how to knit, purl, work a yarn over, and decrease with k2tog and ssk. If you can count to ten and follow a chart or written instructions, you can knit this.

It's also a dream project for experienced lace knitters who want something meditative. The 12-row repeat is intuitive once you see how the lace shifts position each repeat, and the 5-stitch garter edges give your eyes a place to rest between lace rows.

If you're brand new to knitting, I'd gently steer you toward my Super Simple Ribbed Lace Knit Scarf & Cowl first. It's a confidence-building beginner pattern. Once you've finished that one, the Shangri-La will feel totally doable.

โœจ Designer Tip: Lace looks scary until you realize every RS row is the same handful of stitches in a different order. The Offset Lace is literally k2tog, yo, k, yo, ssk… shifted across the row. Purl back on WS rows (with a few small variations). The pattern stitches stay simple… the gorgeous result is in the geometry.
Marly Bird wearing the Shangri-La free knit lace scarf pattern crossed at the chest in soft gray.

What Is Offset Lace, Anyway?

Great question. Offset Lace is a lace stitch pattern where the yarn-over and decrease combinations shift position by a set number of stitches each horizontal repeat. Instead of the lace stacking in straight vertical columns (like Columns of Lace or Feather and Fan), it staggers… creating a diagonal rhythm in the finished fabric.

In the Shangri-La, the 12-row pattern repeat works over a multiple of 10 sts plus 5. Each pair of rows shifts the lace one stitch over, so by the time you've worked all 12 rows, the lace has traveled across a full repeat width before resetting. The result is a soft, all-over openwork with a gentle diagonal pulse… never busy, never boring.

Here's the trick: even though the stitch positions move, the stitches themselves stay the same. You're working only three lace moves the entire pattern:

  • k2tog… knit 2 stitches together (right-leaning decrease)
  • yo… yarn over (the lace hole)
  • ssk… slip, slip, knit (left-leaning decrease)

That's it. The decreases on either side of each yarn over keep the stitch count stable, and the shifting positions create the lace fabric. After you've worked a few repeats, your hands will memorize the rhythm and you'll find yourself zoning into Marly-mode (you know the one).

If you're a chart knitter, the Offset Lace chart is here: Shangri-La Offset Lace Chart on Stitch Fiddle. Many lace knitters find the chart easier than written instructions once they're a few repeats in… the visual rhythm of the offset becomes obvious on a chart.

Backlit close-up of the Shangri-La free knit lace shawl scarf pattern showing the offset lace stitch openwork.

Perfect for Weddings, Travel & Special Occasions

One of the things I love most about the Shangri-La is how dressed-up it can look. The Offset Lace stitch reads as elegant and handmade at the same time, and the lightweight drape sits beautifully across the shoulders without flattening a hairstyle or a gown. It's the kind of finished piece that goes where you go and earns compliments every single time.

Here's where this scarf-or-shawl really shines:

  • ๐Ÿ’ Bridal wraps and bridesmaid cover-ups. Knit in ivory, champagne, or soft blush, the Shangri-La becomes a stunning hand-knit bridal accessory… perfect for cool outdoor ceremonies, breezy evening receptions, or destination weddings. The narrow size (14ยพ”) works beautifully for a bride who wants the lace as an accent; the larger sizes wrap fully for warmth on a cool night.
  • ๐Ÿ‘ฐ Mother of the Bride / Mother of the Groom. Elegant, age-appropriate, and a meaningful piece you actually wear again after the wedding. Choose a colorway that complements (not matches) the wedding palette.
  • ๐ŸŒธ Spring and fall outdoor weddings. Lightweight lace handles 50โ€“70ยฐF venues without overheating you indoors. Throw it over a bridesmaid dress or a wedding-guest outfit and you're set for ceremony, reception, and the cooler walk back to the car.
  • ๐Ÿฅ‚ Galas, holiday parties, and black-tie events. The lace texture instantly upgrades a simple little black dress. Drape it as a scarf for a sleek look, or wrap it shawl-style for full glamour.
  • โœˆ๏ธ Travel. Packs into a tiny tube and weighs almost nothing. It's the wrap that lives in your carry-on for over-air-conditioned planes, chilly restaurants, and unexpected temperature drops on vacation.
  • ๐ŸŽ A heart-to-hand gift. Mother's Day, anniversaries, milestone birthdays, graduations, christenings… anything that calls for “this is something special I made for you.” About 15โ€“20 hours of knitting time for the smallest size, and it fits anyone.
  • ๐Ÿ“ธ Photoshoots and family portraits. Adds texture, movement, and a softness the camera loves. (Yes, the photographer will probably ask where you got it.)
โœจ Color note for weddings: The original Shangri-La was knit in a soft grey, but this pattern is breathtaking in ivory, champagne, blush, dusty rose, soft lavender, sage, or pale blue. A silk-blend lace weight in any of those colorways turns the Shangri-La into a one-of-a-kind hand-knit heirloom your friend or family member will treasure long after the wedding day.

Explore More Knit Shawl Patterns

The Shangri-La is part of my growing collection of free knit shawls and lace wraps. If you love this one, you'll want to browse the full Free Knit Lace Shawl Patterns hub, where every free lace shawl is organized by shape, season, and skill level. It's the easiest way to find your next lace project.

A few knit shawls that live near Shangri-La in skill level:

  • Asymmetrical Knit Lace Shawl… another adventurous-beginner-friendly lace project with a step-by-step video tutorial
  • Peak Serenity One-Ball Knit Shawl… worsted weight, faster finish, just one skein
  • Lehabah Fire Sprite Right Triangle Shawl… a step up in size and shaping, fingering weight, gorgeous Columns of Lace
  • Blood of My Blood Knit Shawl… Outlander-inspired, adventurous beginner level

Build Your Skills with This Shawl

Even if you're new to lace, the Shangri-La gives you a few skills worth locking in. You'll practice working a multi-row lace repeat with offset positioning… this is muscle memory you'll carry into every lace shawl or wrap you ever knit. The 12-row pattern is short enough to memorize after a few repeats but long enough to teach you how to track your place in a longer chart.

You'll also master knitting lace weight yarn on bigger needles (a US 7 with CYCA #0 lace is wonderfully airy), maintaining clean garter edges alongside a lace body, and most importantly, wet blocking lace. That last one is where the magic actually happens… unblocked lace looks crumpled and small. Blocked lace transforms into the airy, drapey, magazine-worthy piece you fell in love with in the first place.

Marly Bird modeling the Shangri-La free knit lace shawl scarf pattern with the full offset lace panel visible.

Need a refresher on any of the abbreviations? My knitting definitions page has every knit term you'll see in this pattern. Brand new to lace or want to build your foundation? Start with my BiCrafty Bootcamp: Learn to Knit… it's where all my beginners start.

Want to take your shawl knitting deeper? My BiCrafty Stitch-Nite at Marly Bird House is where I teach shawl techniques like lace edgings, short row garter shaping, and advanced blocking… live, with me, alongside a full community of BiCrafty Besties. It's the perfect next step after you finish the Shangri-La.

Red, blue, and gray knitwear...sweaters, socks, hats, mittens, headband...arranged in a collage. "Bicrafty Stitch-Nite" center text.

Yarn & Materials

The original Shangri-La was knit in Bijou Basin Ranch Shangri-La, a 50% silk / 50% yak down lace weight yarn (CYCA #0, 400 yards / 2 oz per skein). It was an absolute dream to knit and the finished fabric was breathtaking. Unfortunately, this yarn has been discontinued, so you'll need a substitute. The good news: this pattern is gorgeous in any lace weight or fine fingering weight with good drape.

Suggested Alternative Yarns

Look for a lace weight (CYCA #0) or very fine fingering yarn with around 400 yards per 50โ€“100g skein. The original yarn was a silk-and-animal-fiber blend, so substitutes with similar properties will give you the closest match in drape and shine:

  • โค๏ธ Malabrigo Silkpaca… 70% baby alpaca / 30% silk, lace weight. The closest spiritual cousin to the original silk-yak. Insane drape, soft shine, and a huge color range.
  • KnitPicks Gloss Lace… 70% merino / 30% silk, lace weight. Budget-friendly silk-blend option with excellent stitch definition.
  • KnitPicks Alpaca Cloud Lace… 100% baby alpaca, lace weight. A halo of softness, beautiful drape, great for a warmer winter version.
  • KnitPicks Luminance Lace… silk-blend lace with a subtle sheen.
  • KnitPicks Capretta Fingering… 60% merino / 30% baby alpaca / 10% nylon. A silk-allergy-friendly option in fingering weight. Knit on slightly smaller needles (US 5 or 6) for a denser, warmer Shangri-La.
Vibrant skeins of yarn on a wooden tray, with notebook, scissors, and floral accents for a lace shawl knitting project.

Yardage needed:

  • Size 1 (scarf width, 14ยพ”): approximately 800 yards / 2 skeins
  • Size 2 (medium shawl, 20ยฝ”): approximately 1,200 yards / 3 skeins
  • Size 3 (full shawl, 26ยผ”): approximately 1,200 yards / 3 skeins
โœจ Designer Tip: Because you're knitting lace weight on US 7s (a relaxed gauge), you want a yarn that blooms beautifully when blocked. Silk blends, alpaca blends, and superwash merino lace all do this. Avoid tightly-spun, heavy-twist lace yarns… you want drape, not structure.

Video Tutorials

If you're a visual learner, I've got you. Here are my go-to videos for every technique you'll use in the Shangri-La:

  • Long-Tail Cast-On
  • Fixing the Long-Tail Cast-On
  • How to Knit
  • How to Purl
  • How to Yarn Over Increase
  • How to Knit Lace
  • How to Tink (Un-knit)
  • How to Add a Lifeline
  • How to Bury Ends
  • Wet Blocking Tips

A light gray lace-knit shawl with intricate stitch detail is worn as a scarf, shown outdoors in natural light.

Shangri-La Scarf or Shawl… Pattern Details

Skill Level

Adventurous Beginner

Finished Measurements

Scarf / Shawl measures 14ยพ (20ยฝ, 26ยผ)” [37.5 (52, 66.5) cm] across and 60ยฝ (70ยพ, 81ยผ)” [153.5 (179.5, 206.5) cm] in length.

Note: Directions are for the smallest size; changes for larger sizes are in parentheses. When only one number is given, that number applies to all sizes.

Gauge

14 sts and 23 rows = 4″ [10 cm] in Offset Lace pattern, after blocking.

Materials

Yarn: Bijou Basin Ranch Shangri-La (50% silk, 50% yak down, 400 yds / 366 m, 2 oz / 57 g, CYCA #0 lace).
2 (3, 3) skeins: Grey
Note: This yarn has been discontinued. See the Yarn & Materials section above for substitute recommendations.

Needles: US 7 [4.5 mm] 24″ [60 cm] circular needle, or size to obtain gauge.
Note: Scarf or Shawl is worked back and forth in rows. Circular needles are used to accommodate the full width of the stitches.

Notions:

  • Stitch Markers
  • Tapestry Needle
  • Scissors
  • Tape Measure
  • Stitch Saver Cord
  • Notions Bag for Supplies
  • Blocking Squares
  • Blocking Pins
  • Soaking Basin (this might be seasonal at Michaels but works great!)
  • Eucalan Wool Wash
  • Blocking Wires (ideal for lace work)
  • Ball Winder and Swift (great for yarn that comes in hanks)
  • Steamer (this is the one Marly and Robyn both use)
โญ๏ธ Marly Bird Amazon Storefront โญ๏ธ
A woman models a knit lace shawl, showing off its airy texture and stitch detail as she drapes it over her shoulder outdoors.

Abbreviations

  • K… Knit
  • K2tog… Knit Two Together
  • P… Purl
  • RS… Right Side
  • Ssk… Slip, Slip, Knit (see Special Stitches)
  • St(s)… Stitch(es)
  • Yo… Yarn Over

Special Stitches

โญ Slip, Slip, Knit (Ssk): Slip 2 stitches, one at a time, as if to knit. Insert left needle into the front of these 2 stitches and knit them together from this position… 1 stitch decreased.

โญ Flat Slip, Slip, Knit (Flat Ssk):
Note: This is an alternate ssk method that lies flatter and looks more similar to a reversed k2tog.
Insert needle in front leg of next st but do not knit it, insert needle in back leg of second st on left needle, yarn over and knit both of these sts together (1 st decreased).


Pattern Stitches

Offset Lace (worked over a multiple of 10 sts plus 5):

Row 1 (RS): * P5, k2tog, yo, k1, yo, ssk; repeat from * to last 5 sts, p5.
Row 2: K5, * p5, k5; repeat from * to end.
Row 3: K1, p3, k2tog, yo, k3, yo, * ssk, p3, k2tog, yo, k3, yo; repeat from * to last 6 sts, ssk, p3, k1.
Row 4: P1, k3, p1, * p6, k3, p1; repeat from * to end.
Row 5: K2, p1, k2tog, yo, k5, * yo, ssk, p1, k2tog, yo, k5; repeat from * to last 5 sts, yo, ssk, p1, k2.
Row 6: P2, k1, p2, * p7, k1, p2; repeat from * to end.
Row 7: * K1, yo, ssk, p5, k2tog, yo; repeat from * to last 5 sts, k1, yo, ssk, p2.
Row 8: K2, p3, * p2, k5, p3; repeat from * to end.
Row 9: * K2, yo, ssk, p3, k2tog, yo, k1; repeat from * to last 5 sts, k2, yo, ssk, p1.
Row 10: K1, p4, * p3, k3, p4; repeat from * to end.
Row 11: * K3, yo, ssk, p1, k2tog, yo, k2; repeat from * to last 5 sts, k3, yo, ssk.
Row 12: P5, * p4, k1, p5; repeat from * to end.

Repeat Rows 1โ€“12 for Offset Lace.

Offset Lace Chart

โœจ Following along with the free pattern on MarlyBird.com? You'll have everything you need to make this Shawl… but if you want the exclusive charts + the Stitch Fiddle Links, those are only available in the ad-free PDF version.

You'll enjoy a clean, printable, ad-free experience while supporting Marly Bird's free tutorials and patterns ๐Ÿ’–

Etsy
Shopify
Ravelry

Notes

Before You Begin

This shawl is one of those relaxing, “just one more row” projects ๐Ÿ˜Š The 12-row lace repeat looks long at first glance but becomes intuitive after a few passes. A few things to keep in mind before you cast on:

  • Directions are written for the smallest size; changes for larger sizes are in parentheses. When only one number is given, it applies to all sizes.
  • The piece is worked back and forth in rows on a 24″ circular needle. The circular needle simply gives you cord length to hold the full width… you're not knitting in the round.
  • The 5-stitch garter edges on each side keep the fabric flat and give your eyes a clean visual frame around the lace.
  • Lace looks crumpled and small before blocking. Trust the process. Wet blocking transforms this shawl completely.
  • The pattern is fully customizable in length… work more or fewer 12-row repeats to suit your preference, keeping in mind that more repeats = more yarn.
  • Don't stress about perfection. Small mistakes in lace tend to disappear into the texture, especially after blocking.
โœจ Designer Tip: Add a lifeline every 2โ€“3 repeats of the lace pattern. It takes 30 seconds and saves you an hour of tinking if something goes sideways. Past-you will thank future-you every single time. New to lifelines? Watch my quick tutorial here.

GROW

To Unlockย Exclusive Subscriber Contentย click the Box below and join for free by simply adding your email and creating a password! If you are having troubles, clear your cache or reset your password or login to the Grow Publisher Portal.

>> Learn More About Grow Here <<

I'm thrilled to share this amazing pattern with you, many patterns on my blog are absolutely free! I kindly request that you don't copy and paste or distribute this pattern. Prefer an ad-free experience? Buy a digital PDF pattern for a small fee from one of my online stores for a seamless crafting journey. 

I appreciate your support and readership. You are the reason I can keep doing what I love and sharing it with others. So, thank you from the bottom of my yarn-loving heart! Disclosure: This post contains affiliate links, meaning I get a commission if you decide to make a purchase through my links at no cost to you.

Shangri-La free knit lace shawl pattern collage by Marly Bird, showing the finished offset lace fabric draped multiple ways.

Shangri-La Scarf or Shawl… Pattern Instructions

Cast On & Bottom Edging

Cast on 55 (75, 95) sts using long-tail cast-on (see Video Tutorials above).

Work 8 rows in Garter stitch (knit every row).

Begin Offset Lace Pattern

Next Row (RS): K5 (edge sts), place a marker, work Row 1 of Offset Lace pattern (see pattern stitches) to last 5 sts, place a marker, k5 (edge sts).

Work in Offset Lace pattern, keeping 5 sts at each edge in Garter stitch, until 28 (33, 38) vertical repeats (or 336 (396, 456) rows) of pattern have been completed.

You may make the piece as long or as short as you like, keeping in mind this will affect required yarn amounts.

Top Edging & Bind Off

Work 8 rows in Garter stitch (knit every row).

Bind off all sts loosely.

Weave in all loose ends using your tapestry needle. The How to Bury Ends video walks you through my favorite finishing method.

โœจ Designer Tip: Bind off LOOSELY. A tight bind-off will pull the top edge in and ruin the drape after blocking. If your bind-offs tend toward tight, go up a needle size or two for the bind-off row only. Your blocked shawl will thank you.
Light gray knit lace scarf drapes over a dark top; delicate openwork stitches and texture are clearly visible.

Blocking Your Shangri-La

Wet blocking is like sending your yarn on a spa retreat. It's the process where your stitches unwind, enjoy a soothing cleanse, and settle gracefully into their final form. For lace, blocking isn't optional… it's the step that transforms a crumpled-looking piece into the airy, drapey shawl you fell in love with. Here's how to pamper your finished Shangri-La with a thorough wet block:

  1. Soak. Submerge your piece in a basin or sink filled with cool water. Add a small amount of Eucalan wool wash or another no-rinse wool soap… this not only cleans but conditions the fibers. Let it soak for 15โ€“20 minutes.
  2. Press out water gently. Don't twist or wring. Press the piece against the side of the basin, or squeeze gently between your hands. Always support the entire piece when lifting so it doesn't stretch under its own weight.
  3. Burrito roll. Lay the piece flat on a large dry towel. Roll the towel up like a burrito (with the shawl inside) and press firmly to wick out more moisture. Your piece should end up damp, not dripping, not dry.
  4. Pin to your blocking board. Transfer to blocking squares or a blocking mat. Align with the grid and gently stretch the piece to its target dimensions. Use blocking wires along the long edges for the cleanest results (lace knitter's secret weapon), and pin the short edges with blocking pins.
  5. ๐Ÿšจ Don't overstretch! Lace can be stretched dramatically when wet… some yarns will grow to nearly double their unblocked size if you let them. Trust me, you don't want a 5XL scarf. Stretch enough to open the lace, not enough to distort the shape.
  6. Let it dry completely. A full day is typical. A fan can speed things up. Keep out of direct sunlight (some yarns discolor in the sun).

When you unpin your finished shawl, you'll see what every lace knitter knows: blocking is magic. The Offset Lace opens up into a full, airy, drapey fabric, and the piece settles into its real size and shape. Step back, admire your work, and try not to immediately cast on another one. ๐Ÿ’›


Love This Yarn? More Patterns Using Lace Weight or Fingering Weight yarn!

If lace weight knitting has officially stolen your heart (and honestly… how could it not), here are a few more of my favorite knit patterns to cast on with that gorgeous lightweight yarn:

  • Asymmetrical Knit Lace Shawl… another adventurous beginner lace project, similar yarn-weight love
  • Pear Sorbet … the perfect knit lace stepping stone
  • Kat Pashmina Knit Lace Shawl… beautiful knit lace crescent shawl with full video tutorials!
  • Free Knit Lace Shawl Patterns hub… browse the full lace shawl collection
Light gray knit lace scarf with intricate pattern, worn outdoors; showcases delicate texture and stitch detail.

Favorite & Queue on Ravelry

Please favorite and queue the Shangri-La Scarf or Shawl on Ravelry and tag your finished projects #ShangriLaShawl or #MMMDI so I can see them! There is nothing I love more than watching your versions come to life… every color, every blocking shot, every glowing finished photo.

Favorite This Pattern on Ravelry - Marly Bird

More Free Knit Shawl Patterns You'll Love

  • Lehabah Fire Sprite Right Triangle Shawl… fingering weight, gorgeous Columns of Lace
  • Asymmetrical Knit Lace Shawl… another beginner-friendly lace option with video tutorial
  • Peak Serenity One-Ball Knit Shawl… worsted weight, fastest finish, just one skein
  • Blood of My Blood Outlander Knit Shawl… adventurous beginner, fingering weight
  • Free Knit Summer Shawls Roundup… the full collection for warm weather

Or browse the full Knit Shawl Patterns hub for every free knit shawl on the blog, sorted by shape, season, and skill level.

Smiling woman with curly hair and glasses holds a coffee mug, waving amid craft icons, flowers, yarn ball, and pencil.

Frequently Asked Questions

What skill level is the Shangri-La Scarf or Shawl?

Adventurous Beginner. You need to know knit, purl, yarn over (yo), k2tog, and ssk. If you've knitted a few projects and want to try your first lace pattern, this is the one. The 12-row repeat looks intimidating on paper but becomes muscle memory after a few passes.

Can I use a different yarn for the Shangri-La?

Yes… the original Bijou Basin Ranch Shangri-La yarn has been discontinued. Substitute any lace weight (CYCA #0) or very fine fingering weight yarn with good drape. Silk blends, alpaca-silk blends, and silk-merino blends work especially well. Honestly, this is the perfect home for that gorgeous indie skein you've been hoarding. See the Yarn & Materials section above for my specific substitute recommendations.

What's the difference between the scarf and shawl sizes?

Size 1 (14ยพ” wide) wears best as a long scarf… narrow enough to drape comfortably around your neck. Sizes 2 and 3 (20ยฝ” and 26ยผ” wide) are true shawl widths, perfect for wrapping around your shoulders. Same stitch pattern, completely different finished pieces. The dual-purpose design is honestly the best part of this pattern.

Do I need to block the Shangri-La?

Absolutely yes… all lace patterns MUST be blocked. Before blocking, lace looks crumpled and shapeless. After wet blocking, the stitches open up and the shawl transforms into that airy, drapey, beautiful piece you saw in the photos. Skipping the block = not seeing the real finished piece. See the Blocking section above for my full step-by-step process.

How long does it take to knit the Shangri-La?

The smallest size knits up in about 15โ€“20 hours depending on your pace. The larger sizes take 25โ€“35 hours. Lace weight knits slower than worsted… but the result is worth it. It's a wonderful “always-on-the-needles” project to keep going between bigger garment makes.

Are circular needles required even though it's worked flat?

Yes… the pattern is worked back and forth in rows (not in the round), but the full width of stitches (especially in Sizes 2 and 3) won't fit on straight needles. A 24″ circular needle gives you the cord length to hold all the stitches comfortably. You'll just turn at the end of every row like you would on straights.

What is offset lace?

Offset lace is a lace stitch pattern where the yarn-over and decrease combinations shift position by a set number of stitches each repeat. This creates a diagonal or staggered effect in the finished fabric, rather than a straight vertical column of lace holes. In the Shangri-La, the lace shifts across a multi-stitch repeat to create a soft all-over openwork with a gentle rhythmic pulse. See the “What Is Offset Lace, Anyway?” section above for the full breakdown.

How much yarn do I need for the Shangri-La?

Size 1 (scarf width): approximately 800 yards of lace weight (2 skeins of 400-yard yarn). Sizes 2โ€“3 (shawl widths): approximately 1,200 yards (3 skeins). If you're customizing the length, plan for about 13 yards of yarn per inch of length in the smallest size, more for the larger widths.

Where can I get the ad-free PDF?

You've got three options: Etsy, Shopify, or Ravelry. Same pattern, same price, pick whichever shop you prefer. Your purchase supports me as an indie designer and keeps the free patterns coming. ๐Ÿ’›

๐Ÿ›’ Buy the ad-free PDF on Etsy
๐Ÿ›๏ธ Buy the ad-free PDF on Shopify
๐Ÿงถ Buy the ad-free PDF on Ravelry


A gray knit lace scarf with a delicate, openwork stitch is modeled outdoors, showing its texture and drape in sunlight.

Final Thoughts

The Shangri-La has been one of my favorite patterns to revisit. The original silk-yak yarn is gone, but the design itself has only gotten better… three sizes, two finished pieces in one, and a lace stitch that looks twice as fancy as it actually is to knit. That's the kind of pattern that earns its place in your project queue.

If you cast it on, please please please share your progress… tag me @themarlybird on Instagram or Facebook and use #ShangriLaShawl, #MarlyBird, or #MMMDI (Marly Made Me Do It) so I can see it. I want every color, every blocking shot, every “wear it as a scarf today, shawl tomorrow” photo. ๐Ÿ’›

โค๏ธ Your BiCrafty Bestie,
Marly Bird

A cartoon avatar of a person with glasses and a brown bun smiles warmly. Their green shirt and black jacket add a stylish touch, while colorful hearts surround them like loving temperature blankets, stitching together an aura of love and positivity. -Marly Bird
“

Filed Under: Free Patterns, Knit Shawl Patterns, Knitting, Marly Bird Premium Patterns, Our Free Patterns, Pattern Tagged With: badge-new-pattern

Coral Ridge Crochet Shawl โ€“ Free Colorblock Triangle Pattern

May 26, 2026 By Meg Leave a Comment

“

๐ŸŒธ Spring Fling 2026… Day 17 Pattern ๐ŸŒธ

This pattern debuted as Day 17 of Spring Fling 2026 (Tue May 26, 2026). The free pattern stays free forever right here on the blog.

๐Ÿ‘‰ See the full Spring Fling 2026 lineup on the Hub

Share your finished Coral Ridge Shawl with the hashtags #SpringFling2026 + #CoralRidgeShawl ๐ŸŒธ

The Coral Ridge Crochet Shawl is a free colorwork crochet shawl pattern… an architectural center-out triangle crochet shawl with a Greek-key colorblock border. It's an intermediate crochet shawl pattern designed by Marly Bird and Robyn Chachula, worked at a 16 sts ร— 9 rows = 4″ ร— 5″ gauge in CYCA #4 worsted weight yarn, with a finished wingspan of 62″ and a depth of 30″. This crochet wrap pattern doubles as a shawl, a scarf wrap, and (genuinely) a beach sarong. Free pattern on the blog. Ad-free PDF available.

A person models a crocheted triangle scarf with gray, blue, and red patterns, highlighting the textured stitching.

Looking for a free triangle crochet shawl pattern that wears beautifully… feels architectural without being fussy, and lets you play with color in the most satisfying way possible? Coral Ridge is the one. A modern crochet shawl in worsted weight, accessible yarn, traditional center-out construction, and a colorblock Greek-key border that makes the whole thing read like art when it's done. Designed by me and my best friend and business partner Robyn Chachula, this is one of those patterns I keep wearing every time I leave the house.

Hey, bestie ๐Ÿ’› If you've ever wanted a handmade crochet shawl that doubles as a crochet wrap, a crochet scarf wrap, and (genuinely) a beach sarong… this is it. Big enough to actually use, small enough to finish in a few weekends of evening crochet, and the colorblock border is the kind of crochet accessory detail that has strangers asking you about it at the grocery store.

โšก Quick Answer: The Coral Ridge Crochet Shawl is a free triangle crochet shawl pattern… a colorwork crochet shawl + crochet wrap pattern designed by Marly Bird and Robyn Chachula. Center-out construction, 62″ wingspan by 30″ depth, charcoal body with a coral, teal, and navy Greek-key colorblock border. Intermediate skill level (a strong next step for any crochet shawl beginner who's finished a basic triangle shawl). Uses CYCA #4 worsted weight yarn (Red Heart Soft) and a size I/9 (5.5 mm) hook. Free pattern below.

Affiliate Disclosure: This post contains affiliate links. To learn more please visit my privacy policy here ๐Ÿ’–

Free crochet triangle shawl pattern with colorwork border โ€” Coral Ridge Crochet Shawl by Marly Bird, modeled close-up to show gray body, blue, and coral Greek-key stitch detail

What You Will Love About This Free Crochet Coral Ridge Shawl Pattern ๐Ÿ’–

๐ŸŒŠ Worsted weight, accessible yarn. Coral Ridge is designed in Red Heart Soft… a CYCA #4 worsted weight 100% acrylic you can buy at Michaels, JoAnn, or Walmart. No specialty yarn hunt, no expensive substitution math. Affordable and machine washable, which is exactly what a shawl you'll wear constantly needs to be.

๐ŸŒŠ One-piece, no-seam construction. The shawl is worked from the center out in one continuous piece. The diagonal edges build themselves, the bottom point is built in, and there is absolutely nothing to seam at the end. You bind off, weave in ends, block, and you're done.

๐ŸŒŠ Architectural colorblock border. Fourteen rows of edging give you a clean Greek-key motif framed by teal and navy bands. The colorwork is structured so the color changes happen at the rhythm of the rows… not in the middle of stitches, which means no tapestry crochet learning curve.

๐ŸŒŠ Wears four ways. Drape it as a classic shawl, wrap it scarf-style, tie it as a sarong over a swimsuit, or pin it as a poncho-style cover-up. At 62″ across, it's actually big enough to wear in real life… not just over the back of a chair.

๐ŸŒŠ Stash-friendly accent colors. The main body is one solid color from start to finish, and each of the three accent colors only takes one ball. If you've already got a sweater quantity of a solid color in your stash, you're more than halfway there.

๐ŸŒŠ A handmade crochet shawl with real visual impact. If you've been making easy crochet shawl patterns and you're ready for something that looks more advanced than it actually is, Coral Ridge is the bridge. It's the kind of modern crochet shawl that gets photographed at every gathering… a one-of-a-kind crochet accessory pattern you'll reach for every season.

Woman models a gray crochet shawl with blue and coral trim, showing triangle shape and detailed edging. Coral Ridge Shawl.

Quick Pattern Overview

๐Ÿ“ Skill level: Intermediate. You'll need to be comfortable working into the third loop of a half double crochet, working a dc into a stitch two rows below, and moving stitch markers as your work grows. If you've made a top-down triangle shawl before, the rhythm here will feel familiar.

๐Ÿ“ Finished size: 62″ wingspan ร— 30″ depth. One size, designed to drape generously across the shoulders and down the back.

๐Ÿงถ Yarn: Red Heart Soft CYCA #4 worsted weight, 100% acrylic, 256 yds / 141 g per ball. 2 balls Color A (#9010 Charcoal), 1 ball each of Color B (#9518 Teal), Color C (#4604 Navy), Color D (#9251 Coral).

๐Ÿช Hook: Size I/9 (5.5 mm)… or whichever hook you need to hit gauge.

๐Ÿ“ Gauge: 16 sts (dc + ch-1 sp) ร— 9 rows = 4″ ร— 5″ blocked.

๐Ÿชก Construction: Worked from the center back of the neck outward in dc + ch-1 mesh, with increases at both side edges and at one center spine stitch on every row. Fourteen rows of colorblock edging finish the bottom and side edges with a Greek-key motif.

Ad-free PDF of the Coral Ridge Crochet Shawl free pattern โ€” Marly Bird modeling the worsted weight crochet triangle shawl with colorwork Greek-key border in front of her yarn studio shelves
Etsy
Shopify
Ravelry

Love the Pattern but Want an Ad-Free PDF? โญ

The full Coral Ridge Crochet Shawl pattern is free right here on the blog. If you'd rather skip the ads, print clean pages, and have everything you need in one tidy PDF… the ad-free version is available in my shops:

Or if you'd rather have the free pattern delivered straight to your inbox plus get on my newsletter for weekly pattern roundups, BiCrafty tips, and the occasional behind-the-scenes peek… I'd love to have you ๐Ÿ’›

  • ๐Ÿ›’ Shop the Coral Ridge pattern on Etsy
  • ๐Ÿ›’ Shop the Coral Ridge pattern on Ravelry
  • ๐Ÿ›’ Shop the Coral Ridge pattern in the Marly Bird Shopify Store

Join our Newsletter

Get Free Crochet & Knitting
Pattern Links & Coupons!

Hand-drawn bird with curling, detailed feathers and pink accents; cheerful pose showcases fine line and texture work.
>> Become An Insider <<
A woman with glasses and curly hair models a colorful crocheted scarf, showing textured stitches and vibrant yarn.

Is This Crochet Coral Ridge Shawl Pattern Right for You?

This pattern is perfect for you if…

โœ… You're an advanced-beginner or intermediate crocheter who's comfortable reading written instructions, moving stitch markers as you go, and working into the third loop of a half double crochet. If you're a crochet shawl beginner who's already made a basic triangle shawl or a granny square blanket, this is the perfect next pattern to graduate into.

โœ… You want a free triangle crochet shawl pattern that's big enough to actually wear. At 62″ across, Coral Ridge is generous enough to drape across both shoulders, wrap as a sarong, or fold scarf-style around your neck as a crochet scarf wrap.

โœ… You love the satisfaction of colorblock crochet without the learning curve of tapestry crochet. The Greek-key motif here is a colorwork crochet pattern that's created with stripes and slip stitches, not by carrying colors across the row.

โœ… You want a worsted weight crochet shawl worked in machine-washable yarn so you can finish quickly and wear it constantly.

โœ… You're shopping for a handmade crochet shawl with a border that does the visual heavy lifting. Coral Ridge is the rare crochet shawl with border detail that frames the entire piece without overwhelming it.

This might NOT be the right pattern for you if…

โŒ You're brand new to crochet. Save this one for after a few projects. (Try the Stoney Creek Sleeveless Tee if you want a simpler beginner-friendly garment first.)

โŒ You want a lacy, lightweight summer wrap. This is a worsted weight crochet shawl with structured colorwork… beautiful, but more substantial than a fingering weight lace shawl. (For lacy, try the Bluebonnet Crochet Lace Shawl.)

โŒ You don't want to block your finished piece. (Blocking is non-negotiable for this one… the colorblock edging chain-2 spaces need to open up evenly for the Greek-key motif to read.)

Coral Ridge free crochet triangle shawl pattern detail โ€” flat-lay showing the heathered gray body and blue and red Greek-key geometric colorblock border

Meet the Designers: Marly Bird & Robyn Chachula

Marly Bird

I'm Marly… a yarn artist, designer, and teacher who's been designing knit and crochet patterns since 2007. I'm best known for the BiCrafty method (teaching knit and crochet together as one practice), for being host of one of the longest-running fiber arts podcasts and YouTube channels in the industry, and for genuinely believing that crochet and knit patterns should be free, accessible, and sized for every body. Coral Ridge is part of an ongoing series of architectural shawl collaborations I've been doing with Robyn Chachula.

Robyn Chachula

Robyn is my best friend and my business partner… the Robyn to my Batman. She's a vital designing partner to me and my business, and she claims marlybird.com as her home too. Her brain works like an engineer's (because before she came to crochet, that's exactly what she was), so when Robyn drafts a pattern, every stitch has a job and every shaping decision has a reason. Coral Ridge is the latest in a series of architectural shawl collaborations we've designed together, and there are more on the way.

Coral Ridge crochet shawl free pattern modeled in a yarn-filled craft room โ€” gray triangle shawl with teal and red textured border by Marly Bird

Understanding Center-Out Triangle Shawl Construction

Coral Ridge is what's called a traditional center-out triangle shawl. You start at the center back of the neck with a tiny 4-chain foundation, then increase symmetrically on both side edges and at one center “spine” stitch on every row. The shawl grows outward and downward at the same time, forming a wide, generous triangle that drapes evenly across both shoulders.

If you've made a top-down shawl before (like the Farrago Crochet Shawl), the rhythm here will feel familiar… rows get longer as you go, you're working on the right side and wrong side alternately, and the marker in the center stitch is your best friend. The difference is what's happening at that center stitch… in Coral Ridge, you increase through the spine each row, which is what gives the finished shawl its symmetric triangle shape rather than a sloped boomerang.

What I love about this construction is that there's nothing to seam. The shawl comes off your hook in one piece, ready for blocking. The diagonal edges already match each other, the bottom point is built in, and the colorblock edging frames the whole thing like a picture frame around a painting.

Coral Ridge free crochet triangle shawl pattern โ€” handmade crochet shawl in gray with blue and coral colorwork border, styled in a cozy craft room

The Color Palette: Why Charcoal, Teal, Navy & Coral Work So Well Together

The name Coral Ridge came out of the colorway itself. Charcoal, teal, navy, and coral… it's the palette you'd see standing on a rocky shoreline at low tide, where the water shifts between deep blue-grey and sun-warmed teal, and a flash of coral pokes out from a tide pool. We wanted the shawl to feel like the ocean wearing its colors all at once.

Here's what makes the palette work technically… charcoal anchors the whole body of the shawl, so the eye stays calm across all those rows of double crochet mesh. Then the border builds outward through teal and navy (both cool, both close in value, which keeps the transition smooth) before the coral steps in as the Greek-key motif itself. Those bright coral keys on a navy ground are what make the shawl read as striking instead of matchy. It's the one true contrast in the design, and it's saved for the most visible part of the border.

Four colors sounds complicated. It isn't. This is a colorwork crochet pattern where the main body stays one solid color from start to finish (no color changes, no carrying yarn) and then all the colorwork happens in fourteen rows of edging at the end. By the time you're working those edging rounds, you've already crocheted enough of the shawl that the color changes feel like the fun reward at the end of the project. It's the gentlest way I know to make a crochet shawl with border colorwork that looks far more complicated than it actually is.

Coral Ridge free crochet triangle shawl Pinterest pin โ€” three poses showing how to wear this handmade crochet shawl with colorblock teal and coral border

See Coral Ridge in Twelve Different Colorways

The sample shawl is charcoal / coral / teal / navy, but the honest truth is… Coral Ridge wears just about every palette you can think of. So we rendered the shawl in twelve different color combinations to help you choose. Cool blues. Warm berries. Autumn neutrals. Jewel-tone coastal. Take a look and tell me which one is calling your name.

Colorwork crochet shawl in six blue and green colorways โ€” Coral Ridge triangle crochet shawl in icy aqua, teal sage, cobalt black, slate teal, turquoise denim, and navy olive
Free crochet triangle shawl pattern in six cream-body colorways โ€” Coral Ridge by Marly Bird in berry, peacock teal, browns, mustard, lavender plum, and emerald teal jewel-tone

If you're not sure where to start, here are the four palettes I keep coming back to…

  • Icy aqua monochrome (top-left, grid 1): Pale ice blue body with white, aqua, and sky blue in the border. Reads like a soft winter morning. This is the one to make if you've been hoarding pastels.
  • Cream + berry (top-left, grid 2): Cream body with raspberry, dusty rose, and burgundy in the border. Romantic, warm, and exactly the kind of shawl I'd wrap up in with a glass of wine.
  • Cream + mustard (middle-right, grid 2): Cream body with golden mustard, soft tan, and deeper goldenrod. Pure sunny autumn… the harvest-table version of Coral Ridge.
  • Emerald jewel-tone (bottom-right, grid 2): Cream body grading into a deep teal triangle with emerald, aqua, and medium teal in the border. Mermaid-coded, jewel-tone, and the most dramatic of the bunch.

If you've got a sweater quantity of one solid color in your stash already, you're more than halfway to a Coral Ridge of your own. The colorblock edging only takes one ball of each of the three accent colors… which makes this a perfect project for those single skeins of “I had to have it” yarn that have been waiting for the right pattern. Tell me in the comments which colorway you're reaching for. I'll happily play yarn-shop matchmaker.

Coral Ridge free crochet triangle shawl draped over the shoulders of a model in a black sweater โ€” colorblock red and teal border frames the collarbone

How to Wear Coral Ridge: Shawl, Wrap, Scarf, Sarong

At 62 inches across, Coral Ridge is big enough to actually wear in real life, not just drape over a chair back. This is the kind of crochet accessory pattern you'll style four different ways before the season is out… here are the four I keep reaching for.

Drape It Over Your Shoulders

The classic shawl move. The point hangs down at center back, the wingspan covers your shoulders and upper arms, and the colorblock border frames your collarbone. Pin it at the front with a shawl pin or a brooch for cooler weather.

Coral Ridge free crochet triangle shawl โ€” Marly Bird modeling the gray crochet shawl with colorwork border in her colorful craft room

Wrap It Scarf-Style

Fold the long edge in half on the diagonal, then wrap once around your neck like a chunky infinity scarf. The colorblock edging shows on the front of the loop, and the point tucks neatly behind you. This is my fall transition outfit cheat code.

Handmade crochet shawl styled as a crochet scarf wrap โ€” Coral Ridge worsted weight crochet shawl in gray and teal with colorblock Greek-key border, layered over a black cardigan

Tie It as a Sarong (or Beach Coverup)

Here's the secret I wasn't expecting when we designed Coral Ridge… it doubles as a sarong. Hold the long edge across the front of your waist (so the colorblock border runs along the top), wrap the two points around your hips toward the back, cross them, then tie them at the front or side. The triangle drape becomes a flattering A-line skirt over a swimsuit or shorts, and the open weave breathes beautifully in warm weather. If you're packing for a coastal vacation, this is the project I'd put on the needles first.

Pin It Poncho-Style

Drape Coral Ridge across your shoulders so the long edge sits at your collarbone, then pin the two points together at your shoulders to create a poncho silhouette. Wear it over a fitted black turtleneck and dark jeans for an instant Saturday-coffee outfit.


Yarn & Materials

Yarn Needed for Coral Ridge

Red Heart Soft (100% acrylic, 256 yds / 234 m, 5 oz / 141 g, CYCA #4 worsted weight). Machine washable and tumble dry. Available at most major craft retailers.

  • Color A: #9010 Charcoal โ€” 2 balls (main body)
  • Color B: #9518 Teal โ€” 1 ball (inner and outer edging bands)
  • Color C: #4604 Navy โ€” 1 ball (Greek-key ground)
  • Color D: #9251 Coral โ€” 1 ball (Greek-key motif)

Approximately 1,280 yards total across all four colors.

Yarn balls and a woman wearing a crochet shawl; close-up shows soft yarn texture, stitch detail, and color variety.

Hook & Notions

  • Crochet hook: Size I/9 (5.5 mm), or any size needed to obtain gauge
  • Stitch markers
  • Tapestry needle
  • Scissors
  • Tape measure
  • Blocking squares
  • Blocking pins
  • Steam iron or steamer for blocking
โญ๏ธ Marly Bird Amazon Storefront โญ๏ธ

Yarn Substitution Guide: Can I Use a Different Yarn for Coral Ridge?

Absolutely. The pattern was designed in Red Heart Soft because it's accessible and affordable, but any worsted weight (CYCA #4) yarn with about 256 yards per skein will work. A few substitutions I'd recommend if you want to switch…

  • Lion Brand Pound of Love: same fiber (acrylic), more yardage per ball (which means you might only need 1 ball of the body color instead of 2), wide color range.
  • Caron Simply Soft: slightly silkier hand, drapes a bit softer for a more elegant feel.
  • Berroco Vintage (worsted): wool/acrylic/nylon blend if you want a more breathable, slightly fancier finished shawl. Still machine washable.
  • Lion Brand Heartland: beautiful heathered colors for a more rustic palette, same gauge as Red Heart Soft.
  • Cascade 220 Superwash: if you want to go all-wool while keeping the wash-and-wear ease. Slightly heavier hand, blocks beautifully.

Whatever you substitute, please do a gauge swatch first. The pattern is designed at 16 sts and 9 rows = 4″ ร— 5″ in dc + ch-1 space, and if your gauge is off, the wingspan will land somewhere quite different from 62 inches.

Video Tutorials

How to Weave or Bury in Ends

Coral Ridge has eight color changes through the colorblock border, which means eight pairs of ends to weave in at the finish. This quick video shows the two-step method I use to bury ends so they stay buried, even after washing.

How to Wind a Hank with a Swift and Ball Winder

If you're substituting a hand-dyed or specialty yarn that comes in a hank rather than a center-pull ball, this is the fastest way to get it ready for crochet without ending up with a tangled mess on your lap.

  • Blocking Made Easy with the Right Tools
Coral Ridge free crochet triangle shawl pattern detail โ€” gray crochet body with colorwork blue, red, and pink Greek-key colorblock border

Free Coral Ridge Crochet Shawl Pattern Details

Skill Level

Intermediate

Finished Measurements

Shawl is 62″ [157.5 cm] in wingspan by 30″ [76 cm] in depth.

Gauge

16 sts (dc + ch-1 sp) by 9 rows = 4″ [10 cm] by 5″ [12.5 cm]; use any size hook to obtain the gauge.

Abbreviations

  • Ch โ€” Chain(s)
  • Dc โ€” Double Crochet
  • Hdc โ€” Half Double Crochet
  • RS โ€” Right Side
  • Sc โ€” Single Crochet
  • Sl st โ€” Slip Stitch
  • Sp(s) โ€” Space(s)
  • St(s) โ€” Stitch(es)
  • Tch โ€” Turning Chain
  • WS โ€” Wrong Side

Special Stitches

โญ Third Loop: Also known as the middle loop or back bar. The horizontal strand located just under the top two loops of an hdc. When working in turned rows, the third loop is on the front side of the fabric facing you.


Crochet Stitch Diagrams

โœจ Following along with the free pattern on MarlyBird.com? You'll have everything you need to make this Coral Ridge Shawl… but if you want the exclusive stitch diagram charts, those are only available in the ad-free PDF version.

You'll enjoy a clean, printable, ad-free experience while supporting Marly Bird's free tutorials and patterns ๐Ÿ’–

Etsy
Shopify
Ravelry

Notes

  • Shawl is worked from the center out.
  • Place a stitch marker in the center stitch and end stitches throughout. Move the center marker as the shawl grows.
  • Do not skip blocking. The chain-2 spaces of the colorblock edging need to open up for the Greek-key motif to read.

GROW

To Unlockย Exclusive Subscriber Contentย click the Box below and join for free by simply adding your email and creating a password! If you are having troubles, clear your cache or reset your password or login to the Grow Publisher Portal.

>> Learn More About Grow Here <<

I'm thrilled to share this amazing pattern with you, many patterns on my blog are absolutely free! I kindly request that you don't copy and paste or distribute this pattern. Prefer an ad-free experience? Buy a digital PDF pattern for a small fee from one of my online stores for a seamless crafting journey. 

I appreciate your support and readership. You are the reason I can keep doing what I love and sharing it with others. So, thank you from the bottom of my yarn-loving heart! Disclosure: This post contains affiliate links, meaning I get a commission if you decide to make a purchase through my links at no cost to you.

Ad-free PDF of the Coral Ridge Crochet Shawl pattern by Marly Bird โ€” clean printable instructions for crocheters with stitch diagrams

Free Coral Ridge Crochet Shawl Pattern Instructions

Main Body

With Color A, ch 4.

Row 1 (WS): Skip 3 ch (counts as dc), (dc, ch 1, dc, ch 1, 2 dc) in last ch, turn โ€” 5 dc, 2 ch-1 sps.

Row 2: Ch 3 (counts as dc), dc in first dc (this makes 2 dc in first st), ch 1, dc in next dc, (ch 1, dc) 3 times in next dc, place marker in center dc of last 3 dc made for corner, ch 1, dc in next dc, ch 1, 2 dc in top of tch, turn โ€” 9 dc, 6 ch-1 sps.

Row 3: Ch 3 (counts as dc), dc in first dc, (ch 1, dc) in each dc to marked corner dc, (ch 1, dc) 3 times in marked corner dc and move marker to center dc of last 3 dc made, (ch 1, dc) in each dc to last st, ch 1, 2 dc in top of tch, turn โ€” 13 dc, 10 ch-1 sps.

Repeat Row 3 only 30 more times โ€” 33 total rows worked, 133 dc total, 66 dc on either side of center st, 247 sts total, 123 sts on either side of center st. Change color to B, fasten off Color A.

Coral Ridge free crochet triangle shawl pattern detail โ€” gray mesh body with the start of the blue and pink Greek-key colorblock border

Edging

Row 1: Ch 2 (counts as hdc), hdc in each dc and ch-1 sp across to marked corner dc, 3 hdc in corner dc, move marker to center st, hdc in each dc and ch-1 sp across, turn โ€” 124 hdc each side of center marked st, 249 hdc total.

Row 2: Ch 1, 2 sc in first hdc, sc in third loop of each hdc across to marked hdc, 3 sc in marked corner hdc, move marker to center sc, sc in third loop of each hdc across to tch, 2 dc in top of tch, change color to C, fasten off Color B, turn โ€” 126 sc each side of center marked st, 253 sc total.

Row 3: Ch 1, 2 sc in first sc, sc in each sc across to marked sc, 3 sc in marked corner sc, move to center sc, sc in each sc across to last sc, 2 sc in last sc, turn โ€” 128 sc each side of center marked st, 257 sc total.

Row 4: Ch 1, 2 sc in first sc, sc in each sc across to marker, 3 sc in marked corner sc, move marker to center sc of 3 sc just made, sc in each sc to last sc, 2 sc in last sc, change color to D, turn โ€” 130 sc each side of center marked st, 261 sc total.

Row 5: Ch 1, 2 sc in first sc, *sc in next 3 sc, [ch 2, skip 1 sc, sc in next sc, ch 2, skip 1 sc, sc in next 5 sc] 15 times, ch 2, skip 1 sc, sc in next sc, ch 2, skip 1 sc, sc in next 3 sc*, 3 sc in marked sc, move marker to center sc of 3 sc just made, repeat from * to * once, 2 sc in last sc, turn โ€” 32 ch-2 sps + 100 sc each side of center marked st.

Row 6: Ch 1, 2 sc in first sc, sc in each st and ch 2 over each ch-2 sp across to marker, 3 sc in marked sc, move marker to center sc of 3 sc just made, sc in each st and ch 2 over each ch-2 sp across to last sc, 2 sc in last sc, change color to C, turn โ€” 32 ch-2 sps + 102 sc each side of center marked st.

Row 7: Ch 1, 2 sc in first sc, *ch 2, skip 1 sc, sc in next 3 sc, ch 2, skip 1 sc, [dc in next sc 2 rows below (in front of prev ch-sps), sc in next sc, dc in next sc 2 rows below, ch 2, skip 1 sc, sc in next 3 sc, ch 2, skip 1 sc] 16 times*, 3 sc in marked sc, move marker to center sc of 3 sc just made, repeat from * to * to last sc, 2 sc in last sc, turn โ€” 34 ch-2 sps + 32 dc + 70 sc each side of center marked st.

Row 8: Ch 1, 2 sc in first sc, sc in each st and ch 2 over each ch-2 sp across to marker, 3 sc in marked sc, move marker to center sc of 3 sc just made, sc in each st and ch 2 over each ch-2 sp across to last sc, 2 sc in last sc, change color to D, turn โ€” 34 ch-2 sps + 104 sc each side of center marked st.

Row 9: Ch 1, 2 sc in first sc, *sc in next 2 sc, [dc in next sc 2 rows below, ch 2, skip 1 sc, sc in next sc, ch 2, skip 1 sc, dc in next sc 2 rows below, sc in next 3 sc] 16 times, dc in next sc 2 rows below, ch 2, skip 1 sc, sc in next sc, ch 2, skip 1 sc, dc in next sc 2 rows below, sc in next 2 sc*, 3 sc in marked sc, move marker to center sc of 3 sc just made, repeat from * to * to last sc, 2 sc in last sc, turn โ€” 34 ch-2 sps + 34 dc + 72 sc each side of center marked st.

Row 10: Ch 1, 2 sc in first sc, sc in each st and ch 2 over each ch-2 sp across to marker, 3 sc in marked sc, move marker to center sc of 3 sc just made, sc in each st and ch 2 over each ch-2 sp across to last sc, 2 sc in last sc, change color to C, turn โ€” 34 ch-2 sps + 108 sc each side of center marked st.

Row 11: Ch 1, 2 sc in first sc, *[sc in next 5 sc, dc in next sc 2 rows below, sc in next sc, dc in next sc 2 rows below] 17 times, sc in next 5 sc*, 3 sc in marked sc, move marker to center sc of 3 sc just made, repeat from * to * to last sc, 2 sc in last sc, turn โ€” 34 dc + 110 sc each side of center marked st.

Row 12: Ch 1, 2 sc in first sc, sc in each st across to marked sc, 3 sc in marked corner sc, move to center sc, sc in each st across to last sc, 2 sc in last sc, change color to B, turn โ€” 146 sc each side of center marked st, 293 sc total.

Row 13: Ch 2 (counts as hdc), hdc in first sc, hdc in each sc across to marked sc, 3 hdc in marked corner sc, move to center hdc, hdc in each sc across to last sc, 2 hdc in last sc, change color to B, turn โ€” 148 hdc each side of center marked st, 297 hdc total.

Row 14: Ch 1, 2 sc in first hdc, sc in third loop of each hdc across to marked hdc, 3 sc in marked corner hdc, remove center marker, sc in third loop of each hdc across to tch, 2 hdc top of tch, change color to A, turn โ€” 150 sc each side of center marked st, 301 sc total.

Edging Round: Ch 1, sc in each sc across each side to diagonal edge, sc evenly across diagonal edge, sl st to first sc, fasten off all colors, weave in ends.

Coral Ridge free crochet triangle shawl pattern modeled โ€” gray shawl with blue and red Greek-key colorblock border by Marly Bird and Robyn Chachula

Blocking Tips

Blocking your finished Coral Ridge is the difference between “really pretty shawl” and “I cannot believe I made that.” Don't skip it. The chain-2 spaces in the Greek-key motif need to open up evenly for the colorwork to read the way it does in the sample photos, and the diagonal edges need a chance to settle into a true triangle.

Here's how to block Coral Ridge two ways… steam blocking (fast) and wet blocking (deeper set):

  • Steam blocking (my go-to for acrylic): Lay the finished shawl flat on blocking squares, pin to the finished measurements (62″ wingspan ร— 30″ depth) using blocking pins. Hold a steam iron or steamer about an inch above the fabric and let the steam open up the chain spaces. Don't press… just steam. Let the shawl cool and dry completely before you unpin.
  • Wet blocking (deeper set, longer dry): Submerge the shawl in cool water with a touch of no-rinse wool wash like Eucalan. Squeeze out excess water without wringing, then roll in a towel like a burrito to wick away more moisture. Pin to size on blocking squares, smooth with your hands, and let it dry completely (usually 24 hours).
  • ๐Ÿšจ Use extra care to avoid overstretching! The dc + ch-1 mesh body will happily grow another six inches if you let it. Pin to the schematic measurements, not as far as the fabric will go.
  • Never block in direct sunlight (it can discolor acrylic), and never use a hot iron directly on acrylic fibers (you can melt them).

(If you're new to blocking, the full step-by-step is in my Blocking Made Easy guide.)

Favorite & Queue on Ravelry

Favorite and queue the Coral Ridge Crochet Shawl on Ravelry so you never lose track of it… and so I can see how many of you are making this one ๐Ÿ’›

Favorite and queue the free Coral Ridge crochet triangle shawl pattern on Ravelry โ€” worsted weight shawl with colorblock Greek-key border

More Free Crochet Shawl & Wearable Patterns You'll Love

๐ŸŒŠ Farrago Crochet Shawl… top-down construction, single self-striping yarn, textured mixed stitches. The cozy meditative counterpart to Coral Ridge.

๐ŸŒŠ Bluebonnet Crochet Lace Shawl… another collaboration with Robyn, lacy and delicate, perfect for fingering weight if you want a lightweight counterpart to Coral Ridge.

๐ŸŒŠ Lyvia Crochet Ruana… a free crochet ruana wrap with a similar drape-it-everywhere wearability factor.

๐ŸŒŠ Sookie Crochet Cardigan… a free size-inclusive crochet cardigan in XS through 5X if you're ready to graduate from shawls to a full layering piece.

๐ŸŒŠ Stoney Creek Sleeveless Tee… a beginner-friendly free crochet sweater pattern if you'd like to add a simple top to your warm-weather rotation.

๐ŸŒŠ Floral Motif Summer Crochet Tee… a free size-inclusive crochet sweater pattern from S/M to 4X/5X using join-as-you-go motif construction.

๐ŸŒŠ Sunday Sideline Crochet Shawl… a free one-skein triangle crochet shawl pattern that's the easy-crochet-shawl on-ramp before you graduate into Coral Ridge.

๐ŸŒŠ Goldenrod Crochet Cardigan… a size-inclusive Tunisian crochet cardigan in a sunny goldenrod yellow that pairs beautifully over a Coral Ridge shawl on a cool day.

๐ŸŒŠ Northwoods Crochet Cardigan… a cozy free crochet cardigan in heathered Lion Brand Heartland… perfect layering piece for the colder-weather rotation.

Coral Ridge Crochet Shawl free pattern FAQ banner โ€” common questions about this triangle shawl with colorblock border answered

Frequently Asked Questions

What does “worked from the center out” mean in crochet?

So here's the thing… “center out” just means you start your shawl at the very center back of the neck and the fabric grows outward and downward at the same time. You're not seaming anything. You're not picking up stitches later. The shawl literally builds itself in one piece from that tiny 4-chain foundation at the top. The opposite approach is top-down (where the whole top edge of the shawl is the foundation row, like the Farrago Crochet Shawl). Both are beautiful… they just give you different shaping and a different rhythm to crochet.

Can I substitute Red Heart Soft with another yarn?

Yes… easily. Any worsted weight (CYCA #4) yarn with around 256 yards per skein will work. My top picks for substitutions are Red Heart Soft (the original, affordable and widely available), Lion Brand Pound of Love, Caron Simply Soft, Berroco Vintage, or Cascade 220 Superwash if you want to go all-wool. The full sub guide is in the Yarn & Materials section above. Whatever you pick, swatch it first… gauge matters more than yarn brand.

What is “working in the third loop” in crochet?

Great question, because this one comes up a lot. When you make an hdc, the stitch has three loops on top, not two. The “third loop” is the horizontal bar sitting just behind (or below) the front two loops. On Coral Ridge, you'll work into the third loop on a couple of the edging rows… and the reason is that working in the third loop creates a beautiful corded, ribbed texture along the row. It looks like a little decorative ridge running along the color-change line, which is exactly what we wanted in this shawl.

What size hook do I need for worsted weight yarn?

Honestly, it depends on you. For Coral Ridge, the pattern is written for a size I/9 (5.5 mm) hook with Red Heart Soft, and that's the hook size most worsted weight yarns suggest on the label. But everyone's tension is different… if you crochet tight you might need to go up to a J/10 (6 mm), and if you crochet loose you might come down to an H/8 (5 mm). The only way to know for sure is to swatch and check your gauge.

How do you block a crochet shawl?

Two methods work for Coral Ridge… steam blocking (the one I use, because it's fast) and wet blocking (deeper soak, longer dry time, sets the stitches even more). For steam blocking, lay the finished shawl flat on blocking squares, pin to the finished measurements (62″ ร— 30″ for this one), then hover a steam iron or steamer about an inch above the fabric and let the steam open up the chain spaces. Don't press… just steam. Let it cool and dry completely before you unpin. For wet blocking, soak the shawl in cool water with a little wool wash, gently squeeze out the water (don't wring), pin to size, and let it air-dry overnight.

How many yards of yarn do I need for this shawl?

About 1,280 yards total across all four colors. Color A (charcoal/body) needs around 512 yards (2 balls of Red Heart Soft), and Colors B, C, and D each need around 256 yards (1 ball each). One ball of each accent color is more than enough for the edging… you'll likely have leftovers, which makes Coral Ridge a great stash-buster project too.

What is the difference between a shawl and a wrap?

Honestly, the shortest answer is shape. A shawl is typically triangular (like Coral Ridge), and a wrap is typically rectangular or asymmetrical. Both drape over the shoulders, both keep you warm, both look beautiful… it really is mostly a shape distinction. Coral Ridge is technically a shawl by that definition, but because of its size it also wears like a wrap when you fold it on the diagonal.

How long does it take to crochet a triangle shawl this size?

For an intermediate crocheter at a comfortable pace, plan on 15 to 25 hours for Coral Ridge from start to finish. Most of that time is the main body… the 33 rows of dc + ch-1 mesh are the longest part of the project. Once you get to the colorblock edging, it actually goes quickly because you're switching colors every couple of rows and the rhythm changes keep things interesting. Spread across a few weeks of evening crochet sessions, that's a very doable project. Some people will finish it in a long weekend.

Can Coral Ridge really be worn as a sarong?

Yes… and honestly, this is the part I'm most excited about. At 62 inches across, Coral Ridge wraps beautifully around the waist as a beach coverup or vacation sarong. You wrap the long edge across your front, take the two side points around to the back, cross them, and tie at the front or off to one side. The open weave of the dc + ch-1 mesh body is light enough to breathe in warm weather, and the colorblock edging frames the top of your hip line like the design was made for it. Skip the swimsuit coverup at Target and crochet your own.

Final Thoughts

Coral Ridge is one of my favorite collaborations with Robyn… architectural and accessible, structured and wearable, with the kind of colorblock detail that makes you feel like you're wearing something genuinely special when you put it on. Make it for yourself, make it for a friend, share the pattern with someone who's been searching for the perfect free triangle crochet shawl pattern in worsted weight… a handmade crochet shawl that wears like a modern crochet shawl should. Please come back and tell me how it turned out. I love seeing your makes ๐Ÿ’›

Tag me on Instagram @marlybird or share inside Marly's Minions on Facebook. I'm always rooting for you.

โค๏ธ Your BiCrafty Bestie,
Marly Bird
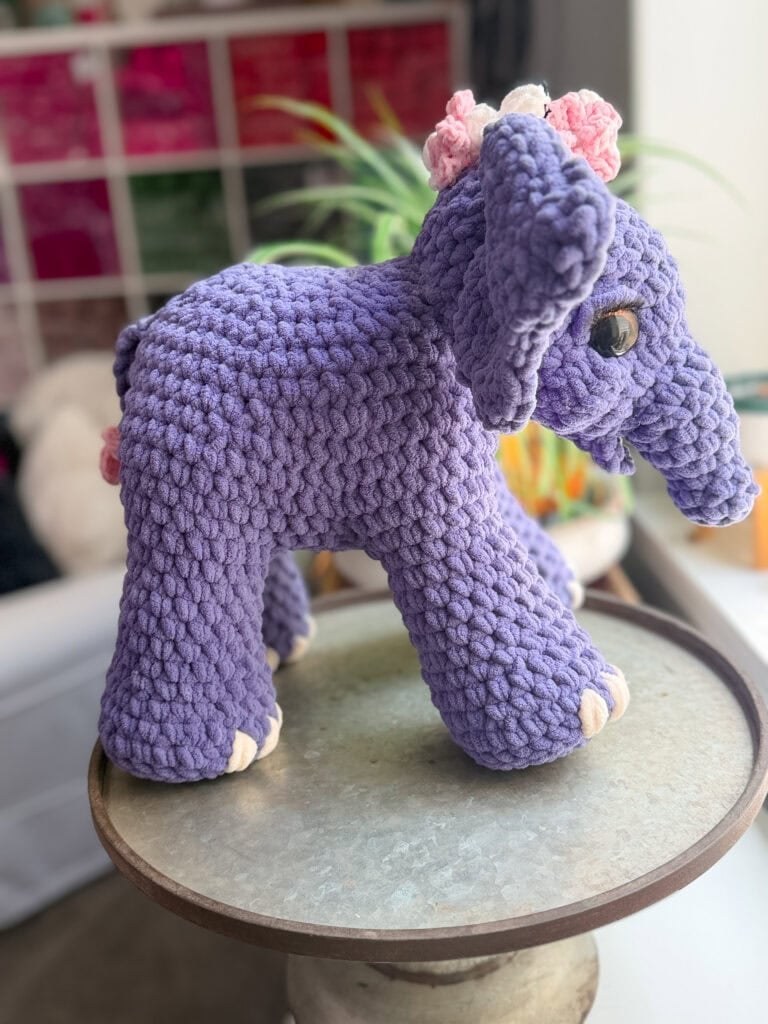
A cartoon avatar of a person with glasses and a brown bun smiles warmly. Their green shirt and black jacket add a stylish touch, while colorful hearts surround them like loving temperature blankets, stitching together an aura of love and positivity. -Marly Bird
“

Filed Under: Crochet, Free Patterns, Marly Bird Premium Patterns, Our Free Patterns, Pattern, Uncategorized Tagged With: colorblock shawl, colorwork crochet shawl, crochet accessory pattern, crochet scarf wrap, crochet wrap pattern, free crochet shawl pattern, Greek-key border, handmade crochet shawl, Marly Bird, modern crochet shawl, Red Heart Soft, spring fling 2026, triangle crochet shawl, worsted weight crochet shawl

Free Crochet Floral Motif Tee Pattern โ€” Sizes Small Through 5X

May 22, 2026 By Meg Leave a Comment

“

๐ŸŒธ Spring Fling 2026 โ€” Day 15 Pattern ๐ŸŒธ

This pattern debuted as Day 15 of Spring Fling 2026 (Fri May 22, 2026) โ€” closing out Week 3 of the event. The free pattern stays free forever right here on the blog.

๐Ÿ‘‰ See the full Spring Fling 2026 lineup on the Hub

Share your finished Floral Motif Tee with the hashtags #SpringFling2026 + #FloralMotifTee ๐ŸŒธ

The Floral Motif Tee is a free crochet pattern for a lightweight, lacy summer sweater built from join-as-you-go floral motifs…and the brand-new updated version is now sized from Small all the way through 4X/5X. It's an intermediate crochet pattern designed by Marly Bird, worked at a 1 motif = 3.5″ gauge in CYCA #1 super fine yarn, with a finished bust circumference from 40″ to 64″. Free pattern on the blog. Ad-free PDF available.

Free crochet Floral Motif Tee pattern by Marly Bird โ€” purple lacy summer sweater worn over a denim jumper, three poses

Looking for a free crochet floral motif tee pattern that actually fits you… no matter what size you wear? The Floral Motif Summer Tee is one of my most-loved warm-weather designs, and I just gave it a serious update. The biggest news: this pattern now goes all the way up to size 4X/5X. That used to stop at 2X/3X…and I heard from so many of you that you wanted the bigger sizes. So here we are. New release, bigger size range, same lacy floral motif tee you've been asking for.

Hey, bestie ๐Ÿ’› If you've ever wanted to crochet a sweater that feels like wearing a summer garden… this is the one. Lightweight, breathable, lacy in all the right places, and now finally available in the sizes that the free pattern world tends to forget about.

โšก Quick Answer: The Floral Motif Tee is a free crochet pattern by Marly Bird for a lacy summer sweater made from joined floral motifs, now sized S/M, L/XL, 2X/3X, and 4X/5X (finished bust 40″, 48″, 56″, 64″). Intermediate skill level. Uses CYCA #1 super fine yarn and a G/6 (4 mm) hook. Free pattern below.

Affiliate Disclosure: This post contains affiliate links. To learn more please visit my privacy policy here ๐Ÿ’–

Marly Bird modeling the free crochet Floral Motif Tee pattern in size S/M with negative ease โ€” size-inclusive summer sweater

What You Will Love About This Free Crochet Floral Motif Tee Pattern ๐Ÿ’–

๐ŸŒธ Truly size-inclusive. The updated pattern is now written in four sizes that fit bust circumferences from 40″ all the way to 64″. For a free crochet sweater pattern, that's rare. Most free crochet garment patterns stop at 2X or sometimes 3X… this one keeps going.

๐ŸŒธ Lightweight and breezy for hot weather. The openwork floral motifs and lace panels mean this top breathes beautifully on a humid day. It's the kind of summer crochet sweater you can actually wear in July.

๐ŸŒธ Satisfying join-as-you-go construction. You build the motif strips first, then crochet the lace panels directly onto them. It feels like assembling a beautiful garment puzzle… and you can see your sweater coming together every single round.

๐ŸŒธ Works in any solid color. The lacy floral stitch pattern really shines in a solid color. Choose a soft pastel for a romantic vibe, a bold jewel tone for a statement piece, or a crisp white for a wardrobe staple.

๐ŸŒธ Reversible lace pattern. The wrong side and right side look the same. No “uh oh, I flipped it” moments.

Free crochet floral motif tee pattern in purple, styled over a black maxi dress โ€” lacy summer crochet sweater

Quick Pattern Overview

๐Ÿ“ Skill level: Intermediate. You'll need to be comfortable working in the round, reading written motif instructions, and joining motifs as you go. If you've made a granny square blanket, you can absolutely tackle this tee.

๐Ÿ“ Sizes: S/M, L/XL, 2X/3X, 4X/5X. Finished bust circumference: 40″, 48″, 56″, 64″. Designed with 2-6″ of positive ease (or wear it with negative ease like Marly does…more on that below).

๐Ÿงถ Yarn: CYCA #1 super fine weight, originally sampled in Miss Babs Kilimanjaro (now discontinued). Miss Babs Katahdin is the official replacement โ€” same 1,750-yd skein. See the yarn alternatives section below. 1 to 3 hanks depending on size.

๐Ÿช Hook: Size G/6 (4.0 mm)…or whichever hook you need to hit gauge.

๐Ÿ“ Gauge: 1 motif = 3.5″ ร— 3.5″ blocked. 4 stitch repeats ร— 10 rows = 5″ ร— 5″ in lace pattern, blocked.

๐Ÿชก Construction: Two strips of joined floral motifs form the front and back yokes, then lace panels are crocheted directly onto each motif strip. Shoulders, sleeves, and side seams are sewn after blocking.

Ad-free PDF of the Floral Motif Crochet Summer Tee pattern by Marly Bird โ€” clean printable instructions for crocheters
Etsy
Shopify
Ravelry

Love the Pattern but Want an Ad-Free PDF? โญ

The full Floral Motif Tee pattern is free right here on the blog. If you'd rather skip the ads, print clean pages, and have everything you need in one tidy PDF… the ad-free version is available in my shops:

Or if you'd rather have the free pattern delivered straight to your inbox plus get on my newsletter for weekly pattern roundups, BiCrafty tips, and the occasional behind-the-scenes peek… I'd love to have you ๐Ÿ’›

  • ๐Ÿ›’ Shop the pattern on Etsy
  • ๐Ÿ›’ Shop the pattern on Ravelry
  • ๐Ÿ›’ Shop the pattern in the Marly Bird Shopify Store

Join our Newsletter

Get Free Crochet & Knitting
Pattern Links & Coupons!

Hand-drawn bird with curling, detailed feathers and pink accents; cheerful pose showcases fine line and texture work.
>> Become An Insider <<
A woman with glasses and curly hair models a colorful crocheted scarf, showing textured stitches and vibrant yarn.

Is This Crochet Floral Motif Tee Pattern Right for You?

This pattern is perfect for you if…

โœ… You're an intermediate crocheter who can comfortably read written pattern instructions, work in the round, and increase/decrease confidently. You don't need to be an advanced lace crocheter, but this isn't a “first sweater” project either.

โœ… You want a summer crochet sweater pattern that's actually wearable in warm weather. Lots of crochet sweaters end up feeling heavy in summer…the lacy motif construction here keeps the fabric airy.

โœ… You love the satisfaction of joining motifs as you go, watching the garment grow piece by piece rather than working one giant fabric.

โœ… You're size 4X or 5X and you're tired of free crochet patterns stopping at 2X. Same.

This might NOT be the right pattern for you if…

โŒ You're brand new to crochet. Save this one for a few projects down the road. (Try one of these free spring sweater patterns if you want a simpler crochet garment to start with.)

โŒ You want a chunky, cold-weather sweater. This is a CYCA #1 super fine pattern…beautiful, but not warm.

โŒ You don't want to block your finished piece. (I'm not even kidding… blocking is non-negotiable for this one. The lace pattern stays scrunched without it.)

Magenta crochet floral motif tee pattern detail โ€” close-up of intricate joined floral lace stitches

This Tee Fits Every Body: Sizes S Through 5X ๐ŸŒธ

Here's the part I'm most excited about. The original Floral Motif Tee was sized S/M through 2X/3X. The updated pattern adds a 4X/5X size, taking the finished bust circumference all the way up to 64″. For a free crochet sweater pattern, that's a genuinely uncommon size range…and it's there because so many of you asked for it.

The Full Size Chart

SizeTo Fit BustFinished BustFinished LengthMotifs per StripYarn (hanks)
S/M32-38″40″ / 101.5 cm21″ / 53.5 cm121
L/XL40-46″48″ / 122 cm24.5″ / 62 cm142
2X/3X48-54″56″ / 142 cm28″ / 71 cm162
4X/5X56-62″64″ / 162.5 cm31.5″ / 80 cm183

How to Pick Your Size: Positive vs. Negative Ease

Ease is just a fancy word for “how much room your sweater has around your body.” There are two ways to wear this tee, and the size you pick depends on the look you want:

๐Ÿ’› Positive ease means the sweater is LARGER than your bust measurement. This gives you a relaxed, drapey, flowy summer-top feel. The pattern was designed with 2-6″ of positive ease in mind, which is what you'll see on most crochet tees. To wear with positive ease, choose the size whose finished bust is 2-6″ larger than your actual bust.

Marly Bird in size S/M with negative ease โ€” free crochet floral motif tee pattern for a fitted summer crochet sweater
Marly is wearing the S/M with a 44″ bust. Perfect example of negative ease.

๐Ÿ’› Negative ease means your bust is LARGER than the sweater. This gives you a closer, more fitted look. Marly wore the S/M size in the sample photos with about 4″ of negative ease…so the sweater hugs the body and shows off the silhouette. To wear with negative ease, choose the size whose finished bust is a few inches SMALLER than your actual bust.

Neither is wrong. They're just different looks. Decide how you want to wear the tee BEFORE you crochet your motifs, then pick your size accordingly.


Picking Your Size if You're 4X or 5X

The 4X/5X size finishes at a 64″ bust circumference. If your actual bust measures:

๐Ÿ‘‰ 56-58″: The 4X/5X size will give you a relaxed, 6-8″ positive ease summer-tee fit. Comfortable and breezy.

๐Ÿ‘‰ 60-62″: The 4X/5X size will fit with 2-4″ of positive ease…the original design intention. This is the sweet spot.

๐Ÿ‘‰ 64-66″: You'll get a closer, near-zero-ease fit. Still totally wearable, especially if you like a more fitted summer top.

๐Ÿ‘‰ Larger than 66″? Drop me a message…I can talk you through adding extra motifs to size up further. The motif construction makes this easier than it sounds.

๐Ÿ’ก Designer Tip: Always crochet at least one motif as a test BEFORE you commit to all the motif strips. Block that one motif, measure it, and confirm it hits the 3.5″ gauge. If your motif is 3″ or 4″, that's not a “close enough” โ€” it's the difference between a sweater that fits and a sweater that doesn't. Adjust hook size up or down to hit gauge before you crochet 24-36 of them.

Pink crochet floral motif tee free pattern โ€” four views showing the size-inclusive lacy summer sweater and stitch detail

How a Crochet Motif Tee Is Constructed

If you've never made a motif-based crochet sweater, here's how this one comes together. It's different from a top-down raglan or a bottom-up seamed sweater… and honestly, I think it's more fun.

You start by crocheting two motif strips. Each strip is a long line of joined floral motifs…the number of motifs in each strip depends on your size (12 for S/M, 14 for L/XL, 16 for 2X/3X, 18 for 4X/5X). These strips will eventually sit on either side of the neck, running from the front to the back over the shoulders.

Each motif is joined to the previous one using the join-as-you-go method on the final round. You don't make 24 (or 36!) separate motifs and then sew them together. Instead, as you crochet the last round of each new motif, you slip stitch into the corresponding corners and edges of the previous motif. By the time the round is finished, the motifs are already attached. No sewing. No weaving. Just satisfying assembly as you go.

Once each strip is complete, you crochet the lace panels directly onto the long edges of the motif strips. This is where the body of the tee takes shape. The lace pattern is a simple 3-row repeat that becomes meditative once you get into the rhythm.

Then come the sleeves, the front-and-back joining seam, and finally blocking and finishing. The result is a lightweight summer tee where every floral motif is locked into a structural strip, the lace fabric drapes beautifully, and the whole thing breathes.

If you've been curious about working with crochet floral motifs, this is a beautiful way to put them into a wearable project rather than just a blanket or scarf. And if you've already enjoyed making a join-as-you-go blanket, the technique here will feel familiar…you're applying the same construction principle to a garment.

Free crochet floral motif tee pattern โ€” front and back views of the lacy purple summer crochet sweater by Marly Bird

Tips for Crocheting the Floral Motif Tee

๐ŸŒธ Block. Your. Motifs. I cannot say this enough. The unblocked motif looks like a scrunched little blob. The blocked motif opens up into a clean 3.5″ floral square. The whole pattern depends on those blocked dimensions. Don't skip it. (More on blocking below…and there's a full guide on blocking your crochet if you've never done it before.)

๐ŸŒธ Swatch your motif first. Make one motif, block it, measure it. If it's not 3.5″, adjust your hook size before you start a strip of 18.

๐ŸŒธ Use stitch markers liberally. Mark the right side and wrong side of your first motif so the front and back panels align correctly during assembly. >> Learn how to make crochet stitch markers <<

๐ŸŒธ Pick a solid yarn color. Variegated yarns hide the gorgeous lace stitch pattern. If you want the floral motifs to be the star, choose a single solid color. Pastels are romantic, jewel tones make a statement, and a crisp white reads as a wardrobe classic.

๐ŸŒธ Drape matters more than fiber. When you're substituting yarn, prioritize a fiber with good drape…wool/nylon blends, silk blends, or a high-twist cotton work beautifully. Pure mercerized cotton can feel stiff in this lace pattern. (See yarn substitution notes below.)

๐ŸŒธ Read the pattern through once before you start. Especially the section about the right and left halves being mirror images. It's easier to grasp the construction logic before you have a hook in your hand than mid-row when you're confused.

If you love working with crochet lace techniques, you'll enjoy this lace stitch pattern…it's reversible, it's rhythmic, and once you get into it, you'll be looking for excuses to crochet “just one more row.”

Free crochet floral motif tee pattern in purple โ€” Pinterest pin showing the size-inclusive lacy summer sweater

Color Inspiration: Pick a Shade That Shows Off the Lace ๐ŸŽจ

The lacy floral motifs in this tee REALLY shine in a solid color. Variegated and self-striping yarns are gorgeous in plenty of other projects, but they tend to hide the floral stitch detail here. Stick with a solid (or a tonal semi-solid that reads as a single color) and let the motifs be the star.

Here are some color directions to think about as you pick your shade:

๐ŸŒธ Soft pastels. Powder pink, sage green, dusty lavender, butter yellow, robin's-egg blue. Pastels feel romantic and garden-party. They photograph beautifully and pair effortlessly with white denim or linen.

๐ŸŒธ Crisp white or natural cream. The classic. A white floral motif tee reads as timeless and lets the lace texture do all the talking. Cream is more forgiving than bright white and shows less from across the room, so it's friendlier if you're worried about lace looking “see through.”

๐ŸŒธ Bold jewel tones. Deep teal, rich aubergine (the original sample color!), garnet red, emerald. Jewel tones make the floral motifs feel a little more dramatic and a little less “shabby chic.” Marly's original sample was knit in Miss Babs Kilimanjaro in Aubergine, and that deep purple really does show off every stitch.

๐ŸŒธ Earthy neutrals. Camel, terracotta, mushroom, soft taupe. These work beautifully if you want a wardrobe-staple tee that goes with everything in your closet.

๐ŸŒธ Statement brights. Coral, bright turquoise, sunshine yellow. Make a summer statement. Just keep it a solid bright, not a variegated bright.

Free crochet floral motif tee pattern in red โ€” size-inclusive lacy summer crochet sweater by Marly Bird
Free crochet floral motif tee pattern in orange โ€” size-inclusive lacy summer crochet sweater by Marly Bird
Free crochet floral motif tee pattern in mustard gold โ€” size-inclusive lacy summer crochet sweater by Marly Bird
Free crochet floral motif tee pattern in yellow โ€” size-inclusive lacy summer crochet sweater by Marly Bird
Free crochet floral motif tee pattern in grass green โ€” size-inclusive lacy summer crochet sweater by Marly Bird
Free crochet floral motif tee pattern in emerald green โ€” size-inclusive lacy summer crochet sweater by Marly Bird
Free crochet floral motif tee pattern in aquamarine โ€” size-inclusive lacy summer crochet sweater by Marly Bird
Free crochet floral motif tee pattern in forest green โ€” size-inclusive lacy summer crochet sweater by Marly Bird
Free crochet floral motif tee pattern in light blue โ€” size-inclusive lacy summer crochet sweater by Marly Bird
Free crochet floral motif tee pattern in cobalt blue โ€” size-inclusive lacy summer crochet sweater by Marly Bird
Free crochet floral motif tee pattern in light purple โ€” size-inclusive lacy summer crochet sweater by Marly Bird
Free crochet floral motif tee pattern in purple โ€” size-inclusive lacy summer crochet sweater by Marly Bird
Free crochet floral motif tee pattern in brown โ€” size-inclusive lacy summer crochet sweater by Marly Bird
Free crochet floral motif tee pattern in cream โ€” size-inclusive lacy summer crochet sweater by Marly Bird
Free crochet floral motif tee pattern in black โ€” size-inclusive lacy summer crochet sweater by Marly Bird
Marly Bird in the free crochet floral motif tee pattern โ€” close-up styling of the lacy summer crochet sweater

๐Ÿ’ก Designer Tip: Before you commit to a full sweater's worth of yarn in any color, crochet one motif and block it. Look at the blocked motif in natural daylight AND under indoor lighting. Some colors that look gorgeous under shop lighting can read very differently in the sun (or in your bathroom mirror). A single test motif costs you about 20 minutes…and could save you from 40 hours of regret.

Yarn & Materials

Yarn Used in the Sample

The original sample was crocheted in Miss Babs Kilimanjaro in the colorway Aubergine…an 85% Superwash Bluefaced Leicester Wool / 15% Nylon blend in CYCA #1 super fine weight (1,750 yards per 400 g hank). It's a gorgeous yarn with beautiful drape… but unfortunately Miss Babs has discontinued this base. The great news? Miss Babs has released Katahdin as the official replacement โ€” same skein size (1,750 yds / 400g), same BFL base, and there are plenty of other excellent substitutes too. See the full Alternative Yarn section below!

What to Look For in a Substitute

If you're swapping yarns, here's what matters for THIS pattern specifically:

๐Ÿ“ Weight: CYCA #1 super fine (sock or fingering weight). Anything heavier and the lace loses its airiness; anything lighter and the structure suffers.

๐Ÿชก Drape: This is the single most important factor. Wool/nylon blends, silk blends, and high-twist cottons drape beautifully. Pure mercerized cotton tends to feel stiff in this lace pattern.

๐Ÿงถ Yardage: Plan for at least 1,200 yards per 4-oz / 100 g put-up. Smaller sizes need around 1,750 yards total; the 4X/5X size needs closer to 5,250 yards if you use a yarn with a typical fingering put-up.

โœจ Stitch definition: The lace and motifs depend on crisp stitch definition. Yarns with too much halo (mohair, brushed alpaca, fluffy single-plys) will blur the floral details.

Hook

๐Ÿช Size G/6 (4.0 mm) crochet hook…or whichever size you need to achieve the 3.5″ blocked motif gauge. I like a smooth, ergonomic hook for fine-weight yarn since you'll be working a lot of stitches.

Notions & Blocking Supplies

  • Stitch Markers
  • Tapestry Needle
  • Scissors
  • Tape Measure
  • Notions Bag for Supplies (Optional)
  • Blocking Squares 
  • Blocking Pins 
  • Soaking Basin 
  • Eucalan Wool Wash 
  • Blocking Wires (ideal for lace work) 
  • Ball Winder and Swift

Alternative Yarn for the Free Crochet Floral Motif Tee

Since Miss Babs Kilimanjaro is discontinued, you'll need a substitute. The good news? Miss Babs themselves have released Katahdin as the direct replacement โ€” same giant 1,750-yard / 400g skein, same Superwash Bluefaced Leicester base, and lots of colors to choose from. Beyond Katahdin, this pattern is forgiving as long as you stay in the CYCA #1 super fine range and prioritize drape. Here are my favorite alternatives, organized by what you're going for.

๐ŸŒŸ Official Miss Babs Replacement: Katahdin

Miss Babs reached out to let us know that Katahdin is their direct substitute for the discontinued Kilimanjaro. Same skein size (1,750 yds / 14 oz), same 100% Superwash Bluefaced Leicester wool base, same beautiful BFL drape and glossy finish. The only difference: Katahdin has no nylon โ€” but BFL is naturally hardwearing, so it holds up beautifully in a garment. If you loved Kilimanjaro and want to support the same indie dyer who made the original, Katahdin is your first stop.

The Closest Match: Premium Wool & Wool-Blend Sock and Fingering Yarns

If you loved the look and feel of the original Miss Babs Kilimanjaro, look for a wool or wool-blend sock or fingering yarn (typically 75% wool / 25% nylon, or 85/15 like the original). These yarns give you the same beautiful drape, springy stitch definition, and rich color saturation. Hand-dyed yarn is a splurge, but you're going to be living with this sweater for years.

YarnFiberWeightWhy It Works
Miss Babs Katahdin โญ100% Superwash Bluefaced Leicester WoolCYCA #1 Light FingeringMiss Babs' own official replacement for the discontinued Kilimanjaro. Same giant 1,750-yd / 400g skein size, same BFL base, beautiful glossy finish and rich color depth. No nylon, but BFL is naturally durable. This is the closest you'll get to the original.
Knit Picks Stroll75% Superwash Merino / 25% NylonCYCA #1 FingeringThe single closest match for the Miss Babs base. Beautiful stitch definition, a huge color range, and the nylon gives you sweater durability.
Cascade Heritage75% Superwash Merino / 25% NylonCYCA #1 FingeringWorkhorse sock yarn that crochets up beautifully in lace. Affordable for the quality and comes in tons of colors.
Cascade 220 Superwash Fingering100% Superwash MerinoCYCA #1 FingeringIf you want pure merino softness and don't need the nylon's added durability. Lovely drape for warm-weather garments.
Malabrigo Sock100% Superwash Merino (hand-dyed)CYCA #1 FingeringFamously soft, deeply saturated, and richly tonal. Choose a solid or near-solid colorway to keep the motif detail readable.
Madelinetosh Tosh Merino Light100% Superwash Merino (hand-dyed)CYCA #2 Light FingeringA touch lighter than the original but still works beautifully. Madelinetosh's tonal colorways glow in this lace pattern.
Dream in Color Smooshy with YakMerino / Yak / NylonCYCA #1 FingeringThe yak adds a gentle warmth and softness, and the hand-dyed colors are stunning. A real treat-yourself yarn.

For Extra Drape and Sheen: Silk-Blend & Luxury Fingering

A silk-blend fingering yarn gives your Floral Motif Tee an extra-luxe drape and a subtle sheen that makes the lace look almost like jewelry. Silk softens the wool's springiness slightly, so the fabric falls a little more rather than holding its shape…gorgeous for a flowing summer top.

YarnFiberWeightWhy It Works
Cascade Heritage Silk85% Merino / 15% Mulberry SilkCYCA #1 FingeringThe silk adds quiet sheen and extra drape without sacrificing structure. One of my favorite “upgrade” yarns for a lace garment.
Knit Picks Gloss Fingering70% Merino / 30% SilkCYCA #1 FingeringMore silk than Cascade Heritage Silk, so you get a noticeable shimmer in the finished fabric. Drapes like a dream.
Knit Picks Twill FingeringMerino / Silk blendCYCA #1 FingeringA subtle tweed-textured silk blend. The little tweedy flecks add personality without competing with the floral motifs.
Knit Picks Capretta Superwash60% Merino / 30% Baby Alpaca / 10% NylonCYCA #1 FingeringNot silk, but it has that same buttery drape thanks to the baby alpaca. Lovely if silk allergies are a concern for you.

For a Pure Summer Fiber: Cotton & Cotton-Blend Fingering

If you live somewhere truly hot and want a plant-based summer tee, look for a cotton or cotton-blend yarn with a little linen, nylon, or acrylic added for drape. Pure mercerized cotton can feel stiff in a lace pattern, so a blend usually drapes better. Linen blends soften beautifully with each wash and develop gorgeous drape over time.

YarnFiberWeightWhy It Works
Knit Picks CotLin70% Tanguis Cotton / 30% LinenCYCA #2-3 (Sport/DK)The cotton-linen blend has that ideal mix of softness and drape. A touch heavier than the original, so expect a slightly larger finished garment…swatch first!
Scheepjes Whirlette60% Cotton / 40% AcrylicCYCA #1 FingeringLightweight, breathable, and ready-to-use balls (no winding hanks). The acrylic in the blend gives it a little extra drape.
Willow Yarns Freesia Cotton100% Mercerized CottonCYCA #1 FingeringIf you really want pure cotton, this is one of the better mercerized cottons for drape thanks to its tight twist. Block hard for the best results.
Premier Afternoon CottonCotton blendCYCA #2 SportA budget-friendly cotton option in a slightly heavier weight. Swatch first if you go with this one…the larger gauge will affect your finished measurements.

Budget-Friendly: Mainstream Yarn from Michaels

If hand-dyed and specialty yarn isn't where you want to spend right now, here are some affordable options you can pick up at Michaels. A few of these are heavier than CYCA #1, which means your finished tee will come out larger than the pattern measurements…so swatch a motif first to see what gauge you're actually getting. Sometimes that larger gauge produces a really lovely, drapier finished tee. Just decide on purpose, not by accident.

YarnFiberWeightWhy It Works
Loops & Threads Silky SoftSilky polyester blendCYCA #3 Light/DKBeautiful drape and a soft sheen, available in solid colors at Michaels. Heavier than the original, so expect a larger finished tee. Could be lovely for a more flowing summer fit.
Lion Brand Mandala StringCotton/poly string yarnCYCA #0-1 Lace/FingeringA lacy, lightweight cotton-blend string that crochets up beautifully in motif-and-lace patterns. Available in solid “Harmony” tone-on-tone colorways.
Caron Skinny CakesAcrylic blendCYCA #1 FingeringThis one IS a self-striping cake, so the floral motif detail will be partially hidden by the color changes. But if you love the watercolor look, it can be stunning. Read the colorway labels and pick one with subtle, low-contrast shifts.
Loops & Threads Luxe Merino Solid100% Merino WoolCYCA #4 WorstedSignificantly heavier than the original. The lace will be bolder, the fabric warmer, the finished tee larger. Treat it as a totally different garment with totally different math…but real merino at this price is hard to beat.

What to Avoid

โŒ Variegated and self-striping yarns. They hide the floral motif detail. Beautiful in plenty of other projects…not in this one.

โŒ Mohair, brushed alpaca, or any “halo” yarn. The fuzzy halo blurs the lace and makes the floral motifs look indistinct.

โŒ Anything bulkier than worsted weight. The pattern math is written for CYCA #1 super fine. The bigger you go, the more your finished measurements will balloon (and the warmer the finished tee).

โŒ Lace weight or laceweight cobweb yarns. Too light to give the motifs structure. You want at least fingering for the motif edges to hold their shape.

๐Ÿ’ก Designer Tip: Whatever yarn you choose, ALWAYS make a single motif and block it before you commit to the full sweater. The blocked motif tells you everything: gauge, drape, color saturation in real lighting, and how the lace pattern reads. Twenty minutes of swatching saves you hours of frogging.

Free crochet floral motif tee pattern in purple โ€” close-up of the joined floral motif stitches and texture

Love This Pattern? More Free Crochet Summer Patterns

If lacy summer crochet is your thing, you'll love these:

๐ŸŒท Wildflowers Crochet Floral Motifs…a deep dive into different floral motif designs you can use as building blocks for blankets, scarves, or even your own garments.

๐ŸŒท 12 Free Spring Sweater Patterns…a curated roundup of my favorite spring/summer sweater patterns in both knit and crochet, including some great size-inclusive options.

๐ŸŒท Join-As-You-Go Blanket Patterns…if you want to practice the join-as-you-go method on a smaller, no-fitting-required project before committing to a sweater, blankets are the perfect playground.

๐ŸŒท Crochet or Knit Lace…a comparison of crochet vs. knit lace techniques, perfect if you're trying to decide which to learn first or which approach suits your project.

Plus-size crochet floral motif tee free pattern in purple over black dress โ€” size-inclusive summer crochet sweater

Free Crochet Floral Motif Tee โ€” Pattern Details

Skill Level

Intermediate

Measurements

To Fit Size: S/M (L/XL, 2X/3X, 4X/5X)

Finished Measurements: Tee is 40 (48, 56, 64)” [101.5, 122, 142, 162.5 cm] bust circumference by 21 (24.5, 28, 31.5)” [53.5, 62, 71, 80 cm] from shoulder to bottom edge. Designed with 2-6″ of positive ease. Modeled by Marly with 4″ negative ease. See notes for more details.

Gauge

1 Motif = 3.5″ by 3.5″ [9 by 9 cm] blocked; use any size hook to obtain the gauge.

4 stitch repeats (24 sts) by 10 rows = 5″ by 5″ [12.5 by 12.5 cm] blocked.

Materials

Yarn: Miss Babs, Kilimanjaro (85% Superwash Bluefaced Leicester Wool / 15% Nylon, 1,750 yds / 1,600 m, 14 oz / 400 g, CYCA #1 Super Fine): 1 (2, 2, 3) hanks. Note: This yarn has been discontinued. See yarn substitution notes above.

Hook: Size G/6 (4.0 mm)

Notions: Stitch Markers

Tapestry Needle

Scissors

Tape Measure

Notions Bag for Supplies (Optional)

Blocking Squares 

Blocking Pins 

Soaking Basin 

Eucalan Wool Wash 

Blocking Wires (ideal for lace work) 

Ball Winder and Swift (great for yarn that comes in hanks)

โญ๏ธ Marly Bird Amazon Storefront โญ๏ธ

Abbreviations

  • Ch โ€” Chain(s)
  • Dc โ€” Double Crochet
  • Dc2tog โ€” Double Crochet Two Together
  • PM โ€” Place Marker
  • RS โ€” Right Side
  • Sc โ€” Single Crochet
  • Sl st โ€” Slip Stitch
  • Sp(s) โ€” Space(s)
  • St(s) โ€” Stitch(es)
  • Tch โ€” Turning Chain
  • WS โ€” Wrong Side

Special Stitches

โญ 2 Double Crochet Cluster (2dc-cl): *Yarn over hook, insert hook into indicated st, yarn over and pull up a loop, yarn over and draw through 2 loops on hook; repeat from * once more in same st, yarn over and draw through all 3 loops on hook.

โญ 3 Double Crochet Cluster (3dc-cl): *Yarn over hook, insert hook into indicated st, yarn over and pull up a loop, yarn over and draw through 2 loops on hook; repeat from * twice more in same st, yarn over and draw through all 4 loops on hook.

โญ Double Crochet 2 Together (Dc2tog): *Yarn over hook, insert hook into indicated st, yarn over and pull up a loop, yarn over and draw through 2 loops on hook; repeat from * in next indicated st, yarn over and draw through all 3 loops on hook. (1 st decreased)


Crochet Stitch Diagrams

โœจ Following along with the free pattern on MarlyBird.com? You'll have everything you need to make this Floral Motif Tee… but if you want the exclusive stitch diagram charts, those are only available in the ad-free PDF version.

You'll enjoy a clean, printable, ad-free experience while supporting Marly Bird's free tutorials and patterns ๐Ÿ’–

Ad-free PDF of the Floral Motif Crochet Summer Tee pattern by Marly Bird โ€” clean printable instructions for crocheters
Etsy
Shopify
Ravelry

Schematic

Schematic diagram for the free crochet floral motif tee pattern showing finished measurements for sizes S/M through 4X/5X

Notes

  • Directions are for size S/M; changes for sizes L/XL, 2X/3X, 4X/5X are in parentheses. When only one number is given then that number applies to all sizes.
  • This summer tee can be worn with positive ease (the sweater is larger than your bust size) or worn with negative ease (your bust is larger than the sweater). Pick the size to crochet based on how you would like to wear the top. Marly is wearing the S/M size in the photos with negative ease.
  • The lace pattern is reversible, and the WS and RS are the same.
  • Summer Tee is made in pieces. First you make 2 strips of joined motifs. These will be on either side of the neck. Then the right front is crocheted directly onto one half of the motif strips. The right back is crocheted in the same manner except that the RS and WS are reversed. The directions are then repeated for the Left Half. The two are seamed by double crochets in the front and back. The shoulders, under arms, and side seams are sewn together after blocking.
  • Do not skip blocking. The lace pattern and motifs really open up when blocked and make the drape of the sweater so much nicer.

Video Tutorials

  • How to Wind Yarn
  • How to Bury Ends
  • Seaming Crochet
  • How to Read Crochet Diagrams
  • Wet Blocking

GROW

To Unlockย Exclusive Subscriber Contentย click the Box below and join for free by simply adding your email and creating a password! If you are having troubles, clear your cache or reset your password or login to the Grow Publisher Portal.

>> Learn More About Grow Here <<

I'm thrilled to share this amazing pattern with you, many patterns on my blog are absolutely free! I kindly request that you don't copy and paste or distribute this pattern. Prefer an ad-free experience? Buy a digital PDF pattern for a small fee from one of my online stores for a seamless crafting journey. 

I appreciate your support and readership. You are the reason I can keep doing what I love and sharing it with others. So, thank you from the bottom of my yarn-loving heart! Disclosure: This post contains affiliate links, meaning I get a commission if you decide to make a purchase through my links at no cost to you.

Free crochet floral motif tee pattern in purple โ€” full-length wear shot of the size-inclusive lacy summer sweater

Free Crochet Floral Motif Tee โ€” Pattern Instructions

Lace Pattern for Gauge

Note: Lace pattern begins with a foundation chain for gauge swatching purposes only. In the actual garment, the lace is worked directly onto the Motif Strips rather than starting as a separate piece.

Chain a multiple of 6 + 2 extra for foundation, see stitch diagram for help.

Row 1 (WS): Skip 1 ch, sc in second ch from hook and in each ch to end, turn.

Row 2: Ch 4 (counts as 1 dc in first st and 1 ch-sp), skip first sc, skip next 2 sc, 3 dc in next sc (dc group made), ch 1, skip next 2 sc, dc in next sc, *ch 1, skip next 2 sc, 3 dc in next sc, ch 1, skip next 2 sc, dc in next sc; repeat from * to end, turn.

Row 3: Ch 4 (counts as 1 dc in first st and 1 ch-sp), skip first ch-1 sp, 3 dc in center dc of next 3-dc group, *ch 1, skip next ch-1 sp, dc in next dc, ch 1, skip next ch-1 sp, 3 dc in center dc of next 3-dc group; repeat from * to tch, ch 1, dc in third ch of tch, turn.

Repeat Row 3 only for Lace pattern.

Motif Strips

Make 2 Motif Strips. Motif Strips are made of 12 (14, 16, 18) motifs each. One strip goes on each side of the neck.

First Motif

See stitch diagram for help.

Ch 6, and sl st in first ch to form a ring.

Round 1: Ch 4 (counts as 1 dc and 1 ch-sp), [dc, ch 1] 15 times in ring, join with sl st in third ch of beg ch-4, do not turn โ€” 16 dc + ch-1 sps.

Round 2: Sl st in next ch-1 sp, ch 3 (does not count as a st), 2 dc-cl in same ch-1 sp as last sl st, ch 3, *3 dc-cl in next ch-1 sp, ch 3; repeat from * around, join with sl st to top of first dc-cl, do not turn โ€” 16 dc-cl + ch-1 sps.

Round 3: Sl st in next ch-3 sp, ch 1, sc in same sp as last sl st, *[ch 5, sc in next ch-3 sp] twice, (5 dc, ch 5, 5 dc) in next ch-3 sp, **sc in next ch-3 sp; repeat from * 3 more times, ending last repeat at **, join with a sl st in first sc. Fasten off โ€” 12 ch-5 sp + 40 dc.

Second Motif

Work same as First Motif up to Round 3.

Round 3 (joining round): Sl st in next ch-3 sp, ch 1, sc in same sp as last sl st, *[ch 5, sc in next ch-3 sp] twice, (5 dc, ch 5, 5 dc) in next ch-3 sp, sc in next ch-3 sp; repeat from * once more, [ch 5, sc in next ch-3 sp] twice, (5 dc, ch 2, sl st in corresponding corner sp of previous motif, ch 2 (counts as ch-5 sp), 5 dc) in next ch-3 sp, sc in next ch-3 sp, [ch 2, sl st in corresponding edge sp of previous motif, ch 2 (counts as ch-5 sp), sc in next ch-3 sp] twice, (5 dc, ch 2, sl st in corresponding corner sp of previous motif, ch 2, 5 dc) in next ch-3 sp, join with a sl st in first sc. Fasten off โ€” 12 ch-5 sp + 40 dc.

Remaining Motifs

Join 10 (12, 14, 16) more Motifs the same as Second Motif, joining them into a long Strip โ€” 12 (14, 16, 18) Motifs in each Strip. Make 2 strips.

Right Half

Right Front

With WS facing, join yarn with sl st at corner so you are ready to work up long edge of Strip.

Row 1 (WS): Ch 1, and work 103 (121, 139, 157) sc evenly across half the squares only (6 (7, 8, 9) squares). This will be approximately 17 sc per square. Leave remaining 6 (7, 8, 9) squares unworked, turn โ€” 103 (121, 139, 157) sc.

Row 2 (RS): Ch 4 (counts as 1 dc in first st and 1 ch-sp), skip first sc, skip next 2 sc, 3 dc in next sc (dc group made), ch 1, skip next 2 sc, dc in next sc, *ch 1, skip next 2 sc, 3 dc in next sc, ch 1, skip next 2 sc, dc in next sc; repeat from * to end, turn โ€” 17 (20, 23, 26) dc groups.

Row 3: Ch 4 (counts as 1 dc in first st and 1 ch-sp), skip first ch-1 sp, 3 dc in center dc of next 3-dc group, *ch 1, skip next ch-1 sp, dc in next dc, ch 1, skip next ch-1 sp, 3 dc in center dc of next 3-dc group; repeat from * to tch, ch 1, dc in third ch of tch, turn.

Repeat Row 3 10 (14, 18, 22) more times. Do not fasten off.

Crochet floral motif tee free pattern โ€” full-length view of the lacy purple summer crochet sweater

Sleeve

Row 1 (RS): Ch 3 (counts as 1 dc, this starts the arm shaping without the extra ch 1), 3 dc in center dc of first 3-dc group, *ch 1, skip next ch-1 sp, dc in next dc, ch 1, skip next ch-1 sp, 3 dc in center dc of next 3-dc group; repeat from * to last 5 (7, 9, 11) dc groups (11 (12, 13, 14) repeats total), ch 1, skip next ch-1 sp, dc in next dc, leave remaining sts unworked, turn โ€” 12 (13, 14, 15) dc groups.

Row 2: Ch 4 (counts as 1 dc in first st and 1 ch-sp), skip first ch-1 sp, 3 dc in center dc of next 3-dc group, *ch 1, skip next ch-1 sp, dc in next dc, ch 1, skip next ch-1 sp, 3 dc in center dc of next 3-dc group; repeat from * to last 3-dc group, ch 1, skip next ch-1 sp, dc in next dc, ch 1, skip next ch-1 sp, 2 dc in center dc of last 3-dc group, dc in top of tch, turn โ€” 11 (12, 13, 14) dc groups.

Row 3: Ch 2 (does not count as a st), skip first dc, dc in next dc, skip next dc, *ch 1, skip next ch-1 sp, dc in next dc, ch 1, skip next ch-1 sp, 3 dc in center dc of next 3-dc group; repeat from * to tch, ch 1, dc in third ch of tch, turn.

Row 4: Ch 4 (counts as 1 dc in first st and 1 ch-sp), skip first ch-1 sp, 3 dc in center dc of next 3-dc group, *ch 1, skip next ch-1 sp, dc in next dc, ch 1, skip next ch-1 sp, 3 dc in center dc of next 3-dc group; repeat from * to last 2 ch-1 sps, ch 1, skip next ch-1 sp, dc2tog over last 2 dc (skipping ch-1 sp between them), turn.

Row 5: Ch 3 (counts as 1 dc), skip first ch-1 sp, 3 dc in center dc of first 3-dc group, *ch 1, skip next ch-1 sp, dc in next dc, ch 1, skip next ch-1 sp, 3 dc in center dc of next 3-dc group; repeat from * to tch, ch 1, dc in third ch of tch, turn.

Repeat Rows 2-5 once, then Rows 2-4 once more โ€” 9 (10, 11, 12) dc groups. Fasten off.

Right Back

With RS facing, join yarn with a sl st at opposite corner of same long edge of Motif Strip, and work other half of the Strip the same way as Right Front. RS and WS switch for the Right Back.

Left Half

Repeat directions for Right Front and Back, then rotate the piece 180 degrees (see schematic for orientation of pieces).

Crochet floral motif tee free pattern โ€” detailed view of the lacy purple summer crochet sweater by Marly Bird

Finishing

Weave in all loose ends.

Joining Left and Right Halves

Lay out the two halves as shown in the schematic, and place a marker at inner edge of each half, 3.5 (4, 4.5, 5) Motifs (12.25 (14, 15.75, 17.5)” [31, 35.5, 40, 44.5 cm]) above bottom edge. The Left Front will be on your right and vice versa when facing the RS of the garment. See schematic for clarification.

With RS facing, join yarn with a sl st at lower inner corner of Left Front (bottom corner of bottom most motif).

Ch 3 (counts as 1 dc), dc in lower inner corner of Right Front, [dc in Left Front edge, dc in Right Front edge] 7 more times across bottom pair of Motifs, *dc in Right Front edge, dc in Left Front edge; repeat from * to marker, working about 8 dcs in edge of each Motif, and ending with a dc in Left Front edge. Ch 3, and sl st to Right Front edge.

Fasten off and remove markers.

For Back Panel, join 5 (6, 7, 8) motifs (17.5 (21, 24.5, 28)” [44.5, 53.5, 62, 71 cm]) in the same manner as for Front.

Seaming

Fold Sweater in half at shoulders. With yarn needle whip stitch or woven stitch together shoulders, tops and bottoms of sleeves, and side seams. Weave in ends.

Woman models a pink crochet floral tee layered over a denim shirt, showing stitch detail in a bright, cozy room.

Blocking Tips

Wet blocking is like sending your yarn on a spa retreat. It's the process where your yarn unwinds, enjoys a soothing cleanse, and settles gracefully into its final form, allowing its true beauty to flourish.

Here's how to pamper your crocheted Floral Motif Tee with a thorough wet block:

  • Submerge your piece in a basin or sink filled with cool water. Add a touch of gentle wool wash like Eucalan…it cleans AND conditions the fiber. Rinse only if your wash requires it.
  • Remove as much water as you can WITHOUT stretching or twisting. Press against the sink, or gently squeeze between your hands. Never wring.
  • ๐Ÿ’ก Always support the entire garment when lifting…gravity will pull on whatever you don't support and stretch it out of shape.
  • Lay the damp piece on a large towel, fold the towel ends over your project, and roll it up like a burrito to wick away more moisture. You want damp, not sopping… and not dry.
  • Place the piece on your blocking board, aligning with the grid for symmetry.
  • Gently expand the piece to the schematic measurements, especially the neckline width, the bottom-to-armhole length, and the shoulder-to-armhole length.
  • ๐Ÿšจ Use extra care to avoid overstretching! While the garment is damp, some yarns love to overstretch. Trust me…the sample tee could have been blocked to a 5XL by accident. Don't let it.
  • Pin sparingly to keep the fabric flat. Smooth with your hands.
  • Let it dry fully. This can take a full day. A fan speeds things up. Never block in direct sunlight (it can discolor the yarn).

Wet blocking is more than a finishing step…it's the moment your crochet stitches settle into the heirloom-quality piece you've been working toward. Don't skip it.

(If you're new to blocking, the full step-by-step is in my Blocking Made Easy guide.)

Favorite & Queue on Ravelry

Favorite and queue the Floral Motif Tee on Ravelry so you never lose track of it…and so I can see how many of you are making this beauty ๐Ÿ’›

Favorite and queue the free crochet floral motif tee pattern on Ravelry โ€” size-inclusive crochet sweater

More Free Crochet Summer Patterns You'll Love

๐ŸŒท 12 Free Spring Sweater Patterns…a curated roundup of my favorite warm-weather sweater patterns.

๐ŸŒท Wildflowers Crochet Floral Motifs…explore more floral motif designs for any project.

๐ŸŒท Join-As-You-Go Blanket Patterns…perfect practice if you want to master the JAYG method on a no-fit-required project.

๐ŸŒท Crochet or Knit Lace?…a comparison if you've ever wondered which approach to lace fits your style.

๐ŸŒท Blocking Made Easy with the Right Tools…the full primer on wet blocking your finished crochet (and knit) pieces.

Free crochet floral motif tee pattern FAQ โ€” common questions about this lacy summer crochet sweater answered

Frequently Asked Questions

What weight yarn works best for a crochet motif tee?

A CYCA #1 super fine (fingering / sock weight) yarn works best for this Floral Motif Tee. The lightweight yarn gives the lacy floral motifs and the lace panels the drape and breathability you want in a summer top. A wool/nylon blend is ideal because it offers stitch definition AND drape, but a silk-blend fingering yarn or merino fingering will also work beautifully. Avoid heavier yarns like worsted or DK for this specific pattern…the lace will lose its airy quality.

How do you join crochet motifs as you go?

Join-as-you-go (JAYG) crochet attaches each new motif to the previous one during the final round of the new motif. Instead of crocheting a complete corner or edge stitch, you slip stitch into the matching corner or edge space of the previous motif, then continue your round. By the time you finish the round, the motifs are already locked together…no sewing required. The Floral Motif Tee uses JAYG to build two long strips of joined motifs that form the front and back of the tee.

How do I block a crochet sweater?

Wet block your finished crochet sweater by submerging it in cool water with a no-rinse wool wash (Eucalan is a favorite), squeezing out the excess water without wringing, rolling it in a towel like a burrito, then laying it flat on a blocking mat. Gently shape it to the schematic measurements, pin sparingly, and let it dry completely (usually 24 hours). For the Floral Motif Tee, blocking is essential…it opens up the lace and floral motifs and creates the final drape.

What is positive vs. negative ease in crochet?

Ease refers to the difference between your body measurement and the finished garment measurement. Positive ease means the garment is larger than your body (a relaxed, drapey fit). Negative ease means your body is larger than the garment (a closer, more fitted look). The Floral Motif Tee is designed with 2-6″ of positive ease, but Marly wore the S/M sample with 4″ of negative ease for a more fitted look. Either is correct…pick based on the silhouette you want.

Can I make this crochet tee in plus sizes?

Yes. The updated Floral Motif Tee pattern is written in four sizes…S/M, L/XL, 2X/3X, and 4X/5X…with finished bust circumferences from 40″ to 64″. This is one of the few free crochet sweater patterns that goes all the way up to a 64″ finished bust. If your bust measures over 66″ and you'd like to size up further, the motif-based construction makes it relatively straightforward to add additional motifs to the strips and back panel.

How many motifs do I need to make for the Floral Motif Tee?

The Floral Motif Tee uses 24 motifs total for size S/M, 28 for L/XL, 32 for 2X/3X, and 36 for 4X/5X. The motifs are joined into two long strips (12, 14, 16, or 18 motifs per strip depending on size), with each strip running from the front to the back over one shoulder.

Is this pattern good for beginner or intermediate crocheters?

The Floral Motif Tee is an intermediate crochet pattern. You should be comfortable working in the round, reading written pattern instructions, working basic increases and decreases, and joining motifs together. Adventurous advanced beginners can absolutely tackle it, but it's not a “first sweater” project. If you've made a granny square blanket and a few simple garments, you have the skills to make this tee.

What's the difference between a motif tee and a regular crochet top?

A motif tee is built from small, individually crocheted shapes (motifs) that are joined together to form the garment. A “regular” crochet top is usually worked as a continuous fabric, either top-down, bottom-up, or in flat pieces that are seamed. Motif construction tends to result in lacier, lighter fabric with more visual interest, while continuous crochet often produces a denser, more uniform fabric. The Floral Motif Tee combines both: floral motifs form the yokes, and lace panels worked directly onto the motif strips form the body.

Final Thoughts

This updated Floral Motif Tee is one of my favorite patterns to share, and I'm so glad I finally got to size it all the way up to 4X/5X. Crochet should be for every body…and free crochet sweater patterns that fit larger sizes should be the norm, not the exception. So make this tee for yourself, make it for a friend, share the pattern with someone who's been searching for a free pattern in their size… and please come back and tell me how it turned out. I love seeing your makes ๐Ÿ’›

Tag me on Instagram @marlybird or share inside Marly's Minions on Facebook. I'm always rooting for you.

โค๏ธ Your BiCrafty Bestie,
Marly Bird

A cartoon avatar of a person with glasses and a brown bun smiles warmly. Their green shirt and black jacket add a stylish touch, while colorful hearts surround them like loving temperature blankets, stitching together an aura of love and positivity. -Marly Bird
“

Filed Under: Crochet, Free Patterns, Marly Bird Premium Patterns, Our Free Patterns, Pattern, Uncategorized Tagged With: crochet sweater 4x 5x, crochet tee, floral motif crochet, free crochet pattern, intermediate crochet, join as you go, lace crochet, plus size crochet, size inclusive crochet, summer crochet

Sookie Crochet Cardigan: Free Crochet Cardigan Pattern in Sizes XS-5X

May 20, 2026 By Meg Leave a Comment


This is a free oversized crochet cardigan pattern. The Sookie Crochet Cardigan is a free crochet cardigan pattern designed by Marly Bird and Robyn Chachula, available in sizes XS through 5X (9 sizes total). Crocheted in panels and seamed together, this oversized cardigan features a gorgeous textured panel stitch pattern with optional side pockets, worked in affordable worsted weight Red Heart Roll With It Mรฉlange. Skill level: adventurous beginner. Originally released during Marly's 2024 Turkey Trot Make-Along and now available as a complete standalone free pattern.

If you have been waiting for a free crochet cardigan pattern that actually fits your body, that you can start without buying anything specialty, and that comes out looking like something you'd buy at a boutique… meet the Sookie.

Hey, bestie ๐Ÿ’›

This cardigan is one of my most loved patterns ever, and it was designed in collaboration with the brilliant Robyn Chachula during my 2024 Turkey Trot Mystery Make-Along.

We built it as a gift for our crochet community… oversized, cozy, perfect-for-fall, and sized from XS all the way through 5X so every single body gets to wear one. The pattern has been living as a multi-part event series on the blog since November 2024, and I am so glad to finally bring it home as one complete, standalone free pattern you can crochet start to finish without hunting across six different lesson pages.

This post contains affiliate links. If you purchase through them, I may earn a small commission at no extra cost to you… and it helps keep these free patterns coming straight from my yarn-loving heart to yours. ๐Ÿ’›

Woman modeling Sookie Crochet Cardigan pattern by Marly Bird, colorful striped crochet sweater, size-inclusive crochet cardigan pattern with video tutorials

What Makes this Sookie Crochet Cardigan Special?

It is crocheted in two panels that get seamed together, with sleeves worked separately and joined at the armholes. That panel construction means the project travels with you, no big awkward heavy fabric in your lap, and each panel finishes in a satisfying burst. The stitch pattern is an elegant textured combination of double crochet, single crochet third-loop work, and a beautiful “x” cross-stitch effect that looks way more complicated than it actually is.

If you have been nervous about garment crochet… start here.

Sookie is genuinely approachable for an adventurous beginner, and I am walking you through every step.

Woman wears colorful crochet cardigan; close-up shows textured stitch detail. Project: Sookie Crochet Cardigan.

Looking for the Original Turkey Trot 2024 Lesson Pages?

The Sookie Crochet Cardigan was originally released in six lesson pages during the Turkey Trot 2024 Mystery Make-Along event. Those original lesson pages are still live here on the blog for anyone who wants to revisit the event-paced walkthrough:

  • Lesson 1: Gauge Swatch + Starting Your First Panel
  • Lesson 2: Customizing Length
  • Lesson 3: Color Management
  • Lesson 4: All About Blocking
  • Lesson 5: Sleeve Shaping
  • Lesson 6: Finishing Touches & Seams

THIS post is the complete standalone version...
one blog post,
one pattern,
start to finish.

No hunting across six lesson pages. If you're new to Sookie, this is the easiest way to read the whole pattern. If you participated in the 2024 Turkey Trot and want to revisit the lesson-by-lesson experience, those pages are still here for you.

Looking for an uninterrupted crochet experience? We have that available as well. The ad-free pdf is available on Etsy, Ravelry, and our Shopify Store.


Person models a vibrant crocheted cardigan with bold stitches and cozy texture; pattern pages displayed alongside design.

What You Will Love About This Pattern ๐Ÿ’–

๐Ÿ“ Sizes XS through 5X. Nine sizes with 9-10 inches of positive ease. The Sookie is built for every body, which is something I care deeply about as a designer.

๐Ÿงถ Panel construction. Two panels + two sleeves + a collar. This is how garment crochet SHOULD feel… manageable pieces that come together at the end, not one giant fabric lump fighting you at every row.

๐ŸŽจ A gorgeous textured stitch pattern. The Panel Stitch Pattern combines hdc, sc third-loop, and “crossed dc” stitches to create a subtly layered fabric that looks custom-made. Fancy-looking, approachable actual skill requirement.

๐ŸŽ’ Optional pockets. Yes, please. Add them or skip them, the pattern works either way.

๐Ÿ’ฐ Affordable yarn. Red Heart Roll With It Mรฉlange and Lion Brand Ferris Wheel are both budget-friendly acrylics available at Joann, Michaels, and online. A full cardigan costs less than a single boutique cardigan would.

๐Ÿงบ Machine washable. Throw it in the wash. Done. Perfect for everyday wear, a gift you'll actually use, or a piece you travel with.

๐Ÿ‘ฏ Co-designed with Robyn Chachula. If you know Robyn, you know her patterns are known for clarity, smart construction, and thoughtful sizing. This is the kind of craft collaboration you only get from two designers who've been at this for decades.

Sookie Crochet Cardigan styled casually showing the panel stitch pattern texture and oversized drape

Quick Pattern Overview

๐ŸŽฏ Skill Level: Adventurous Beginner

๐Ÿ“ Finished Size: XS (S, M, L, XL, 2X, 3X, 4X, 5X). Bust circumference 41-69 inches. Length 21-24.5 inches. Designed with 9-10 inches of positive ease for an oversized fit.

๐Ÿงถ Yarn: Red Heart Roll With It Mรฉlange (100% acrylic, worsted weight, 389 yds/150g) in Curtain Call. Size-dependent: 3-5 balls. Alternate yarn: Lion Brand Ferris Wheel.

๐Ÿชก Hook: Size J/10 (6.0 mm) or size needed to obtain gauge.

๐Ÿ“ Gauge (blocked): 18 dc (6 stitch repeats) by 16 rows in Panel Stitch Pattern = 5″ by 7″ [12.5 cm by 18 cm].

โฑ๏ธ Estimated time: 40-60 hours depending on size and speed. A 4-6 week project for most crocheters… perfect for finishing before sweater weather really hits.


Is This Crochet Cardigan Right for You?

This pattern is a perfect match if you're ready for your first (or second, or tenth) crochet garment and you want something you'll actually wear. You will be right at home if you can:

  • Chain, single crochet, half double crochet, and double crochet
  • Read and follow a written pattern
  • Seam two pieces of crochet fabric together (video tutorial linked below if you haven't before)
  • Block a finished piece (steam blocking for this project)

If any of those feel unfamiliar, start with my BiCrafty Bootcamp: Learn to Crochet. It's where my beginners build their foundation before tackling their first garment.

If you've already crocheted a scarf, hat, or small accessory and you're ready to level up, Sookie is a fantastic first cardigan. The panel construction breaks the project into 4 manageable pieces (2 body panels + 2 sleeves) instead of one giant piece fighting gravity in your lap.

โœจ Designer Tip: Panel construction is honestly my favorite way to crochet garments, especially for beginners. Here's why: each panel takes about half as long as a whole cardigan would, so you get TWO “I finished a piece!” dopamine hits before you even start the sleeves. It also means you can travel with your project easily (one panel at a time fits in a project bag), and if your gauge drifts over the course of the project, you can catch it when you finish panel one and adjust on panel two. Full-garment crocheters envy us, truly.

Explore More Free Crochet Cardigan Patterns

If you love crochet cardigans, you are in good company. Here on the blog I've shared several free cardigan patterns over the years… browse the full collection or pick your next project:

  • Easy One-Piece Crochet Cardigan (Amimono Kimono Pattern)… a one-piece kimono-style design if you want something simpler than Sookie
  • Goldenrod Crochet Cardigan… another reader-favorite cardigan
  • Garden Party Crochet Cardigan…absolute fan favorite crochet cardigan for all seasons
  • Lyvia Ruana…longer than a cardigan but same comfort, style and POCKETS!
  • Creekside Ruana…another Turkey Trot favorite pattern you will love
  • Spectrum Stitch Swoncho…not a cardigan but colorful, cozy and stylish
  • Full Library of Free Knit & Crochet Patterns… every free pattern on the blog
Woman in glasses models a pink crocheted cardigan with textured stitches; yarn and accessories fill shelves behind her.
A woman wears a hand-crocheted yellow shawl with openwork stitches over an orange top, standing outdoors.
A woman models a red Tunisian crochet shawl, showing textured stitches; bookshelves and plants are visible behind her.
A woman models a blue Tunisian crochet shawl, showing its stitch detail and texture outdoors against sunlit trees.
Garden Party Crochet Cardigan
Woman models a textured green crocheted shawl with large pockets, shown in a cozy room with bookshelves and plants.
Creekside Crochet Ruana
Woman models a colorful crochet sweater with blue sleeves, highlighting bold stitch patterns and vibrant texture indoors.

What Does “Panel Construction” Mean in Crochet?

Great question, and the answer is the best-kept secret of intermediate crochet garment design.

Panel construction is when a garment is crocheted as separate rectangular pieces (in Sookie's case, two body panels and two sleeves) and seamed together at the end. This is in contrast to “one-piece” or “top-down seamless” construction, where the entire garment is worked as one continuous piece.

Panel construction has real advantages for crocheters:

  • Portability. One rectangular panel fits in a project bag. A full garment halfway through construction does not.
  • Gauge correction. If your gauge shifts during the project, you notice it when you finish panel one, and you can adjust hook size on panel two. You cannot do this with a one-piece garment without ripping out hours of work.
  • Customization. Length, sleeve depth, and ease are easier to adjust per-panel. Sookie's pattern even tells you exactly how to adjust row counts for a custom length.
  • Stitch pattern showcase. Rectangular panels let textured or lace stitch patterns show off without being interrupted by shaping math.
  • Faster perceived progress. Finishing a panel feels like a win. And you get two of those wins before the sleeves.

The one thing panel construction requires is seaming, which is a skill that intimidates some crocheters. Honestly, seaming is easier than most people fear… and I've got a video linked below that walks you through the whip-stitch seam we use in Sookie. If you can sew on a button, you can seam a crochet panel.

Join our Newsletter

Get Free Crochet & Knitting
Pattern Links & Coupons!

Hand-drawn bird with curling, detailed feathers and pink accents; cheerful pose showcases fine line and texture work.
>> Become An Insider <<
A woman with glasses and curly hair models a colorful crocheted scarf, showing textured stitches and vibrant yarn.

Build Your Skills with This Cardigan

The Sookie is a genuinely skill-building project. By the time you finish, you will have practiced:

  • Foundation half double crochet (fhdc)… a stretchy foundation edge that beats a traditional chain foundation for garment starts
  • Third-loop crochet… the middle bar that creates the horizontal ridge in half double crochet rows, a beautiful textural element
  • Stacked double crochet… a stacked double crochet edge stitch that replaces the ch-3 turning chain for a cleaner finish
  • Crossed double crochet (“x” stitch)… the signature panel stitch that gives Sookie its texture
  • Pocket openings… adding a pocket in-line to an already-worked fabric
  • Panel seaming with whip stitch… joining two finished panels invisibly
  • Sleeve shaping… working decreases at the edges to create a tapered sleeve
  • Collar pickup… adding a finishing collar by picking up stitches around the neckline
  • Steam blocking acrylic… the right way to block an acrylic garment (and why you should never skip it for this pattern)

If any of those techniques are new to you, don't worry. Every one of them has a video tutorial below, and the pattern walks you through step-by-step. This is the kind of project where you come out on the other side a genuinely more confident crocheter.

Need a refresher on the abbreviations? My How to Read Crochet Chart Symbols guide covers the basics. Brand new to crochet? BiCrafty Bootcamp: Learn to Crochet is your starting point.

Banner with "BICRAFTY Crochet Bootcamp" text, cartoon bird holding yarn, yellow background with pink and blue accents.

Want Robyn Walking You Through Every Step? Join the Sookie VIP Workshop

If you want a hands-on, step-by-step walk-through with me coaching you through every part of the Sookie Crochet Cardigan, the full Sookie Crochet Cardigan VIP Workshop is available at Marly Bird House. You get:

  • The complete pattern as a printable PDF
  • Full video walkthroughs for every section
  • Answers to common pattern questions
  • Lifetime access to the workshop inside Marly Bird House

If you are the kind of crafter who learns best by watching, or you're nervous about your first garment and want a designer in your ear while you work… this workshop was made for you. ๐Ÿ‘‰ Get the Sookie Crochet Cardigan VIP Workshop at Marly Bird House

A multicolored crochet cardigan with a matching hood and belt, shown flat with a beaded necklace, features textured stitch detail.

What Is the Marly Bird Turkey Trot (and Other Marly Bird House Events)?

The Sookie Crochet Cardigan was originally released during my Turkey Trot 2024 Mystery Make-Along, which is one of four seasonal make-along events I run throughout the year at Marly Bird House. These events are the BEST way to experience my community in action… everyone working on the same project, getting real-time support, and celebrating finished projects together.

My four annual Marly Bird House make-along events:

  • ๐Ÿˆ Game Day Mystery Make-Along (winter)… a cozy pattern released in pieces during football season
  • ๐ŸŒธ First Fall (late summer/early fall)… a transitional-weather piece to carry you into layering season
  • ๐Ÿฆƒ Turkey Trot Mystery Make-Along (November)… the big Thanksgiving-season release, where Sookie was born
  • ๐Ÿ† Tournament of Stitches (TOS) (every 2-3 years in the spring)… four mystery shawls released over 4 weeks, the longest-running Marly event

Each event is a LIVE experience… I'm teaching, answering questions, and celebrating with everyone as the pattern unfolds. After the event wraps, the full pattern becomes available as a workshop PDF with videos inside Marly Bird House, so you can work through it anytime, at your own pace. The Sookie VIP Workshop linked above is the “graduated” version of the 2024 Turkey Trot event (same content, available anytime).

Want to join the next one live? The newsletter always has the first invite.

Join our Newsletter

Get Free Crochet & Knitting
Pattern Links & Coupons!

Hand-drawn bird with curling, detailed feathers and pink accents; cheerful pose showcases fine line and texture work.
>> Become An Insider <<
A woman with glasses and curly hair models a colorful crocheted scarf, showing textured stitches and vibrant yarn.

Yarn & Materials

The Sookie is designed for Red Heart Roll With It Mรฉlange, a 100% acrylic worsted weight yarn with 389 yards per 150-gram ball. The sample uses the colorway Curtain Call, a warm heathered red that photographs beautifully. Size-dependent yardage: 3 balls (XS-M), 4 balls (L-3X), 5 balls (4X-5X).

Alternate yarn: Lion Brand Ferris Wheel (100% acrylic, worsted weight, 270 yds/85g). Size-dependent: 4-8 balls. Also a lovely heathered acrylic in a wide color range.

What to look for in a yarn substitute: a worsted weight (CYCA #4) yarn, any fiber, with good stitch definition. Acrylic or acrylic blend is ideal for this pattern because the garment is machine washable and the stitch pattern needs light structure to show off. Avoid slippery super-soft yarns (like pure silk or 100% mercerized cotton) as they may lose stitch definition.

Yarn Alternatives for the Sookie Crochet Cardigan

Can't find Red Heart Roll With It Mรฉlange? No problem. Sookie was designed in a worsted weight (CYCA #4) acrylic, so you have LOTS of options. Below are my favorite affiliate-linked alternatives, sorted by the vibe you want for your finished cardigan. As always… swatch and block before you commit to the full project. ๐Ÿ’›

Self-Striping / Cake Yarn Alternatives (closest to the original Roll With It look)

These give you the same gradient stripey magic as Roll With It Mรฉlange. The colors do the work… you just keep crocheting and watch the cardigan shift through a palette on its own.

YarnFiberYardage / BallWhy it works
Red Heart Roll With It Mรฉlange (original)100% acrylic389 yds / 150 gThe sample yarn. Long color shifts, machine washable, budget-friendly. Color shown: Curtain Call.
Lion Brand Ferris Wheel (original alt)100% acrylic270 yds / 85 gThe pattern's printed alternate yarn. Heathered self-striping look. Need 4-8 balls depending on size. Color shown: Morning Java.
Caron Cinnamon Swirl Cakes100% acrylic~360 yds / 170 gSelf-striping cake. Soft, washable, beautiful color shifts. Easy to find at Michaels.

Solid-Color Worsted Acrylic Alternatives

If you want one solid color (or you want to stripe your own custom palette by hand), these are clean worsted acrylics with great stitch definition. All machine washable, all budget-friendly.

YarnFiberYardage / BallWhy it works
KnitPicks Brava Worsted100% premium acrylic218 yds / 100 gBeginner-friendly, budget-friendly, gorgeous color range. Soft and machine washable. My go-to solid worsted acrylic.
Loops & Threads Impeccable100% acrylic277 yds / 113 gAffordable Michaels store-brand acrylic. Great structure for garments that need to hold their shape. Wide color range.
Lion Brand Heartland100% acrylic251 yds / 142 gSoft, heathered solid colors named after U.S. National Parks. Beautiful drape, machine washable. A reader favorite for cardigans.

Wool and Wool-Blend Options (for natural fiber lovers)

If you'd rather stitch in wool, these are my favorite worsted-weight wool and wool-blend picks. Wool gives you more warmth, more stitch memory, and a slightly different drape than acrylic. Important blocking note: wool and wool blends usually respond better to WET blocking than steam blocking… check your yarn label. (The pattern as written is steam-blocked because the sample is acrylic.)

YarnFiberYardage / BallWhy it works
WeCrochet Mighty Stitch Worsted80% acrylic / 20% superwash wool208 yds / 100 gThe best of both worlds: machine washable like an acrylic, with the warmth and bloom of wool. Great middle-ground yarn for first-time wool crocheters.
Berroco Vintage Worsted52% acrylic / 40% wool / 8% nylon218 yds / 100 gWool/acrylic blend with nylon for added durability. Machine washable. Slightly more rustic look than pure acrylic. Drapes beautifully.
Lion Brand Wool-Ease80% acrylic / 20% wool197 yds / 85 gThe classic workhorse wool-blend acrylic. Reliable structure, easy to find at Michaels, great for everyday wear.
KnitPicks Wool of the Andes Worsted100% Peruvian Highland wool110 yds / 50 gFor natural-fiber purists. 100% wool, gorgeous stitch definition, traditional handfeel. Need 2 balls per “Roll With It” ball. Hand-wash recommended.
Cascade 220 Superwash100% superwash wool220 yds / 100 gPremium superwash wool, machine washable. Excellent stitch memory and structure. A splurge yarn for a cardigan you'll keep for years.

Hook: Size J/10 (6.0 mm) or size needed to obtain gauge. I love KnitPicks hooks for projects like this because the ergonomic handle makes 40+ hours of crochet much easier on your hands.

Notions: these are items that are needed to make your crochet cardigan amazing and the experience even better!

  • Stitch Markers
  • Tapestry Needle
  • Scissors
  • Tape Measure
  • Notions Bag for Supplies (Optional)
  • Leather tags (Optional)
  • Leather rivets (Optional)
  • Blocking Squares 
  • Blocking Pins 
  • Soaking Basin 
  • Eucalan Wool Wash 
  • Steamer
โญ๏ธ Marly Bird Amazon Storefront โญ๏ธ
Variegated orange, red, brown, and gold yarn with a person modeling a textured crochet cardigan made from it. Close-up of the Sookie Crochet Cardigan panel stitch pattern showing the crossed double crochet texture in Red Heart Roll With It Mรฉlange Curtain Call

Video Tutorials

Every technique you need is covered in my video library:

  • Foundation Single Crochet >> Click Here for Video Help <<
  • Seaming Crochet >> Click Here for Video Help <<
  • How to Read Crochet Diagrams >> Click Here for Video Help <<
  • Weave in Ends >> Click Here for Video Help <<
  • Stacked Double Crochet >> Click Here for Video Help <<
  • Videos for each section are available in the Marly Bird House VIP Silver Platter Workshop
Person models a vibrant crocheted cardigan with bold stitches and cozy texture; pattern pages displayed alongside design.

๐Ÿ“Œ Get the Sookie Crochet Cardigan PDF
(Access inside the Marly Bird House with unlimited viewing and bonus material)

Etsy
Shopify
Ravelry
Marly Bird House

Love the Pattern but Want an Ad-Free PDF?

The full pattern below is 100% free here on the blog… thank you for supporting the site by reading through the ads! If you'd rather have a clean, printable, ad-free PDF, or you want the full VIP workshop experience with video walkthroughs, here are your options:

  • ๐Ÿ›’ Shop on Etsy
  • ๐Ÿ›’ Shop on Marly Bird Shopify Store
  • ๐Ÿ›’ Shop on Ravelry
  • ๐ŸŒŸ Sookie VIP Workshop (Marly Bird House)… the full workshop experience with video walkthroughs + pattern PDF
Marly Bird wearing the Sookie Crochet Cardigan in Red Heart Roll With It Mรฉlange Curtain Call, a free oversized crochet cardigan pattern in sizes XS-5X

Sookie Crochet Cardigan โ€” Pattern Details

Designers

Designed by Robyn Chachula and Marly Bird

Skill Level

Adventurous Beginner

Measurements

To Fit Size: XS (S, M, L, XL, 2X, 3X, 4X, 5X) with 9-10″ [23-25.5 cm] of positive ease. Sample shown has 9″ of positive ease in size 3X.

Finished Measurements:
Bust circumference: 41 (44, 47, 51, 56, 59, 63, 66, 69)” [104, 112, 119.5, 129.5, 142, 150, 160, 167.5, 175 cm]
Length (shoulder to edge): 21 (21, 21, 22.75, 22.75, 22.75, 24.5, 24.5, 24.5)” [53.5, 53.5, 53.5, 58, 58, 58, 62, 62, 62 cm]

Gauge

BLOCKED: 18 dc (6 stitch repeats) by 16 rows in Panel Stitch Pattern = 5″ [12.5 cm] by 7″ [18 cm]. Use any size hook to obtain the gauge.

Materials

Crochet Yarn: Red Heart Roll With It Mรฉlange (100% Acrylic, 389 yds / 356 m, 5.29 oz / 150 g, CYCA #4 worsted)
Curtain Call: 3 (3, 3, 4, 4, 4, 4, 5, 5) balls

Alternate Yarn: Lion Brand Ferris Wheel (100% Acrylic, 270 yds / 247 m, 3 oz / 85 g, CYCA #4 worsted)
Morning Java: 4 (5, 5, 6, 7, 7, 7, 8, 8) balls

Crochet Hook: Size J/10 [6.0 mm] or size needed to obtain gauge.

Notions: Stitch markers, tapestry needle, basic blocking supplies, steamer or steam iron.

Abbreviations

  • Ch โ€“ Chain(s)
  • Dc โ€“ Double Crochet
  • Dc2tog โ€“ Double Crochet Two Together
  • Fhdc โ€“ Foundation Half Double Crochet (see special stitches)
  • Fsc โ€“ Foundation Single Crochet (see special stitches)
  • Hdc โ€“ Half Double Crochet
  • Hdc2tog โ€“ Half Double Crochet Two Together
  • PM โ€“ Place Marker
  • RS โ€“ Right Side
  • Sc โ€“ Single Crochet
  • Sc2tog โ€“ Single Crochet Two Together
  • Sl st โ€“ Slip Stitch
  • Sp(s) โ€“ Space(s)
  • St(s) โ€“ Stitch(es)
  • Stacked Dc โ€“ Stacked Double Crochet (see special stitches)
  • Tch โ€“ Turning Chain
  • WS โ€“ Wrong Side

Special Stitches

โญ๏ธ Double Crochet 2 Together (Dc2tog): *Yarn over hook, insert hook into indicated st, yarn over and pull up a loop, yarn over and draw through 2 loops on hook; repeat from * in next st indicated, yarn over and draw through all 3 loops on hook. (1 decrease)

โญ๏ธ Foundation Half Double Crochet (fhdc):
First fhdc: Ch 2 (does not count as a st), yarn over hook, insert hook into 2nd ch from hook, yarn over and pull up a loop, yarn over and draw through 1 loop on hook (forming a chain, place marker in chain just made), yarn over and draw through 3 loops on hook (forming the half double crochet).
Next fhdc: Yarn over hook, insert hook into base of previous stitch (in the “chain” space), yarn over and pull up a loop, yarn over and draw through 1 loop on hook (forming a chain), yarn over and draw through 3 loops on hook (forming the next half double crochet). Repeat directions for desired amount of sts.

โญ๏ธ Foundation Single Crochet (fsc):
First fsc: Ch 2, insert hook into 2nd ch from hook, yarn over and pull up a loop, yarn over and draw through 1 loop on hook (forming a chain), yarn over and draw through 2 loops on hook (forming the single crochet).
Next fsc: Insert hook into base of previous stitch (in the “chain” space), yarn over and pull up a loop, yarn over and draw through 1 loop on hook (forming a chain), yarn over and draw through 2 loops on hook (forming the next single crochet). Repeat directions for desired amount of sts.

โญ๏ธ Half Double Crochet 2 Together (Hdc2tog): Yarn over hook, insert hook into indicated st, yarn over and pull up a loop, insert hook into next st indicated, yarn over and pull up a loop, yarn over and draw through all 4 loops on hook. (1 decrease)

โญ๏ธ Single Crochet 2 Together (sc2tog): *Insert hook into indicated stitch, yarn over and pull up a loop; repeat from * in next stitch indicated, yarn over and draw through all 3 loops on hook. (1 decrease)

โญ๏ธ Third Loop: Also known as middle or back bar. Horizontal strand located under the top 2 loops. When working in turned rows the third loop is on the front side of the fabric facing you.

โญ๏ธ Stacked Double Crochet (Stacked Dc): (Do not ch 1 prior to making the first sc) Sc in first stitch, insert hook in between two legs of the base, yarn over and pull up a loop, yarn over and draw through 2 loops on hook.

Person models a vibrant crocheted cardigan with bold stitches and cozy texture; pattern pages displayed alongside design.

Crochet Stitch Diagrams

โœจ Following along with the free pattern on MarlyBird.com? Youโ€™ll have everything you need to make this cardigan… but if you want the exclusive stitch diagram charts, those are only available in the ad-free PDF version.

Youโ€™ll enjoy a clean, printable, ad-free experience while supporting Marly Birdโ€™s free tutorials and patterns ๐Ÿ’–

Etsy
Shopify
Ravelry
Marly Bird House

Schematic

Sookie Crochet Cardigan schematic showing panel construction โ€” two rectangular front and back panels with optional pockets for the free crochet cardigan pattern
Sookie Crochet Cardigan sleeve schematic showing tapered trapezoidal sleeve shape with finished width and height measurements
Sookie Crochet Cardigan seaming schematic showing panel join lines with the do-not-seam armhole marked for the plus size crochet cardigan pattern

Notes

  • Directions are for size XS; changes for sizes S, M, L, XL, 2XL, 3XL, 4XL, 5XL are in parentheses. When only one number is given, that number applies to all sizes.
  • Sweater is oversized. If you prefer a tighter fit, pick a size closer to your bust circumference. The sample shown is the 3X size with 9″ of positive ease.
  • Gauge listed is BLOCKED. The stitch pattern unblocked is much shorter compared to when it is blocked. Make sure you are choosing your hook size based on a blocked swatch.
  • Make a gauge swatch by making 20 fhdc then following the panel directions for Rows 2-16 without a hole for the pockets.
  • Sweater is worked in panels and seamed. The collar is crocheted onto the project at the end.
  • If you do not want to start your panel with foundation hdc, you can chain and hdc instead. Make sure you have the same number of hdc as Row 1 calls for fhdc.
  • We recommend steam blocking with both yarns listed. We do NOT recommend “pin and spray” blocking or wet blocking for the yarn used. If you substitute another yarn, spray or wet blocking might work. Blocking is required and not optional for this project.

Gauge Swatch

To make a gauge swatch, start with 20 fhdc. Continue with Rows 2-9 of the Panel Instructions below twice. Fasten off. Pin to a blocking board (or other surface), opening up the lace portion of the swatch. Measure 18 sts across and compare to gauge listed of 5″ [10 cm]. Measure 16 rows and compare to gauge listed of 7″ [18 cm]. If your swatch is measuring larger than the listed gauge, make another swatch with a smaller hook. If your swatch is measuring smaller than the listed gauge, make another swatch with a larger hook.

โœจ Designer Tip: Do NOT skip the gauge swatch on this pattern. I know, I know… “do I have to?” Yes. Here's why: the Panel Stitch Pattern is quite short unblocked and stretches significantly when steam blocked. A hook size that looks right pre-blocking will give you the wrong finished dimensions post-blocking. Make the swatch, block it, then decide your hook. 30 extra minutes now saves you from a cardigan that's 4 inches too small (or 4 inches too big) later.

GROW

To Unlockย Exclusive Subscriber Contentย click the Box below and join for free by simply adding your email and creating a password! If you are having troubles, clear your cache or reset your password or login to the Grow Publisher Portal.

>> Learn More About Grow Here <<

I'm thrilled to share this amazing pattern with you, many patterns on my blog are absolutely free! I kindly request that you don't copy and paste or distribute this pattern. Prefer an ad-free experience? Buy a digital PDF pattern for a small fee from one of my online stores for a seamless crafting journey. 

I appreciate your support and readership. You are the reason I can keep doing what I love and sharing it with others. So, thank you from the bottom of my yarn-loving heart! Disclosure: This post contains affiliate links, meaning I get a commission if you decide to make a purchase through my links at no cost to you.

Marly Bird wearing the Sookie Crochet Cardigan in Red Heart Roll With It Mรฉlange Curtain Call, a free oversized crochet cardigan pattern in sizes XS-5X

Sookie Crochet Cardigan โ€” Pattern Instructions

Panels (Make 2)

Row 1 (RS): 32 (35, 38, 41, 44, 47, 50, 53, 56) fhdc, turn.
Row 2: Ch 1, sc in the third loop of each hdc across, turn.
Row 3: Stacked dc in first sc, *skip 2 sc, dc in next sc, ch 2, dc in front of previous dc in 3rd sc back from previous dc (same st as 2nd previous dc, creates a “x”); repeat from * across to last sc, dc in last sc, turn.
Row 4: Stacked dc in first dc, 3 dc in each ch-2 sp across, dc in last dc, turn.
Row 5: Stacked dc in first dc, *skip 2 dc, dc in next dc, ch 2, dc in front of previous dc made in 3rd dc back from previous dc made (same st as 2nd previous dc, creates a “x”); repeat from * across to last dc, dc in last dc, turn.

Row 6: Ch 1, sc in first dc, 3 sc in each ch-2 sp across, sc in last dc, turn.
Row 7: Ch 1, hdc in each sc across, turn.
Row 8: Ch 1, sc in the third loop of each hdc across, turn.
Row 9: Ch 1, hdc in each sc across, turn.
Rows 10-15: Repeat Rows 2-7.

Pocket Opening

Note: The pocket is optional. If you do not want pockets, Repeat Rows 8-9 instead.

Row 16: Ch 1, sc in the third loop of the next 7 (8, 10, 11, 13, 14, 16, 17, 19) hdc, sl st in the third loop of the next 18 hdc, sc in the third loop of each remaining hdc across, turn.
Row 17: Ch 1, hdc in each sc to sl sts, 18 fhdc, skip all sl sts, hdc in each remaining sc across, turn.

Remainder of Panel

Repeat Rows 2-9 of the Panel 9 (9, 9, 10, 10, 10, 11, 11, 11) times.
Repeat Rows 2-8 once more, do not fasten off.

Edging Round: Ch 1, sc in each sc across last row to last sc, 3 sc in last sc, place marker in middle sc, turn to work on edge, sc evenly along long edge to foundation, 3 sc in first st of the foundation, place marker in middle sc, turn to work on foundation, sc in each remaining st across to last, 3 sc in last st, place marker in middle sc, turn to work on edge, sc evenly along long edge to beginning, 2 sc in same st as first sc of round, place marker in 2nd sc, sl st to first st, fasten off, weave in ends.

Block Panels

Pin panels to schematic size. Using either the lowest heat setting on your steam iron or a steamer, steam panels to block and allow to dry.

โœจ Designer Tip: Block your panels BEFORE you start the sleeves. I know it feels like you want to power through the whole project, but blocking first lets you confirm your dimensions are correct before you commit 15+ more hours to sleeves. If your gauge drifted and the panels are coming out a size bigger or smaller than planned, this is when you catch it… and you can adjust the sleeve starting row count to match.

Sleeves (Make 2) โ€” XS, S, M Size

Row 1 (RS): 65 fhdc, turn.
Row 2: Ch 1, sc in the third loop of each hdc across, turn.
Row 3: Ch 2 (does not count as a st), skip first sc, dc in next 3 sc, *skip 2 sc, dc in next sc, ch 2, dc in front of previous dc in 3rd sc back from previous dc (same st as 2nd previous dc, creates a “x”); repeat from * across to last 4 sc, dc in next 2 sc, dc2tog over last 2 sc, turn โ€” 19 ch-2 sps + 3 sts each end.
Row 4: Ch 2 (does not count as a st), skip first st, dc in next 2 sts, 3 dc in each ch-2 sp across to last 3 sts, dc in next st, dc2tog over last 2 sts, turn โ€” 61 dc.
Row 5: Ch 2 (does not count as a st), skip first dc, dc in next dc, *skip 2 dc, dc in next dc, ch 2, dc in front of previous dc made in 3rd dc back from previous dc made (same st as 2nd previous dc, creates a “x”); repeat from * across to last 2 dc, dc2tog over last 2 dc, turn โ€” 19 ch-2 sps + 1 st each end.
Row 6: Ch 1, sc2tog over first dc and ch-2 sp, 2 sc in same ch-2 sp, 3 sc in each ch-2 sp across to last ch-2 sp, 2 sc in last ch-2 sp, sc2tog over last ch-2 sp and dc, turn โ€” 57 sc.
Row 7: Ch 1, hdc2tog over first 2 sc, hdc in each sc across to last 2 sc, hdc2tog over last 2 sc, turn โ€” 55 hdc.
Row 8: Ch 1, sc in the third loop of each hdc across, turn.
Row 9: Ch 1, hdc2tog over first 2 sc, hdc in each sc across to last 2 sc, hdc2tog over last 2 sc, turn โ€” 53 hdc.

Repeat Rows 2-9 once, Repeat Rows 2-8 once more โ€” 31 sc. Fasten off, weave in ends.

Sleeves (Make 2) โ€” L, XL, 2X Size

Row 1 (RS): 74 fhdc, turn.
Row 2: Ch 1, sc in the third loop of each hdc across, turn.
Row 3: Ch 2 (does not count as a st), skip first sc, dc in next 3 sc, *skip 2 sc, dc in next sc, ch 2, dc in front of previous dc in 3rd sc back from previous dc (same st as 2nd previous dc, creates a “x”); repeat from * across to last 4 sc, dc in next 2 sc, dc2tog over last 2 sc, turn โ€” 22 ch-2 sps + 3 sts each end.
Row 4: Ch 2 (does not count as a st), skip first st, dc in next 2 sts, 3 dc in each ch-2 sp across to last 3 sts, dc in next st, dc2tog over last 2 sts, turn โ€” 70 dc.
Row 5: Ch 2 (does not count as a st), skip first st, dc in next dc, *skip 2 dc, dc in next dc, ch 2, dc in front of previous dc made in 3rd dc back from previous dc made (same st as 2nd previous dc, creates a “x”); repeat from * across to last 2 dc, dc2tog over last 2 dc, turn โ€” 22 ch-2 sps + 1 st each end.
Row 6: Ch 1, sc2tog over first dc and ch-2 sp, 2 sc in same ch-2 sp, 3 sc in each ch-2 sp across to last ch-2 sp, 2 sc in last ch-2 sp, sc2tog over last ch-2 sp and dc, turn โ€” 66 sc.
Row 7: Ch 1, hdc2tog over first 2 sc, hdc in each sc across to last 2 sc, hdc2tog over last 2 sc, turn โ€” 64 hdc.
Row 8: Ch 1, sc2tog in the third loop over the first 2 hdc, sc in the third loop of each hdc across to last 2 hdc, sc2tog in the third loop over the last 2 hdc, turn โ€” 62 sc.
Row 9: Ch 1, hdc2tog over first 2 sc, hdc in each sc across to last 2 sc, hdc2tog over last 2 sc, turn โ€” 60 hdc.
Row 10: Ch 1, sc in the third loop of each hdc across, turn.
Row 11: Ch 2 (does not count as a st), skip first sc, dc in next 2 sc, *skip 2 sc, dc in next sc, ch 2, dc in front of previous dc in 3rd sc back from previous dc (same st as 2nd previous dc, creates a “x”); repeat from * across to last 3 sc, dc in next sc, dc2tog over last 2 sc, turn โ€” 18 ch-2 sps + 2 sts each end.
Row 12: Ch 2 (does not count as a st), skip first st, dc in next st, 3 dc in each ch-2 sp across to last 2 sts, dc2tog over last 2 sts, turn โ€” 56 dc.
Row 13: Ch 2 (does not count as a st), skip first dc, dc in next 3 dc, *skip 2 dc, dc in next dc, ch 2, dc in front of previous dc made in 3rd dc back from previous dc made (same st as 2nd previous dc, creates a “x”); repeat from * across to last 4 dc, dc in next 2 dc, dc2tog over last 2 dc, turn โ€” 16 ch-2 sps + 3 sts each end.
Row 14: Ch 1, sc2tog over first 2 dc, sc in next sc, 3 sc in each ch-2 sp across to last 3 dc, sc in next dc, sc2tog over last 2 dc, turn โ€” 52 sc.
Row 15: Ch 1, hdc2tog over first 2 sc, hdc in each sc across to last 2 sc, hdc2tog over last 2 sc, turn โ€” 50 hdc.
Row 16: Ch 1, sc2tog in the third loop over the first 2 hdc, sc in the third loop of each hdc across to last 2 hdc, sc2tog in the third loop over the last 2 hdc, turn โ€” 48 sc.
Row 17: Ch 1, hdc2tog over first 2 sc, hdc in each sc across to last 2 sc, hdc2tog over last 2 sc, turn โ€” 46 hdc.
Row 18: Ch 1, sc in the third loop of each hdc across, turn.
Row 19: Ch 2 (does not count as a st), skip first sc, dc in next sc, *skip 2 sc, dc in next sc, ch 2, dc in front of previous dc in 3rd sc back from previous dc (same st as 2nd previous dc, creates a “x”); repeat from * across to last 2 sc, dc2tog over last 2 sc, turn โ€” 14 ch-2 sps + 1 st each end.
Row 20: Ch 2 (does not count as a st), skip first st, 3 dc in each ch-2 sp across to last ch-2 sp, 2 dc in last ch-2 sp, dc2tog over last ch-2 sp and dc, turn โ€” 42 dc.
Row 21: Ch 2 (does not count as a st), skip first dc, dc in next 2 dc, *skip 2 dc, dc in next dc, ch 2, dc in front of previous dc made in 3rd dc back from previous dc made (same st as 2nd previous dc, creates a “x”); repeat from * across to last 3 dc, dc in next dc, dc2tog over last 2 dc, turn โ€” 12 ch-2 sps + 2 sts each end.
Row 22: Ch 1, sc2tog over first 2 dc, 3 sc in each ch-2 sp across to last 2 dc, sc2tog over last 2 dc, turn โ€” 38 sc.
Row 23: Ch 1, hdc2tog over first 2 sc, hdc in each sc across to last 2 sc, hdc2tog over last 2 sc, turn โ€” 36 hdc.
Row 24: Ch 1, sc in the third loop of each hdc across. Fasten off, weave in ends.

Sleeves (Make 2) โ€” 3X, 4X, 5X Size

Row 1 (RS): 83 fhdc, turn.
Row 2: Ch 1, sc2tog in the third loop over the first 2 hdc, sc in the third loop of each hdc across to last 2 hdc, sc2tog in the third loop over the last 2 hdc, turn โ€” 81 sc.
Row 3: Ch 2 (does not count as a st), skip first sc, dc in next 2 sc, *skip 2 sc, dc in next sc, ch 2, dc in front of previous dc in 3rd sc back from previous dc (same st as 2nd previous dc, creates a “x”); repeat from * across to last 3 sc, dc in next sc, dc2tog over last 2 sc, turn โ€” 25 ch-2 sps + 2 sts each end.
Row 4: Ch 2 (does not count as a st), skip first st, dc in next st, 3 dc in each ch-2 sp across to last 2 sts, dc2tog over last 2 sts, turn โ€” 77 dc.
Row 5: Ch 2 (does not count as a st), skip first st, dc in next 3 dc, *skip 2 dc, dc in next dc, ch 2, dc in front of previous dc made in 3rd dc back from previous dc made (same st as 2nd previous dc, creates a “x”); repeat from * across to last 4 dc, dc in next 2 dc, dc2tog over last 2 dc, turn โ€” 23 ch-2 sps + 3 sts each end.
Row 6: Ch 1, sc2tog over first 2 dc, sc in next dc, 3 sc in each ch-2 sp across to last 3 dc, sc in next dc, sc2tog over last 2 dc, turn โ€” 73 sc.
Row 7: Ch 1, hdc2tog over first 2 sc, hdc in each sc across to last 2 sc, hdc2tog over last 2 sc, turn โ€” 71 hdc.
Row 8: Ch 1, sc2tog in the third loop over the first 2 hdc, sc in the third loop of each hdc across to last 2 hdc, sc2tog in the third loop over the last 2 hdc, turn โ€” 69 sc.
Row 9: Ch 1, hdc2tog over first 2 sc, hdc in each sc across to last 2 sc, hdc2tog over last 2 sc, turn โ€” 67 hdc.
Row 10: Ch 1, sc2tog in the third loop over the first 2 hdc, sc in the third loop of each hdc across to last 2 hdc, sc2tog in the third loop over the last 2 hdc, turn โ€” 65 sc.
Row 11: Ch 2 (does not count as a st), skip first sc, dc in next 3 sc, *skip 2 sc, dc in next sc, ch 2, dc in front of previous dc in 3rd sc back from previous dc (same st as 2nd previous dc, creates a “x”); repeat from * across to last 4 sc, dc in next 2 sc, dc2tog over last 2 sc, turn โ€” 19 ch-2 sps + 3 sts each end.
Row 12: Ch 2 (does not count as a st), skip first st, dc in next 2 sts, 3 dc in each ch-2 sp across to last 3 dc, dc in next dc, dc2tog over last 2 dc, turn โ€” 61 dc.
Row 13: Ch 2 (does not count as a st), skip first dc, dc in next dc, *skip 2 dc, dc in next dc, ch 2, dc in front of previous dc made in 3rd dc back from previous dc made (same st as 2nd previous dc, creates a “x”); repeat from * across to last 2 dc, dc2tog over last 2 dc, turn โ€” 19 ch-2 sps + 1 st each end.
Row 14: Ch 1, sc2tog over first dc and ch-2 sp, 2 sc in same ch-2 sp, 3 sc in each ch-2 sp across to last ch-2 sp, 2 sc in last ch-2 sp, sc2tog over last ch-2 sp and dc, turn โ€” 57 sc.
Row 15: Ch 1, hdc2tog over first 2 sc, hdc in each sc across to last 2 sc, hdc2tog over last 2 sc, turn โ€” 55 hdc.
Row 16: Ch 1, sc2tog in the third loop over the first 2 hdc, sc in the third loop of each hdc across to last 2 hdc, sc2tog in the third loop over the last 2 hdc, turn โ€” 53 sc.
Row 17: Ch 1, hdc2tog over first 2 sc, hdc in each sc across to last 2 sc, hdc2tog over last 2 sc, turn โ€” 51 hdc.
Row 18: Ch 1, sc2tog in the third loop over the first 2 hdc, sc in the third loop of each hdc across to last 2 hdc, sc2tog in the third loop over the last 2 hdc, turn โ€” 49 sc.
Row 19: Ch 2 (does not count as a st), skip first sc, dc in next sc, *skip 2 sc, dc in next sc, ch 2, dc in front of previous dc in 3rd sc back from previous dc (same st as 2nd previous dc, creates a “x”); repeat from * across to last 2 sc, dc2tog over last 2 sc, turn โ€” 15 ch-2 sps + 1 st each end.
Row 20: Ch 2 (does not count as a st), skip first st, 3 dc in each ch-2 sp across to last ch-2 sp, 2 dc in last ch-2 sp, dc2tog over last ch-2 sp and dc, turn โ€” 45 dc.
Row 21: Ch 2 (does not count as a st), skip first dc, dc in next 2 dc, *skip 2 dc, dc in next dc, ch 2, dc in front of previous dc made in 3rd dc back from previous dc made (same st as 2nd previous dc, creates a “x”); repeat from * across to last 3 dc, dc in next dc, dc2tog over last 2 dc, turn โ€” 13 ch-2 sps + 2 sts each end.
Row 22: Ch 1, sc2tog over first 2 dc, 3 sc in each ch-2 sp across to last 2 dc, sc2tog over last 2 dc, turn โ€” 41 sc.
Row 23: Ch 1, hdc2tog over first 2 sc, hdc in each sc across to last 2 sc, hdc2tog over last 2 sc, turn โ€” 39 hdc.
Row 24: Ch 1, sc in the third loop of each hdc across. Fasten off, weave in ends.

Block Sleeves

Pin sleeves to schematic size. Using either the lowest heat setting on your steam iron or a steamer, steam sleeves to block and allow to dry.

Back Seam

Join yarn to the Left Panel on the long edge in the marked corner (marked with a star on the panel schematic) with a sl st.

Row 1 (RS): Ch 3 (counts as dc), dc in next sc, *ch 1, skip next sc, dc in next 2 sc; repeat from * 20 (20, 20, 21, 21, 21, 23, 23, 23) times total, turn โ€” 42 (42, 42, 44, 44, 44, 48, 48, 48) dc + 20 (20, 20, 21, 21, 21, 23, 23, 23) ch-1 sps.

Note: If you have customized the length of your project, you will need to adjust the amount of sts you have on Row 1. You will want the finished Row 1 to be 2″ [5 cm] less than half the total length (2″ less than the length of the shoulder to the bottom edge). This means you will either need to crochet more or less of Row 1 across the panel.

Row 2: Ch 1, *sc between next 2 dc, 2 sc in next ch-1 sp; repeat from * across to last 2 dc, sc between last 2 dc, sc in last dc, turn.
Row 3: Stacked dc in first sc, dc in next sc, *ch 1, skip next sc, dc in next 2 sc; repeat from * across, turn.
Row 4: Ch 1, *sc between next 2 dc, 2 sc in next ch-1 sp; repeat from * across to last 2 dc, sc between last 2 dc, sc in last dc. Fasten off, weave in ends.

Join yarn to the Right Panel on the long edge 62 (62, 62, 65, 65, 65, 71, 71, 71) sts across from the corner (including the marked corner st) with a sl st.

Note: If you have customized the length of your project, you will need to adjust the amount of sts you have on Row 1. You will want the finished Row 1 to be 2″ [5 cm] less than half the total length. This means you will need to adjust where you join your yarn. Count the number of stitches on the opposite side and join there for this side.

Row 1 (RS): Ch 3 (counts as dc), dc in next sc, *ch 1, skip next sc, dc in next 2 sc; repeat from * across to corner, turn โ€” 42 (42, 42, 44, 44, 44, 48, 48, 48) dc + 20 (20, 20, 21, 21, 21, 23, 23, 23) ch-1 sps.
Row 2: Ch 1, *sc between next 2 dc, 2 sc in next ch-1 sp; repeat from * across to last 2 dc, sc between last 2 dc, sc in last dc, turn.
Row 3: Stacked dc in first sc, dc in next sc, *ch 1, skip next sc, dc in next 2 sc; repeat from * across, turn.

XS, S, M, L Size โ€” Fasten off with long tail for seaming.
XL, 2X, 3X, 4X, 5X โ€” Repeat Rows 2-3 once, fasten off with long tail for seaming.

Holding right sides together of each panel, whip stitch back seam.

Side Seam

Join yarn to the Left Panel on the long edge in the marked corner with a sl st.

Row 1 (RS): Ch 3 (counts as dc), dc in next sc, *ch 1, skip next sc, dc in next 2 sc; repeat from * 13 (13, 13, 14, 14, 14, 14, 14, 14) times total, fasten off โ€” 28 (28, 28, 30, 30, 30, 30, 30, 30) dc + 13 (13, 13, 14, 14, 14, 14, 14, 14) ch-1 sps.

Holding right sides together of each panel, whip stitch side seam. Repeat on other side.

Note: If you have customized the length of your project, you will need to adjust the amount of sts you have on Row 1. The side seam is the distance from the bottom edge to the start of the sleeve. The easiest way to do this is to fold your panel and sleeve panel in half. Line the fold line of the sleeve and panel up at the shoulder. With a stitch marker, mark off the underside of the sleeve on the panel. Then crochet Row 1 to as close to that marker as you can.

Colorful sookie crochet cardigan with textured stitches, worn over a white shirt; curly hair visible from behind.

Collar

Join yarn to the Right Panel on the long edge in the marked corner with a sl st.

Row 1 (RS): Ch 3 (counts as dc), dc in next sc, *ch 1, skip next sc, dc in next 2 sc*; repeat from * across panel to back seam (see Note 1 below), [ch 1, 2 dc in edge of sc row] 3 (3, 3, 3, 4, 4, 4, 4, 4) times, ch 1, dc in next 2 sc on next panel, repeat from * to * across panel to next corner (see Note 2 below), turn.

Note 1: We on purpose did not force you to count the number of stitches you have on the panel edging, so you might not end perfectly at your back seam.

If you end with 2 additional stitches before the back seam: ch 1, skip 1, 2 dc in last st before the back seam. Crochet across the back seam as written. In hopes you crocheted the same number of sts on the second panel edging, repeat directions in reverse. 2 dc in first st after back seam, ch 1, skip 1 st, then continue with pattern.

If you end with 1 additional stitch before the back seam: dc in that extra st. Crochet across the back seam as written. In hopes you crocheted the same number of sts on the second panel edging, dc in first 3 sts after back seam, then continue with pattern.

Note 2: If you did not end perfectly at the corner, you can rip out back to the back seam and follow directions above or try the options below.

If you ended 1 st short: rip out the previous 3 sts. Ch 1, do not skip 1, dc in next 2 sc, ch 1, do not skip 1, dc in next sc, dc in corner sc.

If you ended 2 sts short: ch 1, skip 1 st, 2 dc in corner sc.

Row 2: Ch 1, *sc between next 2 dc, 2 sc in next ch-1 sp; repeat from * across to last 2 dc, sc between last 2 dc, sc in last dc, turn.
Row 3: Stacked dc in first sc, dc in next sc, *ch 1, skip next sc, dc in next 2 sc; repeat from * across, turn.

Repeat Rows 2-3 once (or desired amount), Repeat Row 2 once more.
Row 7: Sl st in each sc across, fasten off, weave in ends.

Sleeve Seaming

Pin sleeve to armhole opening with right sides facing. Whip stitch sleeve to armhole opening. Whip stitch under arm seam.

Cuff

Join yarn to the underarm Sleeve with sl st.

Round 1 (RS): Ch 3 (counts as dc), dc in next sc, ch 1, *skip next sc, dc in next 2 sc, ch 1; repeat from * around (see Note below), sl st to top of tch, turn.

Note: If you did not end perfectly back at the beginning, here are a few things you can try:

If you ended without a st between your beginning ch-3 and the last dc: ch 1 and join with a sl st. Essentially do not worry about having a st to skip or not when you get back around.

If you ended with 2 sts between the last dc and beginning ch: rip out the last ch 1 and dc. Dc2tog over the next 2 sts, ch 1, skip the last st and join to the beginning ch with a sl st.

Round 2: Ch 1, *sc between next 2 dc, 2 sc in next ch-1 sp; repeat from * around, sl st to first sc, turn.
Round 3: Stacked dc in first sc, dc in next sc, ch 1, *skip next sc, dc in next 2 sc, ch 1; repeat from * around, sl st to first dc, turn.

Repeat Rounds 2-3 for desired length, Repeat Round 2 once more.
Last Round: Sl st in each sc around, fasten off, weave in ends.

Pocket Square (Make 2)

Chain 24.

Row 1 (RS): Dc in 4th ch from hook (skipped chains count as a dc), dc in each ch across, turn โ€” 24 dc.
Row 2: Ch 1, sc in each dc across including the top of the t-ch, turn.
Row 3: Stacked dc in first sc, dc in each sc across, turn.

Repeat Rows 2-3 six more times (or to desired length). Fasten off leaving a long tail for seaming.

Center pocket square on inside of cardigan at pocket opening. Whip stitch top of pocket square to bottom of foundation stitches in the opening. Stitch remaining sides of the square to the inside fabric of the cardigan.

Finishing

Weave in all remaining loose ends. Give the whole cardigan one final light steam block if needed to even out any areas where stitches settled during seaming.

Woman modeling the free Sookie Crochet Cardigan pattern by Marly Bird and Robyn Chachula โ€” colorful striped size inclusive crochet cardigan XS-5X with video tutorials

Blocking Tips

Blocking is NOT optional for the Sookie. I mean it. The Panel Stitch Pattern looks shorter unblocked than it does post-block, and the whole cardigan's finished dimensions are measured with a blocked swatch. Steam blocking is the method for both Red Heart Roll With It Mรฉlange and Lion Brand Ferris Wheel… do NOT wet block or “pin and spray” block either of these acrylics, it can damage the fabric.

Pin each piece to its schematic dimensions on a blocking board (or a clean towel on any flat surface). Use the lowest heat setting on your steam iron or a steamer, held 2-3 inches above the fabric, and steam the full surface gently. Do NOT press the iron directly on the fabric… acrylic melts at high heat, and even medium heat can create shiny spots.

Let each piece dry completely (usually 4-8 hours) before unpinning. For best results, block your panels BEFORE starting the sleeves, and re-block the full cardigan lightly after seaming to smooth out any settling.

If you substitute a different yarn (wool, cotton, etc.), check the yarn label for blocking instructions. Many non-acrylic fibers respond to wet blocking and may benefit from it. For this pattern written as designed with acrylic, steam is the way.

Make This Sookie Cardigan in Any Color You Love ๐ŸŽจ

One of the things I love most about the Sookie is how dramatically it changes personality based on the color you choose. The sample is stitched in Red Heart Roll With It Mรฉlange in Curtain Call (a warm heathered red), but our test-knitters and community crocheters have made this cardigan in every color you can imagine… and EVERY single one is gorgeous.

Solid, variegated, neutral, bold, dark academia, beachy pastel, holiday-festive… it all works. The Panel Stitch Pattern has so much built-in texture that solid colors pop just as beautifully as multicolor cakes do. Below are a few of my favorite color iterations to get your imagination going.

Free Sookie Crochet Cardigan in blue worsted acrylic, oversized crochet cardigan pattern with panel stitch texture
Sookie in cool blue
Free Sookie Crochet Cardigan in teal green, plus size crochet cardigan pattern XS-5X by Marly Bird and Robyn Chachula
Sookie in teal green
Free Sookie Crochet Cardigan in soft pink, panel construction crochet cardigan with optional pockets by Marly Bird
Sookie in soft pink
Free Sookie Crochet Cardigan in neutral tan and cream stripes, size inclusive crochet cardigan pattern XS-5X
Sookie in tan & cream
Free Sookie Crochet Cardigan in black, white and gray stripes, oversized crochet cardigan pattern with video tutorials
Sookie in black, white & gray
Free Sookie Crochet Cardigan in purple, teal and white, free crochet cardigan pattern with panel construction by Marly Bird
Sookie in purple, teal & white
๐Ÿ’ฌ Your turn: Which color is calling your name?

Drop a comment below and tell me which colorway you'd pick for YOUR Sookie… cool blue, teal green, soft pink, tan and cream, classic gray and black, or that gorgeous purple/teal mix? Or are you going somewhere totally different… a rich burgundy, a buttery mustard, a sage neutral, a bright coral? I love seeing what colors my community gravitates toward, and I'm always inspired by what you all come up with.

And if you make the Sookie in your dream color, please tag @marlybird on social media or use #SookieCrochetCardigan so I can share your finished project. โœจ

Favorite & Queue on Ravelry

Please favorite and queue the Sookie Crochet Cardigan on Ravelry and tag your finished projects #SookieCrochetCardigan so I can see them. Every color, every body, every finished photo… absolutely made my week.

Favorite This Pattern on Ravelry - Marly Bird

More Crochet Patterns You'll Love

  • Goldenrod Crochet Cardigan… another reader favorite
  • Trifle Crochet Pullover... Turkey Trot project with Marly Bird House workshop too!
  • Stonington Crochet Gradient Shawl… got mini hanks? Here is your project!
  • Bellini Crochet Cropped Pullover… everybody loves this pattern
  • Tatiana Crochet Sweater… another size-inclusive crochet garment
  • Solomon's Knot Crochet Summer Tee… must make crochet pullover for summer
  • Turkey Trot 2024 Event Recap… see the full event this pattern was born in

Or browse my full library of free knit and crochet patterns for every free pattern on the blog.

Meet the Designers

About Marly Bird
Marly Bird is a professional yarn artist, designer, and teacher who has been designing in the knit and crochet industry since 2007. She's the creator of the BiCrafty method… the only approach that teaches both knitting AND crochet together… and the host of one of the longest-running fiber arts podcasts and YouTube channels in the business. Marly's free patterns, video tutorials, and beginner-friendly teaching style have helped hundreds of thousands of crafters fall in love with the hook and needles. Find her work, free patterns, and online courses at marlybird.com and at Marly Bird House.
About Robyn Chachula
Robyn Chachula is a structural engineer turned full-time crochet designer, author, and teacher. She's published multiple bestselling crochet books (including Crochet Stitches VISUAL Encyclopedia, Unexpected Afghans, and Blueprint Crochet), has been designing for major yarn companies and magazines since 2006, and is celebrated in the crochet community for her clear charts, smart construction, and gorgeous modern takes on traditional techniques. Robyn and Marly have been designing together for years… the Sookie Crochet Cardigan is one of their most-loved collaborations. You can find more of Robyn's work at crochetbyfaye.com.
Free Sookie Crochet Cardigan FAQ โ€” common questions about this size inclusive crochet cardigan pattern by Marly Bird and Robyn Chachula

Frequently Asked Questions

Is the Sookie Crochet Cardigan really beginner friendly?

Honestly, yes… for an adventurous beginner. If you're comfortable with chain, single crochet, half double crochet, double crochet, and a few decreases (dc2tog, hdc2tog, sc2tog), you can absolutely do this. The panel construction makes it easier than a one-piece cardigan because you get to finish smaller pieces at a time. The pattern walks you through every special technique (foundation hdc, third loop, stacked dc, crossed dc) and all of them have video tutorials.

Can I make this cardigan in a different yarn?

Absolutely. Use any worsted weight (CYCA #4) yarn that gets the right gauge on a J/10 hook. Acrylic is ideal for this pattern because it's machine washable and the stitch pattern needs a little structure. If you use wool or another natural fiber, check blocking instructions… many natural fibers respond better to wet blocking than steam blocking. Always swatch and block your swatch before committing to the full project.

How long does this cardigan take to crochet?

Most crocheters finish in 40-60 hours, depending on size and speed. A realistic timeline for most crafters is 4-6 weeks of regular crochet time. The Turkey Trot 2024 mystery version was paced over 11 days as a make-along… so if you have an existing crochet rhythm, you can absolutely finish it in that same timeframe.

Are the pockets required?

Nope, completely optional. The pattern notes specifically tell you what to do if you want to skip them (repeat Rows 8-9 instead of the pocket opening rows). Many crocheters add them because pockets are ALWAYS a welcome feature on a cardigan, but if you prefer a cleaner silhouette, skipping them is fine.

What's the difference between the Sookie and other Marly Bird crochet cardigans?

Great question. The Sookie is a panel-construction oversized cardigan with a textured stitch pattern, pockets, and a collar, designed for 9-10 inches of positive ease. My Easy One-Piece Kimono Cardigan is a simpler, unshaped one-piece design for a more beginner-friendly experience. My Goldenrod Cardigan is a different textural stitch with a different fit. Different cardigans for different moods.

Can I customize the length?

Yes! The pattern includes specific notes on how to adjust the back seam, side seams, and overall body length if you want your cardigan shorter or longer. Sweater Row 1 in the Back Seam section notes exactly how to recalculate… you'll want the finished Row 1 to be 2 inches less than half the total desired length. Side seams adjust with a stitch marker method also explained in the pattern. Customization is genuinely supported here.

Where can I get the ad-free PDF or the full VIP workshop?

The full Sookie VIP Workshop at Marly Bird House includes the printable PDF + video walkthroughs for every section. If you're the kind of crafter who learns best by watching, or you want me coaching you through every step of your first garment, the workshop is the premium experience. Standalone ad-free PDF options on Etsy and Ravelry are coming soon.

What is the Marly Bird Turkey Trot? How can I join the next one?

Turkey Trot is my annual November mystery make-along event inside Marly Bird House, where a full pattern is released in pieces over about 11 days. I host it live, participants work the pattern together, and we celebrate finished projects as a community. It's one of four annual events (alongside Game Day in winter, First Fall in late summer, and Tournament of Stitches in spring). Join the newsletter to get first access when the next event opens for registration.

Marly Bird wearing the Sookie Crochet Cardigan in Red Heart Roll With It Mรฉlange Curtain Call, a free crochet cardigan pattern in sizes XS-5X

๐Ÿ’ฌ Final Thoughts

The Sookie Crochet Cardigan has been one of my community's most-loved designs since the moment we released it. I've seen hundreds of finished projects in every color imaginable, on every body, in homes all over the world. It's the kind of pattern that earns its place in your wardrobe… you'll wear it every fall, reach for it on chilly summer evenings, and pull it out when someone asks “can you recommend a crochet cardigan I could actually finish?”

Thank you for being here, for letting me design for you, and for being the reason I get to keep sharing free patterns. If you make the Sookie, please share your finished project with me. Tag @marlybird on social media or use #SookieCrochetCardigan. Seeing your versions is my favorite thing in the whole wide world.

Love, Your BiCrafty Bestie, Marly Bird
(and co-designer Robyn Chachula ๐Ÿ’›)

Marly Bird Bitmoji with rainbow hearts

Filed Under: Crochet, Free Patterns, Marly Bird Premium Patterns, Our Free Patterns, Pattern, Uncategorized Tagged With: crochet cardigan, free crochet cardigan pattern, Marly Bird, oversized cardigan, panel construction, Red Heart Roll With It, Robyn Chachula, size inclusive cardigan, sookie crochet cardigan, Turkey Trot, worsted weight cardigan, XS-5X crochet

Knit Poncho โ€” Free Knitting Pattern (Woobie Travel Poncho)

May 15, 2026 By Meg 3 Comments

The Woobie Knit Poncho is a free knit poncho pattern by Marly Bird, originally designed for the 2019 Turkey Trot Mystery Make-Along and refreshed for Spring Fling 2026. Worked flat from the top down in Caron Latte Cakes #5 bulky cake gradient yarn, then folded and seamed. Adventurous beginner skill level. Sized S/M/L. Cozy enough to wear like a security blanket… but make it knitwear.

If you've been wanting to knit your first poncho, or you remember the 2019 Turkey Trot and have always wanted the full pattern in one clean place… this is the post. The original lived as three “clue” pages from the mystery make-along; now the whole thing is right here, refreshed, updated, and standalone.

Woman models a soft, blue-and-white striped knit poncho, showing its drape and textured stitches in three different poses.

Hey, bestie ๐Ÿ’›

The Woobie Poncho holds a special place in my design archive. The original ran as a mystery make-along during Thanksgiving week 2019 and the community absolutely fell in love with it. The nickname “Woobie” stuck because it wears like a security blanket you can leave the house in. Cozy. Familiar. The thing you reach for when you want comfort but you also have to be a person in public.

What you're getting today is the fully refreshed pattern… same beloved design, updated formatting, new photos, and our current standard layout. The construction is unchanged. The yarn is unchanged. It's just the cleanest, easiest-to-follow version of the Woobie Poncho I've ever published.

Let's get into it.

*This post contains affiliate links. By clicking one of the links and making a purchase, a small portion will go to support the blog. The price you pay does not change. Thank you for your support of the blog.*

โš ๏ธ A quick yarn note: The Woobie Poncho was designed for Caron Latte Cakes, which is a Michaels-exclusive yarn. Yarnspirations now lists it as a retailer-exclusive that's no longer in active production. Translation: you can still buy it at Michaels right now (and online while stock lasts), but eventually it'll be gone. If you have Latte Cakes in your stash, this is the pattern for it. If you don't, jump down to the Yarn & Materials section for substitute picks. ๐Ÿ’™
Marly Bird wearing the Woobie Knit Poncho, a free knitting pattern with a cozy cowl neck and bulky cake gradient yarn

What You Will Love About the Woobie Knit Poncho ๐Ÿ’–

๐Ÿงฃ It wears like a hug. The Woobie earned its nickname for a reason. The soft knit fabric drapes like a wearable blanket… but the built-in cowl, open lace detail, and asymmetrical shape mean it actually looks fashionable. Comfort that doesn't compromise. That's the whole brief.

๐Ÿงถ It's an adventurous-beginner knit. If you know how to knit, purl, yarn over, and k2tog, you can make this poncho. The lace pattern is a simple 8-row repeat that becomes second nature after the first few inches. No complicated shaping, no tricky construction โ€” just flat knitting that turns into a wearable layer.

โฑ๏ธ It's a weekend-pace project. Bulky yarn + big needles = fast knitting. The Woobie works up faster than most sweaters or shawls, and the finishing is just folding and seaming โ€” no picking up stitches, no complicated edgings.

๐Ÿ“ Size-inclusive sizing (S / M / L with generous fit). Sized Small, Medium, and Large with body widths from 28ยพ” to 37ยผ” (folded in half) โ€” and because a poncho drapes instead of fits to the body, the generous cut works beautifully across a wide range of body types and shapes. Adjustable length means you can make it shorter or longer to suit your style and your frame. This is a poncho that's meant to feel good on YOU, not the other way around.

โœˆ๏ธ It's a wearable travel blanket. The Woobie is one of those rare layers that doubles as a travel piece. Throw it on for a flight or train ride and you have a cozy blanket that keeps you warm without sacrificing free hands for your coffee, your phone, your kindle, or your knitting WIP. (Speaking of which โ€” yes, you can absolutely knit on the plane. Here's my popular guide to flying with knitting needles.) Throw it in your carry-on and your shoulders never get cold again. ๐Ÿงฃโœˆ๏ธ

๐Ÿ“„ Free Pattern here on the blog… ad-free PDF available too. The full pattern lives free right here on the blog. If you'd rather work from a clean ad-free PDF, I've got you covered below.

Woman wears a light blue and white striped knit poncho, showing drape and texture; features garter stitch details.

Quick Pattern Overview

๐Ÿงถ Craft: Knitting

๐ŸŒธ Pattern Name: Woobie Knit Poncho (originally designed for Turkey Trot 2019, refreshed 2026)

๐Ÿ“ Finished Size (S / M / L):

  • Cowl: 26 (34, 34)” [66 (86.5, 86.5) cm] around and 8″ [20.5 cm] in length
  • Body width: 28ยพ (32ยพ, 37ยผ)” [73 (83, 94.5) cm] wide (folded in half)
  • Body length: 24 (24, 34)” [61 (61, 86.5) cm]

๐ŸŽฏ Skill Level: Adventurous Beginner

๐Ÿงต Yarn: Caron Latte Cakes โ€” #5 Bulky cake gradient yarn (Michaels-exclusive, limited availability). See Yarn & Materials below for substitute picks.

๐Ÿชก Needles: U.S. 10 [6 mm] 48″ [122 cm] or longer circular needle (worked flat in rows โ€” circulars hold the full width)

๐Ÿช Crochet Hook: Size J/10 [6 mm] โ€” used only to make the drawstring

๐Ÿ“ Construction: Worked flat from the top down (cowl first, then body), then folded in half and seamed. Drawstring threaded through cowl eyelet row (optional).

๐Ÿ“Š Gauge: 12 sts and 24 rows = 4″ in Cowl Lace Pattern. Note: Latte Cakes has good stretch โ€” account for it when measuring gauge.


A woman models a light blue knit poncho with textured stitches, standing in a cozy room near the Woofie Poncho pattern display.
Etsy
Shopify
Ravelry

Love the Pattern but Want an Ad-Free PDF? โญ

The Woobie Knit Poncho pattern is FREE right here on the blog… but if you'd rather work from a clean, printable, ad-free PDF (with schematic and no scrolling), I have you covered.

Grab the ad-free PDF in the shop of your choice:

  • ๐Ÿ›’ Shopify (shop.marlybird.com)
  • ๐Ÿ›๏ธ Etsy
  • ๐Ÿ’› Ravelry

Get the latest Marly Bird patterns + bestie-only deals in your inbox every week. ๐Ÿ’›

Join our Newsletter

Get Free Crochet & Knitting
Pattern Links & Coupons!

Hand-drawn bird with curling, detailed feathers and pink accents; cheerful pose showcases fine line and texture work.
>> Become An Insider <<
A woman with glasses and curly hair models a colorful crocheted scarf, showing textured stitches and vibrant yarn.

Is the Woobie Knit Poncho Right for You?

This pattern is a great fit if…

โœ… You're an adventurous beginner ready to knit your first poncho. If you can knit, purl, yarn over, and k2tog, you have every skill you need. The construction is flat-knit-fold-and-seam, which is one of the most beginner-friendly garment constructions out there.

โœ… You want a fast, satisfying garment project. Bulky yarn + big needles = quick knit. This is a weekend or two of casual knitting, not a multi-month sweater commitment.

โœ… You love cozy, cake-gradient yarns. The Woobie was designed around Caron Latte Cakes' natural color shifts, and the lightweight lace eyelet rows let those gradients show off beautifully.

โœ… You want a pattern that's generously sized and body-friendly. Because the Woobie is a fold-and-seam poncho (not a fitted garment), the S / M / L sizing wears generously across a wide range of body shapes and sizes. The drape does the work. You're not squeezing into a number โ€” you're putting on a hug. ๐Ÿ’›

โœ… You travel and want a layer that doubles as a blanket. Throw the Woobie on for a plane ride, train trip, or car ride and you have a cozy travel blanket with your arms free for coffee, your phone, your book, or your knitting WIP. (See: flying with knitting needles.)

โœ… You remember the 2019 Turkey Trot and always wanted the full pattern in one place. Welcome back. This is it. ๐Ÿ’›

This pattern might NOT be the right fit if…

โŒ You're a brand-new knitter who hasn't done a basic project yet. The Woobie is forgiving, but it assumes you've cast on and bound off something before.

โŒ You're looking for a lightweight summer layer. The Woobie is bulky and cozy by design โ€” it's the September-through-April layer, not the July layer.

Woman wearing oversized knit poncho with relaxed fit - great travel blanket

Explore More Free Knit Patterns

If you love free knit garment patterns, you'll want to keep these in your queue too:

  • ๐Ÿงฅ Lorelai Knit Vest โ€” the Turkey Trot 2024 featured knit, now available as a free standalone pattern (same Turkey Trot make-along format as the Woobie)
  • ๐Ÿ’• Prism Knit Swoncho โ€” A cozy, colorful knit swoncho featuring eye-catching geometric stitches and effortless layering style perfect for cool-weather making and wearing.
  • ๐ŸŽ‰ Sugar Frost Knit Cardigan โ€” A soft and stylish knit cardigan with beautiful texture and a timeless silhouette that feels like wrapping yourself in a frosted winter hug.
  • ๐Ÿงฃ Lehabah Fire Sprite Knit Shawl โ€” lace shawl with built-in cowl-style detail (Crescent City fan favorite)
  • ๐Ÿงถ Return to Me Boomerang Knit Shawl โ€” cables and lace in a boomerang construction
  • ๐ŸŒฟ Make It Mine Easy Knit Triangle Shawl โ€” beginner-friendly garter triangle
  • ๐Ÿด Blood of My Blood Knit Shawl โ€” half-hexagon lace with cables (Outlander-inspired)
  • ๐Ÿ“š Browse the full Knit Shawl Patterns hub and Turkey Trot 2019 event archive

The Story of the Woobie Poncho: From Turkey Trot 2019 to Standalone

If you're new here, a little history. The Turkey Trot Mystery Make-Along is one of my favorite annual traditions. Every Thanksgiving week, I release a mystery pattern in daily “clues” โ€” knitters and crocheters cast on without knowing what the finished project will be, and we reveal the design row by row throughout the week. It's part craft-along, part community party, and the projects always end up being some of the most-loved designs in my archive.

The 2019 Turkey Trot was the very first one. The knit version was the Woobie Poncho. Three clues released over the Thanksgiving weekend, hundreds of knitters working through it together, and the finished piece earned its “Woobie” nickname from the community itself โ€” because everyone said the same thing when they put it on: “It feels like a hug.”

The original pattern lived as three separate “clue” pages on the blog. For years, anyone who wanted to make the Woobie had to bounce between three URLs and piece the pattern together. Not ideal.

This post fixes that. The Woobie Poncho pattern is now fully refreshed, updated to our current standard layout, with a new schematic and new photos. The full pattern lives on one page. The old clue pages are being retired and redirected here so nobody gets lost in the archive.

If you've made the Woobie before โ€” welcome back. If this is your first time meeting her โ€” get ready to fall in love. ๐Ÿ’›

๐ŸŒŸ Designer Tip: The Woobie's body length is fully customizable. The pattern as written gives you 24″ or 34″ depending on size, but you can stop short for a capelet-length cozy or keep going for a longer drape. Just make sure to leave enough yarn for the stretchy bind-off (approximately 8 times the width of your poncho).

Build Your Skills with the Woobie Poncho

Every pattern is also a chance to grow as a knitter. Here's what you'll add to your skill set when you make the Woobie Knit Poncho:

๐Ÿงถ Cable cast-on (mid-row). The body of the poncho uses the cable cast-on technique to add stitches mid-row. It's a clean, secure cast-on that's perfect for adding live stitches in any project โ€” once you have it in your hands, you'll use it forever.

๐Ÿงถ Stretchy bind-off. The bottom edge of the poncho uses a stretchy bind-off that prevents the kind of tight, pinched cast-off edge that ruins the drape of a knit garment. Essential for any project where the cast-off edge needs to flex.

๐Ÿงถ Working a simple lace pattern. The Cowl Lace Pattern is just an 8-row repeat with a yarn-over/k2tog row. It's the gentlest possible introduction to knitting lace, and once you've done it, you've unlocked dozens of more complicated lace patterns.

๐Ÿงถ Drop-stitch decoration. The body of the poncho uses a “drop the yarn-overs” row that creates an elongated open-stitch effect. It looks dramatic. It's actually one of the easiest decorative techniques you can do in knitting.

๐Ÿงถ Crochet chain (for the drawstring). If you're knit-only, this is your friendly introduction to crochet. A simple chain stitch with a J/10 hook makes the drawstring that threads through the cowl. (BiCrafty Bestie moment! โœจ)


Why the Woobie Makes the Perfect Knit Travel Poncho โœˆ๏ธ

Some knit garments are great in concept and a hassle in practice. The Woobie isn't one of those. It is โ€” genuinely โ€” the easiest layer I own to travel with, and once you wear yours on a plane or a long road trip, you'll understand why.

๐Ÿงฃ Your arms stay free. Unlike a wrap or a blanket, a poncho stays put when you move. You can reach for your tray table, type on your laptop, scroll your phone, sip your coffee, and (most importantly) keep working on your next knitting WIP โ€” all without your “blanket” sliding off your lap.

โœˆ๏ธ It doubles as a blanket. Airplane temperatures are an unsolved mystery of modern aviation. The Woobie gives you blanket-level warmth in a layer you put on once and forget about. No flagging down the flight attendant for a thin paper blanket. No layering a sweater + a wrap + a coat to stay warm.

๐ŸŽ’ It packs flat. Roll it, fold it, stuff it in your tote โ€” the Woobie compresses easily and doesn't crease. Plus the acrylic-blend yarn means no special care after a flight: pull it out, give it a shake, and it's wearable.

๐Ÿชก It's TSA-friendly to KNIT while you wear it. Yes โ€” you can absolutely knit on the plane. (Yes, even with metal needles. Yes, even on the way home.) If you're new to travel knitting, here's my complete guide to flying with knitting needles โ€” what's allowed, what's not, and how to pack so security never gives you a second look.

If you're heading on a trip โ€” and especially if there's a long flight or a chilly destination involved โ€” the Woobie deserves a spot in your carry-on. Cast on now, wear it on your next trip. ๐Ÿ’›

Collage showing a woman knitting outdoors, close hands working yarn, tools displayed, and plane wing over clouds above.

Yarn & Materials

The Woobie Knit Poncho is designed for Caron Latte Cakes โ€” a #5 Bulky weight cake gradient yarn, 58% acrylic / 42% nylon, 530 yds / 250g per ball. It's a Michaels-exclusive yarn and currently still available there, though Yarnspirations lists it as no longer in active production. If you can grab a few cakes for your stash, this is the time. If you can't find it, the substitutes below are excellent.

โš ๏ธ About Caron Latte Cakes: Caron Latte Cakes is a Michaels-exclusive cake gradient yarn that's currently shoppable at Michaels (in-store and online) but listed on Yarnspirations as a retailer-exclusive with limited availability going forward. The Woobie was designed for it, and if you can find it, use it. If not, the substitute yarns below will give you a beautiful poncho with similar drape and gradient effect.
  • ๐Ÿงต Yarn: Caron Latte Cakes at Michaels โ€” #5 Bulky, 58% acrylic / 42% nylon, 530 yds / 250 g cake. Sample color: Blueberry. Yardage: 2 (3, 3) balls depending on size.
  • ๐Ÿชก Needles: U.S. 10 [6 mm] 48″ [122 cm] or longer circular needle, or size to obtain gauge
  • ๐Ÿช Crochet Hook: Size J/10 [6 mm] โ€” for the drawstring chain
  • ๐Ÿ“ Stitch markers, tapestry needle, scissors, tape measure, stitch saver cord, notions bag
  • โœจ Optional: Pom-pom or tassel maker for the drawstring ends.
End view of a fluffy yarn skein in light blue, teal, and green with a soft spiral texture, ideal for knitting a Woobie Poncho.
Fuzzy yarn ball in muted pink, lavender, and gray tones with a soft, textured spiralโ€”ideal for making a Woobie Poncho.
Close-up of a rolled skein of yarn in cream, beige, and yellow with a soft texture, ideal for knitting cozy ponchos.
Close-up of a fuzzy yarn ball in gray and off-white tones, neatly coiled on a white background.
Close-up of a ball of fuzzy light blue and white yarn with soft texture and visible fibers against a white background.
Close-up of a fuzzy yarn ball with rings of light purple, blue, gray, and olive green on a white background.

What Can I Use Instead of Caron Latte Cakes? Yarn Substitute Guide

Since Caron Latte Cakes is being phased out as a Michaels exclusive, this is the most-asked question I get about this pattern. If you can't find Caron Latte Cakes (or you just prefer a different fiber), here are the best substitute yarns for the Woobie Knit Poncho โ€” all swatch-tested, gauge-checked, and ranked by how closely they match the original drape and gradient effect:

YarnWeightYardage / BallFiberWhere to BuyMatch Notes
Caron Latte Cakes (the original)#5 Bulky530 yds / 250 g58% acrylic, 42% nylonMichaels (limited stock)The original โ€” use if you can find it.
Loops & Threads Facets (top sub)Worsted-Bulky~340 yds / 170 gAcrylic blendMichaels๐Ÿ† Closest substitute. Same gradient construction, swatch for gauge โ€” may need a needle size up.
Lion Brand Mandala Ombre#5 Bulky~466 yds / 227 g100% acrylicMichaelsWidely available, soft, machine washable. Closest gradient self-striping at this weight.
Caron Cloud Cakes#5 Bulky240 yds / 240 gAcrylic blendMichaelsCloud-soft, fluffier texture. Lower yardage โ€” you'll need more cakes.
Any #5 bulky cake gradient yarn#5 Bulky500+ yds / cakeAny (swatch first)Your LYS / onlineGeneric guideline if none of the above is available. Always swatch โ€” bulky weight means small gauge differences create big size differences.
Yarn substitutes for the Woobie Knit Poncho โ€” ranked by closeness of match to Caron Latte Cakes.

๐Ÿ’ก Pro tip: If you're switching to a substitute yarn, ALWAYS swatch first. Bulky-weight yarns are unforgiving โ€” a half-stitch difference per inch can change the finished size by several inches. Use the gauge listed in the Pattern Details section as your target and adjust needle size up or down to hit it.

๐ŸŒŸ Designer Tip: Whatever yarn you choose, swatch in the Cowl Lace Pattern (not plain stockinette). Latte Cakes has noticeable stretch, and so do most acrylic cake yarns. The pattern fabric behaves differently than a flat swatch โ€” measure your gauge in the stitch pattern, not in stockinette.
Person models a blue striped Woobie Poncho in a cozy room, showing off its knit texture and drape.

Video Tutorials

If you need a refresher on any of the techniques in this pattern, here are the video tutorials I recommend:

  • ๐ŸŽฅ Long-Tail Cast-on
  • ๐ŸŽฅ Fixing Long Tail Cast-on
  • ๐ŸŽฅ Knit Stitch (Continental)
  • ๐ŸŽฅ Purl Stitch (Continental)
  • ๐ŸŽฅ How to Tink (un-knit)
  • ๐ŸŽฅ How to Add a Lifeline (3 ways)
  • ๐ŸŽฅ How to Yarn Over Increase
  • ๐ŸŽฅ How to Knit Lace
  • ๐ŸŽฅ How to Bury Ends
  • ๐ŸŽฅ How to make an easy DIY Tassel
  • ๐ŸŽฅ How to use a Pom Pom and Tassel Maker
  • ๐ŸŽฅ Extra help on the first part of the body

Woman models a soft, blue-and-white striped knit poncho, showing its drape and textured stitches in three different poses.

Woobie Knit Poncho โ€” Pattern Details

Skill Level

Adventurous Beginner

Measurements

To Fit Sizes: S (M, L)

Finished Measurements:

  • Cowl: 26 (34, 34)” [66 (86.5, 86.5) cm] around and 8″ [20.5 cm] in length
  • Body width: 28ยพ (32ยพ, 37ยผ)” [73 (83, 94.5) cm] wide (folded in half)
  • Body length: 24 (24, 34)” [61 (61, 86.5) cm]

Gauge

12 sts and 24 rows = 4″ in Cowl Lace Pattern.

Note: The Latte Cake yarn has a good amount of stretch, so be sure to account for that stretch when you measure your gauge.

Materials

Yarn: Caron Latte Cakes (58% acrylic, 42% nylon, 8ยพ oz / 250 g, 530 yds / 485 m, #5 Bulky, available only at Michael's): 2 (3, 3) balls. Sample color: Blueberry

Needle: U.S. 10 [6mm] 48″ [122 cm] or longer circular needle, or size required for gauge.
Note: Poncho is worked back and forth in rows. Circular needles are used to accommodate the full width of the sts.

Hook: Size J/10 [6mm]

Notions: Stitch markers, tapestry needle, scissors, tape measure, stitch saver cord, notions bag for supplies, optional pom-pom or tassel maker.

Abbreviations

  • K โ€” Knit
  • K2tog โ€” Knit Two Together
  • RS โ€” Right Side
  • St(s) โ€” Stitch(es)
  • WS โ€” Wrong Side
  • Yo โ€” Yarn Over

Special Techniques

โญ Cable Cast-on: Place a slipknot on left hand needle and k1, slip new st onto left hand needle; * insert right hand needle between first 2 sts on left hand needle, k1 from this position, leave the first st on left hand needle and slip new st onto left hand needle. Repeat from * for desired number of sts.

โญ Stretchy Bind-Off: K2 from left hand needle, insert left hand needle into front leg of the 2 sts on right hand needle, k2tog (1 st remaining on right hand needle), * k1 from left hand needle, insert left hand needle into front leg of last 2 sts on right hand needle, k2tog; repeat from * to last st. Fasten off.

Pattern Stitch โ€” Cowl Lace Pattern

Worked over an even number of sts (minimum 4).

Rows 1-7 (begin WS): Knit.
Row 8 (RS): K1, * yo, k2tog; repeat from * to last st, k1.

Repeat Rows 1-8 for Cowl Lace pattern.

Schematic

Diagram of a Woobie Poncho with precise inch measurements and center fold line, showing shape for knitting construction.
Poncho diagram with colored size measurements in centimeters and a dashed center fold line for knitting project guidance.

Pattern Notes

  • Directions are for the smallest size; changes for larger sizes are in parentheses. When only one number is given, that number applies to all sizes.
  • The Latte Cakes yarn has a good amount of stretch, so be sure to account for that stretch when you measure your gauge.
  • Poncho is worked back and forth in rows. Circular needles are used to accommodate the full width of the sts.
  • Poncho is worked flat from the top down, then folded in half and seamed.

GROW

To Unlockย Exclusive Subscriber Contentย click the Box below and join for free by simply adding your email and creating a password! If you are having troubles, clear your cache or reset your password or login to the Grow Publisher Portal.

>> Learn More About Grow Here <<

I'm thrilled to share this amazing pattern with you, many patterns on my blog are absolutely free! I kindly request that you don't copy and paste or distribute this pattern. Prefer an ad-free experience? Buy a digital PDF pattern for a small fee from one of my online stores for a seamless crafting journey. 

I appreciate your support and readership. You are the reason I can keep doing what I love and sharing it with others. So, thank you from the bottom of my yarn-loving heart! Disclosure: This post contains affiliate links, meaning I get a commission if you decide to make a purchase through my links at no cost to you.

Woman models a light blue knit Woobie Poncho showing textured stitches; yarn and plants in the background.

Woobie Knit Poncho โ€” Pattern Instructions

Cowl

Cast on 78 (102, 102) sts with Long-Tail cast-on (see Video Tutorials).

Work in Cowl Lace Pattern until piece measures 8″ [20 cm], ending after a pattern Row #7 (WS).

Body

Row 1 (RS): Using cable cast-on (see Special Techniques), cast on 47 (47, 61) sts, k across 47 (47, 61) newly cast-on sts, k to end.
Count: 125 (149, 163) sts.

Row 2 (WS): Using cable cast-on, cast on 47 (47, 61) sts, k across 47 (47, 61) newly cast-on sts, k to end.
Count: 172 (196, 224) sts.

Rows 3-16: Knit.

Row 17 (RS): K4, yo twice, * k1, yo twice; repeat from * to last 4 sts, k4.
Count: 172 (196, 224) knit sts.
Count: 165 (189, 217) doubled yarn-overs.
Count: 337 (385, 441) total loops.

Row 18 (WS): K4, carefully drop the next 2 yarn overs from the left hand needle, * k1, carefully drop the next 2 yarn overs from the left hand needle; repeat from * to last 4 sts, k4.
Count: 172 (196, 224) sts.

Begin Body Repeat

Rows 1-6 (begin RS): Knit.
Row 7 (RS): K4, * yo, k2tog; repeat from * to last 4 sts, k4.
Count: 172 (196, 224) sts.
Rows 8-14: Knit.
Row 15 (RS): K4, * yo, k2tog; repeat from * to last 4 sts, k4.
Count: 172 (196, 224) sts.
Rows 16-22: Knit.
Row 23 (RS): K4, yo twice, * k1, yo twice; repeat from * to last 4 sts, k4.
Count: 172 (196, 224) knit sts.
Count: 165 (189, 217) doubled yarn-overs.
Count: 337 (385, 441) total loops.
Row 24 (WS): K4, carefully drop the next 2 yarn overs from the left hand needle, * k1, carefully drop the next 2 yarn overs from the left hand needle; repeat from * to last 4 sts, k4.
Count: 172 (196, 224) sts.

Repeat last 24 rows until piece measures 24 (24, 34)” [61 (61, 86.5) cm] from Body cast-on edge, ending after a Row #6, #14, or #22.

๐ŸŒŸ Designer Tip: You may work this portion as long or short as you like. Be sure to leave enough yarn length at the end to bind off all the sts, which would be approximately 8 times the width of your Poncho for the Stretchy Bind-off method.

Bind off all sts using Stretchy Bind-off (see Special Techniques).

Finishing

Weave in all loose ends.

Seaming

Fold Poncho in half according to schematic.

Sew side seam of Body, shoulder seam, and side seam of Cowl. Leave neck and bottom open.

Drawstring

With crochet hook, make a chain approximately 60″ [152.5 cm] length. Fasten off.

Weave this chain through the first eyelet row of the cowl to act as a drawstring.

Add pom-poms or tassels or beads to the ends of the drawstring as desired.

Wear with pride. ๐Ÿ’›


Favorite & Queue the Woobie Knit Poncho on Ravelry

Favorite This Pattern on Ravelry - Marly Bird
A woman models a light blue knit poncho with textured stitches, standing in a cozy room near the Woofie Poncho pattern display.
Etsy
Shopify
Ravelry

More Free Knit Patterns You'll Love

Loved the Woobie? Here are more of my free knit patterns to add to your queue โ€” a mix of garments, accessories, and quick projects so you can keep the cozy-knit momentum going:

  • โš”๏ธ Eowyn Cable Knit Shawl โ€” a textured right-triangle shawl with cables for Lord of the Rings fans (intermediate)
  • ๐Ÿงฆ My First Toe-Up Knit Socks โ€” a beginner-friendly first-socks pattern with German short row heel
  • ๐ŸŒˆ Heartstrings Knit Socks โ€” your stranded-colorwork-on-socks starter pattern
  • โ›ฐ๏ธ Summit Knit Shawl โ€” a graphic, modern shawl perfect for showing off variegated yarn
  • ๐Ÿต Cabled Knit Cup Cozy โ€” the perfect tiny weekend project (and the best gift add-on to a cute mug)
  • ๐ŸŒŠ Dynamic Wave Mosaic Knit Hat โ€” slip-stitch mosaic colorwork without the float fuss
  • ๐Ÿ“š Browse the full Knit Shawl Patterns hub for even more
A woman wears a Woobie Poncho, with visible knit texture, surrounded by yarn, coffee, checklist, and crafting details.

Frequently Asked Questions

About the designer: Marly Bird is a knit and crochet designer, teacher, and host of the Mondays with Marly podcast on YouTube โ€” with professional experience designing since 2007 designing for major yarn brands including Red Heart, Cascade, Bernat, Lion Brand, and Yarnspirations. She is one of the few designers in the industry who teaches both knitting and crochet at a master level โ€” her signature “BiCrafty” approach. Marly's free patterns and tutorials on marlybird.com and her YouTube channel have helped millions of crafters learn new techniques and finish projects they're proud of. Marly also designs in partnership with Robyn Chachula โ€” a structural-engineer-turned-crochet-designer and the author of nine crochet books, including Blueprint Crochet, Unexpected Afghans, and the Crochet Stitches Visual Encyclopedia, whose work has been featured in Interweave Crochet, Vogue Crochet, and Love of Crochet.

Is the Woobie Knit Poncho beginner-friendly?

It's an adventurous-beginner pattern. If you can cast on, knit, purl, yarn over, and k2tog, you have every skill you need. The construction is flat-knit-fold-and-seam, which is one of the most beginner-friendly garment constructions out there. You'll also pick up two new techniques along the way (cable cast-on and stretchy bind-off), but both are walked through in the Special Techniques section.

What yarn should I use for the Woobie Poncho?

The original was designed for Caron Latte Cakes, a Michaels-exclusive #5 Bulky cake gradient yarn. It's still shoppable at Michaels (in-store and online) but Yarnspirations lists it as a retailer-exclusive with limited future availability. If you can find it, use it. If not, the closest big-box substitute is Loops & Threads Facets (also at Michaels), followed by Lion Brand Mandala Bulky or Caron Cloud Cakes. Any #5 Bulky cake gradient yarn with around 500+ yds per cake will work โ€” just swatch first.

What can I use instead of Caron Latte Cakes for the Woobie Poncho?

The closest substitute is Loops & Threads Facets at Michaels โ€” same gradient cake construction in a slightly different weight (swatch first; you may need a needle size up). Other strong substitutes: Lion Brand Mandala Ombre (#5 bulky, widely available, soft acrylic) and Caron Cloud Cakes (softer, fluffier texture but lower yardage โ€” you'll need more cakes). Any #5 bulky cake gradient yarn with around 500+ yards per cake will work for the Woobie. See the full yarn substitute guide earlier in this post for details, yardage, and where to buy.

Is the Woobie Poncho good for travel?

Yes โ€” the Woobie is one of the best travel knitting projects you can wear. It works as a wearable blanket on planes, trains, or car rides because your arms stay free for coffee, your phone, your book, or your knitting WIP. It packs flat, the acrylic-blend yarn doesn't wrinkle, and it's warm enough to handle airplane-cabin temperatures. If you're flying with knitting in progress, see my complete guide to flying with knitting needles.

How long does the Woobie Knit Poncho take to make?

It's a weekend-pace project for most knitters โ€” one to two weekends of casual knitting. Bulky yarn and big needles mean each row works up fast, and the cowl section is short. The body is where you'll spend most of your time, but it's mostly plain garter and easy lace rows. Significantly faster than a sweater.

Do I have to know how to crochet to make this poncho?

Only for the drawstring. The drawstring is a simple crochet chain โ€” one of the easiest crochet stitches there is, and absolutely learnable from a 2-minute video if you've never crocheted before. If you really don't want to crochet, you can make a long i-cord in knit, braid three strands of yarn, or use a piece of ribbon or leather cord instead. The drawstring is functional but not structural โ€” any flexible cord works.

Can I make the Woobie Poncho longer or shorter?

Absolutely. The body length is the most customizable part of the pattern. Stop short for a capelet-length cozy, or keep going for a longer drape. Just make sure to end after Row #6, #14, or #22 of the body repeat, and leave enough yarn for the stretchy bind-off (about 8 times the width of your poncho).

Why is it called the Woobie?

“Woobie” is the nickname the community gave it during the original 2019 Turkey Trot Mystery Make-Along. A “woobie” is a beloved comfort blanket (think: the one your kid drags around the house), and that's exactly how everyone described wearing this poncho โ€” like a security blanket you could leave the house in. The name stuck, and it's officially the Woobie Poncho now.

Where can I get the ad-free PDF of the Woobie Knit Poncho?

The ad-free PDF is available in my Etsy shop, my Ravelry store, and at shop.marlybird.com. The PDF version is printer-friendly with no ads or scrolling, which makes it much easier to work from while knitting.

A woman models a light blue knit poncho with textured stitches, standing in a cozy room near the Woofie Poncho pattern display.
Etsy
Shopify
Ravelry

Final Thoughts

The Woobie Knit Poncho has been one of my favorite designs to revisit. Going back into a 2019 pattern and refreshing it for a new generation of knitters has been a joy… and seeing the original Woobie crowd (“I still have mine!”) show up in the community has been the cherry on top. Whether you're knitting it for the first time or you're a returning Woobie person who just wants the full pattern in one place… welcome. I'm so glad you're here. ๐Ÿงฃ๐Ÿ’›

If you make one, please share it with me. Tag @MarlyBird on Instagram or post in the Marly's Minions Facebook group. There's nothing better than seeing your finished pieces. ๐Ÿ’›

And if this pattern brightened your day, share it with a fellow knitter on Facebook โ€” that's how patterns like this one find the people who need them most. ๐Ÿงฃ

Until next time, friends… โค๏ธ

โค๏ธ Your BiCrafty Bestie,
Marly Bird
A cartoon avatar of a person with glasses and a brown bun smiles warmly. Their green shirt and black jacket add a stylish touch, while colorful hearts surround them like loving temperature blankets, stitching together an aura of love and positivity. -Marly Bird

๐Ÿงฃ First Released During Spring Fling 2026 ๐Ÿงฃ

The Woobie Knit Poncho was first released as Day 10 of Spring Fling 2026 (Fri May 15) โ€” Marly's annual spring event featuring 20 days of free knit & crochet patterns.

๐Ÿ‘‰ See the full Spring Fling 2026 lineup on the Hub

Share your finished Woobie with the hashtag #SpringFling2026 + #WoobiePoncho ๐Ÿงฃ๐Ÿ’›

“

Filed Under: Free Patterns, Knitting, Make-Alongs, Marly Bird Premium Patterns, Our Free Patterns, Pattern, Uncategorized Tagged With: Caron Latte Cakes, free knit pattern, knit poncho, Marly Bird knit pattern, spring fling 2026, Turkey Trot 2019, Woobie poncho
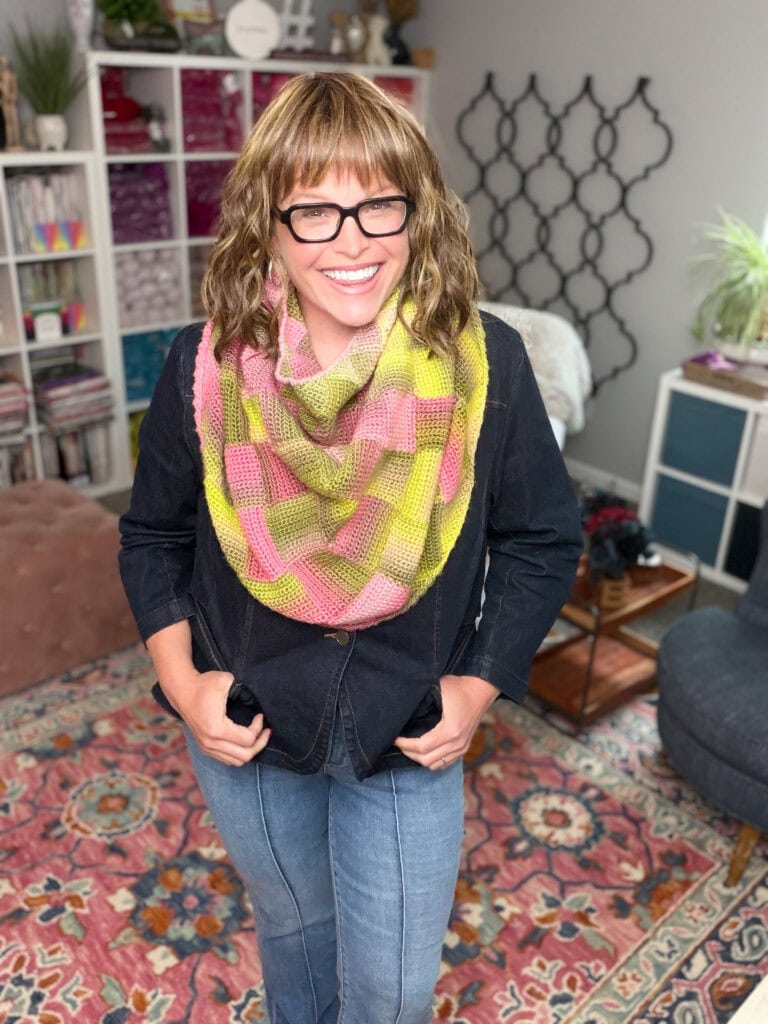
  • « Previous Page
  • 1
  • 2
  • 3
  • 4
  • 5
  • 6
  • Next Page »

Let's Be Social

Join the Marly's Minions Facebook group to share, ask questions, or chat about all of your yarn related crafts!

Join the group
Cartoon of a smiling woman with brown hair in a bun, glasses, black jacket and green shirt, waving next to large "hi" text.

Quick Links

The Pattern Shop

Our Free Patterns

Blog

Marly Bird House
Learn to Knit & Crochet

About

Giveaway Terms and Privacy Notice

Find Us Everywhere

Join the Newsletter

YouTube Channel

Marly's Minions FB Group

Etsy Store

Ravelry Store


AN ELITE CAFEMEDIA HOME/DIY PUBLISHER

Information from your device can be used to personalize your ad experience. Do not sell or share my personal information.

Privacy Policyย  ย Termsย  ย Marly Bird Legal Documents Copyright © 2026