
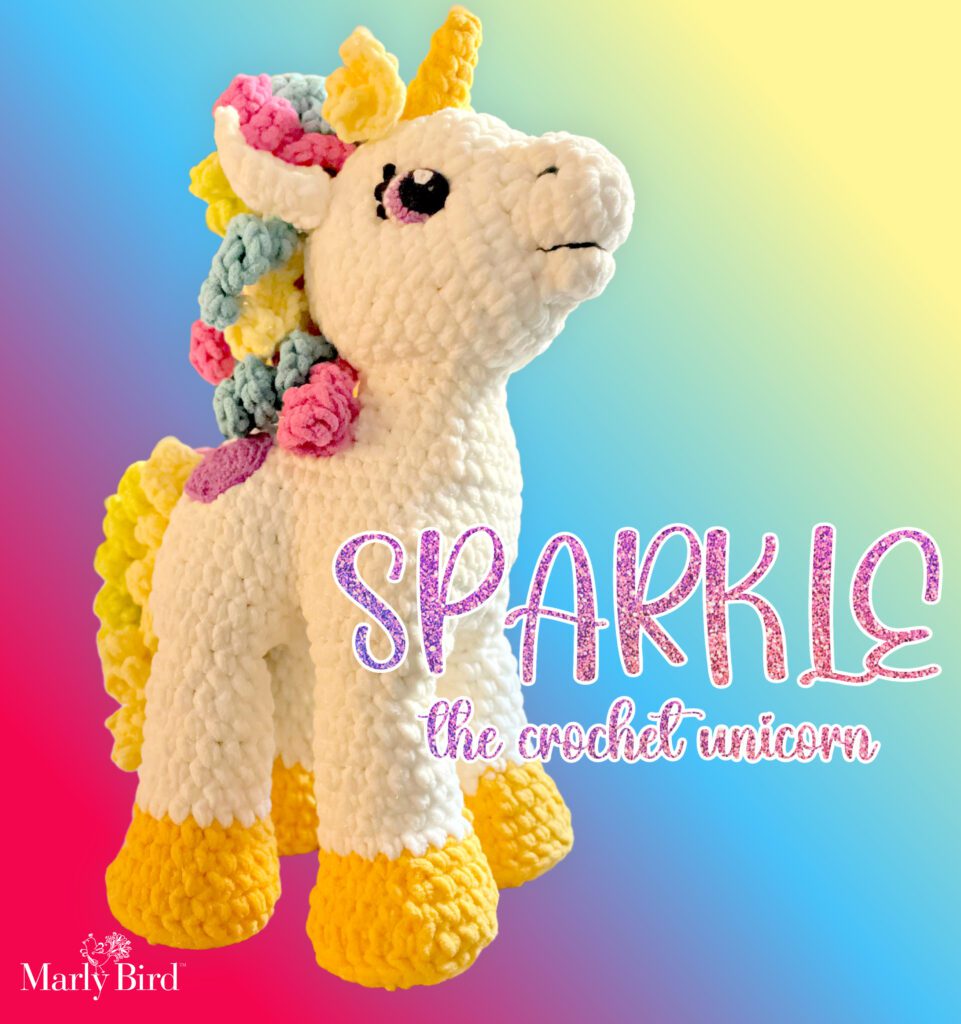
Sparkle The Crochet Unicorn Pattern
A Crochet Unicorn Plushie: Dive into the magic itself with Sparkle and this free crochet unicorn pattern. There’s even a video tutorial walking you through each step-by-step stitch of this cute Marly Unicorn!
The Magic of Crochet Amigurumi
Amigurumi, derived from the Japanese words ‘ami’ (crocheted or knitted) and ‘nuigurumi’ (stuffed doll), is a delightful art form that involves crafting small, stuffed yarn creatures. The magic lies in the ability to bring yarn to life in the form of adorable animals or characters. Whether it’s a tiny bunny with floppy ears, a whimsical unicorn, or a funny little monster, amigurumi creations never fail to charm and captivate.
What sets amigurumi apart is the attention to detail and the intricate craftsmanship. Each creation is carefully handcrafted, stitch by stitch, using crochet or knitting techniques. These techniques allow for endless possibilities in creating different shapes, textures, and designs. The beauty of amigurumi lies in the ability to experiment and let your imagination run wild. From choosing vibrant colors to embellishing with buttons, beads, or embroidery, every amigurumi piece is a unique work of art.
Adorable Amigurumi
One of amigurumi’s most captivating aspects is its sense of nostalgia and comfort. These adorable little creatures often evoke memories of childhood toys. They can instantly transport us back to a time of innocence and wonder. It’s comforting and heartwarming to hold a small, handmade toy in your hands, knowing it was crafted with love and care.
Why is Amigurumi so popular?
Learn 7 reasons why Amigurumi has become so popular; especially with newer crocheters who watch TikTok
Amigurumi Love…
Amigurumi has gained immense popularity in recent years, not only as a crafting hobby but also as a form of self-expression. Many people enjoy and relax in creating these small art pieces, and the amigurumi community is vibrant and supportive. From sharing patterns and tips to participating in swaps and charity projects, this community is committed to spreading the love for amigurumi and the happiness it brings.
Whether you’re a seasoned crafter or a beginner looking for a new hobby, amigurumi offers a world of creativity and imagination. Through this charming art form, you can bring characters and creatures to life, create personalized gifts, or simply surround yourself with cute and whimsical companions. The art and charm of amigurumi truly knows no bounds.
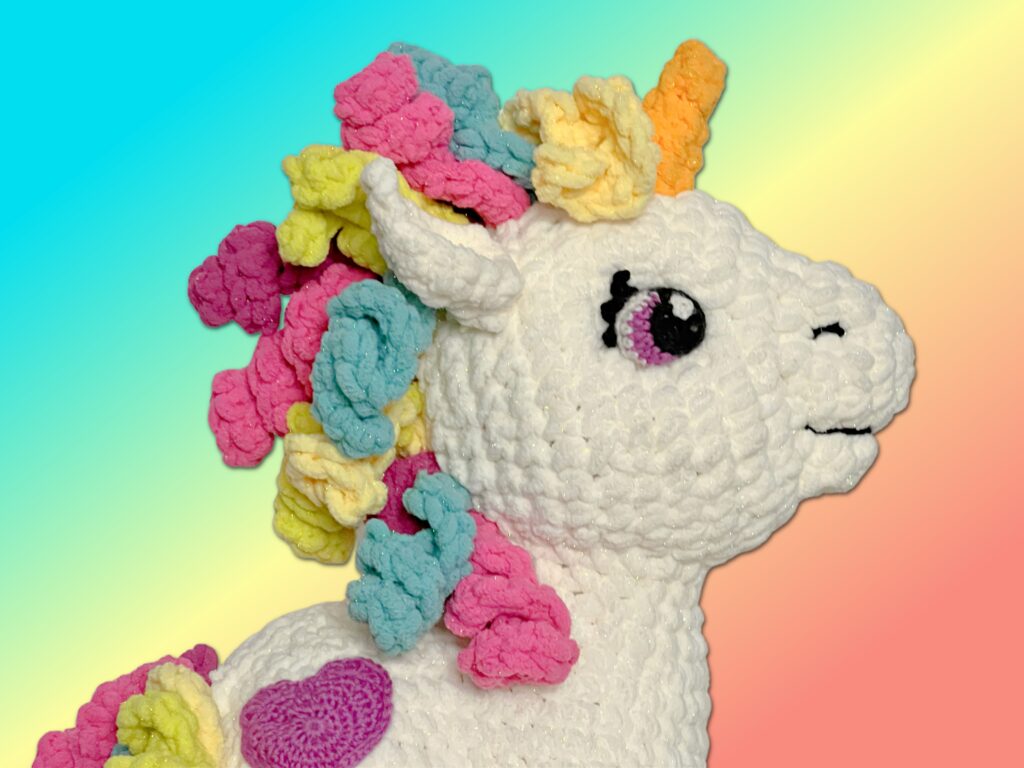
Who is Sparkle the Crochet Unicorn?
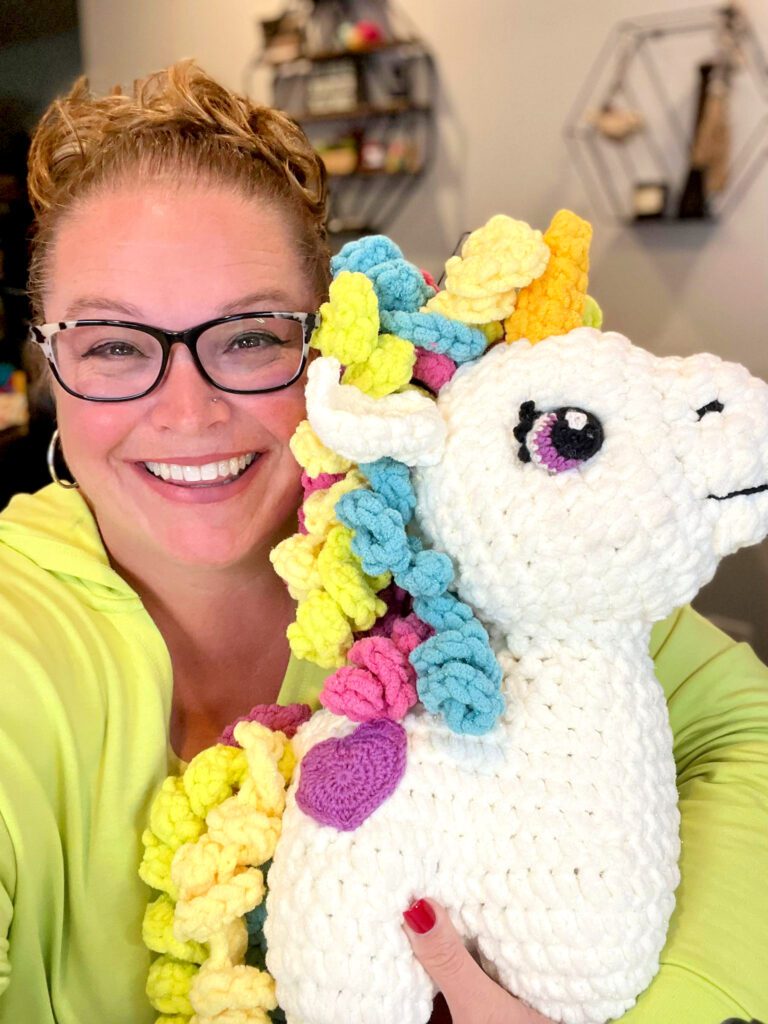
Imagine a world where mythical creatures come to life and charm and charisma embody each crochet coil. In this whimsical realm, we welcome you to meet Sparkle, a mystical and captivating crochet unicorn. We promise to keep you entertained from start to finish!
Sparkle was a glimmer of an idea I had last year during the 24 Days of Quickies Event. I wanted to make a fun Marly Bird mascot, and it was obvious that for Rainbow Maker & Unicorn Wrangler, the mascot needed to be a super cute, cuddly, bright-colored unicorn (not a bird..although I am not opposed to making a fun bird similar to the unicorn style…hmmm). And I’m not talking about a tiny little thing. I wanted a big, squishy rainbow unicorn!
Who Designed Sparkle?
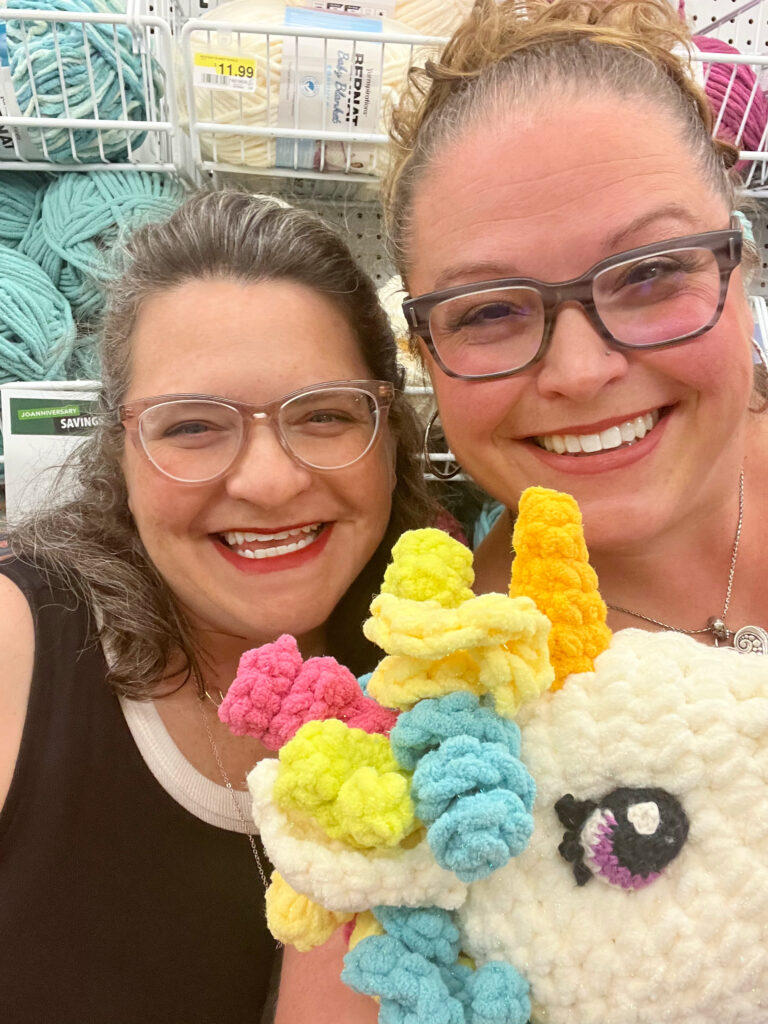
Once I knew I had to have a not-so-little unicorn (and because I am not the best crochet amigurumi pattern writer), I reached out to my friend and the BEST AMIGURUMI PATTERN DESIGNER I know. Enter Megan Kreiner to design a crochet unicorn pattern in amigurumi.
Let’s take a minute to mention that this crochet unicorn pattern is obviously free here on this blog post. But you can purchase the ad-free PDF if you want all the nice and tidy instructions in a downloadable document.
✨You can purchase the ad-free PDF in the Marly Bird Store ✨
Affiliate Disclosure: This post contains affiliate links. To learn more please visit my privacy policy here💖
Meet Megan Kreiner: The Artistry Behind Sparkle
A Disney Animator’s Touch
Working with Disney, Megan Kreiner brings stories to life. Her experience in animation gives her a unique touch, capturing the emotion and magic in her amigurumi designs. She exhibits it the best in her amazing patterns and published books.
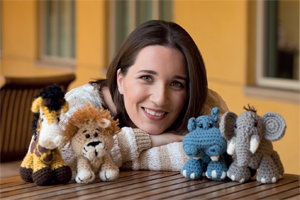
A Menagerie of Amigurumi
From cuddly hedgehogs to mythical baby beasties, Megan has a rich tapestry of designs. She easily proves her mastery in both knitting and crochet. Several of her best-selling books feature a diverse range of crochet toys, from animals to construction trucks to enchanting fantasy scenes.
Amigurumi on MarlyBird.com by MK Knit and Crochet
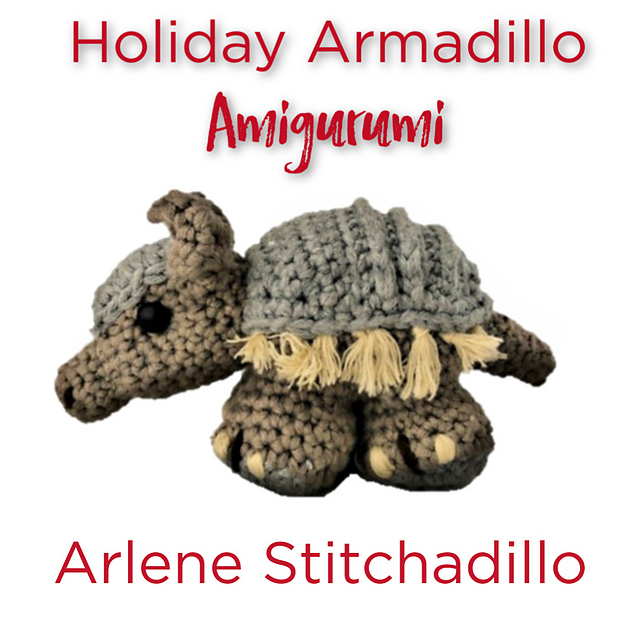
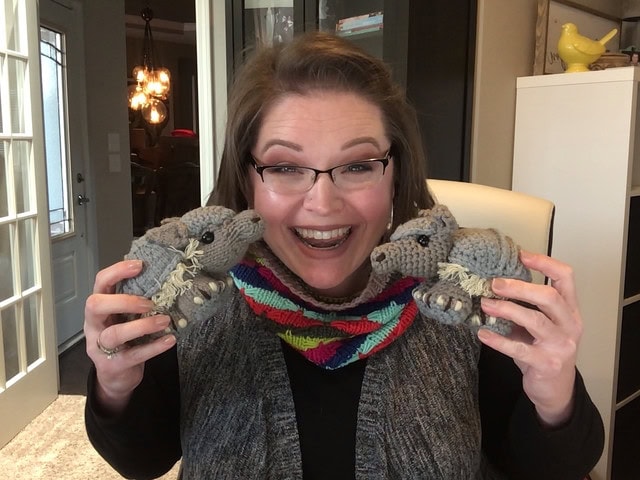
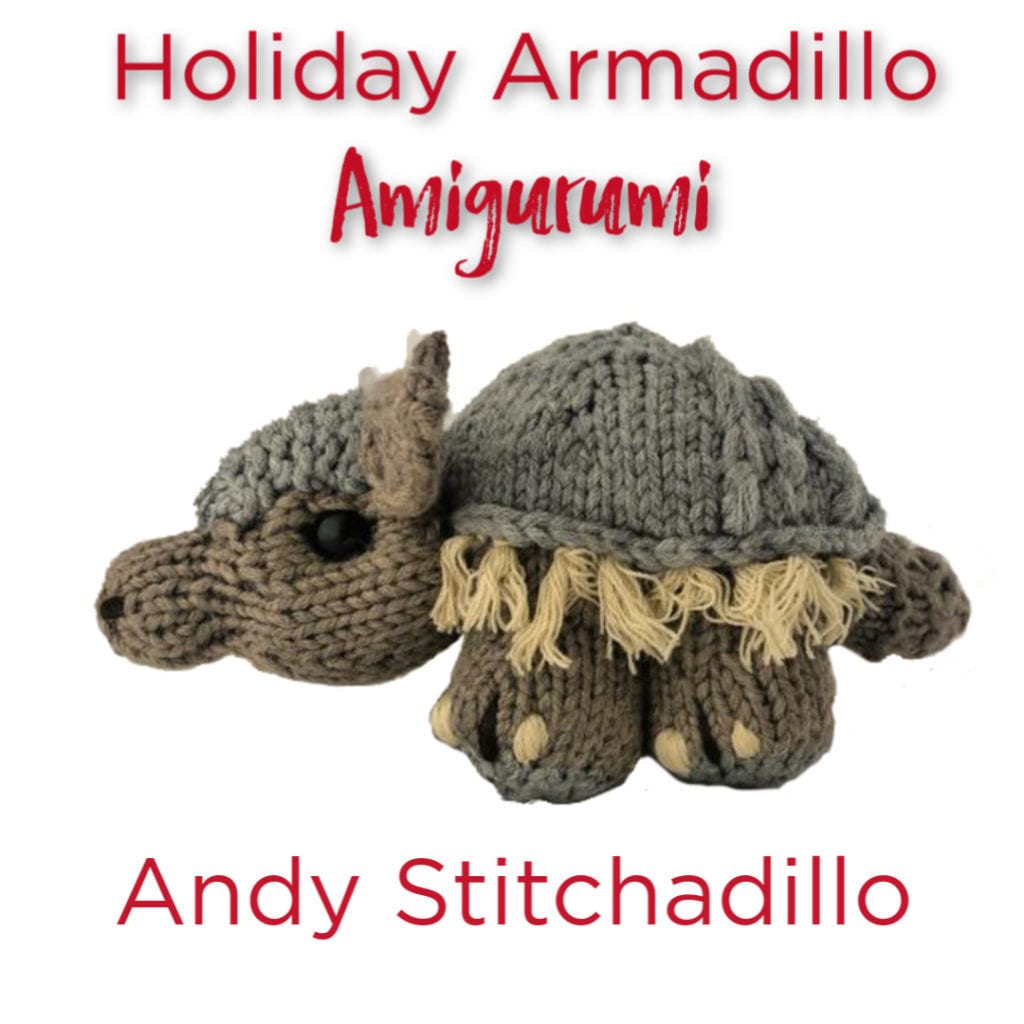
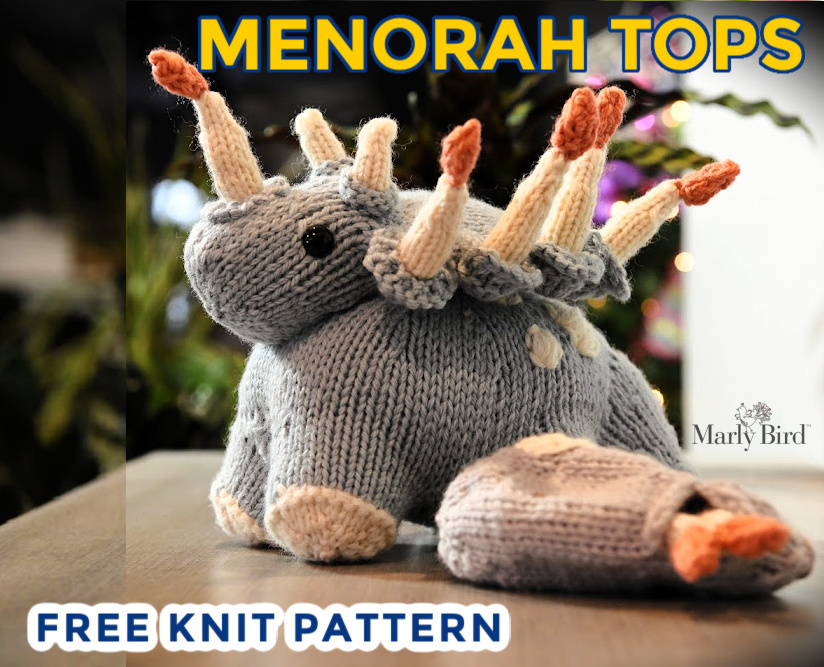
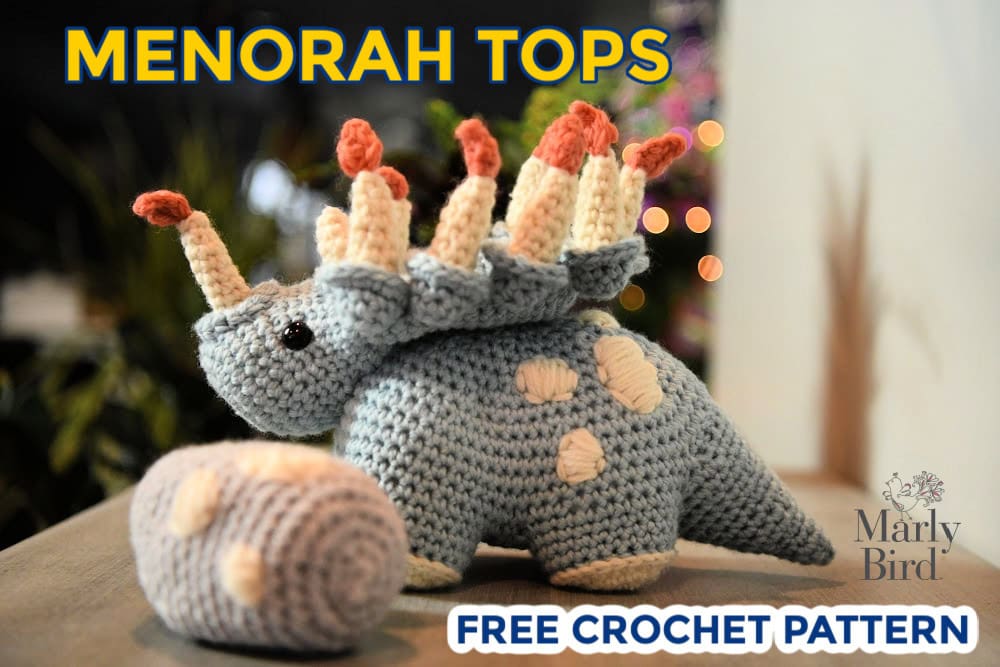
Megan’s portfolio for Marly Bird includes the unexpected Holiday Armadillos, the absolutely incredible MenoraTops, and now the magical crochet unicorn pattern, “Sparkle.” Each creation is a testament to her expertise and creativity.
In the world of animation, capturing emotions and bringing characters to life is an essential skill. Megan Kreiner is a Disney animator who transforms into an amigurumi designer in her free time. She’s taken her expertise in animation and applied it to her intricately designed ‘amigurumiations.’ With her unique touch, Megan captures the same magic and emotion in her crocheted and knitted designs as she did in her work for Disney.
Don’t believe me? Just look at Sparkle’s cheerful eyes. Don’t they make you want to smile?
Unicorn Lovers Rejoice!
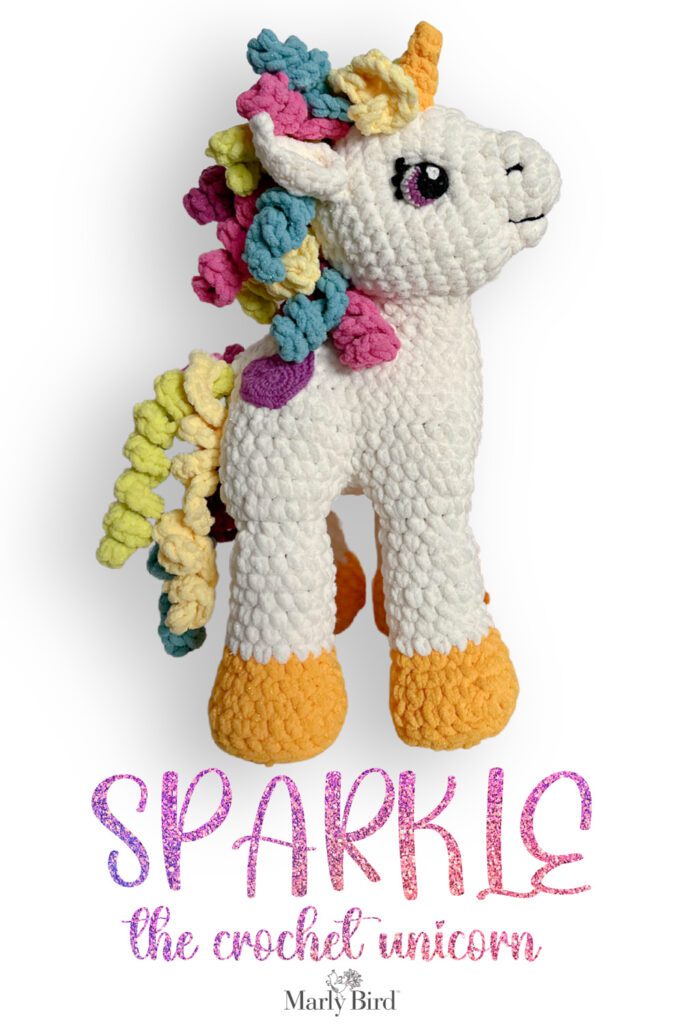
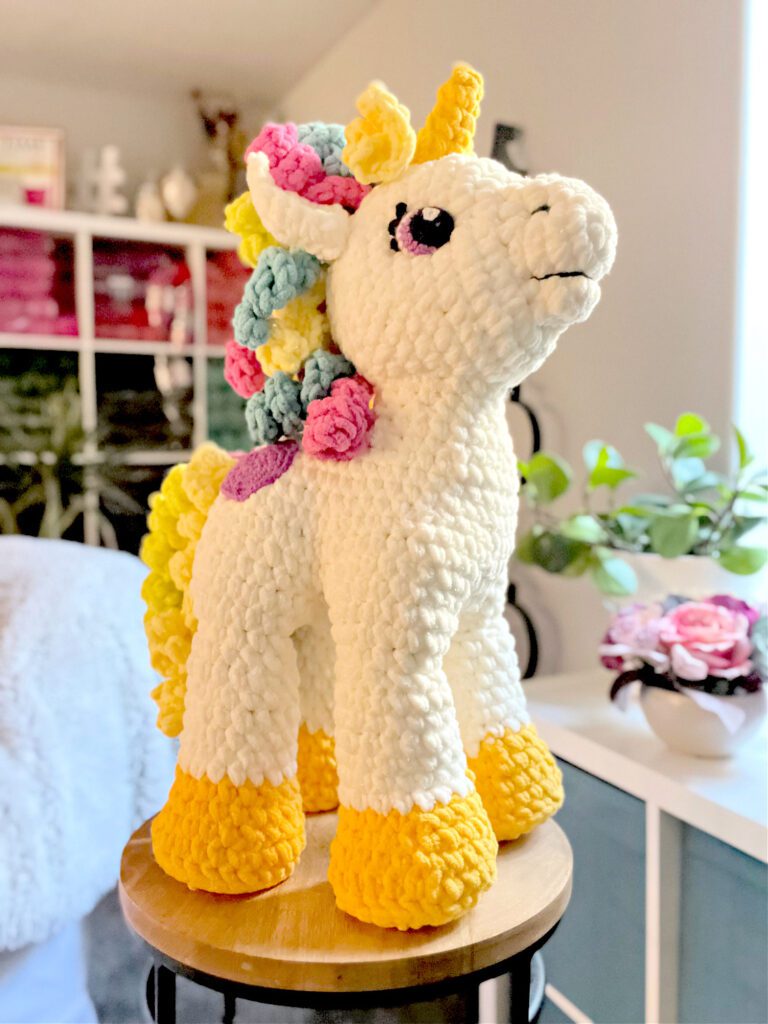
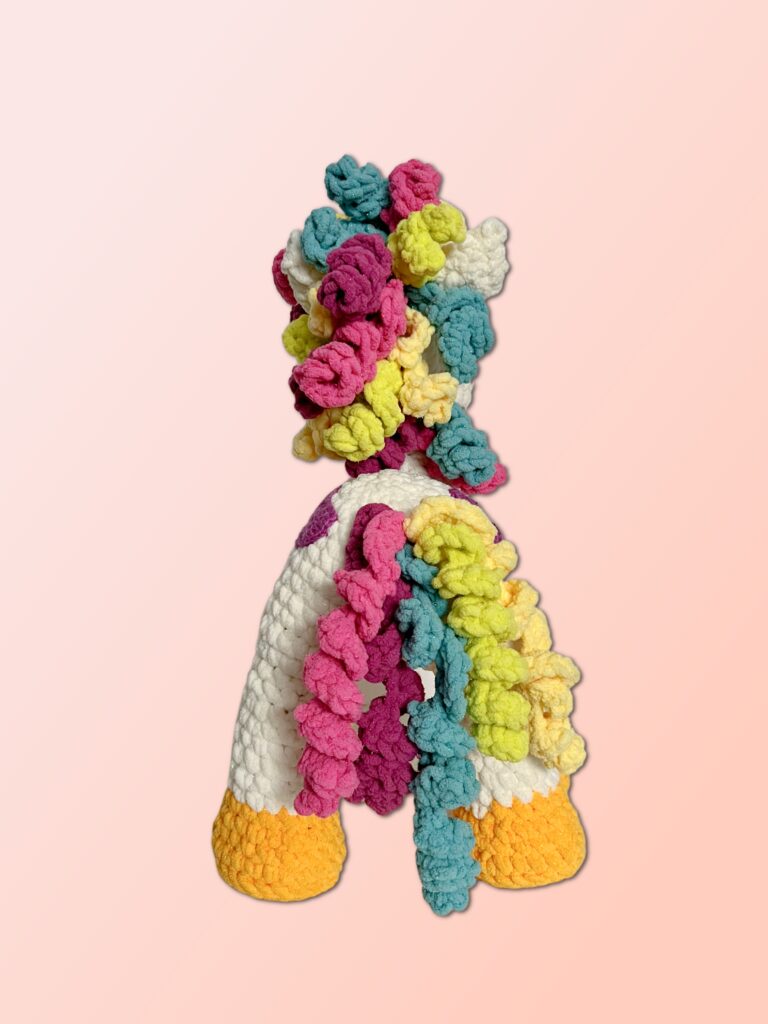
One of the many reasons why this crochet unicorn pattern is truly unique is because it offers a realistic and adorable design. Unlike many other crochet unicorns that sit on their rumps with their legs sticking out, Sparkle stands on all four legs. This attention to detail makes Sparkle come to life and adds a touch of realism to the finished crochet project.
What sets this pattern apart is the careful consideration given to the unicorn’s posture. By allowing Sparkle to stand upright, the design captures the grace and majesty associated with these mythical creatures. It adds a whole new level of charm to the end result.
Sparkle Unicorn Standing Tall!
Crocheting Sparkle with four sturdy legs also provides practical benefits. The structure ensures that the finished unicorn is stable and won’t easily topple over. This makes Sparkle an adorable addition to any decor or toy collection and a safe and durable playmate for children.
With this free crochet unicorn pattern, you can create a magical unicorn that breaks away from the usual sitting position, resulting in a more lifelike and captivating finished product. Whether you’re a crochet enthusiast or someone looking to make a special gift, this pattern offers a delightful twist on the traditional unicorn design by allowing Sparkle to stand tall and proud (and with rainbow colors for a mane, of course).
Stuffed Crochet Unicorn Pattern Details 🦄 🌈
Designed by Megan Kreiner for MarlyBird.com
SKILL LEVEL
Adventurous Beginner
MEASUREMENTS
Finished Measurements
Unicorn is 24” [61 cm] body circumference by 20” [51 cm] tall.
Gauge
7 sc x 8 rounds = 4” [10 cm] x 4” [10 cm]; use any size hook to obtain the gauge.
MATERIALS
Yarn
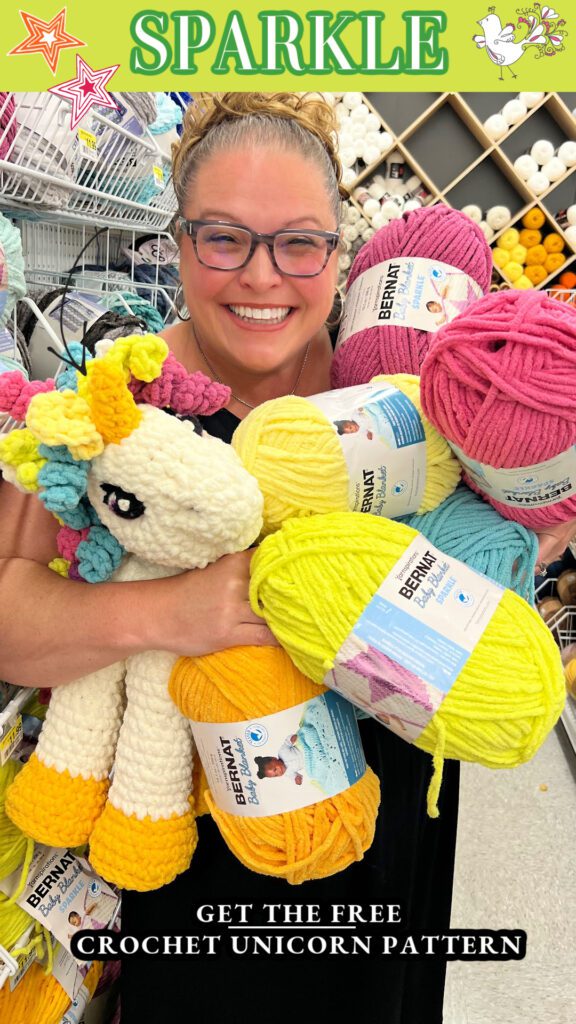
· Bernat, Baby Blanket Sparkle (100% polyester, 220 yds / 201 m, 10.5 oz/ 300 g, CYCA# 6 super bulky weight yarn)
Color A: #71001 Moonlight Sparkle, 2 balls
Color B: #71008 Golden Sparkle, 1 ball
Color C: #71003 Sunshine Sparkle, 50 g
Color D: #71010 Seaside Sparkle, 50 g
Color E: #71009 Freesia Sparkle, 50g
Color F: #71011 Limeade Sparkle, 50 g
Color G: #71006 Hot Pink Sparkle, 50 g
· Patons, Kroy Socks Yarn (75% washable wool/ 25% nylon, 166 yds / 152 m, 1.75 oz / 50 g, CYCA# 1 super fine)
Color H: #55008 Muslin, 10g
Color I: #55040 Coal, 10 g
Color J: #55741 Plum, 20 g
✨ This crochet unicorn pattern can be made with any weight yarn. Although Sparkle is made with a bulky yarn weight, you can use a worsted weight yarn and get a smaller unicorn.
Crochet Hook
N/13 [9.0 mm] or hook size needed for gauge (of the crochet unicorn)
F/5 [3.75 mm] (for the eyes)
Notions
Fiberfill
Stitch Markers
Yarn Needle
Optional: 6” x 6” [15 cm x 15 cm] piece of cardboard (see notes)
Optional: Sharp upholstery needle for shaping
Optional: Large safety eyes instead of crocheting the eyes.
ABBREVIATIONS
Ch – Chain(s)
Dc – Double Crochet
Hdc – Half Double Crochet
PM – Place Marker
RS – Right Side
Sc – Single Crochet
Sl st – Slip Stitch
Sp(s) – Space(s)
St(s) – Stitch(es)
WS – Wrong Side
SPECIAL CROCHET STITCHES
⭐️ Single Crochet 2 Together (sc2tog): *Insert hook into indicated stitch, yarn over and pull up a loop; repeat from * in next stitch indicated, yarn over and draw through all 3 loops on hook. (1 decrease)
⭐️ Back Post Single Crochet (bpsc) : Insert hook from back to front to back around the post of the stitch indicated, yarn over and pull up a loop, yarn over and draw through the loops on hook.
⭐️ Running Stitch: Insert needle from front to back, *bring the needle up again from back to front one stitch length away, insert needle from front to back one stitch length away; repeat from * across work as indicated in pattern.
NOTES
- All crochet stitches are worked as yarn over not as yarn under.
- Unicorn is worked in pieces and seamed together. Details are added last.
- Body parts are worked in continuous spiral rounds that are not joined at the end of the round.
- Use a stitch marker to mark the first stitch of each new round throughout the project.
- Change colors when 2 loops are left on the last stitch of the old color. Fold in the new color to complete the stitch and start using the new color.
- Optional: Draw and cut out (4) 3” [7.5 cm] diameter circles out of the piece of cardboard. This will be used to strengthen the bottom of the feet of the unicorn. You can use an old shipping container for the cardboard.
Looking for more Tips and Tricks for Beginner Amigurumi makers? Check out this blog post.
VIDEO TUTORIAL
- Weaving in ends >> Click Here for Video Help <<
- Adjustable Ring (sometimes called magic ring or magic loop) >> Click Here for Video Help <<
CROCHET UNICORN PATTERN: SPARKLE THE UNICORN
GROW
To Unlock Exclusive Subscriber Content click the Box below and join for free by simply adding your email and creating a password! If you are having troubles, clear your cache or reset your password or login to the Grow Publisher Portal.
>> Learn More About Grow Here <<
I’m thrilled to share this amazing pattern with you, many patterns on my blog are absolutely free! I kindly request that you don’t copy and paste or distribute this pattern. Prefer an ad-free experience? Buy a digital PDF pattern for a small fee from one of my online stores for a seamless crafting journey.
I appreciate your support and readership. You are the reason I can keep doing what I love and sharing it with others. So, thank you from the bottom of my yarn-loving heart! Disclosure: This post contains affiliate links, meaning I get a commission if you decide to make a purchase through my links at no cost to you.
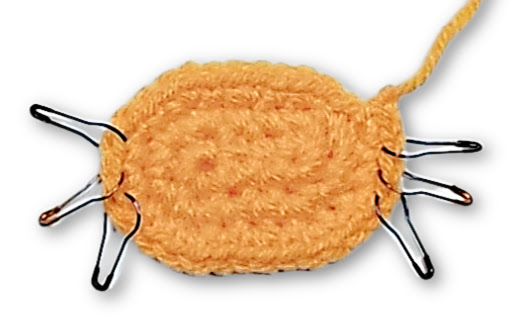
LEGS (and hooves)
Make 4
With color B, make an adjustable ring (sometimes called magic ring).
Round 1: Ch 1, 8 sc in ring, place marker in first st (see notes), pull ring closed, do not join or turn (see notes)–8 sc.
Round 2: 2 sc in each sc around–16 sc.
Round 3: *Sc in next sc, 2 sc in next sc; repeat from * around–24 sc.
Round 4: Bpsc around each sc.
Round 5: Sc in each sc around.
Round 6: *Sc in next 4 sc, sc2tog over next 2 sc; repeat from * around–20 sc.
Round 7: Sc in each sc around.
Round 8: *Sc in next 3 sc, sc2tog over next 2 sc; repeat from * around, change to color A, fasten off B–16 sc.
Rounds 9-14: Sc in each sc around.
Round 15: *Sc in next 2 sc, sc2tog over next 2 sc; repeat from * around–12 sc.
Round 16: Sc in each sc around.
Round 17: *Sc in next sc, 2 sc in next sc; repeat from * around–18 sc.
Round 18: *2 sc in next sc, sc in next 8 sc; repeat from * around. Fasten off with long tail for seaming –20 sc.
BELLY
With color A, ch 5.
Round 1: Sc in 2nd ch from hook in back ridge, sc in next 2 ch in back ridge, 4 sc in next ch in back ridge, rotate to work in unworked loops of chains, sc in next 2 ch, 3 sc in last ch–12 sc.
Round 2: 2 sc in first sc, sc in next 2 sc, 2 sc in next 4 sc, sc in next 2 sc, 2 sc in last 3 sc–20 sc.
Round 3: *Sc in next sc, 2 sc in next sc; repeat from * around, fasten off.–30 sc.
Skip next 11 sc, place marker in each of the next 3 sts, skip next 12 sc, place marker in each of next 3 sts. This marks off the center 3 sts of the short ends of the belly and has 12 sts unmarked on the long edges. See photo for assistance.
Attach Legs to Belly
Round 4: Hold the RS of the belly and first leg together at the first unmarked stitch on the long edge of the belly. (Note: When crocheting make sure you are working on the RS. For me, I held the leg in the front and the belly in the back) Working through both belly and leg stitches at the same time, join color A with a sc to the first unmarked st of the belly and any st on the leg, sc in next 5 sts (of belly and leg). Hold the second leg to the belly. Sc in next 6 sts (of belly and leg). Sc in each of the next 3 marked sts on the belly, do not remove markers. Hold the third leg to the belly. Sc in next 6 sts (of belly and leg). Hold the fourth leg to the belly. Sc in next 6 sts (of belly and leg). Sc in each of the next 3 marked sts on the belly, do not remove markers. Do not fasten off color A –30 sc.
BODY
Round 1: *[Sc in each of the 14 unworked sts of the next leg] twice, sc in next 3 sts on belly; repeat from * around–62 sc.
Round 2: Sc in each sc around.
Round 3: *Sc in next 29 sc, sc2tog over next 2 sc; repeat from * around–60 sc.
Optional: Insert 1 cardboard circle to the bottom of each leg to strengthen the base.
Firmly stuff each leg.
Round 4: Sc in each sc around.
Round 5: *Sc in next 4 sc, sc2tog over next 2 sc; repeat from * around–50 sc.
Rounds 6-8: Sc in each sc around.
Round 9: *Sc in next 4 sc, sc2tog over next 2 sc; repeat from * around to last 2 sts, sc in last 2 sts, fasten off–42 sc.
Hold the body so the 3 marked sts on the belly are oriented at the front and back of the body. Fold the body from front to back in a vertical line. Locate the center of the body along the front-back line. With color A, whipsitch the center st of the right and left sides together. Seam ONLY the center stitch, this will create two 20 st openings. One will become the Back Hips and the other will become the Neck.
TIP: With a crochet hook or a tapestry needle, pull through some of the leftover yarn tails out at the points where there are gaps between the belly and the upper legs to close the holes during assembly.
BACK HIPS
With color A,
Round 1: Join yarn to any sc with sl st, sc2tog in same sc and next sc, *sc2tog over next 2 sc; repeat from * around–10 sc.
Round 2: *Sc2tog over next 2 sc; repeat from * around, fasten off. Use tail to close opening–5 sc.
NECK
With color A,
Round 1: Join yarn to any sc with sc, sc in each sc around–20 sc.
Round 2: *Sc in next 3 sc, sc2tog over next 2 sc; repeat from * around–16 sc.
Rounds 3-4: Sc in each sc around, sl st to first sc, fasten off with long tail for seaming.
Stuff the body and neck firmly.
HEAD
Note: Work starts at the nose and ends at the back of the head.
With color A, make an adjustable ring.
Round 1: Ch 1, 6 sc in ring, place marker in first st (see notes), pull ring closed, do not join or turn (see notes)–6 sc.
Round 2: 2 sc in each sc around–12 sc.
Round 3: Sc in next sc, *3 sc in next sc, sc in next 2 sc; repeat from * around to last 2 sc, 3 sc in next sc, sc in last sc–20 sc.
Round 4: Sc in next 2 sc, *3 sc in next sc, sc in next 4 sc; repeat from * around to last 3 sc, 3 sc in next sc, sc in last 2 sc–28 sc.
Rounds 5-6: Sc in each sc around.
Round 7: *Sc in next sc, 2 sc in next sc; repeat from * around–42 sc.
Rounds 8-10: Sc in each sc around.
Round 11: *Sc in next 5 sc, sc2tog over next 2 sc; repeat from * around–36 sc.
Rounds 12-13: Sc in each sc around.
Round 14: *Sc in next 4 sc, sc2tog over next 2 sc; repeat from * around–30 sc.
Round 15: Sc in each sc around.
Round 16: *Sc in next sc, sc2tog over next 2 sc; repeat from * around–20 sc.
Round 17: *Sc2tog over next 2 sc; repeat from * around, fasten off with long tail for seaming–10 sc.
Stuff head firmly. Using tail, close hole by weaving through the remaining stitches.
Attach Head
The beginning rounds of the head are the nose and should be oriented to the front of the unicorn, the last round is the back of the head and should be oriented to the back. Observe that Rounds 3 & 4 of the head are slightly square in their shaping. Try to keep the square shaping level and plumb to the body (instead of tilted) when pinning head to the neck. Using a mattress stitch or whipstitch, attach the head to the neck (adding additional stuffing if needed).
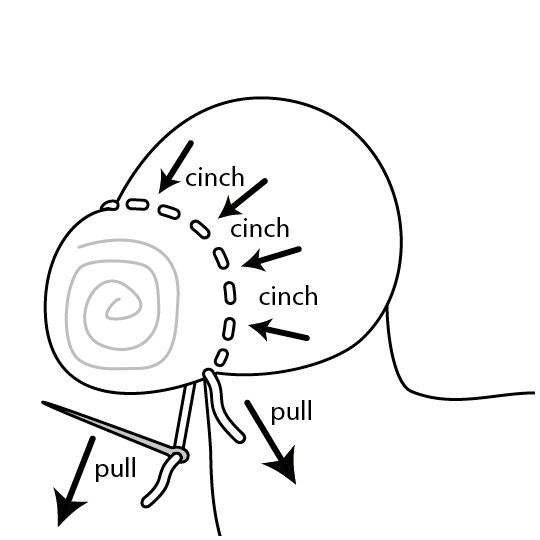
Define Muzzle
With color A and working between Rounds 6-7 at the front of the head, apply a running stitch between Rounds 6-7 starting and ending at the underside of the head around the entire round. Pull firmly to cinch the shaping of the muzzle and fasten off.
NOSTRILS
Make 2
With color I and smaller hook, ch 7.
Row 1: Sc in 2nd ch from hook in the back ridge, sc in each remaining ch in the back ridge, fasten off with long tail for seaming– 6 sc.
Shape Nostril Holes
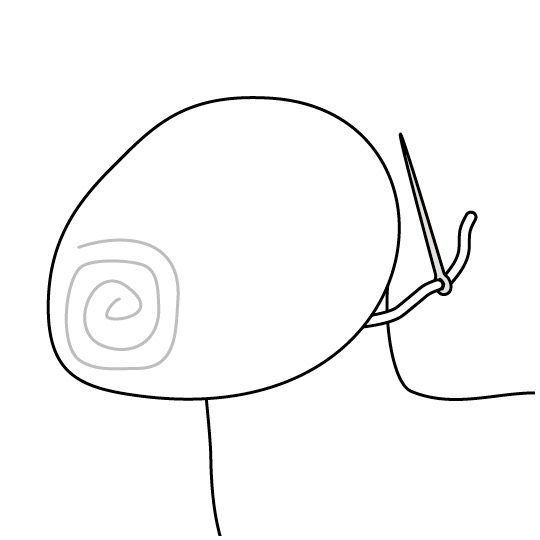
With color A, sink the sides of the muzzle at Round 5 by running a short stitch back and forth through the muzzle.
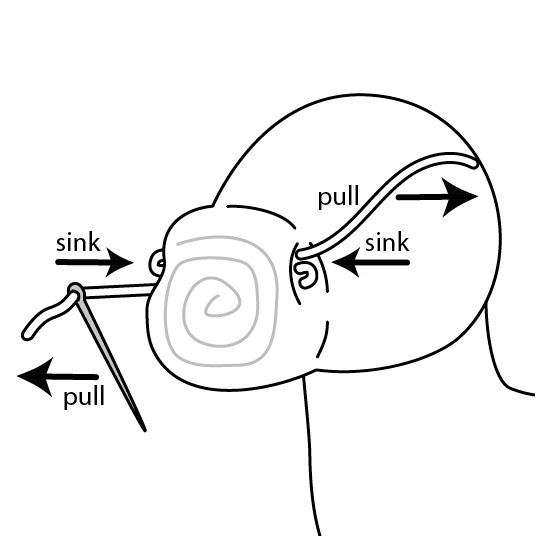
Attach Nostrils
Pin the nostrils into these sunken spaces on the sides of the muzzle in the shape of an arch and sew in place.
MOUTH LINE
With color I and smaller hook, ch 20 and fasten off, leaving a long tail.
Shape Mouth Groove
With color A, apply a long horizontal stitch to the lower front half of the muzzle (slightly below center) starting and ending along the sides of Round 7 (where the running stitch was applied earlier to define the muzzle shaping). Bring the needle out at your starting point and pull to cinch the front of the muzzle to create a groove for the mouth line.
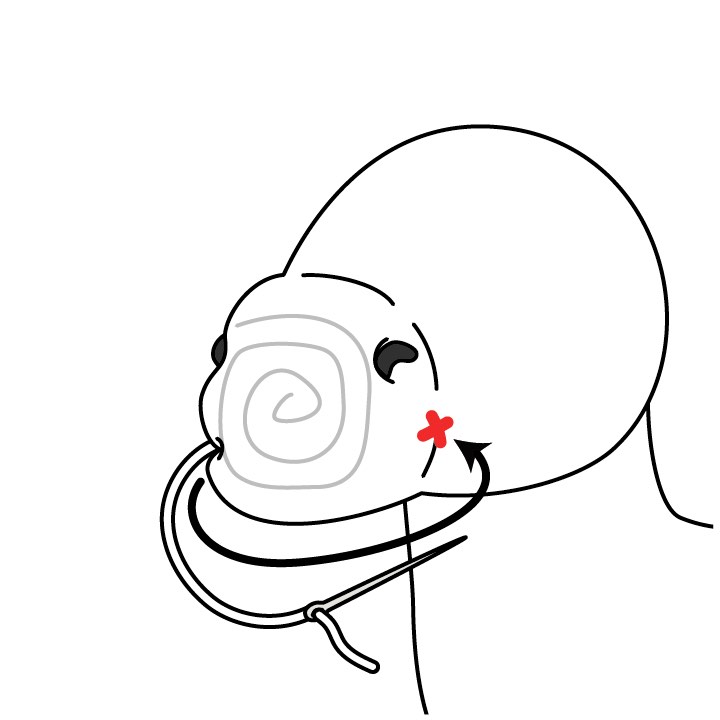
Attach Mouth Line
Attach the ends of the mouth line at the corners of the mouth groove, allowing the ch-20 to sit along the cinched shaping of the mouth. Sew in place
EYES
Make 2
With color I and smaller hook, make an adjustable ring.
Round 1: Ch 1, 8 sc in ring, place marker in first st (see notes), pull ring closed, do not join or turn (see notes)–8 sc.
Round 2: 2 sc in each sc around–16 sc.
Round 3: [2 sc in next sc, sc in next sc] 3 times, 2 sc in next sc, insert hook into next sc, with color J, yarn over and pull up a loop through st and loop on hook (this makes a sl st with the new color ready to use), sl st in next sc, 2 sc in next sc, hdc in next sc, 2 hdc in next 2 sc, hdc in next sc, 2 sc in next sc, insert hook into next sc, with color I, yarn over and pull up a loop through the st and loop on hook, fasten off color J– 24 sts.
Round 4: Sl st in next 11 sts, insert hook into next st, with color H, yarn over and pull up a loop through st and loop on hook, sl st in next 2 sts, sc in next 2 sts, hdc in next 4 sts, sc in next 2 sts, sl st in next 2 sts, TURN — 24 sts.
Row 5: Skip first sl st, sc in next 10 sts, insert hook into next st, with color I, yarn over and pull up a loop through st and loop on hook, TURN– 11 sts.
Round 6: Skip first sl st, sc in next 10 sc, skip last sl st on Round 4, sc in next 12 sl sts– 22 sc.
Round 7: Sc in first sc, sc in each sc around.
Round 8: *Sc in next 8 sc, sc2tog over next 2 sc; repeat from * around — 20 sc.
Round 9: *Sc in next 3 sc, sc2tog over next 2 sc; repeat from * around — 16 sc.
Round 10: *Sc2tog over next 2 sc; repeat from * around, fasten off with long tail – 8 sts.
Stuff eye firmly, use tail to weave through remaining sts to close hole.
CATCHLIGHT
Make 2
With color H and smaller hook, make an adjustable ring.
Round 1: Ch 1, 6 sc in ring, pull ring closed, fasten off with long tail–6 sc.
Attach Catchlights
Using the leftover yarn tail and a running stitch, attach the catch lights to the black pupils of the eyes.
Attach Eyes to Head
With color I and a mattress stitch, attach the back surfaces of the eyes to the sides of the head.
EYELASH
Make 2
With color I and smaller hook, ch 7
Row 1: Skip first ch, *sl st in back ridge of next ch, ch 4, sl st in 2nd ch from hook in back ridge (of ch-4 just made), sc in back ridge of next ch of the ch-4, hdc in back ridge of next ch of the ch-4, sl st in in back ridge of next ch of ch-7; repeat from * across ch-7, fasten off with long tail.
Attach Eyelashes
Sew the ch-7 edge of eyelash to the upper back corners of the eyes.
Shape Eye Sockets
Use color A to sink the eyes into the head by stitching back and forth through the head around the perimeter of the eyes (pulling gently to sink and shape).
EAR
Make 2
With color A, loosely chain 6.
Round 1: Skip first ch from hook, sc in back ridge of next 2 ch, hdc in back ridge of next 2 ch, 5 dc in last ch, rotate to work in unused loops of foundation ch, hdc in next 2 ch, sc in next 2 ch, do not turn – – 13 sts
Round 2: Sc in each st around, ch 2, sl st to first sc, fasten off, weave in ends.
Attach ears
With color A, attach the bases of the ears near the top of the head about 4 rounds behind the eyes.
HORN
With color B, make an adjustable ring.
Round 1: Ch 1, 4 sc in ring, place marker in first st (see notes), pull ring closed, do not join or turn (see notes)–4 sc.
Round 2: Sc in each sc around–4 sc.
Round 3: *Sc in next sc, 2 sc in next sc; repeat from * around–6 sc.
Round 4: Sc in each sc around–4 sc.
Round 5: *Sc in next 2 sc, 2 sc in next sc; repeat from * around–8 sc.
Round 6: Sc in each sc around, fasten off with long tail.
Attach Horn
Stuff horn firmly. Using the leftover yarn tail, sew the open edge of the horn to the top of the head between the eyes.
MANE
Make 1 of each length in colors C, D, E. F, and G (20 total)
Ch-9 Length: Ch 9, 3 sc in 2nd ch from hook, 3 sc in each ch across, fasten off with long tail — 24 sc.
Ch-10 Length: Ch 10, 3 sc in 2nd ch from hook, 3 sc in each ch across, fasten off with long tail–27 sc.
Ch-11 Length: Ch 11, 3 sc in 2nd ch from hook, 3 sc in each ch across, fasten off with long tail –30 sc.
Ch-12 Length: Ch 12, 3 sc in 2nd ch from hook, 3 sc in each ch across, fasten off with long tail –33 sc.
Attach Mane
Using the leftover yarn tails, attach the mane to the top of the head (just behind the horn) and down the back of the neck in a vertical line.
TAIL
Make 1 of each length (5 total)
Ch-20 Length: With color F, ch 20, 3 sc in 2nd ch from hook, 3 sc in each ch across, fasten off with long tail — 57 sc.
Ch-21 Length: With color E, ch 21, 3 sc in 2nd ch from hook, 3 sc in each ch across, fasten off with long tail–60 sc.
Ch-22 Length: With color C, ch 22, 3 sc in 2nd ch from hook, 3 sc in each ch across, fasten off with long tail –63 sc.
Ch-23 Length: With color G, ch 23, 3 sc in 2nd ch from hook, 3 sc in each ch across, fasten off with long tail –66 sc.
Ch-24 Length: With color D, ch 24, 3 sc in 2nd ch from hook, 3 sc in each ch across, fasten off with long tail –69 sc.
Attach Tail
Using the leftover yarn tails, attach the tail pieces to the back of the upper body in a tight grouping.
HEART
Note: Work sl sts loosely to make it easier to work into them.
Make 2
With color J and smaller hook, make an adjustable ring.
Round 1: Ch 1, 12 sc in ring, place marker in first st (see notes), pull ring closed, do not join or turn (see notes)–12 sc.
Round 2: 2 sc in each sc around–24 sc.
Round 3: *Sc in next sc, 2 sc in next sc; repeat from * around–36 sc.
Round 4: Skip next sc, sl st in next sc, sc in next 2 sc, hdc in next 2 sc, dc in next 2 sc, hdc in next 2 sc, sc in next 2 sc, sl st in next 5 sc, sc in next sc, ch 2, sc in next sc, sl st in next 5 sc, sc in next 2 sc, hdc in next 2 sc, dc in next 2 sc, hdc in next 2 sc, sc in next 2 sc, skip next sc, sl st in next sc–34 sts + 1 ch-2 sp.
Round 5: Skip next sl st, sl st in next sc, hdc in next sc, hdc in next hdc, dc in next hdc, dc in next 2 dc, dc in next hdc, hdc in next hdc, hdc in next sc, sl st in next sc, sl st in next 5 sl st, sl st in next sc, (sl st, ch 1, sl st) in ch-2 sp, sl st in next sc, sl st in next 5 sl st, sl st in next sc, hdc in next sc, hdc in next hdc, dc in next hdc, dc in next 2 dc, dc in next hdc, hdc in next hdc, hdc in next sc, skip next sc, sl st in next sl st- -34 sts + 1 ch-1 sp.
Round 6: Skip next sl st, sl st in next hdc, sc in next hdc, hdc in next dc, 6 dc in next dc, dc in next dc, hdc in next dc, sc in next hdc, sl st in next hdc, sl st in next 8 sl st, sl st in ch-1 sp, sl st in next 8 sl st. sl st in next hdc, sc in next hdc, hdc in next dc, dc in next dc, 6 dc in next dc, hdc in next dc, dc in next hdc, sl st in next hdc, fasten off with long tail.
Attach Hearts
Pin and sew the hearts to the sides of the back hips with a running stitch.
Caring for Your Amigurumi Creation
Cleaning Tips: Spot-cleaning Sparkle when necessary is the best way to keep her looking great. However, if she needs a good cleaning, we recommend a hand wash. Gently with a mild detergent, squeeze out excess water and let her air dry.
Let’s See Your Unicorn Amigurumi Pattern Success!
Are you ready to add some sparkle to your life? We encourage you to share your own SPARKLE with us! And we’re excited to see some of the jazzy features and vibrant color palettes that you may have thought of. Be sure to share your crochet unicorn pattern love with us on social media. Use these hashtags to make it easy for us all to follow: #SparkleWithMarly or #MMMDI or #MarlyMagic.
Love Sparkle? Meet Blossom the Elephant 🐘
If you fell in love with Sparkle, you’re going to want to meet her new bestie… Blossom the Elephant is also a free crochet stuffie designed exclusively for MarlyBird.com by Megan Kreiner — the same Disney animator who gave us Sparkle. Blossom is a 14" tall, super-huggable elephant with a beautifully shaped trunk, expressive eyes, and an optional flower crown. She’s worked in super bulky yarn, which means she works up quickly despite her impressive size.
Here’s the bonus for Sparkle makers: Megan’s full video tutorial for Blossom covers many of the same stuffie-building techniques — safety eyes, shaping, and assembly — that will sharpen your skills for making Sparkle too. If you’ve been eyeing Sparkle but wanted a little more guidance before you dive in, Blossom’s step-by-step video is a perfect primer. Grab the free pattern and watch the tutorial below!
👉 Free Crochet Elephant Stuffed Animal Pattern — Meet Blossom 🐘
Frequently Asked Questions
How hard is it to crochet Sparkle the Unicorn?
Sparkle is rated advanced beginner, which means if you can single crochet in the round and do basic increases and decreases… you can totally make her! The pieces are worked in simple shapes and then assembled. The trickiest part is probably attaching all the pieces neatly, but Marly has a video tutorial that walks you through each step. Take your time with the assembly and you’ll be amazed at what you create.
What yarn and hook size do I need for this unicorn pattern?
You’ll want worsted weight yarn and a hook that gives you a tight gauge… usually a size smaller than what the yarn label recommends. With amigurumi, you want your stitches tight enough that the stuffing doesn’t peek through. A smooth acrylic yarn works beautifully and comes in all those fun unicorn colors… think pastels, sparkly whites, rainbow manes. Check the pattern for the specific hook size recommendation.
What is amigurumi exactly?
Amigurumi comes from the Japanese words for “crocheted or knitted” and “stuffed doll”… so it literally means crocheted stuffed toys! It’s a style of making small, cute creatures using tight crochet stitches worked in the round. You create individual parts (body, head, legs, ears), stuff them with fiberfill, and then sew them together. It’s become hugely popular, especially on social media, because the finished pieces are just so adorable and giftable.
Can I make this unicorn in different colors?
Oh please do! That’s half the fun. Sparkle looks gorgeous in classic white with a rainbow mane and tail, but you could go all pink, all purple, use a gradient yarn for the mane… whatever speaks to your inner unicorn lover. Some people match their unicorn to a kid’s favorite colors or nursery theme. As long as you stick to the same yarn weight, the pattern works no matter what colors you choose.
How long does it take to crochet an amigurumi unicorn?
Honestly, it depends on your speed and how much time you can dedicate… but most people finish Sparkle in a few evenings of stitching. The individual pieces work up pretty fast since they’re small. The assembly (sewing on the legs, ears, horn, mane, and tail) takes a bit more time and patience. I’d say plan for a weekend project if you’re working on it steadily. Don’t rush the finishing… that’s what makes the difference between “cute” and “I can’t believe I made this!”
Categories: Crochet, Free Patterns, Our Free Patterns, Pattern, Uncategorized


This is so cute Marly!!! Great gift for the up coming holidays!!!
This is a beautiful pattern easy to read, well laid out. Thank you
Every time I try to do this pattern, I am locked and it says I need to sign in once I sign in. I can’t go back to do the pattering continues to say I am locked out. This is very frustrating. I love this pattern. I have made it twice before I would love to make it again if you could please let me know how I can get past this issue.
Hi there, sorry for the frustration. I can completely understand. My guess is that after you sign into GROW your browser is caching previous versions of the page. I would suggest cleaning out your cache then trying again. Or, I do have an ad-free pdf available for purchase that would make it super easy and you wouldn’t have to use GROW at all 🙂