Search
Close
  • The Pattern Shop
  • Our Free Patterns
    • Browse All Our Free Patterns
    • Our Free Knitting Patterns
    • Our Free Crochet Patterns
  • Blog
    • All Blog Posts
    • All Free Patterns
    • Dibble Dabble Inspiration
    • Giveaways
    • Make-Alongs
    • Product Reviews
    • Roundups
    • Tips, Tricks, Techniques for Knitting and Crochet
Stylized bird with pink and gray swirling tail above elegant โ€œMarlyโ€ text, logo for crochet accessories and home decor.
  • Marly Bird House
  • Learn to Knit & Crochet
    • Newbie? Start Here
    • Video Tutorials
    • Knitting Definitions
    • Crochet Definitions
    • Common Techniques
    • Size Charts for Knitting and Crochet Projects
  • About
ร—
  • The Pattern Shop
  • Free Patterns
  • Blog
  • Marly Bird House
  • Learn to Knit & Crochet
    • Newbie? Start Here
    • Video Tutorials
    • Knitting Definitions
    • Crochet Definitions
    • Common Techniques
    • Size Charts for Knitting and Crochet Projects
  • About
Stylized bird with pink and gray swirling tail above elegant โ€œMarlyโ€ text, logo for crochet accessories and home decor.
Search
Close

New Patterns NOW Available in Ad-Free PDF! Check out The Pattern Shop

Spring Fling 2026: 20 Days of Free Spring & Summer Patterns

May 29, 2026 By Meg 2 Comments

๐ŸŒธ SPRING FLING 2026 โ€” COMPLETE! ๐ŸŒธ
20 days of free spring and summer patterns. The event has ended, but every pattern featured below is still 100% free on the blog.
Browse the full collection โฌ‡๏ธ

Spring Fling was Marly Bird's May 2026 daily pattern event. From May 4โ€“29, a free spring or summer knit or crochet pattern was featured every weekday (Monโ€“Fri @ 10:30am EST), with 65% off the ad-free PDF for 24 hours. 20 days of free patterns. 20 days of seasonal inspiration. All patterns remain free on marlybird.com.

Hey, bestie! ๐Ÿ’›

Welcome to the Spring Fling 2026 Archive… my May 2026 event celebrating all things spring and summer crochet and knit! Every weekday from May 4 through May 29, I put one of my free patterns in the spotlight on this hub page… and the ad-free PDF for that pattern went 65% off for 24 hours. ๐ŸŒธ

Why do I love events like this? Because every spring my readers tell me the same thing: “I have so much yarn but I don't know what to make for warmer weather.” Spring Fling was your answer.

Twenty days of curated, hand-picked spring and summer patterns… lightweight cardigans, breezy tees, gorgeous shawls, beach cover-ups, and so much more.
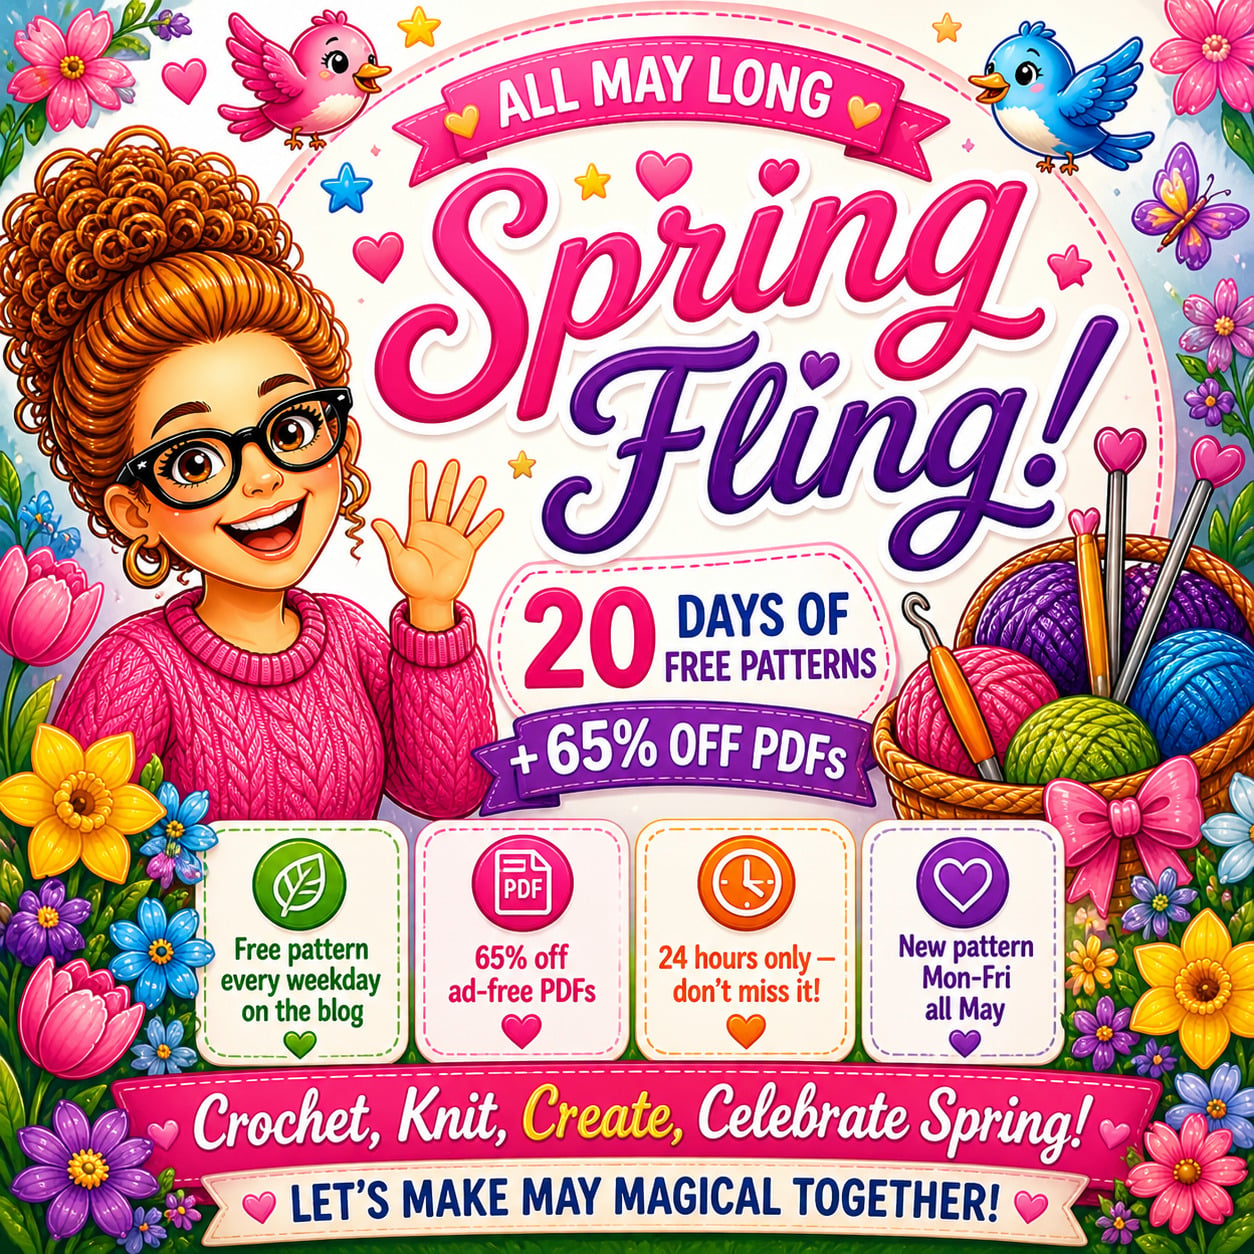
A cheerful woman in glasses waves amid illustrated flowers, skeins of yarn, and birds; spring craft themes are featured.

Here's how it worked:

  • ๐Ÿ—“ Every weekday in May (Monโ€“Fri), I featured a free pattern as the daily spotlight
  • ๐Ÿ“ง The morning email announced which pattern was in the spotlight
  • ๐Ÿ’ธ The ad-free PDF for that day's pattern was 65% off for 24 hours only on Etsy, Shopify, and Ravelry
  • ๐Ÿ“ You can still browse ALL the featured patterns right here on this hub page
  • ๐ŸŒฟ Every pattern works for spring or summer crafting

๐Ÿ”– The event has ended, but all 20 patterns are still free on the blog. Browse below and cast on whenever you're ready! ๐ŸŒท

Spring Fling 2026 โ€” Marly Bird's free pattern event with 20 days of free spring & summer knit and crochet patterns plus 65% off ad-free PDFs

This post contains affiliate links. If you purchase through them, I may earn a small commission at no extra cost to you… and it helps keep these free patterns coming straight from my yarn-loving heart to yours. ๐Ÿ’›


๐Ÿ“… The Full Spring Fling Lineup (20 Days)

Here's every pattern that was featured during Spring Fling 2026. All patterns remain free on the blog โ€” click any link to get started!

Week 1: May 4โ€“8

  • โœ… Day 1 โ€” Mon May 4 ๐Ÿ”ฅ KICKOFF: Blood of My Blood Knit Shawl ๐Ÿด (Outlander-inspired half-hexagon shawl)
  • โœ… Day 2 โ€” Tue May 5: Sunday Sideline Crochet Shawl ๐Ÿงฃ (one-skein crochet triangle shawl)
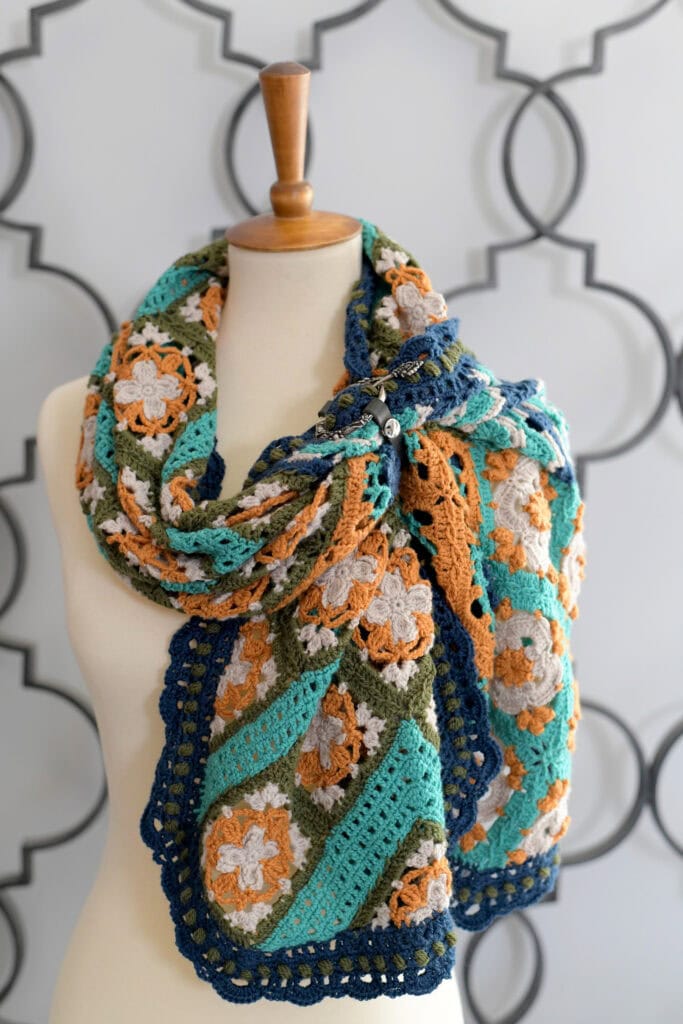
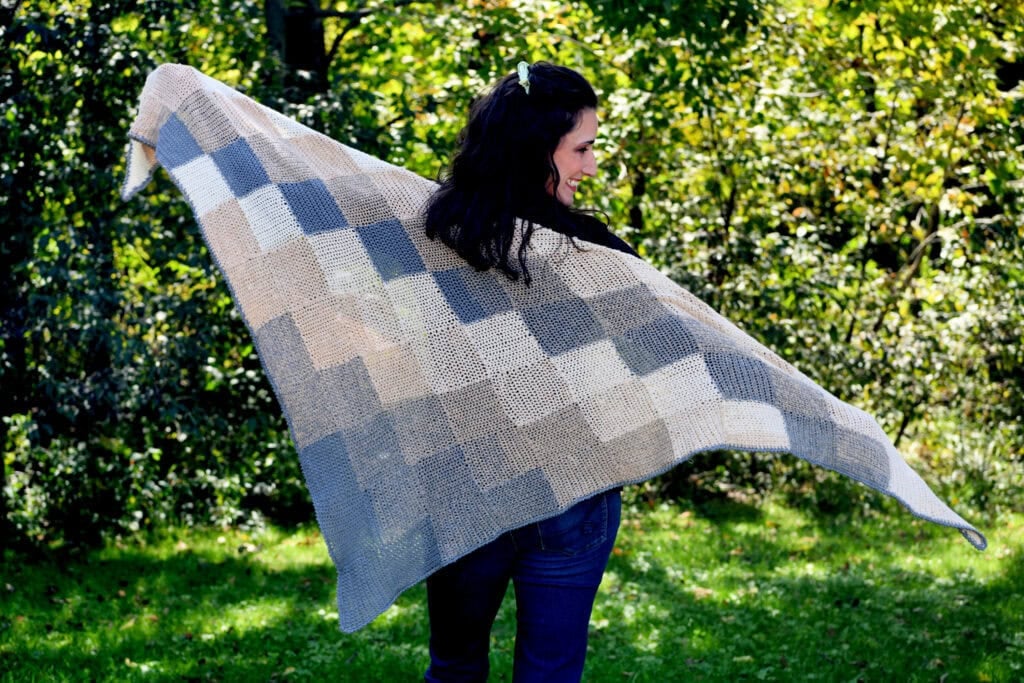
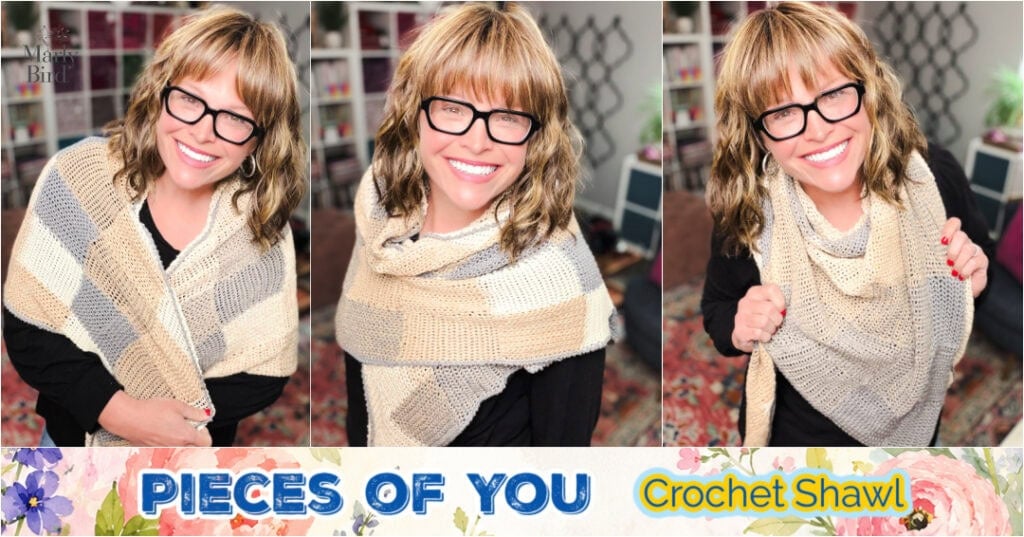
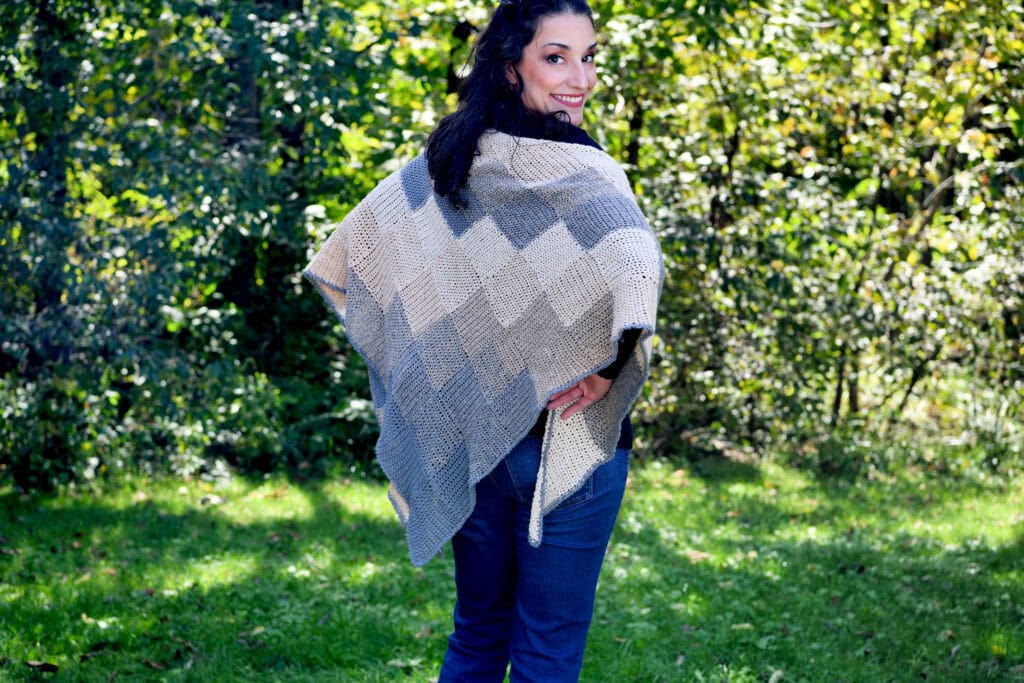
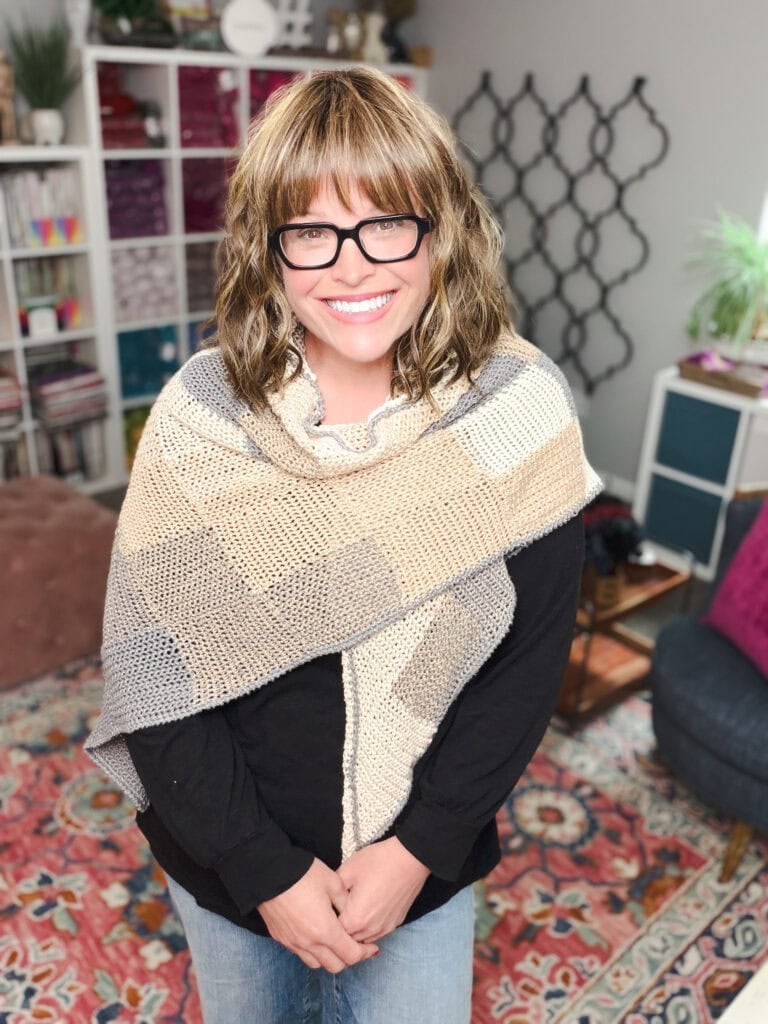
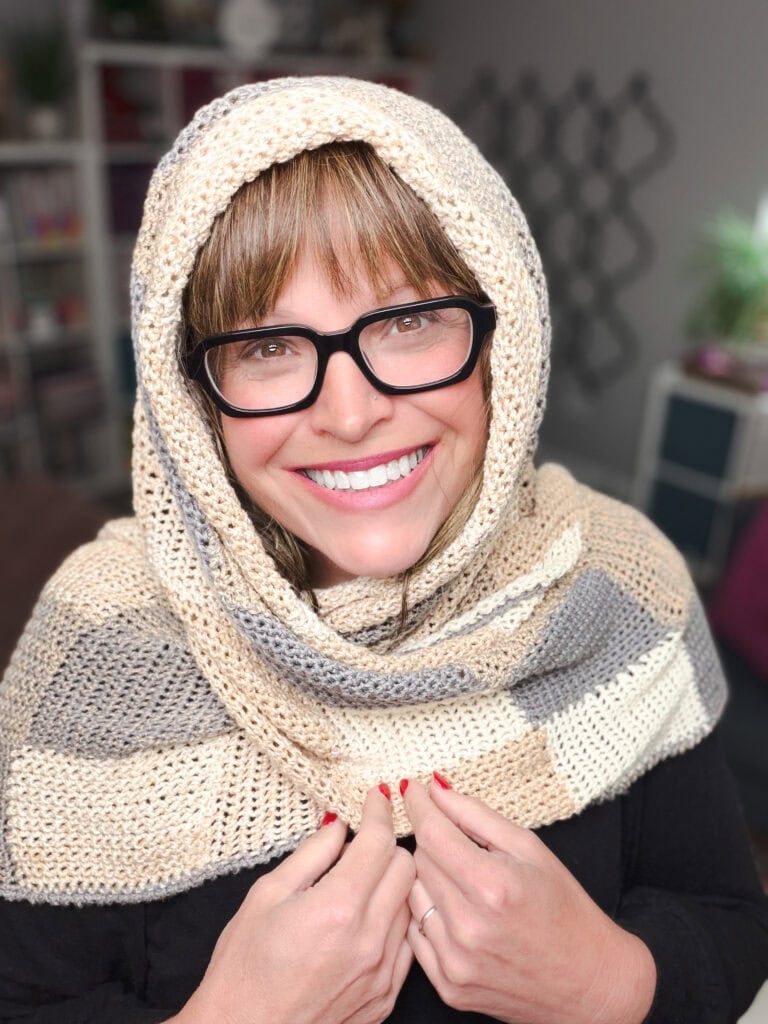
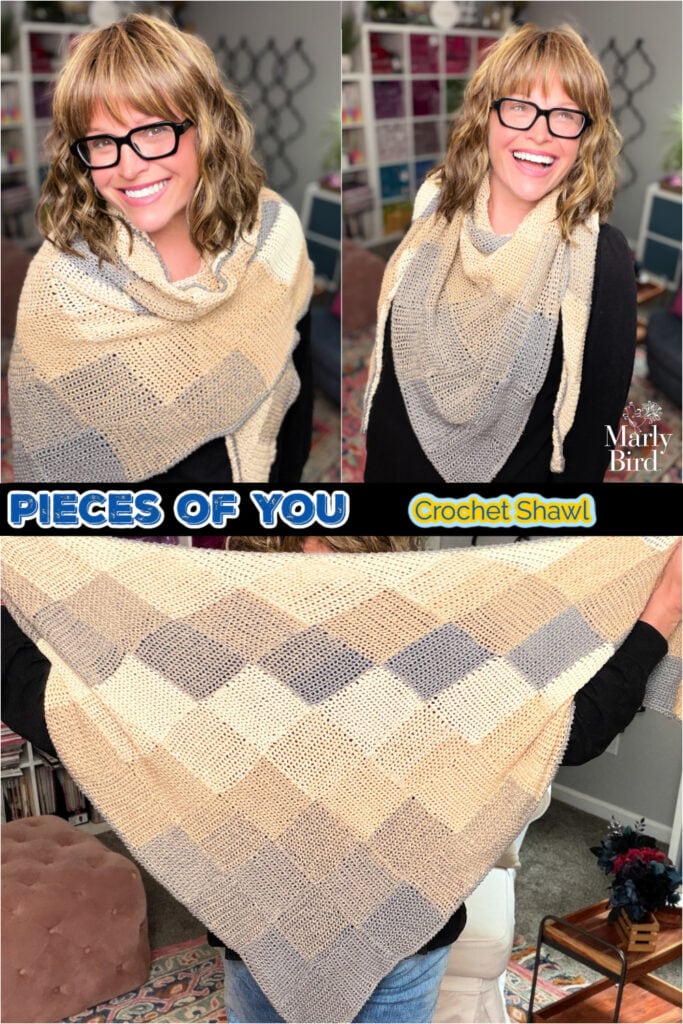
  • โœ… Day 3 โ€” Wed May 6: NEW Pieces of You Single Crochet Entrelac Wrap ๐ŸŒŠ (brand-new free pattern!)
  • โœ… Day 4 โ€” Thu May 7: Solomon's Knot Crochet Tee ๐Ÿ‘• (cotton layering tee)
  • โœ… Day 5 โ€” Fri May 8: NEW Eowyn Knit Shawl ๐Ÿ‘‘ (right-triangle knit shawl, NEW free pattern!)

Week 2: May 11โ€“15

  • โœ… Day 6 โ€” Mon May 11: NEW Lehabah Fire Sprite Knit Shawl ๐Ÿ”ฅ (Crescent City inspired knit lace)
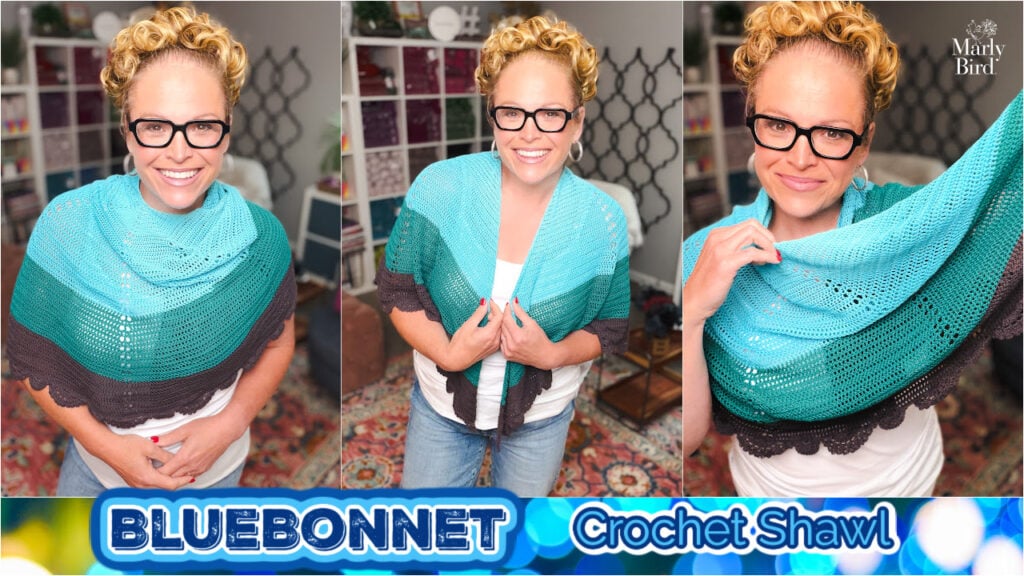
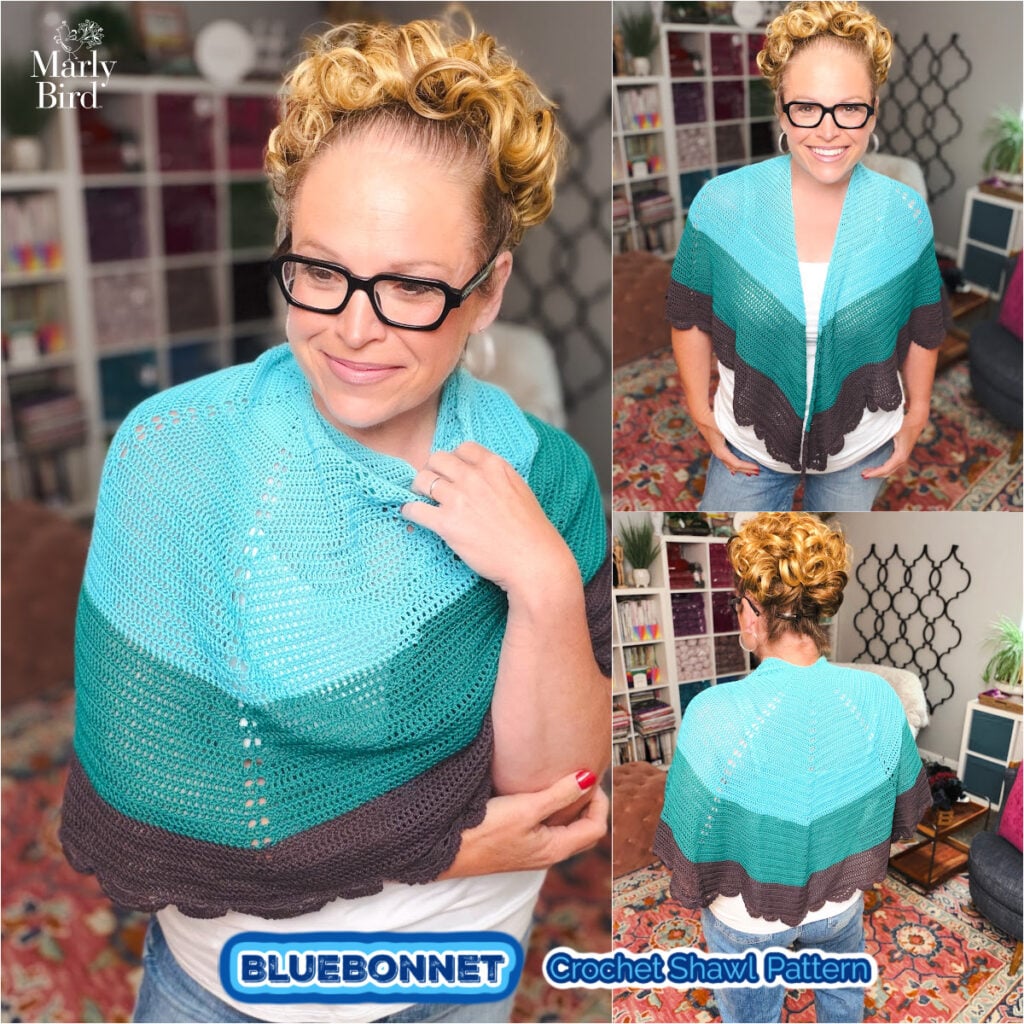
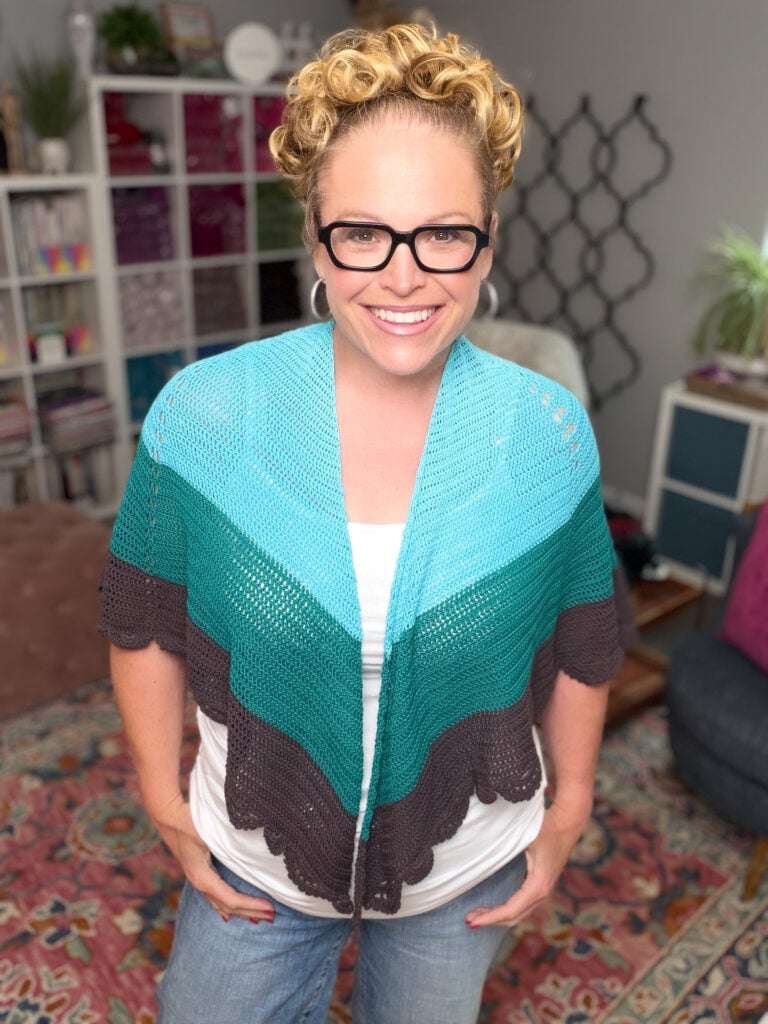
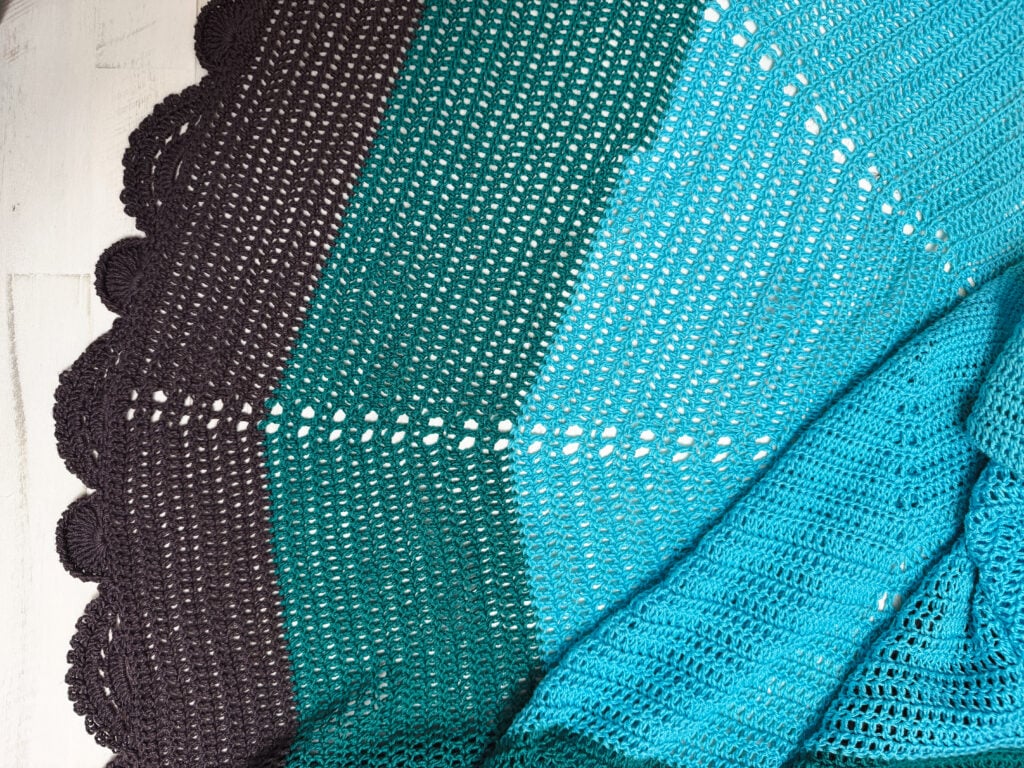
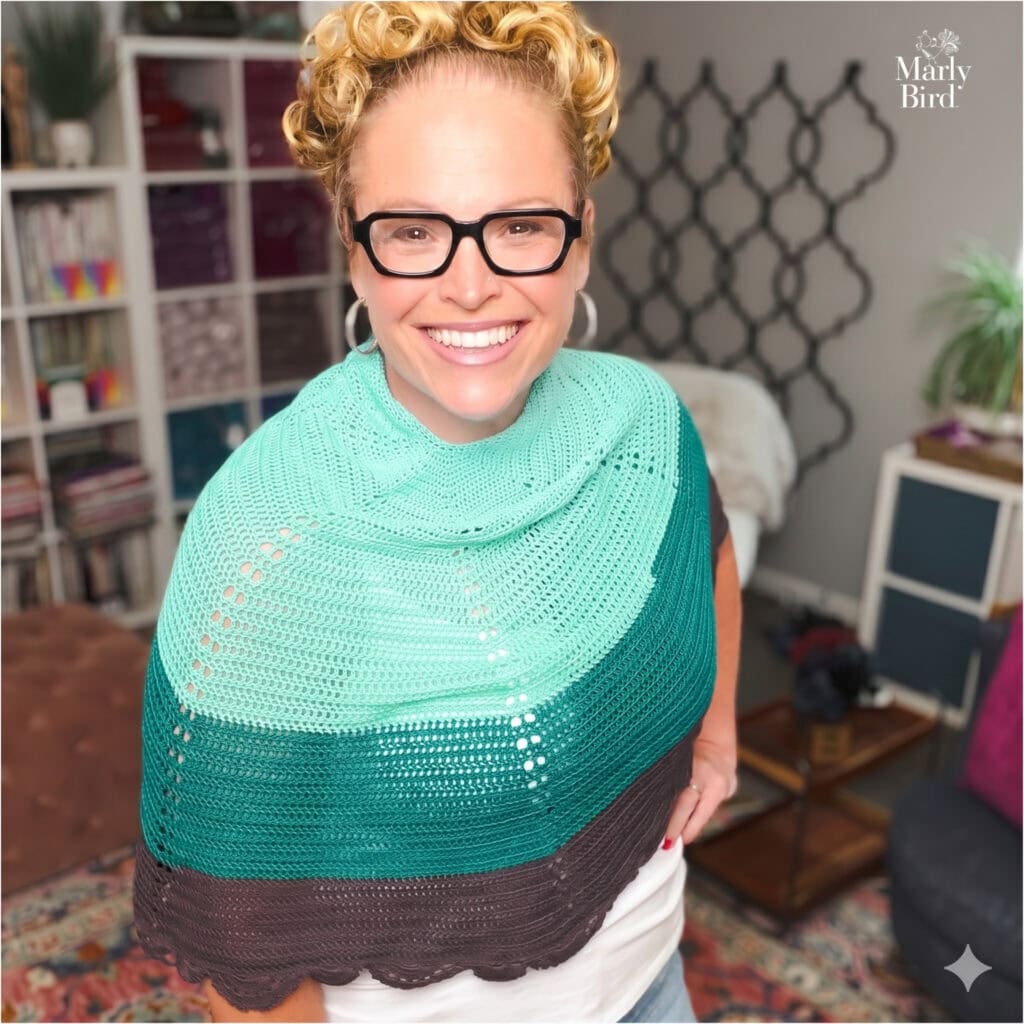
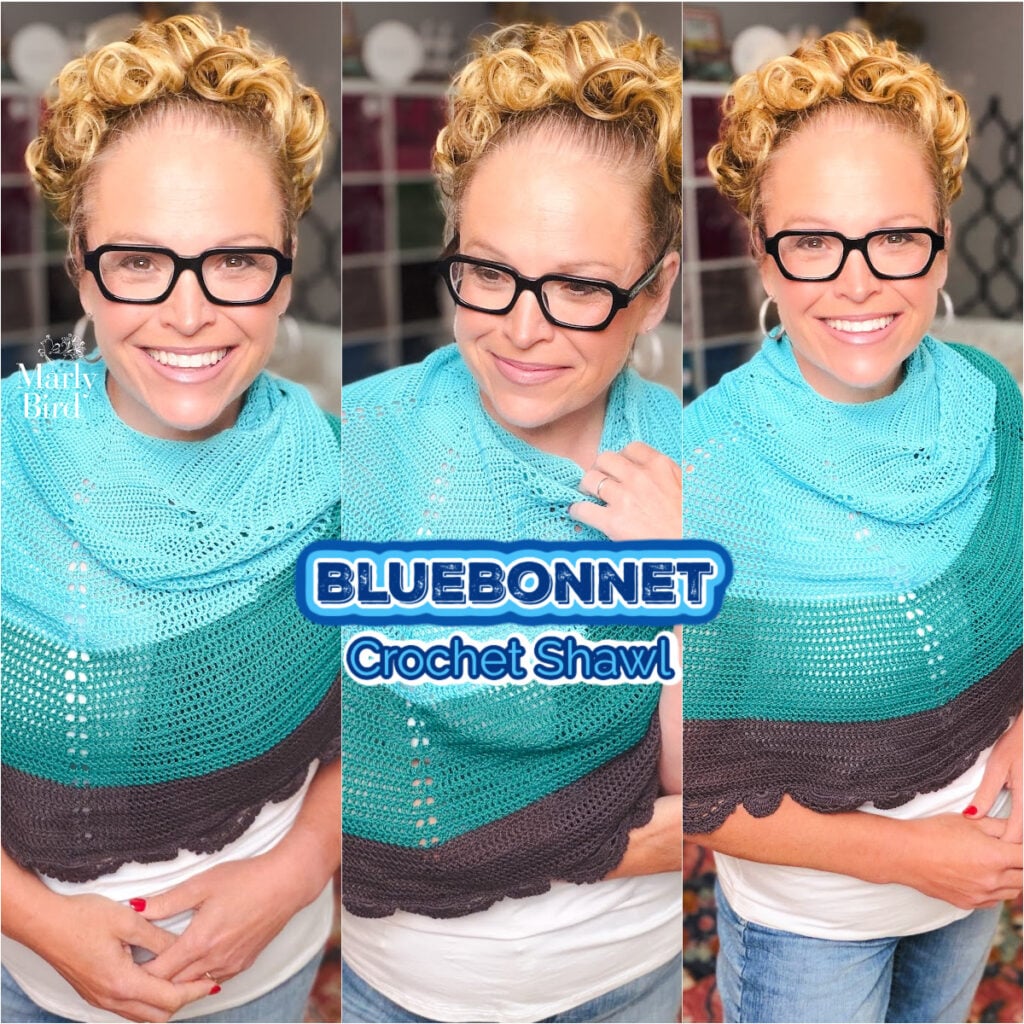
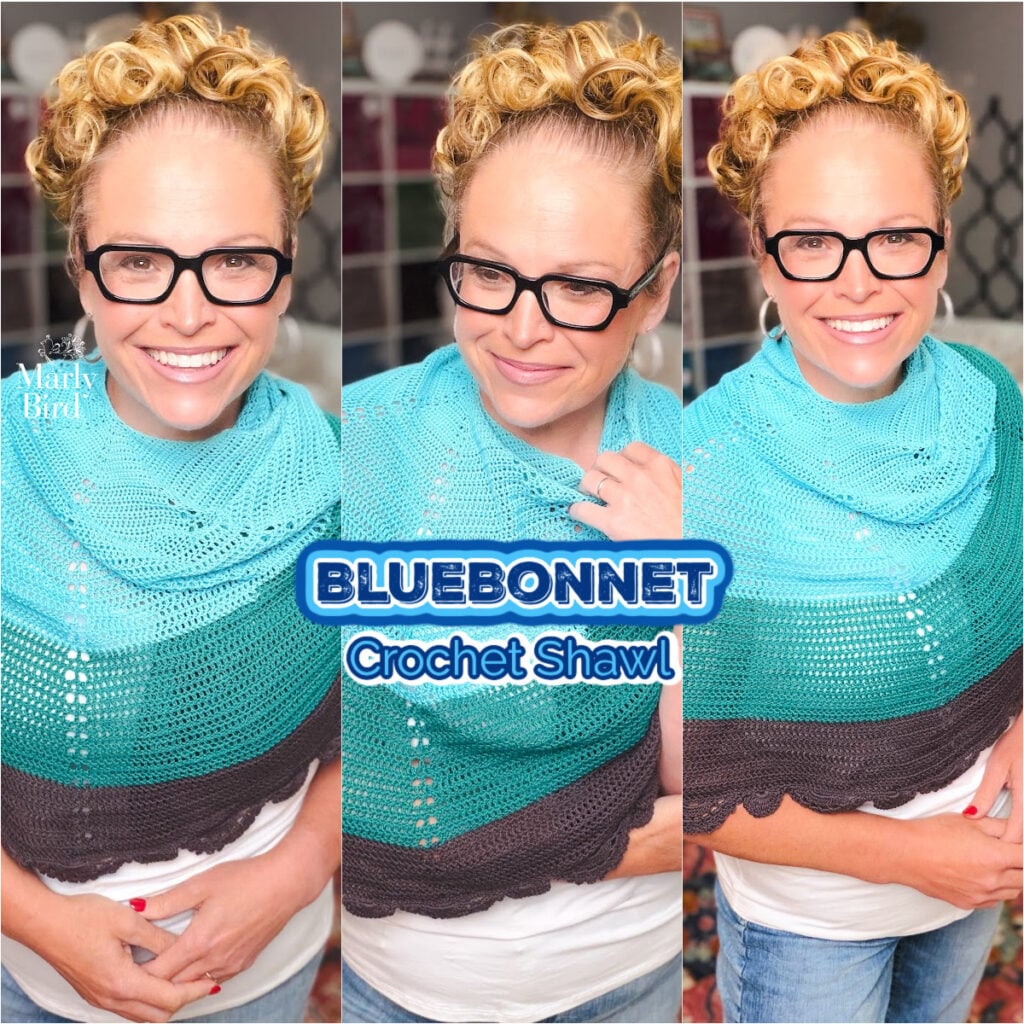
  • โœ… Day 7 โ€” Tue May 12: NEW Bluebonnet Crochet Lace Shawl ๐ŸŒธ (refreshed + reborn for Spring Fling)
  • โœ… Day 8 โ€” Wed May 13: Amaya Crochet Shrug ๐Ÿ’• (versatile spring layering)
  • โœ… Day 9 โ€” Thu May 14: Northwoods Crochet Cardigan ๐ŸŒฟ (Robyn Chachula, XS-5X)
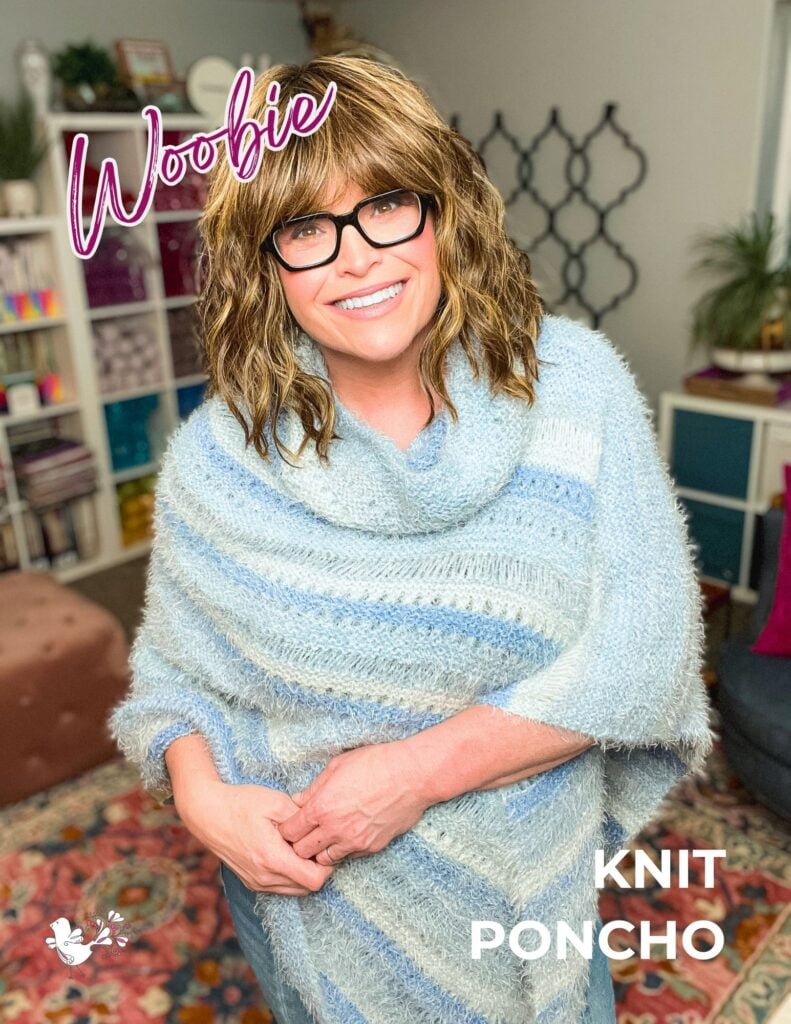
  • โœ… Day 10 โ€” Fri May 15: NEW Knit Woobie Poncho ๐Ÿงฃ (refreshed + reborn for Spring Fling)

Week 3: May 18โ€“22

  • โœ… Day 11 โ€” Mon May 18: Peak Serenity One Ball Knit Shawl ๐Ÿง˜ (one-ball weekend knit shawl)
  • โœ… Day 12 โ€” Tue May 19: Stoney Creek Sleeveless Crochet Tee ๐ŸŒž
  • โœ… Day 13 โ€” Wed May 20: NEW Farmer's Market Filet Crochet Bag ๐ŸŒฝ
  • โœ… Day 14 โ€” Thu May 21 ๐Ÿ”ฅ MIDPOINT: Sookie Crochet Cardigan ๐Ÿงถ (Robyn Chachula, XS-5X)
  • โœ… Day 15 โ€” Fri May 22: NEW Floral Motif Summer Crochet Tee ๐ŸŒบ (refreshed-and-reborn for Spring Fling)

Week 4: May 25โ€“29

  • โœ… Day 16 โ€” Mon May 25: ๐Ÿ‡บ๐Ÿ‡ธ Memorial Day, community thank-you, no sale
  • โœ… Day 17 โ€” Tue May 26: Coral Ridge Crochet Shawl ๐Ÿฆ‹ (four-color triangle shawl, Marly + Robyn Chachula collab)
  • โœ… Day 18 โ€” Wed May 27: NEW Shangri-La Knit Lace Shawl ๐Ÿ”๏ธ (refreshed knit lace scarf/shawl, three sizes)
  • โœ… Day 19 โ€” Thu May 28 โœจ BICRAFTY BONUS DAY (KNIT + CROCHET): Lyvia Crochet Ruana ๐ŸŒธ (oversized cardigan-meets-ruana, with pockets) PLUS Almond Brittle Knit Wrap ๐Ÿฅค (free bulky knit lace wrap pattern, beginner-friendly Lace Bands stitch in 2 cakes of Caron Macchiato Cakes)
  • โœ… Day 20 โ€” Fri May 29 โœจ๐ŸŒท BICRAFTY BONUS FINALE (KNIT + CROCHET): Garden Party Crochet Cardigan ๐ŸŒท (size-inclusive XS-5XL closer!) PLUS Thistlevine Knit Tunic Vest ๐Ÿงถ (free sleeveless knit lace tunic, sizes XS-5X, wear it tunic length or cropped)

๐Ÿ“š Browse All Spring Fling Patterns

Every pattern featured during Spring Fling 2026. Each pattern's blog post is free forever!

  • โœ… Day 1 โ€” Mon May 4: Blood of My Blood Knit Shawl ๐Ÿด
  • โœ… Day 2 โ€” Tue May 5: Sunday Sideline Crochet Shawl ๐Ÿงฃ
  • โœ… Day 3 โ€” Wed May 6: NEW Pieces of You Single Crochet Entrelac Wrap ๐ŸŒŠ
  • โœ… Day 4 โ€” Thu May 7: Solomon's Knot Crochet Tee ๐Ÿ‘•
  • โœ… Day 5 โ€” Fri May 8: NEW Eowyn Knit Shawl ๐Ÿ‘‘
  • โœ… Day 6 โ€” Mon May 11: NEW Lehabah Fire Sprite Knit Shawl ๐Ÿ”ฅ
  • โœ… Day 7 โ€” Tue May 12: NEW Bluebonnet Crochet Lace Shawl ๐ŸŒธ
  • โœ… Day 8 โ€” Wed May 13: Amaya Crochet Shrug ๐Ÿ’•
  • โœ… Day 9 โ€” Thu May 14: Northwoods Crochet Cardigan ๐ŸŒฟ
  • โœ… Day 10 โ€” Fri May 15: NEW Knit Woobie Poncho ๐Ÿงฃ
  • โœ… Day 11 โ€” Mon May 18: Peak Serenity One Ball Knit Shawl ๐Ÿง˜
  • โœ… Day 12 โ€” Tue May 19: Stoney Creek Sleeveless Crochet Tee ๐ŸŒž
  • โœ… Day 13 โ€” Wed May 20: NEW Farmer's Market Filet Crochet Bag ๐ŸŒฝ
  • โœ… Day 14 โ€” Thu May 21 ๐Ÿ”ฅ MIDPOINT: Sookie Crochet Cardigan ๐Ÿงถ
  • โœ… Day 15 โ€” Fri May 22: NEW Floral Motif Summer Crochet Tee ๐ŸŒบ
  • โœ… Day 16 โ€” Mon May 25: ๐Ÿ‡บ๐Ÿ‡ธ Memorial Day, community thank-you, no sale
  • โœ… Day 17 โ€” Tue May 26: Coral Ridge Crochet Shawl ๐Ÿฆ‹
  • โœ… Day 18 โ€” Wed May 27: NEW Shangri-La Knit Lace Shawl ๐Ÿ”๏ธ
  • โœ… Day 19 โ€” Thu May 28 โœจ BICRAFTY BONUS: Lyvia Crochet Ruana ๐ŸŒธ + Almond Brittle Knit Wrap ๐Ÿฅค
  • โœ… Day 20 โ€” Fri May 29 โœจ๐ŸŒท BICRAFTY FINALE: Garden Party Crochet Cardigan ๐ŸŒท + Thistlevine Knit Tunic Vest ๐Ÿงถ

๐Ÿ“Œ Save Spring Fling on Pinterest

Want to save this collection for later? Pin this hub to your Pinterest board so you can come back anytime. ๐Ÿ“

Poster with smiling woman waving, surrounded by flowers, butterflies, and a basket filled with colorful yarn skeins.

๐Ÿ“ง Join the Newsletter

Want to know about future events like this? Join my newsletter to be the first to hear about sales, new patterns, and seasonal events:

Join our Newsletter

Get Free Crochet & Knitting
Pattern Links & Coupons!

Hand-drawn bird with curling, detailed feathers and pink accents; cheerful pose showcases fine line and texture work.
>> Become An Insider <<
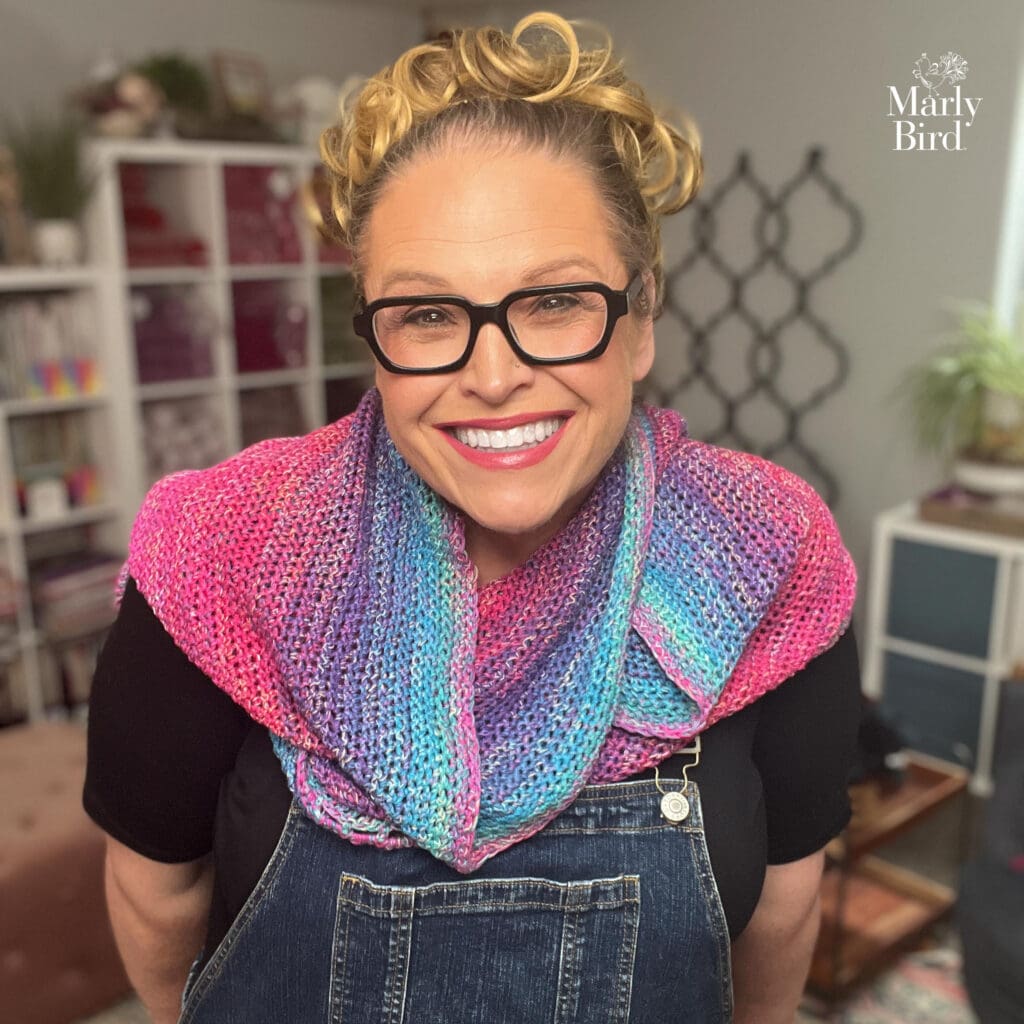
A woman with glasses and curly hair models a colorful crocheted scarf, showing textured stitches and vibrant yarn.

About Marly's Spring Fling ๐ŸŒธ

Spring Fling was the May version of one of my favorite traditions: a daily celebration where my readers and I gathered around a single shared pattern, color, or technique each day for a full month. The first one I ran was Treat Yourself January, which became a community ritual you all loved… and I figured spring deserved the same energy.

Why I loved this event:

  • Daily inspiration … a fresh “what should I make today?” answer 20 times in a row
  • Community moments … we all knit/crochet the same thing on the same day, shared photos, swapped color choices
  • Real savings … 65% off ad-free PDFs was the deepest discount I ran all year
  • Easy to follow … bookmark this hub, sign up for the email, and let me do the curating

If you joined Treat Yourself January with me… thank you for coming back. If this was your first event with me… I hope you found something to cast on! โœจ


๐ŸŒž What's Next? Flat Marly!

Spring Fling is complete, but the fun continues! Flat Marly is now live! ๐ŸŽ‰

Flat Marly is my annual summer adventure community campaign. From June 1 through August 31, you download the free Flat Marly printable, take her on your summer adventures (vacations, beach trips, knit night, the grocery store, anywhere!), and share photos with the community using #FlatMarly. There are surprise giveaways, a year-end Travel Trophy, and a whole summer of community fun.

๐Ÿ‘‰ Get Flat Marly + read all the details here (the printable PDF is free)


A smiling woman with curly hair waves amid colorful flowers, a clipboard, coffee cup, and question marks below an FAQ banner.

Frequently Asked Questions

When did Spring Fling run?

Spring Fling ran Monday May 4 through Friday May 29, 2026. A new spring or summer pattern was featured each weekday (Monโ€“Fri only). 20 days total.

Can I still get the patterns?

Yes! All 20 patterns are still 100% free on the blog. The 65% off PDF discount was 24-hour only during the event, but you can still purchase ad-free PDFs at regular price on Etsy, Shopify, or Ravelry.

Will there be another Spring Fling?

I hope so! Sign up for my newsletter to be the first to know about future events.

Can I share my finished projects?

Please… that's the BEST part! Tag @themarlybird on Instagram and use #SpringFling2026, #mmmdi, and #marlybird. I love seeing what you make.


๐Ÿ’ฌ Final Thoughts

Spring Fling 2026 was my way of celebrating warm weather, breezy stitches, and the pure joy of having too many beautiful patterns to choose from. I designed (or co-designed) every single one of these patterns… and it was a JOY to see them all featured one by one throughout May.

Thank you to everyone who cast on, shared photos, and joined me for this celebration. The patterns are here whenever you're ready to come back. ๐ŸŒธโœจ

Love, Your BiCrafty Bestie, Marly Bird

Crocheted woman figure with curly hair, glasses, pink sweater, waving; surrounded by spring floral and heart applique details.

Filed Under: Crochet, Free Patterns, Knitting, Marly Bird Premium Patterns, Our Free Patterns, Pattern Tagged With: free crochet patterns, free knit patterns, free pattern roundup, marly bird event, sale event, spring crochet, spring fling, spring fling 2026, spring knit, spring patterns, summer crochet, summer knit, summer patterns, treat yourself

Free Knit Tunic Pattern: The Thistlevine Sleeveless Vest by Marly Bird

May 29, 2026 By Meg Leave a Comment

”

The Thistlevine is a free knit tunic vest pattern by Marly Bird… a sleeveless lace layering shell with a Zig Zag Waves peplum hem, a Lace Columns body, and an optional shorter vest length. Knit in worsted weight (Knit Picks Woodland in the sample), sized XS through 5X with finished busts from 31ยฝ” to 62ยฝ”, intermediate skill level. Free here on the blog. Ad-free printable PDF available on Etsy, Shopify, and Ravelry.

โšก Quick Answer: The Thistlevine Knit Tunic is a free sleeveless knit vest and tunic pattern designed by Marly Bird. Worked in one piece from front hem to back hem in worsted weight yarn on US 9 (5.5 mm) needles. Available in 8 sizes (XS through 5X), bust 31ยฝ" to 62ยฝ". Intermediate skill level with two stitch patterns… a Zig Zag Waves peplum and Lace Columns body. Wear it tunic length or shorten the peplum for a cropped vest.
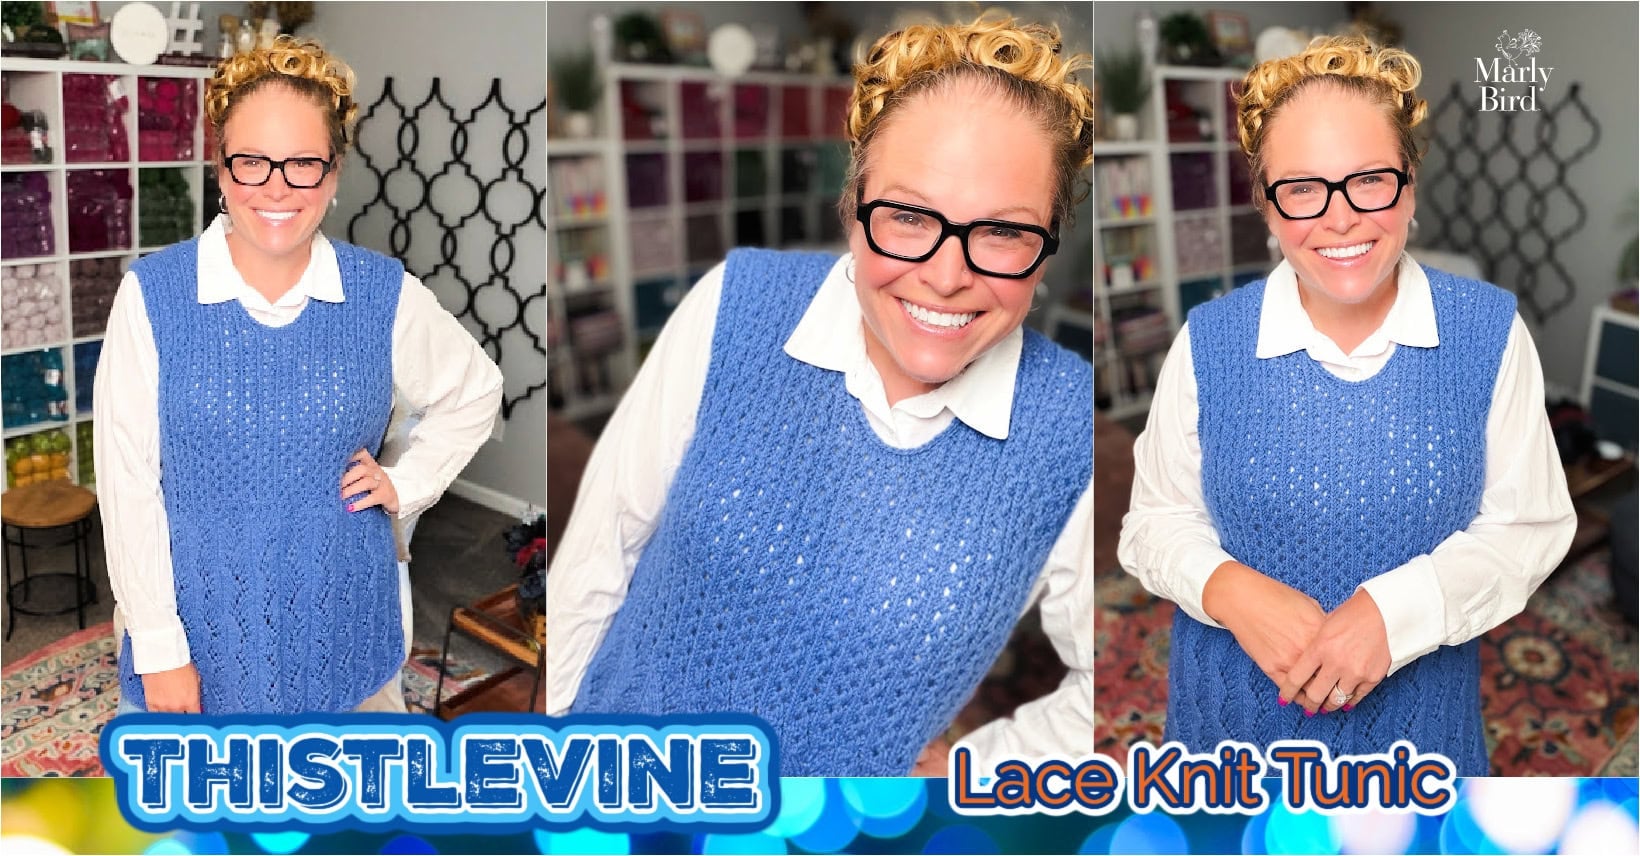
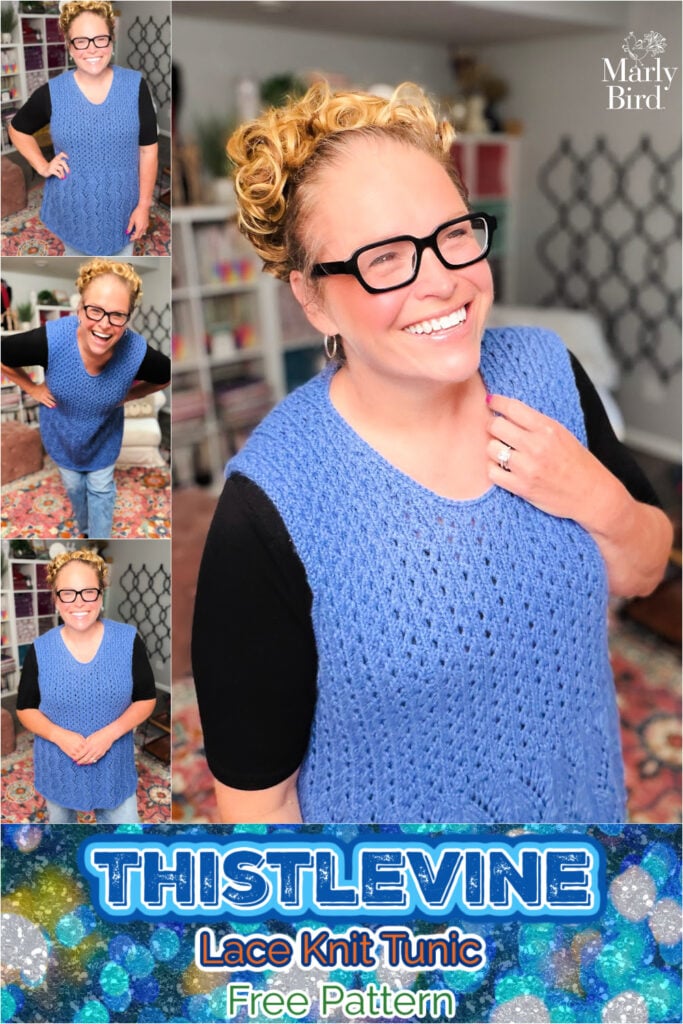
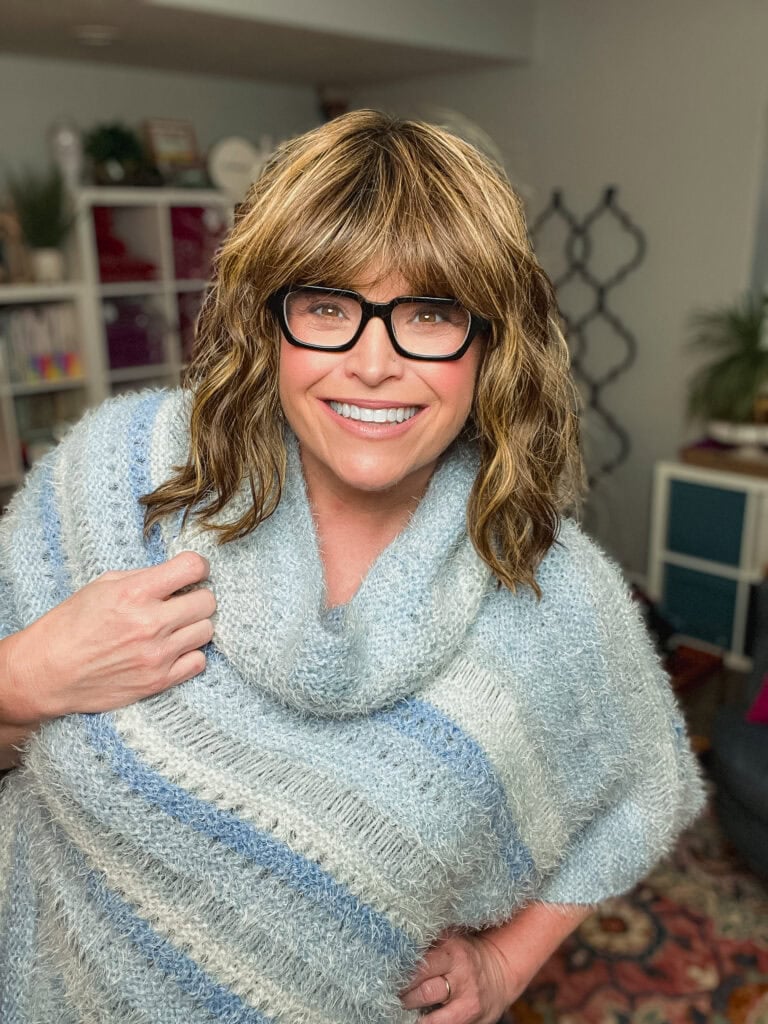
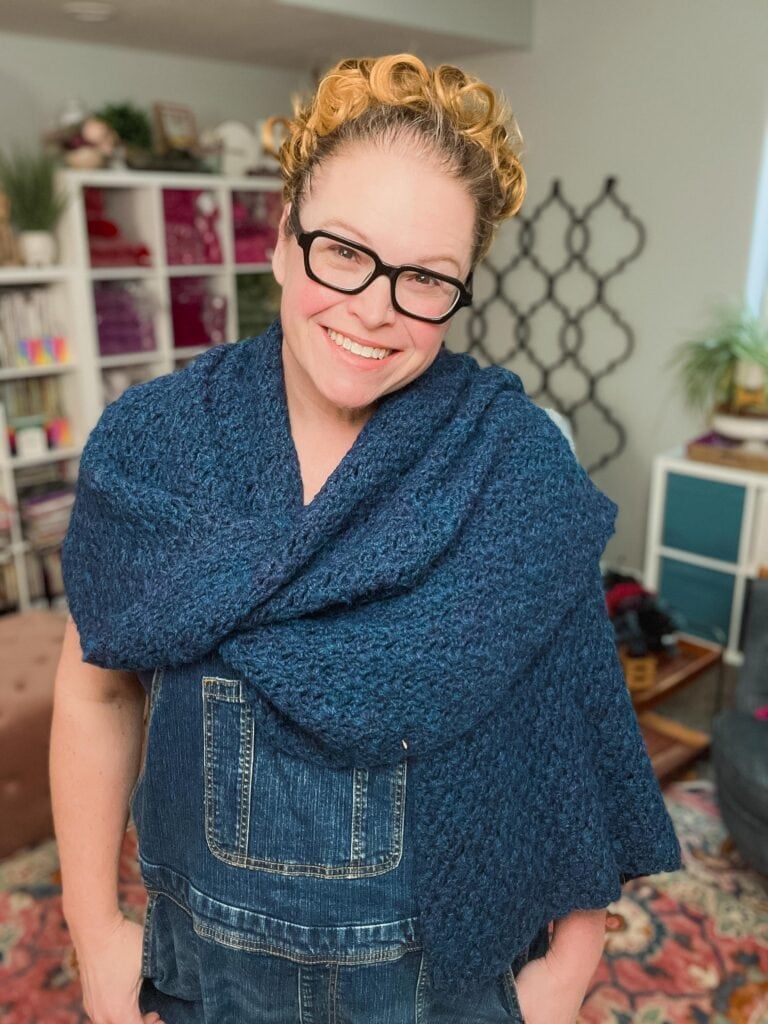
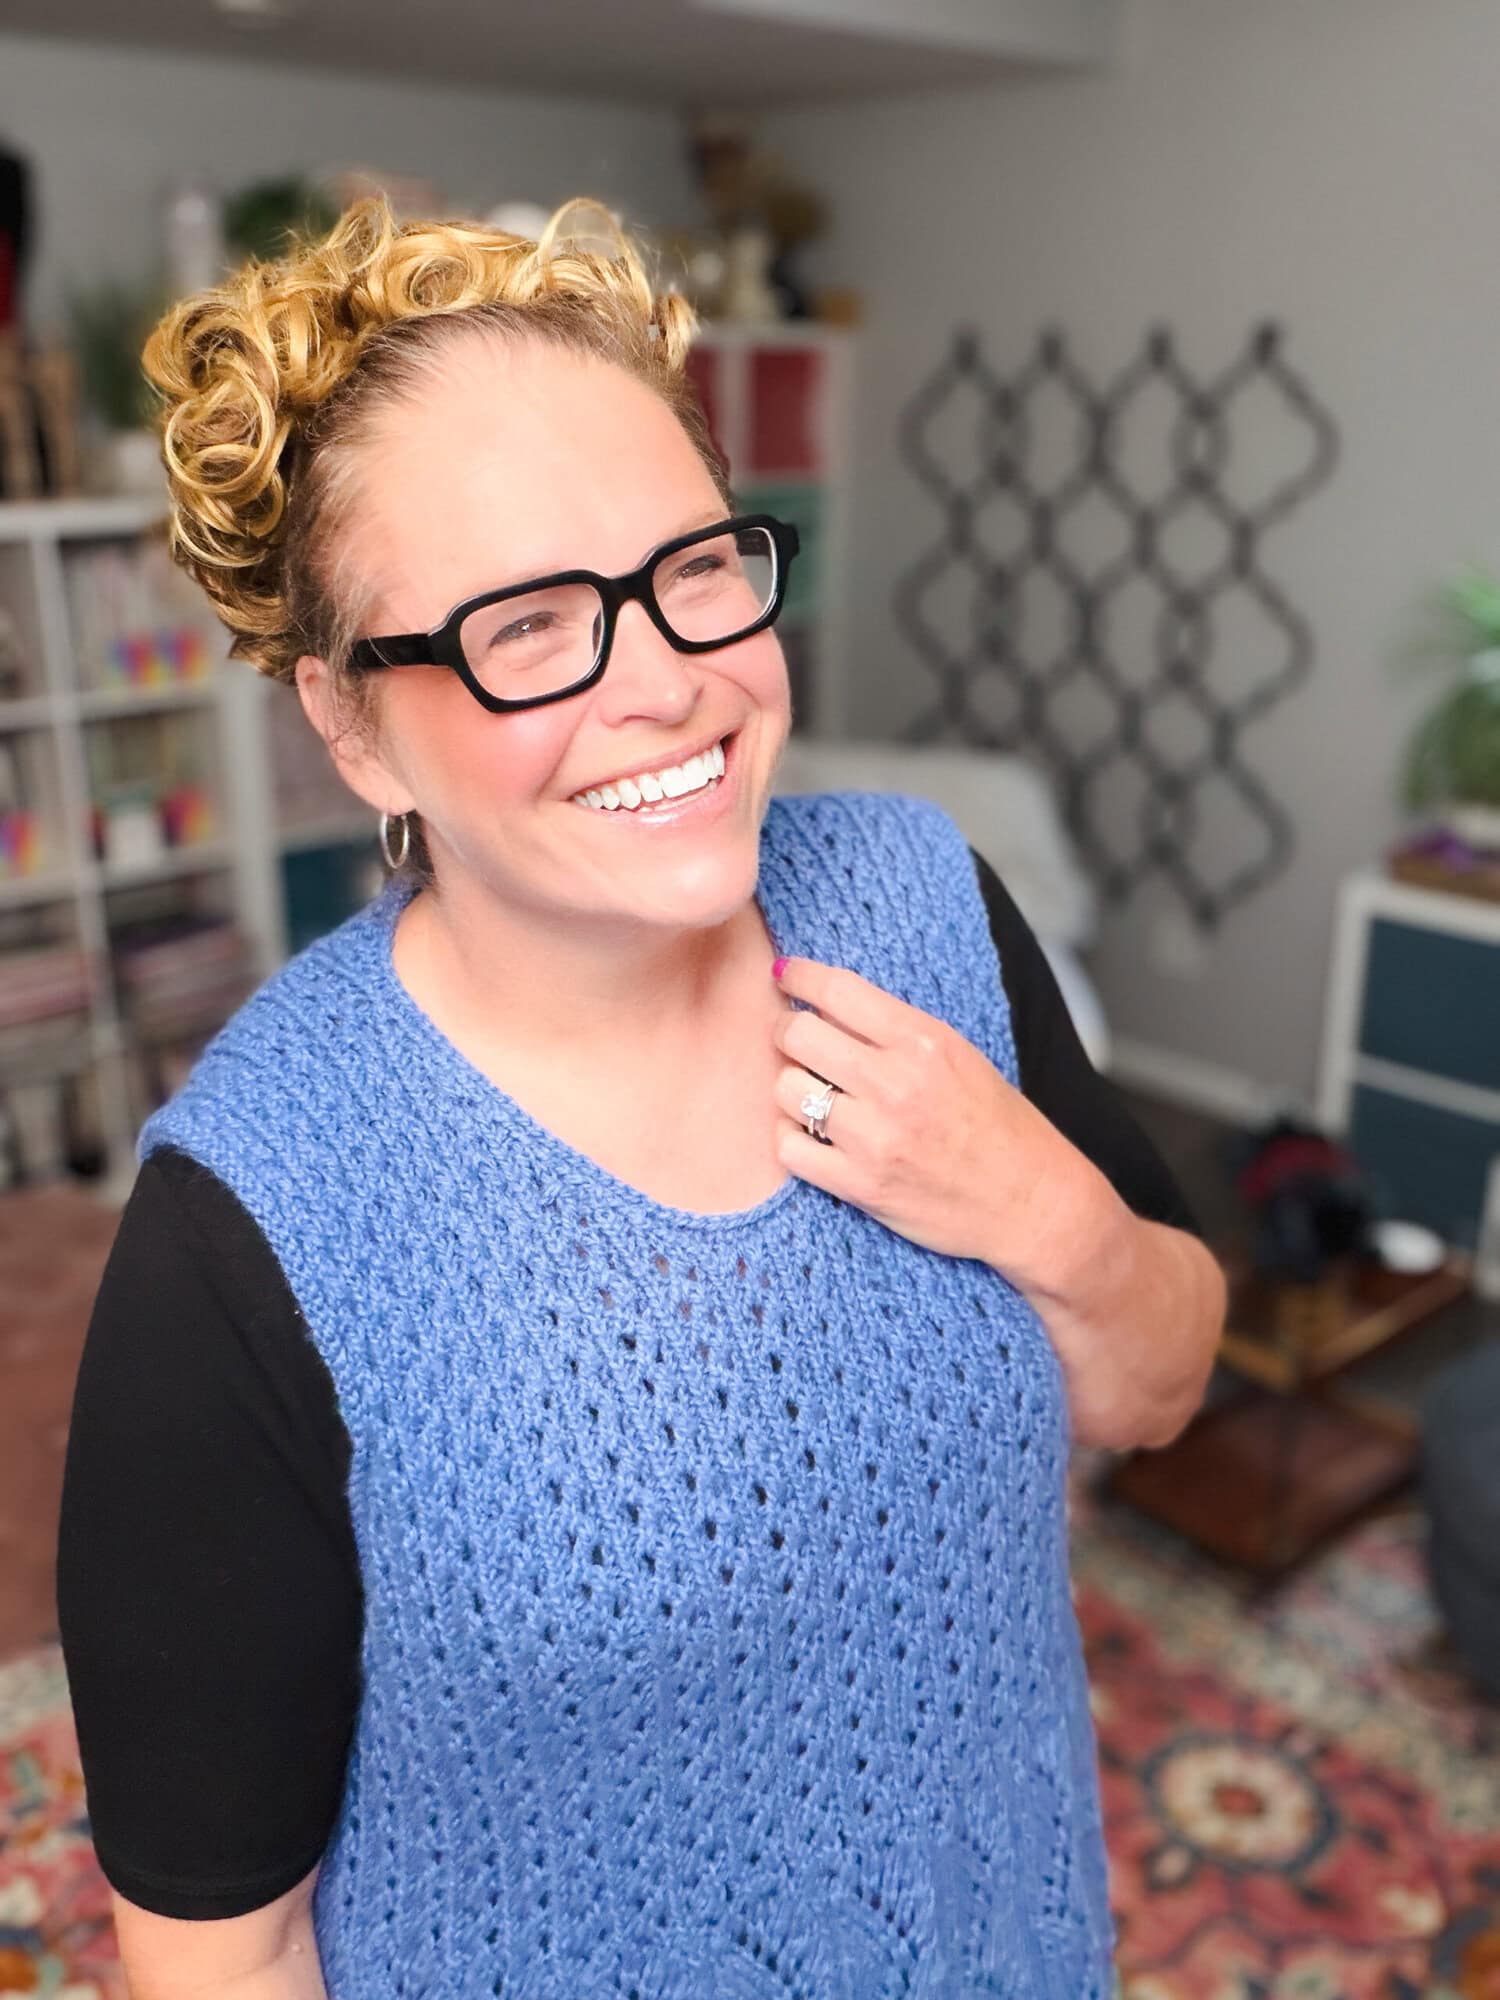
Woman models a blue lace knit tunic with intricate stitch detail, standing in a cozy room with shelves and decor behind her.

Hey, bestie ๐Ÿ’› What if one pattern gave you two completely different looks… a tunic-length layering piece for cool evenings, or a cropped vest for warmer days? That is the Thistlevine. This free knit tunic vest pattern brings together two of my favorite stitch patterns into one sleeveless lace shell that is as beautiful to knit as it is to wear.

The Zig Zag Waves hem creates that soft, swingy peplum movement at the bottom edge. The Lace Columns through the bust and body keep the eye traveling up. It is a piece you reach for again and again, layered over a turtleneck in fall, a flowy blouse in spring, or just on its own when the weather is being weather.

I designed the Thistlevine for every body, sized XS through 5X. Not graded as an afterthought… worked out from scratch for every size, so the lace lands right where you want it.

This post contains affiliate links. If you click and buy, I may earn a small commission at no extra cost to you. Thank you for supporting my yarn-loving heart ๐Ÿ’›

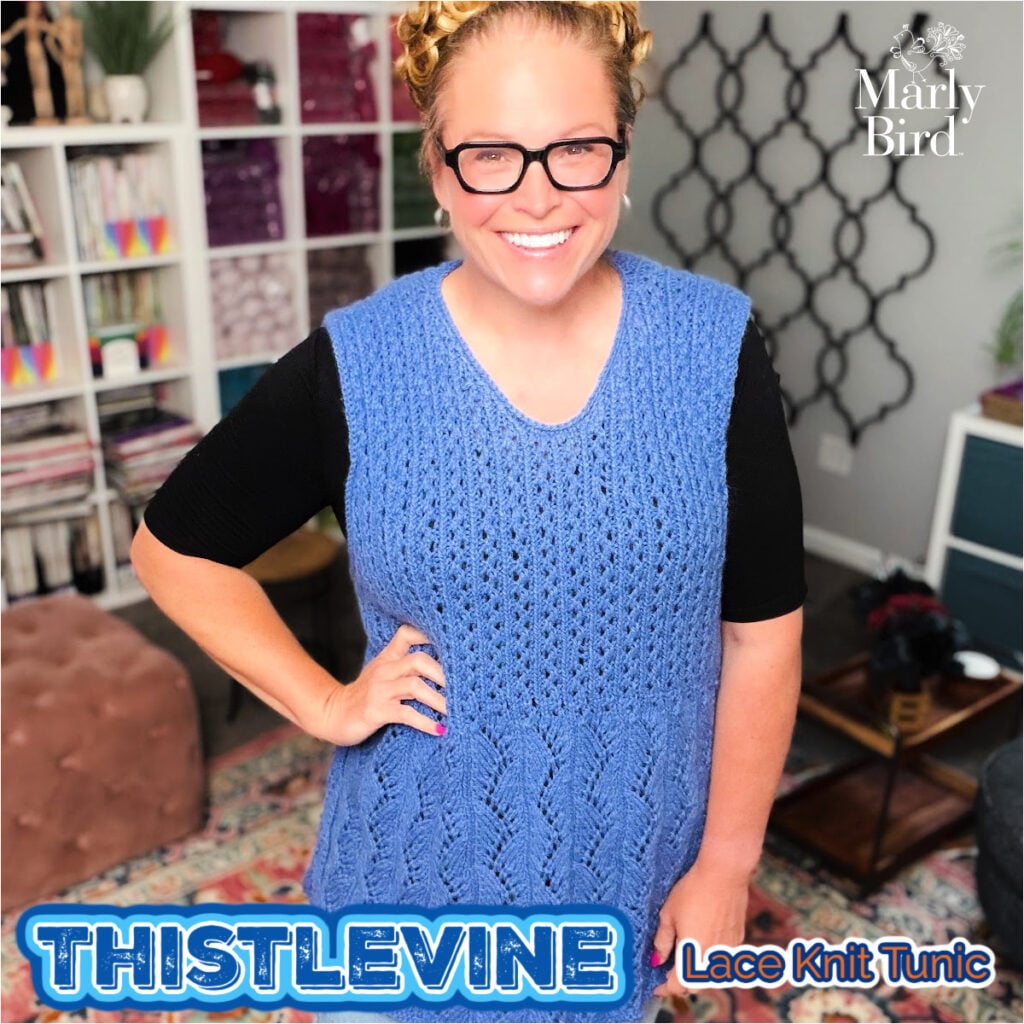
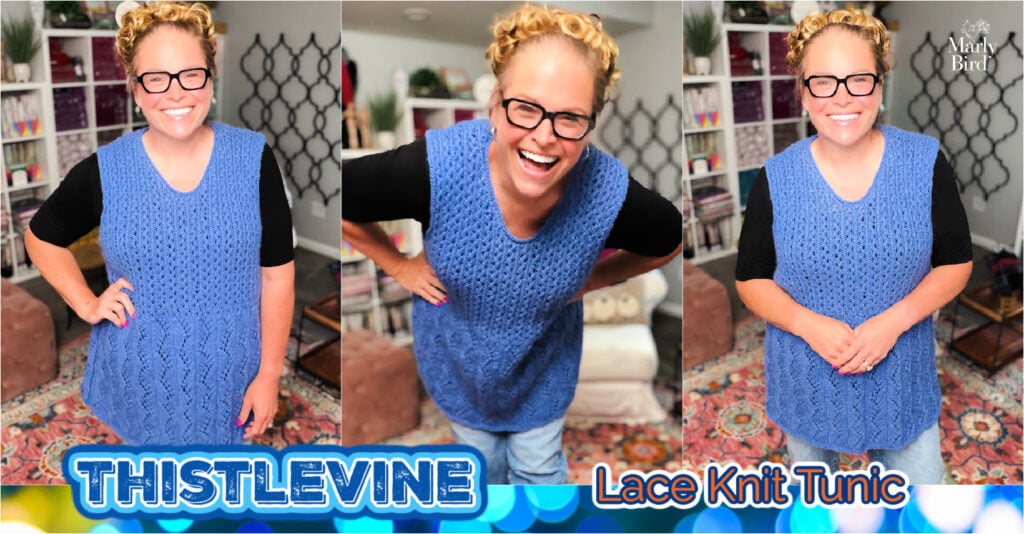
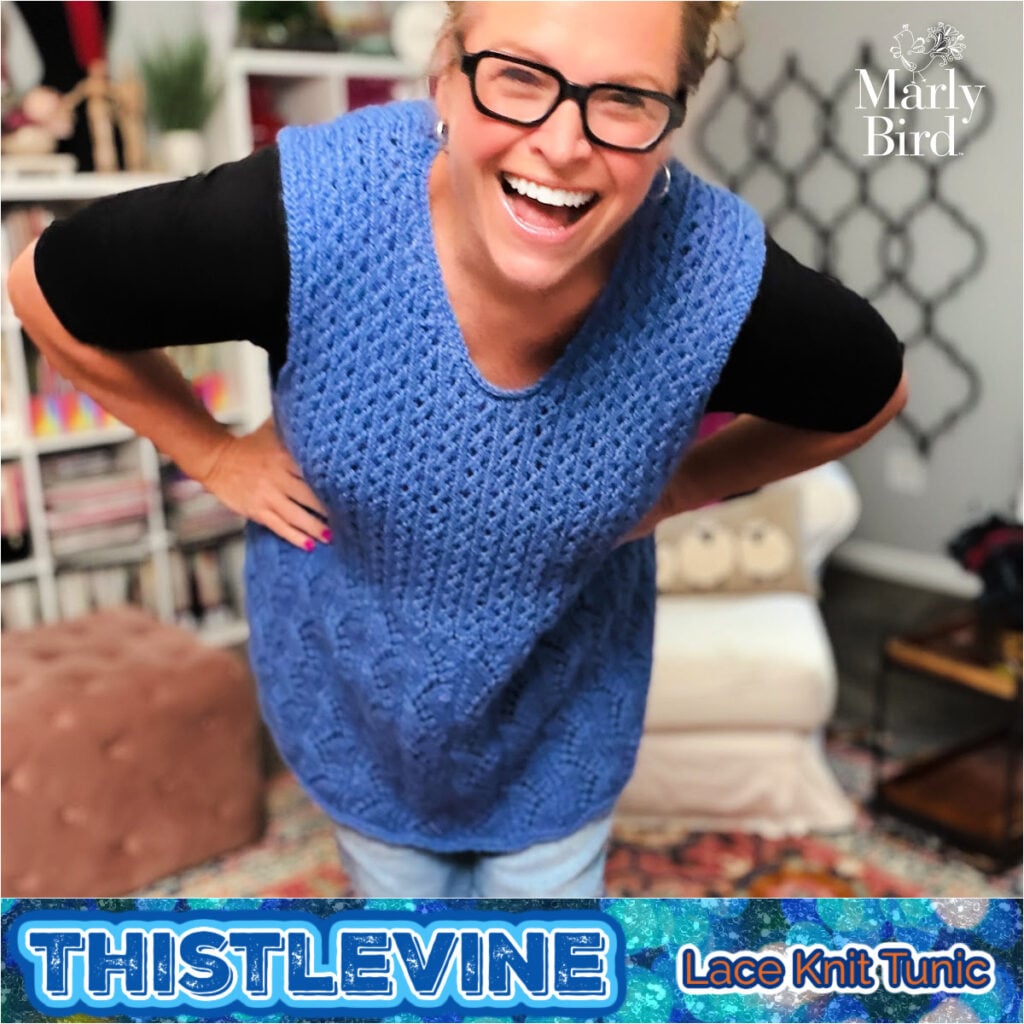
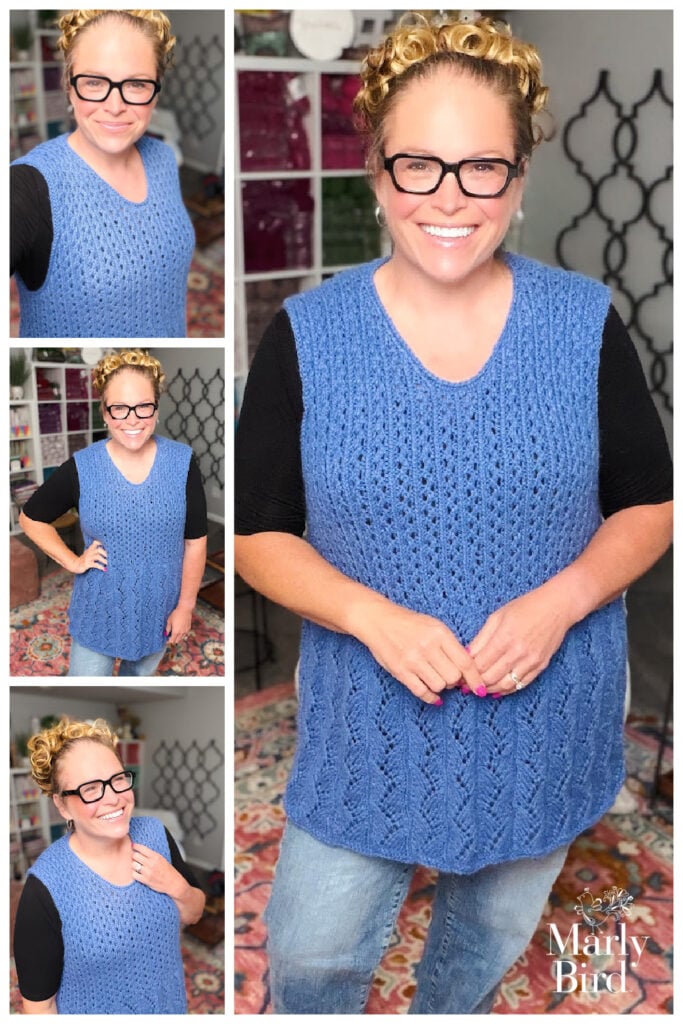
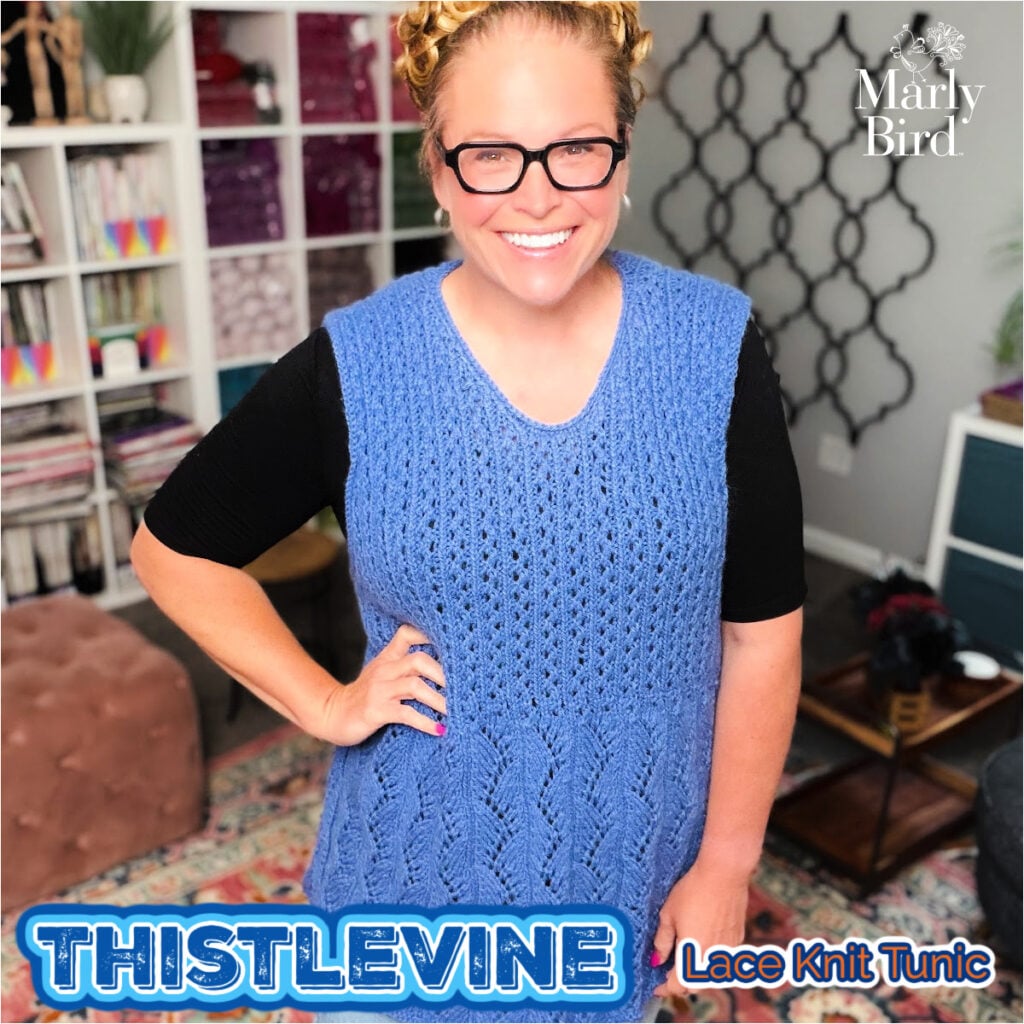
Thistlevine free knit tunic vest pattern by Marly Bird, sleeveless lace layering shell in Knit Picks Woodland Blue Jay Heather, modeled with the Zig Zag Waves peplum hem and Lace Columns body visible

๐ŸŒท The Thistlevine debuted as part of Spring Fling 2026… Day 20 BiCrafty Bonus Finale (Fri May 29, 2026).

Day 20 closed out my 20-day knit and crochet pattern celebration with TWO patterns… the Garden Party Crochet Cardigan for crocheters and the Thistlevine Knit Tunic for knitters. The free pattern stays free forever right here on the blog. Browse the rest of the celebration on the Spring Fling Hub โ†’

๐Ÿ’– What You Will Love About the Thistlevine

๐Ÿงถ Two stunning stitch patterns in one piece. Zig Zag Waves at the hem creates a flowing, peplum-like flare. Lace Columns through the bust and body give a vertical, elongating line. The transition between the two is where the magic lives.

๐Ÿชก One-piece construction. The Thistlevine is worked in one piece. Knit the front to the shoulders then knit down the back, then seamed only at the sides. No sleeves to set in. No yoke math. The armhole and neck edgings are picked up and knitted for a clean, polished finish. โญ๏ธ and exclusively in the ad-free pdf there are charts for the arhole and neck shaping for each size separately!

๐Ÿ‘— Wear it two ways. Knit at full tunic length for a flowy layering piece, or shorten the peplum and bind off earlier for a cropped vest. Both looks come from the same pattern… your choice.

๐Ÿ“ Size-inclusive, 8 sizes (XS through 5X). Finished busts run from 31ยฝ” up to 62ยฝ”. Every size was worked out individually, so the lace pattern repeats land cleanly across the body in every size.

๐ŸŒŠ The peplum silhouette is shaping you do not have to think about. The Zig Zag Waves stitch creates the gentle flare at the hem all on its own. No increases or decreases for shape… the stitch pattern does the work.

๐Ÿงต Intermediate-friendly lace. If you can knit, purl, yarn over, and work k2tog and ssk, you can knit this tunic. The pattern walks you through every special stitch.

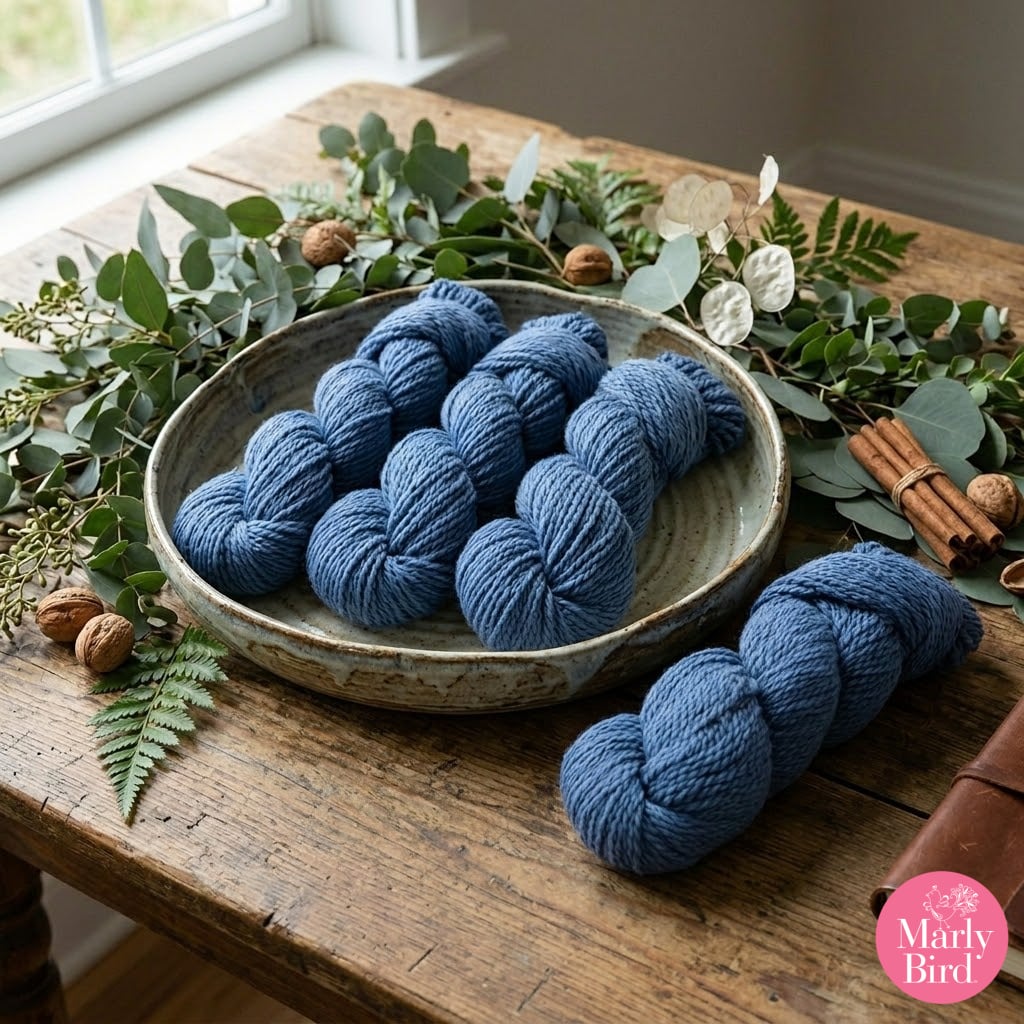
๐Ÿซ Luxurious sample yarn. Knit Picks Woodland (an 80% Merino / 20% Baby Alpaca blend in Blue Jay Heather) shows the lace beautifully and feels soft enough to wear all day.

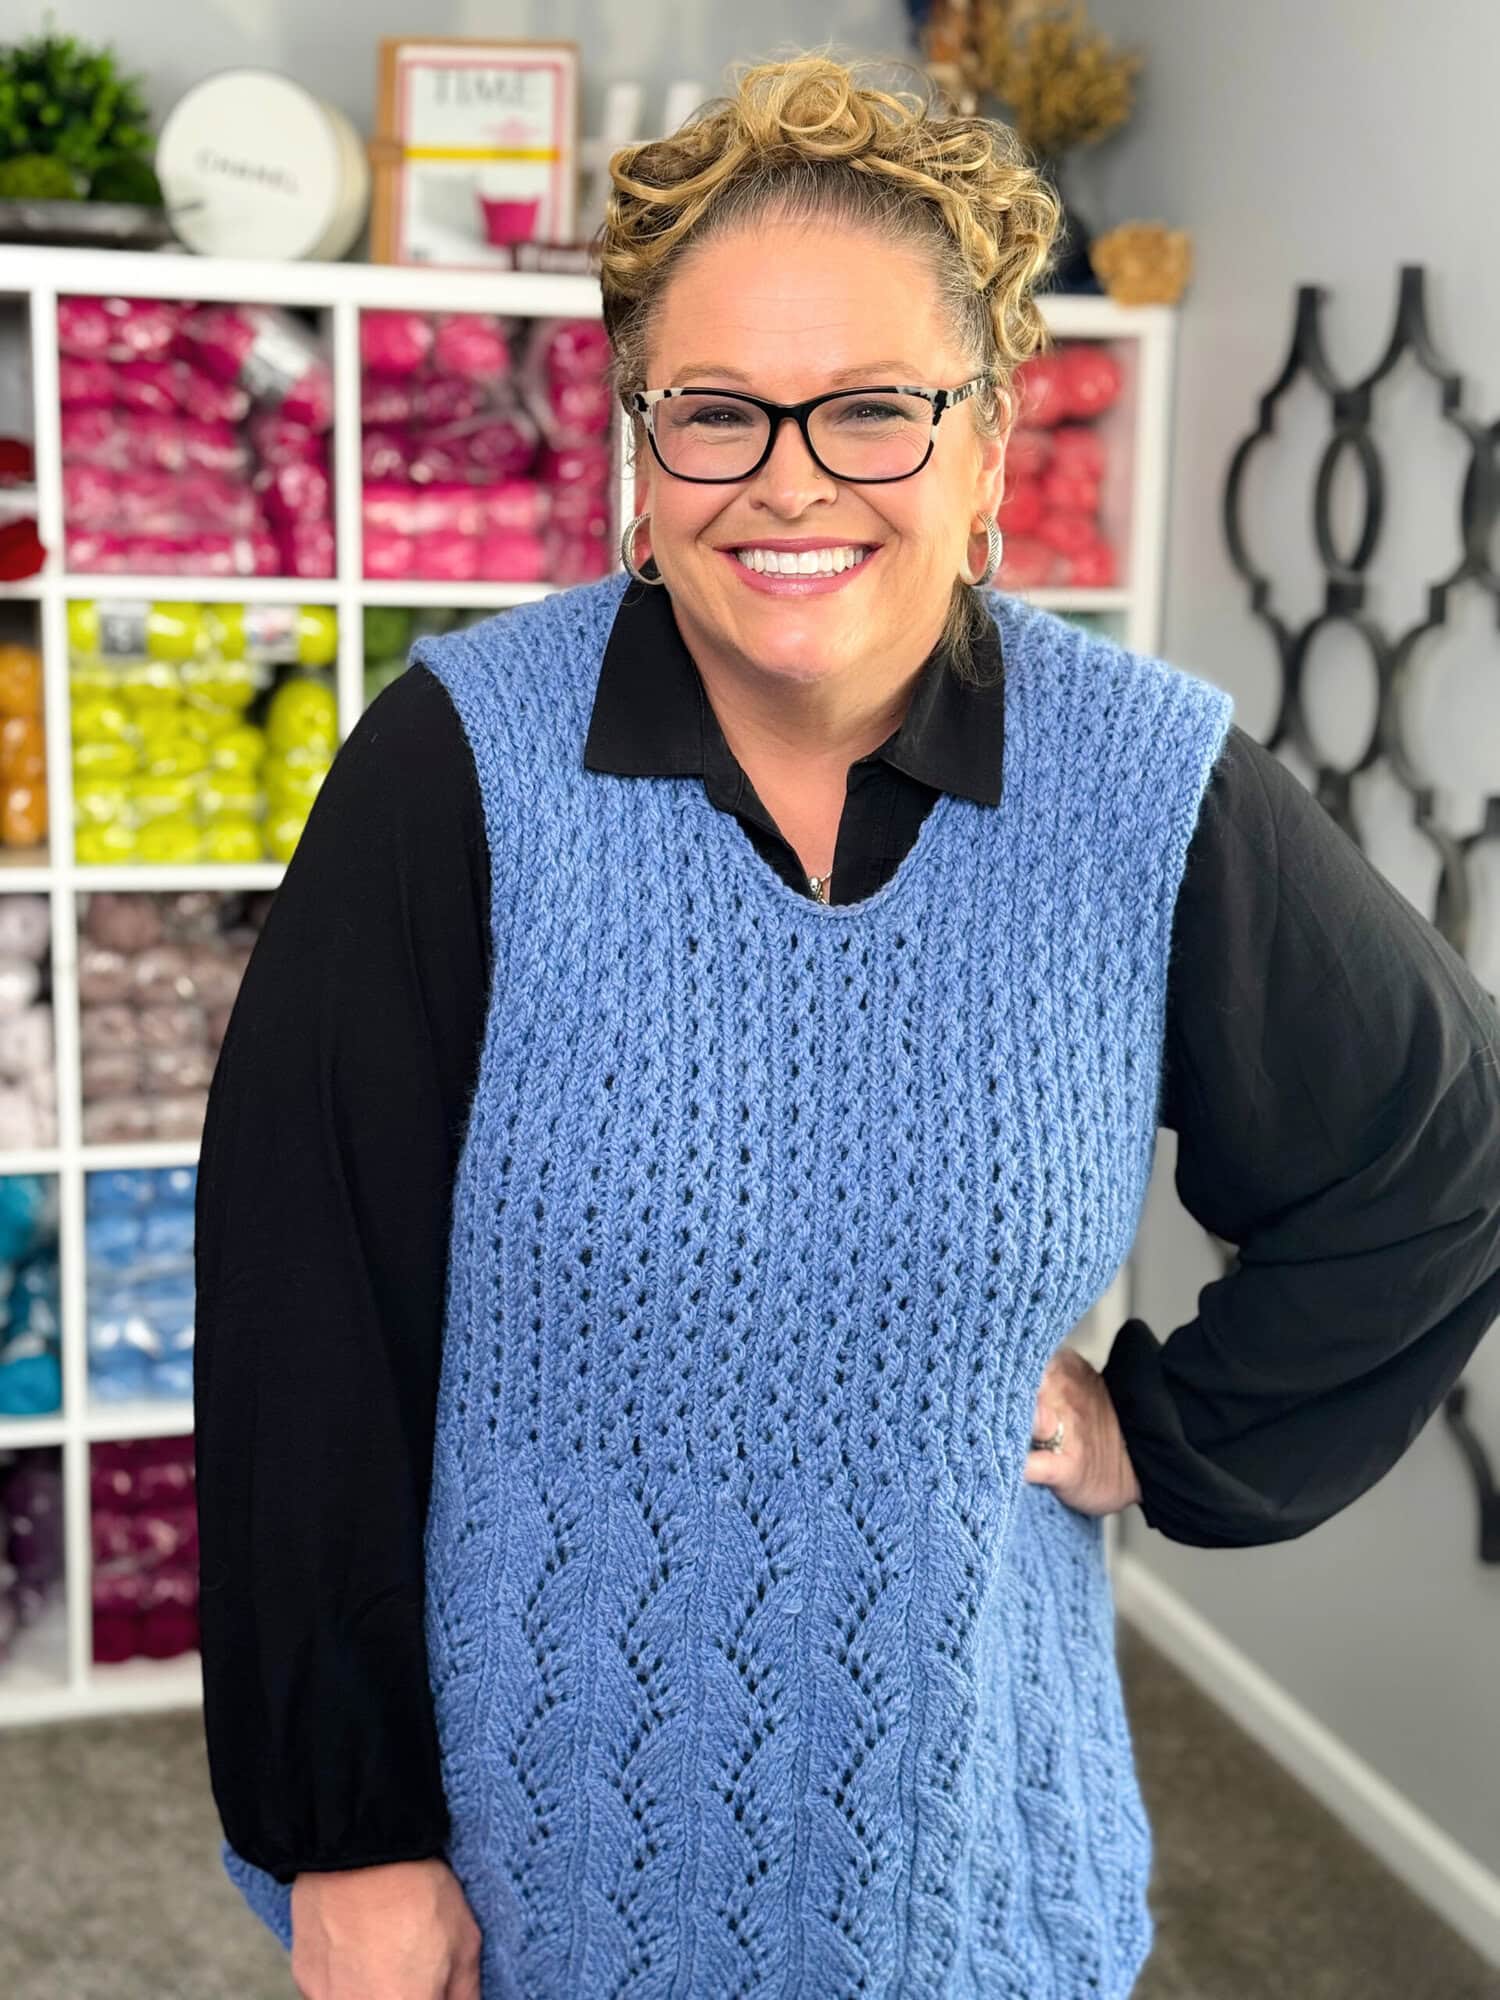
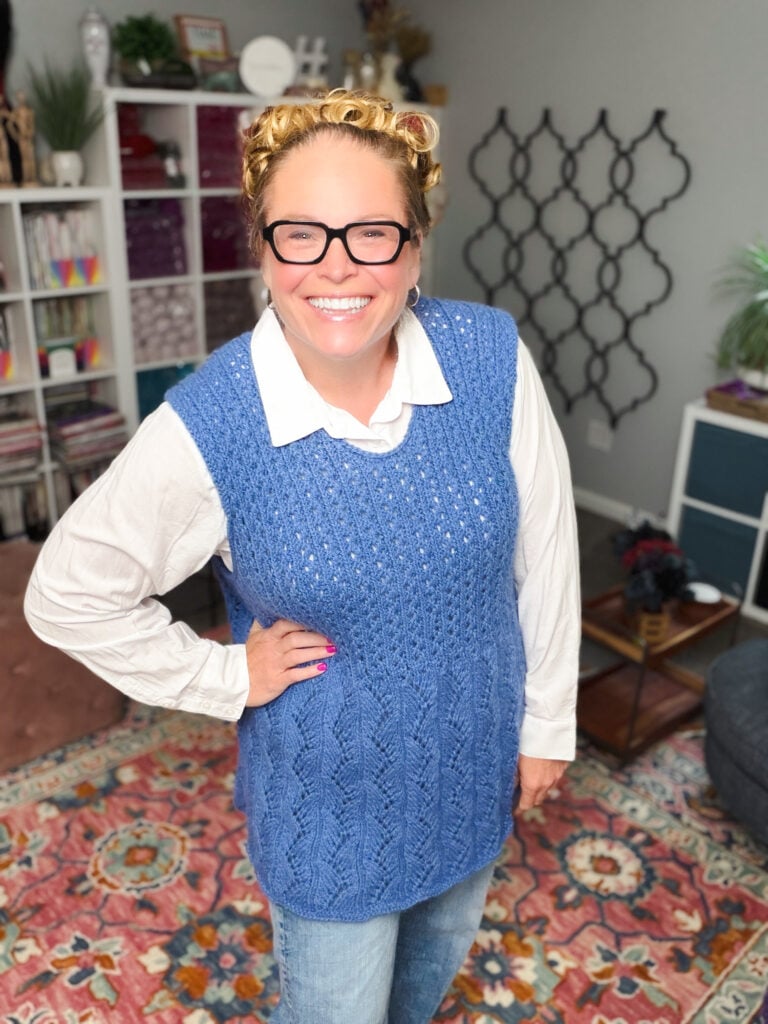
Marly Bird wearing the Thistlevine free knit tunic vest pattern over a white collared blouse, showing the neckline finish and Lace Columns bodice texture

๐Ÿงต Quick Pattern Overview

๐Ÿงถ Craft: Knit (sleeveless tunic/vest)

๐Ÿ“ Skill level: Intermediate

๐Ÿ“ Sizes: XS, S, M, L-XL, 2X, 3X, 4X, 5X (8 sizes)

๐Ÿ“ Finished bust: 31ยฝ” (S 36, M 40ยฝ, L-XL 45, 2X 49ยฝ, 3X 54, 4X 58, 5X 62ยฝ)”… designed to fit snugly. Size up if you are between sizes.

๐Ÿ“ Finished length: 26ยฝ” up to 36ยผ” depending on size (tunic length… shorten the peplum to wear as a cropped vest).

๐Ÿงถ Yarn: Worsted weight #4. Sample knit in Knit Picks Woodland (80% Merino / 20% Baby Alpaca, 180 yds per 100g skein) in Blue Jay Heather. Skeins needed: 4 (4, 5, 5, 6, 7, 8, 9).

๐Ÿชก Needles: US 9 / 5.5 mm 32″ circular for the main fabric, plus a 16″ circular one size smaller for the armhole and neck edgings.

๐Ÿ“ Gauge: 18 sts and 26 rows = 4″ in Lace Columns pattern.

๐ŸŒŠ Stitch patterns: Zig Zag Waves (peplum) and Lace Columns (bust and body).

๐Ÿงต Construction: Worked in one piece from front hem to back hem… seamed at the sides… edgings picked up and knitted.

Blue yarn skeins on a ceramic plate atop a wooden table, surrounded by greenery, walnuts, cinnamon sticks; Marly Bird logo visible.

๐Ÿ’Ž Love the Pattern but Want an Ad-Free PDF? โญ

The free pattern is right here on the blog (scroll down… you will need a free GROW account to unlock the instructions). If you would rather have a beautifully formatted, printable, ad-free PDF you can take with you anywhere, grab the Thistlevine ad-free PDF below ๐Ÿ’–

๐Ÿ›’ Shop Etsy
๐Ÿ›’ Shop Ravelry
๐Ÿ›’ Shop Marly Bird Shopify Store

Is the Thistlevine a vest or a tunic?

It is both… and that is the point. The pattern is written for tunic length (26ยฝ” to 36ยผ” depending on your size), but you can shorten the peplum section and bind off earlier for a cropped vest look. Both instructions are included in the pattern. Two completely different outfits from one set of needles.

Is this a plus size knit tunic pattern?

Yes, fully. The Thistlevine is sized XS through 5X with finished busts from 31ยฝ” to 62ยฝ”. Every size was graded from scratch… not just the smallest size with extra stitches tacked on… so the lace repeats land where they should on every body. This is a pattern designed for every knitter, at every size.

Does the Thistlevine work as a layering piece?

It was designed for layering. The sleeveless lace shell works over a fitted turtleneck in fall or winter, over a flowy blouse in spring, or on its own in summer. The tunic length gives enough coverage to layer over anything without bunching, and the Lace Columns allow whatever you are wearing underneath to show through subtly. It is a true three-season layering staple.

Where can I get the ad-free PDF of the Thistlevine pattern?

The ad-free, printable PDF is available on Etsy, Ravelry, and the Marly Bird Shopify store. The PDF includes visual stitch charts for the armhole and neck shaping for every size… those charts are exclusive to the PDF and not in the free blog version. The free blog version has everything you need to knit the Thistlevine; the PDF is just a cleaner, chart-enhanced upgrade.

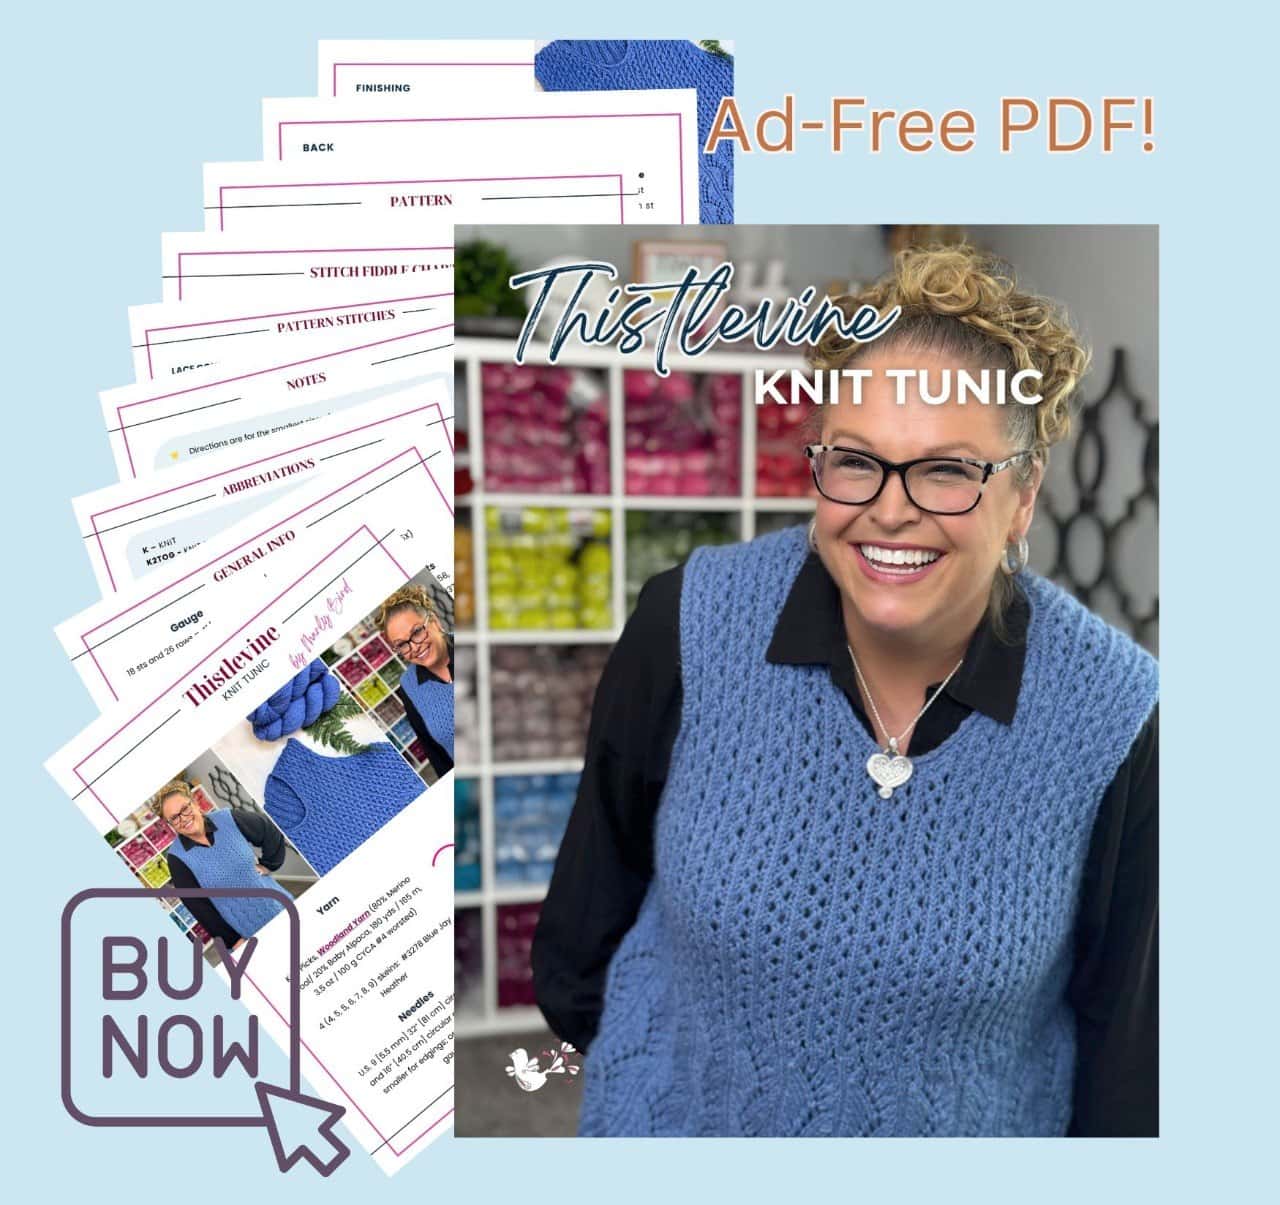
Thistlevine Knit Tunic Vest pattern by Marly Bird... ad-free PDF promo showing Marly wearing the blue heathered knit lace vest sample plus a fanned preview of the printable PDF pages
Etsy
Shopify
Ravelry

Join our Newsletter

Join our Newsletter

Get Free Crochet & Knitting
Pattern Links & Coupons!

Hand-drawn bird with curling, detailed feathers and pink accents; cheerful pose showcases fine line and texture work.
>> Become An Insider <<
A woman with glasses and curly hair models a colorful crocheted scarf, showing textured stitches and vibrant yarn.

๐Ÿค” Is the Thistlevine Right for You?

The Thistlevine is for the knitter who is comfortable with the basics and ready for a piece with personality. If you can already knit, purl, work yarn overs, and decrease (k2tog and ssk), the rest of the pattern is well within reach… I walk you through every special stitch in the instructions.

This is a great pattern for:

  • A knitter who has finished a few smaller projects and is ready for their first garment with some shaping
  • An intermediate knitter who wants a lace project that feels fresh, not fussy
  • Someone who loves a layering piece with shape… not just a rectangular wrap
  • Plus-size knitters who have been waiting for a lace tunic actually graded through 5X

It is not the place to start if you have never knit lace before… but if you have done a few yarn overs and decreases in a hat or shawl, you have the foundation you need.

Marly Bird wearing the Thistlevine free knit tunic vest pattern in a studio lifestyle shot, showing the front silhouette of the sleeveless knit lace tunic over a fitted collared top

๐Ÿงฉ Design Features & Construction

The Thistlevine is built around a smart, low-fuss construction that lets the lace do all the visual work. Here is what is happening under the hood:

๐Ÿงต One-piece front-to-back construction. You cast on at the bottom of the front peplum, knit up through the bust, shape the front armholes, separate at the neck for shoulders, then cast on bridge stitches to join the shoulders and knit DOWN the back… right through the back armhole increases, back bust, and back peplum. Only ONE seam to sew on each side when you are done.

๐ŸŒŠ The Zig Zag Waves peplum. The hem starts with the Zig Zag Waves stitch pattern, which uses traveling yarn overs and edge decreases to create that soft, flared peplum silhouette. You are NOT increasing for shape… the stitch pattern itself makes the peplum flare. A pattern transition row (with p2tog and ssp decreases) takes you from the peplum into the body.

๐Ÿ›๏ธ The Lace Columns body. Through the bust and body, the Lace Columns stitch creates clean vertical lines that elongate the torso and gently skim the figure. The body is straight (no waist shaping)… the peplum and the lace pattern do the visual shaping for you.

โœจ Short-row shoulder shaping. The back shoulders are shaped with short rows worked one stitch below the marker line, which creates a smooth, gently sloped shoulder line. This is what makes the tunic sit cleanly on the body instead of pulling at the neck.

๐Ÿงถ Picked-up edgings, NOT sewn-on bindings. The armhole and neck edgings are picked up and knitted in the round (on smaller needles) AFTER you block and seam. This is what gives the openings that polished, finished look… no curling, no awkward sewn binding to fight with.

๐Ÿ’ก Designer Tip: The one-piece construction means you do not have to match stripes or pattern rows at a yoke join… it is one continuous fabric front to back. If you swap yarns or come back to the project after a break, that consistency is on YOUR side ๐Ÿ’›

๐Ÿง  Build Your Skills: The Lace Inside the Thistlevine

One of the things I love about teaching knit lace is that the “hard” part of lace is mostly about reading your knitting. Once your eye learns the pattern, the stitches almost work themselves. The Thistlevine uses two stitch patterns… and each one teaches you something a little different.

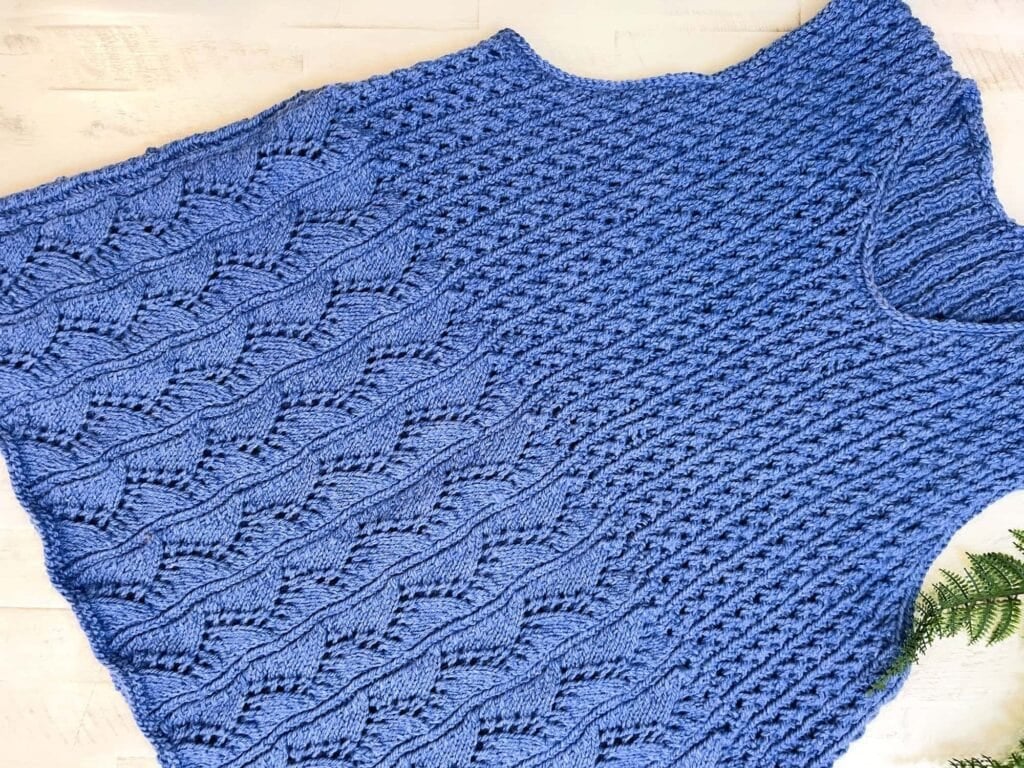
Close-up flat lay detail of the Thistlevine knit tunic vest showing the Zig Zag Waves lace peplum hem stitch pattern and Lace Columns transition by Marly Bird

Lace Columns (the body)

Lace Columns is a 4-row repeat worked over a multiple of 5 stitches plus 3. It uses yarn overs and paired decreases (ssk and k2tog) to form clean vertical columns of lace separated by knit and purl ribs. It is one of those stitch patterns that looks complicated on paper and feels easy in your hands once you find the rhythm. The vertical lines are flattering and they help the body of the tunic skim the figure instead of hanging straight. The stitch count stays the same throughout the pattern repeat… once you cast on for the bust, every Lace Columns row keeps your total stitch count steady.

Zig Zag Waves (the peplum)

Zig Zag Waves is a 16-row repeat over a multiple of 12 stitches plus 3. It pairs traveling yarn overs with k2tog and ssk decreases at the edges of each repeat to push and pull the stitches into a wave pattern. Where the yarn overs land creates the open lace… where the decreases happen creates the soft flare. You do not increase or decrease for shape. The stitch pattern itself does the work of giving the peplum its movement. Like Lace Columns, the total stitch count stays the same throughout the 16-row repeat… yarn overs and decreases balance each other inside every row.

๐Ÿ’ก Designer Tip: Lace almost never looks like much on the needles… it needs to breathe. Block this piece fully before you sew the side seams and you will be amazed at how the Lace Columns open up. Trust the block ๐Ÿ’›
Close-up detail of the Thistlevine free knit tunic vest neckline finish and Lace Columns bodice stitch pattern by Marly Bird

A few special stitches to know

You will see a handful of abbreviations in the pattern that may be new… but they are all friendly. LLM1 and RLM1 are lifted increases that disappear seamlessly into the fabric. TK2tog and Tskp are twisted versions of standard decreases that keep the edges of the lace clean and crisp. M1p is a make-one purlwise used in the peplum transition row. The full definitions are in the pattern… no guesswork required.

๐Ÿ“ Sizing, Fit, and Size-Inclusive Design

The Thistlevine is sized XS through 5X… 8 sizes total. Each size was worked out from scratch so the lace repeats land where they should on every body, not just the smallest sizes with bigger sizes tacked on as an afterthought. This is a pattern I designed for every body ๐Ÿ’›

SizeFinished BustFinished Length
XS31ยฝ” / 80 cm26ยฝ” / 67.5 cm
S36″ / 91.5 cm28″ / 71 cm
M40ยฝ” / 103 cm29ยผ” / 74.5 cm
L-XL45″ / 114.5 cm30ยพ” / 78 cm
2X49ยฝ” / 125.5 cm32″ / 81.5 cm
3X54″ / 137 cm33ยฝ” / 85 cm
4X58″ / 147.5 cm34ยพ” / 88.5 cm
5X62ยฝ” / 159 cm36ยผ” / 92 cm

๐Ÿ“ How to Choose Your Thistlevine Size

Start with your actual full bust measurement… all the way around, over the fullest part. The Thistlevine has 0โ€“2″ of negative to neutral ease, so it is designed to fit snugly. If your bust is between two sizes, go up. You'll get a slightly more relaxed fit, and you can always block lace more open. You cannot block it smaller.

Plus-size knitters: the 3X sample in these photos is shown on a 44″ bust with positive ease (Marly has since lost weight since the sample was made, so the fit is roomier than intended). Sizes 4X and 5X follow the exact same construction… just scaled. This pattern was designed for every body.

When in doubt, size up. You can always block it slightly more open. You cannot block it smaller.

Fit note: The Thistlevine is designed with approximately 0-2″ [0-5 cm] of negative to neutral ease at the full bust… so it fits snugly. For the intended fit, choose the size closest to your actual bust measurement. If you prefer a more relaxed fit, size up. (Love a size-inclusive free vest pattern? Also check out the Lorelai Knit Vest for another free size-inclusive option.) You can always block it slightly more open… you cannot block it smaller. โญ๏ธ The sample is size 3xl and it is shown on a 44″ / 111.75 cm bust (which means it is shown with positive ease but not because Marly intended it to be like that; she had the sample made to fit her but has since lost weight).

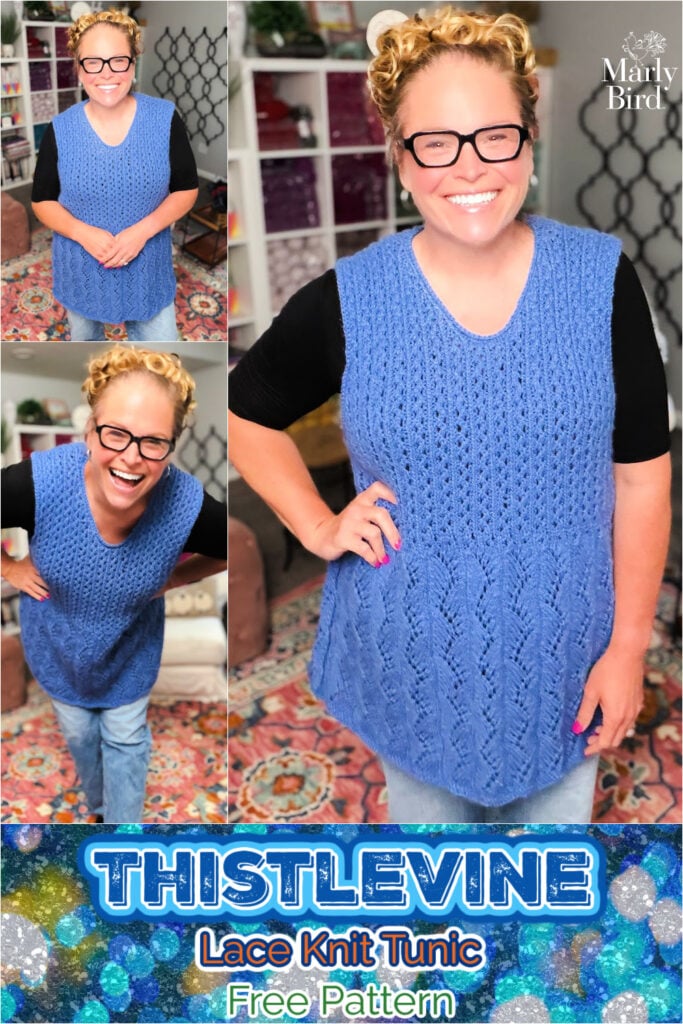
Full-length wearing shot of the Thistlevine free knit tunic vest pattern by Marly Bird, showing the complete A-line peplum silhouette over jeans, sizes XS through 5X

Tunic length OR cropped vest… your call

Because the Thistlevine is worked in one piece front hem to back hem, the length is easy to customize. The finished lengths in the pattern range from 26ยฝ” (XS) up to 36ยผ” (5X), which gives you a true tunic that hits at the upper thigh.

Want a cropped vest instead? Work fewer rows in the peplum section before transitioning to the bust… swatch and measure to land at the length you want. The Zig Zag Waves stitch pattern is a 16-row repeat, so end after a Row 2 or Row 10 to keep the lace lining up correctly on both ends.

Just remember if you shorten the peplum, you will use less yarn… and if you lengthen the body or the back peplum, you will use more. The sample yardage range in the pattern is calculated for the tunic length as written.


๐ŸŽจ 14 Colorways to See Yourself In

One question I get on every garment design: “Will this look good in MY color?” ๐ŸŽจ

If you have been falling down the “what season am I?” rabbit hole on TikTok lately… cool winter, warm autumn, soft summer, bright spring… this is the section for you. The Thistlevine was sampled in Knit Picks Woodland Blue Jay Heather (a heathered medium blue), but the same pattern reads completely differently in a warm rust, a soft cream, a deep emerald, or a moody charcoal. Same stitch pattern, same silhouette… 14 different moods.

Thistlevine free knit tunic vest pattern by Marly Bird shown in 16 different colorways to help knitters choose the best color for their skin tone and wardrobe

Use this grid as a visual swatch library before you commit your yarn budget. A few things to look for as you scroll:

  • ๐ŸŒŠ Cool tones (Blue Jay Heather, deep teal, soft sage, slate) flatter cool-undertone skin and play well with denim and grey
  • ๐Ÿ‚ Warm tones (rust, mustard, camel, terracotta) flatter warm-undertone skin and look gorgeous over cream and chocolate
  • ๐Ÿค Neutrals (cream, oatmeal, charcoal, soft black) make the lace texture the star of the show… wears with absolutely everything
  • ๐Ÿ’Ž Jewel tones (emerald, sapphire, plum, garnet) photograph beautifully and feel dressed-up for evening wear

Hold the grid up next to your existing wardrobe before you order yarn. The color that makes you say “oh, that one” out loud is your answer ๐Ÿ’›

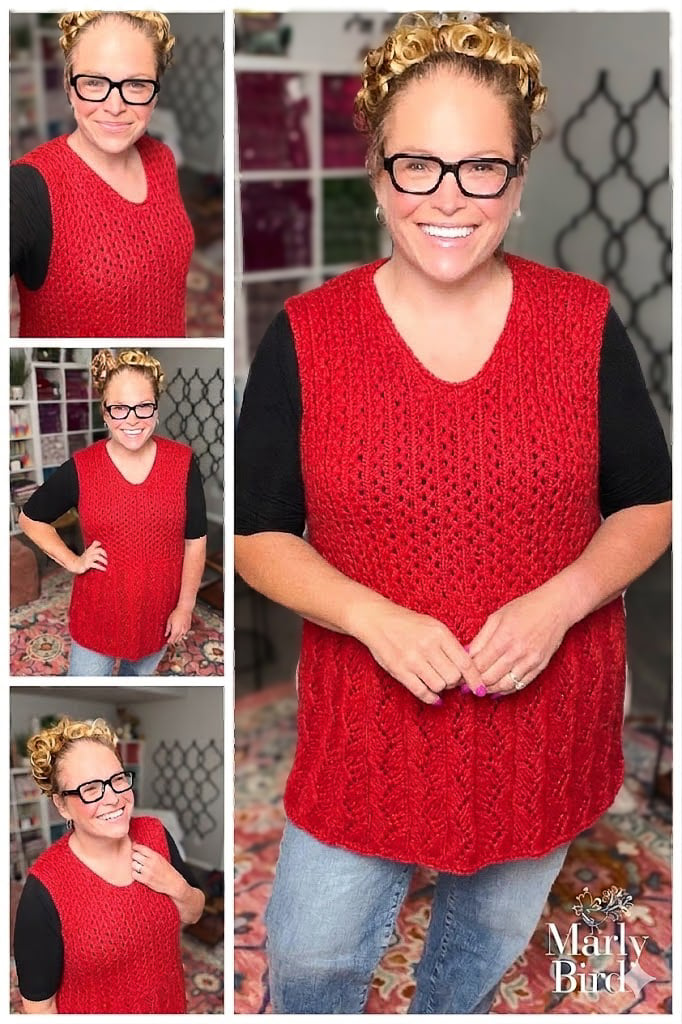
This bright cherry red color is a must make on for my next sample!

A woman models a hand-knit, bright red sleeveless vest with textured stitches over a black shirt indoors. Marly Bird logo visible.

๐Ÿงถ Yarn and Materials

Sample Yarn: Knit Picks Woodland

The Thistlevine sample was knit in Knit Picks Woodland Yarn in the colorway Blue Jay Heather (#3278). Woodland is an 80% Merino / 20% Baby Alpaca blend in worsted weight (#4)… 180 yards per 100g skein. The merino gives you stitch definition for the lace, and the baby alpaca gives you the soft halo and drape that makes a lace garment feel luxurious to wear.

Skeins needed: 4 (4, 5, 5, 6, 7, 8, 9) skeins for sizes XS through 5X.

Yarn Substitution Ideas

The Thistlevine is a lace garment, so the yarn you choose matters more than usual. (Looking for another free lace knit to put your leftover worsted to work? The Birgitta Knit Tunic is a great companion project.) Look for a worsted weight (#4) yarn with good drape (so the lace breathes and the peplum flows), good stitch definition (so the Lace Columns read clearly), and ideally a merino or merino blend (so it feels soft against your skin).

Some yarns I would happily knit this in:

๐Ÿงถ What to Look For in a Yarn Substitution

  • Weight: Worsted weight (#4), 18 sts = 4″ in lace pattern. Row gauge matters less than stitch gauge.
  • Texture: Smooth and twist-defined โ€” avoid fuzzy or textured yarns that obscure lace. Mohair blends will hide the stitch detail entirely.
  • Fiber: Merino or merino blend recommended for drape, softness, and easy blocking. Superwash works but can grow more on blocking โ€” swatch first.
  • Drape: The peplum needs to flow. Stiff plant fibers (100% cotton, 100% linen) may not drape the way the pattern intends… look for cotton blends with some elasticity.
  • Yardage: Knit Picks Woodland is 180 yds/100g. If your substitute has different yardage, calculate total yards needed (not skeins) and buy one skein of buffer.
  • ๐Ÿงถ Woodland Tweed Yarn… a solid worsted choice with great stitch definition
  • ๐Ÿงถ Wool of the Andes Bulky Yarn… another worsted weight option I love for lace
  • ๐ŸŒฒ A more rustic option… for a textured, woodsy finish (be aware of the rougher hand)
  • ๐Ÿ’ง A superwash option… great for easy care, but be cautious of the stretch. Always do a blocked gauge swatch before you commit to an entire sweater
  • ๐Ÿงถ Another superwash sub… same caution on stretch… block your gauge swatch first
  • ๐Ÿ’Ž The splurge option… if this is your “treat yourself” project
  • ๐Ÿ’ฐ An economical worsted… for the budget-friendly cast-on
  • ๐Ÿง Caron Macchiato Cakes… I have not knit the Thistlevine in this one personally, so check gauge first and see if you like the look and feel of the fabric before committing (and you know Yarnspirations… they may discontinue these cakes sooner than later)
  • ๐Ÿงถ Premier Yarns worsted options… browse their worsted weight line through my referral link
  • ๐ŸŒฟ A high-end cotton option… with proper gauge swatching, a quality cotton yarn (NOT something like Lily Peaches & Cream or Dishie) can work beautifully for summer wear. Do your blocked gauge swatch first and make sure you love the hand of the fabric
๐Ÿ’ก Designer Tip: If you sub yarns, do a full blocked gauge swatch before you cast on. Lace yarns behave very differently after they hit water… and that change is even bigger in superwash and cotton. Knit a 5" x 5" swatch in the Lace Columns pattern, wet block it, let it dry flat, and THEN measure your gauge ๐Ÿ’›

Needles & Notions

๐Ÿชก US 9 (5.5 mm) 32″ circular needle for the main body

๐Ÿชก US 8 (5.0 mm) 16″ circular needle (one size smaller) for the armhole and neck edgings

  • Stitch markers
  • Tapestry needle
  • Scissors
  • Stitch Saver Cord
  • Tape measure
  • Notions Bag for Supplies
  • Leather tags
  • Leather rivets
  • Blocking Squares
  • Blocking Pins 
  • Soaking Basin
  • Eucalan Wool Wash
  • Ball Winder and Swift
โญ๏ธ Marly Bird Amazon Storefront โญ๏ธ

๐ŸŽฅ Video Tutorials

If you are a visual learner… or just want a refresher on the techniques before you cast on… my YouTube channel has every supporting tutorial you need to knit the Thistlevine confidently. Save these to your “watch later” before you start ๐Ÿ’›

  • ๐ŸŽฅ Long Tail Cast-On… my favorite stretchy cast-on for the bottom edge of this tunic
  • ๐ŸŽฅ Knit Stitch (Continental Style)… helpful if you are working on speeding up your knit fabric
  • ๐ŸŽฅ Purl Stitch (Continental Style)… pair this with the knit tutorial above
  • ๐ŸŽฅ How to Add a Lifeline… your insurance policy for lace knitting
  • ๐ŸŽฅ How to Knit Lace… the foundation video for understanding how yarn overs and decreases pair up
  • ๐ŸŽฅ How to Tink… how to un-knit stitch by stitch (a lace knitter's best friend)
  • ๐ŸŽฅ How to Bury (Weave In) Ends… a clean finish for your Thistlevine
  • ๐ŸŽฅ Picking Up Stitches… for the armhole and neck edgings worked in the round on the smaller needle
  • ๐ŸŽฅ Mattress Stitch Seaming… the invisible seaming method for the side seams (right side facing, work from peplum hem up to the underarm)
  • ๐ŸŽฅ Blocking Lace Knits… why blocking is non-negotiable for lace and how to pin to schematic measurements
Woman wears a blue lace knit tunic vest over a black shirt, showcasing its stitch detail and drape; "THISTLEVINE" pattern shown.

๐Ÿงถ Thistlevine Knit Tunic โ€” Pattern Details

Skill Level

Intermediate

Measurements

To Fit Size: XS (S, M, L-XL, 2X, 3X, 4X, 5X)

Finished Bust: 31ยฝ (36, 40ยฝ, 45, 49ยฝ, 54, 58, 62ยฝ)” [80 (91.5, 103, 114.5, 125.5, 137, 147.5, 159) cm]

Length: 26ยฝ (28, 29ยผ, 30ยพ, 32, 33ยฝ, 34ยพ, 36ยผ)” [67.5 (71, 74.5, 78, 81.5, 85, 88.5, 92) cm]

Intended to fit snugly around bust.

๐Ÿ“ Fit Note: This tunic is designed with approximately 0-2″ [0-5 cm] of negative to neutral ease at the full bust. For the intended fit, choose the size closest to your actual bust measurement. If you prefer a more relaxed fit, consider sizing up.

Gauge

18 sts and 26 rows = 4″ [10 cm] in Lace Columns pattern.

Note: Accuracy of stitch gauge (measured across) is more important than row gauge (measured along) for this item.

Materials

Yarn: Knit Picks, Woodland Yarn (80% Merino Wool / 20% Baby Alpaca, 180 yds / 165 m, 3.5 oz / 100 g, CYCA #4 worsted)… 4 (4, 5, 5, 6, 7, 8, 9) skeins in #3278 Blue Jay Heather.

Knitting Needle: US 9 [5.5 mm] 32″ [81 cm] circular needle, AND 16″ [40.5 cm] circular needle one size smaller for edgings… or size required for gauge.

Notions:

  • Stitch markers
  • Tapestry needle 
  • Scissors
  • Tape measure
  • Stitch Saver Cord
  • Notions Bag for Supplies
  • Leather tags
  • Leather rivets
  • Blocking Squares
  • Blocking Pins 
  • Soaking Basin
  • Eucalan Wool Wash
  • Ball Winder and Swift
โญ๏ธ Marly Bird Amazon Storefront โญ๏ธ

Abbreviations

  • K โ€” Knit
  • K2tog โ€” Knit Two Stitches Together
  • P โ€” Purl
  • RS โ€” Right Side
  • St(s) โ€” Stitch(es)
  • Tbl โ€” Through The Back Loop
  • WS โ€” Wrong Side
  • Yo โ€” Yarn Over

Special Stitches

โญ Make 1 Purlwise (M1p): With tip of left needle, pick up the horizontal strand between stitches from front to back. Purl this strand through the back leg, twisting it into a loop in the process (1 stitch increased).

โญ Left Lifted Make-One (LLM1): Insert left needle tip into the left leg of the second stitch directly under the stitch on the right hand needle (the grandmother stitch), knit it through the back leg (1 stitch increased).

โญ Right Lifted Make-One (RLM1): Insert right needle tip into the right leg of the stitch directly under the stitch on the left hand needle (the mother stitch), lift the leg onto the left hand needle and knit it (1 stitch increased).

โญ TK2tog (Twisted Knit 2 Together): Slip 2 stitches purlwise, insert tip of left needle into the front leg of first stitch from front to back and slip it back onto left needle (stitch is now twisted), slip next stitch purlwise back onto left needle, knit two together.

โญ Tskp (Twisted Knit-Slip-Pass): Slip one stitch purlwise, knit next stitch, pass slipped stitch over knit stitch.

โญ Ssk (Slip, Slip, Knit): Slip 2 stitches, one at a time, as if to knit. Insert left hand needle into the front of these two stitches and knit them together from this position (1 stitch decreased).

โญ Ssp (Slip, Slip, Purl): Slip 2 stitches, one at a time, as if to knit, then slip them back onto the left needle without changing their orientation. Purl these 2 stitches together through the back loop (1 stitch decreased).


Knitting Charts

โœจ Following along with the free pattern on MarlyBird.com? You will have everything you need to knit the Thistlevine Tunic… but if you want the exclusive knitting charts (Lace Columns, Zig Zag Waves, Front Armhole Shaping for every size, Back Armhole Shaping for every size, and Neck Shaping), those are only available in the ad-free PDF version.

You will enjoy a clean, printable, ad-free experience while supporting Marly Bird's free tutorials and patterns ๐Ÿ’–

Thistlevine Knit Tunic Vest pattern by Marly Bird... ad-free PDF promo showing Marly wearing the blue heathered knit lace vest sample plus a fanned preview of the printable PDF pages with knitting charts and pattern instructions
Etsy
Shopify
Ravelry

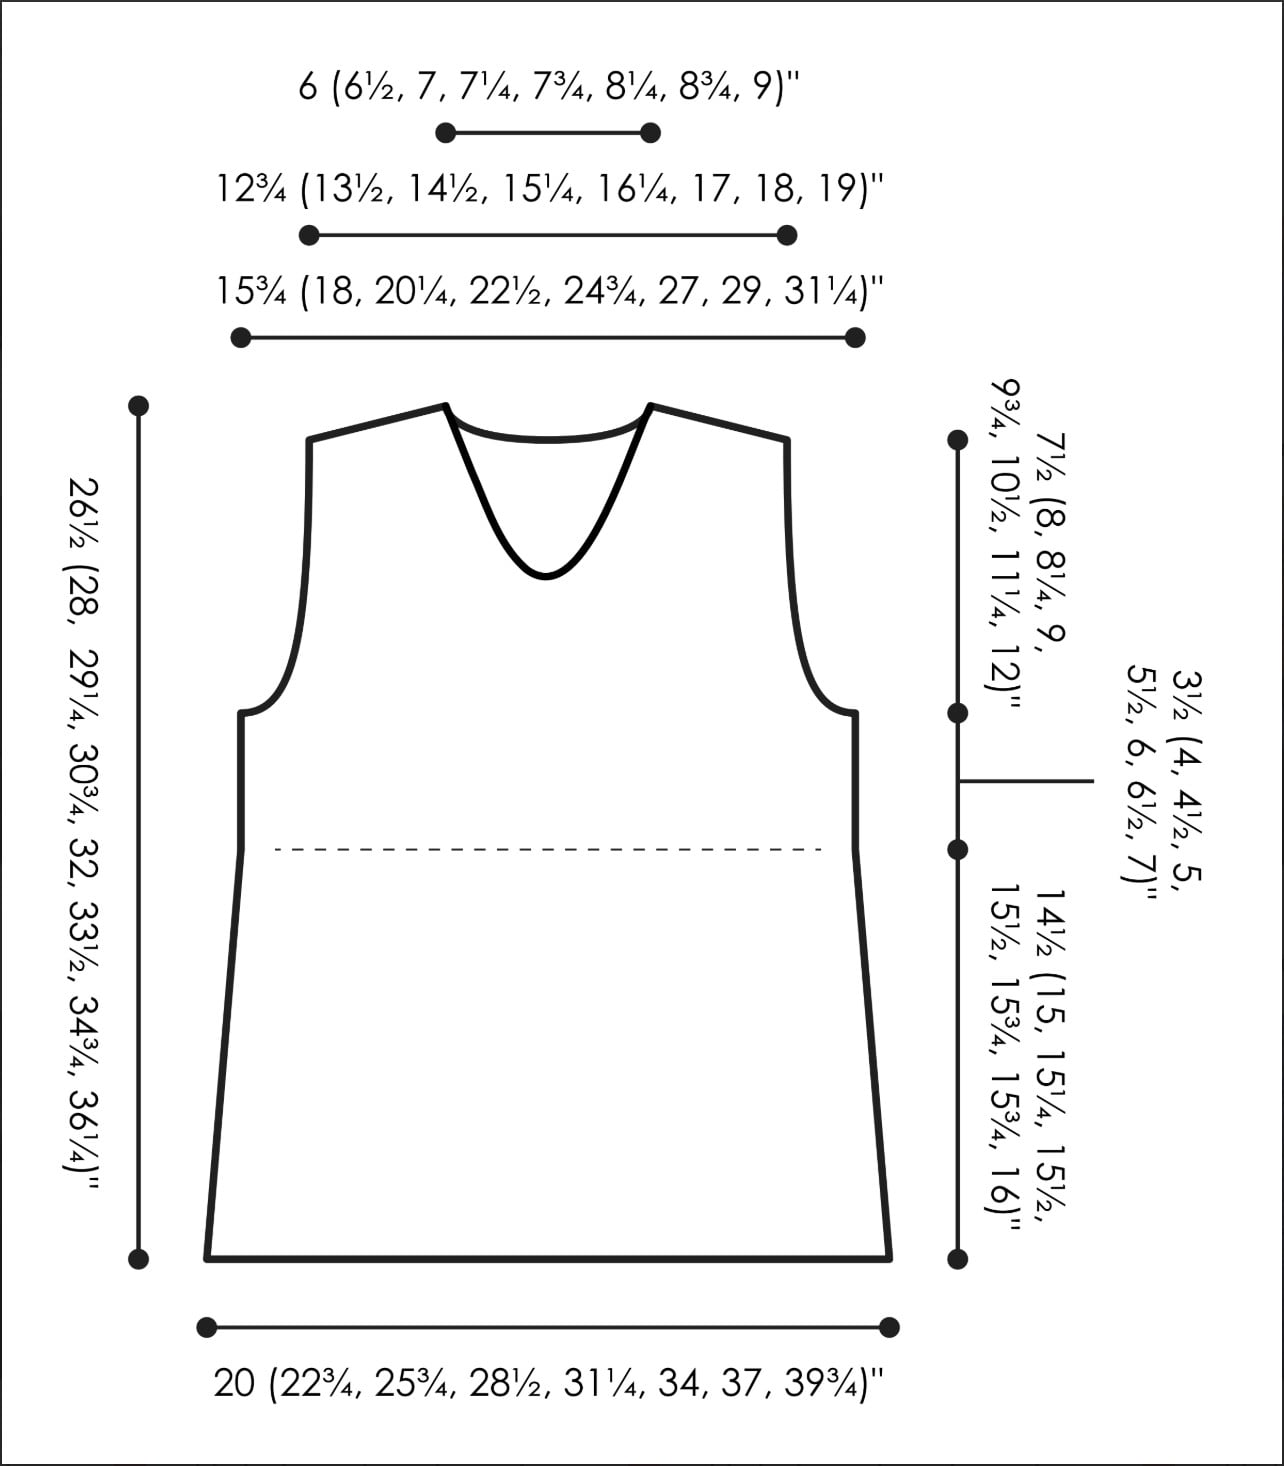
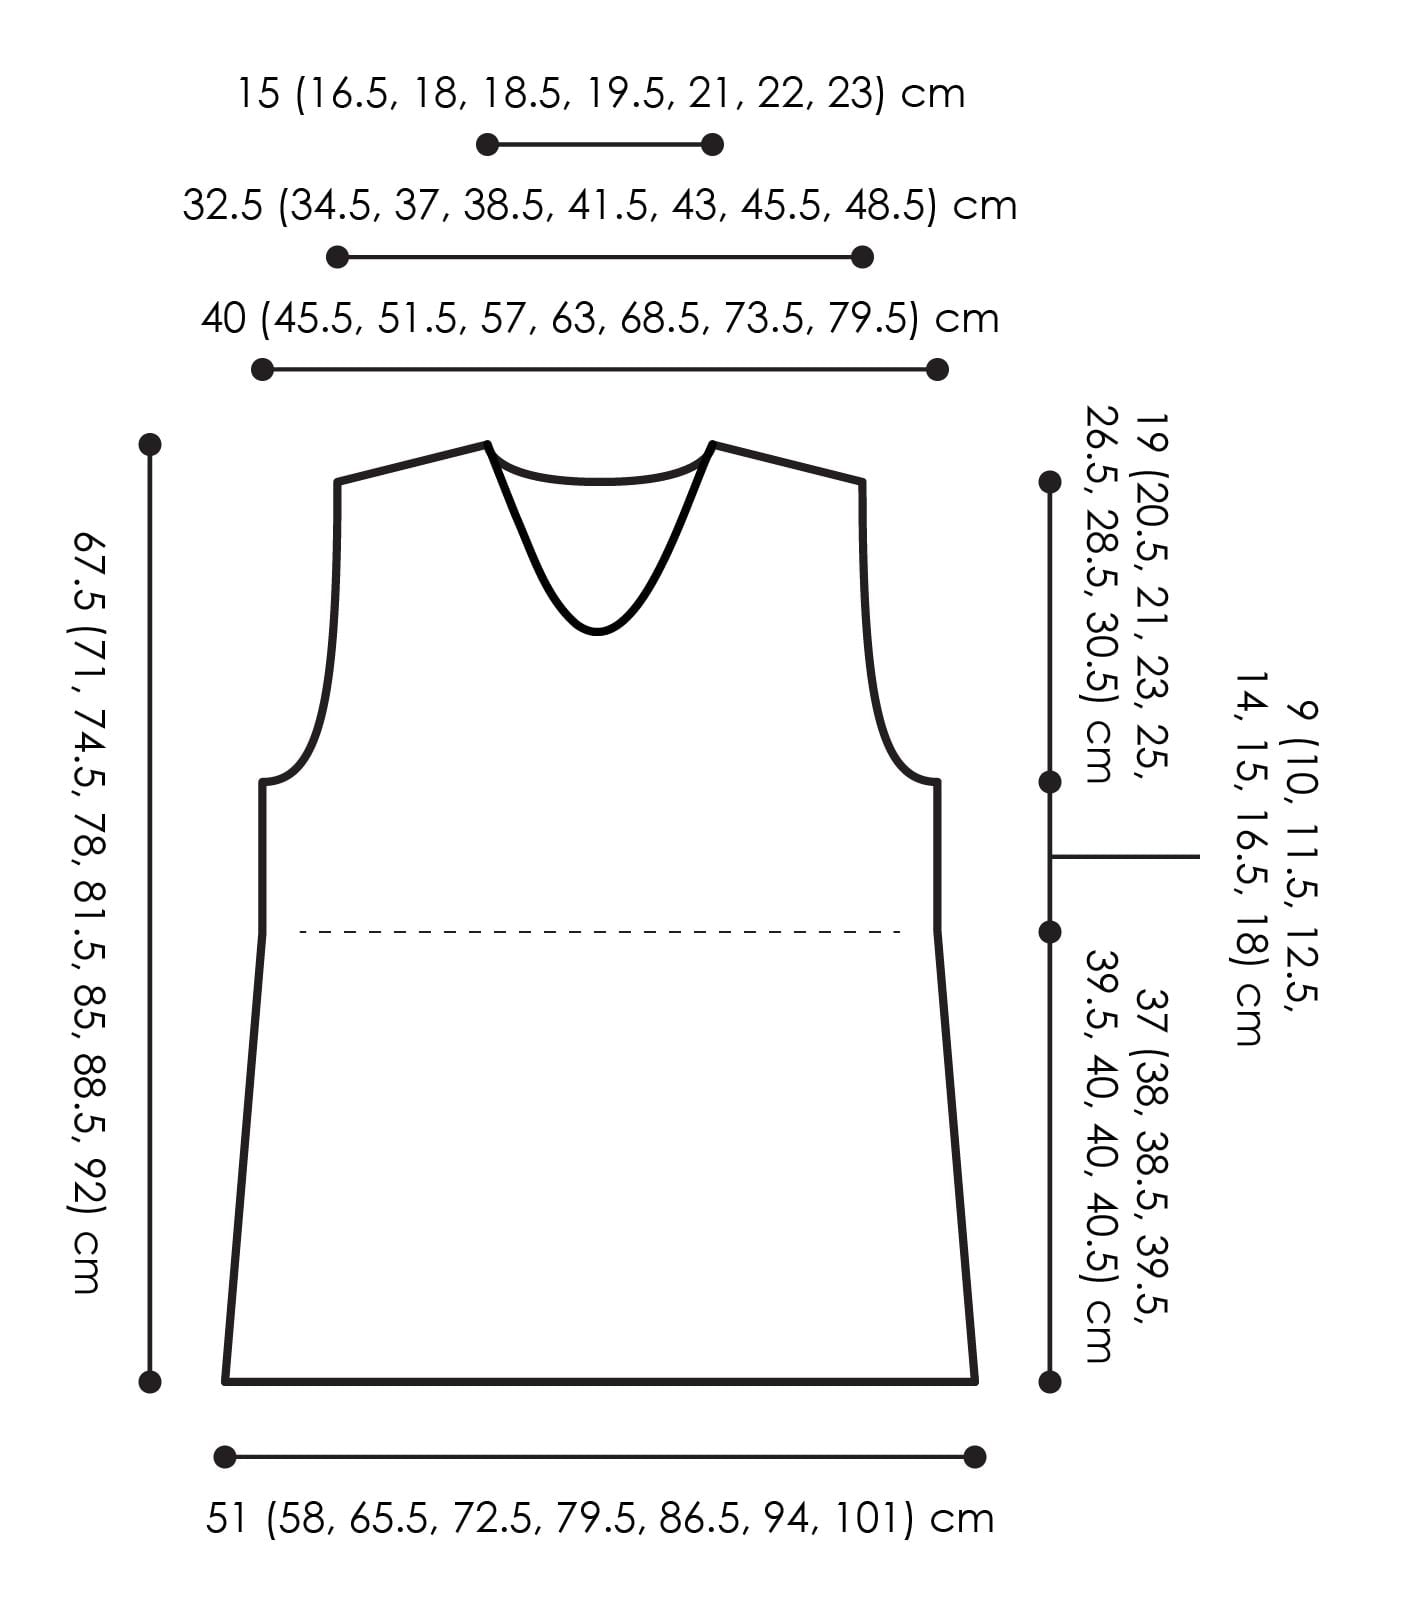
Schematic

Black-and-white diagram of a sleeveless V-neck knit vest with measurement lines for neckline, armholes, shoulders, body width, and length.
Thistlevine free knit tunic vest pattern schematic by Marly Bird, showing front and back measurements for sizes XS through 5X

Pattern Stitches

Lace Columns Pattern
Worked over a multiple of 5 sts plus 3.

  • Row 1 (WS): P1, p1 tbl, * k1, p2, k1, p1 tbl; repeat from * to last st, p1.
  • Row 2: K1, k1 tbl, * p1, ssk, yo, p1, k1 tbl; repeat from * to last st, k1.
  • Row 3: P1, p1 tbl, * k1, p2, k1, p1 tbl; repeat from * to last st, p1.
  • Row 4: K1, k1 tbl, * p1, yo, k2tog, p1, k1 tbl; repeat from * to last st, k1.
  • Row 5: P1, p1 tbl, * k1, p2, k1, p1 tbl; repeat from * to last st, p1.

Repeat Rows 2-5 only for Lace Columns Pattern.

Zig Zag Waves Pattern
Worked over a multiple of 12 sts plus 3.

  • Row 1 (WS): P1, p1 tbl, * k1, p9, k1, p1 tbl; repeat from * to last st, p1.
  • Row 2: K1, k1 tbl, * p1, k2tog, k4, yo, k1, yo, ssk, p1, k1 tbl; repeat from * to last st, k1.
  • Row 3: P1, p1 tbl, * k1, p9, k1, p1 tbl; repeat from * to last st, p1.
  • Row 4: K1, k1 tbl, * p1, k2tog, k3, [yo, k1], twice, ssk, p1, k1 tbl; repeat from * to last st, k1.
  • Row 5: P1, p1 tbl, * k1, p9, k1, p1 tbl; repeat from * to last st, p1.
  • Row 6: K1, k1 tbl, * p1, k2tog, k2, yo, k1, yo, k2, ssk, p1, k1 tbl; repeat from * to last st, k1.
  • Row 7: P1, p1 tbl, * k1, p9, k1, p1 tbl; repeat from * to last st, p1.
  • Row 8: K1, k1 tbl, * p1, k2tog, [k1, yo] twice, k3, ssk, p1, k1 tbl; repeat from * to last st, k1.
  • Row 9: P1, p1 tbl, * k1, p9, k1, p1 tbl; repeat from * to last st, p1.
  • Row 10: K1, k1 tbl, * p1, k2tog, yo, k1, yo, k4, ssk, p1, k1 tbl; repeat from * to last st, k1.
  • Row 11: P1, p1 tbl, * k1, p9, k1, p1 tbl; repeat from * to last st, p1.
  • Row 12: K1, k1 tbl, * p1, k2tog, [k1, yo] twice, k3, ssk, p1, k1 tbl; repeat from * to last st, k1.
  • Row 13: P1, p1 tbl, * k1, p9, k1, p1 tbl; repeat from * to last st, p1.
  • Row 14: K1, k1 tbl, * p1, k2tog, k2, yo, k1, yo, k2, ssk, p1, k1 tbl; repeat from * to last st, k1.
  • Row 15: P1, p1 tbl, * k1, p9, k1, p1 tbl; repeat from * to last st, p1.
  • Row 16: K1, k1 tbl, * p1, k2tog, k3, [yo, k1], twice, ssk, p1, k1 tbl; repeat from * to last st, k1.
  • Row 17: P1, p1 tbl, * k1, p9, k1, p1 tbl; repeat from * to last st, p1.

Repeat Rows 2-17 only for Zig Zag Waves Pattern.


Notes

  • Directions are for the smallest size… changes for all other sizes are in parentheses. When only one number is given, then that number applies to all sizes.
  • Tunic is worked in one piece from bottom front to bottom back, then seamed at the sides. Armhole and neck edgings are picked up and knitted.
  • Required length measurements at different points throughout the pattern are approximate. It is okay to be off by ยผ” [0.5 cm] or even a little more, in order to end up on the correct pattern row as indicated.
  • Two different types of markers are used in this pattern:
    • Shoulder-Shaping Markers… these markers MOVE throughout the short-row shoulder shaping section. Move the marker exactly as instructed after each short-row turn.
    • Armhole-Length Markers… these markers remain FIXED in the fabric. They are used later to measure the length of the back armhole shaping.
    Keeping these markers separate (use a contrasting color for the Shoulder-Shaping Marker) will help ensure proper garment shaping.

GROW

To Unlockย Exclusive Subscriber Contentย click the Box below and join for free by simply adding your email and creating a password! If you are having troubles, clear your cache or reset your password or login to the Grow Publisher Portal.

>> Learn More About Grow Here <<

I'm thrilled to share this amazing pattern with you, many patterns on my blog are absolutely free! I kindly request that you don't copy and paste or distribute this pattern. Prefer an ad-free experience? Buy a digital PDF pattern for a small fee from one of my online stores for a seamless crafting journey. 

I appreciate your support and readership. You are the reason I can keep doing what I love and sharing it with others. So, thank you from the bottom of my yarn-loving heart! Disclosure: This post contains affiliate links, meaning I get a commission if you decide to make a purchase through my links at no cost to you.

Person models a blue lace knit tunic, showing stitch detail and drape, in a cozy room with bookshelves and plants.

๐Ÿงถ Thistlevine Knit Tunic โ€” Pattern Instructions

FRONT

Front Peplum

Cast on 87 (99, 111, 123, 135, 147, 159, 171) sts, and knit 3 rows.

Work in Zig Zag Waves pattern until Peplum measures approximately 14ยฝ (15, 15ยผ, 15ยฝ, 15ยฝ, 15ยพ, 15ยพ, 16)” [37 (38, 38.5, 39.5, 39.5, 40, 40, 40.5) cm], ending after a pattern Row 2 or Row 10.

Bust

๐Ÿ“ Pattern Transition Note: This row reduces the stitch count to prepare for the Lace Columns pattern while maintaining the overall shaping of the garment. Count your stitches after completing this row to ensure accuracy before continuing.

Next Row (pattern transition row, WS): P1, p1 tbl, * k1, p2tog, p5, ssp, k1, p1 tbl; repeat from * to last st, p1 โ€” 73 (83, 93, 103, 113, 123, 133, 143) sts.

Work in Lace Columns pattern for 3ยฝ (4, 4ยฝ, 5, 5ยฝ, 6, 6ยฝ, 7)” [9 (10, 11.5, 12.5, 14, 15, 16.5, 18) cm], starting with a pattern Row 2 and ending after a pattern Row 5 (3, 3, 3, 5, 5, 5, 3).

Shape Front Armholes

For All Sizes Except XS:

Next 2 rows:

  • Row 1 (bind-off row, RS): Bind off 5 sts, k1, k1 tbl, work in established Lace Columns pattern to end โ€” x (78, 88, 98, 108, 118, 128, 138) sts.
  • Row 2 (bind-off row, WS): Bind off 5 sts, p1, p1 tbl, work in established Lace Columns pattern to end โ€” x (73, 83, 93, 103, 113, 123, 133) sts.

Repeat the last 2 rows x (0, 0, 0, 1, 1, 1, 2) more times โ€” x (73, 83, 93, 93, 103, 113, 113) sts.

For All Sizes:

Next 10 rows:

  • Row 1 (dec row, RS): K1, Tskp, work in established Lace Columns pattern to last 3 sts, Tk2tog, k1 โ€” 71 (71, 81, 91, 91, 101, 111, 111) sts.
  • Row 2: P1, p1 tbl, work in established Lace Columns pattern to last 2 sts, p1 tbl, p1.
  • Row 3 (dec row, RS): K1, Tskp, k1, work in established Lace Columns pattern to last 4 sts, k1, Tk2tog, k1 โ€” 69 (69, 79, 89, 89, 99, 109, 109) sts.
  • Row 4: P1, p1 tbl, p1, work in established Lace Columns pattern to last 3 sts, p1, p1 tbl, p1.
  • Row 5 (dec row, RS): K1, Tskp, work in established Lace Columns pattern to last 3 sts, Tk2tog, k1 โ€” 67 (67, 77, 87, 87, 97, 107, 107) sts.
  • Row 6: P1, p1 tbl, work in established Lace Columns pattern to last 2 sts, p1 tbl, p1.
  • Row 7 (dec row, RS): K1, Tskp, work in established Lace Columns pattern to last 3 sts, Tk2tog, k1 โ€” 65 (65, 75, 85, 85, 95, 105, 105) sts.
  • Row 8: P1, p1 tbl, work in established Lace Columns pattern to last 2 sts, p1 tbl, p1.
  • Row 9 (dec row, RS): K1, Tk2tog work in established Lace Columns pattern to last 3 sts, Tskp, k1 โ€” 63 (63, 73, 83, 83, 93, 103, 103) sts.
  • Row 10: P1, p1 tbl, work in established Lace Columns pattern to last 2 sts, p1 tbl, p1.

Repeat the last 10 rows 0 (0, 0, 1, 1, 1, 2, 2) more times โ€” 63 (63, 73, 73, 73, 83, 83, 83) sts.

Work evenly in established Lace Columns pattern until piece measures 3ยฝ (3ยฝ, 3ยพ, 4, 4ยพ, 5, 5ยพ, 6)” [22 (22, 24, 26, 30, 32, 38, 40) cm] from beginning of armhole shaping, ending after a pattern Row #3.

Shape Neck and Shoulders

Place a marker on either side of center 7 sts โ€” 28 (28, 33, 33, 33, 38, 38, 38) sts remain on either side.

Next Row (RS, separate shoulders): Work as established to 1 st before marker, k1, remove marker, bind off center 7 sts, remove marker, k1, work as established to end.

Right Shoulder โ€” Front

Next 10 Rows:

  • Row 1 (WS): Work in established Lace Columns pattern to last st, p1.
  • Row 2 (decrease row, RS): K1, Tskp, work in established Lace Columns pattern to end โ€” 27 (27, 32, 32, 32, 37, 37, 37) sts.
  • Row 3: Work in established Lace Columns pattern to last 2 sts, p1 tbl, p1.
  • Row 4 (decrease row, RS): K1, Tskp, k1, work in established Lace Columns pattern to end โ€” 26 (26, 31, 31, 31, 36, 36, 36) sts.
  • Row 5: Work in established Lace Columns pattern to last 3 sts, p1, p1 tbl, p1.
  • Row 6 (decrease row, RS): K1, Tskp, work in established Lace Columns pattern to end โ€” 25 (25, 30, 30, 30, 35, 35, 35) sts.
  • Row 7: Work in established Lace Columns pattern to last 2 sts, p1 tbl, p1.
  • Row 8 (decrease row, RS): K1, Tskp, work in established Lace Columns pattern to end โ€” 24 (24, 29, 29, 29, 34, 34, 34) sts.
  • Row 9: Work in established Lace Columns pattern to last 3 sts, p2 tbl, p1.
  • Row 10 (decrease row, RS): K1, Tk2tog, work in established Lace Columns pattern to end โ€” 23 (23, 28, 28, 28, 33, 33, 33) sts.

Repeat the last 10 rows 1 (1, 1, 1, 1, 2, 2, 2) more times โ€” 18 (18, 23, 23, 23, 23, 23, 23) sts.

Work evenly in established Lace Columns pattern until Armhole measures 7ยฝ (8, 8ยผ, 9, 9ยพ, 10ยฝ, 11ยผ, 12)” [19 (20.5, 21, 23, 25, 26.5, 28.5, 30.5) cm] in length, ending after a pattern Row 3.

๐Ÿ’ก Designer Tip: Use a removable marker in a contrasting color for the Shoulder-Shaping Marker. This marker will move throughout the short-row section and is different from the Armhole-Length Marker, which remains fixed in the fabric.

With RS facing, mark 1st st for use later in Shoulder Shaping, and move this marker up to the new st above it after every row.

With RS facing, place a marker at left edge of fabric to mark Right Front armhole length. This marker does not move until it is removed.

Right Shoulder โ€” Back

Next 4 rows:

  • Row 1 (RS): Work in established Lace Columns pattern.
  • Row 2: Work in established Lace Columns pattern to end, cast on 5 sts โ€” 23 (23, 28, 28, 28, 28, 28, 28) sts.
  • Row 3: K1, k1 tbl, p1, ssk, yo, p1, work in established Lace Columns pattern to end.
  • Row 4: Work in established Lace Columns pattern to end, cast on 5 sts โ€” 28 (28, 33, 33, 33, 33, 33, 33) sts.

For Last 3 Sizes Only:

Next 2 rows:

  • Row 1 (RS): K1, k1 tbl, ssk, yo, p1, work in established Lace Columns pattern to end.
  • Row 2: Work in established Lace Columns pattern to end, cast on 5 sts โ€” x (x, x, x, x, x, 38, 38, 38) sts.

For All Sizes: Place 28 (28, 33, 33, 33, 38, 38, 38) Right Shoulder sts on a holder or spare needle.

A person models a blue lace knit tunic indoors, showing off the airy stitch detail and texture of the Thistlevine pattern.

Left Shoulder โ€” Front

With WS facing, join new yarn to 28 (28, 33, 33, 33, 38, 38, 38) Left Shoulder sts still on the needle.

Next 10 Rows:

  • Row 1 (WS): P1, work in established Lace Columns pattern to end.
  • Row 2 (decrease row, RS): Work in established Lace Columns pattern to last 3 sts, Tk2tog, k1 โ€” 27 (27, 32, 32, 32, 37, 37, 37) sts.
  • Row 3: P1, p1 tbl, work in established Lace Columns pattern to end.
  • Row 4 (decrease row, RS): Work in established Lace Columns pattern to last 4 sts, k1, Tk2tog, k1 โ€” 26 (26, 31, 31, 31, 36, 36, 36) sts.
  • Row 5: P1, p1 tbl, p1, work in established Lace Columns pattern to end.
  • Row 6 (decrease row, RS): Work in established Lace Columns pattern to last 3 sts, Tk2tog, k1 โ€” 25 (25, 30, 30, 30, 35, 35, 35) sts.
  • Row 7: P1, p1 tbl, work in established Lace Columns pattern to end.
  • Row 8 (decrease row, RS): Work in established Lace Columns pattern to last 3 sts, Tk2tog, k1 โ€” 24 (24, 29, 29, 29, 34, 34, 34) sts.
  • Row 9: P1, p2 tbl, work in established Lace Columns pattern to end.
  • Row 10 (decrease row, RS): Work in established Lace Columns pattern to last 3 sts, Tskp, k1 โ€” 23 (23, 28, 28, 28, 33, 33, 33) sts.

Repeat the last 10 rows 1 (1, 1, 1, 1, 2, 2, 2) more times โ€” 18 (18, 23, 23, 23, 23, 23, 23) sts.

Work evenly in established Lace Columns pattern until Armhole measures 7ยฝ (8, 8ยผ, 9, 9ยพ, 10ยฝ, 11ยผ, 12)” [19 (20.5, 21, 23, 25, 26.5, 28.5, 30.5) cm] in length, ending after a pattern Row 3.

๐Ÿ’ก Designer Tip: Use a removable marker in a contrasting color for the Shoulder-Shaping Marker. This marker will move throughout the short-row section and is different from the Armhole-Length Marker, which remains fixed in the fabric.

With RS facing, mark last st for use later in Shoulder Shaping, and move this marker up to the new st above it after every row.

With RS facing, place a marker at right edge of fabric to mark Left Front armhole length. This marker does not move until it is removed.

Left Shoulder โ€” Back

Next 4 rows:

  • Row 1 (RS): Work in established Lace Columns pattern to end, cast on 5 sts โ€” 23 (23, 28, 28, 28, 28, 28, 28) sts.
  • Row 2: P1, p1 tbl, k1, p2, k1, work in established Lace Columns pattern to end.
  • Row 3: Work in established Lace Columns pattern to end, cast on 5 sts โ€” 28 (28, 33, 33, 33, 33, 33, 33) sts.
  • Row 4: P1, p1 tbl, k1, p2, k1, work in established Lace Columns pattern to end.

For Last 3 Sizes Only:

Next 2 rows:

  • Row 1 (RS): Work in established Lace Columns pattern to end, cast on 5 sts โ€” x (x, x, x, x, 38, 38, 38) sts.
  • Row 2: P1, p1 tbl, k1, p2, k1, work in established Lace Columns pattern to end.
Person models a blue knit vest over a white shirt in a cozy, colorful room; texture and stitch detail of tunic pattern visible.

BACK

Join Shoulders

For All Sizes:

Next 2 Rows:

  • Row 1 (Shoulder joining row, RS): Work in established Lace Columns pattern across Left Shoulder sts, cast on 7 sts, then work in established Lace Columns pattern across Right Shoulder sts from holder or spare needle โ€” 63 (63, 73, 73, 73, 83, 83, 83) sts.
  • Row 2: Work next pattern row of Lace Columns pattern across all sts.
๐ŸŒ€ Short Row Tip: The short rows in this section create a gentle shoulder slope for improved fit. When instructed to work p1 in stitch 1 row below or k1 in stitch 1 row below, you are working into the stitch directly beneath the next stitch on the needle. This technique closes the gap created by the short-row turn and helps create a smooth shoulder line without visible holes. Take care to move the Shoulder-Shaping Markers exactly as instructed… these markers track the shaping progression and should not be confused with the Armhole-Length Markers.

Shape Shoulders with Short Rows

Next 12 Rows:

  • Row 1 (RS): Work in established Lace Columns pattern to second Shoulder-Shaping marker, p1 in st 1 row below the marked st, turn work.
  • Row 2: Work in established Lace Columns pattern to Shoulder-Shaping marker, k1 in st 1 row below the marked st, turn work.
  • Row 3: Work in established Lace Columns pattern to 2nd st past Shoulder-Shaping marker, p1 in st 1 row below next st and move Shoulder-Shaping marker to this st, turn work.
  • Row 4: Work in established Lace Columns pattern to 2nd st past Shoulder-Shaping marker, k1 in st 1 row below next st and move Shoulder-Shaping marker to this st, turn work.
  • Row 5: Work in established Lace Columns pattern to 3rd st past Shoulder-Shaping marker, p1 in st 1 row below next st and move Shoulder-Shaping marker to this st, turn work.
  • Row 6: Work in established Lace Columns pattern to 3rd st past Shoulder-Shaping marker, k1 in st 1 row below next st and move Shoulder-Shaping marker to this st, turn work.
  • Row 7: Work in established Lace Columns pattern to 2nd st past Shoulder-Shaping marker, p1 in st 1 row below next st and move Shoulder-Shaping marker to this st, turn work.
  • Row 8: Work in established Lace Columns pattern to 2nd st past Shoulder-Shaping marker, k1 in st 1 row below next st and move Shoulder-Shaping marker to this st, turn work.
  • Row 9: Work in established Lace Columns pattern to 3rd st past Shoulder-Shaping marker, p1 in st 1 row below next st and move Shoulder-Shaping marker to this st, turn work.
  • Row 10: Work in established Lace Columns pattern to 3rd st past Shoulder-Shaping marker, k1 in st 1 row below next st and move Shoulder-Shaping marker to this st, turn work.
  • Row 11: Work in established Lace Columns pattern to 2nd st past Shoulder-Shaping marker, p1 in st 1 row below next st and move Shoulder-Shaping marker to this st, turn work.
  • Row 12: Work in established Lace Columns pattern to 2nd st past Shoulder-Shaping marker, k1 in st 1 row below next st and move Shoulder-Shaping marker to this st, turn work.

For Last 6 Sizes Only:

Next 2 Rows:

  • Row 1 (RS): Work in established Lace Columns pattern to 3rd st past Shoulder-Shaping marker, p1 in st 1 row below next st and move Shoulder-Shaping marker to this st, turn work.
  • Row 2: Work in established Lace Columns pattern to 3rd st past Shoulder-Shaping marker, k1 in st 1 row below next st and move Shoulder-Shaping marker to this st, turn work.

For All Sizes:

Next 2 Rows:

  • Row 1 (RS): Work in established Lace Columns pattern to end of row.
  • Row 2: Work in established Lace Columns pattern across all sts.

Remove both Shoulder Shaping markers, being sure to keep Armhole length markers in the fabric.

Work evenly in established Lace Columns pattern until Back Armhole measures 6 (6ยผ, 6ยฝ, 5ยฝ, 6, 6ยพ, 6, 6ยฝ)” [15 (16, 16.5, 14, 15, 17, 15, 16.5) cm] from Armhole length marker, ending after a pattern Row #5.

Shape Back Armholes

  • Row 1 (RS): K1, RLM1, work in established Lace Columns Pattern to last st, LLM1, k1 โ€” 65 (65, 75, 75, 75, 85, 85, 85) sts.
  • Row 2: P1, k1, work in established Lace Columns Pattern to last 2 sts, k1, p1.
  • Row 3: K1, RLM1, p1, work in established Lace Columns Pattern to last 2 sts, p1, LLM1, k1 โ€” 67 (67, 77, 77, 77, 87, 87, 87) sts.
  • Row 4: P2, k1, work in established Lace Columns Pattern to last 3 sts, k1, p2.
  • Row 5: K1, RLM1, k1, p1, work in established Lace Columns Pattern to last 3 sts, p1, k1, LLM1, k1 โ€” 69 (69, 79, 79, 79, 89, 89, 89) sts.
  • Row 6: P3, k1, work in established Lace Columns Pattern to last 4 sts, k1, p3.
  • Row 7: K1, RLM1, yo, k2tog, p1, work in established Lace Columns Pattern to last 4 sts, p1, yo, k2tog, LLM1, k1 โ€” 71 (71, 81, 81, 81, 91, 91, 91) sts.
  • Row 8: P1, k1, p2, k1, work in established Lace Columns Pattern to last 5 sts, k1, p2, k1, p1.
  • Row 9: K1, RLM1, p1, ssk, yo, p1, work in established Lace Columns Pattern to last 5 sts, p1, ssk, yo, p1, LLM1, k1 โ€” 73 (73, 83, 83, 83, 93, 93, 93) sts.
  • Row 10: P1, p1 tbl, work in established Lace Columns Pattern to last 2 sts, p1 tbl, p1.

Repeat the last 10 rows 0 (0, 0, 1, 1, 1, 2, 2) more times โ€” 73 (73, 83, 93, 93, 103, 113, 113) sts.

For All Sizes Except XS:

Next 2 Rows:

  • Row 1 (cast-on row, RS): Cast on 5 sts, k1, k1 tbl, p1, yo, k2tog, p1, work in established Lace Columns Pattern to end โ€” x (78, 88, 98, 98, 108, 118, 118) sts.
  • Row 2 (cast-on row, WS): Cast on 5 sts, p1, p1 tbl, k1, p2, k1, work in established Lace Columns Pattern to end โ€” x (83, 93, 103, 103, 113, 123, 123) sts.

Repeat the last 2 rows x (0, 0, 0, 1, 1, 1, 2) more times โ€” x (83, 93, 103, 113, 123, 133, 143) sts.

For All Sizes:

Work evenly in Lace Columns pattern for 3ยฝ (4, 4ยฝ, 5, 5ยฝ, 6, 6ยฝ, 7)” [9 (10, 11.5, 12.5, 14, 15, 16.5, 18) cm], ending after a RS row โ€” 73 (83, 93, 103, 113, 123, 133, 143) sts.

Woman models a blue knitted sleeveless vest over a black shirt, showing textured stitchwork, with craft shelves in the background.

Back Peplum

๐Ÿ“ Pattern Transition Note: This row increases the stitch count to return to the Zig Zag Waves pattern. Verify your stitch count before beginning the Back Peplum section.

Next Row (pattern transition row, WS): P1, p1 tbl, * k1, M1p, p7, M1p, k1, p1 tbl; repeat from * to last st, p1 โ€” 87 (99, 111, 123, 145, 157, 169, 181) sts.

Work in Zig Zag Waves pattern until Peplum measures approximately 14ยฝ (15, 15ยผ, 15ยฝ, 15ยฝ, 15ยพ, 15ยพ, 16)” [37 (38, 38.5, 39.5, 39.5, 40, 40, 40.5) cm], starting with a pattern Row #2, and ending after a pattern Row #3 or #11.

Bind off all sts loosely.


FINISHING

Blocking

The lace motifs will open considerably after blocking.

Block the tunic to the measurements shown in the schematic. Pin carefully and allow the garment to dry completely before seaming.

Because this design features lace stitch patterns, blocking will dramatically improve stitch definition and finished measurements.

Seaming

Sew side seams.

๐Ÿ’ก Designer Tip: Mattress stitch works especially well for the side seams of this garment. Take time to align the Zig Zag Waves motifs before seaming for the smoothest finished appearance.
Full-length wearing shot of the Thistlevine free knit tunic vest pattern by Marly Bird, showing the complete A-line peplum silhouette over jeans, sizes XS through 5X

Armhole Edgings

With RS facing, using shorter circular needle, and beginning at side seam, pick up and knit 64 (76, 78, 86, 100, 106, 112, 128) sts. Join round and mark first st. Knit 1 round, then bind off all sts loosely. Work other armhole edging the same way.

Neck Edging

With RS facing, using shorter circular needle, and beginning at side seam, pick up and knit 68 (70, 72, 74, 76, 82, 90, 94) sts. Join round and mark first st. Knit 1 round, then bind off all sts loosely.

Weave in all loose ends.

Person models a blue lace-knit tunic with intricate stitch detail; text reads "THISTLEVINE Knit Tunic Pattern" and "Marly Bird.

๐Ÿ‘— Styling & Layering Ideas

The Thistlevine is a true three-season piece. The merino-and-alpaca blend is warm enough for fall layering, breathable enough for a cool summer evening, and the sleeveless silhouette means it works as a layering piece OR a stand-alone top depending on what you wear underneath. If you love the layering vest silhouette, browse my full collection of knit vest patterns for spring and summer. A few of my favorite ways to wear this one:

  • ๐Ÿ‚ Over a fitted turtleneck… fall and winter layering staple, especially in a heathered colorway
  • ๐Ÿ‘š Over a flowy blouse or button-down… elevated boho look, perfect for brunch or a workday with personality
  • ๐Ÿ‘– With wide-leg trousers or a midi skirt… takes it from casual to polished in one outfit change
  • ๐ŸŒธ At full tunic length over leggings… a complete, comfortable outfit for travel days or working from home
  • โœ‚๏ธ Shortened to a cropped vest with high-waisted jeans… fresh, modern, summer-ready
  • โ˜€๏ธ On its own for a cool summer evening… the lace breathes beautifully and the layered look is unbeatable in warmer weather
๐Ÿ’ก Designer Tip: If the lace open spots on the bust make you self-conscious, layer it OVER a fitted tank or shell in a contrast color so the pattern reads against the layer underneath. Cream Thistlevine over a black tank… black Thistlevine over a soft pink tank… try it ๐Ÿ’›

๐Ÿ’ง Blocking Tips

The Thistlevine NEEDS to be blocked. Knit lace looks scrunched and unimpressive on the needles… once it hits water, it opens up and the Lace Columns reveal their full vertical lines. This step is non-negotiable for a lace garment.

My go-to approach:

  • ๐Ÿ’ง Wet block before seaming. Soak the finished piece (still flat, before side seams) in cool water with a no-rinse wool wash like Soak or Eucalan for 15-20 minutes. Press out water gently… do NOT wring.
  • ๐Ÿ“ Pin to schematic measurements. Lay the piece flat on blocking mats. Pin out to the finished bust and length measurements for your size (see the table above). Use enough pins to get clean lines… blocking wires make this faster if you have them.
  • ๐ŸŒฌ๏ธ Let it dry completely. This can take 24 to 48 hours depending on humidity. Resist the urge to seam early. Fully-dried blocking is what locks the lace into shape.
  • โœ๏ธ Seam, then add edgings. Once blocked and dry, sew the side seams, then pick up and knit the armhole and neck edgings as written.
  • ๐Ÿ’ฆ Optional second block after finishing. A light steam or spritz block after the edgings are done helps everything settle. Lay flat to dry.

โœ‚๏ธ Seaming Your Tunic: Order Matters

One of the most common questions I get on garment patterns is: “In what order do I seam everything?” For the Thistlevine, the order really does matter… do it in this sequence for the cleanest finish:

  1. Block the finished piece FLAT first (before any seaming). Lay it out to schematic measurements, pin, let dry completely. This is non-negotiable for lace.
  2. Weave in any loose ends from the body (cast-on tail, yarn join tails, shoulder bridge join tails). It is easier to weave them in cleanly while the piece is still flat than after seaming.
  3. Sew the side seams using mattress stitch (with the right side facing you). Work from the bottom of the peplum up to the underarm. Take your time matching the Zig Zag Waves pattern across the seam line… it will be visible.
  4. Pick up and knit the armhole edgings in the round, on the smaller circular needle, starting at the side seam. Knit one round, bind off loosely. Repeat for the second armhole.
  5. Pick up and knit the neck edging the same way… in the round on the smaller circular needle, starting at the side of the shoulder, knit one round, bind off loosely.
  6. Weave in the edging tails (cast-on and bind-off tails for each of the three edgings).
  7. Optional: light steam or spritz block the finished tunic to settle the edgings flat. Lay flat to dry.

Why this order? If you pick up and knit the armhole edgings BEFORE you seam the sides, you cannot work them cleanly in the round… they will end up as flat, sewn-on bindings, which curl. Seaming first means you can join the round at the underarm seam for an invisible finish.

Blue lace knit tunic with intricate stitch detail, modeled over black shirt and jeans in a cozy, colorful room.

โญ Favorite the Thistlevine on Ravelry

Heading to Ravelry next? Favorite the Thistlevine and queue it up so you can find it again later ๐Ÿ’›

  • ๐Ÿ’œ Favorite the Thistlevine pattern on Ravelry
Favorite This Pattern on Ravelry - Marly Bird

๐Ÿงต More Free Knit Patterns You Will Love

If you are in a knit-everything mood (and I support that fully), here are a few more of my free knit patterns to add to your queue:

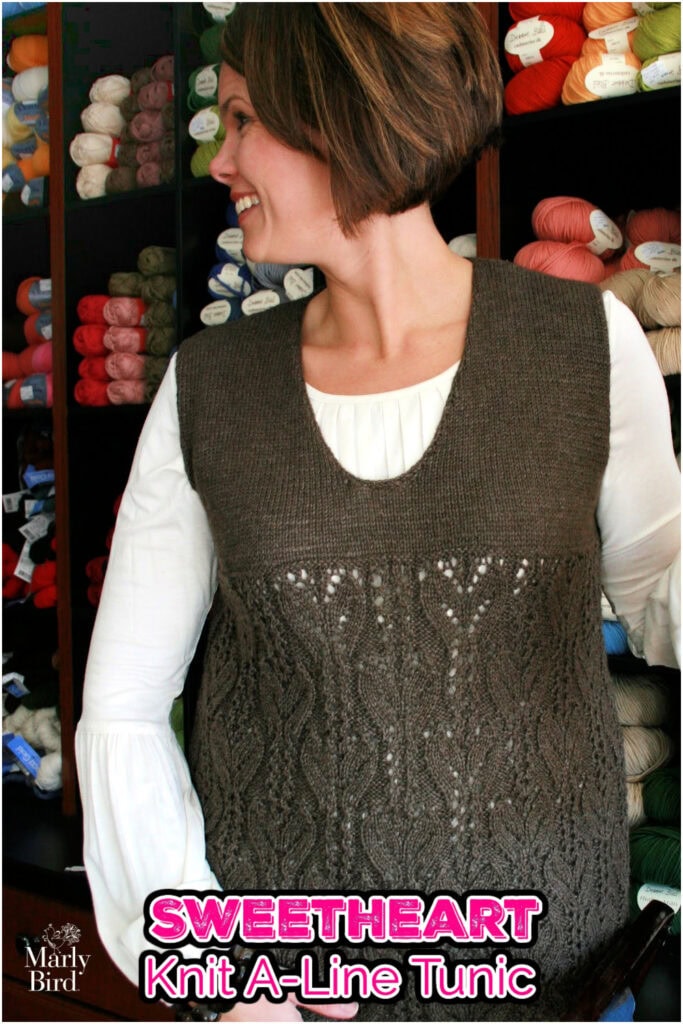
  • ๐Ÿงถ Sweetheart A-Line Knit Tunic… another sleeveless knit tunic with lace, in sport weight
  • ๐Ÿงถ Almond Brittle Knit Wrap… bulky lace knit wrap, beginner-friendly lace
  • ๐Ÿงถ Shangri-La Knit Lace Scarf or Shawl… gorgeous beginner-friendly knit lace project
  • ๐Ÿงถ Blood of My Blood Knit Shawl… half-hexagon lace shawl with cables, intermediate level
Woman models a brown, sleeveless knit A-line tunic with lace details, standing before yarn shelves. SWEETHEART Knit A-Line Tunic.
A woman wearing a chunky, multicolored knit scarf shows off textured stitches; shelves and plants visible behind her.
A gray knit lace scarf with a delicate, openwork stitch is modeled outdoors, showing its texture and drape in sunlight.

๐Ÿ’™ BiCrafty Moment: Are You Also a Crocheter?

If you love the layering vest silhouette in the Thistlevine and you ALSO crochet, check out my Lyvia Crochet Ruana… a flowing layering piece in crochet that hits the same wardrobe note. For even more options in both crafts, browse my full knit and crochet vest patterns collection. Canโ€™t decide which craft to try it in? Youโ€™re already BiCrafty ๐Ÿ’™

Ready to learn the OTHER craft? My BiCrafty Bootcamp walks knitters through crochet (and crocheters through knitting) from the very first stitch.

Thistlevine free knit tunic vest pattern styled over a white button-down shirt by Marly Bird, demonstrating how to layer the sleeveless lace tunic for fall and spring

๐Ÿ’› Meet the Designer

The Thistlevine was designed by Marly Bird, a professional yarn artist, designer, and teacher who has been designing in the knit and crochet industry since 2007. Marly is the creator of the BiCrafty method (teaching BOTH knitting AND crochet together) and the host of one of the longest-running fiber arts podcasts and YouTube channels in the industry. Her designs are known for warm, teaching-first instructions and true size-inclusivity from XS through 5X.

A woman with curly hair and glasses stands by a "FAQS" banner amid crafting items like yarn, flowers, and coffee.

โ“ Frequently Asked Questions

Is the Thistlevine free?

Yes! The full Thistlevine knit tunic pattern is free right here on the blog. You will need a free GROW account (it takes about 30 seconds to set up) to unlock the pattern instructions. If you would rather have a printable, ad-free PDF, that is available on Etsy, Shopify, and Ravelry.

What sizes does the Thistlevine come in?

The Thistlevine is sized XS, S, M, L-XL, 2X, 3X, 4X, and 5X… 8 sizes total. Finished busts range from 31ยฝโ€ (XS) up to 62ยฝโ€ (5X). It is designed to fit snugly around the bust, so size up if you are between sizes.

What skill level is this pattern?

Intermediate. The Thistlevine uses two lace stitch patterns (Lace Columns and Zig Zag Waves), short rows for shoulder shaping, and several twisted special stitches that the pattern explains in detail. If you are comfortable with knit, purl, yarn over, k2tog, and ssk, you have the foundation to knit this tunic successfully.

Can I make the Thistlevine shorter, like a cropped vest?

Absolutely. Because the Thistlevine is worked in one piece front hem to back hem, you can shorten the peplum section to wear it as a cropped vest instead of a full tunic. Just work fewer rows in the Zig Zag Waves peplum before the bust transition, and end after a Row 2 or Row 10 to keep the stitch pattern reading correctly. Swatch and measure to land at the length you want, and remember you will use less yarn if you shorten.

What yarn should I use if I cannot find Knit Picks Woodland?

Look for any worsted weight (#4) yarn with good drape and clear stitch definition… ideally a merino blend so it feels soft against your skin. My suggested substitutes are linked in the Yarn & Materials section above (covering merino, merino/alpaca blends, superwash, splurge options, budget options, and even a high-end cotton). Whatever you choose, do a BLOCKED gauge swatch first… lace yarns behave very differently after they hit water.

How much yarn do I need?

The sample uses Knit Picks Woodland (180 yds per 100g skein). You will need 4 (4, 5, 5, 6, 7, 8, 9) skeins for sizes XS through 5X. If you are shortening the tunic to a cropped vest, you may need slightly less. If you are subbing a yarn with different yardage per skein, do the math on TOTAL yards needed and buy enough for one extra skein for safety.

Are charts included?

Visual stitch charts (Lace Columns, Zig Zag Waves, all four sets of Front and Back Armhole Shaping by size, and the Neck Shaping chart) are included in the ad-free PDF version only. The free blog version has the complete written pattern… you have everything you need to knit the Thistlevine from the free version. The charts are a visual upgrade available with the PDF purchase.

Do I need to block this tunic?

YES. Knit lace looks scrunched and unimpressive on the needles. Wet blocking is what makes the Lace Columns open up, the Zig Zag Waves peplum flow, and the entire piece fit to schematic measurements. Block the piece flat BEFORE you sew the side seams (it is much easier to pin out flat). See the Blocking Tips section above for my step-by-step method.

Thistlevine Knit Tunic Vest pattern by Marly Bird... ad-free PDF promo showing Marly wearing the blue heathered knit lace vest sample plus a fanned preview of the printable PDF pages
Etsy
Shopify
Ravelry

๐Ÿ’› Final Thoughts

The Thistlevine is one of those patterns that hits a sweet spot for me as a designer. The construction is straightforward (one piece, two seams, pick-up edgings), the lace is beautiful without being scary, and the two-stitch-pattern combination gives you something to actually LOOK AT as you knit. It is the kind of project where you finish a row and want to stop and admire it for a minute before you start the next one ๐Ÿ’›

Once you cast off and block, you are going to have a versatile layering shell that works for fall over a turtleneck, spring over a flowy blouse, and summer evenings on its own. Wear it tunic length, shorten it to a vest, knit it in your “wow thatโ€™s MY color” color… this one is yours to make your own.

If you knit a Thistlevine, please tag me with #marlybird on Instagram and share it in Marly's Minions BiCrafty Community on Facebook… I love seeing your finished pieces ๐Ÿ’›

And queue it on Ravelry so you can find it again the next time you want a fresh layering piece on your needles.

Happy knitting, BiCrafty Bestie!

โค๏ธ Your BiCrafty Bestie,
Marly Bird
A cartoon avatar of a person with glasses and a brown bun smiles warmly. Their green shirt and black jacket add a stylish touch, while colorful hearts surround them like loving temperature blankets, stitching together an aura of love and positivity. -Marly Bird
“

Filed Under: Free Patterns, Knitting, Marly Bird Premium Patterns, Our Free Patterns, Pattern, Uncategorized Tagged With: BiCrafty, free knit pattern, free knit tunic, free knit vest, Knit Picks Woodland, knit tunic XS-5X, lace knit, layering shell knit, Marly Bird, plus size knit pattern, sleeveless knit, spring fling 2026

Coral Ridge Crochet Shawl โ€“ Free Colorblock Triangle Pattern

May 26, 2026 By Meg Leave a Comment

“

๐ŸŒธ Spring Fling 2026… Day 17 Pattern ๐ŸŒธ

This pattern debuted as Day 17 of Spring Fling 2026 (Tue May 26, 2026). The free pattern stays free forever right here on the blog.

๐Ÿ‘‰ See the full Spring Fling 2026 lineup on the Hub

Share your finished Coral Ridge Shawl with the hashtags #SpringFling2026 + #CoralRidgeShawl ๐ŸŒธ

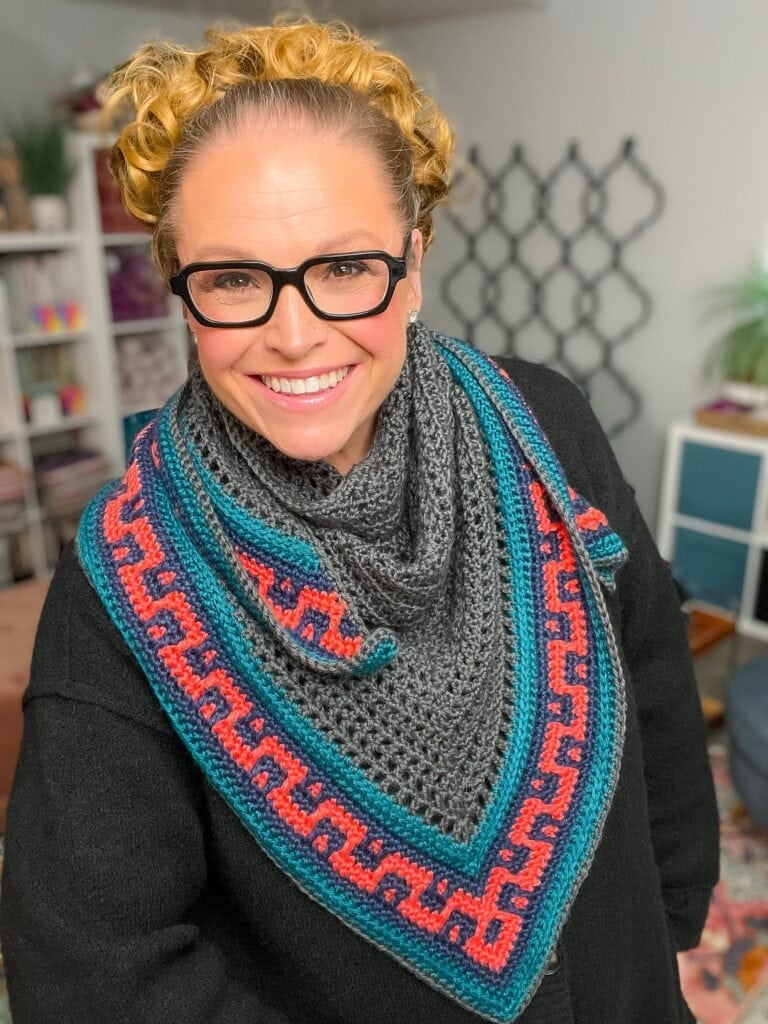
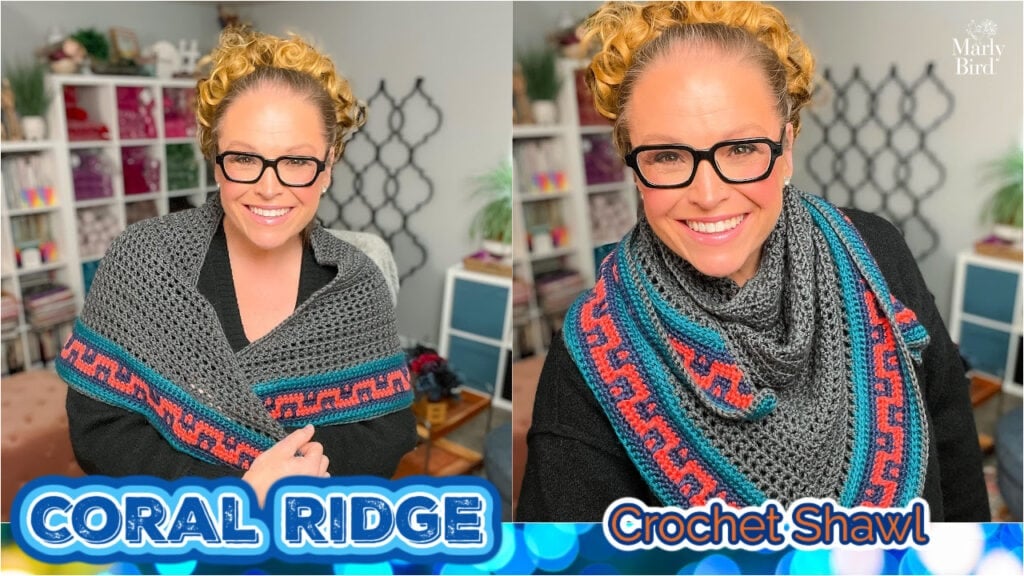
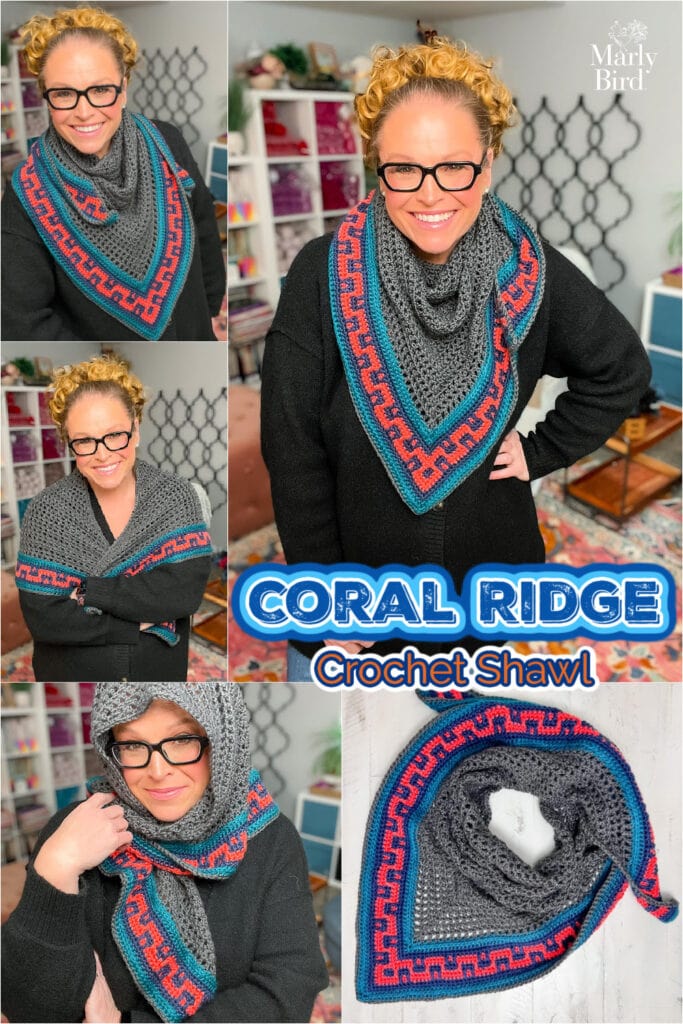
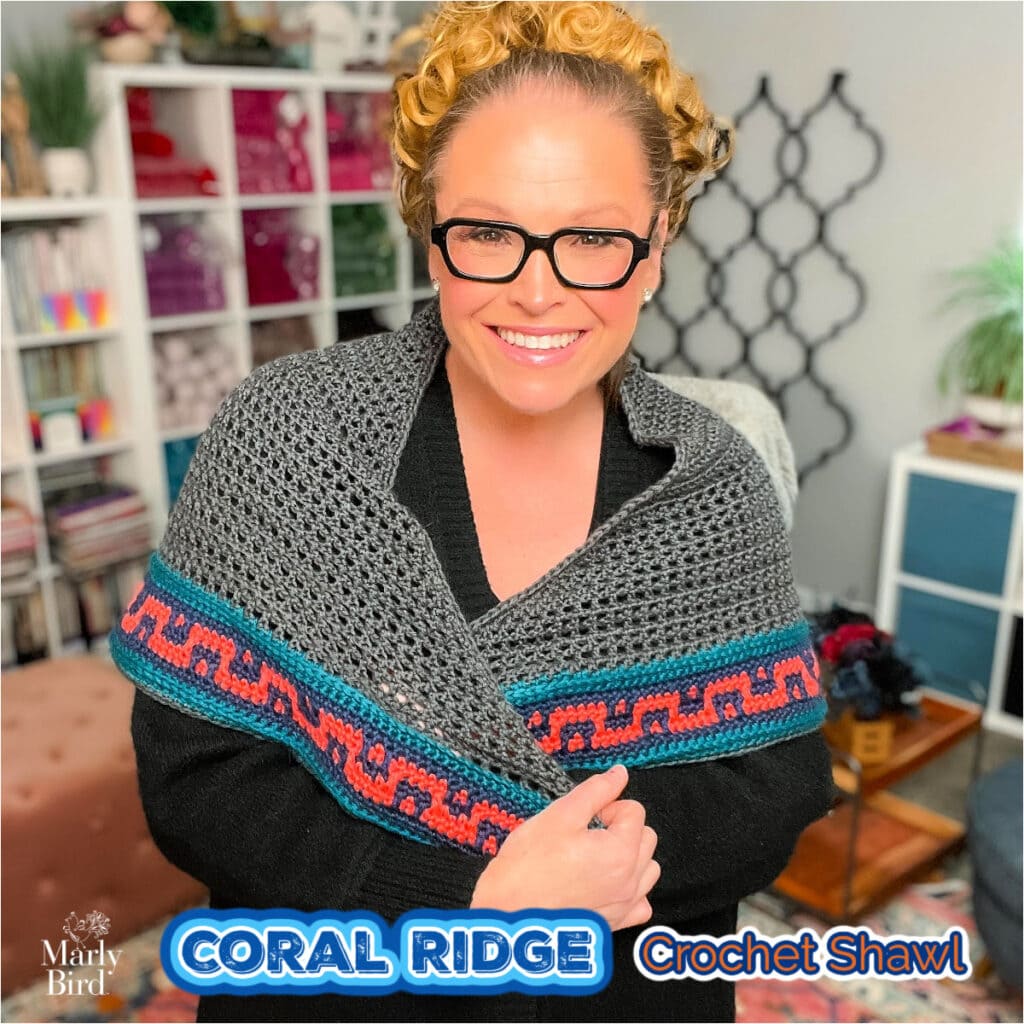
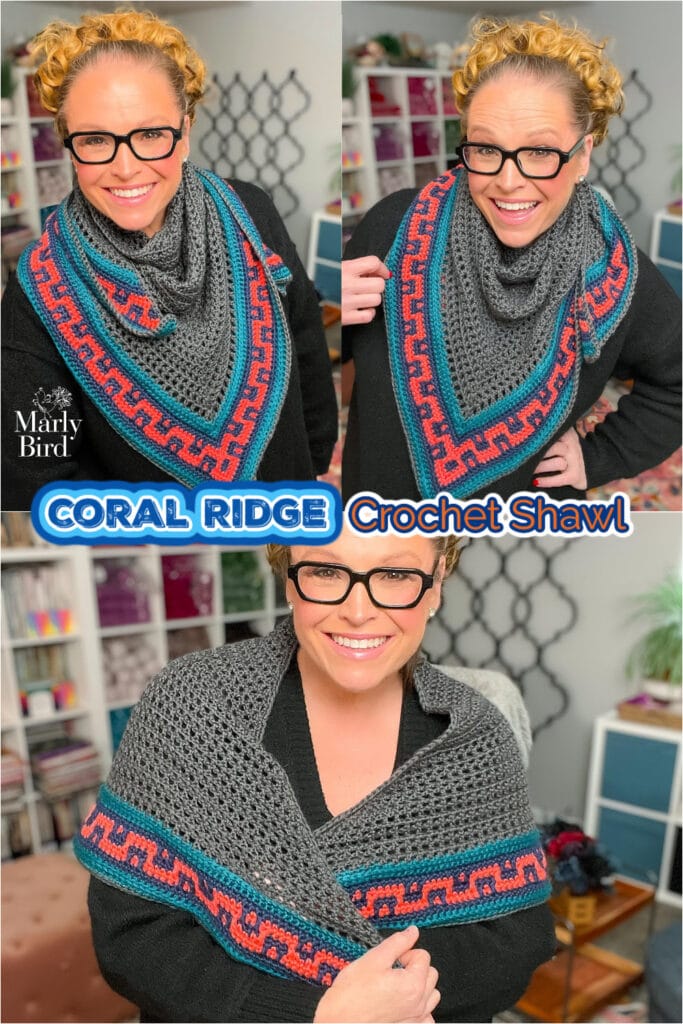
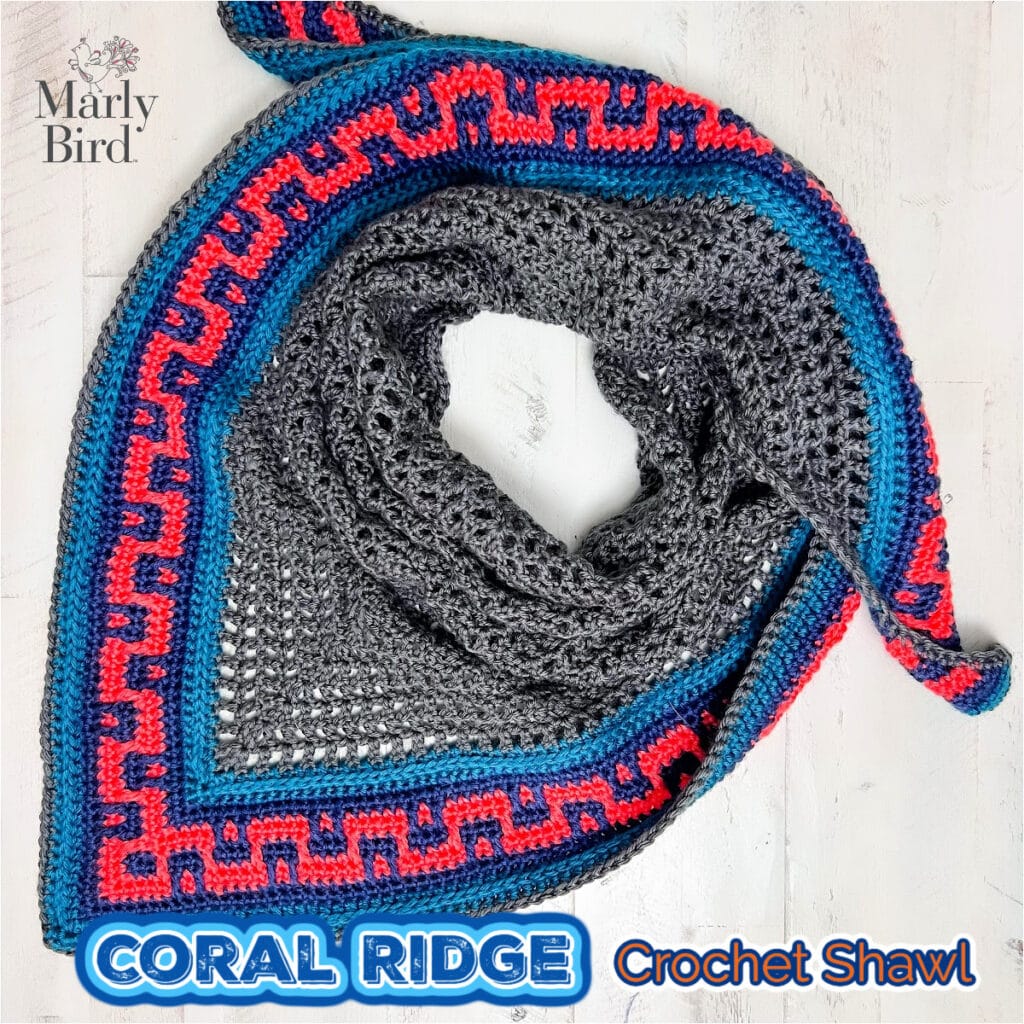
The Coral Ridge Crochet Shawl is a free colorwork crochet shawl pattern… an architectural center-out triangle crochet shawl with a Greek-key colorblock border. It's an intermediate crochet shawl pattern designed by Marly Bird and Robyn Chachula, worked at a 16 sts ร— 9 rows = 4″ ร— 5″ gauge in CYCA #4 worsted weight yarn, with a finished wingspan of 62″ and a depth of 30″. This crochet wrap pattern doubles as a shawl, a scarf wrap, and (genuinely) a beach sarong. Free pattern on the blog. Ad-free PDF available.

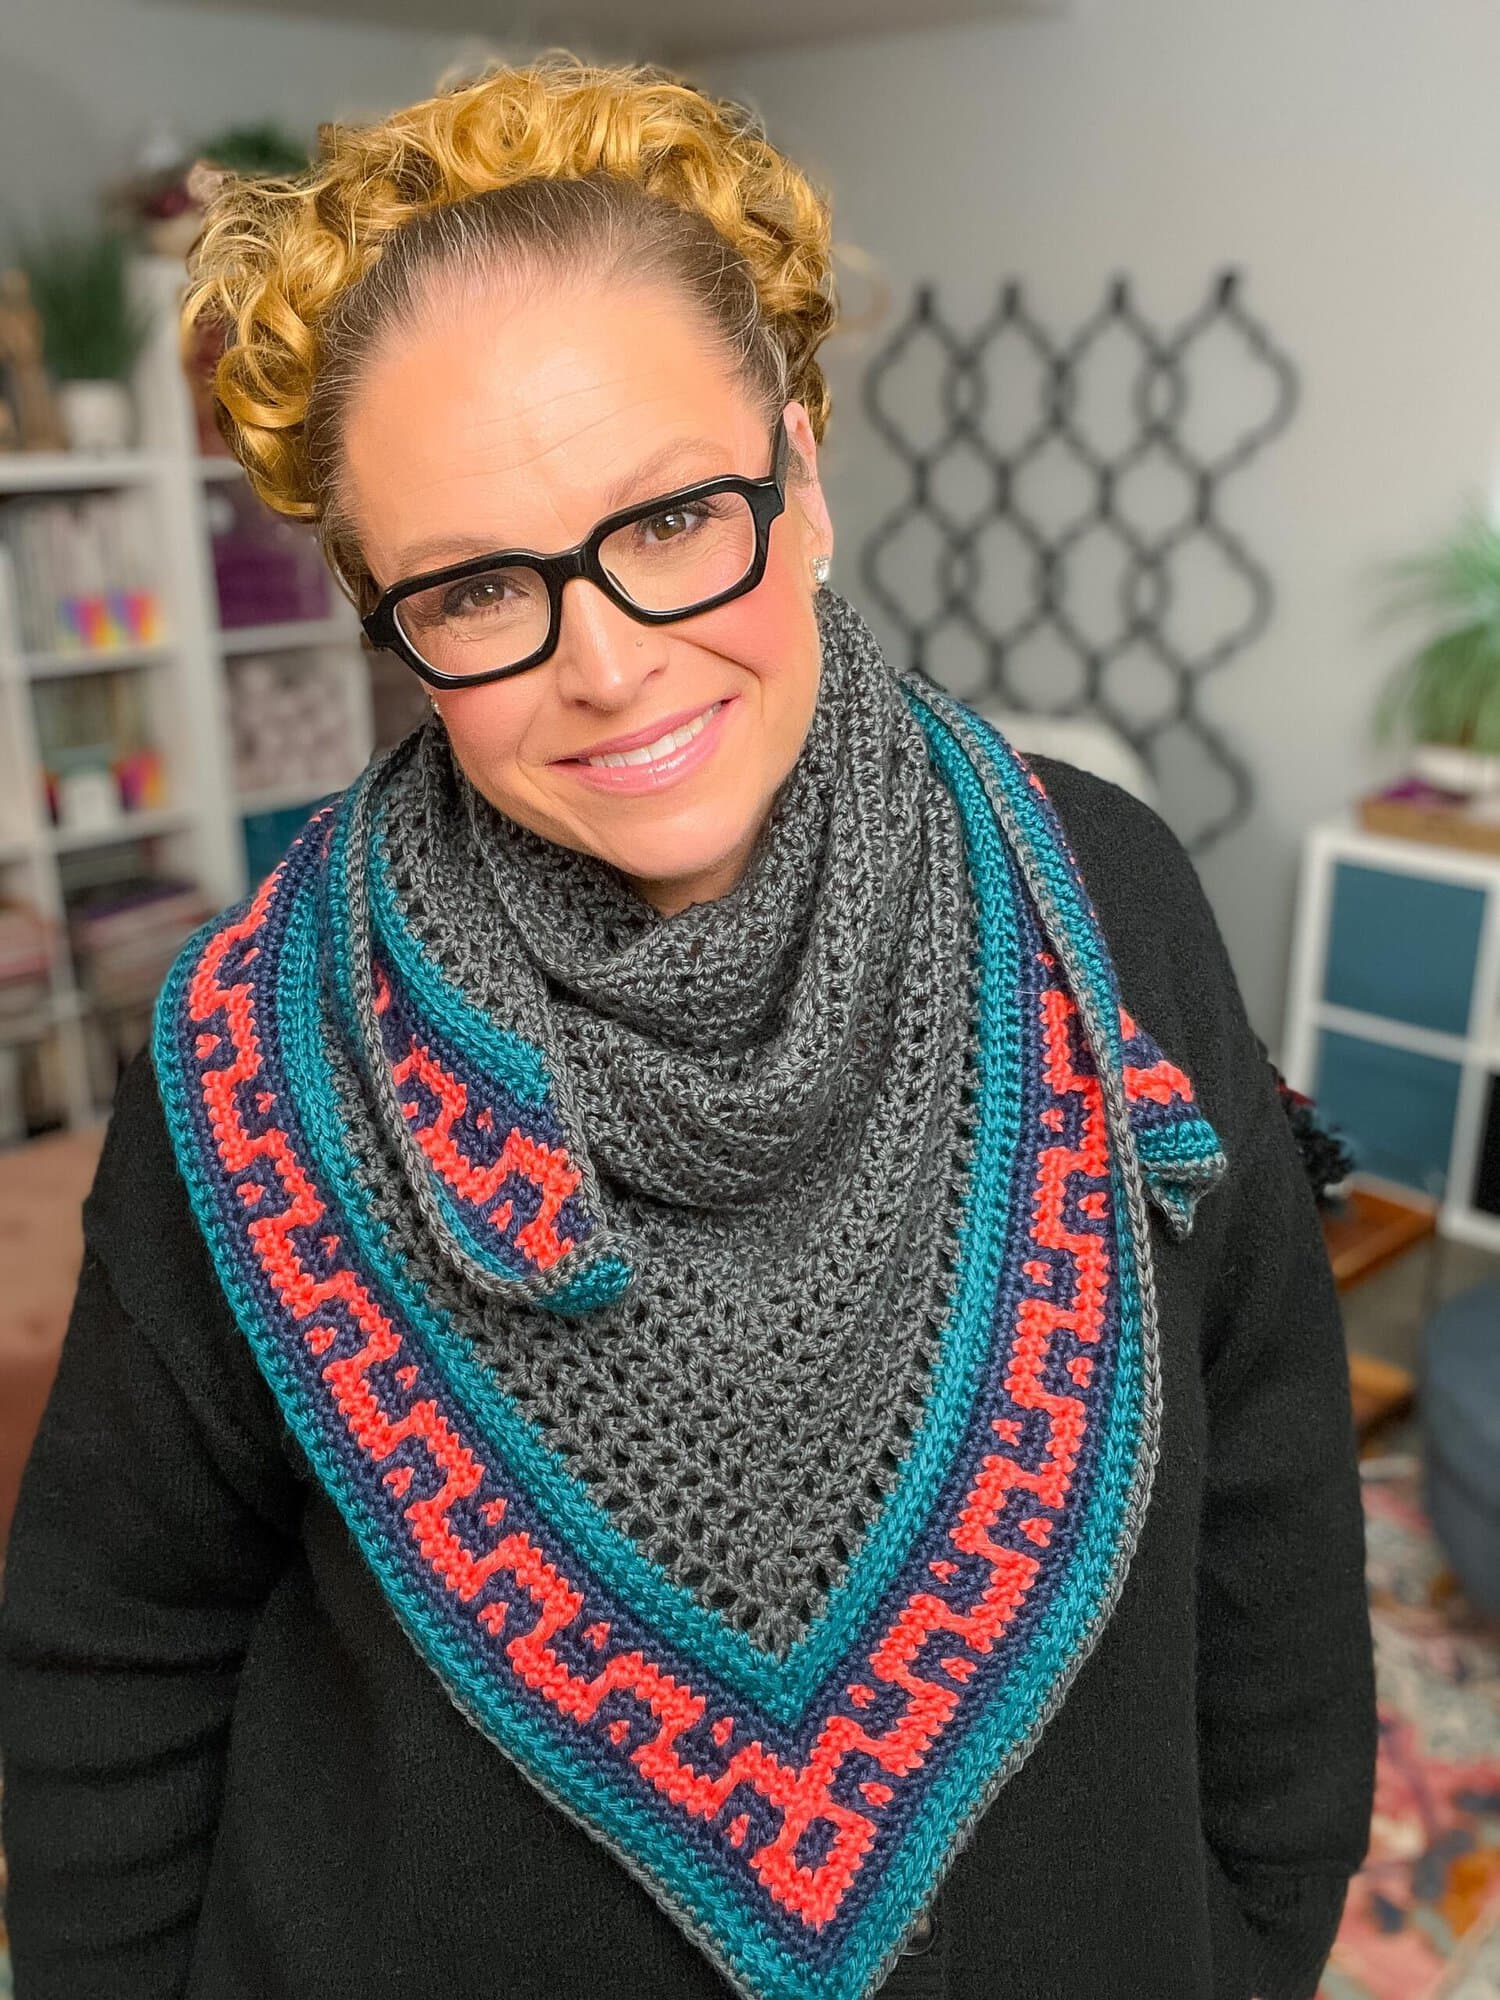
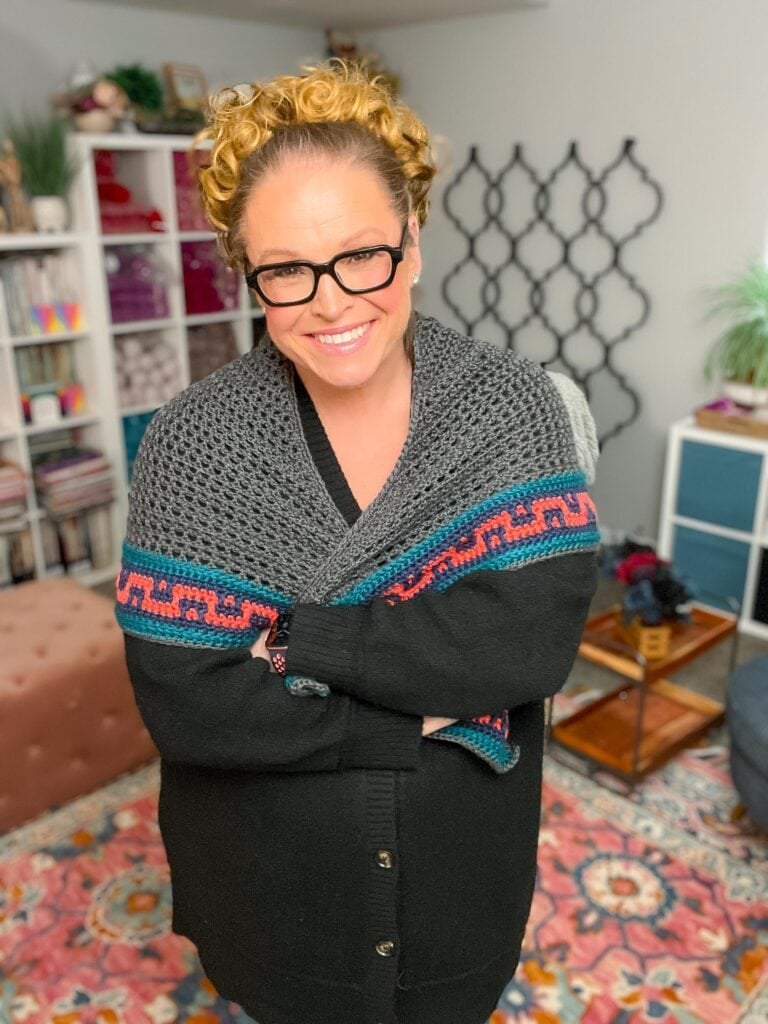
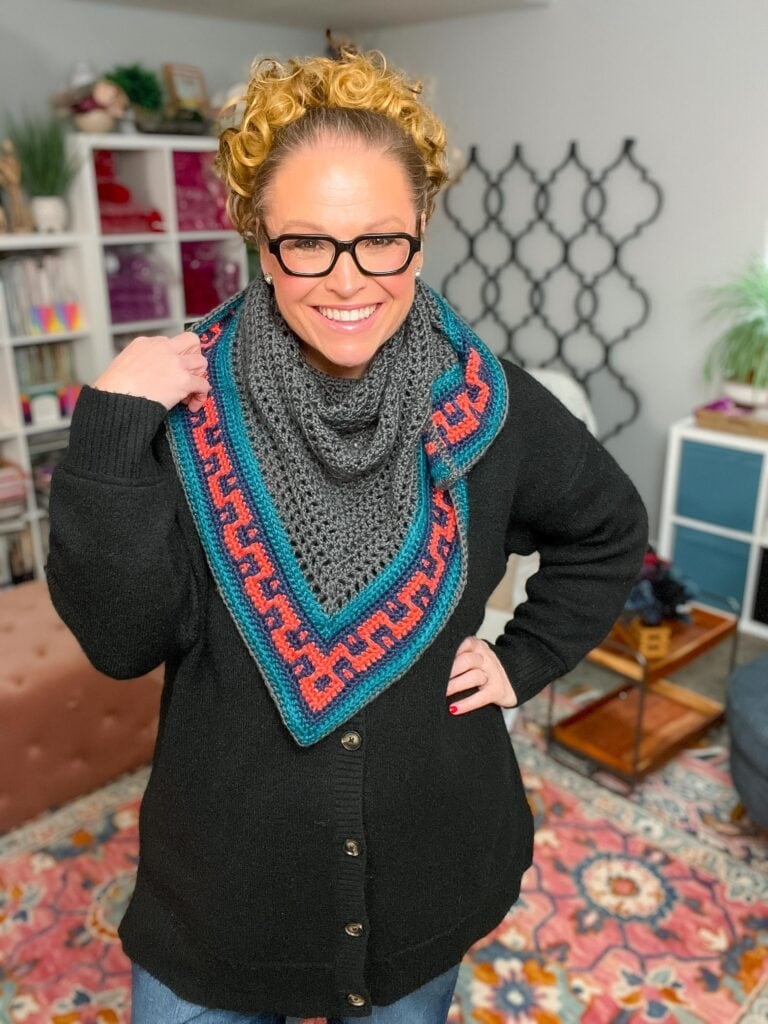
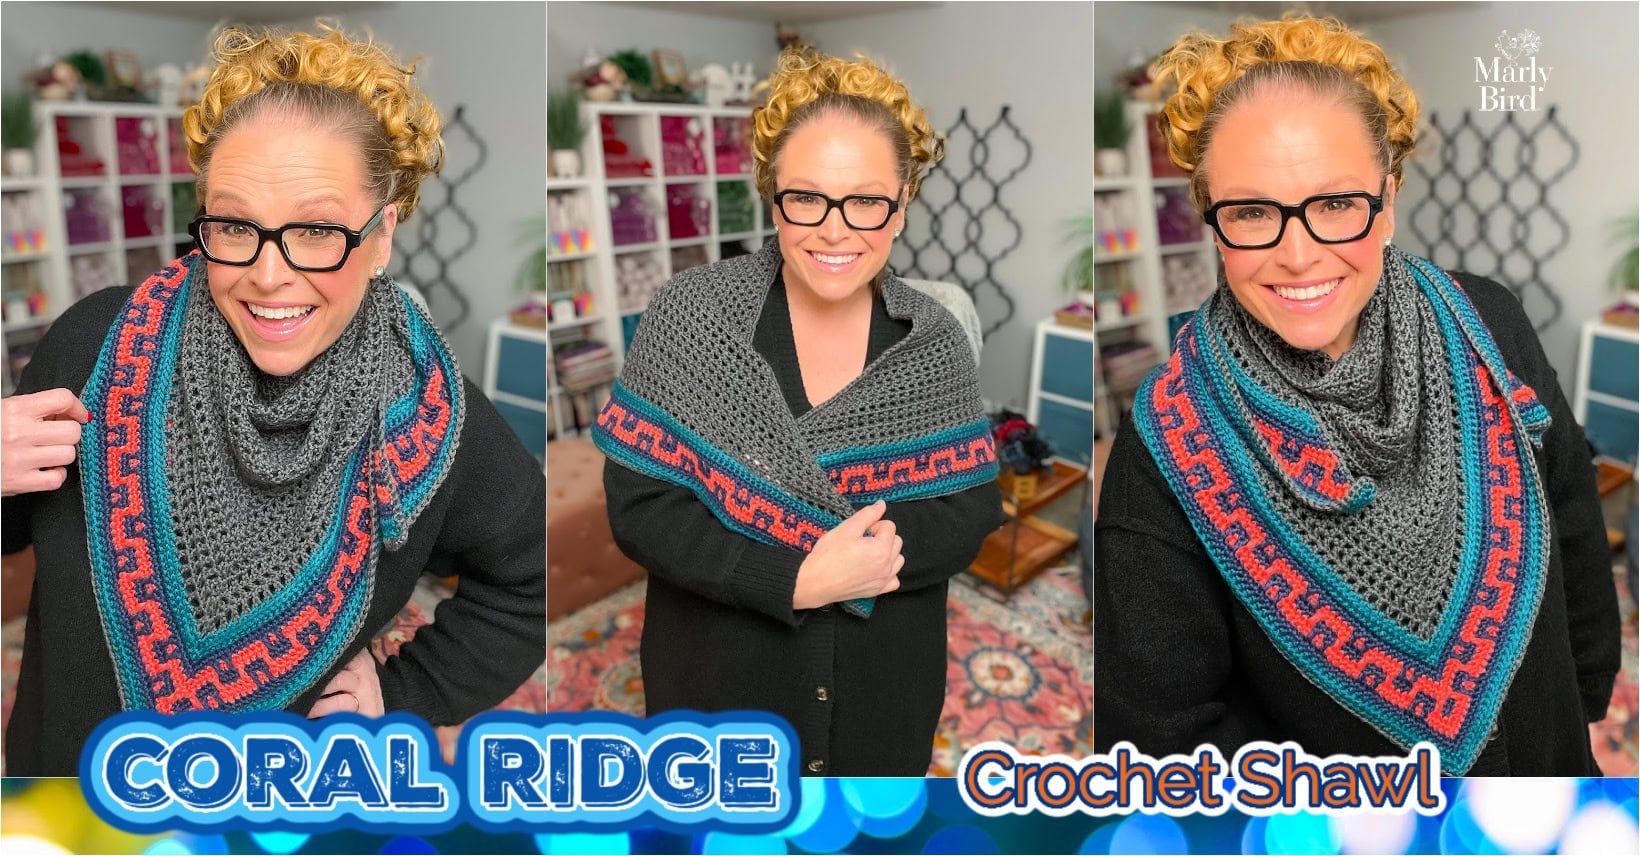
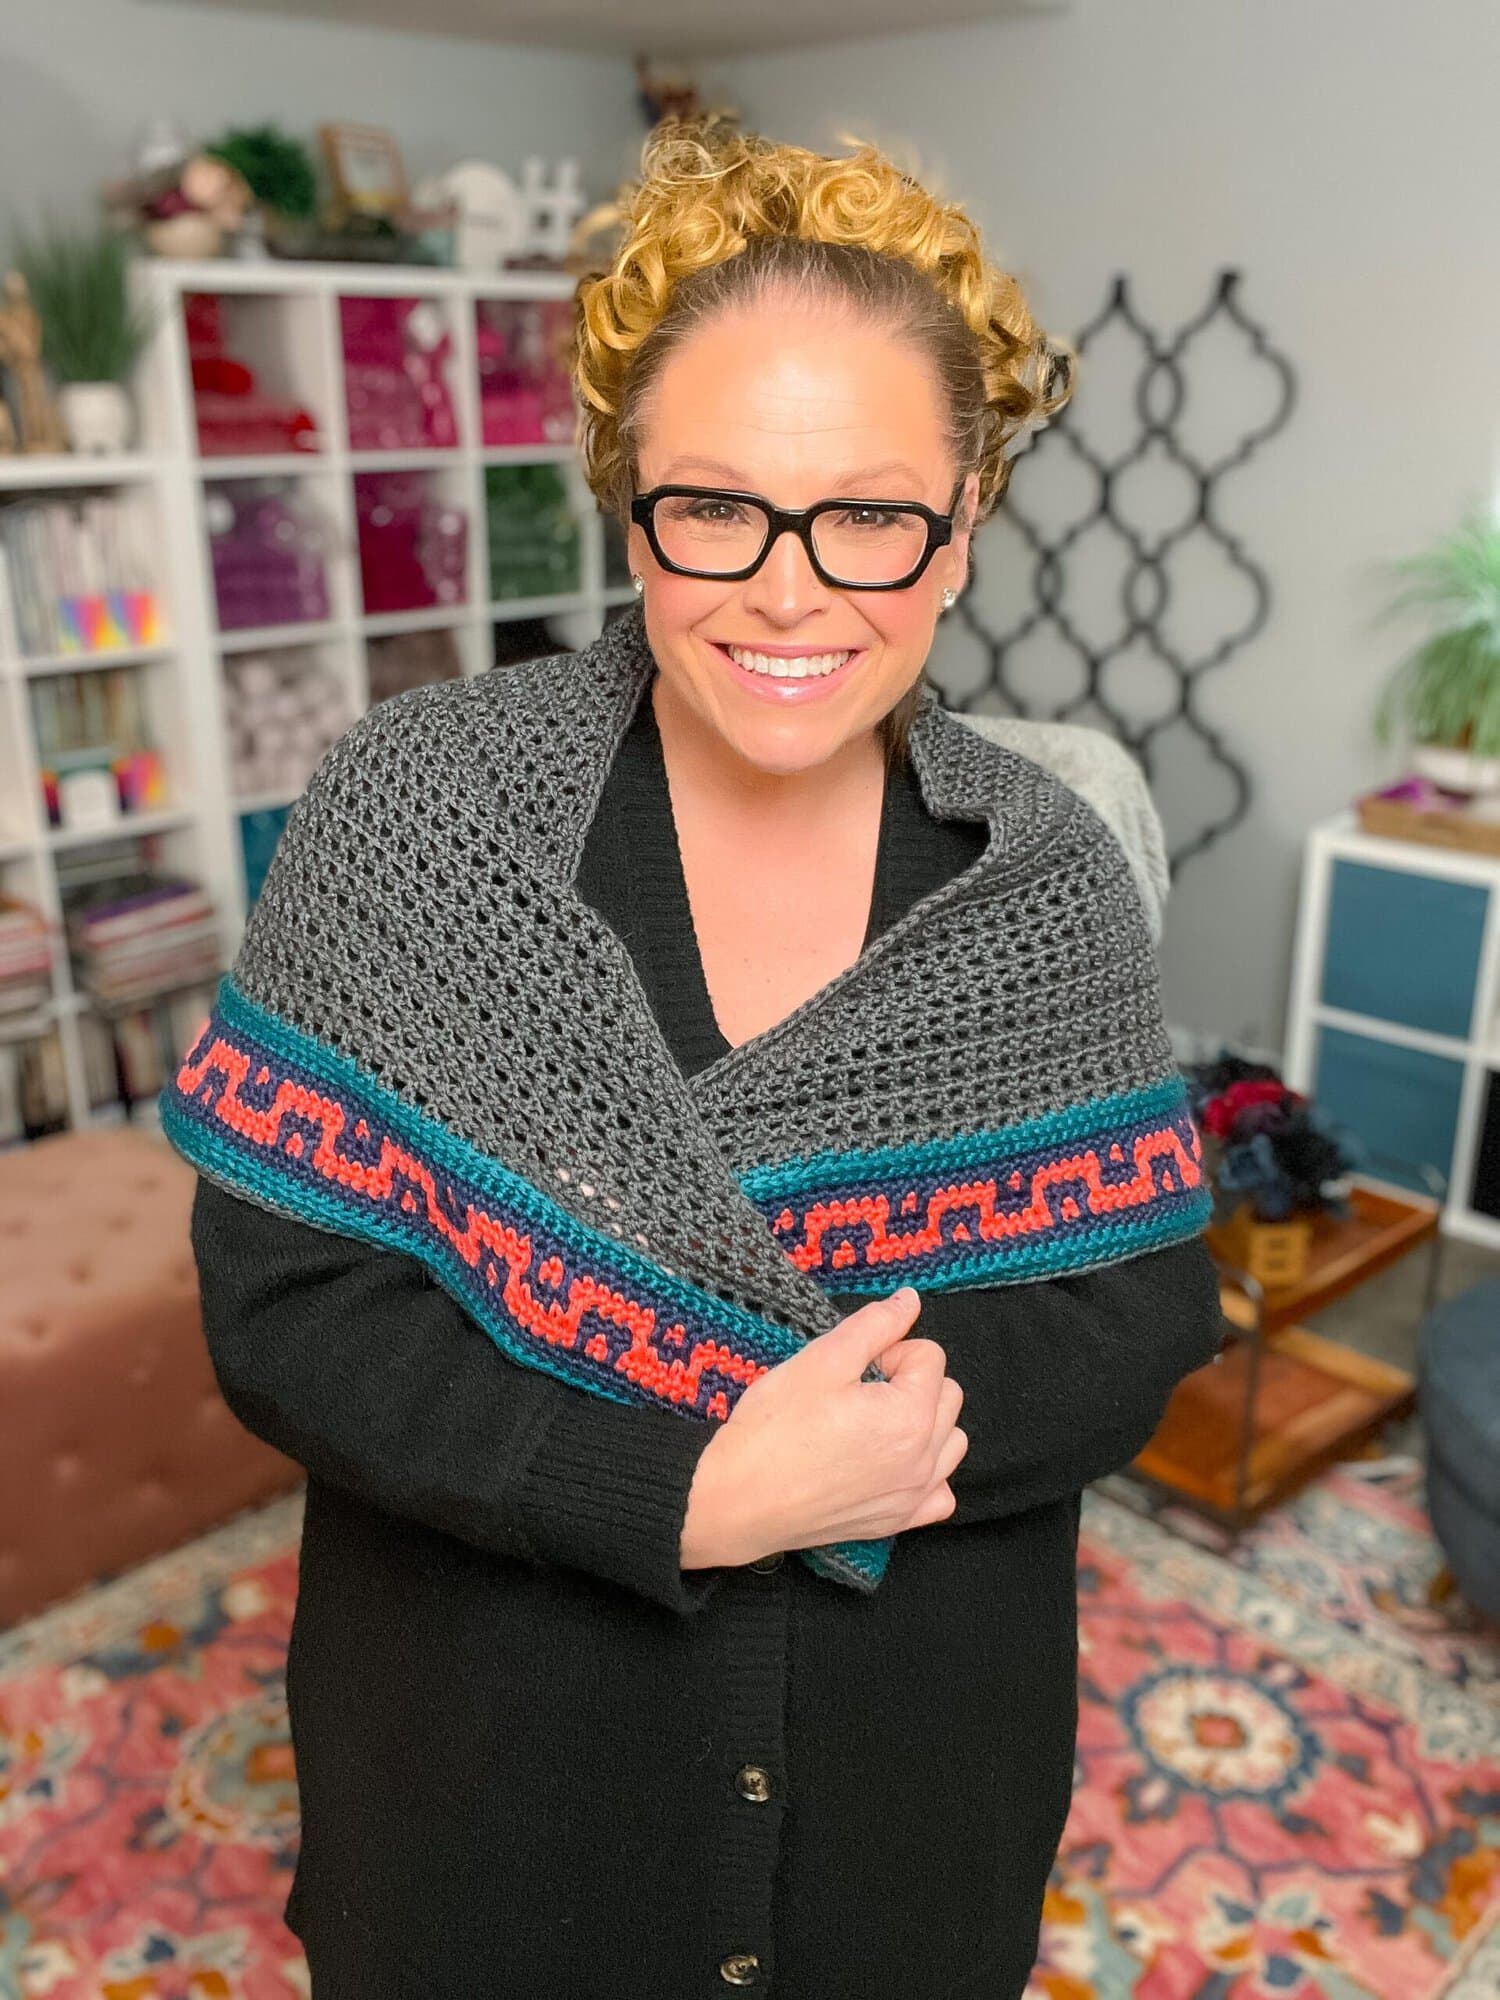
A person models a crocheted triangle scarf with gray, blue, and red patterns, highlighting the textured stitching.

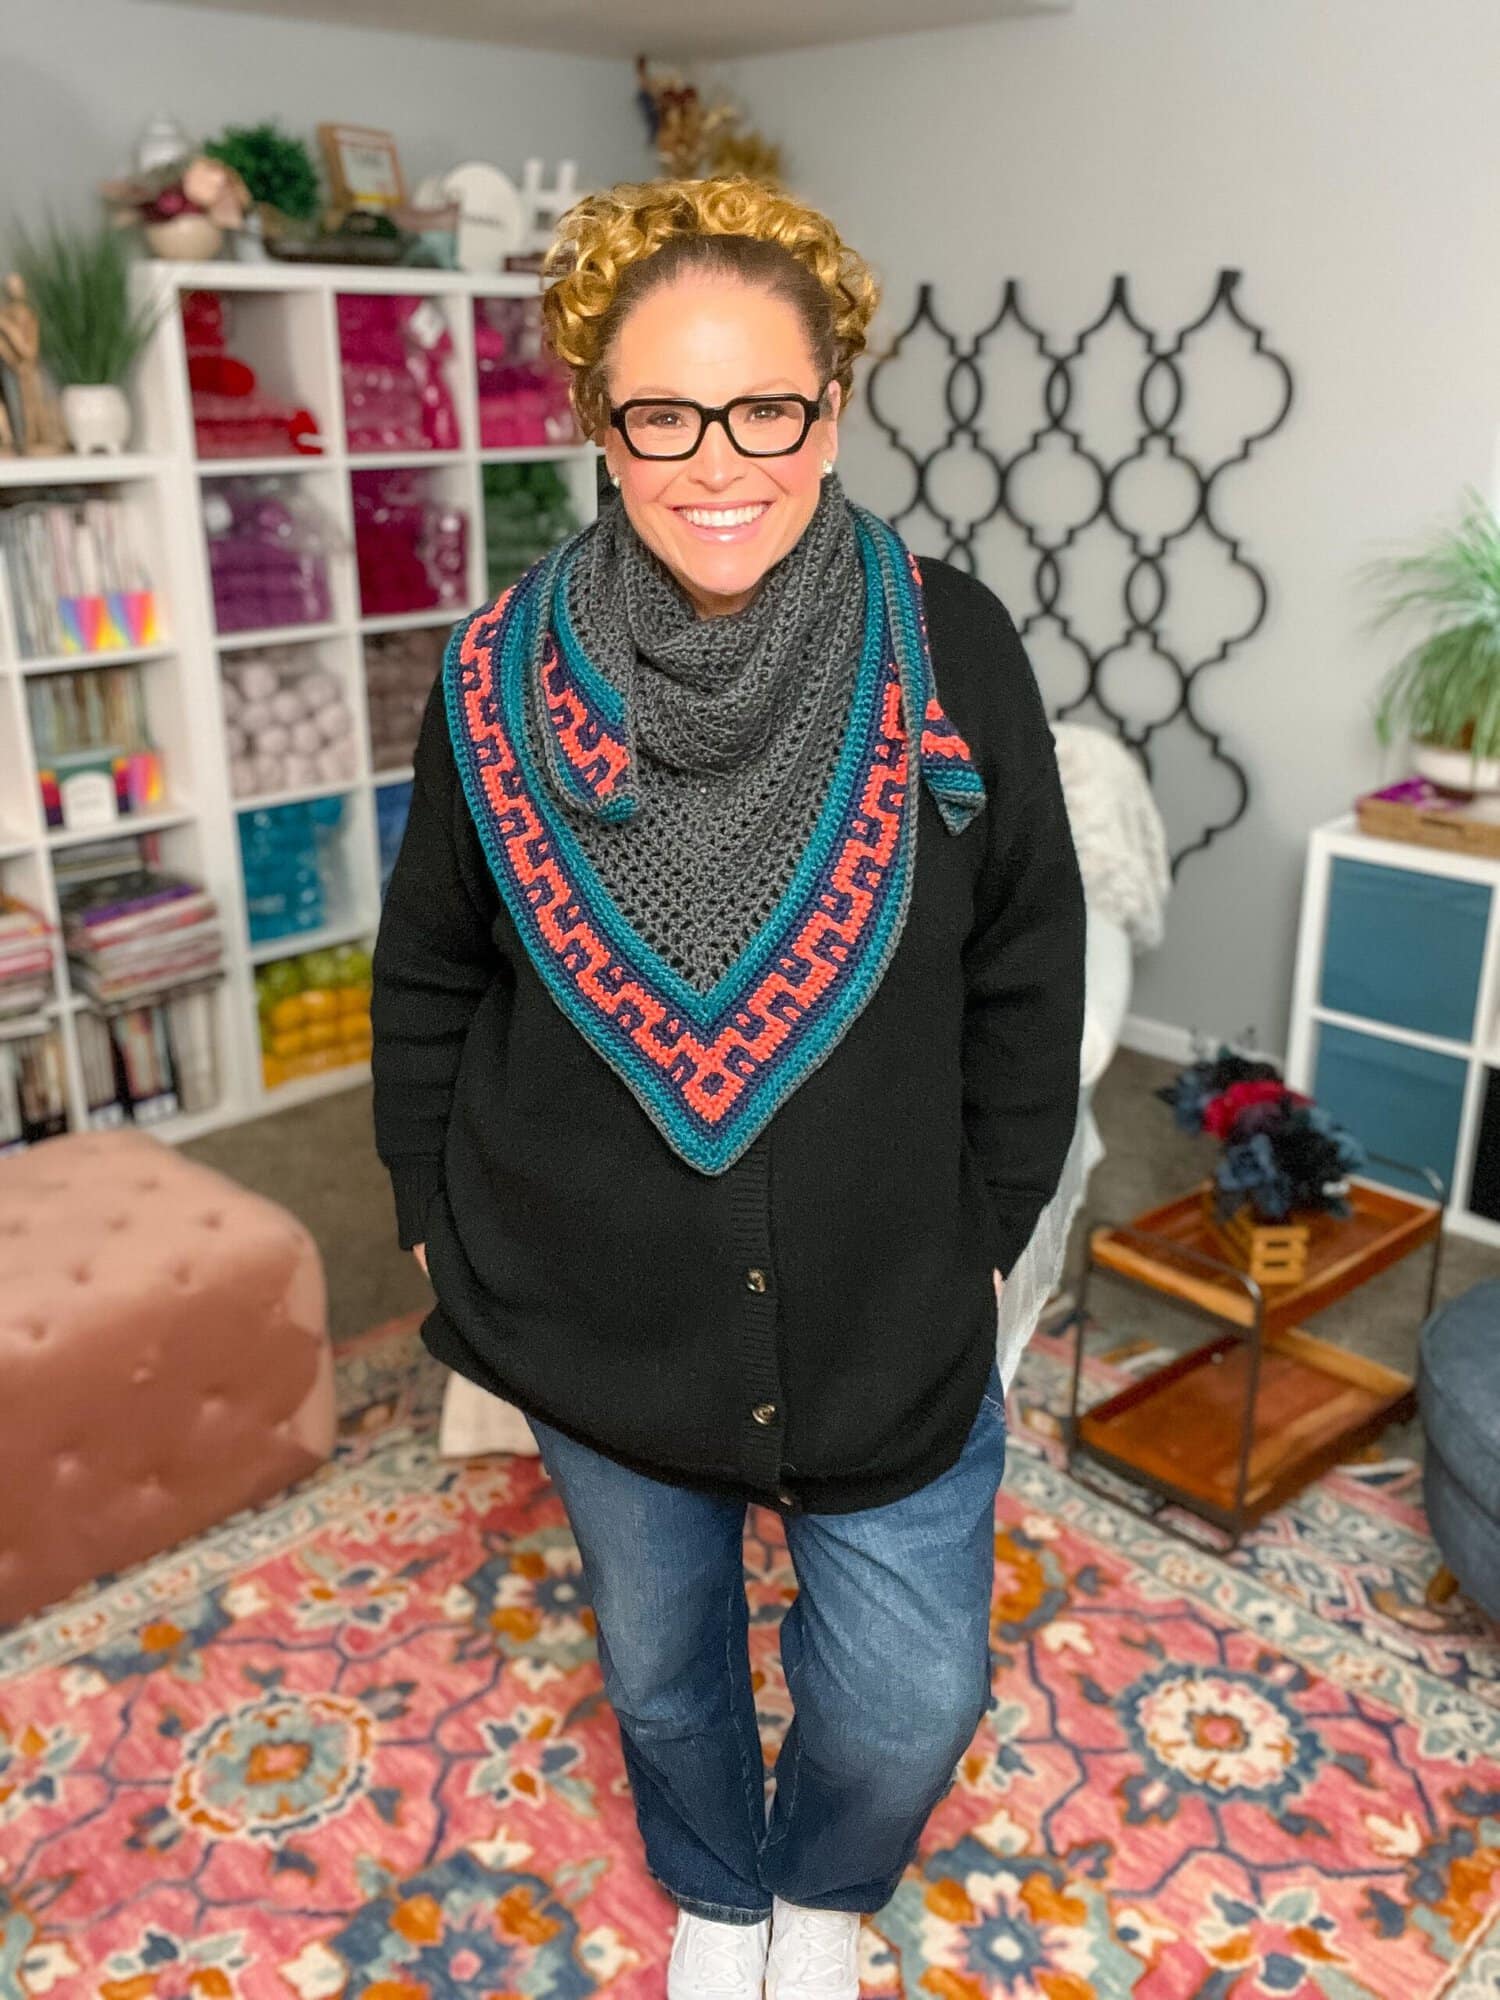
Looking for a free triangle crochet shawl pattern that wears beautifully… feels architectural without being fussy, and lets you play with color in the most satisfying way possible? Coral Ridge is the one. A modern crochet shawl in worsted weight, accessible yarn, traditional center-out construction, and a colorblock Greek-key border that makes the whole thing read like art when it's done. Designed by me and my best friend and business partner Robyn Chachula, this is one of those patterns I keep wearing every time I leave the house.

Hey, bestie ๐Ÿ’› If you've ever wanted a handmade crochet shawl that doubles as a crochet wrap, a crochet scarf wrap, and (genuinely) a beach sarong… this is it. Big enough to actually use, small enough to finish in a few weekends of evening crochet, and the colorblock border is the kind of crochet accessory detail that has strangers asking you about it at the grocery store.

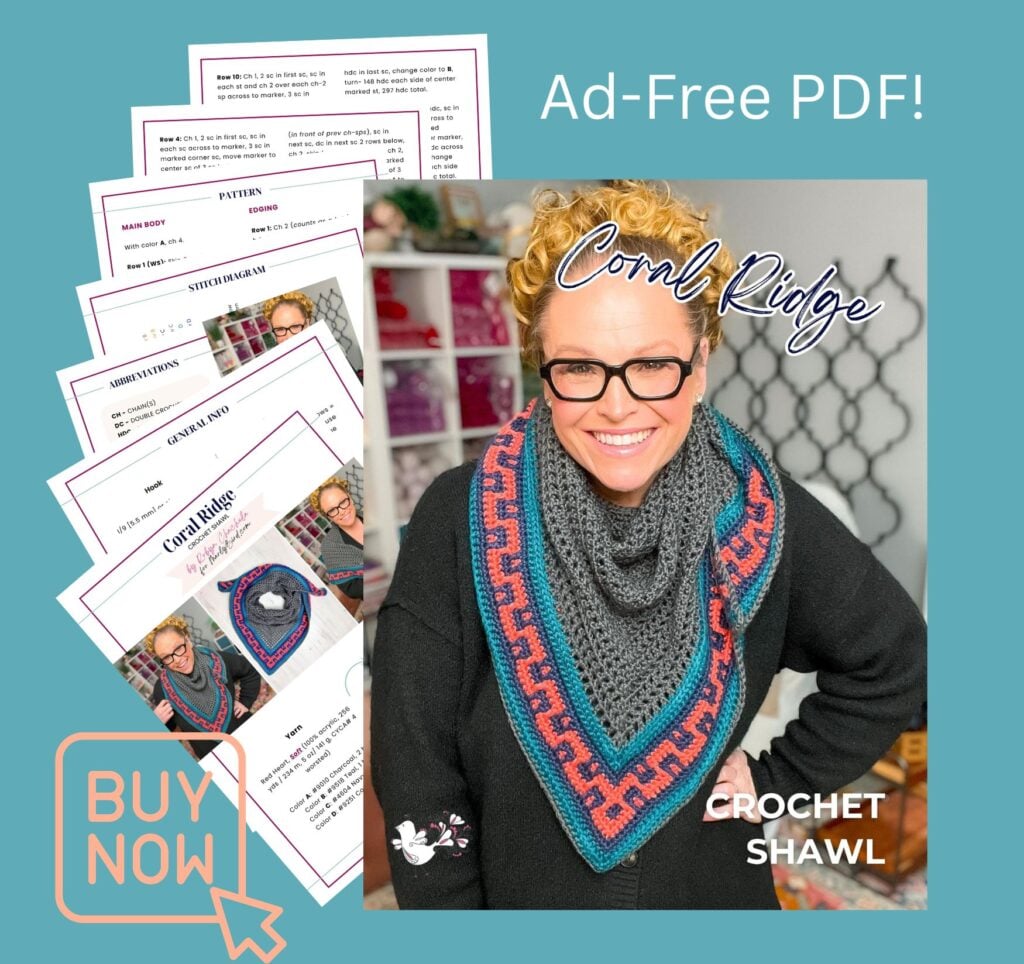
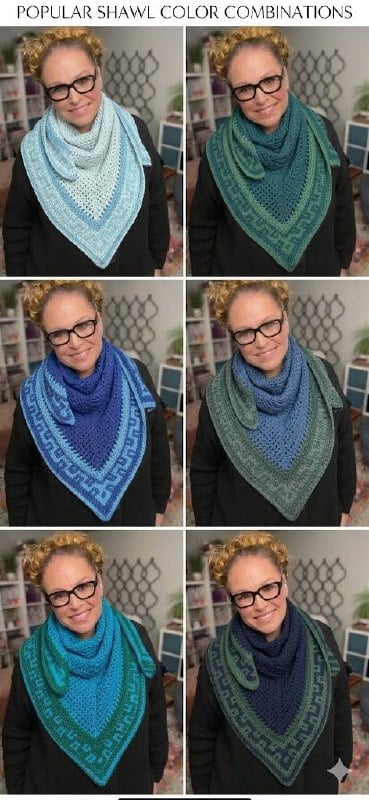
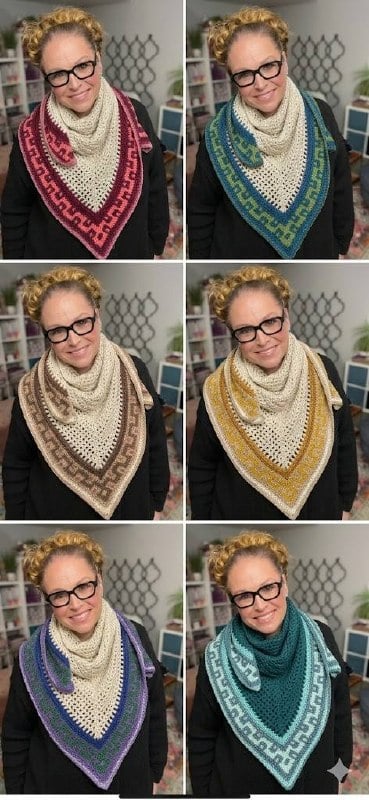
โšก Quick Answer: The Coral Ridge Crochet Shawl is a free triangle crochet shawl pattern… a colorwork crochet shawl + crochet wrap pattern designed by Marly Bird and Robyn Chachula. Center-out construction, 62″ wingspan by 30″ depth, charcoal body with a coral, teal, and navy Greek-key colorblock border. Intermediate skill level (a strong next step for any crochet shawl beginner who's finished a basic triangle shawl). Uses CYCA #4 worsted weight yarn (Red Heart Soft) and a size I/9 (5.5 mm) hook. Free pattern below.

Affiliate Disclosure: This post contains affiliate links. To learn more please visit my privacy policy here ๐Ÿ’–

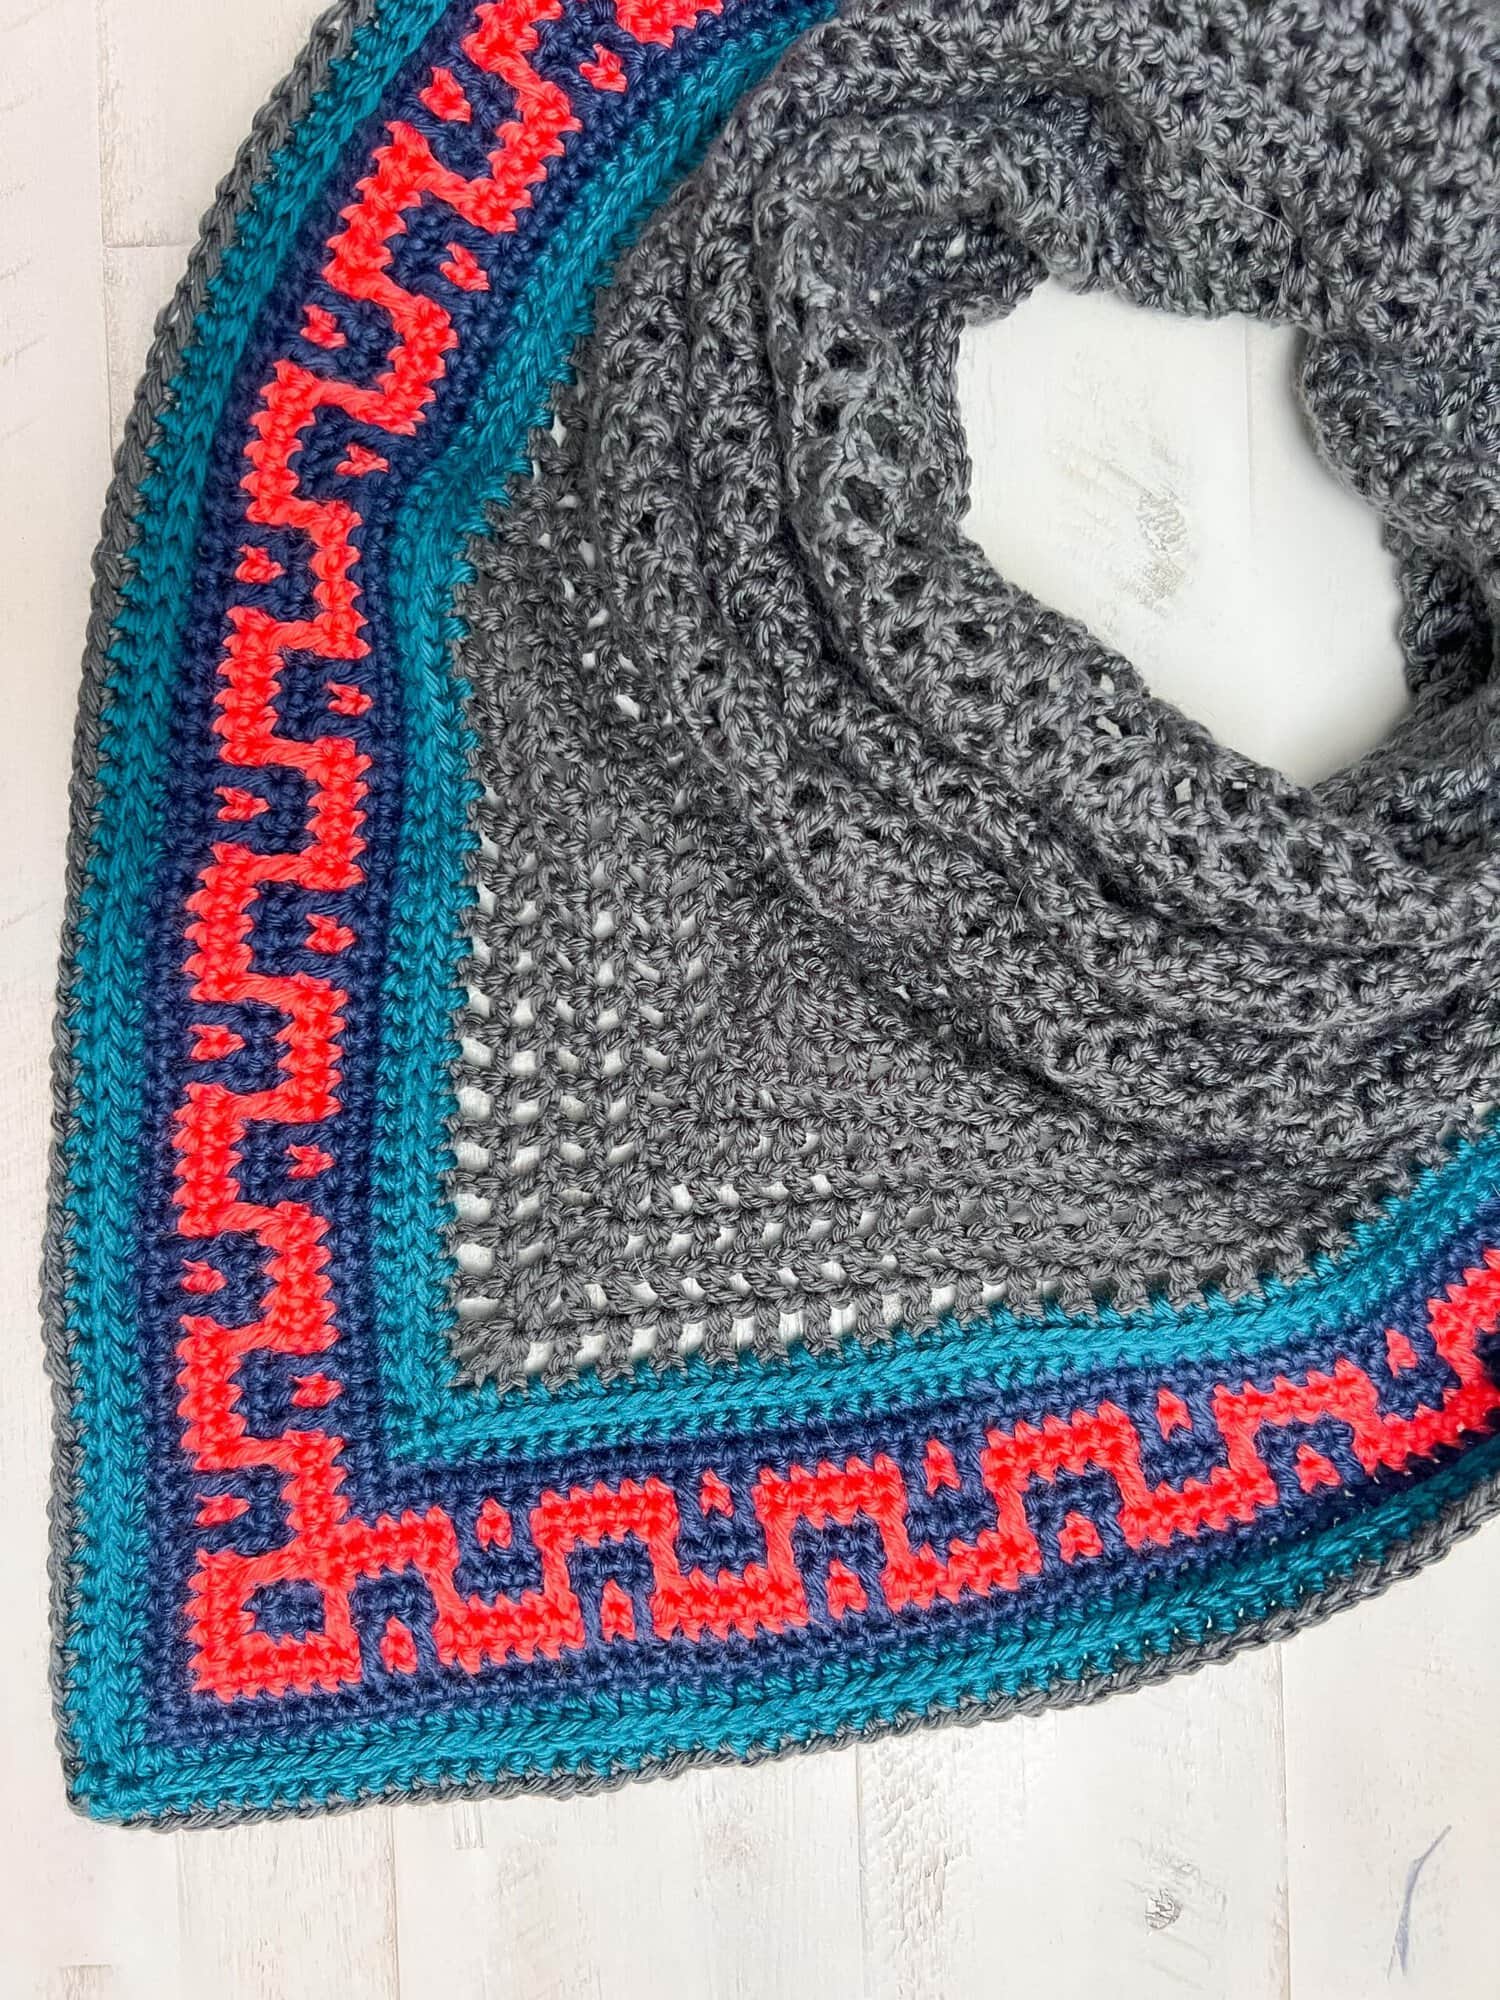
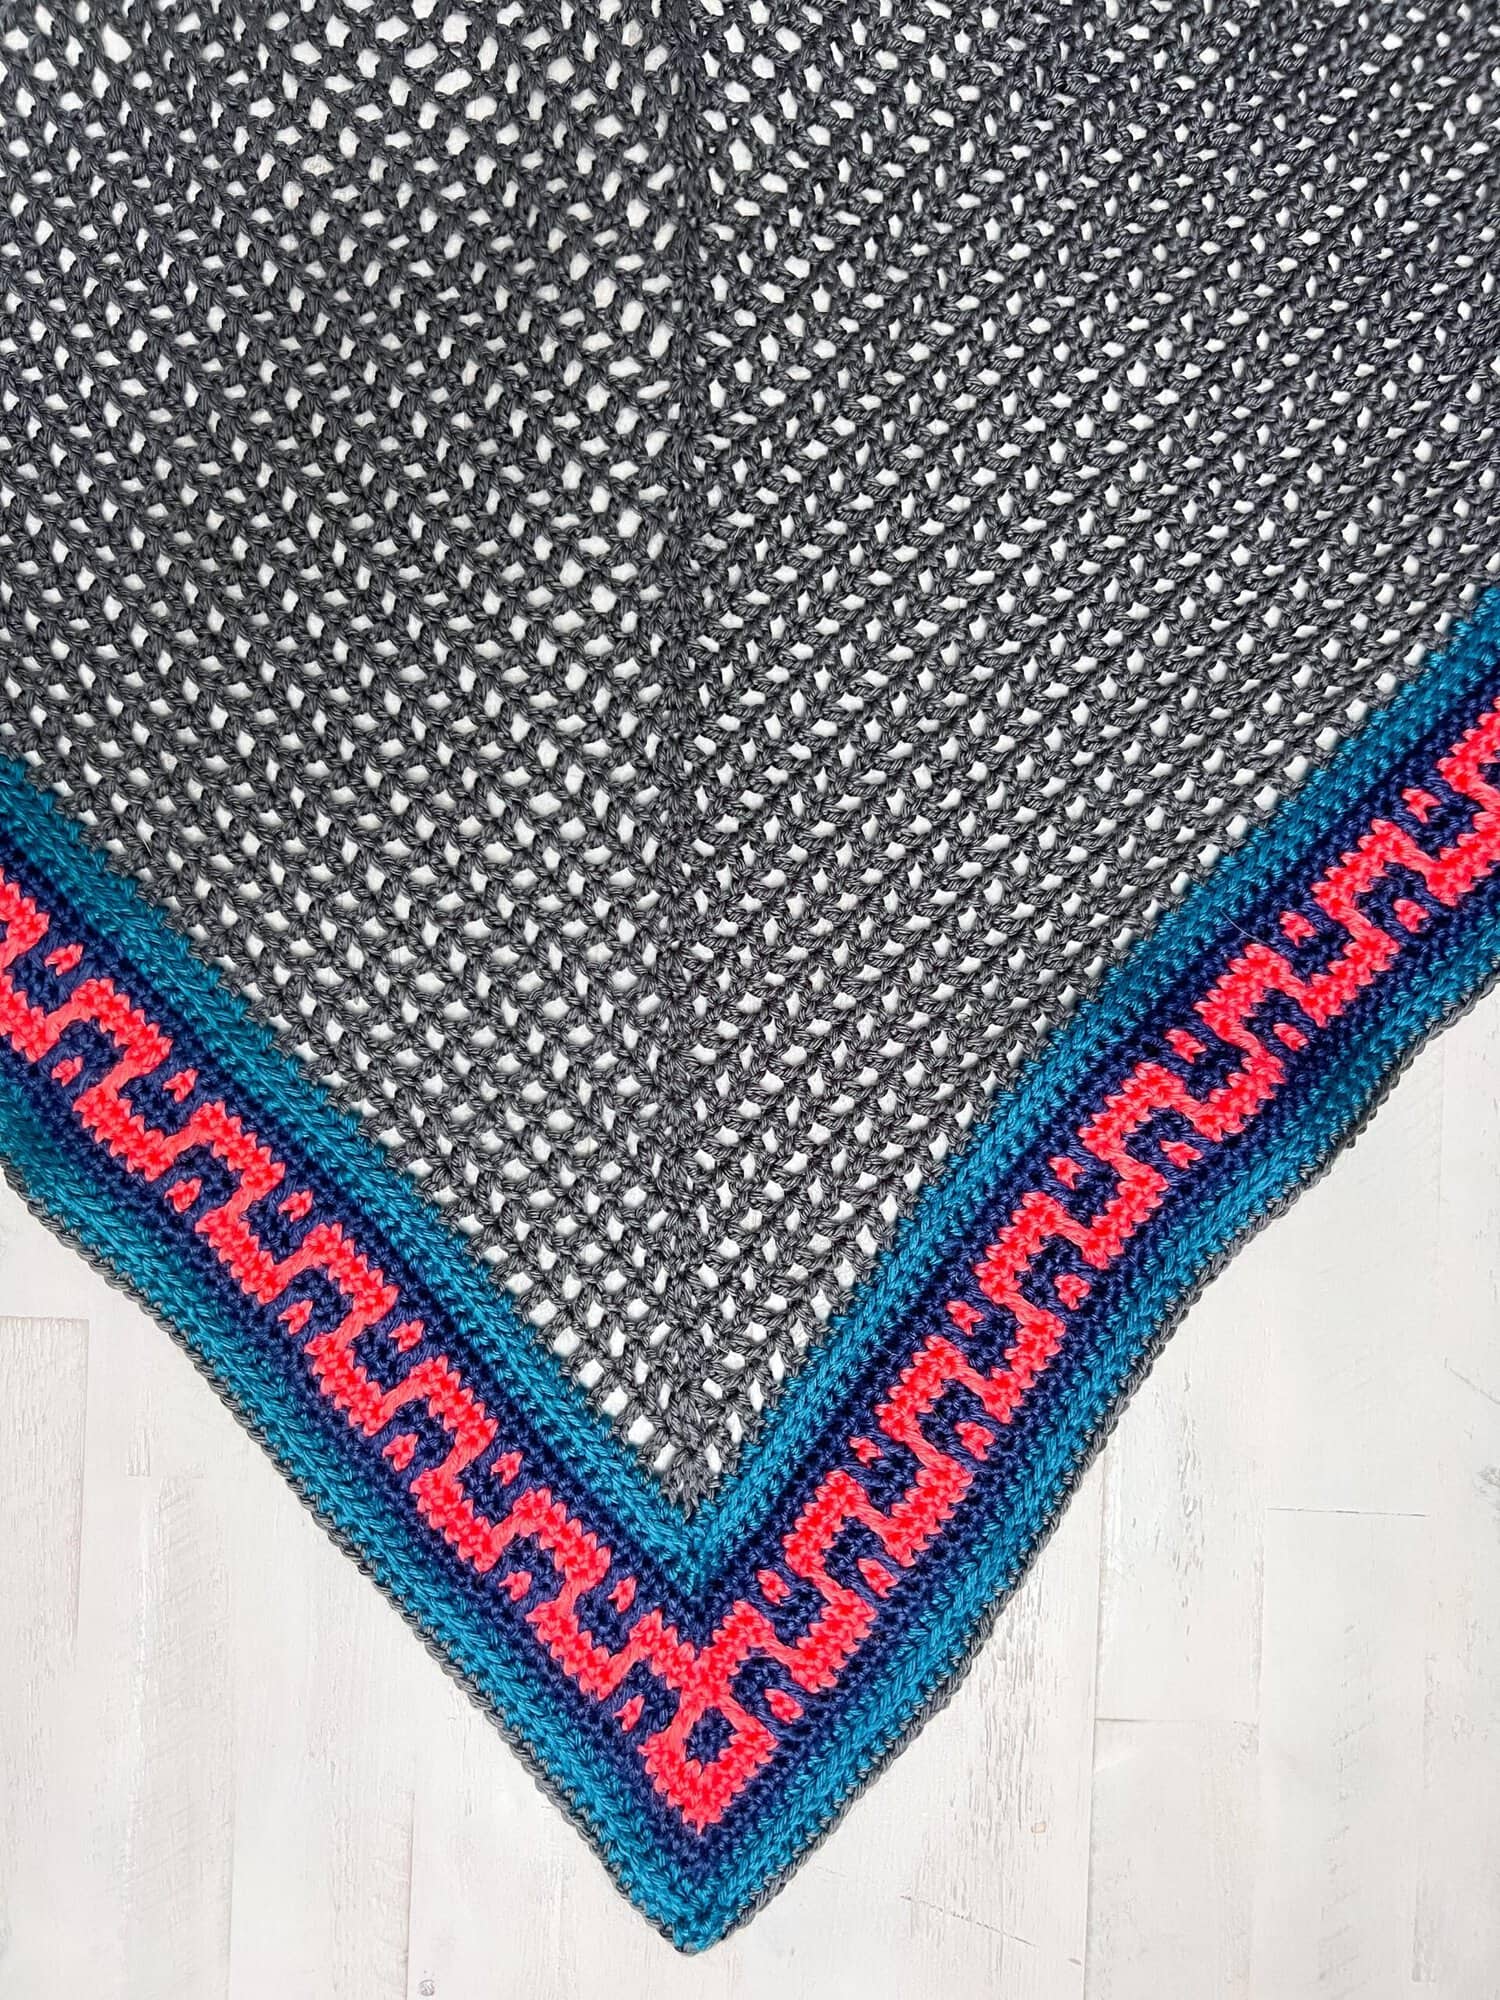
Free crochet triangle shawl pattern with colorwork border โ€” Coral Ridge Crochet Shawl by Marly Bird, modeled close-up to show gray body, blue, and coral Greek-key stitch detail

What You Will Love About This Free Crochet Coral Ridge Shawl Pattern ๐Ÿ’–

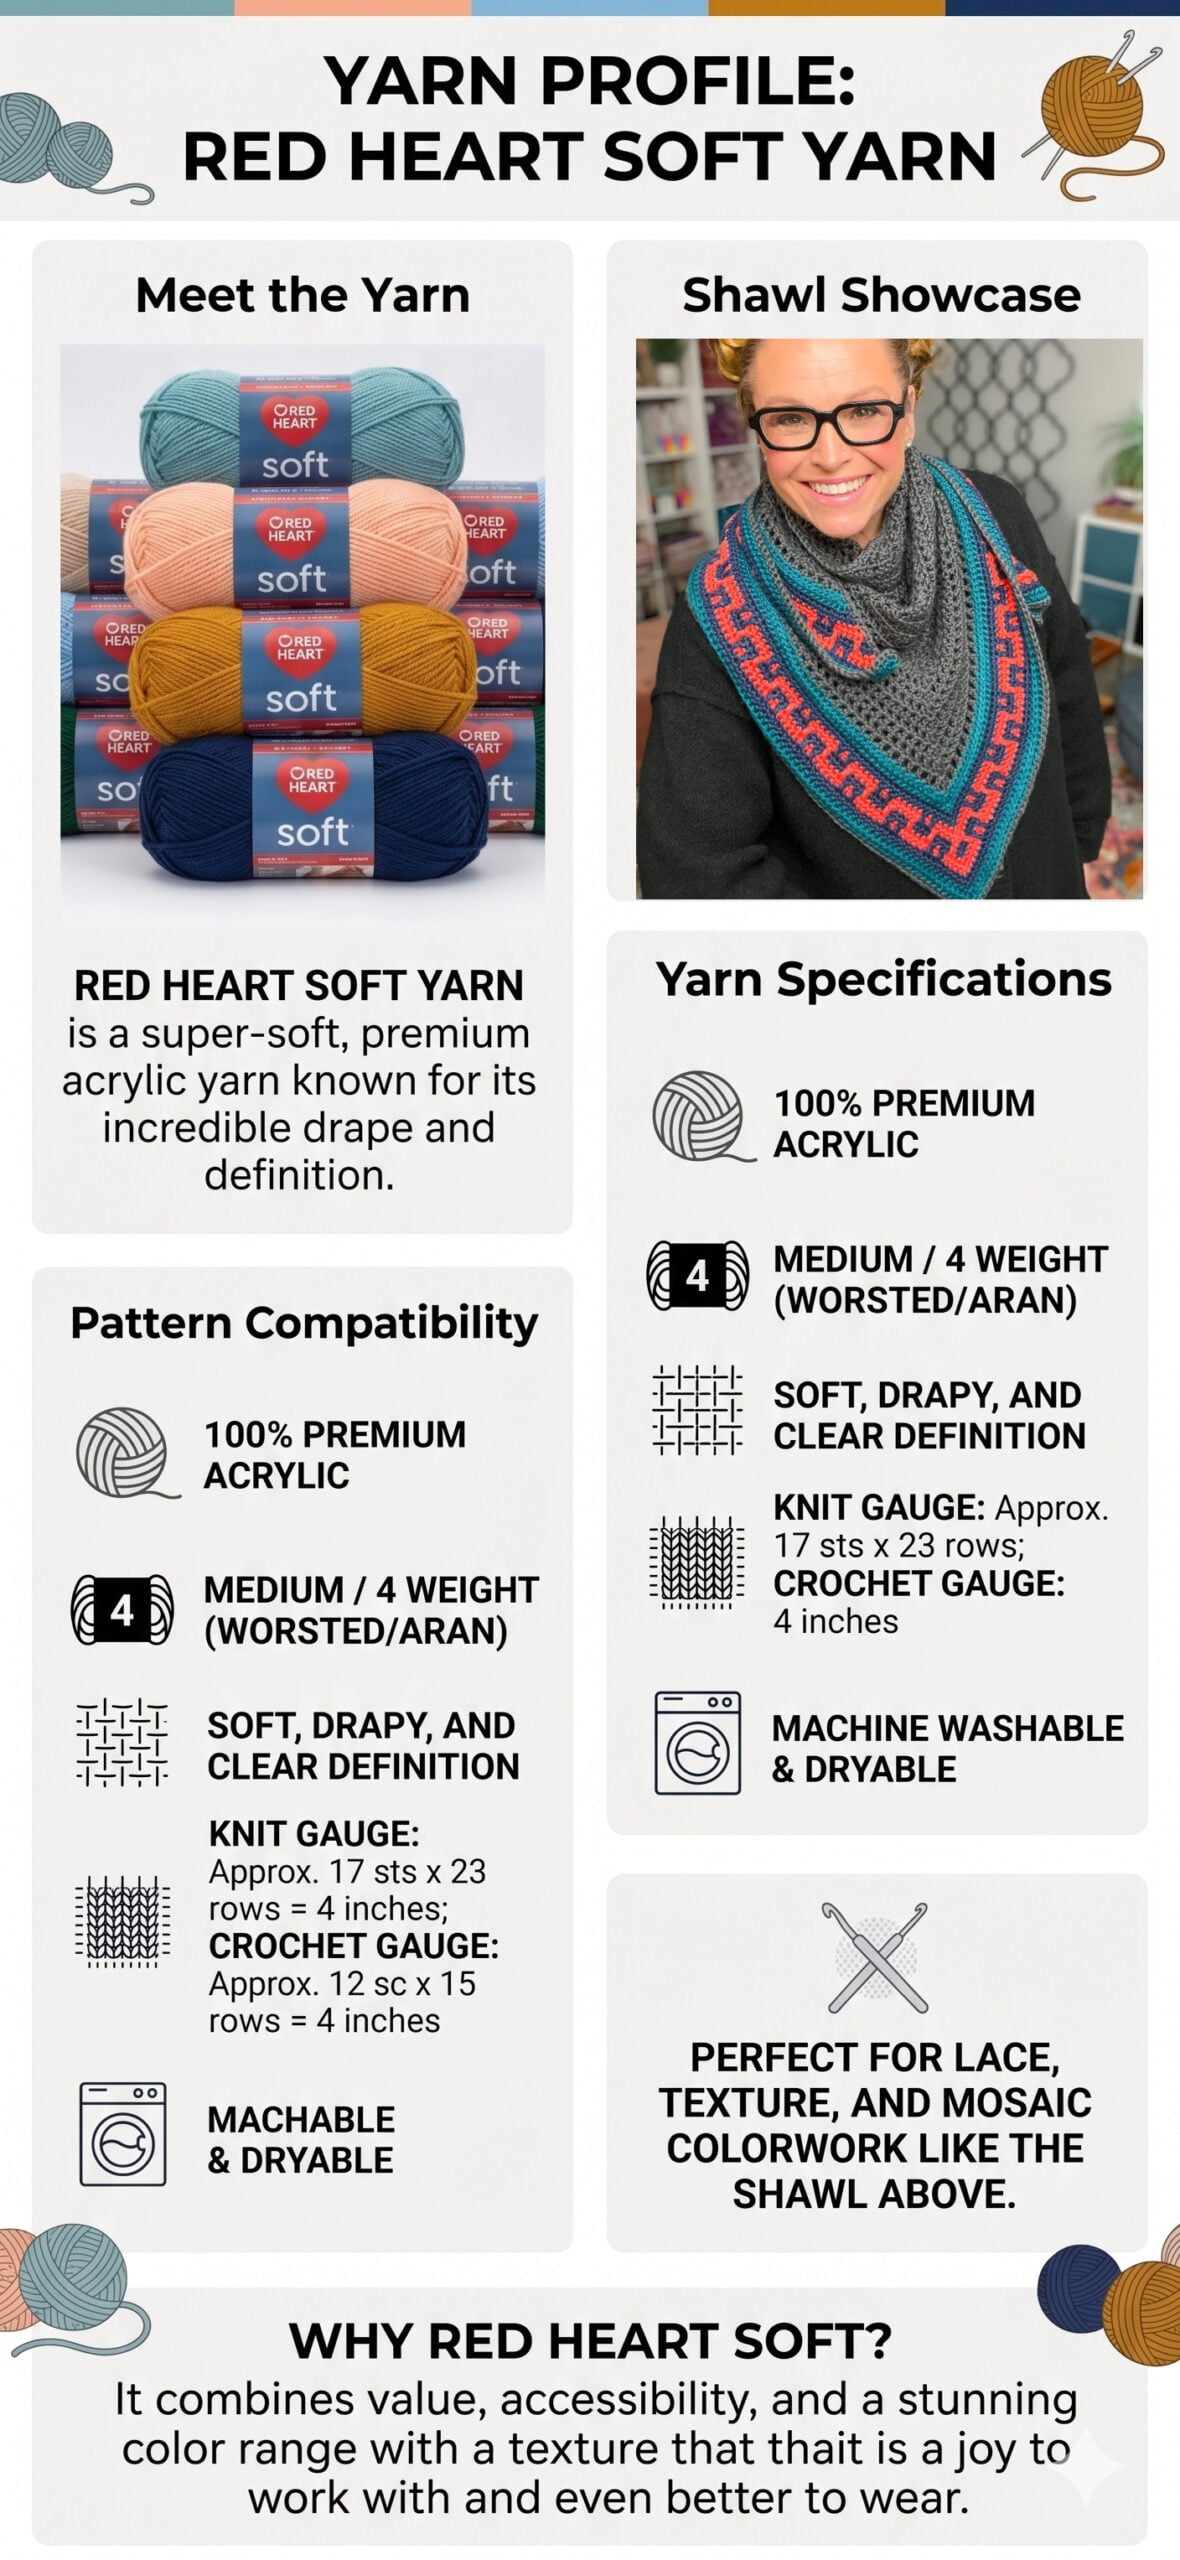
๐ŸŒŠ Worsted weight, accessible yarn. Coral Ridge is designed in Red Heart Soft… a CYCA #4 worsted weight 100% acrylic you can buy at Michaels, JoAnn, or Walmart. No specialty yarn hunt, no expensive substitution math. Affordable and machine washable, which is exactly what a shawl you'll wear constantly needs to be.

๐ŸŒŠ One-piece, no-seam construction. The shawl is worked from the center out in one continuous piece. The diagonal edges build themselves, the bottom point is built in, and there is absolutely nothing to seam at the end. You bind off, weave in ends, block, and you're done.

๐ŸŒŠ Architectural colorblock border. Fourteen rows of edging give you a clean Greek-key motif framed by teal and navy bands. The colorwork is structured so the color changes happen at the rhythm of the rows… not in the middle of stitches, which means no tapestry crochet learning curve.

๐ŸŒŠ Wears four ways. Drape it as a classic shawl, wrap it scarf-style, tie it as a sarong over a swimsuit, or pin it as a poncho-style cover-up. At 62″ across, it's actually big enough to wear in real life… not just over the back of a chair.

๐ŸŒŠ Stash-friendly accent colors. The main body is one solid color from start to finish, and each of the three accent colors only takes one ball. If you've already got a sweater quantity of a solid color in your stash, you're more than halfway there.

๐ŸŒŠ A handmade crochet shawl with real visual impact. If you've been making easy crochet shawl patterns and you're ready for something that looks more advanced than it actually is, Coral Ridge is the bridge. It's the kind of modern crochet shawl that gets photographed at every gathering… a one-of-a-kind crochet accessory pattern you'll reach for every season.

Woman models a gray crochet shawl with blue and coral trim, showing triangle shape and detailed edging. Coral Ridge Shawl.

Quick Pattern Overview

๐Ÿ“ Skill level: Intermediate. You'll need to be comfortable working into the third loop of a half double crochet, working a dc into a stitch two rows below, and moving stitch markers as your work grows. If you've made a top-down triangle shawl before, the rhythm here will feel familiar.

๐Ÿ“ Finished size: 62″ wingspan ร— 30″ depth. One size, designed to drape generously across the shoulders and down the back.

๐Ÿงถ Yarn: Red Heart Soft CYCA #4 worsted weight, 100% acrylic, 256 yds / 141 g per ball. 2 balls Color A (#9010 Charcoal), 1 ball each of Color B (#9518 Teal), Color C (#4604 Navy), Color D (#9251 Coral).

๐Ÿช Hook: Size I/9 (5.5 mm)… or whichever hook you need to hit gauge.

๐Ÿ“ Gauge: 16 sts (dc + ch-1 sp) ร— 9 rows = 4″ ร— 5″ blocked.

๐Ÿชก Construction: Worked from the center back of the neck outward in dc + ch-1 mesh, with increases at both side edges and at one center spine stitch on every row. Fourteen rows of colorblock edging finish the bottom and side edges with a Greek-key motif.

Ad-free PDF of the Coral Ridge Crochet Shawl free pattern โ€” Marly Bird modeling the worsted weight crochet triangle shawl with colorwork Greek-key border in front of her yarn studio shelves
Etsy
Shopify
Ravelry

Love the Pattern but Want an Ad-Free PDF? โญ

The full Coral Ridge Crochet Shawl pattern is free right here on the blog. If you'd rather skip the ads, print clean pages, and have everything you need in one tidy PDF… the ad-free version is available in my shops:

Or if you'd rather have the free pattern delivered straight to your inbox plus get on my newsletter for weekly pattern roundups, BiCrafty tips, and the occasional behind-the-scenes peek… I'd love to have you ๐Ÿ’›

  • ๐Ÿ›’ Shop the Coral Ridge pattern on Etsy
  • ๐Ÿ›’ Shop the Coral Ridge pattern on Ravelry
  • ๐Ÿ›’ Shop the Coral Ridge pattern in the Marly Bird Shopify Store

Join our Newsletter

Get Free Crochet & Knitting
Pattern Links & Coupons!

Hand-drawn bird with curling, detailed feathers and pink accents; cheerful pose showcases fine line and texture work.
>> Become An Insider <<
A woman with glasses and curly hair models a colorful crocheted scarf, showing textured stitches and vibrant yarn.

Is This Crochet Coral Ridge Shawl Pattern Right for You?

This pattern is perfect for you if…

โœ… You're an advanced-beginner or intermediate crocheter who's comfortable reading written instructions, moving stitch markers as you go, and working into the third loop of a half double crochet. If you're a crochet shawl beginner who's already made a basic triangle shawl or a granny square blanket, this is the perfect next pattern to graduate into.

โœ… You want a free triangle crochet shawl pattern that's big enough to actually wear. At 62″ across, Coral Ridge is generous enough to drape across both shoulders, wrap as a sarong, or fold scarf-style around your neck as a crochet scarf wrap.

โœ… You love the satisfaction of colorblock crochet without the learning curve of tapestry crochet. The Greek-key motif here is a colorwork crochet pattern that's created with stripes and slip stitches, not by carrying colors across the row.

โœ… You want a worsted weight crochet shawl worked in machine-washable yarn so you can finish quickly and wear it constantly.

โœ… You're shopping for a handmade crochet shawl with a border that does the visual heavy lifting. Coral Ridge is the rare crochet shawl with border detail that frames the entire piece without overwhelming it.

This might NOT be the right pattern for you if…

โŒ You're brand new to crochet. Save this one for after a few projects. (Try the Stoney Creek Sleeveless Tee if you want a simpler beginner-friendly garment first.)

โŒ You want a lacy, lightweight summer wrap. This is a worsted weight crochet shawl with structured colorwork… beautiful, but more substantial than a fingering weight lace shawl. (For lacy, try the Bluebonnet Crochet Lace Shawl.)

โŒ You don't want to block your finished piece. (Blocking is non-negotiable for this one… the colorblock edging chain-2 spaces need to open up evenly for the Greek-key motif to read.)

Coral Ridge free crochet triangle shawl pattern detail โ€” flat-lay showing the heathered gray body and blue and red Greek-key geometric colorblock border

Meet the Designers: Marly Bird & Robyn Chachula

Marly Bird

I'm Marly… a yarn artist, designer, and teacher who's been designing knit and crochet patterns since 2007. I'm best known for the BiCrafty method (teaching knit and crochet together as one practice), for being host of one of the longest-running fiber arts podcasts and YouTube channels in the industry, and for genuinely believing that crochet and knit patterns should be free, accessible, and sized for every body. Coral Ridge is part of an ongoing series of architectural shawl collaborations I've been doing with Robyn Chachula.

Robyn Chachula

Robyn is my best friend and my business partner… the Robyn to my Batman. She's a vital designing partner to me and my business, and she claims marlybird.com as her home too. Her brain works like an engineer's (because before she came to crochet, that's exactly what she was), so when Robyn drafts a pattern, every stitch has a job and every shaping decision has a reason. Coral Ridge is the latest in a series of architectural shawl collaborations we've designed together, and there are more on the way.

Coral Ridge crochet shawl free pattern modeled in a yarn-filled craft room โ€” gray triangle shawl with teal and red textured border by Marly Bird

Understanding Center-Out Triangle Shawl Construction

Coral Ridge is what's called a traditional center-out triangle shawl. You start at the center back of the neck with a tiny 4-chain foundation, then increase symmetrically on both side edges and at one center “spine” stitch on every row. The shawl grows outward and downward at the same time, forming a wide, generous triangle that drapes evenly across both shoulders.

If you've made a top-down shawl before (like the Farrago Crochet Shawl), the rhythm here will feel familiar… rows get longer as you go, you're working on the right side and wrong side alternately, and the marker in the center stitch is your best friend. The difference is what's happening at that center stitch… in Coral Ridge, you increase through the spine each row, which is what gives the finished shawl its symmetric triangle shape rather than a sloped boomerang.

What I love about this construction is that there's nothing to seam. The shawl comes off your hook in one piece, ready for blocking. The diagonal edges already match each other, the bottom point is built in, and the colorblock edging frames the whole thing like a picture frame around a painting.

Coral Ridge free crochet triangle shawl pattern โ€” handmade crochet shawl in gray with blue and coral colorwork border, styled in a cozy craft room

The Color Palette: Why Charcoal, Teal, Navy & Coral Work So Well Together

The name Coral Ridge came out of the colorway itself. Charcoal, teal, navy, and coral… it's the palette you'd see standing on a rocky shoreline at low tide, where the water shifts between deep blue-grey and sun-warmed teal, and a flash of coral pokes out from a tide pool. We wanted the shawl to feel like the ocean wearing its colors all at once.

Here's what makes the palette work technically… charcoal anchors the whole body of the shawl, so the eye stays calm across all those rows of double crochet mesh. Then the border builds outward through teal and navy (both cool, both close in value, which keeps the transition smooth) before the coral steps in as the Greek-key motif itself. Those bright coral keys on a navy ground are what make the shawl read as striking instead of matchy. It's the one true contrast in the design, and it's saved for the most visible part of the border.

Four colors sounds complicated. It isn't. This is a colorwork crochet pattern where the main body stays one solid color from start to finish (no color changes, no carrying yarn) and then all the colorwork happens in fourteen rows of edging at the end. By the time you're working those edging rounds, you've already crocheted enough of the shawl that the color changes feel like the fun reward at the end of the project. It's the gentlest way I know to make a crochet shawl with border colorwork that looks far more complicated than it actually is.

Coral Ridge free crochet triangle shawl Pinterest pin โ€” three poses showing how to wear this handmade crochet shawl with colorblock teal and coral border

See Coral Ridge in Twelve Different Colorways

The sample shawl is charcoal / coral / teal / navy, but the honest truth is… Coral Ridge wears just about every palette you can think of. So we rendered the shawl in twelve different color combinations to help you choose. Cool blues. Warm berries. Autumn neutrals. Jewel-tone coastal. Take a look and tell me which one is calling your name.

Colorwork crochet shawl in six blue and green colorways โ€” Coral Ridge triangle crochet shawl in icy aqua, teal sage, cobalt black, slate teal, turquoise denim, and navy olive
Free crochet triangle shawl pattern in six cream-body colorways โ€” Coral Ridge by Marly Bird in berry, peacock teal, browns, mustard, lavender plum, and emerald teal jewel-tone

If you're not sure where to start, here are the four palettes I keep coming back to…

  • Icy aqua monochrome (top-left, grid 1): Pale ice blue body with white, aqua, and sky blue in the border. Reads like a soft winter morning. This is the one to make if you've been hoarding pastels.
  • Cream + berry (top-left, grid 2): Cream body with raspberry, dusty rose, and burgundy in the border. Romantic, warm, and exactly the kind of shawl I'd wrap up in with a glass of wine.
  • Cream + mustard (middle-right, grid 2): Cream body with golden mustard, soft tan, and deeper goldenrod. Pure sunny autumn… the harvest-table version of Coral Ridge.
  • Emerald jewel-tone (bottom-right, grid 2): Cream body grading into a deep teal triangle with emerald, aqua, and medium teal in the border. Mermaid-coded, jewel-tone, and the most dramatic of the bunch.

If you've got a sweater quantity of one solid color in your stash already, you're more than halfway to a Coral Ridge of your own. The colorblock edging only takes one ball of each of the three accent colors… which makes this a perfect project for those single skeins of “I had to have it” yarn that have been waiting for the right pattern. Tell me in the comments which colorway you're reaching for. I'll happily play yarn-shop matchmaker.

Coral Ridge free crochet triangle shawl draped over the shoulders of a model in a black sweater โ€” colorblock red and teal border frames the collarbone

How to Wear Coral Ridge: Shawl, Wrap, Scarf, Sarong

At 62 inches across, Coral Ridge is big enough to actually wear in real life, not just drape over a chair back. This is the kind of crochet accessory pattern you'll style four different ways before the season is out… here are the four I keep reaching for.

Drape It Over Your Shoulders

The classic shawl move. The point hangs down at center back, the wingspan covers your shoulders and upper arms, and the colorblock border frames your collarbone. Pin it at the front with a shawl pin or a brooch for cooler weather.

Coral Ridge free crochet triangle shawl โ€” Marly Bird modeling the gray crochet shawl with colorwork border in her colorful craft room

Wrap It Scarf-Style

Fold the long edge in half on the diagonal, then wrap once around your neck like a chunky infinity scarf. The colorblock edging shows on the front of the loop, and the point tucks neatly behind you. This is my fall transition outfit cheat code.

Handmade crochet shawl styled as a crochet scarf wrap โ€” Coral Ridge worsted weight crochet shawl in gray and teal with colorblock Greek-key border, layered over a black cardigan

Tie It as a Sarong (or Beach Coverup)

Here's the secret I wasn't expecting when we designed Coral Ridge… it doubles as a sarong. Hold the long edge across the front of your waist (so the colorblock border runs along the top), wrap the two points around your hips toward the back, cross them, then tie them at the front or side. The triangle drape becomes a flattering A-line skirt over a swimsuit or shorts, and the open weave breathes beautifully in warm weather. If you're packing for a coastal vacation, this is the project I'd put on the needles first.

Pin It Poncho-Style

Drape Coral Ridge across your shoulders so the long edge sits at your collarbone, then pin the two points together at your shoulders to create a poncho silhouette. Wear it over a fitted black turtleneck and dark jeans for an instant Saturday-coffee outfit.


Yarn & Materials

Yarn Needed for Coral Ridge

Red Heart Soft (100% acrylic, 256 yds / 234 m, 5 oz / 141 g, CYCA #4 worsted weight). Machine washable and tumble dry. Available at most major craft retailers.

  • Color A: #9010 Charcoal โ€” 2 balls (main body)
  • Color B: #9518 Teal โ€” 1 ball (inner and outer edging bands)
  • Color C: #4604 Navy โ€” 1 ball (Greek-key ground)
  • Color D: #9251 Coral โ€” 1 ball (Greek-key motif)

Approximately 1,280 yards total across all four colors.

Yarn balls and a woman wearing a crochet shawl; close-up shows soft yarn texture, stitch detail, and color variety.

Hook & Notions

  • Crochet hook: Size I/9 (5.5 mm), or any size needed to obtain gauge
  • Stitch markers
  • Tapestry needle
  • Scissors
  • Tape measure
  • Blocking squares
  • Blocking pins
  • Steam iron or steamer for blocking
โญ๏ธ Marly Bird Amazon Storefront โญ๏ธ

Yarn Substitution Guide: Can I Use a Different Yarn for Coral Ridge?

Absolutely. The pattern was designed in Red Heart Soft because it's accessible and affordable, but any worsted weight (CYCA #4) yarn with about 256 yards per skein will work. A few substitutions I'd recommend if you want to switch…

  • Lion Brand Pound of Love: same fiber (acrylic), more yardage per ball (which means you might only need 1 ball of the body color instead of 2), wide color range.
  • Caron Simply Soft: slightly silkier hand, drapes a bit softer for a more elegant feel.
  • Berroco Vintage (worsted): wool/acrylic/nylon blend if you want a more breathable, slightly fancier finished shawl. Still machine washable.
  • Lion Brand Heartland: beautiful heathered colors for a more rustic palette, same gauge as Red Heart Soft.
  • Cascade 220 Superwash: if you want to go all-wool while keeping the wash-and-wear ease. Slightly heavier hand, blocks beautifully.

Whatever you substitute, please do a gauge swatch first. The pattern is designed at 16 sts and 9 rows = 4″ ร— 5″ in dc + ch-1 space, and if your gauge is off, the wingspan will land somewhere quite different from 62 inches.

Video Tutorials

How to Weave or Bury in Ends

Coral Ridge has eight color changes through the colorblock border, which means eight pairs of ends to weave in at the finish. This quick video shows the two-step method I use to bury ends so they stay buried, even after washing.

How to Wind a Hank with a Swift and Ball Winder

If you're substituting a hand-dyed or specialty yarn that comes in a hank rather than a center-pull ball, this is the fastest way to get it ready for crochet without ending up with a tangled mess on your lap.

  • Blocking Made Easy with the Right Tools
Coral Ridge free crochet triangle shawl pattern detail โ€” gray crochet body with colorwork blue, red, and pink Greek-key colorblock border

Free Coral Ridge Crochet Shawl Pattern Details

Skill Level

Intermediate

Finished Measurements

Shawl is 62″ [157.5 cm] in wingspan by 30″ [76 cm] in depth.

Gauge

16 sts (dc + ch-1 sp) by 9 rows = 4″ [10 cm] by 5″ [12.5 cm]; use any size hook to obtain the gauge.

Abbreviations

  • Ch โ€” Chain(s)
  • Dc โ€” Double Crochet
  • Hdc โ€” Half Double Crochet
  • RS โ€” Right Side
  • Sc โ€” Single Crochet
  • Sl st โ€” Slip Stitch
  • Sp(s) โ€” Space(s)
  • St(s) โ€” Stitch(es)
  • Tch โ€” Turning Chain
  • WS โ€” Wrong Side

Special Stitches

โญ Third Loop: Also known as the middle loop or back bar. The horizontal strand located just under the top two loops of an hdc. When working in turned rows, the third loop is on the front side of the fabric facing you.


Crochet Stitch Diagrams

โœจ Following along with the free pattern on MarlyBird.com? You'll have everything you need to make this Coral Ridge Shawl… but if you want the exclusive stitch diagram charts, those are only available in the ad-free PDF version.

You'll enjoy a clean, printable, ad-free experience while supporting Marly Bird's free tutorials and patterns ๐Ÿ’–

Etsy
Shopify
Ravelry

Notes

  • Shawl is worked from the center out.
  • Place a stitch marker in the center stitch and end stitches throughout. Move the center marker as the shawl grows.
  • Do not skip blocking. The chain-2 spaces of the colorblock edging need to open up for the Greek-key motif to read.

GROW

To Unlockย Exclusive Subscriber Contentย click the Box below and join for free by simply adding your email and creating a password! If you are having troubles, clear your cache or reset your password or login to the Grow Publisher Portal.

>> Learn More About Grow Here <<

I'm thrilled to share this amazing pattern with you, many patterns on my blog are absolutely free! I kindly request that you don't copy and paste or distribute this pattern. Prefer an ad-free experience? Buy a digital PDF pattern for a small fee from one of my online stores for a seamless crafting journey. 

I appreciate your support and readership. You are the reason I can keep doing what I love and sharing it with others. So, thank you from the bottom of my yarn-loving heart! Disclosure: This post contains affiliate links, meaning I get a commission if you decide to make a purchase through my links at no cost to you.

Ad-free PDF of the Coral Ridge Crochet Shawl pattern by Marly Bird โ€” clean printable instructions for crocheters with stitch diagrams

Free Coral Ridge Crochet Shawl Pattern Instructions

Main Body

With Color A, ch 4.

Row 1 (WS): Skip 3 ch (counts as dc), (dc, ch 1, dc, ch 1, 2 dc) in last ch, turn โ€” 5 dc, 2 ch-1 sps.

Row 2: Ch 3 (counts as dc), dc in first dc (this makes 2 dc in first st), ch 1, dc in next dc, (ch 1, dc) 3 times in next dc, place marker in center dc of last 3 dc made for corner, ch 1, dc in next dc, ch 1, 2 dc in top of tch, turn โ€” 9 dc, 6 ch-1 sps.

Row 3: Ch 3 (counts as dc), dc in first dc, (ch 1, dc) in each dc to marked corner dc, (ch 1, dc) 3 times in marked corner dc and move marker to center dc of last 3 dc made, (ch 1, dc) in each dc to last st, ch 1, 2 dc in top of tch, turn โ€” 13 dc, 10 ch-1 sps.

Repeat Row 3 only 30 more times โ€” 33 total rows worked, 133 dc total, 66 dc on either side of center st, 247 sts total, 123 sts on either side of center st. Change color to B, fasten off Color A.

Coral Ridge free crochet triangle shawl pattern detail โ€” gray mesh body with the start of the blue and pink Greek-key colorblock border

Edging

Row 1: Ch 2 (counts as hdc), hdc in each dc and ch-1 sp across to marked corner dc, 3 hdc in corner dc, move marker to center st, hdc in each dc and ch-1 sp across, turn โ€” 124 hdc each side of center marked st, 249 hdc total.

Row 2: Ch 1, 2 sc in first hdc, sc in third loop of each hdc across to marked hdc, 3 sc in marked corner hdc, move marker to center sc, sc in third loop of each hdc across to tch, 2 dc in top of tch, change color to C, fasten off Color B, turn โ€” 126 sc each side of center marked st, 253 sc total.

Row 3: Ch 1, 2 sc in first sc, sc in each sc across to marked sc, 3 sc in marked corner sc, move to center sc, sc in each sc across to last sc, 2 sc in last sc, turn โ€” 128 sc each side of center marked st, 257 sc total.

Row 4: Ch 1, 2 sc in first sc, sc in each sc across to marker, 3 sc in marked corner sc, move marker to center sc of 3 sc just made, sc in each sc to last sc, 2 sc in last sc, change color to D, turn โ€” 130 sc each side of center marked st, 261 sc total.

Row 5: Ch 1, 2 sc in first sc, *sc in next 3 sc, [ch 2, skip 1 sc, sc in next sc, ch 2, skip 1 sc, sc in next 5 sc] 15 times, ch 2, skip 1 sc, sc in next sc, ch 2, skip 1 sc, sc in next 3 sc*, 3 sc in marked sc, move marker to center sc of 3 sc just made, repeat from * to * once, 2 sc in last sc, turn โ€” 32 ch-2 sps + 100 sc each side of center marked st.

Row 6: Ch 1, 2 sc in first sc, sc in each st and ch 2 over each ch-2 sp across to marker, 3 sc in marked sc, move marker to center sc of 3 sc just made, sc in each st and ch 2 over each ch-2 sp across to last sc, 2 sc in last sc, change color to C, turn โ€” 32 ch-2 sps + 102 sc each side of center marked st.

Row 7: Ch 1, 2 sc in first sc, *ch 2, skip 1 sc, sc in next 3 sc, ch 2, skip 1 sc, [dc in next sc 2 rows below (in front of prev ch-sps), sc in next sc, dc in next sc 2 rows below, ch 2, skip 1 sc, sc in next 3 sc, ch 2, skip 1 sc] 16 times*, 3 sc in marked sc, move marker to center sc of 3 sc just made, repeat from * to * to last sc, 2 sc in last sc, turn โ€” 34 ch-2 sps + 32 dc + 70 sc each side of center marked st.

Row 8: Ch 1, 2 sc in first sc, sc in each st and ch 2 over each ch-2 sp across to marker, 3 sc in marked sc, move marker to center sc of 3 sc just made, sc in each st and ch 2 over each ch-2 sp across to last sc, 2 sc in last sc, change color to D, turn โ€” 34 ch-2 sps + 104 sc each side of center marked st.

Row 9: Ch 1, 2 sc in first sc, *sc in next 2 sc, [dc in next sc 2 rows below, ch 2, skip 1 sc, sc in next sc, ch 2, skip 1 sc, dc in next sc 2 rows below, sc in next 3 sc] 16 times, dc in next sc 2 rows below, ch 2, skip 1 sc, sc in next sc, ch 2, skip 1 sc, dc in next sc 2 rows below, sc in next 2 sc*, 3 sc in marked sc, move marker to center sc of 3 sc just made, repeat from * to * to last sc, 2 sc in last sc, turn โ€” 34 ch-2 sps + 34 dc + 72 sc each side of center marked st.

Row 10: Ch 1, 2 sc in first sc, sc in each st and ch 2 over each ch-2 sp across to marker, 3 sc in marked sc, move marker to center sc of 3 sc just made, sc in each st and ch 2 over each ch-2 sp across to last sc, 2 sc in last sc, change color to C, turn โ€” 34 ch-2 sps + 108 sc each side of center marked st.

Row 11: Ch 1, 2 sc in first sc, *[sc in next 5 sc, dc in next sc 2 rows below, sc in next sc, dc in next sc 2 rows below] 17 times, sc in next 5 sc*, 3 sc in marked sc, move marker to center sc of 3 sc just made, repeat from * to * to last sc, 2 sc in last sc, turn โ€” 34 dc + 110 sc each side of center marked st.

Row 12: Ch 1, 2 sc in first sc, sc in each st across to marked sc, 3 sc in marked corner sc, move to center sc, sc in each st across to last sc, 2 sc in last sc, change color to B, turn โ€” 146 sc each side of center marked st, 293 sc total.

Row 13: Ch 2 (counts as hdc), hdc in first sc, hdc in each sc across to marked sc, 3 hdc in marked corner sc, move to center hdc, hdc in each sc across to last sc, 2 hdc in last sc, change color to B, turn โ€” 148 hdc each side of center marked st, 297 hdc total.

Row 14: Ch 1, 2 sc in first hdc, sc in third loop of each hdc across to marked hdc, 3 sc in marked corner hdc, remove center marker, sc in third loop of each hdc across to tch, 2 hdc top of tch, change color to A, turn โ€” 150 sc each side of center marked st, 301 sc total.

Edging Round: Ch 1, sc in each sc across each side to diagonal edge, sc evenly across diagonal edge, sl st to first sc, fasten off all colors, weave in ends.

Coral Ridge free crochet triangle shawl pattern modeled โ€” gray shawl with blue and red Greek-key colorblock border by Marly Bird and Robyn Chachula

Blocking Tips

Blocking your finished Coral Ridge is the difference between “really pretty shawl” and “I cannot believe I made that.” Don't skip it. The chain-2 spaces in the Greek-key motif need to open up evenly for the colorwork to read the way it does in the sample photos, and the diagonal edges need a chance to settle into a true triangle.

Here's how to block Coral Ridge two ways… steam blocking (fast) and wet blocking (deeper set):

  • Steam blocking (my go-to for acrylic): Lay the finished shawl flat on blocking squares, pin to the finished measurements (62″ wingspan ร— 30″ depth) using blocking pins. Hold a steam iron or steamer about an inch above the fabric and let the steam open up the chain spaces. Don't press… just steam. Let the shawl cool and dry completely before you unpin.
  • Wet blocking (deeper set, longer dry): Submerge the shawl in cool water with a touch of no-rinse wool wash like Eucalan. Squeeze out excess water without wringing, then roll in a towel like a burrito to wick away more moisture. Pin to size on blocking squares, smooth with your hands, and let it dry completely (usually 24 hours).
  • ๐Ÿšจ Use extra care to avoid overstretching! The dc + ch-1 mesh body will happily grow another six inches if you let it. Pin to the schematic measurements, not as far as the fabric will go.
  • Never block in direct sunlight (it can discolor acrylic), and never use a hot iron directly on acrylic fibers (you can melt them).

(If you're new to blocking, the full step-by-step is in my Blocking Made Easy guide.)

Favorite & Queue on Ravelry

Favorite and queue the Coral Ridge Crochet Shawl on Ravelry so you never lose track of it… and so I can see how many of you are making this one ๐Ÿ’›

Favorite and queue the free Coral Ridge crochet triangle shawl pattern on Ravelry โ€” worsted weight shawl with colorblock Greek-key border

More Free Crochet Shawl & Wearable Patterns You'll Love

๐ŸŒŠ Farrago Crochet Shawl… top-down construction, single self-striping yarn, textured mixed stitches. The cozy meditative counterpart to Coral Ridge.

๐ŸŒŠ Bluebonnet Crochet Lace Shawl… another collaboration with Robyn, lacy and delicate, perfect for fingering weight if you want a lightweight counterpart to Coral Ridge.

๐ŸŒŠ Lyvia Crochet Ruana… a free crochet ruana wrap with a similar drape-it-everywhere wearability factor.

๐ŸŒŠ Sookie Crochet Cardigan… a free size-inclusive crochet cardigan in XS through 5X if you're ready to graduate from shawls to a full layering piece.

๐ŸŒŠ Stoney Creek Sleeveless Tee… a beginner-friendly free crochet sweater pattern if you'd like to add a simple top to your warm-weather rotation.

๐ŸŒŠ Floral Motif Summer Crochet Tee… a free size-inclusive crochet sweater pattern from S/M to 4X/5X using join-as-you-go motif construction.

๐ŸŒŠ Sunday Sideline Crochet Shawl… a free one-skein triangle crochet shawl pattern that's the easy-crochet-shawl on-ramp before you graduate into Coral Ridge.

๐ŸŒŠ Goldenrod Crochet Cardigan… a size-inclusive Tunisian crochet cardigan in a sunny goldenrod yellow that pairs beautifully over a Coral Ridge shawl on a cool day.

๐ŸŒŠ Northwoods Crochet Cardigan… a cozy free crochet cardigan in heathered Lion Brand Heartland… perfect layering piece for the colder-weather rotation.

Coral Ridge Crochet Shawl free pattern FAQ banner โ€” common questions about this triangle shawl with colorblock border answered

Frequently Asked Questions

What does “worked from the center out” mean in crochet?

So here's the thing… “center out” just means you start your shawl at the very center back of the neck and the fabric grows outward and downward at the same time. You're not seaming anything. You're not picking up stitches later. The shawl literally builds itself in one piece from that tiny 4-chain foundation at the top. The opposite approach is top-down (where the whole top edge of the shawl is the foundation row, like the Farrago Crochet Shawl). Both are beautiful… they just give you different shaping and a different rhythm to crochet.

Can I substitute Red Heart Soft with another yarn?

Yes… easily. Any worsted weight (CYCA #4) yarn with around 256 yards per skein will work. My top picks for substitutions are Red Heart Soft (the original, affordable and widely available), Lion Brand Pound of Love, Caron Simply Soft, Berroco Vintage, or Cascade 220 Superwash if you want to go all-wool. The full sub guide is in the Yarn & Materials section above. Whatever you pick, swatch it first… gauge matters more than yarn brand.

What is “working in the third loop” in crochet?

Great question, because this one comes up a lot. When you make an hdc, the stitch has three loops on top, not two. The “third loop” is the horizontal bar sitting just behind (or below) the front two loops. On Coral Ridge, you'll work into the third loop on a couple of the edging rows… and the reason is that working in the third loop creates a beautiful corded, ribbed texture along the row. It looks like a little decorative ridge running along the color-change line, which is exactly what we wanted in this shawl.

What size hook do I need for worsted weight yarn?

Honestly, it depends on you. For Coral Ridge, the pattern is written for a size I/9 (5.5 mm) hook with Red Heart Soft, and that's the hook size most worsted weight yarns suggest on the label. But everyone's tension is different… if you crochet tight you might need to go up to a J/10 (6 mm), and if you crochet loose you might come down to an H/8 (5 mm). The only way to know for sure is to swatch and check your gauge.

How do you block a crochet shawl?

Two methods work for Coral Ridge… steam blocking (the one I use, because it's fast) and wet blocking (deeper soak, longer dry time, sets the stitches even more). For steam blocking, lay the finished shawl flat on blocking squares, pin to the finished measurements (62″ ร— 30″ for this one), then hover a steam iron or steamer about an inch above the fabric and let the steam open up the chain spaces. Don't press… just steam. Let it cool and dry completely before you unpin. For wet blocking, soak the shawl in cool water with a little wool wash, gently squeeze out the water (don't wring), pin to size, and let it air-dry overnight.

How many yards of yarn do I need for this shawl?

About 1,280 yards total across all four colors. Color A (charcoal/body) needs around 512 yards (2 balls of Red Heart Soft), and Colors B, C, and D each need around 256 yards (1 ball each). One ball of each accent color is more than enough for the edging… you'll likely have leftovers, which makes Coral Ridge a great stash-buster project too.

What is the difference between a shawl and a wrap?

Honestly, the shortest answer is shape. A shawl is typically triangular (like Coral Ridge), and a wrap is typically rectangular or asymmetrical. Both drape over the shoulders, both keep you warm, both look beautiful… it really is mostly a shape distinction. Coral Ridge is technically a shawl by that definition, but because of its size it also wears like a wrap when you fold it on the diagonal.

How long does it take to crochet a triangle shawl this size?

For an intermediate crocheter at a comfortable pace, plan on 15 to 25 hours for Coral Ridge from start to finish. Most of that time is the main body… the 33 rows of dc + ch-1 mesh are the longest part of the project. Once you get to the colorblock edging, it actually goes quickly because you're switching colors every couple of rows and the rhythm changes keep things interesting. Spread across a few weeks of evening crochet sessions, that's a very doable project. Some people will finish it in a long weekend.

Can Coral Ridge really be worn as a sarong?

Yes… and honestly, this is the part I'm most excited about. At 62 inches across, Coral Ridge wraps beautifully around the waist as a beach coverup or vacation sarong. You wrap the long edge across your front, take the two side points around to the back, cross them, and tie at the front or off to one side. The open weave of the dc + ch-1 mesh body is light enough to breathe in warm weather, and the colorblock edging frames the top of your hip line like the design was made for it. Skip the swimsuit coverup at Target and crochet your own.

Final Thoughts

Coral Ridge is one of my favorite collaborations with Robyn… architectural and accessible, structured and wearable, with the kind of colorblock detail that makes you feel like you're wearing something genuinely special when you put it on. Make it for yourself, make it for a friend, share the pattern with someone who's been searching for the perfect free triangle crochet shawl pattern in worsted weight… a handmade crochet shawl that wears like a modern crochet shawl should. Please come back and tell me how it turned out. I love seeing your makes ๐Ÿ’›

Tag me on Instagram @marlybird or share inside Marly's Minions on Facebook. I'm always rooting for you.

โค๏ธ Your BiCrafty Bestie,
Marly Bird
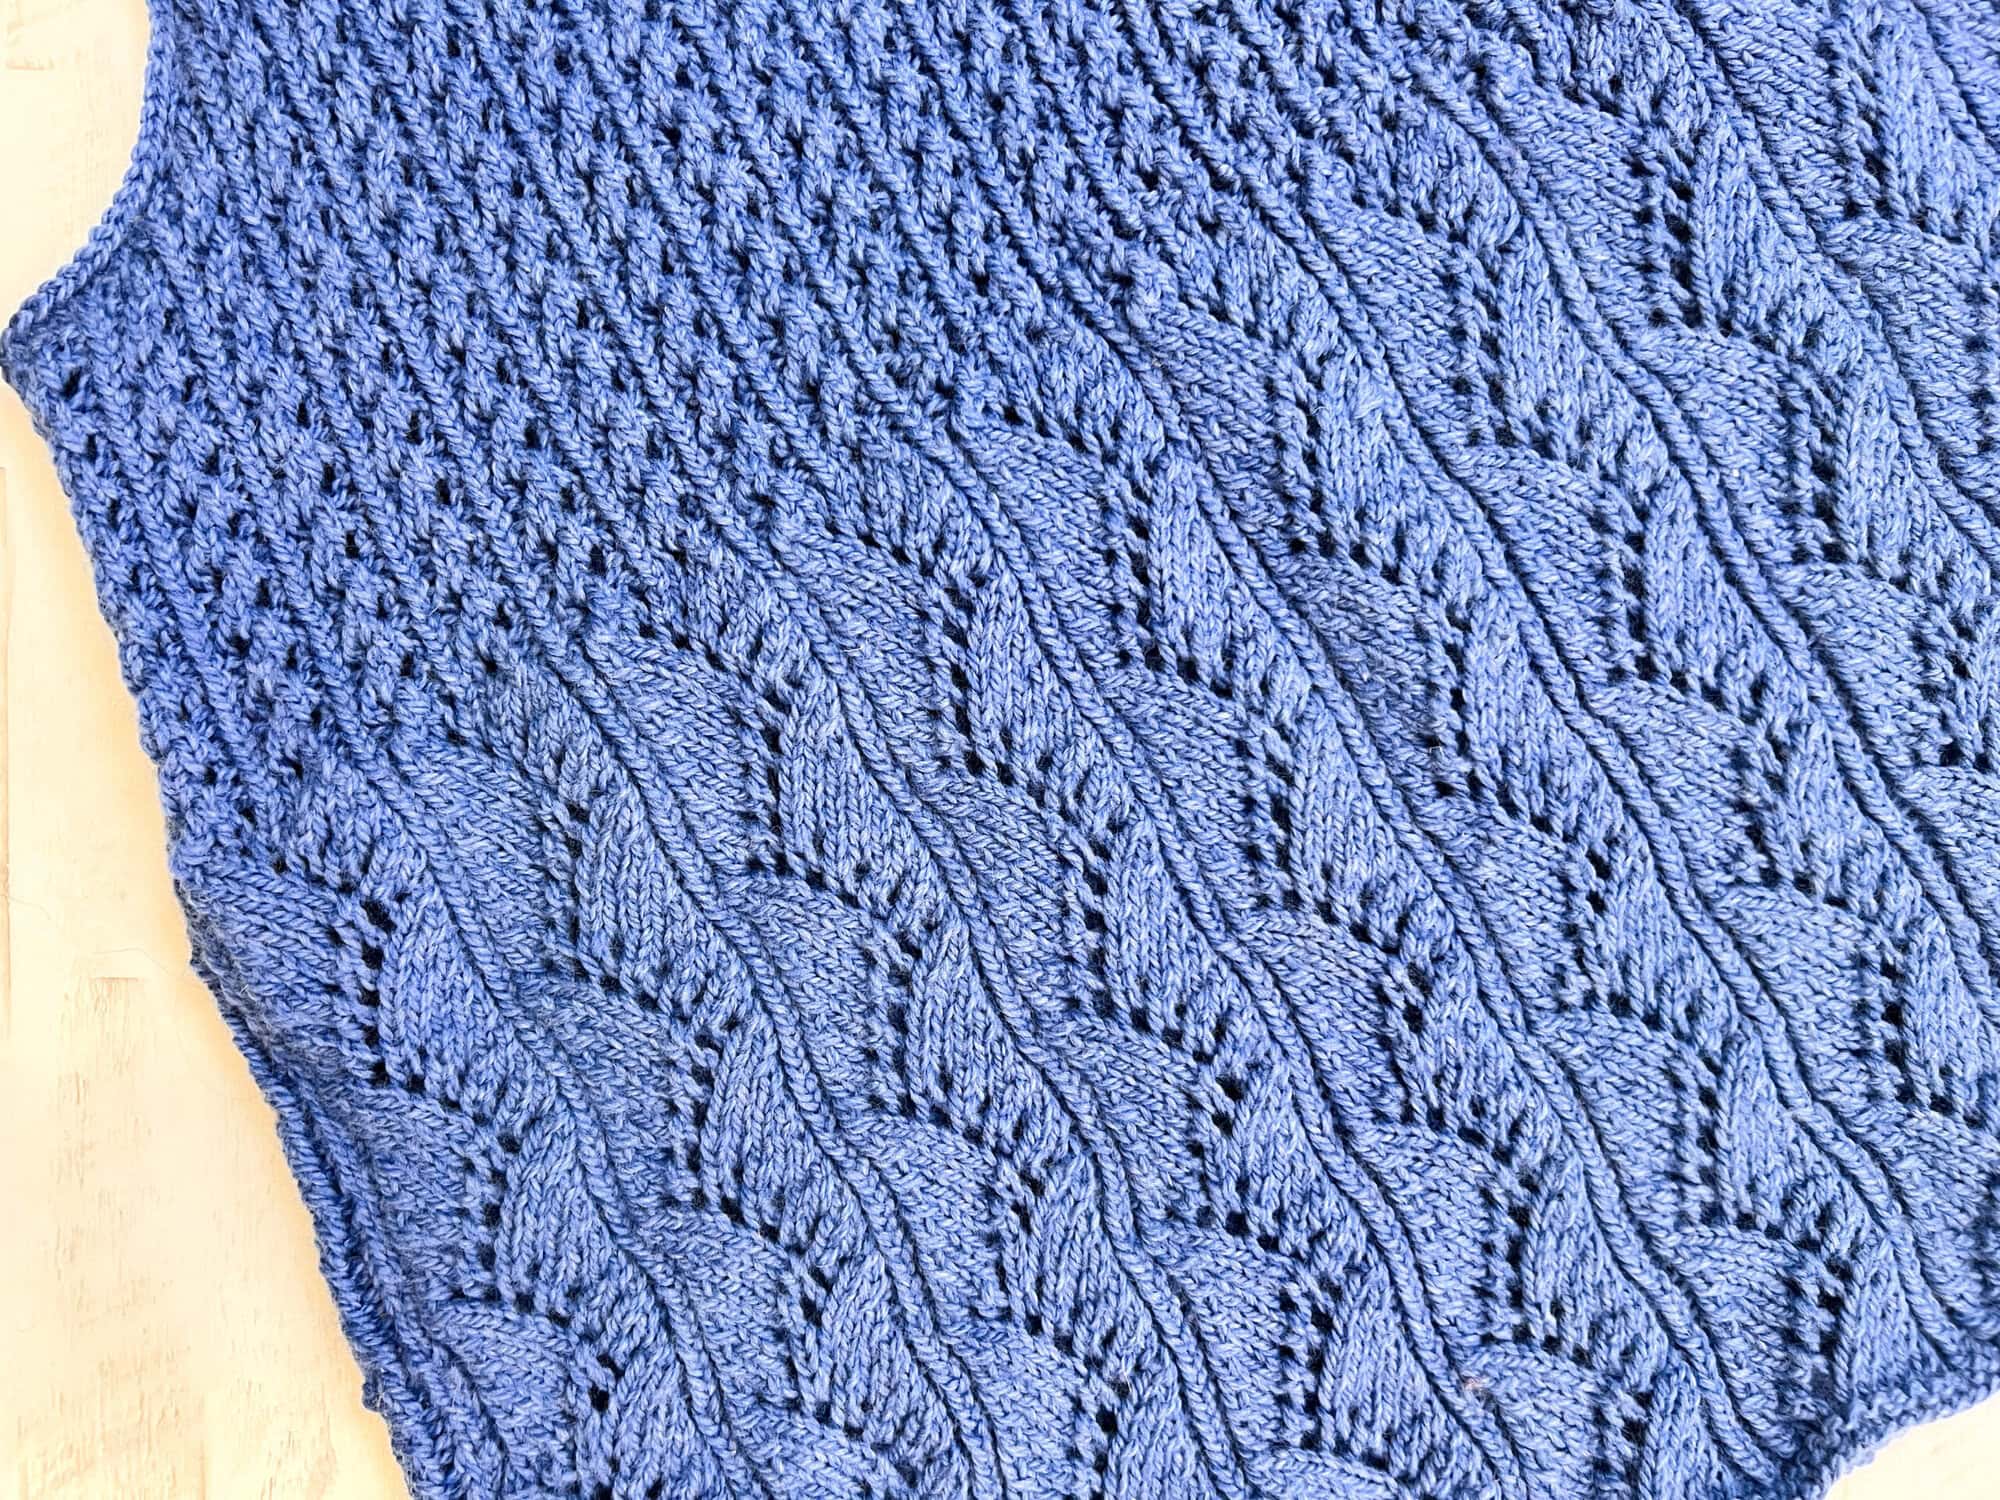
A cartoon avatar of a person with glasses and a brown bun smiles warmly. Their green shirt and black jacket add a stylish touch, while colorful hearts surround them like loving temperature blankets, stitching together an aura of love and positivity. -Marly Bird
“

Filed Under: Crochet, Free Patterns, Marly Bird Premium Patterns, Our Free Patterns, Pattern, Uncategorized Tagged With: colorblock shawl, colorwork crochet shawl, crochet accessory pattern, crochet scarf wrap, crochet wrap pattern, free crochet shawl pattern, Greek-key border, handmade crochet shawl, Marly Bird, modern crochet shawl, Red Heart Soft, spring fling 2026, triangle crochet shawl, worsted weight crochet shawl

Knit Poncho โ€” Free Knitting Pattern (Woobie Travel Poncho)

May 15, 2026 By Meg 2 Comments

The Woobie Knit Poncho is a free knit poncho pattern by Marly Bird, originally designed for the 2019 Turkey Trot Mystery Make-Along and refreshed for Spring Fling 2026. Worked flat from the top down in Caron Latte Cakes #5 bulky cake gradient yarn, then folded and seamed. Adventurous beginner skill level. Sized S/M/L. Cozy enough to wear like a security blanket… but make it knitwear.

If you've been wanting to knit your first poncho, or you remember the 2019 Turkey Trot and have always wanted the full pattern in one clean place… this is the post. The original lived as three “clue” pages from the mystery make-along; now the whole thing is right here, refreshed, updated, and standalone.

Woman models a soft, blue-and-white striped knit poncho, showing its drape and textured stitches in three different poses.

Hey, bestie ๐Ÿ’›

The Woobie Poncho holds a special place in my design archive. The original ran as a mystery make-along during Thanksgiving week 2019 and the community absolutely fell in love with it. The nickname “Woobie” stuck because it wears like a security blanket you can leave the house in. Cozy. Familiar. The thing you reach for when you want comfort but you also have to be a person in public.

What you're getting today is the fully refreshed pattern… same beloved design, updated formatting, new photos, and our current standard layout. The construction is unchanged. The yarn is unchanged. It's just the cleanest, easiest-to-follow version of the Woobie Poncho I've ever published.

Let's get into it.

*This post contains affiliate links. By clicking one of the links and making a purchase, a small portion will go to support the blog. The price you pay does not change. Thank you for your support of the blog.*

โš ๏ธ A quick yarn note: The Woobie Poncho was designed for Caron Latte Cakes, which is a Michaels-exclusive yarn. Yarnspirations now lists it as a retailer-exclusive that's no longer in active production. Translation: you can still buy it at Michaels right now (and online while stock lasts), but eventually it'll be gone. If you have Latte Cakes in your stash, this is the pattern for it. If you don't, jump down to the Yarn & Materials section for substitute picks. ๐Ÿ’™
Marly Bird wearing the Woobie Knit Poncho, a free knitting pattern with a cozy cowl neck and bulky cake gradient yarn

What You Will Love About the Woobie Knit Poncho ๐Ÿ’–

๐Ÿงฃ It wears like a hug. The Woobie earned its nickname for a reason. The soft knit fabric drapes like a wearable blanket… but the built-in cowl, open lace detail, and asymmetrical shape mean it actually looks fashionable. Comfort that doesn't compromise. That's the whole brief.

๐Ÿงถ It's an adventurous-beginner knit. If you know how to knit, purl, yarn over, and k2tog, you can make this poncho. The lace pattern is a simple 8-row repeat that becomes second nature after the first few inches. No complicated shaping, no tricky construction โ€” just flat knitting that turns into a wearable layer.

โฑ๏ธ It's a weekend-pace project. Bulky yarn + big needles = fast knitting. The Woobie works up faster than most sweaters or shawls, and the finishing is just folding and seaming โ€” no picking up stitches, no complicated edgings.

๐Ÿ“ Size-inclusive sizing (S / M / L with generous fit). Sized Small, Medium, and Large with body widths from 28ยพ” to 37ยผ” (folded in half) โ€” and because a poncho drapes instead of fits to the body, the generous cut works beautifully across a wide range of body types and shapes. Adjustable length means you can make it shorter or longer to suit your style and your frame. This is a poncho that's meant to feel good on YOU, not the other way around.

โœˆ๏ธ It's a wearable travel blanket. The Woobie is one of those rare layers that doubles as a travel piece. Throw it on for a flight or train ride and you have a cozy blanket that keeps you warm without sacrificing free hands for your coffee, your phone, your kindle, or your knitting WIP. (Speaking of which โ€” yes, you can absolutely knit on the plane. Here's my popular guide to flying with knitting needles.) Throw it in your carry-on and your shoulders never get cold again. ๐Ÿงฃโœˆ๏ธ

๐Ÿ“„ Free Pattern here on the blog… ad-free PDF available too. The full pattern lives free right here on the blog. If you'd rather work from a clean ad-free PDF, I've got you covered below.

Woman wears a light blue and white striped knit poncho, showing drape and texture; features garter stitch details.

Quick Pattern Overview

๐Ÿงถ Craft: Knitting

๐ŸŒธ Pattern Name: Woobie Knit Poncho (originally designed for Turkey Trot 2019, refreshed 2026)

๐Ÿ“ Finished Size (S / M / L):

  • Cowl: 26 (34, 34)” [66 (86.5, 86.5) cm] around and 8″ [20.5 cm] in length
  • Body width: 28ยพ (32ยพ, 37ยผ)” [73 (83, 94.5) cm] wide (folded in half)
  • Body length: 24 (24, 34)” [61 (61, 86.5) cm]

๐ŸŽฏ Skill Level: Adventurous Beginner

๐Ÿงต Yarn: Caron Latte Cakes โ€” #5 Bulky cake gradient yarn (Michaels-exclusive, limited availability). See Yarn & Materials below for substitute picks.

๐Ÿชก Needles: U.S. 10 [6 mm] 48″ [122 cm] or longer circular needle (worked flat in rows โ€” circulars hold the full width)

๐Ÿช Crochet Hook: Size J/10 [6 mm] โ€” used only to make the drawstring

๐Ÿ“ Construction: Worked flat from the top down (cowl first, then body), then folded in half and seamed. Drawstring threaded through cowl eyelet row (optional).

๐Ÿ“Š Gauge: 12 sts and 24 rows = 4″ in Cowl Lace Pattern. Note: Latte Cakes has good stretch โ€” account for it when measuring gauge.


A woman models a light blue knit poncho with textured stitches, standing in a cozy room near the Woofie Poncho pattern display.
Etsy
Shopify
Ravelry

Love the Pattern but Want an Ad-Free PDF? โญ

The Woobie Knit Poncho pattern is FREE right here on the blog… but if you'd rather work from a clean, printable, ad-free PDF (with schematic and no scrolling), I have you covered.

Grab the ad-free PDF in the shop of your choice:

  • ๐Ÿ›’ Shopify (shop.marlybird.com)
  • ๐Ÿ›๏ธ Etsy
  • ๐Ÿ’› Ravelry

Get the latest Marly Bird patterns + bestie-only deals in your inbox every week. ๐Ÿ’›

Join our Newsletter

Get Free Crochet & Knitting
Pattern Links & Coupons!

Hand-drawn bird with curling, detailed feathers and pink accents; cheerful pose showcases fine line and texture work.
>> Become An Insider <<
A woman with glasses and curly hair models a colorful crocheted scarf, showing textured stitches and vibrant yarn.

Is the Woobie Knit Poncho Right for You?

This pattern is a great fit if…

โœ… You're an adventurous beginner ready to knit your first poncho. If you can knit, purl, yarn over, and k2tog, you have every skill you need. The construction is flat-knit-fold-and-seam, which is one of the most beginner-friendly garment constructions out there.

โœ… You want a fast, satisfying garment project. Bulky yarn + big needles = quick knit. This is a weekend or two of casual knitting, not a multi-month sweater commitment.

โœ… You love cozy, cake-gradient yarns. The Woobie was designed around Caron Latte Cakes' natural color shifts, and the lightweight lace eyelet rows let those gradients show off beautifully.

โœ… You want a pattern that's generously sized and body-friendly. Because the Woobie is a fold-and-seam poncho (not a fitted garment), the S / M / L sizing wears generously across a wide range of body shapes and sizes. The drape does the work. You're not squeezing into a number โ€” you're putting on a hug. ๐Ÿ’›

โœ… You travel and want a layer that doubles as a blanket. Throw the Woobie on for a plane ride, train trip, or car ride and you have a cozy travel blanket with your arms free for coffee, your phone, your book, or your knitting WIP. (See: flying with knitting needles.)

โœ… You remember the 2019 Turkey Trot and always wanted the full pattern in one place. Welcome back. This is it. ๐Ÿ’›

This pattern might NOT be the right fit if…

โŒ You're a brand-new knitter who hasn't done a basic project yet. The Woobie is forgiving, but it assumes you've cast on and bound off something before.

โŒ You're looking for a lightweight summer layer. The Woobie is bulky and cozy by design โ€” it's the September-through-April layer, not the July layer.

Woman wearing oversized knit poncho with relaxed fit - great travel blanket

Explore More Free Knit Patterns

If you love free knit garment patterns, you'll want to keep these in your queue too:

  • ๐Ÿงฅ Lorelai Knit Vest โ€” the Turkey Trot 2024 featured knit, now available as a free standalone pattern (same Turkey Trot make-along format as the Woobie)
  • ๐Ÿ’• Prism Knit Swoncho โ€” A cozy, colorful knit swoncho featuring eye-catching geometric stitches and effortless layering style perfect for cool-weather making and wearing.
  • ๐ŸŽ‰ Sugar Frost Knit Cardigan โ€” A soft and stylish knit cardigan with beautiful texture and a timeless silhouette that feels like wrapping yourself in a frosted winter hug.
  • ๐Ÿงฃ Lehabah Fire Sprite Knit Shawl โ€” lace shawl with built-in cowl-style detail (Crescent City fan favorite)
  • ๐Ÿงถ Return to Me Boomerang Knit Shawl โ€” cables and lace in a boomerang construction
  • ๐ŸŒฟ Make It Mine Easy Knit Triangle Shawl โ€” beginner-friendly garter triangle
  • ๐Ÿด Blood of My Blood Knit Shawl โ€” half-hexagon lace with cables (Outlander-inspired)
  • ๐Ÿ“š Browse the full Knit Shawl Patterns hub and Turkey Trot 2019 event archive

The Story of the Woobie Poncho: From Turkey Trot 2019 to Standalone

If you're new here, a little history. The Turkey Trot Mystery Make-Along is one of my favorite annual traditions. Every Thanksgiving week, I release a mystery pattern in daily “clues” โ€” knitters and crocheters cast on without knowing what the finished project will be, and we reveal the design row by row throughout the week. It's part craft-along, part community party, and the projects always end up being some of the most-loved designs in my archive.

The 2019 Turkey Trot was the very first one. The knit version was the Woobie Poncho. Three clues released over the Thanksgiving weekend, hundreds of knitters working through it together, and the finished piece earned its “Woobie” nickname from the community itself โ€” because everyone said the same thing when they put it on: “It feels like a hug.”

The original pattern lived as three separate “clue” pages on the blog. For years, anyone who wanted to make the Woobie had to bounce between three URLs and piece the pattern together. Not ideal.

This post fixes that. The Woobie Poncho pattern is now fully refreshed, updated to our current standard layout, with a new schematic and new photos. The full pattern lives on one page. The old clue pages are being retired and redirected here so nobody gets lost in the archive.

If you've made the Woobie before โ€” welcome back. If this is your first time meeting her โ€” get ready to fall in love. ๐Ÿ’›

๐ŸŒŸ Designer Tip: The Woobie's body length is fully customizable. The pattern as written gives you 24″ or 34″ depending on size, but you can stop short for a capelet-length cozy or keep going for a longer drape. Just make sure to leave enough yarn for the stretchy bind-off (approximately 8 times the width of your poncho).

Build Your Skills with the Woobie Poncho

Every pattern is also a chance to grow as a knitter. Here's what you'll add to your skill set when you make the Woobie Knit Poncho:

๐Ÿงถ Cable cast-on (mid-row). The body of the poncho uses the cable cast-on technique to add stitches mid-row. It's a clean, secure cast-on that's perfect for adding live stitches in any project โ€” once you have it in your hands, you'll use it forever.

๐Ÿงถ Stretchy bind-off. The bottom edge of the poncho uses a stretchy bind-off that prevents the kind of tight, pinched cast-off edge that ruins the drape of a knit garment. Essential for any project where the cast-off edge needs to flex.

๐Ÿงถ Working a simple lace pattern. The Cowl Lace Pattern is just an 8-row repeat with a yarn-over/k2tog row. It's the gentlest possible introduction to knitting lace, and once you've done it, you've unlocked dozens of more complicated lace patterns.

๐Ÿงถ Drop-stitch decoration. The body of the poncho uses a “drop the yarn-overs” row that creates an elongated open-stitch effect. It looks dramatic. It's actually one of the easiest decorative techniques you can do in knitting.

๐Ÿงถ Crochet chain (for the drawstring). If you're knit-only, this is your friendly introduction to crochet. A simple chain stitch with a J/10 hook makes the drawstring that threads through the cowl. (BiCrafty Bestie moment! โœจ)


Why the Woobie Makes the Perfect Knit Travel Poncho โœˆ๏ธ

Some knit garments are great in concept and a hassle in practice. The Woobie isn't one of those. It is โ€” genuinely โ€” the easiest layer I own to travel with, and once you wear yours on a plane or a long road trip, you'll understand why.

๐Ÿงฃ Your arms stay free. Unlike a wrap or a blanket, a poncho stays put when you move. You can reach for your tray table, type on your laptop, scroll your phone, sip your coffee, and (most importantly) keep working on your next knitting WIP โ€” all without your “blanket” sliding off your lap.

โœˆ๏ธ It doubles as a blanket. Airplane temperatures are an unsolved mystery of modern aviation. The Woobie gives you blanket-level warmth in a layer you put on once and forget about. No flagging down the flight attendant for a thin paper blanket. No layering a sweater + a wrap + a coat to stay warm.

๐ŸŽ’ It packs flat. Roll it, fold it, stuff it in your tote โ€” the Woobie compresses easily and doesn't crease. Plus the acrylic-blend yarn means no special care after a flight: pull it out, give it a shake, and it's wearable.

๐Ÿชก It's TSA-friendly to KNIT while you wear it. Yes โ€” you can absolutely knit on the plane. (Yes, even with metal needles. Yes, even on the way home.) If you're new to travel knitting, here's my complete guide to flying with knitting needles โ€” what's allowed, what's not, and how to pack so security never gives you a second look.

If you're heading on a trip โ€” and especially if there's a long flight or a chilly destination involved โ€” the Woobie deserves a spot in your carry-on. Cast on now, wear it on your next trip. ๐Ÿ’›

Collage showing a woman knitting outdoors, close hands working yarn, tools displayed, and plane wing over clouds above.

Yarn & Materials

The Woobie Knit Poncho is designed for Caron Latte Cakes โ€” a #5 Bulky weight cake gradient yarn, 58% acrylic / 42% nylon, 530 yds / 250g per ball. It's a Michaels-exclusive yarn and currently still available there, though Yarnspirations lists it as no longer in active production. If you can grab a few cakes for your stash, this is the time. If you can't find it, the substitutes below are excellent.

โš ๏ธ About Caron Latte Cakes: Caron Latte Cakes is a Michaels-exclusive cake gradient yarn that's currently shoppable at Michaels (in-store and online) but listed on Yarnspirations as a retailer-exclusive with limited availability going forward. The Woobie was designed for it, and if you can find it, use it. If not, the substitute yarns below will give you a beautiful poncho with similar drape and gradient effect.
  • ๐Ÿงต Yarn: Caron Latte Cakes at Michaels โ€” #5 Bulky, 58% acrylic / 42% nylon, 530 yds / 250 g cake. Sample color: Blueberry. Yardage: 2 (3, 3) balls depending on size.
  • ๐Ÿชก Needles: U.S. 10 [6 mm] 48″ [122 cm] or longer circular needle, or size to obtain gauge
  • ๐Ÿช Crochet Hook: Size J/10 [6 mm] โ€” for the drawstring chain
  • ๐Ÿ“ Stitch markers, tapestry needle, scissors, tape measure, stitch saver cord, notions bag
  • โœจ Optional: Pom-pom or tassel maker for the drawstring ends.
End view of a fluffy yarn skein in light blue, teal, and green with a soft spiral texture, ideal for knitting a Woobie Poncho.
Fuzzy yarn ball in muted pink, lavender, and gray tones with a soft, textured spiralโ€”ideal for making a Woobie Poncho.
Close-up of a rolled skein of yarn in cream, beige, and yellow with a soft texture, ideal for knitting cozy ponchos.
Close-up of a fuzzy yarn ball in gray and off-white tones, neatly coiled on a white background.
Close-up of a ball of fuzzy light blue and white yarn with soft texture and visible fibers against a white background.
Close-up of a fuzzy yarn ball with rings of light purple, blue, gray, and olive green on a white background.

What Can I Use Instead of Caron Latte Cakes? Yarn Substitute Guide

Since Caron Latte Cakes is being phased out as a Michaels exclusive, this is the most-asked question I get about this pattern. If you can't find Caron Latte Cakes (or you just prefer a different fiber), here are the best substitute yarns for the Woobie Knit Poncho โ€” all swatch-tested, gauge-checked, and ranked by how closely they match the original drape and gradient effect:

YarnWeightYardage / BallFiberWhere to BuyMatch Notes
Caron Latte Cakes (the original)#5 Bulky530 yds / 250 g58% acrylic, 42% nylonMichaels (limited stock)The original โ€” use if you can find it.
Loops & Threads Facets (top sub)Worsted-Bulky~340 yds / 170 gAcrylic blendMichaels๐Ÿ† Closest substitute. Same gradient construction, swatch for gauge โ€” may need a needle size up.
Lion Brand Mandala Ombre#5 Bulky~466 yds / 227 g100% acrylicMichaelsWidely available, soft, machine washable. Closest gradient self-striping at this weight.
Caron Cloud Cakes#5 Bulky240 yds / 240 gAcrylic blendMichaelsCloud-soft, fluffier texture. Lower yardage โ€” you'll need more cakes.
Any #5 bulky cake gradient yarn#5 Bulky500+ yds / cakeAny (swatch first)Your LYS / onlineGeneric guideline if none of the above is available. Always swatch โ€” bulky weight means small gauge differences create big size differences.
Yarn substitutes for the Woobie Knit Poncho โ€” ranked by closeness of match to Caron Latte Cakes.

๐Ÿ’ก Pro tip: If you're switching to a substitute yarn, ALWAYS swatch first. Bulky-weight yarns are unforgiving โ€” a half-stitch difference per inch can change the finished size by several inches. Use the gauge listed in the Pattern Details section as your target and adjust needle size up or down to hit it.

๐ŸŒŸ Designer Tip: Whatever yarn you choose, swatch in the Cowl Lace Pattern (not plain stockinette). Latte Cakes has noticeable stretch, and so do most acrylic cake yarns. The pattern fabric behaves differently than a flat swatch โ€” measure your gauge in the stitch pattern, not in stockinette.
Person models a blue striped Woobie Poncho in a cozy room, showing off its knit texture and drape.

Video Tutorials

If you need a refresher on any of the techniques in this pattern, here are the video tutorials I recommend:

  • ๐ŸŽฅ Long-Tail Cast-on
  • ๐ŸŽฅ Fixing Long Tail Cast-on
  • ๐ŸŽฅ Knit Stitch (Continental)
  • ๐ŸŽฅ Purl Stitch (Continental)
  • ๐ŸŽฅ How to Tink (un-knit)
  • ๐ŸŽฅ How to Add a Lifeline (3 ways)
  • ๐ŸŽฅ How to Yarn Over Increase
  • ๐ŸŽฅ How to Knit Lace
  • ๐ŸŽฅ How to Bury Ends
  • ๐ŸŽฅ How to make an easy DIY Tassel
  • ๐ŸŽฅ How to use a Pom Pom and Tassel Maker
  • ๐ŸŽฅ Extra help on the first part of the body

Woman models a soft, blue-and-white striped knit poncho, showing its drape and textured stitches in three different poses.

Woobie Knit Poncho โ€” Pattern Details

Skill Level

Adventurous Beginner

Measurements

To Fit Sizes: S (M, L)

Finished Measurements:

  • Cowl: 26 (34, 34)” [66 (86.5, 86.5) cm] around and 8″ [20.5 cm] in length
  • Body width: 28ยพ (32ยพ, 37ยผ)” [73 (83, 94.5) cm] wide (folded in half)
  • Body length: 24 (24, 34)” [61 (61, 86.5) cm]

Gauge

12 sts and 24 rows = 4″ in Cowl Lace Pattern.

Note: The Latte Cake yarn has a good amount of stretch, so be sure to account for that stretch when you measure your gauge.

Materials

Yarn: Caron Latte Cakes (58% acrylic, 42% nylon, 8ยพ oz / 250 g, 530 yds / 485 m, #5 Bulky, available only at Michael's): 2 (3, 3) balls. Sample color: Blueberry

Needle: U.S. 10 [6mm] 48″ [122 cm] or longer circular needle, or size required for gauge.
Note: Poncho is worked back and forth in rows. Circular needles are used to accommodate the full width of the sts.

Hook: Size J/10 [6mm]

Notions: Stitch markers, tapestry needle, scissors, tape measure, stitch saver cord, notions bag for supplies, optional pom-pom or tassel maker.

Abbreviations

  • K โ€” Knit
  • K2tog โ€” Knit Two Together
  • RS โ€” Right Side
  • St(s) โ€” Stitch(es)
  • WS โ€” Wrong Side
  • Yo โ€” Yarn Over

Special Techniques

โญ Cable Cast-on: Place a slipknot on left hand needle and k1, slip new st onto left hand needle; * insert right hand needle between first 2 sts on left hand needle, k1 from this position, leave the first st on left hand needle and slip new st onto left hand needle. Repeat from * for desired number of sts.

โญ Stretchy Bind-Off: K2 from left hand needle, insert left hand needle into front leg of the 2 sts on right hand needle, k2tog (1 st remaining on right hand needle), * k1 from left hand needle, insert left hand needle into front leg of last 2 sts on right hand needle, k2tog; repeat from * to last st. Fasten off.

Pattern Stitch โ€” Cowl Lace Pattern

Worked over an even number of sts (minimum 4).

Rows 1-7 (begin WS): Knit.
Row 8 (RS): K1, * yo, k2tog; repeat from * to last st, k1.

Repeat Rows 1-8 for Cowl Lace pattern.

Schematic

Diagram of a Woobie Poncho with precise inch measurements and center fold line, showing shape for knitting construction.
Poncho diagram with colored size measurements in centimeters and a dashed center fold line for knitting project guidance.

Pattern Notes

  • Directions are for the smallest size; changes for larger sizes are in parentheses. When only one number is given, that number applies to all sizes.
  • The Latte Cakes yarn has a good amount of stretch, so be sure to account for that stretch when you measure your gauge.
  • Poncho is worked back and forth in rows. Circular needles are used to accommodate the full width of the sts.
  • Poncho is worked flat from the top down, then folded in half and seamed.

GROW

To Unlockย Exclusive Subscriber Contentย click the Box below and join for free by simply adding your email and creating a password! If you are having troubles, clear your cache or reset your password or login to the Grow Publisher Portal.

>> Learn More About Grow Here <<

I'm thrilled to share this amazing pattern with you, many patterns on my blog are absolutely free! I kindly request that you don't copy and paste or distribute this pattern. Prefer an ad-free experience? Buy a digital PDF pattern for a small fee from one of my online stores for a seamless crafting journey. 

I appreciate your support and readership. You are the reason I can keep doing what I love and sharing it with others. So, thank you from the bottom of my yarn-loving heart! Disclosure: This post contains affiliate links, meaning I get a commission if you decide to make a purchase through my links at no cost to you.

Woman models a light blue knit Woobie Poncho showing textured stitches; yarn and plants in the background.

Woobie Knit Poncho โ€” Pattern Instructions

Cowl

Cast on 78 (102, 102) sts with Long-Tail cast-on (see Video Tutorials).

Work in Cowl Lace Pattern until piece measures 8″ [20 cm], ending after a pattern Row #7 (WS).

Body

Row 1 (RS): Using cable cast-on (see Special Techniques), cast on 47 (47, 61) sts, k across 47 (47, 61) newly cast-on sts, k to end.
Count: 125 (149, 163) sts.

Row 2 (WS): Using cable cast-on, cast on 47 (47, 61) sts, k across 47 (47, 61) newly cast-on sts, k to end.
Count: 172 (196, 224) sts.

Rows 3-16: Knit.

Row 17 (RS): K4, yo twice, * k1, yo twice; repeat from * to last 4 sts, k4.
Count: 172 (196, 224) knit sts.
Count: 165 (189, 217) doubled yarn-overs.
Count: 337 (385, 441) total loops.

Row 18 (WS): K4, carefully drop the next 2 yarn overs from the left hand needle, * k1, carefully drop the next 2 yarn overs from the left hand needle; repeat from * to last 4 sts, k4.
Count: 172 (196, 224) sts.

Begin Body Repeat

Rows 1-6 (begin RS): Knit.
Row 7 (RS): K4, * yo, k2tog; repeat from * to last 4 sts, k4.
Count: 172 (196, 224) sts.
Rows 8-14: Knit.
Row 15 (RS): K4, * yo, k2tog; repeat from * to last 4 sts, k4.
Count: 172 (196, 224) sts.
Rows 16-22: Knit.
Row 23 (RS): K4, yo twice, * k1, yo twice; repeat from * to last 4 sts, k4.
Count: 172 (196, 224) knit sts.
Count: 165 (189, 217) doubled yarn-overs.
Count: 337 (385, 441) total loops.
Row 24 (WS): K4, carefully drop the next 2 yarn overs from the left hand needle, * k1, carefully drop the next 2 yarn overs from the left hand needle; repeat from * to last 4 sts, k4.
Count: 172 (196, 224) sts.

Repeat last 24 rows until piece measures 24 (24, 34)” [61 (61, 86.5) cm] from Body cast-on edge, ending after a Row #6, #14, or #22.

๐ŸŒŸ Designer Tip: You may work this portion as long or short as you like. Be sure to leave enough yarn length at the end to bind off all the sts, which would be approximately 8 times the width of your Poncho for the Stretchy Bind-off method.

Bind off all sts using Stretchy Bind-off (see Special Techniques).

Finishing

Weave in all loose ends.

Seaming

Fold Poncho in half according to schematic.

Sew side seam of Body, shoulder seam, and side seam of Cowl. Leave neck and bottom open.

Drawstring

With crochet hook, make a chain approximately 60″ [152.5 cm] length. Fasten off.

Weave this chain through the first eyelet row of the cowl to act as a drawstring.

Add pom-poms or tassels or beads to the ends of the drawstring as desired.

Wear with pride. ๐Ÿ’›


Favorite & Queue the Woobie Knit Poncho on Ravelry

Favorite This Pattern on Ravelry - Marly Bird
A woman models a light blue knit poncho with textured stitches, standing in a cozy room near the Woofie Poncho pattern display.
Etsy
Shopify
Ravelry

More Free Knit Patterns You'll Love

Loved the Woobie? Here are more of my free knit patterns to add to your queue โ€” a mix of garments, accessories, and quick projects so you can keep the cozy-knit momentum going:

  • โš”๏ธ Eowyn Cable Knit Shawl โ€” a textured right-triangle shawl with cables for Lord of the Rings fans (intermediate)
  • ๐Ÿงฆ My First Toe-Up Knit Socks โ€” a beginner-friendly first-socks pattern with German short row heel
  • ๐ŸŒˆ Heartstrings Knit Socks โ€” your stranded-colorwork-on-socks starter pattern
  • โ›ฐ๏ธ Summit Knit Shawl โ€” a graphic, modern shawl perfect for showing off variegated yarn
  • ๐Ÿต Cabled Knit Cup Cozy โ€” the perfect tiny weekend project (and the best gift add-on to a cute mug)
  • ๐ŸŒŠ Dynamic Wave Mosaic Knit Hat โ€” slip-stitch mosaic colorwork without the float fuss
  • ๐Ÿ“š Browse the full Knit Shawl Patterns hub for even more
A woman wears a Woobie Poncho, with visible knit texture, surrounded by yarn, coffee, checklist, and crafting details.

Frequently Asked Questions

About the designer: Marly Bird is a knit and crochet designer, teacher, and host of the Mondays with Marly podcast on YouTube โ€” with professional experience designing since 2007 designing for major yarn brands including Red Heart, Cascade, Bernat, Lion Brand, and Yarnspirations. She is one of the few designers in the industry who teaches both knitting and crochet at a master level โ€” her signature “BiCrafty” approach. Marly's free patterns and tutorials on marlybird.com and her YouTube channel have helped millions of crafters learn new techniques and finish projects they're proud of. Marly also designs in partnership with Robyn Chachula โ€” a structural-engineer-turned-crochet-designer and the author of nine crochet books, including Blueprint Crochet, Unexpected Afghans, and the Crochet Stitches Visual Encyclopedia, whose work has been featured in Interweave Crochet, Vogue Crochet, and Love of Crochet.

Is the Woobie Knit Poncho beginner-friendly?

It's an adventurous-beginner pattern. If you can cast on, knit, purl, yarn over, and k2tog, you have every skill you need. The construction is flat-knit-fold-and-seam, which is one of the most beginner-friendly garment constructions out there. You'll also pick up two new techniques along the way (cable cast-on and stretchy bind-off), but both are walked through in the Special Techniques section.

What yarn should I use for the Woobie Poncho?

The original was designed for Caron Latte Cakes, a Michaels-exclusive #5 Bulky cake gradient yarn. It's still shoppable at Michaels (in-store and online) but Yarnspirations lists it as a retailer-exclusive with limited future availability. If you can find it, use it. If not, the closest big-box substitute is Loops & Threads Facets (also at Michaels), followed by Lion Brand Mandala Bulky or Caron Cloud Cakes. Any #5 Bulky cake gradient yarn with around 500+ yds per cake will work โ€” just swatch first.

What can I use instead of Caron Latte Cakes for the Woobie Poncho?

The closest substitute is Loops & Threads Facets at Michaels โ€” same gradient cake construction in a slightly different weight (swatch first; you may need a needle size up). Other strong substitutes: Lion Brand Mandala Ombre (#5 bulky, widely available, soft acrylic) and Caron Cloud Cakes (softer, fluffier texture but lower yardage โ€” you'll need more cakes). Any #5 bulky cake gradient yarn with around 500+ yards per cake will work for the Woobie. See the full yarn substitute guide earlier in this post for details, yardage, and where to buy.

Is the Woobie Poncho good for travel?

Yes โ€” the Woobie is one of the best travel knitting projects you can wear. It works as a wearable blanket on planes, trains, or car rides because your arms stay free for coffee, your phone, your book, or your knitting WIP. It packs flat, the acrylic-blend yarn doesn't wrinkle, and it's warm enough to handle airplane-cabin temperatures. If you're flying with knitting in progress, see my complete guide to flying with knitting needles.

How long does the Woobie Knit Poncho take to make?

It's a weekend-pace project for most knitters โ€” one to two weekends of casual knitting. Bulky yarn and big needles mean each row works up fast, and the cowl section is short. The body is where you'll spend most of your time, but it's mostly plain garter and easy lace rows. Significantly faster than a sweater.

Do I have to know how to crochet to make this poncho?

Only for the drawstring. The drawstring is a simple crochet chain โ€” one of the easiest crochet stitches there is, and absolutely learnable from a 2-minute video if you've never crocheted before. If you really don't want to crochet, you can make a long i-cord in knit, braid three strands of yarn, or use a piece of ribbon or leather cord instead. The drawstring is functional but not structural โ€” any flexible cord works.

Can I make the Woobie Poncho longer or shorter?

Absolutely. The body length is the most customizable part of the pattern. Stop short for a capelet-length cozy, or keep going for a longer drape. Just make sure to end after Row #6, #14, or #22 of the body repeat, and leave enough yarn for the stretchy bind-off (about 8 times the width of your poncho).

Why is it called the Woobie?

“Woobie” is the nickname the community gave it during the original 2019 Turkey Trot Mystery Make-Along. A “woobie” is a beloved comfort blanket (think: the one your kid drags around the house), and that's exactly how everyone described wearing this poncho โ€” like a security blanket you could leave the house in. The name stuck, and it's officially the Woobie Poncho now.

Where can I get the ad-free PDF of the Woobie Knit Poncho?

The ad-free PDF is available in my Etsy shop, my Ravelry store, and at shop.marlybird.com. The PDF version is printer-friendly with no ads or scrolling, which makes it much easier to work from while knitting.

A woman models a light blue knit poncho with textured stitches, standing in a cozy room near the Woofie Poncho pattern display.
Etsy
Shopify
Ravelry

Final Thoughts

The Woobie Knit Poncho has been one of my favorite designs to revisit. Going back into a 2019 pattern and refreshing it for a new generation of knitters has been a joy… and seeing the original Woobie crowd (“I still have mine!”) show up in the community has been the cherry on top. Whether you're knitting it for the first time or you're a returning Woobie person who just wants the full pattern in one place… welcome. I'm so glad you're here. ๐Ÿงฃ๐Ÿ’›

If you make one, please share it with me. Tag @MarlyBird on Instagram or post in the Marly's Minions Facebook group. There's nothing better than seeing your finished pieces. ๐Ÿ’›

And if this pattern brightened your day, share it with a fellow knitter on Facebook โ€” that's how patterns like this one find the people who need them most. ๐Ÿงฃ

Until next time, friends… โค๏ธ

โค๏ธ Your BiCrafty Bestie,
Marly Bird
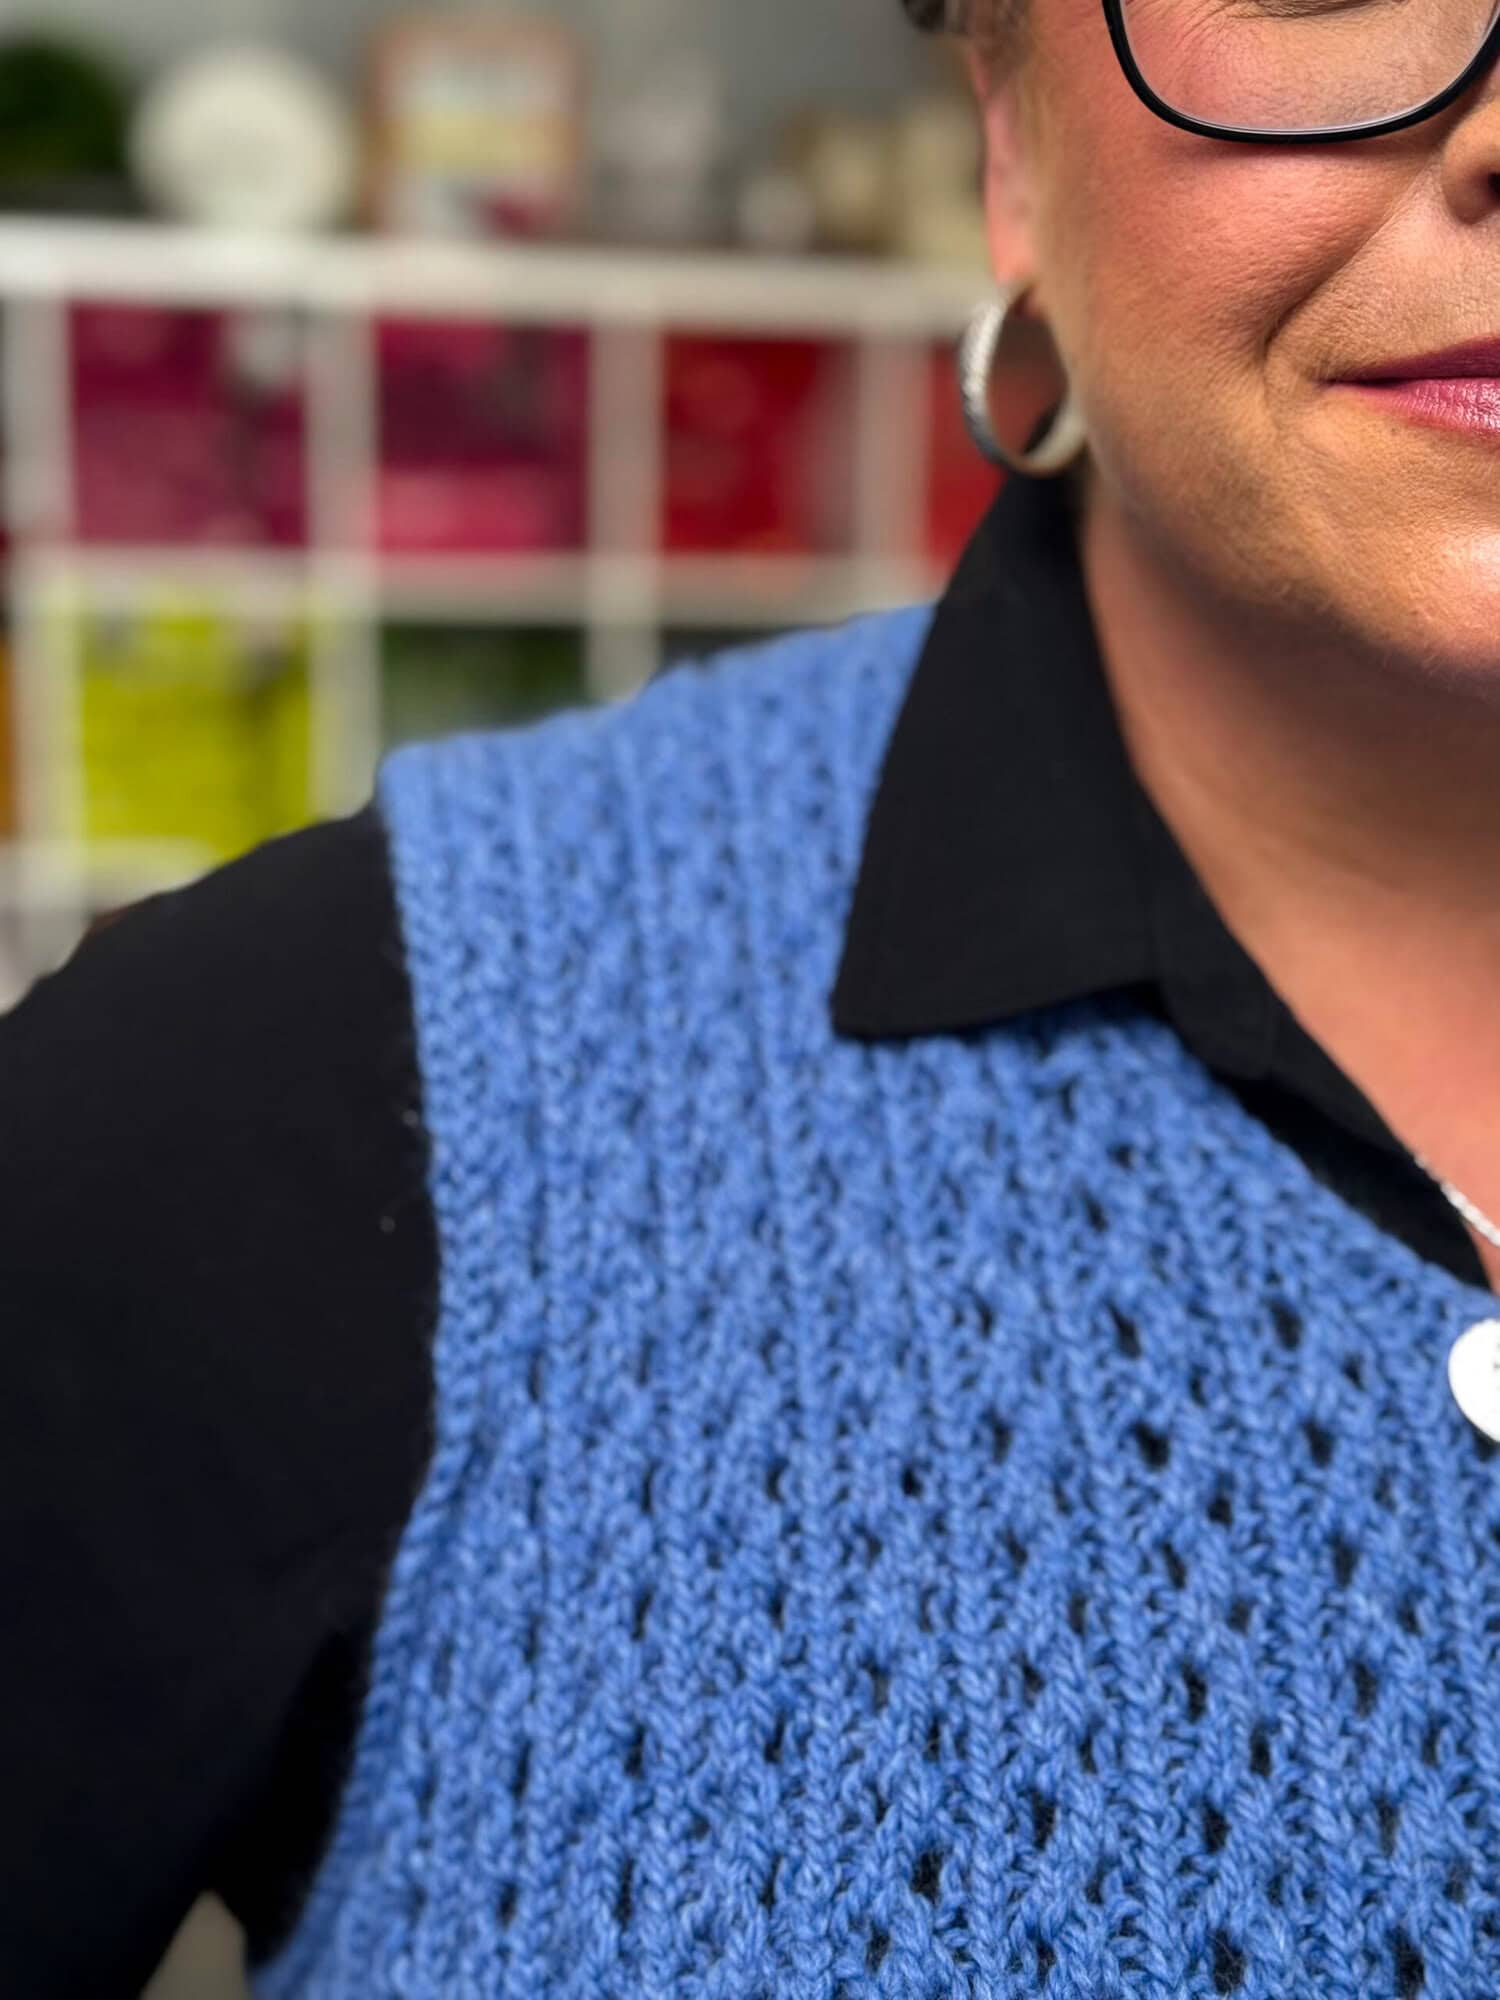
A cartoon avatar of a person with glasses and a brown bun smiles warmly. Their green shirt and black jacket add a stylish touch, while colorful hearts surround them like loving temperature blankets, stitching together an aura of love and positivity. -Marly Bird

๐Ÿงฃ First Released During Spring Fling 2026 ๐Ÿงฃ

The Woobie Knit Poncho was first released as Day 10 of Spring Fling 2026 (Fri May 15) โ€” Marly's annual spring event featuring 20 days of free knit & crochet patterns.

๐Ÿ‘‰ See the full Spring Fling 2026 lineup on the Hub

Share your finished Woobie with the hashtag #SpringFling2026 + #WoobiePoncho ๐Ÿงฃ๐Ÿ’›

“

Filed Under: Free Patterns, Knitting, Make-Alongs, Marly Bird Premium Patterns, Our Free Patterns, Pattern, Uncategorized Tagged With: Caron Latte Cakes, free knit pattern, knit poncho, Marly Bird knit pattern, spring fling 2026, Turkey Trot 2019, Woobie poncho

Bluebonnet Crochet Lace Shawl โ€” Free Crochet Pattern

May 12, 2026 By Meg Leave a Comment

”

The Bluebonnet Crochet Lace Shawl is a free crochet lace shawl pattern by Marly Bird, named for the Texas state wildflower. It's worked in lightweight (CYC #1 super fine) cotton-blend gradient cake yarn, using familiar stitches in the body… single crochet, half double crochet, and double crochet… with a detailed lace edging that echoes the layered petal structure of an actual bluebonnet bloom. Perfect for spring and summer layering.

The original Bluebonnet Shawl was designed for Red Heart It's A Wrap, which has since been discontinued. If you have a cake in your stash, this is the perfect pattern for it. And if you don't… I've gathered a small list of beautiful substitute yarns below that work just as well. The natural color shifts in any lightweight gradient cake yarn do most of the design work for you, the stitches are familiar, and the finished shawl is the kind of lightweight layer you'll actually reach for when the AC is set too cold.

Person models a blue and dark gray crochet lace shawl, showing stitch detail and drape; colorful background with shelves behind.

Hey, bestie ๐Ÿ’›

I'm so glad you're here. The Bluebonnet Shawl is one of those patterns I keep coming back to, year after year. The first version went up on the blog way back in 2018, and we've just refreshed the whole thing… new photos, updated formatting, the same beautiful pattern in our current standard layout. It feels like a brand-new shawl all over again.

โš ๏ธ A quick yarn note: The original Bluebonnet Shawl was designed for Red Heart It's A Wrap, which has been discontinued. If you have It's A Wrap in your stash, fantastic โ€” use it! If not, jump down to the Yarn & Materials section for my hand-picked substitute yarns. The pattern works beautifully with any lightweight (CYC #1) cotton-blend or cake gradient yarn. ๐Ÿ’™

If you've never made a lace shawl before, don't worry. We'll walk through it together. And if you're a seasoned lace crocheter… you're going to love how this stitch pattern flows.

*This post contains affiliate links. By clicking one of the links and making a purchase, a small portion will go to support the blog. The price you pay does not change. Thank you for your support of the blog.*

Blue and gray striped crochet lace shawl shown worn in three ways; close-up highlights stitch detail and drape.

What You Will Love About This Bluebonnet Crochet Lace Shawl ๐Ÿ’–

๐ŸŒธ A lace shawl that uses stitches you already know. The body of this shawl is worked entirely in single crochet, half double crochet, and double crochet. No surprise stitches in the main body, no charts you have to decode just to get started. The lace happens in the edging… by the time you get there, you'll already be comfortable with the yarn.

๐Ÿ’™ The yarn does half the design work. The Bluebonnet Shawl is designed for a lightweight (CYC #1) cotton-blend gradient cake yarn. The natural long color repeats in a gradient cake do all the color-block magic for you, with zero color management on your end. The original was Red Heart It's A Wrap (now discontinued); my substitute picks are below.

๐ŸŒฟ It's a true summer-weight shawl. Most lightweight shawl patterns call for fingering or sock yarn… which usually means a wool blend that's lovely in fall but stuffy in July. A cotton-blend lightweight yarn drapes beautifully and breathes well, making this the shawl you'll actually wear from spring through late summer.

๐Ÿ“ A petal-inspired lace edging. The stitch pattern in the lace border was designed to echo the layered petal structure of an actual bluebonnet bloom. It's a small design detail that I love… and one you can point to when someone asks “did you make that?”

๐Ÿ“„ Free here on the blog… ad-free PDF available too. The full pattern lives free right here on the blog, including the new stitch counts and updated formatting. If you'd rather work from a clean ad-free PDF (with charts), I've got you covered below.

Woman models a blue and gray crochet lace shawl, showing openwork stitches and soft drape over a white top indoors.

Quick Pattern Overview

๐Ÿงถ Craft: Crochet

๐ŸŒธ Pattern Name: Bluebonnet Crochet Lace Shawl

๐Ÿ“ Finished Size: Shawl is 23.5โ€ [59.5 cm] deep including border and 56โ€ [142 cm] in wingspan

๐ŸŽฏ Skill Level: Intermediate (advanced beginners welcome… the body is all familiar stitches, the lace edging adds the intermediate-level challenge)

๐Ÿงต Yarn: Lightweight (CYC #1 super fine) cotton-blend gradient cake yarn โ€” see Yarn & Materials below for substitute picks. (Original: Red Heart It's A Wrap, now discontinued.)

๐Ÿชก Hook: Size E/4 [3.5  mm]

๐Ÿ“ Construction: Worked flat, body in classic crochet stitches, finished with a layered lace edging

๐ŸŒธ Best for: Spring and summer layering, prayer shawls, gift shawls, “I want a lace shawl that doesn't require a 60-row chart” projects


Person models a blue crochet lace shawl in a cozy room; "Bluebonnet Crochet Shawl" pattern pages are visible behind them.
Etsy
Shopify
Ravelry

Love the Pattern but Want an Ad-Free PDF? โญ

The Bluebonnet Crochet Lace Shawl pattern is FREE right here on the blog… but if you'd rather work from a clean, printable, ad-free PDF (with crochet stitch charts and no scrolling), I have you covered.

Grab the ad-free PDF in the shop of your choice:

  • ๐Ÿ›’ Get the Pattern in my Shopify (shop.marlybird.com)
  • ๐Ÿ›๏ธ Get the Pattern in my Etsy Store
  • ๐Ÿ’› Get the pattern in my Ravelry Store

Get the latest Marly Bird patterns + bestie-only deals in your inbox every week. ๐Ÿ’›

Join our Newsletter

Get Free Crochet & Knitting
Pattern Links & Coupons!

Hand-drawn bird with curling, detailed feathers and pink accents; cheerful pose showcases fine line and texture work.
>> Become An Insider <<
A woman with glasses and curly hair models a colorful crocheted scarf, showing textured stitches and vibrant yarn.

Is the Bluebonnet Crochet Lace Shawl Right for You?

This pattern is a great fit if…

โœ… You have a cake of It's A Wrap in your stash โ€” OR you want a pattern designed for lightweight cotton-blend gradient cake yarn. The shawl was designed around the way these gradient cakes shift color naturally as you crochet. Substitute yarn picks are in the Yarn & Materials section.

โœ… You're an advanced beginner or intermediate crocheter ready to try lace. The body uses single crochet, half double crochet, and double crochet… stitches you already know. The lace edging is where you'll stretch, but you'll be comfortable with the yarn by then.

โœ… You want a lightweight, drapey shawl for spring and summer. The cotton/acrylic blend breathes well and doesn't overheat you in warmer weather.

โœ… You love a “the yarn does the work” pattern. No striping math, no color planning… just crochet and watch the cake yarn do its thing.

This pattern might NOT be the right fit if…

โŒ You've never held lace weight yarn and don't want to start there. The yarn is thin and the hook is small… it takes a little practice. (See the Build Your Skills section below for a gentle on-ramp.)

โŒ You're looking for a heavy, snuggle-up-in-winter shawl. This one's a featherweight… beautiful, but not your January blanket-shawl.


Explore More Free Crochet Shawl Patterns

If you love lace and lightweight crochet shawls as much as I do, you'll want to keep these in your queue too:

  • ๐ŸŒŠ Alpaca Clouds Crochet Wrap โ€” a free lace crochet shawl with a beginner-friendly cloud stitch and three sizes. The yarn is heavier than lace but the shawl is perfectly lightweight.
  • ๐ŸŒผ Fernanda Crochet Motif Shawl โ€” join-as-you-go motifs in DK weight
  • ๐Ÿงฃ Sunday Sideline Crochet Shawl โ€” one-skein triangle shawl for advanced beginners
  • ๐Ÿ’š Beginner Lace Border Crochet Shawl โ€” a gentle on-ramp to lace borders
  • ๐ŸŒˆ Rainbow Sprinkles Crescent Shawl โ€” also designed for cake yarns like It's A Wrap
  • ๐ŸŒฟ Chevron Waves Lacy Wrap โ€” another lightweight summer-shawl favorite

And if you want the full collection in one place, head over to the Free Crochet Patterns hub.

A woman models a neutral-tone crochet entrelac wrap, showing textured blocks, worn over black in a colorful room.
Woman models a vibrant crochet crescent shawl in pink, blue, and purple, showing off stitch texture and drape.
A woman models a textured blue alpaca crochet shawl, showing stitch detail; denim top and plants in the background.
Woman models a red crochet shawl with visible stitch detail over a floral dress, standing on grass with trees behind her.
Person models a vibrant Tunisian crochet shawl with a floral pin, displaying textured stitches indoors near bookshelves and plants.
Tunisian crochet scarf with floral and geometric patterns in orange, green, blue, teal, and white on mannequin.
Woman smiles, wearing a colorful floral crochet blanket; yarn and craft shelves are softly blurred behind her.

Is Lace Yarn Too Hard for Beginner Crocheters?

Honestly? Lace yarn isn't HARDER… it's just different. Here's what to know going in.

The biggest adjustment is tension. Lace weight yarn is thinner than the worsted or DK most crocheters start with, so your stitches will feel smaller and your hook will feel finer. The trick is to keep your tension consistent… not necessarily tight or loose, just even. Stitches should sit at a uniform height. Don't worry about speed.

The second adjustment is visibility. Lace yarn is easier to work with in good lighting. If you usually crochet on the couch under a lamp, set up a brighter task light for the first few rows… it makes a huge difference.

The good news: the body of the Bluebonnet Shawl uses three of the most common crochet stitches there are. You're already familiar with them. The yarn is the new variable… not the stitches. By the time you reach the lace edging, the yarn will feel completely normal in your hands.

๐ŸŒŸ Designer Tip: Before you start the shawl, swatch a 4-inch square in plain double crochet with your It's A Wrap and recommended hook. This gives your hands time to adjust to the yarn weight and lets you confirm gauge without commitment. Frog it after… no harm done… and you'll be ready to start the real project with confidence.
Crocheted fabric with teal and brown yarn, showing intricate patterns, clear scalloped edging, and visible texture.

Build Your Skills with the Bluebonnet Shawl

Every pattern is also a chance to grow as a crafter. Here's what you'll add to your skill set when you make the Bluebonnet Crochet Lace Shawl:

๐ŸŒธ Working with lace weight yarn. Once you've finished one lace-weight project, you'll have unlocked a whole category of patterns that probably felt intimidating before.

๐ŸŒธ Combining basic stitches into elegant fabric. Sc, hdc, and dc are workhorse stitches… but when you arrange them with intention, they create texture and drape that looks far more advanced than the technique itself.

๐ŸŒธ Working a lace edging. Lace borders are the gateway skill to true lace shawls. The edging on this pattern is a perfect introduction… contained, repeating, and visually rewarding.

๐ŸŒธ Blocking a finished lace project. Blocking is what transforms lace from “huh, looks crinkly” to “wow, look at that drape.” See the Blocking Tips section below for the steps.


Yarn & Materials

The Bluebonnet Crochet Lace Shawl is designed for a lightweight (CYC #1 super fine) cotton-blend gradient cake yarn. The original yarn was Red Heart It's A Wrap, which has been discontinued. The good news: a number of beautiful substitute yarns work just as well, and the pattern is forgiving enough to look gorgeous in any of them.

โš ๏ธ About Red Heart It's A Wrap: The original It's A Wrap (and the full It's A Wrap family โ€” Rainbow, Sprinkles, and Hues) has been discontinued by Red Heart. If you have a cake in your stash, you can absolutely still use it for this pattern โ€” in fact, that's exactly what it was designed for. But because it's no longer available to buy, my main recommendations below point to current substitute yarns.

Recommended Substitute Yarns

There isn't a perfect 1:1 big-box substitute for It's A Wrap, but these are the yarns I recommend (in order from “closest match” to “would look stunning, just adjust your hook”):

๐ŸŒฟ KnitPicks Candy Mountain โ€” the closest match. CYC #1 fingering/lace weight, gradient self-striping. Easy to find, ships fast, and the color shifts behave very much like It's A Wrap. My top pick for a current, easy-to-buy substitute.

๐ŸŒธ KnitPicks Summer Breeze โ€” sport weight (CYC #2), cotton blend. Slightly heavier than the original, which means a slightly heavier shawl and a slightly larger finished size. Use a hook size up from the pattern and check gauge. The drape is gorgeous.

๐Ÿ’™ Hobbii Sultan Deluxe Shine โ€” cotton-blend cake yarn from Hobbii (international shipping, but worth it for the colors). A great option if you want something a little more luxe than acrylic-blend.

๐ŸŒธ Hobbii Azalea and Hobbii Honolulu โ€” two more lovely cotton-blend cake yarns from Hobbii's collection. Great for spring/summer shawls.

๐ŸŒˆ Ice Yarns Cakes Cotton Fine โ€” a fantastic substitute, especially if you're trying to replace It's A Wrap Rainbow in any pattern (it works beautifully in the Tilted Blocks Shawl too).

๐Ÿงฉ Ice Yarns Cakes Puzzle โ€” another cake yarn option from Ice Yarns with similar weight and gradient behavior.

โ˜๏ธ Ice Yarns Mohair Pastel โ€” if you want a completely different vibe, a lace-weight mohair would give the shawl a soft, halo-y, dreamy texture. Pastel colorways are stunning for spring.

Honest heads-up: there aren't currently any big-box (Michaels, JOANN, Hobby Lobby) yarns at this exact weight + construction. So if you want a true cotton-blend lightweight cake yarn, you'll be ordering online from KnitPicks, Hobbii, or Ice Yarns. All three are reliable shippers โ€” just plan a few extra days into your project timeline.

๐ŸŒŸ Designer Tip: Whatever yarn you choose, swatch first. Lightweight cotton blends, sport weights, and mohair all behave differently โ€” a quick 4-inch gauge swatch will save you from “why is my shawl twice as big as the pattern says?” frustration later.

Other Materials You'll Need

  • ๐Ÿชก Crochet hook: Grab a set of affordable crochet hooks and never be without the right size!
  • ๐Ÿ“ Stitch markers, scissors, tapestry needle (all your usual finishing tools)
  • ๐Ÿ› Blocking supplies: blocking wires + pins and a no-rinse wool wash like Eucalan (works beautifully on cotton/acrylic blends, cotton, and mohair)
โญ๏ธ Marly Bird Amazon Storefront โญ๏ธ

Choosing Your Colors for the Bluebonnet Shawl ๐ŸŽจ

The original Bluebonnet Shawl is famous for those soft, dreamy blue-to-purple-to-cream color shifts โ€” that's the gradient cake yarn doing its magic. But here's the thing: this pattern looks gorgeous in just about any color story you can imagine. The stitch pattern itself โ€” the petal-inspired lace edging, the panel shaping in the body โ€” is what makes the shawl special. The yarn just dresses it up.

If a true blue-bonnet palette isn't your thing, or you want to make one for a friend whose favorite color is decidedly NOT blue, here are a few ways to think about color for this shawl:

Woman modeling a bluebonnet crochet lace shawl, showing openwork stitches and drape, worn over a white top and jeans.
Woman modeling a crochet lace shawl in teal and brown, highlighting delicate stitching and drape. "Marly Bird" in corner.

Classic Gradient Cake โ€” The Original Look ๐Ÿ’™

This is the shawl as it was designed โ€” natural color shifts that move through several related shades over the course of a single cake of yarn. There's zero color management on your end: you just keep crocheting and the colors change themselves. If you love the original Bluebonnet vibe, any of the substitute yarns in the Yarn & Materials section above will give you that same gradient effect (just in different color stories).

Bluebonnet Crochet Lace Shawl shown in a soft orange to blue gradient cake yarn โ€” the alternaive colorway to original sample- Hobbii Azalea lace yarn cake

A Different Gradient โ€” A Whole New Mood ๐ŸŒ…

Swap the cool blue-and-purple gradient for a warm sunset palette, a leafy forest gradient, or a soft pastel rainbow, and the shawl reads completely differently. Same stitches, same construction, totally new vibe. This is a great option if you're making the shawl as a gift and want to match the recipient's wardrobe or favorite colors.

Solid or Semi-Solid โ€” Let the Stitches Shine โœจ

Here's a secret about lace patterns: they often look BEST in a single solid color. When you remove the visual movement of a gradient, your eye lands on the lace itself โ€” the open spaces, the petal shapes in the edging, the way the panels swirl out from the center top. A solid Bluebonnet Shawl is a completely different garment than the gradient version, and honestlyโ€ฆ it might be my favorite way to make it.

Marly Bird wears lace crochet shawls in 16 colors, arranged in a grid. Each cowl showcases unique stitch and texture. Marly Bird logo bottom right.
Bluebonnet Crochet Lace Shawl shown in an alternate gradient colorway, demonstrating how the pattern looks in different color stories

If you go solid, I recommend a soft, slightly tonal yarn (a hand-dyed semi-solid with subtle variation, or a brand's “solid” colorway that still has a little depth) over a perfectly flat color. The tiny tonal shifts make the lace look richer without competing with it. Think of it like the difference between a flat painted wall and a wall with a soft tone-on-tone texture โ€” the textured one shows off everything in front of it better.

Color ideas for a solid Bluebonnet:

  • ๐Ÿค Soft cream or natural โ€” timeless, bridal, perfect for a wedding wrap
  • ๐Ÿฉถ Light gray or silver โ€” modern, sophisticated, pairs with everything in your closet
  • ๐Ÿ’™ A single shade of blue โ€” keeps the Bluebonnet name but simplifies the look
  • ๐ŸŒฟ Sage green or dusty rose โ€” gentle, wearable, neutral-adjacent
  • ๐Ÿ–ค Deep navy, charcoal, or burgundy โ€” dramatic, evening-friendly, the lace really pops
๐ŸŒŸ Designer Tip: If you can't decide between gradient and solid, ask yourself this: do you want the YARN to be the star, or do you want the STITCHES to be the star? Gradients hand the spotlight to the yarn. Solids hand it to the lace. Both are gorgeous โ€” there's no wrong answer, just two different shawls.

Video Tutorials

Two helpful video tutorials to keep open while you work on this shawl:

  • ๐ŸŽฅ How to Bury Ends ยป Click here for video help

Bluebonnet Crochet Lace Shawl shown in an alternate gradient colorway, demonstrating how the pattern looks in different color stories

  • ๐ŸŽฅ Reading Crochet Diagrams ยป Click here for video help
A person models a lacy blue crochet shawl, shown in three poses to display its intricate stitchwork and drape.

Bluebonnet Crochet Lace Shawl โ€” Pattern Details

Skill Level

Adventurous Beginner

Finished Measurements

Shawl is 23.5โ€ [59.5 cm] deep including border and 56โ€ [142 cm] in wingspan

Gauge

24 dc by 11 dc rows = 4โ€ [10 cm] by 4โ€ [10 cm]; use any size hook to obtain the gauge.

Materials

Crochet Yarn 

Red Heart, Itโ€™s a Wrap (50% Cotton/ 50% Acrylic, 1100 yds / 1006 m, 7 oz/ 200 g, CYCA# 1 fingering) : Action, 2 cakes

Note: Yarn has been discontinued. 

Crochet Hook

Size E/4 [3.5  mm]

Notions 

  • Stitch Markers
  • Tapestry Needle
  • Scissors
  • Tape Measure
  • Blocking Squares 
  • Blocking Pins 
  • Soaking Basin 
  • Eucalan Wool Wash 
  • Blocking Wires (ideal for lace work) 
โญ๏ธ Marly Bird Amazon Storefront โญ๏ธ

Abbreviations

Ch – Chain(s) 

Dc – Double Crochet 

Dtr – Double Treble Crochet

Hdc – Half Double Crochet

RS – Right Side 

Sc – Single Crochet

Sl st – Slip Stitch

Sp(s) – Space(s) 

St(s) – Stitch(es)

Tch– Turning Chain

WS – Wrong Side


Special Stitches

โญ๏ธDouble Treble Crochet (Dtr): Yarn over hook three times, insert hook into indicated stitch, yarn over and pull up a loop; [yarn over and draw through two loops] four times.

โญ๏ธReverse Single Crochet (reverse sc): Also known as a Crab Stitch; working from left to right, insert hook from front to back in next stitch to the right,  yarn over and pull up a loop, yarn over and draw through 2 loops on hook.


CROCHET STITCH DIAGRAM

โœจ Following along with the free pattern on MarlyBird.com? Youโ€™ll have everything you need to make the shawl, but if you want the exclusive stitch diagram charts, those are only available in the ad-free PDF version.

Youโ€™ll enjoy a clean, printable, ad-free experience while supporting Marly Birdโ€™s free tutorials and patterns ๐Ÿ’–

Etsy
Shopify
Ravelry

SCHEMATIC

Crochet shawl diagram with bluebonnet shape, labeled sides, and lines showing triangular lace sections for shaping.

Pattern Notes

The shawl is made from the center top to bottom with panel shaping increases made every other row. 

The color change happens naturally with the yarn. 

GROW

To Unlockย Exclusive Subscriber Contentย click the Box below and join for free by simply adding your email and creating a password! If you are having troubles, clear your cache or reset your password or login to the Grow Publisher Portal.

>> Learn More About Grow Here <<

I'm thrilled to share this amazing pattern with you, many patterns on my blog are absolutely free! I kindly request that you don't copy and paste or distribute this pattern. Prefer an ad-free experience? Buy a digital PDF pattern for a small fee from one of my online stores for a seamless crafting journey. 

I appreciate your support and readership. You are the reason I can keep doing what I love and sharing it with others. So, thank you from the bottom of my yarn-loving heart! Disclosure: This post contains affiliate links, meaning I get a commission if you decide to make a purchase through my links at no cost to you.

Person models a blue and dark gray crochet lace shawl, showing stitch detail and drape; colorful background with shelves behind.

Bluebonnet Crochet Lace Shawl โ€” Pattern Instructions

Body

๐ŸŒŸ Designer Note โ€” The Start of This Shawl Will Feel a Little Different (and That's Okay) ๐Ÿ’›

A heads-up before you pick up your hook: the way this shawl begins is probably different from any shawl you've started before. You'll chain just 5 stitches, work a tiny foundation row, and then in Row 3 you'll stretch your yarn down to work into the edge stitches of Row 1 โ€” essentially crocheting around the little starting nub to build out from the center top of the shawl.

If that sounds strange, that's because it IS a little strange the first time you do it. Most shawl patterns start with a long foundation chain or a magic ring, not a tiny anchor that you build outward from. I promise it works. Just follow the instructions exactly as written for Rows 1 through 4, and by Row 5 your shawl will look like a normal shawl-in-progress with the panel shaping clearly visible. You don't need to understand WHY it works at the start to get a beautiful finished piece โ€” you just need to trust the instructions for the first four rows.

Once you're past Row 4, the construction settles into a rhythm: each odd row adds 2 stitches and each even row adds 12 stitches, and the markers move out across the body to shape the five panels.

Ch 5

Row 1 (WS): 2 sc in second ch from hook, sc in each of next 2 ch, 2 sc in last ch, turn.โ€” 6 sts.

Row 2 (RS): Ch 1, 2 sc in first st, sc in each st to last st, 2 sc in last st, turn.โ€” 8 sts.

Row 3: Ch 1, sc in edge st of row 1 (stretch yarn to reach side, work over ch just made), 2 sc in first st of row 2, sc in each st to last st, 2 sc in last st, sc in left edge st of row 1, turn. โ€“ 12 sts.

Row 4: Ch 1, 2 sc in first st and each st across, turn. โ€“ 24 sts.

Row 5: Ch 1, 2 sc in first st, sc in each of next 2 sts, * ch 2, sc in next st, ch 2, sc in each of next 3 sts; repeat from * to last st, 2 sc in last st, turn. โ€“ 26 sc + 10 ch-2 sps.

Row 6: Ch 1, 2 sc in first st, * sc in each st to next ch-2 sp, sc in next ch-2 sp, sc in next st (place marker), sc in next ch-2 sp; repeat from * 4 more times, sc in each st to last st, 2 sc in last st, turn. โ€“ 38 sts, (7 sts in first and last sections, 6 sts in each of the 4 center sections).

Row 7: Ch 1, 2 sc in first st, * sc in each st to marker, ch 2, sc in marked st (move marker), ch 2; repeat from * 4 more times, sc in each st to last st, 2 sc in last st, turn.โ€” 40 sts + 10 ch-2 sps.

Row 8: Ch 1, 2 sc in first st, * sc in each st to next ch-2 sp, sc in next ch-2 sp, sc in next st (move marker), sc in next ch-2 sp; repeat from * 4 more times, sc in each st to last st, 2 sc in last st, turn. โ€“ 52 sts, (10 sts in first and last sections, 8 sts in each of the center sections).

Rows 9-16: Repeat Rows 7-8 โ€“ 108 sts, (22 sts in first and last sections, 16 sts in each of the center sections).  Note: Each odd row increases by 2 sts; each even row increases by 12 sts.

Row 17: Ch 1, 2 hdc in first st, * hdc in each st to marker, ch 2, hdc in marked st (move marker), ch 2; repeat from * 4 more times, hdc in each st to last st, 2 hdc in last st, turn.โ€”110 sts + 10 ch-2 sps.

Row 18: Ch 1, 2 hdc in first st, * hdc in each st to next ch-2 sp, hdc in next ch-2 sp, hdc in next st (move marker), hdc in next ch-2 sp; repeat from * 4 more times, hdc in each st to last st, 2 hdc in last st, turn. โ€“ 122 sts, (25 sts in first and last sections, 18 sts in each of the center sections).

Rows 19-28: Repeat Rows 17-18 โ€“ 192 sts, (40 sts in first and last sections, 28 sts in each of the center sections).

Row 29: Ch 2 (does not count as a st throughout), 2 dc in first st, * dc in each st to marker, ch 2, dc in marked st (move marker), ch 2; repeat from * 4 more times, dc in each st to last st, 2 dc in last st, turn.โ€”194 sts + 10 ch-2 sps.

Row 30: Ch 2, 2 dc in first st, * dc in each st to next ch-2 sp, dc in next ch-2 sp, dc in next st (move marker), dc in next ch-2 sp; repeat from * 4 more times, dc in each st to last st, 2 dc in last st, turn. โ€“ 206 sts, (43 sts in first and last sections, 30 sts in each of the center sections).

Rows 31-68: Repeat Rows 29-30 โ€“ 472 sts, (100 sts in first and last sections, 68 sts in each of the center sections).

Row 69: Ch 1, sc in each st across, (move markers up). Turn. 

Row 70: Ch 1, [sc in ea st across to marker, 2 sc in marked st] twice, sc in each st across to next marker, sc in marked st, [sc in ea st across to marker, 2 sc in marked st] twice, sc in each st across to end, turn — 476 sts.

Border

Note: Border edging is made from multiple short rows which create each scallop and shell individually.  The edging has a multiple of 25 plus 1.

FIRST HALF SHELL

Row 1a (WS): Ch 1, sl st next 5 sc, turn. 

Row 1b (RS): Skip 4 sl sts, 7 dtr in last sl st, reverse sc in each dtr just made (half shell completed), turn.

Row 1c (WS): Skip 3 sts on body, sl st in next st (same as prev sl st). 

REPEAT FOR BODY

Row 2a (WS): * Sl st in next 7 sts, ch 5, skip 2 sts along body, sl st in next st, ch 3, skip 1 st along body, sl st in next st, turn. 

Row 2b (RS): 12 dc in ch-5 space, skip 1 st along body, sl st in next st on body, ch 3, skip 1 st along body, sl st in next st, turn. 

Row 2c (WS): [Ch 2, skip 1 dc, dc in next dc] 6 times, ch 2, skip 1 st along body, sl st in next st, ch 3, skip 1 st along body, sl st in next st, turn.  

Row 2d (RS): [3 dc in next ch-2 sp] 7 times, skip 1 st along body, sl st in next st, turn. 

Row 2e (WS): [Ch 5, skip next dc, sl st in next dc] 10 times, ch 5, skip next dc**, sl st in next 9 sts along body, turn. 

Row 3a (RS): Skip next 4 sl sts, 13 dtr in next st (shell made), skip 3 sts along body, sl st in next st on body (same st as prev ch-5 sp), reverse sc in each dtr, turn.

Row 3b (WS): Skip 3 sts on body (from center of shell), sl st in next st, turn

Repeat from * on Row 2a thru Row 3b across to last 5 sts ending at ** on Row 2e. 

LAST HALF SHELL

Row 4a (WS): Sl st in each st to end, ch 5 (counts as dtr), turn. 

Row 4b (RS): 6 dtr in last st (half shell completed), skip 3 sts along body, sl st in next st, reverse sc in each dtr. Fasten off.

Finishing

Fasten off, weave in the ends. 


Crochet Lace Shawl in blue, green, and gray displayed to show intricate stitch detail and soft texture. Shelves behind.

Wash and Block

Wet blocking is like sending your yarn on a spa retreat. It's the process where your yarn unwinds, enjoys a soothing cleanse, and settles gracefully into its final form, allowing its true beauty to flourish.

Here's how to pamper your creation with a thorough wet block:

  • Begin by submerging your piece in a basin or sink filled with water. This is a great moment to add a touch of gentle soap or specialized wool washโ€”enhanced with lanolin and fiber conditionersโ€”to not only clean but also condition the yarn. (Just remember to rinse well, especially if you aren't using a no-rinse wash.)
  • Remove as much water as you can without stretching or distorting the fibers.

Some helpful techniques include:

  • Pressing the piece against the sink to shed excess water.
  • Gently squeezing between your handsโ€”just avoid any twisting or wringing.
  • ๐Ÿ’ก Always support the entire garment when lifting to prevent any part from stretching out of shape. 

Carefully lay the piece on a large towel without stretching it. Fold the towels ends over your project and roll it up like a burrito to wick away more moisture. Aim for a balanceโ€”your piece should be damp, not sopping, and certainly not dry, to avoid any creases. 

Place your piece on the blocking board with care. Now, shape it while it's damp.

Align with the grid if your board has one, centering your work for symmetry.

Gently expand your piece to the desired measurements, using your pattern's schematic and the grid for precision.

๐Ÿšจ USE EXTRA CARE TO AVOID OVERSTRETCHING! As the project is damp, some yarns like to overstretch or grow and you must be vigilant to avoid this.

Secure with pins, using them sparingly to keep the fabric flat. Smooth the piece with your hands to ensure an even spread.

Leave your masterpiece to dry and take this chance to cast on a new project. Drying could take a full day, but if you're pressed for time, setting up a fan can speed up the process significantly. Do not place the project in direct sunlight as it can discolor the yarn!

Remember, wet blocking is more than a finishing stepโ€”it's an act of transformation, turning your knitted work into an heirloom-quality piece. Now, step back, let the magic happen, and watch as your stitches settle into their new, polished configuration.


Person models a blue crochet lace shawl in a cozy room; "Bluebonnet Crochet Shawl" pattern pages are visible behind them.
Etsy
Shopify
Ravelry

Blocking Tips for Your Bluebonnet Shawl

Blocking is the single biggest thing you can do to make your finished shawl look professional. Lace especially needs it… the holes open up, the drape settles in, and the fabric flattens into the shape you designed it to be. Here's how I block this one.

  1. Weave in all ends first. You want them secure before blocking, because wet fibers can shift.
  2. Fill a clean sink or basin with cool water and a tiny splash of Eucalan wool wash. Soak the finished shawl for 15-20 minutes. Press it gently under the water, do not agitate.
  3. Drain. Gently press out excess water (do not wring). Roll the shawl in a clean towel and press to remove more water.
  4. Lay the damp shawl on blocking mats. Use blocking wires along the long edges to keep things straight, and T-pins to pin out each point of the lace edging.
  5. Let it dry completely. This usually takes overnight depending on humidity. Don't unpin too early… the shape sets as it dries.

Once it's blocked, the lace pattern opens up beautifully and the whole shawl drapes the way it's supposed to. This is the moment you'll be glad you bought blocking supplies. ๐Ÿ’›


Got It's A Wrap in Your Stash? More Patterns to Use It Up

If you have It's A Wrap (any of the four versions โ€” original, Rainbow, Sprinkles, or Hues) sitting in your stash from when it was still in production, you're not alone! It was a beloved yarn, and a lot of us bought more of it than we could use up before it disappeared. Here are more of my free patterns designed around this same gorgeous cake yarn:

  • ๐ŸŒˆ Rainbow Sprinkles Crescent Shawl โ€” crescent-shaped, designed for It's A Wrap Sprinkles
  • ๐ŸŒฟ Chevron Waves Lacy Wrap โ€” chevron lace, lightweight, summer-ready
  • ๐Ÿ“š It's A Wrap One-Ball Patterns Roundup โ€” the full collection of patterns from me and other designers that use just ONE ball of It's A Wrap yarn. The perfect stash-busting hub.

Favorite & Queue the Bluebonnet Shawl on Ravelry

Favorite This Pattern on Ravelry - Marly Bird

More Free Crochet Shawl Patterns You'll Love

Add these to your queue while you're here:

  • ๐ŸŒŠ Alpaca Clouds Crochet Wrap
  • ๐ŸŒผ Fernanda Crochet Motif Shawl
  • ๐Ÿงฃ Sunday Sideline Crochet Shawl
  • ๐Ÿ’š Beginner Lace Border Crochet Shawl
  • ๐Ÿ“š Browse the full Free Crochet Patterns hub
A woman in a teal crochet lace shawl smiles, highlighting the shawlโ€™s intricate openwork and soft texture.

Frequently Asked Questions

About the designer: Marly Bird is a knit and crochet designer, teacher, and host of Mondays with Marly podcast with professional experience designing since 2007 designing for major yarn brands including Red Heart, Cascade, Bernat, Yarnspirations, Lion Brand, and KnitPicks & WeCrochet. She is one of the few designers in the industry who teaches both knitting and crochet at a master level โ€” her signature “BiCrafty” approach. Marly's free patterns and tutorials have helped millions of crafters learn new techniques on marlybird.com and her YouTube channel.

Is the Bluebonnet Crochet Lace Shawl beginner-friendly?

It's best suited for advanced beginners and intermediate crocheters. The body of the shawl uses single crochet, half double crochet, and double crochet… stitches most crocheters know well. The intermediate-level challenge is the lace edging at the end, plus working with lace weight yarn for the first time. By the time you reach the edging, the yarn will feel comfortable in your hands.

What yarn should I use for the Bluebonnet Shawl now that It's A Wrap is discontinued?

My top substitute pick is KnitPicks Candy Mountain โ€” it's the closest match in weight and gradient behavior. Hobbii's Sultan Deluxe Shine, Azalea, and Honolulu cotton blends are excellent options too. Ice Yarns Cakes Cotton Fine is another favorite, especially if you're replacing It's A Wrap Rainbow specifically. See the full substitute yarn list in the Yarn & Materials section above. If you still have It's A Wrap in your stash, you can absolutely use it โ€” that's what the pattern was originally designed for.

Is lace weight yarn difficult for beginner crocheters?

It's not harder, just different. The yarn is thinner and the hook is smaller, so consistent tension matters more than with worsted weight. Good lighting helps a lot. I recommend swatching a small square in plain double crochet before you start the shawl… it gives your hands time to adjust without commitment.

How long does the Bluebonnet Crochet Lace Shawl take to make?

Most crocheters finish it in two to three weeks of casual evening crochet, depending on how much time you put in. The body works up faster than you'd expect for a lace-weight project because it uses tall stitches (hdc and dc) rather than only single crochet. The lace edging takes a little longer per row, but there are far fewer rows of it. [MARLY: confirm typical hours/weeks if there's a more specific estimate from pattern testing.]

Do I have to block this shawl?

Yes, please block it! Blocking is what makes lace look like lace. Before blocking, the fabric will look crinkly and the lace edging will feel a little scrunched up. After a proper wet-block (see the Blocking Tips section above), the lace opens up, the drape settles in, and the whole shawl transforms. It's the single biggest finishing step you can take.

Where can I get the ad-free PDF of the Bluebonnet Shawl?

The ad-free PDF (with crochet stitch charts) is available in my Ravelry shop, my Etsy shop, and at shop.marlybird.com. The PDF includes the full pattern plus charts that aren't shown on the blog version, so it's the easiest way to work the pattern without scrolling.

Why is it called the Bluebonnet Shawl?

It's named for the Texas state wildflower โ€” those gorgeous blue-purple blooms that carpet Texas highways every spring. The lace stitch pattern in the edging echoes the layered petal structure of an actual bluebonnet bloom, which is a small design detail I love. If you've ever driven through Texas Hill Country in April, you know exactly the color and softness this shawl is named for.

A woman models a crocheted lace shawl in blue and teal, showing stitch detail; yarn shelves fill the background.

Final Thoughts

The Bluebonnet Crochet Lace Shawl has been one of my favorite patterns for years, and getting to re-release it with fresh photos and our current standard layout feels like reintroducing an old friend. Whether you're crocheting it as a gift, a prayer shawl, or simply because you have a cake of It's A Wrap calling your name from the stash… I hope you love making it as much as I loved designing it. ๐Ÿ’™๐ŸŒธ

If you make one, please share it with me. Tag @MarlyBird on Instagram or post in the Marly's Minions Facebook group. There's nothing better than seeing your finished pieces. ๐Ÿ’›

And if this pattern brightened your day, share it with a fellow crocheter on Facebook โ€” that's how patterns like this one find the people who need them most. ๐ŸŒธ

โค๏ธ Your BiCrafty Bestie,
Marly Bird
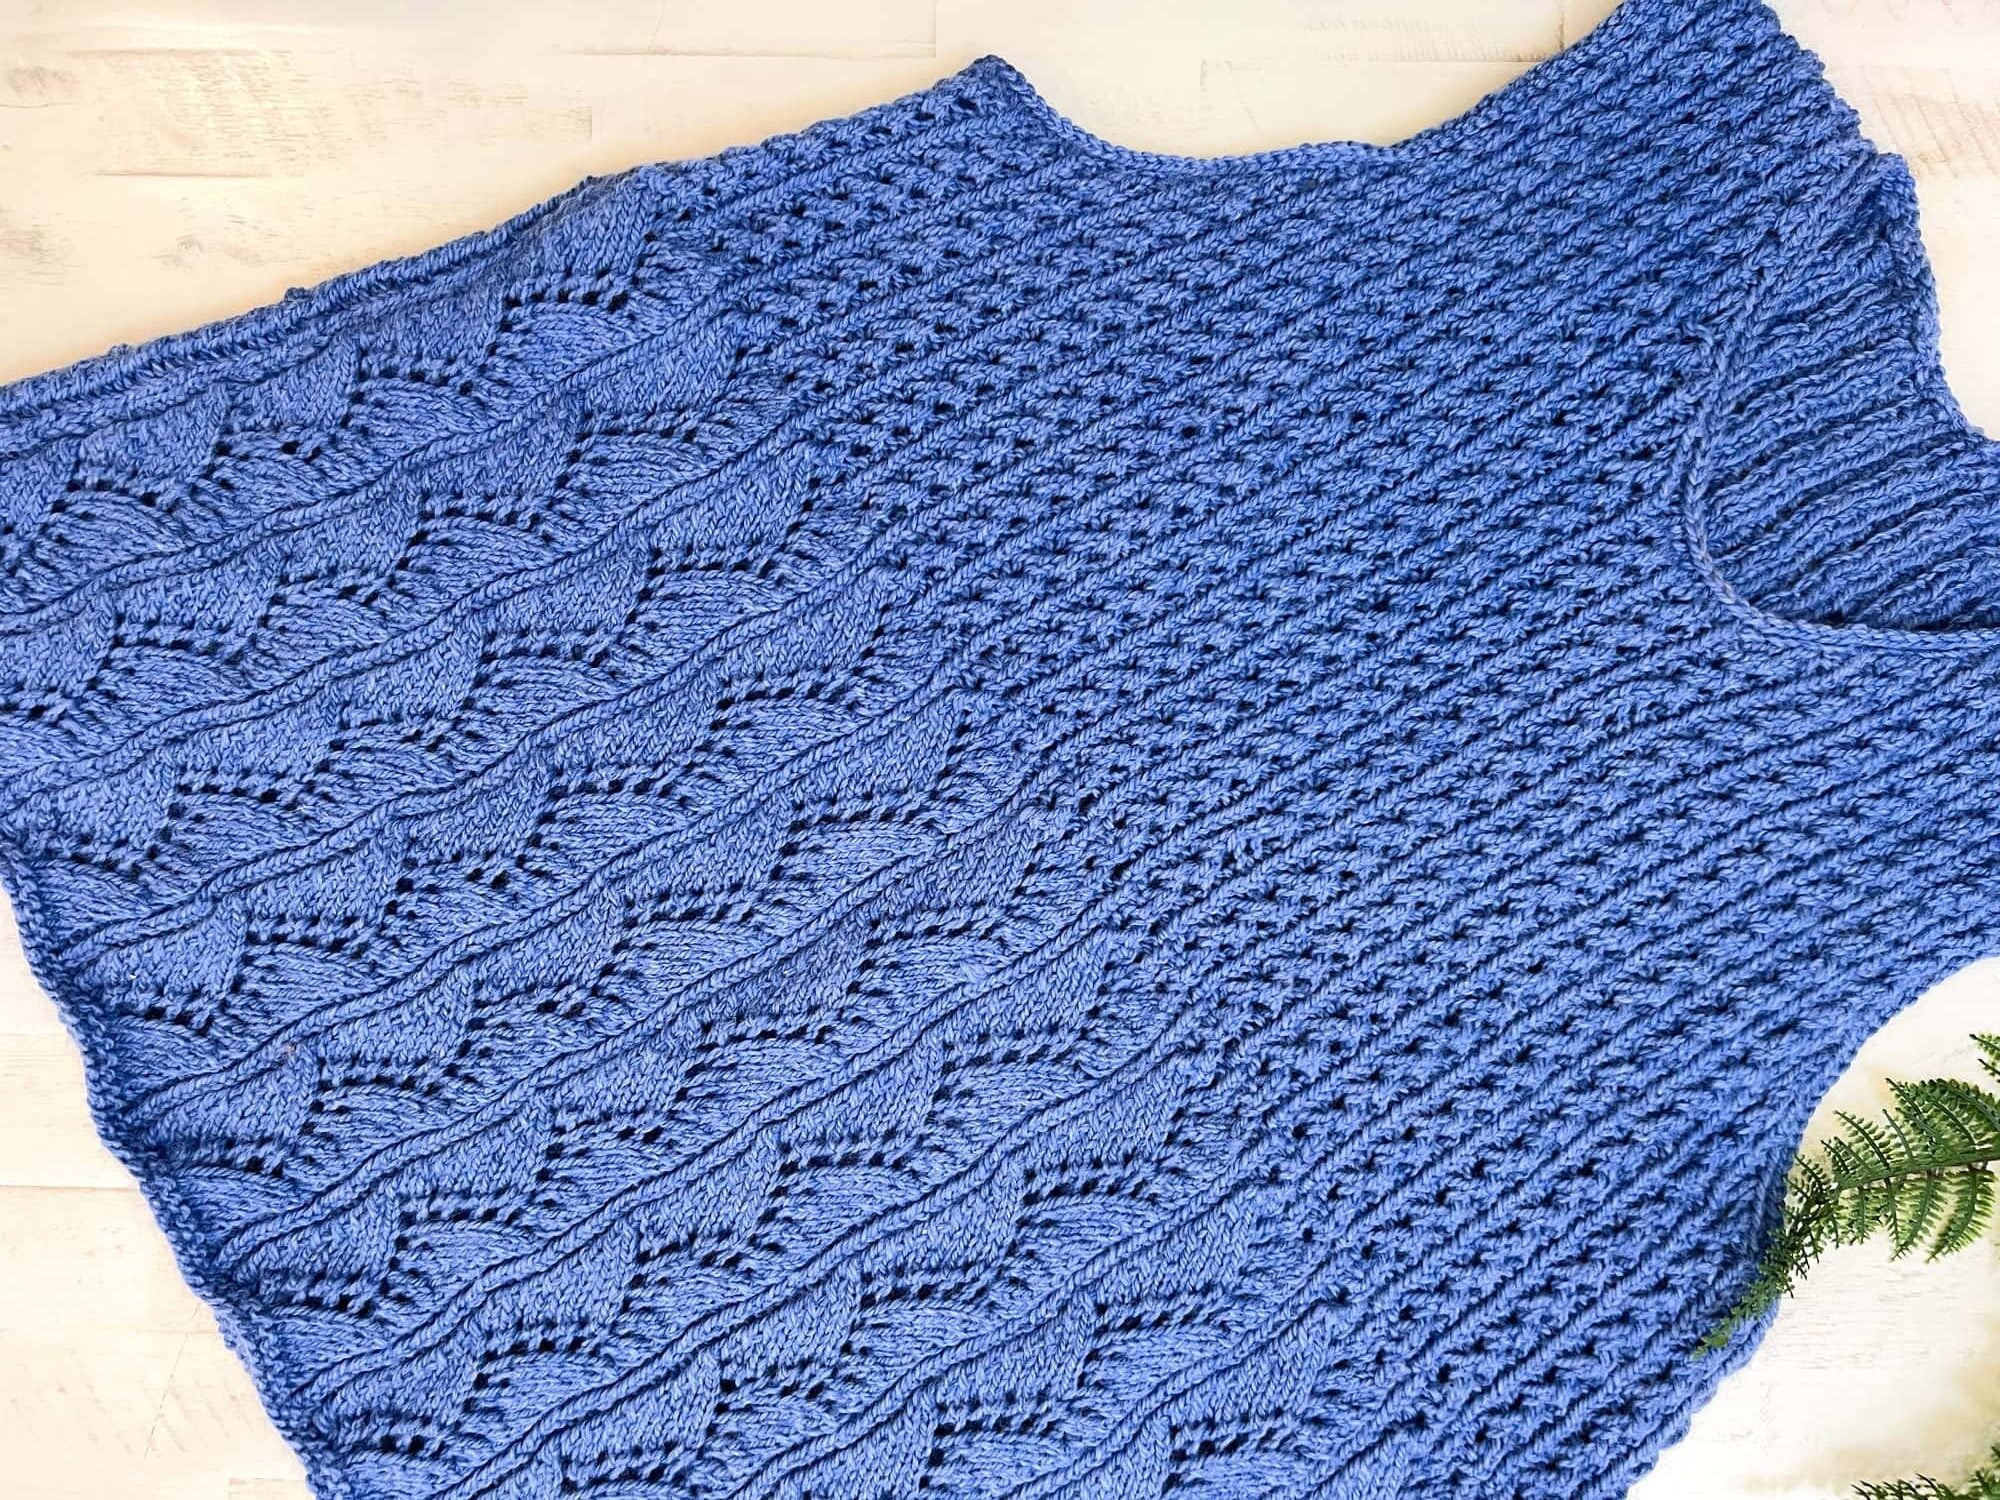
A cartoon avatar of a person with glasses and a brown bun smiles warmly. Their green shirt and black jacket add a stylish touch, while colorful hearts surround them like loving temperature blankets, stitching together an aura of love and positivity. -Marly Bird
๐ŸŒธ Spring Fling Day 7 Spotlight ๐ŸŒธ

This pattern debuted as Day 7 of Spring Fling 2026 (Tue May 12, 2026), part of my 20-day knit and crochet pattern celebration. The free pattern stays free forever right here on the blog… and you can grab the ad-free PDF anytime on Etsy, Shopify, or Ravelry.

๐Ÿ‘‰ See the full Spring Fling 2026 lineup on the Hub

Share your finished Bluebonnet Shawl with the hashtag #SpringFling2026 + #BluebonnetShawl ๐Ÿ’™
“

Filed Under: Crochet, Free Patterns, Marly Bird Premium Patterns, Our Free Patterns, Pattern Tagged With: crochet shawl, free crochet pattern, lace crochet, Marly Bird crochet pattern, Red Heart It's A Wrap, spring fling 2026, summer crochet

Pieces of You: Free Single Crochet Entrelac Wrap Pattern

May 5, 2026 By Meg Leave a Comment

This free crochet entrelac pattern teaches you single crochet entrelacโ€ฆ a beginner-friendly version of the โ€œscaryโ€ knit technique youโ€™ve probably heard about. The Pieces of You crochet entrelac wrap is worked in tiers of squares with a single crochet you already know, finished in triangles for a clean straight edge, and shown off in a gorgeous gradient cake yarn. Designed by Marly Bird as part of Spring Fling 2026.

Hereโ€™s the thing nobody tells you about entrelacโ€ฆ single crochet entrelac is NOT the scary knit version. Itโ€™s NOT Tunisian entrelac either. Itโ€™s plain old single crochetโ€ฆ the very first stitch you ever learnedโ€ฆ worked in a clever order that builds up interlocking woven blocks. If you can sc, you can do this. The Pieces of You wrap is the perfect way to fall in love with the technique.

A woman models a large patchwork knit shawl with beige, gray, and cream squares on grass with leafy trees in the background.

Hey, bestie ๐Ÿ’› If entrelac has been on your โ€œsomeday when Iโ€™m braverโ€ list, today is your day. This free crochet entrelac pattern uses one stitch (single crochet), one gorgeous gradient cake yarn (Red Heart Itโ€™s a Wrap Rainbow), and one repeating set of tier instructions to build a 68โ€ณ wingspan wrap that looks like youโ€™ve been crocheting forever. I wrote it specifically to be the friendliest entry point into entrelac that exists on the internetโ€ฆ and Iโ€™m so excited for you to try it.

Affiliate disclosure: Some of the links in this post are affiliate links, which means if you click through and purchase, I may earn a small commission at no extra cost to you. I only recommend yarns and tools Iโ€™ve used and trust with my yarn-loving heart. Thank you for supporting free patterns on the blog ๐Ÿ’›

A woman wears a crochet entrelac wrap in beige, tan, and gray, showing its texture and drape; โ€œPieces of You Crochet Shawlโ€ text below.

Table of Contents

Toggle
  • What You Will Love About This Pattern ๐Ÿ’–
  • Quick Pattern Overview
  • Is This Crochet Wrap Right for You?
  • What Is Single Crochet Entrelac?
  • SC Entrelac vs Knit Entrelac vs Tunisian Entrelac
  • Why Single Crochet Entrelac Is Easier Than You Think
  • The Corner to Corner Connection
  • Yarn & Materials
  • Love the Pattern but Want an Ad-Free PDF?
  • Pieces of You โ€” Pattern Details
  • GROW
  • Pieces of You โ€” Pattern Instructions
  • Blocking Tips
  • Make It Your Own: Color Variations & Yarn Substitutions
  • More Crochet Wrap & Shawl Patterns You'll Love
  • Favorite & Queue on Ravelry
  • Frequently Asked Questions
  • Final Thoughts
๐ŸŒธ Spring Fling 2026: Pieces of You debuted as Day 3 of Spring Fling 2026, my 20-day spring crochet and knit pattern celebration. Browse all 20 patterns on the Spring Fling Hub.

What You Will Love About This Pattern ๐Ÿ’–

โœจ Only one stitch. Single crochet, start to finish. No Tunisian hook, no special technique youโ€™ve never tried. If you can chain, single crochet, and slip stitchโ€ฆ you can crochet entrelac. Promise.

๐ŸŒˆ Gradient yarn does the heavy lifting. The Pieces of You wrap is designed for cake yarnโ€ฆ that magical self-striping yarn that shifts colors all on its own. You get a wrap that looks like you spent hours planning a color sequenceโ€ฆ when really, the yarn did it for you while you watched Netflix.

๐Ÿชก Designer-intentional drape. I deliberately call for a hook one size larger than the yarn label suggests. That looser gauge is what gives this wrap its drapey, wear-it-everywhere feel. (More on the why down in the materials sectionโ€ฆ itโ€™s one of my favorite teaching moments in this pattern.)

๐Ÿ“ Repeatable rhythm. Once you finish Tier 1 and Tier 2, every interior tier follows the same rhythm. It becomes meditativeโ€ฆ the kind of project you pick up after dinner and donโ€™t put down until youโ€™ve added another tier.

๐Ÿ“ Generous, wearable size. 68โ€ณ wingspan by 34โ€ณ deepโ€ฆ big enough to wrap, drape, and feel like a real shawl, not a scarf pretending to be one.

A crochet entrelac wrap in neutral tones is worn over blue jeans, highlighting its textured stitches outdoors in bright sunlight.

Quick Pattern Overview

๐Ÿงถ Skill Level: Intermediate (advanced beginner with patience can absolutely do this)

๐Ÿ“ Finished Size: 68โ€ณ [172.5 cm] wingspan x 34โ€ณ [86.5 cm] deep

๐Ÿ“ Gauge: 18 sc by 19 rows = 4โ€ณ x 4โ€ณ

๐ŸŒˆ Yarn: Red Heart Itโ€™s a Wrap Rainbow (CYCA #2 sport, 632 yds / 5.29 oz cake), Foggy colorway, 2 balls *sadly this yarn has been discontinued

๐Ÿช Hook: Size I/9 (5.5 mm)โ€ฆ yes, bigger than the ball band suggests. On purpose. Trust me.

๐ŸŽจ Construction: Worked in tiers of squares from corner to corner; final tier worked in triangles for a clean straight edge.


Is This Crochet Wrap Right for You?

This pattern is a beautiful fit if youโ€™ve crocheted a few projects beyond a granny square and youโ€™re ready to try something that looks impressive without actually being hard. You should be comfortable working single crochet, slip stitch, and reading row-by-row instructions. Each square is just scโ€ฆ but the connection between squares (the sc2tog into the previous tier + slip stitch turn) takes a few rounds of practice before it clicks.

If youโ€™ve been intimidated by entrelac on knitting Instagram or by Tunisian entrelac videosโ€ฆ this is your gateway. SC entrelac is genuinely the most approachable version of the technique that exists. And once youโ€™ve made one, youโ€™ll see entrelac everywhere and want to make ten more.

If youโ€™re a brand-new beginner who has never finished a project? Save this for your second or third make. Youโ€™ll enjoy it so much more once basic single crochet feels automatic.

A woman models a neutral-tone crochet entrelac wrap, showing textured blocks, worn over black in a colorful room.

What Is Single Crochet Entrelac?

Entrelac is a technique where small geometric shapes (usually squares) are worked one at a time and connected to the previous row of squares as you go. The result is fabric that looks woven, like a basket or a tile floor, even though itโ€™s all one continuous piece worked with one tool.

A single crochet entrelac pattern uses only single crochet stitches plus slip stitches to build those interlocking blocks. Thereโ€™s no Tunisian hook, no special equipment, and no new stitch to learn. The โ€œmagicโ€ is in the order you work the squaresโ€ฆ you work into the edges of previous squares to anchor the next row of blocks, which is what creates the woven illusion.

Thatโ€™s literally the whole secret. Stitches worked into edges of previous squares = interlocking blocks. The fabric does the impressive part for you.

A woman models a vibrant knitted wrap in purple, pink, and orange patchwork; โ€œWildberry Wrapโ€ appears vertically in pink text.

SC Entrelac vs Knit Entrelac vs Tunisian Entrelac

If youโ€™ve Googled โ€œentrelacโ€ before and ended up overwhelmed, hereโ€™s whyโ€ฆ most of the entrelac content online is one of two intimidating versions. Let me break down all three so you can see exactly where SC entrelac fits.

Knit entrelac. Worked with two knitting needles using a combination of pick-up stitches, short rows, and constant turning. Beautiful, but a real commitment of brain power. Most โ€œentrelac is hardโ€ reputations come from knit entrelac. But I am here to tell you, as somebody who literally wrote a book for How to Knit Entrelac, you can do this! (If you also knit, I have a stunning Dragonscale Knit Entrelac Blanket here on the blog thatโ€™s worth bookmarking once youโ€™ve conquered the crochet version.)

Entrelac knit blanket in blue, green, and yellow squares with woven texture; yarn skeins beside the folded project.

Tunisian entrelac. Worked with a Tunisian (Afghan) hookโ€ฆ the long one with a stopper on the end. Tunisian crochet has its own learning curve before you even get to entrelac, and many crocheters never use a Tunisian hook at all. My friend Mikey of The Crochet Crowd just released a beautiful Tunisian entrelac workshop, and itโ€™s gorgeous workโ€ฆ but itโ€™s a different skill set.

Single crochet entrelac (this pattern). Worked with a regular crochet hook using single crochet, slip stitch, and sc2tog. The same tools you already own. The same stitches you already know. Thatโ€™s it. Thatโ€™s the whole technique. SC entrelac is the friendliest version of entrelac (imho) that exists, and it produces a fabric just as beautiful as the other two.

Woman models a beige, cream, and gray crochet entrelac shawl in four poses; โ€œPieces of You Crochet Shawlโ€ text shown.

This is the differentiation that matters: when you see โ€œentrelacโ€ in the wild and feel a little flutter of fearโ€ฆ remember, the Pieces of You wrap is single crochet. Just single crochet. Youโ€™re already qualified.


Why Single Crochet Entrelac Is Easier Than You Think

1. You only need one stitch. Single crochetโ€ฆ the first stitch every crocheter learns. Plus the slip stitch to turn. Thatโ€™s the whole stitch vocabulary. No double crochet, no trebles, no special texture stitches.

2. Each square is independent and tiny. On this pattern, 18 stitches by 19 rows. Thatโ€™s a few minutes of crocheting per square. If you mess up a square, you frog one little block, not a whole row. The mental load of entrelac is way smaller than it looks.

3. The pattern is repeatable. Tier 3 establishes the rhythm. Tiers 4 through 10 repeat that exact same rhythm. Once youโ€™ve worked one full tier, the next seven feel like muscle memory.

4. The yarn does the visual work. Gradient cake yarn means you donโ€™t have to plan a single color change. You crochetโ€ฆ the colors shift on their ownโ€ฆ and the finished wrap looks intentional and designer-y. Effort vs. reward on this pattern is one of the best in my entire catalog.

A smiling woman with glasses holds up a large, hand-knit blanket made of beige, tan, and gray squares in a cozy, colorful room.

The Corner to Corner Connection

If youโ€™ve ever made a corner-to-corner (C2C) crochet blanket, you already know more than you think about entrelac. Corner to corner entrelac crochet is essentially what weโ€™re doing hereโ€ฆ building the fabric diagonally, one block at a time, from one corner outward. The Pieces of You crochet shawl is structured exactly the same way, just with single crochet squares instead of double crochet C2C blocks.

If you fell in love with C2C and want to level upโ€ฆ entrelac is your next stop. The construction logic is identical; the texture is just more sophisticated.

Curious about corner-to-corner entrelac crochet but not sure where to start? Think a shawl is too much? Not a problem!

Get this fun and easy crochet corner to corner single crochet entrelac block that can be turned into a afghan square, or pot holder, or throw pillow, or cushion, then simply sign up for the Marly Bird Newsletter and get the free downloadable pdf pattern for the C2C Single Crochet Entrelac Block

(Want to see what I more? Head over to my free corner-to-corner crochet patterns roundup for inspiration on where C2C and entrelac overlap.)

Watch the Full Video Tutorial

To view the video on YouTube Click Here


Yarn & Materials

Designer Yarn: Red Heart Itโ€™s a Wrap Rainbow

This wrap was designed using Red Heart Itโ€™s a Wrap Rainbow in the Foggy colorwayโ€ฆ a 55% acrylic / 45% cotton blend that comes in a generous 632-yard cake. The acrylic gives it body and durability; the cotton gives it that lovely soft drape. And because itโ€™s a self-striping cake, you get all the gradient color shifts without ever cutting yarn for a color change. Two cakes is all you need for the full 68โ€ณ wingspan.

Designer Tipโ€ฆ Why the bigger hook? The ball band on Itโ€™s a Wrap Rainbow recommends a smaller hook than Iโ€™m asking you to use. Thatโ€™s intentional. A size I/9 (5.5 mm) hook with this CYCA #2 sport-weight yarn creates a slightly looser fabricโ€ฆ and that looseness is what makes the wrap drape instead of stand stiff. If you go down to the ball-band-recommended hook, youโ€™ll end up with a sturdier fabric that wears more like a placemat than a wrap. Trust the bigger hook. (Same logic applies to many shawl and wrap patternsโ€ฆ designer-chosen gauge is almost always optimized for drape, not for matching the ball band.)

Colorful yarn cakes neatly stacked on the left; right side features "It's A Wrap One Ball Patterns" text and logo on light background.

Yarn Substitutions

If you canโ€™t find Red Heart Itโ€™s a Wrap Rainbow (itโ€™s been popping in and out of stock), or you want to play with a different gradient, here are my go-to substitute options for cake yarn projects:

Other gradient cake yarns to consider: Lion Brand Mandala String (size 1 weight yarn, new to us but might be great), Lion Brand Mandala (DK weight, comes in beautiful color stories; you may need 3 cakes for the full yardage), Caron Cakes (worsted weight; go down a hook size and check gauge carefully), Premier Sweet Roll (similar weight to Itโ€™s a Wrap, gorgeous self-striping), and the Facetsโ„ข Yarn by Loops & Threads (worsted weight, 100% Acrylic, similar drape behavior).

๐Ÿ’• The Chevron Waves Crochet Wrap โ€“ Another Lace Weight Crochet Shawl Free Pattern

If you want to swap to a non-cake yarn and choose your own colors, youโ€™ll need approximately 1,250 yards of CYCA #2 sport-weight yarn. Just be aware that without the self-striping element, youโ€™ll be doing your own color-change planningโ€ฆ which is its own kind of fun.

A woman models the Pieces of You wrap, highlighting its colorful geometric knit pattern and soft textured stitches.

Tools & Notions

Beyond yarn, hereโ€™s what youโ€™ll want on hand:

  • Crochet hook: Size I/9 (5.5 mm)
  • Stitch markersโ€ฆ youโ€™ll use these on the last stitch of every Row 19 to mark the corner of each finished square. Theyโ€™re essential, not optional.
  • Tapestry needle for weaving in ends
  • Blocking mats and pins (or blocking wires)โ€ฆ entrelac fabric blooms beautifully when blocked. Pick up blocking wires here if you donโ€™t have them yet.
  • Wool washโ€ฆ I love Eucalan for blocking, no rinse needed.
โญ๏ธ Marly Bird Amazon Storefront โญ๏ธ

Love the Pattern but Want an Ad-Free PDF?

The full Pieces of You pattern is right here on the blog for free, forever. But if youโ€™d rather have a clean, printable, ad-free PDF you can take to your reading chair (or to your favorite yarn shop), the formatted PDF is available in my shops:

  • Pieces of You on Etsy
  • Pieces of You on the Marly Bird Shop
  • Pieces of You on Ravelry
A woman models a large checkered crochet shawl using single crochet entrelac; pattern preview shown in the background.
Etsy
Shopify
Ravelry

Pieces of You โ€” Pattern Details

Skill Level

Intermediate

Finished Measurements

68โ€ณ [172.5 cm] wingspan x 34โ€ณ [86.5 cm] deep

Gauge

19 sc by 19 rows = 4โ€ณ x 4โ€ณ [10 x 10 cm]; use any size hook to obtain the gauge.

Materials

  • Yarn: Red Heart Itโ€™s a Wrap Rainbow (55% acrylic / 45% cotton, 632 yds / 570 m, 5.29 oz / 150 g, CYCA #2 sport): Foggy colorway, 2 balls
  • Hook: Size I/9 (5.5 mm)
  • Notions: Stitch markers, tapestry needle

Abbreviations

  • Ch โ€” Chain(s)
  • PM โ€” Place marker
  • RS โ€” Right Side
  • Sc โ€” Single Crochet
  • Sc2tog โ€” Single Crochet Two Together
  • Sc3tog โ€” Single Crochet Three Together
  • Sl st โ€” Slip Stitch
  • Sp(s) โ€” Space(s)
  • St(s) โ€” Stitch(es)
  • Tch โ€” Turning Chain
  • WS โ€” Wrong Side

Special Stitches

โญ๏ธ Reverse Single Crochet (rev sc): Also known as a Crab Stitch. Working from left to right, insert hook from front to back in next stitch to the right, yarn over and pull up a loop, yarn over and draw through 2 loops on hook. This is what gives the finished wrap its tidy, twisted-rope edging.

โญ๏ธ Single Crochet 2 Together (sc2tog): *Insert hook into indicated stitch, yarn over and pull up a loop; repeat from * in next stitch indicated, yarn over and draw through all 3 loops on hook. In this pattern, sc2tog is the magic stitch that joins each new square to the edge of the previous tier.

โญ๏ธ Single Crochet 3 Together (sc3tog): *Insert hook into indicated stitch, yarn over and pull up a loop; repeat from * in next 2 stitches indicated, yarn over and draw through all 4 loops on hook. In this pattern, sc3tog is only used on the final row of the triangles.


Layout

Entrelac wrap diagram: 12-tier diamond grid, numbered color blocks, labeled rows, blue top row, arrows show direction.

Stitch Diagram

The crochet stitch diagram is exclusive to the ad-free pdf.

Etsy
Shopify
Ravelry

Notes

The shawl is worked with a bigger hook than listed on the ball band on purpose. The looser gauge will help the fabric drape more and create a nicer garment.

The single crochet entrelac technique used in this shawl is similar to the corner to corner technique.

To work the entrelac technique, start by working the first square of Tier 1. All subsequent Tiers (2-11) work off of the previous tier to build up the work. See the layout and stitch diagram as a guide.

When starting a new ball of yarn, begin at the same starting color as used on Tier 1. (This is what keeps the gradient consistent across the whole wrap. The cake yarn shifts colors gradually within each ball, so re-starting at the matching color point on ball 2 keeps the visual flow uninterrupted.)

The final tier of the shawl is made in triangles instead of squares to finish with a straight edge. (Without the triangles, your wrap would end on a zigzagโ€ฆ the triangles fill in the negative space along the top edge and give you that clean, straight finish a wrap deserves.)

โญ๏ธ Designer Tipโ€ฆ The โ€œslip stitch in place of the ch-1 turnโ€: This is the trickiest part of any entrelac or mosaic-style pattern, and the part most crocheters trip on. When you reach the end of a row that connects to the previous tier, youโ€™ll work an sc2tog (joining your new square to the previous tier) and then a slip stitch into the next stitch on the previous tier. That slip stitch takes the place of the ch-1 youโ€™d normally do after turning. So when you turn for the next row, do NOT chain 1โ€ฆ the slip stitch already counts as your turning chain. This keeps the edge of your square clean and tight against the previous tier with no gaps. Read this twice. Then read it a third time as you work Square 1 of Tier 2. By Square 2 it will be muscle memory. [MARLY: please verify this explanation matches how youโ€™d describe it on video.]

GROW

To Unlockย Exclusive Subscriber Contentย click the Box below and join for free by simply adding your email and creating a password! If you are having troubles, clear your cache or reset your password or login to the Grow Publisher Portal.

>> Learn More About Grow Here <<

Iโ€™m thrilled to share this amazing pattern with you, many patterns on my blog are absolutely free!ย I kindly request that you donโ€™t copy and paste or distribute this pattern. Prefer an ad-free experience? Buy a digital PDF pattern for a small fee from one of my online stores for a seamless crafting journey.

I appreciate your support and readership.ย You are the reason I can keep doing what I love and sharing it with others. So, thank you from the bottom of myย yarn-loving heart! Disclosure: This post contains affiliate links, meaning I get a commission if you decide to make a purchase through my links at no cost to you.

Woman models the beige and gray knit Pieces of You Wrap shawl, showing off its soft texture in a cozy, colorful room.

Pieces of You โ€” Pattern Instructions

Pattern was updated to have an odd number of stitches on 6-1-2026.

Tier 1

Chain 20.

Row 1 (RS): Sc in 2nd chain from hook and in each chain across, turn โ€” 19 sc.

Rows 2-19: Ch 1, sc in each sc across, turn. Place a marker in the last st on Row 19. Do not fasten off.

Tier 2

Square 1

Chain 20, turn.

Row 1 (WS): Sc in 2nd chain from hook and in each of the next 18 ch, sc2tog (the last chain and the marked stitch on square from previous tier), slip stitch in next stitch on square from previous tier [note: the slipped stitch takes the place of the ch 1 we usually do after the turn], turn โ€” 19 sts (17 sc + 1 sc2tog).

Row 2: Sc in sc2tog and in each sc across, turn โ€” 19 sc.

Row 3: Ch 1, sc in each of the next 18 sc, sc2tog (the last sc and the next stitch on square from previous tier), slip stitch in next stitch on square from previous tier, turn โ€” 19 sts (17 sc + 1 sc2tog).

Repeat Rows 2-3 eight more times, place a marker in the last stitch on Row 19, do not fasten off, do not turn.

Square 2

Working along the edge of the same square of previous tier:

Row 1 (WS): Ch 1, 19 sc evenly along the edge, turn โ€” 19 sc.

Rows 2-19: Ch 1, sc in each sc across, turn. Place a marker in the last st on Row 19.

Tier 3

Square 1

Chain 20, turn.

Row 1 (RS): Sc in 2nd chain from hook and in each of the next 18 ch, sc2tog (the last chain and the marked stitch on square from previous tier), slip stitch in next stitch on square from previous tier [note: the slipped stitch takes the place of the ch 1 we usually do after the turn], turn โ€” 19 sts (17 sc + 1 sc2tog).

Row 2: Sc in sc2tog and in each sc across, turn โ€” 19 sc.

Row 3: Ch 1, sc in each of the next 18 sc, sc2tog (the last sc and the next stitch on square from previous tier), slip stitch in next stitch on square from previous tier, turn โ€” 19 sts (17 sc + 1 sc2tog).

Repeat Rows 2-3 eight more times, place a marker in the last stitch on Row 19, do not fasten off, do not turn.

Square 2

Working along the edge of the same square of previous tier:

Row 1 (RS): Ch 1, 18 sc evenly along the edge, sc2tog (the last sc and the marked stitch on square from previous tier), slip stitch in next stitch on square from previous tier, turn โ€” 19 sts (17 sc + 1 sc2tog).

Row 2 (WS): Sc in sc2tog, and each sc across, turn โ€” 19 sc.

Row 3: Ch 1, sc in each of the next 18 sc, sc2tog (the last sc and the next stitch on square from previous tier), slip stitch in next stitch on square from previous tier, turn โ€” 19 sts (17 sc + 1 sc2tog).

Repeat Rows 2-3 eight more times, place a marker in the last stitch on Row 19, do not fasten off, do not turn.

Square 3

Working along the edge of the same square of previous tier:

Row 1 (WS): Ch 1, 19 sc evenly along the edge, turn โ€” 19 sc.

Rows 2-19: Ch 1, sc in each sc across, turn. Place a marker in the last st on Row 19.

Tiers 4-11

Repeat directions from Tier 3. Start with a Square 1, then repeat Square 2 for all interior squares, and finish with a Square 3. See layout for assistance.

โญ๏ธ Designer Tipโ€ฆ Reading the layout: Each tier adds one more square than the tier before it. Tier 1 = 1 square, Tier 2 = 2 squares, Tier 3 = 3 squares, and so on through Tier 11 (11 squares). The layout diagram shows you which way each square is oriented (RS or WS row) and which edge of the previous tier youโ€™re working into. Pin a printed copy of the diagram next to your project and check off each square as you finish it.
A woman models a striped, knit entrelac wrap scarf, showing its textured crochet pattern and soft drape over her head and shoulders.

Tier 12 (Triangle Finishing Tier)

This final tier uses triangles instead of squares to fill in the zigzag edge and give your wrap a clean, straight top edge. Each triangle decreases gradually until it tapers to a point.

Triangle 1

Chain 20, turn.

Row 1 (WS): Sc in 2nd chain from hook and in each of the next 18 ch, sc2tog (the last chain and the marked stitch on square from previous tier), slip stitch in next stitch on square from previous tier [note: the slipped stitch takes the place of the ch 1 we usually do after the turn], turn โ€” 19 sts (18 sc + 1 sc2tog).

Row 2: Sc in sc2tog and in each sc across to last 2 sc, sc2tog over last 2 sc, turn โ€”18 ( 17 sc + 1 sc2tog).

Row 3: Ch 1, sc2tog over first 2 sc, sc in each sc to last sc, sc2tog (the last sc and the next stitch on square from previous tier), slip stitch in next stitch on square from previous tier, turn โ€” 17 sts (15 sc + 2 sc2tog).

Row 4: Sc in sc2tog and in each sc across to last 2 sc, sc2tog over last 2 sc, turn โ€”16 sts (15 sc + 1 sc2tog).

Row 5: Ch 1, sc2tog over first 2 sc, sc in each sc to last sc, sc2tog (the last sc and the next stitch on square from previous tier), slip stitch in next stitch on square from previous tier, turn โ€” 15 sts (13 sc + 2 sc2tog).

Row 6: Sc in sc2tog and in each sc across to last 2 sc, sc2tog over last 2 sc, turn โ€” 14 sts (13 sc + 1 sc2tog).

Row 7: Ch 1, sc2tog over first 2 sc, sc in each sc to last sc, sc2tog (the last sc and the next stitch on square from previous tier), slip stitch in next stitch on square from previous tier, turn โ€” 13 sts (11 sc + 2 sc2tog).

Row 8: Sc in sc2tog and in each sc across to last 2 sc, sc2tog over last 2 sc, turn โ€” 12 sts (11 sc + 1 sc2tog).

Row 9: Ch 1, sc2tog over first 2 sc, sc in each sc to last sc, sc2tog (the last sc and the next stitch on square from previous tier), slip stitch in next stitch on square from previous tier, turn โ€” 11 sts (9 sc + 2 sc2tog).

Row 10: Sc in sc2tog and in each sc across to last 2 sc, sc2tog over last 2 sc, turn โ€” 10 sts (9 sc + 1 sc2tog).

Row 11: Ch 1, sc2tog over first 2 sc, sc in each sc to last sc, sc2tog (the last sc and the next stitch on square from previous tier), slip stitch in next stitch on square from previous tier, turn โ€” 9 sts (7 sc + 2 sc2tog).

Row 12: Sc in sc2tog and in each sc across to last 2 sc, sc2tog over last 2 sc, turn โ€”8 sts (7 sc + 1 sc2tog).

Row 13: Ch 1, sc2tog over first 2 sc, sc in each sc to last sc, sc2tog (the last sc and the next stitch on square from previous tier), slip stitch in next stitch on square from previous tier, turn โ€” 7 sts (5 sc + 2 sc2tog).

Row 14: Sc in sc2tog and in each sc across to last 2 sc, sc2tog over last 2 sc, turn โ€” 6 sts (5 sc + 1 sc2tog).

Row 15: Ch 1, sc2tog over first 2 sc, sc in each sc to last sc, sc2tog (the last sc and the next stitch on square from previous tier), slip stitch in next stitch on square from previous tier, turn โ€” 5 sts (3 sc + 2 sc2tog).

Row 16: Sc in sc2tog, sc in next 2 sc, sc2tog over last 2 sc, turn โ€” 4 sts (3 sc + 1 sc2tog).

Row 17: Ch 1, sc2tog over first 2 sc, sc in next sc, sc2tog (the last sc and the next stitch on square from previous tier), slip stitch in next stitch on square from previous tier, turn โ€”3 sts (1 sc, 2 sc2tog).

Row 18: Sc in sc2tog, sc2tog over last 2 sc, turn โ€“ 2 sts (1 sc, 1 sc2tog).

Row 19: Ch 1, sc3tog over sc2tog and next st on square from previous tier. Do not fasten off, do not turn. Place a marker in the last st on Row 19.

Triangle 2

Working along the edge of the same square of previous tier

Row 1 (WS): Ch 1, 18 sc evenly along the edge, sc2tog (the last sc and the marked stitch on square from previous tier), slip stitch in next stitch on square from previous tier, turn โ€”19 sts ( 18 sc, 1 sc2tog).

Row 2: Sc in sc2tog and in each sc across to last 2 sc, sc2tog over last 2 sc, turn โ€”18 ( 17 sc + 1 sc2tog).

Row 3: Ch 1, sc2tog over first 2 sc, sc in each sc to last sc, sc2tog (the last sc and the next stitch on square from previous tier), slip stitch in next stitch on square from previous tier, turn โ€” 17 sts (15 sc + 2 sc2tog).

Row 4: Sc in sc2tog and in each sc across to last 2 sc, sc2tog over last 2 sc, turn โ€”16 sts (15 sc + 1 sc2tog).

Row 5: Ch 1, sc2tog over first 2 sc, sc in each sc to last sc, sc2tog (the last sc and the next stitch on square from previous tier), slip stitch in next stitch on square from previous tier, turn โ€” 15 sts (13 sc + 2 sc2tog).

Row 6: Sc in sc2tog and in each sc across to last 2 sc, sc2tog over last 2 sc, turn โ€” 14 sts (13 sc + 1 sc2tog).

Row 7: Ch 1, sc2tog over first 2 sc, sc in each sc to last sc, sc2tog (the last sc and the next stitch on square from previous tier), slip stitch in next stitch on square from previous tier, turn โ€” 13 sts (11 sc + 2 sc2tog).

Row 8: Sc in sc2tog and in each sc across to last 2 sc, sc2tog over last 2 sc, turn โ€” 12 sts (11 sc + 1 sc2tog).

Row 9: Ch 1, sc2tog over first 2 sc, sc in each sc to last sc, sc2tog (the last sc and the next stitch on square from previous tier), slip stitch in next stitch on square from previous tier, turn โ€” 11 sts (9 sc + 2 sc2tog).

Row 10: Sc in sc2tog and in each sc across to last 2 sc, sc2tog over last 2 sc, turn โ€” 10 sts (9 sc + 1 sc2tog).

Row 11: Ch 1, sc2tog over first 2 sc, sc in each sc to last sc, sc2tog (the last sc and the next stitch on square from previous tier), slip stitch in next stitch on square from previous tier, turn โ€” 9 sts (7 sc + 2 sc2tog).

Row 12: Sc in sc2tog and in each sc across to last 2 sc, sc2tog over last 2 sc, turn โ€”8 sts (7 sc + 1 sc2tog).

Row 13: Ch 1, sc2tog over first 2 sc, sc in each sc to last sc, sc2tog (the last sc and the next stitch on square from previous tier), slip stitch in next stitch on square from previous tier, turn โ€” 7 sts (5 sc + 2 sc2tog).

Row 14: Sc in sc2tog and in each sc across to last 2 sc, sc2tog over last 2 sc, turn โ€” 6 sts (5 sc + 1 sc2tog).

Row 15: Ch 1, sc2tog over first 2 sc, sc in each sc to last sc, sc2tog (the last sc and the next stitch on square from previous tier), slip stitch in next stitch on square from previous tier, turn โ€” 5 sts (3 sc + 2 sc2tog).

Row 16: Sc in sc2tog, sc in next 2 sc, sc2tog over last 2 sc, turn โ€” 4 sts (3 sc + 1 sc2tog).

Row 17: Ch 1, sc2tog over first 2 sc, sc in next sc, sc2tog (the last sc and the next stitch on square from previous tier), slip stitch in next stitch on square from previous tier, turn โ€”3 sts (1 sc, 2 sc2tog).

Row 18: Sc in sc2tog, sc2tog over last 2 sc, turn โ€“ 2 sts (1 sc, 1 sc2tog).

Row 19: Ch 1, sc3tog over sc2tog and next st on square from previous tier. Do not fasten off, do not turn. Place a marker in the last st on Row 19.

Repeat Triangle 2 for all interior squares, end with a Triangle 3.ย  See layout for assistance.

Triangle 3

Working along the edge of the same square of previous tier:

Row 1 (WS): Ch 1, 19 sc evenly along the edge, turn โ€” 19 sc.

Row 2: Ch 1, sc in each sc across to last 2 sc, sc2tog over last 2 sc, turn โ€” 18 sts (16 sc + 1 sc2tog).

Row 3: Ch 1, sc2tog over first 2 sc, sc in each sc across, turn โ€” 17 sts (15 sc + 1 sc2tog).

Row 4: Ch 1, sc in each sc across to last 2 sc, sc2tog over last 2 sc, turn โ€” 16 sts (15 sc + 1 sc2tog).

Row 5: Ch 1, sc2tog over first 2 sc, sc in each sc across, turn โ€” 15 sts (15 sc + 1 sc2tog).

Row 6: Ch 1, sc in each sc across to last 2 sc, sc2tog over last 2 sc, turn โ€” 14 sts (16 sc + 1 sc2tog).

Row 7: Ch 1, sc2tog over first 2 sc, sc in each sc across, turn โ€” 13 sts (15 sc + 1 sc2tog).

Row 8: Ch 1, sc in each sc across to last 2 sc, sc2tog over last 2 sc, turn โ€” 12 sts (16 sc + 1 sc2tog).

Row 9: Ch 1, sc2tog over first 2 sc, sc in each sc across, turn โ€” 11 sts (15 sc + 1 sc2tog).

Row 10: Ch 1, sc in each sc across to last 2 sc, sc2tog over last 2 sc, turn โ€” 10 sts (16 sc + 1 sc2tog).

Row 11: Ch 1, sc2tog over first 2 sc, sc in each sc across, turn โ€” 9 sts (15 sc + 1 sc2tog).

Row 12: Ch 1, sc in each sc across to last 2 sc, sc2tog over last 2 sc, turn โ€” 8 sts (16 sc + 1 sc2tog).

Row 13: Ch 1, sc2tog over first 2 sc, sc in each sc across, turn โ€” 7 sts (15 sc + 1 sc2tog).

Row 14: Ch 1, sc in each sc across to last 2 sc, sc2tog over last 2 sc, turn โ€” 6 sts (16 sc + 1 sc2tog).

Row 15: Ch 1, sc2tog over first 2 sc, sc in each sc across, turn โ€” 5 sts (15 sc + 1 sc2tog).

Row 16: Ch 1, sc in each sc across to last 2 sc, sc2tog over last 2 sc, turn โ€” 4 sts (3 sc + 1 sc2tog).

Row 17: Ch 1, sc2tog over first 2 sc, sc in each sc across, turn โ€”3 sts (1 sc, 2 sc2tog).

Row 18: Ch 1, sc in next sc, sc2tog over last 2 sc, turn โ€“ 2 sts (1 sc, 1 sc2tog).

Row 19: Ch 1, sc2tog over last 2 sc. Fasten off. Weave in ends.

Border

With RS facing, join yarn with a slip stitch to any corner.

Round 1 (RS): *3 sc in corner, sc evenly along the edge; repeat from * around, sl st to first sc, do not turn.

Round 2: Reverse sc in each sc around, sl st to first sc to join, fasten off. Weave in ends.

Beige, cream, and gray checkered crochet entrelac shawl draped over shoulders; stitch pattern and texture are clearly shown.

Blocking Tips

Entrelac fabric is the kind of fabric that blooms when itโ€™s blocked. Before blocking, the squares can look a little compressed and the woven effect feels subtle. After blocking, the squares relax open, the diagonal lines between them become crisp, and the whole wrap finally looks like the photos. Do not skip this step.

Wet block (recommended for this wrap):

  • Fill a clean sink or basin with cool water and a tiny splash of Eucalan wool wash. Soak the finished wrap for 15-20 minutesโ€ฆ gently press it under the water; do not agitate.
  • Drain the water without lifting the wrap (lifting a soaking wet shawl by one corner stretches it permanently). Press out as much water as you can with the wrap still in the basin, then transfer it onto a clean towel.
  • Roll the wrap up in the towel like a burrito and press to remove excess water.
  • Lay the wrap flat on blocking mats. Pin it to the schematic dimensions: 68โ€ณ wingspan x 34โ€ณ deep. Use blocking pins along the top straight edge and at the bottom point. Take your time getting the angles even.
  • Let it dry completely before unpinningโ€ฆ usually 12-24 hours depending on humidity.

Spray block (faster alternative): Pin the dry wrap to size on your blocking mats, then mist it thoroughly with cool water from a spray bottle until the fabric is damp throughout. Let dry completely. Less dramatic than a full wet block, but still effective.

Designer Tipโ€ฆ Pin every corner of every square. If you really want the woven effect to pop, place a pin at each corner of each entrelac square (where four squares meet). Itโ€™s tedious but the difference is striking. The blocked fabric will show every interlocking block clearly. This is how you get that โ€œdid you really make that?โ€ reaction.


Make It Your Own: Color Variations & Yarn Substitutions

Stick with gradient cake yarn. The whole magic of this design is the self-striping color shiftโ€ฆ itโ€™s what makes a one-stitch wrap look intentional and designer-y. If you swap to a solid yarn, youโ€™ll have a pretty wrap, but youโ€™ll lose 80% of the visual impact. My strongest recommendation is to stay with a cake-style gradient yarn even if you swap brands.

Plan your second cake. Per the pattern notes, when you start the second cake of yarn, begin at the same color as the start of cake 1. This keeps the gradient flowing visually instead of jumping mid-wrap. Take 3 minutes to wind off (or pull from the center) until you reach the matching color pointโ€ฆ itโ€™s worth the small bit of waste for a wrap that looks cohesive.

Color shift placement. If you want full control over WHERE in the wrap the color shifts happen, pause and pull off color sections to create your own custom transitions. Most makers love the surprise of letting the cake do its thingโ€ฆ but if you want stripes to land at specific tier boundaries, you can absolutely engineer that.

Want a moodier version? Try a darker cake yarn (Lion Brand Mandala โ€œSphinxโ€ colorway, or any of the Hobbii Cotton Sky Cake darker palettes) for a winter-friendly Pieces of You. Same pattern, completely different vibe.


A woman models a vibrant entrelac crochet shawl in purples, pinks, and reds; detailed single crochet stitches are visible.
Wildberry Single Crochet Entrelac Wrap
A woman models a crochet infinity scarf in purple and blue hues, showing its textured wrap pattern against a beige jacket.
Single Crochet Entrelac Cowl + Video
Woman displays a vibrant geometric crochet blanket in a cozy yarn-filled craft room, highlighting stitch detail and texture.
Corner to Corner Throw
Woman models a pink and green crocheted shawl with bold text โ€œMarly Birdโ€ left; stitch texture visible over black top.
Boysenberry Bramble Single Crochet Entrelac Cowl

More Crochet Wrap & Shawl Patterns Youโ€™ll Love

If you fall in love with single crochet entrelac (and you will), here are more crochet wraps and shawls from the blog to add to your queue:

  • Free Crochet Corner to Corner Patterns Roundupโ€ฆ every C2C pattern on the blog, all in one place. The natural next stop if you loved this construction.
  • Boysenberry Bramble SC Entrelac Cowlโ€ฆ a smaller, faster project to keep practicing single crochet entrelac.
  • Spring Fling 2026 Hubโ€ฆ the full lineup of free patterns from this 20-day event, knit and crochet.
  • Wildberry Single Crochet Entrelac Wrapโ€ฆ beautiful pattern that highlights long color changing yarn.

Favorite & Queue on Ravelry

Save the Pieces of You wrap to your Ravelry queue so you can come back to it any time:

Favorite This Pattern on Ravelry - Marly Bird

A woman with glasses smiles near colorful yarn and a clipboard, suggesting a crochet entrelac project is being discussed.

Frequently Asked Questions

What is single crochet entrelac?

Single crochet entrelac is a crochet technique where small squares are worked one at a time and joined to the previous row of squares as you go, using only single crochet, slip stitch, and sc2tog. The result is a fabric that looks wovenโ€ฆ like interlocking blocksโ€ฆ even though itโ€™s all one continuous piece. Unlike Tunisian entrelac (which needs a special hook) or knit entrelac (which uses two needles and short rows), single crochet entrelac uses tools and stitches you already own.

Is SC entrelac the same as Tunisian entrelac?

No. Tunisian entrelac is worked with a Tunisian (Afghan) hook, which is a long crochet hook with a stopper on the end, using Tunisian stitches like Tunisian simple stitch. Single crochet entrelac uses a regular crochet hook and only single crochet stitches. Both produce a similar woven-block fabric, but the technique and tools are completely differentโ€ฆ and SC entrelac is much friendlier for crocheters who havenโ€™t learned Tunisian crochet yet.

Why is the recommended hook bigger than the yarn label suggests?

Designer-chosen gauge for shawls and wraps is almost always optimized for drape, not for matching the ball band. The Pieces of You wrap calls for a size I/9 (5.5 mm) hook with a CYCA #2 sport yarn, which is one or two sizes larger than the ball band recommends. That looser gauge gives the finished wrap its flowy, wearable drape. If you go down to the ball-band-recommended hook, youโ€™ll end up with a fabric thatโ€™s too dense and stiff to wear comfortably as a wrap.

Can I substitute the yarn?

Yes. The pattern was designed for Red Heart Itโ€™s a Wrap Rainbow, but any CYCA #2 sport-weight gradient cake yarn will work beautifully. Good substitute options include Lion Brand Mandala (DK weight, may need 3 cakes), Premier Sweet Roll, and Hobbii Cotton Sky Cake. You can also use a non-cake yarnโ€ฆ youโ€™ll need approximately 1,250 yards of CYCA #2 sportโ€ฆ but youโ€™ll lose the self-striping effect and need to plan your own color changes. And to keep the drape, it is recommended to use a hook larger than what the ball band calls for!

Whatโ€™s the difference between this and corner-to-corner crochet?

Corner-to-corner (C2C) crochet and single crochet entrelac share the same diagonal constructionโ€ฆ both build fabric one block at a time, working outward from one corner. The difference is the stitch and texture. Traditional C2C uses double crochet โ€œblocksโ€ of 3 dc, creating a stair-step pattern. Single crochet entrelac uses larger 18-stitch single crochet squares, creating a smoother, more woven look. If youโ€™ve made a C2C blanket, you already know the construction logicโ€ฆ entrelac is the next step up in texture sophistication.

Is this beginner-friendly or do I need to be experienced?

The pattern is rated Intermediate, but advanced beginners can absolutely tackle it. You should be comfortable with single crochet, slip stitch, sc2tog, and reading row-by-row written instructions. The trickiest moment is the โ€œslip stitch in place of the ch-1 turnโ€ technique that joins each square to the previous tierโ€ฆ it takes a few squares before it clicks, but once it does, the rest of the wrap is meditative repetition. Brand-new crocheters who have never finished a project should save this for their second or third make. Just have Blind Faith!

How long will this take to make?

Most intermediate crocheters finish the Pieces of You wrap in 35-50 hours of total crochet time, depending on speed and how often you frog. Thatโ€™s roughly 2-4 weeks of evening crocheting. Each square takes about 20-30 minutes once the rhythm sets in, and the wrap has 66 squares plus the triangle finishing tier. Pace yourselfโ€ฆ entrelac rewards rested, focused crocheting more than rushed marathon sessions.

How do I block a finished crochet wrap?

Wet block by soaking the finished wrap in cool water with a small amount of no-rinse wool wash for 15-20 minutes. Press out the water (do not lift or wring), roll in a clean towel to remove more moisture, then pin to the finished schematic dimensions on blocking mats. Let dry completely before unpinning. Blocking is essential for entrelac fabricโ€ฆ the squares relax open and the woven effect becomes much more pronounced. For a faster method, pin the dry wrap to size and mist thoroughly with a spray bottle.


Final Thoughts

Entrelac was on my โ€œsomedayโ€ list for years before I finally tried it. Once I learned the single crochet version, I made up for lost timeโ€ฆ I couldnโ€™t stop. The Pieces of You wrap is the pattern I wish someone had handed me at the beginningโ€ฆ approachable, gradient-yarn-friendly, beautifully drapey, and built so the construction makes sense as you go. If you make it, share it with me using the hashtag at the bottom of this post. I love seeing your color choices.

And rememberโ€ฆ single crochet entrelac is NOT the scary version. Itโ€™s the friendly version. Youโ€™ve got this

โค๏ธ Your BiCrafty Bestie, Marly Bird
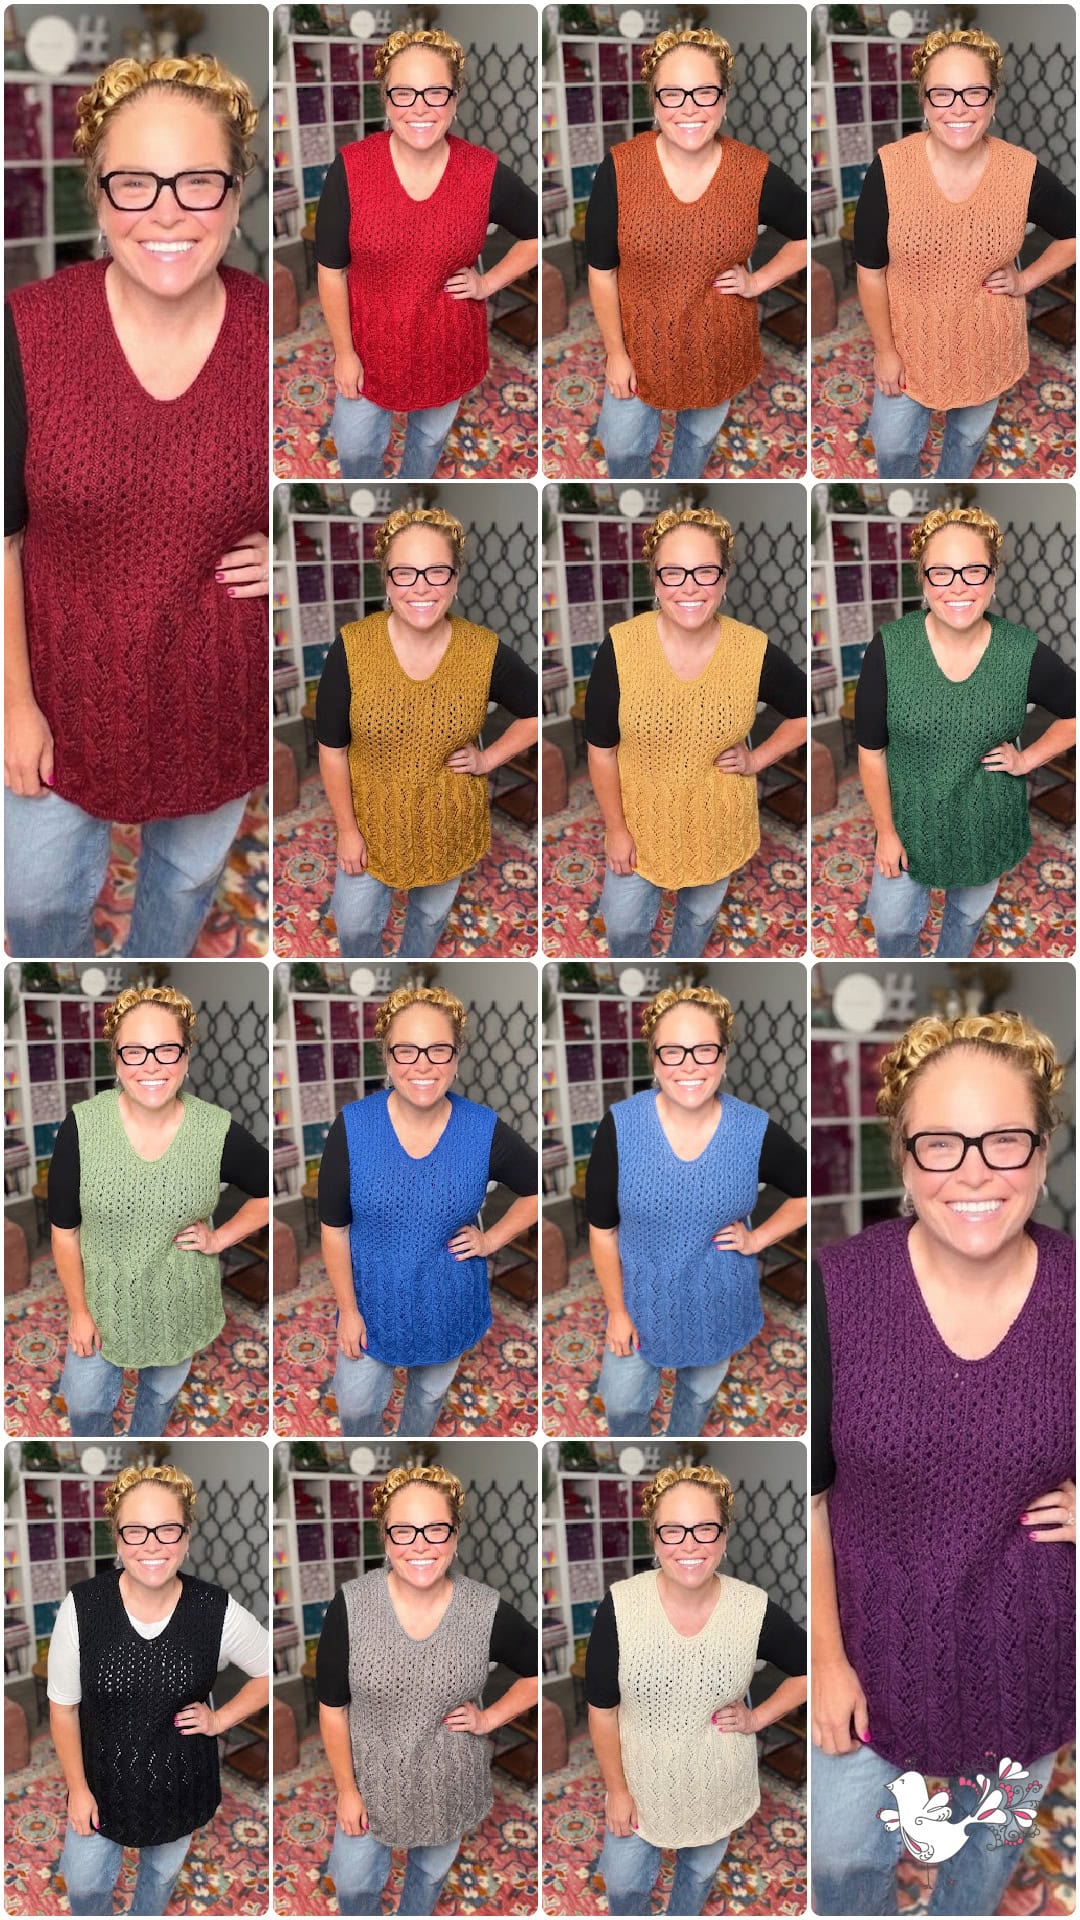
A cartoon avatar of a person with glasses and a brown bun smiles warmly. Their green shirt and black jacket add a stylish touch, while colorful hearts surround them like loving temperature blankets, stitching together an aura of love and positivity. -Marly Bird

#PiecesOfYouWrap

Filed Under: Crochet, Free Patterns, Marly Bird Premium Patterns, Our Free Patterns, Pattern Tagged With: C2C crochet, cake yarn, corner to corner entrelac, crochet entrelac, crochet technique tutorial, free crochet shawl pattern, free crochet wrap pattern, gradient yarn, intermediate crochet, Red Heart It's a Wrap Rainbow, SC entrelac, single crochet entrelac, spring fling 2026
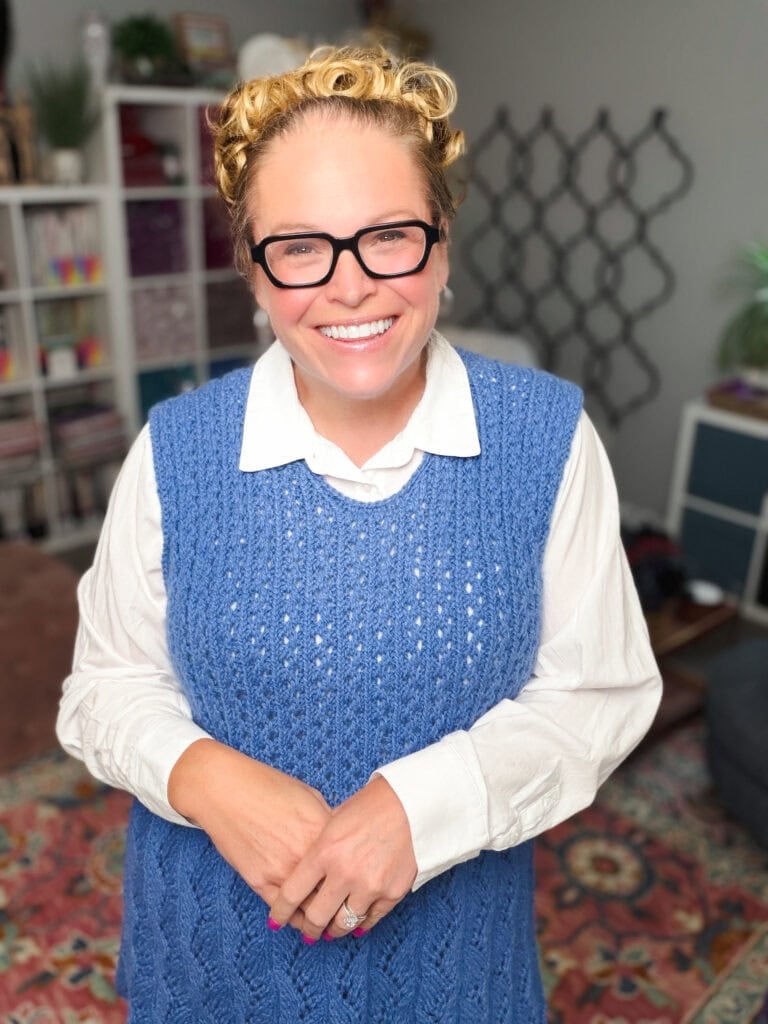
Let's Be Social

Join the Marly's Minions Facebook group to share, ask questions, or chat about all of your yarn related crafts!

Join the group
Cartoon of a smiling woman with brown hair in a bun, glasses, black jacket and green shirt, waving next to large "hi" text.

Quick Links

The Pattern Shop

Our Free Patterns

Blog

Marly Bird House
Learn to Knit & Crochet

About

Giveaway Terms and Privacy Notice

Find Us Everywhere

Join the Newsletter

YouTube Channel

Marly's Minions FB Group

Etsy Store

Ravelry Store


AN ELITE CAFEMEDIA HOME/DIY PUBLISHER

Information from your device can be used to personalize your ad experience. Do not sell or share my personal information.

Privacy Policyย  ย Termsย  ย Marly Bird Legal Documents Copyright © 2026