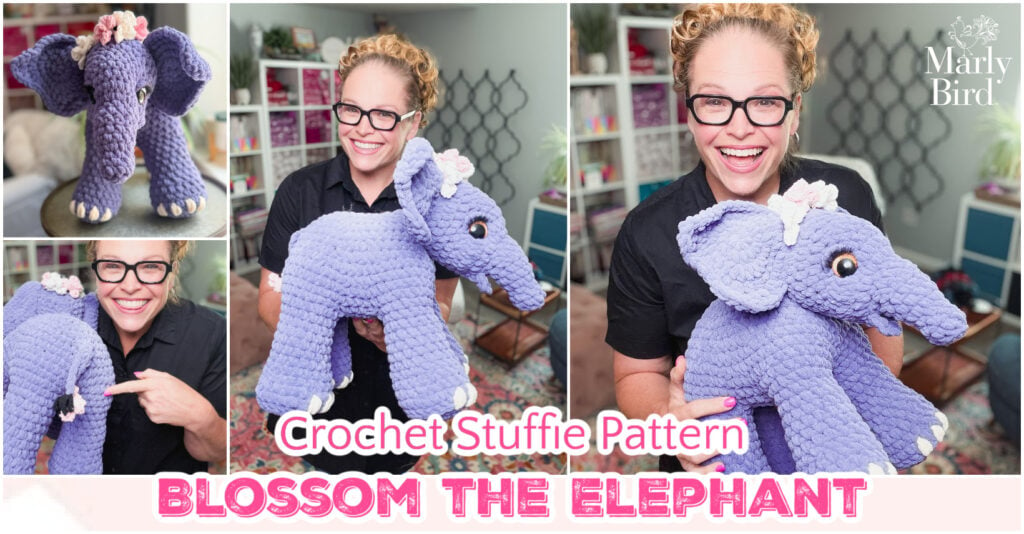
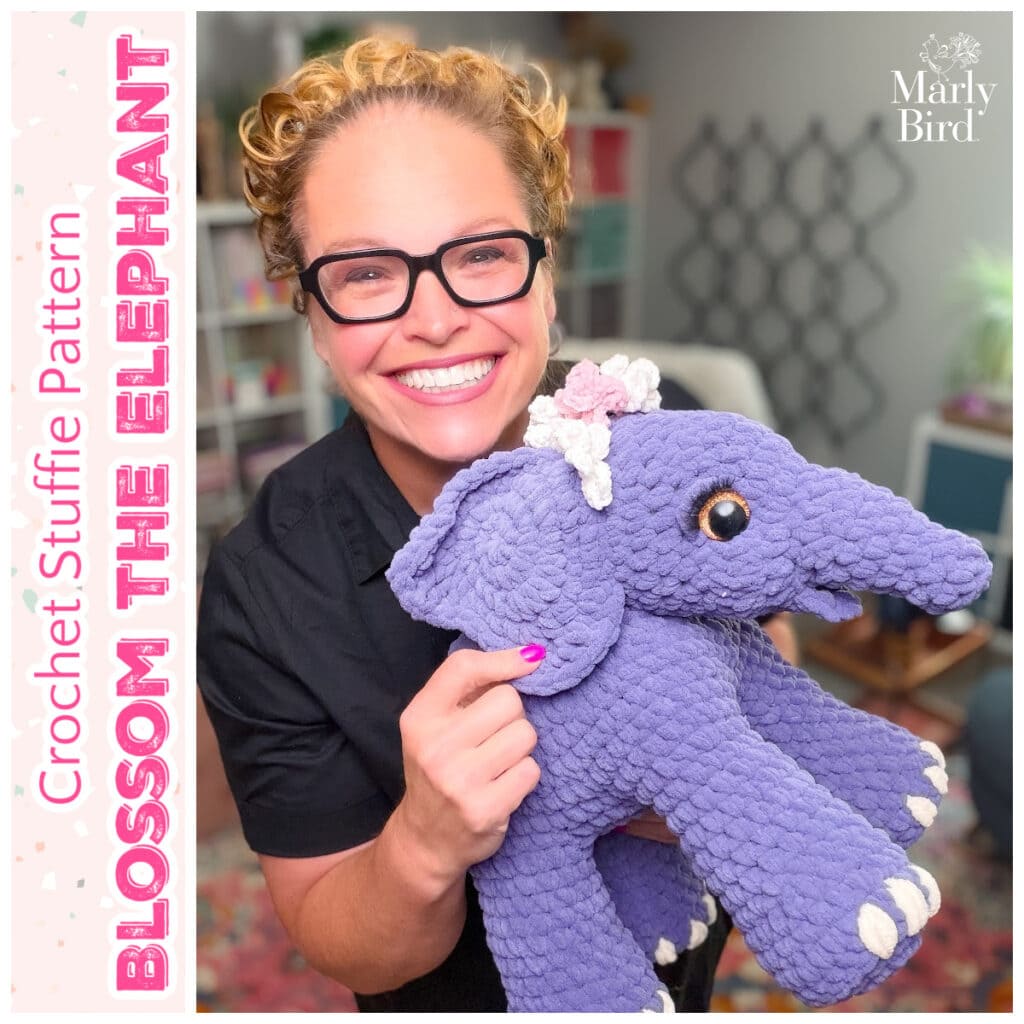
Free Crochet Elephant Stuffed Animal Pattern — Meet Blossom 🐘
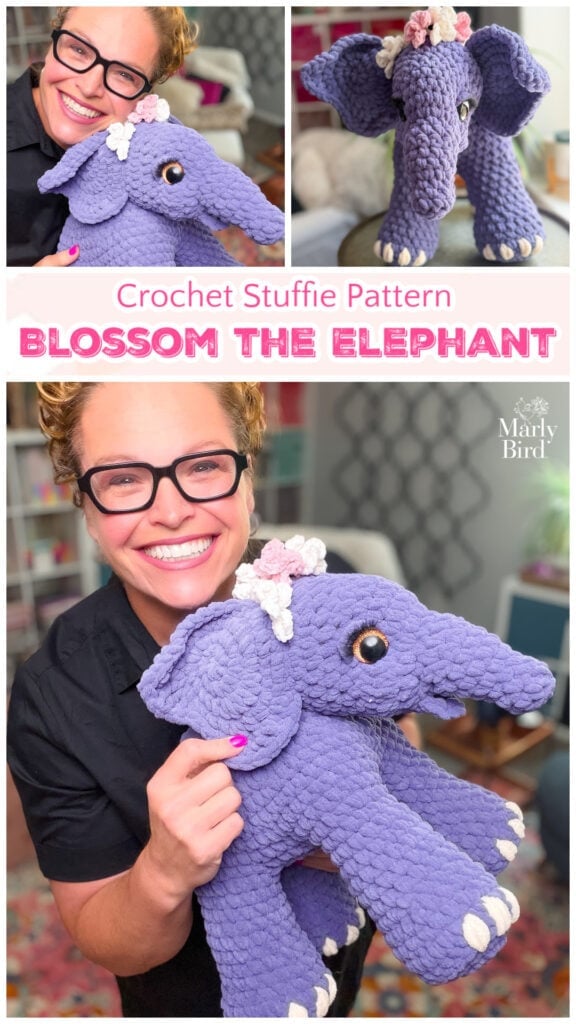
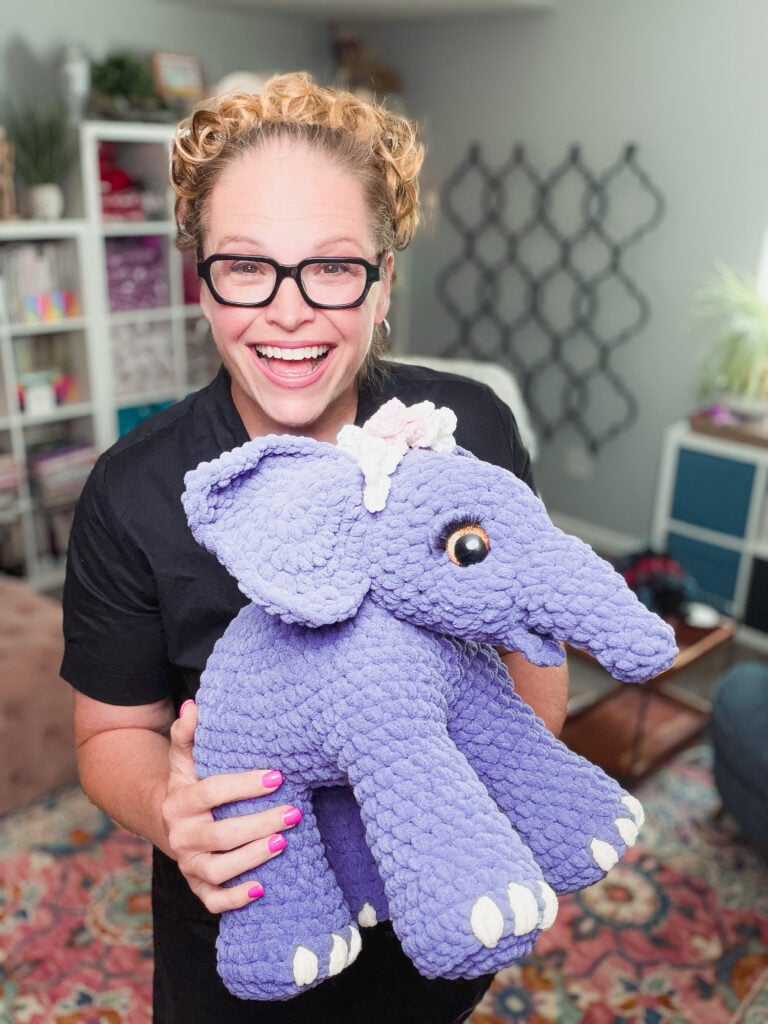
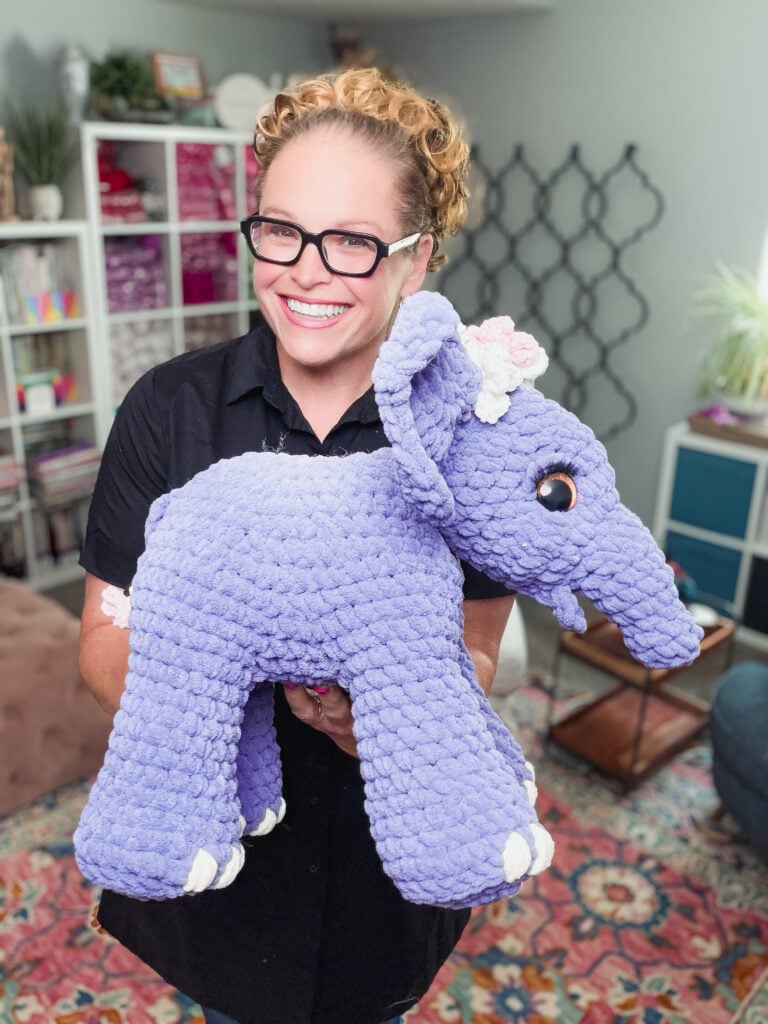
New Pattern! Meet Blossom — a large, huggable crochet elephant stuffie designed exclusively for MarlyBird.com by Disney animator Megan Kreiner. Free pattern with full video tutorial below.
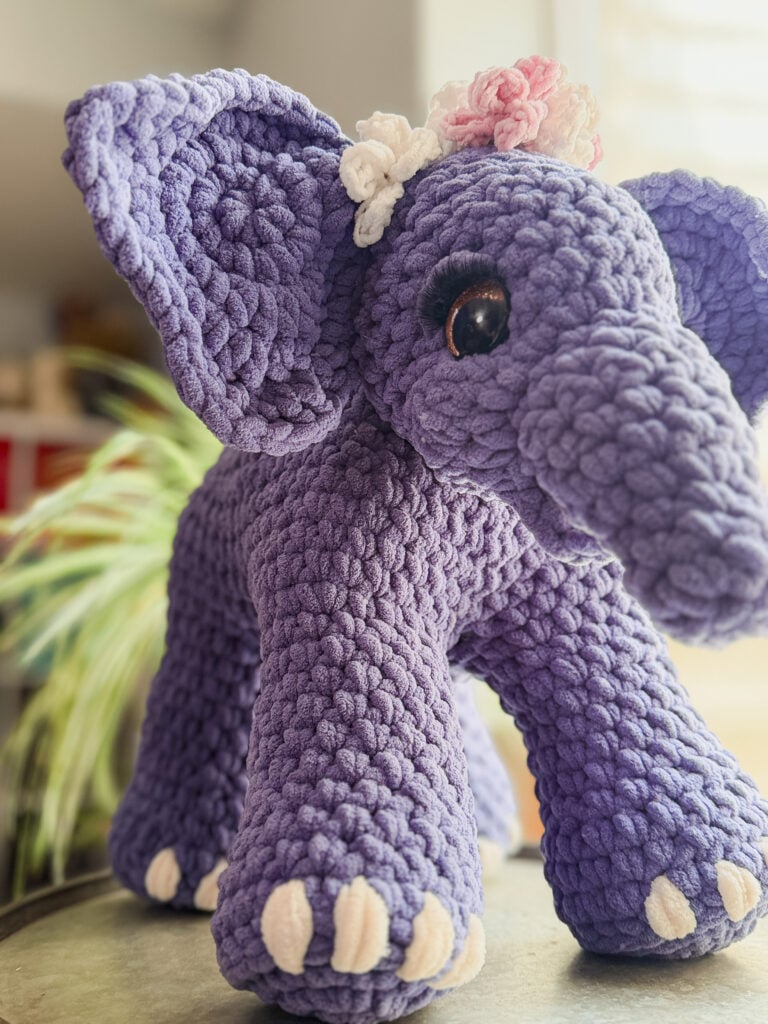
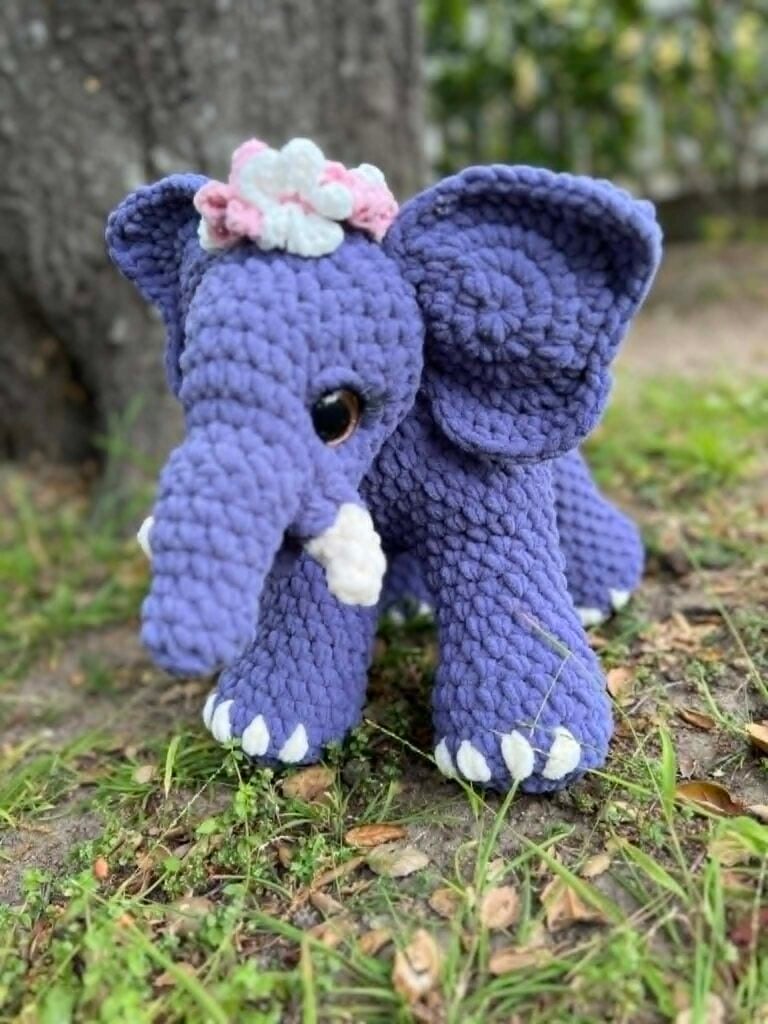
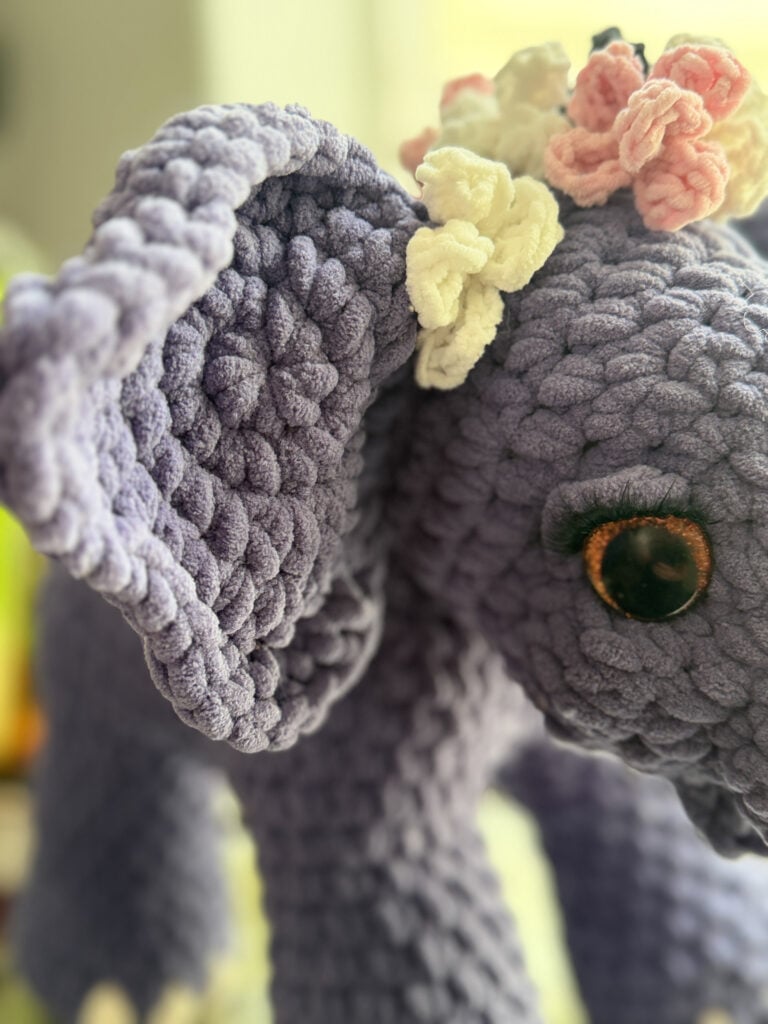
The Blossom Elephant Crochet Stuffie is a free intermediate crochet pattern that creates a 14″ tall huggable elephant with shaped trunk, expressive eyes, and an optional flower crown. Designed by Megan Kreiner — a Disney Feature Animation and DreamWorks animator whose character design instincts are in every curve of that trunk. This isn't just a pattern… it's a character. Made with super bulky Loops & Threads Demi Purl yarn, Blossom works up surprisingly fast for her size.
Hey, bestie 💛
How do you eat an elephant? One bite at a time.
If you've ever heard me say that, you know I'm a track coach. When my athletes are staring down a personal record that feels impossible — intimidated by the goal in front of them — I remind them that every big achievement happens the same way: one step at a time. One stride. One rep. One more push when you want to quit.
This elephant is the team mascot for that mindset. She represents tackling big goals one stitch at a time, whether that's a personal record on the track or finishing your first big crochet stuffie. Her name is Blossom, and I commissioned her exclusively from one of the most talented amigurumi designers I know — Megan Kreiner, who literally worked at Disney Feature Animation designing characters you've probably loved your whole life.
And now you can crochet her. Let's do this… one stitch at a time. 🐘
What You Will Love About Blossom 💖
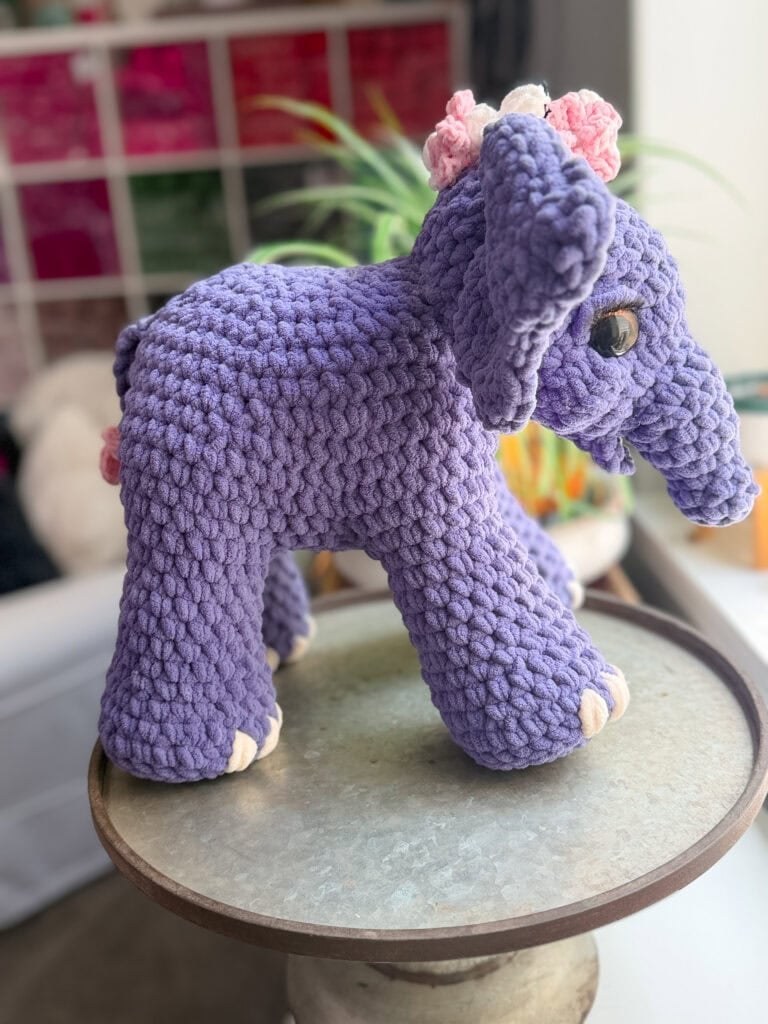
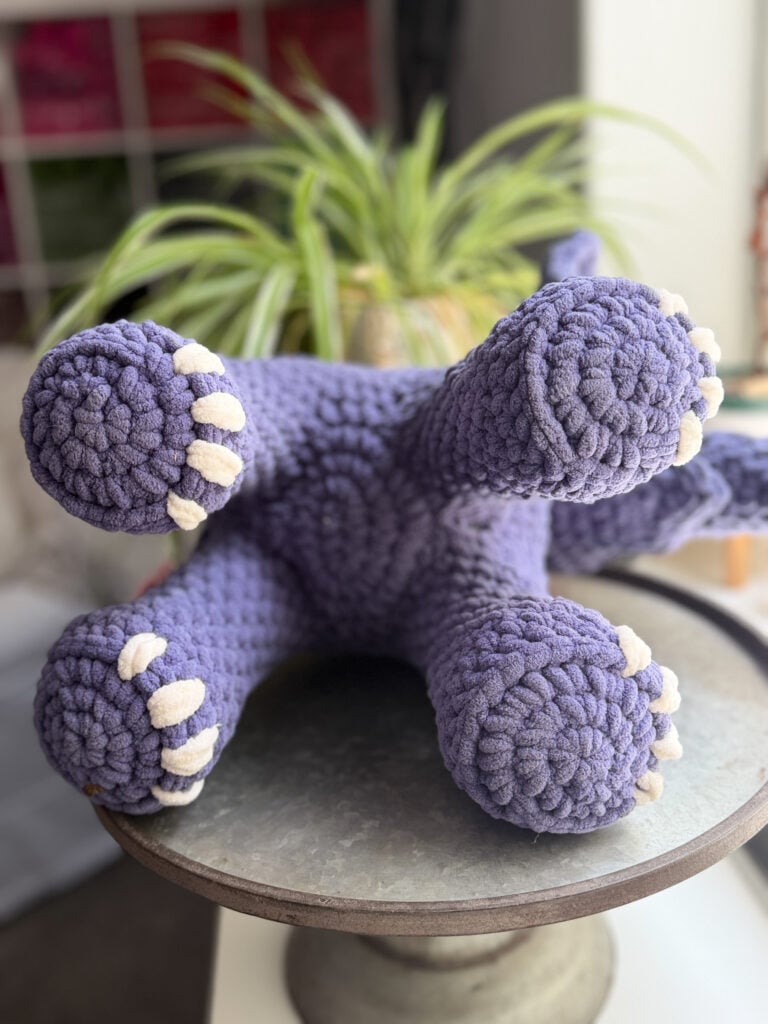
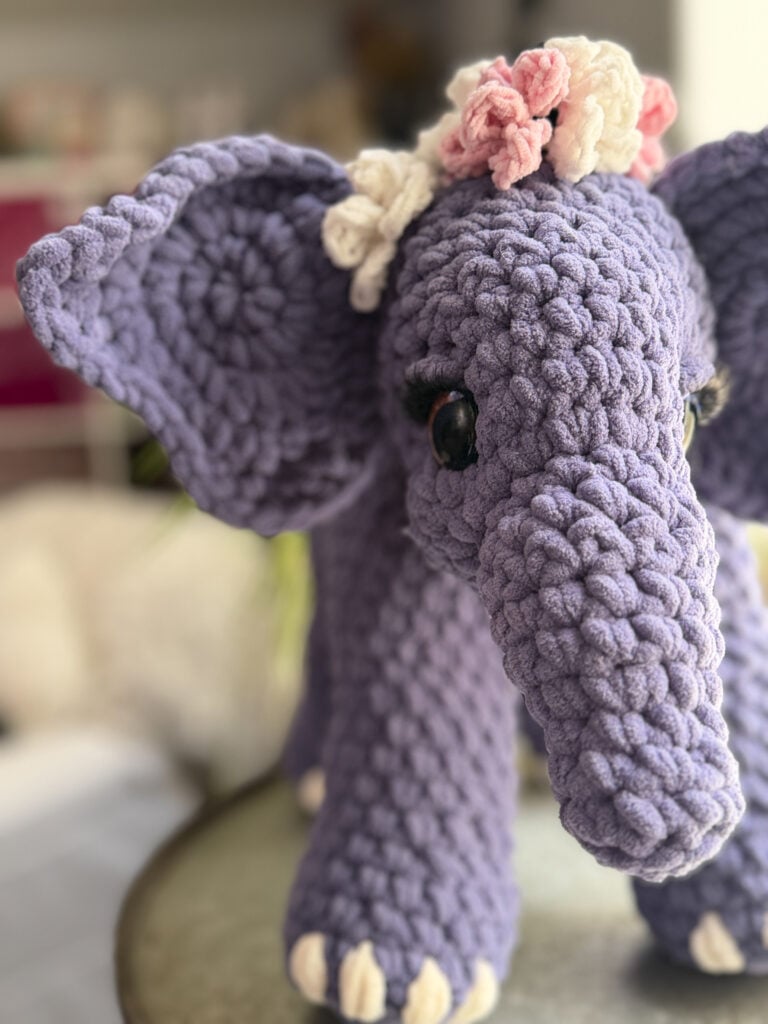
🐘 She's BIG and huggable. At 14″ tall and 24″ around the body, Blossom is a real snuggle buddy — not a tiny shelf decoration. Kids (and adults) will actually want to squeeze her.
⚡ Super bulky yarn = surprisingly fast. Despite her size, Blossom works up much faster than you'd expect because you're using chunky Loops & Threads Demi Purl with a big N/13 hook. This is not a 40-hour micro-amigurumi project.
🎨 Designed by a Disney animator. Megan Kreiner worked at Disney Feature Animation and DreamWorks. She literally authored “Disney Classic Crochet” (Mickey Mouse, Donald Duck, Dumbo…). Her character design instincts are why Blossom has personality — that shaped trunk, those expressive eye sockets, the way her ears sit. This isn't a generic elephant shape. It's a character.
🌸 Customizable details. Add the optional tusks, false eyelashes (yes, really — and yes, you should), flower crown, or keep her simple. Make her yours.
🎥 Full video tutorial. Robyn Chachula walks you through the tricky parts so you're never stuck wondering “wait, what does this mean?”
📄 Free right here on the blog. The full pattern lives free below — thank you for supporting the site by reading through the ads! An ad-free PDF is available if you want to print it and work from the couch.
Quick Pattern Overview
🧶 Craft: Crochet
🎯 Skill Level: Intermediate (short rows for trunk and forehead shaping, multiple pieces to seam)
📏 Finished Size: 14″ [35 cm] tall × 24″ [61 cm] body circumference — this is a BIG, huggable stuffed animal
🪝 Hooks: Size N/13 [9.0 mm] for super bulky yarn (main body) + Size G/7 [4.5 mm] or H/8 [5.0 mm] for worsted weight details
🧵 Yarn: Loops & Threads Demi Purl (super bulky #6) in Purple Haze + Ivory, plus Petite Purl (worsted) in Black and Skinny Chenille (worsted) in Flamingo + Swan for details. All available at Michaels!
📐 Gauge: 7 sc × 8 rounds = 4″ [10 cm] using super bulky yarn and N/13 hook
🏗️ Construction: Worked in pieces (head with shaped trunk, 4 legs, belly, body, 2 ears, tail, optional tusks, hair, flowers) then seamed together. Continuous spiral rounds throughout.
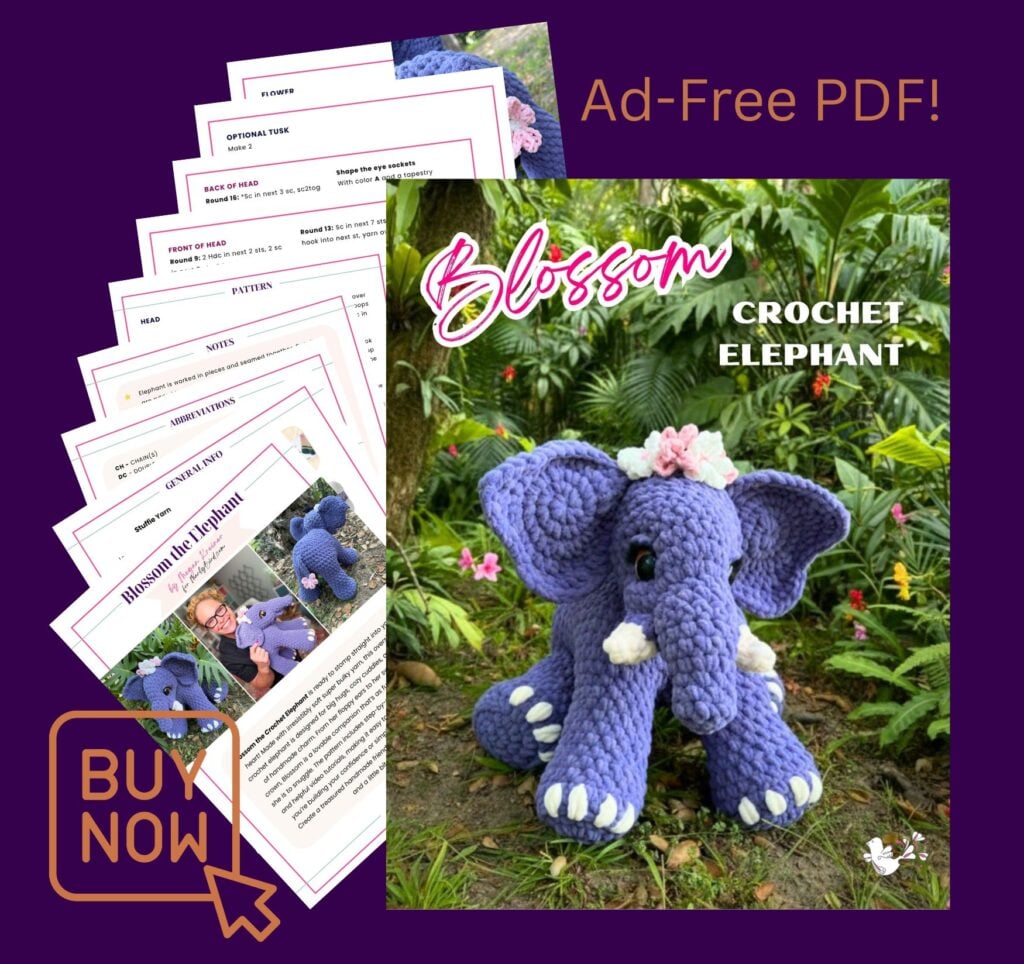
Love the Pattern but Want an Ad-Free PDF? ⭐
The full pattern below is 100% free right here on the blog… thank you for supporting it by reading through the ads! But if you'd rather work from a clean, printable, ad-free PDF you can take to the couch or your crafting group… I've got you covered.
🛒 Grab the ad-free PDF:
🛒 Shop on Etsy
🛒 Shop on Ravelry
🛒 Shop on Shopify
Join our Newsletter
Get Free Crochet & Knitting
Pattern Links & Coupons!

Is This Crochet Elephant Right for You?
This pattern is perfect for you if…
✅ You want to make a LARGE stuffed animal that's actually huggable (not tiny amigurumi)
✅ You're comfortable with basic crochet and ready to try short rows and seaming
✅ You love character-driven designs with personality (not generic shapes)
✅ You want a project that works up faster than traditional amigurumi because of the super bulky yarn
✅ You shop at Michaels and want a one-stop-shopping supply list
This pattern might not be for you if…
❌ You've never crocheted before (learn single crochet first, then come back!)
❌ You want a tiny desk-sized amigurumi (Blossom is 14″ tall — she's a lap elephant)
❌ You prefer patterns with no seaming (Blossom has multiple pieces to assemble)

Meet the Designer: Megan Kreiner
Megan Kreiner isn't your average crochet pattern designer. Before she started creating amigurumi patterns, she worked at Disney Feature Animation and DreamWorks Animation — the studios behind the movies you grew up watching.
She's also the author of “Disney Classic Crochet” — the official pattern book featuring Mickey Mouse, Donald Duck, Dumbo, and other beloved characters. When you crochet a Megan Kreiner design, you're working with someone who understands how to make a stuffed shape feel like a character with personality.
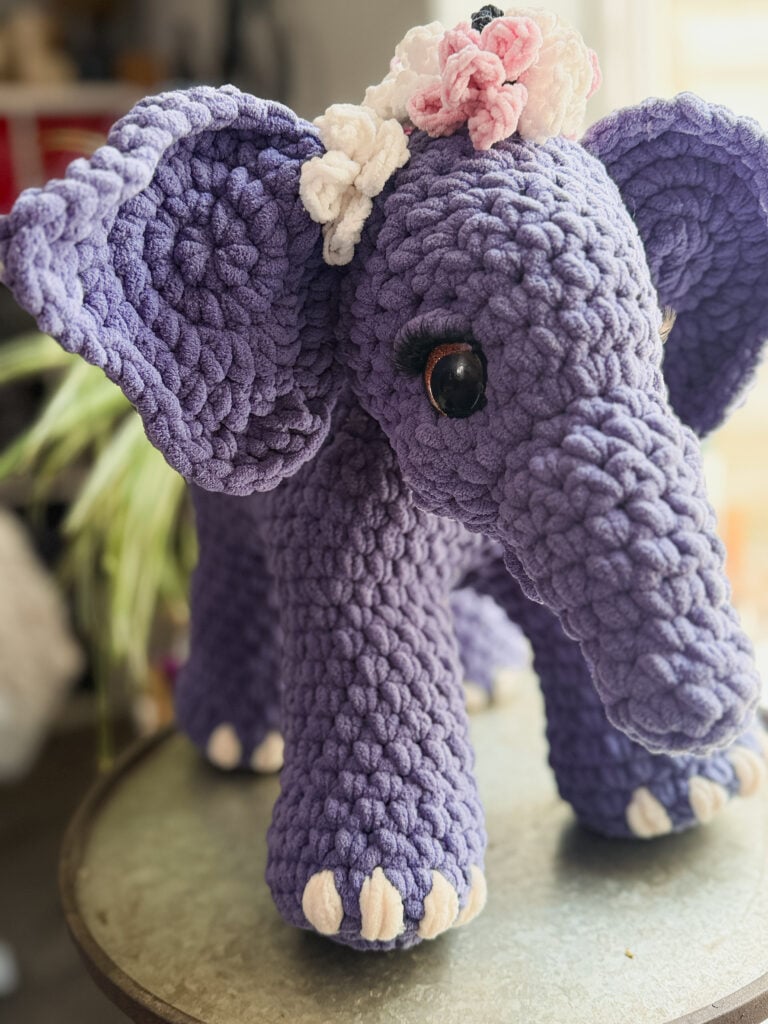
That expertise shows in every detail of Blossom: the way the trunk has a realistic kink (created through clever short rows, not just a tube), the shaped forehead that gives her that characteristic elephant brow, the eye socket shaping that makes her look alive.
This is why I commissioned Blossom exclusively for MarlyBird.com — I wanted you to have access to this level of character design in a free pattern.
Yarn & Materials
One of the best things about Blossom? All three yarns are from Loops & Threads, available at Michaels. One trip, everything you need.
Yarn
Main Body — Loops & Threads Demi Purl (100% polyester, 122 yds/112m, 7 oz/200g, CYCA #6 super bulky)
- 🧶 Color A: Purple Haze — 2 balls (main elephant color)
- 🧶 Color B: Blanc — 1 ball (tusks + toenails)
Hair — Loops & Threads Petite Purl (100% polyester, 537 yds/491m, 8.75 oz/250g, CYCA #4 worsted)
- 🧶 Color C: Moonless Night — 50g (curly hair on head + tail)
Flowers — Loops & Threads Skinny Chenille (100% polyester, 524 yds/480m, 8.75 oz/250g, CYCA #4 worsted)
- 🧶 Color D: Flamingo — 50g (flower petals)
- 🧶 Color E: Swan — 50g (flower centers)
Hooks
- 🪝 Size N/13 [9.0 mm] — for super bulky yarn (main body pieces)
- 🪝 Size G/7 [4.5 mm] or H/8 [5.0 mm] — for worsted weight details (hair, flowers)
Notions
- 🔵 Stitch markers
- 🪡 Tapestry needle
- ✂️ Scissors
- 📏 Tape measure
- 🧸 Poly fiberfil stuffing
- 👀 1 pair 30mm safety eyes
- 💅 Optional: 1 pair false eyelashes + super glue (trust me, these are adorable)
- 📍 Optional: Long bamboo marking pins (game changer for checking placement before seaming)
- 🔧 Optional: Safety eye installation tool — large size (makes seating those 30mm eyes MUCH easier)
Video Tutorials
Robyn Chachula walks you through the tricky parts of this pattern — including the short-row trunk shaping, eye installation, and assembly. Watch before you start so you know what to expect!
How to Crochet the Elephant Head
How to Crochet the Lip and Tusk
How to Crochet the Leg x 4 for the Elephant
How to Crochet the Belly & Body
How to Attach the Ears to the Head
How to Attach the Head to the Body
How to Crochet the Tail and Hair
How to Crochet Blossom Flowers
Tips for Crocheting Large Stuffies in Super Bulky Yarn
If you've mostly made small amigurumi in worsted or DK weight yarn, working with super bulky takes a small adjustment. Here's what to know:
🧶 Work tighter than the yarn label suggests. For stuffed animals, you want a fabric dense enough that the stuffing doesn't show through. If your stitches look loose and gappy, go down a hook size.
🧸 Stuff firmly and progressively. The pattern tells you exactly when to stuff each piece — follow those instructions. Adding stuffing as you go (rather than trying to stuff everything at the end) gives you better control over the shape.
📍 Use bamboo marking pins before seaming. Before you commit to sewing pieces together, pin them in place and step back to check the placement. This is especially important for the ears, eyes, and head position. Adjust first, sew second.
⏱️ It goes faster than you think. Super bulky yarn means fewer stitches per inch, which means each piece works up quickly. Don't be intimidated by the 14″ finished size — you'll be surprised how fast Blossom comes together.
About Blossom's Special Features
What makes Blossom different from other free elephant patterns on the internet? The details:
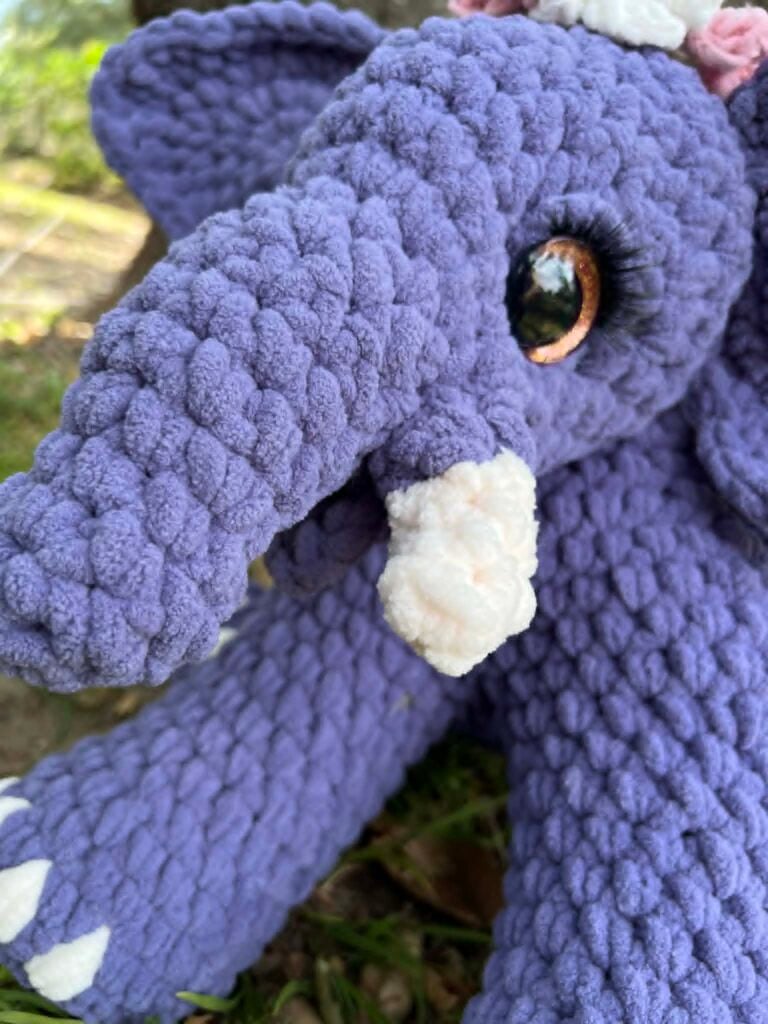
🐘 Shaped trunk with realistic kink. The trunk uses short rows to create a natural curve — not just a straight tube. This is the technique that makes intermediate crocheters say “ohhh, THAT'S how you do it.”
🐘 Shaped forehead. More short rows create the characteristic elephant brow that gives Blossom her expressive face.
🐘 Sunken eye sockets. After installing the safety eyes, you'll cinch the yarn through the head to sink the eyes in — creating depth and realism.
🐘 Legs attached via belly construction. The unique assembly technique joins the legs to the belly first, then builds the body around them. Clever engineering.
🐘 Optional tusks with color contrast. Simple tubes in ivory with a color A border, sewn next to the lower lip.
🐘 Chenille loop hair. The black chenille creates soft, curly loops on top of the head and at the tip of the tail.
🐘 Optional flower crown. Two-color flowers (flamingo petals + swan centers) that you can arrange however you like.
🐘 Optional false eyelashes. Yes, really. And yes, they're adorable. Glue them to the top edge of the eyes for maximum charm.
🐘 Chain-stitch eyelids. A simple detail that frames the eyes beautifully.
Blossom Elephant Crochet Stuffie — Pattern Details
Skill Level
Intermediate
Finished Measurements
14″ [35 cm] tall × 24″ [61 cm] body circumference
Gauge
7 sc × 8 rounds = 4″ [10 cm] × 4″ [10 cm] using super bulky weight yarn and size N/13 [9.0 mm] hook
Use any size hook to obtain the gauge.
Materials
Yarn:
- Loops & Threads Demi Purl (super bulky #6) — Color A: Purple Haze (2 balls), Color B: Blanc (1 ball)
- Loops & Threads Petite Purl (worsted #4) — Color C: Moonless Night (50g)
- Loops & Threads Skinny Chenille (worsted #4) — Color D: Flamingo (50g), Color E: Swan (50g)
Hooks:
- Size N/13 [9.0 mm] or hook needed for gauge with super bulky yarns
- Size G/7 [4.5 mm] or H/8 [5.0 mm] for worsted weight yarns
Notions: Stitch Markers
Optional: 1 Safety eye tool Large Size
Optional: 1 pair false eyelashes and super glue
Optional: Long Bamboo Marking Pins
Abbreviations
- BPsc… Back Post Single Crochet
- Ch… Chain(s)
- Dc… Double Crochet
- FPsc… Front Post Single Crochet
- Hdc… Half Double Crochet
- RS… Right Side
- Sc… Single Crochet
- Sc2tog… Single Crochet 2 Together (decrease)
- Sl st… Slip Stitch
- Sp(s)… Space(s)
- St(s)… Stitch(es)
- Tr… Treble Crochet
- WS… Wrong Side
Special Stitches
Single Crochet 2 Together (sc2tog): *Insert hook into indicated stitch, yarn over and pull up a loop; repeat from * in next stitch indicated, yarn over and draw through all 3 loops on hook. (1 decrease)
Back Post Single Crochet (BPsc): Insert hook from back to front to back around the post of the stitch indicated, yarn over and pull up a loop, yarn over and draw through the loops on hook.
Front Post Single Crochet (FPsc): Insert hook from front to back to front around the post of the stitch indicated, yarn over and pull up a loop, yarn over and draw through the loops on hook.
Pattern Notes
Construction: Elephant is worked in pieces and seamed together. Details are added last.
Spiral rounds: Body parts are worked in continuous spiral rounds that are not joined at the end of the round. Use a stitch marker to mark the first stitch of each new round throughout the project.
Color changes: Change colors when 2 loops are left on the last stitch of the old color. Fold in the new color to complete the stitch and start using the new color.
Pin before sewing: Pin on pattern pieces with long bamboo marking pins to check for placement and balance before sewing everything together.
GROW
To Unlock Exclusive Subscriber Content click the Box below and join for free by simply adding your email and creating a password! If you are having troubles, clear your cache or reset your password or login to the Grow Publisher Portal.
>> Learn More About Grow Here <<
I'm thrilled to share this amazing pattern with you, many patterns on my blog are absolutely free! I kindly request that you don't copy and paste or distribute this pattern. Prefer an ad-free experience? Buy a digital PDF pattern for a small fee from one of my online stores for a seamless crafting journey.
I appreciate your support and readership. You are the reason I can keep doing what I love and sharing it with others. So, thank you from the bottom of my yarn-loving heart! Disclosure: This post contains affiliate links, meaning I get a commission if you decide to make a purchase through my links at no cost to you.
Blossom Elephant Crochet Stuffie — Pattern Instructions
HEAD
Trunk
With color A, make an adjustable ring.
Set-up Round: Ch 1, 8 sc in ring, place marker in first sc (see notes), pull ring closed, do not join (see notes), do not turn throughout — 8 sc.
Round 1: Sc in back loop only of each sc around.
Rounds 2-3: Sc in each sc around.
Round 4: *Sc in next sc, 2 sc in next sc; repeat from * around — 12 sc.
Round 5: Sc in each sc around.
Note: The next round uses short rows within the round to create the kink in the trunk.
Round 6: Sc in next 10 sc, TURN, sc in next 8 sc, TURN, sc in next 8 sc, insert hook into side of the 8 st flap (anywhere around the center row edge), yarn over and pull up a loop, insert hook into next st, yarn over and pull up a loop, yarn over and draw hook through all 3 loops on hook (counts as sc2tog), sc in last sc — 12 sts.
Round 7: Sc in first sc, insert hook into next st, yarn over and pull up a loop, insert hook into side of the 8 st flap (anywhere around the center row edge), yarn over and pull up a loop, yarn over and draw hook through all 3 loops on hook (counts as sc2tog), sc in next 8 sc, TURN, sc in next 8 sc, TURN, sc in next 8 sc, insert hook into side of the 8 st flap (anywhere around the center row edge), yarn over and pull up a loop, insert hook into next st, yarn over and pull up a loop, yarn over and draw hook through all 3 loops on hook (counts as sc2tog), sc in last sc — 12 sts.
Round 8: Sc in first sc, insert hook into next st, yarn over and pull up a loop, insert hook into side of the 8 st flap (anywhere around the center row edge), yarn over and pull up a loop, yarn over and draw hook through all 3 loops on hook (counts as sc2tog), sc in next 10 sc — 12 sts.
Front of Head
Round 9: 2 Hdc in next 2 sts, 2 sc in next 8 sts, 2 hdc in last 2 sts — 24 sts.
Round 10: 2 Hdc in next 6 sts, sc in next 12 sts, 2 hdc in last 6 sts — 36 sts.
Round 11: [Sc2tog over next 2 sts] 6 times, sc in next 12 sts, [sc2tog over next 2 sts] 6 times — 24 sts.
Note: The next round uses short rows within the round to create the forehead.
Round 12: Sc in next 8 sts, sc in next 10 sts, TURN, sc in next 10 sc, TURN, sc in next 10 sc, insert hook into side of the 10 st flap (anywhere around the center row edge), yarn over and pull up a loop, insert hook into next st, yarn over and pull up a loop, yarn over and draw hook through all 3 loops on hook (counts as sc2tog), sc in last 5 sts — 24 sts.
Round 13: Sc in next 7 sts, insert hook into next st, yarn over and pull up a loop, insert hook into side of the 10 st flap (anywhere around the center row edge), yarn over and pull up a loop, yarn over and draw hook through all 3 loops on hook (counts as sc2tog), sc in next 3 sts, 2 sc in next 8 sts, sc in next 5 sts — 32 sts.
Round 14: *Sc in next 3 sts, 2 sc in next st; repeat from * around — 40 sc.
Round 15: Sc in each sc around.
Stuff trunk.
Back of Head
Round 16: *Sc in next 3 sc, sc2tog over next 2 sc; repeat from * around — 32 sts.
Round 17: *Sc in next 2 sc, sc2tog over next 2 sc; repeat from * around — 24 sts.
Round 18: *Sc in next 2 sc, sc2tog over next 2 sc; repeat from * around — 18 sts.
Round 19: *Sc in next sc, sc2tog over next 2 sc; repeat from * around — 12 sts.
Stuff head. Install eyes between rounds 12 and 13 with about 10 sts of space between the eyes. Note: Eye placement is easier when the head is stuffed so you can see the head shaping. Stuff head, place the eyes, remove as much stuffing as you need to install the eye backings, then restuff firmly.
Round 20: *Sc2tog over next 2 sts; repeat from * around — 6 sts.
Fasten off. Using tail, close hole by weaving through the remaining stitches.
Shape the Eye Sockets
With color A and a tapestry needle, run yarn back and forth through the head between the edges of the eyes. Gently cinch to sink the eyes into the head.
LOWER LIP
With color A, make an adjustable ring.
Set-up Round: Ch 1, 6 sc in ring, pull ring closed, do not join, TURN — 6 sc.
Row 1: Ch 1, skip ch, sl st in next 2 sc, (sl st, ch 2, sl st) in next sc, sl st in last 3 sc.
Fasten off, leaving a long tail for sewing.
Attach lower lip: Position the flat edge of the lower lip under the base of the trunk. Sew the flat edge of the lip to the head and weave in ends.
OPTIONAL TUSKS (Make 2)
With color B, make an adjustable ring.
Set-up Round: Ch 1, 4 sc in ring, place marker in first st, pull ring closed, do not join, do not turn throughout — 4 sc.
Round 1: Sc in back loop only of each sc around.
Round 2: *Sc in next sc, 2 sc in next sc; repeat from * around — 6 sts.
Round 3: Sc in each sc around, change color to A, fasten color B.
Round 4: 2 FPsc around each sc, fasten off color A leaving a long tail for seaming — 12 sts.
Attach optional tusks: Using the leftover yarn tail, attach the open edges of the tusks to the head next to the lower lip, adding a bit of stuffing if needed before closing the seam. Weave in yarn ends.
LEG (Make 4)
With color A, make an adjustable ring.
Set-up Round: Ch 1, 6 sc in ring, place marker in first st (see notes), pull ring closed, do not join or turn (see notes) — 6 sc.
Round 1: 2 sc in each sc around — 12 sc.
Round 2: 2 sc in each sc around — 24 sc.
Round 3: BPsc around each sc.
Round 4: Sc in each sc around.
Round 5: *Sc in next 4 sc, sc2tog over next 2 sc; repeat from * around — 20 sc.
Round 6: Sc in each sc around.
Round 7: *Sc in next 3 sc, sc2tog over next 2 sc; repeat from * around — 16 sc.
Rounds 8-13: Sc in each sc around.
Round 14: *Sc in next 3 sc, 2 sc in next sc; repeat from * around. Fasten off with long tail for seaming — 20 sc.
BELLY
With color A, ch 5.
Round 1: Sc in 2nd ch from hook in back ridge, sc in next 2 ch in back ridge, 4 sc in next ch in back ridge, rotate to work in unworked loops of chains, sc in next 2 ch, 3 sc in last ch, do not turn, do not join — 12 sc.
Round 2: 2 sc in first sc, sc in next 2 sc, 2 sc in next 4 sc, sc in next 2 sc, 2 sc in last 3 sc — 20 sc.
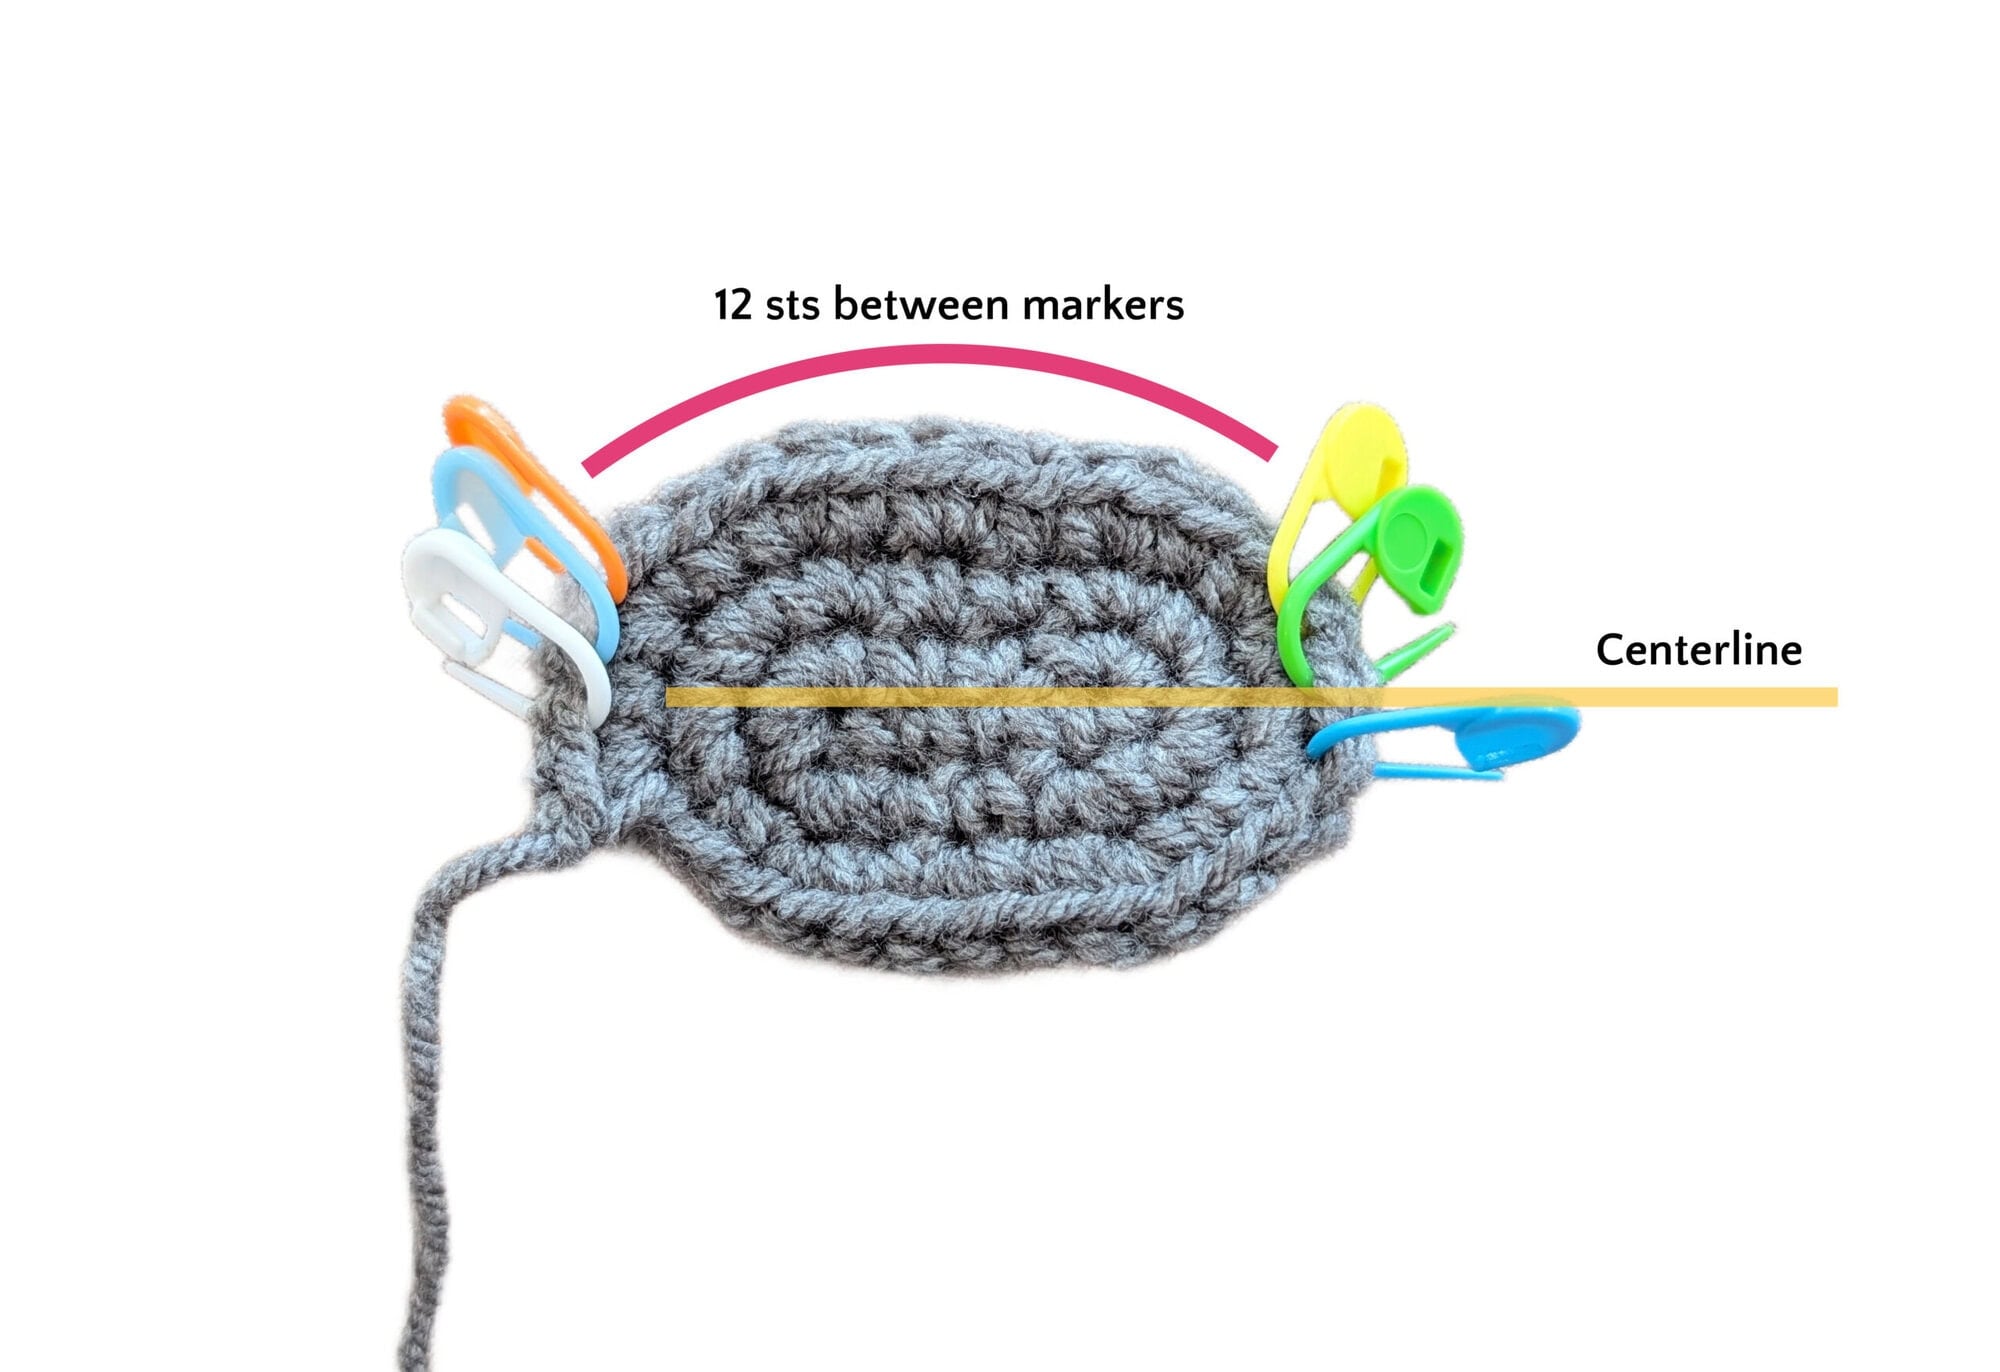
Round 3: *Sc in next sc, 2 sc in next sc; repeat from * around, fasten off — 30 sc.
Skip next 11 sc, place marker in each of the next 3 sts (12th, 13th, and 14th sts), skip next 12 sc, place marker in each of next 3 sts (27th, 28th, and 29th st). This marks off the center 3 sts of the short ends of the belly and has 12 sts unmarked on the long edges.
Attach Legs to Belly
Note: Round 4 works on the inside edge of both the belly and legs to attach them to each other.
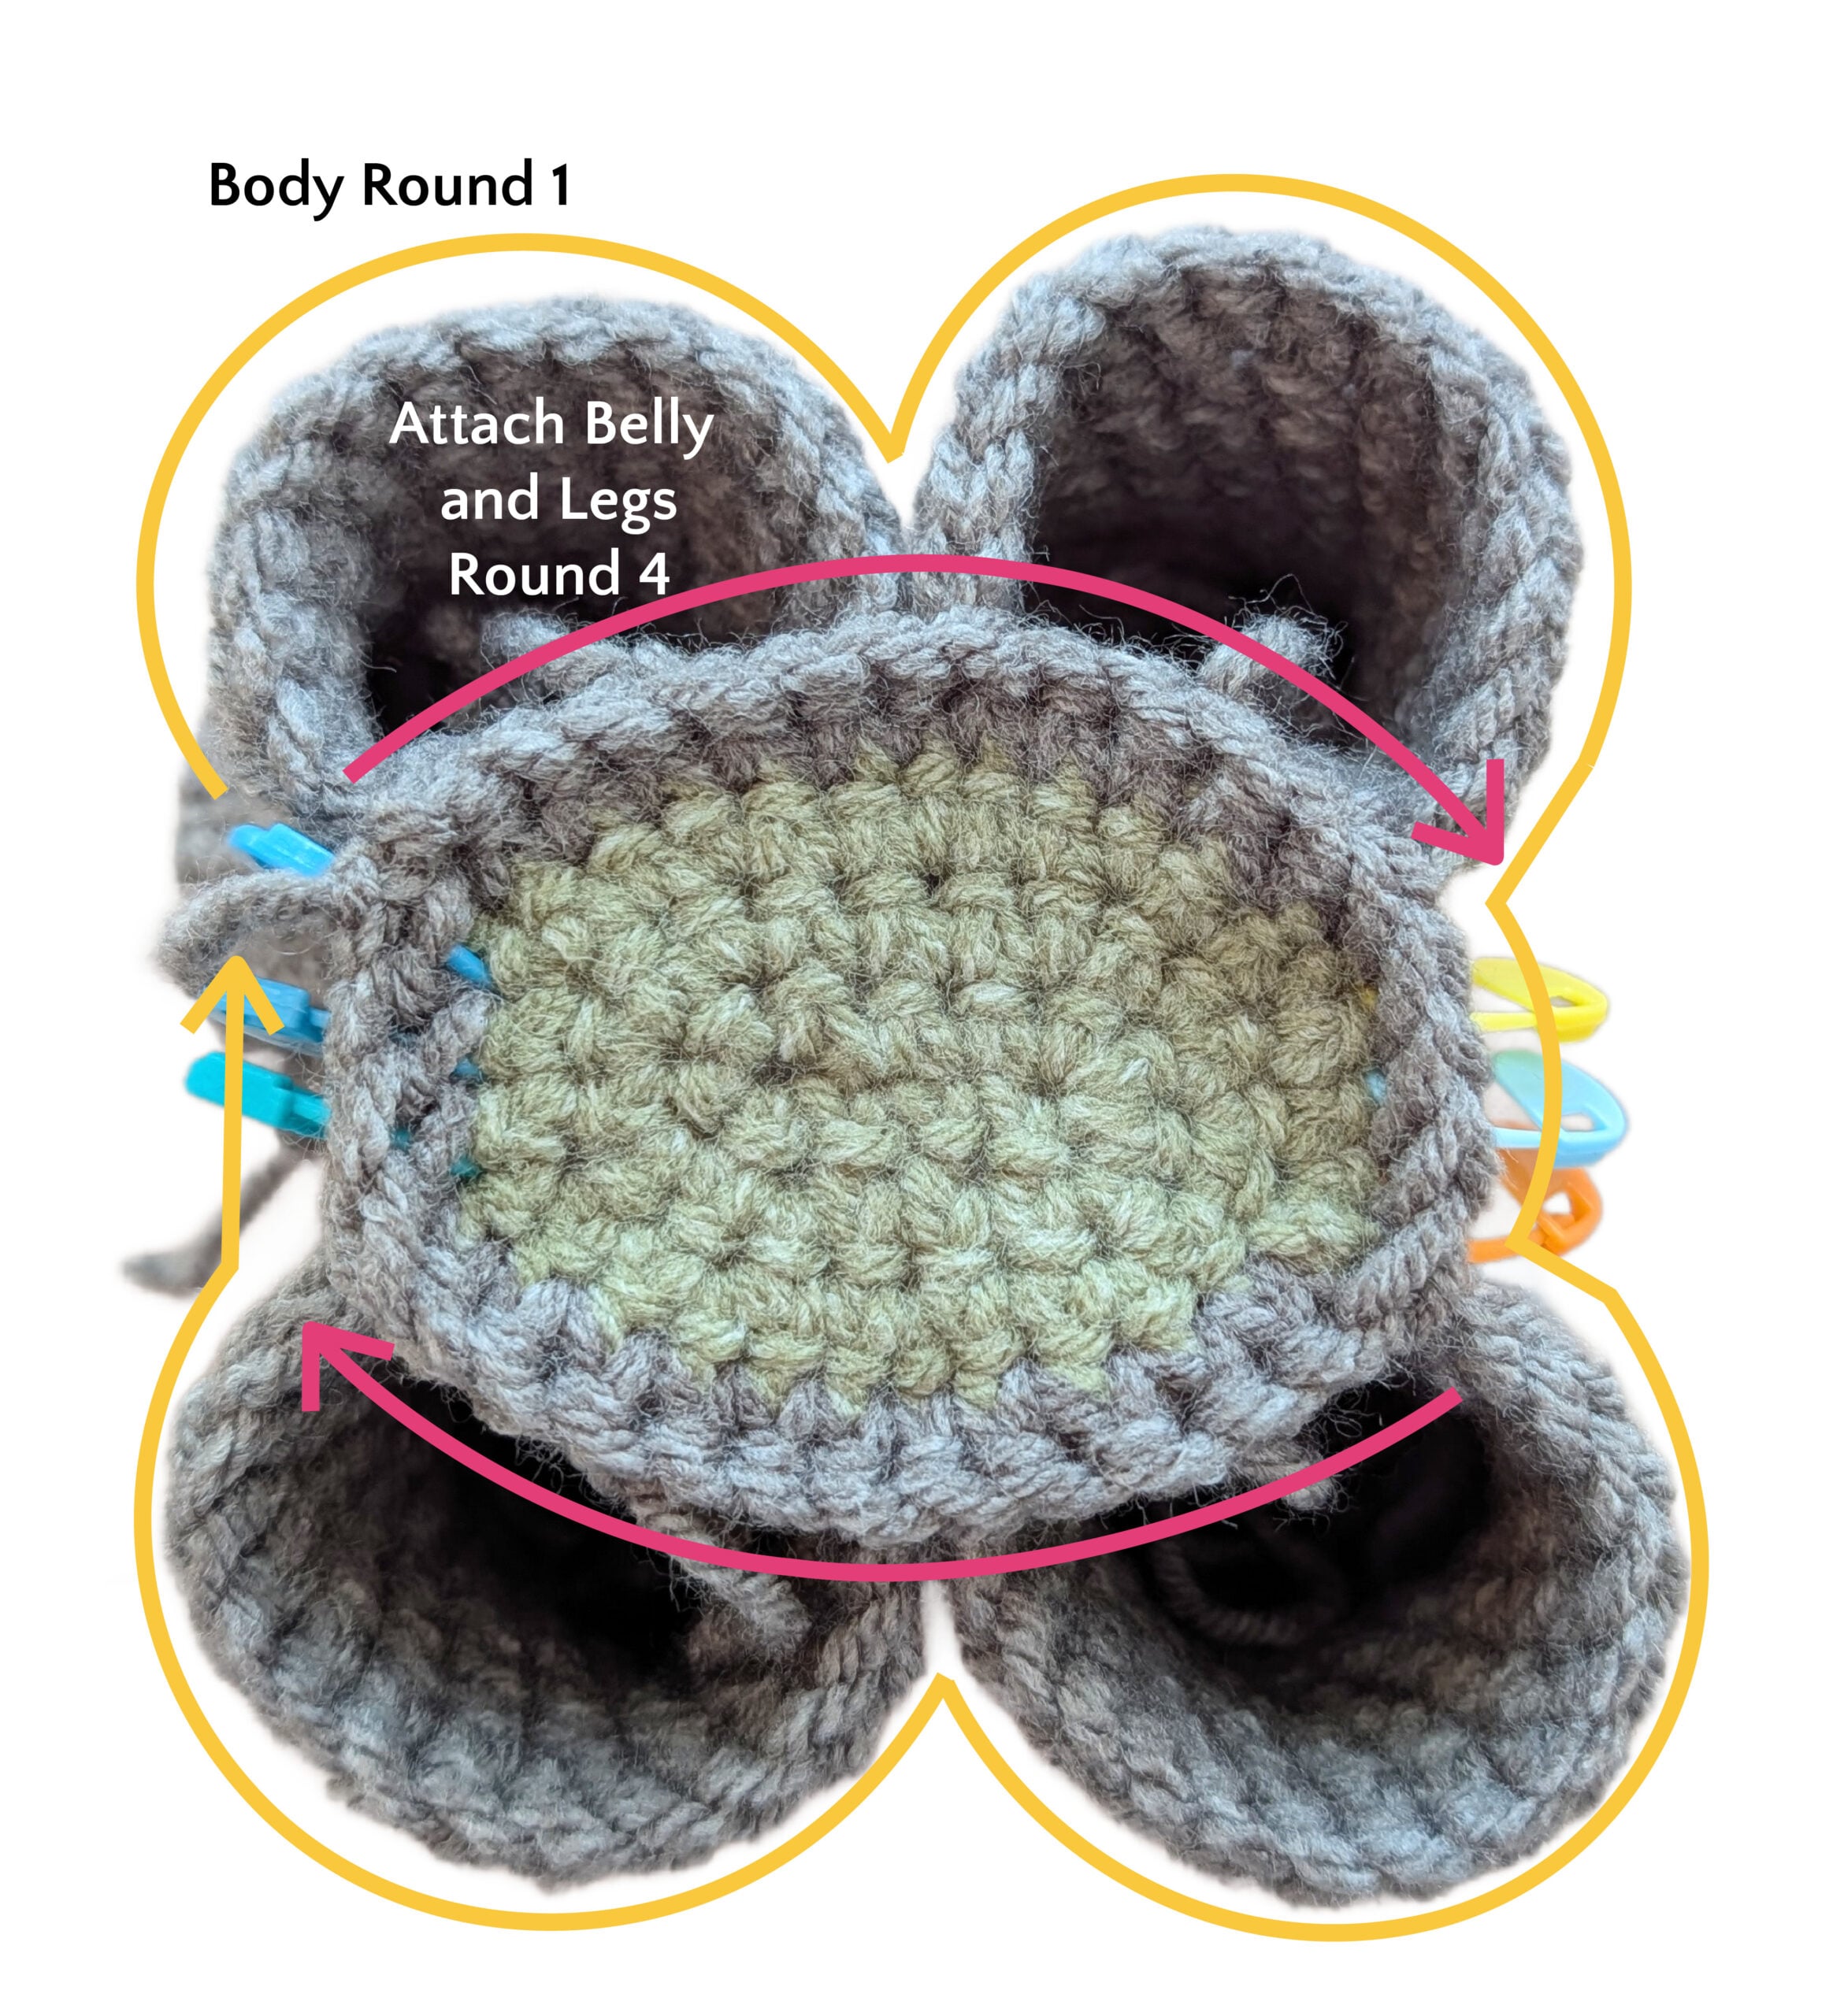
Round 4: Hold the RS of the belly and first leg together at the first unmarked stitch on the long edge of the belly. (Note: When crocheting make sure to hold the right sides together. The WS of the belly will be facing up. I held the leg in the front and the belly in the back.) Working through both belly and leg stitches at the same time, join color A with a sc to the first unmarked st of the belly and any st on the leg, sc in next 5 sts (of belly and leg). Hold the second leg to the belly. Sc in next 6 sts (of belly and leg). Sc in each of the next 3 marked sts on the belly, do not remove markers. Hold the third leg to the belly. Sc in next 6 sts (of belly and leg). Hold the fourth leg to the belly. Sc in next 6 sts (of belly and leg). Sc in each of the next 3 marked sts on the belly, sl st to first sc, do not fasten off, do not remove markers — 30 sc.
BODY
Note: Round 1 works on the outside edge of both the belly and legs setting up the shape of the body.
Round 1: *[Sc in each of the 14 unworked sts of the next leg] twice, sc in next 3 sts on belly; repeat from * around — 62 sc.
Round 2: Sc in each sc around.
Round 3: *Sc in next 29 sc, sc2tog over next 2 sc; repeat from * around — 60 sc.
Firmly stuff each leg.
Round 4: Sc in each sc around.
Round 5: *Sc in next 4 sc, sc2tog over next 2 sc; repeat from * around — 50 sts.
Rounds 6-8: Sc in each sc around.
Round 9: *Sc in next 3 sc, sc2tog over next 2 sc; repeat from * around — 40 sts.
Round 10: *Sc in next 3 sc, sc2tog over next 2 sc; repeat from * around — 32 sts.
Round 11: *Sc in next 2 sc, sc2tog over next 2 sc; repeat from * around — 24 sts.
Round 12: *Sc in next sc, sc2tog over next 2 sc; repeat from * around, fasten off leaving long tail for seaming — 16 sts.
Firmly stuff the body.
Note: If you feel like your opening is too large, crochet Round 13 before seaming. If you feel like your opening is fine, then use the directions below to seam the body.
Position the body so the 3 marked sts are oriented at the left and right sides of the body. Hold the 8 st (16 sts total, 8 on each side) back seam together in a vertical line from the front of the body to the back. Continue to stuff body firmly as you sew the seam closed. Remove scrap yarn.
(Optional) Round 13: *Sc in next 4 sts, sc2tog over next 2 sts twice; repeat from * around, fasten off with long tail for seaming. Seam opening closed as described above.
Attach Head
Pin Round 20 at the back of the head to the front of the back seam along the top of the body. Count 6 rounds down the front of the body from this first connection point and pin the bottom of the head (about 3-4 rounds behind the eyes) to the front of the body. Sew the back surface of the head to the front of the body.
RIGHT EAR
With color A, make an adjustable ring.
Set-up Round: Ch 1, 8 sc in ring, place marker in first st (see notes), pull ring closed, do not join or turn (see notes) — 8 sc.
Round 1: 2 sc in each sc around — 16 sc.
Round 2: 2 sc in next 4 sc, sc in next 4 sc, 2 hdc in next 3 sc, 2 sc in next 2 sc, sc in last 3 sc — 25 sts.
Round 3: Sc in next 2 sts, 2 sc in next st, sc in next 4 sts, 2 hdc in next st, 2 dc in next st, hdc in next st, sc in next 3 sts, 2 dc in next 2 sts, hdc in next 2 sts, sc in last 8 sts — 30 sts.
Round 4: Sc in next 9 sts, 3 hdc in next st, 3 dc in next st, hdc in next st, sc in next st, sl st in next 4 sts, 2 hdc in next st, 2 dc in next 4 sts, sc in next 3 sts, sl st in last 5 sts, sl st to first sc, fasten off leaving long tail for seaming — 39 sts.
LEFT EAR
With color A, make an adjustable ring.
Set-up Round: Ch 1, 8 sc in ring, place marker in first st (see notes), pull ring closed, do not join or turn (see notes) — 8 sc.
Round 1: 2 sc in each sc around — 16 sc.
Round 2: Sc in next 3 sc, 2 sc in next 2 sc, 2 hdc in next 3 sc, sc in next 4 sc, 2 sc in next 4 sc — 25 sts.
Round 3: Sc in next 8 sts, hdc in next 2 sts, 2 dc in next 2 sts, sc in next 3 sts, hdc in next st, 2 dc in next st, 2 hdc in next st, sc in next 4 sts, 2 sc in next st, sc in last 2 sts — 30 sts.
Round 4: Sl st in next 5 sts, sc in next 3 sts, 2 dc in next 4 sts, 2 hdc in next st, sl st in next 4 sts, sc in next st, hdc in next st, 3 dc in next st, 3 hdc in next st, sc in last 9 sts, sl st to first sl st, fasten off leaving long tail for seaming — 39 sts.
Attach ears: Using the photo as a guide, pin the straight edges of the ears to their respective sides of the head about 4-5 rounds behind the eyes with about 10 sts of space between them along the top of the head. Seam to head with tails.
TOENAILS
With color B and a tapestry needle, satin stitch four groupings (4-5 stitches each) of short stitches to the front of each foot to create toenails.
TAIL
With color A, ch 9.
Row 1: Sc in the back ridge of the 2nd ch from hook, sc in the back ridge of each remaining ch across, fasten off leaving long tail for seaming — 8 sc.
Attach tail: Sew tail to back of body with leftover yarn tails, use photo as a guide for placement.
EYELID (Make 2)
With color A, ch 4, fasten off leaving a long tail for sewing.
Attach eyelashes (optional): Place and glue fake eyelashes to top edge of eyes.
Attach eyelids: Pin the eyelids along the top edge of the eyes. Sew in place and weave in ends.
HAIR
With color C, *sc into a surface st at top of elephant head, ch 10-15, sl st in base of chain to create a loop; repeat from * 5-6 times to create a small grouping of loops at the top of the head, fasten off and weave in ends.
Using the same technique, apply a grouping of 6-8 loops to the end of the tail. See photo as guide for placement.
FLOWER (Make as many as you like)
With color D or E, make an adjustable ring.
Set-up Round: Ch 1, 5 sc in ring, place marker in first st (see notes), change to color E or D, pull ring closed, do not join or turn (see notes) — 5 sc.
Round 1: Working in back loops only; (sl st, ch 3, 3 tr, ch 3, sl st) in each sc around, fasten off leaving long tail for seaming — 5 petals.
Attach flowers: Sew flowers to the hair, create a flower crown by attaching flowers to a simple chain sewn into a loop, or attach to the tail as desired.
Looking for a Smaller Elephant?
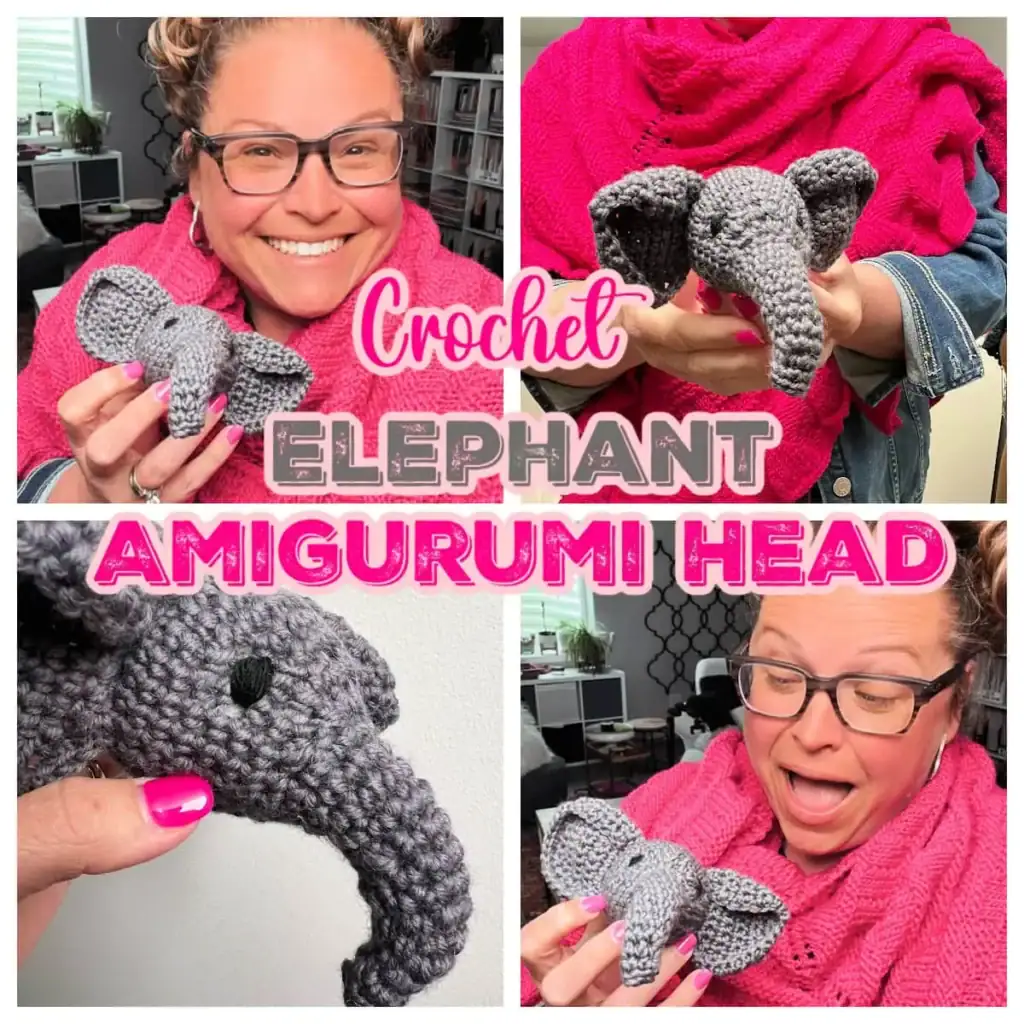
If you love elephants but want something smaller and faster to make, check out my Free Crochet Amigurumi Elephant Head Pattern — it's beginner-friendly, works up in worsted weight yarn, and makes a cute mini version perfect for mobiles, keychains, or first-time stuffie makers.
More Free Crochet Stuffie Patterns You'll Love
If you enjoyed making Blossom, here are more amigurumi and stuffie patterns to try:
- 🧶 Crochet Amigurumi Elephant Head… beginner mini version
- 🧶 Why Is Amigurumi So Popular?… learn about the craft
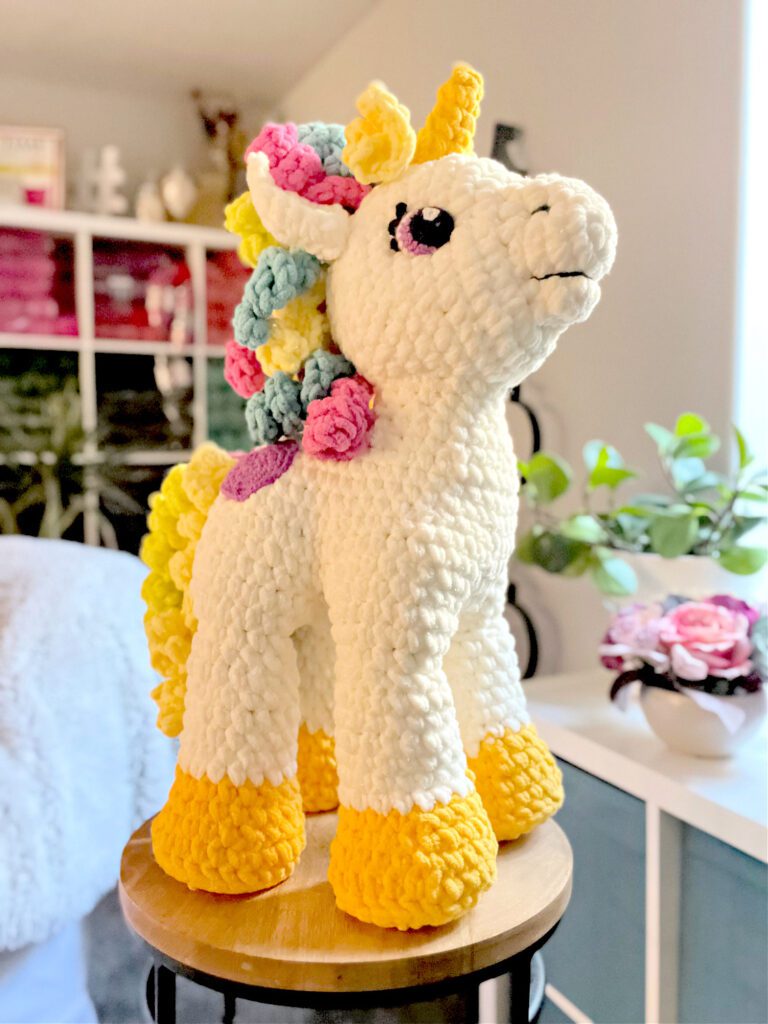
- 🦄 Sparkles the Unicorn… if Blossom gave you confidence, Sparkles gives you sparkle. Flowing mane, spiral horn, and the kind of magical energy that makes everyone in the room smile. Perfect next stuffie project.
- 🦕 Rori the Raptor… a Megan Kreiner original for Marly Bird. Fierce, textured, and surprisingly cuddly. Same designer as Blossom, completely different attitude. Your stuffie collection needs a dinosaur.
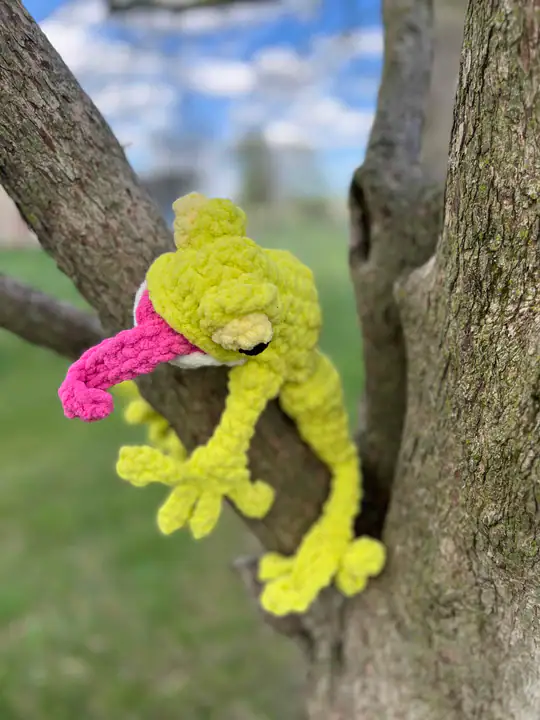
- 🐸 Leap the Tree Frog… long legs, wide eyes, and so much personality. A great stash-buster if you have leftover super bulky yarn from Blossom, and a fantastic gift for anyone who loves frogs as much as Marly loves elephants.
Favorite & Queue on Ravelry
Love this pattern? Save it to your Ravelry queue so you don't forget, and favorite it to help other crocheters find it!

Frequently Asked Questions
What is the best yarn for a large crochet stuffed animal?
Super bulky or blanket-weight yarn like Loops & Threads Demi Purl works beautifully for large stuffies. The thick yarn means fewer stitches to make (so it works up faster), creates a soft and cuddly fabric, and is forgiving of tension inconsistencies. The finished stuffie holds its shape well and has that huggable, squishy feel kids love.
What size hook do I need for super bulky yarn amigurumi?
For Blossom, you'll use a size N/13 (9.0 mm) hook with the super bulky yarn. This is larger than typical amigurumi hooks (which are usually G/7 or smaller) because the yarn is so much thicker. For the worsted weight details (hair and flowers), you'll switch down to a G/7 (4.5 mm) or H/8 (5.0 mm) hook.
How long does it take to crochet a large stuffed elephant?
Because Blossom uses super bulky yarn, she works up faster than you might expect for her 14″ size. An experienced crocheter might finish her in 10-15 hours of working time. Beginners or those new to amigurumi should expect longer — but the video tutorial helps you move through the tricky parts efficiently.
Can an intermediate crocheter make this pattern?
Yes! This pattern is rated intermediate because it includes short rows (for the trunk and forehead shaping) and requires seaming multiple pieces together. If you're comfortable with basic crochet stitches and willing to watch the video tutorial for the new techniques, you can absolutely make Blossom.
What is a stuffie vs. amigurumi?
Great question! “Stuffie” usually refers to larger soft toys, often made with bulky or super bulky yarn. “Amigurumi” is a Japanese term that traditionally means small, tightly-crocheted stuffed creatures made in sport or DK weight yarn with very tight stitches. Blossom is a stuffie — she's large, made with super bulky yarn, and meant to be hugged and squeezed.
How do I stuff a large crochet elephant so it holds its shape?
The key is to stuff firmly and progressively as you work. The pattern tells you exactly when to stuff each piece — follow those instructions rather than trying to stuff everything at the end. For the body and head, stuff firmly enough that the shape holds but not so tight that the stitches distort. Use small handfuls of poly fiberfil and push them into corners and curves with your fingers or the eraser end of a pencil.
Are safety eyes safe for babies?
For children under 3 years old, safety eyes with plastic backings are a choking hazard. If you're making Blossom for a baby or toddler, embroider the eyes instead using yarn or embroidery floss. You can create simple French knots or satin-stitched circles that are completely safe for little ones.
Where can I buy Loops & Threads Demi Purl?
Loops & Threads yarns are exclusive to Michaels stores and Michaels.com. If you can't find Demi Purl in your area, Bernat Blanket yarn (also CYCA #6 super bulky) is a great alternative — it's widely available at Walmart, Joann, and online. Use the same hook size and make a gauge swatch to check your tension.
🐘 Want to Print Blossom and Take Her Anywhere?
Get the complete pattern as a clean, ad-free PDF — no scrolling through ads at the couch, no hunting for your place. Perfect for your project bag, your crafting group, or your coffee table.
Final Thoughts
How do you eat an elephant? One bite at a time. How do you crochet an elephant? One stitch at a time. 🐘
Whether you're making Blossom for a child who needs a snuggle buddy, for yourself as a reminder to tackle big goals one step at a time, or just because you love elephants and wanted to try something new… I hope she brings you as much joy to make as she brought me to commission.
Tag me when you finish yours — I'd love to see your Blossom! 💛
❤️ Your BiCrafty Bestie,
Marly Bird

Categories: Uncategorized