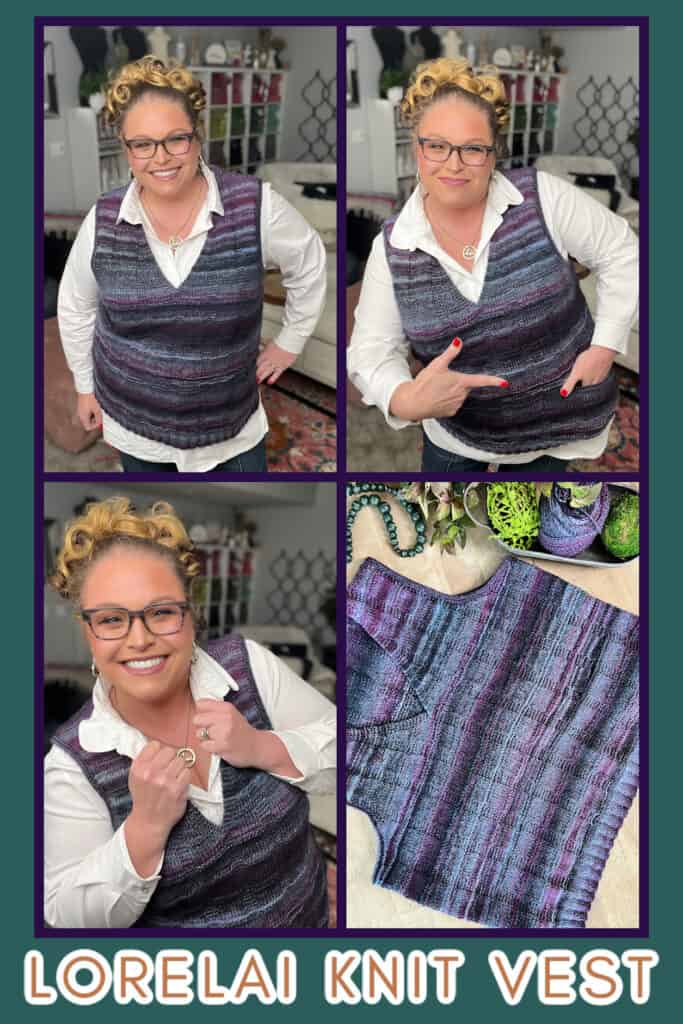
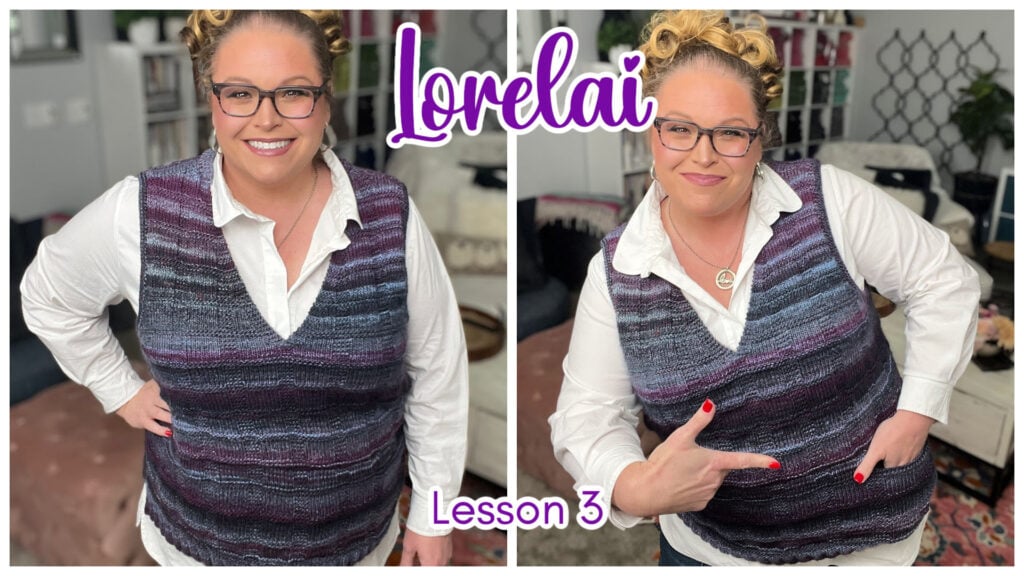
Lorelai Knit Vest – Free Knit Vest Pattern from Turkey Trot 2024
Get ready to fall in love with layers 🧶 The Lorelai Knit Vest was the featured knitting project for Turkey Trot 2024, and now the full pattern is available as a free knit vest pattern right here on the blog.
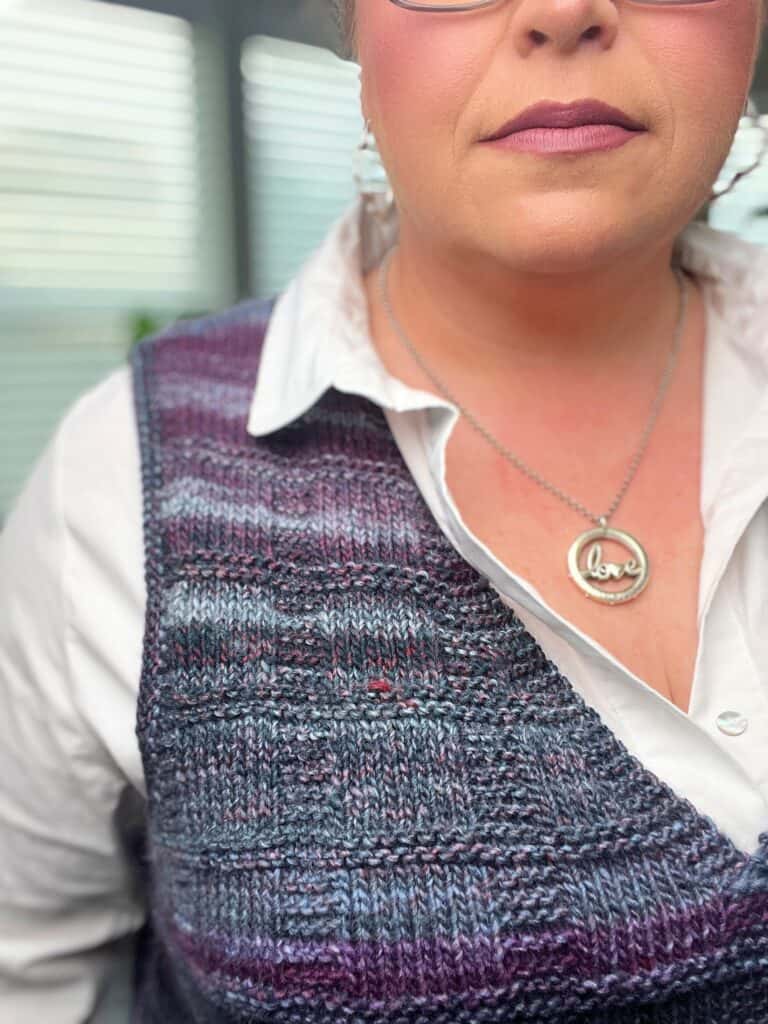
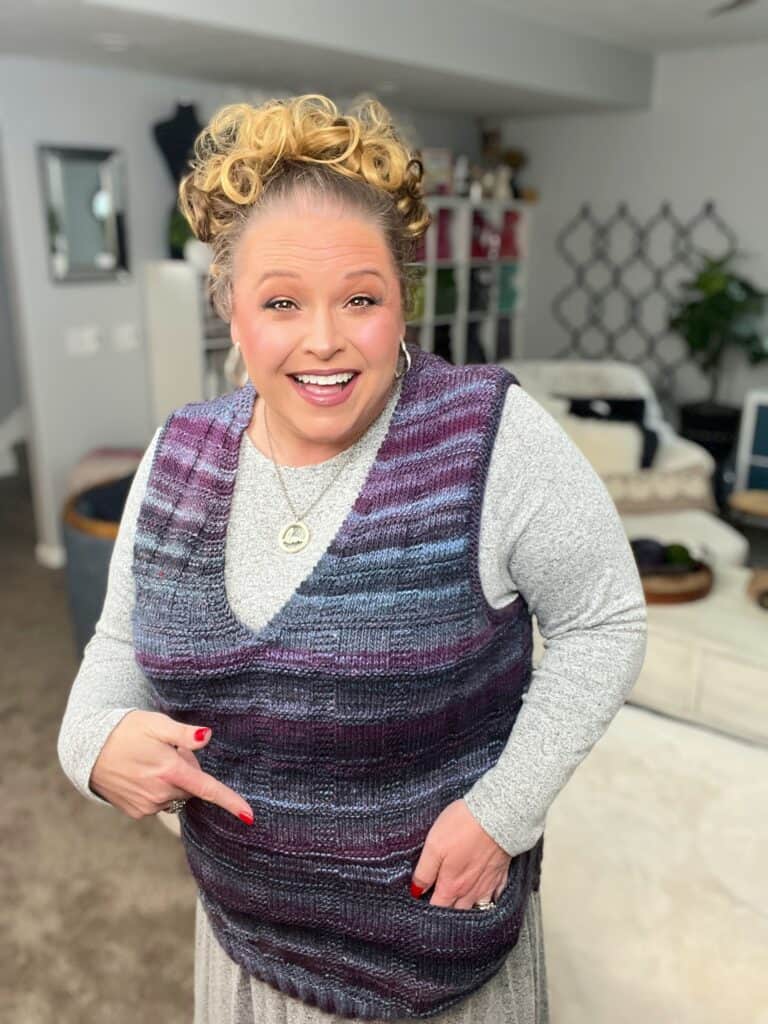
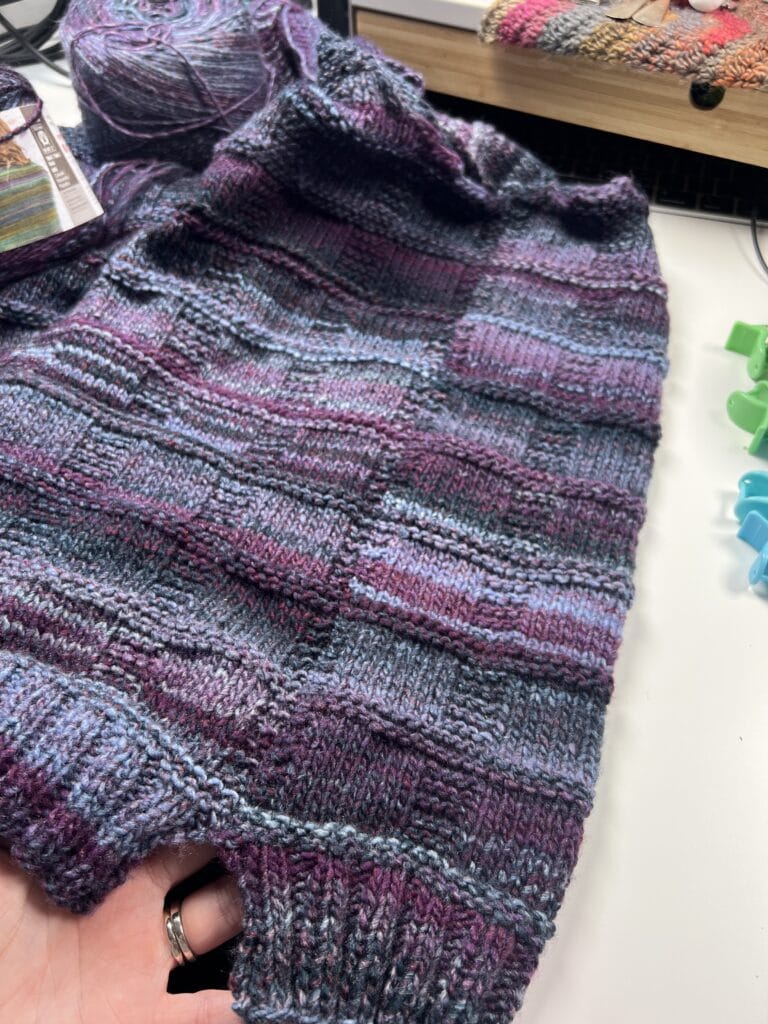
Lorelai is a cozy, size-inclusive, adventurous beginner–friendly knit vest that’s perfect for throwing over a button-down shirt, long-sleeve tee, or even a simple dress. The Stockinette Windows texture, relaxed fit, and optional pockets give you that polished, “I totally meant to look this pulled together” vibe… even if you were just chasing the yarn ball five minutes ago.

Affiliate Disclosure: This post contains affiliate links. To learn more please visit my privacy policy here💖
Don’t forget to share your progress in the Marly’s Minions: Marly Bird BiCrafty Community on Facebook. We love cheering you on and seeing your color choices in action:
https://www.facebook.com/groups/MarlysMinions
If you haven’t joined the event yet, it’s not too late to knit the Lorelai Vest at your own pace. Head to the Turkey Trot 2024 info page to see how the make-along worked and grab extra details:
https://marlybird.com/blog/turkey-trot-2024/

📌 Get the Lorelai Knit Vest Turkey Trot Make-Along in the Marly Bird House
(Access inside the Marly Bird House with unlimited viewing and bonus material)
What You’ll Love About the Lorelai Knit Vest
The Lorelai Knit Vest is designed to be:
- Layer-friendly – Great over shirts, blouses, or dresses.
- Size-inclusive – Written for XS through 4X–5X, with 2–4″ of positive ease.
- Textured but approachable – The Stockinette Windows pattern keeps things interesting without being fussy.
- Customizable – Optional pockets, easy length adjustments, and a clean neckline/armhole finish.
- Beginner-friendly with support – Tons of video tutorials plus an option for a fully guided course inside Marly Bird House.
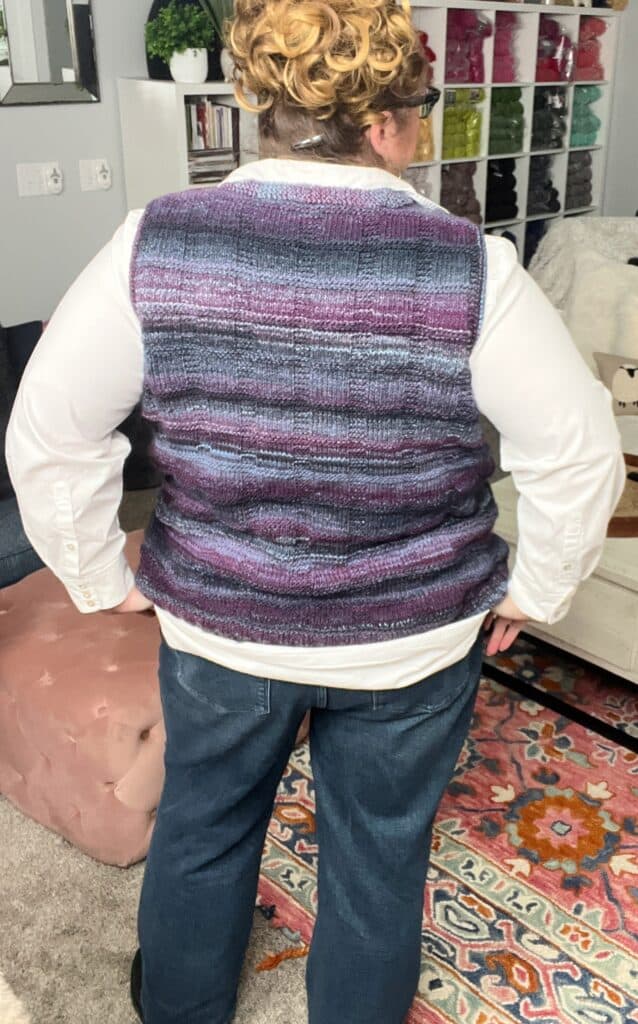
It’s worked in pieces from the bottom up, then seamed and finished with tidy edgings so your vest looks clean, professional, and totally gift-worthy (even if the gift is for yourself 😉).
Join our Newsletter
Get Free Crochet & Knitting
Pattern Links & Coupons!

Skill Level – Is the Lorelai Knit Vest Right for You?
This is labeled Adventurous Beginner – which in Marly-speak means:
- You’re comfortable with:
- Casting on and binding off
- Knit and purl stitches
- Basic ribbing
- You’re ready to try some new skills with guidance, like:
- Simple shaping (decreases)
- Reading a textured stitch pattern
- Working optional pockets
- Seaming and basic finishing
If you’ve done a scarf, cowl, or basic sweater and you’re craving something a little more interesting (but not overwhelming), the Lorelai Knit Vest is a fantastic next step.
And remember, you’re not doing this alone:
- There are step-by-step video tutorials linked throughout the pattern.
- You can ask questions in Marly’s Minions: Marly Bird BiCrafty Community.
- You can upgrade to the ad-free PDF or take the course inside Marly Bird House if you want the full “Silver Platter” experience.

Yarn & Materials for the Lorelai Knit Vest
Yarn
The original Lorelai sample is worked in:
- Red Heart Roll With It Melange
- 100% acrylic
- 389 yds / 356 m per 150 g
- Category: #4 worsted
Colorway used in the sample: Autograph
You’ll need:
- 3 (3, 3, 4, 4, 4, 5) skeins depending on your chosen size.
(Full yardage details are given in the pattern section.)
Because this is a vest (no sleeves!) it’s a very reasonable yardage commitment for a garment, and the long-striping yarn does a lot of the visual heavy lifting for you.
⭐️ Looking for a similar sweater with sleeves? Check out the Paris Gellar Sweater

You can shop for Roll With It Melange here:
- Herrschners: https://tidd.ly/3LeBk7r
- Or check your local craft store or big box retailer that carries Red Heart yarns.
If you can’t find the exact yarn, look for:
- Worsted weight (#4) yarn
- With nice drape (acrylic, wool, or blends all work)
- Good stitch definition so the Stockinette Windows texture shows up
Needles
You’ll need:
- Two 32″ [81 cm] US 8 [5 mm] circular needles
- One holds the full width of the vest pieces.
- The second is used when you work both upper fronts at the same time.
Even though the vest is worked flat in rows, the circular needles make it much more comfortable to hold the number of stitches you’ll have on the needles.
Notions
Have these handy:
- Removable stitch markers (for marking edges, pattern sections, and shaping points)
- Tapestry needle for weaving in ends and seaming
- Stitch holders or spare circular needles
- Scissors
- A tape measure or ruler
- Optional but recommended: blocking tools (blocking mats, pins, and a ruler to help check measurements)
You can find many of Marly’s favorite tools in the Marly Bird Amazon Storefront if you like to see exactly what she uses.


Sizing & Fit Details
The Lorelai Knit Vest is written for the following size range:
- To Fit Sizes:
XS (S, M, L–XL, 2X, 3X, 4X–5X) - Finished Bust Measurements:
28 (34, 39½, 45, 51, 56.5, 62) inches
[71 (86.5, 100.5, 114.5, 129.5, 143.5, 157.5) cm] - Finished Length:
20½ (21, 23¾, 24½, 25¼, 28, 30½) inches
[52 (53.5, 60.5, 62, 64, 71, 77.5) cm]
Designed to be worn with about 2–4″ of positive ease, so pick your size based on your actual bust and the amount of ease you prefer.
For example:
- If your bust is 38″, you might choose:
- Size M (39½”) for a slimmer fit, or
- Size L–XL (45″) for a more relaxed, layering fit.
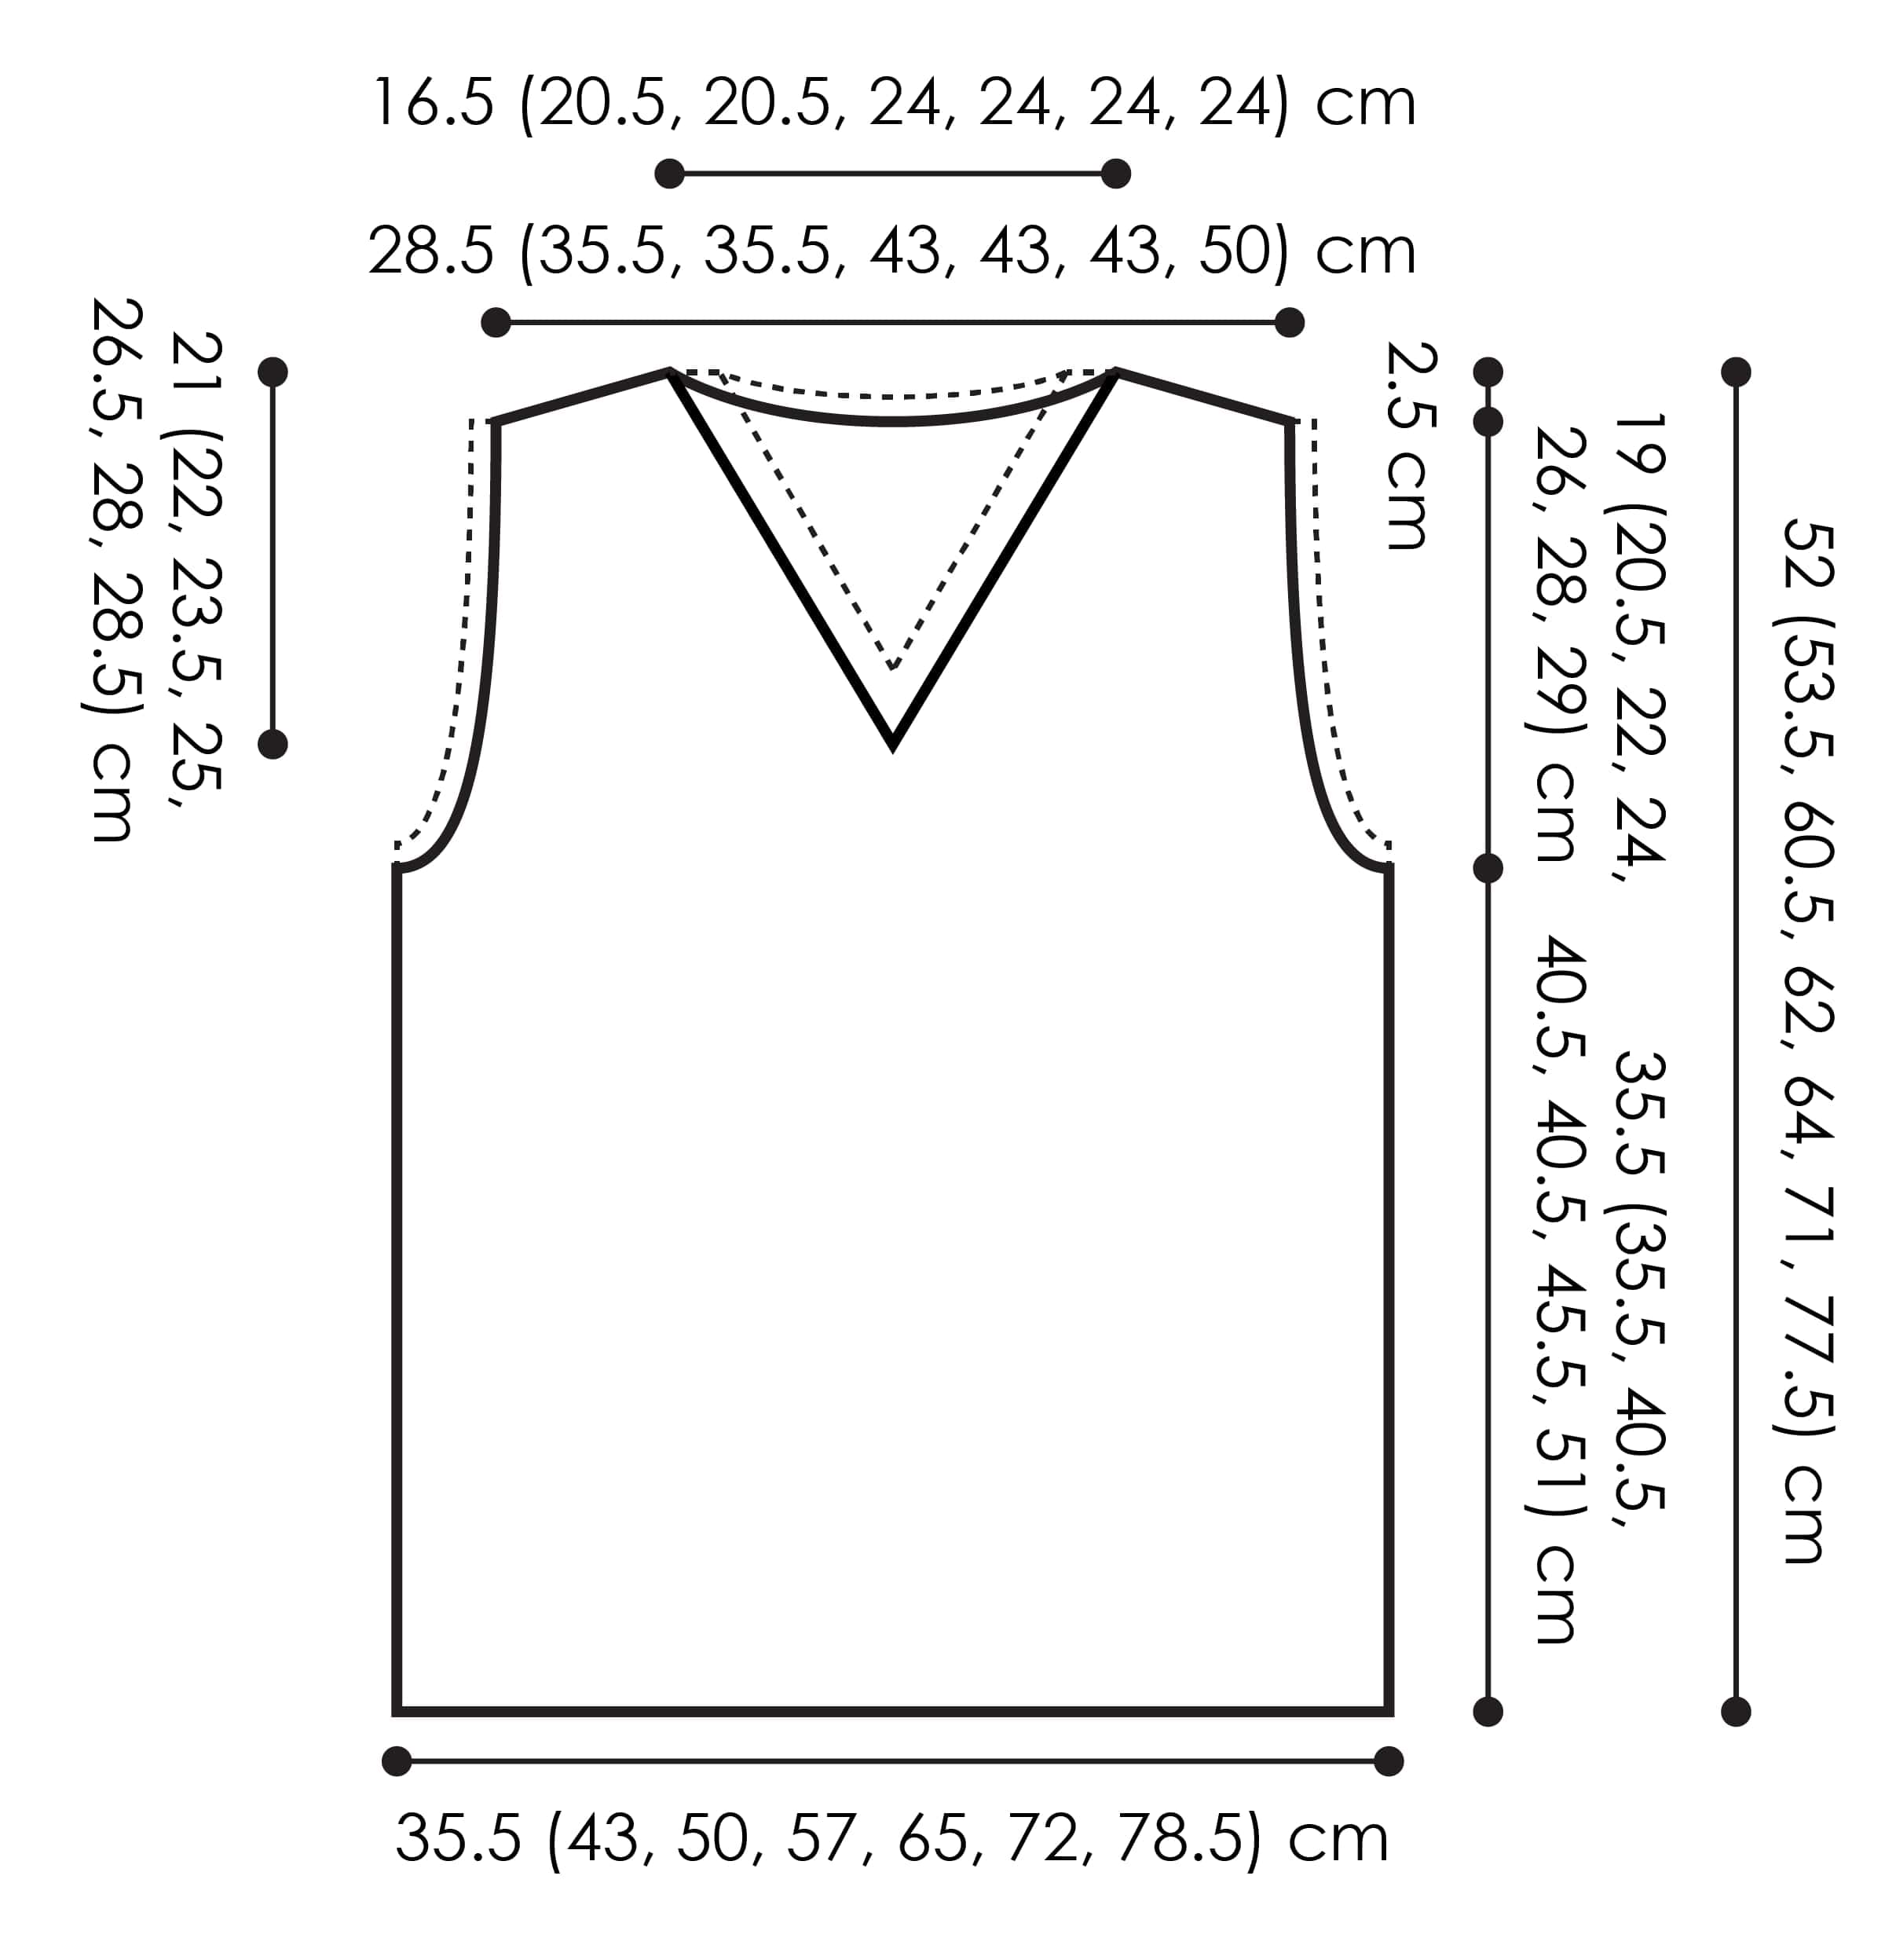
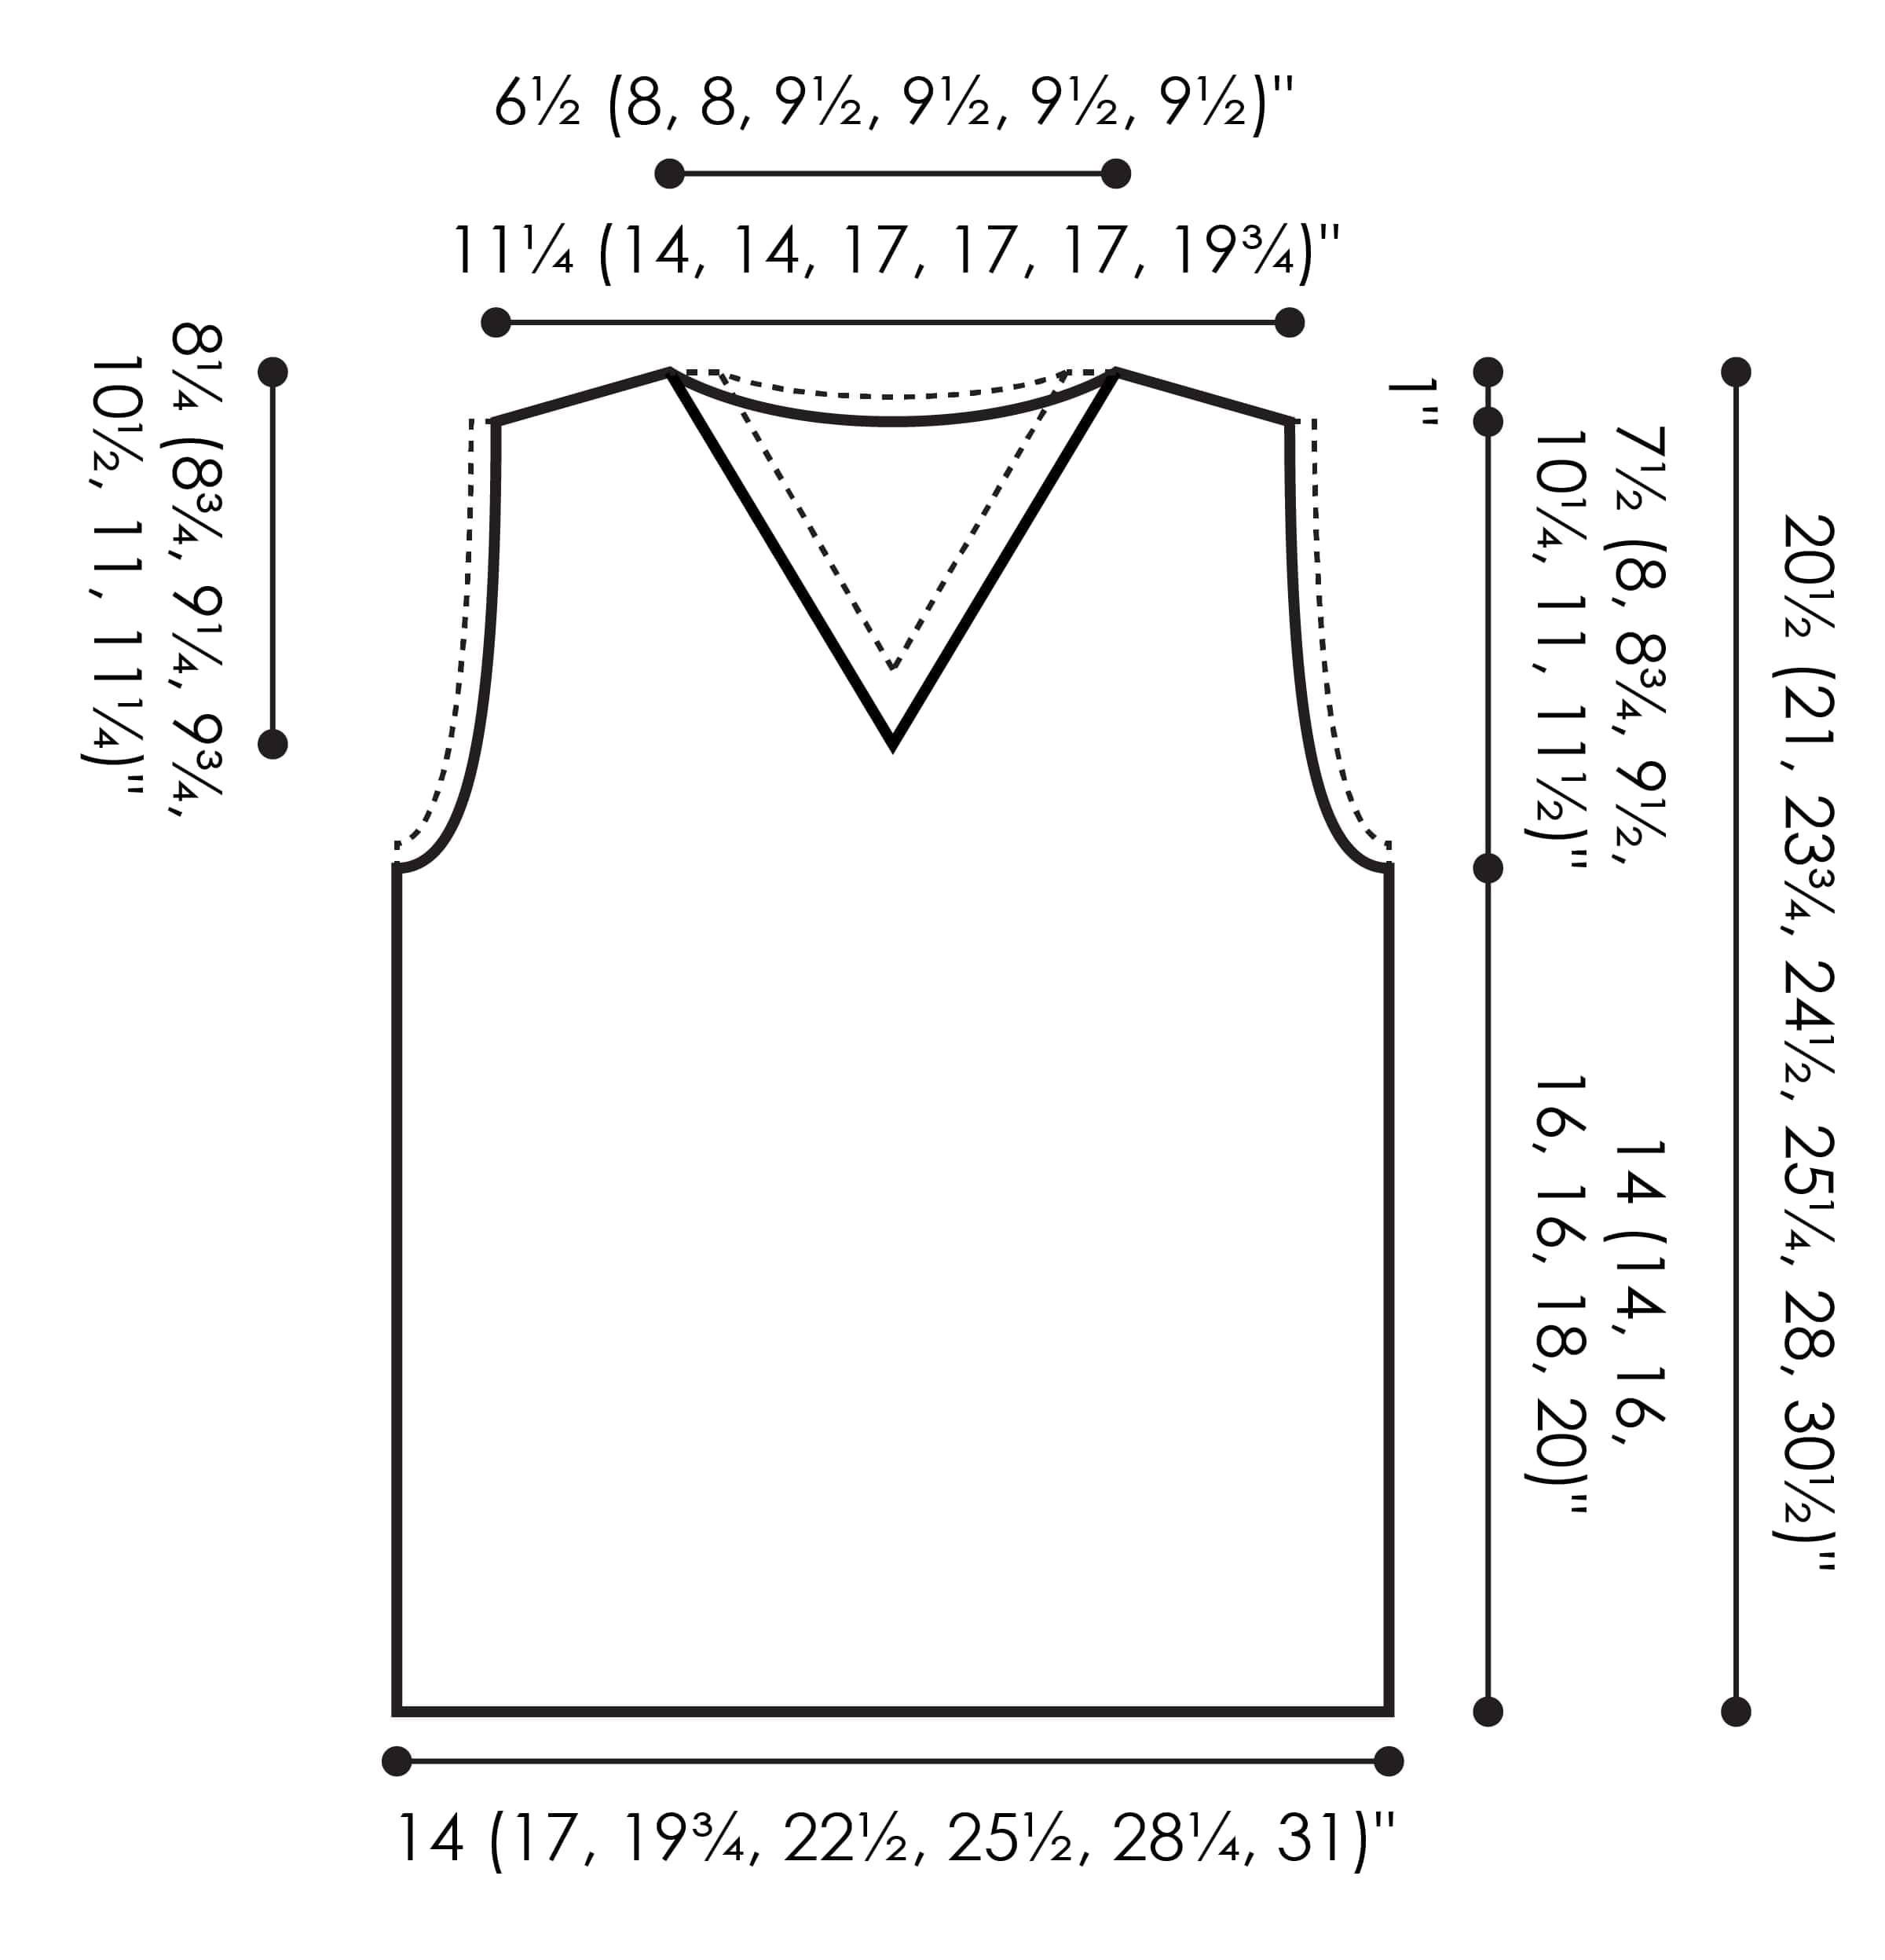
The schematic in the pattern gives detailed measurements so you can compare to a vest or sweater you already love.
Gauge – Start with the Swatch
I know, I know… swatching isn’t everyone’s favorite. But for a fitted garment like a vest, gauge really matters if you want your Lorelai to match the pattern measurements and use the listed yardage.
- Gauge for this pattern:
17 sts and 28 rows = 4″ x 4″ [10 x 10 cm]
in Stockinette Windows pattern, after blocking
You’ll work your gauge swatch in pattern, not plain stockinette, so you can see exactly how the fabric behaves.
In the pattern you’ll find:
- Full instructions for a Stockinette Windows gauge swatch worked over 36 stitches
- Notes on how many repeats to work
- How to measure gauge after binding off and relaxing/blocking the swatch
If you get:
- Too many stitches per 4″ → Your gauge is too tight → Go up a needle size
- Too few stitches per 4″ → Your gauge is too loose → Go down a needle size
Spending a little time here saves a lot of “Why is this so big/small?!” later.
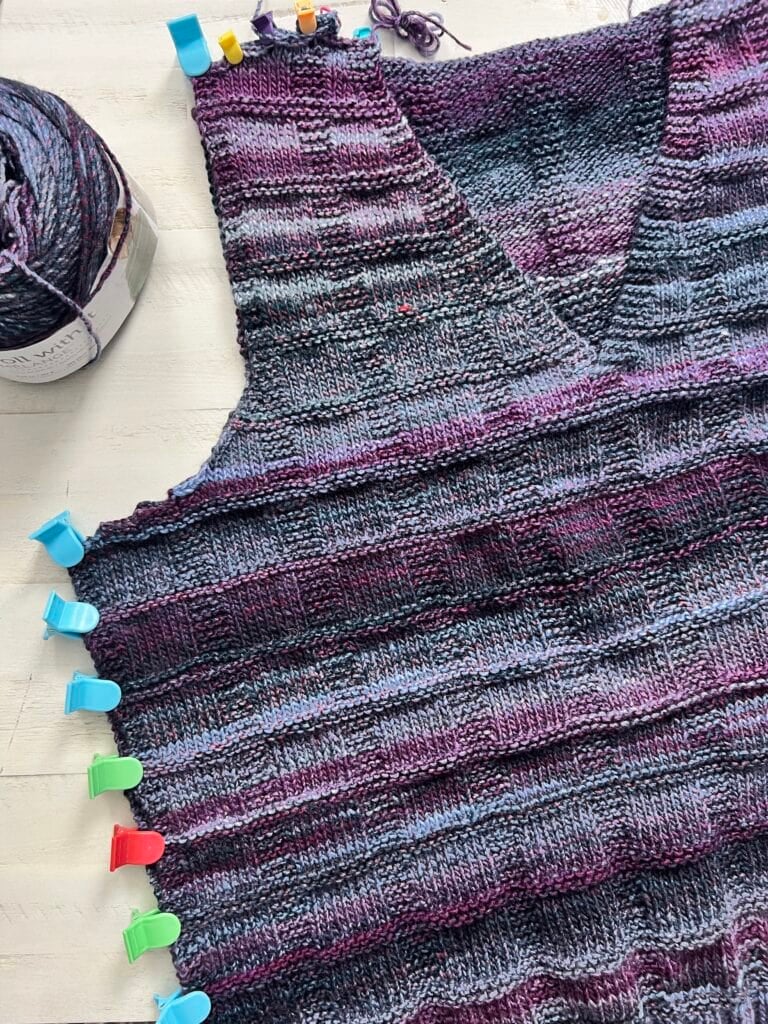
Construction Overview – How the Lorelai Knit Vest Is Built
Here’s the big-picture view of how you’ll knit Lorelai:
- Back
- Worked bottom up.
- Start with a ribbed hem, then transition into the Stockinette Windows pattern.
- Shape the armholes with bind-offs and decreases.
- Finish with shaping for the back neckline and shoulders.
- Front
- Also worked bottom up, starting with the same ribbed hem.
- Work into the Stockinette Windows pattern, with the option to add as-you-go pockets.
- Shape the armholes, then split for the V-neck and work each side separately with shaping for a clean neckline.
- Optional Pockets
- Pockets are worked as pocket linings that are joined back into the Front.
- They’re hidden on the inside but give you that cozy, functional vest feel.
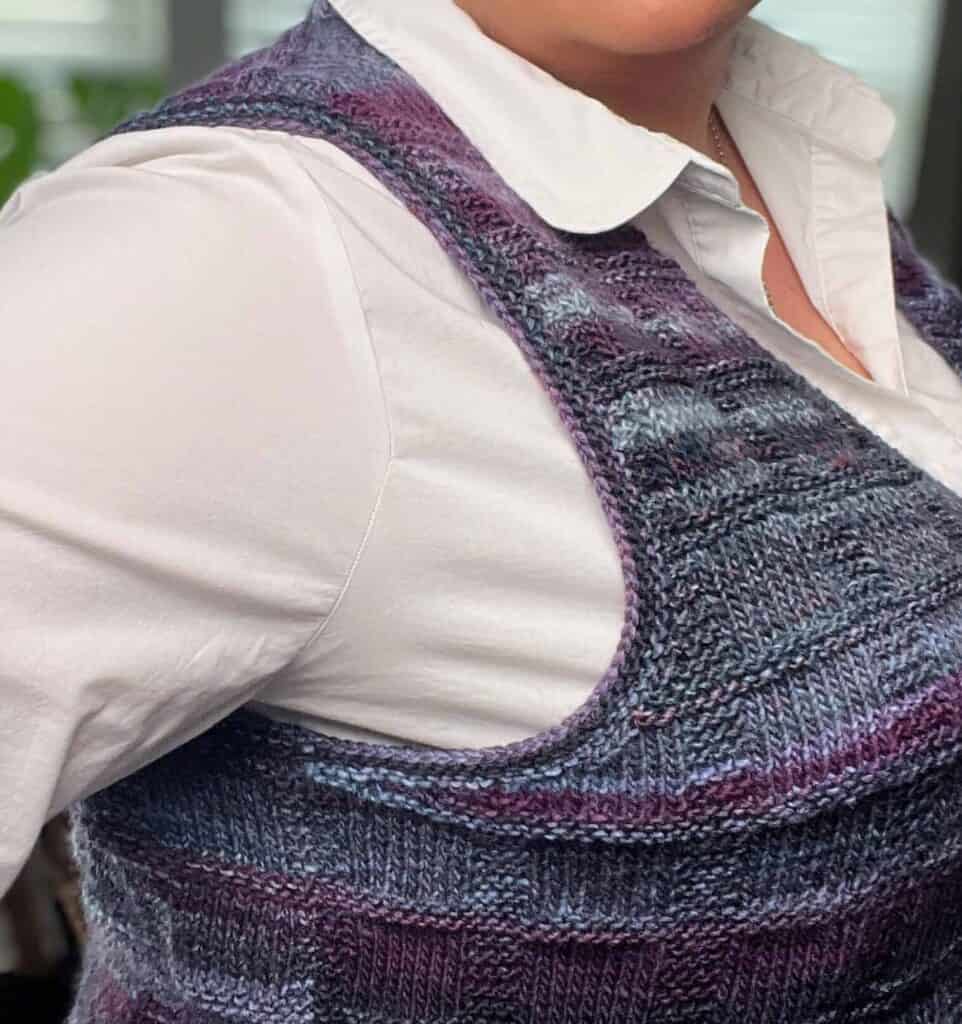
- Finishing & Edgings
- Sew side seams and shoulder seams.
- Pick up and knit around the armholes for a simple, clean edging.
- Work the back neck edging and join the front neck stitches with a garter stitch graft for a polished finish.
- Weave in ends and block.
Once you understand this flow, the pattern rows will make a lot more sense as you knit along.
Optional Pockets – A Fun Skill Builder
One of the standout features of Lorelai is the option to add pockets worked as-you-go.
You’ll:
- Mark pocket placement on the Front.
- Bind off stitches where the pockets will open.
- Use a separate ball of yarn to pick up stitches below that opening and work a pocket lining in stockinette.
- Later, you’ll secure the pocket lining on the inside so it lays flat and doesn’t add bulk.
You can:
- Work two pockets,
- Work just one, or
- Skip them entirely if you prefer a cleaner front.
This is a great way to learn pocket construction without having to guess at placement or sizing—the pattern does that work for you.
Video Tutorials to Support Your Knitting
To make this a true teaching pattern, there are tons of video links to help with specific techniques used in the Lorelai Knit Vest. Here are some of the skills covered:
- Long Tail Cast-On >> Click Here for Video Help <<
- Knit Stitch (continental style) >> Click Here for Video Help <<
- Purl Stitch (continental style) >> Click Here for Video Help <<
- How to Tink >> Click Here for Video Help <<
- How to Add Lifeline >> Click Here for Video Help <<
- How to Bury Ends >> Click Here for Video Help <<
- Lorelai Knit Vest – Ribbing >> Click Here for Video Help <<
- Lorelai Knit Vest – Stitch Pattern >> Click Here for Video Help <<
- Lorelai Knit Vest – Adding Pockets >> Click Here for Video Help <<
- Lorelai Knit Vest – Armhole Shaping and Neckline >> Click Here for Video Help <<
- Lorelai Knit Vest – Shoulders >> Click Here for Video Help <<
- Lorelai Knit Vest – Finishing Skills
- Side Seam >> Click Here for Video Help <<
- Shoulder Seam >> Click Here for Video Help <<
- Securing Pocket >> Click Here for Video Help <<
- Neck Finishing >> Click Here for Video Help <<
- Garter Stitch Grafting >> Click Here for Video Help <<
- Armhole Edging >>Click Here for Video Help <<
All of these are linked inside the pattern so you can click and knit along with me step by step.

Get the Lorelai Knit Vest Pattern Your Way
You’ve got three great options depending on how you like to learn and knit:
1. Free Pattern on the Blog
This very page includes the full written Lorelai Knit Vest pattern for free, supported by ads. You’ll get:
- Written instructions for all sizes
- Pattern stitches
- Shaping details
- Schematic images
- Links to video tutorials
It’s perfect if you’re comfortable scrolling or printing directly from the blog.
2. Ad-Free, Printable PDF Pattern
If you’d rather knit without ads or distractions, the ad-free PDF is for you. It’s beautifully formatted and easy to print or use on a tablet.
The PDF includes:
- Fully formatted written pattern for all sizes
- Schematics in inches and centimeters
- Stockinette Windows pattern chart for gauge
- Full charts of front and back for all sizes (exclusive to the PDF)
- Row-by-row checksheets so you can track your progress
- Linked video tutorials in one tidy, convenient file
📌 Get the Lorelai Knit Vest Turkey Trot Make-Along in the Marly Bird House
(Access inside the Marly Bird House with unlimited viewing and bonus material)
(Use your favorite pattern platform—this part is all about your convenience!)
3. Guided Course Inside Marly Bird House
If you love learning with step-by-step video support, check out the Lorelai Knit Vest workshop inside Marly Bird House:
- Modules breaking the pattern into bite-sized lessons
- Video walkthroughs for major sections and techniques
- Great if you enjoy make-alongs, classes, or prefer to follow along visually
You can learn more and explore courses here:
https://marlybirdhouse.com
Once inside, look for the Turkey Trot 2024 / Lorelai Knit Vest content to dive in.

Begin with the Gauge Swatch
Before you start the full vest, the pattern walks you through making a gauge swatch in the Stockinette Windows pattern.
You’ll:
- Cast on a specific number of stitches (given in the pattern).
- Work several repeats of the pattern rows.
- Bind off, relax or block the swatch, then measure.
This step ensures:
- Your bust and length measurements match the schematic.
- You don’t run out of yarn partway through the project.
- The fabric feels how you want it—cozy and drapey, not stiff or too loose.
If your gauge doesn’t match, adjust your needle size and try again. It’s worth it for a vest you’ll actually want to wear all the time.
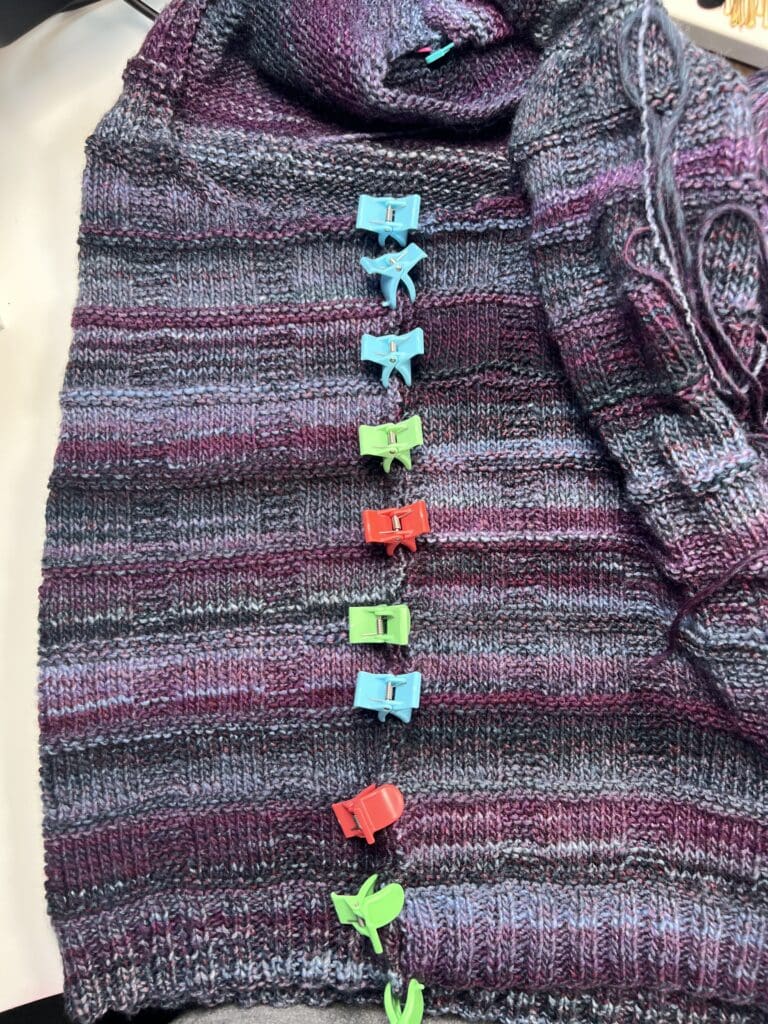
Pattern Stitches Overview
The Lorelai vest uses:
- Ribbing at the hem:
- A simple 2 x 2 rib worked flat for a clean, stretchy edge.
- Stockinette Windows pattern:
- A combination of knit and purl sections that form “window” panels of texture.
- There are two versions:
- Standard pattern
- Offset version for some sizes so the windows line up nicely across the bust.
The full row-by-row instructions for both versions are given in the pattern section, along with the chart used for the gauge swatch.
Seaming & Finishing Details
Once both pieces are knit, you’ll seam and finish:
- Side seams – Worked with mattress stitch so they’re nearly invisible from the right side.
- Shoulder seams – Also worked with mattress stitch, except for the live front stitches used for the neck finishing.
- Armhole edgings – Stitches are picked up around each armhole, worked in a simple edging, and then bound off loosely.
- Neck edging – Pick up around the back neck, then use garter stitch grafting to join to the live front shoulder stitches. This creates a smooth, continuous edge that looks very polished.
The pattern includes a written walkthrough of the garter stitch graft, so even if it’s a new skill, you’ll be guided through.

Lorelai Knit Vest – Free Pattern Instructions
Designed by Marly Bird
SKILL LEVEL
Adventurous Beginner
MEASUREMENTS
To Fit Size
XS (S, M, L-XL, 2X, 3X, 4X-5X)
Finished Measurements
(also see schematic)
Bust 28 (34, 39½, 45, 51, 56.5, 62)” [71 (86.5, 100.5, 114.5, 129.5, 143.5, 157.5) cm]
Length 20½ (21, 23¾, 24½, 25¼, 28, 30½)” [52 (53.5, 60.5, 62, 64, 71, 77.5) cm]
- Designed to have 2-4” of positive ease
Gauge
See Gauge Swatch Instructions Below
17 sts in and 28 rows in Stockinette Windows pattern = 4 x 4” [10 x 10 cm]
- Note: Work a gauge swatch in the Stockinette Windows pattern stitch over 36 stitches and at least 3 full repeats, then rows 1-4 once more. Bind off and measure.
Begin with the Gauge Swatch
Before you start with the pattern, it is important you begin with a gauge swatch to confirm you are using the right size needles for you.
For the gauge swatch, use size 8 [5mm] needles and work up these instructions:
Cast on 36
Row 1 (WS): Knit.
Rows 2-4: Knit.
Row 5: * K2, p8, k2; repeat from * to end.
Row 6: Knit.
Row 7: * K2, p8, k2; repeat from * to end.
Row 8: Knit.
Row 9: * K2, p8, k2; repeat from * to end.
Row 10: Knit.
Row 11: * K2, p8, k2; repeat from * to end.
Row 12: Knit.
Row 13: * K2, p8, k2; repeat from * to end.
Row 14: Knit.
Repeat rows 1-14 two or three times more, then rows 1-4 once more. Bind off.
Measure the swatch.
Gauge: 17 sts in and 28 rows in Stockinette Windows pattern = 4 x 4” [10 x 10 cm]
- If you get TOO MANY STITCHES = Go Up A Needle Size ⬆️
- If you get TOO FEW STITCHES = Go Down A Needle Size ⬇️
MATERIALS
Yarn
Red Heart, Roll With It Melange (100% acrylic, 389 yds / 356 m, 5.29 oz / 150 g CYCA #4 worsted)
3 (3, 3, 4, 4, 4, 5) skeins: #Autograph
Note: Yarn amounts include an extra ball for color-matching when working the upper front sections.
Knitting Needles
Two 32” [81 cm] U.S. 8 [5 mm] circular needles, or size required for gauge.
⭐️ Note: Vest is worked back-and-forth in rows; a circular needle is used to hold the full length of the sts. A second needle is included for working both upper front sections at the same time.
Notions
Stitch Holders or Stitch Savers (I love using these)
ABBREVIATIONS
K – Knit
K2tog – Knit Two Stitches Together
P – Purl
Pm – Place Marker
RS – Right Side
St(s) – Stitches
WS – Wrong Side
SPECIAL STITCHES
⭐️ Ssk (Slip, Slip, Knit): Slip 2 stitches, one at a time, as if to knit. Insert left hand needle into the front of these two stitches and knit them together from this position (1 stitch decreased)
PATTERN STITCHES
Stockinette Windows Pattern (for sizes S, L-XL, 3X)
Worked over a multiple of 12 sts.
Row 1 (WS): Knit.
Row 2: Knit
Row 3: Knit
Row 4: Knit.
Row 5: * K2, p8, k2; repeat from * to end.
Row 6: Knit.
Row 7: * K2, p8, k2; repeat from * to end.
Row 8: Knit.
Row 9: * K2, p8, k2; repeat from * to end.
Row 10: Knit.
Row 11: * K2, p8, k2; repeat from * to end.
Row 12: Knit.
Row 13: * K2, p8, k2; repeat from * to end.
Row 14: Knit.
Repeat Rows 1-14 for Stockinette Windows Pattern.
Stockinette Windows Pattern (offset – for sizes XS, M, 2X, 4X-5X)
Worked over a multiple of 12 sts.
Row 1 (WS): Knit.
Row 2: Knit
Row 3: Knit
Row 4: Knit.
Row 5: P4, k2, * k2, p8, k2; repeat from * to end to last 6 sts, k2, p4.
Row 6: Knit.
Row 7: P4, k2, * k2, p8, k2; repeat from * to end to last 6 sts, k2, p4.
Row 8: Knit.
Row 9: P4, k2, * k2, p8, k2; repeat from * to end to last 6 sts, k2, p4.
Row 10: Knit.
Row 11: P4, k2, * k2, p8, k2; repeat from * to end to last 6 sts, k2, p4.
Row 12: Knit.
Row 13: P4, k2, * k2, p8, k2; repeat from * to end to last 6 sts, k2, p4.
Row 14: Knit.
Repeat Rows 1-14 for Stockinette Windows Pattern, offset.
SCHEMATIC
CHART
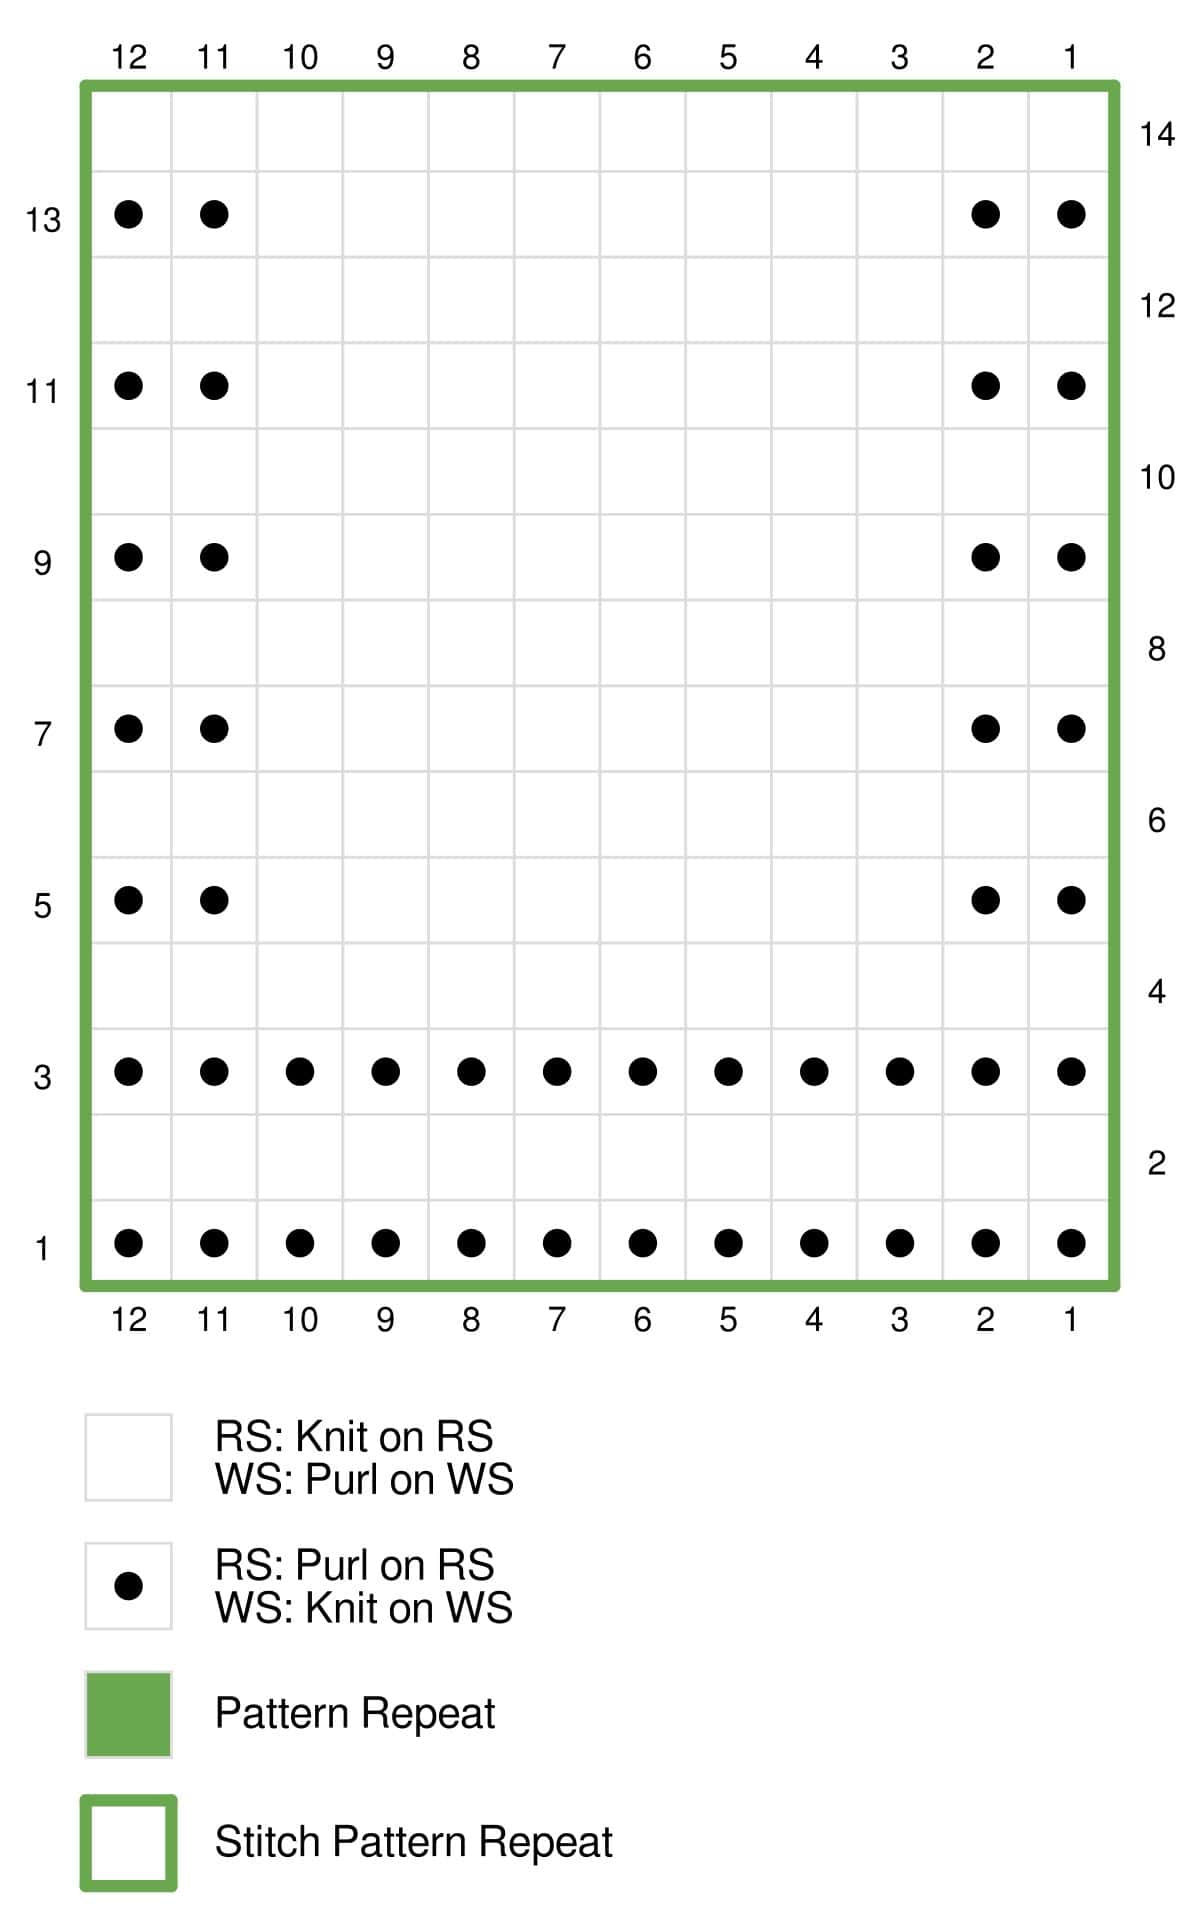
✅ Full charts for each size is exclusive to the ad-free pdf.
✅ Row-by-Row Checksheet exclusive to the ad-free pdf.
NOTES
- Directions are for the smallest size; changes for all other sizes are in parentheses. When only one number is given then that number applies to all sizes.
- Vest is worked from the bottom up in 2 pieces, then seamed together. Optional pockets are worked as-you-go.
VIDEO TUTORIALS
- Long Tail Cast-On >> Click Here for Video Help <<
- Knit Stitch (continental style) >> Click Here for Video Help <<
- Purl Stitch (continental style) >> Click Here for Video Help <<
- How to Tink >> Click Here for Video Help <<
- How to Add Lifeline >> Click Here for Video Help <<
- How to Bury Ends >> Click Here for Video Help <<
- Lorelai Knit Vest – Ribbing >> Click Here for Video Help <<
- Lorelai Knit Vest – Stitch Pattern >> Click Here for Video Help <<
- Lorelai Knit Vest – Adding Pockets >> Click Here for Video Help <<
- Lorelai Knit Vest – Armhole Shaping and Neckline >> Click Here for Video Help <<
- Lorelai Knit Vest – Shoulders >> Click Here for Video Help <<
- Lorelai Knit Vest – Finishing Skills
- Side Seam >> Click Here for Video Help <<
- Shoulder Seam >> Click Here for Video Help <<
- Securing Pocket >> Click Here for Video Help <<
- Neck Finishing >> Click Here for Video Help <<
- Garter Stitch Grafting >> Click Here for Video Help <<
- Armhole Edging >> Click Here for Video Help <<
GROW
To Unlock Exclusive Subscriber Content click the Box below and join for free by simply adding your email and creating a password! If you are having troubles, clear your cache or reset your password or login to the Grow Publisher Portal.
>> Learn More About Grow Here <<
I'm thrilled to share this amazing pattern with you, many patterns on my blog are absolutely free! I kindly request that you don't copy and paste or distribute this pattern. Prefer an ad-free experience? Buy a digital PDF pattern for a small fee from one of my online stores for a seamless crafting journey.
I appreciate your support and readership. You are the reason I can keep doing what I love and sharing it with others. So, thank you from the bottom of my yarn-loving heart! Disclosure: This post contains affiliate links, meaning I get a commission if you decide to make a purchase through my links at no cost to you.
Lorelai Knit Vest Pattern Instructions
BACK
Cast on 62 (74, 86, 98, 110, 122, 134) sts.
Row 1 (WS): K2, * p2, k2; repeat from * to end.
Row 2: P2, * k2, p2; repeat from * to end.
Repeat the last 2 rows 5 more times – 12 total rows worked in ribbing.
Next 2 rows:
Row 1 (WS): P1, work in Stockinette Windows Pattern (or offset version, depending on your selected size) to last st, p1.
Row 2: K1, work in Stockinette Windows Pattern (or offset version, depending on your selected size) to last st, k1.
Work in established Stockinette Windows Pattern for 82 (82, 96, 96, 96, 110, 124) more rows, keeping first and last st in Stockinette st, and ending after a Row 14 of pattern – 6 (6, 7, 7, 7, 8, 9) windows created lengthwise.
Shape Back Armholes
Next 2 Rows:
Row 1 (WS): Bind off 4 sts, p1, knit to last st, p1 – 58 (70, 82, 94, 106, 118, 130) sts.
Row 2: Bind off 4 sts, knit to end – 54 (66, 78, 90, 102, 114, 126) sts.
For last 5 sizes only (M and up):
Next 2 Rows:
Row 1 (WS): Bind off 4 sts, p1, knit to last st, p1 – x (x, 74, 86, 98, 110, 122) sts.
Row 2: Bind off 4 sts, knit to end – x (x, 70, 82, 94, 106, 118) sts.
For last 3 sizes only (2X and up):
Next 2 Rows:
Row 1 (WS): Bind off 4 sts, p1, work in established Stockinette Windows Pattern to last st, p1 – x (x, x, x, 90, 102, 114) sts.
Row 2: Bind off 4 sts, k1, work in established Stockinette Windows Pattern to last st, k1 – x (x, x, x, 86, 98, 110) sts.
For last 2 sizes only (3X and up):
Next 2 Rows:
Row 1 (WS): Bind off 4 sts, p1, work in established Stockinette Windows Pattern to last st, p1 – x (x, x, x, x, 94, 106) sts.
Row 2: Bind off 4 sts, k1, work in established Stockinette Windows Pattern to last st, k1 – x (x, x, x, x, 90, 102) sts.
For All Sizes:
Next 2 Rows:
Row 1 (WS): P1, Work in established Stockinette Windows Pattern to last st, p1.
Row 2: K1, ssk, knit to last 3 sts, k2tog, k1 – 52 (64, 68, 80, 84, 88, 100) sts.
Repeat the last 2 rows 1 (1, 3, 3, 5, 7, 7) more times – 50 (62, 62, 74, 74, 74, 86) sts.
Work 42 (46, 46, 50, 50, 50, 52) more rows evenly in Stockinette Windows Pattern, keeping the first and last sts in Stockinette st, and ending after a Row #6 (10, 2, 6, 12, 4, 6) of pattern.
Separate For Neck
Mark center 12 (18, 18, 24, 24, 24, 24) sts, leaving 19 (22, 22, 25, 25, 25, 31) sts on either side.
Next Row (WS): P1, work in established Stockinette Windows Pattern to center 12 (18, 18, 24, 24, 24, 24) sts, bind off center 12 (18, 18, 24, 24, 24, 24) sts, work in established Stockinette Windows Pattern to last st, p1 – 19 (22, 22, 25, 25, 25, 31) sts remain for each Shoulder.
Shape Back Right Shoulder and Neck
Next 10 Rows:
Row 1 (RS): Knit.
Row 2: Bind off 4 sts at Neck edge, p1, work in established Stockinette Windows Pattern to last st, p1 – 15 (18, 18, 21, 21, 21, 27) sts.
Row 3: Knit.
Row 4: Bind off 4 sts at Neck edge, p1, work in established Stockinette Windows Pattern to last st, p1 – 11 (14, 14, 17, 17, 17, 23) sts.
Row 5: Bind off 2 (3, 3, 4, 4, 4, 5) at Shoulder edge, knit to end – 9 (11, 11, 13, 13, 13, 18) sts.
Row 6: P1, work in established Stockinette Windows Pattern to last st, p1.
Row 7: Bind off 3 (3, 3, 4, 4, 4, 6) at Shoulder edge, knit to end – 6 (8, 8, 9, 9, 9, 12) sts.
Row 8: P1, work in established Stockinette Windows Pattern to last st, p1.
Row 9: Bind off 3 (4, 4, 4, 4, 4, 6) at Shoulder edge, knit to end – 3 (4, 4, 5, 5, 5, 6) sts.
Row 10: P1, work in established Stockinette Windows Pattern to last st, p1.
Bind off remaining 3 (4, 4, 5, 5, 5, 6) sts.
Shape Back Left Shoulder and Neck
With RS Facing, join new yarn to 19 (22, 22, 25, 25, 25, 31) still on the needle.
Next 9 Rows:
Row 1 (RS): Bind off 4 sts, knit to end – 15 (18, 18, 21, 21, 21, 27) sts.
Row 2: P1, work in established Stockinette Windows Pattern to last st, p1.
Row 3: Bind off 4 sts, knit to end – 11 (14, 14, 17, 17, 17, 23) sts.
Row 4: Bind off 2 (3, 3, 4, 4, 4, 5) at Shoulder edge, p1, work in established Stockinette Windows Pattern to last st, p1 – 9 (11, 11, 13, 13, 13, 18) sts.
Row 5: Knit.
Row 6: Bind off 3 (3, 3, 4, 4, 4, 6) at Shoulder edge, p1, work in established Stockinette Windows Pattern to last st, p1 – 6 (8, 8, 9, 9, 9, 12) sts.
Row 7: Knit.
Row 8: Bind off 3 (4, 4, 4, 4, 4, 6) at Shoulder edge, p1, work in established Stockinette Windows Pattern to last st, p1 – 3 (4, 4, 5, 5, 5, 6) sts.
Row 9: Knit.
Bind off remaining 3 (4, 4, 5, 5, 5, 6) sts.
FRONT
Cast on 62 (74, 86, 98, 110, 122, 134) sts.
Row 1 (WS): K2, * p2, k2; repeat from * to end.
Row 2: P2, * k2, p2; repeat from * to end.
Repeat the last 2 rows 5 more times – 12 total rows worked in ribbing.
Next 2 rows:
Row 1 (WS): P1, work in Stockinette Windows Pattern (or offset version, depending on your selected size) to last st, p1.
Row 2: K1, work in Stockinette Windows Pattern (or offset version, depending on your selected size) to last st, k1.
Work in established Stockinette Windows Pattern for 43 more rows, keeping first and last st in Stockinette st, and ending after a Row 3 of pattern.
Optional Pockets
Note: You may choose to work one or two pockets, or no pockets.
Set-Up: With RS facing, place a marker on the needle after st #1 (7, 7, 13, 13, 13, 19); another after st #25 (31, 31, 37, 37, 37, 43) [first pocket placement made], and another after st #37 (43, 55, 61, 73, 85, 91), another after st #61 (67, 79, 85, 97, 109, 115) [second pocket placement made] – 1 (7, 7, 13, 13, 13, 19) sts remain at left edge, 4 markers placed, 24 sts marked for each Pocket.
Next row (Pocket bind-off row, RS): * Knit to next marker, remove marker, bind off 24 sts between markers, remove marker; repeat from * once more, knit to end.
Pocket Lining
Use a separate ball of yarn and needles to work Pocket Lining as follows (do not cut working yarn):
With WS facing and holding Front piece upside down, pick up and knit 24 sts in the purl-bumps closest to Pocket-bind off.
Work in Stockinette st for 12” [30.5 cm], beginning with a WS (purl) row, and ending with a RS (knit) row.
Knit 4 rows, then cut yarn and place all Pocket Lining sts on a holder or spare needle.
Work other Pocket Lining the same.
Rejoin Pocket
Next Row (WS): P1, work Row 5 of Stockinette Windows Pattern to last st using the held Pocket Lining sts in place of the bound-off Pocket sts, p1.
Work in established Stockinette Windows Pattern for 37 (37, 51, 51, 51, 65, 79) more rows, keeping first and last st in Stockinette st, and ending after a Row 14 of pattern – 6 (6, 7, 7, 7, 8, 9) windows created lengthwise.
Shape Front Armholes
Next Row (WS): Bind off 4 sts, p1, knit to last st, p1 – 58 (70, 82, 94, 106, 118, 130) sts.
For last 5 sizes only (M and up):
Next 2 Rows:
Row 1 (RS): Bind off 4 sts, knit to end – x (x, 78, 90, 102, 114, 126) sts.
Row 2: Bind off 4 sts, p1, knit to last st, p1 – x (x, 74, 86, 98, 110, 122) sts.
For last 3 sizes only (2X and up):
Next 2 Rows:
Row 1 (RS): Bind off 4 sts, knit to end – x (x, x, x, 94, 106, 118) sts.
Row 2: Bind off 4 sts, p1, work in established Stockinette Windows Pattern to last st, p1 – x (x, x, x, 90, 102, 114) sts.
For last 2 sizes only (3X and up):
Next 2 Rows:
Row 1 (RS): Bind off 4 sts, k1, work in established Stockinette Windows Pattern to last st, k1 – x (x, x, x, 86, 98, 110) sts.
Row 2: Bind off 4 sts, p1, work in established Stockinette Windows Pattern to last st, p1 – x (x, x, x, x, 94, 106) sts.
Split Front Neck
For all sizes:
With RS facing, identify the center 4-st Garter column, and place a marker on the needle just to the left of these 4 sts.
Next Row (neck split row, RS): Bind off 4 sts, k1, work in established Stockinette Windows Pattern to marker, remove marker, mark the last 4 sts worked for picking up later (these sts are marked with Xs on the chart), turn work, place remaining 25 (31, 33, 39, 41, 43, 49) sts on a holder or spare needle for Right Front Shoulder – 29 (35, 37, 43, 45, 47, 53) sts on the needle for Left Front Shoulder.
Next Row (WS): P1, work in established Stockinette Windows Pattern to last st, p1.
Shape Left Front Armhole and Neck
For Sizes S, L-XL, and 2X Only:
Next 2 Rows:
Row 1 (armhole and neck decrease row, RS): K1, ssk, knit to last 5 sts, k2tog, k3 – x (33, x, 41, 43, x, x) sts.
Row 2: K4, work in established Stockinette Windows Pattern to last st, p1.
Repeat the last 2 rows x (1, x, 3, 1, x, x) more times – x (31, x, 35, 41, x, x) sts.
For Sizes XS, M, 2X, 3X, and 4X-5X Only:
Next 4 Rows:
Row 1 (armhole and neck decrease row, RS): K1, ssk, knit to last 5 sts, k2tog, k3 – 27 (x, 35, x, 39, 45, 51) sts.
Row 2: K4, work in established Stockinette Windows Pattern to last st, p1.
Row 3 (armhole decrease row, RS): K1, ssk, knit to end – 26 (x, 34, x, 38, 44, 50) sts.
Row 4: K4, work in established Stockinette Windows Pattern to last st, p1.
Repeat the last 4 rows 0 (x, 1, x, 1, 3, 3) more times – 26 (x, 31, x, 35, 35, 41) sts.
For All Sizes:
Next 4 Rows:
Row 1 (neck decrease row, RS): Knit to last 5 sts, k2tog, k3 – 25 (30, 30, 34, 34, 34, 40) sts.
Row 2: K4, work in established Stockinette Windows Pattern to last st, p1.
Row 3: Knit.
Row 4: K4, work in established Stockinette Windows Pattern to last st, p1.
Repeat the last 4 rows 7 (11, 11, 12, 12, 12, 11) more times – 18 (19, 19, 22, 22, 22, 29) sts.
For Sizes XS and 4X-5X Only:
Next 6 Rows:
Row 1 (neck decrease row, RS): Knit to last 5 sts, k2tog, k3 – 17 (x, x, x, x, x, 28) sts.
Row 2: K4, work in established Stockinette Windows Pattern to last st, p1.
Row 3: Knit.
Row 4: K4, work in established Stockinette Windows Pattern to last st, p1.
Row 5: Knit.
Row 6: K4, work in established Stockinette Windows Pattern to last st, p1.
Repeat the last 6 rows 1 (x, x, x, x, x, 0) more times – 16 (x, x, x, x, x, 28) sts.
For All Sizes:
Next 2 Rows:
Row 1 (neck decrease row, RS): Knit to last 5 sts, k2tog, k3 – 15 (18, 18, 21, 21, 21, 27)
Row 2: K4, work in established Stockinette Windows Pattern to last st, p1.
Shape Left Front Shoulder
Next 7 Rows:
Row 1 (RS): Bind off 2 (3, 3, 4, 4, 4, 5) sts, knit to end – 13 (15, 15, 17, 17, 17, 22) sts.
Row 2: K4, work in established Stockinette Windows Pattern to last st, p1.
Row 3: Bind off 3 (3, 3, 4, 4, 4, 6) sts, knit to end – 10 (12, 12, 13, 13, 13, 16) sts.
Row 4: K4, work in established Stockinette Windows Pattern to last st, p1.
Row 5: Bind off 3 (4, 4, 4, 4, 4, 6) sts, knit to end – 7 (8, 8, 9, 9, 9, 10) sts.
Row 6: K4, work in established Stockinette Windows Pattern to last st, p1.
Row 7: Bind off 3 (4, 4, 5, 5, 5, 6, 6) sts, knit to end – 4 sts.
Place remaining 4 sts on a holder. Cut yarn and leave a long tail.
Shape Right Front Armhole and Neck
For this section, cycle through your ball of yarn to match the color of the first Left Front row worked at neck split.
Next 2 Rows:
Row 1 (pick up row, RS): With RS facing but working into WS of work, and using new color-matched yarn, pick up and knit the purl bumps of the 4 marked sts at neck split, then knit across all held Right Front sts – 29 (35, 37, 43, 45, 47, 53) sts.
Row 2: P1, work in established Stockinette Windows Pattern to last st, p1.
For Sizes S, L-XL, and 2X Only:
Next 2 Rows:
Row 1 (armhole and neck decrease row, RS): K3, ssk, knit to last 3 sts, k2tog, k1 – x (33, x, 41, 43, x, x) sts.
Row 2: P1, work in established Stockinette Windows Pattern to last 4 sts, k4.
Repeat the last 2 rows x (1, x, 3, 1, x, x) more times – x (31, x, 35, 41, x, x) sts.
For Sizes XS, M, 2X, 3X, and 4X-5X Only:
Next 4 Rows:
Row 1 (armhole and neck decrease row, RS): K3, ssk, knit to last 3 sts, k2tog, k1 – 27 (x, 35, x, 39, 45, 51) sts.
Row 2: P1, work in established Stockinette Windows Pattern to last 4 sts, k4.
Row 3 (armhole decrease row, RS): Knit to last 3 sts, k2tog, k1 – 26 (x, 34, x, 38, 44, 50) sts.
Row 4: P1, work in established Stockinette Windows Pattern to last 4 sts, k4.
Repeat the last 4 rows 0 (x, 1, x, 1, 3, 3) more times – 26 (x, 31, x, 35, 35, 41) sts.
For All Sizes:
Next 4 Rows:
Row 1 (neck decrease row, RS): K3, ssk, knit to end – 25 (30, 30, 34, 34, 34, 40) sts.
Row 2: P1, work in established Stockinette Windows Pattern to last 4 sts, k4.
Row 3: Knit.
Row 4: P1, work in established Stockinette Windows Pattern to last 4 sts, k4.
Repeat the last 4 rows 7 (11, 11, 12, 12, 12, 11) more times – 18 (19, 19, 22, 22, 22, 29) sts.
For Sizes XS and 4X-5X Only:
Next 6 Rows:
Row 1 (neck decrease row, RS): K3, ssk, knit to end – 17 (x, x, x, x, x, 28) sts.
Row 2: P1, work in established Stockinette Windows Pattern to last 4 sts, k4.
Row 3: Knit.
Row 4: P1, work in established Stockinette Windows Pattern to last 4 sts, k4.
Row 5: Knit.
Row 6: P1, work in established Stockinette Windows Pattern to last 4 sts, k4.
Repeat the last 6 rows 1 (x, x, x, x, x, 0) more times – 16 (x, x, x, x, x, 28) sts.
For All Sizes:
Next Row (neck decrease row, RS): K3, ssk, knit to end – 15 (18, 18, 21, 21, 21, 27)
Shape Right Front Shoulder
Next 7 Rows:
Row 1 (WS): Bind off 2 (3, 3, 4, 4, 4, 5) sts, p1, work in established Stockinette Windows Pattern to last 4 sts, k4 – 13 (15, 15, 17, 17, 17, 22) sts.
Row 2: Knit.
Row 3: Bind off 3 (3, 3, 4, 4, 4, 6) sts, p1, work in established Stockinette Windows Pattern to last 4 sts, k4 – 10 (12, 12, 13, 13, 13, 16) sts.
Row 4: Knit.
Row 5: Bind off 3 (4, 4, 4, 4, 4, 6) sts, p1, work in established Stockinette Windows Pattern to last 4 sts, k4 – 7 (8, 8, 9, 9, 9, 10) sts.
Row 6: Knit.
Row 7: Bind off 3 (4, 4, 5, 5, 5, 6) sts, k4 – 4 sts.
Place remaining 4 sts on a holder; do not cut yarn.
FINISHING
Sew side seams with mattress stitch. Leave the ribbing open for a vent.
Sew Pocket inside seams, if applicable.
Sew Shoulder seams with mattress stitch, except for the 4 live sts at each Front Shoulder.
Armhole Edging
With RS facing, and starting and ending at armhole seam, pick up and knit 1 st for every bound off st and 2 sts for every 3 row-edge sts.
Knit 3 rows, then bind off all sts loosely knitwise.
Sew Armhole Edging seam with mattress stitch.
Back Neck Edging
With RS facing, pick up and knit 1 st for every bound off st and 2 sts for every 3 row-edge sts across Back Neck edge. Cut yarn.
Place 4 live sts from Right Front Shoulder back onto the needle.
Join new yarn with RS facing, and work Garter St bind-off across Back Neck sts as follows:
Row 1 (RS): K3, k2tog, turn work.
Row 2: Knit.
Repeat the last 2 rows until all Back Neck sts have been used, and 8 total sts remain (4 sts from each Front Shoulder), ending after a WS (knit) row.
Using Garter Stitch Grafting (also see Video Tutorials), join together the remaining 4 sts at each Front Shoulder, creating the missing RS row in the process.
Place the 4 front stitches from a holder onto a needle and hold to back. The purl stitches should be facing you. The 4 stitches on the needle after the back neck edge are in the front and the purl stitches should also be facing you. Hold both needles in left hand.
With the tail from the back needle and a tapestry needle, continue as follows:
Set Up –
Front: Insert needle as if to purl, leave on.
Back: Insert needle as if to purl, leave on.
Repeat –
Front: Insert needle as if to knit, drop the stitch off the front needle. Insert into the next stitch as if to purl, leave on.
Back: Insert needle as if to knit, drop the stitch off the back needle. Insert into the next stitch as if to purl, leave on.
Repeat the last set of instructions to the last stitch on each needle.
Last Stitch –
Front: Insert needle as if to knit, drop the stitch off the front needle.
Back: Insert needle as if to knit, drop the stitch of the back needle.
Fasten off.
Weave in all loose ends.
FAQ – Lorelai Knit Vest
Do I have to knit the pockets?
Nope! The pockets are totally optional. The pattern explains how to add them as-you-go, but you can skip that section if you prefer a smoother front.
Is this pattern good for confident beginners?
Yes. If you’re comfortable with knit/purl and ready to learn shaping, reading simple pattern repeats, and basic finishing, Lorelai is a great next step—especially with all the video support.
Can I use a solid color yarn instead of a self-striping yarn?
Absolutely. A solid or heathered yarn will make the Stockinette Windows texture really pop. Variegated or long-striping yarns give more color play. Just be sure you’re using a worsted weight yarn and check your gauge.
Can I make the vest longer or shorter?
Yes. You can add or remove length in the body (before the armhole shaping). Just keep in mind this will change your yarn usage.
Where can I ask questions if I get stuck?
You have options:
- Post in Marly’s Minions: Marly Bird BiCrafty Community on Facebook.
- Ask inside the Marly Bird House workshop if you’re taking the course.
- Leave a comment on the blog post, and we’ll try to help as soon as possible.
Is there a crochet version of this vest?
This specific pattern is knit, but there are plenty of crochet garments and Turkey Trot projects on MarlyBird.com and inside Marly Bird House if you’re bi-crafty.
Final Thoughts – Share Your Lorelai Knit Vest
The Lorelai Knit Vest is one of those pieces you’ll reach for over and over again. It’s cozy without being bulky, stylish without being fussy, and packed with little teaching moments that help you grow as a knitter.
When you finish (or even when you’re still mid-knit), I’d love to see:
- Photos in Marly’s Minions: Marly Bird BiCrafty Community
- Your makes on social media—tag @themarlybird and use #marlybird and #mmmdi (marly made me do it)
- Your project pages on Ravelry if you use it
Whether you’re knitting from the free pattern, following along with the ad-free PDF, or taking the course inside Marly Bird House, I’m so excited to be your BiCrafty Bestie cheering you on through every stitch. 💖
❤️ Your BiCrafty Bestie,
Marly Bird

Categories: Free Patterns, Knitting, Make-Alongs, Marly Bird Premium Patterns, Our Free Patterns, Pattern