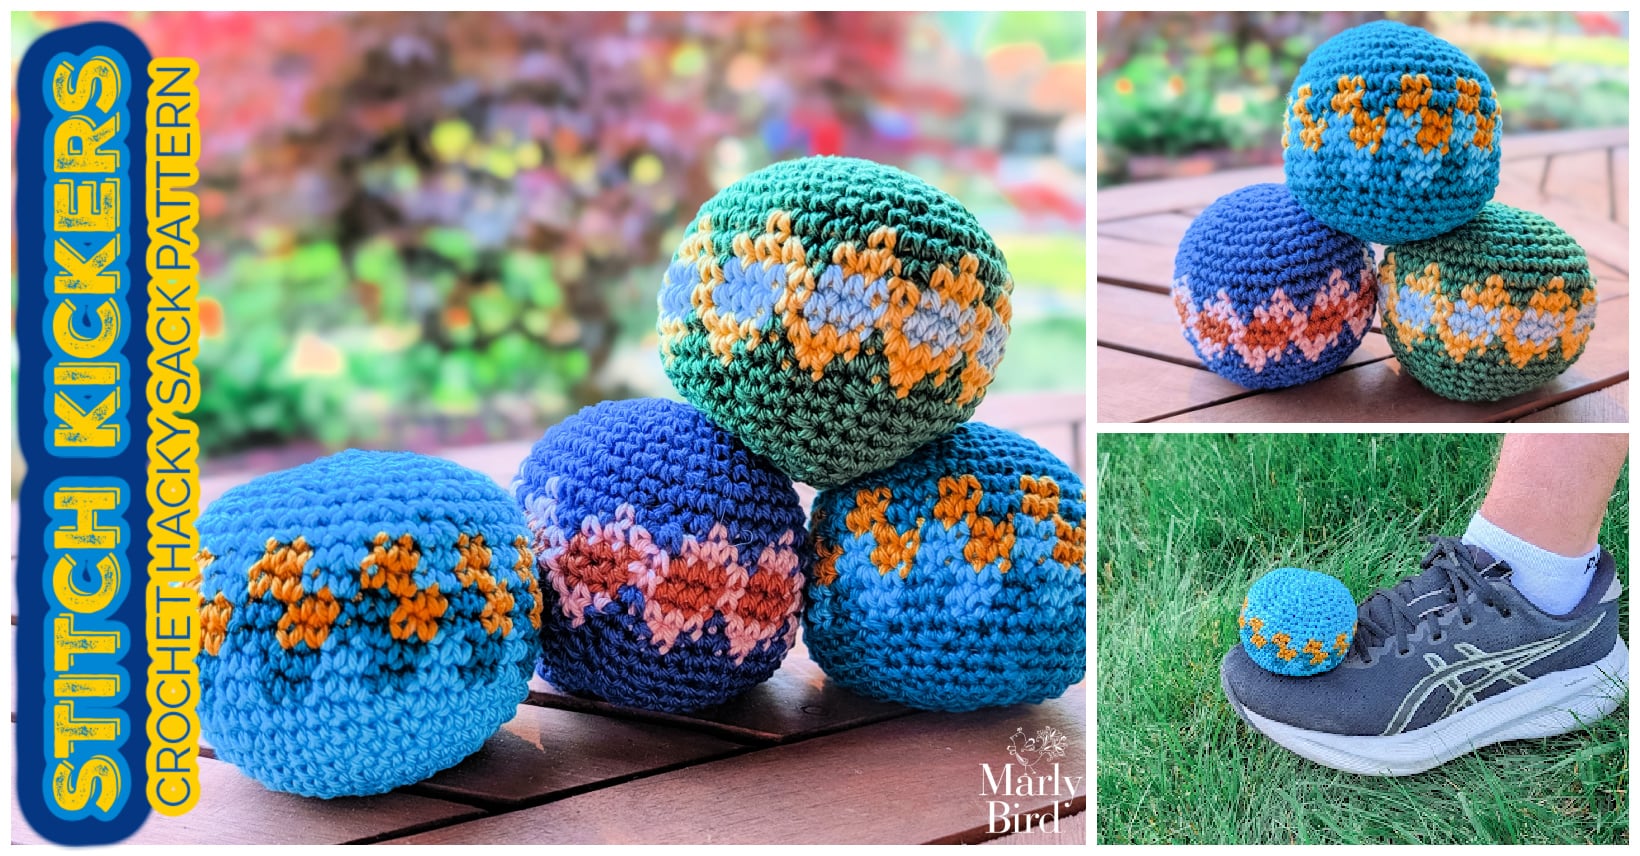
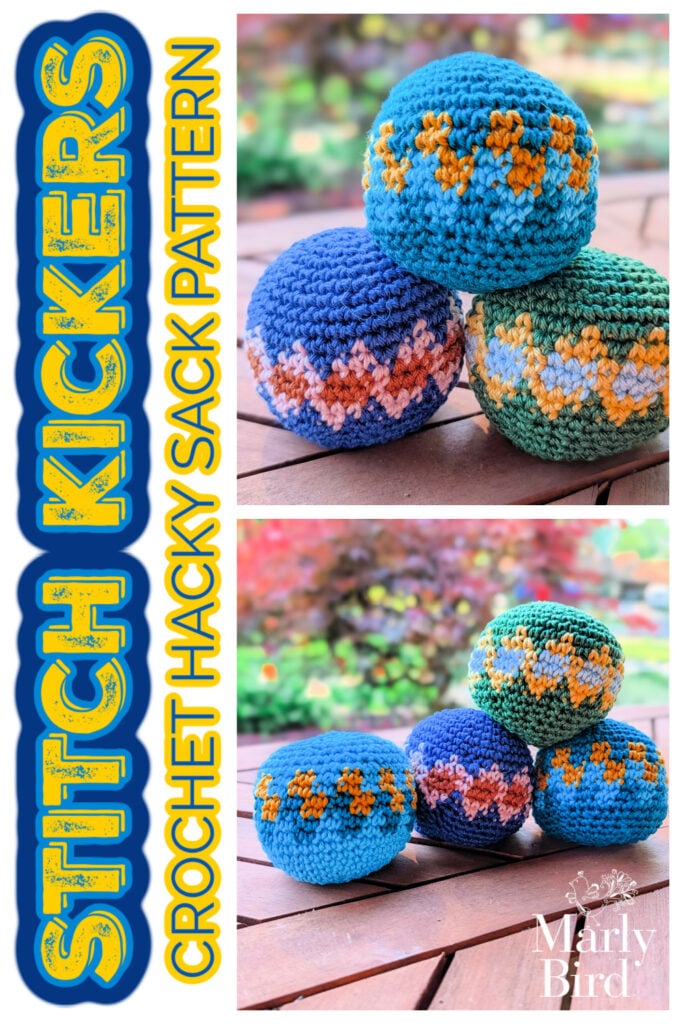
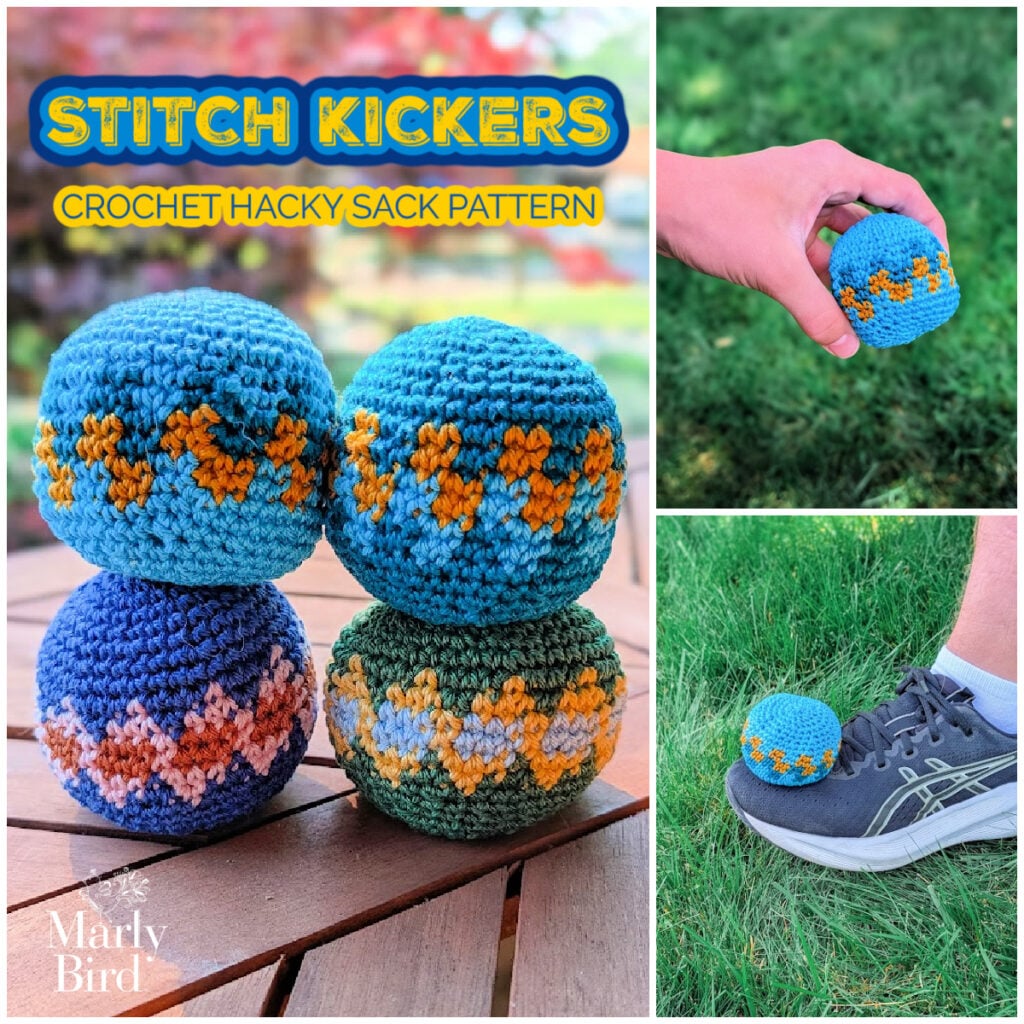
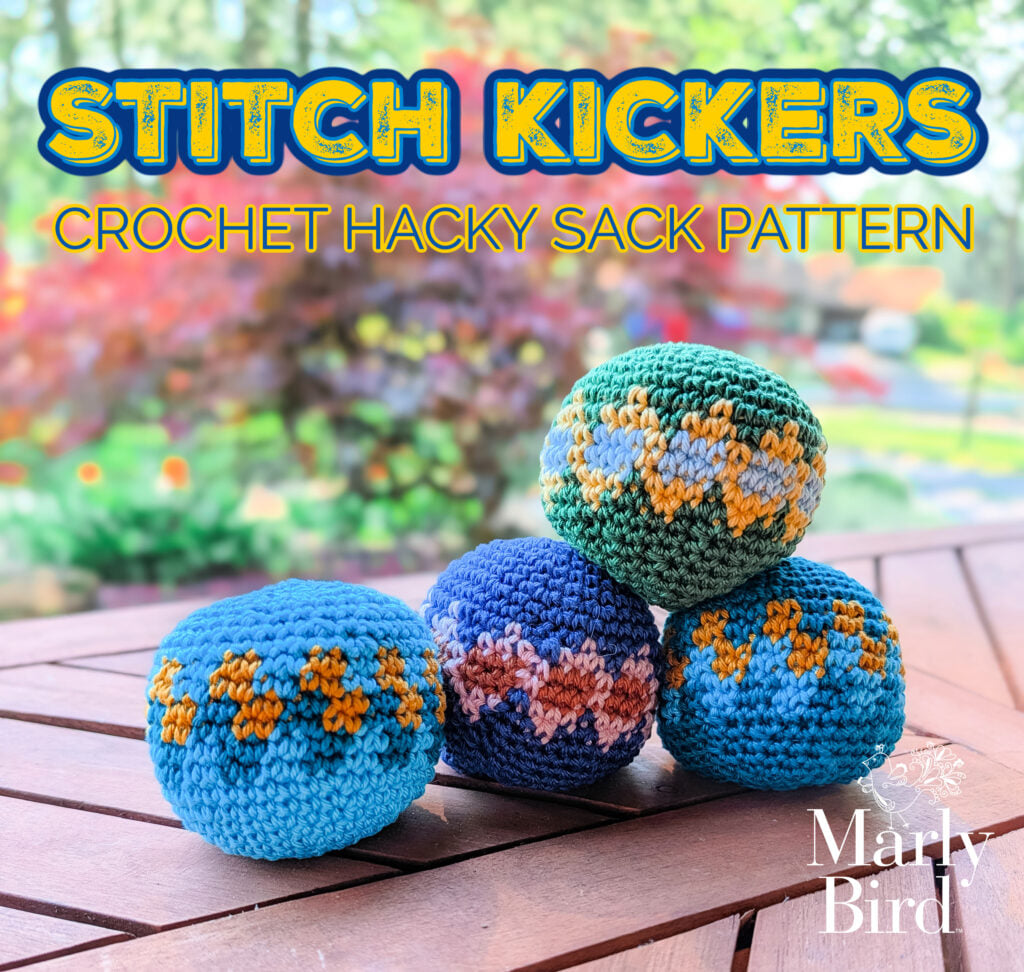
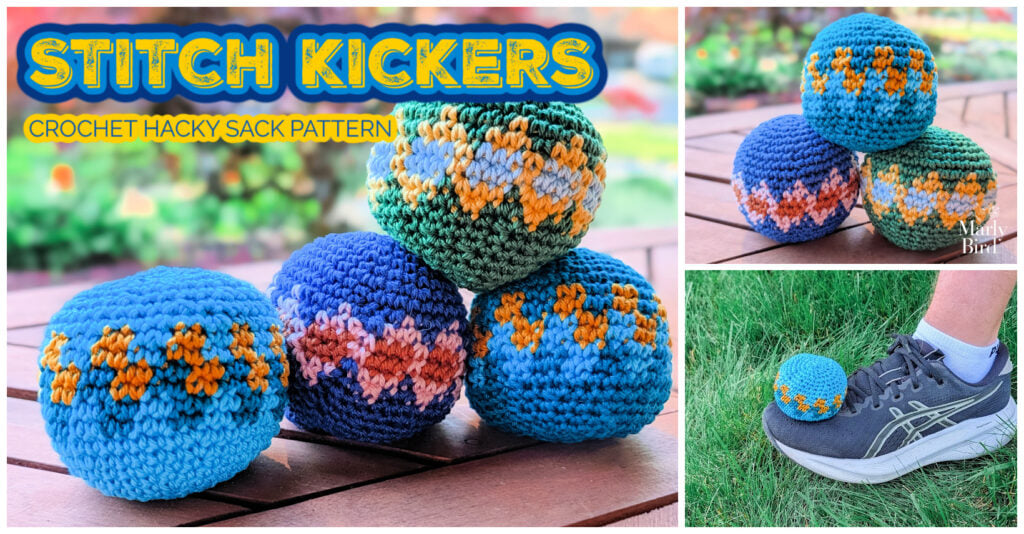
This free crochet hacky sack pattern — the Stitch Kickers — is a fun, fast, colorful project designed by Marly Bird and Robyn Chachula. Made with DK-weight cotton and a D/3 hook, this little footbag measures 2.5 inches in diameter, uses tapestry colorwork for a gorgeous geometric design, and works up in under an hour. Four colorway options included!
⚡ Quick Answer:
Yes — the Stitch Kickers crochet hacky sack pattern is completely free right here on the blog! It's rated Adventurous Beginner, uses a little tapestry colorwork in the middle section, and crochets up quickly in DK-weight cotton. Scroll down for the full pattern, or grab the ad-free PDF to take it anywhere.
✍️ Real People. Real Designers. Real Instructions You Can Count On.
This is NOT an AI-written pattern — and these are NOT AI-generated images. 🙅♀️ The Stitch Kickers Crochet Hacky Sack was designed by real designers Marly Bird and Robyn Chachula, with real technique knowledge built from decades of crafting experience, real test crocheters, and real step-by-step instructions you can actually follow. Every stitch, every round, every colorwork tip was crafted by human hands and verified by human crocheters. When you follow this pattern, you're in good hands. 🧶
Looking for a fast, colorful crochet project that makes everyone smile? 😊 The Stitch Kickers hacky sack is one of those secretly perfect quick makes — small enough to finish in one sitting, colorful enough to show off some tapestry crochet skills, and fun enough that your kids, grandkids, or any kid at heart will immediately want to play with it the second you finish. And yes… they're surprisingly satisfying to make.
Hey, bestie 💛 I am SO excited to share this free crochet hacky sack pattern with you today! I designed this with the incredibly talented Robyn Chachula — and if you know Robyn's work, you know she makes things that are approachable AND genuinely interesting to crochet. This little footbag is no exception. There's a colorwork section in the middle that uses tapestry crochet technique, and it gives the finished piece that satisfying “wait, you MADE that?” look. The whole thing works up in under an hour once you get your rhythm… which means you could easily knock out a whole set of these for summer gift-giving or just to have on hand for impromptu backyard fun. 🎉
This post contains affiliate links. As a yarn-loving heart, I earn a small commission when you shop through my links — at no extra cost to you. Thank you for supporting free patterns and tutorials on MarlyBird.com!
What You Will Love About This Pattern 💖
✨ Adventurous Beginner friendly. You know basic single crochet? You can make this. The colorwork section follows a chart, but it's small and manageable — this is a great “first colorwork” project if tapestry crochet has felt intimidating.
⏱️ Truly a one-sitting project. The finished hacky sack is only 2.5 inches across. That means the whole thing — increases, colorwork, decreases, stuffing — works up in under an hour. One Netflix episode. Done.
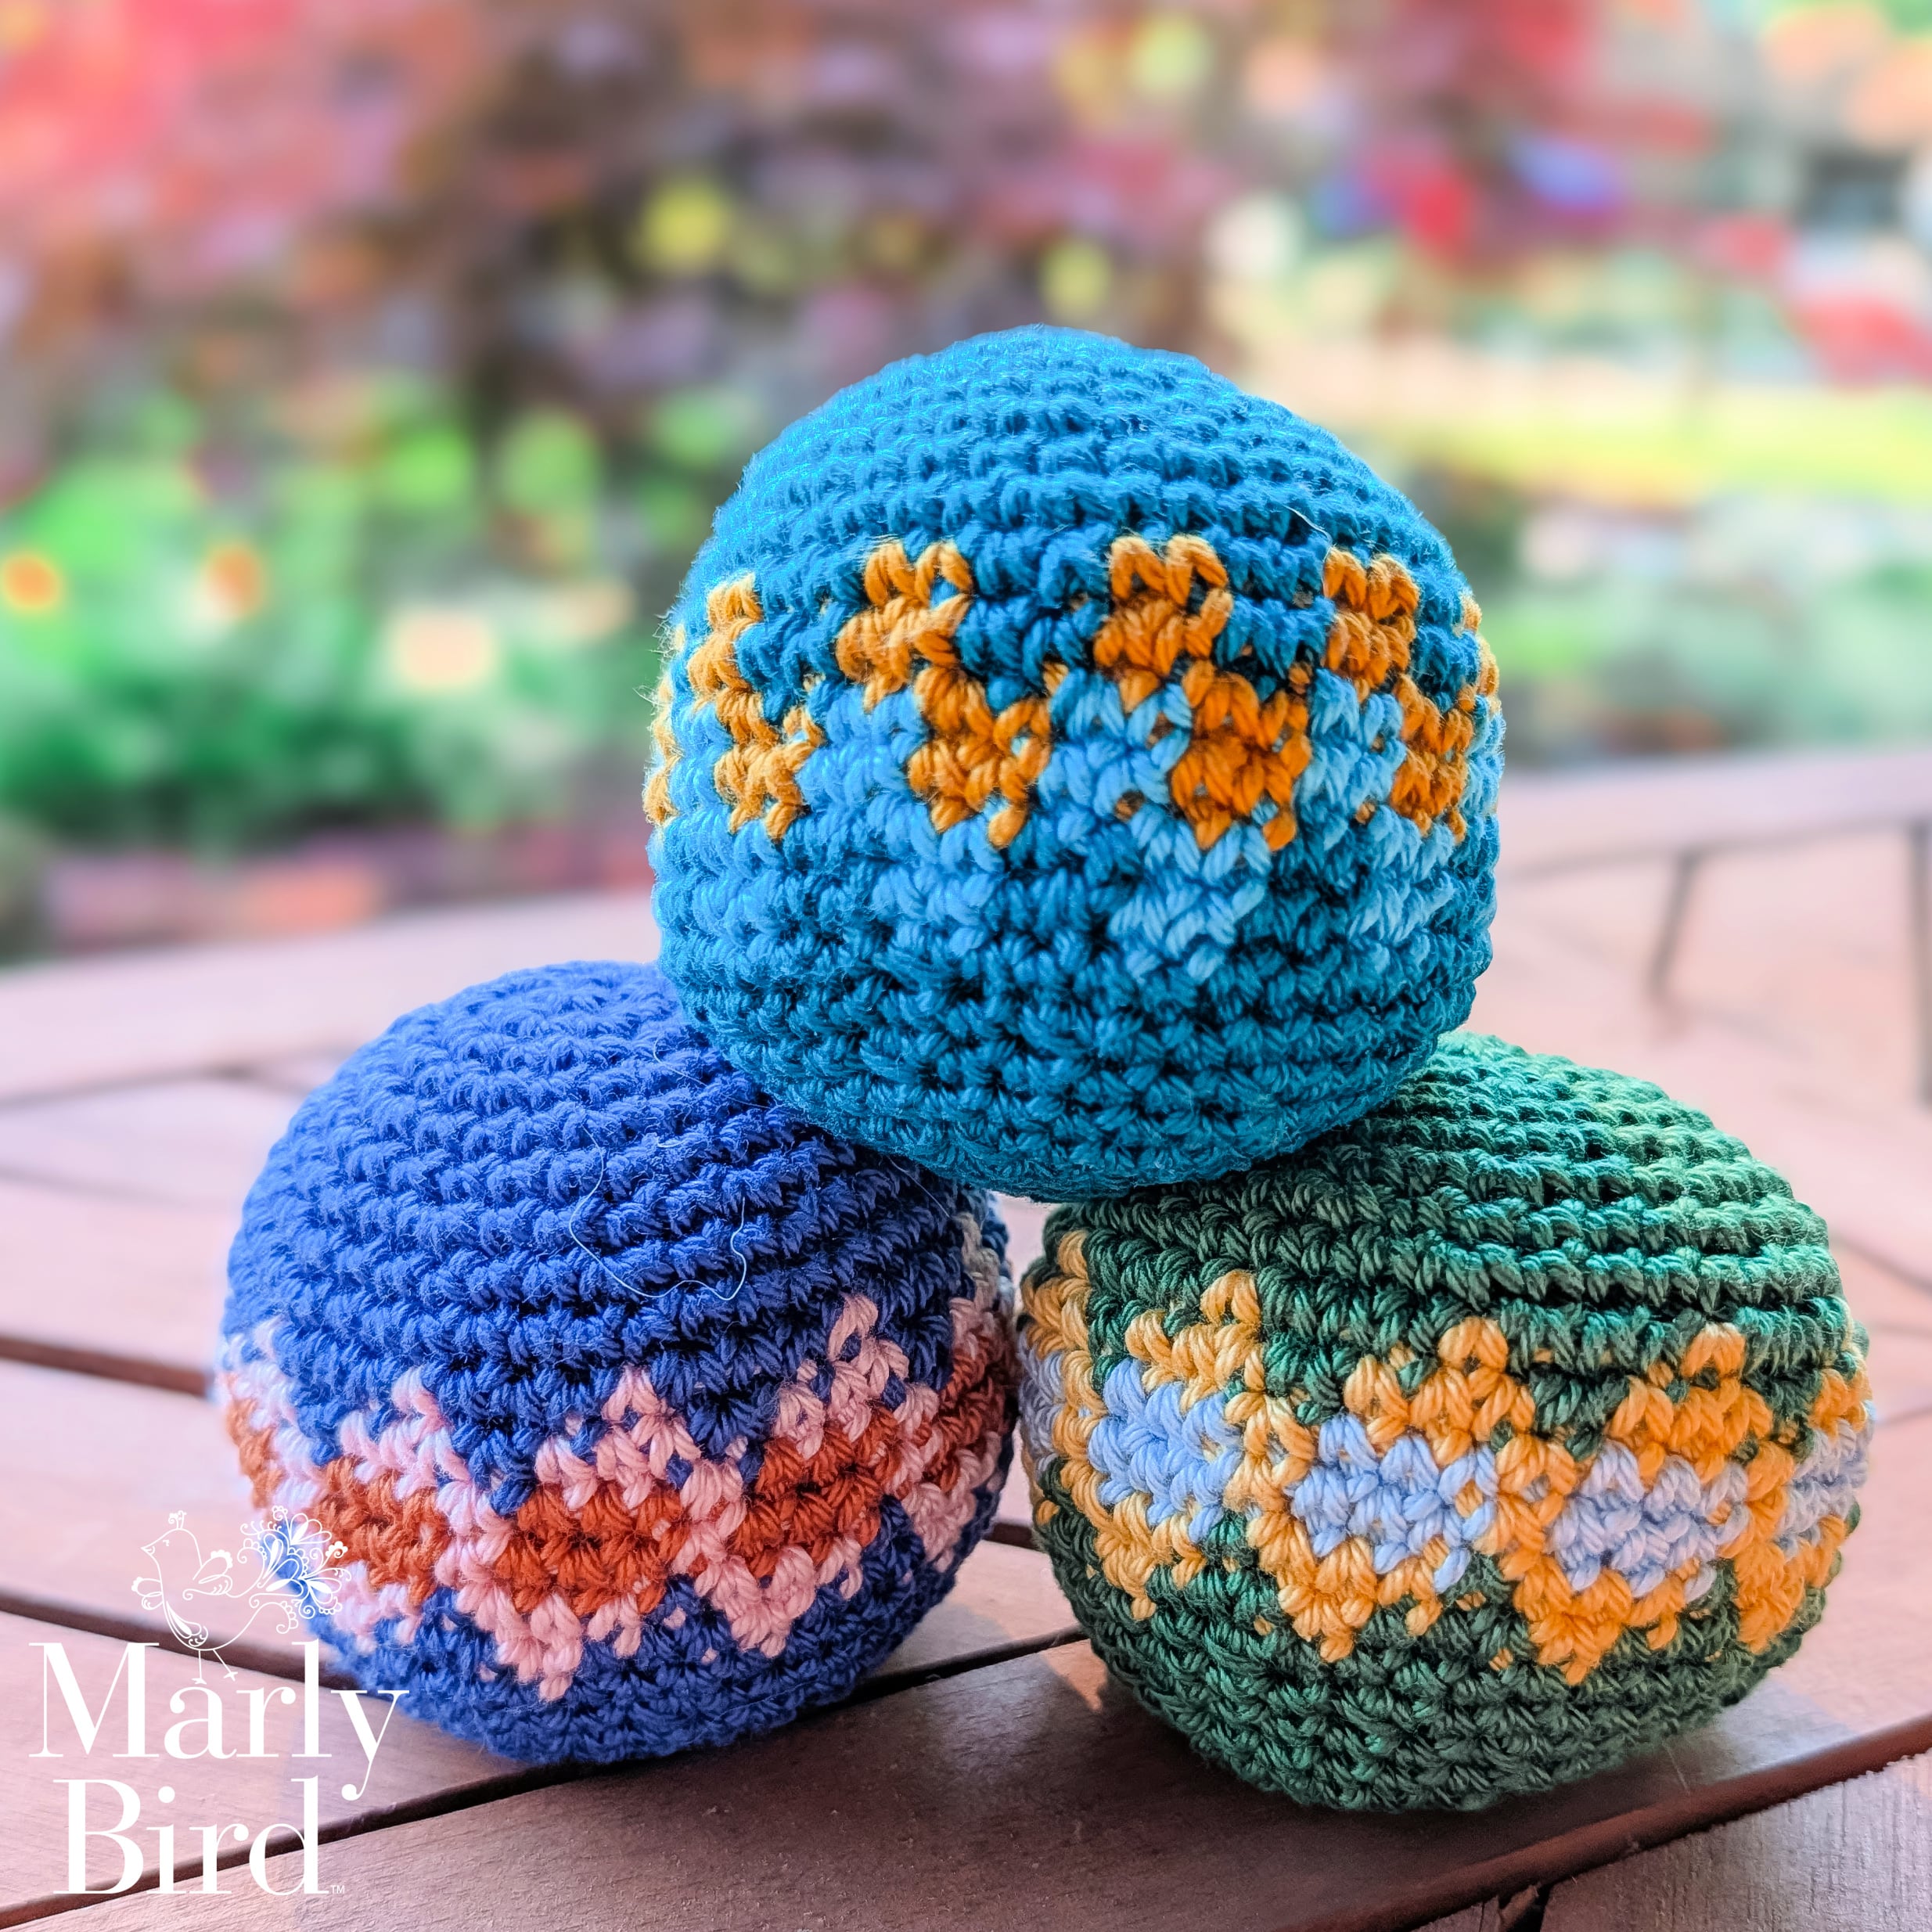
🎨 Four ready-to-go colorway options. We designed four beautiful colorway combinations using WeCrochet Animation cotton. Whether you want bold blue, tropical green, cool azure, or warm butterscotch, there's a starting point that's ready to go. Or mix and match your own scraps!
🧶 A great stash-buster for cotton scraps. You only need about 10g of the main color and tiny amounts of two accent colors. This is the perfect project for those little leftover balls of DK cotton that aren't quite enough for anything else.
🎁 The gift that gets USED. A lot of handmade gifts live in a drawer. A crochet hacky sack? It goes straight to the backyard, the beach bag, the school locker. Kids love them. Adults love them. They're a tiny piece of handmade joy that someone will actually play with.
🧵 A gentle intro to tapestry colorwork. If you've been curious about colorwork but a full sweater feels overwhelming… this is your starter project. Six rounds, a small chart, two colors carried — exactly the right scale to build the skill without the commitment.
Quick Pattern Overview
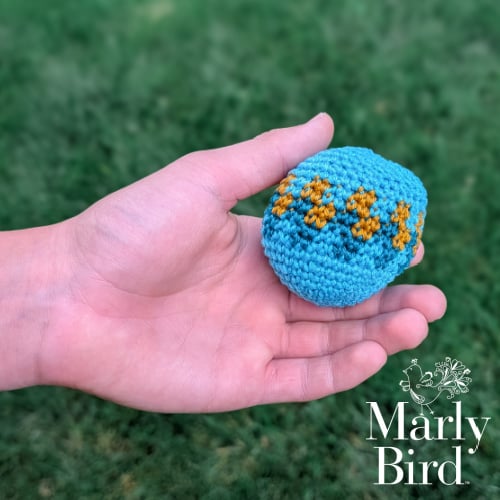
📐 Finished size: 2.5 inches [6.5 cm] in diameter — the classic hacky sack footbag size, weighted perfectly for kicking.
🧶 Yarn: WeCrochet Animation (100% mercerized cotton, DK weight, #3) — approximately 10g of the main color plus small amounts of two accent colors. Four ready-to-go colorways are included in the pattern.
🪝 Hook: Size D/3 [3.25 mm] — or whatever size gives you the correct gauge.
📊 Gauge: 12 sc × 12 rounds = 2 inches × 2 inches. Gauge matters here because the fabric needs to be firm enough to hold the poly pellet filling securely.
⭐ Skill level: Adventurous Beginner. You'll need: single crochet, magic adjustable ring, sc2tog decrease, and basic tapestry colorwork (carrying and changing colors). All techniques are explained in the pattern.
🏅 Designed by: Marly Bird & Robyn Chachula — crochet designers, authors, and teachers with decades of crafting experience between them.
Love the Pattern but Want an Ad-Free PDF? ⭐
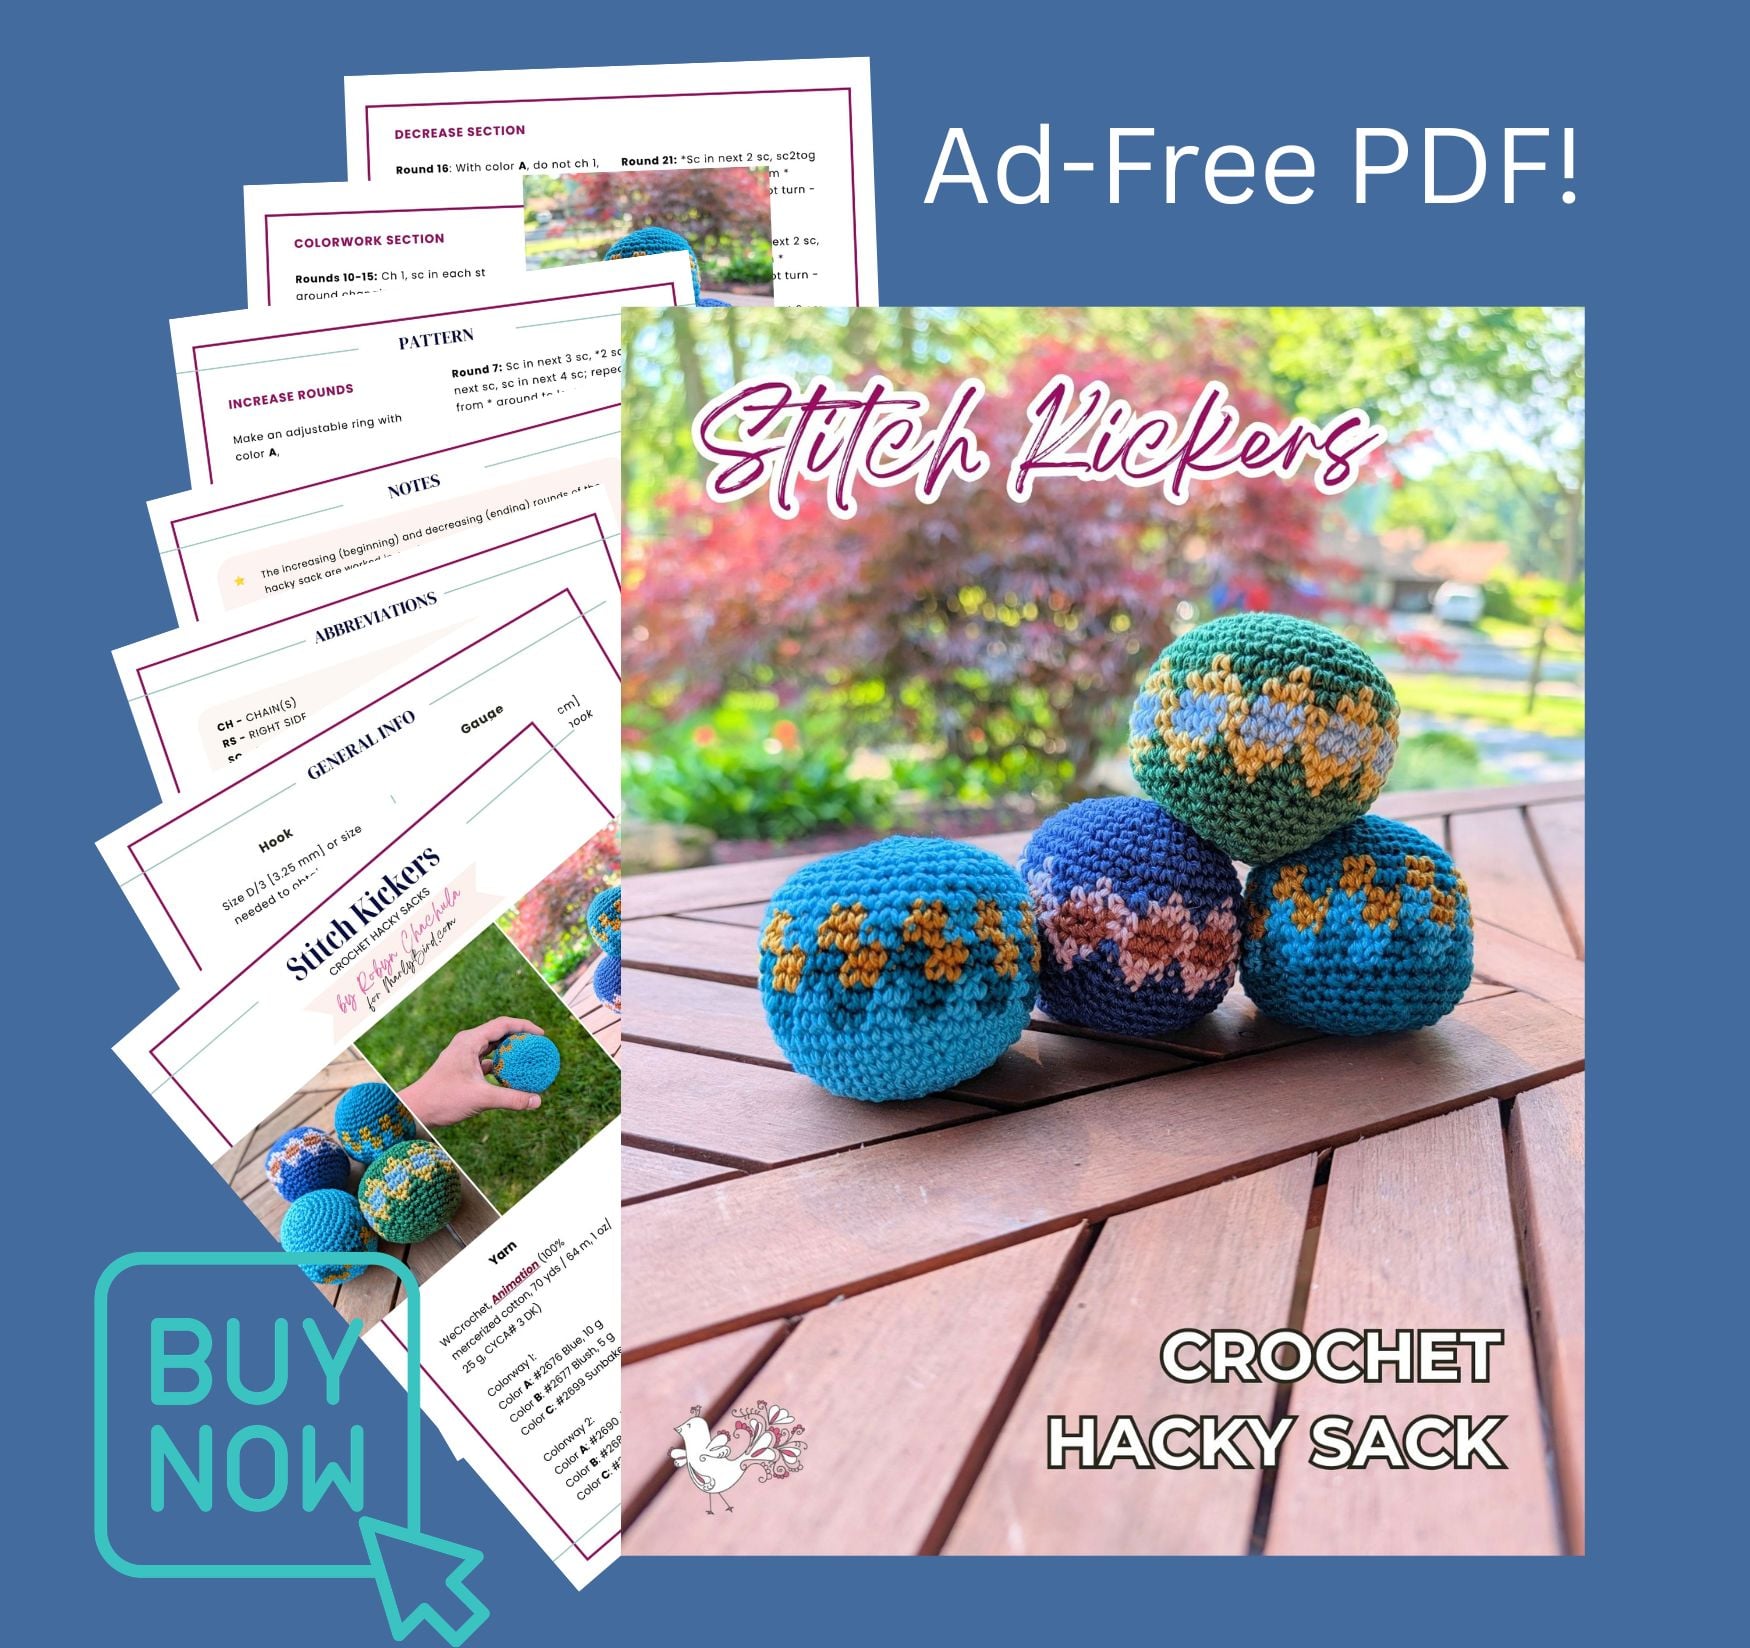
The full Stitch Kickers crochet hacky sack pattern is completely free right here on the blog… but if you'd like a clean, printable, ad-free PDF version to take to your yarn group, travel with, or just have on hand without scrolling, you can grab it on any of our shops!
Is This Hacky Sack Pattern Right for You?
This pattern is perfect for you if you're looking for a quick, confidence-building project that introduces colorwork at a completely manageable scale. You'll need to be comfortable with single crochet and the magic ring… but everything else is taught right in the pattern. If you've never tried tapestry colorwork before, this is genuinely one of the best “first colorwork” projects out there — the motif is simple, the rounds are short, and because the piece is small, any tension wobbles are easy to correct.
This pattern might not be the right fit if you're a total beginner who hasn't yet learned to crochet in the round. The spiral increases and joined colorwork rounds require you to read your work a little — if you're still getting your bearings with basic stitches, I'd suggest starting with my beginner's guide to how to crochet first, then coming back to this once you're comfortable in the round!
What Is a Hacky Sack — And Why Crochet One?
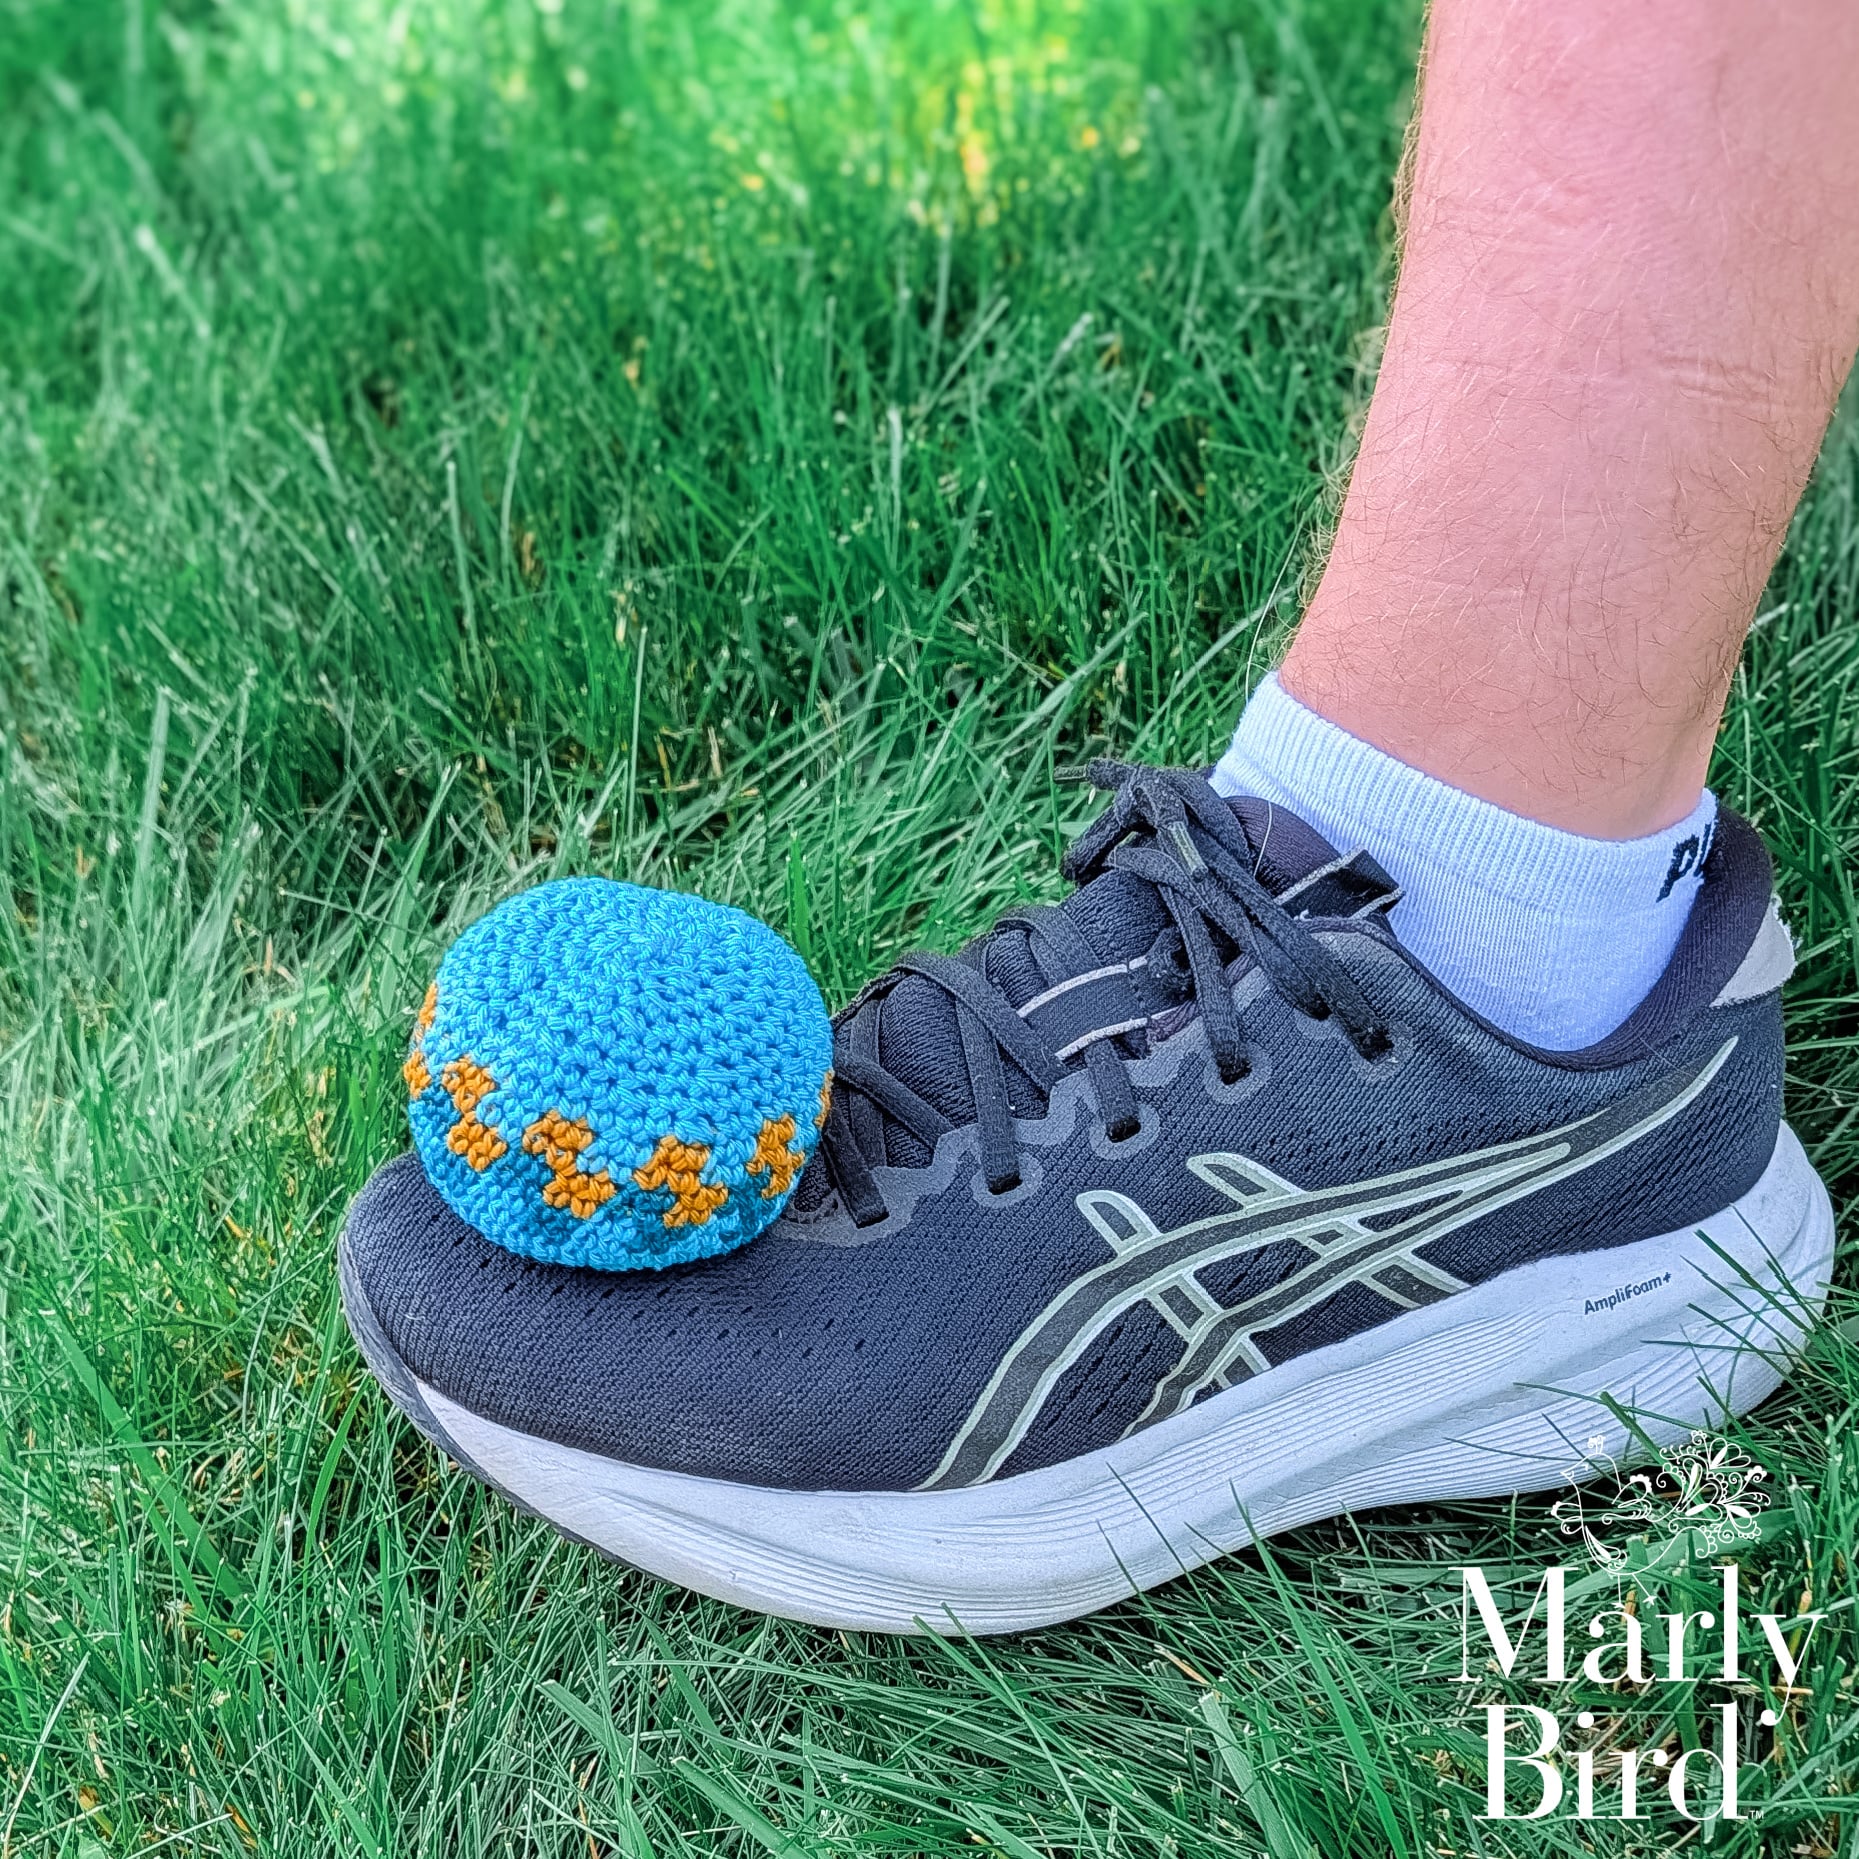
A hacky sack — also called a footbag — is a small weighted ball that players keep airborne using only their feet, knees, and body (no hands allowed!). It's one of those perfectly simple outdoor games that works for any age, requires no equipment beyond the bag itself, and is genuinely fun whether you're playing in a circle with friends or practicing solo kicks in the backyard.
A Quick History — 50 Years of Footbag
Foot-juggling games are actually ancient — China's cuju (“kick-ball”) dates to the 3rd century B.C., and the feathered-shuttlecock game jianzi is still played across China, Vietnam, and the Philippines today. Several Native American tribes also played foot-juggling games using small bladders filled with animal hair. But the modern hacky sack? That has a specific origin story, and it's a good one. 😄
In 1972, Mike Marshall and John Stalberger invented it in Oregon City, Oregon. Marshall had learned a foot-juggling game and taught it to Stalberger, who was recovering from knee surgery — he found kicking a small bag helped rehabilitate his knee. They spent years developing and promoting the game, launched the first packaged branded Hacky Sacks in 1977, and by 1979 had a US Patent. By 1983, Wham-O (the company behind the Frisbee and Slip ‘N Slide) had acquired the brand.
The 1980s and 90s were the cultural peak — hacky sacks were everywhere on college campuses, city parks, and concert venues. The generic non-trademarked name “footbag” became the competitive sports term, and the World Footbag Championships still run today. Over 25 million official Hacky Sack-branded footbags have been sold… and honestly? With Gen Z rediscovering screen-free outdoor games, the handmade crochet version fits this moment perfectly. 🌿
Why crochet one instead of buying one? Because yours will be better. You control the weight by adjusting the fill, so you can make it lighter for kids or heavier for experienced players. The colorwork design makes each one completely unique. And in an era of mass-produced everything, something handmade by a real person with real skills carries something a factory ball never can.
💡 Bonus Use: Microwave Hand Warmer!
Want to turn your cotton-yarn hacky sack into a cozy little hand warmer? Fill it with plain, dry, uncooked rice and microwave it briefly for gentle warmth. Start with 15–30 seconds and test carefully before handling. Some microwaves heat more aggressively than others, so always use caution.
Important: This version must be made with 100% cotton yarn only. Do not microwave acrylic, polyester, nylon, metallic yarn/thread, safety eyes, buttons, beads, poly pellets, stuffing, or synthetic materials. Never leave it unattended in the microwave, and stop using it immediately if you notice scorching, smoke, odor, damage, or leaking rice.
See the Microwave Hand Warmer Safety Disclaimer below before making or using this option.
⚠️ Microwave Hand Warmer Safety Disclaimer
Safety Note: This microwave hand warmer idea is an optional bonus use only. Heating results vary by microwave, materials, stitch tension, and construction. Use at your own risk.
For a microwave-safe version, use 100% cotton yarn only and fill only with plain, dry, uncooked rice. Do not microwave acrylic, polyester, nylon, wool blends, metallic yarn or thread, safety eyes, buttons, beads, zippers, poly pellets, fiberfill, or synthetic materials.
Microwave briefly, starting with 15–30 seconds, and test carefully before handling. Do not overheat. Do not microwave unattended. Allow the item to cool completely before reheating. Discontinue use immediately if you notice scorching, smoke, odor, damage, or leaking rice.
This item is for gentle external warmth only and is not a medical device. Do not use on infants, young children, pets, sleeping individuals, or anyone with reduced heat sensitivity. The maker and user are responsible for safe materials, construction, heating, and use. The designer/publisher is not responsible for injury, burns, fire, property damage, misuse, substitutions, or finished items made or sold from this pattern.
🎁 Make a Set — It's the Best Gift That Gets Used
The Stitch Kickers hacky sack has a secret superpower as a gift: it's small, inexpensive to make, works up fast, and it actually gets used. Here are a few of my favorite ways to give these:
- 🎒 End-of-school gift for kids — make a few in bright colors and tuck one in each kid's bag on the last day
- 🎉 Birthday party favors — make a batch in a colorway that matches the party theme
- 🎓 Graduation gift — knit them in school colors for a personal, handmade touch
- 🧦 Stocking stuffer — they're the perfect size, and handmade ones feel extra special under the tree
- 🏕️ Camp activity — bring yarn and hook, teach the kids to crochet their own, then kick them around
- 🌈 Custom colorways — team colors, pride flags, favorite color combos — the four-colorway system means there are endless options
🎯 Important Technique Note: Yarn Over vs. Yarn Under
🎯 Important Technique Note from Marly:
Use the yarn-over (YO) method of single crochet for this pattern — not yarn-under. Here's why this matters more than you'd think…
A lot of new crocheters come to this pattern through amigurumi — they learned to make stuffed animals, and in amigurumi, the yarn-under (YU) method is very commonly used because it creates extra-tight stitches that hide the stuffing. So intuitively, you might think: tight stitch = good hacky sack. You're right about the tight part! But yarn-under doesn't just tighten the stitch — it also creates a slightly knobby, textured surface on the exterior of the fabric. For a stuffed bear, that doesn't matter at all. For a hacky sack, it makes a real difference. A knobby exterior creates unpredictable friction points — the ball can catch mid-kick or deflect in a direction you didn't expect. The yarn-over method gives you the same tight stitch structure with a smoother outer surface, so the ball travels cleanly and consistently. Both methods make a tight stitch. Only yarn-over makes a smooth one. Not sure which method you've been using? Here's how to tell →

A Quick Guide to Tapestry Colorwork Crochet
Tapestry colorwork is the technique used in the middle six rounds of this hacky sack — and if you haven't tried it before, don't worry. The basic idea is simple: you work with two (or more) colors at once, carrying the color you're not currently using across the top of your stitches and crocheting over it. When you're ready to switch colors, you complete the last step of the stitch in the new color.
The result is a dense, colorful fabric where the design shows clearly on the right side while the carried yarn is neatly buried inside the stitches. It's a completely different look from colorwork done by carrying yarn on the wrong side — the fabric is thicker, more structured, and has a lovely texture that makes these hacky sacks feel really satisfying in the hand.
One thing to know before you start: every stitch in this pattern is worked as a standard yarn over (YO) — NOT yarn under. This matters for your colorwork tension and for the play quality of the finished ball. Not sure about the difference? Read my full breakdown of ⭐️ yarn over vs. yarn under in crochet ⭐️— it's one of those things that makes a surprising difference once you understand it! 🧵
✏️ Designer Tip:
The key to clean tapestry colorwork is tension… specifically, carrying the unused yarn loosely across the top of your stitches. Too tight and your fabric will pucker and distort. When in doubt, stretch your stitches slightly as you work over the carried yarn. The pattern notes remind you of this too — we've thought through every detail!
The colorwork section uses two color chart options. Both are simple geometric motifs designed to look great on the small curved surface of a hacky sack. Pick the one that calls to you… or try both colorways and compare!
Explore More Crochet Colorwork Patterns
If this hacky sack sparks your interest in tapestry and colorwork crochet, you are going to love exploring this whole corner of the craft! Check out my guide to 6 crochet colorwork techniques — it covers tapestry, Fair Isle, mosaic, and more.
Yarn & Materials
The original pattern uses WeCrochet Animation (100% mercerized cotton, DK weight, CYCA #3, 70 yds / 64 m per 25g skein). This yarn is specifically designed for colorwork — the mercerized cotton has a smooth, defined stitch definition that makes the colorwork motif crisp and clear. It's also 100% cotton, which means it has the right weight and heft for a hacky sack that actually plays well.
Each hacky sack uses about 10g of the main color (Color A) and just a small amount of two accent colors (Colors B and C). That means one skein of each color gives you enough for multiple hacky sacks… extra economical, especially if you're making a set as gifts.
The Four Included Colorways
We designed four beautiful starting-point colorways. All colorway numbers reference WeCrochet Animation:

- Colorway 1: Blue (#2676) main + Blush (#2677) + Sunbaked (#2699)
- Colorway 2: Jalapeno (#2690) main + Creme Brulee (#2683) + Dewdrop (#2684)
- Colorway 3: Azure (#2674) main + Kenai (#2691) + Butterscotch (#2679)
- Colorway 4: Kenai (#2691) main + Butterscotch (#2679) + Azure (#2674)
Yarn Substitutions
The best yarn for a crochet hacky sack is 100% cotton in a DK or worsted (Medium #4) weight. Cotton is durable, has very little stretch (so it keeps its shape while being kicked), and withstands impacts against hard-soled shoes much better than acrylic. This is one pattern where yarn choice genuinely affects how the finished project plays!
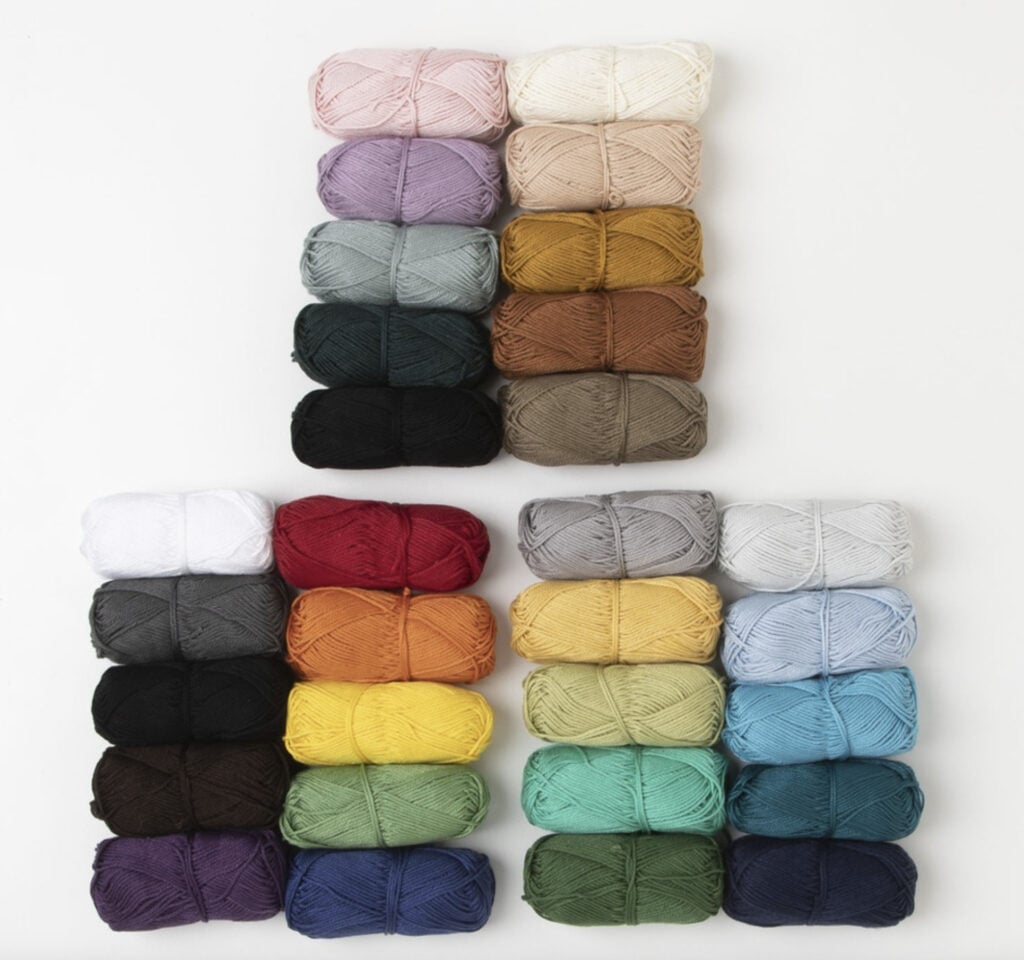
🌿 Cotton yarn variety pack — grab a variety of colors at a great price, perfect if you're making multiple footbags for a craft market or gifts! A little goes a long way on these tiny projects.
🌿 Bernat Softee Cotton — 60% cotton / 40% acrylic blend, light weight, great color range and widely available.
🌊 Berroco Remix Light DK — a recycled cotton blend with beautiful drape and a wide color selection.
✏️ Designer Tip:
Whatever yarn you substitute, make a small gauge swatch before you start! The poly pellet stuffing needs a firm, dense fabric to stay inside — if your gauge is too loose, those little pellets WILL find their way out through the gaps. Tighter = better for this project.
The Filling Guide — What Actually Works 🎯
What you put inside your hacky sack matters more than most patterns acknowledge. The filling determines how the ball feels in the hand, how it kicks, how long it lasts — and whether you ever have to deal with mold, sprouting, or leaking. Here's the honest breakdown:
Best Filling: Poly Pellets
Poly pellets (plastic craft stuffing pellets) are the clear winner for any hacky sack you plan to actually use. They're durable, won't spoil if the ball gets wet, give you great weight control, and play consistently outdoors. You can find them at any craft store Michaels, or on Amazon as “stuffing pellets” or “poly fill pellets.”
🎯 Target weight: 50–55 grams for standard recreational play. Go lighter (around 40g) for a finesse-style sack, or heavier (up to 60g) for more momentum. When in doubt, start lighter — you can always add more before you close it up.
The nylon stocking method (used in this pattern): Cut a 5″ section of pantyhose, knot one end, fill with pellets, knot the other end, and insert the pouch into your crochet shell. The pantyhose acts as an inner bag so pellets stay contained even if your stitches loosen with heavy play. This is Robyn's tested method — it works beautifully.
The balloon method (alternate): Some crocheters fill a small balloon with poly pellets, tie it off, and insert that instead of a pantyhose pouch. The balloon creates a slightly rounder, firmer shape and is especially good for younger kids (no chance of any escape). Both methods work — use whichever you have on hand!
Food Fillings — Know the Tradeoffs
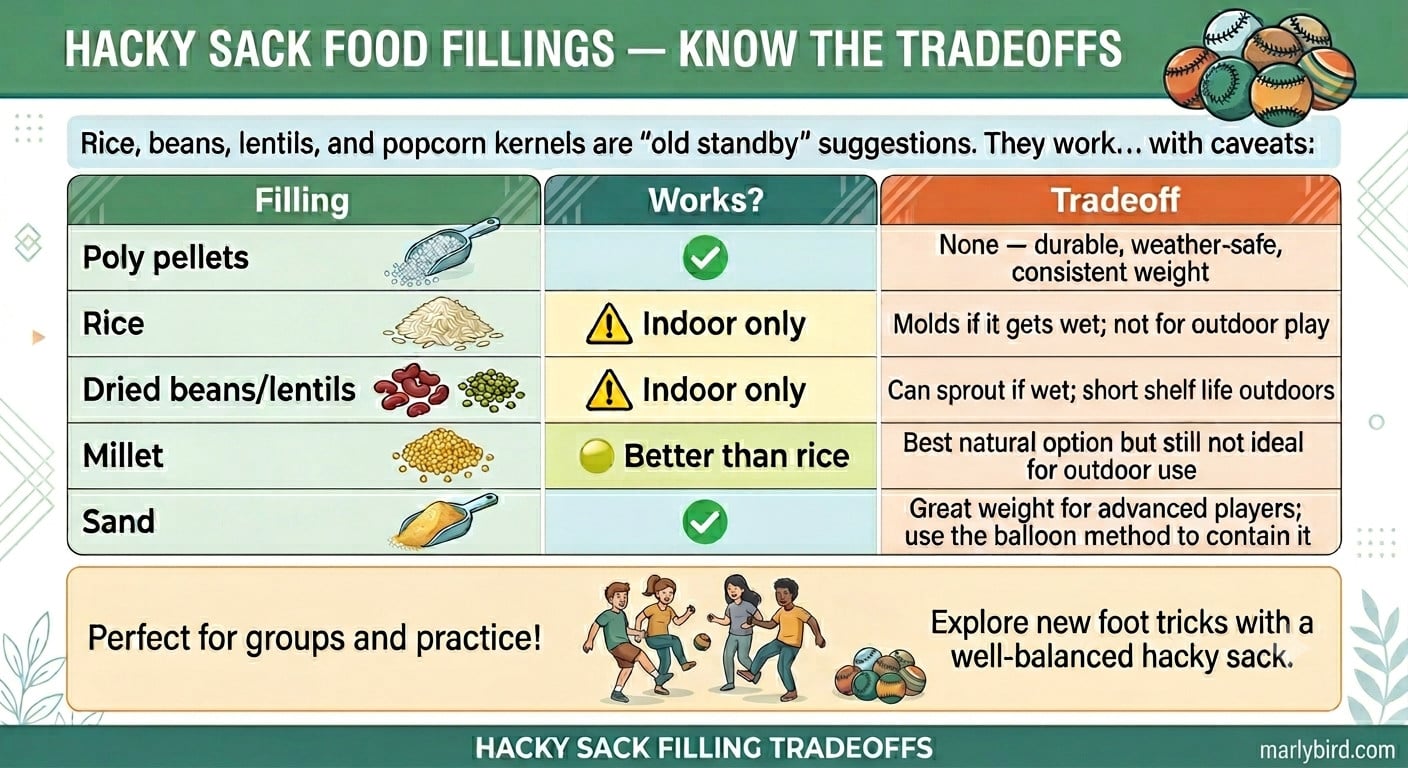
Rice, beans, lentils, and popcorn kernels are the “old standby” suggestions you'll see in older blog posts. They work… with caveats:
| Filling | Works? | Tradeoff |
|---|---|---|
| Poly pellets | ✅ Best | None — durable, weather-safe, consistent weight |
| Rice | ⚠️ Indoor only | Molds if it gets wet; not for outdoor play |
| Dried beans/lentils | ⚠️ Indoor only | Can sprout if wet; short shelf life outdoors |
| Millet | 🟡 Better than rice | Best natural option but still not ideal for outdoor use |
| Sand | ✅ Good | Great weight for advanced players; use the balloon method to contain it |
💡 Bonus Use: Microwave Hand Warmer!
If you fill a cotton-yarn hacky sack with rice, you can microwave it for 30–60 seconds for a cozy hand warmer! ☀️ The cotton + rice combination holds heat well. Just make sure to use 100% cotton yarn (not acrylic — never microwave acrylic!) and do NOT use poly pellets for the microwave version. Great cold-weather gift idea!
Video Tutorials
New to any of the techniques in this pattern? Here are the videos referenced in the pattern notes:
- 🎬 Magic Ring / Adjustable Ring — how to make the ring that starts every round
- 🎬 Weave in Tail for Adjustable Ring — securing that tail so it stays put
- 🎬 Single Crochet (sc) — the only stitch you need for this pattern
- 🎬 Single Crochet 2 Together (sc2tog) — the decrease used to close the sack
- 🎬 How to Change Colors and Crochet Stripes — your guide to the tapestry colorwork section
🎬 How to Bury/Weave in Ends:
New to crochet entirely? Start here 👉 Learn How to Crochet: The First Five Things You Need to Know — and then come back to tackle these Stitch Kickers!
Stitch Kickers Crochet Hacky Sack || Pattern Details
Skill Level
Adventurous Beginner
Finished Measurements
Hacky Sack is 2.5″ [6.5 cm] in diameter.
Gauge
12 sc by 12 rounds = 2″ [5 cm] by 2″ [5 cm]; use any size hook to obtain the gauge.
Materials
Yarn: WeCrochet Animation (100% mercerized cotton, 70 yds / 64 m, 1 oz / 25 g, CYCA #3 DK)
Colorway 1: Color A: #2676 Blue, 10 g | Color B: #2677 Blush, small amount | Color C: #2699 Sunbaked, small amount
Colorway 2: Color A: #2690 Jalapeno, 10 g | Color B: #2683 Creme Brulee, small amount | Color C: #2684 Dewdrop, small amount
Colorway 3: Color A: #2674 Azure, 10 g | Color B: #2691 Kenai, small amount | Color C: #2679 Butterscotch, small amount
Colorway 4: Color A: #2691 Kenai, 10 g | Color B: #2679 Butterscotch, small amount | Color C: #2674 Azure, small amount
Crochet Hook: Size D/3 [3.25 mm]
Notions: Stitch Markers, Tapestry Needle, Scissors, Tape Measure, Poly Pellets (weighted), Pantyhose or small balloon (for fill containment), Notions Bag for Supplies (optional)
Abbreviations
- Ch — Chain(s)
- RS — Right Side
- Sc — Single Crochet
- Sl st — Slip Stitch
- WS — Wrong Side
Special Stitches
⭐ Magic Loop or Adjustable Ring: Wrap yarn around your fingers, pull up a loop through the ring created, chain 1. Follow directions for the number of stitches for round 1. Pull on the yarn end to close the ring. <<Also see video >>
⭐ Single Crochet 2 Together (sc2tog): *Insert hook into indicated stitch, yarn over and pull up a loop; repeat from * in next stitch indicated, yarn over and draw through all 3 loops on hook. (1 decrease)
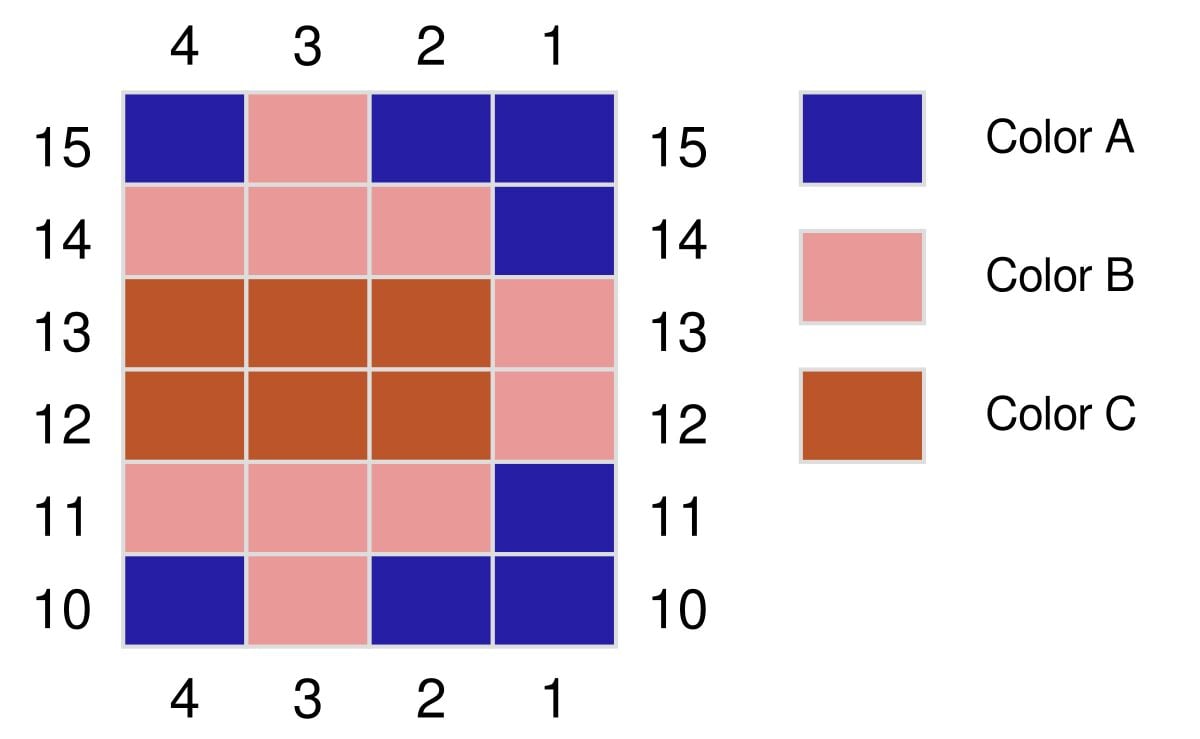
Crochet Color Charts
Option 1
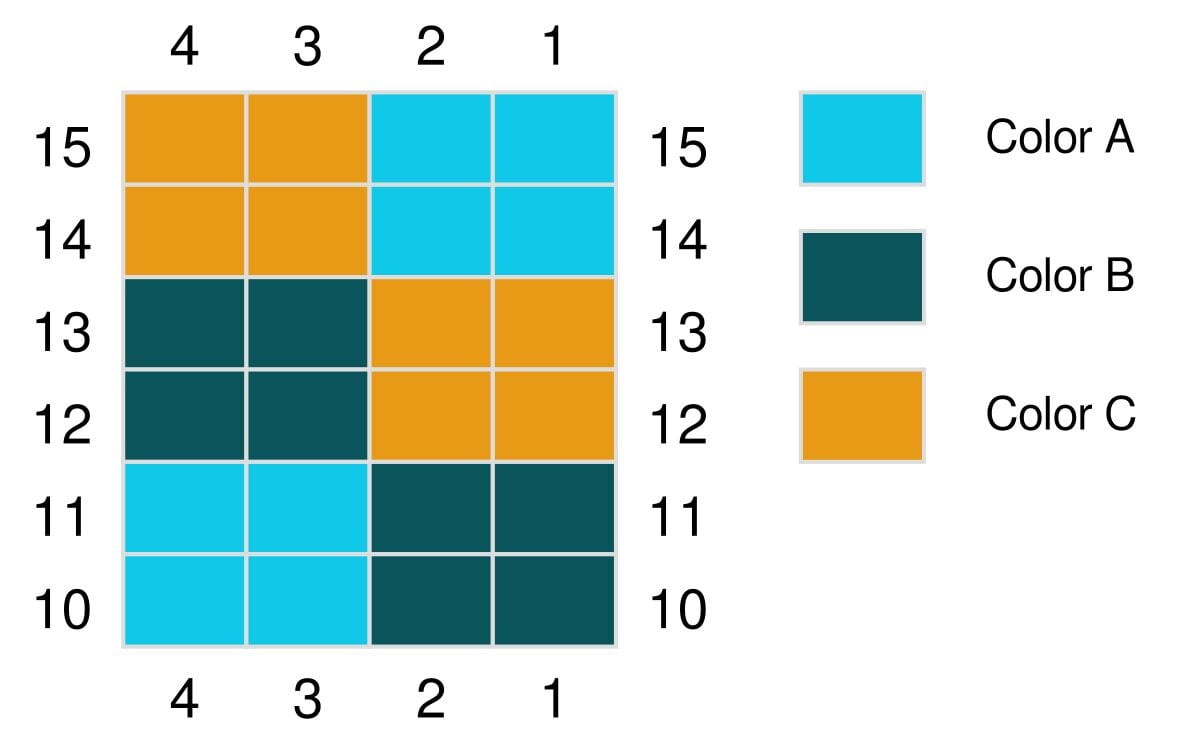
Option 2
Notes
- The increasing rounds at the beginning and the decreasing rounds at the end of the hacky sack are worked in a spiral. This means you will continue crocheting around without joining at the end of each round unless the pattern tells you to join.
- Use a stitch marker to mark the first stitch of each round. Move the marker up as you complete each round so you always know where the round begins.
- The middle rounds, which are the colorwork rounds, are worked in joined rounds. For these rounds, you will join as instructed at the end of each round before beginning the next round.
- All stitches are worked as yarn over (YO), not yarn under. This helps create the intended fabric and play quality for the hacky sack.
- Changing colors in tapestry colorwork: work until the last 2 loops of the stitch remain on the hook in the first color. Draw the new color through the last 2 loops to complete the stitch, then continue with the new color.
- When carrying a color that is not in use, lay it loosely across the top of the round and crochet over it as you work. Do not pull the carried yarn too tightly, or the fabric may pucker and the hacky sack may lose its shape.
- Check your gauge and tension as you work. A firm fabric helps keep the filling contained, but the stitches should not be so tight that the hacky sack becomes stiff or hard to shape.
- For the filled hacky sack version, the poly pellets are placed inside a tied piece of pantyhose before being inserted into the crocheted shell. Make sure the pantyhose is securely knotted and the final opening is closed firmly.
- This hacky sack is intended for play and decorative use. It is not intended for babies, pets, or anyone who may chew, tear, or open the finished item. Inspect regularly and discontinue use if stitches loosen, seams open, or filling becomes exposed.
- Do not microwave the poly pellet version of this hacky sack.
GROW
To Unlock Exclusive Subscriber Content click the Box below and join for free by simply adding your email and creating a password! If you are having troubles, clear your cache or reset your password or login to the Grow Publisher Portal.
>> Learn More About Grow Here <<
I'm thrilled to share this amazing pattern with you, many patterns on my blog are absolutely free! I kindly request that you don't copy and paste or distribute this pattern. Prefer an ad-free experience? Buy a digital PDF pattern for a small fee from one of my online stores for a seamless crafting journey.
I appreciate your support and readership. You are the reason I can keep doing what I love and sharing it with others. So, thank you from the bottom of my yarn-loving heart! Disclosure: This post contains affiliate links, meaning I get a commission if you decide to make a purchase through my links at no cost to you.

📄 Want the Ad-Free Printable PDF?
Grab the clean, printable version — no ads, no scrolling, includes the colorwork charts.
Stitch Kickers Crochet Hacky Sack || Pattern Instructions
Pattern designed by Marly Bird and Robyn Chachula
Round 6: Sc in each sc around, do not join, do not turn.
Round 7: Sc in next 3 sc, *2 sc in next sc, sc in next 4 sc; repeat from * around to last 2 sts, 2 sc in next sc, sc in last sc, do not join, do not turn — 36 sc.
Round 8: Sc in next sc, *2 sc in next sc, sc in next 5 sc; repeat from * around to last 5 sts, 2 sc in next sc, sc in last 4 sc, do not join, do not turn — 42 sc.
Round 9: Sc in next 10 sc, 2 sc in next sc, sc in next 20 sc, 2 sc in next sc, sc in next 9 sc, sl st in last sc, do not join, do not turn — 44 sts.
Colorwork Section
Rounds 10–15: Ch 1, sc in each st around changing colors as shown on colorwork chart (see notes on changing colors), join by threading free loop of last stitch through first st of round, do not turn.
Fasten off Colors B and C.
📊 Chart Option 1: https://www.stitchfiddle.com/c/soev8a-jorg6
📊 Chart Option 2: https://www.stitchfiddle.com/c/soev6k-7o79vy
Decrease Section
Round 16: With color A, do not ch 1, sc in next 10 sc, sc2tog over next 2 sc, sc in next 20 sc, sc2tog over next 2 sc, sc in last sc, do not join, do not turn — 42 sc.
Round 17: *Sc in next 5 sc, sc2tog over next 2 sc; repeat from * around, do not join, do not turn — 36 sc.
Round 18: Sc in next 2 sc, *sc2tog over next 2 sc, sc in next 4 sc; repeat from * around to last 4 sc, sc2tog over next 2 sc, sc in last 2 sc, do not join, do not turn — 30 sc.
Round 19: Sc in each sc around, do not join, do not turn.
Round 20: *Sc2tog over next 2 sc, sc in next 3 sc; repeat from * around, do not join, do not turn — 24 sc.
✏️ Designer Tip — Stuffing the Hacky Sack:
Cut pantyhose to a 5″ [13 cm] length. Knot one end and turn inside out. Place inside the hacky sack. Stuff pantyhose full of poly pellets — aim for 50–55 grams for standard play feel (pack lighter, ~40g, for a kids' or finesse version). Knot the other end. Trim any extra or tuck it into the project. Then continue with Round 21. Balloon method: alternatively, fill a small balloon with poly pellets, tie it off, and use that instead — great for kids!
Round 21: *Sc in next 2 sc, sc2tog over next 2 sc; repeat from * around, do not join, do not turn — 18 sc.
Round 22: *Sc2tog over next 2 sc, sc in next sc; repeat from * around, do not join, do not turn — 12 sc.
Round 23: *Sc2tog over next 2 sc; repeat from * around, fasten off with a long tail for seaming — 6 sc.
Weave tail through remaining stitches to close hole. Weave in end securely.
Love This Yarn? More Patterns Using WeCrochet Animation
WeCrochet Animation is such a fun yarn to work with — that mercerized cotton sheen really makes colorwork pop. If you fall in love with it making this hacky sack, grab a few skeins of WeCrochet Animation and browse the MarlyBird.com pattern library for your next colorwork project! [MARLY: add specific pattern links here if you'd like]
Favorite This Pattern on Ravelry 💖
If you're a Ravelry user, you can queue this pattern, add it to your favorites, and keep track of your project notes all in one place. And if you make one, I'd LOVE to see your finished photos in the project gallery!

More Quick Crochet Gift Patterns You'll Love
If you loved how fast this hacky sack worked up, you're going to want to explore the whole collection of quick-finish crochet projects on MarlyBird.com! Explore all my Quick Crochet Gift Ideas here!
Frequently Asked Questions
What skill level do I need to crochet a hacky sack?
This pattern is rated Adventurous Beginner. You'll need to be comfortable with single crochet and crocheting in the round — but if you can do those two things, you can do this! The colorwork section uses tapestry technique (changing and carrying colors), which is demonstrated in the pattern notes. It's a great first colorwork project because the piece is small and the motif is simple. If you're brand new to crochet, start with how to crochet for beginners first!
What is the best filling for a crochet hacky sack?
Poly pellets are the best filling for any hacky sack you plan to actually play with outdoors. They're durable, won't mold if the bag gets wet, and give you consistent weight and playability. Aim for 50–55 grams for standard play. Use the pantyhose pouch method (or a small balloon filled with pellets) to keep the pellets contained so they don't escape through the stitches over time. Rice, beans, and lentils are okay for casual indoor use but will mold or sprout if they get wet.
How heavy should a crochet hacky sack be?
Around 50–55 grams is the sweet spot for standard recreational play — it feels great in the hand and kicks predictably. Go lighter (around 40g) if you're making it for kids or for a finesse-style game. Going heavier than 60g makes the sack hard to control for most players. When in doubt, start lighter — you can always add more pellets before you close it up!
How long does it take to crochet a hacky sack?
Most crocheters can finish this hacky sack in under an hour once they get comfortable with the pattern. The piece is small — only 2.5 inches in diameter — so even the colorwork section works up quickly. It's genuinely a one-sitting project, which makes it perfect for a quick gift or a between-projects palette cleanser.
Why does my hacky sack kick unpredictably or feel lumpy?
The most common cause: you're using the yarn-under (YU) method of single crochet. Many crocheters who learned through amigurumi default to yarn-under because it creates tight stitches — which seems right for a hacky sack. But yarn-under also creates a slightly knobby exterior surface that adds friction and can make the ball deflect unexpectedly. Switch to yarn-over for the same tight stitch with a smoother surface. The second possible cause: overfilled — the sack should feel squishy, not packed hard. Aim for 50–55g of poly pellets.
Can I use a different yarn for this pattern?
Yes! Any DK-weight cotton or cotton-blend yarn (CYCA #3) will work as long as you match the gauge. The important thing is achieving a firm, tight fabric — you want to crochet with a smaller hook than you normally would for DK weight, so the pellets can't work their way out through the stitches. Check your gauge before you start!
Do I need to know tapestry crochet to make this pattern?
The pattern teaches you what you need right in the notes! Tapestry colorwork is used for the middle 6 rounds — you'll carry and change colors following a simple chart. The pattern notes explain the color-changing technique clearly, and the chart options are hosted on StitchFiddle. Want a deeper dive? Check out my post on yarn over vs. yarn under in crochet — knowing this makes your tapestry tension much cleaner!
Can I make a knitted hacky sack instead of a crocheted one?
Great BiCrafty question! 🧶 Crochet is actually better suited for hacky sacks — crocheted fabric doesn't stretch as much with repeated kicking, so the ball holds its shape over time. Knitted fabric tends to have more stretch and can lose its round shape after heavy use. For this pattern specifically, the tight single crochet construction is what gives the Stitch Kickers their satisfying weight and kick. Stick with crochet for this one!
Is this a good gift to make?
Honestly… yes, so much. A crochet hacky sack is one of those gifts that feels special (it's handmade!) but also actually gets used. Kids love them, adults who played in the 90s get nostalgic, and they work for every budget because each one uses almost nothing in terms of materials. Make a set in different colorways — school colors, team colors, or favorite combos — and you have an incredible gift for very little cost or time.
Is this an AI-generated pattern?
Absolutely not! The Stitch Kickers Crochet Hacky Sack was designed by real designers — Marly Bird and Robyn Chachula — with real skill, real testing, and real instructions you can count on. Every stitch count, every colorwork round, every technique tip was crafted and verified by human hands. The photos are also real photos of real handmade hacky sacks, not AI-generated images. When you follow this pattern, you're following instructions built by experienced designers who have been crafting and teaching for decades.
Final Thoughts
There's something really joyful about a project this small that delivers this much fun. The Stitch Kickers Crochet Hacky Sack is a 10-gram, one-hour make that brings people together outdoors, introduces a really useful colorwork technique, and makes a perfect handmade gift that actually gets played with. Whether you're making one to learn tapestry crochet, knocking out a whole set for summer gifts, or just because it looks like a blast… I hope it brings you all the joy! 🎉
❤️ Your BiCrafty Bestie,
Marly Bird