Search
Close
  • The Pattern Shop
  • Our Free Patterns
    • Browse All Our Free Patterns
    • Our Free Knitting Patterns
    • Our Free Crochet Patterns
  • Blog
    • All Blog Posts
    • All Free Patterns
    • Dibble Dabble Inspiration
    • Giveaways
    • Make-Alongs
    • Product Reviews
    • Roundups
    • Tips, Tricks, Techniques for Knitting and Crochet
Stylized bird with pink and gray swirling tail above elegant โ€œMarlyโ€ text, logo for crochet accessories and home decor.
  • Marly Bird House
  • Learn to Knit & Crochet
    • Newbie? Start Here
    • Video Tutorials
    • Knitting Definitions
    • Crochet Definitions
    • Common Techniques
    • Size Charts for Knitting and Crochet Projects
  • About
ร—
  • The Pattern Shop
  • Free Patterns
  • Blog
  • Marly Bird House
  • Learn to Knit & Crochet
    • Newbie? Start Here
    • Video Tutorials
    • Knitting Definitions
    • Crochet Definitions
    • Common Techniques
    • Size Charts for Knitting and Crochet Projects
  • About
Stylized bird with pink and gray swirling tail above elegant โ€œMarlyโ€ text, logo for crochet accessories and home decor.
Search
Close

New Patterns NOW Available in Ad-Free PDF! Check out The Pattern Shop

Free Holiday Gift Card Holder Patterns โ€” Crochet & Knit ๐ŸŽ

July 24, 2026 By Meg Leave a Comment

Free holiday gift card holder patterns โ€” the tiny crochet and knit project that turns a plain gift card into something handmade and memorable. These free patterns work up in under an hour each, use minimal yarn, and make the perfect last-minute holiday make.

โšก Quick Answer:

A holiday gift card holder is a small knitted or crocheted pouch or envelope that wraps around a gift card โ€” turning a simple gift into a handmade one. Most patterns are free, take under an hour, and use less than 50 yards of yarn. This collection includes 10+ free options for both knitters and crocheters.

Hey, bestie ๐Ÿ’›

Here's the thing about gift card holders… they are genuinely one of the most clever small projects you can have in your back pocket. Thirty minutes of knitting or crocheting, a tiny bit of yarn you probably already have, and suddenly that store gift card becomes something personal and handmade. Teachers, neighbors, coworkers โ€” a handmade gift card holder makes the gift feel intentional even when you're grabbing a gift card at the last minute. No judgment. We've all been there. ๐Ÿ˜„

๐Ÿงถ Affiliate Disclosure: This post contains affiliate links. If you purchase through them I may earn a small commission at no extra cost to youโ€ฆ and it helps support free patterns and content from my yarn-loving heart ๐Ÿ’› See my privacy policy here.
๐ŸŸจ [MARLY ACTION] Add a hero image here โ€” a flat lay of a finished gift card holder with a gift card inside, holiday styling. 1200px+ wide. Remove this box when done.

โฌ‡๏ธ Jump to the free patterns โ†’


Why Knit or Crochet a Gift Card Holder? ๐ŸŽ

Gift cards get the reputation of being impersonal โ€” and a handmade holder completely flips that. You're saying: I chose this gift card AND I made something with my hands to give it to you. That combination? Genuinely special.

These tiny projects are also the perfect stash-busters. Most patterns use 30โ€“80 yards of worsted or DK weight yarn โ€” the perfect amount to use up that one lone skein that's been sitting in your basket wondering what it's going to become. Leftover holiday yarn is practically begging to become a gift card holder.


Free Holiday Gift Card Holder Patterns ๐ŸŽ„

All of these patterns are free. Most work up in 30โ€“60 minutes. Click any title to get the free pattern.

Crochet Gift Card Holders

๐ŸŽ… Yarnspirations Free Crochet Patterns โ€” search “gift card holder” for current free offerings in worsted and DK weight.

๐ŸŽ„ Ravelry: Free Crochet Holiday Pouches & Gift Holders โ€” the largest free pattern library online; filter by “holiday” and “free” for gift card holder options.

๐ŸฆŒ AllFreeCrochet Holiday Gift Card Holders โ€” curated free collection of crochet gift card holder patterns, beginner-friendly.

โ›„ Red Heart Free Patterns โ€” search “gift card” for free worsted-weight patterns in holiday colorways.

Knit Gift Card Holders

๐Ÿงถ Ravelry: Free Knit Holiday Gift Pouches โ€” filter by craft (knitting), holiday, and free for gift card holder options.

๐ŸŽ Yarnspirations Free Knit Patterns โ€” search “gift card” or “gift pouch” for free knit options.

โ„๏ธ LoveCrafts Free Knitting Patterns โ€” browse their free holiday knitting section for gift pouch patterns.


Tips for Making Gift Card Holders ๐Ÿ’ก

Most gift card holders work in one of two constructions: a flat envelope shape (worked flat then seamed) or a small pouch (worked in the round). Both take less than an hour with worsted weight yarn and have minimal finishing.

Standard gift card size is 3.375″ ร— 2.125″ โ€” leave 1/4″ of ease on all sides for the card to slide in and out easily. If you're making for a specific retailer's thicker gift cards, measure first.

A little button, snap, or tie closure makes the holder feel polished. Many free patterns include closure options โ€” or improvise with whatever you have in your notion stash!

Join our Newsletter

Get Free Crochet & Knitting
Pattern Links & Coupons!

Hand-drawn bird with curling, detailed feathers and pink accents; cheerful pose showcases fine line and texture work.
>> Become An Insider <<
A woman with glasses and curly hair models a colorful crocheted scarf, showing textured stitches and vibrant yarn.

More Free Holiday Patterns You'll Love ๐ŸŽ„

๐ŸŽ„ Free Holiday Wine Cozy Patterns โ€” another quick, gift-perfect holiday make

๐ŸŽ Free Festive Gnome Patterns โ€” adorable handmade gifts that don't need to hold a gift card to be magic

๐Ÿ“š Full Free Pattern Library โ€” every free knit and crochet pattern on marlybird.com


Frequently Asked Questions

How much yarn do I need for a crochet gift card holder?

Most gift card holders use 30โ€“80 yards of worsted or DK weight yarn. That's well within leftover/scrap yarn territory โ€” they're perfect stash-busters. Check each pattern for its specific yardage.

What size hook for a crochet gift card holder?

Most worsted-weight gift card holder patterns use a US G (4mm) or H (5mm) hook. A tighter gauge is better here โ€” a looser fabric means the gift card might slip out. When in doubt, size down.

Can a beginner make a gift card holder?

Absolutely โ€” most gift card holder patterns are among the most beginner-friendly crochet and knitting projects you can find. They're usually just a rectangle with a bit of shaping. If you can chain, single crochet, and seam two edges together, you can make one.

What kind of yarn is best for gift card holders?

Worsted or DK weight acrylic or cotton works beautifully โ€” something with a bit of structure so the holder keeps its shape. Avoid super-fluffy or bulky yarns, which add too much bulk around the card.

How do I make a gift card holder without a pattern?

Swatch a 3.5″ ร— 2.5″ rectangle in your chosen yarn and stitch. Seam two long sides and one short side, leaving one short side open for the card to slip in. Add a button or tie for closure. Done! Gift card holders are a great “eyeball it” project once you know the technique.

Final Thoughts ๐Ÿ’ฌ

Gift card holders are proof that handmade doesn't have to mean hours of work. Thirty minutes, a bit of leftover yarn, and suddenly your gift card gift becomes something someone will remember. Stock up on these heading into December โ€” they're the secret weapon of the holiday crafter. ๐ŸŽ

Made one? Share it! Tag @marlybird and use #MMMDI so I can see yours. ๐Ÿ’›

โค๏ธ Your BiCrafty Bestie,
Marly Bird

A cartoon avatar of a person with glasses and a brown bun smiles warmly. Their green shirt and black jacket add a stylish touch, while colorful hearts surround them like loving temperature blankets, stitching together an aura of love and positivity. -Marly Bird

Filed Under: Uncategorized

25 Free Holiday Mug Cozy Patterns – Crochet & Knit โ˜•๏ธ๐ŸŽ„

July 24, 2026 By Meg Leave a Comment

โ˜• Picture this: you wrap a brand-new mug, tuck it into a gift bag… and then slide a handmade mug cozy over it right before you hand it over. Suddenly that simple mug is a moment. That's the magic of this tiny project. It takes less than an hour, uses just a small amount of yarn, and turns an ordinary mug into a gift that feels genuinely thoughtful. ๐ŸŽ„

Mug cozies are one of those secret weapon projects every crafter should have in their back pocket. Teachers, neighbors, coworkers, your mail carrier… a cozy little mug cozy says “I thought about you” without blowing the gift budget. ๐Ÿ’›

This collection is part of our 25 Days of Christmas in July event โ€” a whole month of holiday pattern roundups to help you get ahead of the holiday rush. And because we're BiCrafty here at Marly Bird, you'll find both crochet AND knit options in this list! ๐Ÿงถ

Why Mug Cozies Make Perfect Holiday Gifts ๐ŸŽ

Let me count the reasons…

โฑ๏ธ They're fast. Most mug cozy patterns crochet or knit up in 30 to 60 minutes. That means you can make a whole round of gifts in an afternoon โ€” no marathon crafting sessions required.

๐Ÿ’ฐ They're budget-friendly. One mug cozy uses about 50โ€“75 yards of yarn. That's a tiny amount, even from a premium skein. You can stretch one small ball of cotton yarn into 4โ€“6 cozies easily.

๐ŸŽ€ They're great paired gifts. Nestle a cozy around a mug filled with hot cocoa packets, a tea bag sampler, or some flavored coffee pods and suddenly you have a gift set that looks like you spent way more than you did!

๐ŸŽ They're perfect teacher gifts. Teachers live on coffee and tea. A handmade mug cozy from a student? That goes on the desk… not in the donation pile.

๐Ÿงฆ They're ideal stocking stuffers. Flat, easy to tuck in, festive, and genuinely useful. Mug cozies are the underrated stocking stuffer of the handmade gift world.

Already a mug cozy fan? Then you'll want to browse our full year-round collection of free mug hugs and cup cozies to crochet and knit โ€” even more cozy goodness waiting for you there! ๐Ÿ’›

Before You Stitch: Mug Cozy Tips & Sizing ๐Ÿ“

A little prep goes a long way with mug cozies! Here's what to know before you cast on or chain up:

๐Ÿ“ Standard mug sizes: Most standard coffee mugs are about 3.5 inches tall and 10โ€“11 inches in circumference. Travel mugs and large latte cups tend to be taller (4โ€“5 inches) and a bit wider (11โ€“13 inches). Always check the pattern's finished measurements against the actual mug you're making it for โ€” especially for gifts!

๐ŸŒฟ Cotton yarn is your best friend. This is the big one. Cotton doesn't felt from heat the way wool does. If someone microwaves their mug or uses it daily, a wool cozy can shrink and felt over time. Cotton stays put, washes beautifully, and holds its shape. Look for dishcloth cotton, kitchen cotton, or any 100% cotton yarn in worsted or DK weight. Great picks: Lion Brand 24/7 Cotton, Paintbox Simply DK Cotton, or Bernat Handicrafter Cotton.

๐Ÿ”˜ Button placement tip: For crochet mug cozies with button closures, place the button on the back of the handle side so it doesn't press into your palm when you drink. Small buttons (1/2 inch to 5/8 inch) work best for most patterns.

โš ๏ธ Do a quick gauge check! Mug cozies are small, so even a tiny difference in tension can mean the cozy doesn't fit quite right. If you're making these as gifts, a quick swatch is totally worth the 5 minutes it takes.

โ˜• Free Crochet Holiday Mug Cozy Patterns

These are real patterns from real indie designers… each one carefully picked for quality, holiday spirit, and that special something that makes a handmade gift feel genuinely thoughtful. ๐ŸŽ„

๐ŸŽ… Santa Belly Mug Cozy โ€” Divine Debris FREE

Santa Belly Mug Cozy by Divine Debris

This one is an absolute SHOW-STOPPER. The Santa Belly Mug Cozy uses tapestry crochet to wrap Santa's famous red suit and black belt buckle right around your mug… and the result looks WAY more impressive than the technique actually requires. It's one of those projects that makes everyone ask ‘wait, you MADE that?' Perfect for gifting to the person who appreciates a little extra holiday magic in their morning coffee routine.

๐Ÿ‘‰ Get the pattern โ†’

๐ŸŒฒ Trees All Around Mug Cozy โ€” Divine Debris FREE

Trees All Around Mug Cozy by Divine Debris

Little Christmas trees all the way around your mug… how cozy is that?! Divine Debris brings the same beautiful tapestry crochet technique to this elegant tree design, so if you loved the Santa Belly cozy, this is a perfect companion make. It's classic, timeless, and would look right at home on any holiday table or tucked into a gift bag for a coworker or neighbor.

๐Ÿ‘‰ Get the pattern โ†’

โ›„ Winter Mug Cozy Patterns (Snowpeople + Penguin) โ€” Divine Debris FREE

Winter Mug Cozy Patterns (Snowpeople + Penguin) by Divine Debris

Two for one! This collection from Divine Debris includes both a snowperson AND a penguin design… making it ideal when you want variety in the same tapestry crochet style. The penguin one is especially adorable for winter gifting even after Christmas has passed. Stock up on yarn in your favorite colors and make a whole flock of these for your gift list.

๐Ÿ‘‰ Get the pattern โ†’

๐Ÿงถ Kate Mug Cozy โ€” Sunflower Cottage Crochet FREE

Kate Mug Cozy by Sunflower Cottage Crochet

The Kate Mug Cozy is a gorgeous textured winter design from Sunflower Cottage Crochet that looks stunning without requiring complex stitches. It's beginner-friendly and works up beautifully in seasonal colors… think deep burgundy, forest green, or cozy cream. A perfect gateway project if you're new to mug cozies, and a great option for anyone who prefers a winter-chic aesthetic over character designs.

๐Ÿ‘‰ Get the pattern โ†’

๐ŸŒฟ Holly Jolly Festive Christmas Mug Rug Coaster โ€” The Loopy Lamb FREE

Holly Jolly Festive Christmas Mug Rug Coaster by The Loopy Lamb

Okay, so this one is technically a mug rug coaster rather than a cup sleeve… but it's so festively Christmas-y that we had to include it! The Loopy Lamb's Holly Jolly design is perfect for tucking under your mug on a desk or table. Pair it with a simple cup cozy for a complete little gifting set that looks like something you'd find at a holiday boutique. ๐ŸŽ

๐Ÿ‘‰ Get the pattern โ†’

โ˜• Cozy Cocoa Mug Sweater โ€” Hookfully FREE

Cozy Cocoa Mug Sweater by Hookfully

A MUG SWEATER. Yes, really! The Cozy Cocoa Mug Sweater from Hookfully is exactly what it sounds like… a tiny little sweater for your hot cocoa mug. The Christmas cocoa theme makes it completely irresistible for holiday gifting. If you want one pattern that makes absolutely everyone smile the moment they unwrap it, this is the one. Make a few extras because you WILL be asked to make more.

๐Ÿ‘‰ Get the pattern โ†’

๐Ÿ’ Winterberry Mug Cozy โ€” MJ's Off the Hook Designs FREE

Winterberry Mug Cozy by MJ's Off the Hook Designs

The Winterberry Mug Cozy brings beautiful winter botanical energy to your cup. Picture rich holiday colors with berry and branch details that feel equal parts cozy and elegant… a step above the typical character cozy. This one is perfect for the friend with refined taste who appreciates handmade things but gravitates toward botanical and nature-inspired designs over Santas and snowmen.

๐Ÿ‘‰ Get the pattern โ†’

๐ŸŽ„ Crochet Christmas Tree Cozy โ€” Heather Corinne FREE

Crochet Christmas Tree Cozy by Heather Corinne

A festive Christmas tree design that captures the spirit of the season beautifully! Heather Corinne's Christmas Tree Cozy is a free pattern where the tree shape makes this instantly recognizable as a holiday project… and it's a wonderful one to make in multiples for gifting batches. Stitch a whole forest of these in an afternoon and check a bunch of names off your list at once. ๐ŸŒฒ

๐Ÿ‘‰ Get the pattern โ†’

๐Ÿฌ Peppermint Cup Cozy โ€” The Crochet Village FREE

Peppermint Cup Cozy by The Crochet Village

Peppermint plus coffee equals peak holiday season! The Peppermint Cup Cozy from The Crochet Village features that classic red and white swirl pattern that immediately signals Christmas… even before you taste whatever's inside the mug. It's cheerful, easy, and makes a perfect gift for anyone who loves festive mugs and cozy winter drinks… which is basically everyone on your list. ๐ŸŽ‰

๐Ÿ‘‰ Get the pattern โ†’

๐Ÿ’ก Want even more mug cozy patterns year-round? Our full collection of free mug hugs and cup cozies to crochet and knit has you covered! ๐Ÿ’›

๐Ÿชก Free Knit Holiday Mug Cozy Patterns

Knitters, we see you! ๐ŸŽ‰ Knit mug cozies are a bit rarer to find than crochet versions… but the ones that exist are absolutely gorgeous. These are perfect beginner-to-intermediate knit projects that prove tiny projects can be seriously beautiful. ๐Ÿ’›

๐ŸŽ… Bernat Santa's Mug Cozy (KNIT) โ€” Yarnspirations / Bernat FREE

Bernat Santa's Mug Cozy (KNIT) by Yarnspirations / Bernat

This is THE holiday knit mug cozy. Santa's cheerful face is knitted right in using colorwork… and it's a fantastic mini colorwork project that's small enough for even a newer knitter to tackle without feeling overwhelmed. You'll finish faster than you expect, and the result looks like something you'd find in a boutique holiday shop. A total conversation-starter at the holiday table!

๐Ÿ‘‰ Get the pattern โ†’

โœจ Paid Patterns Worth the Investment

Sometimes a small Etsy investment unlocks a pattern you'll use for seasons to come. These paid designs are among the most-favorited holiday mug cozy patterns on Etsy… and they earn those stars! ๐ŸŒŸ

๐Ÿงฅ Crochet Christmas Mug Jumper Pattern โ€” CrochetbyzoeShop (Etsy) โญ 7,111 favorites PAID

Crochet Christmas Mug Jumper Pattern by CrochetbyzoeShop (Etsy) โญ 7,111 favorites

With over 7,000 fans on Etsy, this Christmas Mug Jumper is clearly something special! A mug JUMPER… as in a tiny holiday sweater for your mug… that's both clever and completely adorable. This pattern has earned its massive following for good reason. It's one of those designs you make and immediately want to make five more of for everyone on your gift list. The wow factor is off the charts.

๐Ÿ‘‰ Get the pattern โ†’

โ„๏ธ Christmas Crochet Mug Cozy Pattern โ€” Etsy Designer PAID

A snowflake-inspired holiday cozy in classic red, white, and green… the ultimate Christmas color palette. The snowflake motif is one of those designs that looks incredibly detailed but is totally achievable once you have the pattern in hand. Worth the small investment for a design you'll reach for season after season. ๐ŸŽ„

๐Ÿ‘‰ Get the pattern โ†’

๐ŸŽ Christmas Crochet Mug Cozy Pattern Bundle (Gingerbread + Jingle Bells + Snowflake) โ€” Etsy Designer PAID

Bundle up! This Etsy pattern bundle includes THREE holiday designs… Gingerbread, Jingle Bells, AND Snowflake. Getting three patterns in one purchase means you can mix and match for your gift batches… or try a new design each holiday season. Great value for a crafter who loves variety and wants options at the ready all season long. ๐Ÿช

๐Ÿ‘‰ Get the pattern โ†’

๐ŸŒธ Crochet Snowflake Flower Mug Cozy / Poinsettia Cup Sleeve โ€” MushyyStore (Etsy) โญ 1,747 favorites PAID

Crochet Snowflake Flower Mug Cozy / Poinsettia Cup Sleeve by MushyyStore (Etsy) โญ 1,747 favorites

A delicate snowflake and Poinsettia flower design from MushyyStore with nearly 2,000 devoted fans… and once you see it, you'll completely understand why. This design sits somewhere between a mug cozy and a wearable piece of art. The floral motif feels more elevated than a typical holiday cozy… beautiful for gifting to someone with refined taste who'd appreciate something truly unique under their tree. ๐ŸŒบ

๐Ÿ‘‰ Get the pattern โ†’

How to Gift Mug Cozies Like a Pro ๐ŸŽ€

A handmade mug cozy is lovely on its own… but here are a few ways to turn it into a truly wow-worthy gift:

  • ๐Ÿซ– Pair with a mug โ€” slip the cozy right over a mug from a local pottery shop, a thrifted ceramic treasure, or even a plain mug you've personalized with a paint pen
  • โ˜• Fill the mug โ€” hot cocoa packets, tea bags, a mini bag of flavored coffee, or individually wrapped truffles turn one little cozy into a whole gift basket moment
  • ๐Ÿ›๏ธ Bag them up beautifully โ€” a cozy in a clear organza bag with a handwritten gift tag looks like something from a boutique shop
  • ๐Ÿ“ Add a care card โ€” handwrite a little note with yarn content, washing instructions, and a personalized message… it makes it feel extra intentional
  • ๐ŸŽ„ Make it a set โ€” stitch up matching cozies for a couple or a family and present them together

And for more holiday gifting ideas, don't miss our free crochet and knit gift card holder patterns โ€” they pair PERFECTLY with a handmade mug cozy! ๐ŸŽ

Frequently Asked Questions About Mug Cozies โ“

What size should a mug cozy be?

So here's the thing… mug sizes vary more than you might expect! Most standard coffee mugs are about 3.5 inches tall and 10โ€“11 inches in circumference. Travel mugs tend to be taller (4โ€“5 inches) and wider (11โ€“13 inches). The best approach is to measure the actual mug you're making the cozy for before you start โ€” especially when it's a gift. Most patterns include sizing notes, and many are easily adjustable by adding or subtracting rows. ๐Ÿ“

What yarn works best for a mug cozy?

Honestly, cotton is the clear winner every time. ๐ŸŒฟ Cotton doesn't felt when it gets warm or damp, it washes easily, and it holds its shape wash after wash. Look for 100% cotton yarn in worsted or DK weight โ€” Lion Brand 24/7 Cotton, Paintbox Simply DK Cotton, or Bernat Handicrafter Cotton are all fantastic choices. Avoid 100% wool for anything that might get regularly warm or damp, since wool can felt over time with heat and moisture exposure.

Are mug cozies safe for hot drinks?

Great question! Yes, with the right yarn. ๐ŸŒก๏ธ Cotton and acrylic yarns are both safe for hot mugs. The cozy's whole job is to insulate your hand from the heat of the mug, so it's doing exactly what it's designed for. Just avoid pure wool for daily hot-mug use (can felt over time with heat and moisture) and skip any novelty yarns with metallic fibers if there's any chance the mug is going in the microwave.

How long does it take to make a mug cozy?

Honestly, mug cozies are one of the fastest projects in the craft world! โšก Most crochet mug cozies take 30 to 60 minutes for an average-paced crafter. Knit versions vary more depending on the stitch pattern โ€” simple ribbing is quick, but colorwork designs might take 1.5 to 2 hours. Even at their slowest, you can make multiple mug cozies in a single afternoon. Batch-making is a total game-changer for holiday gift season!

Do I need a button for a mug cozy?

Nope! ๐Ÿ”˜ Lots of mug cozy patterns are slip-on designs with no closure at all โ€” they just slide right over the mug. If you DO want a button closure, it adds a lovely handmade detail and a bit of adjustability. Just make sure to place the button on the back side of the cozy (away from the handle) so it doesn't press into your palm when you hold the mug. Small buttons in the 1/2 inch to 5/8 inch range work best for most cozy patterns.

Happy crafting, friends! ๐ŸŽ„ These little projects pack a BIG gifting punch. If you make one โ€” or a whole holiday batch โ€” I'd love to see them! ๐Ÿ’›

Filed Under: Uncategorized

Undercover Wine Sleeve โ€” Free Holiday Knit Wine Cozy Pattern by Marly Bird ๐Ÿท๐ŸŒฟ

July 21, 2026 By Meg Leave a Comment

Free pattern published July 2026 by Marly Bird. Designing since 2007.

The Undercover Wine Sleeve is a free holiday knit wine bottle cozy pattern designed by Marly Bird. Worked in the round on double-pointed needles using worsted weight yarn, this adventurous beginner pattern features festive two-color stripes, garter stitch borders, and handknitted holly leaves and berries sewn on as embellishments. Fits a standard 750ml wine bottle. ๐Ÿท๐ŸŒฟ

โšก Quick Answer:

The Undercover Wine Sleeve is a free adventurous beginner knit pattern. You'll need worsted weight yarn in 5 colors, US 8 (5mm) double-pointed needles, and about 2 evenings to complete the cozy plus the holly embellishments. Cast on 56 sts, work striped stockinette to 9″, decrease for the neck, then knit on the holly leaves and berries. Full free pattern below! ๐ŸŒฟ

Knitted wine cozy in red and pink stripes with crocheted holly embellishment; yarn balls and hook beside the project.

Hey, bestie ๐Ÿ’› I have been sitting on this pattern idea for a while, and I am SO happy to finally share it. The Undercover Wine Sleeve started as a “what if I made the most extra wine cozy possible” thought… and honestly? It delivered. ๐Ÿ˜„ We've got festive stripes. We've got a little garter stitch collar. And we've got the tiniest, most adorable knitted holly leaves and berries you've ever seen on a wine bottle.

This is the wine gift you bring to the holiday party when you want everyone to stop mid-conversation and go “wait… did you MAKE that?!” Answer: yes. Yes you did. And it took you two evenings. You're welcome. ๐Ÿท๐ŸŽ„

๐Ÿงถ Affiliate Disclosure: This post contains affiliate links. If you purchase through them I may earn a small commission at no extra cost to youโ€ฆ and it helps support free patterns and content from my yarn-loving heart ๐Ÿ’› See my privacy policy here.

🎄 Countdown to Christmas 🎄

—
Days
—
Hours
—
Mins
—
Secs

Until Christmas Morning! 🎄

🤴 Start your handmade gifts now — December comes faster than you think! 🎅

Why You'll Love This Pattern ๐Ÿ’–

๐ŸŽ It looks incredibly impressive for the skill level. Adventurous beginner is exactly right โ€” you need to be comfortable knitting in the round and doing basic decreases, but that's genuinely it. The holly leaves look like they required some kind of advanced degree. They don't. The pattern walks you through every row.

๐Ÿงถ One ball of yarn does the whole job. Well... five colors, but you use most of just two. The holly leaves and berries use tiny amounts โ€” this is a stash-buster dream. If you have worsted weight wool scraps in any shade of green and red, you're already set for the embellishments.

๐Ÿท It transforms a $15 bottle into a memorable gift. The handmade factor makes people gasp a little. And since it's knit in the round with simple stripe repeats, it works up rhythmically โ€” the kind of knitting you can do while watching your favorite holiday movie. ๐ŸŽ„

This pattern is for you if you're comfortable knitting in the round on DPNs, have tried color changes before (or want to!), and love a project with a satisfying embellishment finish. You'll come away knowing the jogless stripe technique, how to carry yarn up the inside, and how to knit a simple leaf shape โ€” all genuinely useful skills for future holiday knitting. ๐Ÿ’›


๐Ÿ’– What You Will Love

  • Impressive results for the effort โ€” looks advanced, knits up in two evenings
  • Stash-buster dream โ€” uses most of just two balls; holly embellishments use green + red scraps you probably already have
  • Showstopping holiday gift โ€” transforms a $15 bottle into the most-talked-about gift at the party
  • Beginner-friendly techniques โ€” knit in the round, basic decreases, color changes โ€” all clearly explained
  • Satisfying embellishment finish โ€” holly leaves and berries sewn on separately, so you get two guilt-free knitting sessions

๐ŸŽ“ What You Will Learn

  • Knitting in the round on DPNs โ€” casting on and working seamlessly in circular rounds
  • Two-color striped stockinette โ€” alternating colors every two rounds for clean, even stripes
  • Jogless stripe technique โ€” the trick to eliminating the color jog for perfectly smooth stripes
  • Carrying yarn up the inside โ€” keeping floats tidy without cutting yarn at every stripe change
  • Knitting a simple leaf shape โ€” yarn-over increases and decrease rows to form the holly leaves flat
  • Making a knit berry โ€” a tiny 5-stitch technique that gives you adorable dimensional berries

Quick Pattern Overview

๐Ÿงถ Craft: Knitting

โญ Skill Level: Adventurous Beginner โ€” comfortable with knitting in the round, basic decreases (k2tog), and color changes

๐Ÿ“ Finished Size: 11" x 10" (27.94 x 25.4 cm) โ€” fits a standard 750ml wine bottle

๐Ÿงต Yarn: Worsted weight (#4), 100% superwash merino or similar โ€” approx. 186 yds / 100g for Color A and Color B; just small amounts of Colors C, D, and E for embellishments

๐Ÿชก Needles: US 8 (5mm) DPNs for the sleeve body; US 7 (4.5mm) straights or circular for the holly leaves

๐Ÿ“ Gauge: 20 sts = 4" (10 cm) in stockinette stitch

๐ŸŽ„ Holiday bonus: The holly leaf and berry embellishments are made separately and sewn on โ€” which means you can make the sleeve in an evening and add the holiday details the next day. Two bite-sized knitting sessions = one showstopping gift!


Want to Save This Pattern? ๐Ÿ’Œ

Join my newsletter and I'll send you more free patterns, knitting tips, and holiday gift ideas all season long โ€” plus you'll have this pattern safely in your inbox whenever you need it!

Join our Newsletter

Get Free Crochet & Knitting
Pattern Links & Coupons!

Hand-drawn bird with curling, detailed feathers and pink accents; cheerful pose showcases fine line and texture work.
>> Become An Insider <<
A woman with glasses and curly hair models a colorful crocheted scarf, showing textured stitches and vibrant yarn.

Yarn & Materials

I originally designed the Undercover Wine Sleeve using Chic Sheep by Marly Birdโ„ข (100% washable merino wool, 186 yds / 170m, worsted weight #4) โ€” my own yarn line. Chic Sheep has since been discontinued, but the good news is that any 100% superwash merino or wool blend in worsted weight will give you beautiful results. See the substitution section below!

The colors I used were: Color A #5327 Mai Tai (warm orange-red) ยท Color B #5254 Sunset (bright orange) ยท Color C #5633 Velvet (deep green) ยท Color D #5632 Polo (olive green) ยท Color E #5390 Lipstick (red). You can absolutely use any five colors you love โ€” the stripe pattern and leaf shapes look beautiful in any holiday palette.

Rows of colorful yarn balls, both vibrant and muted, displayed for knitting or Tunisian crochet projects.

Yarn Substitutions

For Colors A and B (the main body โ€” you'll use most of each ball), look for a 100% superwash wool or merino wool blend in worsted weight (#4), approximately 186-220 yds per 100g. My top picks:

  • Cascade 220 Superwash โ€” 100% superwash wool, 220 yds / 100g. Excellent stitch definition, beautiful color range, and machine washable. One of my favorite Chic Sheep subs.
  • KnitPicks Swish Worsted โ€” 100% superwash merino, soft and affordable, gorgeous solid colors. Machine washable and beautifully pigmented.
  • Malabrigo Rios โ€” 100% superwash merino, hand-dyed, incredibly soft. A treat-yourself substitute with stunning colorways.
  • Berroco Ultra Wool โ€” 100% superwash wool, 219 yds / 100g, crisp stitch definition and great color saturation.

For Colors C, D, and E (just small amounts for the holly leaves and berries!) โ€” any worsted weight scraps in deep green, olive green, and red will do perfectly. This is a great opportunity to use up those single skeins you've been holding onto. ๐ŸŒฟ

Needles & Notions

  • US 8 (5mm) set of 5 double-pointed needles, or size needed for gauge (sleeve body)
  • US 7 (4.5mm) straight or 24" circular needles (holly leaves โ€” worked flat)
  • Stitch marker
  • Tapestry needle (for sewing embellishments and weaving ends)
โญ๏ธ Marly Bird Amazon Storefront โญ๏ธ

Undercover Wine Sleeve || Pattern Details

Skill Level

Adventurous Beginner

Measurements

To Fit: Average wine bottle (standard 750ml)

Finished Measurements: 11" x 10" (27.94 x 25.4 cm)

Gauge

20 sts = 4" (10 cm) in stockinette stitch

Materials

Yarn: Red Heart Yarn Chic Sheep by Marly Birdโ„ข (100% washable merino wool, 186 yds / 170 m, 3.5 oz/100 g), CYCA 4 worsted โ€” or approved substitute (see above)

ColorColorwayAmount
Color A#5327 Mai Tai1 ball
Color B#5254 Sunset1 ball
Color C#5633 VelvetJust a bit
Color D#5632 PoloJust a bit
Color E#5390 LipstickJust a bit

Needles:

  • US 8 (5mm) set of 5 double-pointed needles, or size required for gauge
  • US 7 (4.5mm) straight or 24" circular needles

Notions:

  • Stitch marker
  • Tapestry needle

Abbreviations

AbbreviationMeaning
BegBegin(ning)
KKnit
K2togKnit 2 together
PPurl
P2togPurl 2 together
PssoPass slip stitch over
SlSlip
Sl1wyifSlip next stitch purlwise with yarn in front of work
St(s)Stitch(es)
YoYarn over

Pattern Stitches

Stockinette Stitch in the round: All rounds: Knit. Repeat for pattern.

Garter Stitch in the round: Round 1: Purl. Round 2: Knit. Repeat rounds 1 and 2 for pattern.


Video Tutorials

  • Jogless Stripes <Click Here>
  • No Cuss Cast On <Click Here>

Notes

  • Sleeve pattern is worked in the round
  • Colors change every two rounds and carry color up on the inside
  • Use jogless stripe technique when changing colors โ€” see the Designer Tip in the Notes section above for float-management guidance
  • Holly leaves and berries are made flat and sewn onto the finished sleeve
โœจ Designer Tip: When working the jogless stripes, carry your floats loosely on the inside of the cozy โ€” you want the sleeve to slide on and off the bottle easily. A tight float will pucker the fabric and make it hard to insert the bottle. A gentle, relaxed carry is all you need! ๐Ÿ’›

GROW

To Unlockย Exclusive Subscriber Contentย click the Box below and join for free by simply adding your email and creating a password! If you are having troubles, clear your cache or reset your password or login to the Grow Publisher Portal.

>> Learn More About Grow Here <<

I'm thrilled to share this amazing pattern with you, many patterns on my blog are absolutely free! I kindly request that you don't copy and paste or distribute this pattern. Prefer an ad-free experience? Buy a digital PDF pattern for a small fee from one of my online stores for a seamless crafting journey. 

I appreciate your support and readership. You are the reason I can keep doing what I love and sharing it with others. So, thank you from the bottom of my yarn-loving heart! Disclosure: This post contains affiliate links, meaning I get a commission if you decide to make a purchase through my links at no cost to you.
Undercover Wine Sleeve || Pattern Instructions

Bottom Edge

With Color A, and larger double-pointed needles, cast on 56 sts.

Place marker for the beginning of the round if needed.

Rounds 1โ€“4: Work in Garter stitch pattern (see Pattern Stitches above).

Body

With Color B

Rounds 1 & 2: Knit

With Color A

Rounds 3 & 4: Knit

Continue in Stockinette St Pattern, alternating 2 rounds Color B and 2 rounds Color A, until the piece measures 9" (22.9 cm), or to desired length.

Neck Edge

Continue with color sequence.

Round 1: *K2tog; repeat from * around โ€” 28 sts.

Round 2: Knit

Round 3: Purl

Round 4: Knit

Round 5: Purl

Bind off all sts knitwise.

Finishing

Weave in all loose ends.

After blocking and drying, sew the holly leaves and berries onto the finished sleeve (see Holly Leaves & Berries section below). Arrange them near the top of the cozy for the most festive effect. ๐ŸŒฟ


Holly Leaves & Berries Pattern

These little embellishments are what make the Undercover Wine Sleeve truly special. ๐ŸŒฟ Each one is knitted flat โ€” make one larger leaf (Color C), one smaller leaf (Color D), and three berries (Color E), then sew them together into a sprig on the finished cozy.

LARGER LEAF

With Color C, and smaller needles, cast on 3 sts

Rows 1-3: Knit

Row 4: K1, yo, k1, yo, k1 -- 5 sts.

Row 5: K1, p to last st, k1

Row 6: K2, yo, k1, yo, k2 -- 7 sts.

Row 7: K1, p to last st, k1

Row 8: K3, yo, k1, yo, k3 -- 9 sts.

Row 9: K1, p to last st, k1

Row 10: K4, yo, k1, yo, k4 -- 11 sts.

Row 11: Bind off 3 sts, p to last st, k1 -- 8 sts.

Row 12: Bind off 3 sts, (1 st on needle) k1, yo, k1, yo, k2 -- 7 sts.

Row 13: K1, p to last st, k1

Row 14: K3, yo, k1, yo, k3 -- 9 sts.

Row 15: K1, p to last st, k1

Row 16: K4, yo, k1, yo, k4 -- 11 sts.

Row 17: K1, p to last st, k1

Row 18: K5, yo, k1, yo, k5 -- 13 sts.

Row 19: Bind off 4 sts, p to last st, k1 -- 9 sts.

Row 20: Bind off 4 sts, k2, yo, k1, yo, k2 -- 7 sts.

Row 21: K1, p to last st, k1

Row 22: K3, yo, k1, yo, k3 -- 9 sts.

Row 23: K1, p2, p3tog, p2, k1 --7 sts.

Row 24: K2, sl1, k2tog, psso, k2 --5 sts.

Row 25: K1, p3tog, k1 --3 sts.

Row 26: K3tog. 

Fasten off. 

Leave a long tail to use for sewing to sleeve.

SMALLER LEAF

With Color D, and smaller needles, cast on 3 sts

Rows 1-3: Knit

Row 4: K1, yo, k1, yo, k1 -- 5 sts.

Row 5: K1, p to last st, k1.

Row 6: K2, yo, k1, yo, k2 -- 7 sts.

Row 7: K1, p to last st, k1.

Row 8: K3, yo, k1, yo, k3 -- 9 sts.

Row 9: K1, p to last st, k1.

Row 10: K4, yo, k1, yo, k4 -- 11 sts.

Row 11: Bind off 3 sts, p to last st, k1 -- 8 sts.

Row 12: Bind off 4 sts, (1 st on needle) k2tog, k1 -- 3 sts.

Row 13: Sl1wyif, p2tog, psso -- 1 st.

Fasten off.

Leave a long tail to use for sewing to sleeve.

BERRIES (make 3)

With Color E, and smaller needles, cast on 1 st, leave a long tail!

Row 1: [(K1, yo) twice, k1] all in 1 st -- 5 sts.

Row 2: Purl

Row 3: Knit

Row 4: Purl

Row 5: Sl 2 stitches as if to knit (one at a time), k3tog, pass 2 slipped sts over knit st. 

Fasten off. 

Leave a long tail to use for sewing to sleeve. 

Tie both ends together to form a berry.


More Holiday Wine Cozy Patterns You'll Love ๐Ÿท

If the Undercover Wine Sleeve has you in full holiday hostess-gift mode, I have more free wine cozy patterns right here on the blog for you! Whether you crochet, knit, or love to do both... there's a pattern waiting for you. ๐Ÿ’›

  • Pour Decisions Crochet Wine Cozy โ€” free adventurous beginner crochet pattern with a lacy body and leather strap closure. The crochet companion to this pattern! ๐Ÿงต
  • All Buttoned Up Knitted Wine Bottle Cover โ€” another free knit wine cozy from me, with simple stitches and six sweet buttons down the front. Easy level, great first wine cozy knit! ๐Ÿชก
  • Knit Wine Cozies โ€” A Festive Trio โ€” three free knit wine bottle cozy patterns in one post, each with a different look and skill level. Perfect if you want to knit a matching set! ๐ŸŽ
  • Holiday Wine Cozy Patterns Roundup โ€” 25+ free and paid holiday wine cozy patterns, crochet and knit! Browse the full collection including patterns from other designers I love. ๐Ÿท

Frequently Asked Questions

What yarn can I use instead of Chic Sheep for the Undercover Wine Sleeve?

Since Chic Sheep by Marly Bird has been discontinued, any 100% superwash merino or wool blend in worsted weight (#4) works beautifully. Great options include Cascade 220 Superwash, KnitPicks Swish Worsted, Malabrigo Rios, and Berroco Ultra Wool โ€” all around 186-220 yds per 100g. For Colors C, D, and E (just a tiny bit for the embellishments!), any worsted weight scraps in deep green, olive green, and red work perfectly.

What are the finished measurements of the Undercover Wine Sleeve?

The finished sleeve measures 11" x 10" (27.94 x 25.4 cm) and is designed to fit a standard 750ml wine bottle. For a champagne bottle (slightly taller and narrower), add 2-3 inches of length and cast on 4-6 fewer stitches. Sparkling cider bottles are nearly identical in shape to a standard wine bottle and should fit as-written!

How do I do the jogless stripe technique?

The jogless stripe technique eliminates the little "step" that naturally appears when you change colors in the round. When you start the second round of a new color, lift the right leg of the stitch from the round below up onto your left needle, then knit it together with the first stitch of the round. It sounds fiddly but becomes second nature quickly โ€” and the result is perfectly smooth stripes with no visible jog. I have a YouTube video linked in the pattern above that walks through every step!

How do I make the holly leaves look neat?

Two things make the biggest difference: consistent tension on the yarn over rows (the increases โ€” don't pull too tight!) and blocking the leaves before sewing them on. Even a quick damp press with a blocking mat and pins will help the leaves lay completely flat and show off their pretty lobed shape. Let them dry fully before sewing them onto the sleeve, and use the long tail you left to anchor each piece securely.

Can I sell items made from the Undercover Wine Sleeve pattern?

Yes! You're welcome to sell finished wine cozies made from this free pattern. I just ask that you credit "Pattern by Marly Bird" and include a link back to this post when you share them online. Thank you for supporting handmade! ๐Ÿ’›

Can I customize the size for a different bottle?

Absolutely! The sleeve is a simple tube, so sizing adjustments are very straightforward. For a larger bottle: increase your cast-on count in increments of 4 (to keep the stripe repeat clean) and add length as needed. For a smaller bottle: reduce the cast-on by 4-8 stitches and knit a shorter body. Just keep your gauge consistent and measure the bottle at its widest point to calculate your stitch count.


Final Thoughts ๐Ÿ’›

I am so excited that the Undercover Wine Sleeve is finally out in the world! ๐ŸŽ‰ There is something SO satisfying about putting a handknitted wine bottle cozy on a bottle and watching someone's face when they realize those little leaves are actually knitted. That moment never gets old.

If you make one (or twelve โ€” no judgment! ๐Ÿ˜„), please share it with me. Tag @marlybird on Instagram or Facebook and use #MMMDI (Marly Made Me Do It), #MarlyBird, and #UndercoverWineSleeve so I can find you and cheer you on. I want to see every single set of those holly leaves. ๐ŸŒฟ๐Ÿ’›

โค๏ธ Your BiCrafty Bestie,
Marly Bird
A cartoon avatar of a person with glasses and a brown bun smiles warmly. Their green shirt and black jacket add a stylish touch, while colorful hearts surround them like loving temperature blankets, stitching together an aura of love and positivity. -Marly Bird

Filed Under: Chic Sheep by Marly Bird Patterns, Free Patterns, Knitting, Our Free Patterns, Pattern

Wildflower Hexagon Motif Crochet Blanket โ€” Free Pattern

July 18, 2026 By Meg Leave a Comment

Crochet this stunning Wildflower Hexagon Motif Crochet Blanket โ€” a free pattern designed by Robyn Chachula for Marly Bird and perfect for adventurous beginners. The 52″ ร— 59″ throw combines 44 hexagon motifs joined as you go with 15 colorful dimensional blossom appliquรฉs. Full written instructions included here on the blog, plus an ad-free PDF available on Etsy, Shopify, and Ravelry.

Hey bestie ๐Ÿ’› If you've been looking for a blanket project that actually makes you want to keep going โ€” motif after motif, color after color โ€” this is the one. The Wildflower Hexagon Motif Blanket is one of those projects where the construction is smart, the flowers make you happy, and the finished blanket genuinely looks like it came from a boutique shop. I am SO excited to share this one with you.

This pattern was designed by the incredibly talented Robyn Chachula, my BiCrafty bestie and co-creator here at Marly Bird. Robyn is a master at making complex-looking designs feel totally doable… and this blanket is proof.

๐Ÿงถ Affiliate Disclosure: This post contains affiliate links. If you purchase through them I may earn a small commission at no extra cost to youโ€ฆ and it helps support free patterns and content from my yarn-loving heart ๐Ÿ’› See my privacy policy here.
Wildflower Hexagon Motif Crochet Blanket free pattern by Robyn Chachula for Marly Bird โ€” a 52 by 59 inch colorful throw with dimensional blossom appliquรฉs

What You Will Love About This Blanket Pattern ๐Ÿ’–

๐ŸŒธ Dimensional blossom appliquรฉs that pop off the blanket. These aren't flat granny-square flowers โ€” they have real petal depth, and they make the whole project feel like a wearable art piece.

๐Ÿงฉ Join-as-you-go construction that eliminates seaming. You join each hexagon motif AS you work the final round. No sitting down afterward with a yarn needle trying to sew 44 hexagons together. The blanket comes together as you go.

๐ŸŽจ An 8-color palette that's endlessly customizable. The original uses a beautiful combination of Blue Smoke, Soft Yellow, Salmon, Honeysuckle, Icy Teal, Sea Green, Boysenberry, and Pale Orchid. But you could do jewel tones, pastels, a monochromatic look… the options are gorgeous.

๐Ÿ“ Polished edges with no “chunky hexagon corners.” The pattern includes full hexagons PLUS half hexagons, quarter hexagons, and partial hexagons to fill in the edges. The finished blanket has clean, rectangular edges.

๐ŸŒฟ A decorative 7-round border that ties it all together. The border uses a mix of your blanket colors to frame the whole project beautifully. That finishing touch elevates this from “cozy blanket” to “heirloom piece.”

๐Ÿง  Skills you'll build that carry into EVERY future project. Back post stitches, reading crochet diagrams, working in multiple colors, dimensional flowers… this blanket is a skill sampler in the best possible way.

Wildflower Hexagon Motif Crochet Blanket crochet pattern PDF โ€” available on Etsy Shopify and Ravelry

Quick Pattern Overview

Skill LevelAdventurous Beginner
DesignerRobyn Chachula for Marly Bird
Finished Size52″ ร— 59″ (132 ร— 156 cm)
Yarn WeightWorsted (#4)
HookUS I/9 (5.5 mm), or size to obtain gauge
GaugeHexagon Motif = 6.5″ (16.5 cm) side to side
Motif Count44 full hexagons + 12 half + 4 quarter + 8 partial hexagons
Blossom Motifs15 total (5 each of Motif A, B, and C)
Colors Used8 colors (main + 7 contrasting)
Free or Paid?Free here on the blog! Ad-free PDF available on Etsy, Shopify, and Ravelry.

Love the Pattern? Grab the Ad-Free PDF โญ

The full pattern is free right here on the blog… but if you want a clean, printable, ad-free PDF version to take to your favorite chair without distractions, we've got you covered. Grab it on your preferred platform:

๐Ÿงก Etsy โ€” Get the PDF
๐Ÿ’— Shopify โ€” Get the PDF
๐Ÿ’™ Ravelry โ€” Get the PDF
Wildflower Hexagon Motif Crochet Blanket ad-free PDF pattern mockup for printable crochet pattern

Is This Pattern Right for You?

โšก Quick Answer:

This blanket is rated Adventurous Beginner โ€” meaning you should know basic crochet stitches (chain, single crochet, double crochet) before starting. The “adventurous” part is learning join-as-you-go construction, back post stitches, and color work. If you've made a few small projects and can follow a stitch pattern, you're ready!

If you've crocheted a granny square or two and want to try something with more wow factor, this is your blanket. The individual motifs are small and satisfying โ€” you're never working on one huge piece for weeks without a sense of progress.

If you're completely new to crochet, I'd suggest starting with a simpler project first to get your gauge and tension consistent. Come back to this one once you've got a few completed projects under your belt… it'll be worth the wait!

โœจ Designer Tip: Working with multiple colors can feel intimidating, but this pattern is very forgiving. Each motif is small, so if your tension or color placement isn't perfect, you won't notice once all 44 hexagons are joined. Don't let “adventurous” scare you โ€” let it excite you!

Join our Newsletter

Get Free Crochet & Knitting
Pattern Links & Coupons!

Hand-drawn bird with curling, detailed feathers and pink accents; cheerful pose showcases fine line and texture work.
>> Become An Insider <<
A woman with glasses and curly hair models a colorful crocheted scarf, showing textured stitches and vibrant yarn.

Why Modular Motifs Win: The Power of Join-As-You-Go

One of the things that makes this blanket so clever is the join-as-you-go (JAYG) construction. Instead of crocheting all 44 hexagons separately and then seaming them together (which can take HOURS and creates a different look), you join each hexagon to its neighbors AS you work the final round.

The result? No seaming pile at the end. The joins are almost invisible. And you can see your blanket taking shape as you work, which is incredibly motivating.

โœจ Designer Tip: Your gauge really matters for JAYG projects! Make a gauge swatch before you start and measure your hexagon: it should be 6.5″ from side to side. If yours is bigger, try a smaller hook. If smaller, go up a hook size. Getting gauge right from the start means all your hexagons will fit together perfectly.
Join as you go hexagon crochet construction technique for the Wildflower Hexagon Motif Blanket by Marly Bird

Understanding the Motif Shapes

To fill a rectangular blanket with hexagons, you need more than just full hexagons. This pattern uses FOUR types of motifs to create clean edges:
โ€ข Full Hexagons (the main body), โ€ข Half Hexagons (fill the long sides), โ€ข Quarter Hexagons (go in the corners), and โ€ข Partial Hexagons (fill the short sides). Each shape is worked to fit exactly where it needs to go, giving you those polished rectangular edges.

The Blossom Motifs โ€” The Secret Sauce

The 15 blossom motifs are worked separately and applied to the surface of the finished hexagon background. They're dimensional flowers with two layers of petals that create a gorgeous 3D effect. Working the back post stitches to attach the outer layer of petals is the technique that gives these flowers their depth… and once you learn it, you'll want to add dimensional flowers to EVERYTHING.


Herrschners Worsted 8 yarn in multiple colors โ€” used in the Wildflower Hexagon Motif Crochet Blanket

Choosing Your Color Palette

The original sample uses a gorgeous garden-inspired palette: Blue Smoke as the main color for all the hexagon backgrounds and border, with Soft Yellow, Salmon, Honeysuckle, Icy Teal, Sea Green, Boysenberry, and Pale Orchid for the blossom motifs. It's fresh, cheerful, and just a little bit dreamy.

The Original Sample Colors (Herrschners Worsted 8)

  • Color A โ€” Blue Smoke (#1016): 4 balls โ€” main hexagon color + border
  • Color B โ€” Soft Yellow (#1041): 1 ball โ€” blossom center
  • Color C โ€” Salmon (#1038): 1 ball โ€” blossom accent + border Round 3
  • Color D โ€” Honeysuckle (#1039): 1 ball โ€” blossom accent
  • Color E โ€” Icy Teal (#1072): 1 ball โ€” blossom accent + border Round 5
  • Color F โ€” Sea Green (#1035): 1 ball โ€” blossom accent
  • Color G โ€” Boysenberry (#1069): 1 ball โ€” blossom accent
  • Color H โ€” Pale Orchid (#1028): 1 ball โ€” blossom accent

Total yardage: approximately 5,390 yards (1,956 yards in Color A + 489 yards each of Colors Bโ€“H)

Make It Your Own โ€” Color Alternatives

The beauty of this design is that the color story is entirely up to you. Want a soft, pastel nursery blanket? Use pale pinks, mint greens, and lavenders for the blossoms against a white or cream background. Going for a bold statement piece? Try deep jewel tones โ€” navy, emerald, burgundy, mustard โ€” against a charcoal gray background. A monochromatic look in varying shades of one color reads as incredibly sophisticated.

One tip: choose your Color A (the background) first, and then pick blossom colors that pop against it. High contrast between the hexagon background and the flowers is what makes the blossoms really sing.

โœจ Designer Tip: Plan your color arrangement for the blossoms BEFORE you start crocheting. Lay out your yarn skeins on a table and photograph your arrangement. You'll thank yourself when you're deep into the project and can't remember which flower went where!

Wildflower Hexagon Motif Crochet Blanket free pattern โ€” colorful hexagon crochet blanket with blossom appliques

What You'll Need

๐Ÿงถ Yarn

Sample Yarn: Herrschners Worsted 8 (100% acrylic, 489 yards / 448 meters, 8 oz / 226 g per skein, CYCA #4 worsted)

  • Color A (Blue Smoke #1016): 4 balls
  • Colors Bโ€“H (one ball each): Soft Yellow, Salmon, Honeysuckle, Icy Teal, Sea Green, Boysenberry, Pale Orchid

Yarn Substitutes: Any worsted-weight (#4) yarn works. Match the yardage and make a gauge swatch. Acrylic yarns behave most like the original; natural fibers (wool, cotton) will give a different drape but are absolutely doable.

๐Ÿช Hook

US I/9 (5.5 mm) โ€” or size needed to obtain gauge (hexagon = 6.5″ side to side)

๐Ÿ“ฆ Notions

  • Stitch markers
  • Tapestry needle (for weaving in ends and attaching blossom motifs)
  • Scissors
  • Tape measure

๐Ÿ“Š Yarn Calculator

Total yardage needed: approximately 5,390 yards

  • Color A: 489 ร— 4 balls = 1,956 yards
  • Colors Bโ€“H: 489 ร— 7 balls = 3,423 yards
  • Approximate total with some leftover: ~5,390 yards

If substituting yarn, match this total yardage and make sure each individual color has at least 489 yards (one full skein) available.

โญ๏ธ Marly Bird Amazon Storefront โญ๏ธ

What You'll Learn

This project is a real skill-builder. By the time you finish this blanket, you'll have practiced:

  • ๐Ÿ”— Join-as-you-go motif construction โ€” the thread join technique for seamless joining
  • ๐Ÿ“– Reading crochet stitch diagrams โ€” the pattern includes visual diagrams for every motif
  • ๐ŸŒˆ Color changes โ€” working cleanly with 8 different colors across a large project
  • โ†ฉ๏ธ Back post stitches (bpsc and bp slst) โ€” the technique that creates dimensional texture
  • ๐ŸŒธ Working dimensional crochet flowers โ€” layered petals with depth and shape
  • ๐Ÿ“ Adapting motif shapes for polished edges โ€” half, quarter, and partial hexagons
  • ๐Ÿชก Decorative border techniques โ€” a 7-round border using multiple colors

These are skills you'll carry into EVERY project after this. This blanket is genuinely a crochet education wrapped in a beautiful finished object.


Wildflower Hexagon Motif Crochet Blanket free crochet pattern by Marly Bird featuring colorful dimensional flowers

Wildflower Hexagon Motif Blanket โ€” Pattern Details

The complete pattern is below, free here on the blog. If you'd prefer an ad-free, printable PDF version, grab it on Etsy, Shopify, or Ravelry.

Skill Level

Intermediate

Measurements

Finished Measurements

Blanket is 52โ€ [132 cm] wide by 59โ€ [156 cm] long. 

Gauge 

Hexagon Motif = 6.5โ€ [16.5 cm] in diameter from side to side; use any size hook to obtain the gauge. 

Schematic

The pattern includes a Blanket Layout Chart showing where each full hexagon, half hexagon, quarter hexagon, and partial hexagon is placed. This layout chart is included in the ad-free PDF. The schematic below shows the finished dimensions: 52″ wide ร— 59″ long.

Wildflower Hexagon Crochet Blanket Schematic and color layout

Materials

Yarn

Herrschners, Worsted 8 (100% acrylic, 489 yd / 448 m, 8 oz/ 226 g, CYCA# 4 worsted) 

Color A: #1016 Blue Smoke, 4 balls

Color B: #1041 Soft Yellow, 1 ball

Color C: #1038 Salmon, 1 ball

Color D: #1039 Honeysuckle, 1 ball

Color E: #1072 Icy Teal, 1 ball

Color F: #1035 Sea Green, 1 ball

Color G: #1069 Boysenberry, 1 ball

Color H: #1028 Pale Orchid, 1 ball

Crochet Hook

Size I/9 [5.5 mm]

Notions

  • Stitch Markers
  • Tapestry Needle
  • Scissors
  • Tape Measure
โญ๏ธ Marly Bird Amazon Storefront โญ๏ธ

Crochet Stitch Diagrams

โœจ Following along with the free pattern on MarlyBird.com? You'll have everything you need to make this Wildflower Hexagon Motif Blanket… but if you want the exclusive stitch diagram charts, blossom motif diagrams, hexagon motif diagrams, border diagrams, and blanket layout chart, those are only available in the ad-free PDF version.

You'll enjoy a clean, printable, ad-free experience while supporting Marly Bird's free tutorials and patterns ๐Ÿ’–

๐Ÿงก Etsy
๐Ÿ’— Shopify
๐Ÿ’™ Ravelry

Abbreviations

BP โ€” Back Post | CC โ€” Contrasting Color | Ch โ€” Chain(s) | Dc โ€” Double Crochet | FP โ€” Front Post | Hdc โ€” Half Double Crochet | RS โ€” Right Side | Sc โ€” Single Crochet | Sl st โ€” Slip Stitch | Sp(s) โ€” Space(s) | St(s) โ€” Stitch(es) | Tch โ€” Turning Chain | Tr โ€” Treble Crochet | WS โ€” Wrong Side

Wildflower Hexagon Motif Crochet Blanket free crochet pattern by Marly Bird featuring colorful dimensional flowers

Special Stitches

โญ๏ธ Back Post Single Crochet (bpsc): Insert hook from back to front to back around the post of the stitch indicated, yarn over and pull up a loop, yarn over and draw through both loops on hook.

โญ๏ธ Back Post Slip Stitch (bp slst): Insert hook from back to front to back around the post of the stitch indicated, yarn over and draw through both the stitch and loop on hook.

โญ๏ธ Thread Join: Remove hook from free loop, thread hook from front to back in stitch indicated, place free loop back on hook and pull through stitch. This threads the 2 stitches together through their top 2 loops.

โญ๏ธ Stacked Double Crochet (Stacked Dc): (Do not ch 1 prior to making the first sc) Sc in first stitch, insert hook in between two legs of the base, yarn over and pull up a loop, yarn over and draw through 2 loops on hook.

โญ๏ธ Stacked Treble Crochet (Stacked Tr): (Do not ch 1 prior to making the first sc) Sc in first stitch, [insert hook in between two legs of the base, yarn over and pull up a loop, yarn over and draw through 2 loops on hook] twice.


Video Tutorials

  • How to Bury Ends >> Click Here for Video Help <<
  • Back Post Stitches >> Click Here for Video Help <<
  • Blossom Crochet Flower>> Click Here for Video Help <<

Notes

  • Change colors by working until the last 2 loops on the hook of the first color, draw new color through the last 2 loops, and proceed in the next color.
  • Most rounds start with a stacked dc; if you prefer, you can ch 3 to start the round.
  • Motifs are joined by threading the free loops through indicated stitches on the adjacent motifs. This join is not critical โ€” feel free to use any join or seaming technique that you prefer.
  • After completing all hexagon background motifs and joining them, apply the completed Blossom Motifs to the surface of the blanket using a tapestry needle and yarn tail.

GROW

To Unlockย Exclusive Subscriber Contentย click the Box below and join for free by simply adding your email and creating a password! If you are having troubles, clear your cache or reset your password or login to the Grow Publisher Portal.

>> Learn More About Grow Here <<

I'm thrilled to share this amazing pattern with you, many patterns on my blog are absolutely free! I kindly request that you don't copy and paste or distribute this pattern. Prefer an ad-free experience? Buy a digital PDF pattern for a small fee from one of my online stores for a seamless crafting journey. 

I appreciate your support and readership. You are the reason I can keep doing what I love and sharing it with others. So, thank you from the bottom of my yarn-loving heart! Disclosure: This post contains affiliate links, meaning I get a commission if you decide to make a purchase through my links at no cost to you.

Wildflower Hexagon Motif Crochet Blanket free crochet pattern by Marly Bird featuring colorful dimensional flowers

Wildflower Hexagon Motif Crochet Blanket – Pattern Instructions

Blossom Motifs โ€” Make 5 of Each (Motif A, B, and C)

Note: CC1 and CC2 vary by motif letter โ€” see color assignment note above.

Round 1: With color B, make an adjustable ring. Stacked dc in ring, dc in ring, [ch 5, 3 dc in ring] 5 times, ch 5, dc in ring, change color to CC1, sl st to top of stacked dc, pull ring closed, do not turn. โ€” 6 ch-5 sps + 6 groups of 3 dc.

Round 2: *(Sc, hdc, 7 dc, hdc, sc) in next ch-5 sp, skip next dc, sl st to next dc; repeat from * around, fasten off color, do not turn. โ€” 6 petals.

Round 3: With color CC2, join yarn with a bpsc around any center dc in the groups of dc from Round 1, *ch 7, sl st to sc just made, ch 3, skip (sc, hdc, 3 dc), bp sl st around next dc, ch 3**, bpsc around next center dc from the groups of dc on Round 1; repeat from * around ending at **, sl st to first sc, do not turn. โ€” 6 ch-7 sps + 12 ch-3 sps.

Round 4: Ch 1, (sc, hdc, 4 dc, ch 2, 4 dc, hdc, sc) in each ch-7 sp, sl st to first sc, fasten off, do not turn. โ€” 6 petals.

Round 5: Join color A with bp sl st around the dc before any ch-2 sp, *ch 2, bp sl st around next dc, ch 3, 2 dc between next 2 sc (between next 2 petals), ch 3**, skip (sc, hdc, 3 dc) on next petal, bp sl st around next dc; repeat from * around ending at **, sl st to first sl st, do not turn. โ€” 12 dc + 12 ch-3 sps + 6 ch-2 sps.

Round 6: (Stacked dc, ch 2, dc) in first ch-2 sp, *4 dc in next ch-3 sp, dc between next 2 dc, 4 dc in next ch-3 sp**, (dc, ch 2, dc) in next ch-2 sp; repeat from * around ending at **, sl st to top of stacked dc, fasten off, weave in ends. โ€” 66 dc + 6 ch-2 sps.

Hexagon Motifs โ€” Join 44

With color A, make an adjustable ring.

Round 1: Stacked dc in ring, 11 dc in ring, pull ring closed, sl st to top of stacked dc to join, do not turn. โ€” 12 dc.

Round 2: Stacked dc in first dc, *(dc, ch 2, dc) in next dc, dc in next dc; repeat from * around to last dc, (dc, ch 2, dc) in last dc, sl st to top of stacked dc to join, do not turn. โ€” 18 dc + 6 ch-2 sps.

Round 3: Stacked dc in first dc, dc in next dc, *(dc, ch 2, dc) in next ch-2 sp, dc in next 3 dc; repeat from * around to last ch-2 sp, (dc, ch 2, dc) in last ch-2 sp, dc in last dc, sl st to top of stacked dc to join, do not turn. โ€” 30 dc + 6 ch-2 sps.

Round 4: Stacked dc in first dc, dc in next 2 dc, *(dc, ch 2, dc) in next ch-2 sp, dc in next 5 dc; repeat from * around to last ch-2 sp, (dc, ch 2, dc) in last ch-2 sp, dc in last 2 dc, sl st to top of stacked dc to join, do not turn. โ€” 42 dc + 6 ch-2 sps.

Round 5: Stacked dc in first dc, dc in next 3 dc, *(dc, ch 2, dc) in next ch-2 sp, dc in next 7 dc; repeat from * around to last ch-2 sp, (dc, ch 2, dc) in last ch-2 sp, dc in last 3 dc, sl st to top of stacked dc to join, do not turn. โ€” 54 dc + 6 ch-2 sps.

Round 6: Stacked dc in first dc, dc in next 4 dc, *(dc, ch 2, dc) in next ch-2 sp, dc in next 9 dc; repeat from * around to last ch-2 sp, (dc, ch 2, dc) in last ch-2 sp, dc in last 4 dc, sl st to top of stacked dc to join, fasten off, weave in ends. โ€” 66 dc + 6 ch-2 sps.

Joining Motifs: Complete motif through Round 5. Follow directions through Round 6 to first adjoining corner ch-2 sp, *dc in ch-2 sp, ch 1, thread join to adjoining ch-2 sp on adjacent motif, dc in same ch-2 sp on motif, dc in next 2 dc on motif, [skip 2 dc on adjacent motif, thread join to next dc on adjacent motif, dc in next 3 dc on motif] twice, skip 2 dc on adjacent motif, thread join to next dc on adjacent motif, dc in next dc on motif; repeat from * across all sides of adjacent motifs, dc in next ch-2 sp on motif, thread join to next adjoining ch-2 sp on adjacent motif, ch 1, dc in same ch-2 sp on motif, continue with Round 6 directions to end.

Half Hexagon Motifs โ€” Join 12

With color A, make an adjustable ring.

Row 1 (WS): Stacked dc in ring, 6 dc in ring, pull ring closed, turn. โ€” 7 dc.

Row 2: Stacked dc in first dc, [(dc, ch 2, dc) in next dc, dc in next dc] 3 times, turn. โ€” 10 dc + 3 ch-2 sps.

Row 3: Stacked dc in first dc, dc in next dc, [(dc, ch 2, dc) in next ch-2 sp, dc in next 3 dc] twice; (dc, ch 2, dc) in last ch-2 sp, dc in last 2 dc, turn. โ€” 16 dc + 3 ch-2 sps.

Row 4: Stacked dc in first dc, dc in next 2 dc, [(dc, ch 2, dc) in next ch-2 sp, dc in next 5 dc] twice, (dc, ch 2, dc) in last ch-2 sp, dc in last 3 dc, turn. โ€” 22 dc + 3 ch-2 sps.

Row 5: Stacked dc in first dc, dc in next 3 dc, [(dc, ch 2, dc) in next ch-2 sp, dc in next 7 dc] twice, (dc, ch 2, dc) in last ch-2 sp, dc in last 4 dc, turn. โ€” 28 dc + 3 ch-2 sps.

Row 6: Stacked dc in first dc, dc in next 4 dc, [(dc, ch 2, dc) in next ch-2 sp, dc in next 9 dc] twice, (dc, ch 2, dc) in last ch-2 sp, dc in last 5 dc, fasten off, weave in ends. โ€” 34 dc + 3 ch-2 sps.

Joining: Join Half Motifs in same manner as Hexagon Motifs. Connect all adjoining ch-2 sps and every 3rd dc along the sides. For the short beginning edge, connect the first and 4th dc. For the short ending edge, connect the 3rd and last dc.

Quarter Hexagon Motifs โ€” Join 4

Note: The motif will be joined on the WS on 2 corners and on the RS on the other 2 corners; position the motif to fit the corner of the blanket.

With color A, make an adjustable ring.

Row 1 (WS): Stacked dc in ring, 3 dc in ring, pull ring closed, turn. โ€” 4 dc.

Row 2: Stacked dc in first dc, (dc, ch 2, dc) in next dc, dc in next dc, (dc, tr) in last dc, turn. โ€” 5 dc + 1 tr + 1 ch-2 sp.

Row 3: (Stacked tr, dc) in first tr, dc in next 3 dc, (dc, ch 2, dc) in next ch-2 sp, dc in last 2 dc, turn. โ€” 8 dc + 1 tr + 1 ch-2 sp.

Row 4: Stacked dc in first dc, dc in next 2 dc, (dc, ch 2, dc) in next ch-2 sp, dc in next 5 dc, (dc, tr) in last st, turn. โ€” 11 dc + 1 tr + 1 ch-2 sp.

Row 5: (Stacked tr, dc) in first tr, dc in next 7 dc, (dc, ch 2, dc) in next ch-2 sp, dc in last 4 dc, turn. โ€” 14 dc + 1 tr + 1 ch-2 sp.

Row 6: Stacked dc in first dc, dc in next 4 dc, (dc, ch 2, dc) in next ch-2 sp, dc in next 9 dc, (dc, tr) in last st, fasten off, weave in ends. โ€” 17 dc + 1 tr + 1 ch-2 sp.

Joining: Join Quarter Motifs in same manner as Hexagon Motifs. Connect all adjoining ch-2 sps and every 3rd dc. For the short beginning edge, connect the first and 4th dc. For the long ending edge, connect the last tr to the adjoining ch-2 sp.

Partial Hexagon Motifs โ€” Join 8

With color A, make an adjustable ring.

Row 1 (WS): Stacked dc in ring, 6 dc in ring, pull ring closed, turn. โ€” 7 dc.

Row 2: (Stacked tr, dc) in first dc, dc in next dc, [(dc, ch 2, dc) in next dc, dc in next dc] twice, (dc, tr) in last st, turn. โ€” 9 dc + 2 tr + 2 ch-2 sps.

Row 3: (Stacked tr, dc) in first st, dc in next 3 dc, [(dc, ch 2, dc) in next ch-2 sp, dc in next 3 dc] twice; (dc, tr) in last st, turn. โ€” 15 dc + 2 tr + 2 ch-2 sps.

Row 4: (Stacked tr, dc) in first st, dc in next 5 dc, [(dc, ch 2, dc) in next ch-2 sp, dc in next 5 dc] twice, (dc, tr) in last st, turn. โ€” 21 dc + 2 tr + 2 ch-2 sps.

Row 5: (Stacked tr, dc) in first st, dc in next 7 dc, [(dc, ch 2, dc) in next ch-2 sp, dc in next 7 dc] twice, (dc, tr) in last st, turn. โ€” 27 dc + 2 tr + 2 ch-2 sps.

Row 6: (Stacked tr, dc) in first st, dc in next 9 dc, [(dc, ch 2, dc) in next ch-2 sp, dc in next 9 dc] twice, (dc, tr) in last st, fasten off, weave in ends. โ€” 33 dc + 2 tr + 2 ch-2 sps.

Joining: Join in same manner as Hexagon Motifs. Connect all adjoining ch-2 sps and every 3rd dc. Connect the first and last stitch to the adjoining ch-2 sps.

Finishing โ€” Border (7 Rounds)

Round 1: With color A, join to corner before a long edge with a sc, *place 219 sc evenly across long edge to corner, 3 sc in corner (place marker in middle sc), place 171 sc evenly across short edge to corner**, 3 sc in corner (place marker in middle sc); repeat from * around ending at **, 2 sc in first corner, sl st to first sc to join, do not turn. โ€” 792 sc.

Round 2: Stacked dc in first sc (same sc as join), dc in next 5 sc, *[(dc, ch 2, dc) in next sc, dc in next 7 sc] repeat across until 7 sts to marker, (dc, ch 2, dc) in next sc, dc in next 6 sc, (2 dc, ch 2, 2 dc) in marked sc (move marker to ch-2 sp)**, dc in next 6 sc; repeat from * around ending at **, sl st to top of stacked dc to join. Fasten off color A. โ€” 96 ch-2 sps.

Round 3: Join color C to next dc (not stacked dc) with a sc, sc in next 2 sc, *skip 3 dc, (4 dc, ch 2, 4 dc) in next ch-2 sp**, skip 3 dc, sc in next 3 dc; repeat from * around ending at **, sl st to first sc to join. Fasten off color C.

Round 4: Locate any ch-2 sp on corner, join color A with bpsc to first dc after corner ch-2 sp, *[skip 3 dc, 2 dc in next sc, (dc, ch 2, dc) in next sc, 2 dc in next sc, skip 3 dc, bpsc in next dc**, ch 2, bpsc in next dc] repeat across to corner ending at **, ch 3 (move marker), bpsc in next dc; repeat from * around blanket ending at **, ch 3, sl st to first sc to join. Fasten off color A.

Round 5: Join color E (Icy Teal) to first sc with sc, *[skip next 3 dc, (4 dc, ch 2, 4 dc) in next ch-2 sp, skip next 3 dc, sc in next sc**, sc in next ch-2 sp, sc in next sc] repeat across to corner ending at **, 3 sc in corner ch-3 sp, sc in next sc; repeat from * around blanket ending at **, 3 sc in last corner ch-3 sp, sl st to first sc to join. Fasten off color E.

Round 6: Join color A with a standing dc (or stacked dc) in first sc, dc in same dc, *[skip 3 dc, bpsc in next dc, ch 2, bpsc in next dc, skip 3 dc**, 2 dc in next sc, dc in next sc, 2 dc in next sc] repeat across to corner ending at **, 2 dc in next 5 sc in corner; repeat from * around blanket ending at **, 2 dc in last 4 sc, sl st to first dc to join.

Round 7: Ch 1, reverse sc in each dc and sc around, 1 reverse sc in ch-2 sp, sl st to first st to join. Fasten off and weave in ends.

Pattern ยฉ Robyn Chachula for Marly Bird. Free here on the blog for personal use. Please do not sell or redistribute. marlybird.com

Enjoy the free pattern! If you'd like a clean, printable, ad-free PDF copy to keep in your project bag, it's available on three platforms:

๐Ÿงก Etsy โ€” Get the PDF
๐Ÿ’— Shopify โ€” Get the PDF
๐Ÿ’™ Ravelry โ€” Get the PDF

Use Code HALFOFF for 50% off the entire collection!

๐Ÿงถ Love Making Crochet Projects?

If you love a variety of crochet makes โ€” accessories, home decor, quick projects โ€” check out my Crochet Project Collection inside Marly Bird House. Curated crochet patterns, techniques, and project plans all in one place.

๐ŸŒธ Explore the Crochet Collection โ†’

crochet blanket with geometric, multicolored stitches draped on a gray couch; arrow highlights stitch detail.

Take Your Blanket Skills Further โ€” The Monet Crochet Blanket Course ๐ŸŽจ

Ready to go deeper with crochet blanket design?

If this Wildflower Blanket has you falling in love with motif-based blanket making, the Monet Crochet Blanket Course inside Marly Bird House is your natural next step.

The Monet course is a paint-by-color inspired crochet blanket project with full step-by-step video instruction. Think impressionist art meets cozy handmade โ€” stunning color blending, beautiful stitch work, and a guided learning experience that takes your blanket skills to a whole new level.

It's a complete paid-for course, which means you get: full video walkthroughs, written pattern, instructor support, and everything you need to go from “I just finished the Wildflower!” to “I can't believe I made this.”

๐ŸŽจ Check Out the Monet Blanket Course โ†’

Two women smile and point at intricate floral crochet blankets with rich texture on a light peach background.

More Free Crochet Patterns You'll Love

If you're loving the motif-and-texture world, here are some other Marly Bird patterns worth bookmarking…

The Enchanted Crochet Motif Shawl brings the same love of motif work to a beautiful rectangular shawl โ€” perfect if you want a wearable project after the blanket. And if dimensional crochet flowers have your heart, the Free Crochet Floral Motif Tee puts those petal-making skills to work in a gorgeous garment.

For more colorful inspiration, check out Color Is Back โ€” Free Colorful Knit & Crochet Patterns. The Spring Fling 2026 pattern collection also has some wonderful floral and colorful crochet options to try next.

Love the Sookie Crochet Cardigan vibe? The Sookie Crochet Cardigan and the Farmer's Market Filet Crochet Bag are both free patterns with that same joyful, crafty energy this blanket has.


Frequently Asked Questions

Is this blanket beginner-friendly?

Honestly, it depends on your definition of beginner. If you know basic crochet stitches (chain, sc, dc) and can follow a pattern, you're ready to try. The “adventurous” in Adventurous Beginner means you'll be pushing into new territory โ€” back post stitches, color changes, JAYG joins โ€” but the fundamentals are all basic. Think of it as the best kind of stretch project.

What is join-as-you-go (JAYG) crochet?

JAYG means you join each motif to its neighbors as you work the final round, instead of crocheting everything separately and seaming later. You work through the last round of each hexagon normally, and at the join points, you do a “thread join” that locks the motifs together. No seaming pile at the end! The blanket comes together as you go, which is incredibly satisfying.

How do I work the thread join?

Remove your hook from the free loop, thread the hook from front to back through the indicated stitch on the adjacent motif, place the free loop back on the hook, and pull it through. This threads the two stitches together through their top loops for an almost invisible join. It feels tricky the first time… but you'll get it within a few motifs!

Can I use a different yarn?

Absolutely! Any worsted-weight (#4) yarn works. Just make sure your gauge matches (hexagon = 6.5″ from side to side) โ€” adjust your hook size if needed. Acrylic yarn behaves most like the original Herrschners Worsted 8. Natural fiber yarns (wool, cotton, blends) will give a different drape and feel but are totally doable. Just make a swatch first!

How long does this blanket take to make?

Plan for approximately 25-35 hours of crocheting time, depending on your speed and experience. The individual motifs work up quickly once you get into the rhythm, and JAYG means no extra time spent seaming at the end. Many crafters find the repetitive motif work meditative and satisfying… just one more hexagon before bed!

Can I make the blanket smaller or larger?

Yes! To make it smaller, simply make fewer hexagons. To make it larger, add more hexagons in rows and columns (and adjust your half/quarter/partial hexagons for the edges accordingly). You'll need additional yarn beyond the listed amounts if you go larger. Plan for approximately 1,956 yards for the background color and about 489 yards for each contrasting color.

Do I need to block this blanket?

Light blocking can help even out your stitches and open up the hexagon shape nicely, but it's not strictly required since this is 100% acrylic yarn. Acrylic fibers don't respond to wet blocking the way wool does. You can do a light steam block or simply wash and lay flat to dry if you want to even things out. The blanket will settle nicely with a few washes.

What's the difference between the hexagon, half hexagon, quarter hexagon, and partial hexagon motifs?

Great question! The full hexagons make up the main body of the blanket. The half hexagons fill in the long side edges. The quarter hexagons go in the four corners. The partial hexagons fill the short side edges. Together, these four shapes create a clean, straight rectangular border around the hexagon grid โ€” no jagged edges!

Can I use my own color palette?

100% yes โ€” that's one of the most fun parts of this pattern! The original uses Blue Smoke as the background with 7 contrasting blossom colors. You could do a completely different palette: soft pastels, bold jewel tones, a rainbow gradient, or even a monochromatic look with tonal variations of one color. The pattern structure works with any color combination.

Is the PDF version worth buying?

The pattern is free right here on the blog with complete instructions! The PDF version is for people who prefer a clean, printable, ad-free format to take to their chair, take to a knit night, or save offline. It's the same pattern, just formatted for easy printing without blog ads or navigation. Totally your call!

๐Ÿงก Etsy โ€” Get the PDF
๐Ÿ’— Shopify โ€” Get the PDF
๐Ÿ’™ Ravelry โ€” Get the PDF
Wildflower Hexagon Motif Crochet Blanket ad-free PDF pattern mockup for printable crochet pattern

Final Thoughts

The Wildflower Hexagon Motif Blanket is one of those projects that feels like a gift to yourself from the moment you cast on. Every motif is a little victory. Every blossom you attach is a moment of pure creative joy. And when you spread that finished blanket out and see all 44 hexagons and 15 flowers coming together into something this beautiful… it's genuinely one of the most rewarding crochet experiences you can have.

Robyn Chachula designed this with so much care and creativity, and I'm so proud to share it here on the blog for free. Whether you're making it for yourself, for a loved one, or for a future heirloom, I hope every stitch brings you joy.

I'd love to see your finished Wildflower Blanket! Share your photos in the comments below or tag me on Instagram โ€” seeing your makes genuinely makes my day. ๐Ÿงถ๐ŸŒธ

โค๏ธ Your BiCrafty Bestie,
Marly Bird
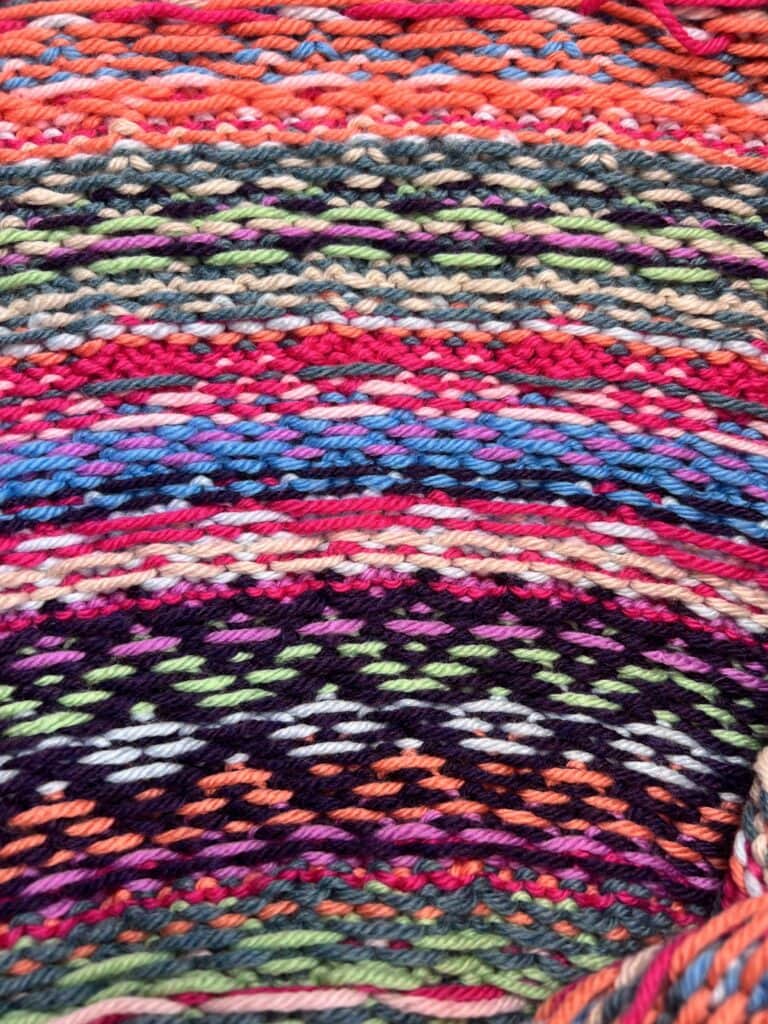
A cartoon avatar of a person with glasses and a brown bun smiles warmly. Their green shirt and black jacket add a stylish touch, while colorful hearts surround them like loving temperature blankets, stitching together an aura of love and positivity. -Marly Bird

Filed Under: Uncategorized

30 Free Mini Christmas Ornament Patterns to Crochet & Knit

July 10, 2026 By Meg Leave a Comment

๐ŸŽ„ Welcome to Day 5 of our 25 Days of Christmas in July event! We're celebrating the most wonderful time of the year… in the middle of summer. And honestly? We're not sorry about it. ๐Ÿ˜„

Today we're talking about one of our absolute favorite quick-win holiday projects… mini Christmas ornaments! ๐ŸŽโœจ Whether you crochet, knit, or do both (hello, BiCrafty friends!), mini ornaments are the perfect way to stitch up something magical without a huge time commitment.

We've rounded up 30 free mini Christmas ornament patterns to crochet and knit… plus all the tips you need to stuff, finish, and hang them beautifully. Let's go! ๐Ÿงถ

Five crochet mini ornamentsโ€”mushroom, mugs, globe, logโ€”hang on a tree or rest on fabric; visible stitch detail.

๐ŸŽ… Big News Coming to the Marly Bird House!

Santa is bringing something new to Christmas in July at the Marly Bird House this year! ๐ŸŽ… Stay tuned.

🎅 ❄ 🎄 ❄ 🎁

Ho Ho Ho! Only

—
Days
—
Hours
—
Mins
—
Secs

Until Christmas Morning! 🎄

🤴 Start those handmade gifts now — Santa's watching! 🎅


๐ŸŒŸ Why Mini Ornaments Are the Perfect Holiday Project

Not all holiday knits and crochets need to be big, ambitious projects. Sometimes the sweetest things come in small packages... literally! ๐ŸŽ€

Here's why mini ornaments deserve a spot in your holiday crafting lineup every single year:

  • ๐Ÿ• Quick to finish โ€” Most mini ornaments work up in 30 minutes to 2 hours. Perfect for ADHD crafters who want that satisfying "done!" feeling fast.
  • ๐ŸŽ Gifting in batches โ€” Make a set of 6, 12, or 24 and you have a gorgeous handmade gift that looks incredibly thoughtful (because it is!).
  • ๐ŸŽ„ Tree decorating made personal โ€” A tree covered in handmade ornaments is a tree covered in love. Every single one tells a story.
  • ๐Ÿงฆ Stocking stuffers โ€” Tiny, lightweight, and wrapped in a little tissue... they're the sweetest surprise tucked into a stocking.
  • ๐Ÿค Ornament swaps โ€” Crafting groups, workplaces, and family gatherings love a handmade ornament swap. Show up with a dozen mini crocheted balls and you'll be the star of the swap.
  • ๐ŸŒˆ Scrap yarn heaven โ€” Mini ornaments use such small amounts of yarn that they're perfect for using up all those beautiful little scraps in your stash.

Whether you're brand new to making ornaments or you've been stitching them up every Christmas season, there is always a new technique, a new color combo, or a new design waiting to inspire you. โœจ


๐ŸŽ„ Free Crochet Mini Ornament Patterns

Crocheters, this section is for you! ๐ŸŽ‰ These free patterns come from some of our favorite indie designers... plus a couple of classic brand favorites. They work up for all skill levels, from total beginners making their very first magic ring to more experienced stitchers ready for textured stitches and surface details. Most of these take under two hours... and some are done in 30 minutes flat. ๐ŸŽฏ

Quick yarn tip: Most mini crochet ornaments work best in worsted weight (#4) with a hook one size smaller than the label recommends. That tighter gauge keeps stuffing from showing through and helps your ornament hold its shape beautifully. ๐Ÿงถ

๐ŸŽฑ Flatland Christmas Bauble Ornaments โ€” Once Upon a Cheerio FREE

These flat crochet baubles are such a clever take on the classic ornament shape... worked flat so you skip the stuffing entirely! ๐ŸŽฑ Two pieces seamed together give you that perfect round ornament silhouette with way less fuss than a 3D version. They're great for using up small holiday yarn scraps, and you can customize the colors endlessly. Once Upon a Cheerio is a long-time community favorite and this pattern has been loved since 2018 for good reason.

๐Ÿ‘‰ Get the free pattern โ†’

๐Ÿฅ’ Crochet Christmas Pickle Ornament โ€” Once Upon a Cheerio FREE

Crochet Christmas Pickle Ornament - Once Upon a Cheerio

If you've never heard of the Christmas pickle tradition... it's a real thing! ๐Ÿ˜„ A pickle ornament is hidden deep in the tree on Christmas Eve, and the first child to find it gets an extra present or good luck for the year. This crocheted version from Once Upon a Cheerio is genuinely adorable and completely unforgettable at an ornament swap. It's also a perfect handmade gift for anyone who loves quirky holiday charm.

๐Ÿ‘‰ Get the free pattern โ†’

๐Ÿ˜‡ Easy Crochet Christmas Angel Ornaments โ€” Sunflower Cottage Crochet FREE

Easy Crochet Christmas Angel Ornaments - Sunflower Cottage Crochet

Tiny crocheted angels that are genuinely easy to make... Sunflower Cottage Crochet always delivers on that promise! ๐Ÿ˜‡ These sweet ornaments have a timeless folk-art feel and look gorgeous hanging in clusters on a tree. If you want ornaments that feel meaningful and handmade-special, little angels are hard to beat. They make wonderful gifts for teachers, grandparents, or anyone who loves angel decor.

๐Ÿ‘‰ Get the free pattern โ†’

๐Ÿ”ต Crochet Christmas Baubles Flat โ€” Sunflower Cottage Crochet FREE

Crochet Christmas Baubles Flat - Sunflower Cottage Crochet

Another flat ornament option from Sunflower Cottage Crochet... and I love that they dedicated a whole pattern to the flat bauble approach! ๐Ÿ”ต Flat baubles are perfect when you want that classic round ornament look without any stuffing. They work up so quickly and store beautifully flat between seasons too. A wonderful pattern for making in bulk for gifts or ornament swaps.

๐Ÿ‘‰ Get the free pattern โ†’

๐ŸŒฟ Celtic Weave Bauble Ornament โ€” EyeLoveKnots FREE

Celtic Weave Bauble Ornament - EyeLoveKnots

The Celtic Weave stitch gives these bauble ornaments the most beautiful interlocking texture... and they look SO professional on a tree! ๐ŸŒฟ EyeLoveKnots is one of those designers who makes detailed stitches feel completely approachable with clear photo tutorials every step of the way. If you've ever wanted to try the Celtic Weave stitch, a mini ornament is the perfect low-stakes way to learn it and end up with something gorgeous.

๐Ÿ‘‰ Get the free pattern โ†’

๐ŸฆŒ Reindeer Ornament โ€” EyeLoveKnots FREE

Reindeer Ornament - EyeLoveKnots

A round crochet ornament with an adorable amigurumi-style reindeer face right on the front... antlers, big eyes, and of course a red nose! ๐ŸฆŒ This is the kind of ornament that every single person who sees your tree will stop and comment on. EyeLoveKnots published this in 2023 and it quickly became a community favorite. The face embellishments are simpler than they look and the pattern walks you through every step beautifully.

๐Ÿ‘‰ Get the free pattern โ†’

๐ŸŒฒ Star-Topped Tree Ornament โ€” Underground Crafter FREE

Star-Topped Tree Ornament - Underground Crafter

Underground Crafter always delivers well-written, beginner-friendly patterns... and this star-topped tree ornament is no exception! ๐ŸŒฒ The little dimensional tree with a star on top works up quickly and has that sweet, classic Christmas feel. It would look gorgeous in a set of three different greens hanging from a garland. Published in late 2024, it's a wonderful addition to Underground Crafter's impressive free library.

๐Ÿ‘‰ Get the free pattern โ†’

โ˜• Cute Cup Ornament (Hot Cocoa Mug) โ€” Divine Debris FREE

Cute Cup Ornament (Hot Cocoa Mug) - Divine Debris

A tiny crocheted hot cocoa mug ornament... could this be any more cozy?! โ˜• Divine Debris has the most charming holiday patterns and this little cup is absolutely perfect for any crafter who loves their warm beverages as much as their yarn. The mug shape is worked in the round and very beginner-friendly. Hang it on the tree, gift it to a coffee-loving friend... or make a whole set of mugs in different colors.

๐Ÿ‘‰ Get the free pattern โ†’

๐ŸŽฟ Winter Beanie Ornament โ€” Divine Debris FREE

Winter Beanie Ornament - Divine Debris

A tiny crocheted beanie... complete with ribbing and a little pom pom on top! ๐ŸŽฟ This free pattern from Divine Debris is genuinely adorable and works up in under an hour. It makes a great ornament on its own, but honestly? Make a bunch in different colors and string them into a tiny garland for the most charming tree decoration ever. This is one of those patterns that just makes everyone smile.

๐Ÿ‘‰ Get the free pattern โ†’

๐ŸŽ… Tiny Santa Hat Ornament โ€” The Nicole Chase FREE

Tiny Santa Hat Ornament - The Nicole Chase

The most perfect tiny Santa hat you've ever seen... and it's free! ๐ŸŽ… The Nicole Chase has a wonderful collection of holiday mini ornaments and this Santa hat is one of the most-loved. It works up super fast, uses minimal yarn, and looks incredibly polished for such a small project. Make a dozen and scatter them across your tree... or gift a set of six tied together with a ribbon. Pure holiday magic.

๐Ÿ‘‰ Get the free pattern โ†’

โ›„ Tiny Snowman Ornament โ€” The Nicole Chase FREE

Tiny Snowman Ornament - The Nicole Chase

A tiny crocheted snowman with a little scarf and button details... could this be any more charming?! โ›„ The Nicole Chase designed this to be perfectly approachable for newer crocheters while still looking absolutely impressive. The round snowman shape is classic amigurumi technique in miniature. This pairs beautifully with the Tiny Santa Hat for a fun matching ornament set.

๐Ÿ‘‰ Get the free pattern โ†’

๐ŸŒฟ Christmas Wreath Ornament โ€” Pine Tree Crochet FREE

Christmas Wreath Ornament - Pine Tree Crochet

A beautiful little crocheted wreath with a bow at the bottom... hung on a real tree in that photo and it looks absolutely stunning! ๐ŸŒฟ Pine Tree Crochet's free wreath ornament pattern has a classic, elegant feel that works in traditional red and green OR modern tones like sage and blush. This is a wonderful ornament for gifting to someone who appreciates timeless holiday decor.

๐Ÿ‘‰ Get the free pattern โ†’

๐Ÿฌ Caron Candy Cane Ornament โ€” Yarnspirations / Caron FREE

Caron Candy Cane Ornament - Yarnspirations / Caron

Twisted red and white stripes that look just like a real candy cane... these are SO festive! ๐Ÿฌ This free Caron pattern uses simple technique to achieve that classic spiral stripe. They're quick, easy, and pack an enormous amount of visual punch on a tree. This is a fantastic beginner project and a great pattern for batch-making... a basket of handmade candy cane ornaments makes the sweetest holiday gift.

๐Ÿ‘‰ Get the free pattern โ†’

โญ Crochet Star Christmas Ornament โ€” Raffamusadesigns FREE

One of the most-shared crochet star ornament patterns on the internet... and for great reason! โญ Raffamusadesigns' 2.5-inch crochet star is the pattern that gets passed around holiday crafting groups year after year. It's a clean, well-written free pattern with beautiful results. Highly recommended for anyone wanting a star ornament that actually looks crisp and professional. Very popular on Pinterest and in crochet communities.

๐Ÿ‘‰ Get the free pattern โ†’

๐Ÿช Gingerbread Smilies Christmas Ornament โ€” Hooked On Patterns FREE

Gingerbread Smilies Christmas Ornament - Hooked On Patterns

A crocheted gingerbread person ornament with the most endearing little smile... these are genuinely adorable! ๐Ÿช Hooked On Patterns has been a trusted free pattern resource for years and this gingerbread smilies design is one of their most beloved holiday patterns. Make them in classic gingerbread brown with white icing details, or go creative with any color combo you love. They make the absolute best handmade gift tags tied onto a wrapped present.

๐Ÿ‘‰ Get the free pattern โ†’


๐Ÿชก Free Knit Mini Ornament Patterns

Knitters, here are some free patterns to add to your holiday queue! ๐ŸŽ‰ Mini knit ornaments are such a satisfying way to practice working in the round on DPNs and get that "done!" feeling without committing to a big project. Perfect for using up small amounts of beautiful yarn from your stash. ๐Ÿงถ

Quick yarn tip: Most knit ornament patterns use worsted weight (#4) or DK (#3) yarn on DPNs. Going down a needle size from the label's recommendation will give you a tighter fabric... and a firmer ornament that holds its round shape year after year. ๐ŸŽฏ

โ„๏ธ Patons Christmas Ornaments โ€” 3D Ball Set โ€” Yarnspirations / Patons FREE

Patons Christmas Ornaments โ€” 3D Ball Set - Yarnspirations / Patons

A free Patons pattern for dimensional knit ball ornaments... classic, beautiful, and completely satisfying to make! โ„๏ธ This is a wonderful introduction to knitting in the round on DPNs. The 3D ball shape comes from simple even increases and decreases... a great skill-building project that produces gorgeous results. Try them in classic red and green, or go modern with deep jewel tones and metallic accents. The full set makes a stunning collection all on its own.

๐Ÿ‘‰ Get the free pattern โ†’

๐Ÿ”ด Holiday Ornament โ€” Knit Ball Ornament โ€” Lion Brand FREE

Holiday Ornament โ€” Knit Ball Ornament - Lion Brand

Lion Brand's free knit ball ornament pattern is the knitter's equivalent of the classic crochet ball... and equally satisfying to make! ๐Ÿ”ด This is a clean, well-written free pattern that walks you through working in the round with simple shaping. It's beautiful in solid colors, but absolutely magical in self-striping or variegated yarn where the color does all the decorative work for you. A great pattern to have in your holiday queue every year.

๐Ÿ‘‰ Get the free pattern โ†’


โœจ Paid Patterns Worth Every Penny

Sometimes a small investment in a great PDF pattern is absolutely worth it... especially when you're making a whole set for gifting! โœจ These Etsy patterns come from indie designers who put serious care into their instructions, stitch counts, and photography. If you're planning to make ornaments in bulk this holiday season, a well-written paid PDF can save you hours of guessing.

๐Ÿงค Mini Crochet Mitten Ornament Pattern (PDF) โ€” TvorivouCestou PAID

A detailed PDF pattern for the most adorable tiny crocheted mitten ornaments... each one small enough to hang from a tree branch but full of that handmade character people love! ๐Ÿงค These make wonderful ornament swap gifts and are a beautiful way to use up fingering or DK weight yarn scraps. The pattern includes clear instructions and stitch counts for consistent, polished results.

๐Ÿ‘‰ View on Etsy โ†’

๐ŸŽ„ Crochet Christmas Ornaments 5-in-1 Bundle: Angel, Bell, Balls, Star โ€” Indie Designer PAID

Five ornament patterns in one PDF... this is such a smart purchase if you want variety on your tree! ๐ŸŽ„ The bundle includes an angel, bell, ball ornaments, and a star... basically a complete crocheted ornament collection in one place. Perfect for crafters who love having a coordinated set that all came from the same pattern family. Great value and wonderful for gifting.

๐Ÿ‘‰ View on Etsy โ†’

โ„๏ธ Snowflake Crochet Pattern: 13 Mix & Match Christmas Ornaments (PDF) โ€” Indie Designer PAID

Thirteen different snowflake ornament designs in one PDF... a snowflake lover's absolute dream! โ„๏ธ If you've always wanted a collection of coordinating snowflakes that feel like a set, this is the pattern for you. Mix and match the designs for a gorgeous all-white snowflake section of your tree, or starch them stiff and hang them in a window for a stunning seasonal display. A standout in any ornament swap.

๐Ÿ‘‰ View on Etsy โ†’

๐Ÿงฆ Mini Retro Stocking Ornament Crochet Pattern (PDF) โ€” Indie Designer PAID

A mini crocheted stocking with that perfect vintage, retro feel... these are so charming on a tree! ๐Ÿงฆ The retro styling makes these stand out from standard stocking ornaments and they have that folk-art quality that makes handmade items feel truly special. If you love a bit of nostalgic holiday aesthetic, this pattern is absolutely for you.

๐Ÿ‘‰ View on Etsy โ†’


๐Ÿ’ก Tips for Stuffing & Finishing Mini Ornaments

Mini ornaments have a few quirks that bigger projects don't have. Here's what Marly has learned from designing since 2007... and from making more holiday ornaments than she can count! ๐ŸŽ„

๐Ÿชข Stuffing Tips

  • โœ… Use polyester fiberfill for most ornaments... it's lightweight and won't add too much weight to your tree branches.
  • โœ… For very tiny ornaments, a chopstick or pencil eraser is perfect for pushing small bits of stuffing into corners without overstuffing.
  • โœ… Don't overstuff! Mini ornaments look best when they're firm but not stretched to the bursting point. The yarn's stitch pattern should still be visible.
  • โœ… For flat ornaments (snowflakes, stars), you can skip stuffing entirely and use a light spray of liquid starch to stiffen them beautifully.
  • โœ… If you want ornaments that keep their shape perfectly over time, consider using a plastic ornament ball inside as a form instead of fiberfill.

๐ŸŽ€ Finishing Tips

  • โœ… Hanging loops: Use a yarn needle threaded with a doubled length of yarn or thin ribbon. Pull through the top of the ornament and tie in a loop. Simple and secure!
  • โœ… Ornament caps: Little gold or silver ornament caps (available at craft stores) can be glued to the top of round ball ornaments for a professional finish.
  • โœ… Weave in ends securely. Mini ornaments get handled more than regular ornaments... little hands will grab them! Double-knot your ends before weaving.
  • โœ… Add a drop of fabric stiffener to textured or lacy ornaments to help them hold their shape year after year.
  • โœ… Store carefully. Even small crocheted and knit ornaments can get snagged or squished. Store them in egg carton compartments or individual zip-lock bags between the tissue paper layers in your ornament box.

๐Ÿงถ Yarn Weight Cheat Sheet for Mini Ornaments

Yarn WeightBest ForHook/Needle Size
Fingering (#1)Delicate snowflakes, lacy ornaments, tiny amigurumiHook: 1.75โ€“2.25 mm | Needle: US 1-2
Sport/DK (#3)Mini ball ornaments, detailed shapesHook: 3.0โ€“3.75 mm | Needle: US 3-5
Worsted (#4)Quick ornaments, beginners, chunky amigurumi styleHook: 3.75โ€“5.0 mm | Needle: US 6-8

Pro tip: Going down one hook/needle size from the yarn label's recommendation will give you a tighter gauge, less stuffing showing through, and a firmer ornament that holds its shape. ๐Ÿ’ช

And if you're looking for even more holiday pattern inspiration, check out our full round-up at Christmas Ornament Patterns for all sizes and skill levels... plus our holiday pattern hub where you can find more seasonal favorites! ๐ŸŽ„


๐ŸŽ… Something Special is Coming to Marly Bird House!

This post is part of our 25 Days of Christmas in July event... and Day 5 is extra special because it's connected to something exciting happening at the Marly Bird House! โœจ

๐ŸŽ… Big News Coming to the Marly Bird House!

Santa is bringing something new to Christmas in July at the Marly Bird House this year! ๐ŸŽ… Stay tuned.

We'll be sharing all the details soon! In the meantime, keep crafting those mini ornaments... and make sure you're following along with the full 25 Days of Christmas in July event so you don't miss a single free pattern or surprise. ๐ŸŽ„โœจ


โ“ Frequently Asked Questions About Mini Christmas Ornaments

What yarn is best for crocheting or knitting mini Christmas ornaments?

Honestly, it depends on the look you're going for! ๐ŸŽจ For delicate, lacy ornaments... go fingering weight. For quick, chunky, satisfying ornaments that work up in an hour... worsted weight is your best friend. The most important thing is to go down a hook or needle size from what the yarn label recommends. This tightens your gauge so stuffing doesn't peek through and your ornament holds its round shape beautifully.

How long does it take to make a mini crocheted ornament?

So here's the thing... most mini ornaments are genuinely quick! โฑ๏ธ A basic crocheted ball ornament in worsted weight can be finished in about 30-45 minutes once you know the pattern. Fancier ornaments with colorwork, appliqued faces, or lots of detail might take 1-2 hours. That's what makes them so perfect for batch-making sessions... put on a holiday movie and crank out 5 or 6 in an afternoon. ๐ŸŽฌ๐ŸŽ„

Can beginners make mini Christmas ornament patterns?

Absolutely! ๐Ÿ™Œ Many of the patterns in this list are specifically labeled beginner-friendly. For crochet beginners, a basic ball ornament using single crochet in the round is a perfect starter project... you only need to know the magic ring, single crochet, increase, and decrease. For knit beginners, a flat garter stitch ornament with simple shaping is a great first small project. Start easy, gain confidence, then work your way up to colorwork and amigurumi faces!

What size hook or needles do I need for mini ornament patterns?

Great question! ๐ŸŽฏ The size depends on your yarn weight... but as a general rule, go one size smaller than the yarn label recommends. For worsted weight yarn (most common for beginners), that means a 3.75-4.0 mm crochet hook or US 6 (4.0 mm) knitting needles. For fingering weight lace ornaments, you're usually looking at a 1.75-2.25 mm hook or US 1-2 needles. The tighter gauge is your friend for ornaments!

How do I keep mini knit and crochet ornaments from losing their shape over time?

Such a practical question... and here's what works! ๐Ÿ’ช First, stuff firmly but not to bursting. Second, for flat ornaments like snowflakes and stars, use liquid starch or a stiffener spray to help them hold their crisp shape. Third, store them carefully between seasons... individual zip-lock bags or egg carton compartments protect them from snags and squishing. And finally, use good quality yarn with some elasticity (wool blends are great for this) so the ornament springs back to shape year after year. ๐ŸŽ„

Filed Under: Crochet, Free Patterns, Knitting, Round Ups, Uncategorized

Free Rory Knit Hat Pattern โ€” 5 Sizes from Toddler to Adult (Adventurous Beginner)

July 6, 2026 By Meg Leave a Comment

The Rory Knit Hat is a free beginner knit hat pattern in 5 sizes from Toddler through Adult Large, designed by Marly Bird. Featuring the gorgeous Stockinette Windows textured stitch, this worsted weight beanie knits up in a weekend with just knit and purl skills… plus an optional pom pom and your choice of single or folded brim.

โšก Quick Answer:

The Rory Knit Hat is a free beginner knit hat pattern in 5 sizes โ€” Toddler through Adult Large. You need worsted weight yarn (#4), US 7 (4.5 mm) 16″ circular needles, and the ability to knit and purl in the round. One ball knits any size, and most adults finish in 4โ€“6 hours! ๐ŸŽ‰

Rory Knit Hat free beginner knit hat pattern by Marly Bird โ€” pink colorway

Hey, bestie ๐Ÿ’›

This one is special to me.

Rory was a VIP exclusive for my Turkey Trot 2024 knitters… my most dedicated community members who show up year after year for every knit-along. They got first access. Now it belongs to ALL of you. ๐Ÿ’›

I designed Rory to pair with the Lorelai Knit Vest โ€” same beautiful Stockinette Windows stitch, same Turkey Trot 2024 collection, totally wearable as a set or solo. If you loved the vest, you are going to absolutely fall for this hat.

Five sizes. One ball of yarn. A weekend project that practically knits itself once you get the rhythm.

Let's make a Rory. ๐ŸŽ‰

This post contains affiliate links. If you purchase through my links, I earn a small commission at no extra cost to you โ€” it helps keep the free patterns coming! Thanks for supporting my yarn-loving heart. ๐Ÿ’›

Rory Knit Hat free beginner knit hat pattern by Marly Bird โ€” green colorway

What You Will Love About This Pattern ๐Ÿ’–

โœจ Five sizes, one pattern. Toddler, Child, Adult Small, Adult Medium, and Adult Large are all included โ€” knit the whole family a matching set!

๐Ÿงถ Weekend-ready. Most knitters finish an adult size in 4โ€“6 hours. It's the perfect TV-knitting project… the kind you can do without looking once you've got the rhythm.

๐Ÿ’› Stunning without the stress. The Stockinette Windows texture looks way more complicated than it is. You're just knitting and purling in a simple 14-round repeat. That's it!

๐ŸŽจ Built for cake yarns. Self-striping and gradient yarns look absolutely magical with this stitch. The color changes play perfectly with the textured windows for a look that's 100x more impressive than the effort required.

๐ŸŽ€ Options, options, options. Choose a single brim or folded brim. Add a faux fur pom pom or keep it clean. Add a leather tag for that designer-finished touch. Make it yours!

๐ŸŽ The perfect gift hat. Five sizes means you can make everyone on your list a Rory Hat โ€” and you only have to learn the pattern once. Yes, please. ๐Ÿ’›

๐Ÿ”— Part of the Turkey Trot 2024 collection. Pair Rory with the Lorelai Knit Vest for a full matching set using the same beautiful stitch pattern!

Quick Pattern Overview

๐Ÿงข Pattern type: In-the-round knit hat, worked from the brim up to the crown.

๐Ÿ“ Sizes: Toddler (Child, Adult Small, Adult Medium, Adult Large) โ€” five sizes in one pattern.

๐Ÿ“ Finished measurements: 16 (17ยฝ, 20ยพ, 22ยฝ, 24)” circumference and 6ยฝ (8ยพ, 10ยพ, 11, 12ยพ)” in length.

๐Ÿงถ Yarn weight: Worsted weight (#4). One ball covers any size!

๐Ÿ“ Gauge: 20 sts ร— 32 rounds = 4″ in Stockinette Windows Pattern.

๐Ÿชก Needles: US 7 (4.5 mm) 16″ circular needles + double-pointed needles for the crown.

โญ Skill level: Adventurous Beginner. If you can knit, purl, and work in the round… you can knit Rory.

โฑ๏ธ Time to knit: Most adults finish in 4โ€“6 hours across a weekend.


Love the Pattern but Want an Ad-Free PDF? โญ

If you'd love a clean, printer-friendly, ad-free version of the Rory Hat to save to your phone or print out for couch-knitting, grab the PDF from my shop! You get the exact same pattern โ€” just without the ads and screen scrolling. ๐Ÿ’›

Rory Knit Hat ad-free PDF โ€” printable knit hat pattern by Marly Bird
๐Ÿ›๏ธ Buy on Etsy
๐Ÿ›’ Buy on Shopify
๐Ÿ“Œ Add to Ravelry Queue

The Story Behind Rory

Every year I run Turkey Trot โ€” my annual fall knit-along event where a group of dedicated VIP knitters get early exclusive access to my newest designs. In 2024, Rory was one of those exclusives.

My VIP Turkey Trot knitters got to meet Rory first. They tested it, loved it, and made the most beautiful hats. And I always planned to release it to everyone eventually… that day is today! ๐ŸŽ‰

Rory is the companion hat to the Lorelai Knit Vest โ€” both use my Stockinette Windows stitch pattern, and both were Turkey Trot 2024 designs. Wear them together and you've got a complete look straight from the collection.

If you were a Turkey Trot 2024 VIP… welcome back, bestie. And if this is your very first time meeting Rory… I'm so glad you're here. Let's knit!

Rory Knit Hat free knitting pattern โ€” pin this for later!

Is This Pattern Right for You?

Skill Level: What “Adventurous Beginner” Means

“Adventurous Beginner” means you've completed a few basic knitting projects and you're ready for something with a little more texture and interest. You don't need to be experienced… you just need to be willing to try something new!

โ„น๏ธ You Can Knit Rory If You Can:

  • Cast on stitches
  • Knit and purl in the round
  • Work a simple 14-round stitch repeat (it's really just K and P in different arrangements!)
  • Do basic crown decreases (K2tog and SSK)
  • Switch to double-pointed needles when the stitch count gets small

The crown decreases are the only technique that might feel new if you're a true beginner โ€” but they're simpler than they look, and there's a video tutorial linked below to walk you through exactly what to do. You've got this! ๐Ÿ’ช

At a Glance

DetailInfo
Skill LevelAdventurous Beginner
SizesToddler, Child, Adult S, Adult M, Adult L
Circumference16 (17ยฝ, 20ยพ, 22ยฝ, 24)”
Length6ยฝ (8ยพ, 10ยพ, 11, 12ยพ)”
Yarn WeightWorsted (#4)
Needle SizeUS 7 (4.5 mm)
Gauge20 sts ร— 32 rows = 4″
Time to Knit4โ€“6 hours (adult size)
TechniquesCast on, K, P, K2tog, SSK, working in the round, DPNs
Rory Knit Hat by Marly Bird โ€” free beginner hat with Stockinette Windows stitch

Join our Newsletter

Get Free Crochet & Knitting
Pattern Links & Coupons!

Hand-drawn bird with curling, detailed feathers and pink accents; cheerful pose showcases fine line and texture work.
>> Become An Insider <<
A woman with glasses and curly hair models a colorful crocheted scarf, showing textured stitches and vibrant yarn.

What Is the Stockinette Windows Pattern?

The Stockinette Windows Pattern is the signature stitch that gives the Rory Hat its beautiful textured look. It's also the same stitch used in the Lorelai Knit Vest โ€” which is exactly why these two pieces look so stunning worn together.

How the Stitch Pattern Works

The pattern is a 14-round repeat worked over a multiple of 8 stitches. The first 4 rounds create a horizontal textured stripe (alternating purl and knit rounds). Then rounds 5โ€“14 create the “windows” โ€” vertical columns of 2 purl stitches set against 6 knit stitches that create a beautiful ribbed window effect.

It sounds more complicated than it is! Once you've done one full repeat, your hands will remember. It's a truly satisfying rhythm to knit. ๐Ÿงถ

๐Ÿ’ก Designer Tip:

Use stitch markers every 8 stitches when you cast on to help you track your pattern repeats. The pattern even calls for this in the Notes section โ€” it's a game-changer for keeping your place, especially on the toddler and child sizes!

Reading the Chart

A visual chart for the Stockinette Windows Pattern is available with the pattern below. Charts are read from right to left, bottom to top (just like you knit!). Each row on the chart represents one round of knitting.

If you're new to reading charts, don't worry โ€” the written instructions are right there alongside the chart. You can use whichever format works best for your brain. ๐Ÿ’›

Knitting the Rory Hat WIP โ€” Stockinette Windows stitch in Lion Brand Ferris Wheel yarn

Yarn + Materials for the Rory Hat

The Yarn: Lion Brand Ferris Wheel

The Rory Hat was originally designed using Lion Brand Ferris Wheel... a 100% acrylic worsted weight cake yarn that comes in beautiful self-striping colorways. The sample was made in Pink Marmalade and Wasabi โ€” you'll need one ball of each.

Lion Brand Ferris Wheel is a great cake yarn โ€” it has just enough yardage to cover any of the five sizes (270 yards / 247 m per ball), and the self-striping colorways create beautiful color variation without any colorwork required on your part. ๐ŸŽจ

Why This Yarn Works So Well for This Pattern

Here's the secret to why Rory looks so impressive: the Stockinette Windows stitch creates natural visual breaks in the fabric. When you pair that with a self-striping or color-changing cake yarn… those color transitions land right inside the textured windows, creating a look that seems far more complex than it actually is.

You get a multi-toned, textured hat with zero colorwork. Zero! Just knitting and purling in a simple repeat. That's the magic. โœจ

๐Ÿ’ก Designer Tip:

One ball of worsted weight yarn covers ALL five sizes of the Rory Hat โ€” yes, even Adult Large! That makes this one of the most budget-friendly pattern purchases (or free gifts to yourself) in your knitting library. ๐Ÿ˜„

Other Yarns That Work Great

Any worsted weight (#4) yarn will work beautifully for the Rory Hat. Self-striping and cake yarns are especially fun with the Stockinette Windows texture… but solid colors are gorgeous too and really show off the stitch definition.

YarnFiberYardsNotes
Lion Brand Roll With It100% Acrylic656 ydGreat self-striping alternative โ€” similar vibe to Ferris Wheel!
Caron Cinnamon Swirl Cakes100% AcrylicVariesBudget cake yarn, available at Michaels โ€” beautiful color gradients
Lion Brand Wool-Ease80% Acrylic / 20% Wool197 ydSolid color, machine washable โ€” great stitch definition for showing off the pattern
Loops & Threads Impeccable100% Acrylic268 ydBudget pick, widely available at Michaels โ€” great for gifting a whole batch of Rory Hats!
KnitPicks Brava Worsted100% Premium Acrylic218 ydThe upgrade budget pick โ€” excellent stitch definition, great color range

๐Ÿ’ก Designer Tip:

This pattern is especially beautiful with self-striping or cake yarns โ€” the color changes play perfectly with the Stockinette Windows texture. One ball is all you need for any size! If you're using a solid color, choose something that shows off texture well (avoid very fluffy or fuzzy yarns that can obscure the pattern).

Needles & Notions

๐Ÿชก Needles: US 7 (4.5 mm) 16″ circular needles plus a set of 5 double-pointed needles (or 2 circulars / magic loop cord) in the same size.

๐Ÿ“Œ Stitch markers. You'll want to place one every 8 stitches at the cast-on to keep your pattern repeats organized โ€” plus a distinctive marker at the beginning of the round.

๐Ÿชข Tapestry needle for finishing and weaving in ends.

๐ŸŽ€ Optional: Faux fur pom pom, leather tag, and leather rivets if you want to add those finishing touches. (Video tutorial below for adding the pom pom!)

๐Ÿงด Optional: Eucalan Wool Wash for washing your finished hat. It's a no-rinse formula โ€” gentle on fibers, no fuss.

Rory Knit Hat ad-free PDF โ€” printable knit hat pattern by Marly Bird
๐Ÿ›๏ธ Buy on Etsy
๐Ÿ›’ Buy on Shopify
๐Ÿ“Œ Add to Ravelry Queue
โญ๏ธ Marly Bird Amazon Storefront โญ๏ธ

Tips for Knitting the Rory Hat

Choosing Your Size

The Rory Hat fits snugly around the head but is slouchy on top, so use the finished circumference measurement (not the cast-on count) to choose your size. Measure the widest part of the head (just above the ears) with a soft tape measure, then choose the size that's 1โ€“2″ smaller than that measurement for a comfortably snug hat.

The Adult Medium (22ยฝ” circumference) fits most average adult heads. If you're between sizes… go with your gauge! A slightly looser gauge = go down a size. A tighter gauge = go up a size.

Such a fun knit slouchy hat pattern to knit up for you and your family.

โ„น๏ธ Size Reference Guide:

  • Toddler: 16″ finished circumference (fits ~18โ€“19″ head)
  • Child: 17ยฝ” finished circumference (fits ~19โ€“20″ head)
  • Adult Small: 20ยพ” finished circumference (fits ~21โ€“22″ head)
  • Adult Medium: 22ยฝ” finished circumference (fits ~23โ€“24″ head)
  • Adult Large: 24″ finished circumference (fits ~25โ€“26″ head)

Need something outside the range? The stitch multiple is 8, so you can add or subtract stitches in increments of 8 and adjust needle size to hit your gauge. Just make sure you're working with a multiple of 8 stitches for the pattern to work out!

Rory Knit Hat and Lorelai Knit Vest WIP โ€” Turkey Trot 2024 set by Marly Bird

Single Brim vs. Folded Brim โ€” Which Should You Choose?

The single brim (1ยฝโ€“2ยฝ” depending on size) sits flat with a clean edge. The folded brim (3โ€“5″ depending on size) folds up on itself for extra warmth and a classic beanie silhouette. Both versions use the same simple 1×1 ribbing โ€” the folded brim just asks you to work twice as long before you start the body.

My recommendation? If you're knitting for cold weather or for someone who runs warm… single brim. If you want maximum coziness and that classic folded-cuff beanie look… go folded! Both are beautiful. ๐Ÿ’›


How to Add a Faux Fur Pom Pom

An optional faux fur pom pom takes the Rory Hat from “cute” to “absolutely irresistible.” ๐ŸŽ€

The pom pom is completely removable โ€” it attaches to the finished hat after all the knitting is done. Watch Marly's tutorial video below for step-by-step instructions on adding a removable faux fur pom pom: How to Add a Removable Faux Fur Pom Pom โ€” Marly Bird on YouTube.

Rory Knit Hat by Marly Bird โ€” free worsted weight beginner knit hat pattern

Adding a Leather Tag

Want that designer-finished look? Add a small leather tag to the brim using leather rivets. This is purely optional and purely gorgeous. ๐Ÿ˜

The pattern lists leather tags and leather rivets in the optional notions. Pick them up at a craft store or online โ€” and watch how a tiny tag makes the whole hat look like it came from a boutique.

I've ordered from this etsy shop and have been happy with the tags. Night Owl Laser

๐Ÿ’ก Designer Tip:

Leather tags make incredible gifts. If you're making a batch of Rory Hats for holiday giving, grab a set of tags and suddenly your handknit gifts look like something you'd find in a boutique shop window. It's a tiny detail with huge impact!

Video Tutorials

Rory doesn't have a dedicated step-by-step tutorial video, but all the foundational skills you need are right on Marly's YouTube channel! ๐ŸŽฌ Search for cast-ons, knit and purl basics, ribbing, weaving in ends, or the faux fur pom pom โ€” it's all there to watch alongside your knitting.

Rory Knit Hat free pattern โ€” knit a beginner hat in a weekend by Marly Bird
๐Ÿ›๏ธ Buy on Etsy
๐Ÿ›’ Buy on Shopify
๐Ÿ“Œ Add to Ravelry Queue

๐Ÿ“„ Want a clean, printable version? Grab the ad-free PDF โ€” no ads, no scrolling, just the pattern. Perfect for your project bag! ๐Ÿงถ

Rory Knit Hat || Pattern Details

Designed by Marly Bird | marlybirdhouse.com

Sizes & Measurements

To Fit Size: Toddler (Child, Adult Small, Adult Medium, Adult Large)

Sample knit in: Adult Medium (average hat size)

Finished Circumference: 16 (17ยฝ, 20ยพ, 22ยฝ, 24)” [40.5 (44.5, 52.5, 57, 61) cm]

Finished Length: 6ยฝ (8ยพ, 10ยพ, 11, 12ยพ)” [16.5 (22, 27.5, 28, 32.5) cm]

Gauge

20 stitches ร— 32 rounds = 4″ [10 cm] in Stockinette Windows Pattern.

Use any size needle to obtain gauge. Always swatch! Your gauge determines your size.

Materials

Yarn: Lion Brand Ferris Wheel (100% Acrylic, 270 yds/247 m, 3 oz/85 g, CYCA #4 Worsted)

  • Pink Marmalade โ€” 1 (1, 1, 1, 1) ball
  • Wasabi โ€” 1 (1, 1, 1, 1) ball

Needles: US 7 [4.5 mm] 16″ [40.5 cm] circular needles + set of 5 double-pointed needles, or size required for gauge

Notions: Stitch markers, tapestry needle, leather tags, leather rivets, optional Faux Pom Pom

โญ๏ธ Marly Bird Amazon Storefront โญ๏ธ

Abbreviations

  • K โ€” Knit
  • K2tog โ€” Knit Two Together
  • P โ€” Purl
  • PM โ€” Place Marker
  • RS โ€” Right Side
  • Sl โ€” Slip
  • St(s) โ€” Stitch(es)
  • WS โ€” Wrong Side

Special Stitches

SSK (Slip, Slip, Knit): Slip 2 stitches, one at a time, as if to knit. Insert left-hand needle into the front of these two stitches and knit them together from this position (1 stitch decreased).

Pattern Stitches

Stockinette Windows Pattern (Circular) โ€” worked in the round over a multiple of 8 sts.

Round 1: Purl.
Round 2: Knit.
Round 3: Purl.
Round 4: Knit.
Round 5: *P2, K6; repeat from * around.
Round 6: Knit.
Round 7: *P2, K6; repeat from * around.
Round 8: Knit.
Round 9: *P2, K6; repeat from * around.
Round 10: Knit.
Round 11: *P2, K6; repeat from * around.
Round 12: Knit.
Round 13: *P2, K6; repeat from * around.
Round 14: Knit.
Repeat Rounds 1โ€“14 for Stockinette Windows Pattern worked in the round.

Stockinette Windows Pattern (Flat) โ€” worked back-and-forth over a multiple of 8 sts. Note: Hat is worked in the round. The flat version is given here for the purposes of measuring gauge.

Row 1 (WS): Knit.
Row 2: Knit.
Row 3: Knit.
Row 4: Knit.
Row 5: *P6, K2; repeat from * to end.
Row 6: Knit.
Row 7: *P6, K2; repeat from * to end.
Row 8: Knit.
Row 9: *P6, K2; repeat from * to end.
Row 10: Knit.
Row 11: *P6, K2; repeat from * to end.
Row 12: Knit.
Row 13: *P6, K2; repeat from * to end.
Row 14: Knit.
Repeat Rows 1โ€“14 for Stockinette Windows Pattern worked flat.

Chart

Rory Knit Hat stitch pattern and crown decrease chart by Marly Bird

Notes

  1. Directions are for size Toddler; changes for sizes (Child, S, M, L) are in parentheses. When only one number is given, it applies to all sizes.
  2. When casting on, place a marker every 8 sts to not lose count and to more easily keep track of pattern repeats.
  3. Hat is made from the bottom brim to crown.
  4. If you want a safety net as you knit, adding a lifeline every so often will be helpful โ€” just to make sure you have a point to rip back to if something goes wrong. (video help)

GROW

To Unlockย Exclusive Subscriber Contentย click the Box below and join for free by simply adding your email and creating a password! If you are having troubles, clear your cache or reset your password or login to the Grow Publisher Portal.

>> Learn More About Grow Here <<

I'm thrilled to share this amazing pattern with you, many patterns on my blog are absolutely free! I kindly request that you don't copy and paste or distribute this pattern. Prefer an ad-free experience? Buy a digital PDF pattern for a small fee from one of my online stores for a seamless crafting journey. 

I appreciate your support and readership. You are the reason I can keep doing what I love and sharing it with others. So, thank you from the bottom of my yarn-loving heart! Disclosure: This post contains affiliate links, meaning I get a commission if you decide to make a purchase through my links at no cost to you.

Rory Knit Hat free beginner knit hat pattern by Marly Bird โ€” pink colorway

Rory Knit Hat || Pattern Instructions

Brim

Cast on 80 (88, 104, 112, 120) sts. Join round being careful not to twist cast-on edge, and mark first st.

Round 1: *K1, P1; repeat from * to end of round.

For single-layer brim:
Repeat the last round for 1ยฝ (2, 2ยผ, 2ยฝ, 2ยฝ)” [4 (5, 5.5, 6.5, 6.5) cm].

For folded brim:
Repeat the last round for 3 (4, 4ยฝ, 5, 5)” [7.5 (10, 11.5, 12.5, 12.5) cm].

๐Ÿ›๏ธ Buy on Etsy
๐Ÿ›’ Buy on Shopify
๐Ÿ“Œ Add to Ravelry Queue

Body

Work in Stockinette Windows Pattern for 28 (42, 56, 56, 70) rounds, or 2 (3, 4, 4, 5) repeats lengthwise, then work Rounds 1โ€“4 only once more.

If desired, you may work a few additional rounds in pattern at this point for a slightly longer hat.

Crown

Note: Switch to double pointed needles when sts become too snug to fit around circular needle.

Round 1 (decrease round): *P2, ssk, K2, K2tog; repeat from * around โ€” 60 (66, 78, 84, 90) sts.

Round 2: Knit.

Round 3 (decrease round): *P2, ssk, K2tog; repeat from * around โ€” 40 (44, 52, 56, 60) sts.

Round 4: Knit.

Round 5: *P2, K2; repeat from * around.

Round 6 (decrease round): *Ssk, K2tog; repeat from * around โ€” 20 (22, 26, 28, 30) sts.

Round 7: Knit.

Cut yarn.

Finishing

Thread yarn tail into a tapestry needle.

Weave tapestry needle through center of all remaining live sts, and pull tight like a drawstring.

Secure tail to the wrong side of the hat.

Weave in all loose ends.

Optional: Add Pom Pom to top of hat.

Optional: Add Leather Tag with Leather Rivets.


Make It a Set โ€” Pair Rory with the Lorelai Knit Vest

Rory and the Lorelai Knit Vest were designed as a collection โ€” and they are absolutely stunning together. Both use the Stockinette Windows stitch pattern, so they share the same beautiful texture in coordinating colorways. ๐Ÿงถ

Knit the vest in one colorway and the hat in the coordinating colors… or go matchy-matchy and use the same yarn for both. Either way, you'll have a complete Turkey Trot 2024 look that's totally wearable from October through March.

Both patterns are free here on the blog! ๐Ÿ’›

Lorelai Knit Vest and Rory Knit Hat by Marly Bird โ€” Turkey Trot 2024 matching set

Ravelry crafters: favorite and queue Rory on Ravelry to save it to your library! Your queue is your knitting wishlist. ๐Ÿ’›

Favorite This Pattern on Ravelry - Marly Bird

More Free Knitting Patterns You'll Love

Love a good knit hat? Here are more free knitting patterns from my collection โ€” all designed with that same Marly Bird balance of beautiful and beginner-friendly! ๐Ÿงถ

๐ŸŽจ Kaleidoscope Harmony Knit Hat โ€” A stunning colorwork hat that's more approachable than it looks. Perfect next step after Rory!

๐ŸŒˆ Harmony Hues Knit Hat โ€” A beautiful stash-buster hat using multiple colors from your yarn collection. Great for using up those special one-skein finds.

๐Ÿงก Lorelai Knit Vest โ€” The companion vest to Rory, using the exact same Stockinette Windows stitch. Wear them as a matched set!

Browse all my free knit patterns in one place: Free Knitting Patterns by Marly Bird ๐Ÿ’›

Want to go deeper into knitting skills? Check out what's available at Marly Bird House โ€” courses, workshops, and community for knitters and crocheters at every level! ๐Ÿก

Woman models a knit hat with bold teal, orange, yellow, white, and purple patterns; textured crochet stitches are visible.
Kaleidoscope Harmony Knit Hat
Person models a bright knit hat with blue pom-pom, showing textured stitching; yarn and crochet decor seen behind.
Harmony Hues
Woman models a hand-crocheted purple and blue vest, showcasing textured stitch detail over a white shirt indoors.

Rory Knit Hat FAQ โ€” answers to common questions about this free beginner knit hat pattern

Frequently Asked Questions About the Rory Hat

What does “Adventurous Beginner” mean?

Adventurous Beginner means you've completed a few basic knitting projects and you're ready to try something with a little more texture. If you can knit, purl, and work in the round, you can knit the Rory Hat. The crown decreases are the only technique that might feel new… and there's a video tutorial linked above to walk you through them!

Can I make this hat on magic loop?

Yes! The pattern calls for 16″ circular needles, but you can absolutely use magic loop on any longer cable. When the stitch count decreases at the crown, just switch to DPNs or continue on magic loop โ€” whichever you prefer. Both work perfectly.

What if I want a bigger or smaller size?

The pattern already includes 5 sizes from Toddler (16″ circumference) to Adult Large (24″ circumference). If you need something outside that range, the stitch multiple is 8, so you can add or subtract stitches in increments of 8 and adjust your needle size to hit your gauge. The pattern structure stays exactly the same!

Can I use a different yarn?

Absolutely! Any worsted weight yarn (#4) will work โ€” see the substitute table above for some of my favorites. Self-striping and cake yarns are especially fun with the Stockinette Windows stitch pattern because the color changes play so beautifully with the texture. Solid colors look gorgeous too and show off the stitch definition wonderfully.

How do I add a pom pom?

The pattern calls for an optional faux fur pom pom that attaches after the hat is complete. It's fully removable! Marly has a video tutorial showing exactly how to attach one โ€” watch the Removable Faux Fur Pom Pom tutorial here. You can also use a traditional yarn pom pom if you prefer that look.

Can I sell hats made from this pattern?

Yes! You may sell finished hats made from this free pattern. Please credit Marly Bird as the designer โ€” a simple “pattern by Marly Bird of marlybird.com” in your listing description is perfect. Thank you for the support! ๐Ÿ’›

Is this the same stitch as the Lorelai Vest?

Yes! The Stockinette Windows pattern in Rory is inspired by the stitch pattern in the Lorelai Knit Vest. They make a beautiful matching set โ€” knit the vest, make the hat, and you have a complete Turkey Trot 2024 look!

How long does this hat take to knit?

Most knitters finish an adult size in 4โ€“6 hours, often spread across a weekend. It's a wonderful TV-knitting project โ€” the stitch pattern is simple enough to do without looking once you've got the 14-round rhythm locked in. Smaller sizes knit up even faster!

Rory Knit Hat ad-free PDF โ€” printable knit hat pattern by Marly Bird
๐Ÿ›๏ธ Buy on Etsy
๐Ÿ›’ Buy on Shopify
๐Ÿ“Œ Add to Ravelry Queue

Final Thoughts

I held this one back for my VIP Turkey Trot knitters… and now it belongs to all of you. That feels exactly right. ๐Ÿ’›

Rory is one of those hats that looks like you spent way more time on it than you did. The Stockinette Windows texture is beautiful, the sizing covers the whole family, and one ball of yarn gets you all the way to the crown. It's genuinely one of my favorite designs from 2024.

โค๏ธ Your BiCrafty Bestie,
Marly Bird
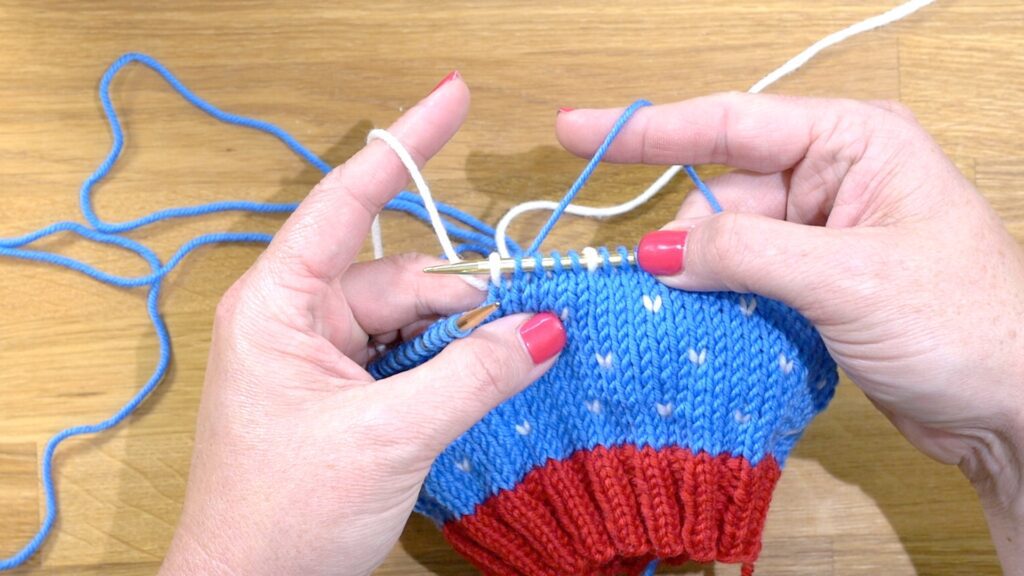
A cartoon avatar of a person with glasses and a brown bun smiles warmly. Their green shirt and black jacket add a stylish touch, while colorful hearts surround them like loving temperature blankets, stitching together an aura of love and positivity. -Marly Bird

Filed Under: Free Patterns, Knitting, Our Free Patterns, Pattern

  • « Previous Page
  • 1
  • 2
  • 3
  • 4
  • …
  • 6
  • Next Page »

Let's Be Social

Join the Marly's Minions Facebook group to share, ask questions, or chat about all of your yarn related crafts!

Join the group
Cartoon of a smiling woman with brown hair in a bun, glasses, black jacket and green shirt, waving next to large "hi" text.

Quick Links

The Pattern Shop

Our Free Patterns

Blog

Marly Bird House
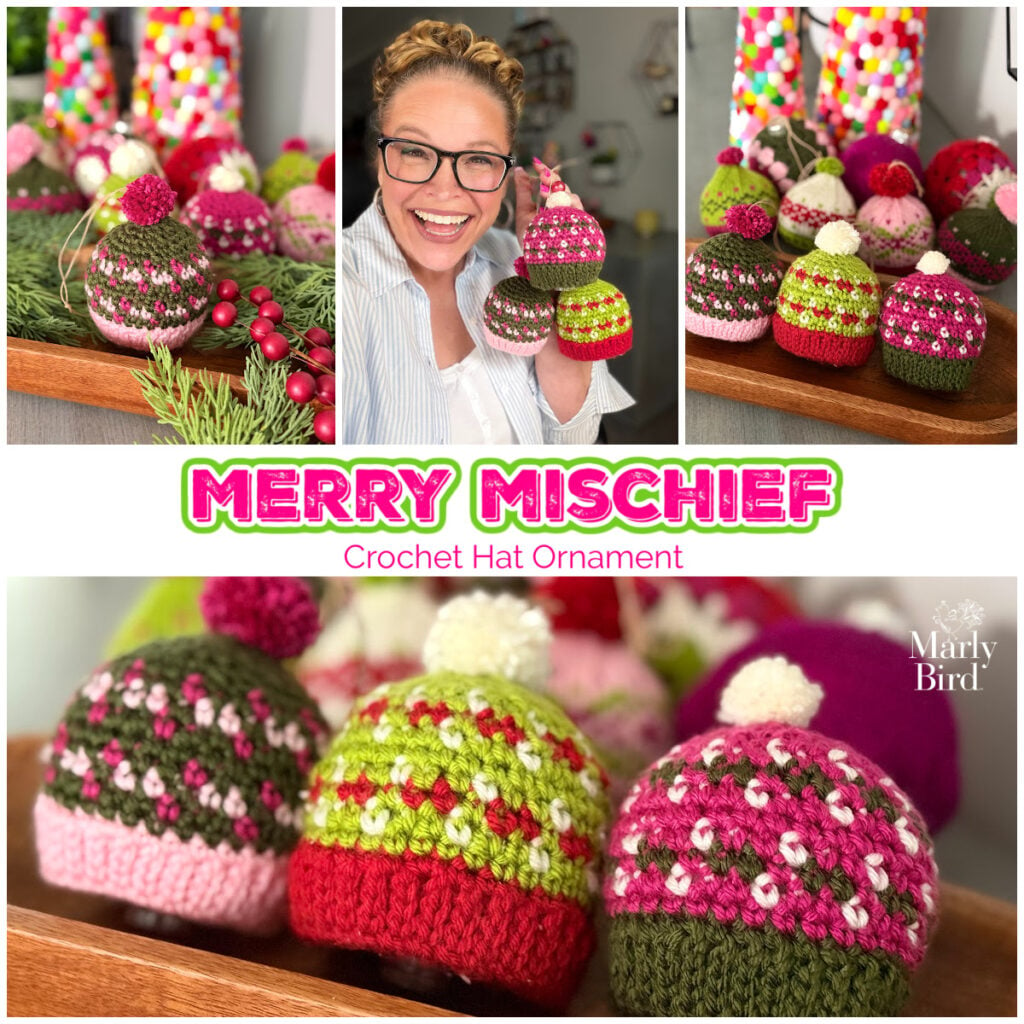
Learn to Knit & Crochet

About

Giveaway Terms and Privacy Notice

Find Us Everywhere

Join the Newsletter

YouTube Channel

Marly's Minions FB Group

Etsy Store

Ravelry Store


AN ELITE CAFEMEDIA HOME/DIY PUBLISHER

Information from your device can be used to personalize your ad experience. Do not sell or share my personal information.

Privacy Policyย  ย Termsย  ย Marly Bird Legal Documents Copyright © 2026