Free Knit Tunic Pattern: The Thistlevine Sleeveless Vest by Marly Bird
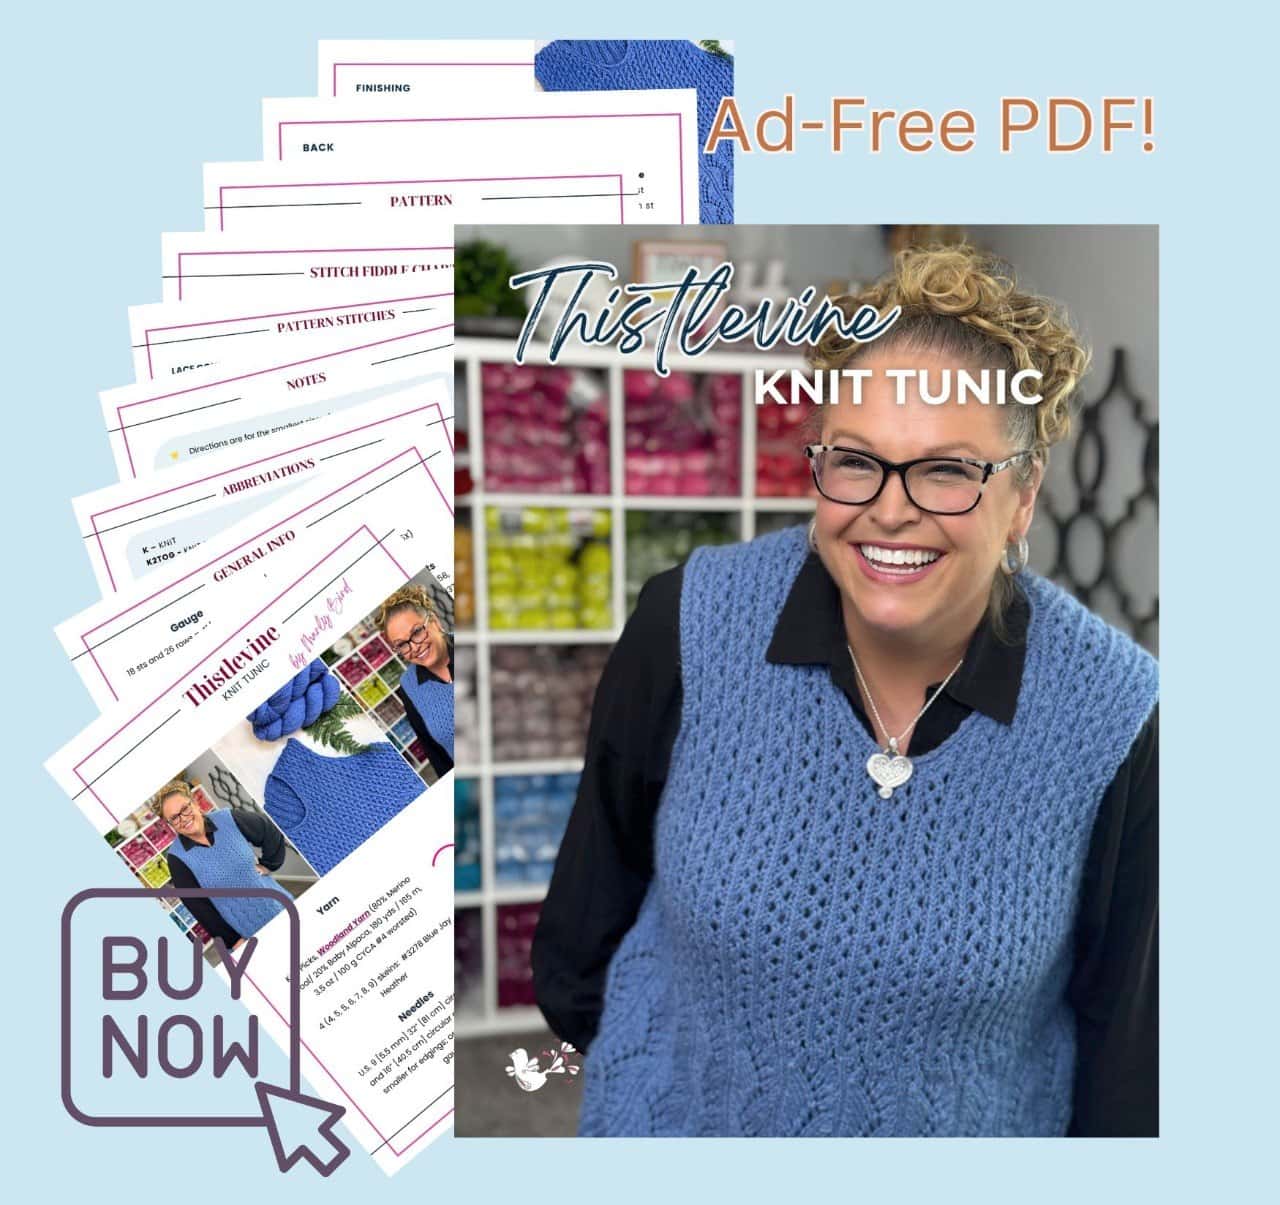
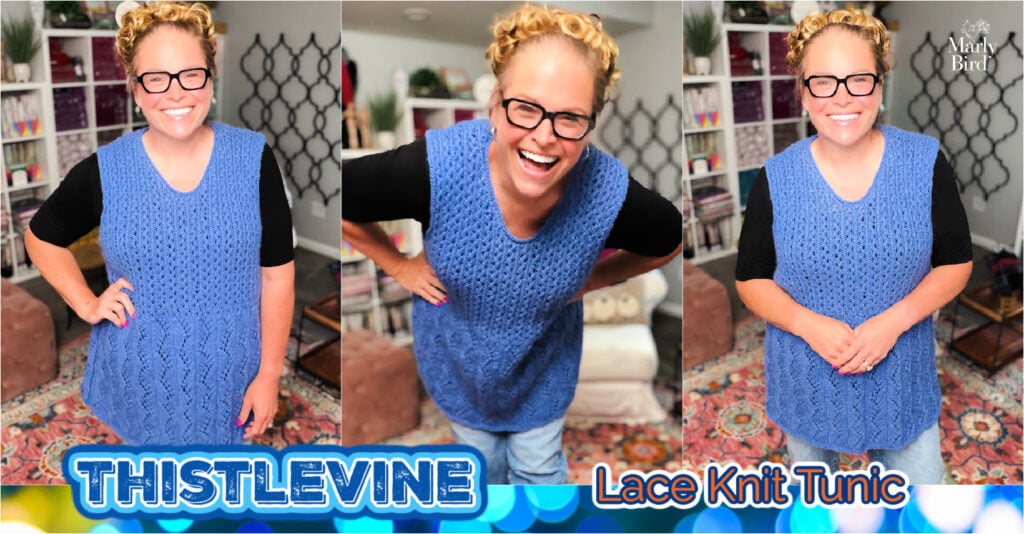
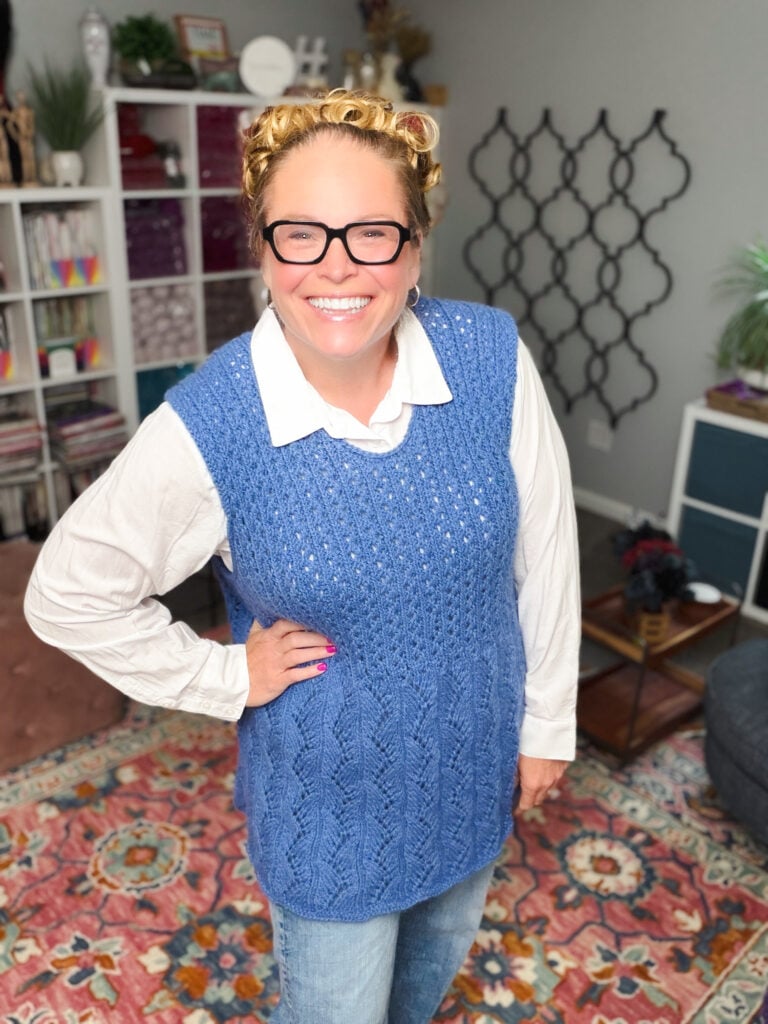
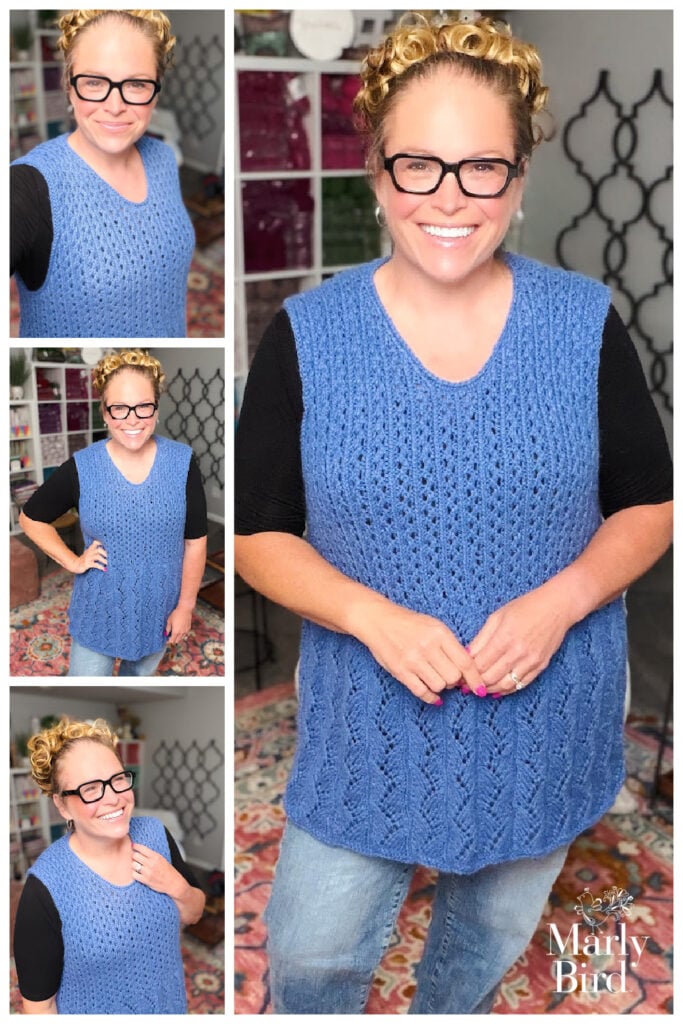
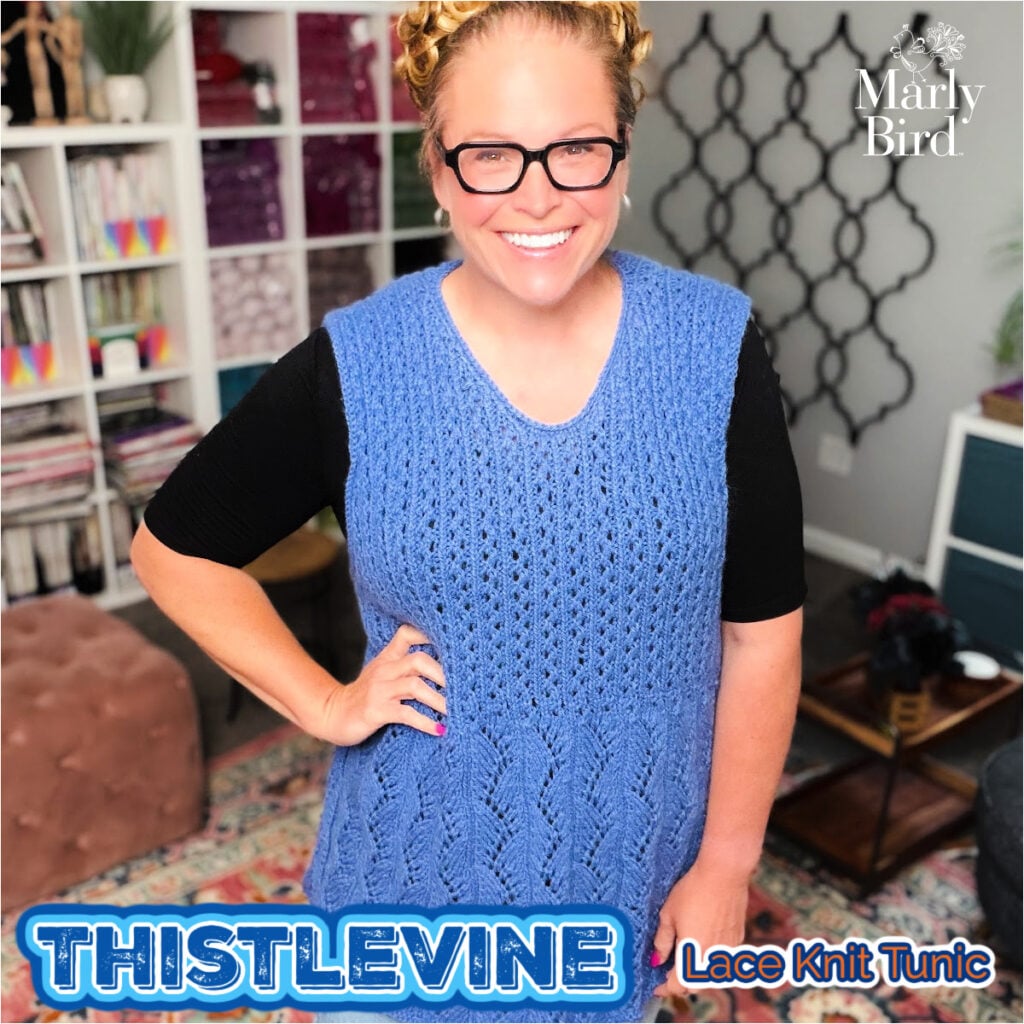
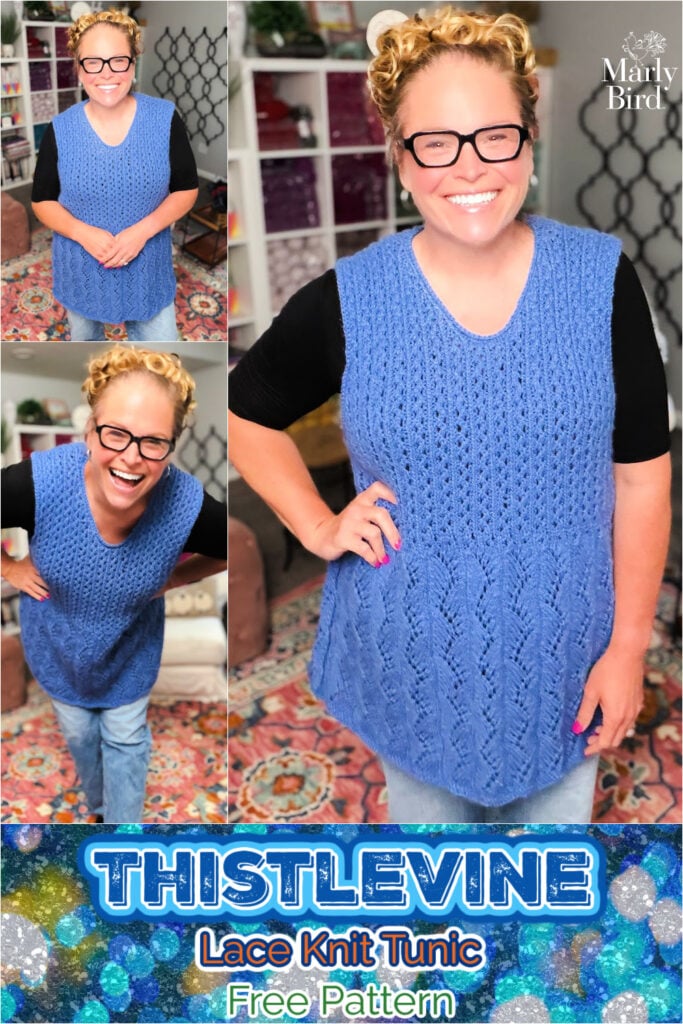
The Thistlevine is a free knit tunic vest pattern by Marly Bird… a sleeveless lace layering shell with a Zig Zag Waves peplum hem, a Lace Columns body, and an optional shorter vest length. Knit in worsted weight (Knit Picks Woodland in the sample), sized XS through 5X with finished busts from 31½” to 62½”, intermediate skill level. Free here on the blog. Ad-free printable PDF available on Etsy, Shopify, and Ravelry.
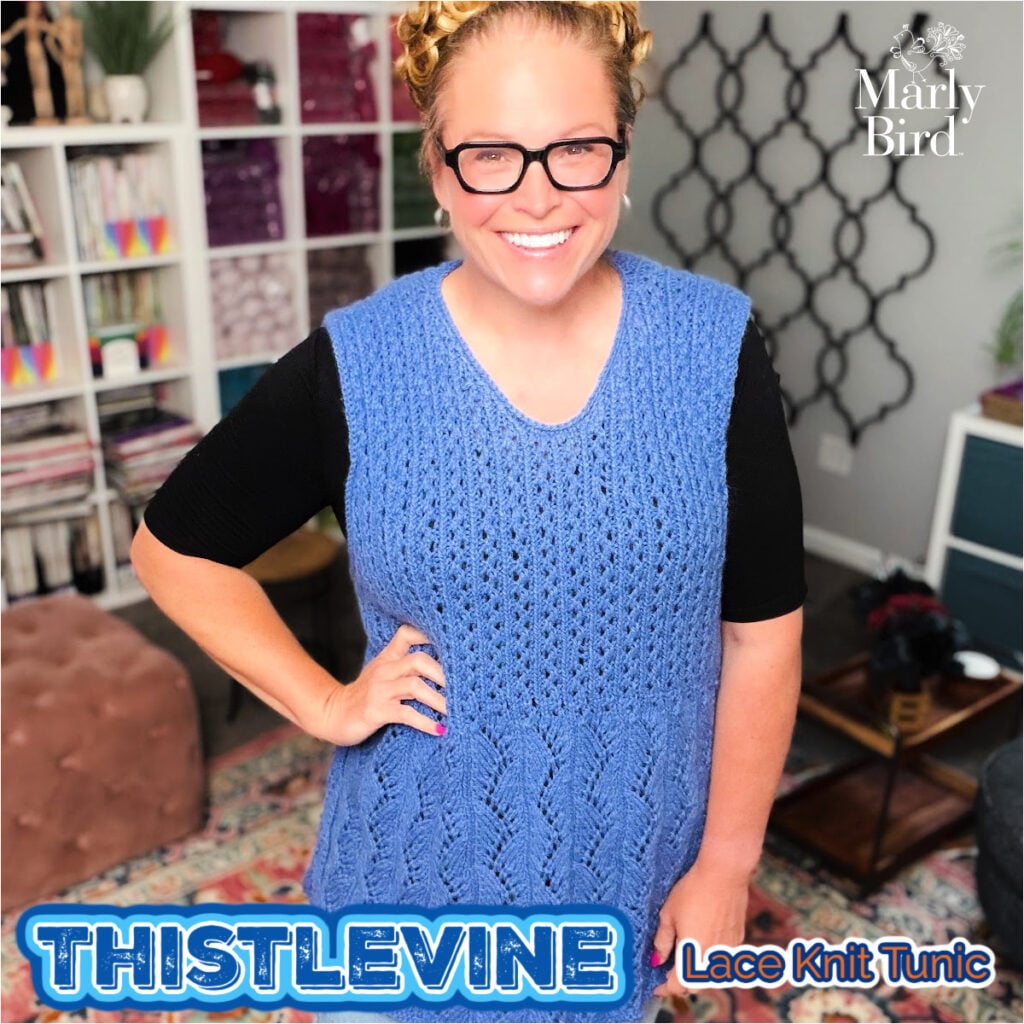
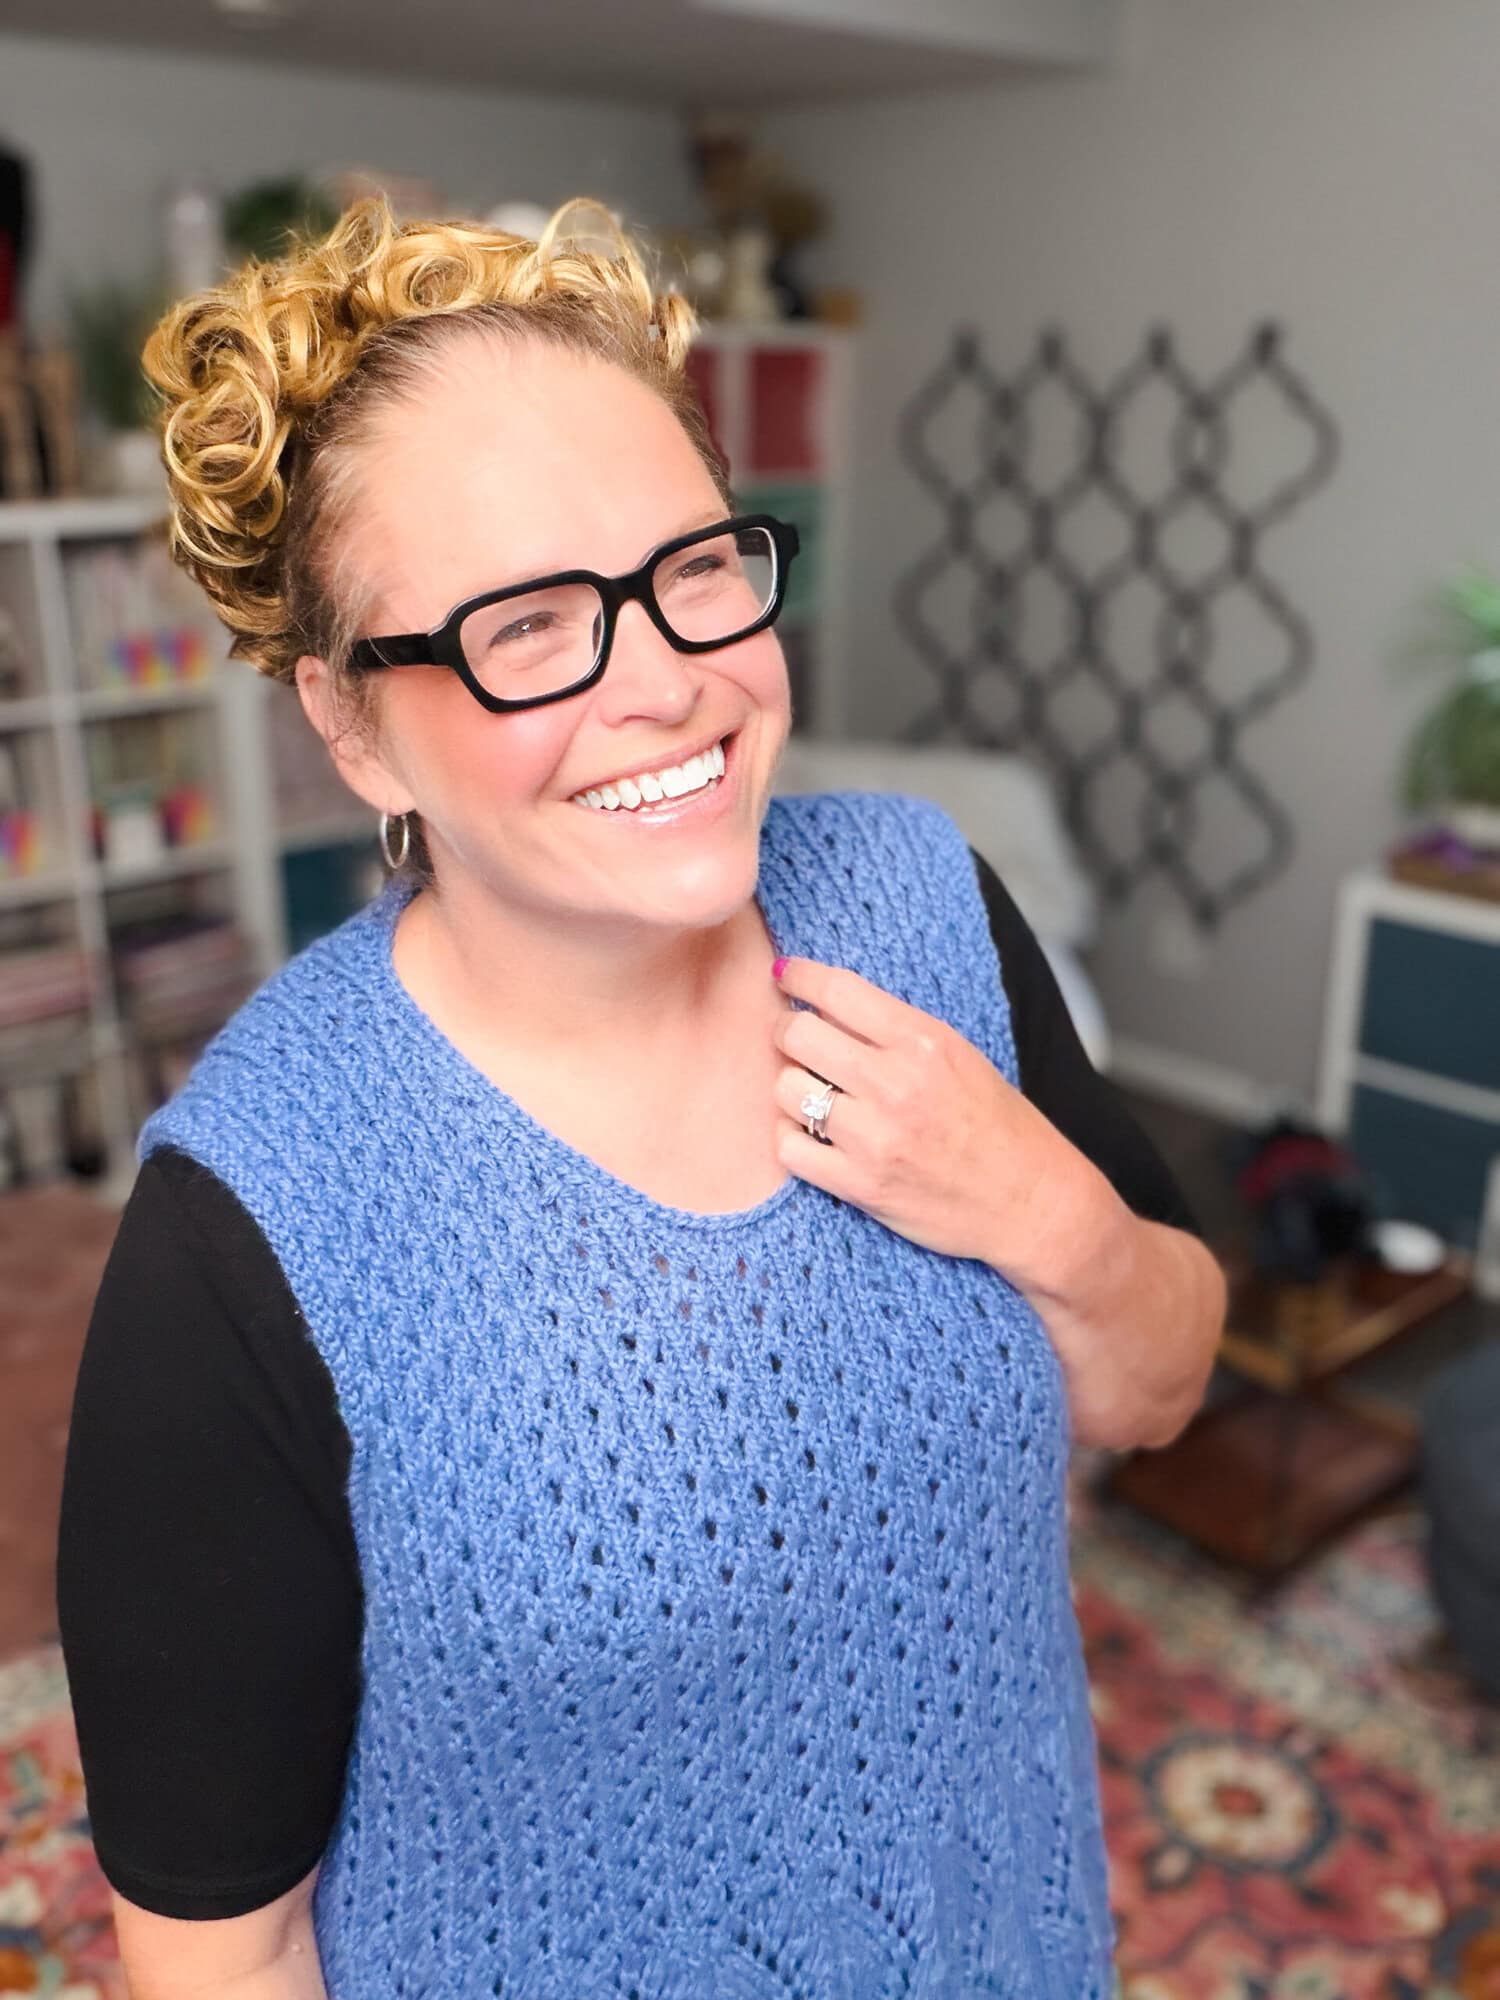
Hey, bestie 💛 What if one pattern gave you two completely different looks… a tunic-length layering piece for cool evenings, or a cropped vest for warmer days? That is the Thistlevine. This free knit tunic vest pattern brings together two of my favorite stitch patterns into one sleeveless lace shell that is as beautiful to knit as it is to wear.
The Zig Zag Waves hem creates that soft, swingy peplum movement at the bottom edge. The Lace Columns through the bust and body keep the eye traveling up. It is a piece you reach for again and again, layered over a turtleneck in fall, a flowy blouse in spring, or just on its own when the weather is being weather.
I designed the Thistlevine for every body, sized XS through 5X. Not graded as an afterthought… worked out from scratch for every size, so the lace lands right where you want it.
This post contains affiliate links. If you click and buy, I may earn a small commission at no extra cost to you. Thank you for supporting my yarn-loving heart 💛
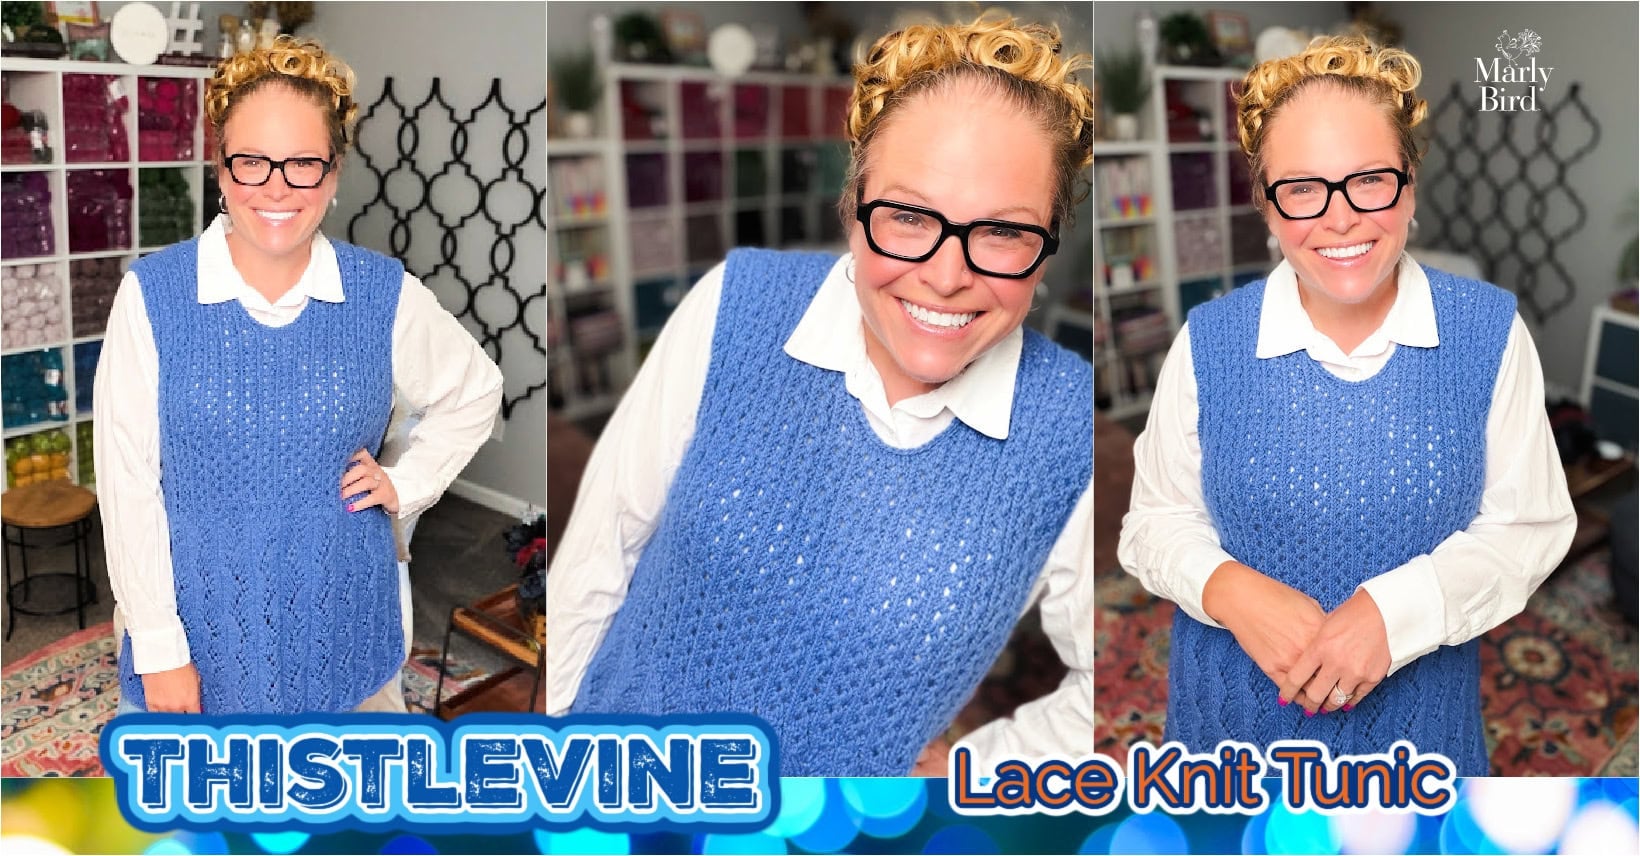
🌷 The Thistlevine debuted as part of Spring Fling 2026… Day 20 BiCrafty Bonus Finale (Fri May 29, 2026).
Day 20 closed out my 20-day knit and crochet pattern celebration with TWO patterns… the Garden Party Crochet Cardigan for crocheters and the Thistlevine Knit Tunic for knitters. The free pattern stays free forever right here on the blog. Browse the rest of the celebration on the Spring Fling Hub →
💖 What You Will Love About the Thistlevine
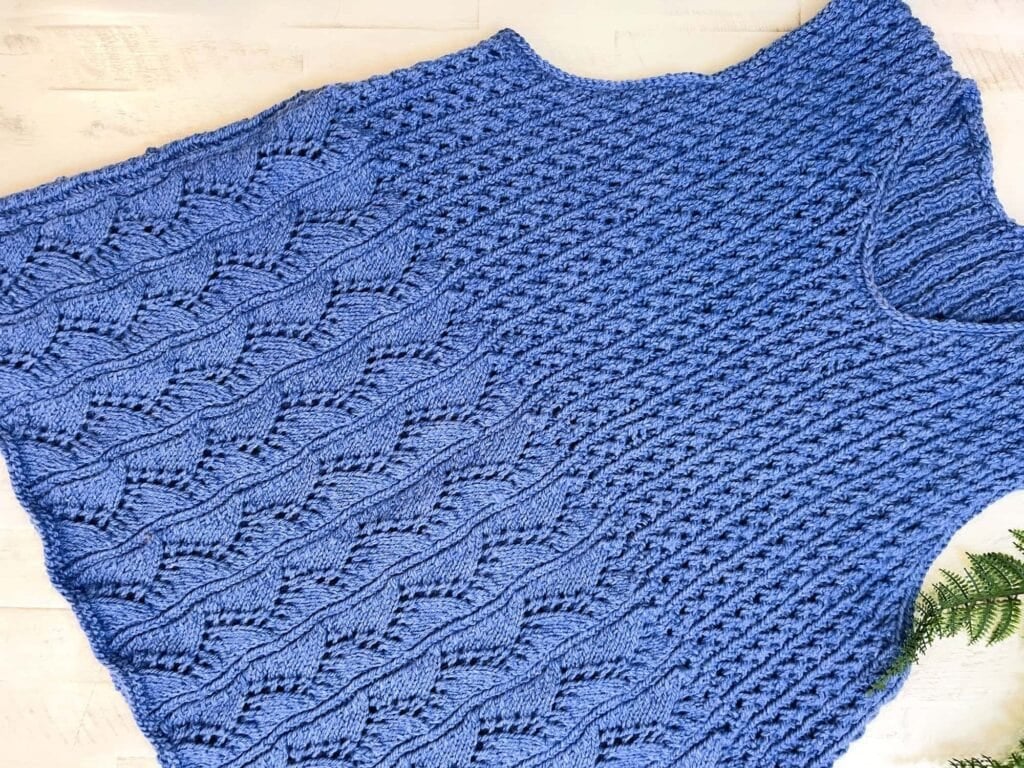
🧶 Two stunning stitch patterns in one piece. Zig Zag Waves at the hem creates a flowing, peplum-like flare. Lace Columns through the bust and body give a vertical, elongating line. The transition between the two is where the magic lives.
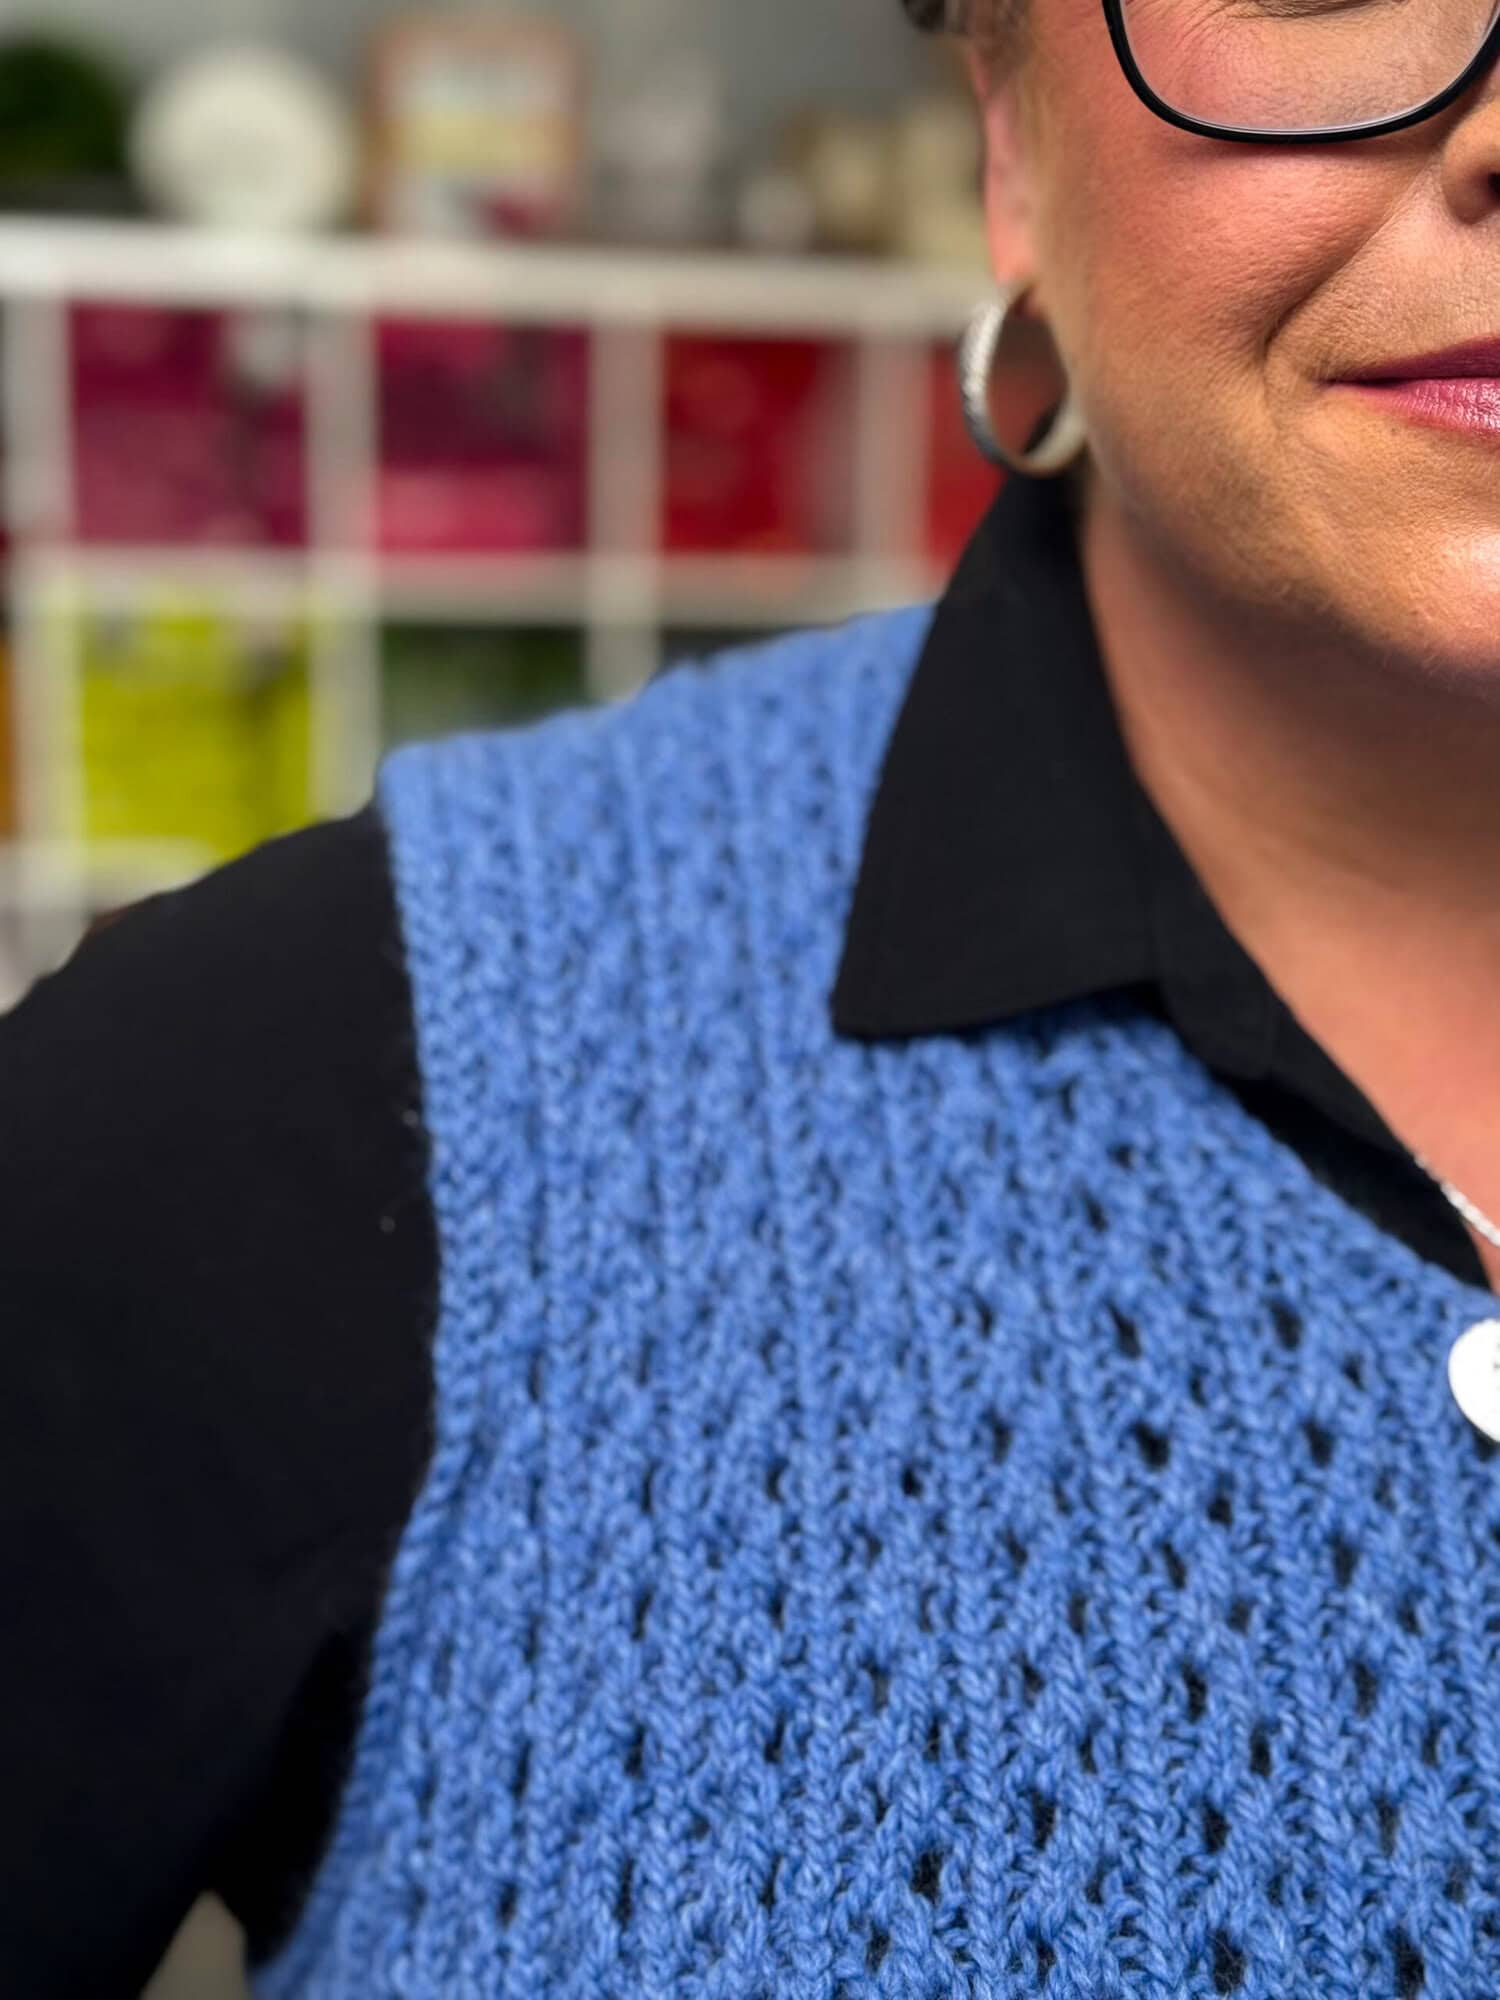
🪡 One-piece construction. The Thistlevine is worked in one piece. Knit the front to the shoulders then knit down the back, then seamed only at the sides. No sleeves to set in. No yoke math. The armhole and neck edgings are picked up and knitted for a clean, polished finish. ⭐️ and exclusively in the ad-free pdf there are charts for the arhole and neck shaping for each size separately!
👗 Wear it two ways. Knit at full tunic length for a flowy layering piece, or shorten the peplum and bind off earlier for a cropped vest. Both looks come from the same pattern… your choice.
📐 Size-inclusive, 8 sizes (XS through 5X). Finished busts run from 31½” up to 62½”. Every size was worked out individually, so the lace pattern repeats land cleanly across the body in every size.
🌊 The peplum silhouette is shaping you do not have to think about. The Zig Zag Waves stitch creates the gentle flare at the hem all on its own. No increases or decreases for shape… the stitch pattern does the work.
🧵 Intermediate-friendly lace. If you can knit, purl, yarn over, and work k2tog and ssk, you can knit this tunic. The pattern walks you through every special stitch.
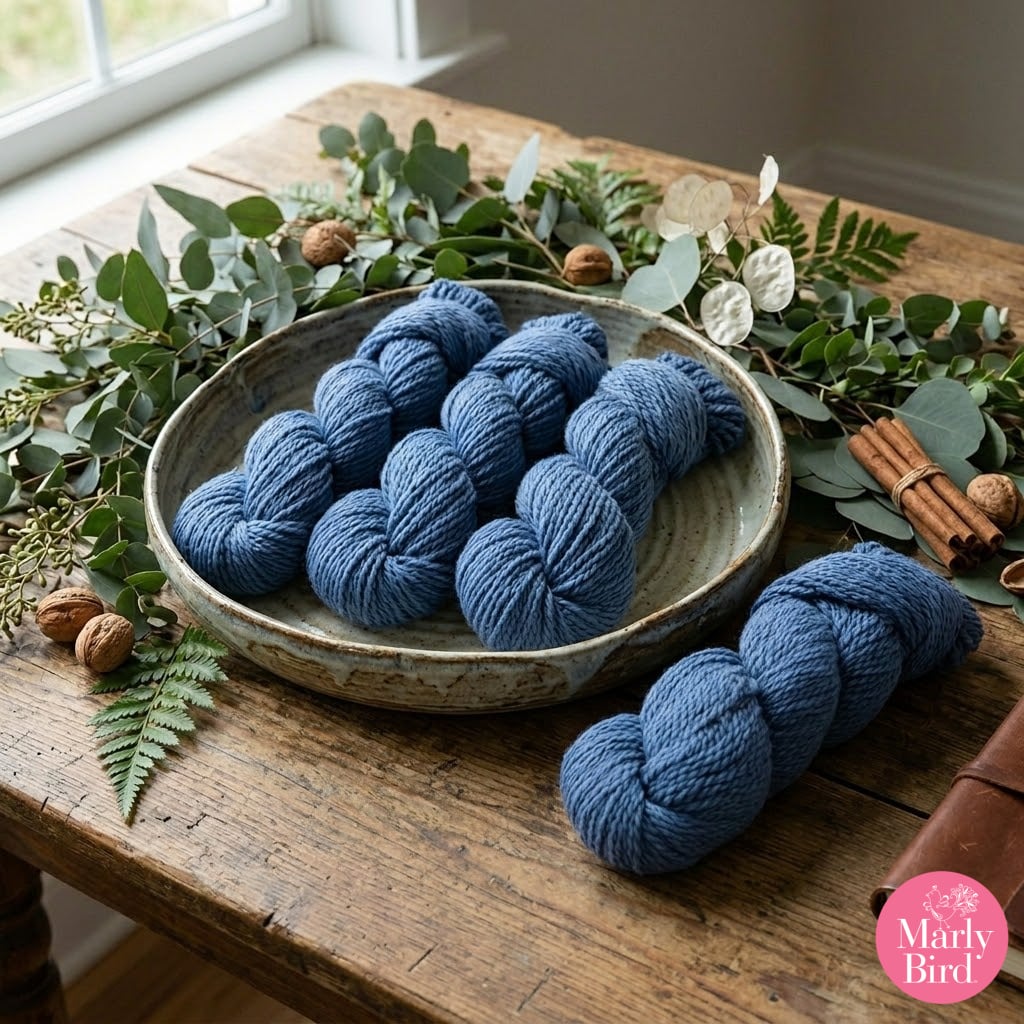
🫐 Luxurious sample yarn. Knit Picks Woodland (an 80% Merino / 20% Baby Alpaca blend in Blue Jay Heather) shows the lace beautifully and feels soft enough to wear all day.
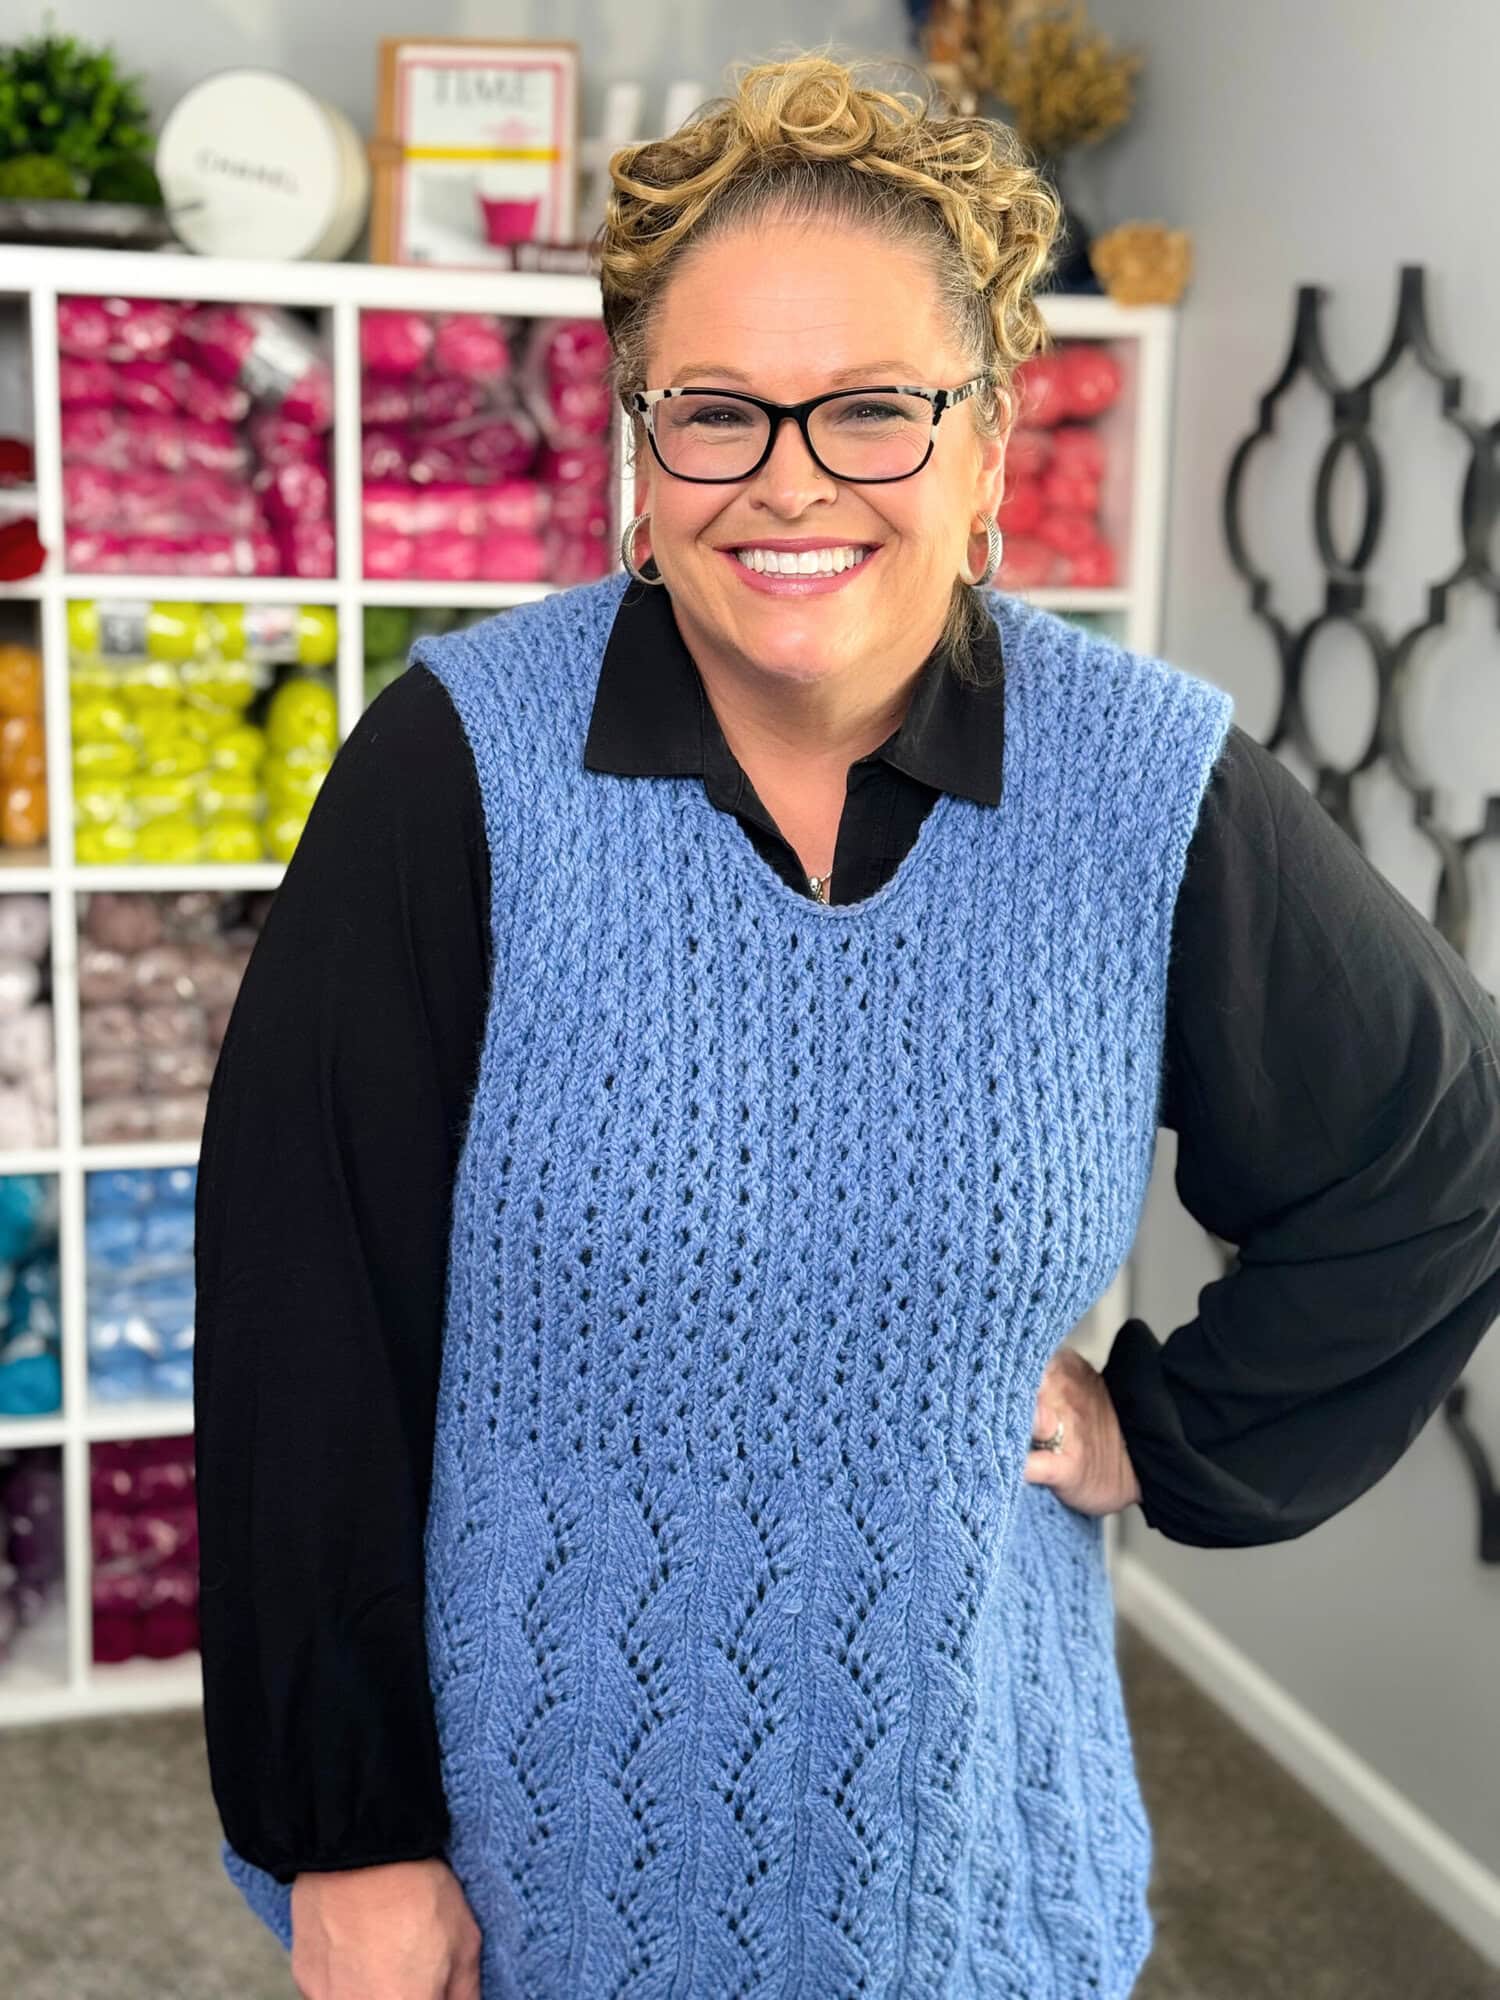
🧵 Quick Pattern Overview
🧶 Craft: Knit (sleeveless tunic/vest)
📏 Skill level: Intermediate
📐 Sizes: XS, S, M, L-XL, 2X, 3X, 4X, 5X (8 sizes)
📏 Finished bust: 31½” (S 36, M 40½, L-XL 45, 2X 49½, 3X 54, 4X 58, 5X 62½)”… designed to fit snugly. Size up if you are between sizes.
📏 Finished length: 26½” up to 36¼” depending on size (tunic length… shorten the peplum to wear as a cropped vest).
🧶 Yarn: Worsted weight #4. Sample knit in Knit Picks Woodland (80% Merino / 20% Baby Alpaca, 180 yds per 100g skein) in Blue Jay Heather. Skeins needed: 4 (4, 5, 5, 6, 7, 8, 9).
🪡 Needles: US 9 / 5.5 mm 32″ circular for the main fabric, plus a 16″ circular one size smaller for the armhole and neck edgings.
📐 Gauge: 18 sts and 26 rows = 4″ in Lace Columns pattern.
🌊 Stitch patterns: Zig Zag Waves (peplum) and Lace Columns (bust and body).
🧵 Construction: Worked in one piece from front hem to back hem… seamed at the sides… edgings picked up and knitted.
💎 Love the Pattern but Want an Ad-Free PDF? ⭐
The free pattern is right here on the blog (scroll down… you will need a free GROW account to unlock the instructions). If you would rather have a beautifully formatted, printable, ad-free PDF you can take with you anywhere, grab the Thistlevine ad-free PDF below 💖
🛒 Shop Etsy
🛒 Shop Ravelry
🛒 Shop Marly Bird Shopify Store
Is the Thistlevine a vest or a tunic?
It is both… and that is the point. The pattern is written for tunic length (26½” to 36¼” depending on your size), but you can shorten the peplum section and bind off earlier for a cropped vest look. Both instructions are included in the pattern. Two completely different outfits from one set of needles.
Is this a plus size knit tunic pattern?
Yes, fully. The Thistlevine is sized XS through 5X with finished busts from 31½” to 62½”. Every size was graded from scratch… not just the smallest size with extra stitches tacked on… so the lace repeats land where they should on every body. This is a pattern designed for every knitter, at every size.
Does the Thistlevine work as a layering piece?
It was designed for layering. The sleeveless lace shell works over a fitted turtleneck in fall or winter, over a flowy blouse in spring, or on its own in summer. The tunic length gives enough coverage to layer over anything without bunching, and the Lace Columns allow whatever you are wearing underneath to show through subtly. It is a true three-season layering staple.
Where can I get the ad-free PDF of the Thistlevine pattern?
The ad-free, printable PDF is available on Etsy, Ravelry, and the Marly Bird Shopify store. The PDF includes visual stitch charts for the armhole and neck shaping for every size… those charts are exclusive to the PDF and not in the free blog version. The free blog version has everything you need to knit the Thistlevine; the PDF is just a cleaner, chart-enhanced upgrade.
Join our Newsletter
Join our Newsletter
Get Free Crochet & Knitting
Pattern Links & Coupons!


🤔 Is the Thistlevine Right for You?
The Thistlevine is for the knitter who is comfortable with the basics and ready for a piece with personality. If you can already knit, purl, work yarn overs, and decrease (k2tog and ssk), the rest of the pattern is well within reach… I walk you through every special stitch in the instructions.
This is a great pattern for:
- A knitter who has finished a few smaller projects and is ready for their first garment with some shaping
- An intermediate knitter who wants a lace project that feels fresh, not fussy
- Someone who loves a layering piece with shape… not just a rectangular wrap
- Plus-size knitters who have been waiting for a lace tunic actually graded through 5X
It is not the place to start if you have never knit lace before… but if you have done a few yarn overs and decreases in a hat or shawl, you have the foundation you need.
🧩 Design Features & Construction
The Thistlevine is built around a smart, low-fuss construction that lets the lace do all the visual work. Here is what is happening under the hood:
🧵 One-piece front-to-back construction. You cast on at the bottom of the front peplum, knit up through the bust, shape the front armholes, separate at the neck for shoulders, then cast on bridge stitches to join the shoulders and knit DOWN the back… right through the back armhole increases, back bust, and back peplum. Only ONE seam to sew on each side when you are done.
🌊 The Zig Zag Waves peplum. The hem starts with the Zig Zag Waves stitch pattern, which uses traveling yarn overs and edge decreases to create that soft, flared peplum silhouette. You are NOT increasing for shape… the stitch pattern itself makes the peplum flare. A pattern transition row (with p2tog and ssp decreases) takes you from the peplum into the body.
🏛️ The Lace Columns body. Through the bust and body, the Lace Columns stitch creates clean vertical lines that elongate the torso and gently skim the figure. The body is straight (no waist shaping)… the peplum and the lace pattern do the visual shaping for you.
✨ Short-row shoulder shaping. The back shoulders are shaped with short rows worked one stitch below the marker line, which creates a smooth, gently sloped shoulder line. This is what makes the tunic sit cleanly on the body instead of pulling at the neck.
🧶 Picked-up edgings, NOT sewn-on bindings. The armhole and neck edgings are picked up and knitted in the round (on smaller needles) AFTER you block and seam. This is what gives the openings that polished, finished look… no curling, no awkward sewn binding to fight with.
🧠 Build Your Skills: The Lace Inside the Thistlevine
One of the things I love about teaching knit lace is that the “hard” part of lace is mostly about reading your knitting. Once your eye learns the pattern, the stitches almost work themselves. The Thistlevine uses two stitch patterns… and each one teaches you something a little different.
Lace Columns (the body)
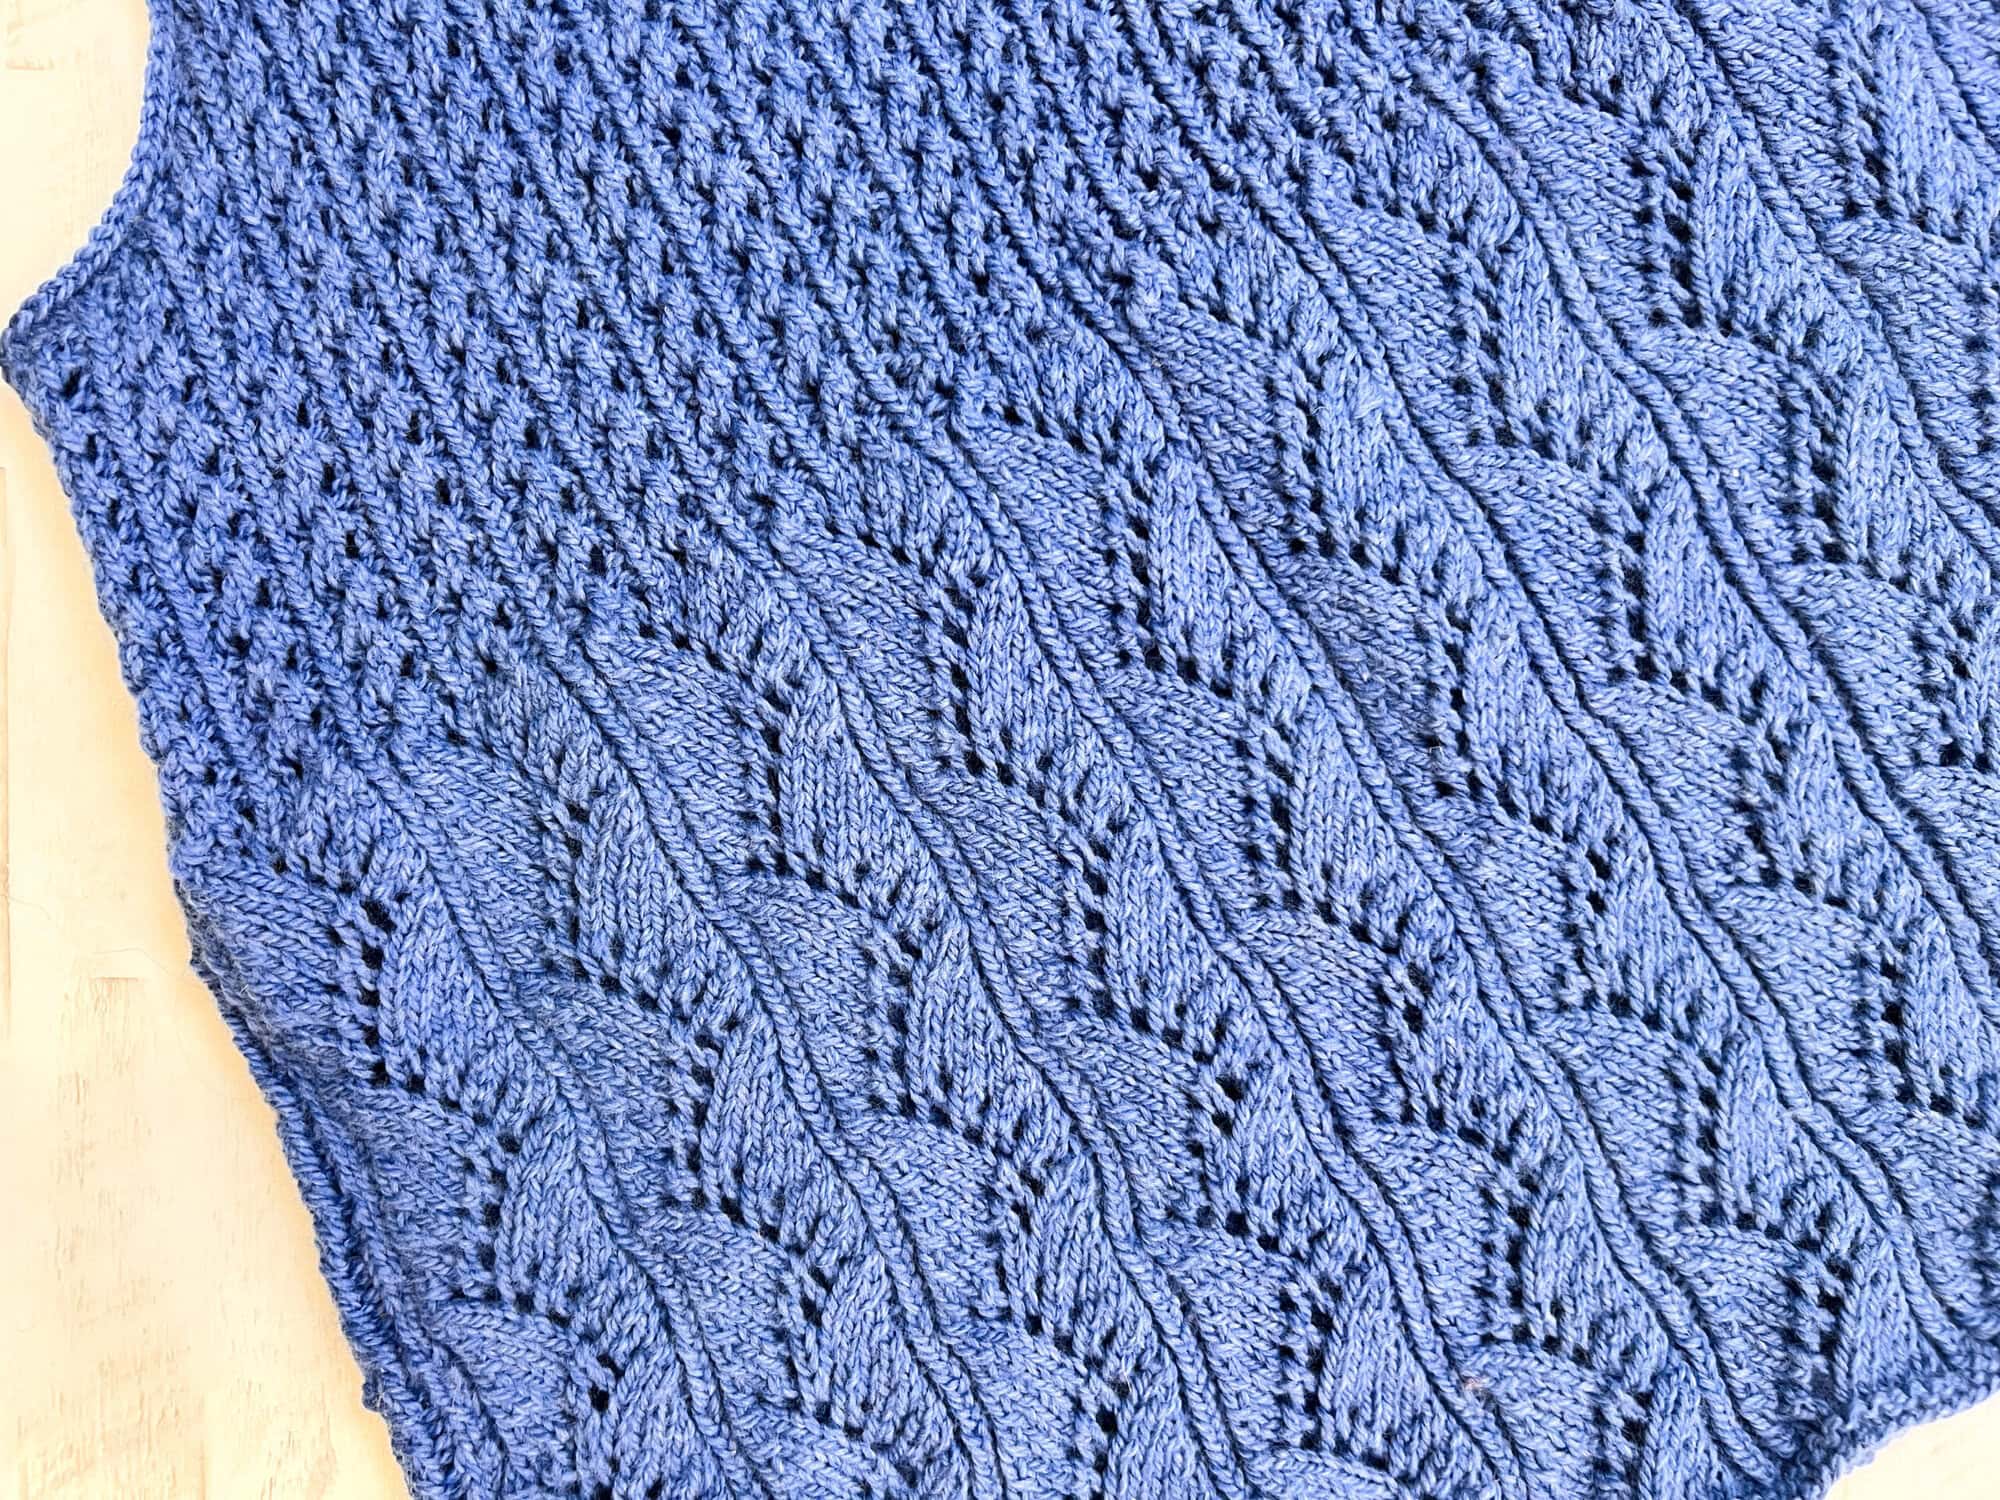
Lace Columns is a 4-row repeat worked over a multiple of 5 stitches plus 3. It uses yarn overs and paired decreases (ssk and k2tog) to form clean vertical columns of lace separated by knit and purl ribs. It is one of those stitch patterns that looks complicated on paper and feels easy in your hands once you find the rhythm. The vertical lines are flattering and they help the body of the tunic skim the figure instead of hanging straight. The stitch count stays the same throughout the pattern repeat… once you cast on for the bust, every Lace Columns row keeps your total stitch count steady.
Zig Zag Waves (the peplum)
Zig Zag Waves is a 16-row repeat over a multiple of 12 stitches plus 3. It pairs traveling yarn overs with k2tog and ssk decreases at the edges of each repeat to push and pull the stitches into a wave pattern. Where the yarn overs land creates the open lace… where the decreases happen creates the soft flare. You do not increase or decrease for shape. The stitch pattern itself does the work of giving the peplum its movement. Like Lace Columns, the total stitch count stays the same throughout the 16-row repeat… yarn overs and decreases balance each other inside every row.
A few special stitches to know
You will see a handful of abbreviations in the pattern that may be new… but they are all friendly. LLM1 and RLM1 are lifted increases that disappear seamlessly into the fabric. TK2tog and Tskp are twisted versions of standard decreases that keep the edges of the lace clean and crisp. M1p is a make-one purlwise used in the peplum transition row. The full definitions are in the pattern… no guesswork required.
📐 Sizing, Fit, and Size-Inclusive Design
The Thistlevine is sized XS through 5X… 8 sizes total. Each size was worked out from scratch so the lace repeats land where they should on every body, not just the smallest sizes with bigger sizes tacked on as an afterthought. This is a pattern I designed for every body 💛
| Size | Finished Bust | Finished Length |
|---|---|---|
| XS | 31½” / 80 cm | 26½” / 67.5 cm |
| S | 36″ / 91.5 cm | 28″ / 71 cm |
| M | 40½” / 103 cm | 29¼” / 74.5 cm |
| L-XL | 45″ / 114.5 cm | 30¾” / 78 cm |
| 2X | 49½” / 125.5 cm | 32″ / 81.5 cm |
| 3X | 54″ / 137 cm | 33½” / 85 cm |
| 4X | 58″ / 147.5 cm | 34¾” / 88.5 cm |
| 5X | 62½” / 159 cm | 36¼” / 92 cm |
📐 How to Choose Your Thistlevine Size
Start with your actual full bust measurement… all the way around, over the fullest part. The Thistlevine has 0–2″ of negative to neutral ease, so it is designed to fit snugly. If your bust is between two sizes, go up. You'll get a slightly more relaxed fit, and you can always block lace more open. You cannot block it smaller.
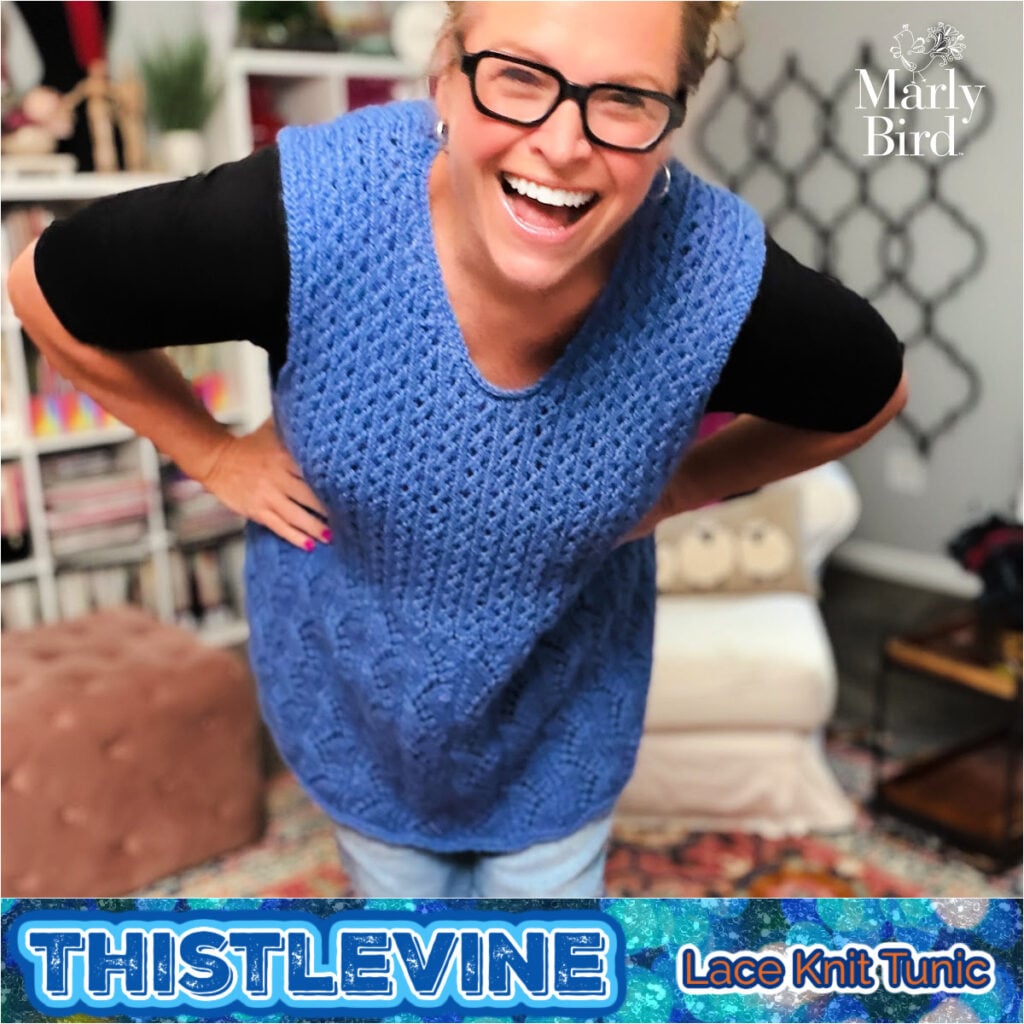
Plus-size knitters: the 3X sample in these photos is shown on a 44″ bust with positive ease (Marly has since lost weight since the sample was made, so the fit is roomier than intended). Sizes 4X and 5X follow the exact same construction… just scaled. This pattern was designed for every body.
When in doubt, size up. You can always block it slightly more open. You cannot block it smaller.
Fit note: The Thistlevine is designed with approximately 0-2″ [0-5 cm] of negative to neutral ease at the full bust… so it fits snugly. For the intended fit, choose the size closest to your actual bust measurement. If you prefer a more relaxed fit, size up. (Love a size-inclusive free vest pattern? Also check out the Lorelai Knit Vest for another free size-inclusive option.) You can always block it slightly more open… you cannot block it smaller. ⭐️ The sample is size 3xl and it is shown on a 44″ / 111.75 cm bust (which means it is shown with positive ease but not because Marly intended it to be like that; she had the sample made to fit her but has since lost weight).
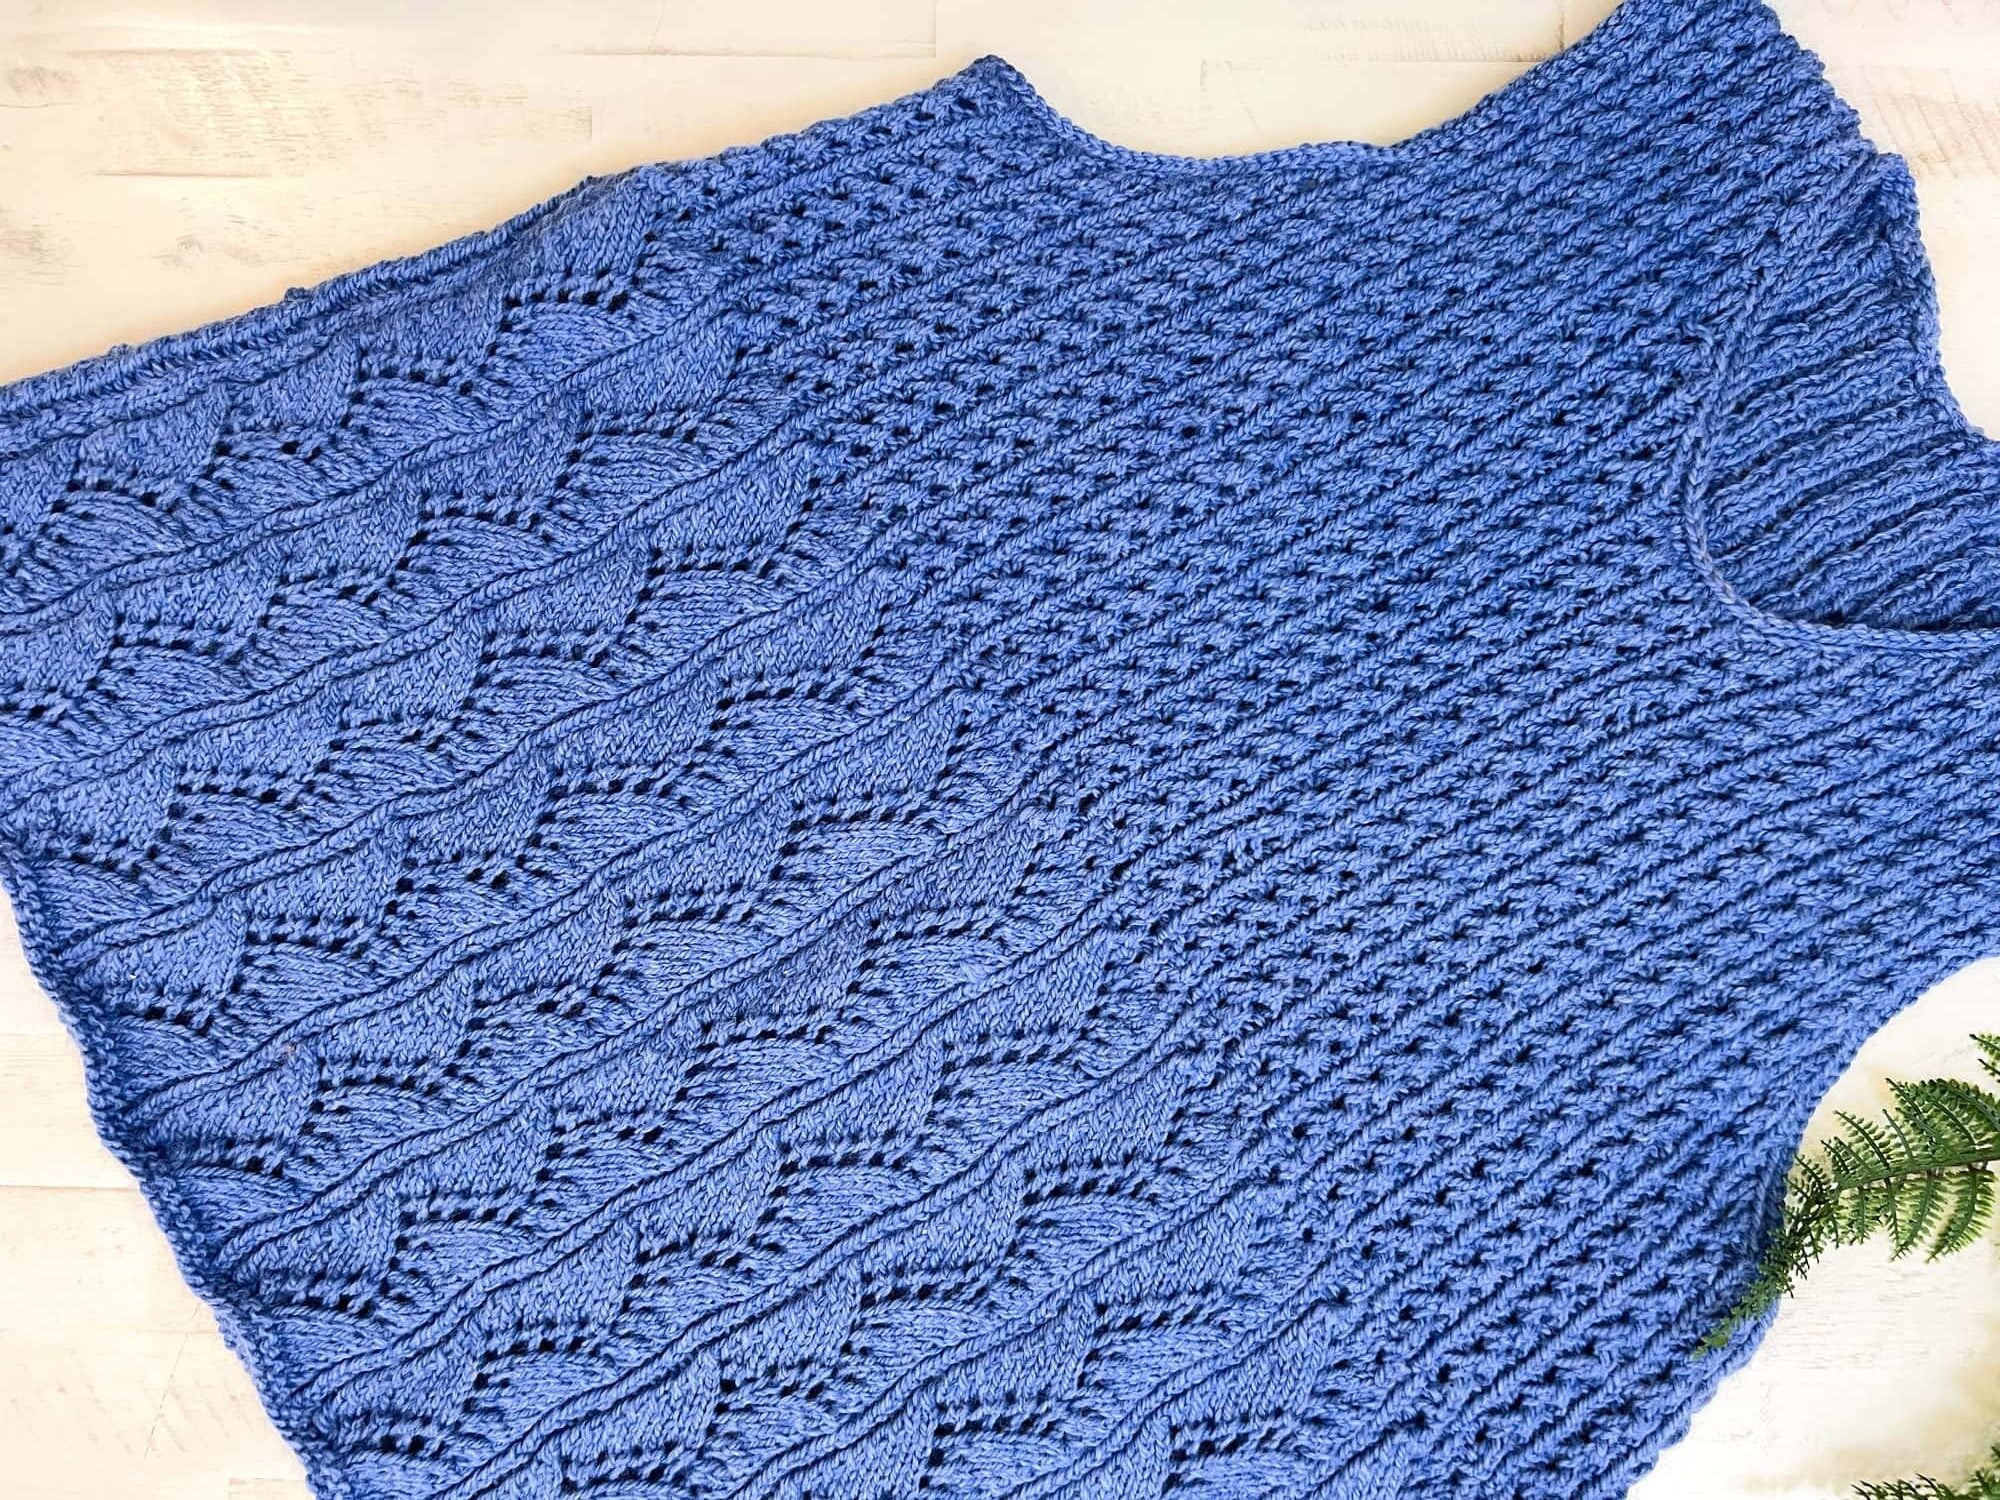
Tunic length OR cropped vest… your call
Because the Thistlevine is worked in one piece front hem to back hem, the length is easy to customize. The finished lengths in the pattern range from 26½” (XS) up to 36¼” (5X), which gives you a true tunic that hits at the upper thigh.
Want a cropped vest instead? Work fewer rows in the peplum section before transitioning to the bust… swatch and measure to land at the length you want. The Zig Zag Waves stitch pattern is a 16-row repeat, so end after a Row 2 or Row 10 to keep the lace lining up correctly on both ends.
Just remember if you shorten the peplum, you will use less yarn… and if you lengthen the body or the back peplum, you will use more. The sample yardage range in the pattern is calculated for the tunic length as written.
🎨 14 Colorways to See Yourself In
One question I get on every garment design: “Will this look good in MY color?” 🎨
If you have been falling down the “what season am I?” rabbit hole on TikTok lately… cool winter, warm autumn, soft summer, bright spring… this is the section for you. The Thistlevine was sampled in Knit Picks Woodland Blue Jay Heather (a heathered medium blue), but the same pattern reads completely differently in a warm rust, a soft cream, a deep emerald, or a moody charcoal. Same stitch pattern, same silhouette… 14 different moods.
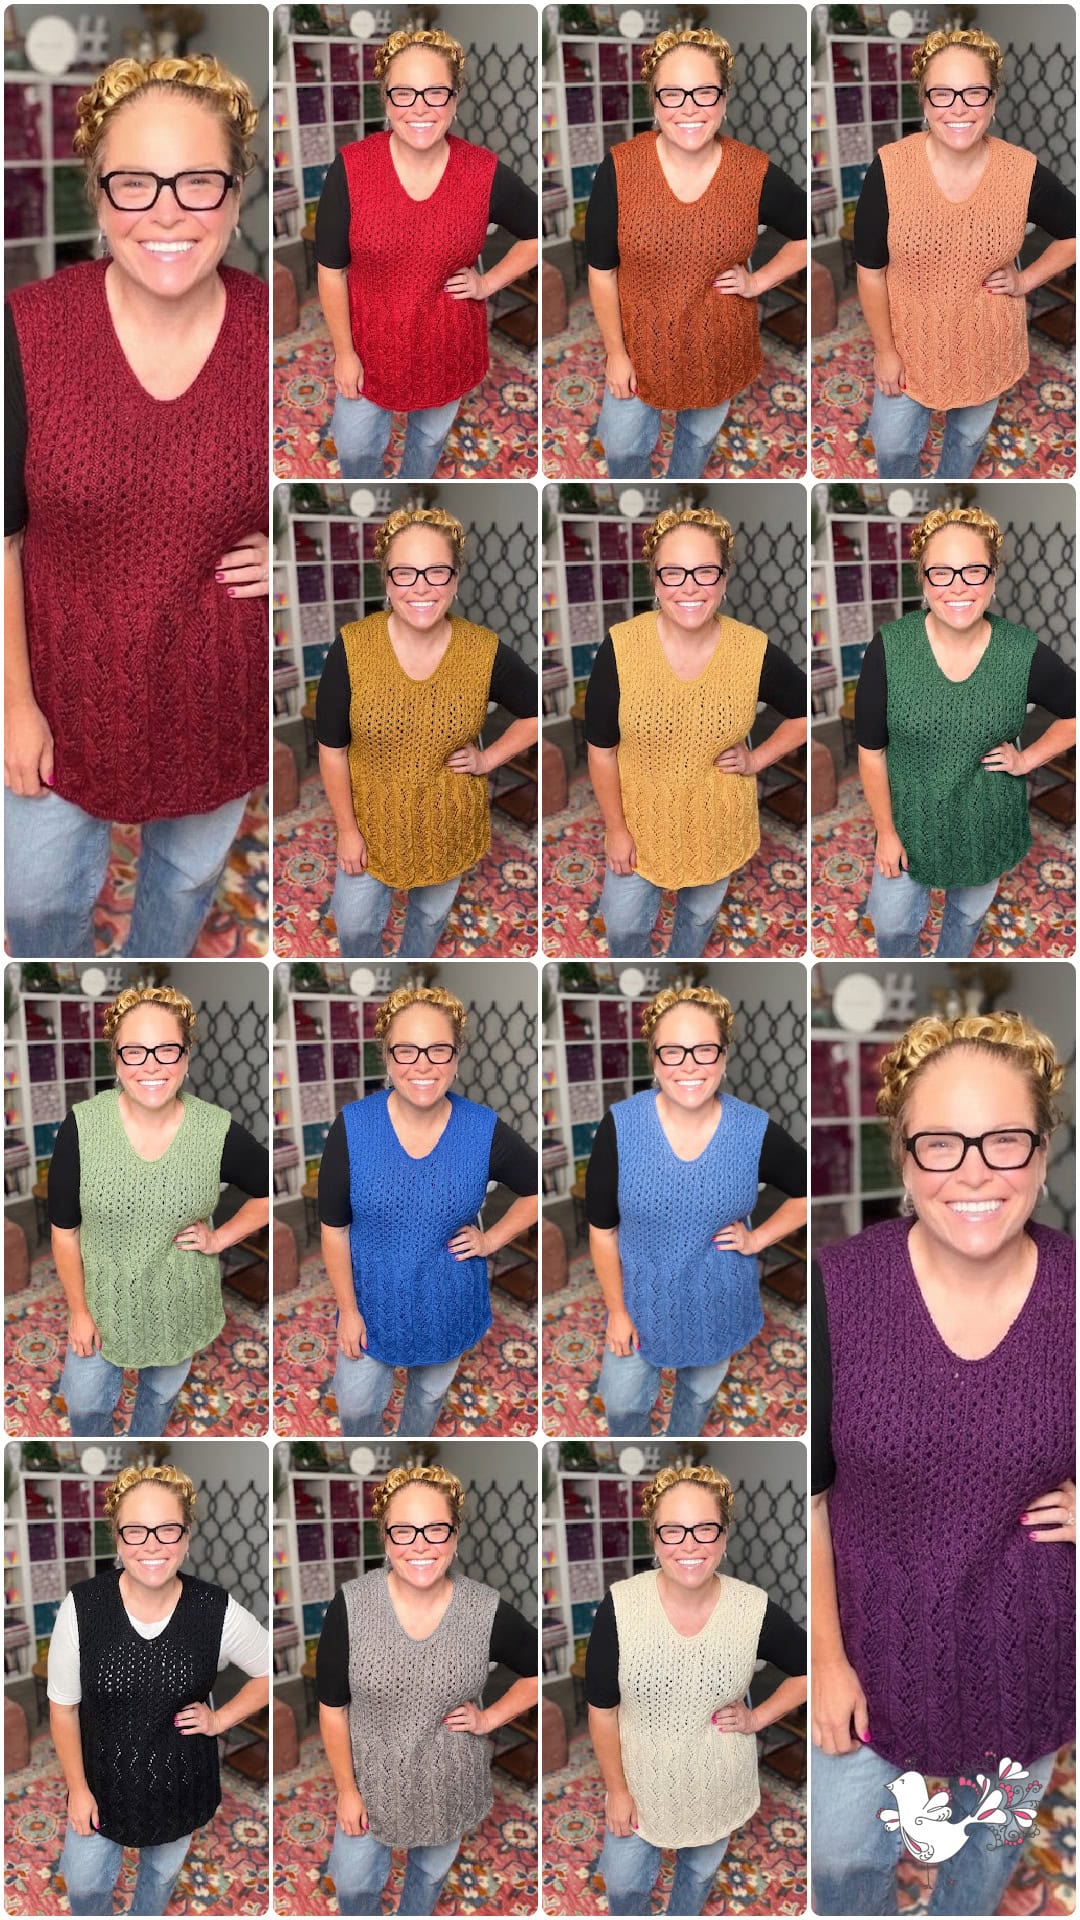
Use this grid as a visual swatch library before you commit your yarn budget. A few things to look for as you scroll:
- 🌊 Cool tones (Blue Jay Heather, deep teal, soft sage, slate) flatter cool-undertone skin and play well with denim and grey
- 🍂 Warm tones (rust, mustard, camel, terracotta) flatter warm-undertone skin and look gorgeous over cream and chocolate
- 🤍 Neutrals (cream, oatmeal, charcoal, soft black) make the lace texture the star of the show… wears with absolutely everything
- 💎 Jewel tones (emerald, sapphire, plum, garnet) photograph beautifully and feel dressed-up for evening wear
Hold the grid up next to your existing wardrobe before you order yarn. The color that makes you say “oh, that one” out loud is your answer 💛
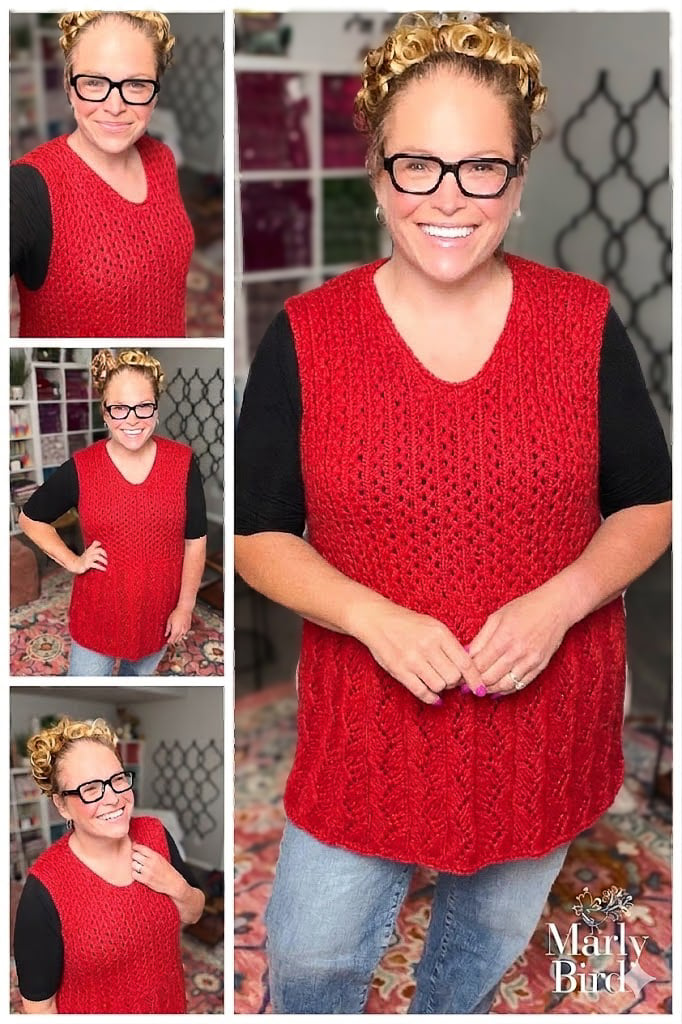
This bright cherry red color is a must make on for my next sample!
🧶 Yarn and Materials
Sample Yarn: Knit Picks Woodland
The Thistlevine sample was knit in Knit Picks Woodland Yarn in the colorway Blue Jay Heather (#3278). Woodland is an 80% Merino / 20% Baby Alpaca blend in worsted weight (#4)… 180 yards per 100g skein. The merino gives you stitch definition for the lace, and the baby alpaca gives you the soft halo and drape that makes a lace garment feel luxurious to wear.
Skeins needed: 4 (4, 5, 5, 6, 7, 8, 9) skeins for sizes XS through 5X.
Yarn Substitution Ideas
The Thistlevine is a lace garment, so the yarn you choose matters more than usual. (Looking for another free lace knit to put your leftover worsted to work? The Birgitta Knit Tunic is a great companion project.) Look for a worsted weight (#4) yarn with good drape (so the lace breathes and the peplum flows), good stitch definition (so the Lace Columns read clearly), and ideally a merino or merino blend (so it feels soft against your skin).
Some yarns I would happily knit this in:
🧶 What to Look For in a Yarn Substitution
- Weight: Worsted weight (#4), 18 sts = 4″ in lace pattern. Row gauge matters less than stitch gauge.
- Texture: Smooth and twist-defined — avoid fuzzy or textured yarns that obscure lace. Mohair blends will hide the stitch detail entirely.
- Fiber: Merino or merino blend recommended for drape, softness, and easy blocking. Superwash works but can grow more on blocking — swatch first.
- Drape: The peplum needs to flow. Stiff plant fibers (100% cotton, 100% linen) may not drape the way the pattern intends… look for cotton blends with some elasticity.
- Yardage: Knit Picks Woodland is 180 yds/100g. If your substitute has different yardage, calculate total yards needed (not skeins) and buy one skein of buffer.
- 🧶 Woodland Tweed Yarn… a solid worsted choice with great stitch definition
- 🧶 Wool of the Andes Bulky Yarn… another worsted weight option I love for lace
- 🌲 A more rustic option… for a textured, woodsy finish (be aware of the rougher hand)
- 💧 A superwash option… great for easy care, but be cautious of the stretch. Always do a blocked gauge swatch before you commit to an entire sweater
- 🧶 Another superwash sub… same caution on stretch… block your gauge swatch first
- 💎 The splurge option… if this is your “treat yourself” project
- 💰 An economical worsted… for the budget-friendly cast-on
- 🧁 Caron Macchiato Cakes… I have not knit the Thistlevine in this one personally, so check gauge first and see if you like the look and feel of the fabric before committing (and you know Yarnspirations… they may discontinue these cakes sooner than later)
- 🧶 Premier Yarns worsted options… browse their worsted weight line through my referral link
- 🌿 A high-end cotton option… with proper gauge swatching, a quality cotton yarn (NOT something like Lily Peaches & Cream or Dishie) can work beautifully for summer wear. Do your blocked gauge swatch first and make sure you love the hand of the fabric
Needles & Notions
🪡 US 9 (5.5 mm) 32″ circular needle for the main body
🪡 US 8 (5.0 mm) 16″ circular needle (one size smaller) for the armhole and neck edgings
🎥 Video Tutorials
If you are a visual learner… or just want a refresher on the techniques before you cast on… my YouTube channel has every supporting tutorial you need to knit the Thistlevine confidently. Save these to your “watch later” before you start 💛
- 🎥 Long Tail Cast-On… my favorite stretchy cast-on for the bottom edge of this tunic
- 🎥 Knit Stitch (Continental Style)… helpful if you are working on speeding up your knit fabric
- 🎥 Purl Stitch (Continental Style)… pair this with the knit tutorial above
- 🎥 How to Add a Lifeline… your insurance policy for lace knitting
- 🎥 How to Knit Lace… the foundation video for understanding how yarn overs and decreases pair up
- 🎥 How to Tink… how to un-knit stitch by stitch (a lace knitter's best friend)
- 🎥 How to Bury (Weave In) Ends… a clean finish for your Thistlevine
- 🎥 Picking Up Stitches… for the armhole and neck edgings worked in the round on the smaller needle
- 🎥 Mattress Stitch Seaming… the invisible seaming method for the side seams (right side facing, work from peplum hem up to the underarm)
- 🎥 Blocking Lace Knits… why blocking is non-negotiable for lace and how to pin to schematic measurements
🧶 Thistlevine Knit Tunic — Pattern Details
Skill Level
Intermediate
Measurements
To Fit Size: XS (S, M, L-XL, 2X, 3X, 4X, 5X)
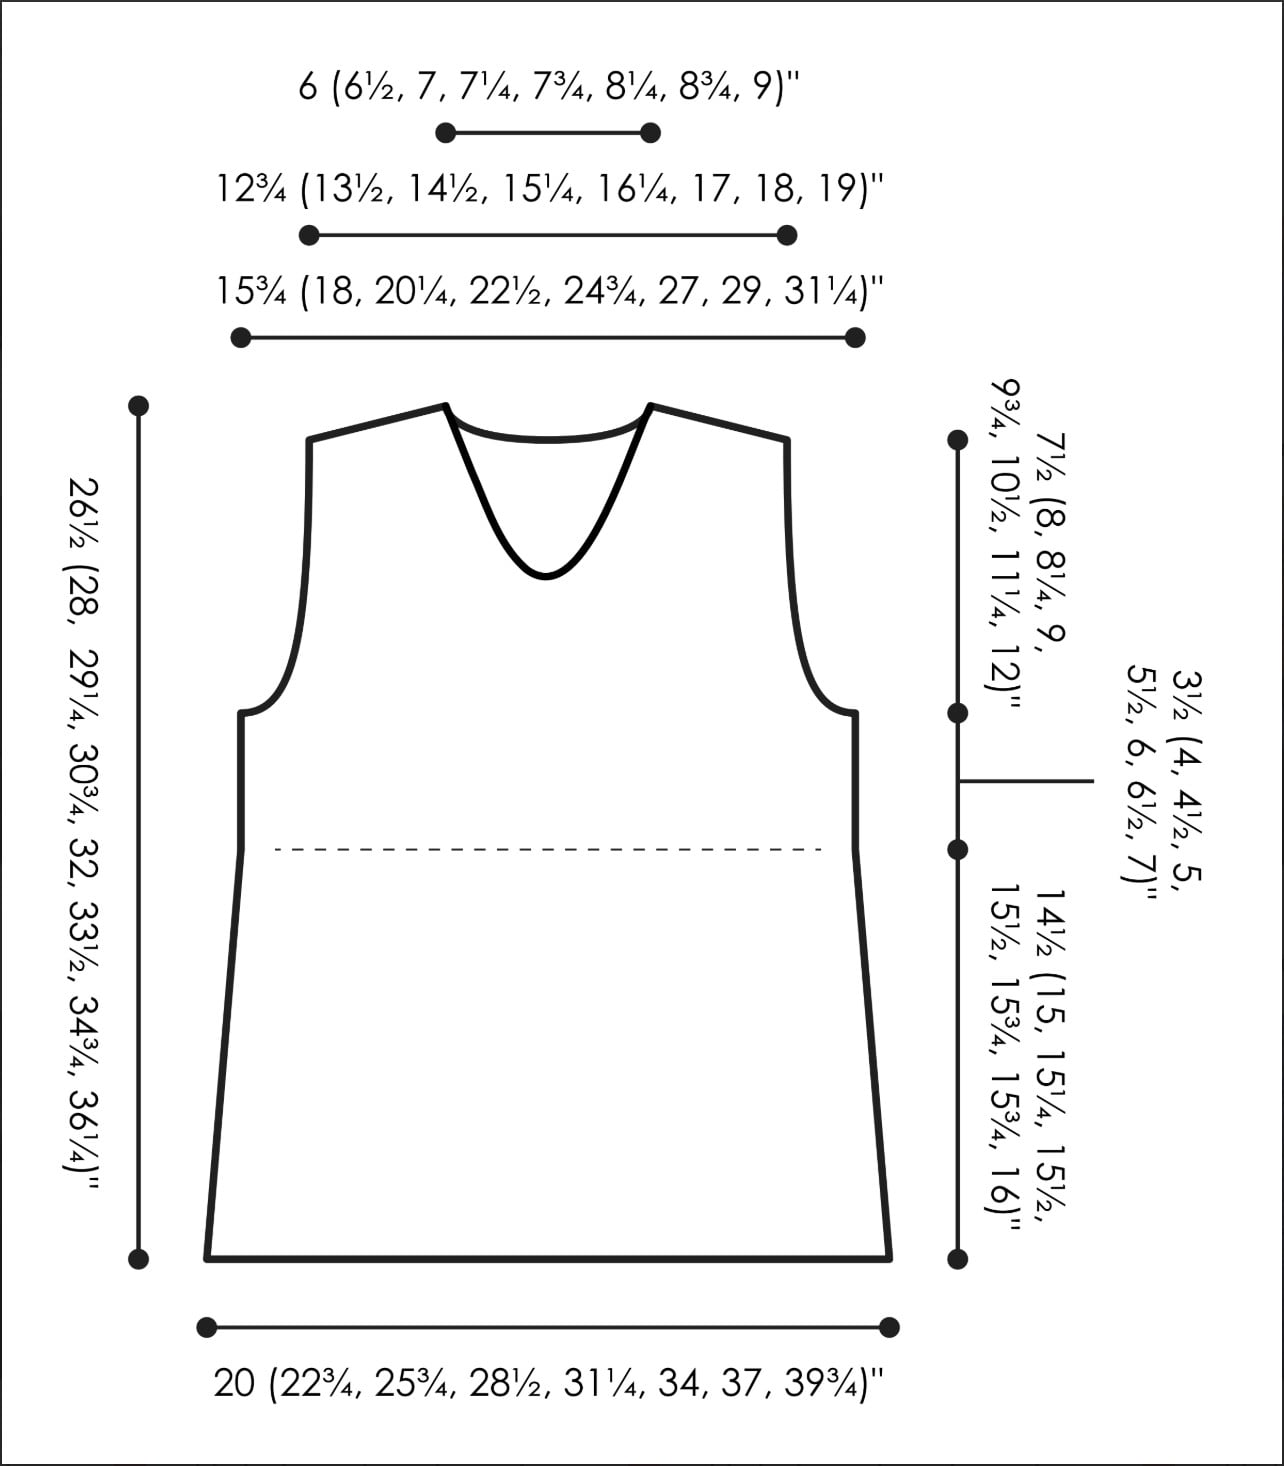
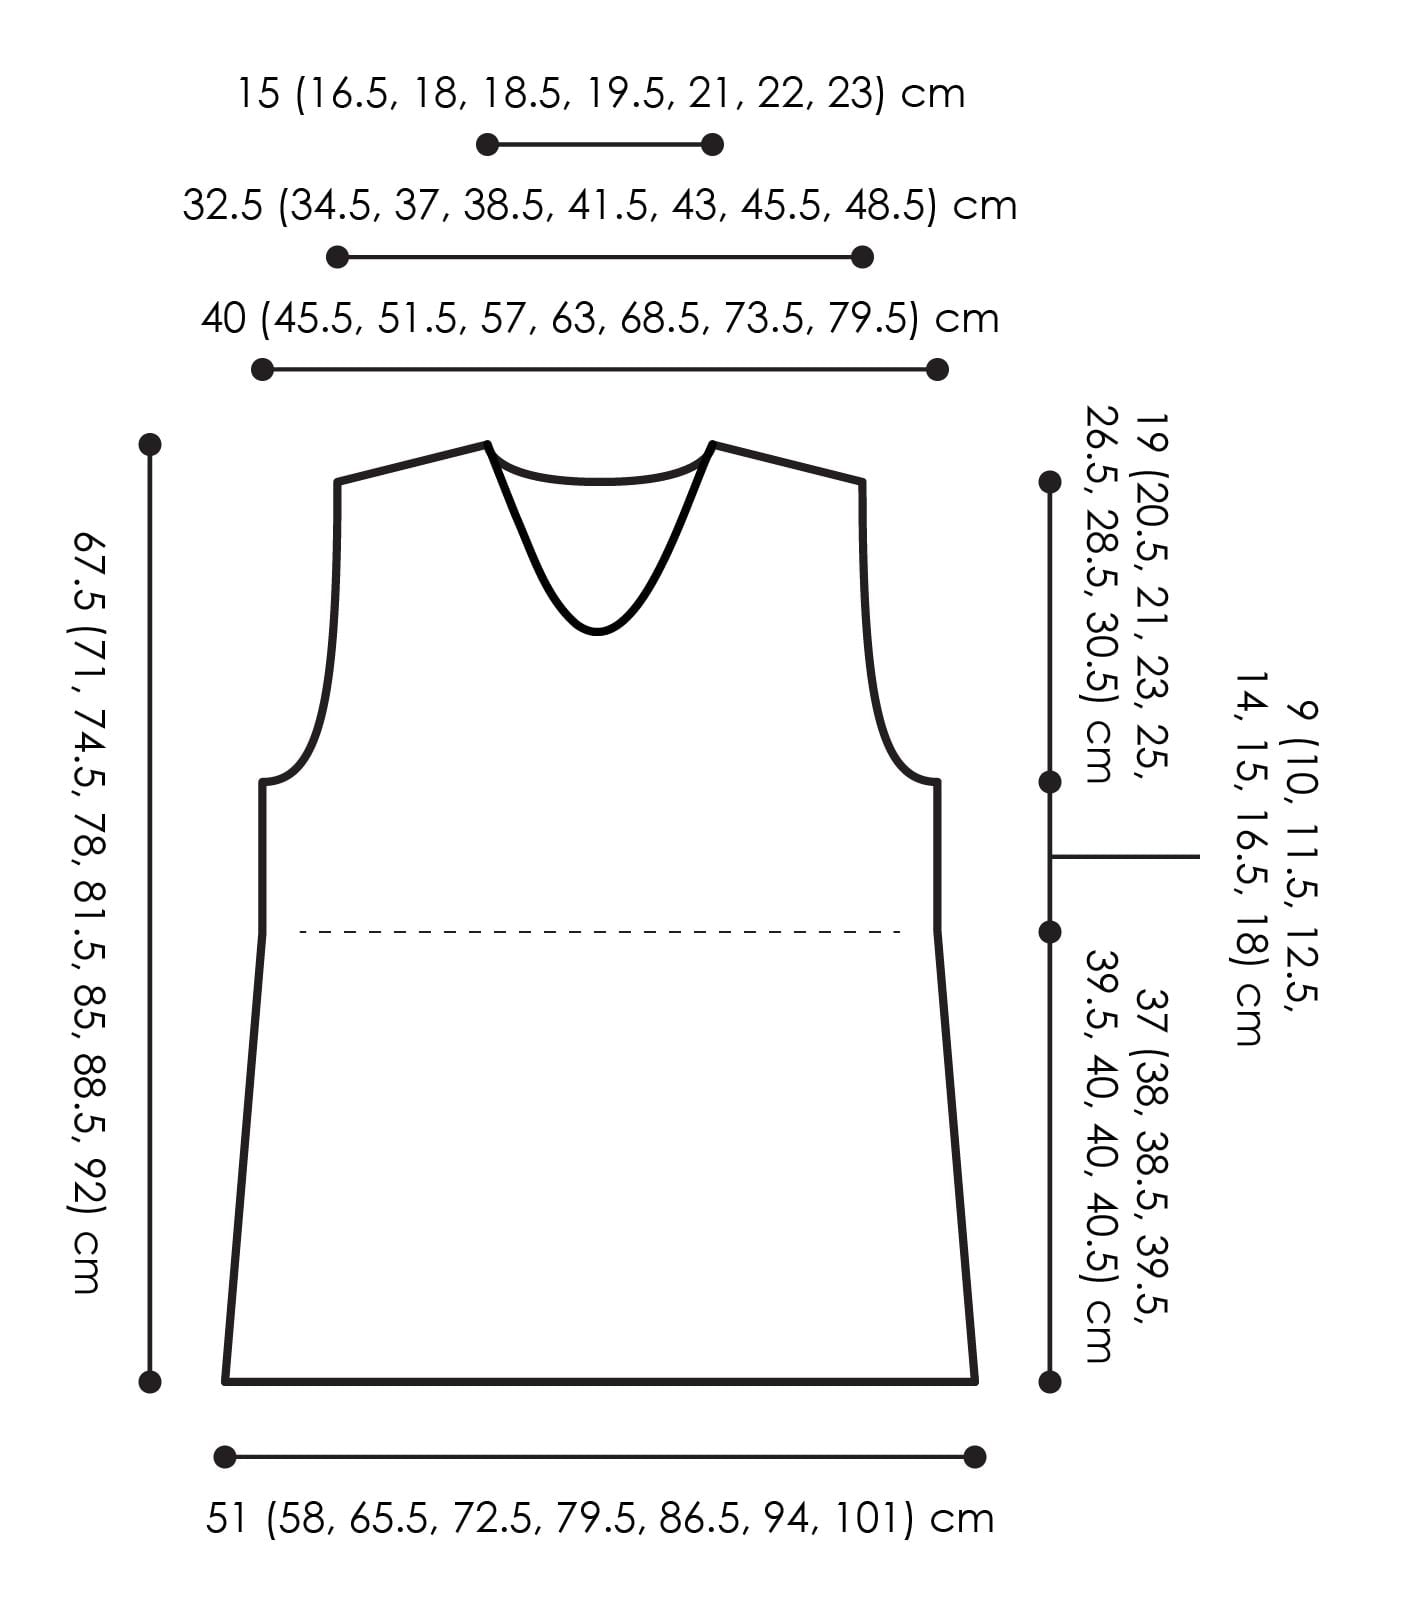
Finished Bust: 31½ (36, 40½, 45, 49½, 54, 58, 62½)” [80 (91.5, 103, 114.5, 125.5, 137, 147.5, 159) cm]
Length: 26½ (28, 29¼, 30¾, 32, 33½, 34¾, 36¼)” [67.5 (71, 74.5, 78, 81.5, 85, 88.5, 92) cm]
Intended to fit snugly around bust.
Gauge
18 sts and 26 rows = 4″ [10 cm] in Lace Columns pattern.
Note: Accuracy of stitch gauge (measured across) is more important than row gauge (measured along) for this item.
Materials
Yarn: Knit Picks, Woodland Yarn (80% Merino Wool / 20% Baby Alpaca, 180 yds / 165 m, 3.5 oz / 100 g, CYCA #4 worsted)… 4 (4, 5, 5, 6, 7, 8, 9) skeins in #3278 Blue Jay Heather.
Knitting Needle: US 9 [5.5 mm] 32″ [81 cm] circular needle, AND 16″ [40.5 cm] circular needle one size smaller for edgings… or size required for gauge.
Notions:
Abbreviations
- K — Knit
- K2tog — Knit Two Stitches Together
- P — Purl
- RS — Right Side
- St(s) — Stitch(es)
- Tbl — Through The Back Loop
- WS — Wrong Side
- Yo — Yarn Over
Special Stitches
⭐ Make 1 Purlwise (M1p): With tip of left needle, pick up the horizontal strand between stitches from front to back. Purl this strand through the back leg, twisting it into a loop in the process (1 stitch increased).
⭐ Left Lifted Make-One (LLM1): Insert left needle tip into the left leg of the second stitch directly under the stitch on the right hand needle (the grandmother stitch), knit it through the back leg (1 stitch increased).
⭐ Right Lifted Make-One (RLM1): Insert right needle tip into the right leg of the stitch directly under the stitch on the left hand needle (the mother stitch), lift the leg onto the left hand needle and knit it (1 stitch increased).
⭐ TK2tog (Twisted Knit 2 Together): Slip 2 stitches purlwise, insert tip of left needle into the front leg of first stitch from front to back and slip it back onto left needle (stitch is now twisted), slip next stitch purlwise back onto left needle, knit two together.
⭐ Tskp (Twisted Knit-Slip-Pass): Slip one stitch purlwise, knit next stitch, pass slipped stitch over knit stitch.
⭐ Ssk (Slip, Slip, Knit): Slip 2 stitches, one at a time, as if to knit. Insert left hand needle into the front of these two stitches and knit them together from this position (1 stitch decreased).
⭐ Ssp (Slip, Slip, Purl): Slip 2 stitches, one at a time, as if to knit, then slip them back onto the left needle without changing their orientation. Purl these 2 stitches together through the back loop (1 stitch decreased).
Knitting Charts
✨ Following along with the free pattern on MarlyBird.com? You will have everything you need to knit the Thistlevine Tunic… but if you want the exclusive knitting charts (Lace Columns, Zig Zag Waves, Front Armhole Shaping for every size, Back Armhole Shaping for every size, and Neck Shaping), those are only available in the ad-free PDF version.
You will enjoy a clean, printable, ad-free experience while supporting Marly Bird's free tutorials and patterns 💖
Schematic
Pattern Stitches
Lace Columns Pattern
Worked over a multiple of 5 sts plus 3.
- Row 1 (WS): P1, p1 tbl, * k1, p2, k1, p1 tbl; repeat from * to last st, p1.
- Row 2: K1, k1 tbl, * p1, ssk, yo, p1, k1 tbl; repeat from * to last st, k1.
- Row 3: P1, p1 tbl, * k1, p2, k1, p1 tbl; repeat from * to last st, p1.
- Row 4: K1, k1 tbl, * p1, yo, k2tog, p1, k1 tbl; repeat from * to last st, k1.
- Row 5: P1, p1 tbl, * k1, p2, k1, p1 tbl; repeat from * to last st, p1.
Repeat Rows 2-5 only for Lace Columns Pattern.
Zig Zag Waves Pattern
Worked over a multiple of 12 sts plus 3.
- Row 1 (WS): P1, p1 tbl, * k1, p9, k1, p1 tbl; repeat from * to last st, p1.
- Row 2: K1, k1 tbl, * p1, k2tog, k4, yo, k1, yo, ssk, p1, k1 tbl; repeat from * to last st, k1.
- Row 3: P1, p1 tbl, * k1, p9, k1, p1 tbl; repeat from * to last st, p1.
- Row 4: K1, k1 tbl, * p1, k2tog, k3, [yo, k1], twice, ssk, p1, k1 tbl; repeat from * to last st, k1.
- Row 5: P1, p1 tbl, * k1, p9, k1, p1 tbl; repeat from * to last st, p1.
- Row 6: K1, k1 tbl, * p1, k2tog, k2, yo, k1, yo, k2, ssk, p1, k1 tbl; repeat from * to last st, k1.
- Row 7: P1, p1 tbl, * k1, p9, k1, p1 tbl; repeat from * to last st, p1.
- Row 8: K1, k1 tbl, * p1, k2tog, [k1, yo] twice, k3, ssk, p1, k1 tbl; repeat from * to last st, k1.
- Row 9: P1, p1 tbl, * k1, p9, k1, p1 tbl; repeat from * to last st, p1.
- Row 10: K1, k1 tbl, * p1, k2tog, yo, k1, yo, k4, ssk, p1, k1 tbl; repeat from * to last st, k1.
- Row 11: P1, p1 tbl, * k1, p9, k1, p1 tbl; repeat from * to last st, p1.
- Row 12: K1, k1 tbl, * p1, k2tog, [k1, yo] twice, k3, ssk, p1, k1 tbl; repeat from * to last st, k1.
- Row 13: P1, p1 tbl, * k1, p9, k1, p1 tbl; repeat from * to last st, p1.
- Row 14: K1, k1 tbl, * p1, k2tog, k2, yo, k1, yo, k2, ssk, p1, k1 tbl; repeat from * to last st, k1.
- Row 15: P1, p1 tbl, * k1, p9, k1, p1 tbl; repeat from * to last st, p1.
- Row 16: K1, k1 tbl, * p1, k2tog, k3, [yo, k1], twice, ssk, p1, k1 tbl; repeat from * to last st, k1.
- Row 17: P1, p1 tbl, * k1, p9, k1, p1 tbl; repeat from * to last st, p1.
Repeat Rows 2-17 only for Zig Zag Waves Pattern.
Notes
- Directions are for the smallest size… changes for all other sizes are in parentheses. When only one number is given, then that number applies to all sizes.
- Tunic is worked in one piece from bottom front to bottom back, then seamed at the sides. Armhole and neck edgings are picked up and knitted.
- Required length measurements at different points throughout the pattern are approximate. It is okay to be off by ¼” [0.5 cm] or even a little more, in order to end up on the correct pattern row as indicated.
- Two different types of markers are used in this pattern:
- Shoulder-Shaping Markers… these markers MOVE throughout the short-row shoulder shaping section. Move the marker exactly as instructed after each short-row turn.
- Armhole-Length Markers… these markers remain FIXED in the fabric. They are used later to measure the length of the back armhole shaping.

GROW
To Unlock Exclusive Subscriber Content click the Box below and join for free by simply adding your email and creating a password! If you are having troubles, clear your cache or reset your password or login to the Grow Publisher Portal.
>> Learn More About Grow Here <<
I'm thrilled to share this amazing pattern with you, many patterns on my blog are absolutely free! I kindly request that you don't copy and paste or distribute this pattern. Prefer an ad-free experience? Buy a digital PDF pattern for a small fee from one of my online stores for a seamless crafting journey.
I appreciate your support and readership. You are the reason I can keep doing what I love and sharing it with others. So, thank you from the bottom of my yarn-loving heart! Disclosure: This post contains affiliate links, meaning I get a commission if you decide to make a purchase through my links at no cost to you.
🧶 Thistlevine Knit Tunic — Pattern Instructions
FRONT
Front Peplum
Cast on 87 (99, 111, 123, 135, 147, 159, 171) sts, and knit 3 rows.
Work in Zig Zag Waves pattern until Peplum measures approximately 14½ (15, 15¼, 15½, 15½, 15¾, 15¾, 16)” [37 (38, 38.5, 39.5, 39.5, 40, 40, 40.5) cm], ending after a pattern Row 2 or Row 10.
Shape Neck and Shoulders
Place a marker on either side of center 7 sts — 28 (28, 33, 33, 33, 38, 38, 38) sts remain on either side.
Next Row (RS, separate shoulders): Work as established to 1 st before marker, k1, remove marker, bind off center 7 sts, remove marker, k1, work as established to end.
Right Shoulder — Front
Next 10 Rows:
- Row 1 (WS): Work in established Lace Columns pattern to last st, p1.
- Row 2 (decrease row, RS): K1, Tskp, work in established Lace Columns pattern to end — 27 (27, 32, 32, 32, 37, 37, 37) sts.
- Row 3: Work in established Lace Columns pattern to last 2 sts, p1 tbl, p1.
- Row 4 (decrease row, RS): K1, Tskp, k1, work in established Lace Columns pattern to end — 26 (26, 31, 31, 31, 36, 36, 36) sts.
- Row 5: Work in established Lace Columns pattern to last 3 sts, p1, p1 tbl, p1.
- Row 6 (decrease row, RS): K1, Tskp, work in established Lace Columns pattern to end — 25 (25, 30, 30, 30, 35, 35, 35) sts.
- Row 7: Work in established Lace Columns pattern to last 2 sts, p1 tbl, p1.
- Row 8 (decrease row, RS): K1, Tskp, work in established Lace Columns pattern to end — 24 (24, 29, 29, 29, 34, 34, 34) sts.
- Row 9: Work in established Lace Columns pattern to last 3 sts, p2 tbl, p1.
- Row 10 (decrease row, RS): K1, Tk2tog, work in established Lace Columns pattern to end — 23 (23, 28, 28, 28, 33, 33, 33) sts.
Repeat the last 10 rows 1 (1, 1, 1, 1, 2, 2, 2) more times — 18 (18, 23, 23, 23, 23, 23, 23) sts.
Work evenly in established Lace Columns pattern until Armhole measures 7½ (8, 8¼, 9, 9¾, 10½, 11¼, 12)” [19 (20.5, 21, 23, 25, 26.5, 28.5, 30.5) cm] in length, ending after a pattern Row 3.
With RS facing, mark 1st st for use later in Shoulder Shaping, and move this marker up to the new st above it after every row.
With RS facing, place a marker at left edge of fabric to mark Right Front armhole length. This marker does not move until it is removed.
Right Shoulder — Back
Next 4 rows:
- Row 1 (RS): Work in established Lace Columns pattern.
- Row 2: Work in established Lace Columns pattern to end, cast on 5 sts — 23 (23, 28, 28, 28, 28, 28, 28) sts.
- Row 3: K1, k1 tbl, p1, ssk, yo, p1, work in established Lace Columns pattern to end.
- Row 4: Work in established Lace Columns pattern to end, cast on 5 sts — 28 (28, 33, 33, 33, 33, 33, 33) sts.
For Last 3 Sizes Only:
Next 2 rows:
- Row 1 (RS): K1, k1 tbl, ssk, yo, p1, work in established Lace Columns pattern to end.
- Row 2: Work in established Lace Columns pattern to end, cast on 5 sts — x (x, x, x, x, x, 38, 38, 38) sts.
For All Sizes: Place 28 (28, 33, 33, 33, 38, 38, 38) Right Shoulder sts on a holder or spare needle.
Left Shoulder — Front
With WS facing, join new yarn to 28 (28, 33, 33, 33, 38, 38, 38) Left Shoulder sts still on the needle.
Next 10 Rows:
- Row 1 (WS): P1, work in established Lace Columns pattern to end.
- Row 2 (decrease row, RS): Work in established Lace Columns pattern to last 3 sts, Tk2tog, k1 — 27 (27, 32, 32, 32, 37, 37, 37) sts.
- Row 3: P1, p1 tbl, work in established Lace Columns pattern to end.
- Row 4 (decrease row, RS): Work in established Lace Columns pattern to last 4 sts, k1, Tk2tog, k1 — 26 (26, 31, 31, 31, 36, 36, 36) sts.
- Row 5: P1, p1 tbl, p1, work in established Lace Columns pattern to end.
- Row 6 (decrease row, RS): Work in established Lace Columns pattern to last 3 sts, Tk2tog, k1 — 25 (25, 30, 30, 30, 35, 35, 35) sts.
- Row 7: P1, p1 tbl, work in established Lace Columns pattern to end.
- Row 8 (decrease row, RS): Work in established Lace Columns pattern to last 3 sts, Tk2tog, k1 — 24 (24, 29, 29, 29, 34, 34, 34) sts.
- Row 9: P1, p2 tbl, work in established Lace Columns pattern to end.
- Row 10 (decrease row, RS): Work in established Lace Columns pattern to last 3 sts, Tskp, k1 — 23 (23, 28, 28, 28, 33, 33, 33) sts.
Repeat the last 10 rows 1 (1, 1, 1, 1, 2, 2, 2) more times — 18 (18, 23, 23, 23, 23, 23, 23) sts.
Work evenly in established Lace Columns pattern until Armhole measures 7½ (8, 8¼, 9, 9¾, 10½, 11¼, 12)” [19 (20.5, 21, 23, 25, 26.5, 28.5, 30.5) cm] in length, ending after a pattern Row 3.
With RS facing, mark last st for use later in Shoulder Shaping, and move this marker up to the new st above it after every row.
With RS facing, place a marker at right edge of fabric to mark Left Front armhole length. This marker does not move until it is removed.
Left Shoulder — Back
Next 4 rows:
- Row 1 (RS): Work in established Lace Columns pattern to end, cast on 5 sts — 23 (23, 28, 28, 28, 28, 28, 28) sts.
- Row 2: P1, p1 tbl, k1, p2, k1, work in established Lace Columns pattern to end.
- Row 3: Work in established Lace Columns pattern to end, cast on 5 sts — 28 (28, 33, 33, 33, 33, 33, 33) sts.
- Row 4: P1, p1 tbl, k1, p2, k1, work in established Lace Columns pattern to end.
For Last 3 Sizes Only:
Next 2 rows:
- Row 1 (RS): Work in established Lace Columns pattern to end, cast on 5 sts — x (x, x, x, x, 38, 38, 38) sts.
- Row 2: P1, p1 tbl, k1, p2, k1, work in established Lace Columns pattern to end.
BACK
Join Shoulders
For All Sizes:
Next 2 Rows:
- Row 1 (Shoulder joining row, RS): Work in established Lace Columns pattern across Left Shoulder sts, cast on 7 sts, then work in established Lace Columns pattern across Right Shoulder sts from holder or spare needle — 63 (63, 73, 73, 73, 83, 83, 83) sts.
- Row 2: Work next pattern row of Lace Columns pattern across all sts.
Shape Shoulders with Short Rows
Next 12 Rows:
- Row 1 (RS): Work in established Lace Columns pattern to second Shoulder-Shaping marker, p1 in st 1 row below the marked st, turn work.
- Row 2: Work in established Lace Columns pattern to Shoulder-Shaping marker, k1 in st 1 row below the marked st, turn work.
- Row 3: Work in established Lace Columns pattern to 2nd st past Shoulder-Shaping marker, p1 in st 1 row below next st and move Shoulder-Shaping marker to this st, turn work.
- Row 4: Work in established Lace Columns pattern to 2nd st past Shoulder-Shaping marker, k1 in st 1 row below next st and move Shoulder-Shaping marker to this st, turn work.
- Row 5: Work in established Lace Columns pattern to 3rd st past Shoulder-Shaping marker, p1 in st 1 row below next st and move Shoulder-Shaping marker to this st, turn work.
- Row 6: Work in established Lace Columns pattern to 3rd st past Shoulder-Shaping marker, k1 in st 1 row below next st and move Shoulder-Shaping marker to this st, turn work.
- Row 7: Work in established Lace Columns pattern to 2nd st past Shoulder-Shaping marker, p1 in st 1 row below next st and move Shoulder-Shaping marker to this st, turn work.
- Row 8: Work in established Lace Columns pattern to 2nd st past Shoulder-Shaping marker, k1 in st 1 row below next st and move Shoulder-Shaping marker to this st, turn work.
- Row 9: Work in established Lace Columns pattern to 3rd st past Shoulder-Shaping marker, p1 in st 1 row below next st and move Shoulder-Shaping marker to this st, turn work.
- Row 10: Work in established Lace Columns pattern to 3rd st past Shoulder-Shaping marker, k1 in st 1 row below next st and move Shoulder-Shaping marker to this st, turn work.
- Row 11: Work in established Lace Columns pattern to 2nd st past Shoulder-Shaping marker, p1 in st 1 row below next st and move Shoulder-Shaping marker to this st, turn work.
- Row 12: Work in established Lace Columns pattern to 2nd st past Shoulder-Shaping marker, k1 in st 1 row below next st and move Shoulder-Shaping marker to this st, turn work.
For Last 6 Sizes Only:
Next 2 Rows:
- Row 1 (RS): Work in established Lace Columns pattern to 3rd st past Shoulder-Shaping marker, p1 in st 1 row below next st and move Shoulder-Shaping marker to this st, turn work.
- Row 2: Work in established Lace Columns pattern to 3rd st past Shoulder-Shaping marker, k1 in st 1 row below next st and move Shoulder-Shaping marker to this st, turn work.
For All Sizes:
Next 2 Rows:
- Row 1 (RS): Work in established Lace Columns pattern to end of row.
- Row 2: Work in established Lace Columns pattern across all sts.
Remove both Shoulder Shaping markers, being sure to keep Armhole length markers in the fabric.
Work evenly in established Lace Columns pattern until Back Armhole measures 6 (6¼, 6½, 5½, 6, 6¾, 6, 6½)” [15 (16, 16.5, 14, 15, 17, 15, 16.5) cm] from Armhole length marker, ending after a pattern Row #5.
Shape Back Armholes
- Row 1 (RS): K1, RLM1, work in established Lace Columns Pattern to last st, LLM1, k1 — 65 (65, 75, 75, 75, 85, 85, 85) sts.
- Row 2: P1, k1, work in established Lace Columns Pattern to last 2 sts, k1, p1.
- Row 3: K1, RLM1, p1, work in established Lace Columns Pattern to last 2 sts, p1, LLM1, k1 — 67 (67, 77, 77, 77, 87, 87, 87) sts.
- Row 4: P2, k1, work in established Lace Columns Pattern to last 3 sts, k1, p2.
- Row 5: K1, RLM1, k1, p1, work in established Lace Columns Pattern to last 3 sts, p1, k1, LLM1, k1 — 69 (69, 79, 79, 79, 89, 89, 89) sts.
- Row 6: P3, k1, work in established Lace Columns Pattern to last 4 sts, k1, p3.
- Row 7: K1, RLM1, yo, k2tog, p1, work in established Lace Columns Pattern to last 4 sts, p1, yo, k2tog, LLM1, k1 — 71 (71, 81, 81, 81, 91, 91, 91) sts.
- Row 8: P1, k1, p2, k1, work in established Lace Columns Pattern to last 5 sts, k1, p2, k1, p1.
- Row 9: K1, RLM1, p1, ssk, yo, p1, work in established Lace Columns Pattern to last 5 sts, p1, ssk, yo, p1, LLM1, k1 — 73 (73, 83, 83, 83, 93, 93, 93) sts.
- Row 10: P1, p1 tbl, work in established Lace Columns Pattern to last 2 sts, p1 tbl, p1.
Repeat the last 10 rows 0 (0, 0, 1, 1, 1, 2, 2) more times — 73 (73, 83, 93, 93, 103, 113, 113) sts.
For All Sizes Except XS:
Next 2 Rows:
- Row 1 (cast-on row, RS): Cast on 5 sts, k1, k1 tbl, p1, yo, k2tog, p1, work in established Lace Columns Pattern to end — x (78, 88, 98, 98, 108, 118, 118) sts.
- Row 2 (cast-on row, WS): Cast on 5 sts, p1, p1 tbl, k1, p2, k1, work in established Lace Columns Pattern to end — x (83, 93, 103, 103, 113, 123, 123) sts.
Repeat the last 2 rows x (0, 0, 0, 1, 1, 1, 2) more times — x (83, 93, 103, 113, 123, 133, 143) sts.
For All Sizes:
Work evenly in Lace Columns pattern for 3½ (4, 4½, 5, 5½, 6, 6½, 7)” [9 (10, 11.5, 12.5, 14, 15, 16.5, 18) cm], ending after a RS row — 73 (83, 93, 103, 113, 123, 133, 143) sts.
Back Peplum
Next Row (pattern transition row, WS): P1, p1 tbl, * k1, M1p, p7, M1p, k1, p1 tbl; repeat from * to last st, p1 — 87 (99, 111, 123, 145, 157, 169, 181) sts.
Work in Zig Zag Waves pattern until Peplum measures approximately 14½ (15, 15¼, 15½, 15½, 15¾, 15¾, 16)” [37 (38, 38.5, 39.5, 39.5, 40, 40, 40.5) cm], starting with a pattern Row #2, and ending after a pattern Row #3 or #11.
Bind off all sts loosely.
FINISHING
Blocking
The lace motifs will open considerably after blocking.
Block the tunic to the measurements shown in the schematic. Pin carefully and allow the garment to dry completely before seaming.
Because this design features lace stitch patterns, blocking will dramatically improve stitch definition and finished measurements.
Seaming
Sew side seams.
Armhole Edgings
With RS facing, using shorter circular needle, and beginning at side seam, pick up and knit 64 (76, 78, 86, 100, 106, 112, 128) sts. Join round and mark first st. Knit 1 round, then bind off all sts loosely. Work other armhole edging the same way.
Neck Edging
With RS facing, using shorter circular needle, and beginning at side seam, pick up and knit 68 (70, 72, 74, 76, 82, 90, 94) sts. Join round and mark first st. Knit 1 round, then bind off all sts loosely.
Weave in all loose ends.
👗 Styling & Layering Ideas
The Thistlevine is a true three-season piece. The merino-and-alpaca blend is warm enough for fall layering, breathable enough for a cool summer evening, and the sleeveless silhouette means it works as a layering piece OR a stand-alone top depending on what you wear underneath. If you love the layering vest silhouette, browse my full collection of knit vest patterns for spring and summer. A few of my favorite ways to wear this one:
- 🍂 Over a fitted turtleneck… fall and winter layering staple, especially in a heathered colorway
- 👚 Over a flowy blouse or button-down… elevated boho look, perfect for brunch or a workday with personality
- 👖 With wide-leg trousers or a midi skirt… takes it from casual to polished in one outfit change
- 🌸 At full tunic length over leggings… a complete, comfortable outfit for travel days or working from home
- ✂️ Shortened to a cropped vest with high-waisted jeans… fresh, modern, summer-ready
- ☀️ On its own for a cool summer evening… the lace breathes beautifully and the layered look is unbeatable in warmer weather
💧 Blocking Tips
The Thistlevine NEEDS to be blocked. Knit lace looks scrunched and unimpressive on the needles… once it hits water, it opens up and the Lace Columns reveal their full vertical lines. This step is non-negotiable for a lace garment.
My go-to approach:
- 💧 Wet block before seaming. Soak the finished piece (still flat, before side seams) in cool water with a no-rinse wool wash like Soak or Eucalan for 15-20 minutes. Press out water gently… do NOT wring.
- 📐 Pin to schematic measurements. Lay the piece flat on blocking mats. Pin out to the finished bust and length measurements for your size (see the table above). Use enough pins to get clean lines… blocking wires make this faster if you have them.
- 🌬️ Let it dry completely. This can take 24 to 48 hours depending on humidity. Resist the urge to seam early. Fully-dried blocking is what locks the lace into shape.
- ✏️ Seam, then add edgings. Once blocked and dry, sew the side seams, then pick up and knit the armhole and neck edgings as written.
- 💦 Optional second block after finishing. A light steam or spritz block after the edgings are done helps everything settle. Lay flat to dry.
✂️ Seaming Your Tunic: Order Matters
One of the most common questions I get on garment patterns is: “In what order do I seam everything?” For the Thistlevine, the order really does matter… do it in this sequence for the cleanest finish:
- Block the finished piece FLAT first (before any seaming). Lay it out to schematic measurements, pin, let dry completely. This is non-negotiable for lace.
- Weave in any loose ends from the body (cast-on tail, yarn join tails, shoulder bridge join tails). It is easier to weave them in cleanly while the piece is still flat than after seaming.
- Sew the side seams using mattress stitch (with the right side facing you). Work from the bottom of the peplum up to the underarm. Take your time matching the Zig Zag Waves pattern across the seam line… it will be visible.
- Pick up and knit the armhole edgings in the round, on the smaller circular needle, starting at the side seam. Knit one round, bind off loosely. Repeat for the second armhole.
- Pick up and knit the neck edging the same way… in the round on the smaller circular needle, starting at the side of the shoulder, knit one round, bind off loosely.
- Weave in the edging tails (cast-on and bind-off tails for each of the three edgings).
- Optional: light steam or spritz block the finished tunic to settle the edgings flat. Lay flat to dry.
Why this order? If you pick up and knit the armhole edgings BEFORE you seam the sides, you cannot work them cleanly in the round… they will end up as flat, sewn-on bindings, which curl. Seaming first means you can join the round at the underarm seam for an invisible finish.
⭐ Favorite the Thistlevine on Ravelry
Heading to Ravelry next? Favorite the Thistlevine and queue it up so you can find it again later 💛

🧵 More Free Knit Patterns You Will Love
If you are in a knit-everything mood (and I support that fully), here are a few more of my free knit patterns to add to your queue:
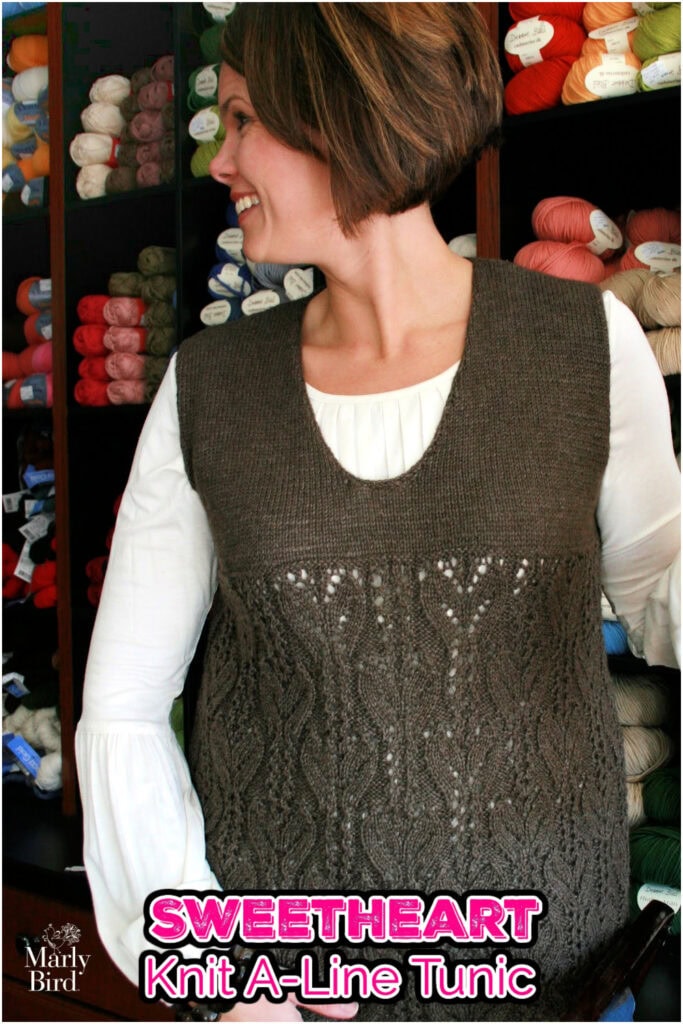
- 🧶 Sweetheart A-Line Knit Tunic… another sleeveless knit tunic with lace, in sport weight
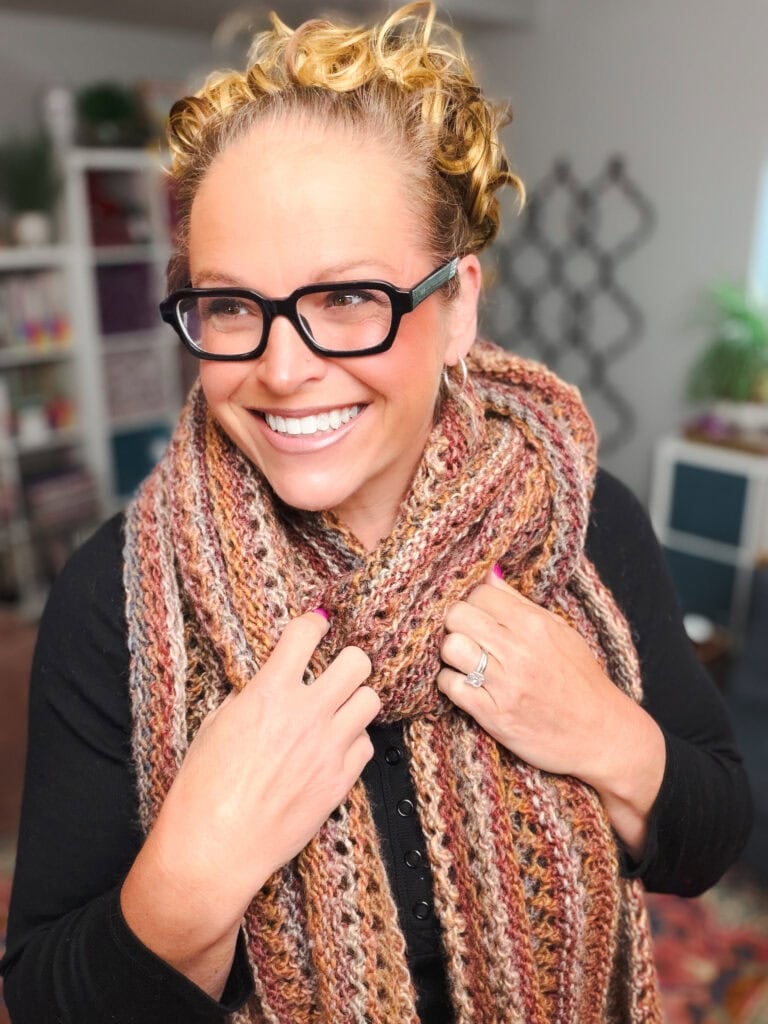
- 🧶 Almond Brittle Knit Wrap… bulky lace knit wrap, beginner-friendly lace
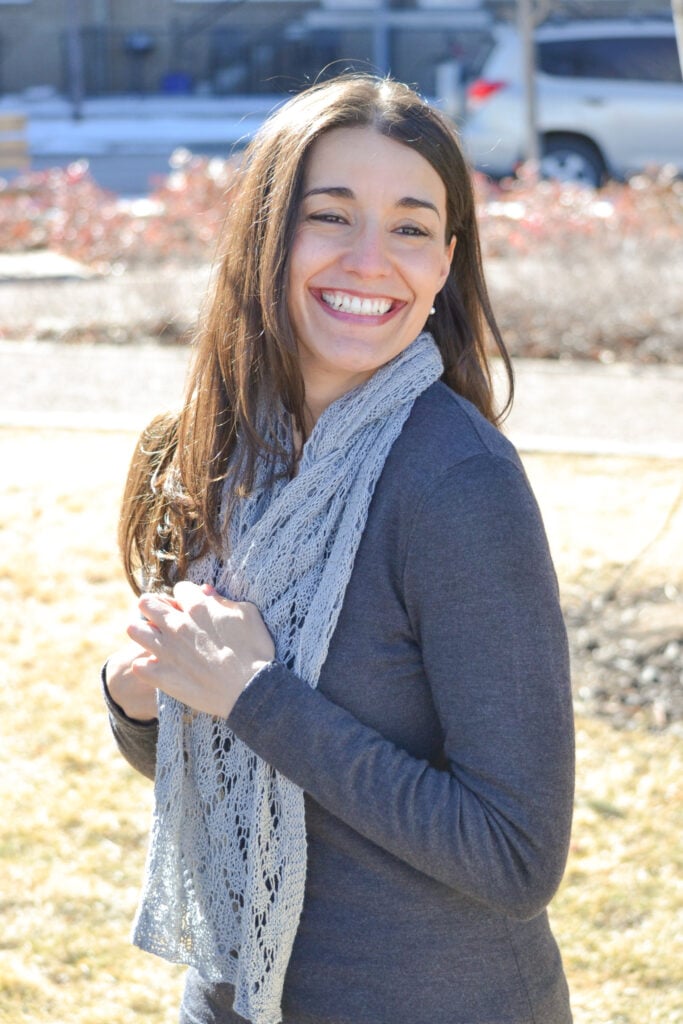
- 🧶 Shangri-La Knit Lace Scarf or Shawl… gorgeous beginner-friendly knit lace project
- 🧶 Blood of My Blood Knit Shawl… half-hexagon lace shawl with cables, intermediate level
💙 BiCrafty Moment: Are You Also a Crocheter?
If you love the layering vest silhouette in the Thistlevine and you ALSO crochet, check out my Lyvia Crochet Ruana… a flowing layering piece in crochet that hits the same wardrobe note. For even more options in both crafts, browse my full knit and crochet vest patterns collection. Can’t decide which craft to try it in? You’re already BiCrafty 💙
Ready to learn the OTHER craft? My BiCrafty Bootcamp walks knitters through crochet (and crocheters through knitting) from the very first stitch.
💛 Meet the Designer
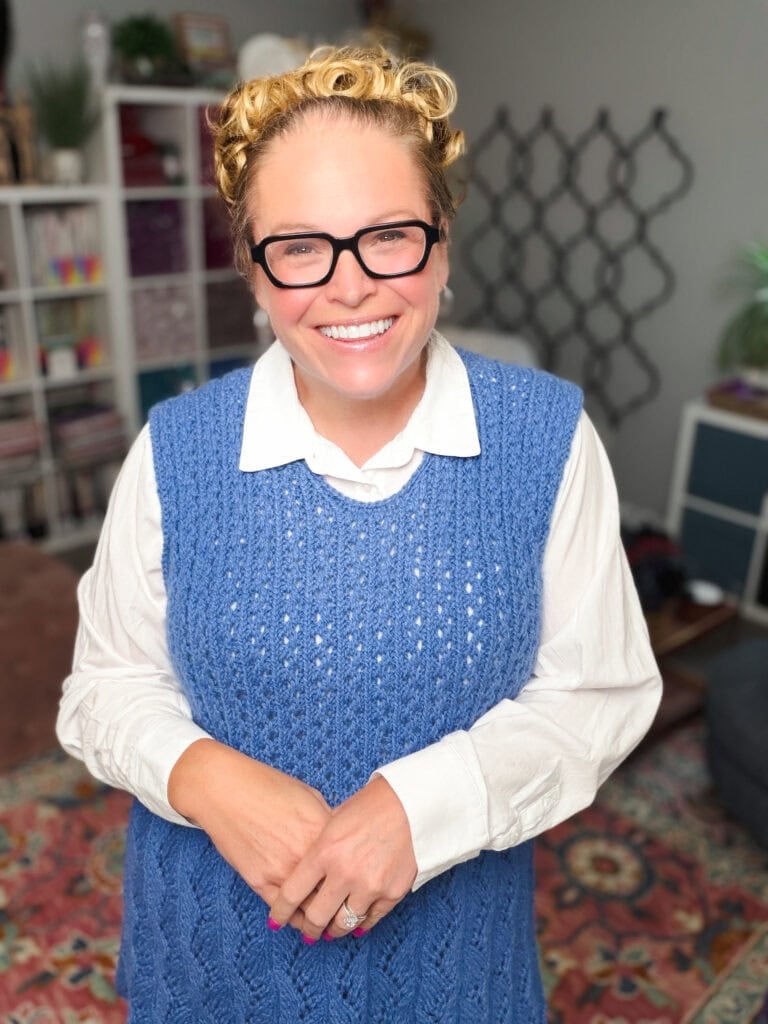
The Thistlevine was designed by Marly Bird, a professional yarn artist, designer, and teacher who has been designing in the knit and crochet industry since 2007. Marly is the creator of the BiCrafty method (teaching BOTH knitting AND crochet together) and the host of one of the longest-running fiber arts podcasts and YouTube channels in the industry. Her designs are known for warm, teaching-first instructions and true size-inclusivity from XS through 5X.

❓ Frequently Asked Questions
Is the Thistlevine free?
Yes! The full Thistlevine knit tunic pattern is free right here on the blog. You will need a free GROW account (it takes about 30 seconds to set up) to unlock the pattern instructions. If you would rather have a printable, ad-free PDF, that is available on Etsy, Shopify, and Ravelry.
What sizes does the Thistlevine come in?
The Thistlevine is sized XS, S, M, L-XL, 2X, 3X, 4X, and 5X… 8 sizes total. Finished busts range from 31½” (XS) up to 62½” (5X). It is designed to fit snugly around the bust, so size up if you are between sizes.
What skill level is this pattern?
Intermediate. The Thistlevine uses two lace stitch patterns (Lace Columns and Zig Zag Waves), short rows for shoulder shaping, and several twisted special stitches that the pattern explains in detail. If you are comfortable with knit, purl, yarn over, k2tog, and ssk, you have the foundation to knit this tunic successfully.
Can I make the Thistlevine shorter, like a cropped vest?
Absolutely. Because the Thistlevine is worked in one piece front hem to back hem, you can shorten the peplum section to wear it as a cropped vest instead of a full tunic. Just work fewer rows in the Zig Zag Waves peplum before the bust transition, and end after a Row 2 or Row 10 to keep the stitch pattern reading correctly. Swatch and measure to land at the length you want, and remember you will use less yarn if you shorten.
What yarn should I use if I cannot find Knit Picks Woodland?
Look for any worsted weight (#4) yarn with good drape and clear stitch definition… ideally a merino blend so it feels soft against your skin. My suggested substitutes are linked in the Yarn & Materials section above (covering merino, merino/alpaca blends, superwash, splurge options, budget options, and even a high-end cotton). Whatever you choose, do a BLOCKED gauge swatch first… lace yarns behave very differently after they hit water.
How much yarn do I need?
The sample uses Knit Picks Woodland (180 yds per 100g skein). You will need 4 (4, 5, 5, 6, 7, 8, 9) skeins for sizes XS through 5X. If you are shortening the tunic to a cropped vest, you may need slightly less. If you are subbing a yarn with different yardage per skein, do the math on TOTAL yards needed and buy enough for one extra skein for safety.
Are charts included?
Visual stitch charts (Lace Columns, Zig Zag Waves, all four sets of Front and Back Armhole Shaping by size, and the Neck Shaping chart) are included in the ad-free PDF version only. The free blog version has the complete written pattern… you have everything you need to knit the Thistlevine from the free version. The charts are a visual upgrade available with the PDF purchase.
Do I need to block this tunic?
YES. Knit lace looks scrunched and unimpressive on the needles. Wet blocking is what makes the Lace Columns open up, the Zig Zag Waves peplum flow, and the entire piece fit to schematic measurements. Block the piece flat BEFORE you sew the side seams (it is much easier to pin out flat). See the Blocking Tips section above for my step-by-step method.
💛 Final Thoughts
The Thistlevine is one of those patterns that hits a sweet spot for me as a designer. The construction is straightforward (one piece, two seams, pick-up edgings), the lace is beautiful without being scary, and the two-stitch-pattern combination gives you something to actually LOOK AT as you knit. It is the kind of project where you finish a row and want to stop and admire it for a minute before you start the next one 💛
Once you cast off and block, you are going to have a versatile layering shell that works for fall over a turtleneck, spring over a flowy blouse, and summer evenings on its own. Wear it tunic length, shorten it to a vest, knit it in your “wow that’s MY color” color… this one is yours to make your own.
If you knit a Thistlevine, please tag me with #marlybird on Instagram and share it in Marly's Minions BiCrafty Community on Facebook… I love seeing your finished pieces 💛
And queue it on Ravelry so you can find it again the next time you want a fresh layering piece on your needles.
Happy knitting, BiCrafty Bestie!
❤️ Your BiCrafty Bestie,
Marly Bird

Categories: Free Patterns, Knitting, Marly Bird Premium Patterns, Our Free Patterns, Pattern, Uncategorized