Search
Close
  • The Pattern Shop
  • Our Free Patterns
    • Browse All Our Free Patterns
    • Our Free Knitting Patterns
    • Our Free Crochet Patterns
  • Blog
    • All Blog Posts
    • All Free Patterns
    • Dibble Dabble Inspiration
    • Giveaways
    • Make-Alongs
    • Product Reviews
    • Roundups
    • Tips, Tricks, Techniques for Knitting and Crochet
Stylized bird with pink and gray swirling tail above elegant โ€œMarlyโ€ text, logo for crochet accessories and home decor.
  • Marly Bird House
  • Learn to Knit & Crochet
    • Newbie? Start Here
    • Video Tutorials
    • Knitting Definitions
    • Crochet Definitions
    • Common Techniques
    • Size Charts for Knitting and Crochet Projects
  • About
ร—
  • The Pattern Shop
  • Free Patterns
  • Blog
  • Marly Bird House
  • Learn to Knit & Crochet
    • Newbie? Start Here
    • Video Tutorials
    • Knitting Definitions
    • Crochet Definitions
    • Common Techniques
    • Size Charts for Knitting and Crochet Projects
  • About
Stylized bird with pink and gray swirling tail above elegant โ€œMarlyโ€ text, logo for crochet accessories and home decor.
Search
Close

New Patterns NOW Available in Ad-Free PDF! Check out The Pattern Shop

Stitch Kickers || Free Crochet Hacky Sack Pattern

June 25, 2026 By Meg Leave a Comment

This free crochet hacky sack pattern โ€” the Stitch Kickers โ€” is a fun, fast, colorful project designed by Marly Bird and Robyn Chachula. Made with DK-weight cotton and a D/3 hook, this little footbag measures 2.5 inches in diameter, uses tapestry colorwork for a gorgeous geometric design, and works up in under an hour. Four colorway options included!

โšก Quick Answer:

Yes โ€” the Stitch Kickers crochet hacky sack pattern is completely free right here on the blog! It's rated Adventurous Beginner, uses a little tapestry colorwork in the middle section, and crochets up quickly in DK-weight cotton. Scroll down for the full pattern, or grab the ad-free PDF to take it anywhere.

Stitch Kickers crochet hacky sack pattern - multiple colorful crocheted hacky sacks on outdoor wooden deck

โœ๏ธ Real People. Real Designers. Real Instructions You Can Count On.

This is NOT an AI-written pattern โ€” and these are NOT AI-generated images. ๐Ÿ™…โ€โ™€๏ธ The Stitch Kickers Crochet Hacky Sack was designed by real designers Marly Bird and Robyn Chachula, with real technique knowledge built from decades of crafting experience, real test crocheters, and real step-by-step instructions you can actually follow. Every stitch, every round, every colorwork tip was crafted by human hands and verified by human crocheters. When you follow this pattern, you're in good hands. ๐Ÿงถ

Looking for a fast, colorful crochet project that makes everyone smile? ๐Ÿ˜Š The Stitch Kickers hacky sack is one of those secretly perfect quick makes โ€” small enough to finish in one sitting, colorful enough to show off some tapestry crochet skills, and fun enough that your kids, grandkids, or any kid at heart will immediately want to play with it the second you finish. And yes… they're surprisingly satisfying to make.


Hey, bestie ๐Ÿ’› I am SO excited to share this free crochet hacky sack pattern with you today! I designed this with the incredibly talented Robyn Chachula โ€” and if you know Robyn's work, you know she makes things that are approachable AND genuinely interesting to crochet. This little footbag is no exception. There's a colorwork section in the middle that uses tapestry crochet technique, and it gives the finished piece that satisfying “wait, you MADE that?” look. The whole thing works up in under an hour once you get your rhythm… which means you could easily knock out a whole set of these for summer gift-giving or just to have on hand for impromptu backyard fun. ๐ŸŽ‰

This post contains affiliate links. As a yarn-loving heart, I earn a small commission when you shop through my links โ€” at no extra cost to you. Thank you for supporting free patterns and tutorials on MarlyBird.com!

What You Will Love About This Pattern ๐Ÿ’–

โœจ Adventurous Beginner friendly. You know basic single crochet? You can make this. The colorwork section follows a chart, but it's small and manageable โ€” this is a great “first colorwork” project if tapestry crochet has felt intimidating.

โฑ๏ธ Truly a one-sitting project. The finished hacky sack is only 2.5 inches across. That means the whole thing โ€” increases, colorwork, decreases, stuffing โ€” works up in under an hour. One Netflix episode. Done.

๐ŸŽจ Four ready-to-go colorway options. We designed four beautiful colorway combinations using WeCrochet Animation cotton. Whether you want bold blue, tropical green, cool azure, or warm butterscotch, there's a starting point that's ready to go. Or mix and match your own scraps!

๐Ÿงถ A great stash-buster for cotton scraps. You only need about 10g of the main color and tiny amounts of two accent colors. This is the perfect project for those little leftover balls of DK cotton that aren't quite enough for anything else.

๐ŸŽ The gift that gets USED. A lot of handmade gifts live in a drawer. A crochet hacky sack? It goes straight to the backyard, the beach bag, the school locker. Kids love them. Adults love them. They're a tiny piece of handmade joy that someone will actually play with.

๐Ÿงต A gentle intro to tapestry colorwork. If you've been curious about colorwork but a full sweater feels overwhelming… this is your starter project. Six rounds, a small chart, two colors carried โ€” exactly the right scale to build the skill without the commitment.


Quick Pattern Overview

Stitch Kickers crochet hacky sack size comparison - 2.5 inch finished diameter

๐Ÿ“ Finished size: 2.5 inches [6.5 cm] in diameter โ€” the classic hacky sack footbag size, weighted perfectly for kicking.

๐Ÿงถ Yarn: WeCrochet Animation (100% mercerized cotton, DK weight, #3) โ€” approximately 10g of the main color plus small amounts of two accent colors. Four ready-to-go colorways are included in the pattern.

๐Ÿช Hook: Size D/3 [3.25 mm] โ€” or whatever size gives you the correct gauge.

๐Ÿ“Š Gauge: 12 sc ร— 12 rounds = 2 inches ร— 2 inches. Gauge matters here because the fabric needs to be firm enough to hold the poly pellet filling securely.

โญ Skill level: Adventurous Beginner. You'll need: single crochet, magic adjustable ring, sc2tog decrease, and basic tapestry colorwork (carrying and changing colors). All techniques are explained in the pattern.

๐Ÿ… Designed by: Marly Bird & Robyn Chachula โ€” crochet designers, authors, and teachers with decades of crafting experience between them.


Love the Pattern but Want an Ad-Free PDF? โญ

Stitch Kickers crochet hacky sack ad-free PDF pattern - clean printable version available on Etsy, Shopify, and Ravelry

The full Stitch Kickers crochet hacky sack pattern is completely free right here on the blog… but if you'd like a clean, printable, ad-free PDF version to take to your yarn group, travel with, or just have on hand without scrolling, you can grab it on any of our shops!

Buy on Etsy
Buy on Shopify
Buy on Ravelry

Is This Hacky Sack Pattern Right for You?

This pattern is perfect for you if you're looking for a quick, confidence-building project that introduces colorwork at a completely manageable scale. You'll need to be comfortable with single crochet and the magic ring… but everything else is taught right in the pattern. If you've never tried tapestry colorwork before, this is genuinely one of the best “first colorwork” projects out there โ€” the motif is simple, the rounds are short, and because the piece is small, any tension wobbles are easy to correct.

This pattern might not be the right fit if you're a total beginner who hasn't yet learned to crochet in the round. The spiral increases and joined colorwork rounds require you to read your work a little โ€” if you're still getting your bearings with basic stitches, I'd suggest starting with my beginner's guide to how to crochet first, then coming back to this once you're comfortable in the round!

What Is a Hacky Sack โ€” And Why Crochet One?

Crochet hacky sack being kicked - Stitch Kickers footbag in action outdoors

A hacky sack โ€” also called a footbag โ€” is a small weighted ball that players keep airborne using only their feet, knees, and body (no hands allowed!). It's one of those perfectly simple outdoor games that works for any age, requires no equipment beyond the bag itself, and is genuinely fun whether you're playing in a circle with friends or practicing solo kicks in the backyard.

A Quick History โ€” 50 Years of Footbag

Foot-juggling games are actually ancient โ€” China's cuju (“kick-ball”) dates to the 3rd century B.C., and the feathered-shuttlecock game jianzi is still played across China, Vietnam, and the Philippines today. Several Native American tribes also played foot-juggling games using small bladders filled with animal hair. But the modern hacky sack? That has a specific origin story, and it's a good one. ๐Ÿ˜„

In 1972, Mike Marshall and John Stalberger invented it in Oregon City, Oregon. Marshall had learned a foot-juggling game and taught it to Stalberger, who was recovering from knee surgery โ€” he found kicking a small bag helped rehabilitate his knee. They spent years developing and promoting the game, launched the first packaged branded Hacky Sacks in 1977, and by 1979 had a US Patent. By 1983, Wham-O (the company behind the Frisbee and Slip ‘N Slide) had acquired the brand.

The 1980s and 90s were the cultural peak โ€” hacky sacks were everywhere on college campuses, city parks, and concert venues. The generic non-trademarked name “footbag” became the competitive sports term, and the World Footbag Championships still run today. Over 25 million official Hacky Sack-branded footbags have been sold… and honestly? With Gen Z rediscovering screen-free outdoor games, the handmade crochet version fits this moment perfectly. ๐ŸŒฟ

Why crochet one instead of buying one? Because yours will be better. You control the weight by adjusting the fill, so you can make it lighter for kids or heavier for experienced players. The colorwork design makes each one completely unique. And in an era of mass-produced everything, something handmade by a real person with real skills carries something a factory ball never can.

๐Ÿ’ก Bonus Use: Microwave Hand Warmer!

Want to turn your cotton-yarn hacky sack into a cozy little hand warmer? Fill it with plain, dry, uncooked rice and microwave it briefly for gentle warmth. Start with 15โ€“30 seconds and test carefully before handling. Some microwaves heat more aggressively than others, so always use caution.

Important: This version must be made with 100% cotton yarn only. Do not microwave acrylic, polyester, nylon, metallic yarn/thread, safety eyes, buttons, beads, poly pellets, stuffing, or synthetic materials. Never leave it unattended in the microwave, and stop using it immediately if you notice scorching, smoke, odor, damage, or leaking rice.

See the Microwave Hand Warmer Safety Disclaimer below before making or using this option.

โš ๏ธ Microwave Hand Warmer Safety Disclaimer

Safety Note: This microwave hand warmer idea is an optional bonus use only. Heating results vary by microwave, materials, stitch tension, and construction. Use at your own risk.

For a microwave-safe version, use 100% cotton yarn only and fill only with plain, dry, uncooked rice. Do not microwave acrylic, polyester, nylon, wool blends, metallic yarn or thread, safety eyes, buttons, beads, zippers, poly pellets, fiberfill, or synthetic materials.

Microwave briefly, starting with 15โ€“30 seconds, and test carefully before handling. Do not overheat. Do not microwave unattended. Allow the item to cool completely before reheating. Discontinue use immediately if you notice scorching, smoke, odor, damage, or leaking rice.

This item is for gentle external warmth only and is not a medical device. Do not use on infants, young children, pets, sleeping individuals, or anyone with reduced heat sensitivity. The maker and user are responsible for safe materials, construction, heating, and use. The designer/publisher is not responsible for injury, burns, fire, property damage, misuse, substitutions, or finished items made or sold from this pattern.

๐ŸŽ Make a Set โ€” It's the Best Gift That Gets Used

The Stitch Kickers hacky sack has a secret superpower as a gift: it's small, inexpensive to make, works up fast, and it actually gets used. Here are a few of my favorite ways to give these:

  • ๐ŸŽ’ End-of-school gift for kids โ€” make a few in bright colors and tuck one in each kid's bag on the last day
  • ๐ŸŽ‰ Birthday party favors โ€” make a batch in a colorway that matches the party theme
  • ๐ŸŽ“ Graduation gift โ€” knit them in school colors for a personal, handmade touch
  • ๐Ÿงฆ Stocking stuffer โ€” they're the perfect size, and handmade ones feel extra special under the tree
  • ๐Ÿ•๏ธ Camp activity โ€” bring yarn and hook, teach the kids to crochet their own, then kick them around
  • ๐ŸŒˆ Custom colorways โ€” team colors, pride flags, favorite color combos โ€” the four-colorway system means there are endless options

๐ŸŽฏ Important Technique Note: Yarn Over vs. Yarn Under

๐ŸŽฏ Important Technique Note from Marly:

Use the yarn-over (YO) method of single crochet for this pattern โ€” not yarn-under. Here's why this matters more than you'd think…

A lot of new crocheters come to this pattern through amigurumi โ€” they learned to make stuffed animals, and in amigurumi, the yarn-under (YU) method is very commonly used because it creates extra-tight stitches that hide the stuffing. So intuitively, you might think: tight stitch = good hacky sack. You're right about the tight part! But yarn-under doesn't just tighten the stitch โ€” it also creates a slightly knobby, textured surface on the exterior of the fabric. For a stuffed bear, that doesn't matter at all. For a hacky sack, it makes a real difference. A knobby exterior creates unpredictable friction points โ€” the ball can catch mid-kick or deflect in a direction you didn't expect. The yarn-over method gives you the same tight stitch structure with a smoother outer surface, so the ball travels cleanly and consistently. Both methods make a tight stitch. Only yarn-over makes a smooth one. Not sure which method you've been using? Here's how to tell โ†’

A Quick Guide to Tapestry Colorwork Crochet

Tapestry colorwork is the technique used in the middle six rounds of this hacky sack โ€” and if you haven't tried it before, don't worry. The basic idea is simple: you work with two (or more) colors at once, carrying the color you're not currently using across the top of your stitches and crocheting over it. When you're ready to switch colors, you complete the last step of the stitch in the new color.

The result is a dense, colorful fabric where the design shows clearly on the right side while the carried yarn is neatly buried inside the stitches. It's a completely different look from colorwork done by carrying yarn on the wrong side โ€” the fabric is thicker, more structured, and has a lovely texture that makes these hacky sacks feel really satisfying in the hand.

One thing to know before you start: every stitch in this pattern is worked as a standard yarn over (YO) โ€” NOT yarn under. This matters for your colorwork tension and for the play quality of the finished ball. Not sure about the difference? Read my full breakdown of โญ๏ธ yarn over vs. yarn under in crochet โญ๏ธโ€” it's one of those things that makes a surprising difference once you understand it! ๐Ÿงต

โœ๏ธ Designer Tip:

The key to clean tapestry colorwork is tension… specifically, carrying the unused yarn loosely across the top of your stitches. Too tight and your fabric will pucker and distort. When in doubt, stretch your stitches slightly as you work over the carried yarn. The pattern notes remind you of this too โ€” we've thought through every detail!

The colorwork section uses two color chart options. Both are simple geometric motifs designed to look great on the small curved surface of a hacky sack. Pick the one that calls to you… or try both colorways and compare!


Explore More Crochet Colorwork Patterns

If this hacky sack sparks your interest in tapestry and colorwork crochet, you are going to love exploring this whole corner of the craft! Check out my guide to 6 crochet colorwork techniques โ€” it covers tapestry, Fair Isle, mosaic, and more.

Yarn & Materials

The original pattern uses WeCrochet Animation (100% mercerized cotton, DK weight, CYCA #3, 70 yds / 64 m per 25g skein). This yarn is specifically designed for colorwork โ€” the mercerized cotton has a smooth, defined stitch definition that makes the colorwork motif crisp and clear. It's also 100% cotton, which means it has the right weight and heft for a hacky sack that actually plays well.

Each hacky sack uses about 10g of the main color (Color A) and just a small amount of two accent colors (Colors B and C). That means one skein of each color gives you enough for multiple hacky sacks… extra economical, especially if you're making a set as gifts.

The Four Included Colorways

We designed four beautiful starting-point colorways. All colorway numbers reference WeCrochet Animation:

Stitch Kickers crochet hacky sack - all four colorway options displayed together on outdoor wooden deck
  • Colorway 1: Blue (#2676) main + Blush (#2677) + Sunbaked (#2699)
  • Colorway 2: Jalapeno (#2690) main + Creme Brulee (#2683) + Dewdrop (#2684)
  • Colorway 3: Azure (#2674) main + Kenai (#2691) + Butterscotch (#2679)
  • Colorway 4: Kenai (#2691) main + Butterscotch (#2679) + Azure (#2674)

Yarn Substitutions

The best yarn for a crochet hacky sack is 100% cotton in a DK or worsted (Medium #4) weight. Cotton is durable, has very little stretch (so it keeps its shape while being kicked), and withstands impacts against hard-soled shoes much better than acrylic. This is one pattern where yarn choice genuinely affects how the finished project plays!

๐ŸŒฟ Cotton yarn variety pack โ€” grab a variety of colors at a great price, perfect if you're making multiple footbags for a craft market or gifts! A little goes a long way on these tiny projects.

๐ŸŒฟ Bernat Softee Cotton โ€” 60% cotton / 40% acrylic blend, light weight, great color range and widely available.

๐ŸŒŠ Berroco Remix Light DK โ€” a recycled cotton blend with beautiful drape and a wide color selection.

โœ๏ธ Designer Tip:

Whatever yarn you substitute, make a small gauge swatch before you start! The poly pellet stuffing needs a firm, dense fabric to stay inside โ€” if your gauge is too loose, those little pellets WILL find their way out through the gaps. Tighter = better for this project.

The Filling Guide โ€” What Actually Works ๐ŸŽฏ

What you put inside your hacky sack matters more than most patterns acknowledge. The filling determines how the ball feels in the hand, how it kicks, how long it lasts โ€” and whether you ever have to deal with mold, sprouting, or leaking. Here's the honest breakdown:

Best Filling: Poly Pellets

Poly pellets (plastic craft stuffing pellets) are the clear winner for any hacky sack you plan to actually use. They're durable, won't spoil if the ball gets wet, give you great weight control, and play consistently outdoors. You can find them at any craft store Michaels, or on Amazon as “stuffing pellets” or “poly fill pellets.”

๐ŸŽฏ Target weight: 50โ€“55 grams for standard recreational play. Go lighter (around 40g) for a finesse-style sack, or heavier (up to 60g) for more momentum. When in doubt, start lighter โ€” you can always add more before you close it up.

The nylon stocking method (used in this pattern): Cut a 5″ section of pantyhose, knot one end, fill with pellets, knot the other end, and insert the pouch into your crochet shell. The pantyhose acts as an inner bag so pellets stay contained even if your stitches loosen with heavy play. This is Robyn's tested method โ€” it works beautifully.

The balloon method (alternate): Some crocheters fill a small balloon with poly pellets, tie it off, and insert that instead of a pantyhose pouch. The balloon creates a slightly rounder, firmer shape and is especially good for younger kids (no chance of any escape). Both methods work โ€” use whichever you have on hand!

Food Fillings โ€” Know the Tradeoffs

Rice, beans, lentils, and popcorn kernels are the “old standby” suggestions you'll see in older blog posts. They work… with caveats:

Filling Works? Tradeoff
Poly pellets โœ… Best None โ€” durable, weather-safe, consistent weight
Rice โš ๏ธ Indoor only Molds if it gets wet; not for outdoor play
Dried beans/lentils โš ๏ธ Indoor only Can sprout if wet; short shelf life outdoors
Millet ๐ŸŸก Better than rice Best natural option but still not ideal for outdoor use
Sand โœ… Good Great weight for advanced players; use the balloon method to contain it

๐Ÿ’ก Bonus Use: Microwave Hand Warmer!

If you fill a cotton-yarn hacky sack with rice, you can microwave it for 30โ€“60 seconds for a cozy hand warmer! โ˜€๏ธ The cotton + rice combination holds heat well. Just make sure to use 100% cotton yarn (not acrylic โ€” never microwave acrylic!) and do NOT use poly pellets for the microwave version. Great cold-weather gift idea!

Video Tutorials

New to any of the techniques in this pattern? Here are the videos referenced in the pattern notes:

  • ๐ŸŽฌ Magic Ring / Adjustable Ring โ€” how to make the ring that starts every round
  • ๐ŸŽฌ Weave in Tail for Adjustable Ring โ€” securing that tail so it stays put
  • ๐ŸŽฌ Single Crochet (sc) โ€” the only stitch you need for this pattern
  • ๐ŸŽฌ Single Crochet 2 Together (sc2tog) โ€” the decrease used to close the sack
  • ๐ŸŽฌ How to Change Colors and Crochet Stripes โ€” your guide to the tapestry colorwork section

๐ŸŽฌ How to Bury/Weave in Ends:

New to crochet entirely? Start here ๐Ÿ‘‰ Learn How to Crochet: The First Five Things You Need to Know โ€” and then come back to tackle these Stitch Kickers!

Stitch Kickers Crochet Hacky Sack || Pattern Details

Skill Level

Adventurous Beginner

Finished Measurements

Hacky Sack is 2.5″ [6.5 cm] in diameter.

Gauge

12 sc by 12 rounds = 2″ [5 cm] by 2″ [5 cm]; use any size hook to obtain the gauge.

Materials

Yarn: WeCrochet Animation (100% mercerized cotton, 70 yds / 64 m, 1 oz / 25 g, CYCA #3 DK)

Colorway 1: Color A: #2676 Blue, 10 g | Color B: #2677 Blush, small amount | Color C: #2699 Sunbaked, small amount

Colorway 2: Color A: #2690 Jalapeno, 10 g | Color B: #2683 Creme Brulee, small amount | Color C: #2684 Dewdrop, small amount

Colorway 3: Color A: #2674 Azure, 10 g | Color B: #2691 Kenai, small amount | Color C: #2679 Butterscotch, small amount

Colorway 4: Color A: #2691 Kenai, 10 g | Color B: #2679 Butterscotch, small amount | Color C: #2674 Azure, small amount

Crochet Hook: Size D/3 [3.25 mm]

Notions: Stitch Markers, Tapestry Needle, Scissors, Tape Measure, Poly Pellets (weighted), Pantyhose or small balloon (for fill containment), Notions Bag for Supplies (optional)

โญ๏ธ Marly Bird Amazon Storefront โญ๏ธ

Abbreviations

  • Ch โ€” Chain(s)
  • RS โ€” Right Side
  • Sc โ€” Single Crochet
  • Sl st โ€” Slip Stitch
  • WS โ€” Wrong Side

Special Stitches

โญ Magic Loop or Adjustable Ring: Wrap yarn around your fingers, pull up a loop through the ring created, chain 1. Follow directions for the number of stitches for round 1. Pull on the yarn end to close the ring. <<Also see video >>

โญ Single Crochet 2 Together (sc2tog): *Insert hook into indicated stitch, yarn over and pull up a loop; repeat from * in next stitch indicated, yarn over and draw through all 3 loops on hook. (1 decrease)

Crochet Color Charts

Option 1

Option 2

Notes

  • The increasing rounds at the beginning and the decreasing rounds at the end of the hacky sack are worked in a spiral. This means you will continue crocheting around without joining at the end of each round unless the pattern tells you to join.
  • Use a stitch marker to mark the first stitch of each round. Move the marker up as you complete each round so you always know where the round begins.
  • The middle rounds, which are the colorwork rounds, are worked in joined rounds. For these rounds, you will join as instructed at the end of each round before beginning the next round.
  • All stitches are worked as yarn over (YO), not yarn under. This helps create the intended fabric and play quality for the hacky sack.
  • Changing colors in tapestry colorwork: work until the last 2 loops of the stitch remain on the hook in the first color. Draw the new color through the last 2 loops to complete the stitch, then continue with the new color.
  • When carrying a color that is not in use, lay it loosely across the top of the round and crochet over it as you work. Do not pull the carried yarn too tightly, or the fabric may pucker and the hacky sack may lose its shape.
  • Check your gauge and tension as you work. A firm fabric helps keep the filling contained, but the stitches should not be so tight that the hacky sack becomes stiff or hard to shape.
  • For the filled hacky sack version, the poly pellets are placed inside a tied piece of pantyhose before being inserted into the crocheted shell. Make sure the pantyhose is securely knotted and the final opening is closed firmly.
  • This hacky sack is intended for play and decorative use. It is not intended for babies, pets, or anyone who may chew, tear, or open the finished item. Inspect regularly and discontinue use if stitches loosen, seams open, or filling becomes exposed.
  • Do not microwave the poly pellet version of this hacky sack.

GROW

To Unlockย Exclusive Subscriber Contentย click the Box below and join for free by simply adding your email and creating a password! If you are having troubles, clear your cache or reset your password or login to the Grow Publisher Portal.

>> Learn More About Grow Here <<

I'm thrilled to share this amazing pattern with you, many patterns on my blog are absolutely free! I kindly request that you don't copy and paste or distribute this pattern. Prefer an ad-free experience? Buy a digital PDF pattern for a small fee from one of my online stores for a seamless crafting journey. 

I appreciate your support and readership. You are the reason I can keep doing what I love and sharing it with others. So, thank you from the bottom of my yarn-loving heart! Disclosure: This post contains affiliate links, meaning I get a commission if you decide to make a purchase through my links at no cost to you.

๐Ÿ“„ Want the Ad-Free Printable PDF?

Grab the clean, printable version โ€” no ads, no scrolling, includes the colorwork charts.

Buy on Etsy Buy on Shopify Buy on Ravelry

Stitch Kickers Crochet Hacky Sack || Pattern Instructions

Pattern designed by Marly Bird and Robyn Chachula

Increase Rounds

Make an adjustable ring with color A.

Round 1: 6 sc in ring, pull ring close, do not join, do not turn, place marker in first st โ€” 6 sc.

Round 2: 2 sc in each sc around, do not join, do not turn โ€” 12 sc.

Round 3: *2 sc in next sc, sc in next sc; repeat from * around, do not join, do not turn โ€” 18 sc.

Round 4: *Sc in next 2 sc, 2 sc in next sc; repeat from * around, do not join, do not turn โ€” 24 sc.

Round 5: Sc in next sc, *2 sc in next sc, sc in next 3 sc; repeat from * around to last 3 sts, 2 sc in next sc, sc in last 2 sc, do not join, do not turn โ€” 30 sc.

Round 6: Sc in each sc around, do not join, do not turn.

Round 7: Sc in next 3 sc, *2 sc in next sc, sc in next 4 sc; repeat from * around to last 2 sts, 2 sc in next sc, sc in last sc, do not join, do not turn โ€” 36 sc.

Round 8: Sc in next sc, *2 sc in next sc, sc in next 5 sc; repeat from * around to last 5 sts, 2 sc in next sc, sc in last 4 sc, do not join, do not turn โ€” 42 sc.

Round 9: Sc in next 10 sc, 2 sc in next sc, sc in next 20 sc, 2 sc in next sc, sc in next 9 sc, sl st in last sc, do not join, do not turn โ€” 44 sts.

Colorwork Section

Rounds 10โ€“15: Ch 1, sc in each st around changing colors as shown on colorwork chart (see notes on changing colors), join by threading free loop of last stitch through first st of round, do not turn.

Fasten off Colors B and C.

๐Ÿ“Š Chart Option 1: https://www.stitchfiddle.com/c/soev8a-jorg6

๐Ÿ“Š Chart Option 2: https://www.stitchfiddle.com/c/soev6k-7o79vy

Decrease Section

Round 16: With color A, do not ch 1, sc in next 10 sc, sc2tog over next 2 sc, sc in next 20 sc, sc2tog over next 2 sc, sc in last sc, do not join, do not turn โ€” 42 sc.

Round 17: *Sc in next 5 sc, sc2tog over next 2 sc; repeat from * around, do not join, do not turn โ€” 36 sc.

Round 18: Sc in next 2 sc, *sc2tog over next 2 sc, sc in next 4 sc; repeat from * around to last 4 sc, sc2tog over next 2 sc, sc in last 2 sc, do not join, do not turn โ€” 30 sc.

Round 19: Sc in each sc around, do not join, do not turn.

Round 20: *Sc2tog over next 2 sc, sc in next 3 sc; repeat from * around, do not join, do not turn โ€” 24 sc.

โœ๏ธ Designer Tip โ€” Stuffing the Hacky Sack:

Cut pantyhose to a 5″ [13 cm] length. Knot one end and turn inside out. Place inside the hacky sack. Stuff pantyhose full of poly pellets โ€” aim for 50โ€“55 grams for standard play feel (pack lighter, ~40g, for a kids' or finesse version). Knot the other end. Trim any extra or tuck it into the project. Then continue with Round 21. Balloon method: alternatively, fill a small balloon with poly pellets, tie it off, and use that instead โ€” great for kids!

Round 21: *Sc in next 2 sc, sc2tog over next 2 sc; repeat from * around, do not join, do not turn โ€” 18 sc.

Round 22: *Sc2tog over next 2 sc, sc in next sc; repeat from * around, do not join, do not turn โ€” 12 sc.

Round 23: *Sc2tog over next 2 sc; repeat from * around, fasten off with a long tail for seaming โ€” 6 sc.

Weave tail through remaining stitches to close hole. Weave in end securely.


Love This Yarn? More Patterns Using WeCrochet Animation

WeCrochet Animation is such a fun yarn to work with โ€” that mercerized cotton sheen really makes colorwork pop. If you fall in love with it making this hacky sack, grab a few skeins of WeCrochet Animation and browse the MarlyBird.com pattern library for your next colorwork project! [MARLY: add specific pattern links here if you'd like]

Favorite This Pattern on Ravelry ๐Ÿ’–

Stitch Kickers crochet hacky sack by Marly Bird and Robyn Chachula

If you're a Ravelry user, you can queue this pattern, add it to your favorites, and keep track of your project notes all in one place. And if you make one, I'd LOVE to see your finished photos in the project gallery!

Favorite the Stitch Kickers Crochet Hacky Sack pattern on Ravelry

More Quick Crochet Gift Patterns You'll Love

If you loved how fast this hacky sack worked up, you're going to want to explore the whole collection of quick-finish crochet projects on MarlyBird.com! Explore all my Quick Crochet Gift Ideas here!

Frequently Asked Questions

What skill level do I need to crochet a hacky sack?

This pattern is rated Adventurous Beginner. You'll need to be comfortable with single crochet and crocheting in the round โ€” but if you can do those two things, you can do this! The colorwork section uses tapestry technique (changing and carrying colors), which is demonstrated in the pattern notes. It's a great first colorwork project because the piece is small and the motif is simple. If you're brand new to crochet, start with how to crochet for beginners first!

What is the best filling for a crochet hacky sack?

Poly pellets are the best filling for any hacky sack you plan to actually play with outdoors. They're durable, won't mold if the bag gets wet, and give you consistent weight and playability. Aim for 50โ€“55 grams for standard play. Use the pantyhose pouch method (or a small balloon filled with pellets) to keep the pellets contained so they don't escape through the stitches over time. Rice, beans, and lentils are okay for casual indoor use but will mold or sprout if they get wet.

How heavy should a crochet hacky sack be?

Around 50โ€“55 grams is the sweet spot for standard recreational play โ€” it feels great in the hand and kicks predictably. Go lighter (around 40g) if you're making it for kids or for a finesse-style game. Going heavier than 60g makes the sack hard to control for most players. When in doubt, start lighter โ€” you can always add more pellets before you close it up!

How long does it take to crochet a hacky sack?

Most crocheters can finish this hacky sack in under an hour once they get comfortable with the pattern. The piece is small โ€” only 2.5 inches in diameter โ€” so even the colorwork section works up quickly. It's genuinely a one-sitting project, which makes it perfect for a quick gift or a between-projects palette cleanser.

Why does my hacky sack kick unpredictably or feel lumpy?

The most common cause: you're using the yarn-under (YU) method of single crochet. Many crocheters who learned through amigurumi default to yarn-under because it creates tight stitches โ€” which seems right for a hacky sack. But yarn-under also creates a slightly knobby exterior surface that adds friction and can make the ball deflect unexpectedly. Switch to yarn-over for the same tight stitch with a smoother surface. The second possible cause: overfilled โ€” the sack should feel squishy, not packed hard. Aim for 50โ€“55g of poly pellets.

Can I use a different yarn for this pattern?

Yes! Any DK-weight cotton or cotton-blend yarn (CYCA #3) will work as long as you match the gauge. The important thing is achieving a firm, tight fabric โ€” you want to crochet with a smaller hook than you normally would for DK weight, so the pellets can't work their way out through the stitches. Check your gauge before you start!

Do I need to know tapestry crochet to make this pattern?

The pattern teaches you what you need right in the notes! Tapestry colorwork is used for the middle 6 rounds โ€” you'll carry and change colors following a simple chart. The pattern notes explain the color-changing technique clearly, and the chart options are hosted on StitchFiddle. Want a deeper dive? Check out my post on yarn over vs. yarn under in crochet โ€” knowing this makes your tapestry tension much cleaner!

Can I make a knitted hacky sack instead of a crocheted one?

Great BiCrafty question! ๐Ÿงถ Crochet is actually better suited for hacky sacks โ€” crocheted fabric doesn't stretch as much with repeated kicking, so the ball holds its shape over time. Knitted fabric tends to have more stretch and can lose its round shape after heavy use. For this pattern specifically, the tight single crochet construction is what gives the Stitch Kickers their satisfying weight and kick. Stick with crochet for this one!

Is this a good gift to make?

Honestly… yes, so much. A crochet hacky sack is one of those gifts that feels special (it's handmade!) but also actually gets used. Kids love them, adults who played in the 90s get nostalgic, and they work for every budget because each one uses almost nothing in terms of materials. Make a set in different colorways โ€” school colors, team colors, or favorite combos โ€” and you have an incredible gift for very little cost or time.

Is this an AI-generated pattern?

Absolutely not! The Stitch Kickers Crochet Hacky Sack was designed by real designers โ€” Marly Bird and Robyn Chachula โ€” with real skill, real testing, and real instructions you can count on. Every stitch count, every colorwork round, every technique tip was crafted and verified by human hands. The photos are also real photos of real handmade hacky sacks, not AI-generated images. When you follow this pattern, you're following instructions built by experienced designers who have been crafting and teaching for decades.

Final Thoughts

There's something really joyful about a project this small that delivers this much fun. The Stitch Kickers Crochet Hacky Sack is a 10-gram, one-hour make that brings people together outdoors, introduces a really useful colorwork technique, and makes a perfect handmade gift that actually gets played with. Whether you're making one to learn tapestry crochet, knocking out a whole set for summer gifts, or just because it looks like a blast… I hope it brings you all the joy! ๐ŸŽ‰

โค๏ธ Your BiCrafty Bestie,
Marly Bird

A cartoon avatar of a person with glasses and a brown bun smiles warmly. Their green shirt and black jacket add a stylish touch, while colorful hearts surround them like loving temperature blankets, stitching together an aura of love and positivity. -Marly Bird

Filed Under: Crochet, Free Patterns, Our Free Patterns, Pattern Tagged With: badge-beginner-friendly, free crochet pattern, Marly Bird, summer crochet

Boysenberry Bramble Cowl: Free Single Crochet Entrelac Pattern

June 2, 2026 By Meg Leave a Comment

This free crochet entrelac pattern teaches you single crochet entrelac… a beginner-friendly version of the โ€œscaryโ€ knit technique youโ€™ve probably heard about. The Boysenberry Bramble Cowl is a smaller, faster project worked in a CYCA #4 worsted gradient cake yarn… finished with a tidy reverse single crochet edge for a polished neckline. Designed by Marly Bird, originally published in 2018 and lovingly refreshed for 2026.

Hereโ€™s the thing nobody tells you about entrelac… single crochet entrelac is NOT the scary knit version. Itโ€™s NOT Tunisian entrelac either. Itโ€™s plain old single crochet… the very first stitch you ever learned… worked in a clever order that builds up interlocking woven blocks. If you can sc, you can do this. The Boysenberry Bramble cowl is the perfect place to start.

Marly Bird wearing the Boysenberry Bramble single crochet entrelac cowl in a purple-pink-green gradient yarn, showing the woven block texture.

Hey, bestie ๐Ÿ’› If entrelac has been on your โ€œsomeday when Iโ€™m braverโ€ list, today is your day. The Boysenberry Bramble cowl uses one stitch (single crochet), one gorgeous worsted gradient cake yarn, and one set of tier instructions that build on themselves to create a fully-shaped 28ยฝโ€ณ neckline cowl with a 46โ€ณ bottom flare. Itโ€™s the smaller, faster, more wearable cousin of my Pieces of You single crochet entrelac wrap… and a perfect first SC entrelac project before you graduate to the full wrap.

Affiliate disclosure: Some of the links in this post are affiliate links, which means if you click through and purchase, I may earn a small commission at no extra cost to you. I only recommend yarns and tools Iโ€™ve used and trust with my yarn-loving heart. Thank you for supporting free patterns on the blog ๐Ÿ’›

Colorful crochet cowl in greens, yellow, and pink; visible stitch detail and texture as worn by a smiling woman.

What You Will Love About This Pattern ๐Ÿ’–

โœจ Only one stitch. Single crochet, start to finish. No Tunisian hook, no special technique youโ€™ve never tried. If you can chain, single crochet, and slip stitch… you can crochet entrelac. Promise.

๐ŸŒˆ Gradient yarn does the heavy lifting. The Boysenberry Bramble cowl is designed for cake yarn… that magical self-striping yarn that shifts colors all on its own. You get a cowl that looks like you spent hours planning a color sequence… when really, the yarn did it for you while you watched your shows.

๐ŸŽฏ Cowl-sized commitment. The full Pieces of You wrap is gorgeous but takes 35-50 hours. The Boysenberry Bramble cowl is the perfect โ€œlearn the technique without committing to a giant wrapโ€ project. Smaller stakes, same beautiful woven look.

๐Ÿ“ Repeatable rhythm. Once you finish Tier 1 (base triangles) and Tier 2 (your first squares), the rest of the cowl follows the same rhythm. It becomes meditative… the kind of project you pick up in the evening and donโ€™t put down.

๐Ÿชก Tidy, finished neckline. The cowl is shaped (46โ€ณ bottom circumference, 28ยฝโ€ณ top circumference) for a flattering fit, and finished with a single round of reverse single crochet. That little twisted-rope edge along the top is what makes it look professionally designed instead of homemade.


Quick Pattern Overview

๐Ÿงถ Skill Level: Intermediate (advanced beginner with patience can absolutely do this)

๐Ÿ“ Finished Size: Bottom circumference 46โ€ณ / 117 cm; neck circumference 28ยฝโ€ณ / 72.5 cm; length 20ยฝโ€ณ / 52 cm

๐Ÿ“ Gauge: 15 sc = 3ยผโ€ณ and 15 sc rows = 2ยพโ€ณ after blocking

๐ŸŒˆ Yarn: Originally designed for Red Heart Unforgettable (now discontinued); the recommended substitute is Loops & Threads Facets from Michaels. Both are CYCA #4 worsted-weight gradient acrylic, ~270 yd / 100g.

๐Ÿช Hook: Size G-6 (4.25 mm) or size required for gauge

๐ŸŽจ Construction: Worked flat in tiers of triangles and squares, then seamed at the end. The fabric grows on the bias, building tier by tier from a base of triangles up to a final tier of triangles for a clean straight top edge.


A woman displays a single crochet entrelac blanket in pink, yellow, and green checkerboard; yarn shelves fill the cozy background.

Is This Crochet Cowl Right for You?

This pattern is a beautiful fit if youโ€™ve crocheted a few projects beyond a granny square and youโ€™re ready to try something that looks impressive without actually being hard. You should be comfortable working single crochet, slip stitch, and reading row-by-row instructions. Each square is just sc… but the connection between squares (the sc2tog into the previous tier + slip stitch turn) takes a few rounds of practice before it clicks.

If youโ€™ve been intimidated by entrelac on knitting Instagram or by Tunisian entrelac videos… this is your gateway. SC entrelac is genuinely the most approachable version of the technique that exists. And once youโ€™ve made one cowl, youโ€™ll want to graduate up to the bigger Pieces of You wrap next.

If youโ€™re a brand-new beginner who has never finished a project? Save this for your second or third make. Youโ€™ll enjoy it so much more once basic single crochet feels automatic.

Join our Newsletter

Get Free Crochet & Knitting
Pattern Links & Coupons!

Hand-drawn bird with curling, detailed feathers and pink accents; cheerful pose showcases fine line and texture work.
>> Become An Insider <<
A woman with glasses and curly hair models a colorful crocheted scarf, showing textured stitches and vibrant yarn.

What Is Single Crochet Entrelac?

Entrelac is a technique where small geometric shapes (usually squares) are worked one at a time and connected to the previous row of squares as you go. The result is fabric that looks woven, like a basket or a tile floor, even though itโ€™s all one continuous piece worked with one tool.

A single crochet entrelac pattern uses only single crochet stitches plus slip stitches to build those interlocking blocks. Thereโ€™s no Tunisian hook, no special equipment, and no new stitch to learn. The โ€œmagicโ€ is in the order you work the squares… you work into the edges of previous squares to anchor the next row of blocks, which is what creates the woven illusion.

Thatโ€™s literally the whole secret. Stitches worked into edges of previous squares = interlocking blocks. The fabric does the impressive part for you.

Woman models a pink and yellow crochet scarf with visible textured stitches; bookshelves and home decor in the background.

SC Entrelac vs Knit Entrelac vs Tunisian Entrelac

If youโ€™ve Googled โ€œentrelacโ€ before and ended up overwhelmed, hereโ€™s why… most of the entrelac content online is one of two intimidating versions. Let me break down all three so you can see exactly where SC entrelac fits.

Knit entrelac. Worked with two knitting needles using a combination of pick-up stitches, short rows, and constant turning. Beautiful, but a real commitment of brain power. Most โ€œentrelac is hardโ€ reputations come from knit entrelac. As somebody who literally wrote a book on How to Knit Entrelac… I promise itโ€™s doable, but itโ€™s a different beast.

Tunisian entrelac. Worked with a Tunisian (Afghan) hook… the long one with a stopper on the end. Tunisian crochet has its own learning curve before you even get to entrelac, and many crocheters never use a Tunisian hook at all.

Single crochet entrelac (this pattern). Worked with a regular crochet hook using single crochet, slip stitch, and sc2tog. The same tools you already own. The same stitches you already know. Thatโ€™s it. Thatโ€™s the whole technique. SC entrelac is the friendliest version of entrelac that exists, and it produces a fabric just as beautiful as the other two.

You are just building squares one on top of another. Very similarly to how corner-to-corner crochet is worked… if youโ€™ve made a C2C blanket, you already know the construction logic.

This is the differentiation that matters: when you see โ€œentrelacโ€ in the wild and feel a little flutter of fear… remember, the Boysenberry Bramble cowl is single crochet. Just single crochet. Youโ€™re already qualified.


Yarn & Materials

Original Yarn: Red Heart Unforgettable (Discontinued)

The Boysenberry Bramble cowl was originally designed in 2018 using Red Heart Unforgettable in the Sugarcane colorway… a 100% acrylic, worsted-weight gradient cake yarn at 270 yd / 100g.

Heads up… Red Heart Unforgettable has been discontinued and most colorways (including Sugarcane) are no longer in production. You can still find skeins at clearance pricing on Yarnspirations or in destash listings, but itโ€™s not a yarn youโ€™ll want to count on for a fresh project. The good news? Thereโ€™s a near-perfect substitute thatโ€™s actively in production.

Recommended Substitute: Loops & Threads Facets

My #1 swap for Unforgettable is Loops & Threads Facets from Michaels. Itโ€™s a worsted-weight gradient acrylic that was made to fill the Unforgettable gap… same weight (CYCA #4), same gradient cake construction, same drape. Youโ€™ll need approximately 4 balls for this cowl… check your gauge and yardage on whichever colorway you choose.

Other worsted gradient cake substitutes (backup options): Lion Brand Mandala (worsted gradient, ~590 yd cake… fewer balls needed), Caron Cakes (worsted acrylic/wool blend gradient cake), or any LYS worsted-weight gradient cake yarn at CYCA #4. Just check your total yardage… aim for ~1,000 yd of worsted gradient yarn for the full cowl.

โญ๏ธ Designer Tip… Match your second cake. When you start ball 2, begin from the same color point you started ball 1 at. This keeps the gradient flowing visually instead of jumping mid-cowl. Take 3 minutes to wind off (or pull from the center) until you reach the matching color… it's worth the small bit of waste for a cowl that looks cohesive.

Tools & Notions

  • Crochet hook: Size G-6 (4.25 mm) or size required for gauge
  • Stitch markers… youโ€™ll use these to mark the last sc of every Row 15 (the corner of each finished square). Theyโ€™re essential, not optional.
  • Bent-tip yarn needle for weaving in ends and seaming
  • Blocking mats and pins (or blocking wires)… entrelac fabric blooms beautifully when blocked.
  • Wool wash… I love Eucalan for blocking, no rinse needed.
โญ๏ธ Marly Bird Amazon Storefront โญ๏ธ

Video Support

Need to see the technique in motion? Watch my single crochet entrelac tutorial on YouTube before you cast on… it walks you through the same connecting stitch (sc2tog into the previous tier + slip stitch turn) used throughout this pattern.

Woman models the Boysenberry Bramble Cowl, showing off its textured stitch pattern in a cozy room with bookshelves and plants.

Love the Pattern but Want an Ad-Free PDF?

The full Boysenberry Bramble pattern is right here on the blog for free, forever. But if youโ€™d rather have a clean, printable, ad-free PDF you can take to your reading chair (or to your favorite yarn shop), the formatted PDF with charts is available on Ravelry:

  • Boysenberry Bramble on Ravelry

Or sign up for the newsletter below to unlock the in-page Grow version (free… just takes your email) and get future free patterns straight to your inbox.

Join our Newsletter

Get Free Crochet & Knitting
Pattern Links & Coupons!

Hand-drawn bird with curling, detailed feathers and pink accents; cheerful pose showcases fine line and texture work.
>> Become An Insider <<
A woman with glasses and curly hair models a colorful crocheted scarf, showing textured stitches and vibrant yarn.

Boysenberry Bramble โ€” Pattern Details

Skill Level

Intermediate

Finished Measurements

Bottom Circumference 46โ€ณ / 117 cm
Neck Circumference 28ยฝโ€ณ / 72.5 cm
Length 20ยฝโ€ณ / 52 cm

Boysenberry Bramble Single Crochet Entrelac Cowl schematic by Marly Bird, showing the trapezoid shape with bottom circumference 46 inches, neck circumference 28.5 inches, and length 20.5 inches.

Gauge

15 sc = 3ยผโ€ณ and 15 sc rows = 2ยพโ€ณ after blocking. CHECK YOUR GAUGE. Use any size hook to obtain the gauge.

Materials

  • Yarn (original): RED HEARTยฎ Unforgettableโ„ข; 3.5 oz (100 g) ball, 270 yd (247 m), 100% Acrylic; 4 balls #3962 Sugarcane (discontinued… see Loops & Threads Facets above as the recommended substitute)
  • Hook: Size G-6 (4.25 mm) or size required for gauge
  • Notions: Bent-tip yarn needle, stitch markers

Abbreviations

  • ch = chain
  • hdc = half double crochet
  • ea = each
  • linked hdc = linked half double crochet (see Special Stitches)
  • rep = repeat
  • RS = right side
  • sc = single crochet
  • sk = skip
  • sl st = slip stitch
  • sp = space
  • st(s) = stitch(es)
  • WS = wrong side
  • * to * = work directions from * to * the number of times specified or to a specific stitch

Special Stitches

โญ๏ธ Sc2tog: Pull up a loop in each of 2 indicated sts, yo and draw through all 3 loops on hook.

โญ๏ธ Sc3tog: Pull up a loop in each of 3 indicated sts, yo and draw through all 4 loops on hook.

โญ๏ธ Reverse Single Crochet (Crab Stitch): Sc in last st of previous row or round, * sc in next st to the RIGHT of last st; rep from * around (reversing normal direction of round), sl st in 1st sc to connect. Fasten off. This is what gives the finished cowl its tidy, twisted-rope edging at the top.

Stitch Diagram & Layout Charts

Boysenberry Bramble Single Crochet Entrelac Cowl stitch chart key by Marly Bird, showing the symbols used for chain, single crochet, slip stitch, and direction of work.
Boysenberry Bramble Single Crochet Entrelac Cowl stitch chart by Marly Bird, showing the stitch placement for one tier of squares.
Boysenberry Bramble Single Crochet Entrelac Cowl layout chart by Marly Bird, showing the 13 tiers stacked from base triangles up to ending triangles with directional arrows.

Notes

  • Cut yarn and re-join with a sl st in indicated st after each tier of squares or triangles.
  • The working direction of each tier is the opposite of the previous tier (this is what makes the squares stack on the bias and creates the woven look).
  • If you would like an ad-free PDF that includes a chart for the stitches used, grab it on Ravelry.

โญ๏ธ Designer Tip… The “slip stitch in place of the ch-1 turn”: When you reach the end of a row that connects to the previous tier, you'll work an sc2tog (joining your new square to the previous tier) and then a slip stitch into the next stitch on the previous tier. That slip stitch takes the place of the ch-1 you'd normally do after turning. So when you turn for the next row, do NOT chain 1… the slip stitch already counts as your turning chain. Read this twice. Then read it a third time as you work Square 1 of Tier 2. By Square 2 it will be muscle memory.

GROW

To Unlockย Exclusive Subscriber Contentย click the Box below and join for free by simply adding your email and creating a password! If you are having troubles, clear your cache or reset your password or login to the Grow Publisher Portal.

>> Learn More About Grow Here <<

I'm thrilled to share this amazing pattern with you, many patterns on my blog are absolutely free! I kindly request that you don't copy and paste or distribute this pattern. Prefer an ad-free experience? Buy a digital PDF pattern for a small fee from one of my online stores for a seamless crafting journey. 

I appreciate your support and readership. You are the reason I can keep doing what I love and sharing it with others. So, thank you from the bottom of my yarn-loving heart! Disclosure: This post contains affiliate links, meaning I get a commission if you decide to make a purchase through my links at no cost to you.

A pink and yellow Boysenberry Bramble Cowl with textured stitches, wrapped around a woman's shoulders indoors.

Boysenberry Bramble โ€” Pattern Instructions

Tier 1
Entrelac builds upon itself on the bias in this pattern. In order to do that we have to begin with a tier of base triangles that we can work off of to make our square blocks on the next tier.
Base Triangle 1
Ch 2.
Row 1 (RS): Sc in 2nd ch from hook and mark this sc โ€” 1 st. Ch 2 (does not count as a st), turn.
Row 2: (Hdc, sc) in sc โ€” 2 sts. Ch 1, turn.
Row 3: Sc in first 2 sts and in next ch โ€” 3 sts. Ch 2, turn.
Row 4: (Hdc, sc) in first st, sc in each of next 2 sts โ€” 4 sts. Ch 1, turn.
Row 5: Sc in first 4 sts and in next ch โ€” 5 sts. Ch 2, turn.
Row 6: (Hdc, sc) in first st, sc in each of next 4 sts โ€” 6 sts. Ch 1, turn.
Row 7: Sc in first 6 sts and in next ch โ€” 7 sts. Ch 2, turn.
Row 8: (Hdc, sc) in first st, sc in each of next 6 sts โ€” 8 sts. Ch 1, turn.
Row 9: Sc in first 8 sts and in next ch โ€” 9 sts. Ch 2, turn.
Row 10: (Hdc, sc) in first st, sc in each of next 8 sts โ€” 10 sts. Ch 1, turn.
Row 11: Sc in first 10 sts and in next ch โ€” 11 sts. Ch 2, turn.
Row 12: (Hdc, sc) in first st, sc in each of next 10 sts โ€” 12 sts. Ch 1, turn.
Row 13: Sc in first 12 sts and in next ch โ€” 13 sts. Ch 2, turn.
Row 14: (Hdc, sc) in first st, sc in each of next 12 sts โ€” 14 sts. Ch 1, turn.
Row 15: Sc in first 14 sts and in next ch, mark last sc made โ€” 15 sts. Ch 1 loosely; do not turn.
Mark RS of triangle to keep track of RS of work.

Woman wears a hand-knit, textured Boysenberry Bramble Cowl indoors, with shelves of books and yarn in the background.

Base Triangle 2
Row 1 (RS): Sc in left edge of last sc worked โ€” 1 st. Ch 2, turn.
Rows 2-15: Work same as Rows 2-15 of Base Triangle 1.
Mark RS of triangle to keep track of RS of work.
Base Triangles 3-11
Work same as Base Triangle 2.
Fasten off.


Tier 2
This tier is built on Base Triangles of Tier 1.
Each square will begin with WS facing.
Join yarn with sl st to top corner of last completed triangle.
Square 1
Row 1 (WS): Working along side edge of triangle, sc in edge st of first 14 rows of triangle, sc2tog over edge st of next row and marked st on next triangle, remove marker, sl st in next st on same triangle โ€” 15 sts. Turn.
Row 2: Sk sl st, sc in each of next 15 sts. Ch 1, turn.
Row 3: Sc in first 14 sts, sc2tog over next sc and next st on adjoining triangle, sl st in next st on same triangle โ€” 15 sts. Turn.
Rows 4-14: Rep the last 2 rows 5 more times, then rep Row 2 only once more.
Row 15: Sc in first 14 sts, sc2tog over next sc and next st on adjoining triangle, mark sc2tog just made. Ch 1 loosely; do not turn.
Squares 2-11
Work same as Square 1.
Fasten off.


Tier 3
This tier is worked evenly, building on Tier 2.
Each square will begin with RS facing.
Join yarn with sl st to top corner of last completed square.
Square 1
Row 1 (RS): Working along side edge of square, sc in edge st of first 14 rows of square, sc2tog over edge st of next row and marked st on next square, remove marker, sl st in next st on same square โ€” 15 sts. Turn.
Row 2: Sk sl st, sc in each of next 15 sts. Ch 1, turn.
Row 3: Sc in first 14 sts, sc2tog over next sc and next st on adjoining square, sl st in next st on same square โ€” 15 sts. Turn.
Rows 4-14: Rep the last 2 rows 5 more times, then rep Row 2 only once more.
Row 15: Sc in first 14 sts, sc2tog over next sc and next st on adjoining square, mark sc2tog just made. Ch 1 loosely; do not turn.
Squares 2-11
Work same as Square 1.
Fasten off.


Tier 4
This is a 1-st decrease tier.
Each square will begin with WS facing.
Join yarn with sl st to top corner of last completed square.
Square 1
Row 1 (WS): Working along side edge of square, sc in edge st of first 12 rows of square, sc2tog over edge sts of next 2 rows, sc2tog over edge st of next row and marked st on next square, remove marker, sl st in next st on same square โ€” 14 sts. Turn.
Row 2: Sk sl st, sc in each of next 14 sts. Ch 1, turn.
Row 3: Sc in first 13 sts, sc2tog over next sc and next st on adjoining square, sl st in next st on same square โ€” 14 sts. Turn.
Rows 4-14: Rep the last 2 rows 5 more times, then rep Row 2 only once more.
Row 15: Sc in first 14 sts, sc2tog over next sc and next st on adjoining square, mark sc2tog just made. Ch 1 loosely; do not turn.
Squares 2-11
Work same as Square 1.
Fasten off.


Tier 5
This is a 1-st and 2-row decrease tier.
Each square will begin with RS facing.
Join yarn with sl st to top corner of last completed square.
Square 1
Row 1 (RS): Working along side edge of square, sc in edge st of first 12 rows of square, sc2tog over edge sts of next 2 rows, sc3tog over edge st of next row, marked st on next square, and next st on same square (this is the one you would have normally worked sl st into), remove marker, sl st in next st on same square โ€” 14 sts. Turn.
Row 2: Sk sl st, sc in each of next 14 sts. Ch 1, turn.
Row 3: Sc in first 12 sts, sc3tog over next 2 sc and next st on adjoining square, sl st in next st on same square โ€” 13 sts. Turn.
Row 4: Sk sl st, sc in each of next 13 sts. Ch 1, turn.
Row 5: Sc in first 12 sts, sc2tog over next sc and next st on adjoining square, sl st in next st on same square โ€” 13 sts. Turn.
Rows 6-12: Rep the last 2 rows 3 more times, then rep Row 2 only once more.
Row 13: Sc in first 12 sts, sc2tog over next sc and next st on adjoining square, mark sc2tog just made. Ch 1 loosely; do not turn.
Squares 2-11
Work same as Square 1.
Fasten off.


Tier 6
This is a 1-st decrease tier.
Each square will begin with WS facing.
Join yarn with sl st to top corner of last completed square.
Square 1
Row 1 (WS): Working along side edge of square, sc in edge st of first 10 rows of square, sc2tog over edge sts of next 2 rows, sc2tog over edge st of next row and marked st on next square, remove marker, sl st in next st on same square โ€” 12 sts. Turn.
Row 2: Sk sl st, sc in each of next 12 sts. Ch 1, turn.
Row 3: Sc in first 11 sts, sc2tog over next sc and next st on adjoining square, sl st in next st on same square โ€” 12 sts. Turn.
Rows 4-12: Rep the last 2 rows 4 more times, then rep Row 2 only once more.
Row 13: Sc in first 12 sts, sc2tog over next sc and next st on adjoining square, mark sc2tog just made. Ch 1 loosely; do not turn.
Squares 2-11
Work same as Square 1.
Fasten off.


Tier 7
This is a 1-st and 2-row decrease tier.
Each square will begin with RS facing.
Join yarn with sl st to top corner of last completed square.
Square 1
Row 1 (RS): Working along side edge of square, sc in edge st of first 10 rows of square, sc2tog over edge sts of next 2 rows, sc3tog over edge st of next row, marked st on next square, and next st on same square (this is the one you would have normally worked sl st into), remove marker, sl st in next st on same square โ€” 12 sts. Turn.
Row 2: Sk sl st, sc in each of next 12 sts. Ch 1, turn.
Row 3: Sc in first 10 sts, sc3tog over next 2 sc and next st on adjoining square, sl st in next st on same square โ€” 11 sts. Turn.
Row 4: Sk sl st, sc in each of next 11 sts. Ch 1, turn.
Row 5: Sc in first 10 sts, sc2tog over next sc and next st on adjoining square, sl st in next st on same square โ€” 11 sts. Turn.
Rows 6-10: Rep the last 2 rows twice more, then rep Row 2 only once more.
Row 11: Sc in first 10 sts, sc2tog over next sc and next st on adjoining square, mark sc2tog just made. Ch 1 loosely; do not turn.
Squares 2-11
Work same as Square 1.
Fasten off.


Tier 8
This is a 1-st decrease tier.
Each square will begin with WS facing.
Join yarn with sl st to top corner of last completed square.
Square 1
Row 1 (WS): Working along side edge of square, sc in edge st of first 8 rows of square, sc2tog over edge sts of next 2 rows, sc2tog over edge st of next row and marked st on next square, remove marker, sl st in next st on same square โ€” 10 sts. Turn.
Row 2: Sk sl st, sc in each of next 10 sts. Ch 1, turn.
Row 3: Sc in first 9 sts, sc2tog over next sc and next st on adjoining square, sl st in next st on same square โ€” 10 sts. Turn.
Rows 4-10: Rep the last 2 rows 3 more times, then rep Row 2 only once more.
Row 11: Sc in first 10 sts, sc2tog over next sc and next st on adjoining square, mark sc2tog just made. Ch 1 loosely; do not turn.
Squares 2-11
Work same as Square 1.
Fasten off.


Tier 9
This is a 1-st and 2-row decrease tier.
Each square will begin with RS facing.
Join yarn with sl st to top corner of last completed square.
Square 1
Row 1 (RS): Working along side edge of square, sc in edge st of first 8 rows of square, sc2tog over edge sts of next 2 rows, sc3tog over edge st of next row, marked st on next square, and next st on same square (this is the one you would have normally worked sl st into), remove marker, sl st in next st on same square โ€” 10 sts. Turn.
Row 2: Sk sl st, sc in each of next 10 sts. Ch 1, turn.
Row 3: Sc in first 8 sts, sc3tog over next 2 sc and next st on adjoining square, sl st in next st on same square โ€” 9 sts. Turn.
Row 4: Sk sl st, sc in each of next 9 sts. Ch 1, turn.
Row 5: Sc in first 8 sts, sc2tog over next sc and next st on adjoining square, sl st in next st on same square โ€” 9 sts. Turn.
Rows 6-8: Rep the last 2 rows once more, then rep Row 4 only once more.
Row 9: Sc in first 8 sts, sc2tog over next sc and next st on adjoining square, mark sc2tog just made. Ch 1 loosely; do not turn.
Squares 2-11
Work same as Square 1.
Fasten off.


Tier 10
This tier is worked evenly.
Each square will begin with WS facing.
Join yarn with sl st to top corner of last completed square.
Square 1
Row 1 (WS): Working along side edge of square, sc in edge st of first 8 rows of square, sc2tog over edge st of next row and marked st on next square, remove marker, sl st in next st on same square โ€” 9 sts. Turn.
Row 2: Sk sl st, sc in each of next 9 sts. Ch 1, turn.
Row 3: Sc in first 8 sts, sc2tog over next sc and next st on adjoining square, sl st in next st on same square โ€” 9 sts. Turn.
Rows 4-8: Rep the last 2 rows twice more, then rep Row 2 only once more.
Row 9: Sc in first 8 sts, sc2tog over next sc and next st on adjoining square, mark sc2tog just made. Ch 1 loosely; do not turn.
Squares 2-11
Work same as Square 1.
Fasten off.
Tiers 11 & 12
Work same as Tier 10, being sure to begin all Tier 11 squares with RS facing, and all Tier 12 squares with WS facing.


Tier 13
This tier is worked in Ending Triangles to make a flat top edge.
Each triangle will begin with RS facing.
Join yarn with sl st to top corner of last completed square.
Ending Triangle 1
Row 1 (RS): Working along side edge of square, sc in edge st of first 8 rows of square, sc2tog over edge st of next row and marked st on next square, remove marker, sl st in next st on same square โ€” 9 sts. Turn.
Row 2: Sk sl st, sc in each of next 7 sts, sc2tog over last 2 sts โ€” 8 sts. Ch 1, turn.
Row 3: Sc2tog over first two sts, sc in each of sc to last sc, sc2tog over next sc and next st on adjoining square, sl st in next st of same square โ€” 7 sts. Turn.
Row 4: Sk sl st, sc in each sc to last 2 sc, sc2tog over last 2 sts โ€” 6 sts. Ch 1, turn.
Rows 5-7: Rep the last 2 rows once more, then Rep row 3 only once more โ€” 3 sts. Ch 1, turn.
Row 8: Sk sl st, sc in next st, sc2tog over last 2 sts โ€” 2 sts. Ch 1, turn.
Row 11: Sc3tog in over next 2 sts and next st on square โ€” 1 st. Ch 1; do not turn.
Ending Triangles 2-11
Work same as Ending Triangle 1. Do not fasten off.
Finishing
Work 1 round in Reverse Single Crochet around top edge.
Fasten off.
Weave in ends.
Block to schematic measurements.


Blocking Tips

Entrelac fabric is the kind of fabric that blooms when itโ€™s blocked. Before blocking, the squares can look a little compressed and the woven effect feels subtle. After blocking, the squares relax open, the diagonal lines between them become crisp, and the whole cowl finally looks like the photos. Do not skip this step.

Wet block (recommended for this cowl):

  • Fill a clean sink or basin with cool water and a tiny splash of Eucalan wool wash. Soak the finished cowl for 15-20 minutes… gently press it under the water; do not agitate.
  • Drain the water without lifting the cowl (lifting a soaking-wet piece by one corner stretches it permanently). Press out as much water as you can with the cowl still in the basin, then transfer it onto a clean towel.
  • Roll the cowl up in the towel like a burrito and press to remove excess water.
  • Lay the cowl flat on blocking mats. Pin it to the schematic dimensions: bottom 46โ€ณ, top 28ยฝโ€ณ, length 20ยฝโ€ณ. Use blocking pins along both straight edges and at the bottom corners. Take your time getting the angles even.
  • Let it dry completely before unpinning… usually 12-24 hours depending on humidity.

Spray block (faster alternative): Pin the dry cowl to size on your blocking mats, then mist it thoroughly with cool water from a spray bottle until the fabric is damp throughout. Let dry completely. Less dramatic than a full wet block, but still effective.

โญ๏ธ Designer Tip… Pin every corner of every square. If you really want the woven effect to pop, place a pin at each corner of each entrelac square (where four squares meet). It's tedious but the difference is striking. The blocked fabric will show every interlocking block clearly. This is how you get that “did you really make that?” reaction.


Want to Go Deeper Into Crochet Techniques?

If single crochet entrelac sparks something in you… if you finish this cowl and immediately want to learn more crochet techniques that look harder than they are… check out the courses inside Marly Bird House. Itโ€™s where I teach the deeper, more technical side of crochet (and knitting) for crafters who want to grow past beginner-level patterns. Plus, members get early access to new free patterns and a private community to share your makes in.


A woman wears a colorful crocheted Boysenberry Bramble Cowl, showing wavy stitch texture and drape; blurred shelves behind her.

More Crochet Patterns Youโ€™ll Love

If you fall in love with single crochet entrelac (and you will), here are more crochet patterns from the blog to add to your queue:

  • Pieces of You Single Crochet Entrelac Wrap… the bigger sister to this cowl. Same technique, full 68โ€ณ wingspan. Your natural graduation project.
  • Free Crochet Corner-to-Corner Patterns Roundup… every C2C pattern on the blog. Same diagonal construction logic, different stitches. The natural cousin to entrelac.
  • Spring Fling 2026 Free Pattern Hub… 20 free knit and crochet patterns from my spring 2026 event.
  • Sunday Sideline Crochet Cardigan… another easy-elevated crochet make for when you want a wearable garment without the entrelac learning curve.
  • Super Simple Crochet Shawl… if you want a faster, even more beginner-friendly crochet shawl to alternate with this cowl.

Favorite & Queue on Ravelry

Save the Boysenberry Bramble cowl to your Ravelry queue so you can come back to it any time:

Favorite This Pattern on Ravelry - Marly Bird

A woman waves while holding a mug, surrounded by yarn for the Boysenberry Bramble Cowl crochet project and a checklist.

Frequently Asked Questions

Is single crochet entrelac hard?

Honestly, no… it just looks hard. If you can single crochet, slip stitch, and sc2tog, you have every stitch you need. The trickiest moment is the โ€œslip stitch in place of the ch-1 turnโ€ technique that joins each new square to the previous tier. It takes a few squares before it clicks, but once it does, the rest of the cowl is meditative repetition. Single crochet entrelac is genuinely the friendliest version of entrelac that exists.

What yarn can I substitute for Red Heart Unforgettable?

My #1 substitute is Loops & Threads Facets from Michaels… itโ€™s the same weight, same gradient cake construction, and same drape as Unforgettable. Lion Brand Mandala and Caron Cakes also work beautifully. The key is to stay in worsted weight (CYCA #4) and stick with a self-striping gradient cake yarn so you keep the color-shift effect that makes this cowl look intentional.

Do I need a Tunisian hook for crochet entrelac?

Nope! Thatโ€™s Tunisian entrelac, which is a different technique. The Boysenberry Bramble cowl uses a regular crochet hook (size G-6 / 4.25 mm) and only single crochet, slip stitch, and sc2tog. No special equipment, no new stitches to learn. If you already crochet, you already own everything you need.

How do I block an entrelac cowl?

Wet block by soaking the finished cowl in cool water with a small amount of no-rinse wool wash for 15-20 minutes. Press out the water (do not lift or wring), roll in a clean towel to remove more moisture, then pin to the finished schematic dimensions on blocking mats. Let dry completely before unpinning. Blocking is essential for entrelac fabric… the squares relax open and the woven effect becomes much more pronounced.

Why does the working direction change every tier?

Great question… thatโ€™s actually how entrelac fabric is constructed on the bias. Each tier of squares is worked in the opposite direction from the tier below it (RS facing one tier, WS facing the next). That alternating direction is what stacks the squares diagonally and creates the woven, interlocking-block look. If you worked every tier in the same direction, youโ€™d end up with a flat striped fabric instead of the basket-weave effect.

What weight is Loops & Threads Facets?

Loops & Threads Facets is a CYCA #4 worsted-weight yarn, 100% acrylic, in a gradient cake construction. Itโ€™s designed as Michaelsโ€™ in-house counterpart to Red Heart Unforgettable, so it slots in as a one-for-one substitute in any pattern that originally called for Unforgettable… including this one.

How much yarn do I need for this cowl?

The original pattern calls for 4 balls of Red Heart Unforgettable (270 yd / 100g each), so plan for approximately 1,000-1,100 yards of CYCA #4 worsted-weight gradient yarn. If youโ€™re using Lion Brand Mandala (which has more yardage per cake at ~590 yd), youโ€™ll need roughly 2 cakes. Always check your gauge before buying so you can adjust yardage if needed.

Can I make this cowl smaller or larger?

Yes… entrelac scales beautifully because the construction is repeatable. To make it smaller, work fewer base triangles in Tier 1 (each base triangle adds about 4โ€ณ of bottom circumference). To make it larger, work more base triangles. Just remember that every Tier 2-12 will then have that same number of squares, so plan your yardage accordingly. For a closer-fitting cowl, work fewer triangles; for a more dramatic shoulder-cape effect, add a couple.


A pink and green checkered crocheted cowl with visible textured stitches, worn draped around the neck indoors.

Final Thoughts

The Boysenberry Bramble cowl was the pattern I designed back in 2018 to introduce crocheters to single crochet entrelac in a friendly, achievable way… and seven years later, itโ€™s still doing exactly that. If you make it, share it with me using #BoysenberryBrambleCowl. I love seeing your color choices.

And remember… single crochet entrelac is NOT the scary version. Itโ€™s the friendly version. Youโ€™ve got this ๐Ÿ’›

โค๏ธ Your BiCrafty Bestie,
Marly Bird
A cartoon avatar of Marly Bird with glasses and a brown bun smiles warmly. Her green shirt and black jacket add a stylish touch, and colorful hearts surround her.

#mmmdi

Filed Under: Crochet, Free Patterns, Our Free Patterns, Pattern Tagged With: beginner crochet entrelac, Boysenberry Bramble, cake yarn, crochet cowl, crochet entrelac, free crochet cowl pattern, free crochet patterns, gradient yarn, intermediate crochet, Loops & Threads Facets, Marly Bird, SC entrelac, single crochet entrelac

Easy Beginner Garter Stitch Bias Knit Shawl โ€” Free Knitting Pattern

June 1, 2026 By admin 12 Comments

Updated May 2026: This post has been refreshed with expanded content, a new yarn alternatives section, video tutorials, and an expanded FAQ.

The Easy Beginner Garter Stitch Bias Knit Shawl is a free knit shawl pattern by Marly Bird worked from a single corner outward in pure garter stitch. No purling, no charts, no complicated shaping… just a simple 2-row repeat that builds a beautiful diagonal drape all on its own. Any worsted or aran weight yarn works… and gauge does not matter. Keep going until your shawl is the size you love, then finish with the included garter edge bind-off.

If you have ever wondered how a shawl gets that gorgeous diagonal drape without any complicated shaping rows, this is it. This pattern uses a simple right-angle construction that starts from one corner and builds outward… the triangular shape creates itself as you go, and the result has that same beautiful diagonal look most knitters associate with bias knitting.

The only stitch you need is a knit stitch.
No purling.
No reading charts.
No counting complex repeats.

Just a satisfying 2-row pattern you will have memorized within the first few rows, worked in a self-striping or multi-color yarn that handles ALL the color changes for you. If you are a brand new knitter, this is one of the best first shawl patterns you will ever find. And if you are an experienced knitter looking for the perfect travel project… I see you, and this is it.

โšก Quick Answer: The Beginner Garter Stitch Bias Knit Shawl is a free knitting pattern worked entirely in garter stitch โ€” no purling, gauge doesn't matter, any worsted weight yarn works. The simple 2-row repeat grows on the bias for beautiful diagonal drape. Perfect first shawl for new knitters.
Four mannequins model a beginner garter stitch bias knit shawl in blue, purple, and white, each showcasing different drape styles.
๐Ÿงถ Affiliate Disclosure: This post contains affiliate links. If you purchase through them I may earn a small commission at no extra cost to youโ€ฆ and it helps support free patterns and content from my yarn-loving heart ๐Ÿ’› See my privacy policy here.

Hey, bestie ๐Ÿ’›

I designed this shawl a while back using Red Heart With Love Stripes… and it instantly became one of my most-recommended beginner knitting projects. The original yarn has since been discontinued, but here is the thing… this shawl is so forgiving that it works with practically ANY worsted or aran weight yarn you love. Multi-color, self-striping, ombrรฉ, cakes… all of it is fair game. And because gauge genuinely does not matter here, you can cast on with whatever yarn calls to you from your stash, keep knitting until the shawl feels big enough, and then work the garter edge bind-off. Done. It is that simple.

I have pulled together a whole list of stripy, colorful yarn options below… including some new favorites that are really affordable. Let's get into it.

Marly Bird's Easy Beginner Garter Stitch Bias Knit Shawl, a free knitting pattern for beginners showing the diagonal drape in a colorful self-striping yarn

What You Will Love About This Beginner Knit Shawl ๐Ÿ’–

๐Ÿงถ It is 100% garter stitch. The entire shawl… body AND the garter edge bind-off… is knit stitch only. No purling. Ever. If you can knit, you can make this shawl.

๐Ÿ“ Gauge does not matter. This is genuinely rare in knitting patterns, and it is a huge deal for beginners. Grab your worsted or aran weight yarn, grab your US 10 needles (or whatever size is recommended on the label), and start knitting. Keep going until the shawl is the size you want it to be. The stitch count really does not matter… you just work until it feels right, then do the bind-off.

โœˆ๏ธ This is the ultimate travel project. The 2-row repeat is so simple you will have it memorized after the first few rows. You can set it down mid-row, pick it up two weeks later on a plane, and never miss a beat. No charts to track. No complex stitch patterns to re-orient yourself to. Just knit.

๐ŸŒˆ Self-striping yarn does all the color work for you. No ends to weave in between color changes. The yarn does the design work… you just enjoy watching the stripes appear.

๐Ÿ“„ It is free right here on the blog. The full pattern lives free โฌ‡๏ธ below… thank you for supporting the site by reading through the ads!

๐ŸŽ“ Two video tutorials walk you through everything. Part 1 covers the cast-on, setup rows, and body. Part 2 covers the garter edge bind-off. You are never on your own with this one.

Colorful Garter Stitch Bias Shawls in purple, blue, white, and gray are draped on three mannequins, showing knit texture.

Quick Pattern Overview

๐Ÿงถ Craft: Knitting

๐ŸŽฏ Skill Level: Easy Beginner

๐Ÿ“ Finished Size (sample, after blocking): 88″ (223.5 cm) wingspan along increase edge / 56″ (142 cm) along straight edge / 47″ (119.5 cm) along bind-off edge. Because gauge does not matter with this pattern, your finished size will depend on your yarn and how long you knit. Keep going until it feels right!

๐Ÿชก Needles: US Size 10 (6 mm) 36″ circular knitting needle. The shawl is worked flat… circular needles are just used to hold the growing number of stitches comfortably as the shawl grows.

๐Ÿงต Yarn: Any worsted or aran weight yarn in a colorful, self-striping, ombrรฉ, or multi-color style. The original yarn (Red Heart With Love Stripes, Baroque Stripe) is discontinued. See the full yarn list below!

๐Ÿ“ Gauge: 14 sts and 28 rows = 4″ in Garter Stitch after blocking. But here is the beautiful thing about this pattern: gauge does not matter. Your shawl will just be a different finished size, and that is perfectly fine.

๐Ÿ—๏ธ Construction: Worked flat from one corner outward using right-angle construction. The shawl builds its triangle shape as you go, creating that gorgeous diagonal drape knitters love. Finished with a built-in garter edge bind-off that works directly onto the live stitches.


Is This Beginner Bias Knit Shawl Right for You?

This pattern is perfect for you if…

โœ… You are a brand new knitter who has learned the knit stitch and wants a real project (not just a dishcloth)

โœ… You want a shawl pattern where gauge does not matter and you cannot mess it up

โœ… You love colorful, self-striping yarn and want a pattern that shows it off

โœ… You need a portable travel project with a simple repeat you can memorize

โœ… You want to learn bias knitting in the most beginner-friendly way possible

This pattern might not be for you if…

โŒ You want a lace shawl with intricate stitch patterns (this is pure garter stitch)

โŒ You prefer patterns with exact finished measurements (this one is flexible by design)

โŒ You have never knitted before (learn the knit stitch first, then come back!)

Banner with โ€œBICRAFTY Knitting Bootcampโ€ text, cartoon bird, and decorative accents in yellow, pink, and blue.

Love Colorful Self-Striping Yarn? More Patterns to Try! ๐ŸŒˆ

One of the best things about self-striping and gradient yarn is that it works beautifully for SO many project types beyond shawls. Here are a few of my favorite patterns that absolutely shine in a stripy, colorful yarn…

  • ๐Ÿงฅ Know Your Worth Cocoon Cardigan … a gorgeous, easy-wear cocoon cardigan that shows off every stripe of a self-striping yarn beautifully
  • ๐Ÿงฅ Amanda Woods Knit Cocoon Cardigan … another cocoon-style knit that drapes beautifully and makes self-striping yarn the star
  • ๐Ÿฆบ Lorelai Knit Vest … a stylish layering vest that works up fast and looks stunning in a gradient or ombrรฉ yarn
  • ๐Ÿงฅ Shoop, Shoop, Shoop Knit Cardigan … a fan-favorite VIP pattern from Turkey Trot 2023 that is absolutely dreamy in a stripy colorway
Woman models a blue-green garter stitch shawl, showing its soft texture while seated on a wooden bench outdoors.
Bias Knit Scarf Pattern in Knitting for Dummies 3rd Edition – By Marly Bird

Bias Shawl vs. Right-Angle Construction โ€” What's the Difference?

You will often hear this shawl called a “bias shawl,” and that name has stuck because of how it looks… that beautiful diagonal drape is exactly what most knitters picture when they hear the word bias. But technically, true bias knitting works differently: it uses increases on one side and decreases on the other simultaneously, which creates a fabric that runs on the diagonal from corner to corner.

This shawl is actually a right-angle construction… you start at one corner, increase on one sides to build out the triangle, and the result has that same gorgeous diagonal appearance without the complexity of true bias knitting. That is what makes it perfect for beginners.

So if you found this post searching for a bias shawl… you are in the right place. The look is the same, the technique is simpler, and the garter stitch does all the heavy lifting.

โœจ Designer Tip: If you love the bias construction in this shawl, check out my collection of 20 Free Bias Knit Projects Made Corner-to-Corner… there are blankets, scarves, and more all using this same satisfying diagonal technique!
Collage showing a woman knitting outdoors, close hands working yarn, tools displayed, and plane wing over clouds above.

Your Perfect Travel Knitting Project

I hear from knitters all the time who are looking for the ideal travel project… something portable, easy to pick up and put down, and simple enough to work while watching TV or chatting with friends. This shawl checks every box.

โœˆ๏ธ Airport and airplane friendly. No charts to reference, no complex stitch patterns to track. Just knit.

๐ŸŽ’ Fits in any bag. One ball of yarn, one circular needle, one stitch marker. That is it. These are my favorite knitting bags for all projects!

๐Ÿ›‹๏ธ Perfect TV knitting. The 2-row repeat is so simple you can knit without looking down once you have it memorized. We call this a perfect Netflix and Chill knitting project ๐Ÿ“บ

โธ๏ธ Easy to set down and pick up. No complicated pattern to re-orient yourself to. Just find your marker and keep going.


Join our Newsletter

Get Free Crochet & Knitting
Pattern Links & Coupons!

Hand-drawn bird with curling, detailed feathers and pink accents; cheerful pose showcases fine line and texture work.
>> Become An Insider <<
A woman with glasses and curly hair models a colorful crocheted scarf, showing textured stitches and vibrant yarn.

Build Your Skills with This Shawl

Even though this is an easy beginner pattern, you will learn real knitting skills that transfer to more advanced projects:

๐Ÿ“š Kfb (knit front and back)… a basic increase that adds one stitch. You will use this constantly in garment knitting.

๐Ÿ“š K2tog (knit two together)… a basic decrease that removes one stitch. Another essential skill for shaped garments.

๐Ÿ“š Reading your knitting… because you are watching the bias shape develop, you will learn to “read” your fabric and understand what is happening structurally.

๐Ÿ“š The garter edge bind-off… a technique that finishes and binds off at the same time. This skill transfers to other edgings and finishing techniques.

๐Ÿ“š Blocking… the finishing step that transforms your knitting. You will learn why blocking matters and how to do it properly.

Want to level up your knitting skills even more? Check out the BiCrafty Bootcamp at Marly Bird House for structured lessons that take you from beginner to confident knitter.


Striped knit shawl in blue, purple, and white draped on a mannequin; skein of Red Heart With Love Stripes yarn below.

Yarn & Materials

Original Yarn (Discontinued)

The original sample was knit in Red Heart With Love Stripes in the colorway Baroque Stripe (E400-1978). This yarn has been discontinued, but the good news is that this shawl works beautifully with ANY worsted or aran weight yarn. The pattern is so forgiving that you can substitute freely.

Substitute Yarns

Here are my favorite substitutes, organized by where to find them:

From Herrschners (affiliate links)

  • ๐Ÿงถ Lion Brand Ferris Wheel… beautiful long color changes, great drape
  • ๐Ÿงถ Lion Brand Mandala… classic gradient yarn with tons of colorways
  • ๐Ÿงถ Lion Brand Mandala Gradient… similar to Mandala with softer color transitions
  • ๐Ÿงถ Red Heart Super Saver Stripes… budget-friendly and widely available
  • ๐Ÿงถ Herrschners Be Stripey… new and affordable, lots of colorways
  • ๐Ÿงถ Red Heart Super Easy Stripes… great for a LARGER shawl
  • ๐Ÿงถ Premier Puzzle Yarn… fun color combinations

From Michaels

  • ๐Ÿงถ Loops & Threads Impeccable Stripes… affordable and easy to find
  • ๐Ÿงถ Caron Macchiato Cakes… beautiful warm neutrals
  • ๐Ÿงถ Caron Blossom Cakes… gorgeous floral-inspired colorways (see my Caron Blossom Cakes post)
  • ๐Ÿงถ Caron Upside Down Cakes… fun, unexpected color combinations
  • ๐Ÿงถ Loops & Threads Soft Classic Ombre… soft gradient transitions
  • ๐Ÿงถ Loops & Threads Carousel Twist… bright, cheerful stripes
๐Ÿงน A note on fiber care: Most of the yarns on this list are acrylic or acrylic-blend worsted weights, which means they are machine washable. This is a huge bonus for a beginner project… no hand washing required, and the finished shawl can go right in the washing machine on a gentle cycle. That also makes this shawl an excellent gift choice, since acrylic holds up beautifully to regular laundering. If you choose a natural fiber yarn (wool, alpaca, etc.), hand wash gently and lay flat to dry.

Needles & Notions

  • ๐Ÿชก US Size 10 (6 mm) 36″ circular knitting needle… circular needles hold the growing stitch count comfortably as the shawl gets bigger. The shawl is worked flat (back and forth), not in the round. Shop circular needles at Jimmy Beans Wool or Knit Picks.
  • ๐Ÿ”ต Stitch markers (including at least one removable marker)
  • โœ‚๏ธ Scissors
  • ๐Ÿ“ Tape measure
  • ๐Ÿชก Tapestry needle (for weaving in ends)
  • ๐Ÿ‘œ Notions bag for supplies
  • ๐Ÿท๏ธ Leather tags + rivets (optional… for a polished finishing touch)

Video Tutorials

I have two full-length video tutorials for this pattern, plus links to individual technique tutorials for every skill used in the pattern. Watch these before you cast on and you will feel completely prepared.

๐ŸŽฅ Part 1: Getting Started… covers the cast on, setup rows, placing your stitch marker, and the beginning of the bias shaping. Watch this before you cast on your first stitch.

๐ŸŽฅ Part 2: The Garter Edge Bind-Off… a complete walkthrough of the garter edge bind-off section, including how to set it up, how to join your live stitches, and how to finish the shawl beautifully.

๐ŸŽฅ Get Fix It Help… a complete walkthrough of the common mistake fixes for your knitting. This is a video you will want to save and come back to.

Individual technique tutorials:

  • ๐ŸŽฅ Long Tail Cast On
  • ๐ŸŽฅ Knit Front and Back (kfb)
  • ๐ŸŽฅ Knit Two Together (k2tog)
Beginner Garter stitch bias knit shawl stripes in blue, purple, white, gray, and brown shown on a mannequin from three angles.

Easy Beginner Garter Stitch Bias Knit Shawl โ€” Pattern Details

Skill Level

Easy Beginner

Finished Measurements (Sample, After Blocking)

  • 88″ (223.5 cm) wingspan along the increase edge
  • 56″ (142 cm) along the straight edge
  • 47″ (119.5 cm) along the bind-off edge

Note: Because gauge does not matter with this pattern, your finished measurements will depend on your yarn weight and needle size. Work until your shawl feels like the right size for you, then work the garter edge bind-off.

Gauge

14 sts and 28 rows = 4″ (10 cm) in Garter Stitch after blocking

Gauge note: Gauge is not critical for this pattern. Your shawl will simply be a different finished size depending on your yarn and needles. Cast on and enjoy the process!

Materials

Yarn: Any worsted or aran weight yarn in a colorful, self-striping, ombrรฉ, or gradient colorway. See full yarn list above.

Original sample yarn: Red Heartยฎ With Loveยฎ Stripes, Baroque Stripe (E400-1978)… 2 skeins. Discontinued. Use any of the substitute yarns listed in the Yarn section above.

Needles: US Size 10 (6 mm) 36″ circular knitting needle. The shawl is worked flat. Circular needles are used simply to hold the growing number of stitches comfortably.

Notions: Stitch markers

Tapestry needle 

Scissors

Tape measure

Notions Bag for Supplies

Leather tags (optional)

Leather rivets (optional)

โญ๏ธ Marly Bird Amazon Storefront โญ๏ธ

Abbreviations

  • CO — cast on
  • k — knit
  • k2tog — knit 2 stitches together (right-leaning decrease)
  • k2togtbl — knit 2 stitches together through the back loops
  • kfb — knit into the front and back of the same stitch (increase)
  • RS — right side
  • SM — slip marker
  • st(s) — stitch(es)
  • WS — wrong side

Schematic

Asymmetrical shawl knit in striped garter stitch with blue, gray, and white hues; labeled measurements and start point shown.

Pattern Notes

Construction: This shawl is worked flat from one corner outward using garter stitch throughout. The shawl grows on the bias… meaning it grows diagonally instead of straight across like a traditional triangle shawl. Simple increases and decreases create the asymmetrical shape while keeping the knitting relaxing and easy to follow. After the desired size is reached, a decorative garter stitch bind-off is worked directly onto the live stitches. This edging finishes the shawl while binding off the remaining stitches at the same time.

Right Side and Wrong Side: Because the shawl is worked entirely in garter stitch, both sides look very similar. After completing the setup rows, place a removable marker on the Right Side of your work. This marker will help you keep track of which side is the front of the shawl as it grows.

Stitch Marker Placement: The stitch marker placed during the setup rows marks the shaping line of the shawl. Do not remove this marker. Whenever the pattern instructs you to “SM,” simply slip the marker from the left needle to the right needle without knitting it.

Joining a New Skein: To maintain the stripe sequence, begin the new skein at the same point in the color repeat whenever possible. Compare the colors at the end of the current skein to the beginning of the new skein and adjust as needed before joining.

Measuring Your Shawl: Measure the shawl periodically as you work. The sample shawl measures 88″ along the increase edge (wingspan) and 56″ along the straight edge. You may continue knitting beyond the sample measurements if you have sufficient yarn and would like a larger shawl. You can also stop earlier for a smaller shoulder shawl.

Understanding the Garter Edge Bind-Off: The garter edge bind-off is worked directly onto the live stitches of the shawl. During the bind-off process, one live shawl stitch is joined to the edging on every Wrong Side row. As you continue working, the number of live shawl stitches gradually decreases until all stitches have been incorporated into the edging. If it appears that your shawl stitches are disappearing… don't worry! That means you're doing it correctly.

โœจ Designer Tip: If you're new to knitting, place a removable stitch marker every 20 rows. These markers make it much easier to count rows and track your progress if you need to put the project down and come back later.

Join our Newsletter

Get Free Crochet & Knitting
Pattern Links & Coupons!

Hand-drawn bird with curling, detailed feathers and pink accents; cheerful pose showcases fine line and texture work.
>> Become An Insider <<
A woman with glasses and curly hair models a colorful crocheted scarf, showing textured stitches and vibrant yarn.

GROW

To Unlockย Exclusive Subscriber Contentย click the Box below and join for free by simply adding your email and creating a password! If you are having troubles, clear your cache or reset your password or login to the Grow Publisher Portal.

>> Learn More About Grow Here <<

I'm thrilled to share this amazing pattern with you, many patterns on my blog are absolutely free! I kindly request that you don't copy and paste or distribute this pattern. Prefer an ad-free experience? Buy a digital PDF pattern for a small fee from one of my online stores for a seamless crafting journey. 

I appreciate your support and readership. You are the reason I can keep doing what I love and sharing it with others. So, thank you from the bottom of my yarn-loving heart! Disclosure: This post contains affiliate links, meaning I get a commission if you decide to make a purchase through my links at no cost to you.

Easy Beginner Garter Stitch Bias Knit Shawl โ€” Pattern Instructions

Set-Up

Using the Long Tail Cast On, CO 2 sts.

Row 1 (WS): Kfb, k1. โ€” 3 sts

Row 2 (RS): Kfb, k1, kfb. โ€” 5 sts

Row 3 (WS): Kfb, place marker, knit to end. โ€” 6 sts
Place a removable marker on the Right Side of the work at the increased edge.

๐Ÿ’ก Need extra help? Watch the Part 1 video tutorial before continuing.

Body

Row 4 (RS): Knit to marker, SM, knit to last st, kfb in last st. โ€” 1 st increased

Row 5 (WS): Kfb, knit to 2 sts before marker, k2tog, SM, knit to end. โ€” stitch count remains unchanged

Repeat Rows 4 and 5: Continue repeating Rows 4 and 5 until the shawl measures approximately 88″ along the increase edge (wingspan) and 56″ along the straight edge… or your desired size, ending after completing a Right Side row.

โœจ Designer Tip: Leave enough yarn to complete the garter edge bind-off. If you are unsure, begin the bind-off when approximately 10% of your yarn remains.

Garter Edge Bind-Off

Ready to finish your shawl? Watch the Part 2 video tutorial for a complete walkthrough of this section.

Do not bind off the shawl body.

The garter edge bind-off is worked directly onto the live stitches and serves as both the decorative edging and the bind-off.

Setup Row (WS): CO 2 sts. Kfb, k2togtbl (working one cast-on stitch together with one live shawl stitch). โ€” 3 sts remain on needle

Row 1 (RS): Kfb, k1, kfb. โ€” 5 sts

Row 2 (WS): Knit 4, then k2togtbl using the final edging stitch and the next live shawl stitch.

Row 3 (RS): Knit 5.

Repeat Rows 2 and 3: Continue repeating Rows 2 and 3 until all remaining live shawl stitches have been incorporated into the edging. As you work, the edging stitch count remains the same while the number of live shawl stitches gradually decreases. When all shawl stitches have been joined to the edging, bind off all remaining stitches loosely.

Finishing

Weave in all ends. Wash the shawl according to the yarn label instructions. Lay the shawl flat on blocking mats or towels and gently shape it to your desired finished measurements. Allow the shawl to dry completely before removing pins.

Blocking helps smooth the garter stitch fabric, evens out the edges, and allows the shawl to reach its full size… it makes a noticeable difference, so don't skip it!


Blocking Tips

Blocking is the step that takes this shawl from “nice” to “wow.” Here is how to do it right:

๐Ÿงผ Wash it first. Fill a basin with cool water and a small amount of wool wash (or mild dish soap for acrylic yarns). Submerge the shawl and let it soak for 10-15 minutes. Do not agitate… just let the water do its work.

๐Ÿ’ง Remove gently. Lift the shawl out of the water (don't wring!) and press it gently against the sink to remove excess water. Roll it in a clean towel and press again. The shawl should feel damp but not dripping.

๐Ÿ“ Pin it out. Lay the shawl flat on blocking mats (or clean towels on a carpeted floor). Shape it to your desired measurements, gently stretching the edges. Pin the corners and along the edges to hold the shape while it dries.

โณ Let it dry completely. This usually takes 12-24 hours depending on the fiber content and your environment. Resist the urge to unpin it early… the shawl needs to be fully dry to hold its blocked shape.

โœจ Designer Tip: For acrylic yarns (like most of the substitutes on this list), you can also “kill” the yarn with steam for a permanent block. Hold a steam iron just above the pinned shawl (don't touch the iron to the yarn!) and let the steam penetrate the fabric. This sets the stitch definition permanently.

A woman wearing a chunky, multicolored knit scarf shows off textured stitches; shelves and plants visible behind her.
A person models a vibrant, textured Fire Sprite Shawl; knit stitches and bright colorwork are visible against bookshelves.
Woman modeling a blue textured triangle shawl over a navy shirt, showing stitch detail in a bright, cozy room.
Woman wearing oversized knit poncho with relaxed fit - great travel blanket
Person models a blue and yellow Tunisian crochet scarf with bold stripes, highlighting stitch texture and drape.
Make It Mine Triangle Shawl

More Free Knit Shawl Patterns You'll Love

Ready for your next shawl project? Here are some of my favorites from the marlybird.com collection… every level from beginner through intermediate is covered:

  • โœจ Almond Brittle Knit Wrap … beginner-friendly bulky lace, works up quickly
  • ๐Ÿ”ฅ Lehabah Fire Sprite Right Triangle Shawl … advanced beginner lace shawl with gorgeous columns of lace stitch
  • ๐Ÿ”๏ธ Eowyn Cable Knit Shawl … free cable knit shawl for when you are ready to tackle cables
  • ๐Ÿงญ Woobie Travel Poncho … another perfect travel knitting project, bulky and fast
  • ๐Ÿ“š Full Knit Shawl Patterns Collection … browse every free knit shawl on marlybird.com organized by shape, skill level, and season
Favorite This Pattern on Ravelry - Marly Bird

Favorite & Queue on Ravelry

Love this pattern? Save it to your Ravelry queue so you don't forget, and favorite it to help other knitters find it!

A smiling woman wears a purple striped knit shawl, showing its texture. Yarn and flowers highlight her love of knitting.

Frequently Asked Questions

Is this really a bias shawl?

Great question! Most knitters call this a “bias shawl” because of the gorgeous diagonal drape… and if that is what you searched for, you are in the right place. Technically, true bias knitting uses simultaneous increases and decreases to create fabric that runs on the diagonal. This shawl uses right-angle construction instead… you start at one corner, increase to build the triangle, and get that same beautiful diagonal look with simpler shaping. Same drape, easier technique!

Why does gauge not matter for this pattern?

Because this shawl is designed to be worked until it reaches your desired size, exact gauge is not critical. If your gauge is different from the pattern, your shawl will simply be a different finished size… but it will still work up beautifully. This makes it perfect for beginners who are still learning to achieve consistent tension.

Can I use a different weight yarn?

Absolutely! This pattern works with any yarn weight from DK to bulky. Just use the needle size recommended on your yarn label. A lighter weight yarn (like DK) will give you a lacier, lighter shawl. A heavier weight (like bulky) will give you a thicker, cozier wrap. Adjust your stopping point based on how much yarn you have.

How much yarn do I need?

The original sample used approximately 2 skeins (about 700 yards total) of worsted weight yarn. However, because you control the finished size, you can make this shawl with more or less yarn. If you want a smaller shoulder shawl, one skein might be enough. For a larger wrap, you may need 3 skeins or more.

What is the garter edge bind-off?

The garter edge bind-off is a technique that creates a decorative edging while simultaneously binding off the live stitches of your shawl. You cast on a few stitches for the edging, then work them back and forth while joining one live shawl stitch on each wrong side row. The result is a neat, finished edge with a subtle garter ridge detail.

Can I make this shawl bigger or smaller?

Yes! That is one of the best things about this pattern. Simply continue the body repeat until your shawl reaches the size you want, then work the garter edge bind-off. For a smaller shoulder shawl, stop when the wingspan measures about 60″. For a larger blanket-style wrap, keep going until it is 100″ or more.

Do I need to know how to purl for this pattern?

No! This entire shawl… including the decorative bind-off… is worked using only the knit stitch. If you can knit, you can make this shawl. You will also learn kfb (knit front and back) and k2tog (knit two together), but both are simple variations of the basic knit stitch.

Final Thoughts

This beginner garter stitch bias knit shawl holds a special place in my heart because it is exactly the kind of project I wish I had when I was learning to knit. No complicated techniques. No scary charts. No anxiety about gauge. Just the simple pleasure of watching garter stitch grow into something beautiful… row by row, stitch by stitch.

If this is your first shawl, I am so excited for you. And if you are an experienced knitter looking for something relaxing and portable… I think you will love it just as much. The bias construction creates such a satisfying drape, and watching those self-striping colors develop is genuinely addictive.

Tag me when you finish yours… I would love to see it! ๐Ÿ’›

โค๏ธ Your BiCrafty Bestie,
Marly Bird
A cartoon avatar of a person with glasses and a brown bun smiles warmly. Their green shirt and black jacket add a stylish touch, while colorful hearts surround them like loving temperature blankets, stitching together an aura of love and positivity. -Marly Bird

Filed Under: Our Free Patterns, Pattern Tagged With: beginner knit shawl, bias knitting, easy knit pattern, free knit pattern, free knitting pattern, garter stitch shawl, knit shawl, Marly Bird, shawl knitting pattern, travel knitting project, triangle shawl

Free Knit Tunic Pattern: The Thistlevine Sleeveless Vest by Marly Bird

May 29, 2026 By Meg Leave a Comment

”

The Thistlevine is a free knit tunic vest pattern by Marly Bird… a sleeveless lace layering shell with a Zig Zag Waves peplum hem, a Lace Columns body, and an optional shorter vest length. Knit in worsted weight (Knit Picks Woodland in the sample), sized XS through 5X with finished busts from 31ยฝ” to 62ยฝ”, intermediate skill level. Free here on the blog. Ad-free printable PDF available on Etsy, Shopify, and Ravelry.

โšก Quick Answer: The Thistlevine Knit Tunic is a free sleeveless knit vest and tunic pattern designed by Marly Bird. Worked in one piece from front hem to back hem in worsted weight yarn on US 9 (5.5 mm) needles. Available in 8 sizes (XS through 5X), bust 31ยฝ" to 62ยฝ". Intermediate skill level with two stitch patterns… a Zig Zag Waves peplum and Lace Columns body. Wear it tunic length or shorten the peplum for a cropped vest.
Woman models a blue lace knit tunic with intricate stitch detail, standing in a cozy room with shelves and decor behind her.

Hey, bestie ๐Ÿ’› What if one pattern gave you two completely different looks… a tunic-length layering piece for cool evenings, or a cropped vest for warmer days? That is the Thistlevine. This free knit tunic vest pattern brings together two of my favorite stitch patterns into one sleeveless lace shell that is as beautiful to knit as it is to wear.

The Zig Zag Waves hem creates that soft, swingy peplum movement at the bottom edge. The Lace Columns through the bust and body keep the eye traveling up. It is a piece you reach for again and again, layered over a turtleneck in fall, a flowy blouse in spring, or just on its own when the weather is being weather.

I designed the Thistlevine for every body, sized XS through 5X. Not graded as an afterthought… worked out from scratch for every size, so the lace lands right where you want it.

This post contains affiliate links. If you click and buy, I may earn a small commission at no extra cost to you. Thank you for supporting my yarn-loving heart ๐Ÿ’›

Thistlevine free knit tunic vest pattern by Marly Bird, sleeveless lace layering shell in Knit Picks Woodland Blue Jay Heather, modeled with the Zig Zag Waves peplum hem and Lace Columns body visible

๐ŸŒท The Thistlevine debuted as part of Spring Fling 2026… Day 20 BiCrafty Bonus Finale (Fri May 29, 2026).

Day 20 closed out my 20-day knit and crochet pattern celebration with TWO patterns… the Garden Party Crochet Cardigan for crocheters and the Thistlevine Knit Tunic for knitters. The free pattern stays free forever right here on the blog. Browse the rest of the celebration on the Spring Fling Hub โ†’

๐Ÿ’– What You Will Love About the Thistlevine

๐Ÿงถ Two stunning stitch patterns in one piece. Zig Zag Waves at the hem creates a flowing, peplum-like flare. Lace Columns through the bust and body give a vertical, elongating line. The transition between the two is where the magic lives.

๐Ÿชก One-piece construction. The Thistlevine is worked in one piece. Knit the front to the shoulders then knit down the back, then seamed only at the sides. No sleeves to set in. No yoke math. The armhole and neck edgings are picked up and knitted for a clean, polished finish. โญ๏ธ and exclusively in the ad-free pdf there are charts for the arhole and neck shaping for each size separately!

๐Ÿ‘— Wear it two ways. Knit at full tunic length for a flowy layering piece, or shorten the peplum and bind off earlier for a cropped vest. Both looks come from the same pattern… your choice.

๐Ÿ“ Size-inclusive, 8 sizes (XS through 5X). Finished busts run from 31ยฝ” up to 62ยฝ”. Every size was worked out individually, so the lace pattern repeats land cleanly across the body in every size.

๐ŸŒŠ The peplum silhouette is shaping you do not have to think about. The Zig Zag Waves stitch creates the gentle flare at the hem all on its own. No increases or decreases for shape… the stitch pattern does the work.

๐Ÿงต Intermediate-friendly lace. If you can knit, purl, yarn over, and work k2tog and ssk, you can knit this tunic. The pattern walks you through every special stitch.

๐Ÿซ Luxurious sample yarn. Knit Picks Woodland (an 80% Merino / 20% Baby Alpaca blend in Blue Jay Heather) shows the lace beautifully and feels soft enough to wear all day.

Marly Bird wearing the Thistlevine free knit tunic vest pattern over a white collared blouse, showing the neckline finish and Lace Columns bodice texture

๐Ÿงต Quick Pattern Overview

๐Ÿงถ Craft: Knit (sleeveless tunic/vest)

๐Ÿ“ Skill level: Intermediate

๐Ÿ“ Sizes: XS, S, M, L-XL, 2X, 3X, 4X, 5X (8 sizes)

๐Ÿ“ Finished bust: 31ยฝ” (S 36, M 40ยฝ, L-XL 45, 2X 49ยฝ, 3X 54, 4X 58, 5X 62ยฝ)”… designed to fit snugly. Size up if you are between sizes.

๐Ÿ“ Finished length: 26ยฝ” up to 36ยผ” depending on size (tunic length… shorten the peplum to wear as a cropped vest).

๐Ÿงถ Yarn: Worsted weight #4. Sample knit in Knit Picks Woodland (80% Merino / 20% Baby Alpaca, 180 yds per 100g skein) in Blue Jay Heather. Skeins needed: 4 (4, 5, 5, 6, 7, 8, 9).

๐Ÿชก Needles: US 9 / 5.5 mm 32″ circular for the main fabric, plus a 16″ circular one size smaller for the armhole and neck edgings.

๐Ÿ“ Gauge: 18 sts and 26 rows = 4″ in Lace Columns pattern.

๐ŸŒŠ Stitch patterns: Zig Zag Waves (peplum) and Lace Columns (bust and body).

๐Ÿงต Construction: Worked in one piece from front hem to back hem… seamed at the sides… edgings picked up and knitted.

Blue yarn skeins on a ceramic plate atop a wooden table, surrounded by greenery, walnuts, cinnamon sticks; Marly Bird logo visible.

๐Ÿ’Ž Love the Pattern but Want an Ad-Free PDF? โญ

The free pattern is right here on the blog (scroll down… you will need a free GROW account to unlock the instructions). If you would rather have a beautifully formatted, printable, ad-free PDF you can take with you anywhere, grab the Thistlevine ad-free PDF below ๐Ÿ’–

๐Ÿ›’ Shop Etsy
๐Ÿ›’ Shop Ravelry
๐Ÿ›’ Shop Marly Bird Shopify Store

Is the Thistlevine a vest or a tunic?

It is both… and that is the point. The pattern is written for tunic length (26ยฝ” to 36ยผ” depending on your size), but you can shorten the peplum section and bind off earlier for a cropped vest look. Both instructions are included in the pattern. Two completely different outfits from one set of needles.

Is this a plus size knit tunic pattern?

Yes, fully. The Thistlevine is sized XS through 5X with finished busts from 31ยฝ” to 62ยฝ”. Every size was graded from scratch… not just the smallest size with extra stitches tacked on… so the lace repeats land where they should on every body. This is a pattern designed for every knitter, at every size.

Does the Thistlevine work as a layering piece?

It was designed for layering. The sleeveless lace shell works over a fitted turtleneck in fall or winter, over a flowy blouse in spring, or on its own in summer. The tunic length gives enough coverage to layer over anything without bunching, and the Lace Columns allow whatever you are wearing underneath to show through subtly. It is a true three-season layering staple.

Where can I get the ad-free PDF of the Thistlevine pattern?

The ad-free, printable PDF is available on Etsy, Ravelry, and the Marly Bird Shopify store. The PDF includes visual stitch charts for the armhole and neck shaping for every size… those charts are exclusive to the PDF and not in the free blog version. The free blog version has everything you need to knit the Thistlevine; the PDF is just a cleaner, chart-enhanced upgrade.

Thistlevine Knit Tunic Vest pattern by Marly Bird... ad-free PDF promo showing Marly wearing the blue heathered knit lace vest sample plus a fanned preview of the printable PDF pages
Etsy
Shopify
Ravelry

Join our Newsletter

Join our Newsletter

Get Free Crochet & Knitting
Pattern Links & Coupons!

Hand-drawn bird with curling, detailed feathers and pink accents; cheerful pose showcases fine line and texture work.
>> Become An Insider <<
A woman with glasses and curly hair models a colorful crocheted scarf, showing textured stitches and vibrant yarn.

๐Ÿค” Is the Thistlevine Right for You?

The Thistlevine is for the knitter who is comfortable with the basics and ready for a piece with personality. If you can already knit, purl, work yarn overs, and decrease (k2tog and ssk), the rest of the pattern is well within reach… I walk you through every special stitch in the instructions.

This is a great pattern for:

  • A knitter who has finished a few smaller projects and is ready for their first garment with some shaping
  • An intermediate knitter who wants a lace project that feels fresh, not fussy
  • Someone who loves a layering piece with shape… not just a rectangular wrap
  • Plus-size knitters who have been waiting for a lace tunic actually graded through 5X

It is not the place to start if you have never knit lace before… but if you have done a few yarn overs and decreases in a hat or shawl, you have the foundation you need.

Marly Bird wearing the Thistlevine free knit tunic vest pattern in a studio lifestyle shot, showing the front silhouette of the sleeveless knit lace tunic over a fitted collared top

๐Ÿงฉ Design Features & Construction

The Thistlevine is built around a smart, low-fuss construction that lets the lace do all the visual work. Here is what is happening under the hood:

๐Ÿงต One-piece front-to-back construction. You cast on at the bottom of the front peplum, knit up through the bust, shape the front armholes, separate at the neck for shoulders, then cast on bridge stitches to join the shoulders and knit DOWN the back… right through the back armhole increases, back bust, and back peplum. Only ONE seam to sew on each side when you are done.

๐ŸŒŠ The Zig Zag Waves peplum. The hem starts with the Zig Zag Waves stitch pattern, which uses traveling yarn overs and edge decreases to create that soft, flared peplum silhouette. You are NOT increasing for shape… the stitch pattern itself makes the peplum flare. A pattern transition row (with p2tog and ssp decreases) takes you from the peplum into the body.

๐Ÿ›๏ธ The Lace Columns body. Through the bust and body, the Lace Columns stitch creates clean vertical lines that elongate the torso and gently skim the figure. The body is straight (no waist shaping)… the peplum and the lace pattern do the visual shaping for you.

โœจ Short-row shoulder shaping. The back shoulders are shaped with short rows worked one stitch below the marker line, which creates a smooth, gently sloped shoulder line. This is what makes the tunic sit cleanly on the body instead of pulling at the neck.

๐Ÿงถ Picked-up edgings, NOT sewn-on bindings. The armhole and neck edgings are picked up and knitted in the round (on smaller needles) AFTER you block and seam. This is what gives the openings that polished, finished look… no curling, no awkward sewn binding to fight with.

๐Ÿ’ก Designer Tip: The one-piece construction means you do not have to match stripes or pattern rows at a yoke join… it is one continuous fabric front to back. If you swap yarns or come back to the project after a break, that consistency is on YOUR side ๐Ÿ’›

๐Ÿง  Build Your Skills: The Lace Inside the Thistlevine

One of the things I love about teaching knit lace is that the “hard” part of lace is mostly about reading your knitting. Once your eye learns the pattern, the stitches almost work themselves. The Thistlevine uses two stitch patterns… and each one teaches you something a little different.

Close-up flat lay detail of the Thistlevine knit tunic vest showing the Zig Zag Waves lace peplum hem stitch pattern and Lace Columns transition by Marly Bird

Lace Columns (the body)

Lace Columns is a 4-row repeat worked over a multiple of 5 stitches plus 3. It uses yarn overs and paired decreases (ssk and k2tog) to form clean vertical columns of lace separated by knit and purl ribs. It is one of those stitch patterns that looks complicated on paper and feels easy in your hands once you find the rhythm. The vertical lines are flattering and they help the body of the tunic skim the figure instead of hanging straight. The stitch count stays the same throughout the pattern repeat… once you cast on for the bust, every Lace Columns row keeps your total stitch count steady.

Zig Zag Waves (the peplum)

Zig Zag Waves is a 16-row repeat over a multiple of 12 stitches plus 3. It pairs traveling yarn overs with k2tog and ssk decreases at the edges of each repeat to push and pull the stitches into a wave pattern. Where the yarn overs land creates the open lace… where the decreases happen creates the soft flare. You do not increase or decrease for shape. The stitch pattern itself does the work of giving the peplum its movement. Like Lace Columns, the total stitch count stays the same throughout the 16-row repeat… yarn overs and decreases balance each other inside every row.

๐Ÿ’ก Designer Tip: Lace almost never looks like much on the needles… it needs to breathe. Block this piece fully before you sew the side seams and you will be amazed at how the Lace Columns open up. Trust the block ๐Ÿ’›
Close-up detail of the Thistlevine free knit tunic vest neckline finish and Lace Columns bodice stitch pattern by Marly Bird

A few special stitches to know

You will see a handful of abbreviations in the pattern that may be new… but they are all friendly. LLM1 and RLM1 are lifted increases that disappear seamlessly into the fabric. TK2tog and Tskp are twisted versions of standard decreases that keep the edges of the lace clean and crisp. M1p is a make-one purlwise used in the peplum transition row. The full definitions are in the pattern… no guesswork required.

๐Ÿ“ Sizing, Fit, and Size-Inclusive Design

The Thistlevine is sized XS through 5X… 8 sizes total. Each size was worked out from scratch so the lace repeats land where they should on every body, not just the smallest sizes with bigger sizes tacked on as an afterthought. This is a pattern I designed for every body ๐Ÿ’›

SizeFinished BustFinished Length
XS31ยฝ” / 80 cm26ยฝ” / 67.5 cm
S36″ / 91.5 cm28″ / 71 cm
M40ยฝ” / 103 cm29ยผ” / 74.5 cm
L-XL45″ / 114.5 cm30ยพ” / 78 cm
2X49ยฝ” / 125.5 cm32″ / 81.5 cm
3X54″ / 137 cm33ยฝ” / 85 cm
4X58″ / 147.5 cm34ยพ” / 88.5 cm
5X62ยฝ” / 159 cm36ยผ” / 92 cm

๐Ÿ“ How to Choose Your Thistlevine Size

Start with your actual full bust measurement… all the way around, over the fullest part. The Thistlevine has 0โ€“2″ of negative to neutral ease, so it is designed to fit snugly. If your bust is between two sizes, go up. You'll get a slightly more relaxed fit, and you can always block lace more open. You cannot block it smaller.

Plus-size knitters: the 3X sample in these photos is shown on a 44″ bust with positive ease (Marly has since lost weight since the sample was made, so the fit is roomier than intended). Sizes 4X and 5X follow the exact same construction… just scaled. This pattern was designed for every body.

When in doubt, size up. You can always block it slightly more open. You cannot block it smaller.

Fit note: The Thistlevine is designed with approximately 0-2″ [0-5 cm] of negative to neutral ease at the full bust… so it fits snugly. For the intended fit, choose the size closest to your actual bust measurement. If you prefer a more relaxed fit, size up. (Love a size-inclusive free vest pattern? Also check out the Lorelai Knit Vest for another free size-inclusive option.) You can always block it slightly more open… you cannot block it smaller. โญ๏ธ The sample is size 3xl and it is shown on a 44″ / 111.75 cm bust (which means it is shown with positive ease but not because Marly intended it to be like that; she had the sample made to fit her but has since lost weight).

Full-length wearing shot of the Thistlevine free knit tunic vest pattern by Marly Bird, showing the complete A-line peplum silhouette over jeans, sizes XS through 5X

Tunic length OR cropped vest… your call

Because the Thistlevine is worked in one piece front hem to back hem, the length is easy to customize. The finished lengths in the pattern range from 26ยฝ” (XS) up to 36ยผ” (5X), which gives you a true tunic that hits at the upper thigh.

Want a cropped vest instead? Work fewer rows in the peplum section before transitioning to the bust… swatch and measure to land at the length you want. The Zig Zag Waves stitch pattern is a 16-row repeat, so end after a Row 2 or Row 10 to keep the lace lining up correctly on both ends.

Just remember if you shorten the peplum, you will use less yarn… and if you lengthen the body or the back peplum, you will use more. The sample yardage range in the pattern is calculated for the tunic length as written.


๐ŸŽจ 14 Colorways to See Yourself In

One question I get on every garment design: “Will this look good in MY color?” ๐ŸŽจ

If you have been falling down the “what season am I?” rabbit hole on TikTok lately… cool winter, warm autumn, soft summer, bright spring… this is the section for you. The Thistlevine was sampled in Knit Picks Woodland Blue Jay Heather (a heathered medium blue), but the same pattern reads completely differently in a warm rust, a soft cream, a deep emerald, or a moody charcoal. Same stitch pattern, same silhouette… 14 different moods.

Thistlevine free knit tunic vest pattern by Marly Bird shown in 16 different colorways to help knitters choose the best color for their skin tone and wardrobe

Use this grid as a visual swatch library before you commit your yarn budget. A few things to look for as you scroll:

  • ๐ŸŒŠ Cool tones (Blue Jay Heather, deep teal, soft sage, slate) flatter cool-undertone skin and play well with denim and grey
  • ๐Ÿ‚ Warm tones (rust, mustard, camel, terracotta) flatter warm-undertone skin and look gorgeous over cream and chocolate
  • ๐Ÿค Neutrals (cream, oatmeal, charcoal, soft black) make the lace texture the star of the show… wears with absolutely everything
  • ๐Ÿ’Ž Jewel tones (emerald, sapphire, plum, garnet) photograph beautifully and feel dressed-up for evening wear

Hold the grid up next to your existing wardrobe before you order yarn. The color that makes you say “oh, that one” out loud is your answer ๐Ÿ’›

This bright cherry red color is a must make on for my next sample!

A woman models a hand-knit, bright red sleeveless vest with textured stitches over a black shirt indoors. Marly Bird logo visible.

๐Ÿงถ Yarn and Materials

Sample Yarn: Knit Picks Woodland

The Thistlevine sample was knit in Knit Picks Woodland Yarn in the colorway Blue Jay Heather (#3278). Woodland is an 80% Merino / 20% Baby Alpaca blend in worsted weight (#4)… 180 yards per 100g skein. The merino gives you stitch definition for the lace, and the baby alpaca gives you the soft halo and drape that makes a lace garment feel luxurious to wear.

Skeins needed: 4 (4, 5, 5, 6, 7, 8, 9) skeins for sizes XS through 5X.

Yarn Substitution Ideas

The Thistlevine is a lace garment, so the yarn you choose matters more than usual. (Looking for another free lace knit to put your leftover worsted to work? The Birgitta Knit Tunic is a great companion project.) Look for a worsted weight (#4) yarn with good drape (so the lace breathes and the peplum flows), good stitch definition (so the Lace Columns read clearly), and ideally a merino or merino blend (so it feels soft against your skin).

Some yarns I would happily knit this in:

๐Ÿงถ What to Look For in a Yarn Substitution

  • Weight: Worsted weight (#4), 18 sts = 4″ in lace pattern. Row gauge matters less than stitch gauge.
  • Texture: Smooth and twist-defined โ€” avoid fuzzy or textured yarns that obscure lace. Mohair blends will hide the stitch detail entirely.
  • Fiber: Merino or merino blend recommended for drape, softness, and easy blocking. Superwash works but can grow more on blocking โ€” swatch first.
  • Drape: The peplum needs to flow. Stiff plant fibers (100% cotton, 100% linen) may not drape the way the pattern intends… look for cotton blends with some elasticity.
  • Yardage: Knit Picks Woodland is 180 yds/100g. If your substitute has different yardage, calculate total yards needed (not skeins) and buy one skein of buffer.
  • ๐Ÿงถ Woodland Tweed Yarn… a solid worsted choice with great stitch definition
  • ๐Ÿงถ Wool of the Andes Bulky Yarn… another worsted weight option I love for lace
  • ๐ŸŒฒ A more rustic option… for a textured, woodsy finish (be aware of the rougher hand)
  • ๐Ÿ’ง A superwash option… great for easy care, but be cautious of the stretch. Always do a blocked gauge swatch before you commit to an entire sweater
  • ๐Ÿงถ Another superwash sub… same caution on stretch… block your gauge swatch first
  • ๐Ÿ’Ž The splurge option… if this is your “treat yourself” project
  • ๐Ÿ’ฐ An economical worsted… for the budget-friendly cast-on
  • ๐Ÿง Caron Macchiato Cakes… I have not knit the Thistlevine in this one personally, so check gauge first and see if you like the look and feel of the fabric before committing (and you know Yarnspirations… they may discontinue these cakes sooner than later)
  • ๐Ÿงถ Premier Yarns worsted options… browse their worsted weight line through my referral link
  • ๐ŸŒฟ A high-end cotton option… with proper gauge swatching, a quality cotton yarn (NOT something like Lily Peaches & Cream or Dishie) can work beautifully for summer wear. Do your blocked gauge swatch first and make sure you love the hand of the fabric
๐Ÿ’ก Designer Tip: If you sub yarns, do a full blocked gauge swatch before you cast on. Lace yarns behave very differently after they hit water… and that change is even bigger in superwash and cotton. Knit a 5" x 5" swatch in the Lace Columns pattern, wet block it, let it dry flat, and THEN measure your gauge ๐Ÿ’›

Needles & Notions

๐Ÿชก US 9 (5.5 mm) 32″ circular needle for the main body

๐Ÿชก US 8 (5.0 mm) 16″ circular needle (one size smaller) for the armhole and neck edgings

  • Stitch markers
  • Tapestry needle
  • Scissors
  • Stitch Saver Cord
  • Tape measure
  • Notions Bag for Supplies
  • Leather tags
  • Leather rivets
  • Blocking Squares
  • Blocking Pins 
  • Soaking Basin
  • Eucalan Wool Wash
  • Ball Winder and Swift
โญ๏ธ Marly Bird Amazon Storefront โญ๏ธ

๐ŸŽฅ Video Tutorials

If you are a visual learner… or just want a refresher on the techniques before you cast on… my YouTube channel has every supporting tutorial you need to knit the Thistlevine confidently. Save these to your “watch later” before you start ๐Ÿ’›

  • ๐ŸŽฅ Long Tail Cast-On… my favorite stretchy cast-on for the bottom edge of this tunic
  • ๐ŸŽฅ Knit Stitch (Continental Style)… helpful if you are working on speeding up your knit fabric
  • ๐ŸŽฅ Purl Stitch (Continental Style)… pair this with the knit tutorial above
  • ๐ŸŽฅ How to Add a Lifeline… your insurance policy for lace knitting
  • ๐ŸŽฅ How to Knit Lace… the foundation video for understanding how yarn overs and decreases pair up
  • ๐ŸŽฅ How to Tink… how to un-knit stitch by stitch (a lace knitter's best friend)
  • ๐ŸŽฅ How to Bury (Weave In) Ends… a clean finish for your Thistlevine
  • ๐ŸŽฅ Picking Up Stitches… for the armhole and neck edgings worked in the round on the smaller needle
  • ๐ŸŽฅ Mattress Stitch Seaming… the invisible seaming method for the side seams (right side facing, work from peplum hem up to the underarm)
  • ๐ŸŽฅ Blocking Lace Knits… why blocking is non-negotiable for lace and how to pin to schematic measurements
Woman wears a blue lace knit tunic vest over a black shirt, showcasing its stitch detail and drape; "THISTLEVINE" pattern shown.

๐Ÿงถ Thistlevine Knit Tunic โ€” Pattern Details

Skill Level

Intermediate

Measurements

To Fit Size: XS (S, M, L-XL, 2X, 3X, 4X, 5X)

Finished Bust: 31ยฝ (36, 40ยฝ, 45, 49ยฝ, 54, 58, 62ยฝ)” [80 (91.5, 103, 114.5, 125.5, 137, 147.5, 159) cm]

Length: 26ยฝ (28, 29ยผ, 30ยพ, 32, 33ยฝ, 34ยพ, 36ยผ)” [67.5 (71, 74.5, 78, 81.5, 85, 88.5, 92) cm]

Intended to fit snugly around bust.

๐Ÿ“ Fit Note: This tunic is designed with approximately 0-2″ [0-5 cm] of negative to neutral ease at the full bust. For the intended fit, choose the size closest to your actual bust measurement. If you prefer a more relaxed fit, consider sizing up.

Gauge

18 sts and 26 rows = 4″ [10 cm] in Lace Columns pattern.

Note: Accuracy of stitch gauge (measured across) is more important than row gauge (measured along) for this item.

Materials

Yarn: Knit Picks, Woodland Yarn (80% Merino Wool / 20% Baby Alpaca, 180 yds / 165 m, 3.5 oz / 100 g, CYCA #4 worsted)… 4 (4, 5, 5, 6, 7, 8, 9) skeins in #3278 Blue Jay Heather.

Knitting Needle: US 9 [5.5 mm] 32″ [81 cm] circular needle, AND 16″ [40.5 cm] circular needle one size smaller for edgings… or size required for gauge.

Notions:

  • Stitch markers
  • Tapestry needle 
  • Scissors
  • Tape measure
  • Stitch Saver Cord
  • Notions Bag for Supplies
  • Leather tags
  • Leather rivets
  • Blocking Squares
  • Blocking Pins 
  • Soaking Basin
  • Eucalan Wool Wash
  • Ball Winder and Swift
โญ๏ธ Marly Bird Amazon Storefront โญ๏ธ

Abbreviations

  • K โ€” Knit
  • K2tog โ€” Knit Two Stitches Together
  • P โ€” Purl
  • RS โ€” Right Side
  • St(s) โ€” Stitch(es)
  • Tbl โ€” Through The Back Loop
  • WS โ€” Wrong Side
  • Yo โ€” Yarn Over

Special Stitches

โญ Make 1 Purlwise (M1p): With tip of left needle, pick up the horizontal strand between stitches from front to back. Purl this strand through the back leg, twisting it into a loop in the process (1 stitch increased).

โญ Left Lifted Make-One (LLM1): Insert left needle tip into the left leg of the second stitch directly under the stitch on the right hand needle (the grandmother stitch), knit it through the back leg (1 stitch increased).

โญ Right Lifted Make-One (RLM1): Insert right needle tip into the right leg of the stitch directly under the stitch on the left hand needle (the mother stitch), lift the leg onto the left hand needle and knit it (1 stitch increased).

โญ TK2tog (Twisted Knit 2 Together): Slip 2 stitches purlwise, insert tip of left needle into the front leg of first stitch from front to back and slip it back onto left needle (stitch is now twisted), slip next stitch purlwise back onto left needle, knit two together.

โญ Tskp (Twisted Knit-Slip-Pass): Slip one stitch purlwise, knit next stitch, pass slipped stitch over knit stitch.

โญ Ssk (Slip, Slip, Knit): Slip 2 stitches, one at a time, as if to knit. Insert left hand needle into the front of these two stitches and knit them together from this position (1 stitch decreased).

โญ Ssp (Slip, Slip, Purl): Slip 2 stitches, one at a time, as if to knit, then slip them back onto the left needle without changing their orientation. Purl these 2 stitches together through the back loop (1 stitch decreased).


Knitting Charts

โœจ Following along with the free pattern on MarlyBird.com? You will have everything you need to knit the Thistlevine Tunic… but if you want the exclusive knitting charts (Lace Columns, Zig Zag Waves, Front Armhole Shaping for every size, Back Armhole Shaping for every size, and Neck Shaping), those are only available in the ad-free PDF version.

You will enjoy a clean, printable, ad-free experience while supporting Marly Bird's free tutorials and patterns ๐Ÿ’–

Thistlevine Knit Tunic Vest pattern by Marly Bird... ad-free PDF promo showing Marly wearing the blue heathered knit lace vest sample plus a fanned preview of the printable PDF pages with knitting charts and pattern instructions
Etsy
Shopify
Ravelry

Schematic

Black-and-white diagram of a sleeveless V-neck knit vest with measurement lines for neckline, armholes, shoulders, body width, and length.
Thistlevine free knit tunic vest pattern schematic by Marly Bird, showing front and back measurements for sizes XS through 5X

Pattern Stitches

Lace Columns Pattern
Worked over a multiple of 5 sts plus 3.

  • Row 1 (WS): P1, p1 tbl, * k1, p2, k1, p1 tbl; repeat from * to last st, p1.
  • Row 2: K1, k1 tbl, * p1, ssk, yo, p1, k1 tbl; repeat from * to last st, k1.
  • Row 3: P1, p1 tbl, * k1, p2, k1, p1 tbl; repeat from * to last st, p1.
  • Row 4: K1, k1 tbl, * p1, yo, k2tog, p1, k1 tbl; repeat from * to last st, k1.
  • Row 5: P1, p1 tbl, * k1, p2, k1, p1 tbl; repeat from * to last st, p1.

Repeat Rows 2-5 only for Lace Columns Pattern.

Zig Zag Waves Pattern
Worked over a multiple of 12 sts plus 3.

  • Row 1 (WS): P1, p1 tbl, * k1, p9, k1, p1 tbl; repeat from * to last st, p1.
  • Row 2: K1, k1 tbl, * p1, k2tog, k4, yo, k1, yo, ssk, p1, k1 tbl; repeat from * to last st, k1.
  • Row 3: P1, p1 tbl, * k1, p9, k1, p1 tbl; repeat from * to last st, p1.
  • Row 4: K1, k1 tbl, * p1, k2tog, k3, [yo, k1], twice, ssk, p1, k1 tbl; repeat from * to last st, k1.
  • Row 5: P1, p1 tbl, * k1, p9, k1, p1 tbl; repeat from * to last st, p1.
  • Row 6: K1, k1 tbl, * p1, k2tog, k2, yo, k1, yo, k2, ssk, p1, k1 tbl; repeat from * to last st, k1.
  • Row 7: P1, p1 tbl, * k1, p9, k1, p1 tbl; repeat from * to last st, p1.
  • Row 8: K1, k1 tbl, * p1, k2tog, [k1, yo] twice, k3, ssk, p1, k1 tbl; repeat from * to last st, k1.
  • Row 9: P1, p1 tbl, * k1, p9, k1, p1 tbl; repeat from * to last st, p1.
  • Row 10: K1, k1 tbl, * p1, k2tog, yo, k1, yo, k4, ssk, p1, k1 tbl; repeat from * to last st, k1.
  • Row 11: P1, p1 tbl, * k1, p9, k1, p1 tbl; repeat from * to last st, p1.
  • Row 12: K1, k1 tbl, * p1, k2tog, [k1, yo] twice, k3, ssk, p1, k1 tbl; repeat from * to last st, k1.
  • Row 13: P1, p1 tbl, * k1, p9, k1, p1 tbl; repeat from * to last st, p1.
  • Row 14: K1, k1 tbl, * p1, k2tog, k2, yo, k1, yo, k2, ssk, p1, k1 tbl; repeat from * to last st, k1.
  • Row 15: P1, p1 tbl, * k1, p9, k1, p1 tbl; repeat from * to last st, p1.
  • Row 16: K1, k1 tbl, * p1, k2tog, k3, [yo, k1], twice, ssk, p1, k1 tbl; repeat from * to last st, k1.
  • Row 17: P1, p1 tbl, * k1, p9, k1, p1 tbl; repeat from * to last st, p1.

Repeat Rows 2-17 only for Zig Zag Waves Pattern.


Notes

  • Directions are for the smallest size… changes for all other sizes are in parentheses. When only one number is given, then that number applies to all sizes.
  • Tunic is worked in one piece from bottom front to bottom back, then seamed at the sides. Armhole and neck edgings are picked up and knitted.
  • Required length measurements at different points throughout the pattern are approximate. It is okay to be off by ยผ” [0.5 cm] or even a little more, in order to end up on the correct pattern row as indicated.
  • Two different types of markers are used in this pattern:
    • Shoulder-Shaping Markers… these markers MOVE throughout the short-row shoulder shaping section. Move the marker exactly as instructed after each short-row turn.
    • Armhole-Length Markers… these markers remain FIXED in the fabric. They are used later to measure the length of the back armhole shaping.
    Keeping these markers separate (use a contrasting color for the Shoulder-Shaping Marker) will help ensure proper garment shaping.

GROW

To Unlockย Exclusive Subscriber Contentย click the Box below and join for free by simply adding your email and creating a password! If you are having troubles, clear your cache or reset your password or login to the Grow Publisher Portal.

>> Learn More About Grow Here <<

I'm thrilled to share this amazing pattern with you, many patterns on my blog are absolutely free! I kindly request that you don't copy and paste or distribute this pattern. Prefer an ad-free experience? Buy a digital PDF pattern for a small fee from one of my online stores for a seamless crafting journey. 

I appreciate your support and readership. You are the reason I can keep doing what I love and sharing it with others. So, thank you from the bottom of my yarn-loving heart! Disclosure: This post contains affiliate links, meaning I get a commission if you decide to make a purchase through my links at no cost to you.

Person models a blue lace knit tunic, showing stitch detail and drape, in a cozy room with bookshelves and plants.

๐Ÿงถ Thistlevine Knit Tunic โ€” Pattern Instructions

FRONT

Front Peplum

Cast on 87 (99, 111, 123, 135, 147, 159, 171) sts, and knit 3 rows.

Work in Zig Zag Waves pattern until Peplum measures approximately 14ยฝ (15, 15ยผ, 15ยฝ, 15ยฝ, 15ยพ, 15ยพ, 16)” [37 (38, 38.5, 39.5, 39.5, 40, 40, 40.5) cm], ending after a pattern Row 2 or Row 10.

Bust

๐Ÿ“ Pattern Transition Note: This row reduces the stitch count to prepare for the Lace Columns pattern while maintaining the overall shaping of the garment. Count your stitches after completing this row to ensure accuracy before continuing.

Next Row (pattern transition row, WS): P1, p1 tbl, * k1, p2tog, p5, ssp, k1, p1 tbl; repeat from * to last st, p1 โ€” 73 (83, 93, 103, 113, 123, 133, 143) sts.

Work in Lace Columns pattern for 3ยฝ (4, 4ยฝ, 5, 5ยฝ, 6, 6ยฝ, 7)” [9 (10, 11.5, 12.5, 14, 15, 16.5, 18) cm], starting with a pattern Row 2 and ending after a pattern Row 5 (3, 3, 3, 5, 5, 5, 3).

Shape Front Armholes

For All Sizes Except XS:

Next 2 rows:

  • Row 1 (bind-off row, RS): Bind off 5 sts, k1, k1 tbl, work in established Lace Columns pattern to end โ€” x (78, 88, 98, 108, 118, 128, 138) sts.
  • Row 2 (bind-off row, WS): Bind off 5 sts, p1, p1 tbl, work in established Lace Columns pattern to end โ€” x (73, 83, 93, 103, 113, 123, 133) sts.

Repeat the last 2 rows x (0, 0, 0, 1, 1, 1, 2) more times โ€” x (73, 83, 93, 93, 103, 113, 113) sts.

For All Sizes:

Next 10 rows:

  • Row 1 (dec row, RS): K1, Tskp, work in established Lace Columns pattern to last 3 sts, Tk2tog, k1 โ€” 71 (71, 81, 91, 91, 101, 111, 111) sts.
  • Row 2: P1, p1 tbl, work in established Lace Columns pattern to last 2 sts, p1 tbl, p1.
  • Row 3 (dec row, RS): K1, Tskp, k1, work in established Lace Columns pattern to last 4 sts, k1, Tk2tog, k1 โ€” 69 (69, 79, 89, 89, 99, 109, 109) sts.
  • Row 4: P1, p1 tbl, p1, work in established Lace Columns pattern to last 3 sts, p1, p1 tbl, p1.
  • Row 5 (dec row, RS): K1, Tskp, work in established Lace Columns pattern to last 3 sts, Tk2tog, k1 โ€” 67 (67, 77, 87, 87, 97, 107, 107) sts.
  • Row 6: P1, p1 tbl, work in established Lace Columns pattern to last 2 sts, p1 tbl, p1.
  • Row 7 (dec row, RS): K1, Tskp, work in established Lace Columns pattern to last 3 sts, Tk2tog, k1 โ€” 65 (65, 75, 85, 85, 95, 105, 105) sts.
  • Row 8: P1, p1 tbl, work in established Lace Columns pattern to last 2 sts, p1 tbl, p1.
  • Row 9 (dec row, RS): K1, Tk2tog work in established Lace Columns pattern to last 3 sts, Tskp, k1 โ€” 63 (63, 73, 83, 83, 93, 103, 103) sts.
  • Row 10: P1, p1 tbl, work in established Lace Columns pattern to last 2 sts, p1 tbl, p1.

Repeat the last 10 rows 0 (0, 0, 1, 1, 1, 2, 2) more times โ€” 63 (63, 73, 73, 73, 83, 83, 83) sts.

Work evenly in established Lace Columns pattern until piece measures 3ยฝ (3ยฝ, 3ยพ, 4, 4ยพ, 5, 5ยพ, 6)” [22 (22, 24, 26, 30, 32, 38, 40) cm] from beginning of armhole shaping, ending after a pattern Row #3.

Shape Neck and Shoulders

Place a marker on either side of center 7 sts โ€” 28 (28, 33, 33, 33, 38, 38, 38) sts remain on either side.

Next Row (RS, separate shoulders): Work as established to 1 st before marker, k1, remove marker, bind off center 7 sts, remove marker, k1, work as established to end.

Right Shoulder โ€” Front

Next 10 Rows:

  • Row 1 (WS): Work in established Lace Columns pattern to last st, p1.
  • Row 2 (decrease row, RS): K1, Tskp, work in established Lace Columns pattern to end โ€” 27 (27, 32, 32, 32, 37, 37, 37) sts.
  • Row 3: Work in established Lace Columns pattern to last 2 sts, p1 tbl, p1.
  • Row 4 (decrease row, RS): K1, Tskp, k1, work in established Lace Columns pattern to end โ€” 26 (26, 31, 31, 31, 36, 36, 36) sts.
  • Row 5: Work in established Lace Columns pattern to last 3 sts, p1, p1 tbl, p1.
  • Row 6 (decrease row, RS): K1, Tskp, work in established Lace Columns pattern to end โ€” 25 (25, 30, 30, 30, 35, 35, 35) sts.
  • Row 7: Work in established Lace Columns pattern to last 2 sts, p1 tbl, p1.
  • Row 8 (decrease row, RS): K1, Tskp, work in established Lace Columns pattern to end โ€” 24 (24, 29, 29, 29, 34, 34, 34) sts.
  • Row 9: Work in established Lace Columns pattern to last 3 sts, p2 tbl, p1.
  • Row 10 (decrease row, RS): K1, Tk2tog, work in established Lace Columns pattern to end โ€” 23 (23, 28, 28, 28, 33, 33, 33) sts.

Repeat the last 10 rows 1 (1, 1, 1, 1, 2, 2, 2) more times โ€” 18 (18, 23, 23, 23, 23, 23, 23) sts.

Work evenly in established Lace Columns pattern until Armhole measures 7ยฝ (8, 8ยผ, 9, 9ยพ, 10ยฝ, 11ยผ, 12)” [19 (20.5, 21, 23, 25, 26.5, 28.5, 30.5) cm] in length, ending after a pattern Row 3.

๐Ÿ’ก Designer Tip: Use a removable marker in a contrasting color for the Shoulder-Shaping Marker. This marker will move throughout the short-row section and is different from the Armhole-Length Marker, which remains fixed in the fabric.

With RS facing, mark 1st st for use later in Shoulder Shaping, and move this marker up to the new st above it after every row.

With RS facing, place a marker at left edge of fabric to mark Right Front armhole length. This marker does not move until it is removed.

Right Shoulder โ€” Back

Next 4 rows:

  • Row 1 (RS): Work in established Lace Columns pattern.
  • Row 2: Work in established Lace Columns pattern to end, cast on 5 sts โ€” 23 (23, 28, 28, 28, 28, 28, 28) sts.
  • Row 3: K1, k1 tbl, p1, ssk, yo, p1, work in established Lace Columns pattern to end.
  • Row 4: Work in established Lace Columns pattern to end, cast on 5 sts โ€” 28 (28, 33, 33, 33, 33, 33, 33) sts.

For Last 3 Sizes Only:

Next 2 rows:

  • Row 1 (RS): K1, k1 tbl, ssk, yo, p1, work in established Lace Columns pattern to end.
  • Row 2: Work in established Lace Columns pattern to end, cast on 5 sts โ€” x (x, x, x, x, x, 38, 38, 38) sts.

For All Sizes: Place 28 (28, 33, 33, 33, 38, 38, 38) Right Shoulder sts on a holder or spare needle.

A person models a blue lace knit tunic indoors, showing off the airy stitch detail and texture of the Thistlevine pattern.

Left Shoulder โ€” Front

With WS facing, join new yarn to 28 (28, 33, 33, 33, 38, 38, 38) Left Shoulder sts still on the needle.

Next 10 Rows:

  • Row 1 (WS): P1, work in established Lace Columns pattern to end.
  • Row 2 (decrease row, RS): Work in established Lace Columns pattern to last 3 sts, Tk2tog, k1 โ€” 27 (27, 32, 32, 32, 37, 37, 37) sts.
  • Row 3: P1, p1 tbl, work in established Lace Columns pattern to end.
  • Row 4 (decrease row, RS): Work in established Lace Columns pattern to last 4 sts, k1, Tk2tog, k1 โ€” 26 (26, 31, 31, 31, 36, 36, 36) sts.
  • Row 5: P1, p1 tbl, p1, work in established Lace Columns pattern to end.
  • Row 6 (decrease row, RS): Work in established Lace Columns pattern to last 3 sts, Tk2tog, k1 โ€” 25 (25, 30, 30, 30, 35, 35, 35) sts.
  • Row 7: P1, p1 tbl, work in established Lace Columns pattern to end.
  • Row 8 (decrease row, RS): Work in established Lace Columns pattern to last 3 sts, Tk2tog, k1 โ€” 24 (24, 29, 29, 29, 34, 34, 34) sts.
  • Row 9: P1, p2 tbl, work in established Lace Columns pattern to end.
  • Row 10 (decrease row, RS): Work in established Lace Columns pattern to last 3 sts, Tskp, k1 โ€” 23 (23, 28, 28, 28, 33, 33, 33) sts.

Repeat the last 10 rows 1 (1, 1, 1, 1, 2, 2, 2) more times โ€” 18 (18, 23, 23, 23, 23, 23, 23) sts.

Work evenly in established Lace Columns pattern until Armhole measures 7ยฝ (8, 8ยผ, 9, 9ยพ, 10ยฝ, 11ยผ, 12)” [19 (20.5, 21, 23, 25, 26.5, 28.5, 30.5) cm] in length, ending after a pattern Row 3.

๐Ÿ’ก Designer Tip: Use a removable marker in a contrasting color for the Shoulder-Shaping Marker. This marker will move throughout the short-row section and is different from the Armhole-Length Marker, which remains fixed in the fabric.

With RS facing, mark last st for use later in Shoulder Shaping, and move this marker up to the new st above it after every row.

With RS facing, place a marker at right edge of fabric to mark Left Front armhole length. This marker does not move until it is removed.

Left Shoulder โ€” Back

Next 4 rows:

  • Row 1 (RS): Work in established Lace Columns pattern to end, cast on 5 sts โ€” 23 (23, 28, 28, 28, 28, 28, 28) sts.
  • Row 2: P1, p1 tbl, k1, p2, k1, work in established Lace Columns pattern to end.
  • Row 3: Work in established Lace Columns pattern to end, cast on 5 sts โ€” 28 (28, 33, 33, 33, 33, 33, 33) sts.
  • Row 4: P1, p1 tbl, k1, p2, k1, work in established Lace Columns pattern to end.

For Last 3 Sizes Only:

Next 2 rows:

  • Row 1 (RS): Work in established Lace Columns pattern to end, cast on 5 sts โ€” x (x, x, x, x, 38, 38, 38) sts.
  • Row 2: P1, p1 tbl, k1, p2, k1, work in established Lace Columns pattern to end.
Person models a blue knit vest over a white shirt in a cozy, colorful room; texture and stitch detail of tunic pattern visible.

BACK

Join Shoulders

For All Sizes:

Next 2 Rows:

  • Row 1 (Shoulder joining row, RS): Work in established Lace Columns pattern across Left Shoulder sts, cast on 7 sts, then work in established Lace Columns pattern across Right Shoulder sts from holder or spare needle โ€” 63 (63, 73, 73, 73, 83, 83, 83) sts.
  • Row 2: Work next pattern row of Lace Columns pattern across all sts.
๐ŸŒ€ Short Row Tip: The short rows in this section create a gentle shoulder slope for improved fit. When instructed to work p1 in stitch 1 row below or k1 in stitch 1 row below, you are working into the stitch directly beneath the next stitch on the needle. This technique closes the gap created by the short-row turn and helps create a smooth shoulder line without visible holes. Take care to move the Shoulder-Shaping Markers exactly as instructed… these markers track the shaping progression and should not be confused with the Armhole-Length Markers.

Shape Shoulders with Short Rows

Next 12 Rows:

  • Row 1 (RS): Work in established Lace Columns pattern to second Shoulder-Shaping marker, p1 in st 1 row below the marked st, turn work.
  • Row 2: Work in established Lace Columns pattern to Shoulder-Shaping marker, k1 in st 1 row below the marked st, turn work.
  • Row 3: Work in established Lace Columns pattern to 2nd st past Shoulder-Shaping marker, p1 in st 1 row below next st and move Shoulder-Shaping marker to this st, turn work.
  • Row 4: Work in established Lace Columns pattern to 2nd st past Shoulder-Shaping marker, k1 in st 1 row below next st and move Shoulder-Shaping marker to this st, turn work.
  • Row 5: Work in established Lace Columns pattern to 3rd st past Shoulder-Shaping marker, p1 in st 1 row below next st and move Shoulder-Shaping marker to this st, turn work.
  • Row 6: Work in established Lace Columns pattern to 3rd st past Shoulder-Shaping marker, k1 in st 1 row below next st and move Shoulder-Shaping marker to this st, turn work.
  • Row 7: Work in established Lace Columns pattern to 2nd st past Shoulder-Shaping marker, p1 in st 1 row below next st and move Shoulder-Shaping marker to this st, turn work.
  • Row 8: Work in established Lace Columns pattern to 2nd st past Shoulder-Shaping marker, k1 in st 1 row below next st and move Shoulder-Shaping marker to this st, turn work.
  • Row 9: Work in established Lace Columns pattern to 3rd st past Shoulder-Shaping marker, p1 in st 1 row below next st and move Shoulder-Shaping marker to this st, turn work.
  • Row 10: Work in established Lace Columns pattern to 3rd st past Shoulder-Shaping marker, k1 in st 1 row below next st and move Shoulder-Shaping marker to this st, turn work.
  • Row 11: Work in established Lace Columns pattern to 2nd st past Shoulder-Shaping marker, p1 in st 1 row below next st and move Shoulder-Shaping marker to this st, turn work.
  • Row 12: Work in established Lace Columns pattern to 2nd st past Shoulder-Shaping marker, k1 in st 1 row below next st and move Shoulder-Shaping marker to this st, turn work.

For Last 6 Sizes Only:

Next 2 Rows:

  • Row 1 (RS): Work in established Lace Columns pattern to 3rd st past Shoulder-Shaping marker, p1 in st 1 row below next st and move Shoulder-Shaping marker to this st, turn work.
  • Row 2: Work in established Lace Columns pattern to 3rd st past Shoulder-Shaping marker, k1 in st 1 row below next st and move Shoulder-Shaping marker to this st, turn work.

For All Sizes:

Next 2 Rows:

  • Row 1 (RS): Work in established Lace Columns pattern to end of row.
  • Row 2: Work in established Lace Columns pattern across all sts.

Remove both Shoulder Shaping markers, being sure to keep Armhole length markers in the fabric.

Work evenly in established Lace Columns pattern until Back Armhole measures 6 (6ยผ, 6ยฝ, 5ยฝ, 6, 6ยพ, 6, 6ยฝ)” [15 (16, 16.5, 14, 15, 17, 15, 16.5) cm] from Armhole length marker, ending after a pattern Row #5.

Shape Back Armholes

  • Row 1 (RS): K1, RLM1, work in established Lace Columns Pattern to last st, LLM1, k1 โ€” 65 (65, 75, 75, 75, 85, 85, 85) sts.
  • Row 2: P1, k1, work in established Lace Columns Pattern to last 2 sts, k1, p1.
  • Row 3: K1, RLM1, p1, work in established Lace Columns Pattern to last 2 sts, p1, LLM1, k1 โ€” 67 (67, 77, 77, 77, 87, 87, 87) sts.
  • Row 4: P2, k1, work in established Lace Columns Pattern to last 3 sts, k1, p2.
  • Row 5: K1, RLM1, k1, p1, work in established Lace Columns Pattern to last 3 sts, p1, k1, LLM1, k1 โ€” 69 (69, 79, 79, 79, 89, 89, 89) sts.
  • Row 6: P3, k1, work in established Lace Columns Pattern to last 4 sts, k1, p3.
  • Row 7: K1, RLM1, yo, k2tog, p1, work in established Lace Columns Pattern to last 4 sts, p1, yo, k2tog, LLM1, k1 โ€” 71 (71, 81, 81, 81, 91, 91, 91) sts.
  • Row 8: P1, k1, p2, k1, work in established Lace Columns Pattern to last 5 sts, k1, p2, k1, p1.
  • Row 9: K1, RLM1, p1, ssk, yo, p1, work in established Lace Columns Pattern to last 5 sts, p1, ssk, yo, p1, LLM1, k1 โ€” 73 (73, 83, 83, 83, 93, 93, 93) sts.
  • Row 10: P1, p1 tbl, work in established Lace Columns Pattern to last 2 sts, p1 tbl, p1.

Repeat the last 10 rows 0 (0, 0, 1, 1, 1, 2, 2) more times โ€” 73 (73, 83, 93, 93, 103, 113, 113) sts.

For All Sizes Except XS:

Next 2 Rows:

  • Row 1 (cast-on row, RS): Cast on 5 sts, k1, k1 tbl, p1, yo, k2tog, p1, work in established Lace Columns Pattern to end โ€” x (78, 88, 98, 98, 108, 118, 118) sts.
  • Row 2 (cast-on row, WS): Cast on 5 sts, p1, p1 tbl, k1, p2, k1, work in established Lace Columns Pattern to end โ€” x (83, 93, 103, 103, 113, 123, 123) sts.

Repeat the last 2 rows x (0, 0, 0, 1, 1, 1, 2) more times โ€” x (83, 93, 103, 113, 123, 133, 143) sts.

For All Sizes:

Work evenly in Lace Columns pattern for 3ยฝ (4, 4ยฝ, 5, 5ยฝ, 6, 6ยฝ, 7)” [9 (10, 11.5, 12.5, 14, 15, 16.5, 18) cm], ending after a RS row โ€” 73 (83, 93, 103, 113, 123, 133, 143) sts.

Woman models a blue knitted sleeveless vest over a black shirt, showing textured stitchwork, with craft shelves in the background.

Back Peplum

๐Ÿ“ Pattern Transition Note: This row increases the stitch count to return to the Zig Zag Waves pattern. Verify your stitch count before beginning the Back Peplum section.

Next Row (pattern transition row, WS): P1, p1 tbl, * k1, M1p, p7, M1p, k1, p1 tbl; repeat from * to last st, p1 โ€” 87 (99, 111, 123, 145, 157, 169, 181) sts.

Work in Zig Zag Waves pattern until Peplum measures approximately 14ยฝ (15, 15ยผ, 15ยฝ, 15ยฝ, 15ยพ, 15ยพ, 16)” [37 (38, 38.5, 39.5, 39.5, 40, 40, 40.5) cm], starting with a pattern Row #2, and ending after a pattern Row #3 or #11.

Bind off all sts loosely.


FINISHING

Blocking

The lace motifs will open considerably after blocking.

Block the tunic to the measurements shown in the schematic. Pin carefully and allow the garment to dry completely before seaming.

Because this design features lace stitch patterns, blocking will dramatically improve stitch definition and finished measurements.

Seaming

Sew side seams.

๐Ÿ’ก Designer Tip: Mattress stitch works especially well for the side seams of this garment. Take time to align the Zig Zag Waves motifs before seaming for the smoothest finished appearance.
Full-length wearing shot of the Thistlevine free knit tunic vest pattern by Marly Bird, showing the complete A-line peplum silhouette over jeans, sizes XS through 5X

Armhole Edgings

With RS facing, using shorter circular needle, and beginning at side seam, pick up and knit 64 (76, 78, 86, 100, 106, 112, 128) sts. Join round and mark first st. Knit 1 round, then bind off all sts loosely. Work other armhole edging the same way.

Neck Edging

With RS facing, using shorter circular needle, and beginning at side seam, pick up and knit 68 (70, 72, 74, 76, 82, 90, 94) sts. Join round and mark first st. Knit 1 round, then bind off all sts loosely.

Weave in all loose ends.

Person models a blue lace-knit tunic with intricate stitch detail; text reads "THISTLEVINE Knit Tunic Pattern" and "Marly Bird.

๐Ÿ‘— Styling & Layering Ideas

The Thistlevine is a true three-season piece. The merino-and-alpaca blend is warm enough for fall layering, breathable enough for a cool summer evening, and the sleeveless silhouette means it works as a layering piece OR a stand-alone top depending on what you wear underneath. If you love the layering vest silhouette, browse my full collection of knit vest patterns for spring and summer. A few of my favorite ways to wear this one:

  • ๐Ÿ‚ Over a fitted turtleneck… fall and winter layering staple, especially in a heathered colorway
  • ๐Ÿ‘š Over a flowy blouse or button-down… elevated boho look, perfect for brunch or a workday with personality
  • ๐Ÿ‘– With wide-leg trousers or a midi skirt… takes it from casual to polished in one outfit change
  • ๐ŸŒธ At full tunic length over leggings… a complete, comfortable outfit for travel days or working from home
  • โœ‚๏ธ Shortened to a cropped vest with high-waisted jeans… fresh, modern, summer-ready
  • โ˜€๏ธ On its own for a cool summer evening… the lace breathes beautifully and the layered look is unbeatable in warmer weather
๐Ÿ’ก Designer Tip: If the lace open spots on the bust make you self-conscious, layer it OVER a fitted tank or shell in a contrast color so the pattern reads against the layer underneath. Cream Thistlevine over a black tank… black Thistlevine over a soft pink tank… try it ๐Ÿ’›

๐Ÿ’ง Blocking Tips

The Thistlevine NEEDS to be blocked. Knit lace looks scrunched and unimpressive on the needles… once it hits water, it opens up and the Lace Columns reveal their full vertical lines. This step is non-negotiable for a lace garment.

My go-to approach:

  • ๐Ÿ’ง Wet block before seaming. Soak the finished piece (still flat, before side seams) in cool water with a no-rinse wool wash like Soak or Eucalan for 15-20 minutes. Press out water gently… do NOT wring.
  • ๐Ÿ“ Pin to schematic measurements. Lay the piece flat on blocking mats. Pin out to the finished bust and length measurements for your size (see the table above). Use enough pins to get clean lines… blocking wires make this faster if you have them.
  • ๐ŸŒฌ๏ธ Let it dry completely. This can take 24 to 48 hours depending on humidity. Resist the urge to seam early. Fully-dried blocking is what locks the lace into shape.
  • โœ๏ธ Seam, then add edgings. Once blocked and dry, sew the side seams, then pick up and knit the armhole and neck edgings as written.
  • ๐Ÿ’ฆ Optional second block after finishing. A light steam or spritz block after the edgings are done helps everything settle. Lay flat to dry.

โœ‚๏ธ Seaming Your Tunic: Order Matters

One of the most common questions I get on garment patterns is: “In what order do I seam everything?” For the Thistlevine, the order really does matter… do it in this sequence for the cleanest finish:

  1. Block the finished piece FLAT first (before any seaming). Lay it out to schematic measurements, pin, let dry completely. This is non-negotiable for lace.
  2. Weave in any loose ends from the body (cast-on tail, yarn join tails, shoulder bridge join tails). It is easier to weave them in cleanly while the piece is still flat than after seaming.
  3. Sew the side seams using mattress stitch (with the right side facing you). Work from the bottom of the peplum up to the underarm. Take your time matching the Zig Zag Waves pattern across the seam line… it will be visible.
  4. Pick up and knit the armhole edgings in the round, on the smaller circular needle, starting at the side seam. Knit one round, bind off loosely. Repeat for the second armhole.
  5. Pick up and knit the neck edging the same way… in the round on the smaller circular needle, starting at the side of the shoulder, knit one round, bind off loosely.
  6. Weave in the edging tails (cast-on and bind-off tails for each of the three edgings).
  7. Optional: light steam or spritz block the finished tunic to settle the edgings flat. Lay flat to dry.

Why this order? If you pick up and knit the armhole edgings BEFORE you seam the sides, you cannot work them cleanly in the round… they will end up as flat, sewn-on bindings, which curl. Seaming first means you can join the round at the underarm seam for an invisible finish.

Blue lace knit tunic with intricate stitch detail, modeled over black shirt and jeans in a cozy, colorful room.

โญ Favorite the Thistlevine on Ravelry

Heading to Ravelry next? Favorite the Thistlevine and queue it up so you can find it again later ๐Ÿ’›

  • ๐Ÿ’œ Favorite the Thistlevine pattern on Ravelry
Favorite This Pattern on Ravelry - Marly Bird

๐Ÿงต More Free Knit Patterns You Will Love

If you are in a knit-everything mood (and I support that fully), here are a few more of my free knit patterns to add to your queue:

  • ๐Ÿงถ Sweetheart A-Line Knit Tunic… another sleeveless knit tunic with lace, in sport weight
  • ๐Ÿงถ Almond Brittle Knit Wrap… bulky lace knit wrap, beginner-friendly lace
  • ๐Ÿงถ Shangri-La Knit Lace Scarf or Shawl… gorgeous beginner-friendly knit lace project
  • ๐Ÿงถ Blood of My Blood Knit Shawl… half-hexagon lace shawl with cables, intermediate level
Woman models a brown, sleeveless knit A-line tunic with lace details, standing before yarn shelves. SWEETHEART Knit A-Line Tunic.
A woman wearing a chunky, multicolored knit scarf shows off textured stitches; shelves and plants visible behind her.
A gray knit lace scarf with a delicate, openwork stitch is modeled outdoors, showing its texture and drape in sunlight.

๐Ÿ’™ BiCrafty Moment: Are You Also a Crocheter?

If you love the layering vest silhouette in the Thistlevine and you ALSO crochet, check out my Lyvia Crochet Ruana… a flowing layering piece in crochet that hits the same wardrobe note. For even more options in both crafts, browse my full knit and crochet vest patterns collection. Canโ€™t decide which craft to try it in? Youโ€™re already BiCrafty ๐Ÿ’™

Ready to learn the OTHER craft? My BiCrafty Bootcamp walks knitters through crochet (and crocheters through knitting) from the very first stitch.

Thistlevine free knit tunic vest pattern styled over a white button-down shirt by Marly Bird, demonstrating how to layer the sleeveless lace tunic for fall and spring

๐Ÿ’› Meet the Designer

The Thistlevine was designed by Marly Bird, a professional yarn artist, designer, and teacher who has been designing in the knit and crochet industry since 2007. Marly is the creator of the BiCrafty method (teaching BOTH knitting AND crochet together) and the host of one of the longest-running fiber arts podcasts and YouTube channels in the industry. Her designs are known for warm, teaching-first instructions and true size-inclusivity from XS through 5X.

A woman with curly hair and glasses stands by a "FAQS" banner amid crafting items like yarn, flowers, and coffee.

โ“ Frequently Asked Questions

Is the Thistlevine free?

Yes! The full Thistlevine knit tunic pattern is free right here on the blog. You will need a free GROW account (it takes about 30 seconds to set up) to unlock the pattern instructions. If you would rather have a printable, ad-free PDF, that is available on Etsy, Shopify, and Ravelry.

What sizes does the Thistlevine come in?

The Thistlevine is sized XS, S, M, L-XL, 2X, 3X, 4X, and 5X… 8 sizes total. Finished busts range from 31ยฝโ€ (XS) up to 62ยฝโ€ (5X). It is designed to fit snugly around the bust, so size up if you are between sizes.

What skill level is this pattern?

Intermediate. The Thistlevine uses two lace stitch patterns (Lace Columns and Zig Zag Waves), short rows for shoulder shaping, and several twisted special stitches that the pattern explains in detail. If you are comfortable with knit, purl, yarn over, k2tog, and ssk, you have the foundation to knit this tunic successfully.

Can I make the Thistlevine shorter, like a cropped vest?

Absolutely. Because the Thistlevine is worked in one piece front hem to back hem, you can shorten the peplum section to wear it as a cropped vest instead of a full tunic. Just work fewer rows in the Zig Zag Waves peplum before the bust transition, and end after a Row 2 or Row 10 to keep the stitch pattern reading correctly. Swatch and measure to land at the length you want, and remember you will use less yarn if you shorten.

What yarn should I use if I cannot find Knit Picks Woodland?

Look for any worsted weight (#4) yarn with good drape and clear stitch definition… ideally a merino blend so it feels soft against your skin. My suggested substitutes are linked in the Yarn & Materials section above (covering merino, merino/alpaca blends, superwash, splurge options, budget options, and even a high-end cotton). Whatever you choose, do a BLOCKED gauge swatch first… lace yarns behave very differently after they hit water.

How much yarn do I need?

The sample uses Knit Picks Woodland (180 yds per 100g skein). You will need 4 (4, 5, 5, 6, 7, 8, 9) skeins for sizes XS through 5X. If you are shortening the tunic to a cropped vest, you may need slightly less. If you are subbing a yarn with different yardage per skein, do the math on TOTAL yards needed and buy enough for one extra skein for safety.

Are charts included?

Visual stitch charts (Lace Columns, Zig Zag Waves, all four sets of Front and Back Armhole Shaping by size, and the Neck Shaping chart) are included in the ad-free PDF version only. The free blog version has the complete written pattern… you have everything you need to knit the Thistlevine from the free version. The charts are a visual upgrade available with the PDF purchase.

Do I need to block this tunic?

YES. Knit lace looks scrunched and unimpressive on the needles. Wet blocking is what makes the Lace Columns open up, the Zig Zag Waves peplum flow, and the entire piece fit to schematic measurements. Block the piece flat BEFORE you sew the side seams (it is much easier to pin out flat). See the Blocking Tips section above for my step-by-step method.

Thistlevine Knit Tunic Vest pattern by Marly Bird... ad-free PDF promo showing Marly wearing the blue heathered knit lace vest sample plus a fanned preview of the printable PDF pages
Etsy
Shopify
Ravelry

๐Ÿ’› Final Thoughts

The Thistlevine is one of those patterns that hits a sweet spot for me as a designer. The construction is straightforward (one piece, two seams, pick-up edgings), the lace is beautiful without being scary, and the two-stitch-pattern combination gives you something to actually LOOK AT as you knit. It is the kind of project where you finish a row and want to stop and admire it for a minute before you start the next one ๐Ÿ’›

Once you cast off and block, you are going to have a versatile layering shell that works for fall over a turtleneck, spring over a flowy blouse, and summer evenings on its own. Wear it tunic length, shorten it to a vest, knit it in your “wow thatโ€™s MY color” color… this one is yours to make your own.

If you knit a Thistlevine, please tag me with #marlybird on Instagram and share it in Marly's Minions BiCrafty Community on Facebook… I love seeing your finished pieces ๐Ÿ’›

And queue it on Ravelry so you can find it again the next time you want a fresh layering piece on your needles.

Happy knitting, BiCrafty Bestie!

โค๏ธ Your BiCrafty Bestie,
Marly Bird
A cartoon avatar of a person with glasses and a brown bun smiles warmly. Their green shirt and black jacket add a stylish touch, while colorful hearts surround them like loving temperature blankets, stitching together an aura of love and positivity. -Marly Bird
“

Filed Under: Free Patterns, Knitting, Marly Bird Premium Patterns, Our Free Patterns, Pattern, Uncategorized Tagged With: BiCrafty, free knit pattern, free knit tunic, free knit vest, Knit Picks Woodland, knit tunic XS-5X, lace knit, layering shell knit, Marly Bird, plus size knit pattern, sleeveless knit, spring fling 2026

Almond Brittle Knit Wrap: Free Beginner-Friendly Bulky Knit Lace Pattern

May 27, 2026 By Meg Leave a Comment

”

The Almond Brittle Knit Wrap is a free bulky-weight knit lace wrap pattern designed for confident beginners and easy knitters who want a real lace project they can actually finish in 1 to 2 weeks. Worked back-and-forth in rows on US 10 (6 mm) circular needles using a simple repeating 10-row Lace Bands stitch pattern, the finished wrap measures 80 inches wide by 18 inches deep with tassels on each corner. The pattern uses 2 cakes of Caron Macchiato Cakes (80% acrylic, 20% wool, CYCA #5 bulky). Originally a fan favorite from the Truthful Threads 2023 release, this wrap is the bulky-yarn cousin of my popular Know Your Worth Knit Cocoon Cardigan.

If you've been dreaming about a lace wrap but the thought of fingering-weight yarn on size 4 needles for the next six months makes your eyes glaze over… bestie, I made this one for YOU.

A person models a chunky, multicolored Almond Brittle knit wrap in Caron Macchiato Cakes bulky yarn, showing the Lace Bands stitch pattern and tassel corners

The Almond Brittle Knit Wrap is a free bulky-weight knit lace pattern that proves lace knitting does NOT have to be a marathon. Worked on US 10 needles in 2 cakes of Caron Macchiato Cakes, with a simple repeating Lace Bands stitch pattern, this wrap goes from cast-on to bind-off in about a week or two of evening knitting. The finished piece is a generous 80 inches wide by 18 inches deep… that's “wrap yourself up in it on the couch” dimensions, not a fussy little neck scarf.

This pattern was a fan favorite the moment it released, and I'm bringing it back here on the blog as a free pattern because it's still one of the best “first lace project” wraps I've ever designed. It's an easy knit you can work on at Stitch Night with your friends, or while sipping a glass of wine on the couch with your favorite show… and just a heads-up: pay attention to the actual stretch of the lace. The Lace Bands open up DRAMATICALLY when you block this wrap. It'll surprise you in the best way.

Hey, bestie ๐Ÿ’›

This wrap is one of my favorite “I just want a finished project I can actually wear” designs. I knit the original sample during the Truthful Threads 2023 season specifically because so many of you told me you LOVED the idea of lace knitting but couldn't commit to a fingering-weight, months-long project. The Lace Bands stitch pattern uses just three simple lace rows separated by garter and reverse-stockinette breathers… it's the kind of rhythm you'll memorize after the first repeat and then knit on autopilot while you binge your favorite show.

And those tassels on the corners? Pure joy. Optional, of course, but they take a project from “nice handknit” to “she made this and it's GORGEOUS” in about fifteen minutes of finishing work. I'll show you my favorite tassel-making shortcut later in the post too.

A woman models a cozy multicolored Almond Brittle knit wrap with visible Lace Bands stitch detail and corner tassels
๐Ÿงถ Affiliate Disclosure: This post contains affiliate links. If you purchase through them I may earn a small commission at no extra cost to you… and it helps support free patterns and content from my yarn-loving heart ๐Ÿ’› See my privacy policy here.

๐Ÿ’– What You'll Love About the Almond Brittle Knit Wrap

  • ๐Ÿ’› Real lace… without the months-long commitment. Bulky yarn + US 10 needles + a 10-row pattern repeat = a finished wrap in 1 to 2 weeks of evening knitting.
  • ๐Ÿ’› The stitch pattern is genuinely beginner-friendly. Only 3 of the 10 rows have any lace at all (just a yarn over plus a basic decrease), and even those are separated by easy garter and reverse-stockinette rest rows.
  • ๐Ÿ’› The dimensions are wrap-yourself-up generous. 80 inches wide by 18 inches deep means it's a full-coverage wrap, not a fussy little shawlette.
  • ๐Ÿ’› The tassels are pure joy. Optional but recommended… they take maybe 15 minutes total and add so much personality.
  • ๐Ÿ’› You only need 2 cakes of yarn. A finished wrap from just 2 cakes is unbeatable value for a piece this big.
  • ๐Ÿ’› It's a Stitch Night dream project. Easy enough to chat through, simple enough to sip wine through, rhythmic enough to lose yourself in.

๐Ÿงต Quick Pattern Overview

  • ๐ŸŽฏ Skill level: Easy
  • ๐Ÿ“ Finished measurements: 80″ wide ร— 18″ deep [203 cm ร— 45.5 cm]
  • ๐Ÿงถ Yarn weight: Bulky (CYCA #5)
  • ๐Ÿงถ Yarn used: Caron Macchiato Cakes (80% acrylic, 20% wool, 481 yds / 440 m, 8 oz / 227 g per cake)… 2 cakes in Boundless
  • ๐Ÿชก Needles: US 10 (6 mm) 60″ [152.5 cm] circular needle and double-pointed needles in the same size, or size required for gauge. (Wrap is worked back-and-forth in rows… the circular is just to hold the full width of stitches.)
  • ๐Ÿ“ Gauge: 11 sts ร— 23 rows = 4″ ร— 4″ [10 cm ร— 10 cm] in Lace Bands pattern
  • ๐Ÿงท Notions: Stitch markers, tapestry needle, scrap cardboard or a tassel maker (for the corner tassels)
  • โฑ๏ธ Estimated knitting time: 15-25 hours total (1-2 weeks of evening knitting)

๐Ÿ’Ž Love the Pattern but Want an Ad-Free PDF?

Mockup of the Almond Brittle Knit Wrap ad-free printable PDF pattern

โœจ The full Almond Brittle Knit Wrap pattern is right here on the blog, completely free. But if you'd love a clean, printable, ad-free version you can take with you to the yarn store or pin to your project bag, you can grab the ad-free PDF below… and your purchase directly supports my free pattern library here on the blog.

Grab the Ad-Free Printable PDF

Skip the ads. Print clean. Pin to your project bag. Support free patterns on marlybird.com ๐Ÿ’›

Etsy
Shopify
Ravelry

And while you're here… pop your email in the box below so I can send you brand-new free patterns the moment they hit the blog ๐Ÿ’Œ

Join our Newsletter

Get Free Crochet & Knitting
Pattern Links & Coupons!

Hand-drawn bird with curling, detailed feathers and pink accents; cheerful pose showcases fine line and texture work.
>> Become An Insider <<
A woman with glasses and curly hair models a colorful crocheted scarf, showing textured stitches and vibrant yarn.

๐Ÿชก Why Bulky Lace? (And Why This Pattern Matters)

Here's the thing about traditional lace knitting: most patterns are designed for fingering or laceweight yarn on tiny needles, which means a finished shawl can take months. And while a delicate cobweb-lace heirloom is gorgeous, it's also intimidating, slow, and frankly, not the project most knitters can squeeze into a real life with jobs and kids and Stitch Night and naps.

Bulky lace flips that whole equation. Bigger yarn means bigger holes… which means the lace pattern shows up dramatically without requiring a single chart. The Lace Bands pattern in Almond Brittle is just a single, repeating yarn-over-and-decrease row, with plain rest rows in between. That's it. On US 10s in bulky yarn, every yarn over becomes a clean, visible hole the moment you block the finished wrap.

This is why Almond Brittle is the wrap I recommend to every knitter who's curious about lace but scared to commit. It gives you the satisfaction of “I MADE LACE” without the steep learning curve. You'll come away from this project with new skills (yarn overs, k2tog, ssk, blocking lace) AND a beautiful finished wrap you'll wear for years.

If you fall in love with the Lace Bands stitch pattern, you'll also adore my Know Your Worth Knit Cocoon Cardigan… it uses this same Lace Bands stitch in a cocoon-cardigan construction, and it's been one of my most popular patterns for years. Once you've knit Almond Brittle, you've already learned everything you need to make the cardigan version too. (More on that pairing below.)


๐Ÿค” Is This Pattern Right for You?

The Almond Brittle Knit Wrap is your match if…

  • โœ… You're a confident beginner or easy knitter who has done basic knit + purl + a few simple decreases.
  • โœ… You've been intimidated by lace knitting and want a “lace lite” project that gives you a real lace finished look without months of charts.
  • โœ… You love generous, full-coverage wraps you can actually curl up in.
  • โœ… You appreciate budget-friendly yarn that still has enough wool to block beautifully.
  • โœ… You want a relaxing knit you can work on at Stitch Night, on the couch, or with a glass of wine in hand.

This pattern is probably NOT for you if…

  • โŒ You're specifically craving fingering-weight, complex lace charts (try Lehabah or Blood of My Blood instead).
  • โŒ You want a small, neck-scarf-sized accessory (Almond Brittle is wrap-around-yourself big).

๐Ÿง  Build Your Skills: The Lace Bands Stitch Pattern

The Almond Brittle Knit Wrap is built on a single repeating 10-row stitch pattern called Lace Bands. It's the kind of stitch I love teaching because it gives knitters a “real lace” finished look without the steep learning curve of traditional lace charts. Once you've worked the pattern through once, you'll have it memorized.

Here's the architecture: 4 rows of plain garter stitch (knit every stitch, both sides), then a single lace row (yarn over + k2tog), a rest row (purl on the wrong side with garter borders), another single lace row (this time yo + ssk for a mirror-image hole), another rest row, and one final lace row to close the band. That's it. The rest of the pattern is just repeating those 10 rows until your wrap is 18 inches deep.

What you need to know how to do before casting on:

  • ๐Ÿงถ Knit and purl stitches
  • ๐Ÿงถ Yarn over (yo)… if it's new, that's totally fine, the video tutorials below have you covered
  • ๐Ÿงถ Knit two together (k2tog)… a basic right-leaning decrease
  • ๐Ÿงถ Slip-slip-knit (ssk)… a basic left-leaning decrease
  • ๐Ÿงถ Long-tail cast-on (or your favorite stretchy cast-on)
โœจ Designer Tip: Add a lifeline every 10 rows (after each Lace Bands pattern repeat). A lifeline is just a piece of smooth, contrasting thread threaded through every live stitch… it gives you a safety net so if you make a mistake 12 rows down the road, you can rip back to the lifeline and pick the stitches up cleanly. Honestly, lifelines are the difference between “I love this project” and “I'm frogging this whole thing.”
โš ๏ธ Pay Attention to the Stretch: Knit lace stretches A LOT when you block it. The Almond Brittle wrap will look smaller and tighter coming off your needles than the finished 80″ ร— 18″ measurements suggest. Don't panic. When you wet-block this piece, the Lace Bands will open up dramatically and the wrap will grow into those final dimensions. The stretch is part of the magic… but it WILL surprise you the first time you see it.

๐Ÿงถ Yarn and Materials

Close-up of the Almond Brittle Knit Wrap in Caron Macchiato Cakes, showing the textured striping in warm pink, peach, and brown colorway and the open Lace Bands stitch pattern

The Yarn I Used: Caron Macchiato Cakes

The Almond Brittle sample is knit in Caron Macchiato Cakes, color Boundless. Macchiato Cakes is a CYCA #5 bulky weight yarn, 80% acrylic / 20% wool, with 481 yards / 440 meters per 8 oz / 227 g cake. You need 2 cakes total for the wrap.

Here's why I picked this yarn for this specific pattern:

  • ๐Ÿงถ The 80/20 acrylic-wool blend. Just enough wool (20%) to block beautifully and open the lace… but acrylic-dominant, which means the finished wrap is machine washable and crazy easy to live with.
  • ๐Ÿงถ The cake format. No center-pull mess, no caking yarn yourself before you cast on. Just pop the cake on the floor next to your chair and knit from the outside.
  • ๐Ÿงถ The yardage. 481 yards per cake means just 2 cakes covers the entire 80″ wrap with comfortable margin. That's exceptional value for a piece this size.
  • ๐Ÿงถ The budget. Macchiato Cakes is widely available at Michaels and Yarnspirations and tends to land at the friendly end of the price spectrum. A whole wrap for the cost of dinner out… yes please.
Two cakes of Caron Macchiato Cakes bulky yarn, the sample yarn used in the Almond Brittle free knit lace wrap pattern, shown in two colorways: Soulful (marled blue and gray) and Bewitch (purple, orange, and gray).

Yarn Substitutes

Any CYCA #5 bulky weight yarn that gets gauge will work beautifully. A few smart substitutes to consider:

  • ๐Ÿงถ Lion Brand Mandala Thick & Quick (3-pack at Michaels)… gorgeous gradient cake. Heads-up: Thick & Quick is CYCA #6 super bulky (one weight up from Macchiato Cakes), so you'll want to size up to US 11 or 13 needles and check gauge before committing… the lace will be a touch more dramatic and the finished wrap a bit wider per stitch.
  • ๐Ÿงถ WeCrochet Mighty Stitch Worsted… not technically bulky, but knit at a slightly looser gauge it makes a softer, drapier version of the same wrap (you'll need extra yardage)
  • ๐Ÿงถ Bernat Softee Chunky… 100% acrylic, fully washable, budget-friendly. The lace will be a touch less open than wool-blend versions but still gorgeous.
  • ๐Ÿงถ Bernat Super Fluffee… an extra-soft, lofty acrylic option if you want a snugglier, plushier hand on your finished wrap. Beautiful for cozy winter wrapping.
Bulky knit lace scarf with tassels displayed on mannequin, highlighting its openwork texture and drape.

๐ŸŽฅ Video Tutorials

If any of the techniques in this pattern are new to you, I've got you. The two videos below are the most useful ones for THIS pattern specifically… and there's a full library of beginner technique tutorials waiting on my YouTube channel if you want more.

๐ŸŽฅ Lace Bands Stitch Pattern Walkthrough (from the Know Your Worth Cardigan Tutorial)

The Almond Brittle Knit Wrap uses the same Lace Bands stitch pattern I teach in my Know Your Worth Cocoon Cardigan tutorial. The full video walks you through every row of the Lace Bands repeat in real time, with close-ups of the yarn over and decrease rows. If you're a visual learner, watch this BEFORE you cast on Almond Brittle and you'll be in great shape.

๐ŸŽฅ Watch the Lace Bands stitch walkthrough on YouTube (from the Know Your Worth Cocoon Cardigan tutorial).

๐ŸŽฅ DIY Tassel Maker (How to Make the Corner Tassels)

The tassels on the corners of Almond Brittle are 8 inches long and they're easier than you think. In this short video I'll show you my favorite DIY tassel-maker trick using scrap cardboard. You'll be knocking out matching tassels in about 15 minutes total once you've got the technique down.

๐ŸŽฅ Watch the DIY Tassel Maker video on YouTube… a quick walkthrough using scrap cardboard to make four matching 8-inch tassels for the wrap corners.

๐ŸŽฅ Supporting Knit Technique Videos

If any of these techniques are new to you, here are my free video tutorials covering each one:

  • ๐ŸŽฅ Long-Tail Cast-On
  • ๐ŸŽฅ Knit Stitch (Continental)
  • ๐ŸŽฅ Purl Stitch (Continental)
  • ๐ŸŽฅ How to Knit Lace (yarn overs + decreases explained)
  • ๐ŸŽฅ Tinking (un-knit one stitch at a time when you catch a mistake)
  • ๐ŸŽฅ Burying Ends
โญ๏ธ Marly Bird Amazon Storefront โญ๏ธ

Marly Bird wearing the Almond Brittle free bulky knit lace wrap pattern in Caron Macchiato Cakes, with corner tassels and yarn supplies visible in a cozy crafting room background.

๐Ÿงถ Almond Brittle Knit Wrap: Pattern Details

Skill Level

Easy / Confident Beginner

Finished Measurements

80″ wide ร— 18″ deep [203 cm ร— 45.5 cm], after blocking. Lace knit fabric stretches significantly when blocked… your wrap will look smaller off the needles than the finished measurements suggest. That's normal and expected.

Gauge

11 sts ร— 23 rows = 4″ ร— 4″ [10 cm ร— 10 cm] in Lace Bands pattern, after blocking.

Gauge is not essential for this item, but may affect amount of yarn required. To measure your gauge in Lace Bands pattern, cast on 4 extra sts beyond the pattern multiple, and keep 2 sts at each edge in garter stitch (knitting them on every row).

Materials

Yarn: Caron Macchiato Cakes (80% acrylic, 20% wool, 481 yds / 440 m, 8 oz / 227 g per cake, CYCA #5 bulky)… 2 cakes. Sample color: Boundless.

Needles: US 10 [6 mm] 60″ [152.5 cm] circular needle and double-pointed needles in the same size, or size required for gauge. Note: The wrap is worked back-and-forth in rows; a circular needle is used to hold the full width of the stitches.

Notions:

Stitch markers
Tapestry needleย 
Scissors
Tape measure
Notions Bag for Supplies
Supplies for Tassels

โญ๏ธ Marly Bird Amazon Storefront โญ๏ธ

Abbreviations

  • K … Knit
  • K2tog … Knit two stitches together (1 stitch decreased)
  • P … Purl
  • PM … Place marker
  • RS … Right side
  • Sl … Slip
  • SlM … Slip marker
  • Ssk … Slip, slip, knit (see Special Stitches)
  • St(s) … Stitch(es)
  • WS … Wrong side
  • Yo … Yarn over

Special Stitches

Ssk (Slip, Slip, Knit): Slip 2 stitches, one at a time, as if to knit. Insert the left-hand needle into the front of these two stitches and knit them together from this position (1 stitch decreased).


Stitch Pattern: Lace Bands

Worked over an even number of stitches (minimum 8).

  • Rows 1-4 (begin RS): Knit.
  • Row 5 (RS): K2, * K2tog, yo; repeat from * to last 2 sts, k2.
  • Row 6 (WS): K2, p to last 2 sts, k2.
  • Row 7 (RS): K2, * Yo, ssk; repeat from * to last 2 sts, k2.
  • Row 8 (WS): K2, p to last 2 sts, k2.
  • Row 9 (RS): K2, * K2tog, yo; repeat from * to last 2 sts, k2.
  • Row 10 (WS): K2, p to last 2 sts, k2.

Repeat Rows 1-10 for Lace Bands pattern.


GROW

To Unlockย Exclusive Subscriber Contentย click the Box below and join for free by simply adding your email and creating a password! If you are having troubles, clear your cache or reset your password or login to the Grow Publisher Portal.

>> Learn More About Grow Here <<

I'm thrilled to share this amazing pattern with you, many patterns on my blog are absolutely free! I kindly request that you don't copy and paste or distribute this pattern. Prefer an ad-free experience? Buy a digital PDF pattern for a small fee from one of my online stores for a seamless crafting journey. 

I appreciate your support and readership. You are the reason I can keep doing what I love and sharing it with others. So, thank you from the bottom of my yarn-loving heart! Disclosure: This post contains affiliate links, meaning I get a commission if you decide to make a purchase through my links at no cost to you.

Person wears a handmade chunky knit scarf with multicolored yarn and tassels, showing varied stitches and cozy texture indoors.

๐Ÿงถ Almond Brittle Knit Wrap: Pattern Instructions

Cast On

Using US 10 (6 mm) circular needle and your preferred stretchy cast-on (long-tail recommended), cast on 220 sts.

Body

Work in Lace Bands pattern (see Stitch Pattern above) until piece measures 18″ [45.5 cm] from cast-on edge, ending after a pattern Row 4 (one of the all-knit rows).

Tip: Add a lifeline every 10 rows (after each Lace Bands pattern repeat). Your future self will thank you.

Bind Off

Bind off all stitches loosely in knit. (A loose bind-off matters here… it prevents the top edge from pulling in and gives the wrap room to block out to full width.)

Finishing

Tassels. Make 4 tassels about 8″ [20.5 cm] in length (see the DIY Tassel Maker video above). Sew one tassel to each corner of the wrap using a tapestry needle.

Weave in ends. Use a tapestry needle to bury all loose yarn tails through the wrong side of the fabric.

Wet block. Soak the wrap in lukewarm water with a splash of wool wash for 20 minutes. Gently squeeze out excess water (do not wring). Lay flat on blocking mats and pin out to 80″ ร— 18″. Let dry completely (12-24 hours) before unpinning. Blocking is non-negotiable for lace… this is the step that opens those yarn-over holes into the beautiful Lace Bands pattern you fell in love with.


Shoop Shoop Shoop knit pattern by Marly Bird in Caron Macchiato Cakes bulky yarn, a textured striped accessory with lace sections and decorative buttons on the edge.
Trifle Tunisian crochet sweater pattern by Marly Bird in Caron Macchiato Cakes bulky yarn, short-sleeve top in blue and gray with lacy textured stitches, shown flat on a white wooden surface.
Trifle
Marly Bird modeling the Know Your Worth Knit Cocoon Cardigan in the Lace Bands stitch pattern, the cocoon-cardigan companion to the Almond Brittle Knit Wrap, with yarn-filled shelves in the background.
All About It crochet newsboy hat pattern by Marly Bird in Caron Macchiato Cakes bulky yarn, a textured blue crochet hat with visible stitch detail, modeled outdoors.

๐Ÿงถ Love These Yarns? More BiCrafty Patterns Using Caron Macchiato Cakes & Red Heart Roll With It

One of my favorite parts of being a designer is reusing my favorite yarns across multiple patterns… when a yarn is THIS good, why not? Both Caron Macchiato Cakes and Red Heart Roll With It (and its tweed cousin) are workhorse cake yarns I've used across knit AND crochet patterns. Here are some of my other designs you might love, in both crafts.

Other Patterns I've Designed with Caron Macchiato Cakes

  • ๐Ÿงถ Trifle… a cozy bulky-yarn favorite
  • ๐Ÿงถ All About It… another Macchiato Cakes design
  • ๐Ÿงถ Shoop Shoop Shoop… bulky cake-yarn fun

BiCrafty Patterns Using Red Heart Roll With It (and Roll With It Tweed)

These designs use Red Heart Roll With It, the worsted-weight self-striping cousin to Macchiato Cakes. Both knit AND crochet patterns below.

  • ๐Ÿงถ Sookie Crochet Cardigan (crochet)… free blog pattern, sizes XS to 5X
  • ๐Ÿงถ Giovanni Crochet Tweed Scarf (crochet)… free blog pattern
  • ๐Ÿงถ Roy G. Biv Knit Hat (knit)… free blog pattern
  • ๐Ÿงถ Cozy Sideline (knit)
  • ๐Ÿงถ Sunday Chill
  • ๐Ÿงถ Lorelai
  • ๐Ÿงถ Sugar Biscuit Mosaic Knit Hat (knit)
  • ๐Ÿงถ Sugar Biscuit Fingerless Mitts (knit)
  • ๐Ÿงถ Farrago
  • ๐Ÿงถ Check Me Out
  • ๐Ÿงถ Check It Out
  • ๐Ÿงถ One Ball Shawl
  • ๐Ÿงถ Crochet Swancho CAL (crochet)
  • ๐Ÿงถ Hooded Sedge Stitch Scarf
  • ๐Ÿงถ Roy G. Biv Revised

๐Ÿงถ Pair Almond Brittle with the Know Your Worth Cocoon Knit Cardigan

The Know Your Worth Knit Cocoon Cardigan is the cocoon-cardigan cousin of Almond Brittle. It uses the same Lace Bands stitch pattern you'll learn here, in a wearable cardigan construction… and it's been one of my most popular patterns for years. If you knit and love Almond Brittle, the cardigan is your natural next project. You've already learned every technique you need.

  • ๐Ÿ“– Read the Know Your Worth Cocoon Cardigan blog post
  • ๐Ÿ’œ Favorite the Know Your Worth pattern on Ravelry
  • ๐Ÿ›๏ธ Buy the ad-free Know Your Worth PDF on Etsy (size-inclusive, includes video tutorial)

๐Ÿ’› Meet the Designer

About Marly Bird
Marly Bird is a professional yarn artist and designer who has been designing knit and crochet patterns since 2007. She's the BiCrafty designer… the only creator who teaches BOTH knitting and crochet together. Follow her free pattern library at marlybird.com, her YouTube channel @marlybird, and her premium education community at Marly Bird House.
Marly Bird smiling, wearing the Almond Brittle free knit lace wrap pattern draped around her shoulders, showing the Lace Bands stitch and tassel corners.

โ“ Frequently Asked Questions

What skill level is the Almond Brittle Knit Wrap?

Easy. Honestly, if you can knit, purl, do a yarn over, and work a basic decrease (k2tog and ssk), you have everything you need to make this wrap. The bulky weight yarn + the simple repeating 10-row pattern means it's one of the most beginner-friendly “real lace” projects I've designed.

How much yarn do I need?

Two cakes of Caron Macchiato Cakes (each cake is 481 yds / 440 m). So you're looking at roughly 962 yds total. If you substitute a different bulky weight yarn, plan for about 900-1,000 yards.

How long does it take to knit the Almond Brittle Wrap?

About 15-25 hours of knitting time, depending on your speed. For most knitters, that translates to 1-2 weeks of evening knitting. Bulky weight + simple rhythm means this is one of the fastest “real lace” projects you can make.

Can I substitute a different yarn?

Absolutely. Any CYCA #5 bulky weight yarn that matches gauge (11 sts ร— 23 rows = 4″ ร— 4″ in Lace Bands pattern) will work. Lion Brand Mandala Thick & Quick (super bulky, size up your needles), Bernat Softee Chunky, and Bernat Super Fluffee are all great choices. The acrylic/wool blends will be most similar to the original Caron Macchiato Cakes. If you go 100% acrylic, the lace will block slightly less dramatically but the wrap will still look gorgeous.

Do I have to add the tassels?

Nope… the tassels are optional. The wrap is gorgeous without them, but the tassels add a fun, playful finish that takes about 15 minutes total. If tassels aren't your style, try a simple knotted fringe instead, or just leave the corners clean. (Watch the DIY tassel maker video above for the fastest way to make them.)

Do I have to block the wrap?

Yes. Always. Blocking is what transforms knit lace from a scrunched-up tangle into the airy, drapey piece you envisioned. Wet block the finished wrap (soak in lukewarm water with wool wash for 20 minutes, squeeze gently, pin flat to 80″ ร— 18″, let dry 12-24 hours) and you'll watch the Lace Bands open into their beautiful finished form.

How much does this lace stretch when blocked?

A lot. Like… it'll surprise you. Coming off the needles, your wrap will likely measure 65 to 70 inches wide and 13 to 15 inches deep. After a thorough wet block and pinning to the final 80″ ร— 18″ dimensions, the Lace Bands open up dramatically. This is by design… pay attention to the stretch when you're knitting and don't panic if your unblocked wrap looks smaller than you expected. The blocking step is where the magic happens.

Can I make the wrap larger?

Yes! The pattern is worked over an even number of stitches (minimum 8), so you can cast on any even number to adjust the width. To make it longer, just keep knitting until you reach your desired depth, ending after a pattern Row 4. Plan for extra yarn if you go bigger… approximately 6-7 yards per inch of additional width or depth.

Is this a good Stitch Night / social knitting project?

Honestly? It's one of the BEST Stitch Night projects I've designed. The Lace Bands pattern is rhythmic enough to memorize after one repeat, the rows are long enough that you don't have to count too often, and 6 of the 10 rows are pure knit-on-autopilot. Bring it to Stitch Night, bring it to your favorite chair with a glass of wine, bring it on a long Zoom call. You'll love how easy it is to live with this pattern.


๐Ÿงต More Free Knit Shawl & Wrap Patterns from Marly Bird

  • ๐Ÿงถ 11 Free Knit Lace Shawl Patterns… the full roundup including this wrap and 10 others
  • ๐Ÿ“š Knit Shawl Patterns: Free Designs for Every Shape, Season & Skill Level… master hub for every free knit shawl on the blog
  • ๐ŸŒŸ Lehabah Fire Sprite Knit Shawl… fingering-weight right triangle lace shawl
  • ๐ŸŒณ Eowyn Free Cable Knit Shawl… textured right triangle with cables
  • ๐ŸŒธ Pear Sorbet Knit Lace Shawlette… fingering-weight shawlette with garter tab cast-on
  • ๐Ÿงฅ Know Your Worth Cocoon Knit Cardigan… the cocoon cardigan in the same Lace Bands stitch pattern

๐Ÿก Want to Go Deeper with Knit Lace? Join Marly Bird House

If you finished Almond Brittle and you're hungry for more lace… I teach guided knit-along classes, deep-dive workshops on lace construction, and live coaching inside Marly Bird House. Whether you want to take on a fingering-weight lace shawl as your next project or you'd love a friendly community to knit alongside, we'd love to have you. Come check it out.


The finished Almond Brittle free bulky knit lace wrap pattern displayed flat on a mannequin, showing the full 80-inch width and the corner tassels.

๐Ÿ’› Final Thoughts

The Almond Brittle Knit Wrap is the project I hand to every knitter who tells me lace knitting feels too daunting. It's bulky, fast, generously sized, and uses one of the simplest “real lace” stitch patterns you can find. You'll finish it in a week or two, you'll wear it CONSTANTLY, and you'll surprise yourself with how much you genuinely loved the lace rows once you got into the rhythm. Pour a glass of wine, bring it to Stitch Night, and don't forget to block it… that's when the magic happens.

I'd love to see your finished Almond Brittle Wrap! Share your project on Instagram with #MMMDI and #MarlyBird so I can find you and cheer you on ๐Ÿ’›

Pin this pattern for later, share it with a knitting friend, and happy knitting, bestie! ๐Ÿ’›

โค๏ธ Your BiCrafty Bestie,
Marly Bird
A cartoon avatar of a person with glasses and a brown bun smiles warmly. Their green shirt and black jacket add a stylish touch, while colorful hearts surround them like loving temperature blankets, stitching together an aura of love and positivity. -Marly Bird
“

Filed Under: Free Patterns, Knit Shawl Patterns, Knitting, Marly Bird Premium Patterns, Our Free Patterns, Pattern Tagged With: badge-beginner-friendly, badge-new-pattern, beginner lace knitting, bulky knit lace, Caron Macchiato Cakes, easy knit lace, free knit pattern, free knit shawl pattern, free knit wrap, knit lace pattern, knit wrap pattern, Marly Bird, Marly Bird knit pattern

Free Knit Lace Shawl Patterns

May 27, 2026 By admin Leave a Comment

๐Ÿ“ Updated 2026-05-27: Fully refreshed lineup with 11 free knit lace shawl patterns. Newly added: Tilted Blocks, Pear Sorbet, Shangri-La (just published!), Brontรซ, Almond Brittle, and Culebra Peak. Real yarn affiliate links throughout, plus a brand-new section featuring premium knit lace shawl patterns and the Stitch Switch Vol 2 collection. โค๏ธ Marly Bird

A free knit lace shawl pattern uses yarn overs paired with decreases to create open, decorative stitches in a shawl-shaped fabric. The best free knit lace shawl patterns are graded for every skill level, work in yarn weights from lace through bulky, and transform from scrunched-up stitches into ethereal, drapey wraps after a single proper blocking. This roundup features 11 free knit lace shawl patterns from Marly Bird (plus a curated list of premium lace designs)… triangle, right triangle, boomerang, half-hexagon, half-circle, and crescent shapes, fingering through bulky weight, beginner through advanced. Any shawl can be a lace shawl… the look changes dramatically based on the lace stitches you choose, the yarn weight you pick, and the gauge you knit at.

If you've been scrolling Ravelry and Pinterest hunting for a free knit lace shawl pattern that fits your skill level AND your yarn stash AND looks gorgeous when it's done… you're in the right place. This roundup pulls together 11 free knit lace shawl patterns from my own design library, ranging from easy garter-and-lace shawls beginners can absolutely tackle to a fingering-weight mosaic stretch project that'll keep advanced knitters happily occupied. Every single one is free here on the blog, and every single one shows you exactly what lace knitting can be.

Free knit lace shawl patterns by Marly Bird... a collage hero showing eleven free knit lace shawl designs in fingering, sport, worsted, and bulky weight yarn.

Hey, bestie ๐Ÿ’›

Lace shawls hold a special place in my heart. I've been teaching knitters how to read lace charts, conquer their first yarn-over, and fall in love with that magical “scrunched-to-stunning” blocking transformation since 2007 now… and honestly, watching a new knitter pin out her first lace shawl and see those holes open up never stops feeling like a tiny miracle. There's nothing else in knitting quite like it.

Whether you're knitting your very first lace shawl or your fortieth, these patterns will give you a beautiful project to wrap up in. Grab your favorite mug, pull up a chair, and let's find your next one.

๐Ÿงถ Affiliate Disclosure: This post contains affiliate links. If you purchase through them I may earn a small commission at no extra cost to you… and it helps support free patterns and content from my yarn-loving heart ๐Ÿ’› See my privacy policy here.
Several lace knit shawls in varied colors and patterns are modeled indoors and outdoors, showing stitch detail and drape.

What Makes a Free Knit Lace Shawl Pattern Great?

A free knit lace shawl pattern at its best gives you three things: an approachable on-ramp to lace knitting (yarn overs + decreases that form a clear, repeatable pattern), a shape that flatters how you actually wear shawls, and a finished fabric that opens up beautifully under a wet block. That's the whole magic. Lace looks impossibly intricate when it's finished, but the technique itself is mostly… knit, yarn over, knit two together, repeat. Once you understand the rhythm, you can knit anything.

And the absolute best part? Lace shawls are some of the most rewarding “value-per-skein” projects in knitting. A single skein of fingering weight yarn can become a wingspan-spanning showstopper. A handful of skeins of worsted creates a wrap your friends will ask you to make for them. It's the only craft skill that turns a $20 ball of yarn into something people stop you in the grocery store to compliment.

โœจ One thing knitters miss: ANY shawl can be made with lace stitches or in a lace-weight yarn. The same triangle, crescent, or rectangle “recipe” looks dramatically different depending on the lace pattern you choose and the gauge you knit at. A fingering-weight, US-7-needle version of a shawl floats and drapes like a cloud. The same shape worked in worsted on US-10 needles wraps thick and structured around your shoulders like a hug. Don't get hung up on the shawl pattern being labeled “lace”… pick a shape you love, add lace stitches you love (or knit it in lace-weight yarn), and you've got your own lace shawl.

What You'll Learn From This Roundup

This isn't just a list of links. By the end of this post you'll know:

  • ๐Ÿงถ Which lace shawl shape is right for you (triangle, right triangle, boomerang, half-hexagon, half-circle, and crescent… they wear very differently)
  • ๐Ÿ“ What yarn weight to choose for different drape and warmth (and why ANY shawl can become a lace shawl with the right yarn + stitch choices)
  • โœจ Why blocking matters so much (and how to do it without ruining anything)
  • ๐ŸŽฏ A pattern recommendation matched to your exact skill level… whether you've never done a yarn over before or you eat lace charts for breakfast
  • ๐Ÿ’› Which 11 free knit lace shawl patterns belong on your queue (plus a curated list of premium lace designs if you want to go deeper)

Lace Knitting 101: A Quick Primer

If lace knitting is new to you, here's everything you need to know in under 200 words.

The mechanics. Lace is made by pairing two simple actions: a yarn over (which adds a stitch + creates a deliberate hole) and a decrease (which removes a stitch and brings two strands together at an angle). The yarn over makes the open stitch you see. The decrease keeps the stitch count balanced so your fabric stays flat. That's it. Different combinations of yarn-overs and decreases create different patterns… leaves, diamonds, fans, waves, fish-tails, you name it.

Charts vs. written. Lace patterns come in two formats: charts (visual grids showing each stitch) and written line-by-line instructions. Most patterns include both. Once you can read a lace chart, you'll never go back… it's faster and easier to track than reading “k2, yo, k2tog, k1, ssk, yo, k2, k2” sixteen times.

Skill level honesty. Lace knitting requires you to be comfortable with: knit, purl, yarn over (yo), knit two together (k2tog), and slip-slip-knit (ssk). If you can do those five things, you can knit lace. Confident beginners do it all the time.

Blocking is non-negotiable. Unblocked lace looks like a sad, scrunched-up tangle. After a wet block, it transforms into the airy, ethereal piece you fell in love with on Pinterest. Always block your lace.

โœจ Designer Tip: If lace is brand new to you, start with a worsted-weight or bulky-weight lace shawl (Mariposa, Tilted Blocks, Almond Brittle). The bigger stitches make it much easier to see what's happening, fix mistakes when they happen, and finish the project quickly enough to actually enjoy the win. Move to fingering and lace weight on shawl #2 or #3.

11 Free Knit Lace Shawl Patterns

Patterns are organized to give you a mix of shapes, yarn weights, and skill levels. The newest design (Lehabah) leads, then we balance variety from there so you can find your match. A few of these (Brontรซ, Almond Brittle, Culebra Peak) are currently being prepped for the blog… I've included them here because they belong in this lineup and I want you to know what's coming.

1. Lehabah Fire Sprite Knit Shawl โญ: The Newest Lace Shawl on the Blog

Woman models the Lehabah Fire Sprite free knit lace shawl pattern in orange fingering weight yarn, showing asymmetrical right triangle shape and lace columns

If you make ONE shawl from this list, make it Lehabah. She is my newest knit lace shawl design and I am absolutely in love with how she came out.

Lehabah is an asymmetrical right triangle shawl worked in fingering weight yarn on US 5 needles, with simple columns of lace that open up gorgeously after blocking, an i-cord-style slipped edge that gives a polished finish, and a ribbed border that grounds the airy lace with structure. The whole thing is inspired by the fire sprite Lehabah from the Crescent City series… bright, fierce, and just the right amount of magical. Advanced beginners ready to level up will feel right at home here.

Quick Facts:

  • ๐ŸŽฏ Skill level: Advanced Beginner to Intermediate
  • ๐Ÿงถ Yarn weight: Fingering (CYCA #1)
  • ๐Ÿ“ Shape: Asymmetrical right triangle (increases on ONE edge)
  • ๐Ÿ“ Approximate size: Generous wingspan, perfect for wearing as a wrap or scarf

๐Ÿ‘‰ Get the free Lehabah Fire Sprite Knit Shawl pattern here

2. Blood of My Blood Knit Shawl: Outlander-Inspired Half-Hexagon

Model wears the Blood of My Blood free knit shawl pattern in red lace weight yarn, showing the half-hexagon shape with cables and lace

Blood of My Blood pairs intertwined cables with delicate lace in a stunning half-hexagon silhouette inspired by Claire and Jamie Fraser… yes, that Claire and Jamie. It is romantic, textural, and has serious wingspan (56ยฝ to 68 inches across, depending on size).

The half-hexagon construction creates angular edges rather than a smooth curve, so the shawl drapes with structure and intention. Lace weight yarn makes the cables float and the lace breathe. It's one of those projects that looks complicated on the needles but reads as pure poetry once it's blocked and on your shoulders.

Quick Facts:

  • ๐ŸŽฏ Skill level: Adventurous Beginner / Confident Beginner
  • ๐Ÿงถ Yarn weight: Lace (CYCA #0)
  • ๐Ÿ“ Shape: Half-hexagon (worked outward from center, angular edges… NOT a half-moon)
  • ๐Ÿ“ Approximate size: S/M/L with wingspans from 56ยฝ to 68 inches

๐Ÿ‘‰ Get the free Blood of My Blood Knit Shawl pattern

3. Asymmetrical Knit Lace Shawl: Garter + Lace Beginner Friendly

Free Asymmetrical Knit Lace Shawl pattern in teal, shown draped and flat to highlight the garter + lace stitch combination

This one is for the new lace knitter who wants a project that looks impressive but won't make her cry. The Asymmetrical Knit Lace Shawl pairs cozy garter stitch with a simple repeating lace pattern, all worked in an asymmetrical shape that drapes beautifully across the shoulders. The garter stitch sections give your brain a rest between lace rows… which is exactly what a brand-new lace knitter needs.

I included a video tutorial with this pattern too, because lace charts can feel intimidating when you're new. Watch me work through the stitches and you'll feel a hundred times more confident before you cast on.

Quick Facts:

  • ๐ŸŽฏ Skill level: Beginner-friendly (great first lace project)
  • ๐Ÿงถ Yarn weight: Worsted (works beautifully in Caron One Pound or any smooth worsted)
  • ๐Ÿ“ Shape: Asymmetrical (bias-worked, off-center triangle drape)
  • ๐Ÿ“ Approximate size: Wearable wrap size, customizable by yarn quantity

๐Ÿ‘‰ Get the free Asymmetrical Knit Lace Shawl pattern

4. Return to Me Boomerang Knit Shawl: Cables Meet Lace

Return to Me free boomerang knit shawl pattern in green sport weight yarn with easy cables and lace

Return to Me is the boomerang shawl that proved cables and lace were always meant to be together. The pattern features simple, easy-to-memorize cables paired with airy lace, all worked in sport weight merino with a built-in I-cord edge for that polished finish. The boomerang construction… shaping on TWO edges so the shawl curves into that classic bent-wing silhouette… means it drapes spectacularly on the shoulders.

Bonus: no essential gauge required. If you've ever frogged a shawl because your gauge was off by two stitches, you'll appreciate that.

Quick Facts:

  • ๐ŸŽฏ Skill level: Intermediate
  • ๐Ÿงถ Yarn weight: Sport (CYCA #2)
  • ๐Ÿ“ Shape: Asymmetrical boomerang (shaping on TWO edges)
  • ๐Ÿ“ Approximate size: Generous shoulder-wrap drape

๐Ÿ‘‰ Get the free Return to Me Boomerang Knit Shawl pattern

5. Mariposa Textured Shawl: Classic Triangle, Worsted Weight

Mariposa free knit triangle shawl pattern in worsted weight yarn, showing textured lace spine and applied border

Mariposa is a free intermediate knit triangle shawl in worsted weight yarn featuring a lace spine that runs straight down the center back, surrounded by gentle textured stitches that frame the lace without competing with it. The applied border keeps the edges crisp.

This is one of my favorites for confident beginners ready to take on their first “real” lace project. The worsted weight makes every stitch readable, so when something goes wrong you can actually see it (and fix it) without a magnifying glass.

Quick Facts:

  • ๐ŸŽฏ Skill level: Intermediate
  • ๐Ÿงถ Yarn weight: Worsted (CYCA #4)
  • ๐Ÿ“ Shape: Traditional triangle (symmetric, worked top-down)
  • ๐Ÿ“ Approximate size: Wearable shawl wingspan

๐Ÿ‘‰ Get the free Mariposa Textured Shawl pattern

6. Tilted Blocks Knit Lace Shawl: Half-Circle, Textured Lace

Teal, gray, and beige Tilted Blocks half-circle knit lace shawl with textured block stitches, modeled indoors by a woman with curly hair and glasses.
Tilted Blocks Half-Circle Knit Lace Shawl

The Tilted Blocks Knit Lace Shawl is a half-circle garter-stitch shawl with tilted, offset blocks of texture and lace that march across the body like little staircases. It is the perfect “I want to learn something new” project for a confident beginner… the half-circle shape teaches you short-row construction (a brand new skill if you've only done triangles), and the tilted block motif is repetitive enough that it becomes meditative once you get into the rhythm.

The half-circle drape wraps around the shoulders beautifully and stays put without slipping… no constant readjusting like some triangle shawls require. If you're tired of pointed-bottom triangles falling off your shoulders all night, this shape is your fix. Pair it with a long color-fade yarn like It's a Wrap Rainbow and you'll get a shawl that becomes your everyday go-to accessory.

Quick Facts:

  • ๐ŸŽฏ Skill level: Confident Beginner
  • ๐Ÿงถ Yarn: DK or worsted weight color-fade yarn (It's a Wrap Rainbow recommended)
  • ๐Ÿ“ Shape: Half-circle (worked top-down with short-row shaping)
  • ๐Ÿ“ Finished size: 38″ down center line
  • ๐Ÿชก Needles: US 8 (5 mm)

๐Ÿ‘‰ Get the free Tilted Blocks Knit Lace Shawl pattern here (Note: a refreshed blog version is coming soon… when it goes live this URL will redirect automatically.)

7. Pear Sorbet Knit Lace Shawl: Fingering Weight Shawlette

Pear Sorbet free knit lace shawlette in light green fingering weight yarn, displayed on a mannequin showing the lace center panel and stockinette body.

Pear Sorbet is a fingering-weight knit lace shawlette with a gorgeous lace center panel running down the spine and gentle stockinette wings spreading out from either side. It is the perfect “I have one beautiful hand-dyed skein and I don't know what to do with it” pattern… one skein of fingering weight is all you need.

This one was originally designed in Drew Emborsky's “Inappropriate” yarn (a 90% merino, 10% nylon fingering blend), but it shines in any smooth fingering. The garter tab cast-on gives you that classic top-down shawl construction, and the side increases are simple yarn-overs framing the lace center panel.

Quick Facts:

  • ๐ŸŽฏ Skill level: Advanced Beginner (comfortable with knit, purl, increase, decrease)
  • ๐Ÿงถ Yarn weight: Fingering (CYCA #1)… ~440 yds of a smooth fingering wool blend
  • ๐Ÿ“ Shape: Traditional triangle (garter tab cast-on, top-down, lace center panel)
  • ๐Ÿ“ Needles: US 7 (4.5 mm) 36″ circular

๐Ÿ‘‰ Get the free Pear Sorbet Knit Lace Shawl pattern

8. Shangri-La Knit Lace Shawl / Scarf: Airy Openwork

Shangri-La free knit lace shawl scarf in light gray fingering weight yarn, draping over a dark top with delicate openwork stitches and texture clearly visible.

Shangri-La is a flexible knit lace design that works as both a long scarf and a wrap-around shawl, depending on how you style it. The all-over openwork lace pattern creates that ethereal, “barely-there” fabric that drapes weightlessly around the neck or shoulders, and a smooth fingering or sport weight yarn keeps the fabric soft enough to wrap and tie however you want.

This is the design for the knitter who wants something genuinely lacy from edge to edge… no big stockinette panels, no chunky garter borders, just lace all the way through. Bonus: because it can be styled both ways, it's the most “versatile drawer staple” piece in this whole roundup.

Quick Facts:

  • ๐ŸŽฏ Skill level: Intermediate
  • ๐Ÿงถ Yarn weight: Fingering or sport, smooth-ply for crisp lace definition
  • ๐Ÿ“ Shape: Rectangular scarf / wrap-style shawl
  • ๐Ÿ“ Approximate size: Long scarf dimensions; wraps comfortably as a shawl

๐Ÿ‘‰ Get the free Shangri-La Knit Lace Scarf / Shawl pattern here

9. Brontรซ Knit Lace Shawl: Romantic, Jewel-Tone Drape

Brontรซ knit lace shawl in dark green jewel-tone yarn, modeled by a woman over a black dress by a window, showing delicate openwork stitch detail and drape.

Brontรซ is a romantic knit lace shawl I designed for the reader-knitter in all of us… a piece that feels like it belongs in a candlelit library with a worn-in copy of Jane Eyre. Worked in jewel-tone yarn, the all-over lace pattern creates a dramatic, draping fabric that wraps with old-world elegance.

This one is currently being prepped for the blog. I'll have the full free pattern, video tutorial support, and yarn recommendations all live very soon… pop your email into the newsletter signup below and I'll send it straight to you when it goes live.

Quick Facts:

  • ๐ŸŽฏ Skill level: Intermediate
  • ๐Ÿงถ Yarn weight: Fingering or lace
  • ๐Ÿ“ Shape: Triangle
  • ๐Ÿ“ Status: Free pattern coming soon to the blog

๐Ÿ‘‰ Brontรซ Knit Lace Shawl... free pattern blog post coming soon! Join the newsletter below and I'll send it to your inbox when it's live.

10. Almond Brittle Knit Lace Wrap: Bulky, Fast, and Easy

Almond Brittle free knit lace wrap in bulky weight yarn, draped to show the lace band stitch pattern and tassel corners.

If you've been intimidated by lace because it always seems to mean tiny needles and 80 hours of knitting, Almond Brittle is going to change your mind. This is a rectangular knit lace wrap worked in bulky weight yarn on US 10 needles, using a simple lace band stitch pattern that alternates garter stitch rows with single rows of yarn-overs and decreases. Tassels on each corner finish it off with playful texture.

The whole project measures 80 inches wide by 18 inches deep when finished… that's full wrap-yourself-up-in-it dimensions. And because it's bulky weight, you'll fly through it. This is the lace wrap I recommend to anyone who has said “I want to try lace but I don't have months for it.” You'll finish in a week or two of evening knitting.

Quick Facts:

  • ๐ŸŽฏ Skill level: Easy
  • ๐Ÿงถ Yarn weight: Bulky (CYCA #5)… 2 cakes of Caron Macchiato Cakes (80% acrylic, 20% wool, 481 yds / 440 m per cake)
  • ๐Ÿ“ Shape: Rectangular wrap with tassel corners
  • ๐Ÿ“ Finished size: 80″ wide ร— 18″ deep [203 cm ร— 45.5 cm]
  • ๐Ÿชก Needles: US 10 (6 mm) 60″ circular

๐Ÿ‘‰ Almond Brittle Knit Wrap… free blog post coming soon! In the meantime you can favorite the design on Ravelry here.

11. Culebra Peak Knit Lace Shawl: Mountain-Inspired Openwork

Culebra Peak knit lace shawl, showing mountain-inspired openwork lace pattern and gentle triangle drape.

Culebra Peak is a knit lace shawlette named for the Colorado 14er, with a border-lace pattern that echoes the angular ridgelines you see climbing toward the summit. The original design was worked in luxurious Bijou Basin Ranch “Lhasa Wilderness” (a yak and bamboo blend) on US 7 needles. The pattern is being refreshed right now and will post as a free pattern here on the blog in the coming weeks… I'm including her in this roundup because she absolutely belongs in your “future cast-on” list.

Mountain-inspired border lace motifs, a wide-and-shallow shawlette drape, and the kind of stitch architecture that rewards a careful knitter. Pop your email into the newsletter signup below and I'll send the free pattern to you the moment the refresh is live.

Quick Facts:

  • ๐ŸŽฏ Skill level: Easy (border-lace repeat with short-row shaping)
  • ๐Ÿงถ Original yarn: Bijou Basin Ranch Lhasa Wilderness (75% yak / 25% bamboo, 180 yds per skein)… 2 skeins
  • ๐Ÿ“ Shape: Rectangular shawlette with border-lace edge + short-row tapering
  • ๐Ÿ“ Finished size: 66ยฝ” wide ร— 12″ deep
  • ๐Ÿชก Needles: US 7 (4.5 mm)

๐Ÿ‘‰ Culebra Peak Knit Lace Shawl… refreshed free pattern coming soon to the blog! Join the newsletter below and I'll send it to you the day it goes live.


Premium Knit Lace Shawl Patterns (and Lace Pieces) by Marly Bird

I've been designing knit and crochet patterns since 2007, and there are some lace designs I'm especially proud of that live as premium patterns rather than free blog patterns. If you've worked through the free roundup above and you want more of my lace work, these are the next ones to add to your queue. (Yes, even the duster and the shrug… the same lace skills translate beautifully to garments.)

  • ๐Ÿ’Ž Kat Pashmina Knit Shawl… a gorgeous lace knit shawl that's also part of BiCrafty Stitch Nite inside Marly Bird House. Pattern + video tutorial in one bundle.
  • ๐Ÿ’Ž Belo Casamento Knit Lace Shrug… not technically a shawl, but a knit lace shrug worked with the same yarn-over + decrease vocabulary you'd use in a shawl. The pattern uses silk + merino wool lace weight yarn, so the finished shrug is light as air but still cozy. Available as a premium PDF on Etsy, with a free version of the pattern also available on my site at the Belo Casamento Knit Lace Shrug page.

The Stitch Switch Vol 2 Knit Shawl Collection

The Stitch Switch Vol 2 series is one of my favorite premium knit lace projects: a curated collection of three knit shawls that share a foundation construction but each spotlight a different lace motif, so you can build your own “shawl wardrobe” using the same skill set. You can grab the whole collection or pick the individual lace shawl pattern that catches your eye.

๐Ÿ‘‰ Stitch Switch Vol 2: Knit Shawl Collection on Ravelry (3-pattern bundle)

  • ๐Ÿ’Ž Akoya Pearl Knit Lace Shawl… a pearl-inspired lace motif. One of the three patterns in the Stitch Switch Vol 2 collection.
  • ๐Ÿ’Ž Carbonado Diamond Knit Lace Shawl… a diamond-faceted lace motif with a structural, geometric feel. The bold, graphic one in the trio.
  • ๐Ÿ’Ž Diamonds and Pearls Knit Lace Shawl… combines both motifs for a single, richly textured statement shawl. The showstopper of the collection.

๐Ÿ‘‰ You can also browse the full Marly Bird Ravelry Store for every published pattern in one place.

A Lace Knit Piece That Could Easily Become a Shawl

Violet Knit Duster: free knit lace duster pattern by Marly Bird, modeled in purple yarn showing the all-over lace stitch pattern and long open-front silhouette.

The Violet Knit Duster isn't a shawl… but it is one of my favorite knit lace designs, and the lace pattern + construction would translate beautifully into a rectangular wrap or shawl if you wanted to play designer. Marly Bird's free Violet Knit Duster pattern is on the blog, and if you want the premium video-tutorial version, you can grab the bundled video pattern on Etsy here.

This is the principle I want you to internalize: any shape, any garment, becomes a “lace” piece when you swap in lace stitches and the right yarn. The Violet Duster lace panel would work just as gorgeously as a shoulder wrap.


How to Pick the Right Lace Shawl for You

With 11 free knit lace shawl patterns to choose from, here's how I'd think about narrowing down.

If you're new to lace: Start with the Asymmetrical Knit Lace Shawl (beginner with a video tutorial) or Almond Brittle (bulky weight, the easiest way to “see” lace stitches as you work them). Worsted or bulky weight is your friend. Bigger stitches = easier reading + faster reward.

If you've done one or two lace shawls: Move to Mariposa or Tilted Blocks. All worsted, all intermediate. You'll learn how a lace spine works, how to read longer charts, and how short-row half-circle construction differs from a top-down triangle.

If you're an intermediate knitter ready for fingering weight: Lehabah, Pear Sorbet, and (when it goes live) Culebra Peak are all your answer. Fingering yarn opens up the lace beautifully, and these three patterns teach you different construction approaches: right triangle, garter-tab top-down triangle, and mountain-inspired motif knitting.

If you're advanced and want to be challenged: Blood of My Blood (lace weight + cables + half-hexagon), Return to Me (cables + lace + boomerang), or Shangri-La (all-over lace, rectangular wrap). All three will keep you happily occupied.

If you want all-the-way wraparound coverage: Pick Tilted Blocks (half-circle, sits on the shoulders without slipping), Almond Brittle (80-inch rectangular wrap), or a larger triangle.

Budgeting yardage: Fingering and lace weight lace shawls typically use 400-800 yards. Worsted weight shawls usually need 600-1,000 yards. Bulky wraps like Almond Brittle run about 800-1,000 yards across 2 cakes. ALWAYS check the specific pattern's yardage and buy a little extra… blocking and dye lots are the two surprises that bite knitters most.


Colorful yarn skeins in a wooden tray, with tools and floral accents nearby; shelves of yarn visible in the background.

Yarn for Knit Lace Shawls

The right yarn makes lace bloom. The wrong yarn makes it sad. Here's what to look for, and the specific yarns I keep coming back to (with affiliate links so you can grab them).

Smooth, plied yarns over fuzzy, single-ply yarns. A smooth ply lets every lace stitch show clearly. Fuzzy yarn (like mohair or brushed alpaca) softens the definition… beautiful in some contexts, but for your first few lace projects, pick smooth.

Wool, wool blends, or merino are your best friends. They block out beautifully (which is what gives lace its airy, open look). Acrylic and cotton work too, but they don't block the way wool does. If you choose acrylic, set realistic expectations: you'll get a beautiful shawl, but the lace won't open quite as dramatically.

And remember: any shawl pattern can be made into a “lace shawl” by swapping the yarn weight, gauge, or stitch pattern. The same shape worked in fingering-weight merino on US 5 needles versus bulky acrylic on US 10 needles produces two completely different finished pieces. Don't be afraid to substitute.


Marly's Favorite Yarns for Knit Lace Shawls

  • ๐Ÿงถ KnitPicks Gloss Lace… 70% merino / 30% silk lace weight. My top pick for true lace-weight shawls like Blood of My Blood. The silk gives stitches a gorgeous sheen and the merino blocks open beautifully.
  • ๐Ÿงถ KnitPicks Gloss Fingering… same merino/silk blend in fingering weight. Perfect for Lehabah, Pear Sorbet, or the future free Culebra Peak.
  • ๐Ÿงถ Malabrigo Sock… kettle-dyed merino fingering. The semi-solid hand-dyed colors make lace look painterly. Pair this with Pear Sorbet or Lehabah.
  • ๐Ÿงถ Malabrigo Rios… kettle-dyed superwash merino in worsted weight. Best choice when you want a “luxury” feel on a worsted shawl like Mariposa or Tilted Blocks.
  • ๐Ÿงถ KnitPicks Stroll Fingering Sock Yarn… budget-friendly superwash merino/nylon fingering. Comes in dozens of colors. Excellent first-lace-shawl yarn for Lehabah or Pear Sorbet.
  • ๐Ÿงถ Cascade Heritage… 75% merino / 25% nylon fingering. Smooth, strong, blocks like a dream. A great Lehabah substitute.
  • ๐Ÿงถ Cascade Heritage Silk… 85% merino / 15% silk fingering. The silk halo on this one is gorgeous for lace.
  • ๐Ÿงถ KnitPicks Capretta Superwash Fingering… merino/cashmere/nylon blend. The cashmere makes the lace SO soft. Splurge yarn for a special lace shawl.
  • ๐Ÿงถ Berroco Ultra Alpaca Light… wool/alpaca DK weight. The alpaca content gives a soft drape that's gorgeous for the boomerang and triangle shawls in DK weight.
  • ๐Ÿงถ KnitPicks Wool of the Andes Worsted… 100% Peruvian highland wool worsted. The classic budget-friendly wool. Perfect for Mariposa, Tilted Blocks, or Asymmetrical Knit Lace Shawl.
  • ๐Ÿงถ WeCrochet Mighty Stitch Worsted… 80% acrylic / 20% wool. Best of both worlds: machine-washable acrylic body with enough wool to actually block. Great for everyday lace wraps.
  • ๐Ÿงถ Red Heart Soft… 100% acrylic worsted. If you want a fully washable, kid-safe, budget-friendly lace wrap, this is your yarn. Won't block as dramatically as wool but produces a beautiful, durable shawl.
โœจ Designer Tip: Whatever yarn you choose, always make a swatch and BLOCK the swatch before you commit to a whole shawl. The yarn you fell in love with on the ball might behave completely differently when wet-blocked. Better to find out on a swatch than on hour 30 of your project.
โญ๏ธ Marly Bird Amazon Storefront โญ๏ธ

Want More Free Knit Shawl Patterns? Join the Newsletter

I drop new free knit shawl patterns on the blog regularly… join my newsletter and I'll send the next one straight to your inbox, along with behind-the-design stories, yarn sale alerts, and the occasional bonus tutorial.

Join our Newsletter

Get Free Crochet & Knitting
Pattern Links & Coupons!

Hand-drawn bird with curling, detailed feathers and pink accents; cheerful pose showcases fine line and texture work.
>> Become An Insider <<
A woman with glasses and curly hair models a colorful crocheted scarf, showing textured stitches and vibrant yarn.

Other Knit Shawl Patterns You'll Love

Want to explore shawls beyond lace? Start here:

  • ๐Ÿ“š Knit Shawl Patterns: Free Designs for Every Shape, Season & Skill Level… the master hub for every free knit shawl pattern on the blog, organized by shape and skill level
  • ๐ŸŒณ Eowyn Free Cable Knit Shawl Pattern… textured right triangle with cables (less lace, more cable goodness)
  • ๐Ÿ’• Crazy Stripes Easy Knit Crescent Shawl… bold stripes + box mosaic stitches in a crescent silhouette
  • ๐ŸŒŸ Top 20 Knit Prayer Shawl Patterns… bigger, warmer, meditative shawls

Want to Go Deeper With Knit Shawls? Join Marly Bird House

If you're falling in love with lace knitting and you want guided instruction, video walkthroughs, and a community of knitters cheering you on… Marly Bird House is my online education home. The Kat Pashmina Knit Shawl above is part of our BiCrafty Stitch Nite program in there, along with full courses, deep-dive workshops on shawl construction, and live coaching where I walk you through the WHY behind every technique. Come check it out and grab a free preview.


About Marly Bird

About Marly Bird
Marly Bird is a professional yarn artist and designer who has been teaching both knitting and crochet since 2007. She's the creator of the BiCrafty method… the only approach that teaches both crafts together. Follow her work at marlybird.com.
Lace Knit Shawl Patterns FAQ banner introducing the frequently asked questions section of Marly Bird's free knit lace shawl roundup.

Frequently Asked Questions

What is a knit lace shawl?

So here's the thing… a knit lace shawl is a shawl made using lace knitting techniques, primarily yarn overs paired with decreases to create deliberate, decorative holes in a patterned fabric. Lace shawls can be made in any yarn weight, from delicate lace and fingering through bulky weight, and they come in many shapes (triangle, right triangle, crescent, half-hexagon, boomerang, half-circle, hexagon, rectangular). What unifies them is the openwork stitch construction and the dramatic transformation that happens when they're blocked.

Can any shawl be made into a lace shawl?

Honestly, yes. Any shawl pattern can be made with lace stitches OR knit in a lace-weight yarn, and the look will be dramatically different depending on the yarn and gauge you use. A triangle shawl recipe worked in fingering-weight merino on US 5 needles drapes like a cloud. The exact same triangle worked in worsted wool on US 10 needles becomes a thick, cozy wrap. Swap out a plain stitch section for a lace pattern stitch and suddenly you've got a “lace shawl.” Don't get hung up on the pattern label… pick the shape you love, then play with yarn weight and stitch choices to get the lace shawl you want.

Are knit lace shawls hard to make?

Not as hard as they look. If you can knit, purl, do a yarn over (yo), knit two together (k2tog), and slip-slip-knit (ssk), you can knit lace. Most patterns include a chart, written instructions, and stitch counts on every row so you can verify your work as you go. Worsted and bulky weight lace shawls (like Mariposa or Almond Brittle) are particularly approachable for new lace knitters because the bigger stitches are easier to read and fix.

What yarn is best for a knit lace shawl?

Smooth, plied yarns in wool, wool blends, or merino make the most beautiful lace shawls because they block out crisply and show every stitch. Fingering weight (CYCA #1) and lace weight (CYCA #0) yield the most delicate, ethereal lace, while DK (CYCA #3), worsted (CYCA #4), and bulky (CYCA #5) create graphic, bold openwork that's easier to learn on. Avoid fuzzy single-ply yarns and pure cotton for your first lace projects… the stitches won't show as clearly.

Do you have to block a lace shawl?

Yes. Always. Blocking is what transforms a knit lace shawl from a scrunched-up tangle into the airy, drapey piece you envisioned. To wet-block a lace shawl: soak it in lukewarm water with a splash of wool wash for 20 minutes, gently squeeze out excess water (do not wring), lay it flat on blocking mats, and pin it out to its intended dimensions. Let it dry completely (12-24 hours) before unpinning. Blocking can increase a shawl's wingspan by 20-30 percent and opens the yarn-over holes into the lace pattern you fell in love with.

What's the difference between a right triangle, boomerang, and traditional triangle shawl?

A right triangle shawl has increases on ONE edge only. The shawl grows asymmetrically and creates a long, drapey diagonal line when worn. Lehabah is a right triangle. A boomerang shawl has shaping on TWO edges (typically increases on one side and a curved or spine treatment on the other), producing that distinctive long, swooping bent-wing curve. Return to Me is a boomerang. A traditional triangle shawl is symmetric, with increases worked on both sides AND along the center spine, creating a balanced point at the bottom center. Mariposa, Pear Sorbet, and (likely) Brontรซ and Culebra Peak are traditional triangles. Half-circle shawls like Tilted Blocks sit on the shoulders without slipping because the curved edge hugs the body. Rectangular wraps like Almond Brittle and Shangri-La offer the most versatile drape… you can scarf-tie them, throw them shoulder-style, or wrap once around like a stole. Different constructions wear very differently… pick the shape that matches how you actually drape a shawl.

How long does it take to knit a lace shawl?

A worsted weight knit lace shawl typically takes 25-50 hours of knitting depending on size, stitch complexity, and your speed. Bulky weight wraps like Almond Brittle finish in 15-25 hours. Fingering weight shawls usually run 40-80 hours, and lace weight projects can take 60-120+ hours. Most knitters finish a bulky wrap in 1-2 weeks, a worsted shawl in 2-4 weeks of evening knitting, a fingering weight shawl in 4-8 weeks, and a lace weight project in 2-3 months. Lifelines (a contrast thread run through a row of stitches you know is correct) help enormously on longer projects… they save you from frogging back further than necessary if you make a mistake.

What size needles do I use for lace knitting?

Great question… lace knitting traditionally uses needles 1-2 sizes LARGER than the yarn's recommended needle. The bigger needles create the open, airy fabric lace is known for. For fingering weight lace, US 5-7 is common. For DK and sport, US 7-9. For worsted, US 8-10. For bulky weight (Almond Brittle territory), US 10-11. Always check the specific pattern's recommendation, swatch, and adjust… your tension matters more than the number on the needles.

Can a beginner knit a lace shawl?

Absolutely. Start with a bulky or worsted weight pattern that pairs simple lace with stretches of garter stitch or stockinette so your brain gets rest between lace rows. The Asymmetrical Knit Lace Shawl and Almond Brittle Knit Wrap are both designed to be approachable for confident beginners. Look for patterns that include video tutorials (several on this list do), use a lifeline on your first few attempts, and remember: blocking will hide a multitude of sins. Your first lace shawl will not be perfect. It will be beautiful.

The Lehabah Fire Sprite Shawl in green, purple, and blue features bold colorwork and textured stitches.

Final Thoughts

Eleven free knit lace shawl patterns… triangle, right triangle, boomerang, half-hexagon, half-circle, rectangular, and crescent shapes, fingering through bulky weight, beginner through advanced. Every one of them free, right here on the blog (or coming free very soon). Plus a curated set of premium lace designs (Kat Pashmina, the Stitch Switch Vol 2 collection, Belo Casamento, Violet Duster) if you want even more. That's the kind of yarn-loving generosity I want this corner of the internet to be known for.

If you're going to make ONE this season, my honest recommendation: start with Lehabah. The lace columns, the asymmetrical right-triangle drape, the polished i-cord edge… she's the design I'm most excited about right now, and she's free for you.

Know a knitter who'd love this roundup? Share it with them on Facebook… knitting friends make the best blocking buddies! ๐Ÿ’›

โค๏ธ Your BiCrafty Bestie,
Marly Bird
A cartoon avatar of a person with glasses and a brown bun smiles warmly. Their green shirt and black jacket add a stylish touch, while colorful hearts surround them like loving temperature blankets, stitching together an aura of love and positivity. -Marly Bird

Filed Under: Free Patterns Tagged With: BiCrafty, free knit lace shawl, free knit shawl pattern, knit boomerang shawl, knit lace pattern, knit lace shawl, knit shawl, knit shawl patterns, knit triangle shawl, lace knitting, Marly Bird, shawl pattern roundup

  • 1
  • 2
  • Next Page »

Let's Be Social

Join the Marly's Minions Facebook group to share, ask questions, or chat about all of your yarn related crafts!

Join the group
Cartoon of a smiling woman with brown hair in a bun, glasses, black jacket and green shirt, waving next to large "hi" text.

Quick Links

The Pattern Shop

Our Free Patterns

Blog

Marly Bird House
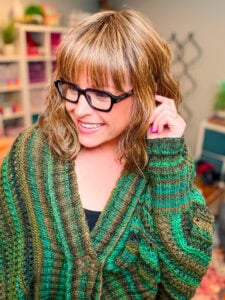
Learn to Knit & Crochet

About

Giveaway Terms and Privacy Notice

Find Us Everywhere

Join the Newsletter

YouTube Channel

Marly's Minions FB Group

Etsy Store

Ravelry Store


AN ELITE CAFEMEDIA HOME/DIY PUBLISHER

Information from your device can be used to personalize your ad experience. Do not sell or share my personal information.

Privacy Policyย  ย Termsย  ย Marly Bird Legal Documents Copyright © 2026