Search
Close
  • The Pattern Shop
  • Our Free Patterns
    • Browse All Our Free Patterns
    • Our Free Knitting Patterns
    • Our Free Crochet Patterns
  • Blog
    • All Blog Posts
    • All Free Patterns
    • Dibble Dabble Inspiration
    • Giveaways
    • Make-Alongs
    • Product Reviews
    • Roundups
    • Tips, Tricks, Techniques for Knitting and Crochet
Stylized bird with pink and gray swirling tail above elegant “Marly” text, logo for crochet accessories and home decor.
  • Marly Bird House
  • Learn to Knit & Crochet
    • Newbie? Start Here
    • Video Tutorials
    • Knitting Definitions
    • Crochet Definitions
    • Common Techniques
    • Size Charts for Knitting and Crochet Projects
  • About
×
  • The Pattern Shop
  • Free Patterns
  • Blog
  • Marly Bird House
  • Learn to Knit & Crochet
    • Newbie? Start Here
    • Video Tutorials
    • Knitting Definitions
    • Crochet Definitions
    • Common Techniques
    • Size Charts for Knitting and Crochet Projects
  • About
Stylized bird with pink and gray swirling tail above elegant “Marly” text, logo for crochet accessories and home decor.
Search
Close

New Patterns NOW Available in Ad-Free PDF! Check out The Pattern Shop

Toe-Up Knit Socks & Toe-Up Crochet Socks: Free Patterns + German Short Rows

April 30, 2026 By admin 7 Comments

📝 Updated April 30, 2026: Refreshed from a 2020 sock-along event into an evergreen Toe-Up Sock Hub. Both knit and crochet toe-up sock patterns are still available free, with new standalone pattern posts, refreshed framework, expanded internal linking to all 14+ Marly Bird sock patterns, and a free German Short Rows worksheet for sock heel customization.

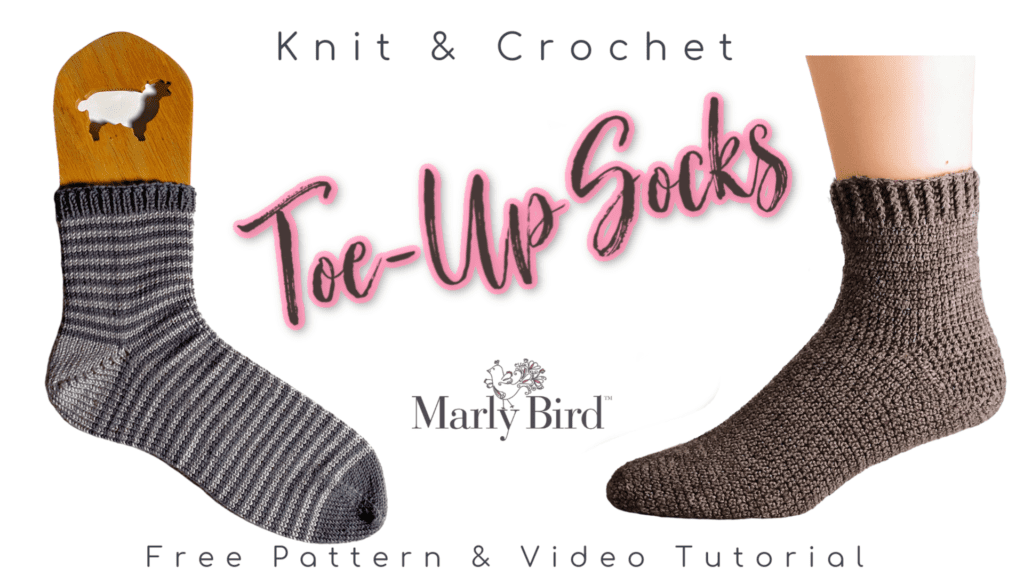
The Toe-Up Sock Hub is your starting point for learning toe-up sock construction in both knit and crochet. Designed by Marly Bird (knit version) and Rohn Strong (crochet version), these free toe-up sock patterns include step-by-step video tutorials, multiple sizes, and a German short row heel for the smoothest, most comfortable fit. Plus a free downloadable worksheet for customizing the heel diagonal to your foot.
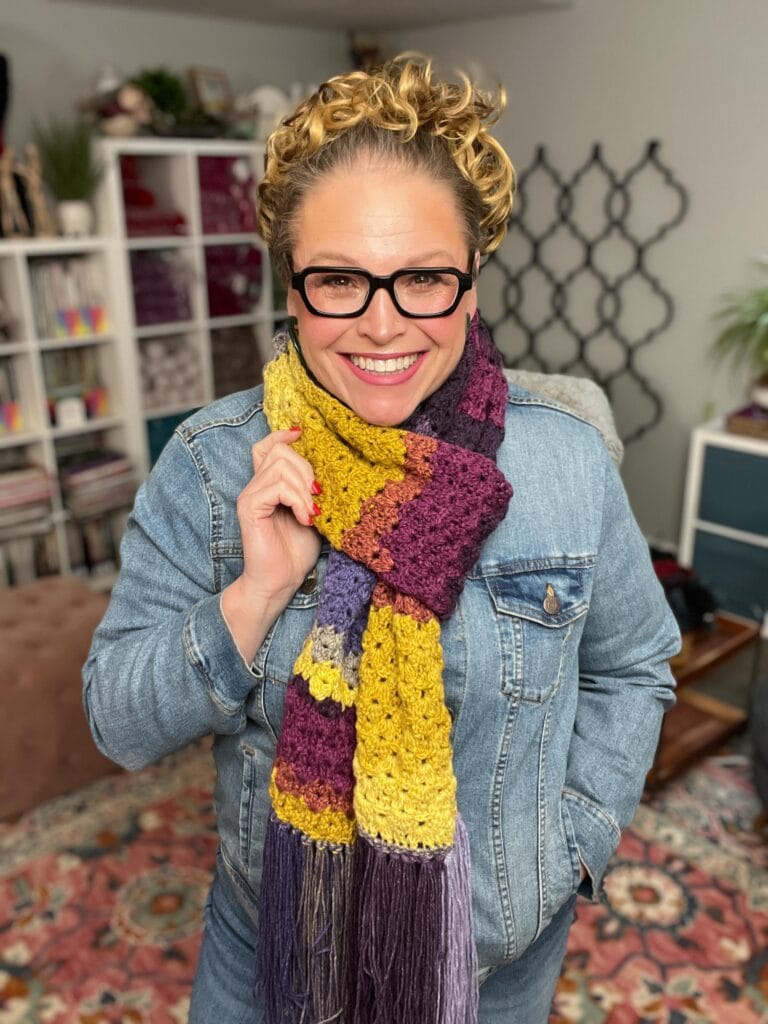
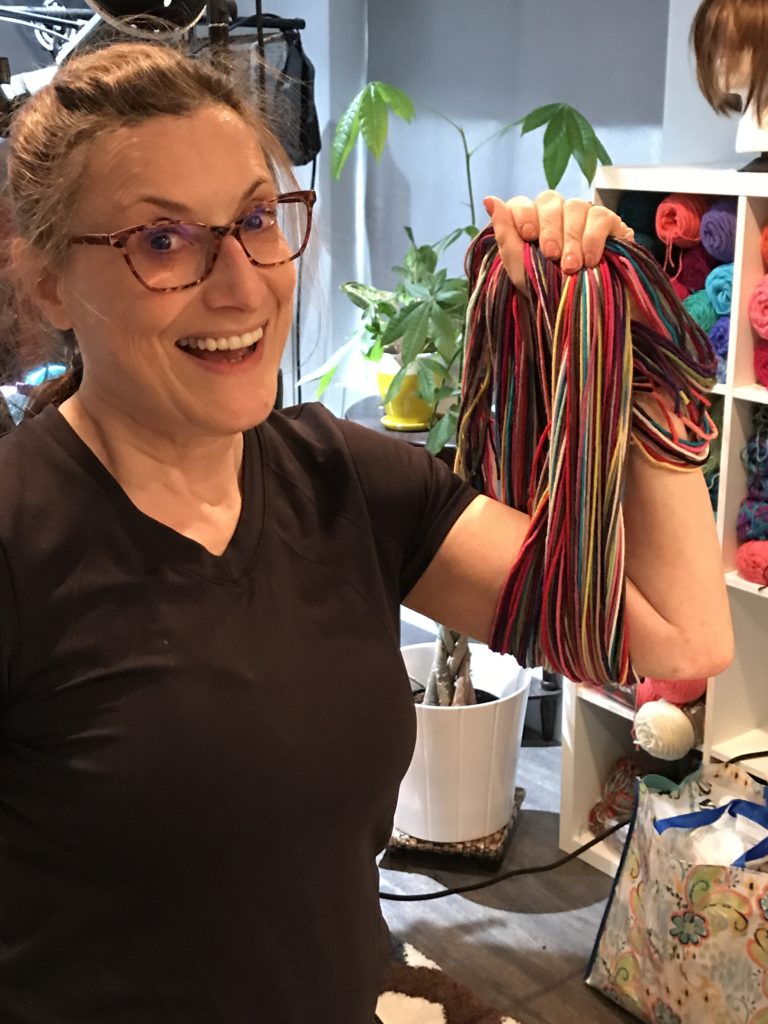
Hey, bestie 💛

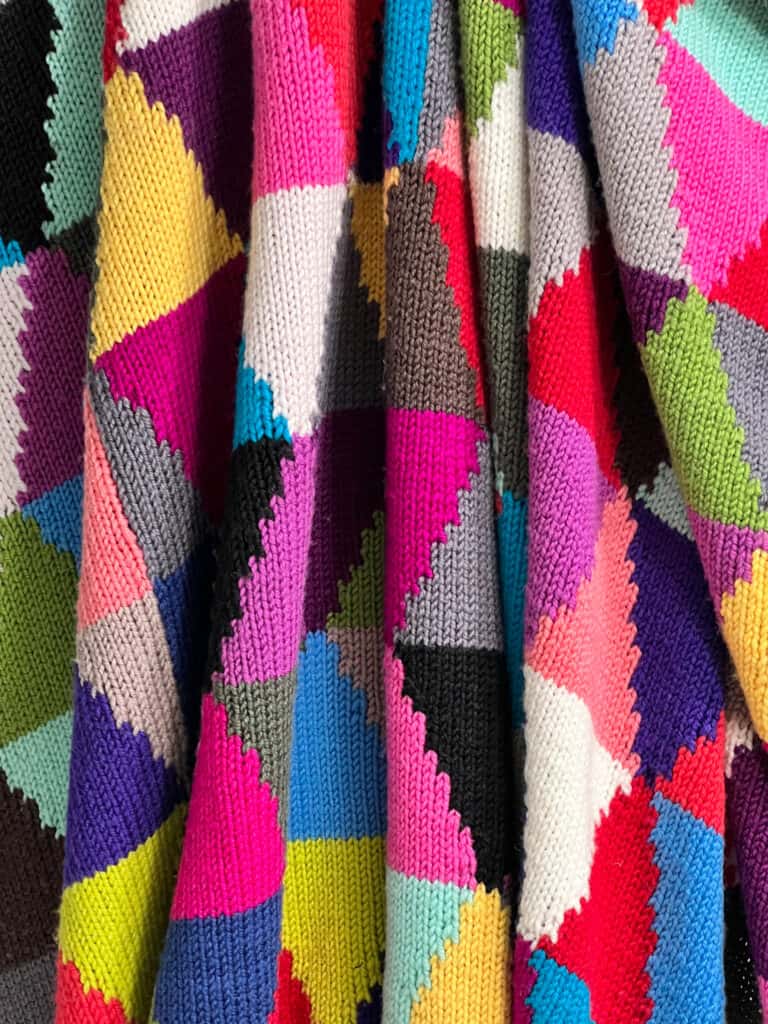
If you’ve been wanting to try toe-up sock construction, you are in the perfect place. This is the original sock-along that introduced thousands of knitters and crocheters to toe-up socks back in 2020, and it’s still one of the most-loved sock resources on the blog. The video tutorials still get traffic. The patterns are still free. And the techniques (Judy’s Magic Cast-on, German short row heels) are timeless.

Here’s what’s new: each pattern now has its own dedicated, framework-fresh standalone post too. So whether you want the full overview of toe-up construction (you’re in the right place), or you just want to dive straight into the pattern (links below), you’re covered.

This post contains affiliate links. If you purchase through them, I may earn a small commission at no extra cost to you… and it helps keep these free patterns coming straight from my yarn-loving heart to yours. 💛


Get the Free Patterns

Both patterns are FREE here on the blog, with full step-by-step video tutorials. Pick your craft:

  • 🧦 My First Toe-Up Knit Socks — Free knit pattern with Judy’s Magic Cast-on, German short row heel, and 6 sizes. Designed by Marly Bird.
  • 🧶 My First Toe-Up Crochet Socks by Rohn Strong — original 2020 free crochet pattern. (An updated standalone version is in progress; for now, the 2020 lesson pages below have the complete pattern.)
🟨 MARLY ACTION — Update knit pattern link when published:
The new standalone knit pattern is currently Draft 53268. Once Marly publishes it, the link above will resolve to the live URL automatically. If you want to pre-set it: replace https://marlybird.com/?p=53268 with https://marlybird.com/blog/my-first-toe-up-knit-socks-free-pattern/ after publish.
Delete this yellow box once the new knit pattern is published.

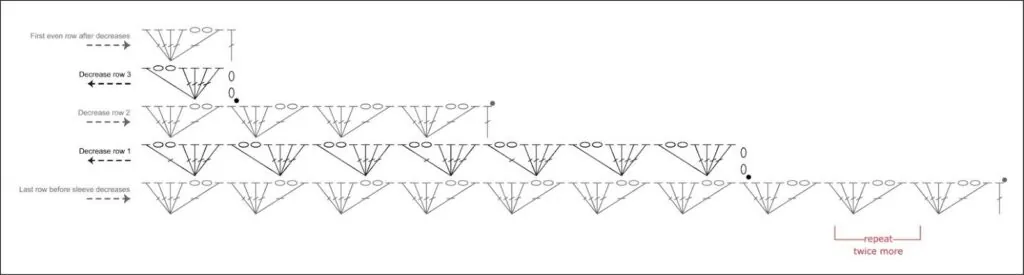
Free German Short Rows Worksheet for Custom Heel Fit

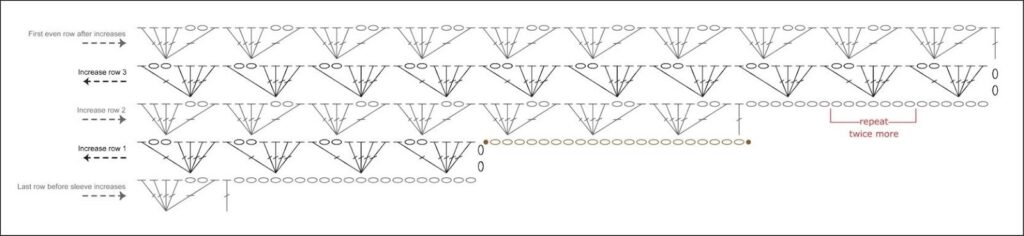
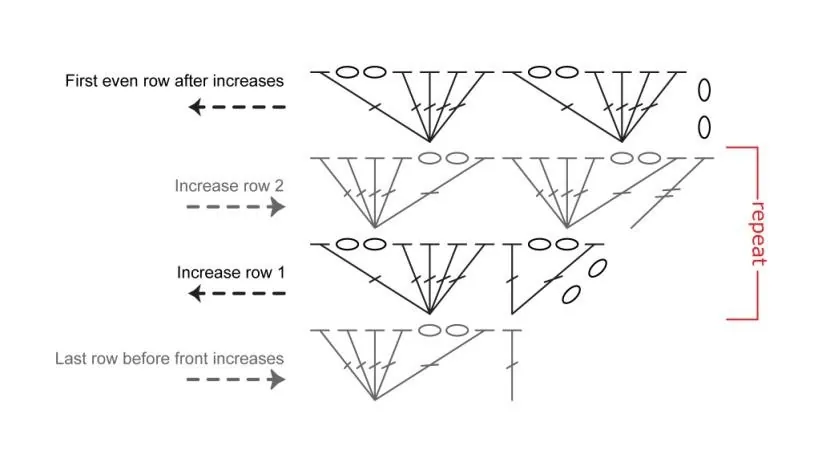
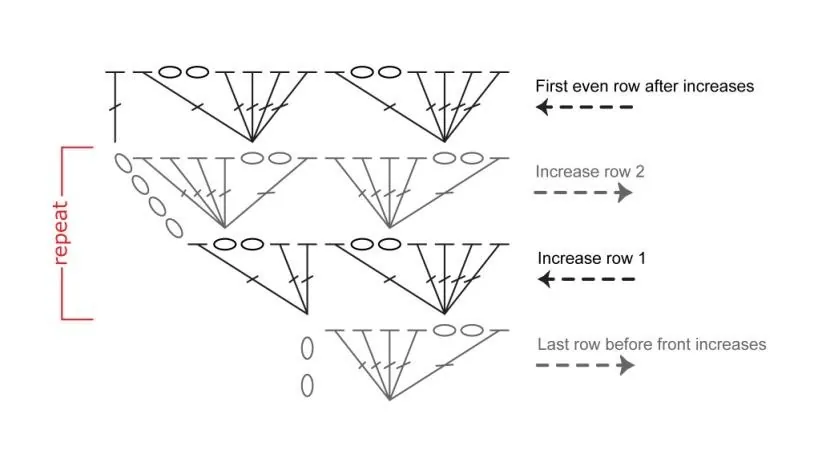
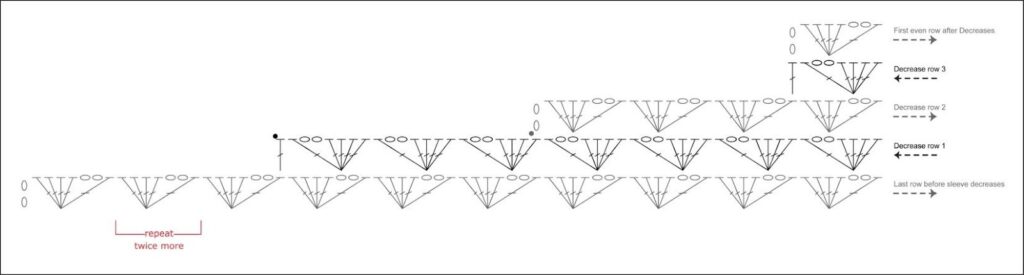
If you have a higher instep, larger heel diagonal, or wider ankles than the standard sizing, you don’t have to abandon toe-up socks. I made a free downloadable customization worksheet that walks you through the math to adjust the heel diagonal so the sock fits YOUR foot perfectly.

👉 Get the free Customize Sock Heel Diagonal worksheet here

🟨 MARLY ACTION — Lead Magnet (when ready):
Once you have a Kit form set up for the German Short Rows lead magnet, replace the direct PDF link above with the Kit signup form embed. This is THE highest-value lead magnet opportunity on the blog right now — sock knitters are intermediate-to-advanced + high-LTV email subscribers + tag them with “sock-knitter” for future workshop sale targeting.
Delete this yellow box when the Kit form is wired up.

Why Toe-Up Sock Construction?

Toe-up socks have a lot of advantages over the more traditional cuff-down construction:

  • Try them on as you go. The fit is built into the construction. You can stop at any point and slip the sock on to check.
  • Use up every yard of yarn. Once the foot and heel are done, just keep knitting the leg until you’re almost out. No more “I have 30 yards left, can I finish this leg?” anxiety.
  • No Kitchener stitch needed. The toe-up construction means you bind off at the cuff with a stretchy bind-off. Cuff-down requires Kitchener-stitching the toe shut at the end — toe-up skips that.
  • German short row heels work beautifully. The smoothest, prettiest, no-holes heel construction lives natively in toe-up sock patterns.

If you’ve never made socks before, both toe-up AND cuff-down are great starting points. They’re just different. For my full breakdown of sock-knitting techniques and skill-building patterns, see my Ultimate Guide to Knit Socks.

✨ Designer Tip: If you’re brand new to socks, start with the knit toe-up pattern. The video tutorials walk you through Judy’s Magic Cast-on (toe), the foot, the German short row heel, the leg, and the stretchy bind-off (cuff). One pair and you’ll have all the major sock techniques in your hands. Hands-down the fastest way to “get” sock knitting.

Yarn & Materials for Toe-Up Socks

Yarn: Both patterns are written for Patons Kroy Socks (75% washable wool / 25% nylon, sock-weight, 166 yds/50g). Any sock-weight (CYCA #1 super fine) yarn with similar yardage works.

  • Knit pattern: 2 (2, 2, 2, 3, 3) balls
  • Crochet pattern: 3 (3, 3, 4, 4, 4) balls (crochet uses more yarn)

For knit: US 2 (2.75 mm) circular needles. For crochet: US 2.5 mm crochet hook. Plus tapestry needle, stitch markers, scissors.

I shop my KnitPicks needles for sock knitting because the size 2 tips are sharp enough for the tight gauge. Want more sock yarn project ideas? See my What To Crochet With Sock Yarn guide.

⭐️ Marly Bird Amazon Storefront ⭐️

The Original 2020 Sock-Along Lessons (Still Free)

The original 2020 sock-along released the patterns in three weekly parts, each with its own lesson page and video. These lesson pages are still live for anyone who wants the lesson-by-lesson experience or wants to reference a specific section:

Knit Toe-Up Sock — Original 2020 Lesson Pages

  • Part 1: Cast-On, Toe, and Foot
  • Part 2: German Short Row Heel
  • Part 3: Leg and Cuff

Crochet Toe-Up Sock — Original 2020 Lesson Pages

  • Part 1: Toe and Foot
  • Part 2: Heel
  • Part 3: Leg and Cuff

For the standalone full-pattern experience (recommended for new readers), use the new pattern post links at the top of this hub.


More Free Sock Patterns by Marly Bird

Once you’ve nailed your first toe-up pair, here’s the rest of the Marly Bird sock library:

Free Knit Sock Patterns

  • My First Knit Socks (cuff-down)… if you want to learn cuff-down construction next
  • Marly Knit Socks… cuff-down with heel flap, ribbed cuff, eyelet leg
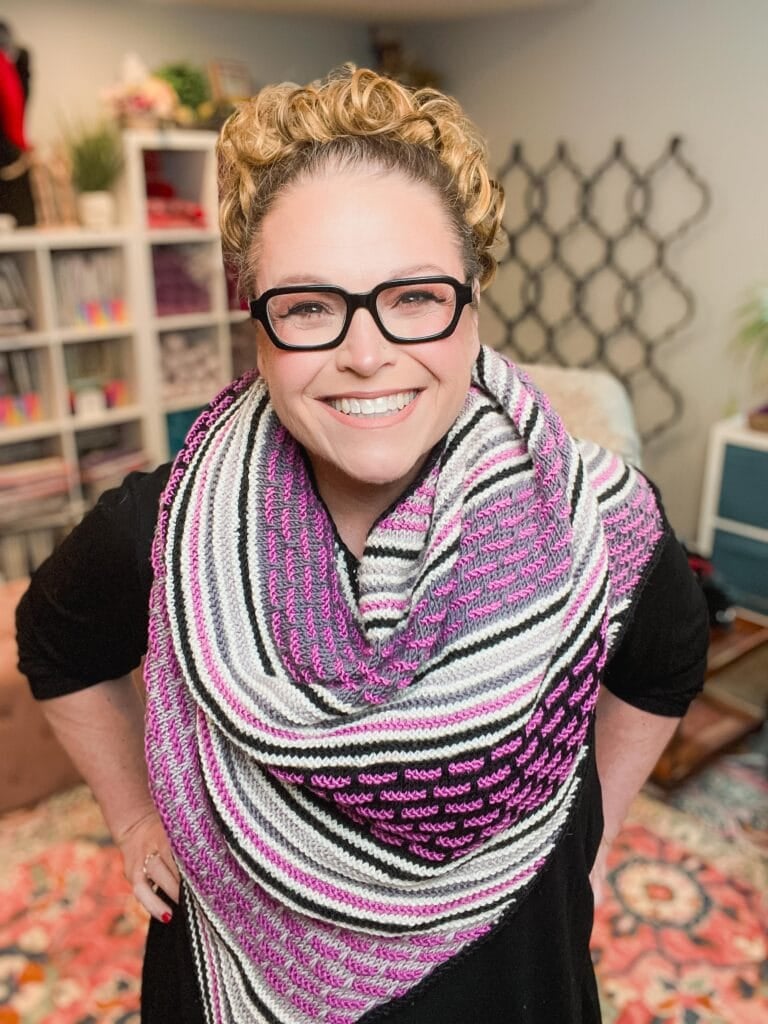
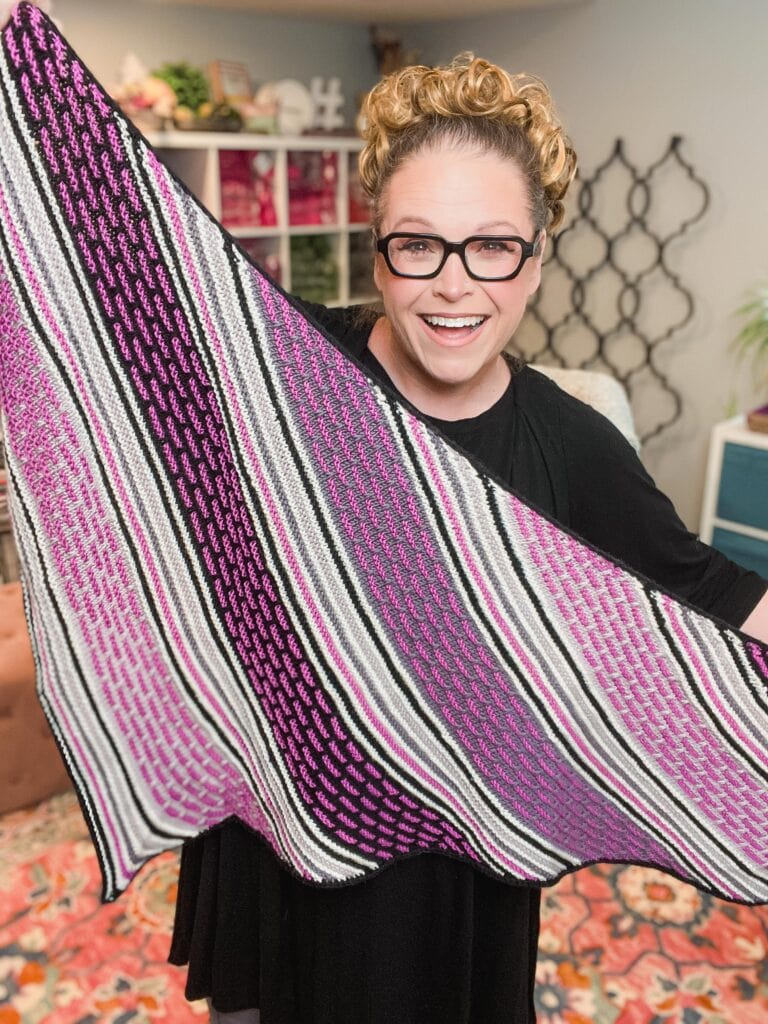
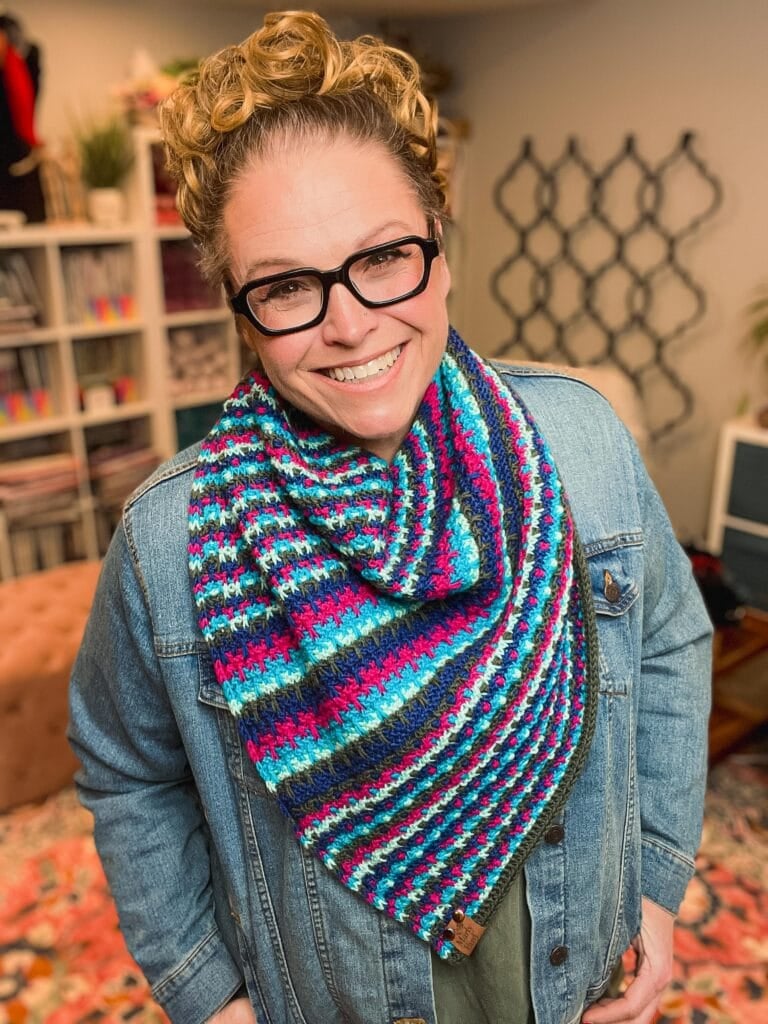
  • Hint of Hazelnut Knit Socks… colorful mini-skein vertical colorwork
  • Heartstrings Stranded Colorwork Socks… DK-weight stranded colorwork
  • Hygge Stripe Socks… worsted-weight beginner socks
  • Appalachian Cozy Up Thigh-High Knit Socks… continuous cables toe to thigh

Free Crochet Sock Patterns

  • How to Crochet Socks + 5 Free Crocheted Sock Patterns… the comprehensive crochet sock starter guide
  • Beginner Crochet Socks… your first crochet sock pattern
  • 10 Free Crochet Sock Patterns… Yarnspirations roundup of additional crochet socks

Sock Knitting Resources & Tutorials

  • The Ultimate Guide to Knit Socks… master sock-knitting tutorial
  • Sock Knitting Tools & Supplies… what you actually need to knit socks
  • Cheerful Cable Slipper Socks Tutorial… easy slipper sock alternative

Join our Newsletter

Get Free Pattern Links & Coupons!

>> Become An Insider <<
A smiling person with curly hair and glasses forms a heart shape with their hands. Behind them, the text reads "Marly Bird," "Weekly Newsletter," and "Your BigCrafty Bestie." Sporting a light cardigan, they share the joy of an amigurumi free crochet animal pattern. -Marly Bird

Want to Master Sock Construction? Sock Workshops at Marly Bird House

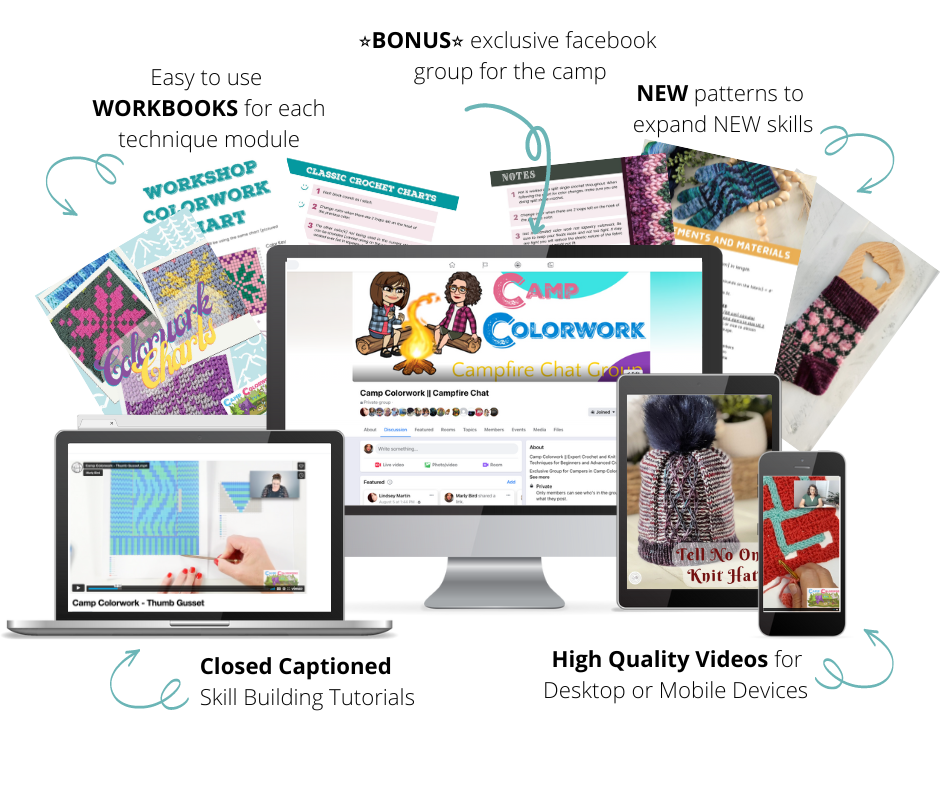
If you want hands-on coaching, advanced techniques, multiple full sock patterns, and an 86-page sock ebook with sizing charts and stitch dictionary… my Marly Bird House sock workshops are the comprehensive deep-dive:

  • 🧦 Classic and Colorful Crochet Socks Workshop… 9 crochet sock patterns + 86-page ebook + 25 hours of video tutorials. The comprehensive crochet sock course.
  • 📚 The Crochet Sock Stitch Dictionary, Vol. 1… 20 stitches you can swap into any crochet sock pattern
  • 🌿 Tranquility Knit Socks & Tranquility Crochet Socks… mindfulness-paced sock courses available at Marly Bird House
  • 🧴 Aromatherapy Knit Socks & Aromatherapy Crochet Socks… self-care meets sock making

Browse all sock courses at Marly Bird House.


Watch the Original 2020 Sock-Along Announcement Video

This is the original announcement video that kicked off the 2020 Sock-Along. Even though the live event ended, the video is still genuinely useful for understanding the why and how of toe-up sock construction:

Knit and Crochet Toe-Up Socks Video Tutorial - Free Digital Pattern - Marly Bird

Frequently Asked Questions

What’s the difference between toe-up and cuff-down sock construction?

Toe-up starts at the toe with Judy’s Magic Cast-on, works the foot up, turns the heel, knits the leg, and binds off at the cuff. Cuff-down starts at the cuff, works the leg down, turns the heel, knits the foot, and grafts the toe shut with Kitchener stitch. Toe-up’s main advantages: try them on as you go, use up every yard of yarn. Cuff-down’s main advantages: classic heel flap construction, no Kitchener stitch needed at the end (the cuff IS the bind-off).

Do I need a special yarn for toe-up socks?

No special yarn… any sock-weight (CYCA #1 super fine) yarn works. Look for around 400+ yards per 100 grams. A wool/nylon blend gives you the best durability for actual wear. Hand-dyed indie sock yarn works beautifully here.

Are German short rows hard?

Honestly, no — they’re actually easier to memorize than wrap-and-turn short rows once you get the rhythm. The video tutorials walk you through every motion. By the end of one sock, you’ll have it. And the heel comes out smoother and more polished than W&T heels every time.

What if I have a high instep or wide ankles?

Use my free Customize Sock Heel Diagonal worksheet. It walks you through the math step-by-step to adjust the pattern for your specific foot measurements. Free, downloadable, and the key to perfect-fitting socks.

Can a beginner make these socks?

Yes! Both knit and crochet versions are written for adventurous beginners. If you can knit/crochet basic stitches, work in the round, and watch a video to learn a new technique, you can make a pair of toe-up socks.

Where can I get the ad-free PDF?

The ad-free knit pattern PDF is available on Ravelry. The crochet pattern is being updated by Robyn Chachula and the new standalone version will be available soon.


💬 Final Thoughts

Toe-up socks were the construction that made me fall in love with sock knitting. The 2020 sock-along introduced thousands of you to toe-up socks for the first time, and your finished pairs still show up on Instagram regularly. I love seeing them.

If you’re new here and just discovering this hub: welcome. Pick your craft (knit or crochet), grab the pattern, watch the videos, and cast on. You’ve got this.

Tag your finished pairs @themarlybird with #mmmdi and #marlybird… I want to see every pair. 🧦💖

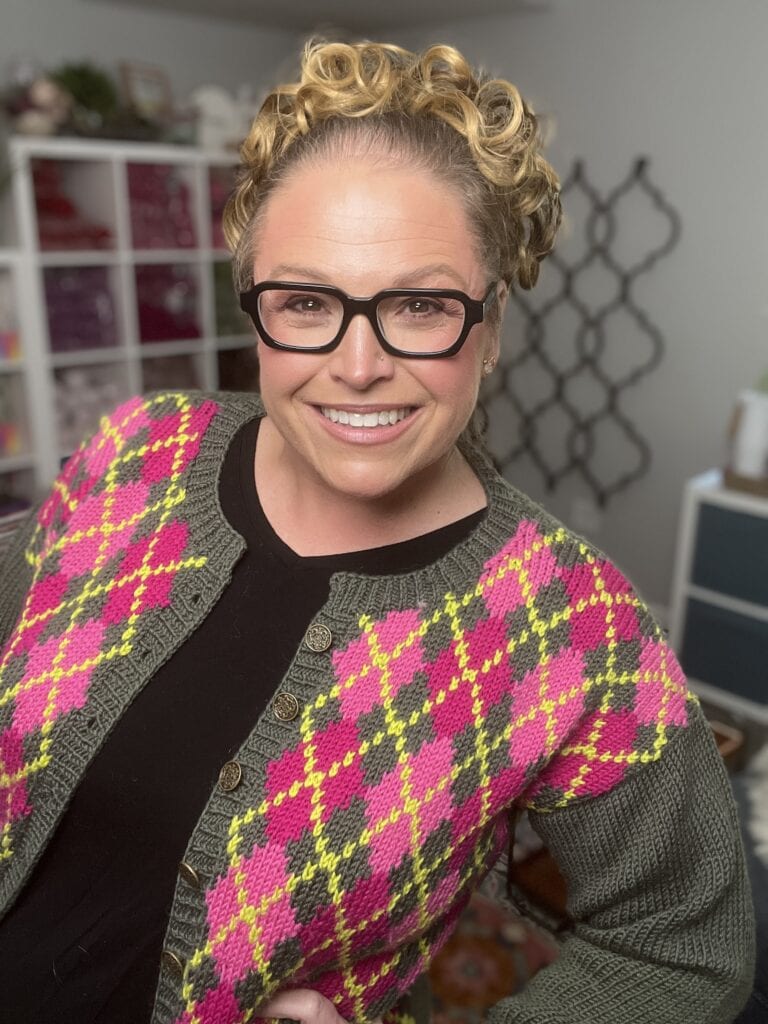
Love, Your BiCrafty Bestie, Marly Bird

Marly Bird Bitmoji with rainbow hearts

Filed Under: Crochet, Knitting, Make-Alongs, Pattern, Uncategorized, YouTube Video Tutorial

🧶 25 Quick Crochet Gift Ideas (Perfect Handmade Gifts You Can Make Fast!)

April 9, 2026 By admin Leave a Comment

Looking for quick crochet gift ideas that are thoughtful, handmade, and actually doable—even when you’re short on time? You’re in the right place, friend 💕

This curated list is packed with easy crochet gifts you can make fast, whether you need a last-minute present, a stash-busting project, or just something fun to create and give. From cozy accessories to practical everyday items, these are the kinds of gifts people actually use and love.

Four crochet projects: blue headband, textured cup cozies, granny square basket, and colorful scarf with visible stitch detail.

Affiliate Disclosure: This post contains affiliate links. To learn more please visit my privacy policy here💖

✨ This post was updated in April 2026 with fresh patterns, new ideas, and even more quick crochet gift inspiration!


🎁 What You Will Love About These Crochet Gift Ideas

  • ✔️ Quick to make (many in one evening!)
  • ✔️ Beginner-friendly options included
  • ✔️ Perfect for stash busting
  • ✔️ Great for year-round gifting
  • ✔️ Mix of free + premium patterns worth every stitch
  • ✔️ Thoughtful handmade gifts people actually use

🧶 Why Crochet Gifts Are Always a Good Idea

There’s just something special about giving a handmade gift…you know?

It says: “I took the time to make this just for you.”

And the best part? Crochet gifts don’t have to take weeks to complete. With the right patterns, you can whip up something beautiful in just a few hours.


⚡ What Makes a Great Quick Crochet Gift?

When you’re short on time (or patience 😉), look for patterns that:

  • Use simple stitches
  • Have minimal shaping
  • Work up quickly
  • Use small amounts of yarn
  • Don’t require complicated finishing
Collage of crochet gifts: textured pink drink holder, rose motifs, gray clutch, patchwork pouch, and colorful cowl.

⚡ Ultra-Fast Crochet Gifts (Under 1 Hour)

Short on time? These are your go-to lifesavers 🙌

  • Scrunchies – these are fun from RepeatCrafterMe
  • Simple coffee cozy – free pattern
  • Chapstick holders – everybody loves these
  • Mini pouches – great to store crochet hooks or pencils

These are perfect for beginner crocheters and ideal when you need a last-minute gift that still feels thoughtful and handmade.


🧶 Quick Crochet Gift Ideas You Can Make Today

🧣 Bumpy Road Headband – Marly Bird Free Pattern

Teal yarn, a pink and black crochet hook, and a partially crocheted teal swatch on white background; visible stitch detail.

👉 Pin this idea for later!

A cozy, stylish headband that’s perfect for beginner crocheters and quick last-minute gifts. This is a go-to project when you want something wearable that works up fast. Get the free headband pattern here.


💎 Spectacular Spectacular Necklace – Marly Bird Free Pattern

crochet necklace handmade gift idea quick jewelry pattern

👉 Pin this idea for later!

A lightweight crochet jewelry piece that’s perfect for gifting something unique and handmade without spending hours. Get the crochet necklace pattern here.


🧺 Hygge Mini Candy Basket – Marly Bird Free Pattern + Video Tutorial

small crochet basket gift idea for candy or spa items

👉 Pin this idea for later!

This adorable basket is perfect for building a gift set—just add treats, yarn, or self-care goodies. Get the mini basket pattern here.


🧼 Bright Crochet Dishcloth – MooglyBlog Free Pattern

Stacked crochet dishcloths in red, yellow, green, and blue with white zigzag stitch detail, beside a green gnome figurine.

Perfect for housewarming gifts or eco-conscious friends, this quick project is both practical and thoughtful. Get the crochet dishcloth pattern here.


☕ Yule Fuel Coffee Cozy – Marly Bird Free Pattern

crochet coffee cozy handmade gift idea for coffee lovers

👉 Pin this idea for later!

A quick and textured project that’s perfect for teachers, coworkers, and anyone who loves their daily cup. Get the free pattern here.


🍷 Wine Cozy Collection – Marly Bird

crochet wine cozy handmade hostess gift idea. Pink crocheted wine holder with leather handle on tray, showing textured stitches; three glasses and bright pink cushions nearby.

👉 Pin this idea for later!

Turn a simple bottle into a standout handmade gift—perfect for hostess gifts, dinner parties, or celebrations. Get the pattern here.


💍 Super Simple Beaded Necklace – Marly Bird Free Pattern

crochet beaded necklace handmade jewelry gift idea

Elegant and fast—perfect for bundling into gift sets or gifting solo. Click here for the pattern.


👜 Ramble and Rue Crochet Sling Bag – Marly Bird Free Pattern

Two crochet crossbody bags with colorful granny squares and woven straps sit in a round basket, accented by greenery and beads. crochet market bag eco friendly handmade gift idea

A practical and stylish gift for everyday use—great for sustainable living lovers. Get the pattern here.


🍐Petal Link Crochet Scarf with Fringe – Marly Bird Free Pattern

Person holds a hand-crocheted scarf in yellow, purple, and maroon; dense stitches show rich texture. Yarn shelves in background.
Create a cozy, colorful crochet scarf, perfect for fall and winter fashion, inspired by Marly Bird’s knitting and crochet techniques.

Get the free pattern here!


🛋️ Cover Story Crochet Cover Cozy – Marly Bird Free Pattern

Neutral-tone crochet pouch with granny square pattern on woven tray, greenery, wooden beads, and fringed tan textile nearby.

A statement piece that works up quickly and makes a meaningful home decor gift. Get the pattern here.


👩‍🍳 Tunisian Crochet Potholders – Marly Bird Free Pattern

Two Tunisian crochet pot holders with looped corners, one red-pink and one purple-navy, stacked on a white background.
Tunisian crochet potholders – Bicrafty Bootcamp – Marly Bird

A standout handmade gift for cooks, bakers, and entertainers. Get the free potholder pattern here.


Woman with glasses holds wrapped knit gifts and a yarn basket, surrounded by colorful hearts and stars.

🎯 Who These Crochet Gifts Are Perfect For

  • Teachers
  • Friends
  • Coworkers
  • Neighbors
  • Hostess gifts
  • Market prep
  • Last-minute gifting

🎁 Turn These Into Gift Sets (So Easy!)

  • Dishcloth + scrubby + soap
  • Wine cozy + bottle + pajamas
  • Basket + treats or yarn
  • Spa set + skincare items

✨ Designer Tip: A simple bundle can turn a small project into a truly memorable gift!


🌟 If You Want a Showstopper Gift…

  • Modern Mosaic Crochet Blanket – Free Crochet Blanket Pattern
  • Day Dream C2C Blanket – Free Corner to Corner Crochet Blanket Pattern
  • Monet Crochet Mosaic Throw – 50% off the Pattern + Full Course in the Marly Bird House

These are perfect for milestone gifts or heirloom-quality pieces.

Three crocheted blankets: one with black and white geometrics, one multicolored patchwork, one black with floral mandalas.

Join our Newsletter

Get Free Pattern Links & Coupons!

>> Become An Insider <<
A smiling person with curly hair and glasses forms a heart shape with their hands. Behind them, the text reads "Marly Bird," "Weekly Newsletter," and "Your BigCrafty Bestie." Sporting a light cardigan, they share the joy of an amigurumi free crochet animal pattern. -Marly Bird

🧵 Best Yarn Choices for Quick Crochet Gifts

  • Cotton → dishcloths, spa items
    • Dishie Yarn
    • Vividie Yarn
  • Acrylic → budget-friendly gifts
    • Brava Yarn
    • Worsted 8 Heathers
  • Blends → wearables and cozy items
    • Comfy Worsted Weight
    • DillyDally Yarn
    • Memento Yarn – not a blend but a good choice

✨ Designer Tip: Keep cotton and worsted yarn in your stash—you’ll always be ready for a last-minute gift!


Woman with glasses holds a pencil beside a "When to Start" checklist featuring yarn, gift, and calendar icons for crafting gifts.

⏱️ How Long Do These Crochet Gifts Take?

  • 1–2 hours → scrubbies, jewelry
  • 2–4 hours → headbands, cozies
  • 1–2 days → bags, pillows
  • 2-4 weeks → blankets

A smiling woman with curly hair and glasses is surrounded by craft tools and a “FAQs” banner, ready to help with projects.

❓ Frequently Asked Questions About Quick Crochet Gifts

What are the fastest crochet gifts to make?

Dishcloths, scrubbies, coasters, and coffee cozies are some of the fastest crochet gifts you can make.

Are crochet gifts beginner-friendly?

Yes! Many patterns use simple stitches and are perfect for beginners.

What can I crochet in one evening?

Headbands, wine cozies, jewelry, and small baskets are great one-evening projects.

What yarn is best for crochet gifts?

Cotton for practical items, acrylic or blends for wearables.

Are handmade crochet gifts still popular?

Absolutely. Handmade gifts are meaningful and widely appreciated.

Can I sell items made from these patterns?

In many cases yes, but always check pattern permissions.

How do I make crochet gifts look professional?

Use quality yarn, block your items, and add finishing touches like tags.

What are good crochet gifts for people who have everything?

Practical items like dishcloths, baskets, and cozies are always appreciated.


💕 Final Thoughts

Crochet gifts don’t have to be complicated to be meaningful.

With just a bit of yarn and time, you can create something thoughtful, useful, and truly one-of-a-kind 💛


🔍 SEO + DISCOVERY PACKAGE

SEO Title: Quick Crochet Gift Ideas – 25 Easy & Fast Handmade Gifts
SEO Slug: quick-crochet-gift-ideas
Meta Description: Discover quick crochet gift ideas that are easy, fast, and perfect for handmade gifting year-round.
Focus Keywords:
quick crochet gift ideas
easy crochet gifts
fast crochet projects
crochet gifts to make
last minute crochet gifts

Social Title: 25 Quick Crochet Gift Ideas You’ll Love
Social Description: Need a quick handmade gift? These crochet ideas are fast, easy, and perfect for any occasion.

Filed Under: Crochet, Free Patterns

Easy One Piece Crochet Cardigan (Free Pattern) – Amimono

March 31, 2026 By admin 17 Comments

This easy one piece crochet cardigan pattern is perfect for beginners who want a lightweight, kimono-style layering piece. Made from a simple rectangle with minimal seaming, this free crochet cardigan includes step-by-step guidance, video support, and size-inclusive instructions for a stylish and wearable handmade garment.

A smiling woman with glasses and curly blonde hair wears a pink Easy One Piece Crochet Cardigan, making a heart shape with her hands. She stands in a cozy room with shelves of yarn and home decor in the background. -Marly Bird

Looking for an easy one piece crochet cardigan that looks handmade in the best way possible (you know—“did you really make that?” vibes)? The Amimono Crochet Kimono Style Cardigan is the answer. This free, size-inclusive cardigan pattern is worked in one piece and has only two seams, creating a drapey, lightweight garment perfect for layering all year long.

If you’ve been searching for a free two-rectangle crochet cardigan pattern, a crochet cardigan in one piece, or just an easy crochet cardigan pattern to show off your stitches—welcome home, friend. 🧶


🧥 The Crochet Cardigan You’ll Actually Wear

Let’s be honest… not all handmade cardigans get worn 😅

This one is different.

This lightweight crochet kimono cardigan is:

  • Easy to throw on over a tank or tee
  • Not bulky or stiff
  • Perfect for spring, summer, and layering year-round
  • Stylish enough that people will ask, “Wait… you made that?!”

It’s the kind of project that doesn’t just sit in your closet… it becomes a go-to piece.

Why You’ll Love This Crochet Cardigan

  • Beginner-friendly construction: Two rectangles + two seams = a modern crochet cardigan that looks far more complex than it is.
  • Lightweight layering: Designed with breathable cotton-bamboo yarn for drape and shine—ideal for spring and summer.
  • Size inclusive: Pattern includes multiple sizes and clear stitch diagrams so you can make the perfect fit.
  • Customizable: Adjust length or sleeve width easily by adding or removing rows.
  • Confidence booster: Great for your first “real garment” after scarves and blankets!
A smiling person wearing a pink Easy One Piece Crochet Cardigan stands in a craft room. Displayed to the left are preview pages of a crochet pattern PDF. Text reads "Ad-Free PDF! Amiimono Crochet Cardigan" with a "Buy Now" icon in the corner. -Marly Bird
Etsy
Shopify
Ravelry

Affiliate Disclosure: This post contains affiliate links. To learn more please visit my privacy policy here💖


Yarn Selection & Substitutions

This pattern is written for a lightweight cotton-bamboo blend that offers beautiful drape and a soft sheen—perfect for warm-weather cardigans and easy to wear indoors year-round.

Discontinued Yarn Used on Project: Cotton Bam Boo by Classic Elite (52% cotton, 48% bamboo; 50 gram ball = approx 130 yards) 10 (12, 13, 14, 16, 17) balls Main Color (MC)—3495 Privileged Plum

Here are some excellent yarn choices for your Amimono Kimono:

  • Heatherly Sport by WeCrochet – With a blend of acrylic and Merino wool, Heatherly is the perfect choice for baby blankets and other baby projects that require next-to-skin softness! 1 hank has 328 yds.
  • Shine Sport by WeCrochet – a 60% Pima Cotton, 40% Modal natural beech wood fiber and 1 ball has 110 yds. 
  • WeCrochet. Samia – 80% Cupro, 20% Mulberry Silk and has 188 yds in each ball. 
  • WeCrochet Comfy Sport – a soft, smooth cotton/acrylic blend with great stitch definition has 136 yds.
  • WeCrochet CotLin Sport – a cotton/linen blend with a matte finish and lovely texture has 123 yds.

If you prefer a touch of shimmer, try a bamboo blend. For a more rustic matte finish, linen or cotton-linen yarns are beautiful alternatives.

Easy one piece crochet cardigan worn casually with jeans
Beginner crochet kimono cardigan draped fit
Lightweight crochet sweater pattern finished garment
Seamless crochet cardigan construction example
Boho crochet cardigan layering outfit idea

Important: Always make a gauge swatch—and hang it to measure accurately before starting! Learn how here:

  • How to Make a Gauge Swatch in Crochet
  • How to Calculate Crochet Gauge
  • Watch Marly Explain Crochet Gauge on YouTube
A smiling woman with curly blonde hair, wearing black glasses and a pink cardigan inspired by the Amimono Kimono Free Crochet Pattern, stands with one hand on her hip in a cozy room with shelves and home decor in the background. -Marly Bird

✔️ Is This Crochet Cardigan Pattern Right for You?

If you’re nodding along to any of these… you’re in the right place 👇

  • ✔️ You’ve never made a crochet garment before
  • ✔️ You want something simple and low-stress
  • ✔️ You love the idea of minimal shaping
  • ✔️ You prefer projects with just a couple seams
  • ✔️ You want a lightweight cardigan you’ll actually wear

✨ Designer Tip: This is one of my favorite “first garment” projects because it builds confidence without overwhelming you.


About the Easy Crochet Cardigan Construction

This isn’t your typical “granny square cardigan” or hexagon sweater. The Amimono is a one piece crochet cardigan that uses simple shaping and strategic seaming to create elegant sleeves and a natural drape.

You’ll work one large back panel using stitch patterns provided (complete with stitch diagrams), then add stitches for the sleeves, add space for the neck opening and then finally the two fronts of the cardigan. The seam along the side of the cardigan and bottom of the sleeve will join the cardigan together. The result? A sleek, two-seam crochet cardigan that feels handmade but polished.

Technical drawing of a cross-shaped pattern with various measurements indicated in inches, including details for different sections and angles. -Marly Bird

Crochet Kimono Style Cardigan Pattern Details

  • Skill Level: Intermediate – if you can chain, single crochet, and double crochet, you can make this. The hardest part is reading the pattern.
  • Construction: One large piece with two seams.
  • Pattern Includes: Full written instructions, detailed stitch diagrams, and sizing adjustments.
  • Sizes: Inclusive sizing for multiple body measurements.
  • Best For: Makers who want their first garment to feel easy yet impressive.

🧠 Never Made a Crochet Cardigan Before?

Friend, I’ve got you 💛

This pattern is designed to keep things simple:

  • No complicated shaping
  • No scary construction steps
  • No confusing assembly

You’re essentially creating a rectangle (yes, really!) and turning it into a wearable cardigan.

And with the included video support, I walk you through the steps so you’re never left guessing.

A smiling woman with curly hair wearing glasses and a deep pink crocheted cardigan, inspired by the Amimono Kimono Free Crochet Pattern, stands in a cozy room with colorful yarn shelves, a patterned rug, and home decor in the background. -Marly Bird

🎁 Want More Beginner-Friendly Crochet Patterns?

If you loved this project, you’re going to want more patterns like this 👇

Grab your free resource here:
👉 (INSERT YOUR OPT-IN LINK — gauge worksheet or similar)

You’ll get helpful tips, pattern support, and more projects designed to build your skills with confidence.

Join our Newsletter

Get Free Pattern Links & Coupons!

>> Become An Insider <<
A smiling person with curly hair and glasses forms a heart shape with their hands. Behind them, the text reads "Marly Bird," "Weekly Newsletter," and "Your BigCrafty Bestie." Sporting a light cardigan, they share the joy of an amigurumi free crochet animal pattern. -Marly Bird

How to Crochet This Easy One Piece Cardigan – Amimono

Designed by: Marly Bird

To Fit Sizes: Small  (Medium, Large, Extra Large, 2X, 3X)

To Fit measurements: 32-34 (36-38, 40-42, 40-46, 48-50, 52-54)”

Finished Measurements: 36 (40, 44, 48, 52, 56)”

Gauge: 4 stitch pattern repeats and 8 rows = 4″ in Asymmetrical Stitch Pattern. Take time to save time, check your gauge.

MATERIALS

Yarn
Sample used Cotton Bam Boo by Classic Elite (52% cotton, 48% bamboo; 50 gram / 130 yards); 10 (12, 13, 14, 16, 17) balls Main Color (MC)—3495 Privileged Plum

Crochet Hook
US F/4 (3,75 mm); Or size to obtain gauge.

Notions

  • Removable stitch markers
  • Tapestry needle
  • Chenille type needle
  • Two – 1″ [2.5 cm] buttons
  • 6″ [12.25 cm] of 1/2″ [1.25 cm] grosgrain ribbon
  • Sewing thread to match the ribbon
  • Sewing Needle
  • Basic Blocking Supplies
  • Steamer or Steam Iron
  • Leather tag (optional)
  • Leather rivets (optional)
⭐️ Marly Bird Amazon Storefront ⭐️
A smiling person with curly blonde hair and black glasses wears a pink crocheted cardigan, inspired by the Amimono Kimono Free Crochet Pattern, over a black top, standing in a bright room with shelves, a plant, and a patterned rug in the background. -Marly Bird

SPECIAL TERMS

⭐️ ch (chain): Wrap the yarn around the crochet hook (yo) and draw it through the loop on the hook to form the first chain. Rep this step as many times as instructed. (The loop on the hook is never included when counting

the number of chains).

⭐️ sl st (slip stitch): Insert crochet hook in the indicated stitch, yo and draw through both the st and the loop on the hook.

⭐️ sc (single crochet): Insert crochet hook in indicated st, yo and pull up a loop; yo and draw through both loops on hook.

⭐️ dc (double crochet): Yo, insert hook into indicated st, yo and pull up a loop; [yo and draw through 2 loops on hook] 2 times.

⭐️ Stacked Double Crochet (Stacked Dc): (Do not ch 1 prior to making the first sc) Sc in first stitch, insert hook in between two legs of the base, yarn over and pull up a loop, yarn over and draw through 2 loops on hook.

stacked double crochet stitch - Marly Bird
How to work the Stacked double crochet stitch – Marly Bird

AMIMONO CROCHET CARDIGAN PATTERN STITCHES

Asymmetrical Stitch Pattern: (multiple of 4+1) [also, see chart to the right]

Ch a multiple of 4 + 1.

Row 1: (Set-up Row): Dc in sixth ch from hook (first two skipped ch’s count as 1 dc), (3 dc, ch 2, 1dc) in same ch as first dc.  *Skip 6 chs, (4 dc, ch 2, 1 dc) in next ch, rep from * across to last 4 chs, dc in last ch, turn.

Row 2: (WS) Ch 2, *(4 dc, ch 2, 1dc) in ch 2 sp of prev row, rep from *to end of row, dc in 6th ch or tch, turn.

Row 3: (RS) Ch 2,  *(4 dc, ch 2, 1dc) in ch 2 sp of prev row, rep from *to end of row, dc in second ch or tch, turn.

Rep Row 3 for Asymmetrical  St Patt.

NOTE: The sweater is worked in one piece and seamed along the side and underarm.

VIDEO TUTORIALS

  • How to crochet slip stitch and chain [ watch on youtube ]
  • How to single crochet [ watch on youtube ]
  • How to double crochet [ watch on youtube ]
  • Crochet-along event live to talk about the pattern with Cryssi [ watch on youtube ]
  • How to stacked double crochet [ watch on youtube ] <– this can replace a ch3 at the start of a row
  • How to read crochet diagrams [ watch on youtube ]
  • How to seam crochet [ watch on youtube ]

NOTES

This easy one piece crochet cardigan is worked in one panel that is seamed together to create sleeves and sides. It’s one of my favorite beginner-friendly garment constructions because it’s nearly impossible to mess up!

  • Construction: Crocheted from the bottom up starting at the back, adding the sleeves, then added neck and front opeing. You’ll seam along the bottom of the sleeves and along each side.
  • Fit: This cardigan is designed for a relaxed, drapey fit with plenty of positive ease. If you prefer a closer fit, choose a smaller size or adjust your hook size for a slightly tighter gauge. But be aware of the size of the neck opening as it can get too large.
  • Gauge: Because drape is everything here, make a hanging gauge swatch before starting. Gravity changes how fabric hangs—and we want this cardigan to flow beautifully.
  • Yarn Substitution: If you swap yarns, pick something with similar drape and weight. Cotton, bamboo, or linen blends are best for breathable summer cardigans. Acrylic blends work too, but may have less movement.
  • Customization: Want a longer/shorter cardigan? Just add remove rows evenly to both the front before the sleeves are added and after the sleeves are decreased on the front.
  • Blocking: Light blocking before and after seaming will make your stitches shine and help everything hang just right.
  • Finishing Touches: Feel free to add a single crochet border, fringe, or even a belt—make it uniquely yours!
  • Directions are for size Small  (Medium, Large, Extra Large, 2X, 3X) are in parentheses. When only one number is given then that number applies to all sizes.

Remember, every maker’s stitch tension is unique. Take your time, check your gauge, and enjoy the relaxing rhythm of this two-seam crochet cardigan pattern. You’ve got this!

A smiling person wearing a pink Easy One Piece Crochet Cardigan stands in a craft room. Displayed to the left are preview pages of a crochet pattern PDF. Text reads "Ad-Free PDF! Amiimono Crochet Cardigan" with a "Buy Now" icon in the corner. -Marly Bird
Etsy
Shopify
Ravelry

GROW

To Unlock Exclusive Subscriber Content click the Box below and join for free by simply adding your email and creating a password! If you are having troubles, clear your cache or reset your password or login to the Grow Publisher Portal.

>> Learn More About Grow Here <<

I’m thrilled to share this amazing pattern with you, many patterns on my blog are absolutely free! I kindly request that you don’t copy and paste or distribute this pattern. Prefer an ad-free experience? Buy a digital PDF pattern for a small fee from one of my online stores for a seamless crafting journey. 

I appreciate your support and readership. You are the reason I can keep doing what I love and sharing it with others. So, thank you from the bottom of my yarn-loving heart! Disclosure: This post contains affiliate links, meaning I get a commission if you decide to make a purchase through my links at no cost to you.


AMIMONO CROCHET KIMONO PATTERN

Back

With MC, ch 129 (143, 157, 171, 185, 199)—18 (20, 22, 24, 26, 28) repeats.

Row 1 (Set-up Row): Dc in sixth ch from hook (first two skipped ch’s count as 1 dc), (3 dc, ch 2, 1dc) in same ch as first dc.  *Skip 6 chs, (4 dc, ch 2, 1 dc) in next ch, rep from * across to last 4 chs, dc in last ch, turn.

Row 2: Ch 2, *(4 dc, ch 2, 1dc) in ch 2 sp of prev row, rep from *to end of row, dc in 6th ch or tch, turn.

Row 3: Ch 2,  *(4 dc, ch 2, 1dc) in ch 2 sp of prev row, rep from *to end of row, dc in second ch or tch, turn.

Rep row three for 37 (39, 39, 41, 43, 43) rows.

Note: If you change this amount to shorten the length of the cardigan make note of how many rows you completed so you can duplicate it on the fronts after the sleeves.

Increase for Sleeves (also, see charts below) 

Note:To add stitches for the arm, you will remove the hook at the beginning of each row, add chain stitches to the opposite end, fasten off and pick up the dropped loop to continue.

Row 1: Drop yarn, join new yarn to opposite end with sl st, ch 21, fasten off.  Pick up row again, ch 23, dc in sixth ch from hook (first two skipped ch’s count as 1 dc), (3 dc, ch 2, 1dc) in same ch as first dc.  *Skip 6 chs, (4 dc, ch 2, 1 dc) in next ch, rep from * 1 time, sk 3 ch and 1 dc, (4 dc, ch 2, 1 dc) in next ch 2 sp of previous row. Cont in est patt across back to last ch 2 sp of previous row. Work (4 dc, ch 2, 1 dc) in last ch 2 sp, sk dc and 1 ch, (4 dc, ch 2, 1 dc)  in next ch, *skip 6 chs, (4 dc, ch 2, 1 dc) in next ch, rep from * 1 time, dc in last ch, turn—24 (26, 28, 30, 32, 34) repeats.

Row 2: Repeat first row—30 (32, 34, 36, 38, 40) repeats.

Row 3: Drop yarn, join new yarn to opposite end with sl st, ch 35, fasten off.  Pick up row again, ch 37, dc in sixth ch from hook (first two skipped ch’s count as 1 dc), (3 dc, ch 2, 1dc) in same ch as first dc.  *Skip 6 chs, (4 dc, ch 2, 1 dc) in next ch, rep from * 3 times, sk 3 ch and 1 dc, (4 dc, ch 2, 1 dc) in next ch 2 sp of previous row. Cont in est patt across back to last ch 2 sp of previous row. Work (4 dc, ch 2, 1 dc) in last ch 2 sp, sk dc and 1 ch, (4 dc, ch 2, 1 dc)  in next ch, *skip 6 chs, (4 dc, ch 2, 1 dc) in next ch, rep from * 4 times, dc in last ch, turn—40 (42, 44, 46, 48, 50) repeats.

Work est patt evenly for next 11 (13, 13, 15, 17, 17) rows. 

A woman with curly hair in an updo stands in a cozy, well-lit room, wearing a textured deep pink crochet sweater made with the Amimono Kimono Free Crochet Pattern. Shelves of yarn and a patterned rug are visible in the background. -Marly Bird
A crochet diagram for the Amimono Kimono Free Crochet Pattern shows rows of chain and double crochet stitches with increase points, repeat sections, sleeve increases, and clear row numbering for easy following. -Marly Bird
Crochet pattern diagram for the Amimono Kimono Free Crochet Pattern, showing rows of symbols for chains, double crochets, and increases, with arrows and text instructions highlighting where to increase stitches and repeat pattern sections. -Marly Bird

Neck Opening (also see chart below)

Row 1: Work est patt across 17 (18, 18, 19, 19, 20) repeats, ending with a dc in last dc of previous row repeat, drop yarn, sk 6 (6, 8, 8, 10, 10) repeats in the center, join new yarn to first dc of next repeat, ch 2, cont in est patt across sleeve. Place stitch marker in loop on hook then set aside. Continue to work the other side of the sleeve, sleeves are worked separately from this point forward.  

Crochet diagram for the Amimono Kimono Free Crochet Pattern, showing a repeating pattern of stitches with instructions for even row splits. Symbols show stitch types, with arrows and text for guidance; repeat sections are marked in red. -Marly Bird

Neck and Arm Shaping (also see charts below)

Work neck evenly for 12 (12, 12, 14, 14, 14) rows, then increase for 6 (6, 8, 8, 10, 10) rows, adding 3 (3, 4, 4, 5, 5) reps at each side.

A crochet diagram from the Amimono Kimono Free Crochet Pattern shows a repeating pattern. It highlights increases in rows with arrows and labels: "Last row before front increases," "Increase row 1," "Increase row 2," and "First even row after increases. -Marly Bird
Knitting pattern diagram showing increases with alternating rows of V-stitches in various stages of progression.

At the same time, work sleeves evenly until there are 32 (36, 36, 40, 40, 44) full rows (from cuff to cuff), then work sleeve decreases (same for all sizes, see chart).

Diagram showing the Amimono Kimono Free Crochet Pattern with rows of interconnected symbols, illustrating stitches for creating crochet lace. The rows are labeled, and arrows indicate where to repeat certain sections. -Marly Bird
chart for full rows (from cuff to cuff)
A crochet diagram for the Amimono Kimono Free Crochet Pattern, showing a stepwise pattern with repeating sections, decrease instructions for each row, visual stitch symbols, and arrows indicating direction of work. -Marly Bird
sleeve decreases left sleeve
Crochet diagram for the Amimono Kimono Free Crochet Pattern, showing rows of chain, double crochet, and treble stitches, with arrows marking decreases on rows 3, 7, and 9; repeat a section twice more near the end. -Marly Bird
sleeve decreases right sleeve

A smiling woman with glasses and curled hair wears a pink crocheted cardigan, reminiscent of the Amimono Kimono Free Crochet Pattern, over a black top. She stands in a cozy, well-lit room with shelves, books, and colorful decor in the background. -Marly Bird

RIGHT AND LEFT FRONT

Cont in est patt for each front piece. Work evenly for 40 (42, 42, 44, 46, 46) rows after sleeve decreases, fasten off.

FINISHING

Wash and Block piece to measurements.

With (RS) facing each other, whip stitch sides together.

Arm Bands: With RS facing, join MC to sleeve

seam with sl st.

Rnd 1: Ch 1, sc evenly around arm opening, sl st to first sc, fasten off.

Neck and Body Edging

Join MC to the middle of neck opening with sl st. Row 1: Ch 1, sc evenly around neck, body opening, bottom of piece, up the other body opening and the other half of the neck opening, sl st to first sc, fasten off. 

To add buttons cut 2 pieces of grosgrain ribbon 2” [5 cm] in length. Fold ends to the middle and pin to WS of Left Front and WS of Right Front where the buttons will be placed, look at photo for placement. Backstitch ribbon to kimono with matching sewing thread and needle. Sew buttons to RS of each front, see photo for placement.

For crocheted closure ch 12 (or enough to go around the buttons but not too large so it will fall off), join with a sl st to first ch, ch 12 again and sl st to first ch (figure 8 created), ch1 and sc around the 12 chs on each side of the figure 8. Join with a sl st to first sc, fasten off. 


A smiling woman with curly blonde hair and glasses wears a pink crochet cardigan, inspired by the Amimono Kimono Free Crochet Pattern, over a black top. She stands indoors, forming a heart shape with her hands amid shelves and home decor. -Marly Bird

🧺 Do You Need to Block Your Crochet Cardigan?

Short answer… YES 🙌

Blocking helps:

  • Even out your stitches
  • Improve drape
  • Give your cardigan that polished, finished look

For best results:

  • Wet block or steam block (depending on fiber)
  • Lay flat to dry
  • Shape gently to size

✨ This step makes a HUGE difference, especially for garments.

For more details, see my guide to measuring crochet gauge and blocking tips from other garment projects on the blog.


A smiling woman with blonde hair and glasses wears a pink crocheted cardigan—reminiscent of the Amimono Kimono Free Crochet Pattern—over a black top, standing in a colorful, yarn-filled room with hands on hips. -Marly Bird

🧵 More Crochet Patterns You’ll Love

If you loved making this cardigan, you’ll definitely want to check out these next:

👉 (ADD YOUR INTERNAL LINKS HERE — HIGH PRIORITY)

Look for:

  • Other crochet cardigan patterns
  • Lightweight crochet tops
  • Beginner-friendly garment patterns
  • Summer crochet projects

✨ This is where you keep your reader on your site longer (and boost SEO big time)


A woman with glasses gestures happily under an "FAQs" banner, surrounded by icons related to beginner crochet shawl projects.

Frequently Asked Questions

Is this crIs this crochet cardigan beginner-friendly?

Yes, this crochet cardigan pattern is beginner-friendly and designed with simplicity in mind. If you are comfortable with basic crochet stitches like chains and double crochet, you can successfully make this garment.

The construction avoids complex shaping and focuses on simple techniques, making it a great way to build confidence while creating your first wearable piece.


How long does it take to crochet a cardigan?

Most crocheters can complete this cardigan in a few days to a week, depending on how much time they spend crocheting each day.

Because the pattern uses repetitive stitches and a simple structure, it’s an easy project to work on in short sessions without losing your place.


What is a one piece crochet cardigan?

A one piece crochet cardigan is a garment made primarily from a single continuous section of fabric rather than multiple panels.

In this pattern, the cardigan is worked from the back to the front in one piece, then finished with minimal seaming to create sleeves and structure.


How do you crochet a cardigan in one piece?

To crochet a cardigan in one piece, you create the main body as a single fabric panel, typically starting at the back and working outward to the front.

Once complete, small seams are added to shape the sleeves and sides. This method simplifies construction and eliminates the need for complicated shaping or piecing.


Is this a good first crochet garment?

Yes, this is an excellent first crochet garment. It introduces you to garment construction without overwhelming you with shaping, counting, or complicated assembly.

If you have made scarves or blankets before, you already have the skills needed to complete this cardigan.


Can I customize the length of the cardigan?

Yes, this pattern is very easy to customize for length.

You can add rows to make the cardigan longer or remove rows for a shorter version. Just be sure to adjust both sides evenly so the garment remains balanced.

Blocking may also add a small amount of additional length to your finished piece.


What yarn is best for a lightweight crochet cardigan?

The best yarn for a lightweight crochet cardigan is one that offers good drape and breathability.

Recommended yarn types include:

  • Cotton blends for softness and structure
  • Bamboo blends for excellent drape
  • Linen blends for a crisp, breathable feel
  • Lightweight acrylic blends for durability and easy care

Sport and DK weight yarns are especially great for creating a comfortable, wearable layer.


Can I substitute yarn for this pattern?

Yes, you can substitute yarn, but it’s important to match the gauge and choose a yarn with similar weight and drape.

Always make a gauge swatch before starting to ensure your cardigan will fit correctly. Different yarn fibers can affect how the garment stretches and feels when worn.


How do I seam a crochet cardigan neatly?

To seam a crochet cardigan neatly, use a tapestry needle and matching yarn.

Common seaming methods include:

  • Whipstitch for a quick and sturdy seam
  • Mattress stitch for a more invisible finish

Working from the outer edge inward helps maintain alignment and creates a clean, professional look.


Do I need to block this crochet cardigan?

Yes, blocking is an important finishing step for crochet garments.

Blocking helps:

  • Even out stitches
  • Improve drape
  • Give the cardigan a polished, finished appearance

You can wet block or steam block depending on your yarn type. Always test your method on a swatch first.


Should I block before or after seaming?

For best results, block your pieces before seaming.

Pre-blocking helps ensure edges are straight and easier to match during assembly. After seaming, you can lightly block the finished cardigan to smooth everything out.


What is a hanging gauge swatch and why does it matter?

A hanging gauge swatch is a swatch that is allowed to hang freely to simulate how the fabric will behave when worn.

This is important because yarn can stretch under its own weight. Checking your hanging swatch helps you predict how your cardigan will fit after wearing.


Can I add a collar or edging to this cardigan?

Yes, this cardigan is easy to customize with added details.

You can:

  • Add crochet ribbing along the front edges
  • Create a collar for more structure
  • Add decorative edging for a unique finish

These small changes can dramatically alter the style of your finished garment.


What if my crochet cardigan feels stiff?

If your cardigan feels stiff, it is usually due to tight tension or yarn choice.

To fix this:

  • Compare your fabric to your gauge swatch
  • Try blocking to relax the fibers
  • Use a larger hook for better drape in future projects

Cotton and linen yarns will soften over time, while acrylic yarns can benefit from gentle steam blocking.


My neckline stretched out—how can I fix it?

If your neckline stretches out, you can reinforce it by sewing a strip of grosgrain ribbon along the inside back neckline.

You can also:

  • Add a row of slip stitches to tighten the edge
  • Lightly block the neckline to reshape it

These techniques help maintain structure while keeping the garment comfortable to wear.


More Crochet Cardigans You’ll Love

  • Creekside Crochet Ruana
  • Garden Party Cardigan – Glow Up
  • You Are Valued
  • Stoney Creek
  • Aurora Lace
  • Oakley Lace Shrug
  • Sookie
  • Trifle
  • Lyvia Ruana

Each of these patterns features simple shapes, stunning textures, and clear instructions—just like the Amimono!


Final Thoughts

The Amimono Kimono is proof that you don’t need complicated shaping to make something beautiful. With a simple stitch pattern, lot’s of crochet fabric, a bit of seaming, and your favorite yarn, you can create a lightweight, modern cardigan you’ll wear on repeat.

Share your finished project with me using #marlybird and #mmmdi (Marly Made Me Do It) — I can’t wait to see your gorgeous makes!

❤️ Your BiCrafty Bestie,
Marly Bird

A cartoon avatar of a person with glasses and a brown bun smiles warmly. Their green shirt and black jacket add a stylish touch, while colorful hearts surround them like loving temperature blankets, stitching together an aura of love and positivity. -Marly Bird

Filed Under: Crochet, Free Patterns, Marly Bird Premium Patterns, Our Free Patterns, Pattern

Stellar Stripes Knit Shawl – Free Sport Weight Hexagon Shawl Pattern

February 24, 2026 By admin 1 Comment

The Stellar Stripes Knit Shawl is one of those pieces that feels just as special to knit as it does to wear. 💛✨

This free hexagon knit shawl pattern is worked from the center outward, creating bold, rhythmic stripes that radiate in a striking geometric shape. The finished piece drapes almost like a full circle when worn, wrapping around your shoulders in the most satisfying way.

Even though the original yak yarn has been discontinued, this sport weight knit shawl is incredibly versatile and easy to substitute.

If you’re exploring different shapes and constructions, don’t miss my full guide to knit shawl patterns, where I break down triangle shawls, crescent shawls, asymmetrical wraps, and more.

Woman models a yellow and gray striped knit shawl with wood beads; closeup shows stitch detail. Project: Stellar Stripes Shawl.

Affiliate Disclosure: This post contains affiliate links. To learn more please visit my privacy policy here💖


What You Will Love About This Pattern 💖

  • Unique center-out hexagon construction
  • Easy-to-memorize stripe rhythm
  • Beginner-friendly increases
  • Customizable size
  • Lightweight sport weight yarn
  • Nearly full-circle drape when worn
  • Excellent travel knitting project

This is what I call a “Social Knitter” project. You can chat. Watch a show. Travel. And still make beautiful progress. 🎬🧶

A woman models a blue and yellow knit shawl with bold stripes; preview pages of the Stellar Stripes Knit Shawl pattern shown beside her.
Etsy
Shopify
Ravelry

Quick Pattern Overview

The Stellar Stripes Knit Shawl is a beginner-friendly sport weight shawl worked center-out in a hexagon shape. Featuring simple increases and two-row stripes, this project is highly memorizable and easily customizable in size.


Gold and blue striped knit shawl in sport weight yarn, shown worn and from multiple angles to display its triangular shape.

Understanding the Hexagon Construction

Unlike a traditional triangle shawl, this piece grows evenly outward in six wedge-shaped sections.

Here’s what that means for you:

  • The increases are consistent and predictable.
  • Each wedge grows at the same rate.
  • The shape builds naturally without complicated math.
  • The shawl drapes differently than a triangle.

Because it grows evenly, the finished piece wraps more like a soft circle around your shoulders.

That’s what gives it that modern, almost cape-like feel.

And yes — you can make it larger simply by continuing the increase repeats. Just remember that larger size means more yarn.

Hexagon shawl with a vertical top slit, features geometric shaping and detailed dimension lines for accurate crafting.

Concentration Level 🎷

If we were assigning concentration levels like we did during Tournament of Stitches, this would absolutely be:

Netflix & Chill
or
Social Knitter

The two-row stripe repeat is easy to memorize. The increases are consistent. The rhythm settles in quickly.

It’s engaging enough to feel satisfying but not stressful.

Woman models a blue and yellow striped knit shawl with visible stitch detail; yarn and cozy decor in the background.

A Perfect Travel Knitting Project ✈️🧶

This shawl is ideal for travel knitting.

Why?

  • The pattern is memorizable.
  • You only change colors every two rows.
  • There are no complicated lace charts.
  • It’s worked flat.
  • You can easily pause and resume.

When traveling, make sure your knitting bag includes:

  • Stitch markers
  • Small scissors (TSA-compliant if flying)
  • A tapestry needle
  • A tape measure
  • A small notions pouch

I love using an Erin Lane knitting bag with a separate notions pouch to keep everything organized.

If you’re flying, be sure to read my guide on taking knitting needles on a plane so you’re fully prepared.

Travel knitting is about simplicity and portability. This shawl checks every box.

Collage showing a woman knitting outdoors, close hands working yarn, tools displayed, and plane wing over clouds above.

Stitch Markers & Lifelines (Beginner Support)

Because this shawl uses strategic yarn overs and increases, stitch markers are your best friend.

Place markers between sections to:

  • Maintain correct increase placement
  • Catch mistakes early
  • Reduce counting stress

And don’t be afraid to use a lifeline.

If you’re new, adding a lifeline after a repeat gives you confidence. If something goes wrong, you can safely rip back without panic.

Knitting should feel empowering, not stressful.


Finished Measurements & Gauge 📏

Gauge:
15 stitches = 4 inches in Garter Stitch

Finished Size:
23.5” at widest point
44” at longest point

Gauge is flexible, but it affects:

  • Final size
  • Yarn requirements
  • Drape

If knitting looser, you’ll use more yarn and create a larger shawl.

If knitting tighter, it will be slightly smaller and more structured.

Person holds a blue and gold striped geometric knit shawl, showing its stitch detail; shelves with supplies in background.

Choosing the Right Yarn 🧵✨

Let’s talk about the original yarn choice first — because this is a teaching moment.

The original yarn was 100% yak.

Yak fiber is special because it offers:

  • Lightweight warmth
  • Natural softness
  • Subtle halo
  • Excellent insulation without bulk
  • Beautiful drape
Three skeins of Bijou Spun sport yarn—two light brown, one dark blue—100% yak down with blue labels, ideal for knit shawl projects.

For a center-out hexagon shawl, that lightweight warmth makes the fabric fluid without feeling heavy.

Yak also adds a slight glow that enhances the stripe effect.

Since it’s discontinued, we need smart substitutes.


What to Look for in a Substitute

Because of the construction and drape, choose:

  • Sport weight yarn
  • Wool or wool blend
  • Good elasticity
  • Soft hand

Avoid cotton. It lacks elasticity and can feel heavy in this construction.


Economical Option 💰

Knit Picks Wool of the Andes Sport

Affordable, structured, reliable stitch definition.


Mid-Range Option 💖

Berroco Ultra Alpaca Light

Soft, warm, beautiful drape.


Sleek Option ✨

Malabrigo Arroyo

Smooth, saturated color, excellent drape.


Needle Strategy 🪡

You’ll use U.S. 7 (4.5 mm) circular needles with a long cable.

Even though the shawl is worked flat, the circular needle holds the growing stitch count comfortably.

As the shawl expands, stitches increase dramatically.

✨ Designer Tip:
An interchangeable needle set allows you to switch cable lengths as the shawl grows without changing needle size.

Investing in good needles makes larger projects far more enjoyable.

Looking for a full knitting needle review of my favorite needles? Or maybe you are trying to figure out how to store your knitting needles? Check out these posts I have here on MarlyBird.com

These are Marly’s Favorite Interchangeable Needles

Styling the Stellar Stripes Shawl 💛

Because of the hexagon shape, this shawl wraps beautifully.

Ways to wear it:

  • Draped evenly across both shoulders
  • Wrapped forward like a soft cowl
  • Secured with a decorative shawl pin
  • Layered over a jacket

Shawl pins work especially well with this shape.

If you want styling ideas:

👉 Check out my guide to styling shawl pins
👉 Watch my videos on how to make your own shawl pins

This shape highlights decorative pins beautifully.

We Love These Shawl Pins and Buttons from JUL

A woman models a blue and yellow knit shawl with bold stripes; preview pages of the Stellar Stripes Knit Shawl pattern shown beside her.

Get the Ad-Free PDF

Prefer a clean printable version?

Etsy
Shopify
Ravelry

Available on:

  • Shopify: https://shop.marlybird.com/products/stellar-stripes-knit-shawl-pattern
  • Etsy: https://tidd.ly/3MYUXkY
  • Ravelry: https://www.ravelry.com/patterns/library/stellar-stripes-shawl-knit

A woman models a blue and gold striped knit shawl; close-up shows beaded detail, yarn, and the Stellar Stripes pattern.

Free Stellar Stripes Knit Shawl Pattern Details

SKILL LEVEL

Adventurous Beginner

MEASUREMENTS

Finished Measurements

23.5” [59.5 cm] at widest point x 44″ [112 cm] at longest point

Gauge 

15 sts = 4″ [10 cm] in Garter Stitch

MATERIALS

Sample Yarn 

Bijou Basin Ranch, Sport (100% yak, 328 yds / 300 m, 3.5 oz / 100 g CYCA #2 sport) 

1 skein: Blue (A)

1 skein: Gold (B)

Note: This yarn has been discontinued.

Suggested Alternatives

Knit Picks, Yakish Yarn

Knit Picks, Wool of the Andes

Baa Ram Ewe, Skipper

Berroco, Ultra Alpaca Light Yarn

Malabrigo, Arroyo Yarn

Knitting Needle

U.S. 7 [4.5 mm] circular needles, 40” [100 cm] length cable or size required for gauge

Notions 

  • Stitch markers
  • Tapestry needle 
  • Scissors
  • Tape measure
  • Blocking Squares
  • Blocking Pins
  • Soaking Basin 
  • Eucalan Wool Wash 
  • Ball Winder and Swift 
⭐️ Marly Bird Amazon Storefront ⭐️

ABBREVIATIONS

BO – Bind Off

K – Knit

Kfb – Knit Front and Back

P – Purl

Pm – Place Marker

Pwise – Purl Wise

Sl – Slip

Slm – Slip Marker

SSK – Slip, slip, knit

St(s) – Stitches

Tbl – Through The Back Loop

Yo – Yarn Over


SPECIAL STITCHES 

⭐️ Kfb (Knit Front & Back): Knit through front and back of next stitch – 1 stitch increased.

⭐️ Ssk (Slip, Slip, Knit): Slip 2 stitches, one at a time, as if to knit. Insert left hand needle into the front of these two stitches and knit them together from this position (1 stitch decreased)


SCHEMATIC 

Hexagon shawl with a vertical top slit, features geometric shaping and detailed dimension lines for accurate crafting.

NOTES

  • The color pattern for this shawl is made by changing yarn color every 2 rows. It is not necessary to cut the yarn each time you change. Simply leave the old color hanging at the edge, and carry it up when it’s time to use it again.
  • The shawl is worked back and forth in rows. 
  • The circular needle is used in order to hold the full length of the sts.
  • Stitch markers can be used between yarn overs to help maintain placement on the row.
  • Bind off this shawl knitwise and be sure to not make the bind off too tight.
  • Gauge is not crucial for this project, but will affect required yarn amounts and finished sizes if different from the gauge given above.

VIDEO TUTORIALS

  • Long-Tail Cast-On >> Click Here for Video Help <<
  • Knit Stitch (continental style) >> Click Here for Video Help <<
  • Purl Stitch (continental style) >> Click Here for Video Help <<
  • How to Knit Lace >> Click Here for Video Help <<
  • How to Add Lifeline >> Click Here for Video Help <<
  • How to Tink >> Click Here for Video Help <<
  • How to Bury Ends >> Click Here for Video Help <<

GROW

To Unlock Exclusive Subscriber Content click the Box below and join for free by simply adding your email and creating a password! If you are having troubles, clear your cache or reset your password or login to the Grow Publisher Portal.

>> Learn More About Grow Here <<

I’m thrilled to share this amazing pattern with you, many patterns on my blog are absolutely free! I kindly request that you don’t copy and paste or distribute this pattern. Prefer an ad-free experience? Buy a digital PDF pattern for a small fee from one of my online stores for a seamless crafting journey. 

I appreciate your support and readership. You are the reason I can keep doing what I love and sharing it with others. So, thank you from the bottom of my yarn-loving heart! Disclosure: This post contains affiliate links, meaning I get a commission if you decide to make a purchase through my links at no cost to you.


STELLAR STRIPES KNIT SHAWL PATTERN

BEGINNING TAB

Using A, cast on 2 sts, and knit 2 rows.

Turn work 90 degrees, pick up 1 st from edge, turn work 90 degrees, pick up 2 sts from cast on edge–5 sts.

BODY

Row 1 (RS): Knit.

Row 2: Sl 1 pwise, pm, kfb 3 times, pm, k1–8 sts. 

Change to B.

Row 3: Sl 1 pwise, knit to end.

Row 4: Sl 1 pwise, slm, kfb 6 times, slm, k1–14 sts. 

Change to A.

Row 5: Sl 1 pwise, knit to end.

Row 6: Sl 1 pwise, slm, kfb 11 times, k1, slm, k1–25 sts. 

Remove markers.

Change to B.

Row 7: Sl 1 pwise, knit to end.

Row 8: Sl 1 pwise, pm * yo, k3, yo, k1, pm; repeat from * 4 more times, yo, k3, yo, pm, k1–37 sts.

Change to A.

Row 9: Sl 1 pwise, knit to end.

Row 10: Sl 1 pwise, slm, * yo, knit to 1 st before marker, yo, k1, slm; repeat from * 4 more times, yo, knit to last marker, yo, slm, k1–49 sts.

Repeat the last 2 rows 4 more times, being sure to change colors every 2 rows–97 sts, 15 sts in first section, 16 sts in each other section, 2 edge sts.

Next 4 rows:

Change to B.

Row 1 (RS): Sl 1 pwise, knit to end.

Row 2: Sl 1 pwise, slm, yo, purl to last st, yo, k1–99 sts, 16 sts in first 5 sections, 17 sts in last section, 2 edge sts.

Change to A.

Row 3: Sl 1 pwise, knit to end.

Row 4: Sl 1 pwise, slm, * yo, knit to 1 st before marker, yo, k1, slm; repeat from * 4 more times, yo, knit to last marker, yo, slm, k1–111 sts, 18 sts in first section, 18 sts in each of 4 center sections, 19 sts in last section, 2 edge sts.

Repeat the last 4 rows 21 more times–405 sts, 82 sts in first section, 60 sts in each of 4 center sections, 81 sts in last section, 2 edge sts.

Using A, knit 6 rows.

STRETCHY BIND OFF

K2, * sl 2 to left hand needle, ssk, k1; repeat from * until 1 st rem.

Fasten off.

FINISHING

Weave in all loose ends.
Wet block to measurements.

A woman wears and displays a blue and mustard sport weight knit shawl with bold stripes; textured stitch detail is visible.

Blocking Your Hexagon Shawl 💦✨

Blocking makes a huge difference here.

Because this is a geometric shape, you want to:

  • Emphasize the six points
  • Shape the wedges evenly
  • Maintain symmetry

When wet blocking:

  • Align to a grid
  • Gently stretch each point
  • Avoid overstretching
  • Pin evenly

You can exaggerate the points slightly to enhance the hexagon shape.

Steam blocking is also an excellent option, especially with superwash yarn.

For full tutorials:

👉 How to Wet Block Knitting
👉 How to Steam Block Superwash Yarn
👉 Blocking Must-Haves Guide

Blocking is the transformation moment.


Blue and mustard striped knit shawl displayed on a woman; close-ups show stitch detail and work in progress.

Frequently Asked Questions

Is this a good beginner knit shawl pattern?

Yes. It uses simple increases and garter stitch stripes.

Can I make this shawl larger?

Yes. Continue the increase repeats and purchase additional yarn.

How much yarn do I need?

Follow the pattern yardage. Add extra if sizing up.

Can I use acrylic?

Yes, but blocking results will differ.

Can I use cotton?

Not recommended due to lack of elasticity and drape.

What if I run out of yarn?

You can stop earlier or finish with a contrasting border.

Is this worked in the round?

No. It’s worked back and forth in rows.

Is this similar to a triangle shawl?

No. It forms a hexagon and wraps differently.

Does gauge matter?

It affects size and yardage, but exact fit is flexible.

Is this part of a shawl collection?

Explore more designs in my Knit Shawl Patterns Guide.


Woman wears four distinct knit shawls, showcasing garter tab triangle and textured stitch patterns in vibrant colors.

More Knit Shawl Patterns You’ll Love 🧶

If you love this construction, explore even more shapes and styles in my complete Knit Shawl Patterns Guide.

There’s a shawl for every mood.


Blue and yellow striped knit shawl draped over a denim jacket, showing even stitches and soft texture. Shelves in background.

Final Thoughts ✨

Stellar Stripes is modern, beginner-friendly, travel-ready, and endlessly customizable.

It teaches shaping.
It builds confidence.
It wraps beautifully.

And if you decide to make it bigger?

Even better.

❤️ Your BiCrafty Bestie,
Marly Bird

A cartoon avatar of a person with glasses and a brown bun smiles warmly. Their green shirt and black jacket add a stylish touch, while colorful hearts surround them like loving temperature blankets, stitching together an aura of love and positivity. -Marly Bird

Filed Under: Knit Shawl Patterns, Knitting, Our Free Patterns, Pattern, Uncategorized

Crazy Stripes Free Easy Knit Crescent Shawl Pattern with Box Mosaic Stitches

January 25, 2026 By admin Leave a Comment

If you love knitting projects that feel relaxing but still look impressive, this free easy knit crescent shawl pattern is a must-make.

Designed with bold box mosaic stitches and a beautifully wearable crescent shape, this shawl delivers modern colorwork using simple slip stitches and only one color per row.

It’s the kind of project that draws you in, builds confidence, and results in a cozy accessory you’ll actually reach for — whether you’re new to mosaic knitting or just want an easy, satisfying knit.

A smiling woman with glasses models a large, striped Knit Crescent Shawl in white, black, and purple. The collage showcases close-ups of the shawl’s texture and yarn, with the text "CRAZY STRIPES Mosaic Knit Crescent Shawl. -Marly Bird

If you’re looking for an easy knit crescent shawl pattern that looks bold and modern without complicated techniques, this project is for you. 🧶✨


What You Will Love About This Pattern 💖

  • Free and easy knit crescent shawl pattern
  • Bold box mosaic stitches with simple slip stitches
  • Only one color worked per row
  • Comfortable crescent shape that stays on your shoulders
  • Beginner-friendly introduction to mosaic knitting
  • A modern shawl you’ll actually wear

✨ Designer Tip: Mosaic knitting feels fancy, but once you get the rhythm, it’s wonderfully relaxing and addictive.

A smiling person wears a large, striped knit crescent shawl in purple, white, and black. Behind them are preview pages of the "Crazy Stripes Knit Shawl" ad-free PDF pattern. Text reads: "Ad-Free PDF! Crazy Stripes KNIT SHAWL. BUY NOW. -Marly Bird
Etsy
Shopify
Ravelry

Quick Pattern Overview

This post features a free easy knit crescent shawl pattern that uses box mosaic stitches for bold, modern colorwork. The pattern is designed for confident beginners who want to explore mosaic knitting using simple slip stitches and only one color per row.

In this post, you’ll learn:

  • What a crescent shawl is and why it’s such a comfortable, wearable shape
  • How mosaic knitting works and why it’s beginner-friendly
  • Why box mosaic stitches are perfect for easy colorwork projects
  • How to choose yarn colors that make mosaic patterns pop
  • Where to learn more mosaic knitting and advanced colorwork techniques

This free knit shawl pattern is approachable, skill-building, and a great introduction to knit colorwork without overwhelm.

A smiling woman wearing glasses and a denim jacket models a large, striped Knit Crescent Shawl in shades of pink, purple, black, and white. The text reads: "CRAZY STRIPES Mosaic Knit Crescent Shawl. -Marly Bird

What Is a Crescent Shawl?

A crescent shawl is shaped with a gentle curve that mirrors the natural slope of your shoulders. Unlike triangle shawls, crescent shawls tend to stay in place and feel more comfortable for everyday wear.

Why knitters love crescent shawls:

  • Natural drape
  • Comfortable fit
  • Less slipping and adjusting
  • Ideal for accessories you wear all day
A smiling person wearing glasses and a black dress holds up a large, colorful knit mosaic shawl with pink, purple, black, and white stripes in a cozy, well-decorated craft room. -Marly Bird

Is This an Easy Knit Crescent Shawl Pattern?

Yes — this pattern is designed for confident beginners.

You should be comfortable with:

  • Knit and purl stitches
  • Basic increases
  • Following simple repeats

You do not need prior colorwork experience. Mosaic knitting is one of the easiest ways to explore colorwork because you work with just one color at a time.

If you’re brand new to mosaic knitting, this guide will help:
https://marlybird.com/blog/mosaic-knitting-for-beginners/

A smiling person with curly hair and glasses wears a large knit mosaic shawl in pink, black, and white stripes, standing in a cozy, colorful room with shelves and patterned decor in the background. -Marly Bird

This easy knit crescent shawl proves that bold colorwork doesn’t have to be complicated — slip stitches and one color per row are all it takes.

-Your BiCrafty Bestie, Marly Bird

What Is Mosaic Knitting?

Mosaic knitting is a colorwork technique that uses slipped stitches to create patterns. Instead of carrying multiple yarns across a row, stitches are slipped to reveal the color from previous rows.

Why mosaic knitting is beginner-friendly:

  • One color per row
  • No stranded floats
  • Clean fabric structure
  • Easy-to-read charts

If you’d like a deeper dive into tools, charts, and techniques, this resource is a great place to start:
https://marlybird.com/blog/mosaic-knitting-and-mosaic-crochet-resources/

Join our Newsletter

Get Free Pattern Links & Coupons!

>> Become An Insider <<
A smiling person with curly hair and glasses forms a heart shape with their hands. Behind them, the text reads "Marly Bird," "Weekly Newsletter," and "Your BigCrafty Bestie." Sporting a light cardigan, they share the joy of an amigurumi free crochet animal pattern. -Marly Bird

Crescent Shawl vs. Moon Shawl: What’s the Difference?

These terms are often used interchangeably, but there is a subtle distinction.

  • Crescent shawls have a shallow curve and balanced drape
  • Moon shawls typically feature a deeper curve and more dramatic shaping

This pattern is a classic crescent shawl, designed for comfort and versatility.

A knitted blanket with black, white, gray, and magenta stripes and patterns—reminiscent of a knit mosaic shawl—is draped on a white surface next to a wooden tray holding a large red candle. -Marly Bird

How Do You Wear a Crescent Shawl?

One of the best things about crescent shawls is how easy they are to style.

You can:

  • Drape it over your shoulders
  • Wrap it scarf-style
  • Pin it for a polished look
  • Wear it asymmetrically for a modern feel

The curved shape helps it stay put without constant fussing.


Yarn & Color Tips for Mosaic Knitting

Color contrast is key when working box mosaic stitches.

For best results:

  • Choose one light and one dark color
  • Use solid or lightly textured yarns
  • Avoid pairing two busy variegated yarns

✨ Designer Tip: Take a black-and-white photo of your yarn choices. Strong contrast in grayscale usually means crisp mosaic stitches.

A chart with 12 rows of colored yarn swatches, each row numbered 1 to 12. Two vertical columns of box mosaic stitches knitting, numbered 6 and 7 in the center, highlight color variations for easy comparison. -Marly Bird

A smiling person wearing glasses models a Knit Crescent Shawl with colorful, striped mosaic patterns in pink, purple, black, and white. Text reads "Crazy Stripes Mosaic Knit Crescent Shawl." Shelves of yarn fill the background. -Marly Bird

Crazy Stripes Mosaic Knit Crescent Shawl Details

MEASUREMENTS

Finished Measurements
Shawl measures 90” (228.5 cm) wingspan x 28” (71 cm) deep.

Gauge
18 sts = 4″ in stockinette stitch

MATERIALS

Yarn
Red Heart, Chic Sheep (100% merino wool, 186 yds / 170 m, 3.5 oz/ 100 g, CYCA# 4 worsted) :

  • Color A: Vineyard, 5 balls
  • Color B: Sterling, 1 ball
  • Color C: Platinum, 1 ball
  • Color D: Stiletto, 2 balls
  • Color E: Lace, 2 balls

Note: Sample Yarn has been discontinued.

Good Alternative Yarns

Knit Picks, Brava (100% acrylic, 218 yds / 199 m, 3.5 oz/ 100 g, CYCA# 4 worsted) 

Knit Picks Swish Worsted (100% Superwash Merino Wool, 231 yds / 211 m, 3½ oz/ 100 g, CYCA# 4 worsted) 

Knitpicks, Wool of the Andes Tweed (80% Peruvian Highland Wool, 20% Donegal Tweed, 110 yds / 100.5 m, 1¾ oz / 50 g, CYCA #4 worsted)

Herrschners, Worsted Heathers (100% Premium Acrylic, 489 yds / 448 m, 8 oz/ 226 g, CYCA# 4 worsted)

Knitting Needles
9 (5.5mm) 24” circular or longer

Notions

  • Stitch Markers
  • Tapestry Needle
  • Scissors
  • Tape Measure
  • Leather tags (Optional)
  • Leather rivets (Optional)
A smiling person wears a large, striped knit crescent shawl in purple, white, and black. Behind them are preview pages of the "Crazy Stripes Knit Shawl" ad-free PDF pattern. Text reads: "Ad-Free PDF! Crazy Stripes KNIT SHAWL. BUY NOW. -Marly Bird
Etsy
Shopify
Ravelry

STITCH GUIDE

The sample is made in Crazy Stripes for the garter stitch section. If you choose one of the other versions you will need to adjust the amount of yarn you need for each color.

Crazy Stripes Shawl: other color options for garter stitch section

SPECIAL STITCHES

⭐️KFB: knit front and back (video for help)

⭐️WYIB: with yarn in back

⭐️WYIF: with yarn in front 

⭐️Cable Cast-on: Insert right hand needle between first 2 sts on left hand needle, k1 from this position, leave the first sts on left hand needle and slip new st onto left hand needle. Rep from * for desired number of sts.

⭐️Knitted Cast On: *Insert right hand needle knitwise into first st of left hand needle, wrap the yarn around the needle and pull through as to make a knit st, leave the first st on left hand needle and slip st just made to left hand needle (1 st CO); rep from * to required number of sts. Here is a video to help with knitted cast on.

⭐️SSK: slip 1 stitch as if to knit, slip 1 stitch as if to knit, insert left hand needle in front leg of those two slipped stitches on the right hand needle, knit the two stitches together.

⭐️K2tog: insert needle into first two stitches on left hand needle as if to knit, knit them together, knit the two stitches together.


NOTES

  • Yarn amounts listed are based on the sample shawl shown. Yardage may vary depending on your personal gauge, yarn choice, or if you choose to make your shawl larger or smaller.
  • Slip stitches as if to knit unless otherwise instructed. This is important for keeping your box mosaic stitches clean and consistent throughout the shawl.
  • As the shawl grows, switch to longer needles. Crescent shawls gain width quickly, and giving your stitches room on the needle will make knitting more comfortable and help prevent stitches from bunching up.
  • Consider adding lifelines at pattern change points. Placing a lifeline before starting a new section or stitch pattern gives you a safe place to rip back to if needed — especially helpful if you’re new to mosaic knitting.
  • Reading charts tip: Mosaic charts are repetitive by nature. Once you establish the rhythm, trust it. Many knitters find mosaic knitting easier after the first few repeats.
  • Customization friendly: Crescent shawls are easy to adjust. You can work additional repeats to make your shawl larger or stop early for a lighter, scarf-style version.

✨ Designer Tip: If this is your first mosaic project, slow down for the first few rows and focus on accuracy. Speed comes naturally once the pattern clicks.

Don’t forget to favorite and add this shawl to your Ravelry queue so you can easily find it again and share your finished project with the community.

GROW

To Unlock Exclusive Subscriber Content click the Box below and join for free by simply adding your email and creating a password! If you are having troubles, clear your cache or reset your password or login to the Grow Publisher Portal.

>> Learn More About Grow Here <<

I’m thrilled to share this amazing pattern with you, many patterns on my blog are absolutely free! I kindly request that you don’t copy and paste or distribute this pattern. Prefer an ad-free experience? Buy a digital PDF pattern for a small fee from one of my online stores for a seamless crafting journey. 

I appreciate your support and readership. You are the reason I can keep doing what I love and sharing it with others. So, thank you from the bottom of my yarn-loving heart! Disclosure: This post contains affiliate links, meaning I get a commission if you decide to make a purchase through my links at no cost to you.

A smiling woman with glasses models a vibrant Knit Crescent Shawl featuring colorful stripes and mosaic patterns in pink, purple, black, and white. A close-up highlights the shawl’s rich texture. Text reads: “CRAZY STRIPES Mosaic Knit Crescent Shawl.”. -Marly Bird
Crazy Stripes Shawl: Crescent Garter Stitch Knit Shawl by Marly Bird
Etsy
Shopify
Ravelry

Crazy Stripes Mosaic Knit Crescent Shawl Free Pattern

With color A or as desired color

Cast on 5 sts.

GARTER STITCH SECTION 1

Note: See Stitch Guide for Garter Stripe pattern options. Have fun and make this shawl your own by using one of the suggested striping options or make up your own unique pattern!

Row 1 (RS): Kfb, kfb, knit to last 2 stitches, k2tog — 6 sts.

Row 2 (WS): Knit.

Repeat rows 1 and 2, 22 more times until there are 28 sts ending after a row 2. 

BOXED MOSAIC SLIPPED STITCH PATTERN

Do not cut the yarn in this section until the start of the next section, carry it up along the sides. If you need visual help to see how to do this, take a look at this video (I know this isn’t the same pattern, but the link has the video starts at the point where I change colors so you can see how to do it).

With color B

Row 1 (RS): Kfb, kfb, knit to last 2 stitches, k2tog — 29 sts.

Row 2 (WS): K1, purl to last stitch, k1.

With color A

Row 3 (RS): Kfb, kfb, slip 1 wyib, *k5, slip 1 wyib; repeat from * 3 times, k2tog — 30 sts.

Row 4 (WS): *Knit to the slipped stitch, slip stitch wyif; repeat from * to last slipped stitch, knit to end.

With color B

Row 5 (RS): Kfb, kfb, knit to last 2 stitches, k2tog — 31 sts.

Row 6 (WS): K1, purl to last stitch, k1.

With color A

Row 7 (RS): Kfb, kfb, k1, slip 1 wyib, *k5, slip 1 wyib; repeat from * 3 times, k1, k2tog — 32 sts.

Row 8 (WS): *Knit to the slipped stitch, slip yarn wyif; repeat from * to last slipped stitch, knit to end.

With color B

Row 9 (RS): Kfb, kfb, knit to last 2 stitches, k2tog —33 sts.

Row 10 (WS): K1, purl to last stitch, k1.

With color A

Row 11 (RS): Kfb, kfb, k2, slip 1 wyib, *k5, slip 1 wyib; repeat from * 3 times, k2, k2tog — 34 sts.

Row 12 (WS): *Knit to the slipped stitch, slip yarn wyif; repeat from * to last slipped stitch, knit to end. 

With color B

Row 13 (RS): Kfb, kfb, knit to last 2 stitches, k2tog —35 sts.

Row 14 (WS): K1, purl to last stitch, k1.

With color A

Row 15 (RS): Kfb, kfb, k3, slip 1 wyib, *k5, slip 1 wyib; repeat from * 3 times, k3, k2tog — 36 sts.

Row 16 (WS): *Knit to the slipped stitch, slip yarn wyif; repeat from * to last slipped stitch, knit to end. 

With color B

Row 17 (RS): Kfb, kfb, knit to last 2 stitches, k2tog —37 sts.

Row 18 (WS): K1, purl to last stitch, k1.

With color A

Row 19 (RS): Kfb, kfb, k4, slip 1 wyib, *k5, slip 1 wyib; repeat from * 3 times, k4, k2tog — 38 sts.

Row 20 (WS): *Knit to the slipped stitch, slip yarn wyif; repeat from * to last slipped stitch, knit to end. 

A woman with glasses and curly hair models a large striped shawl in shades of pink, purple, black, and white. The text reads "CRAZY STRIPES Mosaic Knit Crescent Shawl," a beginner mosaic knitting pattern using box mosaic stitches. -Marly Bird
Crazy Stripes Shawl: Crescent Garter Stitch Knit Shawl by Marly Bird

With color B

Row 21 (RS): Kfb, kfb, knit to last 2 stitches, k2tog —39 sts.

Row 22 (WS): K1, purl to last stitch, k1.

With color A

Row 23 (RS): Kfb, kfb, k5, slip 1 wyib, *k5, slip 1 wyib; repeat from * 3 times, k5, k2tog — 40 sts.

Row 24 (WS): *Knit to the slipped stitch, slip yarn wyif; repeat from * to last slipped stitch, knit to end. 

With color B

Row 25 (RS): Kfb, kfb, knit to last 2 stitches, k2tog —41 sts.

Row 26 (WS): K1, purl to last stitch, k1.

Cut color B.

GARTER STITCH SECTION 2

Note: See Stitch Guide for Garter Stripe pattern options.

With color A or as desired.

Row 1 (RS): Kfb, kfb, knit to last 2 stitches, k2tog — 42 sts.

Row 2 (WS): Knit.

Repeat rows 1 and 2, 10 more times until there are 52 sts ending after a row 2. 

BOXED MOSAIC SLIPPED STITCH PATTERN

Do not cut the yarn in this section until the start of the next section, carry it up along the sides.

With color C.

Row 1 (RS): Kfb, kfb, knit to last 2 stitches, k2tog — 53 sts.

Row 2 (WS): K1, purl to last stitch, k1.

With color A

Row 3 (RS): Kfb, kfb, slip 1 wyib, *k5, slip 1 wyib; repeat from * 7 times, k2tog — 54 sts.

Row 4 (WS): *Knit to the slipped stitch, slip stitch wyif; repeat from * to last slipped stitch, knit to end.

With color C

Row 5 (RS): Kfb, kfb, knit to last 2 stitches, k2tog — 55 sts.

Row 6 (WS): K1, purl to last stitch, k1.

With color A

Row 7 (RS): Kfb, kfb, k1, slip 1 wyib, *k5, slip 1 wyib; repeat from * 7 times, k1, k2tog — 56 sts.

Row 8 (WS): *Knit to the slipped stitch, slip yarn wyif; repeat from * to last slipped stitch, knit to end.

With color C

Row 9 (RS): Kfb, kfb, knit to last 2 stitches, k2tog — 57 sts.

Row 10 (WS): K1, purl to last stitch, k1.

With color A

Row 11 (RS): Kfb, kfb, k2, slip 1 wyib, *k5, slip 1 wyib; repeat from * 7 times, k2, k2tog — 58 sts.

Row 12 (WS): *Knit to the slipped stitch, slip yarn wyif; repeat from * to last slipped stitch, knit to end. 

With color C

Row 13 (RS): Kfb, kfb, knit to last 2 stitches, k2tog — 59 sts.

Row 14 (WS): K1, purl to last stitch, k1.

With color A

Row 15 (RS): Kfb, kfb, k3, slip 1 wyib, *k5, slip 1 wyib; repeat from * 7 times, k3, k2tog — 60 sts.

Row 16 (WS): *Knit to the slipped stitch, slip yarn wyif; repeat from * to last slipped stitch, knit to end. 

With color C

Row 17 (RS): Kfb, kfb, knit to last 2 stitches, k2tog — 61 sts.

Row 18 (WS): K1, purl to last stitch, k1.

With color A

Row 19 (RS): Kfb, kfb, k4, slip 1 wyib, *k5, slip 1 wyib; repeat from * 7 times, k4, k2tog — 62 sts.

Row 20 (WS): *Knit to the slipped stitch, slip yarn wyif; repeat from * to last slipped stitch, knit to end. 

With color C

Row 21 (RS): Kfb, kfb, knit to last 2 stitches, k2tog —63 sts.

Row 22 (WS): K1, purl to last stitch, k1.

With color A

Row 23 (RS): Kfb, kfb, k5, slip 1 wyib, *k5, slip 1 wyib; repeat from * 7 times, k5, k2tog — 64 sts.

Row 24 (WS): *Knit to the slipped stitch, slip yarn wyif; repeat from * to last slipped stitch, knit to end. 

With color C

Row 25 (RS): Kfb, kfb, knit to last 2 stitches, k2tog —65 sts.

Row 26 (WS): K1, purl to last stitch, k1.

Cut color C.

Crazy Stripes Shawl: Crescent Garter Stitch Knit Shawl by Marly Bird

GARTER STITCH SECTION 3

Note: See Stitch Guide for Garter Stripe pattern options.

With color A or as desired

Row 1 (RS): Kfb, kfb, knit to last 2 stitches, k2tog — 66 sts.

Row 2 (WS): Knit.

Repeat rows 1 and 2, 10 more times until there are 76 sts ending after a row 2. 

BOXED MOSAIC SLIPPED STITCH PATTERN

Do not cut the yarn in this section until the start of the next section, carry it up along the sides.

With color D

Row 1 (RS): Kfb, kfb, knit to last 2 stitches, k2tog — 77 sts.

Row 2 (WS): K1, purl to last stitch, k1.

With color A

Row 3 (RS): Kfb, kfb, slip 1 wyib, *k5, slip 1 wyib; repeat from * 11 times, k2tog — 78 sts.

Row 4 (WS): *Knit to the slipped stitch, slip stitch wyif; repeat from * to last slipped stitch, knit to end.

With color D

Row 5 (RS): Kfb, kfb, knit to last 2 stitches, k2tog — 79 sts.

Row 6 (WS): K1, purl to last stitch, k1.

With color A

Row 7 (RS): Kfb, kfb, k1, slip 1 wyib, *k5, slip 1 wyib; repeat from * 11 times, k1, k2tog — 80 sts.

Row 8 (WS): *Knit to the slipped stitch, slip yarn wyif; repeat from * to last slipped stitch, knit to end.

With color D

Row 9 (RS): Kfb, kfb, knit to last 2 stitches, k2tog — 81 sts.

Row 10 (WS): K1, purl to last stitch, k1.

With color A

Row 11 (RS): Kfb, kfb, k2, slip 1 wyib, *k5, slip 1 wyib; repeat from * 11 times, k2, k2tog — 82 sts.

Row 12 (WS): *Knit to the slipped stitch, slip yarn wyif; repeat from * to last slipped stitch, knit to end. 

With color D

Row 13 (RS): Kfb, kfb, knit to last 2 stitches, k2tog — 83 sts.

Row 14 (WS): K1, purl to last stitch, k1.

With color A

Row 15 (RS): Kfb, kfb, k3, slip 1 wyib, *k5, slip 1 wyib; repeat from * 11 times, k3, k2tog — 84 sts.

Row 16 (WS): *Knit to the slipped stitch, slip yarn wyif; repeat from * to last slipped stitch, knit to end. 

With color D

Row 17 (RS): Kfb, kfb, knit to last 2 stitches, k2tog — 85 sts.

Row 18 (WS): K1, purl to last stitch, k1.

With color A

Row 19 (RS): Kfb, kfb, k4, slip 1 wyib, *k5, slip 1 wyib; repeat from * 11 times, k4, k2tog — 86 sts.

Row 20 (WS): *Knit to the slipped stitch, slip yarn wyif; repeat from * to last slipped stitch, knit to end. 

With color D

Row 21 (RS): Kfb, kfb, knit to last 2 stitches, k2tog — 87 sts.

Row 22 (WS): K1, purl to last stitch, k1.

With color A

Row 23 (RS): Kfb, kfb, k5, slip 1 wyib, *k5, slip 1 wyib; repeat from * 11 times, k5, k2tog — 88 sts.

Row 24 (WS): *Knit to the slipped stitch, slip yarn wyif; repeat from * to last slipped stitch, knit to end. 

With color D

Row 25 (RS): Kfb, kfb, knit to last 2 stitches, k2tog — 89 sts.

Row 26 (WS): K1, purl to last stitch, k1.

Cut color D.

GARTER STITCH SECTION 4

Note: See Stitch Guide for Garter Stripe pattern options.

With color A or as desired

Row 1 (RS): Kfb, kfb, knit to last 2 stitches, k2tog — 90sts.

Row 2 (WS): Knit.

Repeat rows 1 and 2, 10 more times until there are 100 sts ending after a row 2

Continue in the established pattern of garter with color A, then work boxed mosaic slip stitch pattern until there are a total of 7 boxed mosaic slipped stitch pattern sections. Then do one last section of garter stitch.

A smiling woman wearing glasses shows off a large Knit Crescent Shawl with black, white, purple, and pink stripes. Text reads, "Crazy Stripes Mosaic Knit Crescent Shawl. Marly Bird. -Marly Bird

Color Sequence will go

Garter– A– 28 sts

Boxed– A,B– 41 sts

Garter– A– 52 sts

Boxed– A,C– 65 sts

Garter– A– 76 sts

Boxed A,D– 89 sts

Garter– A– 100 sts

Boxed– A,B — 113 sts

Garter– A — 124 sts

Boxed– A,C –137 sts

Garter– A — 148 sts

Boxed A,D — 161 sts

Garter– A– 173 sts

Boxed– A,B– 186 sts

Garter– A — 197 sts

A smiling person with curly hair and glasses wears a black, white, and pink knit mosaic shawl, standing in a cozy room with shelves and plants in the background. -Marly Bird

ATTACHED I-CORD BIND OFF

The applied i-cord bind off is a nice stretchy bind off that will give your shawl that little extra something.

Continuing with Color A. 

Using the cable cast-on or the knitted cast-on, cast on 4 stitches. Place those 4 stitches on the left hand needle with the other shawl stitches.

Row 1 (RS): K3 (of the cast-on stitches), ssk (1 stitch from the newly cast-on stitches and one stitch from the shawl). Slip the 4 stitches from the right hand needle back to the left hand needle (slip them purlwise through the back leg so you don’t change the orientation of the stitch).

Repeat row 1 to the end of the row. All the live stitches on the shawl will have been worked and 4 stitches remain on your needle left hand needle. Do not turn your work.

Note: If you wish to end the i-cord here and not apply it around the entire shawl you could do so by working a row of k2tog’s, then on the next row k2tog and finish off.

First Corner of applied i-cord

Helpful Tip: For the remainder of the i-cord, you could use 2 dpn for ease instead of the long needle you used for the shawl. Also, if you want the i-cord to be more snug than the fabric of the shawl you could use a smaller needle size.

The last stitch and the first stitch that you bound off are actually at the 1st and 3rd corners of your shawl. So when we want to turn the corner and work along the edge of the shawl we will need to work another stitch into that same corner.

The corner turn instructions are different for the 2nd corner. I only point this out so when you are sure to follow the instructions.

Row 1 (RS): K4 stitches.

Row 2 (RS): Pick up and knit 1 stitch in the corner of the shawl (the same spot at the last stitch from bind off), slip the 5 stitches from the right hand needle back to the left hand needle. K3, ssk (1 stitch from the original 4 and the newly picked up and knit stitch).

You will now be working along the decrease edge of the shawl.

Row 3 (RS): Pick up and knit 1 stitch along the edge of the shawl, slip the 5 stitches from the right hand needle back to the left hand needle. K3, ssk (1 stitch from the original 4 and the newly picked up and knit stitch).

Repeat row 3 to the corner of shawl.

2nd corner of applied i-cord

Row 1 (RS): Pick up and knit 1 stitch in the corner of the shawl, slip the 5 stitches from the right hand needle back to the left hand needle. K3, ssk (1 stitch from the original 4 and the newly picked up and knit stitch). Slip the 4 stitches from the right hand needle back to the left hand needle.

Row 2 (RS): K4 stitches.

Row 3 (RS): Pick up and knit 1 stitch in the SAME corner stitch of the shawl, slip the 5 stitches from the right hand needle back to the left hand needle. K3, ssk (1 stitch from the original 4 and the newly picked up and knit stitch).

You will now be working along the increase edge of the shawl.

Row 4 (RS): Pick up and knit 1 stitch along the edge of the shawl, slip the 5 stitches from the right hand needle back to the left hand needle (slip them through the back leg so you don’t change the orientation of the stitch). K3, ssk (1 stitch from the original 4 and the newly picked up and knit stitch).

Repeat row 4 to the last corner.

3rd corner of applied i-cord

Row 1 (RS): Pick up and knit 1 stitch in the corner of the shawl (this is the first stitch that was bound off), slip the 5 stitches from the right hand needle back to the left hand needle. K3, ssk (1 stitch from the original 4 and the newly picked up and knit stitch). Slip the 4 stitches from the right hand needle back to the left hand needle (slip them through the back leg so you don’t change the orientation of the stitch).

Row 2 (RS): K4 stitches.

FINAL FINISHING

Once all the stitches on the shawl have been worked with the applied i-cord you will have 4 stitches remaining on the needle.

Seam the 4 stitches of the i-cord you have on your knitting needle together with the cast on edge of the i-cord. The easiest way to do it is to use a simple overhand stitch.

The best way to do it is to graft the stitches so that the i-cord looks seamless.

WEAVE IN YOUR ENDS

WASH AND BLOCK YOUR SHAWL 🙂 THIS IS THE FINISHING TOUCH AND ONE YOU SHOULDN’T SKIP, ESPECIALLY IF YOU ARE USING WOOL!

A smiling woman with curly hair and glasses wears a vibrant Knit Crescent Shawl in pink, white, and black stripes over a denim jacket. She stands in a cozy, well-lit room with shelves of yarn in the background. -Marly Bird

Blocking & Finishing Your Knit Crescent Shawl

Blocking enhances the stitch definition and overall drape of your shawl.

  • Wet block gently
  • Shape into a smooth crescent
  • Allow to dry completely

This step really helps the mosaic pattern shine.

⭐️ Must Have Blocking Supplies ⭐️

Want to Learn More Mosaic & Colorwork Techniques?

If you’re loving mosaic knitting and want to confidently explore more colorwork techniques, I highly recommend Camp Colorwork.

Learn Colorwork with Confidence in Camp Colorwork 🧶✨

Camp Colorwork is my step-by-step course designed to help knitters understand multiple colorwork styles, including mosaic knitting, stranded colorwork, and more — without overwhelm.

Inside Camp Colorwork, you’ll learn:

  • How different colorwork techniques work
  • How to read and follow charts confidently
  • How to manage yarn and tension
  • How to choose colors that work beautifully together

👉 Learn more about Camp Colorwork here:
https://marlybird.com/blog/camp-colorwork/

💖 Use coupon code HEART to get 25% off and start building your colorwork confidence today.

Camp Colorwork crochet and knitting course by Marly Bird and Robyn Chachula

More Mosaic Knitting Patterns You’ll Love 🧶

If you enjoyed this easy knit crescent shawl pattern, here are more mosaic projects to explore:

  • Pixel Pop Knit Hat (Free Pattern)
    https://marlybird.com/blog/pixel-pop-knit-hat-free-pattern/
  • Knit Mosaic Slippers (Free Pattern)
    https://marlybird.com/blog/knit-mosaic-slippers-pattern/
  • Twilight Trails Knit Mosaic Hat (Free Pattern)
    https://marlybird.com/blog/twilight-trails-knit-mosaic-hat-pattern-a-stylish-textured-design/
  • Cocoa Dreams Mosaic Knit Fingerless Mittens (Free Pattern)
    https://marlybird.com/blog/cocoa-dreams-mosaic-knit-fingerless-mittens-free-pattern/
  • Falling Leaves Mosaic Knit Hat (Free Pattern)
    https://marlybird.com/blog/cozy-up-with-the-falling-leaves-mosaic-knit-hat-free-pattern-mosaic-tips/
  • Slipped Stripes Scarf (Slip-Stitch Texture)
    https://marlybird.com/blog/working-texture-with-slip-stitches-slipped-stripes-scarf/
  • Dynamic Wave Mosaic Knit Hat (Free Pattern)
    https://marlybird.com/blog/mosaic-knit-hat-pattern-dynamic-wave/
  • Sugar Biscuit Fingerless Mitts (Free Pattern)
    https://marlybird.com/blog/sugar-biscuit-knit-fingerless-mitts-pattern/
  • Sugar Biscuit Knit Hat (Free Pattern)
    https://marlybird.com/blog/sugar-biscuit-knit-hat-pattern/
  • Treat Your Feet Sock Make-Along — Multiple slip stitch sock patterns + video tutorials
    https://marlybird.com/blog/treat-your-feet-sock-make-along-2025/

You can also browse a full roundup here:
https://marlybird.com/blog/free-mosaic-knitting-patterns/


A smiling person with curly blonde hair, black glasses, and a large striped and patterned shawl—made from an easy knit crescent shawl pattern—stands indoors in a cozy, colorfully decorated room. -Marly Bird
A smiling woman with curly blonde hair and glasses wears a black top and a large, striped knit mosaic shawl in purple, white, and black. She stands indoors in a cozy, colorful room with bookshelves and yarn in the background. -Marly Bird
A smiling person with glasses holds up a knitted shawl featuring pink, purple, black, and white stripes with a geometric pattern—an inviting display of box mosaic stitches knitting—in a cozy, well-decorated room. -Marly Bird
A smiling person with curly hair and glasses wears a black, white, and pink knit mosaic shawl, standing in a cozy room with shelves and plants in the background. -Marly Bird

FAQ – Easy Knit Crescent Shawl Pattern

Is this knit crescent shawl pattern free?

Yes! This is a 100% free knit crescent shawl pattern available on MarlyBird.com.

Is mosaic knitting good for beginners?

Absolutely. Mosaic knitting is one of the most beginner-friendly colorwork techniques because you work with only one color per row.

Can I adjust the size of the shawl?

Yes — crescent shawls are easy to customize by adding or removing repeats.


Bonus: Another Mosaic Project You Might Love 🎉

Mosaic stitches were also used in the NYE Countdown Knit Cowl, a fun, festive colorwork project available here:
https://marlybird.thrivecart.com/nye-countdown-25-knit/

A smiling person with curly hair and glasses wears a blue denim jacket and a colorful, striped crochet scarf reminiscent of box mosaic stitches knitting. Bookshelves and decor are visible in the background. -Marly Bird
New Years Eve Countdown 2026 Knit Cowl

Final Thoughts 💕

This free easy knit crescent shawl pattern is proof that colorwork doesn’t have to be complicated to be stunning. With box mosaic stitches, comfortable shaping, and beginner-friendly construction, it’s a project that builds confidence while creating something beautiful and wearable.

If you make one, be sure to share it — I love seeing your projects! 💖

❤️ Your BiCrafty Bestie,
Marly Bird

A cartoon avatar of a person with glasses and a brown bun smiles warmly. Their green shirt and black jacket add a stylish touch, while colorful hearts surround them like loving temperature blankets, stitching together an aura of love and positivity. -Marly Bird

#mmmdi #marlybird

Filed Under: Chic Sheep by Marly Bird Patterns, Free Patterns, Knit Shawl Patterns, Knitting, Marly Bird Premium Patterns, Our Free Patterns, Pattern

Chic Sheep Dream Intarsia Knit Blanket – Free Modern Colorwork Blanket Pattern

January 15, 2026 By admin 5 Comments

If you’ve ever wanted to knit a bold, modern colorwork blanket that looks like a stained-glass window made of yarn, the Chic Sheep Dream Intarsia Knit Blanket is calling your name.

Designed by my brilliant friend Anne Berk (aka Annetarsia), this blanket uses all 24 original colors of Chic Sheep by Marly Bird™ in a geometric, triangle-based intarsia design. Every row becomes a little color adventure, and the finished blanket is a true heirloom piece.

A chic intarsia knit blanket with vibrant geometric patterns is elegantly draped over a wooden ladder. The text "Chic Sheep Dream Intarsia Blanket" graces the top, while a logo featuring "Marly Bird" sits in the bottom right corner. -Marly Bird

In this post, you’ll find:

  • And the full free pattern right here on the blog
  • The story behind the design
  • Tips for intarsia knitting, yarn choices, and prep
  • A link to an ad-free, printable PDF pattern

Affiliate Disclosure: This post contains affiliate links. To learn more please visit my privacy policy here💖

The Story Behind the Dream Intarsia Knit Blanket

This blanket literally started as a dream.

I told Anne I imagined a blanket that:

  • Used all my Chic Sheep colors
  • Looked like stained glass
  • Featured strong geometric shapes, especially triangles

I knew if anyone could take that chaotic, colorful dream and turn it into a real, knittable design, it was Anne.

She:

  • Designed the triangle-based intarsia chart
  • Worked out how much yarn each “butterfly” needed
  • Knit the sample
  • Loved it so much… she knit a second one from the leftover yarn!

It’s one of those projects that perfectly blends math, color, and creativity—and somehow still feels totally snuggly and approachable.

A person with glasses smiles while holding up a vibrant, multicolored quilt reminiscent of the Chic Sheep Dream Intarsia Knit Blanket. The background features shelves adorned with books and decor. -Marly Bird

What You’ll Love About the Dream Intarsia Knit Blanket

A chic intarsia knit blanket with vibrant geometric patterns is elegantly draped over a wooden ladder. The text "Chic Sheep Dream Intarsia Blanket" graces the top, while a logo featuring "Marly Bird" sits in the bottom right corner. -Marly Bird

Relax & Knit
Upgrade to the Printable PDF

Beautifully formatted to print and relax while knitting. The paid pattern includes:

  • Stunning Colorwork Design
  • Perfect for Relaxing and Learning
  • Customizable Colors
  • A Show-Stopping Statement Piece:
  • Generous Size and Soft Drape
  • A Rewarding Finish
Get The Ad-Free PDF

Stunning Colorwork Design: This blanket features beautiful intarsia knitting, allowing you to create bold, colorful blocks of design without the bulk of stranded colorwork. The result? A smooth, polished finish that looks as good on the back as it does on the front.

Perfect for Relaxing and Learning: Whether you’re an experienced knitter or new to intarsia, this project offers the perfect mix of relaxation and skill-building. The color changes keep things interesting, while the larger sections of stockinette stitch provide a soothing, meditative rhythm.

Customizable Colors: Choose a palette that reflects your personal style or home decor. Go bold with vibrant, modern shades, or opt for neutrals and pastels for a timeless, cozy look.

A Show-Stopping Statement Piece: This blanket is more than just a knit—it’s a work of art. Drape it over a couch, fold it at the foot of your bed, or gift it to someone special. The clean lines and modern style make it a statement piece in any room.

Generous Size and Soft Drape: Designed for comfort, the Dream Intarsia Knit Blanket has a generous size that’s perfect for snuggling up on chilly nights. Combined with soft, luxurious yarn, it’s as cozy to use as it is beautiful to look at.

A Rewarding Finish: There’s nothing quite like watching the colorful blocks of this pattern come together as you knit. By the end, you’ll have a stunning, handmade heirloom that you’ll cherish for years to come.

If you’ve been dreaming of a colorwork project that’s approachable, rewarding, and modern, the Dream Intarsia Knit Blanket is the perfect choice for your needles. 🧶✨


Prefer a Printable Version? Get the Ad-Free PDF

If you’re a “paper pattern and highlighter” knitter, the ad-free PDF is going to be your best friend.

The paid PDF pattern includes:

  • Beautifully formatted, printer-friendly layout
  • Full written instructions, charts, and layout references in one place
  • Easy-to-read type and structure for sofa knitting sessions
  • Everything you need, without ads or scrolling

You can grab the Dream Knit Intarsia Blanket ad-free PDF here:

  • Marly Bird Store (Shopify):
    https://shop.marlybird.com/products/dream-knit-intarsia-blanket-pattern-modern-colorwork-knit-blanket
  • Etsy (affiliate):
    https://tidd.ly/4jPLLLS

Use the free blog version to get started, then upgrade to the PDF if you want to keep this pattern in your forever library. 💕

Image promoting an ad-free PDF knitting pattern for the Dream Intarsia Knit Blanket. A close-up of the colorful geometric blanket is shown, with preview pages and “BUY NOW” text highlighted by a pink arrow. -Marly Bird
Etsy
Shopify

Yarn for the Dream Knit Intarsia Blanket

The original blanket was knit in Chic Sheep by Marly Bird, a 100% merino worsted-weight yarn that had all my heart. That yarn line has since been discontinued (I know. I’m still emotional about it. 😭).

The good news?

You can knit this blanket in almost any worsted-weight (#4) yarn.

If you’re looking for a yarn that behaves similarly to Chic Sheep, try:

  • Knit Picks Swish Worsted – soft superwash wool with great stitch definition, a very nice stand-in for Chic Sheep.
    👉 https://tidd.ly/4qL6Zxt

Other great options:

  • Wools like Universal Deluxe Worsted or Knit Picks Wool of the Andes Superwash
    👉 https://tidd.ly/3JGXmPK
    👉 https://tidd.ly/4qmTEux
  • Wool blends like Berroco Vintage or Caron Simply Me
    👉 https://tidd.ly/46D6pd5
    👉 https://tidd.ly/4qV238y
  • Acrylics like Brava, Brava Tweed, Worsted 8 Heathers, or Lion Brand Color Theory
    👉 https://tidd.ly/3Jj67zn
    👉 https://tidd.ly/3X6lWMS
    👉 https://tidd.ly/4oXxtuD
    👉 https://tidd.ly/4bvWmJx

As long as it’s worsted weight and you have enough yardage, you’re good to go.

Important:
For a blanket, gauge matters more for yarn usage and finished size than for fit. If your gauge is looser than Anne’s, you might need more yarn. If it’s tighter, your blanket will be smaller. Swatching helps you plan.


How Much Yarn Do I Really Need?

Originally, this blanket used:

  • 3 balls of the border color
  • 1 ball each of 23 additional colors

Here’s the fun part:

Anne knit the entire blanket and had enough yarn left over from each ball to knit a second blanket, only needing extra border yarn.

So:

  • If you want the full “24-color experience,” one ball of each is plenty generous.
  • If you prefer a stash-busting version, you can absolutely use leftovers and scraps in any color story you like.

If you love stash-busting projects, don’t miss:
👉 20 Stash Busting Knitting Patterns: https://marlybird.com/20-stash-busting-knitting-patterns/

A colorful quilt featuring a chic pattern of multicolored triangles is displayed on a table. In the blurred background, there are shelves, a fluffy cushion, and some decorative items. The overall setting is cozy and dream-like, perfect for showcasing an intarsia knit blanket. -Marly Bird

Is This a Good First Intarsia Project?

This pattern is a fantastic intarsia project if:

  • You’re comfortable with knit, purl, and basic chart reading
  • You’re ready to manage multiple yarn sources (butterflies/bobbins)
  • You’re excited by color and don’t mind a little bit of organized chaos at your feet

You’ll practice:

  • Intarsia links: wrapping old and new colors to avoid holes
  • Managing multiple color butterflies without panicking
  • Reading a layer chart and a color placement schematic

For a deeper dive into intarsia techniques, I highly recommend:

  • Annetarsia Knits: A New Link to Intarsia by Anne Berk
    👉 https://amzn.to/4gx3TY3
    👉 https://bit.ly/Annetarsia-Book

It’s way more than “just” an intarsia book—it’s packed with tips that level up your general knitting skills, too.


Helpful Intarsia Videos from Anne Berk

If you’re a visual learner, these videos are gold:

  • Determining yarn amounts for butterflies:
    https://youtu.be/swsoUuKQOes
  • Winding butterflies:
    https://youtu.be/P-i2T5IxL3Q
  • How to finish perfect intarsia:
    https://youtu.be/hxYe0gNIUww
  • How to knit straight intarsia:
    https://youtu.be/hLbfjLV1PIc
  • How to bury in ends:
    https://youtu.be/8_NBGUKjO-E

You can work through these before you start, or keep them handy as “campfire support” while you knit.

A woman smiles as she holds up a colorful Intarsia knit blanket with multiple strands of yarn hanging from it, standing in a room with soft lighting. -Marly Bird

Dream Intarsia Blanket – Key Measurements & Gauge

Finished Measurement
Blanket measures approximately 55.5″ (141 cm) wide x 52.5″ (133.5 cm) long.

Gauge
20 sts = 4″ (10 cm); 28 rows = 4″ (10 cm) in Layer Chart, after blocking.
CHECK YOUR GAUGE. Use any size needles to obtain the gauge.

Even though this isn’t a garment, gauge still matters:

  • If your gauge is much larger than Anne’s, you may run out of yarn early.
  • If your gauge is much smaller, your blanket will be smaller than the sample.

If you’re using a different yarn and need to calculate yardage, watch Anne’s video on determining yarn amounts:
👉 https://youtu.be/swsoUuKQOes


Materials At a Glance

Yarn (original sample):
Red Heart Chic Sheep by Marly Bird – 100% washable merino, 186 yds per ball.

  • 3 balls: Velvet (A) – border color
  • 1 ball each: Fairy Tale (B), Dragon Fruit (C), Sangria (D), Vineyard (E), Regal (F), Royal (G), VIP (H), Suite (I), Poolside (J), Crème de Mint (K), Green Tea (L), Polo (M), Lipstick (N), Sunset (O), Mai Tai (P), Mimosa (Q), Stiletto (R), Sterling (S), Platinum (T), Lace (U), Linen (V), Suede (W), Leather (X)
    or approximately 87 yards (79.5 meters) of 23 other colors.

Needles

  • US 7 (4.5 mm) 32″ (81 cm) circular needle

Notions

  • Stitch markers
  • Plastic bags for organizing yarn butterflies
  • Yarn needle
⭐️ Marly Bird Amazon Storefront ⭐️

Special Techniques & Pattern Notes (Overview)

You’ll find full details further down in the post, but here’s a quick overview:

  • Intarsia:
    Each block of color has its own strand. When changing colors, you wrap the old yarn over the new yarn to prevent holes.
  • Reading the chart:
    • RS rows are worked right to left
    • WS rows are worked left to right
    • Each row begins and ends with 1 selvedge stitch in the main color.
  • Avoiding holes:
    When changing colors:
    • Lay the old color over the new
    • Bring the new color up from below
    • Work the next stitch with the new color
      This “links” the yarns without pulling too tight.
  • Managing butterflies:
    • Each full triangle uses about 6 yards (5.5 m)
    • Each half triangle uses about 3 yards (2.75 m)
    • You’ll prepare 312 butterflies at 6 yards and 72 butterflies at 3 yards.
    • Keep butterflies in bags by “layer” so you don’t get overwhelmed.

All of the detailed notes and numbers are already in your existing content—just keep those sections intact below the pattern heading.


Chic Sheep Dream Intarsia Knit Blanket – Free Pattern

Now for the good part—the free pattern!

Use this blog version if you’re happy scrolling, or snag the ad-free PDF if you want everything in a tidy, printable format.

SPECIAL TECHNIQUES

INTARSIA

Intarsia is a method of color knitting that uses a new strand of yarn for each block of color. When changing colors, the yarn strands must be wrapped in a way to prevent a gap.

Knit Row: Knit to the color change, behind the work, bring old color yarn (the color you just finished using) over the new yarn to the left and bring the new yarn up from below on the right, then continue to knit with the new color.

Purl Row: Purl to the color change, in front of the work, bring old color yarn over the new yarn to the left and bring the new yarn up from below on the right, then continue to purl with the new color.

Knitting project featuring a colorful, intarsia design with intricate lace trim, set against a beach backdrop.

GET THE BOOK! Hey, it’s Marly. I want to highly recommend that you grab the Annetarsia book by Anne Berk. It is an amazing book and you will not be disappointed in it at all. It is so much more than a book about intarsia knitting. There are lessons in there that will really improve your general knitting as well. Order if from Amazon or directly from Anne. Simply click the links.

For more information and patterns, check out  “Annetarsia Knits: A New Link to Intarsia (available at www.annetarsia.com)


A colorful quilt reminiscent of a chic sheep dream features triangles in various hues, adorned with a wooden bead string. A dark wooden tray holds a red candle and a floral arrangement with pink roses and greenery, all set on a light wooden surface. -Marly Bird

PATTERN NOTES

When adding any new yarn: always leave a 5” end, which will anchor the stitch and give you enough yarn to adjust tension and bury the end, in finishing. Add yarn within 1 st from the link, for ease in finishing.

How to read the chart: Chart rows are worked from right to left on RS rows and left to right on WS rows. Each row begins and ends with 1 st MC selvedge.

Avoid holes when knitting intarsia: To link between motifs, lay the old color over the new color, then work the next stitch with the new color to link the old yarn gently with the new color yarn. Do not overtighten, as the link and stitches need room to breathe.

When 3 colors come together and one will not be used lay both the old and the unused color over the new piece of yarn, then make the stitch with the new color, locking in the other 2 colors, which will be in position to be worked on the next row.

Keep control of the butterflies: When yarn supplies tangle, first pull the loose strands of AC away. As you knit, the yarn butterflies will get smaller and can also be converted to loose strands. ALL yarn supplies can be converted to loose strands if you choose, you will just need to add new yarn more often. As you practice, you will gain confidence and the butterflies will become faster and easier to use. Using smaller lengths of yarn in the beginning might be less stressful, and your fabric will be just fine, so don’t hesitate to try that method.

Woman demonstrating knitting technique with colorful yarn and stitches, surrounded by crafting supplies and studio equipment.
Anne Berk winding butterflies of yarn for the Chic Dream Blanket
  • Each full triangle uses 6 yards (5.5 meters), and each half triangle uses 3 yards (2.75 meters).
  • While working the Layer Chart, choose the color bobbins in the order as shown in the Layer Diagram, or choose them randomly as follows: There are 25 full triangles and 2 half triangles per layer. On each layer, work each of the 24 colors once, then choose random colored bobbins for the extra full triangle and the 2 half triangles. Arrange the colors in order so they are randomly dispersed in relation to the colors on the previous layers. There will be a few bobbins of color leftover when the blanket is finished.
  • On each row, as each color is changed, use the intarsia method to prevent any gaps from forming between colors.
  • 312 yarn bobbins (butterflies) 6 yd lengths
  • 72 yarn bobbins (butterflies) 3 yd lengths

STITCH PATTERNS

SEED STITCH

(Worked over a multiple of 2 sts + 1)

Row 1: K1, *p1, k1; repeat from * to end.

Repeat row 1 for Seed st.


CHIC SHEEP DREAM INTARSIA KNIT BLANKET PREPARATION

Full disclosure, when Anne was prepping for this blanket she had the help of Lindsey from Erin.Lane Bags and myself. It was so much fun learning from the master how to make these butterfly bobbins in the absolute perfect amounts. Then bundle them up.

Seeing all the colors of yarn in my collection in one bundle was really awesome. Look at these pictures!

Two women smile in a cozy knitting studio filled with colorful yarns, surrounded by equipment and finished projects.
yarn prep for the intarsia chic dream blanket
Anne Berk showing the yarn prep for the blanket

Here is what you need to know to prepare for your CHIC SHEEP DREAM INTARSIA KNIT BLANKET.

FULL TRIANGLES: Hold the 24 colors together and measure and cut as a unit to save time. Be careful to maintain a relaxed tension when measuring, or they may be cut too short.

Cut all 24 colors into 6 yard (5.5 meter) lengths and wind each separate length into a yarn bobbin (SEE MARLY’S VIDEO ON YARN BOBBINS). Place each set of 24 yarn bobbins into a separate bag. Make 13 sets, one for each layer of triangles

HALF TRIANGLES: Cut all 24 colors into 3 yard (2.75 meter) lengths and wind onto bobbins. Make 3 sets and place all together into a bag.  Use randomly next to each side edging, and to create one or more divided triangle on each layer.

GROW

To Unlock Exclusive Subscriber Content click the Box below and join for free by simply adding your email and creating a password! If you are having troubles, clear your cache or reset your password or login to the Grow Publisher Portal.

>> Learn More About Grow Here <<

I’m thrilled to share this amazing pattern with you, many patterns on my blog are absolutely free! I kindly request that you don’t copy and paste or distribute this pattern. Prefer an ad-free experience? Buy a digital PDF pattern for a small fee from one of my online stores for a seamless crafting journey. 

I appreciate your support and readership. You are the reason I can keep doing what I love and sharing it with others. So, thank you from the bottom of my yarn-loving heart! Disclosure: This post contains affiliate links, meaning I get a commission if you decide to make a purchase through my links at no cost to you.


CHART

This intarsia chart is worked over a multiple of 20 sts. Once all rows of the chart are complete, 1 set is complete.

Anne Berk Chic Dream Blanket Pattern Chart on MarlyBird.com
Click on Chart to Print Larger Image

SCHEMATIC FOR COLOR PLACEMENT

A grid of colorful triangles, each containing a single capital letter, forms a tessellated pattern reminiscent of a Dream Intarsia Knit Blanket, with vibrant colors like red, blue, green, pink, yellow, and brown. -Marly Bird
Colorful patchwork blanket made of triangles in vibrant shades, showcasing various yarn textures and a dark border.

A colorful knitted fabric reminiscent of the Chic Sheep Dream Intarsia Knit Blanket, with a patchwork pattern featuring vibrant colors like red, blue, yellow, pink, and purple in a geometric zigzag design. The texture and folds of the fabric are beautifully visible. -Marly Bird

CHIC SHEEP DREAM ARGYLE KNIT BLANKET PATTERN

With long tail method, cast on 277 with Color A, then work 14 rows in Seed stitch, ending after a right side row.

Increase Row (wrong side): Work 9 sts in Seed stitch, place a marker, kfb, purl to the last 9 sts, place another marker, work Seed stitch to end – 278 sts.

Next Row (right side): Work Seed stitch to marker as established, slip the marker, work Row 1 of the Layer Chart (see chart above) using desired colors (see Notes) to the next marker, slip the marker, work to the end in Seed stitch as established.

Work in established Layer pattern, keeping 9 edge sts in Seed stitch until Rows 1–52 of the Layer pattern have been completed 6 times, then work Rows 1–26 once more.

Decrease Row: (right side): Change to Color A only and work in Seed st to marker, remove marker, p2tog, purl to marker, remove marker, work in Seed st to end – 277 sts remain.

Work 14 rows in Seed st. Bind off all sts in Seed st.

FINISHING

Weave in all loose ends.

Block blanket to measurements.

Colorful patchwork of triangles in various shades, featuring a mix of knit and crochet stitches.
Colorful crochet project featuring vibrant pink, blue, yellow, and green stitches in a patchwork design.

More Intarsia Patterns from Marly Bird

Loved this blanket and want more intarsia in your life? You’ll also like:

  • Chic Highland Argyle Cardigan – a stunning argyle cardigan designed by Anne Berk, using intarsia in sweater form.
    👉 https://marlybird.com/free-knitting-patterns/perfect-argyle-knit-cardigan-pattern-chic-highland-argyle/
A smiling woman with curly blonde hair and black glasses wears a green cardigan with a pink and yellow argyle pattern, standing in a cozy room with shelves, patterned decor, and a Dream Intarsia Knit Blanket in the background. -Marly Bird

Keep an eye on MarlyBird.com for more intarsia-friendly designs and colorwork fun.


Crochet Sister Pattern – Day Dream C2C Crochet Blanket

If you’re BiCrafty (or intarsia feels like too big of a leap right now), check out the crochet sister to this blanket:

  • Day Dream C2C Crochet Blanket – Free Crochet Chic Sheep Blanket
    This version also uses all 24 colors of Chic Sheep and is worked in corner-to-corner crochet.
    👉 https://marlybird.com/blog/day-dream-c2c-crochet-blanket-free-colorful-throw-pattern/

It’s a great way to play with the same color palette using a completely different technique.

A smiling woman holds up a colorful, geometric-patterned crochet blanket. The collage includes close-ups of its vibrant squares and stripes, featuring the text "Day Dream C2C Crochet Blanket - FREE Crochet Chic Sheep Blanket" at the bottom. -Marly Bird

FAQ – Chic Sheep Dream Intarsia Knit Blanket

Do I need prior intarsia experience to knit this blanket?
Not necessarily, but it helps to be a confident knitter first. If you’re comfortable with knit/purl and ready to learn, the combination of the chart, notes, and videos makes this a solid intarsia “first big project.”


Can I use fewer colors or just stash yarn?
Absolutely. You can:

  • Use fewer colors and repeat them across the triangles
  • Combine leftover worsted-weight yarns for a scrappy version
  • Stick to a limited palette (like neutrals with one bright accent)

Just remember to match the yarn weight (worsted) and aim for a usable gauge so your triangle shapes and overall size stay pleasing.


How important is gauge for this blanket?
Gauge is important for:

  • Yardage – looser gauge = more yarn used
  • Finished size – tighter gauge = smaller blanket

It doesn’t have to be exact down to the last stitch, but getting close means your result will be similar to the sample, and you’re less likely to run out of yarn.


Is this blanket portable? Can I work on it in sections?
It’s a full-size blanket, so it’s not the most portable project once you’ve got a lot of fabric on your needles. You can, however, work on shorter sessions, one “layer” of triangles at a time, and keep your butterflies organized in project bags.


Image promoting an ad-free PDF knitting pattern for the Dream Intarsia Knit Blanket. A close-up of the colorful geometric blanket is shown, with preview pages and “BUY NOW” text highlighted by a pink arrow. -Marly Bird

Final Thoughts

The Chic Sheep Dream Intarsia Knit Blanket is one of those projects that really lives up to its name—it started as a dream, turned into a design challenge, and became a beloved, modern heirloom.

It’s:

  • A color lover’s playground
  • A huge confidence booster if you’re new to intarsia
  • A perfect excuse to dive into your stash or treat yourself to new yarn

However you choose to knit it—faithfully following Anne’s color layout or creating a completely custom palette—I hope this blanket brings you as much joy as it’s brought to us.

Now grab your yarn, wind those butterflies, and let’s knit something unforgettable. 🧶💗

❤️ Your BiCrafty Bestie,
Marly Bird

A cartoon avatar of a person with glasses and a brown bun smiles warmly. Their green shirt and black jacket add a stylish touch, while colorful hearts surround them like loving temperature blankets, stitching together an aura of love and positivity. -Marly Bird

Filed Under: Chic Sheep by Marly Bird Patterns, Free Patterns, Knitting, Marly Bird Premium Patterns, Our Free Patterns, Pattern, Tips, Tricks, Techniques for Knitting and Crochet

  • 1
  • 2
  • 3
  • …
  • 151
  • Next Page »

Let's Be Social

Join the Marly's Minions Facebook group to share, ask questions, or chat about all of your yarn related crafts!

Join the group
Cartoon of a smiling woman with brown hair in a bun, glasses, black jacket and green shirt, waving next to large "hi" text.

Quick Links

The Pattern Shop

Our Free Patterns

Blog

Marly Bird House

Learn to Knit & Crochet

About

Giveaway Terms and Privacy Notice

Find Us Everywhere

Join the Newsletter

YouTube Channel

Marly's Minions FB Group

Etsy Store

Ravelry Store


AN ELITE CAFEMEDIA HOME/DIY PUBLISHER

Information from your device can be used to personalize your ad experience. Do not sell or share my personal information.

Privacy Policy   Terms   Marly Bird Legal Documents Copyright © 2026