Some crochet hats are cute. Some crochet hats are cozy. And then there are crochet hats that make you stop mid-row and say:
“Okay… THAT stitch though.” 😍
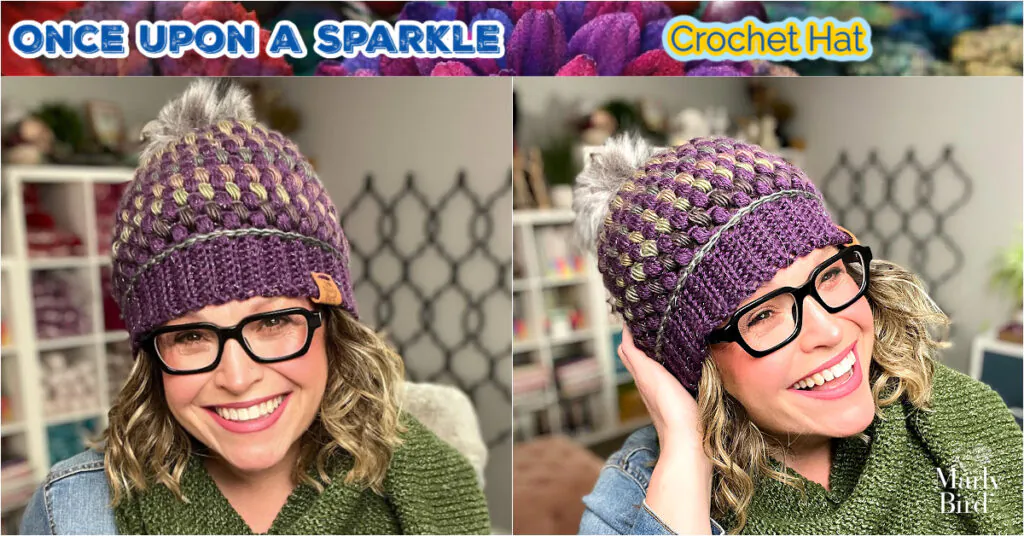
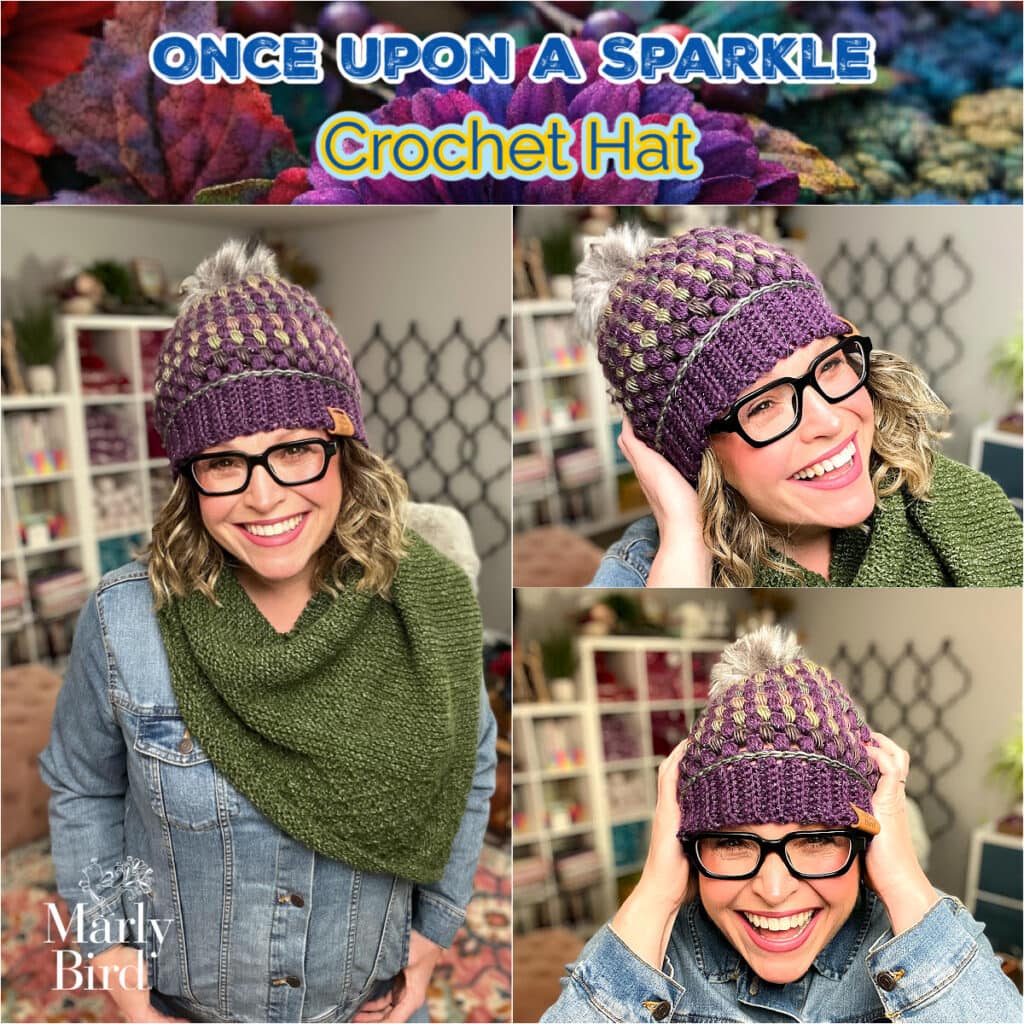
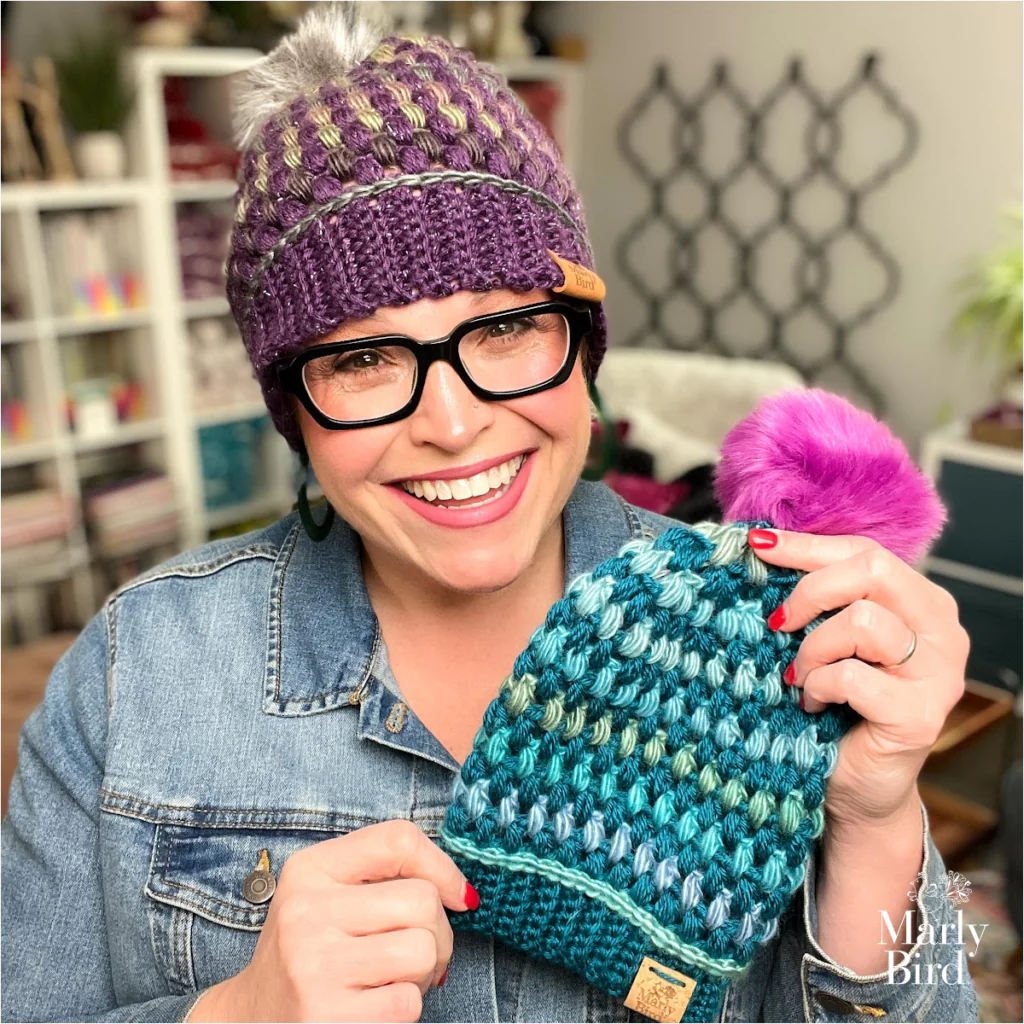
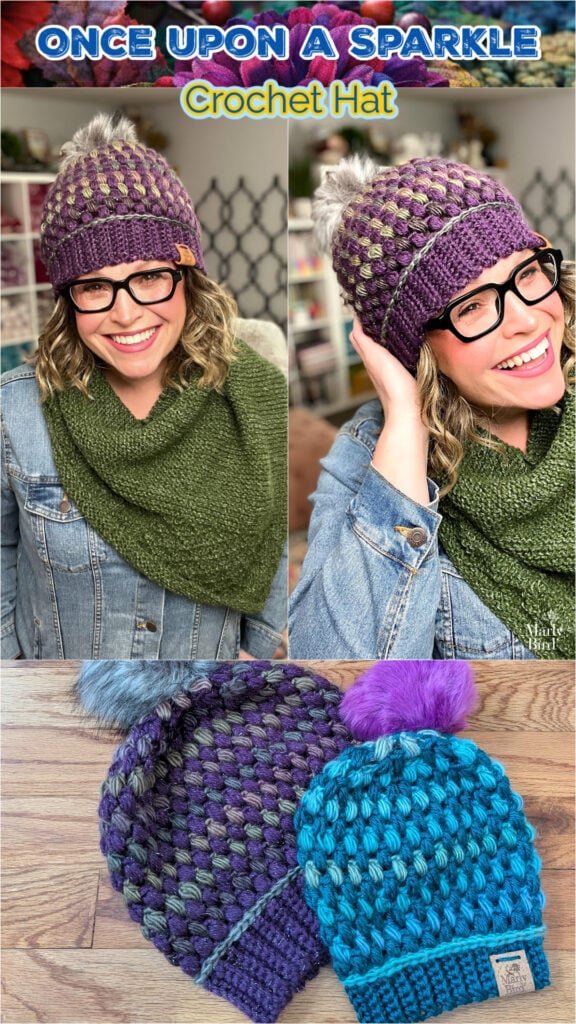
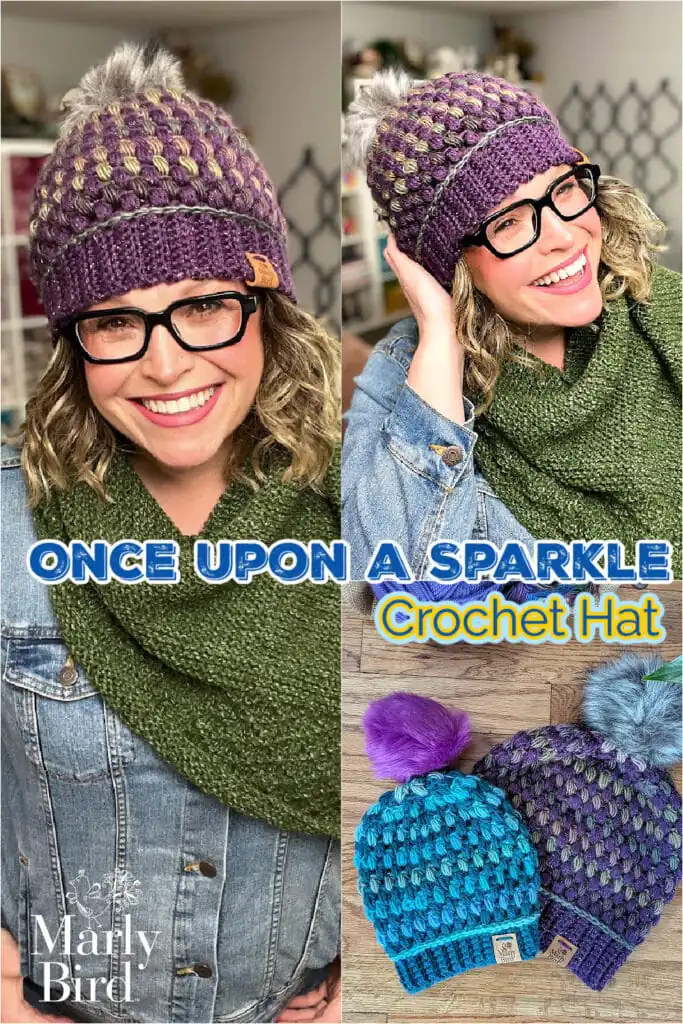
The Once Upon a Sparkle Crochet Hat is absolutely that hat. This free crochet hat pattern brings bold puff stitch texture together with a classic ribbed brim to create a design that’s playful, modern, and genuinely wearable. It’s fun to make, satisfying to finish, and (bonus!) looks great on everybody.
Whether you’re crocheting for yourself, for gifts, or because you just want an excuse to play with texture, this hat delivers.
Quick Pattern Overview
The Once Upon a Sparkle Crochet Hat is worked in the round, starting with a stretchy ribbed brim and transitioning into a beautifully textured puff stitch body. Two colors are carried up the side, giving you that eye-catching look without a pile of yarn ends to weave in (we love that for us 🙌).
In this post, you’ll learn:
Why puff stitches are such a texture win
How the ribbed brim helps the hat actually stay put
What makes this pattern size-inclusive
Easy ways to customize your finished hat
Where to find video support if you want it
Who This Pattern Is Perfect For 🧶
This pattern is a great fit if you:
Love textured crochet stitches
Want a hat that feels “special” but not stressful
Enjoy patterns with clear repeats
Want sizing that actually works for real humans
Appreciate video support when learning new stitches
If you can single crochet and are ready to try puff stitches, you’re more than ready for this one 💪
Why Puff Stitches Steal the Show ✨
Puff stitches add instant drama—in the best way. They create a raised, plush texture that makes even simple shapes feel extra special. In this hat, the puff stitches are worked in repeating rounds, so once you find the rhythm, it’s smooth sailing.
Paired with a snug ribbed brim, the result is a hat that looks fancy but feels friendly—and stays comfortably in place when you wear it.
What You Will Love About This Pattern 💖
Free crochet hat pattern
Bold puff stitch texture
Stretchy ribbed brim for comfort
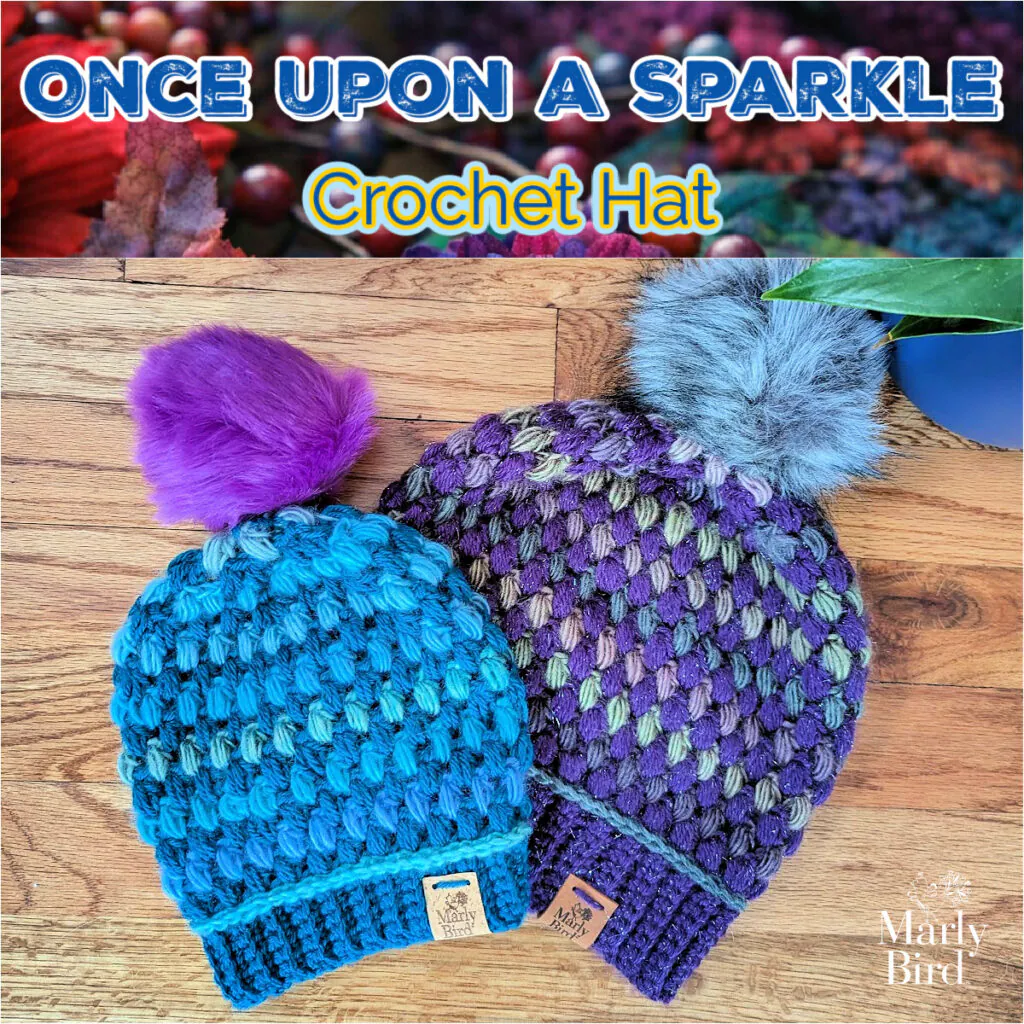
Sizes from baby through adult
Optional pom pom and leather tag
Video tutorials included (because I’ve got you 😉)
✨ Designer Tip: Puff stitches love consistency—relax your hands, keep your loops even, and let the texture do the work.
Colors are carried up the side (no cutting every round 🎉)
Ribbing gives a comfy, stay-put fit
Yarn Notes & Custom Touches
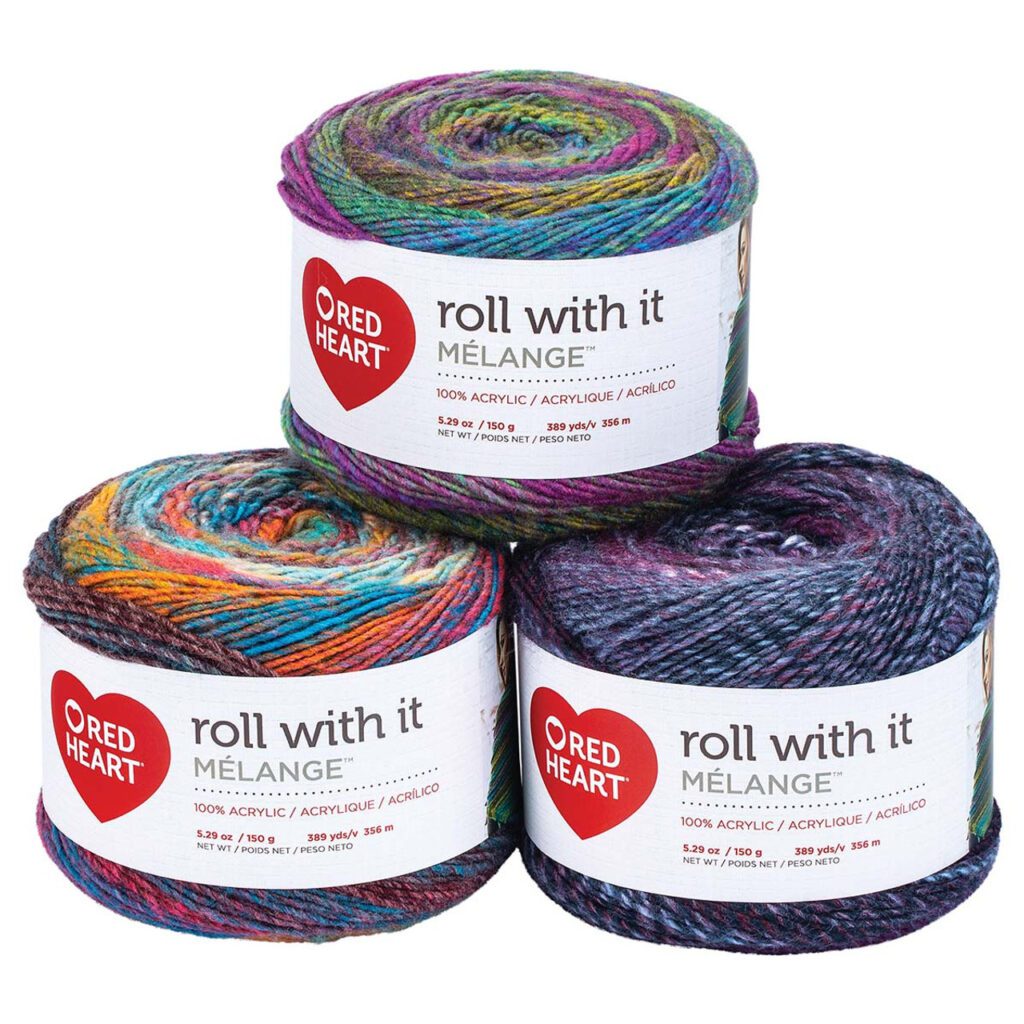
The original sample used Red Heart Sparkle Soft and Red Heart Unforgettable. Sparkle Soft has since been discontinued, but no worries—this pattern works beautifully with other worsted-weight yarns that have good stitch definition.
⭐️ 3 Half Double Crochet Cluster (3 hdc-cl): *Yarn over hook, insert hook into indicated stitch, yarn over and pull up a loop; repeat from * twice more in same st, yarn over and draw through all 7 loops on hook.
⭐Back Loop Only (blo): This is the furthest loop to you of the top 2 loops of the stitch indicated, regardless if you are on the RS or WS.
⭐️Chain (Ch): With slip knot or free loop on hook, yarn over hook and pull through loop on hook.
⭐️Single Crochet (Sc): Insert hook into indicated stitch, yarn over and pull up a loop, yarn over and draw through 2 loops on hook.
⭐️Slip Stitch (Sl st): Insert hook into indicated stitch, yarn over and pull up a loop and draw through loop on hook.
⭐️Single Crochet Two Together (Sc2tog): *Insert hook into indicated stitch, yarn over and pull up a loop; repeat from * in next stitch indicated, yarn over and draw through all 3 loops on hook.
Directions are for size Baby; changes for sizes (Toddler-Child, Adult Small-Medium, Adult Large-Extra Large) are in parentheses. When only one number is given then that number applies to all sizes.
Brim of the hat is worked flat then seamed together before starting on the body of the hat.
Body of the hat is worked into the long side edge of the brim as instructed.
Body of the hat is worked in joined rounds. Use a marker to identify the first stitch of each round. Do not turn at the end of each round.
Do not cut colors, carry the color up the side of the project.
GROW
To Unlock Exclusive Subscriber Content click the Box below and join for free by simply adding your email and creating a password! If you are having troubles, clear your cache or reset your password or login to the Grow Publisher Portal.
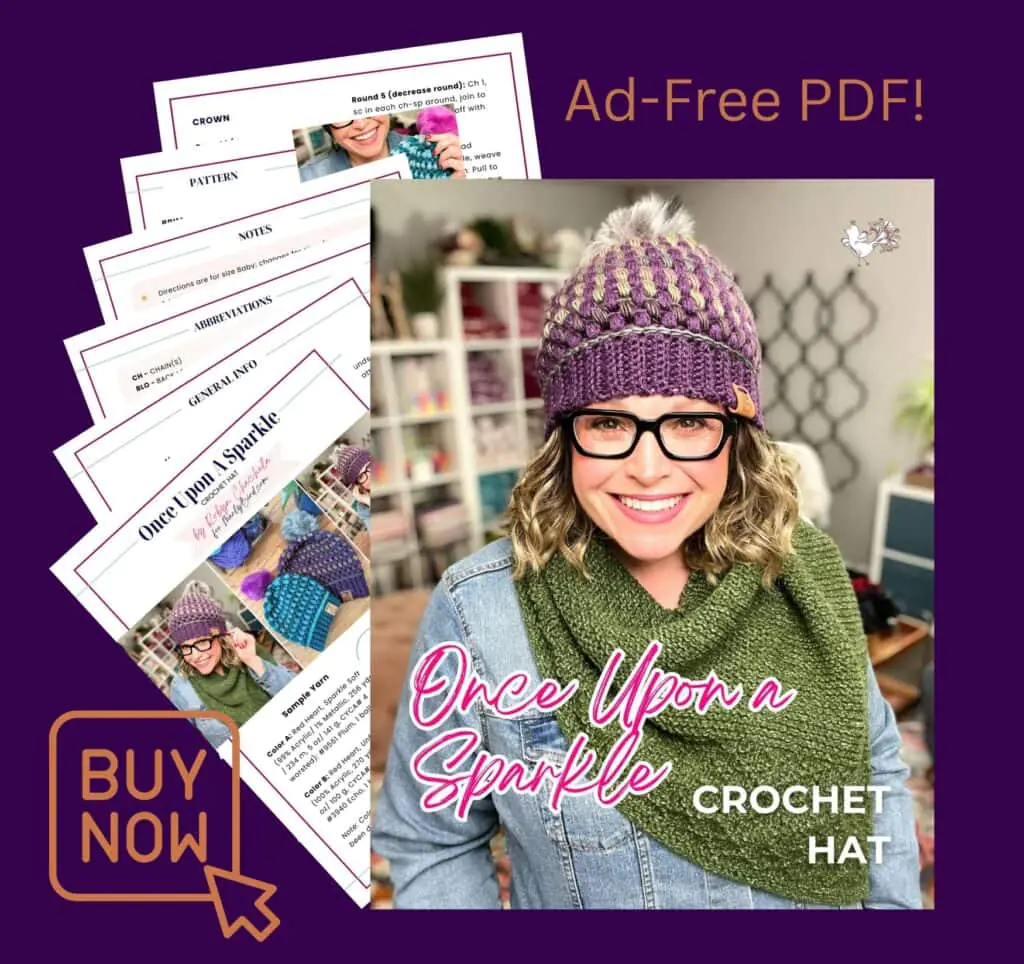
I'm thrilled to share this amazing pattern with you, many patterns on my blog are absolutely free! I kindly request that you don't copy and paste or distribute this pattern. Prefer an ad-free experience? Buy a digital PDF pattern for a small fee from one of my online stores for a seamless crafting journey.
I appreciate your support and readership. You are the reason I can keep doing what I love and sharing it with others. So, thank you from the bottom of my yarn-loving heart! Disclosure: This post contains affiliate links, meaning I get a commission if you decide to make a purchase through my links at no cost to you.
Row 1 (RS): Sc in 2nd ch from hook and in each ch across, turn — 6 (8, 10, 10) sc.
Row 2: Ch 1, sc-blo in each sc across, turn.
Repeat row 2, 46 (54, 62, 70) times more —48 (56, 64, 72) rows.
Joining Row: Ch 1, *slip stitch into the front loop of next st and next ch on foundation ch at the same time: repeat from * across, do not turn, do not fasten off.
BODY
Turn to begin working on long edge of brim (around the row ends), with color A ch 1.
Set-up Round (RS): Evenly place 48 (56, 64, 72) sc along long side of brim, join to first sc (begin working in the round), do not turn throughout.
Round 1: With color A, ch 2, *3 hdc-cl in next sc, ch 1, skip next sc; repeat from * around, join to first st with sl st, sl st in next ch-1 sp, change color to B – 24 (28, 32, 36) ch-1 sps. Round 2: Ch 2, *3 hdc-cl in ch-sp, ch 1, skip next st; repeat from * around, join to first st with sl st, sl st in next ch-1 sp, change color to A.
Round 3: Ch 2, *3 hdc-cl in ch-sp, ch 1, skip next st; repeat from * around, join to first st with sl st, sl st in next ch-1 sp, change color to B.
Repeat rounds 2-3 until hat measures approx. 4.75 (5.5, 5.5, 6.25 )” [12 (14, 14, 16) cm] not including brim or to desired length, ending after a round 2.
CROWN
Round 1 (decrease round): Ch 2, *[3 hdc-cl in ch-sp, ch 1, skip next st] twice, 3 hdc-cl in next ch-sp, skip next st, 3 hdc-cl in next ch-sp, ch 1, skip next st; repeat from * around, join to first st with sl st, sl st in next ch-1 sp, change color to B – 18 (21, 24, 27) ch-1 sps.
Round 2 (decrease round): Ch 2, *3 hdc-cl in next ch-sp, skip next st, 3 hdc-cl in next ch-sp, ch 1, skip next sts, 3 hdc-cl in ch-sp, ch 1, skip next st; repeat from * around, join to first st with sl st, sl st in next ch-1 sp, change color to A – 12 (14, 16, 18) ch-1 sps.
Round 3 (decrease round): Ch 2, *3 hdc-cl in next ch-sp, skip next st, 3 hdc-cl in next ch-sp, ch 1, skip next sts; repeat from * around, join to first st with sl st, sl st in next ch-1 sp, change color to B – 6 (7, 8, 9) ch-1 sps.
Round 4 (decrease round): Ch 2, *3 hdc-cl in next ch-sp, ch 1, skip next sts; repeat from * around, join to first st with sl st, sl st in next ch-1 sp, change color to A – 6 (7, 8, 9) ch-1 sps.
Round 5 (decrease round): Ch 1, sc in each ch-sp around, join to first sc with sl st, fasten off with long tail- 6 (7, 8, 9) sc.
With the color A tail thread through a tapestry needle, weave yarn through every stitch. Pull to tighten the hat and close. Weave yarn around stitches, then back in the opposite direction to secure the end.
FINISHING
BRIM EDGING DETAIL (Optional)
With color B, insert hook from RS under the top 2 loops of any sc on the Set-up Round of body to WS around post of sc to front under the top 2 loops of next sc, yarn over with yarn on RS, pull up a loop, yarn over and draw through 2 loops on hook, *insert hook from RS to WS to RS under the top 2 loops of next sc, yarn over with yarn on RS, pull up a loop, yarn over and draw through 2 loops on hook; repeat from * around, sl st to first sc, fasten off and weave in ends.
(Optional) Add pom pom and Leather Tag with Leather Rivets
The Once Upon a Sparkle Crochet Hat is joyful, cozy, and just the right amount of extra. It’s the kind of project that reminds you why texture is so fun—and why handmade hats are always a good idea.
If you make one, I’d love to see it 💕 #mmmdi #marlybird
❤️ Your BiCrafty Bestie, Marly Bird
SEO Title: Free Crochet Hat Pattern – Once Upon a Sparkle Puff Stitch Hat SEO Slug: free-crochet-hat-pattern-once-upon-a-sparkle Meta Description: Make the Once Upon a Sparkle Hat with this free crochet hat pattern. A cozy puff stitch design with bold texture, a stretchy ribbed brim, and sizes for everyone. Focus Keyword: free crochet hat pattern
Secondary Keywords: crochet puff stitch hat textured crochet hat crochet hat with ribbed brim crochet hat pattern all sizes
Social Title: Free Crochet Hat Pattern – Once Upon a Sparkle ✨ Social Description: Puff stitches, cozy texture, and a stretchy brim—this free crochet hat pattern is fun to stitch and easy to love!
Some crochet projects are about speed. Some are about learning. And some are about settling in, slowing down, and enjoying every stitch. 💕
The Farrago Crochet Shawl is definitely that third kind. This free crochet shawl pattern is textured, rhythmic, and incredibly satisfying to work—perfect for cozy evenings, long rows, and that “just one more row” feeling.
Quick Pattern Overview
The Farrago Crochet Shawl is a classic triangle shawl worked from the top down using a mix of double crochet, half double crochet, treble crochet, and chain spaces. The stitch pattern creates a beautiful blend of structure and openness that drapes like a dream.
In this post, you’ll learn:
How triangle shawl construction works
Why repeating sections are so relaxing
How stitch diagrams support visual learners
Easy ways to adjust size and drape
Helpful tips for finishing your shawl
Why This Shawl Feels So Good to Make
The word Farrago means a mixture—and that’s exactly what this shawl delivers. Structured stitches meet airy spaces, giving you texture without heaviness and warmth without bulk.
The repeating sections make it easy to find your flow, while the stitch diagram is there if you like seeing the pattern laid out visually.
Affiliate Disclosure:This post contains affiliate links. To learn more please visit my privacy policy here💖
What You Will Love About This Pattern 💖
Free crochet shawl pattern (here on the blog)
Classic triangle shape
Relaxing, repeating rows
Stitch diagram included
Easy size adjustments
Beautiful drape with worsted-weight yarn
✨ Designer Tip: Shawls are the perfect playground for stitch patterns—no fitting stress, just pure stitchy joy.
Take a few minutes to read through the pattern before starting. Even if you don’t understand every instruction right away, reading the pattern once from top to bottom will help you see how the rows repeat and how the shawl grows. Many questions answer themselves once you see the big picture.
This shawl is worked from the top center outward in rows. You’ll begin at the very top point of the triangle and increase on every row to create the shape. The shawl gets wider and deeper at the same time, which is what creates that classic triangular look.
The corner space is the key to the whole pattern. Every row includes a corner made by working (3 double crochet, chain 3, 3 double crochet) into the same space. This is what forms the center point of the shawl. ✨ Tip: Place a stitch marker in the corner chain-3 space and move it up each row. This makes it much easier to stay oriented.
The pattern uses a repeating row sequence. After the setup rows, you’ll repeat the same group of rows over and over. Once you’ve completed a full repeat a couple of times, you may notice that the pattern starts to feel familiar and rhythmic — that’s a good sign!
Turning chains matter. Turning chains are not just there to get you to the right height — they often count as stitches or create spaces that you work into on the next row. Pay close attention to whether the pattern says to work into the turning chain or into a chain space.
Focus on where stitches go, not just how many there are. Many stitches are worked into chain spaces instead of individual stitches. If your stitch count seems off, check that you’re placing stitches into the correct spaces before pulling anything out.
Exact gauge is not critical for a shawl. Because this is not a fitted garment, being slightly off gauge won’t ruin the project. What matters most is that you like the fabric you’re creating. If it feels too stiff, go up a hook size. If it feels too loose, go down a hook size.
You can make the shawl larger or smaller. To adjust the size, simply work more or fewer repeats of the repeating rows. Always stop after completing a full repeat so the edges stay neat and balanced.
Row counts are more reliable than measurements while working. Measuring a shawl while it’s unblocked can be misleading. Counting rows and repeats will give you a more accurate sense of progress.
Blocking is not optional for this design. Blocking opens up the stitch pattern, smooths edges, and gives the shawl its final shape. Your shawl may look slightly bunched or uneven before blocking — that’s completely normal.
BEGINNER TIPS FOR SUCCESS
✨ Designer Tip: Use lifelines if you’re nervous. Running a scrap piece of yarn through the stitches at the end of a repeat gives you a safe place to rip back to if needed.
✨ Designer Tip: Mark the right side. If the pattern has a right and wrong side, place a removable stitch marker on the right side so you always know which side you’re working on.
✨ Designer Tip: Count at the end of each row. Taking 10 seconds to count stitches or pattern repeats at the end of a row can save you a lot of time later.
✨ Designer Tip: Don’t be afraid to frog. Everyone pulls out stitches — even designers. Frogging is part of the process, not a failure.
✨ Designer Tip: Use smooth yarn while learning. If this is your first shawl, smooth or lightly variegated yarn makes it easier to see stitches and spot mistakes.
✨ Designer Tip: Relax into the rhythm. Once the pattern repeat clicks, this shawl becomes a great “sit and stitch” project. Just pause at row changes to stay on track.
To Unlock Exclusive Subscriber Content click the Box below and join for free by simply adding your email and creating a password! If you are having troubles, clear your cache or reset your password or login to the Grow Publisher Portal.
I'm thrilled to share this amazing pattern with you, many patterns on my blog are absolutely free! I kindly request that you don't copy and paste or distribute this pattern. Prefer an ad-free experience? Buy a digital PDF pattern for a small fee from one of my online stores for a seamless crafting journey.
I appreciate your support and readership. You are the reason I can keep doing what I love and sharing it with others. So, thank you from the bottom of my yarn-loving heart! Disclosure: This post contains affiliate links, meaning I get a commission if you decide to make a purchase through my links at no cost to you.
Row 1: Ch 5, (3 dc, ch 3, 3 dc, ch 1, tr) in ring, pull ring closed, turn.
Row 2: Ch 4, sc in ch-1 sp, ch 3, (sc, ch 3, sc) in ch-3 sp, ch 3, (sc, ch 1, hdc) in tch-sp, turn.– 3 ch-3 sps.
Row 3: Ch 5, 3 dc in ch-1 sp, 3 dc in next ch-3 sp, (3 dc, ch 3, 3 dc) in corner ch-3 sp (optional: place marker in ch-3 sp just made to mark corner), 3 dc in next ch-3 sp, (3 dc, ch 1, tr) in tch-sp, turn.– 6 groups of 3 dc.
Row 4: Ch 4, sc in ch-1 sp, [ch 3, sc between next 2 groups of 3dc] repeat to corner, ch 3, (sc, ch 3, sc) in corner ch-3 sp (optional: move marker to ch-3 just made to mark corner), [ch 3, sc between next 2 groups of 3dc] repeat to last 3dc group, ch 3, (sc, ch 1, hdc) in tch-sp, turn. —7 ch-3 sps.
Row 5: Ch 5, 3 dc in ch-1 sp, [ch 1, dc in next ch-3 sp, ch 1, 3 dc in next ch-3 sp] repeat to 1 ch-3 sp before corner, ch 1, dc in next ch-3 sp, ch 1, (3 dc, ch 3, 3 dc) in corner ch-3 sp (optional: move marker to ch-5 sp just made to mark corner), [ch 1, dc in next ch-3 sp, ch 1, 3 dc in next ch-3 sp] repeat to last ch-3 sp, ch 1, dc in last ch-3 sp, ch 1, (3 dc, ch 1, tr) in tch-sp, turn. — 9 ch-1 sps.
Row 6: Ch 4, [sc in next ch-1 sp, ch 3] repeat to corner, (sc, ch 3, sc) in corner ch-3 sp (optional: move marker to ch-3 sp just made to mark corner), [ch 3, sc in next ch-1 sp] repeat to tch-sp, ch 3, (sc, ch 1, hdc) in tch-sp, turn.–11 ch-3 sps.
Row 7: Ch 5, 3 dc in ch-1 sp, 3 dc in each ch-3 sp to corner, (3 dc, ch 3, 3 dc) in corner ch-3 sp (optional: move marker to ch-3 sp just made to mark corner), 3 dc in each ch-3 sp to tch-sp, (3 dc, ch 1, tr) in tch-sp, turn.– 14 groups of 3 dc.
“My edges look uneven — is that normal?” Yes! Shawl edges often look wobbly before blocking. As long as you’re following the pattern and placing stitches correctly, blocking will straighten everything out.
“I lost track of my repeat — what should I do?” Stop, place a stitch marker where you are, and compare your work to the last completed row. Look for the corner space and work outward from there.
“Can I change yarn?” Absolutely. Just choose a yarn with similar weight and drape, and check that you like the fabric with your chosen hook.
FREQUENTLY ASKED QUESTIONS (FAQ)
Is this pattern suitable for beginners? This pattern is best for adventurous beginners who are comfortable with basic crochet stitches like double crochet and working in rows. If this is your first shawl, take your time, read through the Notes, and don’t be afraid to pause and check your work as you go.
Do I need to get exact gauge for this shawl? No — exact gauge is not critical for a shawl. What matters most is that you like the fabric you’re creating. If your stitches feel too tight or stiff, try a larger hook. If the fabric feels too loose, go down a hook size.
How do I know if I’m placing stitches in the right spot? Many stitches in this pattern are worked into chain spaces rather than into individual stitches. Focus on where the pattern tells you to place stitches, especially around the corner space, instead of counting every stitch.
What if my stitch count doesn’t match? First, check that you didn’t miss or add stitches at the beginning or end of the row, especially around the turning chain. If the mistake is only a stitch or two and the fabric still looks correct, it’s often safe to continue.
Can I make the shawl larger or smaller? Yes! To adjust the size, simply work more or fewer repeats of the repeating rows. Always finish after completing a full repeat so the stitch pattern stays balanced and the edges remain neat.
Do I have to block the shawl? Yes — blocking is highly recommended. Blocking opens up the stitch pattern, smooths the edges, and helps the shawl drape properly. The shawl will look noticeably better after blocking.
What is the best way to block this shawl? Wet blocking works best for this design. Soak the shawl in lukewarm water with a gentle wool wash, gently squeeze out excess water, then lay it flat and pin it to shape. Allow it to dry completely.
My edges look uneven — did I do something wrong? Uneven edges are very common before blocking, especially on triangular shawls. As long as you followed the pattern and maintained the corner increases, blocking will even everything out.
Can I substitute a different yarn? Absolutely. Any yarn with similar weight and good drape will work. Smooth yarns highlight stitch definition, while color-changing yarns emphasize movement in the fabric.
How long does this shawl take to make? This varies by experience level and available stitching time. Many crocheters find it’s a great project to work on over several relaxed sessions, especially once the repeat becomes familiar.
Helpful Skills & Tutorials
If this is your first triangle shawl—or your first time working from a chart—you’re in good hands. The pattern references:
The Farrago Crochet Shawl is calm, cozy, and deeply satisfying—exactly the kind of project that reminds you why you love crochet in the first place. If you enjoy texture, rhythm, and a little me-time with your hook, this shawl belongs on your list.
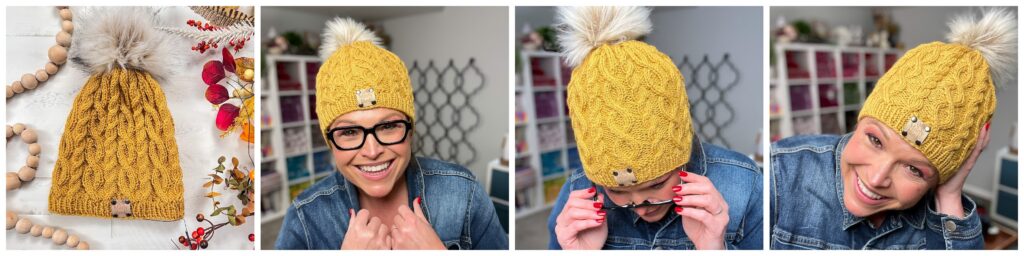
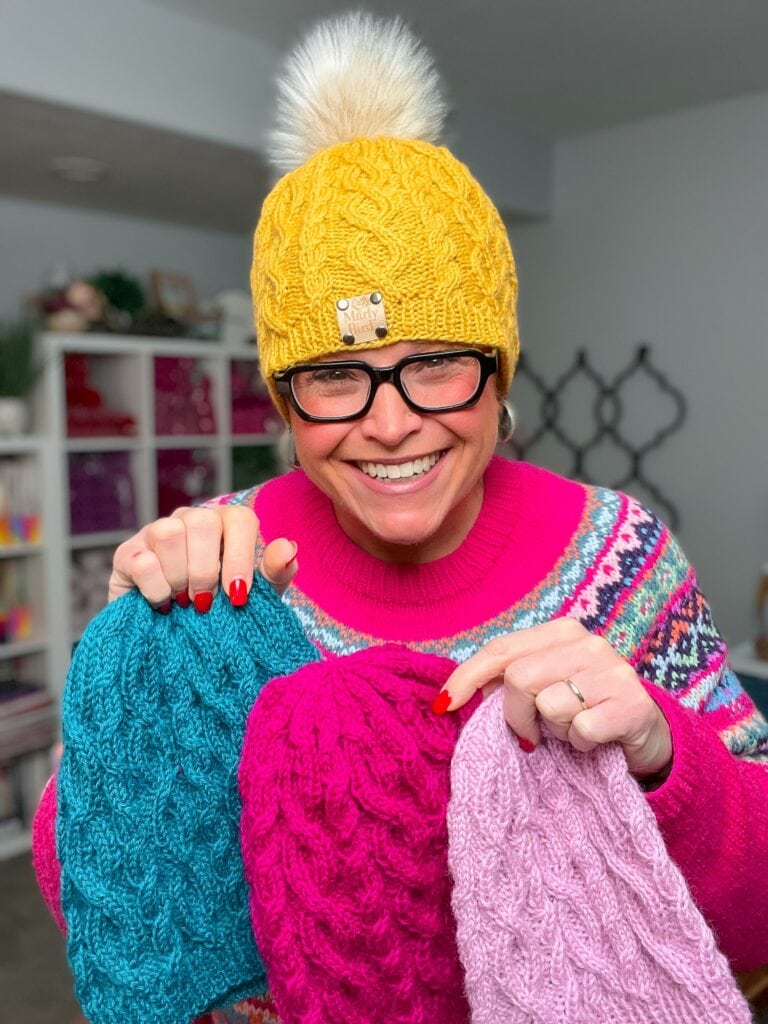
There’s something extra special about a project that feels grounded — literally. Cozy cables, real wool, and a design that invites you to slow down and enjoy the stitches. The Keystone Cable Knit Hat was created for Turkey Trot 2025 with exactly that in mind: a comforting, confidence-building knit that feels just as good on your needles as it does on your head.
This is one of those hats you’ll reach for again and again — to knit, to gift, and to wear — because the design is timeless, the cables are approachable, and the finished fabric is beautifully stretchy and comfortable.
Quick Pattern Overview
The Keystone Cable Knit Hat is a bottom-up knit hat worked in the round, featuring bold yet easy-to-memorize cable panels that behave like ribbing for a flexible, comfortable fit.
In this post you’ll learn:
Why this cable pattern is perfect for adventurous beginners
How the design evolved from a larger garment project
Yarn options and how fiber choice changes the finished hat
Styling ideas to make the hat uniquely yours
Affiliate Disclosure:This post contains affiliate links. To learn more please visit my privacy policy here💖
A Confidence-Building Take on Cables
Cables don’t have to be complicated to be impressive. The Keystone Cable Knit Hat was designed as a study in cable stitches — bold, structured, and visually striking, without being intimidating.
The cable panels are rhythmic and easy to remember, which means you spend less time staring at instructions and more time enjoying the flow of the knitting. It’s an ideal introduction to working cables in the round, and yes — you can absolutely work these cables with or without a cable needle.
✨ Designer Tip: Skipping the cable needle once you’re comfortable can dramatically speed things up and make this hat a fantastic “TV knitting” project.
What You Will Love About This Pattern
Adventurous beginner–friendly cable work
Worked in the round from the bottom up
Bold, defined cables that stretch comfortably when worn
Multiple sizes included for a wide range of heads
Optional double brim for extra warmth
Pom-pom friendly (or leave it clean and classic)
Easy to customize with labels or embellishments
📌 Turkey Trot 2025 Workshop here (Access inside the Marly Bird House with unlimited viewing and bonus material)
“This is the kind of cable hat that makes you feel proud while you’re knitting it — and even prouder when you wear it.”
Marly Bird
Design, Fit, and Construction Details
The Keystone Cable Knit Hat is designed to fit snugly while still being incredibly comfortable. The cable panels act like ribbing, allowing the fabric to stretch significantly when worn and relax beautifully when off the needles.
Because of that stretch, the hat feels secure without being tight, making it great for everyday wear — from brisk fall walks to chilly winter errands. You can also adjust the height easily, creating a more fitted or slouchy look depending on your style.
Yarn Choices & Fiber Notes
For Turkey Trot 2025, this hat was intentionally designed using Universal Yarns Deluxe Worsted, a natural wool yarn that highlights the structure and definition of the cables beautifully.
Why wool works so well here:
Excellent stitch definition for cables
Natural elasticity enhances the stretch of the design
Warm without being bulky
That said, this pattern is flexible. If you prefer an acrylic or wool-blend yarn, you can absolutely substitute — just know that fiber choice will affect drape, warmth, and stitch crispness.
If you’re looking for great worsted-weight substitutions, these are solid options that work beautifully for cable projects:
Strong, architectural cable panels that feel modern and timeless
Optional double brim for added warmth
Pom-pom ready crown (faux fur looks fabulous here 😄)
Easy to personalize with a removable pom or a leather label
Adding a small leather tag with rivets is a simple way to give this hat a polished, handmade-boutique feel — perfect for gifting or personal wear.
Keystone Cable Knit Hat Pattern Details
Designed by Marly Bird
SKILL LEVEL
Adventurous Beginner
MEASUREMENTS
To Fit Sizes
Baby – Toddler (Child, Teen – Adult S, Adult M – Adult L)
Sample is size Adult M-Adult L
To fit head circumference ranges:
12 – 14¼ (14¼ – 16½, 16½ – 19½ , 19½ – 22½ )”
[30.5 – 36 (36 – 42, 42 – 49.5, 49.5 – 57) cm]
Finished Measurements
Note: Hat fabric is extremely stretchy. The Cable Panels pattern behaves like a rib and so the measurements are flexible. The circumference of the Hat can grow up to 25-30% when worn, so be sure to choose a size that is smaller than your real head circumference when laid flat.
Circumference when laid flat:11½ (13¾, 16, 18¼)” [37 (44.5, 51.5, 59) cm]
Kfb – Knit into the front and back of the same stitch (see Special Stitches)
P – Purl
P2tog – Purl 2 together
Pfb – Purl into the front and back of the same stitch (see Special Stitches)
RS – Right Side
Sl – Slip
Ssk – Slip, slip, knit (see Special Stitches)
St(s) – Stitches
WS – Wrong side
SPECIAL STITCHES
⭐️ Ssk (Slip, Slip, Knit): Slip 2 stitches, one at a time, as if to knit. Insert left hand needle into the front of these 2 stitches and knit them together from this position – 1 stitch decreased.
⭐️ Kfb (Knit Front & Back): Knit through front and back of next stitch – 1 stitch increased.
⭐️ Pfb (Purl Front & Back): Purl through front and back of next stitch – 1 stitch increased.
CABLE STITCHES
⭐️ 2/2 LC (2/2 Left Cable): Slip 2 sts onto cable needle and hold in front, k2 from left hand needle, k2 from cable needle.
⭐️ 2/2 RC (2/2 Right Cable): Slip 2 sts onto cable needle and hold in back, k2 from left hand needle, k2 from cable needle.
⭐️ 2/1 LPC (2/1 Left Purl Cable): Slip 2 sts onto cable needle and hold in front, p1 from left hand needle, k2 from cable needle.
⭐️ 2/1 RPC (2/1 Right Purl Cable): Slip 1 st onto cable needle and hold in back, k2 from left hand needle, p1 from cable needle.
Directions are for the smallest size; changes for larger sizes are in parentheses. When only one number is given then that number applies to all sizes.
Hat is worked in the round from the bottom up.
Hat fabric is extremely stretchy. The Cable Panels pattern behaves like a rib, and so the measurements are flexible. The circumference of the Hat can grow up to 25-30% when worn, so be sure to choose a size where the Hat is smaller, when laid flat, than your real head circumference.
Optional double-brim may increase the amount of yarn required.
To Unlock Exclusive Subscriber Content click the Box below and join for free by simply adding your email and creating a password! If you are having troubles, clear your cache or reset your password or login to the Grow Publisher Portal.
I'm thrilled to share this amazing pattern with you, many patterns on my blog are absolutely free! I kindly request that you don't copy and paste or distribute this pattern. Prefer an ad-free experience? Buy a digital PDF pattern for a small fee from one of my online stores for a seamless crafting journey.
I appreciate your support and readership. You are the reason I can keep doing what I love and sharing it with others. So, thank you from the bottom of my yarn-loving heart! Disclosure: This post contains affiliate links, meaning I get a commission if you decide to make a purchase through my links at no cost to you.
📌 Turkey Trot 2025 Workshop here (Access inside the Marly Bird House with unlimited viewing and bonus material)
Join round being careful to not twist cast-on edge, and place a marker to mark beginning of round.
Work in 1 x 1 Rib for ¾ (1, 1, 1)” [2 (2.5, 2.5, 2.5) cm].
For Double Brim Option Only:
Next Round: Knit.
Work in 1 x 1 Rib for the same number of rounds as in the first ribbed section, then work 2 additional rounds.
Fold brim to the wrong side so the cast on row is next to the row on the needles, and join the cast on edge to the working round as follows:
Next Round: *Insert right needle into next st on left needle and into the corresponding cast-on st at the same time and knit these two sts together; repeat from * for each st around.
BODY
Single Brim – Increase Round
For Size Teen – Adult S only:
Next Round (increase round): * Work 5 sts in established 1 x 1 Rib, pfb; repeat from * around.
Count:112 sts.
For Sizes Baby – Toddler, Child, and Adult M – Adult L Only:
Next Round (increase round): * Work 8 (10, x, 6) sts in established 1 x 1 Rib, kfb, Work 8 (10, x, 6) sts in established 1 x 1 Rib, pfb; repeat from * around.
Count:80 (96, x, 128) sts.
(Optional) Double Brim — Increase Round
For All Sizes:
Next Round (increase round): * Work 8 (10, 5, 6) sts in stockinette stitch, kfb, repeat from * around.
Count:80 (96, 112, 128) sts.
BODY OF HAT CABLES
For All Sizes:
Count:80 (96, 112, 128) sts.
Work evenly in Cable Panels pattern for 31 (39, 43, 41) rounds starting with pattern Round #11 (3, 11, 1), and ending after a pattern Round #5.
Adult M-Adult Large Please note:For a more petite hat, stop here and move to the crown. For a taller hat (which will also match the sample and the 10” height) add 12 more rounds. For reference: sample yellow hat is an Adult Medium-Large and is worked for 53 rounds ending after a pattern round 5. Before the crown shaping it measured 8.75″ tall and after the crown it is 10″ tall.
CROWN SHAPING
Note: Change to double-pointed needles when sts become too tight to fit around circular.
Use tapestry needle to slide tail knitwise through all remaining sts, then pull tight like a drawstring.
Thread yarn tail to inside and secure.
Weave in all loose ends. Attach pompom and leather tag (optional).
Styling & Wearability
This is a truly wearable cable hat. Dress it up with a wool coat and boots, or toss it on with a puffer jacket and sneakers. It works just as well for outdoor walks as it does for everyday errands.
Go classic with a solid color, bold with a faux fur pom-pom, or minimalist with a clean crown and subtle label — the Keystone Cable Knit Hat adapts to your style.
More Marly Bird Patterns You’ll Love
If you enjoy this style of knitting, you may also love:
These are great follow-up projects for knitters who want to continue building cable confidence.
Want to Build Your Cable Confidence?
If you’re ready to take cables further — from hats to garments — explore the technique-driven patterns and learning resources inside Marly Bird House, where skills are supported with clear instructions and video tutorials.
📌 Turkey Trot 2025 Workshop here (Access inside the Marly Bird House with unlimited viewing and bonus material)
Is the Keystone Cable Knit Hat beginner-friendly? Yes. This pattern is ideal for adventurous beginners who want to try cables in a supportive, approachable way.
Do I need a cable needle? No. You can use one if you like, but the cables can also be worked without a cable needle.
Is this hat knit in the round? Yes, it’s worked in the round from the brim up to the crown.
How stretchy is the finished hat? Very stretchy. The cable panels behave like ribbing and expand comfortably when worn.
Can I use acrylic yarn instead of wool? Absolutely. Wool offers the best stitch definition, but acrylic and blends will still work well.
Does the pattern include multiple sizes? Yes, it includes sizes ranging from baby through adult.
How long does it take to knit? Most knitters finish this hat in a weekend or a few relaxed evenings.
Can I add a pom-pom? Yes! Faux fur pom-poms are especially fun and easy to swap out.
Is this a good gift knit? Definitely — it’s classic, cozy, and easy to personalize.
Final Thoughts
The Keystone Cable Knit Hat proves that cables don’t have to be complicated to be stunning. It’s thoughtful, wearable, and designed to help knitters feel confident every step of the way.
If you make one (or three 😉), be sure to share it and let me know how it turned out. #marlybird #mmmdi
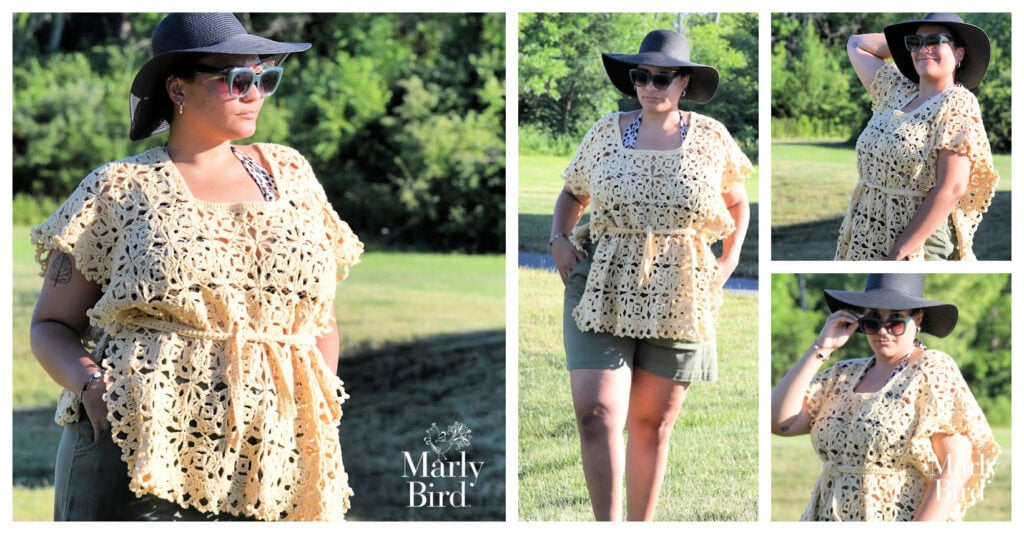
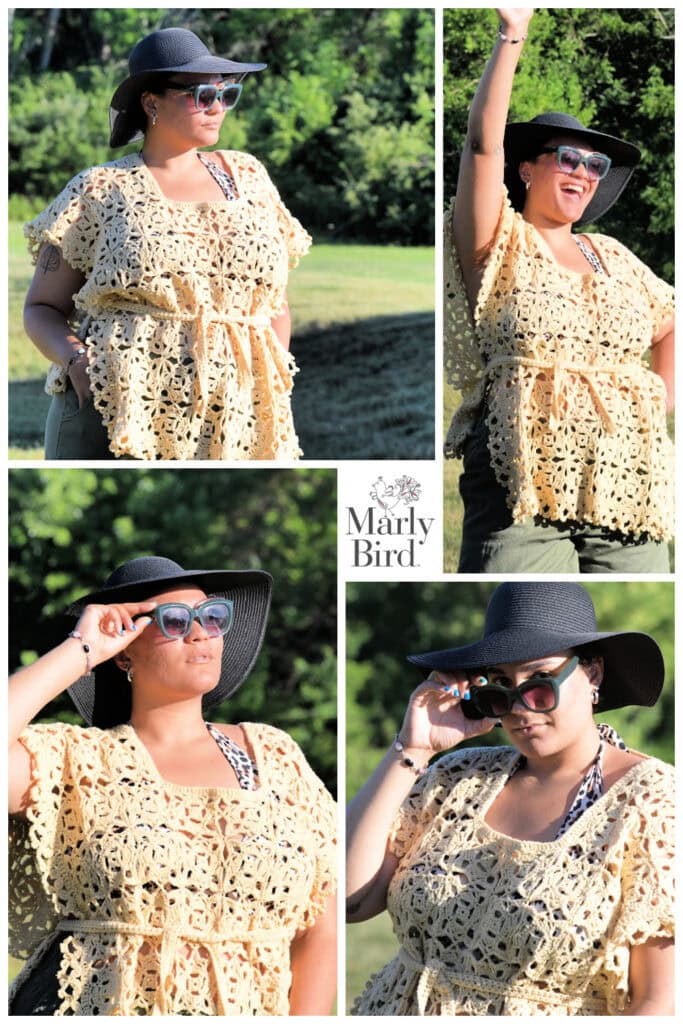
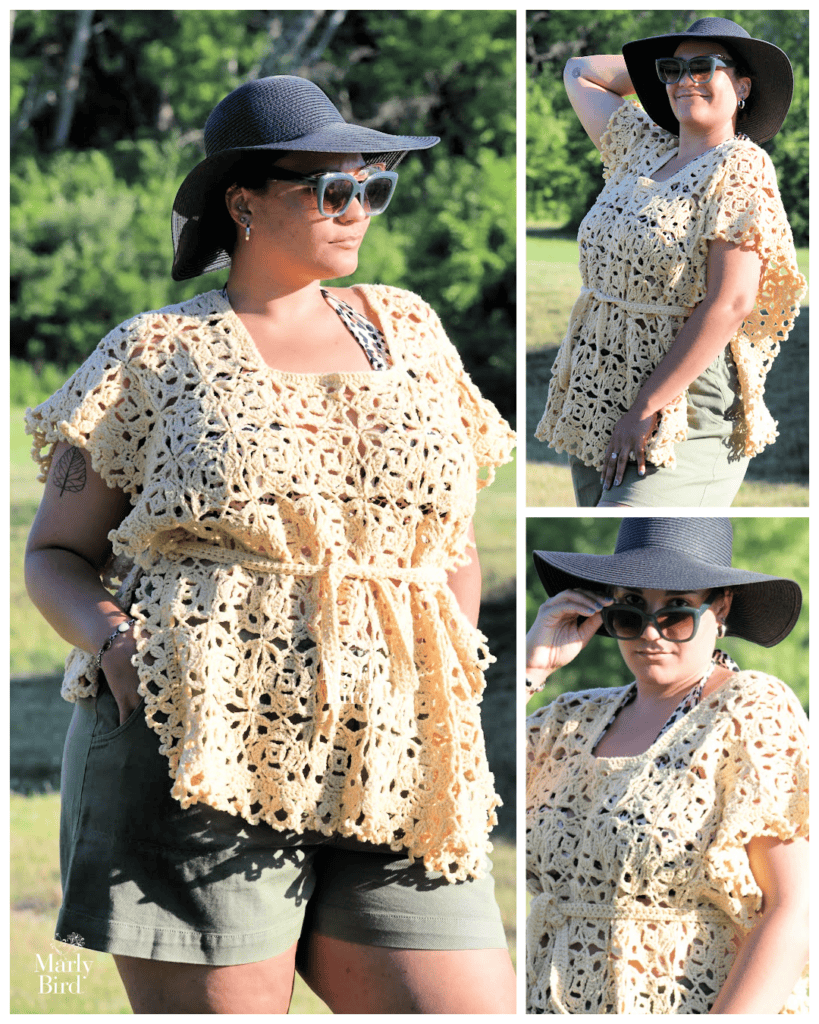
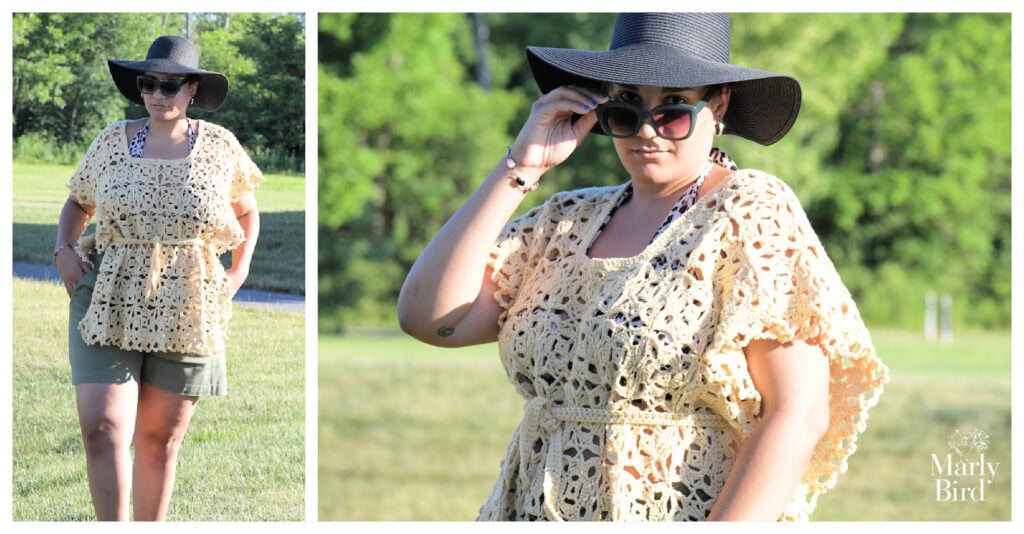
The Fun in the Sun Crochet Ruana is a free crochet ruana pattern designed as a lightweight summer cover-up. Worked in airy join-as-you-go motifs in a DK-weight wool/cotton blend, this beach cover-up drapes beautifully over a swimsuit, layers over a sundress on cool evenings, and packs flat for travel. Includes a written pattern, motif chart, schematic, optional belt, and full sizing notes.
Hey, bestie 💛 Some summer days call for nothing more than sunshine, a cool drink, and an easy layer you can toss on without thinking twice. The Fun in the Sun Crochet Ruana was designed for exactly those moments… whether you're heading poolside, strolling the beach, lounging on a cruise ship deck, or grabbing iced coffee after a swim.
Affiliate Disclosure:This post contains affiliate links. To learn more please visit my privacy policy here💖
Light, breezy, and effortlessly wearable, this free crochet ruana pattern brings together airy motifs and a thoughtful yarn choice to create a garment that feels relaxed but polished… the kind of handmade piece you'll reach for all summer long. If this is your first ruana, you might also love reading What Is a Crochet Ruana? (And Why You'll Want to Make One) before you cast on.
What You Will Love About This Pattern 💖
🌊 A true summer layering piece that works way beyond the beach… pool days, patio dinners, vacation outfits, and breezy summer mornings.
🧶 Join-as-you-go motifs mean no endless seaming. Once your motifs are done, your ruana is essentially done.
🌞 Open, airy stitch pattern with beautiful drape that lets the breeze move through the fabric on hot days.
👗 One size, infinitely styleable… wear it loose for boho flow or cinch it with the optional belt for a more defined waistline.
✈️ Packs flat for vacation… folds into a corner of a tote and shakes out without a wrinkle.
✨ Designer Tip: Lay your motifs out on a flat surface every 6 to 8 motifs as you work. It helps you visualize the rectangle taking shape and makes joining choices stress-free.
Quick Pattern Overview
This ruana is built from crochet motifs that are joined as you go, creating a flowing garment with minimal finishing and a beautiful drape. Here's the quick overview before you dive in:
🧶 Skill Level: Intermediate (confident with basic stitches and working in the round)
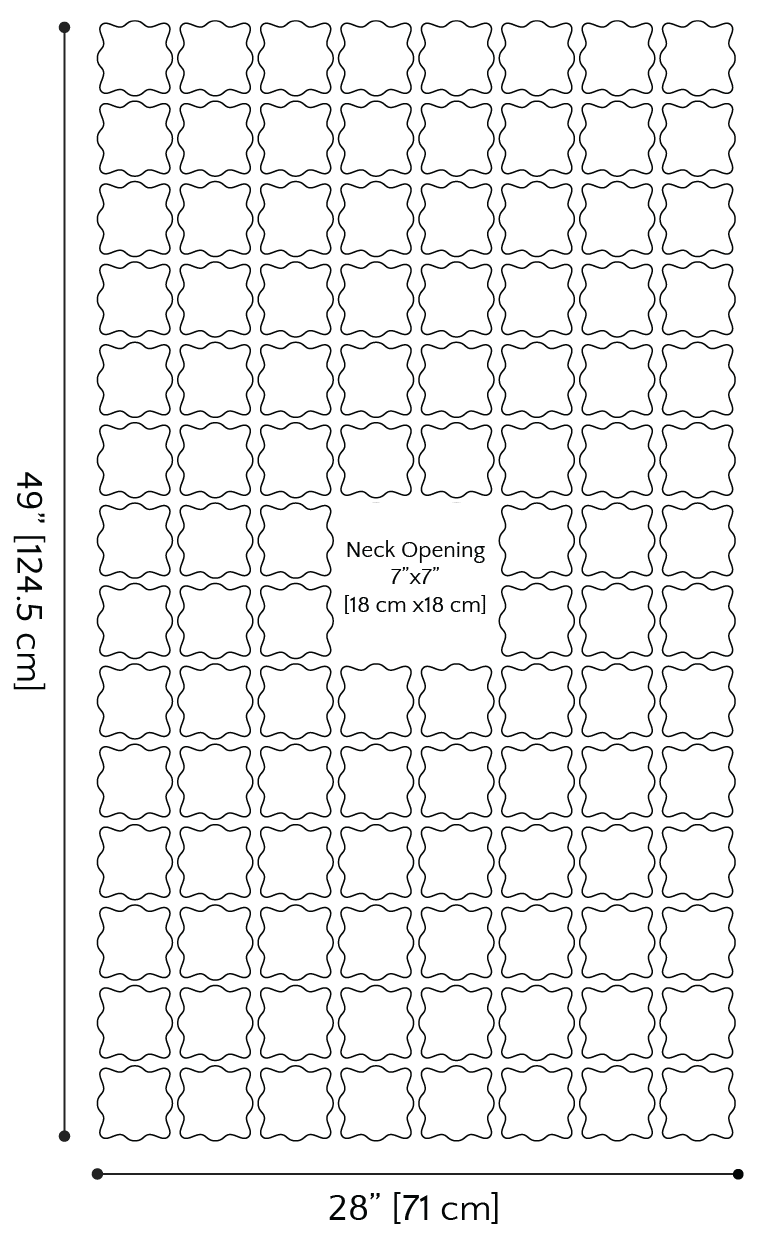
📏 Finished Measurements: 32″ wide × 53″ long [81.5 × 134.5 cm]… one size fits most
🪡 Hook: US H/8 (5 mm)
🧵 Yarn: Green Mountain Spinnery Comfort Cotton (DK weight, wool/organic cotton blend)… 10 hanks in Maize, or any DK-weight cotton or cotton blend
📐 Construction: Square motifs worked in the round and joined as you go, finished with neck and body edging plus an optional belt
⏳ Estimated Time: Most crocheters finish in two to four weeks of relaxed evening crochet
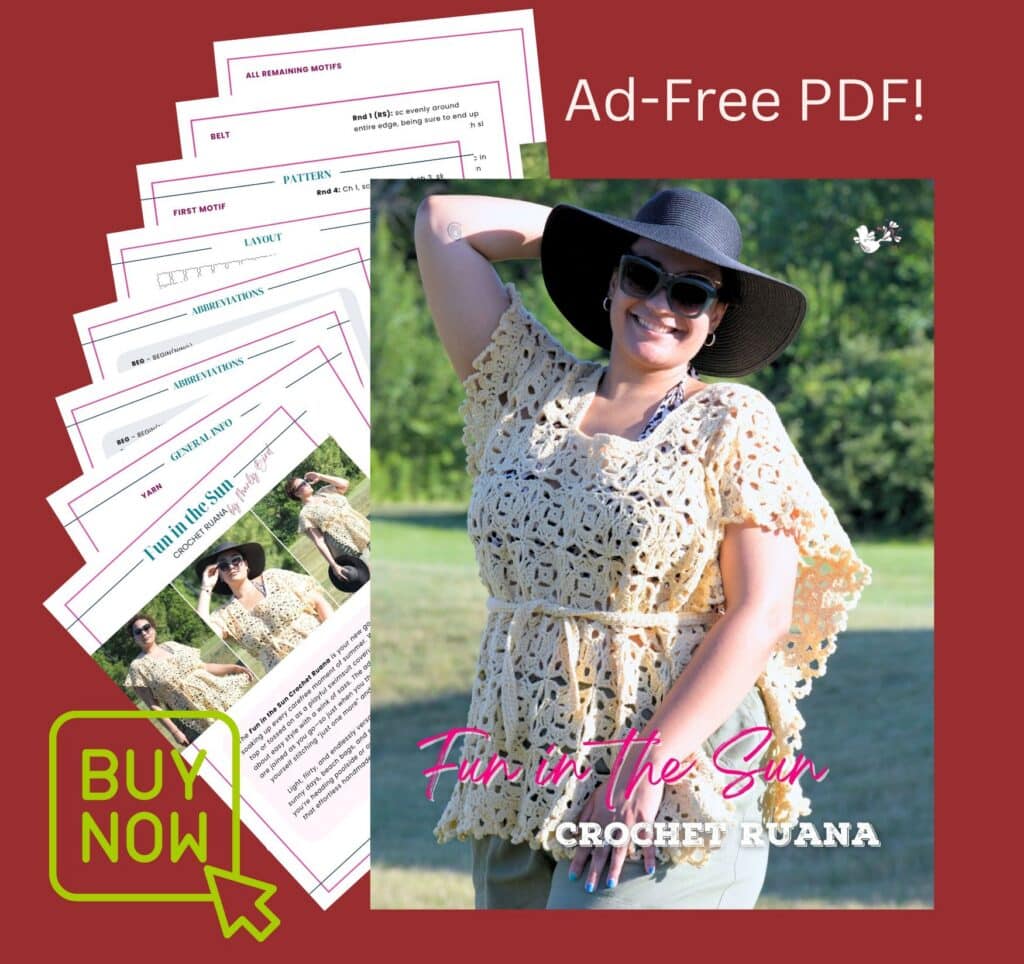
Love the Pattern but Want an Ad-Free PDF? ⭐
The full Fun in the Sun Crochet Ruana pattern is free right here on the blog… but if you'd rather print it out, tuck it in your project bag, and skip the ads, you can grab the ad-free printable PDF below. Your purchase directly supports the free patterns on this site (thank you, from my yarn-loving heart 💛):
✅ Are comfortable with basic crochet stitches (sc, hdc, dc, tr) and can work confidently in the round
✅ Want a portable project… motifs are tiny, travel-friendly, and perfect for vacation crochet
✅ Love the relaxed, drapey silhouette of a ruana over a structured, fitted garment
✅ Want a summer make that won't be too hot to wear in summer (that classic crochet contradiction)
You might want to start somewhere else if you…
❌ Are a true beginner who's never worked in the round… try the Stoney Creek Sleeveless Tee first for a flat-panel beginner garment build
❌ Want a tightly-fitted, shaped garment… this is intentionally loose and drapey
❌ Don't enjoy joining motifs… this project is built from a LOT of small motifs, so the make needs to feel meditative, not tedious
A Summer Cover-Up That Actually Gets Worn
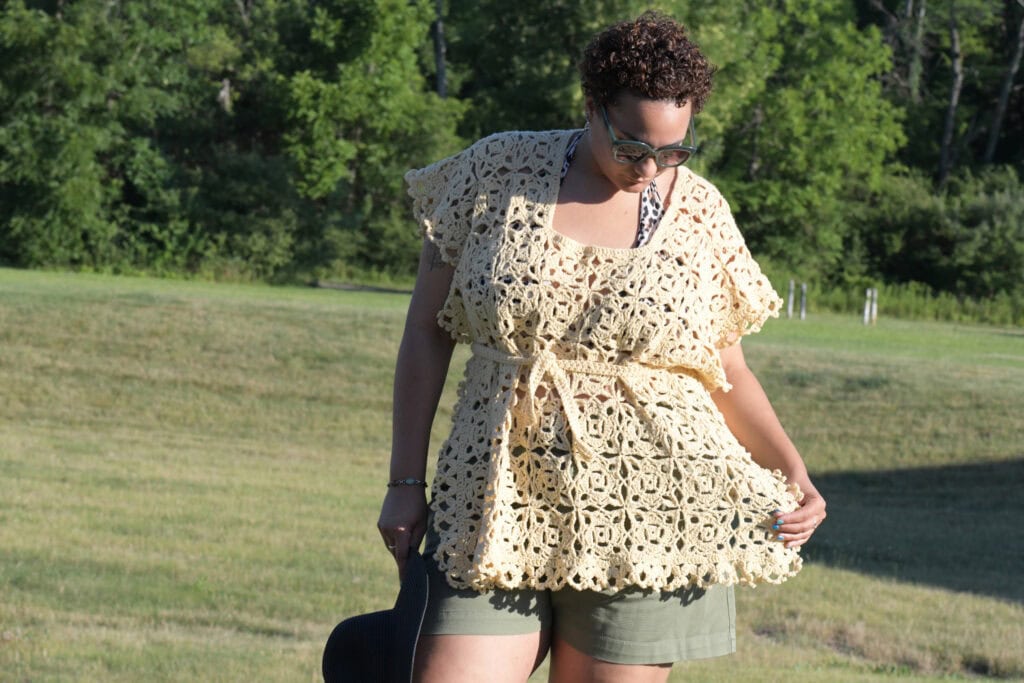
The Fun in the Sun Crochet Ruana is designed to move with you. The open motif structure keeps things breathable in the heat, while the overall coverage gives you just enough warmth when the breeze kicks up… something every pool, beach, or cruise ship regular knows all too well.
Instead of flimsy or overly bulky fabric, this design strikes a balance. Light enough for summer, but substantial enough to be practical when the sun dips or the air-conditioning cranks up.
This ruana is constructed from square motifs arranged into a generous rectangle, allowing the fabric to drape naturally over the shoulders and body. The result is an easy, flattering silhouette that doesn't cling and doesn't restrict movement. An optional belt lets you wear it loose and flowy or gently cinched for definition. Because the garment isn't heavily shaped, it adapts beautifully to different body types and styling preferences.
Build Your Summer Crochet Skills With This Ruana
This pattern is a perfect “next step” project if you've made a few small crochet items and you're ready to try a wearable garment without the intimidation of sizing and shaping. You'll practice:
🌀 Crochet motifs worked in the round… repetition until they feel intuitive
🪢 Join-as-you-go techniques… the magic trick that turns “I made a pile of motifs, now what?” into a finished ruana
🌸 Decorative edging with double-treble crochet clusters… fancier-looking than it is to actually work
💧 Wet blocking to open the lace motifs and lock in beautiful drape
Video tutorials for the key techniques are linked in the Video Tutorials section below… especially worth watching if this is your first motif garment.
Yarn & Materials
The original sample uses Green Mountain Spinnery Comfort Cotton, a DK-weight blend of fine wool and organic cotton. This blend was chosen intentionally because the cotton keeps the fabric breathable for warm days, the wool adds just enough warmth for cooler poolside evenings, the blend provides structure without stiffness, and the motifs hold their shape beautifully after blocking.
If you'd prefer a different yarn (cost, availability, fiber preference, or color), any DK-weight cotton or cotton blend will work beautifully. Here are five yarns I'd recommend with confidence for this pattern:
Pure cotton drapes more and feels cooler against the skin (especially when worn wet over a swimsuit). Cotton blends with a little wool or linen hold their shape better and recover faster after washing. Both work… pick by feel.
✨ Designer Tip: Whatever yarn you choose, make one full motif first and block it before committing to the whole project. A single blocked motif tells you everything about how your finished ruana will drape… and is way cheaper than a frogging session 10 motifs in.
Fun in the Sun Crochet Ruana — Pattern Details
Skill Level
Intermediate
To Fit Size
One size fits most
Finished Measurements
Ruana measures 32″ [81.5 cm] wide and 53″ [134.5 cm] long
Gauge
1 motif = 3.5″ x 3.5″ [9 x 9 cm] Use any hook size necessary to obtain gauge.
Materials
Yarn
Green Mountain Spinnery Comfort Cotton(100% Fine Wool/ 20% Organic Cotton, 2 oz / 57 g, 180 yd / 165 m, CYCA #3 DK)
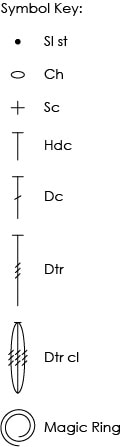
Beg – Beginning Ch – Chain Dc – Double crochet Dtr – Double treble crochet Hdc – Half double crochet Lp – Loop Rep – Repeat Rnd – Round RS – Right side Sc – Single crochet Sk – Skip Sl st – Slip stitch Sp – Space St(s) – Stitch(es) Tr – Triple crochet WS – Wrong side Yo – Yarn over
Special Stitches
⭐️ Double Treble Crochet Cluster (dtr cl)
* Yo 3 times, pull up a lp in indicated st, [yo and draw through 2 lps] 3 times; rep from * twice more, yo and draw through all 4 lps on hook.
⭐️ Magic Ring (aka Adjustable Ring)
Wrap yarn around your left middle finger twice, leaving a 6″ tail. Insert hook under both strands, and pull up a loop. Ch 1, and begin working directly into center of ring. This ring can be tightened later by pulling on the yarn tail.
Schematic Layout
Notes
Motifs are joined as you go to reduce finishing time.
To make the piece larger, simply add more motifs.
To make it longer, add more along the top and bottom edges
To make it wider, add more along the side edges
Blocking is essential for proper drape and stitch definition.
Fun in the Sun Crochet Ruana — Pattern Instructions
First Motif
Create a Magic Ring.
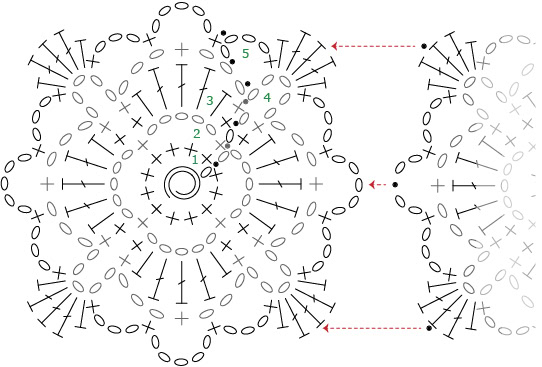
Rnd 1 (RS): Ch 1, 12 sc in ring, join with sl st in first sc – 12 sc.
Rnd 2: Ch 1, sc in first sc, ch 5, * sk 2 sc, sc in next sc, ch 5; rep from * twice more, join with sl st in first sc – 4 ch-5 sps.
Rnd 3: Ch 1, * (sc, hdc, 3 dc, hdc, sc) in next ch-5 sp; rep from * 3 more times, join with sl st in first sc.
Rnd 4: Ch 1, sc in first sc, * ch 3, sk 2 sts, sc in next dc, ch 3, sk 2 sts, sc in next sc, ch 5, ** sc in next sc; rep from * 3 more times, ending last rep at **, join with sl st in first sc – 4 ch-5 sps.
Rnd 5: (2 sl st, ch 1, sc) in first ch-3 sp, * ch 5, sc in next ch-3 sp, ch 3, (sc, hdc, 3 dc, hdc, sc) in next ch-5 sp, ch 3, ** sc in next ch-3 sp; rep from * 3 more times, ending last rep at **, join with sl st in first sc – 4 ch-5 sps, 8 ch-3 sps.
Fasten off.
Remaining Motifs (Join-As-You-Go)
✨ Designer Tip: Use stitch markers to mark joining points before starting the joining round.
Work remaining motifs as follows using layout for placement, join 8 rows of 14 motifs across (minus 4 for the neck opening):
Rnds 1-4: Same as First Motif.
Rnd 5 (joining rnd): (2 sl st, ch 1, sc) in first ch-3 sp, ch 5, sc in next ch-3 sp, ch 3, (sc, hdc, 2 dc) in next ch-5 sp, sl st in corresponding corner dc on adjoining motif, (dc, hdc, sc) in same ch-5 sp as last dc on current motif, * ch 3, sc in next ch-3 sp, ch 2, sl st in corresponding ch-5 sp on adjoining motif, ch 2, sc in next ch-3 sp on current motif, ch 3, (sc, hdc, 2 dc) in next ch-5 sp, sl st in corresponding corner dc on adjoining motif, (dc, hdc, sc) in same ch-5 sp as last dc on current motif; rep from * for all joined sides, then complete rnd same as First Motif.
Fasten off.
Belt
Ch 251, note you can chain more or less for a shorter or longer belt.
Row 1: Sc in 2nd ch from hook and each ch across, turn — 250 sc.
Row 2: Ch 2, hdc in each sc across, turn.
Row 3: Ch 1, sc in each hdc across.
Fasten off.
Neck Edging
With RS facing, join yarn with a sl st at the back of the neck in the center join (where the two motifs are connected at their corner by a sl st between the dc).
Rnd 1 (RS): Ch 2 (does not count as a st), * dc in next 2 dc, dc in next hdc, 2 dc in next ch-3 sp, 3 dc in next ch-5 sp, 2 dc in next ch-3 sp, dc in next hdc, dc in next 2 dc, skip join; repeat from * around each motif on neck opening, sl st to first dc, fasten off — 104 dc.
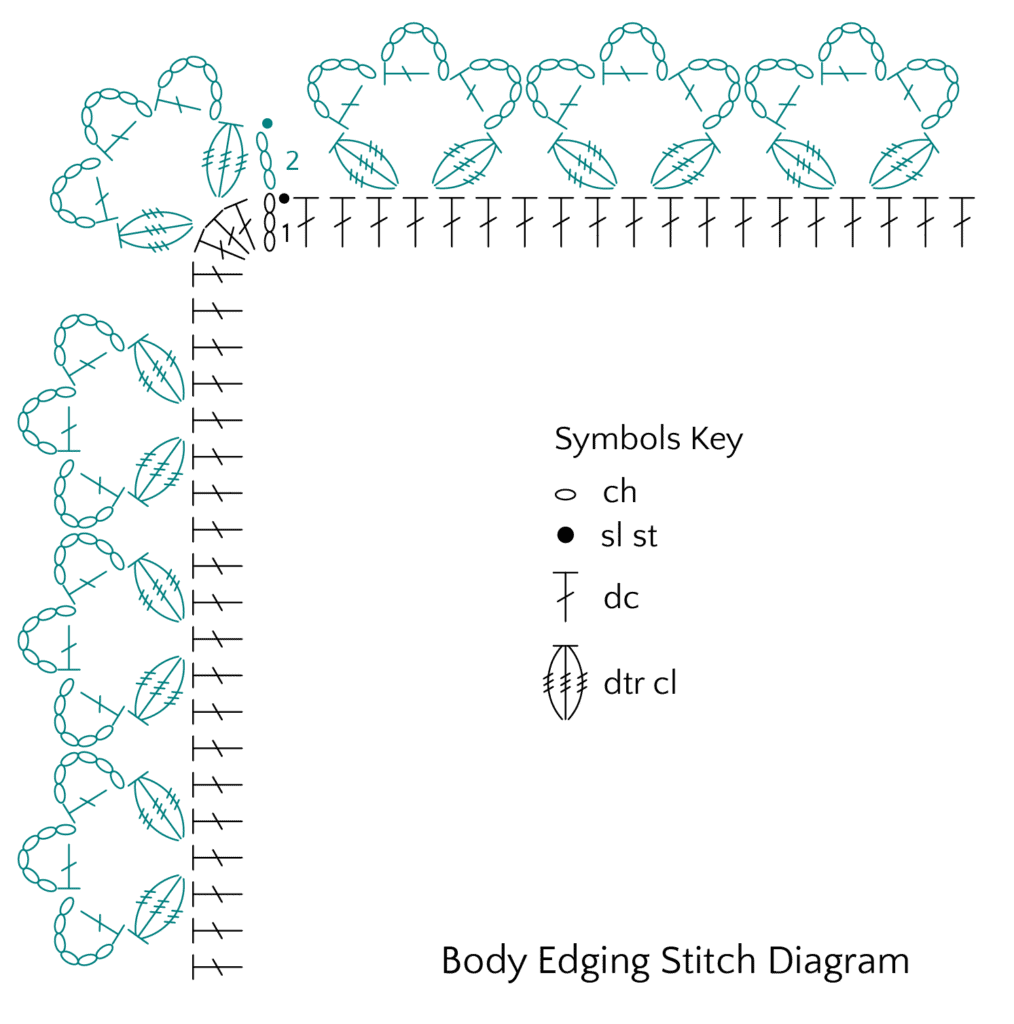
Body Edging
With RS facing, join yarn with a sl st in any corner at the center dc.
Rnd 1 (RS): Ch 3 (counts as 1 dc), 4 dc in same st as join, *dc in next dc, dc in next hdc, 2 dc in next ch-3 sp, 4 dc in next ch-5 sp, 2 dc in next ch-3 sp, dc in next hdc, dc in next 2 dc, skip join, [dc in next 2 dc, dc in next hdc, 2 dc in next ch-3 sp, 3 dc in next ch-5 sp, 2 dc in next ch-3 sp, dc in next hdc, dc in next 2 dc, skip join] repeat across motifs along the edge to last motif before next corner, dc in next 2 dc, dc in next hdc, 2 dc in next ch-3 sp, 3 dc in next ch-5 sp, 2 dc in next ch-3 sp, dc in next hdc, dc in next dc**, 5 dc in corner dc; repeat from * around body ending at **, sl st to top of beginning ch-3, do not turn — 103 dc along short edge + 181 dc along long edge + 5 dc in each corner.
Rnd 2: Ch 3 (does not count as a st), sk 1 dc, *dtr cl in next dc, [ch 6, dc in first of these 6 ch] 3 times, dtr cl in same st as last dtr cl, skip 5 dc; repeat from * around, join with sl st in first dtr cl — 34 dtr cl along short edge + 60 dtr cl along long edge + 2 dtr cl in each corner.
Fasten off.
Weave in loose ends.
Finishing
Block ruana and belt to measurements. Allow to dry completely before wearing.
Blocking Tips for Crochet Motif Garments
Blocking is what turns “a pile of crocheted shapes” into “a finished garment.” For this ruana especially, blocking opens up the motifs, evens out the stitches, and gives the fabric the gorgeous summer drape it's designed for. A few tips:
💧 Wet block… don't steam block. The wool/cotton blend (and most cotton-blend yarns) respond best to a full soak in cool water with a wool wash like Eucalan, gentle press out (don't wring), then pin to measurements.
📐 Pin to the schematic. Lay the ruana flat on blocking squares, measure to 32″ wide × 53″ long, and pin every motif corner so the shapes open up evenly.
⏰ Dry completely before unpinning… 24 to 48 hours depending on humidity. Tempting to peek, but the drape locks in during full dry-down.
🛁 Re-block after washing. A quick re-block after the first wash brings everything back to shape and keeps the ruana looking polished season after season.
Love This Yarn? More Patterns Using Cotton Blends
If you fell in love with the breathable wool/cotton blend in this pattern, here are a few more crochet patterns on the blog that work beautifully in cotton or cotton-blend yarns:
If you Ravel, please favorite and queue the Fun in the Sun Crochet Ruana on Ravelry… it helps other crocheters discover the pattern and supports the free patterns on this blog. Thank you, bestie! 💛
Styling & Wearability
This ruana is a summer multitasker.
Toss it over a swimsuit for pool days, wear it with shorts and a tank for casual outings, or layer it over a sundress when the evening cools off. It's the kind of piece that looks intentional without trying too hard… relaxed, handmade, and completely wearable in real life.
More Crochet Patterns You'll Love
If you enjoy lightweight crochet garments and warm-weather projects, here are more free crochet patterns to add to your queue:
Yes. The open motif pattern, breathable DK-weight wool/cotton blend yarn, and relaxed silhouette make the Fun in the Sun Crochet Ruana ideal for warm-weather wear. The fabric lets air move through it on hot days, and you can substitute 100% cotton or a cotton/linen blend if you want an even lighter, cooler fabric.
Can this be worn as a swimsuit cover-up?
Absolutely… it was designed with pool, beach, and cruise wear in mind. Cotton-blend yarns are fine getting damp from a wet swimsuit, but try to rinse and lay flat to dry after heavy chlorine or saltwater exposure to keep the fibers happy long term.
What's the best yarn for a summer crochet cover-up?
Look for a DK-weight cotton, cotton blend, or cotton/linen blend with good stitch definition. Pure cotton drapes more and feels cooler against the skin. Cotton with a touch of wool, acrylic, or linen holds its shape better and resists stretching out. Any of the five yarns listed in the Yarn & Materials section above will give you a beautiful Fun in the Sun Crochet Ruana.
Is this pattern size-inclusive? Will it fit plus sizes?
The Fun in the Sun Crochet Ruana is written as one size fits most, with a relaxed, drapey fit that adapts to a wide range of bodies thanks to its open silhouette. To make it longer or wider, simply add more motifs (more rows along the top and bottom edges = longer; more columns along the sides = wider). The motif structure makes sizing up easy… each motif adds about 3.5″ / 9 cm in either direction.
Do I need to block the ruana?
Yes… blocking is essential for this pattern. The motifs need to open up and even out for the lace pattern to show, and blocking is what gives the ruana its signature summer drape. See the Blocking Tips section above for the full how-to.
Is this pattern beginner-friendly?
It's best for confident beginners through intermediate crocheters. You'll need to be comfortable with single, half double, double, treble, and double treble crochet, working in the round, and reading a chart. If you're a true beginner, try the Stoney Creek Sleeveless Tee first to build garment confidence on a simpler shape.
How long does it take to crochet a ruana?
Most crocheters finish the Fun in the Sun Crochet Ruana in two to four weeks of relaxed evening crochet. Once your motif rhythm clicks (usually after the first 5 or 6 motifs), the project moves quickly. The join-as-you-go construction means there's no big finishing push at the end… when you're done with motifs, you're nearly done with the ruana.
Can I adjust the length or width?
Yes… the motif layout makes resizing very easy. Add more motifs along the top and bottom edges to make the ruana longer, or add columns along the side edges to make it wider. Each motif is approximately 3.5″ / 9 cm square, so you can calculate exactly how many additional motifs you need.
Is the belt required?
No… the belt is completely optional and purely a styling choice. Wear the ruana loose for a boho, flowy summer look, or add the belt for a more defined waist. The belt can also be shortened or lengthened by adjusting the starting chain count.
Does this ruana travel well?
Beautifully. The cotton-blend fabric folds flat, shakes out without wrinkling, and weighs very little. To pack it for travel: fold lengthwise into thirds, then loosely roll. Toss it on top of your packed clothes (not crushed at the bottom) and it'll be ready to wear the second you arrive.
Can I wear this over a wet swimsuit?
Yes… the open stitch pattern actually helps the fabric dry quickly. After your beach or pool day, give the ruana a quick freshwater rinse (especially after saltwater or heavy chlorine), then lay flat to dry. Treat it like any other cotton-blend handmade garment and it'll last for many summers.
How do I wash and care for the finished ruana?
Hand wash in cool water with a gentle wool wash like Eucalan, then lay flat to dry on a clean towel or blocking mats. Avoid the dryer and avoid wringing… both can distort the motifs. A quick re-block after the first wash brings the ruana back to its original shape.
Where can I get the ad-free PDF of this pattern?
The full pattern is free here on the blog. If you'd like a printable, ad-free PDF you can take to the beach, project bag, or print and tuck into your pattern binder, you can buy it on Etsy, Shopify, or Ravelry. Your purchase directly supports the free patterns on this blog. 💛
Final Thoughts
The Fun in the Sun Crochet Ruana is all about relaxed summer style… easy to make, easy to wear, and endlessly versatile. Whether you're soaking up sunshine or chasing shade, this is the kind of handmade piece that earns a permanent spot in your warm-weather rotation.
If you make one, please share it! Tag #marlybird and #mmmdi so I can see your version. Nothing makes my day faster than seeing a new ruana out in the wild on a real BiCrafty Bestie. 💛
Happy crocheting, bestie!
❤️ Your BiCrafty Bestie, Marly Bird
🟨 MARLY ACTION — Consolidated Yoast SEO Settings (fill all of this in the Yoast meta box below the editor):
Yoast SEO Title (different from the H1 above — this is what shows in Google search results, <60 chars):
Recommended: Free Crochet Ruana Pattern: Fun in the Sun Cover-Up | Marly Bird (58 chars)
Alternates:
• Free Crochet Summer Cover-Up Pattern — Fun in the Sun Ruana (58 chars)
• Fun in the Sun Crochet Ruana: Free Beach Cover-Up Pattern (56 chars)
Meta Description (<155 chars):
Make a free crochet ruana — the Fun in the Sun Summer Cover-Up. Join-as-you-go motifs, DK cotton, easy poolside style. Pattern + chart + schematic.
(149 chars — under the limit)
SEO Slug (already correct, keep):
free-crochet-ruana-pattern-fun-in-the-sun
Social / OG Title:
Fun in the Sun Crochet Ruana — Free Summer Cover-Up Pattern
Social / OG Description:
This free crochet ruana pattern is perfect for summer! Light, breezy motifs come together into an easy, wearable beach cover-up or layering piece. ☀️🧶
Categories to set (verify these are checked):
Crochet • Free Patterns • Our Free Patterns • Pattern (already set in draft)
Tags to set (suggested — currently empty):
crochet ruana, free crochet pattern, crochet cover-up, summer crochet, crochet motif, beach cover-up, crochet wrap, free crochet ruana pattern
Hero / Featured Image:
Use the existing top image (Fun-in-the-Sun-Ruana-Cover-Up-Pattern-Facebook-Group-1, 1024×534). Confirm it's 1200px+ wide for Google Discover eligibility — if not, swap in the larger pinterest pin version (Fun-in-the-Sun-Ruana-Cover-Up-Pattern-Pinterest-Pin-1, 683×1024) or upload a fresh 1200×800+ horizontal version with Marly's face + the ruana for best Discover odds (per framework v2 Section 12).
Hero image alt text:
Fun in the Sun Crochet Ruana — free crochet ruana pattern worn as a summer beach cover-up in soft yellow yarn with airy motif stitch detail.
Delete this yellow box when Yoast is fully filled in.
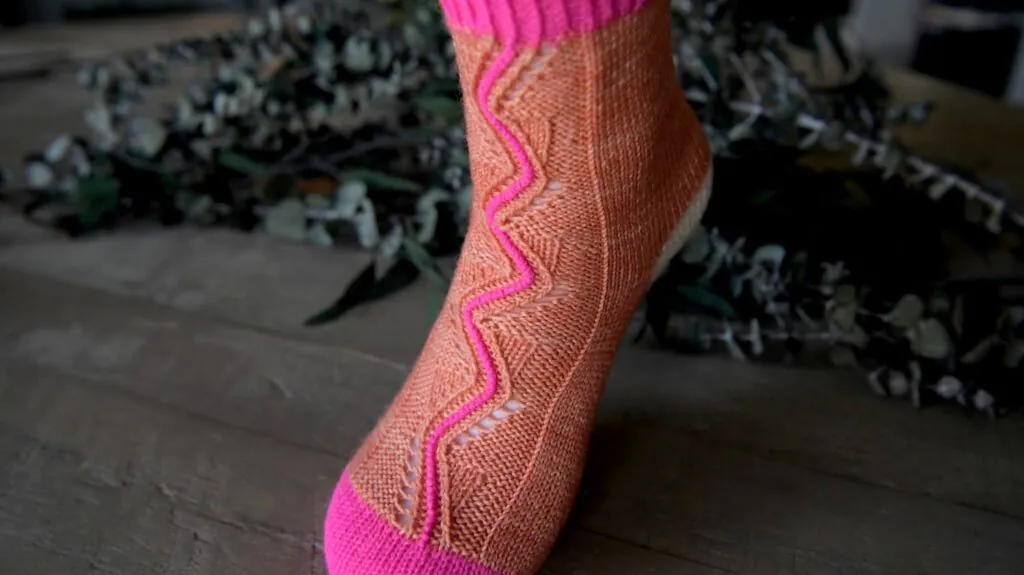
Some designs start with a sketch. Others start with a feeling — or in this case, a moment of inspiration that turned into a color story I couldn’t stop thinking about.
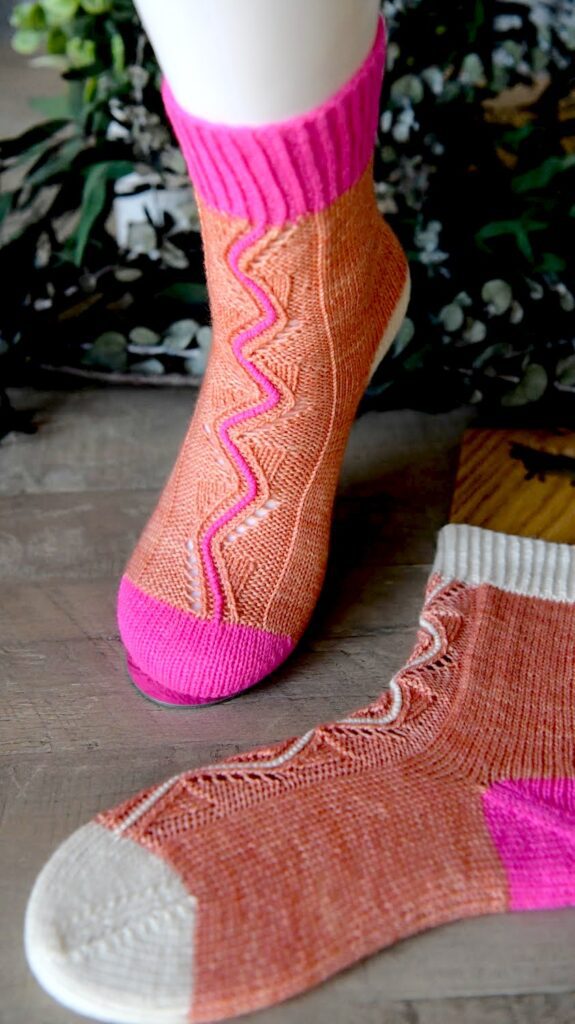
The Hint of Hazelnut Socks are playful, bold, and surprisingly approachable, designed to help knitters use those mini skeins we all collect while building confidence with vertical colorwork. These socks are a celebration of color, curiosity, and the joy of trying something just a little different.
If you’ve ever looked at a set of mini skeins and wondered “What should I actually make with these?” — this pattern is for you.
Quick Pattern Overview
The Hint of Hazelnut Socks are knit socks featuring vertical colorwork stripes paired with a solid contrast yarn. Designed to be eye-catching without being overwhelming, these socks are a great way to experiment with color while still creating a wearable, everyday project.
In this post, you’ll learn:
Why vertical colorwork is easier than it looks
How this sock pattern works beautifully with mini skeins
Yarn ideas for both indie and commercial sock yarns
Tips for knitting socks as a portable (but engaging) project
Affiliate Disclosure:This post contains affiliate links. To learn more please visit my privacy policy here💖
Vertical Colorwork Socks (Without the Stress)
Vertical striping creates a bold visual impact, but it doesn’t require complicated charts or advanced colorwork techniques. Instead, the color changes happen in a predictable rhythm that allows you to focus on consistency rather than complexity.
This pattern was inspired by a color palette that stopped me in my tracks — proof that great design ideas can come from anywhere (yes, even something as simple as a coffee creamer bottle). The end result is a sock that feels intentional, modern, and fun to knit.
What You Will Love About This Pattern
Free knit sock pattern with striking vertical colorwork
Perfect for using mini skeins from advent calendars or kits
Designed for knitters ready to explore color confidently
Works well with a solid sock yarn base
Creates socks that are fun to knit and even more fun to wear
✨ Designer Tip: If you’ve never used mini skeins in socks before, this pattern is a fantastic place to start — the colorwork feels playful, not intimidating.
“Sometimes the best designs come from curiosity — what happens if I try this?”
Marly Bird
Design, Fit, and Construction Details
The Hint of Hazelnut Socks are designed with comfort and wearability in mind. The vertical colorwork adds visual interest without affecting stretch, and the solid contrast yarn helps anchor the design so the socks remain practical for everyday use.
These socks are worked using familiar sock construction methods, making them a great project for knitters who are comfortable knitting socks and ready to level up their color confidence.
Yarn Ideas & Mini Skein Pairings
One of the best things about this pattern is how beautifully it works with mini skeins. Many knitters collect mini skeins through advent calendars, mystery make-alongs, or special sets — and sometimes the included project just doesn’t click.
This pattern gives those minis a new purpose.
Mini Skein + Full Skein Pairing Ideas
Pair a colorful mini set with a coordinating solid sock yarn for the best results.
TK2tog (Twisted Knit 2 Together): Slip 2 stitches purlwise, insert tip of left needle into the front leg of first stitch from front to back and and slip it back onto left needle (stitch is now twisted), slip next stitch purlwise back onto left needle, knit two together.
Tskp (Twisted Knit-Slip-Pass): Slip one stitch purlwise, knit next stitch, pass slipped stitch over knit stitch.
Ssk (Slip, Slip, Knit): Slip 2 stitches, one at a time, as if to knit. Insert left hand needle into the front of these two stitches and knit them together from this position (1 stitch decreased)
SPECIAL TECHNIQUES
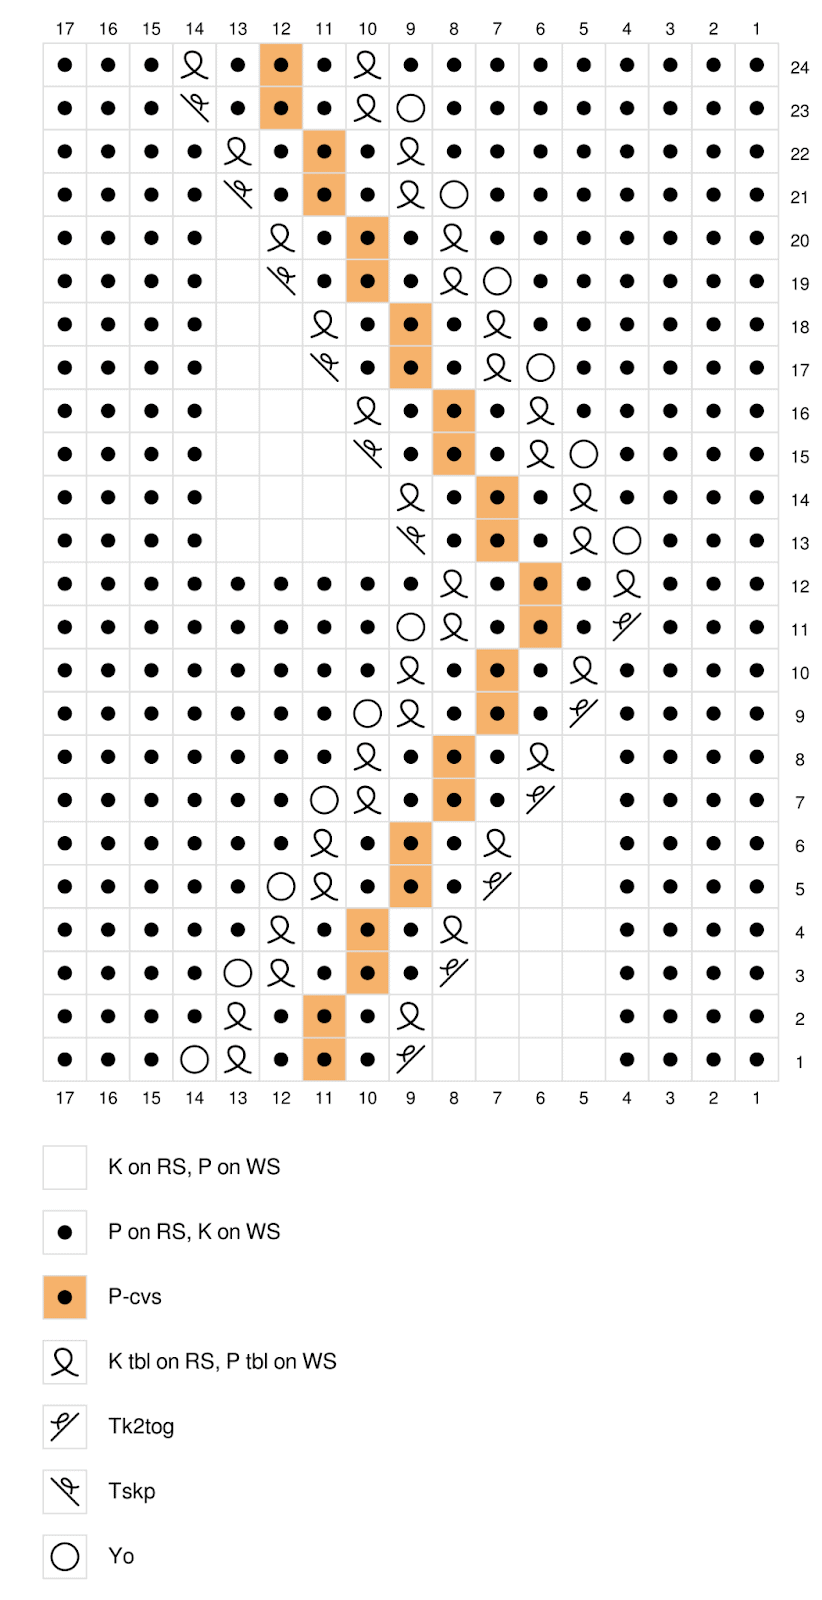
CVS (Contrasting Vertical Strand): Use the designated contrasting color when working the next stitch as written. If p-cvs then purl the stitch, if k-cvs then knit the stitch. When working a CVS st, be sure the MC strand is held off to the left. Then reach in from right to grab the dangling CVS strand, work the stitch, then leave it behind off to the right. Return to MC. No need to twist the colors as is done when working intarsia; one color simply wraps over the other color.
Directions are for size S; changes for sizes M, & L are in parentheses. When only one number is given then that number applies to all sizes.
CVS & Lace pattern is worked down the front of the sock and top of foot.
These socks use a forethought heel technique to preplan where the heel will be placed.
Designer Tip: to get a slightly larger heel diagonal measurement, add a few rounds of knitting to the heel before beginning the heel decreases.
CVS requires yarn management. Each CVS column requires approx. 10” [20.5 cm] of yarn for 1” [2.54 cm] of knitting. It is best to use the yarn bobbins or butterfly yarn management skill (see video tutorial for help) to keep that one strand of yarn out of the way.
GROW
To Unlock Exclusive Subscriber Content click the Box below and join for free by simply adding your email and creating a password! If you are having troubles, clear your cache or reset your password or login to the Grow Publisher Portal.
I'm thrilled to share this amazing pattern with you, many patterns on my blog are absolutely free! I kindly request that you don't copy and paste or distribute this pattern. Prefer an ad-free experience? Buy a digital PDF pattern for a small fee from one of my online stores for a seamless crafting journey.
I appreciate your support and readership. You are the reason I can keep doing what I love and sharing it with others. So, thank you from the bottom of my yarn-loving heart! Disclosure: This post contains affiliate links, meaning I get a commission if you decide to make a purchase through my links at no cost to you.
HINT OF HAZELNUT SOCKS PATTERN INSTRUCTIONS
CUFF
With A, cast on 56 (64, 72) sts using the long-tail cast on method (see Video Tutorials)
Divide the sts evenly onto 4 double pointed needles – 14 (16, 18) sts on each needle.
Join round and mark first st.
Round 1: * P1, k1 tbl; repeat from * to the end of the round.
Repeat Round 1 until Cuff measures 2” [5 cm].
Cut color A.
LEG
With MC and using A as CVS:
Set-Up Round: K20 (24, 28), pm, work Row 1 of CVS & Lace Pattern over next 17 sts, pm, knit to end of round.
Next Round: K to marker, slm, work in established CVS & Lace Pattern over next 17 sts, slm, k to end of round.
Repeat the last round to desired length, ending after a Round 12 or 24 of CVS and Lace Pattern.
Next Round (partial round): Work as established across first 42 (48, 54) sts of the round.
FORETHOUGHT HEEL PREP
Most sock patterns instruct to only work 1 row for the forethought heel but I find it easier to pick up for the heel with 3 rows.
Next Row: Knit across the first 28 (32, 36)Sole sts. Slip those sts just knit back to the left hand needle, or slide them to the other end of the circular needle. Drop working yarn. With waste yarn the same weight as working yarn:
(RS): Knit the same 28 (32, 36) sts just slipped, turn,
(WS): P28 (32, 36), turn,
(RS): K28 (32, 36).
Cut waste yarn.
Continue to Foot and work with MC and color A again.
FOOT
Continue in established CVS & Lace pattern, and Stockinette st for remaining sts, until Foot measures 4 (4½, 5)” [10 (11.5 12.5) cm] shorter than desired final length and ending after a Round 12 or 24 of CVS & Lace Pattern (not mandatory).
Cut MC and discontinue use of the CVS.
TOE
Continue with color A only as follows:
Round 1: K28 (32, 36), place removable marker into the fabric between sts, k28 (32, 36), place another marker as before.
Round 2 (dec round): * K1, k2tog, k to 3 sts before marker, ssk, k1; repeat from * once more — 24 (28, 32) sts remain.
Round 3: Knit around.
Repeat rounds 2 and 3 only until 16 (20, 24) sts total remain.
Toe Grafting
Graft Toe sts together using Kitchener Stitch as follows (also see Video Tutorials):
Arrange sts so the 8 (10, 12) instep sts are on one needle, and the 8 (10, 12) sole sts are on another needle.
Hold both needles together in your left hand, with yarn tail on the first stitch on the back needle.
Cut a long tail from the working yarn (about 4 times the width of the fabric to be joined), and thread tail into yarn needle.
Step 1: Insert yarn needle purlwise into first st on front needle and pull it through, leaving st on the knitting needle.
Step 2: Insert yarn needle knitwise into first st on the back needle and pull it through, leaving st on the knitting needle.
Step 3: Insert yarn needle knitwise into first st on front needle and pull it through, then drop this st off knitting needle.
Step 4: Insert yarn needle purlwise into first st on front needle and pull it through, leaving st on the knitting needle.
Step 5: Insert yarn needle purlwise into first st on the back needle and pull it through, then drop this st off knitting needle.
Step 6: Insert yarn needle knitwise into first st on the back needle and pull it through, leaving st on the knitting needle.
Repeat steps 3-6 only, pausing to pull sts taut and neaten the seam after every couple of inches. Be sure to always pause after a step 6 so as to not lose your place.
When 2 sts remain, work step 3, then step 5, then fasten off.
HEEL
With RS facing, from right to left in the round directly below the waste yarn for the heel, insert the top of the needle under the right leg of each of the 28 (32, 36) sts.
With another needle, work the same process on the stitches directly above the waste yarn for the heel. Insert the tip of the needle under the right leg of each of the 28 (32, 36) stitches in the round above the waste yarn.
There are now 56 (64, 72) sts on the two needles.
Remove the waste yarn starting at the st at the top left so it will unravel cleanly.
Don’t worry about picking up extra stitches at the gap. We will close the holes at the gap with the beginning and finishing tails of the heel.
Note: If the sock is too snug at the instep/heel diagonal, add a few rounds and a few sts to the heel before beginning the decrease rounds. Add an extra 2 stitches for every extra round you add. This will allow for a larger heel diagonal.
With B:
Round 1: K28 (32, 36), place removable marker into the fabric between sts, k28 (32, 36), place another marker as before.
Round 2 (dec round): * K1, k2tog, k to 3 sts before marker, ssk, k1; repeat from * once more — 24 (28, 32) sts.
Round 3: Knit.
Repeat round 2 and 3 until 16 (20, 24) sts total remain on the needles.
Heel Grafting
Graft Heel sts together using Kitchener stitch, same way as Toe sts.
FINISHING
Use duplicate stitch to close any gap or hole (see Video Tutorials).
Weave in all loose ends.
Socks as a Portable Project (With a Realistic Note)
Socks are one of the most loved portable knitting projects — small, lightweight, and easy to toss into a bag. While the Hint of Hazelnut Socks do require a bit more attention due to the colorwork, they’re still a great on-the-go project when you want something engaging.
A little focus goes a long way here, and the results are worth it.
Do you like lace patterns for socks? Check out this knit lace blog post with multiple links you must have!
Staying Organized While Knitting Socks
Keeping your yarn tidy makes sock knitting even more enjoyable, especially when working with multiple colors.
Is this sock pattern beginner-friendly? This pattern is best for knitters who are already comfortable knitting socks and want to try colorwork.
Do I need a full mini skein for each color? No. This pattern is designed to make excellent use of mini skeins without needing large amounts.
Can I use a sock yarn without nylon? Yes. Nylon is optional. If desired, you can add reinforcing yarn, but it’s not required.
Will the vertical colorwork affect stretch? No. The construction allows the socks to stretch comfortably for everyday wear.
How long does it take to knit a pair? Time varies, but many knitters find these socks engaging enough to keep momentum steady.
Are these socks good for gifts? Absolutely. The bold colorwork makes them feel special and handmade.
Can I simplify the color palette? Yes. Using fewer or more subtle colors creates a different but equally beautiful effect.
Are these socks good for travel knitting? They can be — just keep your yarn organized and be mindful of color changes.
Final Thoughts
The Hint of Hazelnut Socks are a joyful reminder that creativity doesn’t have to be complicated. With a handful of mini skeins, a solid base yarn, and a willingness to play with color, you can create socks that feel personal, modern, and truly handmade.
If you knit a pair, be sure to save the pattern, share your colors, and tell me what inspired your palette. #marlybird #mmmdi
Some designs come together exactly as planned. And then there are the designs that change everything.
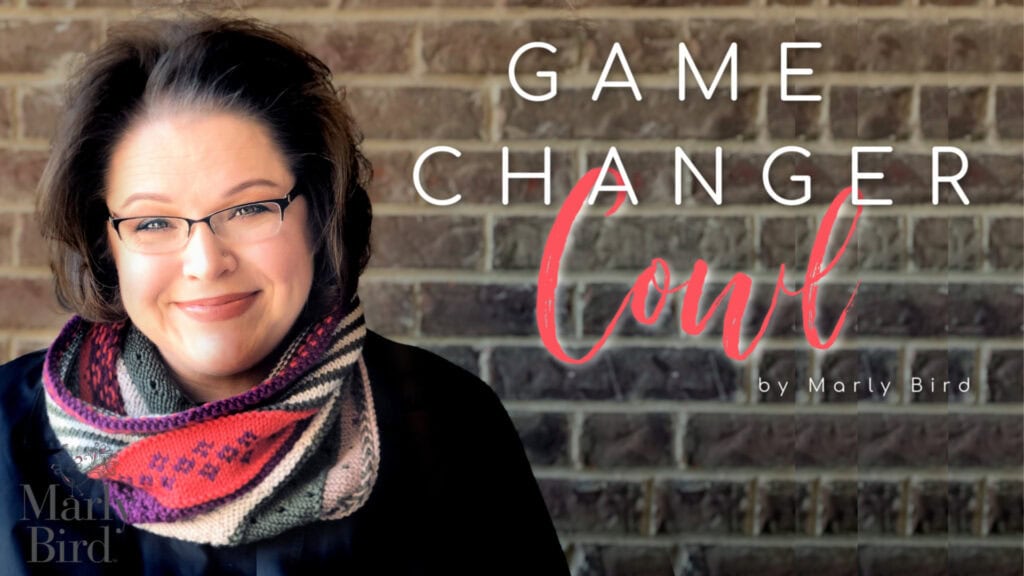
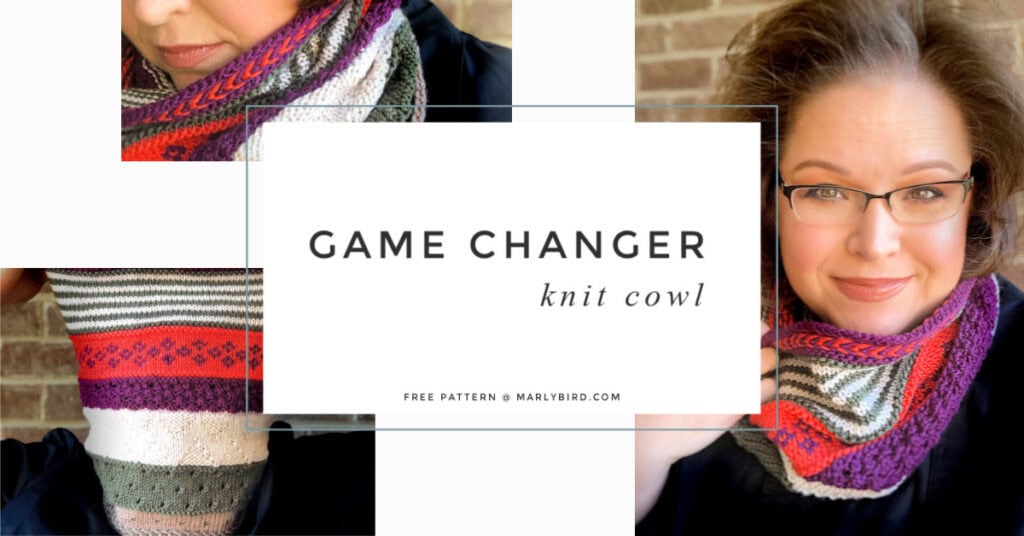
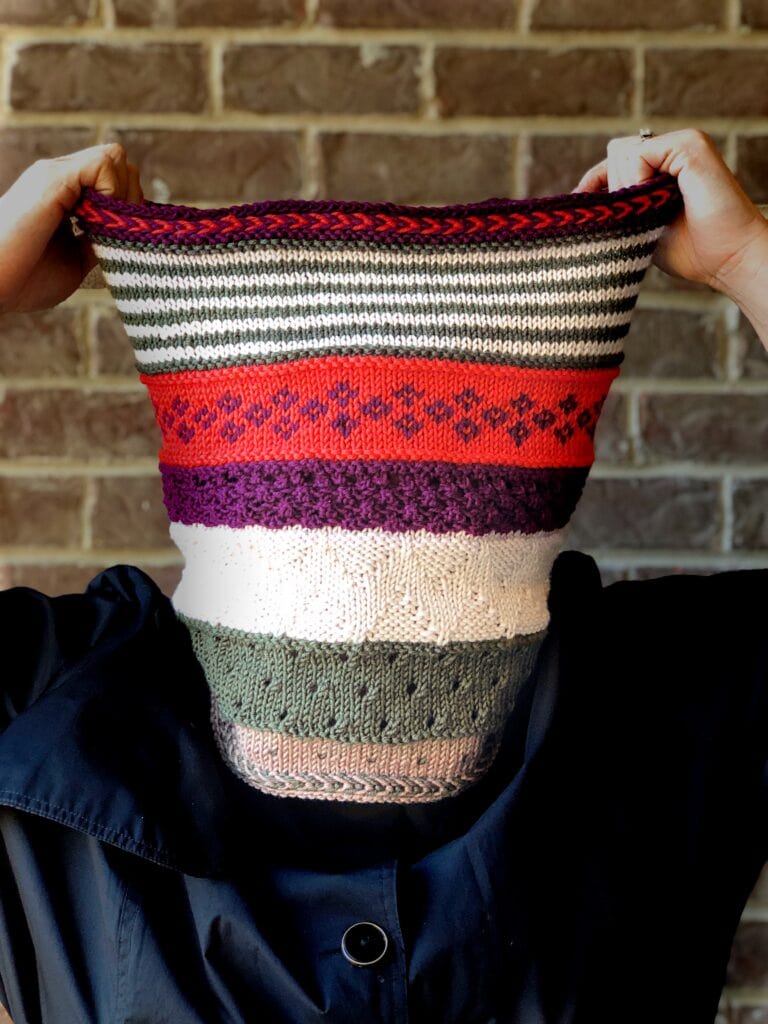
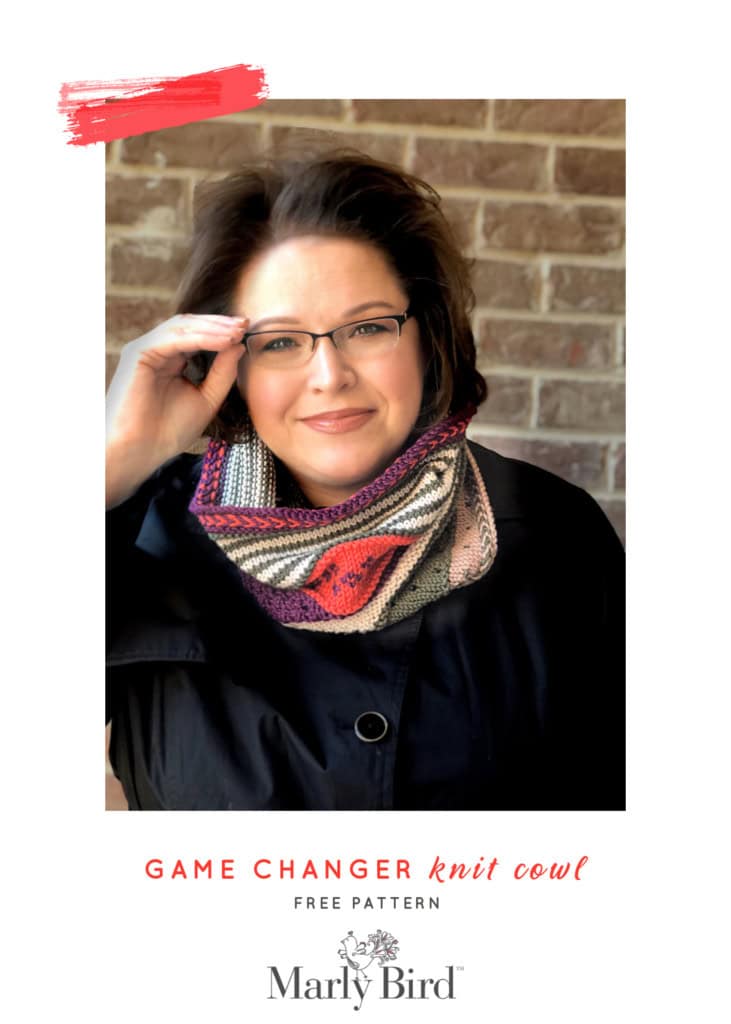
The Game Changer Knit Cowl is one of those patterns — born from a last-minute creative pivot, shaped by community energy, and polished through hands-on knitting during one of my favorite yearly traditions. This free knit cowl pattern is bold, engaging, and packed with texture, making it just as fun to knit as it is to wear.
If you love learning new stitches, playing with color, and knitting projects that keep your interest from cast-on to bind-off, this one’s for you.
Quick Pattern Overview
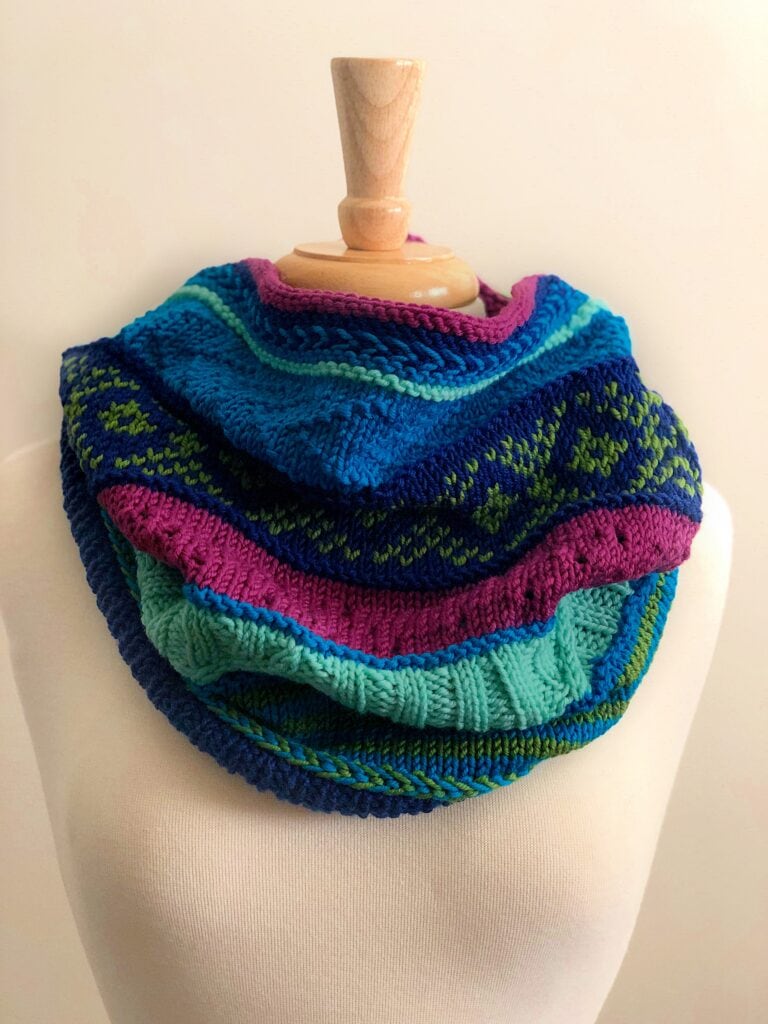
The Game Changer Knit Cowl is a circular, worsted-weight knit cowl worked in the round. It features multiple stitch sections, color changes, and texture shifts that create a dynamic, eye-catching finished piece.
In this post, you’ll learn:
The story behind the Game Changer name
How this cowl builds skills without feeling overwhelming
Yarn options to replace the discontinued Chic Sheep yarn
Why this pattern has become a longtime community favorite
The Story Behind the Game Changer
Back in 2018, I hosted my very first Game Day Mystery Make-Along — a spontaneous idea sparked just a week before the Super Bowl. The concept was simple: knitters and crocheters would all work on a mystery project together earlier in the day, then settle in to enjoy the Super Bowl (or… not 😉).
You don’t have to be a sportsball fan to join the fun.
The event was a huge success, and since then, Game Day Mystery Make-Alongs have become one of the biggest events of the year, happening every Super Bowl Sunday. We knit and crochet before kickoff so everyone can relax, snack, and enjoy the rest of the day however they like.
In early 2020 — just before the world shifted in ways none of us expected — I was designing what I thought would be the knit project for that year’s Game Day Make-Along. I knew I wanted:
A cowl
Multiple stitch sections
A true skill-builder people would enjoy learning from
I cast on using my Chic Sheep yarn and spent weeks working through the design… and then, just days before the event, I changed my mind. (Very on brand for me. Very ADHD. Very real.)
I redesigned the official Game Day knit project — and the original design became something else entirely.
That “something else” is what you’re knitting here.
Hence the name: Game Changer.
The design that wasn’t supposed to be — and ended up being one of the most loved cowls I’ve ever created.
What You Will Love About This Pattern
Free knit cowl pattern with rich texture and colorwork
Ideal for advanced beginners and confident knitters alike
Multiple stitch patterns keep the knitting engaging
Worked in the round for a seamless finish
Perfect balance of learning and relaxing knitting
✨ Designer Tip: This cowl is an excellent way to practice stitch pattern transitions — a skill that makes reading and understanding more complex patterns much easier down the road.
“The best designs aren’t always planned — sometimes they’re the ones that happen when you trust your instincts and change direction.”
Design, Fit, and Construction Details
The Game Changer Knit Cowl is worked in the round using worsted-weight yarn, creating a cozy, substantial fabric without feeling bulky. The stitch patterns are arranged in sections, allowing you to focus on one technique at a time before moving on to the next.
The finished size offers generous coverage, sitting comfortably around the neck and layering easily over coats, sweaters, or lighter tops.
Yarn Choices & Chic Sheep Substitutions
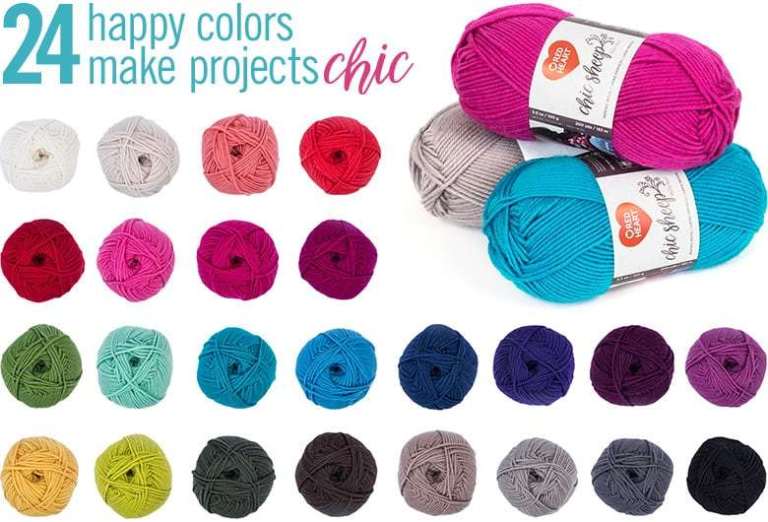
The original sample was knit with Red Heart Chic Sheep by Marly Bird, a smooth superwash merino that showcased stitch definition beautifully. While Chic Sheep is no longer available, there are many excellent substitutes that work just as well.
K – Knit P – Purl K2TOG – Knit 2 together P3TOG – Purl 3 together PM – Place marker PTBL – Purl through the back loop RS – Right side WS – Wrong side ST(S) – Stitch(es) YO – Yarn over
STITCH PATTERNS
Stockinette Stitch (in the round) Knit all rounds
SPECIAL TECHNIQUES
Latvian Braid Worked over multiple rounds using two colors to create a decorative horizontal braid. The yarns will twist as you work—this is expected. Do not untwist until the braid is complete.
NOTES
Read through each section before beginning.
Use stitch markers to help track sections and color changes.
Allow your work to rotate naturally to prevent yarn tangling during colorwork.
Lifelines are recommended in textured sections (noted in pattern).
Blocking is essential to relax stitches and showcase texture.
This cowl is worked entirely in the round from bottom to top.
To Unlock Exclusive Subscriber Content click the Box below and join for free by simply adding your email and creating a password! If you are having troubles, clear your cache or reset your password or login to the Grow Publisher Portal.
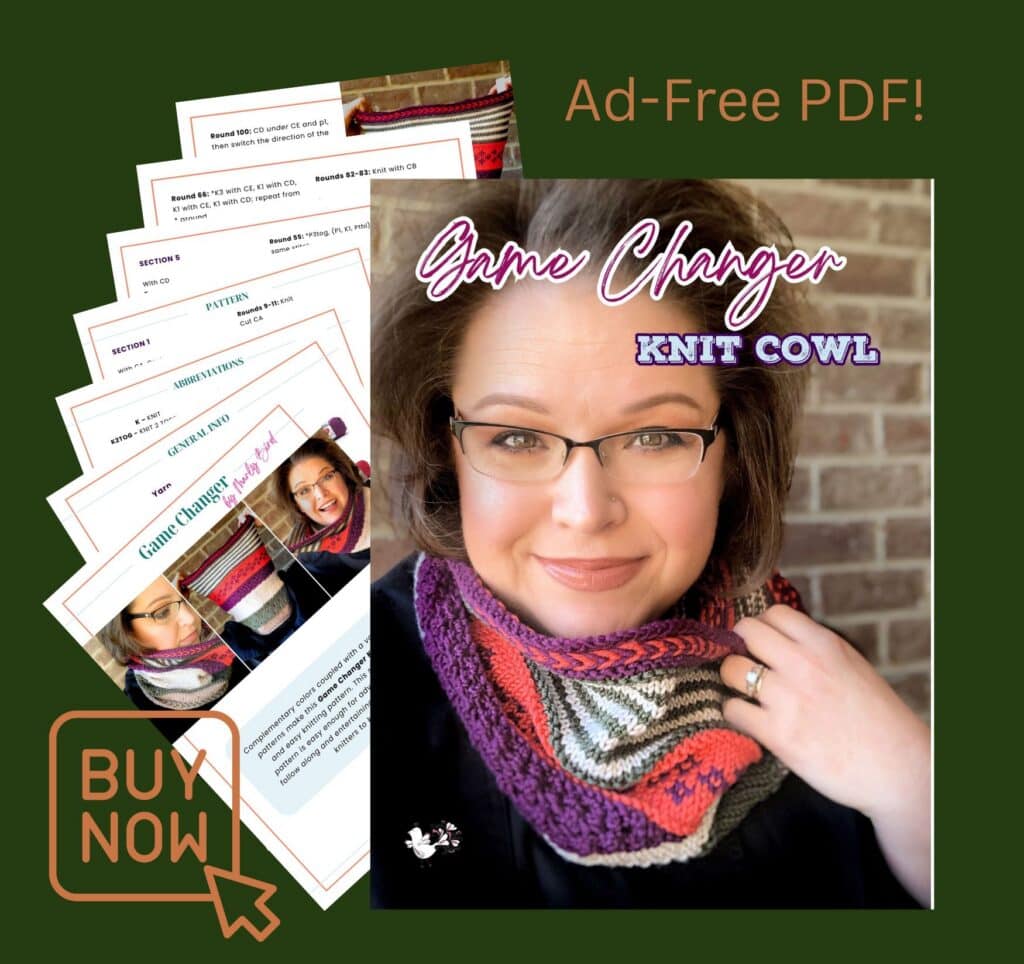
I'm thrilled to share this amazing pattern with you, many patterns on my blog are absolutely free! I kindly request that you don't copy and paste or distribute this pattern. Prefer an ad-free experience? Buy a digital PDF pattern for a small fee from one of my online stores for a seamless crafting journey.
I appreciate your support and readership. You are the reason I can keep doing what I love and sharing it with others. So, thank you from the bottom of my yarn-loving heart! Disclosure: This post contains affiliate links, meaning I get a commission if you decide to make a purchase through my links at no cost to you.
GAME CHANGER KNIT COWL PATTERN INSTRUCTIONS
SECTION 1 – CAST ON & SETUP
With Color A (CA), cast on 120 stitches. Place marker and join to work in the round, being careful not to twist.
Round 1 (RS): Knit.
SET UP FOR LATVIAN BRAID
Round 2: *K1 with CA, K1 with CB; repeat from * around.
Round 3: Bring yarns to the front between the needles. P1 with CA, *CB under CA and p1, CA under CB and p1; repeat from * around. (Yarns will twist—do not untwist yet.)
Round 4: CA under CB and p1, then switch direction of twist. *CB over CA and p1, CA over CB and p1; repeat from * around. Bring yarns to the back between the needles.
SECTION 2
With CA
Rounds 5–7: Knit.
Round 8: *K4 with CA, K1 with CB; repeat from * around.
Rounds 9–11: Knit.
Cut CA.
SECTION 3
With CB
Round 12: Knit. Round 13: Purl. Round 14: Knit.
Round 15: *K3, k2tog, yo; repeat from * around.
Rounds 16–19: Knit.
Round 20: *K2tog, yo, k3; repeat from * around.
Rounds 21–24: Knit.
Round 25: K2, k2tog, yo, *K3, k2tog, yo; repeat from * around to last stitch, k1.
This cowl introduces techniques you’ll see again and again in knitwear — making it a fantastic stepping stone toward more complex projects like sweaters and shawls with textured sections.
Frequently Asked Questions
Is this knit cowl pattern beginner-friendly? Yes — adventurous beginners who are comfortable knitting in the round will do great with this pattern.
Can I simplify the color choices? Absolutely. You can use fewer colors or stick to a cohesive palette for a more subtle look.
How long does it take to knit? Because of the changing stitch patterns, the project stays engaging and typically moves along faster than you’d expect.
Is this pattern good for learning new techniques? Yes! It’s designed specifically to help knitters practice multiple stitches in a supportive way.
Final Thoughts
The Game Changer Knit Cowl is a reminder that sometimes the best designs come from trusting your instincts — even when that means changing your mind at the last minute. It’s playful, skill-building, and rooted in community, which makes it a joy to knit and to wear.
If you make one, be sure to save the pattern, share your progress, and tell me what colors you chose. #marlybird #mmmdi