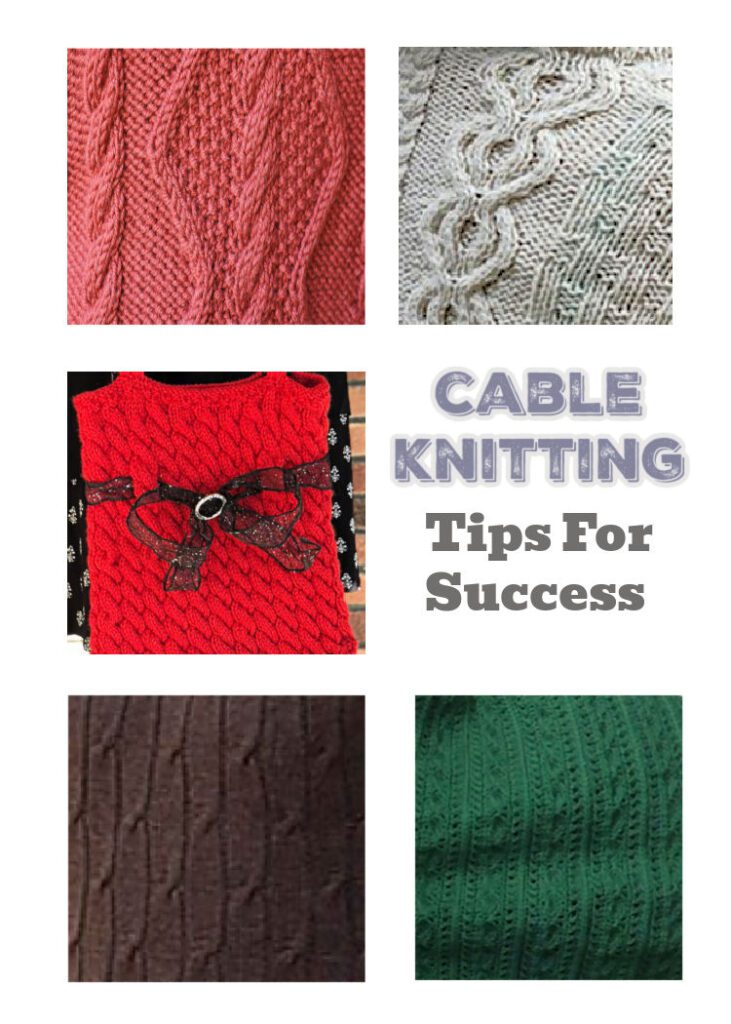
Cable Knitting Tips For Success
Knitted cables stole my heart from a young age. Nothing was more gorgeous to me in knitting than these intricate criss-crossing lines forming fabulous braids and designs. But they looked so difficult. I thought I’d never manage to work them. I’m here to tell you now – they’re simple. There’s a few things you should know, and we’ll answer your questions with some tips. When it comes to cable knitting, tips and tricks are invaluable.
We could write tons about knitting cables from all angles, but in this post, we’ll answer some commonly asked questions or FAQs about knitting cables.
Let’s start at the beginning.
What Are Knitted Cables?
Knitted cables are simply this: groups of knit stitches usually worked on a reverse stockinette stitch background that cross over one another.
That’s it!
All you’re doing as you knit cables is changing the order in which the stitches are worked. This is what makes the stitches cross over one another and form these luscious relief patterns.
Now, at first, you may find this a little difficult. You’ll feel like you’re juggling with the stitches and that you really don’t want to have to slide them off your needle without working them. But that’s all you’re doing – changing the order of the stitches before you work them. You can do this with or without a cable needle, and we’ll discuss both methods in a little bit.
Neat Cable Knitting Tips
Cables look best when the stitches are even across the whole cable. But beginners and experienced knitters often find that the outside stitches of their cables are a little looser than they’d like. This is caused at two points: when the yarn is moved from front to back (between purl stitches and knit stitches), and the opposite, from back to front (between knit and purl stitches).
At these points, when you’re moving your yarn between two stitch types, make sure you pull the yarn a little tighter for your next two stitches. We say two stitches because, after these two stitches, there’s less chance of the yarn loosening after two stitches than after just one. This will ensure you don’t have any extra yarn between your stitches – that’s what causes the loopy look or larger stitches on the outsides of your cable.
How Do You Prevent Holes In Knitting Cables?
Preventing holes when knitting cables is similar to my answer for working cables neatly. During the yarn transition to either front or back, you need to pull it a little more snugly than you normally would.
Another method for preventing holes in cable knitting is to not push the just completed stitch all the way onto your right needle until the next stitch is also complete. Keep the recently completed stitch or two on the sloped tip of your right-hand needle, which is a little narrower. This reduces the amount of spare yarn and keeps your cables neat and hole-free.
How Do You Knit Cables For Beginners?
My suggestion for beginner cable knitters is to use a cable needle to change the location of your stitches. Yes, this adds another needle to juggle in that tight spot, but it’s better than trying a slightly more advanced cable method of not using a cable needle at all.
You have several cable needle options. Cable needles are short knitting needles, usually around 5” long, with a point at each end. You normally find them in packs of two or 3 sizes (thicknesses). You also have three different shape options – all have points at both ends. They come completely straight, straight at each end with a bump or curve in the center, or U-shaped.
You may like to try all the options to see which type you prefer. For speed, I prefer straight ones, which you do have to hold close to your working stitches. But with the U-shape, you can actually let go of the cable needle. Letting the whole needle hang down, holding the stitches you’re moving secure while you work other stitches, is quite comforting.
Here’s an awesome video about knitting cables with a cable needle.
Are Cables Hard To Knit?
As an experienced knitter, I ADORE cables!
Are they hard to knit? No, not really.
As I said earlier, you’re just switching the order of the stitches you’re knitting, so in that sense, they're easy. Everything takes a little practice. The more cables you knit, the better, neater, and quicker you’ll get.
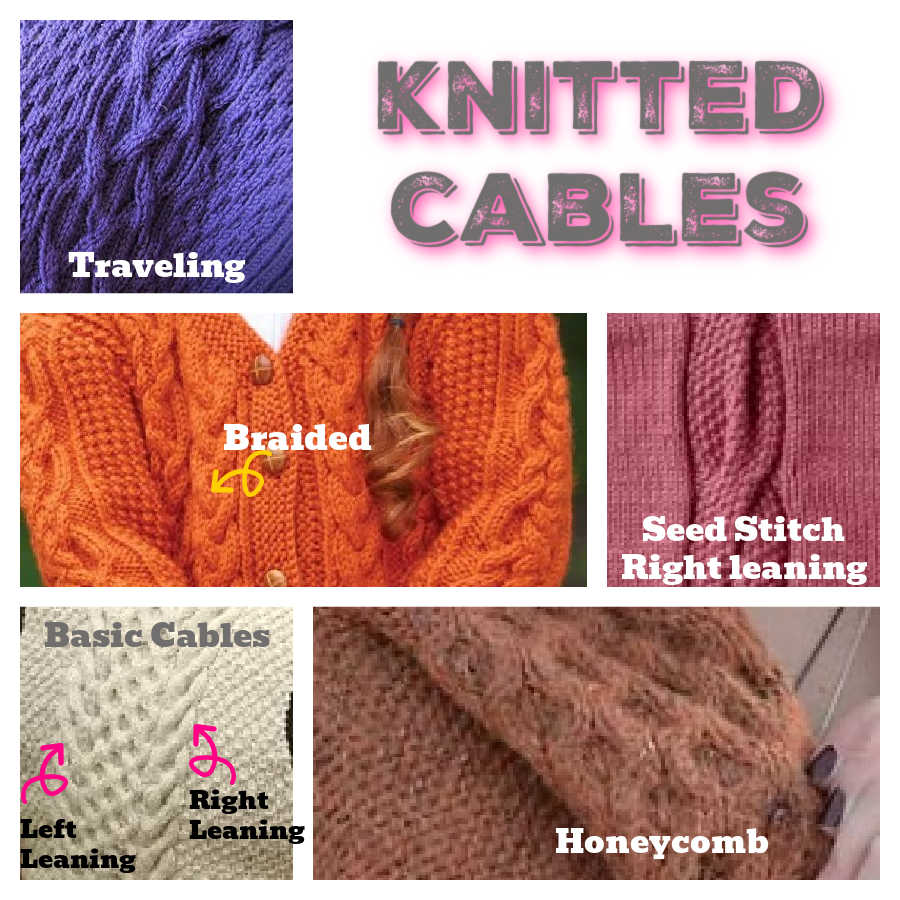
Start with vertical rope cables – those that go straight up and down with only one type or direction of cross-over (knit stitches over knit stitches). Then, try crossing in the other direction.
Once you have simple rope cables down, try honeycomb cables. Honeycomb cable stitch patterns require you to cross stitches in both directions, but they’re still knit stitches over knit stitches.
After you’ve nailed these, you might want to branch out and try more complex cables, such as traveling cables, which can move across the whole width of your project or back and forth.
Traveling cables also require you to cross knit stitches over purl stitches. This means you need to follow your charts or patterns very carefully to ensure you work the right stitch in the right place.
Here's a few more cable knitting tips…
Does Cable Knitting Use More Yarn?
In short – yes – cable knitting does use more yarn. The reason is that in addition to working both knit and purl in the same row (like ribbing), you’re crossing stitches over one another. This narrows your finished fabric even more. You’re going to need extra stitches to knit the width you need.
If you worked swatches of the same stitch count in stockinette stitch, ribbing, and cables, you’ll find the cabled swatch may be closer to the ribbing width, depending on how many cables you use and how wide the cables are. 4 stitches over 4 stitches is going to narrow the fabric more than 2 stitches over 2 stitches.
Think of it this way. Stockinette stitch is flat. Ribbing has relief and is sometimes considerably narrower, depending on which ribbing stitch count you use, but it's very stretchy. With cables, you have both knit and purl stitches and a relief pattern with stitches crossing over each other. Where the stitches cross, you actually have a double layer of stitches.
If you love cables, it’s absolutely worth the work. Try it and see!
Need More Cable Knitting Tips?
Let’s answer a few more questions for you.
And, if you need even more help, join the Marly Bird Facebook Group! There are loads of people in there eager to help and answer all of your cable knitting and other knitting questions.
How Do You Make Knitted Cables Stand Out?
Knitted cables stand out when they’re on a background of reverse stockinette stitch. So, since your cables are almost always in the knit stitch, they pop to the front of your work. Purl stitches always recede into the background.
If you work knit cables on a knit background, they’ll blend in and look like folds or creases in a knit fabric rather than the proud cables they should be.
What Is The Best Yarn For Knitting Cables?
I like to suggest wool or wool blends for cables since they are a bit more ‘sticky’ than man-made fibers. Cotton and cotton blends also work well, but cotton has less stretch so it can be harder to get those edge stitches of each cable nice and snug and neat.
Should You Block Cable Knits?
Yes – cable knitting should be blocked for best results.
BUT NOTE: Make sure you swatch in the knit cable pattern BEFORE starting your project. Make sure you get gauge BEFORE you start your project. You don’t want to get to the end of a knitted cables project only to find it’s too small. Heavy blocking can’t correct size with cables, and you’ll lose all that beautiful texture!
Do Cables Make Knitting Smaller?
YES – knitting cables considerably narrows your knitting and can shorten it too. As I just said, you MUST swatch first, block, and then measure to be sure you meet the gauge BEFORE you start knitting your project. It’s much better to work this way to avoid disappointment.
Do You Need A Cable Needle To Knit Cables?
No – you can knit cables without a cable needle.
I always thought I’d never do this, but for narrower cables, I do work without a cable needle. I find it quicker and easier.
But once you’re switching more than two or three stitches per cable, I strongly suggest you use a cable needle. If you don’t, you’ll spend more time picking up dropped stitches than knitting. Ask me how I know.
How to work cables without a cable needle.
Cable Knitting Tips: Cables In The Round
You need to be particularly aware when you knit cables in the round if you’re using charts. When knitting flat, you read charts from right to left on odd rows and left to right on even rows. When it comes to knitting in rounds, you always see the right side of your work. This means you always read the chart from right to left on EVERY round.
How Do You Know When You’re On A Cable Row or Round?
Well, I have just the video for you that explains this very thing.
Check it out below!
I hope you’ve enjoyed learning our cable knitting tips.
If you’d like to practice what you’ve just learned, be sure to click on these pattern links below. We have lots of advanced beginner patterns for cable knitting, so you can put your new skills to work right away.
Let’s get knitting cables!
Don’t forget to join the Facebook Group and share pictures of your projects!