There’s something special about a project that grows with you — stitch by stitch, row by row — until suddenly you’re holding a beautiful, wearable piece that feels both comforting and empowering.
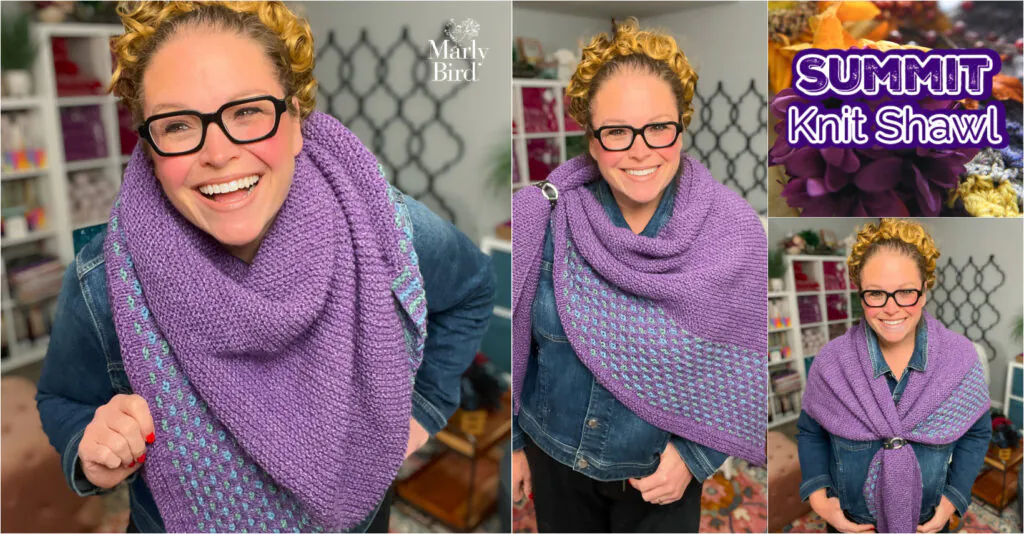
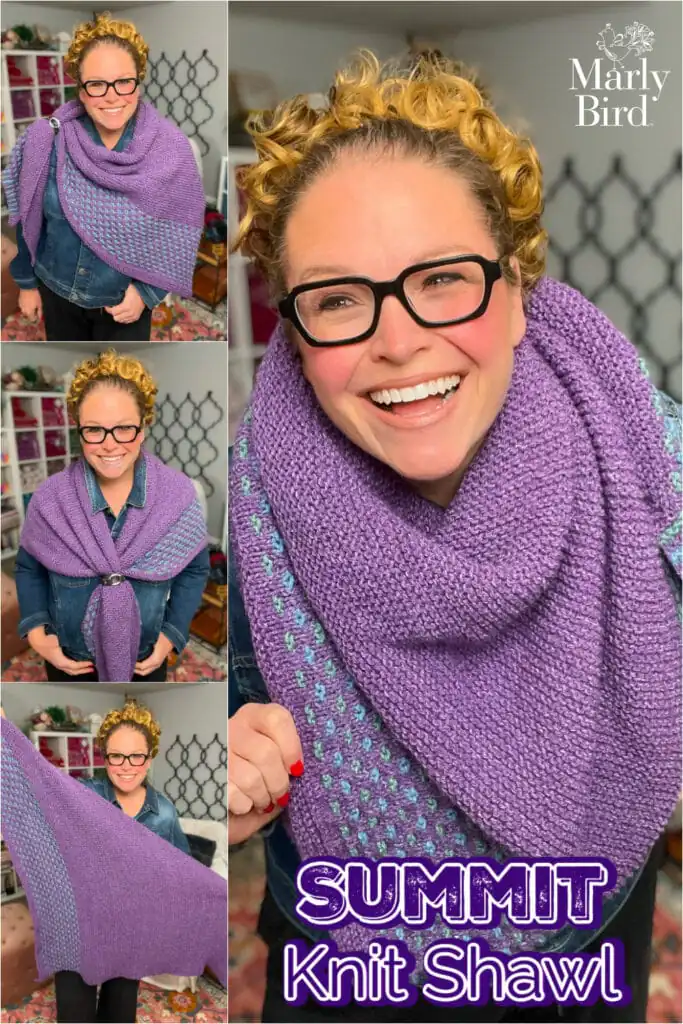
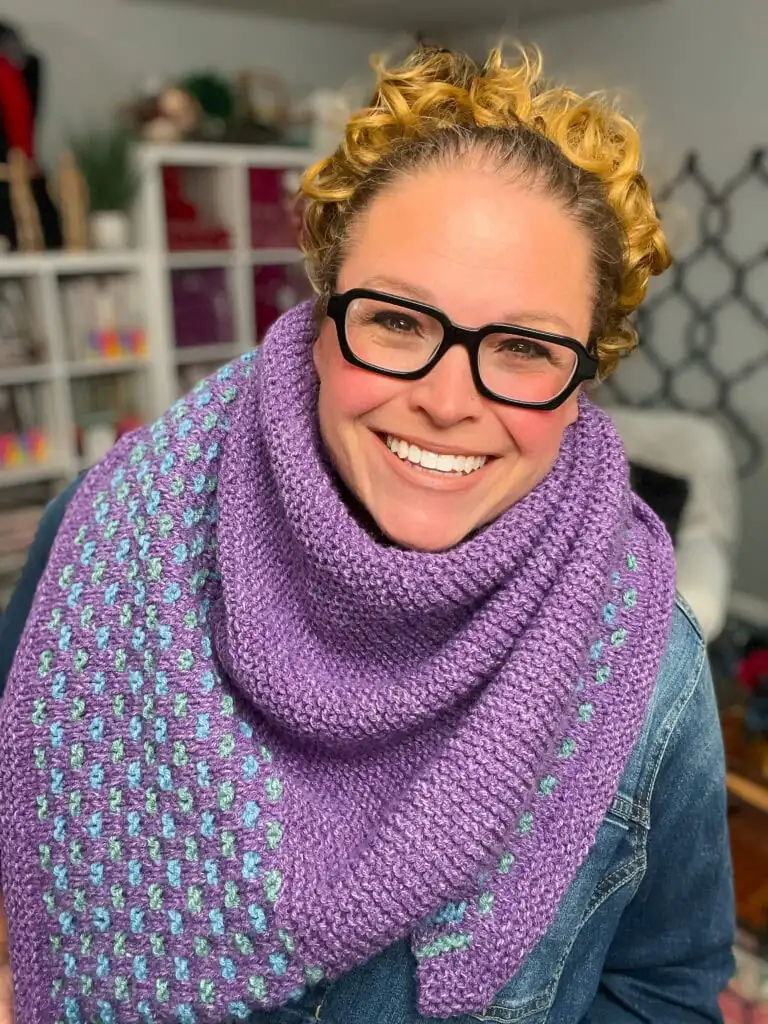
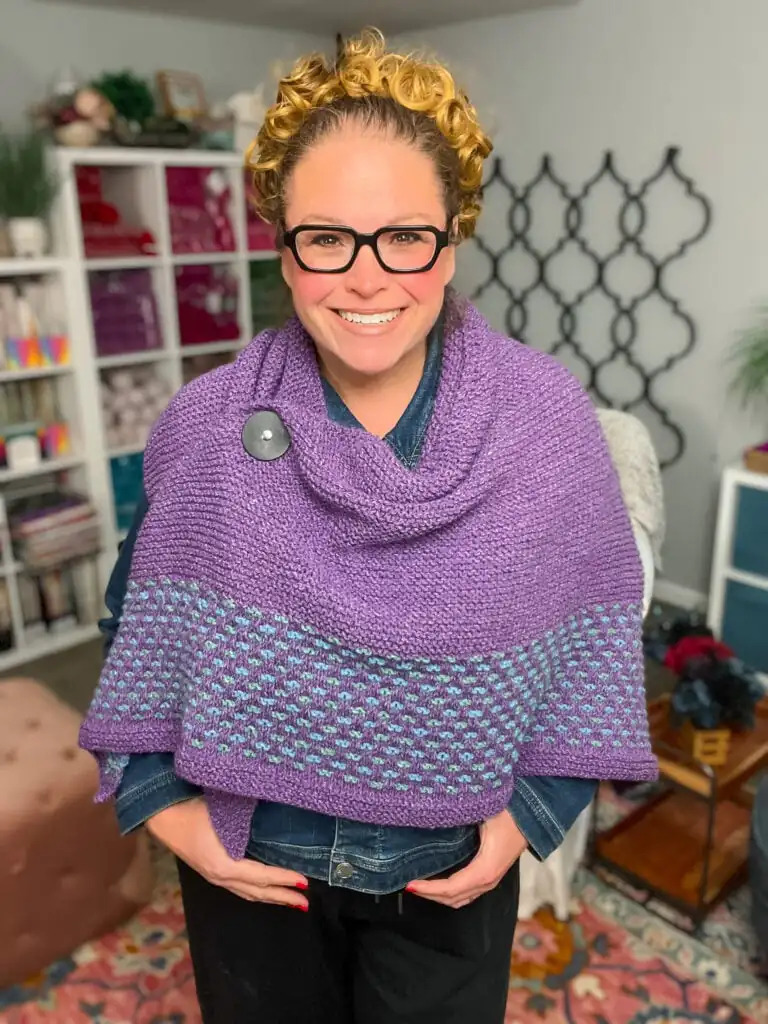
The Summit Knit Shawl is exactly that kind of knit. It’s simple, soothing, and quietly confidence-boosting, making it a perfect companion whether you’re easing back into knitting or craving a relaxing project that still feels intentional and polished.
This free knit shawl pattern was designed to be approachable, flexible, and deeply satisfying — the kind of project that reminds you why you love knitting in the first place.
Quick Pattern Overview
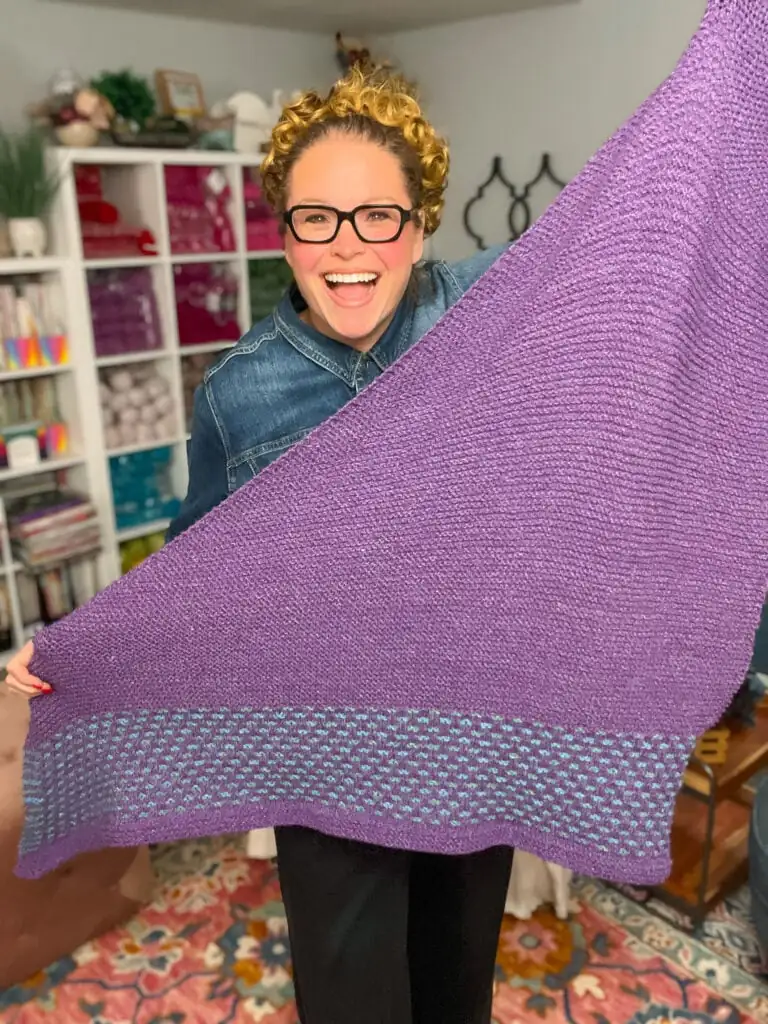
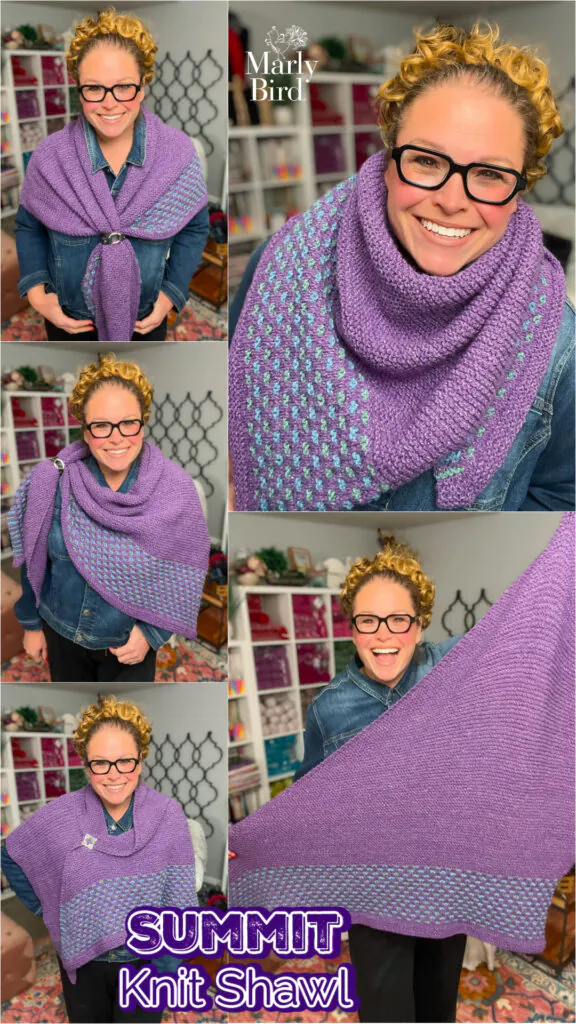
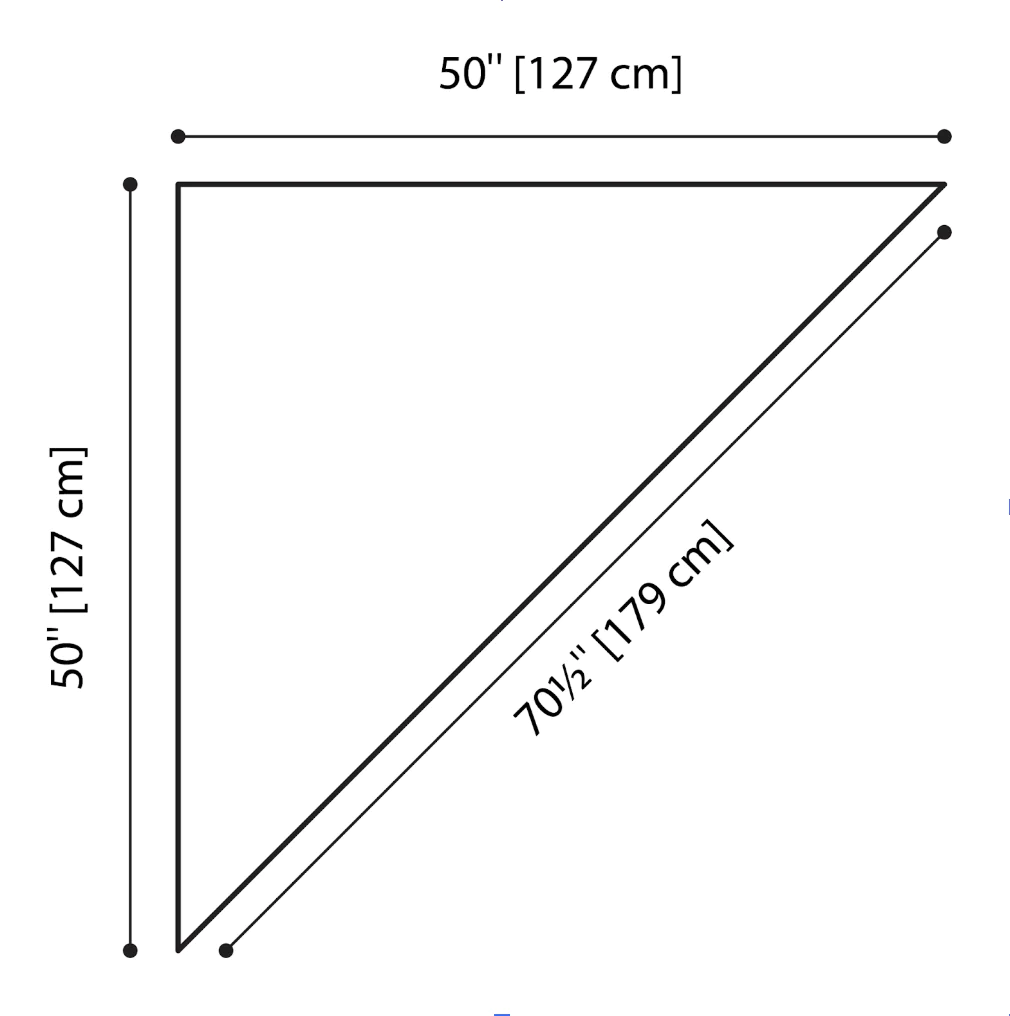
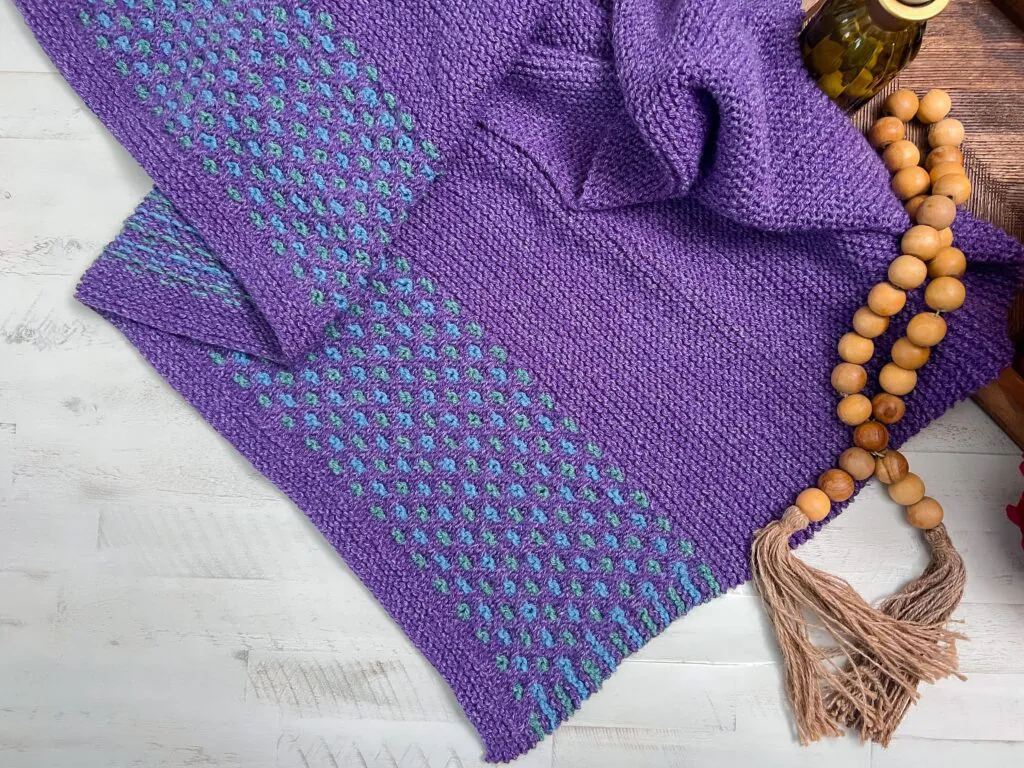
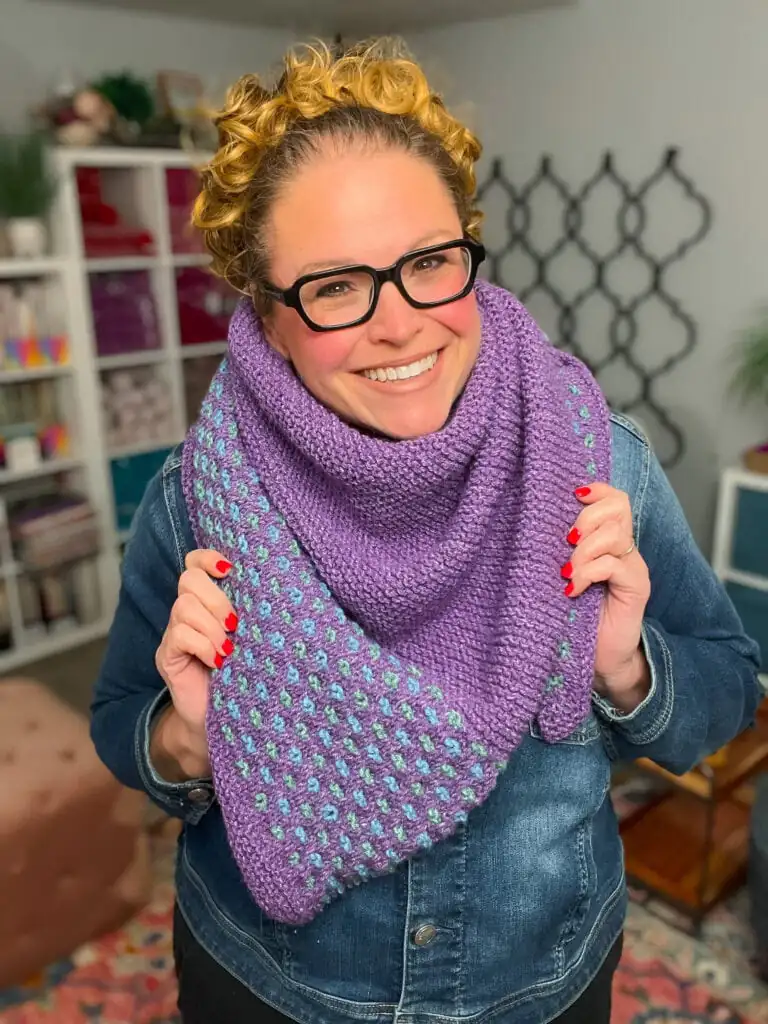
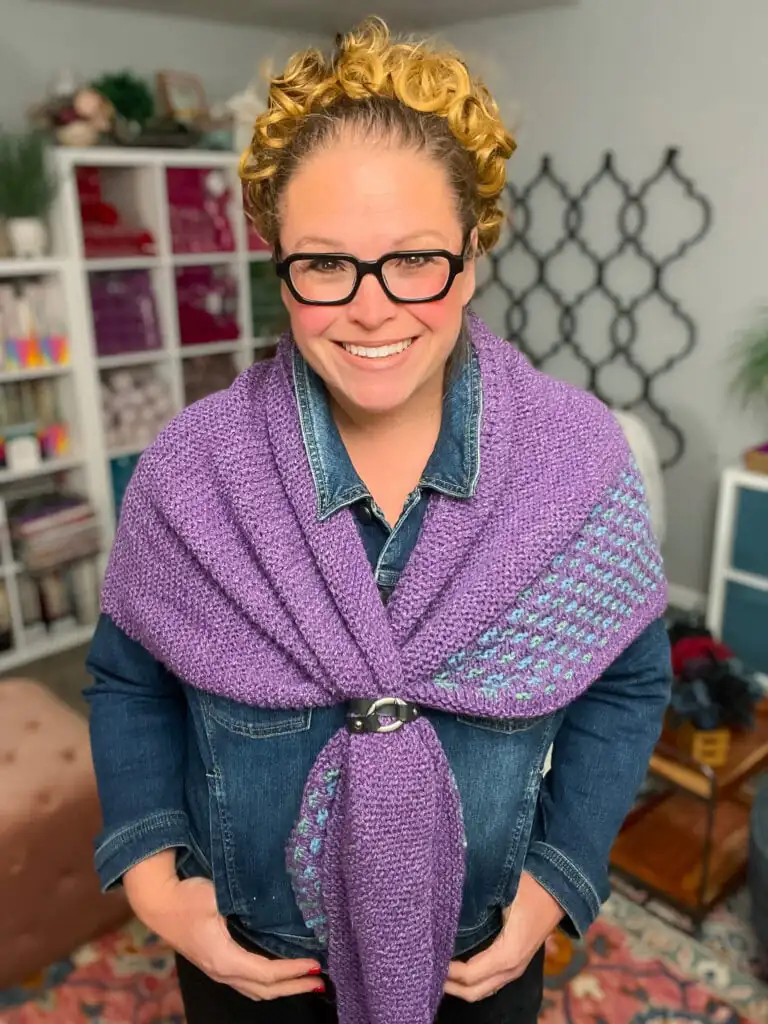
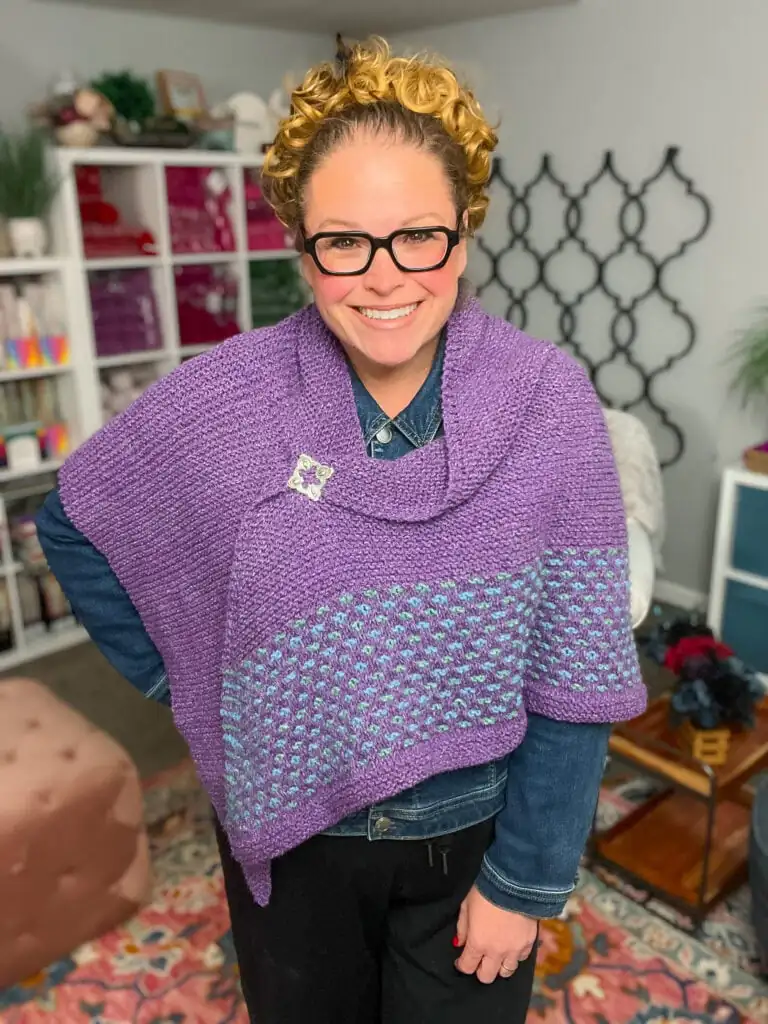
The Summit Knit Shawl is a right-angle triangle shawl worked back and forth in rows, featuring long stretches of garter stitch and a striking color-banded section near the top.
In this post, you’ll learn:
What makes this shawl beginner-friendly yet engaging
How the simple construction creates a polished finished look
Yarn options and substitutions for easy customization
How this pattern fits into your everyday wardrobe
Understanding the Construction: Why This Shawl Works
At its heart, the Summit Knit Shawl is all about simple geometry and thoughtful pacing. The right-angle triangle shape grows steadily with increases worked along one edge every other row. That predictable rhythm makes the knitting feel calm and intuitive — no surprises, no stress.
The garter stitch body creates a squishy, drapey fabric that lies beautifully when worn, while the color band section adds visual interest without overwhelming the knitter. It’s a design that proves you don’t need complicated techniques to create something eye-catching and wearable.
Relaxing garter stitch with an engaging color band accent
Right-angle triangle shape that’s easy to wear and style
Gauge-forgiving design (great for stress-free knitting)
Perfect for mindful knitting, travel projects, or evening TV knitting
✨ Designer Tip: This is a fantastic pattern for practicing clean edges and consistent increases — skills that quietly level up your knitting across all future projects.
“This is the kind of shawl that grows with you — steady, comforting, and quietly confidence-building.”
Design, Fit, and Wearability
The Summit Knit Shawl is generously sized, offering plenty of coverage without feeling bulky. The garter stitch fabric drapes naturally, making it easy to wear tossed over your shoulders, wrapped scarf-style, or layered under a coat when temperatures dip.
Because the increases happen gradually and predictably, the shape stays balanced and flattering — no awkward corners or curling edges here.
Affiliate Disclosure:This post contains affiliate links. To learn more please visit my privacy policy here💖
Yarn Choices & Substitutions
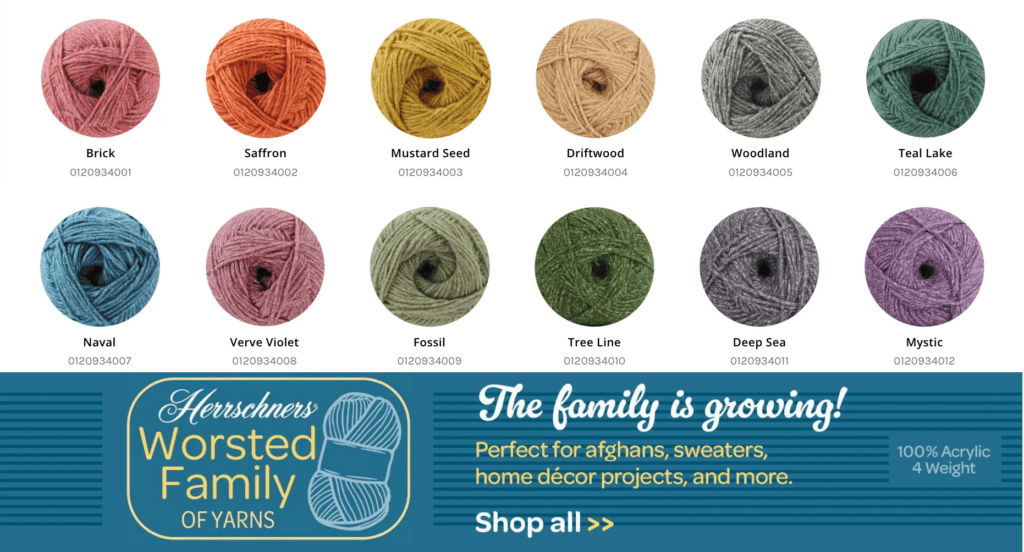
The original design uses Herrschners Worsted 8 Heathers, a worsted-weight acrylic yarn that offers excellent stitch definition, durability, and affordability — making it a fantastic choice for shawls that see real-life wear.
Clean garter stitch fabric that blocks beautifully
Eye-catching color band detail near the top edge
One-sided increases for easy stitch tracking
Long stretches of relaxing knit stitches
This is a “trust the process” kind of project — and the payoff is absolutely worth it.
Summit Knit Shawl Pattern Details
Designed by Marly Bird
SKILL LEVEL
Adventurous Beginner
MEASUREMENTS
Finished Measurements
Shawl measures approximately 50” [127 cm] across top (bound-off) edge and along vertical side edge, and 70½” [179 cm] along diagonal edge (increase-side edge).
Gauge
16 sts and 28 rows = 4½” [11.5 cm] by 4″ [10 cm] in Garter stitch.
This is a right angle triangle shawl with increases on only one side of the fabric every other row.
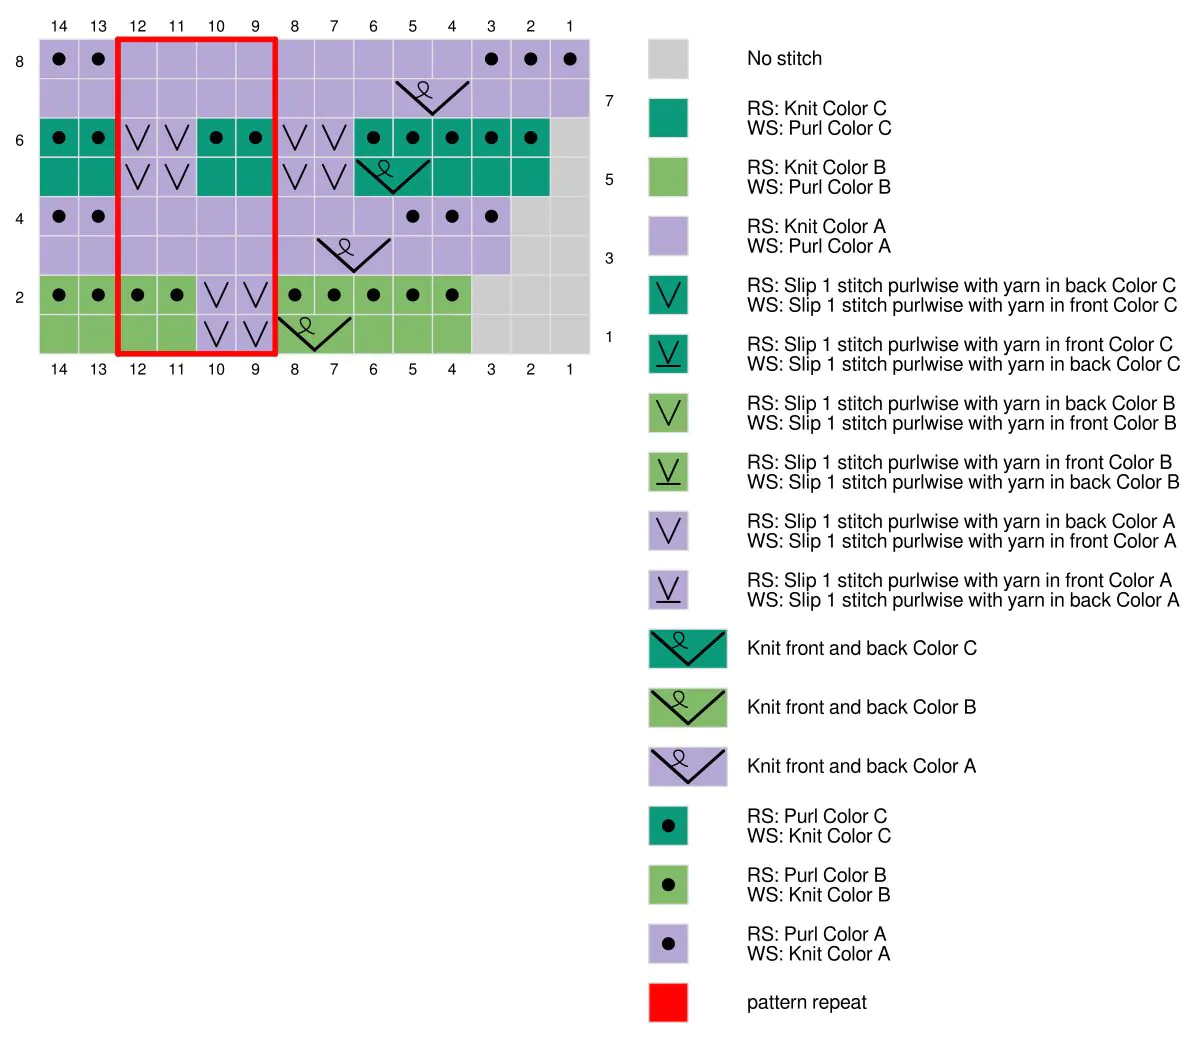
The majority of the body of the shawl is worked in Garter stitch, and features a 52-row color band section at the top.
Bind off this shawl knitwise and be sure to not make the bind off too tight.
Gauge is not crucial for this project, but will affect required yarn amounts and finished sizes if different from gauge given above.
GROW
To Unlock Exclusive Subscriber Content click the Box below and join for free by simply adding your email and creating a password! If you are having troubles, clear your cache or reset your password or login to the Grow Publisher Portal.
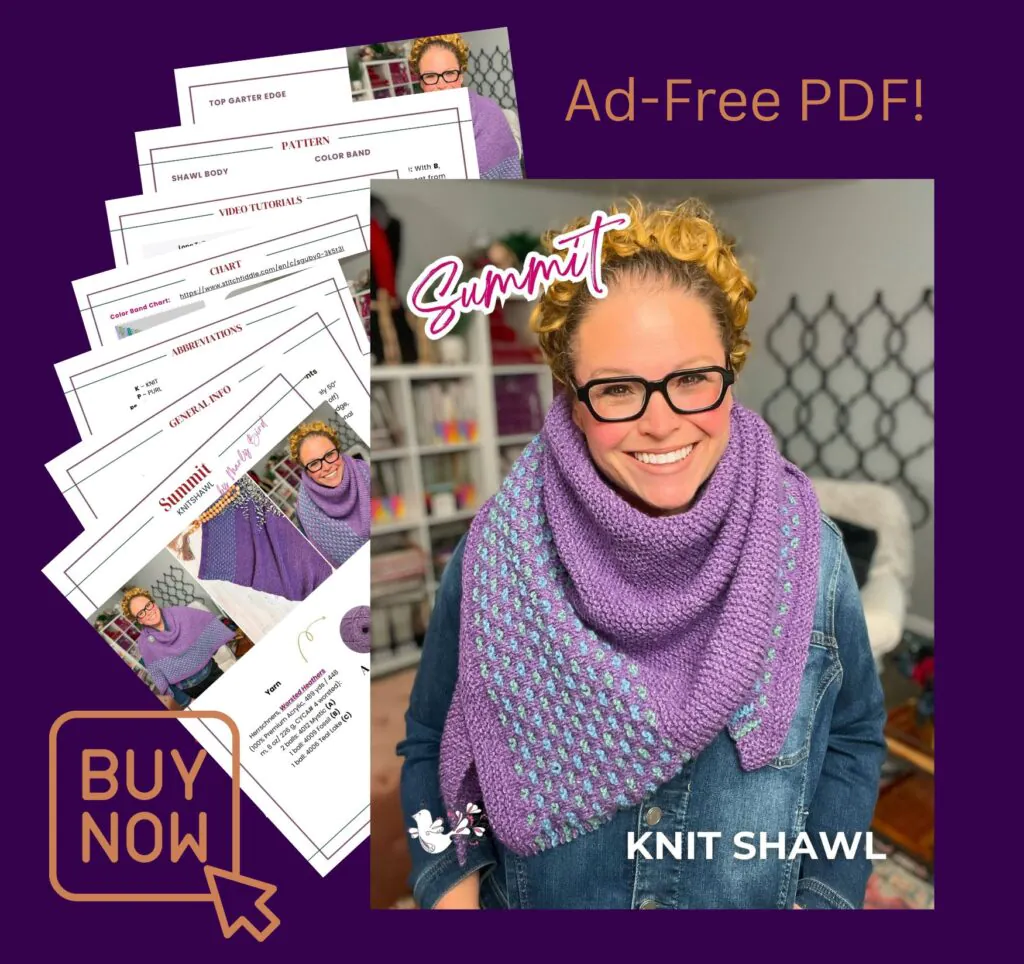
I'm thrilled to share this amazing pattern with you, many patterns on my blog are absolutely free! I kindly request that you don't copy and paste or distribute this pattern. Prefer an ad-free experience? Buy a digital PDF pattern for a small fee from one of my online stores for a seamless crafting journey.
I appreciate your support and readership. You are the reason I can keep doing what I love and sharing it with others. So, thank you from the bottom of my yarn-loving heart! Disclosure: This post contains affiliate links, meaning I get a commission if you decide to make a purchase through my links at no cost to you.
If you’re new to shaping or want extra confidence with increases and stitch consistency, many of the techniques used here are reinforced across Marly Bird’s tutorials and skill-building resources — making this shawl a wonderful stepping stone into more advanced designs.
Frequently Asked Questions
Is this shawl good for beginners? Yes! This pattern is ideal for adventurous beginners who are comfortable with knit and purl stitches and want to build confidence with shaping.
Does gauge really matter for this shawl? Not strictly. Gauge will affect the finished size and yarn usage, but the design is forgiving and flexible.
Can I change the colors or yarn weight? Absolutely. Stick with a similar yarn weight for best results, but color choices are completely customizable.
How long does it take to knit? This is a relaxed, steady project — perfect for knitting over a few evenings or a cozy weekend.
The Summit Knit Shawl is proof that simple stitches, thoughtful design, and a steady rhythm can come together to create something truly special. Whether you’re knitting it as a gift or keeping it for yourself, this is the kind of project that reminds you how satisfying knitting can be.
If you make one, I’d love to see it — save the pattern, share your progress, and let me know how it turns out. #marlybird #mmmdi
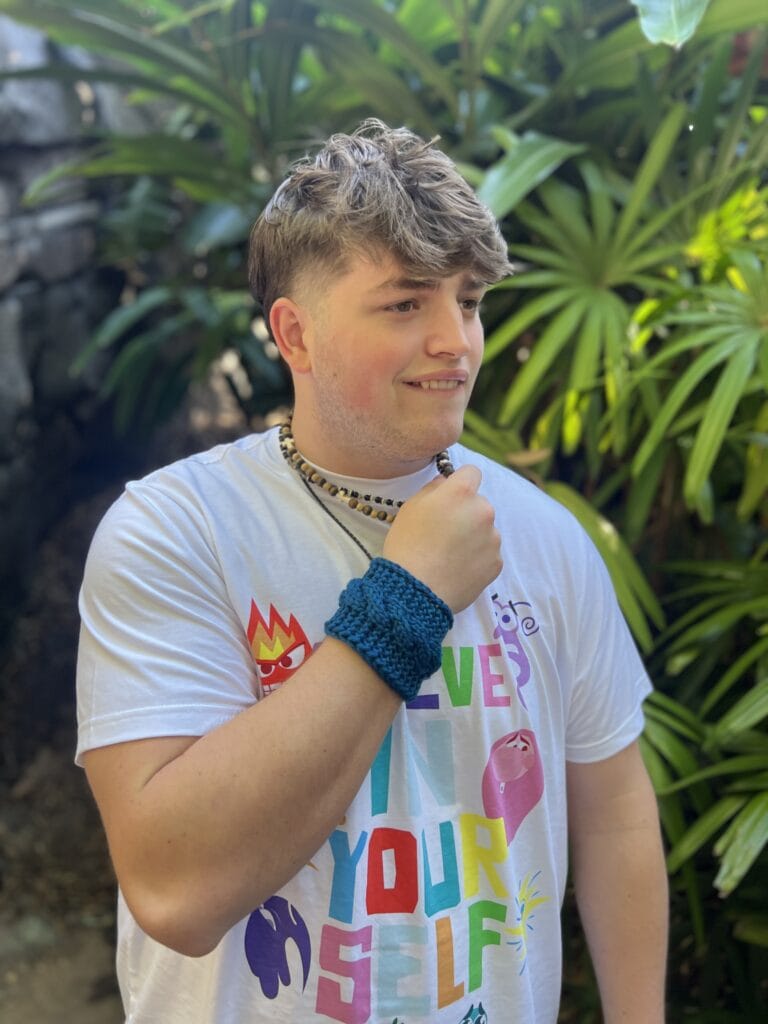
Small projects can be mighty—and this one proves it. ☕️
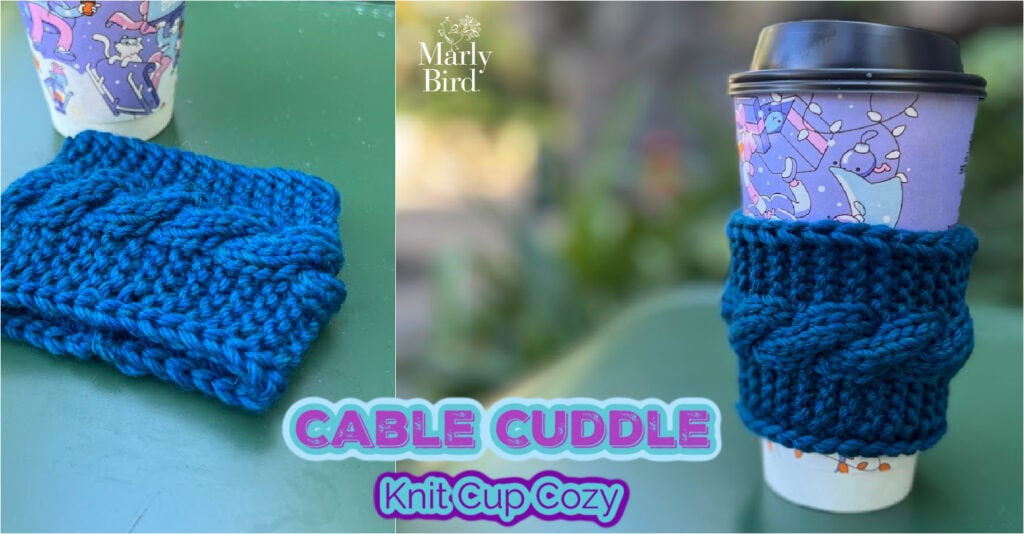
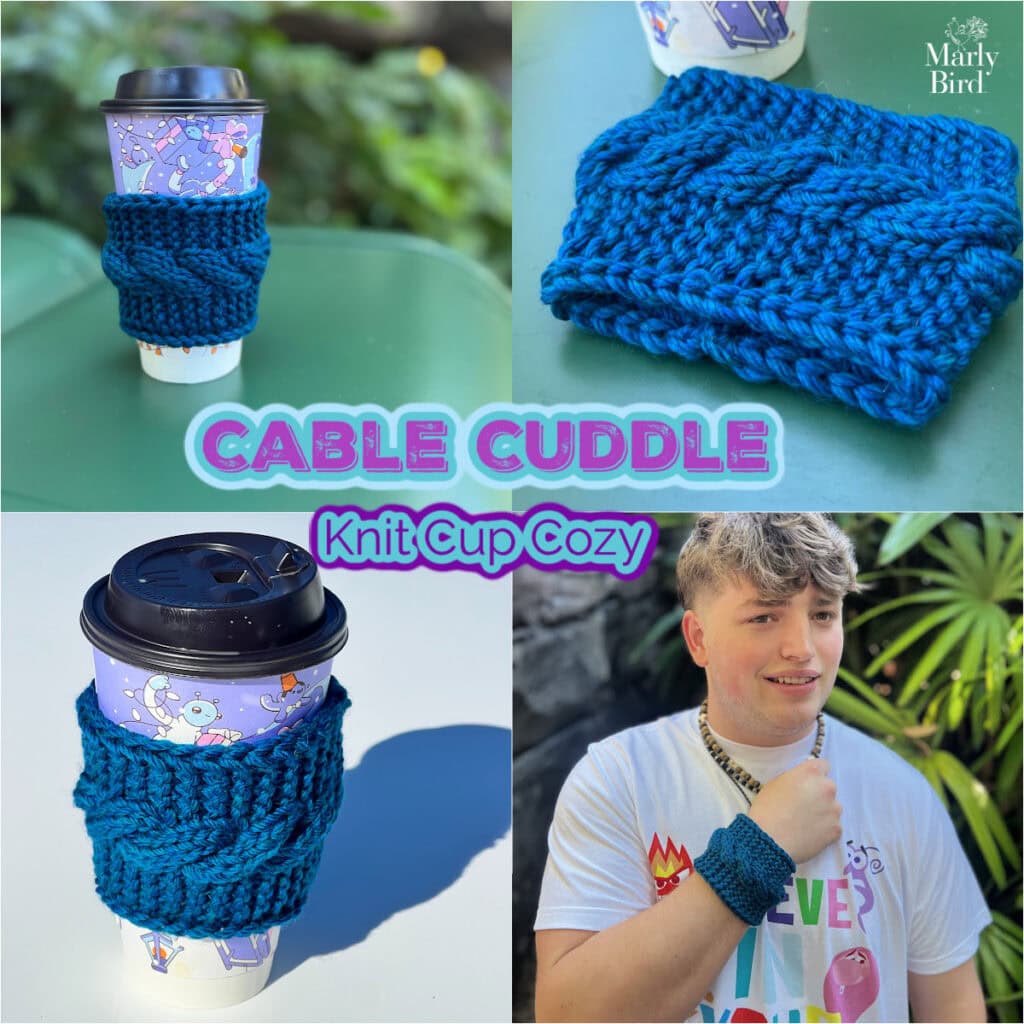
The Cable Cuddle Cup Cozy is a quick knit that delivers big texture, cozy vibes, and serious handmade charm. Whether you’re knitting for yourself, making gifts, or just want a satisfying project you can finish in an evening, this reusable coffee and tea sleeve checks all the boxes.
If you love knitting pieces that feel useful and special, this newly free pattern deserves a spot on your needles.
Quick Pattern Overview
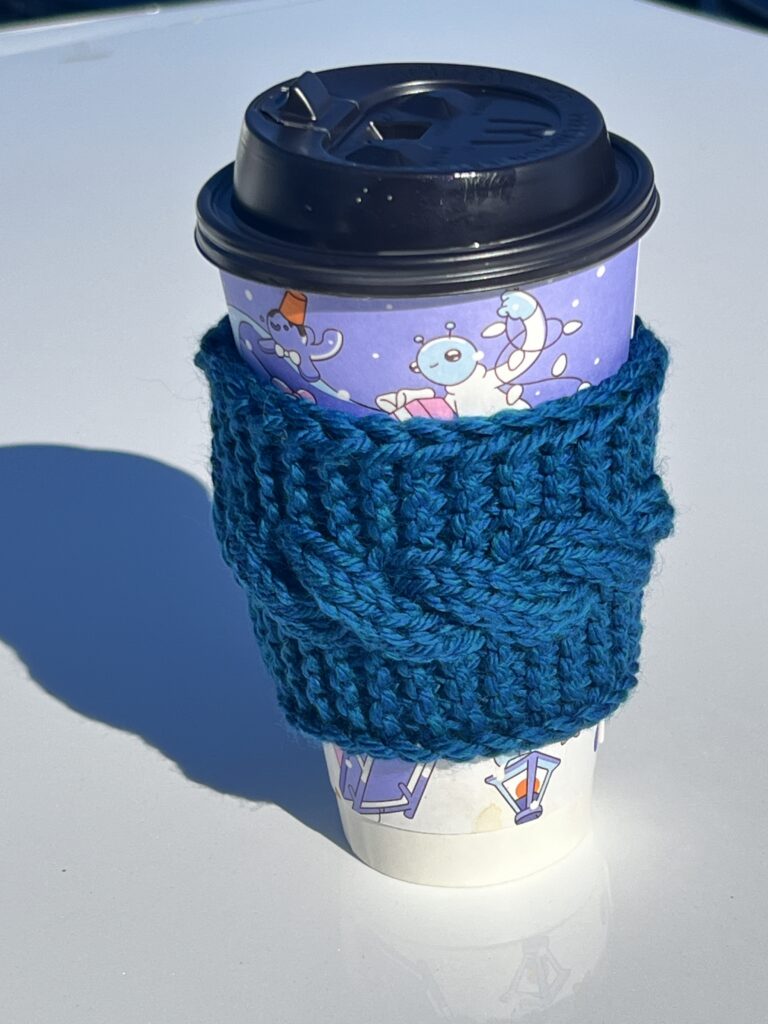
The Cable Cuddle Cup Cozy is a free knit coffee sleeve pattern worked flat and seamed, featuring classic cable texture and garter stitch for stretch and comfort.
In this post you’ll learn:
Why cup cozies are perfect confidence-building projects
How cables work in a small, manageable format
How this cozy fits coffee cups and tea mugs
Why this pattern makes an excellent handmade gift
Why Knit a Cup Cozy?
Reusable cup cozies are:
Eco-friendly alternatives to disposable sleeves
Quick knits with instant gratification
Thoughtful handmade gifts
Excellent gifts and market-style makes
A great way to practice cables without commitment
If you enjoy quick knit gifts or love having a go-to project between bigger makes, this cozy fits beautifully into your rotation.
Coffee, Tea, and the Little Rituals That Matter ☕🍵
There’s something comforting about the ritual of a warm drink in your hands—whether that’s a morning coffee, an afternoon latte, or a quiet cup of tea at the end of the day. The Cable Cuddle Cup Cozy was designed to fit right into those moments.
A knit cup cozy does more than protect your hands from heat. It:
Adds insulation so drinks stay warm longer
Makes reusable cups more comfortable to hold
Turns an everyday habit into something personal and handmade
If you’re a coffee lover, this cozy slips perfectly over takeaway cups or reusable tumblers. If you’re more of a tea drinker, it works just as well on travel mugs or insulated cups for loose-leaf blends and herbal infusions.
And let’s be honest—there’s just something extra satisfying about wrapping your hands around a warm mug that’s dressed in cables you knit yourself. It’s cozy in every sense of the word.
✨ Designer Tip: Knit a few of these in different colors and keep them near your coffee station—they make fantastic grab-and-go gifts for guests, too.
Join our Newsletter
Get Free Crochet & Knitting Pattern Links & Coupons!
One of my favorite surprises about this pattern is that it isn’t just for cups — it also works beautifully as a knit wrist cuff.
Slip it over your wrist for:
A little extra warmth on chilly days
Light coverage without full mittens
Cozy texture that still lets you use your fingers
✨ Designer Tip: Make two — one for your cup, one for your wrist. Trust me on this one.
Design, Fit, and Construction Details
The cozy is knit widthwise, then seamed to form a cuff that fits most standard takeaway cups. The combination of garter stitch and cables creates:
Stretch where you need it
Texture that insulates
A snug, secure fit
Ready to Fall in Love with Knitting Cables?
If this cup cozy is your first taste of cables, you’re in for a treat. Cable knitting opens the door to texture-rich projects that feel timeless, cozy, and incredibly satisfying to make.
Once you’ve tried cables on a small project like this, you might love exploring them in other ways — from accessories to garments and home décor.
Here are some knit cable projects from Marly Bird that cable lovers often gravitate toward next:
⭐️ 3/3 rc (3/3 Right Cable): slip 3 sts onto cable needle and hold in back, k3 from left hand needle, k3 from cable needle.
⭐️ Brk (Brioche Knit): Knit the next stitch together with its corresponding yo from the previous row.
⭐️ Sl 1 (Slip 1): Slip the next stitch purlwise (as if to purl).
⭐️ Sl 1yo (Slip 1 with Yarn Over): Bring the working yarn forward between the needles, slip the next stitch purlwise, then bring the working yarn over the right needle to the back of the work. This slipped stitch with a yo on top of it is considered one stitch, and will be worked as a brk on the next row.
⭐️ Y0 (Yarn Over): Bring the yarn over the needle.
The YO and the stitch of the Sl1yo are treated as 1 stitch and are not separated.
Coffee cozy knit widthwise then seam the cast on to the bind off.
GROW
To Unlock Exclusive Subscriber Content click the Box below and join for free by simply adding your email and creating a password! If you are having troubles, clear your cache or reset your password or login to the Grow Publisher Portal.
I'm thrilled to share this amazing pattern with you, many patterns on my blog are absolutely free! I kindly request that you don't copy and paste or distribute this pattern. Prefer an ad-free experience? Buy a digital PDF pattern for a small fee from one of my online stores for a seamless crafting journey.
I appreciate your support and readership. You are the reason I can keep doing what I love and sharing it with others. So, thank you from the bottom of my yarn-loving heart! Disclosure: This post contains affiliate links, meaning I get a commission if you decide to make a purchase through my links at no cost to you.
CABLE CUDDLE CUP COZY PATTERN
Cast on 16 sts with long tail cast-on.
Row 1 (WS): Sl1yo, k4, place marker, purl 6, place marker, k5.
These types of projects are ideal for last-minute gifts, teacher thank-yous, or just keeping a few handmade items ready to go.
Want to Get More Comfortable with Cable Knitting?
Cables look impressive, but once you understand how they work, they’re surprisingly approachable. If you’d like extra support as you explore cable knitting, these tutorials and resources can help:
These are great references to bookmark as you continue building your cable skills.
FAQ
Is this good for beginners? Yes—if you’re comfortable with knit and purl, this is a great intro to cables.
How long does it take to knit? Most knitters finish one in an evening.
Is there a printable PDF? Yes! An optional ad-free PDF is available.
Will this knit cup cozy fit both coffee and tea cups? Yes. The finished cozy is designed to fit most standard takeaway coffee cups and reusable travel mugs commonly used for tea or coffee.
Can I use this as a gift pattern? Absolutely. Knit cup cozies make thoughtful, reusable gifts and are perfect for holidays, teacher gifts, or stocking stuffers.
Is this an eco-friendly knitting project? Yes. Reusable knit cup cozies reduce the need for disposable sleeves and are a great way to combine handmade style with sustainability.
Final Thoughts
If knitting cables has you hooked, you may enjoy stepping up to a larger wearable project next — like a poncho, cardigan, or sweater that lets those cables really shine.
Some cable-rich wearables to explore when you’re ready:
The Cable Cuddle Cup Cozy is proof that small projects can still feel special. 💙 Try it in your favorite color—and don’t be surprised if you end up making more than one.
Save this pattern, share it with your knitting bestie, and tag #mmmdi and #marlybird so I can cheer you on!
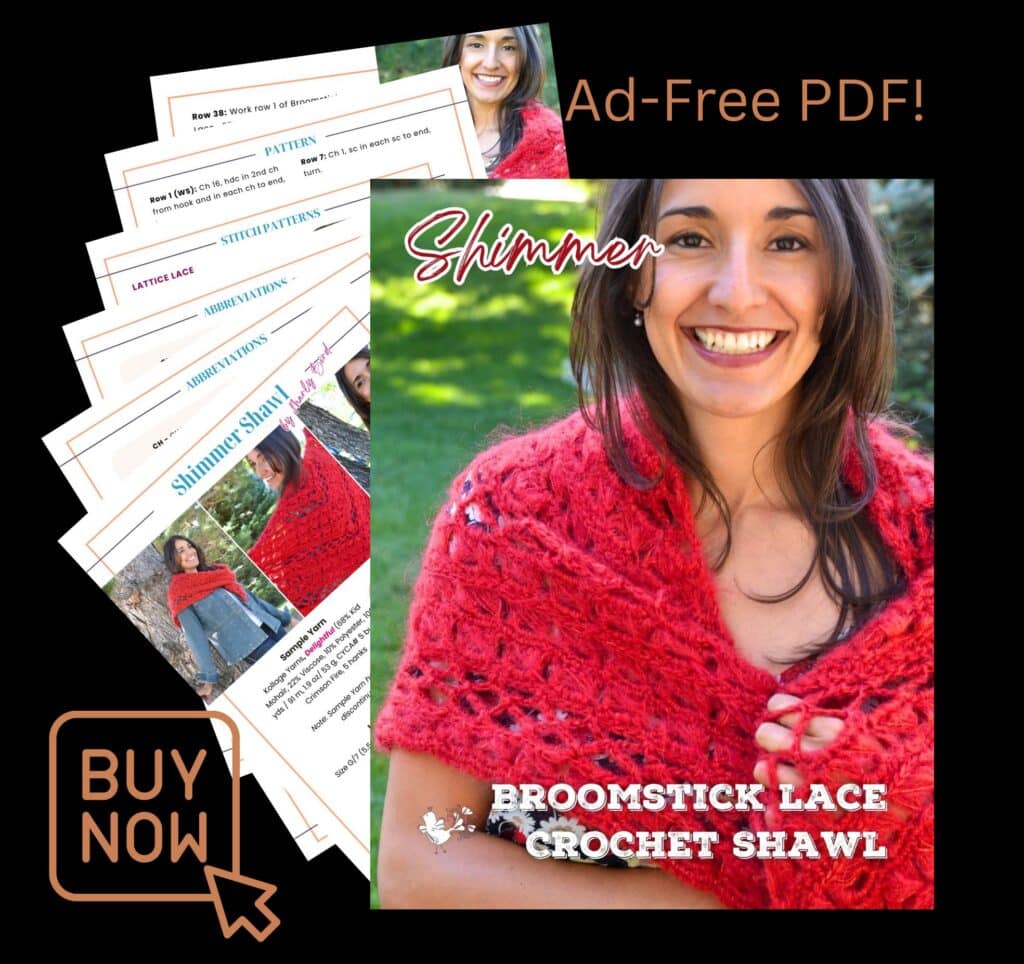
Some crochet projects just feel special the moment you start them—and this is one of those. ✨ The Shimmer Shawl is light, airy, and full of beautiful texture, using broomstick lace to create an open, flowing fabric that looks far more complicated than it actually is. If you’ve ever wanted a crochet shawl that feels elegant but still approachable, this one checks all the boxes.
Quick Pattern Overview
The Shimmer Shawl is a triangular crochet shawl that blends broomstick lace and lattice lace for a soft, drapey finish that shines in lightweight yarns.
In this post you’ll learn:
What broomstick lace really is (and why it’s easier than it looks)
Why this shawl is ideal for confident beginners
How yarn choice affects drape and openness
How to wear and style a lightweight crochet wrap year-round
What Is Broomstick Lace?
Broomstick lace is a crochet technique that uses an oversized knitting needle (or dowel) to create elongated loops, which are then worked into grouped stitches. The result? ✨ Big, airy texture ✨ Lightweight fabric ✨ Eye-catching stitch definition
Despite how dramatic it looks, broomstick lace follows a very repeatable rhythm—making it an excellent confidence-booster once you see it in action.
✨ Designer Tip: If you’ve ever felt nervous about lace, this is a fantastic first step because the stitch structure is forgiving and rhythmic.
“This shawl is proof that crochet lace can feel relaxed, modern, and totally wearable.”
Design, Fit, and Construction Details
The Shimmer Shawl is worked as a triangle, increasing gradually to create a generous wingspan without bulk. The stitch patterns alternate between broomstick lace and lattice lace, giving the fabric movement and visual interest without stiffness.
Because the fabric is intentionally open, the shawl blocks beautifully and gains even more drape once finished.
Yarn Choices & Substitutions
The original sample was made with a bulky mohair-blend yarn, which creates that soft halo and light-catching texture. Mohair blends are especially lovely for broomstick lace because they:
Fill in open stitches without heaviness
Add softness and visual depth
Create warmth without weight
You can substitute with:
Lightweight bulky yarns with good drape
Blown yarns
Soft acrylic or wool blends for easier care
The key is choosing a yarn that moves, not one that feels stiff.
Join our Newsletter
Get Free Crochet & Knitting Pattern Links & Coupons!
CH – chain(s) DC – double crochet HDC – half double crochet REP – repeat SC – single crochet SP(s) – space(s) SK – skip ST(s) – stitch(es) TCH – turning chain TR – treble crochet WS – wrong side YO – yarn over
STITCH PATTERNS
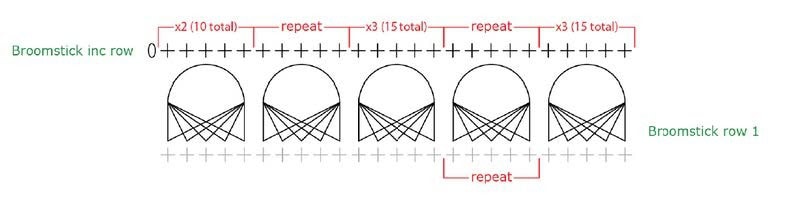
BROOMSTICK LACE (multiple of 5 sts) Row 1 (RS): Pull up loop in each stitch across, moving each loop to broomstick holder (larger knitting needle), ch 1 to lock last st, turn. Row 2: Ch 1, *insert hook into next 5 loops at the same time, 5 sc in group; rep from * to end, turn. Rep rows 1 and 2 for Broomstick Lace.
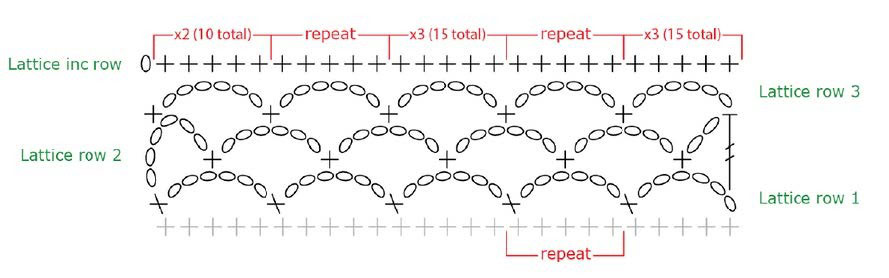
LATTICE LACE (multiple of 5 sts) Row 1 (RS): *Ch 6, sk 4 sts, sc in next st; rep from * to end, turn. Row 2: *Ch 6, sc in next ch-6 sp; rep from * to end, ch 2, tr in 1st ch of beg ch-6 of previous row, turn. Row 3: *Ch 6, sc in next ch-6 sp; rep from * to end, turn. Rep rows 2 and 3 only for Lattice Lace.
CROCHET STITCH DIAGRAMS
VIDEO TUTORIALS
The following video tutorials are recommended to help you feel confident as you work through this pattern:
Crochet Diagram Tips >> https://youtu.be/fJvO9WwGAUU << Learn how to read and follow crochet diagrams, including understanding stitch symbols and row direction.
Broomstick Lace >> https://youtu.be/cUYwe8wgiUc?si=M7FKFbS0NlalZmsB << A step-by-step walkthrough of broomstick lace, including pulling up loops, working grouped stitches, and maintaining even tension.
Before diving into the Shimmer Shawl, take a moment to get comfortable with the techniques used in this design. This project combines broomstick lace and lattice lace to create an open, airy fabric with beautiful drape. If broomstick lace is new to you, don’t worry — it’s rhythmic once you get the hang of it, and the results are absolutely worth it.
This shawl is worked flat from the center outward, increasing symmetrically to form a triangular shape. Reading through the entire pattern before you start will help you understand how the stitch patterns and increase rows work together as the shawl grows.
Be sure to gather all tools before starting, especially the large knitting needle used as the broomstick. Consistent tension and careful loop placement will make your finished shawl look its best.
NOTES
• Take gauge after blocking. Gauge for this shawl should be measured after washing and blocking your swatch. Broomstick lace and lattice lace both relax significantly once blocked.
• Use stitch markers generously. Stitch markers are extremely helpful for identifying center loops or chain spaces during increase rows.
• Focus on even loop height. Consistent loop height on broomstick rows creates cleaner lace and easier stitch placement.
• Read increase rows carefully. Taking a moment to visualize increase placement can prevent missed stitches.
• Blocking is not optional. Wet blocking opens the lace and allows the shawl to reach full measurements.
• Yarn substitution tips. Choose yarns with good drape and softness; stiff yarns may not showcase the lace well.
• Trust the process. The shawl may look uneven while working — blocking is where the magic happens.
SHIMMER BROOMSTICK LACE CROCHET SHAWL PATTERN
Row 1 (WS): Ch 16, hdc in 2nd ch from hook and in each ch to end, turn—15 hdc. Row 2 (RS): Work row 1 of Broomstick Lace—15 loops on needle. Row 3: Ch 1, insert hook in first 5 loops at the same time, 10 sc in group, insert hook in next 5 loops at the same time, 15 sc in group, insert hook in last 5 loops at the same time, 10 sc in group, turn—35 sc. Row 4: Ch 1, sc in each sc to end, turn. Row 5: Work row 1 of Broomstick Lace—35 loops on needle.
Row 6 (Broomstick inc row): Mark center 5 loops, ch 1, insert hook in first 5 loops at the same time, 10 sc in group, *insert hook in next 5 loops at the same time, 5 sc in group; rep from * to center 5 loops, insert hook in center 5 loops at the same time, 15 sc in group, work from * to * to last 5 loops, insert hook in last 5 loops at the same time, 10 sc in group, remove markers, turn—55 sc.
Row 7: Ch 1, sc in each sc to end, turn. Row 8: Work row 1 of Broomstick Lace—55 loops on needle. Row 9: Work a Broomstick inc row as before—75 sc. Rows 10–12: Work rows 1–3 of Lattice Lace.
Row 13 (Lattice inc row): Mark center ch-6 sp, ch 1, 10 sc in first ch-6 sp, 5 sc in each ch-6 sp to center sp, 15 sc in center sp, 5 sc in each ch-6 sp to last sp, 10 sc in last ch-6 sp, remove marker, turn—95 sc.
Row 14: Work row 1 of Broomstick Lace—95 loops on needle. Row 15: Work a Broomstick inc row as before—115 sc. Row 16: Ch 1, sc in each sc to end, turn. Row 17: Work row 1 of Broomstick Lace—115 loops on needle. Row 18: Work a Broomstick inc row as before—135 sc. Row 19: Ch 1, sc in each sc to end, turn. Row 20: Work row 1 of Broomstick Lace—135 loops on needle. Row 21: Work a Broomstick inc row as before—155 sc. Rows 22–24: Work rows 1–3 of Lattice Lace. Row 25: Work a Lattice inc row as before—175 sc. Row 26: Work row 1 of Broomstick Lace—175 loops on needle. Row 27: Work a Broomstick inc row as before—195 sc. Row 28: Ch 1, sc in each sc to end, turn. Row 29: Work row 1 of Broomstick Lace—195 loops on needle. Row 30: Work a Broomstick inc row as before—215 sc. Row 31: Ch 1, sc in each sc to end, turn. Row 32: Work row 1 of Broomstick Lace—215 loops on needle. Row 33: Work a Broomstick inc row as before—235 sc. Rows 34–36: Work rows 1–3 of Lattice Lace. Row 37: Work a Lattice inc row as before—255 sc. Row 38: Work row 1 of Broomstick Lace—255 loops on needle. Row 39: Work a Broomstick inc row as before—275 sc. Fasten off.
FINISHING
Wet block piece to measurements. Weave in all loose ends.
Styling & Wearability
This shawl shines as:
A lightweight wrap for cool evenings
A spring or fall layering piece
A statement accessory over simple outfits
Because it’s breathable, it works beautifully indoors and out—no overheating required.
If you love learning new techniques like broomstick lace, you’ll also enjoy Marly’s skill-building crochet resources designed to help you understand why stitches work—not just how to follow them.
FAQ
Is this a good first broomstick lace project? Yes! The repeats are predictable and forgiving, making it ideal for learning the technique.
Is this shawl heavy? Not at all. The open lace structure keeps it light and airy.
Is there a printable version? Yes—an optional ad-free PDF is available for purchase.
Is broomstick lace hard for beginners? Broomstick lace looks dramatic, but it’s very approachable once you understand the rhythm. This pattern is best for confident beginners who are comfortable with basic crochet stitches and ready to try something new.
What kind of yarn works best for broomstick lace shawls? Soft yarns with drape work best, especially mohair blends or lightweight bulky yarns that fill open stitches without feeling heavy.
Final Thoughts
The Shimmer Shawl is one of those patterns that feels impressive without being intimidating—and those are my favorites. 💖 If you make one, I’d love to see your color choice.
Save this for later, share it with your BiCrafty Bestie, and don’t forget to tag #mmmdi and #marlybird!
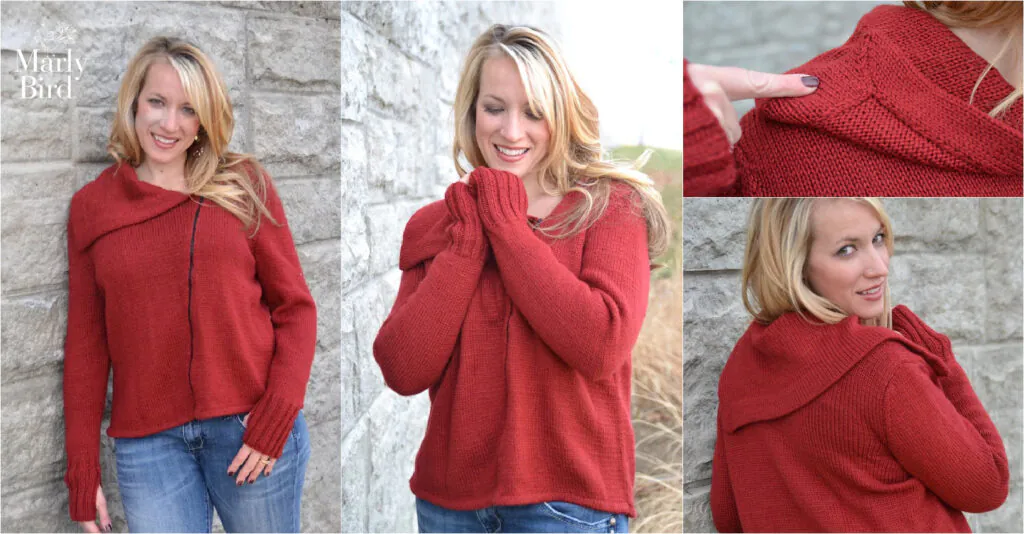
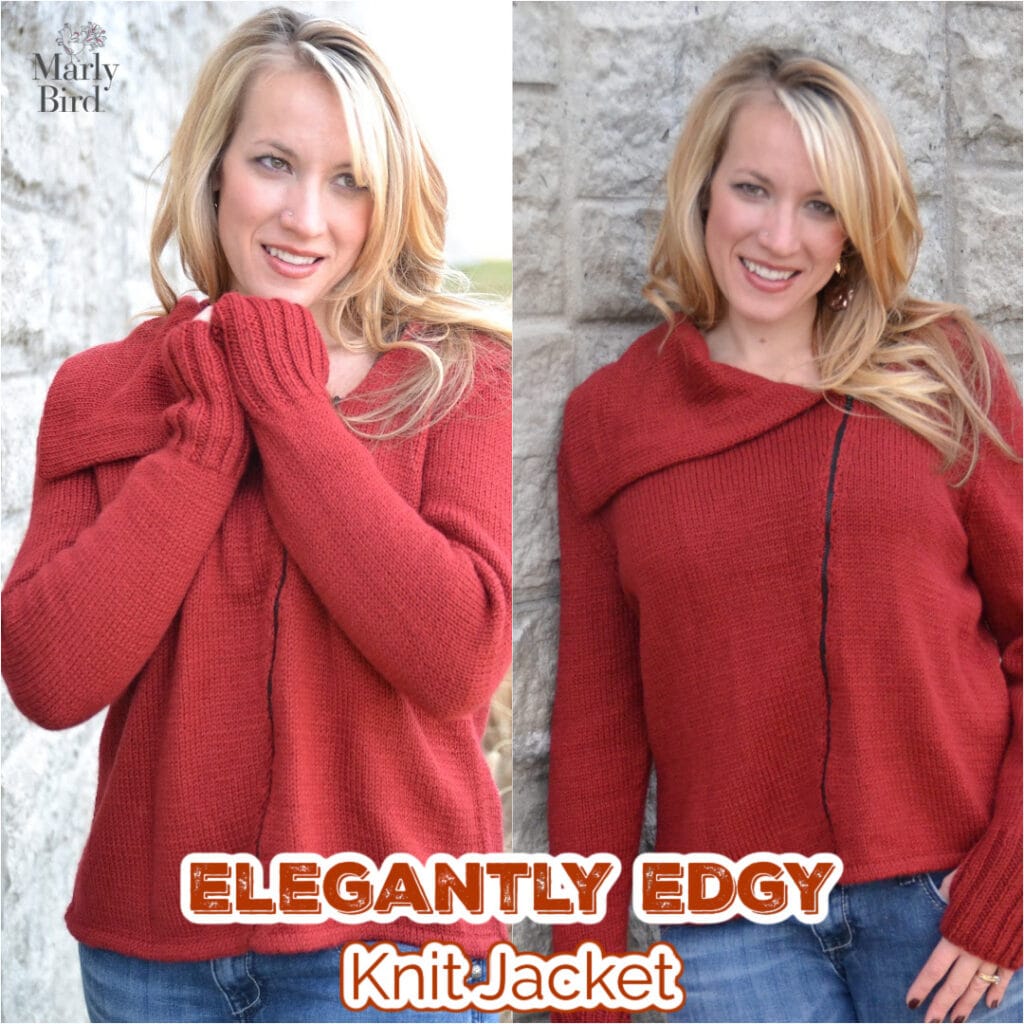
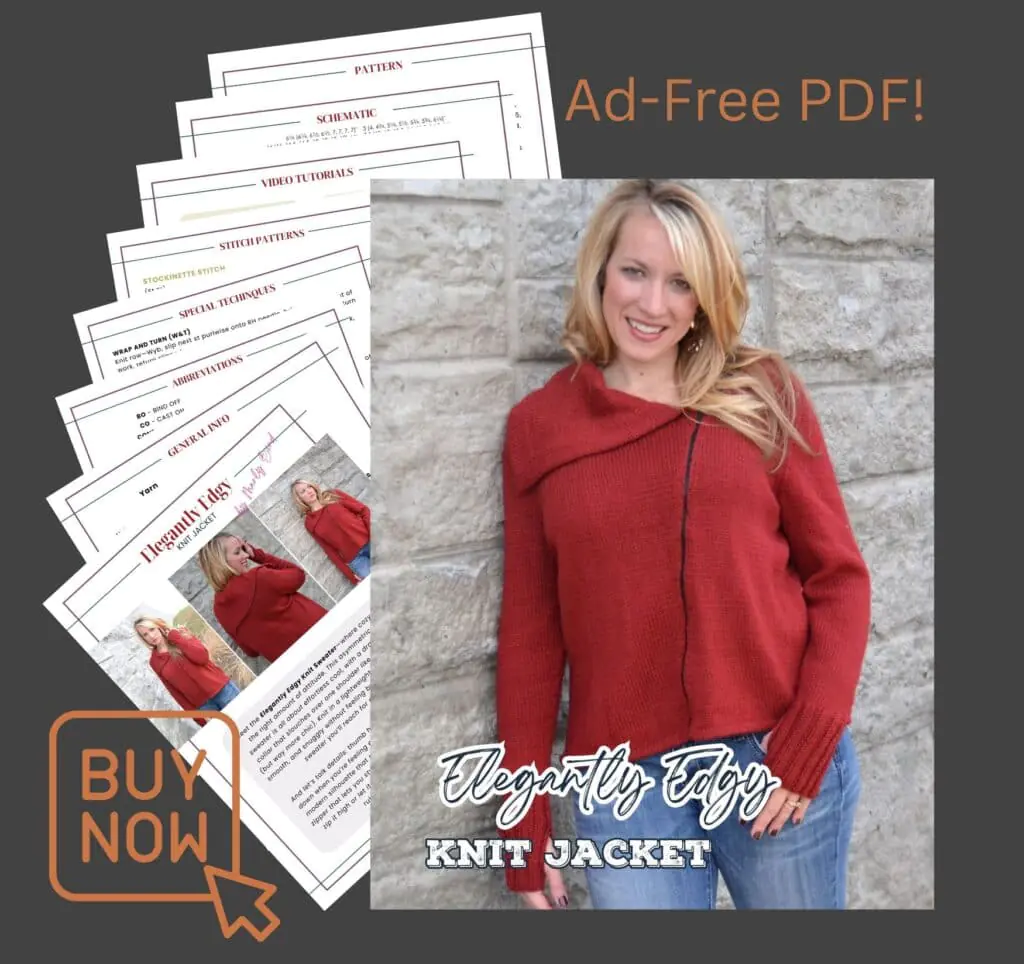
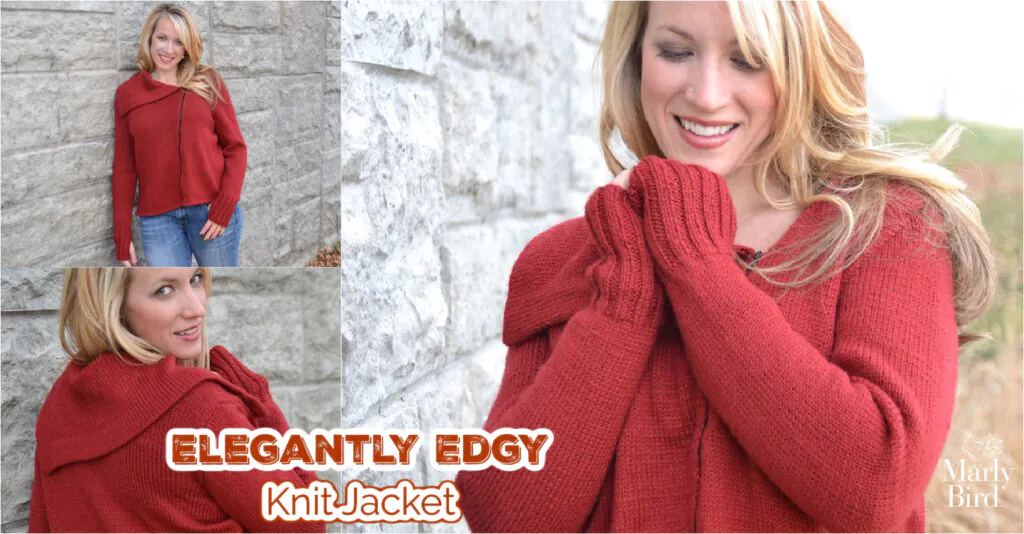
Some knit garments are cozy. Some are stylish. And every once in a while, one manages to be both — without trying too hard. The Elegantly Edgy Knit Jacket is one of those pieces. With its asymmetrical zipper, dramatic oversized collar, and relaxed modern fit, this jacket feels effortlessly cool while still being comfortable enough for everyday wear.
If you love garments that look polished but feel approachable, this newly free knit jacket pattern might be exactly what your wardrobe (and your needles) have been waiting for.
Quick Pattern Overview
The Elegantly Edgy Knit Jacket is a free, zip-front knit jacket pattern worked flat and seamed, featuring sculpted shaping and thoughtful design details.
In this post you’ll learn:
What makes an asymmetrical knit jacket flattering and wearable
Who this pattern is best suited for skill-wise
How fit, ease, and drape are built into the design
Why this is a great confidence-building garment project
How to style and layer the finished jacket year-round
What Does “Asymmetrical” Mean in Knit Garments?
Asymmetry in knitting is all about visual interest without sacrificing comfort. In this jacket, the asymmetry shows up through the angled zipper front and oversized collar, which naturally drapes across the body when worn.
Rather than feeling unbalanced, this design:
Draws the eye vertically
Softens the neckline
Creates a relaxed, intentional silhouette
It’s modern without being trendy — which makes it easy to wear year after year.
What You Will Love About This Pattern
Free knit jacket pattern available on MarlyBird.com
Asymmetrical zipper front for modern styling
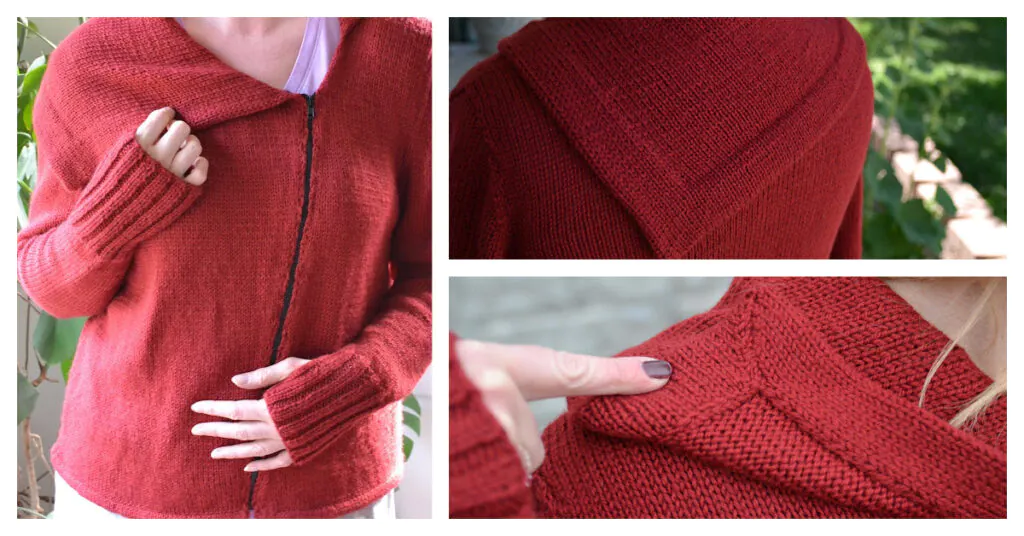
Dramatic oversized collar that replaces the need for a scarf
Thumb hole cuffs for cozy, functional details
Structured seams that elevate the finished garment
Optional ad-free PDF available for purchase
✨ Designer Tip: This jacket is designed with 2–4 inches of positive ease, giving it a relaxed fit without feeling oversized or sloppy.
“This jacket feels like something you’d find in a boutique — but you made it yourself.”
Affiliate Disclosure:This post contains affiliate links. To learn more please visit my privacy policy here💖
Design, Fit, and Construction Details
The Elegantly Edgy Knit Jacket is worked flat in pieces and seamed, which provides structure and longevity. This construction choice helps the jacket keep its shape while still allowing the fabric to drape beautifully.
Design highlights include:
Stockinette stitch body for clean lines
Shaped shoulders using short rows for better fit
Set-in sleeves for a polished look
Reverse stockinette oversized collar for texture
A zippered front that allows multiple styling options
The result is a garment that feels more like a wardrobe staple than a casual sweater.
Yarn Choice & Substitutions
The original sample was knit in a DK-weight merino blend, chosen for its softness, drape, and stitch definition. This weight gives the jacket warmth without bulk and allows the collar to fall naturally.
When choosing a substitute, look for yarn that is:
DK weight
Smooth enough to highlight clean lines
Drapey rather than stiff
Comfortable for all-day wear
Merino blends, superwash wool, or soft acrylic blends can all work well depending on climate and fiber preference.
Great Substitute Yarns for Dolce Merino
If you’re substituting Dolce Merino, you want yarns that offer softness, drape, and stitch definition — especially for a garment like the Elegantly Edgy Jacket. Here are some excellent alternatives depending on the look and feel you want:
Best for: Luxurious drape and subtle sheen This blend of merino, silk, and cashmere gives a silky hand with rich stitch definition, making it ideal if you want the jacket to feel elevated and refined. It’s a great choice if you’re dressing this piece up or want something special for gifting.
🧵 Rico Design Luxury Merino Supercash DK
Best for: Classic luxury knitwear feel Another upscale choice, this yarn feels soft and substantial while still maintaining great stitch clarity. Use this if you want a timeless, high-end look that still feels cozy and wearable.
🧵 Universal Yarn Bella Tweed
Best for: Rustic, textured aesthetic If you love a bit of character in your fabric, Bella Tweed adds flecks and visual interest without sacrificing drape. It produces a look that’s a little more earthy and artisanal, perfect for casual autumn and winter wear.
🧵 Universal Yarn Fawning
Best for: Softness + warmth without bulk Fawning is incredibly soft and cozy. It’s ideal if comfort and warmth are your top priorities. The fabric will feel gentle against the skin — perfect for layers you’ll wear all day.
Best for: Colorful, blended effects This option brings vibrant melange color transitions and the softness of alpaca. It’s a great choice if you want a statement fabric with visual depth, and the alpaca adds a cozy halo that’s perfect for layering pieces.
Join our Newsletter
Get Free Crochet & Knitting Pattern Links & Coupons!
When substituting yarn, consider these key points:
Gauge matters: Always swatch to match the recommended gauge in the pattern so your fit stays accurate.
Fiber content affects drape: Wool and merino blends tend to be springy, while alpaca and silk blends can add drape or halo.
Texture impacts stitch definition: Tweeds and melanges add visual texture, which can change how design elements like collars and seams read visually.
✨ Designer Tip: If you love luxury and drape, lean toward silk- or cashmere-blended DKs. If you want everyday wearability and cozy warmth, merino-rich or alpaca-blends are your go-tos.
Special Features That Make This Jacket Stand Out
Asymmetrical zipper closure
Oversized collar that adds drama and warmth
Thumb hole cuffs for practical coziness
Structured seams that enhance fit and durability
These thoughtful details turn a simple knit jacket into a standout piece.
Elegantly Edgy Knit Jacket Pattern Details
SKILL LEVEL
Intermediate
MEASUREMENTS
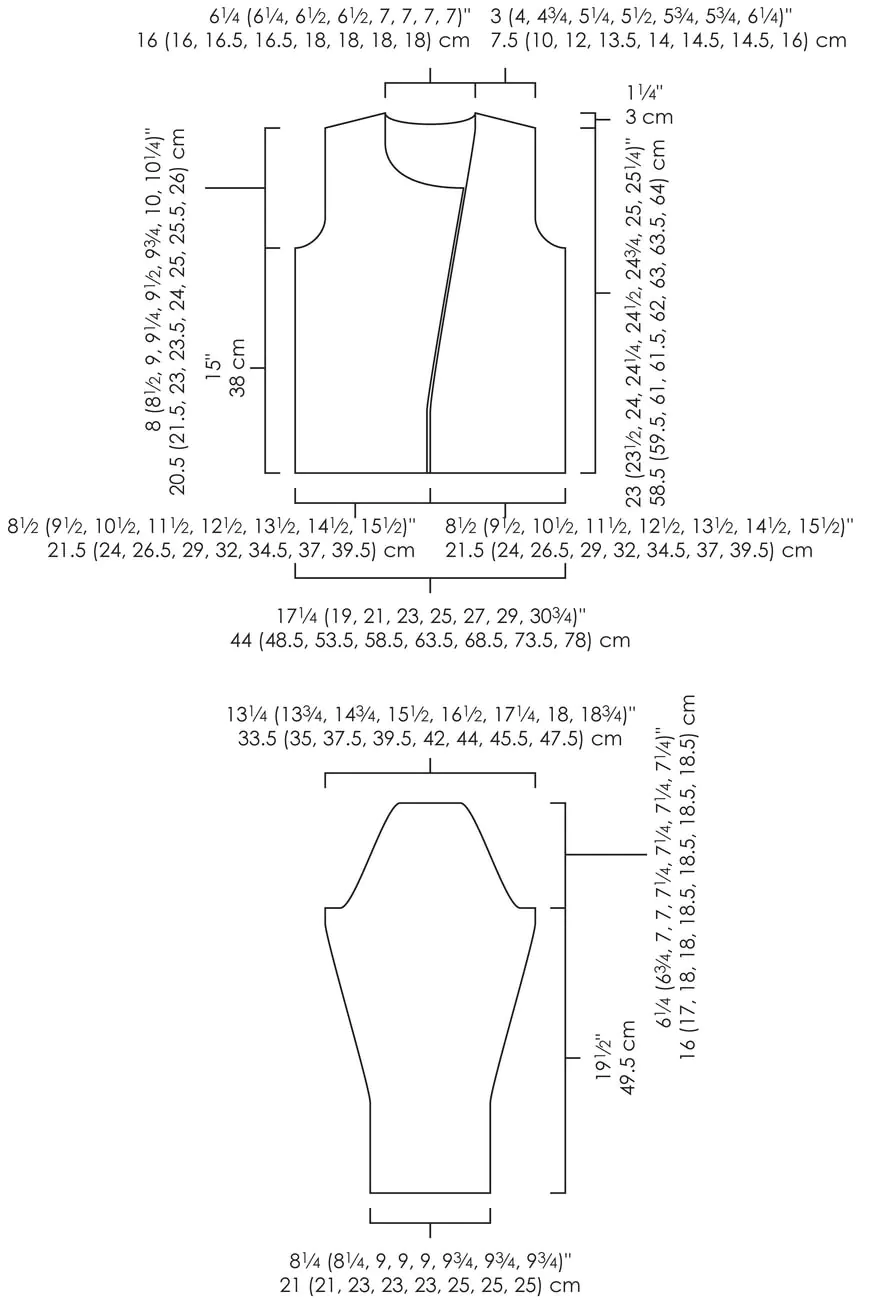
Finished Measurements Chest: 34¼ (38, 42, 46, 50, 54, 58, 61¾)”; [87 (96.5, 106.5, 117, 127, 137, 147.5, 157) cm] To be worn with positive ease approx. 2 inches
BO – Bind Off CO – Cast On CONT – Continue DEC(’D) – Decrease(d) EOR – Every Other Row INC(’D) – Increase(d) K – Knit K2TOG – Knit 2 Sts Together LH – Left Hand MEAS – Measure(s) P – Purl P2TOG – Purl 2 Sts Together PWISE – Purlwise REP – Repeat RH – Right Hand RS – Right Side ST(S) – Stitch(es) TOG – Together WS – Wrong Side WYB – With Yarn in Back WYF – With Yarn in Front
STITCH PATTERNS
⭐️ BACKWARD LOOP CAST‑ON *Wrap yarn around left thumb from front to back and secure in palm; insert rhn upward through strand on thumb, slip loop to needle, tighten. Rep from * for desired sts.
⭐️ MAKE ONE (M1) Insert LH needle under horizontal strand between st just worked and next st, from the front to the back, knit through the back loop (1 st increased)
⭐️ SLIP SLIP KNIT (SSK) Slip 2 stitches, one at a time, as if to knit. Insert left hand needle into the front of these two stitches and knit them together from this position (1 stitch decreased)
⭐️ SLIP SLIP PUK (SSP) Slip 2 stitches, one at a time, as if to knit, then slip them back onto the left needle without changing their orientation. Purl these 2 stitches together through the back loop – 1 stitch decreased.
SPECIAL TECHNIQUES
WRAP AND TURN (W&T) Knit row—Wyb, slip next st purlwise onto RH needle, bring yarn to front of work, return slipped st to LH needle, bring yarn to back of work, then turn work. Purl row—Wyf slip next st purlwise onto RH needle, bring yarn to back of work, return slipped st to LH needle, bring yarn to front of work, then turn work.
HIDE WRAPS Knit row—Pick up the wrap from the front with the RH needle and knit together with the st it wraps. Purl row—pick up the wrap through back of loop with RH needle and purl together with the st it wraps.
3-NEEDLE BIND OFF Hold both pieces to be joined in your left hand, needles parallel to each other, one in front of the other. Hold a 3rd, empty needle in your right hand. Insert right needle knitwise into the 1st st on both front and back needles, and knit them together. Work the next pair of sts the same way, then pass 1st st on right needle over 2nd st. Continue in this manner until all sts have been bound off.
MATTRESS STITCH With RS of both pieces facing you, pass yarn needle from bottom to top under horizontal strand between first and second sts, pull yarn through. Insert needle into corresponding horizontal strand on the other pc. Cont these steps alternating from one piece to the other.
ZIPPER With RS facing and zipper closed, pin zipper to Fronts with upper edge of zipper aligned with right front neck shaping and so that front edges are touching the outer edges of the zipper teeth, leaving zipper teeth exposed between the fronts. With contrasting sewing thread and RS facing, baste zipper to fronts close to zipper teeth. Turn the work inside out. With matching sewing thread, use a whipstitch to sew the outer edges of the zipper to the WS of the sweater fronts. Turn the work back so the RS is facing, and with matching sewing thread, use small backstitches to secure the knitted fabric close to the zipper teeth. Remove basting thread.
STITCH PATTERNS
STOCKINETTE STITCH (St St) Knit on RS, purl on WS.
REVERSE STOCKINETTE STITCH (Rev St St) Purl on RS, knit on WS.
2 X 2 RIBBING (multiple of 4 sts + 2) Row 1 (RS): Sl 1 pwise wyb, k1, *p2, k2; rep from * to end. Row 2 (WS): Sl 1 pwise wyf, p1, *k2, p2; rep from * to end. Rep Rows 1–2 for 2 x 2 Ribbing.
Read ahead before shaping sections. Front edge shaping overlaps with armhole and neck shaping in this pattern. Reading the full Front instructions before beginning will help you understand how these sections interact.
Pay close attention to RS and WS instructions. This pattern frequently switches between RS and WS shaping, especially during short rows and collar construction. Marking the RS of your fabric is highly recommended.
Short rows are essential to the fit and drape. Take care when working wrap-and-turns and when hiding wraps. Neatly worked wraps will make the collar and shoulders look polished.
Block pieces before assembly. Blocking individual pieces before seaming and zipper installation will improve fit accuracy and make finishing much easier.
Zipper installation is easiest when basted first. Temporarily basting the zipper in place before final sewing helps prevent puckering and ensures proper alignment.
Use stitch markers liberally. Stitch markers can be helpful for tracking armhole decreases, shoulder shaping, and front edge shaping.
SCHEMATIC
GROW
To Unlock Exclusive Subscriber Content click the Box below and join for free by simply adding your email and creating a password! If you are having troubles, clear your cache or reset your password or login to the Grow Publisher Portal.
I'm thrilled to share this amazing pattern with you, many patterns on my blog are absolutely free! I kindly request that you don't copy and paste or distribute this pattern. Prefer an ad-free experience? Buy a digital PDF pattern for a small fee from one of my online stores for a seamless crafting journey.
I appreciate your support and readership. You are the reason I can keep doing what I love and sharing it with others. So, thank you from the bottom of my yarn-loving heart! Disclosure: This post contains affiliate links, meaning I get a commission if you decide to make a purchase through my links at no cost to you.
ELEGANTLY EDGY KNIT JACKET PATTERN
BACK
With straight needle, CO 88 (98, 108, 118, 128, 138, 148, 158) sts. Work in Stockinette stitch for 7 rows.
Joining Row Fold so WSs are facing each other, *with left-hand needle, pick up corresponding CO stitch, knit this stitch together with next stitch on needle; repeat from * to end.
Continue in Stockinette stitch until piece measures 15″ from fold, ending with a WS row.
ARMHOLE
Row 1 (RS): Bind off 6 (6, 6, 7, 7, 8, 8, 9) stitches at the beginning of the next 2 rows (one at each edge), then bind off 2 stitches at the beginning of the next 2 rows — 72 (82, 92, 100, 110, 118, 128, 136) stitches remain.
Decrease Row (RS): K2, k2tog, knit to last 4 stitches, ssk, k2 — 2 stitches decreased.
Repeat armhole decrease row every other row 3 (3, 3, 5, 8, 11, 15, 17) more times — 64 (74, 84, 88, 92, 94, 96, 100) stitches remain.
Work in Stockinette stitch until armhole measures 8 (8½, 9, 9¼, 9½, 9¾, 10, 10¼)”, ending with a WS row.
SHOULDERS AND NECK
Row 1 (RS): Work 22 (26, 30, 32, 33, 34, 35, 37) stitches, bind off 22 (22, 24, 24, 26, 26, 26, 26) stitches for neck, knit to end.
LEFT SHOULDER
Row 1 (WS): Purl to end.
Short Row 1 (RS): Bind off 5 stitches at neck edge, k13 (17, 20, 21, 22, 23, 24, 25) stitches, wrap and turn; (WS) purl to end.
Short Row 2 (RS): K10 (13, 15, 15, 16, 17, 18, 18) stitches, wrap and turn; (WS) purl to end.
Short Row 3 (RS): K7 (9, 10, 9, 10, 11, 12, 11) stitches, wrap and turn; (WS) purl to end.
Short Row 4 (RS): K3 (4, 5, 5, 5, 6, 6, 6) stitches, wrap and turn; (WS) purl to end.
Next Row (RS): Knit to end, hiding wraps as they appear. Slip left shoulder stitches onto stitch holder or waste yarn. Break yarn.
RIGHT SHOULDER
Rejoin yarn at neck edge.
Short Row 1 (WS): Bind off 5 stitches at neck edge, p13 (17, 20, 21, 22, 23, 24, 25) stitches, wrap and turn; (RS) knit to end.
Short Row 2 (WS): P10 (13, 15, 15, 16, 17, 18, 18) stitches, wrap and turn; (RS) knit to end.
Short Row 3 (WS): P7 (9, 10, 9, 10, 11, 12, 11) stitches, wrap and turn; (RS) knit to end.
Short Row 4 (WS): P3 (4, 5, 5, 5, 6, 6, 6) stitches, wrap and turn; (RS) knit to end.
Next Row (WS): Purl to end, hiding wraps as they appear. Slip right shoulder stitches onto stitch holder or waste yarn. Break yarn.
LEFT FRONT
With straight needle, CO 44 (49, 54, 59, 64, 69, 74, 79) stitches. Work in Stockinette stitch for 7 rows.
Joining Row Fold so WSs are facing each other, *pick up corresponding CO stitch and knit together with next stitch; repeat from * to end.
Work in Stockinette stitch for 4″ [10 cm], ending with a WS row.
FRONT EDGE
✨ Designer Note: Read the following instructions before beginning. Front edge shaping overlaps armhole shaping. Continue working armhole shaping while completing the remaining front edge decreases.
Decrease Row (RS): Knit to last 4 stitches, ssk, k2 — 1 stitch decreased.
Repeat neck decrease row every 8th row 15 (15, 16, 16, 17, 17, 17, 17) more times.
At the same time, when piece measures 15″ from fold, end with a WS row.
ARMHOLE
Row 1 (RS): Bind off 6 (6, 6, 7, 7, 8, 8, 9) stitches, knit to end. Row 2 (WS): Purl to end. Row 3 (RS): Bind off 2 stitches, knit to end. Row 4 (WS): Purl to end.
Decrease Row (RS): K2, k2tog, knit to end — 1 stitch decreased.
Repeat armhole decrease row every other row 3 (3, 3, 5, 8, 11, 15, 17) more times.
Continue working as established until last front edge decrease row is complete — 16 (21, 25, 27, 28, 29, 30, 32) stitches remain.
Work in Stockinette stitch until armhole measures 8 (8½, 9, 9¼, 9½, 9¾, 10, 10¼)”, ending with a RS row.
NECK
Note: The Left Front neckline is shaped entirely by the front edge decreases worked earlier. No additional neck bind-offs are required.
SHOULDER (LEFT FRONT)
Short Row 1 (WS): P13 (17, 20, 21, 22, 23, 24, 25) stitches, wrap and turn; (RS) knit to end.
Short Row 2 (WS): P10 (13, 15, 15, 16, 17, 18, 18) stitches, wrap and turn; (RS) knit to end.
Short Row 3 (WS): P7 (9, 10, 9, 10, 11, 12, 11) stitches, wrap and turn; (RS) knit to end.
Short Row 4 (WS): P3 (4, 5, 5, 5, 6, 6, 6) stitches, wrap and turn; (RS) knit to end.
Next Row (WS): Purl to end, hiding wraps as they appear. Slip left shoulder stitches onto stitch holder or waste yarn. Break yarn.
RIGHT FRONT
With straight needle, CO 44 (49, 54, 59, 64, 69, 74, 79) stitches. Work in Stockinette stitch for 7 rows.
Joining Row Fold so WSs are facing each other, *with left-hand needle, pick up corresponding CO stitch, knit this stitch together with next stitch on needle; repeat from * to end.
Work in Stockinette stitch for 4″ [10 cm], ending with a WS row.
FRONT EDGE
Note: Read the following instructions before beginning. Front edge shaping overlaps armhole shaping.
Increase Row (RS): K2, m1, knit to end — 1 stitch increased.
Repeat neck increase row every 8th row 12 (12, 13, 13, 14, 14, 14, 14) more times.
At the same time, when piece measures 15″ from fold, end with a RS row.
ARMHOLE
Note: Armhole shaping begins on a WS row to mirror Left Front shaping.
Row 1 (WS): Bind off 6 (6, 6, 7, 7, 8, 8, 9) stitches, purl to end.
Row 2 (RS): Knit to end.
Row 3 (WS): Bind off 2 stitches, purl to end.
Decrease Row (RS): Knit to last 4 stitches, ssk, k2 — 1 stitch decreased.
Repeat armhole decrease row every other row 3 (3, 3, 5, 8, 11, 15, 17) more times.
Continue working as established until last front edge increase row is complete — 45 (50, 56, 58, 61, 62, 63, 65) stitches remain after all shaping.
Continue in Stockinette stitch until armhole measures 8 (8½, 9, 9¼, 9½, 9¾, 10, 10¼)” [20.5 (21.5, 23, 23.5, 24, 25, 25.5, 26) cm], ending with a WS row.
SHOULDER (RIGHT FRONT)
Short Row 1 (RS): K13 (17, 20, 21, 22, 23, 24, 25) stitches, wrap and turn; (WS) purl to end.
Short Row 2 (RS): K10 (13, 15, 15, 16, 17, 18, 18) stitches, wrap and turn; (WS) purl to end.
Short Row 3 (RS): K7 (9, 10, 9, 10, 11, 12, 11) stitches, wrap and turn; (WS) purl to end.
Short Row 4 (RS): K3 (4, 5, 5, 5, 6, 6, 6) stitches, wrap and turn; (WS) purl to end.
Next Row (RS): Knit to end, hiding wraps as they appear. Slip right shoulder stitches onto stitch holder or waste yarn. Break yarn.
SLEEVE
Make 2
With straight needle, CO 42 (42, 46, 46, 46, 50, 50, 50) stitches. Work in 2×2 ribbing for 5″, ending with a WS row.
Work in Stockinette stitch for 1″ [2.54 cm], ending with a WS row. Begin increase shaping on the next RS row. Stitch markers may be helpful to track increase rows.
Increase Section
Increase Row (RS): K2, m1, knit to last 2 stitches, m1, k2 — 2 stitches increased.
Repeat the increase row as follows:
Every 8 (8, 6, 6, 6, 6, 6, 4) rows 6 (3, 14, 10, 6, 6, 2, 20) times more; then every 6 (6, 0, 4, 4, 4, 4, 2) rows 6 (10, 0, 6, 12, 12, 18, 2) times — 68 (70, 76, 80, 84, 88, 92, 96) stitches.
Work in Stockinette stitch until sleeve measures 19½” [49.5 cm] from beginning, ending with a WS row.
SHAPE SLEEVE CAP
Read through this entire section before beginning to anticipate bind-offs and decreases.
Row 1 (RS): Bind off 6 (6, 6, 7, 7, 8, 8, 9) stitches at the beginning of the next 2 rows (one at each edge), then bind off 2 stitches at the beginning of the next 2 rows — 52 (54, 60, 62, 66, 68, 72, 74) stitches remain.
Decrease Row (RS): K2, k2tog, knit to last 4 stitches, ssk, k2 — 2 stitches decreased.
Repeat cap decrease row: Every other row 3 (3, 3, 5, 8, 10, 13, 16) more times, then every 4th row 6 (6, 5, 4, 4, 3, 2, 1) times, then every other row 3 (4, 7, 7, 5, 5, 4, 3) times — 26 (26, 28, 28, 30, 30, 32, 32) stitches remain.
Bind off 4 stitches at beginning of next 2 rows, then bind off 3 stitches at beginning of next 2 rows — 12 (12, 14, 14, 16, 16, 18, 18) stitches remain.
Using Mattress Stitch, seam side seams and set in sleeves.
COLLAR
Pick Up & Setup
Place marker into fabric on left front, 3 (3½, 3, 3¼, 2¼, 2½, 2¾, 3)” down neck edge from shoulder seam.
With 24″ circular needle and WS facing, beginning at marker on left front neck edge, pick up and knit:
16 (19, 15, 17, 12, 13, 14, 16) sts to shoulder
34 (34, 36, 36, 38, 38, 38, 38) sts along back neck
17 (19, 16, 17, 12, 13, 15, 16) sts along right front edge to BO sts
31 (31, 33, 33, 35, 35, 35, 35) sts along right front BO sts
— 98 (103, 100, 103, 97, 99, 102, 105) sts.
Facing
Next Row (RS): Use the backwards loop method to CO 8 sts for facing, purl to end — 106 (111, 108, 111, 105, 107, 110, 113) sts.
Next Row (WS): Use the backwards loop method to CO 8 sts for facing, knit to end — 114 (119, 116, 119, 113, 115, 118, 121) sts.
Collar Body
Continue to work back and forth in Reverse Stockinette stitch until collar measures 9″ from pick-up row, ending with a RS row.
Shaping
Decrease Row 1 (WS): K1, ssk, knit to last 3 sts, k2tog, k1 — 2 sts dec’d.
Decrease Row 2 (RS): P1, p2tog, purl to last 3 sts, ssp, p1 — 2 sts dec’d.
Repeat the last 2 rows 7 more times — 82 (87, 84, 87, 81, 83, 86, 89) sts rem.
Bind off all sts.
Assembly & Finishing
Fold piece at center of decreases and neatly sew BO edge to RS.
Fold facing edges to the RS and neatly sew in place.
Using needle and sewing thread, sew on zipper.
Styling & Wearability
This jacket is incredibly versatile and works well across seasons.
Wear it:
Zipped high for a dramatic neckline
Partially zipped for casual layering
Open for a relaxed, effortless look
It pairs beautifully with jeans, leggings, or layered over dresses — making it an easy grab-and-go piece for everyday life.
Why This Jacket Is a Great “First Statement Garment”
If you’ve knit sweaters before and are ready to try something a little more design-forward, this jacket is a fantastic next step. The techniques used — short rows, set-in sleeves, and zipper installation — are introduced in a manageable, well-supported way.
It’s a confidence-building project that feels genuinely special when finished.
This pattern is ideal for knitters who want to expand their garment skills. It includes shaping, seaming, and finishing techniques that translate beautifully to future projects.
FAQ
What skill level is this knit jacket pattern? This pattern is best suited for intermediate knitters who are comfortable with stockinette stitch, shaping, and basic garment construction.
How should this knit jacket fit? The jacket is designed to be worn with approximately 2–4 inches of positive ease for a relaxed, modern fit. The asymmetrical front and oversized collar are meant to drape naturally rather than sit snugly.
Is adding a zipper to a knit jacket difficult? Adding a zipper can feel intimidating, but this pattern includes clear instructions and video support. Basting the zipper first and taking your time helps ensure a polished result.
Is this jacket suitable for layering? Yes. This jacket works well layered over lightweight tops in fall and spring and as an indoor layering piece during colder months.
Can I substitute a different yarn weight? This pattern was designed for DK-weight yarn. Using a different weight will affect fit and drape and may require significant gauge adjustments.
Is there a printable version of the pattern? Yes. An optional ad-free PDF is available for purchase if you prefer a clean, printable format.
Final Thoughts
The Elegantly Edgy Knit Jacket is the kind of project that feels empowering to finish — stylish, wearable, and undeniably handmade. If you’ve been searching for a free knit jacket pattern that feels modern and intentional, this one delivers.
Save this for later, share it with your BiCrafty Bestie, and if you make one, tag #mmmdi and #marlybird so I can admire your work 💖🧶
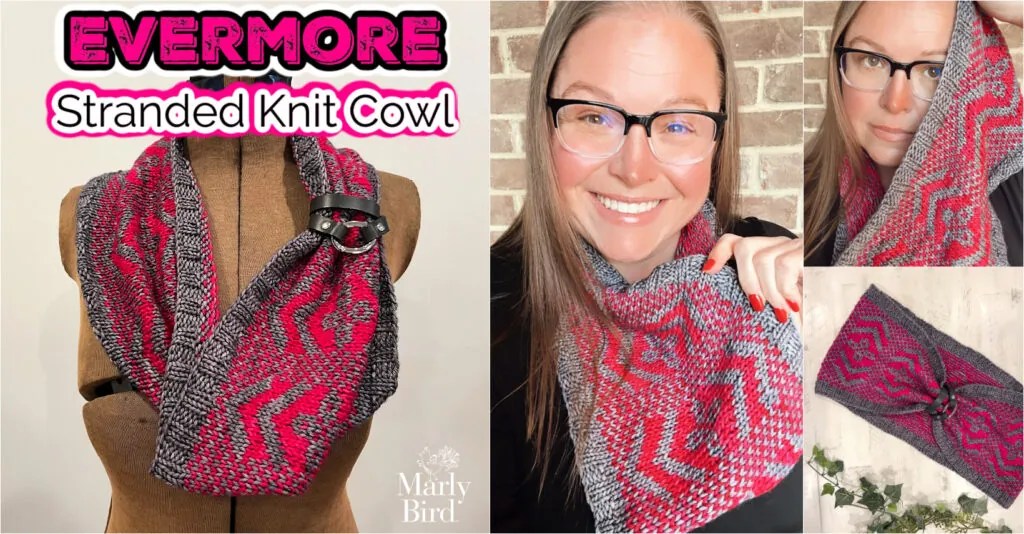
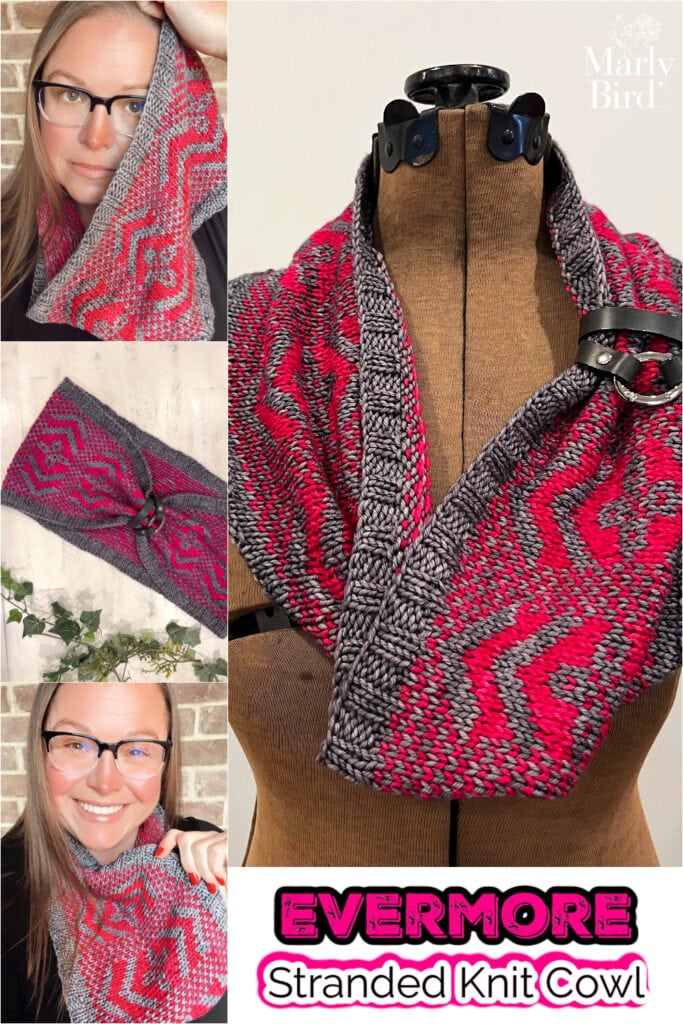
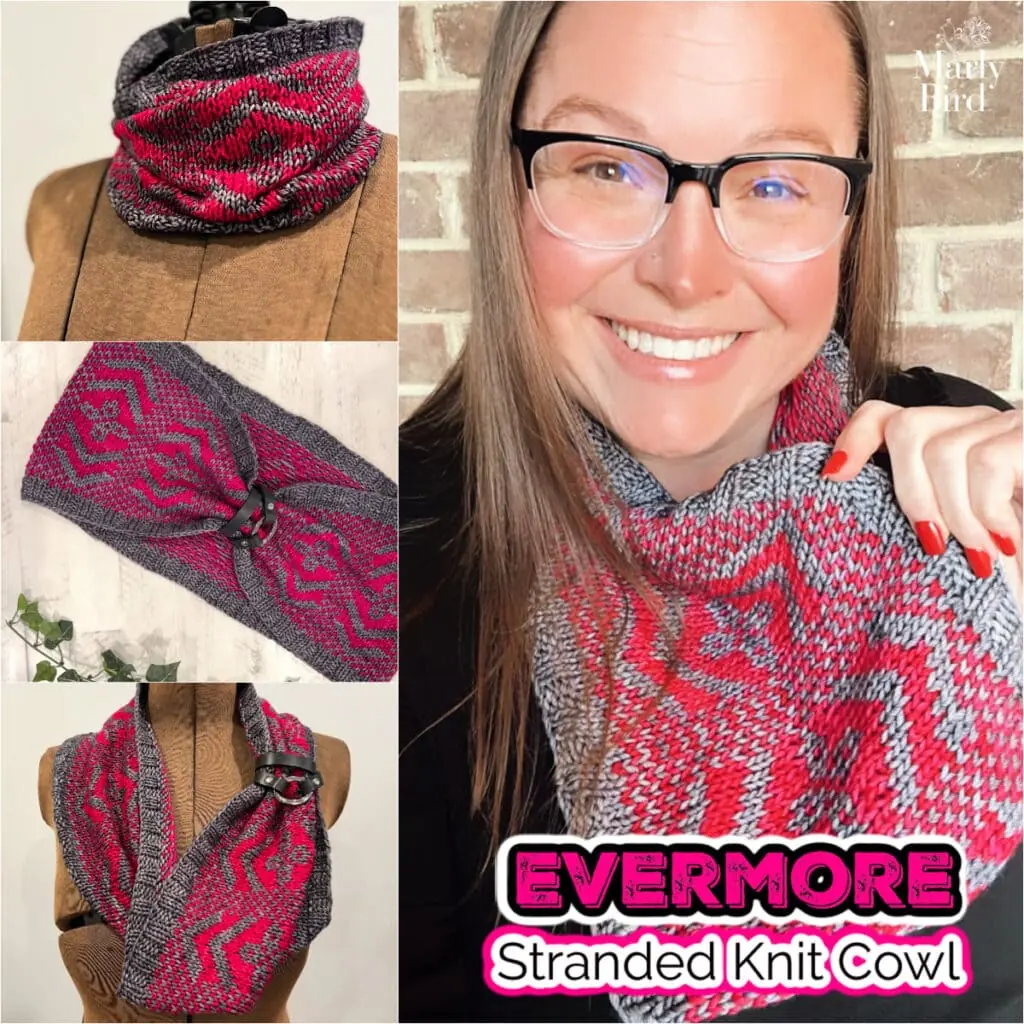
Bold colorwork doesn’t have to mean complicated knitting — and the Evermore Knit Cowl proves it 🧶✨. This free stranded colorwork knit cowl pattern is designed to help knitters build confidence with colorwork while creating a modern, wearable accessory that looks far more intricate than it actually is.
Worked in the round using two colors, Evermore is the kind of project that feels satisfying from the very first chart repeat and results in a cozy cowl you’ll reach for again and again.
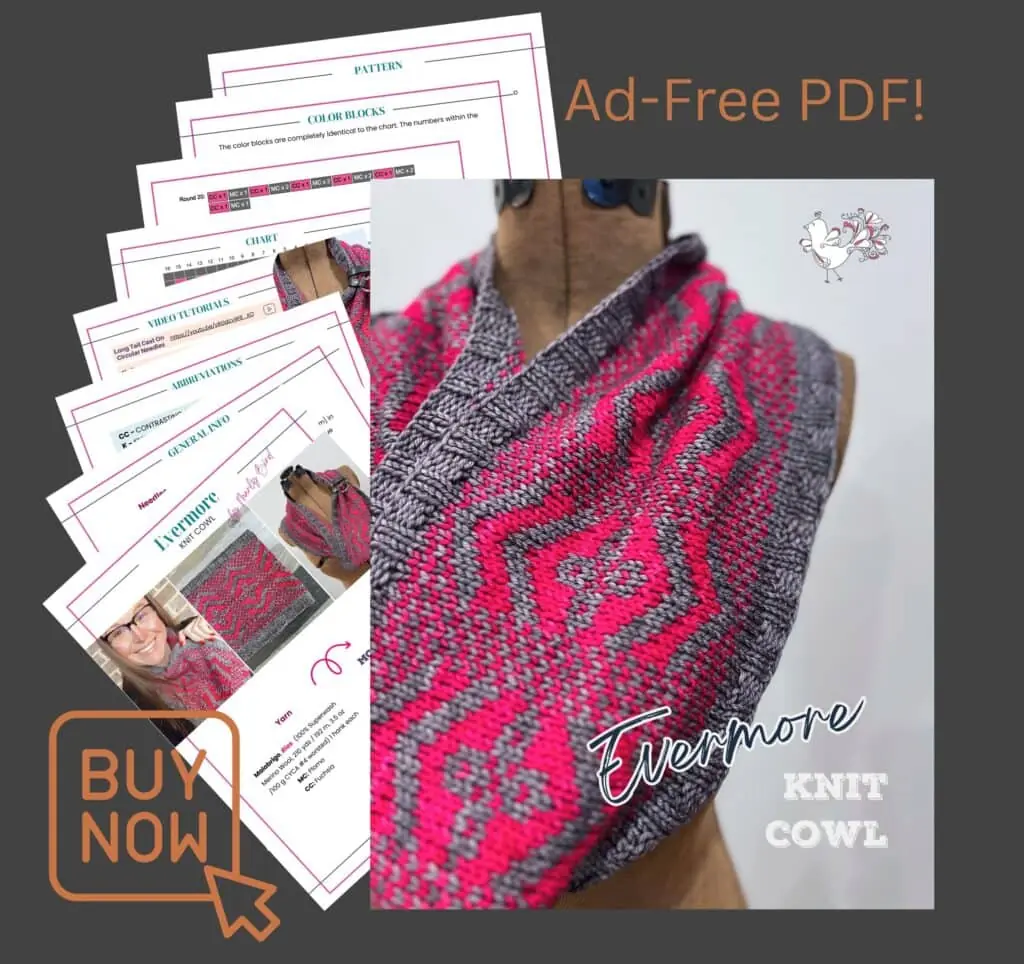
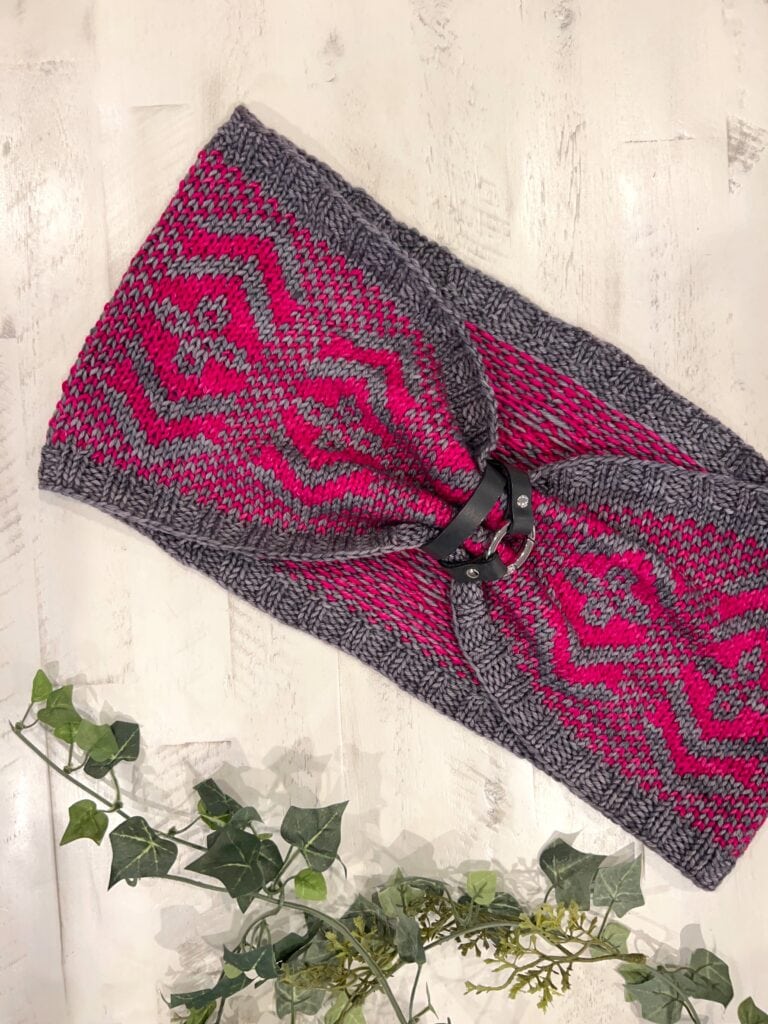
The Evermore Knit Cowl is a free stranded colorwork knitting pattern rated Adventurous Beginner. Worked in the round in worsted weight yarn using two colors, it finishes at 32 inches in circumference and 8.5 inches long. The pattern is free to read right here on the blog — or grab the ad-free printable PDF on Etsy, Shopify, or Ravelry.
Affiliate Disclosure:This post contains affiliate links. To learn more please visit my privacy policy here💖
Quick Pattern Overview
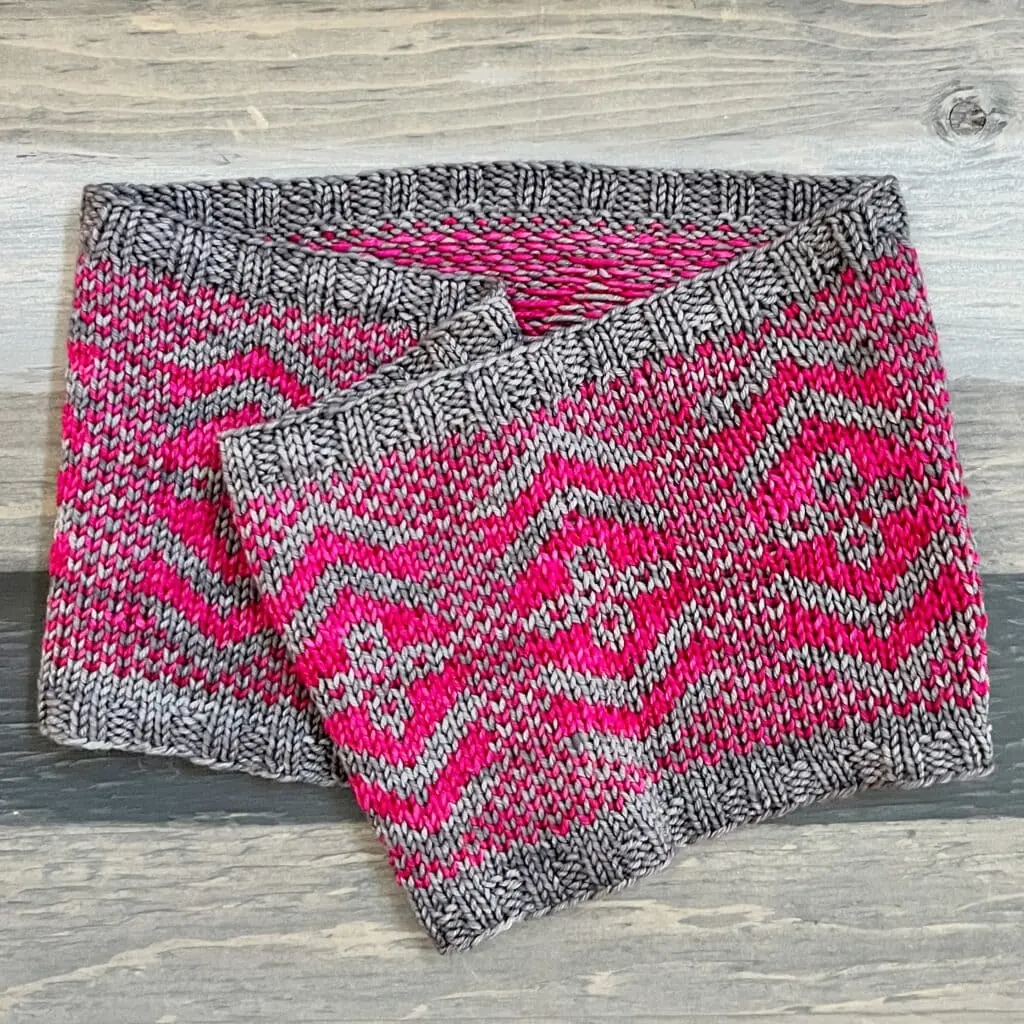
The Evermore Knit Cowl is a stranded colorwork accessory worked in the round using a repeating chart motif. Ribbed cuffs frame the design, while the colorwork body creates bold visual impact without complicated shaping.
In this post, you’ll learn:
What stranded colorwork knitting is (and what it’s not)
Why cowls are a great way to learn colorwork
How charts are used in stranded knitting
Tips for managing floats comfortably
Where to learn more stranded colorwork techniques
What Is Stranded Colorwork Knitting?
Stranded colorwork knitting uses two colors worked in the same round, with the unused yarn carried loosely across the back of the fabric as “floats.” This technique creates dense, warm fabric and allows for beautiful geometric or pictorial designs… all from simple stockinette stitch, just worked with two yarns instead of one.
You’ll often hear “stranded colorwork” and “Fair Isle” used interchangeably, but they’re not quite the same thing. Fair Isle is a specific regional tradition from Fair Isle island off Scotland, with its own color palette, traditional motifs, and guidelines (including strict rules about float length). Stranded colorwork is the broader technique… Fair Isle is one beautiful style within it. The Evermore Cowl uses general stranded colorwork without being tied to any specific tradition, which is what makes it so flexible and modern.
Cowls are one of the best projects for learning stranded colorwork because the short circumference means manageable float lengths, no seaming, and a finished object you’ll actually wear. You get all the confidence of colorwork without the commitment of a full sweater… and that’s exactly the kind of win that keeps you coming back for more.
Stranded Knitting or Fair Isle Technique: these patterns may appear intricate, but they're simply crafted in stockinette stitch with a two-color-per-round approach: one hue for the motifs and another for the backdrop. The yarn not currently in use is carried, or ‘stranded', across the back of the active stitches, remaining concealed on the fabric's right side. These carried yarns form ‘floats' behind the stitches, resulting in a denser and cozier material than single-yarn knitting, though with a bit less give.
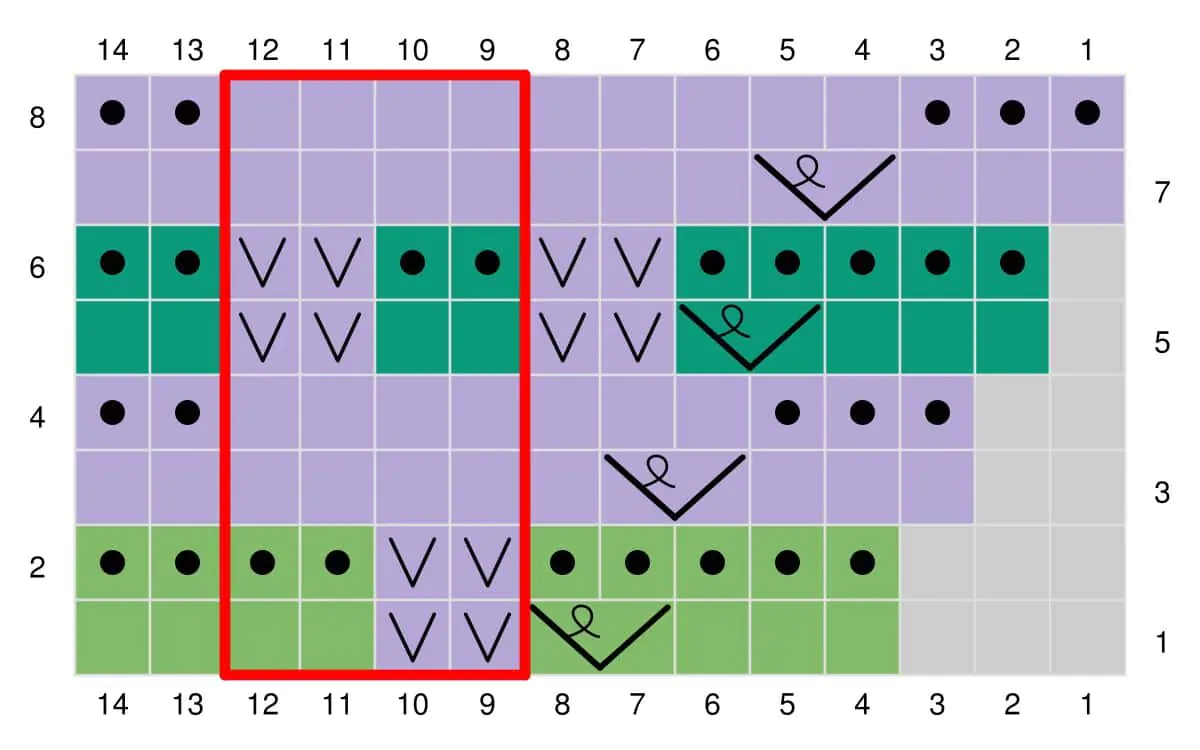
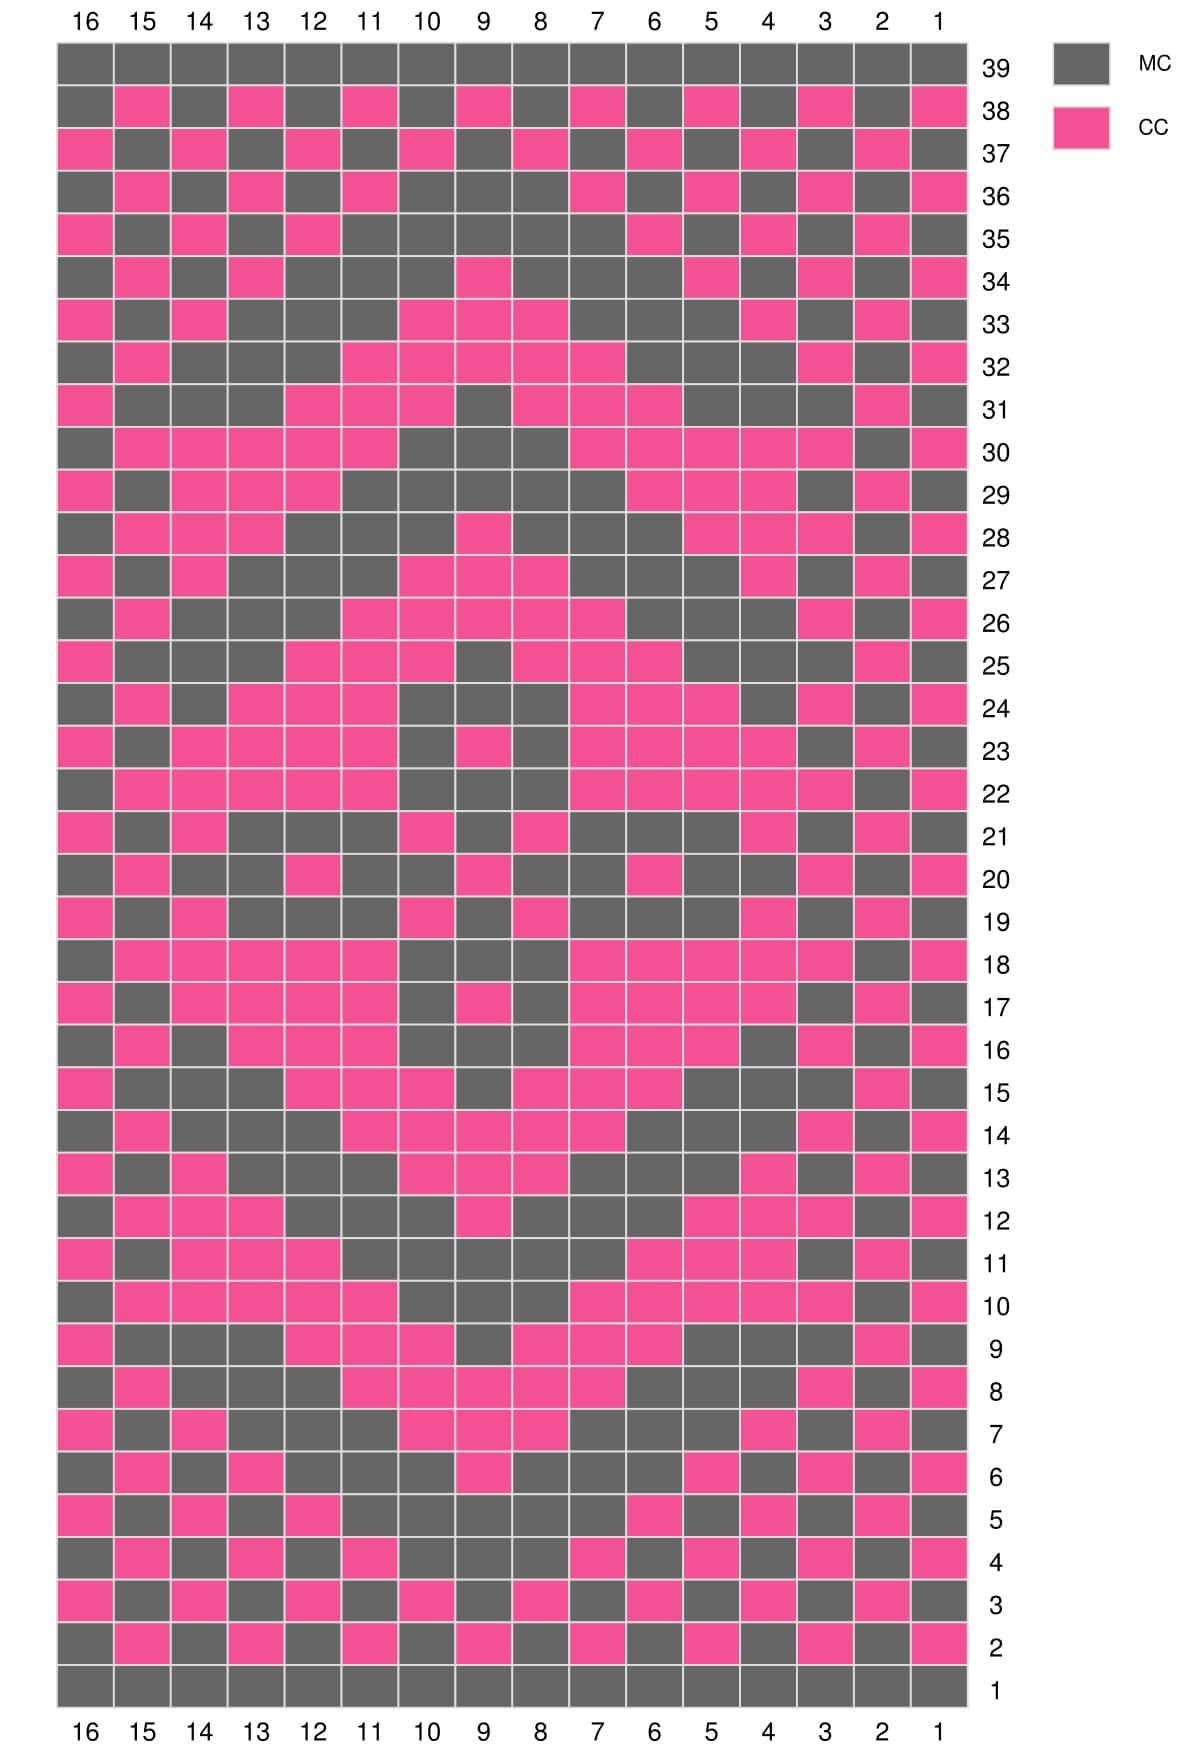
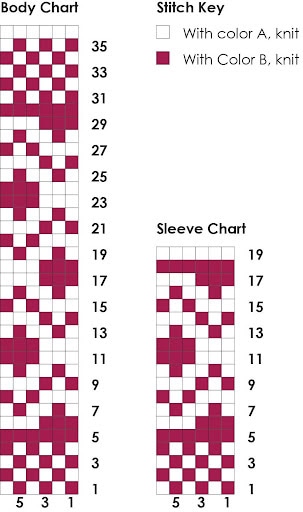
Use the stranded or Fair Isle technique to complete the body of the cowl. Read stitches on charts from right to left, and rounds from bottom to top.
The chart represents a portion of the project, therefore each row of the chart will be worked on repeat until all the stitches of the round are complete.
It is recommended to use stitch markers between repeats to keep count.
When stranding a color beyond 4-6 sts, tuck the float (see Video Tutorials).
GROW
To Unlock Exclusive Subscriber Content click the Box below and join for free by simply adding your email and creating a password! If you are having troubles, clear your cache or reset your password or login to the Grow Publisher Portal.
I'm thrilled to share this amazing pattern with you, many patterns on my blog are absolutely free! I kindly request that you don't copy and paste or distribute this pattern. Prefer an ad-free experience? Buy a digital PDF pattern for a small fee from one of my online stores for a seamless crafting journey.
I appreciate your support and readership. You are the reason I can keep doing what I love and sharing it with others. So, thank you from the bottom of my yarn-loving heart! Disclosure: This post contains affiliate links, meaning I get a commission if you decide to make a purchase through my links at no cost to you.
EVERMORE STRANDED KNIT COWL PATTERN
BEGINNING CUFF
With MC, and long tail cast-on, cast on 144 sts, place marker, join to work in the round.
Work in 2×2 ribbing for 1” [4 cm].
Next round (increase round): * K9, M1; repeat from * around — 160 sts.
BODY
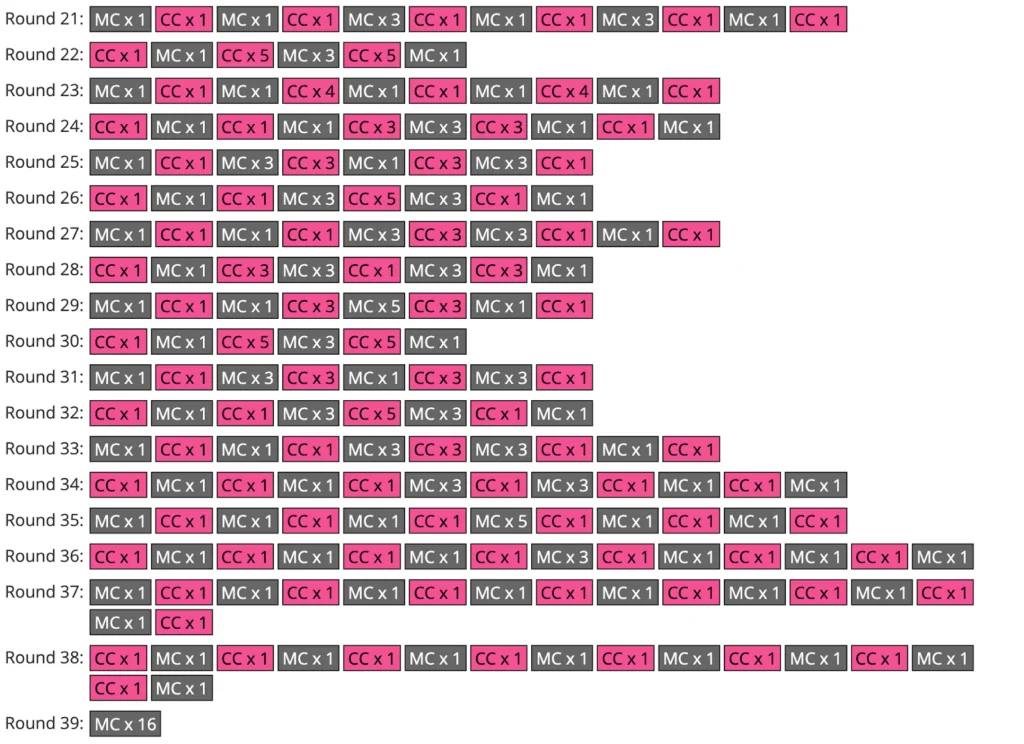
Using the stranded knitting technique (see Video Tutorials), work in Stockinette St following the color chart for Body of Cowl through Round 39. There are 10 total repeats for each round of the chart.
Cut CC leaving a long tail. With MC continue with pattern.
Next round (decrease round): *K8, k2tog; repeat from * around — 144 sts.
ENDING CUFF
Work in 2×2 ribbing for 1” [4 cm] to match beginning cuff.
Bind off in pattern.
FINISHING
Weave in all loose ends. Wash and Block Cowl.
Want to Learn More About Stranded Colorwork?
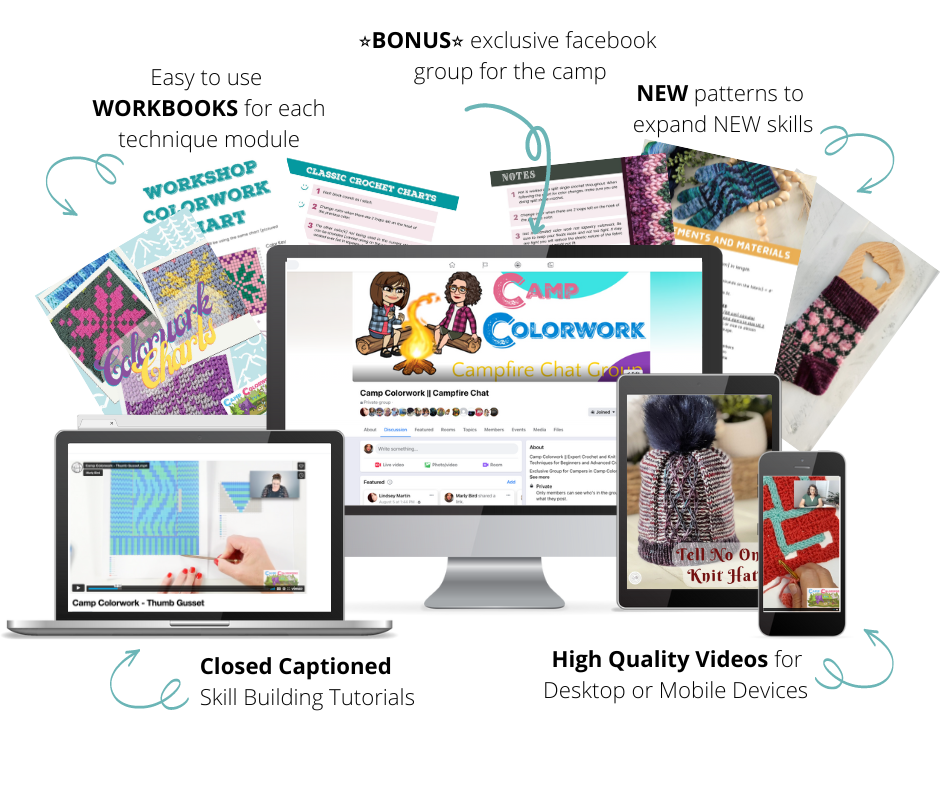
If Evermore sparks your interest in colorwork knitting, Camp Colorwork is where the magic really happens. Inside the course, you’ll learn how to read charts, manage floats, choose colors confidently, and knit stranded colorwork with ease.
Is the Evermore colorwork cowl pattern free? Yes! The Evermore Knit Cowl is free to read right here on the blog. If you’d like a clean, ad-free printable version to take to your knitting bag, grab the PDF on Etsy, Shopify, or Ravelry.
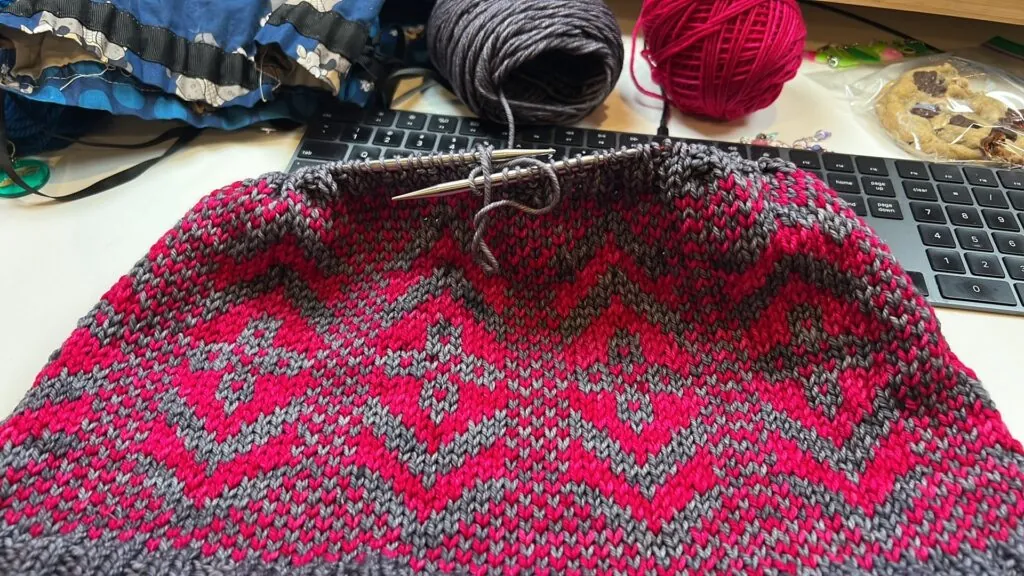
What yarn is used in the Evermore knit cowl? The pattern uses Malabrigo Rios (100% Superwash Merino Wool, worsted weight, 210 yards per 100g skein) in two colors. The sample uses Plomo (gray) as the main color and Fucsia (bright pink) as the contrast color — one skein of each.
What skill level is the Evermore knit cowl? Adventurous Beginner. If you’re comfortable knitting in the round and reading a simple chart, you’re ready for this one. Video tutorials for every technique — including float management — are linked right in the pattern so you’re never left guessing.
What is the finished size of the Evermore cowl? The finished Evermore Cowl measures 32 inches (81.5 cm) in circumference and 8.5 inches (21.5 cm) in length. It’s designed to sit comfortably around the neck without bulk.
How do I get the ad-free PDF of the Evermore pattern? The printable PDF is available on Etsy, Shopify, or Ravelry. It includes the full pattern, charts, and color blocks — all formatted without ads so you can focus on the knitting.
Can I substitute a different yarn for the Evermore cowl? Absolutely. Any worsted weight (CYCA #4) yarn in two contrasting colors will work. Look for good stitch definition — superwash merino is excellent for colorwork. You’ll need approximately 200+ yards of each color.
What needles do I need to knit the Evermore cowl? US 9 (5.5mm) 24-inch circular needles, or the size needed to hit your gauge. Gauge is 20 stitches and 24 rows = 4 inches in stranded knitting — always swatch first!
Final Thoughts
The Evermore Knit Cowl is proof that stranded colorwork can be fun, approachable, and incredibly rewarding. If you’ve been curious about colorwork knitting, this is a fantastic place to start.
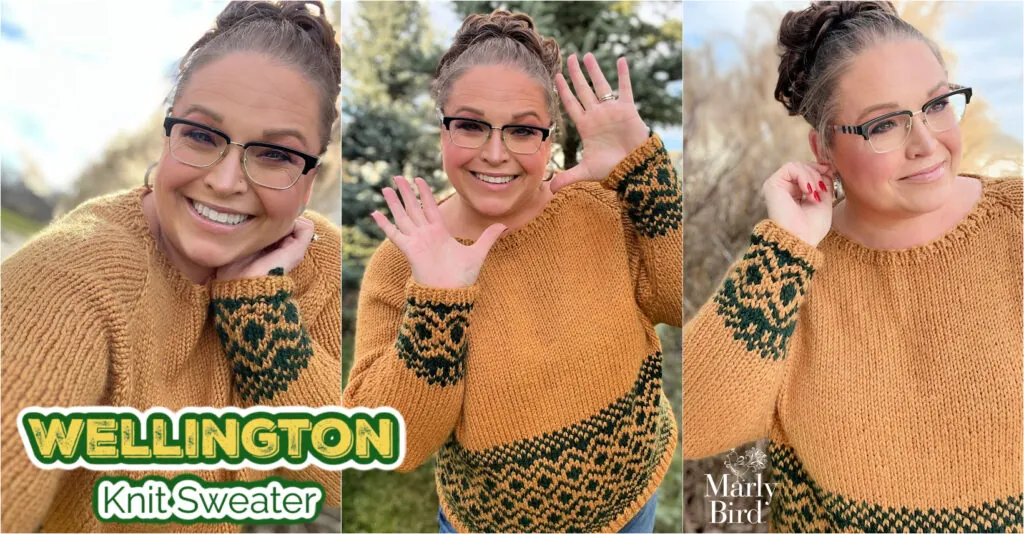
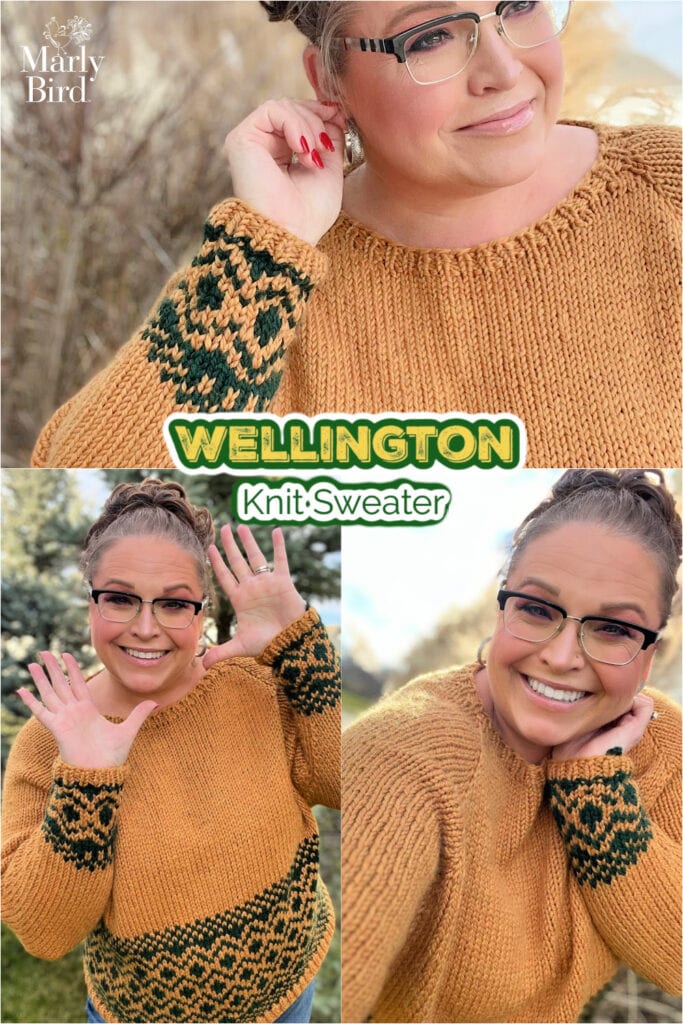
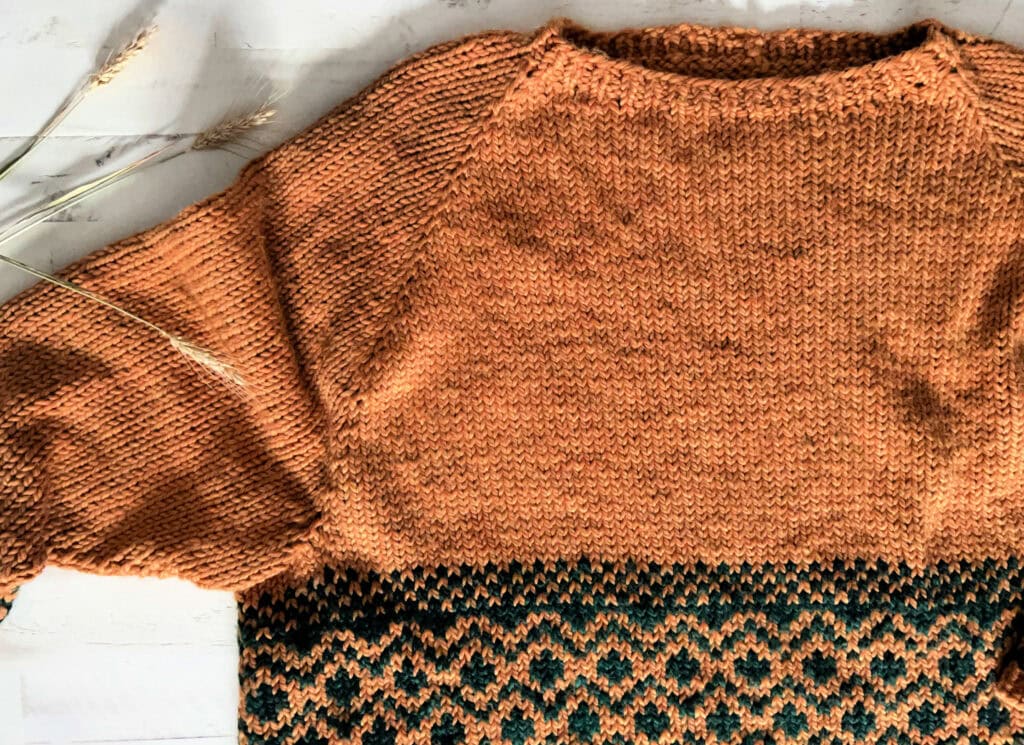
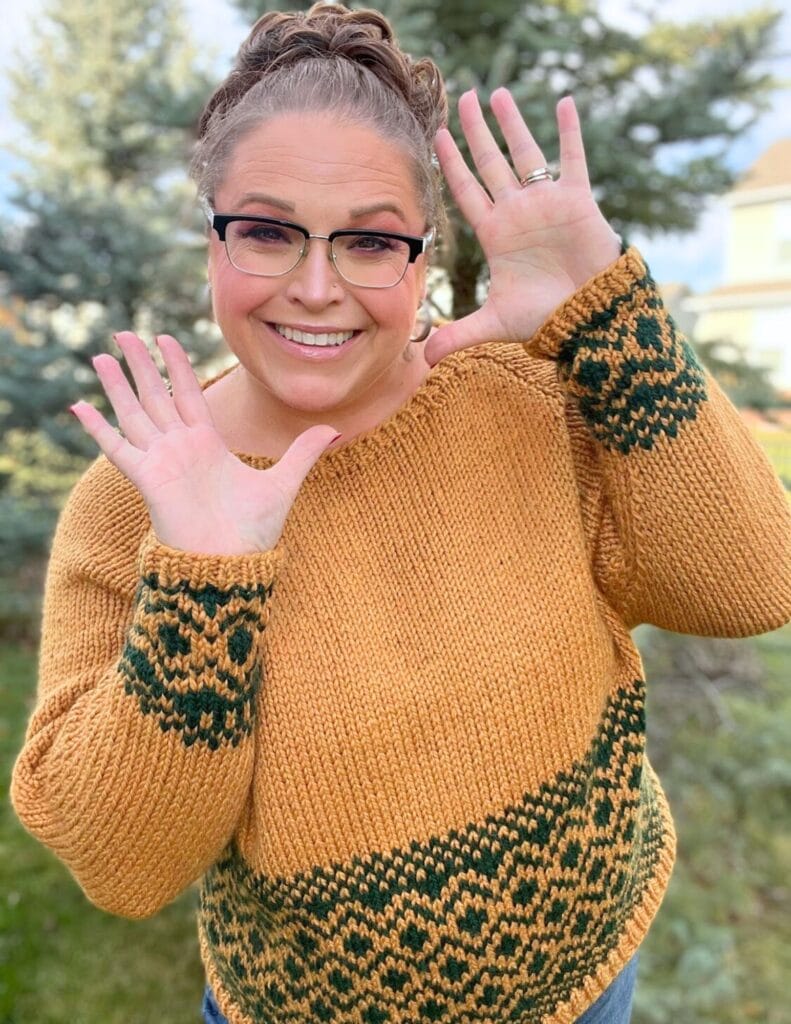
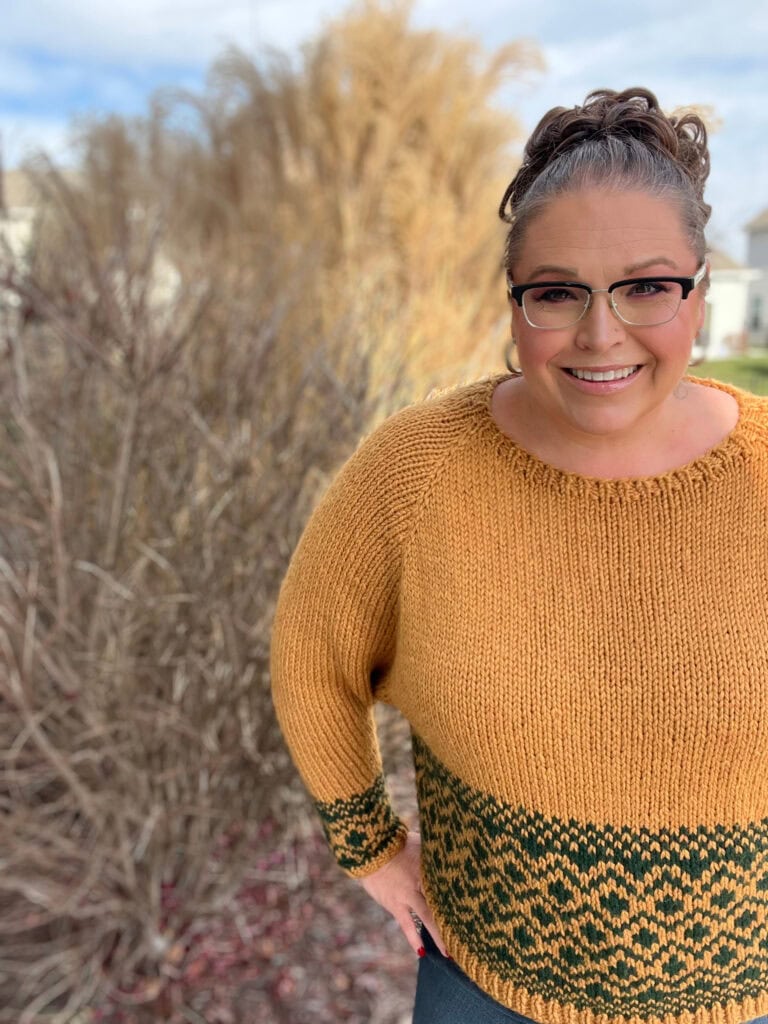
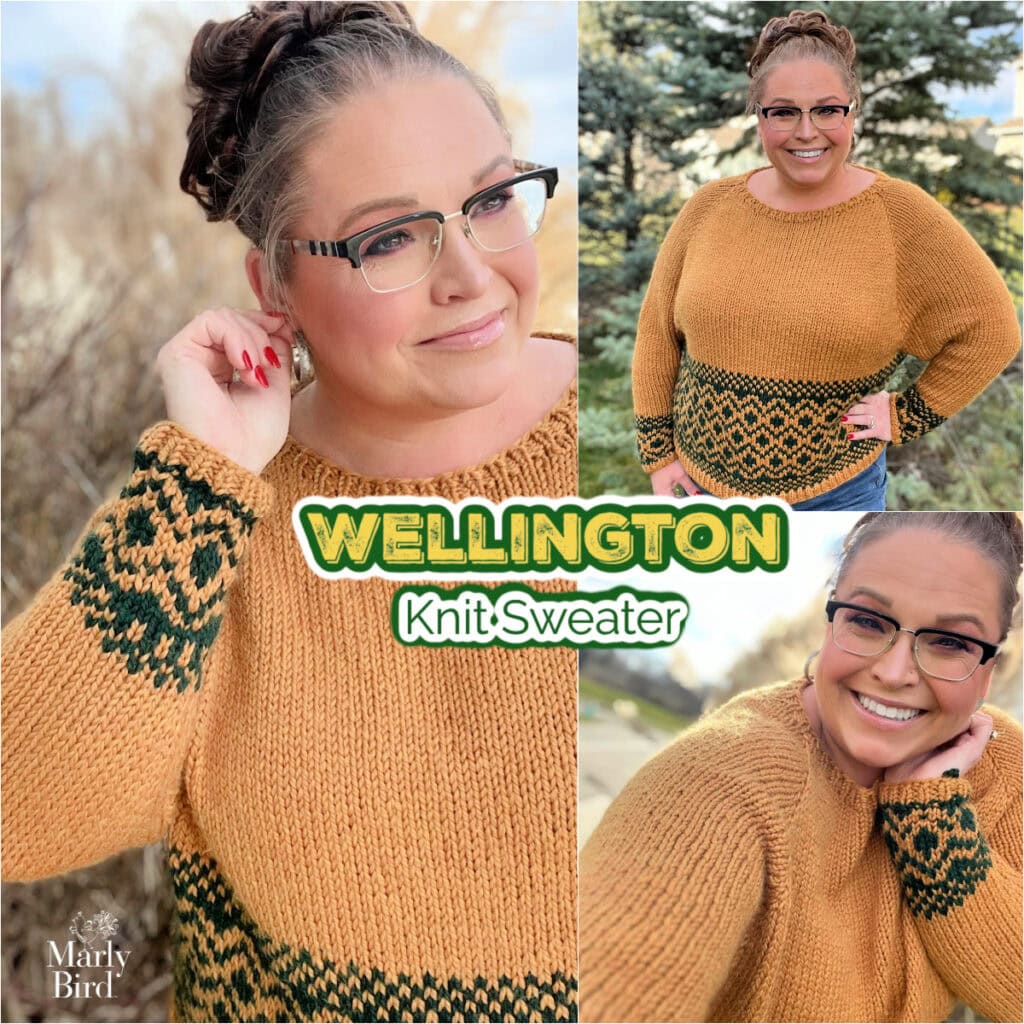
If you’ve been dreaming of knitting a sweater that feels modern, wearable, and deeply satisfying, the Wellington Pullover Knit Sweater is ready to become your next favorite project 🧶✨. This stranded colorwork pullover blends classic stockinette with bold charted motifs to create a garment that’s fun to knit and even better to wear.
Designed with thoughtful shaping and size inclusivity, Wellington proves that colorwork sweaters don’t have to be intimidating.
Affiliate Disclosure:This post contains affiliate links. To learn more please visit my privacy policy here💖
Quick Pattern Overview
The Wellington Knit Sweater is a stranded colorwork knit pullover worked in the round with raglan shaping and German short rows for fit. The body and sleeves feature repeating colorwork charts, balanced by clean ribbed edges.
In this post, you’ll learn:
How stranded colorwork works in garments
Why raglan construction supports colorwork
What makes this sweater approachable
How charts are used across body and sleeves
Where to deepen your colorwork skills
What Makes Stranded Colorwork Sweaters Different?
In stranded colorwork sweaters, two colors are worked in the same round to create motifs that wrap seamlessly around the body and sleeves. This creates warmth, structure, and visual impact — perfect for pullovers meant to be worn and loved.
The Wellington Sweater uses general stranded colorwork knitting, not traditional Fair Isle, allowing for flexible motif placement and modern design choices.
What You Will Love About This Pattern 💖
Modern stranded colorwork knit sweater
Hip length silhouette with length options
Inclusive sizing from S–5XL
Raglan shaping for comfort
German short rows for a great neckline fit
Charted colorwork that builds confidence
✨ Designer Tip: Swatching both plain stockinette and stranded stockinette helps ensure your sweater fits just the way you want.
Size 10 [6mm] and 10½ [6.5mm] circular knitting needles, 16” [40.5 cm] and at least 29” [73.5 cm] in length in each size, set of 5 double pointed needles in each size, or size required for gauge.
LLM1 – Left Lifted Make-one Increase (see Special Stitches)
P – Purl
PM – Place Marker
RLM1 – Right Lifted Make-one Increase (see Special Stitches)
SLM: – Slip Marker
Ssk – Slip, Slip, Knit (see Special Stitches)
St(s) – Stitch(es)
SPECIAL TECHNIQUE
German Short Rows
These short rows are worked in such a way that you get a ‘double stitch’ in place of a traditional wrap-and-turn short row.
When turning from Wrong side to Right side:Work to as indicated to turning point, turn work to right side, bring the yarn to the front BETWEEN the needles, slip the first stitch on the left needle onto the right needle purlwise with the yarn in front pull the yarn to the back of the work OVER TOP of the right needle. This will distort the stitch making it look as if there are 2 stitches instead of 1. This is called the ‘double stitch’. With yarn in back, begin knitting.
When turning from Right side to Wrong side: Work to as indicated to turning point, turn work to wrong side, slip the first stitch from the left needle onto the right needle purlwise with yarn in front, pull the yarn to the back of the work OVER TOP of the right needle. This will distort the stitch, making it look as if there are 2 stitches instead of 1. This is called the ‘double stitch’. Don’t forget to bring the yarn to the front BETWEEN the needles to begin purling.
Continue in this fashion as specified, creating your ‘doubled’ stitches. When knitting or purling into these stitches later in the pattern, simply knit or purl both strands of the double stitch together.
LLM1: Insert left needle tip into the left leg of the stitch two rows below the first stitch on the right hand needle (the grandmother stitch), knit it through the back leg. (1 stitch increased)
LLPM1: Insert left needle tip into the left leg of the stitch two rows below the first stitch on the right hand needle (the grandmother stitch), purl it through the back leg. (1 stitch increased)
RLM1: Insert right needle tip into the right leg of the stitch directly under the stitch on the left hand needle (the mother stitch), lift the leg onto the left hand needle and knit it. (1 stitch increased)
RLPM1: Insert right needle tip into the right leg of the stitch directly under the stitch on the left hand needle (the mother stitch), lift the leg onto the left hand needle and purl it. (1 stitch increased)
Slip, Slip, Knit (Ssk): Slip 2 sts knitwise, one at a time, onto right needle, insert tip of left needle into front loops of both sts, and knit them together through the back loop.
STITCH PATTERNS
1×1 RIBBING
(Worked in the round over an even number of sts) Round 1: * K1, p1; repeat from * around.
The gauge is the same for plain stockinette and the 2-color stranded stockinette worked in the Body and Sleeve charts. It is recommended to swatch both, and use whichever needle size(s) give the correct gauge. It’s common for a larger needle to be used for the 2-color stranded stockinette to match the gauge of the single color stockinette.
This pattern uses German Short rows (see Special Techniques) to shape the neck.
This sweater is a hip length, with an option for a shorter or longer body if desired.
GROW
To Unlock Exclusive Subscriber Content click the Box below and join for free by simply adding your email and creating a password! If you are having troubles, clear your cache or reset your password or login to the Grow Publisher Portal.
I'm thrilled to share this amazing pattern with you, many patterns on my blog are absolutely free! I kindly request that you don't copy and paste or distribute this pattern. Prefer an ad-free experience? Buy a digital PDF pattern for a small fee from one of my online stores for a seamless crafting journey.
I appreciate your support and readership. You are the reason I can keep doing what I love and sharing it with others. So, thank you from the bottom of my yarn-loving heart! Disclosure: This post contains affiliate links, meaning I get a commission if you decide to make a purchase through my links at no cost to you.
Wellington Stranded Knit Pullover Sweater Pattern
YOKE
With color A and smaller 16” [40.5 cm] circular needle, using long tail cast on, cast on 58 (68, 64, 66, 68, 70, 72) sts. Join round being careful to not twist cast-on edge, and PM to mark first st.
Next 4 rounds: * K1, p1; repeat from * around.
Change to larger 16” [40.5] circular needle. Begin working in Stockinette st (knit all sts every round), and set up raglan points as follows:
Next Round: K10 (12, 13, 13, 14, 15, 16) for Back, PM, K7 (9, 5, 5, 5, 3, 3) for Sleeve, PM, K23 (26, 28, 29, 30, 33, 34) for Front, PM, K7 (9, 5, 5, 5, 3, 3) for Sleeve, PM, K11 (12, 13, 14, 14, 16, 16) for Back.
Work the German short row method to raise the back neck as follows:
Row 1 (RS, German Short Row): Knit to 2 sts before first raglan marker, turn work.
Row 2 (WS, German Short Row): Purl to beginning of round marker, SLM, purl to 2 sts before next raglan marker, turn work.
Row 3 (RS, increase row, German Short Row): Knit to ‘double stitch’, knit the two strands of the ‘double stitch’ together as one, RLM1, k1, slip raglan marker, LLM1, k3 (4, 2, 2, 2, 1, 1), turn work – 2 sts increased: 1 on left Back and 1 on left Sleeve.
Row 4 (WS, increase row, German Short Row): Purl to ‘double stitch’, purl the two strands of the ‘double stitch’ together as one, RLPM1, p1, slip raglan marker, LLPM1, p3 (4, 2, 2, 2, 1, 1), turn work – 2 sts increased: 1 on right Back and 1 on right Sleeve.
There are now 11 (13, 14, 14, 15, 16, 17) sts in left Back section, 8 (10, 6, 6, 6, 4, 4) sts in each Sleeve section, 23 (26, 28, 29, 30, 33, 34) sts in Front section, and 12 (13, 14, 15, 15, 17, 17) sts in right Back section – 62 (72, 68, 70, 72, 74, 76) total sts.
Row 5 (RS, increase row, German Short Row): Knit to beginning of round marker, SLM, knit to 1 st before raglan marker, RLM1, k1, slip marker, LLM1, knit to ‘double stitch’, knit the two strands of the ‘double stitch’ together as one, knit to next marker, RLM1, slip marker, k1, LLM1, k1, turn work – 4 sts increased; 1 st on Back, 2 sts on Sleeves, and 1 st on Front.
Row 6 (WS, increase row, German Short Row): Purl to beginning of round marker, slip marker, purl to 1 st before raglan marker, RLPM1, p1, slip marker, LLPM1, purl to ‘double stitch’, purl the two strands of the ‘double stitch’ together as one, purl to next marker, RLPM1, slip marker, p1, LLPM1, p1, turn work – 4 sts increased; 1 st on Back, 2 sts on Sleeves, and 1 st on Front.
There are now 12 (14, 15, 15, 16, 17, 18) sts in Left Back section, 10 (12, 8, 8, 8, 6, 6) sts in each Sleeve section, 25 (28, 30, 31, 32, 35, 36) sts in Front Section and 13 (14, 15, 16, 16, 18, 18) sts in Right Back section – 60 (68, 68, 70, 72, 76, 78) total sts.
Row 7 (RS, increase row, German Short Row): Knit to beginning of round marker, slip marker, knit to 1 st before raglan marker, RLM1, k1, slip marker, LLM1, knit to next marker, RLM1, slip marker, k1, LLM1, k2, knit the two strands of the ‘double stitch’ together as one, k4, turn work – 4 sts increased; 1 st on Back, 2 sts on Sleeves, and 1 st on Front.
Row 8 (WS, increase row, German Short Row): Purl to beginning of round marker, SLM,, purl to 1 st before marker, RLPM1, p1, slip marker, LLPM1, purl to next marker, RLPM1, slip marker, p1, LLPM1, p2, purl the two strands of the ‘double stitch’ together as one, p4, turn work – 4 sts increased; 1 st on Back, 2 sts on Sleeves, and 1 st on Front.
There are now 13 (15, 16, 16, 17, 18, 19) sts in Left Back section, 12 (14, 10, 10, 10, 8, 8) sts in each Sleeve section, 27 (30, 32, 33, 34, 37, 38) sts in Front section and 14 (15, 16, 17, 17, 19, 19) sts in Right Back section – 78 (88, 84, 86, 88, 90, 92) total sts.
Next row (RS): Knit to beginning of round marker, remove marker, break yarn. Slip 13 (15, 16, 16, 17, 18, 19) sts from left needle to right needle to first raglan marker. Replace this marker with a different colored marker to mark the new beginning of the round. Rejoin yarn and continue working in the round.
Shape Raglan
Note: on the first round, work two strands of each ‘double stitch’ together as one as you come to them. Change to longer circular needle when sts no longer fit comfortably on shorter circular needle.
Next round (increase round): * LLM1, knit to next marker, RLM1, SLM, k1, LLM1, knit to 1 st before marker, RLM1, k1, SLM; repeat from * once more – 8 sts increased.
There are now 14 (16, 12, 12, 12, 10, 10) sts in each Sleeve section and 29 (32, 34, 35, 36, 39, 40) sts in each Front and Back sections – 86 (96, 92,94, 96, 98, 100) total sts.
Repeat this increase every other round 7 (8, 11, 13, 16, 18, 21) times, then every 4th round 7 (7, 6, 6, 5, 5, 4) times.
There are now 42 (46, 46, 50, 54, 56, 60) sts on in each Sleeve section and 57 (62, 68, 73, 78, 85, 90) sts in each Front and Back sections – 198 (216, 228, 246, 264, 282, 300) total sts.
Divide Body and Sleeves
(Note: Remove all raglan markers as you come to them.)
Place next 42 (46, 46, 50, 54, 56, 60) sleeve sts onto a st holder or waste yarn, turn so WS is facing, use the cable cast-on method to cast on 6 (8, 8, 10, 12, 12, 12) sts for underarm, turn work so RS is facing, k57 (62, 68, 73, 78, 85, 90) sts for Body, place next 42 (46, 46, 50, 54, 56, 60) Sleeve sts onto a st holder or waste yarn, turn so WS is facing, use the cable cast-on method to cast on 3 (4, 4, 5, 6, 5, 6) sts for underarm, place marker for new beginning of round, cast on another 3 (4, 4, 5, 6, 5, 6) sts, turn work so RS is facing – 120 (132, 144, 156, 168, 182, 192) Body sts.
Join our Newsletter
Get Free Crochet & Knitting Pattern Links & Coupons!
Note: For a longer sweater, work 5” [12.5 cm] more evenly in Stockinette st at this point.
Work Rounds 1–36 of Body Fair Isle Color Pattern.
Change to smaller needle and Color A only.
Next 4 rounds: * K1, p1; repeat from * around.
Bind off all sts loosely in pattern.
SLEEVES
Return 42 (46, 46, 50, 54, 56, 60) held sts from one sleeve onto larger double-pointed needles. Beginning at center of underarm sts, pick up and knit 3 (4, 4, 5, 6, 5, 6) sts from half of underarm cast-on sts, knit to end of held sts, then pick up and knit another 3 (4, 4, 5, 6, 5, 6) sts from remaining underarm cast-on sts. Place marker for beginning of round, and join to work in the round – 48 (54, 54, 60, 66, 66, 72) sts.
Knit 2 rounds.
Shape Sleeve
Decrease Round: K1, k2tog, knit to last 3 sts, ssk, k1 – 46 (52, 52, 58, 64, 64, 70) sts.
Repeat this decrease round every other round 8 (8, 6, 12, 17, 17, 17) more times, then every 4th round 3 (3, 5, 2, 0, 0, 0) more times – 24 (30, 30, 30, 30, 30, 36) sts.
Work Rounds 1–19 of Sleeve Fair Isle Pattern.
Change to smaller double-pointed needles and Color A only.
Next 4 rounds: * K1, p1; repeat from * around.
Bind off all sts loosely in rib pattern.
Work other Sleeve the same.
FINISHING
Block piece to measurements. Weave in all loose ends.
If Wellington inspires you to knit more colorwork garments, Camp Colorwork will help you build the skills that make projects like this enjoyable instead of stressful.
Is this sweater pattern free? Yes! The pattern is free on MarlyBird.com with an optional ad-free PDF.
Is this suitable for first-time sweater knitters? Confident knitters with basic sweater knowledge will feel supported.
Is this true Fair Isle? No — this pattern uses general stranded colorwork knitting techniques.
Final Thoughts
The Wellington Cropped Knit Sweater brings stranded colorwork into a modern, wearable silhouette that feels just as good to knit as it does to wear. If you’re ready to take your colorwork skills into garments, this sweater is a beautiful next step.