Search
Close
  • The Pattern Shop
  • Our Free Patterns
    • Browse All Our Free Patterns
    • Our Free Knitting Patterns
    • Our Free Crochet Patterns
  • Blog
    • All Blog Posts
    • All Free Patterns
    • Dibble Dabble Inspiration
    • Giveaways
    • Make-Alongs
    • Product Reviews
    • Roundups
    • Tips, Tricks, Techniques for Knitting and Crochet
Stylized bird with pink and gray swirling tail above elegant โ€œMarlyโ€ text, logo for crochet accessories and home decor.
  • Marly Bird House
  • Learn to Knit & Crochet
    • Newbie? Start Here
    • Video Tutorials
    • Knitting Definitions
    • Crochet Definitions
    • Common Techniques
    • Size Charts for Knitting and Crochet Projects
  • About
ร—
  • The Pattern Shop
  • Free Patterns
  • Blog
  • Marly Bird House
  • Learn to Knit & Crochet
    • Newbie? Start Here
    • Video Tutorials
    • Knitting Definitions
    • Crochet Definitions
    • Common Techniques
    • Size Charts for Knitting and Crochet Projects
  • About
Stylized bird with pink and gray swirling tail above elegant โ€œMarlyโ€ text, logo for crochet accessories and home decor.
Search
Close

New Patterns NOW Available in Ad-Free PDF! Check out The Pattern Shop

Free Crochet Ruana Pattern โ€“ Lyvia Oversized Cardigan with Pockets

January 27, 2026 By Marly Bird 1 Comment

”

If you love crochet garments that feel cozy, stylish, and effortless, the Lyvia Ruana is about to become a wardrobe favorite โค๏ธ. This free crochet ruana pattern is designed as an oversized, open-front cardigan-style wrap with beautiful texture, relaxed drape, and the kind of comfort you reach for day after day.

And letโ€™s not bury the leadโ€ฆ

โœจ It has pockets. โœจ
Real ones. Functional ones. The good kind.

A woman models a hand-crocheted oversized cardigan in vibrant red, showcasing chunky textured stitches and relaxed fit.

Affiliate Disclosure: This post contains affiliate links. To learn more please visit my privacy policy here๐Ÿ’–


Quick Pattern Overview

The Lyvia Ruana is a free crochet pattern featuring classic ruana construction with a modern, oversized silhouette. Worked in panels and joined with thoughtful finishing details, this design creates an easy layering piece that feels polished without being fussy.

In this post, youโ€™ll learn:

  • What makes a ruana different from a cardigan
  • Why oversized ruanas are so wearable
  • How pockets are built into the design
  • Yarn options that work beautifully for this pattern
  • Where to find similar ruana patterns youโ€™ll love

Woman models a chunky, hand-crocheted red cardigan with textured stitches; yarn and plants on shelves in cozy studio background.

What Is a Crochet Ruana?

A crochet ruana is a wrap-style garment made from rectangular panels that create an open-front shape when worn. Unlike fitted cardigans, ruanas rely on drape rather than shaping, making them incredibly forgiving and comfortable.

The Lyvia Ruana leans into that ease with relaxed arm openings, generous width, and a silhouette that layers beautifully over tees, tanks, and long sleeves.


What You Will Love About This Pattern ๐Ÿ’–

  • Free crochet ruana pattern
  • Oversized, relaxed cardigan-style fit
  • Beautiful lace texture paired with structured ribbing
  • Built-in pockets (the real MVPs)
  • Size-inclusive design: Sโ€“XL and 2XLโ€“5XL
  • Easy-to-style layering piece

โœจ Designer Tip: Ruanas are one of the most wearable crochet garments because they move with your body instead of restricting it.

A woman wears a red crochet ruana with visible textured stitches; pattern pages are displayed on the left.
Etsy
Shopify
Ravelry

โ€œThis oversized crochet ruana is the kind of layering piece you throw on once โ€” and then wonder how you lived without it.โ€


About the Design & Fit

The Lyvia Ruana is designed with two flexible size groupings to ensure comfortable wear across a wide range of bodies:

  • Sโ€“XL: Relaxed, draped fit with generous coverage
  • 2XLโ€“5XL: Extra width and length for confident layering

When worn, the ruana measures approximately:

  • 40 (46ยฝ)โ€ wide
  • 24 (30)โ€ long, folded lengthwise

The oversized shape allows the ruana to sit comfortably on the shoulders without slipping or feeling bulky.


Yarn Choice + Substitutions

The Lyvia Ruana sample was made using Red Heart Chic Sheep by Marly Bird, a 100% merino wool yarn known for its softness, warmth, and excellent stitch definition โ€” perfect for textured garments.

If youโ€™d like to substitute yarn, these worsted-weight options work beautifully and maintain the drape and structure of the design:

  • Malabrigo Rios
    https://tidd.ly/49VZcW1
  • Berroco Ultra Wool
    https://tidd.ly/4pSjENv
  • Swish Worsted
    https://tidd.ly/4qL6Zxt
  • Cascade 220 Superwash
    https://tidd.ly/4afBG7B
  • Plymouth Yarn Worsted Merino Superwash
    https://tidd.ly/3M2TXMd
  • Madelinetosh Tosh Vintage
    https://tidd.ly/4rgPp3P
  • Malabrigo Washted
    https://tidd.ly/4qC5nWh
  • Heatherly Worsted
    https://tidd.ly/4a7z2Qj
  • Woodland Tweed
    https://tidd.ly/4r7dfPs
  • Twill Yarn
    https://tidd.ly/4pK2CBn

โœจ Designer Tip: Choose a yarn with good drape and stitch definition โ€” this allows the lace texture to shine without feeling stiff.


Letโ€™s Talk About the Pockets ๐Ÿงต

Yes, the Lyvia Ruana includes fully functional pockets โ€” not decorative ones.

Theyโ€™re integrated into the front of the garment so they sit naturally when worn, without pulling or distorting the fabric. Perfect for warming hands, holding your phone, or stashing cozy essentials.

Once youโ€™ve worn a ruana with pockets, thereโ€™s no going back ๐Ÿ˜‰


A woman wears a red crochet ruana with visible textured stitches; pattern pages are displayed on the left.
Etsy
Shopify
Ravelry

LYVIA CROCHET RUANA WITH POCKETS PATTERN DETAILS

Designed by Marly Bird

SKILL LEVEL 

Intermediate

MEASUREMENTS

To Fit Sizes 

S-XL (2XL-5XL)

Note: The smaller size is more of a one-size-fits-all, while the larger size is oversized.

Finished Measurements

Ruana measures 40 (46ยฝ)” / 101.5 (118) cm wide and 24 (30)” / 68.5 (84) cm long folded in half lengthwise.

Gauge

4 repeats and 13 rows = 6ยฝ” (16.5 cm) in Lace stitch; use any size hook to obtain the gauge.

MATERIALS

Yarn

Red Heart Chic Sheep by Marly Bird (100% Merino Wool, 3.5 /100 g, 200 yd / 183 m) 

11 (14) balls: #5254 Sunset

Hook

U.S. H/8 [5mm]

Notions

  • Stitch Markers
  • Tapestry Needle
  • Scissors
  • Tape Measure
  • Leather tags (Optional)
  • Leather rivets (Optional)
โญ๏ธ Marly Bird Amazon Storefront โญ๏ธ

ABBREVIATIONS

Approx โ€“ Approximate(ly)

Beg โ€“ Begin(ning)

Bpdc – Back Post Double Crochet (see Special Stitches)

Ch – Chain(s)

Cont – Continue(ity)

Dc – Double Crochet

Dc2tog – Double Crochet Two Together

Fpdc – Front Post Double Crochet (see Special Stitches)

Hdc – Half Double Crochet

RS – Right Side

Sc – Single Crochet

Sc2tog – Single Crochet Two Together (see Special Stitches)

Sl st – Slip Stitch

Sp(s) – Space(s)

St(s) – Stitch(es)

Tr – Treble Crochet

WS – Wrong Side

Yo – yarn over


SPECIAL STITCHES / TECHNIQUES       

โญ๏ธ Back Post Double Crochet (bpdc): Yo, insert hook from back-to front-to-back around post of indicated st and pull up a loop, [yo and draw through 2 loops] twice.

โญ๏ธ Front Post Double Crochet (fpdc): Yo, insert hook from front-to back-to-front around post of indicated st and pull up a loop, [yo and draw through 2 loops] twice.

โญ๏ธ Double Crochet 2 Together (Dc2tog): *Yarn over hook, insert hook into indicated st, yarn over and pull up a loop, yarn over and draw through 2 loops on hook; repeat from * in next st, yarn over and draw through all 3 loops on hook. 

โญ๏ธ Linked double crochet (linked dc): Ch a foundation as indicated in pattern.Insert hook in 2nd ch from hook, yo and pull up a loop, insert hook in 3rd ch from hook, yo and pull up a loop, [yo and draw through 2 loops on hook] twice (first linked dc made), * insert hook into horizontal bar (sliding hook from top to bottom of stitch, not to the back of the stitch) of previous linked dc, yo and pull up a loop, insert hook in next ch, yo and pull up a loop, [yo and draw through 2 loops on hook] twice (next linked dc made); repeat from * to end.  When working next row, ch 3, then insert hook in 2nd ch from hook and then first st of row to pull up loops for first linked dc.

โญ๏ธ Shallow Post Half-Double Crochet (Shallow Fphdc): Yarn over, insert hook from front to back under the top 2 loops (โ€œvโ€) of indicated st, then from back to front again through the top 2 loops of next st (not around post of indicated st), yo and pull up a loop, yo and draw through all 3 loops on hook. Note: all shallow post sts are worked in the same manner, using the โ€œvโ€ rather than the actual post.

โญ๏ธ Single Crochet 2 Together (Sc2tog): Insert hook in first of 2 indicated sts and pull up a loop, insert hook in second of 2 indicated sts and pull up  a loop, yarn over and draw through all three loops on hook, resulting in 1 stitch.

โญ๏ธ Stacked Double Crochet (Stacked Dc): (Do not ch 1 prior to making the first sc) Sc in first stitch, insert hook in between two legs of the base, yo and pull up a loop, yo and draw through 2 loops on hook.

โญ๏ธ Stacked Treble Crochet (Stacked Tr): (Do not ch 1 prior to making the first sc) Sc in first stitch, * insert hook in between two legs of the base of last sc made, yo and pull up a loop, yo and draw through 2 loops on hook; repeat from * once more.


PATTERN STITCH

LACE STITCH

Ch a multiple of 6 sts plus 2.

Setup row (WS): Hdc in 2nd ch from hook, * hdc in next ch, ch 3, skip 3 foundation ch, hdc in next ch, ch 1, skip next foundation ch; repeat from * to last 6 sts, hdc in next ch, ch 3, skip 3 foundation ch, hdc in each of last 2 sts, turn.

Row 1 (RS): Ch 1, sc in first hdc, * ch 2, 3 dc in next ch-3 sp, ch 2, sc in next ch-1 sp, repeat from * to last ch-3 sp, ch 2, 3 dc in next ch-3 sp, ch 2, sc in last hdc, turn.

Row 2: Stacked tr (see Special Stitches and Video Tutorials), ch 1, skip first sp * hdc in next dc, ch 1, skip next dc, hdc in next dc, ch 3, skip next (sp, sc, sp); repeat from * to last 3 dc, hdc in next dc, ch 1, skip next dc, hdc in next dc, ch 1, tr in last sc, turn.

Row 3: Stacked dc, dc in first ch-1 sp, * ch 2, sc in next ch-1 sp, ch 2, dc in next ch-3 sp; repeat from * to last 2 ch-1 sps, ch 2, sc in next ch-1 sp, ch 2, dc in last ch-1 sp, dc in last tr, turn.

Row 4: Ch 1, hdc in each of first 2 dc, * ch 3, skip next (sp, sc, sp), hdc in next dc, ch 1, skip next dc, hdc in next dc; repeat from * to last 2 sps, ch 3, skip next (sp, sc, sp), hdc in each of last 2 dc, turn.

Repeat Rows 1-4 for Lace Stitch.


STITCH DIAGRAM

The crochet stitch diagram is only available in the ad-free pdf.  

A woman wears a red crochet ruana with visible textured stitches; pattern pages are displayed on the left.
Etsy
Shopify
Ravelry

SCHEMATIC

Schematic shows rectangular crochet ruana with inch/cm measurements, pocket placement, width, height, and dashed outline.

 VIDEO TUTORIALS

  • Back post double crochet: https://www.youtube.com/watch?v=q2GQMEE_0-E
  • Front post double crochet: https://www.youtube.com/watch?v=EdyOmRUS-cg
  • Linked double crochet: https://www.youtube.com/watch?v=LP1d29Bgv0I
  • Shallow post sts: https://www.youtube.com/watch?v=lFv7cLC7_mc
  • Stacked double crochet: https://www.youtube.com/watch?v=KI35LQoYbm8
  • (For a stacked treble crochet, work the โ€œscโ€ an additional time)

NOTES

  • Sizes are written for the smallest size. If changes are necessary for larger sizes the instructions will be written thus ( ). 
  • For a petite larger size follow the stitch count for the larger size but row count for the smaller size. 
  • For a tall smaller size follow the stitch count for the smaller size but the row count for the larger size. 
  • Work both fronts at the same time with separate balls of yarn (at the same point of color if not using a solid) to ensure matching sides.

GROW

To Unlockย Exclusive Subscriber Contentย click the Box below and join for free by simply adding your email and creating a password! If you are having troubles, clear your cache or reset your password or login to the Grow Publisher Portal.

>> Learn More About Grow Here <<

I'm thrilled to share this amazing pattern with you, many patterns on my blog are absolutely free! I kindly request that you don't copy and paste or distribute this pattern. Prefer an ad-free experience? Buy a digital PDF pattern for a small fee from one of my online stores for a seamless crafting journey. 

I appreciate your support and readership. You are the reason I can keep doing what I love and sharing it with others. So, thank you from the bottom of my yarn-loving heart! Disclosure: This post contains affiliate links, meaning I get a commission if you decide to make a purchase through my links at no cost to you.


A woman models an oversized crochet cardigan with bold red yarn and chunky textured stitches.

LYVIA CROCHET RUANA WITH POCKETS PATTERN

POCKETS

(Make both the same to start)

Ch 31.

Row 1: Work in linked dc across (see Special Stitches and Video Tutorials) โ€“ 29 dc.

Row 2: Ch 2, linked dc in each dc across โ€“ 29 dc.

Repeat Row 2 until piece measures 8″ (20.5 cm).

Fasten off.

FRONT PANELS

(Make both the same)

Ribbing

Ch 75 (87).

Row 1 (RS): Sc in 2nd ch from hook and in each ch to end, turn โ€“ 74 (86) sc.

Row 2: Ch 1, hdc in first st, shallow fphdc (see Special Stitches and Video Tutorials) in each st across, hdc in last st, turn โ€“ 74 (86) hdc.

Row 3: Ch 1, hdc in first st, fpdc (see Special Stitches and Video Tutorials) around next st, * bpdc (see Special Stitches and Video Tutorials) around each of next 2 sts, fpdc around each of next 2 sts; repeat from * to last 4 sts, bpdc around each of next 2 sts, fpdc around next st, hdc last st, turn โ€“ 74 (86) sts.

Row 4: Ch 1, hdc in first st, bpdc around next st, * fpdc around each of next 2 sts, bpdc around each of next 2 sts; repeat from * to last 4 sts, fpdc around each of next 2 sts, bpdc around next st, hdc last st, turn โ€“ 74 (86) sts.

Repeat Rows 3 and 4 only 3 more times.

Body

Row 1 (RS): Ch 1, sc in each st to approx center of row, sc2tog over next 2 sts, sc in each st to end โ€“ 73 (85) sts.

Row 2: Ch 1, hdc in first sc, * hdc in next sc, ch 3, skip 3 sc, hdc in next sc, ch 1, skip next sc; repeat from * to last 6 sc, hdc in next sc, ch 3, skip 3 sc, hdc in each of last 2 sc, turn.

Begin Lace Stitch

Work Rows 1-4 of Lace st 5 times โ€“ 20 total rows worked.

Join Pocket

Next 4 rows:

Row 1 (joining row, RS): Ch 1, sc in first hdc, * ch 2, 3 dc in next ch-3 sp, ch 2, sc in next ch-1 sp, repeat from * 2 (3) more times, ch 2, 3 dc in next ch-3 sp, ch 2, hold Pocket piece behind Body piece and sc in next ch-1 sp on Body and first dc on Pocket at the same time, then cont as follows across Pocket sts only: * ch 2, skip next dc, dc in next dc, dc2tog across next 2 dc, dc in next dc, ch 2, skip next dc, sc in next dc; repeat from * twice more, ch 2, skip next dc, dc in next dc, dc2tog across next 2 dc, dc in next dc, ch 2, skip next dc, skip 3 ch-1 sps and 4 ch-3 sps on Body piece, sc in next ch-1 sp on Body and last dc on Pocket at the same time, then cont as follows across remaining Body sts: * ch 2, 3 dc in next ch-3 sp, ch 2, sc in next ch-1 sp, repeat from * 2 (3) more times, ch 2, 3 dc in last ch-3 sp, ch 2, sc in last hdc, turn.

Row 2: Stacked tr, ch 1, skip first sp * hdc in next dc, ch 1, skip next dc, hdc in next dc, ch 3, skip next (sp, sc, sp); repeat from * to last 3 dc, hdc in next dc, ch 1, skip next dc, hdc in next dc, ch 1, tr in last sc, turn.

Row 3: Stacked dc, dc in first ch-1 sp, * ch 2, sc in next ch-1 sp, ch 2, dc in next ch-3 sp; repeat from * to last 2 ch-1 sps, ch 2, sc in next ch-1 sp, ch 2, dc in last ch-1 sp, dc in last tr, turn.

Row 4: Ch 1, hdc in each of first 2 dc, * ch 3, skip next (sp, sc, sp), hdc in next dc, ch 1, skip next dc, hdc in next dc; repeat from * to last 2 sps, ch 3, skip next (sp, sc, sp), hdc in each of last 2 dc, turn.

Cont evenly in Lace st for 24 (36) more rows, or 6 (9) Lace st repeats.

Fasten off at end of first panel; keep yarn attached at end of second panel.

BACK

Work across final rows of Front Panels as follows:

Next 4 rows:

Row 1: (joining row, RS): Ch 1, sc in first hdc, * ch 2, 3 dc in next ch-3 sp, ch 2, sc in next ch-1 sp, repeat from * to last ch-3 sp, ch 2, 3 dc in next ch-3 sp, ch 2, sc2tog over last hdc of current Front Panel and first hdc of second Front Panel, repeat from * to * to last ch-3 sp of second Front Panel, , ch 2, 3 dc in next ch-3 sp, ch 2, sc in last hdc, turn โ€“ 24 (28) repeats across.

Row 2: Stacked tr, ch 1, skip first sp * hdc in next dc, ch 1, skip next dc, hdc in next dc, ch 3, skip next (sp, sc, sp); repeat from * to last 3 dc, hdc in next dc, ch 1, skip next dc, hdc in next dc, ch 1, tr in last sc, turn.

Row 3: Stacked dc, dc in first ch-1 sp, * ch 2, sc in next ch-1 sp, ch 2, dc in next ch-3 sp; repeat from * to last 2 ch-1 sps, ch 2, sc in next ch-1 sp, ch 2, dc in last ch-1 sp, dc in last tr, turn.

Row 4: Ch 1, hdc in each of first 2 dc, * ch 3, skip next (sp, sc, sp), hdc in next dc, ch 1, skip next dc, hdc in next dc; repeat from * to last 2 sps, ch 3, skip next (sp, sc, sp), hdc in each of last 2 dc, turn.

Cont in Lace st for 44 (56) more rows, or 11 (14) Lace st repeats.

Ribbing

Row 1 (RS): Ch 1, sc in each of first 2 hdc, * 3 sc in next ch-3 sp, sc in next hdc, sc in next ch-1 sp, sc in next hdc; repeat from * to approx center of row, 4 sc in next ch-3 sp, sc in next hdc, sc in next ch-1 sp, sc in next hdc, repeat from * to * to last ch-3 sp, 3 sc in last ch-3 sp, sc in each of 2 last hdc, turn โ€“ 148 (172) dc.

Row 2: Ch 1, hdc in each stitch across – 148 (172)

Row 3: Ch 1, hdc in first st, fpdc around next st, * bpdc around each of next 2 sts, fpdc around each of next 2 sts; repeat from * to last 4 sts, bpdc around each of next 2 sts, fpdc around next st, hdc last st, turn โ€“ 148 (172) sts.

Row 4: Ch 1, hdc in first st, bpdc around next st, * fpdc around each of next 2 sts, bpdc around each of next 2 sts; repeat from * to last 4 sts, fpdc around each of next 2 sts, bpdc around next st, hdc last st, turn โ€“ 148 (172) sts.

Repeat Rows 3 and 4 only 3 more times.

Next Row (RS): Ch 1, shallow bpsc in each stitch to end โ€“ 148 (172) sc.

Fasten off.

FINISHING

Side Edging And Seaming

With RS facing, join yarn with sl st to bottom right corner of Body, ch 1, and work 218 (270) sc evenly along side edge of piece to next corner.

Fasten off.

Fold Body in half with WS facing out.

Mark the 15th sc from each edge.

With WS facing, join yarn with sl st in first marked st, ch 1, and hdc in this st.

Remove hook from loop, insert hook in marked st on opposite side and pull open loop though this st.

* Hdc in next st on first side, remove hook from loop, insert hook in next st on opposite side and pull open loop though this st, repeat from * until 10 (12)” [25.5 (30.5) cm] remain unseamed for armhole.

Fasten off.

Work other side the same way.

Red knitted fabric with open-lace stitches and ribbed sections, showing detail ideal for cardigan projects.

Collar Edging

With RS facing, join yarn with sl st in bottom st of inner Right Front edge, and work 218 (270) sc around edge to bottom of Left Front.

Next 8 rows: Work same as Rows 2-10 of ribbing at beg of Back Panel. 

Next row: Ch 1, shallow bphdc in each stitch to end

Pocket Edging And Seaming

With RS facing, join yarn with sl st to first ch-1 sp at edge of Pocket opening on Body (this is the same ch-1 sp previously used for joining Body to Pocket piece).

Row 1 (RS): Ch 1, sc in same ch-1 sp, * sc in next hdc, 4 sc in next ch-3 sp, sc in next hdc, sc in next ch-1 sp; repeat from * 3 more times, sc once more in same ch-1 sp (this ch-1 sp was also previously used for joining), turn โ€“ 30 sc.

Rows 2-5: Work same as Rows 2-5 of ribbing at beg of Front Panels.

Fasten off.

With tapestry needle, whipstitch Pocket piece to WS of Body, and short edges of Pocket trims to RS of Body.

Work other Pocket the same way.

Weave in all loose ends.

Woman models a red crochet ruana in a yarn-filled room, showing front and side views; visible stitch and drape detail.

Styling the Lyvia Ruana

One of the best things about the Lyvia Ruana is how versatile it is. Wear it:

  • Over jeans and a tee for everyday comfort
  • Layered with leggings and boots
  • Tossed over a dress for a cozy-chic look
  • Wrapped up indoors as a stylish alternative to a blanket

Itโ€™s the kind of piece that works just as well at home as it does out and about.


If You Love This Shape, Try These Too

If ruana-style garments are already a favorite, youโ€™ll definitely want to explore these popular patterns as well:

  • Rockford Crochet Ruana
  • Creekside Crochet Ruana

Each offers a different stitch texture while keeping the same easy-to-wear construction.


A woman wears a red crochet ruana with visible textured stitches; pattern pages are displayed on the left.
Etsy
Shopify
Ravelry

FAQ โ€“ Lyvia Crochet Ruana

Is this crochet ruana pattern free?
Yes! The Lyvia Ruana is a free crochet pattern on MarlyBird.com, with an optional ad-free PDF.

What skill level is this pattern?
This pattern is best for intermediate crocheters or confident beginners comfortable with lace stitches and garment construction.

Can I adjust the length?
Absolutely. The ruana construction makes it easy to customize length.

Are the pockets optional?
Theyโ€™re part of the design โ€” and trust me, youโ€™ll want them.


Final Thoughts ๐Ÿงถ

The Lyvia Ruana is the perfect blend of comfort, style, and practicality. With its oversized fit, beautiful texture, and yes โ€” pockets โ€” itโ€™s a crochet garment youโ€™ll reach for again and again.

If you make one, be sure to share it and tag me โ€” I love seeing your finished projects โค๏ธ
#mmmdi #marlybird

โค๏ธ Your BiCrafty Bestie,
Marly Bird

A cartoon avatar of a person with glasses and a brown bun smiles warmly. Their green shirt and black jacket add a stylish touch, while colorful hearts surround them like loving temperature blankets, stitching together an aura of love and positivity. -Marly Bird
“

Filed Under: Crochet, Free Patterns, Marly Bird Premium Patterns, Our Free Patterns, Pattern

Free Knit Scarf or Cowl Pattern โ€“ Super Simple Rib and Lace Design

January 26, 2026 By Marly Bird 2 Comments

๐Ÿ“ Updated 2026-05-11: Refreshed with the v2 framework… added FAQ schema, author bio, newsletter signup, and improved structure. Marly Bird

AI Summary: The Super Simple Rib and Lace Knit Scarf or Cowl is a free, beginner-friendly one-ball knitting pattern that combines easy memorized lace stitches with classic ribbing. Worked flat with optional decorative buttons, the finished piece transforms from a flowing scarf into a cozy cowl in seconds… no extra shaping required.

If you love knitting projects that are relaxing, versatile, and just plain satisfying, this free rib and lace knit scarf cowl pattern is one youโ€™ll want to cast on right away ๐Ÿงถโœจ. Designed as a one-ball knitting project, this accessory can be worn as either a scarf or a cowl, depending on how you finish it… making it perfect for knitters who want options without extra work.

A mannequin displays a textured, multicolored Rib and Lace Knit Scarf Cowl in shades of blue, purple, and pink, fastened with blue buttons. The Marly Bird logo appears in the lower right corner. Geometric wall art is in the background. -Marly Bird

This design lets the yarn shine, combining easy-to-memorize lace stitches with classic ribbing for texture, stretch, and visual interest. Itโ€™s simple enough to knit while watching TV, yet engaging enough to keep you from getting bored.

๐Ÿงถ Affiliate Disclosure: This post contains affiliate links. If you purchase through them I may earn a small commission at no extra cost to you… and it helps support free patterns from my yarn-loving heart ๐Ÿ’› See my privacy policy here.

Quick Pattern Overview

This post features a free knit scarf or cowl pattern worked in a simple rib and lace stitch pattern. The design uses one ball of yarn and optional buttons, allowing the finished piece to function as a traditional scarf or be buttoned into a cozy cowl.

In this post, youโ€™ll learn:

  • Why rib and lace stitches work so well together
  • How this design can be worn as a scarf or a cowl
  • What makes this an ideal one-ball knitting project
  • How the lace stitches double as buttonholes
  • Where to find video support if you need it
Multicolored rib and lace scarf and cowl with buttons, featuring hues of blue, purple, and pink.

What Is a Rib and Lace Knit Scarf Cowl?

A rib and lace knit scarf cowl is a versatile accessory that blends stretchy ribbing with decorative lace stitches. The ribbing provides structure and elasticity, while the lace adds visual interest without complicated techniques.

In this design, the lace yarn overs naturally create spaces that can be used as buttonholes, eliminating the need to plan or knit separate buttonhole rows… a small detail that makes a big difference.


What You Will Love About This Pattern ๐Ÿ’–

  • Free knit scarf or cowl pattern
  • One-ball yarn project
  • Easy lace stitches separated by ribbing
  • Beginner-friendly lace technique
  • Optional buttons with no buttonholes to knit
  • Customizable length and styling

โœจ Designer Tip: This is the kind of pattern thatโ€™s perfect for letting a special yarn do the talking.

Etsy
Shopify
Ravelry
๐Ÿ’Œ Want more free patterns like this? Get a fresh free knit or crochet pattern, designer tips, and behind-the-scenes stories delivered straight to your inbox.

Join our Newsletter

Get Free Crochet & Knitting
Pattern Links & Coupons!

Hand-drawn bird with curling, detailed feathers and pink accents; cheerful pose showcases fine line and texture work.
>> Become An Insider <<
A woman with glasses and curly hair models a colorful crocheted scarf, showing textured stitches and vibrant yarn.

A Yarn-Inspired Design Story

There are times when I like to let the yarn lead the way… and thatโ€™s exactly how this pattern came to life. With just one ball of Red Heart Colorscape yarn, I knew I wanted to create something I could wrap around my neck and wear comfortably all day.

I chose a stitch pattern that was easy to remember, flowed naturally, and wouldnโ€™t feel repetitive. I cast on, started knitting, and let the yarn guide the final shape.

The result? A super simple rib and lace knit scarf cowl that works beautifully as either a scarf or a buttoned cowl… no extra fuss required.


Finished Size, Gauge, and Materials

Finished Measurements

  • Approximately 54โ€ long x 7.5โ€ wide

Gauge

  • 3 stitch pattern repeats = 7โ€
  • Exact gauge is not critical for this project

Materials Overview

  • Worsted-weight yarn (one ball)
  • Size 10 (6 mm) knitting needles
  • Stitch markers
  • Tapestry needle
  • Scissors
  • Tape measure
  • 6 decorative buttons (optional)

Multicolored ribbed and lace scarf displayed on a mannequin, featuring buttons and text promoting a free pattern.
Etsy
Shopify
Ravelry

Free Pattern: Super Simple Rib and Lace Knit Scarf Cowl by Marly Bird

Finished Measurements

54โ€ long x 7.5″ wide

Gauge

3 stitch pattern repeats = 7″  CHECK YOUR GAUGE. Use any size needle to obtain the gauge. Exact gauge is not critical to this project.


Materials

Yarn

 Red Heart, Colorscape (100% acrylic, 187 yds / 171 m, 3.5 oz/ 100 g, CYCA# 4 worsted)

Needle

Size 10 [6 mm]

Notions

  • Stitch Markers
  • Tapestry Needle
  • Scissors
  • Tape Measure
  • 6 decorative buttons

Special Stitches

โญ๏ธ SK2P: Slip 1 stitch as if to knit, k2tog, pass slipped stitch over the resulting stitch of the k2tog.

GROW

To Unlockย Exclusive Subscriber Contentย click the Box below and join for free by simply adding your email and creating a password! If you are having troubles, clear your cache or reset your password or login to the Grow Publisher Portal.

>> Learn More About Grow Here <<

I'm thrilled to share this amazing pattern with you, many patterns on my blog are absolutely free! I kindly request that you don't copy and paste or distribute this pattern. Prefer an ad-free experience? Buy a digital PDF pattern for a small fee from one of my online stores for a seamless crafting journey. 

I appreciate your support and readership. You are the reason I can keep doing what I love and sharing it with others. So, thank you from the bottom of my yarn-loving heart! Disclosure: This post contains affiliate links, meaning I get a commission if you decide to make a purchase through my links at no cost to you.

Colorful rib and lace scarf and cowl in shades of purple and blue, featuring decorative buttons.

Rib and Lace Knit Scarf and Cowl Pattern

Rib and Lace stitch multiple is 8 sts + 3

Body

Using any cast on (I prefer Long Tail) cast on 27 sts.
Set-up row: Knit
Row 1 (RS): *[P1, K1] twice, yarn over, SK2P (see special stitches), yarn over, k1, place marker; repeat from * to the last 3 sts, P1, K1, P1.
Row 2 (WS): K1, P1, K1, *slip marker, P5, K1, P1, K1; repeat from * to end.
Repeat rows 1 and 2 until piece measures approx 54″ or until you are about out of yarn ending on a RS row.
Final Row (RS): Bind off all stitches.

Finishing

Weave in all ends.
Buttons
With RS facing, sew buttons evenly spaces along the cast on edge of the Free Knitting Pattern Super Simple Rib and Lace Scarf Cowl. 
Now, as the scarf is wrapped around the neck, the yarn overs in the lace acts as button holes to close it up and turn the scarf into a cowl.


Need Some Video Support?

If you like seeing stitches in action, Iโ€™ve got you covered ๐ŸŽฅ
Thereโ€™s a full video tutorial available to walk you through the Super Simple Rib and Lace Knit Scarf Cowl step by step.

Ribbed and lace scarf and cowl with vibrant blues and purples, featuring decorative buttons and a cozy texture.
Etsy
Shopify
Ravelry

Finishing and Styling Options

Once your knitting is complete, simply weave in your ends. If you choose to add buttons, sew them evenly along the cast-on edge with the right side facing.

When worn, the lace yarn overs act as natural buttonholes, allowing you to close the scarf into a cowl without additional shaping or planning. Itโ€™s one of my favorite little details in this design.

Wear it:

  • As a traditional scarf
  • Buttoned into a cozy cowl
  • Draped loosely or snugged up for warmth

About Marly Bird
Marly Bird is a professional yarn artist and designer who has been teaching both knitting and crochet since 2007. She's the creator of the BiCrafty method… the only approach that teaches both crafts together. Follow her work at marlybird.com.

FAQ โ€“ Free Rib and Lace Knit Scarf Cowl Pattern

Is this knit scarf cowl pattern free?
Yes! This is a completely free knitting pattern available on MarlyBird.com.

Is this pattern good for beginners?
Yes. Itโ€™s ideal for beginners who are comfortable with knit and purl stitches and ready to try simple lace.

Can I make this longer or shorter?
Absolutely. The pattern is easy to customize based on your yarn and preferred length.

Do I have to add buttons?
Nope! The buttons are optional, but theyโ€™re what allow the scarf to transform into a cowl.


Final Thoughts ๐Ÿงถ

If you love this rib-and-lace knit aesthetic, you'll also adore the Lehabah Fire Sprite Right Triangle Knit Shawl… another knit design that pairs ribbing with lace for a beautifully textured, drapey finish.

The Super Simple Rib and Lace Knit Scarf Cowl is proof that you donโ€™t need complicated techniques or piles of yarn to create something beautiful. With simple stitches, thoughtful design, and a little flexibility, this one-ball project is bound to become a favorite in your handmade wardrobe.

If you make one, be sure to share it… I love seeing your finished projects!

Know a knitter who'd love this pattern? Share it on Facebook… craft friends make the best knit-along buddies! ๐Ÿ’›

โค๏ธ Your BiCrafty Bestie,
Marly Bird

A cartoon avatar of a person with glasses and a brown bun smiles warmly. Their green shirt and black jacket add a stylish touch, while colorful hearts surround them like loving temperature blankets, stitching together an aura of love and positivity. -Marly Bird


#mmmdi #marlybird

Filed Under: Free Patterns, Knitting, Marly Bird Premium Patterns, Our Free Patterns, Pattern, YouTube Video Tutorial

Free Tunisian Crochet Cowl Pattern โ€“ Spiced Latte Cowl

January 26, 2026 By Marly Bird Leave a Comment

A cozy, modern Tunisian crochet cowl that combines bold texture and colorwork in a beginner-friendly free pattern.

Woman modeling a vibrant Tunisian crochet cowl, with close-ups showing the textured stitch detail and soft yarn skeins.

If you love crochet projects that feel cozy, modern, and just a little bit impressive, the Spiced Latte Tunisian Crochet Cowl is one youโ€™ll want on your hook โ˜•๐Ÿงถ. This free Tunisian crochet cowl pattern combines bold colorwork with beautiful texture using approachable Tunisian stitches, resulting in a finished piece that looks intricate without being overwhelming.

Whether youโ€™re newer to Tunisian crochet or looking for a fresh, confidence-building accessory, this cowl is a satisfying make that delivers warmth, style, and serious handmade pride.


Quick Pattern Overview

This post features a free Tunisian crochet cowl pattern worked flat and seamed, with a decorative edging worked in the round. The design uses a combination of Tunisian simple stitch, knit stitch, reverse stitch, and double crochet stitch to create bold texture and graphic colorwork.

In this post, youโ€™ll learn:

  • What makes Tunisian crochet different from standard crochet
  • Why this cowl is approachable for Tunisian beginners
  • How color changes work in Tunisian crochet
  • Tips for yarn substitution and hook choice
  • How to get clean edges and polished finishing

What Is a Tunisian Crochet Cowl?

A Tunisian crochet cowl is a warm, cozy neck accessory made using Tunisian crochet โ€” a technique that blends elements of knitting and crochet. Stitches are worked in two steps (a forward pass and a return pass), creating a dense, beautifully textured fabric thatโ€™s perfect for cold-weather accessories.

This free Tunisian crochet cowl pattern is especially beginner-friendly because it uses basic Tunisian stitches, clear color changes, and simple construction with a double-ended hook. If youโ€™re new to Tunisian crochet, this project is a great way to learn the rhythm while creating something stylish and wearable.

A smiling woman with glasses and curly hair models a colorful Tunisian crochet cowl in teal, orange, white, and black. She wears a gray turtleneck and denim jacket. Text: "Spiced Latte Free Crochet Pattern Tunisian Cowl. -Marly Bird

Affiliate Disclosure: This post contains affiliate links. To learn more please visit my privacy policy here๐Ÿ’–


What You Will Love About This Pattern ๐Ÿ’–

  • Free Tunisian crochet cowl pattern
  • Bold colorwork with rich stitch texture
  • Cozy, structured fabric that holds its shape
  • Repeating sections that build confidence
  • Great introduction to multiple Tunisian stitches
  • Stylish accessory youโ€™ll actually wear

โœจ Designer Tip: Tunisian crochet has a rhythm all its own โ€” once you settle into the forward and return passes, the stitches really start to flow.

Person models a vibrant Tunisian crochet cowl with textured stitches on a magazine cover; preview pages visible in background.
Etsy
Shopify
Ravelry

What Is Tunisian Crochet?

Tunisian crochet is a technique that blends the look of knitting with the ease of crochet. Stitches are worked in two steps:

  1. A forward pass, where loops are picked up and left on the hook
  2. A return pass, where loops are worked off the hook

This creates a thicker, more structured fabric, making Tunisian crochet ideal for cowls, scarves, hats, and blankets.

If youโ€™re new to the technique, this is a great place to start:
https://marlybird.com/blog/tunisian-crochet-the-ultimate-bicrafty-technique/


Is This Tunisian Crochet Cowl Beginner-Friendly?

Yes โ€” this pattern is ideal for confident crocheters who are new to Tunisian crochet.

Youโ€™ll practice:

  • Tunisian Simple Stitch (TSS)
  • Tunisian Knit Stitch (TKS)
  • Tunisian Reverse Stitch (TRS)
  • Tunisian Double Crochet (TDC)
  • Color changes during the return pass

The repeating structure allows the stitches to click quickly, even if this is your first Tunisian project.

A smiling woman with curly blonde hair, glasses, and a denim jacket models a colorful Tunisian Crochet cowl with geometric patterns in teal, orange, black, and white in three different poses indoors. -Marly Bird

โ€œThis Tunisian crochet cowl proves that bold texture and colorwork donโ€™t require complicated construction โ€” just thoughtful stitches and a steady rhythm.โ€


Yarn, Hook, and Notions

This cowl was designed using worsted-weight yarn, creating a warm yet flexible fabric with excellent stitch definition.

  • Hook: Size L/11 (8.0 mm) Tunisian double-ended hook or size needed to obtain gauge
  • Notions: Stitch markers, tapestry needle
  • Optional: Leather tags or rivets for a polished finish

โœจ Designer Tip: Because this cowl sits close to the neck, choose a yarn that feels soft and comfortable against your skin.


Notes for Success

  • The original sample yarn has been discontinued, but many worsted-weight yarns make excellent substitutes.
  • Itโ€™s often easier to count stitches from the previous row while working the forward pass instead of counting during the return pass.
  • The edging is worked in the round in a continuous spiral โ€” place a marker in the first stitch of each round.
  • Youโ€™ll need an additional ball of yarn to work the return pass when completing the edging.
  • When working in the round with a double-ended hook, work as many stitches as comfortably fit on the hook, then alternate between forward and return passes until the round is complete.

SPICED LATTE TUNISIAN COWL DETAILS

Designed by Robyn Chachula

SKILL LEVEL

Intermediate

MEASUREMENTS

Finished Measurements

Cowl is 11.5โ€ [29 cm] wide by 32โ€ [81.5 cm] long. 

Gauge 

11 sts and 10 rows = 4โ€ [10 cm] x 4โ€ [10 cm]; use any size hook to obtain the gauge. 

MATERIALS

Crochet Yarn 

We Crochet, Snuggle Puff (70% Pima Cotton/ 30% Nylon, 142 yds / 130 m, 1.75 oz/ 50 g, CYCA# 4 worsted), 1 ball each of the following:

Color A: #28790 Vixen

Color B: #27823 Lamb

Color C: #28792 Kingfisher

Color D: #27818 Robinโ€™s Egg

Color E: #27820 Hatchling

Color F: #28795 Owlet

Crochet Hook

Size L/11 [8.0 mm] Tunisian Double Ended Hook

Notions 

  • Stitch Markers
  • Tapestry Needle
  • Scissors
  • Tape Measure
  • Leather tags (Optional)
  • Leather rivets (Optional)

ABBREVIATIONS

RS – Right Side 

St(s) – Stitch(es)

WS – Wrong Side

Yo – yarn over

Person models a vibrant Tunisian crochet cowl with textured stitches on a magazine cover; preview pages visible in background.
Etsy
Shopify
Ravelry

SPECIAL STITCHES 

โญ๏ธTunisian Double Crochet Stitch (Tdc): Yarn over, insert hook into st 2 rows below as to tss, yarn over and pull up a loop, yarn over and draw through 2 loops on hook. Note: for an even more secure tdc, insert hook in both the vertical and horizontal bar of the indicated stitch.

โญ๏ธ Tunisian Knit Stitch (TKS): Insert hook from between front and back vertical bar of next st, yarn over from wrong side and pull up a loop through the right side.

โญ๏ธ Tunisian Reverse Stitch (TRS): Insert hook from right to left into back vertical bar of next st on the wrong side (or back of work), yarn over and pull up a loop. This pushes the return pass to the front of the work creating a purl-like look. 

โญ๏ธ Tunisian Simple Stitch (TSS): Insert hook from right to left into front vertical bar of next st, yarn over and pull up a loop.

โญ๏ธ โ€œWork Loops off as normalโ€ Yarn over and draw through 1 loop on hook, *yarn over, draw through 2 loops on hook; repeat from * to end.


VIDEO TUTORIALS

  • Working with Double Ended Hook in the Round << Click Here for Video Tutorial >>
  • Tunsian Mosaic Tips << Click Here for Video Tutorial >>
  • Tunisian Crochet Basics << Click Here for Video Tutorial >>
  • Tunisian Knit and Purl Stitches << Click Here for Video Tutorial >>

NOTES

  • The sample yarn has been discontinued. Any worsted or bulky weight yarn will work as a substitute. Make sure its one that is very soft for you. Here are a few we like:
    • WeCrochet, Wonderfluff Bulky
    • WeCrochet, Billow
    • WeCrochet, Oceana
  • It is easier to count the stitches of the previous row while working the forward pass of the next row, instead of counting them while working the return pass.
  • The edging is worked in the round in a continuous spiral.ย  Place marker in the first stitch of each round.ย 
  • You will need an additional ball of color to work the return pass in the edging.
  • When working in the round, on the forward pass work any number of stitches that comfortably fit on the Tunisian Double Ended hook. Turn and work stitches off of hook for the return pass until 2 loops are left on hook, then turn and work more forward pass stitches. Keep switching between forward and return passes until the round is complete.ย 
  • Change color at the last st and pull through 2 loops on the return pass.ย 

GROW

To Unlockย Exclusive Subscriber Contentย click the Box below and join for free by simply adding your email and creating a password! If you are having troubles, clear your cache or reset your password or login to the Grow Publisher Portal.

>> Learn More About Grow Here <<

I'm thrilled to share this amazing pattern with you, many patterns on my blog are absolutely free! I kindly request that you don't copy and paste or distribute this pattern. Prefer an ad-free experience? Buy a digital PDF pattern for a small fee from one of my online stores for a seamless crafting journey. 

I appreciate your support and readership. You are the reason I can keep doing what I love and sharing it with others. So, thank you from the bottom of my yarn-loving heart! Disclosure: This post contains affiliate links, meaning I get a commission if you decide to make a purchase through my links at no cost to you.


A smiling woman with glasses holds and wears a colorful Tunisian Crochet cowl. Yarn shelves fill the background. Text reads: "SPICED LATTE Tunisian Crochet Cowl" and "Marly Bird" in the top left corner, featuring a free cowl pattern. -Marly Bird

SPICED LATTE TUNISIAN COWL PATTERN

Chain 26.

Row 1: Fwd: Starting with color A, tss in each st across. Rtn: Work loops off as normal, change color to B.

Row 2: Fwd: Trs in each st across to last, tss in last st. Rtn: Work loops off as normal, change color to A.

Row 3: Fwd: Trs in each st across to last, tss in last st. Rtn: Work loops off as normal.

Row 4: Fwd: Trs in each st across to last, tss in last st. Rtn: Work loops off as normal, change color to B.

Row 5: Fwd: Yo, skip next st, *tks in next 2 sts, yo twice, skip next 2 sts; repeat from * across to last 4 sts, tks in next 2 sts, yo, skip next st, tss in last st. Rtn: Work loops off as normal, change color to A.ย 

Row 6: Fwd: Tdc in next st 2 rows below, *trs in next 2 sts, tdc in next 2 sts 2 rows below; repeat from * across to last 4 sts, trs in next 2 sts, tdc in next st 2 rows below, tss in last st. Rtn: Work loops off as normal.

A smiling woman with glasses and curly hair, wearing a denim jacket, holds up a colorful Tunisian Crochet piece with orange, teal, black, and white patterns in a cozy, yarn-filled room. -Marly Bird

Row 7: Fwd: Tks in each st across to last, tss in last st. Rtn: Work loops off as normal, change color to B.

Row 8: Fwd: Trs in each st across to last, tss in last st. Rtn: Work loops off as normal, change color to C.

Rows 9-15: Repeat Rows 2-8 with colors C and D

Rows 16-22: Repeat Rows 2-8 with colors E and F

Rows 23-29: Repeat Rows 2-8 with colors B and A

Rows 30-36: Repeat Rows 2-8 with colors D and C

Rows 37-43: Repeat Rows 2-8 with colors F and E

Repeat Rows 2-43 once more

Bind off: *Trs in next st, pull loop through loop on hook; repeat from *  across, fasten off. 

A smiling person with glasses and curly hair holds up a colorful Tunisian Crochet piece with multiple patterns and colors in a cozy room, shelves, and yarn in the background. -Marly Bird

FINISHING

Weave in the ends. 

Seaming

Fold cowl in half with RS facing.  Using color A, whip stitch bind off row and foundation row together. 

Edging

Round 1: Fwd: Join color C with sl st to any st on edge of cowl, pick up a loop in each st along edge of cowl around. Rtn: Work off loops as normal, change color to E. 

Round 2: Fwd: Trs in each st around.. Rtn: Work off loops as normal, change color to F. 

Round 3: Fwd: Trs in each st around.. Rtn: Work off loops as normal, change color to D. 

Bind off: *Trs in next st, pull loop through loop on hook; repeat from *  across, fasten off. 

Repeat on the opposite side of cowl.ย  Weave in ends.

Person models a vibrant Tunisian crochet cowl with textured stitches on a magazine cover; preview pages visible in background.
Etsy
Shopify
Ravelry

Finishing and Styling Your Cowl

Once seamed and edged, this cowl forms a comfortable loop that sits beautifully around the neck. The dense Tunisian fabric provides warmth, while the bold colorwork adds visual interest.

Wear it:

  • Looped once for a relaxed fit
  • Snugged up on chilly days
  • Paired with denim, jackets, or winter layers
  • Wear it as a Snood!
A woman wearing glasses and a cozy Tunisian crochet cowl. -Marly Bird

Want to Learn More Tunisian Crochet Techniques?

If this project has sparked your interest in Tunisian crochet, youโ€™ll find lots of support and inspiration here on MarlyBird.com:

  • Tunisian Crochet for Beginners:
    https://marlybird.com/blog/bicrafty-bootcamp-tunisian-crochet-beginners/
  • Tunisian Crochet Resources & Tools:
    https://marlybird.com/blog/tunisian-crochet-resources/
  • Free Tunisian Crochet Hat Patterns:
    https://marlybird.com/blog/free-tunisian-crochet-hat/
Promotional image for "Bicrafty Bootcamp: Triple Threat Tunisian Crochet for Beginners" featuring pink and blue camo background with "Marly Bird and Team" logo at the bottom. -Marly Bird

More Tunisian Crochet Patterns Youโ€™ll Love ๐Ÿงถ

Keep exploring Tunisian crochet with these patterns and collections:

  • Swiss House Tunisian Crochet Hat (Free Pattern):
    https://marlybird.com/blog/swiss-house-tunisian-crochet-free-hat-pattern/
  • Tunisian Crochet Blanket Patterns:
    https://marlybird.com/blog/tunisian-crochet-blanket-patterns/
  • Tunisian Crochet Clothing & Accessories:
    https://marlybird.com/blog/tunisian-crochet-patterns-clothing-and-accessories/
  • Tunisian Crochet Home Decor Patterns:
    https://marlybird.com/blog/tunisian-crochet-home-patterns/
  • Tunisian Crochet Projects for All Skill Levels:
    https://marlybird.com/blog/tunisian-crochet-projects/
Person models a vibrant Tunisian crochet cowl with textured stitches on a magazine cover; preview pages visible in background.
Etsy
Shopify
Ravelry

FAQ โ€“ Free Tunisian Crochet Cowl Pattern

Is this Tunisian crochet cowl pattern free?
Yes! This is a completely free pattern available on MarlyBird.com.

Do I need a special hook?
Yes, a Tunisian double-ended hook is recommended for this pattern.

Is this a good first Tunisian crochet project?
Yes โ€” the repeating structure and clear stitch patterns make it a great confidence-building project.


Final Thoughts โ˜•๐Ÿงถ

The Spiced Latte Tunisian Crochet Cowl is a cozy, confidence-building project that highlights the beauty of Tunisian crochet without overwhelming you. With rich texture, bold colorwork, and approachable construction, itโ€™s a piece youโ€™ll be proud to wear โ€” or gift.

If you make one, be sure to share it and tag me โ€” I love seeing your projects!

โค๏ธ Your BiCrafty Bestie,
Marly Bird

A cartoon avatar of a person with glasses and a brown bun smiles warmly. Their green shirt and black jacket add a stylish touch, while colorful hearts surround them like loving temperature blankets, stitching together an aura of love and positivity. -Marly Bird

#mmmdi #marlybird

Filed Under: BiCrafy Bootcamp Tunisian Crochet, Crochet, Free Patterns, Marly Bird Premium Patterns, Our Free Patterns, Pattern

Hygge Stripe Socks | Free Beginner Knit Sock Pattern

January 25, 2026 By Marly Bird Leave a Comment

If youโ€™re searching for a free beginner knit sock pattern thatโ€™s cozy, approachable, and fun to knit, the Hygge Stripe Socks are a perfect choice. Inspired by the Danish concept of hyggeโ€”that warm, comforting feeling of slowing down and enjoying simple pleasuresโ€”these socks are designed to be thick, soft, and ideal for relaxing at home.

Hygge stripe socks in beige and light pink yarn, showcasing ribbed cuffs and a smooth knit body, with yarn in background.

Affiliate Disclosure: This post contains affiliate links. To learn more please visit my privacy policy here๐Ÿ’–

Knit with worsted-weight wool yarn, these striped socks work up faster than traditional fingering-weight socks and feel wonderfully cushy on your feet. Whether youโ€™re making your first pair of knit socks or adding another favorite to your handmade sock drawer, this pattern delivers comfort without complexity.


What You Will Love About This Free Knit Sock Pattern

  • A free beginner knit sock pattern you can cast on without hesitation
  • Cozy worsted-weight wool socks perfect for house wear
  • A classic striped socks pattern thatโ€™s easy to customize
  • Straightforward construction using familiar sock-knitting techniques
  • A relaxing project thatโ€™s ideal for slower, mindful knitting
Etsy
Shopify
Ravelry

Is This an Easy Knit Sock Pattern for Beginners?

Many knitters looking for easy knit sock patterns for beginners want something that feels achievable without tiny needles or ultra-thin yarn. While this pattern does assume basic comfort with knitting in the round on double-pointed needles, it is often considered more approachable than traditional sock patterns.

Because these socks are knit with worsted-weight yarn, stitches are easier to see, and progress happens quickly. That makes this pattern a great stepping stone after a first basic sock or for knitters who want a stripe knit sock pattern for beginners that feels cozy and rewarding.


A Classic Striped Sock Knitting Pattern

This design features simple stripes that create visual interest without adding complexity. The stripe sequence is easy to follow, making this an easy stripe knit sock pattern that still looks polished when finished.

Stripes are also a wonderful way to personalize your socks. Use contrasting colors for bold stripes, softer tones for a subtle look, or stash yarns to create a one-of-a-kind pair.


Yarn Choices for Cozy Wool Socks

The original pattern uses Red Heart Chic Sheep by Marly Bird, a soft merino wool yarn thatโ€™s breathable, warm, and perfect for cozy socks.

When substituting yarn, look for a worsted-weight wool or wool-blend yarn with good elasticity. Wool fibers help the socks retain their shape, making this a dependable wool sock pattern for comfortable wear.

Always check gauge when changing yarns, as fiber content and twist can affect fit.

Yarn Suggestions for This Pattern

If youโ€™re looking for specific yarn options, choose worsted-weight wool or wool-blend yarns that provide warmth, elasticity, and durability. These fibers help the socks hold their shape and stay cozy over time.

Recommended yarns from Knit Picks:

  • Wool of the Andes Worsted โ€“ A classic, budget-friendly wool with excellent elasticity and warmth
  • Twill Worsted โ€“ Smooth plies that give great stitch definition for stripes
  • Swish Worsted – Extra-soft, springy superwash wool thatโ€™s comfortable for cozy socks and easy-care wear

Recommended yarns from Jimmy Beans Wool:

  • Malabrigo Rios โ€“ Soft, springy, and warm with beautiful color options for stripes
  • Dream In Color Classy Cashmere โ€“ Cozy and consistent, with excellent stitch clarity
  • Lana Grossa Cool Wool Big Yarn โ€“ A traditional wool that wears well and blocks nicely

Avoid cotton yarns for this pattern. Cotton lacks elasticity, which can cause socks to stretch out and lose their shape over time. Wool and wool-blend yarns are a much better choice for comfortable, long-lasting knit socks.

Solid colors, heathers, and gentle tonal yarns all work beautifully for stripes, making this pattern a great opportunity to experiment with color combinations that fit your personal style.


Fit, Gauge, and Customizing Your Socks

These striped knit socks are designed to fit snugly with slight negative ease, which means they stretch comfortably around the foot and stay put during wear (no saggy ankles here!). Getting the right fit starts with gauge and a few simple measurements.

Understanding Sock Fit (Negative Ease Explained)

Socks should fit tighter than most garments. If they were knit to the exact foot circumference, they would slide down and lose shape quickly. These socks are designed with negative ease, meaning the finished sock circumference is slightly smaller than the actual foot circumference for a secure, comfortable fit.

Join our Newsletter

Get Free Crochet & Knitting
Pattern Links & Coupons!

Hand-drawn bird with curling, detailed feathers and pink accents; cheerful pose showcases fine line and texture work.
>> Become An Insider <<
A woman with glasses and curly hair models a colorful crocheted scarf, showing textured stitches and vibrant yarn.

How to Choose the Right Size

Before you cast on, take two quick measurements:

  1. Foot circumference (around the ball of the foot)
  2. Foot length (from the back of the heel to the tip of the longest toe)

Use the charts below to select the size that best matches the foot youโ€™re knitting for.

Sock Size by Foot Circumference

SizeFoot Circumference (in)Foot Circumference (cm)
Child5ยพ โ€“ 6ยฝ14.5 โ€“ 16.5
Adult Small7ยผ โ€“ 818.5 โ€“ 20.5
Adult Medium8ยพ โ€“ 9ยฝ22 โ€“ 24
Adult Large10ยผ โ€“ 1126 โ€“ 28

โœจ Designer Tip:
If youโ€™re between sizes, choose the smaller size for a snug, sock-like fit.


Foot Length Guide (Heel to Toe)

To customize sock length, knit the foot until it measures slightly shorter than the wearerโ€™s actual foot length. This allows room for the toe shaping without making the sock too long.

Womenโ€™s Foot Length Guide

US Shoe SizeFoot Length (in)Suggested Sock Foot Length (in)
698ยฝ
79ยฝ9
89ยพ9ยผ
9109ยฝ
1010ยฝ10
1110ยพ10ยผ

Menโ€™s Foot Length Guide

US Shoe SizeFoot Length (in)Suggested Sock Foot Length (in)
8109ยฝ
910ยฝ10
1010ยพ10ยผ
111110ยฝ
1211ยฝ11

Customizing Your Socks

One of the best things about knitting socks is how easy they are to personalize:

  • Foot Length: Knit the foot to your preferred length before starting the toe.
  • Stripe Placement: Adjust stripe width or placement to suit your style.
  • Color Choices: Choose colors that reflect your idea of hyggeโ€”cozy, comforting, and personal.

Because these socks are knit at a thicker gauge, theyโ€™re ideal for house socks, lounging, or light wear, rather than tight-fitting shoes.


How to Measure Your Foot for Knit Socks

Taking a few minutes to measure the foot before you start will dramatically improve the fit of your socksโ€”especially when knitting for someone else.

Step-by-Step Foot Measuring Guide

  1. Measure foot circumference around the ball of the foot (the widest part).
  2. Measure foot length from the back of the heel to the tip of the longest toe.
  3. Write both measurements down and keep them with your pattern as you knit.

โœจ Designer Tip: Measure the foot while standing for the most accurate circumference.


Knitting Socks for Someone Else (Quick Checklist)

  • โœ”๏ธ Confirm foot circumference
  • โœ”๏ธ Confirm foot length
  • โœ”๏ธ Ask whether the recipient prefers a snug or relaxed fit
  • โœ”๏ธ Choose wool or wool-blend yarn for elasticity
  • โœ”๏ธ Knit the foot slightly shorter than the actual foot length to allow room for toe shaping

Printable Sock Fit & Measurement Reference

For easy reference, consider printing or saving the sock sizing charts included in this post. Keeping a foot circumference and length guide nearby makes sock knitting faster, more confident, and far less stressfulโ€”especially when youโ€™re knitting multiple pairs.


Text promoting learning knitting and crochet techniques via YouTube, featuring Marly Bird branding.

Need help with knitting? You can find help with basic knitting, fair isle knitting and intarsia on the MarlyBirdYouTube Channel. By the way, have you subscribed to my YouTube Channel yet?

Hygge Stripe Socks Details

SKILL LEVEL

Advanced Beginner

Finished Sock measures approx.
7 (8, 9)โ€ [17.7 (20, 22.8) cm] circumference around foot.

Gauge
24 sts = 4″ (10 cm) Stockinette st. CHECK YOUR GAUGE. Use any size needles to obtain the gauge.

MATERIALS

Yarn
Chic Sheep; (4 Medium), Art. R170 100% Merino Wool available 3.5 oz (100 g), 186 yd (170 m) balls

  • Color A: Linen–2 balls
  • Color B: Suede–1 ball
Brown and cream striped knitted socks beside yarn, scissors, and knitting needles on a light backdrop.

Needles
US #5/3.75mm set of 5 double pointed needles

Notions

  • Stitch Markers
  • Tapestry Needle
  • Scissors
  • Tape Measure
  • WIP Tube (as seen in video)
  • Wooden Sock Blockers (as seen in video)
โญ๏ธ Marly Bird Amazon Storefront โญ๏ธ

Special Stitches

  • ssk (slip, slip, knit):
    Slip next 2 stitches knitwise to the right needle, insert the point of the left needle through the front of these stitches, and knit them together through the back loop.

Abbreviations

* or ** = repeat whatever follows the * or ** as indicated

k = knit

k2tog = knit next 2 stitches together

p = purl

p2tog = purl next 2 stitches together

st(s) = stitch(es)


VIDEO SUPPORT

This pattern pairs beautifully with Marlyโ€™s โ€œMy First Knit Socks on Double Pointed Needlesโ€ video series. The videos provide step-by-step visual instruction and are especially helpful if this is your first time knitting socks or working with DPNs.

Recommended videos to reference while knitting:

  • No Cuss Cast on and joining in the round
  • Working ribbing and stockinette in the round
  • Heel flap and heel turn construction
  • Picking up stitches for the gusset
  • Gusset decreases (traditional and alternative)
  • Toe shaping and Kitchener stitch
  • Adding a Life Line

You do not need to watch every video to successfully knit this pattern. Use the videos as support whenever you want extra visual guidance.


NOTES

  • This pattern is written for double-pointed needles (DPNs). If you are new to DPNs, take your time with the first few rounds and keep the first two stitches on each needle snug to prevent ladders.
  • This sock is designed with negative ease, meaning the finished sock circumference is slightly smaller than the foot for a secure, comfortable fit.
  • Cut yarn at each color change and weave in ends as you go. Do not carry yarn up the inside of the sock, as this will affect fit and comfort.
  • This pattern includes two gusset options: a traditional gusset for a clean, classic look and an alternative gusset where the decreases become a visible design feature. Choose one method and work it consistently.
  • For best results, measure foot length before beginning the foot section. Knit the foot until it measures approximately ยฝโ€ shorter than the actual foot length to allow room for toe shaping.
  • If knitting for someone else, foot circumference and length measurements are strongly recommended before casting on.

Hygge Stripe Socks

PATTERN

Cuff
With Color A and using long tail cast on, cast on 40 (48, 56) sts onto 4 double pointed needles [10 (12, 14) sts on each needle].

Join round being careful to not twist cast on edge.

โœจ Designer Tip: Keep the first two stitches of each needle snug to help prevent ladders between needles.

K 1 round. Mark fabric under last needle of round to indicate start of rnd.

Next round: * K1, p1; repeat from * around.
Repeat the last round until Cuff measures 2″ [5 cm].


Leg
Rounds 1-7: Change to Color B, continue evenly in Stockinette st (knit every across every needle of every round) for 7 rnds.

Rounds 8-14: Change to Color A, continue evenly in Stockinette st for 7 rnds.
Repeat rounds 1-14 once more then rounds 1-7 once again.

Leg of sock measures approx 6″ (15 cm) including Cuff at this point.


Striped knitting project in cream and light brown yarn, featuring a ribbed stitch pattern with blue knitting needles.

Heel Flap
With color A, using Needle #4, knit across all sts on Needle #1.

You now have a total of 20 (24, 28) sts on one needle (these are the Heel sts) and the remaining sts 20 (24, 28) sts divided between the 2 remaining needles.

Turn work to face the wrong side, and begin working back and forth in rows across Heel sts only as follows:
Row 1 (wrong side): K3, p to last 3 sts, k3.
Row 2: K3, * with yarn in back slip 1 purlwise, k1; repeat from * to last 3 sts, k3.
Row 3: K3, p to last 3 sts, k3.
Row 4: K3, * k1, with yarn in back slip 1 purlwise; repeat from * to last 3 sts, k3.
Repeat these rows until 20 (24, 28) rows have been complete, ending on a row 4.
There will be 10 (12, 14) Garter st ridges at each edge worked in Heel Flap.


Hygge Stripe Socks with Chic Sheep by Marly Bird

Heel Turn
Row 1 (wrong side): Purl 11 (13, 15), p2tog, p1, turn โ€“ 19 (23, 27) total Heel sts, counting both Heel needles.

Note: Leave remaining sts unworked on left needle when turning.

Row 2: With yarn in back slip 1 purlwise, k3, ssk, k1, turn โ€“ 1 st decreased.

Note: There will be a small gap between the sts that form the Heel turn and the yet unworked sts on the needle.

Row 3: With yarn in front slip 1 purlwise, p to 1 st before gap, p2tog, p1, turn โ€“ 1 st decreased.

Note: The p2tog will close the gap.

Row 4: With yarn in back slip 1 purlwise, k to 1 st before gap, ssk, k1, turn โ€“ 1 st decreased.

Note: The ssk will close the gap.

Repeat Rows 3 and 4 until 12 (14, 16) total Heel sts remain.
All Heel sts are now on 1 needle.
Slip half the Heel sts purlwise onto a spare needle.


Gusset
โœจ Designer Tip: if you don't watch ANY video but one, I highly suggest that you watch this one video to see how to do the gusset.

Hygge Stripe Socks with Chic Sheep by Marly Bird

The gusset returns the sock to working in the round and gradually reduces stitches back to the original foot circumference.

We now want to divide the stitches remaining on the heel flap onto two needles so that we can work in the round again. Do this by slipping half the number of stitches remaining onto a spare needle which is needle 5 at this point.

Pick Up Round for Gusset: 
Needle 1: Using the needle to the left of the center heel (this is now needle 1), pick up and knit 10 (12, 14) sts from the side of the heel flap, then pick up 2 stitches at the top of the gusset (see video for help)
Needles 2 and 3: work across in stockinette stitch
Needle 4: using the spare needle, pick up 2 sts at the top of the gusset and 10 (12, 14) stitches down the side of the heel flap, then, WITH THE SAME NEEDLE, knit the remaining stitches on needle 5.

Now you have 4 needles with stitches on them and a 5th needle as the spare needle you use as your right hand needleโ€“ 18 (21, 24) sts on each Needle 1 and 4, 10 (12, 14) sts on each Needle 2 and 3.
Move marker to fabric just under Needle 4 to indicate start of round.

Hygge Stripe Socks with Chic Sheep by Marly Bird

The beginning point of the round is NOW the center of the heel, so if you have been using a stitch marker to mark the 4th needle or the last needle of the round then you will want to move the marker to the needle on the needle to the right of the center heel (see image). 

The goal now is to get all the needles to have the same number of stitches as they did when you cast on. Therefore, we will be decreasing the stitches on needles 1 and 4 every other round until all the they have 10 (12, 14) sts on them just like needles 2 and 3.

Set-up round: 
Needle 1: Knit to the last 2 sts, ssk.
Needles 2 and 3: work across tin stockinette stitch
Needle 4: k2tog, knit to the end of the round.
Now you have 1 less stitch on needles 1 and 4 and you have eliminated (or drastically reduced) the gap at the top of the gusset.

Next, choose either the traditional gusset or the alternative gusset for the next section, but choose only one! Either one will get the job done but you have a choice of how you want your socks to look.
TRADITIONAL GUSSET–the gusset decreases form an uninterrupted stockinette stitch line down the gusset (as seen on the Hygge Stripe Socks with Chic Sheep by Marly Bird)

Round 1: 
Needle 1: Knit to the last 3 sts, k2tog, k1.
Needles 2 and 3: work across in stockinette stitch
Needle 4: K1, ssk, knit to the end of the round.
Now you have 1 less stitch on needles 1 and 4.

Round 2: Knit all stitches
Repeat rounds 1 and 2 until there are 10 (12, 14) sts on each needle, 40 (48, 56) sts total.
OR
ALTERNATIVE GUSSET–the gusset decreases are more visible and are a design feature (as seen on the blue or green socks)

Round 1: 
Needle 1: Knit to the last 3 sts, ssk, k1.
Needles 2 and 3: work across in stockinette stitch
Needle 4: K1, k2tog, knit to the end of the round.
Now you have 1 less stitch on needles 1 and 4.

Round 2: Knit all stitches
Repeat Gusset Rounds 1 and 2 until there are 10 (12, 14) sts on each needle, 40 (48, 56) sts total.


Foot
Work evenly in Stockinette st around all needles until Foot measures 1ยฝ ” (5 cm) less than desired Foot length measuring from the back of the heel.


Toe
Before starting the toe, double-check foot length. Socks should be about ยฝโ€ shorter than the actual foot length for proper fit.

Round 1:
Needle 1: Knit to 3 sts before end of needle, k2tog, k1.
Needle 2: K1, ssk, knit to end.
Needle 3: Knit to 3 sts before end of needle, k2tog, k1.
Needle 4: K1, ssk, knit to end.
โ€“ 1 stitch decreased on each needle, 36 (44, 52) sts total.

Round 2: Knit around.
Repeat Rounds 1 and 2 until there are 5 (6, 7) sts on each needle, 20 (24, 28) sts total.
Repeat Round 1 only until there are 10 (12, 14) sts total.
Knit across Needle 1 only. Working yarn is now at side of toe.
Slip all sts from Needle 1 purlwise onto Needle 4–5 (6, 7) sts on needle 4 now.
Slip all sts from Needle 3 purlwise onto Needle 2–5 (6, 7) sts on needle 2 now.
All sts are now on 2 needles and set up for grafting.


FINISHING
Graft Toe sts together using Kitchener st as follows:
Hold both needles together in your left hand, with wrong sides facing inward. Cut a long tail from the working yarn (about 4 times the width of the fabric to be joined), and thread tail into yarn needle.
Step 1: Insert yarn needle purlwise into first st on front needle and pull it through, leaving st on the knitting needle.
Step 2: Insert yarn needle knitwise into first st on the back needle and pull it through, leaving st on the knitting needle.
Step 3: Insert yarn needle knitwise into first st on front needle and pull it through, then drop this st off knitting needle.
Step 4: Insert yarn needle purlwise into first st on front needle and pull it through, leaving st on the knitting needle.
Step 5: Insert yarn needle purlwise into first st on the back needle and pull it through, then drop this st off knitting needle.
Step 6: Insert yarn needle knitwise into first st on the back needle and pull it through, leaving st on the knitting needle.

Repeat steps 3-6 only, pausing to pull sts taut and neaten the seam after every couple of inches. Be sure to always pause after a step 6 so as to not lose your place.
When 2 sts remain, work step 3, then step 5, then fasten off.
Weave in all loose ends.


Who Are These Socks Perfect For?

The Hygge Stripe Socks are a great fit if you:

  • Are looking for a basic sock knitting pattern that feels cozy and approachable
  • Enjoy knitting socks with double-pointed needles
  • Want a comfortable menโ€™s sock pattern knitting option or a unisex sock design
  • Prefer worsted-weight projects that knit up efficiently

Other Marly Bird Sock Patterns You Might Love

If knitting socks has you hooked, there are plenty of other sock patterns designed by Marly Bird to explore next. Whether youโ€™re just getting started or looking to expand your sock-knitting skills, these patterns offer a wide range of styles, constructions, and techniques.

Beginner-Friendly Sock Patterns

  • My First Knit Socks
    https://marlybird.com/blog/my-first-knit-socks/
    A trusted beginner sock pattern with step-by-step guidance, designed to build confidence with classic cuff-down sock construction.
  • Skyline Ribbed Knit Socks
    https://marlybird.com/blog/free-ribbed-knit-socks-pattern-skyline/
    A free ribbed sock pattern that focuses on stretch, fit, and everyday wearโ€”perfect once youโ€™re comfortable knitting in the round.

Intermediate Sock Patterns

  • Gemstones Knit Socks
    https://www.ravelry.com/patterns/library/gemstone-socks
  • Toe-Up Knit Socks Sock-Along
    https://marlybird.com/blog/toe-up-knit-socks-toe-up-crochet-socks-2020-sock-along/
    Learn toe-up sock construction with flexibility for customizing foot length and fit.

Advanced or Specialty Sock Patterns

  • Heartstrings Knit Socks
    https://marlybird.com/blog/heartstrings-knit-socks-free-stranded-colorwork-sock-pattern/
    A free stranded colorwork sock pattern that introduces chart reading and color management techniques.
  • Thigh High Knit Socks
    https://marlybird.com/blog/thigh-high-knit-sock-pattern/
    A bold statement sock pattern featuring extended leg length, shaping, and dramatic styling.
  • Alex Seersucker Knit Socks
    https://shop.marlybird.com/collections/all/products/alex-seersucker-knit-socks
    A textured sock pattern with refined stitch work, ideal for knitters who enjoy detailed fabric and polished results.

Explore Even More Sock Inspiration

If youโ€™re looking for a broader overview of sock styles and techniques, this roundup is a great place to browse and plan your next project:
https://marlybird.com/blog/knit-socks-10-free-patterns/


Frequently Asked Questions

Is this a free knit sock pattern?
Yes, the Hygge Stripe Socks pattern is available for free on MarlyBird.com.

Is this a good sock pattern for beginners?
This pattern works well for knitters who have basic experience knitting in the round and want an easier, more forgiving sock project using worsted-weight yarn.

Are these socks meant to be worn with shoes?
These socks are designed primarily as house socks. They are thicker than traditional socks and are best worn indoors or with roomy footwear.

Can I knit this striped sock pattern for men?
Yes. The simple, classic design makes this a great menโ€™s sock pattern knitting option as well as a versatile unisex sock.


Related Sock Knitting Resources

Knit Socks | 10 FREE Patterns
https://www.ravelry.com/patterns/library/hygge-stripe-socks

Final Thoughts

The Hygge Stripe Socks with Chic Sheep are the kind of project that reminds us why knitting feels so comforting. As a free striped knit sock pattern, they combine simplicity, warmth, and timeless style into a pair of socks youโ€™ll reach for again and again.

If youโ€™re searching for an easy stripe knit sock pattern or a cozy wool sock pattern that delivers both comfort and satisfaction, these socks are a wonderful choice.

Happy knitting!

Filed Under: Chic Sheep by Marly Bird Patterns, Free Patterns, Knitting, Marly Bird Premium Patterns, Our Free Patterns, Pattern, Uncategorized

Free Knit Tunic Pattern โ€“ Sweetheart A-Line Tunic by Marly Bird

January 23, 2026 By Marly Bird Leave a Comment

Looking for a free knit tunic pattern thatโ€™s flattering, comfortable, and actually wearable? The Sweetheart A-Line Knit Tunic is a free pattern designed to skim the body beautifully while giving knitters a relaxing, confidence-building project theyโ€™ll reach for again and again.

A woman models a brown A-Line Tunic with lace detail, standing before shelves of colorful yarn. The text reads "SWEETHEART Knit Tunic Pattern" and "Marly Bird" in the corner. -Marly Bird

Affiliate Disclosure: This post contains affiliate links. To learn more please visit my privacy policy here๐Ÿ’–

Some patterns never go out of styleโ€”and the Sweetheart A-Line Tunic is one of them. ๐Ÿ’• This was my very first knit sweater design, and years later, knitters still come back to it again and again. Thereโ€™s just something special about a project that combines beautiful lace, a flattering A-line silhouette, and a design that feels just as good to wear as it does to knit.

The Sweetheart Free Knit Tunic Pattern features a lace-patterned lower body that flows effortlessly into smooth stockinette at the top, creating a piece thatโ€™s elegant without feeling fussy. Itโ€™s the kind of sweater that sparks complimentsโ€”and conversationsโ€”every time you wear it.


What You Will Love About This Pattern

  • ๐Ÿ’• A flattering A-line shape designed to celebrate real bodies
  • ๐Ÿงถ Lace detail that feels engaging to knit and stunning to wear
  • ๐Ÿ“Š Charted lace patterns for visual knitters
  • ๐Ÿ‘š Sleeveless tunic style perfect for layering
  • โœจ A tried-and-true design that has stood the test of time
A smiling woman in a bakery holds coffee and wears a Marly Bird A-Line Tunic. Overlapping pages feature Free Knit Tunic Pattern instructions. Text reads โ€œAd-Free PDF!โ€, โ€œSweetheart A-Line Tunic,โ€ and โ€œBUY NOWโ€ with a mouse pointer icon. -Marly Bird
Etsy
Shopify
Ravelry

Who Is This Pattern Perfect For?

The Sweetheart A-Line Tunic is a wonderful choice for knitters who enjoy thoughtful construction and classic style.

This pattern is perfect for you if:

  • Youโ€™re an intermediate knitter comfortable with knit, purl, and basic lace techniques
  • You enjoy working from charts as well as written instructions
  • You want a garment thatโ€™s forgiving, flattering, and wearable
  • You love timeless designs that donโ€™t chase trends
  • You want to knit a sweater that feels special without being overly complicated

Design Features & Construction

This tunic is worked in pieces and seamed after blocking, allowing the lace to open beautifully and the garment to drape just right.

  • Lace at the hem adds movement and visual interest
  • Stockinette upper body keeps the focus on fit and comfort
  • Sweetheart-inspired lace motifs give the design its name
  • A-line shaping provides ease through the body without clinging

โœจ Designer Tip: Blocking is essential for this patternโ€”especially for the lace. Take the time to block thoroughly and youโ€™ll be rewarded with gorgeous stitch definition.

A smiling woman stands against a red brick wall, wearing a white long-sleeve shirt under a brown, knit A-Line Tunic with a lace pattern. Pink text at the bottom reads, "SWEETHEART Knit A-Line Tunic by Marly Bird. -Marly Bird

Understanding A-Line Shaping in Knit Garments

One of the reasons the Sweetheart A-Line Tunic remains such a fan favorite is its thoughtful shaping. A-line shaping gently widens the garment from the hem upward, creating a silhouette that skims the body instead of clinging to it.

In knitting, this effect is created through strategic increases placed along the sides of the garment. As you work upward, those increases add width gradually, allowing the tunic to flow comfortably over the hips and midsection while still fitting nicely across the bust and shoulders.

This style of shaping is especially forgiving and flattering, making it a great choice for many body types. It also gives the finished tunic beautiful movement when worn โ€” one of those details you might not fully appreciate until you see it on.

A woman stands in front of yarn shelves wearing a brown Marly Bird A-Line Tunic with a textured heart pattern. Close-up shows the detailed knitting. Text reads: โ€œSWEETHEART Knit A-Line Tunic โ€“ Free Knit Tunic Pattern.โ€. -Marly Bird
Etsy
Shopify
Ravelry

Sizing, Fit, Yarn & Gauge

The Sweetheart A-Line Tunic is designed with positive ease through the body, creating a relaxed and flattering fit.

  • Sizes: XS (S, M, L, XL, 2X, 3X, 4X)
  • Fit: A-line silhouette with comfortable ease
  • Gauge: Achieved in both lace and stockinette (be sure to check gauge for each)

This tunic looks best when the lace has room to open up, so choosing the right yarn and achieving gauge are key.


Lace Gauge & Blocking: What to Expect as You Knit

If this is your first time knitting a lace garment, itโ€™s important to know this upfront: lace almost never looks its best while itโ€™s still on the needles.

As you work through the Sweetheart lace section, the fabric may appear dense, uneven, or even slightly smaller than expected. Thatโ€™s completely normal. Lace patterns rely on blocking to open up the stitches and reveal the full beauty of the design.

This is why checking gauge โ€” and checking it after blocking โ€” is so important for this tunic. Taking the time to knit, wash, and block a proper swatch will give you a much clearer picture of how the finished garment will look and fit.

Trust the process. Once blocked, the lace transforms, and the stitch pattern truly comes to life.

Here is an article we wrote all about Lace Knitting 101.

โญ๏ธ Must Have Blocking Supplies โญ๏ธ

Join our Newsletter

Get Free Crochet & Knitting
Pattern Links & Coupons!

Hand-drawn bird with curling, detailed feathers and pink accents; cheerful pose showcases fine line and texture work.
>> Become An Insider <<
A woman with glasses and curly hair models a colorful crocheted scarf, showing textured stitches and vibrant yarn.

Yarn Choices & Substitutions

The original sample was knit using Bijou Basin Ranch Lhasa Wilderness Yak, a luxurious blend that adds incredible softness and drape. While that yarn is now discontinued, there are many excellent alternatives that work beautifully for this design.

Great Yarn Substitutions

When choosing a substitute, look for a sport-weight yarn with good drape and stitch definition.

From Jimmy Beans Wool:

  • Blue Sky Fibers Woolstok Light โ€“ Soft, smooth, and excellent for lace definition
  • Malabrigo Caprino Yarn โ€“ A versatile wool that blocks beautifully

From Knit Picks:

  • Knit Picks Galileo – This is our first choice as a substitute
  • Heatherly Sportโ€“ A wool/silk blend that gives lovely drape and sheen
  • Hawthorne Sport โ€“ Durable with crisp stitch definition
  • Wool of the Andes Sport โ€“ A budget-friendly option with excellent structure
  • Knit Picks Woolen Tweed Yarn – Beautiful rustic look you will love

โœจ Designer Tip: Swatch generously and block your swatch the same way youโ€™ll block the finished tunic. Lace behaves very differently before and after blocking.

Knit Lace Patterns - marly bird
50+ Knit Lace Patterns

Needles, Tools & Techniques Youโ€™ll Use

  • Circular needles (used to hold stitches while working flat)
  • Stitch markers and tapestry needle
  • Blocking mats and pins (highly recommended!)

Youโ€™ll practice:

  • Reading lace charts
  • Working lace increases and decreases
  • Seaming sweater pieces
  • Blocking lace for maximum impact

Styling & Layering Ideas

One of the reasons this tunic remains a favorite is how easy it is to style:

  • Layer it over a long-sleeve tee or blouse for everyday wear
  • Pair it with jeans, leggings, or slim trousers
  • Dress it up with boots and accessories for a polished look

Itโ€™s a piece youโ€™ll reach for again and again.


A smiling woman in a bakery holds coffee and wears a Marly Bird A-Line Tunic. Overlapping pages feature Free Knit Tunic Pattern instructions. Text reads โ€œAd-Free PDF!โ€, โ€œSweetheart A-Line Tunic,โ€ and โ€œBUY NOWโ€ with a mouse pointer icon. -Marly Bird
Etsy
Shopify
Ravelry

Seaming Your Tunic: Order Matters

Seaming is one of those steps that can feel intimidating, but with a clear plan, it becomes much more manageable.

For the Sweetheart A-Line Tunic, itโ€™s generally easiest to:

  1. Seam the shoulders first, ensuring the neckline aligns correctly
  2. Seam the side seams from hem to underarm

Working in this order helps maintain the garmentโ€™s shape and makes it easier to match lace sections neatly. Blocking all pieces before seaming is especially helpful here, as it allows the fabric to relax and makes alignment more precise.

Taking your time during finishing is well worth it โ€” careful seaming is what turns beautifully knit pieces into a polished, wearable garment.


Frequently Asked Questions

Is the Sweetheart A-Line Tunic a free pattern?
Yes! The pattern instructions are available for free on the blog. An ad-free PDF is also available for knitters who prefer a printable format.

Does this pattern include charts?
Yes, the lace patterns are fully charted, making this an excellent choice for visual knitters.

Is this sweater knit in the round?
No. The tunic is worked flat in pieces and seamed after blocking.

Are there video tutorials for this pattern?
This pattern does not include dedicated videos, but itโ€™s written clearly and supported by standard knitting techniques many knitters are already familiar with.


A woman models a brown A-Line Tunic with a lace pattern on the lower half, shown front and back. She smiles by shelves of colorful yarn. Text reads "Sweetheart Knit Tunic Pattern by Marly Bird. -Marly Bird

Sweetheart A-Line Tunic Pattern Details

To Fit Sizes
XS (S, M, L, XL, 2X, 3X, 4X)

Finished Measurements
To fit bust: 30 (34, 38, 42, 46, 50, 54, 58)”
Finished bust: 35 (39, 43, 48, 54, 58, 62)”
Finished length: 24 (25ยฝ, 28ยฝ, 29ยฝ, 30ยฝ, 32, 35, 37)”

Gauge
34 sts and 28 rows = 4″ (10 cm) in Sweetheart Lace over needles listed, after blocking
34 sts and 28 rows = 4″ (10 cm) in Stockinette stitch using smaller needles, after blocking

Take time to save time, check your gauge.

Sample Yarn
Discontinued โ€“ Bijou Basin Ranch
Bijou Basin Ranch โ€œBijou Spunโ€; 75% Yak / 25% Bamboo; 180 yards; 50 grams; CYCA size 2 sport
Natural Brown; 4 (5, 6, 6, 7, 9, 10, 11) hanks

Alternative Yarn
Knit Picks Galileo; 50% Merino Wool, 50% Viscose from Bamboo; 131 yards; 50 grams; CYCA size 2 sport

Needles
Size US 5 (3.75 mm) 24″ circular needles or longer
Size US 4 (3.5 mm) circular needles, 24″ or longer; or size to obtain correct gauge

Hook
US D-3 (3.25 mm)

Notions

  • Stitch markers
  • Tapestry needle 
  • T-pins
  • Tape measure
  • Blocking Squares 
  • Blocking Pins
  • Soaking Basin 
  • Eucalan Wool Wash 
  • Leather tags (optional)
  • Leather rivets (optional)

Abbreviations

BEG โ€“ Beginning
CONT โ€“ Continue
EST โ€“ Establish(ed)
K โ€“ Knit
K2TOG โ€“ Knit 2 Together
P โ€“ Purl
P2TOG โ€“ Purl 2 Together
REP โ€“ Repeat
RS โ€“ Right Side
SL โ€“ Slip
SSK โ€“ Slip, Slip, Knit
ST(S) โ€“ Stitch(es)
WS โ€“ Wrong Side
YO โ€“ Yarn Over


Video Tutorials

Knit โ€“ https://youtu.be/nkzVGuaksR8
Purl โ€“ https://youtu.be/TsPqLvRmOow
SSK โ€“ https://youtu.be/sjT0hKT5SD8?t=1074
K2tog โ€“ https://youtu.be/JrHqDYb2ss8?t=346
Yarn Over โ€“ https://youtu.be/sjT0hKT5SD8?t=602
Add a Lifeline โ€“ https://youtu.be/FiqYUE_aHAw
UnKnit / Tink โ€“ https://youtu.be/c7Gud7k4Y8k
Bury Ends โ€“ https://youtu.be/B_NBGUKjO-E
Blocking โ€“ https://youtu.be/lt_hXakidFM
Seaming โ€“ https://youtu.be/lvbj_J_SJ4


Stitch Patterns

Sweetheart Lace Setup (top chart)

Worked over a multiple of 24 sts + 15.

Row 1 (RS): P4, k2tog, yo, k1, p1, k1, yo, ssk, p4, * p2, yo, ssk, p1, k2tog, yo, p6, k2tog, yo, k1, p1, k1, yo, ssk, p4; rep from * to end.

Row 2: K4, p3, k1, p3, k4, * k2, p2, k1, p2, k6, p3, k1, p3, k4; rep from * to end.

Row 3: P3, k2tog, k2, yo, p1, yo, k2, ssk, p3, * p2, k2tog, yo, p1, yo, ssk, p5, k2tog, k2, yo, p1, yo, k2, ssk, p3; rep from * to end.

Row 4: K3, p4, k1, p4, k3, * k2, p2, k1, p2, k5, p4, k1, p4, k3; rep from * to end.

Row 5: P2, k2tog, k2, yo, k1, p1, k1, yo, k2, ssk, p2, * p2, yo, ssk, p1, k2tog, yo, p4, k2tog, k2, yo, k1, p1, k1, yo, k2, ssk, p2; rep from * to end.

Row 6: K2, p5, k1, p5, k2, * k2, p2, k1, p2, k4, p5, k1, p5, k2; rep from * to end.

Row 7: P1, k2tog, k2, yo, k2, p1, k2, yo, k2, ssk, p1, * p2, k2tog, yo, p1, yo, ssk, p3, k2tog, k2, yo, k2, p1, k2, yo, k2, ssk, p1; rep from * to end.

Row 8: (K1, p6) twice, k1, * k2, p2, k1, p2, k3, (p6, k1) twice; rep from * to end.

Row 9: K2tog, k2, yo, k3, p1, k3, yo, k2, ssk, * p2, yo, ssk, p1, k2tog, yo, p2, k2tog, k2, yo, k3, p1, k3, yo, k2, ssk; rep from * to end.

Row 10: P7, k1, p7, * k2, p2, k1, p2, k2, p7, k1, p7; rep from * to end.

Row 11: K3, k2tog, k2, yo, p1, yo, k2, ssk, k3, * p2, k2tog, yo, p1, yo, ssk, p2, k3, k2tog, k2, yo, p1, yo, k2, ssk, k3; rep from * to end.

Row 12: As row 10.

Row 13: k2, k2tog, k2, yo, k1, p1, k1, yo, k2, ssk, k2, * p2, yo, ssk, p1, k2tog, yo, p2, k2, k2tog, k2, yo, k1, p1, k1, yo, k2, ssk, k2; rep from * to end.

Row 14: As row 10.

Row 15: Yo, ssk, k1, (k2tog, yo) twice, p1, (yo, ssk) twice, k1, k2tog, yo, * p2, k2tog, yo, p1, yo, ssk, p2, Yo, ssk, k1, (k2tog, yo) twice, p1, (yo, ssk) twice, k1, k2tog, yo; rep from * to end.

Row 16: K1, p3, (k1, p2) twice, k1, p3, k1, * k2, p2, k1, p2, k3, p3, (k1, p2) twice, k1, p3, k1; rep from * to end.

Row 17: P1, yo, k3tog, yo, p1, yo, ssk, p1, k2tog, yo, p1, yo, k3tog, yo, p1, * p1, k2tog, yo, k1, p1, k1, yo, ssk, p2, yo, k3tog, yo, p1, yo, ssk, p1, k2tog, yo, p1, yo, k3tog, yo, p1; rep from * to end.

Row 18: k2, p1, k2, p2, k1, p2, k2, p1, k2, * (k1, p3) twice, k3, p1, k2, p2, k1, p2, k2, p1, k2; rep from * to end.

Etsy
Shopify
Ravelry

Sweetheart Lace Setup (bottom chart):

(worked over a multiple of 24 sts + 5)

Row 1 (RS): K2tog, yo, p1, * yo, ssk, p5, k2tog, k2, yo, p1, yo, k2, ssk, p5, k2tog, yo, p1; rep from * to last 2 sts, yo, ssk.

Row 2: P2, k1, * p2, k5, p4, k1, p4, k5, p2, k1; rep from * to last 2 sts, p2.

Row 3: Yo, ssk, p1, * k2tog, yo, p4, k2tog, k2, yo, k1, p1, k1, yo, k2, ssk, p4, yo, ssk, p1; rep from * to last 2 sts, k2tog, yo.

Row 4: P2, k1, * p2, k4, p5, k1, p5, k4, p2, k1; rep from * to last 2 sts, p2.

Row 5: K2tog, yo, p1, * yo, ssk, p3, k2tog, k2, yo, k2, p1, k2, yo, k2, ssk, p3, k2tog, yo, p1; rep from * to last 2 sts, yo, ssk.

Row 6: P2, k1, * p2, k3, p6, k1, p6, k3, p2, k1; rep from * to last 2 sts, p2.

Row 7: Yo, ssk, p1, * k2tog, yo, p2, k2tog, k2, yo, k3, p1, k3, yo, k2, ssk, k2, yo, ssk, p1; rep from * to last 2 sts, k2tog, yo.

Row 8: P2, k1, * p2, k2, p7, k1, p7, k2, p2, k1; rep from * to last 2 sts, p2.

Row 9: K2tog, yo, p1, * yo, ssk, p2, k3, k2tog, k2, yo, p1, yo, k2, ssk, k3, p2, k2tog, yo, p1; rep from * to last 2 sts, yo, ssk.

Row 10: As row 8.

Row 11: Yo, ssk, p1, * k2tog, yo, p2, k2, k2tog, k2, yo, k1, p1, k1, yo, k2, ssk, k2, p2, yo, ssk, p1; rep from * to last 2 sts, k2tog, yo.

Row 12: As row 8.

Row 13: k2tog, yo, p1, * yo, ssk, p2, yo, ssk, k1, (k2tog, yo) twice, p1, (yo, ssk) twice, k1, k2tog, yo, p2, k2tog, yo, p1; rep from * to last 2 sts, yo, ssk.

Row 14: P2, k1, * p2, k3, p3, (k1, p2) twice, k1, p3, k3, p2, k1; rep from * to last 2 sts, p2.

Row 15: Yo, ssk, p1, * k1, yo, ssk, p2, yo, k3tog, yo, p1, yo, ssk, p1, k2tog, yo, p1, yo, k3tog, yo, p2, k2tog, yo, k1, p1; rep from * to last 2 sts, k2tog, yo.

Row 16: P2, k1, * p3, k3, p1, k2, p2, k1, p2, k2, p1, k3, p3, k1; rep from * to last 2 sts, p2.

Row 17: K2tog, yo, p1, * yo, k2, ssk, p5, k2tog, yo, p1, yo, ssk, p5, k2tog, k2, yo, p1; rep from * to last 2 sts, yo, ssk.

Row 18: P2, k1, * p4, k5, p2, k1, p2, k5, p4, k1; rep from * to last 2 sts, p2.

Row 19: Yo, ssk, p1, * k1, yo, k2, ssk, p4, yo, ssk, p1, k2tog, yo, p4, k2tog, k2, yo, k1, p1; rep from * to last 2 sts, k2tog, yo.

Row 20: P2, k1, * p5, k4, p2, k1, p2, k4, p5, k1; rep from * to last 2 sts, p2.

Row 21: K2tog, yo, p1, * k2, yo, k2, ssk, p3, k2tog, yo, p1, yo, ssk, p3, k2tog, k2, yo, k2, p1; rep from * to last 2 sts, p2.

Row 22: P2, k1, * p6, k3, p2, k1, p2, k3, p6, k1; rep from * to last 2 sts, p2.

Row 23: Yo, ssk, p1, k3, yo, k2, ssk, p2, yo, ssk, p1, k2tog, yo, k2tog, k2, yo, k3, p1, k2tog, yo.

Row 24: P2, k1, * p7, k2, p2, k1, p2, k2, p7, k1; rep from * to last 2 sts, p2.

Row 25: K2tog, yo, p1, * yo, k2, ssk, k3, p2, k2tog, yo, p1, yo, ssk, p2, k3, k2tog, k2, yo, p1; rep from * to last 2 sts, yo, ssk.

Row 26: As row 24.

Row 27: Yo, ssk, p1, * k1, yo, k2, ssk, k2, p2, yo, ssk, p1, k2tog, yo, p2, k2, k2tog, k2, yo, k1, p1; rep from * to last 2 sts, k2tog, yo.

Row 28: As row 24.

Row 29: K2tog, yo, p1, * (yo, ssk) twice, k1, k2tog, yo, p2, k2tog, yo, p1, yo, ssk, p2, yo, ssk, k1, (k2tog, yo) twice, p1; rep from * to last 2 sts, yo, ssk.

Row 30: P2, k1, * p2, k1, p3, k3, p2, k1, p2, k3, p3, k1, p2, k1; rep from * to last 2 sts, p2.

Row 31: Yo, ssk, p1, * k2tog, yo, p1, yo, k3tog, yo, p2, k2tog, yo, k1, p1, k1, yo, ssk, p2, yo, k3tog, yo, p1, yo, ssk, p1; rep from * to last 2 sts, k2tog, yo.

Row 32: P2, k1, * p2, k2, p1, k3, p3, k1, p3, k3, p1, k2, p2, k1; rep from * to last 2 sts, p2.

Rep rows 1-32 for Sweetheart Lace.


Charts

A stitch key for a knitting chart shows six symbols: a blank square (K on RS, p on WS), a dash (P on RS, k on WS), right-leaning slash (K2tog), left-leaning slash (Ssk), circle (Yo), and triangle (K3tog). -Marly Bird
Knitting chart titled "Sweetheart Lace Setup Chart," showing an 18-row by 39-stitch grid with various knitting symbols and a highlighted 24-stitch repeat section between stitches 17 and 39. -Marly Bird
A 32-row by 29-stitch knitting lace chart labeled "Sweetheart Lace Chart," with a 24-stitch repeat section outlined in orange. Various knitting symbols fill the grid, indicating different stitch types. -Marly Bird

Sweetheart Knit A-Line Tunic Schematic

Line drawing of a sleeveless A-Line Tunic with measurements along the edges and around neck and armholes for various sizes. The labels read "Front & Back" in the center, perfect for following a Knit Tunic Pattern by Marly Bird. -Marly Bird

Notes

โญ๏ธ Regarding Yarn and Gauge: The Sweetheart Tunic is a light piece with open lacework along the bottom and Stockinette stitch at the top. It is important to choose a yarn that will hold the lace open while looking good in the Stockinette.

Please be sure to take pre-block, post-block and hanging gauge swatch measurements. All three will be important for you to do all you can to make sure your piece will be finished the way you want.

โญ๏ธThe instructions are written for smallest size. If changes are necessary for larger sizes the instructions will be written thus ( ). When only one number is given, it applies to all sizes.

โญ๏ธ Tunic is made in pieces and seamed together after blocking!

โญ๏ธ For the shaping, here are some simple instructions:

  • Work lace dec rows as follows (RS): P1, p2tog, work as est to last 3 sts, p2tog, p1.
  • Work back armhole dec sts as follows (RS): K1, ssk, work as est to last 2 sts, k2tog, k1.
  • Work front armhole dec rows as follows: Left Front (RS): K1, ssk, work as est to end. Right Front (RS): Work as est to last 3 sts, k2tog, k1.
  • Work front neck dec row as follows: Left Front (RS): Work as est to last 3 sts, k2tog, k1. Right Front (RS): K1, ssk, work as est to end.

GROW

To Unlockย Exclusive Subscriber Contentย click the Box below and join for free by simply adding your email and creating a password! If you are having troubles, clear your cache or reset your password or login to the Grow Publisher Portal.

>> Learn More About Grow Here <<

I'm thrilled to share this amazing pattern with you, many patterns on my blog are absolutely free! I kindly request that you don't copy and paste or distribute this pattern. Prefer an ad-free experience? Buy a digital PDF pattern for a small fee from one of my online stores for a seamless crafting journey. 

I appreciate your support and readership. You are the reason I can keep doing what I love and sharing it with others. So, thank you from the bottom of my yarn-loving heart! Disclosure: This post contains affiliate links, meaning I get a commission if you decide to make a purchase through my links at no cost to you.
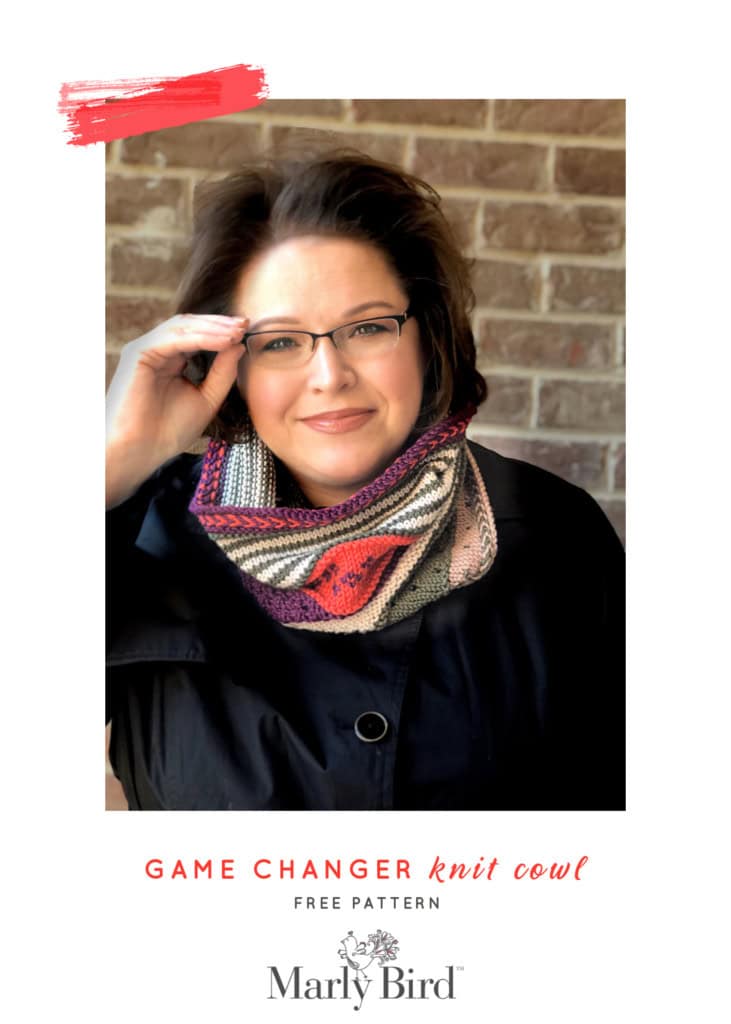

A woman models a brown Marly Bird A-Line Tunic over a white blouse, sitting outdoors with a dog and holding a newspaper. Text reads: "Sweetheart Knit A-Line Tunic. -Marly Bird

Sweetheart Knit A-Line Tunic Pattern

Back

Sweetheart Lace Bottom: With larger needles, CO 113 (125, 141, 153, 171, 191, 207, 221) sts.

Row 1 (RS): P1 (7, 3, 9, 6, 4, 12, 7), pm, work in Sweetheart Lace Setup to last 1 (7, 3, 9, 6, 4, 12, 7) sts, pm, p to end.

Row 2: K to marker, work in Sweetheart Lace Setup to next marker, k to end. Cont as est, keeping edge sts in Rev St Stand center sts in Sweetheart Lace Setup, until all 18 rows of chart have been worked.

Remove markers.

Next 2 rows:

Row 1 (RS): P6 (12, 8, 14, 11, 9, 17, 12), pm, work in Sweetheart Lace to last 6 (12, 8, 14, 11, 9, 17, 12) sts, pm, p to end.

Row 2: K to marker, work in Sweetheart Lace to next marker, k to end.

Cont as est, keeping edge sts in Rev St St and center sts in Sweetheart Lace, for a total of 80 (80, 96, 96, 96, 96, 112, 112) rows, or 2.5 (2.5, 3, 3, 3, 3, 3.5, 3.5) Sweetheart Lace reps (not including setup). AT THE SAME TIME, dec 1 st at each edge on 11th row of Sweetheart lace, then every 22 (22, 20, 20, 16, 14, 14, 12) rows 3 (3, 4, 4, 5, 6, 7, 8) more times โ€“ 105 (117, 131, 143, 159, 177, 191, 203) sts rem. See notes on first page on how to decrease.

Stockinette St Top:

Change to smaller needles, and work in flat Stockinette St for 2 (21โ„4, 23โ„4, 31โ„4, 33โ„4, 41โ„4, 43โ„4, 51โ„2)”, ending with a WS row.

Shape Armholes

BO 5 (6, 7, 8, 9, 10, 11, 12) sts at beg of next 2 rows, then 5 sts at beg of next 0 (0, 0, 0, 0, 0, 2, 2) rows, then 4 sts at beg of next 0 (0, 0, 0, 0, 2, 2, 2) rows, then 3 sts at beg of next 0 (0, 0, 2, 4, 4, 2, 2) rows, then 2 sts at beg of next 2 (2, 4, 2, 2, 2, 2, 4) rows.

Dec 1 st at each edge EOR 2 (3, 3, 4, 4, 4, 5, 6) times, then every 4 rows 1 (2, 3, 3, 4, 5, 5, 5) times โ€“ 85 (91, 97, 103, 109, 115, 121, 125) sts rem.

Cont evenly until piece measures 231โ„2 (241โ„4, 271โ„2, 281โ„2, 293โ„4, 31, 343โ„4, 36)” from beg, ending with a RS row.

Shape Shoulders and Neck

Next row (WS): P33 (36, 39, 40, 43, 46, 48, 48), BO19 (19, 19, 23, 23, 23, 25, 29), p to end.

Right Shoulder

Row 1 (RS): BO 5 (6, 7, 7, 8, 9, 9, 9), k to end.

Row 2: BO 3 sts, p to end.

Row 3: BO 6 (6, 7, 7, 8, 9, 9, 9), k to end.

Row 4: BO 3 sts, p to end.

Row 5: BO 6 (7, 7, 8, 8, 9, 10, 10), k to end.

Row 6: BO 2 sts, p to end.

Row 7: BO 6 (7, 8, 8, 9, 9, 10, 10), k to end. BO rem 2 sts.

Left Shoulder

With RS facing, reattach yarn

to 33 (36, 39, 40, 43, 46, 48, 48) sts still on the needle.

Row 1(RS): BO 3 sts, k to end.

Row 2: BO 5 (6, 7, 7, 8, 9, 9, 9), p to end. Row 3: BO 3 sts, k to end.

Row 4: BO 6 (6, 7, 7, 8, 9, 9, 9), p to end. Row 5: BO 2 sts, k to end.

Row 6: BO 6 (7, 7, 8, 8, 9, 10, 10), p to end. Row 7: BO 2 sts, k to end.

BO rem 6 (7, 8, 8, 9, 9, 10, 10) sts.

Front

Work same as Back to armhole.

Shape Armhole and Neck

Shape armhole same as back. AT THE SAME TIME, when piece measures 16 1โ„2 (16 3โ„4, 19 3โ„4, 20 1โ„4, 20 3โ„4, 21 1โ„2, 24 1โ„2, 25 1โ„2)”, end with a RS row and shape neck as follows:

Next row (WS): P41 (44, 47, 50, 53, 56, 59, 61), BO 3 sts, P to end.

Work each side separately in St St, dec 1 st at neck edge EOR 12 (11, 10, 12, 11, 11, 10, 10) times, every 4 rows 6 (7, 7, 7, 8, 8, 10, 12) times, and every 6 rows 0 (0, 1, 1, 1, 1, 1, 1) times.

When piece measures 231โ„2 (241โ„4, 271โ„2, 281โ„2, 293โ„4, 31, 343โ„4, 36)” from beg, shape shoulder same as back.

DESIGNER NOTE: Shape shoulders on the front same as the back – only the shoulder shaping and not the neck shaping.

When the back instructions read to do shaping on the neck edge ignore it, maintain Stockinette st pattern.

Be sure to follow instructions for left shoulder back for right shoulder front and vice versa.

My tech editor and I thought this was clear but we have had some questions about it. So I hope this helps ๐Ÿ™‚

Finishing

Block all pieces to measurements.

Sew shoulder and side seams.

Edging

With RS facing, work 1 round in single crochet around neck edge and each armhole edge.

A smiling woman in a bakery holds coffee and wears a Marly Bird A-Line Tunic. Overlapping pages feature Free Knit Tunic Pattern instructions. Text reads โ€œAd-Free PDF!โ€, โ€œSweetheart A-Line Tunic,โ€ and โ€œBUY NOWโ€ with a mouse pointer icon. -Marly Bird
Etsy
Shopify
Ravelry

Love This Pattern? Save It on Ravelry ๐Ÿ’–

Be sure to favorite the Sweetheart A-Line Tunic on Ravelry, add it to your queue, and share your finished tunic with the knitting community.

Favorite This Pattern on Ravelry - Marly Bird

Final Thoughts

The Sweetheart A-Line Tunic will always hold a special place in my heart. As my very first sweater design, it represents everything I love about knitwearโ€”thoughtful construction, timeless style, and the joy of creating something you truly love to wear.

If youโ€™re looking for a knit tunic pattern that feels classic, flattering, and deeply satisfying to make, this one might just become a favorite in your wardrobe too.

Happy knitting! ๐Ÿงถ๐Ÿ’•

โค๏ธ Your BiCrafty Bestie,
Marly Bird
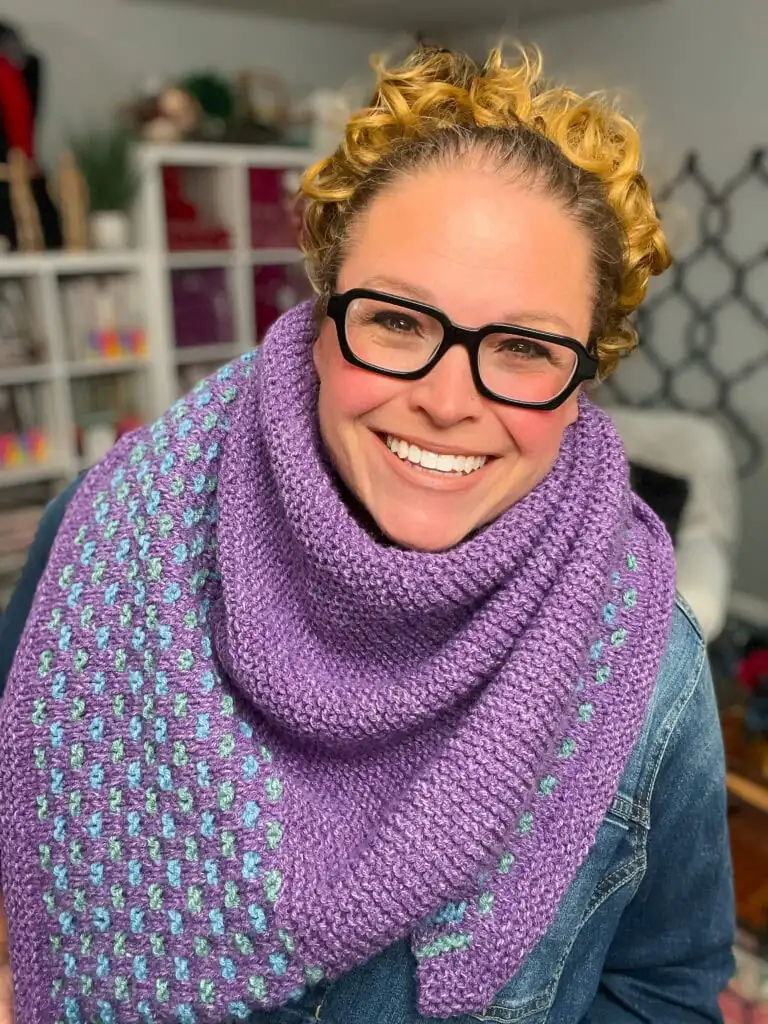
A cartoon avatar of a person with glasses and a brown bun smiles warmly. Their green shirt and black jacket add a stylish touch, while colorful hearts surround them like loving temperature blankets, stitching together an aura of love and positivity. -Marly Bird

Filed Under: Free Patterns, Knitting, Marly Bird Premium Patterns, Our Free Patterns, Pattern

Celestia Shawl: Crochet With Fingering Weight Yarn

January 18, 2026 By Marly Bird Leave a Comment

If your fingering weight yarn stash is starting to look like a tiny-skein rainbow explosion, the Celestia Chevron Crochet Shawl is here to rescue (and justify ๐Ÿ˜˜) all that gorgeous sock yarn.

Get wrapped up in this fun and vibrant project! Our free, easy-to-follow crochet shawl pattern is perfect for beginners and experienced crocheters alike. Create your own summer layering wrap with the help of Marly Bird - ad-free pdf also available for purchase and includes stitch diagrams

Affiliate Disclosure: This post contains affiliate links. To learn more please visit my privacy policy here๐Ÿ’–


Meet the Celestia Chevron Crochet Shawl

If your fingering weight yarn stash is starting to look like a tiny-skein rainbow explosion, the Celestia Chevron Crochet Shawl is here to rescue (and justify ๐Ÿ˜˜) all that gorgeous sock yarn.

This free easy lacy crochet shawl pattern uses fingering weight yarn in a dramatic chevron lace that looks fancy but is totally doable once you get into the rhythm. Itโ€™s perfect for:

  • Advent calendar mini hanks
  • Hand-dyed sock yarn youโ€™ve been โ€œsaving for something specialโ€
  • That one skein you loved so much you bought itโ€ฆ and then froze ๐ŸงŠ

You can follow the full pattern for free in this post, or grab the ad-free PDF (with stitch diagram) in the Marly Bird Store if you like your patterns printer-friendly and project-bag ready.

Free pattern? Check.

Yarn stash justification? Double-check.

Letโ€™s play with some chevrons. ๐Ÿ’ซ

Celestia Chevron Crochet Shawl Pattern - Marly Bird

Why Youโ€™ll Love This Free Easy Lacy Crochet Shawl Pattern

Hereโ€™s why the Celestia Chevron Crochet Shawl has such main-character energy:

  • Lacy chevron stitch pattern โ€“ eye-catching zigzags and open stitches that drape beautifully
  • Lightweight but cozy โ€“ perfect for transitional weather, cool evenings, or indoor AC battles
  • Adventurous beginner friendly โ€“ if youโ€™re comfortable with basic stitches and simple decreases, youโ€™re golden
  • Mini-skein + leftovers friendly โ€“ amazing for scrappy fades, advent sets, and sock yarn leftovers
  • Repeat that actually repeats โ€“ once youโ€™ve done a few rows, the rhythm kicks in and it becomes a โ€œjust one more rowโ€ฆโ€ project ๐Ÿงถ

๐Ÿ’ก Designer Tip: If youโ€™re nervous about working with small yarn, start with a solid or tonal color. Itโ€™s easier to see your stitches while youโ€™re getting to know the pattern.


An ad displays a colorful chevron crochet shawl made with fingering weight yarn and a printable pattern PDF. Text reads "Ad-Free PDF! Celestial Chevron Crochet Shawl." A "Buy Now" button is in the lower left on a purple background. -Marly Bird
Etsy
Shopify
Ravelry

Celestia Chevron Crochet Shawl โ€“ Free Pattern + Ad-Free PDF

Youโ€™ve got options, Bestie:

  • The entire Celestia Chevron Crochet Shawl pattern is free right here in this blog post โ€“ just scroll to the pattern section below.
  • You can also purchase the ad-free PDF in the Marly Bird Store for a cleaner, printer-friendly version that includes the stitch diagram.

Free pattern on the blog or pretty PDF in your project bag โ€“ you truly cannot go wrong.

Ad-free PDF:
https://shop.marlybird.com/products/celestia-chevron-shawl

Psst: You can also favorite and queue this pattern on Ravelry to save it for later:
https://www.ravelry.com/patterns/library/celestia-chevron-shawl


How Do You Crochet the Chevron Shawl with Fingering Weight Yarn?

Before we dive deep into the pattern, letโ€™s talk about the yarn for a second โ€“ because a lot of crocheters ask:

โ€œWhat is fingering weight yarn, and is it the same as sock yarn?โ€

The short version:

  • Fingering weight yarn = thin, drapey, beautiful
  • Sock yarn = usually fingering weight, but with extra durability (like nylon)

And yes, Celestia is a fabulous way to use both.

๐Ÿ’ก Designer Tip: If youโ€™ve been wanting to try fingering weight yarn but feel a little intimidated, a shawl is the perfect place to start. It doesnโ€™t have to โ€œfitโ€ a body the way a sweater doesโ€”so you get all the drape and color fun with less stress.


What Is Fingering Weight Yarn?

Fingering weight yarn is also known as:

  • โ€œSuperfine yarnโ€
  • โ€œSock yarnโ€
  • โ€œBaby yarnโ€
  • โ€œ4-plyโ€ (in some countries)

Depending on where you live (US, UK, Australia, New Zealand), the terminology changes, but the yarn is the same:

A thin, flexible yarn thatโ€™s perfect for everyday wear and detailed stitch work.

According to the Craft Yarn Council, fingering falls into Category 1 / Super Fine. Itโ€™s:

  • Thinner than sport weight
  • Thicker than lace weight

That sweet spot means itโ€™s excellent for shawls, light garments, accessories, and of courseโ€ฆ socks.


Join our Newsletter

Get Free Crochet & Knitting
Pattern Links & Coupons!

Hand-drawn bird with curling, detailed feathers and pink accents; cheerful pose showcases fine line and texture work.
>> Become An Insider <<
A woman with glasses and curly hair models a colorful crocheted scarf, showing textured stitches and vibrant yarn.

What Is the Difference Between Fingering Weight Yarn and Sock Yarn?

All sock yarn is fingering weight, but not all fingering weight is sock yarn.

  • Fingering weight yarn โ€“ can be made from many fibers: wool, cotton, blends, etc.
  • Sock yarn โ€“ usually a blend, often wool + nylon, where the nylon adds durability for high-wear areas (like heels and toes).

So:

  • If youโ€™re making socks, look for a yarn specifically labeled โ€œsock yarnโ€ for strength.
  • If youโ€™re making shawls, wraps, or garments like Celestia, you can use almost any fingering weight yarn that feels good against your skin and blocks nicely.

๐Ÿ’ก Designer Tip: Have a skein of special sock yarn thatโ€™s โ€œtoo pretty for socksโ€? Celestia is a perfect way to show it off where everyone can see it.

Curious about socks too? Check out the Classic and Colorful Crochet Socks course in the Marly Bird House:
https://www.marlybirdhouse.com/products/courses/view/1110002


Crocheting with Fingering Weight Yarn (a.k.a. Sock Yarn) Made Easy

Crocheting with fingering weight yarn feels different from working with a worsted (#4) or bulky (#5) yarnโ€”but not in a bad way. Itโ€™s more like switching from a chunky sharpie to a really smooth gel pen. โœ’๏ธ

You get:

  • Delicate stitch definition โ€“ lacy patterns and chevrons really shine
  • Lovely drape โ€“ especially when blocked
  • Lightweight fabric โ€“ great for layering and multi-season wear

Yes, it may require a little more attention and patience, but the payoff is gorgeous: a shawl that looks intricate, feels floaty, and wears beautifully.


What Is the Recommended Hook Size for Fingering Weight or Sock Yarn?

As a general rule, fingering weight yarn pairs well with:

  • C/2 (2.75 mm)
  • D/3 (3.25 mm)
  • E/4 (3.5 mm)

The exact hook size depends on:

  • The pattern
  • Your personal tension
  • The fabric you want (denser vs. lacier)
Fingering weight yarn.

For the Celestia Chevron Crochet Shawl, follow the hook size and gauge listed in the pattern section below, and adjust as needed.

Designers sometimes go up a hook size to get a more open, lacy fabric, or down a size for a denser, warmer fabric. Both are validโ€”it just depends on the look and feel you want.

โฃ๏ธ Marlyโ€™s favorite hooks for small yarns (larger handles to save your hands): Too Shay Crochet

๐Ÿ’ก Designer Tip: When in doubt, grab two hooksโ€”one the pattern suggests, and one a half-size bigger. Swatch with both and see which fabric you like better.


What Is the Best Crochet Gauge for Fingering Weight Yarn?

Gauge in crochet is all about:

  • Hook size
  • Yarn weight
  • Your personal tension

Yarn labels often suggest a general gauge. For fingering weight yarn (CYC #1), typical crochet gauge might be around:

  • 21โ€“32 stitches over 4″ using single crochet
  • Hook sizes around 2.25 mm โ€“ 3.5 mm

But remember: those are guidelines, not laws.

Especially for shawls like Celestia, โ€œbestโ€ gauge depends on the fabric you want:

  • Looser gauge โ†’ more drape, more open lace
  • Tighter gauge โ†’ denser fabric, slightly smaller shawl

So the real answer to โ€œWhat is the best gauge?โ€ is:
๐Ÿ‘‰ The one that gives you the fabric you love.


When in Doubt, Make a Gauge Swatch

A little swatching now saves a lot of โ€œwhy is this so stiff/loose?โ€ later.

To find your gauge:

  1. Make a swatch in the stitch pattern used in the project (not just plain single crochet).
  2. Aim for at least 4″ x 4″, but 6″ x 6″ is even better for accuracy.
  3. Count how many stitches and rows you have over 4″.
  4. Compare to the pattern gauge.

If you want:

  • More drape โ†’ go up a hook size
  • Denser fabric โ†’ go down a hook size

Measuring Your Gauge Swatch

Once your swatch is made:

  1. Measure it before blocking and jot those numbers down.
  2. Then wash and block the swatch the way youโ€™ll block your shawl.
    • Tutorial: https://youtu.be/Tf_hXkaidFM
  3. Let it dry completely (I know, waiting is rude, but necessary ๐Ÿ˜…).
  4. Measure again after blocking.

๐Ÿ’ก Designer Tip: Wet blocking your swatch does double dutyโ€”it also tests whether your yarn is colorfast. Better to find out on a 6″ swatch than a full shawl.

Tools that make this easier:

  • Blocking mats: https://amzn.to/423DJ7r
  • Blocking combs/pins: https://amzn.to/3owkJ3L
  • Crochet gauge square: https://shrsl.com/430bm

Place the gauge square in the center of your blocked swatch and count stitches and rows inside the window. Divide by four to get stitches/rows per inch.


Tips for Crocheting with Fingering Weight Yarn

Keeping Tension with a Crochet Hook and Fine Yarn

When youโ€™re working with finer yarns like fingering weight on projects such as crochet shawls, wraps, or lightweight garments, consistent tension is key for:

  • A smooth, even fabric
  • Nice drape
  • A professional-looking finish

To help with tension:

  • Choose the right hook size (see above)
  • Keep your hand relaxedโ€”no white-knuckle gripping
  • Try hooks with larger handles to reduce hand strain
  • Pause occasionally and check your stitches to see if youโ€™re creeping tighter or looser over time

๐Ÿ’ก Designer Tip: If youโ€™ve made a gauge swatch, keep it nearby. Use the pre-blocked measurements from that swatch to check your fabric as you go.


Benefits of Stitch Markers in Crochet: Keeping Edges Straight, Stitch Count, and More

Stitch markers are like tiny, colorful traffic cones for your crochet. ๐Ÿšง

Theyโ€™re especially helpful with:

  • Chevron patterns (like Celestia)
  • Long rows in shawls and wraps
  • Areas with regular increases or decreases

You can use removable stitch markers to:

  • Mark edges so your sides stay straight
  • Highlight increase and decrease points in the chevron pattern
  • Keep track of pattern repeats over long rows

Video about removable stitch markers:
https://youtu.be/Sqi2gpfgsvw

Favorite stitch markers:
https://amzn.to/3oDX5SS

Marlyโ€™s favorite stitch to pair with markers: the Stacked Double Crochet
https://marlybird.com/blog/how-to-crochet-a-stacked-double-crochet/


Stitch Markers for Edges

For shawls like Celestia, neat edges make a huge difference.

You can:

  • Place a marker in the first and last stitch of each row
  • Mark special points like the center of a chevron

This helps:

  • Keep your stitch count on track
  • Prevent accidental increases/decreases at the edges
  • Give you that crisp, straight border that looks so good after blocking

The Beauty of Blocking a Crochet Project

Youโ€™ve nailed your tension. Youโ€™ve used your markers. Youโ€™ve woven in your ends. Now itโ€™s time for the magic step: blocking. โœจ

Blocking is especially important for:

  • Lace patterns
  • Chevron designs
  • Fingering weight shawls (hi Celestia ๐Ÿ‘‹)

Blocking:

  • Opens up the lace
  • Sharpens points and chevrons
  • Evens out your stitches
  • Helps your shawl lie beautifully on the body

Basic Instructions for Blocking Crochet

Yes, you can block acrylic, but it behaves differently than wool. For wool and wool blends, traditional wet-blocking is often best. For acrylics, youโ€™ll usually want gentle steam.

Video on blocking acrylic:
https://youtu.be/lJnH4DD75zI

Youโ€™ll need:

  • A sink or basin
  • Wool wash or gentle detergent: https://amzn.to/3qbCfuL
  • Blocking mats/boards: https://amzn.to/4257zZq
  • Rust-proof pins or blocking combs: https://amzn.to/3BWIa9K
  • Towels

(Yes, these are the same tools you used for your gauge swatchโ€”look at you being prepared. ๐Ÿ˜‰)

โญ๏ธ Marly Bird Amazon Storefront โญ๏ธ

Blocking Crochet โ€“ Step by Step

  1. Fill a sink/basin with lukewarm water and a little wool wash.
  2. Gently immerse your crochet project and let it soak 15โ€“20 minutes.
  3. Drain the water and press out excess moisture (do not wring or twist).
  4. Lay the project on a towel, roll it up, and press again to remove more moisture.
  5. Lay out your blocking mats on a flat surface.
  6. Arrange your shawl on the mats, shaping to the desired measurements.
  7. Pin edges and points with T-pins or blocking combs.
  8. Allow to air dry completely.
  9. Remove pins and admire how fancy your stitches look now.

By the way, thereโ€™s an exclusive blocking video from the BiCrafty Games course in the Marly Bird House that walks through this visually, and Iโ€™ve made it available here for free:
https://youtu.be/Tf_hXkaidFM


Caution When Blocking

โ›” A quick warning: Some yarns bleed when exposed to water.

To test:

  • Wet a small swatch or a tiny corner of your work.
  • Press it onto a white cloth or towel.

If color transfers:

  • Avoid full wet-blocking
  • Consider steam blocking instead

If it doesnโ€™t bleed, youโ€™re good to go with wet blocking.


Does Color Choice Matter When Crocheting with Fingering Weight Yarn?

Most of the time, with fingering weight yarn, weโ€™re focusing on:

  • Stitch detail
  • Lace pattern
  • Overall fabric and drape

But color can absolutely make a difference in terms of visibility and ease of stitching, especially for:

  • Beginners
  • Crocheters with low vision
  • Very detailed stitch patterns

For beginners, high-contrast colors (and avoiding very dark yarn at first) can make stitches easier to see.


Solid or Variegated?

Both can be beautiful, but they behave differently:

  • Variegated yarns โ€“ amazing visual effects, color pooling, and shifting tones
    • Check out color pooling basics here:
      https://marlybird.com/blog/basics-of-planned-pooling-crochet/
  • Solid or tonal yarns โ€“ show stitch definition more clearly, which is wonderful for lace and chevrons

If your main goal is to make the stitch pattern the star, solid or tonal yarns are often the best choice. If you want the color story to be the star, variegated is a blast.

Ultimately, your yarn, your rules. ๐Ÿ’โ€โ™€๏ธ


High Contrast and Grayscale Color Yarn

For crocheters with low vision, high-contrast colors or grayscale combinations can make a huge difference.

  • Bold pairs (like black/white or bright/high-contrast combos) make stitches easier to see
  • Grayscale or neutrals can give subtle contrast thatโ€™s easier on the eyes

Choosing high-contrast or grayscale fingering-weight yarns can:

  • Make counting stitches easier
  • Reduce eye strain
  • Increase confidence and enjoyment in the project
Fingering weight yarn in a rainbow of shades, and grayscale.

What Is the Best Fingering Weight Yarn?

The honest answer: it depends on budget, fiber preference, and what youโ€™re making.

For Celestia and similar shawls, here are some great options:

  • Budget-friendly:
    • WeCrochet Hawthorne: https://shrsl.com/42jwl
    • WeCrochet Stroll: https://shrsl.com/430s2
    • More WeCrochet fingering yarns: https://shrsl.com/430s7
  • โ€œTreat yourselfโ€ options:
    • Malabrigo Sock:
      https://www.jimmybeanswool.com/knitting/yarn/Malabrigo/Sock.asp?showLarge=true&specPCVID=102870
    • Madelinetosh Pashmina:
      https://www.jimmybeanswool.com/knitting/yarn/Madelinetosh/Pashmina.asp?showLarge=true&specPCVID=110292

๐Ÿ’ก Designer Tip: Whatever yarn you choose, make a small swatch, block it, and wear it against your neck for a few minutes. If it feels great there, it will feel great as a shawl.

Hand-dyed skeins of fingering weight yarn. Marly Bird.

Sock Yarn for More Than Just Socks!

Sock yarn is usually fingering weight and designed to be:

  • Durable
  • Smooth
  • Comfortable next to the skin

Itโ€™s fantastic for socksโ€”but it can do so much more:

  • Shawls
  • Wraps
  • Scarves and cowls
  • Baby garments
  • Lightweight sweaters
  • Home decor
  • Amigurumi and toys

Sock Yarn Project Suggestions

Here are a few idea categories where sock yarn shines:

  1. Crochet Shawls and Wraps
    • Lightweight, elegant, and drapey
    • Beautiful for lacework and chevron patterns
    • Example: Lots of lace shawl inspiration here:
      https://marlybird.com/blog/lace-crochet-shawl/
    • Another wrap idea:
      https://marlybird.com/free-crochet-patterns/free-crochet-patterns-chevron-waves-lacy-wrap/
  2. Crochet Scarves and Cowls
    • Airy but warm
    • Choose solids or variegated colorways for interest
    • Fun cowl pattern:
      https://marlybird.com/closing-time-cowl/
    • More lacy patterns to explore:
      https://brianakdesigns.com/crafting-your-way-to-the-best-lacy-crochet-patterns/
  3. Baby Garments and Accessories
    • Soft, drapey, easy to layer
    • Great for lightweight sweaters, hats, and booties
  4. Home Decor
    • Accent blankets, decorative pillows, and more
    • Example:
      https://www.ravelry.com/patterns/library/coral-story-blanket
  5. Amigurumi and Toys
    • Strong and smooth yarn = toys that can handle love and play
    • Tons of patterns here:
      https://www.ravelry.com/patterns/search#craft=crochet&weight=light-fingering&pc=toysandhobbies&sort=best&view=captioned_thumbs

Sock yarn is one of those โ€œdo everythingโ€ yarns once you decide it doesnโ€™t have to be just for feet. ๐Ÿ˜‰


An ad displays a colorful chevron crochet shawl made with fingering weight yarn and a printable pattern PDF. Text reads "Ad-Free PDF! Celestial Chevron Crochet Shawl." A "Buy Now" button is in the lower left on a purple background. -Marly Bird
Etsy
Shopify
Ravelry

Make a Show-Stopping Celestia Chevron Shawl with This Free Easy Lacy Crochet Shawl Pattern

Ready to stitch? Letโ€™s talk specifics.

Celestia is:

  • Worked in chevron lace using multiple colors of fingering weight yarn
  • Designed as a long, wrap-style shawl with tassels at the corners
  • A great canvas for fades, minis, or colorplay

You can purchase the ad-free PDF pattern here:
https://shop.marlybird.com/products/celestia-chevron-shawl

Or keep scrolling for the full free pattern below.

And donโ€™t forget to favorite/queue on Ravelry:
https://www.ravelry.com/patterns/library/celestia-chevron-shawl


SKILL LEVEL

Adventurous Beginner


MEASUREMENTS

Finished Measurements

Shawl is 18.5โ€ [47 cm] wide by 74โ€ [188 cm] long.

Gauge

28 sts (2 chevrons) x 12 rows in stitch pattern = 5.25โ€ [13.5 cm] x 4.25โ€ [11 cm]; use any size hook to obtain the gauge.


MATERIALS

Yarn

WeCrochet, Hawthorne Fingering Weight (80% superwash fine highland wool/ 20% polyamide, 357 yds / 326 m, 3.5 oz/ 100 g, CYCA# 1 lace):

Color A: #28626 Equinox Kettle Dye, 3 hanks

Color B: #26693 Poseidon Kettle Dye, 1 hank

Color C: #26693 Daphne Kettle Dye, 1 hank

Color D: #28625 Turkish Delight Kettle Dye, 1 hank

Color E: #28624 Nymph Kettle Dye, 1 hank

Hook

Size E/4 [3.5 mm]

Notions

  • Stitch markers: https://amzn.to/41hcAOv
  • Tapestry needle: https://amzn.to/3mn7t0r
  • Blocking mats and blocking pins: https://amzn.to/3MzcFc0
  • Spray water bottle for blocking (optional)

CROCHET ABBREVIATIONS

Ch โ€“ Chain(s)

Dc โ€“ Double Crochet

Dc2tog โ€“ Double Crochet Two Together

Dc3tog โ€“ Double Crochet Three Together

Sc โ€“ Single Crochet

Sc2tog โ€“ Single Crochet Two Together

Sc3tog โ€“ Single Crochet Three Together

Sp(s) โ€“ Space(s)

St(s) โ€“ Stitch(es)

Tch โ€“ Turning Chain

Tr โ€“ Treble Crochet

Tr2tog โ€“ Treble Crochet Two Together

Tr3tog โ€“ Treble Crochet Three Together

WS โ€“ Wrong Side


SPECIAL STITCHES

โญ๏ธ Single Crochet 2 Together (sc2tog):
*Insert hook into indicated stitch, yarn over and pull up a loop; repeat from * in next stitch indicated, yarn over and draw through all 3 loops on hook.

โญ๏ธ Single Crochet 3 Together (sc3tog):
*Insert hook into indicated stitch, yarn over and pull up a loop; repeat from * in next 2 stitches indicated, yarn over and draw through all 4 loops on hook.

โญ๏ธ Double Crochet 2 Together (dc2tog):
*Yarn over hook, insert hook into indicated st, yarn over and pull up a loop, yarn over and draw through 2 loops on hook; repeat from * in next st indicated, yarn over and draw through all 3 loops on hook.

โญ๏ธ Double Crochet 3 Together (dc3tog):
*Yarn over hook, insert hook into indicated st, yarn over and pull up a loop, yarn over and draw through 2 loops on hook; repeat from * in next 2 sts indicated, yarn over and draw through all 4 loops on hook.

โญ๏ธ Treble Crochet 2 Together (tr2tog):
*Yarn over hook twice, insert hook into indicated st, yarn over and pull up a loop, [yarn over and draw through 2 loops on hook] twice; repeat from * in next st indicated, yarn over and draw through all 3 loops on hook.

โญ๏ธ Treble Crochet 3 Together (tr3tog):
*Yarn over hook twice, insert hook into indicated st, yarn over and pull up a loop, [yarn over and draw through 2 loops on hook] twice; repeat from * in next 2 sts indicated, yarn over and draw through all 4 loops on hook.


An ad displays a colorful chevron crochet shawl made with fingering weight yarn and a printable pattern PDF. Text reads "Ad-Free PDF! Celestial Chevron Crochet Shawl." A "Buy Now" button is in the lower left on a purple background. -Marly Bird
Etsy
Shopify
Ravelry

STITCH DIAGRAM

Only available in the Ad-Free PDF. Upgrade here:
https://shop.marlybird.com/products/celestia-chevron-shawl


NOTES

  • Do not turn after working Color A and stay on the RS. Join a new color on RS in the first stitch of Color A row.
  • Make shawl to any length that you desire. You will need to order additional hanks of A if you want a longer shawl.
  • Tassels are optional.

VIDEO TUTORIALS

  • Weaving In Ends >> https://www.youtube.com/watch?v=8_NBGUKjO-E
  • Blocking >> https://youtu.be/lJnH4DD75zI
  • Reading Crochet Stitch Diagrams >> https://youtu.be/fJvO9WwGAUU

GROW

To Unlockย Exclusive Subscriber Contentย click the Box below and join for free by simply adding your email and creating a password! If you are having troubles, clear your cache or reset your password or login to the Grow Publisher Portal.

>> Learn More About Grow Here <<

I'm thrilled to share this amazing pattern with you, many patterns on my blog are absolutely free! I kindly request that you don't copy and paste or distribute this pattern. Prefer an ad-free experience? Buy a digital PDF pattern for a small fee from one of my online stores for a seamless crafting journey. 

I appreciate your support and readership. You are the reason I can keep doing what I love and sharing it with others. So, thank you from the bottom of my yarn-loving heart! Disclosure: This post contains affiliate links, meaning I get a commission if you decide to make a purchase through my links at no cost to you.


free, easy-to-follow crochet shawl pattern is perfect for beginners and experienced crocheters alike. Create your own summer layering wrap with the help of Marly Bird - ad-free pdf also available for purchase and includes stitch diagrams

Celestia Chevron Crochet Shawl Pattern || Free Easy Lacy Crochet Shawl Pattern

Chain 102 with color A.

Row 1: Tr in 5th ch from hook, *tr in next 5 ch, 3 tr in next ch, tr in next 5 ch, tr3tog over next 3 ch; repeat from * across to last 13 ch, tr in next 5 ch, 3 tr in next ch, tr in next 5 ch, tr2tog over last 2 ch, fasten off color A. Do not turn — 99 sts.

Row 2: Join color B to first st of previous row, sc2tog over first sc and space between prev and next st, [sc in space between prev and next st] 6 times, sc in next st, [sc in space between prev and next st] 6 times*, sc2tog in space between prev and next 2 sts; repeat from * across ending at ** at last st, sc2tog in space between prev and last st and in last st, turn.

Row 3: Ch 2, skip first st, dc in next sc, [ch 1, skip next sc, dc in next sc] twice, ch 1, skip next sc, (dc, ch 1, dc) in next sc, [ch 1, skip next sc, dc in next sc] twice, ch 1, skip next sc*, dc3tog over next 3 sc; repeat from * across ending at ** in last 2 sts, dc2tog over last 2 sts, turn.

Row 4: Ch 1, sc2tog over first st and next ch-1 sp, [sc in next dc, sc in next ch-1 sp] twice, sc in next dc, 3 sc in next ch-1 sp, [sc in next dc, sc in next ch-1 sp] twice, sc in next dc*, sc3tog over next (ch-1 sp, st, ch-1 sp); repeat from * across ending at ** in last ch-1 sp, sc2tog over last ch-1 sp and last st, fasten off color B. Do not turn.

Row 5: Join color A to first st on previous row, ch 3 (does not count as a st), tr in next sc, tr in next 5 sc, 3 tr in next sc, tr in next 5 sc*, tr3tog over next 3 sc; repeat from * across ending at ** at last 2 sc, tr2tog over last 2 sc, fasten off color A. Do not turn.

Repeat Rows 2โ€“5 51 more times or to desired length change color in following order: C, A, D, A, E, A, B, A


FINISHING

Edging

Join color A to any corner, sc evenly along the long edge. Fasten off, weave in the ends. Repeat on the opposite side.

Blocking

Weave in all ends.

Option 1: Pin shawl to schematic size, spray with water and allow to dry.

Option 2: Wet block shawl as demonstrated in video tutorial. Pin to schematic size and allow to dry.

Tassels

Make 4 tassels, one with each Color B, C, D, and E. Join to each corner.


FAQs: Celestia Chevron Crochet Shawl

Is this crochet shawl pattern beginner friendly?
I call this Adventurous Beginner. If youโ€™re comfortable with chains, single crochet, double crochet, treble crochet, and basic decreases (2-together, 3-together), youโ€™re ready. The repeat looks fancy, but once youโ€™ve worked it a few times, it flows.

Can I make the shawl longer or shorter?
Yes! You can customize the length by repeating the main section more or fewer times. Just remember: more repeats = more yarn. If youโ€™re going longer, grab an extra hank of Color A to be safe.

Do I have to use fingering weight yarn?
Fingering weight gives the light, floaty drape I designed for. You can experiment with sport weight, but it will change the size and feel. Always swatch first and make sure you love the fabric.

Can I use just one color instead of several?
Absolutely. Celestia looks stunning in a single solid or tonal color. The lace chevrons will really pop.

How should I block my Celestia Shawl?
Wet block for wool and wool blends, or use gentle steam for acrylic. For step-by-step blocking instructions, see:
https://youtu.be/lJnH4DD75zI
and
https://youtu.be/Tf_hXkaidFM


An ad displays a colorful chevron crochet shawl made with fingering weight yarn and a printable pattern PDF. Text reads "Ad-Free PDF! Celestial Chevron Crochet Shawl." A "Buy Now" button is in the lower left on a purple background. -Marly Bird
Etsy
Shopify
Ravelry

Final Thoughts

The Celestia Chevron Crochet Shawl is one of those projects that looks โ€œstore boughtโ€ in the best possible wayโ€”but you get all the stitching satisfaction of making it yourself. ๐Ÿฅฐ

Itโ€™s:

  • Relaxing without being boring
  • A fabulous use of fingering/sock yarn
  • A great skill-stretcher for adventurous beginners

Whether youโ€™re dressing up a simple tee and jeans, layering over a sundress, or wrapping up for a cool evening, Celestia is ready to be your new โ€œgrab it on the way out the doorโ€ shawl.

When you finish yours, please share it so I can cheer you on:

  • Tag me on Instagram: @themarlybird
  • Use the hashtags #mmmdi and #marlybird
  • Share your pics in the Marlyโ€™s Minions: Marly Bird BiCrafty Community on Facebook

Now go grab that gorgeous yarn youโ€™ve been saving and give it the chevron moment it deserves. ๐Ÿ’–๐Ÿงถ

โค๏ธ Your BiCrafty Bestie,
Marly Bird
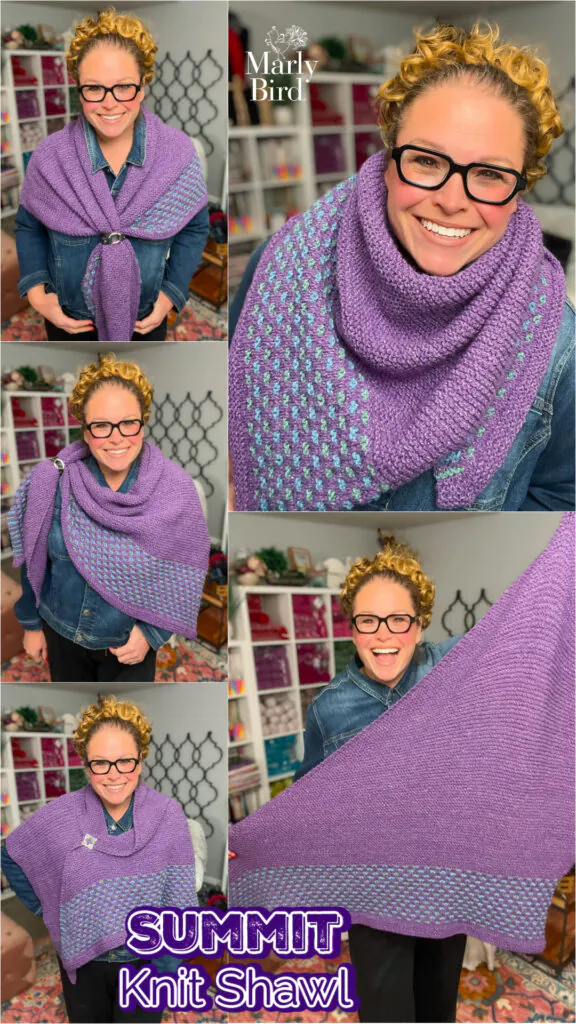
A cartoon avatar of a person with glasses and a brown bun smiles warmly. Their green shirt and black jacket add a stylish touch, while colorful hearts surround them like loving temperature blankets, stitching together an aura of love and positivity. -Marly Bird

Filed Under: Crochet, Free Patterns, Marly Bird Premium Patterns, Our Free Patterns, Tips, Tricks, Techniques for Knitting and Crochet
  • « Previous Page
  • 1
  • …
  • 4
  • 5
  • 6
  • 7
  • 8
  • …
  • 97
  • Next Page »

Let's Be Social

Join the Marly's Minions Facebook group to share, ask questions, or chat about all of your yarn related crafts!

Join the group
Cartoon of a smiling woman with brown hair in a bun, glasses, black jacket and green shirt, waving next to large "hi" text.

Quick Links

The Pattern Shop

Our Free Patterns

Blog

Marly Bird House
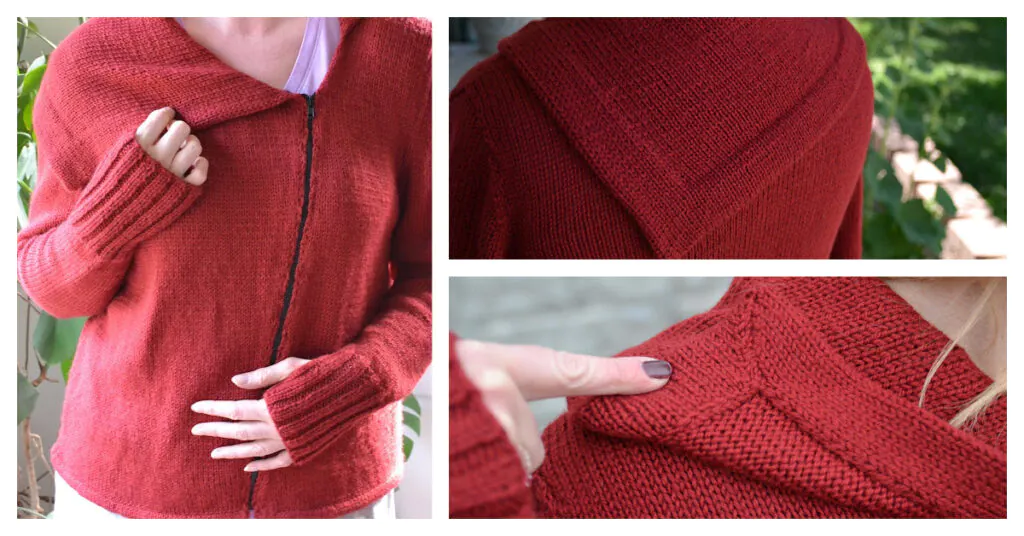
Learn to Knit & Crochet

About

Giveaway Terms and Privacy Notice

Find Us Everywhere

Join the Newsletter

YouTube Channel

Marly's Minions FB Group

Etsy Store

Ravelry Store


AN ELITE CAFEMEDIA HOME/DIY PUBLISHER

Information from your device can be used to personalize your ad experience. Do not sell or share my personal information.

Privacy Policyย  ย Termsย  ย Marly Bird Legal Documents Copyright © 2026