Search
Close
  • The Pattern Shop
  • Our Free Patterns
    • Browse All Our Free Patterns
    • Our Free Knitting Patterns
    • Our Free Crochet Patterns
  • Blog
    • All Blog Posts
    • All Free Patterns
    • Dibble Dabble Inspiration
    • Giveaways
    • Make-Alongs
    • Product Reviews
    • Roundups
    • Tips, Tricks, Techniques for Knitting and Crochet
Stylized bird with pink and gray swirling tail above elegant “Marly” text, logo for crochet accessories and home decor.
  • Marly Bird House
  • Learn to Knit & Crochet
    • Newbie? Start Here
    • Video Tutorials
    • Knitting Definitions
    • Crochet Definitions
    • Common Techniques
    • Size Charts for Knitting and Crochet Projects
  • About
×
  • The Pattern Shop
  • Free Patterns
  • Blog
  • Marly Bird House
  • Learn to Knit & Crochet
    • Newbie? Start Here
    • Video Tutorials
    • Knitting Definitions
    • Crochet Definitions
    • Common Techniques
    • Size Charts for Knitting and Crochet Projects
  • About
Stylized bird with pink and gray swirling tail above elegant “Marly” text, logo for crochet accessories and home decor.
Search
Close

New Patterns NOW Available in Ad-Free PDF! Check out The Pattern Shop

The Gerri Hat — Free Beginner Eyelet Lace Knit Hat Pattern

October 4, 2026 By Marly Bird Leave a Comment

Last Updated: October 4, 2026

The Gerri Beginner Knit Hat is a free knitting pattern designed by Marly Bird, named after Gerri, the owner of Marly's local yarn shop. Worked in the round with an eyelet lace stitch and available in three sizes, this pattern is perfect for knitters taking their first steps beyond basic ribbing.

⚡ Quick Answer:

The Gerri Beginner Knit Hat is a free knit pattern featuring an eyelet lace stitch worked in the round. Perfect for beginner knitters, it's available in 3 sizes and uses about 220–440 yards of worsted-weight yarn.

⭐ Beginner 🧶 Worsted #4 📏 ~220-440 yds 🪡 US 8 (5mm)

Hey, bestie 💛 The Gerri hat holds a special place in my heart because it's more than just a pattern…it's a memory stitched into yarn. This hat is named after Gerri, who owns Knit Knack, my beloved local yarn shop, and it was the pattern I created as the final project in my beginner knitting classes back when I taught at that shop. Watching absolute beginners walk in knowing nothing about needles and stitches, and walk out with this gorgeous eyelet lace hat? That was pure magic. 🧶✨

Here's what I love: this hat teaches you the skills you need for EVERY project that comes next…working in the round, reading a stitch pattern, counting stitches carefully, and switching to double-pointed needles when the crown gets tight. Plus, the eyelet lace stitch is easier than it looks, and it creates this delicate, sophisticated texture that catches the light beautifully. Your first lace project will blow your mind.

And if you're a crocheter learning to knit? This is your hat. The stitch pattern is just repetitive enough to build muscle memory without feeling overwhelming, and the finished hat is something you'll want to wear every single day. ✨

🧶 Affiliate Disclosure: This post contains affiliate links. If you purchase through them I may earn a small commission at no extra cost to you… and it helps support free patterns and content from my yarn-loving heart 💛 See my privacy policy here.
The Gerri Hat — free beginner eyelet lace knit hat pattern by Marly Bird, named after Gerri from Knit Knack yarn shop

👇 Jump to the pattern →

Why You'll Love This Pattern 💖

✨ You're ready for lace. The Gerri eyelet pattern looks intricate, but it's just knit, yarn over, and knit two together repeated four times. Beginners are often surprised how easy lace actually is…and how beautiful.

🎯 It teaches you skills you'll use forever. Working in the round, reading stitch patterns, counting stitches, and switching to DPNs…these are the foundation skills you need for every hat, every sweater, every project that comes next.

💛 The finished hat is stunning. Eyelet lace creates a delicate, airy texture that looks way more advanced than it actually is. You'll want to knit this in every color of yarn you own.

This pattern is your perfect match if you already know how to knit, purl, and do a yarn over…and you're ready to push just a tiny bit further. You'll come away understanding how lace works, confident in your stitch-counting skills, and proud of a hat that looks like a designer pattern.

Quick Pattern Overview

📍 Construction. You'll cast on 80, 88, or 96 stitches directly onto a 16-inch circular needle, place a stitch marker, and join to work in the round. Circular needles make working in the round smooth and meditative…no more poking yourself with double-pointed needles until the crown decreases get tight.

🎨 The brim. You'll start with 1½ inches of 1×1 ribbing. Ribbing is knit-purl-knit-purl all the way around, and it gives the hat a stretchy, fitted edge that feels professional.

✨ The eyelet lace stitch. This is where the magic happens. You'll work a 4-round repeating pattern: knit, then your lace round (knit 2 together + yarn over), then knit, then a purl round that adds texture. The yarn overs create the little eyelets, and the decreases keep the stitch count stable. Six and a half to seven and a half inches of pure lace goodness.

🔄 The crown. Once the lace is done, you'll switch to double-pointed needles (because the 16-inch circular gets too loose to work with), then decrease gradually over 13 rounds. Each decrease round removes a certain number of stitches, pulling the crown to a perfect point.

🪡 Finishing. Thread your yarn needle, pull the last stitches tight, weave in the ends, and try it on. It's that simple.

Love the Pattern but Want an Ad-Free PDF? ⭐

Get the ad-free downloadable PDF version of the Gerri Knit Hat pattern…print it out, take it to the couch, grab your needles, and never worry about scrolling or ads. Plus, get the free video tutorials linked in the PDF for every technique in this pattern.

Join our Newsletter

Get Free Crochet & Knitting
Pattern Links & Coupons!

Hand-drawn bird with curling, detailed feathers and pink accents; cheerful pose showcases fine line and texture work.
>> Become An Insider <<
A woman with glasses and curly hair models a colorful crocheted scarf, showing textured stitches and vibrant yarn.
Buy on Etsy Buy on Shopify Buy on Ravelry

What Is Eyelet Lace Knitting?

Eyelet lace is not complicated magic…it's just increases and decreases working together in a rhythm.

Here's the truth that often surprises beginners: lace knitting is easier than colorwork. You're not juggling two yarns or tracking complicated stitches…you're doing the same moves you already know how to do (knit, purl, yarn over), just in a specific order.

The eyelet lace stitch works like this: every yarn over (yo) creates a new stitch, and every knit-2-together (k2tog) removes a stitch. The stitch count stays exactly the same, but you create decorative little holes where the yarn overs are. The “lace” effect comes from these holes arranged in a pattern…it looks delicate and intricate, but it's just strategic increases and decreases.

In the Gerri hat, you'll work this pattern over 4 rounds:
🧶 Round 1: Knit all stitches
🧶 Round 2: *K2tog, yo, k2, repeat from *
🧶 Round 3: Knit all stitches
🧶 Round 4: *K3, p1, repeat from *

That's it. Two knit rounds to build the fabric, one lace round with the increases and decreases, one purl round to add subtle texture and anchor the eyelets visually. Repeat this 4-round sequence until you're ready to close the crown.

💡 Why purl every 4th round? The purl bumps (which appear on the knit side) create visual rhythm and make the eyelets “pop.” It also helps the fabric sit flat and not curl at the edges…purls are your secret weapon for fabric stability.

Yarn & Materials

Yarn…Original Recommendation: Cascade 220 Superwash (100% superwash wool, 220 yds per 100g ball). This was Marly's choice because it's bouncy, washable, and takes stitch definition beautifully. You'll need 1 ball for Small/Medium, 2 balls for Large.

Yarn Alternatives

💛 For Budget-Friendly Knitting: KnitPicks Brava Worsted (100% acrylic, 218 yds per 100g). Softer than typical acrylic, machines washable, and beginner-friendly. Use the same yardage as Cascade 220.

💛 For a Wool Alternative: KnitPicks Wool of the Andes Worsted (100% Peruvian Highland wool, 110 yds per 50g). Wool knits slightly tighter than Cascade, so you may need one extra ball. Works beautifully for lace with excellent stitch definition.

💛 For Luxury Fiber: Malabrigo Rios (100% superwash merino, 220 yds per 100g). Hand-dyed, incredibly soft, and the eyelets shine like stained glass when you hold it up to the light. Use the same yardage as Cascade.

💛 For Blend Warmth: Berroco Vintage Worsted (52% acrylic / 40% wool / 8% nylon, 218 yds per 100g). The wool percentage gives it warmth and nice drape, while the acrylic makes it affordable and easy-care. Same yardage as Cascade.

Needles:

  • One US 8 (5mm) circular needle, 16 inches long (for the body)
  • Four US 8 (5mm) double-pointed needles (for the crown decreases)
  • Stitch markers (at least one, preferably a removable one)
  • Tapestry needle (for weaving in ends)

Optional Notions:

  • Eucalan Wool Wash (for blocking and care)
  • Blocking wires (optional, but makes edges perfectly straight)
  • Faux fur pom pom (for a cozy top accent)
⭐️ Marly Bird Amazon Storefront ⭐️

Video Tutorials

New to a technique? No worries…Marly has video tutorials for every skill in this pattern. Here's what to watch if you need a refresher:

🎥 Long Tail Cast On with Circular Needles…the cast-on method used for the Gerri hat.
🎥 How to Knit…the foundation stitch.
🎥 How to Purl…the second stitch you'll master.
🎥 Yarn Over…creates the eyelets in the lace pattern.
🎥 Knit Two Together (K2tog)…the decrease that shapes the pattern.
🎥 Switching from Circular Needles to DPNs…when your stitches get tight at the crown.
🎥 Adding a Lifeline…your safety net if you make a mistake.
🎥 Tinking (Unraveling One Stitch at a Time)…fixing small mistakes.
🎥 Burying Ends…the finishing touch that makes your hat look polished.

The Gerri Beginner Knit Hat || Pattern Details

Skill Level

Beginner. You should be comfortable with knit, purl, and yarn over stitches. If you've completed a basic hat or scarf, you're ready for the Gerri.

Finished Measurements

[MARLY: verify finished hat circumference and height for each size — example format: Small: 16 inches circumference, 8.5 inches tall; Medium: 17.5 inches circumference, 9 inches tall; Large: 19 inches circumference, 9.5 inches tall]

Gauge

5 stitches and 5 rows = 1 inch in Eyelet Lace and Purl Stitch Pattern. Adjust needle size up or down to achieve this gauge. A slightly loose gauge makes the lace more open and floaty; a tight gauge makes it more structured.

Materials

Yarn: Cascade 220 Superwash (100% superwash wool, 220 yds/100g), 1 ball (Small/Medium) or 2 balls (Large)

Needles: US 8 (5mm) 16-inch circular needle and four US 8 (5mm) double-pointed needles

Notions: Stitch marker, tapestry needle, (optional) blocking wires and Eucalan Wool Wash

Abbreviations

CO — Cast on. Creating the foundation stitches on your needle.

K…Knit. Insert your right needle from left to right, wrap yarn, and pull through.

P…Purl. Insert your right needle from right to left, wrap yarn, and pull through the front.

K2tog…Knit two stitches together as one. This decreases your stitch count by one.

YO — Yarn over. Wrap yarn from front to back over your right needle to create an eyelet.

PM — Place marker. Mark your position in the round to keep track of where each round begins.

St(s)…Stitch(es). The loops of yarn on your needle.

Special Stitches

1×1 Ribbing: Knit one, purl one, repeat. The knit and purl stitches alternate all the way around, creating a stretchy, textured edge.

K2tog (Knit Two Together): Insert your right needle through two stitches on the left needle (from left to right), then knit them together as one stitch. This is your decrease stitch…it removes one stitch from your total count.

Yarn Over (YO): Bring your yarn to the front of your work, then knit the next stitch normally. The yarn wrapped around your right needle creates one new stitch. This is an increase that also creates the eyelet hole.

Design Notes

✨ This hat is worked in the round from the bottom up. Count your stitches after each eyelet row to ensure you haven't accidentally increased or decreased. The stitch count should stay the same throughout the brim and body…only the crown decreases change it.

🪡 When the crown decreases get too snug for your 16-inch circular needle, switch to double-pointed needles. You'll know it's time when stitches bunch up and your circular needle feels cramped.

💡 A lifeline is your best friend in lace. After completing a few rounds of the Eyelet Lace and Purl pattern, run a length of contrasting yarn through all your stitches. If you make a mistake and need to frog back, the lifeline stops your stitches from unraveling past that point.

The Gerri Beginner Knit Hat || Pattern Instructions

Brim

Using the long-tail cast-on method, cast on 80 (88, 96) stitches. Place a stitch marker, join to work in the round, being careful not to twist.

Round 1 and all subsequent brim rounds: *K1, P1, repeat from * around.

Continue in 1×1 ribbing until the piece measures 1½ inches from the cast-on edge.

Body

Eyelet Lace and Purl Stitch Pattern (multiple of 4 sts and 4 rows):

Round 1: Knit all stitches.

Round 2: *K2tog, yo, k2, repeat from * to end. (Stitch count remains the same.)

Round 3: Knit all stitches.

Round 4: *K3, p1, repeat from * to end.

Repeat Rounds 1–4 until the piece measures 5½ (6½, 7½) inches from the cast-on edge, ending on Round 4 of the pattern. Knit one additional round.

Note: Count your stitches after each lace round (Round 2) to ensure your stitch count has remained steady. If you're missing or gaining stitches, check your yarn overs and decreases.

Decrease

Switch to double-pointed needles when the circular needle becomes too loose for your stitches to move comfortably.

Round 1: *K6, K2tog, repeat from * to last st, k1. (70, 77, 84 sts)

Round 2: Knit.

Round 3: *K5, K2tog, repeat from * to last st, k1. (60, 66, 72 sts)

Round 4: Knit.

Round 5: *K4, K2tog, repeat from * to last st, k1. (50, 55, 60 sts)

Round 6: Knit.

Round 7: *K3, K2tog, repeat from * to last st, k1. (40, 44, 48 sts)

Round 8: Knit.

Round 9: *K2, K2tog, repeat from * to last st, k1. (30, 33, 36 sts)

Round 10: Knit.

Round 11: *K1, K2tog, repeat from * to last st, k1. (20, 22, 24 sts)

Round 12: Knit.

Round 13: *K2tog, repeat from * to end. (10, 11, 12 sts)

Finishing

Cut the yarn, leaving a 6-inch tail. Thread the tail onto a tapestry needle. Insert the needle through all remaining stitches and pull tight to close the crown.

Weave in all loose ends on the inside of the hat, using the tapestry needle to guide each tail through nearby stitches. Trim excess yarn.

Optional: Attach a faux fur pom pom to the top using a removable pom pom button for a cozy, playful finish.

Try on your Gerri hat and admire your work! 💛

Save This Pattern on Ravelry

Add Gerri Hat to your Ravelry queue or favorites

More Beginner Knit Hat Patterns You'll Love

Once you've mastered the Gerri, explore these beginner-friendly knit hat patterns:

  • Ribbed Knit Hat…a simple, classic hat perfect for practicing your tension and rhythm
  • Chill Out Winter Fair Isle Hat…ready to add colorwork to your skills
  • Simple Knit Hat Pattern…another beginner classic with endless customize options

Frequently Asked Questions

What skill level is the Gerri Knit Hat pattern?

The Gerri is a true beginner pattern. You should be comfortable with knit, purl, and yarn over stitches…basic skills you typically learn in your first few hours of knitting. The eyelet lace stitch is worked over 4 rounds, so once you understand the pattern, you just repeat it over and over. Perfect for building confidence and learning to read a stitch pattern.

What yarn do I need for the Gerri Knit Hat?

The pattern calls for Cascade 220 Superwash (100% superwash wool, 220 yds per 100g). You'll need 1 ball for Small/Medium sizes, or 2 balls for Large. However, any worsted-weight yarn works perfectly…acrylic, wool, blends, whatever you have in your stash. If you choose a yarn with different yardage, use the yardage guide (220–440 yds depending on size) to judge whether you have enough.

Can I make this hat if I only know knit and purl?

Yes! You'll need to learn one new stitch for this pattern: the yarn over (yo). A yarn over is actually the easiest new stitch to pick up…you just wrap yarn around your needle. YouTube tutorials make it crystal clear, and once you do it three or four times, it becomes automatic. Knit and purl make up 95% of this pattern; the yarn over is the special ingredient that creates the eyelets.

What is eyelet lace knitting?

Eyelet lace is a technique where you create decorative little holes in your knitted fabric by pairing yarn overs (increases) with decreases (like knit 2 together). Every yarn over adds a stitch, and every decrease removes one, so your stitch count stays the same…but you've created a gorgeous pattern of holes. It looks intricate and fancy, but it's actually very straightforward once you understand the rhythm. The Gerri hat teaches you everything you need to know.

Can I add a pom pom to the Gerri hat?

Absolutely! The finishing instructions include an optional pom pom. You can use a removable pom pom button (so you can swap it off for washing) or sew a faux fur pom pom directly to the crown. Some people skip the pom pom entirely and prefer the clean, minimalist look. It's your hat…make it however makes you happy!

Is this pattern available as an ad-free PDF?

Yes! The ad-free PDF version is available on Etsy, Shopify, and Ravelry. The PDF includes all the pattern instructions, a stitch-diagram reference, and links to the video tutorials. You can print it out, take it anywhere, and knit without distractions. This blog post is free, but the PDF version supports the work behind the pattern!

Final Thoughts

The Gerri hat holds a special place in my teaching heart because it's the pattern that taught countless knitters to believe in themselves. It took that magical moment…”wait, I can make LACE?”…and turned it into something beautiful, wearable, and deeply satisfying. Every finished Gerri hat is proof that a beginner's hands can create something that looks like a designer pattern.

If you cast this on, I hope you'll share your finished hat with me. Tag me @marlybird on Instagram or Facebook, use #MMMDI (Marly Made Me Do It), #MarlyBird, or #GerriHat, and I will absolutely gush over your work. Seriously…I love seeing the hats you make. ✨

Happy knitting, bestie. You've got this. 💛

❤️ Your BiCrafty Bestie,
Marly Bird

A cartoon avatar of a person with glasses and a brown bun smiles warmly. Their green shirt and black jacket add a stylish touch, while colorful hearts surround them like loving temperature blankets, stitching together an aura of love and positivity. -Marly Bird

Filed Under: Knitting, Marly Bird Premium Patterns

The All the Hype Striped Knit Cowl

September 8, 2026 By Marly Bird Leave a Comment

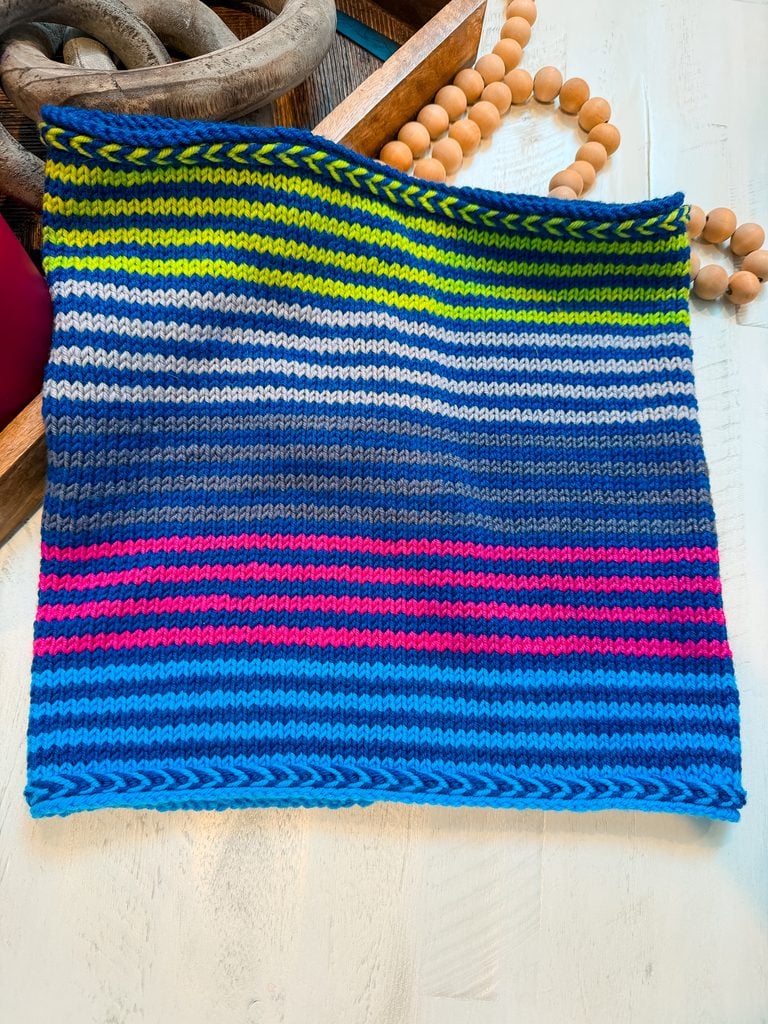
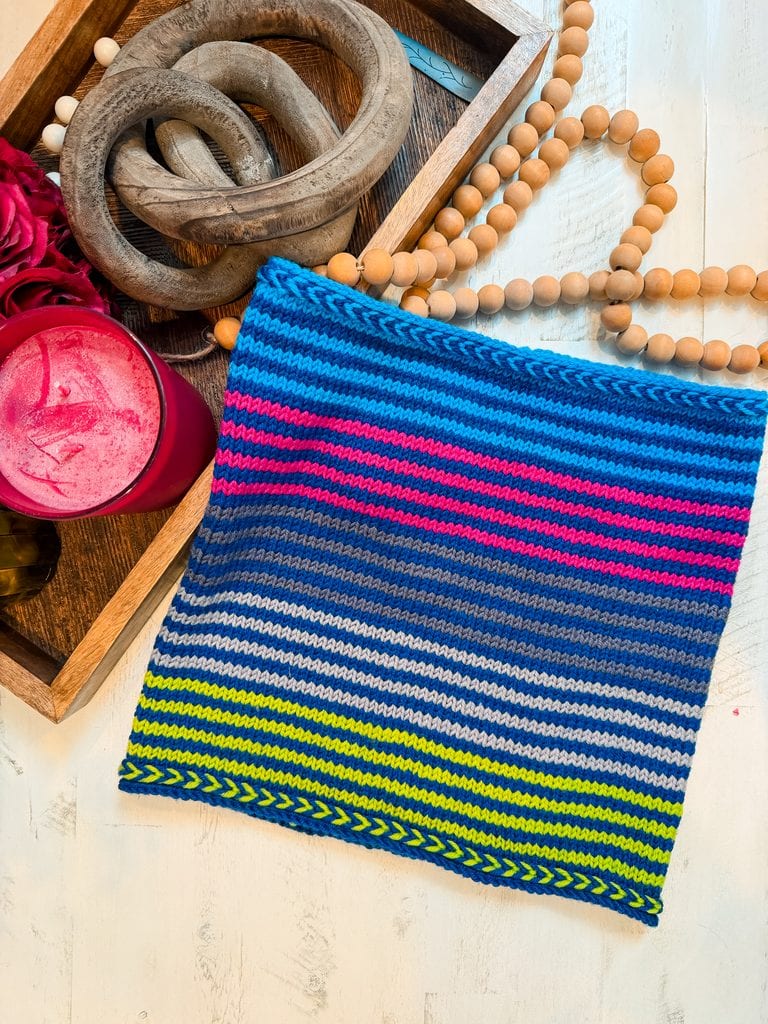
The All the Hype Striped Cowl is a free knit pattern designed by Marly Bird, worked in the round with bold 2-row stripes, a jogless color-join technique, and Latvian braid detailing at the top and bottom edges. It's an easy-level project that measures 30″ around and 13½” tall after blocking, making it a fast, scrap-friendly knit for advanced beginners and beyond.

⚡ Quick Answer:

This free knit cowl pattern uses six colors of worsted weight yarn worked in 2-row stripes, with a Latvian braid at each edge for a polished finish. It's rated Easy, uses about 6 balls total, and knits up in an evening or two once you've got the stripe rhythm down.

Hey, bestie 💛 If you've been following along, you know I'm a sucker for a good stash-busting stripe project… and this one might be my favorite yet. The cowls and snoods in my pattern library tend to be quick, satisfying knits, and this one adds a little extra flair with a technique I'm genuinely obsessed with: the Latvian braid. 🧶

🧶 Affiliate Disclosure: This post contains affiliate links. If you purchase through them I may earn a small commission at no extra cost to you… and it helps support free patterns and content from my yarn-loving heart 💛 See my privacy policy here.
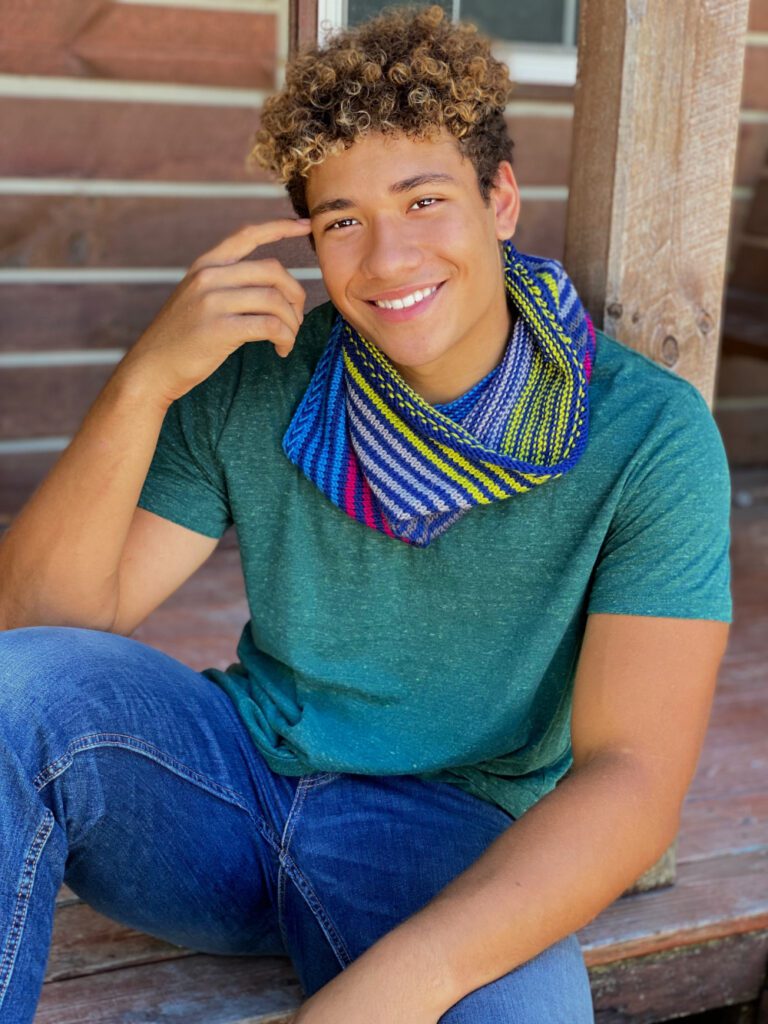
Bright knit cowl scarf with blue, yellow, pink, and white stripes drapes over a young man's teal tee and jeans.

Jump to the pattern →


💖 Why You'll Love This Pattern

🧶 It's a true stash project. You only need 2 balls of your main color plus a single ball each of five accent colors… perfect for using up odds and ends from your stash.

✨ The Latvian braid makes it feel special. This little detail at the top and bottom edges adds texture and visual interest without adding real difficulty… it just takes a little patience and a video to walk you through it.

🎯 It teaches a genuinely useful skill. The jogless color-join technique in this pattern is one you'll use again and again anytime you're striping in the round… once you learn it here, you'll never look at a striped hat or cowl the same way.

This is your pattern if you love bold color, want to use up leftover worsted weight yarn, and are ready to learn one or two new techniques without committing to a whole sweater. You'll come away knowing how to join colors invisibly in the round and how to work a Latvian braid… two skills that show up constantly in colorwork knitting.


🧵 Quick Pattern Overview

🧶 Easy 📐 One Size 🪡 US 8 (5mm) Circular 🧶 Worsted Weight 🌈 6 Colors · 2-Row Stripes 🪢 Latvian Braid Edges

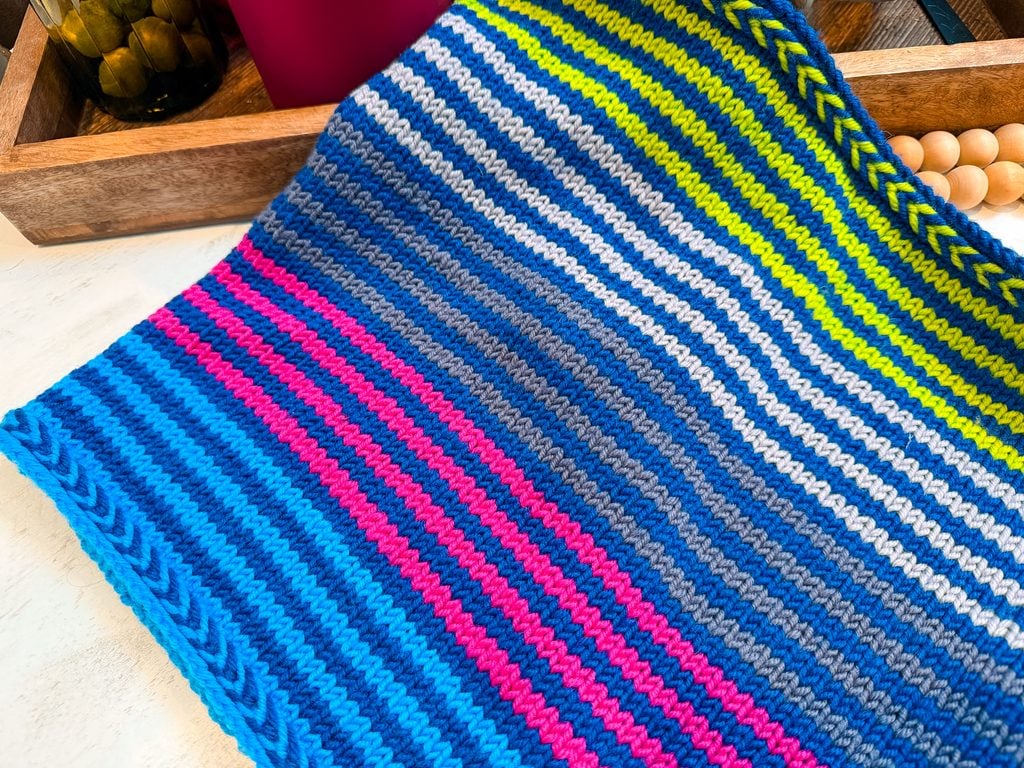
🎨 Six colors, worked in bold 2-row stripes… two rounds of an accent color, two rounds of your main color, repeated all the way around.

🔄 Worked seamlessly in the round on a 24″ circular needle, so there's no seaming when you're done.

🪢 Latvian braid edges bookend the striped body, adding a twisted, textured detail at the very top and bottom of the cowl.

📏 One size fits most adults, finishing at 30″ in circumference and 13½” tall after blocking.


⭐ Love the Pattern but Want an Ad-Free PDF?

The full pattern is free right here on the blog… always will be! But if you'd rather have a clean, printable, distraction-free copy to knit from, the ad-free PDF is available on Ravelry.

Buy on Ravelry

Want the next free pattern delivered straight to your inbox? Pop your email in below and I'll send you my latest designs as soon as they're live. 💌

Join our Newsletter

Get Free Crochet & Knitting
Pattern Links & Coupons!

Hand-drawn bird with curling, detailed feathers and pink accents; cheerful pose showcases fine line and texture work.
>> Become An Insider <<
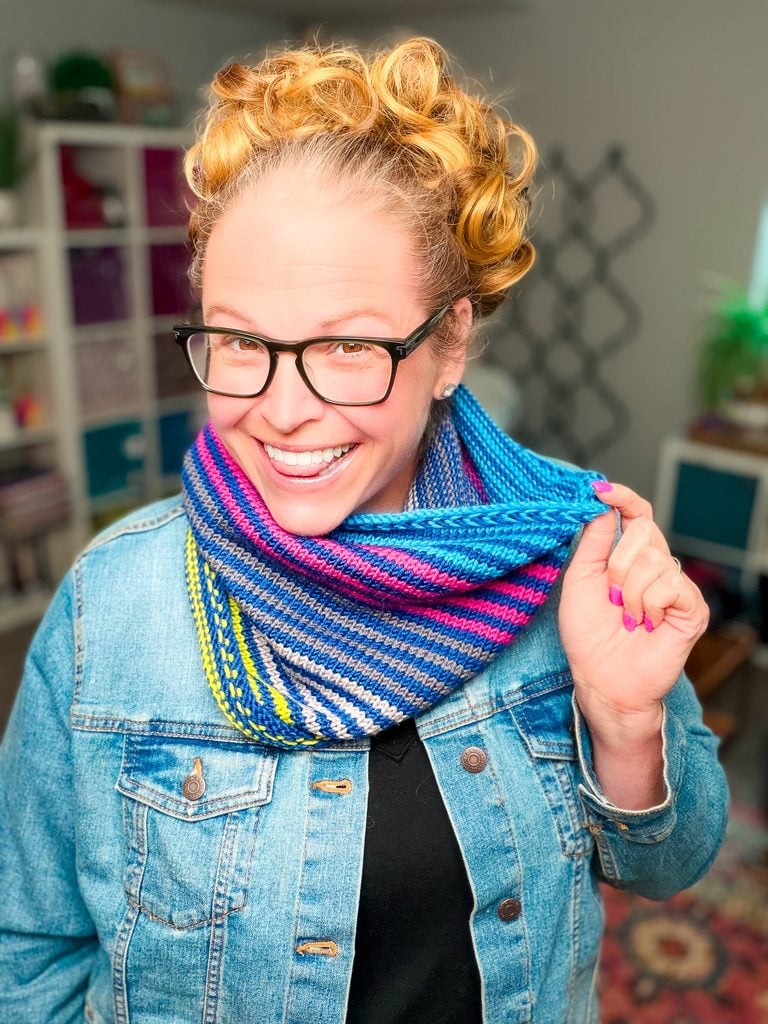
A woman with glasses and curly hair models a colorful crocheted scarf, showing textured stitches and vibrant yarn.

🎨 How to Avoid a Jog in Striped Knitting

So here's the thing about knitting stripes in the round… every time you switch colors, the first stitch of the new round sits slightly higher than the last stitch of the old one. That little stair-step is called a “jog,” and it's the thing that makes hand-knit stripes look less polished than they could.

This pattern uses a jogless join to solve that… a simple adjustment at the color change that lines the stripes up cleanly all the way around. Once you've done it a few times, it becomes second nature, and you'll find yourself using it on every striped project from here on out.

✨ Designer Tip: Before working the Latvian braid rows, thread a lifeline through your live stitches — use a length of smooth waste yarn or dental floss. If a braid row gets twisted in the wrong direction, you'll have a safe place to rip back to without losing everything.

🧶 Yarn & Materials

The sample was knit in Red Heart Chic Sheep by Marly Bird, a 100% merino wool that's since been discontinued. I've listed close substitutes below so you can still make this cowl with a yarn you can actually get your hands on.

You'll need 2 balls of your main color (A) and 1 ball each of five accent colors (B–F), all in worsted weight (CYCA #4).

✨ Designer Tip: Because this is such a scrap-friendly pattern, it's a great excuse to raid your stash for five accent colors that don't obviously “match.” The bold 2-row stripe sequence somehow makes almost any combination work.
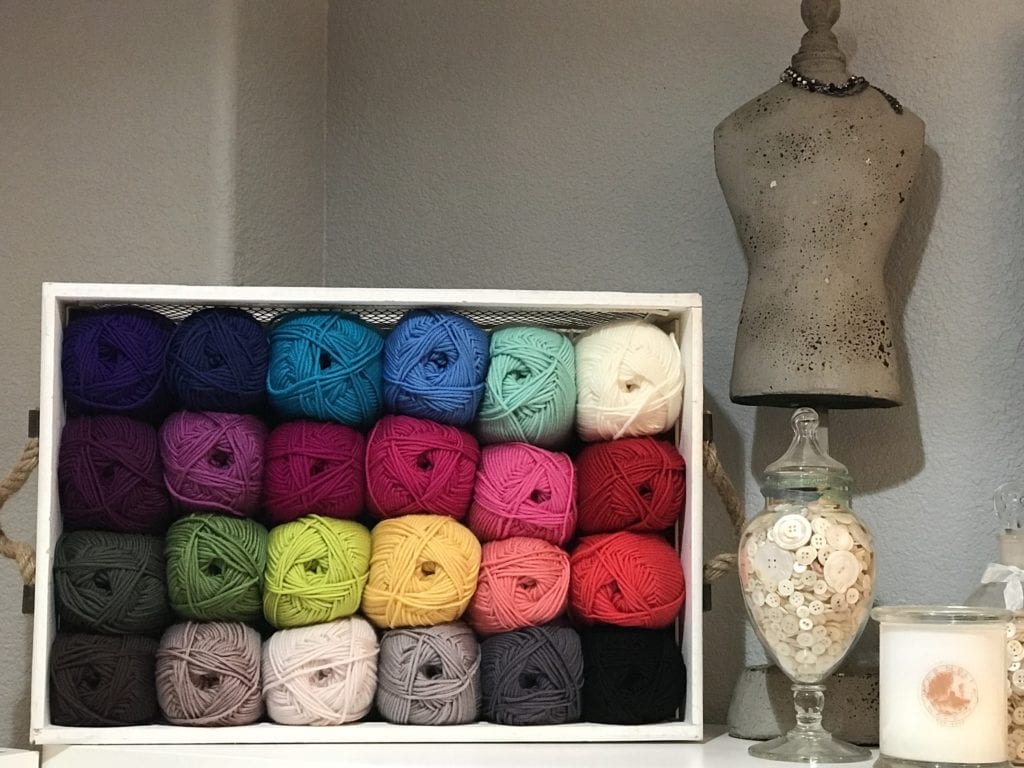
Colorful yarn balls in a white box, jar of buttons, candle, and dress form displayed on white shelf for crafting organization.

Yarn Alternatives

Any of these worsted weight wools or wool blends will work beautifully in place of Chic Sheep:

  • Malabrigo Rios
  • Berroco Ultra Wool
  • KnitPicks Swish Worsted
  • Cascade 220 Superwash
  • Madelinetosh Tosh Vintage

Notions

  • Stitch marker
  • Tapestry needle (for weaving in ends)
⭐️ Marly Bird Amazon Storefront ⭐️

🎬 Video Tutorials

If you are a visual learner, I've got you covered on the two techniques that make this cowl special:

👉 Watch my full Latvian Braid tutorial before you start the top and bottom edges… it's much easier to follow along with the video than words alone.

👉 Watch how to knit a Latvian braid before you start the top and bottom edges… it's much easier to follow along with the video than words alone.

👉 Watch how to knit jogless stripes to see the color-join technique in action before you start the striped body.

And when it's time to finish up, here's my full walkthrough on weaving in ends so they never pop back out:


All the Hype Striped Cowl || Pattern Details

Skill Level

Easy

Measurements

To Fit Size: One size fits most adults.

Finished Measurements: Cowl measures 30″ [76 cm] in circumference and 13½” [34 cm] in height when laid flat, after blocking.

Gauge

20 sts = 4″ (10 cm) in Stockinette st.

Materials

Yarn: Red Heart Chic Sheep by Marly Bird (100% Merino Wool, 3½ oz / 100 g, 200 yds / 183 m, CYCA #4 medium)… see Yarn Alternatives above for substitutes.

  • 2 balls: VIP (A)
  • 1 ball each: Suite (B), Dragon Fruit (C), Platinum (D), Sterling (E), Green Tea (F)

Needles: US 8 [5 mm] 24″ (61 cm) circular needle, or size needed for gauge.

Notions: Stitch marker, tapestry needle for weaving in the ends (see Video Tutorials above).

Abbreviations

  • K – knit
  • P – purl
  • Sts – stitch(es)

Notes

This is a true scrap project… I grabbed a couple balls of the VIP Chic Sheep yarn and scraps of the other colors and just decided I wanted a simple striped knit project.

I love the look of the Latvian braid so I added it to the start and the finish. I think it makes this project just that little something special. I hope you love it too.

GROW

To Unlock Exclusive Subscriber Content click the Box below and join for free by simply adding your email and creating a password! If you are having troubles, clear your cache or reset your password or login to the Grow Publisher Portal.

>> Learn More About Grow Here <<

I'm thrilled to share this amazing pattern with you, many patterns on my blog are absolutely free! I kindly request that you don't copy and paste or distribute this pattern. Prefer an ad-free experience? Buy a digital PDF pattern for a small fee from one of my online stores for a seamless crafting journey. 

I appreciate your support and readership. You are the reason I can keep doing what I love and sharing it with others. So, thank you from the bottom of my yarn-loving heart! Disclosure: This post contains affiliate links, meaning I get a commission if you decide to make a purchase through my links at no cost to you.


All the Hype Striped Cowl || Pattern Instructions

Cast On & Set-Up

With color A, cast on 120 sts.

Join round being careful to not twist cast-on edge, and place a marker just before first st to mark beginning of round.

Round 1 (RS): Knit.

Latvian Braid (Bottom Edge)

(Also see Video Tutorials above.)

Round 2: *K1 with color A, k1 with color B; repeat from * around.

Bring both yarns between the needles to the front.

Round 3: P1 with color A, *bring color B under color A and p1 with B, bring color A under color B and p1 with A; repeat from * around. This twists the yarn as you work, but don't take the time to untwist the strands, as they will be untwisted after Round 4.

Round 4: Bring color A under color B and p1 with A, then switch the direction of the twist, *bring color B over color A and p1 with B, bring color A over color B and p1 with A; repeat from * around.

Bring both yarns between the needles to the back.

Body

Work 40 rounds in Stockinette st (knit every round) in the following color sequence:

2 rounds with B, 2 rounds with A, 2 rounds with B, 2 rounds with A

2 rounds with C, 2 rounds with A, 2 rounds with C, 2 rounds with A

2 rounds with D, 2 rounds with A, 2 rounds with D, 2 rounds with A

2 rounds with E, 2 rounds with A, 2 rounds with E, 2 rounds with A

2 rounds with F, 2 rounds with A, 2 rounds with F, 2 rounds with A

Latvian Braid (Top Edge) & Bind Off

Next 3 rounds: Repeat Rounds 2–4 from the Bottom Edge Latvian Braid, above.

Final round: Knit around with color A only.

Bind off all sts loosely.

Finishing

Block cowl to measurements.

Weave in all loose ends (see Video Tutorials above).


🧺 Blocking Tips for the All the Hype Striped Cowl

Don't skip this step… blocking is what makes the Latvian braid rows relax and lie flat, opens up the fabric for better drape, and brings the finished measurements to their full size. It's a quick process for a cowl this size.

What you'll need: A basin of cool water, a splash of Eucalan wool wash, a clean towel, and a flat surface to dry on. Blocking mats help if you want to pin it to measurements.

How to wet block this cowl: Submerge it in cool water with a capful of wool wash and let it soak for about 15 minutes. Gently squeeze out excess water (no wringing!), roll it in a towel to remove more moisture, then lay flat and shape to 30″ [76 cm] circumference and 13½” [34 cm] height. Let it dry completely before moving it — usually 24 hours, or less if you have good air circulation.

✨ Designer Tip: The Latvian braid rows can look a little stiff or puckered before blocking… don't panic! After a good soak they relax into that beautiful raised band you see in the photos. Blocking is the finishing touch that makes the whole thing come together.

Favorite This Pattern on Ravelry - Marly Bird

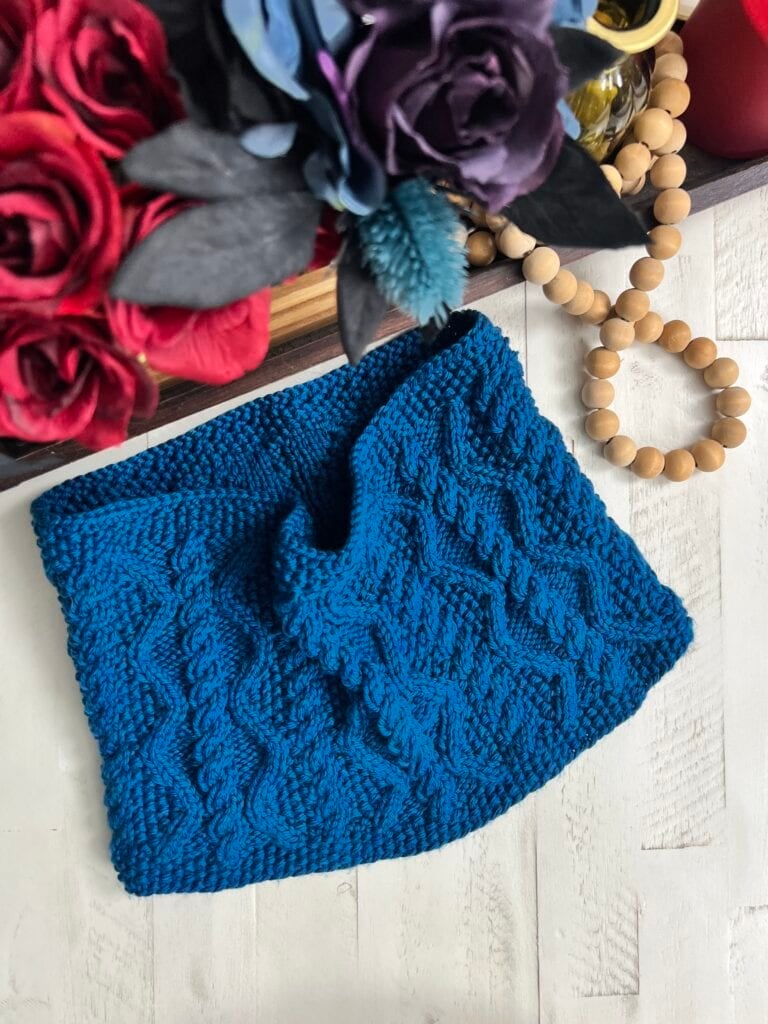
Blue cable knit cowl with wavy texture displayed on white wood, accented by a beaded bracelet and fabric bouquet.
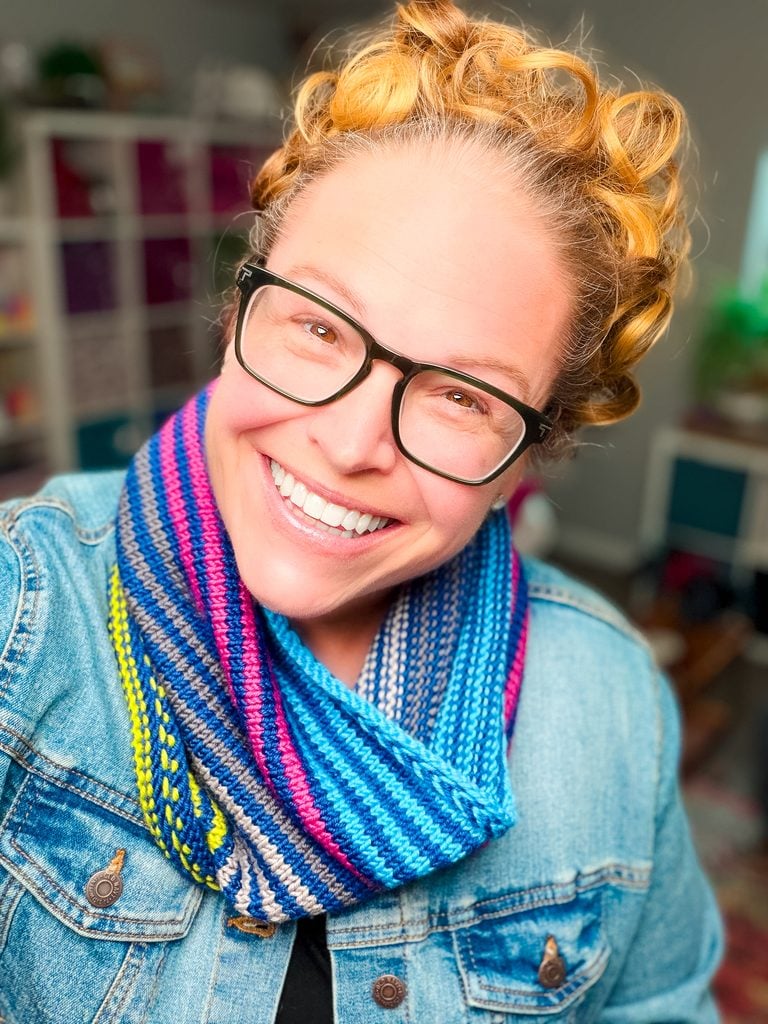
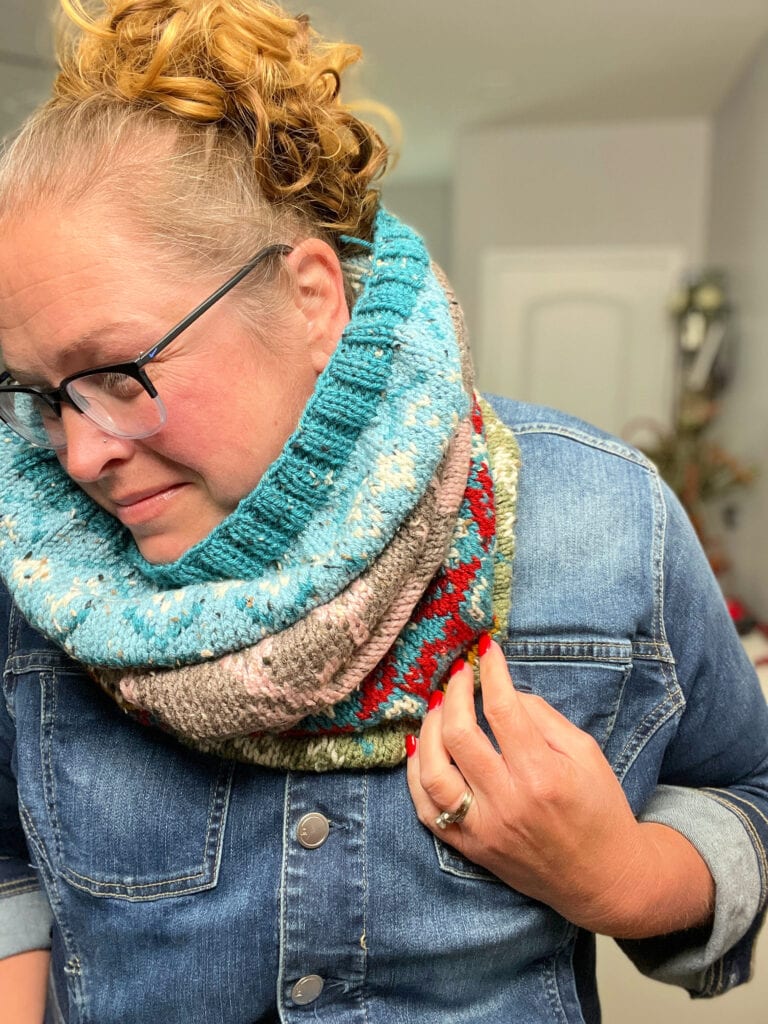
Woman wearing a blue denim jacket displays a colorful, textured crochet scarf wrapped around her neck in a softly lit craft room.
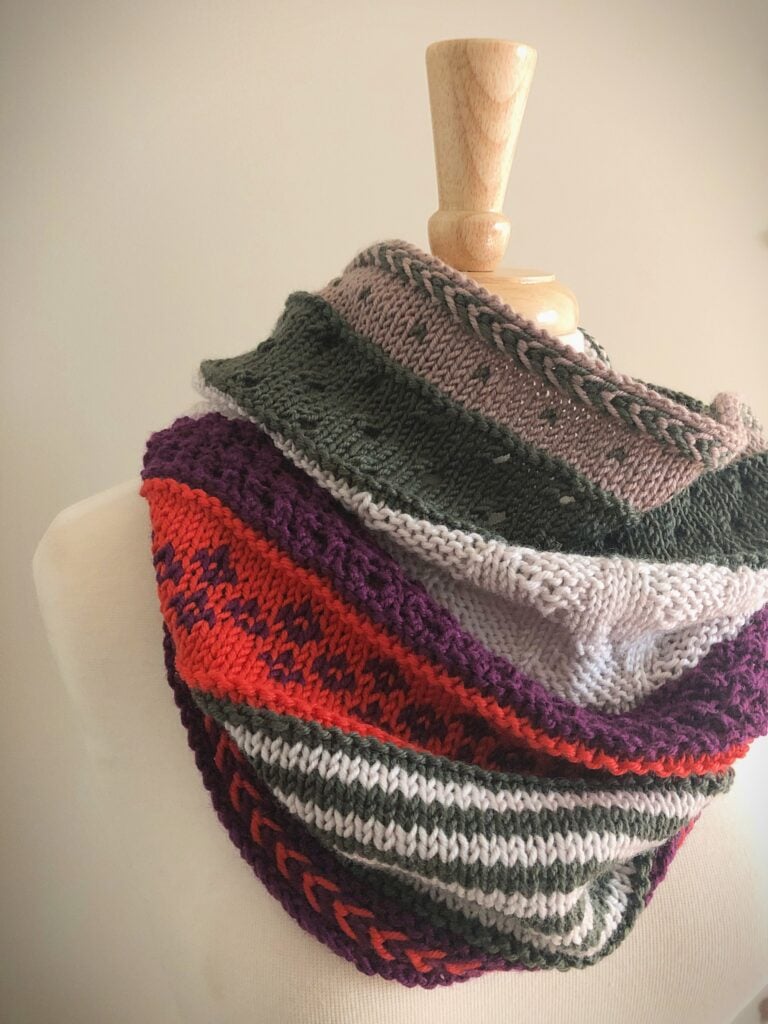
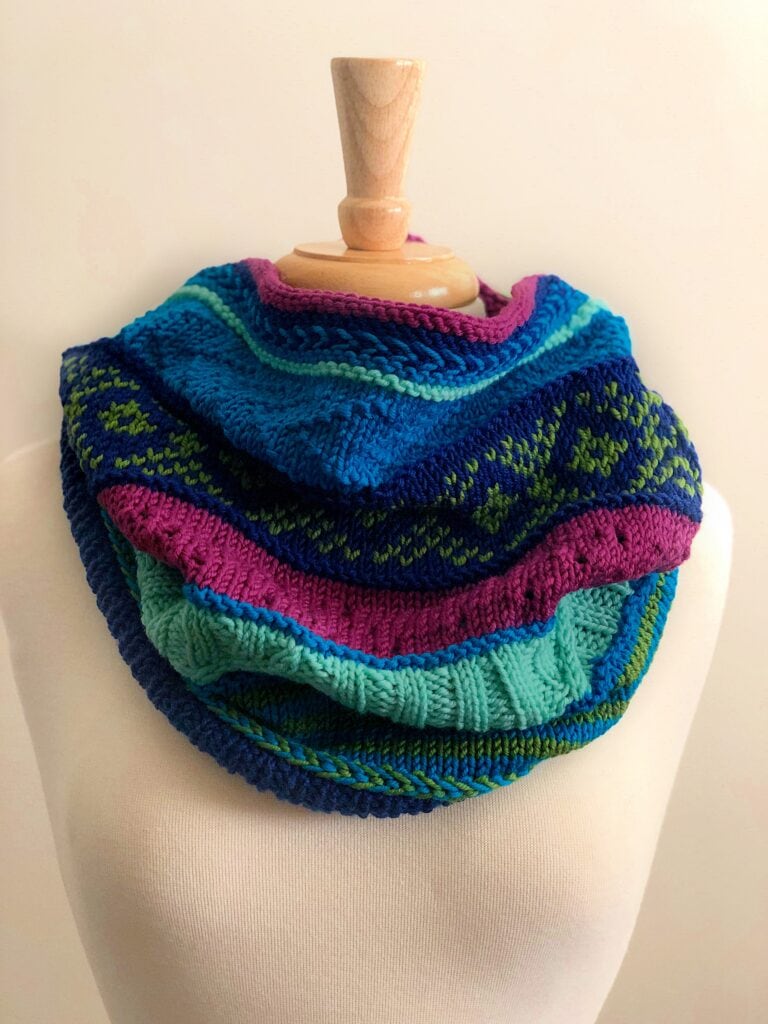
A knit cowl with blue, teal, green, and purple stripes and patterns drapes loosely around a mannequin’s neck.
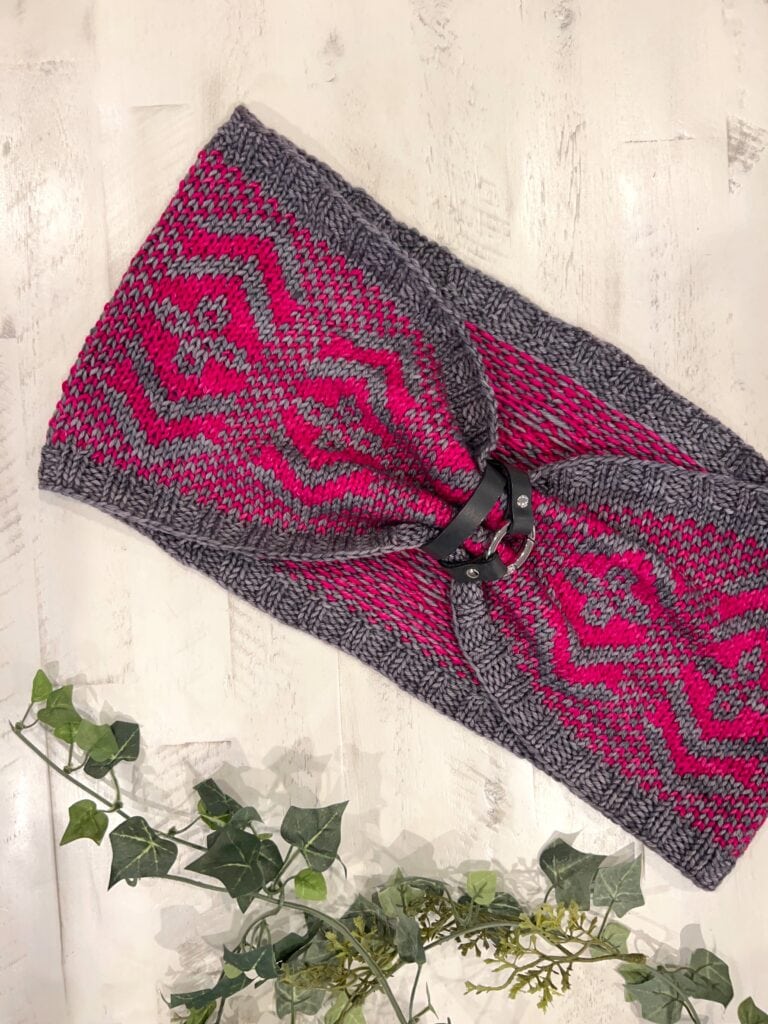
Pink and gray geometric knit cowl, closed with a black leather ring, displayed on white wood with green ivy.
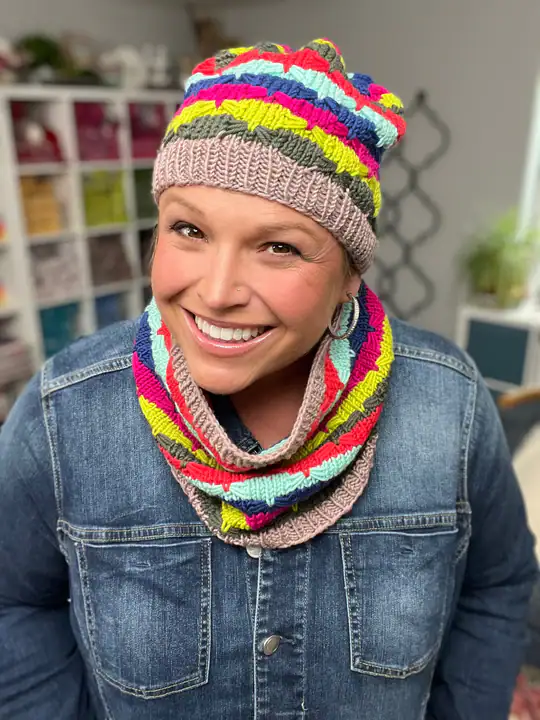
Woman models a striped knit hat and matching cowl; both show detailed stitchwork. Yarn shelves fill the background.

🧣 More Knit Cowl Patterns You'll Love

If you loved the stripes and stashbusting vibe of this one, you'll want to check out a few more of my favorite knit cowls:

🧣 Fairhope Cable Knit Cowl — Bold, braided cable texture that makes a serious statement. A great next step after this one.

🧣 Game Changer Knit Cowl — A fun, textured stitch-sampler style project that works up beautifully in one skein.

🧣 Evermore Knit Cowl — a gorgeous stranded colorwork cowl that takes your knitting to the next level… perfect for when you're ready to play with two colors at once.

🧣 Dancer's Delight Knit Cowl/Snood — a cozy cowl-snood hybrid with beautiful texture… it doubles as a hood which makes it endlessly practical for cold weather.

🧣 Game Day Knit Cowl — a textured one-skein cowl that works up fast and makes an impressive gift. Great for when you want beautiful stitch detail without a long commitment.

🧣 Afternoon Delight Knit Hat and Cowl — a quick matching hat and cowl set that makes the perfect gift… works up fast in worsted weight and looks like you spent way more time on it than you did.


❓ Frequently Asked Questions

What is a Latvian braid in knitting?

So here's the thing… a Latvian braid is a decorative two-color technique worked by purling with two strands and twisting them in a specific direction each round. It creates a raised, braided-looking band that's traditionally used as an edge finish on Latvian mittens, and it works beautifully on a cowl too.

Can I use a different yarn than Chic Sheep for this cowl?

Yes! Chic Sheep has since been discontinued, but any worsted weight wool or wool blend that gets 20 sts = 4″ in stockinette will work. Check the Yarn Alternatives section above for my top picks.

How much yarn do I need for a striped cowl like this?

Honestly, not much! This pattern uses 2 balls of your main color and just 1 ball each of five accent colors, all worsted weight. It's a great project for using up leftover skeins from your stash.

Is this cowl pattern beginner-friendly?

This one's rated Easy, so it's great for advanced beginners who are comfortable knitting in the round. If you've never worked a Latvian braid before, the video tutorial above walks you through it step by step.

How do I avoid a jog when knitting stripes in the round?

Great question! This pattern teaches a jogless join right in the instructions, and I've also linked a video tutorial above so you can see it in action before you start your own stripes.

Where can I buy the ad-free PDF for this pattern?

The ad-free PDF is available on Ravelry right now. The free version here on the blog has everything you need to make the cowl… the PDF is just a clean, printable option if you'd rather knit from that.


💛 Final Thoughts

The All the Hype Striped Cowl really is as fun to knit as its name suggests… bold color, a satisfying rhythm once you get into the stripe sequence, and a little Latvian braid magic at each edge. Grab your stash and get those needles moving!

If you cast it on, please please please share your progress… tag me @marlybird on Instagram or Facebook and use #MMMDI (Marly Made Me Do It), #MarlyBird, or #AllTheHypeCowl so I can see it. 💛

❤️ Your BiCrafty Bestie,
Marly Bird

A cartoon avatar of a person with glasses and a brown bun smiles warmly. Their green shirt and black jacket add a stylish touch, while colorful hearts surround them like loving temperature blankets, stitching together an aura of love and positivity. -Marly Bird

Filed Under: Free Patterns, Knitting, Pattern

🎄 25 Days of Christmas in July: Crochet & Knit Holiday Patterns🎄

July 25, 2026 By Marly Bird 5 Comments

Can you believe it's time to start talking Christmas again? Okay, maybe the tree isn't up just yet… but that doesn't mean we can't get a head start on the coziest, cutest, and craftiest season of the year!


Welcome to 25 Days of Christmas in July 2026 — a festive countdown packed with holiday-themed crochet and knitting patterns for crafters of every skill level. Whether you're a beginner or a seasoned holiday stitcher, this is your go-to guide for handmade holiday inspiration!

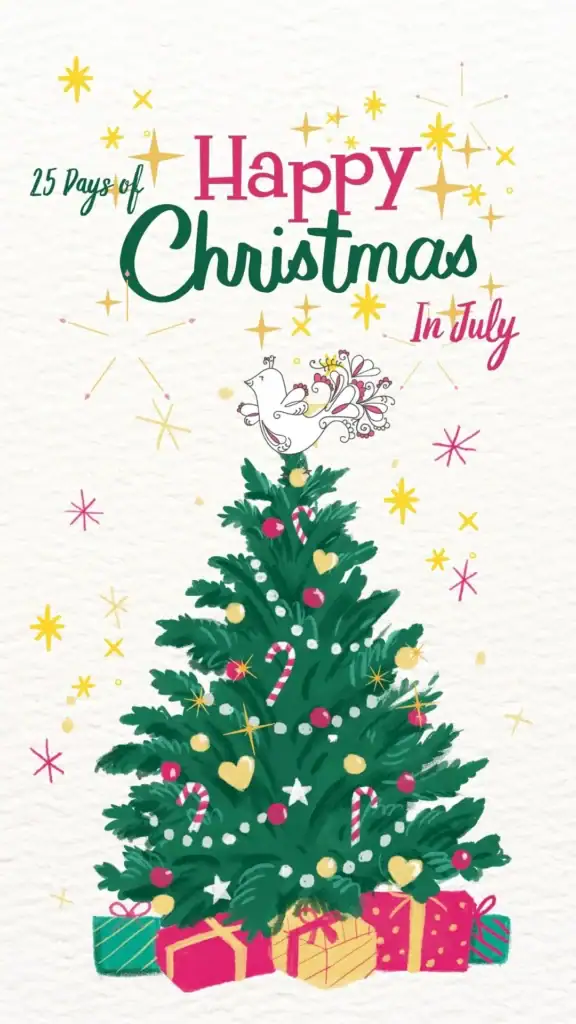
Illustrated Christmas tree with ornaments, candy canes, and gifts. Text reads: 25 Days of Christmas in July — the ultimate Christmas in July event! — Marly Bird
🎅 ❄ 🎄 ❄ 🎁

Ho Ho Ho! Only

—
Days
—
Hours
—
Mins
—
Secs

Until Christmas Morning! 🎄

🤴 Start those handmade gifts now — Santa's watching! 🎅


🎄 What Is Christmas in July?

Christmas in July is the perfect time to beat the heat and your gift-making deadlines. From Christmas stockings and tree ornaments to festive garlands and holiday wearables, we're sharing daily pattern roundups to help you create a handmade holiday... without the last-minute stress.

Each day from July 6th through July 30th, a new merry theme drops — packed with free knit and crochet patterns, hand-picked just for you. Think of it as your one-stop jolly shop for all things holiday crafting!

🛷 Psst... This year we have something extra special! ✨

The Sleigh the Holiday Make-Along is happening July 25–30 — we're stitching up handmade ornaments together! Knit and crochet options for every skill level, scrap-friendly, and 100% festive fun. 🎄

👇 Sign up using the form below to get the supply list delivered to your inbox!

🧶 Why Join the Fun?

  • Get a head start on handmade Christmas gifts (before the holiday rush!)
  • Stock up your craft fair booth with best-selling holiday makes
  • Discover brand new free knitting and crochet patterns every single day
  • Find inspiration in 25 themed daily roundups — both knit AND crochet 🎉
  • Celebrate with a warm, creative community of crafters just like you!

Whether you're into quick ornaments, cozy slippers, adorable amigurumi snowmen, or a full holiday table spread — there's something magical waiting for you every single day.


🎄 Free Ornament Patterns — Live Now!

Two free ornament patterns just dropped as part of the Sleigh the Holiday 2026 Make-Along. Click an image to grab your free pattern!

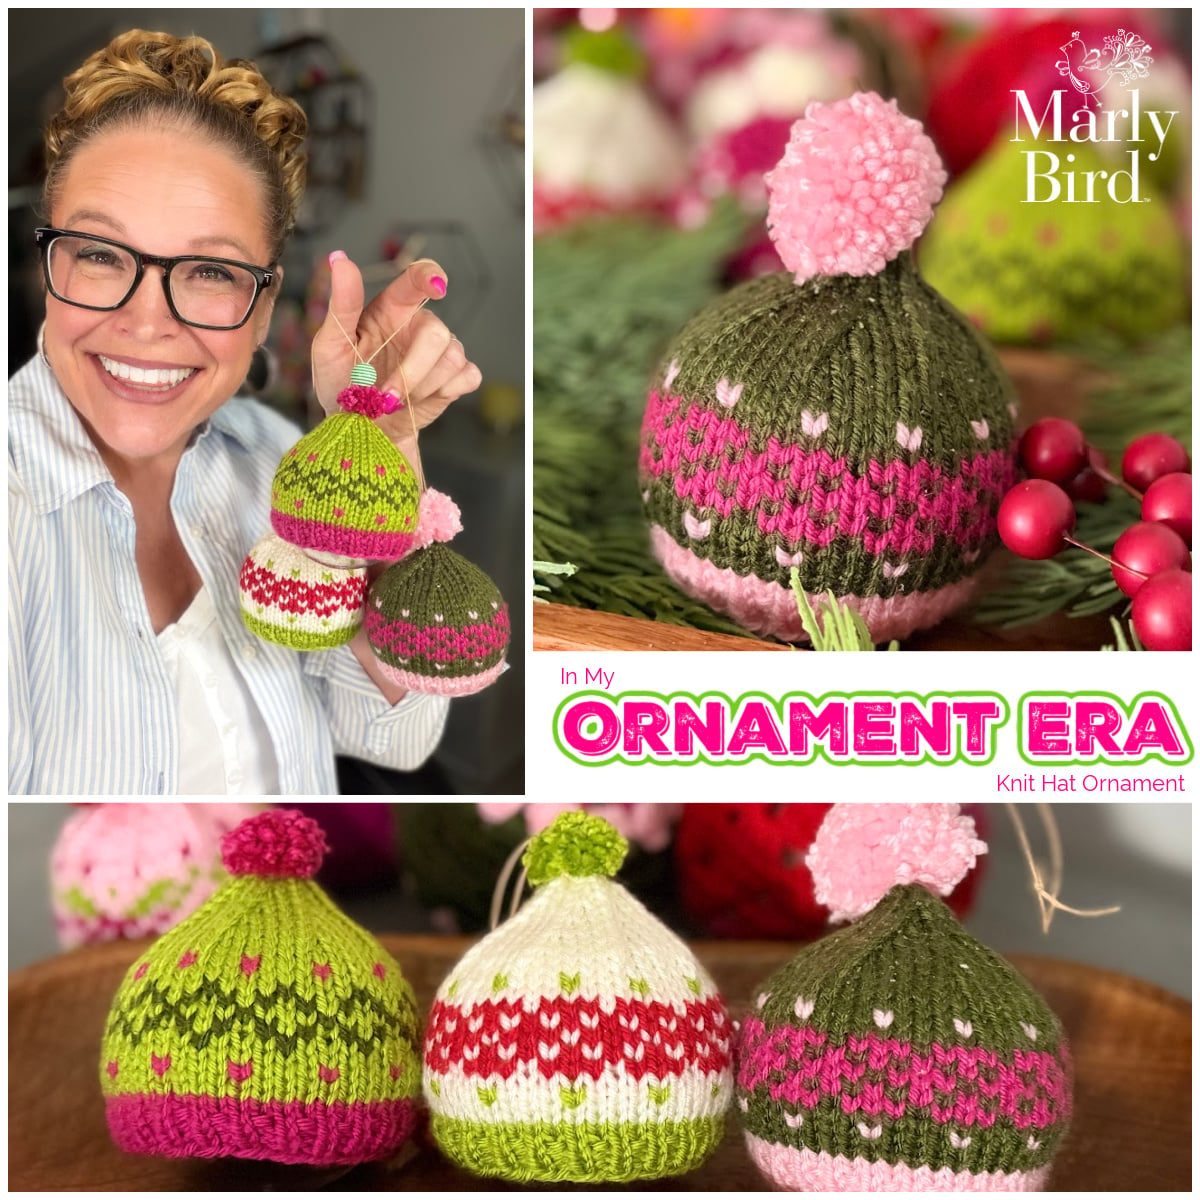
In My Ornament Era — Free Fair Isle Knit Ornament Pattern by Marly Bird
In My Ornament Era →
Free Fair Isle Knit Ornament
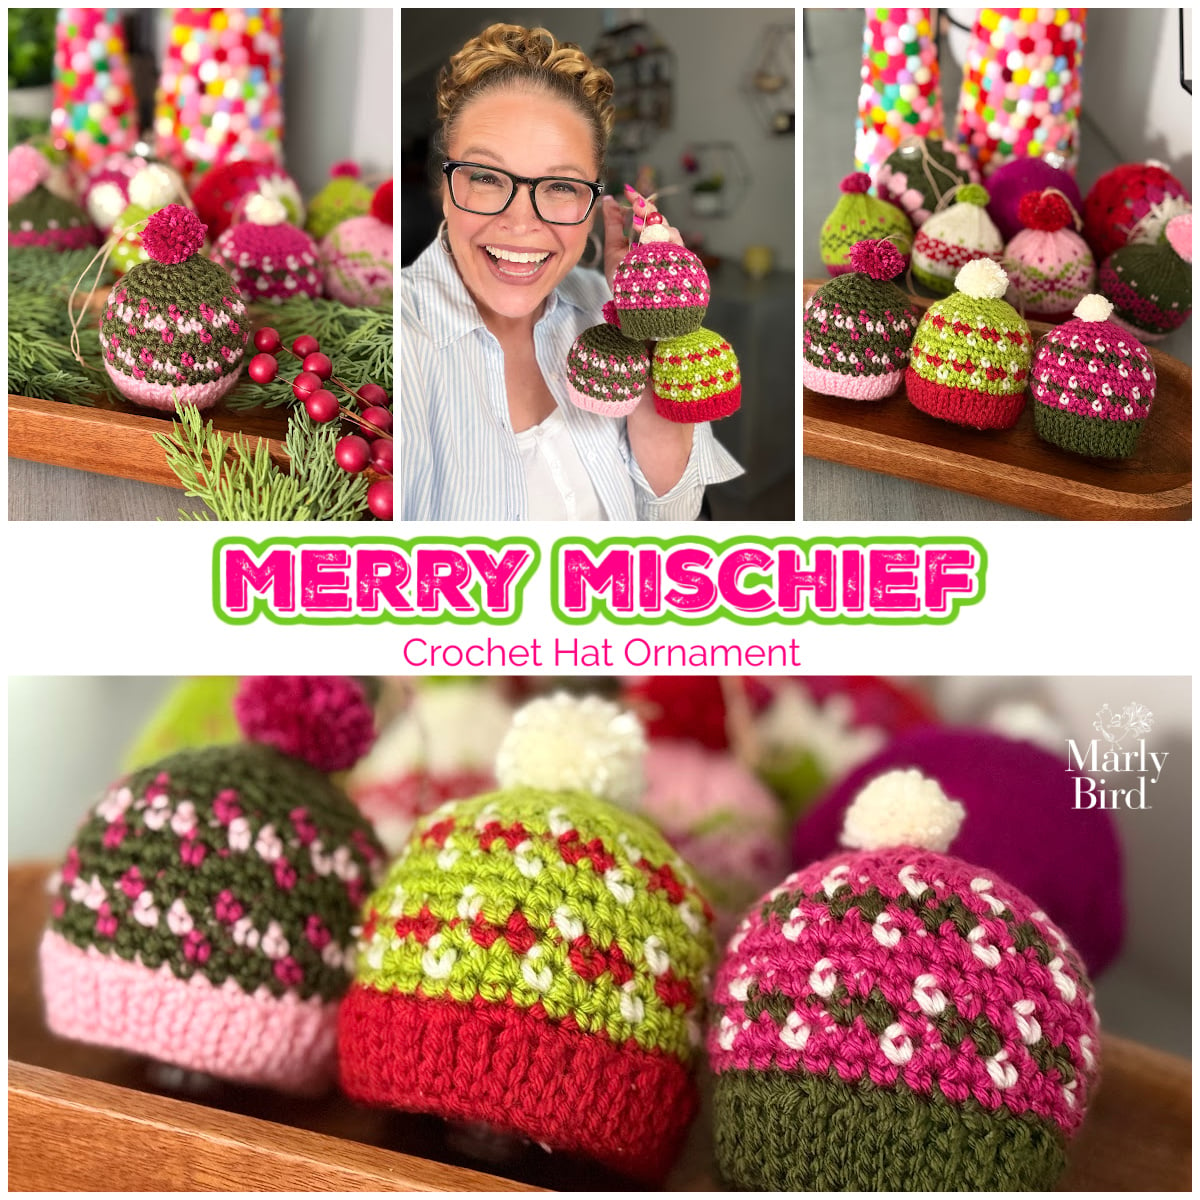
Merry Mischief — Free Crochet Hat Ornament Pattern by Robyn Chachula for Marly Bird
Merry Mischief →
Free Crochet Colorwork Ornament

🛷 Sleigh the Holiday Make-Along — July 25–30, 2026 🎄

Tiny Stitches. Big Holiday Cheer. ✨

It's back, baby... and this year, we're going small in size but BIG on holiday cheer! 🎁 Say hello to the Sleigh the Holiday Make-Along — our fabulously festive Christmas in July event where we'll be stitching up handmade ornaments full of charm, personality, and yarny goodness.

These are not your basic, boring holiday bulbs... think fun shapes, cozy textures, colorwork moments, embroidery details, stuffed cuties, flat favorites, and maybe even a cable or two — because we like our ornaments with a little extra sass. ✨

And yes... we've got both knit AND crochet ornaments, because we are nothing if not BiCrafty Besties around here. 💖

🎄 This Year's Make-Along Includes...

  • 🎄 1 free knit ornament pattern — available right here on the Marly Bird website
  • 🎄 1 free crochet ornament pattern — available right here on the Marly Bird website
  • 🎄 More VIP ornament patterns inside the Marly Bird House VIP Experience
  • 🎄 Instructional video support to help you every stitch of the way
  • 🎄 A festive community experience inside Marly's Minions: Marly Bird BiCrafty Community on Facebook
  • 🎄 Scrap-friendly projects — perfect for using up those little bits of yarn we all have tucked away 🧵

🗓 Event dates: July 25–30, 2026
📋 Supply list + details drop: July 21 — so you'll have time to gather your yarn, hooks, needles, stuffing, ornament hooks, ribbon, and whatever festive little extras you want to use to make your ornaments shine
🏷 Hashtags: #SleighTheHoliday and #MMMDI

Whether you're newer to knit or crochet, or you've been stitching for years, this is the perfect little holiday project party. We'll have a mix of beginner-friendly, advanced beginner, and intermediate projects — plus video tutorials and step-by-step support so I truly believe you can make these. 🙌

And let's be honest... in the economy we're living in, a scrap yarn project is basically self-care. Use what you have, make something adorable, and then feel completely justified buying more yarn for the next big thing. That's just smart crafting. 😉

✨ Want the Full Ornament Collection? Upgrade to VIP! ✨

Get Crochet VIP - Start Your Crochet Ornament Collection for Sleigh the Holiday 2026
Get Knitting VIP - Start Your Knitting Ornament Collection for Sleigh the Holiday 2026

👇 Sign up using the newsletter form below — it's free to join! You'll get the supply list + all event updates delivered straight to your inbox. 💌


📅 The Full 25-Day Lineup

✨ Daily Pattern Roundups: July 6–30, 2026
🎁 Knit + Crochet Projects: Ornaments, Garlands, Gifts, Stockings, Holiday Home Décor, and more
🎄 Perfect for: Holiday markets, gift-giving, or just stitching up seasonal joy

So grab your favorite iced peppermint mocha (because... July 🤷), cue up that holiday playlist, and get ready to stitch your way through the most wonderful time of the summer.

👉 Check back here daily from July 6th through July 30th to grab that day's pattern roundup!

🎄 July 6 — Day 1: Christmas Garland

🎄 July 7 — Day 2: Crochet Christmas Blankets

🎄 July 8 — Day 3: Christmas Tree Skirts

🎄 July 9 — Day 4: Holiday Pillow Covers

🎄 July 10 — Day 5: Christmas Tree Ornaments 🛷 Sleigh the Holiday Make-Along — sign up above!

🎄 July 11 — Day 6: Christmas Hats (Knit and Crochet) 🎄

🎄 July 12 — Day 7: Crochet Christmas Stockings 🧦 (Don't miss the Merry Stitchmas Stockings Make-Along!)

🎄 July 13 — Day 8: Holiday Sweaters & Vests

🎄 July 14 — Day 9: Holiday Fingerless Mittens & Gloves

🎄 July 15 — Day 10: Holiday Slippers & Boot Cuffs

🎄 July 16 — Day 11: Handmade Holiday Décor

🎄 July 17 — Day 12: Festive Gnome Patterns

🎄 July 18 — Day 13: Christmas Amigurumi (you gotta see these!)

🎄 July 19 — Day 14: Christmas Bookmarks, Book Sleeves, & Reading Pillows

🎄 July 20 — Day 15: Holiday Coasters & Mug Rugs

🎄 July 21 — Day 16: Holiday Wine Cozies

🎄 July 22 — Day 17: Festive Table Runners

🎄 July 23 — Day 18: Festive Holiday Table

🎄 July 24 — Day 19: Mini Wreaths & Christmas Trees

🎄 July 25 — Day 20: Advent Calendars

🎄 July 26 — Day 21: Holiday Gift Card Holders

🎄 July 27 — Day 22: Holiday Mug Cozies

🎄 July 28 — Day 23: Mini Christmas Tree Ornaments

🎄 July 29 — Day 24: Holiday Gift Tags & Toppers

🎄 July 30 — Day 25: Holiday Earwarmers & Headbands 🎉


Frequently Asked Questions

What is 25 Days of Christmas in July?

So here's the thing... it's the perfect time to beat the summer heat AND get a head start on your holiday crafting! Every day from July 6th through July 30th, a new themed roundup of free knit and crochet patterns drops right here. 25 days, 25 holiday topics, hundreds of free patterns!

Why should I join the Christmas in July fun?

Honestly... you'll get a head start on all those handmade Christmas gifts, discover new free knitting and crochet patterns every single day, and find tons of inspiration with themed daily roundups. Plus, it's a super fun way to celebrate the season with a creative community!

When does the 2026 Christmas in July event happen?

The daily pattern roundups run from July 6th through July 30th, 2026 — that's 25 full days of holiday crafting goodness! Bookmark this page and check back daily for each new roundup.

What kind of patterns can I expect to find?

Oh, all sorts of goodies! We've got everything from Christmas stockings and tree ornaments to festive garlands, cozy slippers, holiday home décor, gnomes, amigurumi, table runners, and more. There's truly something magical for everyone, whether you love quick one-evening projects or more involved makes.

Is this event for both knitters and crocheters?

Absolutely! Every single roundup features BOTH knit AND crochet options — that's the BiCrafty way! Whether you're a knitter, a crocheter, or a proud BiCrafty beast who does both, there's something here for you every day.

How do I follow along?

Great question! Bookmark this page and check back daily. You can also subscribe to the newsletter (sign up below!) to get each day's roundup delivered straight to your inbox every morning at 10:30 AM ET.

❤️ Your BiCrafty Bestie,
Marly Bird

A cartoon avatar of a person with glasses and a brown bun smiles warmly. Their green shirt and black jacket add a stylish touch, while colorful hearts surround them like loving temperature blankets, stitching together an aura of love and positivity. -Marly Bird

Filed Under: Crochet, Free Patterns, Round Ups, Uncategorized

Crochet Advent Calendars: Creative Patterns to Count Down to Christmas

July 24, 2026 By Marly Bird Leave a Comment

Originally published September 2025 · Updated July 2026 with Christmas countdown, affiliate links, expanded FAQ, and fresh pattern picks.

Crochet advent calendars are reusable, handmade holiday countdown displays featuring 24 numbered pockets or pouches to fill with small surprises throughout December. This collection includes 10 free and paid crochet advent calendar patterns — gnome wall hangings, stocking garlands, amigurumi sets, and more — plus yarn recommendations, supplies, and tips for creating a holiday tradition that lasts for years.

⚡ Quick Answer:

Crochet advent calendar patterns range from beginner stocking garlands to intermediate gnome wall hangings. Most use worsted weight (#4) yarn and a 5mm crochet hook, and can be completed in a few evenings to a couple of weeks. Start with the free Crochet Gnome Advent Calendar for the most pattern support and step-by-step video tutorials! 🎄

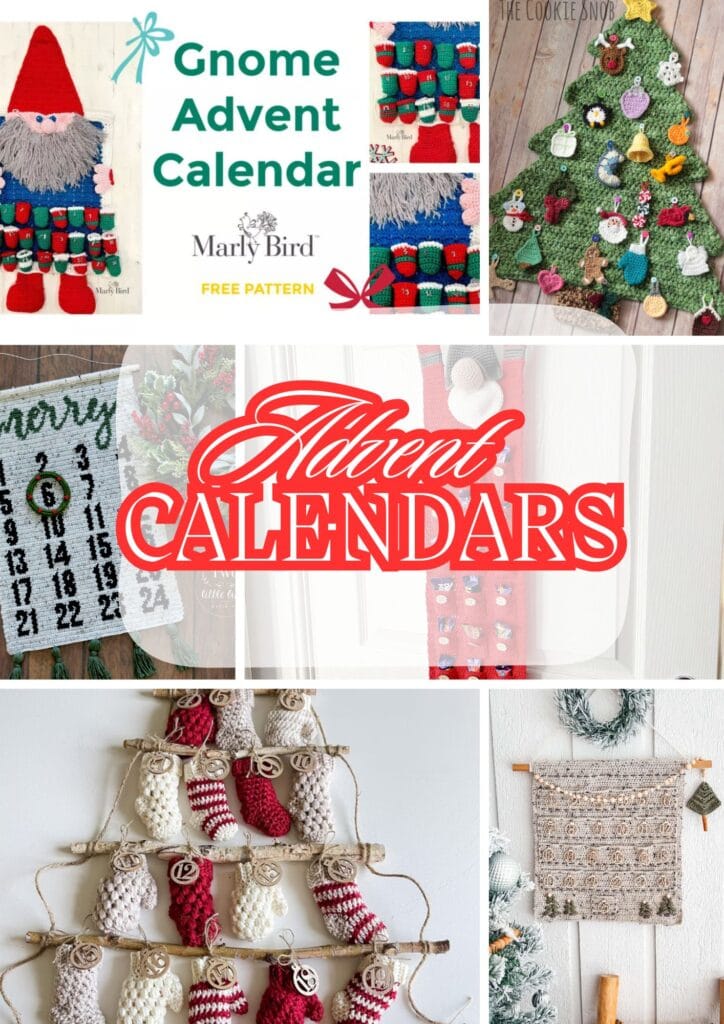
A collage of handmade Crochet Advent Calendars, including gnome, tree, and mitten designs in festive colors, with the words "Advent Calendars" in bold red script at the center for a fun Countdown to Christmas. -Marly Bird

Hey, bestie 💛

Let me tell you why a crochet advent calendar might be the most satisfying seasonal project you'll ever make.

Twenty-four little pockets. Each one holding a secret your people get to discover one day at a time. And every pocket? You made it yourself… with yarn and a hook.

That's not just a decoration. That's a holiday tradition. The kind you pull out of storage every December for the next thirty years and feel proud of all over again.

Whether you want a charming gnome wall hanging, a cheerful stocking garland, or a full amigurumi scene — there's a pattern below for every skill level and holiday style. Let's find yours! 🎄

🧶 Affiliate Disclosure: This post contains affiliate links. If you purchase through them I may earn a small commission at no extra cost to you… and it helps support free patterns and content from my yarn-loving heart 💛 See my privacy policy here.

🎄 Countdown to Christmas 🎄

—
Days
—
Hours
—
Mins
—
Secs

Until Christmas Morning! 🎄

🤴 Start your handmade calendar now — December comes faster than you think! 🎅


Why Make a Crochet Advent Calendar? 🎄

🔄 They last forever. Unlike a paper or cardboard calendar that goes into the recycling bin on December 26, a crocheted one goes back into your storage bin… and comes out again next November, and the one after that. Your grandkids might inherit this thing.

🎨 You can make it completely yours. Choose colors that match your holiday theme. Make it whimsical with gnomes. Go classic with red-and-green stockings. Make 24 tiny amigurumi. The patterns are the starting point — your yarn choices, embellishments, and filling ideas make it one of a kind.

🌱 Zero cardboard waste, maximum handmade heart. If you're looking for a more thoughtful alternative to the disposable kind (and let's be honest, the cheap chocolate ones never taste that good anyway), a handmade calendar is the upgrade your holidays deserve.

💛 Every single pocket becomes part of the tradition. Kids remember the calendar their parent or grandparent crocheted. These are the objects that carry stories. And you get to make one with your own hands.


What You'll Need 🧶

Best Yarn for Crochet Advent Calendar Pockets

Worsted weight (#4) yarn is the sweet spot for advent calendar pockets — it's sturdy enough to hold its shape, widely available, and comes in every holiday color imaginable. Two fiber types work especially well:

🌿 Cotton yarn gives a firm, crisp finish that holds the pocket structure beautifully. It blocks flat and keeps its shape even after being stuffed with goodies for 24 days. Great choice for wall-hanging styles.

🧶 Acrylic yarn gives you the best color range for holiday shades — true reds, deep greens, bright whites — and it's machine washable. KnitPicks Brava Worsted is a fantastic option for solid, vibrant holiday colors.

✨ Designer Tip: For a calendar you'll use year after year, choose machine-washable yarn. Little hands (and little chocolates) can leave their mark. You want to be able to toss those pockets in the wash when December is over!

Tools & Notions

  • Crochet hooks (sizes 4.0mm–5.5mm depending on pattern — check your specific pattern for the right size)
  • Tapestry needles for sewing pockets or attaching embellishments
  • Stitch markers to keep track of pocket counts and rounds
  • Sharp scissors for clean yarn cuts
  • Buttons, beads, or felt numbers for labeling pockets 1–24
  • Wooden dowel or driftwood for hanging wall-style calendars
⭐️ Marly Bird Amazon Storefront ⭐️

Join our Newsletter

Get Free Crochet & Knitting
Pattern Links & Coupons!

Hand-drawn bird with curling, detailed feathers and pink accents; cheerful pose showcases fine line and texture work.
>> Become An Insider <<
A woman with glasses and curly hair models a colorful crocheted scarf, showing textured stitches and vibrant yarn.

10 Free & Featured Crochet Advent Calendar Patterns

Here are some of the most creative and festive crochet advent calendar patterns you can make — ranging from beginner-friendly to satisfyingly complex:

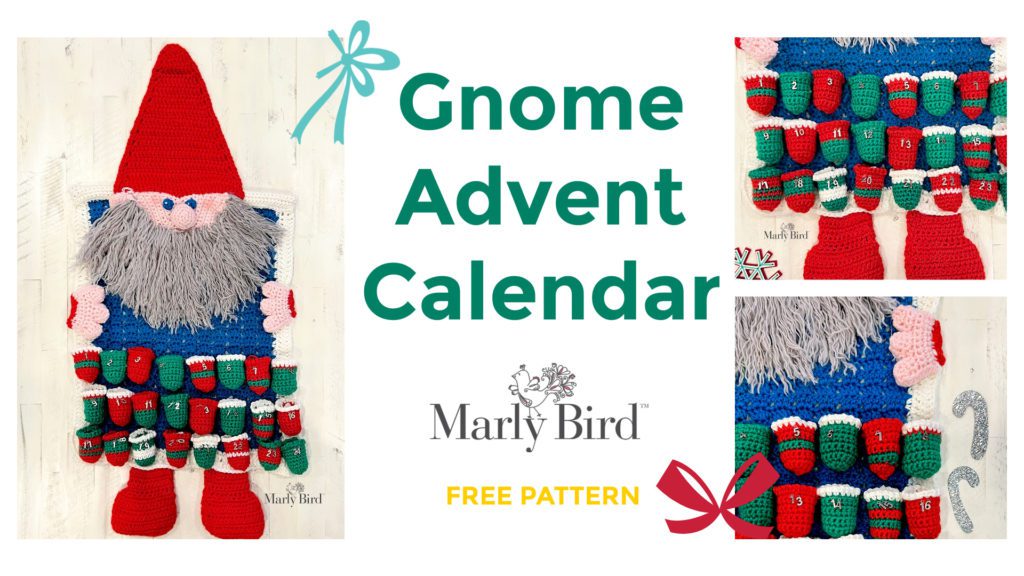
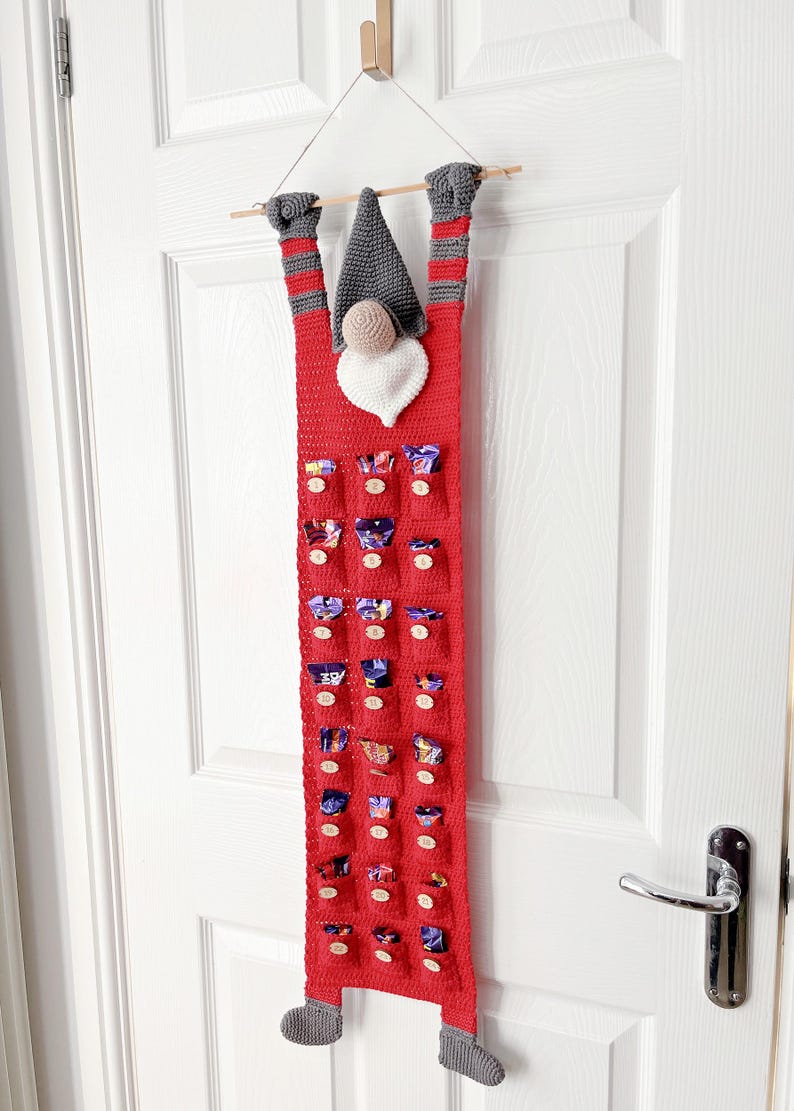
🎅 Crochet Gnome Advent Calendar — Free Pattern

A playful gnome-themed calendar with 24 little pockets to hide daily surprises. This is Marly's own free pattern — with full video tutorial support and step-by-step instructions. Perfect for beginners! [FREE]

Crochet Gnome Advent Calendar - Marly Bird

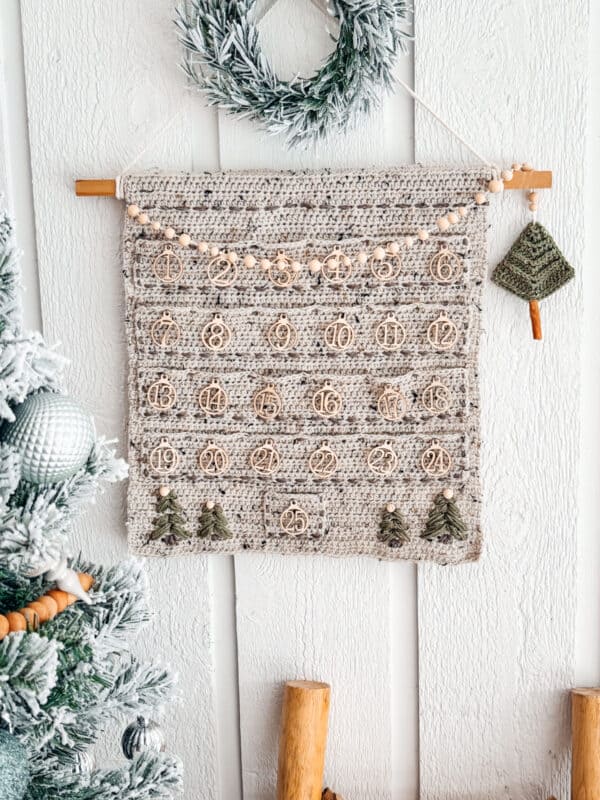
🧶 Gnome Sweet Gnome Advent Calendar — PDF Pattern

A charming gnome-themed calendar available as a downloadable PDF — doubles as gorgeous holiday décor. A fan favorite for its detailed construction and festive personality. [PAID]

Gnome Sweet Gnome crochet advent calendar PDF pattern on Etsy

🎄 Crochet Advent Calendar by Briana K Designs

A classic design featuring numbered crochet stockings — each pocket perfect for hiding daily treasures. The granny square construction makes it a satisfying project for intermediate crocheters. [FREE]

A crochet Christmas advent calendar with numbered granny stocking pockets hanging on a wall.

🌳 Christmas Tree Advent Calendar — Cookie Snob Crochet

A beautiful tree-shaped calendar with ornament pockets for each day — a real showpiece for the holiday mantel. The tree silhouette makes it instantly recognizable as an advent display. [FREE]

Christmas Tree Advent Calendar crochet pattern

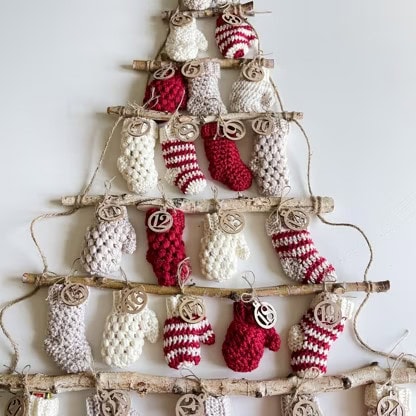
🎁 MJ's Merry Advent Calendar — Crochet Pattern

Beautifully structured and stunning as a holiday centerpiece — this mitten-and-tag style calendar feels rustic and cozy. Great for a more natural, farmhouse-style holiday aesthetic. [PAID]

A tree made of sticks adorned with knitted mittens, wooden tags, and touches inspired by a crochet advent calendar. -Marly Bird

🎅 CAL: Christmas Crochet Advent Calendar

A crochet-along (CAL) format where you build your calendar step by step over time. A great option if you love the community aspect of crafting alongside others! [FREE/PAID]

Christmas Crochet Advent Calendar CAL kit

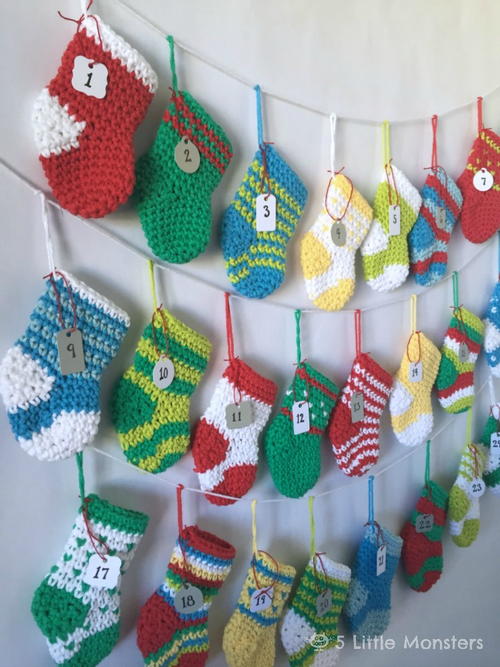
🧦 Crochet Stocking Advent Calendar

Twenty-four tiny crochet stockings, each numbered and hung in a row. Fill with candy, small toys, or handwritten notes — a classic advent format that works beautifully in crochet. [FREE]

Crochet Stocking Advent Calendar with 24 numbered mini stockings

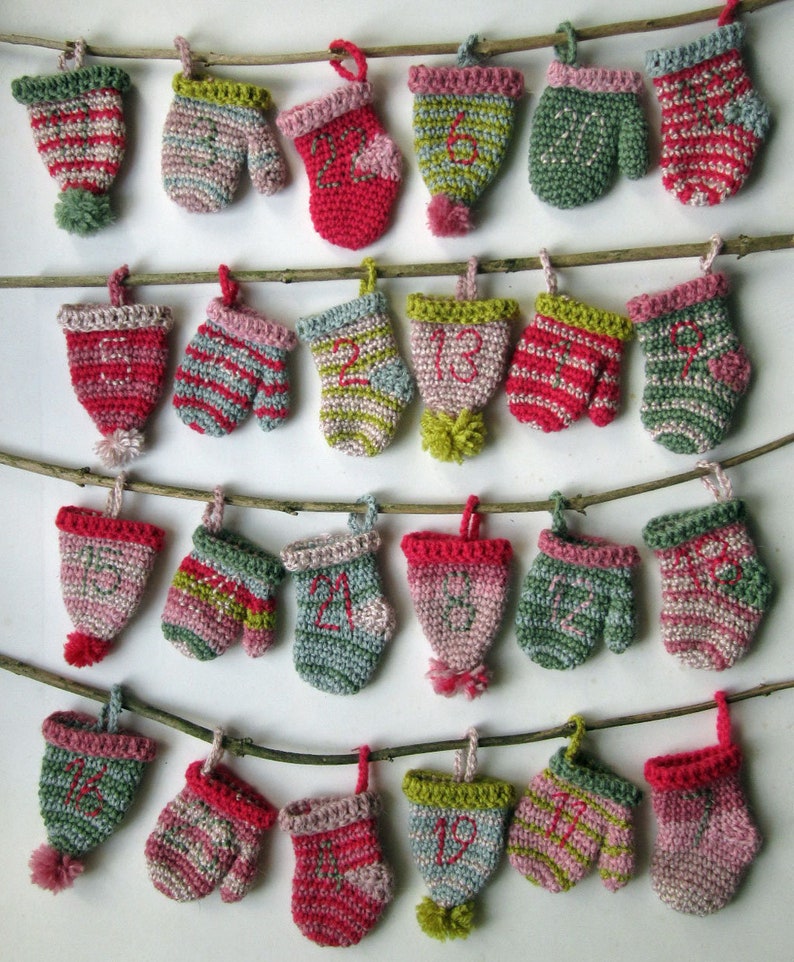
✨ Christmas Sock/Mitten Bobble Hat Calendar

A creative take on the advent format — 24 mini crochet mittens, each numbered, strung together like a garland. Whimsical, colorful, and completely irresistible. [PAID]

A string of 24 crocheted mitten ornaments numbered 1 to 24 in holiday colors hung on a branch

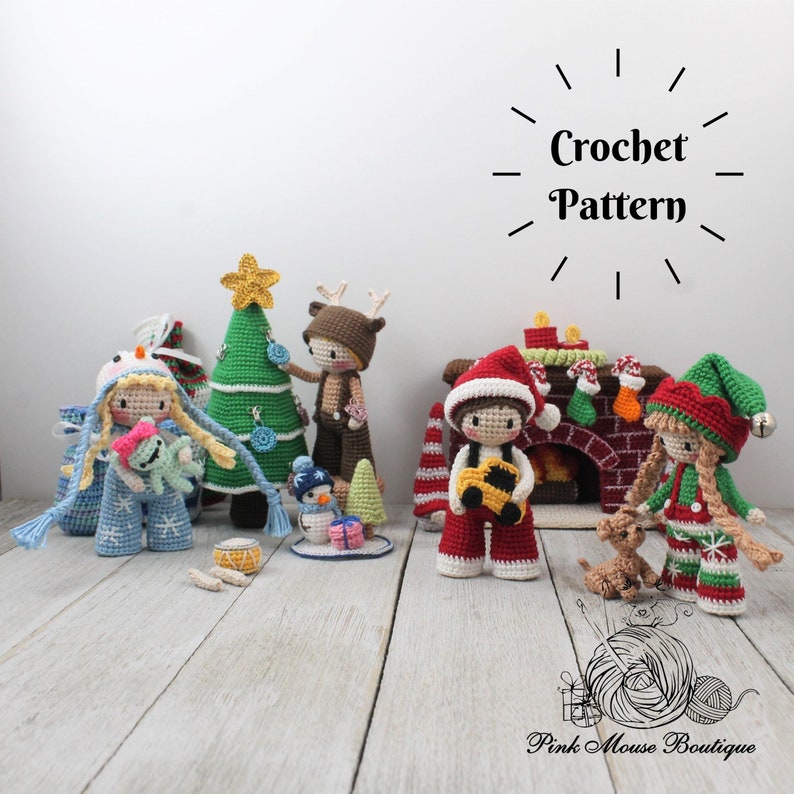
🎄 Amigurumi Advent Calendar — 24-Character Set

A full 24-character amigurumi set — Santa, snowman, reindeer, elves, and more. This is the most ambitious option on the list, but the result is a heirloom display that tells a whole holiday story. [PAID]

Crochet pattern for a Christmas amigurumi advent calendar set with 24 holiday characters

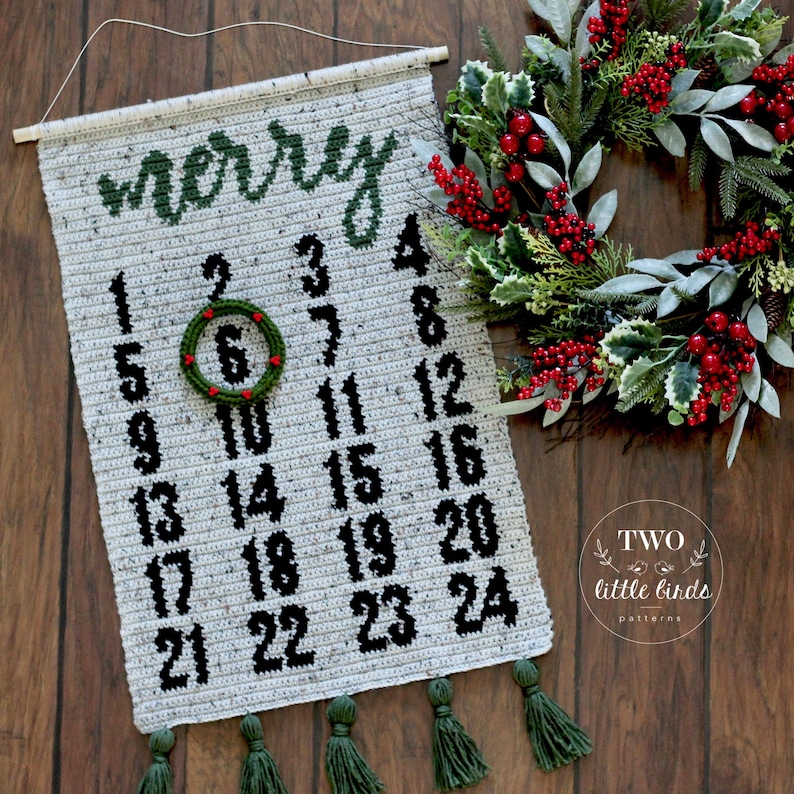
🎀 Merry Advent Calendar — Tapestry Crochet

Elegant tapestry crochet construction with a sophisticated holiday look. This one makes a beautiful heirloom family calendar that will look equally gorgeous year after year. [PAID]

Merry Advent Calendar crochet pattern featuring tapestry crochet holiday design

Creative Ways to Fill Your Crochet Advent Calendar 🎁

Fill with Candy, Toys, or Notes

Classic chocolates are always a hit — but small toys, trinkets, or personalized handwritten notes make the experience even more special. For kids who have everything, try filling pockets with activity cards, small books, or little craft supplies.

Make It a Family Activity

If you have helpers who crochet, consider making the calendar itself a collaborative project — each person crochets a few pockets. Then the whole family fills them together in November, and everyone has a stake in what's inside.

Reuse Year After Year

This is the real magic of a handmade advent calendar. It goes back in the box on December 26, comes back out next November, and carries a year's worth of memory with it. Plan the filling fresh each year, but the calendar itself just gets more precious with age.


Tips for Customizing Your Crochet Advent Calendar 🎨

Choosing Colors for Your Holiday Theme

Traditional red, green, and white never goes out of style — but don't sleep on gold, silver, and deep navy for a more modern winter vibe. Dusty sage and cranberry is a stunning combination if you want something that feels a little less "standard Christmas." Pick 2–3 colors and repeat them across all 24 pockets for a cohesive look.

Adding Numbers to Pockets

Felt number appliques are the easiest approach — cut them yourself or buy pre-made. Embroidery works beautifully if you want something more heirloom. You can also crochet or purchase small wooden number tags to hang from each pocket.

Sizing Your Pockets

Most patterns are written for standard chocolate-box-sized pockets. If you want to fill with slightly larger surprises (small toys, folded notes, little books), go up a hook size or two to make slightly bigger pockets. Just make all 24 the same size so the calendar looks uniform when hung!


More Holiday Crochet Projects You'll Love 🎄

Caught the holiday handmade bug? Here's what to make next:

  • Whimsical Christmas Gnome Crochet Patterns — more gnome patterns to go with your gnome calendar
  • 30 Free Mini Christmas Ornament Patterns — tiny crochet ornaments to fill those calendar pockets
  • 30+ Free Christmas Amigurumi Patterns — a full Santa, snowman, and reindeer collection
  • Crochet Christmas Tree Ornament Patterns — for when the calendar is done and the tree needs dressing
  • Holiday Gift Card Holder Patterns — perfect companion for your advent calendar gifting
  • Handmade Holiday Décor Patterns — more ways to make your home feel hand-crafted this season
  • 25 Days of Christmas in July: Full Holiday Pattern Collection — even more holiday crochet and knit patterns

Frequently Asked Questions About Crochet Advent Calendars

How long does it take to make a crochet advent calendar?

It depends on the pattern and your pace! A simple stocking garland might take 3–5 evenings of casual crocheting. A full amigurumi set of 24 characters could take several weeks. Most intermediate patterns fall somewhere in between — a couple of weeks of regular crochet sessions. Starting in October means you're well ahead of schedule.

Can beginners make crochet advent calendars?

Yes! Several patterns on this list are genuinely beginner-friendly — especially simple stocking or mitten designs that repeat the same pocket 24 times. Once you know the pattern for one pocket, you just make 23 more. That's actually great practice for building speed and consistency!

What's the best crochet advent calendar pattern for beginners?

Start with the free Crochet Gnome Advent Calendar by Marly Bird — it comes with full video tutorial support, clear written instructions, and the gnome design is forgiving for slight size variations. The Crochet Stocking Advent Calendar is another great beginner option with its simple, repeating construction.

What can I put inside the pockets?

The classics: chocolate, candy, small toys, and coins. But handwritten notes, activity cards, little ornaments, lip balm, stickers, hair accessories, or tiny books all work beautifully. For adults, think: scratch tickets, gift card envelopes, tea bags, bath salts, or a card for each day. The pocket is just the starting point!

Are crochet advent calendars washable?

Most are, especially if you've used cotton or acrylic yarn — both are typically machine washable. Just remove any non-washable embellishments (wooden buttons, felt numbers, metal charms) before washing, and lay flat to dry to preserve the pocket shape.

Can I sell finished crochet advent calendars made from these patterns?

It varies by designer. Many indie designers allow sale of finished items with credit given — always read each pattern's terms and conditions before selling. Marly's Gnome Advent Calendar pattern includes her standard finished-goods terms in the pattern notes.

Do crochet advent calendars have to be 24 days?

Traditionally, yes — the Advent period runs from December 1 through December 24. But it's your calendar! Some people make 25 pockets (through Christmas Day), 12 pockets for a "12 Days of Christmas" version, or even a weekly advent with just 4 pockets for each Sunday of December. Make the version that fits your family.


Final Thoughts: Start Your Handmade Holiday Tradition This Year 🎄

Here's the thing about a crochet advent calendar: it's one of those projects that feels like a lot going in… and then you're suddenly pulling it out of the box in year three and your kids are fighting over who gets to hang it up.

Twenty-four pockets. Made by your hands. Full of whatever you decide to put inside this year. That's a pretty wonderful thing to make.

Start with the beginner-friendly options if you're new — the gnome calendar and the stocking garland are both designed to be achievable. And if you're a more experienced crocheter looking for a project with real scope? The amigurumi set is calling your name.

Either way… start now. December comes faster than we think. 🎄

If you make one, please share it! Tag me @marlybird on Instagram or Facebook and use #MMMDI (Marly Made Me Do It) and #MarlyBird so I can see your beautiful handmade calendar. 💛


❤️ Your BiCrafty Bestie,
Marly Bird
A cartoon avatar of a person with glasses and a brown bun smiles warmly. Their green shirt and black jacket add a stylish touch, while colorful hearts surround them like loving temperature blankets, stitching together an aura of love and positivity. -Marly Bird

Filed Under: Uncategorized

51 Free Crochet Corner-to-Corner Patterns (C2C + On the Bias)

July 21, 2026 By Marly Bird 1 Comment

Looking for free crochet corner-to-corner patterns? This collection covers 51 free C2C and crochet-on-the-bias patterns from blankets and throws to scarves, pillows, and dishcloths. Whether you're brand new to diagonal crochet or ready to tackle your first graphghan, there's something here for every skill level.

⚡ Quick Answer:

Best for beginners: the Striped C2C Crochet Blanket (simple color changes, no chart). Best graphghan: C2C Pop Art Flowers (bold pixel art, approachable chart). Best bias project: Daydreamer Diagonal Blanket (smooth fabric, stunning color gradients). All 51 patterns are free on Yarnspirations.

Hey, bestie 💛

Corner-to-corner crochet is one of those techniques that looks so impressive… but is honestly much more approachable than it appears. Once you get the rhythm of the blocks, it becomes almost meditative — and the pixelated results are absolutely stunning. Whether you want to make a cozy throw or a personalized graphghan with your family's name, this list has you covered. Let's dive in!

✨ Updated July 2026 with refreshed links and new framework formatting.

🧶 Affiliate Disclosure: This post contains affiliate links. If you purchase through them I may earn a small commission at no extra cost to you… and it helps support free patterns and content from my yarn-loving heart 💛 See my privacy policy here.
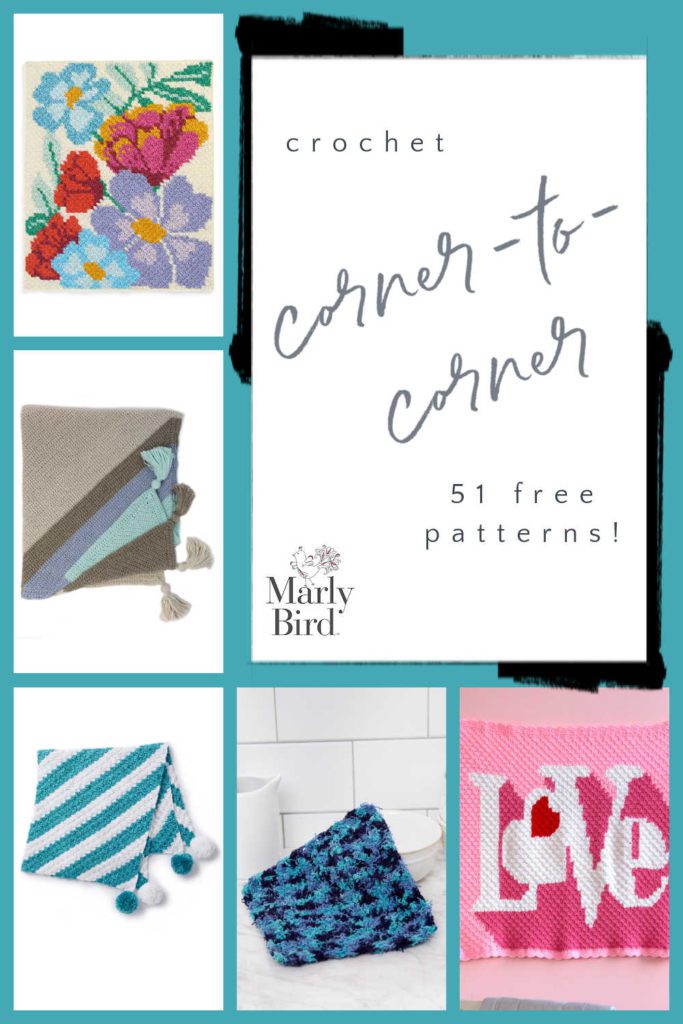
51 Free Crochet Corner-to-Corner Patterns collection by Marly Bird, showing C2C blankets, bias projects, and diagonal crochet techniques.

👉 Jump to the patterns →


🧶 What Is Corner-to-Corner Crochet?

Most crochet patterns work in horizontal rows, moving from one side to the other. Corner-to-corner (C2C) flips that on its head — you start in one corner with a tiny block of stitches, increase diagonally until you reach the widest point, then decrease back down to the opposite corner.

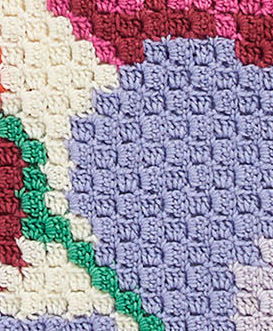
Each C2C “block” typically consists of 4 double crochet stitches grouped together. When those blocks stack up diagonally, you get that signature pixel texture that's perfect for graphghans, blankets with pictures or words, and graphic throws.

Close-up of corner-to-corner crochet fabric showing the C2C block structure.
Close-up of C2C block fabric.

What About Crocheting on the Bias?

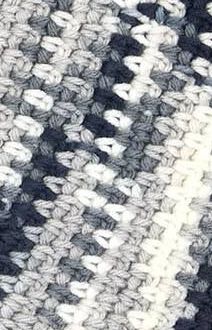
Crocheting on the bias creates a similar diagonal fabric but uses a completely different method. Instead of grouped blocks, you work regular single crochet, half double, or double crochet stitches in back-and-forth rows with consistent increases on one edge and decreases on the other.

The bias method creates a smoother fabric than C2C blocks — no pixel texture — making it ideal for scarves, shawls, and pillows where you want the yarn's color or texture to shine without the graphic block look.

Close-up of crochet-on-the-bias fabric showing smooth diagonal texture.
Close-up of crochet-on-the-bias fabric.
✨ Designer Tip: Not sure which method to try first? Start with C2C! The block structure makes it easy to see your progress row by row, and the repetitive nature means you'll be in the groove quickly. Bias crocheting is a great next step once you're comfortable with diagonal increases and decreases.

🧶 Free C2C Crochet Blanket Patterns

These are the patterns that started it all for most C2C crocheters… blankets and throws. The graphic variety here is incredible — from simple stripes to full graphghan charts with animals, snowflakes, and geometric designs.

  • Corner to Corner Guest Throw — Red Heart
  • Crochet Corner-to-Corner Throw — Red Heart
  • Crochet Corner to Corner Afghan — Caron
  • Corner to Corner Crochet School Bus Blanket — Bernat
  • Corner-to-Corner Ombré Throw — Red Heart
  • Crochet Corner to Corner Afghan — Bernat
  • Corner-to-Corner Restful Throw — Red Heart
  • Corner-to-Corner Crochet Throw — Red Heart
  • Corner to Corner Pretty Florals Crochet Graphghan — Caron
  • Block Party Crochet Blanket — Bernat
  • Geometric C2C Crochet Blanket — Bernat
  • Geo Folk C2C Crochet Afghan — Bernat
  • Argyle C2C Crochet Baby Blanket — Caron
  • C2C Pop Art Flowers Crochet Blanket — Caron
  • Bias Panels C2C Chevron Crochet Blanket — Bernat
  • Peak Your Interest C2C Crochet Tapestry — Red Heart
  • Digital Snowflake C2C Crochet Blanket — Red Heart
  • Solomon's Knot C2C Crochet Blanket — Red Heart
  • C2C Crochet Lattice Blanket — Bernat
  • Geometric Steps C2C Crochet Blanket — Red Heart
  • Crochet C2C Nordic Motif Blanket — Bernat
  • Daisy C2C Crochet Blanket — Bernat
  • Striped C2C Crochet Blanket — Bernat ⭐ Great for beginners
  • Fading Rainbow C2C Crochet Blanket — Bernat
  • C2C Blast Off Crochet Baby Blanket — Bernat
  • C2C Crochet Dreamy Clouds Baby Blanket — Bernat
  • Crochet C2C Big Star Blanket — Bernat
  • C2C Crochet Dino Blanket — Bernat
  • Bias Blocks Baby Blanket — Bernat
  • Heart Throb Blanket — Red Heart
  • Corner-to-Corner Snowflake Blanket — Red Heart
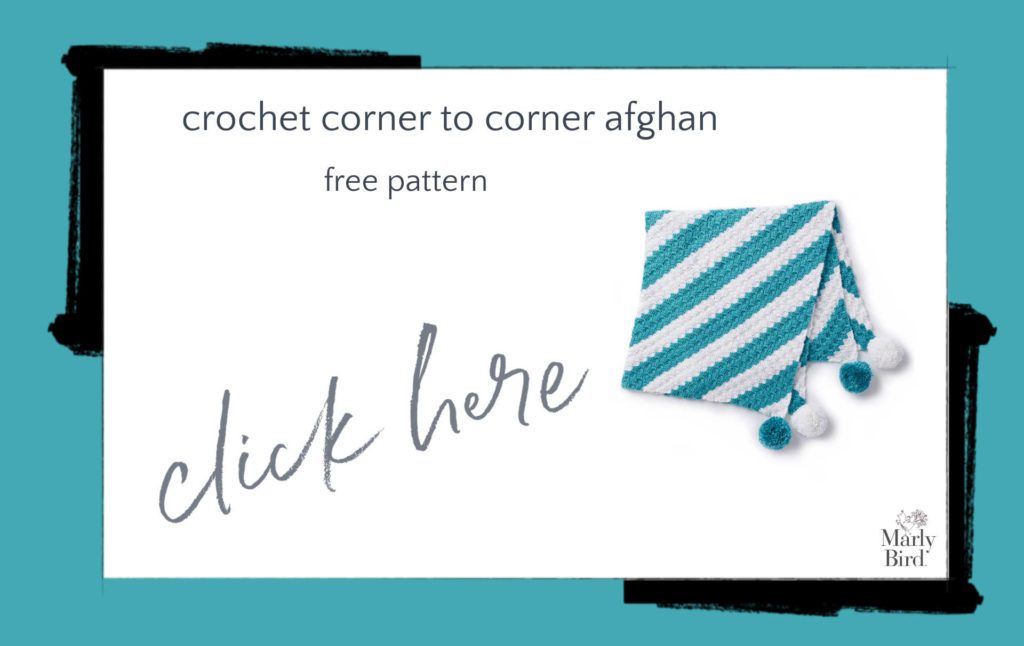
Free Crochet C2C Afghan pattern by Caron from Yarnspirations.

🧶 Other C2C Crochet Patterns

C2C isn't just for blankets! These patterns take the same diagonal block technique and apply it to dishcloths, a bobble cowl, and stylish scarves.

  • Scrubbing Stripes C2C Crochet Dishcloth — Red Heart
  • Corner-to-Corner Dishcloth — Lily Sugar ‘n Cream
  • Crochet Corner to Corner Bobble Cowl — Caron
  • Pump Up the Volume Crochet Scarf — Bernat
  • Pump Up the Volume Crochet Super Scarf — Bernat
  • On the Bias Crochet Scarf — Caron
  • On the Bias Scarf — Patons
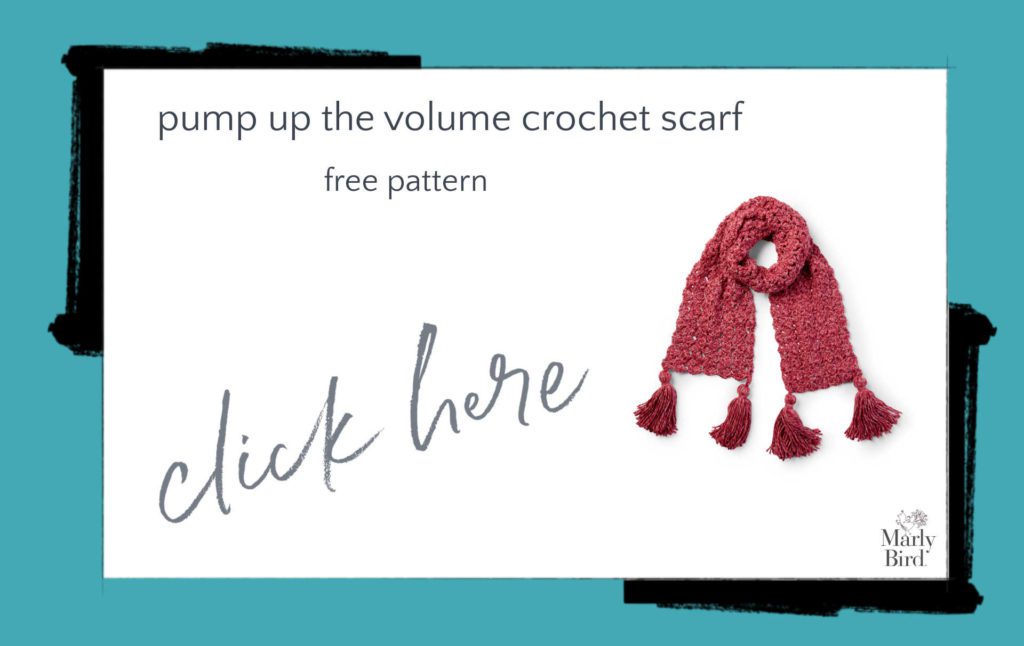
Pump Up the Volume Crochet Scarf — free C2C scarf pattern from Bernat/Yarnspirations.

🧶 Free Crochet on the Bias Patterns

Crocheting on the bias gives you that beautiful diagonal drape without the block texture of C2C. These patterns are perfect if you love the look of stripes going diagonally, or want a smoother fabric for shawls, pillows, or home decor.

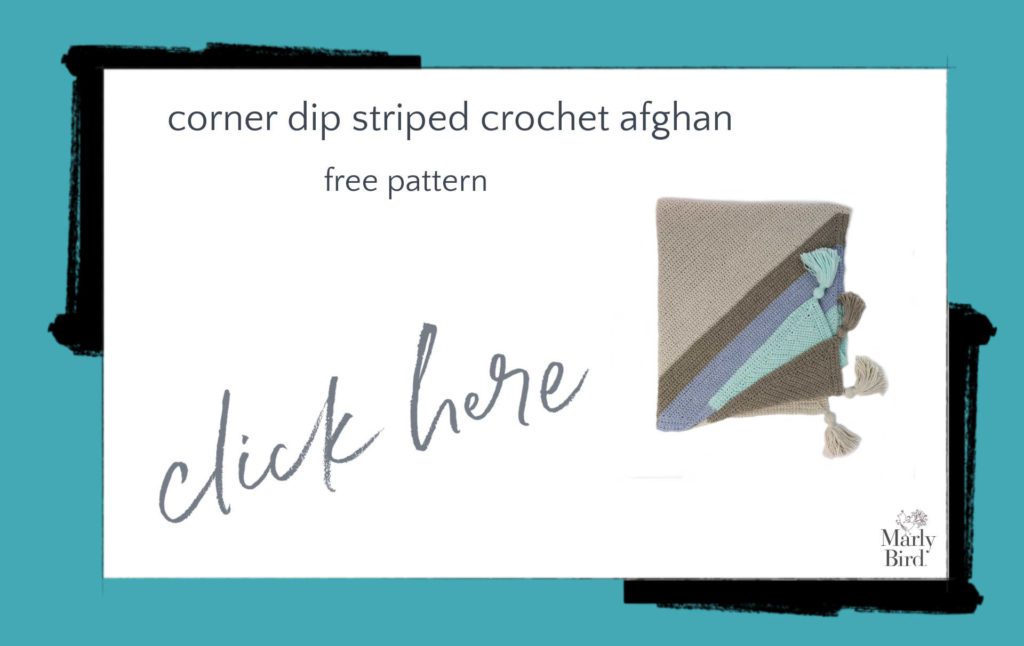
  • Corner Dip Striped Crochet Afghan — Patons
  • Daydreamer Diagonal Blanket — Red Heart ⭐ Best bias pick
  • Earn Your Stripes Baby Blanket — Bernat
  • Fur Trimmed C2C Crochet Blanket — Bernat
  • Bias Striped Swirl Crochet Blanket — Caron
  • Bias Loop Crochet Cushion — Caron
  • Corner to Corner Crochet Pillow — Bernat
  • Loopy Corner Crochet Pillow — Bernat
  • Corner to Corner Crochet Dishcloth — Red Heart
  • Crochet Shawl on the Bias — Caron
  • Grays on a Bias Crochet Shawl — Caron
  • Bias Color Block Crochet Scarf — Red Heart
  • Stepping Diamonds Crochet Scarf — Caron
Corner Dip Striped Crochet Afghan — free crochet-on-the-bias pattern from Patons.

🎓 Learn C2C Crochet with Marly Bird

Want to learn the C2C technique before diving into the patterns above? I've got you covered with tutorials and full pattern walkthroughs right here on the blog.

  • BiCrafty Bootcamp: Corner-to-Corner Crochet Lesson — Marly's step-by-step C2C tutorial for beginners
  • Corner-to-Corner Rectangle Using Half Double Crochet
  • Beginner Corner to Corner Crochet Blanket
  • Corner to Corner Planned Pooling Crochet Chevron Throw Blanket
  • Corner to Corner Single Crochet Entrelac 12” Square
  • Heart Throb Baby Blanket — C2C Pattern Walkthrough

💛 More Free Crochet Patterns You'll Love

If you loved exploring diagonal crochet, here are more free crochet pattern collections to bookmark…

  • Day Dream C2C Crochet Blanket — Marly's own colorful corner-to-corner throw pattern, free on the blog
  • Modern Mosaic Blocks Throw — free mosaic crochet blanket perfect for color lovers
  • Free Crochet Mitten Patterns — roundup of the best free crochet mitten patterns
  • Free Knit and Crochet Holiday Patterns — perfect for seasonal C2C gift projects

Join our Newsletter

Get Free Crochet & Knitting
Pattern Links & Coupons!

Hand-drawn bird with curling, detailed feathers and pink accents; cheerful pose showcases fine line and texture work.
>> Become An Insider <<
A woman with glasses and curly hair models a colorful crocheted scarf, showing textured stitches and vibrant yarn.

❓ Frequently Asked Questions

What exactly is corner-to-corner crochet?

Instead of working in horizontal rows, corner-to-corner (C2C) crochet works on the diagonal. You start in one corner with a tiny block, increase until you hit the widest point, then decrease back down to the opposite corner. Each block is usually a small cluster of double crochet stitches… and when they come together, you get a cool pixelated look perfect for making pictures, words, and graphic designs.

What's the difference between C2C blocks and crocheting on the bias?

Both create diagonal fabric, but they look totally different! C2C uses little clusters (usually 4 double crochets per block) that stack on top of each other… giving you that signature pixel texture. Crocheting on the bias uses regular stitches in rows with increases and decreases at the edges to create the diagonal shape. The bias method gives you a smoother fabric. Both are fun… it just depends on the look you're going for.

Is corner-to-corner crochet good for beginners?

Yes! Once you understand the basic block structure, it's honestly very repetitive in the best way. You're doing the same stitch cluster over and over… the magic is in how you increase and decrease to shape the piece. If you can double crochet and chain, you can do C2C. Marly even has a BiCrafty Bootcamp lesson that walks you through the whole thing from scratch.

What kind of projects can I make with C2C crochet?

So many things! Blankets are the most popular… especially graphghan blankets where you follow a pixel chart to create pictures (think dinosaurs, flowers, snowflakes, even school buses!). But C2C also works beautifully for throws, baby blankets, pillow covers, scarves, and dishcloths. The technique is especially fun for personalized gifts because you can chart out names, images, or team logos.

How do I read a C2C crochet chart?

C2C charts are read diagonally, not left to right! Each square on the chart represents one block of stitches. You start in the bottom corner and work your way up diagonally. On increase rows you're adding blocks; on decrease rows you're dropping them. The color of each square tells you which yarn to use for that block. It feels odd at first but once you do a few rows, it clicks. Stitch markers between color sections are a lifesaver while you're learning.


💕 Final Thoughts

Corner-to-corner crochet opens up a whole new world of design possibilities… literally any image, word, or pattern you can chart can become a crochet project. And the best part? Once you get the rhythm of those increasing and decreasing blocks, it becomes one of the most satisfying makes you'll ever sit down with.

Whether you're making your first striped throw or attempting your first graphghan, I hope this collection gives you plenty of inspiration to cast on. Tag me @marlybird on Instagram and use #MMMDI and #MarlyBird when you finish — I love seeing your diagonal crochet projects! 🧶💛


❤️ Your BiCrafty Bestie,
Marly Bird
A cartoon avatar of a person with glasses and a brown bun smiles warmly. Their green shirt and black jacket add a stylish touch, while colorful hearts surround them like loving temperature blankets, stitching together an aura of love and positivity. -Marly Bird

Filed Under: Round Ups

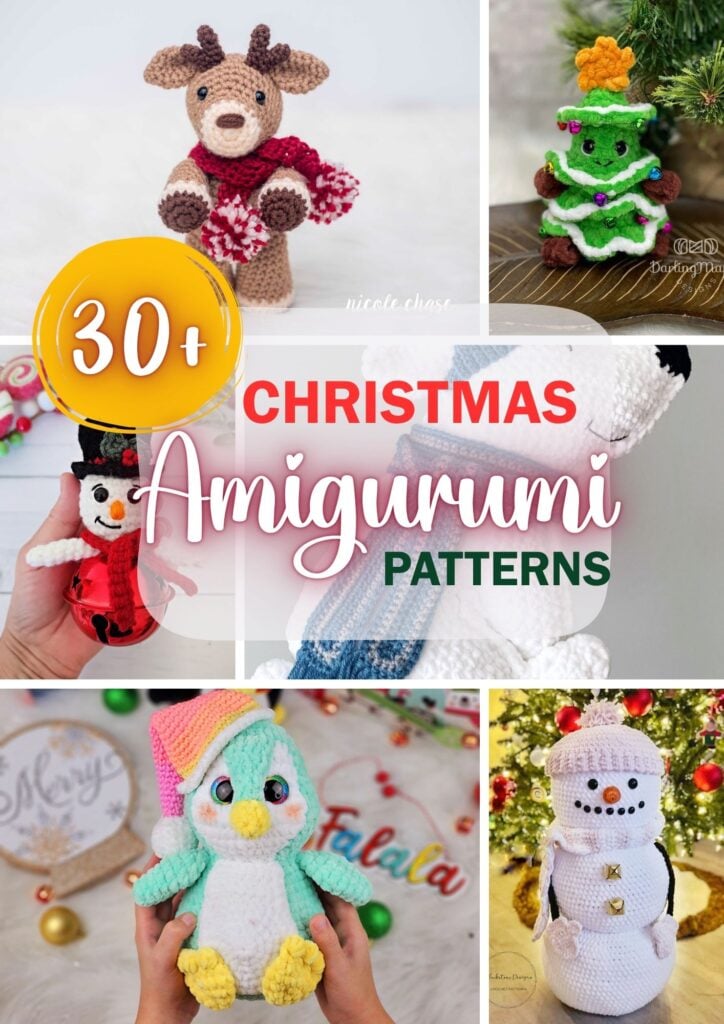
30+ Free Christmas Amigurumi Patterns: Santa, Snowman, Reindeer & More!

July 17, 2026 By Marly Bird Leave a Comment

Originally published July 2025 · Updated July 2026 with the Christmas countdown, character-organized pattern sections, materials guide, beginner tips, expanded FAQ, and more internal links to get you inspired all season long.

⚡ Quick Answer:

Looking for free Christmas amigurumi patterns? This page has 15+ options organized by character type… Santa, snowman, elf, gnome, and more. Every pattern is labeled FREE or PAID. Best beginner pick: the Snowman Ornament by Hookfully (mostly spheres!). Knitters… scroll down for holiday stuffed toy tips too! 🧸🎄

🧶 Affiliate Disclosure: This post contains affiliate links. If you purchase through them I may earn a small commission at no extra cost to you… and it helps support free patterns and content from my yarn-loving heart 💛 See my privacy policy here.

Welcome back to Day 13 of 25 Days of Christmas in July! Today we're diving into one of the most joyful corners of the crochet and knitting world: Christmas amigurumi patterns. If you've never made one before, you're in for a treat… these little plushies are pure magic. 🎄


🕎 Celebrating Hanukkah Too? Marly's got you covered on ALL the holidays! Check out the free Knit Menorah Tops pattern, the Crochet Menorah Tops pattern, and the full Free Hanukkah Patterns roundup for even more festive BiCrafty holiday making! 💙

What makes Christmas amigurumi so special? They're a beautiful blend of nostalgia and creativity. You get to craft Santa plushies with rosy cheeks, elf dolls with pointy hats, snowman decorations that'll make you smile every time you look at them, and reindeer friends that feel like old holiday memories made real. And here's the BiCrafty bonus: whether you crochet or knit, there are adorable Christmas amigurumi patterns waiting for you. Both crafts create that same cozy, handmade magic. ✨

These patterns are perfect for gift toppers, stocking stuffers, mantel decorations, and craft fairs. And the best part? Most are beginner-friendly and work up in an evening. Seriously… you could have a finished snowman sitting on your desk by coffee break tomorrow.

🎅 ❄ 🎄 ❄ 🎁

Ho Ho Ho! Only

—
Days
—
Hours
—
Mins
—
Secs

Until Christmas Morning! 🎄

🤴 Start those handmade gifts now… Santa's watching! 🎅


Why Christmas Amigurumi Make the BEST Handmade Gifts

  • 🎁 Unforgettable gifts that show real thought and effort. Store-bought ornaments are nice, but a handmade plushie? That's treasured forever.
  • ⏰ Surprisingly fast to make. Most patterns take an evening or two... even faster if you're speedy with your hooks!
  • 💰 Budget-friendly. A small amigurumi uses maybe 50 grams of yarn. You can make a whole crew of gift toppers from a couple of skeins.
  • 🎨 Totally customizable. Change the colors, swap the expressions, add extra details... make each one unique to the person you're gifting it to.
  • 💝 Perfect for every age. Babies love tiny soft toys, kids collect them like treasure, and adults display them on shelves and mantels with genuine delight.
  • 🎓 Teacher gifts that stand out from the usual candle and gift card crowd.
  • 📸 Photography props for holiday family photos (especially adorable for baby's first Christmas shoots!)

And here's a bonus: most amigurumi patterns work up faster than you'd think... a simple snowman or Santa can be done in a cozy evening! And because they use smaller amounts of yarn, they're a perfect way to use up those mini skeins hiding in your stash. 🎉 (Looking for more ways to use up your stash? Check out our beginner amigurumi guide for year-round toy-making inspiration!)


What You Need to Make Christmas Amigurumi

Before you dive into the patterns... here's a quick rundown of what you'll need to get started. Good news: most of this you probably already have in your craft room! 🧵

🧶 Best Yarn for Christmas Amigurumi

Worsted weight yarn (#4) is the classic choice for amigurumi... it gives great stitch definition, works up quickly, and is beginner-friendly. A few of our favorites:

  • KnitPicks Brava Worsted ... 100% acrylic, affordable, great color range for holiday characters
  • Lion Brand Heartland ... smooth and consistent, easy to find locally
  • Premier Everyday Anti-Pilling Worsted ... smooth, affordable 100% acrylic with a huge color selection. The anti-pilling finish means your finished amigurumi stays pristine even after years of being loved and handled. Top everyday pick! 🌟
  • Premier Parfait Plush ... ultra-soft chenille-style yarn that makes the squishiest, most huggable amigurumi you have ever touched. Perfect for large stuffed characters meant for snuggling, not just displaying! Tip: use a smaller hook and stuff VERY firmly for best shape. 🧸
  • Premier Parfait Chunky ... the big sister of Parfait Plush! Same irresistible softness in a chunky weight so your holiday amigurumi works up fast. Ideal for larger display pieces when you want maximum snuggle factor with minimum stitching time. Great for last-minute holiday gifts! 🎁
  • Loops & Threads Faux Fur Yarn ... perfect for adding fluffy, realistic texture to polar bears, shaggy snowmen, and Santa coat trim. A little goes a long way as an accent, or use it for the whole piece for maximum drama! ⚠️ Heads up: faux fur hides your stitches, so count carefully as you go.

DK weight works too if you want slightly more delicate details or smaller finished pieces. The key? Go down a hook size from the label recommendation to keep your gauge tight and prevent stuffing from peeking through.

Balls of yarn in blue, gray, green, red, brown, pink, and cream are laid on a textured gray carpet beside two bare legs.

🪡 Crochet Hooks & Knitting Needles

For most worsted weight amigurumi, you'll want a 3.5mm to 4.5mm crochet hook... the tighter the gauge, the cuter and cleaner the finished toy! If you're knitting stuffed toys, double-pointed needles (DPNs) in the same size range work beautifully for working in the round. Browse KnitPicks hooks and needles

🧸 Stuffing, Safety Eyes & Other Notions

  • Polyfill fiberfill stuffing (firm is key... stuff MORE than you think you need!)
  • Safety eyes in sizes 6mm-12mm (the most common for amigurumi) Get the useful tool too!
  • Stitch markers for tracking rounds
  • A yarn needle for sewing pieces together and weaving in ends
  • Wire armature (optional, for characters that need to stand upright)
  • Amigurumi Sticks (helpful for sewing together parts)
⭐️ Marly Bird Amazon Storefront ⭐️
💡 Good to Know: If you want to go deeper into amigurumi construction, technique, and toy design, check out the books by Megan Kreiner ... she's one of the best amigurumi educators around and her books are absolute gems for toy makers at any skill level!
💡 Fun Fact: Amigurumi (the art of crocheting small, stuffed toys) has its roots in Japan and goes back hundreds of years... but in recent decades, it's become a worldwide handmade holiday favorite thanks to how joyful and downright adorable these little guys are!

🎄 Free Christmas Amigurumi Crochet Patterns

I've rounded up my absolute favorites below and organized them by character so you can jump straight to what you need! Each one is labeled FREE or PAID so you know exactly what you're clicking into. Spoiler... most of them are free! 🙌

🎅 Santa Claus Amigurumi Patterns

  • Santa Baubles by HookedonPatterns (FREE)
  • Santa Belly Snow Globe by Golden Lucy Crafts (FREE)
  • Santa Bauble by StartCrochet (FREE)
  • Santa Ornament by Hookfully (FREE)

⛄ Snowman Amigurumi Patterns

  • Snowman Baubles by HookedonPatterns (FREE)
  • Snowman Lovey by HookedonPatterns (FREE) ... extra sweet for babies!
  • Giant Snowman Amigurumi by Blackstone Designs (FREE) ... makes an impressive display piece!
  • Snowman Jingle Bell Ornament by A Crocheted Simplicity (FREE)
  • Snowman Ornament by Hookfully (FREE) ... our top beginner pick!
  • Wobbly Snowman Amigurumi by Hookfully (FREE) ... the wobble is part of the charm! 😄
  • Large Festive Snowman by Carol Hladik Designs (FREE)
  • Little Frosty Friend Snowman by Carol Hladik Designs (FREE)

🧝 Elf, Gnome & Holiday Characters

  • Elf Ornament by Hookfully (FREE) ... tiny, sweet, and fast to make!
  • Snowman Gnome by Jen Hayes Creations (FREE)
  • Eggnog the Elf Amigurumi (PAID · Etsy PDF) ... trust me, this one is worth every penny!
  • Holiday Characters by Darling Maple Designs (FREE & PAID) ... browse their full collection of Santa, elf, reindeer & more!

🦌 Reindeer & Christmas Animal Amigurumi

Rudolph and friends deserve some yarn love too! From quick ornament-style reindeer to show-stopping plushies, plus irresistibly chubby polar bears and penguins in little scarves... this section has all the winter wonderland animal amigurumi your stash has been waiting for. 🦌🐧❄️

🦌 Reindeer:

  • Crochet Reindeer Amigurumi (PAID · Etsy)
  • Christmas Reindeer on Ravelry (FREE · free Ravelry account required)
  • Randall the Reindeer by The Nicole Chase (FREE)
  • Rudolph the Red-Nosed Reindeer Ragdoll by Passionate Crafter (FREE)
  • Little Reindeer by CrochetHea (FREE)
  • 🎥 Free Crochet Reindeer Video Tutorial on YouTube (FREE)
  • Bunny Holiday Amigurumi (PAID · Etsy)

🐧 Polar Bears & Penguins:

  • Patty the Polar Bear by Getting Hooked on Crochet (FREE)
  • Polar Bear by Spin a Yarn Crochet (FREE)
  • Crochet Penguin Amigurumi by Jess Huff (FREE)
  • Penguin on Ravelry (FREE · free Ravelry account required)
  • Penguin Jingle Bell Ornament by A Crocheted Simplicity (FREE)
  • Chilly the Penguin by The Hook Nook Life (FREE)

Love holiday animals? You'll also want to check out Marly's own Crochet Amigurumi Elephant pattern... she's not Christmas-specific, but she makes an absolutely adorable holiday gift! 🐘

Christmas in July festive graphic promoting free crochet and knit holiday patterns from Marly Bird

💡 More holiday crochet inspiration from the 25 Days of Christmas in July series! If you love amigurumi and cute holiday makes, check out Day 12: Festive Gnome Patterns (gnomes are basically amigurumi with personality! 😄), Day 5: Christmas Ornament Patterns, Christmas Hat Patterns, and Christmas Slipper Patterns. Or head back to the full 25 Days of Christmas in July hub to browse all the holiday goodness! 🎄


🧵 Beginner Tips for Your First Christmas Amigurumi

First time making amigurumi? Here are the four things that make the biggest difference between a squishy little character and a lumpy pile of yarn confusion. 😄

1. Start with Basic Round Shapes

Amigurumi is almost all circles, ovals, and spheres worked in continuous rounds. If you can work a magic circle (or a chain-2 starting circle) and do single crochet increases and decreases... you have everything you need. The Snowman Ornament from our list above is literally just spheres stacked on spheres. Start there! Once you've done one round piece, the rest unlocks fast.

2. Stuff Firmly... More Than You Think!

This is the #1 beginner mistake. Under-stuffed amigurumi look floppy and sad instead of squishy and round. Add stuffing as you go (don't wait until the end to stuff) and keep adding until the shape is solid and holds itself up. If you press your finger into a finished piece and it doesn't spring back... add more stuffing. Seriously. More. 😄

3. Insert Safety Eyes BEFORE You Stuff and Close

This is a step that cannot be undone! Position your safety eyes while the piece is still open, insert the post, and press the washer firmly onto the back from inside. Give it a good tug to make sure it's secure. Once you've stuffed and closed the piece, you can't get back in to attach washers properly. For toys going to children under 3, skip safety eyes and embroider eyes with yarn instead... much safer for little ones!

4. Use a Slightly Smaller Hook Than the Label Says

A tighter gauge is everything in amigurumi. If you use the recommended hook size on your yarn label, your fabric may have gaps that let the stuffing peek through. Go down one or even two hook sizes from what the label recommends. The fabric should feel dense and sturdy... no visible holes. This is the secret to that clean, professional-looking finish on every amigurumi you see on Instagram!

💡 New to amigurumi entirely? Check out Marly's Easy Amigurumi for Beginners guide for a full introduction to the technique before you dive into these holiday patterns!

Join our Newsletter

Get Free Crochet & Knitting
Pattern Links & Coupons!

Hand-drawn bird with curling, detailed feathers and pink accents; cheerful pose showcases fine line and texture work.
>> Become An Insider <<
A woman with glasses and curly hair models a colorful crocheted scarf, showing textured stitches and vibrant yarn.

🤴 A Note for Knitters: Holiday Stuffed Toys & Ornaments

Okay, let's talk about the knitters in the room... because while amigurumi is traditionally a crochet art form, knitters can absolutely get in on the stuffed holiday toy fun! 🎅

What to Look for in Knitted Stuffed Toy Patterns

Look for patterns labeled knitted stuffed ornament, knitted toy, or knitted plush. They use the same construction principles as amigurumi... worked in the round, stuffed with polyfill, finished with safety eyes or embroidered features. The main difference is the fabric texture: knitted fabric has a bit more stretch, so you'll want to work at a tighter gauge (go down a needle size) to keep stuffing from showing through. The finished look is a little different from crochet... but just as completely adorable! ✨

Best Search Terms to Find Knitted Holiday Amigurumi

  • "knitted Christmas ornament pattern"
  • "knitted snowman pattern"
  • "knitted Santa toy pattern"
  • "knit stuffed animal Christmas"
  • "holiday knit toy in the round"

Your needles deserve some Christmas magic too! 🧶 And if you find a great knitted holiday toy pattern, share it in our Facebook community... I'd love to add more knitting options to this list!


⚠️ A Word About Choosing Trustworthy Amigurumi Patterns

Whether you crochet or knit, here's something important to know before clicking through patterns on Pinterest or social media... the craft world has been flooded with AI-generated pattern images, and amigurumi is one of the most affected categories right now.

Here's the problem: AI image generators can create stunningly realistic photos of adorable amigurumi characters that look like professional pattern photography. But the "pattern" behind that image? It may be completely made up, technically incoherent, or describe a totally different item than what's shown in the preview. You click, you download (or buy), and what you get has nothing to do with that gorgeous little reindeer you were picturing. 😔

How to protect yourself:

  • ✅ Check the designer's website or blog ... real designers have a portfolio of real finished projects made by real crafters
  • ✅ Read Etsy reviews before buying ... look for reviews that mention actually MAKING the pattern, not just "so cute!"
  • ✅ Check Ravelry ... real patterns get rated and reviewed by real makers who share their finished objects (FOs)
  • ✅ Look for tech editing credits ... professional patterns are tested and tech edited. No mention of this? Proceed carefully.
  • ✅ Choose designers with community presence ... a real blog, social media history, and a community of makers who trust their work are all good signs

Every designer in this roundup is a real human creator with a real community behind them. And if you want patterns you can trust completely... Marly designs all of her own patterns from scratch, gets them tech edited, and tests them with real makers. Check out her Crochet Amigurumi Elephant and the Easy Amigurumi guide for a taste of what a fully designed, trustworthy pattern looks like! 💛


Frequently asked questions about Christmas amigurumi crochet patterns — Santa, snowman, elf, and reindeer plushies by Marly Bird

Frequently Asked Questions

What yarn weight is best for amigurumi?

Most amigurumi patterns call for worsted weight yarn (size 4), which is the sweet spot for beginners. It gives great stitch definition, works up fast, and is easy to find. The key is to pair your yarn with a slightly smaller hook than the label recommends for a tight gauge that keeps stuffing from peeking through.

What is the best stuffing for amigurumi?

Polyfill fiberfill stuffing is the classic choice. Stuff your piece firmly ... you'll probably use more than you think! For pieces that need to sit upright, some crafters add poly pellets to the base for weight. For toys for babies or young kids, make sure your stuffing is hypoallergenic and labeled safe for children's toys.

How do I make safety eyes secure in amigurumi?

Insert safety eyes before you close up and stuff your piece. Push the post through your fabric, then press the washer on from the inside firmly and give it a good tug. For toys for children under 3, skip safety eyes and embroider eyes with yarn instead for safety.

What exactly is amigurumi?

Amigurumi is the Japanese art of crocheting or knitting small, stuffed toys and animals. The word comes from the Japanese ami (knitted or crocheted) and nuigurumi (stuffed doll). It originated in Japan and has become wildly popular worldwide.

Are Christmas amigurumi patterns beginner-friendly?

Most of them, yes! If you can work in the round, single crochet, and do basic increases and decreases, you have everything you need. Snowman ornament styles are especially great for first-timers because they are mostly just spheres. Start simple and work your way up to more detailed characters.

What can I do with finished Christmas amigurumi?

They make adorable gift toppers, stocking stuffers, mantel decorations, and even tree ornaments if they are small and light enough. They are also popular at craft fairs and holiday markets. Many crafters build up a collection each year for a charming holiday village display on their mantel.

How much yarn do I need for a Christmas amigurumi?

So here's the thing... most small amigurumi use very little yarn. A single ornament-size snowman or Santa can work up with less than 50 grams of worsted weight yarn! Larger display pieces like the Giant Snowman might use 100-200 grams. This makes amigurumi the PERFECT project for using up those small skeins and mini balls from your stash. If you're buying new yarn, one standard skein of worsted weight is usually more than enough for 2-3 small holiday amigurumi. 🎉

Can I sell amigurumi made from these free patterns?

Great question! Every designer has their own terms of use, so the honest answer is: always check the individual pattern's terms before selling finished items. Most free amigurumi patterns allow selling finished handmade items (with credit to the designer), but some require a commercial license. When in doubt, reach out to the designer directly... they are usually incredibly friendly and happy to clarify! 💛


Marly Bird in a red shirt with a joyfully surprised expression for Christmas in July crochet and knit holiday patterns

✨ Final Thoughts

Whether you're building an entire Christmas amigurumi collection or making just one special little plushie to slip under the tree... these patterns are pure holiday joy in yarn form. There's something about a handmade toy that carries a kind of magic a store-bought gift just can't match. 💛

And here's the thing about amigurumi... once you make your first one, you're kind of hooked. (Pun absolutely intended. 😄) Start with a simple snowman, level up to Santa, and before you know it you've got a whole merry crew lined up on your mantle. It happens to the best of us. 🎄

Don't forget to check out all the other holiday makes in the 25 Days of Christmas in July series... there are festive patterns for every skill level and every kind of crafter. And if you make any of these adorable little guys, please tag me so I can ooh and aah over your creations! Find me on Instagram and in our Facebook community. Happy stitching! 🧸🎄

❤️ Your BiCrafty Bestie,
Marly Bird
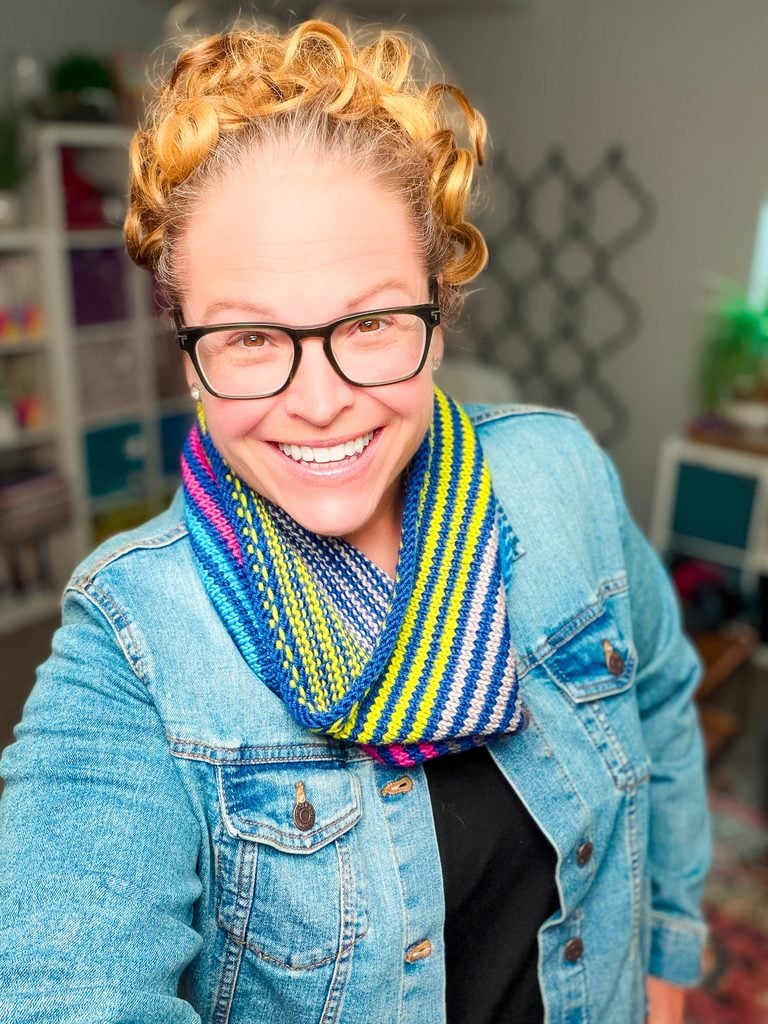
A cartoon avatar of a person with glasses and a brown bun smiles warmly. Their green shirt and black jacket add a stylish touch, while colorful hearts surround them like loving temperature blankets, stitching together an aura of love and positivity. -Marly Bird

Filed Under: Crochet, Free Patterns, Knitting, Round Ups, Uncategorized

  • 1
  • 2
  • 3
  • …
  • 96
  • Next Page »

Let's Be Social

Join the Marly's Minions Facebook group to share, ask questions, or chat about all of your yarn related crafts!

Join the group(opens in new tab)
Cartoon of a smiling woman with brown hair in a bun, glasses, black jacket and green shirt, waving next to large "hi" text.

Quick Links

The Pattern Shop

Our Free Patterns

Blog

Marly Bird House
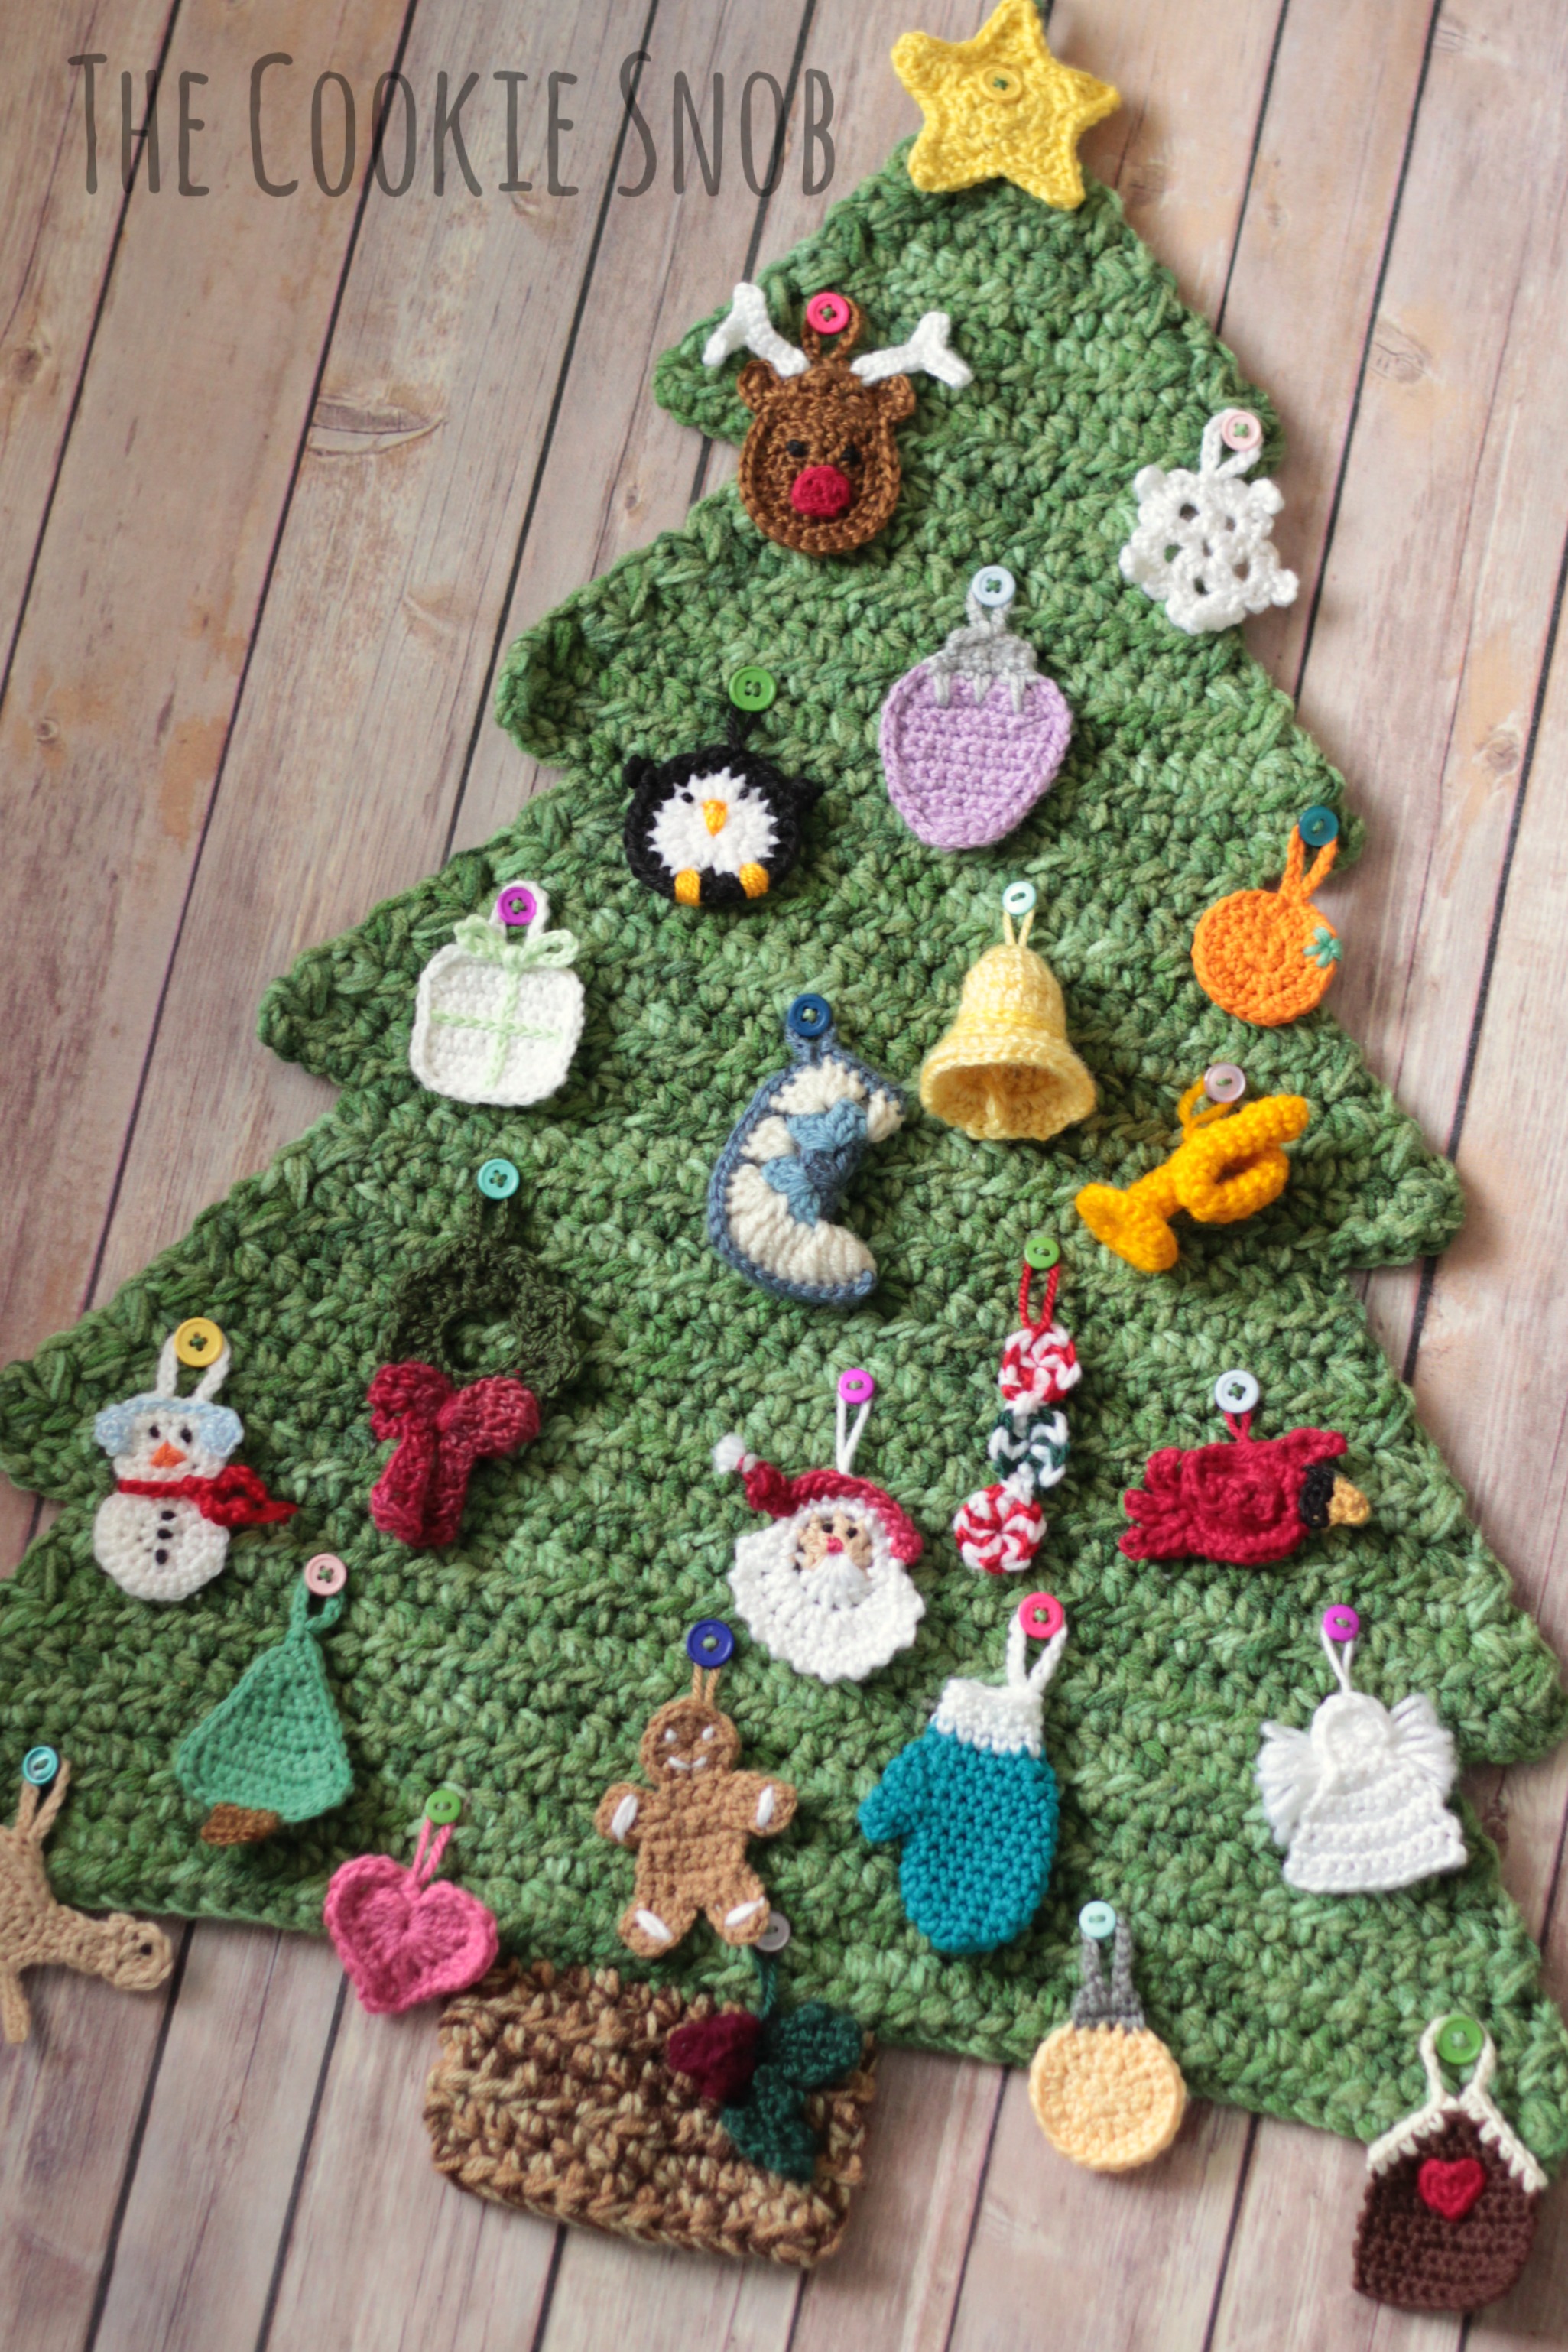
Learn to Knit & Crochet

About

Giveaway Terms and Privacy Notice

Find Us Everywhere

Join the Newsletter

YouTube Channel

Marly's Minions FB Group

Etsy Store

Ravelry Store


AN ELITE CAFEMEDIA HOME/DIY PUBLISHER

Information from your device can be used to personalize your ad experience. Do not sell or share my personal information.

Privacy Policy   Terms   Marly Bird Legal Documents Copyright © 2026