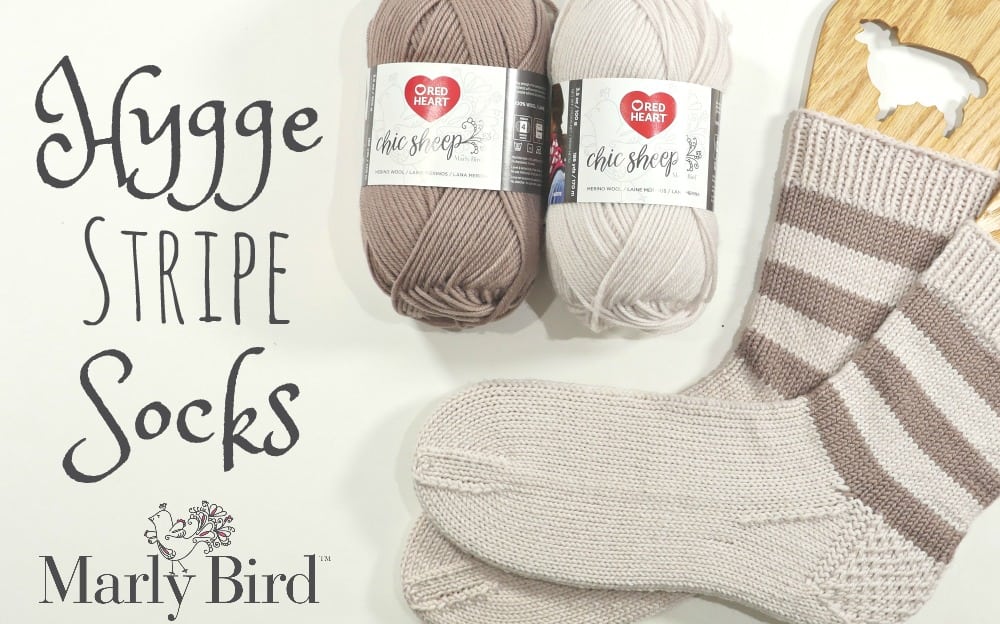
Hygge Stripe Socks | Free Beginner Knit Sock Pattern
If you’re searching for a free beginner knit sock pattern that’s cozy, approachable, and fun to knit, the Hygge Stripe Socks are a perfect choice. Inspired by the Danish concept of hygge—that warm, comforting feeling of slowing down and enjoying simple pleasures—these socks are designed to be thick, soft, and ideal for relaxing at home.
Affiliate Disclosure: This post contains affiliate links. To learn more please visit my privacy policy here💖
Knit with worsted-weight wool yarn, these striped socks work up faster than traditional fingering-weight socks and feel wonderfully cushy on your feet. Whether you’re making your first pair of knit socks or adding another favorite to your handmade sock drawer, this pattern delivers comfort without complexity.
What You Will Love About This Free Knit Sock Pattern
- A free beginner knit sock pattern you can cast on without hesitation
- Cozy worsted-weight wool socks perfect for house wear
- A classic striped socks pattern that’s easy to customize
- Straightforward construction using familiar sock-knitting techniques
- A relaxing project that’s ideal for slower, mindful knitting

Is This an Easy Knit Sock Pattern for Beginners?
Many knitters looking for easy knit sock patterns for beginners want something that feels achievable without tiny needles or ultra-thin yarn. While this pattern does assume basic comfort with knitting in the round on double-pointed needles, it is often considered more approachable than traditional sock patterns.
Because these socks are knit with worsted-weight yarn, stitches are easier to see, and progress happens quickly. That makes this pattern a great stepping stone after a first basic sock or for knitters who want a stripe knit sock pattern for beginners that feels cozy and rewarding.
A Classic Striped Sock Knitting Pattern
This design features simple stripes that create visual interest without adding complexity. The stripe sequence is easy to follow, making this an easy stripe knit sock pattern that still looks polished when finished.
Stripes are also a wonderful way to personalize your socks. Use contrasting colors for bold stripes, softer tones for a subtle look, or stash yarns to create a one-of-a-kind pair.
Yarn Choices for Cozy Wool Socks
The original pattern uses Red Heart Chic Sheep by Marly Bird, a soft merino wool yarn that’s breathable, warm, and perfect for cozy socks.
When substituting yarn, look for a worsted-weight wool or wool-blend yarn with good elasticity. Wool fibers help the socks retain their shape, making this a dependable wool sock pattern for comfortable wear.
Always check gauge when changing yarns, as fiber content and twist can affect fit.
Yarn Suggestions for This Pattern
If you’re looking for specific yarn options, choose worsted-weight wool or wool-blend yarns that provide warmth, elasticity, and durability. These fibers help the socks hold their shape and stay cozy over time.
Recommended yarns from Knit Picks:
- Wool of the Andes Worsted – A classic, budget-friendly wool with excellent elasticity and warmth
- Twill Worsted – Smooth plies that give great stitch definition for stripes
- Swish Worsted – Extra-soft, springy superwash wool that’s comfortable for cozy socks and easy-care wear
Recommended yarns from Jimmy Beans Wool:
- Malabrigo Rios – Soft, springy, and warm with beautiful color options for stripes
- Dream In Color Classy Cashmere – Cozy and consistent, with excellent stitch clarity
- Lana Grossa Cool Wool Big Yarn – A traditional wool that wears well and blocks nicely
Avoid cotton yarns for this pattern. Cotton lacks elasticity, which can cause socks to stretch out and lose their shape over time. Wool and wool-blend yarns are a much better choice for comfortable, long-lasting knit socks.
Solid colors, heathers, and gentle tonal yarns all work beautifully for stripes, making this pattern a great opportunity to experiment with color combinations that fit your personal style.
Fit, Gauge, and Customizing Your Socks
These striped knit socks are designed to fit snugly with slight negative ease, which means they stretch comfortably around the foot and stay put during wear (no saggy ankles here!). Getting the right fit starts with gauge and a few simple measurements.
Understanding Sock Fit (Negative Ease Explained)
Socks should fit tighter than most garments. If they were knit to the exact foot circumference, they would slide down and lose shape quickly. These socks are designed with negative ease, meaning the finished sock circumference is slightly smaller than the actual foot circumference for a secure, comfortable fit.
Join our Newsletter
Get Free Crochet & Knitting
Pattern Links & Coupons!

How to Choose the Right Size
Before you cast on, take two quick measurements:
- Foot circumference (around the ball of the foot)
- Foot length (from the back of the heel to the tip of the longest toe)
Use the charts below to select the size that best matches the foot you’re knitting for.
Sock Size by Foot Circumference
| Size | Foot Circumference (in) | Foot Circumference (cm) |
|---|---|---|
| Child | 5¾ – 6½ | 14.5 – 16.5 |
| Adult Small | 7¼ – 8 | 18.5 – 20.5 |
| Adult Medium | 8¾ – 9½ | 22 – 24 |
| Adult Large | 10¼ – 11 | 26 – 28 |
✨ Designer Tip:
If you’re between sizes, choose the smaller size for a snug, sock-like fit.
Foot Length Guide (Heel to Toe)
To customize sock length, knit the foot until it measures slightly shorter than the wearer’s actual foot length. This allows room for the toe shaping without making the sock too long.
Women’s Foot Length Guide
| US Shoe Size | Foot Length (in) | Suggested Sock Foot Length (in) |
|---|---|---|
| 6 | 9 | 8½ |
| 7 | 9½ | 9 |
| 8 | 9¾ | 9¼ |
| 9 | 10 | 9½ |
| 10 | 10½ | 10 |
| 11 | 10¾ | 10¼ |
Men’s Foot Length Guide
| US Shoe Size | Foot Length (in) | Suggested Sock Foot Length (in) |
|---|---|---|
| 8 | 10 | 9½ |
| 9 | 10½ | 10 |
| 10 | 10¾ | 10¼ |
| 11 | 11 | 10½ |
| 12 | 11½ | 11 |
Customizing Your Socks
One of the best things about knitting socks is how easy they are to personalize:
- Foot Length: Knit the foot to your preferred length before starting the toe.
- Stripe Placement: Adjust stripe width or placement to suit your style.
- Color Choices: Choose colors that reflect your idea of hygge—cozy, comforting, and personal.
Because these socks are knit at a thicker gauge, they’re ideal for house socks, lounging, or light wear, rather than tight-fitting shoes.
How to Measure Your Foot for Knit Socks
Taking a few minutes to measure the foot before you start will dramatically improve the fit of your socks—especially when knitting for someone else.
Step-by-Step Foot Measuring Guide
- Measure foot circumference around the ball of the foot (the widest part).
- Measure foot length from the back of the heel to the tip of the longest toe.
- Write both measurements down and keep them with your pattern as you knit.
✨ Designer Tip: Measure the foot while standing for the most accurate circumference.
Knitting Socks for Someone Else (Quick Checklist)
- ✔️ Confirm foot circumference
- ✔️ Confirm foot length
- ✔️ Ask whether the recipient prefers a snug or relaxed fit
- ✔️ Choose wool or wool-blend yarn for elasticity
- ✔️ Knit the foot slightly shorter than the actual foot length to allow room for toe shaping
Printable Sock Fit & Measurement Reference
For easy reference, consider printing or saving the sock sizing charts included in this post. Keeping a foot circumference and length guide nearby makes sock knitting faster, more confident, and far less stressful—especially when you’re knitting multiple pairs.

Need help with knitting? You can find help with basic knitting, fair isle knitting and intarsia on the MarlyBirdYouTube Channel. By the way, have you subscribed to my YouTube Channel yet?
Hygge Stripe Socks Details
SKILL LEVEL
Advanced Beginner
Finished Sock measures approx.
7 (8, 9)” [17.7 (20, 22.8) cm] circumference around foot.
Gauge
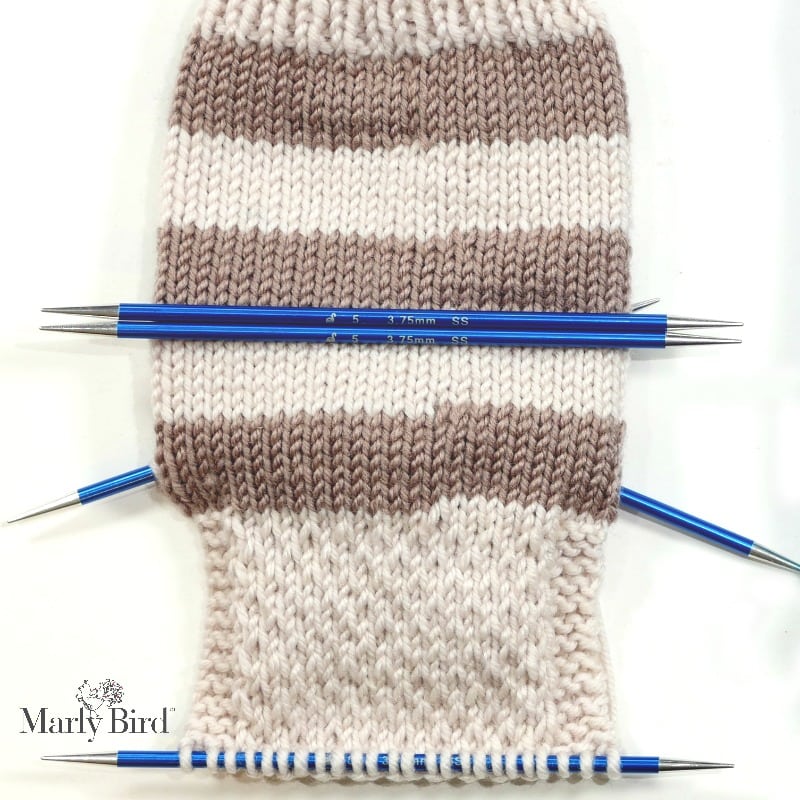
24 sts = 4″ (10 cm) Stockinette st. CHECK YOUR GAUGE. Use any size needles to obtain the gauge.
MATERIALS
Yarn
Chic Sheep; (4 Medium), Art. R170 100% Merino Wool available 3.5 oz (100 g), 186 yd (170 m) balls
- Color A: Linen–2 balls
- Color B: Suede–1 ball
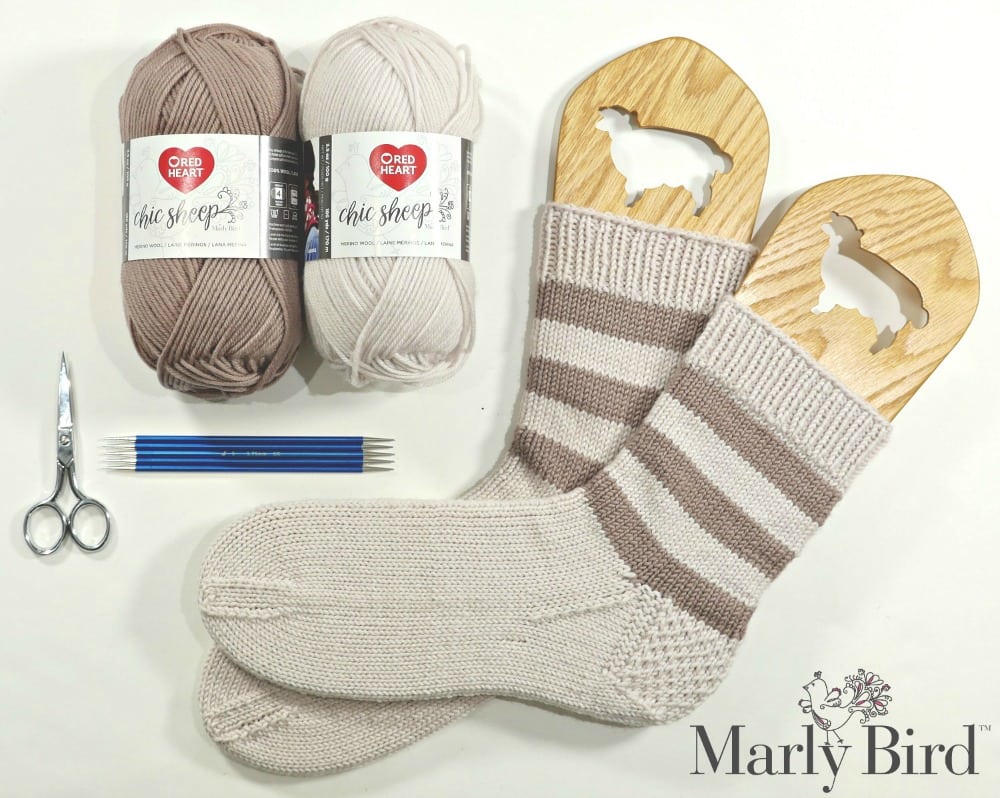
Needles
US #5/3.75mm set of 5 double pointed needles
Notions
- Stitch Markers
- Tapestry Needle
- Scissors
- Tape Measure
- WIP Tube (as seen in video)
- Wooden Sock Blockers (as seen in video)
Special Stitches
- ssk (slip, slip, knit):
Slip next 2 stitches knitwise to the right needle, insert the point of the left needle through the front of these stitches, and knit them together through the back loop.
Abbreviations
* or ** = repeat whatever follows the * or ** as indicated
k = knit
k2tog = knit next 2 stitches together
p = purl
p2tog = purl next 2 stitches together
st(s) = stitch(es)
VIDEO SUPPORT
This pattern pairs beautifully with Marly’s “My First Knit Socks on Double Pointed Needles” video series. The videos provide step-by-step visual instruction and are especially helpful if this is your first time knitting socks or working with DPNs.
Recommended videos to reference while knitting:
- No Cuss Cast on and joining in the round
- Working ribbing and stockinette in the round
- Heel flap and heel turn construction
- Picking up stitches for the gusset
- Gusset decreases (traditional and alternative)
- Toe shaping and Kitchener stitch
- Adding a Life Line
You do not need to watch every video to successfully knit this pattern. Use the videos as support whenever you want extra visual guidance.
NOTES
- This pattern is written for double-pointed needles (DPNs). If you are new to DPNs, take your time with the first few rounds and keep the first two stitches on each needle snug to prevent ladders.
- This sock is designed with negative ease, meaning the finished sock circumference is slightly smaller than the foot for a secure, comfortable fit.
- Cut yarn at each color change and weave in ends as you go. Do not carry yarn up the inside of the sock, as this will affect fit and comfort.
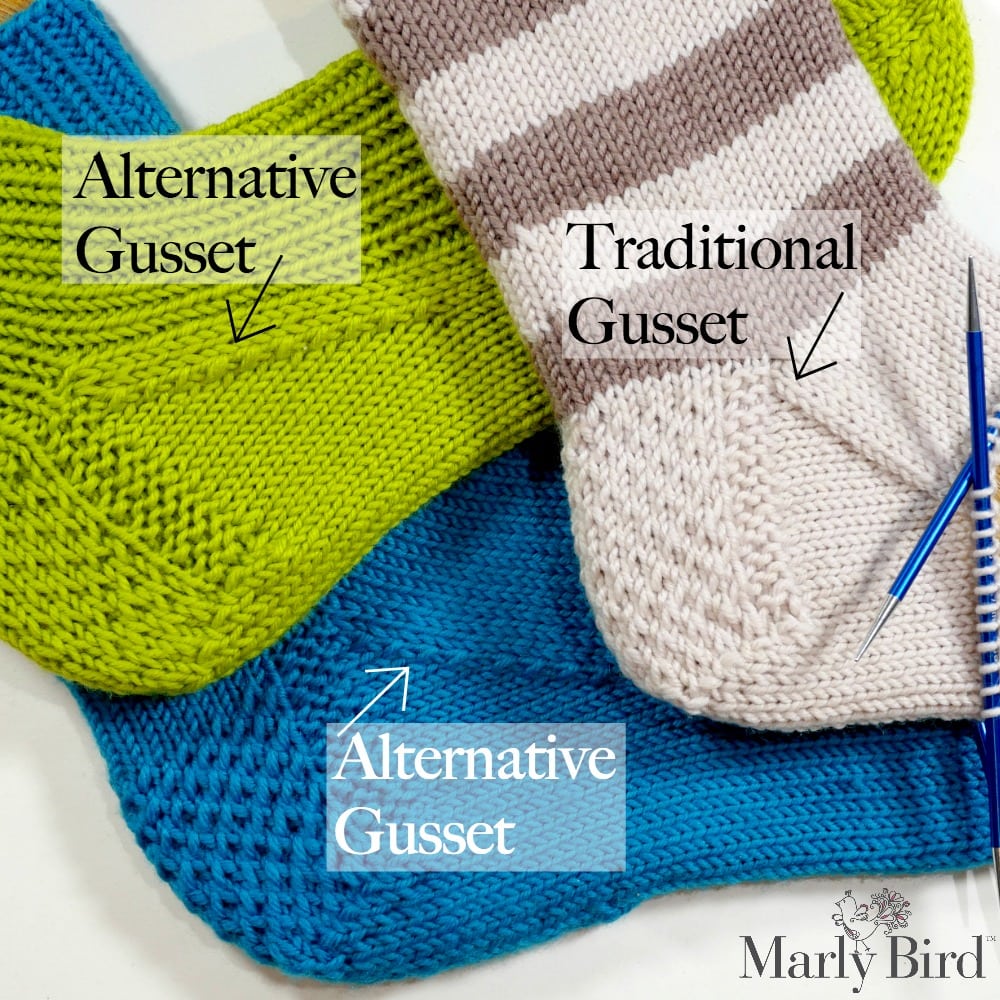
- This pattern includes two gusset options: a traditional gusset for a clean, classic look and an alternative gusset where the decreases become a visible design feature. Choose one method and work it consistently.
- For best results, measure foot length before beginning the foot section. Knit the foot until it measures approximately ½” shorter than the actual foot length to allow room for toe shaping.
- If knitting for someone else, foot circumference and length measurements are strongly recommended before casting on.
Hygge Stripe Socks
PATTERN
Cuff
With Color A and using long tail cast on, cast on 40 (48, 56) sts onto 4 double pointed needles [10 (12, 14) sts on each needle].
Join round being careful to not twist cast on edge.
✨ Designer Tip: Keep the first two stitches of each needle snug to help prevent ladders between needles.
K 1 round. Mark fabric under last needle of round to indicate start of rnd.
Next round: * K1, p1; repeat from * around.
Repeat the last round until Cuff measures 2″ [5 cm].
Leg
Rounds 1-7: Change to Color B, continue evenly in Stockinette st (knit every across every needle of every round) for 7 rnds.
Rounds 8-14: Change to Color A, continue evenly in Stockinette st for 7 rnds.
Repeat rounds 1-14 once more then rounds 1-7 once again.
Leg of sock measures approx 6″ (15 cm) including Cuff at this point.
Heel Flap
With color A, using Needle #4, knit across all sts on Needle #1.
You now have a total of 20 (24, 28) sts on one needle (these are the Heel sts) and the remaining sts 20 (24, 28) sts divided between the 2 remaining needles.
Turn work to face the wrong side, and begin working back and forth in rows across Heel sts only as follows:
Row 1 (wrong side): K3, p to last 3 sts, k3.
Row 2: K3, * with yarn in back slip 1 purlwise, k1; repeat from * to last 3 sts, k3.
Row 3: K3, p to last 3 sts, k3.
Row 4: K3, * k1, with yarn in back slip 1 purlwise; repeat from * to last 3 sts, k3.
Repeat these rows until 20 (24, 28) rows have been complete, ending on a row 4.
There will be 10 (12, 14) Garter st ridges at each edge worked in Heel Flap.
Heel Turn
Row 1 (wrong side): Purl 11 (13, 15), p2tog, p1, turn – 19 (23, 27) total Heel sts, counting both Heel needles.
Note: Leave remaining sts unworked on left needle when turning.
Row 2: With yarn in back slip 1 purlwise, k3, ssk, k1, turn – 1 st decreased.
Note: There will be a small gap between the sts that form the Heel turn and the yet unworked sts on the needle.
Row 3: With yarn in front slip 1 purlwise, p to 1 st before gap, p2tog, p1, turn – 1 st decreased.
Note: The p2tog will close the gap.
Row 4: With yarn in back slip 1 purlwise, k to 1 st before gap, ssk, k1, turn – 1 st decreased.
Note: The ssk will close the gap.
Repeat Rows 3 and 4 until 12 (14, 16) total Heel sts remain.
All Heel sts are now on 1 needle.
Slip half the Heel sts purlwise onto a spare needle.
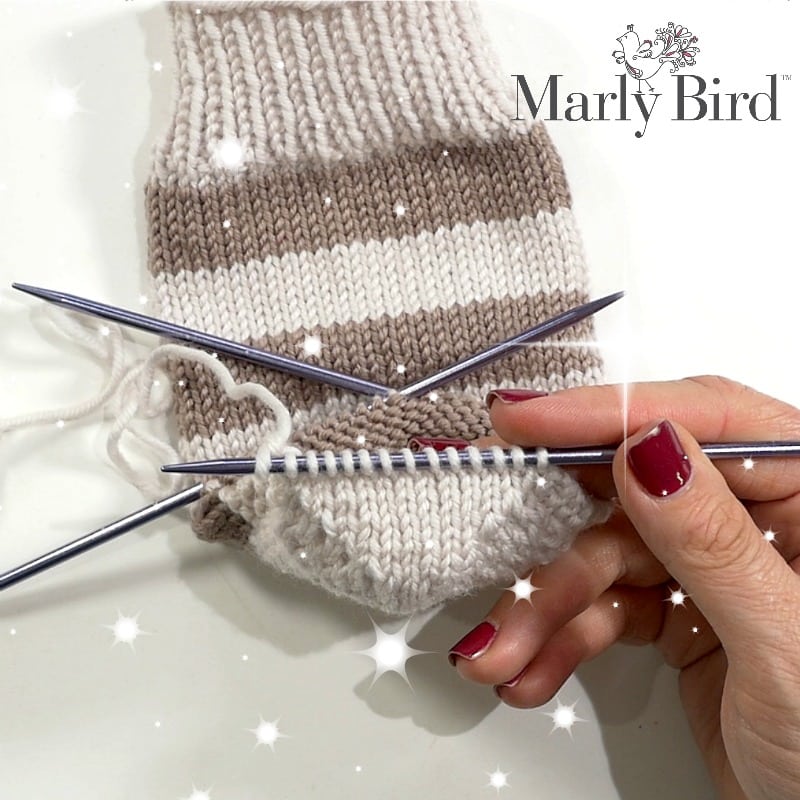
Gusset
✨ Designer Tip: if you don't watch ANY video but one, I highly suggest that you watch this one video to see how to do the gusset.
The gusset returns the sock to working in the round and gradually reduces stitches back to the original foot circumference.
We now want to divide the stitches remaining on the heel flap onto two needles so that we can work in the round again. Do this by slipping half the number of stitches remaining onto a spare needle which is needle 5 at this point.
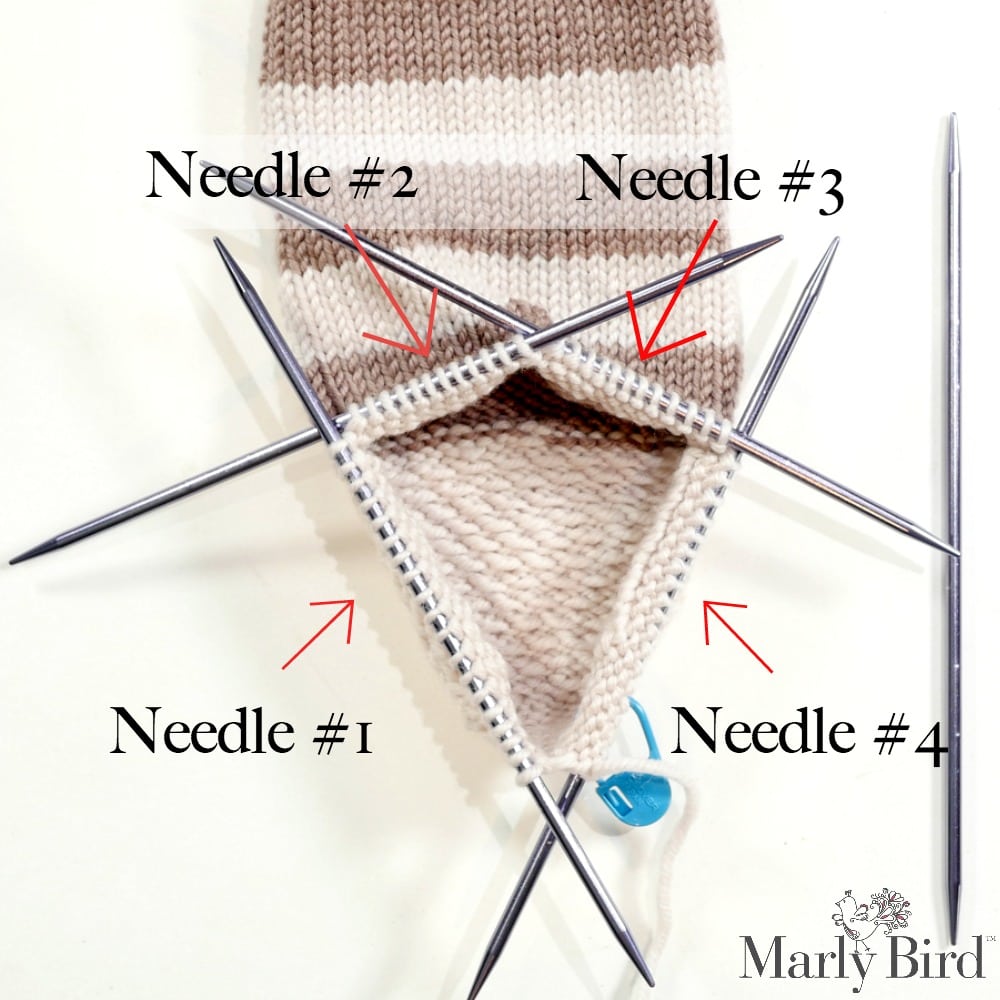
Pick Up Round for Gusset:
Needle 1: Using the needle to the left of the center heel (this is now needle 1), pick up and knit 10 (12, 14) sts from the side of the heel flap, then pick up 2 stitches at the top of the gusset (see video for help)
Needles 2 and 3: work across in stockinette stitch
Needle 4: using the spare needle, pick up 2 sts at the top of the gusset and 10 (12, 14) stitches down the side of the heel flap, then, WITH THE SAME NEEDLE, knit the remaining stitches on needle 5.
Now you have 4 needles with stitches on them and a 5th needle as the spare needle you use as your right hand needle– 18 (21, 24) sts on each Needle 1 and 4, 10 (12, 14) sts on each Needle 2 and 3.
Move marker to fabric just under Needle 4 to indicate start of round.
The beginning point of the round is NOW the center of the heel, so if you have been using a stitch marker to mark the 4th needle or the last needle of the round then you will want to move the marker to the needle on the needle to the right of the center heel (see image).
The goal now is to get all the needles to have the same number of stitches as they did when you cast on. Therefore, we will be decreasing the stitches on needles 1 and 4 every other round until all the they have 10 (12, 14) sts on them just like needles 2 and 3.
Set-up round:
Needle 1: Knit to the last 2 sts, ssk.
Needles 2 and 3: work across tin stockinette stitch
Needle 4: k2tog, knit to the end of the round.
Now you have 1 less stitch on needles 1 and 4 and you have eliminated (or drastically reduced) the gap at the top of the gusset.
Next, choose either the traditional gusset or the alternative gusset for the next section, but choose only one! Either one will get the job done but you have a choice of how you want your socks to look.
TRADITIONAL GUSSET–the gusset decreases form an uninterrupted stockinette stitch line down the gusset (as seen on the Hygge Stripe Socks with Chic Sheep by Marly Bird)
Round 1:
Needle 1: Knit to the last 3 sts, k2tog, k1.
Needles 2 and 3: work across in stockinette stitch
Needle 4: K1, ssk, knit to the end of the round.
Now you have 1 less stitch on needles 1 and 4.
Round 2: Knit all stitches
Repeat rounds 1 and 2 until there are 10 (12, 14) sts on each needle, 40 (48, 56) sts total.
OR
ALTERNATIVE GUSSET–the gusset decreases are more visible and are a design feature (as seen on the blue or green socks)
Round 1:
Needle 1: Knit to the last 3 sts, ssk, k1.
Needles 2 and 3: work across in stockinette stitch
Needle 4: K1, k2tog, knit to the end of the round.
Now you have 1 less stitch on needles 1 and 4.
Round 2: Knit all stitches
Repeat Gusset Rounds 1 and 2 until there are 10 (12, 14) sts on each needle, 40 (48, 56) sts total.
Foot
Work evenly in Stockinette st around all needles until Foot measures 1½ ” (5 cm) less than desired Foot length measuring from the back of the heel.
Toe
Before starting the toe, double-check foot length. Socks should be about ½” shorter than the actual foot length for proper fit.
Round 1:
Needle 1: Knit to 3 sts before end of needle, k2tog, k1.
Needle 2: K1, ssk, knit to end.
Needle 3: Knit to 3 sts before end of needle, k2tog, k1.
Needle 4: K1, ssk, knit to end.
– 1 stitch decreased on each needle, 36 (44, 52) sts total.
Round 2: Knit around.
Repeat Rounds 1 and 2 until there are 5 (6, 7) sts on each needle, 20 (24, 28) sts total.
Repeat Round 1 only until there are 10 (12, 14) sts total.
Knit across Needle 1 only. Working yarn is now at side of toe.
Slip all sts from Needle 1 purlwise onto Needle 4–5 (6, 7) sts on needle 4 now.
Slip all sts from Needle 3 purlwise onto Needle 2–5 (6, 7) sts on needle 2 now.
All sts are now on 2 needles and set up for grafting.
FINISHING
Graft Toe sts together using Kitchener st as follows:
Hold both needles together in your left hand, with wrong sides facing inward. Cut a long tail from the working yarn (about 4 times the width of the fabric to be joined), and thread tail into yarn needle.
Step 1: Insert yarn needle purlwise into first st on front needle and pull it through, leaving st on the knitting needle.
Step 2: Insert yarn needle knitwise into first st on the back needle and pull it through, leaving st on the knitting needle.
Step 3: Insert yarn needle knitwise into first st on front needle and pull it through, then drop this st off knitting needle.
Step 4: Insert yarn needle purlwise into first st on front needle and pull it through, leaving st on the knitting needle.
Step 5: Insert yarn needle purlwise into first st on the back needle and pull it through, then drop this st off knitting needle.
Step 6: Insert yarn needle knitwise into first st on the back needle and pull it through, leaving st on the knitting needle.
Repeat steps 3-6 only, pausing to pull sts taut and neaten the seam after every couple of inches. Be sure to always pause after a step 6 so as to not lose your place.
When 2 sts remain, work step 3, then step 5, then fasten off.
Weave in all loose ends.
Who Are These Socks Perfect For?
The Hygge Stripe Socks are a great fit if you:
- Are looking for a basic sock knitting pattern that feels cozy and approachable
- Enjoy knitting socks with double-pointed needles
- Want a comfortable men’s sock pattern knitting option or a unisex sock design
- Prefer worsted-weight projects that knit up efficiently
Other Marly Bird Sock Patterns You Might Love
If knitting socks has you hooked, there are plenty of other sock patterns designed by Marly Bird to explore next. Whether you’re just getting started or looking to expand your sock-knitting skills, these patterns offer a wide range of styles, constructions, and techniques.
Beginner-Friendly Sock Patterns
- My First Knit Socks
https://marlybird.com/blog/my-first-knit-socks/
A trusted beginner sock pattern with step-by-step guidance, designed to build confidence with classic cuff-down sock construction. - Skyline Ribbed Knit Socks
https://marlybird.com/blog/free-ribbed-knit-socks-pattern-skyline/
A free ribbed sock pattern that focuses on stretch, fit, and everyday wear—perfect once you’re comfortable knitting in the round.
Intermediate Sock Patterns
- Gemstones Knit Socks
https://www.ravelry.com/patterns/library/gemstone-socks - Toe-Up Knit Socks Sock-Along
https://marlybird.com/blog/toe-up-knit-socks-toe-up-crochet-socks-2020-sock-along/
Learn toe-up sock construction with flexibility for customizing foot length and fit.
Advanced or Specialty Sock Patterns
- Heartstrings Knit Socks
https://marlybird.com/blog/heartstrings-knit-socks-free-stranded-colorwork-sock-pattern/
A free stranded colorwork sock pattern that introduces chart reading and color management techniques. - Thigh High Knit Socks
https://marlybird.com/blog/thigh-high-knit-sock-pattern/
A bold statement sock pattern featuring extended leg length, shaping, and dramatic styling. - Alex Seersucker Knit Socks
https://shop.marlybird.com/collections/all/products/alex-seersucker-knit-socks
A textured sock pattern with refined stitch work, ideal for knitters who enjoy detailed fabric and polished results.
Explore Even More Sock Inspiration
If you’re looking for a broader overview of sock styles and techniques, this roundup is a great place to browse and plan your next project:
https://marlybird.com/blog/knit-socks-10-free-patterns/
Frequently Asked Questions
Is this a free knit sock pattern?
Yes, the Hygge Stripe Socks pattern is available for free on MarlyBird.com.
Is this a good sock pattern for beginners?
This pattern works well for knitters who have basic experience knitting in the round and want an easier, more forgiving sock project using worsted-weight yarn.
Are these socks meant to be worn with shoes?
These socks are designed primarily as house socks. They are thicker than traditional socks and are best worn indoors or with roomy footwear.
Can I knit this striped sock pattern for men?
Yes. The simple, classic design makes this a great men’s sock pattern knitting option as well as a versatile unisex sock.
Related Sock Knitting Resources
Final Thoughts
The Hygge Stripe Socks with Chic Sheep are the kind of project that reminds us why knitting feels so comforting. As a free striped knit sock pattern, they combine simplicity, warmth, and timeless style into a pair of socks you’ll reach for again and again.
If you’re searching for an easy stripe knit sock pattern or a cozy wool sock pattern that delivers both comfort and satisfaction, these socks are a wonderful choice.
Happy knitting!