Search
Close
  • The Pattern Shop
  • Our Free Patterns
    • Browse All Our Free Patterns
    • Our Free Knitting Patterns
    • Our Free Crochet Patterns
  • Blog
    • All Blog Posts
    • All Free Patterns
    • Dibble Dabble Inspiration
    • Giveaways
    • Make-Alongs
    • Product Reviews
    • Roundups
    • Tips, Tricks, Techniques for Knitting and Crochet
Stylized bird with pink and gray swirling tail above elegant โ€œMarlyโ€ text, logo for crochet accessories and home decor.
  • Marly Bird House
  • Learn to Knit & Crochet
    • Newbie? Start Here
    • Video Tutorials
    • Knitting Definitions
    • Crochet Definitions
    • Common Techniques
    • Size Charts for Knitting and Crochet Projects
  • About
ร—
  • The Pattern Shop
  • Free Patterns
  • Blog
  • Marly Bird House
  • Learn to Knit & Crochet
    • Newbie? Start Here
    • Video Tutorials
    • Knitting Definitions
    • Crochet Definitions
    • Common Techniques
    • Size Charts for Knitting and Crochet Projects
  • About
Stylized bird with pink and gray swirling tail above elegant โ€œMarlyโ€ text, logo for crochet accessories and home decor.
Search
Close

New Patterns NOW Available in Ad-Free PDF! Check out The Pattern Shop

Free Knit Swing Cardigan Pattern โ€“ Opening Night Cardigan by Marly Bird

January 16, 2026 By Marly Bird Leave a Comment

Looking for a flattering, drapey knit cardigan pattern youโ€™ll wear on repeat?
The Opening Night Cardigan is your new favorite cast-on.

This swing-style knit cardigan is free to follow right here on the blog. Designed for confident beginners and beyond, this open front cardigan flows beautifully around the body, has a dramatic oversized collar, and includes a full range of sizes from XS to 4X.

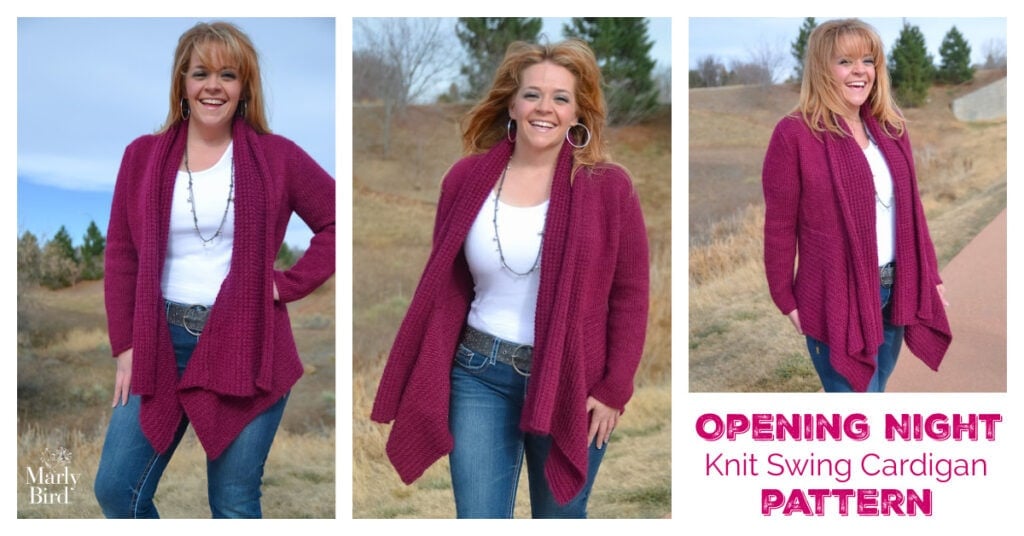
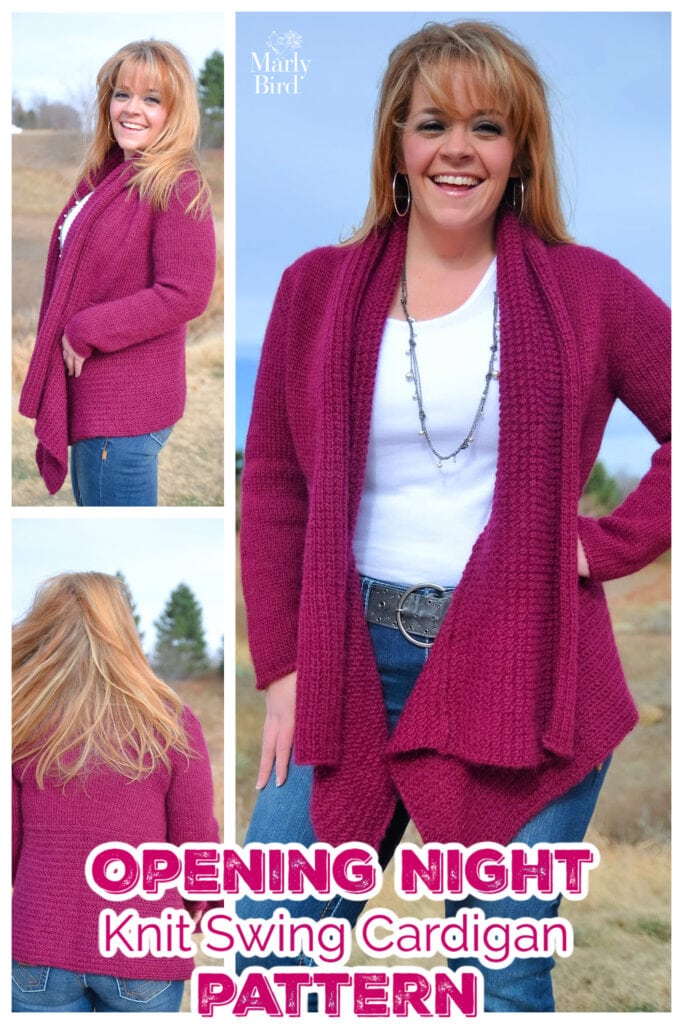
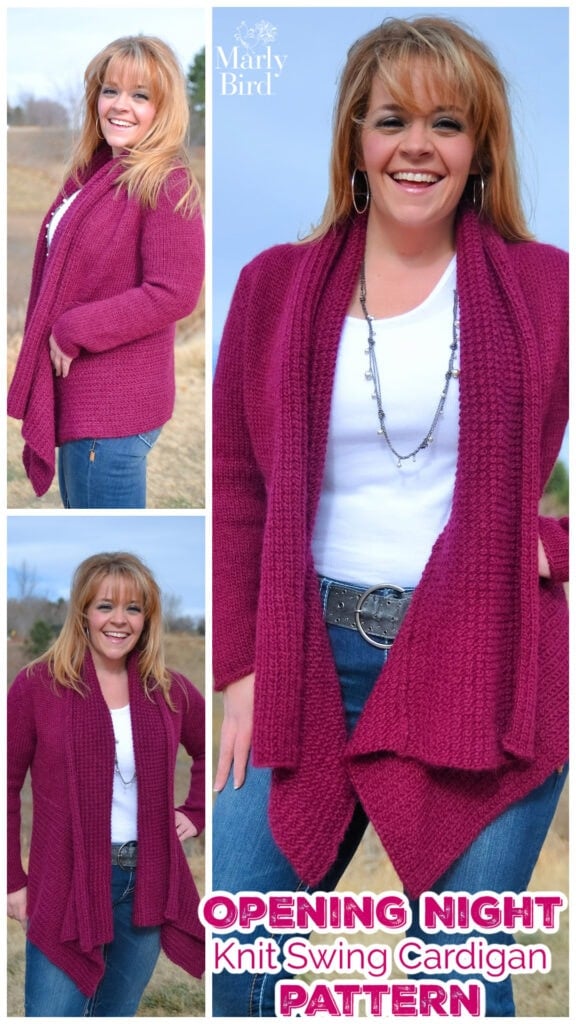
Three images show a smiling woman outdoors in a deep pink knit swing cardigan, jeans, and a white top. Text reads "OPENING NIGHT Knit Swing Cardigan PATTERN," featuring our free knit swing cardigan pattern. -Marly Bird

Affiliate Disclosure: This post contains affiliate links. To learn more please visit my privacy policy here๐Ÿ’–

Whether you're layering it for fall photos, cozying up at the movies, or just want to feel a little fabulous on a Tuesday, this piece has the comfort of a favorite hoodie with the elegance of a handmade heirloom. ๐Ÿ’ƒ


Meet the Opening Night Cardigan

The Opening Night Knit Swing Cardigan is one of those โ€œthrow it on and instantly feel put-togetherโ€ pieces. It has a swingy, A-line shape that moves with you, a generous collar that frames your face, and a length that works with jeans, dresses, leggings, and everything in between.

This design has been a long-time favorite in the Marly Bird world because it looks good on so many body types, and itโ€™s fun and relaxing to knit.

Why Youโ€™ll Love This Free Knit Swing Cardigan Pattern

  • Open front, swing silhouette โ€“ elegant drape that flatters lots of figures
  • Oversized collar โ€“ adds dramatic flair and cozy warmth
  • Knit in pieces and seamed โ€“ easier to manage on your needles than one huge sweater
  • Beginner-friendly techniques โ€“ no complicated charts or fussy stitch patterns
  • Ad-free PDF upgrade available โ€“ perfect for printing, highlighting, and tossing in your project bag
  • Course-style support โ€“ you can also work this project inside the Marly Bird House with detailed video lessons
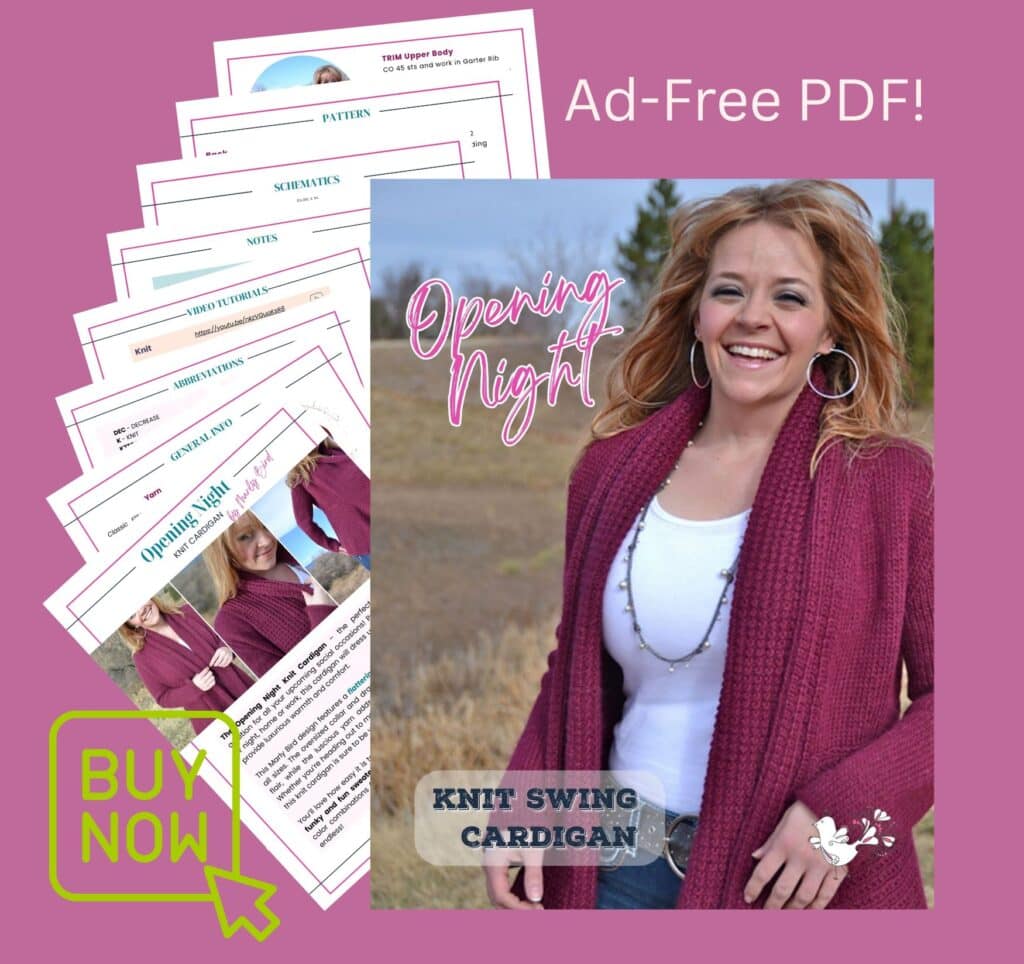
A smiling woman in a maroon knit cardigan stands outdoors. Beside her is a PDF preview of free knit swing cardigan pattern instructions. Text reads, "Ad-Free PDF! Opening Night! Knit Swing Cardigan." A green "Buy Now" button is at the bottom left. -Marly Bird
Etsy
Shopify
Ravelry

Is This Knit Cardigan Pattern Right for You?

Iโ€™d rate the Opening Night Cardigan as Confident Beginner.

If youโ€™re comfortable with:

  • Casting on and binding off
  • Knitting and purling
  • Basic decreases like k2tog and ssk
  • Reading simple shaping instructions
  • Seaming knit pieces together

โ€ฆthen you are absolutely ready for this pattern.

You donโ€™t need to be an expert garment knitter. This is a fantastic โ€œfirst real sweaterโ€ project or a nice, low-stress knit for more experienced makers who want something relaxing and wearable.


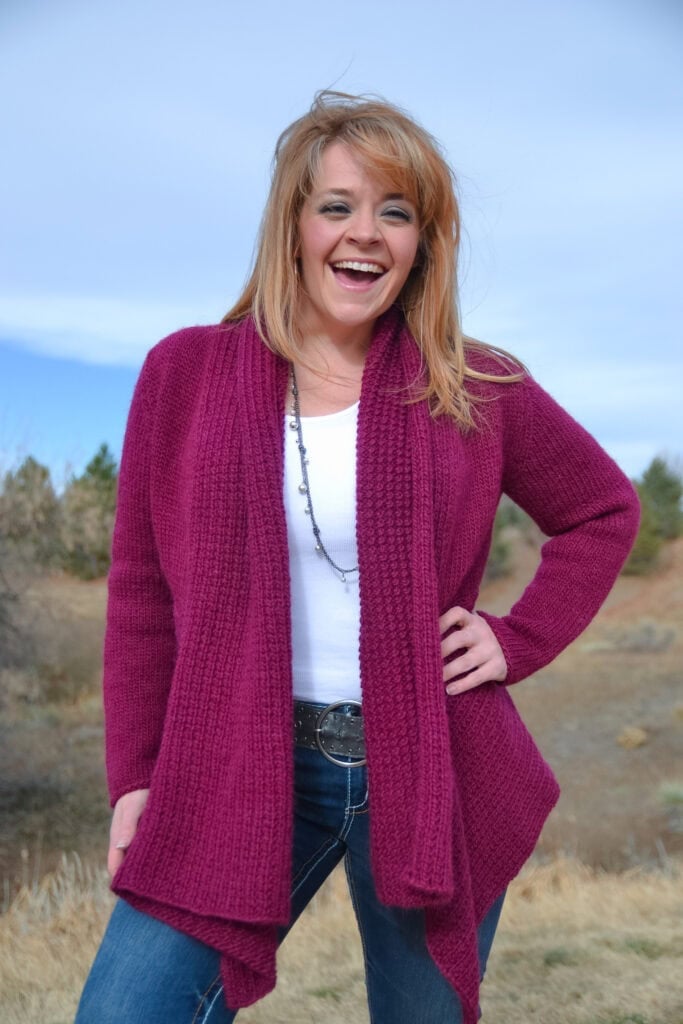
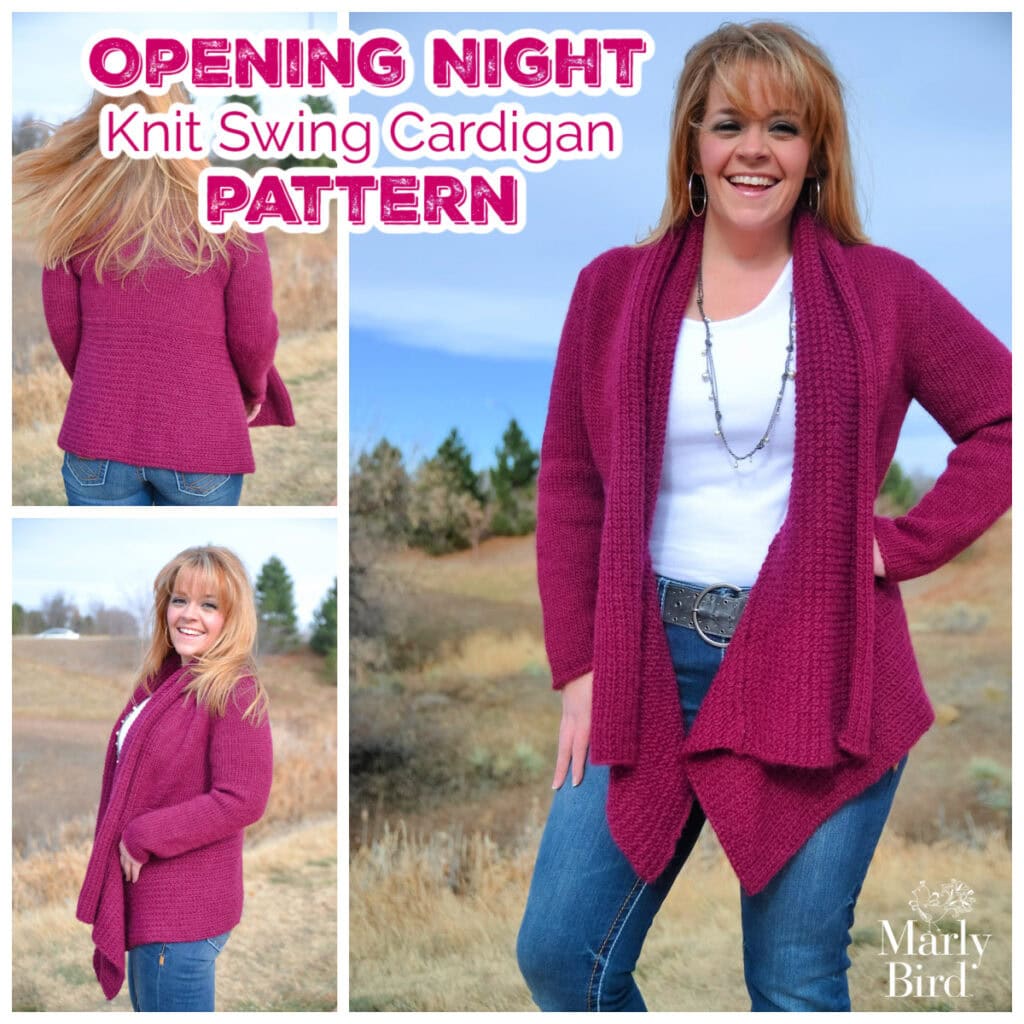
A woman with blonde hair, wearing a magenta cardigan made from a free knit swing cardigan pattern, white top, and blue jeans, stands outdoors smiling with one hand on her hip against a backdrop of trees and blue sky. -Marly Bird

Pattern Details at a Glance

These details are also written inside the pattern, but hereโ€™s a quick overview so you can plan:

  • Skill Level: Confident Beginner
  • Construction: Knit flat in pieces (back, fronts, sleeves), then seamed
  • Stitches Used: Knit, purl, k2tog, ssk, seaming
  • Gauge: 15 sts and 20 rows = 4″ (10 cm) in Stockinette Stitch
  • Sizes: Womenโ€™s XS (S, M, L, XL, 2X, 3X, 4X)
  • Finished Chest: Approx. 32.75โ€“57″
  • Back Length (excluding trim): Approx. 12.5โ€“16.25″

Cardigan shown in Size M.


Choosing Your Size and Fit

This cardigan is designed with:

  • An open front, so youโ€™re not buttoning it closed across the fullest part of your bust
  • A swing shape through the body for gorgeous movement
  • A draped collar that adds visual interest and softness around the neckline

To choose a size:

  1. Take your upper bust or high bust measurement (around your chest just under your armpits).
  2. Compare that measurement to the Finished Chest in the pattern.
  3. Aim for about 2โ€“4″ (5โ€“10 cm) of positive ease at the upper bust/shoulder area for most bodies.

If youโ€™re between sizes:

  • Choose the smaller size if you like a slightly closer-to-the-body fit in the shoulders and upper bust.
  • Choose the larger size if you want even more drape through the front and back.

Remember, because this cardigan hangs open, the fit is very forgiving. The most important area to fit is your shoulders/upper bust so the cardigan hangs smoothly and doesnโ€™t slide back.


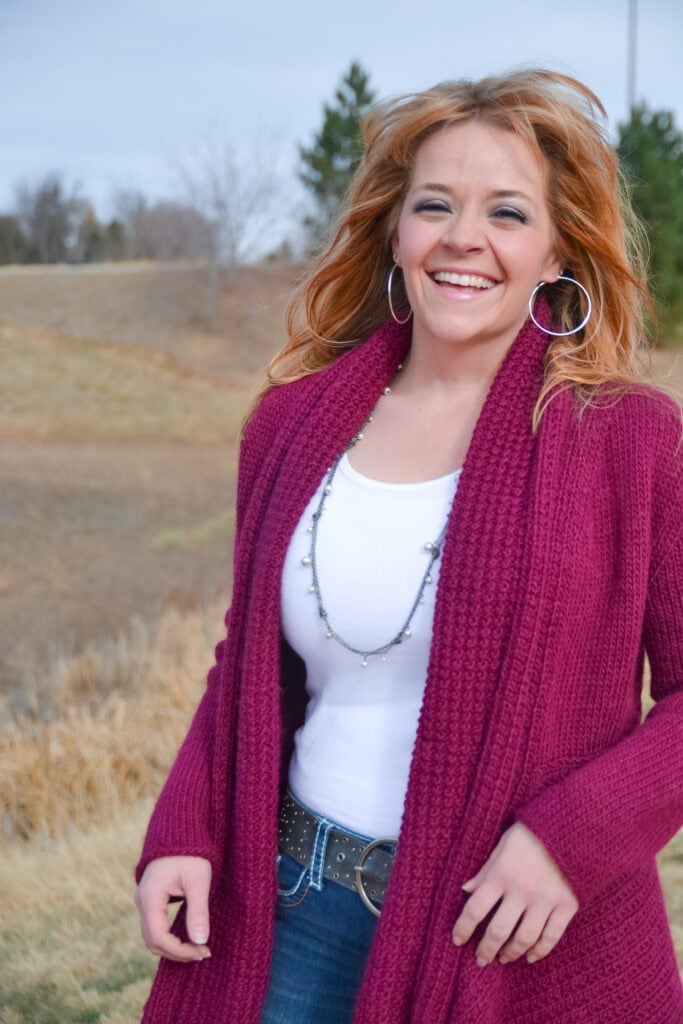
A woman with wavy red hair, wearing a white top, long maroon sweater inspired by a free knit swing cardigan pattern, and hoop earrings, smiles outdoors in a grassy, lightly wooded area on a cloudy day. -Marly Bird

Yarn Choices and Smart Substitutions

Originally, the Opening Night Cardigan was knit in Classic Elite Montera, a beautiful 50% wool / 50% llama yarn. That line has been discontinued, but the good news is: this pattern works wonderfully in many worsted to aran weight yarns.

Yarn Weight and Yardage

The pattern is written for a worsted/aran weight yarn with a soft hand and good drape.

Approximate yardage (from the original yarn):

  • Around 9 (10, 12, 14, 16, 20, 22, 23) skeins depending on size
  • Roughly 1143โ€“2921 yards total

Always check the specific yardage listed inside the pattern for your chosen size, and then compare that to whichever yarn youโ€™re using.

What to Look For in a Substitute Yarn

When choosing an alternative yarn, look for:

  • Fiber content: wool, wool blends, or wool/llama/alpaca blends are ideal
  • Structure: plied yarns that show stitch definition and drape well
  • Gauge: you want to be able to hit 15 sts = 4″ (10 cm) in Stockinette Stitch

Bulky yarns may be tempting, but theyโ€™ll drastically change the fabric and weight of the cardigan. Stick close to pattern gauge for the intended look and movement.

Recommended Substitutes:

  • Swish Bulky by Knit Picks
  • Hue & Me
  • Wool of the Andes Superwash Bulky
  • Wool of the Andes Bulky

Color Tips

Solid or heathered yarns really let the swing shape and collar shine. If youโ€™re drawn to variegated or striping yarns, choose colorways with soft, subtle shifts rather than super-high-contrast stripes.

Need help thinking through color? Read my post:
How to Choose Colors for a Colorwork Project (Prism Make-Along) โ€“ even though itโ€™s written for colorwork, the same ideas apply when picking the perfect solid or tonal:
https://marlybird.com/blog/how-to-choose-colors-for-a-colorwork-project-prism-make-along/


Needles, Notions, and Gauge

The exact needle sizes and notions are listed in the pattern, but hereโ€™s the gist:

  • A pair (or circulars) that lets you achieve 15 sts and 20 rows = 4″ (10 cm) in Stockinette Stitch
  • Tapestry needle for weaving in ends and seaming
  • Stitch markers
  • Measuring tape
  • Blocking tools (mats, pins, or wires)

Take the time to swatch. I know, I know โ€” โ€œMarly, donโ€™t come for my needles like that!โ€ ๐Ÿ˜‚ But for a sweater, swatching is truly your friend.

  • Knit a Stockinette Stitch swatch larger than 4″ x 4″.
  • Wash and block the swatch the way you plan to treat the finished cardigan.
  • Measure your gauge after itโ€™s completely dry.

If your stitch count is off:

  • Too many stitches per 4″ (your gauge is too tight) โ†’ go up a needle size.
  • Too few stitches per 4″ (your gauge is too loose) โ†’ go down a needle size.

A woman models a deep pink knit swing cardigan outdoors. The collage shows front, side, and back views. Text at the bottom reads, "OPENING NIGHT Free Knit Swing Cardigan Pattern. -Marly Bird

Basic Knitting Techniques Used

If youโ€™re still building confidence, here are the key techniques youโ€™ll use in this pattern:

  • Knit (K)
  • Purl (P)
  • Knit two together (k2tog) โ€“ right-leaning decrease
  • Slip, slip, knit (ssk) โ€“ left-leaning decrease
  • Seaming โ€“ mattress stitch or your favorite seaming method

If any of those sound new or a little rusty, thatโ€™s okay โ€” Iโ€™ve got you covered with video help.


Video Tutorials to Support You

Here are some helpful Marly Bird videos you can watch while you work on your Opening Night Cardigan:

  • Knit โ€“ https://youtu.be/nkzVGuaKsR8
  • Purl โ€“ https://youtu.be/TsPqLvRmOow
  • SSK โ€“ https://youtu.be/sjT0hKT55D8?t=1074
  • K2tog โ€“ https://youtu.be/JrHqDYb2ss8?t=346
  • Add a Lifeline โ€“ https://youtu.be/FiqYUE_oHAw
  • UnKnit / Tink โ€“ https://youtu.be/c7Gud7k4Y8k
  • Seaming โ€“ https://youtube.com/live/tjBzj-j_SJ4

You can absolutely knit this sweater at your own pace, but if you like to have someone โ€œsit with youโ€ and walk through the techniques, put these on while you stitch.


Blocking Tips for the Perfect Drape

This cardigan really comes to life after blocking. The fabric relaxes, the drape improves, and the swing silhouette looks chefโ€™s kiss.

A few blocking tips:

  • Swatch before and after blocking. Your pre-block and post-block gauge may be different, and thatโ€™s important for sizing.
  • For most wool and wool-blend yarns, wet blocking will give you the nicest drape.
  • Gently squeeze out excess water, lay your pieces flat, and shape to match the dimensions in the pattern.
  • Let everything dry completely before seaming or wearing.

For a deeper dive, read:
Steam Blocking vs Wet Blocking for Superwash Yarn (Prism Make-Along Part 10)
https://marlybird.com/blog/steam-blocking-vs-wet-blocking-superwash-yarn-prism-make-along-part-10/


Styling Your Opening Night Cardigan

Letโ€™s talk outfits, because youโ€™re not knitting this just to let it live on a hanger.

Here are a few fun ways to style your Opening Night Cardigan:

  • Casual everyday look
    Throw it over a fitted tee or tank, your favorite jeans, and ankle boots. The swing shape keeps it comfy, and the collar makes it look intentional and polished.
  • Office or Zoom chic
    Layer it over a simple blouse or mock-neck top with slim trousers or a pencil skirt. The cardigan gives you โ€œIโ€™m cozyโ€ vibes while still looking professional on camera or in person.
  • Dress it up
    Pair it with a knit or jersey dress and tall boots. Choose a neutral cardigan color over a bold dressโ€ฆ or flip it: bold cardigan, simple black dress. Either way, youโ€™ll look effortlessly put-together.
  • Weekend cozy
    Leggings, long tunic, Opening Night Cardigan, and big mug of coffee. Enough said.

Because this cardigan has such a clean shape, you can knit it in a neutral (gray, navy, black, camel) for maximum versatility, or choose a gorgeous jewel tone if you want the cardigan itself to be the statement piece.


A smiling woman in a maroon knit cardigan stands outdoors. Beside her is a PDF preview of free knit swing cardigan pattern instructions. Text reads, "Ad-Free PDF! Opening Night! Knit Swing Cardigan." A green "Buy Now" button is at the bottom left. -Marly Bird
Etsy
Shopify
Ravelry

Ad-Free PDF Pattern Upgrade

If you prefer to knit without ads and without your phone or tablet timing out on you, thereโ€™s also an ad-free, printable PDF version of the Opening Night Cardigan pattern available.

The PDF is great if you:

  • Like to print, highlight, and scribble notes
  • Want a clean layout with clear section breaks
  • Prefer to knit from a hard copy or use a tablet with a markup app

Skip the scrolling and knit distraction-free with the ad-free, printable PDF version โ€” perfect for your project bag.

You can find the Opening Night Cardigan PDF in the Marly Bird Store (and it may also be available on Etsy and Ravelry, depending on when youโ€™re reading this).


Opening Night Knit Swing Cardigan โ€“ Free Pattern

Yarn

Classic Elite โ€œMonteraโ€ (50% wool, 50% llama, 127 yds / 100 g per ball) in color #3827,
9 (10, 12, 14, 16, 20, 22, 23) skeins.

Alternative Yarns

  • Swish Bulky
  • City Tweed Aran
  • Cascade Baby Alpaca Chunky

Needles

Size US 9 (5.5 mm) circular needle, 24″ in length or longer, or size needed to obtain gauge.

Notions

Stitch holder, tapestry needle.

To Fit Sizes

Womenโ€™s XS (S, M, L, XL, 2X, 3X, 4X)
Instructions are given for smallest size, with larger sizes in parentheses.
When only one number is given, it applies to all sizes.
Shown in size M.

Finished Measurements

Chest:
29 (32ยพ, 36ยพ, 41, 44ยฝ, 48ยฝ, 52ยพ, 57)”
[73.5 (83, 93.5, 104, 113, 123, 134, 145) cm]

Back length, not including trims:
12ยฝ (13, 14, 14ยฝ, 15, 16, 16ยผ, 16ยฝ)”
[32 (33, 35.5, 37, 38, 40.5, 41.5, 42) cm]

Gauge

15 sts and 20 rows = 4″ [10 cm] in Stockinette stitch

Take time to save time, check your gauge.


ABBREVIATIONS

DEC โ€“ decrease
K โ€“ knit
K2TOG โ€“ knit 2 together
P โ€“ purl
PATT โ€“ pattern
PM โ€“ place marker

REM โ€“ remain(ing)
RS โ€“ right side
SL โ€“ slip
SSK โ€“ slip, slip, knit
ST(S) โ€“ stitch(es)
WS โ€“ wrong side


STITCH PATTERNS

Garter Rib
(Worked over an odd number of sts)

Row 1 (RS): Knit.
Row 2 (WS): K1, *p1, k1; repeat from * to end.
Repeat Rows 1 and 2 for Garter Rib.

Stockinette Stitch
Knit on RS, purl on WS.


VIDEO TUTORIALS

Knit โ€“ https://youtu.be/nkzVGuaKsR8
Purl โ€“ https://youtu.be/TsPqLvRmOow
SSK โ€“ https://youtu.be/sjT0hKT55D8?t=1074
K2tog โ€“ https://youtu.be/JrHqDYb2ss8?t=346
Add a Lifeline โ€“ https://youtu.be/FiqYUE_oHAw
UnKnit / Tink โ€“https://youtu.be/c7Gud7k4Y8k
Seaming โ€“ https://youtube.com/live/tjBzj-j_SJ4


NOTES

  • Need help choosing the correct size for you to make?
    โžก Read this blog post Marly wrote for a similar pattern.
  • Regarding Gauge:
    โ€ข The Opening Night Cardigan will be somewhat heavy for all the sizes so please be sure to take preโ€‘block, postโ€‘block and hanging gauge swatch measurements. All three will be important for you to do all you can to make sure your piece will be finished the way you want.
    โ€ข Often asked if stitch or row gauge is more important on this garment and I believe stitch gauge is more important to get the right fitting garment.
    โ€ข You will do a gauge swatch for BOTH pattern stitches used in the garment.
  • Cardigan is made in pieces and seamed together after blocking!

GROW

To Unlockย Exclusive Subscriber Contentย click the Box below and join for free by simply adding your email and creating a password! If you are having troubles, clear your cache or reset your password or login to the Grow Publisher Portal.

>> Learn More About Grow Here <<

I'm thrilled to share this amazing pattern with you, many patterns on my blog are absolutely free! I kindly request that you don't copy and paste or distribute this pattern. Prefer an ad-free experience? Buy a digital PDF pattern for a small fee from one of my online stores for a seamless crafting journey. 

I appreciate your support and readership. You are the reason I can keep doing what I love and sharing it with others. So, thank you from the bottom of my yarn-loving heart! Disclosure: This post contains affiliate links, meaning I get a commission if you decide to make a purchase through my links at no cost to you.

A smiling woman in a maroon knit cardigan stands outdoors. Beside her is a PDF preview of free knit swing cardigan pattern instructions. Text reads, "Ad-Free PDF! Opening Night! Knit Swing Cardigan." A green "Buy Now" button is at the bottom left. -Marly Bird
Etsy
Shopify
Ravelry

SCHEMATICS

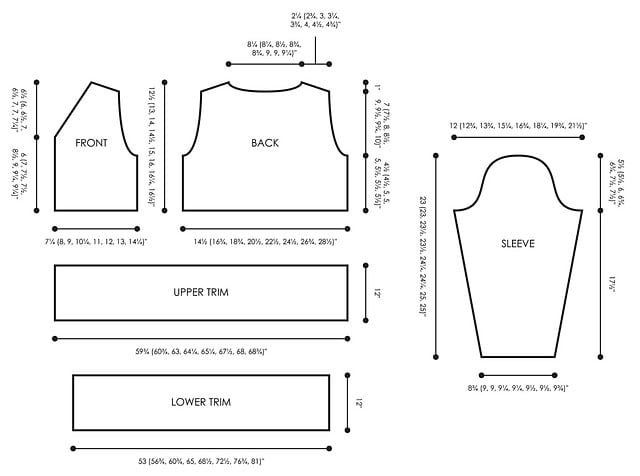
A sewing pattern diagram for a free knit swing cardigan pattern, showing labeled piecesโ€”front, back, sleeve, upper trim, and lower trimโ€”with detailed measurements for each piece in inches along the edges. -Marly Bird
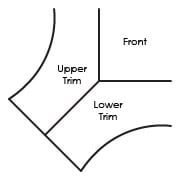
Diagram showing two overlapping trim pieces labeled "Upper Trim" and "Lower Trim" meeting at a corner with a vertical line labeled "Front." The trims have curved outer edges, ideal for finishing your free knit swing cardigan pattern. -Marly Bird

A smiling woman models a deep pink knit swing cardigan over a white top and jeans outdoors. Text reads: โ€œOPENING NIGHT Free Knit Swing Cardigan Pattern.โ€. -Marly Bird

PATTERN

Back

Cast On 57 (65, 72, 79, 87, 94, 102, 109) sts, and work in Stockinette st for
4ยฝ (4ยฝ, 5, 5, 5, 5ยฝ, 5ยฝ, 5ยฝ)” [11.5 (11.5, 12.5, 12.5, 12.5, 14, 14, 14) cm],
ending after a WS row.

Shape armholes
Bind Off 2 (4, 4, 6, 6, 8, 8, 10) sts at beginning of next 2 rows โ€“
53 (57, 64, 67, 75, 78, 86, 89) sts rem.

Next row (dec row, RS): K2, ssk, knit to last 4 sts, k2tog, k2.
Repeat this dec every RS row 1 (1, 3, 3, 5, 5, 7, 7) more times โ€“
49 (53, 56, 59, 63, 66, 70, 73) sts rem.

Work evenly until armhole measures
7 (7ยฝ, 8, 8ยฝ, 9, 9ยฝ, 9ยพ, 10)”
[18 (19, 20.5, 21.5, 23, 24, 25, 25.5) cm],
ending after a WS row.

Shape shoulders and neck
Next row (RS): K15 (17, 18, 19, 21, 22, 24, 25) and place these sts on a holder for right shoulder, attach a 2nd ball of yarn, Bind Off center 19 (19, 20, 21, 21, 22, 22, 23) sts, knit to end.

Left Shoulder and Neck

Next 5 rows:
Row 1 (WS): Bind Off 3 (4, 4, 4, 5, 5, 6, 6) sts at shoulder edge, purl to end.
Row 2: Bind Off 3 sts at neck edge, knit to end.
Row 3: Bind Off 3 (4, 4, 5, 5, 6, 6, 7) sts at shoulder edge, purl to end.
Row 4: Bind Off 2 sts at neck edge, knit to end.
Row 5: Bind Off rem 4 (4, 5, 5, 6, 6, 7, 7) sts.

Right Shoulder and Neck

Place right shoulder sts back on needle.

Row 1 (WS): Bind Off 3 sts at neck edge, purl to end.
Row 2: Bind Off 3 (4, 4, 4, 5, 5, 6, 6) sts at shoulder edge, knit to end.
Row 3: Bind Off 3 sts at neck edge, purl to end.
Row 4: Bind Off 3 (4, 4, 5, 5, 6, 6, 7) sts at shoulder edge, knit to end.
Row 5: Purl.
Row 6: Bind Off rem 4 (4, 5, 5, 6, 6, 7, 7) sts.


LEFT FRONT

Cast On 29 (32, 36, 40, 43, 47, 51, 55) sts and work same as back to armhole shaping, then shape armhole same as back.

Work evenly until armhole measures
4ยฝ (4ยฝ, 5, 5, 5, 5ยฝ, 5ยฝ, 5ยฝ)”
[11.5 (11.5, 12.5, 12.5, 12.5, 14, 14, 14) cm], ending after a WS row.

Neck Shaping

Next row (dec row, RS): Knit to last 4 sts, k2tog, k2.
Repeat this dec every RS row 14 (13, 14, 15, 14, 15, 15, 16) more times โ€“ 10 (12, 13, 14, 16, 17, 19, 20) sts remain.

Work evenly until armhole measures same as back armhole, then shape shoulder same as back.

RIGHT FRONT

Cast On 29 (32, 36, 40, 43, 47, 51, 55) sts and work same as Back to armhole shaping, then shape armhole same as Back.

Work evenly until armhole measures
4ยฝ (4ยฝ, 5, 5, 5, 5ยฝ, 5ยฝ, 5ยฝ)”
[11.5 (11.5, 12.5, 12.5, 12.5, 14, 14, 14) cm],
ending after a WS row.

Neck Shaping

Next row (dec row, RS): K2, ssk, knit to end of row.

Repeat this decrease every RS row 14 (13, 14, 15, 14, 15, 15, 16) more times โ€” 10 (12, 13, 14, 16, 17, 19, 20) sts remain.

Work evenly until armhole measures same as Back armhole, then shape shoulder same as Back.


SLEEVE (make 2)

Cast On 35 (36, 37, 37, 37, 38, 38, 39) sts, and work in Stockinette st for 2″ [5 cm], ending after a WS row.

Next row (inc row, RS): K2, m1, knit to last 2 sts, m1, k2.

Repeat this inc every 12 (10, 8, 8, 6, 6, 4, 4) rows
5 (6, 8, 3, 7, 3, 16, 14) more times,
then every n/a (n/a, n/a, 6, 4, 4, 2, 2) rows
0 (0, 0, 7, 6, 12, 2, 7) more times โ€“
47 (50, 54, 59, 65, 70, 76, 83) sts.

Work in St st until sleeve measures 17ยฝ” [44.5 cm] from beg, ending after a WS row.

Shape Sleeve Cap

Bind Off 2 (4, 4, 6, 6, 8, 8, 10) sts at beginning of next 2 rows.

Next row (dec row, RS): K2, ssk, knit to last 4 sts, k2tog, k2.

Repeat this dec every RS row 11 (11, 12, 12, 13, 13, 14, 14) more times, then work the following WS row evenly.

Bind Off 2 sts at beginning of next 2 rows.
Bind Off 3 sts at beginning of next 0 (0, 0, 0, 2, 2, 4, 4) rows.
Bind Off rem 15 (14, 16, 17, 15, 16, 14, 17) sts.


TRIM LOWER BODY

Cast On 45 sts and work in Garter Rib until piece measures
53 (56ยพ, 60ยฝ, 63ยผ, 68ยฝ, 72ยฝ, 76ยพ, 81)”
[134.5 (144, 154.5, 165, 174, 184, 195, 205.5) cm].

Bind Off all sts.


TRIM UPPER BODY

Cast On 45 sts and work in Garter Rib until piece measures
59ยพ (60ยพ, 63, 64ยผ, 65ยผ, 67ยฝ, 68, 68ยพ)”
[152 (154.5, 160, 163, 165.5, 171.5, 172.5, 174.5) cm].

Bind Off all sts.


FINISHING

Block all pieces to measurements.

Sew shoulder seams. Sew sleeve caps into place, then sew side and sleeve seams.

Pin bottom center Back to center of Lower Body trim, and sew long edge of trim around bottom of sweater. This will leave 12″ [30.5 cm] of trim length unsewn on either side of front.

Pin center Back neck to center of Upper Body trim, and sew long edge of trim around neckline, down front edges, and onto the rem unsewn 12″ [30.5 cm] of Lower Body trim (see trim diagram).

Weave in all loose ends.


A smiling woman in a maroon knit cardigan stands outdoors. Beside her is a PDF preview of free knit swing cardigan pattern instructions. Text reads, "Ad-Free PDF! Opening Night! Knit Swing Cardigan." A green "Buy Now" button is at the bottom left. -Marly Bird
Etsy
Shopify
Ravelry

Related Knit Sweater and Cardigan Patterns

If you love this style of comfy-but-fabulous garment knitting, you might also enjoy:

  • Lipstick Cardigan – https://shop.marlybird.com/products/lipstick-drape-front-cardigan

FAQs: Free Knit Swing Cardigan Pattern

Can I substitute yarn?
Yes! Any worsted or aran weight yarn that meets gauge and has good drape will work. Wool and wool blends are ideal. Always swatch and block to make sure you like the fabric before committing to the full sweater.

Is this pattern okay for beginners?
Itโ€™s great for confident beginners. If you know how to knit, purl, work simple decreases, and do some basic seaming, youโ€™re ready. The fabric is simple Stockinette, so you can focus on the shaping and construction.

Can I knit this in one piece instead of seaming?
The pattern is written to be knit in pieces and seamed. You could adapt it to be more seamless, but the seaming adds nice structure and helps the cardigan hang well. If this is one of your first sweaters, I recommend following the original construction.

How much positive ease should I choose?
Because this is an open-front cardigan with a swing shape, itโ€™s naturally forgiving. Aim for about 2โ€“4″ of positive ease at the upper bust/shoulder area. If you like an extra roomy, cozy feel, you can size up.

What if my row gauge doesnโ€™t match exactly?
Stitch gauge is the most important. If your row gauge is slightly off, you may need to adjust length by knitting more or fewer rows before shaping. Check the โ€œLengthโ€ measurements in the pattern and use your measuring tape as you go.

Do I have to block the cardigan?
Technically, you can skip blocking โ€” but I donโ€™t recommend it! Blocking smooths the fabric, relaxes the fibers, and really brings out the swing and drape. Think of blocking as the magic moment when your cardigan goes from โ€œhandmadeโ€ to โ€œhandmade and polished.โ€

Is there video help if I get stuck?
Yes! Check the video list above for technique tutorials, and if youโ€™re inside the Marly Bird House course, youโ€™ll have additional step-by-step guidance and support.


A smiling woman models a berry-colored knit swing cardigan in three poses outdoors. Text reads "Opening Night Free Knit Swing Cardigan Pattern." The Marly Bird logo is in the lower right corner. -Marly Bird

๐Ÿ’ฌ Final Thoughts

The Opening Night Cardigan is the kind of piece youโ€™ll want to knit again in different colors. Itโ€™s elegant without being fussy, cozy without looking too casual โ€” and totally gift-worthy if youโ€™re feeling generous ๐Ÿงถ๐Ÿ’–

So grab your yarn, swatch wisely, and treat yourself to this swingy, sassy knit that wears like a dream.

๐Ÿ“ธ Donโ€™t forget to tag me @themarlybird and use #mmmdi and #marlybird when you share!

โค๏ธ Your BiCrafty Bestie,
Marly Bird

A cartoon avatar of a person with glasses and a brown bun smiles warmly. Their green shirt and black jacket add a stylish touch, while colorful hearts surround them like loving temperature blankets, stitching together an aura of love and positivity. -Marly Bird

Filed Under: Free Patterns, Knitting, Marly Bird Premium Patterns, Our Free Patterns, Pattern, Uncategorized

My Favorite Knit Sweater Pattern

January 9, 2026 By Marly Bird 1 Comment

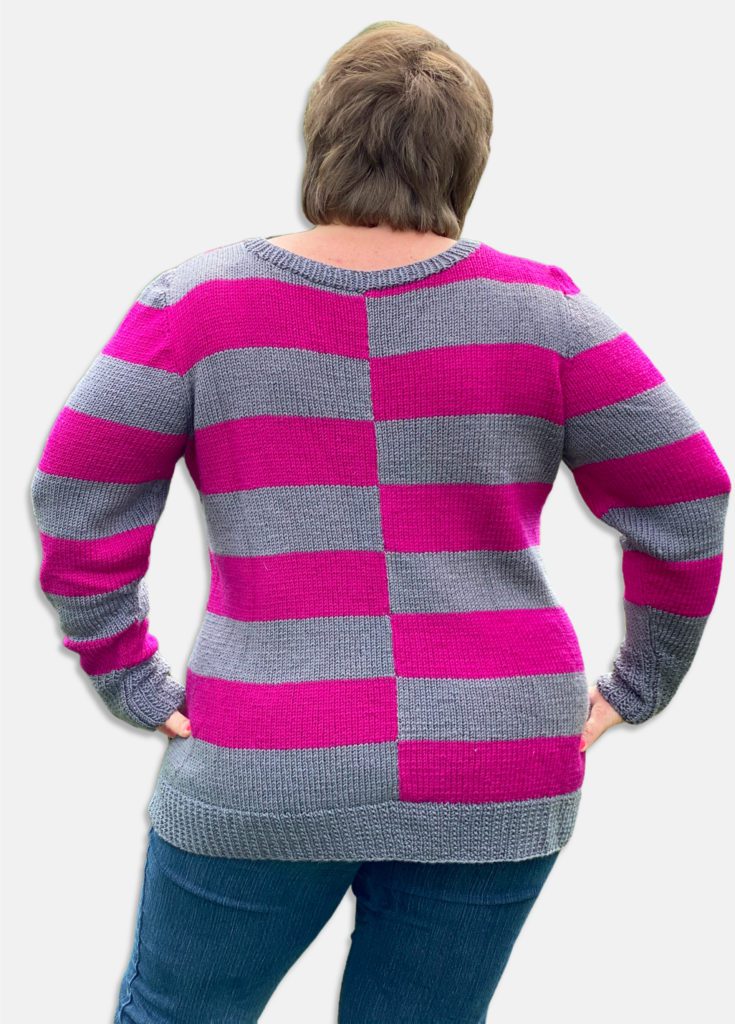
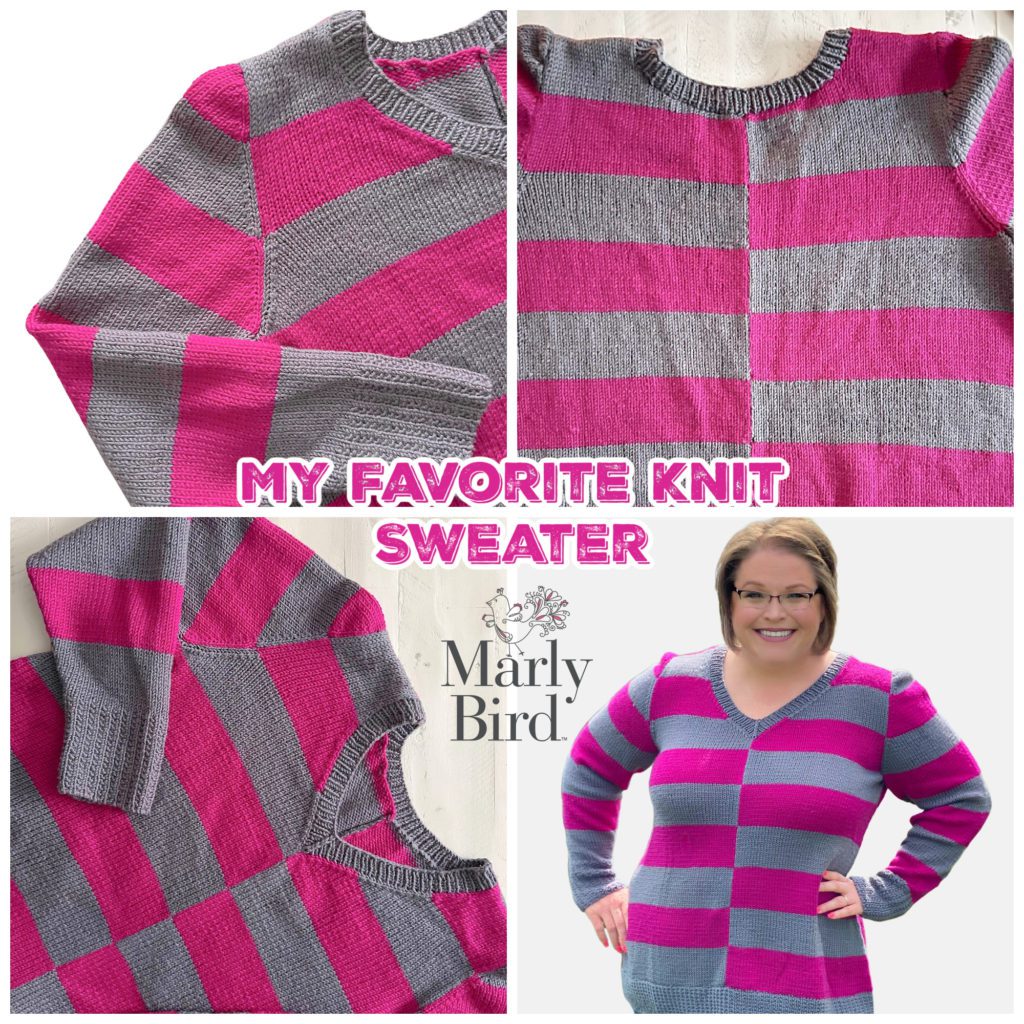
Years ago, I bought a Lane Bryant sweater that I loved and loved and loved. As a designer, many things inspire me, including clothes I love to wear. So, taking what I loved most about that sweater and tweaking it, I have a new sweater design for you. This is my favorite knit sweater pattern ever! It's a two-color striped knit sweater. You work it flat in stockinette, so it's super easy for beginners. But I designed it with extra-flattering A-line shaping enhanced by the offset design of the striped colors. Eeeeee. I love it. I hope you do too.

Affiliate Disclosure: This post contains affiliate links. To learn more please visit my privacy policy here๐Ÿ’–

8 Reasons This Is My Favorite Knit Sweater Pattern

Of course, it's easy to love a new design when fresh from the needles. But a favorite sweater inspired me, so I love this design for longer-lasting reasons. And there are certain things I'm really proud of that make it My Favorite Knit Sweater Pattern. Here they are:

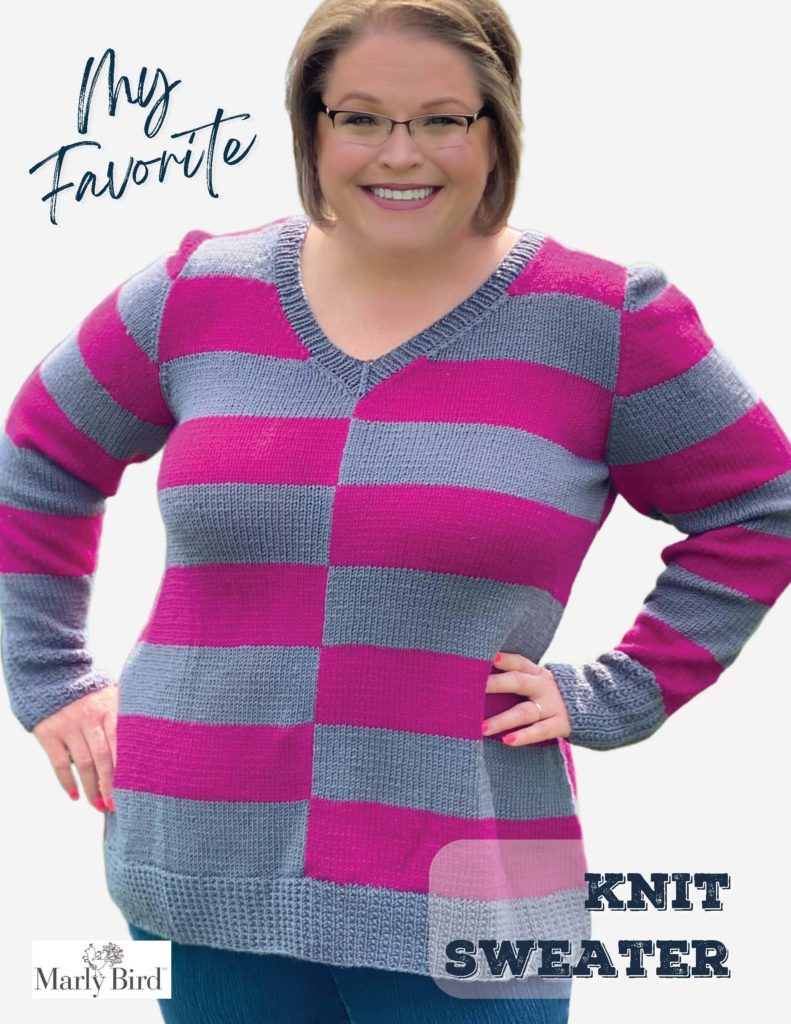
My favorite knit sweater pattern - Marly Bird

1. Offset Stripes Are Slimming and Attractive

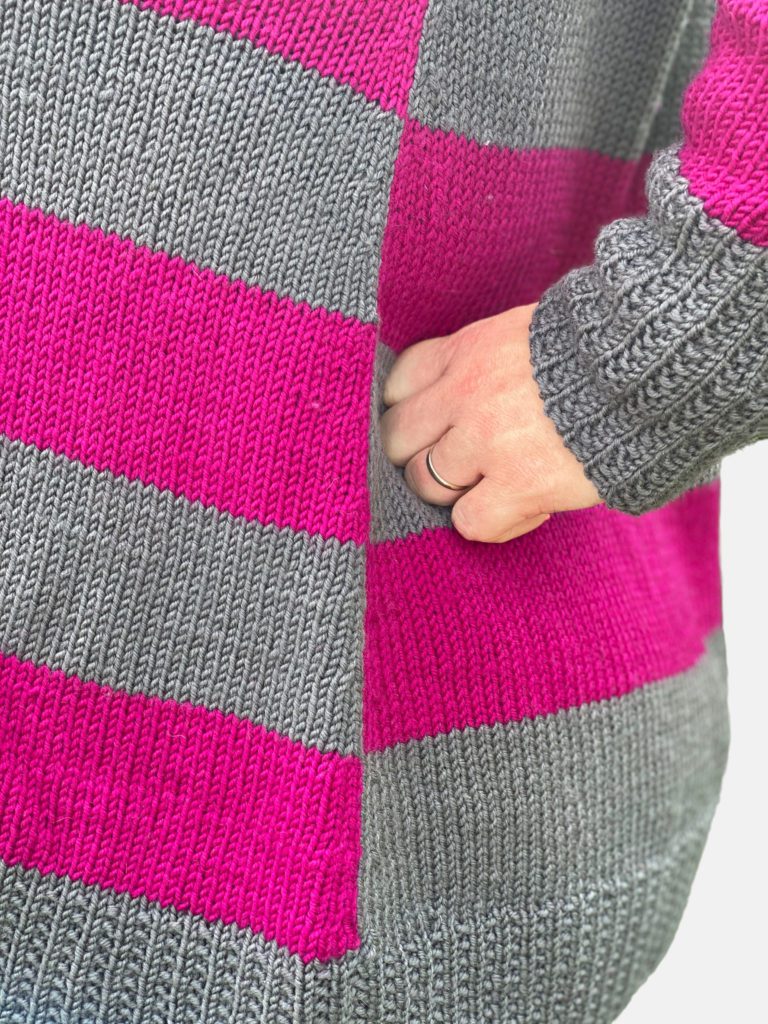
Yes, my favorite knit sweater has horizontal stripes, but I offset them. As you can see in the images, Color A is on the left, and Color B is on the right, and then in the next row, it's the opposite. The result is super flattering for all body types. The eye doesn't get stuck in one place but instead roams with the movement of the colors. It creates a very slimming effect, which you don't always get with horizontal stripes.

2. There Are So Many Options for Your Two Colors

Go bold like mine for a design that really pops. I love this! However, you can use any two colors that you love together to create a style that works well for you. This is the kind of pattern that works as well in neutrals (a tan and olive, for example, or black and gray stripes) as it does in bold colors.

3. Knit Flat So It's Beginner Friendly

You knit this sweater flat rather than in the round. And you knit it in pieces then seam together with mattress stitch. This is really perfect for those offset stripes because it allows you to make sure you're matching the stripes up perfectly as you work. This creates a really beginner-friendly design.

Marly Bird offset striped sweater

4. Stockinette Stitch With Smart Shaping

Knit My Favorite Knit Sweater Pattern in stockinette stitch. This is also beginner-friendly. Or great for relaxing, meditative stitching. And yet, I've incorporated smart shaping into the design. The shaping happens along the side edges. It is negative ease at the upper body and positive ease at the lower body. The result is a very flattering A-line shape that works with many different body types.

5. V-Neck Is Also Flattering

I've designed my Favorite Knit Sweater with a V-neck. I love how that looks on me. Plus, I think it's really flattering for lots of people. It's not just that it's a V-shape but, more specifically, that it's a really flattering depth of the V. And it works well geometrically and visually with the offset striping.

Knit sweater side seam - Marly Bird

6. Super Versatile Yarn Options

In addition to different color options for your yarn, you can actually play with different fiber types for making this sweater. Knit the sweater in pieces and seam it together. The seaming helps hold the weight of the yarn. Therefore, you get the drape and shape you want regardless of the yarn type.

While there might be some exceptions, you can use pretty much any worsted weight yarn that holds the weight. So, if you want to make this sweater in cotton, linen, acrylic, wool, or some blend, go for it. The sweater will work!

7. Broken Ribbing For Even Better Fit

Sometimes a whole sweater is almost perfect … except that the ribbing around the hem and cuffs isn't quite right. Sadly, you pinch in at those places and end up looking like a balloon. Not so with My Favorite Sweater Pattern. The broken ribbing around the hem and the cuffs don't pull in, so this piece won't make you look like a balloon!

Two color knit striped sweater - Marly Bird

8. Great For Gifting!

You can make it for others since this sweater is flattering for all types of people. Plus I wrote the pattern for seven sizes. It's especially great for beginner knitters ready to start gifting handmades to people!

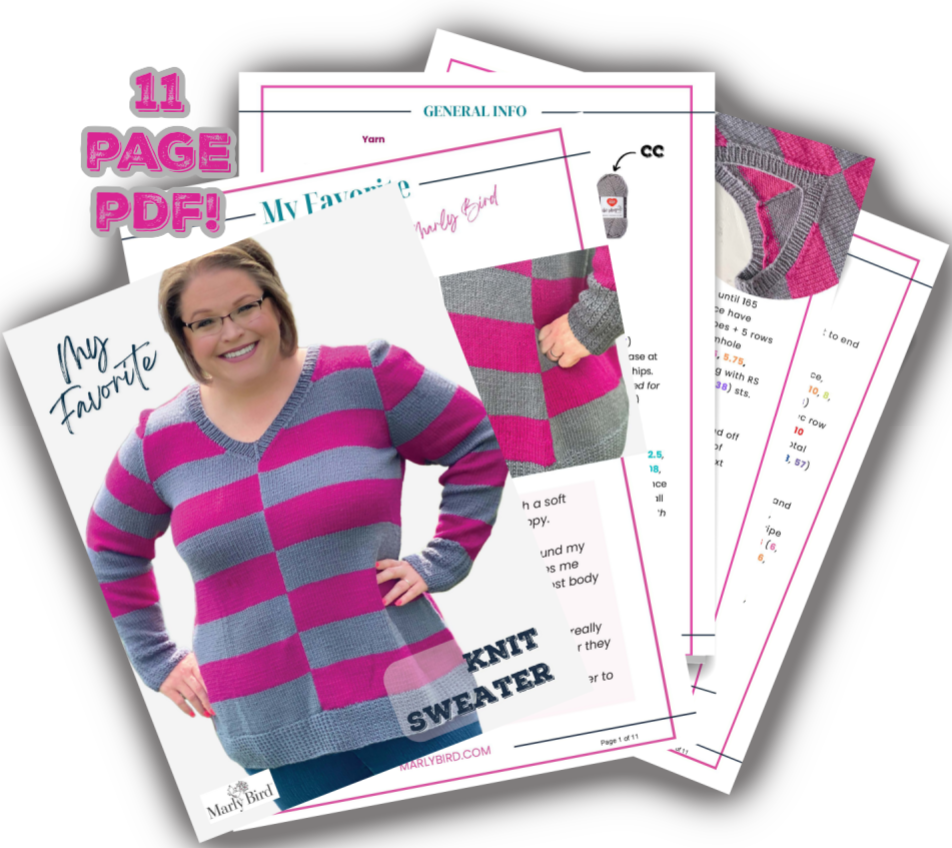
Get My Favorite Knit Sweater Pattern Ad-Free PDF

Favorite knit sweater pdf
Etsy
Shopify
Ravelry

Ready to go? Get My Favorite Knit Sweater Pattern over on Ravelry!

๐ŸŽ‰ Now Free on the Blog: Enjoy One of Our Most Popular Patterns!

Weโ€™re thrilled to share that one of our communityโ€™s favorite patterns is now available completely free right here on the blog. ๐ŸŒŸ This pattern has been a top pick in its ad-free PDF format, and weโ€™ve decided itโ€™s time to let everyone enjoy it without any barriers.

Below, youโ€™ll find all the pattern details you need to get started, plus a step-by-step guide to make the process smooth. And if you're a fan of using Grow, donโ€™t forget to sign up to unlock even more patterns and goodies. We canโ€™t wait to see what you create!


My Favorite Sweater Pattern Details

By Marly Bird

Sizes

XS (S, M, L, 1X, 2X, 3X) 

Gallery of pictures below show 48″ bust wearing the pink sweater shown in 3xl, or the gray is size L

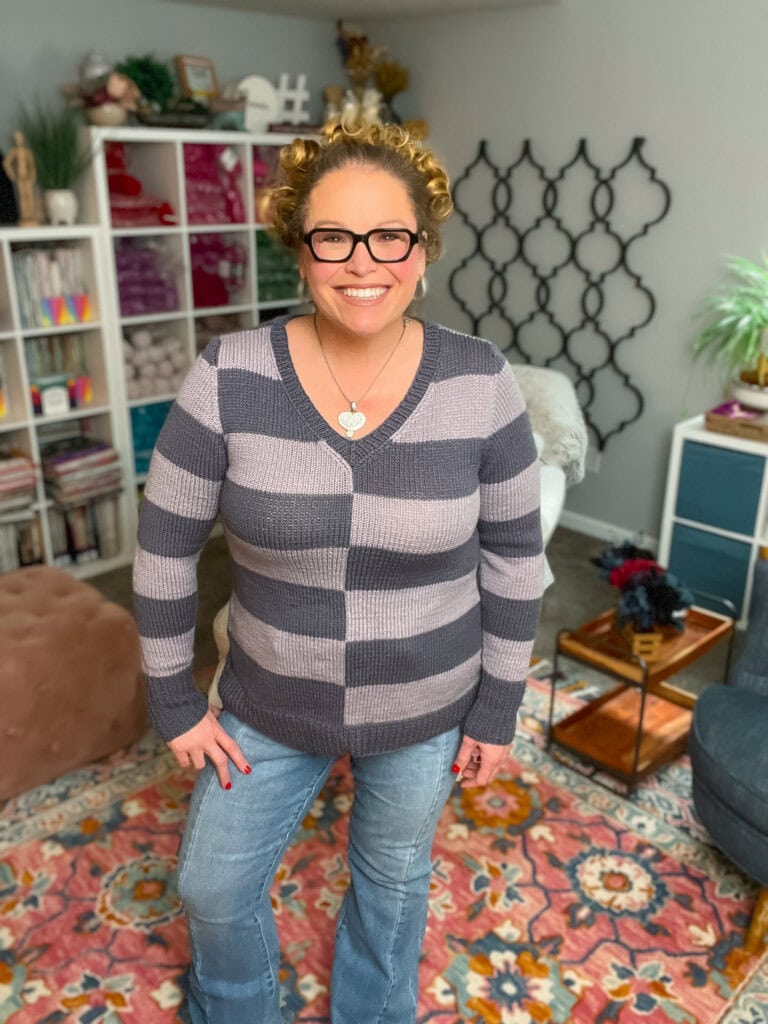
A smiling woman with curly hair and glasses wears her favorite knit sweater pattern and jeans, standing in a colorful room with a patterned rug, bookshelves, plants, and decor. -Marly Bird
48″ bust in a L
A smiling woman with curly hair and glasses stands indoors on a colorful rug, wearing jeans and her favorite knit sweater pattern. Shelves with yarn and books, plants, and home decor decorate the cozy background. -Marly Bird
48″ bust in a L
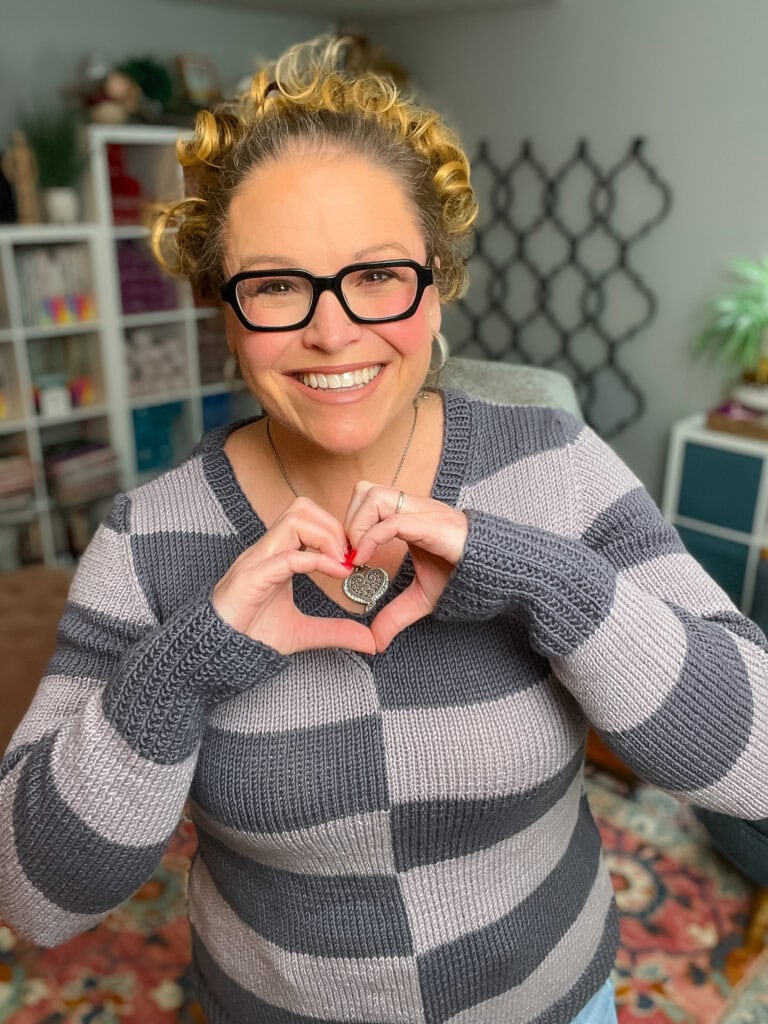
A smiling person with curly hair and glasses wears their favorite knit sweater patternโ€”a gray striped designโ€”and forms a heart shape with their hands, holding a heart-shaped pendant, standing in a cozy, colorful room. -Marly Bird
48″ bust in a L
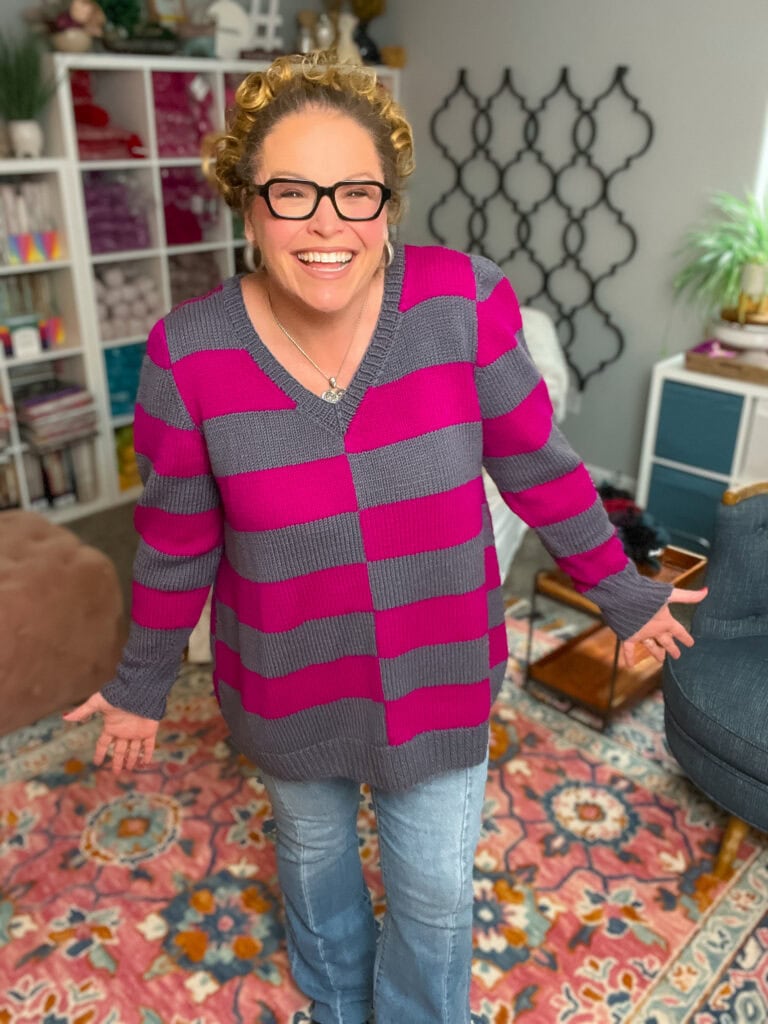
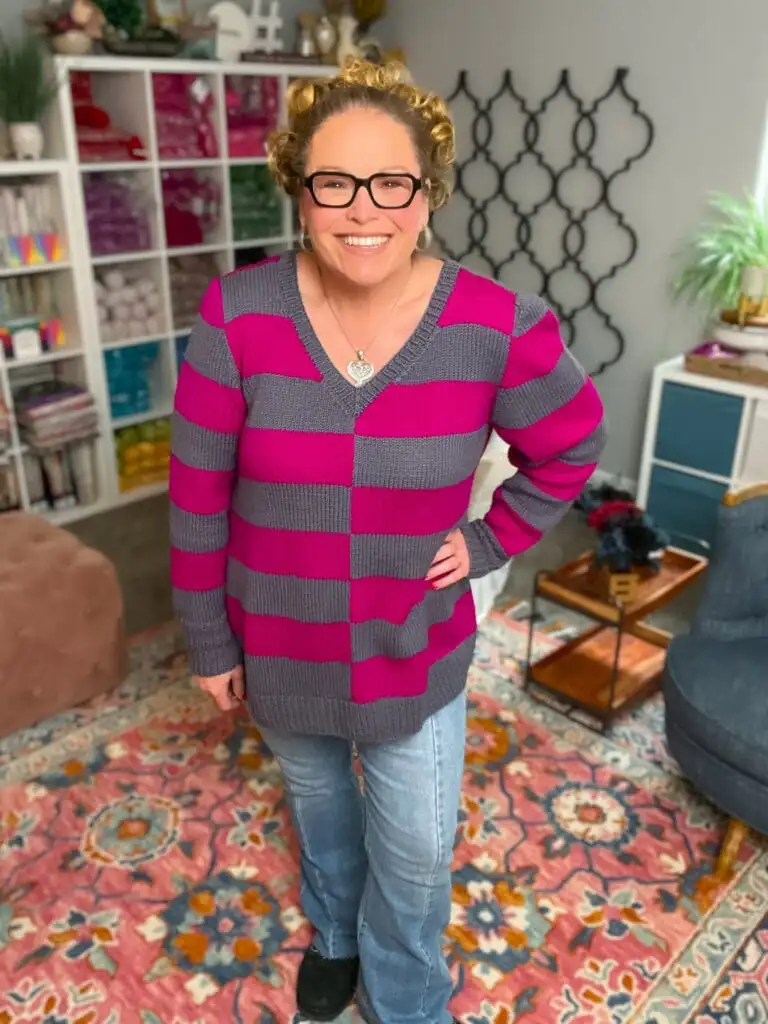
A smiling woman with curly blonde hair and glasses wears her favorite knit sweater patternโ€”a pink and gray striped sweaterโ€”with light blue jeans. She stands on a colorful patterned rug in a cozy room with bookshelves, plants, and wall art. -Marly Bird
48″ bust in a 3xl
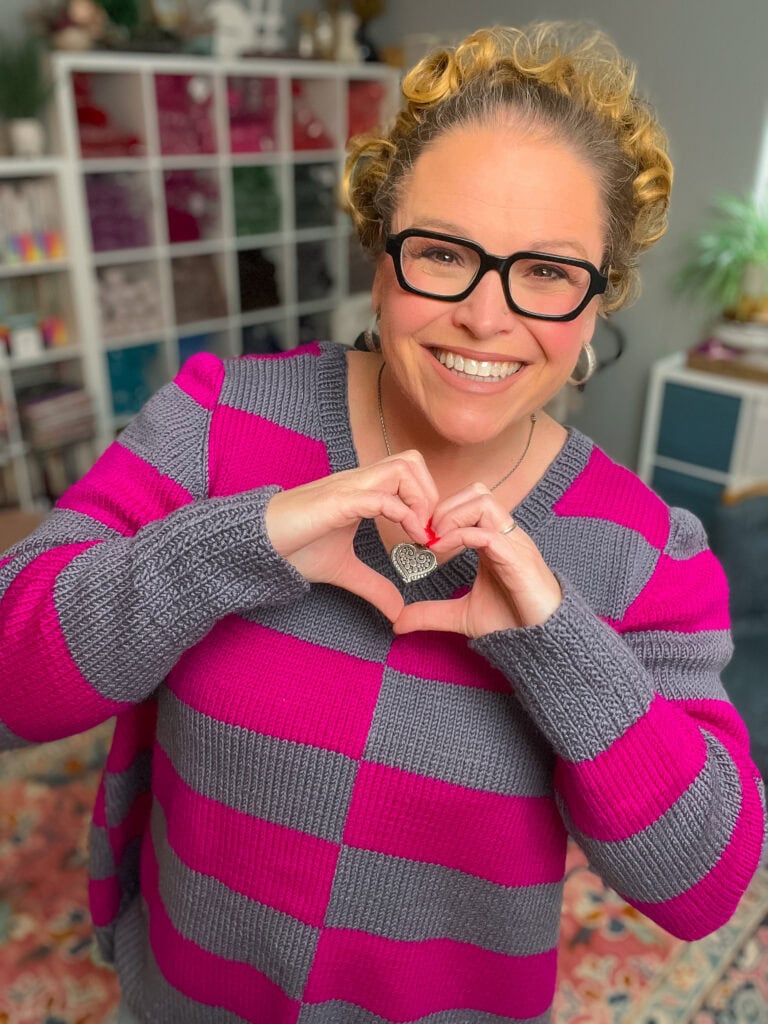
A smiling person with curly hair and glasses wears their favorite knit sweater patternโ€”a pink and gray striped sweaterโ€”and forms a heart shape with their hands. They stand indoors in front of shelves filled with yarn and colorful items. -Marly Bird
48″ bust in a 3xl
A smiling woman with curly hair, glasses, and a heart necklace stands indoors wearing her favorite knit sweater pattern in purple and magenta stripes, paired with jeans and black shoes. Behind her are bookshelves, decorative items, and a colorful rug. -Marly Bird
48″ bust in a 3xl

*Designed to be 2โ€ negative ease at bust and positive ease at hips. 

Finished Measurements

Bust: 26.5 (30, 33.75, 39, 42.5, 46, 49.75)โ€

Length: 28.75โ€ (all sizes; to lengthen, add depth to the hem of each body piece)

Gauge

18 sts = 4″ (10 cm); 27 rows = 4″  in stockinette stitch AFTER BLOCKING!

Yarn

Red Heart Chic Sheep by Marly Birdโ„ข, Art. R170 100% Merino Wool

available 3.5 oz (100 g), 186 yd (170 m) balls

MC: Dragonfruit 3 (3, 4, 5, 5, 6, 6) 

CC: Sterling 3 (3, 3, 4, 4, 6, 6) 

Needle

Size 8 (5mm) 24โ€ (61 cm) circulars, or any size to achieve gauge. 

ABBREVIATIONS

approx – approximate(ly)

dec – decrease

K – Knit

k2tog – knit 2 togther

P – Purl

patt – pattern

pm – place marker

rem – remain(ing)

RS – Right Side

sl – slip

ssk – slip, slip, knit

ssp – slip, slip, purl

St(s) – Stitch(es)

WS – Wrong Side

SPECIAL STITCHES

M1 (Make 1 Increase): With tip of left-hand needle, pick up the horizontal strand between sts from front to back. Knit this strand through the back leg, twisting it into a loop in the process. (see https://youtu.be/nT1e-WgynUc for a Video Tutorial)

CDD (center double decrease): Slip 2 stitches together knitwise, knit one stitch, pass the slipped stitches over [2 stitches decreased] (see https://youtu.be/0NobbFd__LE for a Video Tutorial)

Join our Newsletter

Get Free Crochet & Knitting
Pattern Links & Coupons!

Hand-drawn bird with curling, detailed feathers and pink accents; cheerful pose showcases fine line and texture work.
>> Become An Insider <<
A woman with glasses and curly hair models a colorful crocheted scarf, showing textured stitches and vibrant yarn.

STITCH GUIDE

Broken Ribbing (odd number of sts)

Row 1 (RS): Knit.

Row 2 (WS): P1, *k1, p1; repeat from * to end.

repeat Rows 1-2 for patt.

Stripe Sequence (any number of sts)

Working in stockinette stitch, alternate MC and CC every 20 rows as indicated in pattern. Cut yarn after each Stripe.

Sloped Bind-Off: On the row before the bind-off, slip the last stitch of the row purlwise without working it. On the bind-off row: slip the first 2 stitches purlwise, pass the first slipped stitch over the second slipped stitch (1 st bound-off), bind off rem sts as usual.

SCHEMATIC

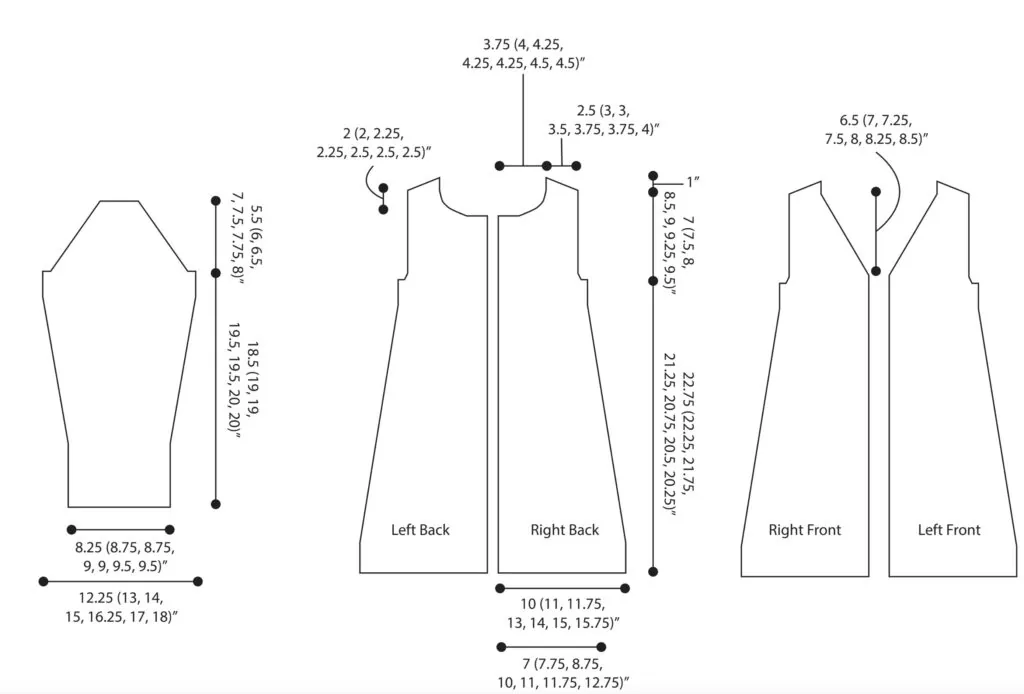
Line drawings of three garment pattern pieces (sleeve, back, and front) from a Favorite Knit Sweater Pattern, with measurement points and lengths in inches labeled for each section. Each piece is labeled, with dotted lines indicating measurement locations. -Marly Bird
A smiling person with curly hair and glasses wears their favorite knit sweater patternโ€”a pink and gray striped sweaterโ€”and forms a heart shape with their hands. They stand indoors in front of shelves filled with yarn and colorful items. -Marly Bird
My Favorite Knit Sweater Pattern by Marly Bird

MY FAVORITE KNIT SWEATER PATTERN

Left Front

Hem

With MC, cast on 45 (49, 53, 59, 63, 67, 71) sts. repeat Rows 1 & 2 of Broken Ribbing patt, 10 times. 

Note: If you wish to add length to the sweater, work more Hem rows.

Main Front

Note: Switch to CC and begin Stripe Sequence. Cont in Stripe Sequence throughout the remainder of the piece. Not including the hem, there will be a total of 9 stripes throughout.

Row 1 (RS): Knit.

Row 2 (WS): Purl.

Dec row (RS): K2, k2tog, knit to end — 1 st decโ€™d. Continuing in Stripe Sequence, repeat Dec row every 10 (10, 10, 8, 8, 8, 8) rows, 3 (1, 1, 11, 10, 9, 8) more time(s), then repeat Dec row every 8 (8, 8, 6, 6, 6, 6) rows, 10 (12, 12, 2, 3, 4, 5) times — 14 total sts decโ€™d, 31 (35, 39, 45, 49, 53, 57) sts rem. 

Work even in Stripe Sequence and stockinette stitch until 132 (130, 126, 122, 120, 118, 116) rows in Stripe Sequence have been worked (6 (6, 6, 6, 6, 5, 5) full Stripes + 12 (10, 6, 2, 0, 18, 16) rows from the next Stripe. Piece measures approx 22.75 (22.25, 21.75, 21.25, 21, 20.5, 20.25)โ€.

Shape Left Front Armhole

Note: Read through remainder of Left Front before proceeding. Neck Shaping is introduced for some sizes before Armhole Shaping is complete.

Bind off 2 (3, 4, 5, 6, 7, 8) sts at beg of next RS row — 29 (32, 35, 40, 43, 46, 49)  sts rem. Work a WS row even.

– (-, -, L, 1X, 2X, 3X) Sizes only:

Dec row (RS): K2, k2tog, knit to end — 1 st decโ€™d.

Dec row (WS): Purl to last 4 sts, p2tog, p2 — 1 st decโ€™d.

Cont to work a Dec row every row, for – (-, -, 0, 0, 0, 2) more rows.

All Sizes:

Dec row (RS): K2, k2tog, knit to end — 1 st decโ€™d.

Next row (WS): Purl.

Cont to work a Dec row every RS row, 0 (0, 1, 2, 4, 6, 6) more times.

At the same time, when Armhole measures .5 (.5, .75, 1, 1, 1, 1)โ€, begin Neck Shaping:

Neck Dec row (RS): Work as estโ€™d to last 4 sts, ssk, k2 — 1 st decโ€™d at Neck Edge. repeat Neck Dec row every RS row, 14 (14, 15, 15, 13, 14, 13) more times, then repeat Neck Dec row every other RS row, 2 (3, 3, 3, 5, 5, 6) times.

After all Armhole and Neck decs are complete, 11 (13, 14, 16, 17, 17, 18) sts rem for Shoulder. Work even in Stripe Sequence until 8 full Stripes + 14 rows of a ninth stripe have been worked. Armhole meas approx 6.25 (6.5, 7, 7.5, 8, 8.25, 8.5)”.

Shape Shoulder

Using the sloped method, bind off 3 (4, 4, 5, 5, 5, 6) sts at beg of next RS row, 4 (4, 5, 5, 6, 6, 6) sts at beg of next RS row, and rem 4 (5, 5, 6, 6, 6, 6) sts at beg of next RS row.

GROW

To Unlockย Exclusive Subscriber Contentย click the Box below and join for free by simply adding your email and creating a password! If you are having troubles, clear your cache or reset your password or login to the Grow Publisher Portal.

>> Learn More About Grow Here <<

I'm thrilled to share this amazing pattern with you, many patterns on my blog are absolutely free! I kindly request that you don't copy and paste or distribute this pattern. Prefer an ad-free experience? Buy a digital PDF pattern for a small fee from one of my online stores for a seamless crafting journey. 

I appreciate your support and readership. You are the reason I can keep doing what I love and sharing it with others. So, thank you from the bottom of my yarn-loving heart! Disclosure: This post contains affiliate links, meaning I get a commission if you decide to make a purchase through my links at no cost to you.

Right Front

Hem

With MC, cast on 45 (49, 53, 59, 63, 67, 71) sts. repeat Rows 1 & 2 of Broken Ribbing patt, 10 times. 

Note: If you wish to add length to the sweater, work more Hem rows.

Main Front

Note: Begin Stripe Sequence, continuing with MC and then switching to CC after 20 rows. Cont in Stripe Sequence throughout remainder of piece. Not including the hem, there will be a total of 9 stripes throughout.

Row 1 (RS): Knit.

Row 2 (WS): Purl.

Dec row (RS): Knit to last 4 sts, ssk, k2 — 1 st decโ€™d. Continuing in Stripe Sequence, repeat Dec row every 10 (10, 10, 8, 8, 8, 8) rows, 3 (1, 1, 11, 10, 9, 8) more time(s), then repeat Dec row every 8 (8, 8, 6, 6, 6, 6) rows, 10 (12, 12, 2, 3, 4, 5) times — 14 total sts decโ€™d, 31 (35, 39, 45, 49, 53, 57) sts rem. 

Work even in Stripe Sequence and stockinette stitch until 133 (131, 127, 123, 121, 119, 117) rows in Stripe Sequence have been worked (6 (6, 6, 6, 6, 5, 5) full Stripes + 13 (11, 7, 3, 1, 19, 17) rows from the next Stripe. Piece meas approx 22.75 (22.25, 21.75, 21.25, 21, 20.5, 20.25)โ€.

Shape Left Front Armhole

Note: Read through remainder of Left Front before proceeding. Neck Shaping is introduced for some sizes before Armhole Shaping is complete.

Bind off 2 (3, 4, 5, 6, 7, 8) sts at beg of next WS row — 29 (32, 35, 40, 43, 46, 49) sts rem. 

– (-, -, L, 1X, 2X, 3X) Sizes only:

Dec row (RS): Knit to last 4 sts, ssk, k2 — 1 st decโ€™d.

Dec row (WS): P2, ssp, purl to end — 1 st decโ€™d.

Cont to work a Dec row every row, for – (-, -, 0, 0, 0, 2) more rows.

All Sizes:

Dec row (RS): Knit to last 4 sts, ssk, k2 — 1 st decโ€™d.

Next row (WS): Purl.

Cont to work a Dec row every RS row, 0 (0, 1, 2, 4, 6, 6) more times.

At the same time, when Armhole meas .5 (.5, .75, 1, 1, 1, 1)โ€, begin Neck Shaping:

Neck Dec row (RS): K2, k2tog, work as estโ€™d to end — 1 st decโ€™d at Neck Edge. repeat Neck Dec row every RS row, 14 (14, 15, 15, 13, 14, 13) more times, then repeat Neck Dec row every other RS row, 2 (3, 3, 3, 5, 5, 6) times.

After all Armhole and Neck decs are complete, 11 (13, 14, 16, 17, 17, 18) sts rem for a Shoulder. If necessary, work even in Stripe Sequence until 8 full Stripes + 15 rows of a ninth Stripe have been worked. Armhole measures approx 6.25 (6.5, 7, 7.5, 8, 8.25, 8.5)”.

Shape Shoulder

Using the sloped method, bind off 3 (4, 4, 5, 5, 5, 6) sts at beg of next WS row, 4 (4, 5, 5, 6, 6, 6) sts at beg of next WS row, and rem 4 (5, 5, 6, 6, 6, 6) sts at beg of next WS row.

Right Back

Work as for Left Front until 165 rows in Stripe Sequence have been worked 8 full Stripes + 5 rows from the next stripe. Armhole measures approx 5 (5.25, 5.75, 6.25, 6.75, 7, 7.25)โ€

, ending with RS rowโ€”28 (31, 33, 35, 36, 37, 38) sts.

Shape Neck

Using the sloped method, bind off 7 (8, 9, 9, 9, 10, 10) sts at beg of next WS row, 5 sts at beg of next WS row, 3 sts at beg of next WS row, and 1 st at beg of next 2 WS rows — 11 (13, 14, 16, 17, 17, 18) sts rem for Shoulder. 

If necessary, work even in Stripe Sequence until 8 full Stripes + 14 rows of a ninth Stripe have been worked. Armhole measures approx 6.25 (6.5, 7, 7.5, 8, 8.25, 8.5)”.

Shape Shoulder

Work as for Left Front.

Left Back

Work as for Right Front until 166 rows in Stripe Sequence have been worked 8 full Stripes + 6 rows from the next stripe. Armhole measures approx 5 (5.25, 5.75, 6.25, 6.75, 7, 7.25)โ€, ending with WS rowโ€”28 (31, 33, 35, 36, 37, 38) sts.

Shape Neck

Using the sloped method, bind off 7 (8, 9, 9, 9, 10, 10) sts at beg of next RS row, 5 sts at beg of next RS row, 3 sts at beg of next RS row, and 1 st at beg of next 2 RS rows — 11 (13, 14, 16, 17, 17, 18) sts rem for Shoulder. 

If necessary, work even in Stripe Sequence until 8 full Stripes + 15 rows of a ninth Stripe have been worked. Armhole measures approx 6.25 (6.5, 7, 7.5, 8, 8.25, 8.5)”.

Shape Shoulder

Work as for Right Front

Sleeve (make 2)

With MC, cast on 37 (39, 39, 41, 41, 43, 43) sts. 

Cuff

Work in Broken Ribbing patt until piece measures 5โ€ from cast-on edge, ending with WS row.

Main Sleeve

Note: Switch to CC and begin Stripe Sequence on left sleeve, continue in MC on right sleeve. Cont in Stripe Sequence throughout the remainder of pieces. See photos for help with color placement

Row 1 (RS): Knit.

Row 2 (WS): Purl.

Inc row (RS): K2, m1, knit to last 2 sts, m1, k2 — 2 sts incโ€™d. repeat Inc row every 8 (8, 6, 6, 4, 4, 4) rows, 5 (9, 7, 9, 4, 6, 12) more times, then repeat Inc row every 10 (-, 8, 8, 6, 6, 6) rows, 3 (-, 4, 3, 11, 10, 6) times — 55 (59, 63, 67, 73, 77, 81) sts. Work even in stockinette stitch and Stripe Sequence until piece measures 18.5 (19, 19, 19.5, 19.5, 20, 20)โ€ from cast-on edge, ending with WS row.

Shape Cap

Bind off 2 (3, 4, 5, 6, 7, 8) sts at beg of next 2 rows — 51 (53, 55, 57, 61, 63, 65) sts rem.

Work 0 (0, 2, 4, 2, 2, 2) rows even.

Dec row (RS): K2, k2tog, knit to last 4 sts, ssk, k2 — 2 sts decโ€™d. repeat Dec row every RS row, 18 (19, 20, 21, 23, 23, 23) more timesโ€”15 (15, 15, 15, 15, 17, 19) sts rem. Bind off rem sts.

Finishing

Weave in ends. Block pieces to finished measurements. Sew center front seam, aligning Stripes from Right and Left Front pieces. Sew center back seam, aligning Stripes from Right and Left Back pieces. Sew Shoulder seams. Sew Sleeve Caps into armholes. Sew Sleeve and side seams.

Neck Edging

With circular needle, beg at Right Shoulder seam, pick up and knit 45 (47, 51, 51, 53, 55, 55) sts along Back Neck, 37 (39, 41, 43, 45, 47, 47) sts along Left Front Neck, 1 st in center seam (place removable marker on this st), and 37 (39, 41, 43, 45, 47, 47) sts along Right Front Neck — 120 (126, 134, 138, 144, 150, 150) sts. PM and join to work in the rnd.

Set-up Rnd: * K1, p1; repeat from * to end.

Dec Rnd: Work in estโ€™d rib to 1 st before marked center st, cdd (marked center st will be in the middle of this decrease), work in estโ€™d rib to end — 2 sts decโ€™d.

repeat Dec rnd every rnd, 3 more timesโ€”112 (118, 126, 130, 136, 142, 142) sts rem. Bind off all sts in patt.

You Might Also Like:

  • My First Knit Sweater
  • Marly Made Me Do It Knit Cardigan With Pockets
  • 35 Graphic Knit and Crochet Sweaters

โค๏ธ Your BiCrafty Bestie,
Marly Bird

A cartoon avatar of a person with glasses and a brown bun smiles warmly. Their green shirt and black jacket add a stylish touch, while colorful hearts surround them like loving temperature blankets, stitching together an aura of love and positivity. -Marly Bird

Frequently Asked Questions

What makes a knit sweater pattern a “favorite”?

A favorite sweater pattern is one that fits beautifully, wears well, is satisfying to knit, and produces something you actually reach for in your closet. The best patterns balance approachable construction with a finished look that feels elevated. Clear instructions, good fit guidance, and a design that translates across different yarn choices and body types are all hallmarks of a pattern worth returning to again and again. When crafters share their “favorite” sweater pattern, they're usually talking about something they've made multiple times in different yarns.

What skill level should I be before attempting a knit sweater?

Most sweater patterns are rated intermediate because you need to be comfortable with increases, decreases, working in the round, and following a multi-part pattern. That said… plenty of people successfully knit their first sweater before technically reaching “intermediate” by choosing a very simple pattern. If you've made hats and cowls and you're comfortable with basic shaping, you might be ready for a simple top-down sweater in the round. The key is choosing a pattern that's labeled for your actual skill level, not the one you aspire to reach.

What yarn does Marly recommend for this sweater?

Check the specific pattern materials section for recommendations. Marly's sweater patterns typically feature yarn with good stitch definition for showing textural details, appropriate weight for the garment's structure, and fiber content suited to the wearing season and care needs. If you're substituting, always match weight and do a gauge swatch. The yarn choice dramatically affects how a sweater looks and wears… a different fiber can transform the same pattern from a spring layer to a cozy winter pullover.

How long does it take to knit a sweater?

Highly variable depending on yarn weight, size, pattern complexity, and your knitting speed! A simple chunky sweater might take 15-20 hours. An average worsted weight sweater is 30-60 hours. A complex fingering weight or detailed colorwork sweater can take 100+ hours. For a realistic timeline: if you knit one hour per day, a “medium” sweater project takes 1-2 months. Many dedicated knitters batch sweater time on weekends and move faster. The journey is part of the joy… a sweater that takes months to make is one you'll wear for decades.

How do I avoid common mistakes when knitting my first sweater?

A few big ones to watch for! Gauge… please swatch and measure. Even a half-stitch difference per inch creates dramatically different sizing over a sweater's width. Read the entire pattern before casting on so you understand what's coming. Place stitch markers generously… they save you from counting errors in long stretches. Try it on as you go if possible (especially for top-down construction). And don't rush the finishing… seaming, picking up collar stitches, and blocking make an enormous difference in the final quality. A well-blocked finished sweater looks like a completely different garment from an unblocked one.

Filed Under: Chic Sheep by Marly Bird Patterns, Free Patterns, Knitting, Marly Bird Premium Patterns, Our Free Patterns, Pattern

Tatiana Crochet Sweater Pattern: A Timeless Lace Alpaca…

November 28, 2025 By Marly Bird 4 Comments

Originally published November 2025 ยท Updated July 2026 with Quick Answer, sizing guide, designer tips, and yarn substitutes.

The Tatiana Crochet Sweater is a timeless lace pullover designed by Marly Bird, featuring a stunning openwork pattern perfect for intermediate to advanced makers. Available in sizes XSโ€“2X with both cropped and tunic length options, it's constructed from one continuous panel with just 2 seams. Designed specifically for baby alpaca yarn that blocks beautifully and drapes elegantly. Get the ad-free PDF on Etsy, Shopify, or Ravelry.

โšก Quick Answer:

The Tatiana is an intermediate-level lace pullover worked in one continuous panel with beautiful drape and retro charm. It comes in sizes XSโ€“2X with cropped or tunic length options, and it was designed specifically for baby alpaca yarn (or soft DK-weight blends) that blocks well. The ad-free PDF is available on Etsy, Shopify, and Ravelry.

โ†’ Jump to pattern details

If you've been dreaming of a stunning, lightweight, and elegant crochet sweater…

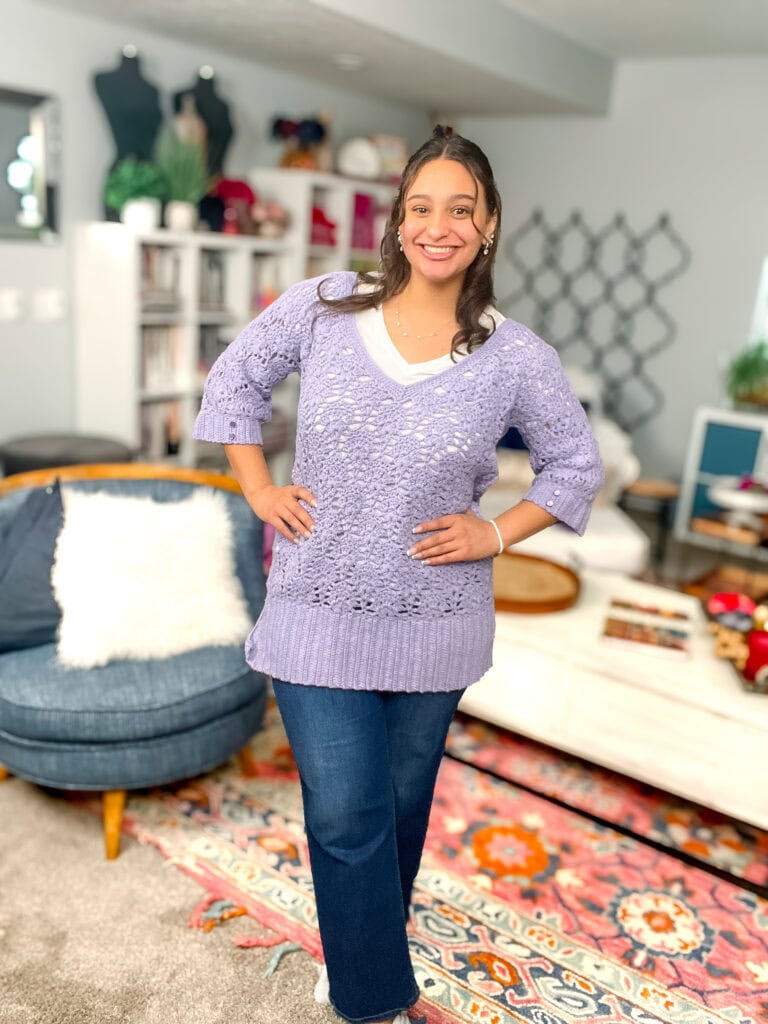
Marly Bird wearing the Tatiana Crochet Sweater lace alpaca pullover in lavender
๐Ÿงถ Affiliate Disclosure: This post contains affiliate links. If you purchase through them I may earn a small commission at no extra cost to youโ€ฆ and it helps support free patterns and content from my yarn-loving heart ๐Ÿ’› See my privacy policy here.

โ†’ Jump to pattern details

This lace pullover has been a maker favorite for more than a decade, yet it still feels modern, wearable, and effortlessly chic. The vintage-inspired construction and beautiful openwork design make it a true closet staple.


Why You'll Love the Tatiana Sweater ๐Ÿ’–

๐Ÿงถ One continuous panel construction: This sweater is worked from a single panel, which means you're not juggling multiple pieces for your first sweater… just one beautiful flow of stitches that becomes your entire sweater.

โœ‚๏ธ Only two seams: Once you finish the panel, you seam the sides and the undersides of the sleeves. That's it. Minimal finishing means more time admiring your work and less time fussing with tricky seams.

๐Ÿ“ Available in cropped and tunic lengths: Choose the silhouette that works for your style. Pair it with high-waisted jeans or wear it as a beach cover-up… the options are endless.

๐ŸŽ€ Retro-inspired sleeve bands: The fitted cuffs and collar give the sweater a vintage charm that feels just right, whether you're dressing up or keeping it casual.

๐Ÿฆ™ Designed specifically for baby alpaca: While you can substitute other yarns, this pattern really shines with baby alpaca… the drape is unreal, and the finished sweater feels like a luxury garment you'd find in a boutique.

This is one of those garments that makes people say, “Wait… you crocheted that?” ๐ŸŒŸ

โœจ Designer Tip: The lace pattern in the Tatiana looks intricate, but it's created from basic stitches arranged in a repeated sequence. Once you learn the repeat, it becomes almost meditative… the perfect project for a Netflix binge or a cozy afternoon.

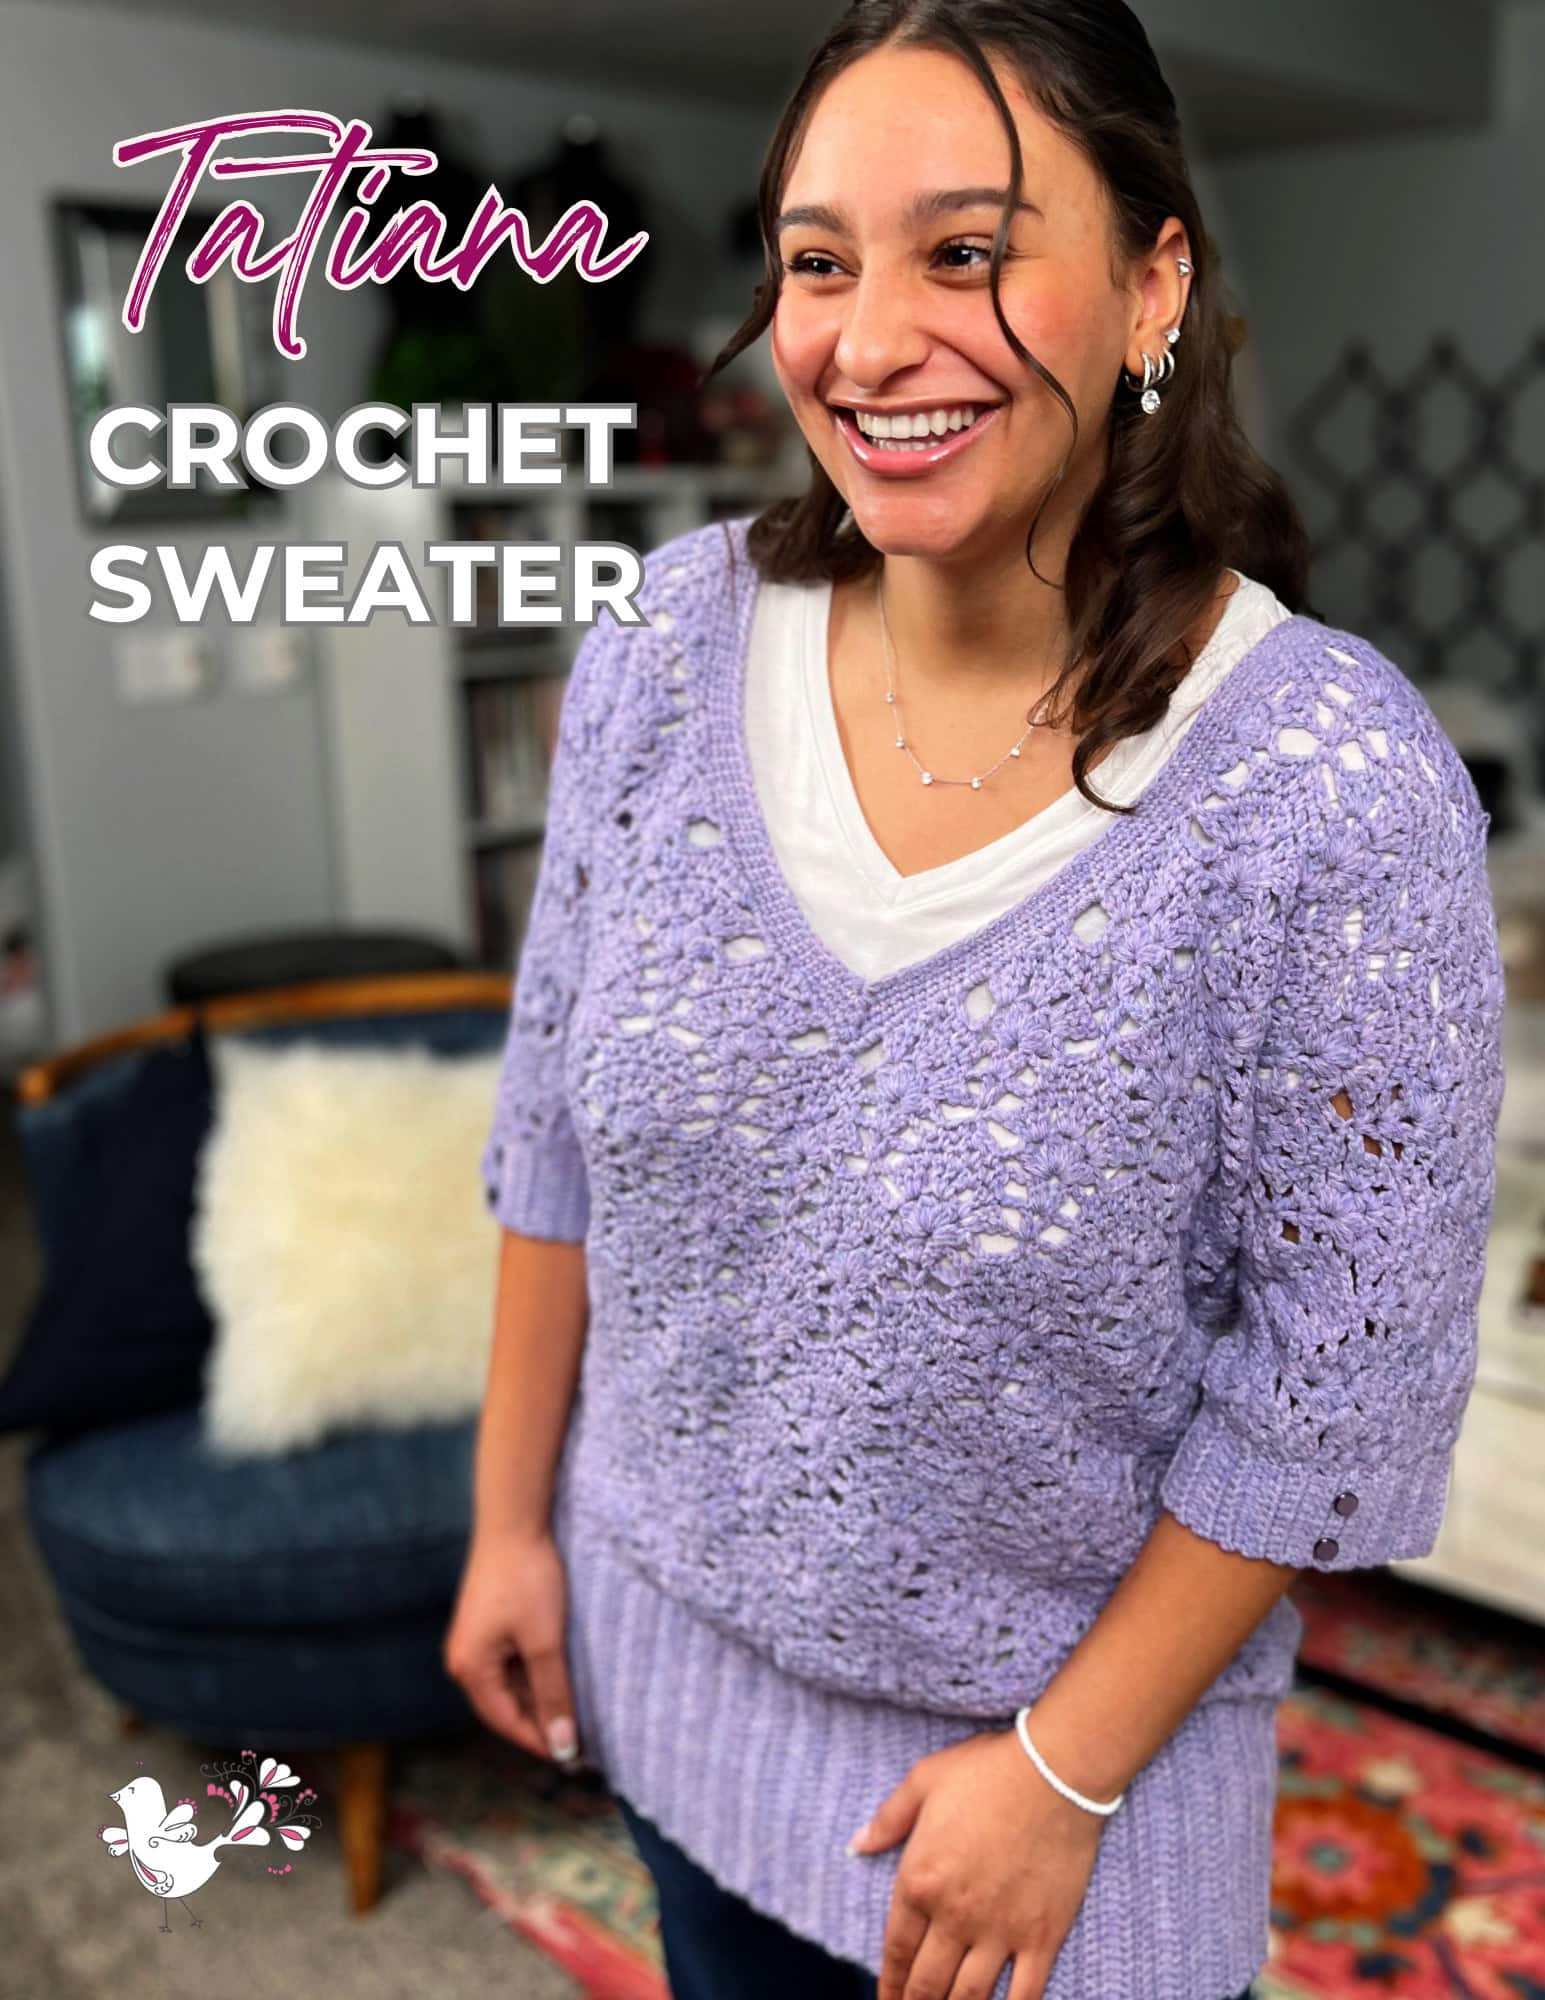
Smiling person wearing a purple crochet sweater over a white top. Text reads "Tatiana Crochet Sweater." The background features a cozy room with a blue chair and various decor elements. -Marly Bird

Relax & Knit
Upgrade to the Printable PDF

Beautifully formatted to print and relax while crocheting. For that uninterrupted crafting experience. The paid pattern includes:

  • Stunning Crochet Lace Design
  • Perfect for Relaxing and Learning
  • Crochet Stitch Diagrams
  • Easy to Follow Written Instruction
Get The Ad-Free PDF

Let's Talk About Alpaca Yarn ๐Ÿงถ

Is Alpaca Soft?

Baby alpaca is one of the softest natural fibers you can work with. It has an incredible halo that softens even more with blocking and washing. Against your skin, it feels like… well, honestly, like butter or a cloud. If you're prone to wool sensitivity, alpaca is often a gentler choice.

Does Alpaca Stretch?

Alpaca has almost no memory. This means it doesn't spring back into shape the way wool does. So your beautiful blocked sweater will grow a bit with wear… and that's actually part of the alpaca magic. The fiber was designed to grow into an even more luxurious drape.

โœจ Designer Tip: Alpaca's lack of memory is a feature, not a bug. That beautiful drape that makes the lace look so luxurious? That's the alpaca doing its thing. Just know going in that this sweater will grow a little with wear… and that's totally normal and expected.
Woman wearing lavender Tatiana lace alpaca crochet sweater over white top and jeans - Marly Bird

Is Alpaca Heavy?

Baby alpaca DK-weight is surprisingly light. Even a full sweater made in alpaca won't feel heavy on your shoulders… in fact, the drape is one reason this pattern looks so elegant and high-end.

Is Alpaca Warm?

Alpaca is warmer than you'd expect for such a light fiber. The tiny scales in the fiber trap warmth efficiently, making it perfect for a sweater that feels substantial but never heavy or bulky.

For more on alpaca fiber and how to care for it, grab my free PDF guide here, or check out my favorite book on the subject: The Knitter's Book of Wool (it's equally useful for crocheters).

Join our Newsletter

Get Free Crochet & Knitting
Pattern Links & Coupons!

Hand-drawn bird with curling, detailed feathers and pink accents; cheerful pose showcases fine line and texture work.
>> Become An Insider <<
A woman with glasses and curly hair models a colorful crocheted scarf, showing textured stitches and vibrant yarn.

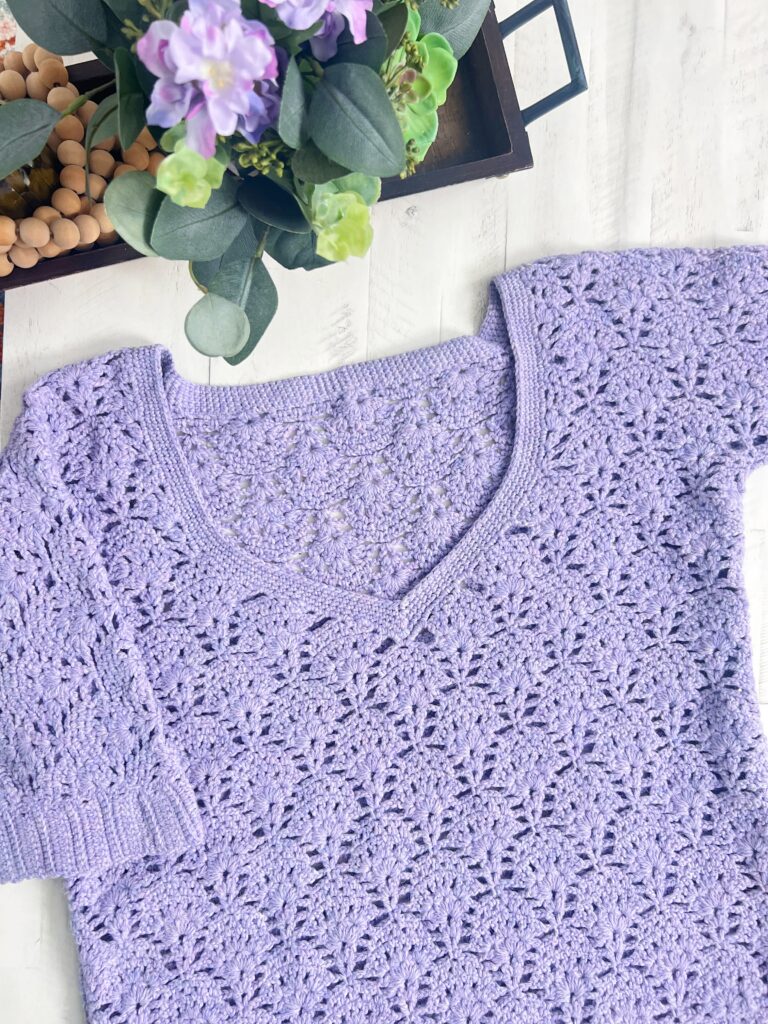
Tatiana Crochet Sweater flat lay - lavender lace alpaca sweater pattern by Marly Bird

Blocked vs Pre-Blocked Gauge… And Why It's Critical ๐Ÿ“

Here's the thing about alpaca that trips up a lot of makers: your gauge will change dramatically after blocking. Pre-blocked alpaca is denser and smaller. Blocked alpaca opens up and relaxes. The pattern is written for blocked gauge, which means if you measure your swatch before blocking, it will look way too small.

This is non-negotiable: make a swatch, block it properly, then measure your gauge. If you skip this step and go straight to the sweater, your finished piece won't fit the way the pattern intends.

โœจ Designer Tip: Your pre-blocked swatch will look MUCH smaller than your finished measurement. That is supposed to happen! Alpaca opens up beautifully when wet blocked. If you skip the swatch, your sweater will not fit the way the pattern intends. I cannot stress this enough… swatch and block it first.

Need a refresher on gauge swatches? Check out my detailed guide: How to Make a Gauge Swatch in Crochet.


Which Size Should You Make? ๐Ÿ“

The Tatiana comes in five sizes: XS, S/M, L, XL, and 2X. And you get to choose between cropped and tunic lengths… so there's truly a version of this sweater for everyone.

For the best fit, grab the PDF and check out the full schematic with finished measurements by size. The schematic shows exactly how the sweater is meant to sit on your body… chest width, length, sleeve width, all spelled out clearly.

General guidance: crochet sweaters are typically made with 1โ€“2 inches of positive ease (the finished sweater is larger than your actual bust measurement). If you're between sizes, the pattern notes will guide you… but when in doubt, size up for alpaca since the fiber has no memory and may grow a bit with wear.

๐Ÿ’ก Good to Know: Alpaca grows with wear and blocking… so the schematic measurements are your “just blocked” measurements. After a few wears, the sweater will relax and drape even more beautifully. This is normal and part of the alpaca magic!

Yarn Substitution Guide ๐Ÿงถ๐Ÿ’ก

Best Choices

๐Ÿฆ™ 100% baby alpaca is the gold standard for this pattern… it's what it was designed for. KnitPicks Alpaca Cloud Lace is a budget-friendly option that gives you that signature halo and drape.

๐ŸŒŸ Alpaca-silk blends work beautifully if you want a bit more sheen and structure. The Malabrigo Silkpaca is absolutely dreamy for this design… the silk adds a subtle luminosity to the lace.

๐Ÿงถ DK or sport weight merino is a great substitute if alpaca is outside your budget or irritates your skin. Choose something with good stitch definition and block well before committing.

๐Ÿชก Wool-silk or wool-bamboo blends give you drape without the stretch… a great option for makers who want more control over the fit.

Yarns to Avoid

Cotton, nylon, and yarns with no memory are not recommended for the Tatiana. Nylon doesn't drape the way the lace pattern deserves, cotton will be too heavy and weight down the project, and fibers with no memory won't hold their shape. You'd end up with a sweater that looks droopy instead of elegant.


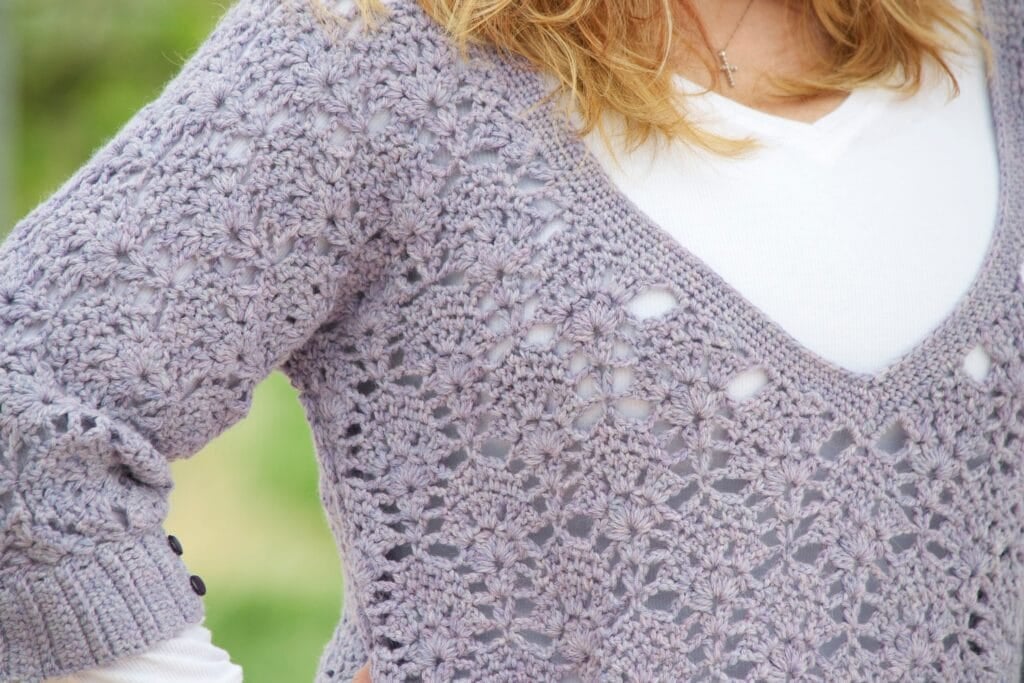
Close-up of Tatiana Crochet Sweater sleeve detail - lace alpaca crochet pattern by Marly Bird

Is Crochet Lace Hard? โœจ

This might surprise you… crochet lace isn't hard. It just requires a few specific skills:

The stitches in this sweater are basic. What you need is: the ability to recognize your stitches, attention to the repeated sequence, comfort following a chart or clear written instructions, and a little patience. That's it.

The DK-weight alpaca also makes this more approachable than you might expect… it's not as fiddly as traditional fine laceweight yarn. Big enough to see clearly, light enough to drape beautifully.


A True Two-Seam Sweater ๐Ÿงฅ

When you're done with the panel, you simply seam the sides, seam the sleeve undersides, and add the neckline, cuffs, and hem. That's it. Two seams. Zero fuss. And a beautifully constructed sweater that looks like it came from a high-end boutique.


Who Will Love This Pattern? ๐Ÿ’•

The Tatiana is perfect for intermediate crocheters who are ready for something truly beautiful. If you've made a simpler crochet sweater before and want to level up to something showstopping, this is your next project. It's just challenging enough to feel like an accomplishment… but not so complicated that it stops being fun.

And here's the best part: it looks gorgeous on every age group. Teens, moms, grandmas… the vintage-inspired lace and flattering silhouette works for everyone.


How to Block Your Alpaca Crochet Sweater ๐Ÿ’ฆ

Blocking transforms your crochet sweater from “handmade” to “boutique.” Here's how to do it:

  • Fill your soaking basin with cool water and add a drop of Eucalan Wool Wash. (Or use a gentle wool wash of your choice.)
  • Submerge your finished sweater and let it soak for 20โ€“30 minutes. Don't agitate… just let the water do the work.
  • Gently squeeze out the water. Don't wring or twist.
  • Roll it in a towel to remove excess moisture.
  • Lay it flat on your blocking squares and pin to shape. Make sure your measurements match the schematic.
  • Let it air dry completely (usually 24โ€“48 hours, depending on humidity).
  • Once dry, you can pin out the lace edges even more if you want extra definition.

You'll need a few supplies to do this right:

  • Blocking Squares
  • Blocking Pins
  • Soaking Basin
  • Eucalan Wool Wash
  • Ball Winder & Swift (for winding your alpaca hank into a cake before you start)
โญ๏ธ Marly Bird Amazon Storefront โญ๏ธ
Smiling person wearing a purple crochet sweater over a white top. Text reads "Tatiana Crochet Sweater." The background features a cozy room with a blue chair and various decor elements. -Marly Bird

Relax & Knit
Upgrade to the Printable PDF

Beautifully formatted to print and relax while crocheting. For that uninterrupted crafting experience. The paid pattern includes:

  • Stunning Crochet Lace Design
  • Perfect for Relaxing and Learning
  • Crochet Stitch Diagrams
  • Easy to Follow Written Instruction
Get The Ad-Free PDF

Get the Tatiana Crochet Sweater Pattern ๐Ÿงถโœจ

Many makers love having the ad-free PDF because it prints beautifully, works offline, and doesn't change. Plus, when you download it once, you own it forever… no logging in every time you want to make the sweater again.

Benefits of the PDF:

  • Print the pattern and take it to your favorite yarn shop or to a coffee date with your knitting friends
  • No ads, no distractions, no interruptions while you're working
  • Fully graded for sizes XSโ€“2X with schematics for every size and length option
  • Clear written instructions, stitch abbreviations, and a helpful chart
  • Easy to return to if you set it down for a few weeks and need a refresher
Etsy
Shopify
Ravelry
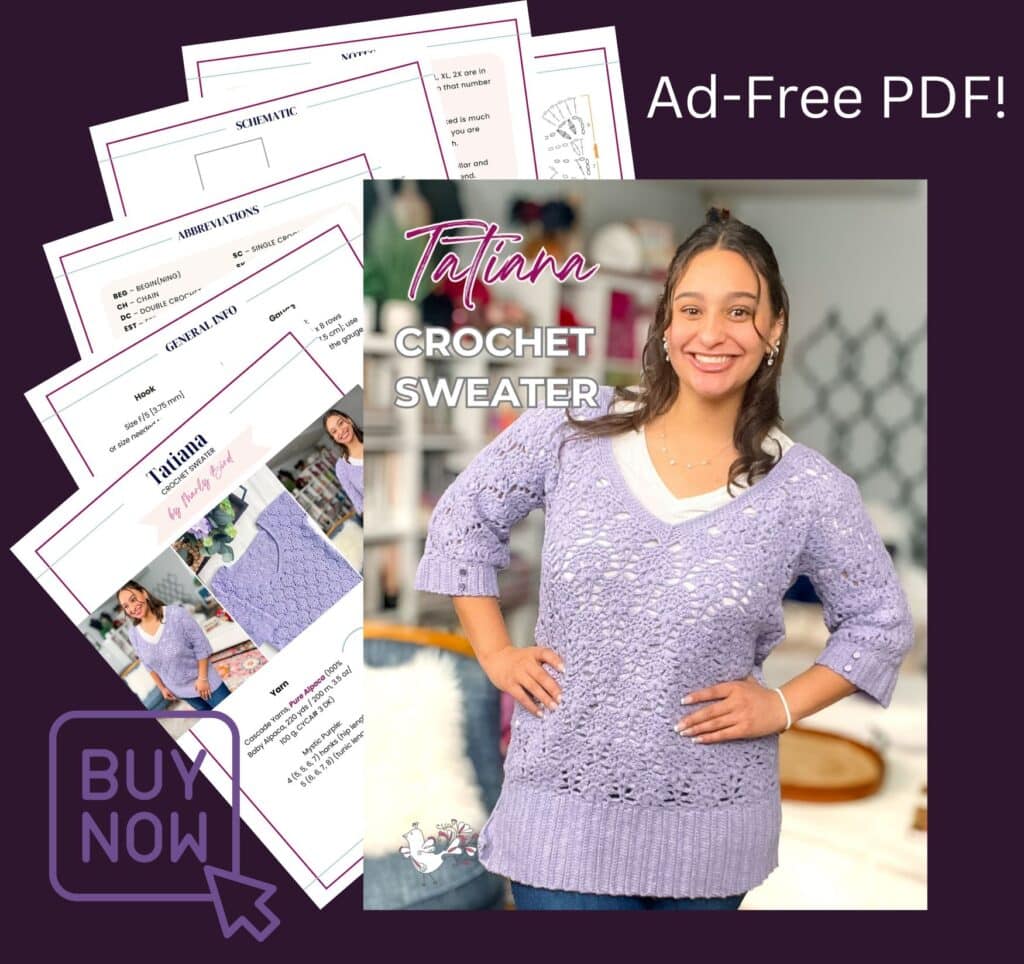
Tatiana Crochet Sweater pattern PDF mockup - Marly Bird

Favorite This Pattern on Ravelry - Marly Bird

๐ŸŽ‰ Love making crochet garments? My Crochet Collection at Marly Bird House is packed with everything you need to take your crochet to the next level… from garment construction to advanced stitch work. Come explore! ๐Ÿ’›

More Crochet Patterns You'll Love ๐ŸŒŸ

  • Sookie Crochet Cardigan Pattern
  • The Calor Wrap Crochet Pattern
  • Free Kimono Crochet Cardigan Pattern
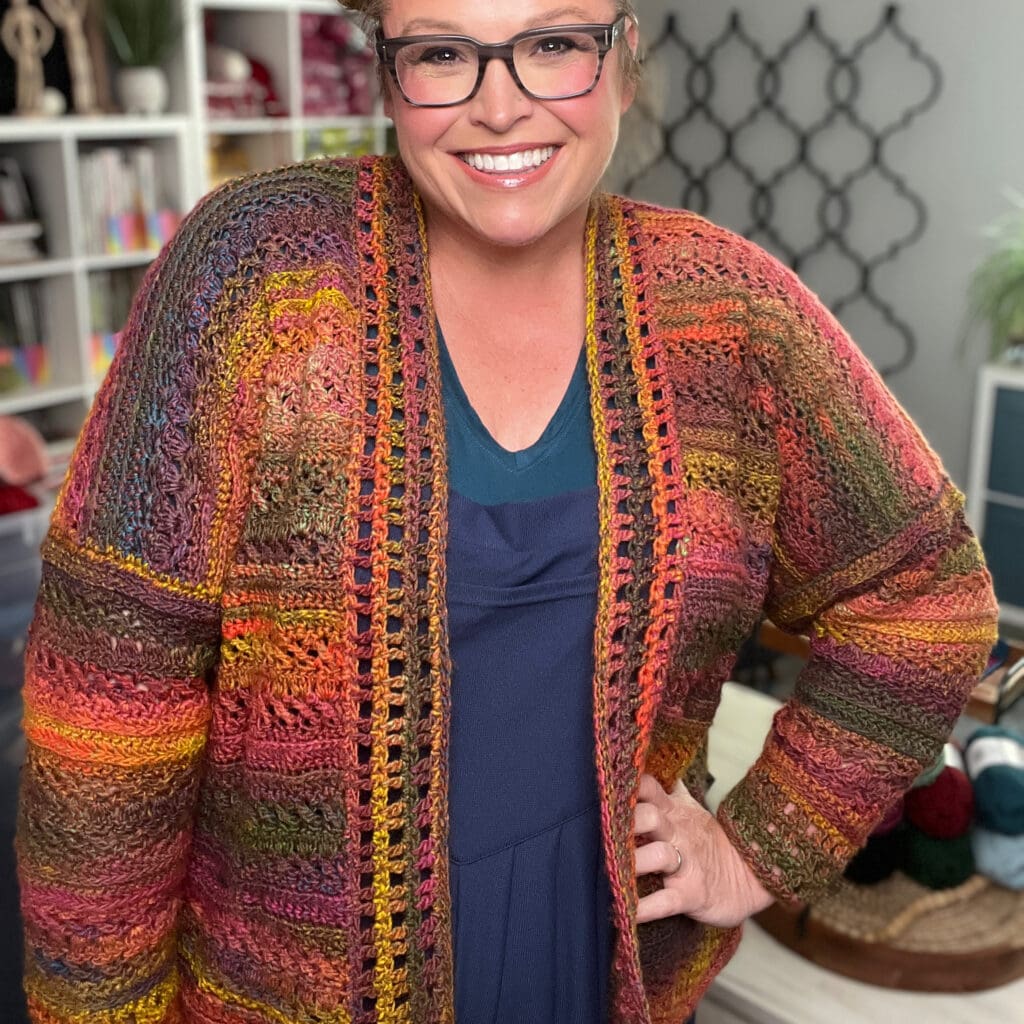
Person wears a vibrant, hand-crocheted Sookie cardigan; visible yarn shelves highlight the colorful stitch texture and detail.
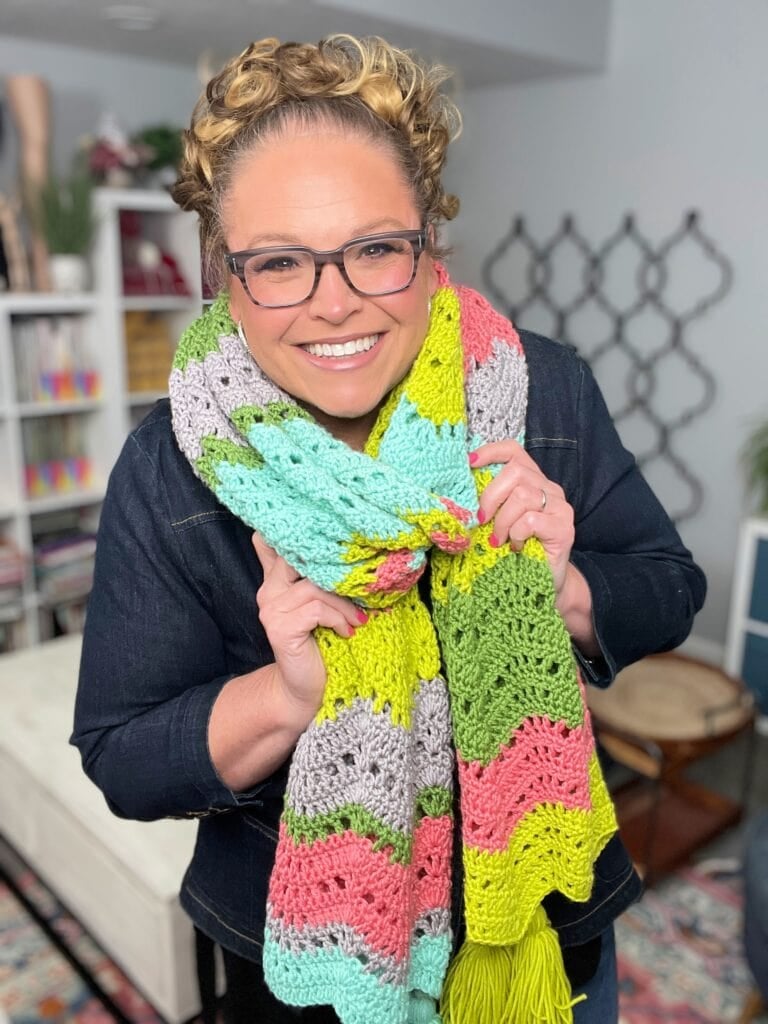
Person displays a striped crochet accessory in green, mint, gray, and pink; distinct textured stitches are visible.

Frequently Asked Questions

What skill level is the Tatiana Crochet Sweater?

The Tatiana is a premium crochet sweater pattern suited for intermediate to advanced makers who have experience with garment construction and crochet lace. You should be comfortable following a chart or detailed written instructions, recognizing your stitches, and have some blocking experience.

Can I use a different yarn?

Absolutely! While the pattern is designed for baby alpaca or soft DK-weight yarn, you can substitute other fibers with similar characteristics: alpaca blends, merino, or DK-weight blends that block well and have good drape. Avoid cotton, acrylic, and yarns with no memory.

What sizes does the Tatiana Crochet Sweater come in?

The Tatiana comes in five sizes: XS, S/M, L, XL, and 2X… so it truly works for a wide range of body types. You also choose between a cropped length and a tunic length, giving you even more options. For exact finished measurements by size, download the PDF… the schematic has everything you need to pick your perfect fit.

How long does it take to make?

This depends on your crochet speed, but expect 30โ€“50 hours of work time. Many makers spread it over several weeks or months, making it the perfect project for a long crafting journey.

Where can I get the pattern?

The Tatiana PDF is available on Etsy, Shopify, and Ravelry. All three versions are identical… it's your choice where you'd like to purchase it.

Do I need to swatch?

Yes! With alpaca especially, you must make a gauge swatch and block it before starting the sweater. Pre-blocked alpaca is much smaller and denser than blocked alpaca. If you measure your swatch before blocking, it will look too small, and your finished sweater won't fit properly.

Final Thoughts ๐Ÿ’•

When you finish your sweater, please please please share your progress… tag me @marlybird on Instagram or Facebook and use #MMMDI (Marly Made Me Do It), #MarlyBird, or #TatianaSweater so I can see it and cheer you on. ๐Ÿ’›

And don't forget to join our Marly's Minions BiCrafty Community on Facebook to share progress, get help, and connect with fellow makers.

โค๏ธ Your BiCrafty Bestie,
Marly Bird
A cartoon avatar of a person with glasses and a brown bun smiles warmly. Their green shirt and black jacket add a stylish touch, while colorful hearts surround them like loving temperature blankets, stitching together an aura of love and positivity. -Marly Bird

Filed Under: Crochet, Marly Bird Premium Patterns, Pattern

Flying with Knitting Needles: TSA Rules + Travel Tips for Yarn Lovers

November 6, 2025 By Marly Bird 5 Comments

Updated November 5, 2025
If you've ever wondered, โ€œCan I take knitting needles on an airplane?โ€ โ€” you're not alone. This is the #1 question I get from traveling crafters, and I'm happy to say: YES, you can โ€” with a few tips and caveats you should know before takeoff.

Whether you're flying across the country or headed off to a fiber festival, this post has everything you need to confidently pack your project bag for the plane. Letโ€™s get into it! ๐Ÿงถโœˆ๏ธ

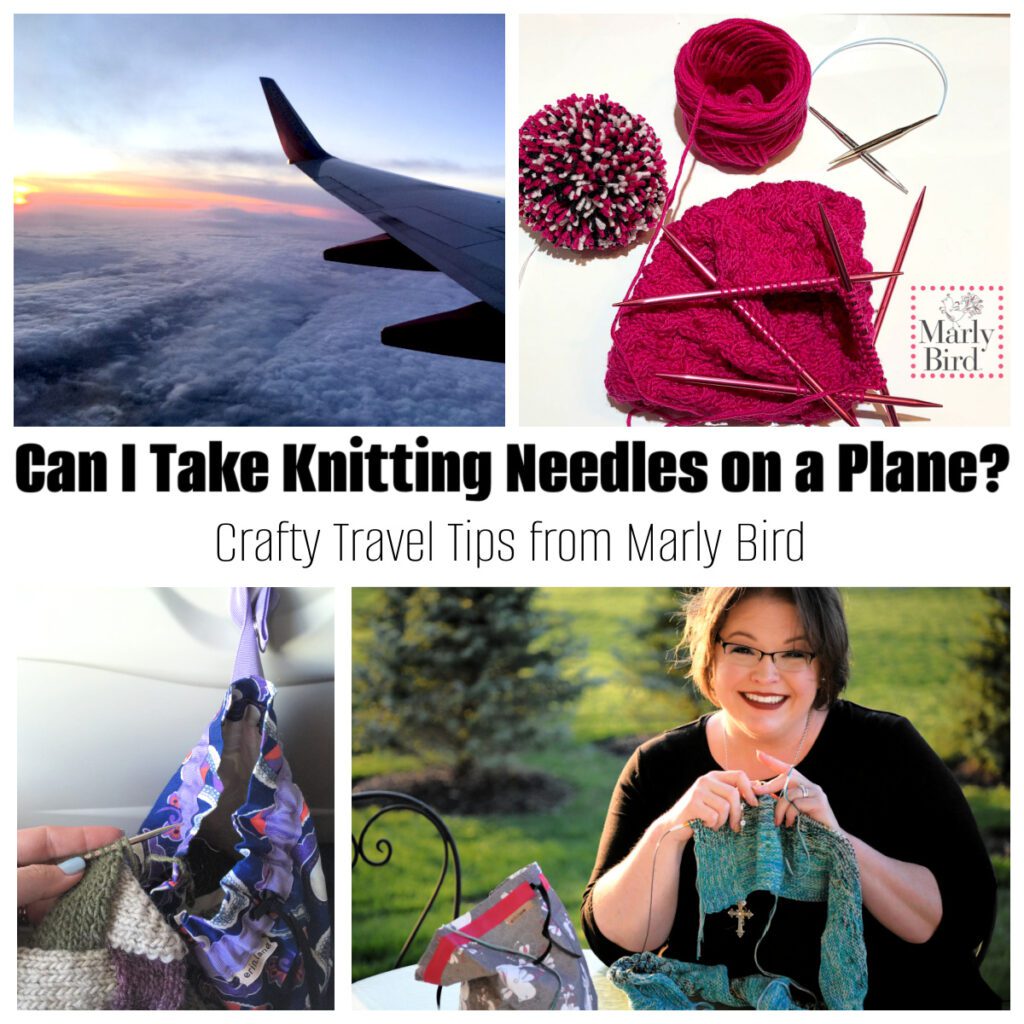
Crafty Travel Tips - Take Knitting Needles on a Plane or Travel with Knitting - Marly Bird

Affiliate Disclosure: This post contains affiliate links. To learn more please visit my privacy policy here๐Ÿ’–

TSA Says You Can Bring Knitting Needles on a Plane

If you're flying within the United States, the TSA website is very clear:
Knitting needles are allowed in both carry-on and checked bags.
You can read their official rules at tsa.gov, or click here: https://www.tsa.gov/travel/security-screening/whatcanibring/all

I personally travel all the time with knitting needles in my carry-on bag. Iโ€™ve flown with:

  • Double-pointed needles for socks
  • Circular Chiaogoo needles for hats
  • Notions like tapestry needles, safety scissors, and stitch markers

Iโ€™ve never been stopped. But Iโ€™ve also learned a few smart packing tips along the wayโ€ฆ


How to Pack Knitting Needles For the Plane

TSA recommends that sharp objects in checked bags should be sheathed or securely wrapped to avoid injury. Even though knitting needles arenโ€™t โ€œsharpโ€ in a traditional sense, this is still a good practice โ€” and not just for checked luggage.

Here are some tips I follow when packing:

  • Use a zippered project bag to keep everything together
  • Store your needles in a dedicated needle case or slot inside the bag
  • Avoid letting loose needles poke out (especially metal ones)

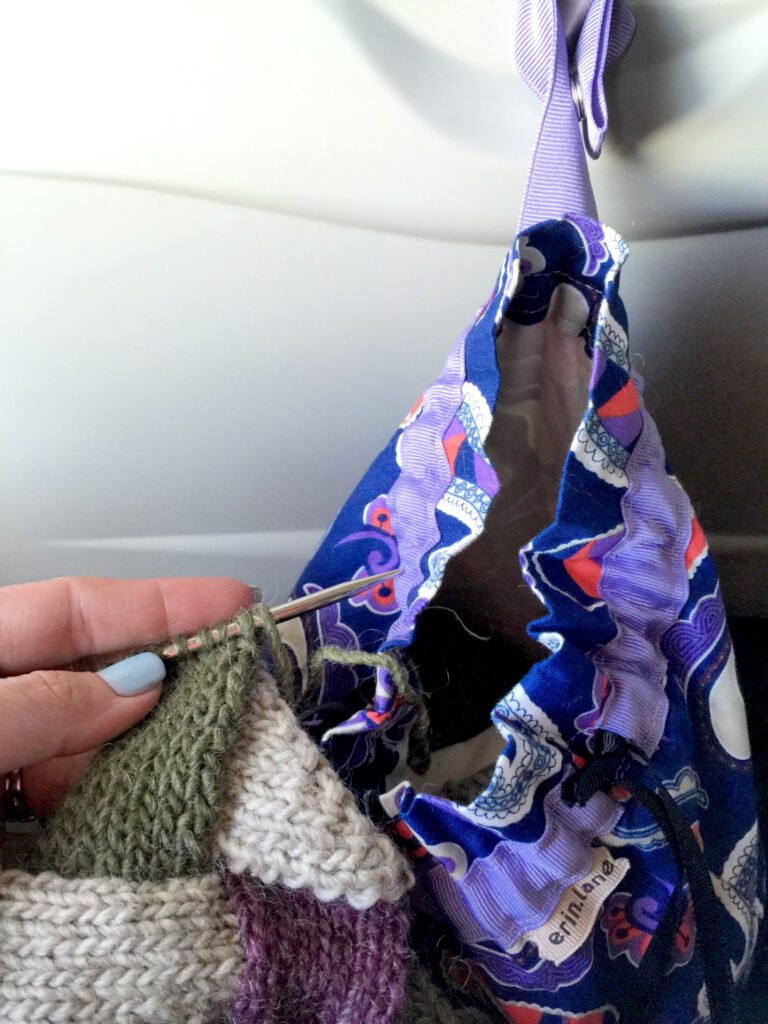
My favorite travel bag is the Erin Lane Bags Twofer Project Bag โ€” it snaps onto the tray table, fits nicely on your lap, and doubles as a yarn pillow when you're ready to nap mid-flight. Itโ€™s a MUST for me.

Pro tip: Iโ€™ve also used it as a neck pillow more times than I can count ๐Ÿ˜„

Knitting needles on a plane and an Erin Lane Bags Twofer bag hanging from the tray table clip - knitting needles with entrelac knitting - Marly Bird

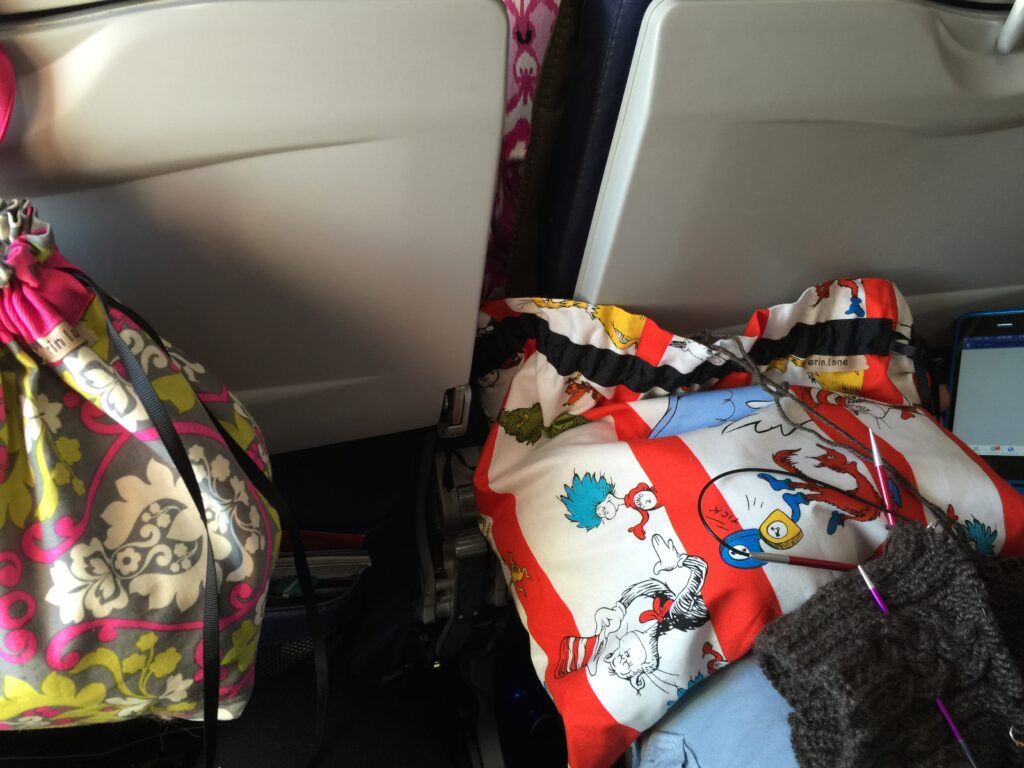
One time, I was on the same flight as a local friend (and knitter) to a show and we got to sit next to each other on the plane. When we pulled out our plain knitting we chuckled because we both had an Erin Lane Bag with our WIP in it! You can see mine was already hanging from the tray table clip while he had his rested on his knee.

erin lane bags on a plane to hold the knitting project while flying - Marly Bird

Also, I've been known to use my project bag, stuffed with a nice squishy project in it, as a pillow under my head as I lean against the window.


Can I Bring Scissors, Cutters, or Notions on a Plane?

This is where things get a little more specific.

โœ… Allowed in carry-on (U.S. flights):

  • Child safety scissors (with rounded tips)
  • Small scissors under 4 inches
  • Tapestry needles
  • Stitch markers
  • Nail clippers (great for cutting yarn)

โŒ Must go in checked luggage:

  • Circular thread cutters (like the Clover style)
  • Blade-style or built-in cutter tools
  • Large or pointed scissors

Important: TSA officers have final say. While the rules allow certain tools, you may still run into someone who says otherwise. If that happens, you can:

  1. Politely ask for a supervisor
  2. Show the TSA website on your phone
  3. Carry a pre-stamped envelope to mail home any tool they wonโ€™t allow

Itโ€™s rare, but itโ€™s always better to be prepared.


Travel Tip for Scissor on a Plane from Marly

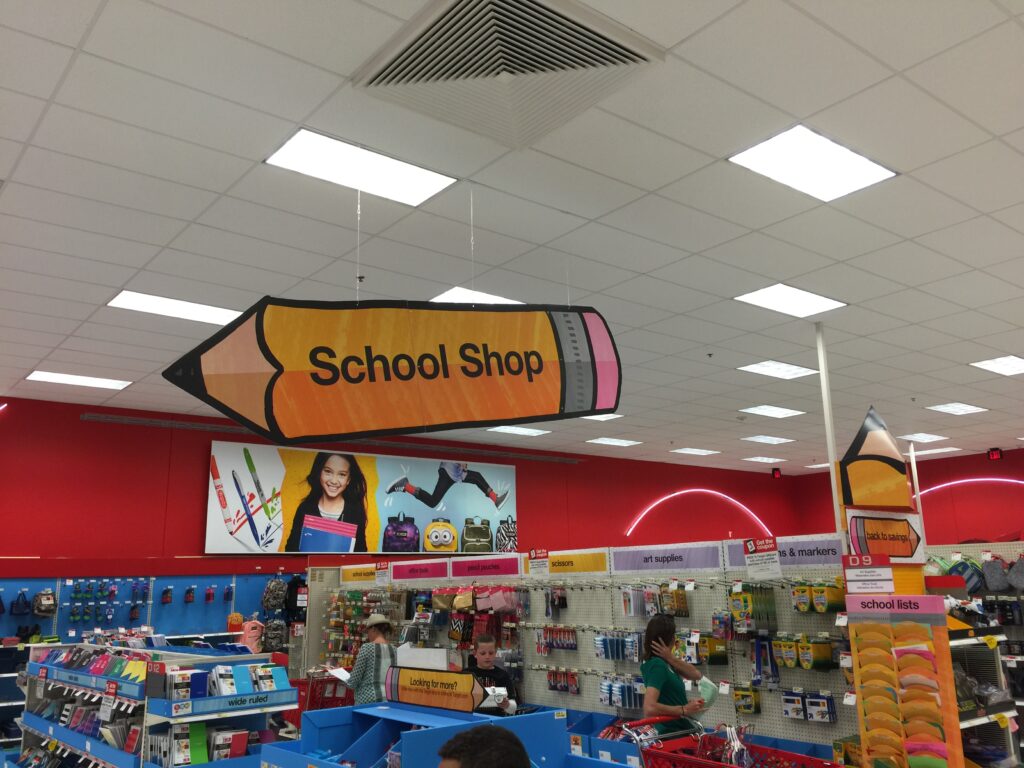
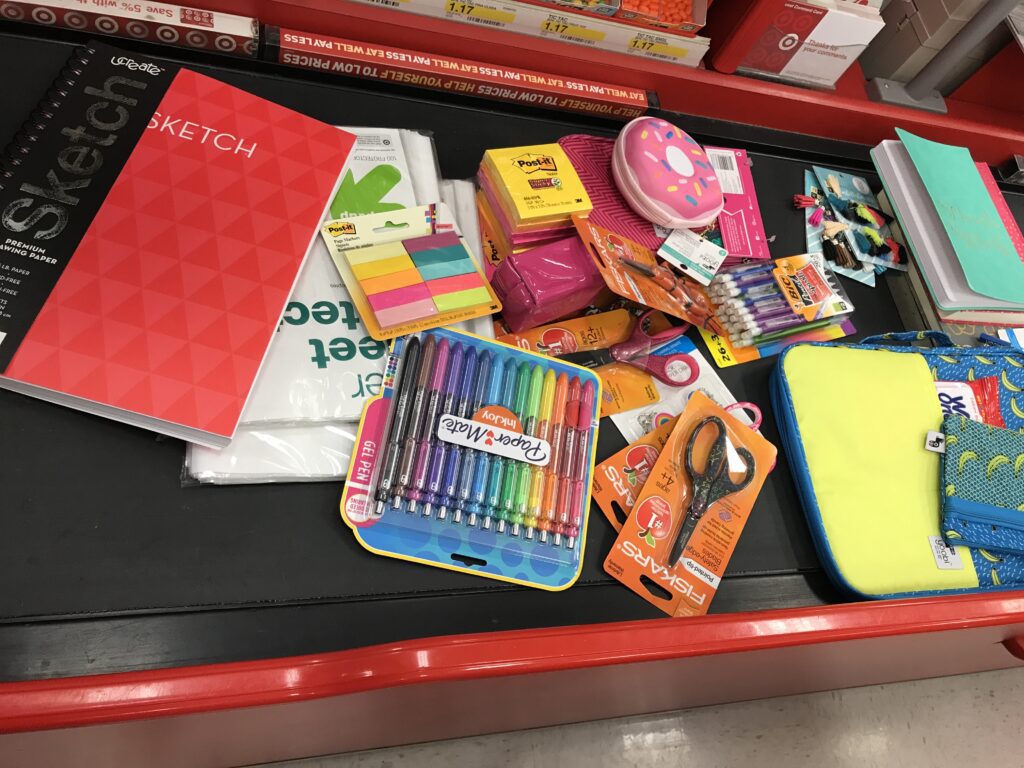
back to school supply sign at target - getting supplies for knitting and crochet in this section every year - Marly Bird
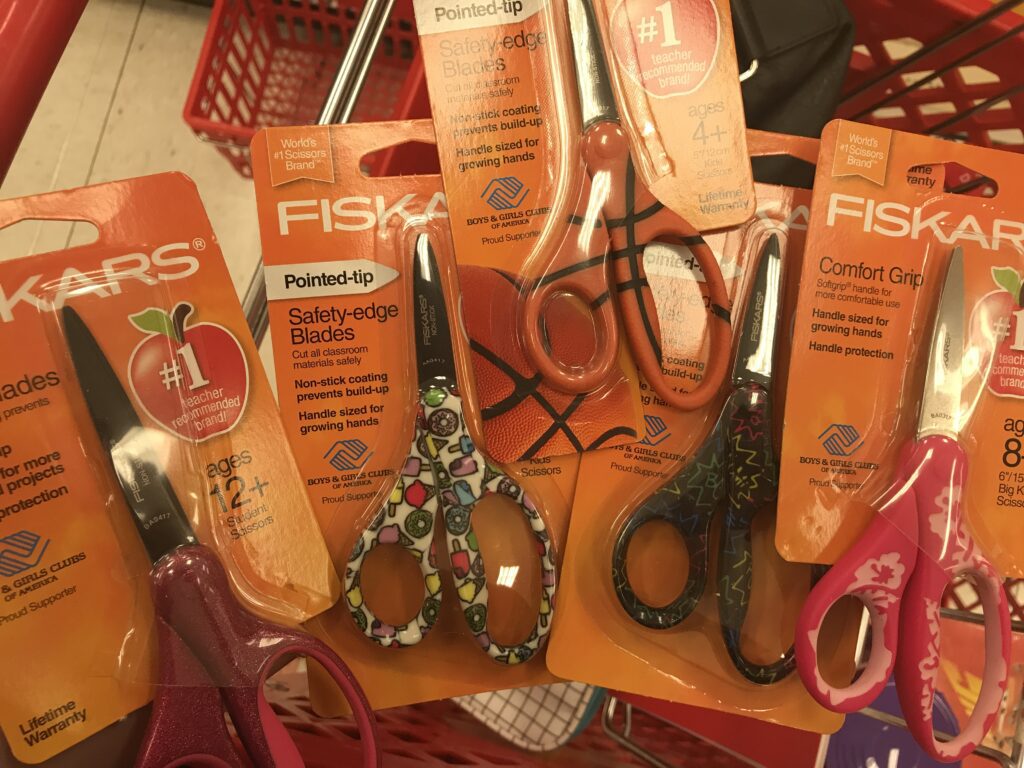
child safety scissors are great for knitters who travel because they are safe to bring in your carry on luggage - image is of a pile of scissors in a basket during back to school supply shopping - Marly Bird
school supplies that also work for crochet and knitting notions and needs - Marly Bird

Little known fact about me, I love back-to-school supply season โ€” it's basically a holiday in my house ๐ŸŽ‰
And it's also a great time to grab travel-friendly notions.

At stores like Target, youโ€™ll find:

  • Colorful child safety scissors that meet TSA blade rules
  • Mini storage boxes that make great stitch marker tins
  • Fun pencil pouches that double as project bag organizers

Theyโ€™re inexpensive, colorful, and easy to toss into your carry-on without worry.

Must Have Travel Items for Knitters and Crocheters

Travel Tips for Flying with Knitting Needles

Hereโ€™s a checklist of what I recommend:

โœˆ๏ธ Bring a plastic tapestry needle
You never know when youโ€™ll need it (and itโ€™s perfectly safe for air travel).

โœˆ๏ธ Pack only the tools you need for your flight
Leave the rest in checked baggage if youโ€™re traveling with more than one project.

โœˆ๏ธ Use circular or DPNs instead of straight needles
Straights are long, awkward, and more likely to get flagged (plus theyโ€™ll poke your seatmate ๐Ÿคญ)

โœˆ๏ธ Bring a printed pattern
Donโ€™t rely only on your phone or tablet โ€” batteries die, signals drop.

โœˆ๏ธ Use a proper project bag
I love the View Ewe Tote from Erin Lane Bags. It lets me see everything inside without rummaging.

โœˆ๏ธ Carry a yarn-safe cutter
Child scissors or nail clippers work great.

โœˆ๏ธ Stash extra stitch markers + a lifeline cord
Always be ready to save your place in case you need to temporarily remove needles.

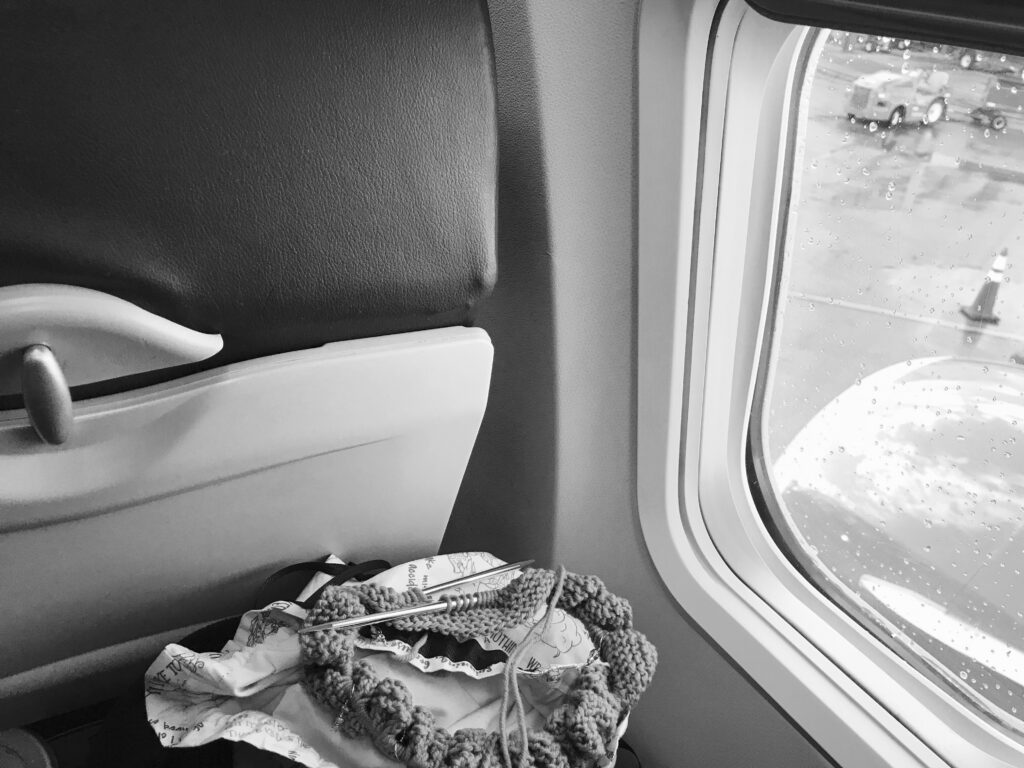
black and white image of a travel knitting project next to the airplane window  before take off - knitting needles on a plane - Marly Bird

Can You Take Knitting Needles on International Flights?

This varies by country. While the U.S., UK, Canada, and Australia are typically flexible, some countries like Greece restrict knitting needles in carry-ons.

Here are links to check:

  • United States of Americaโ€™s Carry-on Restrictions
  • United Kingdomโ€™s Carry-on Restrictions
  • Australiaโ€™s Carry-on Restrictions
  • Canadaโ€™s Carry-on Restrictions
  • Mexicoโ€™s Carry-on Restrictions

Always check the airline website + government guidelines for each country you fly to.

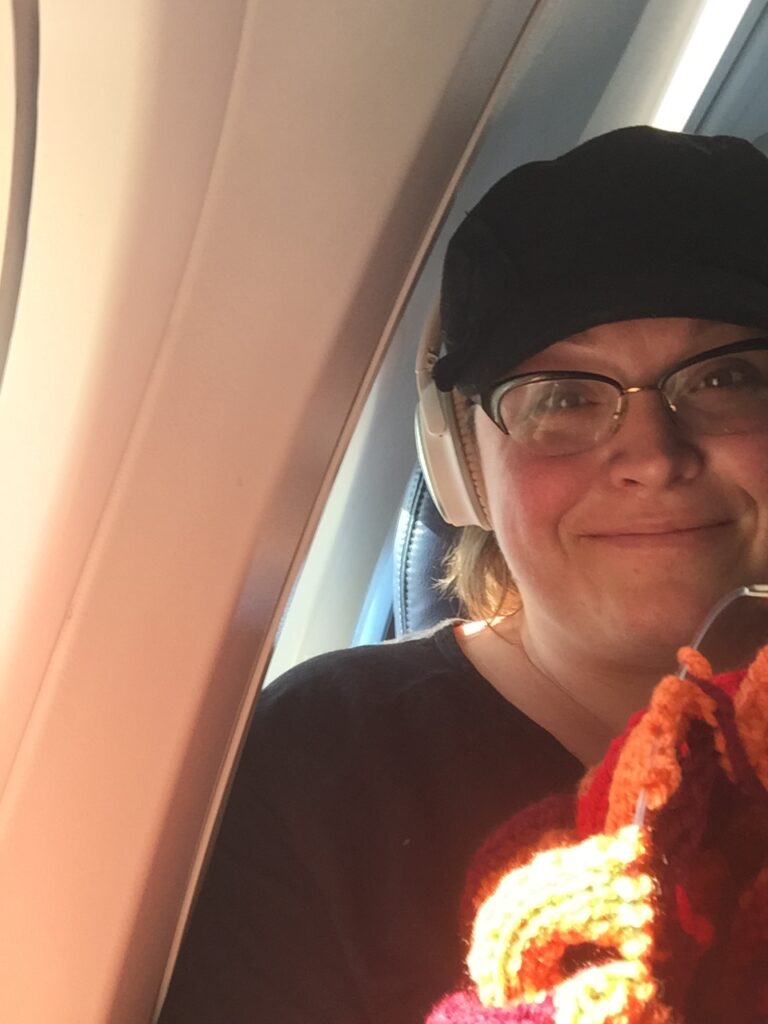
A woman with glasses and tied-back hair smiles while knitting a teal patterned fabric on an airplane, showing that you can take knitting needles on an airplane. She sits by the window in a gray shirt, enjoying her creative project mid-flight. -Marly Bird

Whatโ€™s the Best Knitting Project to Bring on a Plane?

I put more thought into my travel project than I do my suitcase ๐Ÿ˜†
Hereโ€™s what I look for in a travel knit:

  1. Compact size โ€“ nothing that takes up half my bag
  2. Easy to pause & resume โ€“ so I can stop mid-row if needed
  3. Minimal color changes โ€“ to avoid tangling yarn in a small space *this is a loose rule as I love colorwork and often will work on it while on a trip.
  4. Something fun that wonโ€™t finish too quickly โ€“ yes, I always pack a backup!

Here are a few Iโ€™ve taken on planes:

  • Socks โ€“ I use my My First Knit Socks pattern all the time
  • Shawls โ€“ Just keep the pattern printed and easy to track โ€” The Peak Serenity Shawl is a good project for travel, so is the Super Simple Two Ball Shawl
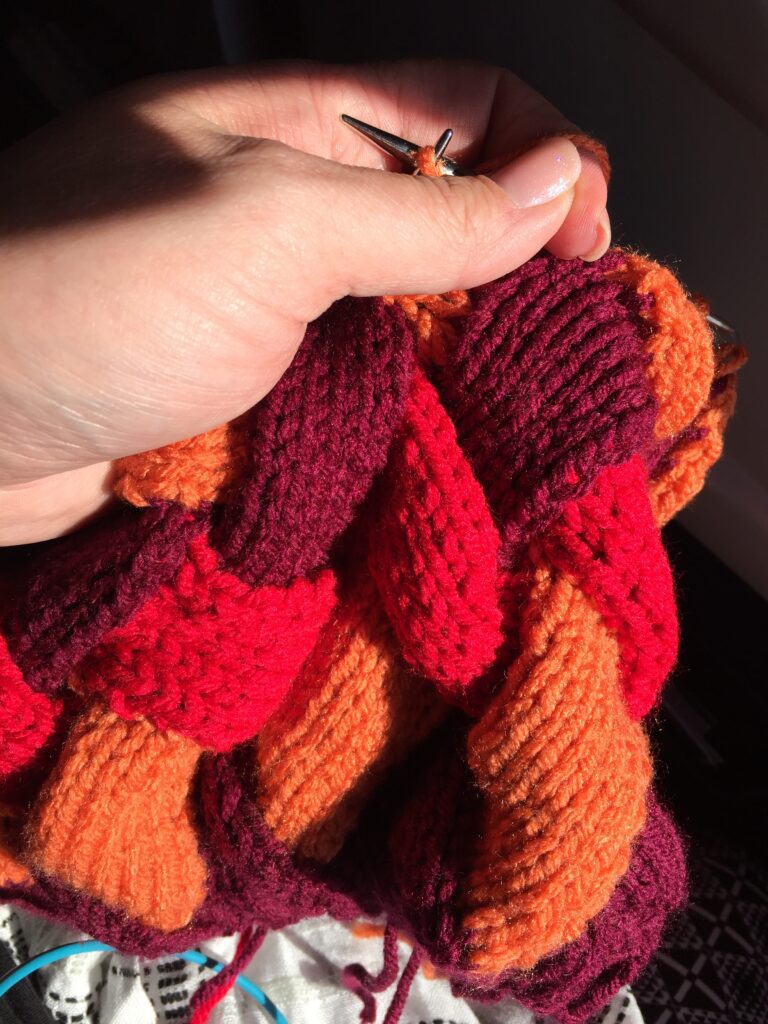
  • Entrelac hats โ€“ like the Huckleberry Entrelac Hat with self-striping yarn โ€” fun tiers and easy to work in small sections

Bonus: If you can knit backwards, entrelac is an especially great travel choice.ve to bring multiple colors, or with a few colors of my favorite yarn so I can work each tier with a new color.

knitting entrelac with addi turbo knitting needles on a plane - great knitting project for travel - Marly Bird
Knitting Entrelac on a plane - Marly Bird

Another bonus to this is the person sitting next to you will think you are super cool because you can knit backwards!

Oh, something to mention is that one good thing about the knitting travel shawl project is it doubles as a wonderful project to work on while on the beach enjoying my vacation.

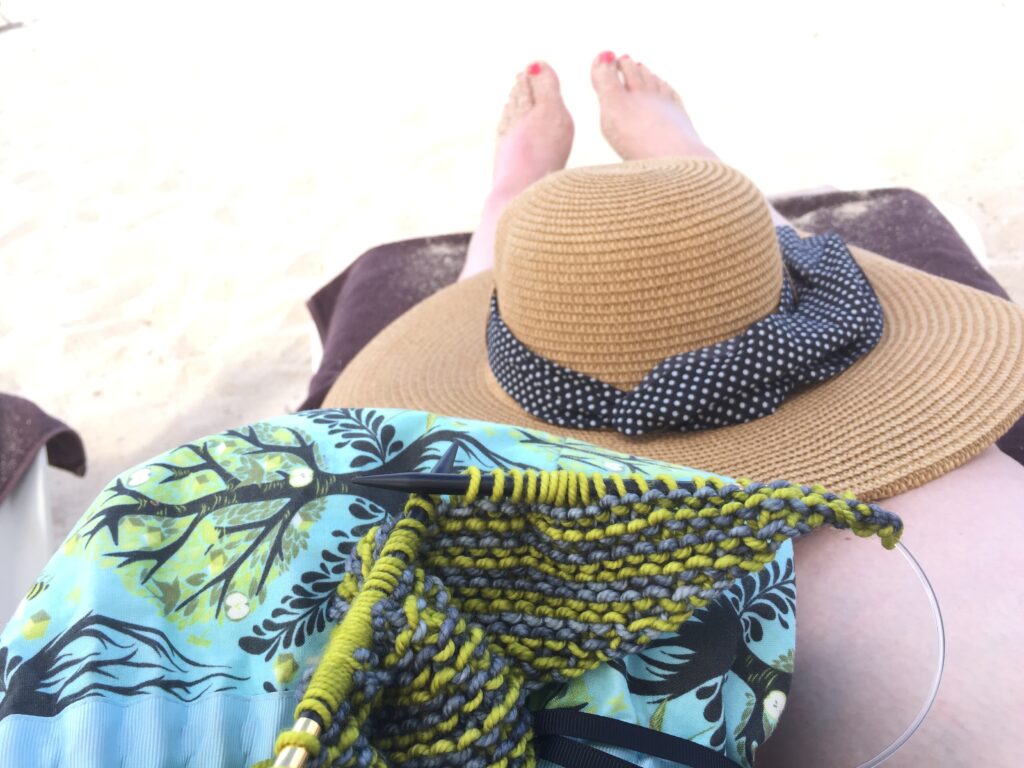
knitting needles in a work in progress shawl sitting on the lap of Marly Bird next to a sun hat - small knitting projects are great for travel - yes knitting needles can go on a plane - Marly Bird

The best part of traveling with my knitting needles on a plane

The best part is the chance to just sit and relax while I listen to a good book and knit. I can let others control the flight, handle the people around me and I just get some solitary time with my needles and yarn. Plus, I get to share my love of the craft with others around me.

Passengers and flight attendants usually will stop me to ask what I am making or how long I've been knitting. It is nice to share with them a little about knitting and how therapeutic it can be.

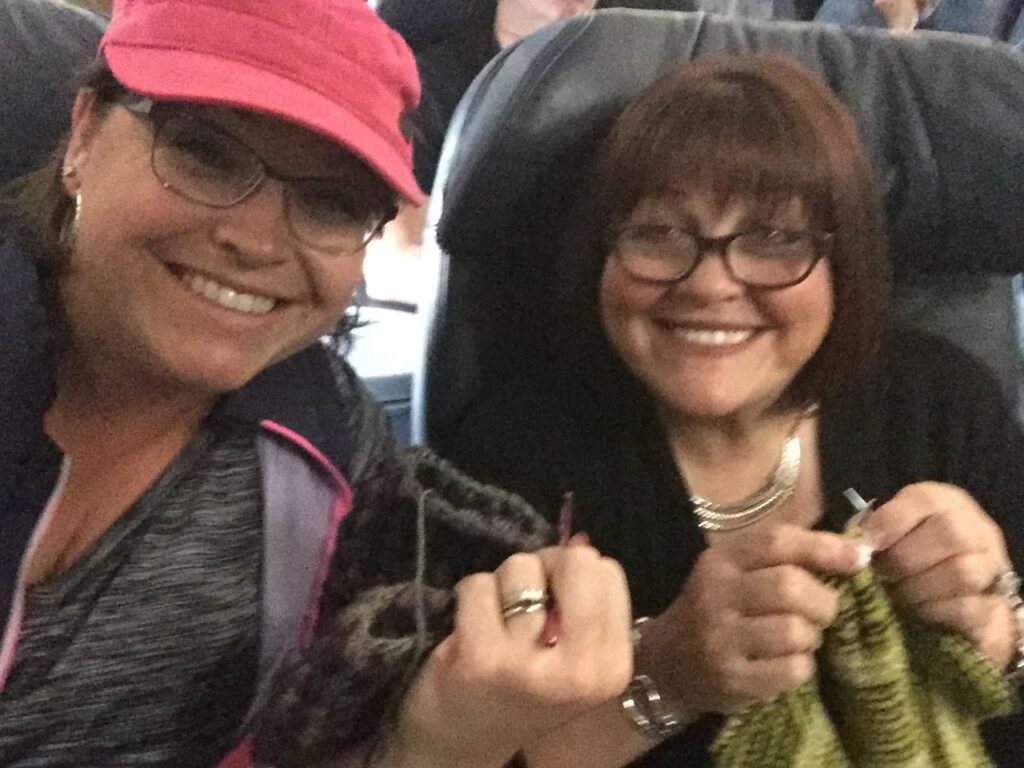
So, yes, you can take your knitting needles on a plane with you. I often do and once, I even had my mom sitting next to me knitting while I crocheted on the plane! Can't wait to do that again!

Marly Bird and Marly's Mom on a plane knitting with knitting needles

๐Ÿงถ Frequently Asked Questions: Knitting on a Plane

Can I bring metal knitting needles on a plane?
Yes, both metal and wooden knitting needles are allowed in carry-on and checked bags according to TSA rules. Iโ€™ve flown with both and never had an issue.

Are scissors or thread cutters allowed in my carry-on?
Yes, as long as the blade is under 4 inches. I recommend safety scissors or even nail clippers. Avoid circular thread cutters with internal blades โ€” those often get flagged.

Can I take crochet hooks on a plane?
Yes! TSA permits both knitting needles and crochet hooks. Iโ€™ve crocheted on flights with no problem.

What if TSA says I canโ€™t bring my needles?
You can (politely!) ask for a supervisor and show them the TSA website on your phone. I also keep a pre-stamped padded envelope in my bag so I can mail anything home if needed. Itโ€™s rare, but always good to be prepared.

What kind of lighting do you use for knitting on a plane?
Airplane lighting can be dim, especially on night flights. I recommend packing a neck light โ€” itโ€™s lightweight, doesnโ€™t bother seatmates, and gives you targeted light right where you need it.

Do you have a phone holder you recommend for flights?
Yes! I use a clip-on phone mount that attaches to the tray table. That way I can watch tutorials or listen to audiobooks hands-free while knitting. You can find them on Amazon, and theyโ€™re great for long flights.

Whatโ€™s the best yarn to use when flying?
Go with something soft, easy to work with, and not prone to splitting. I like worsted weight yarns in center-pull cakes โ€” no tangled mess mid-flight!

Is it okay to knit during takeoff and landing?
Most of the time, yes. I wait until after the flight attendants give the go-ahead for electronic devices just to be respectful โ€” but Iโ€™ve never been told not to knit.

You Might Also Like:

  • How to Pack Your Yarn Project Bag
  • 13 Best Crochet and Knitting Project Bags
  • Summer Adventures With Flat Marly
  • How to Store Knitting Needles

โค๏ธ Your BiCrafty Bestie,
Marly Bird
A cartoon avatar of a person with glasses and a brown bun smiles warmly. Their green shirt and black jacket add a stylish touch, while colorful hearts surround them like loving temperature blankets, stitching together an aura of love and positivity. -Marly Bird

Filed Under: Dibble Dabble Inspiration, Knitting

Easy Crochet Shell Stitch Blanket โ€“ Free Pattern + Video…

October 23, 2025 By Marly Bird 2 Comments

Sample Pattern Name: Shell I Make You a Blanket (updated Oct. 23, 2025)

Crochet blanket featuring shell stitches in shades of orange and cream, with a free pattern note.

Affiliate Disclosure: This post contains affiliate links. To learn more please visit my privacy policy here๐Ÿ’–

๐Ÿฉท Whatโ€™s Your Aesthetic?

Adding a handmade crochet blanket to your home instantly elevates your space and adds cozy charm! Drape your Easy Crochet Shell Stitch Blanket over the arm of a favorite chair, roll it into a woven basket near the fireplace, or layer it at the foot of a bed for extra warmth on chilly nights. If you ask me, you can never have too many handmade blankets!

For more homey inspiration, try these reader favorites:
โ€ข Crochet Pillow Patterns
โ€ข Free Crochet Blanket Patterns Library
โ€ข Chunky Crochet Blanket Patterns


Three neatly folded, crocheted cloths in shades of pink and whiteโ€”crafted with an easy crochet shell stitch patternโ€”sit on a white surface, with a ball of yarn and blurred objects in the background. -Marly Bird

๐Ÿงถ About the Pattern

The classic shell stitch creates a soft wave of texture that looks gorgeous in solids and ombrรฉs. This pattern is beginner-friendly, relaxing to stitch, and easy to resize using the stitch multiple and gauge guide below.

This post walks you through the 30″ x 36″ baby blanket.

Love exploring textures? Browse the Crochet Stitch Tutorials Collection.
โญ๏ธNot sure which size you need? Use the Crochet Blanket Size Chart.


๐Ÿช„ Skill Level

Easy

New to crochet? Start here:
โ€ข How to Crochet for Absolute Beginners
โ€ข How to Read a Crochet Pattern


๐Ÿ“ Finished Measurements

Blog version (shown): 30″ x 36″ baby blanket (approx.)

Find common dimensions in the Crochet Blanket Size Chart.


A partially crocheted pink and white scarf using an easy crochet shell stitch pattern, with a green-handled crochet hook and a skein of Caron Jumbo ombre yarn on a white surface. -Marly Bird

๐Ÿงต Materials

Yarn (Worsted/4)
โ€ข Used in the Sample: Caron Jumbo Ombre in color Salmon; 2 balls for baby blanket size
โ€ข Soft heathers: Herrschners Worsted 8 Heathers
โ€ข Treat-yourself: KnitPicks / WeCrochet Worsted Yarns

Hook
โ€ข US K / 6.5 mm (used in sample) โ€” or size to get gauge & desired drape
Hook size help: Crochet Hook Size Guide

Notions
โ€ข Removable Stitch Markers
โ€ข Tapestry Needle or Chenille Needle
โ€ข Quality Project Bag
โ€ข Optional finishing: Leather Tag, Leather Rivets

โญ๏ธ Marly Bird Amazon Storefront โญ๏ธ

โœ๏ธ Gauge

Each shell repeat โ‰ˆ 2″ wide with sample yarn & hook (10 repeats โ‰ˆ 20″ width). If you change yarn or hook, swatch first.

How to swatch: How to Make a Gauge Swatch in Crochet

๐Ÿงฎ No-Stress Gauge Math (Fill-In)

  1. My repeat width = _____ inches
  2. Target blanket width = _____ inches
  3. Repeats needed = (target รท repeat) = _____ รท _____ = _____ repeats
  4. Starting chain = (repeats ร— 6) + 2 = (_____ ร— 6) + 2 = _____ chains

Example: If 1 repeat = 2″ and you want 30″ wide โ†’ 30 รท 2 = 15 repeats โ†’ (15 ร— 6) + 2 = 92 chains. Check common dimensions in the Blanket Size Chart.


๐Ÿงถ Notes

  • Stitch multiple = 6 + 2
  • Work Row 1 into the back bump for a neat lower edge (optional but pretty)
  • Ch 3 at the start of Row 3 counts as a dc or substitute a Stacked Double Crochet for a cleaner look

๐ŸŽจ Color & Striping Strategies

Use one color for a timeless look, or play with multiple colors and stripes. If changing colors, itโ€™s easiest to switch after a full 2-row repeat so you can carry yarn up the side and hide floats in an edging later. Prefer effortless color transitions? Choose a long-color-change yarn (like the sample ombrรฉ) and let the yarn do the work!

Crochet project featuring an ombre shell stitch pattern in orange and cream, labeled as a free and easy pattern.

๐Ÿ’– Pattern: Easy Crochet Shell Stitch Blanket (30″ x 36″ baby blanket)

Stitch Abbreviations

ch (chain); dc (double crochet); sc (single crochet); st(s) (stitch/es); RS (right side); WS (wrong side)

Video Tutorials

Watch on YouTube Here: https://youtu.be/72FZWawffNU

Foundation Chain

Chain a multiple of 6 + 2. (For the baby size shown: 92 chains.)

Written Instructions

Row 1 (RS): Sc in 2nd ch from hook (back bump). *Skip 2 ch, 5 dc in next ch, skip 2 ch, sc in next ch; repeat from * to end.* Ch 3, turn.

Row 2 (WS): 2 dc in first sc, *skip 2 dc, sc in next dc, skip 2 dc, 5 dc in next sc; repeat from * to last 6 sts,* skip 2 dc, sc in next dc, skip 2 dc, 3 dc in last sc. Ch 1, turn.

Row 3 (RS): Sc in first dc, *skip 2 dc, 5 dc in next sc, skip 2 dc, sc in next dc; repeat from * to end.* Ch 3, turn.

Repeat Rows 2โ€“3 to desired length, ending after a Row 3 for a balanced edge.

Fasten off and weave in or bury in ends.

Need a clean join when changing skeins?

Favorite This Pattern on Ravelry - Marly Bird

โœ‚๏ธ Finishing & Styling

Fasten off and weave in all ends. Block to measurements using your preferred method (steam, spritz, or wet block). Learn more in How to Block Crochet Projects.

Styling ideas:
โ€ข Merry & Bright Crochet Pillow
โ€ข Wheat Stitch Chickens
โ€ข Poufs (footrest)
โ€ข Crochet Home Decor Patterns


๐Ÿงผ Wash & Care (Great for Gifting)

Before gifting, give your blanket a gentle wash to remove spinning oils or dust from making. Lay flat to dry (or tumble low if yarn allows), then double-check that all ends remain securely woven in. Include a care tag so the recipient knows how to love their blanket for years.


๐ŸŽ Gift-Worthy Crochet Blanket

  • Baby Shower: soft pastels, modern neutrals, or gentle ombrรฉs that match the nursery
  • Graduation: school colors or bold stripes for dorm chic
  • Wedding: sophisticated creams, silvers, or heathers for timeless style
  • Housewarming: modern neutrals that blend with any living-room palette

Customize the look by changing yarn weight, hook size, or color palette. Add a leather tag for that polished, boutique finish. Add a cool gift tag to your blanket.

Looking for higher Skill Level Learning? Elevate your crochet blanket skills

Monet Crochet Blanket Masterclass - Marly Bird and Robyn Chachula

Frequently Asked Questions

What is the crochet shell stitch?

The shell stitch is a group of stitches (usually 5 double crochets) all worked into the same stitch or space. When you work them together like that, they fan out into a pretty shell or scallop shape. It's one of those stitches that looks way more complicated than it actually is. If you can double crochet, you can make shell stitch. The pattern alternates shells with single crochets or skipped stitches to create that classic wavy, textured fabric.

Is the shell stitch good for beginners?

It's perfect for beginners who have the basic stitches down! If you're comfortable with single crochet and double crochet… you're ready for shell stitch. The repeat is simple and rhythmic, so once you do a few rows, your hands just know what to do. It's one of those stitches that makes you feel like you leveled up because the finished fabric looks so beautiful, even though the technique itself is super approachable.

What can I make with the shell stitch?

So many things! Blankets are probably the most popular… a shell stitch blanket has gorgeous texture and drape. But it also works beautifully for scarves, shawls, baby items, pillow covers, and even garments. The stitch creates a fabric with a bit of stretch and lots of visual interest. It's especially pretty in solid or tonal colors where you can really see the shell shapes. This post features a free shell stitch blanket pattern that's a great place to start!

How much yarn does the shell stitch use compared to basic stitches?

Shell stitch does use a bit more yarn than plain single crochet or half double crochet because you're packing multiple stitches into the same space. The fabric is also slightly more open and drapey. For a blanket, plan on about 10 to 15 percent more yarn than you'd need for the same size in basic stitches. Always check the pattern's yardage requirements and buy a skein or two extra… especially if you're working with a dye lot you can't easily reorder.

Can I use any yarn weight for the shell stitch?

Yes! Shell stitch works in any yarn weight… but the look changes dramatically. Worsted weight gives you a classic, cozy fabric that's great for blankets and scarves. DK and sport weight create a lighter, more delicate shell that's beautiful for shawls and baby items. Bulky yarn makes big, bold shells that work up fast. The stitch pattern stays the same… you just adjust your hook size to match the yarn. Experiment and see which weight gives you the vibe you love most.


๐ŸŽ€ That Was Funโ€”Whatโ€™s Next?

๐Ÿ“Œ PIN THIS POST โ€“ Save it to your crochet blanket board so you can come back anytime.
๐Ÿ’Œ SHARE โ€“ Post your yarn choices, WIPs, or finished blankets using #MarlyBird and #MMMDI.
๐Ÿ‘ฏ JOIN โ€“ Hang out with other BiCrafty Besties in the Marlyโ€™s Minions Facebook Community.
๐Ÿ”— RAVELRY โ€“ Add your project: Shell I Make You a Blanket


๐Ÿง  Keep Learning with Marly

  • Crochet Hook Size Guide
  • How to Make a Gauge Swatch
  • How to Join Yarn Invisibly
  • How to Block Crochet Projects or Blocking Made Easy
  • Free Crochet Blanket Patterns Library

โค๏ธ Your BiCrafty Bestie,
Marly Bird
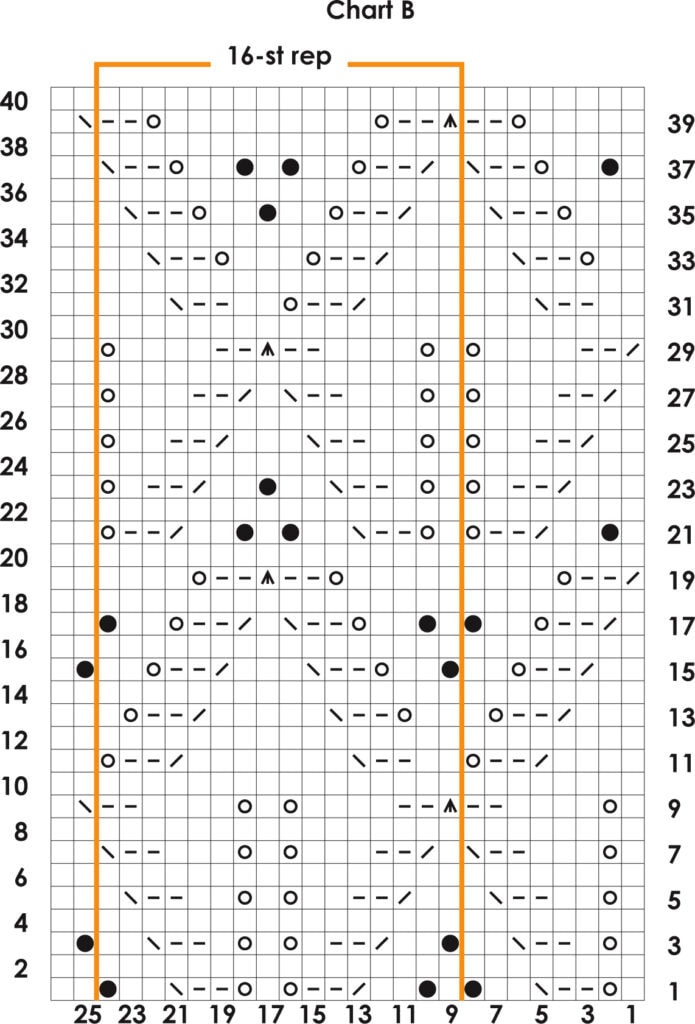
A cartoon avatar of a person with glasses and a brown bun smiles warmly. Their green shirt and black jacket add a stylish touch, while colorful hearts surround them like loving temperature blankets, stitching together an aura of love and positivity. -Marly Bird

Filed Under: Crochet, Free Patterns, Our Free Patterns, Pattern, YouTube Video Tutorial

Moogly CAL 2025 || Sweetcorn Motif Crochet Block

October 2, 2025 By Marly Bird Leave a Comment

Sweetcorn Motif โ€“ Moogly CAL 2025 || Crochet Block by Marly Bird & Robyn Chachula

Itโ€™s time for another gorgeous square in the Moogly 2025 Crochet-Along (CAL), and this one is extra special! The Sweetcorn Motif was co-designed by me, Marly Bird, and my dear friend (and incredible designer) Robyn Chachula. Together we created a block that blends bold texture, playful pops of color, and timeless crochet structureโ€”all wrapped up in a 12โ€ square.

Whether youโ€™re making the full Moogly blanket or just looking for a stand-alone motif to play with, this block is sure to shine in your crochet collection.

A crocheted Sweetcorn Motif crochet block in blue, orange, beige, and pink is displayed on a pillow and tray. Three small yarn skeins are beside it. Text reads: โ€œSweetcorn Moogly Crochet-Along Pattern.โ€. -Marly Bird

Affiliate Disclosure: This post contains affiliate links. To learn more please visit my privacy policy here๐Ÿ’–

๐Ÿ‘‰ Learn about the Year Long Crochet-Along on Moogly Blog here


About the Moogly CAL History

Every year, Tamara of Moogly hosts her beloved Crochet-Along (CAL) featuring free crochet block patterns from a variety of designers. Each block measures 12โ€ x 12โ€ and is released on a schedule, so by the end of the year you have a complete blanket made from squares designed by some of your favorite crochet pros.

โœจ Free Patterns โ€“ Every block, including this one, is available as a free pattern.
โœจ Annual Series โ€“ The CAL runs all year long with new blocks added regularly. (Started in 2015)
โœจ Designer Variety โ€“ Each square is unique, offering lots of fun techniques and stitch combos.
โœจ Standard Size โ€“ Blocks are designed to measure 12โ€ square so theyโ€™re easy to join together.

You can always find the current and past blocks on Mooglyโ€™s Blog.

A Sweetcorn Motif crochet block in blue, orange, beige, and pink lies on a white tray beside yarn, crochet hooks, and pink scissors. The Marly Bird logo is in the bottom right corner. -Marly Bird

The Sweetcorn Motif – 12 inch crochet square block

This crochet square block was a joy to design with Robyn. We wanted something that balanced structured rounds of stitches with playful bursts of popcorns for texture. The final square almost looks like little kernels of color bursting out from the centerโ€”hence the name Sweetcorn!

  • Skill Level: Intermediate
  • Finished Size: 12โ€ x 12โ€
  • Special Stitches: Popcorn, stacked dc, standing dc
  • Yarn Used: Caron One Pound (Faded Brick, Cape Cod Blue, Pink, and Dove)
  • Hook Size: J/10 (6.0 mm)

Robyn created a stitch diagram and we both made samples to show off how versatile this block can be with color. You can follow the written instructions, use the diagram, or even join along with the video tutorial.

A YouTube video thumbnail featuring text that reads "Free Crochet Block" and "Moogly Crochet-Along Pattern," with images of colorful Sweetcorn Motif crochet block squares in blue, peach, and cream tones in the background. -Marly Bird

Past Moogly Blocks by Marly Bird

Over the years Iโ€™ve had so much fun contributing squares to the Moogly CAL. If youโ€™d like to stitch more of my designs, check out these past blocks:

  • Crochet Mosaic Tile Block (Moogly CAL 2023)
  • Larkwood Crochet Block (Moogly CAL 2024)
  • Marly Bird Crochet Mosaic Block (Moogly CAL 2022)
  • Marly Bird Crochet Block (Moogly CAL 2021)
  • Mosaic Crochet Block (Moogly CAL 2020)
  • Diamond Mosaic Crochet Square (Block #15 โ€” 2019 CAL)
  • Faux Cable Square (Block #17 โ€” 2018 CAL)

Two women smiling at the camera, one with curly hair and the other wearing glasses, both sporting festive headbands with glittery designs from quickie patterns. -Marly Bird

Moogly x Marly Bird: A Longtime Collaboration

This isnโ€™t my first time teaming up with Tamara of Mooglyโ€”and it certainly wonโ€™t be the last! Weโ€™ve worked together on multiple crochet events, including:

  • Past Moogly CAL blocks (see the list above).
  • Stash Busting Quickies Vol. 1, 2, and 3 โ€“ fun round-ups of quick and practical crochet patterns.
  • Collaborations from our days at RedHeart.com, where we both created patterns and tutorials for yarn lovers everywhere.

I always love working with Tamara, and adding Robyn into the mix makes this collaboration extra sweet.


Join our Newsletter

Get Free Crochet & Knitting
Pattern Links & Coupons!

Hand-drawn bird with curling, detailed feathers and pink accents; cheerful pose showcases fine line and texture work.
>> Become An Insider <<
A woman with glasses and curly hair models a colorful crocheted scarf, showing textured stitches and vibrant yarn.

Why Youโ€™ll Love This Block

The Sweetcorn Motif is perfect for adventurous crocheters who want to:

  • Practice popcorn stitches for dimensional texture.
  • Add bold pops of color to a blanket project.
  • Explore different techniques like stacked and standing double crochets.
  • Create a statement piece that can stand alone as a pillow cover, wall hanging, or centerpiece square.

If youโ€™ve been following along with the CAL, this block will fit seamlessly into your blanket. And if youโ€™re newโ€”donโ€™t worry! You can jump in at any point.


Two crochet pillows with colorful, geometric granny square and Sweetcorn Motif crochet block patterns rest on a blue sofa in a cozy living room with a red rug and blurred shelves in the background. -Marly Bird

Ad-Free PDF

Looking for the Ad-Free PDF of the Sweetcorn Pillows? You can find that here in our shop.


Ready to Crochet The Square?

๐Ÿงถ Below you will find the full pattern for the crochet square
๐Ÿ“บ Watch the video tutorial to follow step by step.
โœจ Then come back here to share your progress with me on social media using #MarlyBird and #MooglyCAL.


A Sweetcorn Motif crochet block in blue, orange, beige, and pink is displayed on a white tray with matching yarn bundles. Close-up shots and a pillow featuring the block are shown. Text reads: "Free Crochet Block Moogly Crochet-Along Pattern. -Marly Bird

Sweetcorn Motif – MOOGLY 2025 CROCHET BLOCK

Designed by Robyn Chachula

SKILL LEVEL

Intermediate

MEASUREMENTS

Finished Measurements

Block is 12โ€ [30.5 cm] wide by 12โ€ [30.5 cm] long. 

Gauge 

Motif = 12โ€ [30.5 cm] x 12โ€ [30.5 cm]; use any size hook to obtain the gauge. 

MATERIALS

Yarn 

Caron, One Pound (100% acrylic, 812 yds / 742 m, 16 oz/ 454 g, CYCA# 4 worsted)  Best place to get this yarn is directly from Yarnspirations.

Color A: Faded Brick

Color B: Dove

Color C: Cape Cod Blue

Color D: Pink

Crochet Hook

Size J/10 [6.0 mm]

Notions 

Tapestry needle

ABBREVIATIONS

  • Ch – Chain(s) 
  • Dc – Double Crochet 
  • Hdc – Half Double Crochet
  • MC – Main Color
  • RS – Right Side 
  • Sc – Single Crochet
  • Sl st – Slip Stitch
  • Sp(s) – Space(s) 
  • St(s) – Stitch(es)
  • WS – Wrong Side

SPECIAL STITCHES 

โญ๏ธ Magic loop or Adjustable Ring: Wrap yarn around your fingers, pull up a loop through the ring created, chain 1.  Follow directions for the number of stitches for round 1.  Pull on the yarn end to close the ring. 

โญ๏ธPopcorn: Work 4 dc in st indicated, drop loop from hook, insert hook from front to back in top of first dc worked, insert hook in dropped lp and draw through.

โญ๏ธBeginning Popcorn: Ch 3, work 3 dc in st indicated, drop loop from hook, insert hook from front to back in top of beginning ch, insert hook in dropped lp and draw through.

โญ๏ธ Stacked Double Crochet (Stacked Dc): (Do not ch 1 prior to making the first sc) Sc in first stitch, insert hook in between two legs of the base, yarn over and pull up a loop, yarn over and draw through 2 loops on hook.

โญ๏ธ Standing Double Crochet (Standing Dc):With slip knot on hook, yarn over hook, insert hook into stitch or space, yarn over hook and pull up a loop, [yarn over hook, draw through two loops on hook] twice.

CROCHET STITCH DIAGRAM

Crochet stitch diagram for a Sweetcorn Motif crochet block with popcorn and stacked dc stitches, showing rounds of various crochet symbols and a legend for ch, sl st, sc, hdc, dc, stacked dc, and popcorn stitches. -Marly Bird

NOTES

  • Weave in ends as you crochet each round.  It will be very overwhelming if you wait until you are ready to block the motifs.
  • When changing color in a new round, you can change your color with 2 loops left on your hook of your previous color then start the first stitch of the round.  Or you can join the new color with a standing sc or dc. 

VIDEO TUTORIAL

  • How to Read Crochet Diagrams >> Click Here for Video Help <<
  • Weave in Ends >> Click Here for Video Help <<
  • Stacked Double Crochet >> Click Here for Video Help <<
  • Standing Double Crochet >> Click Here for Video Help <<
  • Sweetcorn Motif Video Tutorial >> Click Here for Video Help <<

Crocheted square with a floral motif, featuring navy, peach, gray, and white colors, in textured stitches.

Moogly CAL 2025 || Sweetcorn Motif Crochet Block Instructions

Make an adjustable ring with color A, 

Round 1 (RS): Beginning popcorn in ring, ch 2, *popcorn in ring, ch 2; repeat from * 6 more times, sl st to first st, close ring, change color to B, fasten off previous color, do not turn- 8 popcorn + 8 ch-2 sps. 

Round 2: (Stacked dc, 2 dc) in first ch-2 sp, *ch 5, [3 dc in next ch-2 sp] twice; repeat from * twice more, ch 5, 3 dc in last ch-2 sp, sl st to first st, do not turn – 24 dc + 4 ch-5 sps. 

Round 3: Ch 1, sc between first and last st, *(5 dc, ch 2, 5 dc) in next ch-5 sp, skip 3 dc**, sc in space before next dc; repeat from * around ending at **, sl st to first sc, change color to C, fasten off previous color, do not turn- 40 dc + 4 sc + 4 ch-2 sps. 

Round 4: *Sl st to next dc, ch 4, sl st to next ch-2 sp, ch 4, skip next 4 dc, sl st to next dc**, ch 3, skip next sc; repeat from * around ending at **, ch 1, dc in first st (counts as ch-3 sp) , change color to D, fasten off previous color, , do not turn – 8 ch-4 sps + 4 ch-3 sps. 

Round 5: (Beginning popcorn, ch 3, popcorn) around post of dc, *ch 4, sc in next sl st, ch 4**, ([popcorn, ch 3] twice, popcorn) in next ch-3 sp; repeat from * around ending at **, popcorn in first ch-sp, ch 3, sl st to first st, change color to C, fasten off previous color, do not turn – 12 popcorn + 8 ch-3 sps + 8 ch-4 sps. 

A crocheted square featuring blue, orange, beige, and light pink yarn in a geometric floral pattern, inspired by the Sweetcorn Motif crochet block, with the "Marly Bird" logo in the bottom right corner. -Marly Bird

Round 6: Stacked dc in first popcorn, *3 dc in next ch-3 sp, 5 dc in next 2 ch-4 sps, 3 dc in next ch-3 sp**, (dc, ch 3, dc) in next popcorn; repeat from * around ending at **, dc in first popcorn, ch 3, sl st to first st, fasten off- 72 dc + 4 ch-3 sps.

Round 7: Join color B with a sc in the first st of previous round (same st as join), *[ch 1, skip next dc, sc in next 2 dc] 5 times, ch 1, skip next dc, sc in next dc, (sc, ch 3, sc) in corner ch-3 sp**, sc in next dc; repeat from * around ending at **, fasten off – 56 sc + 24 ch-1 sps + 4 ch-3 sps. 

Round 8: Join color A with sl st to first ch-1 sp, beginning popcorn in same ch-1 sp, *[ch 2, popcorn in next ch-1 sp] repeat to corner ch-3 sp, ch 2, ([popcorn, ch 2] twice, popcorn) in corner ch-3 sp; repeat from * around, ch 2, sl st to top of beginning popcorn, fasten off- 36 popcorn + 36 ch-2 sps.

Round 9: Join color C with stacked dc (or standing dc) in first ch-2 sp on side of motif, 2 dc in same ch-2 sp, *3 dc in each ch-2 sp to corner center popcorn, ch 2; repeat from * around to last ch-2 sp, 3 dc in last ch-2 sp, sl st to first dc – 108 dc + 4 ch-2 sps. 

Round 10: Stacked dc in first dc, *dc in each dc to corner, (dc, ch 2 dc) in corner ch-2 sp; repeat from * around to last 3 dc, dc in last 3 dc, sl st to first dc to join, fasten off – 116 dc + 4 ch-2 sps. 

Round 11: Join color D to first dc after corner ch-sp on previous round with sl st, sl st in next dc, *[ch 1, skip next dc, sl st in next 3 dc] repeat across to last 3 dc before corner ch-2 sp, ch 1, skip next dc, sl st in next 2 dc, ch 3, skip corner ch-2 sp**, sl st in next 2 dc; repeat from * around ending at **, sl st to first sl st, fasten off- 28 ch-1 sps + 4 ch-3 sps + 88 sl st (not including join).

Round 12: Join color A with sc in first ch-1 sp, *[ch 3, skip sl sts, sc in next ch-1 sp] repeat across to corner ch-sp, ch 3, 3 sc in corner ch-3 sp; repeat from * around, ch 3, sl st to first sc to join, fasten off – 24 ch-3 sps + 40 sc. 

Round 13: Join color C with sl st in first ch-3 sp of previous round, ch 2 (counts as hdc), 3 hdc in same ch-3 sp, *4 hdc in each ch-3 sp across to corner, 5 hdc in center sc of corner; repeat from * around, sl st to top of beginning ch to join, fasten off and weave in all ends- 148 hdc. 

A multicolored crocheted square in blue, orange, beige, and pinkโ€”featuring the Sweetcorn Motif crochet blockโ€”with yarn balls and hooks nearby. Text reads: "Free Crochet Block โ€“ Moogly Crochet-Along Pattern." Wooden surface background. -Marly Bird

The Moogly CAL is one of my favorite annual traditions because it brings the crochet community together through creativity, learning, and sharing. Every square is a chance to try something new, and I hope the Sweetcorn Motif inspires you to play with color and texture in a fun, approachable way. Whether you make one block or a whole blanket, youโ€™re adding a little piece of handmade beauty to the worldโ€”and thatโ€™s always worth celebrating.


Two crocheted throw pillows, including a Sweetcorn Motif crochet block design in orange, blue, and cream, rest on a teal chair. A small wooden table with a dark floral arrangement adds charm to this cozy, well-decorated living space. -Marly Bird

SWEETCORN MOTIF PILLOWS

SKILL LEVEL

Intermediate

MEASUREMENTS

Finished Measurements

Pillow is 14โ€ [350.5 cm] wide by 14โ€ [35.5 cm] long. 

Gauge 

Front Panel = 14โ€ [35.5 cm] x 14โ€ [35.5 cm]; use any size hook to obtain the gauge. 

MATERIALS

Yarn 

Caron, One Pound (100% acrylic, 812 yds / 742 m, 16 oz/ 454 g, CYCA# 4 worsted), 1 skein each: 

Color A: Faded Brick

Color B: Dove

Color C: Cape Cod Blue

Color D: Pink

Hook

Size J/10 [6.0 mm]

Notions 

Tapestry needle

1.5โ€ [3.8 cm] long wooden toggle

14โ€ [35.5 cm] square pillow form

ABBREVIATIONS

Ch – Chain(s) 

Dc – Double Crochet 

Hdc – Half Double Crochet

MC – Main Color

RS – Right Side 

Sc – Single Crochet

Sl st – Slip Stitch

Sp(s) – Space(s) 

St(s) – Stitch(es)

WS – Wrong Side

SPECIAL STITCHES 

โญ๏ธ Magic loop or Adjustable Ring: Wrap yarn around your fingers, pull up a loop through the ring created, chain 1.  Follow directions for the number of stitches for round 1.  Pull on the yarn end to close the ring. 

โญ๏ธPopcorn: Work 4 dc in st indicated, drop loop from hook, insert hook from front to back in top of first dc worked, insert hook in dropped lp and draw through.

โญ๏ธBeginning Popcorn: Ch 3, work 3 dc in st indicated, drop loop from hook, insert hook from front to back in top of beginning ch, insert hook in dropped lp and draw through.

โญ๏ธReverse Single Crochet (reverse sc): Also known as a Crab Stitch; working from left to right, insert hook from front to back in next stitch to the right,  yarn over and pull up a loop, yarn over and draw through 2 loops on hook.

โญ๏ธ Stacked Double Crochet (Stacked Dc): (Do not ch 1 prior to making the first sc) Sc in first stitch, insert hook in between two legs of the base, yarn over and pull up a loop, yarn over and draw through 2 loops on hook.

โญ๏ธ Standing Double Crochet (Standing Dc):With slip knot on hook, yarn over hook, insert hook into stitch or space, yarn over hook and pull up a loop, [yarn over hook, draw through two loops on hook] twice.

NOTES

  • Weave in ends as you crochet each round.ย  It will be very overwhelming if you wait until you are ready to block the motifs.
  • When changing color in a new round, you can change your color with 2 loops left on your hook of your previous color then start the first stitch of the round.ย  Or you can join the new color with a standing sc or dc.ย 
  • Second Colorway uses the following order of colors:
    • Color A: Cape Cod Blue
    • Color B: Pink
    • Color C: Dove
    • Color D: Faded Brick

VIDEO TUTORIAL

  • How to Read Crochet Diagrams >> Click Here for Video Help <<
  • Weave in Ends >> Click Here for Video Help <<
  • Stacked Double Crochet >> Click Here for Video Help <<
  • Standing Double Crochet >> Click Here for Video Help <<
  • Sweetcorn Motif Video Tutorial >> Click Here for Video Help <<

STITCH DIAGRAM

SWEETCORN CROCHET PILLOWS PATTERN

A smiling person with glasses holds two colorful crocheted pillows featuring floral and Sweetcorn Motif crochet block patterns in blue, orange, cream, and pink tones, standing in a cozy, well-lit room. -Marly Bird

FRONT PANELย 

Make an adjustable ring with color A, 

Round 1 (RS): Beginning popcorn in ring, ch 2, *popcorn in ring, ch 2; repeat from * 6 more times, sl st to first st, close ring, change color to B, fasten off previous color, do not turn- 8 popcorn + 8 ch-2 sps. 

Round 2: (Stacked dc, 2 dc) in first ch-2 sp, *ch 5, [3 dc in next ch-2 sp] twice; repeat from * twice more, ch 5, 3 dc in last ch-2 sp, sl st to first st, do not turn – 24 dc + 4 ch-5 sps. 

Round 3: Ch 1, sc between first and last st, *(5 dc, ch 2, 5 dc) in next ch-5 sp, skip 3 dc**, sc in space before next dc; repeat from * around ending at **, sl st to first sc, change color to C, fasten off previous color, do not turn- 40 dc + 4 sc + 4 ch-2 sps. 

Round 4: *Sl st to next dc, ch 4, sl st to next ch-2 sp, ch 4, skip next 4 dc, sl st to next dc**, ch 3, skip next sc; repeat from * around ending at **, ch 1, dc in first st (counts as ch-3 sp) , change color to D, fasten off previous color, , do not turn – 8 ch-4 sps + 4 ch-3 sps. 

Round 5: (Beginning popcorn, ch 3, popcorn) around post of dc, *ch 4, sc in next sl st, ch 4**, ([popcorn, ch 3] twice, popcorn) in next ch-3 sp; repeat from * around ending at **, popcorn in first ch-sp, ch 3, sl st to first st, change color to C, fasten off previous color, do not turn – 12 popcorn + 8 ch-3 sps + 8 ch-4 sps. 

Round 6: Stacked dc in first popcorn, *3 dc in next ch-3 sp, 5 dc in next 2 ch-4 sps, 3 dc in next ch-3 sp**, (dc, ch 3, dc) in next popcorn; repeat from * around ending at **, dc in first popcorn, ch 3, sl st to first st, fasten off- 72 dc + 4 ch-3 sps.

Round 7: Join color B with a sc in the first st of previous round (same st as join), *[ch 1, skip next dc, sc in next 2 dc] 5 times, ch 1, skip next dc, sc in next dc, (sc, ch 3, sc) in corner ch-3 sp**, sc in next dc; repeat from * around ending at **, fasten off – 56 sc + 24 ch-1 sps + 4 ch-3 sps. 

Round 8: Join color A with sl st to first ch-1 sp, beginning popcorn in same ch-1 sp, *[ch 2, popcorn in next ch-1 sp] repeat to corner ch-3 sp, ch 2, ([popcorn, ch 2] twice, popcorn) in corner ch-3 sp; repeat from * around, ch 2, sl st to top of beginning popcorn, fasten off- 36 popcorn + 36 ch-2 sps.

Round 9: Join color C with stacked dc (or standing dc) in first ch-2 sp on side of motif, 2 dc in same ch-2 sp, *3 dc in each ch-2 sp to corner center popcorn, ch 2; repeat from * around to last ch-2 sp, 3 dc in last ch-2 sp, sl st to first dc – 108 dc + 4 ch-2 sps. 

Round 10: Stacked dc in first dc, *dc in each dc to corner, (dc, ch 2 dc) in corner ch-2 sp; repeat from * around to last 3 dc, dc in last 3 dc, sl st to first dc to join, fasten off – 116 dc + 4 ch-2 sps. 

Round 11: Join color D to first dc after corner ch-sp on previous round with sl st, sl st in next dc, *[ch 1, skip next dc, sl st in next 3 dc] repeat across to last 3 dc before corner ch-2 sp, ch 1, skip next dc, sl st in next 2 dc, ch 3, skip corner ch-2 sp**, sl st in next 2 dc; repeat from * around ending at **, sl st to first sl st, fasten off- 28 ch-1 sps + 4 ch-3 sps + 88 sl st (not including join).

Round 12: Join color A with sc in first ch-1 sp, *[ch 3, skip sl sts, sc in next ch-1 sp] repeat across to corner ch-sp, ch 3, 3 sc in corner ch-3 sp; repeat from * around, ch 3, sl st to first sc to join, fasten off – 24 ch-3 sps + 40 sc. 

Round 13: Join color C with sl st in first ch-3 sp of previous round, ch 3 (counts as dc), 3 dc in same ch-3 sp, *4 dc in each ch-3 sp across to corner, 5 dc in center sc of corner, place marker in center dc; repeat from * around, sl st to top of beginning ch to join – 148 dc. 

Round 14: Stacked dc in top of beginning ch, *dc in each dc to marker, 5 dc in marked dc; repeat from * around to last dc, dc in last dc, sl st to stacked dc, fasten off and weave in ends – 164 dc. 

BACK PANEL 

Make 2

Ch 42 with color C. 

Row 1: Dc in 4th ch from hook (first 3 ch count as a dc), dc in each ch across, turn – 40 dc. 

Row 2: Ch 1, sc in each dc across to tch, sc in top of tch, turn.

Row 3: Stacked dc in first sc, dc in each sc across, turn. 

Row 4: Ch 1, sc in each dc across, turn. 

Repeat Rows 3-4 seven more times

Round 19: Ch 1, sc in each sc across to last, 3 sc in last sc, sc evenly down side of panel, 3 sc in first ch of foundation, sc in each ch across to last, 3 sc in last ch, sc evenly up side of panel, 2 sc in first sc, sl st to first sc, fasten off, weave in ends. 

FINISHING

Pin front and one back panel together with WS facing matching 2 corners.  Pin second back panel to front panel matching opposite 2 corners.  

Join color C with sc in any sc along the side of the pillow working through both the front and back panel at the same time. 

Seaming Round 1: *Sc in each st across side of pillow (working through all the panels at once) to corner, 2 sc in corner st; repeat from * around, sc in each st to beginning, sl st to first sc, do not turn.

Seaming Round 2: Ch 1, reverse sc in each sc around, fasten off, weave in ends. 

Sew toggle to the inside back panel in the center.  Place pillow form in pillow.  Button toggle through center sts of the outside back panel.

A teal chair displays three pillows: one pink, one teal with a wooden button, and one crocheted in a Sweetcorn Motif crochet block with cream, orange, pink, and teal. A cozy living room setup is visible in the background. -Marly Bird

โค๏ธ Your BiCrafty Bestie,
Marly Bird
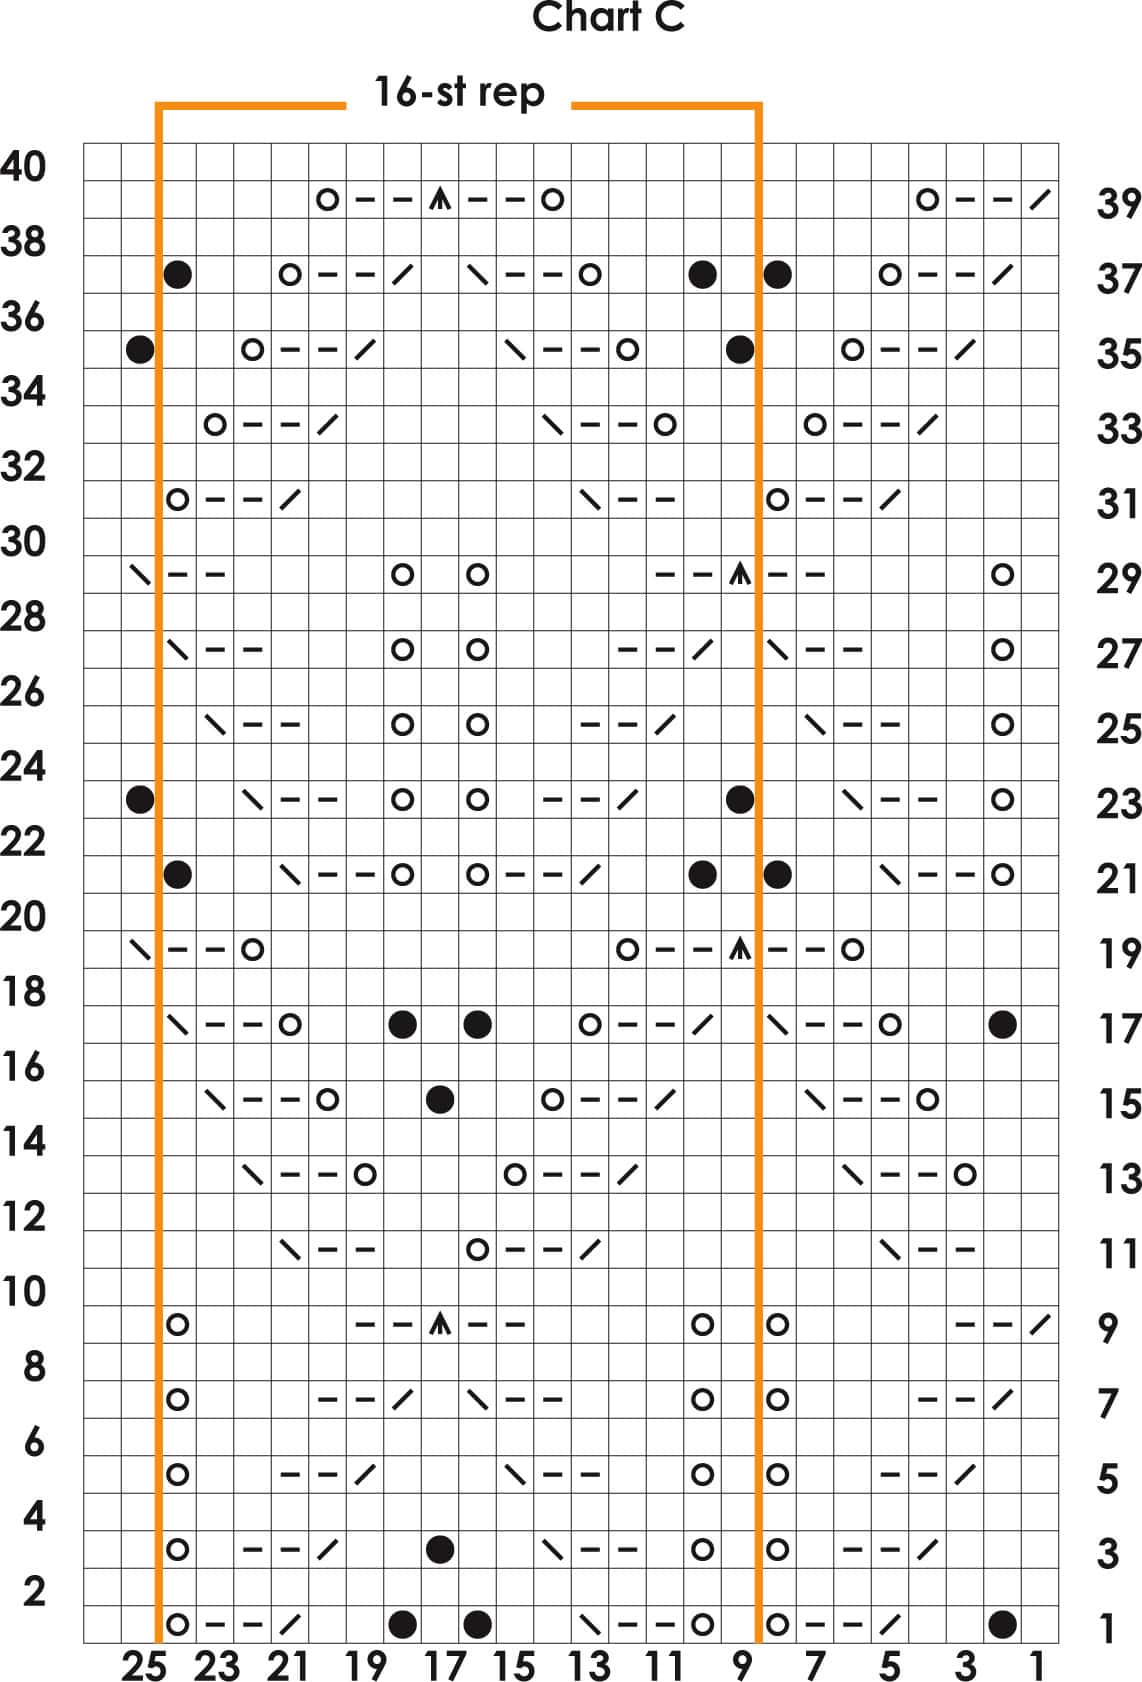
A cartoon avatar of a person with glasses and a brown bun smiles warmly. Their green shirt and black jacket add a stylish touch, while colorful hearts surround them like loving temperature blankets, stitching together an aura of love and positivity. -Marly Bird

Frequently Asked Questions

What is the Moogly CAL?

Oh, the Moogly CAL is such a fun annual event hosted by Tamara over at Moogly's Blog! Every year, designers create gorgeous 12″ square crochet block patterns that are all free. It's a whole year of new projects and by the end, you can have a beautiful blanket made from all these unique squares!

What makes the Sweetcorn Motif block special?

Honestly, this one is extra special because Robyn Chachula and I designed it together! We wanted to blend bold texture with fun pops of color, and the popcorn stitches really make it look like little kernels bursting out… hence the name Sweetcorn! It's a 12″ square and looks amazing in a blanket or even as a standalone pillow.

What skill level is this Sweetcorn Motif block?

Yes! This block is listed as Intermediate. It uses some special stitches like popcorn, stacked dc, and standing dc, which add some lovely texture and structure to the piece. But don't worry, there's a video tutorial to help you through!

What yarn and hook size are needed for the Sweetcorn Motif?

For this project, you'll want to grab some Caron One Pound yarn in four colors: Faded Brick, Dove, Cape Cod Blue, and Pink. And the hook size we used is a J/10, which is 6.0 mm. It works up into a lovely 12″ square!

Can I make just one Sweetcorn Motif block, or do I need to make a whole blanket?

Absolutely, you can make just one! While it's designed as part of the Moogly CAL to create a big blanket, it's also perfect as a stand-alone motif. You could easily turn it into a cute pillow cover, a wall hanging, or a centerpiece square. Have fun with it!

Filed Under: Crochet, Free Patterns, Make-Alongs, Our Free Patterns, Pattern

  • « Previous Page
  • 1
  • …
  • 6
  • 7
  • 8
  • 9
  • 10
  • …
  • 96
  • Next Page »

Let's Be Social

Join the Marly's Minions Facebook group to share, ask questions, or chat about all of your yarn related crafts!

Join the group
Cartoon of a smiling woman with brown hair in a bun, glasses, black jacket and green shirt, waving next to large "hi" text.

Quick Links

The Pattern Shop

Our Free Patterns

Blog

Marly Bird House
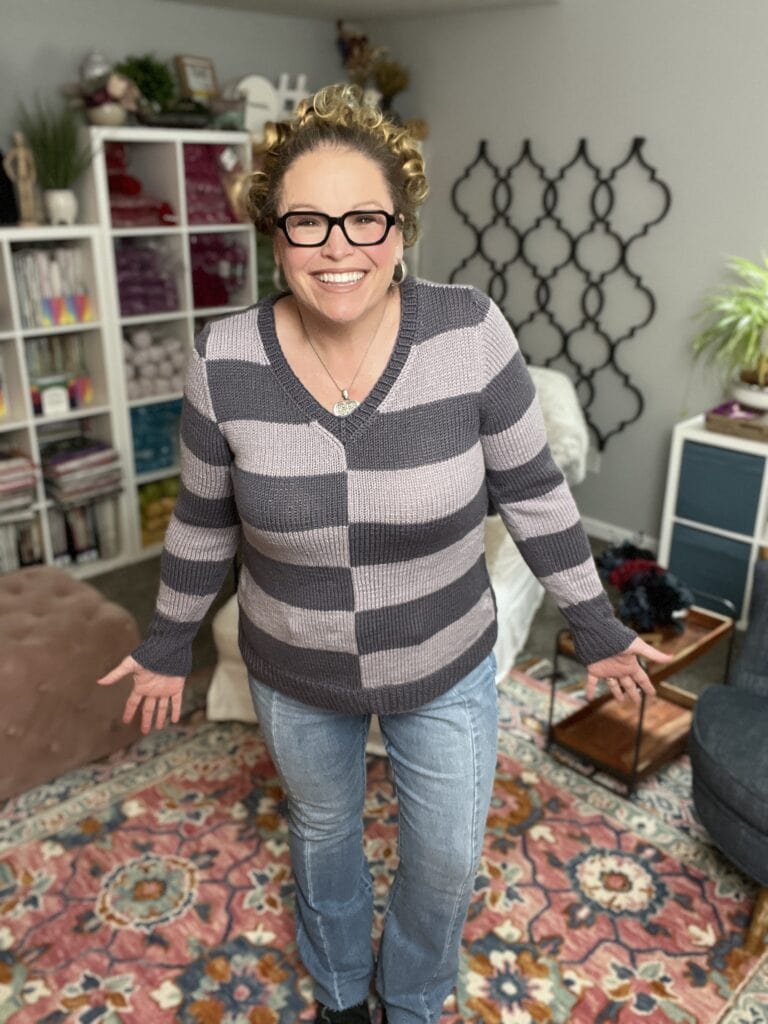
Learn to Knit & Crochet

About

Giveaway Terms and Privacy Notice

Find Us Everywhere

Join the Newsletter

YouTube Channel

Marly's Minions FB Group

Etsy Store

Ravelry Store


AN ELITE CAFEMEDIA HOME/DIY PUBLISHER

Information from your device can be used to personalize your ad experience. Do not sell or share my personal information.

Privacy Policyย  ย Termsย  ย Marly Bird Legal Documents Copyright © 2026