Search
Close
  • The Pattern Shop
  • Our Free Patterns
    • Browse All Our Free Patterns
    • Our Free Knitting Patterns
    • Our Free Crochet Patterns
  • Blog
    • All Blog Posts
    • All Free Patterns
    • Dibble Dabble Inspiration
    • Giveaways
    • Make-Alongs
    • Product Reviews
    • Roundups
    • Tips, Tricks, Techniques for Knitting and Crochet
Stylized bird with pink and gray swirling tail above elegant โ€œMarlyโ€ text, logo for crochet accessories and home decor.
  • Marly Bird House
  • Learn to Knit & Crochet
    • Newbie? Start Here
    • Video Tutorials
    • Knitting Definitions
    • Crochet Definitions
    • Common Techniques
    • Size Charts for Knitting and Crochet Projects
  • About
ร—
  • The Pattern Shop
  • Free Patterns
  • Blog
  • Marly Bird House
  • Learn to Knit & Crochet
    • Newbie? Start Here
    • Video Tutorials
    • Knitting Definitions
    • Crochet Definitions
    • Common Techniques
    • Size Charts for Knitting and Crochet Projects
  • About
Stylized bird with pink and gray swirling tail above elegant โ€œMarlyโ€ text, logo for crochet accessories and home decor.
Search
Close

New Patterns NOW Available in Ad-Free PDF! Check out The Pattern Shop

New Yarn from Yarnspirations || Fall 2024

October 17, 2024 By Marly Bird 1 Comment

Learn about NEW YARN from Yarnspirations from their yarn ambassador, Marly Bird.

These yarns as just a few of the amazing new threads Yarnspirations is planning to add to their already impressive list of yarn.

๐ŸŽฌ Watch the Live Broadcast here https://youtube.com/live/KpIk4GIhEdI?feature=share

A person with glasses and a ponytail gestures excitedly in front of various colorful yarns. Bold yellow text reads "NEW YARNSPIRATIONS. -Marly Bird

โžก๏ธ Click the name to get the yarn from Yarnspirations.com

Bernat Fluffee
Caron Colorama Halo
Patons Evermore
Caron All Day Cotton
Bernat Lattice
Red Heart All In One Flower Power –โฃ๏ธ check out this blog post for more Granny Square Ideas!
Red Heart Super Glow

“`html

Frequently Asked Questions

What new yarns did Yarnspirations release for Fall 2024?

So here's the thing… Yarnspirations has some amazing new threads planned! They've got Bernat Fluffee, Caron Colorama Halo, Patons Evermore, Caron All Day Cotton, Bernat Lattice, Red Heart All In One Flower Power, and Red Heart Super Glow. So much fun stuff to play with!

Where can I see the new yarns Marly is talking about?

Honestly… there's a live broadcast you can watch on YouTube to see all the new yarns! Marly has a link right in the blog post so you can check it out and see them in action.

Can I get these yarns Marly showed?

Yes! You can click on each yarn name in the blog post, and it will take you directly to Yarnspirations.com to get them. So easy!

Marly, what's Red Heart All In One Flower Power yarn like?

Oh, that one's super fun… it's perfect for granny squares! There's even a link to another blog post with more granny square ideas if you want some inspiration.

How do I learn more about the yarns Marly shared?

The best way is to watch the YouTube live broadcast linked in the post. Marly talks all about them there, and you can see them up close!

“`

Filed Under: Uncategorized, Yarn Review, YouTube Video Tutorial

Crochet a Stylish Shrug for Any Season – Amaya Crochet Shrug Pattern

October 11, 2024 By Marly Bird Leave a Comment

”

Welcome to the world of crochet shrugs, where style meets comfort! Whether you're dressing up for a special occasion or just adding a layer for a chilly evening, a crochet shrug sweater is the perfect addition to any outfit. Today, we'll explore everything from choosing the right yarn to perfecting the fit of your shrug, featuring our beloved Amaya Crochet Shrug pattern by Marly Bird and Robyn Chachula.
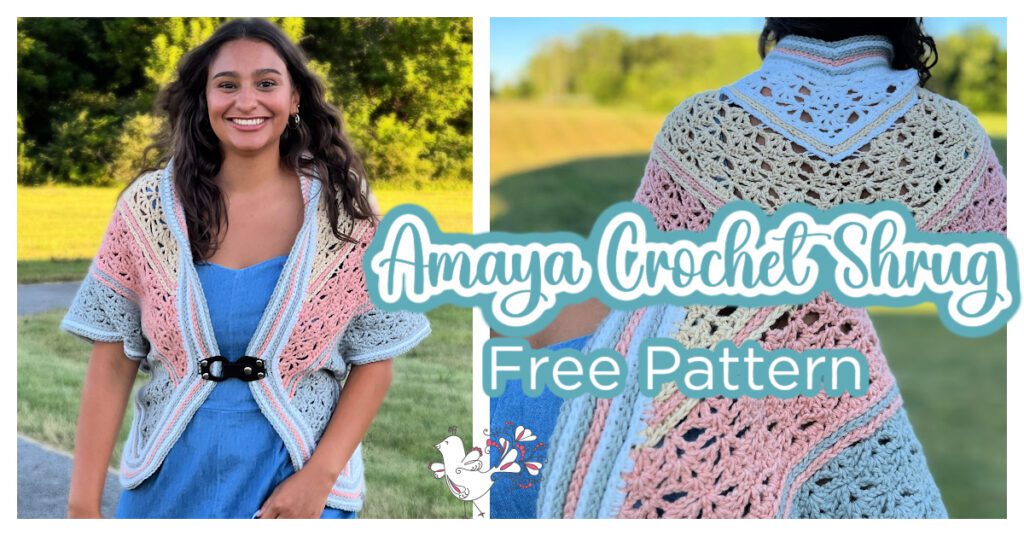
A woman dons a pastel crochet shrug over a blue dress, set against a lush grassy backdrop. The text reads "Amaya Crochet Shrug Free Pattern," highlighting the intricate detail of the crochet shrug's back. -Marly Bird

What is a Crochet Shrug Sweater?

A crochet shrug sweater is a versatile piece of clothing that combines the warmth of a sweater with the ease of a bolero or cardigan. Perfect for any season, these shrugs can be styled for a formal event or worn casually, making them a must-have in every crocheter's wardrobe.

Choosing the Right Yarn for Your Shrug

The key to a successful crochet shrug is selecting the right yarn. For the Amaya Shrug, we recommend a blend like WeCrochet Heatherly Worsted, which offers durability and softness. When choosing yarn, consider the weightโ€”lighter weights for spring and summer, heavier for fall and winterโ€”to ensure your shrug is comfortable and suitable for its intended use.

Here are some alternative yarns that we think work great with this pattern

  • Wool Of The Andes
  • Wool Of The Andes Tweed
  • Brava
  • Brava Tweed
  • Fabwoolous
  • Inspired
  • Red Heart Ombre

How to Choose the Perfect Size for Your Crochet Shrug

Choosing the right fit for your Amaya Crochet Shrug is wonderfully flexible, thanks to its unique construction. This design starts off as a shawl and is transformed into a shrug with the addition of side panels. This method allows you to decide on the final fitโ€”whether you prefer a snug fit with a stylish closure like our model Taylor demonstrates, or a more relaxed, draped look as worn by Robyn. The sizes providedโ€”S/M, L/XL, 2/3X, 4Xโ€”follow the standard guidelines set by the Craft Yarn Council, ensuring that they cater to a wide range of body types.
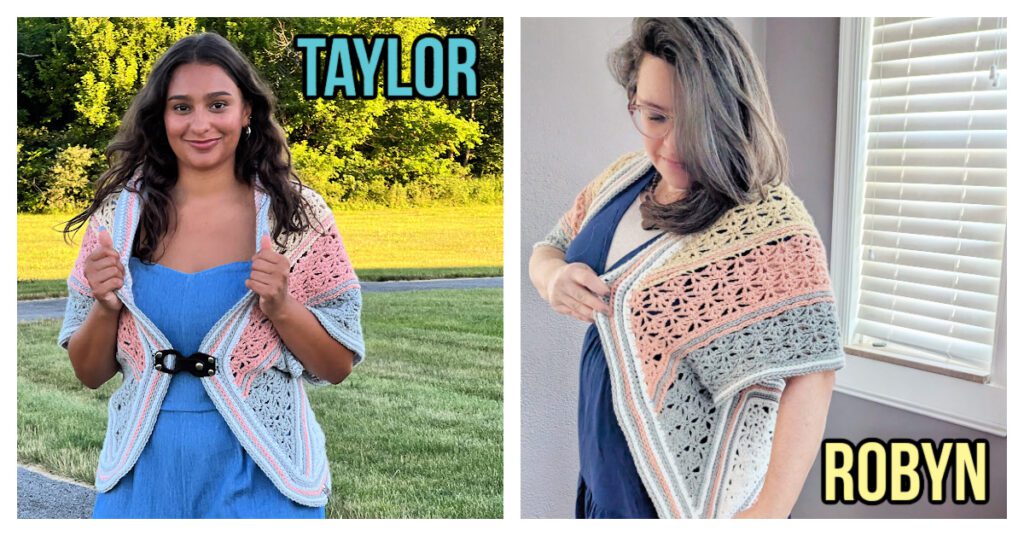
Two women grace the scene with their handmade, multicolored crochet shawls. "Taylor," outdoors in a blue outfit, complements "Robyn," who stands by a window indoors. The intricate pattern of each shawl elegantly enhances their look, resembling an artful shrug draping gracefully over their shoulders. -Marly Bird

The construction of the Amaya Shrug isnโ€™t typical; it doesnโ€™t start with traditional measurements of bust and arms that you might expect. Instead, it evolves through the crafting process, which allows for adjustments tailored to your preference. You can enhance the fit by adding extra rounds of third loop half double crochet to the edging, giving it a more defined structure. This versatility ensures that the shrug not only fits well but also flatters, offering multiple sizing options that let you customize it to your personal style and comfort.

Video Tutorial for the Amaya Crochet Shrug

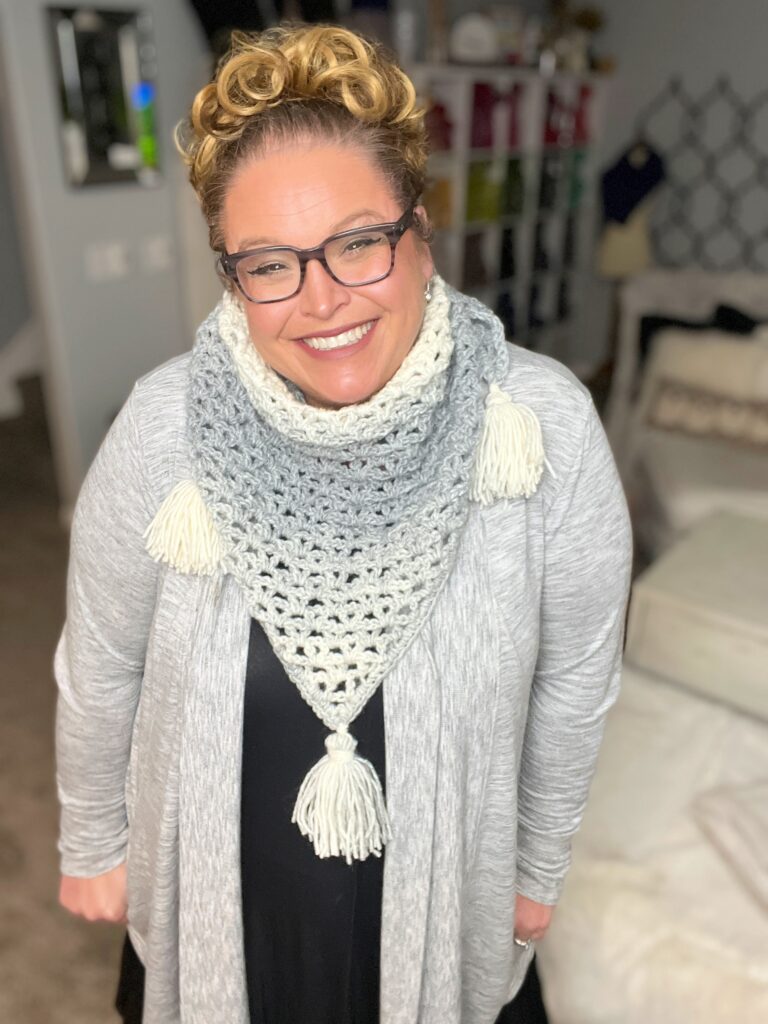
The Amaya Crochet Shrug, inspired by the intricate stitch pattern of the Miranda Crochet Cowl, expands on the design to create a more substantial garment. Both patterns feature the same detailed crochet stitch patterns, bringing continuity and a touch of elegance to your crochet projects.
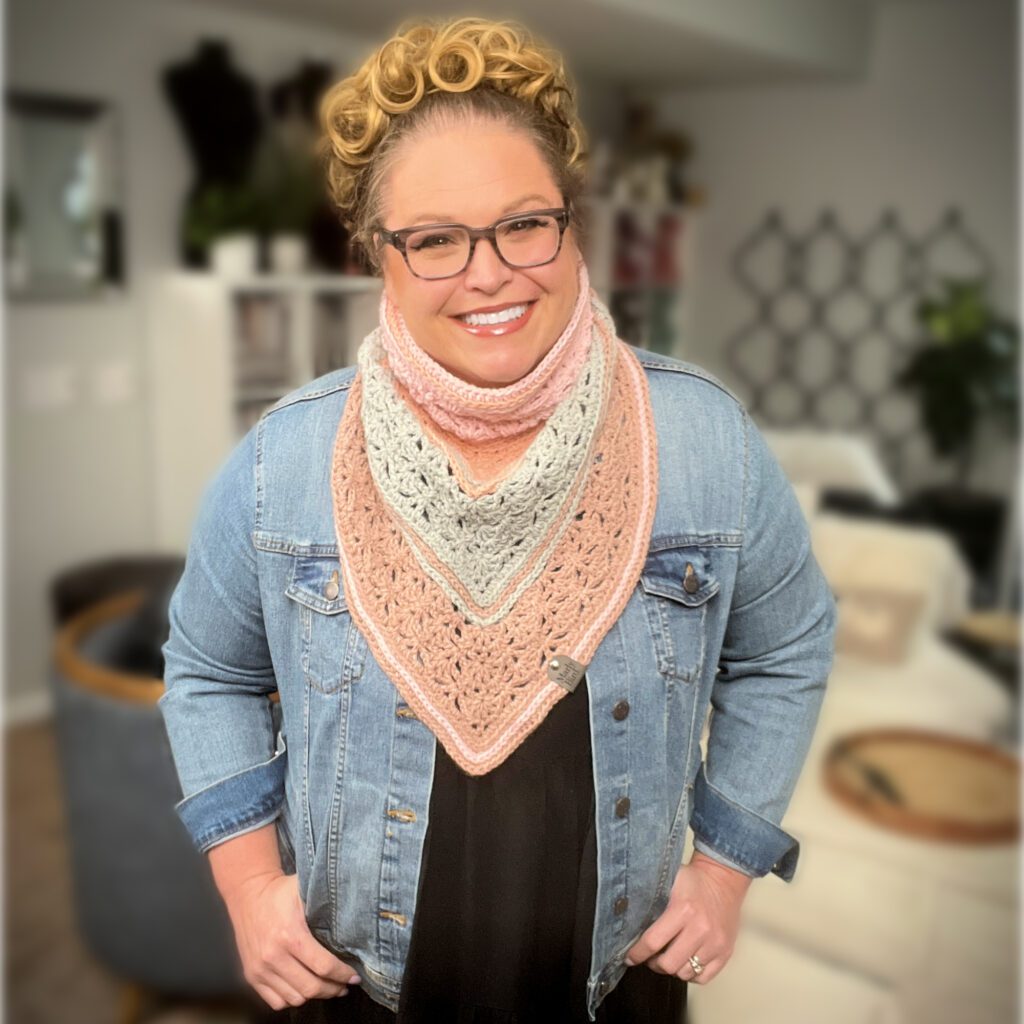
A person wearing glasses smiles warmly, dressed in a denim jacket over a multicolored, crocheted triangular scarf in shades of pink, gray, and cream. The background reveals an indoor setting with plants and blurred decorations. -Marly Bird

To help you master these designs, video tutorials are provided, offering step-by-step guidance. These instructional videos are conveniently linked within the pattern itself, ensuring you have support at every stage of your crochet journey.

But if you are looking for videos specific to this pattern, I am sorry to say we do not have those. But we do have a facebook group that can offer a lot of extra help as needed.
Logo for Marly's Minions Facebook Group featuring a decorative bird design and a playful font.

Game Day Mystery Make-Along Crochet 2024

This shrug was a bonus pattern that was included in the wonderful Game Day Event of 2024. If you own that VIP Experience in your Marly Bird House, then you already have this pattern!

If you are interested in getting the Game Day VIP Experience 0f 2024, just click here!

Explore Other Popular Crochet Shrug Patterns

Once you've mastered the Amaya Shrug, explore other designs available on MarlyBird.com. From the elegant Oakley Crochet Shrug to the You Are Valued Crochet Cocoon Cardigan. We here at MarlyBird.com add innovative new designs released each season, there's always something to keep your hooks busy.
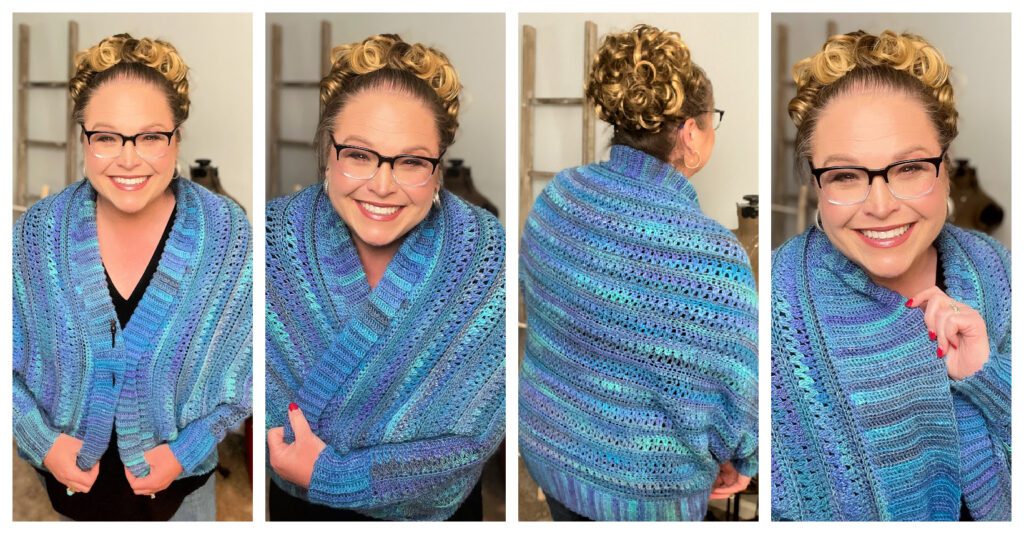
Four-panel image of a woman with curly blonde hair smiling, wearing glasses and a blue crochet cocoon cardigan. Includes front, side, and close-up views in a home setting. -Marly Bird

Tips for Styling Your Crochet Shrug

Crochet shrugs are incredibly versatile. Pair your Amaya Shrug with a summer dress for a touch of elegance, or wear it over a tee and jeans for a casual yet chic look. Experiment with colors and yarn textures to customize your shrug for any occasion.

Get the Ad-Free PDF

A completely black image with no visible content or discernible patterns. -Marly Bird

The PDF includes fully formatted pattern with written instructions, schematic, crochet stitch diagrams, full pattern charts for each size, and video tutorial links.
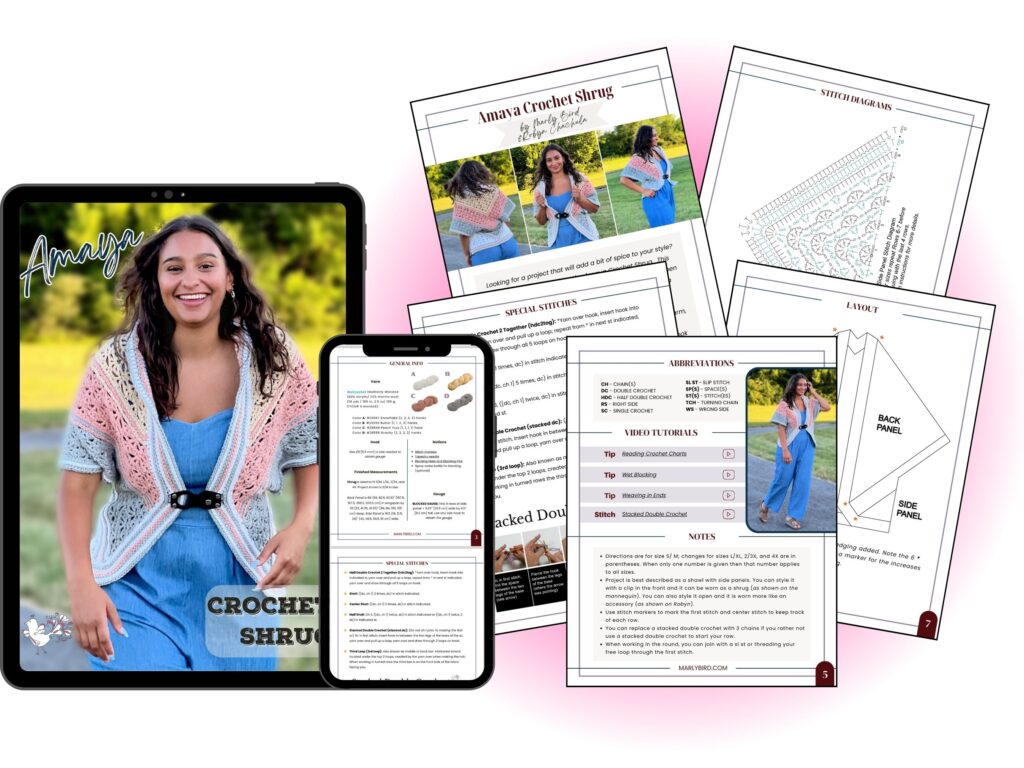
A digital display showcases an Amaya crochet shrug worn by a woman. Beside the tablet and phone are printed patterns, diagrams, and instructions for creating this stylish shrug. The setup suggests a detailed crochet tutorial or guide. -Marly Bird
Etsy
Shopify
Ravelry

Where to get the Amaya Crochet Shrug Ad-Free PDF?

I'm thrilled to offer the Amaya Crochet Shrug pattern for free on MarlyBird.com. But I also understand the value of a seamless crafting experience. For those who'd like to immerse themselves in the project without distractions, an ad-free PDF version is available. This pdf ensures you have a clean, easy-to-follow format at your fingertips whenever inspiration strikes.

Plus, the stitch diagrams are only available in the Ad-Free PDF so there is certainly an added bonus. So, dive into the delightful world of crochet with the Amaya Crochet Shrug with everything you need in the PDF!

This project not only adds a stylish layer to your wardrobe but also helps you hone your crochet skills with its intriguing stitch patterns and construction techniques.
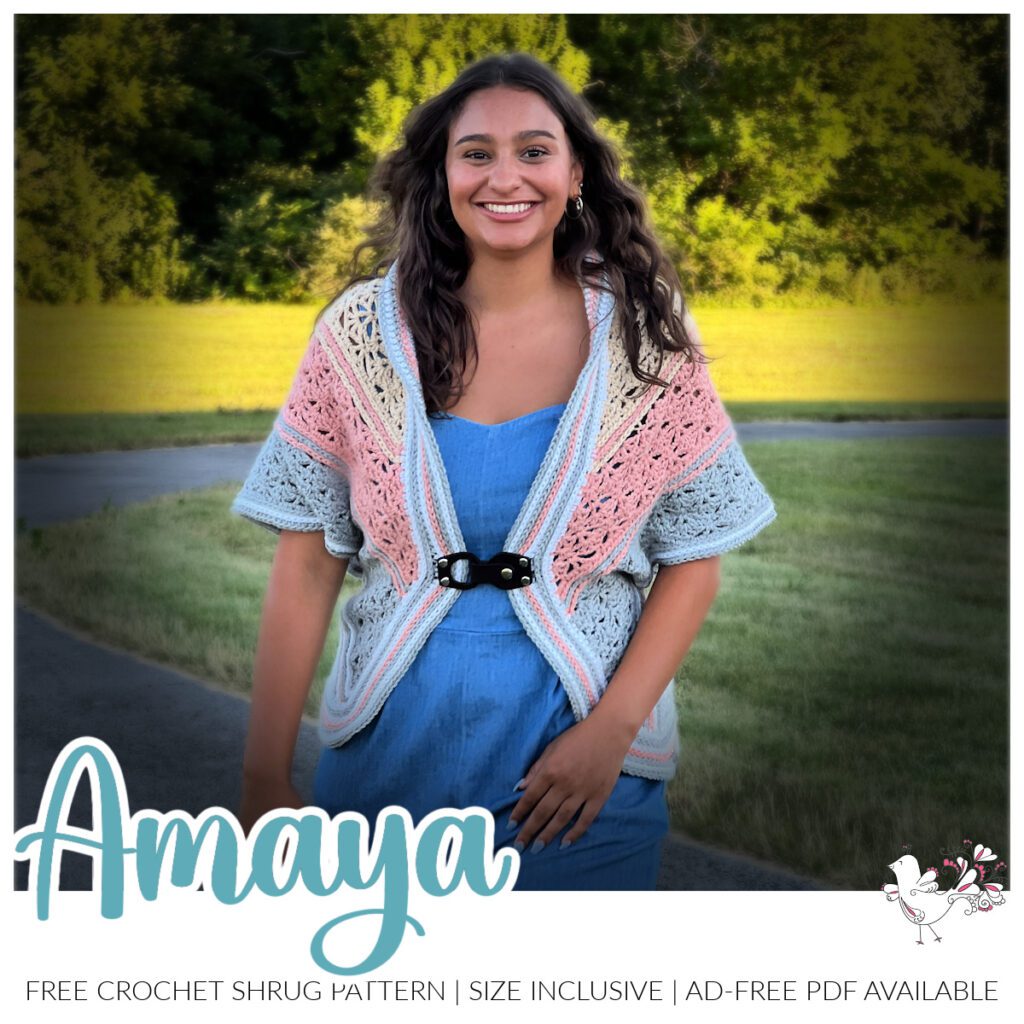
A person wearing a colorful crochet shrug and a blue dress smiles while standing outdoors on a grassy background. Text below reads "Amaya," highlighting the availability of a free crochet shrug pattern and PDF. -Marly Bird

The Amaya Crochet Shrug Pattern

Designed by Marly Bird and Robyn Chachula

SKILL LEVEL

Intermediate

MEASUREMENTS

To Fit Size

S/M (L/XL, 2/3X, 4X) 

Finished Measurements

Back Panel is 66 (66, 82.5, 82.5)โ€ [167.5, 167.5, 209.5, 209.5 cm] in wingspan by 33 (33, 41.25, 41.25)โ€ [84, 84, 105, 105 cm] deep. Side Panel is 16.5 (19, 21.5, 24)โ€ [42, 48.5, 54.5, 61 cm] wide. 

Gauge 

First 6 rows of side panel = 9.25โ€ [23.5 cm] wide by 4.5โ€ [11.5 cm] tall BLOCKED; use any size hook to obtain the gauge. 

MATERIALS

Yarn 

WeCrochet, Heatherly Worsted (80% acrylic/ 20% merino wool, 218 yds / 199 m, 3.5 oz/ 100 g, CYCA# 4 worsted), 

Color A: #29557 Snowflake (2, 2, 3, 3) hanks

Color B: #29550 Butter (1, 1, 2, 3) hanks

Color C: #29549 Peach Fuzz (1, 1, 1, 1) hank

Color D: #29556 Gravity (2, 2, 2, 2) hanks

Hook

Size I/9 [5.5 mm]

Notions 

Tapestry needle, Stitch Markers

ABBREVIATIONS

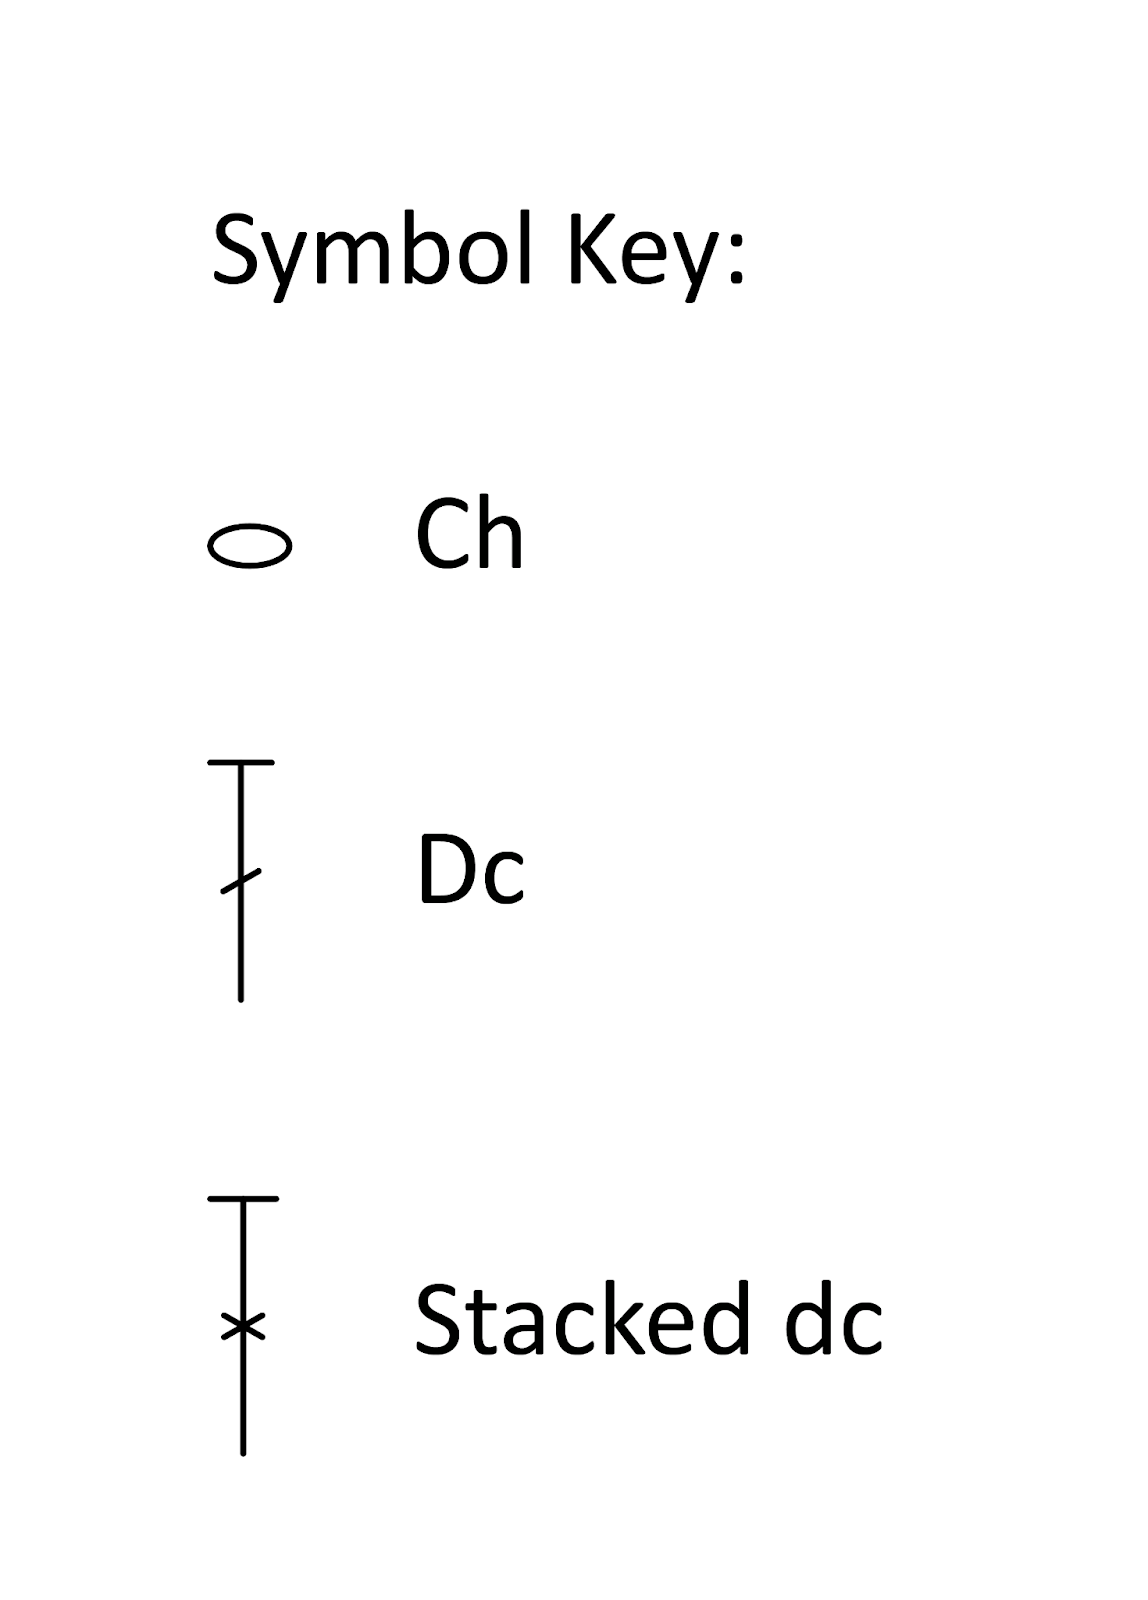
Ch – Chain(s) 

Dc – Double Crochet 

Hdc – Half Double Crochet

RS – Right Side 

Sc – Single Crochet

Sl st – Slip Stitch

Sp(s) – Space(s) 

St(s) – Stitch(es)

Stacked Dc – Stacked Double Crochet 

Tch – Turning Chain

WS – Wrong Side

SPECIAL STITCHES 

โญ๏ธ Stacked Double Crochet (Stacked Dc): (Do not ch 1 prior to making the first sc) Sc in first stitch, insert hook in between two legs of the base, yarn over and pull up a loop, yarn over and draw through 2 loops on hook.

โญ๏ธ Third Loop: Middle bar located on wrong side of st under the top two loops (created by the yarn over)

โญ๏ธ Half Double Crochet 2 Together (hdc2tog): *Yarn over hook, insert hook into indicated st, yarn over and pull up a loop; repeat from * in next st indicated, yarn over and draw through all 5 loops on hook.

SCHEMATICS
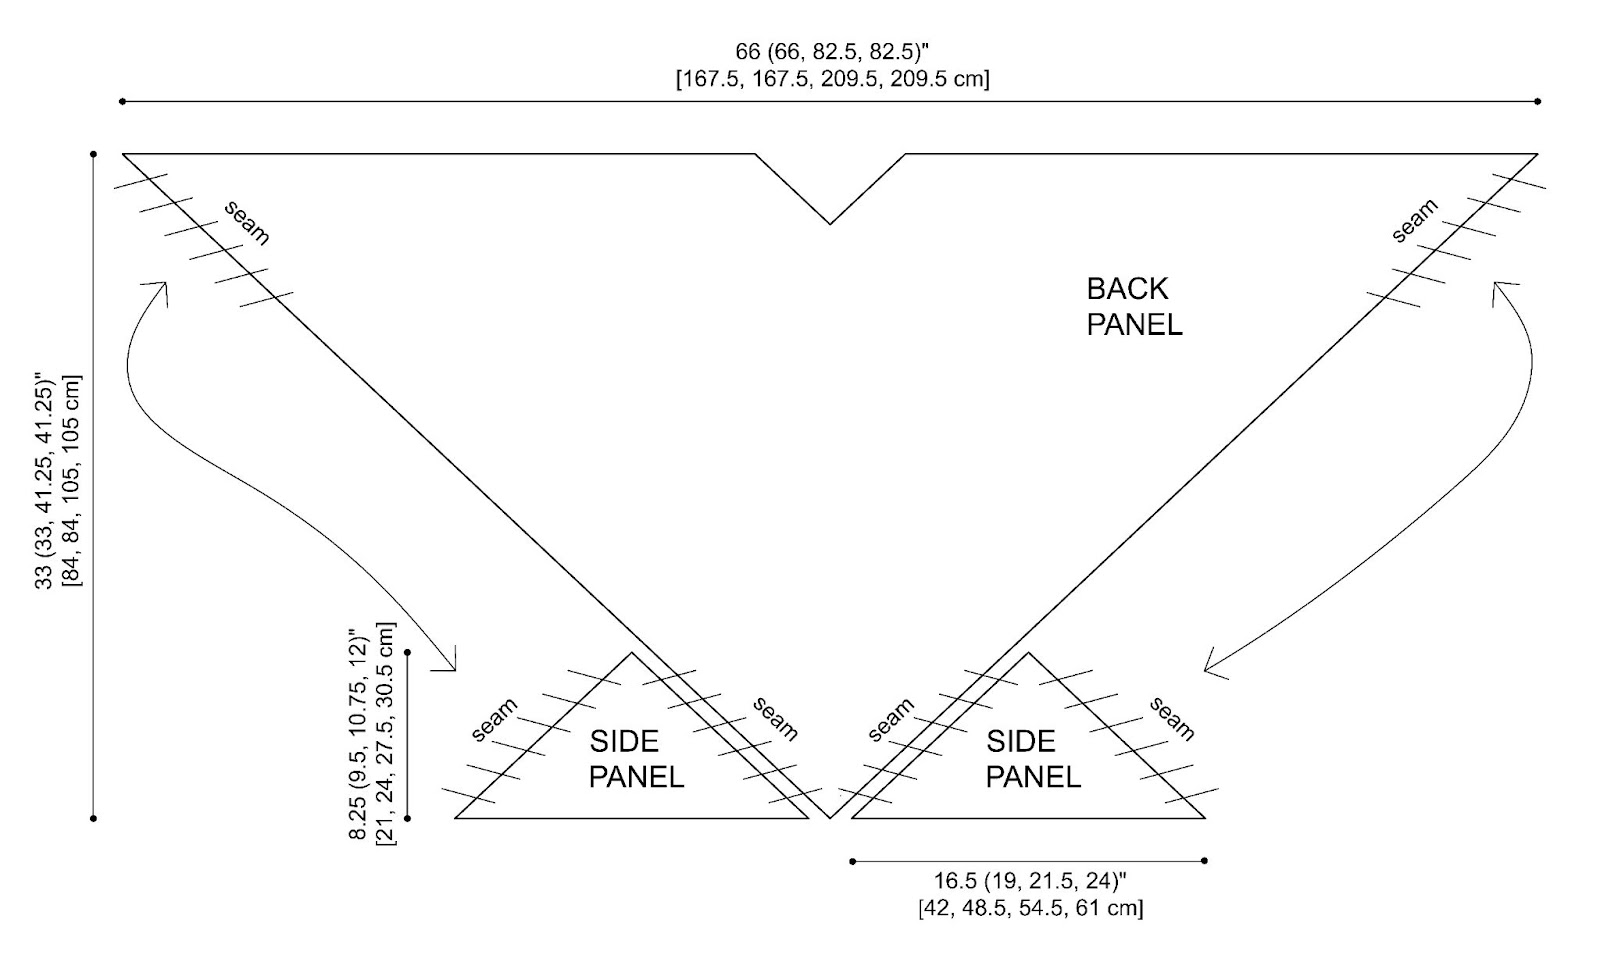
Schematic before seaming last side of side panel.  Block to these measurements. 
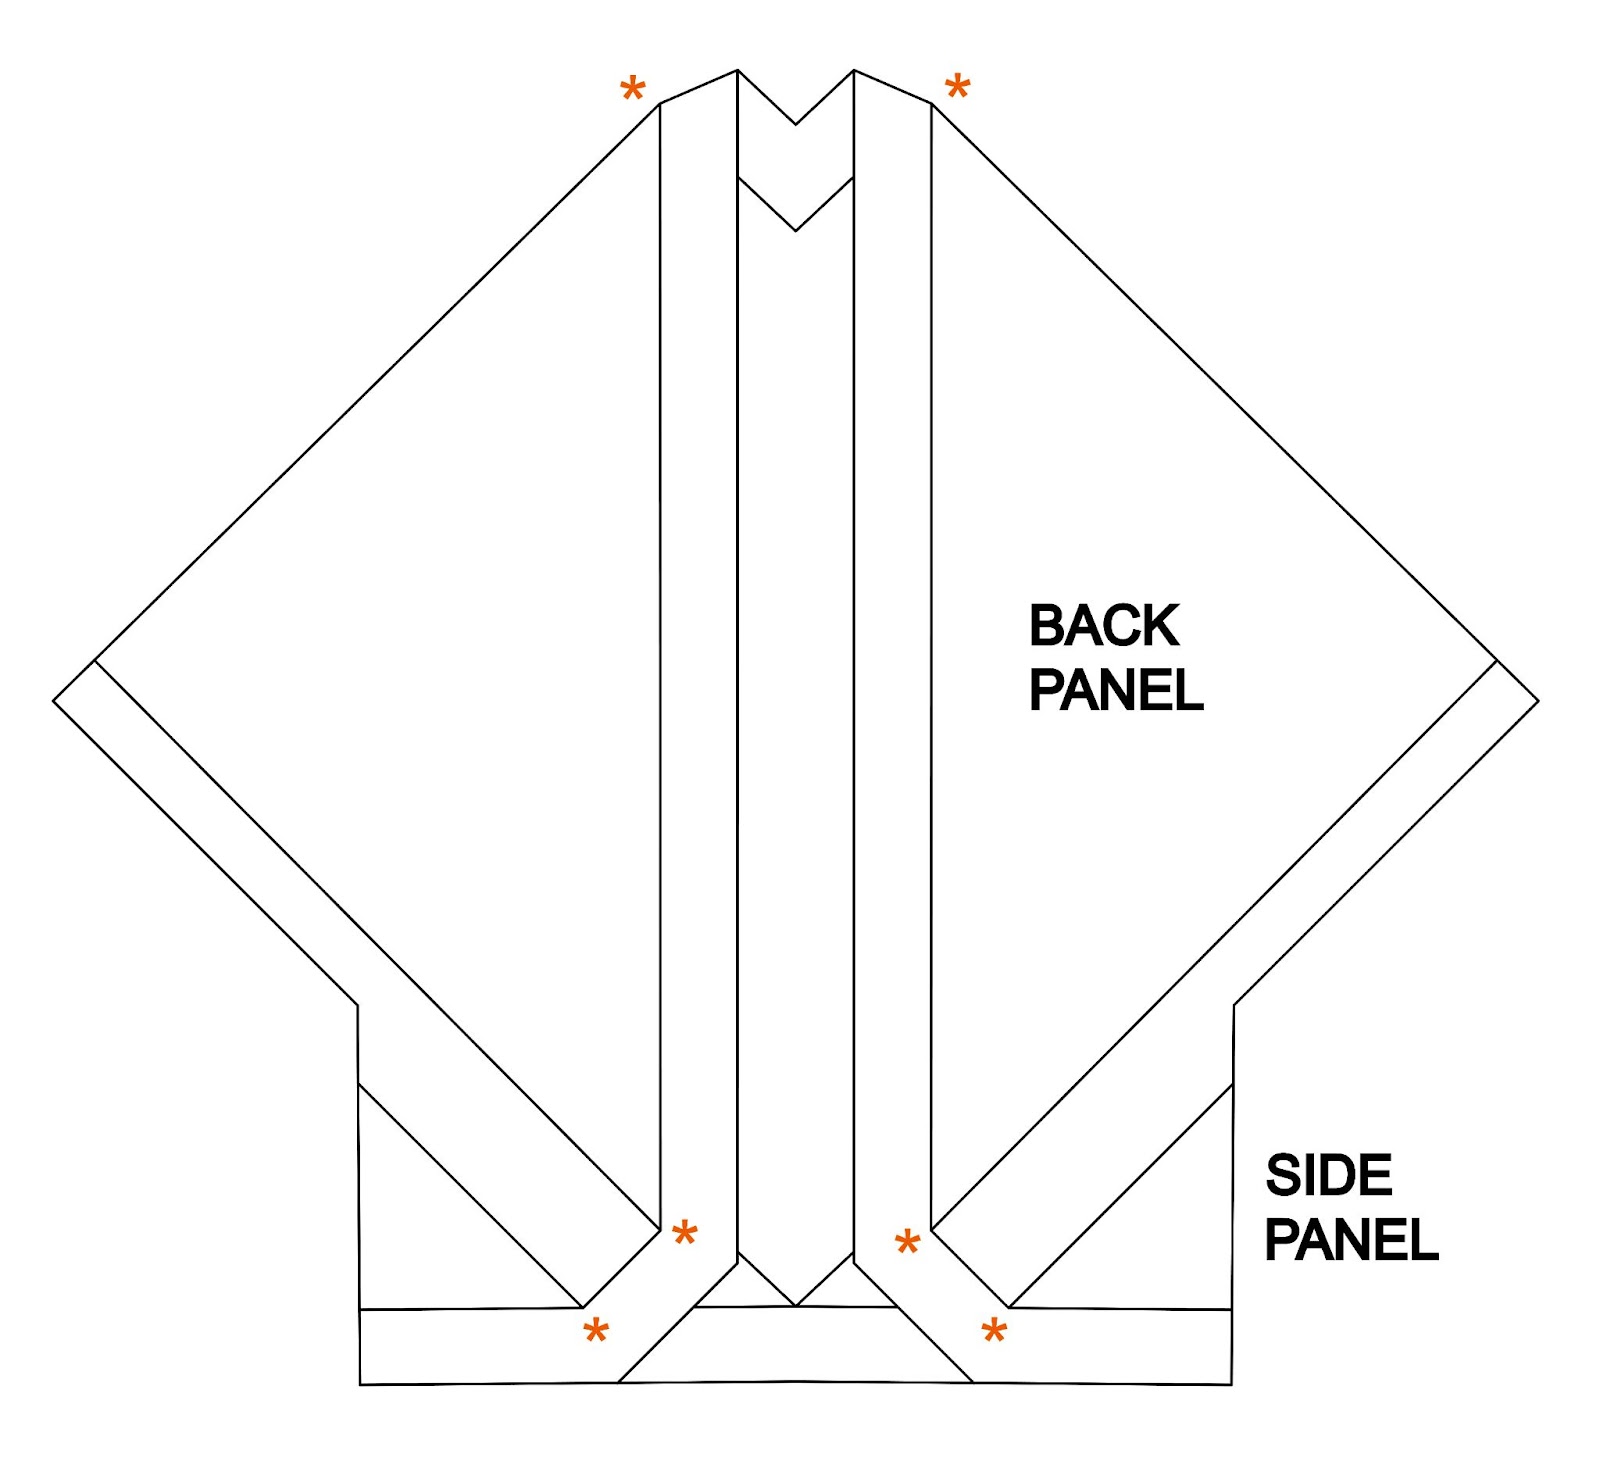
Layout of project after seamed and edging added.  Note the 6 โ€œ*โ€ (asterisks) that locate where to place a marker for the increases on your edging. 
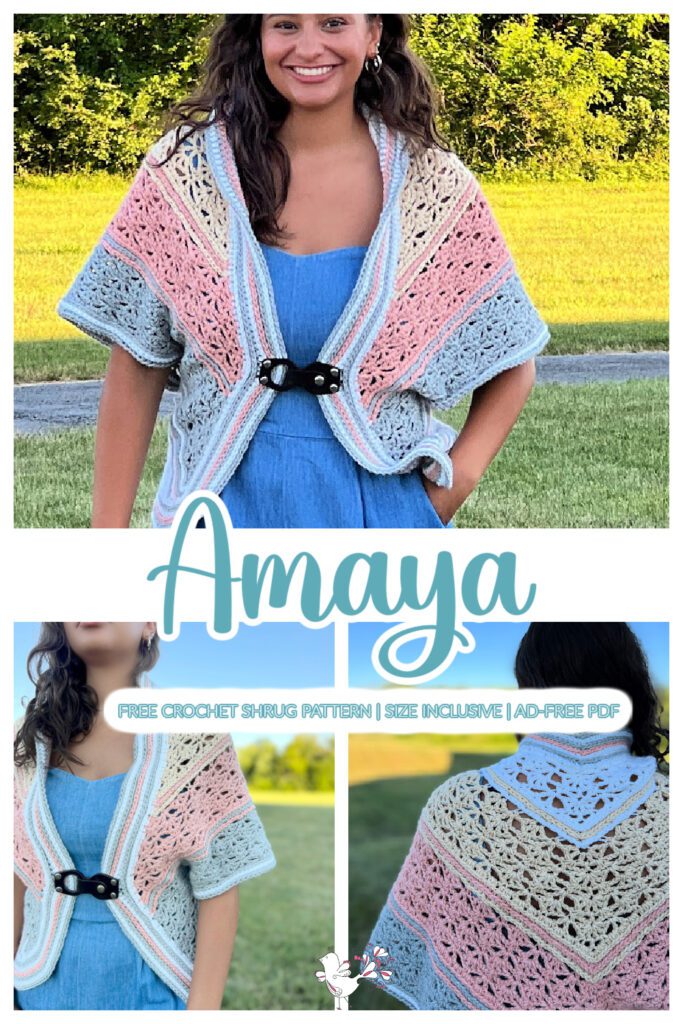
A woman in a blue dress and vibrant handcrafted crochet shrug, adorned with a pink, blue, and cream pattern fastened by a black buckle. The text reads "Amaya" and features a size-inclusive PDF offering a free shrug pattern. -Marly Bird

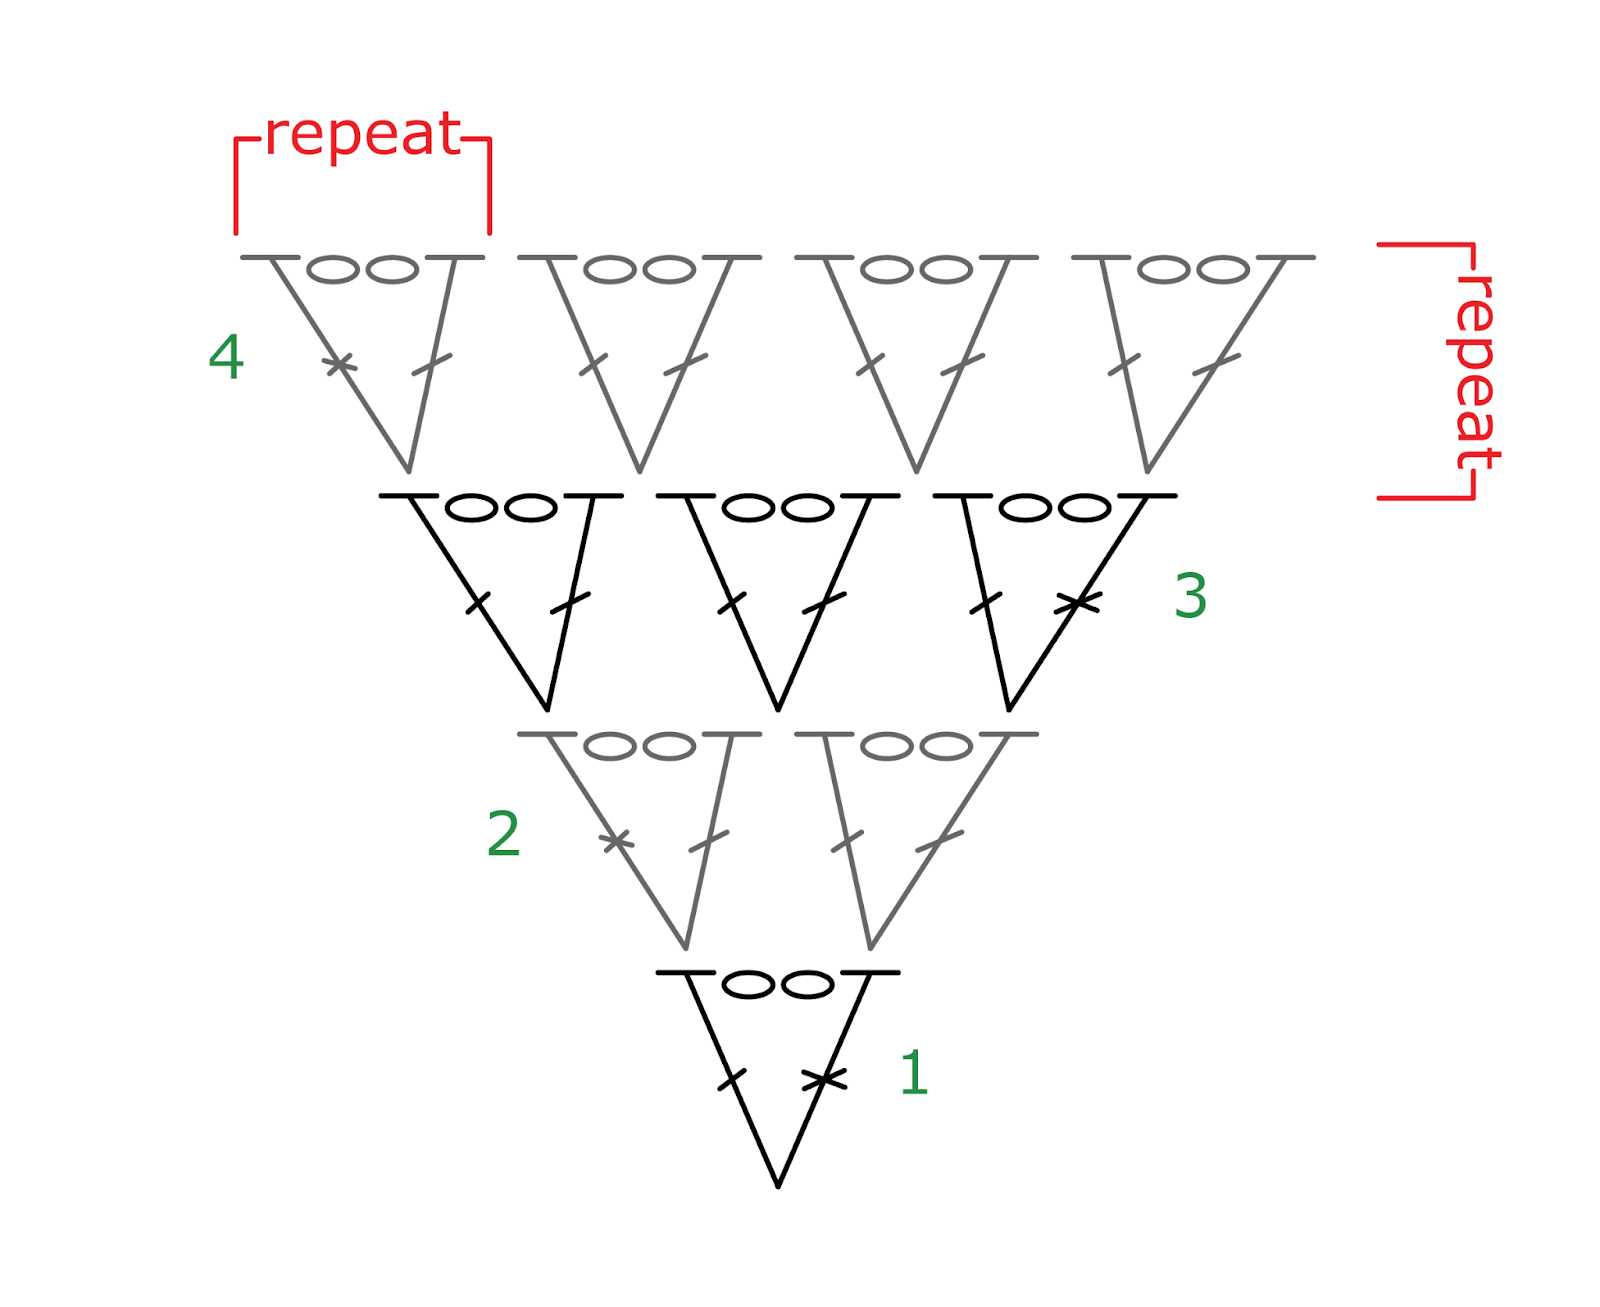
STITCH DIAGRAMS

FULL CROCHET STITCH DIAGRAMS ARE EXCLUSIVE IN THE AD-FREE PDF!

Etsy
Shopify
Ravelry

NOTES FOR AMAYA CROCHET SHRUG

  • Directions are for size S/ M; changes for sizes L/XL, 2/3X, and 4X are in parentheses. When only one number is given then that number applies to all sizes.
  • Project is best described as a shawl with side panels. You can style it with a clip in the front and it can be worn as a shrug (as shown on the mannequin).  You can also style it open and it is worn more like an accessory (as shown on Robyn). 
  • Use stitch markers to mark the first stitch and center stitch to keep track of each row. 
  • You can replace a stacked double crochet with 3 chains if you rather not use a stacked double crochet to start your row. 

VIDEO TUTORIAL

  • Stacked Double Crochet >> Click Here for Video Help <<
  • Weave in Ends >> Click Here for Video Help <<
  • Blocking >> Click Here for Video Help <<
  • Game Day 2024 Miranda Shawl Start Video >> Click Here for Video Help <<
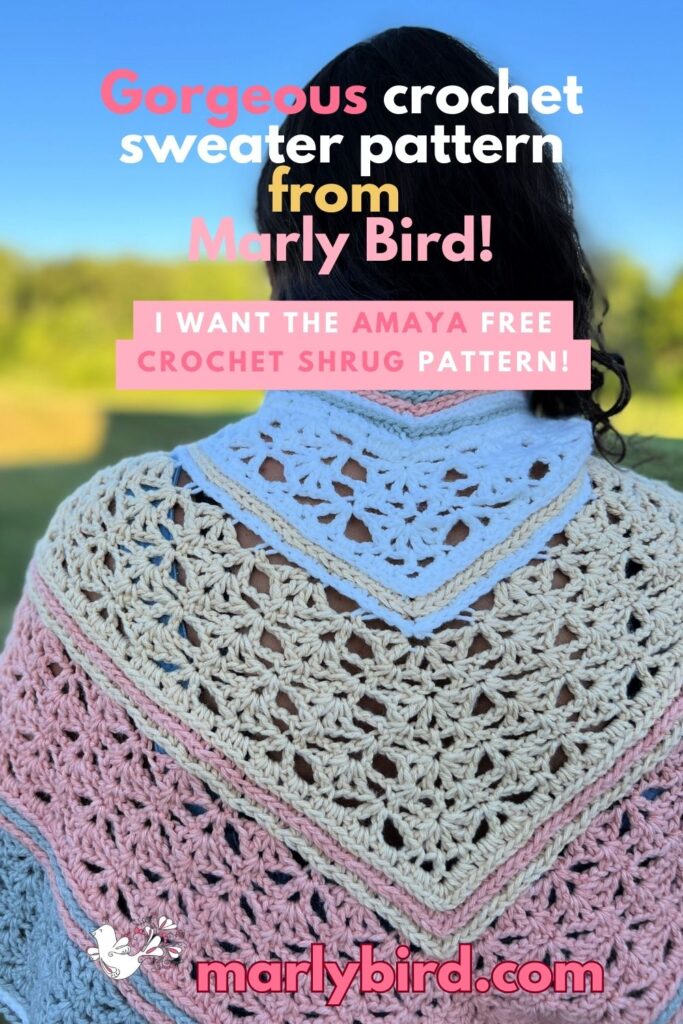
The image features a person draped in a triangular crochet shawl with cream, pink, and blue sections. Text overlays label it as an Amaya Crochet Pattern from Marly Bird and mention the free Amaya Stylish Shrug pattern. The background offers a glimpse of a blurred landscape. -Marly Bird

GROW

To Unlockย Exclusive Subscriber Contentย click the Box below and join for free by simply adding your email and creating a password! If you are having troubles, clear your cache or reset your password or login to the Grow Publisher Portal.

>> Learn More About Grow Here <<

I'm thrilled to share this amazing pattern with you, many patterns on my blog are absolutely free! I kindly request that you don't copy and paste or distribute this pattern. Prefer an ad-free experience? Buy a digital PDF pattern for a small fee from one of my online stores for a seamless crafting journey. 

I appreciate your support and readership. You are the reason I can keep doing what I love and sharing it with others. So, thank you from the bottom of my yarn-loving heart! Disclosure: This post contains affiliate links, meaning I get a commission if you decide to make a purchase through my links at no cost to you.

AMAYA CROCHET SHRUG FREE PATTERN

SIDE PANELS — the Ad-Free PDF includes a stitch diagram for this panel

Make 2

With Color A (A, B, B), make an adjustable ring.

Row 1 (RS): Ch 3 (counts as a dc throughout), [dc in ring, ch 1] 3 times, 2 dc in ring, pull ring closed, turn- 6 dc + 3 ch-1 sps. 

Row 2: Stacked dc in first dc, ch 2, (sc, ch 1, sc) in next ch-1 sp, ch 2, dc in next ch-1 sp, ch 2, (sc, ch 1, sc) in next ch-1 sp, ch 2, dc in top of tch, turn- 3 dc + 4 sc + 4 ch-2 sps + 2 ch-1 sps. 

Row 3: Ch 3, ([dc, ch 1] twice, dc) in first st (half shell made), ch 1, skip ch-2 sp, sc in next ch-1 sp, ch 1, skip ch-2 sp, ([dc, ch 1] 5 times, dc) in next dc (center shell made), skip ch-2 sp, ch 1, sc in next ch-1 sp, ch 1, ([dc, ch 1] twice, 2 dc) in last st (half shell made), turn- 2 half shells + 1 center shell. 

Row 4: Stacked dc in first st, ch 2, (sc, ch 1, sc) in next ch-1 sp, ch 2, (dc, ch 1, dc) in next sc, ch 2, skip next 2 ch-1 sps, (sc, ch 1, sc) in next ch-1 sp, ch 2, dc in next ch-1 sp, ch 2, (sc, ch 1, sc) in next ch-1 sp, ch 2, (dc, ch 1, dc) in next sc, ch 2, skip next 2 ch-1 sps, (sc, ch 1, sc) in next ch-1 sp, ch 2, dc in top of tch, turn- 8 ch-2 sps + 6 ch-1 sps. 

Row 5: Ch 3, ([dc, ch 1] twice, dc) in first st, ch 1, sc in next ch-1 sp, ch 1, ([dc, ch 1] 3 times, dc] in next ch-1 sp (shell made), ch 1, sc in next ch-1 sp, ch 1, ([dc, ch 1] 5 times, dc) in next dc, ch 1, sc in next ch-1 sp, ch 1, ([dc, ch 1] 3 times, dc] in next ch-1 sp, ch 1, sc in next ch-1 sp, ch 1, ([dc, ch 1] twice, 2 dc) in last st, turn- 2 shells + 2 half shells + 1 center shell. 

Row 6: Stacked dc in first st, ch 2, (sc, ch 1, sc) in next ch-1 sp, *ch 2, (dc, ch 1, dc) in next sc, ch 2, skip 2 ch-1 sps, (sc, ch 1, sc) in next ch-1 sp; repeat from * across to marker, ch 2, dc in marked ch-1 sp, place marker in st just made, ch 2, (sc, ch 1, sc) in next ch-1 sp, **ch 2, (dc, ch 1, dc) in next sc, ch 2, skip next 2 ch-1 sps, (sc, ch 1, sc) in next ch-1 sp; repeat from ** across to tch, ch 2, dc in top of tch, turn- 12 ch-2 sps + 10 ch-1 sps. 

CHECK GAUGE:

Lay project out as if to block it.  Check to see that your gauge is 9.25โ€ [23.5 cm] wide by 4.5โ€ [11.5 cm] tall.  Remember crochet lace likes to grow, so this is a blocked measurement.  Even though we are not blocking right now.  You will want to stretch your project as if you were going to block, then measure.  Since this is a wearable, you will want your gauge to be as close to right on as possible.  More than 0.5โ€ [1.3 cm] different (longer or shorter) from the gauge now will change the size of your final project dramatically. In addition, if you are larger than the gauge listed you will need more yarn. 

Row 7: Ch 3, ([dc, ch 1] twice, dc) in first st, *ch 1, sc in next ch-1 sp, ch 1, ([dc, ch 1] 3 times, dc] in next ch-1 sp; repeat from * across to last ch-1 sp before marked st, ch 1, sc in next ch-1 sp, ch 1, ([dc, ch 1] 5 times, dc) in next dc, place marker in center ch-1 sp of shell just made, **ch 1, sc in next ch-1 sp, ch 1, ([dc, ch 1] 3 times, dc] in next ch-1 sp; repeat from ** across to last ch-1 sp, ch 1, sc in last ch-1 sp, ch 1, ([dc, ch 1] twice, 2 dc) in last st, turn- 4 shells + 2 half shells + 1 center shell. 

Repeat Rows 6-7 0 (1, 2, 3) more times- 4 (6, 8, 10) shells + 2 half shells + 1 center shell. 

Row 8 (10, 12, 14): Stacked dc in first st, ch 2, sc in next ch-1 sp, *ch 2, (dc, ch 1, dc) in next sc, ch 2, skip 2 ch-1 sps, sc in next ch-1 sp; repeat from * across to marker, ch 2, dc in marked ch-1 sp, place marker in st just made, ch 2, sc in next ch-1 sp, **ch 2, (dc, ch 1, dc) in next sc, ch 2, skip next 2 ch-1 sps, sc in next ch-1 sp; repeat from ** across to tch, ch 2, dc in top of tch, turn- 16 (20, 24, 28) ch-2 sps + 6 (8, 10, 12) ch-1 sps. 

Row 9 (11, 13, 15) (RS): Ch 2 (counts as a hdc throughout), 2 hdc in first st, *2 hdc in next ch-2 sp, hdc in next sc, 2 hdc in next ch-2 sp, 3 hdc in next ch-1 sp; repeat from * across to 2 ch-2 sps before marker, 2 hdc in next ch-2 sp, hdc in next sc, 2 hdc in next ch-2 sp, 5 hdc in marked dc, place marker in center hdc of group just made, **2 hdc in next ch-2 sp, hdc in next sc, 2 hdc in next ch-2 sp, 3 hdc in next ch-1 sp; repeat from * across to last 2 ch-2 sps, 2 hdc in next ch-2 sp, hdc in next sc, 2 hdc in next ch-2 sp, 3 hdc in last st, do not turn. Fasten off color A (A, B, B)– 69 (85, 101, 117) hdc. 

Row 10 (12, 14, 16) (RS): Join color D (D, A, A) to top of beginning ch-2 on previous row, ch 2, hdc in top of beginning ch 2, hdc in third loop of each hdc across to marker, 3 hdc in third loop of marked hdc, place marker in center hdc of group just made, hdc in third loop of each hdc across to last hdc, 2 hdc in last hdc, do not turn. Fasten off color D (D, A, A)– 73 (89, 105, 121)  hdc.

Row 11 (13, 15, 17) (RS): Join color A (A, B, B) to top of beginning ch-2 on previous row, ch 2, hdc in top of beginning ch 2, hdc in third loop of each hdc across to marker, 3 hdc in third loop of marked hdc, place marker in center hdc of group just made, hdc in third loop of each hdc across to last hdc, 2 hdc in last hdc, do not turn. Fasten off color A (A, B, B)– 77 (73, 109, 125) hdc.

Fasten off, weave in ends.
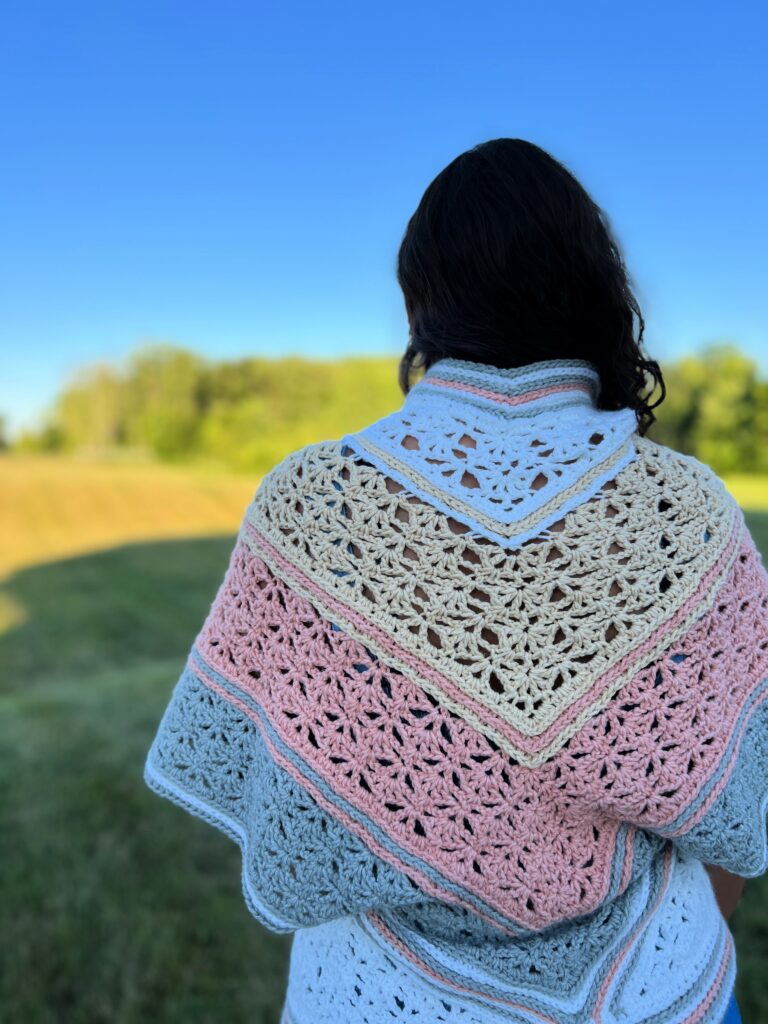
A person stands outdoors facing away, draped in a pastel-colored crocheted shawl with an intricate pattern. The landscape features a grassy field and trees under a clear blue sky. -Marly Bird

BACK PANEL — the Ad-Free PDF includes a stitch diagram for this panel

With Color A, chain 36. 

Row 1 (RS): ([Dc, ch 1] twice, dc) in 4th chain from hook (half shell made), ch 1, skip 3 ch, sc in next ch, ch 1, skip 3 ch, ([dc, ch 1] 3 times, dc] in next ch (shell made), ch 1, skip 3 ch, sc in next ch, ch 1, skip 3 ch, ([dc, ch 1] 5 times, dc) in next ch (center shell made), place marker in center ch-1 sp just made, ch 1, skip 3 ch, sc in next ch, ch 1, skip 3 ch,  ([dc, ch 1] 3 times, dc] in next ch, ch 1, skip 3 ch, sc in next ch, ch 1, skip 3 ch, ([dc, ch 1] twice, 2 dc) in last ch (half shell made), turn- 2 shells + 2 half shells + 1 center shell. 

Row 2: Stacked dc in first st, ch 2, (sc, ch 1, sc) in next ch-1 sp, *ch 2, (dc, ch 1, dc) in next sc, ch 2, skip 2 ch-1 sps, (sc, ch 1, sc) in next ch-1 sp; repeat from * across to marker, ch 2, dc in marked ch-1 sp, place marker in st just made, ch 2, (sc, ch 1, sc) in next ch-1 sp, **ch 2, (dc, ch 1, dc) in next sc, ch 2, skip next 2 ch-1 sps, (sc, ch 1, sc) in next ch-1 sp; repeat from ** across to tch, ch 2, dc in top of tch, turn- 12 ch-2 sps + 10 ch-1 sps. 

Row 3: Ch 3, ([dc, ch 1] twice, dc) in first st, *ch 1, sc in next ch-1 sp, ch 1, ([dc, ch 1] 3 times, dc] in next ch-1 sp; repeat from * across to last ch-1 sp before marked st, ch 1, sc in next ch-1 sp, ch 1, ([dc, ch 1] 5 times, dc) in next dc, place marker in center ch-1 sp of shell just made, **ch 1, sc in next ch-1 sp, ch 1, ([dc, ch 1] 3 times, dc] in next ch-1 sp; repeat from ** across to last ch-1 sp, ch 1, sc in last ch-1 sp, ch 1, ([dc, ch 1] twice, 2 dc) in last st, turn- 4 shells + 2 half shells + 1 center shell. 

Row 4: Stacked dc in first st, ch 2, sc in next ch-1 sp, *ch 2, (dc, ch 1, dc) in next sc, ch 2, skip 2 ch-1 sps, sc in next ch-1 sp; repeat from * across to marker, ch 2, dc in marked ch-1 sp, place marker in st just made, ch 2, sc in next ch-1 sp, **ch 2, (dc, ch 1, dc) in next sc, ch 2, skip next 2 ch-1 sps, sc in next ch-1 sp; repeat from ** across to tch, ch 2, dc in top of tch, turn- 16 ch-2 sps + 6 ch-1 sps. 

Row 5 (RS): Ch 2, 2 hdc in first st, *2 hdc in next ch-2 sp, hdc in next sc, 2 hdc in next ch-2 sp, 3 hdc in next ch-1 sp; repeat from * across to 2 ch-2 sps before marker, 2 hdc in next ch-2 sp, hdc in next sc, 2 hdc in next ch-2 sp, 5 hdc in marked dc, place marker in center hdc of group just made, **2 hdc in next ch-2 sp, hdc in next sc, 2 hdc in next ch-2 sp, 3 hdc in next ch-1 sp; repeat from * across to last 2 ch-2 sps, 2 hdc in next ch-2 sp, hdc in next sc, 2 hdc in next ch-2 sp, 3 hdc in last st, do not turn. Fasten off color A– 69 hdc. 

Row 6 (RS): Join color B to top of beginning ch-2 on previous row, ch 2, hdc in top of beginning ch 2, hdc in third loop of each hdc across to marker, 3 hdc in third loop of marked hdc, place marker in center hdc of group just made, hdc in third loop of each hdc across to last hdc, 2 hdc in last hdc, do not turn. Fasten off color B– 73 hdc.

Row 7 (RS): Join color A to top of beginning ch-2 on previous row, ch 2, hdc in top of beginning ch 2, hdc in third loop of each hdc across to marker, 3 hdc in third loop of marked hdc, place marker in center hdc of group just made, hdc in third loop of each hdc across to last hdc, 2 hdc in last hdc, do not turn. Fasten off color A– 77 hdc.

Row 8 (RS): Join color B to top of beginning ch-2 on previous row, ch 3, ([dc, ch 1] twice, dc) in same st as join, ch 1, skip 2 sts, *sc in third loop of next st, ch 1, skip 3 sts, ([dc, ch 1] 3 times, dc] in third loop of next st, ch 1, skip 3 sts; repeat from * across to 3 sts before marker, sc in third loop of next st, ch 1, skip 2 sts, ([dc, ch 1] 5 times, dc) in third loop of marked st, mark center ch-1 sp of shell just made, ch 1, skip 2 sts, **sc in third loop of next st, ch 1, skip 3 sts, ([dc, ch 1] 3 times, dc] in third loop of next st, ch 1, skip 3 sts; repeat from ** across to 3 sts before last st, sc in third loop of next st, ch 1, ([dc, ch 1] twice, 2 dc) in last st, turn- 8 shells + 2 half shells + 1 center shell. 

Row 9: Stacked dc in first st, ch 2, (sc, ch 1, sc) in next ch-1 sp, *ch 2, (dc, ch 1, dc) in next sc, ch 2, skip 2 ch-1 sps, (sc, ch 1, sc) in next ch-1 sp; repeat from * across to marker, ch 2, dc in marked ch-1 sp, place marker in st just made, ch 2, (sc, ch 1, sc) in next ch-1 sp, **ch 2, (dc, ch 1, dc) in next sc, ch 2, skip next 2 ch-1 sps, (sc, ch 1, sc) in next ch-1 sp; repeat from ** across to last st, ch 2, dc in top of tch, turn- 24 ch-2 sps + 22 ch-1 sps. 

Row 10: Ch 3, ([dc, ch 1] twice, dc) in first st, *ch 1, sc in next ch-1 sp, ch 1, ([dc, ch 1] 3 times, dc] in next ch-1 sp; repeat from * across to last ch-1 sp before marked st, ch 1, sc in next ch-1 sp, ch 1, ([dc, ch 1] 5 times, dc) in next dc, place marker in center ch-1 sp of shell just made, **ch 1, sc in next ch-1 sp, ch 1, ([dc, ch 1] 3 times, dc] in next ch-1 sp; repeat from ** across to last ch-1 sp, ch 1, sc in last ch-1 sp, ch 1, ([dc, ch 1] twice, 2 dc) in last st, turn- 10 shells + 2 half shells + 1 center shell. 

Rows 11-14: Repeat Rows 9-10.  Row 14 has 14 shells + 2 half shells + 1 center shell. 

Row 15: Stacked dc in first st, ch 2, sc in next ch-1 sp, *ch 2, (dc, ch 1, dc) in next sc, ch 2, skip 2 ch-1 sps, sc in next ch-1 sp; repeat from * across to marker, ch 2, dc in marked ch-1 sp, place marker in st just made, ch 2, sc in next ch-1 sp, **ch 2, (dc, ch 1, dc) in next sc, ch 2, skip next 2 ch-1 sps, sc in next ch-1 sp; repeat from ** across to tch, ch 2, dc in top of tch, turn- 36 ch-2 sps + 16 ch-1 sps. 

Repeat Rows 5-15 twice (twice, 3 times, 3 times) changing colors as follows:

First Repeat: Change to color C

Second Repeat: Change to color D

Third Repeat (for 2/ 3X and 4X sizes only): Change to color A.  

This means you will use the previous lace color for the first hdc row, then change to the new color the second hdc row, back to the previous color for the third hdc row, and continue with the new color listed above for the next lace section. 

S/M and L/XL Only:  Repeat Rows 5-7 once more using color D on Row 5, color A on Row 6 and color D on row 7. 

2/ 3X and 4X Only:  Repeat Rows 5-7 once more using color A on Row 5, color B on Row 6 and color A on row 7. 

Stitch Counts:

Row 16: 149 hdc

Row 18: 157 hdc

Row 19: 18 shells + 2 half shells + 1 center shell

Row 26: 56 ch-2 sps + 26 ch-1 sps. 

Row 27: 229 hdc

Row 29: 237 hdc

Row 30: 28 shells + 2 half shells + 1 center shell

Row 37: 76 ch-2 sps + 36 ch-1 sps. 

Row 38: 309 hdc

Row 40: 317 hdc

2/ 3X and 4X Only: Row 41: 38 shells + 2 half shells + 1 center shell

2/ 3X and 4X Only: Row 48: 96 ch-2 sps + 46 ch-1 sps. 

2/ 3X and 4X Only: Row 49: 389 hdc

2/ 3X and 4X Only: Row 51: 397 hdc

Fasten off, weave in all ends.
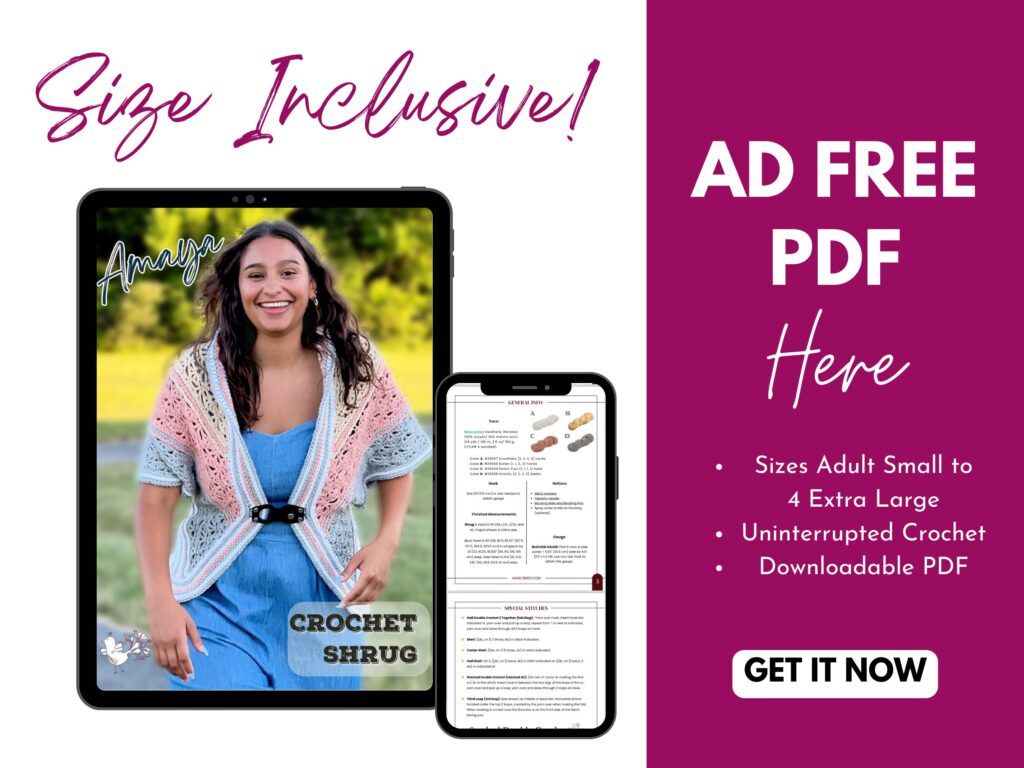
Advertisement for a stylish, size-inclusive crochet shrug pattern. Showcasing a tablet with a smiling person in the shrug, this ad promotes an ad-free PDF featuring sizes from adult small to 4XL. Hit the "Get It Now" button to download your perfect shrug pattern today! -Marly Bird

FINISHING

BLOCKING

Pin back and side panels to schematic size. Spray with water and allow to dry.  You can also use the steam method or cold bath method to block this project if desired.  

SEAMING

Lay back panel and side panel next to each other with right sides facing up as shown in the schematic.  Back and side panels will be seamed together using a slip stitch that goes through the third loop of a stitch on the back panel and the third loop of the corresponding stitch on the side panel.  Skip marked center stitch on the back panel.  Join color B (B, C, C) with a sl st in the next st on the back panel and first stitch on the side panel working in their 3rd loops.  Holding working yarn to the wrong side of the fabric, continuing slip stitching (inserting hook from the front to the back of your work) each stitch together in their third loop across the side panel.  Repeat on the opposite side of the back panel and second side panel.  

Turn work wrong side up.  Fold back panel so beginning and end of the row meet the center.  Fold side panel so that the beginning of the row meets the end of the row.  Now the project looks like the layout and panels are right side up.  Seam panels together using the same method as before. 
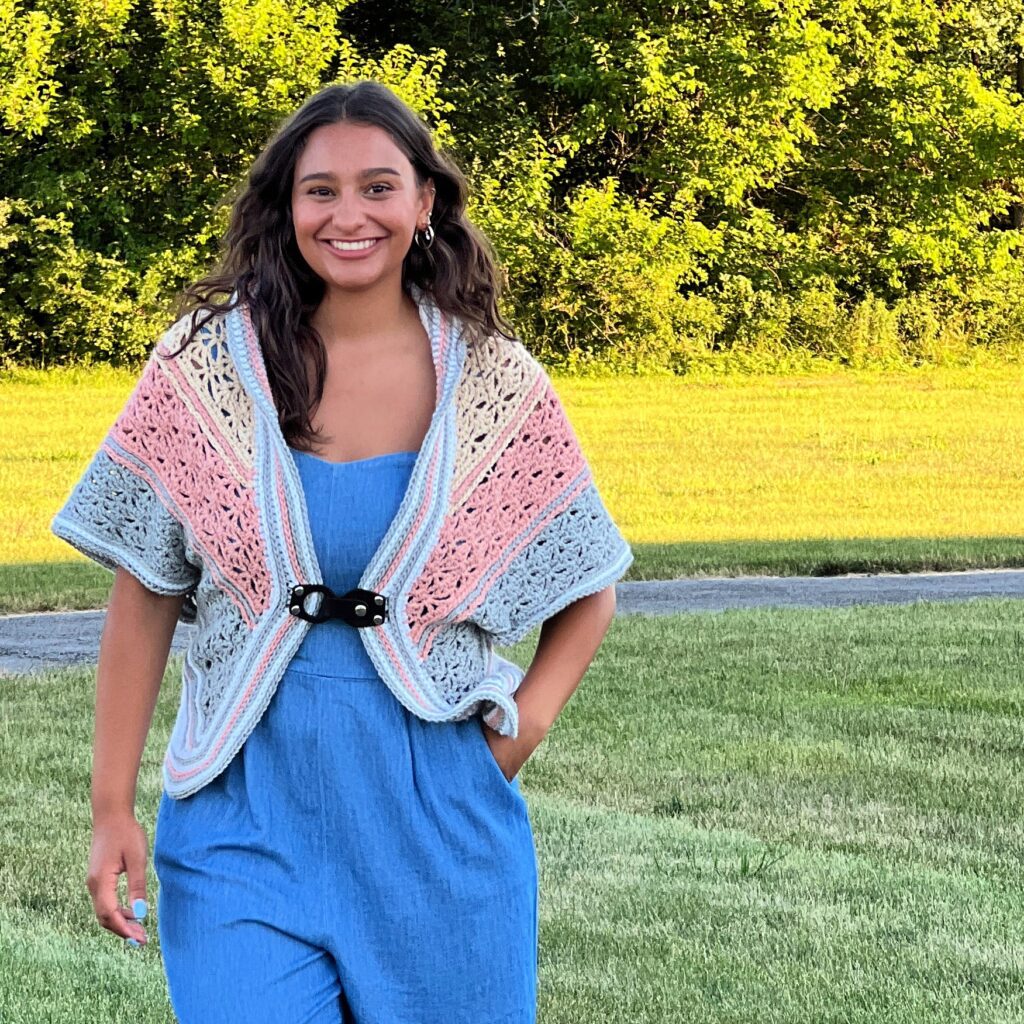
A woman smiles while walking on a grassy area in a blue dress and a stylish crochet shawl with pink, blue, and beige stripes fastened with a black clasp. Trees and a pathway are visible in the background. -Marly Bird

EDGING

Place 6 markers at โ€œ*โ€ as shown on layout.  These will mark where you will place increases throughout the edging.  There are 2 located at the back neck and 2 located on each side of the side and back panel join in the front the project. 

Round 1: Join color A (A, B, B) to center of back neck (this is the center of the first row of the back panel), ch 1, *hdc evenly across to marker, 2 hdc at marker, place marker in 2nd hdc just made, hdc evenly across to next marker, 2 hdc at marker, place marker in 1st hdc just made; repeat from * around, hdc evenly across to beginning of round. Join to first st, change color to D (D, A, A). 

Round 2: Ch 1, skip first st, *hdc in third loop of each hdc to marker, 2 hdc in third loop of marked st, place marker in 2nd hdc just made, hdc in third loop of each hdc to next marker, 2 hdc in third loop of marked st, place marker in 1st hdc just made; repeat from * around, hdc in third loop of each hdc to last 2 hdc, hdc2tog in third loop of last 2 hdc. Join to first st, change color to A (A, B, B). 

Round 3: Repeat Round 2 change color to B (B, C, C) at end of round. 

Round 4: Repeat Round 2 change color to D (D, A, A) at end of round. 

Round 5: Repeat Round 2 change color to A (A, B, B) at end of round. 

Round 6: Repeat Round 2 change color to D (D, A, A) at end of round. 

Round 7: Ch 1, sc in third loop of each hdc around. Join to first st. 

Fasten off, weave in ends.

Ready to start your crochet shrug? Grab your yarn and croche thook and follow the Amaya Crochet Shrug pattern today, and don't forget to sign up for our newsletter for more patterns and crochet tips. Share your completed projects with us on social mediaโ€”we love seeing your creations! #mmmdi #marlybird

If you love making crochet garments, you might also love these!
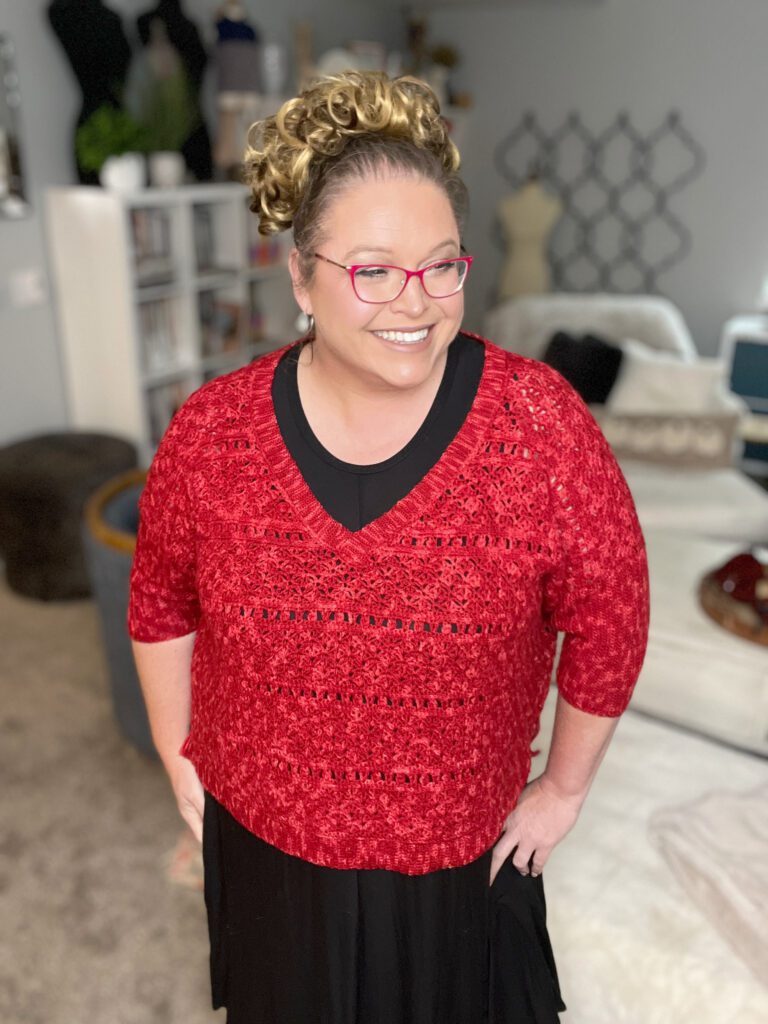
  • Woman models a red Tunisian crochet sweater, showing textured stitch detail in a cozy room with bookshelves and a bed.
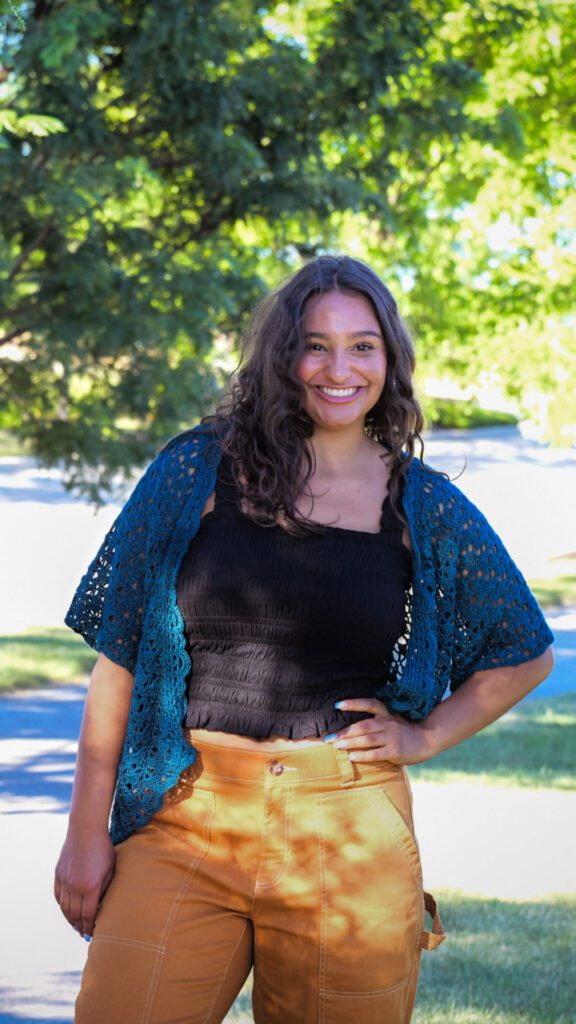
  • Woman models a dark Tunisian crochet cardigan, showing its textured stitch pattern over a black top and mustard pants outdoors.
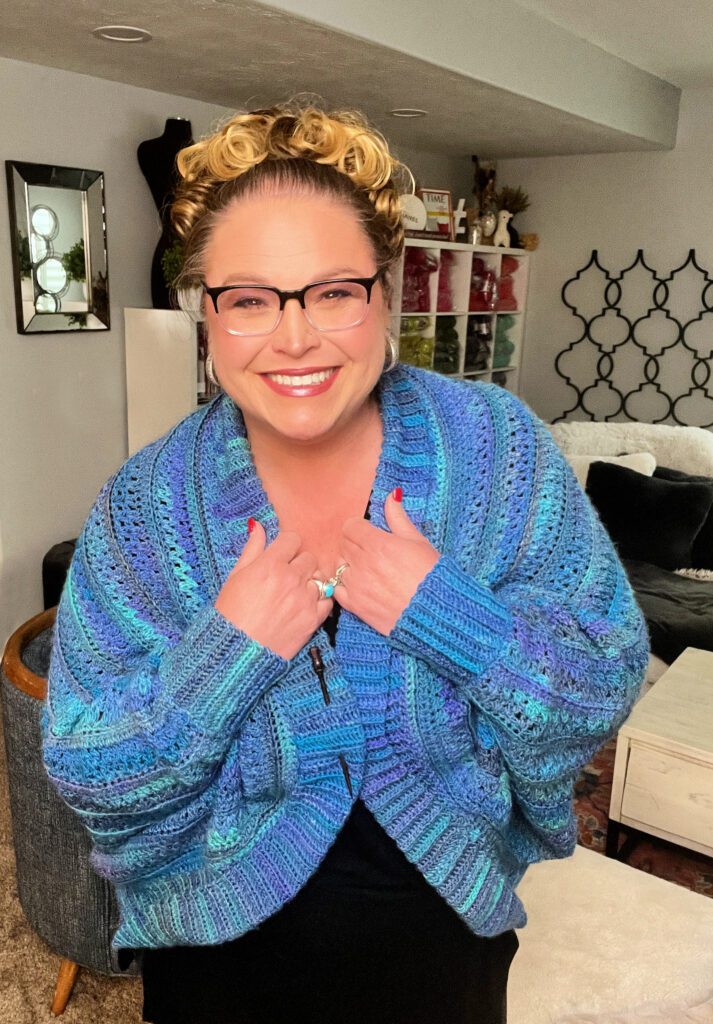
  • Woman models a blue and purple crocheted sweater indoors, highlighting the cozy texture, stitch pattern, and color transitions.
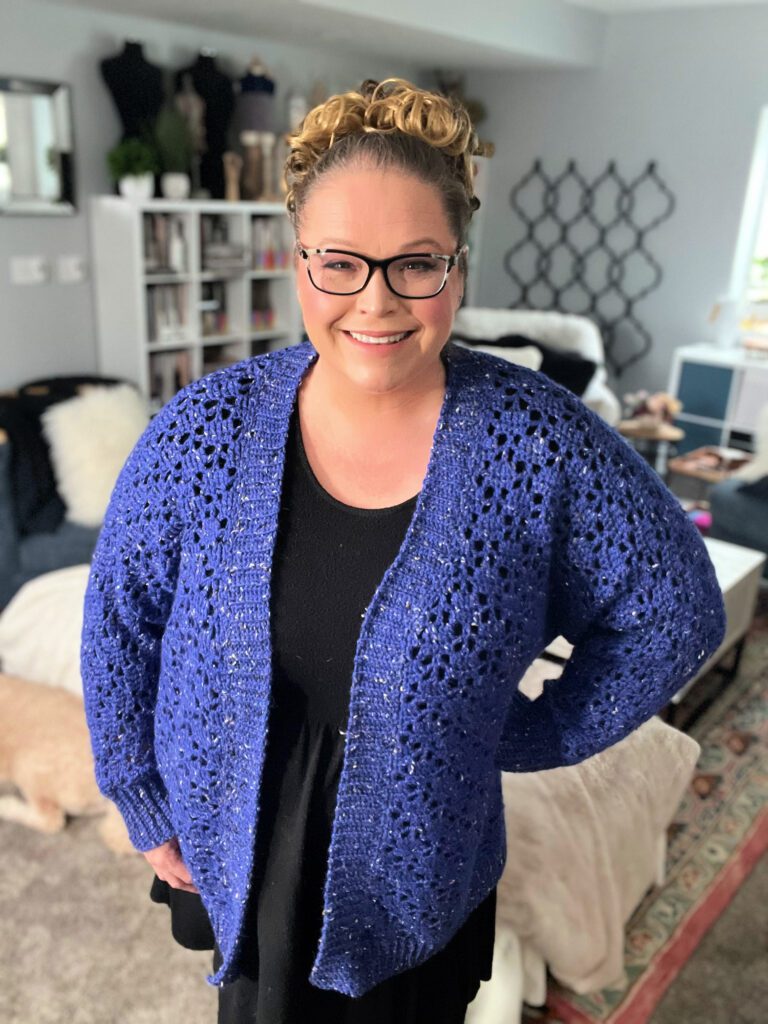
  • Woman models a handmade blue crocheted cardigan with textured stitches, showing its fit and drape in a cozy living room.
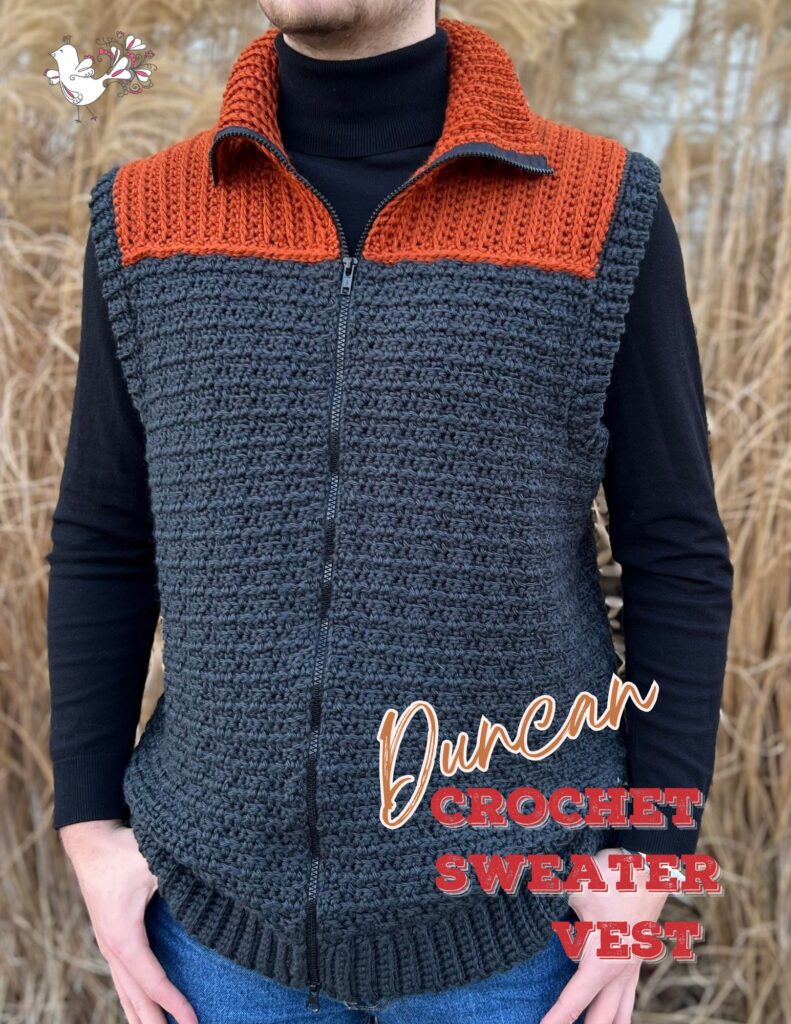
  • Handmade crochet sweater vest with a rust yoke and gray body, worn over a black turtleneck. Project: Duncan Crochet Sweater Vest.

Frequently Asked Questions

What exactly *is* a crochet shrug sweater?

So here's the thing… a crochet shrug is like a super cozy hug you can wear! It's a mix between a sweater and a cardigan or bolero, and it's perfect for adding a little something extra to any outfit, no matter the season. You can totally dress it up or down!

Can you recommend some yarns that would work for the Amaya Shrug?

Honestly… yes! While the pattern suggests WeCrochet Heatherly Worsted, I also think yarns like Wool Of The Andes, Brava, Fabwoolous, Patons Inspired, and Red Heart Ombre would be absolutely lovely. Just think about the weight you want for the season you're making it for.

How do I figure out the best size for my shrug?

This is the fun part… it's super flexible! The Amaya Shrug is made like a shawl first, and then side panels are added. This means YOU get to decide how it fits. You can go for a snug fit or a more relaxed, flowy look. The pattern has sizes S/M, L/XL, 2/3X, and 4X, following standard guidelines.

I'm a little stuck… are there video tutorials to help me out?

Yes, I'm so glad you asked! While there aren't specific video tutorials for *this* exact shrug pattern, the pattern itself has links to videos for stitches like the Stacked Double Crochet, weaving in ends, and blocking. Plus, if you join my Marly's Minions Facebook group, you can get tons of extra help from me and other amazing crocheters!

Where can I get the ad-free PDF version of this pattern?

Oh, easy! You can grab the ad-free PDF version in my shop on Shopify, or on Etsy and Ravelry. It's really handy to have everything in one place without any distractions, and it even includes stitch diagrams, which are super helpful!

“
Filed Under: Crochet, Free Patterns, Marly Bird Premium Patterns, Our Free Patterns, Pattern, Uncategorized

What MORE Can I Make With Crochet Granny Squares?

October 10, 2024 By Marly Bird 7 Comments

Many new crocheters begin with granny squares for their first motifs and fall in love with this quintessential crochet technique. My first love of crochet came to me as I wrapped up in a granny square blanket my grandmother made for me. The warmth and comfort it provided sparked my interest in the world of crochet, and I believe it holds a special place in many crafters' hearts.

Granny squares are not just a nostalgic piece of our crafting history; they are versatile building blocks for countless projects. With hundreds of free patterns available online, you can create everything from cozy blankets to trendy bags, decorative home accessories, and more. If you're wondering what to make with crochet granny squares, youโ€™re in the right place!

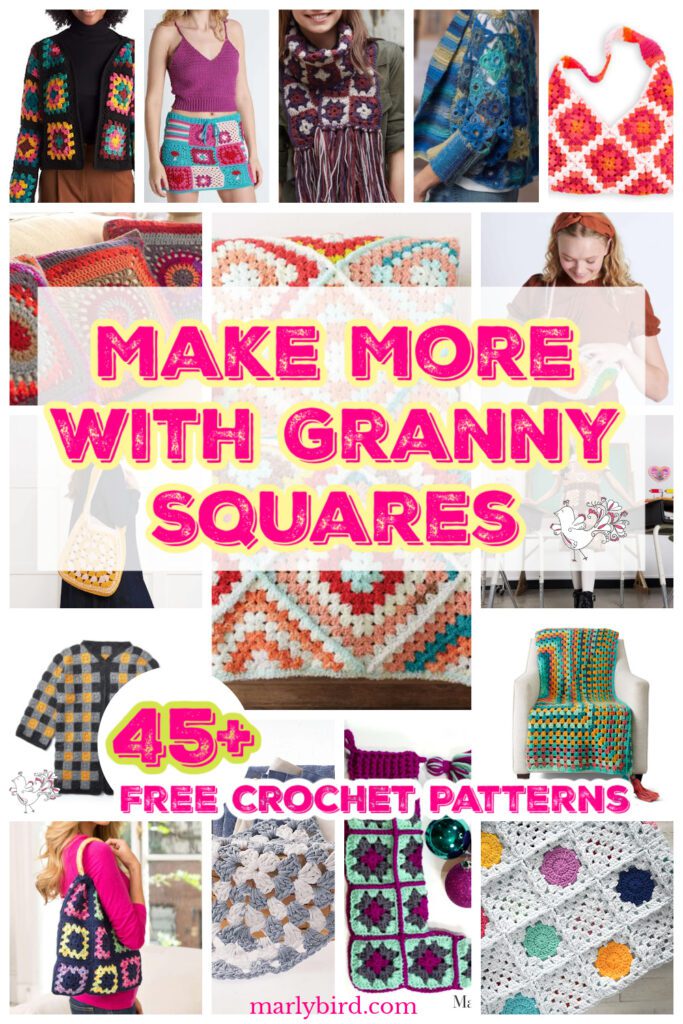
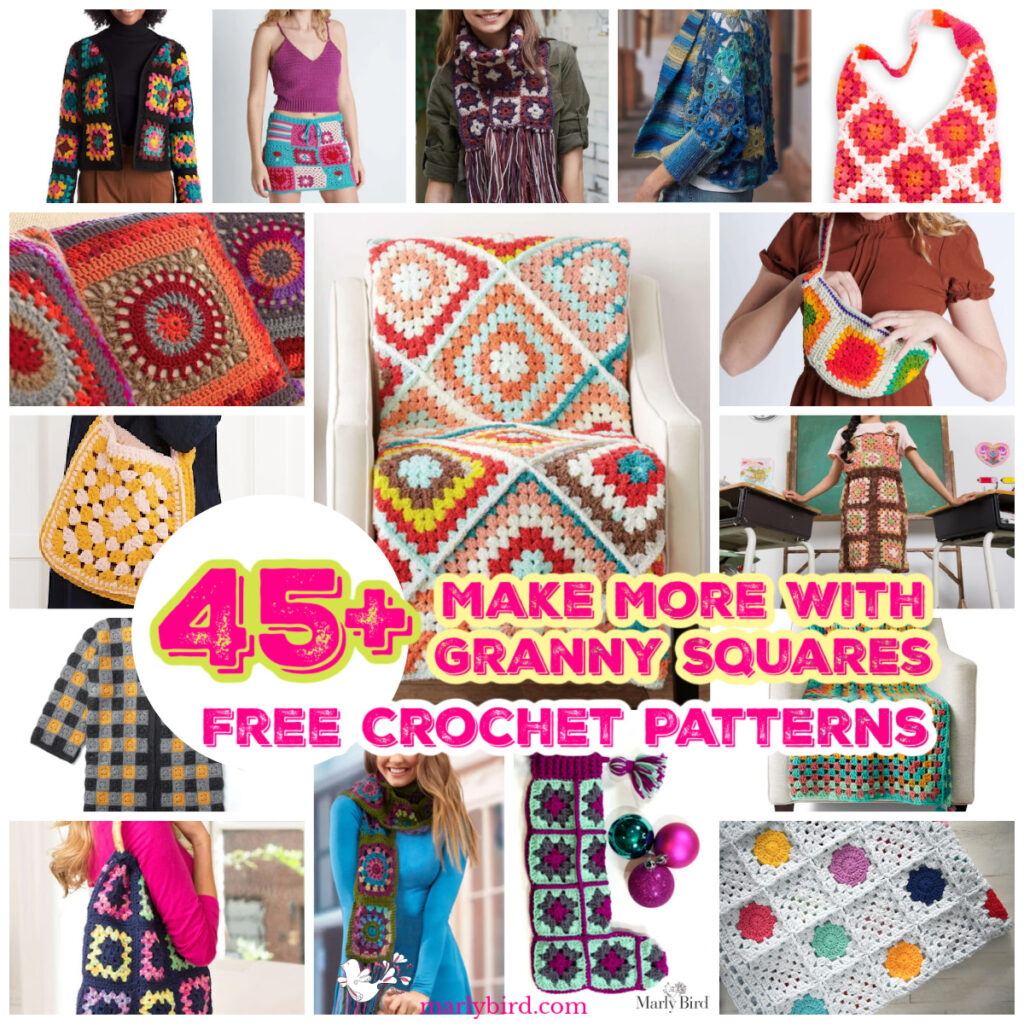
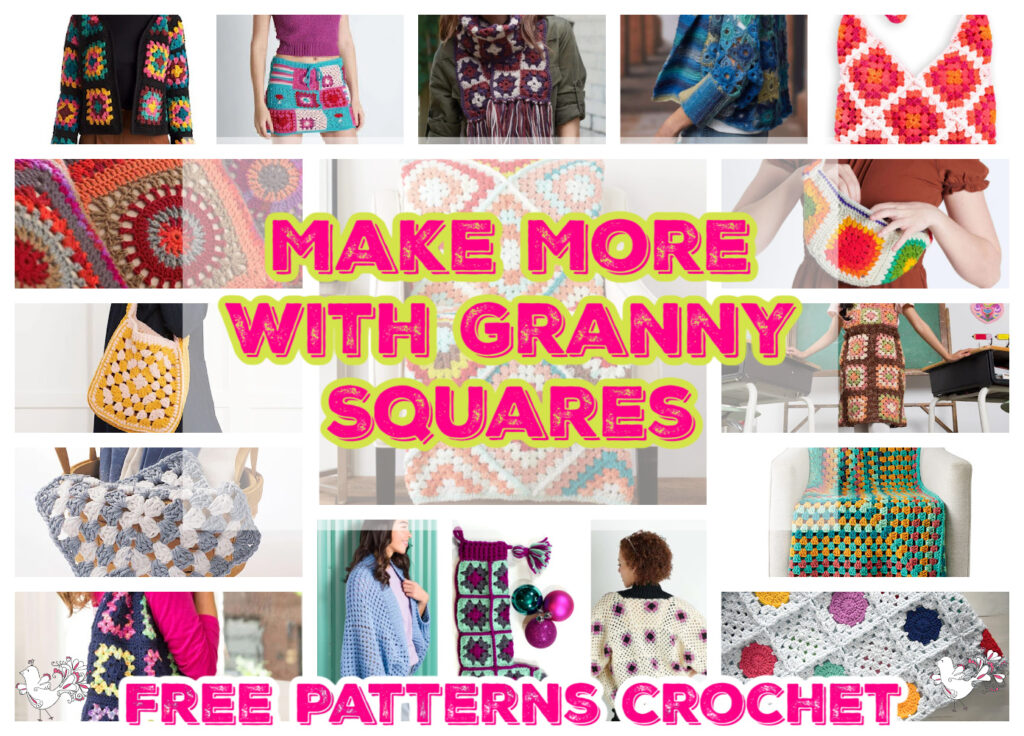
Collage of crochet projects crafted with vibrant granny squares, featuring blankets, bags, and scarves. A text overlay in bright yellow and pink reads "Make More with Granny Squares - Free Patterns Crochet," inviting creativity and inspiration. -Marly Bird

Affiliate Disclosure: This post contains affiliate links. To learn more please visit my privacy policy here๐Ÿ’–

What is a Granny Square?

A granny square is a classic crochet motif made in a square shape, typically featuring a series of double crochet stitches and a combination of colors. They are often joined together to create larger pieces, making them a popular choice for blankets, garments, and accessories. A basic granny square is simple to make and can be customized in various ways to suit your style.

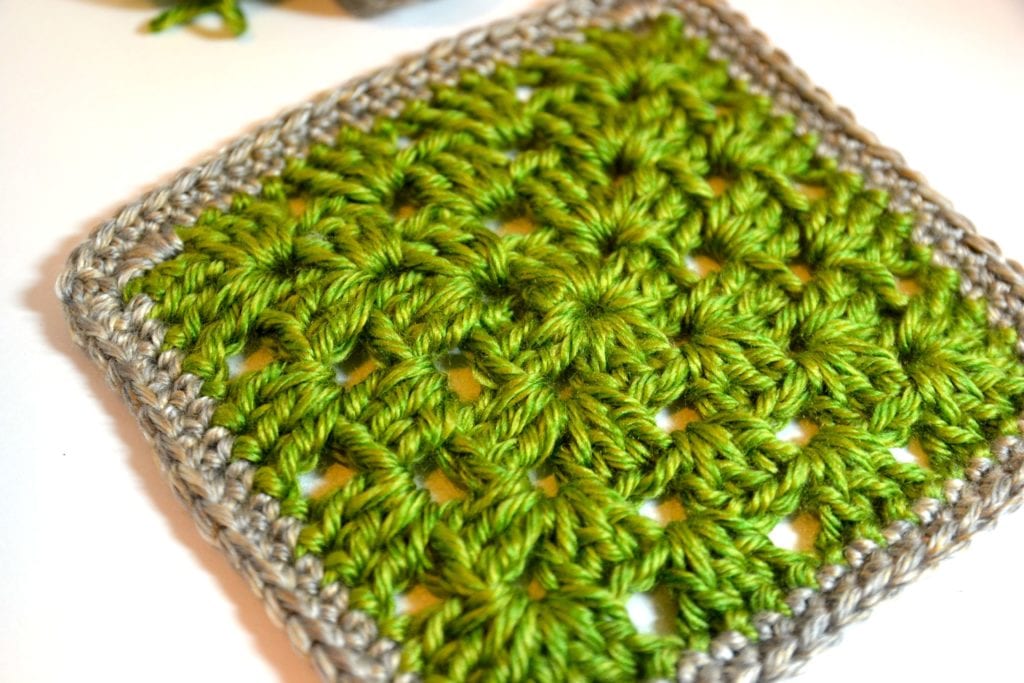
A close-up of a crochet granny square with vibrant green and subtle gray yarns, showcasing intricate patterns and textures on a light background. -Marly Bird

How to Make a Basic Beginner Granny Square

Making a granny square is relatively simple and perfect for beginners. A very common way to make a granny square is written out below and includes a stitch diagram and video tutorial.

First thing is to grab some worsted weight yarn and an I/9/5.5mm crochet hook.

Beginning Round: Start with a slip knot, then chain four and slip stitch to the first chain to create a ring.

Round 1: Chain 3 (counts as a double crochet now and throughout), 2 double crochet into the ring, *chain 3, 3 double crochet into ring {I call these 3 double crochets a ‘Granny Set'. Please make a note that these are NOT double crochet clusters. That is a completely different stitch!}; repeat from * two times more, chain 3. Join with a slip stitch to the 3rd chain of the beginning chain to complete the round. — You should have 4 granny sets (remember the first chain 3 + 2 dc counts as a granny set), and 4 chain 3 corners.

Now, we want to move our starting point of the round over to the chain 3 corner to the left. So we will work slip stitches in the top of the next 2 double crochet and in the chain 3 space to get the start of our round in the chain 3 corner. Once there you are ready to move to the next round.

Round 2: Ch 3, (2 double crochet, chain 3, Granny Set) in the chain 3 space {a corner has been made}, *(Granny Set, chain 3, Granny Set) in the next chain 3 space {another corner has been made}; repeat from * two times more. Join with a slip stitch in the 3rd chain of the beginning chain to complete the round. — You should have 8 granny sets + 4 chain 3 corners.

Again, we want to move our starting point of the round over to the chain 3 corner to the left. So we will work slip stitches in the top of the next 2 double crochet and in the chain 3 space to get the start of our round in the chain 3 corner. Once there you are ready to move to the next round.

Round 3: Ch 3, (2 double crochet, chain 3, Granny Set) in the chain 3 space, *Granny Set in space between the next two Granny Sets {this is where you are beginning to fill in the space between the corners and with each round you do the number of Granny Sets you need to work between the corners will increase by one on each side} (Granny Set, chain 3, Granny Set) in the next chain 3 space {this is the corner of the square}; repeat from * two times more, Granny Set in space between the next two Granny Sets. Join with a slip stitch in the 3rd chain of the beginning chain to complete the round.

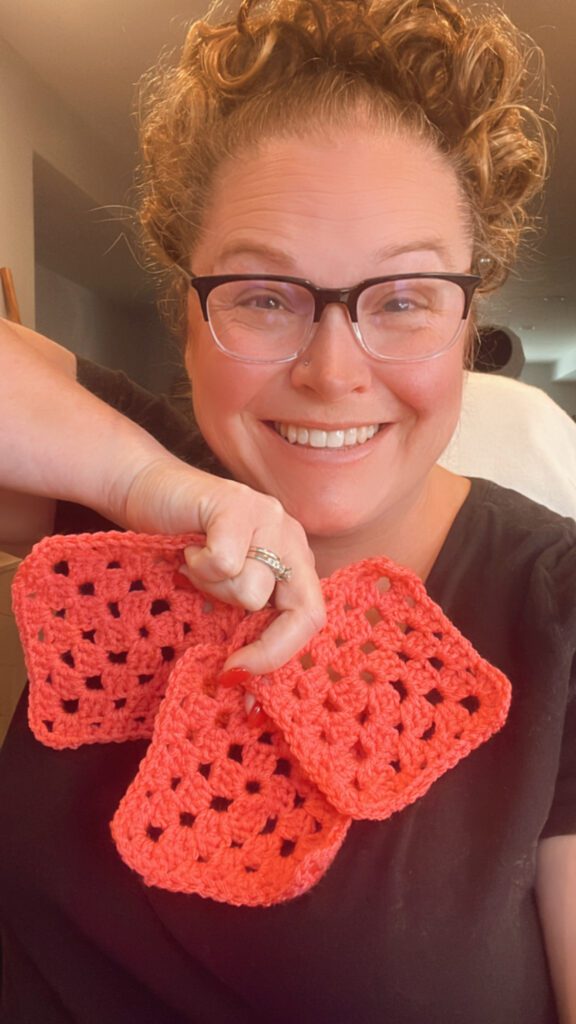
A person wearing glasses smiles while holding up three crocheted Granny Squares in a dimly lit room. They have curly hair and are wearing a black shirt. -Marly Bird
Crochet Granny Squares For Beginners

Continued Rounds: You can see by now that before each round you will need to slip stitch over to the chain 3 space to start the next round. Once there you will continue to work the rounds as follows:

Ch 3, (2 double crochet, chain 3, Granny Set) in the chain 3 space {this is the beginning corner}, *Granny Set in each space between two Granny Sets to next corner {with each round you do the number of Granny Sets you need to work between the corners will increase by one on each side} (Granny Set, chain 3, Granny Set) in the next chain 3 space {this is the corner of the square}; repeat from * two times more, Granny Set in each space between two Granny Sets to beginning of round. Join with a slip stitch in the 3rd chain of the beginning chain to complete the round.

Just repeat from the Continued Rounds for a square as large as you wish.

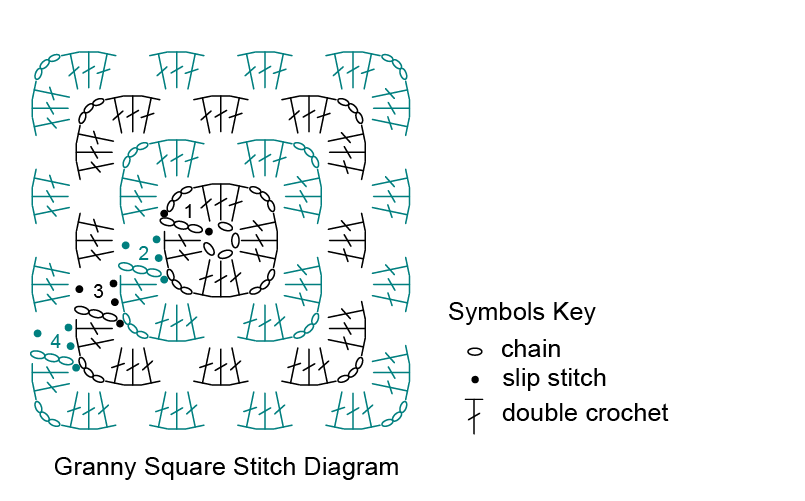
To help you understand how to do this square, here is a stitch diagram of this pattern up to round 4 and a link to a YouTube Video of my partner, Robyn Chachula, teaching how to do this square.

Diagram of a crochet granny square stitch pattern. Includes symbols: circles for chain stitches, dots for slip stitches, and T-shapes for double crochet. Arrows show stitch direction, forming a square with layered motifs. Symbols key labeled on the side. -Marly Bird

Is There More Than One Way to Make a Granny Square?

Absolutely! While the traditional granny square is a classic, there are various ways to construct the same shape. For example, above I gave you a beginner granny square pattern but here are two more granny square patterns that would create the same square shape with slightly different construction.

These different techniques and joining in the round styles create granny squares and each is a unique as the person making them.

Not only is there a plethora of ways to make a basic granny square, but you can also experiment with different stitch patterns instead of the 3 double crochet or Granny Sets. You can try puff stitches, bobbles, v-stitches, etc. Here is the Blooming Granny Square Blanket pattern that shows you just such a look.

Lastely, I think it is important to note that many people and designers call any crochet motif a granny square, not just squares that are the typical granny square look. So when you are searching for crochet motifs, be sure to include a search for granny squares because you never know what you will find.

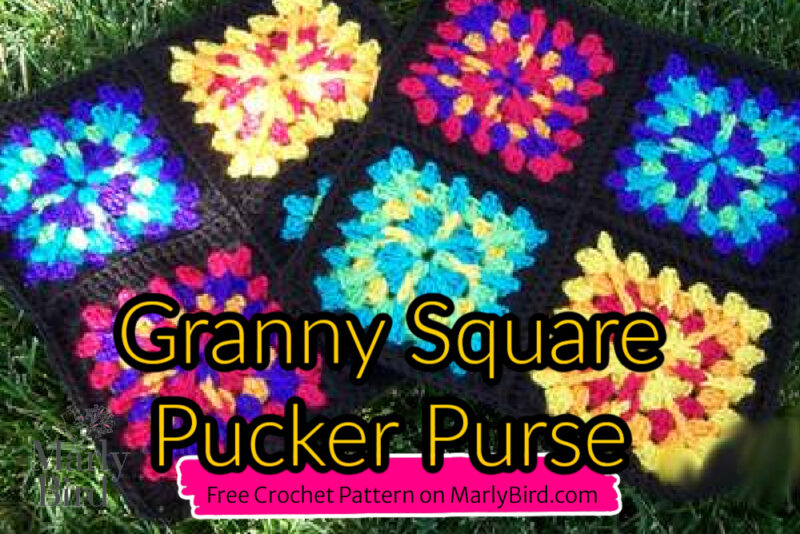
Granny Square motifs joined together to make colorful 4 motif panels for the Granny Square Pucker Purse by Marly Bird - free Crochet pattern

What Yarn and Crochet Hooks are Good for Granny Squares?

For granny squares, it's best to use medium-weight yarn, such as worsted weight, for easy handling and durability. Cotton yarn is also a great choice for those looking for a more structured finish. As for crochet hooks, a size H (5.0 mm) or I (5.5 mm) hook is typically recommended, but always check your yarn label for specific guidance.

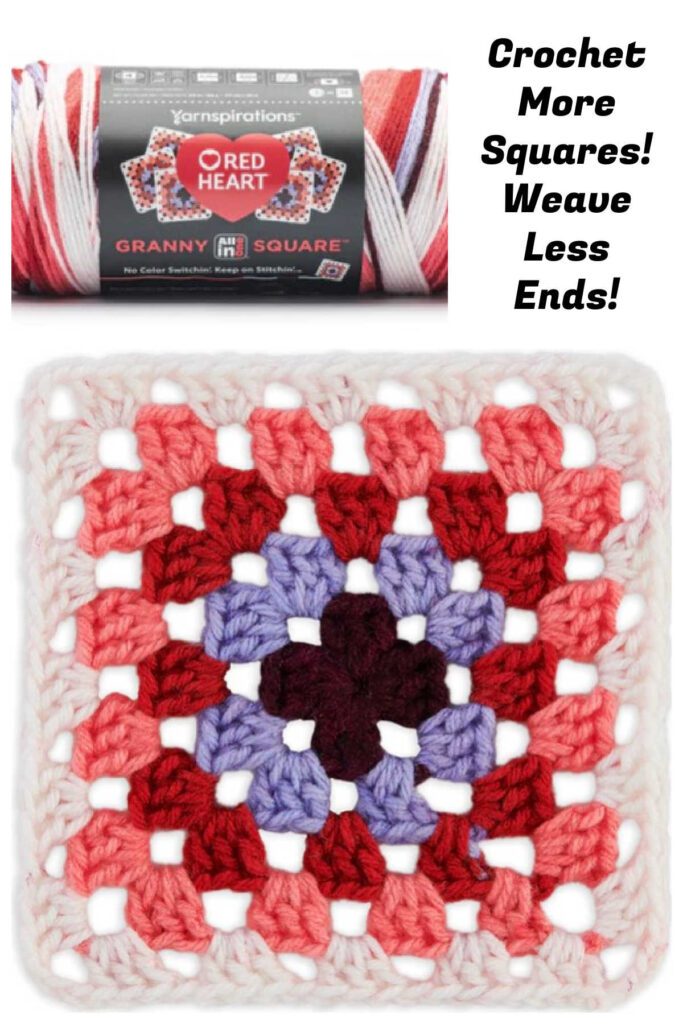
Package of color-pooling yarnspirations crochet yarn next to a completed crochet granny square in white, red, and purple hues. Text suggests additional crochet with less weaving. -Marly Bird

Something fun that is now on the market is a worsted weight yarn by Red Heart that is an All In One Granny Square Yarn. This yarn utilizes color pooling technique to get a granny square. You can learn more about that yarn here!

You Made a Crochet Granny Square Blanket, Now What?

You learned to make a crochet granny square and decided to make a blanket. Once youโ€™ve created a beautiful granny square blanket, the fun doesnโ€™t stop there!

Consider adding a decorative border, using the leftover squares to make matching pillows, or even creating smaller items like coasters and bags. The world of granny squares is full of creativity waiting to be explored!


Collage of crochet projects featuring lively granny squares, including bags, blankets, and clothing. Text reads "Make More with Crochet Granny Squares" and "45+ Free Crochet Patterns." Explore the vibrant designs showcased on Marlybird.com. -Marly Bird

Here are some creative and fun projects you can make with crochet granny squares:

1. Make More Crochet Granny Square Blanket Patterns

Nothing feels quite as cozy as a blanket made from colorful granny squares. This timeless project can be customized with your favorite colors and sizes. Itโ€™s perfect for using up scrap yarn and will brighten any space!

Here are some free blanket patterns you will love:

  • Jane's Granny Square Crochet Blanket Pattern
  • Red Heart Crochet Weekend Granny Throw Pattern
  • Red Heart Crochet Contemporary Granny Ripple Throw Pattern
  • Red Heart Crochet Checkerboard Textures Throw Pattern
  • Red Heart Pretty Patches Crochet Blanket Pattern
  • Red Heart Crochet Time To Relax Granny Throw Pattern
  • Red Heart Crochet Nouveau Chic Granny Throw Pattern โœจThis one is my favorite
  • Bernat Wavy Granny Crochet Blanket Pattern

2. Make More Crochet Granny Square Bag Patterns

Want to carry your crochet projects in style? A granny square bag is a fabulous choice. With various patterns and sizes, you can create a unique tote that showcases your personality.

Here are some more cute crochet granny square patterns you will love:

  • Red Heart Crochet Granny Square Serenity Bag Pattern
  • Crochet Granny Square Purse Pattern
  • Bernat Crochet Big Granny Tote Pattern
  • Red Heart Crochet Granny Cross-Body Bag Pattern
  • Granny Summer Bag Pattern
  • Red Heart Crochet Granny Square Bag Pattern
  • Red Heart Radiant Crochet Glowy Granny Cross Body Bag Pattern

3. Make More Granny Square Coaster Patterns

Looking for a quick project? Granny square coasters make for delightful, functional dรฉcor. They are perfect for protecting surfaces and can be whipped up in no time!

Here are some great free Granny Square Coaster patterns:

  • Red Heart Spiderweb Coasters Pattern
  • Red Heart Crochet Single Square Coasters Pattern
  • Placemat and Coasters with Trim Pattern
  • Coaster Quartet Pattern

4. Make More Granny Square Pillow Patterns

Transform your living room with a granny square pillow. These cushions can be made in any size and color combination, giving your home a cozy, handmade touch.

  • Red Heart Crochet Circle In The Square Pillows Pattern
  • Bernat Granny Hex Pillow Pattern โœจ Slightly Different But You Can Do It
  • Bernat Crochet Granny Butterfly Pillow Pattern
  • Crochet Copenhagen Pillow Pattern
  • Red Heart Crochet Circle In The Square Pillow Pattern
  • Red Heart Crochet Times Square Pillow + Crochet Blanket Pattern

5. Make More Granny Square Shawl Patterns

For those chillier days, a granny square shawl is both practical and stylish. Use larger squares for a dramatic effect or mix smaller ones for a fun, patchwork look.

Here are some wonderful granny square shawl patterns for you to enjoy

  • Granny Fade Crochet Shawl Pattern
  • Going Granny Crochet Shawl Pattern
  • Staggered Stripes Crochet Shawl Pattern
  • Caron Crochet Diamond Tile Motifs Ruana Pattern
  • Shivering Chic Shawl Pattern โœจ by Marly Bird
  • Crochet Big Fringe Triangle Scarf Pattern
  • Granny Jewel Scarf Pattern — This has a Video With It! https://youtu.be/7k4-mjEGKBA

6. Make More Granny Square Garments

Why not wear your love for granny squares? From vests to cardigans, granny square garments are on-trend and add a unique flair to your wardrobe.

  • Red Heart Crochet Granny Square Jacket Pattern
  • Patons Crochet Granny Cardigan Pattern
  • Patons Crochet Textured Granny Cardigan Pattern
  • Bernat Lattice Crochet Granny Jumper Dress Pattern
  • Red Heart Crochet Coatigan In Grannies Pattern
  • Red Heart Have A (Red) Heart Crochet Pullover Pattern
  • Bernat Crochet Flower Power Granny Poncho Pattern
  • Red Heart Crochet Two Color Granny Square Jacket Pattern
  • Caron Crochet Granny Square Cocoon Pattern
  • Patons Regent Park Granny Square Crochet Skirt Pattern
  • Red Heart Crochet Coastal Granny Halter Top Pattern
  • Marly's Granny Square Crochet Cardigan Pattern
  • Buffalo Plaid Crochet Cardigan Pattern

A vibrant collage of crochet projects featuring granny squares showcases blankets, bags, and clothing. The text reads "45+ Make More With Granny Squares Free Crochet Patterns," highlighting the colorful and creative possibilities with crochet granny squares. -Marly Bird

If you like these patterns, you will also love this related blog post on my site!

What Granny Square Project Will You Make Next?

Granny squares are not just a nostalgic piece of our crafting history; they are the gateway to creativity! With hundreds of free patterns available, there's no limit to what you can create. So grab your hook and yarn, and start exploring the delightful world of crochet granny squares. With each square you make, you're not just creating beautiful projects; youโ€™re crafting memories.

If you make one of these projects please share with me! I would love to see your work. @themarlybird on Instagram.

Also, if you found this list helpful please share with others ๐Ÿ™‚

Happy Crocheting!

Marly Bird

Marly Bird Bitmoji sliding down a rainbow

Frequently Asked Questions

I've only ever made granny square blankets… what else can I do with them?

So much! Granny squares are incredibly versatile once you start thinking beyond blankets. Bags and totes made from joined squares are beautiful and sturdy. Garments like cardigans, vests, and ponchos built from squares have a wonderful patchwork quality. Pillowcases and home decor. Coasters and pot holders as individual squares. Bunting and banners using triangles folded from squares. Wall hangings and art pieces. Granny square motifs as appliques on plain bags or clothing. The square is just the building block… what you build with it is unlimited.

Can I make clothing items from granny squares?

Absolutely! Granny square garments have been having a major fashion moment and they look stunning. A cardigan made from joined squares has a beautiful boho aesthetic. A summer top with a square bodice is light and breathable. A vest or poncho built from squares is quick to make and incredibly stylish. The key to wearable granny square garments is choosing a fine enough yarn (DK or lighter) and planning your square layout carefully before joining to make sure it fits your body the way you want.

How do I use leftover squares from past projects?

Leftover squares are treasure! A collection of mismatched squares in different colors and sizes can become a beautiful scrappy blanket… the variation is part of the charm. Individual squares make coasters, potholders, and wall art. Combine small squares into a mini bag. Sew them onto a plain tote as decoration. Frame a particularly beautiful single square. Make a few of the same square as greeting card fronts. Your leftover squares don't need to all become one thing… each square can have its own destiny!

What's the most popular granny square project beyond blankets?

Bags! Granny square bags have been enormously popular… a market bag, tote, or crossbody made from joined squares is practical, beautiful, and shows off your work every time you carry it. Market bags in particular are perfect because the slightly open granny square structure is exactly what you want for a reusable shopping bag. They stretch, they're strong enough to carry groceries, and they look amazing. And when strangers ask where you got your bag… you get to say you made it. That never gets old.

Can I mix different granny square patterns in one project?

Yes! Sampler projects that use a different square pattern for each block are incredibly popular and beautiful. The key is making sure all your squares end up the same finished size so they join neatly. If you're mixing patterns, block all the squares before joining and pin them to a consistent measurement. Mix and match colors, stitch patterns, and designs to your heart's content… the variety is what makes sampler projects so special. Every square is a little adventure.

Filed Under: Crochet, Free Patterns, Round Ups, Uncategorized

What Do You Need In A Crochet Starter Kit?

September 30, 2024 By Marly Bird Leave a Comment

Would you know where to start if you wanted to gather a crochet starter kit for beginners? We've been on the crochet wagon for a while around here, so we'd love to help you pull together your perfect kit.

We'll help you decide on a crochet hook and tell you which yarn, yarn weight, and fiber work best for beginners.

Here's a hint (it's worsted)! But there's more info to come.

So here are a few tips for gathering your own unique beginner crochet kit.

A promotional graphic for Marly Bird's "Beginner's Handy Crochet Starter Kit." The text is overlaid on an intricate crochet pattern featuring squares in various colors, including teal, blue, orange, and white. This crochet starter kit is described as a must-have for every crocheter's tool bag. -Marly Bird

Affiliate Disclosure: This post contains affiliate links. To learn more please visit my privacy policy here๐Ÿ’–

Crochet Starter Kit Basics

There are several things you just can't live without as a crocheter. We've listed here the ‘must-have' pieces for your crochet kit. We'll also let you know what's nice to have but not essential.

  • Crochet Hook – You can't crochet without a crochet hook!
  • Yarn – MUST have!
  • Scissors – For snipping yarn close to your fabric.
  • Tapestry Needle – For weaving in ends.
  • Sewing Needle – For sewing on buttons or any time you need to use thread.
  • Stitch Markers (removable) – To mark the end of a row, a specific stitch, sleeve placement, etc.
  • Tape Measure – Retractable ones are nice and neat, but a regular old-fashioned tape measure works just fine too.
  • Paper and pencil – For marking off rows and keeping count even if you get interrupted.

Now let's work down this list and give you some great options.

Whether you want to try amigurumi, granny squares, or a shawl for your first crochet project, your journey must start with a crochet hook.

Which Crochet Hook Is Best For Beginners?

Great question! And we answered this with our awesome guide to crochet hooks we shared during Bi-Crafty Bootcamp. You MUST check that out if you want the complete lowdown on crochet hooks.

We cover hook sizes, crochet hook anatomy (yes – that's a thing!), materials (what they're made of), crochet hook handles (including ergonomics), and even how to hold a crochet hook!

It's all there, so click over and check it out, but be sure to come back here to find out what else you need in your crochet starter kit.

Best Yarn For Beginner Crocheters?

Thankfully, the answer to this one is affordable and probably the most common yarn in big box stores: worsted weight acrylic yarn. Nothing fancy, just your standard smooth, solid-color yarn with several plies.

What about cotton? Though cotton yarn is usually well-plied, it has no stretch, so it's not an ideal choice for beginner crocheters.

What are plies, and why is working with plied yarn easier?

Basically, plies are the number of strands twisted together. Single-ply yarn splits very easily, and it's much harder for beginners to use for learning crochet.

2-ply yarn is a little better but still splits easily, which leads to frustration.

4 plies is probably the best since it results in a nice rounded yarn strand with more twist, so pushing your crochet hook between the plies is much harder.

Which Scissors Are Best For A Crochet Starter Kit?

I love using a pair of kid's scissors because they're small and fit nicely in my needle case. Since they don't have sharp points, they won't poke through a bag either.

You won't need a fancy pair of snips, or anything too large, just something lightweight you can safely drop in a bag.

Why Use A Tapestry Needle or Yarn Needle?

Tapestry needles have a more blunt point so they tend not to split the yarn as easily as sharp needles. Sharp needles can damage the yarn, especially if you tend to push the needle through the yarn rather than go for the gaps between crochet stitches or under yarn strands.

What Kind Of Sewing Needle Do I Need?

A sewing needle is most often used in crochet work to sew on a button or closure. A basic household general-purpose needle will do, as long as the eye end isn't too thick. Before you thread the needle, you must make sure you can get the whole needle through the hole in the button you're sewing on!

What Kind Of Stitch Markers Should I Use?

In crochet, you'll need removable stitch markers. That's not the solid ring, but the kind that can open up so you can clip them to, or hook them into, your work. There are many different kinds of stitch markers, in fact, we even have a post that shows you how to make your own stitch markers (such fun!)!

Here are a few types that we particularly like:

  • These basic plastic safety-pin-style stitch markers will work fine. Just don't squeeze them too hard or open them too far or they can snap.
  • If you love beads and don't want to make your own, these beaded and numbered stitch markers are for you. Seriously, there are so many styles you'll be spoiled for choice!
  • This set of bee stitch markers is just adorable!
  • Metal stitch markers are also great! We LOVE this set of rainbow-colored stitch markers! These simply hook through the stitches, like a paper clip. They're great for marking sleeve placement when you make a sweater.

You Need A Tape Measure To Get Gauge!

The need to get gauge is ever-present in the crochet world, especially when you get to make garments. To get gauge, you must measure and calculate your stitch and row count within a specified, measured area. Enter the tape measure.

You can get some really unusual tape measures these days, Check out what we found for you!

  • This is a really classy leather-covered tape measure. It's a real keepsake, and useful too!
  • Celebrate spring or summer with these floral tape measures.
  • And these crocheted animal tape measures are the cutest!

I actually like a ruler to measure a gauge swatch since it doesn't move.

The choice is yours. Give both a try and see which you like best

Why Do I Need Paper And Pencil?

It's always great to note what you do as you craft. If you change something, you MUST make a note, especially if you intend making the same pattern again exactly as you did the first time around.

For consistency, and sanity's sake, a better idea is to dedicate one notebook to all your notes and label it so you know where all your crochet notes are – in ONE place.

Here are some fantastic special notebooks we know you'll love:

  • Keep all your pattern notes in one place with this craft project journal.
  • I think we ALL need one of these “Stop Talking, I'm Counting” notebooks.
  • Or one of these “Post-Apocalyptic Life Skills” notebooks! Perfect!!!

Nice To Have In Your Crochet Starter Kit

Here are some bits and pieces that you may not need, but it's nice to have them handy, just in case.

Gauge measuring tool – these nifty little characters only show you an ‘L' shape of your crochet fabric so you can count stitches and rows without distraction.

Row Counter – A step up from paper and pencil (if you remember to use it). We found so many very different options for counting rows. Here are a few of the coolest:

  • What an awesome way to count rows with this mindful row counter ring.
  • Here's a sleeping kitten row counter made from wood.
  • This clicker-style row counter has a pretty mandala.
  • We think this pendant row counter is a fantastic choice!

The Perfect Crochet Bag

You need something to carry all your crochet gear so you can take it everywhere! These are some bags we love that would make amazing carryalls for your crochet starter set.

  • Here's a fantastic organizer bag for crocheters. This one has separate spots for hooks, tools, yarn, and more.
  • This option is an open top craft bag with space for hooks, yarn, and other bits and pieces. Great choice of colors!
  • Here's an awesome crocheter's tote bag with a crochet quote. You can personalize this bag with your name or as a gift. There's more colors to choose from too.
  • This one is another crochet organizer bag. It has a drop-down pocket flap for ample crochet hook storage and a boxy shape – great for fitting in lots of yarn
  • An organizer bag for crochet is a great option for yarn storage. This one has holes you can feed your yarn through to keep your ends ready when you need them. No more yarn juggling!

Best Crochet Set For Beginners

So we've covered everything there that you need in your starter kit, but if you want your kit ‘done for you,' we tracked down some ideal ready-made options for you.

If you're hunting for the best crochet kit for beginners, here are a few that might fit the bill.

  • We found an awesome beginner crochet kit on Etsy. It includes hooks, yarn, a book, stitch markers, and more.
  • Then we found more…here's another great crochet kit option including yarn, hooks, and much more!
  • This also looks like a fantastic option for a crochet kit for beginners.
  • This childrens crochet set contains all you need to make a sweet little octopus.
  • This cute turtle amigurumi beginner kit would be great for getting kids interested in crochet.

Now, what if you don't already know how to crochet? You'll need some tutorials, and we can help you with that, too!

My Marly Bird channel has a fantastic selection of YouTube videos. So, click on over there and learn to crochet to your heart's content!

Need Crochet Tutorials For Beginners?

My Crochet Slanted Shell Super Scarf is an ideal beginner project. Using bulky yarn, it'll work up pronto!

If you're an ambitious beginner and want to try a blanket, here you go. This Beginner Shells Blanket will also work up quickly!

And, here's a beginner crochet poncho to get your crochet juices flowing!

If you want more, scroll back to the top and hit the search button at the top left (the magnifying glass icon). Type in what you're looking for, and hit enter to search the whole site for more crochet fun.

Frequently Asked Questions

What yarn is best for beginners?

Honestly… the best yarn for beginners is affordable and super common: **worsted weight acrylic yarn**. Just grab some smooth, solid-color yarn with a few plies. It's perfect for learning!

What are the absolute must-haves for a crochet starter kit?

So here's the thing… you absolutely can't crochet without a hook and yarn! You'll also definitely want scissors for snipping, a tapestry needle for weaving in those ends, and a sewing needle for buttons. Oh, and stitch markers and a tape measure are super handy!

Why are plies important when choosing yarn?

Yes! Plies are basically the number of strands twisted together. Yarn with fewer plies, like single-ply, can split really easily… which is super frustrating when you're just starting out. Aim for something with more plies, like 4, for a nice rounded yarn that's much easier to work with.

What kind of scissors should I use?

Honestly… you don't need anything fancy! I actually love using a pair of kid's scissors because they're small and safe to toss in a bag. Just make sure they're lightweight and can snip yarn cleanly.

What's the deal with needing paper and a pencil?

It's always a good idea to jot down notes as you craft, especially if you make any changes to a pattern! …Keeping all your crochet notes in one dedicated notebook is a sanity saver… plus, it ensures you can recreate that amazing thing you made again!

Filed Under: BiCrafty Bootcamp Learn to Crochet, Crochet, Tips, Tricks, Techniques for Knitting and Crochet, Uncategorized

Sparkle Up Your Fall with This Irresistible Crochet Pumpkin Pattern!

September 27, 2024 By Marly Bird

The Sparkle Crochet Pumpkin is a free crochet pattern designed by Marly Bird… beginner-friendly, worsted weight, and ready to display in about 2โ€“3 hours. ๐ŸŽƒ Perfect for Halloween decor, a last-minute gift, or your fall mantel โ€” this sparkly little pumpkin works up so fast you could finish it before trick-or-treaters ring the doorbell. Updated: August 2026

โšก Quick Answer: How long does this pumpkin take to crochet?

About 2โ€“3 hours with worsted weight yarn and a 5mm hook. Perfect for a last-minute Halloween accent!

๐Ÿ’ก More of a knitter? Try these 25+ free knit Halloween decorations โ€” there are gorgeous knit pumpkin patterns in the mix! ๐ŸŽƒ

If you are a fan of holiday decor, you will love these patterns Crochet Holiday Barrett, Knit Pumpkin Patch, Crochet Mitten Garland, All Buttoned Up Wine Bottle Cozy, Crochet Mini Stocking Ornament or Gift Card Holder, and a variety of Christmas Stockings 1. Crochet 2. Knit 3. Knit and an entire course to design your own Merry Stitchmas (for crocheters AND knitters!)!

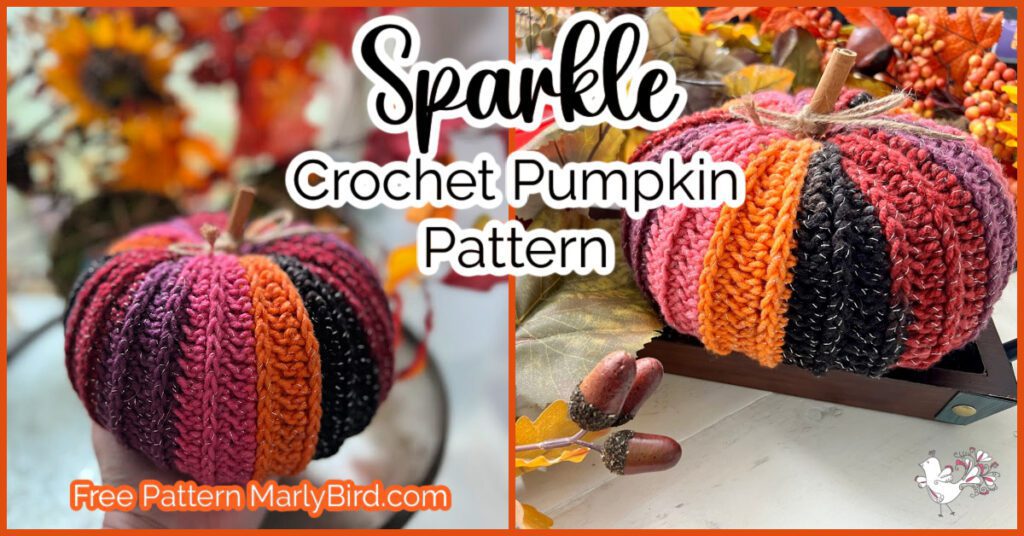
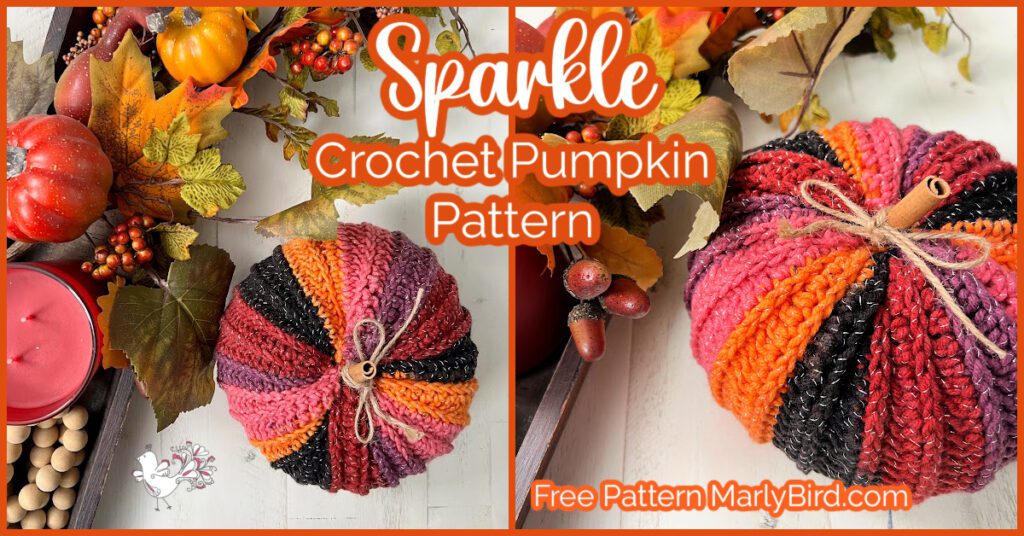
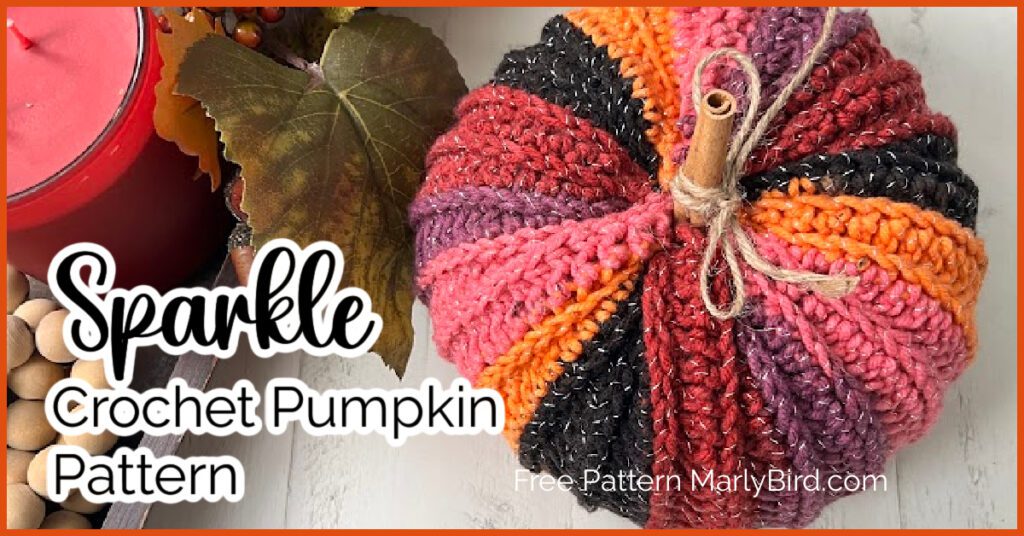
A vibrant crochet pumpkin featuring alternating stripes of bright red, orange, purple, and black yarn is showcased among autumn decorations. Text overlay reads "Sparkle Crochet Pumpkin Pattern" and "Free Crochet Pumpkin Pattern MarlyBird.com". -Marly Bird

Affiliate Disclosure: This post contains affiliate links. To learn more please visit my privacy policy here๐Ÿ’–

Why Crochet Pumpkins Are Perfect for Fall Decor

Crochet pumpkins are the quintessential fall accessory. Not only do they bring a warm, handcrafted touch to your seasonal decorations, but they also make for delightful gifts or festive accents around your home. Their versatility allows you to play with colors, sizes, and textures, making them a favorite among crochet enthusiasts.

Creative Ways to Use Your Crochet Pumpkins

Once your pumpkins are complete, there are so many fun ways to use them! Place them on your mantel, use them as table centerpieces, or even gift them to friends and family. They make wonderful, festive additions to any fall decor.

A split image showcases a vibrant crochet pumpkin pattern in autumn colors (red, orange, black, and pink) with a bow on top. It's artfully displayed among fall decor including artificial leaves, berries, and small gourds. Text reads "Sparkle Crochet Pumpkin Pattern" and "Free Pattern MarlyBird.com". -Marly Bird

How to Customize Your Crochet Pumpkin

Get creative with your pumpkins! Whether you want to use different colors or add unique embellishments, thereโ€™s no limit to how you can personalize your project. Try different yarn textures or add little fall-themed decorations to make each pumpkin your own.

โœจ If you enjoy holiday smells, you can also add a little bit of scented oil or potpourri to the stuffing to have your pumpkin be a little aromatic.

Tips for Achieving the Perfect Pumpkin Shape

Creating a perfect pumpkin shape involves more than just following a pattern. Here are a few tips to ensure your pumpkin turns out just right:

  • Stuff Evenly: Make sure to stuff your pumpkin evenly to avoid lumps and bumps.
  • Adjust Shape: Use a yarn needle to adjust the shape as needed while youโ€™re stuffing and closing.
  • Finishing Touches: Adding a little jute twine or a cinnamon stick as a stem can give your pumpkin a rustic, charming look.
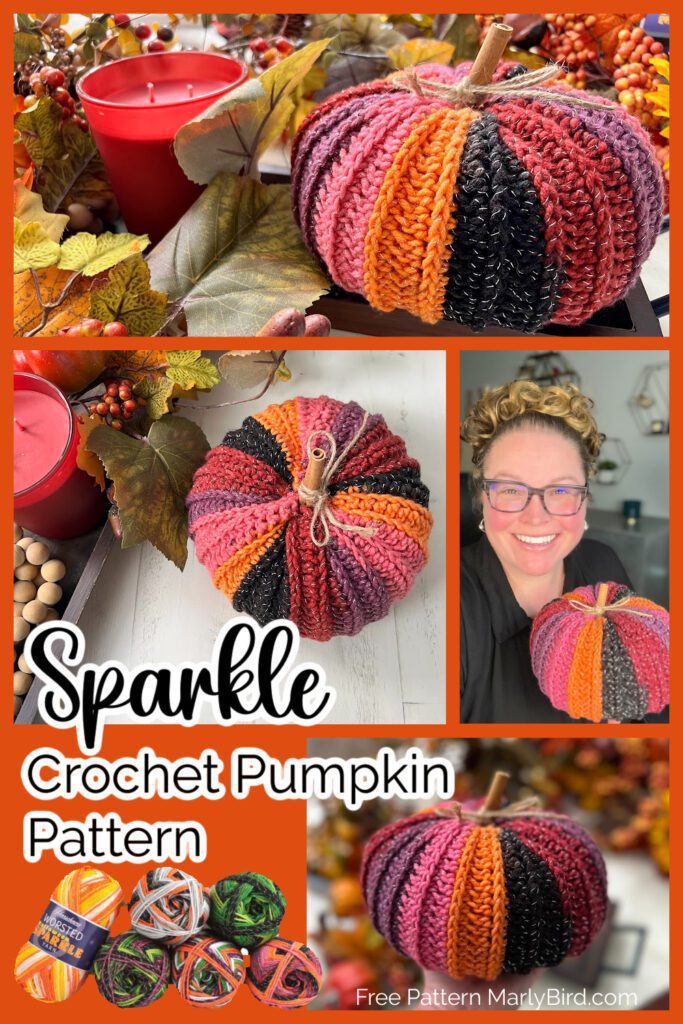
Advertisement for the "Sparkle Crochet Pumpkin Pattern" featuring a multi-colored crocheted pumpkin. The image includes yarn balls, a candle, autumn leaves, and a person holding the crocheted pumpkin. Text highlights a free crochet pumpkin pattern available at MarlyBird.com. -Marly Bird

Common Mistakes to Avoid When Crocheting Pumpkins

Even the best of us make mistakes, so here are some common pitfalls to watch out for:

  • Overstuffing: Too much stuffing can distort the shape of your pumpkin.
  • Stitches Too Big: Using a hook that is too big for the yarn and making really loose stitches will cause your pumpkin fabric to have holes. Avoid this by using an appropriate sized hook.
  • Skipping Rows: Be sure to create a fabric that is long enough to maintain the correct proportional shape or your crochet pumpkin.
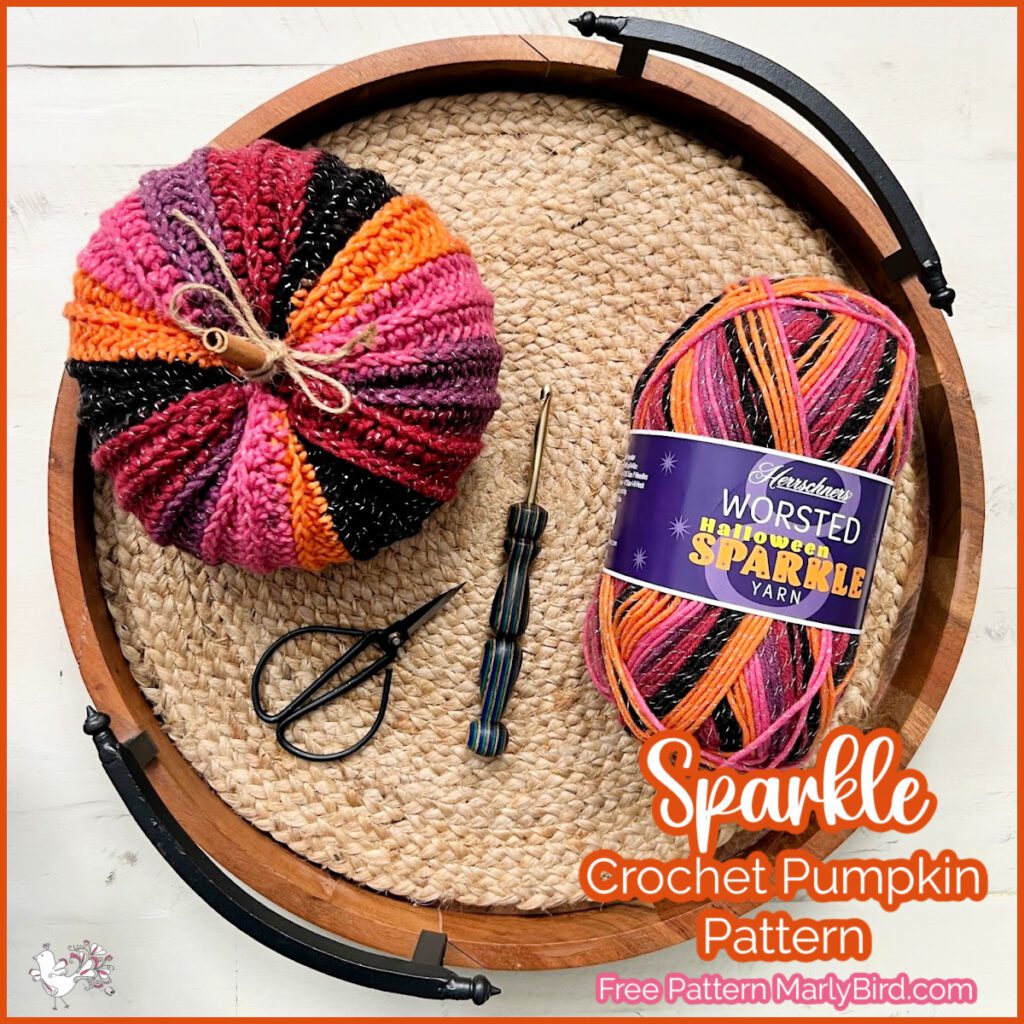
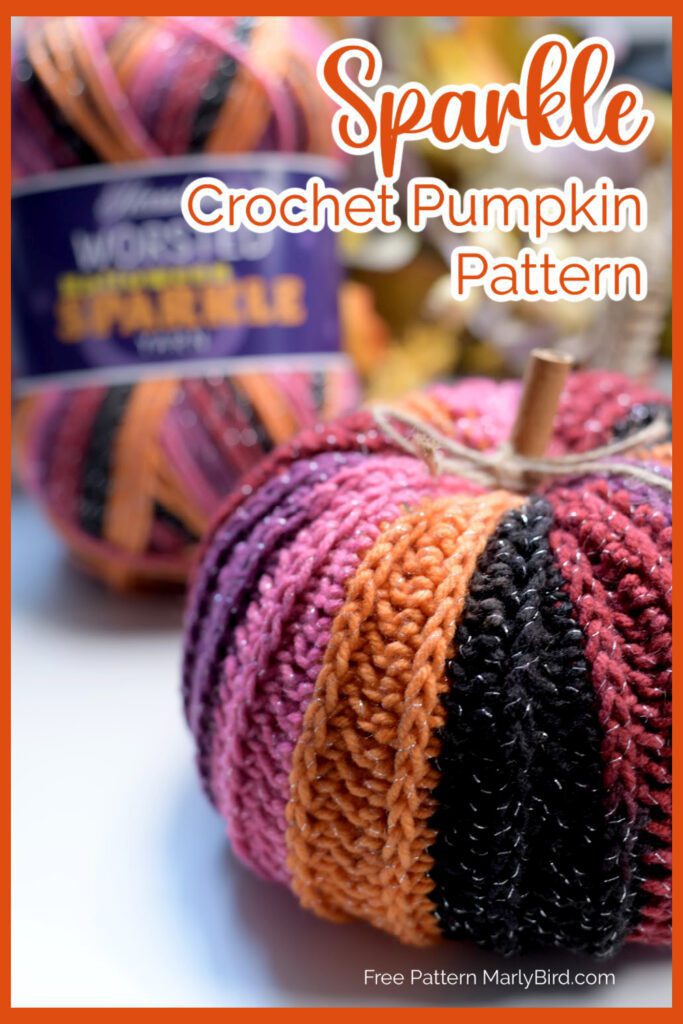
A round woven tray holds a crochet pumpkin in shades of pink, orange, and black, a pair of scissors, a crochet hook, and a skein of variegated yarn labeled "Worsted Show Your Shine Sparkle Yarn." Text on the image reads, "Sparkle Crochet Pumpkin Pattern," showcasing Marly Bird's free crochet pumpkin pattern. -Marly Bird

Quick List of Materials Needed for Your Sparkle Crochet Pumpkin Project

To get started on this sparkling autumn delight, hereโ€™s what youโ€™ll need:

  • Yarn: Herrschners Worsted Halloween Sparkle Yarn – This yarn is perfect for adding a bit of sparkle to your pumpkin with its metallic thread.
  • Crochet Hook: Size J/10 (6mm), or as recommended for your yarn.
  • Fiberfill: For stuffing your pumpkin to give it that lovely plump shape.
  • Tapestry Needle: For weaving in those ends and making your project look polished.
  • Scissors: Essential for trimming yarn.
  • Optional: Cinnamon stick, tine, and leaf embellishments.

โœจ Designer Tip: Yarn Swap for the Sparkle Pumpkin

I used Lion Brand Pound of Love in Pumpkin for another version of this and it's exactly the right orange… and the price is right for a seasonal project. ๐ŸŽƒ You get a ton of yardage too, so you can make a whole pumpkin patch from one skein!

Add This Sparkling Pumpkin to Your Ravelry Queue!

Weโ€™d love to see your beautiful crochet pumpkins come to life! If you enjoyed this pattern, please take a moment to favorite it and add it to your Ravelry queue. Favoriting helps others discover this charming project and lets us know youโ€™re excited about it. Plus, adding it to your queue keeps it easily accessible for when youโ€™re ready to dive into your next fall crochet project.

Favorite This Pattern on Ravelry - Marly Bird
A crocheted pumpkin in vibrant shades of orange, pink, red, purple, and black with a cinnamon stick stem is on display. The pumpkin is accompanied by an orange candle and autumn leaves. Text overlay reads, "Sparkle Crochet Pumpkin Pattern. Free Crochet Pumpkin Pattern MarlyBird.com. -Marly Bird

Step-by-Step Guide to Crocheting a Pumpkin – Free Crochet Pumpkin Pattern

SPARKLE CROCHET PUMPKIN

Designed by Marly Bird

SKILL LEVEL

Easy

MEASUREMENTS

Finished Measurements

Pumpkin is 10โ€ [25.5 cm] wide by 24โ€ [609.5 cm] long, before shaping into a pumpkin. 

Gauge 

12 hdc by 8 rows = 4โ€ [10 cm] x 4โ€ [10 cm]; use any size hook to obtain the gauge. 

MATERIALS

Crochet Yarn 

Herrschners, Worsted Halloween Sparkle Yarn ( 92% acrylic/8% polyester, 489 yd / 448m, 8 oz / 226g, CYCA# 4 worsted) : Sorcerer, 1 ball

Crochet Hook

Size J/10 [6.0 mm]

Notions 

Tapestry needle, Fiber Fil Stuffing, Stitch Marker, Cinnamon Stick (optional), Twine (optional)

ABBREVIATIONS

Ch – Chain(s) 

Hdc – Half Double Crochet

RS – Right Side 

Sc – Single Crochet

Sl st – Slip Stitch

St(s) – Stitch(es)

WS – Wrong Side

SPECIAL STITCHES 

โญ๏ธThird Loop: Also known as middle or back bar. Horizontal strand located under the top 2 loops.. When working in turned rows the third loop is on the front side of the fabric facing you.

NOTES

  • The crochet pumpkin is crocheted flat then seamed together to form a pumpkin shape.
  • Gauge is not critical for this project.

VIDEO TUTORIAL

  • Sparkle Crochet Pumpkin >> Click Here for Video Help <<

GROW

To Unlockย Exclusive Subscriber Contentย click the Box below and join for free by simply adding your email and creating a password! If you are having troubles, clear your cache or reset your password or login to the Grow Publisher Portal.

>> Learn More About Grow Here <<

I'm thrilled to share this amazing pattern with you, many patterns on my blog are absolutely free! I kindly request that you don't copy and paste or distribute this pattern. Prefer an ad-free experience? Buy a digital PDF pattern for a small fee from one of my online stores for a seamless crafting journey. 

I appreciate your support and readership. You are the reason I can keep doing what I love and sharing it with others. So, thank you from the bottom of my yarn-loving heart! Disclosure: This post contains affiliate links, meaning I get a commission if you decide to make a purchase through my links at no cost to you.

Image showing a crocheted pumpkin made with yarn in alternating stripes of orange, black, and pink, presented on a white surface. In the background, there is a skein of similarly colored yarn. The text on the image reads "Sparkle Crochet Pumpkin Pattern" and "Free Crochet Pumpkin Pattern by Marly Bird. -Marly Bird

SPARKLE CROCHET PUMPKIN PATTERN

Chain 31.

Row 1 (WS): Sc in 2nd ch from hook and in each ch across, turn — 30 sc.

Row 2 (RS): Ch 2 (does not count as a st), hdc in each sc across, turn.

Row 3: Ch 2 (does not count as a st), hdc in the third loop of each hdc across, turn.

Repeat row 3 until project measures 24″ [609.5 cm] long or to desired length. End on a RS row, turn.

Joining Row: Fold project so beginning foundation chains and last row are touching, sl st in the third loop of the first st on the last row and the first ch on the foundation at the same time, *sl st in the third loop of the next st on the last row and next ch on the foundation at the same time; repeat from * across, fasten off with extra long tail for weaving.

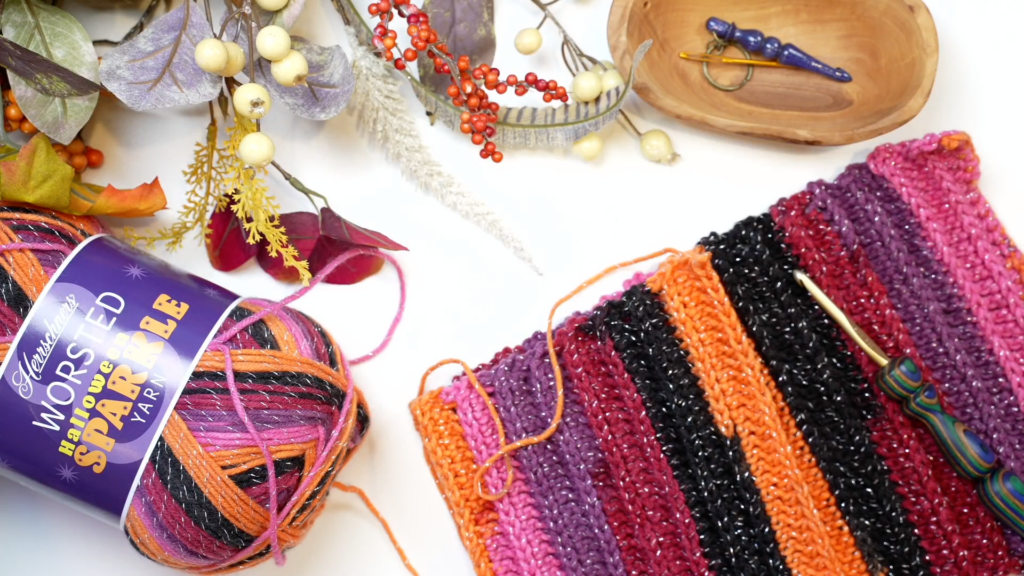
A colorful crochet project with stripes of orange, pink, purple, and black yarn lies partially completed on a white surface. Nearby, a skein of multicolored yarn, autumnal foliage, berries, crochet hooks, and a wooden dish with other crochet tools are arranged neatly next to a crochet pumpkin pattern. -Marly Bird

FINISHING

Weave tail along the edge of the project through the row ends. Pull tail tightly to cinch edge together. Weave in end to reinforce cinched edge.

Turn project inside out to form bowl. Fill pumpkin with fiber fill to desired feel.

Using the tapestry needle weave another strand of yarn through the opposite end along the row ends. Pull tightly to cinch edge together. Weave in to reinforced cinched edge. Pull needle from the top to the bottom and the bottom to the top of the pumpkin to create a slight indent. Weave in ends to secure and fasten off.

Optional: Insert Cinnamon stick into center of pumpkin, tie twine around stitch and tie a bow .

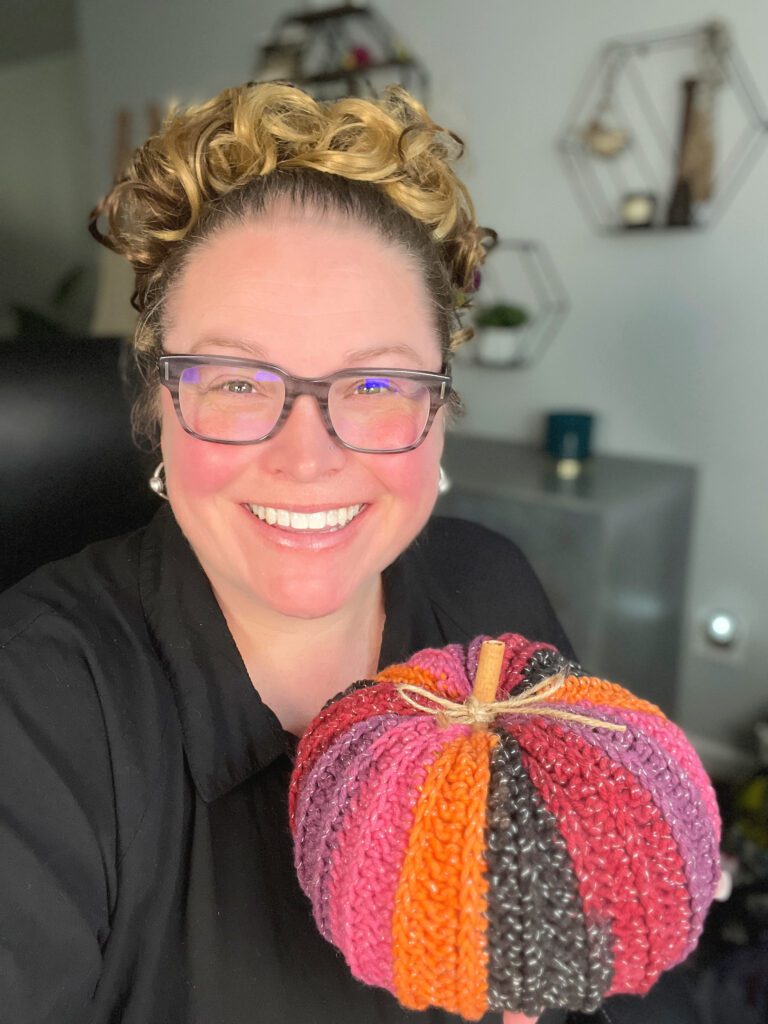
A person with glasses and curled hair, smiling and holding a crocheted pumpkin that features sections of red, orange, yellow, and black. The background includes geometric wall decor and various items on a shelf. -Marly Bird

How to Care for and Maintain Your Handmade Crochet Pumpkin

To keep your crochet pumpkin looking fresh:

  • Store Carefully: Keep it in a dry place away from direct sunlight. I prefer to store my items in a sealed plastic bin. And, a little tip, I add a dryer sheet or two to the bin to keep it smelling nice.
  • Spot Clean: If needed, spot clean gently to maintain its sparkle!

Frequently Asked Questions: Sparkle Crochet Pumpkin

What size does the Sparkle Crochet Pumpkin work out to?

This pumpkin starts as a flat panel 10″ wide by 24″ long, which cinches into a plump pumpkin shape when assembled. The finished size varies a bit depending on your tension and how much fiberfill you use… most crafters get a pumpkin that sits about 4โ€“5″ tall. A perfect tabletop accent!

What yarn weight do I need for this crochet pumpkin pattern?

Worsted weight yarn (CYCA #4) is what the pattern calls for, with a size J/10 (6mm) hook. The original uses Herrschners Worsted Halloween Sparkle Yarn for that festive metallic shimmer… but any worsted weight works great. I love Lion Brand Pound of Love in Pumpkin as an easy-to-find swap!

Can a beginner make this crochet pumpkin?

Yes! The Sparkle Crochet Pumpkin is rated Easy. The main stitch is the half double crochet worked in the third loop, which creates that beautiful ridged texture. If you can chain and work basic stitches in rows, you can make this pumpkin. The assembly (cinching and stuffing) is the trickiest part… but the pattern walks you through every step, and there's a video tutorial too!

How do I stuff the crochet pumpkin?

Use polyester fiberfill and add it gradually as you cinch the edges together with your yarn tail. Fill it enough to get a nice rounded shape without overstuffing (too much stuffing distorts the silhouette). Once stuffed, use your tapestry needle to pull a strand of yarn from top to bottom through the center… that's what creates the classic pumpkin indent! ๐ŸŽƒ

Can I make this crochet pumpkin in different sizes?

Absolutely! Make the flat panel longer for a bigger pumpkin, or shorter for a mini version. You can also go up a hook size or switch to bulky yarn for a chunkier look. Just keep the stitch count at 30 stitches wide and adjust the length to your liking. Make a whole pumpkin patch in different sizes… they look amazing grouped together on your mantel! ๐ŸŽƒ

A vibrant crochet pumpkin featuring alternating stripes of bright red, orange, purple, and black yarn is showcased among autumn decorations. Text overlay reads "Sparkle Crochet Pumpkin Pattern" and "Free Crochet Pumpkin Pattern MarlyBird.com". -Marly Bird

๐ŸŽƒ More Halloween Crochet and Knit Patterns

Love making Halloween decor? Here are more of my favorites to add to your queue…

๐ŸŽญ 100+ Knit and Crochet Costumes for Dress-Up โ€” from tiny trick-or-treaters to fun adult costumes, BiCrafty style.

๐Ÿ•ท๏ธ 150+ Free Halloween Crochet & Knit Decorations โ€” your one-stop Halloween pattern roundup with knit AND crochet options for every skill level.

Time to Make Your Own Crochet Pumpkin

I hope youโ€™re as excited as I am to crochet this dazzling pumpkin! Itโ€™s a wonderful way to celebrate the season and add a personal touch to your home decor. Donโ€™t forget to share your finished pumpkins with usโ€”use #mmmdi or #MarlyBird to show off your creations!

Here are some more Holiday Decor Patterns for you to enjoy.

Make sure to subscribe to our blog for more fun and festive crochet projects!

Happy crocheting, everyone!

Marly Bird (Your BiCrafty Bestie) ๐ŸŽƒโœจ

Filed Under: Crochet, Free Patterns, Our Free Patterns, Pattern, Uncategorized

JOANN Fall Stitch Along 2024 – Knit Cocoon Cardigan with…

September 23, 2024 By Marly Bird Leave a Comment

I'm so excited! You're going to love this…it's time to announce the annual JOANN 2024 Fall Stitch Along!

Drum roll, please…

But before I tell you what we're making, let me tell you there's something for both knitters and crocheters. They are different project types, but no matter which you choose, you'll have fun. I'm sure of it.

I'll take care of the knitting project and Dani, from CJ Design will be helping the crocheters. We all get to join in the fun.

If you like these stitch alongs, check out some of the past events:

  • 2023 JOANN Spring Stitch Along
  • 2022 JOANN Fall Stitch Along
  • 2021 JOANN O'Go Stitch Along
  • 2020 JOANN Stitch Along
Colorful knit and crochet projects with yarn balls, highlighting stitch detail and soft BERNAT Puffs yarn for home decor.
[Read more…]

Filed Under: Free Patterns, Make-Alongs, Pattern, Uncategorized

  • « Previous Page
  • 1
  • …
  • 11
  • 12
  • 13
  • 14
  • 15
  • …
  • 22
  • Next Page »

Let's Be Social

Join the Marly's Minions Facebook group to share, ask questions, or chat about all of your yarn related crafts!

Join the group
Cartoon of a smiling woman with brown hair in a bun, glasses, black jacket and green shirt, waving next to large "hi" text.

Quick Links

The Pattern Shop

Our Free Patterns

Blog

Marly Bird House

Learn to Knit & Crochet

About

Giveaway Terms and Privacy Notice

Find Us Everywhere

Join the Newsletter

YouTube Channel

Marly's Minions FB Group

Etsy Store

Ravelry Store


AN ELITE CAFEMEDIA HOME/DIY PUBLISHER

Information from your device can be used to personalize your ad experience. Do not sell or share my personal information.

Privacy Policyย  ย Termsย  ย Marly Bird Legal Documents Copyright © 2026