Search
Close
  • The Pattern Shop
  • Our Free Patterns
    • Browse All Our Free Patterns
    • Our Free Knitting Patterns
    • Our Free Crochet Patterns
  • Blog
    • All Blog Posts
    • All Free Patterns
    • Dibble Dabble Inspiration
    • Giveaways
    • Make-Alongs
    • Product Reviews
    • Roundups
    • Tips, Tricks, Techniques for Knitting and Crochet
Stylized bird with pink and gray swirling tail above elegant โ€œMarlyโ€ text, logo for crochet accessories and home decor.
  • Marly Bird House
  • Learn to Knit & Crochet
    • Newbie? Start Here
    • Video Tutorials
    • Knitting Definitions
    • Crochet Definitions
    • Common Techniques
    • Size Charts for Knitting and Crochet Projects
  • About
ร—
  • The Pattern Shop
  • Free Patterns
  • Blog
  • Marly Bird House
  • Learn to Knit & Crochet
    • Newbie? Start Here
    • Video Tutorials
    • Knitting Definitions
    • Crochet Definitions
    • Common Techniques
    • Size Charts for Knitting and Crochet Projects
  • About
Stylized bird with pink and gray swirling tail above elegant โ€œMarlyโ€ text, logo for crochet accessories and home decor.
Search
Close

New Patterns NOW Available in Ad-Free PDF! Check out The Pattern Shop

6th Annual Marly Bird Turkey Trot Make-Along 2024! ๐Ÿ‚

November 14, 2024 By Marly Bird 12 Comments

๐Ÿ‚ Welcome to the 6th Annual Marly Bird Turkey Trot Make-Along 2024! ๐Ÿ‚ Get Ready to Craft Something Cozy for the Holidays! ๐Ÿงถโœจ

Get ready to cozy up with your yarn and needles because this yearโ€™s Turkey Trot 2024 is taking you to Stars Hollow! Inspired by our favorite duo, the Lorelai Knit Vest and Sookie Crochet Cardigan bring you the perfect blend of style, charm, and a dash of quirkiness. Whether you're planning a relaxed holiday season in classic Gilmore style or diving into your own small-town spirit, these pieces will become instant wardrobe favoritesโ€”and yes, they both have pockets! ๐Ÿ˜‰

๐Ÿ“Œ Looking for the complete standalone patterns?
Both the Sookie Crochet Cardigan and the Lorelai Knit Vest are now available as complete standalone free patterns… one blog post, one pattern, start to finish. No more hunting across six lesson pages! The original lesson-by-lesson pages are still live below for anyone who wants to revisit the event-paced walkthrough.

๐Ÿงถ Sookie Crochet Cardigan โ€” Free Crochet Cardigan Pattern (XS-5X)
๐Ÿงต Lorelai Knit Vest โ€” Free Knit Vest Pattern
A collage of a smiling person proudly displaying vibrant knitted and crocheted garments, highlighted by a central logo for the 2021 Knitting & Crochet Make-Along with a yarn design, brought to life with Marly Birdโ€™s signature flair. -Marly Bird

Affiliate Disclosure: This post contains affiliate links. To learn more please visit my privacy policy here๐Ÿ’–

Starting November 22, join Marly Bird and Robyn Chachula for ten days of free patterns, step-by-step video tutorials, and endless community support as we stitch our way to finished pieces just in time for the holidays. With two project options, a VIP Silver Platter experience, and a group of enthusiastic crafters cheering each other on, the Turkey Trot 2024 is here to make your crafting season unforgettable.

Looking Back at Turkey Trots Past ๐Ÿฆƒโœจ

The Marly Bird Turkey Trot Make-Along has a rich history, filled with unforgettable projects, shared memories, and a vibrant community of crafters who look forward to it every year! Over the past six years, we've created cozy wearables, from ponchos and cowls to slippers and shawls, each designed to keep you warm and stylish for the holiday season. Every Turkey Trot has its own special flair, and these projects have become favorites in many of your wardrobes (and gifting lists!) ๐Ÿงถ๐ŸŽ

If you're new to the Turkey Trot, take a peek at some of our past projects to see the variety, skill-building, and joy that make this event so special. And for all the returning Trottersโ€”welcome back! Your enthusiasm keeps this tradition alive and thriving year after year.

  • Hand-crocheted striped top with purple, pink, orange, and brown rows, short sleeves, and off-center brown buttons on the front.
  • Tunisian crochet short-sleeve sweater in blue and gray, with lacy textured stitches, shown flat on a white wooden surface.
  • Four triangular, hand-knitted shawls with intricate stitch patterns and varied colors, displayed on mannequin shoulders.
  • Colorful crocheted baby booties with purple, pink, and yellow stripes, black button eyes, and textured stitch detail shown close up.
  • Thick slipper boots in a plaid Tunisian crochet, beige-orange-yellow, with two wooden buttons on each ankle; worn on feet.
  • Purple open-front crochet cardigan with short sleeves, front pockets, and textured stitch detail on a dress form.
  • Crocheted gray scarf with lace textures, pocket detail, and visible Tunisian crochet stitches shown in close-up on a mannequin.
  • Smiling woman models two asymmetrical ponchos: blue-and-white striped crochet, and Tunisian gray with yellow and lace stripes.

๐Ÿฆƒ What is the Marly Bird Turkey Trot Make-Along?

This yearโ€™s Turkey Trot includes free patterns on the Marly Bird website, but thatโ€™s just the beginning! New pattern instructions will be released every other day, plus there are video tutorials available on the Marly Bird YouTube Channel to guide you through every stitch and skill youโ€™ll need.

Join Marly Bird and Robyn Chachula as they walk you through these patterns, offering tips, tutorials, and support to help you complete your cozy fall project with confidence.


๐Ÿงถ Yarn Choices: Pick Your Perfect Colorway!

For this yearโ€™s Turkey Trot, weโ€™re collaborating with Herrschners to make your yarn selection simple and seamless. Choose between Red Heart Roll With It Melange or Lion Brand Ferris Wheelโ€”both known for their stunning long color changes and fantastic color selection.

  • Three multicolored skeins of Red Heart "Roll With It Mรฉlange" yarn stacked, showing soft texture and vibrant color blending.
    Click to Order Roll With It Melange
  • Skein of Lion Brand Ferris Wheel yarn with blue, pink, green, yellow, and purple gradient; soft texture for knitting or crochet.
    Click to Order Ferris Wheel
Check Out Herrschners Here

๐Ÿ†“ Get Free Shipping on any order more than $35 until 11/25/24 use code – JOYFULSHIP

Herrschners has prepared all the yarn youโ€™ll need in just the right amounts to make sure you have what you need, stress-free.

NEED TO KNOW HOW MUCH TO ORDER?

Get the full supply list by signing up below! ๐ŸŽ‰


๐Ÿ“… Pattern Release Schedule (Thanksgiving Feast Edition) and Pattern Lesson Links

Weโ€™ll be serving up each part of the pattern over the course of the event, just like a Thanksgiving meal! Hereโ€™s whatโ€™s on the menu:

  • Appetizer (Day 1): November 22 (links are live at 10 am ET)
    • Crochet Lesson 1
    • Knitting Lesson 1
  • Soup & Salad (Day 2): November 24
    • Crochet Lesson 2
    • Knitting Lesson 2
  • Main Course (Day 3): November 26
    • Crochet Lesson 3
    • Knitting Lesson 3
  • Sides Galore (Day 4): November 29
    • Crochet Lesson 4
    • Knitting Lesson 4
  • Dessert (Day 5): December 1
    • Crochet Lesson 5
    • Knitting Lesson 5 – video delayed and should be made available Dec. 3.
  • Leftovers (Final Touches, Day 6): December 2
    • Crochet Lesson 6 – – I am working on getting the video uploaded now
    • Knitting Lesson 6 – video delayed and should be made available Dec. 4.

Each pattern release will guide you through a new part of your project, building excitementโ€”and stitches!โ€”along the way.

A woman poses in four different knitted and crocheted outfits, smiling in each. She wears glasses and her hair is up. The center features a logo with a turkey design and text: "2021 Knitting & Crochet Make-Along. -Marly Bird

๐ŸŽ‰ Two Ways to Join the Fun of Turkey Trot 2024

Whether youโ€™re here for the free experience or craving something extra with the VIP Silver Platter, weโ€™ve got options for every crafter!

๐Ÿ†“ Free Version Turkey Trot 2024

Enjoy the patterns at no cost by joining the event (see form below) and also subscribing to Grow (see instructions below at sign up) for access to each release. Hereโ€™s what you get in the free version:

  • Written Patterns (viewable on the blog and supported by ads)
  • Video Tutorials to walk you through each section
  • Community Support in the Marly Bird BiCrafty Community on Facebook, where you can share progress, ask questions, and connect with others

A person wearing glasses and a handmade knit vest poses in three images. Another image shows a close-up of the vest lying flat, highlighting the pattern. The text at the bottom reads "ONLY KNITTING. -Marly Bird
A person models a colorful crocheted cardigan in various poses, smiling and showcasing the garment's details. The bottom panel shows the cardigan laid flat. Text at the bottom reads "ONLY CROCHET." The setting is a home with plants in the background. -Marly Bird

โญ๏ธ VIP Silver Platter: Your Best Buy โญ๏ธ

If you want the ultimate experience, the VIP Silver Platter is where the magic happens! Just like a full Thanksgiving spread, the VIP option offers everything you needโ€”plus some exclusive โ€œdessertsโ€ you wonโ€™t find anywhere else! Choose from:

Click Here to Get VIP
  • Only Crochet: Access to all crochet patterns, videos, and bonuses
  • Only Knitting: Access to all knitting patterns, videos, and bonuses
  • โญ๏ธ BiCrafty (BEST VALUE): The ultimate package, with both knitting and crochet content!
Collage featuring various elements of the BiCrafty Collection, including video tutorials, written instructions, and a live Q&A. Highlights colorful photos, an online platform, and bonus patterns, with emphasis on crochet and knitting projects. -Marly Bird

The Turkey Trot 2024 VIP Silver Platter experience offers:

  • Downloadable Ad-Free PDF Patterns for easy, offline access
  • Crochet Stitch Diagrams or Full Knitting Charts with Stitch Fiddle Links for each size
  • Row-by-Row Check Sheets for each size (knit)
  • Exclusive Bonus Patterns (2 surprise projects for each craft!)
  • Live Q&A Sessions with Marly (for knitters) and Robyn (for crocheters)
  • Access to the Marly Bird House for all VIP content, giving you organized, ad-free, unlimited access

With the VIP Silver Platter, you have everything organized in one place so you can focus on what matters: the joy of creating!

Be Our Guest!

๐Ÿ“ฌ How to Sign Up for Turkey Trot 2024

  1. Sign Up for Email Updates: To receive the full supply list and daily pattern links sent directly to your inbox, sign up here or below on the form.
  2. Access Free Patterns through Grow: Make sure to subscribe to Grow (see information below) if you want to access the free versions of each pattern on the blog.

GROW

To Unlockย Exclusive Subscriber Contentย click the Box below and join for free by simply adding your email and creating a password! If you are having troubles, clear your cache or reset your password or login to the Grow Publisher Portal.

>> Learn More About Grow Here <<

I'm thrilled to share this amazing pattern with you, many patterns on my blog are absolutely free! I kindly request that you don't copy and paste or distribute this pattern. Prefer an ad-free experience? Buy a digital PDF pattern for a small fee from one of my online stores for a seamless crafting journey. 

I appreciate your support and readership. You are the reason I can keep doing what I love and sharing it with others. So, thank you from the bottom of my yarn-loving heart! Disclosure: This post contains affiliate links, meaning I get a commission if you decide to make a purchase through my links at no cost to you.

Important! To Access the Free Patterns, Please Subscribe Through Grow

In order to view the free Turkey Trot patterns and tutorials on the Marly Bird blog, youโ€™ll need to subscribe through Grow. Grow is a secure platform that allows us to offer you exclusive access to patterns, tutorials, and more. Hereโ€™s how it works:

  1. Sign Up for Grow: If youโ€™re not already a Grow subscriber, youโ€™ll be prompted to create a Grow account the first time you visit one of our exclusive content pages. Itโ€™s a quick and easy process!
  2. Log In to View Content: Once youโ€™re subscribed, simply log in through Grow whenever you visit the Marly Bird blog to view Turkey Trot patterns and tutorials.
    • Once you join, it takes a few minutes to unlock the content. If the content does not appear after 5 minutes try to refresh the page or clear your cache.
  3. Enjoy Unlimited Access to Free Content: With your Grow subscription, youโ€™ll have seamless access to all Turkey Trot content, plus other free patterns and tutorials exclusive to Marly Bird subscribers.

You should have seen a login prompt to view this sentence. And if you did, you joined Grow to view this exclusive content!

When the patterns are released, you will notice this same lock screen appears on the pattern. Simply use the same login with the information – your username and password – and be good to go.

A person wearing knitwear: a striped sleeveless sweater and a multicolored cardigan, both in earthy tones. They smile, standing in a cozy room with a patterned rug and white furniture. Text reads: "Join the Make-Along 2024 - MarlyBird.com -Marly Bird

Note: The email sign-up and Grow subscription are separate, so be sure to sign up for both if you want access to the free pattern plus daily updates.


๐Ÿ”ฅ Why Upgrade to VIP?

The VIP Silver Platter takes the Turkey Trot experience to the next level! With downloadable PDFs, ad-free tutorials, and all your materials in one easy-to-access place, itโ€™s perfect for anyone who wants to save time and enjoy the full experience without interruptions.

Join VIP Experience

โ“ Frequently Asked Questions

  1. How long will I have access to the patterns?
    VIP members have unlimited access in the Marly Bird House, while free patterns will stay available on the blog, supported by ads.
  2. Is this beginner-friendly?
    Absolutely! These patterns are designed to be accessible, with step-by-step instructions and videos to guide you through.
  3. Can I purchase the patterns individually?
    After the event, individual patterns will be available on Etsy, Ravelry, and the Marly Bird Store. But the VIP Silver Platter offers the best value with all the extra perks!
  4. Where is the supply list? Once you sign up and confirm your email, the supply list will be emailed to you.
  5. Can I gift the VIP experience?
    Yes! Just purchase the VIP option and reach out to our support team to set it up for the recipient.

Whether youโ€™re here to join the free version or ready to dive into the VIP Silver Platter, Turkey Trot 2024 is your chance to learn new techniques, connect with fellow crafters, and create something cozy and festive. Donโ€™t miss out on this fun and festive eventโ€”letโ€™s stitch together this season!

xoxo,
Your BiCrafty Bestie,
Marly Bird

Illustrated poster for the "Turkey Trot with Marly Bird" featuring a bird knitting with yarn shaped like turkey and pie. "#turkeytrot2024" is displayed at the bottom, with a whimsical background and dining table setting. -Marly Bird

Filed Under: Crochet, Free Patterns, Knitting, Make-Alongs, Marly Bird Premium Patterns, Our Free Patterns, Pattern, Uncategorized

Stay Cozy with the Cocoa Dreams Mosaic Knit Fingerless Mittens: Free Pattern & FAQs

November 2, 2024 By Marly Bird 3 Comments

Looking for a quick project to keep your hands warm as the temperatures drop? The Cocoa Dreams Mosaic Knit Fingerless Mittens are the perfect blend of cozy, stylish, and functional. Whether you're a mosaic knitting pro or looking to try out this colorwork technique for the first time, these fingerless mitts are a fantastic way to hone your skills.

This project is free to access on the blog, and you'll find itโ€™s easy to follow with detailed instructions, video tutorials, and all the help you need! And donโ€™t forget to check out more of my fall and winter patterns right here on the blog to keep your needles busy all season long.
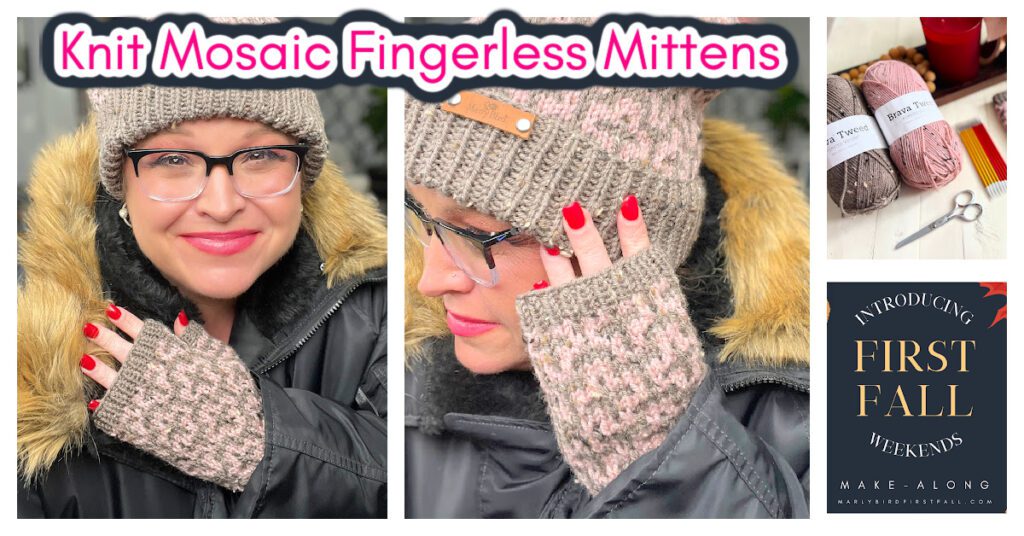
Collage showcasing fingerless mittens with mosaic knit details. Features a person wearing these mittens and a matching hat, alongside yarn and knitting tools. Includes text on a "First Fall Weekends Make-Along" with a free pattern offer. The scene is set outdoors in a winter coat. -Marly Bird

Affiliate Disclosure: This post contains affiliate links. To learn more please visit my privacy policy here๐Ÿ’–


What Makes Mosaic Knitting Perfect for Fingerless Mittens?

Mosaic knitting is a wonderful way to introduce color into your knitting without the complexity of traditional stranded colorwork. The technique uses simple slip stitches to create intricate designs, while only working with one color per row. Itโ€™s a great introduction to colorwork because it avoids the tangled mess that often comes with using multiple yarn strands at once.

For the Cocoa Dreams knit fingerless mittens, the mosaic stitch pattern creates a cozy, textured look thatโ€™s both modern and classicโ€”ideal for keeping your hands warm during those chilly fall days!
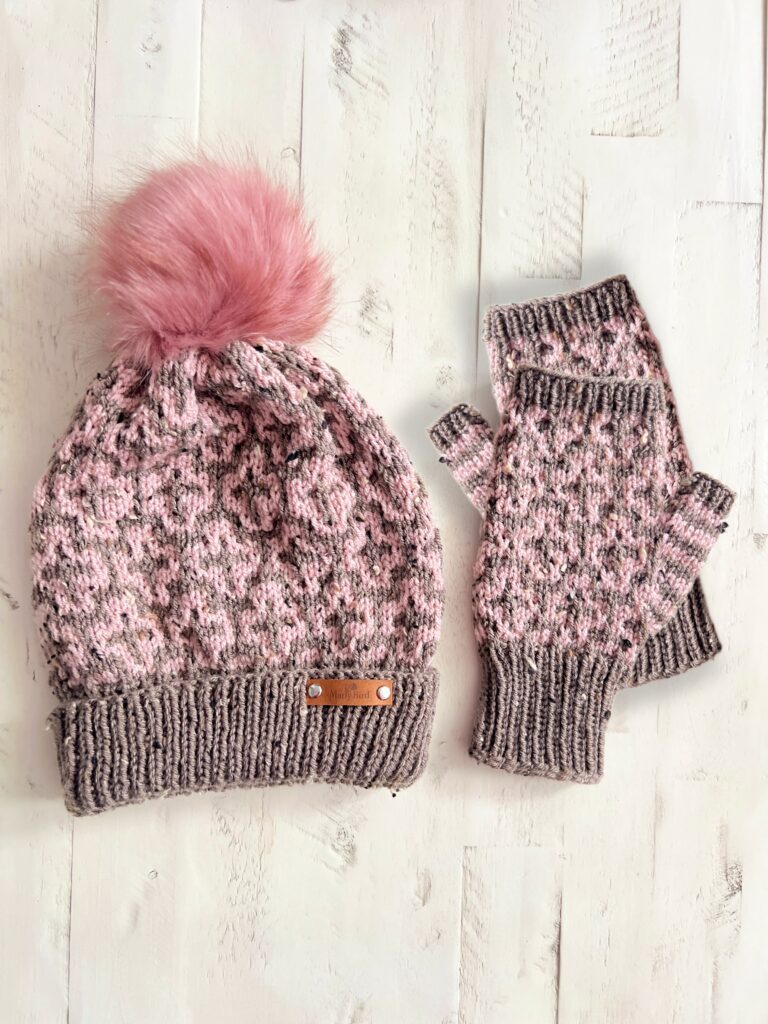

A pink and gray mosaic knit beanie with a pom-pom and matching fingerless mittens adorned in leopard print rests elegantly on a white wooden surface, capturing the essence of Cocoa Dreams. -Marly Bird

Why Youโ€™ll Love the Cocoa Dreams Fingerless Mittens ๐Ÿงค

  • Quick and Satisfying: You can knit these mittens over a weekend, making them the perfect grab-and-go project.
  • Perfect for Layering: Wear them on their own during the fall or layer them over a thinner glove in the winter.
  • Great Introduction to Mosaic Knitting: If youโ€™ve never tried mosaic knitting before, this pattern will ease you in while giving you a beautiful finished result.
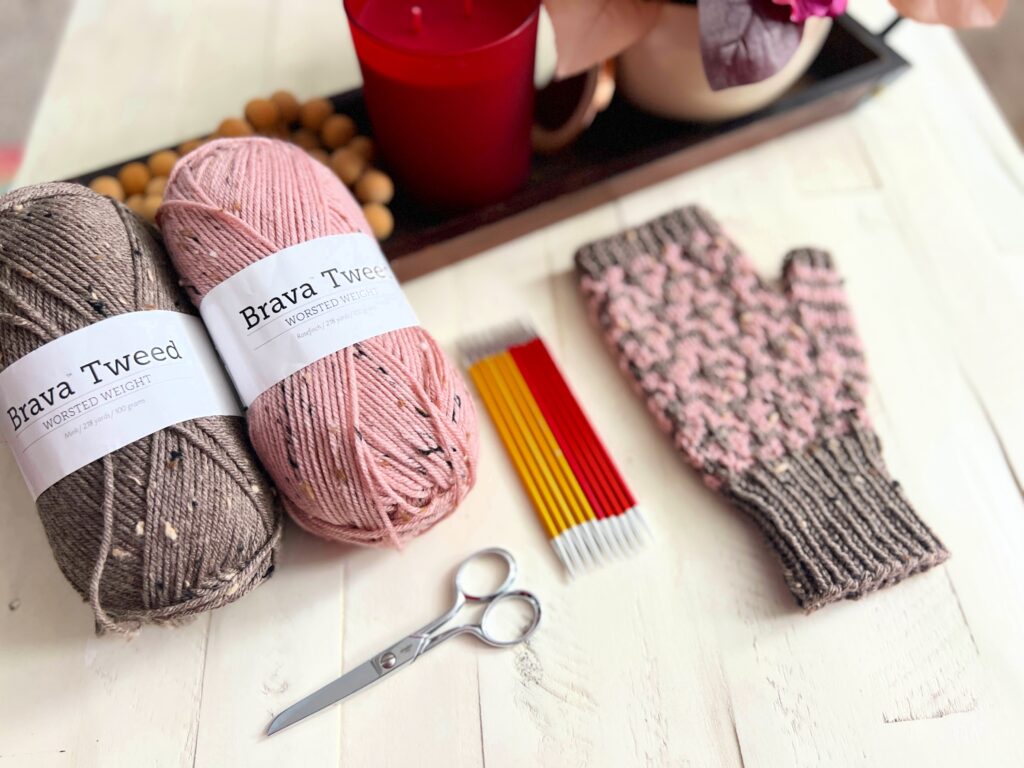
On a white surface, balls of brown and pink Brava Tweed yarn await beside small scissors, red and yellow knitting needles, and a pink knitted glove with a grey cuff. In the background, a red candle flickers atop a decorative tray. Dive into the Cocoa Dreams free pattern for cozy fingerless mittens. -Marly Bird

Yarn & Materials for the Cocoa Dreams Mittens

For these mittens, I suggest using worsted weight yarn in two contrasting colorsโ€”one dark and one light. The key to making mosaic patterns pop is the contrast between your main color and your accent color.

Suggested Yarn:

WeCrochet, Brava Tweed (97% Premium Acrylic/ 3% Viscose, 218 yds / 200 m, 3.5 oz/ 100 g, CYCA# 4 worsted)

  • Yarn A (Main Color): A neutral or earthy tone like a deep brown or burgundy.
  • Yarn B (Contrasting Color): A brighter or lighter color like mustard, cream, or heather gray for the perfect contrast.

Other Supplies:

  • Knitting Needles: US Size 7 (4.5 mm) and size 8 (5 mm) set of 5 double pointed needles.
  • Stitch Markers: To mark your rounds and pattern repeats.
  • Tapestry Needle: For weaving in ends and finishing.

How to Knit Fingerless Mittens in Mosaic

When working mosaic knitting in the round for fingerless mittens, here are a few key tips to keep in mind:

  1. Slipping Stitches: This is the main technique. Youโ€™ll slip stitches purlwise from the left hand needle to the right hand needle without knitting them.
  2. Carrying Yarn: Only one color is used per round. Youโ€™ll alternate between the two colors on different rounds, which simplifies the colorwork process.
  3. Shaping: The mittens feature simple shaping for the thumb gusset to ensure a comfortable fit.

Need more help with mosaic knitting? Check out my step-by-step guide!
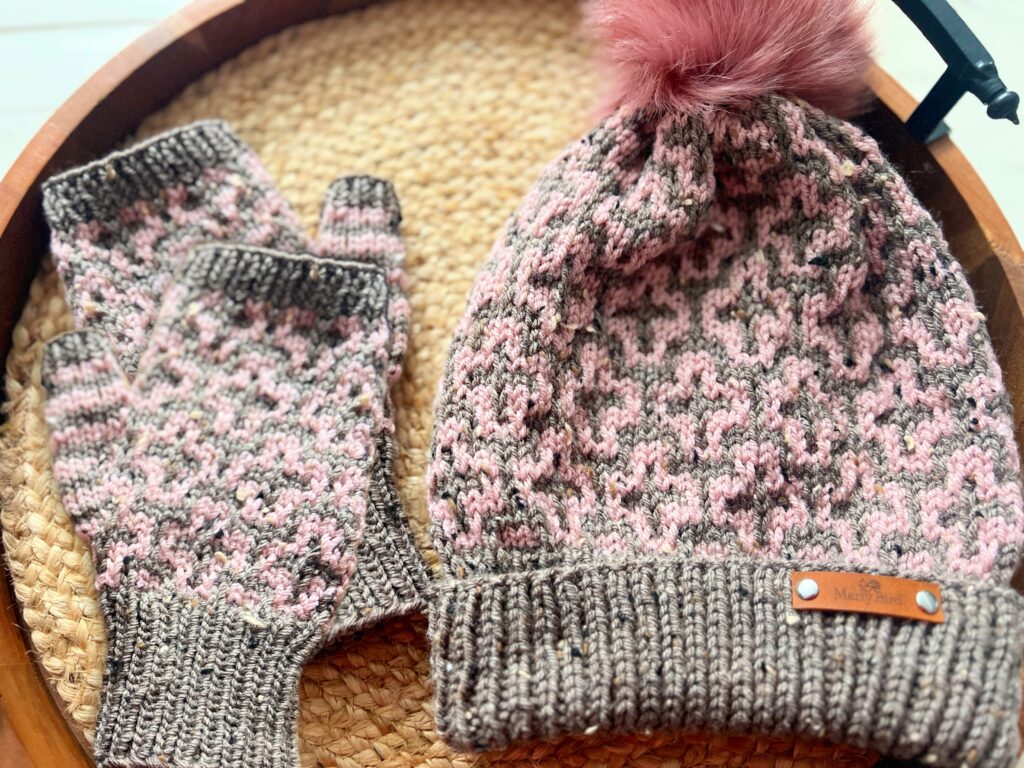

A knitted hat with a pink pom-pom and matching Cocoa Dreams fingerless gloves, featuring a pink and gray pattern, snugly placed on a woven basket. -Marly Bird
Make the Matching Falling Leaves Knit Mosaic Hat!

FAQs About Knitting Fingerless Mittens

Q: Can I use double-pointed needles (DPNs) to knit these mittens?
A: Absolutely! If you're comfortable with DPNs, theyโ€™re a great option for knitting mittens in the round. However, you can also use the magic loop method if you prefer and are comfortable doing that technique.

Q: Whatโ€™s the best yarn for fingerless mittens?
A: Worsted-weight yarn is ideal for these fingerless mittens, as it provides the right amount of warmth without being too bulky. Choose a yarn with good stitch definition to really make the mosaic pattern stand out.

Are you looking for a pair of mittens that use one hank of fingering weight yarn? Check out the More Than Just Socks Fingerless Mittens. They are some of my favorites!
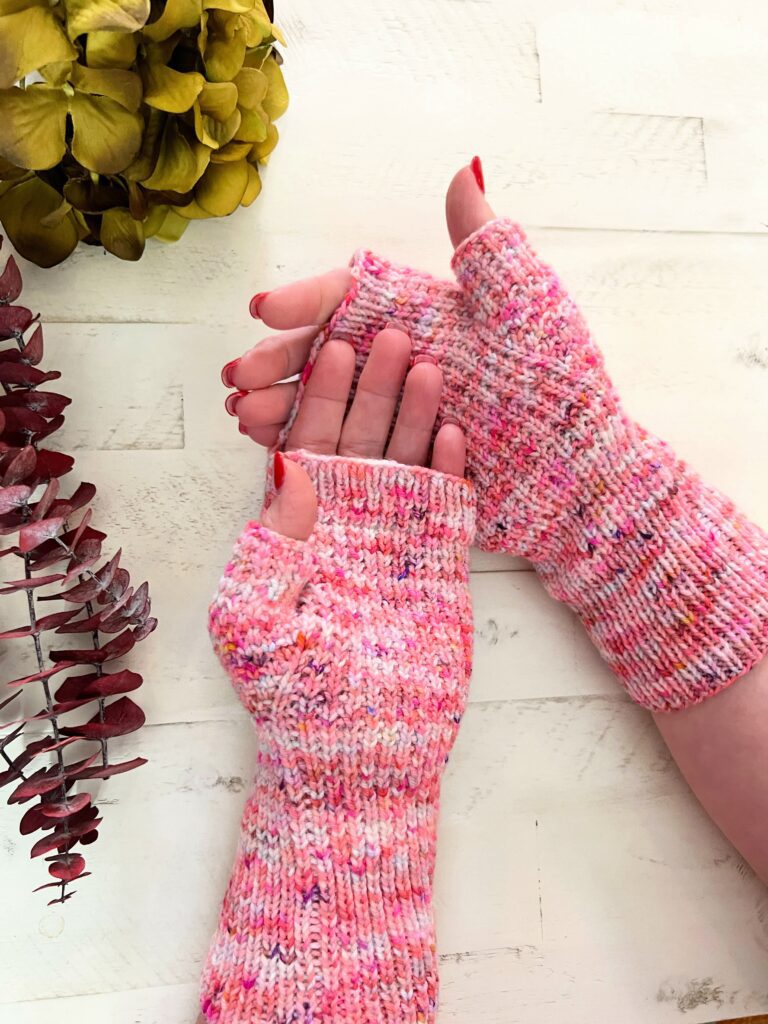
Two hands are adorned with pink speckled knit fingerless gloves. One hand faces up, the other down, revealing the gloves from both sides. Nearby, vibrant dried flowers in green and red rest on a white wooden surface, adding a touch of natureโ€™s charm to this cozy scene. -Marly Bird

Q: How do I measure for the best mitten fit?
A: Measure around the widest part of your hand (usually around the knuckles) and adjust the pattern to ensure your mittens will have a snug but comfortable fit.

Q: Can I make these mittens longer?
A: Yes! You can easily add length by knitting a few extra rounds before or after the thumb gusset to customize the fit.


Customizing Your Cocoa Dreams Mosaic Knit Fingerless Mittens

Want to make these mittens uniquely yours? Here are some fun ways to customize the pattern:

  • Thumb Extensions: Extend the thumb section to make a full-finger mitten or even convert it into a mitt with a fold-over top. Here is another convertible mitten pattern
  • Color Play: Switch up your colors to match your winter wardrobe. You could even make multiple pairs for different outfits.
  • Add Embellishments: Add a small button, embroidery, or patch to the cuff to give your mittens a personal touch.

Get the Free Pattern for Cocoa Dreams Mosaic Knit Fingerless Mittens – Here!

Youโ€™ve learned the basics of mosaic knitting and fingerless mittensโ€”now itโ€™s time to grab your yarn and needles! For the Cocoa Dreams Mosaic Knit Fingerless Mittens, subscribe to the Marly Bird website through grow, login and the pattern will be visible to you.
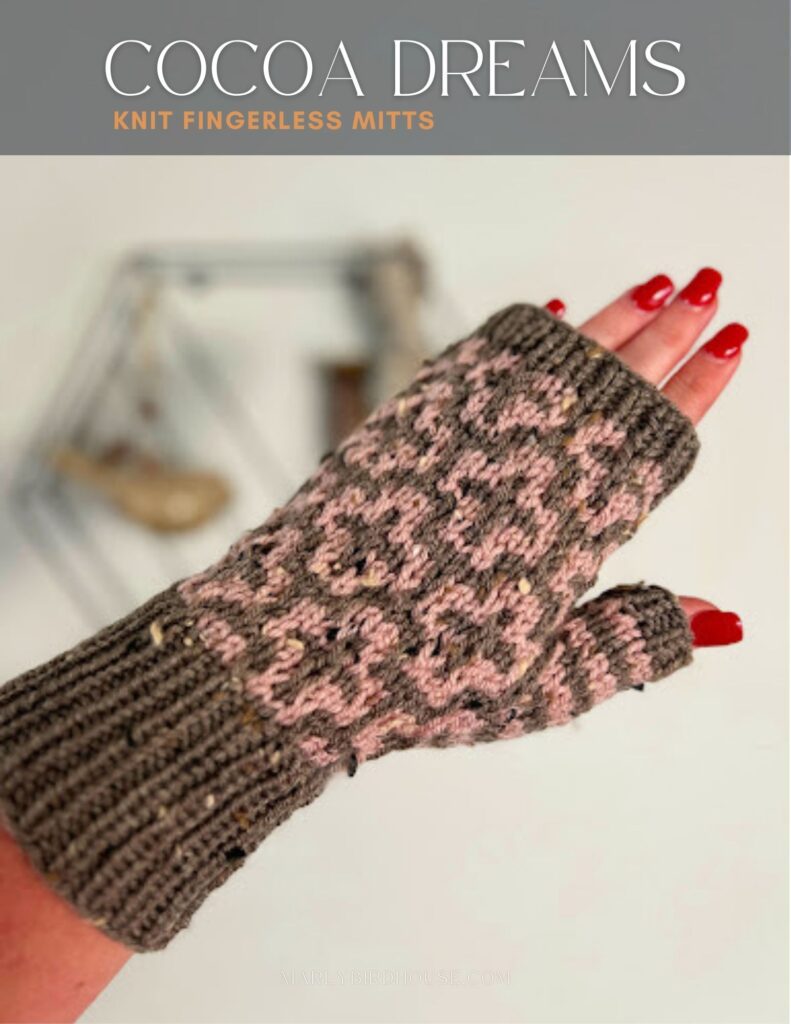
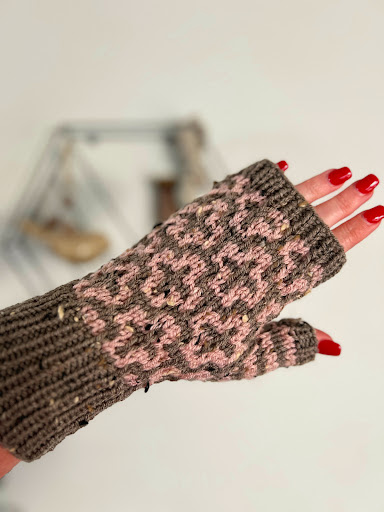
A hand displays a knit fingerless mitt with a brown and pink pattern, perfectly complementing its red-painted nails. The "Cocoa Dreams Knit Fingerless Mittens" stand out beautifully against a backdrop of blurred decorative art, offering both style and charm. -Marly Bird
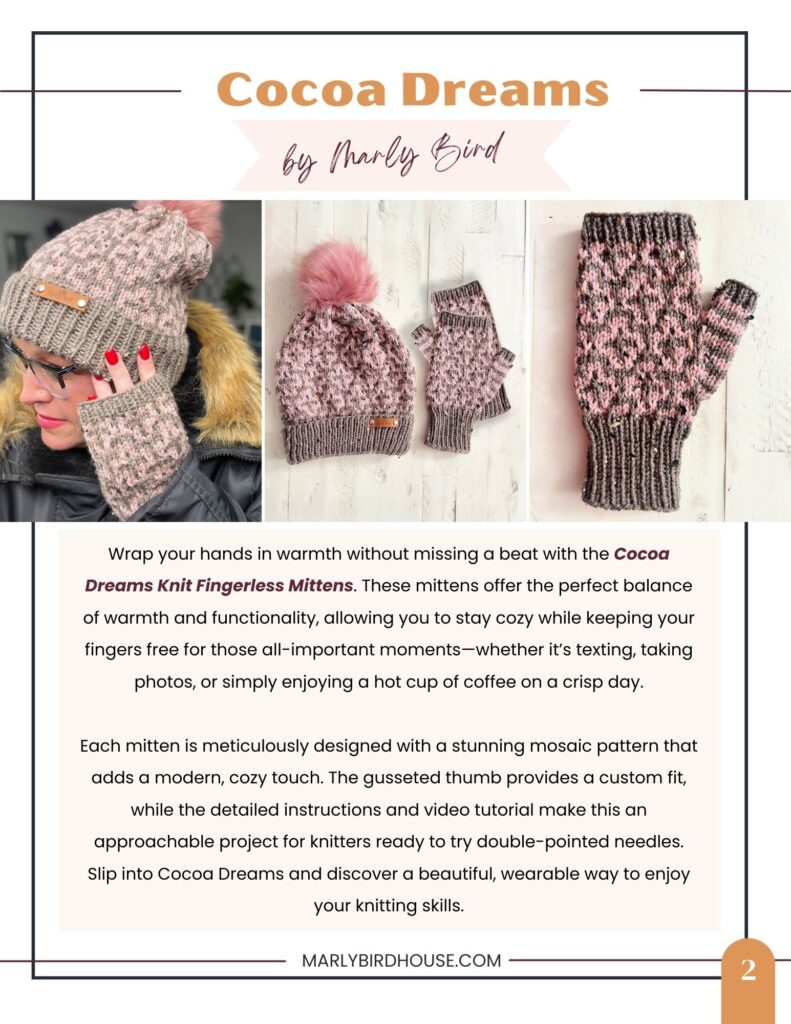
A person wearing a colorful knit hat and gray scarf holds a pink and gray striped fingerless mitten, aptly named Cocoa Dreams. Another matching mitten is shown on a white background. Text describes the mittens' features and benefits, with details on how to access the free pattern for these Mosaic Knit Fingerless Mittens. -Marly Bird

COCOA DREAMS KNIT MOSAIC FINGERLESS MITTENS

Designed by Marly Bird

SKILL LEVEL

Confident Beginner/Intermediate

MEASUREMENTS

To Fit Size

Child (Adult Small- Medium, Adult Large – XLarge) 

Sample shown in Adult Small – Medium

Finished Measurements

To Fit SizeChildAdult Small – MediumAdult Large – XLarge
Finished Hand Circumference (approx) Inches6.5  89.5
Finished Hand Circumference cm16.520.524
Finished Total Length + Cuff Inches69.510.5
Finished Total Length + Cuff cm152426.5

Gauge 

20 stitches 35 rounds= 4″ [10 cm] in mosaic stitch pattern [10 cm] with larger needles; use any size needle to obtain the gauge. 

MATERIALS

Yarn 

WeCrochet, Brava Tweed (97% Premium Acrylic/ 3% Viscose, 218 yds / 200 m, 3.5 oz/ 100 g, CYCA# 4 worsted)

Color A, #61309 Elderberry, 1 ball
Color B, #61304 Wasabi, 1 ball 

Knitting Needle

U.S. 7 [4.5 mm] and U.S. 8 [5 mm] set of 5 double pointed needles, or size required for gauge.

Notions 

Stitch markers, tapestry needle, scrap yarn to hold stitches

ABBREVIATIONS

K โ€“ Knit

K2tog – Knit Two Together

M1 – Make One

P โ€“ Purl

PM – Place Marker

RS – Right Side

Sl – Slip

Sl-wyib – Slip With Yarn in Back

Sl M โ€” Slip Marker

St(s) โ€“ Stitches

WS – Wrong Side

SPECIAL STITCHES

M1 (Make 1 Increase): With tip of left-hand needle, pick up the horizontal strand between stitches from front to back. Knit this strand through the back leg, twisting it into a loop in the process – 1 stitch increased.

SPECIAL TECHNIQUE

Backwards Loop Cast-on Method: * Wrap yarn around left thumb from front to back and secure in palm with other fingers. Insert needle upward through strand on thumb. Slip loop from thumb onto needle, pulling yarn to tighten. Repeat from * for desired number of sts.

CHART

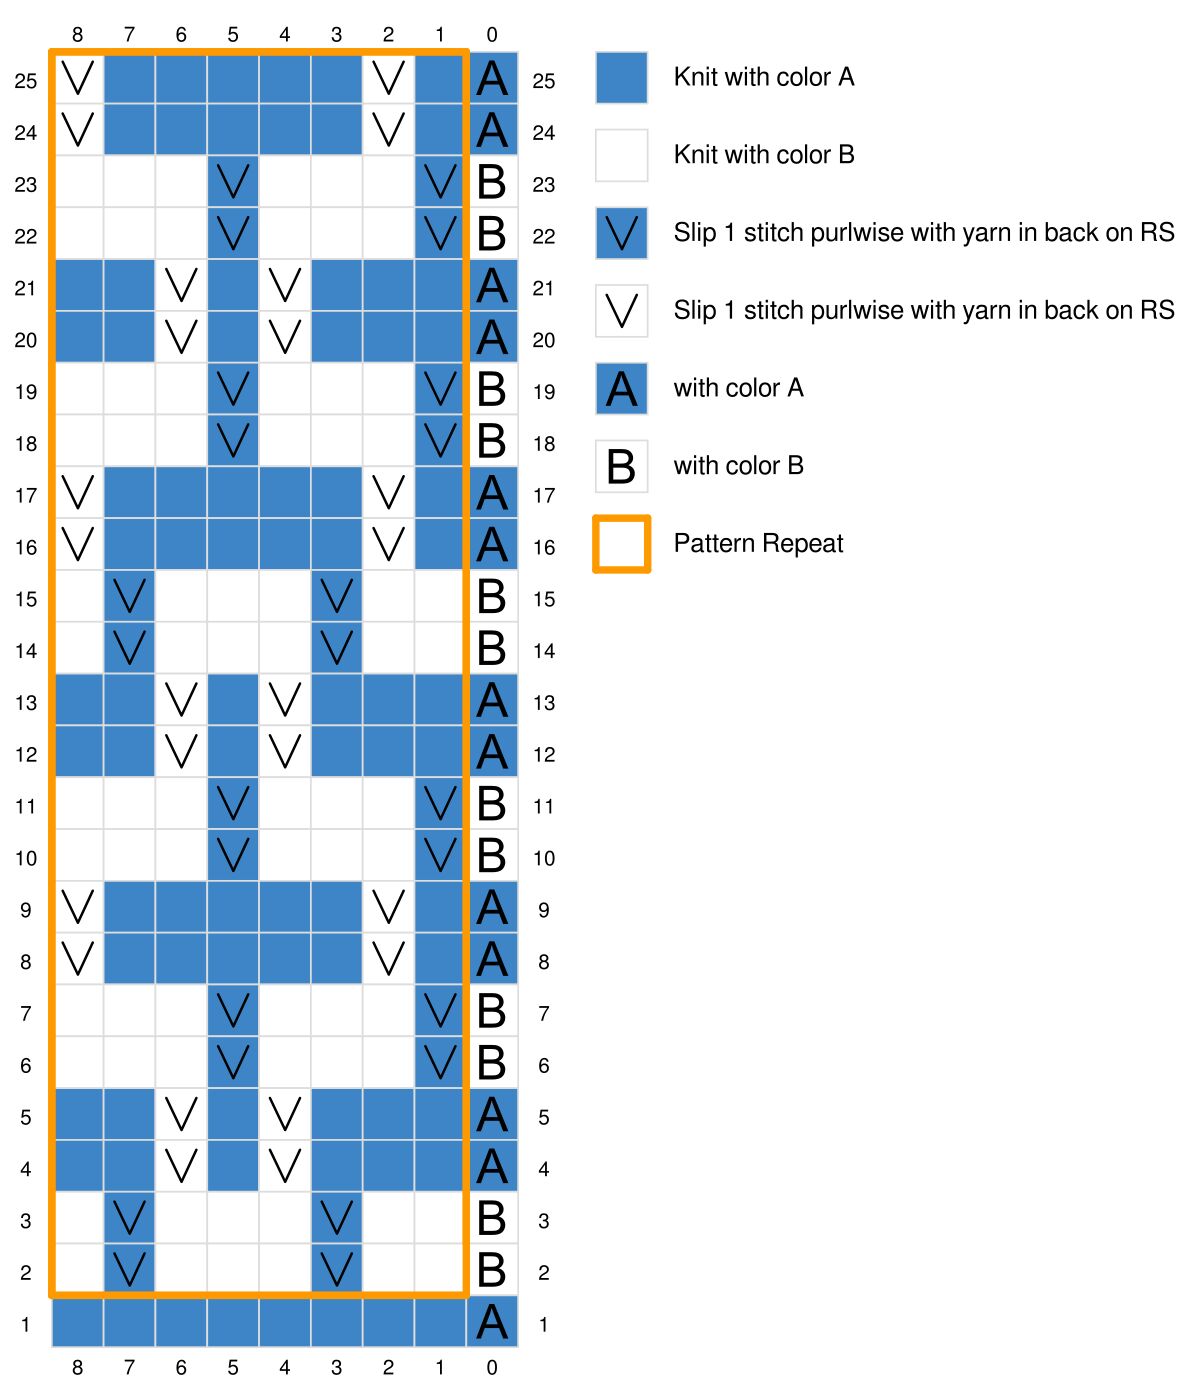
The Ad-Free PDF includes full charts with thumb gusset stitches indicated for each size. Upgrade to the First Fall Weekends VIP Experience and get the 21 page pdf for uninterrupted knitting experience.
VIP Upgrade
A knitting chart for the Falling Leaves Mosaic Knit Hat showcases 25 rows and columns. Blue squares represent color A, white squares with a "V" denote slip stitches, and black squares with "A" or "B" signify colors. An orange outline highlights the pattern repeat. Get inspiring mosaic tips in this free pattern! -Marly Bird

NOTES

  • Directions are for size Child; changes for sizes (S-M, L-XL) are in parentheses. When only one number is given then that number applies to all sizes.
  • Project is made from the bottom cuff to finger cuff.
  • When working on the body, place a marker every 8 stitches for the repeat (adding the marker to actual stitch might be necessary with the double pointed needles)
  • Slip all stitches as if to purl with yarn in back.
    • When slipping stitches be sure to not pull the float too tight or the gauge will get too small.
  • Do not cut colors, carry the color up the side.
  • Work thumb gusset stitches in two row stripes.
  • If you want to be sure you have a safety net as you knit, adding a lifeline to your project every so often will be helpful. Just to make sure you have a point to rip back to if something goes wrong. (video help).
Favorite This Pattern on Ravelry - Marly Bird

VIDEO TUTORIALS

Cocoa Dreams Knit Mosaic Fingerless Mittens Video >> Click Here for Video Help <<
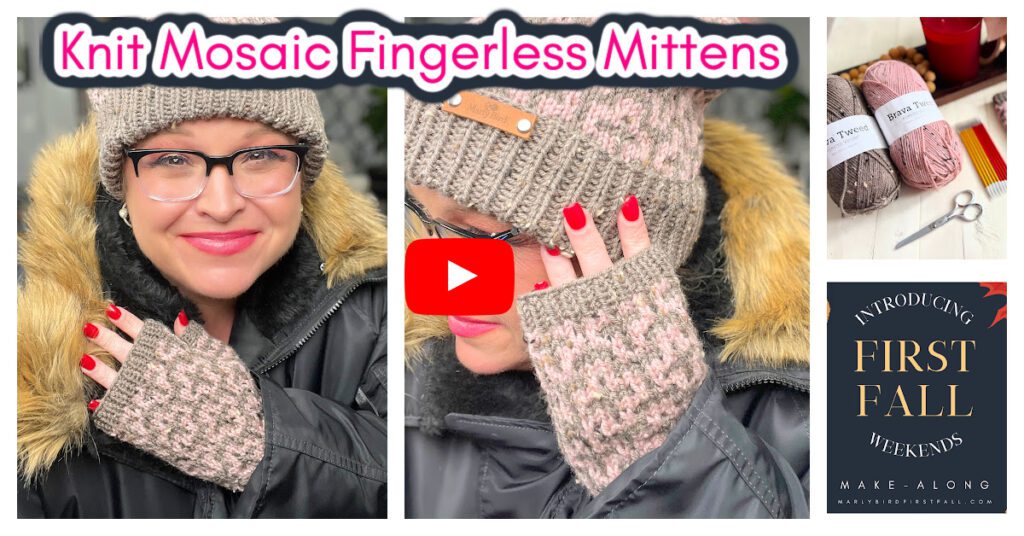
Collage featuring a person wearing knit fingerless mittens and a matching beanie, holding their hand to their face. On the right, there are images of yarn, knitting needles, and text saying "Introducing Cocoa Dreams: First Fall Weekends Make-Along." Enjoy a free pattern with every kit. -Marly Bird

No Cuss Cast On to Double Pointed Needles >> Click Here for Video Help << 

Knit Stitch (continental style) >> Click Here for Video Help <<

Purl Stitch (continental style) >> Click Here for Video Help <<

Perfect Ribbing >> Click Here for Video Help << 

Duplicate Stitch >> Click Here for Video Help <<

How to Add Lifeline >> Click Here for Video Help <<

How to Tink >> Click Here for Video Help <<

Bury Ends >> Click Here for Video Help <<
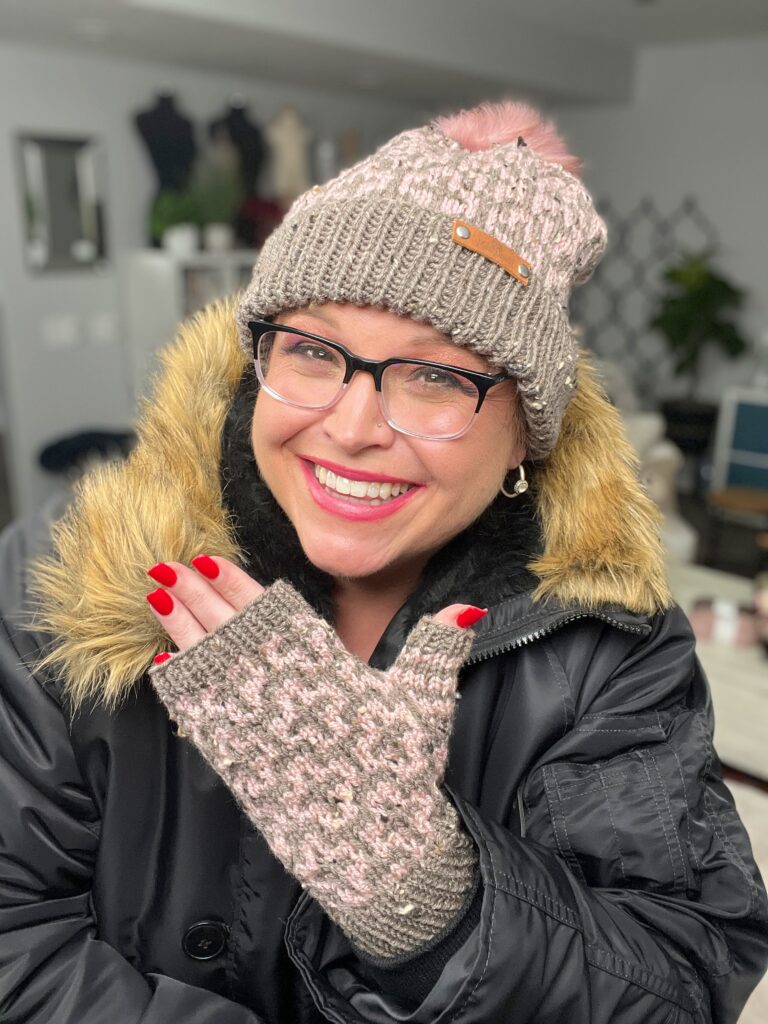
A person smiling warmly, wearing a pink and gray knitted hat with a pom-pom, glasses, and matching fingerless mittens made from a free pattern. They are also wearing a black coat with a fur-lined hood, embodying cozy Cocoa Dreams. -Marly Bird

GROW

To Unlockย Exclusive Subscriber Contentย click the Box below and join for free by simply adding your email and creating a password! If you are having troubles, clear your cache or reset your password or login to the Grow Publisher Portal.

>> Learn More About Grow Here <<

I'm thrilled to share this amazing pattern with you, many patterns on my blog are absolutely free! I kindly request that you don't copy and paste or distribute this pattern. Prefer an ad-free experience? Buy a digital PDF pattern for a small fee from one of my online stores for a seamless crafting journey. 

I appreciate your support and readership. You are the reason I can keep doing what I love and sharing it with others. So, thank you from the bottom of my yarn-loving heart! Disclosure: This post contains affiliate links, meaning I get a commission if you decide to make a purchase through my links at no cost to you.

COCOA DREAMS KNIT MOSAIC FINGERLESS MITTENS

CUFF 

All Sizes

With smaller double pointed needles and color A, cast on 32, (40, 48) stitches. Join to work in the round. 

Round 1: *K1, p1; repeat from * to end of round. 

Work in 1×1 ribbing for 2 (3, 3)โ€ [5 (7.5, 7.5) cm]. 

Mosaic Knit Fingerless Mittens – HAND

With larger double pointed needles, follow the instructions for the size you are making (also see chart for each size)

Child Size

Round 1: With color A, Knit 32.

Round 2: With color B, [K2, sl1wyib, K1] 2 times, K2, sl1wyib, place marker, K1, place marker, *K2, sl1wyib, K1; repeat from * 5 times โ€” 1 thumb stitch between markers.

Round 3 (increase): With color B, [K2, sl1wyib, K1] 2 times, K2, sl1wyib, sl m, M1, knit to marker, M1, sl m, *K2, sl1wyib, K1; repeat from 5 times โ€” 3 thumb stitches between markers.

Round 4: With color A, K2, [K1, sl1wyib] 2 times, K5, sl m, knit to marker, sl m, *K1, sl1wyib, K5, sl1wyib; repeat from* 2 times, K1, sl1wyib, K2.

Round 5 (increase): With color A, K2, [K1, sl1wyib] 2 times, K5, sl m, M1, knit to marker, M1, sl m, *K1, sl1wyib, K5, sl1wyib; repeat from *2 times, K1, sl1wyib, K2 โ€” 5 thumb stitches between markers.

Round 6: With color B, [sl1wyib, K3] 2 times, sl1wyib, K2, sl m, knit to marker, sl m, *sl1wyib, K3; repeat from * 5 times.

Round 7 (increase): With color B, [sl1wyib, K3] 2 times, sl1wyib, K2, sl m, M1, knit to marker, M1, sl m, *sl1wyib, K3; repeat from * 5 times โ€” 7 thumb stitches between markers.

Round 8: With color A, K1, sl1wyib, K4, [K1, sl1wyib] 2 times, K1, sl m, knit to marker, sl m, *K3, sl1wyib, K1, sl1wyib, K2; repeat from * 2 times, K3, sl1wyib.

Round 9 (increase): With color A, K1, sl1wyib, K4, [K1, sl1wyib] 2 times, K1, sl m, M1, knit to marker, M1, sl m, *K3, sl1wyib, K1, sl1wyib, K2; repeat from * 2 times, K3, sl1wyib โ€” 9 thumb stitches between markers.

Round 10: With color B, [sl1wyib, K3] 2 times, sl1wyib, K2, sl m, knit to marker, sl m, *sl1wyib, K3; repeat from * 5 times.

Round 11: With color B, [sl1wyib, K3] 2 times, sl1wyib, K2, sl m, knit to marker, sl m, *sl1wyib, K3; repeat from * 5 times.

Round 12: With color A, K2, [K1, sl1wyib] 2 times, K5, sl m, knit to marker, sl m, *K1, sl1wyib, K5, sl1wyib; repeat from * 2 times, K1, sl1wyib, K2.

Round 13 (increase): With color A, K2, [K1, sl1wyib] 2 times, K5, sl m, M1, knit to marker, M1, sl m, *K1, sl1wyib, K5, sl1wyib; repeat from 2 times, K1, sl1wyib, K2 โ€” 11 thumb stitches between markers.

Round 14: With color B, [K2, sl1wyib, K1] 2 times, K2, sl1wyib, sl m, knit to marker, sl m, *K2, sl1wyib, K1; repeat from * 5 times.

Round 15: With color B, [K2, sl1wyib, K1] 2 times, K2, sl1wyib, remove marker,thread a piece of scrap yarn onto a tapestry needle and thread through 11 stitches, remove marker, cast on 1, *K2, sl1wyib, K1; repeat from * 5 times โ€” 32 stitches.

CONTINUE WITH HAND

Round 16: With color A, *K1, sl1wyib, K5, sl1wyib] 4 times.

Round 17: With color A, *K1, sl1wyib, K5, sl1wyib] 4 times.

Round 18: With color B, *sl1wyib, K3] 8 times.

Round 19: With color B, *sl1wyib, K3] 8 times.

Round 20: With color A, *K3, sl1wyib, K1, sl1wyib, K2] 4 times.

Round 21: With color A, *K3, sl1wyib, K1, sl1wyib, K2] 4 times.

Round 22: With color B, *sl1wyib, K3] 8 times.

Round 23: With color B, *sl1wyib, K3] 8 times.

Round 24: With color A, *K1, sl1wyib, K5, sl1wyib] 4 times.

Round 25: With color A, *K1, sl1wyib, K5, sl1wyib] 4 times.

Round 26: With color B, *K2, sl1wyib, K1] 8 times.

Round 27: With color B, *K2, sl1wyib, K1] 8 times.

Round 28: With color A, Knit around.

Cut color B

Proceed to Finger Cuff


Adult Small- Medium

Round 1: With color A, Knit 40.

Round 2: With color B, *K2, sl1wyib, K1; repeat from * 10 times.

Round 3: With color B, *K2, sl1wyib, K1; repeat from * 10 times.

Round 4: With color A, *K3, sl1wyib, K1, sl1wyib, K2; repeat from * 5 times.

Round 5: With color A, *K3, sl1wyib, K1, sl1wyib, K2; repeat from * 5 times.

Round 6: With color B, *sl1wyib, K3; repeat from * 10 times.

Round 7: With color B, *sl1wyib, K3; repeat from * 10 times.

THUMB GUSSET

Round 8: With color A, K1, sl1wyib, K4, [K1, sl1wyib] 2 times, K1, place marker, k1, place marker, *K3, sl1wyib, K1, sl1wyib, K2; repeat from * 3 times, K3, sl1wyib โ€” 1 thumb stitch between markers.

Round 9 (increase): With color A, K1, sl1wyib, K4, [K1, sl1wyib] 2 times, K1, sl m, M1, knit to marker, M1, sl m, *K3, sl1wyib, K1, sl1wyib, K2; repeat from * 3 times, K3, sl1wyib โ€” 3 thumb stitches between markers.

Round 10: With color B, [sl1wyib, K3] 2 times, sl1wyib, K2, sl m, knit to marker, sl m, *sl1wyib, K3; repeat from * 7 times.

Round 11 (increase): With color B, [sl1wyib, K3] 2 times, sl1wyib, K2, sl m, M1, knit to marker, M1, sl m, *sl1wyib, K3; repeat from * 7 times โ€” 5 thumb stitches between markers.

Round 12: With color A, K2, [K1, sl1wyib] 2 times, K5, sl m, knit to marker, sl m, *K1, sl1wyib, K5, sl1wyib; repeat from * 3 times, K1, sl1wyib, K2.

Round 13 (increase): With color A, K2, [K1, sl1wyib] 2 times, K5, sl m, M1, knit to marker, M1, sl m, *K1, sl1wyib, K5, sl1wyib; repeat from * 3 times, K1, sl1wyib, K2 โ€” 7 thumb stitches between markers.

Round 14: With color B, [K2, sl1wyib, K1] 2 times, K2, sl1wyib, sl m, knit to marker, sl m, *K2, sl1wyib, K1; repeat from * 7 times.

Round 15 (increase): With color B, [K2, sl1wyib, K1]  2 times, K2, sl1wyib, sl m, M1, knit to marker, M1, sl m, *K2, sl1wyib, K1; repeat from * 7 times โ€” 9 thumb stitches between markers.

Round 16: With color A, K1, sl1wyib, K4, [K1, sl1wyib] 2 times, K1, sl m, knit to marker, sl m, *K3, sl1wyib, K1, sl1wyib, K2; repeat from * 3 times, K3, sl1wyib.

Round 17 (increase): With color A, K1, sl1wyib, K4, [K1, sl1wyib] 2 times, K1, sl m, M1, knit to marker, M1, sl m, *K3, sl1wyib, K1, sl1wyib, K2; repeat from * 3 times, K3, sl1wyib โ€” 11 thumb stitches between markers.

Round 18: With color B, [sl1wyib, K3] 2 times, sl1wyib, K2, sl m, knit to marker, sl m, *sl1wyib, K3; repeat from * 7 times.

Round 19: With color B, [sl1wyib, K3] 2 times, sl1wyib, K2, sl m, knit to marker, sl m, *sl1wyib, K3; repeat from * 7 times.

Round 20: With color A, K2, [K1, sl1wyib] 2 times, K5, sl m, knit to marker, sl m, *K1, sl1wyib, K5, sl1wyib; repeat from * 3 times, K1, sl1wyib, K2.

Round 21 (increase): With color A, K2, [K1, sl1wyib] 2 times, K5, sl m, M1, knit to marker, M1, sl m, *K1, sl1wyib, K5, sl1wyib; repeat from * 3 times, K1, sl1wyib, K2 โ€” 13 thumb stitches between markers.

Round 22: With color B, [sl1wyib, K3] 2 times, sl1wyib, K2, sl m, knit to marker, sl m, *sl1wyib, K3; repeat from * 7 times.

Round 23: With color B, [sl1wyib, K3] 2 times, sl1wyib, K2, sl m, knit to marker, sl m, *sl1wyib, K3; repeat from * 7 times.

Round 24: With color A, K1, sl1wyib, K4, [K1, sl1wyib] 2 times, K1, sl m, knit to marker, sl m, *K3, sl1wyib, K1, sl1wyib, K2; repeat from * 3 times, K3, sl1wyib.

Round 25: With color A, K1, sl1wyib, K4, [K1, sl1wyib] 2 times, K1, sl m, M1, knit to marker, M1, sl m, *K3, sl1wyib, K1, sl1wyib, K2; repeat from * 3 times, K3, sl1wyib โ€” 15 thumb stitches between markers.

Round 26: With color B, [K2, sl1wyib, K1]  2 times, K2, sl1wyib, sl m, knit to marker, sl m, *K2, sl1wyib, K1; repeat from * 7 times.

Round 27 (cast on): With color B, [K2, sl1wyib, K1]  2 times, K2, sl1wyib, remove marker,thread a piece of scrap yarn onto a tapestry needle and thread through 15 stitches, remove marker, cast on 1, *K2, sl1wyib, K1; repeat from * 7 times โ€” 40 sts.

CONTINUE WITH HAND

Round 28: With color A, *K3, sl1wyib, K1, sl1wyib, K2; repeat from * 5 times.

Round 29: With color A, *K3, sl1wyib, K1, sl1wyib, K2; repeat from * 5 times.

Round 30: With color B, *sl1wyib, K3; repeat from * 10 times.

Round 31: With color B, *sl1wyib, K3; repeat from * 10 times.

Round 32: With color A, *K1, sl1wyib, K5, sl1wyib; repeat from * 5 times.

Round 33: With color A, *K1, sl1wyib, K5, sl1wyib; repeat from * 5 times.

Round 34: With color B, *sl1wyib, K3; repeat from * 10 times.

Round 35: With color B, *sl1wyib, K3; repeat from * 10 times.

Round 36: With color A, *K3, sl1wyib, K1, sl1wyib, K2; repeat from * 5 times.

Round 37: With color A, *K3, sl1wyib, K1, sl1wyib, K2; repeat from * 5 times.

Round 38: With color B, *K2, sl1wyib, K1; repeat from * 10 times.

Round 39: With color B, *K2, sl1wyib, K1; repeat from * 10 times.

Round 40: With color A, *K1, sl1wyib, K5, sl1wyib; repeat from * 5 times.

Round 41: With color A, *K1, sl1wyib, K5, sl1wyib; repeat from * 5 times.

Round 42: With color B, *sl1wyib, K3; repeat from * 10 times.

Round 43: With color B, *sl1wyib, K3; repeat from * 10 times.

Round 44: With color A, *K3, sl1wyib, K1, sl1wyib, K2; repeat from * 5 times.

Round 45: With color A, *K3, sl1wyib, K1, sl1wyib, K2; repeat from * 5 times.

Round 46: With color B, *sl1wyib, K3; repeat from * 10 times.

Round 47: With color B, *sl1wyib, K3; repeat from * 10 times.

Round 48: With color A, Knit around.

Cut color B

Proceed to Finger Cuff


Adult Large-Extra Large

Round 1: With color A, K48.

Round 2: With color B, *K2, sl1wyib, K1; repeat from * 12 times.

Round 3: With color B, *K2, sl1wyib, K1; repeat from * 12 times.

Round 4: With color A, *K3, sl1wyib, K1, sl1wyib, K2; repeat from * 6 times.

Round 5: With color A, *K3, sl1wyib, K1, sl1wyib, K2; repeat from * 6 times.

Round 6: With color B, *sl1wyib, K3; repeat from * 12 times.

Round 7: With color B, *sl1wyib, K3; repeat from * 12 times.

THUMB GUSSET

Round 8: With color A, K1, sl1wyib, K4, [K1, sl1wyib] 2 times, K1, place marker, k1, place marker, *K3, sl1wyib, K1, sl1wyib, K2; repeat from * 4 times, K3, sl1wyib โ€” 1 thumb stitch between markers.

Round 9 (increase): With color A, K1, sl1wyib, K4, [K1, sl1wyib] 2 times, K1, sl m, M1, knit to marker, M1, sl m, *K3, sl1wyib, K1, sl1wyib, K2; repeat from * 4 times, K3, sl1wyib โ€” 3 thumb stitches between markers.

Round 10: With color B, [sl1wyib, K3] 2 times, sl1wyib, K2, sl m, knit to marker, sl m, *sl1wyib, K3; repeat from * 9 times.

Round 11 (increase): With color B, [sl1wyib, K3] 2 times, sl1wyib, K2, sl m, M1, knit to marker, M1, sl m, *sl1wyib, K3; repeat from * 7 times โ€” 5 thumb stitches between markers.

Round 12: With color A, K2, [K1, sl1wyib] 2 times, K5, sl m, knit to marker, sl m, *K1, sl1wyib, K5, sl1wyib; repeat from * 4 times, K1, sl1wyib, K2.

Round 13 (increase): With color A, K2, [K1, sl1wyib] 2 times, K5, sl m, M1, knit to marker, M1, sl m, *K1, sl1wyib, K5, sl1wyib; repeat from * 4 times, K1, sl1wyib, K2 โ€” 7 thumb stitches between markers.

Round 14: With color B, [K2, sl1wyib, K1] 2 times, K2, sl1wyib, sl m, knit to marker, sl m, *K2, sl1wyib, K1; repeat from * 9 times.

Round 15 (increase): With color B, [K2, sl1wyib, K1]  2 times, K2, sl1wyib, sl m, M1, knit to marker, M1, sl m, *K2, sl1wyib, K1; repeat from * 9 times โ€” 9 thumb stitches between markers.

Round 16: With color A, K1, sl1wyib, K4, [K1, sl1wyib] 2 times, K1, sl m, knit to marker, sl m, *K3, sl1wyib, K1, sl1wyib, K2; repeat from * 4 times, K3, sl1wyib.

Round 17 (increase): With color A, K1, sl1wyib, K4, [K1, sl1wyib] 2 times, K1, sl m, M1, knit to marker, M1, sl m, *K3, sl1wyib, K1, sl1wyib, K2; repeat from * 4 times, K3, sl1wyib โ€” 11 thumb stitches between markers.

Round 18: With color B, [sl1wyib, K3] 2 times, sl1wyib, K2, sl m, knit to marker, sl m, *sl1wyib, K3; repeat from * 9 times.

Round 19: With color B, [sl1wyib, K3] 2 times, sl1wyib, K2, sl m, knit to marker, sl m, *sl1wyib, K3; repeat from * 9 times.

Round 20: With color A, K2, [K1, sl1wyib] 2 times, K5, sl m, knit to marker, sl m, *K1, sl1wyib, K5, sl1wyib; repeat from * 4 times, K1, sl1wyib, K2.

Round 21 (increase): With color A, K2, [K1, sl1wyib] 2 times, K5, sl m, M1, knit to marker, M1, sl m, *K1, sl1wyib, K5, sl1wyib; repeat from * 4 times, K1, sl1wyib, K2 โ€” 13 thumb stitches between markers.

Round 22: With color B, [sl1wyib, K3] 2 times, sl1wyib, K2, sl m, knit to marker, sl m, *sl1wyib, K3; repeat from * 9 times.

Round 23: With color B, [sl1wyib, K3] 2 times, sl1wyib, K2, sl m, knit to marker, sl m, *sl1wyib, K3; repeat from * 9 times.

Round 24: With color A, K1, sl1wyib, K4, [K1, sl1wyib] 2 times, K1, sl m, knit to marker, sl m, *K3, sl1wyib, K1, sl1wyib, K2; repeat from * 4 times, K3, sl1wyib.

Round 25 (increase): With color A, K1, sl1wyib, K4, [K1, sl1wyib] 2 times, K1, sl m, M1, knit to marker, M1, sl m, *K3, sl1wyib, K1, sl1wyib, K2; repeat from * 4 times, K3, sl1wyib โ€” 15 thumb stitches between markers.

Round 26: With color B, [K2, sl1wyib, K1]  2 times, K2, sl1wyib, sl m, knit to marker, sl m, *K2, sl1wyib, K1; repeat from * 9 times.

Round 27: With color B, [K2, sl1wyib, K1] 2 times, K2, sl1wyib, sl m, knit to marker, sl m, *K2, sl1wyib, K1; repeat from * 9 times.

Round 28: With color A, K2, [K1, sl1wyib] 2 times, K5, sl m, knit to marker, sl m, *K1, sl1wyib, K5, sl1wyib; repeat from * 4 times, K1, sl1wyib, K2.

Round 29: With color A, K2, [K1, sl1wyib] 2 times, K5, sl m, M1, knit to marker, M1, sl m, *K1, sl1wyib, K5, sl1wyib; repeat from 4 times, K1, sl1wyib, K2 โ€” 17 thumb stitches between markers.

Round 30: With color B, [sl1wyib, K3] 2 times, sl1wyib, K2, sl m, knit to marker, sl m, *sl1wyib, K3; repeat from * 9 times.

Thread a piece of scrap yarn onto a tapestry needle and thread through gusset stitches between markers โ€” 11 (15, 17) thumb stitches.

Round 31: With color B, [sl1wyib, K3] 2 times, sl1wyib, K2, remove marker,thread a piece of scrap yarn onto a tapestry needle and thread through 17 stitches, remove marker, cast on 1, *sl1wyib, K3; repeat from * 9 times โ€” 48 sts.

CONTINUE WITH HAND

Round 32: With color A, *K1, sl1wyib, K5, sl1wyib; repeat from * 6 times.

Round 33: With color A, *K1, sl1wyib, K5, sl1wyib; repeat from * 6 times.

Round 34: With color B, *sl1wyib, K3; repeat from * 12 times.

Round 35: With color B, *sl1wyib, K3; repeat from * 12 times.

Round 36: With color A, *K3, sl1wyib, K1, sl1wyib, K2; repeat from * 6 times.

Round 37: With color A, *K3, sl1wyib, K1, sl1wyib, K2; repeat from * 6 times.

Round 38: With color B, *K2, sl1wyib, K1; repeat from * 12 times.

Round 39: With color B, *K2, sl1wyib, K1; repeat from * 12 times.

Round 40: With color A, *K1, sl1wyib, K5, sl1wyib; repeat from * 6 times.

Round 41: With color A, *K1, sl1wyib, K5, sl1wyib; repeat from * 6 times.

Round 42: With color B, *sl1wyib, K3; repeat from * 12 times.

Round 43: With color B, *sl1wyib, K3; repeat from * 12 times.

Round 44: With color A, *K3, sl1wyib, K1, sl1wyib, K2; repeat from * 6 times.

Round 45: With color A, *K3, sl1wyib, K1, sl1wyib, K2; repeat from * 6 times.

Round 46: With color B, *sl1wyib, K3; repeat from * 12 times.

Round 47: With color B, *sl1wyib, K3; repeat from * 12 times.

Round 48: With color A, *K1, sl1wyib, K5, sl1wyib; repeat from * 6 times.

Round 49: With color A, *K1, sl1wyib, K5, sl1wyib; repeat from * 6 times.

Round 50: With color B, *K2, sl1wyib, K1; repeat from * 12 times.

Round 51: With color B, *K2, sl1wyib, K1; repeat from * 12 times.

Round 52: With color A, Knit around

Cut color B

Proceed to Finger Cuff

A hand adorned with a Cocoa Dreams fingerless mitten featuring a pink knitted pattern. The nails are painted red, while the softly blurred background showcases a geometric hanging decoration. -Marly Bird

FINGER CUFF

With smaller double pointed needles

Rounds 1-4: With color A, *K1, P1; repeat from * around. 

Bind off in pattern. 

THUMB 

All Sizes

With larger double pointed needles

Continue with the established two row color repeat for the thumb. 

Set-up Round: With color B, place thumb stitches from scrap yarn onto 3 double pointed needles, pick up and knit 1 stitch at cast on. Join to work in the round. 

Round 1: With color B, Knit around.

Round 2: With color A, Knit around. 

Child size proceed to thumb cuff

Round 3: With color A, Knit around. 

Round 4: With color B, Knit around. 

Round 5: With color B, Knit around. 

Round 6: With color A , Knit around. 

THUMB CUFF

With smaller double pointed needles

Rounds 1-3: With color A, *K1, P1; repeat from * around. 

Bind off in pattern.  

FINISHING

Fasten tail securely to wrong side of mitten.

Use tail from Thumb to close any gap or hole at the join with the Duplicate Stitch technique.

Weave in all loose ends.

Donโ€™t Forget to Share Your Project!
Once your Cocoa Dreams Mittens are finished, Iโ€™d love to see how they turned out! Share your project on Ravelry or tag me on social media with #MarlyMadeMeDoIt.


Meta Title:

“Cocoa Dreams Mosaic Knit Fingerless Mittens – Free Pattern & Beginner FAQs”

Meta Description:

“Learn how to knit the Cocoa Dreams Mosaic Fingerless Mittens with this free pattern! Easy mosaic knitting tips and FAQs included for knitters of all levels.”

Filed Under: Free Patterns, Knitting, Make-Alongs, Our Free Patterns, Pattern, Uncategorized, YouTube Video Tutorial

Cozy Up with the Falling Leaves Mosaic Knit Hat: Free Pattern & Mosaic Tips

October 26, 2024 By Marly Bird 15 Comments

Itโ€™s that time of year when you can feel the crisp breeze and see the beautiful fall colors swirling aroundโ€”why not capture that cozy fall vibe with your knitting needles? The Falling Leaves Mosaic Knit Hat is here to give you a stylish, fun-to-make project that can be completed in a weekend! Whether youโ€™re a beginner to mosaic knitting or a seasoned stitcher, this pattern is perfect for adding a splash of color to your autumn wardrobe.

The best part? Itโ€™s free! You can view the pattern right here on my blog. While youโ€™re here, be sure to check out some other fun projects on my Bamburg Bandana Cowl, Anne Slip Stitch Mosaic Shawl, Dynamic Wave Mosaic Hat — Free Pattern.

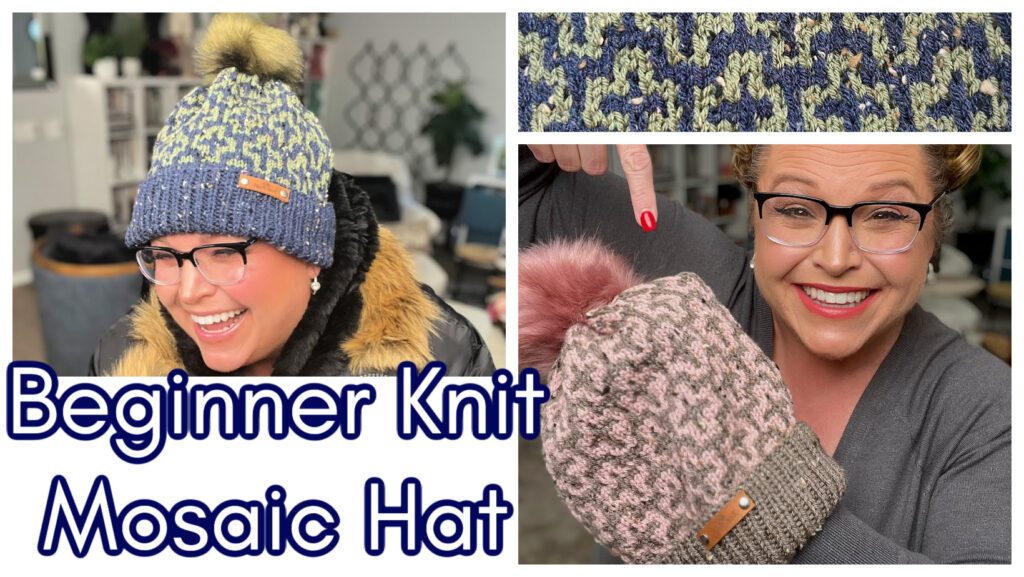
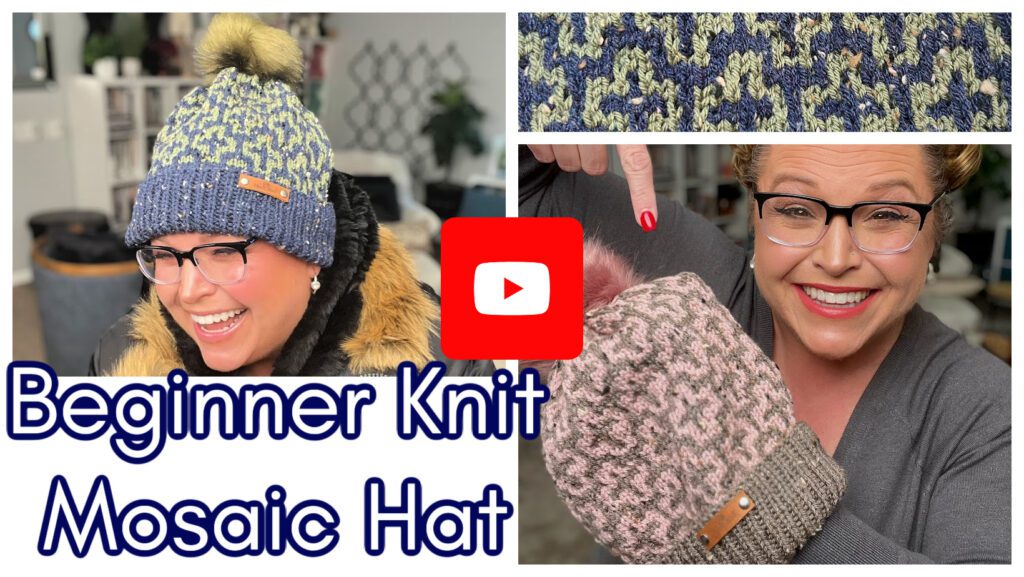
A woman wearing glasses smiles while holding a knit hat with a pom-pom. The text reads "Beginner Knit Mosaic Hat, Free Pattern Included." A close-up shows the hat's intricate pattern. The background features a blurred indoor setting, adding warmth to the scene. -Marly Bird

Affiliate Disclosure: This post contains affiliate links. To learn more please visit my privacy policy here๐Ÿ’–

What is Mosaic Knitting?

Mosaic knitting is a colorwork technique that looks intricate but is surprisingly easy to master. Itโ€™s based on simple slip stitches, which allow you to create eye-catching designs using two colors of yarn without having to carry multiple strands at once. Unlike other colorwork techniques like fair isle or intarsia, you only work with one color per row, which makes it super beginner-friendly!

Mosaic knitting = less yarn tangling and more fun!

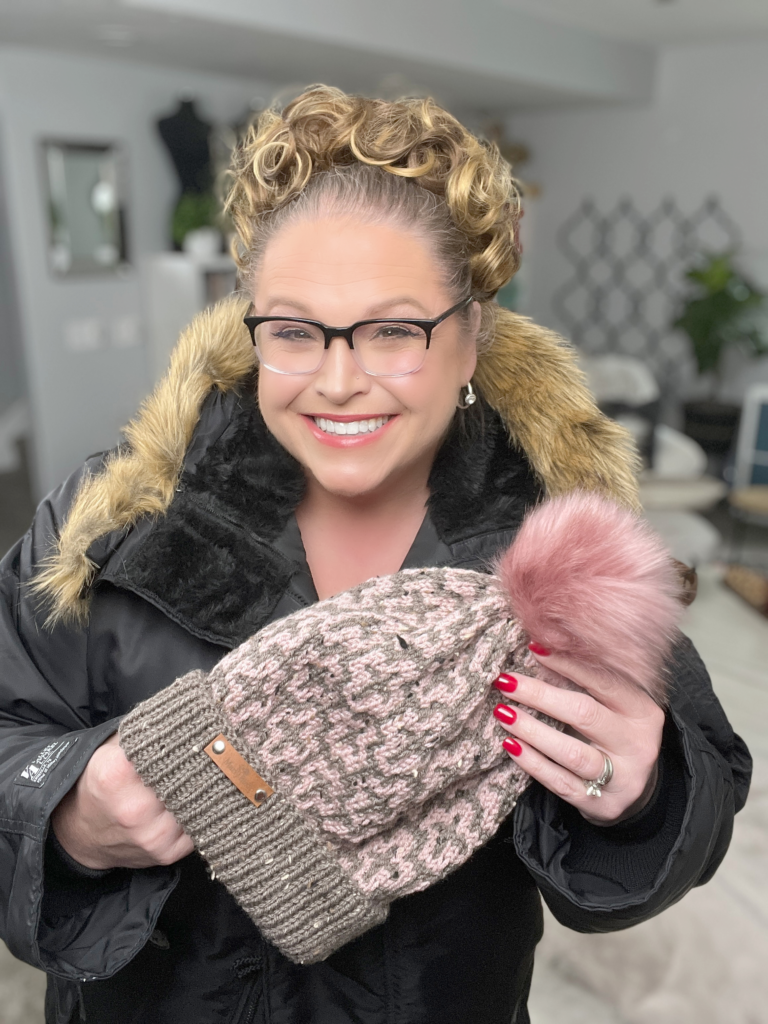
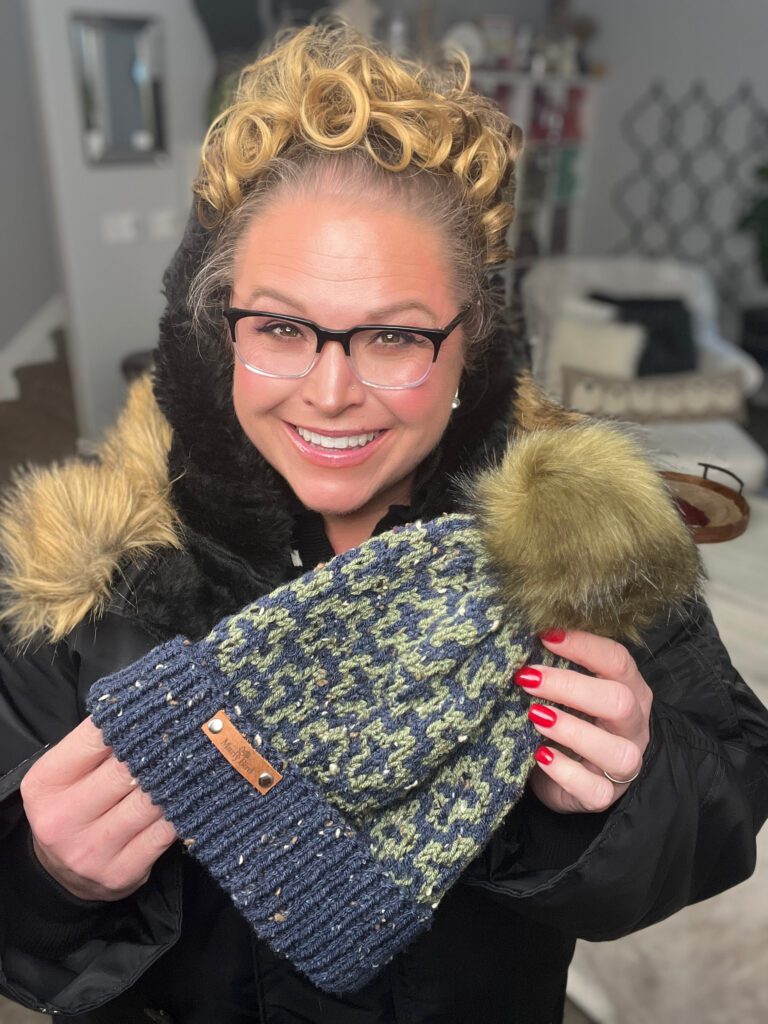
A woman with curly hair and glasses is smiling, holding a Falling Leaves Mosaic Knit Hat adorned with a pink pom-pom. She's wearing a black coat with a fur-trimmed hood. The background reveals a cozy room with a plant and some furniture, offering hints of mosaic tips for home decor enthusiasts. -Marly Bird

Why Youโ€™ll Love the Falling Leaves Mosaic Knit Hat ๐Ÿ

  • Quick Weekend Project: Perfect for knitters who love fast, satisfying projects. This hat can be made in a weekend!
  • Beginner-Friendly Mosaic: Even if youโ€™re new to mosaic knitting, Iโ€™ve included tips and tutorials to help guide you.
  • Free Pattern & Tutorial: You get the pattern, plus a step-by-step tutorial to make sure youโ€™re set up for success.

Materials & Yarn for Mosaic Knitting Hat

The Falling Leaves Mosaic Hat pattern uses worsted-weight yarn. For best results, I recommend using yarn that shows contrast between the two colors, like a dark and light shade. This makes the mosaic pattern pop!

Suggested Yarn:

WeCrochet, Brava Tweed (97% Premium Acrylic/ 3% Viscose, 218 yds / 200 m, 3.5 oz/ 100 g, CYCA# 4 worsted)

  • Yarn A (Main Color): A deep autumn hue such as burgundy, forest green, or navy.
  • Yarn B (Contrasting Color): A light shade like cream, mustard, or heathered gray to create contrast with the main color.

Other Supplies:

  • Knitting Needles: US Size 7 [4.5 mm] and US Size 8 [5 mm] 16″ circular needles, or size to obtain gauge.
  • Stitch Markers: To help you keep track of your rounds.
  • Tapestry Needle: For weaving in ends.
  • Optional leather tags, leather rivets, Faux Pom Pom

How to Get Started with Mosaic Knitting

If youโ€™re new to mosaic knitting, donโ€™t worry! Hereโ€™s a quick guide to get you going:

  1. Slip Stitches: The key technique in mosaic knitting. You slip stitches as if to purl (without knitting them) to bring up a color from the row below, creating the colorwork effect.
  2. One Color at a Time: You only knit with one color per row or round, making this a simpler form of colorwork.
    • But it is important to point out that most mosaic patterns will have you work 2 full rows or rounds with one color.
  3. Follow the Chart: Mosaic patterns often come with charts. In this pattern, youโ€™ll follow a color-coded chart that tells you which stitches to knit and which to slip.

Read more about Mosaic Knitting in my Beginnerโ€™s Guide


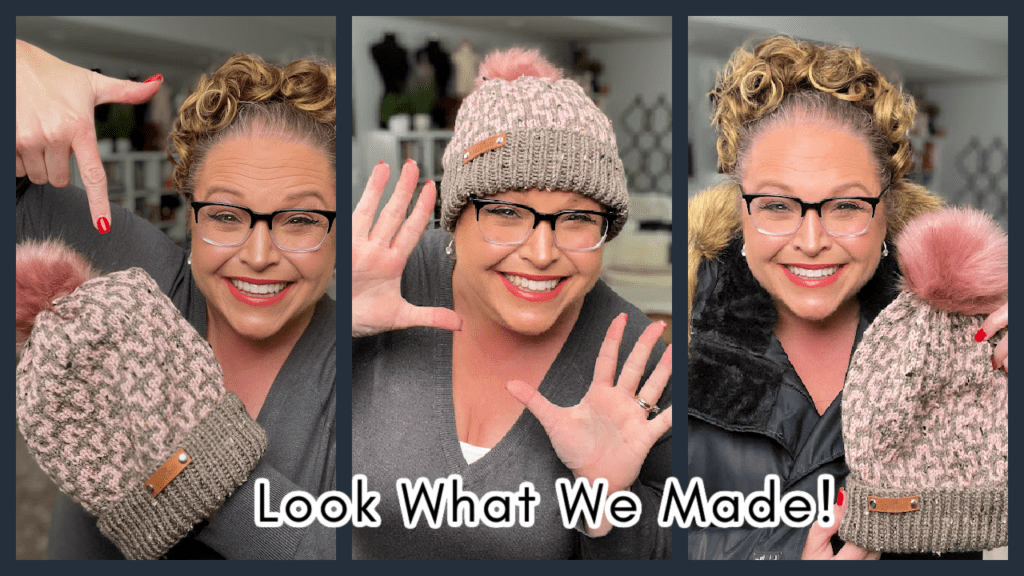
A woman in three side-by-side images showcases a mosaic knit hat with a pink pom-pom, reminiscent of falling leaves. She is smiling, pointing at the hat, and wearing glasses. Text at the bottom reads, "Look What We Made! Free Pattern Available! -Marly Bird

How to Customize Your Hat ๐ŸŽจ

Want to make this hat even more special? Here are a few ideas to customize it:

  • Pom-Pom Fun: Add a large, fluffy pom-pom to the top for a playful touch. You can even make a two-tone pom-pom to match the hatโ€™s colors.
  • Switch Colors: Play around with different color combinations to make the pattern uniquely yours. Using a long color changing yarn like Sandscapes for color B and a solid color of Brava for color A would result in a stunning mosaic hat!
  • Extra Length: If you prefer a slouchy beanie, simply knit a few more rounds before starting the decrease section.

FAQs About Mosaic Knit Hats

Q: Is mosaic knitting hard?
A: Not at all! Mosaic knitting is actually one of the simplest colorwork techniques. Since youโ€™re only working with one color at a time and using slip stitches to create the pattern, itโ€™s very approachable for beginners.

Q: Can I knit this hat with double-pointed needles (DPNs)?
A: Yes! If you prefer working with DPNs instead of circular needles, you can absolutely adapt this pattern. Just be sure to divide your stitches evenly across the needles.

Q: Whatโ€™s the best way to block a knit hat?
A: After you finish your hat, wet block it to even out the stitches and soften the yarn. Use a balloon or a hat form to block your hat without losing its shape.

Q: What type of yarn is best for mosaic knitting?
A: High-contrast yarns work best for mosaic knitting. You want the slip stitches to stand out, so choose colors that show a distinct difference when placed side by side. How to colors for colorwork knitting.


Ready to Start? Hereโ€™s the Free Pattern!

Now that you know a little bit more about mosaic knitting, itโ€™s time to grab your needles and dive into the Falling Leaves Mosaic Knit Hat pattern below.

A woman with glasses and curly hair smiles while holding a Falling Leaves Mosaic Knit Hat with a fur pom-pom. She is wearing a winter coat with a fur trim, and the cozy living room background enhances her joy at discovering the free pattern's mosaic tips. -Marly Bird

FALLING LEAVES KNIT MOSAIC HAT

Designed by Marly Bird

SKILL LEVEL

Adventurous Beginner

MEASUREMENTS

To Fit Size

Toddler (Child, Adult Small, Adult Medium, Adult Large) 

Sample in sized Adult Medium

Finished Measurements

To Fit SizeToddlerChildAdult SmallAdult MediumAdult Large
Finished Head Circumference (approx) Inches16182122.524
Finished Head Circumference cm40.545.553.55761
Height not including Brim INCHES6.257.588.59
Height not including Brim CM161920.521.523

Gauge 

20 stitches by 35 rounds= 4″ [10 cm] x 4″ [10 cm] in mosaic stitch pattern and larger needles; use any size needle to obtain the gauge.  

MATERIALS

Yarn 

WeCrochet, Brava Tweed (97% Premium Acrylic/ 3% Viscose, 218 yds / 200 m, 3.5 oz/ 100 g, CYCA# 4 worsted)

Color A: #61309 Elderberry, 1 ball
Color B: #61304 Wasabi, 1 ball 

Needle

U.S. 7 [4.5 mm] and U.S. 8 [5 mm] 16โ€ circular needles, or size required for gauge.

Notions 

  • Stitch markers,
  • Tapestry needle,
  • Leather tags,
  • Leather rivets,
  • Optional Faux Pom Pom

ABBREVIATIONS

K โ€“ Knit

K2tog – Knit Two Together

P โ€“ Purl

PM – Place Marker

RS – Right Side

Sl – Slip

Sl-wyib – Slip With Yarn in Back

St(s) โ€“ Stitches

WS – Wrong Side

CHART

A knitting chart for the Falling Leaves Mosaic Knit Hat showcases 25 rows and columns. Blue squares represent color A, white squares with a "V" denote slip stitches, and black squares with "A" or "B" signify colors. An orange outline highlights the pattern repeat. Get inspiring mosaic tips in this free pattern! -Marly Bird

NOTES

  • Directions are for size Toddler; changes for sizes (Child, S, M, L) are in parentheses. When only one number is given then that number applies to all sizes.
  • When casting on, place a marker every 20 stitches to not lose count.
  • Project is made from the bottom brim to crown.
  • When working on the body, place a marker every 8 stitches for the repeat.
  • Slip all stitches as if to purl with yarn in back.
    • When slipping stitches be sure to not pull the float too tight or the gauge will get too small.
  • Do not cut colors, carry the color up the inside of the project.
  • If you want to be sure you have a safety net as you knit, adding a lifeline to your project every so often will be helpful. Just to make sure you have a point to rip back to if something goes wrong. (video help).

VIDEO TUTORIALS

  • Long Tail Cast-On >> Click Here for Video Help <<
  • Knit Stitch (continental style) >> Click Here for Video Help <<
  • Purl Stitch (continental style) >> Click Here for Video Help <<
  • Perfect Ribbing >> Click Here for Video Help << 
  • Duplicate Stitch >> Click Here for Video Help <<
  • How to Add Lifeline >> Click Here for Video Help <<
  • Bury Ends >> Click Here for Video Help <<

  • How to add a Removable Faux Fur Pom Pom >> Click Here for Video Help << 
  • Falling Leaves Knit Hat Video >> Click Here for Video Help <<
A woman smiles while wearing a blue knit hat with a pom-pom. Next to her is an image of her holding a pink mosaic knit hat, pointing at it. The words "Beginner Knit Mosaic Hat" and a red YouTube play button are displayed. -Marly Bird

GROW

To Unlockย Exclusive Subscriber Contentย click the Box below and join for free by simply adding your email and creating a password! If you are having troubles, clear your cache or reset your password or login to the Grow Publisher Portal.

>> Learn More About Grow Here <<

I'm thrilled to share this amazing pattern with you, many patterns on my blog are absolutely free! I kindly request that you don't copy and paste or distribute this pattern. Prefer an ad-free experience? Buy a digital PDF pattern for a small fee from one of my online stores for a seamless crafting journey. 

I appreciate your support and readership. You are the reason I can keep doing what I love and sharing it with others. So, thank you from the bottom of my yarn-loving heart! Disclosure: This post contains affiliate links, meaning I get a commission if you decide to make a purchase through my links at no cost to you.

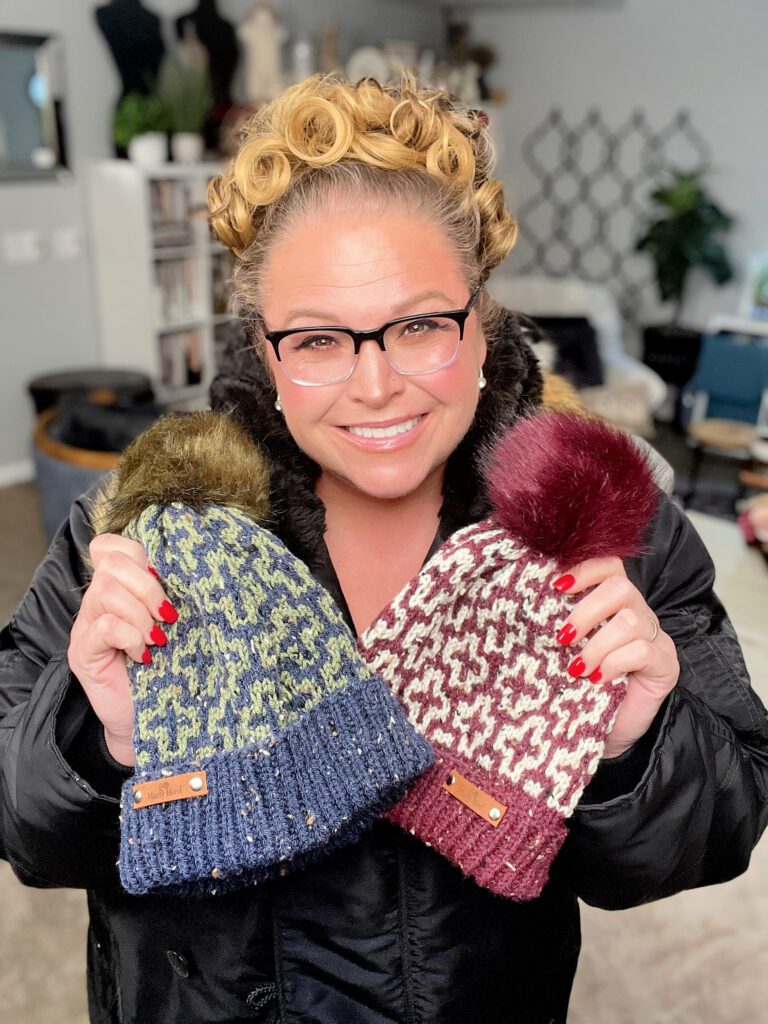
A person wearing glasses smiles while holding two knitted hats with pom-poms, showcasing a free pattern. One hat is blue and green, and the other is red and white. The cozy indoor setting adds warmth with its furnishings and decorations. -Marly Bird

FALLING LEAVES MOSAIC KNIT HAT

BRIM 

With color A and smaller circular needles, cast on 80, (88, 104, 112, 120) stitches, place marker then join to work in the round. 

Round 1: *K1, p1; repeat from * to end of round. 

Work in 1×1 ribbing for 3 (4, 5, 5, 5)โ€ [7.6 (10, 12.7, 12.7, 12.7) cm]. This will be folded over to create a double brim.

BODY

Continue with larger circular needles.

(also see chart)

Round 1: With color A, Knit around.

Round 2: With color B, * [K2, sl1wyib, K] 2 times; repeat from * 10 (11, 13, 14, 15) times. 

Round 3: With color B, * [K2, sl1wyib, K] 2 times; repeat from * 10 (11, 13, 14, 15) times.  

Round 4: With color A, *K2, [K, sl1wyib] 2 times,K2,; repeat from * 10 (11, 13, 14, 15) times.  

Round 5: With color A, *K2, [K, sl1wyib] 2 times,K2,; repeat from * 10 (11, 13, 14, 15) times.

Round 6: With color B, * [sl1wyib, K3,] 2 times; repeat from * 10 (11, 13, 14, 15) times.  

Round 7: With color B, * [sl1wyib, K3,] 2 times; repeat from * 10 (11, 13, 14, 15) times.  

Round 8: With color A, * K, sl1wyib, K5, sl1wyib; repeat from * 10 (11, 13, 14, 15) times.  

Round 9: With color A, * K, sl1wyib, K5, sl1wyib; repeat from * 10 (11, 13, 14, 15) times.  

Round 10: With color B, * [sl1wyib, K3,] 2 times; repeat from * 10 (11, 13, 14, 15) times.  

Round 11: With color B, * [sl1wyib, K3,] 2 times; repeat from * 10 (11, 13, 14, 15) times.  

Round 12: With color A, *K2, [K, sl1wyib] 2 times,K2,; repeat from * 10 (11, 13, 14, 15) times.  

Round 13: With color A, *K2, [K, sl1wyib] 2 times,K2,; repeat from * 10 (11, 13, 14, 15) times.  

Round 14: With color B, * [K2 times, sl1wyib, K] 2 times; repeat from * 10 (11, 13, 14, 15) times.  

Round 15: With color B, * [K2 times, sl1wyib, K] 2 times; repeat from * 10 (11, 13, 14, 15) times.  

Round 16: With color A, * K, sl1wyib, K5, sl1wyib; repeat from * 10 (11, 13, 14, 15) times.  

Round 17: With color A, * K, sl1wyib, K5, sl1wyib; repeat from * 10 (11, 13, 14, 15) times.  

Round 18: With color B, * [sl1wyib, K3,] 2 times; repeat from * 10 (11, 13, 14, 15) times.  

Round 19: With color B, * [sl1wyib, K3,] 2 times; repeat from * 10 (11, 13, 14, 15) times.  

Round 20: With color A, *K2, [K, sl1wyib] 2 times,K2,; repeat from * 10 (11, 13, 14, 15) times.  

Round 21: With color A, *K2, [K, sl1wyib] 2 times,K2,; repeat from * 10 (11, 13, 14, 15) times.  

Round 22: With color B, * [sl1wyib, K3,] 2 times; repeat from * 10 (11, 13, 14, 15) times.  

Round 23: With color B, * [sl1wyib, K3,] 2 times; repeat from * 10 (11, 13, 14, 15) times.  

Round 24: With color A, * K, sl1wyib, K5, sl1wyib; repeat from * 10 (11, 13, 14, 15) times.  

Round 25: With color A, * K, sl1wyib, K5, sl1wyib; repeat from * 10 (11, 13, 14, 15) times.  

Repeat rounds 2-25 until body of hat measures approx. 6 (7.25, 7.50, 8, 8.5)โ€ [15 (18.5, 19, 20, 21) cm] ending after 2 rounds of color B โ€” Do not count brim in measurement. Cut color B.

CROWN

Round 1: With color A, * K2tog; repeat from * around โ€” 40, (42, 52, 56, 60) stitches.

Round 2: Knit 

FINISHING

Thread the tail into a tapestry needle, insert tapestry needle into each stitch on left hand needle as if to knit and off until the tail has been thread through each stitch. 

Pull tight like a drawstring. 

Secure tail to the wrong side of the hat. 

Weave in all loose ends.

(Optional) Add Pom Pom to top of hat. 

(Optional) Add Leather Tag with Leather Rivets


Donโ€™t Forget to Share Your Project!
Once youโ€™ve finished your Falling Leaves Mosaic Knit Hat, Iโ€™d love to see it! Share your project on Ravelry or tag me on social media with #MarlyMadeMeDoIt.

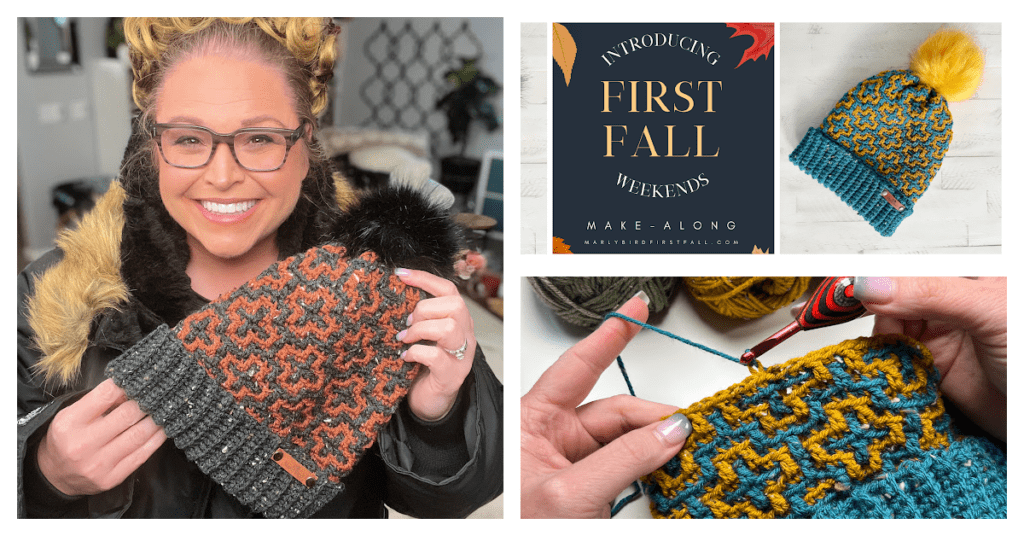
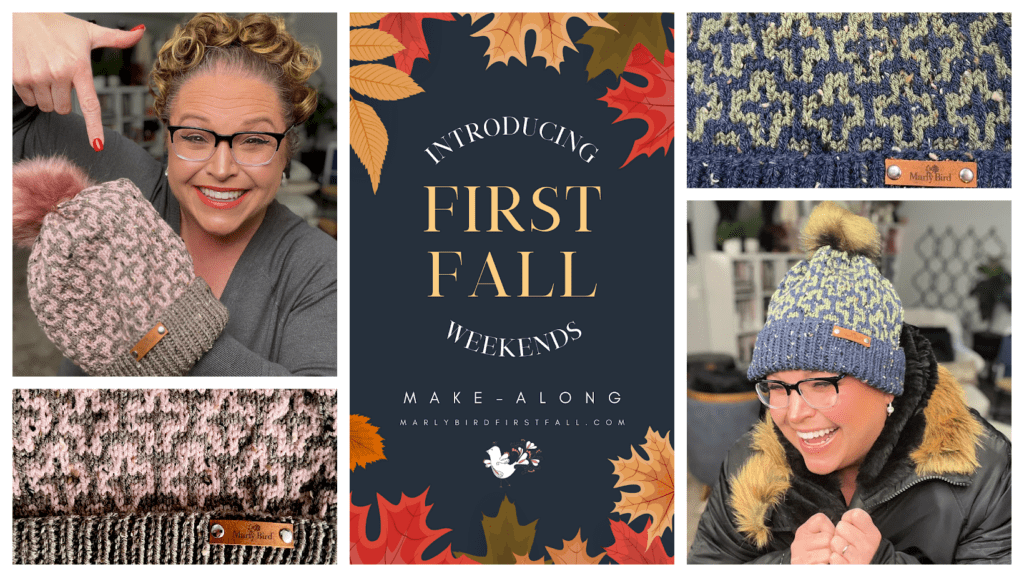
Collage with two women showcasing knitted hats in gray and blue. The background features leaves and the text "Introducing First Fall Weekends Make-Along marlybirdfirstfall.com." Knitted patterns are shown in detail, including a free pattern for a mosaic knit hat. -Marly Bird

Filed Under: Free Patterns, Knitting, Make-Alongs, Marly Bird Premium Patterns, Our Free Patterns, Pattern, Uncategorized, YouTube Video Tutorial

Stay Warm and Stylish with the Autumn Breezes Crochet Mosaic Hat: Free Pattern & Mosaic Crochet Tips

October 26, 2024 By Marly Bird 9 Comments

Crochet lovers, meet your new fall favorite: the Autumn Breezes Crochet Mosaic Hat! This beautiful mosaic crochet hat combines cozy warmth with eye-catching geometric patterns, making it a perfect addition to your fall wardrobe.

Best of all, this pattern is completely free! In this blog post, you'll find everything you need to know to get started on this project, along with tips and tricks to help you master mosaic crochet. Don't forget to check out my other fall crochet patterns while you're hereโ€”there's something for every skill level!

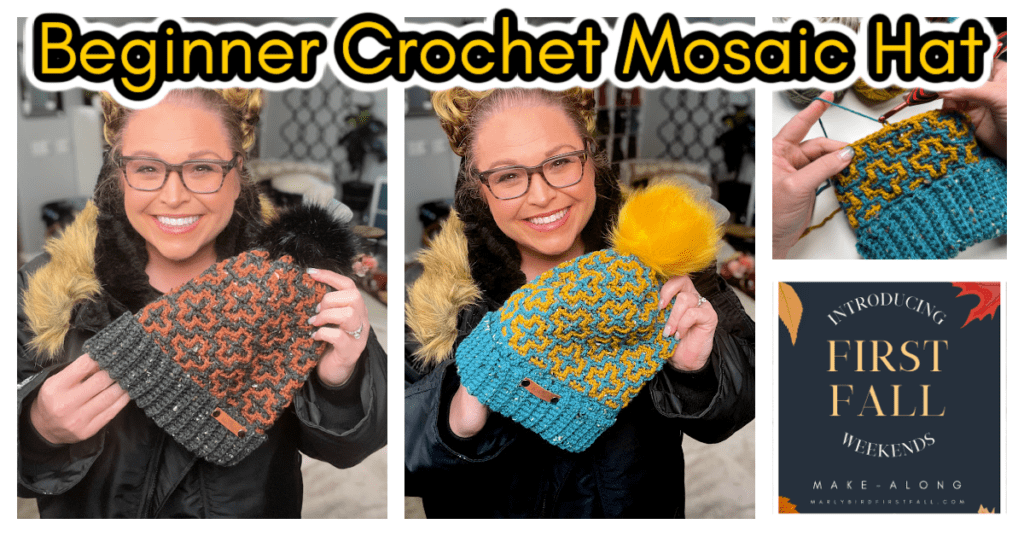
A person smiling and holding handmade crochet hats with mosaic patterns, set against cozy room decor. Text on the image reads "Beginner Crochet Mosaic Hat" and "Introducing First Fall Weekends Make-Along." Discover free patterns and mosaic crochet tips for your creative journey! -Marly Bird

Affiliate Disclosure: This post contains affiliate links. To learn more please visit my privacy policy here๐Ÿ’–


Why Youโ€™ll Love the Autumn Breezes Hat

  • Unique Design: Mosaic crochet brings out intricate patterns using simple slip stitches. This hat uses two contrasting colors to create a stunning visual effect.
  • Perfect for Fall: The textured look and cozy warmth make this hat ideal for chilly autumn days.
  • Mosaic Crochet Made Easy: This pattern is a great introduction to mosaic crochet, with step-by-step instructions and helpful tutorials.

Yarn & Materials for the Autumn Breezes Hat

To make the Autumn Breezes Hat, I recommend using worsted weight yarn in two contrasting colors. The contrast between your main color and accent color will really make the mosaic pattern pop!

Suggested Yarn:

WeCrochet, Brava Tweed (97% Premium Acrylic/ 3% Viscose, 218 yds / 200 m, 3.5 oz/ 100 g, CYCA# 4 worsted)

  • Yarn A (Main Color): A warm, neutral tone such as rust, mustard, or dark brown.
  • Yarn B (Accent Color): A lighter or more vibrant color like cream, teal, or burgundy for contrast.

Other Supplies:

  • Crochet Hook: US I/9 (5.5 mm)
  • Stitch Markers: To help you keep track of your rounds.
  • Tapestry Needle: For weaving in ends.
  • Optional leather tags, leather rivets, Faux Pom Pom

What Is Mosaic Crochet?

Mosaic crochet is a colorwork technique that uses slip stitches to create intricate patterns. Unlike other colorwork techniques, you only work with one color per round, working double crochet stitches into the front loop of the stitch 2 rows below to create geometric color joines from previous rows into the pattern.

For this project, the mosaic stitch pattern creates a geometric, textured look thatโ€™s both modern and classic, making it a perfect fit for fall accessories like the Autumn Breezes Hat.

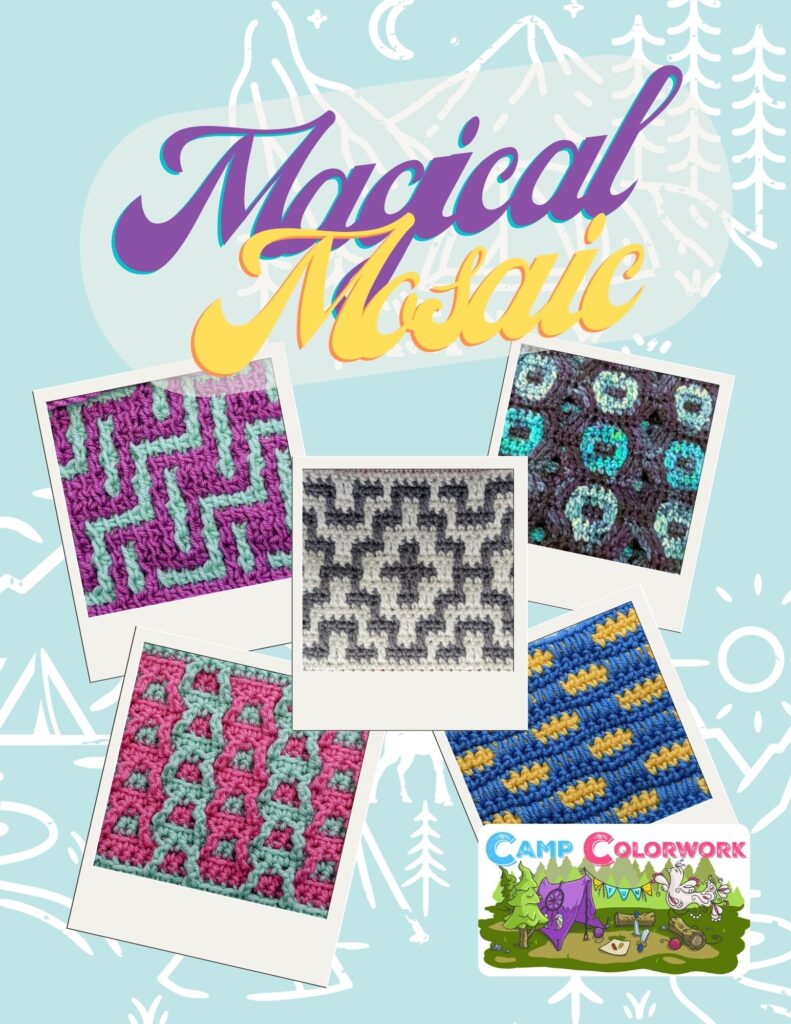
Want to learn more than just this form of mosaic crochet? You should check out Camp Colorwork!

Promotional poster for "magical mosaic" featuring various colorful Mosaic Knitting and Mosaic Crochet patterns arranged on a snowflake background, with the event title and logo "camp colorwork" at the bottom. -Marly Bird

FAQs: Crochet Mosaic Hats

Q: Is mosaic crochet difficult?
A: Mosaic crochet might look complex, but itโ€™s much easier than it appears. Youโ€™ll only work with one color at a time, which makes it beginner-friendly. If you can crochet basic stitches you can do mosaic crochet!

Q: How do I choose colors for mosaic crochet?
A: Choose two high-contrast colors to really make the pattern pop. Think of a dark and a light color combination or go for bold color choices to make your mosaic design stand out.

Q: Can I adjust the size of the hat?
A: Absolutely! You can adjust the number of rounds or stitches to make the hat larger or smaller. Just be mindful of the pattern repeats in mosaic crochet.

Q: How do I block a mosaic crochet hat?
A: Blocking helps open up the stitches and show off the pattern. Gently wet-block your finished hat and shape it with a balloon or hat form to ensure a perfect fit.


Get the Free Autumn Breezes Hat Pattern Here

Youโ€™re all set to start crocheting! Look below for the Autumn Breezes Crochet Mosaic Hat.

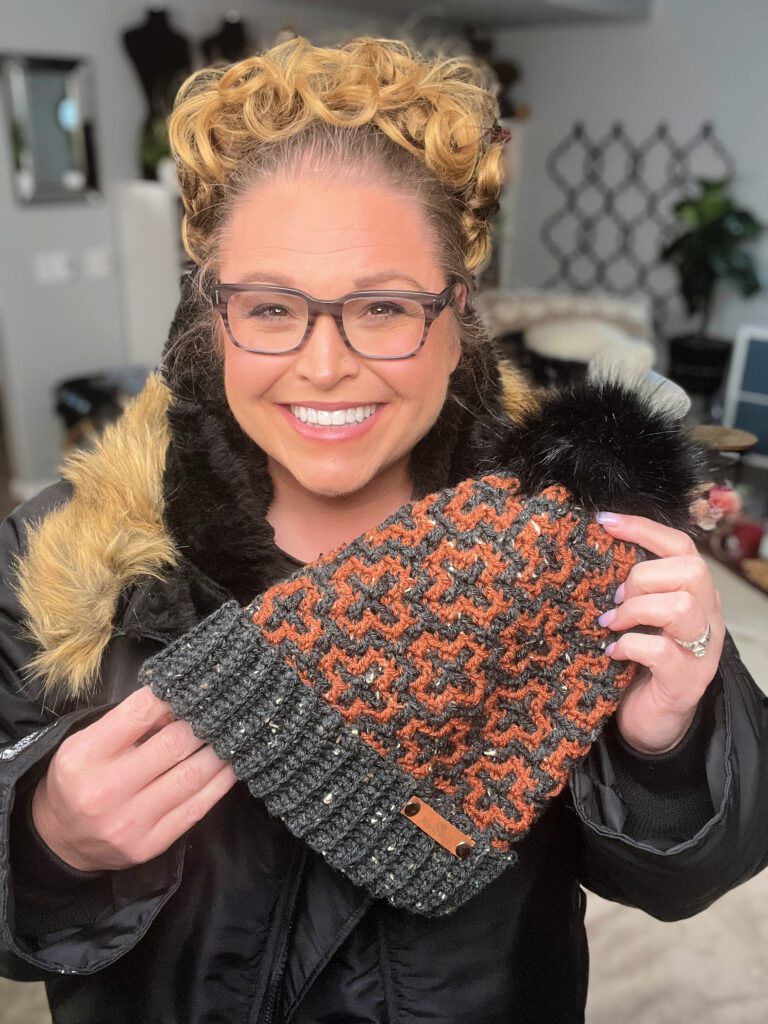
A person with curly hair and glasses smiles, holding a knitted hat with an orange and gray pattern and a black pom-pom. They wear a black jacket with a fur-lined hood, perfectly suited for those First Fall Weekends. The background features a cozy room adorned with plants and decorations. -Marly Bird

Autumn Breezes Crochet Mosaic Hat Pattern Details

Designed by Marly Bird

SKILL LEVEL

Adventurous Beginner

MEASUREMENTS

To Fit Size

Baby (Toddler-Child, Adult Small-Medium, Adult Large-Extra Large) 

Samples shown in  Adult Small-Medium

Finished Measurements

To Fit SizeBabyToddler – ChildAdult Small – MediumAdult Large – Extra Large
Finished Head Circumference (approx) Inches1517.52022.5
Finished Head Circumference cm3844.55157
Finished Height – Not Including BrimInches6.57.588.25
Finished Height – Not Including Brimcm16.5192021

Gauge 

16 sc blo x 25 rounds = 5โ€ [12.5 cm] x  4โ€ [10 cm] in pattern stitch in the round; use any size hook to obtain the gauge.

MATERIALS

Crochet Yarn 

WeCrochet, Brava Tweed (97% Premium Acrylic/ 3% Viscose, 218 yds / 200 m, 3.5 oz/ 100 g, CYCA# 4 worsted)

Color A: #653734 Chimney Sweep, 1 ball
Color B: #61306 Pumpkin Bread, 1 ball 

Crochet Hook

Size I/9 [5.5 mm]

Notions 

Stitch markers, tapestry needle, leather tags, leather rivets, optional Faux Pom Pom

ABBREVIATIONS

Ch – Chain(s) 

BLO – Back Loop Only

Mosaic Dc – Mosaic Double Crochet 

FLO – Front Loop Only

PM – Place Marker

RS – Right Side 

Sc – Single Crochet

Sc2tog – Single Crochet Two Stitches Together

Sl st – Slip Stitch

St(s) – Stitch(es)

WS – Wrong Side

SPECIAL STITCHES 

โญBack Loop Only (blo): This is the furthest loop to you of the top 2 loops of the stitch indicated, regardless if you are on the RS or WS.

โญ๏ธChain (Ch): With slip knot or free loop on hook, yarn over hook and pull through loop on hook.

โญ๏ธFront Loop Only (flo): This is the closest loop to you of the top 2 loops of the stitch indicated, regardless if you are on the RS or WS.

โญ๏ธInvisible join: This is created by removing the free loop from hook, thread hook from back to front in first st, place free loop on hook and draw through stitch. 

โญ๏ธSingle Crochet (Sc): Insert hook into indicated stitch, yarn over and pull up a loop, yarn over and draw through 2 loops on hook.

โญ๏ธSlip Stitch (Sl st): Insert hook into indicated stitch, yarn over and pull up a loop and draw through loop on hook. 

โญ๏ธSingle Crochet Two Together (Sc2tog): *Insert hook into indicated stitch, yarn over and pull up a loop; repeat from * in next stitch indicated, yarn over and draw through all 3 loops on hook.

โญ๏ธMosaic Double Crochet (Mosaic-dc): Yarn over hook, insert hook into front loop of st indicated 2 rounds below (in front of next st), yarn over and pull up a loop, [yarn over and draw through 2 loops on hook] twice. Skip next st on current round (the one directly behind the dc just made).

MOSAIC CHARTS

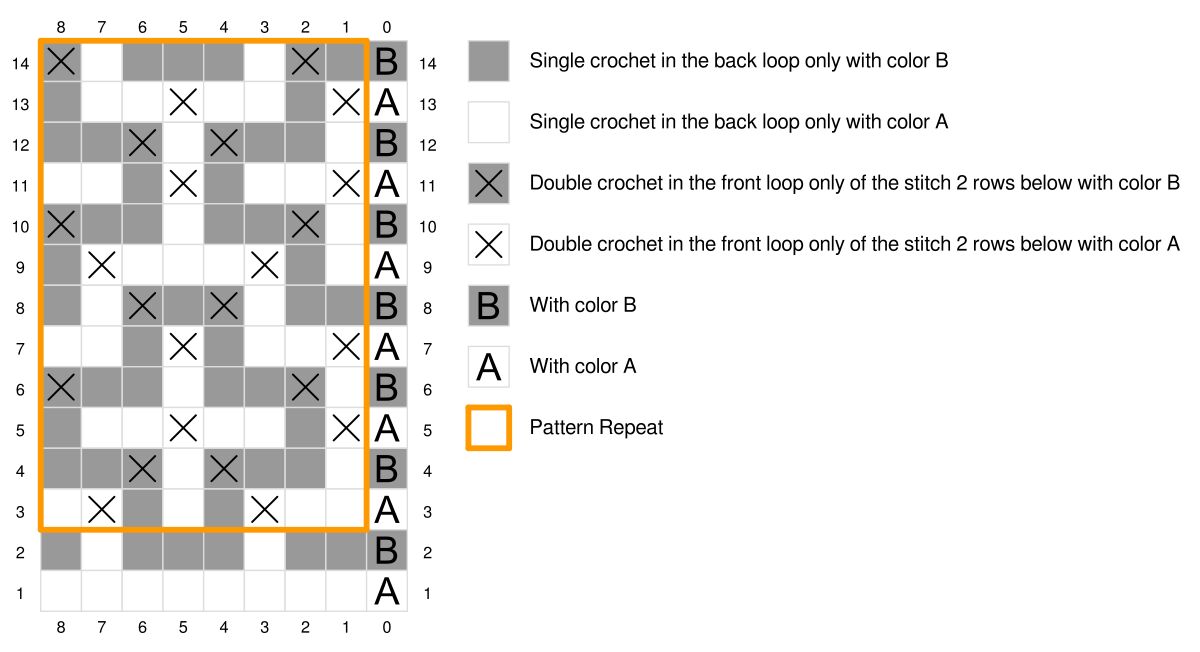
The crochet chart, reminiscent of a Falling Leaves Mosaic Knit Hat, features a grid with symbols indicating stitch types and colors for a pattern. A key on the right explains symbols for single and double crochet in loops with colors A and B, while an orange border marks the pattern repeat area. -Marly Bird


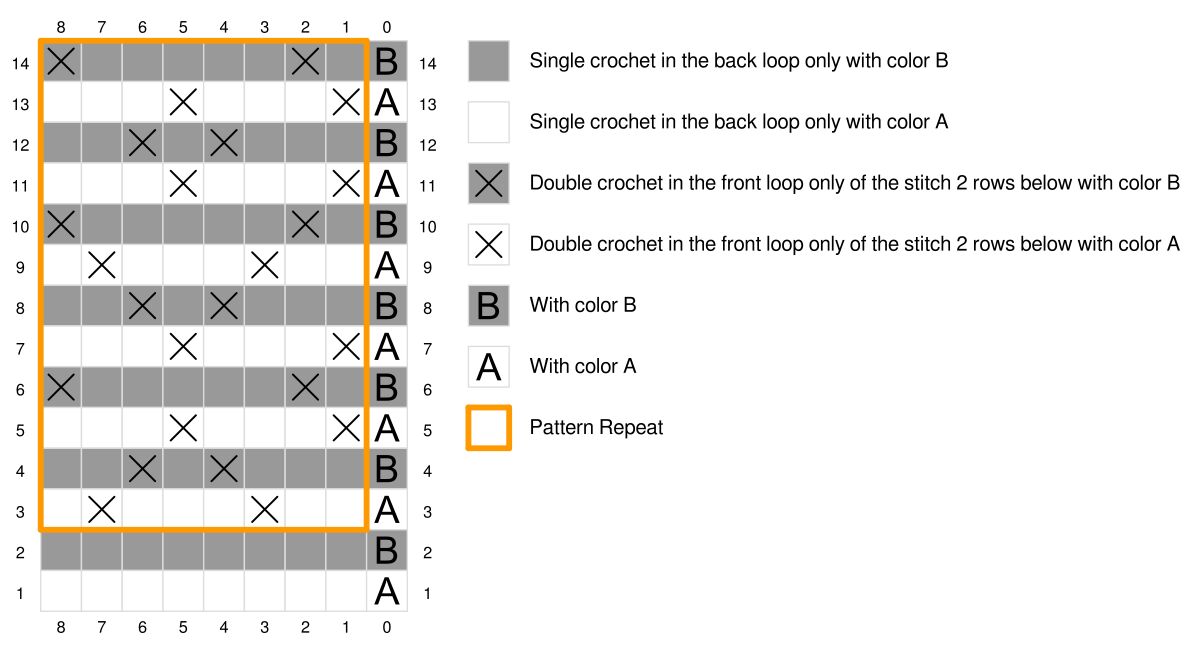
Knitting pattern chart with gray, white, and orange sections indicating stitches and colors for a crochet project.

NOTES

  • Directions are for size Baby; changes for sizes (Toddler-Child, Adult Small-Medium, Adult Large-Extra Large) are in parentheses. When only one number is given then that number applies to all sizes.
  • Brim of the hat is worked flat then seamed together before starting on the body of the hat. 
  • Body of the hat is worked into the long side edge of the brim as instructed.
  • Body of the hat is worked in joined rounds. Use a marker to identify the first stitch of each round.  Do not turn at the end of each round.
  • Join each round with an invisible join (see special stitches), change to a new color while making the chain to start the next round. 
  • Do not cut colors, carry the color up the side of the project.

VIDEO TUTORIAL

  • Single Crochet Ribbing >> Click Here for Video Help <<
  • Through the Back Loop >> Click Here for Video Help <<
  • Through the Front Loop >>Click Here for Video Help <<
  • How to Bury Ends >> Click Here for Video Help <<
  • How to add a Removable Faux Fur pom >> Click Here for Video Help <<
  • How to Crochet the Autumn Breezes Crochet Mosaic Hat >> Click Here for Video <<
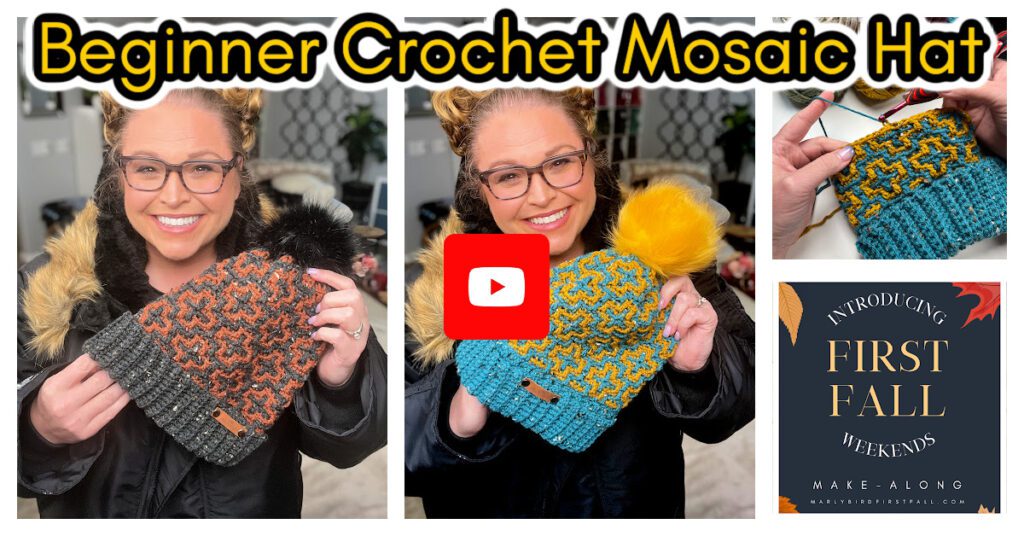
A woman holds two crochet mosaic hats, one brown and one blue. Text reads, "Beginner Crochet Mosaic Hat" and "Introducing First Fall Weekends." A play button icon is centered on the image. -Marly Bird

GROW

To Unlockย Exclusive Subscriber Contentย click the Box below and join for free by simply adding your email and creating a password! If you are having troubles, clear your cache or reset your password or login to the Grow Publisher Portal.

>> Learn More About Grow Here <<

I'm thrilled to share this amazing pattern with you, many patterns on my blog are absolutely free! I kindly request that you don't copy and paste or distribute this pattern. Prefer an ad-free experience? Buy a digital PDF pattern for a small fee from one of my online stores for a seamless crafting journey. 

I appreciate your support and readership. You are the reason I can keep doing what I love and sharing it with others. So, thank you from the bottom of my yarn-loving heart! Disclosure: This post contains affiliate links, meaning I get a commission if you decide to make a purchase through my links at no cost to you.

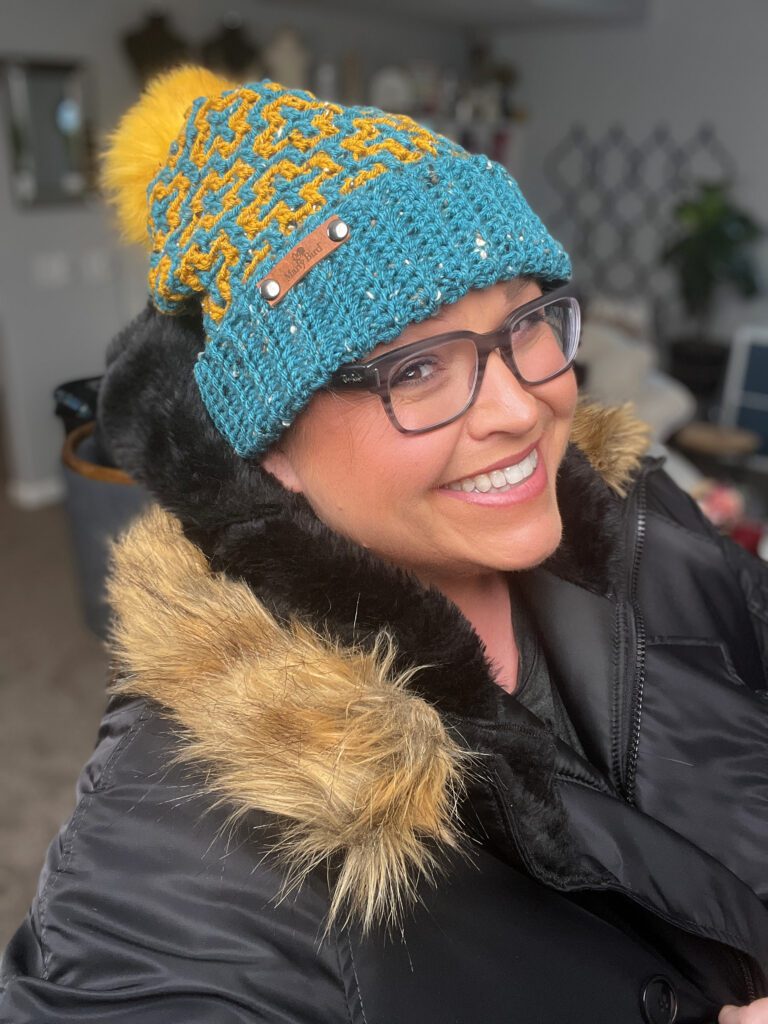
A person smiles warmly, wearing glasses, a Crochet Mosaic Hat in teal with a yellow pattern and pom-pom, and a black coat with a faux fur hood. The background is an inviting indoor space with softly blurred details. -Marly Bird

Autumn Breezes Crochet Mosaic Hat Pattern

BRIM

With color A, chain 17 (19, 21. 21)

Row 1 (RS): Sc in 2nd ch from hook and in each ch across, turn — 16 (18, 20, 20) sc.

Row 2: Ch 1, sc-blo in each sc across, turn.

Repeat row 2, 46 (54, 62, 70) times more โ€” 48 (56, 64, 72) rows. 

Joining Row: Ch 1, *slip stitch into the backloop of next st and next ch on foundation ch at the same time: repeat from * across, do not turn, do not fasten off.

BODY

Turn to begin working on long edge of brim (around the row ends), with color A ch 1.

Set-up Round (RS): Evenly place 48 (56, 64, 72) sc along long side of brim, join to first sc (begin working  in the round), do not turn throughout.

Round 1: Ch 1, sc-blo in each sc around, join to first st.
Round 2: With color B, ch 1, sc-blo in each sc around, join to first st.
Round 3: With color A, ch 1, sc blo in first 2 sts, *mosaic dc-flo in next st 2 rounds below, sc blo in next 3 sts; repeat from * around ending at last 2 sts, mosaic dc-flo in next st 2 round below, sc blo in last st, join to first st.
Round 4: With color B, ch 1, sc blo in first 3 sts, *mosaic dc-flo in next st 2 rounds below, sc blo in next st, mosaic dc-flo in next st 2 rounds below, sc blo in next 5 sts; repeat from * around ending at last 5 sts, mosaic dc-flo in next st 2 rounds below, sc blo in next st, mosaic dc-flo in next st 2 rounds below, sc blo in last 2 sts, join to first st.
Round 5:  With color A, ch 1, *mosaic dc-flo in next st 2 rounds below, sc blo in next 3 sts; repeat from * around, join to first st.
Round 6: With color B, ch 1, *sc blo in next st, mosaic dc-flo in next st 2 rounds below, sc blo in next 5 sts, mosaic dc-flo in next st 2 rounds below; repeat from * around, join to first st.
Round 7: With color A, ch 1, *mosaic dc-flo in next st 2 rounds below, sc blo in next 3 sts; repeat from * around, join to first st.
Round 8: With color B, ch 1, sc blo in first 3 sts, *mosaic dc-flo in next st 2 rounds below, sc blo in next st, mosaic dc-flo in next st 2 rounds below, sc blo in next 5 sts; repeat from * around ending at last 5 sts, mosaic dc-flo in next st 2 rounds below, sc blo in next st, mosaic dc-flo in next st 2 rounds below, sc blo in last 2 sts, join to first st.
Round 9: With color A, ch 1, sc blo in first 2 sts, *mosaic dc-flo in next st 2 rounds below, sc blo in next 3 sts; repeat from * around ending at last 2 sts, mosaic dc-flo in next st 2 round below, sc blo in last st, join to first st.
Round 10: With color B, ch 1, *sc blo in next st, mosaic dc-flo in next st 2 rounds below, sc blo in next 5 sts, mosaic dc-flo in next st 2 rounds below; repeat from * around, join to first st.
Round 11: With color A, ch 1, *mosaic dc-flo in next st 2 rounds below, sc blo in next 3 sts; repeat from * around, join to first st.
Round 12: With color B, ch 1, sc blo in first 3 sts, *mosaic dc-flo in next st 2 rounds below, sc blo in next st, mosaic dc-flo in next st 2 rounds below, sc blo in next 5 sts; repeat from * around ending at last 5 sts, mosaic dc-flo in next st 2 rounds below, sc blo in next st, mosaic dc-flo in next st 2 rounds below, sc blo in last 2 sts, join to first st.
Round 13: With color A, ch 1, *mosaic dc-flo in next st 2 rounds below, sc blo in next 3 sts; repeat from * around, join to first st.
Round 14: With color B, ch 1, *sc blo in next st, mosaic dc-flo in next st 2 rounds below, sc blo in next 5 sts, mosaic dc-flo in next st 2 rounds below; repeat from * around, join to first st.
Repeat round 3-14 until hat measures approx. 6.25 (7.25, 8, 8.25)โ€ [16 (18.5, 20, 21) cm] from brim edge ending after a color B round. Fasten off color B.

CROWN

Round 1 (decrease round): With color A, ch 1, [sc2tog over next 2 sc] repeat around hat, join with a sl st to the first st, fasten off color A with long tail – 24 (28, 32, 36) sc.  

FINISHING

With the color A tail thread through a tapestry needle, weave yarn through every other stitch. Pull to tighten the hat and close. Weave yarn around stitches, then back in the opposite direction to secure the end.

Add pom pom (optional)

A person smiling while holding a knitted Mosaic Hat with an intricate pattern. On the right, close-up images of hands crocheting a similar design and a finished hat with a pom-pom. The text reads: "Introducing First Fall Weekends Make-Along." Enjoy our Free Pattern for those autumn breezes. -Marly Bird

Donโ€™t Forget to Share Your Project!
Once your Autumn Breezes Hat is finished, Iโ€™d love to see how it turned out! Share your project on Ravelry or tag me on social media with #MarlyMadeMeDoIt.

Filed Under: Free Patterns, Knitting, Make-Alongs, Marly Bird Premium Patterns, Our Free Patterns, Pattern, Uncategorized, YouTube Video Tutorial

What to Crochet with Gradient Yarn Sets || Free Pattern Stonington Crochet Gradient Shawl Pattern

October 21, 2024 By Marly Bird 2 Comments

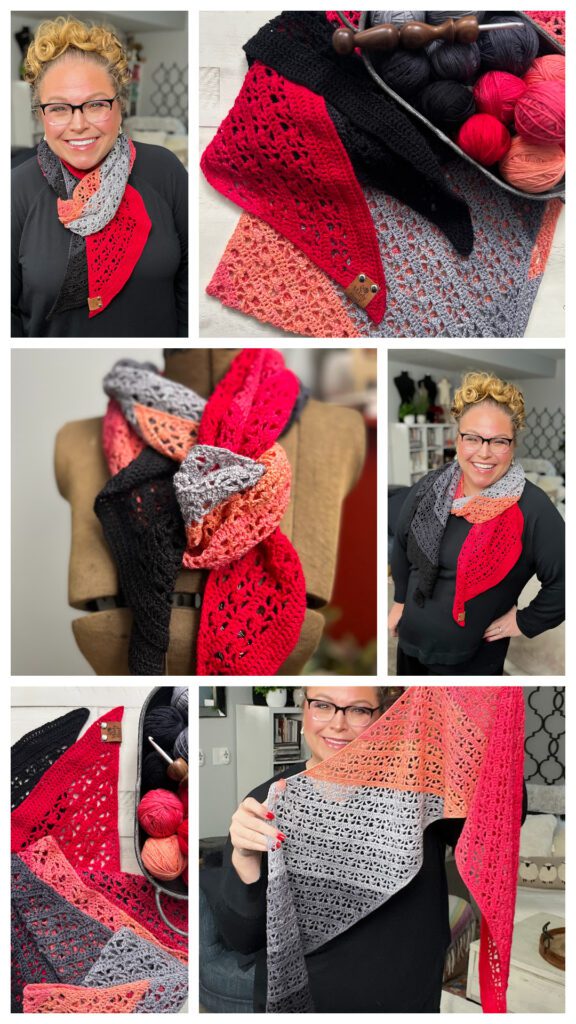
Gradient yarn sets are the perfect way to add a touch of color magic to your crochet projects! Whether you're working with mini skeins or full hanks, these yarn sets offer endless possibilities to create stunning ombrรฉ effects or rich color transitions.

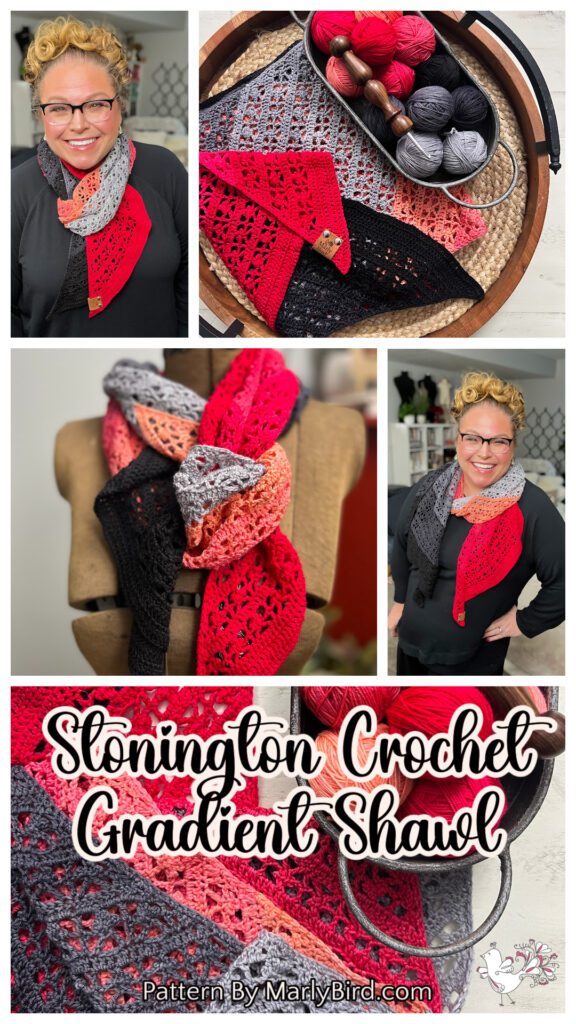
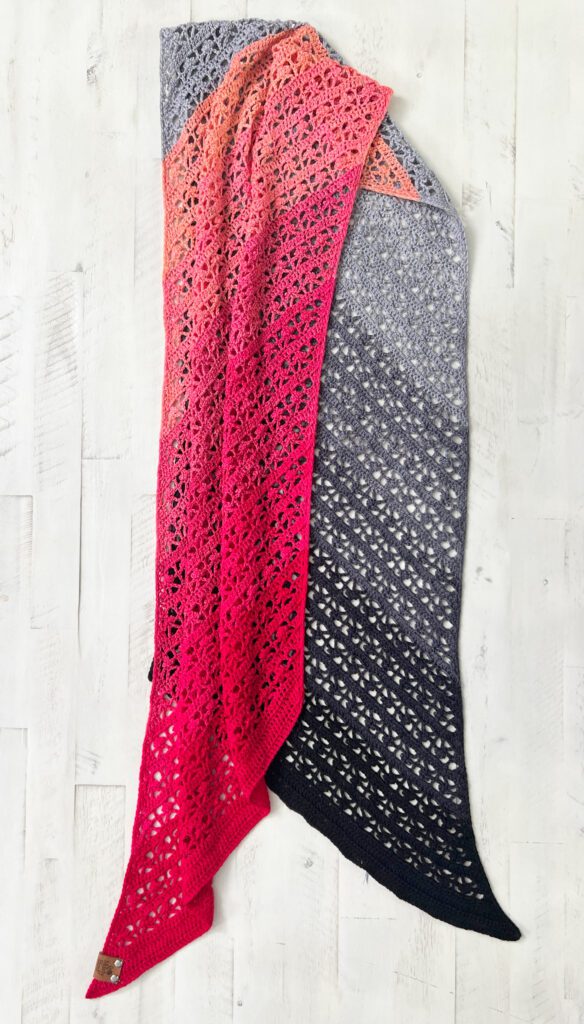
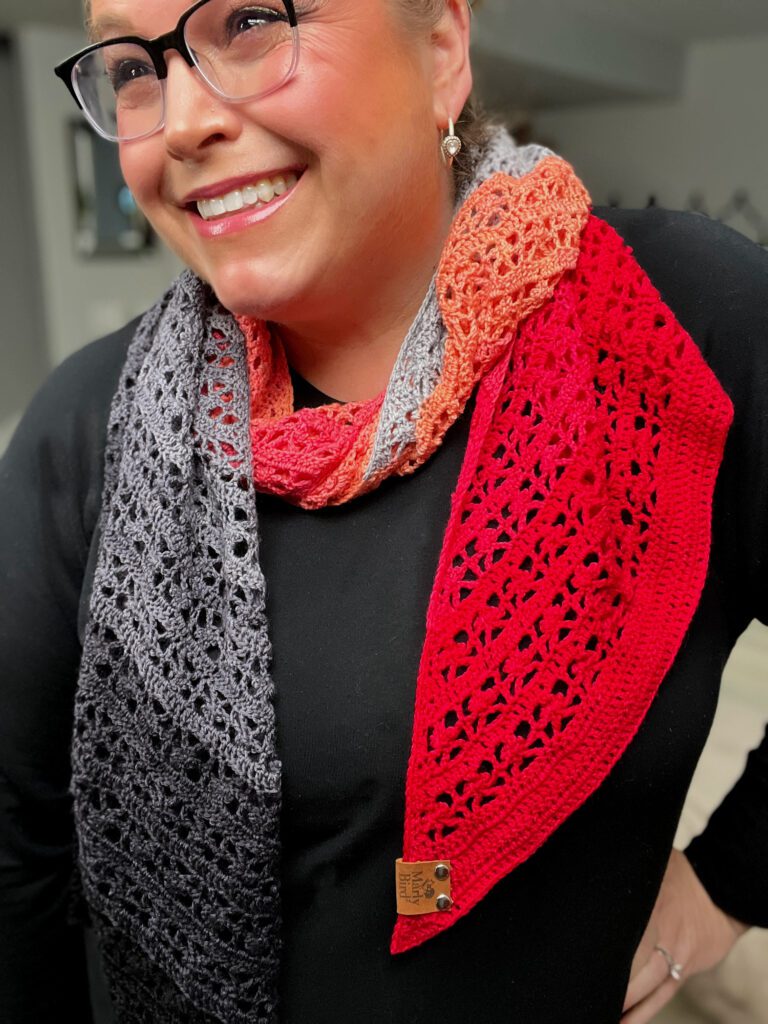
If you're looking for a free crochet shawl pattern to start, Iโ€™ve got you covered with the Stonington Crochet Gradient Shawl!

Be sure to check out these free patterns that work well with gradient yarn sets.

  • Free Crochet Shawl #1
  • Free Crochet Shawl #2
  • Free Crochet Shawl #3
  • Free Crochet Shawl #4
  • Free Crochet Shawl #5
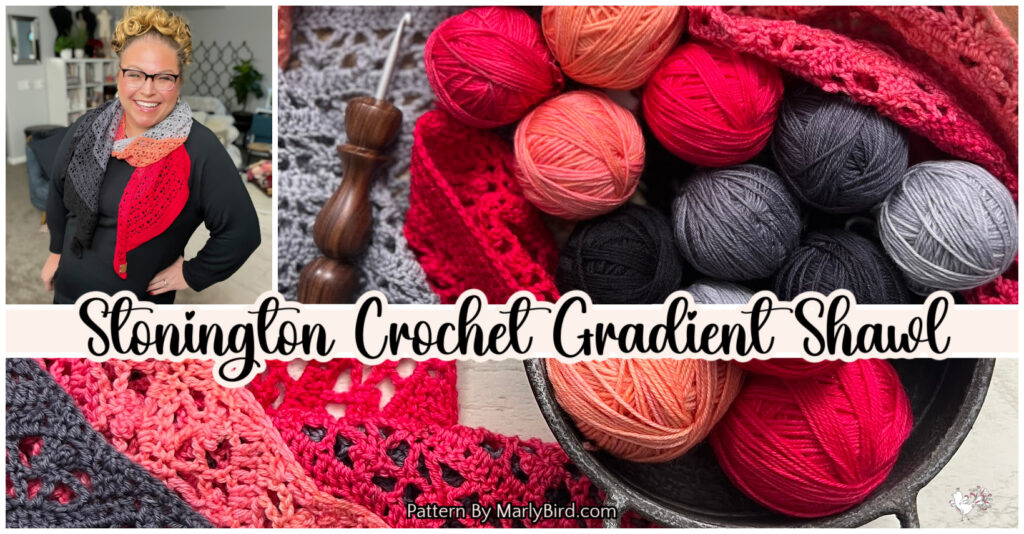
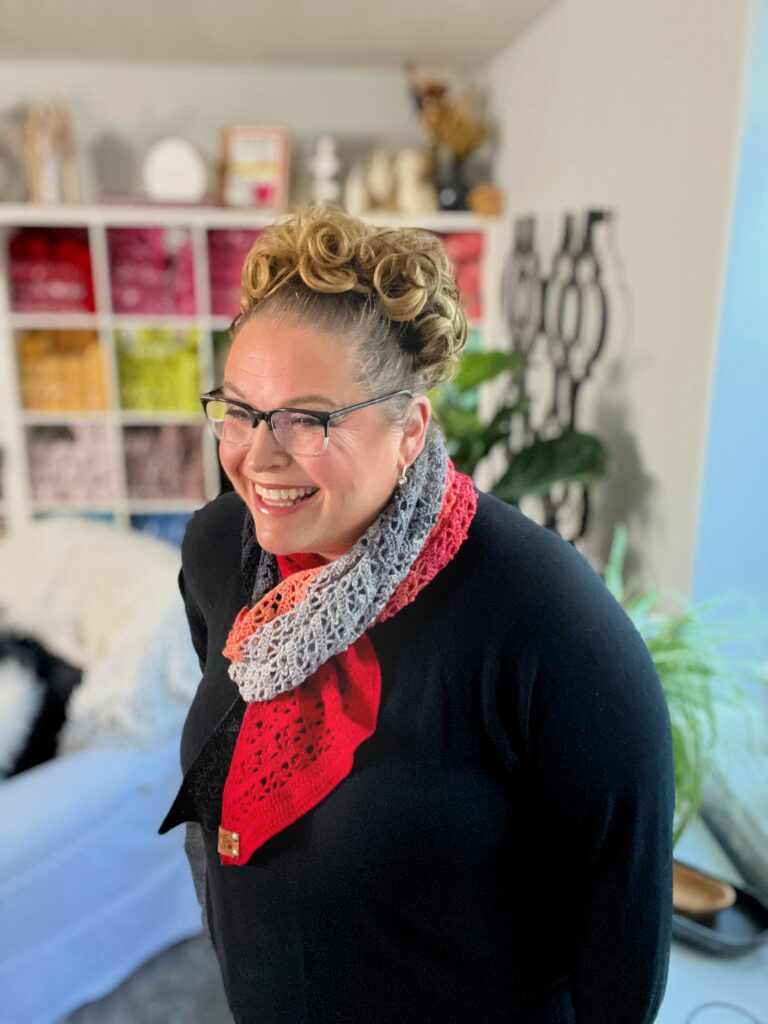
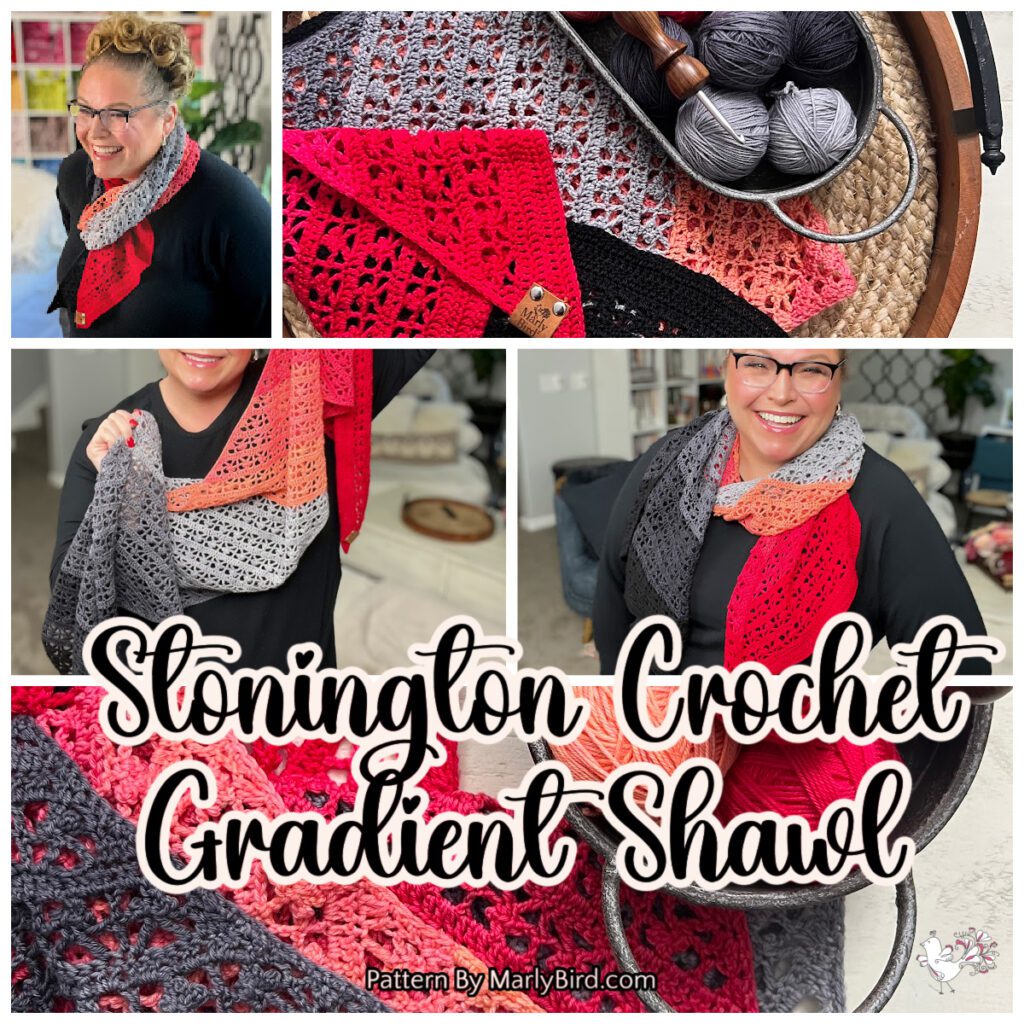
A person wearing a crocheted shawl, with balls of yarn in shades of red, pink, and gray nearby. The text "Stonington Crochet Gradient Shawl" and "Pattern by Marly Bird" is displayed over the image. -Marly Bird

Affiliate Disclosure: This post contains affiliate links. To learn more please visit my privacy policy here๐Ÿ’–

What is Gradient Yarn and Why Use It?

Gradient yarns are spun or dyed to create smooth transitions from one color to another. They are a fantastic option for projects like shawls, scarves, and other wearables, where you want a seamless shift from one hue to the next.

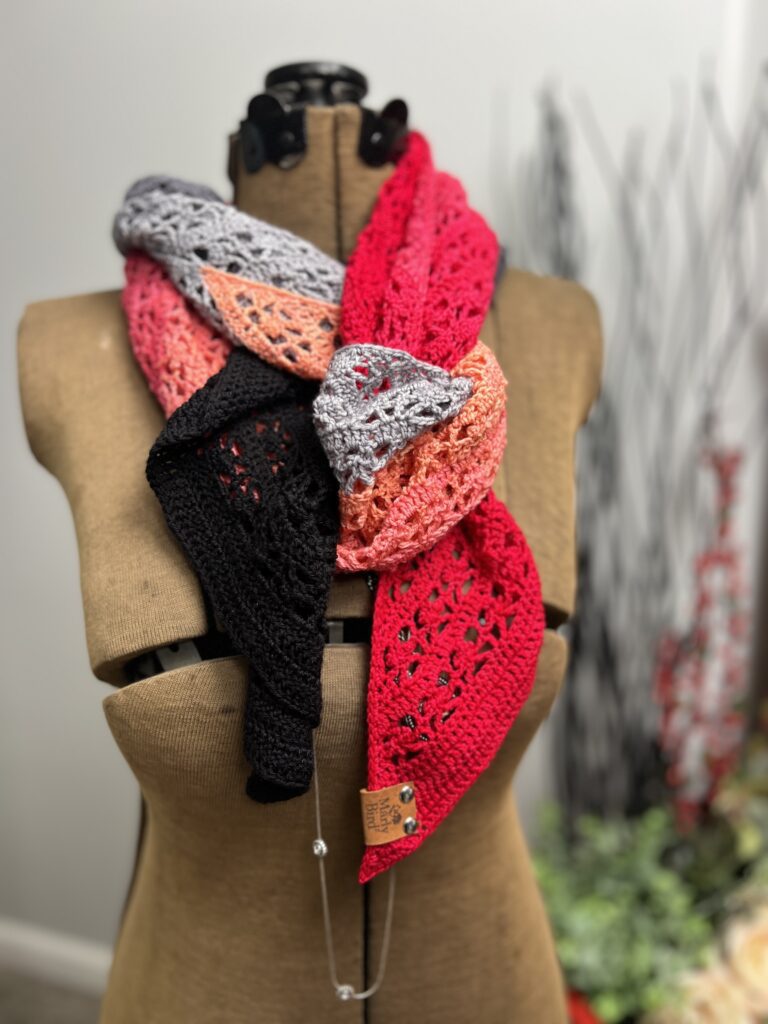
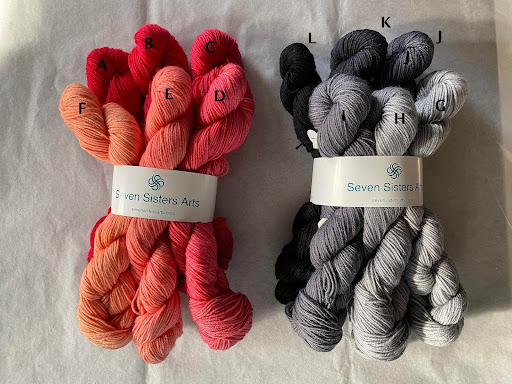
When working with mini skeins of gradient yarn, you can blend colors in creative ways or mix and match to create unique pieces. The Stonington crochet shawl is made with mini skeins I purchased at a fiber festival.

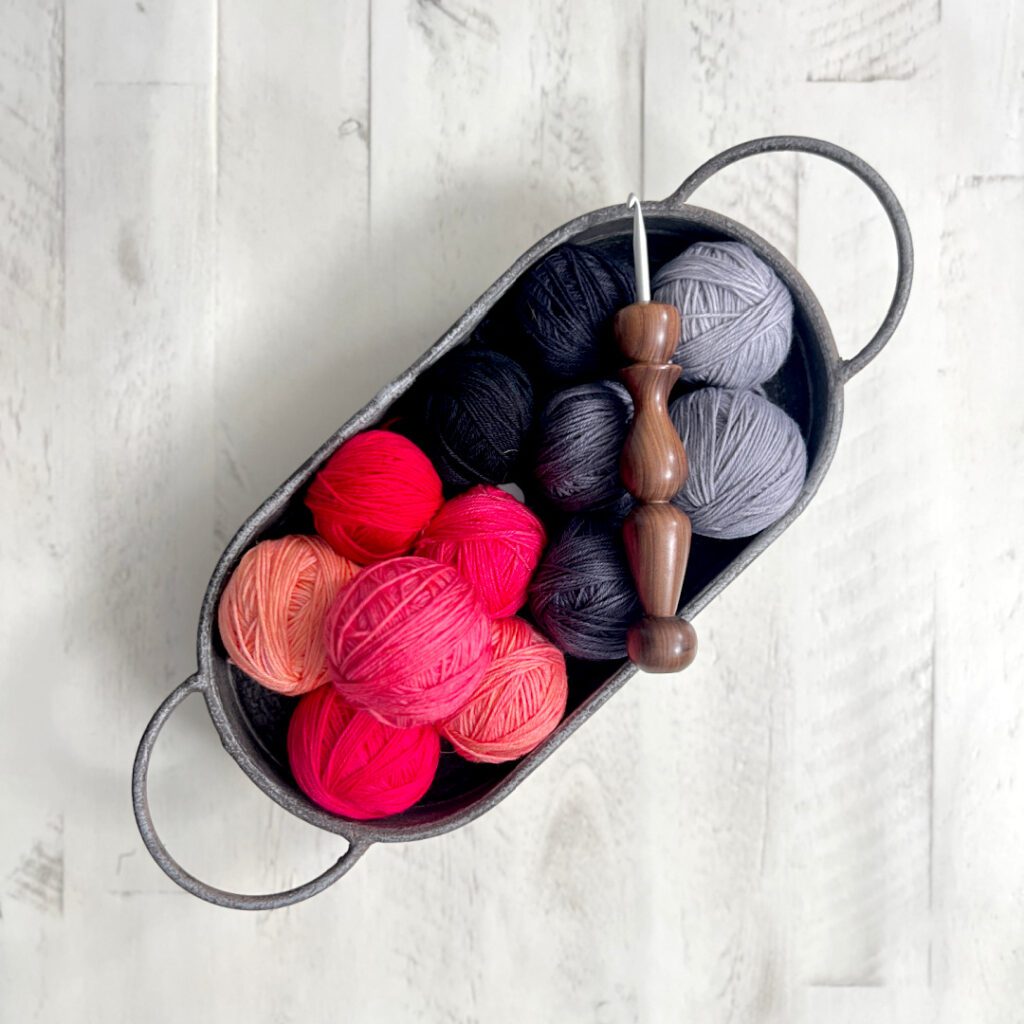
A metal basket filled with various colored yarn balls including shades of pink, red, black, and gray. A wooden-handled crochet hook rests on top. The basket is on a white wooden surface. -Marly Bird

Why Use Mini Skeins for Crochet Projects?

Mini skeins (or mini hanks) are smaller amounts of yarn, typically around 20-25 grams each. Theyโ€™re popular because they allow crafters to explore a variety of colors without having to commit to a full skein. Here are some great reasons to use mini skeins:

  • Versatility: They work well for colorwork, stripes, and gradients, making them perfect for patterns like the Stonington Shawl.
  • Cost-Effective: You get a lot of variety without needing to buy large quantities of each color.
  • Creativity: Mini skeins encourage experimenting with color placement and combinations.

Why the Stonington Crochet Gradient Bias Shawl is Perfect for Gradient Sets

The Stonington Crochet Gradient Shawl was designed to highlight the beauty of gradient yarn. Its bias construction allows the colors to shift seamlessly from one end to the other, making it an ideal project for mini skeins. Whether you opt for a soft transition of pastels or a bold pop of contrasting shades, this shawl will let the yarn do all the talking.

What You'll Love About This Pattern


  • Interesting Stitches: Keeps you engaged with a variety of fun stitchesโ€”no boredom here!
  • ๐ŸงถExciting Color Changes: The gradient yarn makes every color shift a moment to look forward to!
  • ๐ŸŒˆCustomizable: Easily adjust for more or fewer color transitions, so it works with any yarn set you have.
  • ๐ŸŽจWorks Up Fast: This pattern is designed to be a quick project, perfect for those looking for a beautiful finish in no time! โฐ

Tips for Working with Gradient Yarn Sets:

  • Start Light or Dark? Decide if you want the gradient to shift from light to dark or vice versa for your project.
  • Use Stitch Markers to track your color changes, ensuring smooth transitions.
  • Keep Tension Even to ensure that your gradient colors flow seamlessly throughout the piece.
A beige mannequin displays a colorful, crocheted scarf with segments in red, pink, black, and gray patterns. The scarf is wrapped around the neck, showcasing its intricate design. Blurred background elements are visible. -Marly Bird

How to Style Your Stonington Crochet Gradient Shawl ๐Ÿงฃโœจ

One of the best things about the Stonington Crochet Gradient Shawl is its versatility! Whether youโ€™re dressing up or keeping it casual, this shawl has you covered.

  • Wrap It Around: For a classic look, drape the shawl around your shoulders and let the gradient colors cascade for an effortless, elegant vibe. Perfect for a cool evening out!
  • Belt It: Add a trendy touch by wrapping the shawl around your shoulders and securing it with a belt at your waist. This gives you a cozy, chic look while keeping everything in place.
  • Wear It Like a Scarf: Fold the shawl in half lengthwise and wrap it around your neck. The bias construction gives it a unique shape that adds depth and texture to any outfit.
  • Go Asymmetrical: For a bold statement, drape one end over your shoulder and let the other hang longer on one side. This allows the gradient effect to really shine!

Whether youโ€™re pairing it with jeans and a tee or layering it over a little black dress, this shawl is the perfect accessory to elevate any look. ๐ŸŒŸ

Ready to get started? View the free Stonington Crochet Gradient Bias Shawl Pattern now when you subscribe to the Marly Bird website or purchase the ad-free PDF for a seamless crocheting experience. Start creating a project that celebrates the beauty of gradient yarns!

Collage featuring a Stonington Crochet Gradient Shawl in red, pink, and gray shades. Includes yarn balls, detailed crochet patterns, and a person wearing the shawl. Text: "Pattern by Marly Bird. -Marly Bird

Stonington Crochet Gradient Shawl Pattern

Designed by Marly Bird and Robyn Chachula

SKILL LEVEL

Intermediate

MEASUREMENTS

Finished Measurements

Shawl is 20โ€ [51 cm] wide by 70โ€ [178 cm] long. 

Gauge 

20 dc by 11 rows = 4โ€ [10 cm] x 4โ€ [10 cm]

3 stitch repeats in lace stitch pattern = 3.5โ€ [9 cm]; use any size hook to obtain the gauge. 

MATERIALS

Yarn 

Seven Sisters Art, Meridian Gradient Set  (75% Superwash Merino/ 25% Nylon, 900 yds / 823 m, 6.3 oz/ 180 g, CYCA# 1 fingering) : 2 sets, In the Pink and Metals Tonal Shift

Bundles of Seven Sisters Arts yarn in various colors. On the left, shades range from red to coral and pink. On the right, shades vary from light gray to dark gray and black. Each bundle is neatly labeled with letters A to L. -Marly Bird

Colors of the Crochet Gradient Shawl

  • A: Cerise
  • B: Cyclamen
  • C: Flamingo
  • D: Hibiscus
  • E: Blush
  • F: Peach
  • G: Platinum
  • H: Zinc
  • I: Nickel
  • J: Titanium
  • K: Tungsten
  • L: Jett

Yarn Substitutes

Stroll Mini Packs

  • Fiber Content: 75% Fine Superwash Merino Wool, 25% Nylon
  • Yarn Weight: Fingering
  • Yards: 460
  • Grams: 100
Four sets of colorful, twisted yarn skeins are arranged in rows. Each set features five skeins in various colors, including shades of blue, pink, red, gray, orange, green, and teal, against a white background. -Marly Bird

SweetGeorgia Hexa Hue Set Yarn

  • Fiber Content: 80% Superwash Merino Wool, 20% Nylon
  • Yarn Weight: Fingering
  • Yardage: 630

SweetGeorgia Tough Love Sock Party of Five Mini-Skein Set Yarn

  • Fiber Content: 80% Superwash Merino Wool, 20% Nylon
  • Yarn Weight: Fingering
  • Yardage: 525
Image showing four packs of yarn in various colors. Each pack contains yarn in shades like blue, pink, purple, and orange, with "sweetgeorgia" branding. The yarn is arranged neatly in compact bundles. -Marly Bird

Crochet Hook

Size E/4 (3.5 mm)

Notions 

Stitch markers, tapestry needle, leather tags, leather rivets

ABBREVIATIONS

Ch – Chain(s) 

Dc – Double Crochet 

RS – Right Side 

Sc – Single Crochet

Sp(s) – Space(s) 

St(s) – Stitch(es)

Tch – Turning Chain

WS – Wrong Side

Yo – yarn over

A person with curly hair and glasses smiles while wearing a multi-colored scarf and a black top. They stand in a cozy room with colorful shelves and plants. -Marly Bird

SPECIAL STITCHES 

โญ๏ธ Double Crochet 3 Together (Dc3tog): *Yarn over hook, insert hook into indicated st, yarn over and pull up a loop, yarn over and draw through 2 loops on hook; repeat from * in next 2 sts, yarn over and draw through all 4 loops on hook. 

โญ๏ธ Double Crochet 2 Together (Dc2tog): *Yarn over hook, insert hook into indicated st, yarn over and pull up a loop, yarn over and draw through 2 loops on hook; repeat from * in next st, yarn over and draw through all 3 loops on hook. 

โญ๏ธ Single Crochet 2 Together (sc2tog): *Insert hook into indicated st, yarn over and pull up a loop; repeat from * in next st, yarn over and draw through all 3 loops on hook. 

โญ๏ธ Treble Crochet 2 Together (Tr2tog): *Yarn over hook twice, insert hook into indicated st, yarn over and pull up a loop, [yarn over and draw through 2 loops on hook] twice; skip 3 sts, repeat from * in next st, yarn over and draw through all 3 loops on hook. 

CROCHET STITCH DIAGRAM

Only available in the Ad-Free PDF. Get the pattern on Ravelry here.

Relax & Crochet
Upgrade to the Printable PDF

Beautifully formatted to print and relax while crocheting. The paid pattern includes:

  • Downloadable PDF
  • Full Crochet Stitch Diagram
  • Fully Written Instructions
  • Uninterrupted Crochet Time
Get The Ad-Free PDF
A collage of a person wearing a multicolored crocheted scarf in shades of pink, red, gray, and black. The images display the scarf's pattern, its drape around the neck, and the yarn used. The person is smiling, showcasing the scarf's design. -Marly Bird

NOTES

  •  You will increase at the beginning of the RS rows and decrease at the end of the rows, which will not change your stitch count. 
  • When working the sl st into previous st, work through any 2 strands of the previous stitch.  It can be a horizontal and vertical strand or 2 horizontal strands. 
  • Change colors as follows:
    • A : Rows 1-13
    • B : Rows 14-22
    • C: Rows 23-34
    • D: Rows 35-43
    • E: Rows 44-55
    • F: Rows 56-64
    • G: Rows 65-76
    • H: Rows 77-85
    • I: Rows 86-97
    • J: Rows 98-106
    • K: Rows 107-118
    • L: Rows 119-130
A crochet bias shawl showcasing a stunning gradient yarn draped over a white wooden surface. The colors transition smoothly from light gray at the top to deep pink and red at the bottom, featuring an intricate lace design. -Marly Bird

Join the Fun in Marly's Minions BiCrafty Community on Facebook! ๐ŸŽ‰๐Ÿ’ฌ

Love connecting with other crochet and knitting enthusiasts? Come hang out with Marly's Minionsโ€”the most welcoming, crafty group youโ€™ll ever find! Whether you're showing off your latest project, asking for tips, or just need a little creative inspiration, weโ€™ve got you covered.

Our BiCrafty Community is the perfect place to share your progress on the Stonington Crochet Gradient Bias Shawl, get feedback, and swap ideas with fellow yarn lovers. Plus, you'll get access to exclusive events, giveaways, and a whole lot of yarny goodness. ๐Ÿงถโœจ

Ready to join the fun? Click the link and become a part of the Minions family today! Join the Marlyโ€™s Minions BiCrafty Community on Facebook!

Collage showcasing a Stonington Crochet Gradient Shawl. Images feature the vibrant shawl in red, pink, and gray tones, styled on a mannequin and worn by a person. Basket with yarn balls included. Text reads, "Stonington Crochet Gradient Shawl. -Marly Bird

Stonington Crochet Gradient Bias Shawl Written Pattern

GROW

To Unlockย Exclusive Subscriber Contentย click the Box below and join for free by simply adding your email and creating a password! If you are having troubles, clear your cache or reset your password or login to the Grow Publisher Portal.

>> Learn More About Grow Here <<

I'm thrilled to share this amazing pattern with you, many patterns on my blog are absolutely free! I kindly request that you don't copy and paste or distribute this pattern. Prefer an ad-free experience? Buy a digital PDF pattern for a small fee from one of my online stores for a seamless crafting journey. 

I appreciate your support and readership. You are the reason I can keep doing what I love and sharing it with others. So, thank you from the bottom of my yarn-loving heart! Disclosure: This post contains affiliate links, meaning I get a commission if you decide to make a purchase through my links at no cost to you.

Chain 104

Row 1: (RS) 2 dc in 4th ch, dc in each ch across to last 3 ch, dc3tog over last 3 ch, turn.  – 101 dc. 

Row 2: Ch 2, skip first st, dc2tog over next 2 sts, dc in each st across to tch, 3 dc in top of tch, turn.

Row 3: Ch 3 (counts as dc), 2 dc in first dc, dc in each st across to last 3 sts, dc3tog over last 3 sts, turn. 

Row 4: Ch 2, skip first st, dc2tog over next 2 sts, dc in each st across to tch, 3 dc in top of tch, turn.

Row 5: Ch 3 (counts as a dc), 2 dc in first st, dc in next st *ch 2, tr2tog over next st and 4th st away (skip 3 sts), ch 3, sl st in previous st (in 2 strands of tr2tog, see notes), ch 4, sl st in previous st (in 1 strand of sl st and 1 strand of tr2tog), ch 3, sl st in previous st (in 1 strand of sl st and 1 strand of tr2tog), ch 2, dc in next st; repeat from * across to last 3 sts, dc3tog over last 3 sts, turn.

Row 6: Ch 2, skip first st, dc in next st, ch 1, *skip next ch-3 sp, sc in next ch-4 sp, ch 2, dc in next dc, ch 2; repeat from * across to tch, 3 dc in top of tch, turn.

Row 7: Ch 3 (counts a dc), 2 dc in first st, dc in next 2 dc, *2 dc in next ch-2 sp, dc in next st; repeat from * across to last ch-2 sp, 2 dc in last ch-2 sp, dc3tog over (next st, next ch-1 sp, and last dc), turn. 

Row 8: Ch 2, skip first st, dc2tog over next 2 sts, dc in next dc, *ch 2, tr2tog over next st and 4th st away (skip 3 sts), ch 3, sl st in previous st, ch 4, sl st in previous st, ch 3, sl st in previous st, ch 2, dc in next st; repeat from * across to tch, 3 dc in top of tch, turn.

Row 9: Ch 3 (counts as dc), 2 dc in first st, ch 2, skip 2 sts, dc in next st, ch 2, *sc in next ch-4 sp, ch 2, dc in next dc, ch 2; repeat from * across to last ch-4 sp, sc in last ch-4 sp, ch 1, dc2tog over last 2 sts, turn.

Row 10: Ch 2, skip first st, dc2tog over next ch-1 sp and next sc, ch 1, *2 dc in next ch-2 sp, dc in next st; repeat from * across to last 2 sts, dc in next st, 3 dc in top of tch, turn.

A person wearing glasses smiles while showcasing a knitted scarf. The scarf features a gradient pattern transitioning from red to orange to gray. The scarf drapes over a black top, and a small tag is visible on the red section. -Marly Bird

Rows 11-124: Repeat Rows 5-10

Rows 125-127: Repeat Rows 5-7

Rows 128-130: Repeat Rows 2-4

Fasten off, weave in ends.

FINISHING

Edging

Join yarn to RS at any corner using the matching color of the body of the shawl in this section, sc evenly across the long side (changing color to match along the way) to the opposite corner, fasten off.  Repeat on the opposite side.

Blocking

Pin shawl to schematic size, spray with water and allow to dry.


Ready to Start Crocheting? Letโ€™s See Your Creations! ๐Ÿงถโœจ

Now that youโ€™ve got your hands on the Stonington Crochet Gradient Bias Shawl pattern, itโ€™s time to grab your yarn and hook, and let the creativity flow! Weโ€™d love to see how your shawl turns outโ€”whether you stick to the classic gradient or put your own spin on it with different color transitions.

โฃ๏ธ Add your project to Ravelry and favorite the pattern.

Favorite This Pattern on Ravelry - Marly Bird
Get Pattern from Marly Bird Store on Etsy
Get Pattern from Marly Bird Store on Ravelry
Get Pattern from Marly Bird Pattern Shop

Donโ€™t forget to share your progress and finished shawls in the Marly's Minions BiCrafty Community on Facebook! Itโ€™s the perfect place to connect with other crafters, share tips, and celebrate your beautiful work. Join us here!

Thanks for being part of the Marly Bird community, and happy crocheting! ๐ŸŽ‰

Frequently Asked Questions

What is gradient yarn and how is it different from regular yarn?

Gradient yarn (also called ombre yarn or fade yarn) gradually shifts from one color to another across the skein or set. Unlike self-striping yarns that repeat the same color sequence, gradient yarns transition smoothly from one shade to the next… you might go from deep navy through medium blue to pale sky blue across a single project. Mini skein sets are a popular way to get this effect with more control over the color placement.

What types of projects show off gradient yarn best?

Shawls and wraps are absolutely gorgeous in gradient yarn because you have enough length to show the full color transition. Blankets worked in sections are beautiful too. Scarves, cowls, and any project where you work in a continuous piece without seaming tends to show the gradient most dramatically. If you're using a mini skein set, shawls worked top-down are particularly satisfying because you can plan where each color change falls in the design.

How do I make the color transitions look smooth?

A few tricks! If you're using mini skeins, join each new color at the same point in the row (like the beginning) for clean transitions. Some crafters work a “fade” by alternating two colors for a few rows at the transition point… this softens the change from one shade to the next. For ombre yarns that transition within the skein, just let the yarn do its thing and resist the urge to cut and reattach… the beauty is in the gradual shift.

What is the Stonington Crochet Gradient Shawl Pattern?

The Stonington Shawl is a free pattern designed specifically to showcase gradient yarn sets. It's worked in a crescent or asymmetrical shape that lets the color transitions flow naturally through the design. The stitch pattern is accessible for advanced beginners… it's about the yarn doing the work while you focus on the shaping. Perfect for that beautiful gradient set you've been saving for the right project!

Can I use regular yarn instead of gradient yarn for this shawl?

Of course! Any worsted or DK weight yarn in whatever colors you love will work with this pattern. You could do a solid color to really highlight the stitch texture, or stripe through a few coordinating skeins for a different kind of color play. The pattern itself is versatile… the gradient just happens to be one of the most popular ways to make it. Your shawl, your yarn choices!

Filed Under: Crochet, Free Patterns, Marly Bird Premium Patterns, Our Free Patterns, Pattern, Uncategorized

๐Ÿ Marly Bird First Fall Weekends Make-Along 2024!

October 18, 2024 By Marly Bird 4 Comments

๐Ÿ Welcome to the Marly Bird First Fall Weekends Make-Along 2024!

Embrace the Cozy Season with Mosaic Stitch Hats & Fingerless Mittens

Autumn is here, and what better way to welcome it than with some beautiful, quick-to-make projects that you can finish over a weekend?

Join me for two weekends of knitting or crocheting your very own mosaic stitch hat and fingerless mittens. These patterns are designed for everyone, whether you're new to mosaic stitches or a seasoned pro!

A circular graphic showcases the text "First Fall Weekends Make-Along" at its heart, encircled by scattered orange and yellow autumn leaves on a black background. -Marly Bird

What is the First Fall Weekends Make-Along 2024?

The First Fall Make-Along is an annual event hosted by Marly Bird, designed to celebrate the arrival of fall with fun, fast-to-make crochet and knitting projects. This make-along is perfect for anyone who loves to get into the cozy spirit of the season by creating beautiful handmade accessories, like mosaic stitch hats and fingerless mittens.

This year, we changed it to First Fall Weekends Make-along!

  • Quick & Satisfying: These projects are designed to be quick and satisfying, making them perfect to complete in just a weekend.
  • Perfect for Busy Lives: If youโ€™re juggling a busy schedule, this event offers projects that fit right into your weekend without overwhelming you.
  • Knit or Crochet: Whether you prefer knitting or crocheting, the patterns are simple, fun, and tailored for weekend crafting success.

Whether you're heading out to watch a ๐Ÿˆ peewee football game, staying home with a cup of cocoa โ˜•๏ธ, or simply craving a project to unwind with by the fire, these patterns are designed to fit into your life effortlessly โœ….

Is This First Fall Weekends Make-Along for Knitters or Crocheters?

This make-along is inclusive of both knitters and crocheters, offering patterns for both crafts. Even if youโ€™ve never worked with mosaic stitches before, donโ€™t worryโ€”Marlyโ€™s easy-to-follow tutorials, written instructions, and clear charts will guide you through the process. Plus, youโ€™ll have access to the supportive Marly Bird BiCrafty Community to help and cheer you on.

Joining this event is a fun way to connect with other crafters, learn new techniques, and create something perfect for fallโ€”whether to wear, gift, or sell.

And the best part? You can participate at your own pace, with patterns released over two weekends to give you plenty of time to enjoy the process.

This make-along brings a sense of community, creativity, and celebration to the cozy fall season.


Is this a Free Make-Along Event?

YES! ๐ŸŽ‰ The First Fall Weekends Make-Along 2024 is absolutely free for those who subscribe to the event! As a subscriber, you get to participate in all the fun without spending a dime.

Letโ€™s talk about Free for Subscribers vs Optional Upgrade VIP Experience:

This event, like all other Marly Bird events, offers a free option for everyone. Simply sign up, and youโ€™ll receive everything you need to make beautiful mosaic hats and fingerless mittens alongside our community. Hereโ€™s what you get with the free version:

  • Viewable written patterns & charts on the blog for subscribers, supported by ads.
  • Video tutorials on YouTube, walking you through each step of the project.
  • Access to the Marly Bird BiCrafty Community on Facebook, where you can ask questions, share progress, and be part of a supportive group.
  • Once the event is over, individual premium PDF patterns will be available for purchase on Etsy, Ravelry and the Marly Bird Pattern Shop, but the VIP Experience will go into the Marly Bird House Vault!

A promotional graphic for the "First Fall Weekends Make-Along 2024" showcases cozy knitting and crochet projects. Dive into digital patterns, video tutorials, and exclusive club access via computer and tablets, all set against a backdrop of vibrant autumn leaves. -Marly Bird

Give me the VIP Experience Upgrade!

Now, if youโ€™re thinking, Iโ€™d love more features, extra perks, and no ads, then the VIP Experience is for you! There are three VIP Experience options to choose from:

  • Only Crochet: Access only to crochet patterns, videos, and bonuses.
  • Only Knitting: Access only to knitting patterns, videos, and bonuses.
  • โญ๏ธ BiCrafty โญ๏ธ: The ultimate package, with both crochet and knitting patterns and bonuses! — BEST VALUE

And everything is in one convenient place: Marly Bird House, my very own online learning platform! Youโ€™ll have unlimited access to all of this, allowing you to complete the projects at your own pace.

BECOME VIP TODAY

But first, let's answer the question, Why Upgrade to VIP?

With any of the VIP Experiences, you can expect: โ›”๏ธ No more searching through posts for tutorials or patterns scattered across different platforms. โœ… Everything is in one placeโ€”a well-organized collection of patterns, charts, and videos at your fingertips. โฐ Save time and focus on your stitching, instead of digging through posts or blog sections.

And the best part? The VIP Experience is offered at a super low price, making it a fantastic value with all the extras you get! Donโ€™t miss out on these premium perksโ€”upgrade today and ensure you have everything you need to craft confidently.

2 Ways to Join the Fun


Free on the Blog

  • Sign up and receive an email with a link to the supply list once you've confirmed your email.
  • Viewable written patterns on the blog for subscribers, supported by ads.
  • Video tutorials on YouTube, walking you through each step of the project.
  • Access to the Marly Bird BiCrafty Community on Facebook, where you can ask questions, share progress, and be part of a supportive group.
  • Once the event is over, individual premium PDF patterns will be available for purchase, but the VIP Experience will go into the Marly Bird House Vault!
SIGN UP NOW

โญ๏ธ VIP Experienceโญ๏ธ

  • Downloadable Ad-Free PDFs for all patterns.
  • Detailed mosaic charts for each design, so you can follow along easily.
  • Stitch Fiddle Links to customize colors of charts, helping you choose the perfect color combinations.
  • Exclusive Video Tutorials on Vimeo, with no ads!
  • Access to Live Q&A Sessions with Marly Bird during the event.
  • Bonus Ear Warmer Patterns (one for crochet, one for knitting).
  • Bonus Instructional Video on how to make a custom row counter.

All in the Marly Bird House!

UPGRADE NOW

First Fall Weekends Free Patterns

Click the image below to go to the free pattern supported by ads here on the blog.

A person smiling and holding handmade crochet hats with mosaic patterns, set against cozy room decor. Text on the image reads "Beginner Crochet Mosaic Hat" and "Introducing First Fall Weekends Make-Along." Discover free patterns and mosaic crochet tips for your creative journey! -Marly Bird
A woman wearing glasses smiles while holding a knit hat with a pom-pom. The text reads "Beginner Knit Mosaic Hat, Free Pattern Included." A close-up shows the hat's intricate pattern. The background features a blurred indoor setting, adding warmth to the scene. -Marly Bird
A collage showcasing beginner crochet fingerless mittens in blue and gray alongside two balls of yarn and a "First Fall Weekends" crochet-along poster. Dive into the cozy vibes with this free pattern, perfect for crafting your own Cinnamon Dreams this season. -Marly Bird
Collage showcasing fingerless mittens with mosaic knit details. Features a person wearing these mittens and a matching hat, alongside yarn and knitting tools. Includes text on a "First Fall Weekends Make-Along" with a free pattern offer. The scene is set outdoors in a winter coat. -Marly Bird

A collage displays knitted hats with geometric patterns, adorned by a smiling person. At the center, it reads: "First Fall Weekends Make-Along," accented with autumn leaves. The cozy hats feature playful pom-poms and a signature label, celebrating the charm of First Fall Weekends. -Marly Bird

โฐ Schedule of Events โฐ

For two weekends we will work on the same project together. Here is the schedule of the First Fall Weekends Make-Along 2024

Hats – October 26, 2024
Fingerless Mittens – November 2, 2024
Work alongside the community or go at your own paceโ€”it's totally up to you!

๐ŸŒŸ Don't miss out! The VIP Experience will only be available for a limited time, and the price will never be as low again!

BECOME VIP TODAY

Frequently Asked Questions:

  1. How long will I have access to the patterns?
    VIP members have unlimited access in the Marly Bird House. Free patterns will remain on the blog, supported by ads.
  2. Is this beginner-friendly?
    Absolutely! If you know the basics, you'll be able to complete these projects with a bit of focus and determination. This is a great opportunity to build your skills!
  3. Can I purchase the patterns individually?
    After the event ends, individual patterns will be available on Etsy, Ravelry, and the Marly Bird Store. But for the best value, we recommend the VIP Experience!
  4. Can I gift the VIP Experience?
    Yes! Purchase the VIP and contact our support team to set it up for the recipient.

Whether youโ€™re ready to join the free version or want the VIP perks, this Make-Along is your chance to learn new techniques, connect with fellow crafters, and create something beautiful. Donโ€™t miss outโ€”letโ€™s stitch together this fall!

xoxo Your BiCrafty Bestie,

Marly Bird

Filed Under: Crochet, Knitting, Make-Alongs, Marly Bird Premium Patterns, Uncategorized, YouTube Video Tutorial

  • « Previous Page
  • 1
  • …
  • 10
  • 11
  • 12
  • 13
  • 14
  • …
  • 22
  • Next Page »

Let's Be Social

Join the Marly's Minions Facebook group to share, ask questions, or chat about all of your yarn related crafts!

Join the group
Cartoon of a smiling woman with brown hair in a bun, glasses, black jacket and green shirt, waving next to large "hi" text.

Quick Links

The Pattern Shop

Our Free Patterns

Blog

Marly Bird House

Learn to Knit & Crochet

About

Giveaway Terms and Privacy Notice

Find Us Everywhere

Join the Newsletter

YouTube Channel

Marly's Minions FB Group

Etsy Store

Ravelry Store


AN ELITE CAFEMEDIA HOME/DIY PUBLISHER

Information from your device can be used to personalize your ad experience. Do not sell or share my personal information.

Privacy Policyย  ย Termsย  ย Marly Bird Legal Documents Copyright © 2026