Search
Close
  • The Pattern Shop
  • Our Free Patterns
    • Browse All Our Free Patterns
    • Our Free Knitting Patterns
    • Our Free Crochet Patterns
  • Blog
    • All Blog Posts
    • All Free Patterns
    • Dibble Dabble Inspiration
    • Giveaways
    • Make-Alongs
    • Product Reviews
    • Roundups
    • Tips, Tricks, Techniques for Knitting and Crochet
Stylized bird with pink and gray swirling tail above elegant โ€œMarlyโ€ text, logo for crochet accessories and home decor.
  • Marly Bird House
  • Learn to Knit & Crochet
    • Newbie? Start Here
    • Video Tutorials
    • Knitting Definitions
    • Crochet Definitions
    • Common Techniques
    • Size Charts for Knitting and Crochet Projects
  • About
ร—
  • The Pattern Shop
  • Free Patterns
  • Blog
  • Marly Bird House
  • Learn to Knit & Crochet
    • Newbie? Start Here
    • Video Tutorials
    • Knitting Definitions
    • Crochet Definitions
    • Common Techniques
    • Size Charts for Knitting and Crochet Projects
  • About
Stylized bird with pink and gray swirling tail above elegant โ€œMarlyโ€ text, logo for crochet accessories and home decor.
Search
Close

New Patterns NOW Available in Ad-Free PDF! Check out The Pattern Shop

DIY Plaid Crochet Scarf: Free Pattern & Video Tutorial

July 1, 2024 By Marly Bird 2 Comments

Hey there, crochet lovers! Do you adore the timeless charm of plaid? If so, you're going to love my new pattern: the DIY Plaid Crochet Scarf. This stylish scarf combines the classic gingham pattern with the cozy feel of crochet, making it a must-have for any season.

Whether you're a plaid enthusiast or just looking for a fun new crochet plaid project, this pattern has something for everyone. Keep reading to get the free written pattern, watch the full video tutorial, and learn more about creating beautiful gingham crochet pieces, like these!

Collage of a person showcasing a colorful plaid-look crocheted scarf. The main image has the text "Plaid-look with a Crochet Hook". Smiling and wearing glasses, they pose with the scarf in various angles. Marly Bird logo is at the bottom center. Includes Free Pattern and Video Tutorial for DIY Plaid Crochet Scarf.
 -Marly Bird

What is Gingham Plaid?

When I think of gingham plaid, I immediately picture cozy picnics and charming country kitchens. Gingham evokes a sense of nostalgia and comfort with its simple, checked pattern. Unlike tartan, which has complex lines and multiple colors, gingham is all about the clean and classic dual-color scheme.

Traditionally, the beauty of gingham lies in its simplicity and symmetry. Each square of color contrasts perfectly with its neighbors, creating a crisp and classic look. This isnโ€™t the complex colorwork you might see in other patternsโ€”ginghamโ€™s charm is in its straightforward, predictable squares. I find its unassuming beauty truly captivating.

Patterns in crochet gingham stitch - Marly Bird

In crochet, we can bring the gingham plaid look to life through basic chains, single crochet or double crochet stitches, a variety of stitch patterns like the griddle stitch, the v stitch, or even a shell stitch , or we can use the quintessential granny square motifs joined together to get such a look.

By alternating blocks of color, you can replicate the classic gingham check in your crochet projects.

planned pooling crochet scarf-Marly Bird - plaid crochet look

Sometimes it isn't even about the stitch used but the yarn that creates a plaid look as seen in planned pooling. The consistent lengths of color in a yarn coupled with some strategic stitch and color placement can generate some amazing plaid looks with planned pooling.

Learn so much more about crochet planned pooling from these blog posts and the best planned pooling video tutorial!

This crochet gingham plaid technique used in the Check It Out scarf beautifully merges the art of crochet with the timeless appeal of gingham plaid.

6 images of fabrics, including crochet gingham stitch, gingham, tartan, plaid, and buffalo check. Marly Bird

Gingham isnโ€™t just visually appealingโ€”itโ€™s incredibly versatile. Whether in fashion or home decor, gingham checks add a touch of homely elegance. From a breezy summer dress to a cozy throw pillow, this pattern fits seamlessly into various styles. For me, gingham is more than a pattern; itโ€™s a story told through threads of color and tradition.

For more on the history and techniques of gingham, check out my detailed blog post here.

A smiling person with curly hair and glasses is wearing a colorful gingham plaid crochet scarf. The image shows close-ups of the scarf's detailed pattern. Text in the image reads "Check It Out" and "Gingham Plaid Crochet Scarf Free Pattern - Video Tutorial". -Marly Bird

Creating the Check It Out Gingham Crochet Scarf

Now, letโ€™s talk about my Check It Out Gingham Crochet Scarf. This pattern is a fun and easy way to bring that classic gingham look into your wardrobe. Using this simple crochet techniques, you can create a stylish scarf thatโ€™s perfect for any season.

To get started, youโ€™ll need to choose your colors. Gingham is traditionally made with a main color and a contrasting color, but for this free plaid scarf pattern we will use three very different colors to get creative with our final finished crochet scarf.

A smiling woman standing in front of tall grass, wearing glasses and a multicolored crocheted poncho with a cowl neck, playfully gesturing the 'rock on' sign with both hands. - Marly Bird - Check Me Out Crochet Poncho
If I love the look of this crochet plaid technique. Take a look at my Check Me Out Poncho pattern available here!

The Check It Out scarf pattern (and the Check Me Out Poncho pattern) uses basic stitches that when combined together form the Griddle stitch. Don't let that name scare you, you will still only be working single crochet and double crochet, so itโ€™s suitable for all skill levels.

Iโ€™m including the written pattern right here, but if you prefer a crochet stitch diagram and an ad-free, uninterrupted experience, you can purchase the PDF version. This not only gives you a clean, easy-to-follow format but also supports your favorite BiCrafty designerโ€”me!

A woman with glasses smiles while showcasing a colorful, chunky crochet scarf. She wears a denim jacket and her hair is pulled back. The text overlay reads "Free Crochet Pattern for Puffed Scarf, check it out at crystalnpaula.com." The background is an indoor setting with cozy vibes. -Marly Bird

Get the Ad-Free PDF

Purchasing the ad-free PDF of the Check It Out Gingham Plaid Crochet Scarf is a fantastic option for those who want a seamless, uninterrupted crafting experience. This convenient format allows you to easily follow along without distractions, and it's perfect for printing out and taking on-the-go for your crochet projects.

The PDF includes fully formatted pattern with written instructions, crochet stitch diagrams, and video tutorial links.

A tablet and smartphone displaying a crochet scarf pattern titled "Check It Out." Surrounded by printed pages featuring the same pattern, photos of the scarf, and instructional text. A woman wearing glasses and the scarf is smiling. Text reads "Beginner-friendly DIY Plaid Crochet Scarf - Free Pattern with Video Tutorial. -Marly Bird
Etsy
Shopify
Ravelry

Why Choose an Ad-Free PDF?

Purchasing the ad-free PDF of the Check It Out Gingham Crochet Scarf Pattern offers a seamless, distraction-free crafting experience. This pattern also includes the crochet stitch diagram for those who prefer to see the stitches visually.

The ad-free PDF is perfect for printing and taking with you on the go. Plus, it helps support my work as your favorite BiCrafty designer!

A woman wearing glasses and a denim jacket smiles while modeling a colorful, plaid patterned crochet scarf. The image includes two close-up shots of the scarf's texture and detail. The text overlay reads "Plaid-Look with a Crochet Hook" in pink and black lettering. Free Pattern included! -Marly Bird

Check It Out Gingham Plaid Scarf FREE PATTERN

This adorable scarf was designed by Marly Bird

SKILL LEVEL

Adventurous Beginner

MEASUREMENTS

Finished Measurements

Shawl is 13โ€ [33 cm] wide by 71โ€ [180.5 cm] long. 

Gauge 

13 sc x 11 rows = 4โ€ [10 cm] x 4โ€ [10 cm] in griddle stitch pattern; use any size hook to obtain the gauge. 

MATERIALS

Yarn 

Red Heart Roll With It Melange (100% acrylic, 389 yds / 356 m, 5.29 oz/ 150 g, CYCA# 4 worsted) 

Color A: #Autograph, 1 cake

Color B: #Tabloid, 1 cake

Color C: #Curtain Call, 1 cake

Crochet Hook

Size J/10 (6.0 mm)

Notions 

Removable Stitch Markers, Tapestry needle

ABBREVIATIONS

Ch – Chain(s) 

Dc – Double Crochet 

RS – Right Side 

Sc – Single Crochet

Sl st – Slip Stitch 

St(s) – Stitch(es)

WS – Wrong Side

DIAGRAM

 Only available in the Ad-Free PDF

Etsy
Shopify
Ravelry

NOTES

  • Colorwork is tapestry crochet.  Meaning when changing colors within a row, carry contrasting color on top of the stitches and work stitches over the yarn until you need it. 
  • Shawl does not have an edging.  Take extra care with the beginnings and ends of your rows, as they will be visible.  If you rather hide your row ends, you can add a round of single crochet to the edge after the shawl is finished.

GROW

To Unlockย Exclusive Subscriber Contentย click the Box below and join for free by simply adding your email and creating a password! If you are having troubles, clear your cache or reset your password or login to the Grow Publisher Portal.

>> Learn More About Grow Here <<

I'm thrilled to share this amazing pattern with you, many patterns on my blog are absolutely free! I kindly request that you don't copy and paste or distribute this pattern. Prefer an ad-free experience? Buy a digital PDF pattern for a small fee from one of my online stores for a seamless crafting journey. 

I appreciate your support and readership. You are the reason I can keep doing what I love and sharing it with others. So, thank you from the bottom of my yarn-loving heart! Disclosure: This post contains affiliate links, meaning I get a commission if you decide to make a purchase through my links at no cost to you.

CHECK ME OUT GINGHAM PLAID SCARF PATTERN

With color A, chain 43.

Row 1 (RS): Sc in 2nd ch from hook, [dc in next ch, sc in next ch] twice, dc in next ch, *change color to B, [sc in next ch, dc in next ch] 3 times, change color to A, [sc in next ch, dc in next ch] 3 times; repeat from * across, turn — 42 sts.

Rows 2-4: Ch 1, [sc in dc, dc in sc] 3 times, *change color to B, [sc in dc, dc in sc] 3 times, change color to A, [sc in dc, dc in sc] 3 times; repeat from * across, turn. At the end of Row 4, change color to B. 

Rows 5-8: Ch 1, [sc in dc, dc in sc] 3 times, *change color to C, [sc in dc, dc in sc] 3 times, change color to B, [sc in dc, dc in sc] 3 times; repeat from * across, turn. At the end of Row 8, change color to A. 

Row 9: Ch 1, [sc in dc, dc in sc] 3 times, *change color to B, [sc in dc, dc in sc] 3 times, change color to A, [sc in dc, dc in sc] 3 times; repeat from * across, turn. 

Repeat Rows 2-9, ending on a Row 4, until panel measures 71โ€ [180.5 cm] long.

Fasten off and weave in ends. 

A woman with glasses and curly hair wears a colorful, handmade crochet scarf. There are multiple images showing her smiling and posing with the vibrant patchwork scarf in different ways. The Marly Bird logo is visible. Check out the free pattern and video tutorial to create your own DIY plaid crochet scarf! -Marly Bird

Gingham Plaid Crochet Scarf Video Tutorial

For those of you who learn best by watching, Iโ€™ve also created a full video tutorial on the Marly Bird YouTube channel. This step-by-step guide will walk you through the entire process of keeping the chain row consistent, working the Griddle stitch, changing colors, and keeping the edges clean and strait.

The plaid look with a crochet hook video tutorial ensures that you can follow along with the pattern with ease. Get free crochet scarf pattern + full video tutorial at this link.

Make a Plaid Crochet Scarf and Share Pictures with Me!

Gingham plaid holds a special place in both textile history and contemporary style, representing a blend of simplicity and sophistication. As a pattern, it captures the essence of classic design with its symmetrical checks and contrasting hues. Its adaptability allows it to flourish in various applications, from charming home decor to stylish apparel.

The Check It Out Gingham Crochet Scarf is a perfect example of how crochet can capture the timeless appeal of gingham. I hope you enjoy making this scarf as much as I enjoyed designing it.

As you work on yours please share with me! #mmmdi #marlybirdyoutubechannel

Happy crocheting!

Frequently Asked Questions

What exactly is gingham plaid?

Honestly… gingham is all about that simple, two-color check pattern… It's not as complex as tartan, so it has a really clean and classic look. Think cozy picnics and charming kitchens!

I'm having trouble finding the Red Heart Roll With It Melange yarn you suggested. What else could I use?

Oh, that's a good question! I saw a comment suggesting you try the Hobbi brand yarn… It's always fun to experiment with different yarns to see what works best for your project!

What skill level is this scarf pattern best suited for?

Yes! This pattern is listed as ‘Adventurous Beginner'… You'll be using basic stitches like single crochet and double crochet, which form the Griddle stitch, so it's really accessible for most crocheters!

Can I get the pattern without ads?

So here's the thing… you can totally get an ad-free PDF version of the pattern! It makes crafting so much smoother, and you can even print it out to take with you. Plus, it helps support my work!

What are the finished measurements of the scarf?

It's designed to be about 13 inches wide by 71 inches long… so it's a nice, cozy size for wrapping up in!

Filed Under: Crochet, Free Patterns, Marly Bird Premium Patterns, Our Free Patterns, Pattern, Uncategorized, YouTube Video Tutorial

Knit-Look with a Crochet Hook – Free Pattern

June 29, 2024 By Marly Bird 1 Comment

We all love the rich textures and endless possibilities of crochet granny squares, but sometimes, we crave the smooth, uniform look of knitting. Guess what? You can achieve that knit-look with a crochet hook! It's not as hard as you might think. Whether youโ€™re making a cozy hat with a bill, fair isle sweater, or a plush blanket, letโ€™s dive into how you can transform your crochet projects to have that seamless knit-like appearance.

Plus, free crochet hat pattern with video tutorial. The Celebration Crochet Hat (linked to the ad-free pdf available for purchase) is the sister to the Jubilee Knit Hat!
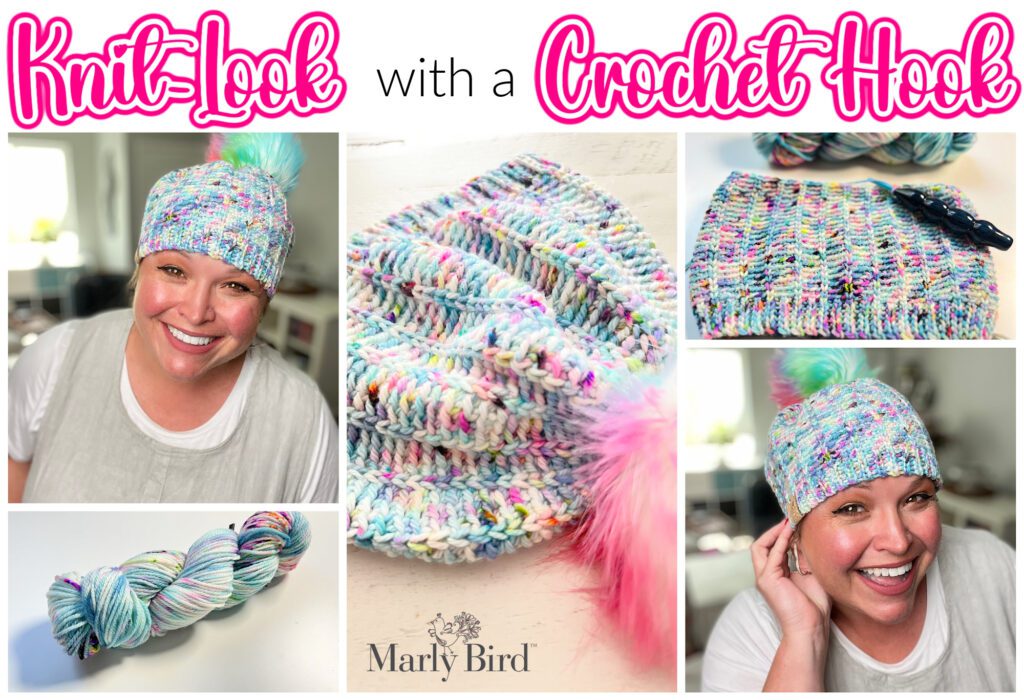
Collage showcasing various images of a woman modeling a colorful knit-look headband with a crochet hook. The images include the yarn used, close-ups of the headband, and happy expressions of the woman wearing it. Text reads, "Knit-Look with a Crochet Hook" and "Marly Bird." Free pattern included! -Marly Bird

Affiliate Disclosure: This post contains affiliate links. To learn more please visit my privacy policy here๐Ÿ’–

Is it possible to crochet a hat with a knitted appearance?

Absolutely! You can crochet a hat with a knitted look by choosing specific crochet stitches that mimic the smooth, continuous texture of knitting. The waistcoat stitch, also known as split single crochet, combined with slip stitch crochet worked in the back loops, can give you that perfect knit-like effect.

As a BiCrafty designer, I've crocheted several hats that utilize these knit-look stitches to bring the best of both worlds to your crochet projects. Iโ€™m thrilled to share one of these designs with you today. Keep reading to get the free pattern for the Celebration Crochet Hat, and discover how you can achieve that polished, knit-like finish in your own creations!
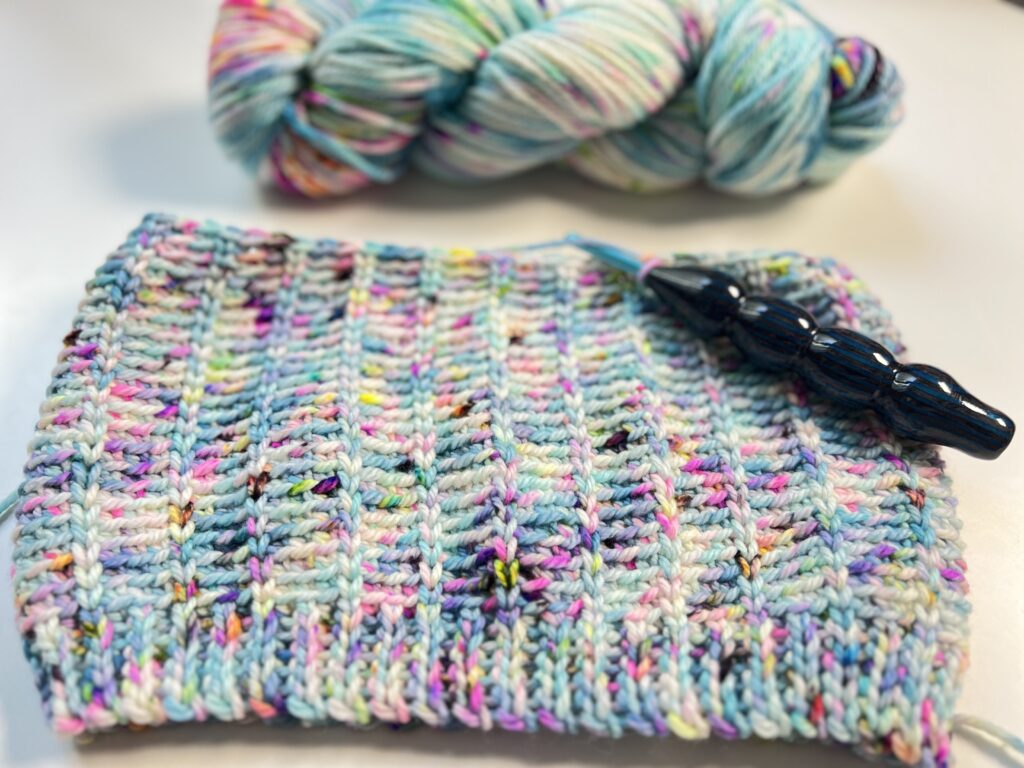
Colorful knitted swatch in pastel hues with a textured stitch, alongside a skein of variegated yarn and a crochet hook.

Can The Knit-Look Crochet Techniques Discussed Be Used For Projects Other Than Hats?

Certainly! These techniques can be adapted to suit a variety of projects, not just hats. Theyโ€™re versatile and can be creatively applied to accessories or garment creation.

During BiCrafty Bootcamp: Crochet for Knitters, we learned how to do the split single crochet by making MARLYโ€™S COLORFUL CROCHET MARKET BAG – free pattern. This knit-look crochet pattern was fun to make and even more fun to use. I get compliments on it all the time. Did you make one?
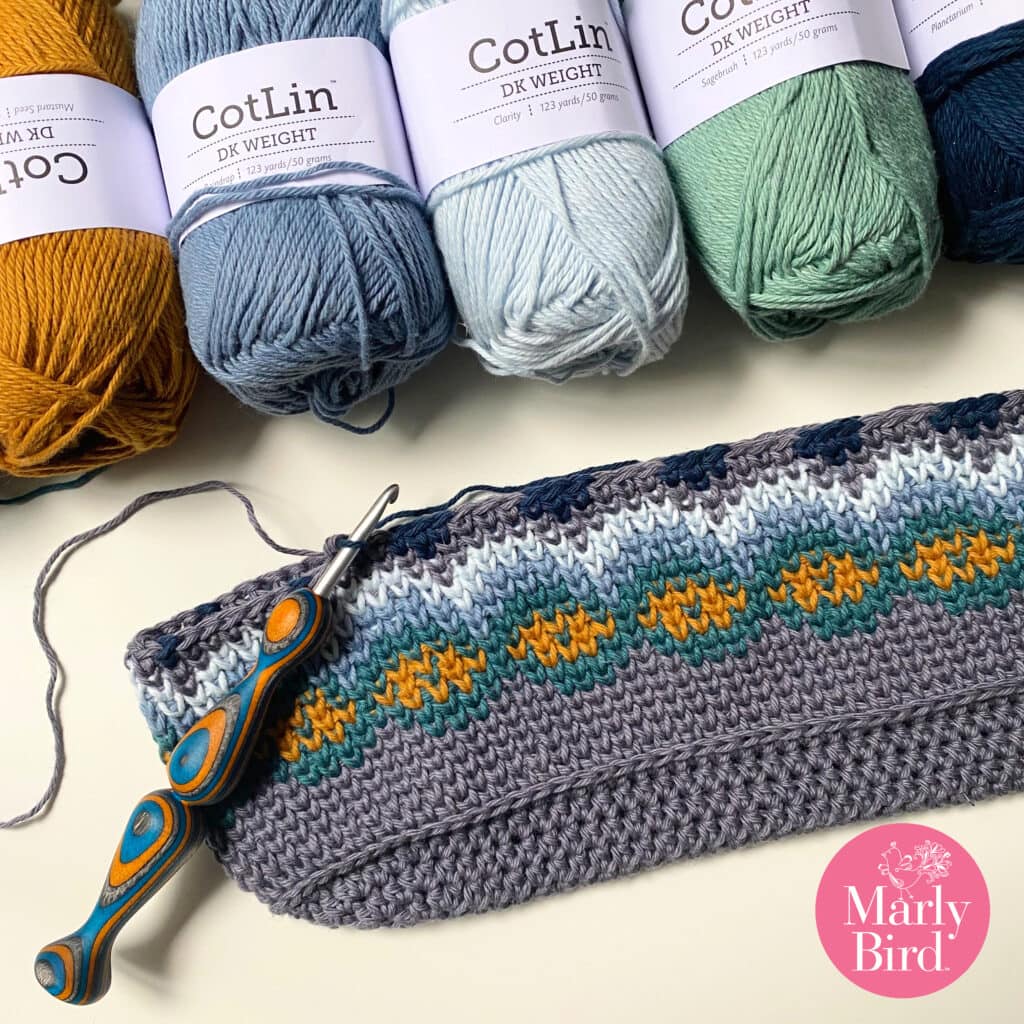
A crocheting project in progress using a multicolored yarn lies on a table, with a vibrant, ergonomic crochet hook inserted. Behind the project are five skeins of CotLin DK weight yarn in various colors and a pink circular tag that says "Marly Bird." This could be the start of your free crochet market bag pattern! -Marly Bird

But I have to mention this, some of my favorite patterns are designed by my friend BrianaK. As a matter of fact, her Fireside Chat Collection is wonderful. Check it out!

Which crochet stitch can mimic the look of knitting?

As a passionate crocheter, I often find myself wanting that classic, clean look of knit fabric but I want to use my crochet hook. Do you find yourself feeling the same?

Among all the wonderful stitches we can use, three stand out for their knit-like appearance: the split single crochet, also known as the waistcoat stitch, the Tunisian knit stitch, and slip stitches. Letโ€™s explore these stitches and see how they can bring a knit-like feel to your crochet projects.

Split Single Crochet or Waistcoat Stitch – Knit-Look Stitch

One of my favorite hidden gems in the crochet world is the split single crochet, which we lovingly call the waistcoat stitch. Instead of inserting your hook through the top loops like we usually do, you insert it through the center of the stitch from the previous row. The result is a dense texture that looks remarkably like knit fabric.
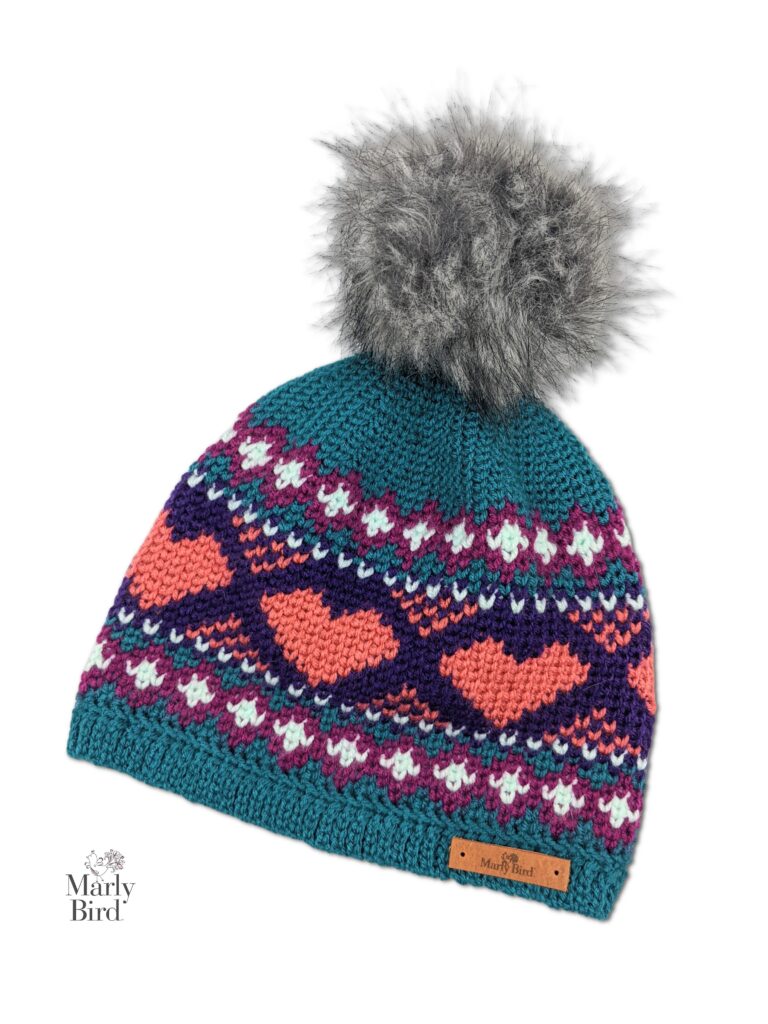
A knit-look crochet hat with a multicolored pattern, featuring designs of hearts and geometric shapes. The beanie has a teal base color, with pink, white, and purple accents. Topped with a fluffy gray pom-pom, it includes the Marly Bird logo on the bottom left. Find the free pattern online! -Marly Bird

I love using the waistcoat stitch when I want my projects to have that knit-look appeal but still enjoy the ease of crochet. It does take some patience to master, as precise hook placement and keeping the loop that is pulled up from the stitch loose is crucial. But trust me, the effort is worth it! This stitch not only makes your projects look sophisticated but also adds a comforting, tactile quality that lasts.

It's also a great way to get a knit stranded or fair isle look with crochet stitches like in the Cinnamon Hearts Crochet Hat. You can see it looks just like its sister the Chocolate Heart Knit Hat
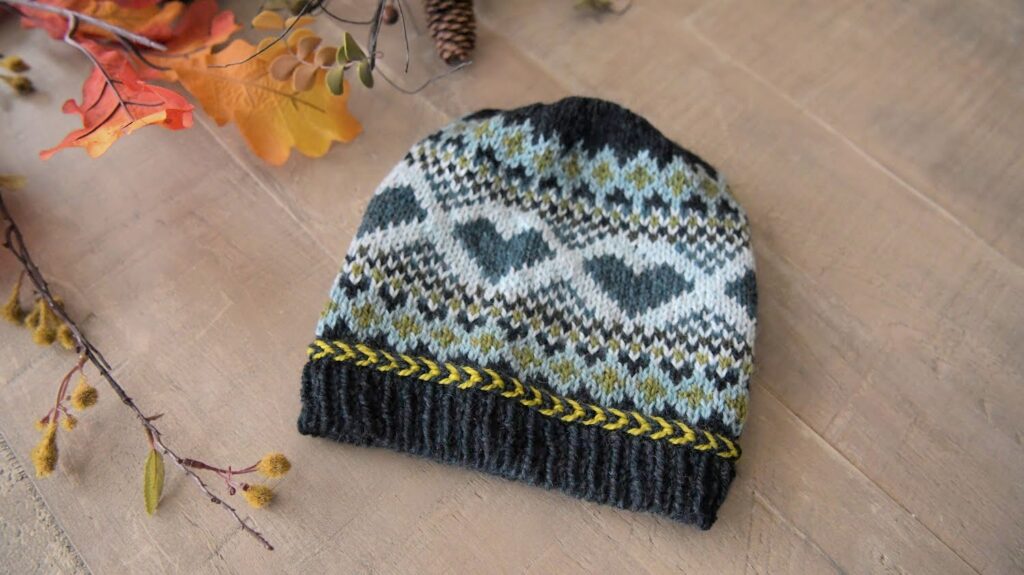
A stranded knit Hat with a Fair Isle pattern featuring hearts and diamonds in various shades of blue, grey, and black. The beanie has a yellow decorative braid near the base. It is displayed on a wooden surface, accompanied by autumn-themed foliage. Pattern available. -Marly Bird

Tunisian Knit Stitch – Knit-Look Stitch

Another fantastic technique that bridges the gap between crochet and knitting is the Tunisian knit stitch. This stitch involves collecting loops on your hook as you go forward and then working them off on the return pass. It creates a fabric that closely resembles the cozy knit textures we adore.

The Tunisian knit stitch has a rhythmic motion that I find almost meditative. It forms a series of warm, interlocking ‘v' patterns, just like the stockinette stitch in knitting. With some practice, this stitch can help you craft projects that look and feel like they were knitted, but with the distinct touch of crochet.

Here is a collage of just a few of the Tunisian Crochet projects designed by Robyn Chachula for MarlyBird.com. Do you have a favorite?

Names in order from top left to right:

  • Beehner Tunisian Crochet Hat
  • Kirkton Tunisian Crochet Cowl – free pattern
  • Turkey Trot Tunisian Crochet Pullover Shawl / Cowl – available in the Marly Bird House
  • Amethyst Puff Tunisian Crochet Shawl – coming soon
  • Poplar Tunisian Crochet Poncho – unbelievably comfortable
  • Garter Star Tunisian Crochet Cowl – coming soon
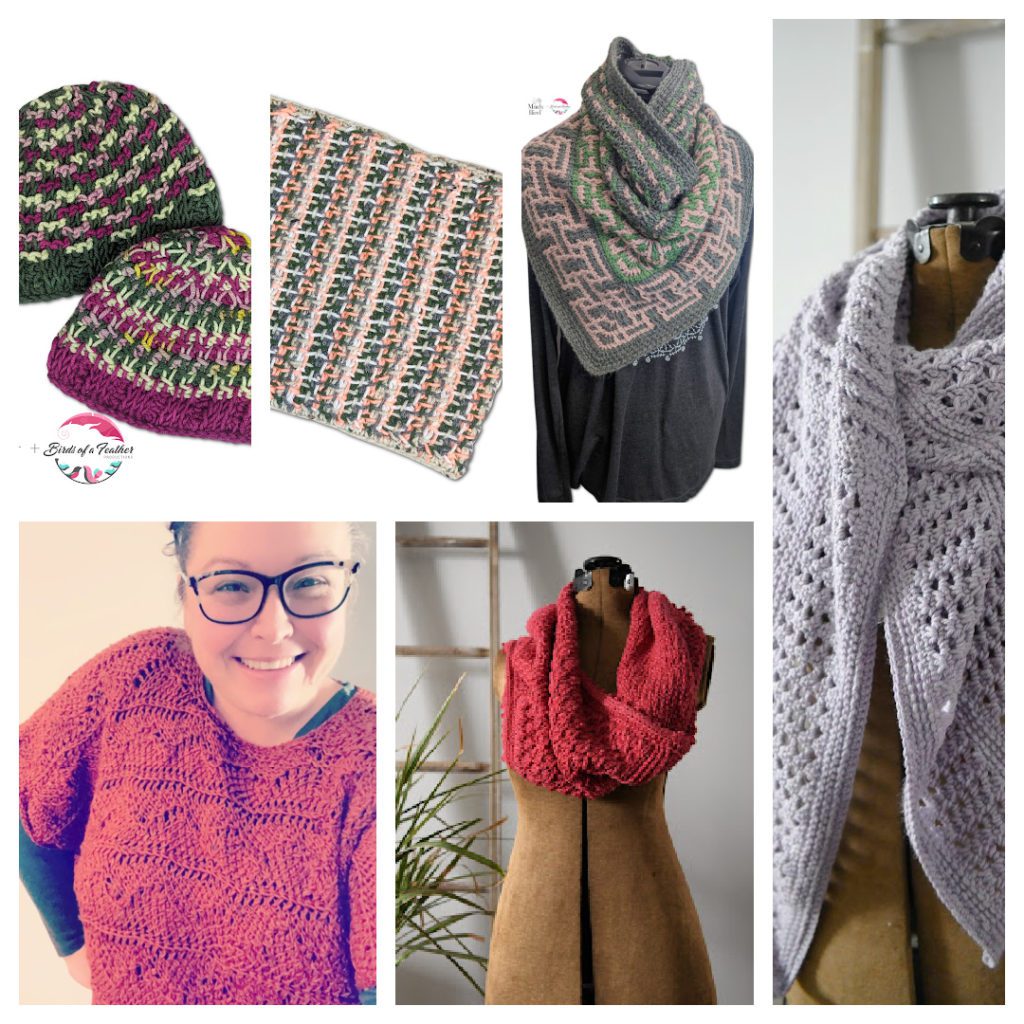
A collage of five images featuring various crochet projects: free Tunisian crochet hats, scarves, and a sweater, displayed on mannequins and a person. Each item showcases intricate patterns and vibrant colors. -Marly Bird

๐ŸŒŸ Want to learn more about Tunisian Crochet? Check out the BiCrafty Bootcamp: Triple Threat Tunisian Crochet for Beginner series taught by renowned designer, Robyn Chachula.

Crochet Slip Stitch – Knit-Look Stitch

Another fantastic stitch that can give you a knit-look is the slip stitch. Donโ€™t let this little stitch fool youโ€”itโ€™s more powerful than it seems! When you work slip stitches through the back loop, it creates a beautiful knit ribbing effect. This technique is perfect for cuffs and brims or even the bills of crochet hats, adding that polished, knit-like finish to your projects.
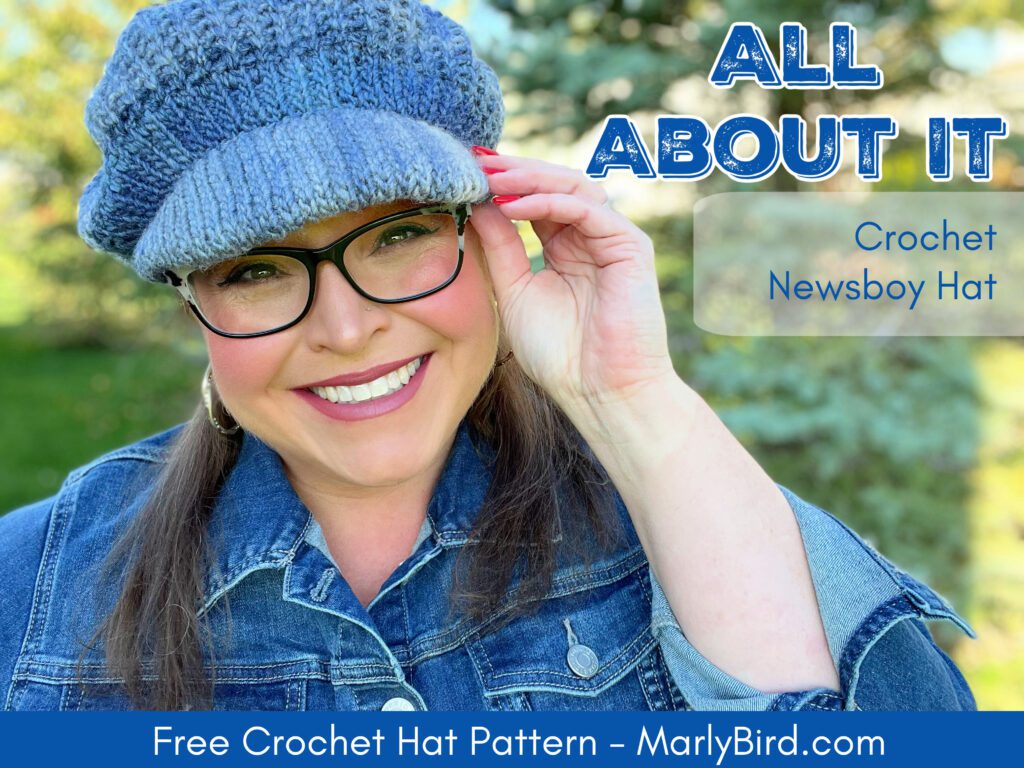
Smiling woman wearing a blue crochet newsboy hat in a park setting with text overlay 'ALL ABOUT IT - Crochet Newsboy Hat - Free Crochet Hat Pattern - MarlyBird.com'.

Honorable Mention Knit-Look Stitch – Half Double Crochet Through the Third Loop & Single Crochet Post Stitches

I couldnโ€™t talk about knit-look stitches without mentioning the half double crochet through the third loop and single crochet post stitches. These stitches deserves an honorable mention for their unique ability to create a knit-like texture.

By working the half double crochet into the third loop, which is located behind the top loops, you achieve a wonderful horizontal knit-like ridge. Same thing happens with you work a single crochet post stitch. Depending if you work it as a front or a back post stitch, the ‘v' at the top of the stitch is pushed toward the outer part of the fabric thus giving a horizontal knit-like ridge.
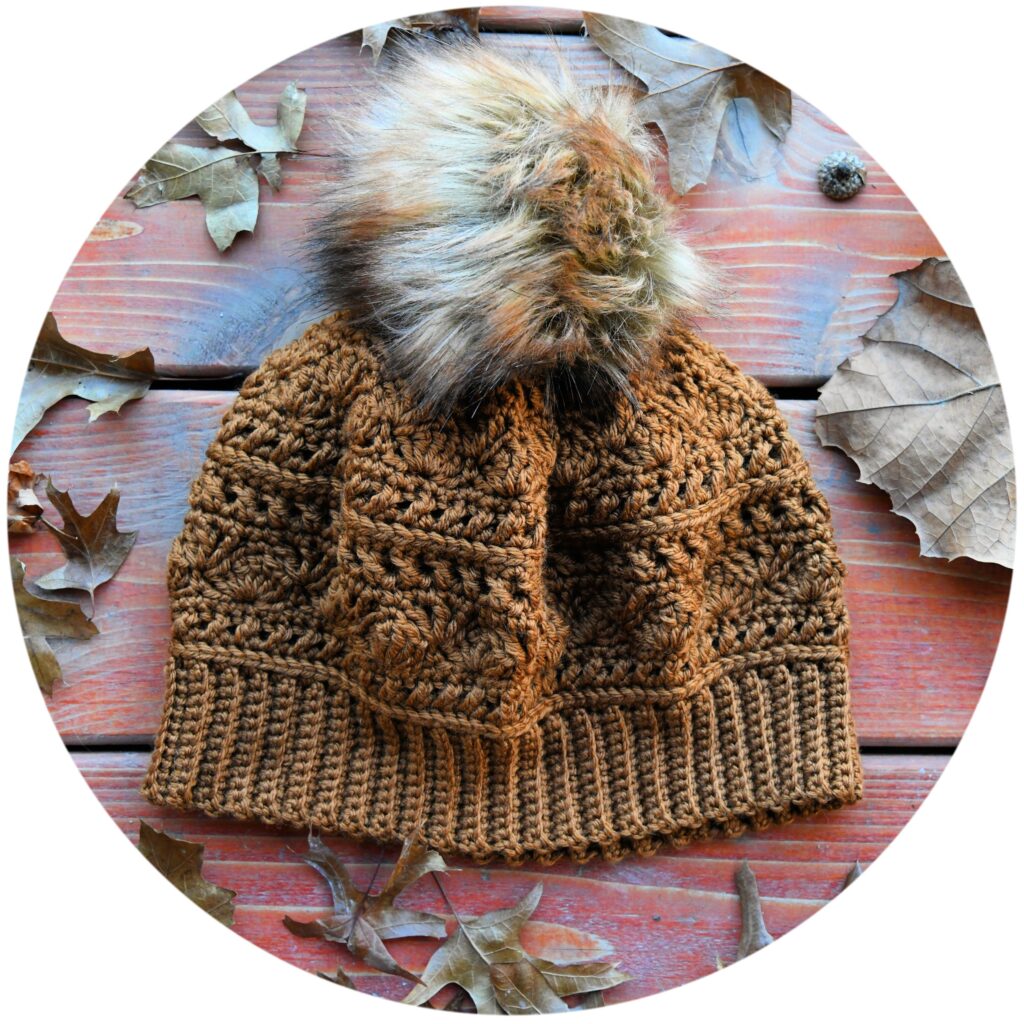
Knit-Look Crochet Hat with a large, fluffy pom-pom on top is displayed on a wooden surface surrounded by scattered dried leaves. The beanie features intricate stitching and ribbed edges. -Marly Bird

Both techniques are perfect for adding subtle, sophisticated texture to your crochet projects, making them a great choice for sweaters, scarves, and more.

๐ŸŒŸ Take a look at this Creekside Crochet Ruana or this pocket shawl, can you see the knit-like stitches I used?

Give it a try and see how it transforms your crochet pieces into elegant, knit-look creations!


What Type of Tarn Works Best For Creating a Knit-Look with Crochet?

Smooth, non-splitting yarns like worsted or Aran weight work exceptionally well. These yarns highlight the intricacy of crochet stitches and offer a knit-like appearance. Tighter spun yarns enhance stitch definition, making the crochet fabric resemble something you might have achieved with knitting needles.

Solid colors will of course show the work better than a speckled or variegated yarn but that doesn't mean those yarns will now work for the desired look. As a matter of fact, using a combination of split single crochet stitches and single crochet through the back look together can give a wonderful contrast between stitch texture and highlight a hand dyed or variegated yarn (just like in the Celebration Crochet Hat pattern given below).

What Size Crochet Hook Works Best for Creating a Knit-Look with Crochet?

When creating a knit-look with crochet, itโ€™s best to start with the recommended hook size for the yarn youโ€™ve chosen. However, if you find that your split single crochet stitches are coming out too snug, donโ€™t hesitate to go up a hook size. This can help you achieve the right texture and look without making your stitches too tight.

Personally, I prefer a hook with a pointier tip, like a Susan Bates hook. These hooks, especially the ones with a big sturdy handle, give me better control over my stitches and make it easier to work through the tighter spaces created by knit-look techniques.
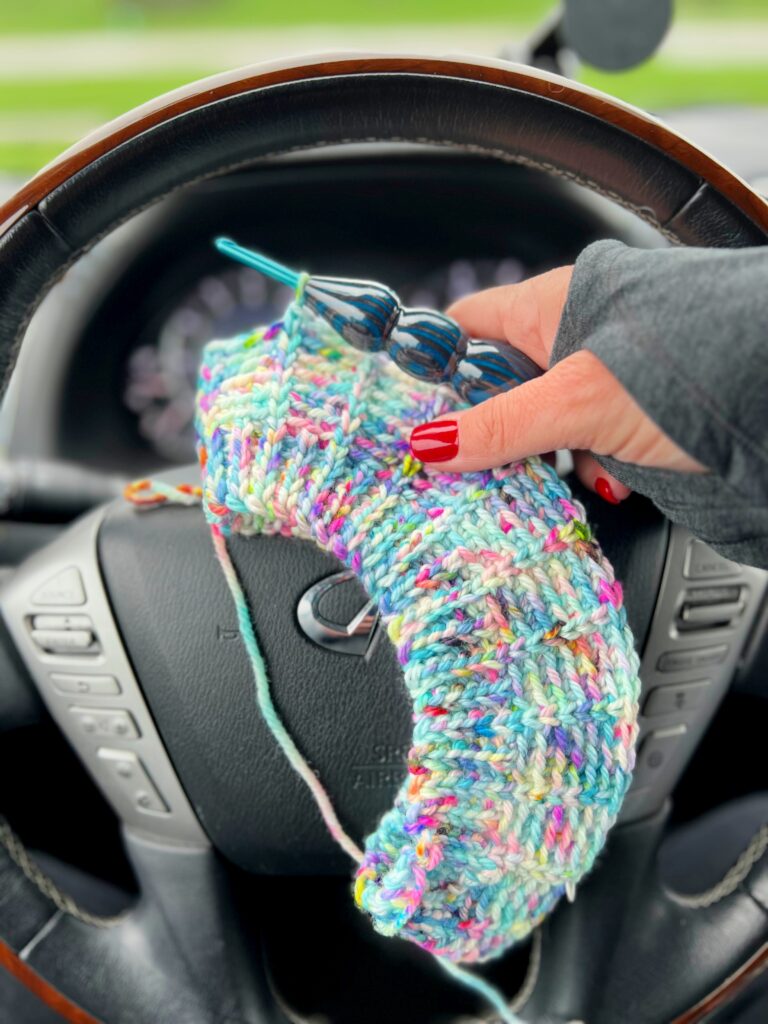
A person with red nail polish and a gray sleeve is holding colorful knitting on circular needles over a steering wheel inside a car, perfecting that knit-look. The wooden trim wheel features a logo with a silver 'L' in the center while the background is blurred. -Marly Bird

Overall, the key is to choose a hook that allows you to complete the stitch pattern comfortably and achieve the correct gauge. Finding the right balance between hook size and stitch tension will help you create beautiful, knit-look crochet projects.
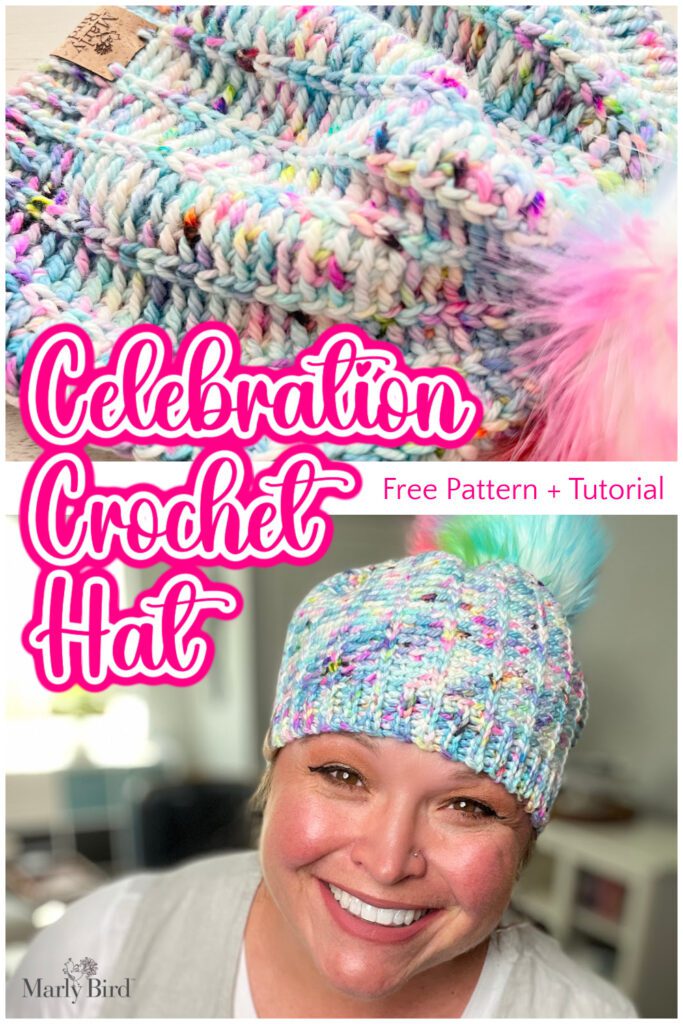
A colorful crocheted hat with a pom-pom is showcased in two images. The top image displays the hat's intricate pattern up close. The bottom image shows a smiling person wearing the finished hat. Text reads: "Celebration Knit-Look Crochet Hat," with "Free Pattern + Tutorial" and "Marly Bird. -Marly Bird

Celebration Crochet Beanie Pattern by Marly Bird

Iโ€™m thrilled to talk about my Celebration Crochet Hat Pattern! This design fully embraces the knit-look crochet with its clever use of textured stitches. Itโ€™s a reflection of my love for both knit and crochet techniques, creating a hat that looks knitted but is crafted entirely with a crochet hook.

When I designed this pattern, I wanted to combine the ease of crochet with the polished look of knitting. The guidance provided is straightforward, allowing you to focus on each stitch without hesitation. The finished hat showcases how crochet can mimic the beauty of knitting, offering a warm and stylish accessory.

SKILL LEVEL

Adventurous Beginner

CROCHET HAT MEASUREMENTS FOR THE FAMILY

To Fit Sizes

Toddler (Kid, Adult Small, Adult Medium, Adult Large)

Finished Measurements of the Crochet Hat

To Fit SizeToddlerKidsAdult SmallAdult MediumAdult Large
Finished Head Circumference 18โ€ (46 cm)19โ€ (48 cm)21โ€ (53.5 cm)23โ€ (58.5 cm)25โ€ (63.5 cm)
Finished Height7.5โ€ (19 cm)7.5โ€ (19 cm)8โ€ (20.5 cm)8โ€ (20.5 cm)8.5โ€ (21.5 cm)

Knit-Look Stitch Gauge 

16 sts by 17 rounds  in stitch pattern = 4โ€ [10 cm] by 4โ€ [10 cm]; use any size hook to obtain the gauge. 

MATERIALS

Yarn 

Sample Made with Sock Obsession Yarns, Aran Yarn Weight (100% superwash merino, 181 yds / 166 m, 3.53 oz/ 100 g, CYCA #4 worsted) –  1 (1, 1, 1, 2) hanks. Sample color – Tiny River 

Sample Made in video We Crochet, Twill Worsted Yarn Weight (100% superwash merino wool, 149 yds / 136 m, 3.5 oz/ 100 g, CYCA# 4 worsted) 

  • Color A: #27934 Gold Rush, 1 hank
  • Color B: #28533 Sea Salt Heather, 1 hank
  • Color B: #27927 Graphite Heather, 1 hank

Crochet Hook

Size H/8 [5.0 mm]

Notions 

Stitch Markers, Tapestry needle, Scissors, optional pom pom 

ABBREVIATIONS

Ch – Chain(s) 

PM – Place Marker

RS – Right Side 

Sc – Single Crochet

Sl st – Slip Stitch

Sp(s) – Space(s) 

Split Sc – Split Single Crochet

St(s) – Stitch(es)

WS – Wrong Side

SPECIAL STITCHES 

โญBack Loop Only: This is the furthest loop to you of the top 2 loops of the stitch indicated, regardless if you are on the RS or WS.

โญ๏ธChain (Ch): With slip knot or free loop on hook, yarn over hook and pull through loop on hook.

โญ๏ธSingle Crochet (Sc): Insert hook into indicated stitch, yarn over and pull up a loop, yarn over and draw through 2 loops on hook.

โญ๏ธSlip Stitch (Sl st): Insert hook into indicated stitch, yarn over and pull up a loop and draw through loop on hook. 

โญ๏ธSplit Single Crochet (Split Sc): Insert hook into indicated titch between the two legs of the stitch, yarn over and pull up a loop, yarn over and draw through both loops on hook.

โญ๏ธSplit Single Crochet/Single Crochet Decrease (Split Sc/Sc dec): Insert hook into indicated stitch between the two legs of the stitch, yarn over and pull up a loop, insert hook into the back loop of the next indicated st, yarn over and pull up a loop, yarn over and draw through all loops on hook – 1 stitch decreased. 

โญ๏ธSplit Single Crochet Two Together (Split Sc2tog): Insert hook into indicated stitch between the two legs of the stitch, yarn over and pull up a loop, insert hook into next stitch between the two legs of the stitch, yarn over and pull up a loop yarn over and draw through all loops on hook – 1 stitch decreased.

STITCH DIAGRAM

Only available in ad-free PDF

Get the Ad-Free PDF

Purchasing the ad-free PDF of the Celebration Crochet Hat Pattern is a fantastic option for those who want a seamless, uninterrupted crafting experience. This convenient format allows you to easily follow along without distractions, and it's perfect for printing out and taking on-the-go for your crochet projects.

The PDF includes fully formatted pattern with written instructions, crochet stitch diagrams, and video tutorial links.
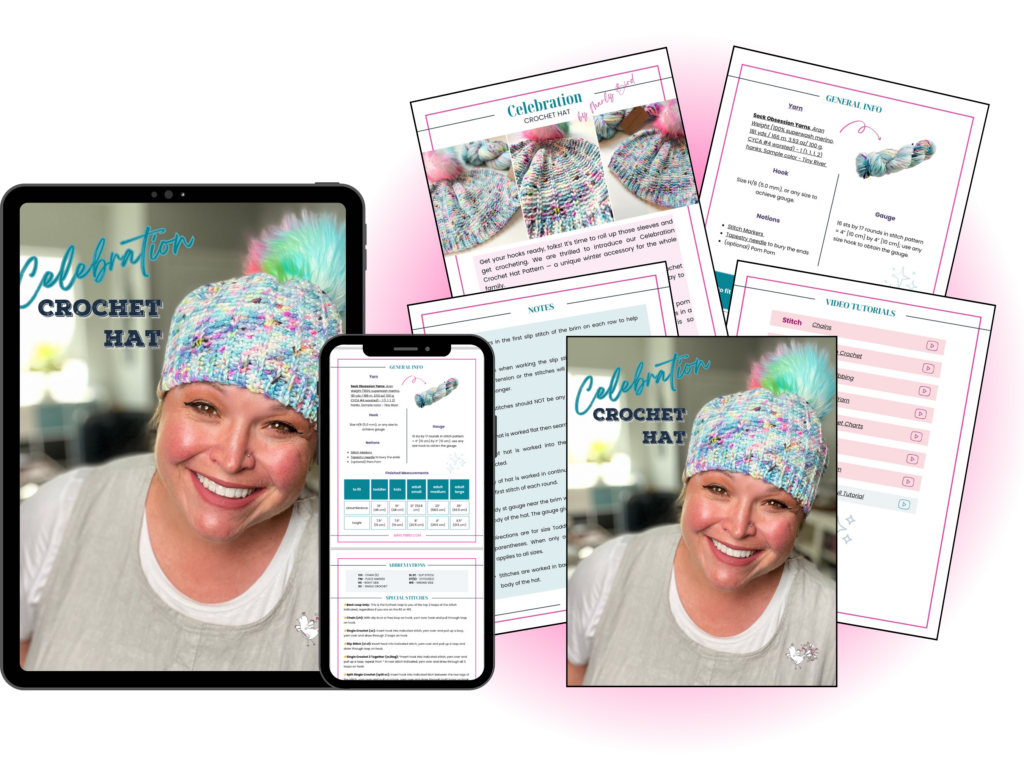
A smiling person wearing a colorful crochet hat with a pom-pom is displayed on a tablet, smartphone, and printed pattern on paper. The free pattern includes instructions, materials list, and images of the completed knit-look hat. The background is a bright pink circle. -Marly Bird
Etsy
Shopify
Ravelry

NOTES

  • Use markers in the first slip stitch of the brim on each row to help keep count.
  • Be cautious when working the slip stitches on th brim, maintain consistent tension or the stitches will begin to get too tight as the brim gets longer. 
  • The slip stitches should NOT be any more snug than the size of the hook.
  • Brim of hat is worked flat then seamed together. 
  • Body of hat is worked into the long side edge of the brim as instructed.
  • Body of hat is worked in continuous rounds. Use a marker to identify the first stitch of each round. 
  • Body st gauge near the brim will be a little more snug than it is in the body of the hat. The gauge given is in the body of hat. 
  • Directions are for size Toddler; changes for sizes Kid, S, M, L are in parentheses. When only one number is given then that number applies to all sizes.
  • Stitches are worked in back loop only unless otherwise stated in the body of the hat. 

VIDEO TUTORIALS

  • How to wind yarn >> Click Here for Video Help << 
  • How to Crochet the >> Celebration Crochet Hat  <<
  • How to Bury Ends >> Click Here for Video Help <<
  • How to add a Removable Faux Fur pom >> Click Here for Video Help <<

GROW

To Unlockย Exclusive Subscriber Contentย click the Box below and join for free by simply adding your email and creating a password! If you are having troubles, clear your cache or reset your password or login to the Grow Publisher Portal.

>> Learn More About Grow Here <<

I'm thrilled to share this amazing pattern with you, many patterns on my blog are absolutely free! I kindly request that you don't copy and paste or distribute this pattern. Prefer an ad-free experience? Buy a digital PDF pattern for a small fee from one of my online stores for a seamless crafting journey. 

I appreciate your support and readership. You are the reason I can keep doing what I love and sharing it with others. So, thank you from the bottom of my yarn-loving heart! Disclosure: This post contains affiliate links, meaning I get a commission if you decide to make a purchase through my links at no cost to you.

CELEBRATION CROCHET HAT Free Pattern

BRIM

Chain 6.

Row 1: Sl st in back loop of 2nd ch from hook and in each ch across, ch 1, turn โ€” 5 sts.

Row 2: Sl st in the back loop only of each slip stitch across, ch 1, turn โ€” 5 sts. 

Repeat Row 2, 70 (74, 82, 90, 98) more times.– 36 (38, 42, 46, 50) raised ridges.

Join the foundation row (chain edge) to the last row (working edge) with a slip stitch into the back loop only of the working edge and the front loop of the chain edge, repeat across row. See video tutorial for help, DO NOT FASTEN OFF. 

BODY

Turn to begin working on long edge of brim (in the row ends), ch 1.

Set-up round 1: Working into the slip stitch edge, sc into the โ€œVโ€ of the slip stitch ridge, and sc into the gully between the ridges, do not turn โ€” 72 (76, 84, 92, 100) sts. 

Round 1: Split sc in the first st of the round, *sc in the back loop of next 3 sts, split sc in next sc; repeat from * around to last 3 sts, sc in the back loop of last 3 sts. 

Repeat Round 1 until hat measures 5.5 (5.5, 6, 6, 6.5) โ€œ [14 (14, 15, 15, 16.5) cm] from brim edge – or to desired size in length (remember that making it larger will require more yarn). 

CROWN

Round 1 (decrease round): *Split sc in next sc, sc in the back loop of next st, sc2tog in back loop of next 2 sts; repeat from * around โ€” 54 (57, 63, 69, 75) sts.

Round 2 and 3: *Split sc in next sc, sc in the back loop of next 2 sts; repeat from * around. 

Round 4 (decrease round): *Split sc in next sc, sc2tog in back loop of next 2 sts; repeat from * around โ€” 36 (38, 42, 46, 50) sts.

Round 5 and 6: *Split sc in next sc, sc in back loop of next st; repeat from * around. 

Round 7 (decrease): *Split sc/sc dec (see special stitches) in next 2 sts; repeat from * around โ€” 18 (19, 21, 23, 25) sts.

Round 8 and 9: Split sc in each st around.

Round 10 (decrease): *Split sc2tog (see special stitches) in next 2 sts; repeat from * around to last stitch, split sc in last st, sl st to first stโ€” 9 (10, 11, 12, 13) sc. Fasten off leaving a long tail. 

FINISHING

No sewing! With the tail thread through a tapestry needle, weave the top closed. 

Weave in all ends

Add pom pom Optional

Get a completely different look by working stripes just like I did in the video tutorial!
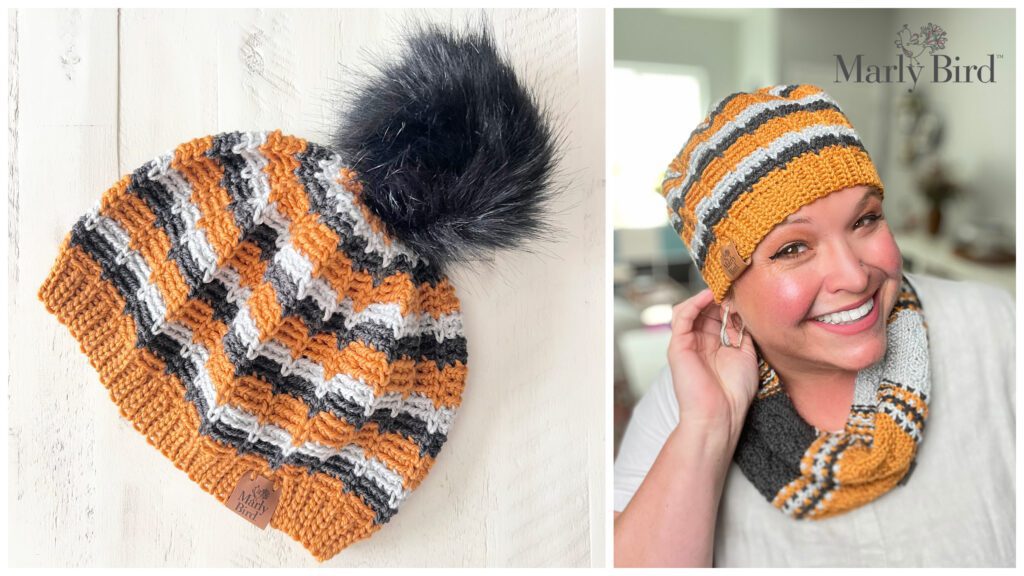
A smiling woman wearing a matching set consisting of a striped orange, black, gray, and white knit-look beanie with a black pom-pom and a coordinating neck warmer. The set is displayed separately on the left against a white surface. The Marly Bird logo is in the top right with details for the free pattern. -Marly Bird

Knit-Look with a Crochet Hook – Final Thoughts

As a BiCrafty person, meaning Iโ€™m both a knitter and a crocheter, I understand the unique charms and challenges of each craft. I also know that not everyone can wrangle two needles, and sometimes a crocheter really wants that sleek, knitted look. That's why offering patterns that achieve a knit-look with a crochet hook is so important to me.

Crochet offers an incredible way to mimic the polished appearance of knitting. Techniques like the split single crochet, half double crochet through the third loop, single crochet post stitch, and slip stitch have become my go-to stitches for achieving that knit texture. Pairing these stitches with the right yarn brings out the best in crochet, creating projects that look knitted but have the unique touch of crochet.
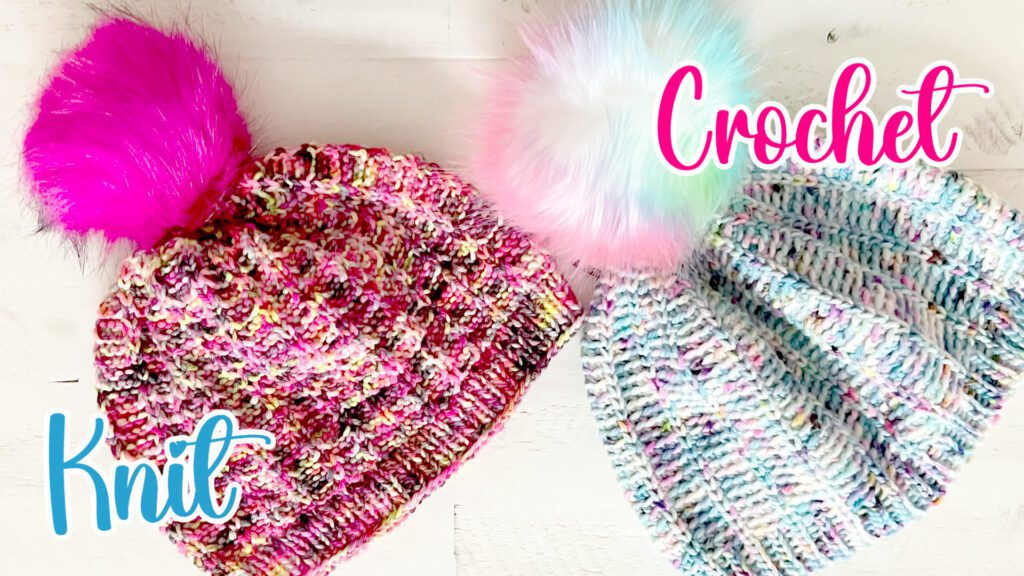
A colorful knitted hat with a bright pink pom-pom is labeled "Knit." Next to it is a blue and white knit-look crochet hat with a multicolored pom-pom, labeled "Crochet." Both hats are laid out on a white surface. -Marly Bird

The Celebration Crochet Hat Pattern is a perfect example of how crochet can break boundaries and mirror the elegance of knitting. Itโ€™s more than just a pattern; itโ€™s an inspiring journey that pushes the boundaries of crochet skills. The resulting hat is a wearable piece of art, blending the warmth and style of knitting with the charm of crochet.

Thank you for joining me on this exploration of knit-look crochet techniques. I can't want to see your crochet knit-look hat! Be sure to share pictures with me on social media and I will be sure to give you a thumbs up!

Happy crocheting!

Frequently Asked Questions

Which crochet stitch looks most like knitting?

The split single crochet (waistcoat stitch) is the closest match to stockinette knit fabric. Instead of inserting your hook under the top loops, you go through the center “V” of the stitch below. The result is a dense, smooth fabric with that characteristic knit “V” pattern on the surface. It takes a little practice to nail the hook placement, but once it clicks it's incredibly satisfying… and people genuinely can't tell the difference from knitting at a glance.

Can I use knit-look crochet stitches for Fair Isle colorwork?

Yes! The waistcoat stitch is amazing for stranded colorwork because that smooth “V” surface makes color motifs read crisply… just like knit Fair Isle. Marly's Celebration Hat in this post looks exactly like its knit sister, the Jubilee Knit Hat. If you crochet and want that Fair Isle look without picking up knitting needles, the waistcoat stitch is your answer.

What yarn works best for knit-look crochet?

Smooth, plied yarn with good stitch definition. You want each stitch's “V” to show clearly, so avoid fuzzy or textured yarns that blur the surface. Worsted or DK weight in solid or tonal colors is ideal. Wool and wool blends have memory and bounce that helps stitches sit neatly. The cleaner and smoother the yarn, the more convincingly knit-like your crochet fabric will look.

Is the Celebration Crochet Hat beginner friendly?

It's rated advanced beginner. You need to be comfortable working in the round and changing colors. The brim uses slip stitch through the back loop (which creates beautiful knit-ribbing!) and the body uses waistcoat stitch. If you've made a basic crochet hat before and want something that looks more polished and knit-like… this is the perfect next project.

What's the difference between Tunisian crochet and regular knit-look stitches?

Tunisian uses a longer hook and works in two passes… a forward pass collecting loops and a return pass working them off. It creates thicker, more structured fabric. Regular knit-look stitches like the waistcoat stitch use a standard hook and produce fabric more similar in weight to regular crochet. Both look like knitting but through completely different mechanics. Tunisian is thicker and more structural; waistcoat stitch is more fluid and drapey.
Filed Under: Crochet, Free Patterns, Marly Bird Premium Patterns, Our Free Patterns, Pattern, Tips, Tricks, Techniques for Knitting and Crochet, Uncategorized, YouTube Video Tutorial

How to Knit Openwork Lace – Easy Drop Stitch Cable Pattern

June 27, 2024 By Marly Bird Leave a Comment

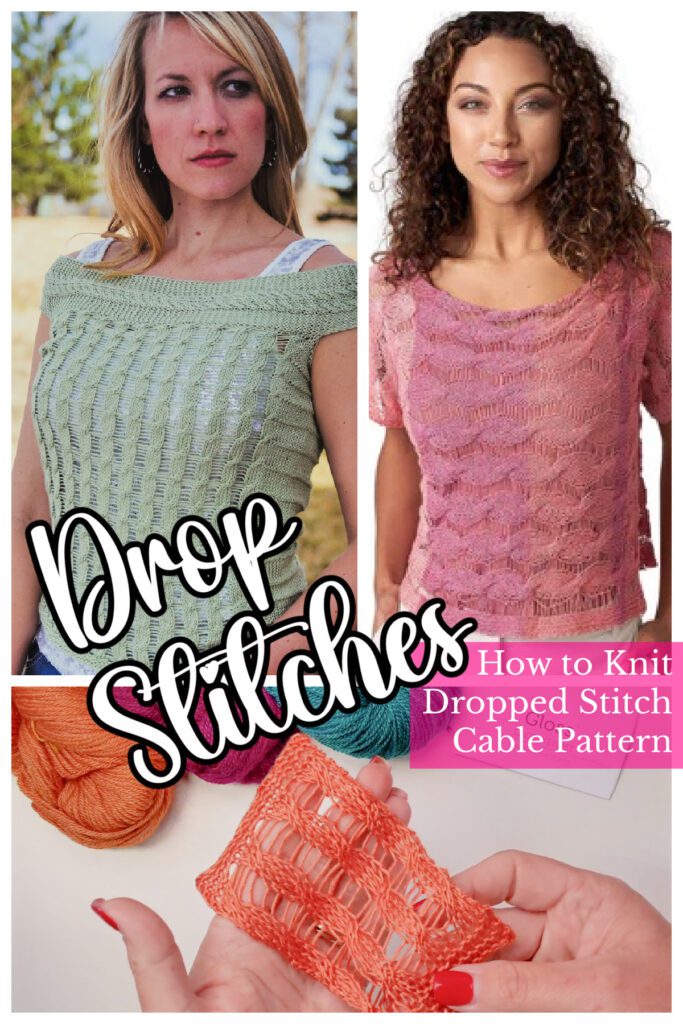
If you're looking to add a touch of elegance to your knitting projects, the Dropped Stitch Cable pattern is the perfect choice. It's time to learn How to Knit Openwork Lace – Easy Drop Stitch Cable Pattern with the help of you BiCrafty Bestie, Marly Bird.

Collage featuring two women modeling knitted tops with knit dropped stitch patterns. The top left image showcases a green knit top, while the top right displays a pink knit top. Below them is a close-up of a hand holding an orange knit piece. Text overlay reads "Drop Stitches" and "How to Knit Dropped Stitch Cable Pattern". Marly Bird

Affiliate Disclosure: This post contains affiliate links. To learn more please visit my privacy policy here๐Ÿ’–

This stunning stitch pattern can be used for a variety of projects, such as my Savannah Shutters top, a swimsuit cover-up, or a beautiful scarf. Its unique texture and drape highlight the beauty of silky yarns, making your creations truly stand out.

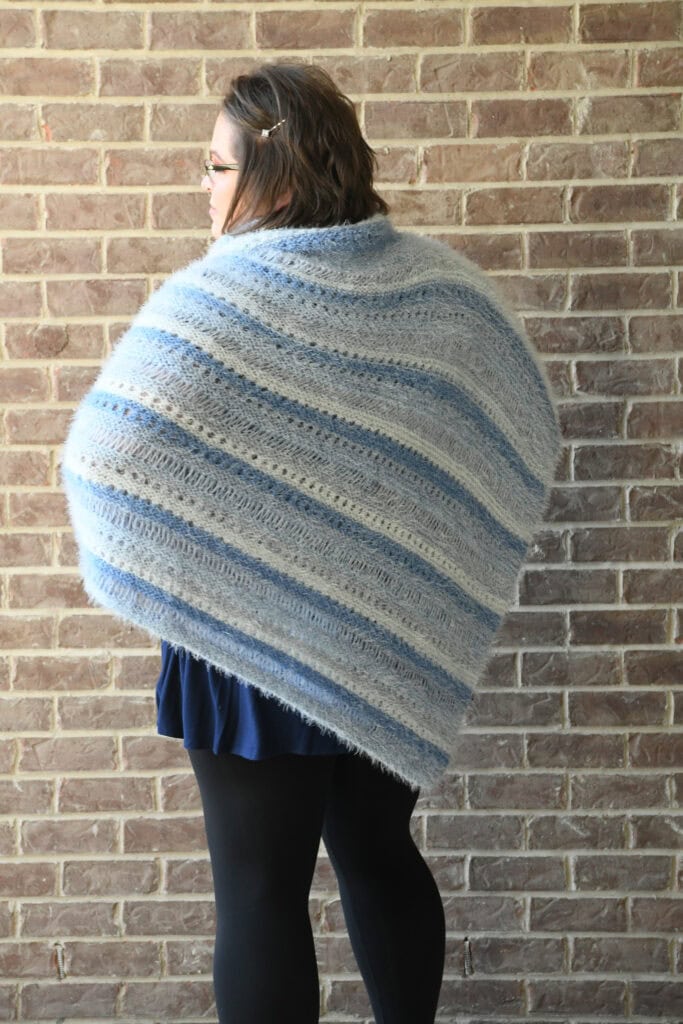
Here at MarlyBird.com, I've been a fan of drop stitches and use them in a variety of projects. You might remember doing a version of a drop stitch pattern on the very first Turkey Trot poncho pattern, or one of the very first youtube videos I did showing dropped stitches for this free pattern by Red Heart.

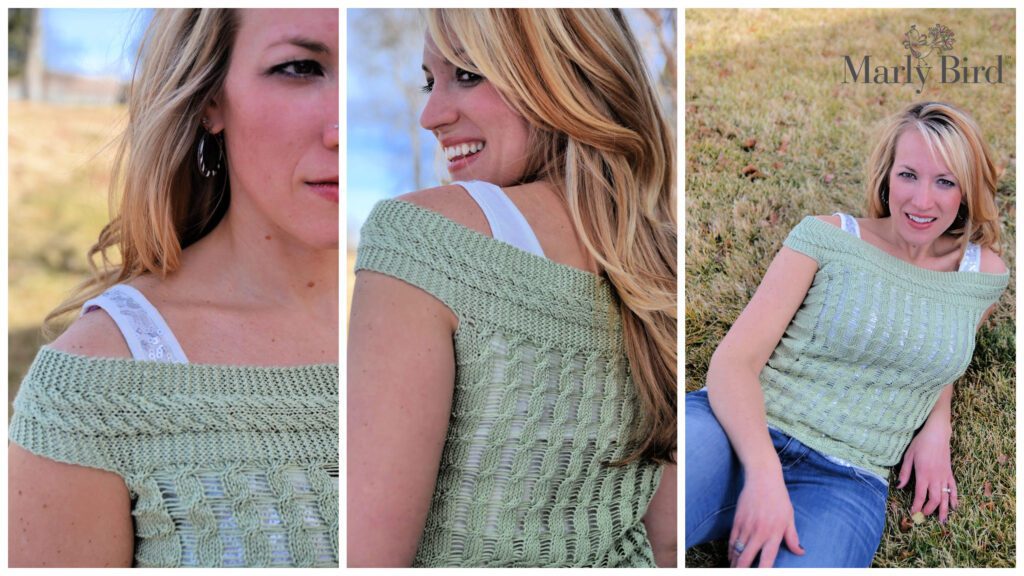
Collage of a woman modeling a green knit top in three different poses. Left: Close-up of her face and shoulder. Center: Back view, highlighting the intricate Knit Openwork Lace pattern. Right: Seated on grass, smiling and looking at the camera. "Marly Bird" logo in the top right corner. Top is the Savannah Shutters Knit top pattern -Marly Bird
>> Get the Savannah Shutters Knit Top on Etsy <<

The Dropped Stitch Cable pattern is versatile and adaptable, suitable for any size needles or weight of yarn. However, it shines brightest when used with yarns that have silk, bamboo, or rayon in their blend. These fibers allow the fabric to drape gracefully and showcase the vibrant colors beautifully.

Fall in LOVE with Dropped Knit Stitches

What is not to love about these fun yarn over and drop stitches. It might be a bit nerve wracking at the start but once you let that stitch fall off the knitting needle and you see the beautiful (intentional) ladders that appear you will be mesmerized!

These dropped stitches enhance the drape and flow of silky yarns. They are also perfect for a variety of projects, from garments to accessories. And, the stitch pattern is easy to adapt to different yarn weights and needle sizes.

As mentioned, a great example of how a designer uses drop stitches to create openwork lace fabric with a highly textured yarn is the poncho I designed for the very first Turkey Trot mystery make-along (event held every Thanksgiving Day weekend).

back view of the 2019 turkey trot mystery make-along poncho by Marly Bird. Showing off the drop knit stitches.

Materials needed for the drop stitch cable pattern

  • Any size knitting needles – choose a needle that works best with the yarn weight you choose to use for your project.
  • Any weight of yarn (preferably with silk, bamboo, or rayon blended with a touch of wool or cotton) – this stitch pattern really highlights the beauty of the yarn. The drop stitch pattern allows for the texture and shine of the yarn to be on display. Plus, the drape of the overall fabric works best with the yarn has a bit of cellulose fiber in it.

Here are some yarn suggestions for this stitch pattern. I like the look and feel of these yarns coupled with openwork lace knit patterns like this one:

Knit Picks, Gloss DK weight yarn

Knit Picks, Galileo DK weight yarn

Knit Picks, Samia Fingering weight yarn

Madelinetosh, Pashmina Sport weight yarn

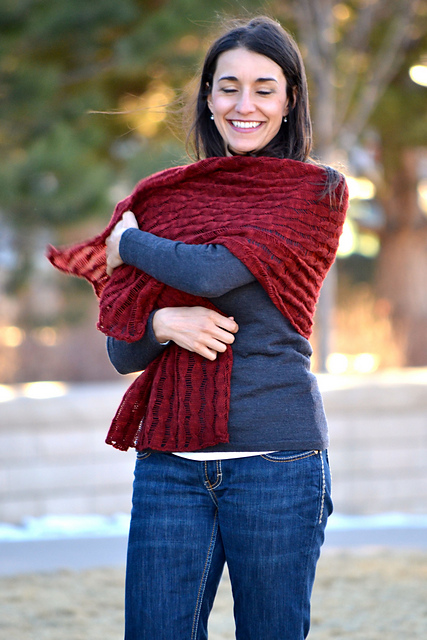
Or, if you have that extra special ball of yarn like Qiviut and you are looking for a simple yet dramatic knit pattern for it, this stitch pattern is the one for you. As a matter of fact, I used this exact yarn for one of my favorite pieces I've ever knit.

A smiling woman with long dark hair stands outdoors, wrapping herself in a large, textured red scarf with an intricate openwork lace design. She is wearing a long-sleeved dark top and blue jeans. The background is slightly blurred, showing a mix of green trees and sunlight. -Marly Bird

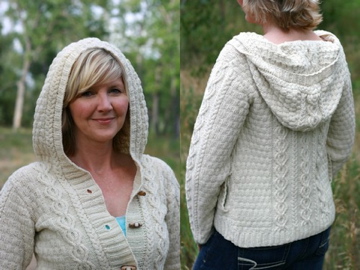
The drop stitch technique can be worked with basic knit cables like the cable 4 back or the cable 4 front, or with even more complex cables like those used in the Trail Hoodie pattern. As long as you keep the intended drop stitch outside of the cable pattern, you can achieve this look.

Split image of a person wearing a knitted cream-colored hoodie. Left side shows the front view with the person smiling, hood up, and buttoned front. The right side reveals intricate drop stitch cable knitting patterns on the back. Outdoor background with trees. -Marly Bird

Knit Openwork Lace – Easy Drop Stitch Cable Pattern

For the easy drop stitch cable pattern instructions, I'm giving you a pattern for a simple and easy Drop Stitch Cable Pattern that uses the cable 4 back stitch + 1 stitch that will be dropped.

The stitches used in this pattern are listed below:

  • Knit (k)
  • Purl (p)
  • Yarn Over (yo)
  • Cable 4 Back (C4B) โ€“ Slip 2 sts onto cable needle and hold in back, k2 from left hand needle, k2 from cable needle.

GROW

To Unlockย Exclusive Subscriber Contentย click the Box below and join for free by simply adding your email and creating a password! If you are having troubles, clear your cache or reset your password or login to the Grow Publisher Portal.

>> Learn More About Grow Here <<

I'm thrilled to share this amazing pattern with you, many patterns on my blog are absolutely free! I kindly request that you don't copy and paste or distribute this pattern. Prefer an ad-free experience? Buy a digital PDF pattern for a small fee from one of my online stores for a seamless crafting journey. 

I appreciate your support and readership. You are the reason I can keep doing what I love and sharing it with others. So, thank you from the bottom of my yarn-loving heart! Disclosure: This post contains affiliate links, meaning I get a commission if you decide to make a purchase through my links at no cost to you.

Dropped Stitch Cable Pattern Flat Instructions

These are the instructions used in the video tutorial. Please note: the number of rows may change depending on the actual pattern; this pattern has 7 rows between each cable row where other pattern might only have 3, 5, or more.

Worked in the Rows, begins with multiple of 4 stitches + 4 (does not include any edge stitches).

Set-up Row: K4, * yo, k4; repeat from * to end.

Row 1: Purl.

Row 2: C4B, *k1, C4B; repeat from * to end.

Rows 3, 5, 7, 9: Purl.

Rows 4, 6, 8: Knit.

Row 10: C4B, *k1, C4B; repeat from * to end.

Repeat Rows 3-10 only for Drop Stitch Cable pattern, ending after a Row 3.

Final Row: K4, *drop next st off needle, k4; repeat from * to end.


Dropped Stitch Cable Pattern In The Round Instructions

These are the instructions are similar to those used in the video tutorial to knit a flat swatch. Please note: the number of rows may change depending on the actual pattern; this pattern has 7 rows between each cable row where other pattern might only have 3, 5, or more.

For working the dropped stitch cable pattern in the round, the stitch multiple is 4 stitches.

Set-up Round: K4, * yo, k4; repeat from * to end.

Round 1: Knit.

Round 2: C4B, *k1, C4B; repeat from * to end.

Rounds 3-9: Knit.

Round 10: C4B, *k1, C4B; repeat from * to end.

Repeat Rounds 3-10 only for Drop Stitch Cable pattern, ending after a Round 3.

Final Round: K4, *drop next st off needle, k4; repeat from * to end.

Drop Stitch Cable Pattern Video Tutorial

To help you get started, I've created a detailed video tutorial where I guide you through each step of knitting the Dropped Stitch Cable pattern flat. You can find the video here.

The Dropped Stitch Cable pattern is a beautiful addition to any knitter's skill set. Whether you're a seasoned knitter or a beginner looking for a new challenge, this pattern offers endless possibilities for creating elegant and unique projects.

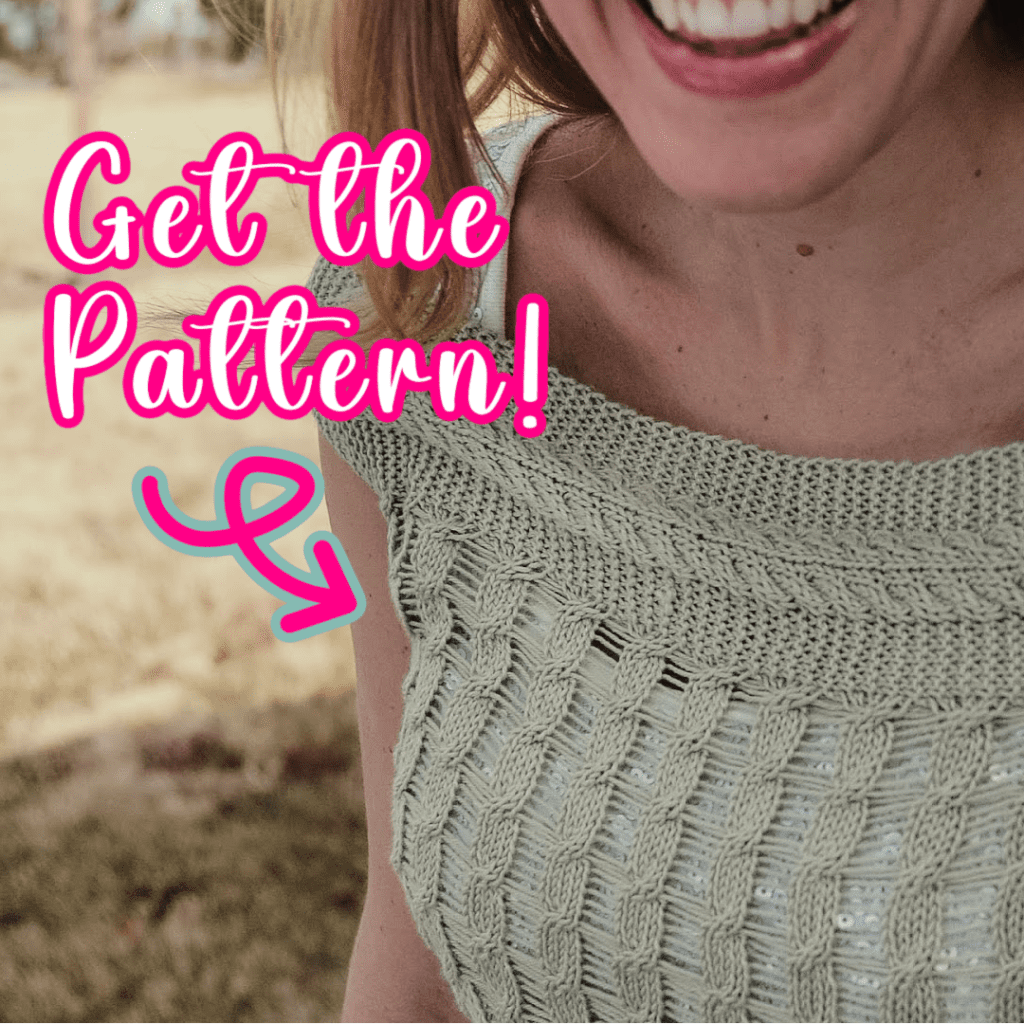
A person wearing a knitted sleeveless top is shown. The text "Get the Pattern!" is superimposed over the image with a pink arrow pointing to the top, highlighting its intricate drop stitch cable pattern. The background is blurred, focusing on the detailed texture of the knitwear. -Marly Bird

Don't forget the Savannah Shutters Knit Top pattern is now available for purchase on Etsy, or Shopify, or in the Marly Bird Ravelry Store

Get Pattern on Etsy
Get Pattern on Shopify
Get Pattern on Ravelry

Happy knitting!

Frequently Asked Questions

What is openwork lace in knitting?

Openwork lace creates intentional holes or openings in knitted fabric through yarn overs paired with decreases. The yarn overs add stitches (creating the holes) while the decreases remove them (maintaining stitch count). The arrangement of yarn overs and decreases creates the specific lace pattern. “Open work” emphasizes the airy, open quality of the resulting fabric… the visible holes are the design element rather than mistakes to avoid. Drop stitch is a specific type of openwork where stitches are intentionally dropped and allowed to run down the fabric, creating dramatic vertical openings.

What is the drop stitch technique?

Drop stitch involves intentionally dropping a stitch off your needle and letting it “ladder” or run down several rows of knitting, creating a long, vertical open column in the fabric. Unlike accidentally dropping a stitch (which is a mistake), drop stitch is planned and deliberate… you often work a specific “over” stitch that creates an elongated loop, then drop that loop at a later point to create the ladder. The resulting fabric has dramatic vertical openings that create a striking, modern effect. It's a technique that makes a visual statement with very little technical complexity.

How does drop stitch combine with cables?

The combination creates beautiful contrast! Dense, structured cable columns paired with open, airy drop-stitch sections creates a fabric with dramatic texture variation. The cable provides architectural strength and visual interest through the twisted stitches, while the adjacent drop-stitch sections open up the fabric and create lightness. This contrast makes each element look more impressive than it would alone. The easy drop stitch cable pattern in this post uses this combination to create a striking fabric that looks more complex than either technique alone.

Is drop stitch knitting beginner-friendly?

Basic drop stitch is actually very accessible… you're literally dropping stitches on purpose, which feels counterintuitive at first but is technically simple. The challenge is maintaining your nerve and trusting the technique! The elongated/yarn-over version that creates controlled drop stitches is slightly more involved but still within advanced beginner reach. When combined with cables, you need intermediate knitting comfort (being comfortable with cable crosses and working with cable needles). The combined drop stitch cable pattern is intermediate territory but very achievable with video support.

What yarn shows drop stitch and openwork lace best?

Smooth yarn that clearly reveals the open spaces! Fuzzy or textured yarn fills in the deliberately open spaces and defeats the purpose. Wool and wool blends are beautiful… the elasticity keeps the stitches neat and the fabric springs back nicely. For drop stitch specifically, slightly heavier smooth yarns show the deliberate ladder effect most dramatically. Avoid cotton for drop stitch (it doesn't have the memory to keep the laddered sections looking intentional) and definitely avoid anything that would obscure the openwork holes that are the whole point of the technique.

Filed Under: Knitting, Tips, Tricks, Techniques for Knitting and Crochet, Uncategorized, YouTube Video Tutorial

Knitting and Crochet Patterns for Cinco de Mayo

May 1, 2024 By Marly Bird 3 Comments

Celebrate Cinco de Mayo in style this year with your very own festive crochet and knitting creations! Whether youโ€™re prepping for a fiesta, throwing a party, or just want to show off your skills, these fun knitting and crochet patterns for Cinco de Mayo are sure to shake things up.

Over 35 patterns curated just for you – from sombrero beanies and bright cardigans to free-flowing scarves and creative crochet amigurumi, use your yarny magic to whip up something special thatโ€™s truly fit for the occasion. Plusโ€ฆ with our easy-to-follow directions, itโ€™ll be easy as piรฑata โ€“ we mean pie โ€“ so grab some mariachi music (and margaritas!) and get ready for some crafty fiesta fun!

If you like patterns for events like Cinco de Mayo you will love the blog post about St. Patricks Day, Mother's Day, Father's Day and Christmas in July!

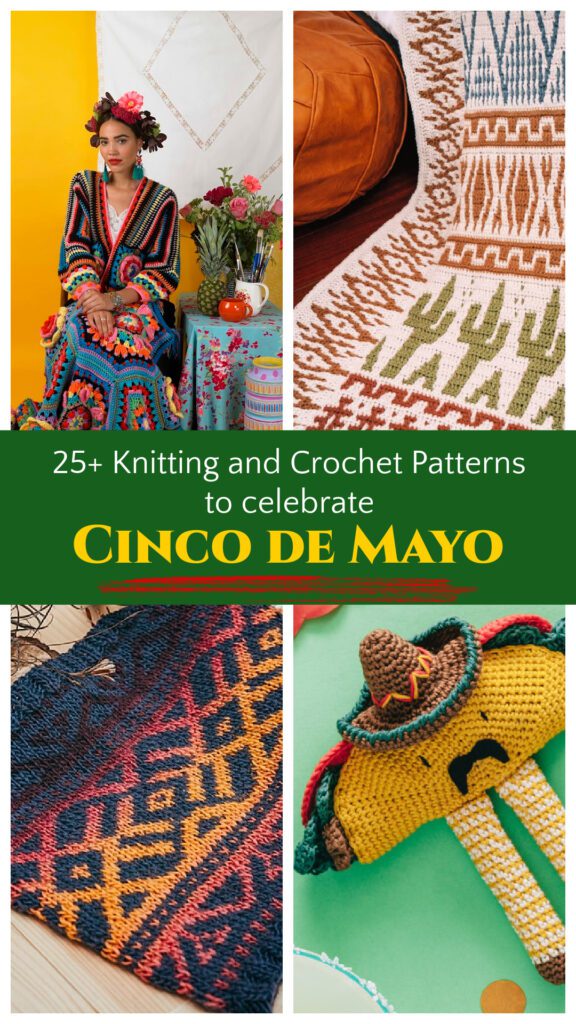
25 plus knitting and crochet patterns to celebrate Mexican heritage and Cinco de Mayo - Marly Bird

What is Cinco de Mayo?

Cinco de Mayo, which means “Fifth of May” in Spanish, commemorates the Mexican army's victory over the French army at the Battle of Puebla on May 5, 1862. The battle was an important victory for Mexico, as the French army was considered one of the strongest armies in the world at that time. The victory was a morale booster for the Mexican army and people, who were fighting against a larger and better-equipped army. Today, Cinco de Mayo is celebrated in Mexico and by people of Mexican heritage in the United States as a symbol of Mexican pride and unity.

Is Cinco de Mayo the same as Day of the Dead?

The short answer is no. Dรญa de Muertos, or Day of the Dead, is a three-day holiday in which families across Mexico gather to remember deceased friends and family members. It's usually held from Oct. 31 to Nov. 2.

How do you celebrate the 5th of May?

Growing up in a family of mixed heritage, we celebrated many holidays. Some more so than others. But what I remember as a teenager, growing up in the suburbs of Denver, Colorado, was learning about the significance of Cinco de Mayo for the Mexican people. I was told it is a minor holiday in Mexico, but here in America, millions attend celebrations across the nation.

As Denver has a sizable Hispanic population, it was common knowledge that to celebrate Mexico's independence day from the French, the best place to be was either the Cinco de Mayo Festival or down on Federal Street in Denver.

It Can Get Noisy!

You would fly your Mexican flag on the car, honk your horn, and drive up and down the street to properly mark the day. Watching the news every year, I became envious of those who could participate in this vibrant celebration of culture and heritage.

I didn't get to celebrate May 5th until I married into the Bird/Cordova family. My husband, who is a quarter Hispanic on his mom's side, used to celebrate every year with his friends. Listening to him reminisce about the Mariachi music, drinking Tequila and Cerveza, and the mouthwatering cuisine such as smothered burritos, guacamole, port green chile, mole poblano (it has hints of chocolate), and homemade tamales made me realize what I had been missing out on all these years. Lord knows Mexican food is one of my favorites!

Marly Bitmoji

What Colors are Most Associated with Cinco de Mayo?

You know how much I love color, so I just had to look into this. Since the Cinco de Mayo celebrations are to commemorate the independence of Puebla (the 4th largest city in Mexico after Mexico City, Monterrey, and Guadalajara), it is only fitting that the colors most associated with it are red, white, and green – the colors of the Mexican flag. 

The Mexican flag has an emblematic meaning. Red represents the blood of the heroes that have died fighting. White stands for unity and purity. Green is for hope. The Mexican coat of arms sits in the center of the flag and features a golden eagle consuming a snake from Aztec mythology. The golden eagle stands for divine guidance and protection and is perched on a prickly pear cactus, which symbolizes Mexico's diverse landscape. 

What Does Yummy Food Have To Do With It?

Chiles en Nogada (Chiles in Walnut Sauce) is a popular Mexican dish in Mexican cuisine made of white sauce, red pomegranates, and green chiles to represent the national colors!

Did you know Guacamole – Guacamole is another dish that represents the colors of the Mexican national flag. The green is represented by the avocado and the chile serrano, white with the onion, and red with the tomato. Am I making you hungry? Check out this website for some fantastic Mexican Food Recipes.

Draped from left top corner to right top corner is a purple, orange, teal, yellow, and green bunting banner with filet type art inside. Underneath is the phrase cinco de mayo and under that is inspired knit & crochet patterns - Marly Bird

Connecting Mexican Celebration Day with Knitting and Crochet Patterns.

Okay, now that we know more about the reason for Cinco de Mayo and the fun holiday full of amazing Mexican cuisine, let's talk more about how we can add our BiCrafty touches to this holiday fiesta!

Because Cinco de Mayo is a celebration of Mexican culture and heritage, what better way to celebrate than by creating festive knitting and crochet projects that also celebrate it?

Knitting and Crochet Patterns for Cinco De Mayo -They're Right Here!

Are you ready to show off some festive flair this Cinco de Mayo? Look no further! We've curated the ultimate selection of knitting and crochet patterns that can spruce up your home decor, your wardrobe, and even your handmade gifts for loved ones. Plus, we've got both free and paid patterns to fit every budget!

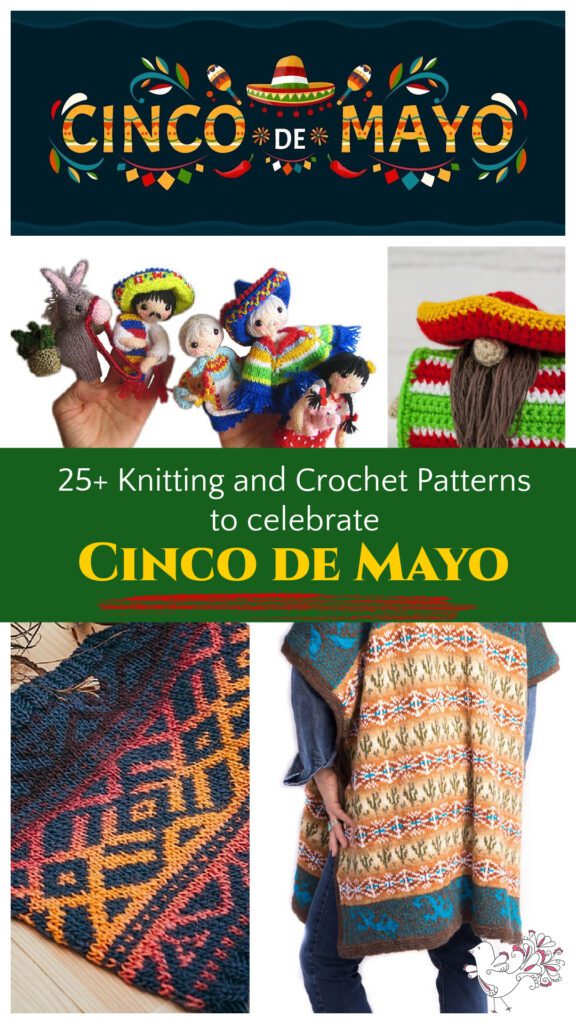
Cinco de Mayo banner with quadrant of 4 images, top left is a image of mexican family finger puppets, top right is an image of a sombrero wearing hombre stuffie, bottom left is a colorful desert cowl, bottom right is a colorful southwestern sarape style ruana on a woman - Marly Bird

More than 15+ Fiesta Knitting Patterns for Cinco de Mayo

Get ready to fiesta like there's no maรฑana with these caliente knitting patterns! Add some Mexican flair to your wardrobe, or create fabulous handmade gifts for your amigos and amigas. Use these Knitting and Crochet Patterns for Cinco de Mayo to brighten up your wardrobe!

Knit colorful cacti, chili peppers, traditional sombrero hats, and more! These vibrant projects will make any Cinco de Mayo celebration delicioso. So grab your needles, slide on your sombrero, and let's get down to some serious knitting business!

The Knit Patterns Are Here!

  • Easy and Fast Cacti Dishcloth – Free Knitting Pattern: https://daisyandstorm.com/2020/12/12/free-cactus-dishcloth-or-afghan-square-knitting-pattern/
  • SEร‘OR TACO Amigurumi has arrived! – Great way to have fun at a taco eating contest: https://knithacker.com/2016/05/senor-taco-amigurumi-has-arrived-just-in-time-for-cinco-de-mayo/
  • Boho Desert Cowl – This is a stunner of a pattern from Briana K – Free Knitting Pattern: https://brianakdesigns.com/boho-desert-knit-cowl-pattern/
  • Prickly Hat Knitting Pattern – Might be a little too warm for May, but how can you resist a fun cacti knit Beanie pattern: https://eweewe.com/collections/hats/products/prickly-pdf-hat-knitting-pattern?ref=olmBp
  • Fiesta Scallop Knit Shawl Pattern – This is just sooo beautiful for a breezy summer evening: https://www.ravelry.com/patterns/library/fiesta-scallop-shawl
  • Chili Pepper Pattern – Amigurumi Free Knitting Pattern: https://www.ravelry.com/patterns/library/chilli-pepper-5
  • Mexican Family finger puppets – Quick easy and fun for the whole family found these on etsy: https://shrsl.com/41u7i
  • Chili Pepper Socks – Free Knitting Sock Pattern: https://www.knitting-and.com/crafts-and-needlework/knitting/patterns/socks/chillisox/
  • Cuddly Cactus Hat for KIDS – OMG, how adorable is this? Free Knitting Pattern: https://littleredwindow.com/cuddly-cactus-hat-knitting-pattern/
  • Fiesta Felted Wool Party Hats – Scrap yarn project that is too cute! Free Knitting Pattern: https://www.ravelry.com/patterns/library/fiesta-party-hat
  • Mexican Girly Doll – This one is for the kids and so much fun: https://www.ravelry.com/patterns/library/mexican-girly-doll
  • Serape Shawl – Southwestern Favorite. I found this one on Ravelry: https://www.ravelry.com/patterns/library/serape-shawl-2
  • Sonoran Sarape Stranded Knit Colorwork – Lost City Knits always designs beautiful items, and this is not lacking in any way: https://lostcityknits.com/product/pattern-sonoran-sarape/
  • Southwestern Felted Shopping Bag – Get the feel of the American-Mexican Southwest with this Free Knitting Bag Pattern: https://rb.gy/rofjx
  • Party Bones – Okay, yes these are too warm for this time of year but they are too cute to not add them to the list of fun patterns: https://www.ravelry.com/patterns/library/party-bones

But There's More…

Don't let the inspiration stop here. Use this knit bunting banner pattern in the colors of Cinco de Mayo and use the duplicate stitch to spell out “Fiesta!” or “Viva Mexico!” It's a fun and easy way to add some festive flair to your home. Or don't knit at all and just make this cute tassel bunting to celebrate. Use bright colors and chunky yarn for maximum impact.

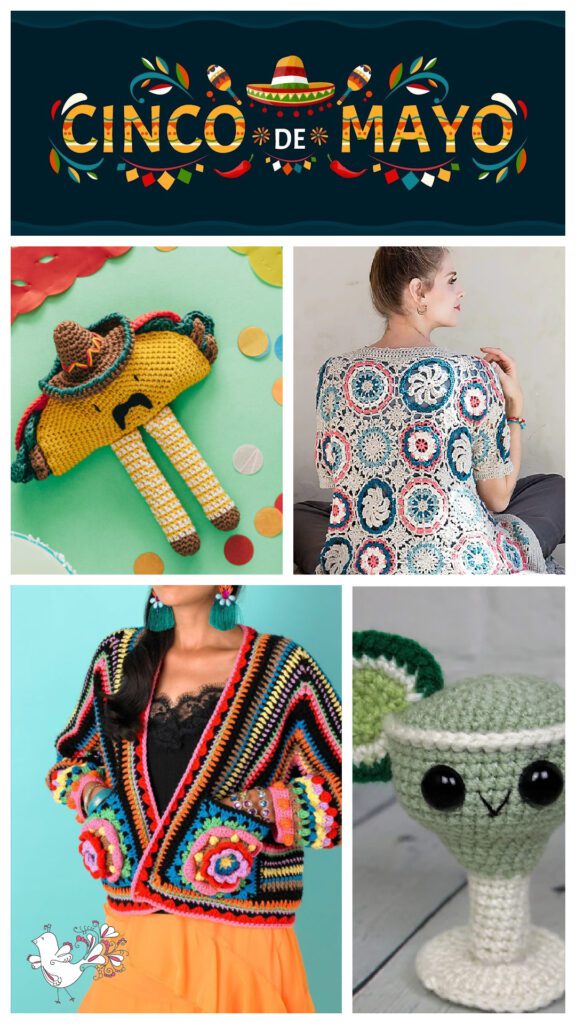
4 images, top left is a image of taco stuffie with legs and wearing a hat, top right is an image of a model wearing a colorful crochet motif cardigan, bottom left is a colorful crochet bomber jacket, bottom right is a margarita stuffie amigurumi with a lime - Marly Bird

20+ Crochet Patterns for Cinco de Mayo

Crocheters! Looking to liven things up? Get your hookin' on with our caliente crochet patterns and start living la vida loca! Spice up your wardrobe or wow amigos and amigas with fabulous handmade gifts that bring Mexican flavor to their life.

From cute crochet cacti to hot chili peppers and more, these vibrant patterns will make any Cinco de Mayo fiesta delicioso. So slap on that sombrero, grab a margarita, and let's get down to some serious crochet business! Ole!

And, Now For Crochet!

  • Boho Desert Cowl – This is a stunner of a pattern from Briana K – Free Crochet Pattern: https://brianakdesigns.com/boho-desert-crochet-cowl-pattern/
  • Fiesta Bundle Amigurumi – stuffie margarita, taco, chips and salsa, and more! https://www.ravelry.com/patterns/sources/fiesta-bundle
  • Crochet Mexican Gnome – Fun and Easy Amigurumi on Etsy: https://shrsl.com/41ova
  • Chili Pepper Crochet Pattern – I found this one on Etsy: https://shrsl.com/41ozj
  • Fiesta Shawl – A favorite pattern of many by Carolyn of the Purple Poncho – Free Crochet Pattern: https://www.thepurpleponcho.com/fiesta-crochet-shawl/
  • Mexican Diamonds Crochet Afghan – must see this! https://www.ravelry.com/patterns/library/mexican-diamonds
  • Crochet Cacti – a plant you can't kill! Free Crochet Pattern: https://rb.gy/41xka
  • Modern Bohemian Blanket – Part of a book called Crochet Southwest Spirit and it is beautiful!
  • Flower Patch Poncho – You're really going to THANK ME for this pattern! Free colorful crochet poncho pattern: https://www.lovecrafts.com/en-us/p/flower-patch-poncho-free-crochet-pattern-in-paintbox-yarns-wool-mix-chunky
  • Blooming Bomber Jacket – And this one… Free Crochet Motif Cardigan Pattern: https://www.lovecrafts.com/en-us/p/blooming-bomber-jacket-free-crochet-pattern-for-women-in-paintbox-yarns-simply-aran
  • Cinco De Mayo Crochet Gnome Pattern – this reminds me so much of my youth. I love everything about this Amigurumi Free Crochet Pattern: https://www.windingroadcrochet.com/cinco-de-mayo-crochet-gnome-pattern/
  • The Loopy Stitch Mexican-Inspired Crochet Blanket – So easy and fun. Beginner crochet friendly Free Crochet Afghan Pattern: https://theloopystitch.com/2016/03/21/crochet-mexican-blanket/comment-page-1/
  • Fiesta Series Blanket – This pattern has squares that are so darn cute; check out the maracas! https://www.ravelry.com/patterns/sources/fiesta-series
  • Mexican Boy And Girl Keychain – I have friends who would go nuts over these super cute patterns on Etsy: https://shrsl.com/41ove
  • Desert Cactus Mosaic Crochet Blanket – Free Crochet Blanket Pattern: https://brianakdesigns.com/desert-cactus-mosaic-crochet-free-blanket-pattern/
  • Clint Serape felted crochet ruana – This one is from an older book by Vickie Howell, but it is PERFECT! Get the book here.
  • Not just for a Fiesta…I would wear this anytime! – I found this on Ravelry: https://www.ravelry.com/patterns/library/labyrinths-cardigan
  • Colorful Flowers Coasters – Let's be honest. We could use these year-round! Free Crochet Pattern: https://www.ravelry.com/patterns/library/colorful-flower-coaster
  • Mini Ball Crochet Garland (great for trim on a sombrero or skirt, or poncho!) Free Crochet Pattern: https://megmadewithlove.com/blog-2/2017/4/24/mini-crochet-ball-garland-pattern
  • Cute Donkey Amigurumi Crochet Pattern – okay, I found this while looking for patterns, and it is so darn cute. I wish I could figure out where to find the crocheted man with the sombrero too – Free Donkey Amigurumi Crochet Pattern: https://amigurumiallfreepatterns.com/cute-donkey-amigurumi-crochet-free-pattern/
  • Fiesta Bunting – Boho Crochet Garland so many color options: https://www.ravelry.com/patterns/library/boho-party-garland-bunting
  • Shoulders in the Sun Top – Free Crochet Pattern: https://www.lovecrafts.com/en-us/p/shoulders-in-the-sun-top-free-crochet-pattern-in-paintbox-yarns-cotton-dk-metallic-dk-free-downloadable-pdf
  • Fiesta Ruffled Crochet Shawl – Free Crochet Shawl Pattern: https://rb.gy/75hel
  • Anything from this designer – Fun and flirty designs are just too cha-cha for words. Make any of these wonderful crochet cardigans, crochet skirts, and crochet tops in the holiday colors and you have a stunner outfit: https://www.ravelry.com/designers/caroline-murphy

Awesome Knit And Crochet Patterns For Cinco De Mayo, Huh?

Chicos and Chicas, I could keep going, but I'm ready to go have some chips and salsa while I start making my own party hat! Listen, you could keep going and make a crochet blanket or table runner with a serape-inspired design is a great way to add some color to your Cinco de Mayo celebrations. Opt for traditional serape colors like pink, turquoise, and yellow, or mix it up with your own color scheme. There are no crochet police!

Are You A Multicrafter?

Maybe you're a multi-crafter and want to try your hand at paper mache maracas or piรฑata decorations. Those are a fun and easy way to add some whimsy to your Cinco de Mayo dรฉcor. Choose a variety of colors and sizes to create a playful display.

No matter what you choose to make, it is certain that with these festive knitting and crochet patterns, you'll be able to create a fun and colorful Cinco de Mayo celebration that is sure to impress. So grab your needles and hooks, and get ready to create some amazing handmade dรฉcor and accessories that will help you celebrate in style!

More Colorful Knit And Crochet Patterns

Kaleidoscope Harmony Knit Hat

Gingham Plaid Poncho

Kaleidoscope Poncho

Frequently Asked Questions

What kinds of Cinco de Mayo projects can I knit or crochet?

Bright, festive, colorful projects! Traditional Mexican embroidery and weaving patterns translate beautifully into colorwork knitting and crochet. Marigold (cempasรบchil) flowers are gorgeous as crochet appliques or blanket motifs. Vibrant striped patterns in bold colors celebrate the festive spirit. Textured stitch patterns that mimic woven fabric have a beautiful connection to traditional Mexican textile arts. And of course, beautiful table runners and home decor items for a fiesta celebration.

What colors should I use for a Cinco de Mayo themed project?

Go bold and bright! Traditional Mexican textiles are famous for their vibrant color combinations… hot pink, marigold yellow, bright turquoise, cobalt blue, vivid green, and deep red. These colors together create that unmistakable joyful energy. The Mexican flag colors (green, white, and red) are another natural choice. For home decor items meant to be used year-round, a more muted palette inspired by traditional Mexican ceramics (terracotta, cream, turquoise) is beautiful. Let yourself have fun with color here!

How can yarn crafts connect to Mexican textile traditions?

Mexican textile arts have an extraordinarily rich history! The Huichol people are known for intricate bead and yarn art (Nierika). Oaxacan weavers create stunning geometric patterns. Traditional embroidery from regions like Chiapas features bold floral motifs. While knitting and crochet as we know them came to Mexico later, the country's deep textile tradition means there's a natural resonance between colorful handmade yarn crafts and Mexican artistic heritage. Patterns that incorporate geometric motifs, bright color blocking, and floral designs honor that connection.

Are there quick projects I can finish before Cinco de Mayo?

Definitely! Flower appliques are very quick… a crochet marigold can be made in under an hour. Colorful striped dishcloths or placemats for a Cinco de Mayo gathering work up in a day or two. A festive headband or accessory. Decorative garland with colorful crocheted elements. Even a small bag or pouch in festive colors. If you're making something for a specific date, aim for simpler construction with bold color… let the color palette do the work and the project will feel festive even in simple stitches.

Can I make a Cinco de Mayo project for someone who doesn't celebrate the holiday?

The colors and aesthetic associated with Mexican folk art and Cinco de Mayo celebrations are beautiful year-round… you don't need a holiday to appreciate vibrant color and beautiful craftsmanship. A marigold crochet flower or a colorful striped blanket is a gorgeous thing regardless of occasion. Many people simply love the aesthetic of bright, saturated colors and geometric patterns in their home and wardrobe. Make what you love and let the beauty of the work speak for itself.

Filed Under: Crochet, Free Patterns, Knitting, Round Ups

Cutest Crochet Easter Bunny Amigurumi Ever!

March 22, 2024 By Marly Bird 2 Comments

Hey there, friends! I am absolutely bursting with excitement to share with you all the bunny rabbit joy I can bring into your homes this Easter (or any time of year)! Let's talk about crochet Easter bunny stuffies – I mean, come on, how cute are they? Isn't this the most gorgeous crochet Easter bunny amigurumi ever? These little bunnies are adorable, and they make for the perfect spring project that you can snuggle up with, gift to loved ones, and even use as festive decor around your home.

Plus, we have a new free crochet Easter bunny amigurumi pattern for you right here on this blog! The cute crochet bunny rabbit stuffed animal is easy and quick to make for beginner crocheters or more seasoned crocheters! Or, if you are looking for something quick to knit (for all my BiCrafty friends), check out the simple booboo bunny pattern.

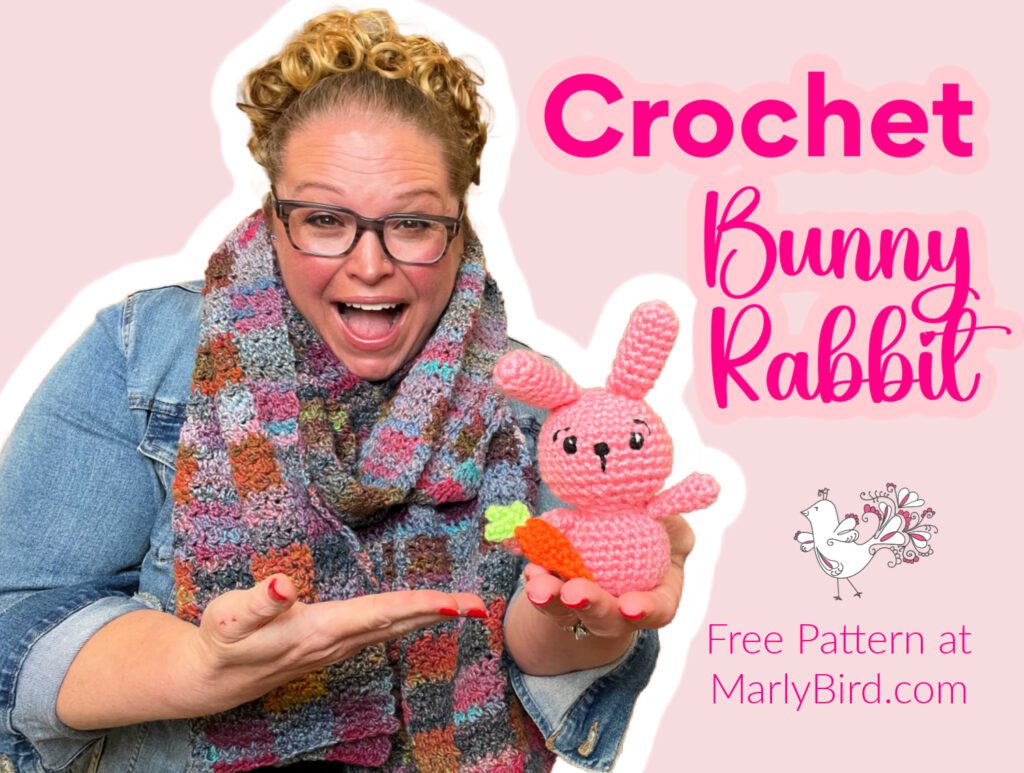
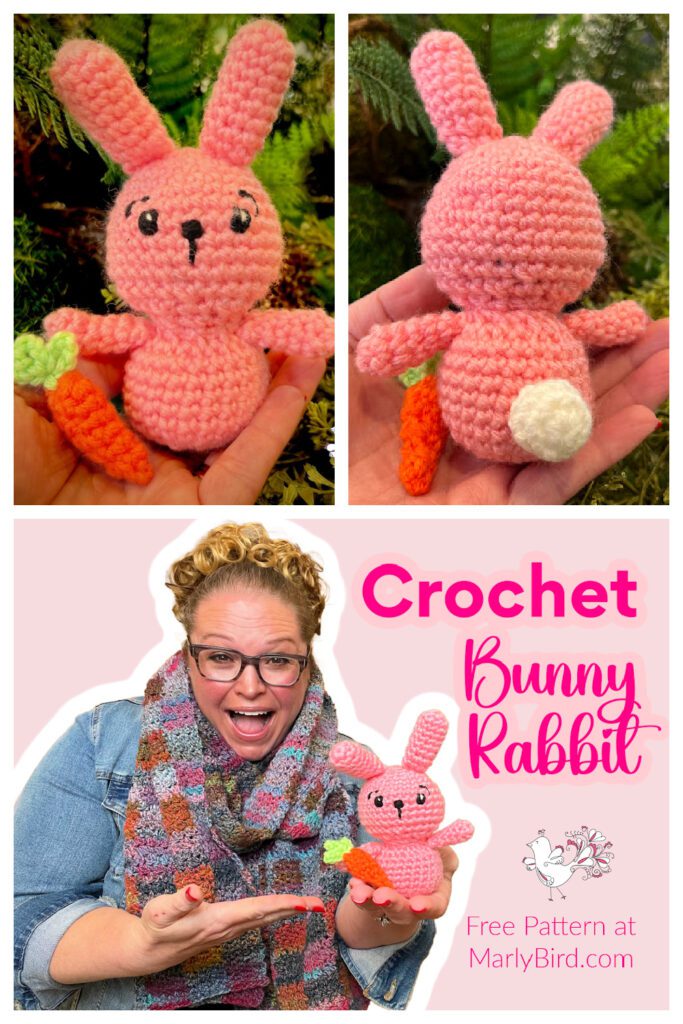
Marly Bird showcasing her adorable handmade crochet bunny rabbit stuffed animal, with a link to a free pattern available on her website.

It's time to grab your hooks, get those creative juices flowing, and let's hop right into making some crochet Easter bunny magic together! Trust me, you won't be able to resist the charm of these charming little bunnies. So, what are you waiting for? Let's get crafting and spread some handmade happiness this Easter season!

Disclosure: This post contains affiliate links, meaning I get a commission if you decide to purchase through my links at no cost to you.

Picking the Perfect Yarn for Your Crochet Easter Bunny Amigurumi

Choosing the right yarn is super important for your bunny stuffies, but it can be varied as well. You could choose a soft fuzzy yarn, a plush blanket yarn, a smooth worsted weight yarn, a velvet yarn, wool yarn, cotton or cotton blend yarn, or acrylic yarn…the sky's the limit! I will say that most people want their bunny to be cuddly and soft. So, look for yarns that will work with the pattern you choose. That's the easiest way.

But pay attention to the care instructions on the yarn as well, as you want it to be easy to wash.

Oh, and as for colors, you could go with more traditional Easter bunny colors of spring. Think pastel pinks, greens, yellows, and of course, bunny white! Or, nobody is stopping you from choosing bold colors or even speckles. I certainly won't stop you from crocheting a hot pink bunny. Choose colors you love ๐Ÿ’•.

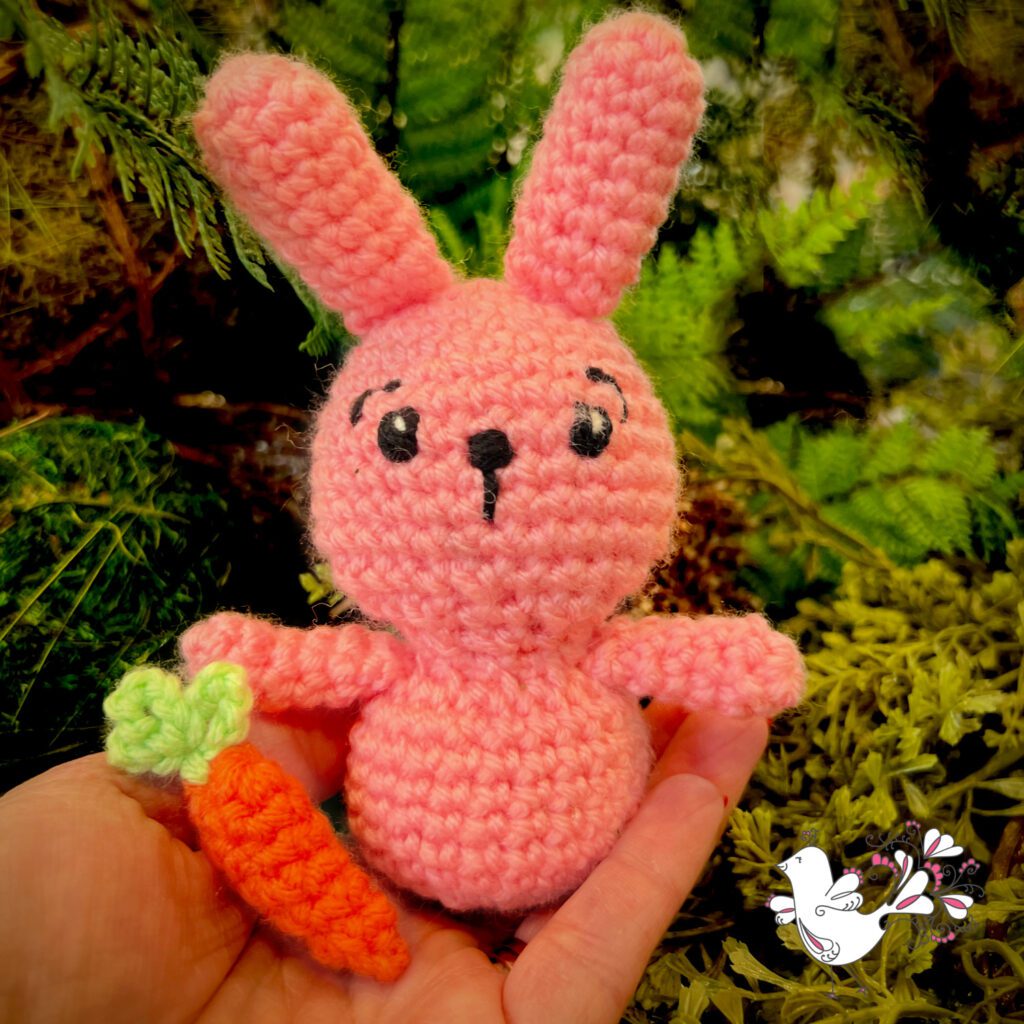
pink crochet bunny rabbit stuffed animal sitting on a hand in front of green background. Also has a crocheted carrot. Marly Bird logo in bottom right corner - pattern available on Marly Bird Website

Easy-to-Follow Patterns for Crocheters of All Levels

Whether you're a crochet newbie or a pro with the hook, there's a crochet Easter bunny amigurumi pattern out there for you. I've got a list of my favorite patterns that are clear, simple, and so much fun to make. You'll find yourself creating a whole family of bunnies before you know it!

Make Your Bunnies Special with Accessories

Okay, let's talk more about how to set your Easter bunny apart from the rest. Sure, you chose an awesome pattern, but maybe you want to give your crochet bunny its own personality with cute accessories! Think tiny crochet carrots, sweet little bow ties, crochet hearts, or even a mini Easter egg. These small details make your bunnies one-of-a-kind and super special.

Some of the little things I've seen that make the bunny rabbit a little extra are an extra fuzzy tail, long ears, whiskers, eyelashes, or moveable limbs. One of my friends even added magnets to the inside of a crochet heart and the paws of the hands on her bunny so the bunny could hold the heart! It's so darn cute and super clever!

Just a note of caution โš ๏ธ : if you are making this stuffie for a baby shower or a kit, be sure to use caution. When making stuffed toy accessories, you don't want to accidentally make something that can be a hazard to small kids, so make sure you follow laws for toy products and, of course, use your common sense.

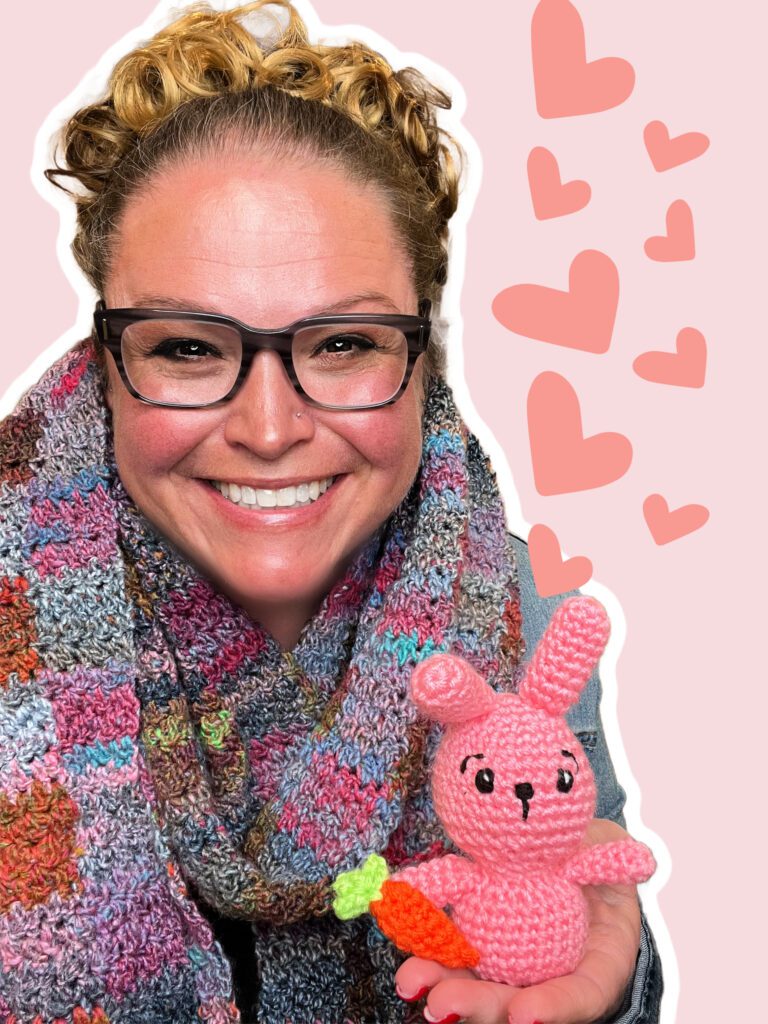
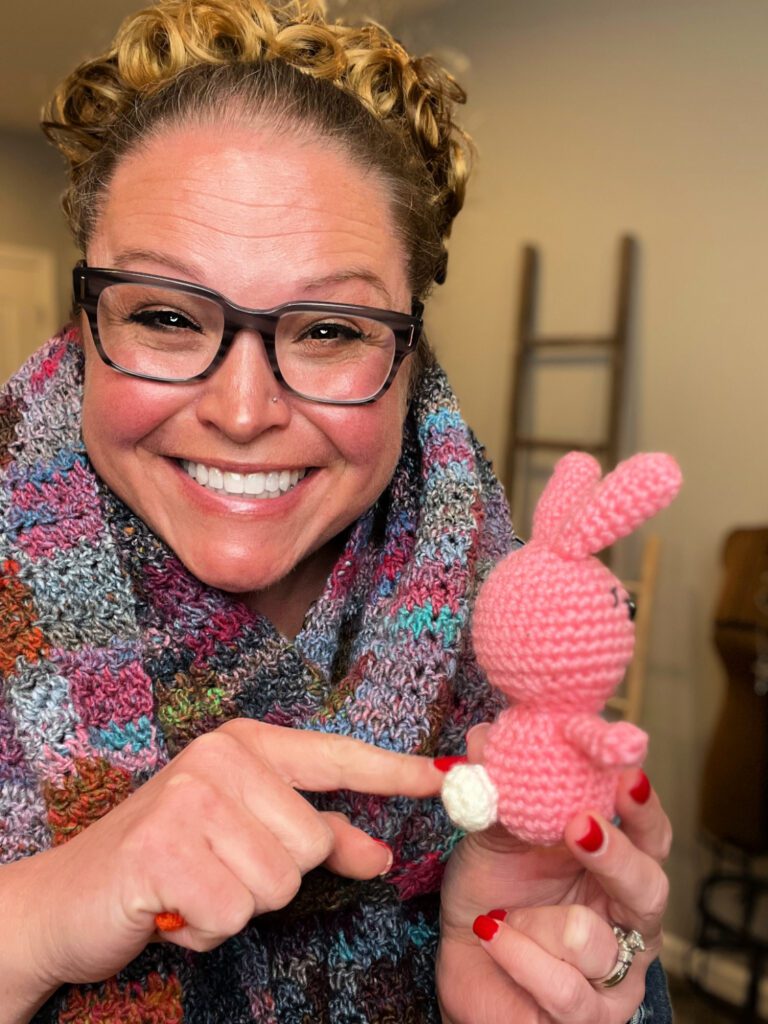
Warm smiles by Marly Bird as she holds a handmade bunny โ€”small crochet bunny rabbit stuffed animal fits in the palm of her hand. Great for Easter baskets.

Sharing Your Adorable Creations

Once you've made your adorable bunny stuffies, you've GOT to show them off! Share your creations on social media and use hashtags #mmmdi or #marlybird. It's the perfect way to connect with fellow crocheters and get inspired by each other's work.

Let's Make This Easter Extra Special – Free Little Crochet Bunny Stuffie

Several years ago, I paid a designer friend to design some simple animal amigurumi patterns I could use on my website. Over the years, we've published some of the designs, but I still have maybe 10 more to publish. So today, I'm offering a free crochet Easter bunny amigurumi pattern by Michele Wilcox just for all of you.

This adorable little bunny rabbit crochet pattern is a super fast project. If you need to crochet bunnies for one or several Easter baskets, this is the crochet rabbit pattern for you, as you can make one in less than 2 hours. Plus, it has a mini crochet carrot accessory to go with it! Trust me, this will work up quickly. It is a fast crochet bunny project, even for a beginner crocheter.

Unleash your creativity with this adorable crochet rabbit! Free pattern at marlybird.com

Designed by Michele Wilcox for MarlyBird.com

Skill Level

Adventurous Beginner

Measurements

Finished Measurements

Bunny is 8โ€ [20.5 cm] in head circumference by 5.5โ€ [14 cm] tall.

Gauge 

 15 sc x 16 rounds = 4โ€ [10 cm] x 4โ€ [10 cm]; use any size hook to obtain the gauge. 

Materials

Yarn 

WeCrochet, Brava Worsted Mini Ball (100% acrylic, 54 yds / 49 m, 0.9 oz/ 25 g, CYCA# 4 worsted) 

Color A: #28423 Cotton Candy, 1 ball

Color B: #28455 White, small amount

Color C: #28440 Orange, small amount

Color D: #28409 Alfalfa, small amount

Color E: #28413 Black, small amount

Crochet Hook

Size G/6 [4.0 mm], or size to obtain gauge (but gauge is not super important for this stuffed animal pattern)

Notions 

Stitch Markers, Scissors, Tapestry needle, Polyester Fiberfill

Crochet Abbreviations

Ch – Chain(s) 

PM – Place Marker

RS – Right Side 

Sc – Single Crochet

Sl st – Slip Stitch

Sp(s) – Space(s) 

St(s) – Stitch(es)

WS – Wrong Side

Special Crochet Stitches

โญ๏ธ Single Crochet 2 Together (sc2tog): *Insert hook into indicated stitch, yarn over and pull up a loop; repeat from * in next stitch indicated, yarn over and draw through all 3 loops on hook. (1 decrease)

โญ๏ธ Double Magic loop or Double Adjustable Ring: Wrap yarn around your fingers twice, pull up a loop through the ring created, chain 1.  Follow directions for number of stitches for round 1.  Pull on yarn end to determine which strand will be closed with yarn end.  Pull on that strand to close 2nd strand of ring.  Pull on yarn end to close first strand of ring. 

Notes

  • Bunny Rabbit is worked in pieces and seamed together. Details are added last. 
  • Body parts are worked in continuous spiral rounds that are not joined at the end of the round. 
  • Body parts start with a double adjustable ring.  You can substitute a chain 2 and sc in the 2nd chain if you wish for the double adjustable ring. 
  • Using a stitch marker to mark the first stitch of each new round throughout all stuffed animal patterns is helpful, and we suggest doing it for this bunny too.ย 
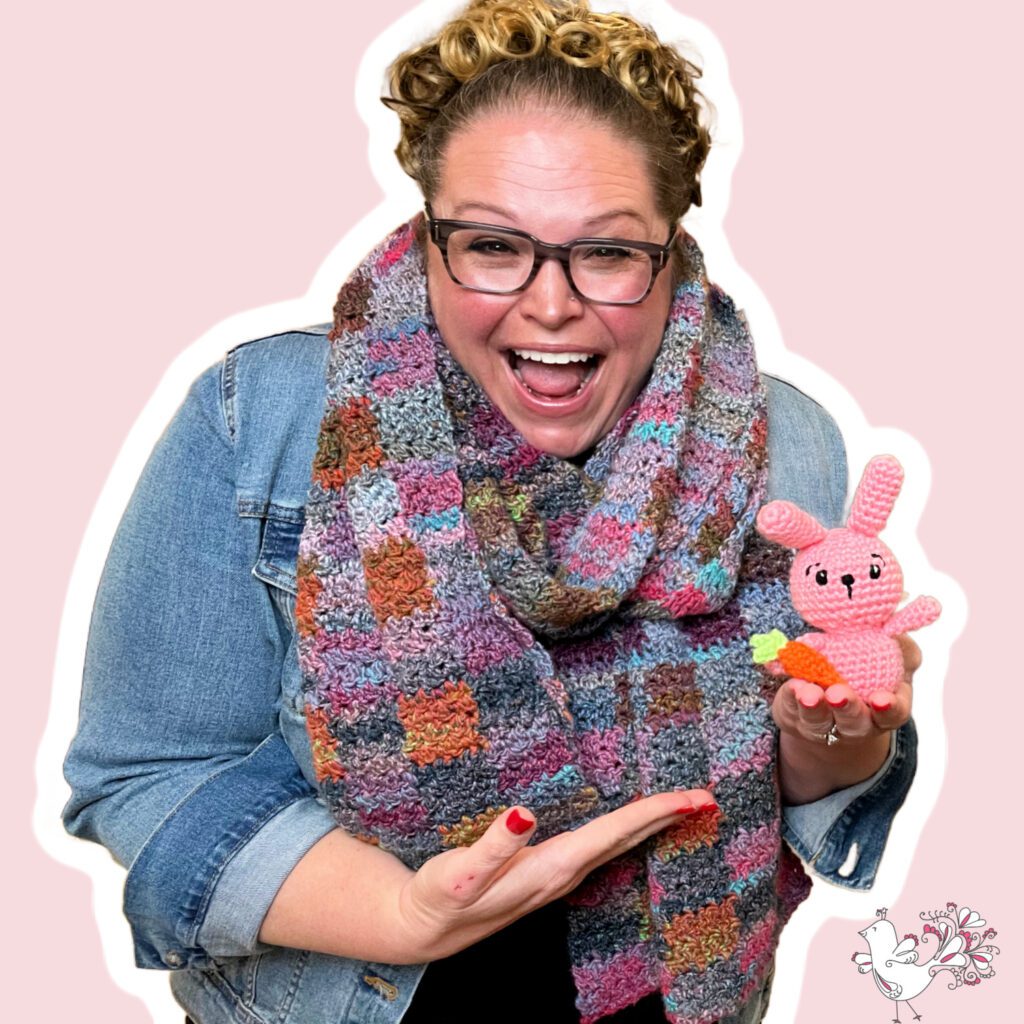
A joyous Marly Bird in a denim jacket and colorful scarf, beaming with delight as she presents a cute pink crocheted bunny rabbit with carrot. Free crochet bunny rabbit pattern on marlybird.com website

Crochet Easter Bunny Amigurumi Pattern

Bunny Head

Note: Head is worked from the top of the head at the increasing rounds through the bottom of the head while decreasing. 

With A, make a double adjustable ring. 

Round 1 (RS): 6 sc in ring, pull ring closed, do not turn–6 sc.

Round 2: 2 sc in each sc around, do not turn– 12 sc. 

Round 3: *Sc in next sc, 2 sc in next sc; repeat from * around, do not turn– 18 sc. 

Round 4: *2 sc in next sc, sc in next 2 sc; repeat from * around, do not turn– 24 sc

Round 5: Sc in each sc around, do not turn.

Round 6: *Sc in next 3 sc, 2 sc in next sc; repeat from * around, do not turn– 30 sc

Rounds 7-11: Sc in each st around, do not turn. 

Round 12: *Sc2tog in front loops only over next 2 sc, sc in next 3 sc; repeat from * around, do not turnโ€“ 24 sc.

Round 13: *Sc in next 2 sc, sc2tog in front loops only over next 2 sc; repeat from * around, do not turnโ€“ 18 sc.

Round 14: *Sc2tog in front loops only over next 2 sc, sc in next sc; repeat from * around, sl st to first sc, fasten off leaving long tail for seamingโ€“ 12 sc.

Stuff head with fiberfill, do not close opening.

Bunny Body

Note: Body is worked from the bottom at the increasing rounds through the top of the body while decreasing. 

With A, make a double adjustable ring. 

Round 1 (RS): 6 sc in ring, pull ring closed, do not turn–6 sc.

Round 2: 2 sc in each sc around, do not turn– 12 sc. 

Round 3: *Sc in next sc, 2 sc in next sc; repeat from * around, do not turn– 18 sc. 

Round 4: *2 sc in next sc, sc in next 2 sc; repeat from * around, do not turn– 24 sc

Rounds 5-10: Sc in each sc around, do not turn.

Round 11: *Sc2tog in front loops only over next 2 sc; repeat from * around, sl st to first sc, fasten off leave long tail for seamingโ€“ 12 sc.

Stuff body with fiberfill, do not close opening.

Sew head to the body, working through the last rounds of head and body.ย ย Seam a second time to make it more sturdy.ย ย Using color E, satin stitch eyes and nose on Round X of head.ย ย Embroider with a long straight stitch for a mouth line. ย 

Bunny Ears

Make 2

With A, make a double adjustable ring. 

Round 1 (RS): 6 sc in ring, pull ring closed, do not turn–6 sc.

Round 2: *Sc in next sc, 2 sc in next sc; repeat from * around, do not turn– 9 sc

Rounds 3-8: Sc in each sc around, do not turn.

Round 9: *Sc2tog in front loops only over next 2 sc, sc in next sc; repeat from * around, sl st to first sc, fasten off leaving long tail for seamingโ€“ 6 sc.

Stuff ears lightly with fiberfill.ย ย Using the photos as a guide sew the ears to the body.

Arms

Make 2

With A, make a double adjustable ring. 

Round 1 (RS): 6 sc in ring, pull ring closed, do not turn–6 sc.

Rounds 2-6: Sc in each sc around, do not turn.

Fasten off leaving a long tail for seaming.  Using the photos as a guide and sew the arms to the body.

Bunny Tail

With B, make a double adjustable ring. 

Round 1 (RS): 6 sc in ring, pull ring closed, do not turn–6 sc.

Round 2: 2 sc in each sc around, do not turn– 12 sc

Rounds 3-4: Sc in each sc around, do not turn.

Fasten off leaving a long tail for seaming. Stuff tail lightly with fiberfill. Gather stitches in the last round together. Sew tail to body.

A beaming Marly Bird with curly hair and glasses showcasing a handmade pink rabbit. She is pointing at the white bunny tail.

Carrot Pattern

With C, make a double adjustable ring. 

Round 1 (RS): 6 sc in ring, pull ring closed, do not turn–6 sc.

Round 2: *Sc in next sc, 2 sc in next sc; repeat from * around, do not turn– 9 sc

Rounds 3-7: Sc2tog in front loops only over next 2 sc, sc in each remaining sc aroundโ€” 4 sc.

Fasten off, leaving a long tail for seaming. Gather stitches in the last round together.ย 

Carrot Top

Join D with sl st to top of carrot, [ch 6, sl st to first sl st] 3 times. Fasten off and weave in ends.ย 

Crocheting these bunnies is not just about making something cute; it's about creating memories and spreading joy. Whether you're making them for your kids, as gifts for friends, or just for fun, these bunnies will surely add an extra dose of cuteness to your Easter.

And remember, I'm here to cheer you on every step of the way! Let's make this Easter one to remember with the sweetest crochet bunny stuffies. They're soft, they're cuddly, and they're waiting for you to bring them to life!

Final Thoughts

We think about making these bunny rabbit amigurumi patterns near Easter, but there's no law saying we can't make one any time of year. Use this cute crochet bunny rabbit stuffed animal pattern and make a bunny for yourself or anyone in your life. Again, this crochet pattern is perfect for all skill levels, and these bunnies will definitely add a pop of spring joy to your home. Don't forget to share your finished bunnies with #mmmdi or #marlybird!

Frequently Asked Questions

What makes a crochet Easter bunny different from a regular amigurumi bunny?

Mostly the styling and color choices! Easter bunnies typically come in pastel colors… soft pinks, lavenders, blues, and creamy whites rather than realistic brown and grey. They often have features that emphasize cuteness over realism… oversized floppy ears, a stitched smile, a fluffy cotton tail. Some Easter bunny patterns include little details like a flower crown, a tiny carrot, or a basket. The construction is the same as any bunny amigurumi, but the aesthetic is specifically designed for that springtime, Easter basket aesthetic.

How long does it take to crochet an Easter bunny stuffie?

A basic Easter bunny amigurumi takes most crocheters 3 to 6 hours… a nice weekend afternoon project. More detailed versions with complex ears, accessories, or multiple pieces to assemble can take longer. The assembly (sewing on ears, arms, tail, and face features) is often the most time-intensive part and the part that gives the bunny its personality. Plan ahead if you're making them as Easter basket gifts… starting a week or two before Easter gives you plenty of time without pressure.

What yarn should I use for Easter bunny stuffies?

Soft, smooth acrylic in pastel colors is the most practical choice… washable, affordable, and available in all those sweet Easter colors. Worsted weight is the most popular for clear stitch definition and easy working. For an extra-fluffy bunny, a small amount of boucle or textured yarn for the fluffy tummy or tail is cute. If you want a more realistic fluffy bunny, loop stitch creates beautiful wool-like fur texture on the body. Machine washable is important if the bunny is destined for an Easter basket or young child.

What are the most important details that make a crocheted bunny look adorable?

The face! Placement and size of the eyes and nose have a huge impact on personality. Ears… floppy ears with a contrasting inner ear color are especially charming. A little nose in pink or dark thread adds character. Proportions matter… oversized head relative to body reads as “cute baby creature” which is what we're going for. A tiny pompom or loop stitch tail finishes the bunny perfectly. Take your time with the face features… pin everything before sewing, step back and look, adjust until it looks right to you.

Can I make Easter bunny stuffies for Easter baskets for babies?

Yes, with appropriate safety modifications! For babies and very young children: embroider eyes rather than using safety eyes (which could be pulled out). No small separate pieces that could detach. No buttons or beads. All seams very firmly closed. Machine washable yarn. Soft, non-scratchy materials. A well-made crocheted Easter bunny for a baby can become a beloved comfort object they carry for years. Make it soft, safe, and sturdy and it will be treasured. The extra care in construction is absolutely worth it.

Filed Under: Uncategorized

Create a Stunning Aurora Lace Crochet Cardigan With This…

March 19, 2024 By Marly Bird Leave a Comment

A simple crochet cardigan you are going to LOVE! Introducing the Aurora Lace Crochet Cardigan, a garment that promises to elevate your wardrobe with intricate patterns and delicate textures. Time to take a step beyond that granny square and create a sweater everybody will want.

Perfect for chilly offices, breezy evenings, or as a chic overlay for your favorite dress or T-shirt. This cardigan seamlessly blends style with comfort.

With easy-to-follow written instructions and crochet stitch diagrams, this one-piece crochet cardigan pattern is for crocheters of all skill levels. It promises an amazing crafting experience; it's a perfect project for Netflix and Chill Crocheter.

A four-panel collage of Marly Bird beaming with joy in a cobalt blue crochet lace cardigan, showing different angles including front, back, and side views, with close-ups highlighting the cardigan's intricate lace pattern and cozy fit. One piece sweater.

Disclosure: This post contains affiliate links, meaning I get a commission if you decide to purchase through my links at no cost to you.

Made from the amazing yarn from WeCrochet, City Tweed Aran, this cardigan adds a touch of luxury to your clothing collection. It offers the joy of creating a truly unique piece.

Learn more about this piece of clothing that's more than a rectangle with sleeves. It's a sweater you'll never want to take off. Yes, it's time to make your very own Aurora Lace Crochet Cardigan.

Get the full PDF with links to full-color PDF stitch diagrams for each pattern size. Click the button below to purchase the pattern.

Purchase Pattern on Etsy
Purchase Pattern on Ravelry
Purchase Pattern on Shopify

If you use Ravelry, please take a minute and favorite and queue up the pattern to show some love.

Favorite This Pattern on Ravelry - Marly Bird

Discover the Beauty of the Aurora Lace Crochet Cardigan

Leggings are everywhere, indeed. Personally, I absolutely love and live in them. You can dress them up with a cotton flare dress from Old Navy, a tunic from Torrid, or a new cardigan *wink. This crochet heavy worsted-weight cardigan was designed by the BiCrafty duo! Marly Bird and Robyn Chachula think this is the perfect accessory to wear with your favorite leggings. This must-have layering piece is great for anyone ready to try crocheting their own clothes.

The pattern is easy to follow. So, if youโ€™re new to crocheting sweaters or youโ€™ve been doing it for a while, youโ€™ll find it fun. As long as you know a few basic crochet skills (and even if you don't, we have help for that) –

  1. slip stitch,
  2. foundation single crochet,
  3. chain,
  4. single crochet,
  5. single crochet back loop ribbing,
  6. double crochet,
  7. stacked double crochet, and
  8. treble crochet.

If you can work these stitches, we're telling you, you can do this! We use those basic crochet stitches in the stitch pattern we call the Aurora Lace stitch pattern. Once you get that 4-row stitch pattern sequence down, you will have a sweater in no time! Plus, Marly filmed a video tutorial to help you with these stitches, so you don't have to flounder!

A collage of Marly Bird showcasing the cobalt blue Aurora Lace Crochet Cardigan with different poses, including a heartwarming one holding a black cat, against a bright blue background with text highlighting the pattern and video tutorial. One piece sweater.

Understanding the Design Inspiration Behind this One Piece Sweater Pattern

The structure of the Aurora Lace Crochet Cardigan is one both Marly and Robyn love to use when designing crochet. Neither enjoys seaming lots of little pieces to make a full garment. Even when they design motif-style sweaters, they always join as you go. So whenever they can design a piece to be made all in one, that is their go-to design.

Marly thought this cardigan should complement the 2023 Turkey Trot crochet pullover sweater (the Trifle Crochet Pullover free pattern on the blog). She doesn't always like wearing a big pullover and prefers an easy-to-wear layering piece, hence the Aurora Lace.

Named for the city in Colorado where Marly used to live, Aurora. It is a beautiful name for a beautiful stitch pattern. So, as much as you'd like to think this sweater is named after the Aurora Borealis, it isn't.

Simple One-Piece Construction Technique

As mentioned, the simple one-piece construction technique makes the crochet process of making a sweater a little easier. The Aurora Lace Crochet Cardigan has minimal seaming. Even the rib is joined as you go and stitched directly onto the body of the garment.

This design approach eliminates the need for sewing or seaming multiple parts together, presenting a streamlined process from start to finish.

“It just makes sense to me to design this way. Crochet is so plyable, flexible and forgiving. Usually any extra waist or shoulder shaping just isn't necessary to get a good fit. So, making a sweater in one piece with little shaping on the sleeve and neck just works.”

– Marly Bird; Your BiCrafty Bestie
Aurora Lace Crochet Cardigan lays flat on a white wood table with blue and white flowers around it at either corner. Showing off the lace stitch pattern and the front single crochet ribbed collar and cuffs - Marly Bird

It's been widely mentioned in the Marly's Minions Facebook group that they appreciate the ease and beauty of working their sweater as a continuous piece. Favorite designs include the Amimono Kimono, Creekside Ruana, Lyvia Ruana, Garden Party Sweater, Goldenrod Crochet Sweater, Ashley Sweater, Hydroponic Tunic.

With a helpful schematic, stitch diagrams, and thoughtful video guidance, understanding crocheting in one piece becomes simple for even a beginner sweater crocheter.

Visual Aids to Assist in Piece Construction

Visual aids are indispensable in demystifying the one-piece construction technique for the Aurora Lace Crochet Cardigan. The 26-page pattern is more than just the written crochet instructions; it offers detailed charts and diagrams. These resources become an invaluable guide for crocheters, helping them visualize the layout and progression of their project with clarity and precision.

Video tutorials with clear step-by-step demonstrations further help the crocheter understand the one-piece construction. As visual learners, Marly and Robyn always give as many visual guidance tools as possible. So, even those new to any concept, especially one-piece crochet, can confidently tackle the project.

Here's the stitch diagram for the Aurora Lace crochet stitch pattern. This chart is also used in the video tutorial. Full stitch diagrams for each size are only available in the pattern.

Aurora Lace Stitch Diagram - Marly Bird

Size Matters. And this Pattern is Size-Inclusive

Since the beginning of their design careers, Marly and Robyn have designed for multiple sizes. They always pushed for more size inclusivity in the yarn fashion industry. Try searching a site like Ravelry for a sweater pattern available in a larger size (bigger than a 49 inch bust). Seeing the design shown on a larger model is also important. That was not often something they saw more than 20 years ago. For them, it is important to design garments for everybody, especially ones they can wear. So, you'll find many (if not all) of their designs are sized up to three extra large. Lots of their newer patterns are sized up to five extra large.

The size range of this particular pattern is impressive. The entire pattern includes written instructions, and the added value of the stitch diagrams provided for each size is immeasurable. Whether you're looking for a size extra small to a 5XL, this pattern will work for you.

The exact Measurements of this pattern are as follows –

To Fit Size: XS (S-L, XL/2X, 3-5X) with 4-15โ€ [10-38 cm] of positive ease.  Sample shown has 7โ€ of positive ease. 

Finished Cardigan Measurements: Sweater is 35 (46, 57.5, 69)โ€ [89, 117, 146, 175.5 cm] bust circumference and 23 (25, 27, 29)โ€ [58.5, 63.5, 68.5, 73.5 cm] in length.  

Here is the schematic for this pattern to help you choose your correct size.

Aurora Lace Crochet Cardigan Pattern. One piece sweater schematic with measurements for sizes XS (S-L, XL-2XL, 3XL-5XL) - Marly Bird

Does My Gauge Matter for a Crochet Sweater?

Yes, gauge does matter when you are crocheting a sweater. You must match the same gauge as the crochet pattern is written. Change your crochet hook size to get the stitches of the correct size (gauge) with the yarn you choose.

We did write a blog post about getting crochet gauge if you're interested in reading it. Remember, you MUST use the same hook and yarn for your gauge swatch as you plan for your project. Even changing the color of the yarn can alter the gauge, so be aware!

The gauge for this sweater pattern is: 2 Stitch Repeats (10 dc + 4 ch-sps) by 8 Rows = 5.75โ€ [15 cm] by 4โ€ [10 cm]; use any size hook to obtain the gauge. 

Aurora Lace Crochet Cardigan pattern and video tutorial in text at the top, Marly Bird models the crochet pattern in cobalt blue color with her hands held in front of her.

Gather Your Materials for the Aurora Lace Cardigan

Marly and Robyn wanted to keep the material list light for this crochet pattern. Still, they also wanted to use a semi-luxury yarn readily available at a very affordable price. City Tweed is one of their favorite yarns. But this is the first time using the aran/heavy worsted weight version.

The blend of merino, superfine alpaca, and Donegal tweed makes for an amazing crocheting experience. This yarn glides on your crochet hook, and the finished look is rustic and super cozy.

Here are the yarn details for this pattern: WeCrochet, City Tweed Aran, (55% merino wool/ 25% superfine alpaca/ 20% Donegal tweed, 164 yds / 150 m, 3.5 oz/ 100 g, CYCA #4 heavy worsted) –ย ย 5 (6, 8, 10) balls. Sample color on pattern – Jacquard; sample color on Marly – Cobalt.

Best Crochet Hooks for Aurora Lace

The lace crochet in this pattern is a bit of a misnomer. It's an aran weight yarn with big lace stitches, so there's no need to select a small hook. A crochet hook with a nice pointed tip does help get into the foundation stitches, but it's not a must-have. Marly used a Susan Bates inline hook with a large ergonomic handle, as she loves to use this when she crochets. It prevents her hand from cramping.

For this pattern, the suggested crochet hook size is a J/10 or a 6mm crochet hook.

Additional Tools You'll Need For This One-Piece Sweater Pattern

As with any pattern, it takes more than just yarn and hooks to crochet an item. A simple set of supportive tools plays a role in a successful project. These are the tools you need to make this sweater:

  • A tape measure – to measure your gauge in the pattern and the ribbing. This is very important for making sure your cardigan matches the desired measurements.
  • Pair of scissors – to cut the yarn. Always leave 4 – 6 inches of tail to weave in later.
  • Speaking of weaving in, you need a darning needle. Don't just crochet over your ends. You'll be very disappointed in the results after you wash and wear your garment. Weaving in ends is crucial for finishing touches.
  • As always, a set of stitch markers will come in handy. Use these markers to keep the edges of your sweater straight. Section off the edges for the back-loop single crochet ribbing added to the sleeve cuff, bottom hem, and neckline collar. These Clover locking stitch markers are Marly's favorites.
  • Blocking Materials: Blocking your sweater is very important to get the full effect of crochet lace. It also makes the seaming process easier. This blog post is full of information about blocking supplies that are Marly's favorites.
  • This is not listed on the pattern but may be useful for those who want a more closed-front cardigan without buttonholes: these pedestal buttons by Jul.

Step-by-Step Video Instructions for Crocheting Your Cardigan

Marly Bird created a YouTube video tutorial for this pattern. She walks you through stitch by stitch to create the stunning Aurora Lace Crochet Cardigan. It's an in-depth tutorial perfect for crocheters ready to expand their skills. Anyone longing to wrap themselves in a handcrafted layer of warmth and style will love it.

๐Ÿงถ What You'll Learn:

  • Foundation Single Crochet: Kick off your cardigan with a sturdy and stretchy base.
  • Aurora Lace Stitch Pattern: Master the heart of this pattern with its captivating lace details. Learn all the crochet stitches in this pattern so you don't crochet without a clue.
  • Sleeves: Learn to add, shape, and tailor sleeves with ease, including increasing and decreasing techniques.
  • Neck Opening: Plan and execute the perfect V-neck opening that frames your face beautifully.
  • Crocheting in One Piece: Simplify construction and reduce seaming as you work the entire sweater in a single piece.
  • Join As You Go Ribbing: Finish with a flourish by adding ribbing that's worked directly onto the cardigan for a polished look.

๐ŸŒŸ Whether an adventurous beginner eager to dive into your first crochet sweater or an experienced crocheter looking for a relaxing project with enough challenge, this crochet cardigan will become a cherished piece in your wardrobe.

Purchase the pattern to follow along with the video tutorial.

Get the full PDF with links to full-color PDF stitch diagrams for each pattern size. Click the button below to purchase the pattern.

Purchase Pattern on Etsy
Purchase Pattern on Ravelry
Purchase Pattern on Shopify

Crocheting the Cuffs, Hem, and Collar for a Polished Look

The garment has been made, washed, and blocked to the schematic measurements and then seamed. The final step is to add the cuff to each sleeve, the bottom hem, and the comfy rib collar around the neckline and front of the cardigan. This task might seem daunting after all that crochet is done. But it's the final piece that gives your garment a polished look turning it into a masterpiece.

Don't worryโ€”you don't have to make the ribbing separate and then use your sewing skills. No, no, no, haven't you learned yet? These two designers like to make things fairly easy and seamless. Therefore, these ribbed pieces are worked with the join-as-you-go technique, using slip stitches into the fabric to join the ribbing.

It's quite easy, and Marly goes over this in detail in the video, so be sure to watch it.

Caring for Your Crochet Clothing

Taking good care of your crochet clothing is important to keep it looking great. After wearing this piece, wash it gently in cool water with a mild soap. Don't twist or wring it; gently press the extra water. Then, lay it flat on a clean towel to dry, shaping it to keep its original form. Don't hang it up – this could stretch out the lovely lace. If you need to store it away, fold it softly and place it in a drawer or a box where it wonโ€™t get squished. Looking after it this way, your handmade sweater will stay as pretty and comfy as the day you finished crocheting.

Aurora Lace Crochet Cardigan on a mannequin showing the side view of the left front and partial sleeve of the crochet sweater by Marly Bird. One piece sweater.

Showcase Your Work: Share Your Aurora Lace Cardigan

We all want to see your work when you finish your Aurora Lace Crochet Cardigan! Take pictures of yourself wearing your sweater on a date or Sunday morning to church! Snap that picture and share it with us on social media!

Our BiCrafty Facebook community is here to show you love and support and give you big CONGRATULATIONS ๐Ÿฅณ as you work on your project!

script text that reads Marly's Minions

Final Thoughts

Let me wrap up: crocheting the Aurora Lace Crochet Cardigan is much more than a crochet hook and yarn. It's like you're stitching a cozy hug. This pattern is your golden ticket to making a one-piece construction and a snuggly comfort sweater uniquely yours. Anyone can whip up this beauty with just the right yarn and some nifty stitch skills. Whether you're dipping your toes into the crochet waters or the seasoned stitcher who's seen it all.

And let's not forgetโ€”when you rock your Aurora Lace, you're rocking a piece you crocheted with your own hands! After youโ€™ve worn it a few times, itโ€™s time for a wash. Give it some tender loving care by hand washing it gently so it stays as perfect as the day you finished it.

Sharing your work with the world or our tight-knit crochet crew is the cherry on top. It's about showing off your skills, sure. But it's also about sparking that ‘Hey, I can make that too!' moment in someone else.

So, there you have it! Making this cardigan is a journey full of heart, craft, and a touch of magic. Let's get our hooks flying and hearts singing and make magic with this pattern!

Happy Stitching, everybody!

Smiling Marly Bird wearing glasses and a cobalt blue crochet cardigan with intricate lace detailing, embracing herself with one hand while standing against a home background with bookshelves.

Frequently Asked Questions

What is the Aurora Lace Crochet Cardigan?

The Aurora Lace Cardigan is a free crochet cardigan pattern described as a “stunning” piece with an easy one-piece construction. Aurora suggests an ethereal, light-filled aesthetic… like the northern lights. Lace crochet gives it an airy, delicate quality. And the one-piece construction means you work the whole cardigan without multiple pieces to seam… the beauty of the design comes with an elegant, efficient construction approach.

What does “one-piece” construction mean for a cardigan?

One-piece construction means the cardigan body and often the sleeves are worked together continuously without separate panels that need to be seamed later. This can be achieved by working back and forth in one large piece with specific shaping, or by working in the round with careful construction. The result is a garment without side seams, which often creates a more fluid drape. For crafters who dislike seaming, one-piece construction is genuinely appealing. It also means fewer yarn ends to weave in at the end!

What skill level is the Aurora Lace Cardigan?

Check the pattern rating! The description says “easy” which is encouraging… but lace patterns and garment construction together are typically intermediate territory at minimum. The “easy” label likely refers to the individual stitch techniques being accessible rather than the overall construction. If you're a crocheter who has made some garments before and is comfortable with following a multi-section pattern, this cardigan is likely achievable. The one-piece construction actually simplifies things by eliminating seaming.

What yarn is best for the Aurora Lace Cardigan?

A lace cardigan needs yarn with beautiful drape… the word “aurora” suggests something light and flowing. DK or sport weight in a smooth fiber with good drape is ideal. Bamboo blends have gorgeous flow. Fine merino creates both drape and softness. Cotton blends work for a crisp, summer-appropriate version. The yarn should flow and move when you wear it, not stand stiffly. Whatever you choose, swatch in the actual stitch pattern (lace stitches have different gauge than stockinette) and block your swatch to see the fabric in its final state.

Is this cardigan appropriate for different seasons?

The open lace construction makes it most suitable for spring, fall, and temperate climates. The airy fabric provides minimal warmth but beautiful coverage. In a cotton or bamboo yarn, it's perfect for warm evenings and indoor layering year-round. In a fine merino, it works as a delicate layer for cooler spring and fall days. For a truly four-season cardigan, a denser stitch pattern would be needed. The Aurora specifically celebrates that light, ethereal quality that makes it a warm-weather and transitional seasons piece.

Filed Under: Crochet, Marly Bird Premium Patterns, Pattern, Uncategorized, YouTube Video Tutorial

  • « Previous Page
  • 1
  • …
  • 13
  • 14
  • 15
  • 16
  • 17
  • …
  • 22
  • Next Page »

Let's Be Social

Join the Marly's Minions Facebook group to share, ask questions, or chat about all of your yarn related crafts!

Join the group
Cartoon of a smiling woman with brown hair in a bun, glasses, black jacket and green shirt, waving next to large "hi" text.

Quick Links

The Pattern Shop

Our Free Patterns

Blog

Marly Bird House

Learn to Knit & Crochet

About

Giveaway Terms and Privacy Notice

Find Us Everywhere

Join the Newsletter

YouTube Channel

Marly's Minions FB Group

Etsy Store

Ravelry Store


AN ELITE CAFEMEDIA HOME/DIY PUBLISHER

Information from your device can be used to personalize your ad experience. Do not sell or share my personal information.

Privacy Policyย  ย Termsย  ย Marly Bird Legal Documents Copyright © 2026