Search
Close
  • The Pattern Shop
  • Our Free Patterns
    • Browse All Our Free Patterns
    • Our Free Knitting Patterns
    • Our Free Crochet Patterns
  • Blog
    • All Blog Posts
    • All Free Patterns
    • Dibble Dabble Inspiration
    • Giveaways
    • Make-Alongs
    • Product Reviews
    • Roundups
    • Tips, Tricks, Techniques for Knitting and Crochet
Stylized bird with pink and gray swirling tail above elegant โ€œMarlyโ€ text, logo for crochet accessories and home decor.
  • Marly Bird House
  • Learn to Knit & Crochet
    • Newbie? Start Here
    • Video Tutorials
    • Knitting Definitions
    • Crochet Definitions
    • Common Techniques
    • Size Charts for Knitting and Crochet Projects
  • About
ร—
  • The Pattern Shop
  • Free Patterns
  • Blog
  • Marly Bird House
  • Learn to Knit & Crochet
    • Newbie? Start Here
    • Video Tutorials
    • Knitting Definitions
    • Crochet Definitions
    • Common Techniques
    • Size Charts for Knitting and Crochet Projects
  • About
Stylized bird with pink and gray swirling tail above elegant โ€œMarlyโ€ text, logo for crochet accessories and home decor.
Search
Close

New Patterns NOW Available in Ad-Free PDF! Check out The Pattern Shop

Swiss House Tunisian Crochet – Free Hat Pattern

September 25, 2025 By Marly Bird Leave a Comment

Originally published September 2025 ยท Updated August 2026 with full SEO optimization and framework treatment.

The Swiss House Tunisian Crochet Hat is a free pattern designed by Robyn Chachula for MarlyBird.com, available as an ad-free PDF on Etsy, Shopify, and Ravelry. Worked in the round in five sizes (Child through Adult XL), it uses WeCrochet Twill in up to seven colors with Tunisian Simple, Knit, and Reverse stitches for a bold, textured colorwork beanie.

The Swiss House Tunisian Crochet Hat is a free Adventurous Beginner pattern by Robyn Chachula that makes colorwork Tunisian crochet totally approachable. Worked in a continuous spiral in the round, it comes in five sizes and looks stunning in two colors or seven… the stitch pattern does all the work. Grab the free pattern below, or snag the ad-free PDF for uninterrupted crocheting!

Hey, bestie! ๐Ÿ’› If you've been itching to try Tunisian crochet in the round, the Swiss House Tunisian Hat is the perfect project to pick up your hook and dive in. Designed by the talented Robyn Chachula, this color-packed hat combines Tunisian Simple Stitch (TSS), Knit Stitch (TKS), and Reverse Stitch (TRS) with clever decreases to create a warm, textured fabric that looks like it came straight from a boutique ski lodge in the Swiss Alps. โ›ธ๏ธ

๐Ÿงถ Affiliate Disclosure: This post contains affiliate links. If you purchase through them I may earn a small commission at no extra cost to youโ€ฆ and it helps support free patterns and content from my yarn-loving heart ๐Ÿ’› See my privacy policy here.
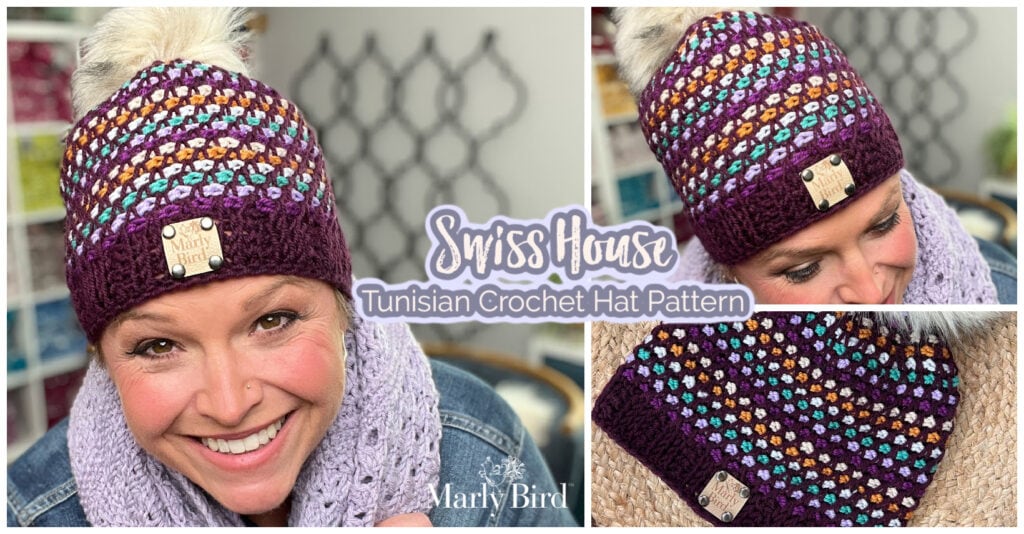
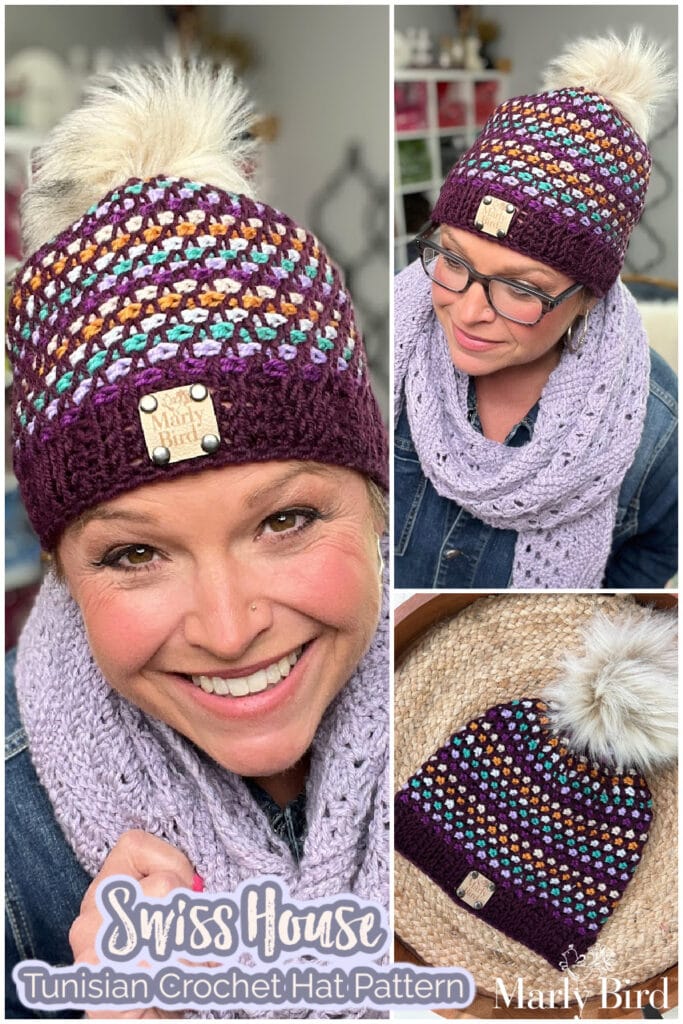
A smiling woman wears a colorful, patterned Tunisian crochet beanie with a pom-pom and "Marly Bird" label. The image also shows a close-up of the Swiss House hat and text: "Free Hat Pattern: Swiss House Tunisian Crochet Hat. -Marly Bird"

Jump to the free pattern


Why You'll Love This Pattern ๐Ÿ’–

๐ŸŒˆ Five sizes and infinite color possibilities make this hat truly everyone's. Worked in Child, Adult S, M, L, and XL, you can customize the palette from a single solid color to seven jewel tones, so everyone finds their perfect fit and every stash gets some love.

๐Ÿงต Tunisian stitches that look knit… but crochet faster. The mix of TSS, TKS, and TRS creates a textured, knit-like fabric that has people saying, “Wait, you crocheted that?!” The spiral construction means no seams, and the density of Tunisian work means this hat will hold its shape year after year.

๐ŸŽ Seamless crown shaping and gift-ready results every time. Robyn's spiral decrease technique creates a crown that tapers smoothly without stacking or bulk, so every size comes off the hook looking polished and professional. It's the kind of hat people want to wear, not just admire.

This is your pattern if you've been curious about Tunisian crochet in the round but weren't sure where to start… Robyn's clear instructions and stitch definitions make every step feel doable.

You'll come away knowing how to work Tunisian crochet in a continuous spiral, how to manage color changes with a double-ended hook, and how to shape a crown that decreases smoothly without stacking.


Quick Pattern Overview

๐Ÿช Craft: Tunisian Crochet (worked in the round)

๐ŸŽจ Designer: Robyn Chachula for MarlyBird.com

โญ Skill Level: Adventurous Beginner

๐Ÿ“ Sizes: Child, Adult S, M, L, XL (5 sizes)

๐Ÿงถ Yarn: WeCrochet Twill, worsted weight, up to 7 colors (1 hank each)

๐Ÿช Hook: Size K/10.5 (6.5mm) Tunisian double-ended hook (or 2 Tunisian hooks + cable)

๐ŸŒ€ Technique: Tunisian Simple Stitch (TSS), Knit Stitch (TKS), and Reverse Stitch (TRS) in a continuous spiral


Love the Pattern but Want an Ad-Free PDF? โญ

Join our Newsletter

Get Free Crochet & Knitting
Pattern Links & Coupons!

Hand-drawn bird with curling, detailed feathers and pink accents; cheerful pose showcases fine line and texture work.
>> Become An Insider <<
A woman with glasses and curly hair models a colorful crocheted scarf, showing textured stitches and vibrant yarn.
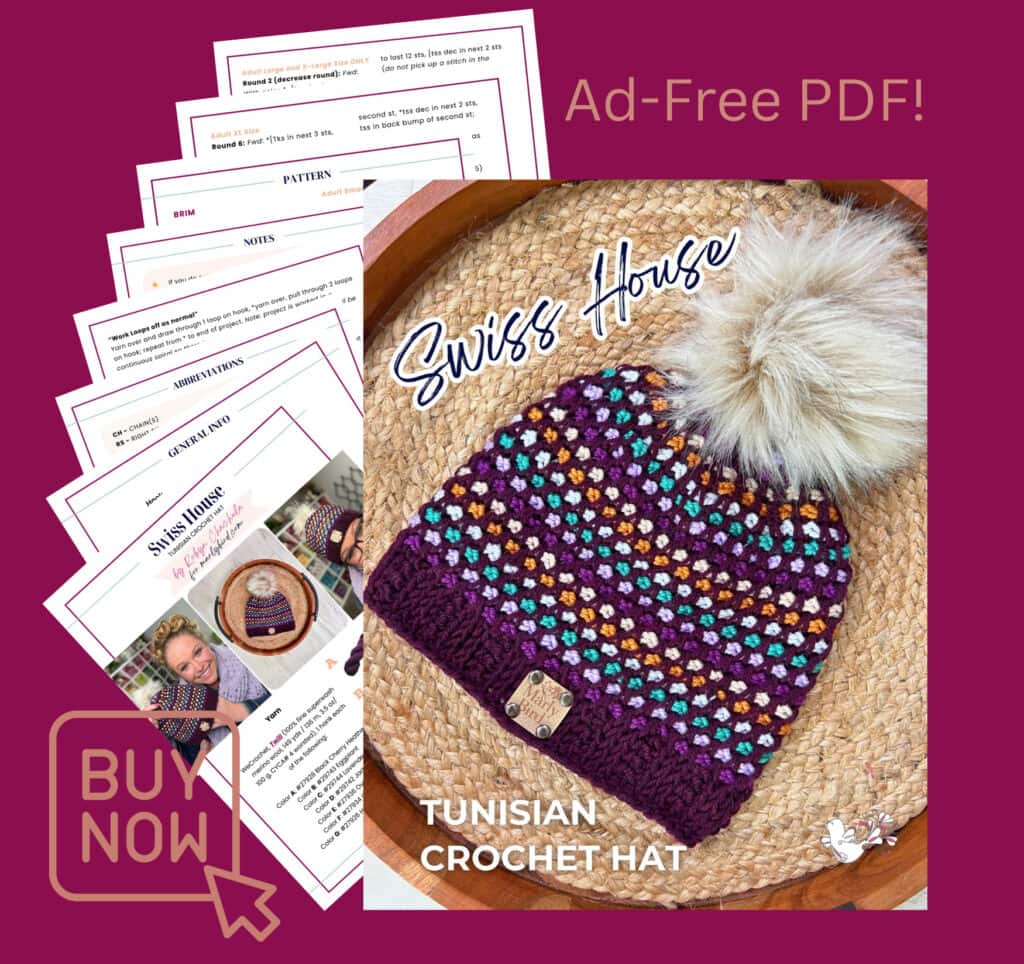
An ad for an ad-free PDF "Swiss House Tunisian Crochet Hat" pattern, featuring a purple, multicolored Tunisian crochet hat with a fluffy pom-pom, pattern pages, and a "Buy Now" buttonโ€”all on a rich burgundy background. -Marly Bird
Etsy
Shopify
Ravelry

What Makes This Tunisian Crochet Hat Special?

The Swiss House Tunisian Hat is more than just a beanie… it's a crochet adventure. Robyn designed it with spiral shaping and offset stitches so the decreases blend beautifully, without stacking or creating bulk. The stitch pattern creates texture that almost looks knit, while the continuous spiral rounds mean you won't find any clunky seams.

This isn't your average crochet hat… it's stylish, modern, and makes people say, “Wait… you crocheted that?!”

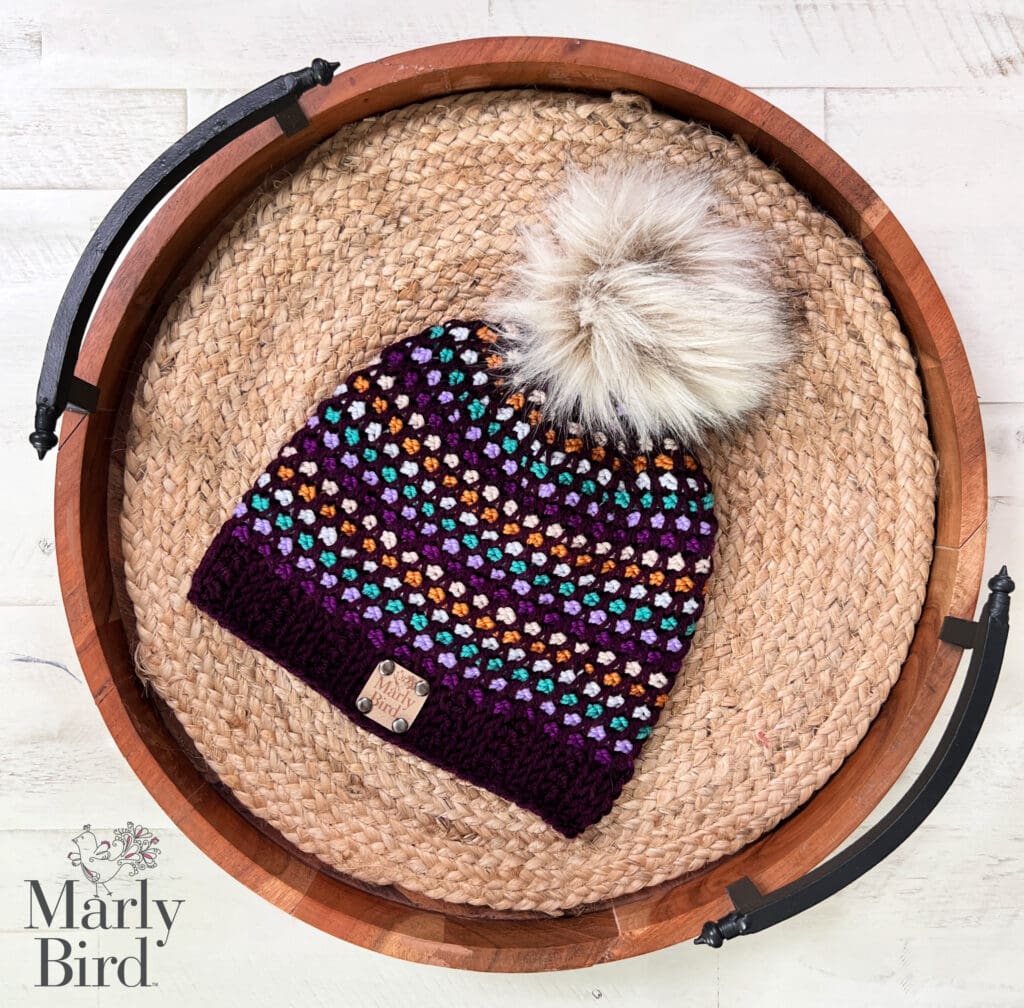
A multicolored crocheted beanie made with Tunisian crochet and topped with a large faux fur pom-pom sits on a woven tray. The beanie features purple, orange, blue, and white stitches with a dark ribbed brim and small tag.

Tips for Working Tunisian Crochet in the Round

If you've only ever worked Tunisian crochet flat, don't worry… this hat will open up a whole new world. Here are a few helpful notes before you begin:

  • Tools matter: You'll need a Tunisian double-ended hook or two interchangeable hooks connected with a cable. This lets you pick up loops on the forward pass and work them off on the return pass, all in a continuous spiral.
  • Use a stitch marker: Since you're working in the round, it's easy to lose track of where one round ends and the next begins. A simple locking marker saves your sanity.
  • Forward and return passes: You can work as many stitches as fit comfortably on your hook. Just remember to switch back and forth until you complete the round.
โœจ Designer Tip: If you're new to Tunisian crochet in the round, practice a small swatch first so you get comfortable switching between forward and return passes before you start the hat. Your gauge will thank you!

Once you try it, you'll wonder why you waited so long to explore Tunisian crochet in the round. If you've never tried Tunisian crochet but want to learn, check out the BiCrafty Bootcamp: Triple Threat Tunisian Crochet.

Promotional graphic for "bicrafty bootcamp: triple threat Tunisian crochet for beginners" featuring stylish text and a camouflage background, hosted by Marly Bird and team. -Marly Bird

Choosing Colors for Your Hat

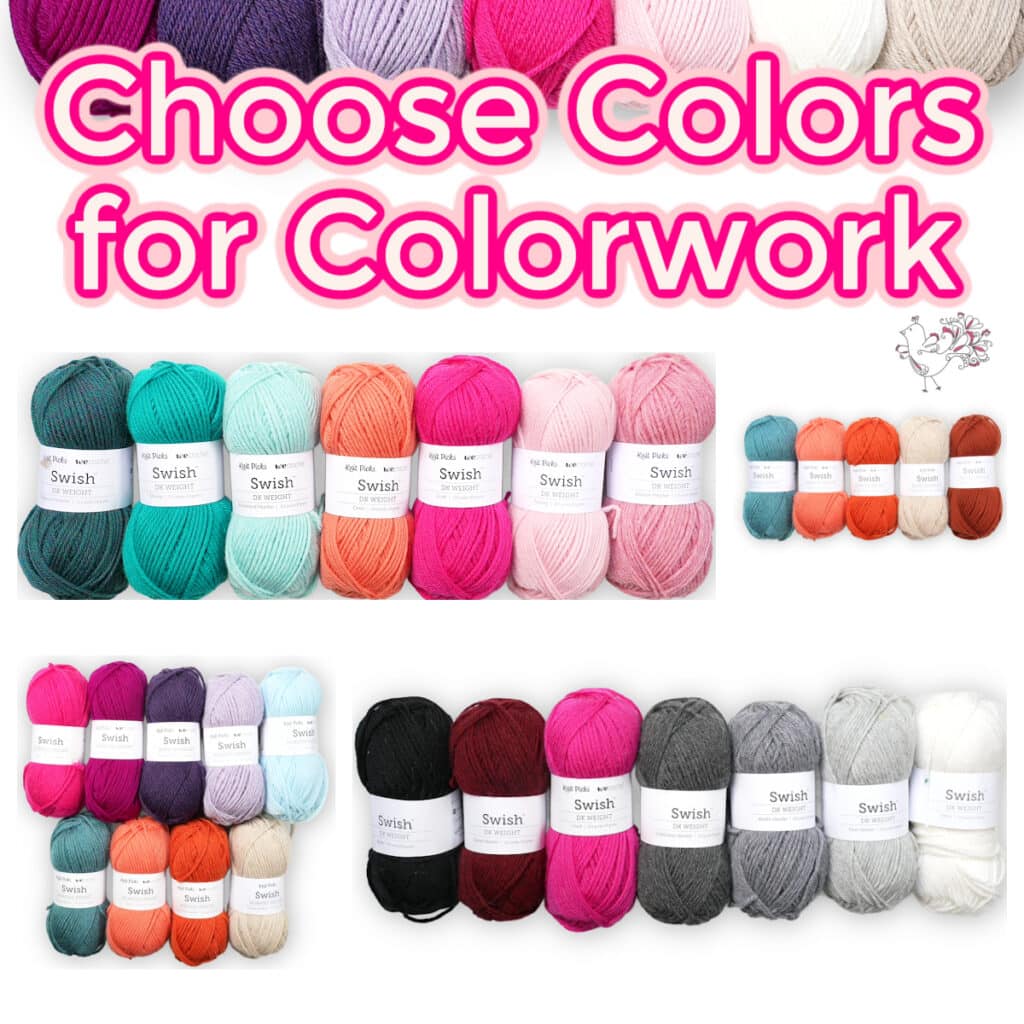
The sample uses seven colors of WeCrochet Twill… rich jewel tones with heathered neutrals… to create a bold, graphic look. But this pattern is totally flexible. Here are some ideas:

๐ŸŽจ Monochrome Magic: Work the entire hat in one solid color to let the stitch texture shine on its own. The TSS/TKS/TRS pattern creates beautiful dimension even without color contrast.

โœจ Stash-Buster: Pull out those leftover worsted-weight hanks and alternate them round by round for a scrappy, playful look… this hat is perfect for using up oddments.

๐ŸŒ… Tone-on-Tone: Pick three shades from the same color family for a subtle gradient effect that feels sophisticated and intentional.

๐ŸŽƒ Seasonal Vibes: Try holiday reds and greens, icy blues and grays, or Halloween purples and oranges… this pattern adapts to every season beautifully.

Whatever palette you choose, this pattern will let your colors shine.

Various yarn skeins in vibrant colors are showcased against a white background with the text "Choose Colors for Colorwork." Perfect for your 2025 Edition colorwork project, the skeins are arranged by color, including pinks, blues, purples, and neutrals. -Marly Bird

Styling & Gifting Ideas

The Swiss House Tunisian Hat is a cozy accessory that's as fashionable on the slopes as it is on city streets. Make one for yourself, then whip up a few extras as handmade holiday gifts. Pair it with a chunky scarf, mittens, or even a pom pom on top for extra flair.

Pro tip: Since this pattern is size-inclusive, you can stitch one for every member of the family… from kids to adults. That's a whole set of matching hats for holiday photos or ski trips!


A woman wearing glasses models a colorful Tunisian crochet hat with a faux fur pom-pom and lavender scarf. The "Swiss House" hat, shown in close-up and laid flat, features the Marly Bird label. Text: "Free Hat Pattern โ€“ Swiss House Tunisian Crochet. -Marly Bird"

Yarn & Materials

This pattern was designed for WeCrochet Twill… a 100% fine superwash merino wool in worsted weight with 149 yards per 100g hank. The heathered tones and jewel colors in the Twill line are exactly what makes this hat's colorwork look like it came from a boutique ski shop. You'll need 1 hank each of up to 7 colors, or fewer if you simplify the palette.

Yarn Substitutions

Any smooth worsted-weight yarn with good stitch definition works here… Tunisian crochet shows stitch detail beautifully. Look for yarns with some natural fiber content for that same luxurious warmth:

KnitPicks Wool of the Andes Worsted is a classic 100% wool in a huge range of colors… perfect for building a coordinated palette. WeCrochet Mighty Stitch Worsted gives you a wool-blend option with great softness and affordability. KnitPicks Brava Worsted is the budget-friendly all-acrylic choice when you want to experiment with colors before committing to the merino.

Notions

  • Tapestry Needle
  • Stitch Markers
  • Size K/10.5 (6.5mm) Tunisian Double-Ended Hook
  • Scissors
  • Tape Measure
  • Faux Fur Pom (Optional)
  • Leather Tags (Optional)
โญ๏ธ Marly Bird Amazon Storefront โญ๏ธ

Video Tutorial

Robyn walks through every step of the Swiss House Tunisian Crochet Hat in the full video tutorial on YouTube… highly recommend watching it before you cast on if you're new to Tunisian in the round. ๐ŸŽฅ


Swiss House Tunisian Hat || Pattern Instructions

Designed by Robyn Chachula

SKILL LEVEL

Adventurous Beginner

MEASUREMENTS

Finished Measurements

Hat is 17.25 (18.5, 20, 21.5, 22.75)” [44, 47, 51, 54.5, 58 cm] in circumference sized to fit Child, Adult Small, Adult Medium, Adult Large, Adult XL. 

Gauge 

12 sts x 11 rounds = 4″ [10 cm] x 4″ [10 cm] in brim stitch pattern

14 sts x 11 rounds = 4″ [10 cm] x 4″ [10 cm] in body stitch pattern; use any size hook to obtain the gauge. 

The logo for WeCrochet.com, featuring the word

MATERIALS

Yarn 

WeCrochet Twill (100% fine superwash merino wool, 149 yds / 136 m, 3.5 oz/ 100 g, CYCA# 4 worsted), 1 hank each of the following:

  • Color A: #27928 Black Cherry Heather
  • Color B: #29743 Eggplant
  • Color C: #29744 Lavender
  • Color D: #29742 Jade
  • Color E: #27936 Overcast
  • Color F: #27934 Gold Rush
  • Color G: #27926 Horchata Heather

Hook

Size K/10.5 (6.5 mm) either Tunisian double ended hook or (2) Tunisian Hooks with any size cable connecting them. 

Notions 

  • Tapestry Needle
  • Stitch Markers
  • Faux Fur Pom (Optional)

ABBREVIATIONS

Ch – Chain(s) 

PM – Place Marker

RS – Right Side 

Sl st – Slip Stitch

St(s) – Stitch(es)

Tch – Turning Chain

TSS- Tunisian Simple Stitch

TKS – Tunisian Knit Stitch

TRS – Tunisian Reverse Stitch

WS – Wrong Side

SPECIAL STITCHES 

โญ๏ธ Foundation Slip Stitch: 

First Stitch: Ch 1, insert hook into back ridge of chain, yarn over and pull up loop (2 loops on hook), yarn over and draw through 1 loop on hook (creates chain), draw through next loop on hook (creates slip stitch).

Next Stitch: Insert hook into chain just created (vertical bar furthest from hook), yarn over and pull up a loop (2 loops on hook), yarn over and draw through both loops on hook (first loop creates chain, second creates slip stitch)

โญ๏ธ Tunisian Simple Stitch (TSS): Insert hook from right to left into front vertical bar of next st, yarn over and pull up a loop.

โญ๏ธ Tunisian Knit Stitch (TKS): Insert hook from front to back between the front and back vertical bars of the next st (under horizontal bars), yarn over and pull up a loop. 

โญ๏ธ Tunisian Reverse Stitch (TRS): Insert hook from right to left into back vertical bar of next st on the wrong side (or back of work), yarn over and pull up a loop. This pushes the return pass to the front of the work creating a purl-like look. 

โญ๏ธ “Work Loops off as normal” Yarn over and draw through 1 loop on hook, *yarn over, pull through 2 loops on hook; repeat from * to end of project.  Note: project is worked in a continuous spiral so there is only 1 first stitch and all the remaining will be pulling through 2 loops.

โญ๏ธ Tunisian Simple Stitch Decrease (TSS dec): Insert hook from right to left into the front vertical bar of the next 2 sts at the same time, yarn over and pull up a loop (1 st decreased).

โญ๏ธ Tunisian Simple Stitch in Back Bump (TSS in back bump): Insert hook into the back bump of the horizontal bar of the stitch indicated, yarn over and pull up a loop.

NOTES

  • If you do not want to use the Foundation Slip Stitch as a start, you can chain instead.  
  • If you do not enjoy working TRS or if you don't like the look, you can do TPS for all TRS stitches throughout the pattern. 
  • Hat is worked in the round in a continuous spiral.  Place marker in the first stitch of each round. 
  • In the brim, make a small ball of color A and use color A for the forward and return pass. 
  • In the body and crown use color A for every forward pass, change color as directed at the start of each new return pass. 
  • On the forward pass work any number of stitches that comfortably fit on the Tunisian Double Ended hook. Turn and work stitches off of hook for the return pass until 2 loops are left on hook, then turn and work more forward pass stitches. Keep switching between forward and return passes until the round is complete. 
  • When working the body section, the stitch pattern repeat is an even number of stitches, but the stitch count is an odd number of stitches.  This means you will have 1 stitch left at the end of the round.  This is on purpose so the next round will be offset from the round before it and the decreases will spiral and not stack.  Work the last stitch in the next round. 

GROW

To Unlockย Exclusive Subscriber Contentย click the Box below and join for free by simply adding your email and creating a password! If you are having troubles, clear your cache or reset your password or login to the Grow Publisher Portal.

>> Learn More About Grow Here <<

I'm thrilled to share this amazing pattern with you, many patterns on my blog are absolutely free! I kindly request that you don't copy and paste or distribute this pattern. Prefer an ad-free experience? Buy a digital PDF pattern for a small fee from one of my online stores for a seamless crafting journey. 

I appreciate your support and readership. You are the reason I can keep doing what I love and sharing it with others. So, thank you from the bottom of my yarn-loving heart! Disclosure: This post contains affiliate links, meaning I get a commission if you decide to make a purchase through my links at no cost to you.


BRIM

Foundation Slip Stitch or Chain 52 (56, 60, 64, 68) with color A, sl st in first st to form ring. See notes for how to work fwd and rtn passes with double ended hook. 

Round 1: Fwd: Pull up loop in each st around (loop on hook counts as a st). Rtn: With color A, work loops off as normal. (52, 56, 60, 64, 68 sts)

Rounds 2-4 (2-4, 2-4, 2-5, 2-5): Fwd: *Tks in next 3 sts, trs in next st; repeat from * around. Rtn: With color A, work loops off as normal.

Child Size

Round  5: Fwd: *[Tks in next 3 sts, tss in back bump of previous st, trs in next st] 3 times, tks in next 3 sts, trs in next st; repeat from * around to last 4 sts, tks in next 3 sts, trs in last st. Rtn: With color B, work loops off as normal. (61, -, -, -, – sts)

Adult Small Size

Round  5: Fwd: *[Tks in next 3 sts, tss in back bump of previous st, trs in next st] 3 times, tks in next 3 sts, trs in next st; repeat from * around to last 8 sts, [tks in next 3 sts, trs in next st] twice. Rtn: With color B, work loops off as normal. (-, 65, -, -, – sts)

Adult Medium Size

Round  5: Fwd: *[Tks in next 3 sts, tss in back bump of previous st, trs in next st] 3 times, [tks in next 3 sts, trs in next st] twice; repeat from * around. Rtn: With color B, work loops off as normal. (-, -, 69, -, – sts)

Adult Large Size

Round  6: Fwd: *[Tks in next 3 sts, tss in back bump of previous st, trs in next st] 3 times, tks in next 3 sts, trs in next st; repeat from * around to last 16 sts, [Tks in next 3 sts, tss in back bump of previous st, trs in next st] twice, [tks in next 3 sts, trs in next st] twice. Rtn: With color B, work loops off as normal. (-, -, -, 75, – sts)

Adult XL Size

Round  6 : Fwd: *[Tks in next 3 sts, tss in back bump of previous st, trs in next st] 3 times, [tks in next 3 sts, trs in next st] twice; repeat from * around to last 8 sts, [tks in next 3 sts, tss in back bump of previous st, trs in next st] twice. Rtn: With color B, work loops off as normal. (-, -, -, -, 79 sts)

An ad for an ad-free PDF "Swiss House Tunisian Crochet Hat" pattern, featuring a purple, multicolored Tunisian crochet hat with a fluffy pom-pom, pattern pages, and a "Buy Now" buttonโ€”all on a rich burgundy background. -Marly Bird
Etsy
Shopify
Ravelry

BODY

Begin changing colors in the following order: C, D, E, F, G, B on each round of the return pass.  Color A will be used exclusively on every round of the forward pass. Mark the first stitch on every round. 

Round 1: Fwd: With color A, *Tss dec in next 2 sts, tss in back bump of second st; repeat from * around to last st, leave last stitch unworked for next round (work last st in next round, see notes) . Rtn: Change color, work loops off as normal.

Round 2: Fwd: With color A, tss dec in next 2 sts (last st of previous round and first st of this round), tss in back bump of second st, *tss dec in next 2 sts, tss in back bump of second st; repeat from * around. Rtn: Change color, work loops off as normal.

Repeat Rounds 1-2 4 (4, 5, 5, 6) more times. 

CROWN

We will start decreasing for the crown.  The simple way we will use to decrease stitches is  to NOT pick up a stitch in the back bump. 

Child Size

Round 1 (decrease round): Fwd: With color A, [tss dec in next 2 sts, tss in back bump of second st] 6 times,  [tss dec in next 2 sts (do not pick up a stitch in the back bump)] twice, [tss dec in next 2 sts, tss in back bump of second st] 14 times, [tss dec in next 2 sts (do not pick up a stitch in the back bump)] twice, [tss dec in next 2 sts, tss in back bump of second st] 6 times, leave last stitch unworked for next round (work last st in next round) . Rtn: Change color, work loops off as normal. – (57, -, -, -, -) sts. 

Adult Small Size

Round 1: Fwd: With color A, *Tss dec in next 2 sts, tss in back bump of second st; repeat from * around to last st, leave last stitch unworked for next round (work last st in next round, see notes) . Rtn: Change color, work loops off as normal. – (-, 65, -, -, -) sts

Adult Medium Size

Round 1 (decrease round): Fwd: With color A, [tss dec in next 2 sts, tss in back bump of second st] 7 times,  [tss dec in next 2 sts (do not pick up a stitch in the back bump)] twice, [tss dec in next 2 sts, tss in back bump of second st] 16 times, [tss dec in next 2 sts (do not pick up a stitch in the back bump)] twice, [tss dec in next 2 sts, tss in back bump of second st] 7 times, leave last stitch unworked for next round (work last st in next round) . Rtn: Change color, work loops off as normal. – (-, -, 65, -, -) sts. 

Adult Large Size

Round 1 (decrease round): Fwd: With color A, [tss dec in next 2 sts, tss in back bump of second st] 17 times,  [tss dec in next 2 sts (do not pick up a stitch in the back bump)] twice, *tss dec in next 2 sts, tss in back bump of second st; repeat across to last st, leave last stitch unworked for next round (work last st in next round) . Rtn: Change color, work loops off as normal. – (-, -, -, 73, -) sts. 

Adult X-Large Size

Round 1 (decrease round): Fwd: With color A, [tss dec in next 2 sts, tss in back bump of second st] 6 times,  *[tss dec in next 2 sts (do not pick up a stitch in the back bump)] twice, [tss dec in next 2 sts, tss in back bump of second st] 11 times; repeat from * once more, [tss dec in next 2 sts (do not pick up a stitch in the back bump)] twice, [tss dec in next 2 sts, tss in back bump of second st] 5 times, leave last stitch unworked for next round (work last st in next round) . Rtn: Change color, work loops off as normal. – (-, -, -, -, 73) sts. 

Adult Large and X-Large Size ONLY

Round 2 (decrease round): Fwd: With color A, [tss dec in next 2 sts, tss in back bump of second st] 4 times, *[tss dec in next 2 sts (do not pick up a stitch in the back bump)] twice, [tss dec in next 2 sts, tss in back bump of second st] 7 times; repeat from * around to last 12 sts, [tss dec in next 2 sts (do not pick up a stitch in the back bump)] twice, [tss dec in next 2 sts, tss in back bump of second st] 4 times. Rtn: Change color, work loops off as normal. – (-, -, -, 65, 65) sts. 

Round 3: Fwd: With color A, *Tss dec in next 2 sts, tss in back bump of second st; repeat from * around to last st, leave last stitch unworked for next round (work last st in next round, see notes) . Rtn: Change color, work loops off as normal.

Adult Small, Medium, Large, and X-Large Size ONLY

Round – (2, 2, 4, 4) (decrease round): Fwd: With color A, [tss dec in next 2 sts, tss in back bump of second st] 3 times, *[tss dec in next 2 sts (do not pick up a stitch in the back bump)] twice, [tss dec in next 2 sts, tss in back bump of second st] 6 times; repeat from * around to last 12 sts, [tss dec in next 2 sts (do not pick up a stitch in the back bump)] twice, [tss dec in next 2 sts, tss in back bump of second st] 4 times. Rtn: Change color, work loops off as normal. – (-, 57, 57, 57, 57) sts. 

Round – (3, 3, 5, 5): Fwd: With color A, *Tss dec in next 2 sts, tss in back bump of second st; repeat from * around to last st, leave last stitch unworked for next round (work last st in next round, see notes) . Rtn: Change color, work loops off as normal.

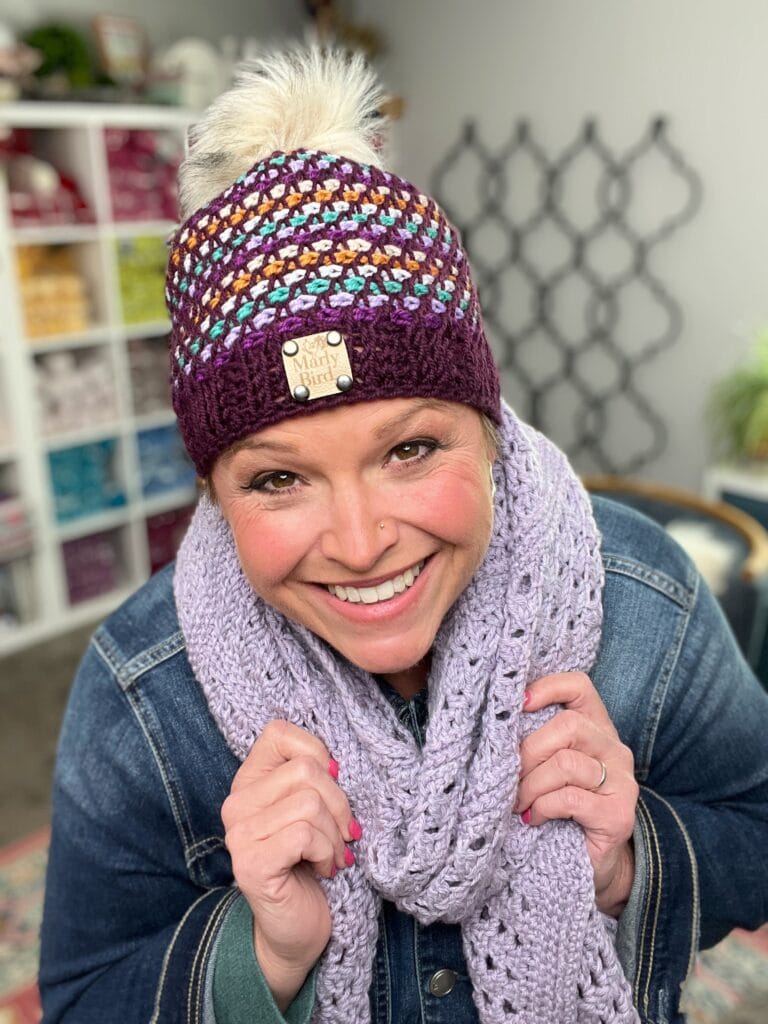
A smiling woman wearing a colorful knit beanie with a pom-pom, made from a free hat pattern, and a light purple crochet scarf. She is dressed in a denim jacket, standing indoors with yarn shelves and a patterned wall in the background. -Marly Bird

All Sizes

Round 2 (4, 4, 6, 6) (decrease round): Fwd: With color A, [tss dec in next 2 sts, tss in back bump of second st] twice, *[tss dec in next 2 sts (do not pick up a stitch in the back bump)] twice, [tss dec in next 2 sts, tss in back bump of second st] 5 times; repeat from * around to last 12 sts, [tss dec in next 2 sts (do not pick up a stitch in the back bump)] twice, [tss dec in next 2 sts, tss in back bump of second st] 4 times. Rtn: Change color, work loops off as normal. – (49, 49, 49, 49, 49) sts. 

Round 3 (5, 5, 7, 7) (decrease round): Fwd: With color A, *[Tss dec in next 2 sts, tss in back bump of second st] 4 times, [tss dec in next 2 sts (do not pick up a stitch in the back bump)] twice; repeat from * around to last st, leave last stitch unworked for next round (work last st in next round, see notes) . Rtn: Change color, work loops off as normal. – (41, 41 41, 41, 41) sts. 

Round 4 (6, 6, 8, 8) (decrease round): Fwd: With color A, [tss dec in next 2 sts, tss in back bump of second st] twice, *[tss dec in next 2 sts (do not pick up a stitch in the back bump)] twice, [tss dec in next 2 sts, tss in back bump of second st] 3 times; repeat from * around to last 8 sts, [tss dec in next 2 sts (do not pick up a stitch in the back bump)] twice, [tss dec in next 2 sts, tss in back bump of second st] twice. Rtn: Change color, work loops off as normal. – (33, 33, 33, 33, 33) sts. 

Round 5 (7, 7, 9, 9) (decrease round): Fwd: With color A, *[Tss dec in next 2 sts, tss in back bump of second st] twice, [tss dec in next 2 sts (do not pick up a stitch in the back bump)] twice; repeat from * around to last st, leave last stitch unworked for next round (work last st in next round, see notes) . Rtn: Change color, work loops off as normal. – (25, 25, 25, 25, 25) sts. 

Round 6 (8, 8, 10, 10) (decrease round): Fwd: With color A, *tss dec in next 2 sts, tss in back bump of second st, [tss dec in next 2 sts (do not pick up a stitch in the back bump)] twice; repeat from * around to last 2 sts, tss dec in next 2 sts, tss in back bump of second st. Rtn: Change color, work loops off as normal. – (17, 17, 17, 17, 17) sts. 

Round 7 (9, 9, 11, 11) (decrease round): Fwd: With color A, *tss dec in next 2 sts (do not pick up a stitch in the back bump); repeat from * around to last st, leave last stitch unworked for next round (work last st in next round, see notes) . Rtn: Change color, work loops off as normal. – (9, 9, 9, 9, 9) sts. 

Bind Off Round: *Tss dec in next 2 sts, pull loop through loop on hook; repeat from * around, fasten off with a long tail.  Weave the long tail through the last round to close hole in the top of the hat. 

FINISHING

Fasten off, weave in ends. Add pom pom to top of hat if desired. 

A smiling woman wears a colorful, patterned Tunisian crochet beanie with a pom-pom and "Marly Bird" label. The image also shows a close-up of the Swiss House hat and text: "Free Hat Pattern: Swiss House Tunisian Crochet Hat. -Marly Bird
Etsy
Shopify
Ravelry

More Tunisian Crochet Patterns You'll Love

Ready for your next Tunisian crochet adventure? The TOS Tunisian Shawl is a stunning larger project using the same technique. The Poplar Tunisian Poncho is a beautiful garment project on Ravelry. And the BiCrafty Bootcamp: Triple Threat Tunisian Crochet is Marly's deep-dive tutorial if you want to level up your Tunisian skills.

Love the pattern? Grab the ad-free PDF… no interruptions while you stitch!

An ad for an ad-free PDF "Swiss House Tunisian Crochet Hat" pattern, featuring a purple, multicolored Tunisian crochet hat with a fluffy pom-pom, pattern pages, and a "Buy Now" buttonโ€”all on a rich burgundy background. -Marly Bird
Etsy
Shopify
Ravelry

Frequently Asked Questions About the Swiss House Tunisian Crochet Hat

Can I make this hat with fewer colors?

Absolutely! You can simplify the color scheme by using just two or three shades. The stitch pattern still looks amazing even in a minimal palette. Fewer color changes also mean less weaving in ends, which is a win in my book.

What if I don't have a Tunisian double-ended hook?

Two interchangeable hooks joined with a long cable will work just as well! Check your crochet set… you may already have what you need. Just make sure the hooks are roughly the same size and the cable is long enough to comfortably hold all your stitches.

Does Tunisian crochet stretch like knit?

Not exactly. Tunisian fabric is denser than regular crochet, but with the right yarn (like Twill merino) and this stitch pattern, you'll get warmth, structure, and a bit of give. The merino fiber naturally has a little elasticity, so the hat should fit comfortably and keep its shape.

What hook size do I need for the Swiss House Tunisian Hat?

Grab a size K/10.5 (6.5mm) Tunisian double-ended hook to start… but as always, gauge rules everything. You're looking for 12 sts ร— 11 rounds = 4″ in the brim pattern and 14 sts ร— 11 rounds = 4″ in the body pattern. If your swatch is off, go up or down a hook size before you start the hat.

How many yards of yarn do I need?

You need 1 hank per color… up to 7 hanks total for the full sample colorway. Each hank of WeCrochet Twill gives you 149 yards, which is plenty for one color's sections even on the larger sizes. Going with fewer colors? You may be able to get away with 2โ€“3 hanks total.

Is this a good first project for Tunisian crochet in the round?

Yes! Robyn designed this hat specifically to be approachable. If you've worked Tunisian flat before and understand the forward and return passes, you're ready. The spiral construction is one of those things that feels tricky in the abstract but clicks the moment you start stitching. Grab the YouTube video tutorial… it makes everything much clearer.

What's the difference between TSS, TKS, and TRS?

Great question! Tunisian Simple Stitch (TSS) inserts the hook into the front vertical bar… it's the most common Tunisian stitch. Tunisian Knit Stitch (TKS) goes between the front and back vertical bars for a knit-like appearance. Tunisian Reverse Stitch (TRS) works into the back vertical bar on the wrong side, creating a purl-like texture. Together, they give the Swiss House hat its beautiful textured, knit-look fabric.


Final Thoughts on the Swiss House Tunisian Crochet Hat

The Swiss House Tunisian Hat is one of those patterns that makes you fall in love with Tunisian crochet all over again. Between the smooth crown shaping, playful colorwork, and cozy fit, this design is both fun to stitch and easy to wear.

Whether you make it in bold jewel tones like the sample or keep it simple with a two-color palette, you'll end up with a hat that feels modern, handmade, and totally gift-worthy. Don't forget… you can add a pom pom for extra personality or keep it sleek for a classic winter look.

I hope you enjoyed this pattern as much as I loved sharing it with you. Be sure to tag me @marlybird and use #MMMDI (Marly Made Me Do It), #MarlyBird, or #SwissHouseHat when you share your finished projects… I can't wait to see all the amazing hats you create.

Until next time, stay warm, stay creative, and keep those hooks moving.

๐ŸŽ‰ Love Tunisian crochet and colorwork? Check out my Crochet Collection in Marly Bird House… Robyn's and my favorite crochet patterns and tutorials all in one place. It's like having us both as your personal crochet guides! ๐Ÿ’›
Favorite This Pattern on Ravelry - Marly Bird

Filed Under: Crochet, Free Patterns, Marly Bird Premium Patterns, Our Free Patterns, Pattern

Free Corner-to-Corner Crochet Baby Blanket Pattern…

July 2, 2025 By Marly Bird 1 Comment

Looking for a corner-to-corner crochet baby blanket pattern thatโ€™s as charming as it is cuddly? Youโ€™re going to love the Ballet Slippers C2C Blanketโ€”a graceful and cozy creation designed to celebrate the elegance of dance while keeping your loved ones warm and snuggly. ๐Ÿ’•

Whether you're a seasoned crocheter or just diving into your first graphgan project, this C2C crochet blanket is sure to become a cherished favorite.

Looking for more C2C blanket patterns? You might like these: Day Dream Blanket, 51 Corner to Corner Patterns,

A crochet blanket featuring a corner to corner crochet design of pink and red golf clubs and a golf bag, displayed on a table with a tray of wooden beads and a vase of pink and beige flowers nearby. Free pattern available. -Marly Bird

Affiliate Disclosure: This post contains affiliate links. To learn more please visit my privacy policy here๐Ÿ’–


Ballet Slippers C2C Blanket: A Whimsical and Elegant Crochet Design

This beautifully designed blanket features a stunning pair of ballet slippers at its heartโ€”an ode to the timeless beauty of ballet. Made using the corner-to-corner crochet technique, the blanket has clean lines, a visually captivating texture, and a soft drape thatโ€™s perfect for babies, toddlers, or even the grown-up ballet lovers in your life!

๐ŸŽ€ Why You'll Love This Blanket Pattern:

  • Features a charming ballet slippers motif
  • Made with C2C crochet for a modern, pixel-style look
  • Plush texture perfect for snuggling
  • Versatile size makes it great as a play mat, stroller blanket, or bed topper

What is Corner-to-Corner Crochet (C2C)?

If youโ€™ve never tried corner-to-corner crochet, you're in for a treat! This popular technique works diagonally from one corner of the project to the opposite corner, creating a graph-like canvas perfect for image-based designs like this one.

๐Ÿงถ With C2C:

  • Each “pixel” is a little block of stitches
  • Itโ€™s easy to follow a chart and watch your image come to life
  • You can create stunning visuals with minimal fuss
  • The final fabric has a lovely weight and squish factor โœ…

๐Ÿ‘‰ New to C2C? No worries! Iโ€™ve got you covered with a step-by-step tutorial:
Learn How to Corner-to-Corner Crochet (C2C) in this beginner-friendly BiCrafty Bootcamp lesson!
This lesson breaks it all down with clear instructions and a video to help you master the basics quickly.

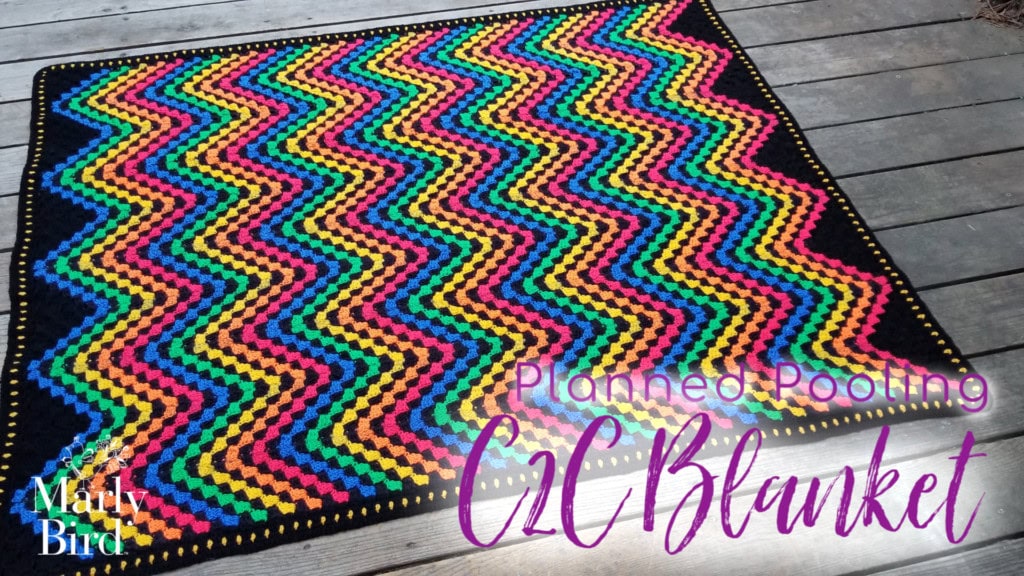
Colorful planned pooling C2C blanket featuring zigzag patterns with bright hues on a black background.

โœจ Want to level up your C2C skills?

Did you know you can use corner-to-corner crochet for planned pooling? Thatโ€™s right! You can create gorgeous colorwork effects like chevrons just by using variegated yarn strategically.

Check out my free pattern and tutorial here:
Corner-to-Corner Planned Pooling Chevron Crochet Throw Blanket โ€“ Free Pattern

Whether you're new to C2C or ready to explore advanced tricks, thereโ€™s so much creative potential in this technique!


Yarn Details and Suggested Substitutes

The original sample uses Blanket yarn by Yarnspirationsโ€”a super bulky, ultra-soft polyester yarn thatโ€™s machine washable and perfect for babies.

๐Ÿงต Yarn Used:

  • Brand: Bernat Blanket
  • Weight: Super Bulky (6)
  • Fiber: 100% Polyester
  • Care: Machine wash and dry

๐Ÿงถ Suggested Yarn Substitutes:
If you want to mix things up or shop your stash, here are a few great alternatives:

  • Premier Yarns Parfait Chunky
  • Sweet Snugglesโ„ข Yarn by Loops & Threads
  • Hobbii Honey Bunny Big

When substituting, make sure to check your gauge so your final blanket still lands at a snuggly, usable size!


Tips for Success with Your Ballet Slippers C2C Blanket

๐Ÿ‘ถ Choose Your Color Palette Wisely โ€“ Soft pinks and pastels enhance the ballet theme, but donโ€™t be afraid to go bold with jewel tones or neutrals for a more modern twist.

๐Ÿ“ Use a row counter or printable C2C chart to stay on track. This is especially helpful for image-based projects like this one!

๐Ÿงผ Donโ€™t forget to block it! Light steam blocking will help even out your stitches and make the slipper motif pop.

Join our Newsletter

Get Free Crochet & Knitting
Pattern Links & Coupons!

Hand-drawn bird with curling, detailed feathers and pink accents; cheerful pose showcases fine line and texture work.
>> Become An Insider <<
A woman with glasses and curly hair models a colorful crocheted scarf, showing textured stitches and vibrant yarn.

Get the Pattern + PDF Options

๐Ÿงพ This free C2C crochet baby blanket pattern is available right here on the blog! Simply scroll down to start crocheting today.

๐Ÿ’พ Want to skip the ads and take your pattern on the go? You can purchase the ad-free, printable PDF version right here on Ravelry: https://www.ravelry.com/patterns/library/ballet-slippers-c2c-blanket

Ravelry
A crochet blanket featuring a corner to corner design with ballet slippers in shades of burgundy, pink, and gray. The text reads "Ballet Slippers" and "Corner to Corner Blanket." A small yarn and hook logo is at the bottom left. -Marly Bird

Free Corner to Corner Crochet Baby Blanket Pattern with Ballet Slippers – Details

Designed by Marly Bird and Robyn Chachula

SKILL LEVEL

Adventurous Beginner

MEASUREMENTS

Finished Measurements

Blanket is 52โ€ [132 cm] wide by 62โ€ [157.5 cm] long. 

Gauge 

4 blocks = 5.5โ€ [14 cm]; use any size hook to obtain the gauge. 

MATERIALS

Yarn 

Bernat, Blanket Yarn (100% Polyester, 220 yds / 201 m, 10.5 oz/ 300 g, CYCA# 6 super bulky)ย 

Color MC: Blush Pink, 6 balls

Color A: Crimson, 2 balls

Color B: Terra Cotta, 2 balls

Color C: Vapor Gray, 2 balls

Hook

Size L/11 (8.0 mm)

Notions 

Tapestry needle, stitch markers

ABBREVIATIONS

Beg – Beginning 

Ch – Chain(s) 
Dc – Double Crochet 

PM – Place Marker

RS – Right Side 

Sl St – Slip Stitch

Sp(s) – Space(s) 
St(s) – Stitch(es)

Tch – Turning Chain

WS – Wrong Side

NOTES

  1. Each box counts as 1 block (ch 3 + 3 dc).
  2. Change color when there are 2 loops left on the hook of the

previous color or when sl st to the next block.

  1. Chart is worked from bottom corner to upper corner on the

diagonal.

  1. Right side “rows” are worked from the right to the left side on

the chart. Wrong side “rows” are worked from the left to right

side on the chart.

VIDEO TUTORIAL

  • Bury Ends >> Click Here for Video Help <<
  • Corner to Corner Tips >> https://youtu.be/rAVwGIoOoXI <<

GROW

To Unlockย Exclusive Subscriber Contentย click the Box below and join for free by simply adding your email and creating a password! If you are having troubles, clear your cache or reset your password or login to the Grow Publisher Portal.

>> Learn More About Grow Here <<

I'm thrilled to share this amazing pattern with you, many patterns on my blog are absolutely free! I kindly request that you don't copy and paste or distribute this pattern. Prefer an ad-free experience? Buy a digital PDF pattern for a small fee from one of my online stores for a seamless crafting journey. 

I appreciate your support and readership. You are the reason I can keep doing what I love and sharing it with others. So, thank you from the bottom of my yarn-loving heart! Disclosure: This post contains affiliate links, meaning I get a commission if you decide to make a purchase through my links at no cost to you.

A smiling woman with glasses and curly hair holds up a handmade quilt featuring pink ballet slippers, made using the Corner to Corner Crochet technique, with ribbons on a white and burgundy background. -Marly Bird

BALLET SLIPPERS CORNER TO CORNER BABY BLANKET FREE PATTERN

DIAGRAMS

โญ๏ธ Crochet Stitch Diagram — Only Available in the ad-free PDF

Pixel art grid of a pink jump rope, ideal as a free pattern for a corner to corner crochet blanket. Handles are shaded in light and dark pink and gray, with a color key at the bottom right labeling shades A, B, C, and MC. Numbered axes included. -Marly Bird
A diamond-shaped grid with labeled blocks, numbered 1 to 6 and color-coded yellow and blue. Arrows show directions for rows: Row 1 (bottom), Row 2 (middle), Row 3 (top), Decreasing Row 1 (left). Perfect for a Ballet Slippers Crochet Blanket free pattern. -Marly Bird

INCREASING ROWS OF BLANKET

Note: Follow the color chart for when to change color. See stitch diagram and basic layout for more information. 

Row 1 (Block 1, RS): With MC, ch 6, dc in 4th ch from hook, dc in last 2 ch.

Row 2 (Block 2, WS): Ch 6, turn, dc in 4th ch from hook, dc in last 2 ch, sl st to top

of beg ch of Block 1.

Row 2 (Block 3, WS): Ch 3, 2 dc in ch-3 sp, dc in last ch.

Row 3 (Block 4, RS): Ch 6, turn, dc in 4th ch from hook, dc in last 2 ch, sl st to top

of beg ch of Block 3.

Row 3 (Block 5, RS): Ch 3, 3 dc in ch-3 sp, sl st to top of beg ch of Block 2.

Row 3 (Block 6, RS): Ch 3, 2 dc in ch-3 sp, dc in last ch.

Repeat Row 3 through Row 34.  Each row will start with a Block 4 and end with a Block 6, with 1 additional Block 5 for each subsequent row.  Use the color chart for when to change color. 

DECREASING EAST SIDE OF BLANKET WHILE INCREASING WEST SIDE

Row 35 (Starting Decrease Block, RS) : Fasten off from previous block and turn, join yarn to top of beg ch of previous block with sl st (also can turn and sl st in each dc of previous block to beg ch), ch 3, 3 dc in ch-3 sp, sl st to top of next block.

Row 35 (Middle Blocks, RS): Ch 3, 3 dc in ch-3 sp, sl st to top of next block. Repeat across the row using the color chart for when to change color until the last block. 

Row 35 (Ending Increase Block, RS): Ch 3, 2 dc in ch-3 sp, dc in last ch.

Row 36 (Starting Increase Block, WS): Ch 6, turn, dc in 4th ch from hook, dc in last 2 ch, sl st to top of next block.

Row 36 (Middle Blocks and Ending Decrease Block, WS): Ch 3, 3 dc in ch-3 sp, sl st to top of next block. Repeat across the row using the color chart for when to change color.

Repeat Rows 35-36 twice and Repeat Row 35 once more

DECREASING ROWS OF BLANKET  

Row 42 (Starting Block, WS) : Fasten off from previous block and turn, join yarn to top of beg ch of previous block with sl st (also can turn and sl st in each dc of previous block to beg ch), ch 3, 3 dc in ch-3 sp, sl st to top of next block.

Row 42 (Middle Blocks and Ending Block, WS): Ch 3, 3 dc in ch-3 sp, sl st to top of next block. Repeat across the row using the color chart for when to change color.

Repeat Row 42 through Row 73.  Row 74 only has a Starting block. 

Fasten off, weave in ends.

A close-up of a crocheted blanket with chunky yarn, featuring a corner to corner crochet pattern in white, burgundy, pink, and gray colors, laid out on a light wooden surface. -Marly Bird

EDGING

Round 1: Join color C to any block on the RS of the blanket with a sl st, ch 3 (counts as dc), 2 dc in same block, * 3 dc (dc group made) in each block to corner, 3 dc in corner; repeat from * around, 3 dc in each block to beginning, sl st to top of beginning ch, fasten off, do not turn – 154 dc groups. 

Round 2: Join color MC with a sc in space between any dc group, *ch 3, sc in space between next  and previous dc group; repeat from * around to beginning, ch 3, sl st to first sc, fasten off, do not turn, place marker in each corner ch-3 sp. 

Round 3: Join color A to any ch-3 sp with sl st, ch 3 (counts as dc), 2 dc in same ch-3 sp, * 3 dc in each ch-3 sp across to corner ch-3 sp, 5 dc in corner ch-3 sp; repeat from * around, 3 dc in each ch-3 sp across to beginning, sl st to top of beginning ch, fasten off. 

Final Thoughts: Let Your Stitches Dance โœจ

Thereโ€™s something truly magical about combining handmade love with a touch of ballet charm. Whether youโ€™re making this for a baby shower, a nursery centerpiece, or a sweet snuggle blanket for your little one, the Ballet Slippers Corner-to-Corner Crochet Blanket is sure to delight.

๐Ÿฉฐ So grab your hook, pick your colors, and let your stitches twirl like a prima ballerinaโ€”this is one project youโ€™ll be proud to show off and gift with love.

โค๏ธ Your BiCrafty Bestie,
Marly Bird

A cartoon avatar of a person with glasses and a brown bun smiles warmly. Their green shirt and black jacket add a stylish touch, while colorful hearts surround them like loving temperature blankets, stitching together an aura of love and positivity. -Marly Bird

Frequently Asked Questions

What makes the Ballet Slippers baby blanket special?

This is a C2C (corner-to-corner) baby blanket with a charming ballet slipper motif worked into the graphghan design! The corner-to-corner construction creates that distinctive diagonal pixel art look, and the ballet slipper design makes it a beautiful, unique gift for dance-loving families or anyone who wants something more distinctive than a plain blanket. It's a heartfelt handmade piece that combines the satisfying C2C technique with a sweet, recognizable motif.

Do I need to know how to read a C2C chart to make this blanket?

Yes! This blanket is worked from a color chart where each square represents one C2C block. You'll need to understand basic C2C construction (increasing to the center, then decreasing) and how to follow the color chart to place the ballet slipper motif correctly. Marly has a BiCrafty Bootcamp lesson on C2C crochet on the blog if you need to learn the technique first. The pattern itself will walk you through the specific row-by-row instructions for the blanket, but having basic C2C familiarity first makes the experience much smoother.

What colors are used for the Ballet Slippers blanket?

Check the pattern for the specific color recommendations! Classic ballet slippers come in soft pink, blush, or champagne tones… so the motif likely uses those shades against a contrasting background. You can absolutely substitute colors to match a nursery theme, team colors, or personal preference. The slipper motif will be most recognizable if you choose a good contrast between the slipper color and the background color. Soft pastel combinations work beautifully for baby gifts.

What size does this blanket come in?

C2C blankets are naturally adjustable based on how many blocks you work! The standard baby blanket size (around 36 to 40 inches square) is typically the target for these patterns. The graphghan motif is designed to fit within a specific block count that creates the right proportions… check the pattern for the recommended final dimensions and block count. To make the blanket larger, you'd need to adjust the borders or add plain blocks around the motif, and potentially adjust the motif placement on the chart.

What yarn is best for a C2C baby blanket?

Machine washable is essential for anything going to a baby! Worsted weight acrylic in the colors you want is the most practical choice… soft, durable, affordable, and perfectly suited to C2C construction. Caron Simply Soft, Red Heart Soft, or Lion Brand Baby Soft are popular choices for soft, washable baby blankets. Make sure your two (or more) colors are from the same weight category so all blocks are the same size. Buying from the same dye lot for each color ensures color consistency throughout the blanket.

Filed Under: Crochet, Free Patterns, Marly Bird Premium Patterns, Our Free Patterns, Pattern, Uncategorized

Easy ‘Know Your Worth’ Knit Cocoon Cardigan Pattern

June 19, 2025 By Marly Bird 2 Comments

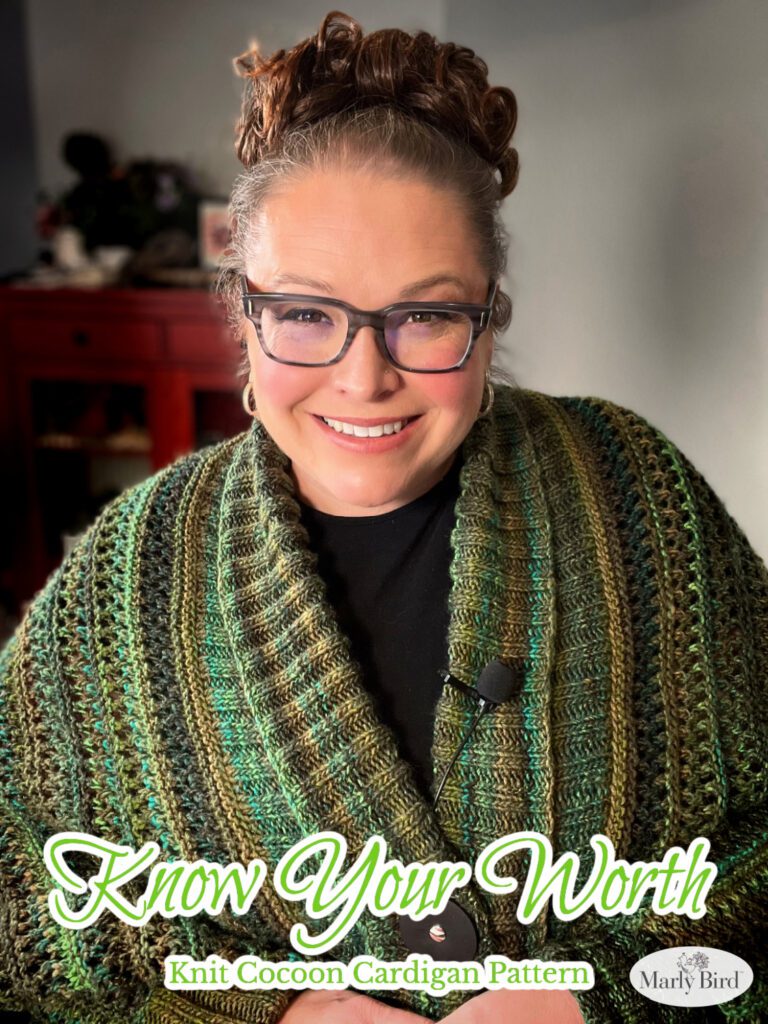
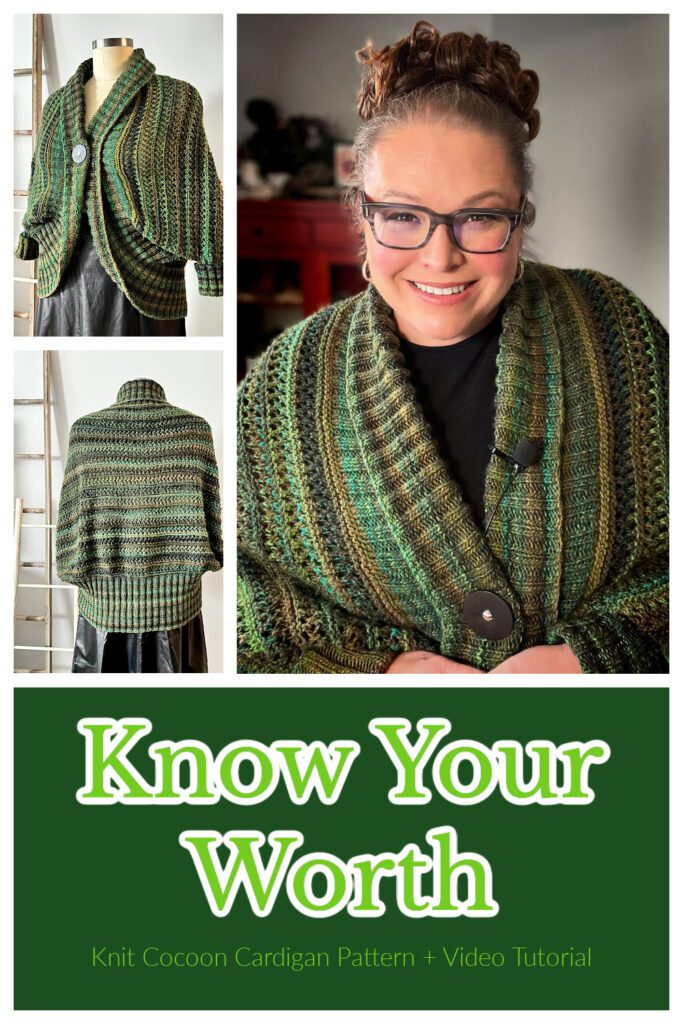
Knit your way to comfort with Marly Bird's ‘Know Your Worth' Knit Cocoon Cardigan Pattern + video tutorial. This easy knit sweater pattern is perfect for knitters of all levels. With simple knit lace and a big comfy ribbed collar, learn how to knit a cardigan that's as cozy as it is beautiful.

This pattern is a beautiful blend of simplicity and elegance, with clear, step-by-step instructions that make it accessible to knitters who are just beginning to explore garment creation. At the same time, its rhythmic stitching and engaging construction will keep the more experienced knitter's interest piqued.

If you love the Kaleidoscope Poncho or the Sycamore Knit Ruana, you will love this.

Let the ‘Know Your Worth' Knit Cocoon Cardigan be your next beloved project, and take pride in wearing a garment that's as unique as you are. Dive into the pleasurable world of knitting with Marly Bird and discover the profound joy of creating something truly your own.

Know Your Worth Knit Cardigan by Marly Bird.

This post contains affiliate links.

Cozy Crafting with Marly Bird's Knit Cocoon Cardigan

Hi, it's me, Marly, your BiCrafty Bestie and I have to tell you, never before have I nonchalantly worn a sample piece in a video and received SO.MANY.REQUESTS FOR THE PATTERN! Yes, from the moment I opened up the box from my contractor (thanks Cryssi) and pullout out this snuggle worthy cardigan I knew I was in LOVE with it. I loved the yarn, I loved the oversized cocoon cardigan shape, and most certainly loved the fit. You better believe that I have have worn the ‘Know Your Worth' sweater more than any other of my designs in the last two months.

And now, you get to make one too! Be prepared my friends. This knits sweater is one you will want to cuddle in immediately. So, get ready to create a huggable masterpiece. It's not just a knit pattern; it's your next favorite thing to wear on a chilly day!

View this post on Instagram

A post shared by Marly Bird (@themarlybird)

Favorite this pattern on Ravelry and Queue it up to make.

Adding this pattern to your queue and favoriting it on Ravelry helps you not only keep track of the patterns you like and want to make, but it helps designers get their patterns noticed by other Ravelry members who might not have seen the sweater.

Favorite This Pattern on Ravelry - Marly Bird

You can purchase on Etsy or Ravelry or Shopify.

>> Get the Pattern on Etsy <<
Know Your Worth Knit Cocoon Cardigan Pattern plus Video Tutorial by Marly Bird - Collage of images showing the pattern on Marly, and on a mannequin showing the front and the back views

Why Everyone is Talking About This Knit Shrug

Call it a cocoon, a cardigan, a shrug, or a big comfy sweater, you are going to love to knit it and wear it. Why? Well, let me tell you.

Just Right for Knitters at Every Level

Are you a newer knitter who has only made washcloths, scarves, or maybe a blanket? No worries! This knitted sweater is perfect if you're just jumping into the magic that is knitting your own clothes. And if you've been knitting sweaters for ages, this easy knit sweater will be a fun, quick project for you. I like to say adventurous beginners will find acceptably challenging while more intermediate knitters (and experienced) will find this relaxing enough they can watch Netflix and chill out while knitting.

A Pattern That Fits All Body Types – Size Inclusive

This isn't your ordinary knitted cardigan. This pattern comes in sizes from small all the way to 5XL, making sure everyone gets to join in the knitting fun. There is a schematic to show the measurements of each size so you can choose if one size is better than another for you. Don't just rely on the S-M (L-2Xl, 3XL-5XL) sizeing. Choose what will fit you best. For example, I am really between a 2 extra large and a 3 extra large. I made the sample the largest of the sizes because I wanted it to fit me big. Having a tighter shrug was not the look I was going for and that is what helped me make my decision on sizing. You can do the same.

Simple Knit Stitches, Big Style

Afraid of knit lace stitches? There's no need! The ‘Know Your Worth' cardigan has a simple knit lace that looks fancy without all the fuss. As long as you make sure for every decrease there is a partnering increase, you will be just fine. In the video tutorial I do mention this, but it is worth repeating.

Not to menion, adding a lifeline to your knitting will help you SO MUCH. That way should you make a mistake you have a safty net to pull the stitches back to and fix a knit mistake.

Dramatic 2×2 Knit Big Comfy Ribbed Collar

Surely there is not worry about the dramatic 2×2 knit ribbed collar, right? Listen, I am here to tell you, in this pattern the stitches are picked up and knit around the cast on and bind off edge of the cocoon. In the video tutorial I show you how to pick up stitches with the circular needle. It is super easy to do and makes it so the collar is joined as you go (meaning – no extra sesaming).

I chose to use this technique because it creates a bold and striking ribbed collar that really makes a statement on any knitwear piece.

You most likely already know this but, the 2×2 pattern refers to alternating two knit and two purl stitches in a set sequence, resulting in a wonderfully textured and stretchy fabric.

What I love about the Dramatic 2×2 Knit Ribbed Collar is how it adds depth and dimension to any garment. Whether you're knitting a cozy sweater or a trendy scarf, this collar technique instantly elevates the design and gives it a modern edge. Plus, it's great for beginners and seasoned knitters alike – the repetitive pattern is easy to follow, but the end result looks like it was made by a pro.

Get Sleeves Without the Fuss

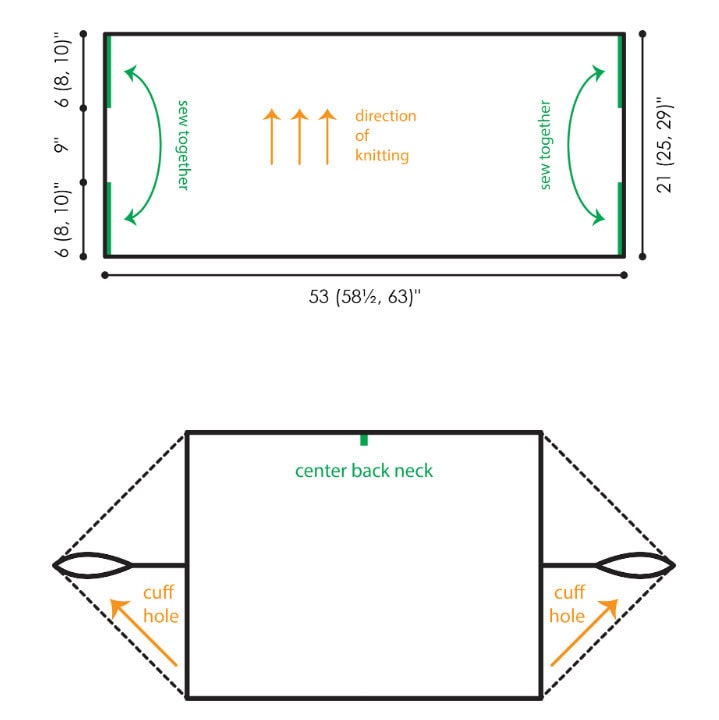
Okay, they might not really be sleeves but the way the cocoon is designed, once the lace knit rectangle is seamed, you will pick up stitches around an space you leave open near the fold. This opening is the cuff hole.

Just as you do with the collar, you will pick up stitches but this time you will use the double pointed needles since you will be knitting in the round and the opening is so small. The cuff is knit in the 2×2 ribbing as well and is made to be long and folded over.

The longer folded over cuff will help the sweater stay in place and really make you feel like you're wrapped in a hug!

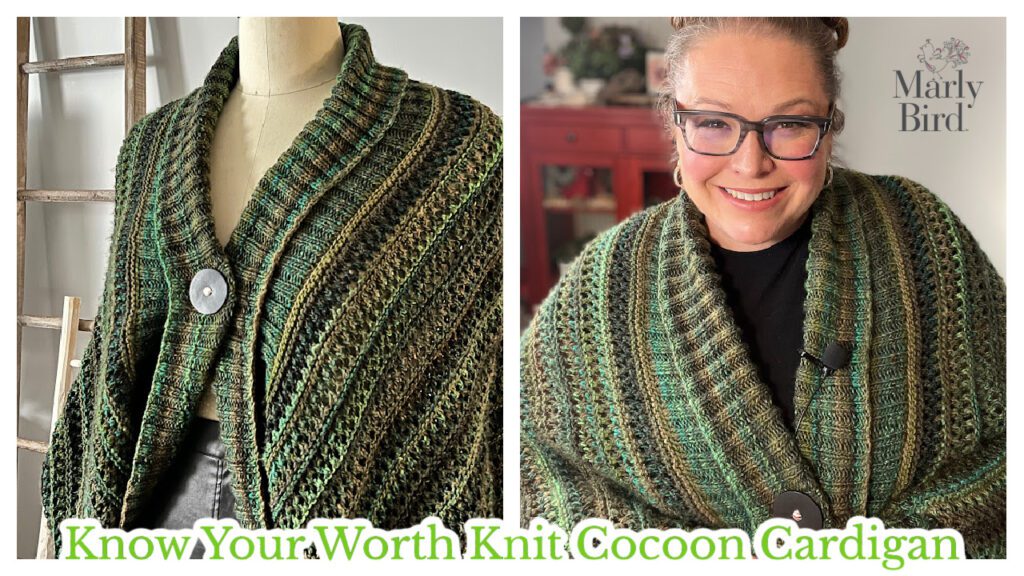
Know Your Worth Knit Cocoon Cardigan by Marly Bird. Collage of two images showing the knit sweater on Marly and on a mannequin

The Star of the Show: Sirdar Jewelspun Yarn

Choosing the perfect yarn for a knitting project is always a delightful part of the process for me. For the particular project I was working on, I had in mind the vibrant and colorful aesthetics of yarns like Noro, Chroma, or Unforgettable. So, when the kind folks at Sirdar sent me their yarn, Jewelspun, I was immediately drawn to its captivating blend of hues. The colors seamlessly transitioned into one another, creating a harmonious palette of complementary shades. The gradual color changes in the yarn were especially appealing as they allowed the design to shine without abrupt shifts or breaks in color. It felt like a match made in knitting heaven, and I knew right away that this yarn was perfect for the project at hand.

Using this beautiful yarn from Sirdar sparked my creativity and inspired me to bring my vision to life with its rich and dynamic colors. Knitting with it felt like a casual and enjoyable journey, where each stitch added to the overall beauty of the piece. The yarn's quality and color palette truly elevated the project, making it a joy to work on. In the end, the yarn not only met but exceeded my expectations, proving once again that the right choice of yarn can truly enhance the knitting experience and result in a masterpiece that brings me immense satisfaction.

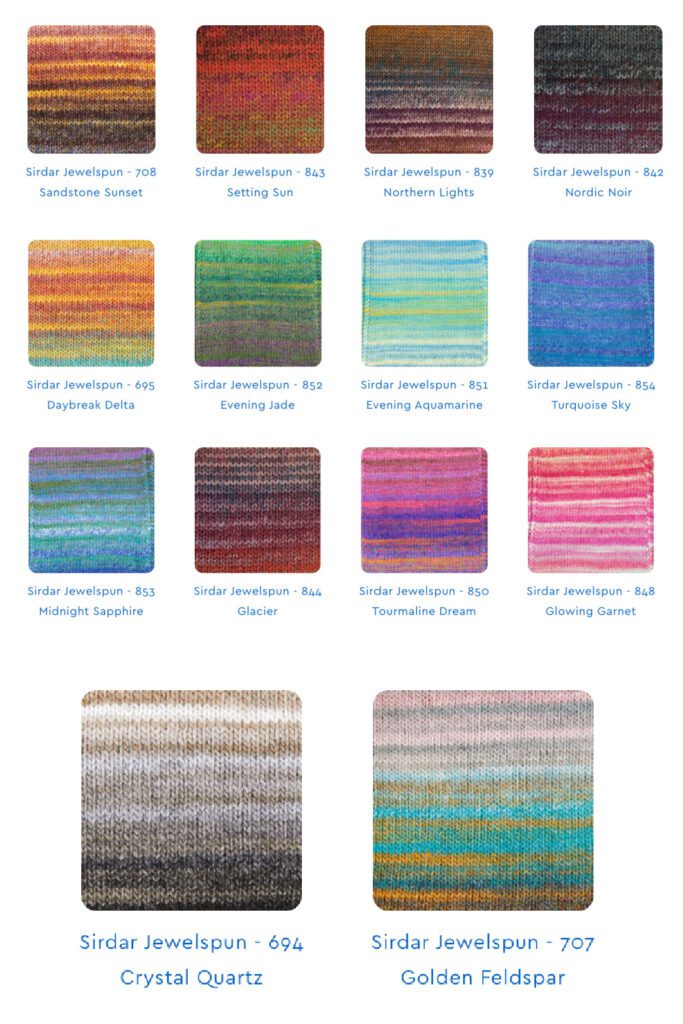
Variety of colorful knitted swatches in Sirdar Jewelspun yarn featuring stripes and gradients in various hues.
Purchase the Jewelspun Yarn at Jimmy Beans Wool

Colors That Make You Want to Knit More!

Jewelspun yarn is not available in many places I can find. But my friends over at Jimmy Beans Wool do carry it in a variety of colors. If you ask me, you can NOT go wrong with any of these choices. They are lovely. The color transition in one 200 gram ball of yarn as you work with it makes your needles go faster just to see what the next color is going to be. When all is said and done, your knitted sweater will look like a pro did it, even if you're just starting.

Your Step-by-Step Cast On to Cast Off Guide

Starting Off Strong

Wondering how to cast on? I prefer the long tail cast on for this design. The Long Tail cast-on places the stitches on the needle as if they are all knits. Therefore, when the work is turned you are looking at purls on the needle. Because of this, I often think of the very first row after this cast on as a WS row.

So, when using this cast on technique and working garter stitch for the first 4 rows, the transition looks nice. Plus, picking up stitches along the edge is easy when it is time to add the collar.

Keep Track of the Number of Stitches When Casting On

Let me share a neat little tip with you when it comes to casting on stitches for this cardigan or any knit project. Trust me, with the sheer number of stitches you need to cast on, it's no surprise that keeping track can be a bit of a challenge. But fear not, there's a simple solution!

What you can do is place a stitch marker every 20th stitch as you're casting on. This way, you create checkpoints that make it a breeze to count your stitches accurately. So, if you happen to lose count along the way (we've all been there!), you can easily backtrack to the nearest stitch marker and pick up right where you left off. It's a game-changer, I tell you! Give it a try next time you're starting a new cardigan project and thank me later. Happy knitting, y'all!

Making the Magic Happen

Once you've cast on for the cocoon cardigan, it's time to dive into the knitting sweaters process. this is where you will be introduced to the Lace Bands Stitch pattern. It is a big lace knit stitch and it is so easy that it is easy to make mistakes. So go slow and keep track of all the increases and decreases in a row.

Remember, you will NOT change the stitch count ever. If you get to the end of a row and have a different stitch count than the previous row something went wrong and you need to check your work. You can tink or unknit your project to find the mistake, or find the mistake on the next row and fix it there. Either way, make sure you don't just gloss over it. It is important you keep the correct number of stitches.

Also, I think it is important to note here that the yarnover lace portion of the stitch pattern will really GROW as you knit. So make sure you do a gauge swatch!!! If you don't, you could end up with a sweater that is too wide (because this pattern really stretches stitchwise and shrinks rowwise).

As always, I do guide you through making a swatch which will also guide you through working the Lace Bands stitch pattern. Once you get past the first 20 rows, this stitch pattern is easy to remember and knitting this cozy knit cocoon, will be cake.

Finishing the Knit Sweater Like a Boss

Not sure how do you cast off your knitting? Not a problem. This pattern actually has you bind off in pattern. All that means is you will work each stitch that is on the left hand needle in the stitch pattern it is supposed to be (if it is a knit, knit it; if it is a purl, purl it). Then, once you get two stitches on the right hand needle, you will make the second stitch away from the tip jump up and over the first stitch close to the tip.

I did make a youtube tutorial showing how to bind off in pattern. If you've never done it before I suggest giving it a look.

Caution: make sure you keep the stitches sized nice and consistent and DO NOT PULL ON THE YARN to tighten up your bind off will be too tight. I know of people who will bind off with a larger needle just to make sure they don't make their cast off too snug.

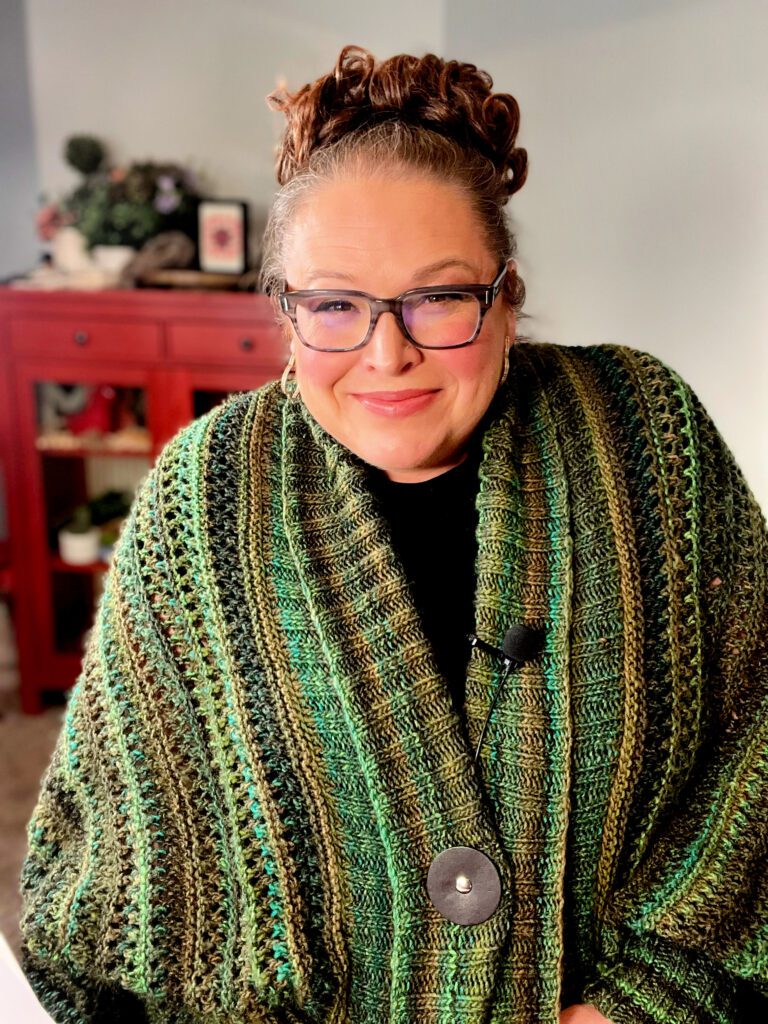
A smiling woman with her hair up in a bun, wearing glasses, showcases the "Know Your Worth Knit Cocoon Cardigan" by Marly Bird. The cardigan features a rich green tone with a subtle lace pattern, accentuated by a large button closure.

Know Your Worth Knit Cocoon Cardigan Information

This pattern is a Marly Bird Premium pattern and can be purchased here.

Purchase the Pattern on Etsy

All the details you need about the project can be found below as well as the YouTube Video Tutorial.

Know Your Worth Cocoon Cardigan

Designed by Marly Bird

SKILL LEVEL

Easy

MEASUREMENTS

To Fit Size

XS-M (L-2X, 3X-5X)

Finished Measurements

Body piece measures 53 (58ยฝ, 64)” [134.5 (148.5, 162.5) cm] x 21 (25, 29)” [53.5 (63.5, 73.5) cm] laid flat

Collar measures 7″ [18 cm] in length (or desired length)

Gauge 

12.5 sts and 32 rows = 4″ [10 cm] in Lace Bands pattern, after blocking.

Note: This stitch pattern tends to stretch widthwise and shrink lengthwise as the piece gets bigger. To account for this, when blocking your gauge swatch, pull it horizontally before pinning.

MATERIALS

Yarn 

Sirdar, Jewelspun (100% Acrylic, 546 yds / 500 m, 7.05 oz / 200 g CYCA #4 worsted) 

4 (4, 5) balls: #0845 Golden Green

Needle

U.S. 7 [4.5 mm] 60โ€ [152.5 cm] circular needle and double-pointed needles in same size, or size required for gauge

Note: Cocoon Body is worked back and forth in rows; Collar and Cuffs are worked circularly.

Notions 

Removable stitch markers, tapestry needle, blocking supplies, Jul Leather Pedestal Button Closure (optional)

Video Tutorial

More Than Just a Sweater

The ‘Know Your Worth' cardigan is more than a knitted sweater pattern โ€“ it's a doorway to more knitting adventures. Marly's got tons of knit patterns waiting for you, from knit shrugs to full-on sweaters.

GROW

To Unlockย Exclusive Subscriber Contentย click the Box below and join for free by simply adding your email and creating a password! If you are having troubles, clear your cache or reset your password or login to the Grow Publisher Portal.

>> Learn More About Grow Here <<

I'm thrilled to share this amazing pattern with you, many patterns on my blog are absolutely free! I kindly request that you don't copy and paste or distribute this pattern. Prefer an ad-free experience? Buy a digital PDF pattern for a small fee from one of my online stores for a seamless crafting journey. 

I appreciate your support and readership. You are the reason I can keep doing what I love and sharing it with others. So, thank you from the bottom of my yarn-loving heart! Disclosure: This post contains affiliate links, meaning I get a commission if you decide to make a purchase through my links at no cost to you.

KNOW YOUR WORTH KNIT COCOON FREE PATTERN

ABBREVIATIONS

K โ€“ Knit

K2tog – Knit Two Stitches Together

P โ€“ Purl

RS – Right Side

St(s) โ€“ Stitches

WS – Wrong Side

Yo – Yarn Over

SPECIAL STITCHES 

Ssk (Slip, Slip, Knit): Slip 2 stitches, one at a time, as if to knit. Insert left hand needle into the front of these two stitches and knit them together from this position (1 stitch decreased)

PATTERN STITCHES 

Lace Bands

Worked over an even number of sts (minimum 8).

Rows 1-4 (begin RS): Knit.

Row 5: K2, * K2tog, yo; repeat from * to last 2 sts, k2.

Row 6: K2, p to last 2 sts, k2.

Row 7: K2, * Yo, ssk; repeat from * to last 2 sts, k2.

Row 8: K2, p to last 2 sts, k2.

Row 9: K2 * K2tog, yo; repeat from * to to last 2 sts, k2.

Row 10: K2, p to last 2 sts, k2.

Repeat Rows 1-10 for Lace Bands pattern.

2 x 2 Ribbing

Worked in the round over a multiple of 4 sts.

Every round: * K2, p2; repeat from * around.

NOTES

  • Directions are for size XS-M; changes for sizes L-2X and 3X-5X are in parentheses. When only one number is given then that number applies to all sizes.
  • The main body of the Cocoon is worked first in a rectangle shape. The short edges are then folded and sewn together to form the sleeve holes. The ribbed Cuffs and Collar are picked up from the main body and worked circularly.

VIDEO TUTORIALS

  • Long-Tail Cast-On >> Click Here for Video Help <<
  • Knit Stitch (continental style) >> Click Here for Video Help <<
  • Purl Stitch (continental style) >> Click Here for Video Help <<
  • How to Add Lifeline >> Click Here for Video Help <<
  • How to Knit Lace >> Click Here for Video Help <<
  • How to Tink >> Click Here for Video Help <<
  • How to Bury Ends >> Click Here for Video Help <<
  • How to Bind Off In pattern >> https://youtu.be/URPo9CA1duM << 
  • Full Tutorial- https://youtu.be/usfXpo0ImQA?si=2gvAK9qjxMQPPLHp

KNOW YOUR WORTH PATTERN

BODY

Cast on 166 (184, 200) sts.

Work in Lace Bands pattern until piece measures 21 (25, 29)โ€ [53.5 (63.5, 73.5) cm], ending after a pattern Row 4.

Note: This stitch pattern tends to stretch in width and shrink in length, so make sure it is pulled out widthwise and not lengthwise when deciding whether itโ€™s long enough to bind off.

Bind off all sts loosely.

FINISHING

Fold the piece widthwise (similar to a hotdog) so that the bind-off edge aligns with the cast-on edge. Begin whip stitching from the edge towards the fold to close the short edge side of the body approximately 6 (8, 10)” [15 (20.5, 25.5) cm], leaving the remaining edge to the fold unseamed for attaching the cuff. 

Cuffs

With double pointed needles, pick up and knit 44 sts evenly around resulting cuff hole, beginning and ending at seam. Join round and mark first st.

Work in 2×2 Ribbing for 6″ [15 cm].

Bind off all sts loosely in rib pattern.

Work other cuff the same.

Collar

Working around the body opening of the cocoon, with RS facing and beginning at one side seam, pick up and knit 1 st for each cast-on st and bound-off st around, not including the sts inside the seams – 328 (364, 396) sts. 

Note: If you find your collar is pulling in too much, pick up an extra stitch every 7th stitch and you will get more fabric. Just make sure the final stitch count is divisible by 4. 

Work in 2 x 2 Ribbing until Collar measures 7โ€ [18 cm] in length or to desired measurement.

Bind off all sts loosely in rib pattern.

Weave in all loose ends.

Diagram showing sewing instructions for a Knit Cocoon Cardigan. The top image displays rectangle dimensions and sewing edges, while the bottom image shows folded edges with labeled arm cuff holes and center back neck. -Marly Bird

Happy Knitting!

โค๏ธ Your BiCrafty Bestie,
Marly Bird

A cartoon avatar of a person with glasses and a brown bun smiles warmly. Their green shirt and black jacket add a stylish touch, while colorful hearts surround them like loving temperature blankets, stitching together an aura of love and positivity. -Marly Bird

Frequently Asked Questions

What is the Know Your Worth Knit Cocoon Cardigan?

The Know Your Worth Cocoon Cardigan is a free knit cocoon-style cardigan pattern by Marly Bird. It has that gorgeous oversized, enveloping silhouette that wraps around you like a warm hug… open in the front, wide flowing sleeves, cozy and relaxed. It's labeled “easy” which means the stitch work is accessible, and the cocoon construction is typically simpler than a set-in sleeve cardigan because the shaping is minimal. The kind of sweater you'll reach for constantly.

What skill level do I need to knit this cardigan?

It's designed to be accessible… the “easy” label means you won't encounter complicated shaping, fussy stitch patterns, or complex construction. If you're comfortable with basic knit and purl, working in rows, and some light seaming… you're in good shape. Cocoon cardigans are often recommended as “first sweater” projects because the forgiving silhouette means fit doesn't need to be as precise as a structured garment. A great confidence-builder for knitters ready to try their first cardigan.

What yarn should I use for the Know Your Worth Cardigan?

Check the pattern materials section for the specific recommendation. Cocoon cardigans need yarn with good drape so the fabric flows beautifully rather than standing away from the body. Worsted or DK weight in a soft wool, wool blend, or smooth acrylic works well. The fiber content affects warmth and drape significantly… a bamboo blend or cotton blend gives more of a spring/fall weight cardigan, while a wool blend is cozy for winter. Choose based on when you want to wear it!

What sizes does this cardigan come in?

Marly typically includes a generous size range in her sweater patterns… check the pattern for the specific sizes available. The cocoon silhouette is naturally forgiving across a wide range of body types because it's designed to drape rather than fit closely. You have some flexibility in choosing your size based on how much ease you want… more ease for a very relaxed, wrapped look, less ease for something slightly more fitted through the shoulders.

Can I make this cardigan with bulky yarn for a faster knit?

Substituting a heavier yarn is possible but changes the finished look significantly. A bulkier cocoon cardigan will be warmer, heavier, and chunkier in texture. The drape will be different… heavier yarn creates a stiffer cocoon rather than a flowy one. If you go up in weight, you'll need to recalculate based on your new gauge and may need to adjust stitch counts. Always swatch when substituting yarn weights for a garment. But if you love a chunkier aesthetic and want a faster knit… it's a fun experiment!

Filed Under: Knitting, Marly Bird Premium Patterns, Pattern, Uncategorized Tagged With: badge-new-pattern

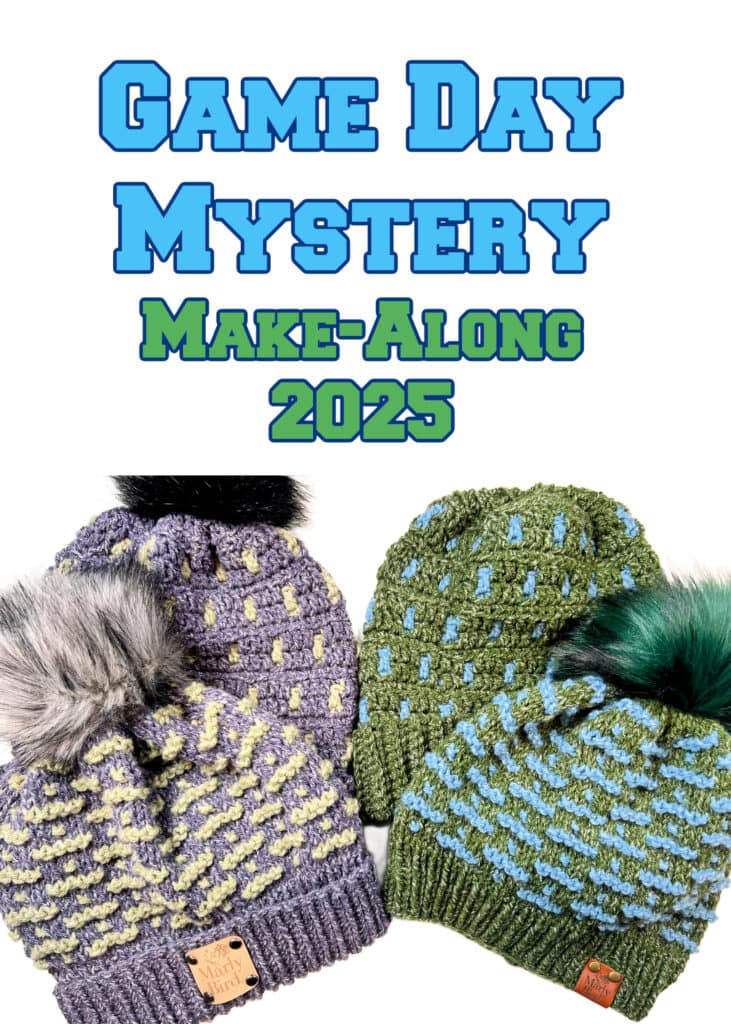
Game Day Mystery Make-Along 2025

January 28, 2025 By Marly Bird 13 Comments

Get ready for Game Day Mystery Make-Along 2025. Join us for a thrilling mystery make-along event for knitters and crocheters on Super Bowl Sunday! The event is COMPLETELY FREE and open to ALL SKILL LEVELS.

Kick-off the event early Sunday morning, participants will receive ‘plays' and instructions for a secret knitting or crocheting project that will be revealed just before the start of the game.

Whether you're a die-hard football fan or just looking for something to do during the commercials, this event is the perfect way to mix crafting and athletic competition. Don't miss out on the fun, register now and get the printable supply list for the 2025 projects!

โญ๏ธ The free content for this event will remain up on the blog until Feb. 28, 2025

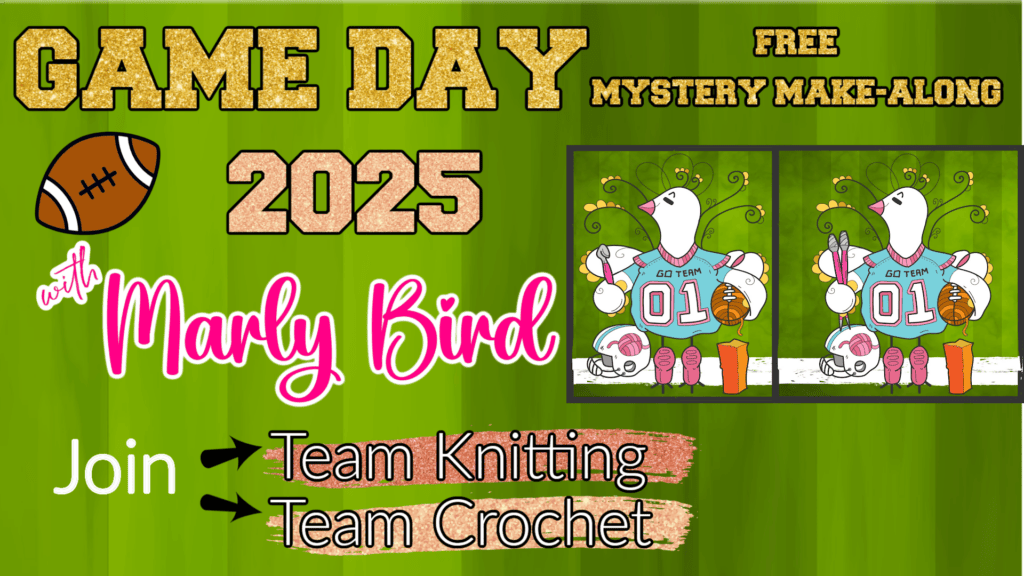
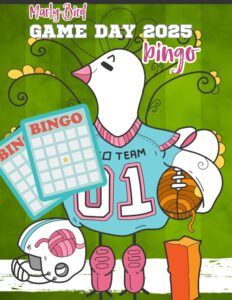
A 2025 Game Day poster with a "Free Mystery Make-Along," showcasing football graphics and a bird cartoon in a jersey. It invites you to join Team Knitting or Team Crochet, highlighting the name Marly Bird. -Marly Bird
Read more: Game Day Mystery Make-Along 2025

Affiliate Disclosure: This post contains affiliate links. To learn more please visit my privacy policy here๐Ÿ’–

History of the Game Day Mystery Make-Along- ๐ŸŽ‰ A Tradition of Yarny Fun! ๐ŸŽ‰

Did you know this is our 8th annual Game Day Mystery Make-Along? Since 2018, we've been mixing the excitement of game day with the joy of crafting. Each year gets bigger and better, with more crafters joining in and amazing projects to make. Don't miss out on being part of this awesome tradition!

๐Ÿ“š Need More Info about Game Day? ๐Ÿ“š

Curious about what we've made in the past or need more details? Head over to our Game Day Mystery Make-Along page on MarlyBird.com. You'll find all the info you need and get a peek at our past projects.

Gradient yarn in shades of blue and teal, displayed for a knitting or crochet project. Soft, smooth texture.

๐ŸŒŸ Free Fun for Everyone! ๐ŸŒŸ

This event is TOTALLY FREE make-along event and perfect for knitters and crocheters of all skill levels. Whether you're a total newbie or a yarn master, there's something exciting for you. And hey, if sports aren't your thing, no worries! You'll have a blast crafting with friends from all over, right from the comfort of your home.

Gradient yarn in shades of blue and teal, displayed for a knitting or crochet project. Soft, smooth texture.

๐Ÿงถ What's the Mystery? ๐Ÿ•ต๏ธโ€โ™€๏ธ

Get your knitting needles and crochet hooks ready for a thrilling adventure! We're not telling you what you'll be making – that's the mystery! Every other hour, beginning at 9 am EST, you'll get a new play with instructions for a super-secret project designed by Marly Bird and Robyn Chachula. The final reveal will be just in time for the Super Bowl, so you can show off your new creation!

๐Ÿ“บ Need a Helping Hand? ๐Ÿ“บ

We've got you covered with video tutorials for each part of the project that needs a bit more hands on instruction. Find them linked in your clue instructions and the first set of videos will be on the Marly Bird YouTube Channel. These videos are a game-changer for your crafting adventure!

Gradient yarn in shades of blue and teal, displayed for a knitting or crochet project. Soft, smooth texture.
A cartoon character on a couch enjoying snacks like chips and a sandwich while cheerfully holding knitting supplies.

To participate in this free event be sure to sign up. Once you are signed up, you will get a printable pdf of the both supply list, make sure you register for this event and the download will be sent to you.

Join the Team Here

๐ŸŽˆ Mark Your Calendars! ๐ŸŽˆ

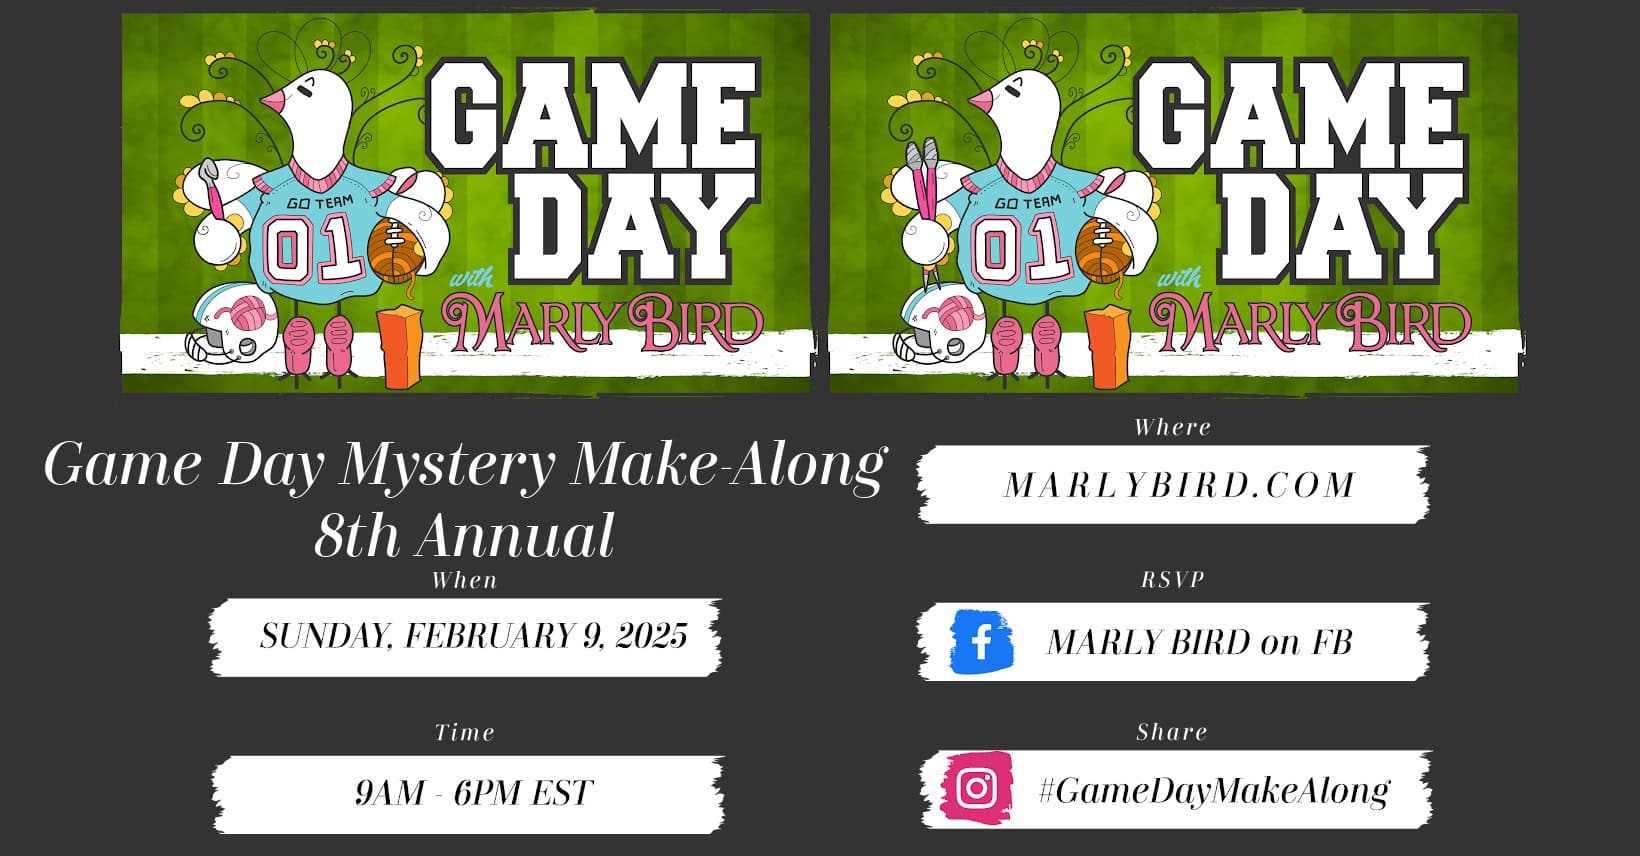
February 09, 2025, is the day! Join us online at MarlyBird.com from 9 am EST to 6 pm EST for a day of mystery, creativity, and tons of fun. We can't wait to see you there!

Let's get those yarns rolling and needles clicking! See you at the Game Day Mystery Make-Along with Marly Bird! ๐Ÿงถ๐ŸŒŸ๐Ÿˆ

ย ย 

Keep Scrolling for Sign Up Link and Supply List

Gradient yarn in shades of blue and teal, displayed for a knitting or crochet project. Soft, smooth texture.
Promotional graphics for 'Game Day with Marly Bird' MVP Packages. The top half shows two nearly identical illustrations side by side, featuring a whimsical cartoon bird wearing a sports jersey with '01' and 'GO TEAM' text, surrounded by sports equipment like footballs, basketballs, and weights. The bird is knitting with needles that have flowers on top. The background is a vibrant green field with a faint white border pattern. Below the illustrations, the text 'MVP PACKAGES' is written in large, ice-blue letters on a textured gray background resembling asphalt. large red banner diagonally across image with padlock images and in the vault written in white
Gradient yarn in shades of blue and teal, displayed for a knitting or crochet project. Soft, smooth texture.

๐Ÿ† MVP Upgrade – Get the VIP Treatment! ๐Ÿ†

๐Ÿšจ The MVP Packages Have Gone Into the Vault! ๐Ÿšจ

The Game Day MVP Packages are now locked away in the vault and are no longer available for purchase at this time. ๐Ÿˆ๐Ÿ”’

But donโ€™t worry! The game day patterns are still available, so you can grab them and keep stitching! ๐Ÿงถโœจ

๐Ÿ“Œ Twilight Trails Knit Mosaic Hat Pattern
๐Ÿ“Œ Moonlit Path Crochet Mosaic Hat Pattern

Stay tuned for future events and exclusive releasesโ€”you never know when the vault might open again! ๐Ÿ˜‰ 

Gradient yarn in shades of blue and teal, displayed for a knitting or crochet project. Soft, smooth texture.
Green graphic with a cartoon bird in football gear, knitting. Text: "8th Annual Game Day Mystery Make-Along." Date: February 9, 2025, 9AM-6PM EST. Visit marlybird.com and Facebook. Hashtag: #GameDayMakeAlong. -Marly Bird

Game Day 2025 Supply List

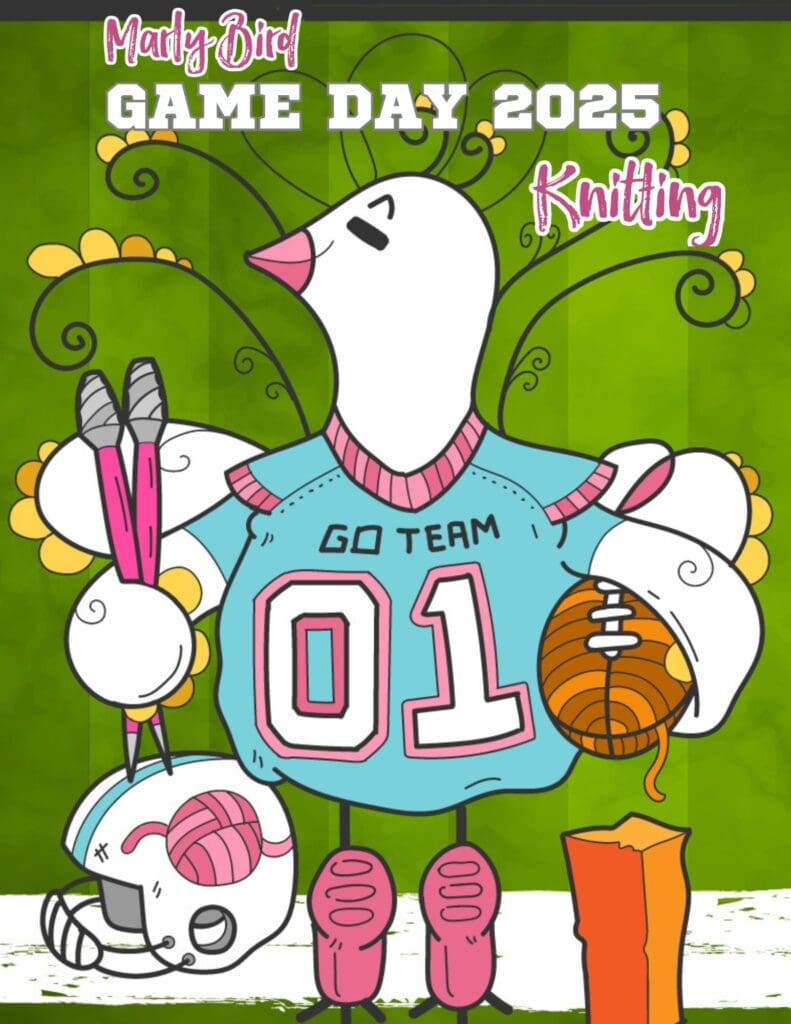
Illustration of a cartoon bird wearing a blue football jersey with the number "01" and holding a football-shaped ball of yarn. Text reads "Marly Bird Mystery Make-Along 2025 Knitting." A football helmet and knitting materials are nearby, embracing the spirit of Game Day creativity. -Marly Bird

Knitting Supply List

Yarn: worsted weight yarn, 2 contrasting colors.

  • Sample made with Herrschners Worsted 8 Heathers Yarn; 1 ball each of 2 different colors.

Knitting Needles: Size 9 (5.5 mm)– 16โ€ and set of 5 double pointed needles, Or any size to obtain gauge.

Notions:

  • Stitch Markers
  • Tapestry Needle
  • Tape Measure
  • Scissors
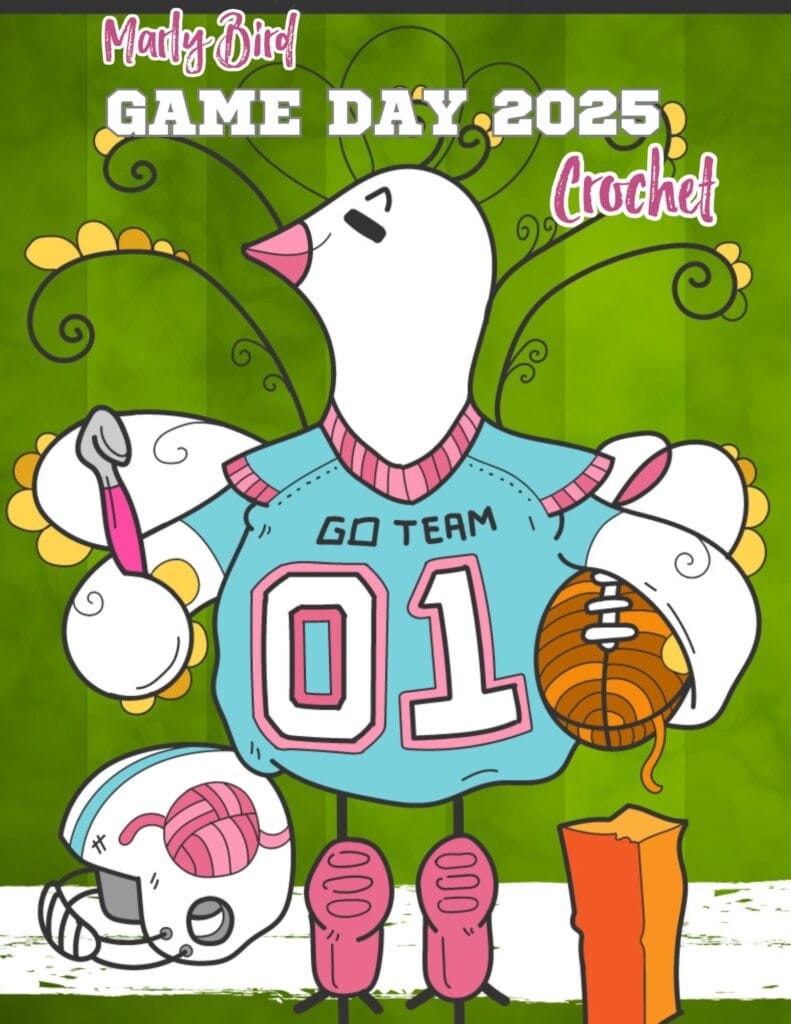
Illustration of a bird in a football jersey with "GO TEAM 01," crocheting a football amid flowers. Nearby are a helmet and goalpost. Text reads "Marly Bird Game Day Mystery, Make-Along 2025 Crochet. -Marly Bird

Crochet Supply List

Yarn: worsted weight yarn, 2 contrasting colors.

  • Sample made with Herrschners Worsted 8 Heathers Yarn; 1 ball each of 2 different colors.

Hook: Size I/9 (5.5 mm)–Or any size to obtain gauge.

Notions:

  • Stitch Markers
  • Tapestry Needle
  • Tape Measure
  • Scissors
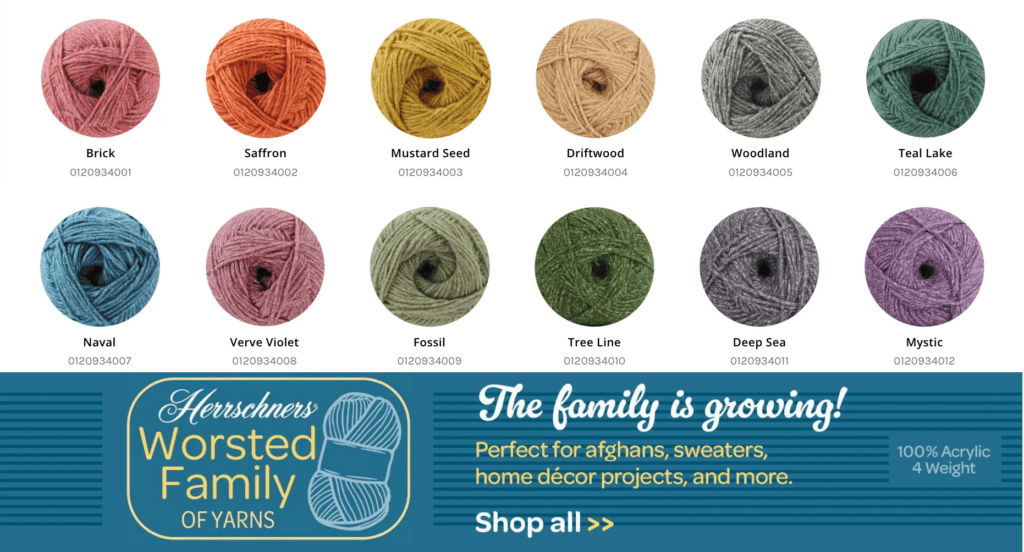
Image of various yarn colors labeled as Brick, Saffron, Mustard Seed, Driftwood, Woodland, Teal Lake, Naval, Verve Violet, Fossil, Tree Line, Deep Sea, and Mystic. Perfect for projects like a temperature blanket using unique stitches. Discover the "Herrschners Worsted Family of Yarns. -Marly Bird
Gradient yarn in shades of blue and teal, displayed for a knitting or crochet project. Soft, smooth texture.

Game Day Mystery Make-Along 2025 Prizes

We have teamed up with some awesome vendors to bring you prizes for this year's Game Day!!! Keep your eye out in the Marly's Minions: A Marly Bird Bicrafty Community Facebook group to enter***!!

Also, last year we introduced MVP giveaways and we are bringing it back this year! 

Our โ€œrefereesโ€ (the Marlyโ€™s Minion Modmins) will nominate โ€œplayersโ€ (YOU!) for six specific categories listed below. Each of these players will get 1 free product of choice from the Marly Bird House!! 

  1. Sportsmanlike Conduct – answering othersโ€™ questions and generally being helpful
  2. The Cheerleader – someone who is going above and beyond to encourage other โ€œplayersโ€ and boost morale
  3. The Flash – someone who finishes so quickly they make MULTIPLE projects
  4. The Underdog – this person faces setbacks but continues to persevere
  5. The Rookie – someone who is new to the craft they chose (knit or crochet) and shows up and works hard to finish
  6. MVP – this is the player who essentially embodies it all – helpfulness, efficiency, kindness, and morale boosting

GRAND PRIZE – To Be Announced

all players are eligible for this prize! Just post your finished item in the Facebook thread (or email to contact@marlybird.com if you do not have Facebook). The winner is chosen entirely at random from the finished item threads and emails!

Winners will be chosen on February 11th. We will reach out to the winners in the Minions Group. We will leave a comment on your post to identify you as a winner ๐Ÿ™‚

***This giveaway is VOID where prohibited and limited to the continental US. Giveaway Terms and Privacy Notice is at the end of this blog post***

โ€œIt's not whether you win or lose, it's how you play the game.โ€ 

โ€• Grantland Rice

Gradient yarn in shades of blue and teal, displayed for a knitting or crochet project. Soft, smooth texture.

Game Day Mystery Make-Along

โžก๏ธ Get the Game Day Make-Along โ€œPlaysโ€ Here โฌ…๏ธ

โญ๏ธ The free content for this event will remain up on the blog until Feb. 28, 2025

Be sure to come back EVERY HOUR from 9 am EST to 6 pm EST on Sunday, February 09, 2025 to see the new play for that hour.

The link to the play will be added to the time below. Simply CLICK the time you want.

๐Ÿ“Œ Twilight Trails Knit Mosaic Hat Pattern
๐Ÿ“Œ Moonlit Path Crochet Mosaic Hat Pattern

9 am Play 1:

โญ๏ธ9 am Crochet Play >>click here<<

โญ๏ธ9 am Knit Play >>click here<<

11 am Play 2:

โญ๏ธ11 am Crochet Play >>click here<< will be live at 11:00

โญ๏ธ11 am Knit Play >>click here<< will be live at 11:00

1 pm Play 3: *MVP has a live Q&A Event at this hour @ 1:15pm EST (details in MBH)*

โญ๏ธ1 pm Crochet Play >>click here<<

โญ๏ธ1 pm Knit Play >>click here<<

3 pm Play 4:

โญ๏ธ3 pm Crochet Play >>click here<< this link will open at 3pm

โญ๏ธ3 pm Knit Play >>click here<< this link will open at 3pm

5 pm Play 5:

โญ๏ธ5 pm Crochet Play >>click here<<

โญ๏ธ5 pm Knit Play >>click here<<

6 pm Play 6: BONUS

โญ๏ธ For Both Knit and Crochet — https://youtu.be/tl0sa3A_v38

Two cartoon characters celebrating with raised hands, surrounded by colorful text saying "YOU DID THE THING!!
Congratulations! Be sure to share your finished projects!
Three knitted hats with pom-poms are displayed, showcasing colorful patterns in purple, green, and blue. Above them, the text "Game Day Make-Along 2025" shines in vibrant blue and green letters, inviting you to join the fun and creativity of this exciting event. -Marly Bird
Gradient yarn in shades of blue and teal, displayed for a knitting or crochet project. Soft, smooth texture.

WAIT, there is more! During the Game:

The fun doesnโ€™t stop once the game starts. Be sure to join us for a game of BINGO during the game. Just grab a card at the link below!

You can start marking as soon as the game starts, and there will be an entry thread in the Marlyโ€™s Minions FB page for your winning bingo cards.

All you need is either one regular BINGO, so horizontal, vertical, or diagonal!

Get the 2025 Bingo Card >>Click Here to Generate Card <<

Cartoon bird in a football jersey holds a football and bingo cards, with a helmet at its feet. Text reads, "Marly Bird Mystery Make-Along Game Day 2025 Bingo." Green background with abstract swirl patterns. -Marly Bird

Are you excited? Share with us on social media what yarn youโ€™re using and what colors you like ๐Ÿ™‚ Be sure to use #gamedaymakealong #mmmdi #marlybird in your posts.

Go Team!

Giveaway Terms and Privacy Notice

Giveaway Terms:

  1. Eligibility: Open to participants aged 18 and older. Void where prohibited by law.
  2. Data Collection and Sharing: By entering the giveaway, participants agree to provide their email addresses, which will be used for the purpose of administering the giveaway and shared with both MarlyBird.com and the giveaway sponsor. By entering, you consent to receive emails from MarlyBird.com and the sponsor, who may contact you for marketing purposes.
  3. No Purchase Necessary: Entry into the giveaway is free and does not require a purchase.
  4. Winner Selection: Winners will be selected at random and notified via the email provided. Odds of winning depend on the number of entries received.
  5. Responsibility: MarlyBird.com and Sponsor are not responsible for technical errors or failures that may affect entry.

Privacy Policy:

  • Data Usage: Email addresses collected will be used for the purposes of:
    • Administering the giveaway.
    • Sharing with MarlyBird.com for communications and marketing.
    • Sharing with the sponsor, who may also use the emails for marketing purposes.
  • Your Rights (CCPA and GDPR): If you are a resident of California or another region with specific data protection laws, you have the right to:
    • Know what data is collected about you.
    • Request deletion of your data.
    • Opt-out of data sharing with third parties.
  • Exercising Your Rights: To exercise these rights, contact us at contact@marlybird.com.

California and U.S. Compliance:

  • CCPA Compliance: This giveaway complies with the California Consumer Privacy Act. You will not be discriminated against for exercising your rights under the CCPA.
  • Wiretapping and Consent Laws: All data collection methods comply with applicable wiretapping and data interception laws. By entering, you provide consent for data collection and sharing as described.

General Legal Notes:

  • This giveaway is governed by the laws of Indiana.
  • MarlyBird.com and Sponsor reserve the right to modify or cancel the giveaway at any time.
  • Any disputes arising from this giveaway will be resolved under Indiana's laws.
  • Participants waive the right to participate in a class-action lawsuit.

Disclaimer for Restricted Areas: This giveaway is void where prohibited. If local laws in your region restrict participation or the sharing of data for marketing purposes, you are not eligible to enter.

Liability Release:

  • By entering, participants agree to release and hold harmless MarlyBird.com and Sponsor from any claims, damages, losses, or expenses resulting from participation or prize acceptance.

Frequently Asked Questions

What was the Game Day Mystery Make-Along 2025?

Game Day 2025 was Marly Bird's annual Super Bowl Sunday mystery make-along event! Participants received pattern clues (“plays”) throughout Super Bowl Sunday as they stitched along in real time with crafters around the world. The 2025 event featured a beautiful winter accessory pattern for both knitters and crocheters. Like all Game Day events, it was completely free, open to all skill levels, and designed to be a cozy, communal celebration of crafting on one of the biggest sports days of the year.

What did participants make in the 2025 Game Day event?

Check the post for the specific pattern reveal from 2025! Each year's Game Day reveals a winter accessory… typically a hat, cowl, mitt, or similar piece. The mystery element means the exact project isn't revealed until game day, which creates a wonderful communal excitement as everyone discovers what they're making at the same time. Past events have produced cowls, fingerless mitts, and various hat styles. The 2025 specific reveal and pattern details are in the full post.

Can I still make the 2025 Game Day pattern if I missed the event?

Yes! The patterns from past Game Day events remain available. The live community aspect happened on Super Bowl Sunday 2025, but the pattern resources are still accessible. You can work through the pattern at your own pace and share your finished object on social media with the event hashtag or in Marly's Minions Facebook group. The community around past Game Day events is warm and supportive… people post their finished objects long after the live event ends.

How is the 2025 event different from the 2026 Game Day Make-Along?

Each year's Game Day features a different pattern and sometimes different participating hosts. The core format stays the same… Super Bowl Sunday, free, mystery reveal, both knit and crochet versions, community vibes. The specific project changes year to year. If you participated in 2025 and loved it, 2026 brings a fresh new pattern. If you missed 2025, there's a whole new Game Day experience waiting in February 2026. Both years' patterns are available for making at any time!

Do I have to watch football to participate in Game Day events?

Not one bit! The “game day” theme is more of a fun framing for a day-long crafting event that falls on Super Bowl Sunday. Plenty of participants spend the day with their craft and completely ignore the game. Others stitch during the commercials. Some watch the game and craft simultaneously. The event is about the community of crafters coming together for a shared making experience… football is just the occasion, not the requirement. You're there for the yarn, not the yardage.

Filed Under: Crochet, Knitting, Make-Alongs, Pattern, Uncategorized

Dinosaur Plush Crochet Pattern: Create Your Very Own Rori the Raptor

January 7, 2025 By Marly Bird Leave a Comment

Ever wanted to create a lovable dinosaur plushie like Rori the Raptor? Youโ€™re in the right spot! In this guide, Iโ€™ll walk you through the dinosaur plush crochet pattern, list the materials youโ€™ll need, and provide step-by-step instructions to bring Rori to life.

Whether youโ€™re a fan of a free crochet pattern or exploring amigurumi popularity, this project is perfect for all skill levels. Letโ€™s get stitching and make your very own Rori the Raptor!

A collage featuring a crocheted dinosaur plush. The top left image shows it outdoors, while the top right highlights its face. Below, a person holds the dinosaur and smiles. Text reads, "Rori the Raptor: Free Crochet Pattern. -Marly Bird

Affiliate Disclosure: This post contains affiliate links. To learn more please visit my privacy policy here๐Ÿ’–

Key Takeaways

  • Rori the Raptor is a new amigurumi project for all skill levels
  • use soft blanket yarn for a cuddly and adorable plushie
  • customize Rori with different colors and unique accessories
  • join our crafting community to share tips and celebrate progress
  • access free resources and patterns to start your crochet project
  • Ad-free pdf available from Etsy, Shopify or Ravelry
Etsy
Shopify
Ravelry

Introduction to Rori the Raptor as a Dinosaur Plush Crochet Pattern

Hey there! I'm so excited to introduce you to Rori the Raptor by Megan Kreiner for MarlyBird.com, our newest easy amigurumi project, for those who have tried making stuffies before. Whether you're a seasoned crocheter or just an adventurous beginner, this dinosaur plushie is perfect for honing your skills. With the rising amigurumi popularity, projects like Rori are gaining more attention. Be sure to check out our free crochet unicorn pattern for more creative ideas.

Creating Rori is a fun way to explore different techniques, similar to the crochet menorah pattern or a free crochet unicorn pattern. With the rising amigurumi popularity, you'll find the pattern clearly written and straightforward, making the process enjoyable from start to finish with easy amigurumi. You will not find yourself lost in unrecognizable abbreviations like many other crochet stuffie patterns available by others.

Using soft blanket yarn, Rori turns out cuddly and adorable, perfect for kids and adults alike. Plus, if you love unique designs, you'll appreciate how this easy amigurumi stands out, much like a holiday armadillo amigurumi pattern or a free crochet unicorn pattern adds charm to your collection.

Five skeins of Bernat yarn are displayed in a row, perfect for crafting a dinosaur plush like Rori the Raptor. Featuring types like Blanket Stripes, Teal, Tweeds, Baby White, and Pink, each yarn's label showcases unique textures and colors ideal for your next crochet pattern. -Marly Bird

Join our crafting community and bring Rori the Raptor to life with others, sharing tips on easy amigurumi and celebrating each other's progress along the way while discussing amigurumi popularity!

Materials Needed for Your Dino Crochet Stuffie

To create Rori the Raptor, you'll need specific materials. I'll outline the recommended yarn types for your dino toy, essential tools for crocheting a crochet boy stuffed animal using easy amigurumi techniques, and additional supplies like optional large safety eyes for crochet to customize your stuffed animal. Whether you're inspired by “how to train your dragon” or just love dinos, these materials will ensure your plush turns out great. You might also explore other patterns like the free crochet unicorn pattern or the frog crochet pattern to expand your collection.

Recommended Yarn Types

When selecting yarn for your Rori the Raptor plushie, I always recommend going for a soft blanket yarn. It gives your crochet dinosaur that perfect cuddly feel, making it an ideal large stuffed animal for both kids and adults. Plus, the texture works wonderfully for adding those charming details to your raptorโ€™s features.

If you're aiming to create a vibrant crochet dino, consider using yarns in varying colors. This approach not only brings your plushie to life but also makes the crochet dinosaur stand out in any collection. Trust me, experimenting with different shades can make your Rori truly unique and eye-catching!

Yarn used on the sample is Bernat, Baby Blanket Sparkle (100% polyester, 220 yds / 201 m, 10.5 oz/ 300 g, CYCA# 6 super bulky), Color A: #71011 Limeade Sparkle, 3 balls; Color B: #71009 Freesia Sparkle, 1 ball. Herrschners,ย  Worsted 8 Yarn (100% acrylic, 489 yds / 448 m, 8 ox/ 226g, CYCA #4 worsted); Color C: White, small amount. Patons, Kroy Socks Yarn (75% washable wool/ 25% nylon, 166 yds / 152 m, 1.75 oz / 50 g, CYCA# 1 super fine); Color D: Red, small amount Color E: Coal, small amount.

Other yarns that would be a great substitute include Skwishy from Herrschners.

A young child smiles on a couch, holding colorful plush bears and a delightful dinosaur plush. Text reads, "Introducing Rori the Raptor by Herrschners. Soft & Totally Irresistible!" Nearby, discover an array of yarn and crochet patterns. -Marly Bird

Essential Crochet Tools for Amigurumi

Having the right crochet tools makes crafting your Rori the Raptor stuffie an large amigurumi stuffed animal a breeze. A comfy crochet hook suitable for your chosen yarn is essential, as it ensures your stitches are even and your tail turns out just right. I am a fan of hooks with large handles like those from TooShay Crochet.

A crochet hook with a colorful, patterned handle stands before a large ball of white yarn, set against a plain background. Nearby, the cheerful Rori the Raptor crochet pattern invites creativity and fun into your crafting journey. -Marly Bird

I always keep a set of stitch markers handy to keep track of your rounds and shape your dinosaur accurately. Additionally, the crochet menorah pattern is a great option for festive projects. I like having markers in many colors like these, but I also love to make my own markers and have a fun video tutorial for that as well.

In addition to hooks and markers, a good pair of scissors and a yarn needle are must-haves for any amigurumi project. Whether you're working on an amigurumi or a free crochet sweater pattern, these tools are essential:

ToolPurpose
Crochet HooksCreating consistent stitches for a smooth finish
Stitch MarkersTracking rounds and shaping the dinosaur's tail
Yarn NeedleWeaving in ends and assembling your plushie
ScissorsCutting yarn cleanly without fraying

Additional Supplies for Custom Features

To give Rori the Raptor some personality, you'll want to include custom features like large safety eyes for crochet or embroidered details. Choosing the right safety eyes not only makes your amigurumi stuffed toy safer for kids but also adds that adorable, lifelike expression that makes Rori stand out.

Here is a useful tool if you like to use safety eyes.

The eyes on Rori are very expressive and are made using yarn and a crochet hook. But I do love selecting eyes that capture the playful spirit of a triceratops or the fierce look of a tyrannosaurus to give each plushie its unique charm. You can make even more dinosaur crochet animals with Megan Kreiner's book, Dinosaur to Crochet: Playful Patterns for Crafting Cuddly Prehistoric Wonders.

Cover of "Dinosaurs to Crochet" by Megan Kreiner features two crocheted dinosaurs: a blue Stegosaurus in the foreground and Rori the Raptor in the background, with leafy plants and rocks around them. Text reads, "Playful patterns for crafting cuddly prehistoric wonders. -Marly Bird

Another essential item you'll need for your Rori the Raptor crochet project is fiberfill. This soft and lightweight stuffing material is perfect for giving your plushie its shape and a cuddly texture. Polyester fiberfill stuffing is easy to work with and helps ensure that Rori's body, limbs, and tail hold their structure while remaining soft and huggable. Be sure to stuff evenly and firmly, especially in the head and tail, to maintain a balanced shape. You can find fiberfill at most craft stores or online, and a small bag typically goes a long way for amigurumi projects like this one.


A vibrant crochet dinosaur plush with a bright yellow body and purple details is posed in a garden setting. The text reads "Rori the Raptor" in bold letters, showcasing this delightful crochet pattern. -Marly Bird

Relax & Knit
Upgrade to the Printable PDF

Beautifully formatted to print and relax while knitting. The paid pattern includes:

  • Easy Access: Download and print your pattern instantly to keep it handy.
  • No Ads: Focus entirely on your crochet project without distractions.
  • Detailed Instructions: Includes step-by-step guidance for every part of Rori.
  • Portable: Take the PDF on the go with your tablet or phone.
  • Professional Layout: Clean formatting makes it easy to follow and reference.
  • A Rewarding Finish
Get The Ad-Free PDF
Etsy
Shopify
Ravelry
Collage of a crochet raptor plush in yellow and pink, showcasing close-ups of its claws and face. A person holds Rori the Raptor, smiling. The text reads: "Rori the Crochet Raptor, free Dinosaur Plush Crochet Pattern. -Marly Bird

Step-by-Step Instructions for Crocheting Rori the Raptor

In this section, you will find the full written instructions for crocheting Rori the Raptor. Letโ€™s dive in and bring Rori to life step by step

SKILL LEVEL

Adventurous Beginner

MEASUREMENTS

Finished Measurements

Gauge 

7 sc x 8 rounds = 4โ€ [10 cm] x 4โ€ [10 cm]; use any size hook to obtain the gauge. 

MATERIALS

Yarn 

๐Ÿงถ Bernat, Baby Blanket Sparkle (100% polyester, 220 yds / 201 m, 10.5 oz/ 300 g, CYCA# 6 super bulky)ย 

Color A: #71011 Limeade Sparkle, 3 balls

Color B: #71009 Freesia Sparkle, 1 ball

๐Ÿงถ Herrschners,ย  Worsted 8 Yarn (100% acrylic, 489 yds / 448 m, 8 ox/ 226g, CYCA #4 worsted)ย 

            Color C: White, small amount

๐Ÿงถ Patons, Kroy Socks Yarn (75% washable wool/ 25% nylon, 166 yds / 152 m, 1.75 oz / 50 g, CYCA# 1 super fine)

Color D: Red, small amount

Color E: Coal, small amount

Crochet Hook

N/13 [9.0 mm] use with super bulky yarn or hook needed for gauge 

G/6 [4.0 mm] use with worsted weight yarn

F/5 [3.75 mm] use with sock weight yarn

Notions 

Dinosaur is 25โ€ [63.5 cm] body circumference by 34โ€ [86.5 cm] long (nose to tail)

Fiberfill

Stitch Markers

Tapestry Needle

CROCHET ABBREVIATIONS

Blo – Back loop only

Ch – Chain(s) 

Dc – Double Crochet

Hdc – Half Double Crochet

PM – Place Marker

RS – Right Side 

Sc – Single Crochet (with yarn over not yarn under)

Sl st – Slip Stitch

Sp(s) – Space(s) 

St(s) – Stitch(es)

WS – Wrong Side

SPECIAL STITCHES 

โญ๏ธ Single Crochet 2 Together (sc2tog): *Insert hook into indicated stitch, yarn over and pull up a loop; repeat from * in next stitch indicated, yarn over and draw through all 3 loops on hook. (1 decrease)

โญ๏ธ Front Post Single Crochet (fpsc) : Insert hook from front to back to front around the post of the stitch indicated, yarn over and pull up a loop, yarn over and draw through the loops on hook.

โญ๏ธ Running Stitch: Insert needle from front to back, *bring the needle up again from back to front one stitch length away, insert needle from front to back one stitch length away; repeat from * across work as indicated in pattern. 

NOTES

  • Dinosaur is worked in pieces and seamed together. Details are added last.ย 
  • Body parts are worked in continuous spiral rounds that are not joined at the end of the round.ย 
  • Use a stitch marker to mark the first stitch of each new round throughout the project.ย 
  • Change colors when 2 loops are left on the last stitch of the old color.ย  Fold in the new color to complete the stitch and start using the new color.ย 

VIDEO TUTORIAL

  • Weaving in ends >> Click Here for Video Help <<

GROW

To Unlockย Exclusive Subscriber Contentย click the Box below and join for free by simply adding your email and creating a password! If you are having troubles, clear your cache or reset your password or login to the Grow Publisher Portal.

>> Learn More About Grow Here <<

I'm thrilled to share this amazing pattern with you, many patterns on my blog are absolutely free! I kindly request that you don't copy and paste or distribute this pattern. Prefer an ad-free experience? Buy a digital PDF pattern for a small fee from one of my online stores for a seamless crafting journey. 

I appreciate your support and readership. You are the reason I can keep doing what I love and sharing it with others. So, thank you from the bottom of my yarn-loving heart! Disclosure: This post contains affiliate links, meaning I get a commission if you decide to make a purchase through my links at no cost to you.

Colorful crocheted dinosaur standing on grass. The text reads: "Rori the Crochet Raptor" and "Marly Bird free Dinosaur Plush pattern. -Marly Bird
Etsy
Shopify
Ravelry

RORI THE RAPTOR FULL WRITTEN FREE PATTERN

By Megan Kreiner for MarlyBird.com

FINGER

Make 4 

With color B, make an adjustable ring. 

Round 1: Ch 1, 4 sc in ring, place marker in first st (see notes), pull ring closed, do not join or turn (see notes)–4 sc.

Round 2: *Sc in next sc, 2 sc in next sc; repeat from * around–6 sc.

Round 3: Sc in each sc around, change to color A. fasten off color B.

Round 4: 2 Fpsc around each sc- 12 sc. 

Round 5: Sc blo in each sc around.

Round 6: *Sc2tog over next 2 sc; repeat from * around–6 sc.

Round 7-8: Sc in each sc around.

Fasten off color A, leaving long tail for seaming.

STARTING FINGER 

Make 2 

Work Finger to Round 7.

Round 8: Sc in next 3 sc, leaving remaining 3 sts unworked. Do not cut yarn. Continue to Hand and Arm

HAND and ARM

Make 2

{Note from Marly: Round 1 joins the starting finger to 2 more fingers and creates a new larger round that begins the hand.  We know this round sounds unusual, but trust us; go step by step and it will work out.}

Round 1 Continue with the starting fingerโ€™s yarn still attached, sc into the first st of any finger (this will become the center finger), sc in next 2 sts of same finger (leave remaining 3 sts unworked), sc into the first st of a second finger, sc in next 5 sts of second finger, sc in unworked 3 sts from center finger, sc in unworked 3 sts from starting finger – 18 sc (includes sts on starting fingerโ€™s last round). 

Round 2: *Sc in next 4 sts, sc2tog over next 2 sc; repeat from * around–15 sc.

Round 3: *Sc in next 3 sts, sc2tog over next 2 sc; repeat from * around–12 sc.

Round 4: Sc in each sc around.

Stuff hand and fingers 25% full.

Round 5: *Sc in next st, sc2tog over next 2 sc; repeat from * around–8 sc.

Rounds 6-8: Sc in each sc around.

Round 9: *Sc in next 2 sts, sc2tog over next 2 sc; repeat from * around–6 sc.

Round 10: *Sc in next st, 2 sc in next st: repeat from * around โ€“ 9 sc.

Round 11: *Sc in next 2 sts, 2 sc in next st: repeat from * around โ€“ 12 sc.

Round 12: Sc in each sc around.

Fasten off yarn and set arm aside.

Repeat for 2nd Arm.

Utilize the yarn tails between the fingers to patch up any holes in your work.

TOE 

Make 3 (two for the left foot, 1 for the right foot)

With color B, make an adjustable ring. 

Round 1: Ch 1, 4 sc in ring, place marker in first st (see notes), pull ring closed, do not join or turn (see notes)–4 sc.

Round 2: *Sc in next sc, 2 sc in next sc; repeat from * around–6 sc.

Round 3: Sc in each sc around.

Round 4: *Sc in next 2 sc, 2 sc in next sc; repeat from * around–8 sc.

Round 5: Sc in each sc around, change to color A. fasten off color B.

Round 6: 2 Fpsc around each sc- 16 sc. 

Round 7: *Sc blo in next 2 sc, sc2tog blo over next 2 sc; repeat from * around – 12 sc.

Round 8: *Sc in next sc, sc2tog over next 2 sc; repeat from * around–8 sc.

Round 9-10: Sc in each sc around.

Fasten off color A, leaving long tail for seaming.

RIGHT LEG TOE

Work toe to Round 9.

Round 10: Sc in next 4 sc, leaving the remaining 4 sts unworked. Do not cut yarn, Continue to Right Foot directions after making the Right Big Claw Toe. 

BIG CLAW TOE 

Make 2 (one for the left and one for the right foot)

With color B, make an adjustable ring. 

Round 1: Ch 1, 4 sc in ring, place marker in first st (see notes), pull ring closed, do not join or turn (see notes)–4 sc.

Round 2: *Sc in next sc, 2 sc in next sc; repeat from * around–6 sc.

Round 3: Sc in each sc around.

Round 4: *Sc in next 2 sc, 2 sc in next sc; repeat from * around–8 sc.

Round 5: Sc in each sc around.

Round 6: *Sc in next sc, 2 sc in next sc; repeat from * around–12 sc.

Round 7-8: Sc in each sc around.

Round 9: *Sc in next sc, sc2tog over next 2 sc; repeat from * around, change to color A. fasten off color B – 8 sc.

Round 10: 2 Fpsc around each sc- 16 sc. 

Round 11: *Sc blo in next 2 sc, sc2tog blo over next 2 sc; repeat from * around – 12 sc.

Round 12: *Sc in next sc, sc2tog over next 2 sc; repeat from * around–8 sc.

Round 13-14: Sc in each sc around.

RIGHT LEG BIG CLAW TOE

Fasten off Big Claw Toe and set aside

LEFT LEG BIG CLAW TOE

Round 14: Sc in next 4 st, leaving remaining 4 sts unworked. Do not cut yarn. Continue to Left Foot.

FOOTย 

Make 2 (1 left foot and 1 right foot)

{Note: Round 1 joins the big claw to 2 more toes and creates a new larger round that begins the foot.}

FOR LEFT FOOT:

Round 1: Continue with the left big claw toeโ€™s yarn still attached, sc into the first st of any toe (this will become the center toe), sc in next 3 sts of same toe (leave remaining 4 sts unworked), sc into the first st of a second toe, sc in next 7 sts of second toe, sc in unworked 4 sts from center toe, sc in unworked 4 sts from left big claw toe – 24 sc (includes sts on left big claw toeโ€™s last round).

FOR RIGHT FOOT:

Round 1: Continue with the right foot toeโ€™s yarn still attached, sc into the first st of the last toe (this will become the center toe), sc in next 3 sts of same toe (leave remaining 4 sts unworked), sc into the first st of the right big claw toe, sc in next 7 sts of big claw toe, sc in unworked 4 sts from center toe, sc in unworked 4 sts from right foot toe – 24 sc (includes sts on right foot toeโ€™s last round).

Round 2: *Sc in next 2 sc, sc2tog over next 2 sc; repeat from * around–18 sc.

Round 3: Sc in each sc around.

Round 4: Sc in next 10 sc, ch 8, skip remaining sts (chain and unworked sts form the opening for the leg)

Round 5: [Sc in next sc, sc2tog over next 2 sc] 3 times, sc in next sc, [sc2tog in back ridge of next 2 ch, sc in back ridge of next ch] twice, sc2tog in back ridge of last 2 ch- 12 sc. 

Rounds 6-7: Sc in each sc around.

Round 8: *Sc2tog over next 2 sc; repeat from * around – 6 sc.

Fasten off yarn and close the hole in the back of the foot with the tail. Stuff toes and foot firmly. Utilize the yarn tails between the toes to patch up any holes in your work.

LEG 

Make 2

Round 1: With the ch-8 leg opening facing up and the toes pointed towards you, join color A with sl st into the right corner of the leg opening, ch 1, sc in each st around (both the unworked sts from the foot and unworked loops on the chain) – 16 sc.

Round 2: *2 sc in next sc, sc in next 7 sc; repeat from * around- 18 sc.

Round 3: Sc in each sc around.

Round 4: *Sc in next 4 sc, sc2tog over next 2 sc; repeat from * around – 15 sc.

Round 5: Sc in each sc around.

Round 6: *Sc in next 3 sc, sc2tog over next 2 sc; repeat from * around – 12 sc.

Rounds 7-10: Sc in each sc around.

Shaping Note:

Because stitches twist when worked in the round, check the location of your last stitch in Rnd 10 before cont to work the shaping in rounds 11-16. If this last stitch isnโ€™t centered over the back heel of the foot, either add or pull back a stitch or two from the end of Rnd 10 to reset the placement of this last stitch. This will help keep the knee shaping centered over the foot.

Rounds 11-12: [Sc2tog in next 2 sts] twice, 2 hdc in next 4 sts, [sc2tog in next 2 sts] twice- 12 sts. (Note: Hdc should line up directly above the toes)

Round 13: Sc in each sc around.

Round 14: *Sc in next 2 sts, 2 sc in next st; repeat from * around – 16 sc.

Round 15: Sc in next 12 sc, ch 1 and turn. In front loop only, sc in next 6 sc, ch 1 and turn. Sc in next 6 sc. Insert hook into side edge of 6-st short row, yarn over and pull up a loop, insert hook into next st of Round 14, yarn over and pull up a loop, yarn over and draw through all loops on hook (counts as 1 sc), sc in last 3 sc- 16 sts.

Round 16: 2 sc in next 2 sts, sc in next 3 sc. Insert hook into next st, yarn over and pull up a loop, insert hook into side edge of  6-st short rows, yarn over and pull up a loop, yarn over and draw through all loops on hook (counts as 1 sc), sc in each remaining st around – 18 sts. 

(Note: the 6-st short rows should line up directly above the toes.)

Round 17: Sc in each sc around.

Round 18: *Sc in next 8 sc, 2 sc in next st; repeat from * around – 20 sc.

Round 19: *Sc in next 4 sc, 2 sc in next st; repeat from * around – 24 sc.

Round 20: *Sc in next 5 sc, 2 sc in next st; repeat from * around – 28 sc.

Fasten off. Stuff legs firmly. They should be able to stand up on their own. 

Crocheted hand in bright lime green with purple tips, featuring textured stitches and loose yarn ends.

Join the Legs

Place the left and right leg next to each other with the toes facing forward (the big claw toes should be next to each other). Match up 4 sts along the inside edges of Round 20 of the left and right legs. Holding the edges together and working from front to back, rejoin yarn and sc through these 4 sts along both edges at the same time to hold them together, leaving the remaining 24 sts on each leg unworked.  Starting from the fasten-off point of these 4 sts, count 12 sts along each leg edge opening and place marker.   Set aside. 

TAIL & BODY

With color A, make an adjustable ring. 

Round 1: Ch 1, 4 sc in ring, place marker in first st (see notes), pull ring closed, do not join or turn (see notes)–4 sc.

Round 2: *Sc in next sc, 2 sc in next sc; repeat from * around – 6 sc.

Rounds 3-4: Sc in each sc around.

Round 5: *Sc in next 2 sc, 2 sc in next sc; repeat from * around – 8 sc. 

Rounds 6-7: Sc in each sc around.

Round 8: *Sc in next 3 sc, 2 sc in next sc; repeat from * around – 10 sc. 

Round 9: Sc in each sc around.

Round 10: *Sc in next 4 sc, 2 sc  in next sc; repeat from * around – 12 sc. 

Round 11: Sc in each sc around.

Round 12: *Sc in next 5 sc, 2 sc  in next sc; repeat from * around – 14 sc. 

Round 13: Sc in each sc around.

Round 14: *Sc in next 6 sc, 2 sc  in next sc; repeat from * around – 16 sc. 

Rounds 15-16: Sc in each sc around.

Round 17:*Sc in next 3 sc, 2 sc in next sc; repeat from * around – 20 sc. 

Rounds 18-19: Sc in each sc around.

Round 20: *Sc in next 4 sc, 2 sc in next sc; repeat from * around – 24 sc. 

Rounds 21-22: Sc in each sc around.

Round 23: *Sc in next 3 sc, 2 sc in next sc; repeat from * around- 30 sc. 

Round 24: *Sc in next 4 sc, 2 sc in next sc; repeat from * around- 36 sc. 

Round 25: *Sc in next 5 sc, 2 sc in next sc; repeat from * around- 42 sc. 

Round 26: *Sc in next 6 sc, 2 sc in next sc; repeat from * around- 48 sc. 

Fasten off.

Attach Legs: 

Take the joined legs and position them upright with the toes facing you.  Locate the marked stitches along the edge of each leg. With the Round 26 of the Body and Tail facing up, position the body and tail behind the joined legs so the front edge of Round 26 lines up along the back edge of the joined legs between the two markers. With color A, starting at the marker on the right side and working through the body and leg edges at the same time, sc the edges together along the 24 sts between the two leg edge markers. Fasten off leaving the remaining 24 sts on the body and tail and the remaining 12 sts along each leg edge unworked.  Stuff Tail firmly.

Rejoin yarn to body and tail edge and continue working along the remaining sts along the body and leg edges;

Rounds 27-28: Sc in each sc around – 48 sc.

Round 29: *Sc in next 4 sc, sc2tog in next 2 sc; repeat from * around- 40 sc. 

Rounds 30-38: Sc in each sc around

Fasten off. Stuff body firmly.

Bright yellow crocheted plant-inspired sculpture with purple accents and textured stitches, forming a whimsical design.

Attach Arms:

Note: The Raptorโ€™s left arm is attached first, then the right arm.  

Round 39: Join color A with sc into the center stitch at the back of the body opening. Working clockwise, sc in next 5 sts. Pick up an arm and orient it so the palm of the hand is facing towards the back of the body. Line up the side edge of the arm opening against the edge of the body opening. Holding the edges together, sc in next 6 sts through both arm and body edges at the same time (leaving the remaining 6 sts of the arm unworked). [Sc2tog in next 2 sc] 8 times across the front edge of the Raptorโ€™s chest. Pick up the 2nd arm and turn it so the palm of the hand is facing towards the back of the body. Line up the side edge of the 2nd arm opening against the edge of the body. Holding edges together, sc in next 6 sts through both edges at the same time (leaving remaining 6 sts of arm unworked). Sc in next 6 sts- 32 sts.

Round 40: Sc in next 6 sts, sc in next 6 unworked sts of the arm, sc in next 8 sts, sc in next 6 unworked sts of 2nd arm, sc in next 6 sts- 32 sc.

Stuff arms 25% full. 

Round 41: *Sc in next 2 sc, sc2tog in next 2 sc; repeat from * around- 24 sc. 

Round 42: Sc in each sc around.

Round 43: *Sc in next 4 sc, sc2tog in next 2 sc; repeat from * around- 20 sc. 

Round 44-49: Sc in each sc around.

Round 50: *Sc in next sc, 2 sc in next sc; repeat from * around- 30 sc. 

Round 51: *Sc in next 2 sc, 2 sc in next sc; repeat from * around- 40 sc. 

Fasten off yarn, leaving a long tail for seaming.

Stuff body firmly.

Curl the Arms:ย 

Bend the arm back at round 9 (the 6-st round) so the top of the forearm touches the front of the upper arm. Attach yarn at the back of the upper arm (between rounds 10-11). With a tapestry or doll needle, draw yarn through both the upper arm and forearm, catching the front of the forearm with a stitch before going back through the forearm and upper arm to the starting point.  Pull the yarn to tighten up the shaping and tie the yarn tails together to secure.  Repeat on other arm. 

If you would like the arms to stay closer to the body, sew the inside edges of the elbows to the sides of the body. 

Shape the Toenails and Fingernails:

Attach an 18โ€ piece of color B to the underside of a nail at its base. Apply a running stitch along the rnd where the nail transitions to the finger/toe. Once you have reached the starting point, pull gently to cinch in the edge of the nail, then apply a 2nd set of running stitches to the same rnd (catching the stitches you missed the first time around). Pull again to cinch the shaping, secure yarn tails. Weave in ends.

Curl and Pose the toenails and big claw toes:

Attach an 18โ€ piece of color B to the underside of a toenail at its base. Apply a running stitch along the surface of the toenail in a straight line from base to tip. Once you reach the tip, pull the yarn gently to curl the nail. Secure the yarn and weave in ends.  Bend the big claw toes back at their base so toe points nearly straight up. When you are happy with the pose, use color A to sew the top surface of the toe to where it makes contact with the leg to hold the shaping in place.

HEAD

With color A, make an adjustable ring. 

Round 1: Ch 1, 6 sc in ring, place marker in first st (see notes), pull ring closed, do not join or turn (see notes)–6 sc.

Round 2: 2 sc in each around – 12 sc.

Round 3: Sc in next sc, *3 sc in next sc, sc in next 2 sc; repeat from * around to last 2 sc, 3 sc in next sc, sc in last sc – 20 sc.

Round 4: Sc in next 2 sc, *3 sc in next sc, sc in next 4 sc; repeat from * around to last 3 sc, 3 sc in next sc, sc in last 2 sc – 28 sc.

Rounds 5-6: Sc in each around.

Round 7: *Sc in next sc, 2 sc in next sc; repeat from * around – 42 sc.

Rounds 8-10: Sc in each around.

Round 11: *Sc in next 5 st, sc2tog in next 2 sts; repeat from * around- 36 sts.

Rounds 12-13: Sc in each sc around.

Round 14: *Sc in next 4 sts, sc2tog in next 2 sts; repeat from * around – 30 sts.

Round 15: Sc in each sc around.

Round 16: *Sc in next st, sc2tog in next 2 sts; repeat from * around – 20 sts.

Round 17: *Sc2tog in next 2 sts; repeat from * around – 10 sts.

Cut yarn and fasten off. Stuff head 20% full. Leave a hole open to adjust the stuffing level if needed. 

JAW

With color B, make an adjustable ring. 

Round 1: Ch 1, 6 sc in ring, place marker in first st (see notes), pull ring closed, do not join or turn (see notes)–6 sc.

Round 2: 2 sc in each around – 12 sc.

Round 3: Sc in next sc, *3 sc in next sc, sc in next 2 sc; repeat from * around to last 2 sc, 3 sc in next sc, sc in last sc – 20 sc.

Round 4: Sc in next 2 sc, *3 sc in next sc, sc in next 4 sc; repeat from * around to last 3 sc, 3 sc in next sc, sc in last 2 sc – 28 sc.

Rounds 5-6: Sc in each around.

Round 7: *Sc in next 3 sts, 2 sc in next st; repeat from * around – 35 sts.

Rounds 8-10: Sc in each around.

Round 11: *Sc in next 5 sts, sc2tog in next 2 sts; repeat from * around – 30 sts. 

Round 12: Sc in each around.

Round 13: *Sc in next st, sc2tog in next 2 sts; repeat from * around – 20 sts. 

Round 14: Sc in each around.

Round 15: *Sc2tog in next 2 sts; repeat from * around – 10 sts.

Cut yarn and fasten off. Stuff jaw 75% full. Leave a hole open to adjust the stuffing level if needed. 

Attach head top to bottom jaw and shape the upper lip: 

Observe that rounds 3 & 4 at the front of the head and jaw are slightly square in their shaping. Try to keep the square shaping level and plumb (instead of tilted) when pinning the head to the jaw.

Line up the back of the head with the back of the jaw so the front of the head sits slightly forward of the front of the jaw.

Press and sink the top half of the jaw into the bottom half of head allowing the sides head to wrap over the sides of the jaw. Pin the folded overlapping edge of the head to the sides of the jaw . With color A and working 1โ€-1.5โ€ [2.5-4 cm] above the folded-over edge of the head, apply a running stitch through the folded edge, catching the surface of the jaw as you work to shape the upper lip and secure the jaw to the head.

Shape lower jaw:

From the front of the head, count 5 rounds back on the jaw. With color B, attach a 24โ€ [61 cm] piece of yarn to the 5th round of the jaw just under the lip shaping on the right side of the head. Apply a running stitch between the 5th and 6th round of the jaw until you reach the under the lip shaping on the left side of the head. Draw the yarn and needle through the jaw back to the starting point and pull to cinch the jaw shaping. Repeat one more time (switching up which running stitches are over vs under). Pull firmly to shape, fasten off and weave in ends.

Add more stuffing to fill out the head and/or jaw if needed. Close the hole in the back of the head and jaw and weave in ends.

This close-up of Rori the Raptor highlights a crocheted dinosaur head with vibrant textures. Its bright yellow body features a striking orange eye, white teeth, and a purple underbelly. The detailed stitching of this dinosaur plush gives it a playful and lifelike appearance. -Marly Bird

EYES 

Make 2

With color E, ch 8 with smallest hook.

Round 1: Starting in 2nd ch from hook and working in back ridge loops, sl st in next ch, sc in next ch, hdc in next 3 ch, sc in next ch, sl st in next ch. Rotate chain so front loops are facing up, sl st in first ch (same ch as previous sl st), sc in next ch, hdc in next 3 ch, sc in next ch, sl st in last ch, change to color D, fasten off color E – 14 sts.

Round 2: Sl st blo of each st around.

Round 3: Sc blo in next 3 sts, 2 sc blo in next st, sc blo in next 6 sts, 2 sc blo in next st, sc blo in next 3 sts – 16 sts.

Round 4: *Sc in next st, 2 sc in next st; repeat from * around – 24 sts.

Round 5:  *Sc in next 2 sts, 2 sc in next st; repeat from * around – 32 sts.

Round 6: Sc in each sc around.

Round 7: *Sc in next 2 sts, sc2tog over next 2 sts; repeat from * around – 24 sts.

Round 8: *Sc in next st, sc2tog over next 2 sts; repeat from * around – 16 sts.

Round 9: *Sc2tog over next 2 sts; repeat from * around – 8 sts.

Cut and fasten off yarn. Stuff the eye firmly and close the hole.

Add catch light to eyes:

With color C yarn – apply a small grouping of short stitches to the center part of the eye for a catch light

Attach eyes and sink the eye sockets:

Attach eyes onto the sides head between rounds 11-12. 

With color A, draw a series of small stitches back and forth through the head around the edges of the eyes, pulling gently to sink the eyes into the head.

Eye Ridge 

Make 2

With color A, ch 10.

Row 1: Starting in 2nd ch from hook and working in back ridge loops, sc in each ch across, turn- 9 sts.

Row 2: Ch 1, sc in each sc across, turn.

Row 3: Fold work the long way to match up Row 2 with the Ch-10 row to form a skinny tube. Ch 1, working through both rows at the same time, sc in each st across, fasten off.

Attach Eye Ridge:

With row 3 of the eye ridge against the head, Position and curve the eye ridge around the top, side and bottom corner of the eye and pin in place. Whip stitch the bottom edge of the eye ridge to the head.

NOSTRILS 

Make 2

With color E yarn, ch 7. 

Starting in 2nd ch from hook and working in back ridge loops, sc in each ch across, fasten off. 

Attach nostrils: 

Pin the nostrils between rounds 3-4 of the head top with about 2 sts of space between them. Sew down and weave in yarn ends.

Add nose ridge details

Pinch the surface of your work to make a ridge of material between the front corner of the right eye brow ridge and just behind the right nostril. With color A, sew back and forth through the base of the ridge with a running stitch to hold the shaping. Repeat on the left side of the head.

TEETH 

Make 2

With color C yarn and medium size hook, Ch 2, [(sc, hdc, dc, ch 2, sl st) in back ridge loop of 2nd ch from hook, ch 4] 4 times, (sc, hdc, dc, ch 2, sl st) in back ridge loop of 2nd ch from hook, fasten off.

Attach teeth:

Tuck the ch edge of the teeth under the lip ridge on right side head. Line up the first tooth under the right nostril and the last tooth just behind the right eye and sew ch edge in place. Repeat on the left side of the head with the other teeth strip.

Rori the Raptor, a crocheted dinosaur plush in bright yellow and purple, stands on grass. With an orange eye and playful expression, its mouth is slightly open to reveal white teeth. The background features greenery and stone paving, creating a charming setting for this delightful crochet pattern design. -Marly Bird

Attach head to body:

Stretch and pin the open edges of the neck over the end of the head and jaw. With color A and a mattress stitch, sew the head to the body, adding more stuffing to neck as needed before closing seam. 

BELLY

With color B, loosely ch 9. 

Row 1: Starting in 2nd ch from hook and working in back ridge loops, sc in each ch across, ch 1 and turn- 8 sc.

Row 2: Sc in each sc across, ch 1 and turn.

Row 3: Sc2tog over first 2 sc, sc in next 4 sc, sc2tog over last 2 sc, ch 1 and turn – 6 sts.

Rows 4-9: Sc in each sc across, ch 1 and turn.

Row 10: 2 sc in next st, sc in next 4 sts, 2 sc in next st, ch 1 and turn – 8 sts.

Rows 11-12: Sc in each sc across, ch 1 and turn. 

Row 13: 2 sc in next st, sc in next 6 sts, 2 sc in next st, ch 1 and turn – 10 sts.

Row 14: Sc in each sc across, ch 1 and turn.

Row 15: 2 sc 2 in next st, sc in next 8 sts, 2 sc in next st, ch 1 and turn – 12 sts.

Rows 16-19: Sc in each sc across, ch 1 and turn. 

Row 20: Sc2tog in first 2 sc, sc in next 8 sc, sc2tog in last 2 sc, ch 1 and turn – 10 sts.

Row 21: Sc2tog in first 2 sc, sc in next 6 sc, sc2tog in last 2 sc, ch 1 and turn – 8 sts.

Row 22: Sc2tog in first 2 sc, sc in next 4 sc, sc2tog in last 2 sc, ch 1 and turn – 6 sts.

Row 23: Sc2tog in first 2 sc, sc in next 2 sc, sc2tog in last 2 sc, ch 1 and turn – 4 sts.

Rows 24-28: Sc in each sc across, ch 1 and turn. 

Row 29: 2 sc in first st, sc in next 2 sc, 2 sc in last st, ch 1 and turn – 6 sts.

Rows 30-31: Sc in each sc across, ch 1 and turn. 

Row 32: 2 sc in first st, sc in next 6 sc, 2 sc in last st, ch 1 and turn- 8 sts.

Rows 33-35: Sc in each sc across, ch 1 and turn. 

Row 36: Sc2tog in first 2 sc, sc in next 4 sc, sc2tog in last 2 sc, ch 1 and turn – 6 sts.

Rows 37: Sc in each sc across, ch 1 and turn. 

Row 38: Sc2tog in first 2 sc, sc in next 2 sc, sc2tog in last 2 sc, ch 1 and turn – 4 sts.

Row 39: Sc in each sc across, ch 1 and turn.  

Row 40: Sc in first sc, sc2tog in next 2 sc, sc in last sc, ch 1 and turn – 3 sts.

Row 41: Sc in each sc across, ch 1 and turn. 

Row 42: Sc in first sc, skip next sc, sc in last sc, ch 1 and turn – 2 sts.

Row 43: Sc in each sc across, ch 1 and turn. 

Row 44: Sc2tog in next 2 sc, ch 1 and turn – 1 st.

Sc around entire edge of belly piece, working 2-3 sts into the ends of row 1 as you turn the corner. Fasten off in first st of Row 44, leaving a long tail for sewing.

Attach Belly Patch:

Position Row 1 of the belly patch against the back edge of the jaw and pin in place. Stretch and flatten out the belly patch against the neck, belly, and lower tail, pinning the edges down as you place down the work. Once you are happy with patchโ€™s location, sew the edges down with a back or running stitch. 


Tips for Making Your Easy Crochet Dino Plushie Unique

Want to make your Rori the Raptor truly one-of-a-kind? Experiment with color and fiber choices inspired by Jurassic World, adjust the size and shape to accommodate different stuffing levels, and add unique embellishments such as a free crochet unicorn pattern. Whether you're crafting a special baby shower gift, or expanding your dino collection with easy amigurumi, these tips will help your plushie stand out!

Want to try your hand and more fun plushie designs? Check out these little beasties.

Book Review Baby Beasts to Crochet by Megan Kreiner - Marly Bird

Color and Yarn Choice Variations

Choosing the right color and yarn can make your Rori the Raptor plushie truly stand out. I love using vibrant greens and earthy browns inspired by dinosaurs like the brontosaurus and pachycephalosaurus to bring Roriโ€™s features to life.

Ideas for Embellishments

One fun way to embellish your Rori the Raptor is by adding a tiny crochet bag for it to carry. This not only enhances Roriโ€™s charm but also adds an extra layer of creativity to your project, reflecting the crochet stuffed animal popularity and making it stand out among other dinosaur plushies.


Troubleshooting Common Crochet Issues

Sometimes, yarn tension can get tricky, or you might make a mistake while assembling your project. Whether you're creating Rori the Raptor, a granny square, a free crochet unicorn pattern, or a crochet menorah, these issues can pop up.

In the following sections, I'll share tips on managing yarn tension and fixing common mistakes to keep your crafting smooth and enjoyable.

Managing Yarn Tension

Keeping your yarn tension consistent is key to creating a smooth and evenly shaped Rori the Raptor. First, it is important to restate that this plushie is made using single crochets created with the yarn over NOT the yarn under. If you don't know the difference you can check out this blog post.

Anyway, I usually start by holding the yarn a with even and consistent tension, then make sure each stitch is the size of my hook as I go to prevent any tight spots. This simple adjustment makes a big difference in the final look of your plushie.

If you find your tension fluctuating, try practicing with a few test swatches before diving into Rori.

Fixing Mistakes During Assembly

When you're putting Rori the Raptor together, it's easy to run into a few bumps along the way. Maybe a limb isn't attaching right or a section isn't shaping as it should. Hereโ€™s how I handle these common assembly hiccups:

  • Carefully examine where things went wrong and use a stitch marker to keep track.
  • Gently unravel the affected stitches back to the mistake.
  • Rework that area with consistent tension to ensure everything fits perfectly.

If a mistake feels too tricky to fix on your own, don't hesitate to reach out to our crafting community. We're all here to help each other create the best Rori possible!

The number one thing I've learned when it comes to a MK Crochet pattern is to Blindly Follow the instructions. Don't overthink any of it, just do.


Sharing Your Finished Rori the Raptor

After completing Rori the Raptor, I love taking adorable photos to showcase your work using easy amigurumi projects and frog crochet pattern. Itโ€™s a fun way to highlight your creation and inspire others with amigurumi popularity. Joining crochet community groups lets you connect, share your progress with free crochet unicorn pattern and menorah pattern, and celebrate your finished plushies together. Letโ€™s explore how to share Rori with the world!

A person with glasses playfully poses with a charming crocheted yellow and pink dinosaur plush, mimicking its claws like a raptor. They stand in a room with a gray carpet and light-colored furniture, embodying the fun spirit of the crochet pattern. -Marly Bird
Favorite This Pattern on Ravelry - Marly Bird

Taking Adorable Photos

I love capturing Rori the Raptor in different settings to showcase his adorable details. Whether he's snuggled up on a cozy blanket or placed among your favorite crafting supplies such as a free crochet unicorn pattern, frog crochet pattern, menorah pattern, and easy amigurumi, taking photos of your finished plushie preserves the joy of your creation.

You donโ€™t need fancy equipmentโ€”just use your smartphone and some natural light to highlight Roriโ€™s soft textures and vibrant colors. Share your photos in our crafting community or on social media with #RoriTheRaptor to inspire and connect with fellow crochet enthusiasts! If you tag @themarlybird or @mkcrochet we would that.


Frequently Asked Questions

What materials do I need to crochet Rori the Raptor?

To crochet Rori the Raptor, I use:

  • Yarn in chosen colors
  • Suitable crochet hook
  • Polyester stuffing
  • Safety eyes or embroidery thread
  • Tapestry needle

How long does it take to complete the Rori plushie?

Depending on your familiarity with crochet, a custom crochet stuffed animal like Rori can be made in about 15 to 25 hours making the Rori plushie. It depends on your skill level and how detailed you want it to be. Whether youโ€™re just starting out or have some crafting experience, you'll find it a fun and rewarding project!

Can I customize the colors of my Rori the Raptor?

Absolutely! You can personalize Rori the Raptor with colors that match your style. Whether you want bright hues or subtle shades, customizing Rori is simple and fun. Letโ€™s create a unique Rori just for you!

Where can I find free dinosaur crochet patterns?

You can find free dinosaur crochet patterns on sites like Ravelry, AllFreeCrochet, and Pinterest. Plus, our Marlyโ€™s Minions community regularly shares links to awesome free designs. Happy crocheting with your dino buddies!

Bringing Rori the Raptor to life offers a fun and rewarding way to enhance your crochet skills with a lovable dinosaur plushie. You'll love experimenting with different colors and custom features to make Rori uniquely yours.

Your BiCrafty Bestie,
Marly Bird

A cartoon avatar of a person with glasses and a brown bun smiles warmly. Their green shirt and black jacket add a stylish touch, while colorful hearts surround them like loving temperature blankets, stitching together an aura of love and positivity. -Marly Bird

Filed Under: Crochet, Free Patterns, Our Free Patterns, Pattern, Uncategorized

Mondays with Marly – Knitting and Crochet Podcast for…

January 3, 2025 By Marly Bird 5 Comments

Craft. Chat. Connect. Mondays are better with your BiCrafty Bestie, Marly Bird!

Looking for fresh ideas and a little crafting companionship? ๐Ÿงถ Welcome to Mondays with Marly, the ultimate knitting and crochet video podcast! This weekly show is your one-stop shop for inspiration, expert tips, lively discussions, and a chance to connect with the vibrant crafting community of Marlyโ€™s Minions. Whether you're here to learn, laugh, or discover something new, thereโ€™s a place for you!

Colorful graphic for "Mondays with Marly Knitting and Crochet Podcast." Features yarn, knitting needles, a microphone, and the tagline "Chat, Craft, Connect" with broadcast details: YouTube at 12:30 PM. -Marly Bird

Affiliate Disclosure: This post contains affiliate links. To learn more please visit my privacy policy here๐Ÿ’–


In this blog post, weโ€™ll look at what each episode offers, how you can easily access the video podcast online, and tips to make the most of every session, including creative crochet and knitting techniques. Tune in every Monday at 12:30 PM ET and enjoy an hour of chat, craft, and connection with the Marly's Minions BiCrafty Community.

Plus, don't forget to check out other blog posts and patterns on marlybird.com to enhance your crafting experience!


Key Takeaways of the Knitting and Crochet Video Podcast Blog Post

  • Weekly video podcast on YouTube for knitting and crochet enthusiasts
  • Learn new techniques with step-by-step tutorials
  • Connect with Marlyโ€™s online community for inspiration and support
  • Discover trends, tools, and tips to improve your projects
  • Engage through live chats and social media with #mondayswithmarly and #mmmdi

Introduction to Mondays with Marly – Knitting and Crochet Video Podcast

Welcome to my podcast! ๐ŸŽง Whether you're casting onto your knitting needles with your favorite yarn, crocheting a new amigurumi pattern, enjoying a fun and ๐ŸŒถ spicy audiobook ๐Ÿ“š, or yearning to learn new skills and techniques, this podcast is made for all craft enthusiasts.

We discuss creative knitting and crochet projects, crafting tips, and fun interviews with influential people in the yarn industry and more.

Donโ€™t forget to explore other blog posts and patterns to inspire your next creation!

A colorful graphic with "Mondays with Marly" in bold pink letters. Includes icons of knitting needles, a microphone, and the words "Chat, Craft, Connect." Perfect for knitting and crochet enthusiasts, it's decorated with hearts and a sunburst design to celebrate each vibrant podcast. -Marly Bird

Overview of the Podcast's Purpose

Welcome to Mondays with Marlyโ€”your weekly go-to for fun, inspiration, and connection with the Marly Bird BiCrafty Community! Every Monday, weโ€™ll gather for an hour of entertainment, learning, and laughter (the kind that might just make you cry). Each episode offers something fresh and exciting, so thereโ€™s always something new to discover.

Weโ€™ll dive into the worlds of knitting and crochet, explore books, chat with inspiring designers, review crafting goodies, do unboxings, and so much more. Honestly, the only thing you can count on is a good time and plenty of surprises! From finding the perfect yarn for your next sweater to refining your favorite crochet techniques, my goal is to help you create pieces youโ€™ll love.

Whether youโ€™re a newbie seeking guidance or a seasoned maker looking for fresh ideas (and the occasional sprinkle of ๐ŸŒถ๐ŸŒถ spicy romantasy โœจ book chatter), this podcast has something for everyone. Donโ€™t forget to visit MarlyBird.com and join the Marlyโ€™s Minions BiCrafty Community for even more inspiration and fun! Tune inโ€”I canโ€™t wait to craft, chat, and connect with you.

script text that reads Marly's Minions - facebook group for Marly Bird

Why “Mondays with Marly” Feels Like Coming Home

You might remember my first podcast, The Yarn Thing Podcast, launched back in 2007. It was the very first crochet podcast on iTunesโ€”and one of the first knitting podcasts, too! Those early episodes were all about connecting with fellow crafters, sharing yarn reviews, interviewing designers, and celebrating the creativity within our community.

Logo featuring a microphone encased in yarn with a banner reading "Yarn Thing Podcast with Marly Bird," all depicted in vivid colors against a green background. -Marly Bird

Fast forward to today, and Iโ€™m bringing that same energy back with Mondays with Marly. This podcast isnโ€™t just about meโ€”itโ€™s about YOU, the incredible community that has supported, inspired, and grown with me over the years. Together, weโ€™ll explore new techniques, dive into creative projects, and share the stories that make our crafting journeys so special. Letโ€™s take our stitches and stories to the next level!


Crafting Connection: Who This Mondays with Marly for?

Whether you're knitting cozy wool sweaters, crocheting soft acrylic blankets, playing with vibrant yarns, or perfecting classic granny squares, this podcast is made with you in mind. I get itโ€”the joys, the frustrations, and the sheer delight of transforming fibers into something uniquely yours. And I know how much a supportive teacher and community can elevate your crafting journey.

As your BiCrafty Bestie, Iโ€™m here for everyoneโ€”from absolute beginners to seasoned fiber artistsโ€”sharing tips, tricks, and inspiration to help you grow your knitting and crochet skills. Join active and supportive community of makers who are as passionate about yarn as you are, and letโ€™s craft, chat, and create together!


What to Expect Each Week of Mondays with Marly Knitting and Crochet Podcast

Every episode of Mondays with Marly is packed with engaging discussions, tutorials, and guest appearances. Hereโ€™s a sneak peek at whatโ€™s coming your way:

  • Crafting Essentials: Learn tips and tricks for knitting and crochet, from selecting yarn to perfecting advanced techniques like brioche knitting or seamless color changes.
  • Step-by-Step Tutorials: Once a month, Iโ€™ll guide you through a free pattern from MarlyBird.com, with tips to complete it successfully.
  • Guest Experts: Hear from top designers, authors, and yarn industry leaders whoโ€™ll inspire your creativity.
  • Trends and Reviews: Stay up-to-date on the latest crafting trends, books, tools, and yarns with honest reviews and fun unboxings.
  • Community Conversations: Join live Q&A sessions and connect with fellow crafters in the Marlyโ€™s Minions BiCrafty Community.

Thereโ€™s something for everyoneโ€”from beginners to seasoned fiber artists. Plus, you can expect a sprinkle of ๐ŸŒถ spicy romantasy book talk for those who love multitasking their crafts with audiobooks!

Cartoon bird with pink accents next to a bright red button that says "SUBSCRIBE." Playful, whimsical design.

Engaging Crafting Discussions

Letโ€™s talk about the stuff we all loveโ€”crafting essentials that make your projects shine. Whether itโ€™s experimenting with different types of stitches to elevate your edges of a blanket or learning how to improve your stockinette knit fabric, we cover it all. If youโ€™re stitching baby blankets, creating adorable creatures, or designing stylish clothing, Iโ€™ve got techniques to share that will boost your skills.

Weโ€™ll also chat about the latest trends in knitwear, tips for choosing the perfect yarn for your sweaters or shawls, and even sprinkle in conversations about crafting-related podcasts and books that inspire creativity. Together, weโ€™ll tackle challenges, share wins, and celebrate the joy of making!


Guest Experts Bringing the ๐Ÿช„Magic to the Knitting and Crochet Podcast

One of my favorite parts of this podcast is hosting amazing guest experts! ๐ŸŽ‰ Whether itโ€™s a well-known designer showcasing their latest book or a sock-making pro walking us through advanced techniques, these guests bring fresh ideas and valuable insights to the table.

Our conversations are full of inspiration, tips, and resources thatโ€™ll have you itching to cast on something new! Some of these interviews will be pre-recorded while others will be live.

The "Mondays with Marly" Knitting and Crochet Podcast logo is an artistic blend of a blue yarn ball, knitting needles, a crochet hook, and a microphone, all accentuated with bright pink and white text. -Marly Bird

Lunch and Learns: Step-by-Step Tutorials

Once a month, Iโ€™ll break down a new free pattern from marlybird.com. These are patterns that are either completely new or new to the website. These little lunch-and-learns will help you complete the pattern and give you a taste of what you can expect from the design. โญ๏ธ Youโ€™ll also get a coupon code to use for the ad-free PDF of the pattern (available for a limited time).

What kind of projects? Think hats, bags, shawls, and moreโ€”all broken down into bite-sized, easy-to-follow steps. Whether youโ€™re a beginner or a seasoned maker, these tutorials are crafted to fit seamlessly into your crafting routine.

Plus, theyโ€™re designed for real-time crafting, so you can watch, stitch, and learn without feeling overwhelmed. And you can always come back to review parts you might have missed.

I love connecting with you through these tutorials, answering your questions, and sharing extra tips along the way. Together, weโ€™ll tackle exciting Marly Bird projects thatโ€™ll leave you feeling inspired and motivated to keep creating.


Mondays with Marly – Upcoming Episodes and Events

Iโ€™m excited to share sneak peeks at future topics like a Crochet Blanket Make-Along (starting in April 2024) and special guests who are inspiring and creative leaders advancing the craft.

A pile of handmade crocheted blankets in shades of gray, black, and white, with a skein of gray yarn labeled "Red Heart Chic Sheep" resting on top. A stainless steel travel cup and a coffee mug sit nearby, perfect for cozying up with your favorite podcast. -Marly Bird

Plus, join unboxings and yarn reviews that offer a chance for you to win yarn giveaways. Iโ€™ll also be offering special discounts to listeners for future Marly Bird House events. Stay tuned for all the fun and creativity coming your way!

Image is of all the shades of Heatherly Worsted Yarn from WeCrochet in a line - Marly Bird

Sneak Peeks at Future Mondays with Marly Podcast Topics

Hereโ€™s a glimpse at whatโ€™s coming up on the podcast! ๐ŸŽ‰

  • Lunch and Learn Skill-Building Lessons
  • Crochet Tips and Techniques
  • Knitting Stitches
  • Focus on Free Patterns for You to Try
  • Yarn Unboxings: See the newest yarns from top companies
  • Yarn Reviews: Honest feedback on the yarns I love (or donโ€™t!)
  • Exclusive Sneak Peeks of Upcoming Projects by Marly Bird
  • Special Limited-Time Discount Codes for Listeners
  • Exclusive Giveaways and Contests!
  • Spicy Romantasy Book Reviews: Hear my thoughts on audiobooks Iโ€™ve been listening to while crafting

These episodes are designed to enhance your skills, inspire your projects, and entertain you for a bit. Itโ€™s like spending time with your BiCrafty Bestie every week!

๐Ÿ’• Do you have a suggestion for the show? Make sure you leave a comment and let me know your idea!


Logo for "Mondays with Marly," featuring knitting needles, a microphone, and text: "Chat, Craft, Connect." Perfect for craft enthusiasts. Below is scheduling info: "Mondays @ 12:30 pm ET" and the YouTube link "youtube.com/marlybird. -Marly Bird

Special Guests to Look Forward To on the Podcast

Iโ€™m super excited about the amazing special guests we have lined up for upcoming episodes! ๐ŸŽ‰ These talented crafters will share unique techniques and insider tips to elevate your projects:

  • Renowned designer Sarah-Jayne Fragola of Bella Coco Crochet discussing creative crochet patterns and her new book
  • Expert crocheter Megan Kreiner sharing secrets for perfect amigurumi
  • Organizational superhero Lindsey Martin talking about project bags and storage
  • New York Times Bestselling Author Penny Reid might also stop byโ€”you never know!

Each guest brings a wealth of knowledge and passion, ensuring you gain valuable insights and inspiration for your next creative endeavor. Donโ€™t miss these exclusive interviews!


When is the Mondays with Marly Podcast?

๐Ÿ“… Mark your calendar: The first episode drops this Monday!
๐ŸŽฅ Where: Watch it on the Marly Bird YouTube Channel (https://youtube.com/marlybird).
๐Ÿ”” Subscribe: Hit that subscribe button and turn on notifications so you donโ€™t miss a single stitch of the fun!


How to Access the Mondays with Marly Knitting and Crochet Podcast

Access Mondays with Marly Knitting and Crochet VIDEO Podcast exclusively on the Marly Bird YouTube Channel for now. We have added the audio version to this RSS feed and to Apple Podcast.

But weโ€™re working to bring each episode to Spotify soon! ๐ŸŽง

Streaming Platforms Coming Soon

Weโ€™re thrilled to announce that episodes will soon be available on:

  • Spotify
  • Apple Podcasts
  • MarlyBird.com RSS Feed

Stay tuned for updates on your favorite platforms, and never miss a moment of crafting inspiration!


Subscription Options for Regular Updates

Subscribing to my podcast is a breeze! Just hit โ€œSubscribeโ€ on YouTube and click the bell to get notifications for new episodes. Staying subscribed ensures youโ€™re always up-to-date on the latest tips, tricks, and creative insights.


Colorful logo for "Mondays with Marly Knitting and Crochet Podcast," featuring knitting needles, a microphone, and hearts on a circular badge. Includes the phrases "Chat, Craft, Connect" and "On Marly Bird YouTube Channel. -Marly Bird

Join the Fun

Whether youโ€™re picking up a crochet hook for the first time, mastering a complex knitting pattern, or simply looking for a place to share your love of yarn, Mondays with Marly is here for YOU.

So grab your favorite skein, tune in, and letโ€™s craft, chat, and connect together. Donโ€™t forget to subscribe and share the fun with your friends. I canโ€™t wait to see you there!

๐Ÿ’• Craft. Chat. Connect. Mondays are better with your BiCrafty Bestie, Marly Bird.

Frequently Asked Questions

What exactly is “Mondays with Marly”?

Honestly, it's your new favorite weekly podcast where we dive into all things knitting and crochet! Think of it as a cozy chat with your BiCrafty Bestie, Marly Bird. We'll cover new techniques, chat about fun projects, and connect with the amazing Marly's Minions community.

When can I tune in to the podcast?

So here's the thing… you can catch a new episode every Monday at 12:30 PM ET! It's the perfect way to kick off your week with some crafting inspiration.

Is this podcast just for knitters or crocheters?

Yes! It's for everyone who loves yarn crafts… whether you're knitting cozy sweaters or crocheting adorable amigurumi, there's something here for you. Marly loves both knitting and crochet, and she wants to share that joy with all of you!

What kind of stuff will Marly talk about on the podcast?

Oh, all sorts of things! You can expect tips and tricks for knitting and crochet, step-by-step tutorials for free patterns, interviews with cool guests from the yarn industry, and even reviews of the latest yarns and tools. Plus, sometimes there's a little spicy book talk thrown in there too!

Where can I watch or listen to “Mondays with Marly”?

You can find the video podcast on the Marly Bird YouTube Channel right now. We're also working on getting it onto Spotify and Apple Podcasts soon, so you'll have lots of options to join the fun!

Filed Under: Podcast, Uncategorized

  • « Previous Page
  • 1
  • …
  • 8
  • 9
  • 10
  • 11
  • 12
  • …
  • 22
  • Next Page »

Let's Be Social

Join the Marly's Minions Facebook group to share, ask questions, or chat about all of your yarn related crafts!

Join the group
Cartoon of a smiling woman with brown hair in a bun, glasses, black jacket and green shirt, waving next to large "hi" text.

Quick Links

The Pattern Shop

Our Free Patterns

Blog

Marly Bird House

Learn to Knit & Crochet

About

Giveaway Terms and Privacy Notice

Find Us Everywhere

Join the Newsletter

YouTube Channel

Marly's Minions FB Group

Etsy Store

Ravelry Store


AN ELITE CAFEMEDIA HOME/DIY PUBLISHER

Information from your device can be used to personalize your ad experience. Do not sell or share my personal information.

Privacy Policyย  ย Termsย  ย Marly Bird Legal Documents Copyright © 2026