Search
Close
  • The Pattern Shop
  • Our Free Patterns
    • Browse All Our Free Patterns
    • Our Free Knitting Patterns
    • Our Free Crochet Patterns
    • The Big List of Free Knitting Patterns from Marly Bird
    • The Big List of Free Crochet Patterns from Marly Bird
  • Blog
    • All Blog Posts
    • All Free Patterns
    • Dibble Dabble Inspiration
    • Giveaways
    • Make-Alongs
    • Product Reviews
    • Roundups
    • Tips, Tricks, Techniques for Knitting and Crochet
Logo of "Marly Bird" featuring stylized text alongside a graphic of a bird perched on a branch, executed in gray and pink tones. The header design is elegant, emphasizing the brand's unique identity. -Marly Bird
  • Marly Bird House
  • Learn to Knit & Crochet
    • Newbie? Start Here
    • Video Tutorials
    • Knitting Definitions
    • Crochet Definitions
    • Common Techniques
    • Size Charts for Knitting and Crochet Projects
  • About
×
  • The Pattern Shop
  • Free Patterns
  • Blog
  • Marly Bird House
  • Learn to Knit & Crochet
    • Newbie? Start Here
    • Video Tutorials
    • Knitting Definitions
    • Crochet Definitions
    • Common Techniques
    • Size Charts for Knitting and Crochet Projects
  • About
Logo of "Marly Bird" featuring stylized text alongside a graphic of a bird perched on a branch, executed in gray and pink tones. The header design is elegant, emphasizing the brand's unique identity. -Marly Bird
Search
Close

New Patterns NOW Available in Ad-Free PDF! Check out The Pattern Shop

Thigh High Knit Sock Pattern – Knitting the Perfect Fit with Appalachian Cozy Up

July 17, 2024 By Marly Bird 2 Comments

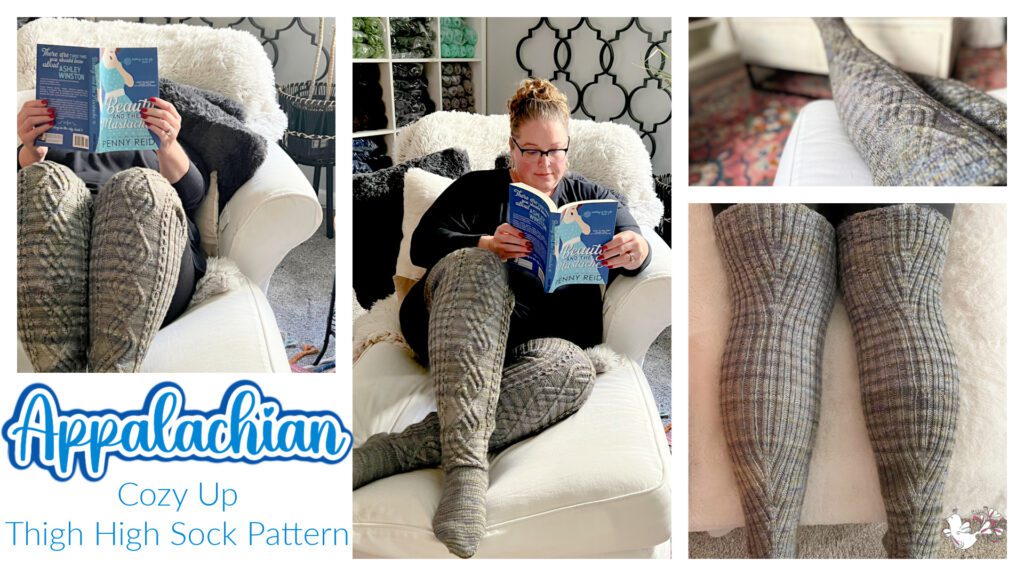
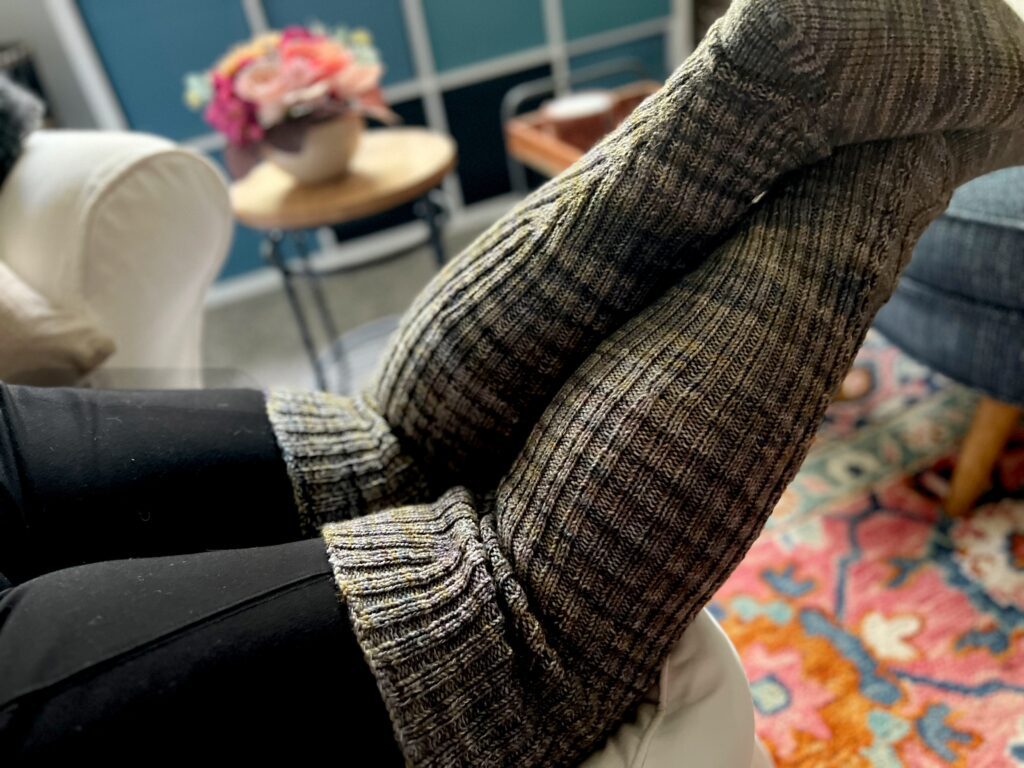
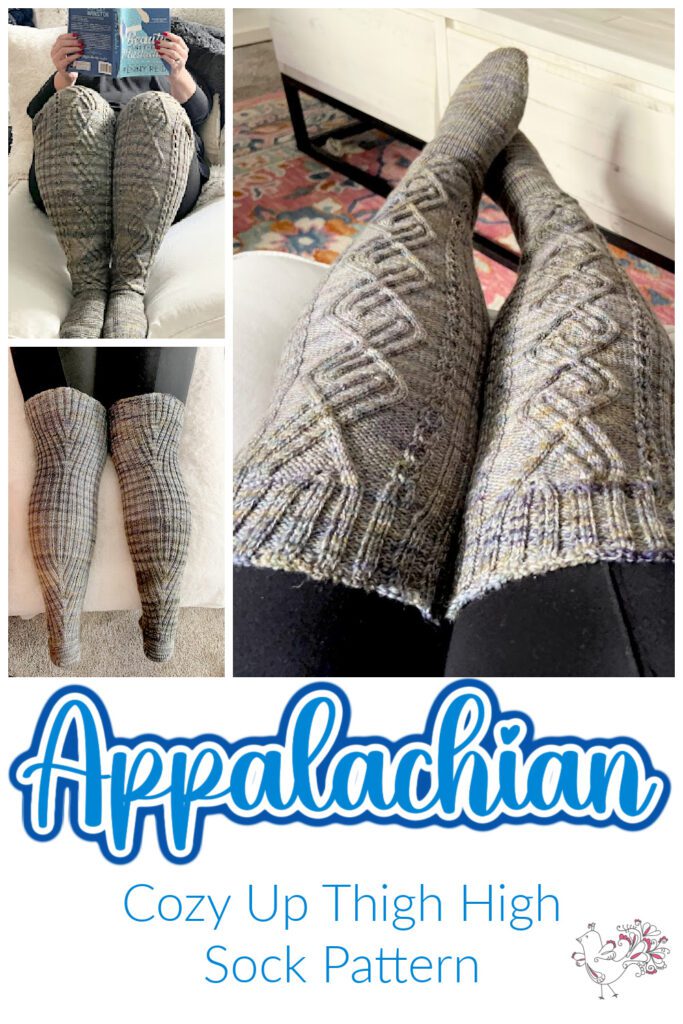
I’ve always dreamed of knitting a pair of thigh-high socks that not only fit beautifully but also felt wonderfully cozy. But, as someone with larger calves and big thighs, finding a pattern that catered to my measurements was a challenge. So, what’s a knitter to do? Design one, of course! Today, I’m thrilled to share my journey and the creation of the Appalachian Cozy Up Thigh High Knit Sock pattern. A sock pattern that celebrates size inclusivity and customization.

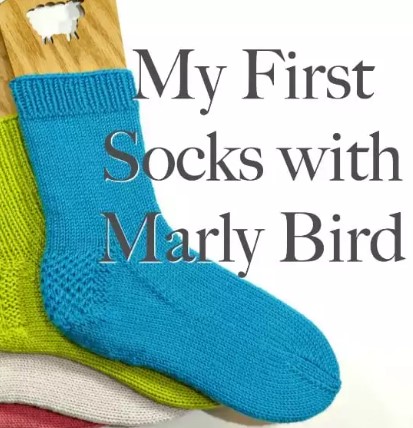
📌Psst: are you new to knitting socks? You should check out this 100% comprehensive pattern and video series to learn how to hand knit socks.

Collage showing a person reading a book while wearing thigh-high knit socks. The text "Appalachian Cozy Up Thigh High Knit Sock Pattern" is displayed in stylized font. Close-up images of the socks highlight their gray and textured knitted design, illustrating the knitting perfect fit. -Marly Bird

Affiliate Disclosure: This post contains affiliate links. If you click on one of these links and make a purchase, I may earn a small commission at no additional cost to you. This helps support the content and free patterns I provide here on MarlyBird.com. Thank you for your support—it means the world to me! 💖

Designing Thigh High Knit Socks for Comfort and Style

The inspiration behind these socks was simple: comfort meets chic. I wanted a pair of thigh-high socks that weren’t just functional but also stylish enough to be worn around the house or under boots on a chilly day. The key was to create a pattern that would accommodate a wide range of sizes, from XS to 5XL, ensuring everyone could enjoy this cozy creation.

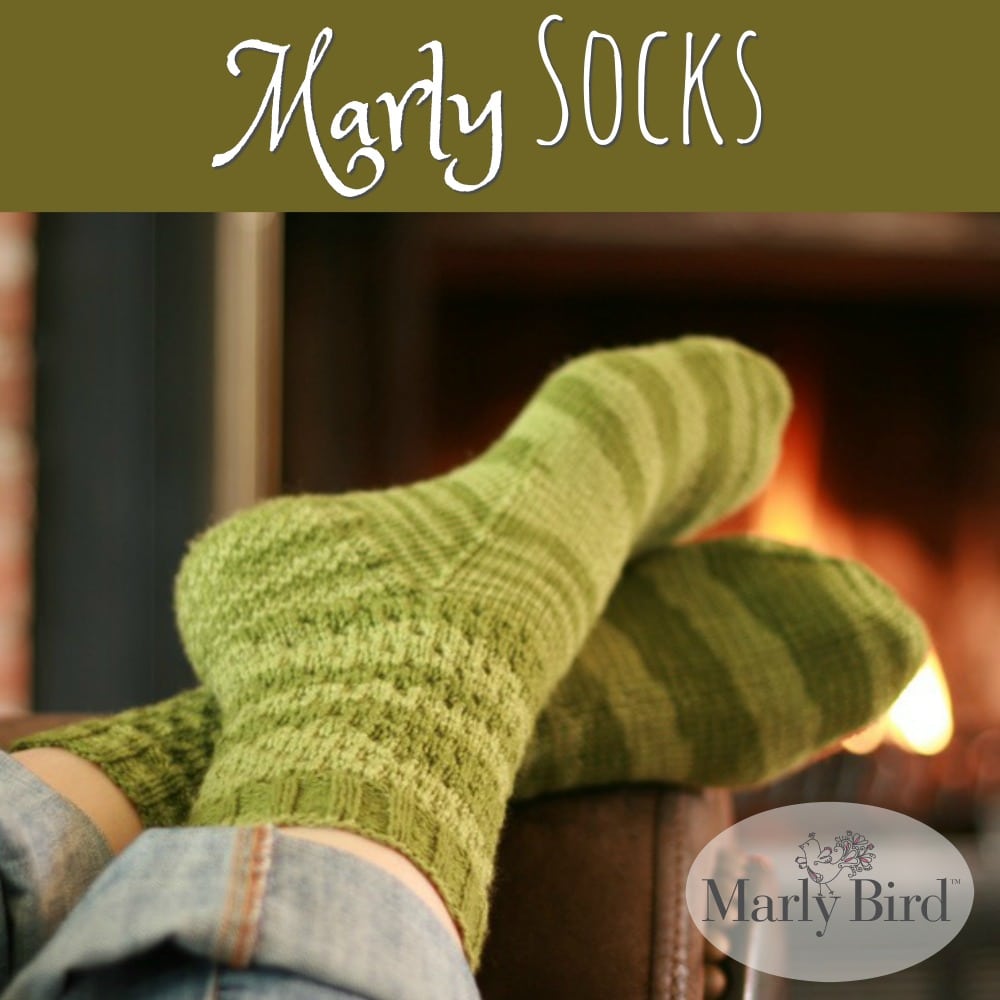
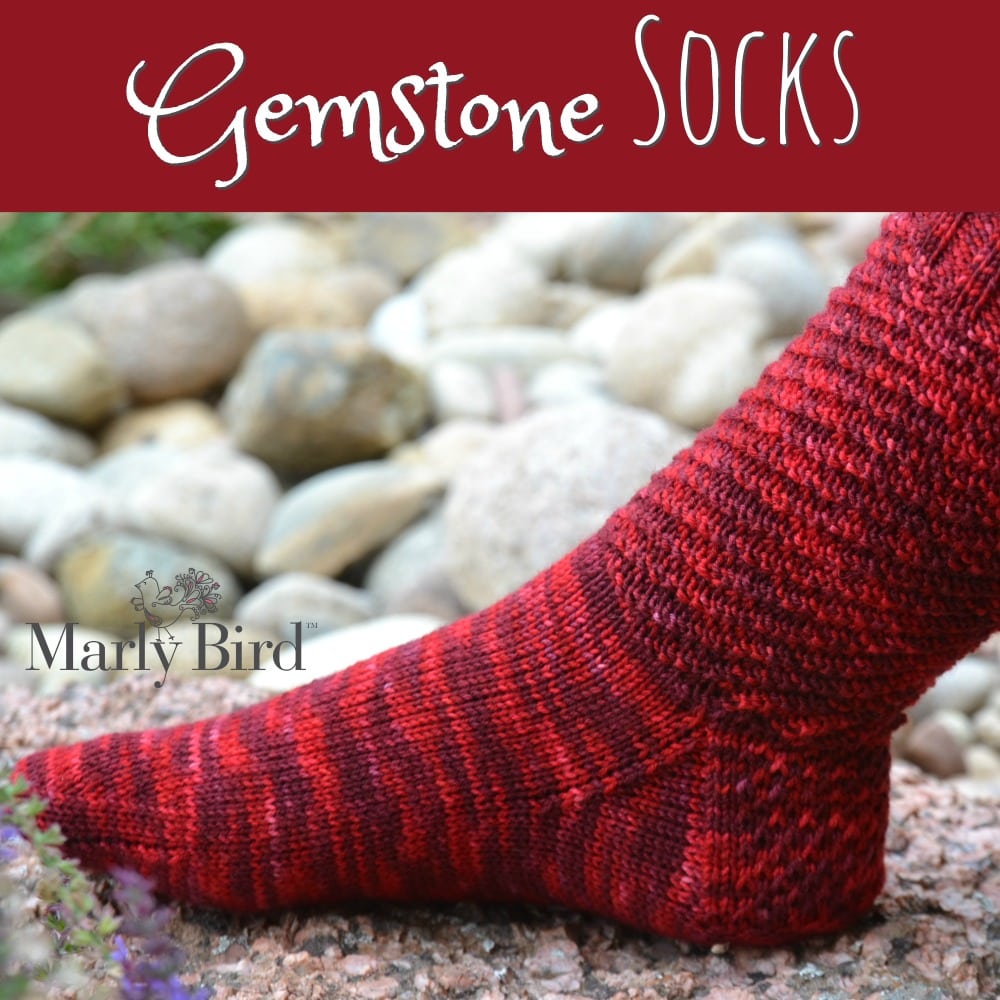
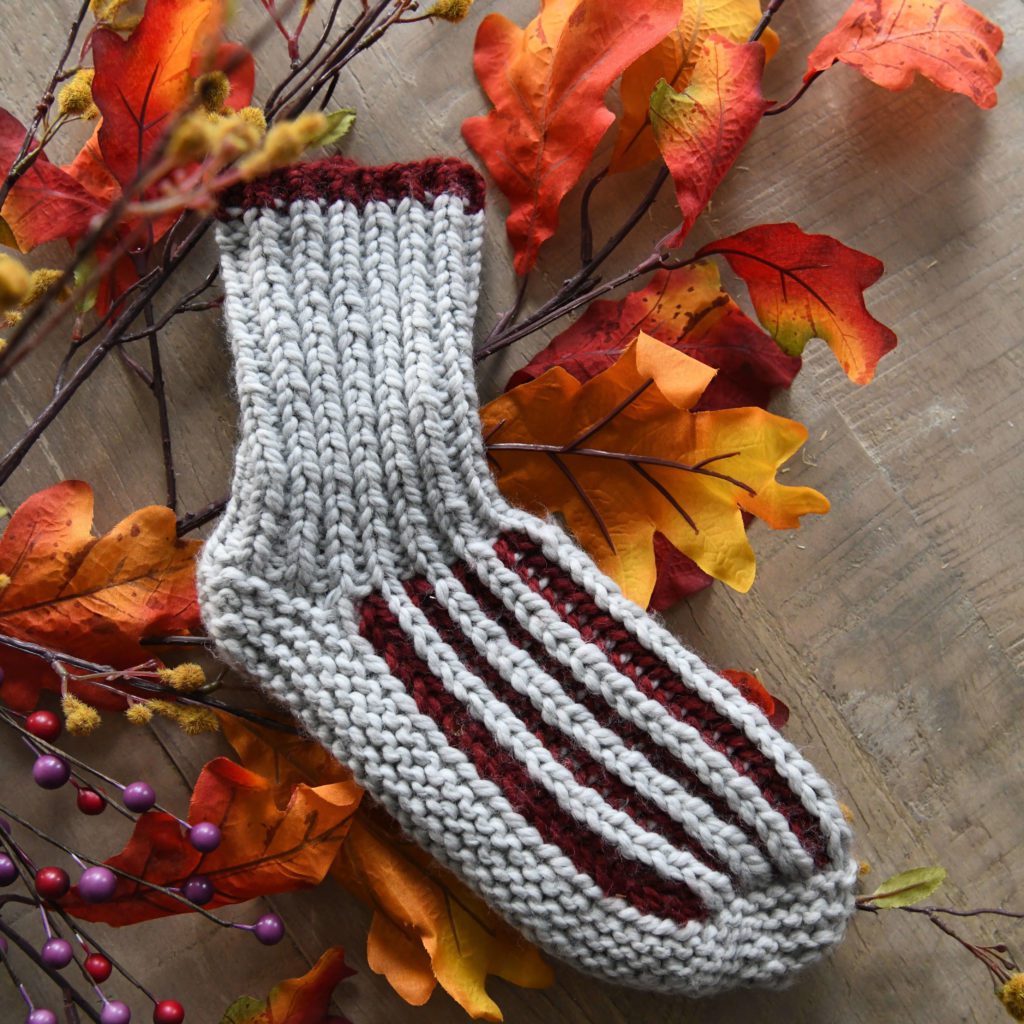
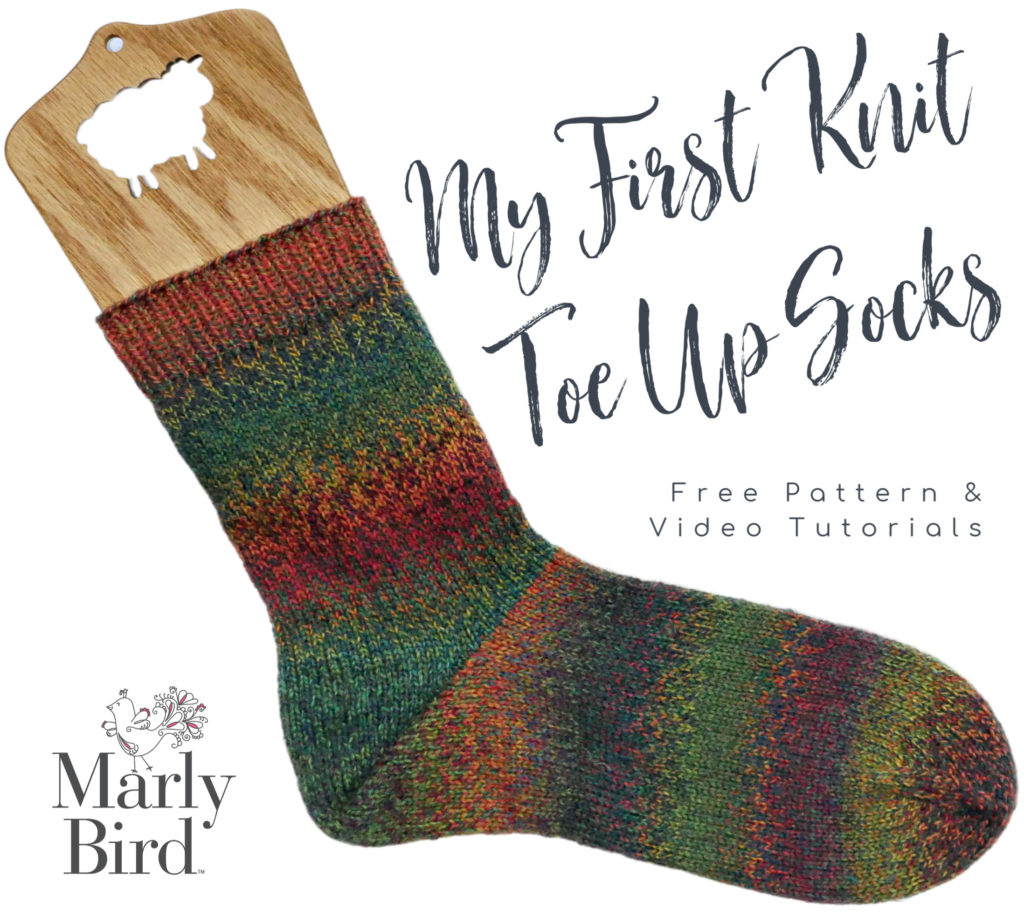
I’ve often written my sock patterns to include multiple sizes, like the My First Knit Socks, My First Toe Up Knit Socks (with german short rows), Marly’s Socks, Hint of Hazelnut Socks, Brioche Top Slipper Socks, or Gemstone Socks. But these are the first socks that needed to include shaping for calves and thighs.

My First Knit Socks with Marly Bird
A close-up of two knitted socks displayed on a wooden surface. One sock is being worn and features a pink cuff and toe with an orange and light brown body. The other sock, lying flat beside it, in similar colors but with a white cuff and heel, evokes the charm of Appalachian Cozy Up with its zigzag patterns. -Marly Bird
A close-up of green knitted socks on someone's feet, resting comfortably by a cozy fireplace showcases the intricate thigh-high knit sock pattern. The words "Marly Socks" are styled at the top, and the "Marly Bird" logo is in the bottom corner. -Marly Bird
A knitted sock in gray and burgundy laid on a wooden surface surrounded by colorful autumn leaves and purple berries, showcasing a Stash Busting pattern. -Marly Bird

Using DK weight yarn was an intentional choice. It offers more warmth and substance than the typical sock yarn, making these socks ideal for snuggling up by a fire or lounging with a good book. Plus, the thicker yarn enhances the textural elements of the design, giving the cables and ribbing a delightful prominence. Not to mention the durability of a thicker sock.

Three skeins of Hawthorne DK yarn are neatly arranged on a white surface. The yarns include two shades of gray with speckles of color and one in a deep navy blue. The textures appear soft and plush, ideal for knitting or crocheting projects like an Appalachian Cozy Up or a thigh-high knit sock pattern. -Marly Bird

Customizable Fit for All Body Types

One of the unique features of the Appalachian Cozy Up Socks is their full customizability. Whether you have slender limbs or curvy silhouettes, these socks are designed to hug your legs perfectly. The pattern includes detailed instructions on how to adjust for different leg widths and lengths, making it truly your own.

Why Ribbing Works

The magic of knit ribbing lies in its elasticity and form-fitting nature. For these socks, I incorporated extensive ribbed sections that not only enhance the aesthetic but also improve the fit. The ribbing allows the fabric to conform snugly to the shape of the leg, preventing the socks from sagging without being uncomfortably tight.

A person in black pants wearing cozy, chunky knit socks with shades of green and gray rests their feet up on a white, cushioned surface. The background includes colorful decor, including a vibrant, patterned rug and a side table with a flower arrangement. It’s the perfect setting to Appalachian Cozy Up. -Marly Bird

Optional Features for Added Convenience

To further ensure that these socks stay up, the pattern includes an option to integrate elastic at the cuffs. This is a game-changer for anyone who struggles with keeping their thigh-highs in place throughout the day. It’s a simple addition that can make all the difference in day-to-day wearability.

Thigh High Knit Sock Pattern PDF

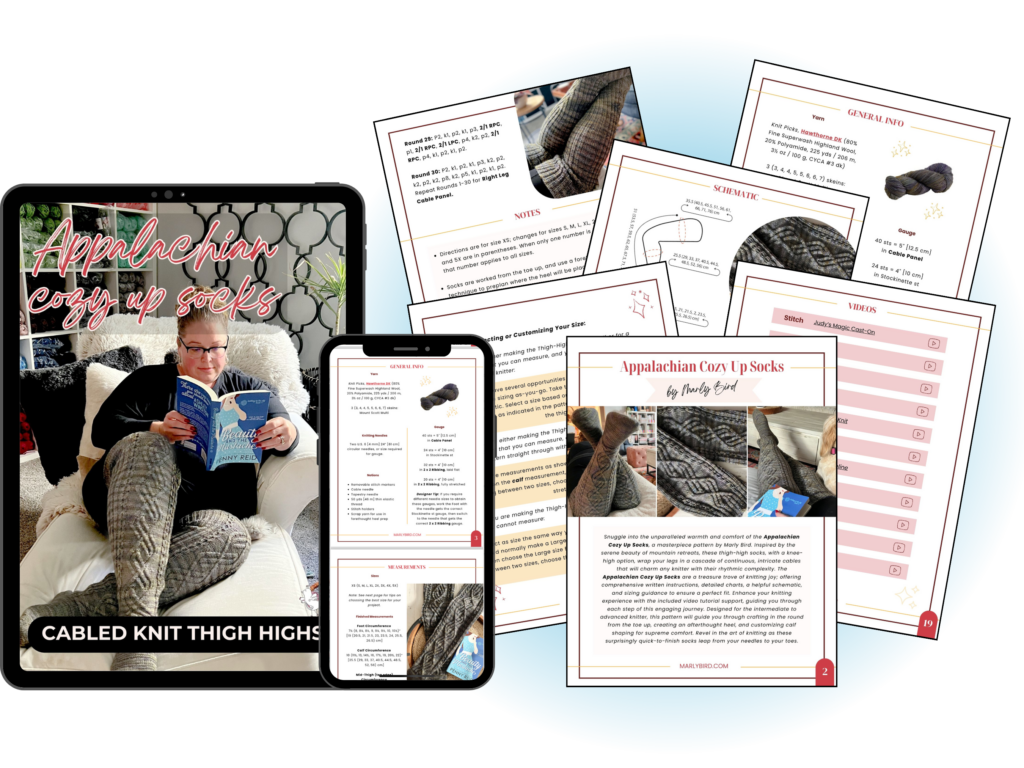
Ready to start your own pair of Appalachian Cozy Up Socks? Great news! The complete pattern is available for purchase in my Etsy Shop, Shopify Store, and on Ravelry. This isn’t just any pattern—it’s a comprehensive ✨29-page guide✨ that includes everything you need to knit these fabulous socks. From fully written-out instructions and detailed charts to helpful notes, a clear schematic, and beautiful images that guide you through every step, this PDF is packed with resources to ensure a joyful knitting experience.

Whether you’re a knitting newbie or a seasoned pro, this pattern will provide you with all the tools to create something truly special. The length and detail reflect the care and thought put into making this pattern accessible and enjoyable for everyone. It’s designed not just to instruct but to inspire and delight you as you knit. So, don’t wait—head over to the Marly Bird Etsy Shop, Shopify Store, or Ravelry page and download your pattern today. Let’s cast on and cozy up in style!

A set of designs and patterns for "Appalachian Cozy Up Socks". It showcases an image of a person wearing thigh-high knit socks, a digital document displayed on a tablet and smartphone, and detailed step-by-step instructions with photos of the knitting process to ensure you're knitting the perfect fit. -Marly Bird
Etsy
Shopify
Ravelry

A Cozy Dream Come True

Imagine lounging on a comfy chair, your favorite book in hand, and your feet tucked warmly in a pair of handknit socks. That’s the experience I envisioned with the Appalachian Cozy Up Thigh High Knit Sock pattern. These aren’t just socks; they’re a weekend retreat for your feet, a warm embrace on a cold day, and a perfect project for anyone who has ever felt left out by standard sock sizes.

A collage featuring thigh-high knitted socks with intricate patterns. The top left shows someone reading while wearing the socks. The bottom left displays the socks laid flat. The main right image is a close-up of the sock details. Text reads "Appalachian Cozy Up Thigh High Sock Pattern. -Marly Bird

Join the Knitting Revolution

If you’ve been searching for the perfect handknit thigh-high sock pattern, look no further. Whether you’re tackling a pair for yourself or knitting a thoughtful gift, these socks are bound to be a satisfying project. I encourage you to cast on and start knitting your cozy dream into reality.

Happy knitting, and remember, every stitch you make is a step towards a more creative and fulfilled you!

Filed Under: Designer Premium Patterns, Knitting, Marly Bird Premium Patterns, Pattern, Uncategorized

Garden Party Crochet Cardigan – Glow Up! Free Pattern + Full Tutorial

July 4, 2024 By Marly Bird 4 Comments

Hey there, crochet friends! 🌸 I’m beyond excited to share the glow-up of a fan favorite – the Garden Party Crochet Cardigan Free Pattern! This beautiful layering piece now comes with more size options, detailed instructions, and even a full video tutorial to guide you every step of the way. Whether you’re a seasoned crocheter or an adventurous beginner, this cardigan is a delightful project to add to your wardrobe. Let’s dive into the details and get started!

Get the Garden Party Crochet Cardigan free pattern below, or purchase printable PDF on Etsy, Shopify, or Ravelry.

A young woman models a blue, crocheted Garden Party Cardigan outdoors. The collage shows her smiling, showcasing the Crochet Cardigan from different angles. Text reads "Garden Party Cardigan - Free Pattern + Full Tutorial. -Marly Bird

Affiliate Disclosure: This post contains affiliate links. If you click on one of these links and make a purchase, I may earn a small commission at no additional cost to you. This helps support the content and free patterns I provide here on MarlyBird.com. Thank you for your support—it means the world to me! 💖

Improved and Free Garden Party Crochet Cardigan Pattern

The Garden Party Crochet Cardigan is back and better than ever! This pattern has been upsized to be more inclusive, ranging from XS to 5XL. Plus, the ad-free PDF includes exclusive new stitch diagrams, and charts for each size; this cardigan is easier to make and customize than ever before. Crochet stitch diagrams and charts are perfect for those who prefer a detailed visual guide. The full written pattern can be found at the bottom of this blog post.P

Choose the Right Yarn for Your Crochet Cardigan Free Pattern

The yarn used for this pattern is called Galileo, a sport weight yarn made of merino wool and bamboo. The beautiful shine and drape of this fabric come from the nature of this yarn. To achieve a similar effect, choose a yarn that has a mix of silk, bamboo, or rayon with wool, acrylic, or cotton.

🌟Don’t forget to work up a gauge swatch and wash and block it to get the full effect of the crochet shell lace stitch pattern!

A hand with red nail polish holds a crochet hook over a partially completed crochet project made of blue yarn. Nearby, there are two balls of yarn, one blue and one green, with a label that reads "Galileo Sport Weight." This free pattern is perfect for creating your next crochet cardigan. -Marly Bird

Choose the Right Crochet Hook For The Crochet Cardigan Free Pattern

For the sample crochet cardigan, I used a US F/3.75mm hook. However, it’s crucial that you use a hook size that allows you to achieve the correct gauge on a BLOCKED SWATCH!

Make sure to allow your swatch to relax after blocking to ensure it doesn’t shrink down and become too small.

🌟Remember, the hook size mentioned on the yarn label is just a suggestion and should not be the standard for your project. Always go with what gets you the right gauge for a perfect fit!

A smiling person sits outdoors wearing a crocheted navy blue Garden Party Crochet Cardigan over a light blue outfit. To the right, there are close-up images of the cardigan's intricate patterns. Text at the bottom reads "Garden Party Crochet Cardigan" in vibrant pink, highlighting the availability of a Free Pattern. -Marly Bird
Etsy
Shopify
Ravelry

Step-by-Step Video Tutorial for the Garden Party Crochet Cardigan

You have been asking for this and now you have it! Marly has got you covered with a full video tutorial that walks you through choosing the right yarn, selecting the perfect size, and working the crochet shell lace pattern and scallop edging. With extra tips and tricks sprinkled throughout, you’ll have all the guidance you need to create a cardigan that’s just right for you.

💕PLUS BONUS Video for how to choose the correct size for you!

Crochet Cardigan that is Versatile, Stylish, and Comfortable

This crochet cardigan is a versatile piece that can be worn any time of year. It looks great over a sundress or paired with a shirt and cargo pants. Whether you prefer a snug fit with negative ease or a relaxed look with positive ease, the options are endless. I’ll be showing images of each fit so you can see the possibilities!

A woman with long, curly hair stands outdoors, smiling at the camera. She wears a black top, a blue crochet cardigan, and mustard yellow pants. One hand is on her hip, and the background features green trees and a sunlit pathway. -Marly Bird
Oversized Fit (2 sizes up)
A person with short, curly hair and glasses is smiling and sitting on a low wall in front of tall green plants. They’re wearing a white dress paired perfectly with a dark green crochet cardigan. -Marly Bird
Standard Fit (as written)
A person with glasses and a warm smile stands indoors, wearing a black top and a Garden Party Crochet Cardigan. They have their hands in their pockets. The background shows home decor, including a door, wall art, and part of a couch with a throw blanket. -Marly Bird
Negative Ease Fit (2 sizes down)

Good First Cardigan for Adventurous Beginners

If you’re an adventurous beginner looking for your first cardigan project, this pattern is perfect for you! The straightforward shell lace stitch pattern uses chains, single crochet, half double crochet, and double crochet – key stitches every crocheter should know.

The shaping is simple, and the entire sweater is made in one piece, minimizing seaming. The customizable edging allows for more or less coverage, ensuring a perfect fit.

If you think you might like a different edging, check out these options in this blog post. https://marlybird.com/blog/crochet-edgings-for-beginners

BiCrafty Bootcamp Crochet

🌟 Are you a newer crochet or maybe a knitter who wants more guidance than you can find on YouTube alone? Then BiCrafty Bootcamp: Crochet for Knitters is the online course for you. Currently it is available for free on the MarlyBird.com website, but it will soon be part of the Marly Bird House. To be updated when that happens, sign up here.

Garden Party Crochet Cardigan Free Pattern

Ready to start your Garden Party Crochet Cardigan? I’ve decided to make the written version of the pattern free on the website. This version only includes the general information, notes, video links, and written information.

If you prefer an uninterrupted crochet experience and want to support your favorite BiCrafty Bestie, consider purchasing the ad-free PDF on Etsy, Shopify, or Ravelry. The PDF includes all the exclusive stitch diagrams and pattern charts for each size.

Get the Ad-Free PDF

A completely black image with no visible content or discernible patterns. -Marly Bird

Purchasing the ad-free PDF of the Garden Party Crochet Cardigan Pattern is a fantastic option for those who want a seamless, uninterrupted crafting experience. This convenient format allows you to easily follow along without distractions, and it’s perfect for printing out and taking on-the-go for your crochet projects.

The PDF includes fully formatted pattern with written instructions, schematic, crochet stitch diagrams, full pattern charts for each size, and video tutorial links.

A collage showcasing the "Garden Party" crochet cardigan pattern. It features a woman modeling the cardigan, a tablet and smartphone displaying the free pattern digitally, and various printed pages from the full tutorial, including instructions and special stitches. -Marly Bird
Etsy
Shopify
Ravelry

Garden Party Crochet Cardigan – Free Pattern

Designed by Marly Bird

SKILL LEVEL

Adventurous Beginner

MEASUREMENTS

To Fit Sizes

XS (S, M, L, XL, 2X, 3X, 4X, 5X) with 2-4” of positive ease

Finished Measurements

Bust 32 (36, 40, 44, 48, 52, 56, 60, 64)” [81.5 (91.5, 101.5, 112, 122, 132, 142, 152.5, 162.5) cm]

Length 24 (24, 25, 25, 26, 26, 27, 27, 28)” [61 (61, 63.5, 63.5, 66, 66, 68.5, 68.5, 71) cm]

Video for Choosing the Right Size For You

Gauge 

2 repeats and 8 rows = 4” [10 cm] in Shell Lace Pattern; use any size hook to obtain the gauge. 

MATERIALS

Crochet Yarn 

WeCrochet, Galileo (50% merino wool, 50% viscose, 131 yds / 120 m, 1¾ oz/ 50 g, CYCA#2 sport) 

#26104 Gem, 5 (6, 7, 7, 8, 8, 9, 10, 11) skeins

Crochet Hook

Size F/5 [3.75 mm]

Notions 

  • Stitch markers
  • Tapestry needle or Chenille Needle
  • Blocking Mats and Blocking Pins

ABBREVIATIONS

Ch – Chain(s) 

Dc – Double Crochet 

Hdc – Half Double Crochet

RS – Right Side 

Sc – Single Crochet

Sl st – Slip Stitch

Sp(s) – Space(s) 

St(s) – Stitch(es)

Stacked Dc – Stacked Double Crochet (see Special Stitches)

Stacked Tr – Stacked Treble Crochet (see Special Stitches)

Tr – Treble Crochet

WS – Wrong Side

SPECIAL STITCHES 

⭐️ Stacked Double Crochet: (Stacked Dc): (Do not ch 1 prior to making the first sc) Sc in first stitch, insert hook in between the two legs of the base of the sc, yarn over and pull up a loop, yarn over and draw through 2 loops on hook.

⭐️ Stacked Treble Crochet (Stacked Tr): (Do not ch 1 prior to making the first sc) Sc in first stitch, * insert hook in between the two legs of the base of sc just made, yarn over and pull up a loop, yarn over and draw through 2 loops on hook creating another sc; repeat from * once more.

⭐️Double Crochet 2 Together (dc2tog): *Yarn over hook, insert hook into indicated st, yarn over and pull up a loop, yarn over and draw through 2 loops on hook; repeat from * in next st indicated, yarn over and draw through all 3 loops on hook.

⭐️Half Shell (h-sh): (3 dc, ch 1, dc) OR (stacked dc, ch 1, 3 dc) in indicated ch or ch-sp.

⭐️Shell (sh): (3 dc, ch 2, 3 dc) in indicated ch or ch-sp.

GROW

To Unlock Exclusive Subscriber Content click the Box below and join for free by simply adding your email and creating a password! If you are having troubles, clear your cache or reset your password or login to the Grow Publisher Portal.

>> Learn More About Grow Here <<

I’m thrilled to share this amazing pattern with you, many patterns on my blog are absolutely free! I kindly request that you don’t copy and paste or distribute this pattern. Prefer an ad-free experience? Buy a digital PDF pattern for a small fee from one of my online stores for a seamless crafting journey. 

I appreciate your support and readership. You are the reason I can keep doing what I love and sharing it with others. So, thank you from the bottom of my yarn-loving heart! Disclosure: This post contains affiliate links, meaning I get a commission if you decide to make a purchase through my links at no cost to you.

A collage showcases a woman wearing a blue crochet cardigan made with a shell lace stitch pattern. Close-up images highlight the intricate design. Text reads "Shell Lace Stitch Pattern." One woman is seated outside, and another smiles while modeling the crochet cardigan. -Marly Bird

SHELL LACE PATTERN

 See Shell Lace Stitch Diagram on page 9 for assistance — only available in ad-free pdf.

Etsy
Shopify
Ravelry

(Foundation is a multiple of 8 ch + 2)

Row 1 (RS): Sc in 2nd ch from hook, * ch 1, skip 3 foundation ch, (3 dc, ch 2, 3 dc) in next ch (shell made), ch 1, skip 3 foundation ch, sc in next ch; repeat from * to end, turn.

Row 2: Stacked dc, dc in 1st sc, ch 2, (sc, ch 3, sc) in next ch-2 sp, ch 2, * (dc, ch 1, dc) in next sc, ch 2, (sc, ch 3, sc) in next ch-2 sp, ch 2; repeat from * to last sc, 2 dc in last sc, turn.

Row 3: Stacked dc, ch 1, 3 dc in 1st dc (half shell made), ch 1, skip ch-2 sp, sc in next ch-3 sp, ch 1, * skip ch-2 sp, (3 dc, ch 2, 3 dc) in next ch-1 sp, ch 1, skip ch-2 sp, sc in next ch-3 sp, ch 1; repeat from * to last ch-2 sp, skip last ch-2 sp, (3 dc, ch 1, dc) in last stacked dc (half shell made), turn.

Row 4: Ch 1, hdc in 1st dc, ch 1, sc in 1st ch-1 sp, ch 2, * (dc, ch 1, dc) in next sc, ch 2, (sc, ch 3, sc) in next ch-2 sp, ch 2; repeat from * to last sc, (dc, ch 1, dc) in last sc, ch 2, (sc, ch 1, hdc) in last stacked dc, turn.

Row 5: Ch 1, sc in 1st hdc, ch 1, skip 1st ch-1 sp and ch-2 sp, (3 dc, ch 2, 3 dc) in next ch-1 sp, ch 1, * skip next ch-2 sp, sc in next ch-3 sp, ch 1, skip next ch-2 sp, (3 dc, ch 2, 3 dc) in next ch-1 sp, ch 1; repeat from * to last ch-2 sp, skip last ch-2 sp and ch-1 sp, sc in last hdc, turn.

Repeat Rows 2-5 only for Shell Lace Pattern.

SCHEMATIC

Garden Party Crochet Cardigan schematic template with measurements for blocking. The pattern has various height and width dimensions labeled in inches. Specific sections include measurements of 48-56" height, and 16-32" width at different parts of the template, perfect for designing a crochet cardigan. -Marly Bird
A schematic diagram shows a crochet cardigan with dimensions. The garment has specific measurements at various points, including widths of 20.5 cm and lengths ranging from 61 cm to 142 cm. Additional dimensions and varying measurements are shown in cm. -Marly Bird

NOTES

  • Directions are for size XS; changes for sizes S, M, L, XL, 2XL, 3XL, 4X, 5X are in parentheses. When only one number is given then that number applies to all sizes.
  • Cardi is worked from the back up the back sleeves over the shoulders and down to the front edge. Arms and sides are seamed then the scalloped edging is then added on to the long open front edge.
  • The cardigan is a classic fit with only 2-4″ of positive ease. Our sample is 2X in size modeled on a 2X and L model.
  • 1 Stitch Repeat is 1 shell + 2 ch-sps + 1 sc that is repeated across Row 3 or 5

VIDEO TUTORIALS

  • How to Make a Slip Knot >> Click Here for Video Help <<
  • How to Chain >> Click Here for Video Help <<
  • How to Single Crochet >> Click Here for Video Help <<
  • How to Double Crochet >> Click Here for Video Help <<
  • How to Half Double Crochet >> Click Here for Video Help <<
  • Stacked Double Crochet >> Click Here for Video Help <<
  • How to Bury Ends >> Click Here for Video Help << 
  • Reading Crochet Charts- https://youtu.be/fJvO9WwGAUU
  • Wet Blocking- https://youtu.be/lJnH4DD75zI
  • Full Pattern Video Tutorial- https://youtu.be/NPSgDbKZsQI

A collage features a woman modeling a blue crochet cardigan. The photo shows the crochet cardigan from various angles, highlighting its intricate design. Text on the image reads "Garden Party Crochet Cardigan" and "Free Pattern," with a clear close-up of the crochet detail. -Marly Bird

Garden Party Crochet Cardigan – Free Pattern Instructions

BACK

See Layouts for each size for assistance. These are located at the end of the pattern.

Ch 66 (74, 82, 90, 98, 106, 114, 122, 130), and work in Shell Lace Pattern for 32 rows, ending after a pattern Row 4 – 8 (9, 10, 11, 12, 13, 14, 15, 16) shells.

Shape Sleeves

Pull last loop large to keep it from unraveling, and remove hook from work.

Using new yarn, ch 24, sl st to opposite end of row, and fasten off.

Place hook back into large loop and tug yarn to bring loop back to normal size.

Next row (RS): Ch 25, skip 1 ch, * sc in next ch, ch 1, skip 3 foundation ch, (3 dc, ch 2, 3 dc) in next ch, ch 1, skip 3 foundation ch; repeat from * to 1st hdc of Back, sc in 1st hdc, work across back in established Shell Lace Pattern working a sc in last hdc of Back, ** skip 3 foundation ch, (3 dc, ch 2, 3 dc) in next ch, ch 1, skip 3 foundation ch, sc in next ch; repeat from ** to end of Sleeve ch, turn- 14 (15, 16, 17, 18, 19, 20, 21, 22) shells.

Work 13 (15, 17, 15, 17, 19, 21, 19, 21) more rows evenly in established Shell Lace Pattern.

RIGHT FRONT

Row 1 (RS): Work in established Shell Lace Pattern to 5th (6th, 6th, 7th, 7th, 8th, 8th, 9th, 9th) ch-1 sp, (3 dc, ch 1, dc) in this ch-1 sp (half shell made), turn.- 4 sh + 2 h-sh (5 sh + 1 h-sh, 5 sh + 2 h-sh, 6 sh + 1 h-sh, 6 sh + 2 h-sh, 7 sh + 1 h-sh, 7 sh + 2 h-sh, 8 sh + 1 h-sh, 8 sh + 2 h-sh).

Row 2: Ch 1, hdc in 1st dc, ch 1, sc in 1st ch-1 sp, ch 2, (dc, ch 1, dc) in next sc, work in established Shell Lace Pattern to end, turn.

Work evenly in established Shell Lace Pattern for 6 (6, 6, 6, 6, 10, 10, 10, 10) more rows.

Shape Neck

 See Right Front Neck Shaping Stitch Diagram on page 10 for assistance.

Row 1 (RS): Work in established Shell Lace Pattern to last stacked dc, (3 dc, ch 2, dc) in last stacked dc, turn.

Row 2: Ch 1, (sc, ch 3, sc) in 1st ch-2 sp, work in established Shell Lace Pattern to end, turn.

Row 3: Work in established Shell Lace Pattern to last ch-3 sp, sc in last ch-3 sp, ch 1, hdc in last sc, turn.

Row 4: Stacked tr, ch 3, (dc, ch 1, dc) in next sc, work in established Shell Lace Pattern to end, turn.

Row 5: Work in established Shell Lace Pattern to last ch-1 sp, (3 dc, ch 2, 3 dc) in last ch-1 sp, ch 1, sc in last stacked tr, turn – 5 sh + 1 h-sh (5 sh + 2 h-sh, 6 sh + 1 h-sh, 6 sh + 2 h-sh, 7 sh + 1 h-sh, 7 sh + 2 h-sh, 8 sh + 1 h-sh, 8 sh + 2 h-sh, 9 sh + 1 h-sh).

Work 5 (3, 5, 7, 9, 3, 5, 7, 9) more rows evenly in Shell Lace Pattern.

Fasten off.

Shape Sleeves

With RS facing, skip 2 ch-3 sps, and join yarn with a sl st in next ch-3 sp.

Next row (RS): Ch 1, sc in same ch-3 sp, ch 1, skip next ch-2 sp, (3 dc, ch 2, 3 dc) in next ch-1 sp, work in established Shell Lace Pattern to end, turn – 2 sh + 1 h-sh (3 shells, 3 sh + 1 h-sh, 4 shells, 4 sh + 1 h-sh, 5 shells, 5 sh + 1 h-sh, 6 shells, 6 sh + 1 h-sh).

Work 31 more rows evenly in Shell Lace Pattern, then fasten off.

LEFT FRONT

With RS facing, skip 3 ch-1 sps at back neck, and join yarn with a sl st in next ch-1 sp

Next row (RS): Stacked dc ch 1, 3 dc in same ch-1 sp as joining sl st, ch 1, skip next ch-2 sp, sc in next ch-3 sp, work in established Shell Lace Pattern to end, turn – 4 sh + 2 h-sh (5 sh + 1 h-sh, 5 sh + 2 h-sh, 6 sh + 1 h-sh, 6 sh + 2 h-sh, 7 sh + 1 h-sh, 7 sh + 2 h-sh, 8 sh + 1 h-sh, 8 sh + 2 h-sh).

Work evenly in established Shell Lace Pattern for 7 (7, 7, 7, 7, 11, 11, 11, 11) rows.

Shape Neck

See Left Front Neck Shaping Stitch Diagram on page 10 for assistance.

Row 1 (RS): Stacked dc, ch 2, 3 dc in 1st dc, ch 1, skip next ch-2 sp, sc in next ch-3 sp, work in established Shell Lace Pattern to end, turn.

Row 2: Work in established Shell Lace Pattern to last sc, (dc, ch 1, dc) in last sc, ch 2, (sc, ch 3, sc) in last ch-2 sp, turn.

Row 3: Ch 3, sc in 1st ch-3 sp, ch 1, skip next ch-2 sp, (3 dc, ch 2, 3 dc) in next ch-1 sp, work in established Shell Lace Pattern to end, turn.

Row 4: Work in established Shell Lace Pattern to last sc, (dc, ch 1, dc) in last sc, ch 2, tr in last ch-3 sp, turn.

Row 5: Ch 1, sc in 1st tr, ch 1, skip next ch-2 sp, (3 dc, ch 2, 3 dc) in next ch-1 sp, work in established Shell Lace Pattern to end, turn – 5 sh + 1 h-sh (5 sh + 2 h-sh, 6 sh + 1 h-sh, 6 sh + 2 h-sh, 7 sh + 1 h-sh, 7 sh + 2 h-sh, 8 sh + 1 h-sh, 8 sh + 2 h-sh, 9 sh + 1 h-sh).

Work 5 (3, 5, 7, 9, 3, 5, 7, 9) more rows evenly in Shell Lace Pattern.

Shape Sleeves

Next row (RS): Work in established Shell Lace Pattern to last 3 ch-3 sps, sc in 3rd to last ch-3 sp, turn –  2 sh + 1 h-sh (3 shells, 3 sh + 1 h-sh, 4 shells, 4 sh + 1 h-sh, 5 shells, 5 sh + 1 h-sh, 6 shells, 6 sh + 1 h-sh).

Work 31 more rows evenly in Shell Lace Pattern, then fasten off.

FIRST FINISHING

Wet block body to schematic size. See video tutorial for assistance. With RS facing, whip stitch side and underarm seams together.

A close-up image of a crocheted scalloped edge in a teal fabric with intricate patterns, reminiscent of a cozy crochet cardigan. In the background, partly blurred, there are a few flowers with light blue, white, and green petals, adding a touch of color to the scene. Garden Party Crochet Cardigan Pattern-Marly Bird

Front Edging

See Edging Stitch Diagram for assistance — only available in ad-free pdf. 

Etsy
Shopify
Ravelry

Place removable markers up right front edge, across back neck, and down left front edge, spacing them approximately 2½“ [6.5 cm] apart. Take your time moving the markers around if needed to make sure all the sections look even.

With RS facing, join yarn with a sl st at bottom right front corner.

Collage featuring a person wearing a blue, scalloped-edge crocheted cardigan over a light blue dress in a lush, grassy area. Close-ups show the intricate crochet pattern and scalloped edge detail. "Scalloped Edging" text in pink on a blue background. -Marly Bird

Row 1 (RS): Ch 1, work 11 sc evenly along edge in first section, then 12 sc in each remaining section, turn

Row 2: Ch 3, skip 1st 2 sc, hdc in next sc, * ch 2, skip 2 sc, hdc in next sc; repeat from * to last 2 sc, ch 1, skip 1 sc, hdc in last sc, turn.

Row 3: Ch 3, hdc in next hdc, * ch 2, hdc in next hdc; repeat from * to last ch-3 sp, ch 1, hdc in last ch-3 sp, turn.

Row 4: Repeat row 3.

Row 5: Stacked dc, ch 1, dc2tog over 1st 2 sps, * ch 2, dc2tog over last worked sp and next sp; repeat from * to last ch-3 sp, ch 2, dc2tog over last worked sp and last ch-3 sp, ch 1, dc in last ch-3 sp, turn.

Row 6: Ch 3, sc in 1st ch-1 sp, * ch 2, sc in next ch-2 sp, ch 5, sc in next ch-2 sp; repeat from * to last stacked dc, ch 2, (sc, ch 1, hdc) in last stacked dc, turn.

Row 7: Ch 1, sc in 1st hdc, 11 dc in next ch-5 sp, * (2 sc, ch 3, 2 sc) in next ch-5 sp, 11 dc in next ch-5 sp; repeat from * to last ch-3 sp, sc in last ch-3 sp, turn.

Fasten off.

Weave in all loose ends. Block Edging if needed.

A woman models a blue crochet cardigan in various poses, showcasing its design and texture. She stands outdoors with greenery in the background. The text "Garden Party Crochet Cardigan - Free Pattern" is displayed in vibrant pink at the bottom, with "Marly Bird Full Tutorial" in smaller text. -Marly Bird

Want more Beginner Crochet Cardigan and Sweater Patterns?

Here are some of our favorite patterns designed by Marly and Robyn over the years. Do you have a favorite?

  • Amimono Crochet Cardigan – one of my first and still one of my favorites
  • You Are Valued – best seller!
  • Stoney Creek – great layering piece
  • Lyvia Ruana – you will want one in every color 🌈
  • Creekside Crochet Ruana – a bit more advanced than beginner but great as a goal project
  • Aurora Lace – splurge on yarn and make this next
  • Trifle – get the turkey trot package and get full tutorials + more patterns!
Amimono - Kimono Style Crochet Cardigan - Marly Bird
Amimono Kimono
A joyful woman in a vibrant red cardigan and leopard print top stands in front of a colorful wall of Fall Crochet Sweaters Patterns, gesturing excitedly. -Marly Bird
Lyvia Ruana
A joyful woman with glasses, wearing a creekside crochet ruana, points excitedly at its pockets under the caption "it has pockets," highlighted by dotted lines and text. Her logo "Marly Bird" is at the bottom. -Marly Bird
Creekside Ruana
A cheerful woman with glasses, wearing a beginner crochet sweater and ripped jeans, walks joyfully on a grass-lined path, waving with one hand. -Marly Bird
Stoney Creek
Hand-crocheted sweater featuring horizontal stripes in shades of blue and gray, displayed on a white wooden background. The pattern includes varied textures and stitches. -Marly Bird
Trifle
Marly Bird beams with joy, modeling her Aurora Lace Crochet Cardigan in cobalt blue, showcasing the bold lacework and cozy ribbed edges of this handmade garment.
Aurora Lace
A smiling woman with curly updo hair, wearing glasses, beams as she models the You Are Valued Crochet Cardigan in a vivid blue, showcasing the crochet texture against a cozy home backdrop - You Are Valued Crochet Cocoon Cardigan Marly Bird.
You are Valued

Okay, as you make any of these patterns please be sure to snap a picture and share with us on social media.

Why? Because I can’t wait to see all the beautiful Garden Party Crochet Cardigans you create! Be sure to share your progress and finished pieces with the hashtags #mmmdi and #marlybird.

Happy crocheting, everyone!

Filed Under: Crochet, Free Patterns, Marly Bird Premium Patterns, Our Free Patterns, Pattern, Uncategorized, YouTube Video Tutorial

DIY Plaid Crochet Scarf: Free Pattern & Video Tutorial

July 1, 2024 By Marly Bird 2 Comments

Hey there, crochet lovers! Do you adore the timeless charm of plaid? If so, you’re going to love my new pattern: the DIY Plaid Crochet Scarf. This stylish scarf combines the classic gingham pattern with the cozy feel of crochet, making it a must-have for any season.

Whether you’re a plaid enthusiast or just looking for a fun new crochet plaid project, this pattern has something for everyone. Keep reading to get the free written pattern, watch the full video tutorial, and learn more about creating beautiful gingham crochet pieces, like these!

Collage of a person showcasing a colorful plaid-look crocheted scarf. The main image has the text "Plaid-look with a Crochet Hook". Smiling and wearing glasses, they pose with the scarf in various angles. Marly Bird logo is at the bottom center. Includes Free Pattern and Video Tutorial for DIY Plaid Crochet Scarf.
 -Marly Bird

What is Gingham Plaid?

When I think of gingham plaid, I immediately picture cozy picnics and charming country kitchens. Gingham evokes a sense of nostalgia and comfort with its simple, checked pattern. Unlike tartan, which has complex lines and multiple colors, gingham is all about the clean and classic dual-color scheme.

Traditionally, the beauty of gingham lies in its simplicity and symmetry. Each square of color contrasts perfectly with its neighbors, creating a crisp and classic look. This isn’t the complex colorwork you might see in other patterns—gingham’s charm is in its straightforward, predictable squares. I find its unassuming beauty truly captivating.

Patterns in crochet gingham stitch - Marly Bird

In crochet, we can bring the gingham plaid look to life through basic chains, single crochet or double crochet stitches, a variety of stitch patterns like the griddle stitch, the v stitch, or even a shell stitch , or we can use the quintessential granny square motifs joined together to get such a look.

By alternating blocks of color, you can replicate the classic gingham check in your crochet projects.

planned pooling crochet scarf-Marly Bird - plaid crochet look

Sometimes it isn’t even about the stitch used but the yarn that creates a plaid look as seen in planned pooling. The consistent lengths of color in a yarn coupled with some strategic stitch and color placement can generate some amazing plaid looks with planned pooling.

Learn so much more about crochet planned pooling from these blog posts and the best planned pooling video tutorial!

This crochet gingham plaid technique used in the Check It Out scarf beautifully merges the art of crochet with the timeless appeal of gingham plaid.

6 images of fabrics, including crochet gingham stitch, gingham, tartan, plaid, and buffalo check. Marly Bird

Gingham isn’t just visually appealing—it’s incredibly versatile. Whether in fashion or home decor, gingham checks add a touch of homely elegance. From a breezy summer dress to a cozy throw pillow, this pattern fits seamlessly into various styles. For me, gingham is more than a pattern; it’s a story told through threads of color and tradition.

For more on the history and techniques of gingham, check out my detailed blog post here.

A smiling person with curly hair and glasses is wearing a colorful gingham plaid crochet scarf. The image shows close-ups of the scarf's detailed pattern. Text in the image reads "Check It Out" and "Gingham Plaid Crochet Scarf Free Pattern - Video Tutorial". -Marly Bird

Creating the Check It Out Gingham Crochet Scarf

Now, let’s talk about my Check It Out Gingham Crochet Scarf. This pattern is a fun and easy way to bring that classic gingham look into your wardrobe. Using this simple crochet techniques, you can create a stylish scarf that’s perfect for any season.

To get started, you’ll need to choose your colors. Gingham is traditionally made with a main color and a contrasting color, but for this free plaid scarf pattern we will use three very different colors to get creative with our final finished crochet scarf.

A smiling woman standing in front of tall grass, wearing glasses and a multicolored crocheted poncho with a cowl neck, playfully gesturing the 'rock on' sign with both hands. - Marly Bird - Check Me Out Crochet Poncho
If I love the look of this crochet plaid technique. Take a look at my Check Me Out Poncho pattern available here!

The Check It Out scarf pattern (and the Check Me Out Poncho pattern) uses basic stitches that when combined together form the Griddle stitch. Don’t let that name scare you, you will still only be working single crochet and double crochet, so it’s suitable for all skill levels.

I’m including the written pattern right here, but if you prefer a crochet stitch diagram and an ad-free, uninterrupted experience, you can purchase the PDF version. This not only gives you a clean, easy-to-follow format but also supports your favorite BiCrafty designer—me!

A woman with glasses smiles while showcasing a colorful, chunky crochet scarf. She wears a denim jacket and her hair is pulled back. The text overlay reads "Free Crochet Pattern for Puffed Scarf, check it out at crystalnpaula.com." The background is an indoor setting with cozy vibes. -Marly Bird

Get the Ad-Free PDF

Purchasing the ad-free PDF of the Check It Out Gingham Plaid Crochet Scarf is a fantastic option for those who want a seamless, uninterrupted crafting experience. This convenient format allows you to easily follow along without distractions, and it’s perfect for printing out and taking on-the-go for your crochet projects.

The PDF includes fully formatted pattern with written instructions, crochet stitch diagrams, and video tutorial links.

A tablet and smartphone displaying a crochet scarf pattern titled "Check It Out." Surrounded by printed pages featuring the same pattern, photos of the scarf, and instructional text. A woman wearing glasses and the scarf is smiling. Text reads "Beginner-friendly DIY Plaid Crochet Scarf - Free Pattern with Video Tutorial. -Marly Bird
Etsy
Shopify
Ravelry

Why Choose an Ad-Free PDF?

Purchasing the ad-free PDF of the Check It Out Gingham Crochet Scarf Pattern offers a seamless, distraction-free crafting experience. This pattern also includes the crochet stitch diagram for those who prefer to see the stitches visually.

The ad-free PDF is perfect for printing and taking with you on the go. Plus, it helps support my work as your favorite BiCrafty designer!

A woman wearing glasses and a denim jacket smiles while modeling a colorful, plaid patterned crochet scarf. The image includes two close-up shots of the scarf's texture and detail. The text overlay reads "Plaid-Look with a Crochet Hook" in pink and black lettering. Free Pattern included! -Marly Bird

Check It Out Gingham Plaid Scarf FREE PATTERN

This adorable scarf was designed by Marly Bird

SKILL LEVEL

Adventurous Beginner

MEASUREMENTS

Finished Measurements

Shawl is 13” [33 cm] wide by 71” [180.5 cm] long. 

Gauge 

13 sc x 11 rows = 4” [10 cm] x 4” [10 cm] in griddle stitch pattern; use any size hook to obtain the gauge. 

MATERIALS

Yarn 

Red Heart Roll With It Melange (100% acrylic, 389 yds / 356 m, 5.29 oz/ 150 g, CYCA# 4 worsted) 

Color A: #Autograph, 1 cake

Color B: #Tabloid, 1 cake

Color C: #Curtain Call, 1 cake

Crochet Hook

Size J/10 (6.0 mm)

Notions 

Removable Stitch Markers, Tapestry needle

ABBREVIATIONS

Ch – Chain(s) 

Dc – Double Crochet 

RS – Right Side 

Sc – Single Crochet

Sl st – Slip Stitch 

St(s) – Stitch(es)

WS – Wrong Side

DIAGRAM

 Only available in the Ad-Free PDF

Etsy
Shopify
Ravelry

NOTES

  • Colorwork is tapestry crochet.  Meaning when changing colors within a row, carry contrasting color on top of the stitches and work stitches over the yarn until you need it. 
  • Shawl does not have an edging.  Take extra care with the beginnings and ends of your rows, as they will be visible.  If you rather hide your row ends, you can add a round of single crochet to the edge after the shawl is finished.

GROW

To Unlock Exclusive Subscriber Content click the Box below and join for free by simply adding your email and creating a password! If you are having troubles, clear your cache or reset your password or login to the Grow Publisher Portal.

>> Learn More About Grow Here <<

I’m thrilled to share this amazing pattern with you, many patterns on my blog are absolutely free! I kindly request that you don’t copy and paste or distribute this pattern. Prefer an ad-free experience? Buy a digital PDF pattern for a small fee from one of my online stores for a seamless crafting journey. 

I appreciate your support and readership. You are the reason I can keep doing what I love and sharing it with others. So, thank you from the bottom of my yarn-loving heart! Disclosure: This post contains affiliate links, meaning I get a commission if you decide to make a purchase through my links at no cost to you.

CHECK ME OUT GINGHAM PLAID SCARF PATTERN

With color A, chain 43.

Row 1 (RS): Sc in 2nd ch from hook, [dc in next ch, sc in next ch] twice, dc in next ch, *change color to B, [sc in next ch, dc in next ch] 3 times, change color to A, [sc in next ch, dc in next ch] 3 times; repeat from * across, turn — 42 sts.

Rows 2-4: Ch 1, [sc in dc, dc in sc] 3 times, *change color to B, [sc in dc, dc in sc] 3 times, change color to A, [sc in dc, dc in sc] 3 times; repeat from * across, turn. At the end of Row 4, change color to B. 

Rows 5-8: Ch 1, [sc in dc, dc in sc] 3 times, *change color to C, [sc in dc, dc in sc] 3 times, change color to B, [sc in dc, dc in sc] 3 times; repeat from * across, turn. At the end of Row 8, change color to A. 

Row 9: Ch 1, [sc in dc, dc in sc] 3 times, *change color to B, [sc in dc, dc in sc] 3 times, change color to A, [sc in dc, dc in sc] 3 times; repeat from * across, turn. 

Repeat Rows 2-9, ending on a Row 4, until panel measures 71” [180.5 cm] long.

Fasten off and weave in ends. 

A woman with glasses and curly hair wears a colorful, handmade crochet scarf. There are multiple images showing her smiling and posing with the vibrant patchwork scarf in different ways. The Marly Bird logo is visible. Check out the free pattern and video tutorial to create your own DIY plaid crochet scarf! -Marly Bird

Gingham Plaid Crochet Scarf Video Tutorial

For those of you who learn best by watching, I’ve also created a full video tutorial on the Marly Bird YouTube channel. This step-by-step guide will walk you through the entire process of keeping the chain row consistent, working the Griddle stitch, changing colors, and keeping the edges clean and strait.

The plaid look with a crochet hook video tutorial ensures that you can follow along with the pattern with ease. Get free crochet scarf pattern + full video tutorial at this link.

Make a Plaid Crochet Scarf and Share Pictures with Me!

Gingham plaid holds a special place in both textile history and contemporary style, representing a blend of simplicity and sophistication. As a pattern, it captures the essence of classic design with its symmetrical checks and contrasting hues. Its adaptability allows it to flourish in various applications, from charming home decor to stylish apparel.

The Check It Out Gingham Crochet Scarf is a perfect example of how crochet can capture the timeless appeal of gingham. I hope you enjoy making this scarf as much as I enjoyed designing it.

As you work on yours please share with me! #mmmdi #marlybirdyoutubechannel

Happy crocheting!

Filed Under: Crochet, Free Patterns, Marly Bird Premium Patterns, Our Free Patterns, Pattern, Uncategorized, YouTube Video Tutorial

Knit-Look with a Crochet Hook – Free Pattern

June 29, 2024 By Marly Bird 1 Comment

We all love the rich textures and endless possibilities of crochet granny squares, but sometimes, we crave the smooth, uniform look of knitting. Guess what? You can achieve that knit-look with a crochet hook! It’s not as hard as you might think. Whether you’re making a cozy hat with a bill, fair isle sweater, or a plush blanket, let’s dive into how you can transform your crochet projects to have that seamless knit-like appearance.

Plus, free crochet hat pattern with video tutorial. The Celebration Crochet Hat (linked to the ad-free pdf available for purchase) is the sister to the Jubilee Knit Hat!

Collage showcasing various images of a woman modeling a colorful knit-look headband with a crochet hook. The images include the yarn used, close-ups of the headband, and happy expressions of the woman wearing it. Text reads, "Knit-Look with a Crochet Hook" and "Marly Bird." Free pattern included! -Marly Bird

Affiliate Disclosure: This post contains affiliate links. If you click on one of these links and make a purchase, I may earn a small commission at no additional cost to you. This helps support the content and free patterns I provide here on MarlyBird.com. Thank you for your support—it means the world to me! 💖

Is it possible to crochet a hat with a knitted appearance?

Absolutely! You can crochet a hat with a knitted look by choosing specific crochet stitches that mimic the smooth, continuous texture of knitting. The waistcoat stitch, also known as split single crochet, combined with slip stitch crochet worked in the back loops, can give you that perfect knit-like effect.

As a BiCrafty designer, I’ve crocheted several hats that utilize these knit-look stitches to bring the best of both worlds to your crochet projects. I’m thrilled to share one of these designs with you today. Keep reading to get the free pattern for the Celebration Crochet Hat, and discover how you can achieve that polished, knit-like finish in your own creations!

Can The Knit-Look Crochet Techniques Discussed Be Used For Projects Other Than Hats?

Certainly! These techniques can be adapted to suit a variety of projects, not just hats. They’re versatile and can be creatively applied to accessories or garment creation.

During BiCrafty Bootcamp: Crochet for Knitters, we learned how to do the split single crochet by making MARLY’S COLORFUL CROCHET MARKET BAG – free pattern. This knit-look crochet pattern was fun to make and even more fun to use. I get compliments on it all the time. Did you make one?

A crocheting project in progress using a multicolored yarn lies on a table, with a vibrant, ergonomic crochet hook inserted. Behind the project are five skeins of CotLin DK weight yarn in various colors and a pink circular tag that says "Marly Bird." This could be the start of your free crochet market bag pattern! -Marly Bird

But I have to mention this, some of my favorite patterns are designed by my friend BrianaK. As a matter of fact, her Fireside Chat Collection is wonderful. Check it out!

Which crochet stitch can mimic the look of knitting?

As a passionate crocheter, I often find myself wanting that classic, clean look of knit fabric but I want to use my crochet hook. Do you find yourself feeling the same?

Among all the wonderful stitches we can use, three stand out for their knit-like appearance: the split single crochet, also known as the waistcoat stitch, the Tunisian knit stitch, and slip stitches. Let’s explore these stitches and see how they can bring a knit-like feel to your crochet projects.

Split Single Crochet or Waistcoat Stitch – Knit-Look Stitch

One of my favorite hidden gems in the crochet world is the split single crochet, which we lovingly call the waistcoat stitch. Instead of inserting your hook through the top loops like we usually do, you insert it through the center of the stitch from the previous row. The result is a dense texture that looks remarkably like knit fabric.

A knit-look crochet hat with a multicolored pattern, featuring designs of hearts and geometric shapes. The beanie has a teal base color, with pink, white, and purple accents. Topped with a fluffy gray pom-pom, it includes the Marly Bird logo on the bottom left. Find the free pattern online! -Marly Bird

I love using the waistcoat stitch when I want my projects to have that knit-look appeal but still enjoy the ease of crochet. It does take some patience to master, as precise hook placement and keeping the loop that is pulled up from the stitch loose is crucial. But trust me, the effort is worth it! This stitch not only makes your projects look sophisticated but also adds a comforting, tactile quality that lasts.

It’s also a great way to get a knit stranded or fair isle look with crochet stitches like in the Cinnamon Hearts Crochet Hat. You can see it looks just like its sister the Chocolate Heart Knit Hat

A stranded knit Hat with a Fair Isle pattern featuring hearts and diamonds in various shades of blue, grey, and black. The beanie has a yellow decorative braid near the base. It is displayed on a wooden surface, accompanied by autumn-themed foliage. Pattern available. -Marly Bird

Tunisian Knit Stitch – Knit-Look Stitch

Another fantastic technique that bridges the gap between crochet and knitting is the Tunisian knit stitch. This stitch involves collecting loops on your hook as you go forward and then working them off on the return pass. It creates a fabric that closely resembles the cozy knit textures we adore.

The Tunisian knit stitch has a rhythmic motion that I find almost meditative. It forms a series of warm, interlocking ‘v’ patterns, just like the stockinette stitch in knitting. With some practice, this stitch can help you craft projects that look and feel like they were knitted, but with the distinct touch of crochet.

Here is a collage of just a few of the Tunisian Crochet projects designed by Robyn Chachula for MarlyBird.com. Do you have a favorite?

Names in order from top left to right:

  • Beehner Tunisian Crochet Hat
  • Kirkton Tunisian Crochet Cowl – free pattern
  • Turkey Trot Tunisian Crochet Pullover Shawl / Cowl – available in the Marly Bird House
  • Amethyst Puff Tunisian Crochet Shawl – coming soon
  • Poplar Tunisian Crochet Poncho – unbelievably comfortable
  • Garter Star Tunisian Crochet Cowl – coming soon
A collage of five images featuring various crochet projects: free Tunisian crochet hats, scarves, and a sweater, displayed on mannequins and a person. Each item showcases intricate patterns and vibrant colors. -Marly Bird

🌟 Want to learn more about Tunisian Crochet? Check out the BiCrafty Bootcamp: Triple Threat Tunisian Crochet for Beginner series taught by renowned designer, Robyn Chachula.

Crochet Slip Stitch – Knit-Look Stitch

Another fantastic stitch that can give you a knit-look is the slip stitch. Don’t let this little stitch fool you—it’s more powerful than it seems! When you work slip stitches through the back loop, it creates a beautiful knit ribbing effect. This technique is perfect for cuffs and brims or even the bills of crochet hats, adding that polished, knit-like finish to your projects.

Smiling woman wearing a blue crochet newsboy hat in a park setting with text overlay 'ALL ABOUT IT - Crochet Newsboy Hat - Free Crochet Hat Pattern - MarlyBird.com'.

Honorable Mention Knit-Look Stitch – Half Double Crochet Through the Third Loop & Single Crochet Post Stitches

I couldn’t talk about knit-look stitches without mentioning the half double crochet through the third loop and single crochet post stitches. These stitches deserves an honorable mention for their unique ability to create a knit-like texture.

By working the half double crochet into the third loop, which is located behind the top loops, you achieve a wonderful horizontal knit-like ridge. Same thing happens with you work a single crochet post stitch. Depending if you work it as a front or a back post stitch, the ‘v’ at the top of the stitch is pushed toward the outer part of the fabric thus giving a horizontal knit-like ridge.

Knit-Look Crochet Hat with a large, fluffy pom-pom on top is displayed on a wooden surface surrounded by scattered dried leaves. The beanie features intricate stitching and ribbed edges. -Marly Bird

Both techniques are perfect for adding subtle, sophisticated texture to your crochet projects, making them a great choice for sweaters, scarves, and more.

🌟 Take a look at this Creekside Crochet Ruana or this pocket shawl, can you see the knit-like stitches I used?

Give it a try and see how it transforms your crochet pieces into elegant, knit-look creations!


What Type of Tarn Works Best For Creating a Knit-Look with Crochet?

Smooth, non-splitting yarns like worsted or Aran weight work exceptionally well. These yarns highlight the intricacy of crochet stitches and offer a knit-like appearance. Tighter spun yarns enhance stitch definition, making the crochet fabric resemble something you might have achieved with knitting needles.

Solid colors will of course show the work better than a speckled or variegated yarn but that doesn’t mean those yarns will now work for the desired look. As a matter of fact, using a combination of split single crochet stitches and single crochet through the back look together can give a wonderful contrast between stitch texture and highlight a hand dyed or variegated yarn (just like in the Celebration Crochet Hat pattern given below).

What Size Crochet Hook Works Best for Creating a Knit-Look with Crochet?

When creating a knit-look with crochet, it’s best to start with the recommended hook size for the yarn you’ve chosen. However, if you find that your split single crochet stitches are coming out too snug, don’t hesitate to go up a hook size. This can help you achieve the right texture and look without making your stitches too tight.

Personally, I prefer a hook with a pointier tip, like a Susan Bates hook. These hooks, especially the ones with a big sturdy handle, give me better control over my stitches and make it easier to work through the tighter spaces created by knit-look techniques.

A person with red nail polish and a gray sleeve is holding colorful knitting on circular needles over a steering wheel inside a car, perfecting that knit-look. The wooden trim wheel features a logo with a silver 'L' in the center while the background is blurred. -Marly Bird

Overall, the key is to choose a hook that allows you to complete the stitch pattern comfortably and achieve the correct gauge. Finding the right balance between hook size and stitch tension will help you create beautiful, knit-look crochet projects.

A colorful crocheted hat with a pom-pom is showcased in two images. The top image displays the hat's intricate pattern up close. The bottom image shows a smiling person wearing the finished hat. Text reads: "Celebration Knit-Look Crochet Hat," with "Free Pattern + Tutorial" and "Marly Bird. -Marly Bird

Celebration Crochet Beanie Pattern by Marly Bird

I’m thrilled to talk about my Celebration Crochet Hat Pattern! This design fully embraces the knit-look crochet with its clever use of textured stitches. It’s a reflection of my love for both knit and crochet techniques, creating a hat that looks knitted but is crafted entirely with a crochet hook.

When I designed this pattern, I wanted to combine the ease of crochet with the polished look of knitting. The guidance provided is straightforward, allowing you to focus on each stitch without hesitation. The finished hat showcases how crochet can mimic the beauty of knitting, offering a warm and stylish accessory.

SKILL LEVEL

Adventurous Beginner

CROCHET HAT MEASUREMENTS FOR THE FAMILY

To Fit Sizes

Toddler (Kid, Adult Small, Adult Medium, Adult Large)

Finished Measurements of the Crochet Hat

To Fit SizeToddlerKidsAdult SmallAdult MediumAdult Large
Finished Head Circumference 18” (46 cm)19” (48 cm)21” (53.5 cm)23” (58.5 cm)25” (63.5 cm)
Finished Height7.5” (19 cm)7.5” (19 cm)8” (20.5 cm)8” (20.5 cm)8.5” (21.5 cm)

Knit-Look Stitch Gauge 

16 sts by 17 rounds  in stitch pattern = 4” [10 cm] by 4” [10 cm]; use any size hook to obtain the gauge. 

MATERIALS

Yarn 

Sample Made with Sock Obsession Yarns, Aran Yarn Weight (100% superwash merino, 181 yds / 166 m, 3.53 oz/ 100 g, CYCA #4 worsted) –  1 (1, 1, 1, 2) hanks. Sample color – Tiny River 

Sample Made in video We Crochet, Twill Worsted Yarn Weight (100% superwash merino wool, 149 yds / 136 m, 3.5 oz/ 100 g, CYCA# 4 worsted) 

  • Color A: #27934 Gold Rush, 1 hank
  • Color B: #28533 Sea Salt Heather, 1 hank
  • Color B: #27927 Graphite Heather, 1 hank

Crochet Hook

Size H/8 [5.0 mm]

Notions 

Stitch Markers, Tapestry needle, Scissors, optional pom pom 

ABBREVIATIONS

Ch – Chain(s) 

PM – Place Marker

RS – Right Side 

Sc – Single Crochet

Sl st – Slip Stitch

Sp(s) – Space(s) 

Split Sc – Split Single Crochet

St(s) – Stitch(es)

WS – Wrong Side

SPECIAL STITCHES 

⭐Back Loop Only: This is the furthest loop to you of the top 2 loops of the stitch indicated, regardless if you are on the RS or WS.

⭐️Chain (Ch): With slip knot or free loop on hook, yarn over hook and pull through loop on hook.

⭐️Single Crochet (Sc): Insert hook into indicated stitch, yarn over and pull up a loop, yarn over and draw through 2 loops on hook.

⭐️Slip Stitch (Sl st): Insert hook into indicated stitch, yarn over and pull up a loop and draw through loop on hook. 

⭐️Split Single Crochet (Split Sc): Insert hook into indicated titch between the two legs of the stitch, yarn over and pull up a loop, yarn over and draw through both loops on hook.

⭐️Split Single Crochet/Single Crochet Decrease (Split Sc/Sc dec): Insert hook into indicated stitch between the two legs of the stitch, yarn over and pull up a loop, insert hook into the back loop of the next indicated st, yarn over and pull up a loop, yarn over and draw through all loops on hook – 1 stitch decreased. 

⭐️Split Single Crochet Two Together (Split Sc2tog): Insert hook into indicated stitch between the two legs of the stitch, yarn over and pull up a loop, insert hook into next stitch between the two legs of the stitch, yarn over and pull up a loop yarn over and draw through all loops on hook – 1 stitch decreased.

STITCH DIAGRAM

Only available in ad-free PDF

Get the Ad-Free PDF

Purchasing the ad-free PDF of the Celebration Crochet Hat Pattern is a fantastic option for those who want a seamless, uninterrupted crafting experience. This convenient format allows you to easily follow along without distractions, and it’s perfect for printing out and taking on-the-go for your crochet projects.

The PDF includes fully formatted pattern with written instructions, crochet stitch diagrams, and video tutorial links.

A smiling person wearing a colorful crochet hat with a pom-pom is displayed on a tablet, smartphone, and printed pattern on paper. The free pattern includes instructions, materials list, and images of the completed knit-look hat. The background is a bright pink circle. -Marly Bird
Etsy
Shopify
Ravelry

NOTES

  • Use markers in the first slip stitch of the brim on each row to help keep count.
  • Be cautious when working the slip stitches on th brim, maintain consistent tension or the stitches will begin to get too tight as the brim gets longer. 
  • The slip stitches should NOT be any more snug than the size of the hook.
  • Brim of hat is worked flat then seamed together. 
  • Body of hat is worked into the long side edge of the brim as instructed.
  • Body of hat is worked in continuous rounds. Use a marker to identify the first stitch of each round. 
  • Body st gauge near the brim will be a little more snug than it is in the body of the hat. The gauge given is in the body of hat. 
  • Directions are for size Toddler; changes for sizes Kid, S, M, L are in parentheses. When only one number is given then that number applies to all sizes.
  • Stitches are worked in back loop only unless otherwise stated in the body of the hat. 

VIDEO TUTORIALS

  • How to wind yarn >> Click Here for Video Help << 
  • How to Crochet the >> Celebration Crochet Hat  <<
  • How to Bury Ends >> Click Here for Video Help <<
  • How to add a Removable Faux Fur pom >> Click Here for Video Help <<

GROW

To Unlock Exclusive Subscriber Content click the Box below and join for free by simply adding your email and creating a password! If you are having troubles, clear your cache or reset your password or login to the Grow Publisher Portal.

>> Learn More About Grow Here <<

I’m thrilled to share this amazing pattern with you, many patterns on my blog are absolutely free! I kindly request that you don’t copy and paste or distribute this pattern. Prefer an ad-free experience? Buy a digital PDF pattern for a small fee from one of my online stores for a seamless crafting journey. 

I appreciate your support and readership. You are the reason I can keep doing what I love and sharing it with others. So, thank you from the bottom of my yarn-loving heart! Disclosure: This post contains affiliate links, meaning I get a commission if you decide to make a purchase through my links at no cost to you.

CELEBRATION CROCHET HAT Free Pattern

BRIM

Chain 6.

Row 1: Sl st in back loop of 2nd ch from hook and in each ch across, ch 1, turn — 5 sts.

Row 2: Sl st in the back loop only of each slip stitch across, ch 1, turn — 5 sts. 

Repeat Row 2, 70 (74, 82, 90, 98) more times.– 36 (38, 42, 46, 50) raised ridges.

Join the foundation row (chain edge) to the last row (working edge) with a slip stitch into the back loop only of the working edge and the front loop of the chain edge, repeat across row. See video tutorial for help, DO NOT FASTEN OFF. 

BODY

Turn to begin working on long edge of brim (in the row ends), ch 1.

Set-up round 1: Working into the slip stitch edge, sc into the “V” of the slip stitch ridge, and sc into the gully between the ridges, do not turn — 72 (76, 84, 92, 100) sts. 

Round 1: Split sc in the first st of the round, *sc in the back loop of next 3 sts, split sc in next sc; repeat from * around to last 3 sts, sc in the back loop of last 3 sts. 

Repeat Round 1 until hat measures 5.5 (5.5, 6, 6, 6.5) “ [14 (14, 15, 15, 16.5) cm] from brim edge – or to desired size in length (remember that making it larger will require more yarn). 

CROWN

Round 1 (decrease round): *Split sc in next sc, sc in the back loop of next st, sc2tog in back loop of next 2 sts; repeat from * around — 54 (57, 63, 69, 75) sts.

Round 2 and 3: *Split sc in next sc, sc in the back loop of next 2 sts; repeat from * around. 

Round 4 (decrease round): *Split sc in next sc, sc2tog in back loop of next 2 sts; repeat from * around — 36 (38, 42, 46, 50) sts.

Round 5 and 6: *Split sc in next sc, sc in back loop of next st; repeat from * around. 

Round 7 (decrease): *Split sc/sc dec (see special stitches) in next 2 sts; repeat from * around — 18 (19, 21, 23, 25) sts.

Round 8 and 9: Split sc in each st around.

Round 10 (decrease): *Split sc2tog (see special stitches) in next 2 sts; repeat from * around to last stitch, split sc in last st, sl st to first st— 9 (10, 11, 12, 13) sc. Fasten off leaving a long tail. 

FINISHING

No sewing! With the tail thread through a tapestry needle, weave the top closed. 

Weave in all ends

Add pom pom Optional

Get a completely different look by working stripes just like I did in the video tutorial!

A smiling woman wearing a matching set consisting of a striped orange, black, gray, and white knit-look beanie with a black pom-pom and a coordinating neck warmer. The set is displayed separately on the left against a white surface. The Marly Bird logo is in the top right with details for the free pattern. -Marly Bird

Knit-Look with a Crochet Hook – Final Thoughts

As a BiCrafty person, meaning I’m both a knitter and a crocheter, I understand the unique charms and challenges of each craft. I also know that not everyone can wrangle two needles, and sometimes a crocheter really wants that sleek, knitted look. That’s why offering patterns that achieve a knit-look with a crochet hook is so important to me.

Crochet offers an incredible way to mimic the polished appearance of knitting. Techniques like the split single crochet, half double crochet through the third loop, single crochet post stitch, and slip stitch have become my go-to stitches for achieving that knit texture. Pairing these stitches with the right yarn brings out the best in crochet, creating projects that look knitted but have the unique touch of crochet.

A colorful knitted hat with a bright pink pom-pom is labeled "Knit." Next to it is a blue and white knit-look crochet hat with a multicolored pom-pom, labeled "Crochet." Both hats are laid out on a white surface. -Marly Bird

The Celebration Crochet Hat Pattern is a perfect example of how crochet can break boundaries and mirror the elegance of knitting. It’s more than just a pattern; it’s an inspiring journey that pushes the boundaries of crochet skills. The resulting hat is a wearable piece of art, blending the warmth and style of knitting with the charm of crochet.

Thank you for joining me on this exploration of knit-look crochet techniques. I can’t want to see your crochet knit-look hat! Be sure to share pictures with me on social media and I will be sure to give you a thumbs up!

Happy crocheting!

Filed Under: Crochet, Free Patterns, Marly Bird Premium Patterns, Our Free Patterns, Pattern, Tips, Tricks, Techniques for Knitting and Crochet, Uncategorized, YouTube Video Tutorial

How to Knit Openwork Lace – Easy Drop Stitch Cable Pattern

June 27, 2024 By Marly Bird Leave a Comment

If you’re looking to add a touch of elegance to your knitting projects, the Dropped Stitch Cable pattern is the perfect choice. It’s time to learn How to Knit Openwork Lace – Easy Drop Stitch Cable Pattern with the help of you BiCrafty Bestie, Marly Bird.

Collage featuring two women modeling knitted tops with knit dropped stitch patterns. The top left image showcases a green knit top, while the top right displays a pink knit top. Below them is a close-up of a hand holding an orange knit piece. Text overlay reads "Drop Stitches" and "How to Knit Dropped Stitch Cable Pattern". Marly Bird

Affiliate Disclosure: This post contains affiliate links. If you click on one of these links and make a purchase, I may earn a small commission at no additional cost to you. This helps support the content and free patterns I provide here on MarlyBird.com. Thank you for your support—it means the world to me! 💖

This stunning stitch pattern can be used for a variety of projects, such as my Savannah Shutters top, a swimsuit cover-up, or a beautiful scarf. Its unique texture and drape highlight the beauty of silky yarns, making your creations truly stand out.

Here at MarlyBird.com, I’ve been a fan of drop stitches and use them in a variety of projects. You might remember doing a version of a drop stitch pattern on the very first Turkey Trot poncho pattern, or one of the very first youtube videos I did showing dropped stitches for this free pattern by Red Heart.

Collage of a woman modeling a green knit top in three different poses. Left: Close-up of her face and shoulder. Center: Back view, highlighting the intricate Knit Openwork Lace pattern. Right: Seated on grass, smiling and looking at the camera. "Marly Bird" logo in the top right corner. Top is the Savannah Shutters Knit top pattern -Marly Bird
>> Get the Savannah Shutters Knit Top on Etsy <<

The Dropped Stitch Cable pattern is versatile and adaptable, suitable for any size needles or weight of yarn. However, it shines brightest when used with yarns that have silk, bamboo, or rayon in their blend. These fibers allow the fabric to drape gracefully and showcase the vibrant colors beautifully.

Fall in LOVE with Dropped Knit Stitches

What is not to love about these fun yarn over and drop stitches. It might be a bit nerve wracking at the start but once you let that stitch fall off the knitting needle and you see the beautiful (intentional) ladders that appear you will be mesmerized!

These dropped stitches enhance the drape and flow of silky yarns. They are also perfect for a variety of projects, from garments to accessories. And, the stitch pattern is easy to adapt to different yarn weights and needle sizes.

As mentioned, a great example of how a designer uses drop stitches to create openwork lace fabric with a highly textured yarn is the poncho I designed for the very first Turkey Trot mystery make-along (event held every Thanksgiving Day weekend).

back view of the 2019 turkey trot mystery make-along poncho by Marly Bird. Showing off the drop knit stitches.

Materials needed for the drop stitch cable pattern

  • Any size knitting needles – choose a needle that works best with the yarn weight you choose to use for your project.
  • Any weight of yarn (preferably with silk, bamboo, or rayon blended with a touch of wool or cotton) – this stitch pattern really highlights the beauty of the yarn. The drop stitch pattern allows for the texture and shine of the yarn to be on display. Plus, the drape of the overall fabric works best with the yarn has a bit of cellulose fiber in it.

Here are some yarn suggestions for this stitch pattern. I like the look and feel of these yarns coupled with openwork lace knit patterns like this one:

Knit Picks, Gloss DK weight yarn

Knit Picks, Galileo DK weight yarn

Knit Picks, Samia Fingering weight yarn

Madelinetosh, Pashmina Sport weight yarn

Or, if you have that extra special ball of yarn like Qiviut and you are looking for a simple yet dramatic knit pattern for it, this stitch pattern is the one for you. As a matter of fact, I used this exact yarn for one of my favorite pieces I’ve ever knit.

A smiling woman with long dark hair stands outdoors, wrapping herself in a large, textured red scarf with an intricate openwork lace design. She is wearing a long-sleeved dark top and blue jeans. The background is slightly blurred, showing a mix of green trees and sunlight. -Marly Bird

The drop stitch technique can be worked with basic knit cables like the cable 4 back or the cable 4 front, or with even more complex cables like those used in the Trail Hoodie pattern. As long as you keep the intended drop stitch outside of the cable pattern, you can achieve this look.

Split image of a person wearing a knitted cream-colored hoodie. Left side shows the front view with the person smiling, hood up, and buttoned front. The right side reveals intricate drop stitch cable knitting patterns on the back. Outdoor background with trees. -Marly Bird

Knit Openwork Lace – Easy Drop Stitch Cable Pattern

For the easy drop stitch cable pattern instructions, I’m giving you a pattern for a simple and easy Drop Stitch Cable Pattern that uses the cable 4 back stitch + 1 stitch that will be dropped.

The stitches used in this pattern are listed below:

  • Knit (k)
  • Purl (p)
  • Yarn Over (yo)
  • Cable 4 Back (C4B) – Slip 2 sts onto cable needle and hold in back, k2 from left hand needle, k2 from cable needle.

GROW

To Unlock Exclusive Subscriber Content click the Box below and join for free by simply adding your email and creating a password! If you are having troubles, clear your cache or reset your password or login to the Grow Publisher Portal.

>> Learn More About Grow Here <<

I’m thrilled to share this amazing pattern with you, many patterns on my blog are absolutely free! I kindly request that you don’t copy and paste or distribute this pattern. Prefer an ad-free experience? Buy a digital PDF pattern for a small fee from one of my online stores for a seamless crafting journey. 

I appreciate your support and readership. You are the reason I can keep doing what I love and sharing it with others. So, thank you from the bottom of my yarn-loving heart! Disclosure: This post contains affiliate links, meaning I get a commission if you decide to make a purchase through my links at no cost to you.

Dropped Stitch Cable Pattern Flat Instructions

These are the instructions used in the video tutorial. Please note: the number of rows may change depending on the actual pattern; this pattern has 7 rows between each cable row where other pattern might only have 3, 5, or more.

Worked in the Rows, begins with multiple of 4 stitches + 4 (does not include any edge stitches).

Set-up Row: K4, * yo, k4; repeat from * to end.

Row 1: Purl.

Row 2: C4B, *k1, C4B; repeat from * to end.

Rows 3, 5, 7, 9: Purl.

Rows 4, 6, 8: Knit.

Row 10: C4B, *k1, C4B; repeat from * to end.

Repeat Rows 3-10 only for Drop Stitch Cable pattern, ending after a Row 3.

Final Row: K4, *drop next st off needle, k4; repeat from * to end.


Dropped Stitch Cable Pattern In The Round Instructions

These are the instructions are similar to those used in the video tutorial to knit a flat swatch. Please note: the number of rows may change depending on the actual pattern; this pattern has 7 rows between each cable row where other pattern might only have 3, 5, or more.

For working the dropped stitch cable pattern in the round, the stitch multiple is 4 stitches.

Set-up Round: K4, * yo, k4; repeat from * to end.

Round 1: Knit.

Round 2: C4B, *k1, C4B; repeat from * to end.

Rounds 3-9: Knit.

Round 10: C4B, *k1, C4B; repeat from * to end.

Repeat Rounds 3-10 only for Drop Stitch Cable pattern, ending after a Round 3.

Final Round: K4, *drop next st off needle, k4; repeat from * to end.

Drop Stitch Cable Pattern Video Tutorial

To help you get started, I’ve created a detailed video tutorial where I guide you through each step of knitting the Dropped Stitch Cable pattern flat. You can find the video here.

The Dropped Stitch Cable pattern is a beautiful addition to any knitter’s skill set. Whether you’re a seasoned knitter or a beginner looking for a new challenge, this pattern offers endless possibilities for creating elegant and unique projects.

A person wearing a knitted sleeveless top is shown. The text "Get the Pattern!" is superimposed over the image with a pink arrow pointing to the top, highlighting its intricate drop stitch cable pattern. The background is blurred, focusing on the detailed texture of the knitwear. -Marly Bird

Don’t forget the Savannah Shutters Knit Top pattern is now available for purchase on Etsy, or Shopify, or in the Marly Bird Ravelry Store

Get Pattern on Etsy
Get Pattern on Shopify
Get Pattern on Ravelry

Happy knitting!

Filed Under: Knitting, Tips, Tricks, Techniques for Knitting and Crochet, Uncategorized, YouTube Video Tutorial

Leggy Frog Crochet Pattern – Leap the Tree Frog Stuffie

May 20, 2024 By Marly Bird Leave a Comment

Leap into the magical world of crochet with the “Leap the Frog” crochet plush pattern, an enchanting creation from the imagination of Disney animator and renowned designer Megan Kreiner. This charming leggy frog crochet pattern is more than just a stuffed animal; it’s a whimsical companion that brings joy and delight to every stitch.

Crafted with Bernat Blanket Yarn infused with subtle sparkle, Leap offers a tactile adventure and a dazzling visual appeal. His cleverly designed mouth opens wide to reveal a playful tongue, perfect for capturing the hearts of both the young and the young at heart. With this pattern, crocheters can enjoy bringing to life a frog that’s not only cuddly but also interactive.

Accessible for adventurous beginners but ideal for intermediate crocheters looking for a project that combines fun with function, the Leap the Frog pattern promises a rewarding crafting experience. Each component is thoughtfully designed to ensure a seamless assembly, resulting in a durable and adorable frog ready for adventures. Whether perched on a shelf or tagging along on daily errands, Leap is a testament to the joy of crochet and the endless possibilities it holds.

Looking for more crochet stuffed animal patterns? Look at the Frogging Friend Crochet Frog, Sparkle the Unicorn or Alden the Owl!

A collage of images features a crochet pattern for a yellow and green tree frog with a pink tongue. The frog is showcased hanging on branches and lying on grass. Text overlaid reads "Leap the Tree Frog Stuffie Crochet Pattern. -Marly Bird

Affiliate Disclosure: This post contains affiliate links. If you click on one of these links and make a purchase, I may earn a small commission at no additional cost to you. This helps support the content and free patterns I provide here on MarlyBird.com. Thank you for your support—it means the world to me! 💖

Meet “Leap the Frog” – Your Next Crochet Project

This isn’t just any crochet stuffed animal; it’s a super cuddly, bright lime yellow tree frog that’s sure to bring a smile to anyone’s face. Whether you’re a beginner or an expert, this pattern is designed to be fun and engaging, with detailed instructions available on my website at MarlyBird.com. So grab your hooks and let’s make something that hops right off your crochet table!

Who is Designer Megan Kreiner?

Now, let’s talk about the brilliant mind behind this delightful pattern. Megan Kreiner is not just any designer; she’s a Disney animator turned knit and crochet designer, which means she brings a touch of magic to everything she creates. With her experience in animation, Megan has a unique ability to bring characters to life through yarn. Her designs, including our friendly “Leap the Frog,” are not only fun to make but also full of personality and charm. You can find more of her enchanting patterns on my website, where we love to feature talented designers like Megan.

Check out these amazing free crochet pattern designs by Megan

Sparkle the Unicorn Stuffie - crochet unicorn pattern - Marly Bird
Sparkle The Crochet Unicorn PatternMeet Sparkle, the crochet unicorn you’ve dreamed of!
Image of a crocheted armadillo stuffed animal labeled "holiday armadillo amigurumi" by Arlene Stitchadillo, featuring a detailed gray and beige yarn texture and a small hat. -Marly Bird
Arlene the Holiday Armadillo
Collage of images featuring crochet menorah tops and a blue crocheted dinosaur with details highlighted, accompanied by text "crochet menorah tops" and "free crochet pattern by Marly Bird. -Marly Bird
Adorable Menorah Tops Crochet Pattern with dino egg to store the candles

Why You’ll Love Crocheting Leap the Tree Frog

One of the most charming aspects of “Leap the Frog” is his interactive design. Imagine a crochet frog whose mouth actually opens to reveal a playful, extendable tongue—perfect for pretending to snap up flies!

This feature not only adds an element of fun to the finished product but also engages children and adults alike, bringing the stuffed animal to life with every play session. It’s these thoughtful details that make the “Leap the Frog” pattern a fantastic project for gifts or educational toys, fostering imagination and interactive play.

But that is not where the fun stops!

Leap isn’t just any frog—he’s a leggy frog crochet stuffie pattern designed with flexibility in mind. Each of Leap’s limbs is crafted to be not only adorable but also incredibly flexible, allowing you to pose him in various fun ways.

Whether he’s sitting on a shelf or dangling from a child’s hand, these leggy limbs bring an added dimension of interactivity and fun to the toy. This flexibility makes Leap not only a delightful decorative piece but also enhances playtime, providing endless opportunities for creative storytelling and display.

Whether you’re looking to add a whimsical touch to your home decor or crafting a gift that stands out, Leap the Frog is the perfect pattern to bring joy and a bit of sparkle into your life.

Two images of a crocheted tree frog made from BERNAT Baby Blanket SPARKLE yarn. One frog is perched on a branch with its tongue out. Another lies on its back in the grass, showcasing this adorable Tree Frog Stuffie. Text reads "Leap the Tree Frog || Free Crochet Pattern ||". -Marly Bird

Plush Yarn for a Plush Crochet Stuffed Animal – Bernat Blanket Yarn with Sparkle

Now, let’s talk about the yarn that brings Leap to life. For this project, we use Bernat Blanket Yarn with a subtle sparkle, which not only enhances the visual appeal of our froggy friend but also offers several practical benefits. This yarn is known for its softness and durability, making Leap incredibly cuddly and resistant to wear and tear—ideal for lots of loving! Additionally, the sparkle in the yarn adds a magical touch that catches the light, bringing a delightful twinkle to Leap’s appearance. Plus, this yarn is easy to care for, which is perfect for toys that may need frequent washing.

Why is amigurumi so popular - Marly Bird
More Amigurumi Stuffie Patterns

Crochet Leap the Tree Frog – What You Need to Know

SKILL LEVEL

Intermediate

MEASUREMENTS

Finished Measurements

Frog is x” [x cm] wide by x” [x cm] long. 

Gauge 

7 sc x 8 rounds = 4” [10 cm] x 4” [10 cm]; use any size hook to obtain the gauge.


MATERIALS

Crochet Yarn 

Bernat, Baby Blanket Sparkle (100% polyester, 220 yds / 201 m, 10.5 oz/ 300 g, CYCA# 6 super bulky) 

Color A: #71011 Limeade Sparkle, 150 g

Color D: #71006 Hot Pink Sparkle, small amount

Bernat, Baby Blanket (100% polyester, 220 yds / 201 m, 10.5 oz/ 300 g, CYCA# 6 super bulky) 

Color B: #10006 Vintage White, 30 g

Color C: #33615 Yellow, small amount

Color E: #10040 Coal, small amount

Crochet Hook

N/13 [9.0 mm] or hook needed for gauge 

Notions 

Tapestry needle, Fiberfil Stuffing, Stitch Markers


ABBREVIATIONS

Theses are basic abbreviations for most crochet patterns but it is important to list the ones actually used in the pattern. Did you know we have a great list of crochet abbreviations and definitions here on the Marly Bird website. Check these out here.

Ch – Chain(s) 

Dc – Double Crochet

Hdc – Half Double Crochet

RS – Right Side 

Sc – Single Crochet

Sl st – Slip Stitch

Sp(s) – Space(s) 

St(s) – Stitch(es)

WS – Wrong Side


SPECIAL STITCHES 

⭐️ Single Crochet 2 Together (sc2tog): *Insert hook into indicated stitch, yarn over and pull up a loop; repeat from * in next stitch indicated, yarn over and draw through all 3 loops on hook. (1 st decreased)

⭐️ Single Crochet 3 Together (sc3tog): *Insert hook into indicated stitch, yarn over and pull up a loop; repeat from * in next 2 stitches indicated, yarn over and draw through all 4 loops on hook. (2 sts decreased)


NOTES

  • Tree Frog is worked in pieces and seamed together. Details are added last. 
  • Body parts are worked in continuous spiral rounds that are not joined at the end of the round. 
  • Use a stitch marker to mark the first stitch of each new round throughout the project. 
  • Change colors when 2 loops are left on the last stitch of the old color.  Fold in the new color to complete the stitch and start using the new color. 
Promotional image for a PDF pattern titled "Leap the Tree Frog." It features crochet instructions for creating a leggy frog. It includes a tablet displaying a picture of the crochet frog, printed pages of the pattern, and the text "Marly Bird" at the bottom. -Marly Bird

Upgrade to the Printable PDF

Beautifully formatted to print and relax while crocheting this adorable 🐸 leggy frog crochet pattern.

Get the Ad-Free PDF

The Ad-Free Crochet Pattern can be purchased on Etsy or Ravelry or Shopify.

Where to Find the Leggy Frog Crochet Pattern – Leap the Frog Pattern

Discovering Leap the Frog is a breeze for crafters of all skill levels. This leggy frog crochet stuffie pattern is available free exclusively to subscribers at MarlyBird.com. Joining is simple: just click the subscription box in the blog post, enter your email, and create a password to unlock a treasure trove of subscriber-only content, including the vibrant and playful Leap the Frog.

For those who prefer a seamless crafting session without interruptions, the ad-free PDF version of the pattern is available for purchase. You can find this version on Etsy, Ravelry, and my Shopify store. This option is perfect for enthusiasts who appreciate having a portable, print-friendly format at their fingertips, ensuring that Leap can come to life in your hands wherever you are. Whether you choose the free version or support us by purchasing the pattern, you’re in for a delightful crochet adventure with Leap the Frog!

Three images of Leap the Tree Frog outdoors. Left: Frog draped casually over a tree branch. Center: Close-up of one of the frog's hand crocheted details. Right: Frog laying flat on the ground among grass and leaves with a pink and white crochet bow on its head. -Marly Bird
Doing a photoshoot can be hard! LOL. Leap was balancing on a limb on second and the next he was falling to the ground. I found this sequence of photos hilarious!

GROW

To Unlock Exclusive Subscriber Content click the Box below and join for free by simply adding your email and creating a password! If you are having troubles, clear your cache or reset your password or login to the Grow Publisher Portal.

>> Learn More About Grow Here <<

I’m thrilled to share this amazing pattern with you, many patterns on my blog are absolutely free! I kindly request that you don’t copy and paste or distribute this pattern. Prefer an ad-free experience? Buy a digital PDF pattern for a small fee from one of my online stores for a seamless crafting journey. 

I appreciate your support and readership. You are the reason I can keep doing what I love and sharing it with others. So, thank you from the bottom of my yarn-loving heart! Disclosure: This post contains affiliate links, meaning I get a commission if you decide to make a purchase through my links at no cost to you.

Leap the Tree Frog Crochet Written Instructions

TOP OF BODY

Note: Body is worked from the center out, with eyelids created with short rows while working.

With color A, loosely chain 10.

Round 1: Sc in back ridge of 2nd ch from hook (place marker, see notes), sc in back ridge of next 7 ch, 3 sc in last ch, turn to work in front loops of foundation ch, sc in front loops of next 7 ch, 2 sc in next ch, do not join or turn (see notes)–20 sc.

Round 2: 2 hdc in next st, hdc in next 4 sts, sc in next 2 sts, hdc in next st, 2 sc in next 3 sts, hdc in next st, sc in next 2 sts, hdc in next 4 sts, 2 hdc in last 2 sts –26 sts.

Round 3: 2 hdc in next 2 sts, hdc in next 3 sts, sc in next 2 sts, sl st in next st, sc in next st, place marker, begin creating eyelid working in short rows as follows:

Row 3a: Ch 1, 2 hdc in next 2 sts on body, ch 1, turn.

Row 3b: Sc in first hdc, hdc in next 2 hdc, sc in last hdc, sl st in marked st on body, remove marker, turn.

Row 3c: Ch 2, position eyelid in front of work, skip eyelid and start working on body.

Round 3 cont: 2 sc in next 4 sts on body, place marker, begin creating next eyelid working in short rows as follows:

Row 3d: Ch 1, 2 hdc in next 2 sts on body, ch 1, turn.

Row 3e: Sc in first hdc, hdc in next 2 hdc, sc in last hdc, sl st in marked st on body, remove marker, turn.

Row 3f: Ch 2, position eyelid in front of work, skip eyelid and start working on body.

Round 3 cont: Sc in next st on body, sl st in next st, sc in next 2 sts, hdc in next 3 sts, 2 hdc in next 2 sts – 28 body sts + 2 ch-2 sps.

Round 4: 2 hdc in next 4 sts, sc in next 2 sts, sl st in next 4 sts, 2 sc in next ch-2 sp, sc in next 4 sts, place marker (this locates the front of the body and center of the upper mouth), sc in next 3 sts, 2 sc in next ch-2 sp, sl st in next 4 sts, sc in next 3 sts, 2 hdc in next 3 sts, 2 sc in next st – 40 sts. 

Round 5: Sl st in each st around, move markers up as you work, fasten off, weave in ends. 

BOTTOM OF BODY

Note: Body is worked from the center out.

With color B, loosely chain 10.

Round 1: Sc in back ridge of 2nd ch from hook (place marker, see notes), sc in back ridge of next 7 ch, 3 sc in last ch, turn to work in front loops of foundation ch, sc in front loops of next 7 ch, 2 sc in next ch, do not join or turn (see notes)–20 sc.

Round 2: 2 hdc in next st, hdc in next 4 sts, sc in next 2 sts, hdc in next st, 2 sc in next 3 sts, hdc in next st, sc in next 2 sts, hdc in next 4 sts, 2 hdc in last 2 sts –26 sts.

Round 3: 2 hdc in next 2 sts, sc in next 3 sts, sl st in next 3 sts, sc in next 3 sts, 2 sc in next 4 sts, sc in next 3 sts, sl st in next 3 sts, sc in next 3 sts, 2 hdc in next 2 sts- 34 sts. 

Round 4: 2 hdc in next 3 sts, sc in next 4 sts, sl st in next 4 sts, sc in next 6 sts, place marker (this locates the front of the body and center of the lower mouth), sc in next 6 sts, sl st in next 4 sts, sc in next 4 sts, 2 hdc in next 2 sts, sc in last st, sl st to first st, fasten off, weave in ends– 40 sts. 

A leggy plush yellow frog with a pink tongue and bulging eyes is draped over a tree branch in a sunlit outdoor setting, with grass and other trees visible in the background. The crochet pattern gives the handmade toy its textured fabric, enhancing its playful appearance. -Marly Bird

EYE

Note: Eye is worked from front to back.

Make 2

With color C, make an adjustable ring.

Round 1: 4 sc in ring, pull ring closed, do not turn or join. 

Round 2: 2 sc in each sc around – 8 sc.

Round 3: Sc in each sc around.

Round 4: *Sc2tog over next 2 sts, repeat from * around, sl st to first st, fasten off with long tail- 4 sts. 

Stuff eye with fiberfil. Weave tail through the last round and pull to close the hole. Keep a long tail for seaming.

INNER MOUTH

Note: Mouth is worked from the center out.

With color D, loosely chain 5.

Round 1: Sc in back ridge of 2nd ch from hook (place marker, see notes), sc in back ridge of next 2 ch, 3 sc in last ch, turn to work in front loops of foundation ch, sc in front loops of next 2 ch, 2 sc in next ch, do not join or turn (see notes)–10 sc.

Round 2: 2 sc in next st, sc in next 2 sts, 2 sc in next 3 sts, sc in next 2 sts, 2 sc in last 2 sts –16 sts.

Round 3: *Sc in next st, 2 sc in next st; repeat from * around, sl st to first st, fasten off, weave in ends –24 sts.

A bright green, crocheted frog with long limbs and big eyes hangs on a tree branch. This leggy frog, created from a delightful crochet pattern, has a pink protruding tongue and is set against a backdrop of a green grassy area with another tree, under a partly cloudy sky. -Marly Bird

TONGUE

With color D, loosely chain 12.

Row 1: Sc in back ridge of 2nd ch and each ch across, fasten off with long tail for seaming. 

ARMS

Note: Arms are worked from upper arm to fingers. 

Make 2

With color A, chain 6 and sl st to first ch. 

Round 1: Sc in next ch, place marker, sc in next 4 ch, sc in next sl st, do not join or turn- 6 sc. 

Round 2: *Sc in next sc, sc2tog over next 2 sc; repeat from * around – 4 sc. 

Rounds 3-6: Sc in each sc around – 4 sc. 

Round 7: *Sc in next sc, 2 sc in next sc; repeat from * around – 6 sc.

Round 8: *Sc in next 2 sc, 2 sc in next sc; repeat from * around – 8 sc. 

Round 9: *Sc in next sc, ch 6, 3 sc in back ridge of 2nd ch from hook, sl st in back ridge of remaining ch across; repeat from * 3 more times, sl st in remaining 4 sts, fasten off leaving a long tail for seaming. 

Flatten opening at the base of the fingers and sew closed. Do not stuff upper arm. Flatten seam at beginning of work and whip stitch closed.

LEGS

Note: Legs are worked from upper leg to toes. 

Make 2

With color A, chain 12 and sl st to first ch. 

Round 1: Sc in next ch, place marker, sc in next 10 ch, sc in next sl st, do not join or turn- 12 sc. 

Rounds 2-3: Sc in each sc around.

Round 4: *Sc in next 2 sc, sc2tog over next 2 sc; repeat from * around – 9 sc. 

Rounds 5-7: Sc in each sc around.

Round 8: *Sc in next sc, sc2tog over next 2 sc; repeat from * around – 6 sc. 

Rounds 9-10: Sl st in next 2 sts, hdc in next st, dc in next 2 sts, hdc in next st. 

Round 11: Sc3tog over next 3 sts, sc in next 3 sts– 4 sc. 

Rounds 12-15: Sc in each sc around. 

Round 16: 2 sc in each sc around – 8 sc.

Round 17: *Sc in next sc, ch 7, 3 sc in back ridge of 2nd ch from hook, sl st in back ridge of remaining ch across; repeat from * 4 more times, sl st in remaining 3 sts, fasten off leaving a long tail for seaming. 

Flatten opening at the base of the toes and sew closed. Slightly stuff upper leg. Flatten seam at beginning of work and whip stitch closed.

FINISHING

Assembly

  1. Match up the body markers and place the WS of the top of the body and the bottom of the body together (RS facing out). With the inner mouth held vertically, RS facing out, pin and sew the top half edge of the inner mouth to the front inner edge of the top of the body and the lower half edge of the inner mouth to the front inner edge of the bottom of the body. Remember the markers indicate the center of the mouth on the body.
A crochet avocado made with green and dark green yarn for the body and pink yarn for the seed, secured with blue and silver stitch markers, lies on a light wooden surface.
A hand-knit piece resembling the head of a frog with its mouth open, using green yarn for the head and upper jaw, darker green for the lower jaw, and pink for the mouth. The knitted object is placed on a wooden surface.
  1. With WS of the top of the body facing up, overlap the flattened sewn edges of the arms and legs along the edges of the body. Pin and sew in place.
A handmade, green crocheted frog is laid out flat on a wooden surface. The frog's limbs are spread out and it has a red mouth with some loose green yarn strands around its body. The texture of the crochet is clearly visible.
  1. Match up the edges of the body top and body bottom together with RS facing out and the edges of the limbs sandwiched between the body halves. Sew the inner surfaces of the edges together (working through the limbs to secure them in place a second time).
  1. Stuff body through the eye hole openings.
  1. Thread the yarn tails at the back of the eyes through the eye holes and secure eyes to the head.
  1. Using color A, tack down the loose corners of the eyelids to the head.
  1. With color E, satin stitch long stitches to the front of the eyes for a pupil.
  1. Using the leftover yarn tails, attach the tongue to the back of the inner mouth.

Hop Over and Share on Social – We Wanna See Your Leap!

We can’t wait to see your completed Leap the Frog! Don’t forget to share pictures of your adorable leggy frog on Ravelry. Need a bit more help or want to join a community of fellow crafters? Head over to the Marly Bird Facebook group where support and inspiration abound.

Happy crocheting!

Filed Under: Apricot Lane Amigurumi, Crochet, Designer Premium Patterns, Free Patterns, Our Free Patterns, Pattern Tagged With: badge-new-pattern

  • « Previous Page
  • 1
  • …
  • 4
  • 5
  • 6
  • 7
  • 8
  • …
  • 17
  • Next Page »

Let's Be Social

Join the Marly's Minions Facebook group to share, ask questions, or chat about all of your yarn related crafts!

Join the group
Digital avatar of a woman with brown hair in a bun, glasses, and a black jacket, waving and saying "hi" with a word bubble above her hand in the website footer. -Marly Bird

Quick Links

The Pattern Shop

Our Free Patterns

Blog

Marly Bird House

Learn to Knit & Crochet

About

Giveaway Terms and Privacy Notice

Find Us Everywhere

Join the Newsletter

YouTube Channel

Marly's Minions FB Group

Etsy Store

Ravelry Store


AN ELITE CAFEMEDIA HOME/DIY PUBLISHER

Information from your device can be used to personalize your ad experience. Do not sell or share my personal information.

Privacy Policy   Terms   Copyright © 2025