
The Crochet Holiday Armadillo Amigurumi Pattern is designed by my friend Megan Kreiner of MK Crochet and Knits for MarlyBird.com
Want to know the story behind the design of Arlene Stitchadillo and her partner, Andy Stitchadillo? READ ALL ABOUT IT HERE.
????Do you want the Knit Holiday Armadillo Amigurumi || Andy Stitchadillo? Click Here for Knit Holiday Armadillo Amigurumi Pattern.

Disclosure: This page may contain affiliate links which help me cover the cost of publishing my blog. Should you choose to make a purchase, at no additional cost to you, I may earn a small percentage of the sale.
CLICK HERE GO TO RAVELRY AND CHECK IT OUT!

Andy Stitchadillo: add to cart on Ravelry
Arlene Stitchadillo: add to cart on Ravelry
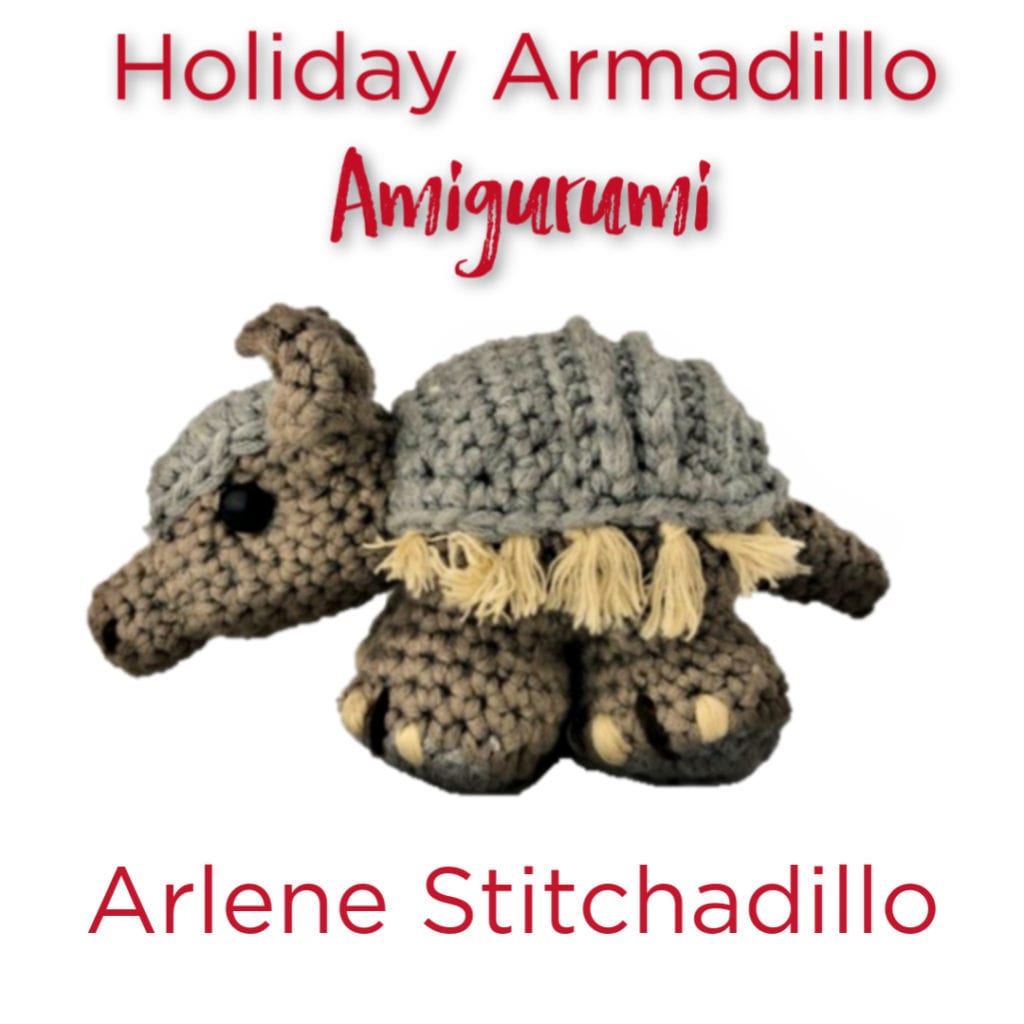
Crochet Holiday Armadillo Amigurumi || Arlene Stitchadillo
DESIGNER Megan Kreiner of MK Crochet and Knits for MarlyBird.com
MEASUREMENTS
FINISHED MEASUREMENTS: 2” [5 cm] wide by 8” [20.5 cm] long (nose to tail)
GAUGE: 1 leg = 1.5″ [4 cm’] in diameter by 2” [5 cm] tall CHECK YOUR GAUGE. Use any size hook to obtain the gauge. Exact gauge is not critical to this project.
MATERIALS
Yarn: Red Heart® Soft Essentials™ [ available in solid color 5 oz (141 g), 131 yd (120 m) balls], Grayhound (MC) 1 ball, Biscuit (A) 1 ball, Cocoa (B) and Cream (C) 10 yds each.
Yarn used in Sample: Berroco Comfort Chunky 5770 Ash Grey (MC) 1 ball, 5771 Driftwood Heather (A) 1 ball, 5741 Bitter Sweet (B) & 5703 Barley (C) 10 yds each.
Hook: Susan Bates® G/7 [4.5 mm] Note: Hook size is much smaller than recommended on ball band to make tight stitches for the armadillo.
Notions
- Tapestry needle to bury the ends (learn how here)
- Polyester Fiberfill
- Straight Pins
- Stitch Marker (make your own)
- Scissors
- 12mm plastic safety eyes with plastic backings (for children 3 and older)
- Black embroidery thread or black yarn (for stitched eyes) and needle
ABBREVIATIONS
Ch — chain
Sl St — slip stitch
Sc — single crochet
MC — main color
A, B, C — contrasting color
SPECIAL STITCHES
Sc2tog- Insert hook into first stitch indicated, yarn over and pull up a loop, insert hook into next stitch indicated, yarn over and pull up a loop, yarn over and draw through all 3 loops on hook. – 1 decrease made.
NOTES
Legs, body, head, and tail are worked in a spiral, meaning you do not have to join at the end of each round. Use a marker to locate the first stitch on each round to keep track of your work.
Change color when you have 2 loops left on the hook from last stitch. Fold in new color and finish the stitch.
PATTERN
Legs (Make 4)
With MC, make an adjustable ring (watch video).
Round 1 (RS): 6 sc in ring, pull ring closed, do not join and do not turn (throughout)- 6 sc.
Round 2: 2 sc in each sc around, place marker in first st to locate beginning of round (throughout)– 12 sc.
Round 3: *Sc in next sc, 2 sc in next sc; repeat from * around, change to A, fasten off MC- 18 sc.
Rounds 4-6: Sc in each sc around- 18 sc
Round 7: *Sc in next 4 sc, sc2tog over next 2 sc; repeat from * around- 15 sc.
Round 8: *Sc in next 3 sc, sc2tog over next 2 sc; repeat from * around, fasten off, leaving long tail for seaming- 12 sc.
Make 3 more legs. On the fourth leg, do not fasten off A. Continue to Rnd 9 of body.
Take a moment and properly secure the tail of the adjustable ring to the WS of the legs (watch video).

Body
Continue working on 4th leg.
Round 9: Sc in next sc, place marker, 2 sc in next sc, [sc in next sc, 2 sc in next sc] 3 times, leave remaining 4 sts unworked. *Pick up next leg, sc in any sc, 2 sc in next sc, [sc in next sc, 2 sc in next sc] 3 times, leave remaining 4 sts unworked; repeat from * on remaining 2 legs, do not join to first sc, do not turn (throughout)- 48 sc.
Round 10: Starting at marker, sc in each sc around body (be careful not to twist the legs)- 48 sc.
Round 11: *Sc in next 4 sc, sc2tog over next 2 sc; repeat from * around- 40 sc.
Line up the inner legs. Using tapestry needle and long tails, whip stitch seams of inner legs together.
Round 12: Sc in each sc around- 40 sc.
Round 13: *Sc in next 3 sc, sc2tog over next 2 sc; repeat from * around- 32 sc.
Rounds 14-15: Sc in each sc around- 32 sc.
Round 16: *Sc in next 6 sc, sc2tog over next 2 sc; repeat from * around- 28 sc.
Round 17: *Sc in next 5 sc, sc2tog over next 2 sc; repeat from * around- 24 sc.
Round 18: *Sc in next 2 sc, sc2tog over next 2 sc; repeat from * around- 18 sc.
Round 19: *Sc in next sc, sc2tog over next 2 sc; repeat from * around- 12 sc.
Stuff body and legs with fiberfill.
Round 20: *Sc2tog over next 2 sc; repeat from * around, fasten off, leaving long tail for seaming- 6 sc.
Finish stuffing the body. Close hole by weaving through last 6 sts and pulling tight. Weave in remaining ends. Decide which two legs will be in the front of your armadillo’s body and place marker, if desired.
With B and tapestry needle, embroider 3 vertical stitches over the front edge of feet to create toe definition. Repeat on all 4 legs.
With C and a tapestry needle, satin stitch 4 groups of 4-5 stitches a piece to front of feet to create toenails. The embroidered B toe lines should line up between the nails. Repeat on all 4 legs.

Head
With A, make an adjustable ring (watch video).
Round 1 (RS): 8 sc in ring, pull ring closed, do not join and do not turn (throughout)- 8 sc.
Round 2: Sc in each sc around, place marker in first st to locate beginning of round (throughout)– 8 sc.
Round 3: *Sc in next 3 sc, 2 sc in next sc; repeat from * around- 10 sc.
Round 4: Sc in each sc around- 10 sc.
Round 5: *Sc in next 3 sc, sc2tog over next 2 sc; repeat from * around- 8 sc.
Round 6: *Sc in next sc, 2 sc in next sc; repeat from * around- 12 sc.
Round 7: *Sc in next 2 sc, 2 sc in next sc; repeat from * around- 16 sc.
Round 8: Sc in each sc around- 16 sc.
Round 9: *Sc in next 3 sc, 2 sc in next sc; repeat from * around- 2 sc.
Round 10: Sc in each sc around- 20 sc
Round 11: *Sc in next 4 sc, 2 sc in next sc; repeat from * around- 24 sc.
Rounds 12-13: Sc in each sc around- 24 sc
Round 14: *Sc in next 4 sc, sc2tog over next 2 sc; repeat from * around- 20 sc.
Round 15: *Sc in next 3 sc, sc2tog over next 2 sc; repeat from * around- 16 sc.
Round 16: *Sc in next 2 sc, sc2tog over next 2 sc; repeat from * around- 12 sc.
Take a moment and properly secure the tail of the adjustable ring to the WS of the head (watch video).
Stuff head with fiberfill. If using plastic safety eyes, install eyes between Rounds 10 & 11 with about 7 sts of space between them.
Round 17: *Sc2tog over next 2 sc; repeat from * around, fasten off, leaving long tail for seaming- 6 sc.
Finish stuffing the head. Close hole by weaving through last 6 sts and pulling tight. Weave in ends (watch video).
If not using safety eyes, use black yarn to embroider eyes onto head between Rounds 10 & 11 with about 7 sts of space between them.
With A yarn, draw a series of small stitches back and forth through the head around the edges of the eyes pulling gently to sink the eyes into the head.
With B yarn, sew 2 short stitches to the front of the snout for nostrils.

Head Plate
With MC, loosely ch 5.
Row 1 (RS): Sc in 2nd ch from hook, sc in each ch across, turn- 4 sc.
Row 2: Ch 1, 2 sc in first sc, sc in next 2 sc, 2 sc in last sc, turn- 6 sc.
Row 3: Ch 1, sc2tog over first 2 sc, sc in next 2 sc, sc2tog over last 2 sc, turn- 4 sc.
Row 4: Ch 1, sc in each sc across, turn- 4 sc.
Row 5: Ch 1, sc in first sc, sc2tog over next 2 sc, sc in last sc, turn- 3 sc.
Row 6: Ch 1, sc in first sc, skip next sc, sc in last sc, turn- 2 sc.
Row 7: Ch 1, sc2tog over next 2 sc, place marker in st just made- 1 sc.
Edging: Sc around entire edge of head plate until you reach the marker. Sl st in marked sc. Fasten off leaving a long tail for seaming.
Pin the head plate to top of head so the tapered end lines up with rnd 6 of the head. Sew down edges with MC using a back or running stitch.

Ears (Make 2)
With A, loosely ch 5.
Row 1 (RS): Sc in 2nd ch from hook, sc in each ch across, turn- 4 sc.
Row 2: Ch 1, sc in each sc across, turn- 4 sc.
Row 3: Ch 1, sc in first sc, sc2tog over next 2 sc, sc in last sc, turn- 3 sc.
Row 4: Ch 1, sc in first sc, skip next sc, sc in last sc, turn- 2 sc.
Row 5: Ch 1, sc2tog over next 2 sc, place marker in st just made- 1 sc.
Edging: Sc around entire edge of ear until you reach the marker. (Sc, ch 2, sl st) in marked sc. Fasten off leaving a long tail for seaming.
Pinch the lower corners at the base of the ear together and secure shaping with a few stitches.
Position ears 2 rounds behind the eyes, directly next to the edge of the head plate and pin in place. With A, attach base of ears to the head with whipstitch.
Tail
With A, make an adjustable ring (watch video).
Round 1 (RS): 6 sc in ring, pull ring closed, do not join and do not turn (throughout)- 6 sc.
Round 2: Sc in each sc around, place marker in first st to locate beginning of round (throughout)– 6 sc.
Round 3: *Sc in next 2 sc, 2 sc in next sc; repeat from * around- 8 sc.
Round 4: Sc in back loop of each sc around- 8 sc.
Round 5: *Sc in next 3 sc, 2 sc in next sc; repeat from * around- 10 sc.
Round 6: Sc in back loop of each sc around- 10 sc.
Round 7: *Sc in next 4 sc, 2 sc in next sc; repeat from * around- 12 sc.
Round 8: Sc in back loop of each sc around- 10 sc.
Round 9: *Sc in next 5 sc, 2 sc in next sc; repeat from * around, fasten off leaving long tail for seaming- 14 sc.
Take a moment and properly secure the tail of the adjustable ring to the WS of the head (watch video).
Using photos for reference, whipstitch the open edge of the tail to the back of the body. Stuff tail with fiberfill before closing seam.

Shell
With MC, loosely ch 9.
Row 1 (RS): 2 sc in 2nd ch from hook, sc in next 6 sc, 2 sc in last sc, turn- 10 sc.
Row 2: Ch 1, 2 sc in first sc, sc in each sc to last, 2 sc in last sc, turn- 12 sc.
Repeat Row 2 three times- 18 sc.
Rows 6-7: Ch 1, sc in each sc across, turn- 18 sc.
Row 8: Ch 1, sc in front loop of each sc across, turn- 18 sc.
Row 9: Ch 1, sc in back loop of each sc across, turn- 18 sc.
Repeat Rows 8-9 once
Row 12: Ch 1, sc2tog in front loop of first 2 sc, sc in front loop of each sc across to last 2 sc, sc2tog in front loop of last 2 sc, turn- 16 sc.
Row 13: Ch 1, sc2tog in back loop of first 2 sc, sc in back loop of each sc across to last 2 sc, sc2tog in back loop of last 2 sc, turn- 14 sc.
Row 14: Ch 1, sc2tog over first 2 sc, sc in each sc across to last 2 sc, sc2tog over last 2 sc, turn- 12 sc.
Row 15: Ch 1, [sc2tog over next 2 sc] twice, sc in each sc across to last 4 sc, [sc2tog over next 2 sc] twice, turn- 8 sc.
Row 16: Ch 1, sc2tog over next 2 sc; repeat from * across, turn- 4 sc.
Edging: Ch 1, sc around edge of shell, sl st to first sc. Fasten off leaving a long tail for seaming.
Place shell over the top of the body with rib detail facing up and oriented towards the tail. Sew down edges of shell with MC using a back or running stitch.
Using the photos for reference, pin the back side of the head to the shell and body, directly above the front legs. Once you are happy with the placement, attach with MC and a mattress stitch.
Finishing
Cut 16-18 5” pieces of C and attach as fringe knots along sides of body under the edge of the shell. Trim to an inch long and separate the yarn plys with a tapestry needle for a fuzzy look.

I can't wait to see your finished Crochet Holiday Armadillo Amigurumi! Show me your Arlene Stitchadillo on social media. Use #MarlyBird and #ArleneStitchadillo
Want the whole pattern in one place?
Purchase the ad-free PDF on Ravelry today.