
Your New Favorite Free Crochet Hat With A Bill Pattern
Are you looking for your new favorite FREE Crochet Hat With A Bill Pattern? Today, I'm excited to share one of the best crochet hats Marly Bird designed. This free pattern uses her signature slip stitch bill technique. This makes the newsboy hat style absolutely beautifully designed and suitable for beginners and experienced crocheters.
lf you like this style of hat then you will love the Blossom Hat or the Ribbed for Him and Her Hat.
Disclosure: This post contains affiliate links, meaning I get a commission if you decide to make a purchase through my links, at no cost to you.
Favorite Crochet Hat with Bill Patterns
Crochet hats are easy to make and will keep you warm all winter long! Crocheting a hat is not only fun, but it's very rewarding – especially when you find a fun new pattern. You can create almost any crochet hat with a bill using my signature crochet slip stitch bill technique.
In this blog post, I'm giving you my newest free newsboy cap pattern, “All About It” Crochet Hat with a bill! You'll also get all kinds of crochet hat info and a list of free hat crochet patterns Marly Bird I know you’ll love.
All of these hat patterns are suitable for adventurous beginners. If you're new to crochet, you can always refer to my BiCrafty Bootcamp Learn to Crochet course. And I have individual crochet stitch tutorials for more information.
- Single Crochet (sc): Insert hook into indicated stitch, yarn over and pull up a loop, yarn over and draw through 2 loops on hook.
- Split Single Crochet (split sc): Insert hook into indicated stitch between the two legs of the stitch, yarn over and pull up a loop, yarn over and draw through both loops on hook.
- Half Double Crochet (hdc): Yarn over, insert hook into indicated stitch, yarn over and pull up a loop, yarn over and draw through all 3 loops on hook.
- Double Crochet (dc): Yarn over hook, insert hook into indicated st, yarn over and pull up a loop, [yarn over and draw through 2 loops on hook] twice.
- Slip Stitch (sl st): Insert hook into indicated stitch, yarn over and pull up a loop and draw through loop on hook.
Once you know basic crochet stitches and simple construction techniques, you can crochet a hat in a weekend! Want to learn more crochet (and knitting) techniques that make life easier? Check out this blog post here.
Best Yarn for Crochet Hats
To crochet any hat pattern whether a slouchy hat, beanie, flat cap, or newsboy, you’ll need some yarn. The crochet hat patterns I've designed range in yarn weights, from worsted to bulky.
Many crocheters I know find it easier to choose a hat pattern first and then choose the yarn. That way, they can shop for yarn and choose one comparable in weight. A similar fiber blend to that used in the pattern sample is useful too.
For me, as a designer, the yarn is where I start. I usually choose a yarn that is soft to the touch. I don't want anything itchy on my head, and I either go with solid colors or long color-change yarn.
Some of my favorite yarns for crocheting hats include (but not limited to…):
- Brava Worsted
- Brava Bulky
- Caron One Pound Jumbo Ombre
- Caron Macchiato Cakes
- Caron Cinnamon Swirl Cakesaron Cinnamon Swirl Cake
- Caron Cake yarn
- Bernat Fabwoolous
- Swish Worsted
- Swish Bulky
- Patons Classic Wool (more itchy than the others)
- Wool of the Andes Superwash Worsted
- Wool of the Andes Bulky
- Wool of the Andes Superwash Bulky
- Heatherly Worsted
- Sirdar Jewelspun Aran
- Sirdar Jewelspun Chunky with Wool
Ultimately, you can really choose any yarn you want to make a crochet hat as long as you're happy with the end result.
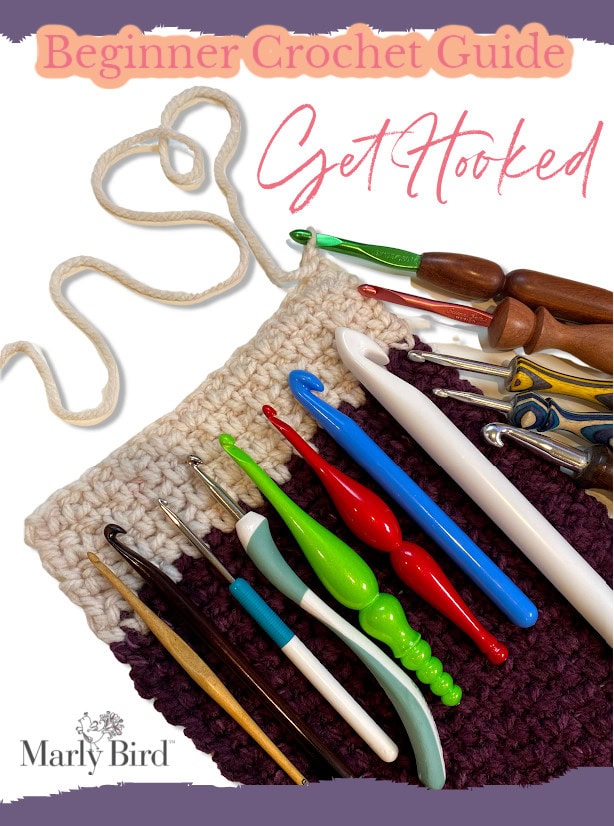
What Size Crochet Hooks
The crochet hook you use is really subjective to the crocheter. Whether you're a Boye, Susan Bates, or Clover fan usually depends on the hook you first learned to crochet with. When I became the spokesperson for Red Heart Yarn, I started using the Susan Bates hooks. I love them!
However, my favorite crochet hooks have a little something added to them by a company called TooShay Crochet. Their Susan Bates hooks with the ergonomic crochet hook handle are my go-to hooks! But if you're not a fan of Bates hooks and want an ergonomic handle, try TooShay Crochet on Etsy. They have many options.
These hooks are great for beginners or crocheters who need a little more to grip with their hands.
As for which hook size is best, start with the size in the pattern and the same weight yarn for the hat. Work a gauge swatch and decide if you need to go up or down a hook size. I find that I use 3.5mm, 4mm, 4.5mm, 5mm, 5.5mm, and 6mm the most. But you can get more information about crochet hook sizes. Check out this ultimate beginner's guide to crochet hooks.
How Do You Know How Big to Crochet Hat Patterns?
Choosing the best size for a hat can be a little tricky. But if you know the rough size of the recipient's head, that helps.
In general, the average adult size head circumference is around 20-22″ [51 – 56 cm]. Obviously, some people have larger-than-average heads. That means you'll be looking at measurements to fit the adult large size of 23-25″ [58.5 – 63.5 cm].
If you're making a crochet hat as a gift, try to get a measurement of the circumference of the intended recipient’s head. Then, you can reference the pattern to figure out what size to make. You should make a hat that has some negative ease so it will stay close around the head. Ease is the difference between the actual size of the head vs the size of the hat. I like to make my hats anywhere between 1-3″ [2.5 – 7.5 cm] of negative ease. That way, the hat doesn't fall down around the eyes when you wear it!
When it comes to the depth or height of the hat, you may be able to adjust the length or “slouchiness” of your beanie, or the roundness of your cap.
For more sizing information, please read the crochet hat size charts below.
| Crochet Hat Size Chart: Circumference | |
| General Sizing | Hat Circumference Range (inches) |
| Child | 18-20 |
| Small Adult | 20-22 |
| Average Adult | 21-23 |
| Large Adult | 22-25 |
| Crochet Hat Size Chart: Length | |
| General Sizing | Hat Circumference Range (inches) |
| Child | 7.5 |
| Small Adult | 8 |
| Average Adult | 8.5 |
| Large Adult | 9 |
Bottom Up or Top Down Hats – Which is Better to Crochet?
Well, let's dive into the age-old debate of bottom-up and top-down hats – which are better? I've pondered this question myself. I often think about what you, the crocheter, would like best vs. what I like to design and make.
Let's talk bottom-up hats first. These hats are crocheted by starting from the brim and working your way up to the crown. I can honestly say that I swear by these hats! The construction makes sense to me, and I'm better at controlling the size and structure.
These crochet hat patterns allow me to adjust the length of the ribbing easily. I use slip stitch or front post/back post [fpdc/bpdc]) for the brim. Then, I can customize the body's width (or billow-ness). After that comes customizing the crown to achieve the perfect fit. Plus, they allow me to flex my creative skills by incorporating various stitch patterns or color combinations in the body.
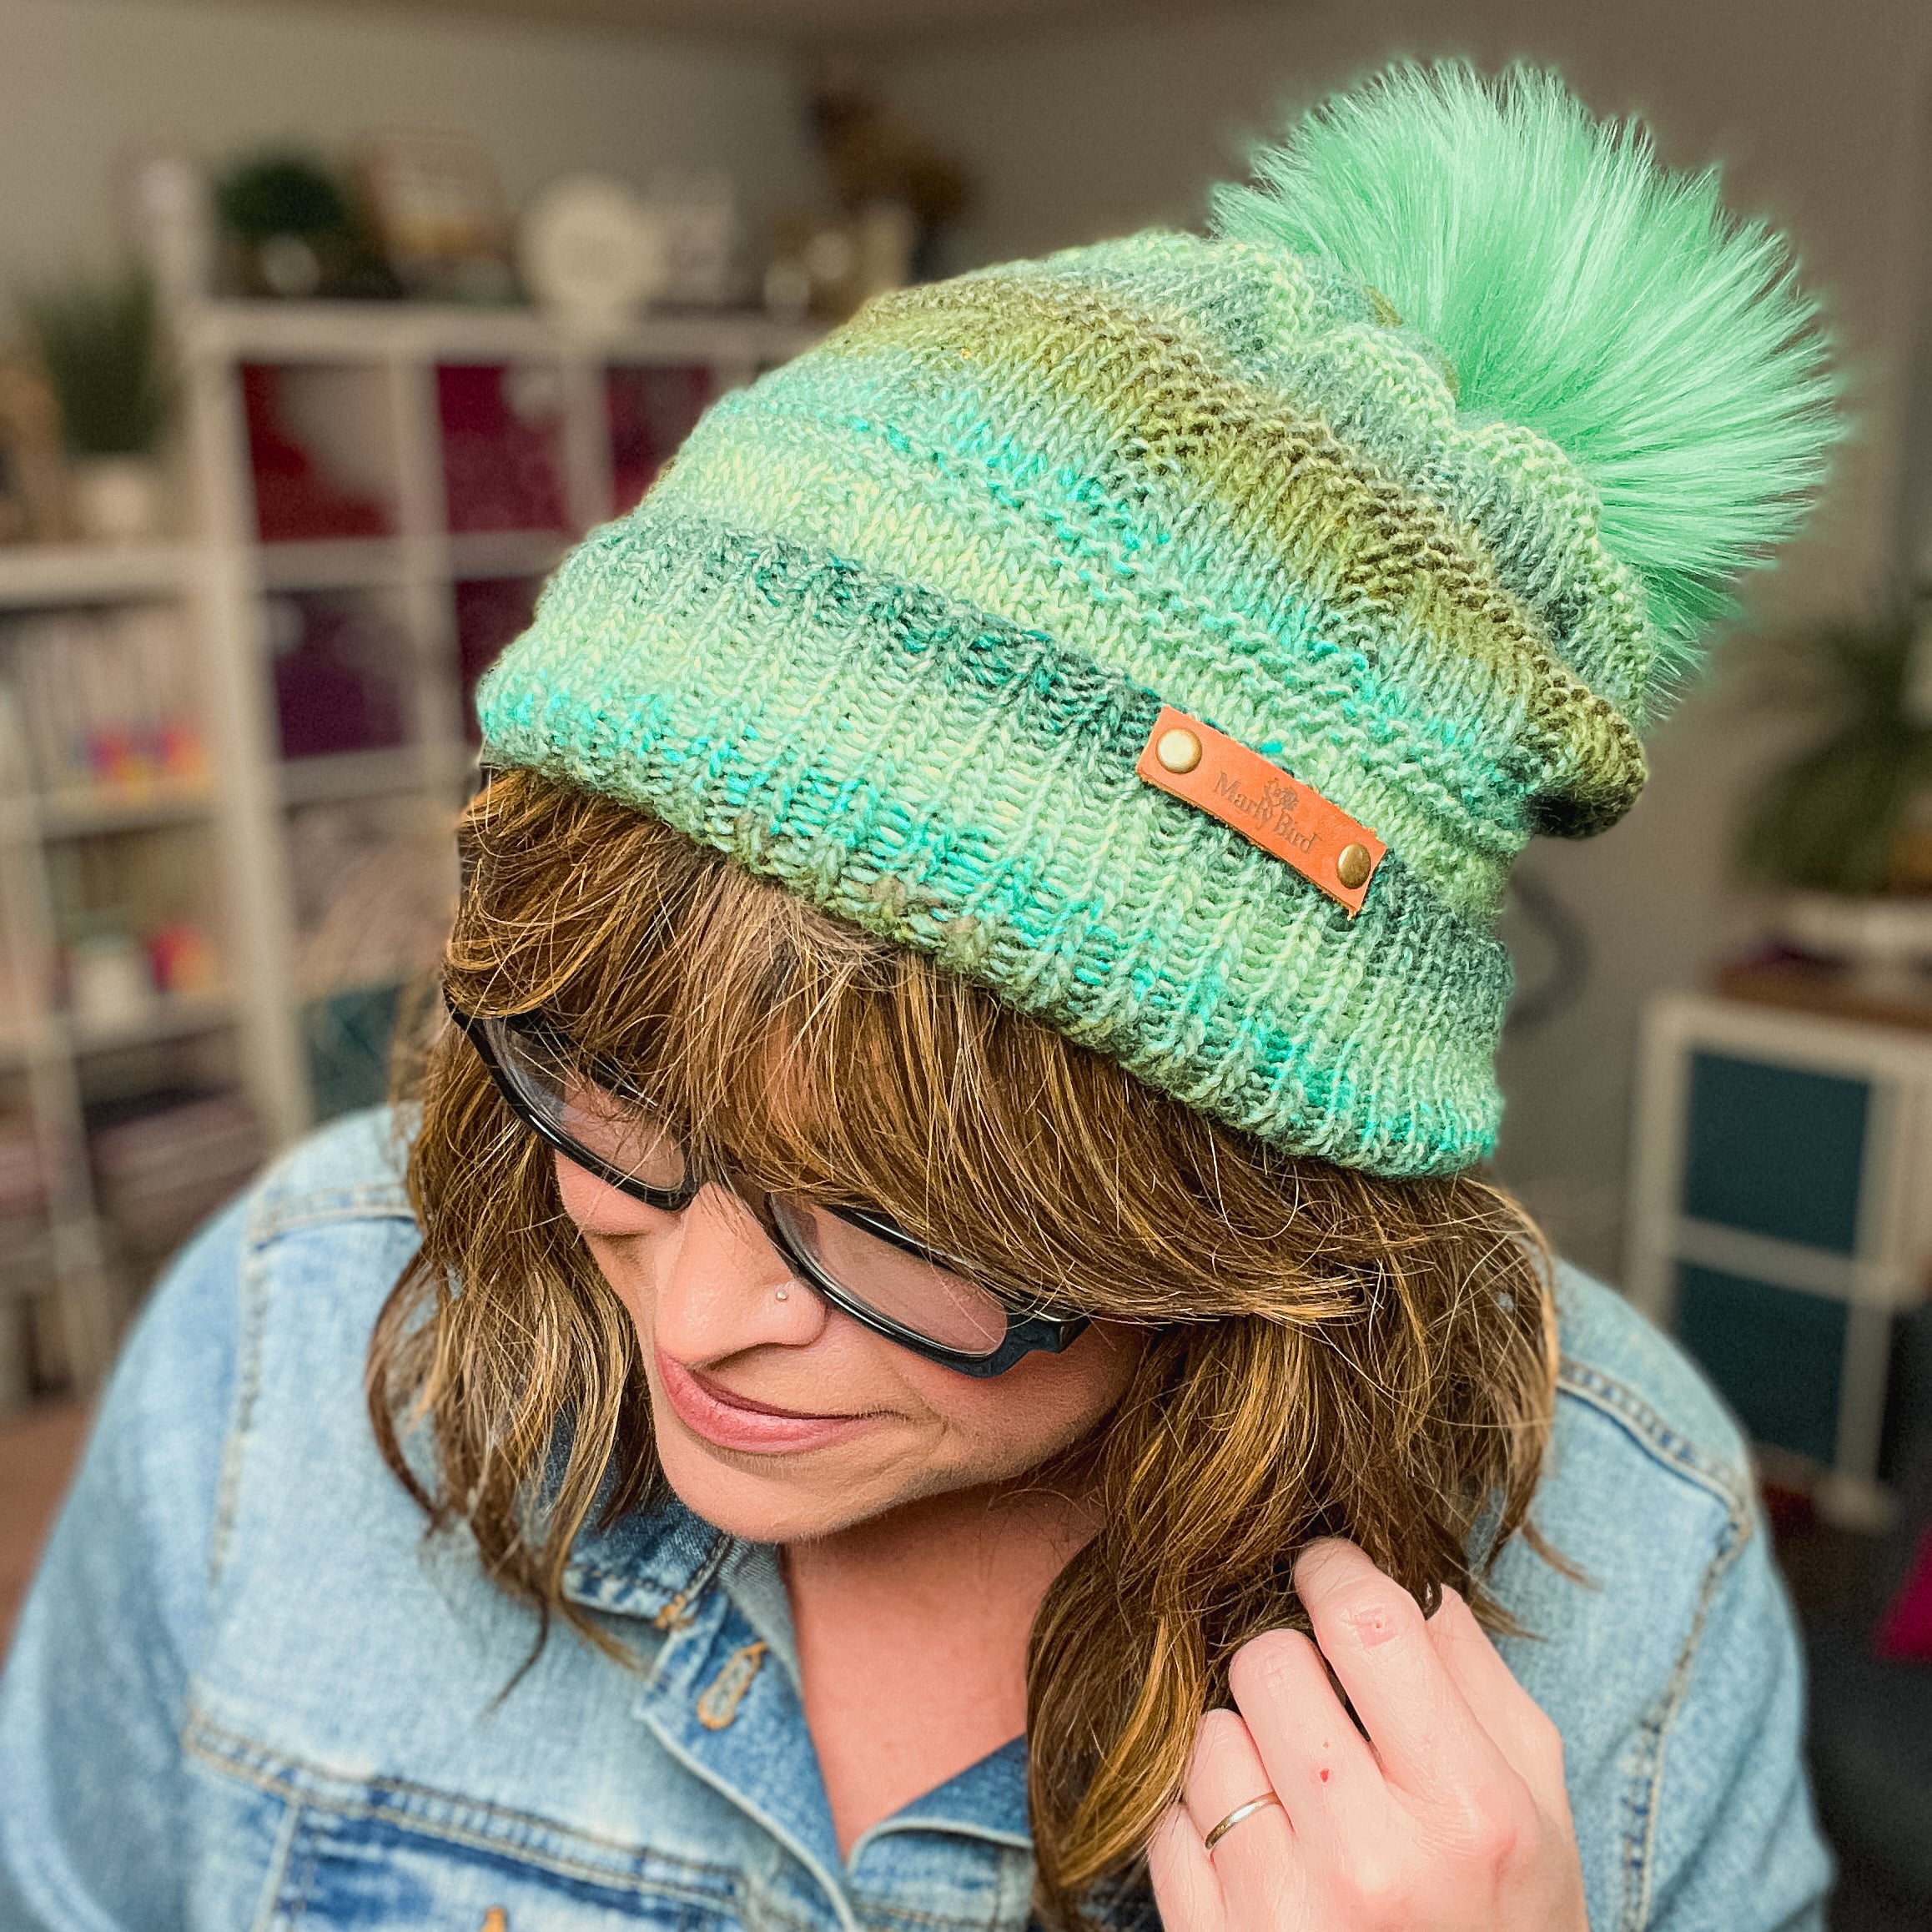
Bottom-up hats are my go-to and preferred hats. *If you want to know more, I also prefer a sl st ribbing and a pom pom on top!*
On the other hand, we have top-down hats. You build these hats starting from the crown. Start with a magic loop (or adjustable ring)and work your way down to the brim. They are praised for their simplicity and ease of construction, but I find them more difficult. With the top-down technique, you can easily try on the hat as you knit. This ensures a snug fit every step of the way. It also allows you to easily adjust the length of the hat based on your preferences. I see the benefits, but again, it's not my preference.
My friend, Tamara, over at Moogly Blog, swears by these crochet hat templates for her top-down hats. I have not tried them, but she loves them. Maybe they will work for you, too, if you are interested in making top-down hats or crochet beanies.
So, which style is better? Well, it ultimately comes down to personal preference and the time you're willing to invest. If you like having full control over each element of your hat and enjoy adding intricate details, a bottom-up hat might be your best bet. However, if you lean towards simplicity and prefer the convenience of trying on the hat as you go, then top-down hats could be the way to go.
Newsboy! Free Crochet Hat Pattern by Marly Bird
From my earliest memories, hats have always held a special allure. I recall the days as a little girl wandering through department stores, eyes widening as they met the hat rack. Without fail, I'd reach out to touch, and soon, I'd try on every hat. My mother always knew where to find me. I was amidst a sea of sun hats, berets, newsie hats, baseball caps, and beanies.
The actresses of my youth only fueled my obsession with hats. Whether it was Blossom with her quirky headgear or Janet Jackson's iconic look in “Poetic Justice,” the fascination was undeniable. As time went by, my “travel hat” became my signature. A strategic choice for those long travel days! It saved me from early morning hair struggles and effortlessly upped my style quotient. Hats, with their uncanny power, made me feel put together with the least bit of fuss.
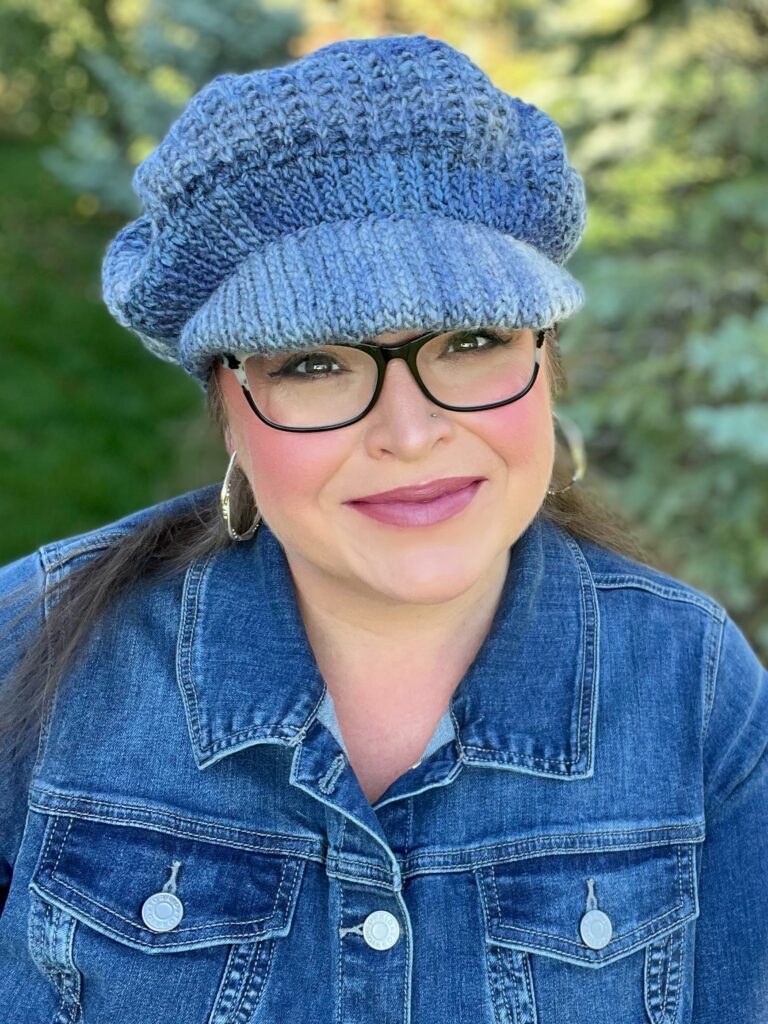
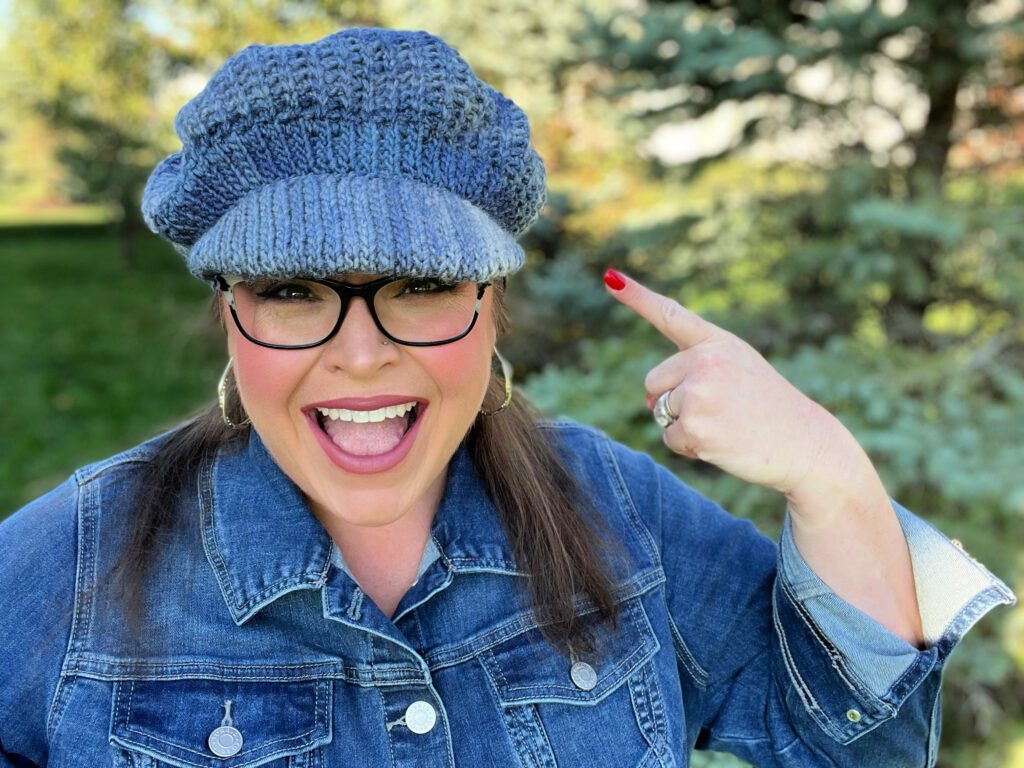
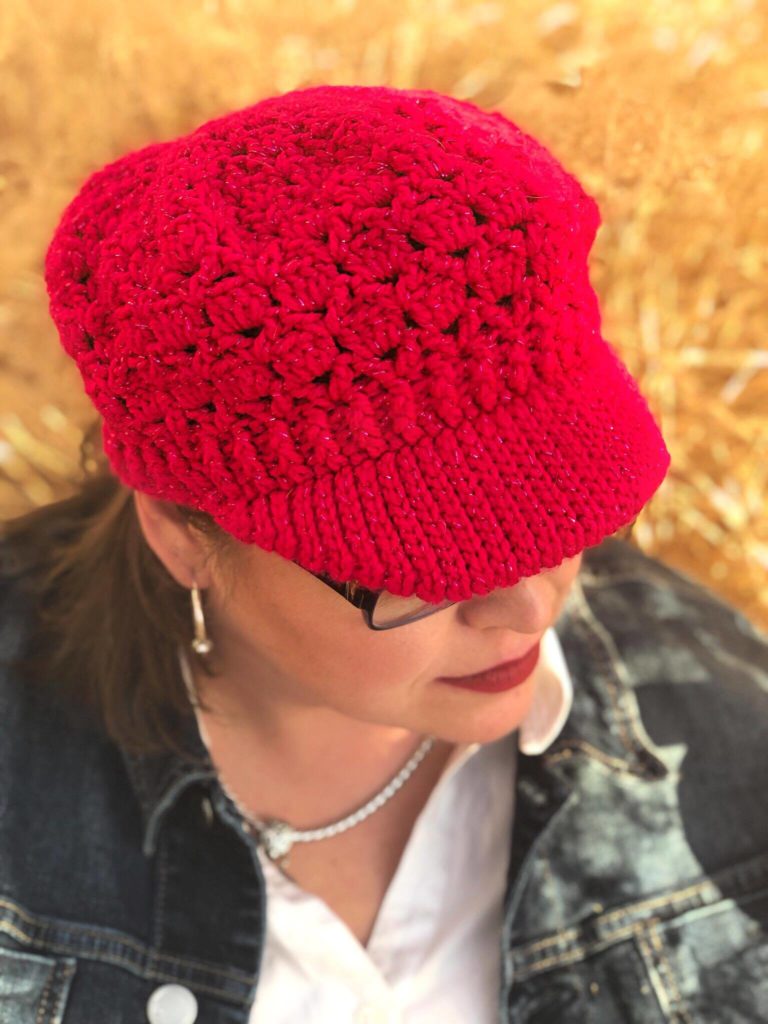
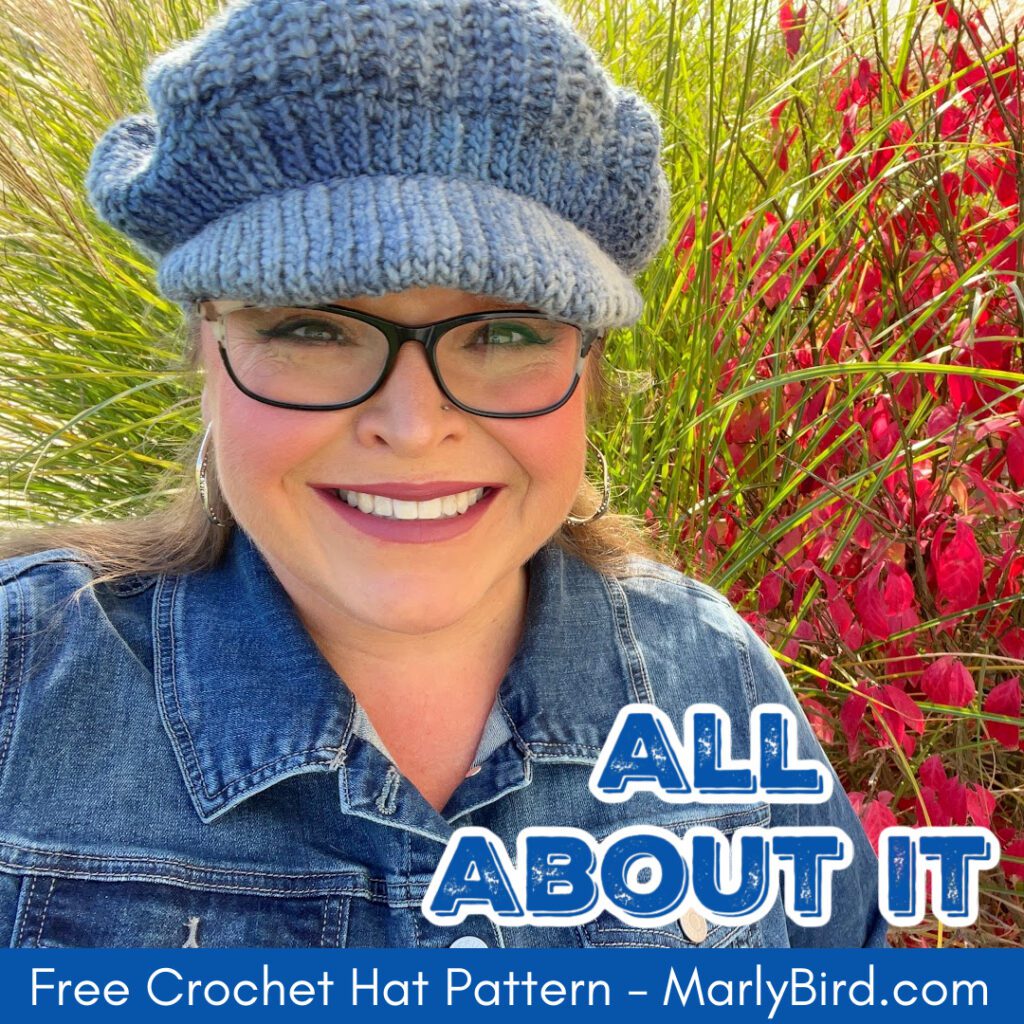
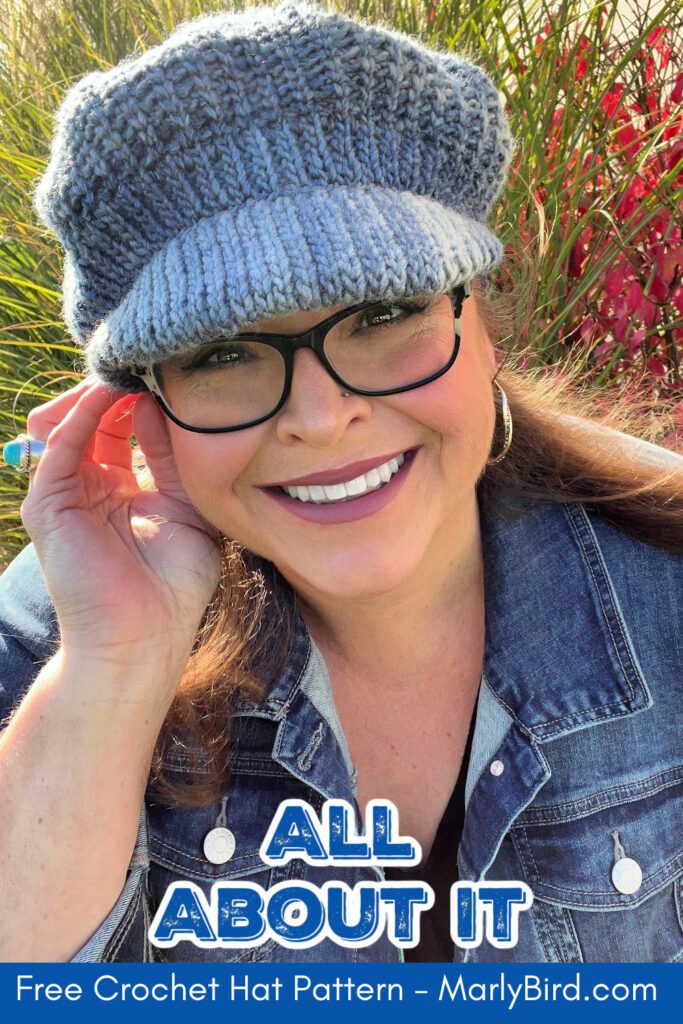
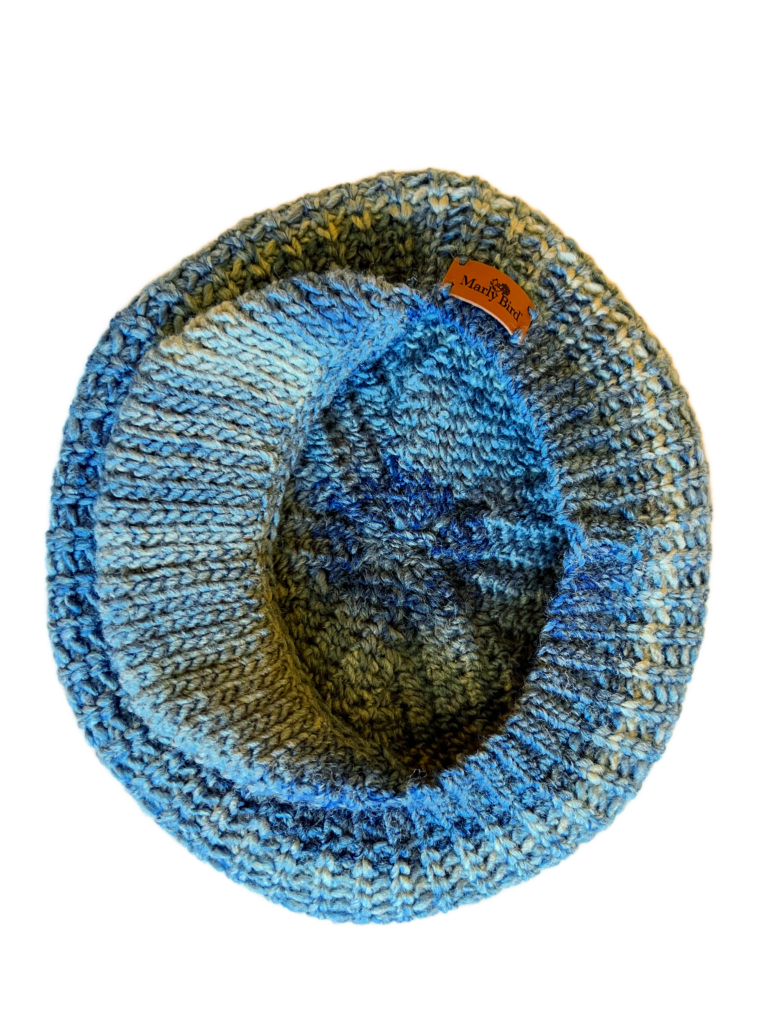
Years later, as my journey evolved into a knit and crochet designer, it's not surprising that hats became my refuge. They were my comfort zone, my space of relaxation. When I developed my signature slip-stitch ribbed bill, it merged my love for design with my eternal hat obsession. The result? The “All About It Hat”. Inspired by the newsboy style, it boasts an oversized fit on the body while remaining snug around the head's circumference. And, oh, that bill! It's just perfect.
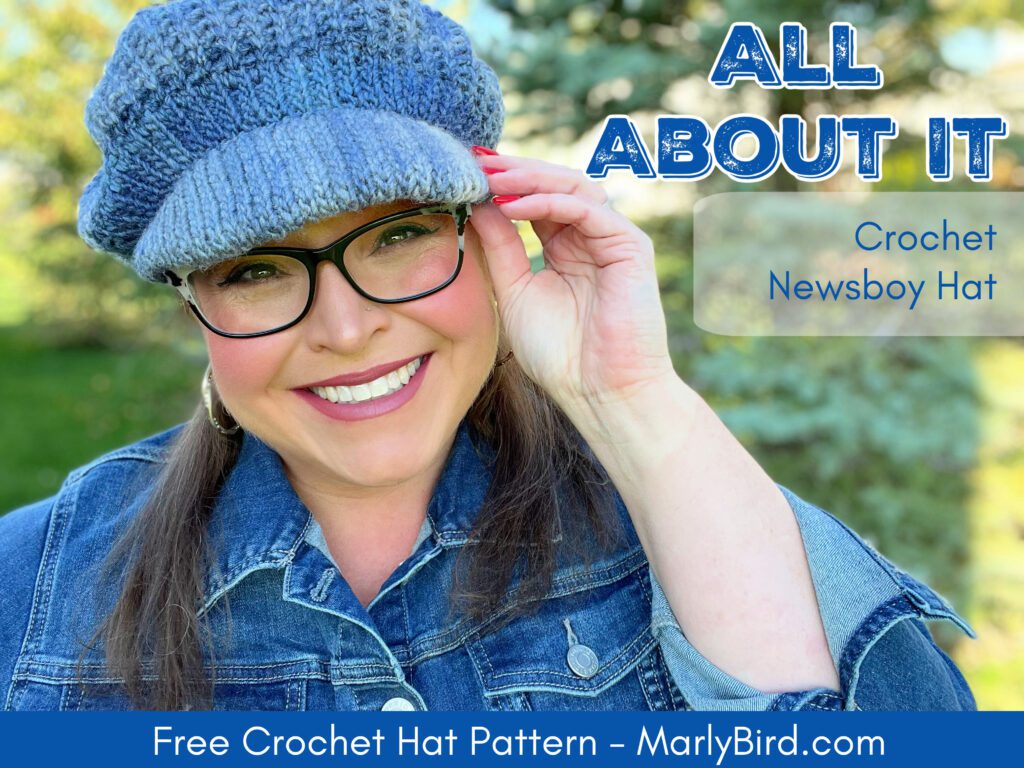
Free Crochet Hat With A Bill Pattern – “All About It!”
In my quest to find the perfect name for this crochet hat pattern, I took to Instagram for inspiration. I hosted an unofficial naming contest. As suggestions poured in, many references echoed the nostalgia of “Newsies,” “Newboy,” and “Cabbie.” Some even drew connections to iconic figures like Barbara Streisand and the musical vibes of “Moody Blues.” However, the title that resonated the most was a clever play on the old Newsies' call, “Read All About It!”. Thus, the “All About It” crochet hat pattern was born.

Ah, there's more good news for crochet enthusiasts! The “All About It” free crochet hat pattern is available on the Marly Bird website. But for those who prefer an uninterrupted crafting experience, there's the option to purchase an ad-free PDF version. The ad-free PDF version includes links to crochet stitch diagrams for the hat's brim, body, and crown. It's all about making your crocheting journey as smooth and enjoyable as possible.
Maybe the “All About It” hat has caught your eye! Or if you plan to stitch it up soon, don't forget to favorite and queue up this pattern and crochet project on Ravelry. It's a great way to keep track and have it handy when you're ready to start!

ALL ABOUT IT FREE CROCHET HAT WITH A BILL PATTERN
Designed by Marly Bird
SKILL LEVEL
Adventurous Beginner
MEASUREMENTS
To Fit Size
Adult Small (Adult Medium, Adult Large), shown in Adult Large
Finished Measurements
To Fit Size
Adult Small
Adult Medium
Adult Large
Finished Head Circumference (around the body of hat)
19.25” (49 cm)
22.5” (57 cm)
25.5” (65 cm)
Note: the brim does pull in more snug than the body.
Finished Height (Crown to bottom of ribbing
6” (15 cm)
7” (18 cm)
8” (20 cm)
Gauge
15 sts by 16 rounds in stitch pattern = 4” [10 cm] by 4” [10 cm]; use any size hook to obtain the gauge.
MATERIALS
Yarn
Caron, Macchiato Cake Yarn, (80% acrylic/ 20% wool, 481 yardage / 440 m, 8 oz/ 227 g, CYCA #5 bulky) – 1 (1, 1) cake. Sample color – Soulful
Crochet Hook
Size I/9 [5.5 mm]
Crochet Notions
Stitch Markers, Tapestry needle, optional pom pom (the perfect hat accessories
ABBREVIATIONS – CROCHET TERMS
Ch – Chain(s)
PM – Place Marker
RS – Right Side
Sc – Single Crochet
Sl st – Slip Stitch
Split Sc – Split Single Crochet
St(s) – Stitch(es)
WS – Wrong Side
SPECIAL CROCHET STITCHES
⭐Back Loop Only: This is the furthest loop to you of the top 2 loops of the stitch indicated, regardless if you are on the RS or WS.
⭐️Chain (Ch): With slip knot or free loop on hook, yarn over hook and pull through loop on hook.
⭐️Single Crochet (Sc): Insert hook into indicated stitch, yarn over and pull up a loop, yarn over and draw through 2 loops on hook.
⭐️Slip Stitch (Sl st): Insert hook into indicated stitch, yarn over and pull up a loop and draw through loop on hook.
⭐️Split Single Crochet (Split Sc): Insert hook into indicated stitch between the two legs of the stitch, yarn over and pull up a loop, yarn over and draw through both loops on hook.
⭐️Split Single Crochet Crown Decrease A (Split Sc dec A): Insert hook into back loop of indicated stitch, yarn over and pull up a loop, insert hook in between the two legs of the stitch, yarn over and pull up a loop, insert hook into the back loop of the next indicated st, yarn over and pull up a loop, yarn over and draw through all loops on hook – 2 stitch decreased.
⭐️Split Single Crochet Crown Decrease B (Split Sc dec B): *Insert hook into indicated stitch between the two legs of the stitch, yarn over and pull up a loop; repeat from * in next 2 sts, yarn over and draw through all loops on hook – 2 stitch decreased.
⭐️Split Single Crochet Two Together (Split Sc2tog): Insert hook into indicated stitch between the two legs of the stitch, yarn over and pull up a loop, insert hook into next stitch between the two legs of the stitch, yarn over and pull up a loop yarn over and draw through all loops on hook – 1 stitch decreased.
NOTES
- This pattern is for a wool newsboy cap-style free crochet pattern with a split single crochet ribbed stitch pattern.
- Use markers in the first slip stitch of the brim on each row to help keep count.
- Be cautious when working the slip stitches on the brim. Maintain consistent tension, or the stitches will get too tight as the brim gets longer.
- The slip stitches should NOT be any more snug than the size of the hook.
- Brim of hat is worked flat then seamed together.
- Body of hat is worked into the long side edge of the brim as instructed.
- Body of hat is worked in continuous rounds. Use a marker to identify the first stitch of each round.
- Body st gauge near the brim will be a little more snug than it is in the body of the hat. The gauge given is in the body of hat.
- Bill of hat is made separately after body of hat, then seamed into place on the slip stitch ribbing brim.
- Directions are for size Adult Small; changes for sizes Medium and Large are in parentheses. When only one number is given, that number applies to all sizes.
VIDEO TUTORIAL
- How to wind yarn >> Click Here for Video Help <<
- How to Crochet Stretchy Slip Stich Ribbing >> Click Here for Video Help <<
- How to Bury Ends >> Click Here for Video Help <<
- How to Crochet the Perfect Crochet Slip Stitch Bill >> Click Here for Video Help <<
- How to add a Removable Faux Fur pom pom >> Click Here for Video Help <<
- How to Crochet the All About It Hat >> Click Here for Video Help <<
CROCHET STITCH DIAGRAMS
Only available on the ad-free pdf.
All About It – Newsboy Free Crochet Hat With A Bill Pattern
HAT BRIM
Chain 6.
Row 1: Sl st in back loop of 2nd ch from hook and in each ch across, ch 1, turn — 5 sts.
Row 2: Skip ch, sl st in the back loop only of each slip stitch across, ch 1, turn — 5 sts.
Repeat Row 2, 70 (82, 94) more times.– 36 (42, 48) raised ridges.
Join the foundation row (chain edge) to the last row (working edge) with a slip stitch into the back loop only of the working edge and the front loop of the chain edge, repeat across the row. See video tutorial for help, DO NOT FASTEN OFF.
BODY
Turn to begin working on long edge of brim (in the row ends), ch 1.
Set-up round 1: Working in the brim edge, sc into the “V” of the slip stitch ridge, and sc into the gully between the ridges, place marker in first sc (see notes) do not turn — 72 (84, 96) sts.
Round 1: *Split Sc in next sc, sc in back loop of next sc; repeat from * around.
Repeat Round 1 until hat measures 3 (3.5, 4) “ [7.5 (9, 10) cm] from brim edge. You can choose to make the hat body taller simply by working until the hat measures desired distance. Just be aware the taller the hat, the more billow-like the hat (which I actually like).
CROWN
Round 1 (crochet decrease round): *[Split sc in next sc, sc in back loop of next sc] 2 (3, 3) times, split sc in next st, split sc dec A (see special stitches), [split Sc in next sc, sc in the back loop of next sc] 2 (2, 3) times; repeat from * around — 60 (72, 84) sts remain.
Round 2: *[Split sc in next sc, sc in back loop of next sc] 2 (3, 3) times, split sc in next stitch, split sc in center sc of the split sc dec A, [split sc in next sc, sc in back loop of next sc] 2 (2, 3) times; repeat from * around.
Round 3 (decrease round): *[Split sc in next sc, sc in the back loop of next sc] 2 (3, 3) times, split sc dec B (see special stitches), sc in back loop of next st, [split sc in next sc, sc in back loop of next sc] 1 (1, 2) times; repeat from * around — 48 (60, 72) sts remain.
Round 4: *[Split sc in next sc, sc in back loop of next sc] 2 (3, 3) times, split sc in center sc of the split sc dec B, sc in back loop of next sc, [split sc in next sc, sc in back loop of next sc] 1 (1, 2) times; repeat from * around.
Round 5 (decrease): *[Split sc in next sc, sc in back loop of next sc] 1 (2, 2) times, split sc in next st, split sc dec A (see special stitches), [split sc in next sc, sc in back loop of next sc] 1 (1, 2) times; repeat from * around — 36 (48, 60) sts remain.
Round 6: *[Split sc in next sc, sc in back loop of next sc] 1 (2, 2) times, split sc in next stitch, split sc in center sc of the split sc dec A, [split sc in next sc, sc in back loop of next sc] 1 (1, 2) times; repeat from * around.
Adult Small move to Crown Finishing
Adult Medium Only
Round 7 (decrease): *[Split sc in next sc, sc in back loop of next sc] 2 times, split sc dec B (see special stitches), sc in back loop of the next sc; repeat from * around — – (36, -) sts remain.
Round 8: *[Split sc in next sc, sc in the back loop of next sc] 1 (2) times, split sc in center sc of the split sc dec B, sc in back loop of next sc; repeat from * around.
Adult Medium move to Crown Finishing
Adult Large Only
Round 7 (decrease): *[Split sc in next sc, sc in back loop of next sc] 2 times, split sc dec B (see special stitches), sc in back loop of the next sc, split sc in next sc, sc in back loop of next sc; repeat from * around — – (1, 48) sts remain.
Round 8: *[Split sc in next sc, sc in the back loop of next sc] 2 times, split sc in center sc of the split sc dec B, sc in back loop of next sc, split sc in next sc, sc in the back loop of next sc; repeat from * around.
Round 9 (decrease round): *Split sc in next sc, sc in back loop of next sc, split sc in next st, split sc dec A (see special stitches), split sc in next sc, sc in the back loop of next sc; repeat from * around — -(-, 36) sts remain.
Round 10: *Split sc in next sc, sc in back loop of next sc, split sc in next stitch, split sc in center sc of the split sc dec A, split sc in next sc; repeat from * around.
Adult Small and Large Crown Finishing
Round 1 (decrease): *Split sc in next sc, sc in back loop of next sc, split sc dec B, sc in back loop of the next sc; repeat from * around — 24 (-, 24) sts remain.
Round 2 (decrease): *Split sc in next sc, split sc dec A; repeat from * around — 12 (-, 12) sts remain.
Round 3 (decrease): *Split sc2tog over next 2 sts; repeat from * around — 6 (-, 6) sts remain.
Round 4: Split sc in each stitch around, fasten off with long tail.
Adult Medium Crown Finishing
Round 1 (decrease): *Split sc in next sc, sc in back loop of next sc, split sc in next sc, split sc dec A (see special stitches); repeat from * around — – (24, -) sts remain.
Round 2 (decrease): Sl st in first st, *sc in back loop of next sc, split sc dec B; repeat from * around to last 3 sts, sc in back loop of next sc, split sc dec b over last 2 st and first st— – (12, -) sts remain.
Round 3 (decrease): *Split sc2tog over next 2 sts; repeat from * around — – (6, -) sts remain.
Round 4: Split sc in each stitch around, fasten off with long tail.
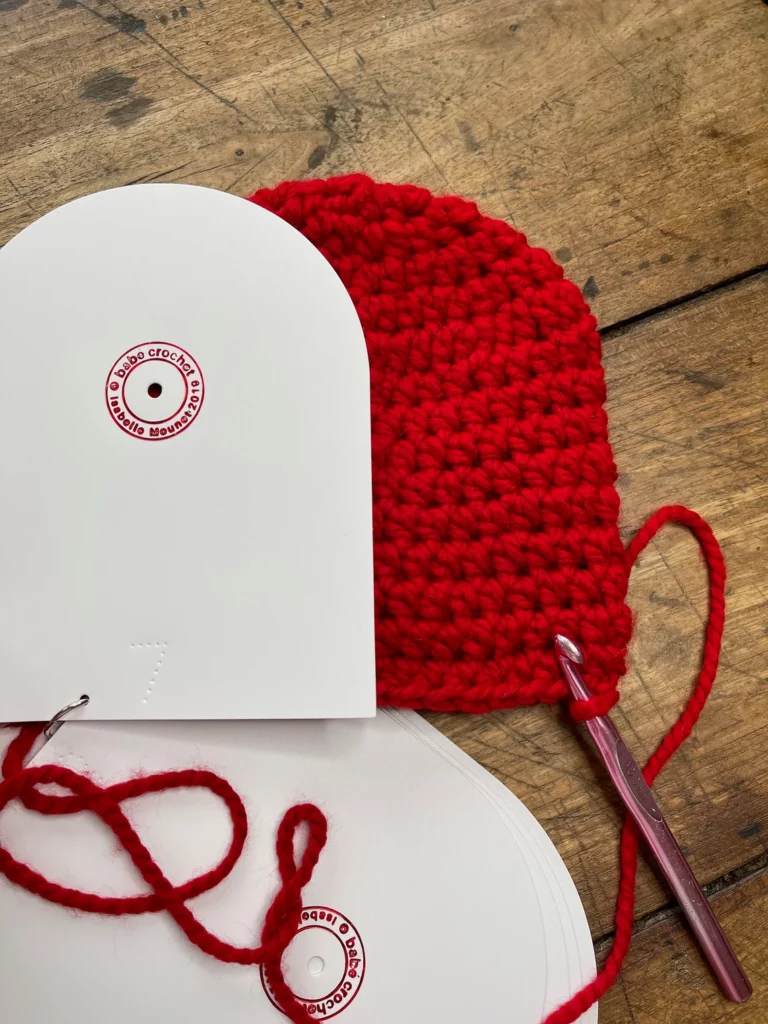
BILL
Row 1: Ch 6, sl st in back loop of 2nd ch from hook and in each ch to end, ch 1, turn –5 sl sts. Place a marker in the middle stitch.
Row 2 (increase row): Sl st in back loop of each st until 1 st BEFORE the marker, sl st in back loop of next st TWICE (this is the stitch before marker), sl st in back loop of marked st, move marker to st just made, sl st in back loop of next st TWICE, sl st in back loop of each st to end, ch 1, turn–2 sts increased.
Row 3: Sl st in back loop of each st to marked st, sl st in back loop of marked st, move marker to st just made, sl st in back loop of each st to end, ch 1, turn.
Repeat Rows 2 and 3 until there are 21 sts total.
Use a second marker, and place it at the end of the last row 2 you completed. This will help you know where to start measuring for the next part.
Work Row 3 only until the piece measures 5” [12.5 cm] (or to desired length if you prefer a shorter or longer bill) from the 2nd marker, then remove the 2nd marker.
Row 1 (decrease): Sl st in back loop of each st until 1 st BEFORE the center marker, skip next st, sl st in back loop of marked st, move marker to st just made, skip next st, sl st in back loop of each st to end, ch 1, turn–2 sts decreased.
Row 2: Sl st in back loop of each st to marked st, sl st in back loop of marked st, move marker to st just made, sl st in back loop of each st to end, ch 1, turn.
Repeat Rows 1 and 2 until 5 stitches remain, ending after a Row 2. Do NOT fasten off.
Fold piece in half, working only into the edge of every other row, sl st to close the piece.
Chain 1 and turn, sl st in back loop of each st to end. Fasten off.
FINISHING
With a tapestry needle, weave tail through the remaining stitches to close the top of the hat.
Weave in all ends
Add pom pom if desired.
Hold the bill to the RS of the hat, align the bottom of the brim with the sl st on the side of the bill. Whipstitch the bill to the brim by working in the front sl sts of the bill and through the center of each rib of the brim. Use tails to tuck in the ends of the bill into the brim. See video tutorial for assistance.
Crochet Hat Patterns Free by Marly Bird
These free crochet hat patterns are perfect for beginners who are still trying to master crochet. I work hard to write patterns and make video tutorials that break down complex stitches and techniques into simple steps. I want even a crochet newbie to understand. No more feeling overwhelmed and giving up halfway through a pattern – I've got your back!
Not only are the patterns beginner-friendly, but they also offer a wide range of styles and designs. I've covered everything, whether you're looking for a cozy winter beanie, a stylish slouchy hat, or a cute newsboy style.
So, if you're like me and enjoy crocheting hats, or if this is your first time, you're in for a treat with these free crochet hat patterns. They're beginner-friendly and offer a wide variety of styles and designs that will keep you hooked (pun intended!).
Get your hooks ready, grab some yarn, and dive into the wonderful world of crochet with Marly Bird.
- Riverside Crochet Bonnet
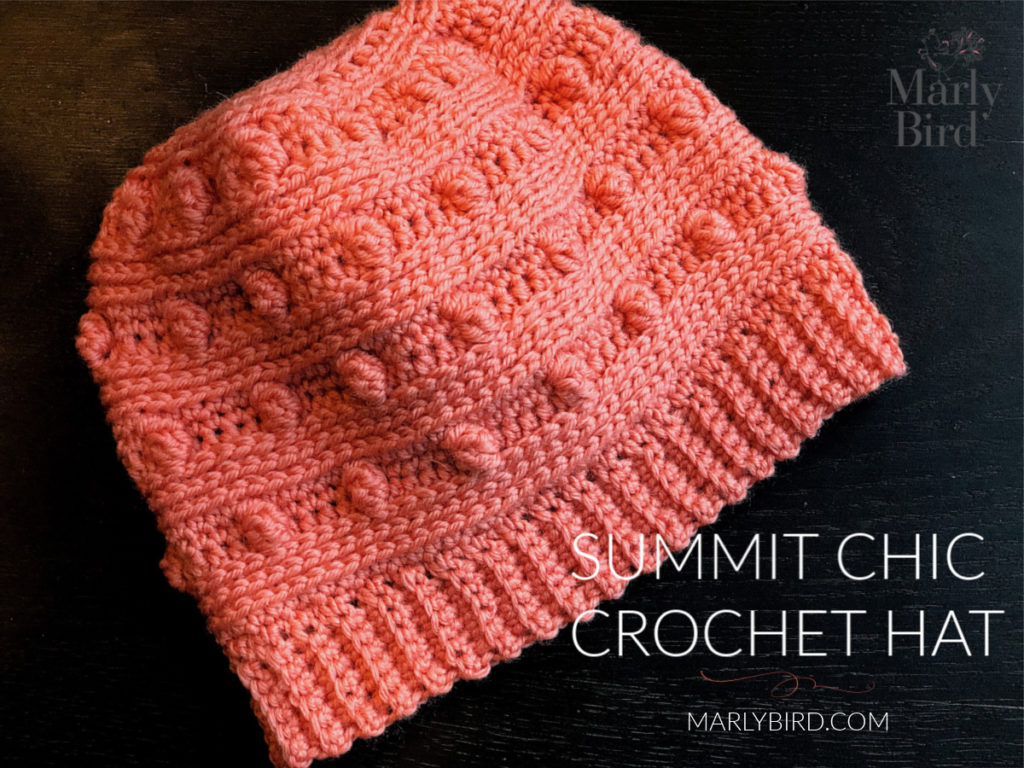
- Summit Chic Crochet Hat
- Ribbed for Him and Her Hat
- We Were Young Crochet Beanie Hat
- Baby It's Cold Outside Crochet Beanie Hat
- Chic and Simple Crochet Hat for the Whole Family!
- Bulky Crochet Messy Bun Hat
- Blossom Crochet Hat with Bill
- Miniature Crochet Hat Christmas Ornament (a little something different)
- Trinity Stitch One Ball Crochet Hat Pattern
- Wings of Hope Crochet Hat
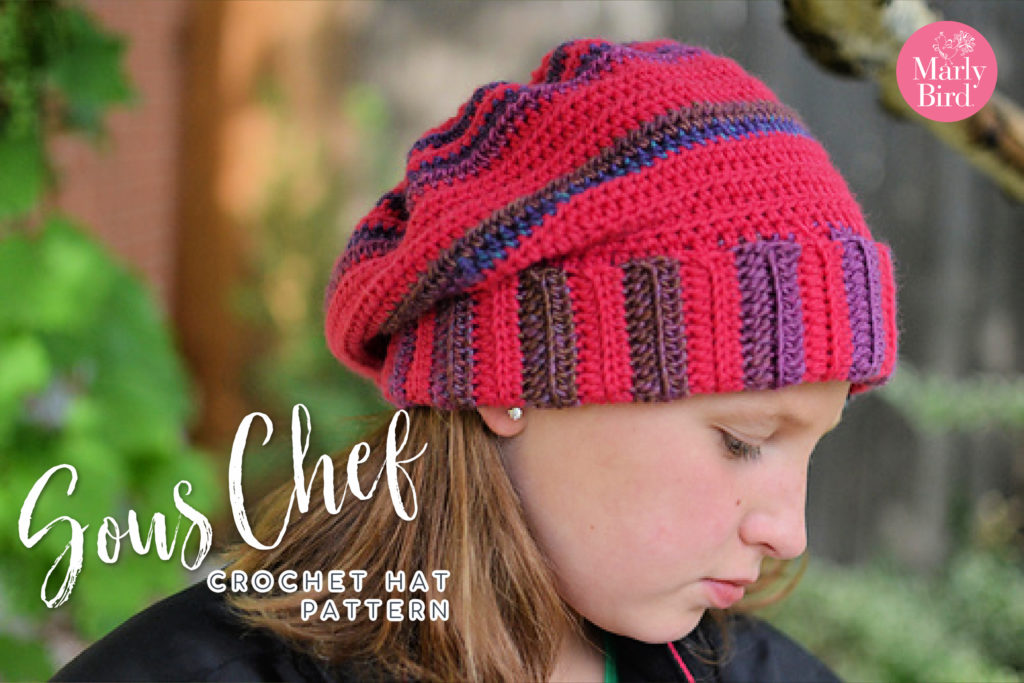
- Sous Chef Crochet Slouchy Hat
- Basic Top Down Hat (from BiCrafty Bootcamp)
Frequently Asked Questions
What makes Marly's crochet hat with bill technique special?
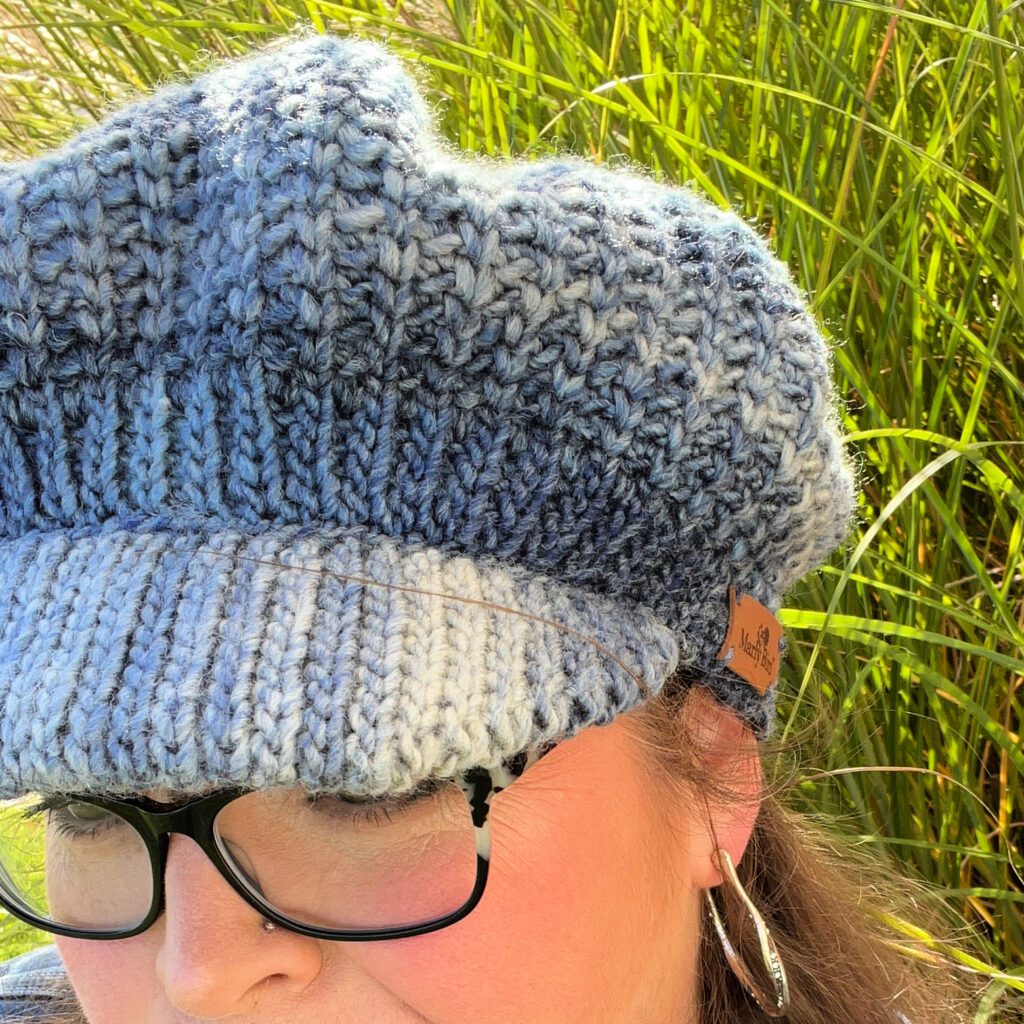
Marly uses her signature slip stitch bill technique to create the brim, and it gives the hat a really clean, polished look… way cleaner than bills made with regular crochet stitches. The slip stitch creates a firm, slightly stiff brim that holds its shape beautifully without needing any extra stiffener or interfacing. Once you try it, you'll use this technique for every brimmed hat you make going forward.
Is this hat pattern beginner friendly?
Yes! It's rated advanced beginner, which means if you can crochet in the round and do basic increases… you're ready. The body of the hat uses simple stitches and the bill, while it looks impressive, just uses slip stitches worked in a specific way that the pattern walks you through clearly. There's also a video tutorial so you can see exactly what Marly's doing at every step. Don't be intimidated by the brim… it's more approachable than it looks.
What yarn should I use for a crochet hat with a bill?
Worsted weight is perfect for a classic hat with a bill… it creates a fabric with enough body to support the brim without being too stiff. For the bill specifically, you want a yarn that holds its shape when worked in slip stitch. Acrylic or wool blends both work great. Avoid super bulky for this style because the bill can get unwieldy. If you want a more structured brim, you can insert a piece of plastic canvas cut to shape between the layers of the bill.
Can I make this hat in different sizes?
Yes! Check the pattern for the size range, but most brimmed hat patterns include sizes for adults and sometimes children too. For adjusting the hat size, you primarily change the circumference of the hat body by adding or removing stitches. The brim size usually scales accordingly. As always with hats… measure the head you're making it for and compare to the pattern's finished measurements before you start.
How do I keep the bill of my crochet hat from flopping?
This is the most common question about brimmed hats! A few options: Marly's slip stitch technique naturally creates a firmer brim, which helps a lot. If you want extra stiffness, you can cut a piece of lightweight plastic canvas to the bill shape and sandwich it between the layers when you finish. Some crafters use a light spray of fabric starch. And proper yarn choice matters too… firmer, more structured yarns hold the brim shape better than drapey fibers.
Categories: Crochet, Free Patterns, Marly Bird Premium Patterns, Our Free Patterns, Pattern, Uncategorized


Hi Marly,
Will this Hat With a Bill also be on Ravelry?
Albertine
Greetings from Australia. I was so impressed by the way Marly’s tutorials on YouTube is so clear, precise and so simple to understand and follow, as well as Marly is so lovely to look at. Thank you for getting me interested in crocheting and knitting again, even though the octogenarian arthritic fingers tend to get stiff now and then. 🪢🧶💝
Thanks for the pattern. I’m going to make a Newsboy Hat for my mom. I think she’s going to love it.