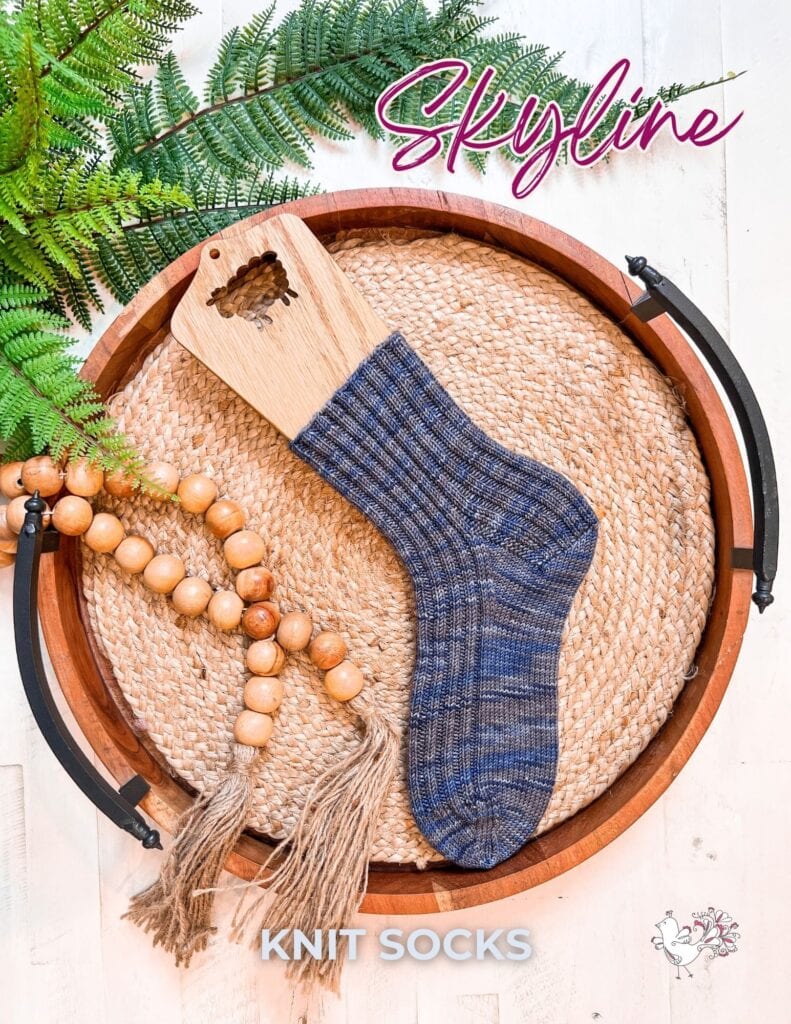
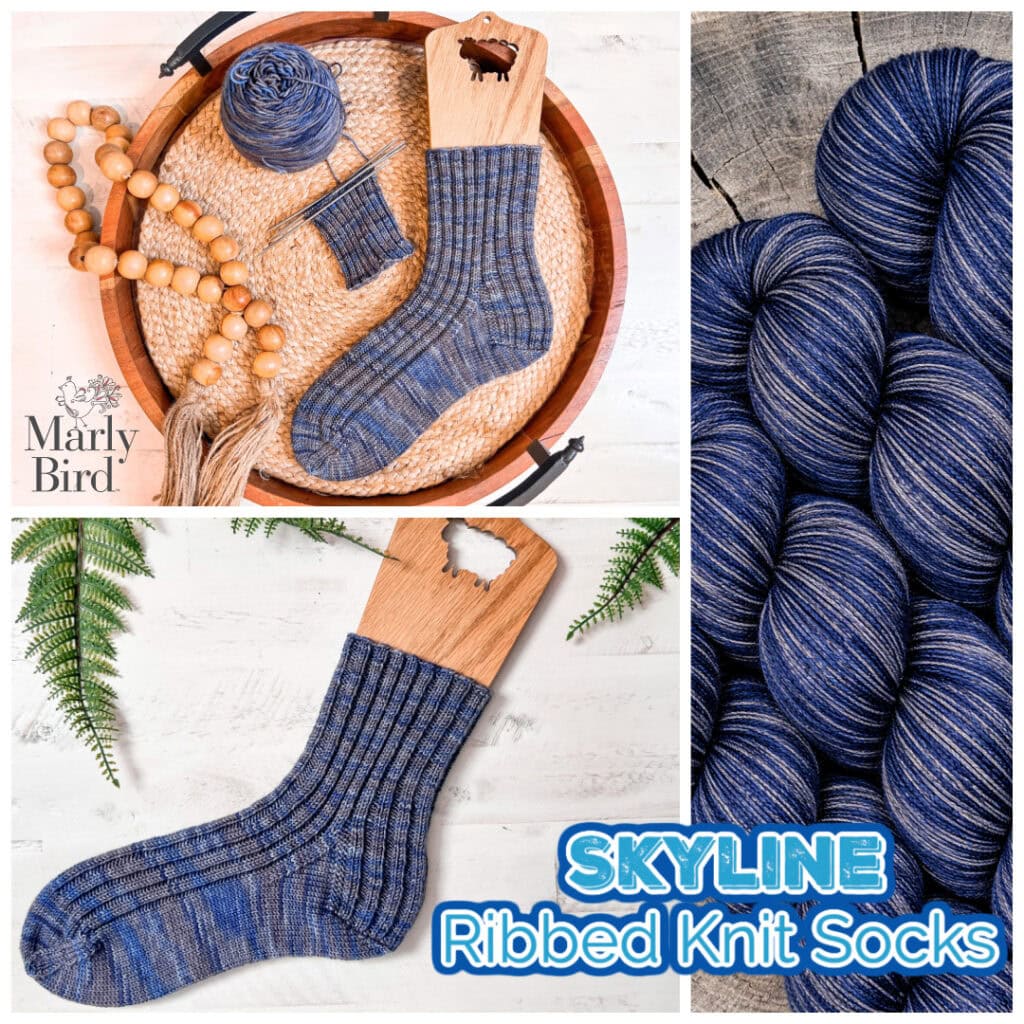
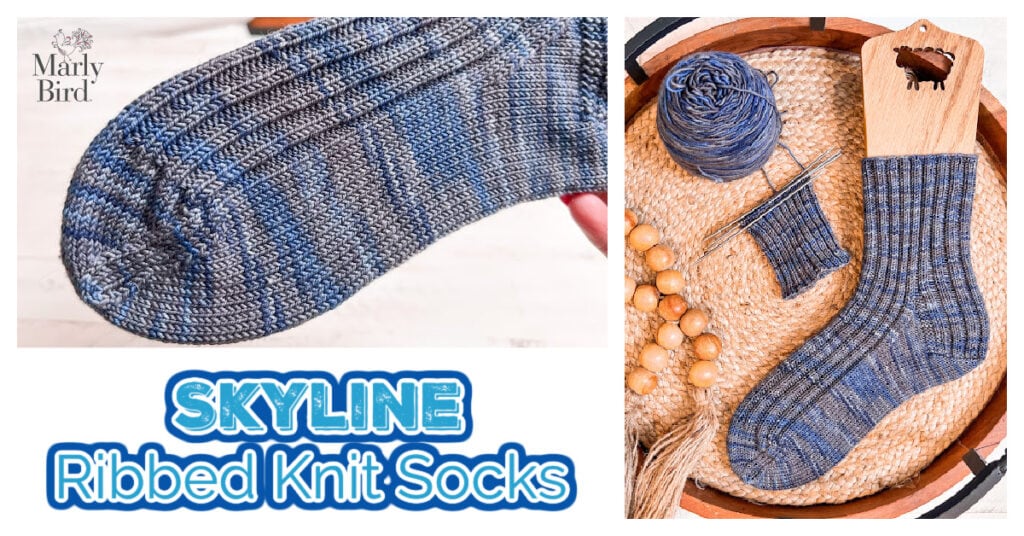
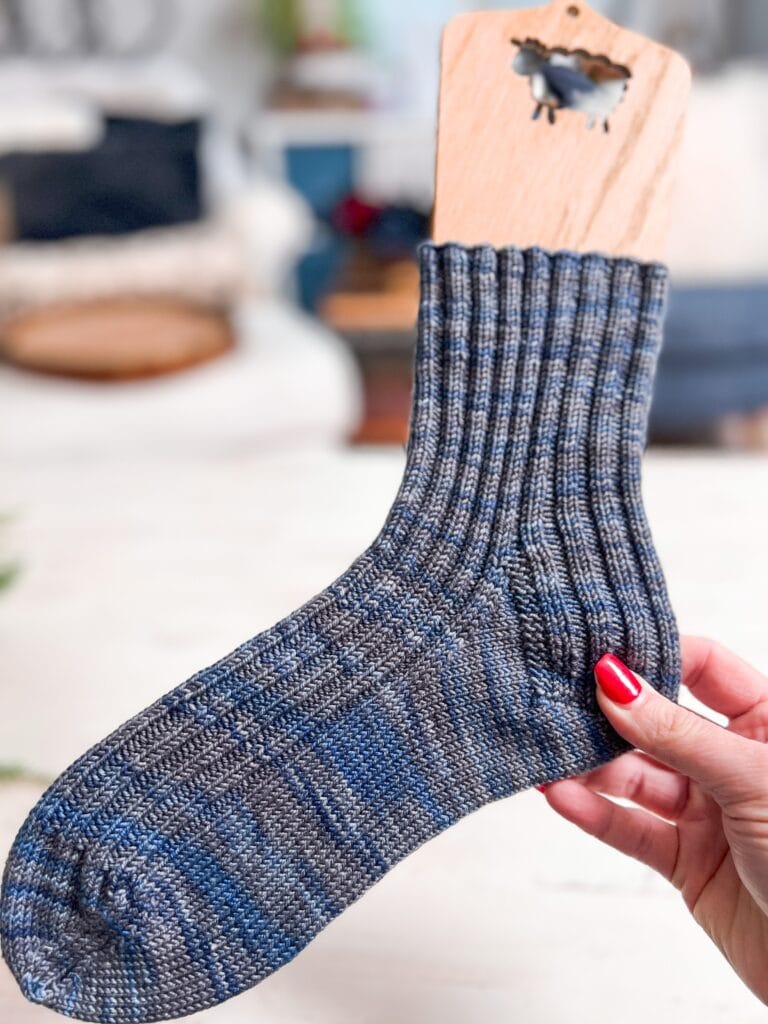
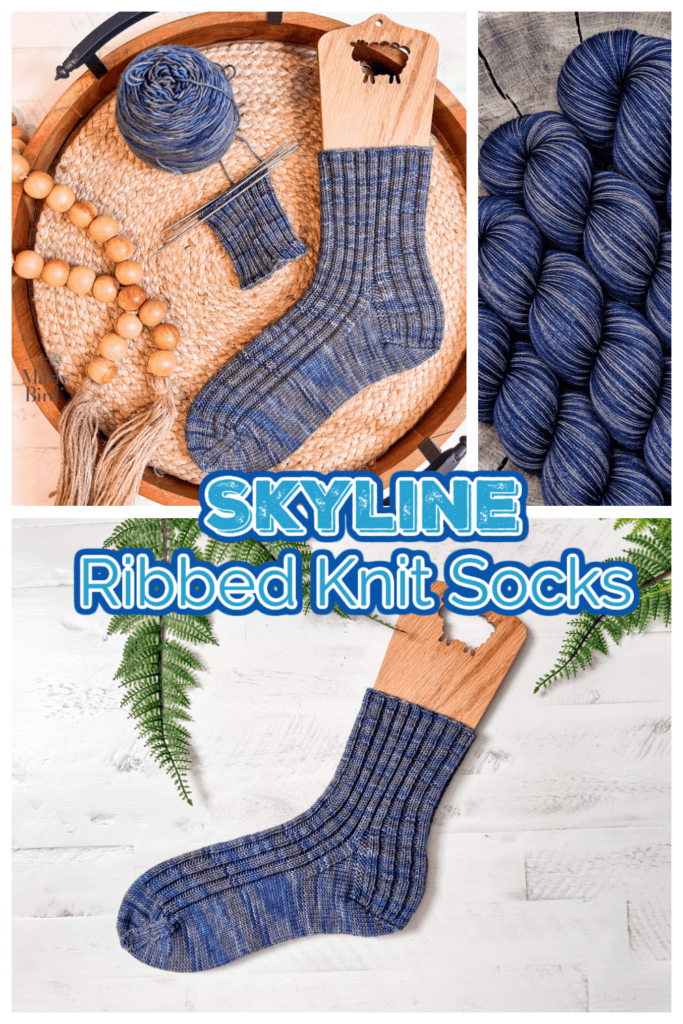
If you’ve been craving a sock that’s classic, cozy, and ridiculously wearable, meet your new bestie: the Skyline Ribbed Knit Socks. These beauties are worked cuff-to-toe in the round, with a heel flap and gusset (the tried-and-true combo that gives you that “ahhh yes, this fits my foot” feeling).
And because I’m officially making this pattern free on MarlyBird.com now (YESSS 🙌), you can cast on and get those stitches clicking without hunting down an old PDF.
✨ Designer Tip: If you’re new to socks, don’t panic—this is just knitting… but smaller… and somehow more addictive. 😄
Affiliate Disclosure: This post contains affiliate links. To learn more please visit my privacy policy here💖
What You Will Love About This Sock Pattern 🧦💙
The Skyline Ribbed Knit Socks are one of those patterns you’ll reach for again and again. They’re cozy without being bulky, classic without feeling boring, and practical enough to actually live in your sock drawer — not just your project page.
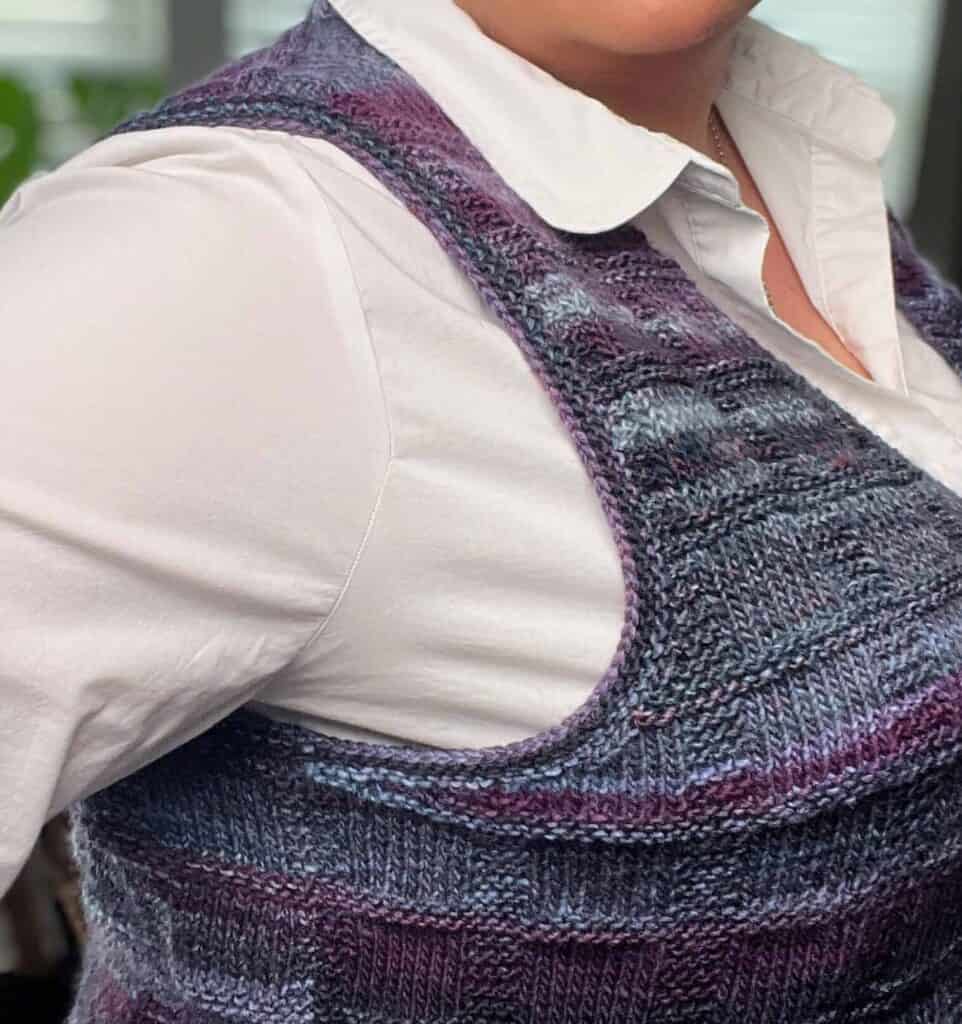
You’ll love the ribbed texture, which creates a flexible, comfortable fit that hugs your foot just right. The heel flap and gusset construction gives you a tried-and-true shape that works for a wide range of feet, while still feeling polished and intentional. And because these socks are worked in DK weight yarn, you get that wonderful balance of warmth and speed — perfect when you want socks sooner rather than later.
Whether this is your first pair of handknit socks or your fifteenth, this pattern delivers that deeply satisfying “I made these and I’m absolutely wearing them” feeling.
What Makes This Pattern Special 🧦✨
Here’s why the Skyline Ribbed Knit Socks deserve a permanent spot in your sock drawer:
- That ribbing though 😍: The rib pattern creates a flexible fit and a polished, timeless look.
- Heel flap + gusset construction: Comfortable, classic, and great for a wide range of feet.
- Customizable length: Adjust the leg height and foot length to match your style.
- DK-weight yarn: Faster socks with cozy warmth—what’s not to love?
✨ Designer Tip: DK socks are perfect when you want a finished pair sooner rather than later. Because waiting months for socks is not always the vibe. 😉

Sizing, Fit Notes, Yarn Substitutions & Gauge Tips 📏🧶
Sizes
Designed to fit:
- Child (Adult S, M, L)
Finished sock foot circumference (laid flat, unblocked):
- 6 (7½, 9, 10½)”
✨ Designer Tip: Socks always look suspiciously tiny off the needles. Trust the math. Trust the stretch. Trust the process. 😆
Gauge
- 32 sts and 44 rows = 4” in Stockinette stitch
Yarn Notes & Substitutions
The original sample yarn has been discontinued, but the pattern includes a recommended replacement.
Sample Yarn (discontinued): Blue Moon Fiber Arts, Socks That Rock Medium Weight (DK)
Replacement Yarn: Knit Picks Hawthorne DK
✨ Designer Tip: For socks, durability matters. Look for yarn blends with nylon or polyamide to keep heels and toes happy long-term.
Needles & Notions
- U.S. 2 (2.75 mm) set of 5 double-pointed needles, or size needed to obtain gauge
- Stitch markers
- Tapestry needle
- Tape measure
Skill-Building Guidance 🧠🧦
This pattern is great if you’re comfortable knitting in the round and ready to practice (or learn!) classic sock techniques, including:
- Long Tail Cast On
- No Cuss Cast On
- Knit and purl (continental style)
- Perfect ribbing
- How to tink
- Avoiding holes at the gusset
- Duplicate stitch
- Adding a lifeline
- Kitchener stitch (including the “no ears” version)
- How to bury ends
✨ Designer Tip: If heels make you nervous, add a lifeline before the heel turn. It’s like a safety net… but for knitters. 😉
Join our Newsletter
Get Free Crochet & Knitting
Pattern Links & Coupons!

What Needles Can You Use to Knit Socks? 🧶
The Skyline Ribbed Knit Socks are written for double-pointed needles (DPNs) — a classic, reliable choice for sock knitting, especially when it comes to heels, gussets, and toes.
That said… sock knitters are passionate about their tools 😄
And the good news? If you’re comfortable with another method, this pattern can absolutely be adapted.
Sock Knitting Needle Options at a Glance
| Needle Method | Why Knitters Love It |
|---|---|
| Double-Pointed Needles (DPNs) | Traditional sock method, easy heel shaping, great control |
| Magic Loop (Long Circular) | Fewer needle changes, good for travel |
| Two Circular Needles | Clear separation of stitches, less laddering for some knitters |
| Short Circular + DPNs | Minimal needle juggling with flexibility for heel and toe |
✨ The stitch counts and construction stay the same — you’re just choosing the tool that feels best in your hands.
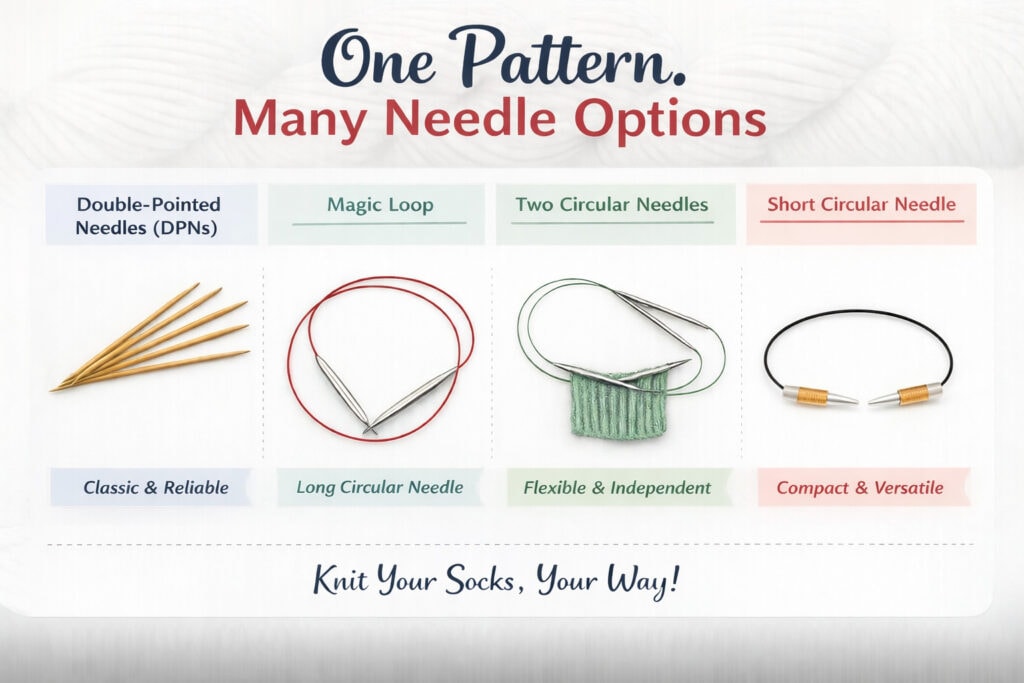
Skyline Ribbed Knit Sock Pattern Written for DPNs… Friendly to Others
If you already knit socks using magic loop, two circulars, or a short circular needle, you can follow the pattern stitch-for-stitch and simply manage the stitches using your preferred setup. No math changes required — just confidence with your method.
✨ Designer Tip: Socks are small projects, which makes them the perfect place to experiment with different needle styles. You might even discover a new favorite.
Want Extra Help? Try a Sock Make-Along 🎥🧦
If you enjoy learning with clear explanations and video support, you may want to explore one of my sock make-alongs.
Both the My First Knit Sock Make-Along (Top-Down) and the My First Knit Toe-Up Socks Make-Along walk through sock construction step by step, helping knitters understand how socks are built and how to achieve a great fit.
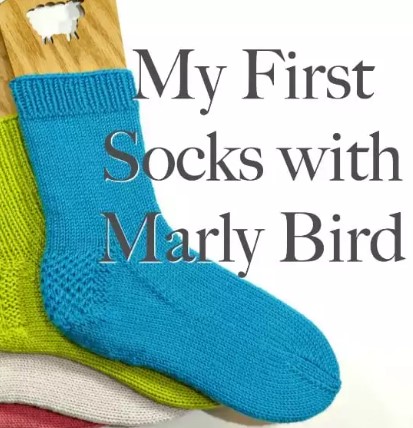
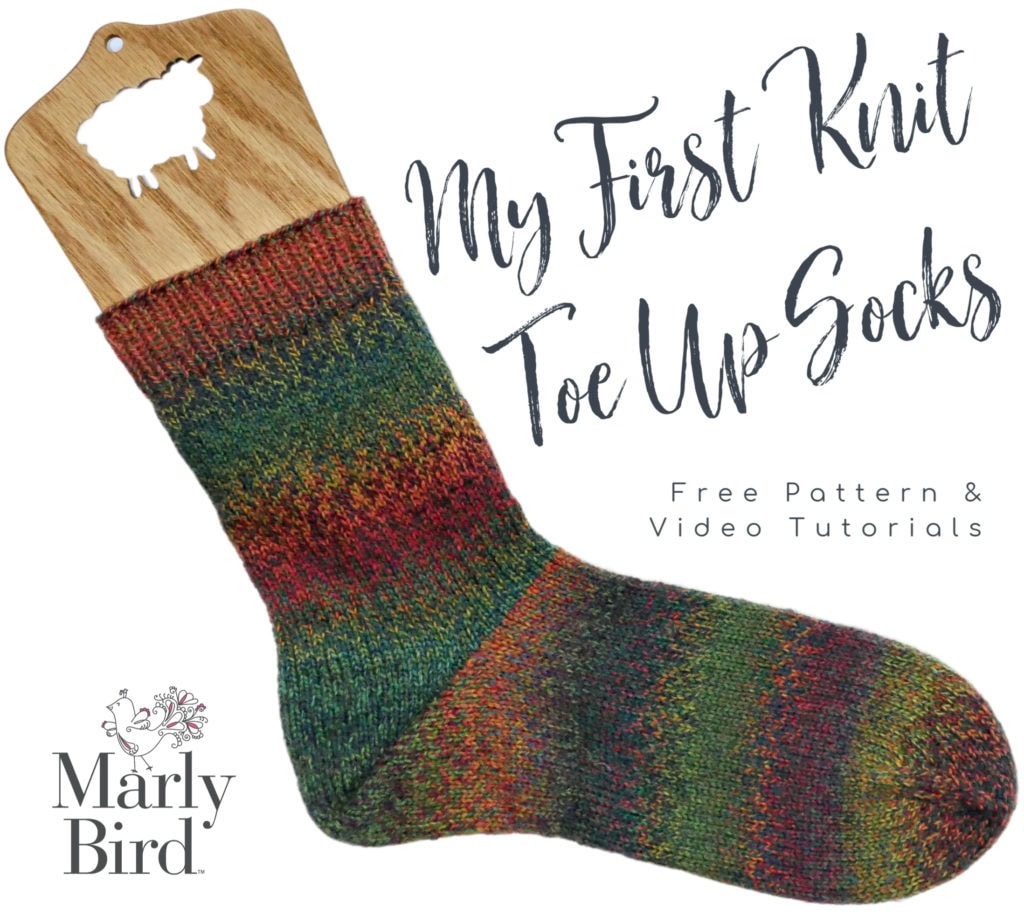
These make-alongs aren’t required to knit the Skyline Ribbed Knit Socks, but they’re a fantastic option if you want extra confidence and guidance.
How to Make Your Handknit Socks Last Longer 🧦✨
Handknit socks are meant to be worn, and with a little care, they can last a long time. Choosing a durable yarn and knitting at the correct gauge helps prevent premature wear.
Washing socks gently and air drying them will keep fibers healthy and strong.
If thin spots appear over time, simple mending techniques like duplicate stitch can reinforce high-wear areas. Caring for your handknit socks keeps them cozy, functional, and wearable for years to come.
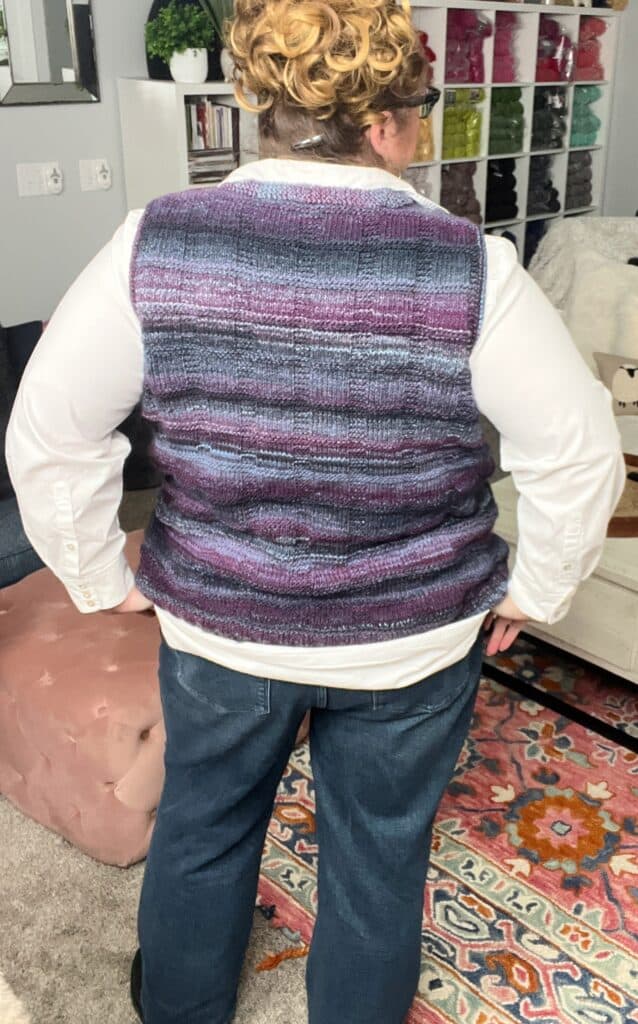
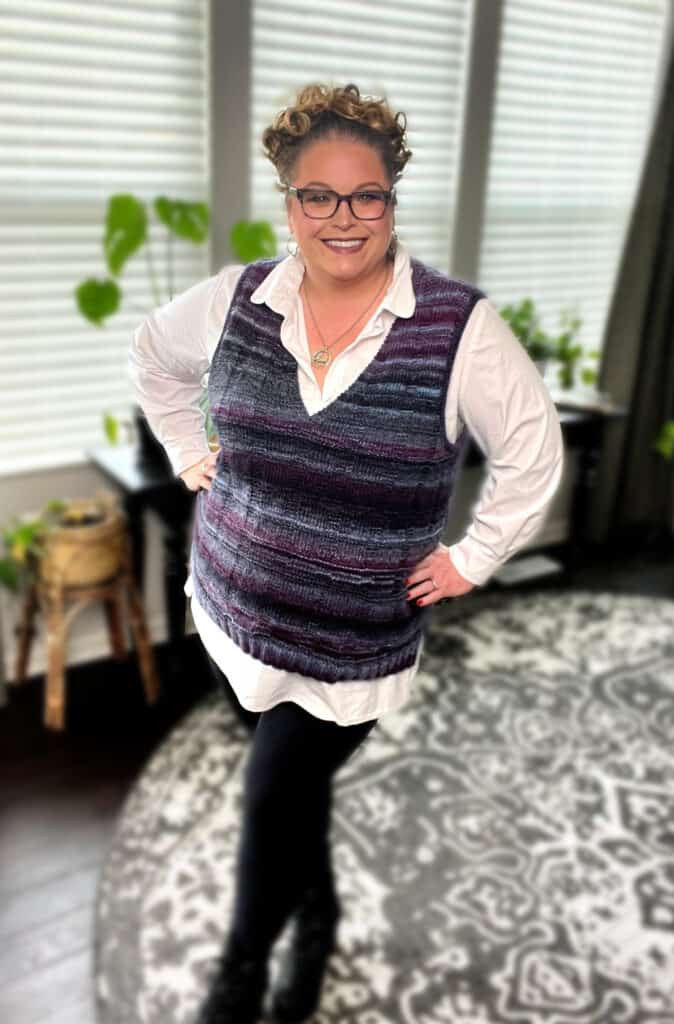
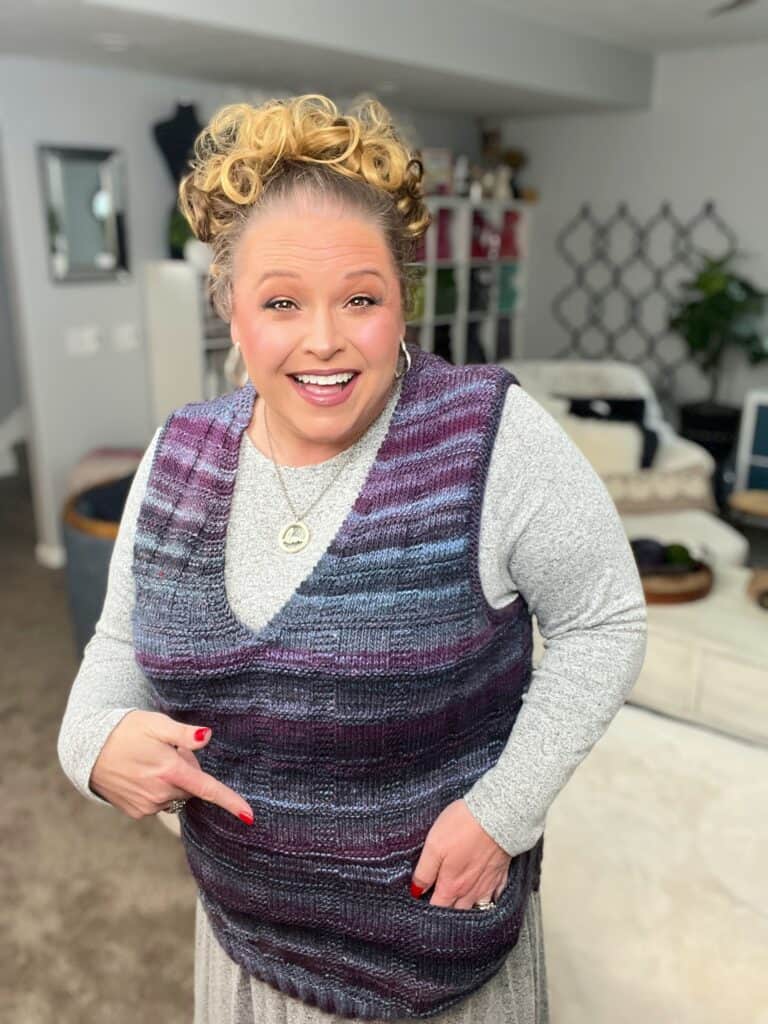
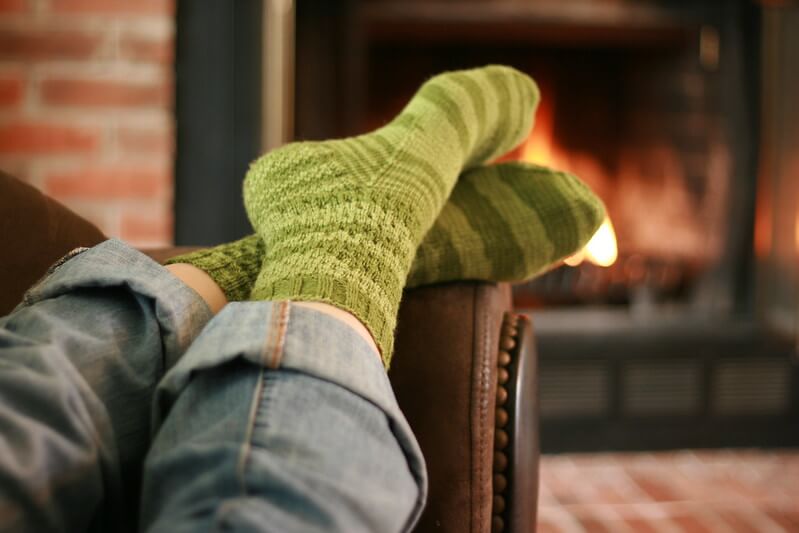
Styling Suggestions 👟🧥
These socks are made to be seen and enjoyed:
- Paired with boots and cuffed jeans
- Worn with sneakers and cropped pants
- Cozy around the house on chilly mornings
The ribbing adds just enough texture to make them interesting without overpowering your outfit.
Ad-Free PDF Option 🛍️
This pattern was originally released as an ad-free PDF and that option is still available for knitters who prefer:
- A clean print layout
- Offline access
- Easy saving for future sock knitting sessions
Free Pattern: Skyline Ribbed Knit Socks 🧦 Details
Designed by Marly Bird
MEASUREMENTS
To Fit Sizes
Child (Adult S, M, L)
Finished Measurements
To Fit Foot Circumference: 5¾ – 6½ (7¼ – 8, 8¾ – 9½, 10¼ – 11)” [14.5 – 16.5 (18.5 – 20.5, 22 – 24, 26 – 28) cm]
Sock Foot Circumference: 6 (7½, 9, 10½)” [15 (19, 23, 26.5) cm], laid flat without blocking.
Gauge
32 sts and 44 rows = 4” [10 cm] in Stockinette st.
MATERIALS
Yarn
Note: The yarn used in the sample has been discontinued; below is a suggested replacement yarn.
Sample Yarn: Blue Moon Fiber Arts, Socks That Rock Medium Weight (100% Superwash Merino Wool, 405 yds / 370 m, 6 oz / 170 g, CYCA #3 dk) : 1 (1, 2, 2) skeins.
Replacement Yarn: Knit Picks, Hawthorne DK (80% Fine Superwash Highland Wool, 20% Polyamide, 225 yds / 206 m, 3½ oz / 100 g, CYCA #3 dk) 2 (2, 3, 3) skeins.
Knitting Needles
U.S. 2 [2.75mm] set of 5 double pointed needles, or size required for gauge.
Notions
ABBREVIATIONS
K – Knit
K2tog – Knit Two Together
P – Purl
P2tog – Purl 2 together
RS – Right Side
Sl – Slip
Ssk – Slip, Slip, Knit (see Special Stitches)
St(s) – Stitch(es)
WS – Wrong Side
Wyib – With Yarn in Back
Wyif – With Yarn in Front
SPECIAL STITCHES
⭐ Slip, Slip, Knit (Ssk): Slip 2 stitches, one at a time, as if to knit. Insert left needle into the front of these 2 stitches and knit them together from this position – 1 stitch decreased.
FOOT LENGTH CHARTS
🚨 These charts are included in the ad-free pdf only
NOTES
- Socks are made in the round from cuff to toe.
- Directions are for child size; changes for sizes S, M, & L are in parentheses. When only one number is given then that number applies to all sizes.
- When using double pointed needles, keep strong tension on the first few stitches of each needle for best results.
- Heel is made with flap and gusset.
- Length of Leg and Foot of sock are customizable but be aware of yarn amounts.
VIDEO TUTORIALS
- Long Tail Cast On >> Click Here for Video Help <<
- No Cuss Cast On >> Click Here for Video Help <<
- Knit Stitch (continental style) >> Click Here for Video Help <<
- Purl Stitch (continental style) >> Click Here for Video Help <<
- Perfect Ribbing >> Click Here for Video Help <<
- How to Tink >> Click Here for Video Help <<
- No Hole at Gusset >> Click Here for Video Help <<
- Duplicate Stitch >> Click Here for Video Help <<
- How to Add Lifeline >> Click Here for Video Help <<
- Kitchener Stitch >> Click Here for Video Help <<
- Kitchener Stitch with no ears >> Click Here for Video Help <<
- How to Bury Ends >> Click Here for Video Help <<
GROW
To Unlock Exclusive Subscriber Content click the Box below and join for free by simply adding your email and creating a password! If you are having troubles, clear your cache or reset your password or login to the Grow Publisher Portal.
>> Learn More About Grow Here <<
I'm thrilled to share this amazing pattern with you, many patterns on my blog are absolutely free! I kindly request that you don't copy and paste or distribute this pattern. Prefer an ad-free experience? Buy a digital PDF pattern for a small fee from one of my online stores for a seamless crafting journey.
I appreciate your support and readership. You are the reason I can keep doing what I love and sharing it with others. So, thank you from the bottom of my yarn-loving heart! Disclosure: This post contains affiliate links, meaning I get a commission if you decide to make a purchase through my links at no cost to you.
SKYLINE RIBBED KNIT SOCKS PATTERN
LEG
Cast on 56 (64, 72, 80) divided evenly across 4 double-pointed needles using the No-Cuss Cast-on (see Video Tutorials).
Join round and mark first st.
Round 1: * K1, p2, k1; repeat from * around,
Repeat this round until Leg measures 5 (6, 7, 8)” [12.5 (15, 18, 20.5) cm] from cast-on edge.
HEEL
Unite Heel sts onto one needle and begin working back and forth in rows as follows:
Next 2 Rows:
Row 1 (RS): K3, work in established rib to end of Needle #1, continue in established rib to last 3 sts on needle #2, turn work.
Count: 28 (32, 36, 40) Heel sts on one needle.
Count: 28 (32, 36, 40) Top-of-Foot sts left unworked on remaining 2 needles.
Row 2: K3, work in established rib to last 3 Heel sts, k3.
Work evenly in established rib across Heel sts only, keeping first and last 3 sts in Garter st, for 25 (29, 33, 37) more rows, ending after a RS row.
There are now 13 (15, 17, 19) Garter st ridges at each edge.
Turn Heel
Next 4 Rows:
Row 1 (WS): K3, p 12 (14, 16, 18), p2tog, p1, turn.
Count: 27 (31, 35, 39) sts.
Note: Leave remaining sts unworked on left needle when turning.
Row 2 (RS): Wyib, sl 1 purlwise, k3, k2tog, k1, turn.
Count: 26 (30, 34, 38) sts.
Note: There will be a small gap between the sts that form the Heel turn and the yet unworked sts on the needle.
Row 3 (WS): Wyif, sl 1 purlwise, p4, p2tog, p1, turn.
Count: 25 (29, 33, 37) sts.
Note: The p2tog will close the gap.
Row 4 (RS): Wyib, sl 1 purlwise, k5, k2tog, k1, turn.
Count: 24 (28, 32, 36) sts.
Note: The ssk will close the gap.
Repeat Rows 3 and 4 only until 16 (18, 20, 22) total Heel sts remain.
Do not turn after final RS row.
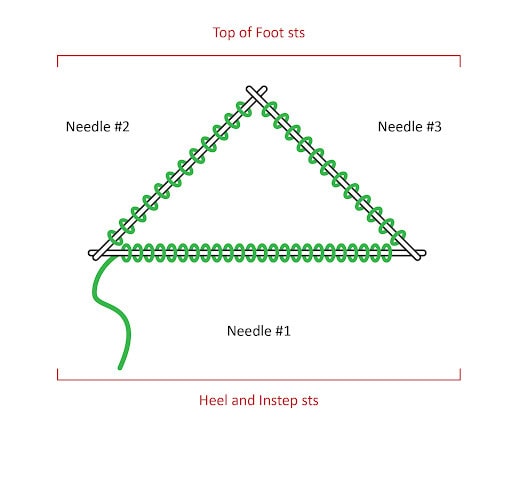
Heel Gusset
Begin working in rounds again as follows:
Slip last 8 (9, 10, 11) on the Heel needle onto a fourth, empty needle.
Remove beginning-of-round marker, and place it at center of Heel sts. This is the new beginning of round.
The needle holding the second half of the heel sts and the working yarn is now Needle #1.
Next 3 Rounds:
Round 1 (Gusset pick up round):
Needle #1: Pick up 1 st under each Garter ridge down left side edge of Heel.
Count: 14 (16, 18, 20) picked up sts.
Count: 22 (25, 28, 31) total sts on Needle #1.
Needles #2 and #3: Work in established rib across Top of Foot.
Needle #4: Pick up 1 st under each Garter ridge up right side edge Heel, pick up 1 more st above final Garter ridge, k 8 (9, 10, 11) from first half of Heel.
Count: 14 (16, 18, 20) picked up sts.
Count: 22 (25, 28, 31) total sts on Needle #4.
Count: 72 (82, 92, 102) total sts around.
Round 2 (decrease round):
Needle #1: K to last 3 sts, k2tog, k1.
Needles #2 and #3: Work in established rib across Top of Foot.
Needle #4: K1, ssk, k to end of needle.
Count: 70 (80, 90, 100) total sts around.
Round 3:
Needle #1: Knit.
Needles #2 and #3: Work in established rib across Top of Foot.
Needle #4: Knit.
Repeat Rounds 2 and 3 only 7 (8, 9, 10) more times.
Count: 56 (64, 72, 80) total sts around.
FOOT
Work evenly as established, keeping bottom-of-Foot sts in Stockinette st and top-of-Foot sts in established rib, until Foot measures 5 (6¾, 7¾, 8½)” [12.5 (17, 19.5, 21.5) cm] from beginning of Heel turn (end of Heel ribbing), or 2 (2¼, 2¾, 3)” [5 (5.5, 7, 7.5) cm] less than desired finished Foot length.
TOE SHAPING
Next 2 Rounds:
Round 1: Knit around.
Round 2 (decrease round):
Needle #1: K to last 3 sts, k2tog, k1.
Needle #2: K1, ssk, k to end of needle.
Needle #3: K to last 3 sts, k2tog, k1.
Needle #4: K1, ssk, k to end of needle.
Count: 52 (60, 68, 76) sts.
Repeat the last 2 rounds until 12 total sts remain across all needles.
FINISHING
Graft Toe sts together using Kitchener st as follows:
Hold both needles together in your left hand, with wrong sides facing inward. Cut a long tail from the working yarn (about 4 times the width of the fabric to be joined), and thread tail into yarn needle.
Step 1: Insert yarn needle purlwise into first st on front needle and pull it through, leaving st on the knitting needle.
Step 2: Insert yarn needle knitwise into first st on the back needle and pull it through, leaving st on the knitting needle.
Step 3: Insert yarn needle knitwise into first st on front needle and pull it through, then drop this st off knitting needle.
Step 4: Insert yarn needle purlwise into first st on front needle and pull it through, leaving st on the knitting needle.
Step 5: Insert yarn needle purlwise into first st on the back needle and pull it through, then drop this st off knitting needle.
Step 6: Insert yarn needle knitwise into first st on the back needle and pull it through, leaving st on the knitting needle.
Repeat steps 3-6 only, pausing to pull sts taut and neaten the seam after every few sts. Be sure to always pause after a step 6 so as to not lose your place.
When 2 sts remain, work step 3, then step 5, then fasten off.
Weave in all loose ends.
✨ Designer Tip: Cast on the second sock immediately while your sock confidence is still riding high. Second Sock Syndrome is real—but totally beatable. 😉
A Perfect Sock Pattern for Travel, TV, and Everyday Knitting 🧦✈️📺
The Skyline Ribbed Knit Socks are designed for real-life knitting — the kind that fits into your day without demanding all your attention.
Why knitters love this pattern for casual knitting:
- ✈️ Travel-friendly: Small project, minimal supplies, easy to toss in a bag
- 📺 TV knitting: Simple, rhythmic ribbing that doesn’t require constant focus
- 🧶 Social Butterfly knitting: Chat, laugh, knit, repeat
- 🍿 Netflix-and-chill knitting: Relaxing stitches with steady progress
This is a pattern you can pick up and put down easily, making it ideal for knitting on the go, during meetings, or while unwinding at night.
✨ Designer Tip: If you love projects that feel calming and productive, this sock pattern is a great match. Also, do you have a knitting buddy that sits next to you while you work? This is my puppy dog, Brioche.

A Thoughtful Handmade Gift Sock Pattern 🎁🧦
Handknit socks are one of the most personal gifts you can give — and this pattern makes gifting easy.
What makes these socks great for gifting:
- 🎁 Flexible ribbing helps with fit when knitting for someone else
- 🧶 Classic design works for many styles and ages
- ⏱️ DK weight yarn means faster knitting and less stress
- 💌 Handmade feel without complicated techniques
These socks are perfect for:
- Holiday gifts
- Birthdays
- Care packages
- “Just because” surprises
They’re cozy, practical, and full of handmade love.
Only in the ad-free pdf, there is a Foot Length Chart added so you can adjust your sock sizes as necessary for your recipient!


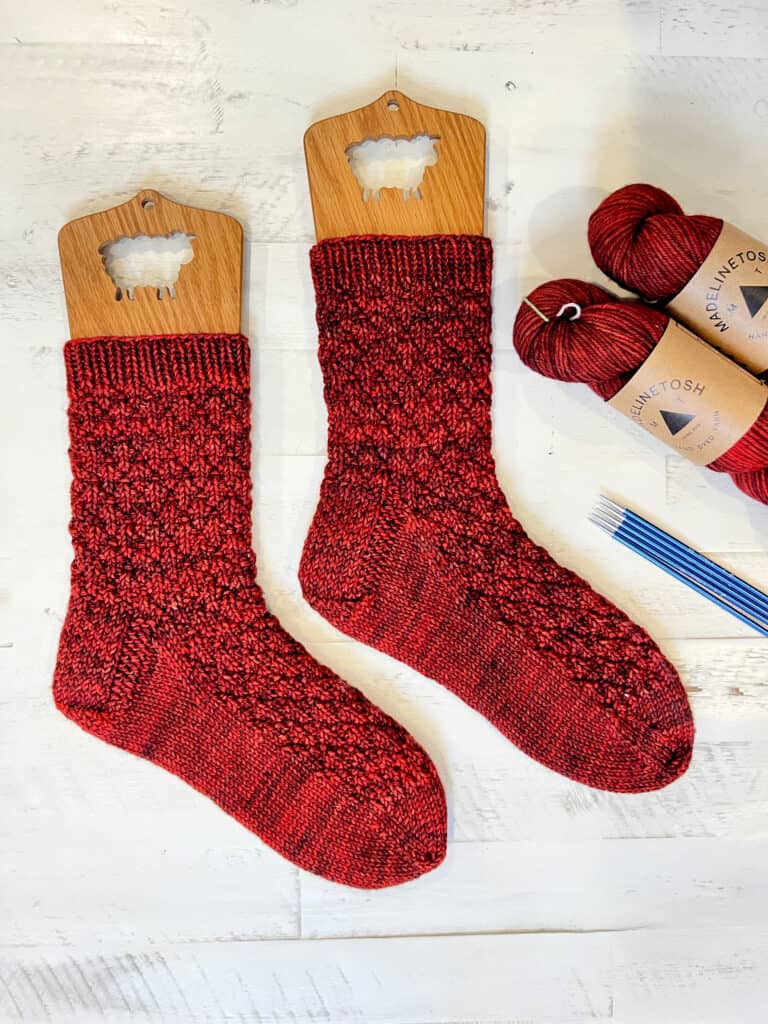
MORE SOCK PATTERNS TO LOVE
If Heartstrings has you hooked on sock knitting and you’re ready for more, here are some of my other sock patterns and workshops you can check out:
⭐️ Aromatherapy Sock Knit Workshop
https://marlybird.thrivecart.com/aromatherapy-sock-knit-workshop/
⭐️ Tranquility Sock Knit
https://marlybird.thrivecart.com/tranquility-sock-knit/
⭐️ Meditation Sock Knit
https://marlybird.thrivecart.com/meditation-sock-knit/
⭐️ Alex Seersucker Knit Socks
https://shop.marlybird.com/products/alex-seersucker-knit-socks
⭐️Appalachian Cozy Up Thigh High Sock Pattern
https://shop.marlybird.com/products/appalachian-cozy-up-thigh-high-sock-pattern
Both Alex and Appalachian are Part of the BiCrafty Stitch Nite Collection:
https://www.marlybirdhouse.com/products/courses/view/1148503
⭐️ Marly Knit Socks
https://shop.marlybird.com/products/marly-knit-socks
⭐️ Heartstrings Stranded Knit Socks (for the experienced knitter)
https://marlybird.com/blog/heartstrings-knit-socks-free-stranded-colorwork-sock-pattern/
If you’re still building your foundational knitting skills, you might also like my BiCrafty Bootcamp – Knitting resources on MarlyBird.com:
https://marlybird.com/blog/knitting-lessons-for-crocheters/
✨ Designer Tip: Socks are a great way to practice new techniques on a small, satisfying project.
FAQ 🙋♀️🧦
Are these socks toe-up or cuff-down?
These socks are worked from cuff to toe.
What heel construction is used?
A classic heel flap and gusset.
Can I customize the length?
Yes! Both leg and foot length can be adjusted.
Do I have to use DPNs?
The pattern is written for DPNs, but experienced knitters may adapt to other methods.
Final Thoughts 💙
If you love socks that are timeless, cozy, and satisfying to knit, the Skyline Ribbed Knit Socks are a total win. They’re approachable, adaptable, and endlessly wearable.
❤️ Your BiCrafty Bestie,
Marly Bird

Alt Text Suggestions for Images 🖼️
- Blue ribbed hand-knit sock in DK weight yarn on a sock blocker
- Close-up of ribbed texture on the Skyline Ribbed Knit Socks
- Heel flap and gusset shaping on a ribbed knit sock
- Knitted sock laid flat showing cuff-to-toe construction