Search
Close
  • The Pattern Shop
  • Our Free Patterns
    • Browse All Our Free Patterns
    • Our Free Knitting Patterns
    • Our Free Crochet Patterns
  • Blog
    • All Blog Posts
    • All Free Patterns
    • Dibble Dabble Inspiration
    • Giveaways
    • Make-Alongs
    • Product Reviews
    • Roundups
    • Tips, Tricks, Techniques for Knitting and Crochet
Stylized bird with pink and gray swirling tail above elegant “Marly” text, logo for crochet accessories and home decor.
  • Marly Bird House
  • Learn to Knit & Crochet
    • Newbie? Start Here
    • Video Tutorials
    • Knitting Definitions
    • Crochet Definitions
    • Common Techniques
    • Size Charts for Knitting and Crochet Projects
  • About
×
  • The Pattern Shop
  • Free Patterns
  • Blog
  • Marly Bird House
  • Learn to Knit & Crochet
    • Newbie? Start Here
    • Video Tutorials
    • Knitting Definitions
    • Crochet Definitions
    • Common Techniques
    • Size Charts for Knitting and Crochet Projects
  • About
Stylized bird with pink and gray swirling tail above elegant “Marly” text, logo for crochet accessories and home decor.
Search
Close

New Patterns NOW Available in Ad-Free PDF! Check out The Pattern Shop

Simple Crochet Frog – Your New Frogging Friend!

February 29, 2024 By Marly Bird 1 Comment

Introducing the Frogging Friend, a delightful crochet creation designed by your BiCrafty Bestie, Marly Bird! This charming amigurumi frog is not just a cute addition to your collection but also a heartwarming companion for all your crocheting escapades. Made with snuggly worsted weight yarn and crafted with love, the Frogging Friend is the perfect size to perch beside you as you stitch your latest project.

Whether you're breezing through stitches or unraveling a few “oops” moments (we all have them!), this little buddy is there with a reassuring smile. With its friendly eyes and comforting texture, the Frogging Friend is more than just a stuffed toy; it's a companion that celebrates every part of your crochet journey – the triumphs, the challenges, and everything in between.

Perfect for crocheters looking for a project with personality and charm, the Frogging Friend comes with a clear, easy-to-follow pattern and a supportive video tutorial led by Marly Bird herself. So, gather your yarn and hook, and get ready to crochet a friend who will stick by you, through thick and thin yarns alike!

Marly Bird holding the Frogging Friend Crochet Stuffie in one had as she smiles to the camera. The stuffed frog is green with big and bold cartoon eyes.

Designed by Marly Bird

SKILL LEVEL

Advanced Beginner

MEASUREMENTS

Finished Measurements

Frog is 12” [30.5 cm] circumference around widest part of body by 7” [18 cm] tall from bottom to top of eyeballs. . 

Gauge 

16 sc by 16 rounds = 4” [10 cm] x 4” [10 cm]; use any size hook to obtain the gauge. 

MATERIALS

Crochet Yarn 

Red Heart Super Saver (100% acrylic, 364 yds / 333 m, 7 oz/ 198 g, CYCA# 4 worsted): 

Color A: Kelly Green, 1 skein

Color B: Spring Green, 1 skein

Color C: Black, 1 skein

Color D: White, 1 skein

Crochet Hook

Size E/5 (3.5 mm)

Notions 

Tapestry needle, Fiberfil stuffing, stitch markers

Favorite This Pattern on Ravelry - Marly Bird

ABBREVIATIONS

Ch – Chain(s) 

RS – Right Side 

Sc – Single Crochet

Sc2tog – Single Crochet Two Together 

Sl st – Slip Stitch 

Sp(s) – Space(s) 

St(s) – Stitch(es)

WS – Wrong Side

SPECIAL STITCHES 

Slip st (slip stitch): Insert crochet hook in the indicated stitch, yarn over and draw through both the stitch and the loop on the hook.

Single Crochet 2 Together (sc2tog): *Insert hook into indicated stitch, yarn over and pull up a loop; repeat from * in next stitch indicated, yarn over and draw through all 3 loops on hook. (1 decrease)

SPECIAL TECHNIQUES

Adjustable Ring (also known as the Magic Loop): 

Start your adjustable ring exactly as you start a slip knot by pulling 6 to 8 inches of yarn from the yarn skein.  The working end of yarn comes from the skein, and the tail end of yarn is on the other side.  Loop the tail end of the yarn under the working end to form a loop.. Pick up the loop and pinch the working end, moving it through the loop. Place a new loop on the hook. Chain 1 to lock in the ring.  Once finished crocheting around the ring, pull the tail end to close the ring.

VIDEO TUTORIALS

  • Full Step By Step Video Tutorial for crocheting Frogging Friend https://youtu.be/TZ14SPtAD9Y 
  • How to make an adjustable ring https://youtu.be/76hW8yT4HlU 
  • How to secure an adjustable ring https://youtu.be/emHjFVFrzl0 
  • How to single crochet https://youtu.be/W6dsC-IwIGg  

NOTES

  • Frog  is worked in pieces and seamed together. Details are added last. 
  • Body, head and eyes are worked in joined rounds. 
  • The arms and legs are worked in continuous spiral rounds that are not joined at the end of the round. 
  • Use a stitch marker to mark the first stitch of each new round throughout project. 
  • Stuff Frog’s body, head, and eyes firmly with fiberfil. The arms and legs only have about an inch of fiberfil at the bottom of the limbs. 
  • When changing color, pull new color through last pull through of the previous stitch or join.
  • Leave a long tail on final finishing to use for seaming. 
Marly Bird holding the Frogging Friend Crochet Stuffie in one had as she smiles to the camera. The stuffed frog is green with big and bold cartoon eyes.

FROGGING FRIEND FROG STUFFIE PATTERN

FROG HEAD

Note: Head is worked from the top at the increasing rounds through the bottom of the head while decreasing. 

Round 1: With color A and using the Adjustable Ring, 6 sc in ring, join with a slip st to first sc, pull ring closed, ch 1–6sc.

Round 2: 2 sc in each sc around, join with a slip st to first sc, ch 1– 12 sc. 

Round 3: *Sc in next sc, 2 sc in next sc; repeat from * around, join with a slip st to first sc, ch 1– 18 sc. 

Round 4: *2 sc in next sc, sc in next 2 sc; repeat from * around, join with a slip st to first sc, ch 1– 24 sc.

Round 5: Sc in next 2 sc, *2 sc in next sc, sc in next 3 sc; repeat from * to last 2 sc, 2 sc in next sc, sc in last sc, join with a slip st to first sc, ch 1—30 sc.

Round 6: *Sc in next 4 sc, 2 sc in next sc; repeat from * around; join with a slip stitch to first sc, ch 1—36 sc.

Round 7: Sc in next 3 sc, *2 sc in next sc, sc in next 5 sc; repeat from * to last 3 sc, 2 sc in next sc, sc in next 2 sc; join with a slip st to first sc, ch 1—42 sc. 

Take a moment and weave closed the magic loop opening on the wrong side. 

Rounds 8-16: Sc in each sc around, join with a slip st to first sc, ch 1.

Round 17: *Sc in next 5 sc, sc2tog over next 2 sc; repeat from * around, join with a slip st to first sc, ch 1—36 sc.

Round 18: Sc in next 2 sc, *sc2tog over next 2 sc, sc in next 4 sc; repeat from * around to last 4 sc, sc2tog over next 2 sc, sc in last 2 sc, join with a slip st to first sc, ch 1—30 sc.

Stuff frog’s head with fiberfil.

Round 19: *Sc in next 3 sc, sc2tog over next 2 sc; repeat from * around, join with a slip st to first sc, ch 1—24 sc.

Round 20: Sc in next sc, *sc2tog over next 2 sc, sc in next 2 sc; repeat from * around to last 3 sc, sc2tog over next 2 sc, sc in last sc, join with a slip st to first sc, ch 1—18 sc.

Round 21: *Sc in next sc, sc2tog over next 2 sc; repeat from * around, join with a slip st to first sc, ch 1—12 sc.

Stuff frog’s head with more fiberfil if necessary.

Round 22: *Sc2tog over next 2 sc; repeat from * around, join with a slip stitch to first sc, fasten off with long tail—6 sc.

Weave tail through the stitches on the last round, pull tight to close hole like a drawstring.  Weave in ends but do not cut the tail yet. It will be used to seam the head to the body. 

FROG BODY

Note: Body is worked from the top at the increasing rounds through the bottom of the head while decreasing. 

Round 1: With color A and using the Adjustable Ring, 6 sc in ring, join with a slip st to first sc, pull ring closed, ch 1–6sc.

Round 2: 2 sc in each sc around, join with a slip st to first sc, ch 1– 12 sc. 

Round 3: *Sc in next sc, 2 sc in next sc; repeat from * around, join with a slip st to first sc, ch 1– 18 sc. 

Round 4: *2 sc in next sc, sc in next 2 sc; repeat from * around, join with a slip st to first sc, ch 1– 24 sc.

Round 5: Sc in next 2 sc, *2 sc in next sc, sc in next 3 sc; repeat from * to last 2 sc, 2 sc in next sc, sc in last sc, join with a slip st to first sc, ch 1—30 sc.

Round 6: *Sc in next 4 sc, 2 sc in next sc; repeat from * around; join with a slip stitch to first sc, ch 1—36 sc.

Round 7: Sc in next 3 sc, *2 sc in next sc, sc in next 5 sc; repeat from * to last 3 sc, 2 sc in next sc, sc in next 2 sc; join with a slip st to first sc, ch 1—42 sc. 

Take a moment and weave closed the magic loop opening on the wrong side. 

Rounds 8-11: Sc in each sc around, join with a slip st to first sc, ch 1.

Round 12: Sc in next 4 sc, *2 sc in next sc, sc in next 6 sc; repeat from * to last 3 sc, 2 sc in next sc, sc in last 2 sc, join with a slip st to first sc, ch 1—48 sc. 

Round 13: Sc in each sc around, join with a slip st to first sc, ch 1. 

Round 14: Sc in next 3 sc, *2 sc in next sc, sc in next 7 sc; repeat from * to last 5 sc, 2 sc in next sc, sc in last 4 sc, join with a slip st to first sc, ch 1—54 sc. 

Round 15: Sc in each sc around, join with a slip stitch to first sc, ch 1. 

Round 16: *Sc in next 8 sc, 2 sc in next sc; repeat from * around, join with a slip st to first sc, ch 1—60 sc. 

Rounds 17-21: Sc in each sc around, join with a slip st to first sc, ch 1. 

Round 22: *Sc in next 8 sc, sc2tog over next 2 sc; repeat from * around, join with a slip stitch to first sc, ch 1—54 sc.

Round 23: Sc in next 4 sc, *sc2tog over next 2 sc, sc in next 7 sc; repeat from * to last 5 sc, sc2tog over next 2 sc,  sc in last 3 sc, join with a slip st to first sc, ch 1—48 sc.

Round 24: *Sc in next 6 sc, sc2tog over next 2 sc; repeat from * around, join with a slip st to first sc, ch 1—42 sc.

Round 25: Sc in next 3 sc, *sc2tog over next 2 sc, sc in next 5 sc; repeat from * to last 4 sc, sc2tog over next 2 sc, sc in last 2 sc, join with a slip st to first sc, ch 1—36 sc

Round 26: *Sc in next 4 sc, sc2tog over next 2 sc; repeat from * around, join with a slip st to first sc, ch 1—30 sc.

Round 27: Sc in next 2 sc, *sc2tog over next 2 sc, sc in next 3 sc; repeat from * to last 3 sc, sc2tog over next 2 sc, sc in last sc, join with a slip st to first sc, ch 1—24 sc.

Stuff frog’s body with fiberfil.

Round 28: *Sc in next 2 sc, sc2tog over next 2 sc; repeat from * around, join with a slip st to first sc, ch 1—18 sc.

Round 29: *Sc in next sc, sc2tog over next 2 sc; repeat from * around, join with a slip st to first sc, ch 1—12 sc.

Stuff frog’s body with more fiberfil if necessary.

Round 30: *Sc2tog over next 2 sc; repeat from * around, join with a slip st to first sc, fasten off—6 sc.

Weave tail through the stitch on the last round, pull tight to close the hole like a drawstring.  Weave in ends.

Frogging Friend, the amigurumi crochet frog by Marly Bird

FROG AMIGURUMI CARTOON EYES

I used the cartoon eyes by Repeat Crafter Me and added my own little tweak to them I hope you love them.

Eyeball – Make 2

Round 1: With color C and using the Adjustable Ring, 10 sc in ring, change to  color B, join with a slip st to first sc, ch 1–10 sc.

Round 2: 2 sc in each sc around, change to color D, join with a slip st to first sc, ch 1– 20 sc.

Round 3: Sc in each sc around, join with a slip st to first sc.

Round 4: Slip st in each sc around, join with a slip st to first slip st. Fasten off. 

Round 5: With color A, insert hook into any back loop of sc from Round 3, yarn over and pull up a loop (one loop on hook), proceed to work a slip st in the back loop of the next sc from Round 3, and in all the remaining sc  around, join with a slip st to first slip st. Fasten off.

Using the tail of color D, embroider a sparkle to the edge between the pupil and the iris. Use photo as guide. Weave in all ends.

Outer Eye – Make 2

Round 1: With color A and using the Adjustable Ring, 10 sc in ring, join with a slip st to first sc, pull ring closed, ch 1–10 sc.

Round 2: 2 sc in each sc around, join with a slip st to first sc, ch 1– 20 sc.

Round 3: *Sc in next sc, 2 sc in next sc; repeat from * around, join with a slip st to first sc, ch 1– 30 sc. 

Rounds 4-6: Sc in each sc around, join with a slip st to first sc.

Round 7: *Sc in next sc, sc2tog over next 2 sc; repeat from * around, join with a slip st to first sc, ch 1—20 sc.

Stuff frog’s eye with fiberfil.Have the eyeball placed with the right side out on the open space of the outer eye (see image below), slip st in next sc of outer eye and through the back leg of the corresponding slip st of the eyeball of Round 5 of the eyeball, join with a slip st to first slip st. Fasten off.

step out photo tutorial for how to add the crochet eyeball to the outer eye of the cartoon eyes used on the Frogging Friend Crochet Stuffie by Marly Bird

FROG ARMS

Note: Arms are worked from the bottom at the increasing rounds through the length of the arm in a spiral. Do not join rounds with a slip stitch. 

Make 2

Round 1: With color A and using the Adjustable Ring, 6 sc in ring, pull ring closed–6sc.

Round 2: 2 sc in each sc around– 12 sc

Rounds 3 – 22: Sc in each sc around.

Stuff lower portion of the frog’s arm with fiberfil. Sample only has about 1” [2.5 cm] filled with stuffing.

Fasten off. 

FROG LEGS

Note: Legs are worked from the bottom at the increasing rounds through the length of the leg in a spiral. Do not join rounds with a slip stitch. 

Make 2

Round 1: With color B and using the Adjustable Ring, 6 sc in ring, pull ring closed–6sc.

Round 2: 2 sc in each sc around, change to color A— 12 sc

Rounds 3 – 24: Sc in each sc around, do not turn.

Stuff lower portion of the frog’s legs with fiberfil. Sample only has about 1” [2.5 cm] filled with stuffing..

Fasten off. 

FINISHING

Using the images as your guide, sew the eyes onto the head. Then sew the head onto the top of the body. Then pinch the legs and arms closed and whip stitch them into place on the body.  Again, using the photo as a guide or watch the video tutorial.

With color C, embroider a smile to the front of the frogs face.  

Frogging Friend laying flat on a white surface with the unattached limbs strategically placed along the body. This image demonstrates how the pieces of the stuffed crochet crog should be assembled. This crochet frog pattern is by Marly Bird

Frequently Asked Questions

What skill level is this frog pattern for?

Honestly… this pattern is rated for an Advanced Beginner! It’s perfect if you’ve got some crochet basics down and are ready for a fun project with a little more detail. You’ll totally be able to tackle it!

How big is the finished frog?

So here's the thing… the finished froggy friend will be about 12 inches around the widest part of its body and stand about 7 inches tall from the bottom to the top of its eyeballs. It's a great size to cuddle!

What kind of yarn do I need?

Yes! You'll need a worsted weight yarn, and the pattern calls for Red Heart Super Saver. The colors listed are Kelly Green, Spring Green, Black, and White, but feel free to get creative with your own color combos!

Can I find a video tutorial for this pattern?

Oh, absolutely! Marly has a super helpful step-by-step video tutorial just for this Frogging Friend, plus videos for special techniques like the adjustable ring. You can find the links right on the page, so no worries if you get stuck!

What do I do if I mess up a stitch?

We've all been there… don't you worry! The pattern is designed to be easy to follow, and Marly even mentions that “oops” moments happen to everyone. Just take a deep breath, maybe refer to the video tutorials for those special stitches, and you'll be back on track in no time!

Filed Under: Crochet, Free Patterns, Our Free Patterns, Pattern Tagged With: badge-new-pattern

Discover the Charm of the Bamberg Bandana Cowl: Your Next Favorite Project!

February 16, 2024 By Marly Bird 1 Comment

Are you ready to add a touch of elegance to your wardrobe with a versatile piece that's both a cowl and a shawl? Look no further than the knit Bamberg Bandana Cowl pattern! This delightful project is perfect for those who love a bit of a challenge mixed with a whole lot of fun. In this blog post we will guide you through all you need to know about this modern knit project and how you can get the pattern. Use the table of contents to jump to any section of the article you desire.
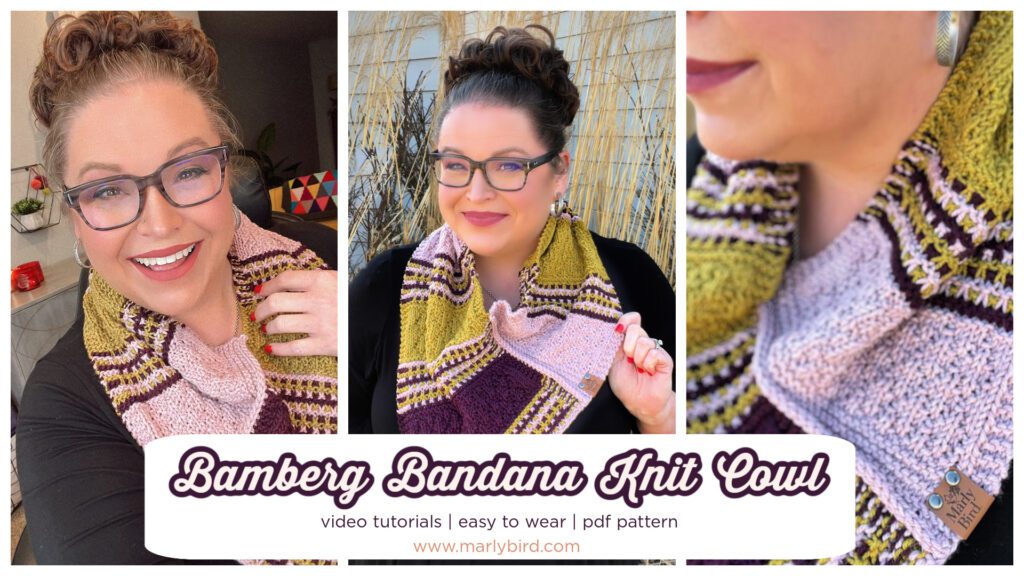
Promotional image for the Bamberg Bandana Knit Cowl featuring Marly Bird. Three photos display Marly smiling and modeling the cowl, which showcases rich textures and colorwork in shades of yellow, purple, and pink. She stands outdoors with tall grass in the background. The image includes text overlays that read 'Bamberg Bandana Knit Cowl,' 'video tutorials,' 'easy to wear,' 'pdf pattern,' and 'www.marlybird.com.

What's a Bandana Cowl?

A bandana cowl, also known as a bandana shawl, is a fashionable accessory that drapes beautifully around your neck and shoulders. It's like a scarf but even cooler because it combines the style of a bandana with the warmth of a cowl. And the best part? You can wear it in lots of different ways! This neck and chest warmer is a multifunctional piece that is modern, unisex, and utilitarian. This piece is an attention grabber and a conversation starter for sure!

What Skills Do I Need To Know to Knit a Simple Cowl?

The Bamberg Bandana Cowl is designed with the adventurous beginner in mind, providing a delightful challenge for those who are comfortable with knit and purl stitches and have general knitting knowledge. This pattern is a stepping stone towards more complex projects, allowing knitters to grow their skills while working on a practical and stylish accessory. The textured design, while simple to follow, results in a sophisticated piece that looks more complicated than it is, making it perfect for those looking to expand their knitting repertoire in a fun and engaging way.

The Bamberg Bandana Cowl Knitting Pattern

The Bamberg Bandana Cowl pattern is not just any ordinary pattern. It's filled with textures that are sure to keep your fingers dancing and your mind engaged. Imagine creating something that looks super fancy but is actually quite simple once you get the hang of it. That's the magic of the Bamberg Bandana Cowl!

Learn how to combine knits and purls to create the Seersucker stitch pattern. And also learn how to combine garter stitch and slip stitches to create a beautiful and easy knit mosaic pattern. These are wonderful stitches for any knitter to learn but perfect for Adventurous Beginners!

But the texture doesn't stop there! Learn a seaming technique that creates a eye catching 3D seam. You can work this seam with knitting needles or a crochet hook.
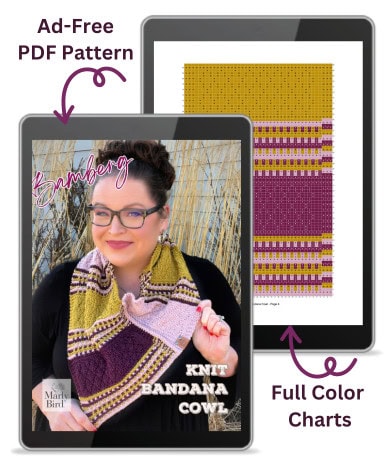
Promotional graphic for the Bamberg Bandana Knit Cowl PDF pattern. The image features an iPad displaying Marly Bird holding the cowl, with text reading 'Ad-Free PDF Pattern.' Beside it, another tablet screen shows full-color charts for the cowl pattern. Arrows point to the key features 'PDF Pattern' and 'Full Color Charts' to highlight the content of the purchase.

This knitting pattern is available as an ad-free pdf instant download. The instructions include both written and charted instructions, as well as video tutorials to help along the way. We understand that we all have different learning styles, that is why Marly Bird patterns provide as many ways to get the instructions as possibly available. Oh, did I mention this pattern is large font and expands over 22 pages?
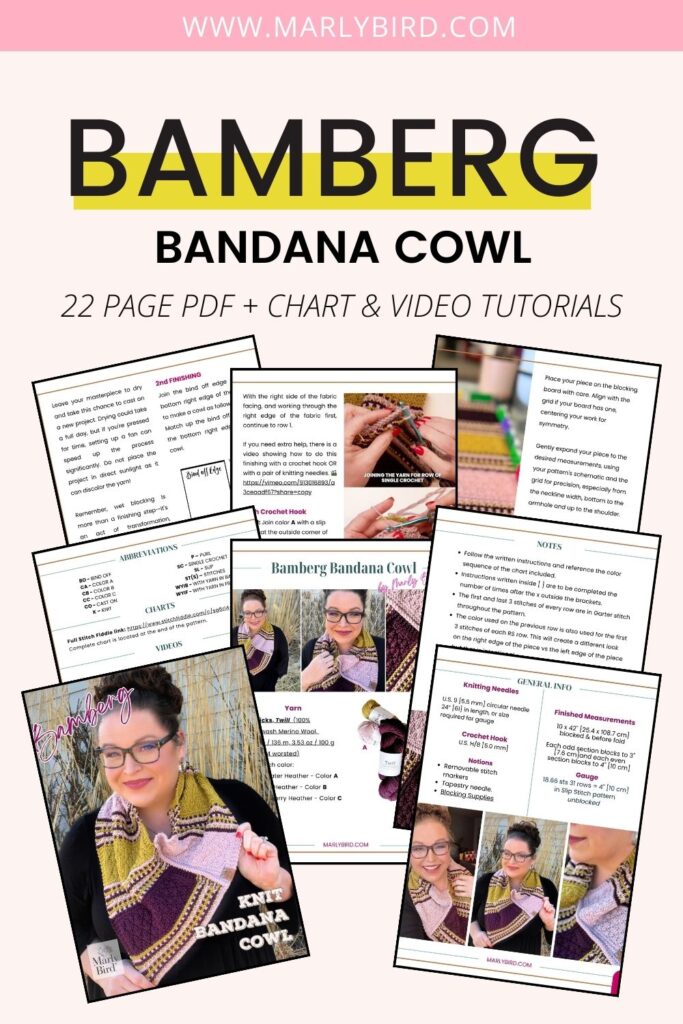
Promotional collage for the Bamberg Bandana Cowl knitting pattern available at www.marlybird.com. The image features the text 'BAMBERG BANDANA COWL' prominently displayed at the top, followed by '22 PAGE PDF + CHART & VIDEO TUTORIALS.' Below, there are multiple snapshots of the PDF pattern pages, showcasing detailed instructions, charts, and photos of Marly Bird wearing the completed cowl. The layout is designed to highlight the comprehensive nature of the pattern and the resources provided for knitters.

Information about the Kerchief Style Shawl

This kerchief style cowl was knit in one day and it only requires one hank of worsted yarn in 3 different colors. The piece is knit flat in sections of slip stitch mosaic and seersucker stitch. The sizing is very customizable and gauge is not super important, you can follow the instructions as written or repeat the pattern to get a scarf length instead of the size given.

MEASUREMENTS

To Fit Size: One Size

Finished Measurements: 10 inches x 42 inches [25.4 x 108.7 cm] blocked & before fold

Gauge: 18.66 sts 31 rows = 4″ [10 cm] in Slip Stitch pattern unblocked.

MATERIALS / TOOLS

Yarn: KnitPicks, Twill  (100% Superwash Merino Wool, 149 yards / 136 meters, 3.53 oz / 100 g CYCA #4 worsted yarn weight) 

  • 1 ball each color: Rose Water Heather – Color A, Serpent Heather – Color B, Black Cherry Heather – Color C

Knitting Needle

U.S. 9 [5.5 mm] 24” [61 cm], or size required for gauge

Crochet Hook (ever wonder what the best crochet hook is for you?)

U.S. H/8 [5 mm] used for seaming

Notions 

  • Removable stitch markers to help with seaming
  • Tapestry needle.
  • Blocking Supplies

Video Tutorials Included!

Sometimes reading a pattern isn't enough for those of us who are visual learners, and that's totally okay! The Bamberg Bandana Cowl comes with closed-captioned video tutorials to help you every step of the way. This pattern was the prototype for what became The Archer pattern for the Game Day 2024 knitting project. The same stitches are used in both projects so the videos for the Game Day will help you with the Bamberg. And as mentioned, the unique finishing technique used to seam this project has its own video. These videos make it like having a teacher right there with you, showing you exactly what to do. How awesome is that?
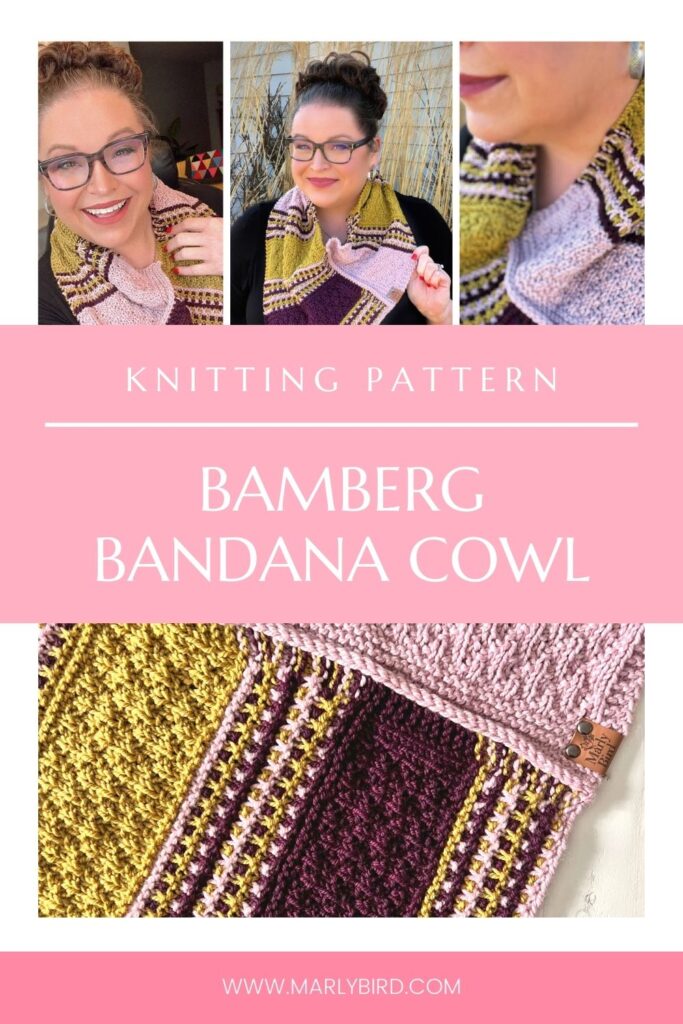
Promotional Pinterest graphic for the 'Bamberg Bandana Cowl' knitting pattern by Marly Bird. The image features three separate pictures of Marly modeling the cowl in yellow and purple hues, alongside a close-up of the cowl's textured stitch patterns. The central pink banner states 'Knitting Pattern - Bamberg Bandana Cowl' with the website 'www.marlybird.com' at the bottom.

Choosing the Right Yarn for Your Bandana Cowl

Knitting the perfect Bamberg Bandana Cowl starts with selecting the right yarn. If you're wondering what type of yarn will make your cowl both comfortable and chic, consider a soft, medium-weight yarn. Wool, acrylic, or a blend can offer warmth and versatility, while a splash of color can bring the textured patterns to life.

Using mohair or polyester or silk or bamboo or yak yarn will definitely give the project a different look but if you swatch with it and like the overall look, then go for it. Let creativity be your guide.

Remember, the yarn weight and fiber you choose will transform your cowl from a simple accessory to a statement piece!

For the sample, Marly used a lovely superwash yarn from KnitPicks called Twill. But any worsted weight yarn can be used for this lovely piece.
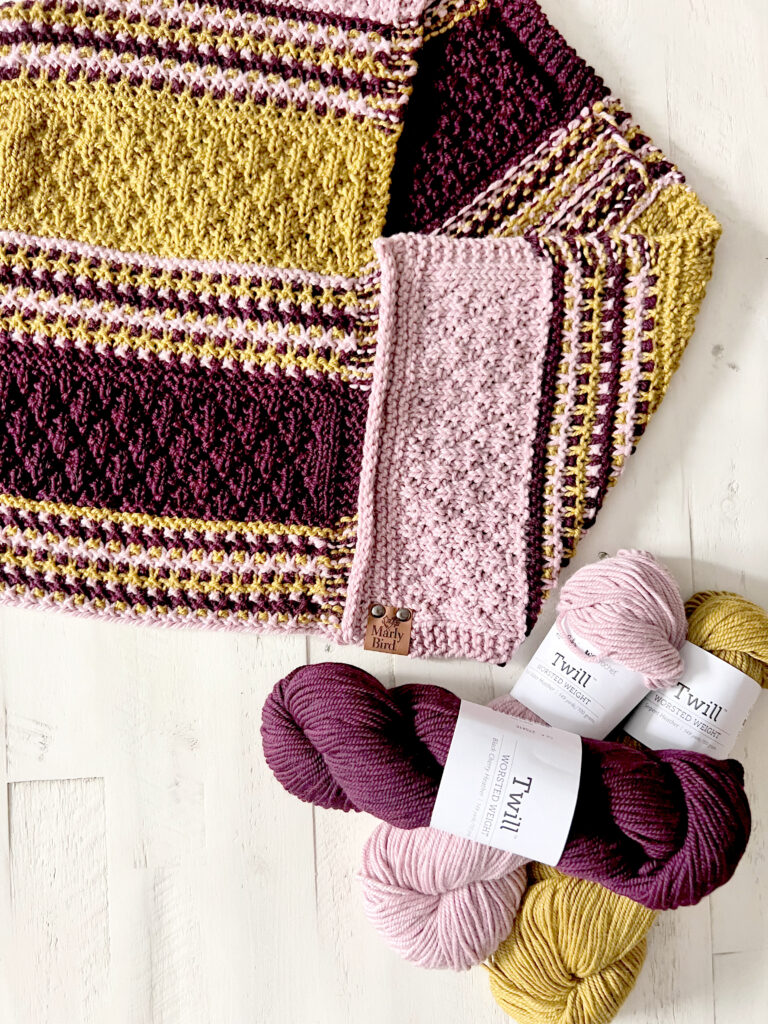
Flat lay image showcasing the Bamberg Bandana Cowl in progress with rich textures in pink, yellow, and purple yarns. The knitting project is laid out on a white surface, displaying its intricate patterns and a Marly Bird branded label. Beside the cowl, there are three skeins of Twill yarn from WeCrochet in coordinating colors, indicating the high-quality materials used in the creation of this piece.

Why You'll Love Knitting This Project

  • It's Unique: Stand out from the crowd with a cowl that's also a shawl!
  • It's Fun: Enjoy a project that's full of texture and exciting new stitches.
  • It's Educational: Learn new techniques with helpful video tutorials.
  • It's Stylish: Add a fashionable twist to any outfit with your very own handcrafted accessory.How to Block Your Handmade Cowl or Shawl?

I Want the Bamberg Pattern – Where Do I Get It?

This pattern is available as part of the 2024 Game Day MVP Package or in the Marly Bird Etsy shop

Don't wait any longer! Grab your yarn and needles (or hook!) and get ready to make something beautiful. The Bamberg Bandana Cowl is perfect for cozying up on cool days or adding a stylish layer on an evening out.

>> Get the Ad-Free Pdf on Etsy Here <<

So, are you team cowl or team shawl? Why choose when you can have both with the Bamberg Bandana Cowl! Get your pattern today and join the crafting fun. If you are making this project, don't forget to favorite and queue it up on Ravelry.

Remember, with the Bamberg Bandana Cowl, you're not just making a piece of clothing; you're creating a work of art to wear and love. Happy crafting!

Frequently Asked Questions

What exactly *is* a bandana cowl?

So here's the thing… a bandana cowl, or bandana shawl, is this super cool accessory that you can wear around your neck and shoulders. It's like a scarf, but with the stylish vibe of a bandana, plus all the cozy warmth of a cowl. Honestly, the best part is how many different ways you can style it!

I'm kind of new to knitting, can I really make this?

Yes! The Bamberg Bandana Cowl is totally designed with adventurous beginners in mind. If you're comfy with basic knit and purl stitches and have a general idea of how knitting works, you'll do great. It’s a fun project that helps you build your skills without being too overwhelming.

What kind of yarn works best for this project?

Honestly, you can use a lot of different yarns! For the sample, I used a lovely superwash wool called Twill from KnitPicks, but any worsted weight yarn will work. You could also experiment with mohair, polyester, silk, bamboo, or yak yarn to get a different look… just make sure to swatch if you do!

How long does it take to knit this cowl?

Well, the sample was actually knit in just one day! It only needs one hank of worsted yarn in three different colors. You'll be working it flat in sections using the slip stitch mosaic and seersucker stitches. The size is super customizable too, so you can make it as written or repeat the pattern for a longer scarf.

Where can I get the pattern for the Bamberg Bandana Cowl?

Oh, that's easy! You can grab the pattern as an ad-free PDF instant download from my Etsy shop… just click the link! It includes written and charted instructions, plus video tutorials to help you out every step of the way. Happy crafting!

Filed Under: Knitting, Marly Bird Premium Patterns Tagged With: badge-new-pattern

Game Day Mystery Make-Along 2024

January 27, 2024 By Marly Bird 9 Comments

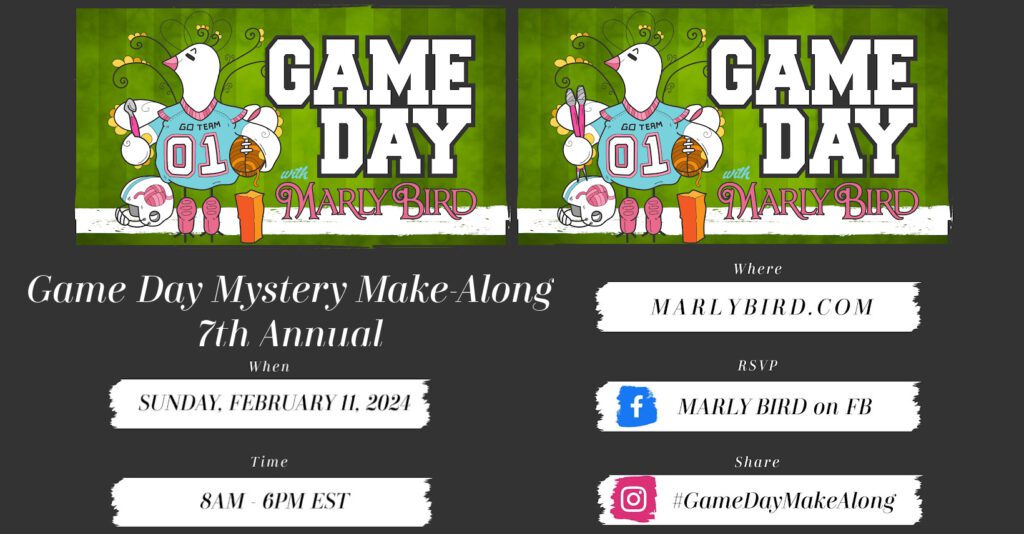
Get ready for Game Day Mystery Make-Along 2024. Join us for a thrilling mystery make-along event for knitters and crocheters on Super Bowl Sunday! The event is COMPLETELY FREE and open to ALL SKILL LEVELS.

Kick-off the event early Sunday morning, participants will receive clues and instructions for a secret knitting or crocheting project that will be revealed just before the start of the game.

Whether you're a die-hard football fan or just looking for something to do during the commercials, this event is the perfect way to mix crafting and athletic competition. Don't miss out on the fun, register now and get the printable supply list for the 2024 projects!

⭐️ The free content for this event will remain up on the blog until Feb. 28, 2024

Bright green background with a cartoon bird wearing a jersey, promoting a Game Day Mystery Make-Along event for knitting and

History of the Game Day Mystery Make-Along- 🎉 A Tradition of Yarny Fun! 🎉

Did you know this is our seventh annual Game Day Mystery Make-Along? Since 2018, we've been mixing the excitement of game day with the joy of crafting. Each year gets bigger and better, with more crafters joining in and amazing projects to make. Don't miss out on being part of this awesome tradition!

📚 Need More Info about Game Day? 📚

Curious about what we've made in the past or need more details? Head over to our Game Day Mystery Make-Along page on MarlyBird.com. You'll find all the info you need and get a peek at our past projects.

Gradient yarn in shades of blue and teal, displayed for a knitting or crochet project. Soft, smooth texture.

🌟 Free Fun for Everyone! 🌟

This event is TOTALLY FREE make-along event and perfect for knitters and crocheters of all skill levels. Whether you're a total newbie or a yarn master, there's something exciting for you. And hey, if sports aren't your thing, no worries! You'll have a blast crafting with friends from all over, right from the comfort of your home.

Gradient yarn in shades of blue and teal, displayed for a knitting or crochet project. Soft, smooth texture.

🧶 What's the Mystery? 🕵️‍♀️

Get your knitting needles and crochet hooks ready for a thrilling adventure! We're not telling you what you'll be making – that's the mystery! Every hour, beginning at 8 am EST, you'll get a new clue with instructions for a super-secret project designed by Marly Bird and Robyn Chachula. The final reveal will be just in time for the Super Bowl, so you can show off your new creation!

📺 Need a Helping Hand? 📺

We've got you covered with video tutorials for each part of the project that needs a bit more hands on instruction. Find them linked in your clue instructions and the first set of videos will be on the Marly Bird YouTube Channel. These videos are a game-changer for your crafting adventure!

Gradient yarn in shades of blue and teal, displayed for a knitting or crochet project. Soft, smooth texture.
A cartoon character on a couch enjoying snacks like chips and a sandwich while cheerfully holding knitting supplies.

🎈 Mark Your Calendars! 🎈

February 11, 2024, is the day! Join us online at MarlyBird.com from 8 am EST to 6 pm EST for a day of mystery, creativity, and tons of fun. We can't wait to see you there!

Let's get those yarns rolling and needles clicking! See you at the Game Day Mystery Make-Along with Marly Bird! 🧶🌟🏈

Gradient yarn in shades of blue and teal, displayed for a knitting or crochet project. Soft, smooth texture.
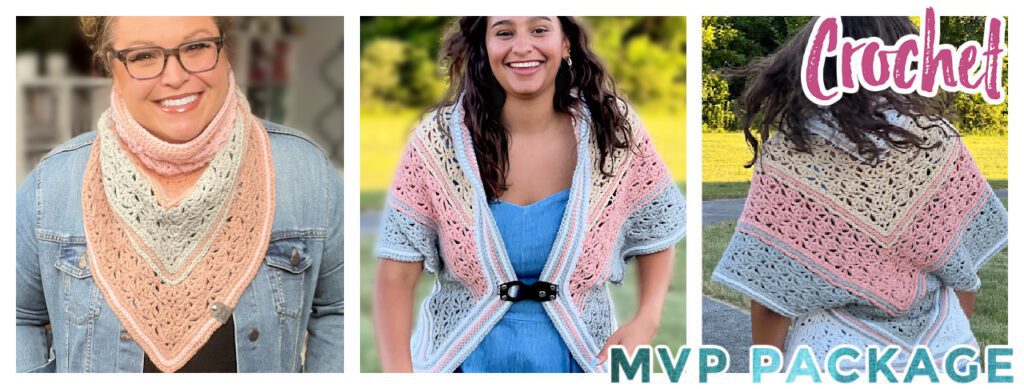
Three images showcasing a crochet shawl. Left: A person wearing the shawl draped as a cowl. Center: Styling it with a belt for game day. Right: Back view of the shawl. Text reads "Crochet MVP Package - Make-Along 2024. -Marly Bird
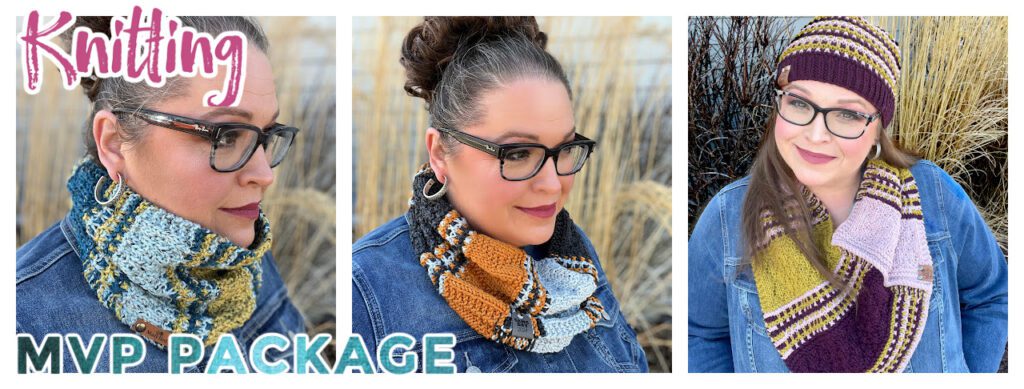
Three images showcase a person wearing knitted accessories: a light blue and brown scarf, a multicolored scarf with black accents, and a purple and mustard set with hat and scarf. Perfect for your game day look, this "Knitting MVP Package" makes for an exciting 2024 make-along project. -Marly Bird
Gradient yarn in shades of blue and teal, displayed for a knitting or crochet project. Soft, smooth texture.

🏆 MVP Upgrade – Get the VIP Treatment! 🏆

Want to elevate your Game Day crafting experience? Join the MVP ranks and enjoy having the pattern and videos all in one place! Our MVP Upgrade, housed in the Marly Bird House, is similar to our beloved Marly Bird First Fall Make-Along and the Silver Platter Experience. It's a fan favorite, and we know you'll love it too!

Individual Patterns in Etsy Store
Knit VIP
Crochet VIP
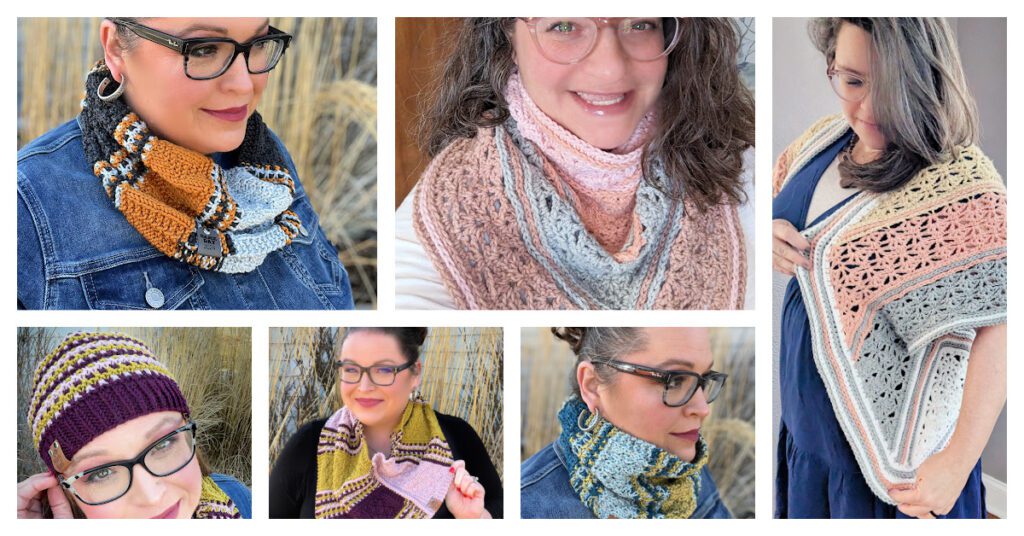
collage of 5 patterns by Marly Bird and Robyn Chachula from the Game Day Mystery Make-Along 2024. These 4 knitting patterns and 2 crochet patterns were all included in the MVP Package in the Marl Bird House. The designs include, 2 bandana cowls. 2 cowls, a hat, and a large shrug.
These are all the designs included in the MVP Packages!
Gradient yarn in shades of blue and teal, displayed for a knitting or crochet project. Soft, smooth texture.

Promotional image for 'Game Day Mystery Make-Along 2024.' It features a cartoon avatar of a smiling woman with brown hair in a bun, wearing glasses, a black jacket, and jeans, playfully running with a football in one hand. The vibrant yellow text 'GAME DAY MYSTERY MAKE-ALONG' dominates the center, with the year '2024' below in bold. The background is a textured green, resembling a football field.

Game Day Supply List

This is the supply list for the 2024 Game Day Mystery Make-Along event for both the knitting team and the crochet team.

We have chosen a yarn from the WeCrochet / Knit Picks yarn collection. 

Their yarn is very lovely and available to everybody. We really like the colors and the way it feels in our hands!

🔗 KnitPicks:bit.ly/KnitPicks-MBird

🔗 WeCrochet:bit.ly/WeCrochet-MBird

We know not everybody wants to purchase new yarn for a mystery project. But I will tell you this project was designed with a light worsted weight yarn. If you choose an alternative yarn, please choose one that is the same weight. 

To get a printable pdf of the both supply list, make sure you register for this event and the download will be sent to you.

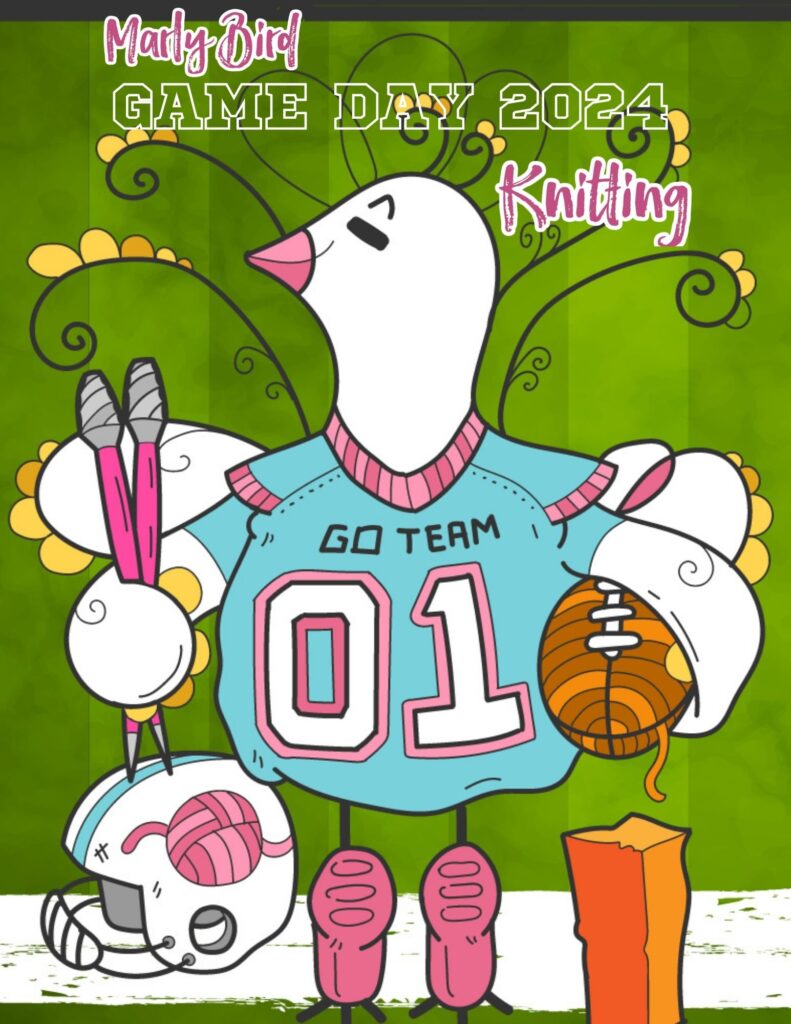
Cartoon bird in a pink sports jersey holding knitting needles and yarn, surrounded by flowers and football gear.

Knitting Supply List

Yarn: light worsted weight yarn, 3 colors.

  • Sample made with WeCrochet, Twill Worsted Weight,(100% Merino Wool, 149 yds / 136 m, 3.53 oz/ 100 g, CYCA#4 worsted): Any 3 Colors – 1 hank each.

Knitting Needles: Size 9 (5.5 mm)– 24”/60cm Or any size to obtain gauge. Highly recommend needles with a pointy tip.

Notions:

  • Stitch Markers
  • Tapestry Needle
  • Tape Measure
  • Scissors
  • Blocking Boards
  • Blocking Pins/Combs
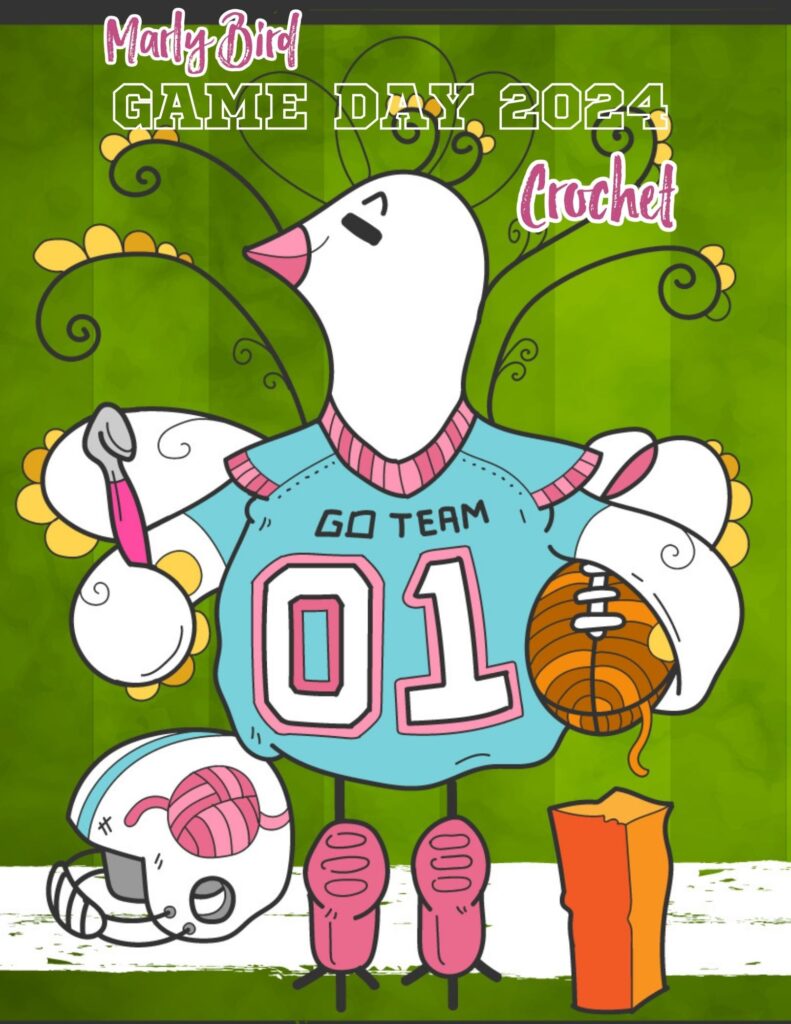
Cartoon bird in a blue sports jersey, holding yarn and a ball, with football elements and a green background.

Crochet Supply List

Yarn: light worsted weight yarn, 4 colors.

  • Sample made with WeCrochet, Heatherly Worsted Weight,(80% Acrylic, 20% Merino Wool, 218 yds / 199 m, 3.53 oz/ 100 g, CYCA#4 worsted): Any 4 Colors – 1 hank each; or Any 2 Colors – 2 hank each.

Hook: Size I/9 (5.5 mm)–Or any size to obtain gauge.

Notions:

  • Stitch Markers
  • Tapestry Needle
  • Tape Measure
  • Scissors
  • Blocking Boards
  • Blocking Pins/Combs
Gradient yarn in shades of blue and teal, displayed for a knitting or crochet project. Soft, smooth texture.

Frequently Asked Questions

What exactly is the Game Day Mystery Make-Along?

So here's the thing… it's a completely FREE event for knitters and crocheters that happens on Super Bowl Sunday! You get clues and instructions for a secret project throughout the day, and the final project is revealed just before the game starts.

Is this event really free?

Yes! It's totally FREE and open to EVERYONE, no matter your skill level. Whether you're just learning or you've been crafting for ages, you can join in the fun!

When does the free content for the Game Day Make-Along stay available?

Honestly… the free content for this year's event will be up on the blog until February 28, 2024. So, you've got plenty of time to check it out and make the project.

I'm a bit new to crochet, will I be able to follow along?

Absolutely! The event is designed for all skill levels, and they even provide video tutorials for any tricky parts. You can find them linked in the clue instructions and on the Marly Bird YouTube Channel.

Can I use yarn I already have in my stash?

You sure can! While the project is designed with a light worsted weight yarn, you can definitely use what you have on hand as long as it's the same weight. Just make sure to check the supply list for the recommended yarn weights.

Filed Under: Crochet, Knitting, Make-Alongs, Marly Bird Premium Patterns, Uncategorized

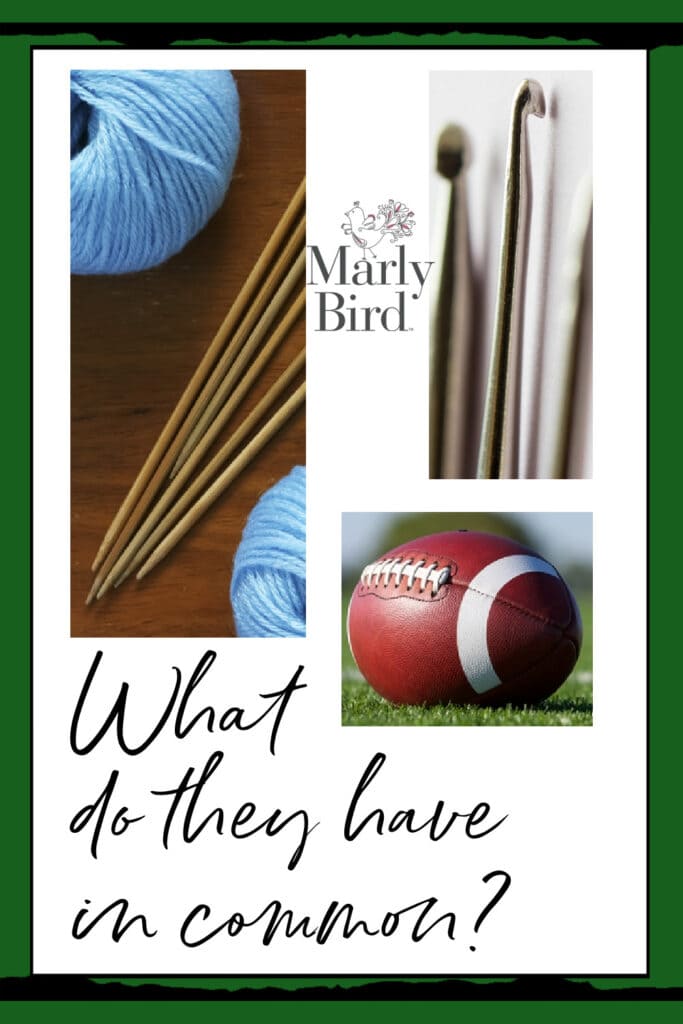
Knitting and Crochet and Football? Oh, My!

January 26, 2024 By Marly Bird 1 Comment

Knitting and crochet and football

Who in their right mind would put together knitting and crochet and football? A match made in Heaven? You wouldn't think so, but they go together pretty well. Maybe not as well as peanut butter and jelly, but these diverse activities have a lot in common.

Exactly how do knitting and crochet, and football compare?

Let me count the ways…

Any time, any place, anywhere

Isn't it true you can knit or crochet any time of day or night as long as you have light enough to see? And you don't have to be sitting in a comfy chair in front of the tv. Location doesn't matter. I just proved that to you when I was crocheting the Riverside Crochet Scarf while standing in lines at Disney World. (You might want to check it out if you haven't already.)

I could just as easily have been making it while watching a football game. By the way, did you see the post about the Game Day Mystery Makealong?

Not only can you knit or crochet at all hours, but you can play football pretty much any time too (as long as there are floodlights or street lamps), and anywhere there's grass, sand, or enough wide open space.

Game Day mystery make-along

Knit, crochet, and football tools and terminology

All three disciplines use tools and terminology specific to their needs. You can't knit with a crochet hook, and you can't crochet with knitting needles, or can you…I'll have to think about that one… Anyway, knit and crochet instructions aren't interchangeable. Each has a different set of abbreviations and even styles of pattern writing.

Similarly, football requires specific tools, if you can call them tools, such as shoulder pads, helmets, and cleats, as well as that spiked ball. Can we call it a double-point ball? I don't know. But there's a whole different language to learn about football, too, not to mention each team has alternative names for similar plays. If they didn't do that, the other team would know exactly what was happening as soon as the quarterback yelled instructions. Makes sense, huh?

Planning knitting, crochet details, and football focus

When you start a project, you must have a detailed plan.

  • Which pattern will you use?
  • What yarn does it call for?
  • Which color(s) do you like?
  • What about the order of colors if there are more than two?

And you most definitely need to focus, especially if it's a detailed lace or colorwork pattern.

Of course, football has the same need for planning.

  • Which plays might confuse the opponent?
  • What should we do first?
  • Then, what?

Undoubtedly, each player has an intense focus on what they have to do and the desired outcome. It all makes sense for knitting, crocheting, and football, right?

Practice makes perfect…kind of…

You don't get better at anything without practice. This goes for anything that takes a particular skill. Crafting takes skills that you only improve through repetition. The more you knit or crochet, the better you get, the more techniques you learn, and so on. But let's not aim for perfection; nobody ever gets all the way there, so it's better to aim for the best you can be.

Once you have these mad crafting skills, you can branch out and adapt, such as changing the colorway, look, stitch pattern, or fit.

Naturally, the same goes for football. Through constant practice and repetition, players learn the plays. They see how these plays fit into the game and can adapt what they do on the field to work with what they see happening as plays unfold. It's the constant repetition that helps those moves happen naturally when needed.

Let's talk about the competition

Are you a competitive knitter or crocheter? Are you determined to finish your surprise section first so you can try to win a prize? I know there are a lot of you out there who want to win! It's fun, right? There's nothing like winning a prize to make your effort worth it.

The Superbowl holds the biggest prize in all of football on game day. Yes, individual players are recognized and invited to play in other bowls across the country. But having your team win the Superbowl is the ultimate football prize.

Will you win a prize on Game Day? If you haven't already looked, check out the blog post, so you're ready to compete. Get ready to combine knitting, crochet, and football for an excellent Game Day Experience. There's tons of fun and prizes planned, so make sure you're ready for kickoff.

It's a social, togetherness thing

Isn't it, though? Are you a member of a knitting or crochet group or community? No? Maybe now's the time to find one. If you're not a Marly Bird Facebook Group member, click on over there and join now! You'll find out about patterns, contests, techniques, stitch patterns, YouTube videos, and a bundle of other stuff. Don't miss out on all the fun!

Oh, yes…football is a social thing too. Just think how many fans are in the stands at each game. And what about those at home watching it all on tv? I wonder how many are knitting or crocheting as they watch football? I will be – how about you?

Not only are knitting, crocheting, and football all social activities, but they're open to all ages and abilities. There's no lower or upper age limit for those who can enjoy any or all of these skills. Kids start crafting and playing football early; these skills last a lifetime. Not to mention what you learn while picking up any of these practices are patience, determination, and self-control, only to name a few. Isn't that awesome?

What do knitting, crochet, & football have in common?

Get ready to knit, crochet, and watch football

See how many things they all have in common? I know; I was surprised, too, when I thought about it.

So, like I said, go join the Marly Bird Facebook Group, check out the Game Day blog post, order your supplies now to be sure they arrive in time and get ready to join in the Game Day fun and competition.

Frequently Asked Questions

Can I really knit or crochet while watching football?

Honestly, yes! You can totally knit or crochet any time of day as long as you have enough light. It doesn't matter if you're comfy on the couch or, like me, standing in line at Disney World… or even watching a football game!

Are knitting and crochet tools and terms the same as football?

Oh, goodness no! You can't use a crochet hook for knitting or vice versa… and football has its own whole set of gear and lingo. Each has its own special language and tools, kind of like how teams have secret names for plays.

Do I need a plan for knitting, crocheting, and football?

You bet! Just like planning which plays might trick the other team, you need to pick your pattern, yarn, and colors for your craft projects. Intense focus is key for both, whether it's a detailed stitch pattern or making sure you're ready for kickoff!

How important is practice in crafting and football?

It's super important! You get better at anything with practice, right? The more you knit or crochet, the more skills you learn. Football players practice constantly too, learning plays so they can adapt on the field. Repetition makes those moves natural!

Is it fun to be competitive in crafting and football?

Yes! Some crafters love to finish a project first and win a prize, just like football players aim for the ultimate prize… the Superbowl! Joining the Game Day Mystery Makealong is a great way to combine your love for crafting and football and snag some fun prizes.

Filed Under: Crochet, Dibble Dabble Inspiration, Knitting

Take a Look Knit Fingerless Mittens Free Pattern

December 22, 2023 By Marly Bird 1 Comment

Check this out! The ‘Take a Look' Knit Fingerless Mittens pattern is FREE on the Marly Bird website! Fingerless mittens are a popular accessory for keeping hands warm and stylish during the colder months. With the rise of technology, it's important to have a pair of mittens that still allow you to use your phone without having to take them off.

That's where the ‘Take a Look' Knit Fingerless Mittens come in! This free pattern by Marly Bird is the perfect combination of fashion and function, making them a must-have for any knitter.

If you like these knit fingerless mittens then you will love the matching hat pattern. Get the Take a Look Cable Knit Hat pattern, or go an entirely different direction and check the Valorous Knit Hat and Cowl set!

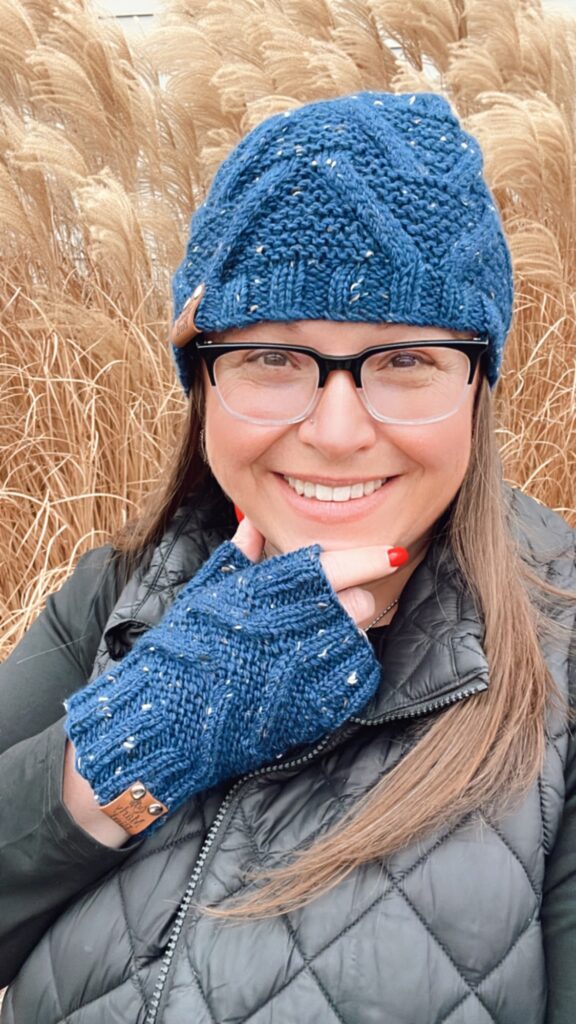
Marly Bird smiling, wearing the 'Take a Look' knit cabled hat and matching fingerless mittens in a rich blue tweed. The hat is topped with a fluffy blue pompom, and the mittens feature intricate cable patterns. She is posing against a backdrop of tall, golden reed grass.

Affiliate Disclosure: This post contains affiliate links. To learn more please visit my privacy policy here💖

These mittens, featuring the luxurious KnitPicks Woodland Tweed yarn, are a testament to cozy craftsmanship.

Beyond their comfort, these knit fingerless mittens offer a fashionable statement with their ribbed cuffs and detailed cabling. They're an essential accessory for anyone who appreciates the fusion of practicality and elegance in their knitting projects.

But that's not all! This is your lucky day for those who like to wear matching hand warmers and hats! These mitts make a complete set when you pair them up with the Take a Look Knit Cabled Hat (only available in here). It's a knit cabled match!

The pattern includes full written instructions and complete charts for both the left and right hand, plus the thumb. And there's a video tutorial to guide you through each step (coming soon; I am finishing it up now).

So, don't miss out on this opportunity to knit your very own pair of ‘Take a Look' knit fingerless mittens and match them with the cozy cabled hat!

Happy Knitting!

‘Take A Look' At This Knit Fingerless Mittens – Free Knitting Pattern

Designed by Marly Bird

SKILL LEVEL

Intermediate

MEASUREMENTS

To Fit Sizes

Adult One Size Fits Most 

Finished Measurements

Slightly stretched 8” circumference [ 20 cm] and length 8” [20 cm] long. 

Gauge 

20 sts and 26.5 rounds = 4″ [10 cm] in Cable Stitch Pattern.

MATERIALS

Yarn 

KnitPicks Woodland Tweed  (80% Merino Wool, 15% Baby Alpaca, 5% Viscose; 180 yds / 165 m, 3½ oz/ 100 g, CYCA# 4 aran/heavy worsted) color used in sample: Plunge Pool Heather – 1 skein

Knitting Needles

US 8 [5 mm] set of 5 double pointed needles, or size required for gauge.

Notions 

Stitch Marker

Cable Needle

Scrap Yarn to Hold Stitches

Tapestry Needle

ABBREVIATIONS

Dec – Decrease

K –  Knit.

P – Purl.

M1 – Make One Increase.

3/1 RC – 3/1 RC.

3/1 LC – 3/1 LC.

P2tog – Purl 2 together.

P2tog tbl – Purl 2 together through back loop.  

St(s) – Stitches

SPECIAL STITCHES

M1 (Make 1 Increase): With tip of left-hand needle, pick up the horizontal strand between stitches from front to back. Knit this strand through the back leg, twisting it into a loop in the process – 1 st increased.

CABLE STITCHES 

3/1 RC (Three over One Right Cable): slip 1 stitch from left hand needle to cable needle and hold to back, knit 3 stitches from left hand needle, knit 1 stitch from cable needle.  

3/1 LC (Three over One Left Cable): slip 3 stitches from left hand needle to cable needle and hold to back, knit 1 stitch from left hand needle, knit 3 stitch from cable needle. 

NOTES

  • Mitts are worked in the round from cuff to fingers.
  • Thumb gusset instructions are specific to left and right hand.
  • Charts are given for both the full left hand and full right hand. The chart given for the thumb works for both hands and is represented with the diamond symbol on the charts.
  • Garter stitch is worked between the cables.

VIDEO TUTORIALS For Knit Fingerless Mittens

  • No Cuss Cast On to Double Pointed Needles  https://youtu.be/0d6i5bRL52A?si=yV8sSJhMydNvAe1h 
  • Perfect Ribbing https://youtu.be/ByLQC3s36mc?si=xzCmqw44e8DPPkiP 
  • How to cable without a cable needle https://youtu.be/d0tJvpTc1O8 
  • How to add a lifeline https://youtu.be/FiqYUE_aHAw?si=Z89qkIhrAw3N-s3P 
  • Bury in Ends https://youtu.be/8_NBGUKjO-E?si=KpsElAqllq5-htqg 

GROW

To Unlock Exclusive Subscriber Content click the Box below and join for free by simply adding your email and creating a password! If you are having troubles, clear your cache or reset your password or login to the Grow Publisher Portal.

>> Learn More About Grow Here <<

I'm thrilled to share this amazing pattern with you, many patterns on my blog are absolutely free! I kindly request that you don't copy and paste or distribute this pattern. Prefer an ad-free experience? Buy a digital PDF pattern for a small fee from one of my online stores for a seamless crafting journey. 

I appreciate your support and readership. You are the reason I can keep doing what I love and sharing it with others. So, thank you from the bottom of my yarn-loving heart! Disclosure: This post contains affiliate links, meaning I get a commission if you decide to make a purchase through my links at no cost to you.

Take a Look Cabled Knit Fingerless Mittens Written Instructions

Wrist Cuff (both)

Using the No Cuss Cast-on, cast on 40 stitches.

Rounds 1-14: [k2, p2] 10 times — 40 stitches.

Round 15 (increase round): [k2, p2] 5 times, [M1, k] 2 times, k4, M1, k11, M1, k, p2 — 44

stitches.

Left Thumb Gusset

Round 16 (thumb gusset set-up): [k2, p2] 4 times, pm, k2, pm, p3, k3, p15, k3, p2

Round 17 (thumb gusset increase): [k2, p2] 4 times, slm, M1, k2, M1, slm, p2, k, 3/1 LC,

k13, 3/1 RC, k, p — 4 stitches between thumb gusset markers.

Round 18: [k2, p2] 4 times, slm, p1, k2, p1, slm, p4, k3, p13, k3, p3.

Round 19 (thumb gusset increase): [k2, p2] 4 times, slm, M1, p1, k2, p1, M1, slm, p2, k2, 

3/1 LC, k11, 3/1 RC, k2, p — 6 stitches between thumb gusset markers.

Round 20: [k2, p2] 4 times, slm, p2, k2, p2, slm, p5, k3, p11, k3, p4.

Round 21 (thumb gusset increase): [k2, p2] 4 times, slm, M1, p2, k2, p2, M1, slm, p2, k3,

3/1 LC, k9, 3/1 RC, k3, p — 8 stitches between thumb gusset markers.

Round 22: [k2, p2] 4 times, slm, k1, p2, k2, p2, k1, slm, p6, k3, p9, k3, p5.

Round 23 (thumb gusset increase): [k2, p2] 4 times, slm, M1, k1, p2, k2, p2, k1, M1, slm, 

p2, k4, 3/1 LC, k7, 3/1 RC, k4, p — 10 stitches between thumb gusset markers.

Round 24: [k2, p2] 4 times, slm, [k2, p2] 2 times, k2, slm, p6, [p, k3, p6] 2 times.

Round 25 (thumb gusset increase): [k2, p2] 4 times, slm, M1, [k2, p2] 2 times, k2, M1, 

slm, p2, k5, 3/1 LC, k5, 3/1 RC, k5, p — 12 stitches between thumb gusset markers.

Round 26: [k2, p2] 4 times, slm, p1, [k2, p2] 2 times, k2, p1, slm, p8, [k3, p5] 2 times, p2.

Round 27 (thumb gusset increase): [k2, p2] 4 times, slm, M1, p1, [k2, p2] 2 times, k2, p1, 

M1, slm, p2, k6, 3/1 LC, k3, 3/1 RC, k6, p — 14 stitches between thumb gusset markers.

Round 28: [k2, p2] 4 times, slm, p2, [k2, p2] 3 times, slm, p8, [p, k3, p2] 2 times, p6.

Round 29: [k2, p2] 4 times, remove marker, slip 14 stitches to holder or scrap yarn, 

remover marker, cast on 2, p2, k7, 3/1 LC, k, 3/1 RC, k7, p — 44 stitches.

Continue to the instructions for the body. 

Right Thumb Gusset

Round 16 (thumb gusset set-up): Pm, k2, pm, [p2, k2] 4 times, p3, k3, p15, k3, p2.

Round 17 (thumb gusset increase): Slm, M1, k2, M1, slm, [p2, k2] 4 times, p2, k, 3/1 LC, k13, 3/1 RC, k, p — 4 stitches between thumb gusset markers.

Round 18: Slm, p1, k2, p1, slm, [p2, k2] 4 times, p4, k3, p13, k3, p3.

Round 19 (thumb gusset increase): Slm, M1, p1, k2, p1, M1, slm, [p2, k2] 4 times, p2, k2, 3/1 LC, k11, 3/1 RC, k2, p — 6 stitches between thumb gusset markers.

Round 20: slm, p2, k2, p2, slm, [p2, k2] 4 times, p5, k3, p11, k3, p4.

Round 21 (thumb gusset increase): slm, M1, p2, k2, p2, M1, slm, [p2, k2] 4 times, p2, k3, 3/1 LC, k9, 3/1 RC, k3, p — 8 stitches between thumb gusset markers.

Round 22: Slm, k1, p2, k2, p2, k1, slm, [p2, k2] 4 times, p6, k3, p9, k3, p5.

Round 23 (thumb gusset increase): Slm, M1, k1, p2, k2, p2, k1, M1, slm, [p2, k2] 4 times, p2, k4, 3/1 LC, k7, 3/1 RC, k4, p — 10 stitches between thumb gusset markers.

Round 24: Slm, [k2, p2] 2 times, k2, slm, [p2, k2] 4 times, p6, [p, k3, p6] 2 times.

Round 25 (thumb gusset increase): Slm, M1, [k2, p2] 2 times, k2, M1, slm, [p2, k2] 4 times, p2, k5, 3/1 LC, k5, 3/1 RC, k5, p — 12 stitches between thumb gusset markers.

Round 26: Slm, p1, [k2, p2] 2 times, k2, p1, slm, [p2, k2] 4 times, p8, [k3, p5] 2 times, p2.

Round 27 (thumb gusset increase): Slm, M1, p1, [k2, p2] 2 times, k2, p1, M1, slm, [p2, k2] 4 times, p2, k6, 3/1 LC, k3, 3/1 RC, k6, p — 14 stitches between thumb gusset markers.

Round 28: Slm, p2, [k2, p2] 3 times, slm, [p2, k2] 4 times, p8, [p, k3, p2] 2 times, p6.

Round 29: Remove marker, slip 14 stitches to holder or scrap yarn, remover marker, cast on 2, [p2, k2] 4 times, p2, k7, 3/1 LC, k, 3/1 RC, k7, p — 44 stitches.

Continue to the instructions for the body. 

Body (both)

Round 30: [k2, p2] 5 times, [p, k3, p4, k3] 2 times, p2.

Round 31: [k2, p2] 5 times, k, 3/1 LC, k13, 3/1 RC, k, p.

Round 32: [k2, p2] 5 times, p2, k3, p13, k3, p3.

Round 33: [k2, p2] 5 times, k2, 3/1 LC, k11, 3/1 RC, k2, p.

Round 34: [k2, p2] 5 times, p3, k3, p11, k3, p4.

Round 35: [k2, p2] 5 times, k3, 3/1 LC, k9, 3/1 RC, k3, p.

Round 36: [k2, p2] 5 times, p4, k3, p9, k3, p5.

Round 37: [k2, p2] 5 times, k4, 3/1 LC, k7, 3/1 RC, k4, p.

Round 38: [k2, p2] 5 times, p4, [p, k3, p6] 2 times.

Round 39: [k2, p2] 5 times, k5, 3/1 LC, k5, 3/1 RC, k5, p.

Round 40: [k2, p2] 5 times, p6, [k3, p5] 2 times, p2.

Round 41: [k2, p2] 5 times, k6, 3/1 LC, k3, 3/1 RC, k6, p.

Round 42: [k2, p2] 5 times, p6, [p, k3, p2] 2 times, p6.

Round 43: [k2, p2] 5 times, k7, 3/1 LC, k, 3/1 RC, k7, p.

Cuff at Fingers (both)

Round 44 (decrease round): [k2, p2] 5 times, M1, k, p2, k2, p, p2tog tbl, k2, p2tog tbl, p, k2, p2tog2, k2, p2tog, p (40 stitches).

Round 45: [k2, p2] 7 times, k2, p2, k2, p2, k2, p2.

Round 46: [k2, p2] 7 times, k2, p2, k2, p2, k2, p2.

Round 47: [k2, p2] 7 times, k2, p2, k2, p2, k2, p2.

Round 48: [k2, p2] 7 times, k2, p2, k2, p2, k2, p2.

Round 49: [k2, p2] 7 times, k2, p2, k2, p2, k2, p2.

Round 50: [k2, p2] 7 times, k2, p2, k2, p2, k2, p2.

Round 51: [k2, p2] 7 times, k2, p2, k2, p2, k2, p2.

Round 52: [k2, p2] 7 times, k2, p2, k2, p2, k2, p2.

Round 53: [k2, p2] 7 times, k2, p2, k2, p2, k2, p2.

Bind off in pattern. 

1st Finishing

Weave in all loose ends.

Thumbs (both)

Divide the 14 sts from holder onto 3 double-pointed needles.

Round 1: Pick up and knit 2 st at cast on of round 29, [p2, k2] 3 times, p2 — 16 stitches. 

Redistribute stitches if needed.

Join round and mark first st.

Work evenly in established 2×2 ribbing pattern until Thumb measures 1″ [2.54 cm] in length, or to desired length.

Bind off in pattern

2nd Finishing

Fasten tail securely to wrong side of knit fingerless mittens.

Use tail from thumb to close any gap or hole at the fingerless mitten join with the Duplicate Stitch technique.

Weave in any remaining loose ends.

Want more patterns with knit cables? Check out these patterns below…

Honeycomb Cable Hat

Dual Cable Knit Boot Toppers

Cable Knit Cardigans

Frequently Asked Questions

Are these mittens easy to make?

Honestly… the pattern is listed as Intermediate, so it might be a bit challenging if you're brand new to knitting. But with the detailed instructions and charts, plus a video tutorial coming soon, you'll totally be able to tackle them! They use some fun cable stitches, which really make them special.

Can I make these mittens to match a hat?

Yes! So glad you asked… This pattern is designed to be a perfect match for the ‘Take a Look Cable Knit Hat'. You can find that pattern linked in the description, and together they make such a cozy and stylish set!

What kind of yarn should I use?

So here's the thing… the sample pair uses KnitPicks Woodland Tweed yarn, which is a lovely aran/heavy worsted weight. It's made with merino wool, baby alpaca, and viscose, giving it a beautiful drape and warmth. Just make sure whatever yarn you choose is also a CYCA #4 weight to get the right gauge.

How long will it take to knit these mittens?

Oh goodness, that really depends on your knitting speed! The pattern itself is pretty straightforward once you get the hang of the cable pattern. Since it's worked in the round, it tends to go a bit faster than flat knitting. Just take your time and enjoy the process!

What if I don't have double pointed needles?

No worries at all! The pattern calls for US size 8 (5mm) double pointed needles, but you can absolutely use whatever needles you have that help you achieve the correct gauge. Some folks prefer using the magic loop method with circular needles for smaller items like mittens.

Filed Under: Free Patterns, Knitting, Our Free Patterns, Pattern, Uncategorized Tagged With: badge-new-pattern

Color-Pooling Yarn For Crochet Granny Squares! 

December 14, 2023 By Marly Bird Leave a Comment

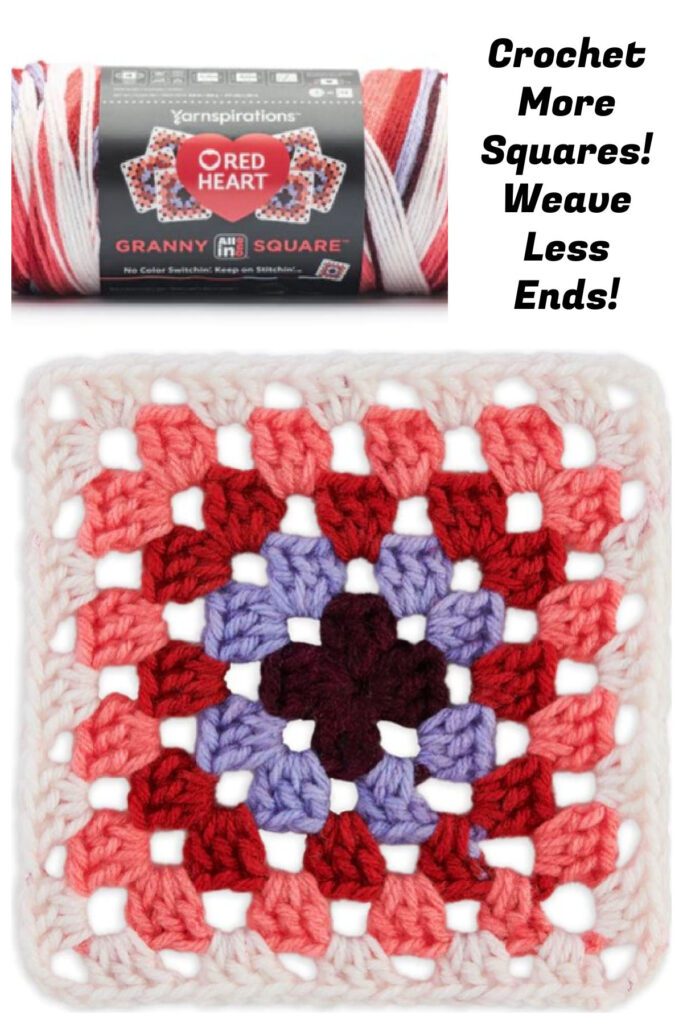
If you’re a crocheter who loves making granny squares but hates weaving in ends, your life just got SO much easier! Red Heart is your life saver with their brand new yarn Red Heart All-in-one Granny Squares. It’s truly a color-pooling yarn for crochet granny squares.

Color-pooling for crochet granny squares: Red Heart All-in-one Granny Squares Yarn - Marly Bird

Let me explain. Remember when you had to change colors for every round of a crochet granny square? 

Wait…you’re doing that now?

Let me tell you…those days are over!

Red Heart All-in-one Granny Squares Yarn 

It’s a new yarn designed specifically for crocheting granny squares. Each skein is designed with 5 colors that look great together in the granny square format.

All you need to do is crochet at the gauge stated on the inside ball band and follow that pattern exactly. If you do, every one of the FOURTEEN granny squares you get from ONE ball will come out perfectly. 

And you’ll only have TWO ends to weave in!!! That cuts down your production time weaving in ends by 67%!!! 

BAM! 

You get to crochet more granny squares and weave in fewer ends than ever before!

It works just like color-pooling. If you haven’t seen color pooling before, check it out on this link. 

It’s genius! 

But this yarn is specifically color-pooling yarn for crochet granny squares.

It’ll save you time and stress, and you’ll be able to make more crochet granny square projects in way less time!

Granny Square Color Pooling

Here’s how it works:

  • The color lengths within the yarn are measured precisely to fit a specific gauge. 
  • Make a swatch to be certain you can get gauge consistently.
  • Stick to that gauge, and your squares will be perfect every time!
  • Then you only have 2 ends to weave in for each granny square.
  • Let the yarn do the work!

No more wrangling 5 colors!

No more color switching and loose stitches.

All the colors come from one ball of Red Heart All-in-one Granny Squares yarn, exactly when you need them.

If you struggle with gauge, this new yarn will help you become a better crocheter.

Seriously, it’s a Win-Win all round.

Let me emphasize: YOU MUST GET GAUGE!!!

Here's a few things you MUST KNOW:

  • Yarn pulls from the center of the skein.
  • The image on the ball band is how each square should look.
  • You work from the center out, so be sure to start with the correct color (as shown on the band).
  • Use ONLY the pattern on the inside of the ball band to ensure success!

Click over to Yarnspirations now for this new yarn. With 16 colorways available, there’s something for everyone! 

They even have free crochet patterns ready for you to try out this genius yarn. And it pairs perfectly with Red Heart Super Saver.

Check it out now! Red Heart All-in-one Granny Squares. It’s truly a color-pooling yarn for crochet granny squares!

See some FREE patterns for this awesome yarn!

Crochet Pack-a-Bunch Backpack

Granny’s Hug Scarf

Best In Dress Crochet Shift

Frequently Asked Questions

What's this new Red Heart yarn all about?

So here's the thing… Red Heart has a brand new yarn called All-in-one Granny Squares and it's a total game-changer for us granny square lovers! It's designed specifically to color-pool for crochet granny squares, meaning you get gorgeous color changes all on their own.

How many granny squares can I get from one ball of this yarn?

Honestly… you get FOURTEEN granny squares from just ONE ball of this yarn! How amazing is that?! It's designed so that each ball perfectly creates 14 squares, cutting down on your work AND your weaving time.

Do I really have to get gauge for this yarn to work?

Yes! You absolutely MUST get gauge… like, seriously. The color lengths in the yarn are precisely measured for a specific gauge, so making sure your swatch is spot on is key to those perfect squares. Stick to that gauge, and the yarn does all the magic for you!

What's the big deal about only weaving in two ends?

Oh my goodness, it's HUGE! Instead of weaving in tons of ends from changing colors, you only have TWO ends to weave in for each granny square. That's like a 67% reduction in weaving time… BAM! More crocheting, less frustration!

Where can I find this magical yarn?

You can totally find this new yarn over on Yarnspirations! They have 16 different colorways, so there's definitely one for everyone. Plus, they've got some free patterns ready for you to try out this awesome yarn!

Filed Under: Crochet, Planned Pooling Crochet, Product Reviews, Yarn Review

  • « Previous Page
  • 1
  • …
  • 14
  • 15
  • 16
  • 17
  • 18
  • …
  • 22
  • Next Page »

Let's Be Social

Join the Marly's Minions Facebook group to share, ask questions, or chat about all of your yarn related crafts!

Join the group
Cartoon of a smiling woman with brown hair in a bun, glasses, black jacket and green shirt, waving next to large "hi" text.

Quick Links

The Pattern Shop

Our Free Patterns

Blog

Marly Bird House

Learn to Knit & Crochet

About

Giveaway Terms and Privacy Notice

Find Us Everywhere

Join the Newsletter

YouTube Channel

Marly's Minions FB Group

Etsy Store

Ravelry Store


AN ELITE CAFEMEDIA HOME/DIY PUBLISHER

Information from your device can be used to personalize your ad experience. Do not sell or share my personal information.

Privacy Policy   Terms   Marly Bird Legal Documents Copyright © 2026