Search
Close
  • The Pattern Shop
  • Our Free Patterns
    • Browse All Our Free Patterns
    • Our Free Knitting Patterns
    • Our Free Crochet Patterns
  • Blog
    • All Blog Posts
    • All Free Patterns
    • Dibble Dabble Inspiration
    • Giveaways
    • Make-Alongs
    • Product Reviews
    • Roundups
    • Tips, Tricks, Techniques for Knitting and Crochet
Stylized bird with pink and gray swirling tail above elegant “Marly” text, logo for crochet accessories and home decor.
  • Marly Bird House
  • Learn to Knit & Crochet
    • Newbie? Start Here
    • Video Tutorials
    • Knitting Definitions
    • Crochet Definitions
    • Common Techniques
    • Size Charts for Knitting and Crochet Projects
  • About
×
  • The Pattern Shop
  • Free Patterns
  • Blog
  • Marly Bird House
  • Learn to Knit & Crochet
    • Newbie? Start Here
    • Video Tutorials
    • Knitting Definitions
    • Crochet Definitions
    • Common Techniques
    • Size Charts for Knitting and Crochet Projects
  • About
Stylized bird with pink and gray swirling tail above elegant “Marly” text, logo for crochet accessories and home decor.
Search
Close

New Patterns NOW Available in Ad-Free PDF! Check out The Pattern Shop

Easy Crochet Shell Stitch Blanket – Free Pattern + Video

October 23, 2025 By Marly Bird 2 Comments

The Easy Crochet Shell Stitch Blanket is a free pattern designed by Marly Bird, featuring a beginner-friendly stitch that creates beautiful wave texture. Available in multiple sizes from 30×36″ baby blanket to custom dimensions using the included stitch-multiple guide. Perfect for gifting, home decor, or your next cozy project.

⚡ Quick Answer:

The shell stitch is a beginner-friendly crochet stitch that creates a beautiful fan or scallop texture by grouping stitches together. This pattern teaches you how to make a 30×36″ blanket (or custom size) with clear written instructions and video tutorials.

Hey, BiCrafty Bestie! 💛 Let me tell you… there's something magical about watching a simple pattern transform into a stunning textured blanket right in your hands. The shell stitch has that effect — it looks way more complicated than it actually is, but once you get into the rhythm of it, you're basically on autopilot. And the best part? The finished fabric is absolutely gorgeous, perfect for gift-giving or keeping all the cozy vibes for yourself.
🧶 Affiliate Disclosure: This post contains affiliate links. If you purchase through them I may earn a small commission at no extra cost to you… and it helps support free patterns and content from my yarn-loving heart 💛 See my privacy policy here.
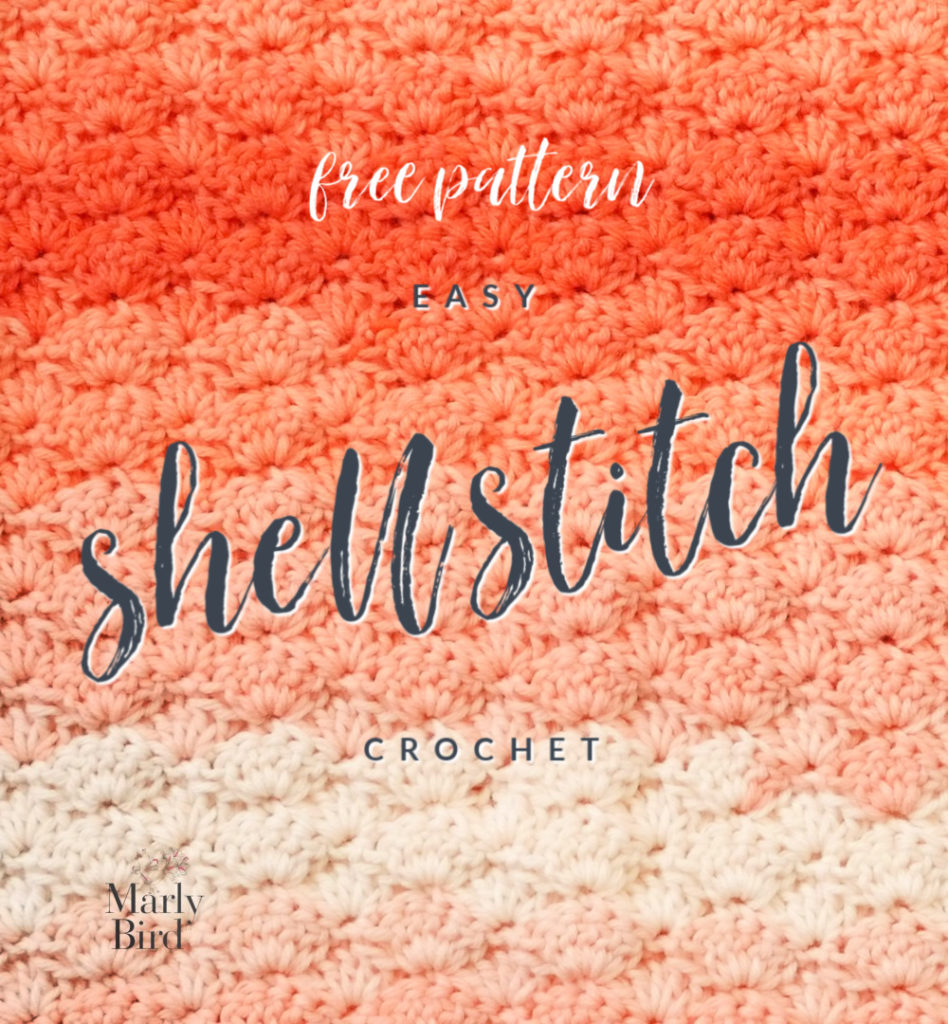
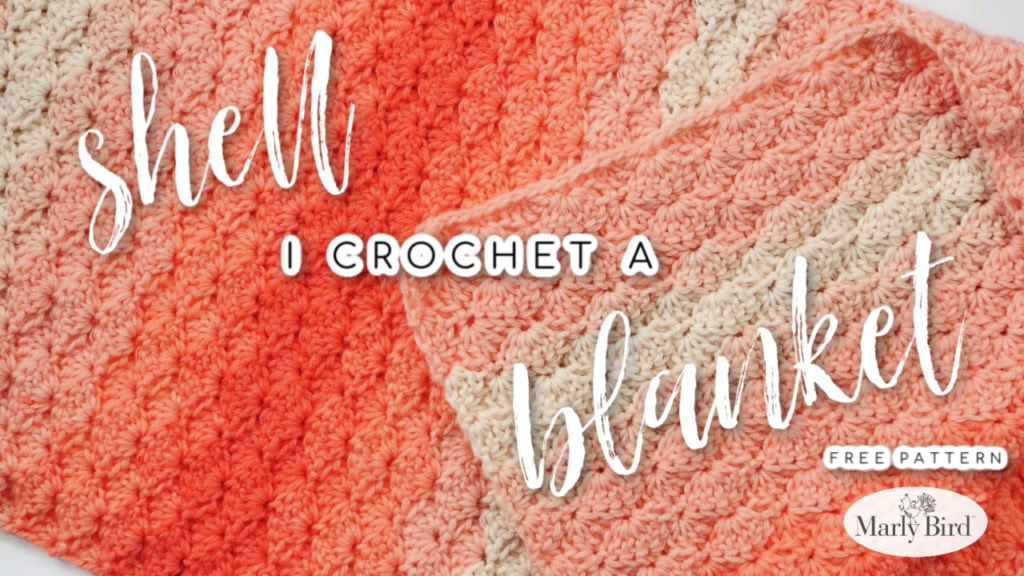
Crochet blanket featuring shell stitches in shades of orange and cream showing the beautiful wavy texture pattern throughout the fabric with a free pattern note.

⬇️ Jump to the pattern →

💖 Why You'll Love This Pattern

🧵 Rhythmic and meditative – Once you learn the two-row repeat, your hands just know what to do. It's the perfect project for Netflix nights or quiet mornings with coffee.

✨ Looks more complicated than it is – The wavy shell texture is absolutely stunning, but you're just combining basic stitches (single crochet and double crochet) in a simple pattern. Even beginners who've mastered the fundamentals can nail this one.

🎨 Works in any yarn weight and color – Solid colors show off the stitch texture beautifully. Ombré or self-striping yarns like the sample take it to another level with minimal effort. Change your yarn weight and you completely change the look.

This pattern is your pattern if you're looking for a beginner-friendly project that feels like a big accomplishment. You'll come away knowing: how shell stitches work, how to adjust patterns using stitch multiples, and exactly how to create custom blanket sizes for any person on your gift list.

📋 Quick Pattern Overview

⭐ Skill Level: Beginner (requires knowledge of single crochet and double crochet)
🧶 Yarn Weight: Worsted (#4)
📏 Finished Size: 30″ × 36″ (baby blanket shown) — fully customizable
🪡 Hook Size: US K / 6.5 mm
⏱ Time Estimate: 15–20 hours for baby size
📊 Stitch Multiple: 6 + 2

⭐ Love the Pattern but Want an Ad-Free PDF?

Get the distraction-free, ad-free PDF version with stitch charts, yardage calculations, and a printable gauge worksheet. Plus, you'll join my newsletter and get early access to new patterns, exclusive discounts, and tips delivered straight to your inbox.
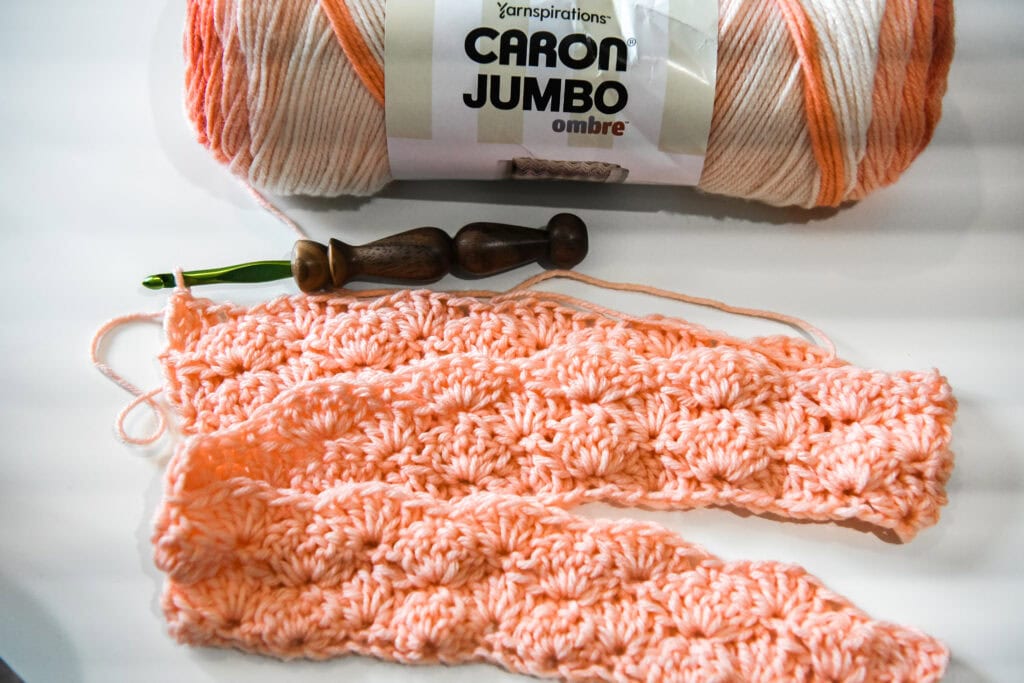
A partially crocheted pink and white shell stitch blanket with a green-handled crochet hook and a skein of Caron Jumbo ombre yarn on a white surface, showing the beautiful wavy shell stitch texture.

Join our Newsletter

Get Free Crochet & Knitting
Pattern Links & Coupons!

Hand-drawn bird with curling, detailed feathers and pink accents; cheerful pose showcases fine line and texture work.
>> Become An Insider <<
A woman with glasses and curly hair models a colorful crocheted scarf, showing textured stitches and vibrant yarn.
Buy on Etsy Buy on Shopify View on Ravelry

🔍 The Shell Stitch Explained

At its heart, the shell stitch is just a group of double crochets (usually 5) all worked into the same stitch or space. When you cluster them like that, they fan out into a beautiful shell or scallop shape. The pattern then skips a few stitches and adds single crochets as spacing, creating that classic wavy texture you see in blankets, shawls, and more.

What makes shell stitch so special is the contrast between the thick, textured shells and the simple stitches between them. The result is a fabric with great drape, visual interest, and that handmade luxury feel — even though the technique is totally approachable for beginners.

✨ Designer Tip: The beauty of the shell stitch really shines in solid or tonal colors where the stitch definition is clear. If you're using a multicolor yarn, the shells still look gorgeous, but the color play takes center stage. Both are stunning — just different aesthetics!

🧵 Yarn & Materials

Yarn (Worsted Weight / #4)

Sample yarn: Caron Jumbo Ombre in Salmon — 2 balls (approx. 594 yards total) for the 30×36″ baby blanket size

Yarn substitutes & alternatives:

  • KnitPicks Brava Worsted — soft, affordable acrylic; perfect for solid-color blankets
  • WeCrochet Brava Tweed — workhorse worsted with subtle tweed texture
  • Berroco Vintage Worsted — wool-blend option with great structure and drape
  • Lion Brand Heartland — thick, cozy acrylic that creates bold shells

Hook & Notions

  • Crochet Hook: US K / 6.5 mm — or size needed for desired drape (always swatch!)
  • Removable Stitch Markers — track your repeat rounds
  • Tapestry Needle — for weaving in ends
  • Blocking Wires — optional but recommended for straight edges
  • Eucalan Wool Wash — gentle care for your finished blanket
⭐️ Marly Bird Amazon Storefront ⭐️

Gauge & Measurements

Gauge: Each shell repeat = approximately 2″ wide with sample yarn and hook (10 repeats ≈ 20″ width). If you change yarn weight or hook size, swatch first to verify your gauge and desired drape.

📌 How to Make a Gauge Swatch (full guide)

📐 Custom Size Calculator

Want to make a different size? Use this fill-in formula:

  1. My shell repeat width = _____ inches
  2. Target blanket width = _____ inches
  3. Repeats needed = (target ÷ repeat width) = _____ ÷ _____ = _____ repeats
  4. Starting chain = (repeats × 6) + 2 = (_____ × 6) + 2 = _____ chains

Example: If 1 repeat = 2″ and you want 30″ wide → 30 ÷ 2 = 15 repeats → (15 × 6) + 2 = 92 chains

📊 Common Crochet Blanket Sizes (reference chart)

💖 Pattern: Easy Crochet Shell Stitch Blanket (30″ × 36″ baby blanket)

Skill Level

Beginner+ (requires single crochet and double crochet knowledge)

New to crochet? Start here →

Stitch Abbreviations

ch = chain | dc = double crochet | sc = single crochet | st(s) = stitch(es) | RS = right side | WS = wrong side | rep = repeat

Special Notes

  • Stitch multiple = 6 + 2
  • Work Row 1 into the back bump for a neat lower edge (optional but creates a polished look)
  • Ch 3 at the start of Row 3 counts as a dc. For a cleaner look, substitute a Stacked Double Crochet
  • If changing colors, do so after a full 2-row repeat so you can carry yarn up the side and hide floats neatly in an edging

Video Tutorials

Easy Crochet Shell Stitch — Full Video Tutorial (YouTube)

Also helpful: How to Crochet a Stacked Double Crochet (cleaner starting chain)

Foundation Chain

Ch a multiple of 6 + 2. (For the baby size shown: 92 chains)

Written Instructions

Row 1 (RS): Sc in 2nd ch from hook (back bump). *Skip 2 ch, 5 dc in next ch, skip 2 ch, sc in next ch; repeat from * to end.* Ch 3, turn.

Row 2 (WS): 2 dc in first sc, *skip 2 dc, sc in next dc, skip 2 dc, 5 dc in next sc; repeat from * to last 6 sts,* skip 2 dc, sc in next dc, skip 2 dc, 3 dc in last sc. Ch 1, turn.

Row 3 (RS): Sc in first dc, *skip 2 dc, 5 dc in next sc, skip 2 dc, sc in next dc; repeat from * to end.* Ch 3, turn.

Repeat Rows 2–3 to desired length, ending after a Row 3 for balanced edges. For the baby size: repeat until blanket measures approximately 36″ long.

Finishing: Fasten off and bury in ends. Block to measurements.

Need a clean join when changing yarn? (video tutorial)

Crochet blanket featuring an ombre shell stitch pattern in orange and cream, labeled as a free and easy pattern with beautiful wave texture visible throughout.

✂️ Blocking, Finishing & Care

Block to measurements using your preferred method: steam blocking, wet blocking, or spritz blocking. Blocking helps even out the stitch definition and gives your blanket that polished, professional finish. Full blocking guide →

Color & yarn care: Before gifting, give your blanket a gentle wash in Eucalan or similar wool wash to remove spinning oils, dust, and loft. Lay flat to dry. If your yarn is machine-washable, include care instructions with the gift so the recipient knows how to love their blanket for years.

🎨 Color & Design Ideas

One solid color: Creates a classic, timeless look that pairs with any decor. Shell texture shines beautifully.

Ombré or self-striping yarn: Like the sample Caron Jumbo Ombre, the color transitions happen automatically as you stitch. Zero planning required!

Stripes: Switch yarn colors after a full 2-row repeat. Carry unused yarn up the edge to hide floats in a later edging. Or use self-striping cake yarn for effortless color play.

🧶 More Crochet Blanket Patterns You'll Love

  • Complete Free Crochet Blanket Patterns Library
  • No Stopping Me Now Crochet Shawl
  • Chunky Crochet Blanket Patterns
  • Free Crochet Pillow Patterns
  • Elevate Your Blanket Skills: Monet Crochet Blanket
Favorite This Pattern on Ravelry - Button to add the Easy Crochet Shell Stitch pattern to your favorites on Ravelry

❓ Frequently Asked Questions

What is the crochet shell stitch?

The shell stitch is a group of stitches (usually 5 double crochets) all worked into the same stitch or space. When grouped like that, they fan out into a pretty shell or scallop shape. It looks way more complicated than it actually is. If you can double crochet and single crochet, you can make shell stitch. The pattern alternates shells with single crochets to create that classic wavy, textured fabric.

Is the shell stitch good for beginners?

It's perfect for beginners who have the basic stitches down! If you're comfortable with single crochet and double crochet, you're ready for shell stitch. The repeat is simple and rhythmic, so once you do a few rows, your hands just know what to do. It makes you feel like you leveled up because the finished fabric looks so beautiful — even though the technique itself is super approachable.

What can I make with the shell stitch?

So many things! Blankets are probably the most popular choice — a shell stitch blanket has gorgeous texture and drape. But it works beautifully for scarves, shawls, baby items, pillow covers, and even garments. The stitch creates a fabric with stretch and visual interest. It's especially pretty in solid or tonal colors where the shells really show.

How much yarn does shell stitch use compared to basic stitches?

Shell stitch uses a bit more yarn than single crochet or half double crochet because you're packing multiple stitches into the same space. The fabric is also more open and drapey. For a blanket, plan on about 10–15% more yarn than you'd need for the same size in basic stitches. Always buy a skein or two extra… especially if you're working with a dye lot you can't easily reorder.

Can I use any yarn weight for shell stitch?

Yes! Shell stitch works in any yarn weight, but the look changes dramatically. Worsted weight gives a classic, cozy fabric perfect for blankets and scarves. DK and sport weight create lighter, more delicate shells beautiful for shawls and baby items. Bulky yarn makes big, bold shells that work up fast. The stitch pattern stays the same… you just adjust your hook size to match the yarn. Experiment and see which weight you love most!

How do I resize this pattern to make a larger blanket?

Use the stitch-multiple formula in the materials section. Measure your gauge (repeat width), then calculate how many repeats you need for your target width. This pattern's stitch multiple of 6 + 2 makes resizing intuitive and forgiving — no complicated math!

What is the best blocking method for shell stitch blankets?

Wet blocking works beautifully for shell stitch because it opens up the shells and evens out the texture. Soak your blanket in cool water with wool wash, gently squeeze (don't wring!), lay flat on blocking wires or a blocking board, and let it air dry. The shells will bloom and the fabric will have a soft, professional finish.

🎀 Final Thoughts

The Easy Crochet Shell Stitch Blanket is one of those patterns that teaches you so much while being genuinely fun to make. You'll master a classic stitch, learn how to customize patterns using stitch multiples, and create something absolutely beautiful in the process. Whether you're making it for a baby shower, a housewarming gift, or just because you deserve something cozy — you've got this, BiCrafty Bestie! 💛

If you cast it on, please please please share your progress! Tag me @marlybird on Instagram or Facebook and use #MMMDI, #MarlyBird, or #ShellStitchBlanket so I can see your beautiful work. There's nothing I love more than seeing my patterns come to life in your hands! 💖

❤️ Your BiCrafty Bestie,
Marly Bird

A cartoon avatar of a person with glasses and a brown bun smiles warmly. Their green shirt and black jacket add a stylish touch, while colorful hearts surround them like loving temperature blankets, stitching together an aura of love and positivity. -Marly Bird

Filed Under: Crochet, Free Patterns, Our Free Patterns, Pattern, YouTube Video Tutorial

Moogly CAL 2025 || Sweetcorn Motif Crochet Block

October 2, 2025 By Marly Bird Leave a Comment

Sweetcorn Motif – Moogly CAL 2025 || Crochet Block by Marly Bird & Robyn Chachula

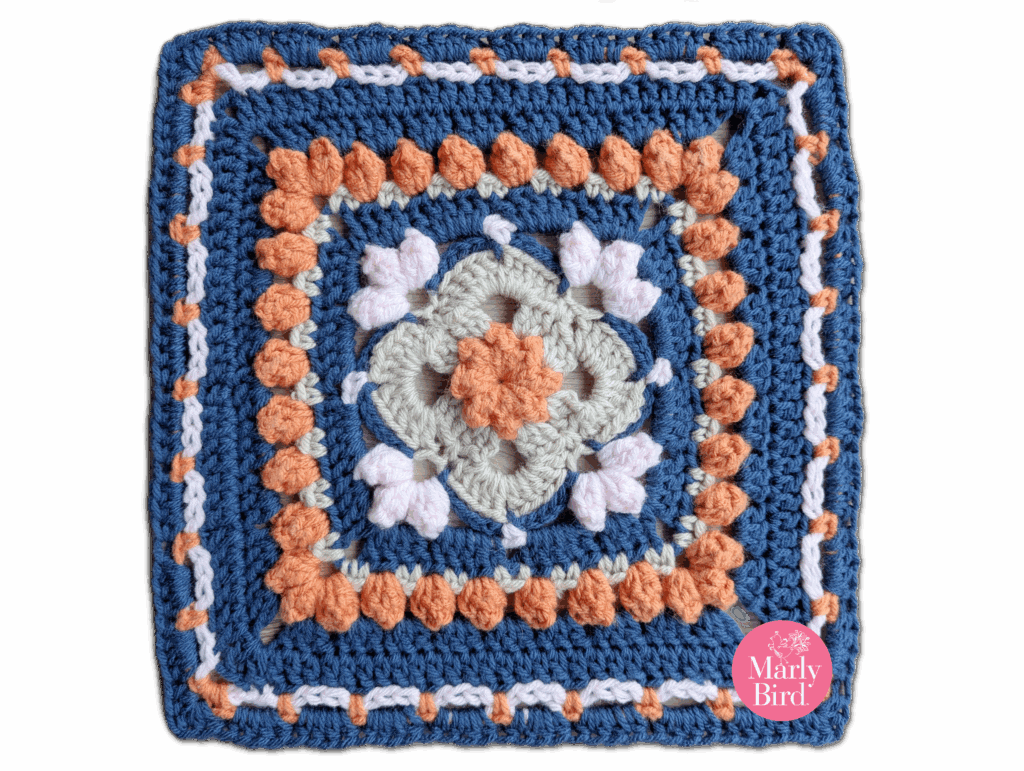
It’s time for another gorgeous square in the Moogly 2025 Crochet-Along (CAL), and this one is extra special! The Sweetcorn Motif was co-designed by me, Marly Bird, and my dear friend (and incredible designer) Robyn Chachula. Together we created a block that blends bold texture, playful pops of color, and timeless crochet structure—all wrapped up in a 12” square.

Whether you’re making the full Moogly blanket or just looking for a stand-alone motif to play with, this block is sure to shine in your crochet collection.

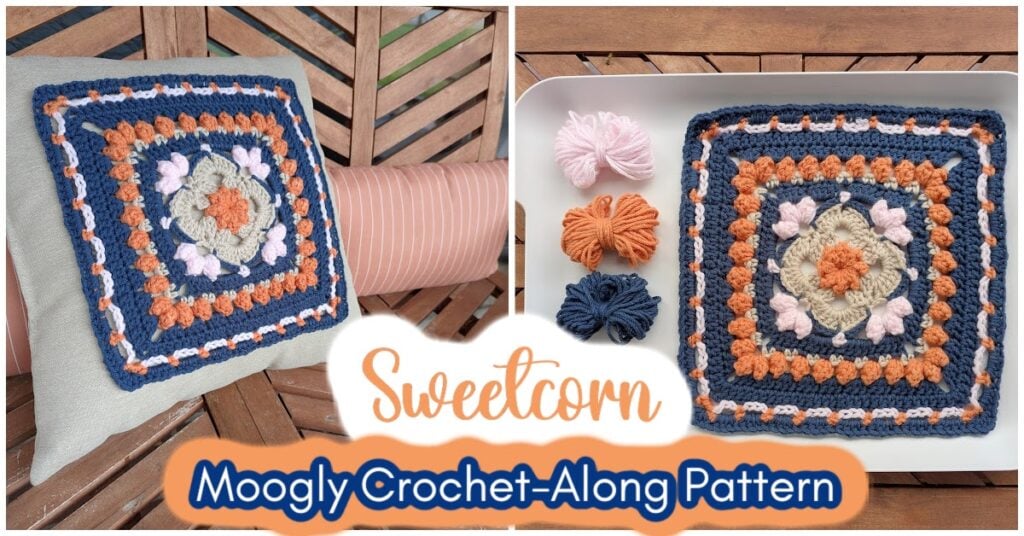
A crocheted Sweetcorn Motif crochet block in blue, orange, beige, and pink is displayed on a pillow and tray. Three small yarn skeins are beside it. Text reads: “Sweetcorn Moogly Crochet-Along Pattern.”. -Marly Bird

Affiliate Disclosure: This post contains affiliate links. To learn more please visit my privacy policy here💖

👉 Learn about the Year Long Crochet-Along on Moogly Blog here


About the Moogly CAL History

Every year, Tamara of Moogly hosts her beloved Crochet-Along (CAL) featuring free crochet block patterns from a variety of designers. Each block measures 12” x 12” and is released on a schedule, so by the end of the year you have a complete blanket made from squares designed by some of your favorite crochet pros.

✨ Free Patterns – Every block, including this one, is available as a free pattern.
✨ Annual Series – The CAL runs all year long with new blocks added regularly. (Started in 2015)
✨ Designer Variety – Each square is unique, offering lots of fun techniques and stitch combos.
✨ Standard Size – Blocks are designed to measure 12” square so they’re easy to join together.

You can always find the current and past blocks on Moogly’s Blog.

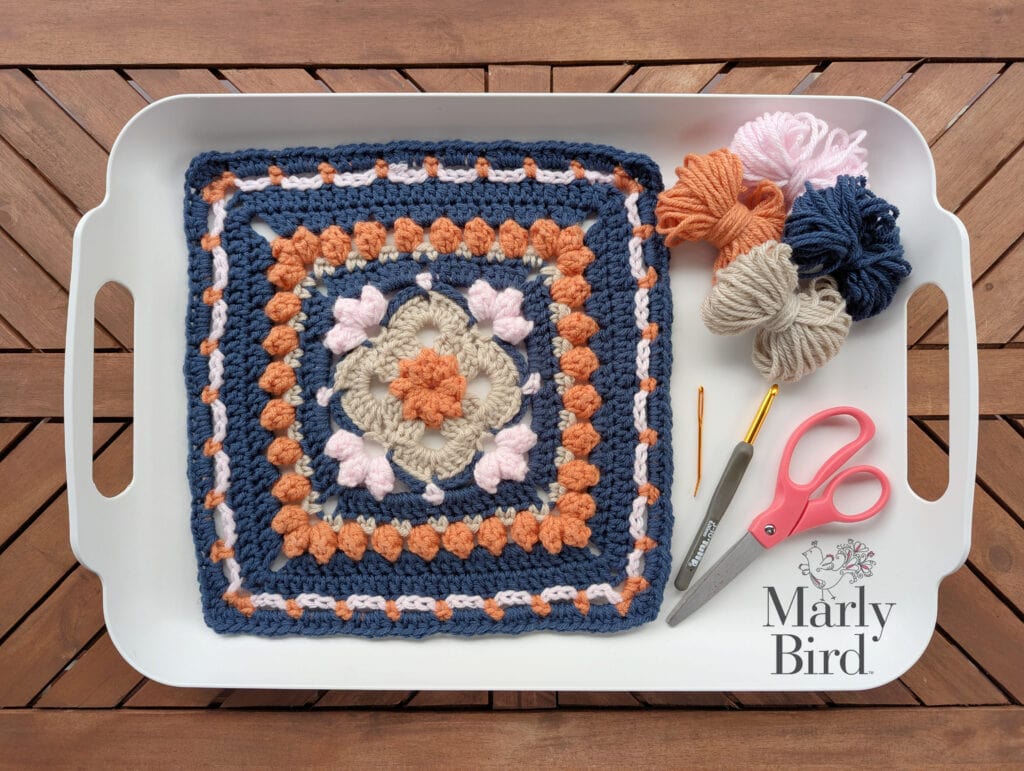
A Sweetcorn Motif crochet block in blue, orange, beige, and pink lies on a white tray beside yarn, crochet hooks, and pink scissors. The Marly Bird logo is in the bottom right corner. -Marly Bird

The Sweetcorn Motif – 12 inch crochet square block

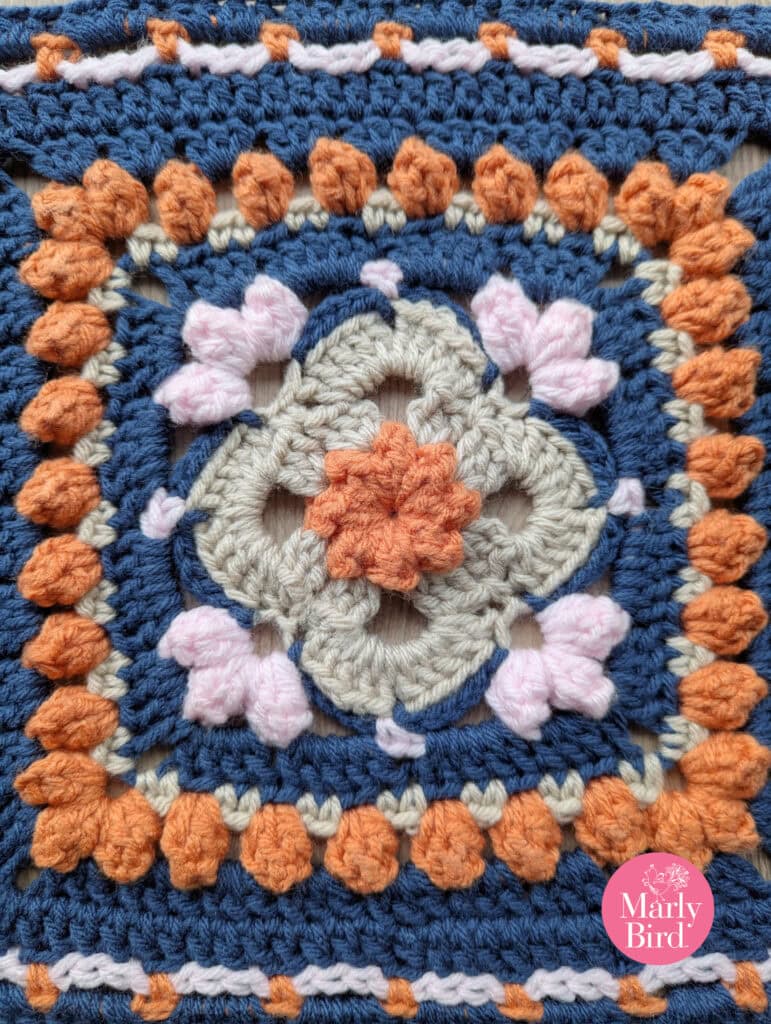
This crochet square block was a joy to design with Robyn. We wanted something that balanced structured rounds of stitches with playful bursts of popcorns for texture. The final square almost looks like little kernels of color bursting out from the center—hence the name Sweetcorn!

  • Skill Level: Intermediate
  • Finished Size: 12” x 12”
  • Special Stitches: Popcorn, stacked dc, standing dc
  • Yarn Used: Caron One Pound (Faded Brick, Cape Cod Blue, Pink, and Dove)
  • Hook Size: J/10 (6.0 mm)

Robyn created a stitch diagram and we both made samples to show off how versatile this block can be with color. You can follow the written instructions, use the diagram, or even join along with the video tutorial.

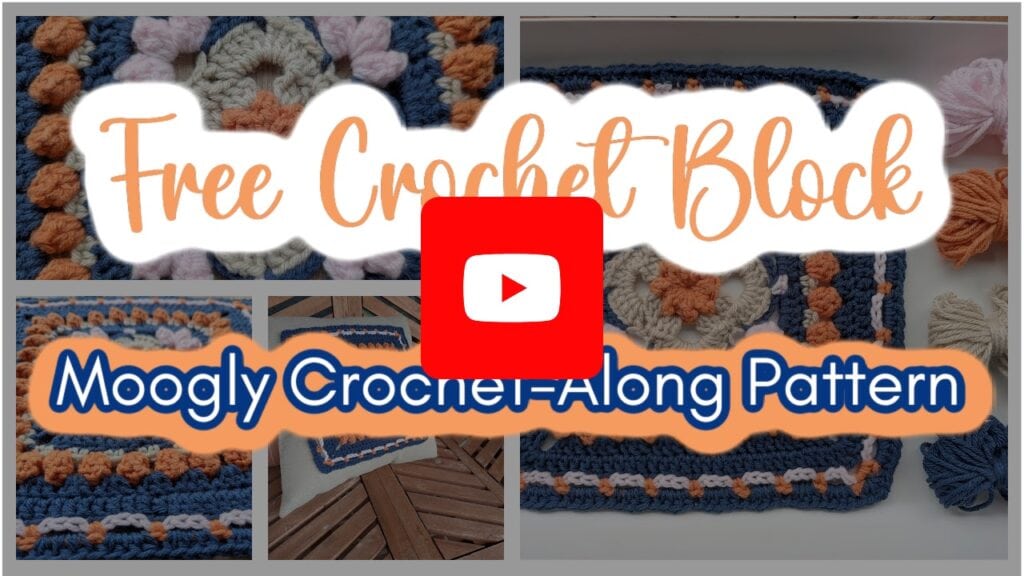
A YouTube video thumbnail featuring text that reads "Free Crochet Block" and "Moogly Crochet-Along Pattern," with images of colorful Sweetcorn Motif crochet block squares in blue, peach, and cream tones in the background. -Marly Bird

Past Moogly Blocks by Marly Bird

Over the years I’ve had so much fun contributing squares to the Moogly CAL. If you’d like to stitch more of my designs, check out these past blocks:

  • Crochet Mosaic Tile Block (Moogly CAL 2023)
  • Larkwood Crochet Block (Moogly CAL 2024)
  • Marly Bird Crochet Mosaic Block (Moogly CAL 2022)
  • Marly Bird Crochet Block (Moogly CAL 2021)
  • Mosaic Crochet Block (Moogly CAL 2020)
  • Diamond Mosaic Crochet Square (Block #15 — 2019 CAL)
  • Faux Cable Square (Block #17 — 2018 CAL)

Two women smiling at the camera, one with curly hair and the other wearing glasses, both sporting festive headbands with glittery designs from quickie patterns. -Marly Bird

Moogly x Marly Bird: A Longtime Collaboration

This isn’t my first time teaming up with Tamara of Moogly—and it certainly won’t be the last! We’ve worked together on multiple crochet events, including:

  • Past Moogly CAL blocks (see the list above).
  • Stash Busting Quickies Vol. 1, 2, and 3 – fun round-ups of quick and practical crochet patterns.
  • Collaborations from our days at RedHeart.com, where we both created patterns and tutorials for yarn lovers everywhere.

I always love working with Tamara, and adding Robyn into the mix makes this collaboration extra sweet.


Join our Newsletter

Get Free Crochet & Knitting
Pattern Links & Coupons!

Hand-drawn bird with curling, detailed feathers and pink accents; cheerful pose showcases fine line and texture work.
>> Become An Insider <<
A woman with glasses and curly hair models a colorful crocheted scarf, showing textured stitches and vibrant yarn.

Why You’ll Love This Block

The Sweetcorn Motif is perfect for adventurous crocheters who want to:

  • Practice popcorn stitches for dimensional texture.
  • Add bold pops of color to a blanket project.
  • Explore different techniques like stacked and standing double crochets.
  • Create a statement piece that can stand alone as a pillow cover, wall hanging, or centerpiece square.

If you’ve been following along with the CAL, this block will fit seamlessly into your blanket. And if you’re new—don’t worry! You can jump in at any point.


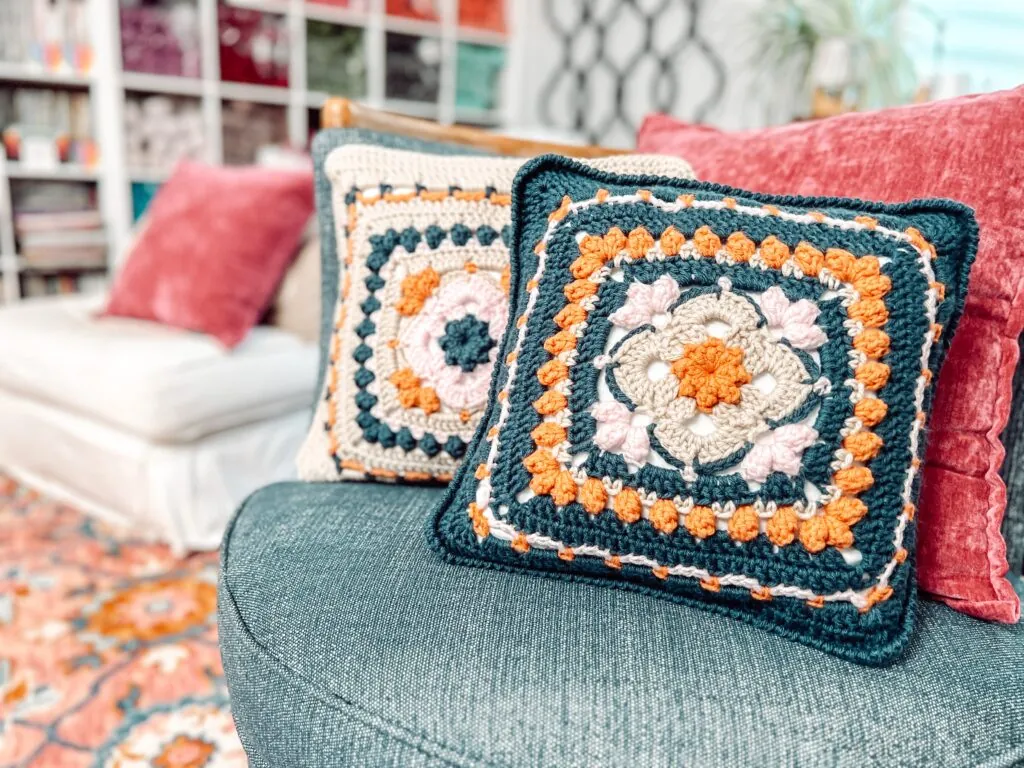
Two crochet pillows with colorful, geometric granny square and Sweetcorn Motif crochet block patterns rest on a blue sofa in a cozy living room with a red rug and blurred shelves in the background. -Marly Bird

Ad-Free PDF

Looking for the Ad-Free PDF of the Sweetcorn Pillows? You can find that here in our shop.


Ready to Crochet The Square?

🧶 Below you will find the full pattern for the crochet square
📺 Watch the video tutorial to follow step by step.
✨ Then come back here to share your progress with me on social media using #MarlyBird and #MooglyCAL.


A Sweetcorn Motif crochet block in blue, orange, beige, and pink is displayed on a white tray with matching yarn bundles. Close-up shots and a pillow featuring the block are shown. Text reads: "Free Crochet Block Moogly Crochet-Along Pattern. -Marly Bird

Sweetcorn Motif – MOOGLY 2025 CROCHET BLOCK

Designed by Robyn Chachula

SKILL LEVEL

Intermediate

MEASUREMENTS

Finished Measurements

Block is 12” [30.5 cm] wide by 12” [30.5 cm] long. 

Gauge 

Motif = 12” [30.5 cm] x 12” [30.5 cm]; use any size hook to obtain the gauge. 

MATERIALS

Yarn 

Caron, One Pound (100% acrylic, 812 yds / 742 m, 16 oz/ 454 g, CYCA# 4 worsted)  Best place to get this yarn is directly from Yarnspirations.

Color A: Faded Brick

Color B: Dove

Color C: Cape Cod Blue

Color D: Pink

Crochet Hook

Size J/10 [6.0 mm]

Notions 

Tapestry needle

ABBREVIATIONS

  • Ch – Chain(s) 
  • Dc – Double Crochet 
  • Hdc – Half Double Crochet
  • MC – Main Color
  • RS – Right Side 
  • Sc – Single Crochet
  • Sl st – Slip Stitch
  • Sp(s) – Space(s) 
  • St(s) – Stitch(es)
  • WS – Wrong Side

SPECIAL STITCHES 

⭐️ Magic loop or Adjustable Ring: Wrap yarn around your fingers, pull up a loop through the ring created, chain 1.  Follow directions for the number of stitches for round 1.  Pull on the yarn end to close the ring. 

⭐️Popcorn: Work 4 dc in st indicated, drop loop from hook, insert hook from front to back in top of first dc worked, insert hook in dropped lp and draw through.

⭐️Beginning Popcorn: Ch 3, work 3 dc in st indicated, drop loop from hook, insert hook from front to back in top of beginning ch, insert hook in dropped lp and draw through.

⭐️ Stacked Double Crochet (Stacked Dc): (Do not ch 1 prior to making the first sc) Sc in first stitch, insert hook in between two legs of the base, yarn over and pull up a loop, yarn over and draw through 2 loops on hook.

⭐️ Standing Double Crochet (Standing Dc):With slip knot on hook, yarn over hook, insert hook into stitch or space, yarn over hook and pull up a loop, [yarn over hook, draw through two loops on hook] twice.

CROCHET STITCH DIAGRAM

Crochet stitch diagram for a Sweetcorn Motif crochet block with popcorn and stacked dc stitches, showing rounds of various crochet symbols and a legend for ch, sl st, sc, hdc, dc, stacked dc, and popcorn stitches. -Marly Bird

NOTES

  • Weave in ends as you crochet each round.  It will be very overwhelming if you wait until you are ready to block the motifs.
  • When changing color in a new round, you can change your color with 2 loops left on your hook of your previous color then start the first stitch of the round.  Or you can join the new color with a standing sc or dc. 

VIDEO TUTORIAL

  • How to Read Crochet Diagrams >> Click Here for Video Help <<
  • Weave in Ends >> Click Here for Video Help <<
  • Stacked Double Crochet >> Click Here for Video Help <<
  • Standing Double Crochet >> Click Here for Video Help <<
  • Sweetcorn Motif Video Tutorial >> Click Here for Video Help <<

Crocheted square with a floral motif, featuring navy, peach, gray, and white colors, in textured stitches.

Moogly CAL 2025 || Sweetcorn Motif Crochet Block Instructions

Make an adjustable ring with color A, 

Round 1 (RS): Beginning popcorn in ring, ch 2, *popcorn in ring, ch 2; repeat from * 6 more times, sl st to first st, close ring, change color to B, fasten off previous color, do not turn- 8 popcorn + 8 ch-2 sps. 

Round 2: (Stacked dc, 2 dc) in first ch-2 sp, *ch 5, [3 dc in next ch-2 sp] twice; repeat from * twice more, ch 5, 3 dc in last ch-2 sp, sl st to first st, do not turn – 24 dc + 4 ch-5 sps. 

Round 3: Ch 1, sc between first and last st, *(5 dc, ch 2, 5 dc) in next ch-5 sp, skip 3 dc**, sc in space before next dc; repeat from * around ending at **, sl st to first sc, change color to C, fasten off previous color, do not turn- 40 dc + 4 sc + 4 ch-2 sps. 

Round 4: *Sl st to next dc, ch 4, sl st to next ch-2 sp, ch 4, skip next 4 dc, sl st to next dc**, ch 3, skip next sc; repeat from * around ending at **, ch 1, dc in first st (counts as ch-3 sp) , change color to D, fasten off previous color, , do not turn – 8 ch-4 sps + 4 ch-3 sps. 

Round 5: (Beginning popcorn, ch 3, popcorn) around post of dc, *ch 4, sc in next sl st, ch 4**, ([popcorn, ch 3] twice, popcorn) in next ch-3 sp; repeat from * around ending at **, popcorn in first ch-sp, ch 3, sl st to first st, change color to C, fasten off previous color, do not turn – 12 popcorn + 8 ch-3 sps + 8 ch-4 sps. 

A crocheted square featuring blue, orange, beige, and light pink yarn in a geometric floral pattern, inspired by the Sweetcorn Motif crochet block, with the "Marly Bird" logo in the bottom right corner. -Marly Bird

Round 6: Stacked dc in first popcorn, *3 dc in next ch-3 sp, 5 dc in next 2 ch-4 sps, 3 dc in next ch-3 sp**, (dc, ch 3, dc) in next popcorn; repeat from * around ending at **, dc in first popcorn, ch 3, sl st to first st, fasten off- 72 dc + 4 ch-3 sps.

Round 7: Join color B with a sc in the first st of previous round (same st as join), *[ch 1, skip next dc, sc in next 2 dc] 5 times, ch 1, skip next dc, sc in next dc, (sc, ch 3, sc) in corner ch-3 sp**, sc in next dc; repeat from * around ending at **, fasten off – 56 sc + 24 ch-1 sps + 4 ch-3 sps. 

Round 8: Join color A with sl st to first ch-1 sp, beginning popcorn in same ch-1 sp, *[ch 2, popcorn in next ch-1 sp] repeat to corner ch-3 sp, ch 2, ([popcorn, ch 2] twice, popcorn) in corner ch-3 sp; repeat from * around, ch 2, sl st to top of beginning popcorn, fasten off- 36 popcorn + 36 ch-2 sps.

Round 9: Join color C with stacked dc (or standing dc) in first ch-2 sp on side of motif, 2 dc in same ch-2 sp, *3 dc in each ch-2 sp to corner center popcorn, ch 2; repeat from * around to last ch-2 sp, 3 dc in last ch-2 sp, sl st to first dc – 108 dc + 4 ch-2 sps. 

Round 10: Stacked dc in first dc, *dc in each dc to corner, (dc, ch 2 dc) in corner ch-2 sp; repeat from * around to last 3 dc, dc in last 3 dc, sl st to first dc to join, fasten off – 116 dc + 4 ch-2 sps. 

Round 11: Join color D to first dc after corner ch-sp on previous round with sl st, sl st in next dc, *[ch 1, skip next dc, sl st in next 3 dc] repeat across to last 3 dc before corner ch-2 sp, ch 1, skip next dc, sl st in next 2 dc, ch 3, skip corner ch-2 sp**, sl st in next 2 dc; repeat from * around ending at **, sl st to first sl st, fasten off- 28 ch-1 sps + 4 ch-3 sps + 88 sl st (not including join).

Round 12: Join color A with sc in first ch-1 sp, *[ch 3, skip sl sts, sc in next ch-1 sp] repeat across to corner ch-sp, ch 3, 3 sc in corner ch-3 sp; repeat from * around, ch 3, sl st to first sc to join, fasten off – 24 ch-3 sps + 40 sc. 

Round 13: Join color C with sl st in first ch-3 sp of previous round, ch 2 (counts as hdc), 3 hdc in same ch-3 sp, *4 hdc in each ch-3 sp across to corner, 5 hdc in center sc of corner; repeat from * around, sl st to top of beginning ch to join, fasten off and weave in all ends- 148 hdc. 

A multicolored crocheted square in blue, orange, beige, and pink—featuring the Sweetcorn Motif crochet block—with yarn balls and hooks nearby. Text reads: "Free Crochet Block – Moogly Crochet-Along Pattern." Wooden surface background. -Marly Bird

The Moogly CAL is one of my favorite annual traditions because it brings the crochet community together through creativity, learning, and sharing. Every square is a chance to try something new, and I hope the Sweetcorn Motif inspires you to play with color and texture in a fun, approachable way. Whether you make one block or a whole blanket, you’re adding a little piece of handmade beauty to the world—and that’s always worth celebrating.


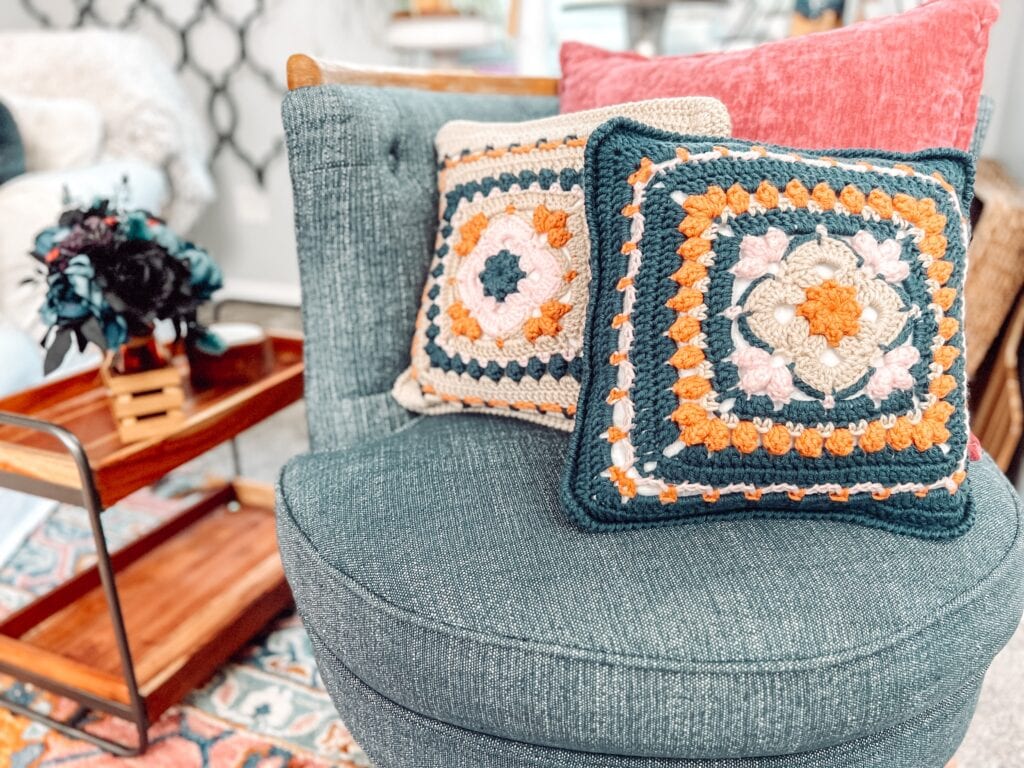
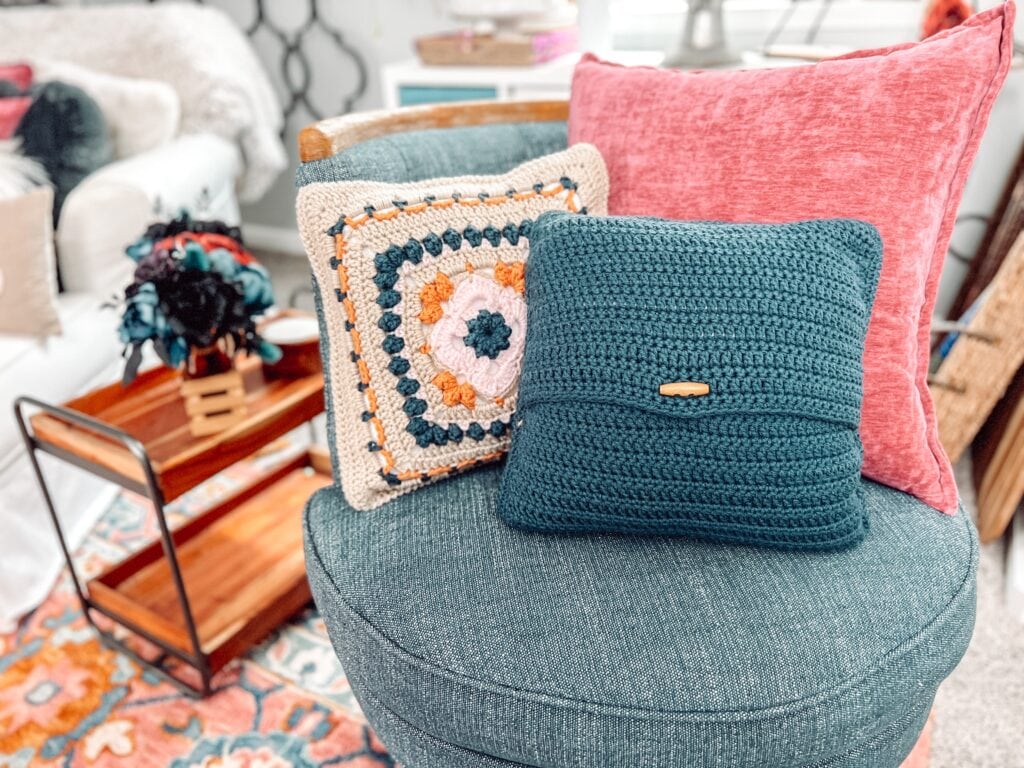
Two crocheted throw pillows, including a Sweetcorn Motif crochet block design in orange, blue, and cream, rest on a teal chair. A small wooden table with a dark floral arrangement adds charm to this cozy, well-decorated living space. -Marly Bird

SWEETCORN MOTIF PILLOWS

SKILL LEVEL

Intermediate

MEASUREMENTS

Finished Measurements

Pillow is 14” [350.5 cm] wide by 14” [35.5 cm] long. 

Gauge 

Front Panel = 14” [35.5 cm] x 14” [35.5 cm]; use any size hook to obtain the gauge. 

MATERIALS

Yarn 

Caron, One Pound (100% acrylic, 812 yds / 742 m, 16 oz/ 454 g, CYCA# 4 worsted), 1 skein each: 

Color A: Faded Brick

Color B: Dove

Color C: Cape Cod Blue

Color D: Pink

Hook

Size J/10 [6.0 mm]

Notions 

Tapestry needle

1.5” [3.8 cm] long wooden toggle

14” [35.5 cm] square pillow form

ABBREVIATIONS

Ch – Chain(s) 

Dc – Double Crochet 

Hdc – Half Double Crochet

MC – Main Color

RS – Right Side 

Sc – Single Crochet

Sl st – Slip Stitch

Sp(s) – Space(s) 

St(s) – Stitch(es)

WS – Wrong Side

SPECIAL STITCHES 

⭐️ Magic loop or Adjustable Ring: Wrap yarn around your fingers, pull up a loop through the ring created, chain 1.  Follow directions for the number of stitches for round 1.  Pull on the yarn end to close the ring. 

⭐️Popcorn: Work 4 dc in st indicated, drop loop from hook, insert hook from front to back in top of first dc worked, insert hook in dropped lp and draw through.

⭐️Beginning Popcorn: Ch 3, work 3 dc in st indicated, drop loop from hook, insert hook from front to back in top of beginning ch, insert hook in dropped lp and draw through.

⭐️Reverse Single Crochet (reverse sc): Also known as a Crab Stitch; working from left to right, insert hook from front to back in next stitch to the right,  yarn over and pull up a loop, yarn over and draw through 2 loops on hook.

⭐️ Stacked Double Crochet (Stacked Dc): (Do not ch 1 prior to making the first sc) Sc in first stitch, insert hook in between two legs of the base, yarn over and pull up a loop, yarn over and draw through 2 loops on hook.

⭐️ Standing Double Crochet (Standing Dc):With slip knot on hook, yarn over hook, insert hook into stitch or space, yarn over hook and pull up a loop, [yarn over hook, draw through two loops on hook] twice.

NOTES

  • Weave in ends as you crochet each round.  It will be very overwhelming if you wait until you are ready to block the motifs.
  • When changing color in a new round, you can change your color with 2 loops left on your hook of your previous color then start the first stitch of the round.  Or you can join the new color with a standing sc or dc. 
  • Second Colorway uses the following order of colors:
    • Color A: Cape Cod Blue
    • Color B: Pink
    • Color C: Dove
    • Color D: Faded Brick

VIDEO TUTORIAL

  • How to Read Crochet Diagrams >> Click Here for Video Help <<
  • Weave in Ends >> Click Here for Video Help <<
  • Stacked Double Crochet >> Click Here for Video Help <<
  • Standing Double Crochet >> Click Here for Video Help <<
  • Sweetcorn Motif Video Tutorial >> Click Here for Video Help <<

STITCH DIAGRAM

SWEETCORN CROCHET PILLOWS PATTERN

A smiling person with glasses holds two colorful crocheted pillows featuring floral and Sweetcorn Motif crochet block patterns in blue, orange, cream, and pink tones, standing in a cozy, well-lit room. -Marly Bird

FRONT PANEL 

Make an adjustable ring with color A, 

Round 1 (RS): Beginning popcorn in ring, ch 2, *popcorn in ring, ch 2; repeat from * 6 more times, sl st to first st, close ring, change color to B, fasten off previous color, do not turn- 8 popcorn + 8 ch-2 sps. 

Round 2: (Stacked dc, 2 dc) in first ch-2 sp, *ch 5, [3 dc in next ch-2 sp] twice; repeat from * twice more, ch 5, 3 dc in last ch-2 sp, sl st to first st, do not turn – 24 dc + 4 ch-5 sps. 

Round 3: Ch 1, sc between first and last st, *(5 dc, ch 2, 5 dc) in next ch-5 sp, skip 3 dc**, sc in space before next dc; repeat from * around ending at **, sl st to first sc, change color to C, fasten off previous color, do not turn- 40 dc + 4 sc + 4 ch-2 sps. 

Round 4: *Sl st to next dc, ch 4, sl st to next ch-2 sp, ch 4, skip next 4 dc, sl st to next dc**, ch 3, skip next sc; repeat from * around ending at **, ch 1, dc in first st (counts as ch-3 sp) , change color to D, fasten off previous color, , do not turn – 8 ch-4 sps + 4 ch-3 sps. 

Round 5: (Beginning popcorn, ch 3, popcorn) around post of dc, *ch 4, sc in next sl st, ch 4**, ([popcorn, ch 3] twice, popcorn) in next ch-3 sp; repeat from * around ending at **, popcorn in first ch-sp, ch 3, sl st to first st, change color to C, fasten off previous color, do not turn – 12 popcorn + 8 ch-3 sps + 8 ch-4 sps. 

Round 6: Stacked dc in first popcorn, *3 dc in next ch-3 sp, 5 dc in next 2 ch-4 sps, 3 dc in next ch-3 sp**, (dc, ch 3, dc) in next popcorn; repeat from * around ending at **, dc in first popcorn, ch 3, sl st to first st, fasten off- 72 dc + 4 ch-3 sps.

Round 7: Join color B with a sc in the first st of previous round (same st as join), *[ch 1, skip next dc, sc in next 2 dc] 5 times, ch 1, skip next dc, sc in next dc, (sc, ch 3, sc) in corner ch-3 sp**, sc in next dc; repeat from * around ending at **, fasten off – 56 sc + 24 ch-1 sps + 4 ch-3 sps. 

Round 8: Join color A with sl st to first ch-1 sp, beginning popcorn in same ch-1 sp, *[ch 2, popcorn in next ch-1 sp] repeat to corner ch-3 sp, ch 2, ([popcorn, ch 2] twice, popcorn) in corner ch-3 sp; repeat from * around, ch 2, sl st to top of beginning popcorn, fasten off- 36 popcorn + 36 ch-2 sps.

Round 9: Join color C with stacked dc (or standing dc) in first ch-2 sp on side of motif, 2 dc in same ch-2 sp, *3 dc in each ch-2 sp to corner center popcorn, ch 2; repeat from * around to last ch-2 sp, 3 dc in last ch-2 sp, sl st to first dc – 108 dc + 4 ch-2 sps. 

Round 10: Stacked dc in first dc, *dc in each dc to corner, (dc, ch 2 dc) in corner ch-2 sp; repeat from * around to last 3 dc, dc in last 3 dc, sl st to first dc to join, fasten off – 116 dc + 4 ch-2 sps. 

Round 11: Join color D to first dc after corner ch-sp on previous round with sl st, sl st in next dc, *[ch 1, skip next dc, sl st in next 3 dc] repeat across to last 3 dc before corner ch-2 sp, ch 1, skip next dc, sl st in next 2 dc, ch 3, skip corner ch-2 sp**, sl st in next 2 dc; repeat from * around ending at **, sl st to first sl st, fasten off- 28 ch-1 sps + 4 ch-3 sps + 88 sl st (not including join).

Round 12: Join color A with sc in first ch-1 sp, *[ch 3, skip sl sts, sc in next ch-1 sp] repeat across to corner ch-sp, ch 3, 3 sc in corner ch-3 sp; repeat from * around, ch 3, sl st to first sc to join, fasten off – 24 ch-3 sps + 40 sc. 

Round 13: Join color C with sl st in first ch-3 sp of previous round, ch 3 (counts as dc), 3 dc in same ch-3 sp, *4 dc in each ch-3 sp across to corner, 5 dc in center sc of corner, place marker in center dc; repeat from * around, sl st to top of beginning ch to join – 148 dc. 

Round 14: Stacked dc in top of beginning ch, *dc in each dc to marker, 5 dc in marked dc; repeat from * around to last dc, dc in last dc, sl st to stacked dc, fasten off and weave in ends – 164 dc. 

BACK PANEL 

Make 2

Ch 42 with color C. 

Row 1: Dc in 4th ch from hook (first 3 ch count as a dc), dc in each ch across, turn – 40 dc. 

Row 2: Ch 1, sc in each dc across to tch, sc in top of tch, turn.

Row 3: Stacked dc in first sc, dc in each sc across, turn. 

Row 4: Ch 1, sc in each dc across, turn. 

Repeat Rows 3-4 seven more times

Round 19: Ch 1, sc in each sc across to last, 3 sc in last sc, sc evenly down side of panel, 3 sc in first ch of foundation, sc in each ch across to last, 3 sc in last ch, sc evenly up side of panel, 2 sc in first sc, sl st to first sc, fasten off, weave in ends. 

FINISHING

Pin front and one back panel together with WS facing matching 2 corners.  Pin second back panel to front panel matching opposite 2 corners.  

Join color C with sc in any sc along the side of the pillow working through both the front and back panel at the same time. 

Seaming Round 1: *Sc in each st across side of pillow (working through all the panels at once) to corner, 2 sc in corner st; repeat from * around, sc in each st to beginning, sl st to first sc, do not turn.

Seaming Round 2: Ch 1, reverse sc in each sc around, fasten off, weave in ends. 

Sew toggle to the inside back panel in the center.  Place pillow form in pillow.  Button toggle through center sts of the outside back panel.

A teal chair displays three pillows: one pink, one teal with a wooden button, and one crocheted in a Sweetcorn Motif crochet block with cream, orange, pink, and teal. A cozy living room setup is visible in the background. -Marly Bird

❤️ Your BiCrafty Bestie,
Marly Bird
A cartoon avatar of a person with glasses and a brown bun smiles warmly. Their green shirt and black jacket add a stylish touch, while colorful hearts surround them like loving temperature blankets, stitching together an aura of love and positivity. -Marly Bird

Frequently Asked Questions

What is the Moogly CAL?

Oh, the Moogly CAL is such a fun annual event hosted by Tamara over at Moogly's Blog! Every year, designers create gorgeous 12″ square crochet block patterns that are all free. It's a whole year of new projects and by the end, you can have a beautiful blanket made from all these unique squares!

What makes the Sweetcorn Motif block special?

Honestly, this one is extra special because Robyn Chachula and I designed it together! We wanted to blend bold texture with fun pops of color, and the popcorn stitches really make it look like little kernels bursting out… hence the name Sweetcorn! It's a 12″ square and looks amazing in a blanket or even as a standalone pillow.

What skill level is this Sweetcorn Motif block?

Yes! This block is listed as Intermediate. It uses some special stitches like popcorn, stacked dc, and standing dc, which add some lovely texture and structure to the piece. But don't worry, there's a video tutorial to help you through!

What yarn and hook size are needed for the Sweetcorn Motif?

For this project, you'll want to grab some Caron One Pound yarn in four colors: Faded Brick, Dove, Cape Cod Blue, and Pink. And the hook size we used is a J/10, which is 6.0 mm. It works up into a lovely 12″ square!

Can I make just one Sweetcorn Motif block, or do I need to make a whole blanket?

Absolutely, you can make just one! While it's designed as part of the Moogly CAL to create a big blanket, it's also perfect as a stand-alone motif. You could easily turn it into a cute pillow cover, a wall hanging, or a centerpiece square. Have fun with it!

Filed Under: Crochet, Free Patterns, Make-Alongs, Our Free Patterns, Pattern

58 Free Bunny Rabbit Patterns to Crochet and Knit

September 18, 2025 By Marly Bird Leave a Comment

March is here! With springtime comes bunny rabbits poking their quivering noses out of their nests to hop around. Celebrate spring with these 58 Yarnspirations patterns featuring bunny rabbits in all styles. Decorate for spring or for Easter, or just use them for a nursery theme.

Three fluffy baby bunnies sit in a metal bucket. Overlaid text reads: "58 Free Bunny Rabbit Patterns, Knit and Crochet." A small crochet bunny graphic and the website marlybird.com appear at the bottom. -Marly Bird

Affiliate Disclosure: This post contains affiliate links. To learn more please visit my privacy policy here💖

🐰 Why Crochet or Knit Bunny Patterns? 🐰

Bunny patterns are a favorite for crocheters and knitters alike because they're irresistibly cute, versatile, and perfect for gifting! Whether you're looking to craft a cuddly companion for a little one or some festive decor for your home, bunnies are a go-to choice. Plus, with so many free bunny patterns available, you can easily find one that matches your skill level and yarn stash!

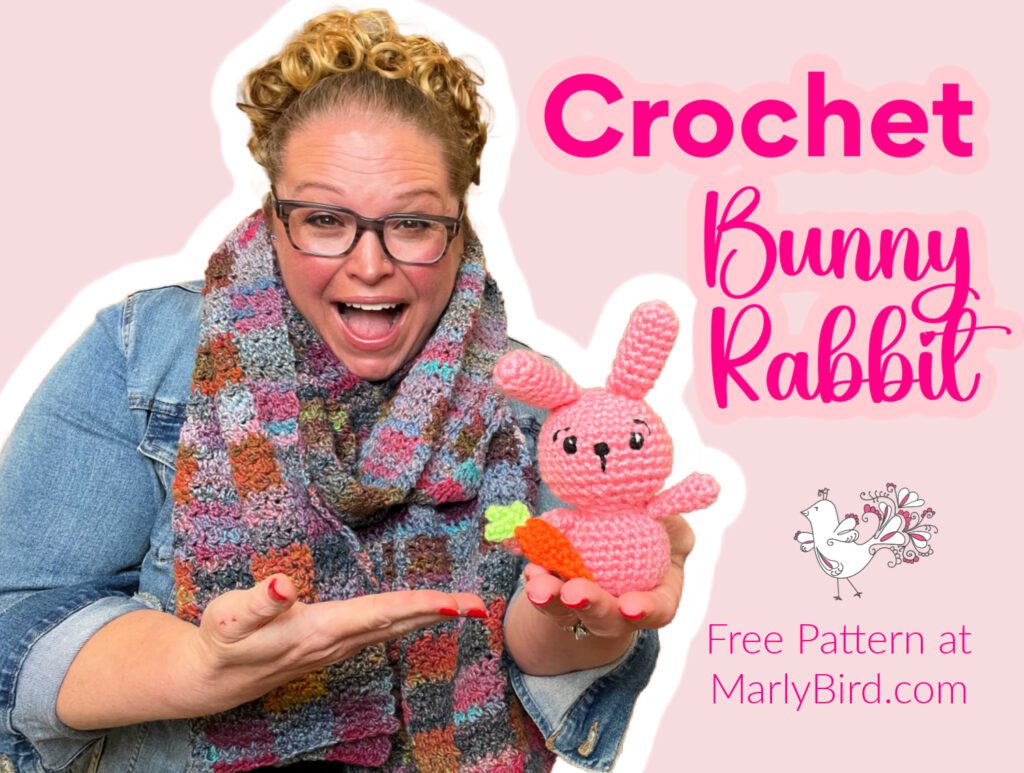
Marly Bird showcasing her adorable handmade crochet bunny rabbit stuffed animal, with a link to a free pattern available on her website.

🐇 Perfect for Easter and Spring Gifts 🌸

Nothing says spring quite like a sweet bunny! Crocheted or knitted bunnies make wonderful gifts for Easter baskets, spring baby showers, or just because. Pair them with a few chocolate eggs or a handmade blanket, and you've got a gift that’s both thoughtful and adorable.

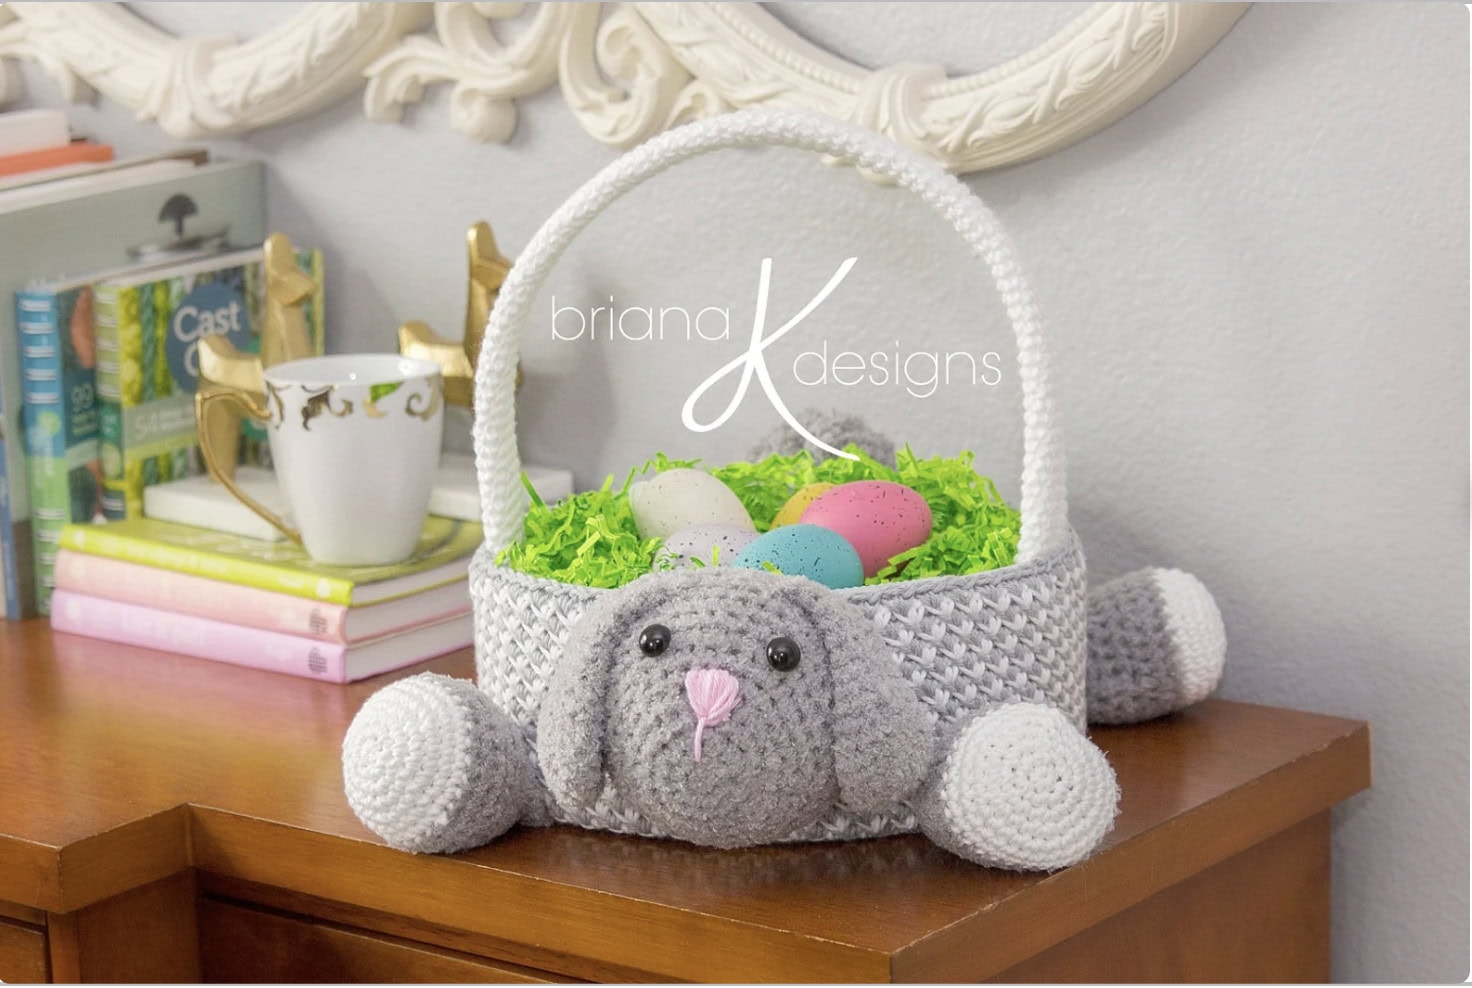
A crocheted basket shaped like a gray bunny with floppy ears and pink nose holds colorful eggs and green grass. It sits on a wooden surface in front of books and a decorative mug, beneath a white ornate mirror. "Briana K Designs" is on the image. -Marly Bird

🍼 Adorable Baby Shower Gifts and Nursery Decor

Handmade bunnies are a charming addition to any nursery. Choose soft pastels for a classic look or vibrant hues for a more modern twist. With the right yarn, these bunnies can double as snuggly toys and delightful decor.

Look at this super cute bunny snuggly amigurumi!


🌟 Beginner-Friendly Bunny Patterns to Try

If you're new to crocheting or knitting, bunnies are a manageable and satisfying project. Look for patterns with simple stitches, minimal shaping, and clear instructions to build your confidence and skills!


🧶 Choosing the Right Yarn for Bunny Patterns 🧶

The yarn you choose can make all the difference in how soft and snuggly your bunny turns out. Here are some tips for picking the perfect yarn for your next bunny project.


🐑 Best Yarn Types for Soft and Cuddly Bunnies

Opt for yarns like cotton blends, brushed acrylic, or plush acrylic for maximum softness. These options are not only gentle on the skin but also hold up well to cuddles and play.


🛠 Essential Tools for Knitting and Crocheting Bunnies 🛠

Having the right tools makes crafting bunnies easier and more enjoyable. Here are a few must-haves for your bunny-making toolkit.


🧵 Must-Have Crochet Hooks and Knitting Needles

For most bunny patterns, you’ll want to use hooks or needles that match the yarn weight you’ve selected. Look for patterns that specify the recommended size, or experiment to get the perfect gauge.


👀 Using Safety Eyes and Embellishments Safely

Safety eyes are adorable, but if you're making a bunny for a young child, consider embroidering the eyes instead. Always double-check that embellishments are securely attached.

Safety Eye Pliers


⏱ Time-Saving Tools for Amigurumi Bunnies

From stitch markers to stuffing tools, a few handy extras can make your bunny-crafting process smoother and more fun.

Amigurumi Sticks

Join our Newsletter

Get Free Crochet & Knitting
Pattern Links & Coupons!

Hand-drawn bird with curling, detailed feathers and pink accents; cheerful pose showcases fine line and texture work.
>> Become An Insider <<
A woman with glasses and curly hair models a colorful crocheted scarf, showing textured stitches and vibrant yarn.

Bunnies to Play With

Toy rabbits have been a staple of childhood for generations, from The Velveteen Rabbit to today. These rabbit toys come in all shapes and sizes: some are meant to be dressed up, while others are suited for cuddling with during naptime.

  • Baby's Bunny
  • Easter Lily Doll
  • Hop Along Bunny
  • Crochet Velvet Bunny
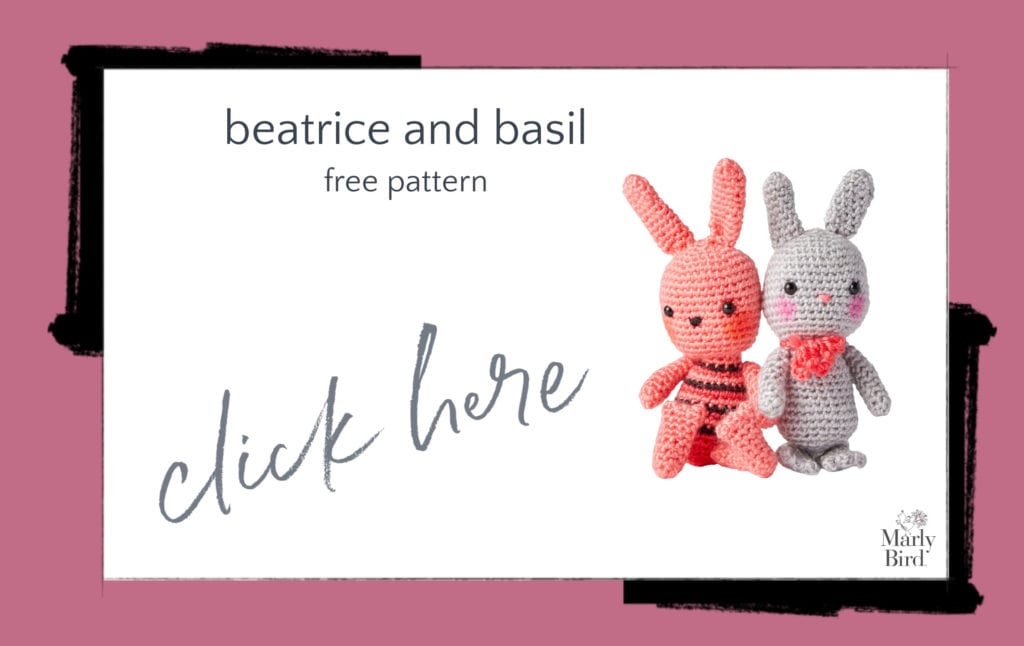
  • Beatrice and Basil Crochet Bunnies
  • Bunny Buddy
  • Bear, Bunny, Kitty and Mouse Finger Puppet
  • Zoe Bunny
  • Bunny Comfort Blankie
  • Nummy Bunny
  • Crochet Bunny Stuffie
  • Bunny Teething Ring
Beatrice and Basil Free Crochet Pattern
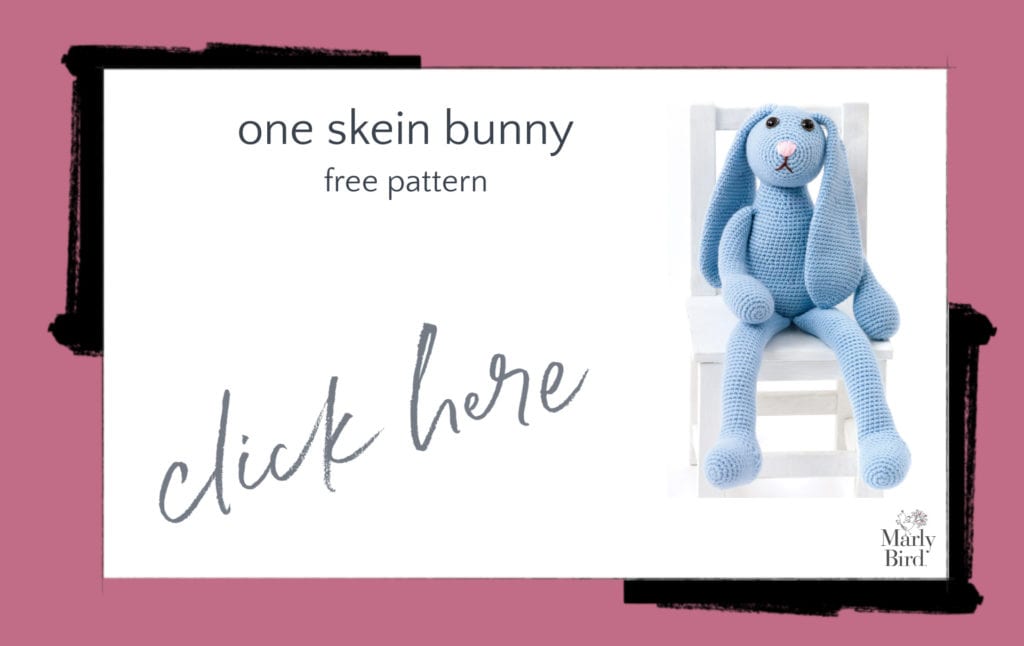
  • One Skein Bunny
  • My First Bunny
  • Striped Sunshine Bunny
  • My Furry Bunny
  • Simple Bunny Toy
  • Flopsy Bunny Toy
  • Doll Robe and Bunny Slippers
  • Square Hare to Crochet
One Skein Bunny Free Crochet Pattern

Bunny Hats and Outfits

Adding bunny ears to a hat instantly makes it cuter. Make a matching set with a pair of booties for a picture-perfect look!

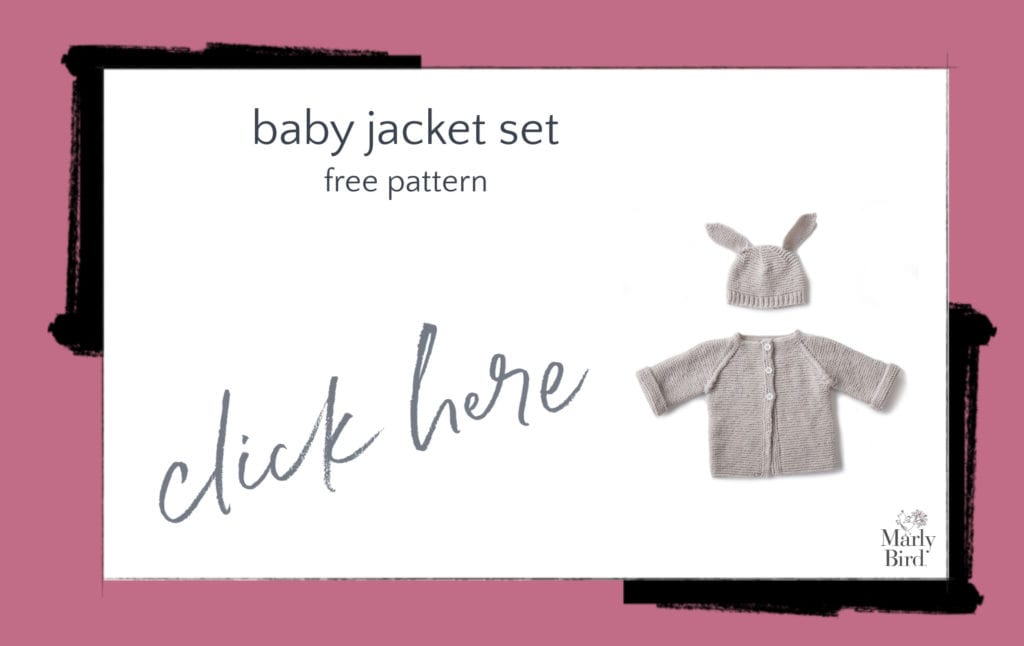
  • Knit Baby Jacket Set
  • Funny Bunny Pullover
  • Fluffy Bunny Hat
  • Bunny Hat
  • Sweet Bunny Hat
  • Cottontail Bunny Cocoon and Hat
  • Bunny Yoke Knit Sweater
  • Funny Bunny Kids Blanket Hoodie
Knit Baby Jacket Set Free Knitting Pattern
  • Hippity-Hop Bunny Hoodie
  • Bunny Hat and Booties
  • Pet Pal Bunny Slippers
  • Bunny Scarf
  • Itty Bitty Fuzzy Wuzzy Bunny Booties
  • Knit Hats with Ears
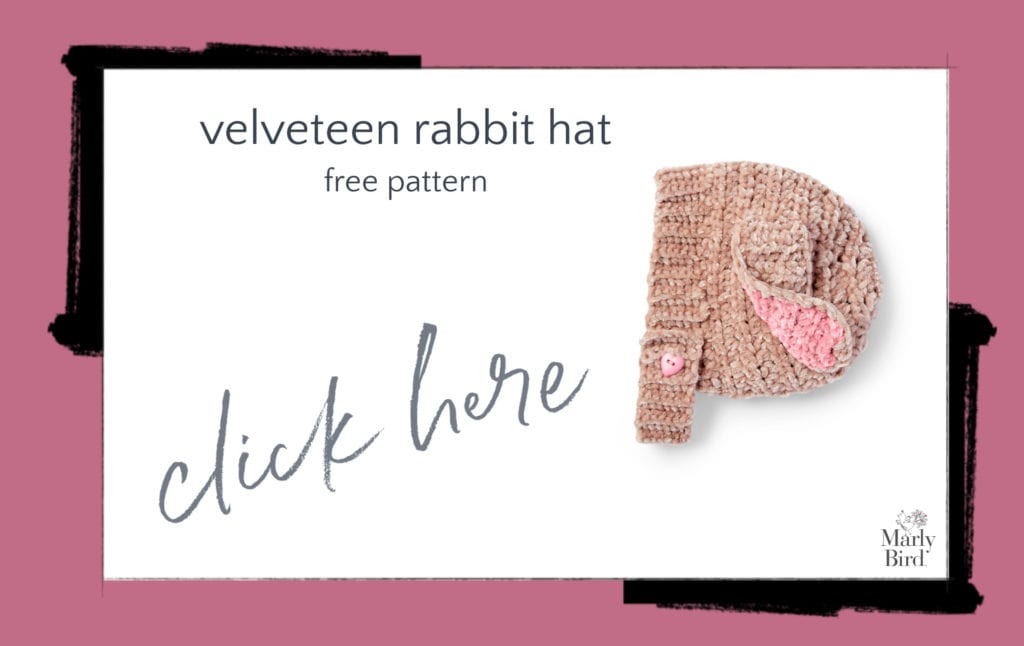
  • Crochet Velveteen Rabbit Hat
  • Costume Hats
  • Bunny Ear Up Costume Hat
Crochet Velveteen Rabbit Hat Free Crochet Pattern

Bunny Pillows, Garlands, and Other Decorations

These bunny items are perfect for nurseries or for seasonal decor! Floor pillows are great for preschoolers' imaginative play, while garlands and wreaths look great in your dining room and front door.

  • Knit Bunny Pillows
  • Filet Crochet Bunny Blanket
  • Bunny Egg Basket
  • Easter Bunny Wreath
  • Bunny Hop Blanket
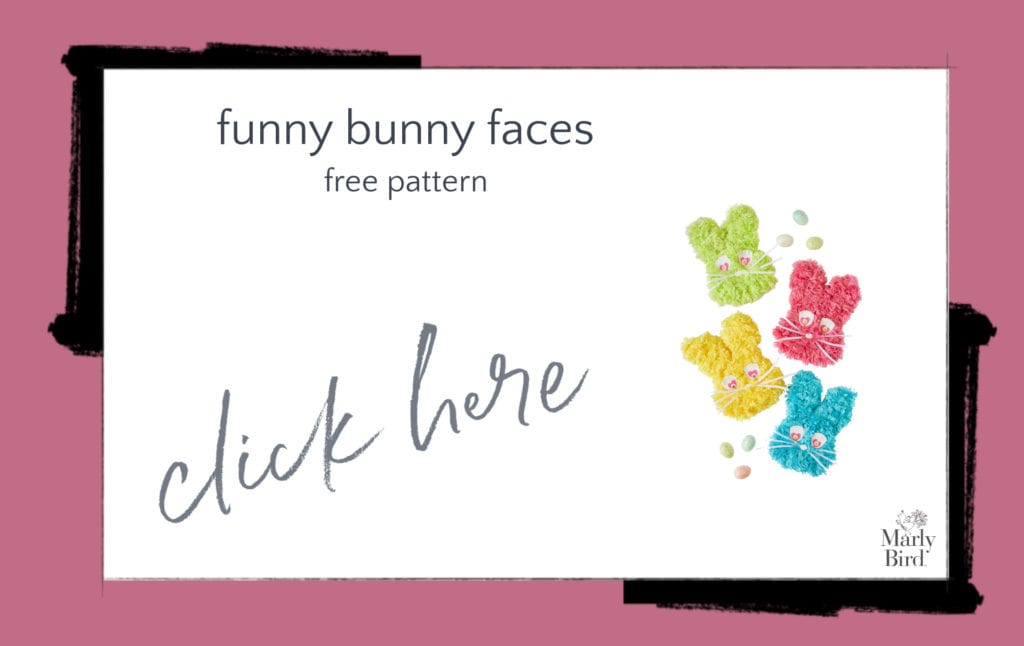
  • Funny Bunny Face
  • Crochet Bunny Floor Pillow
  • Hoppy Easter Crochet Bunny Basket
  • Snuggly Knit Bunny Blanket
  • Woodland Bunny Crochet Blanket
Funny Bunny Faces Free Craft Pattern
  • Bunny Pillow Pal
  • Luv My Bunny Blanket
  • Bunny and Chick Party Decorations
  • Mom and Me Bunny Scrubby Mitts
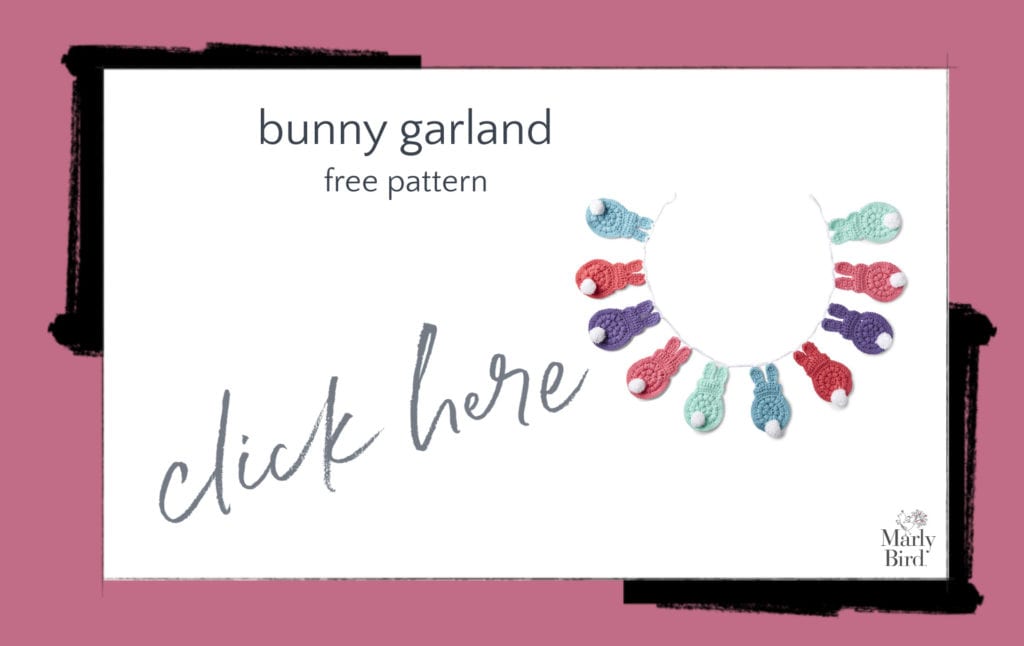
  • Bunny Garland
  • Five Little Bunnies
  • Crochet Pot Pals
  • Sitting Little Bunny Crochet Blanket
  • Sleep Tight Royal Mobile
  • Bunny Time Blanket
Colorful bunny garland in pastel shades, featuring crocheted bunnies with pom-pom tails on a white background.

More Springtime Patterns

  • Boo Boo Bunny Knit Pouch Free Pattern
  • 15 Free Easter Crochet Patterns
  • 10 FREE Spring Sweater Patterns
  • 10 FREE Spring Shawls

❤️ Your BiCrafty Bestie,
Marly Bird
A cartoon avatar of a person with glasses and a brown bun smiles warmly. Their green shirt and black jacket add a stylish touch, while colorful hearts surround them like loving temperature blankets, stitching together an aura of love and positivity. -Marly Bird

Frequently Asked Questions

What's the best yarn for crocheting stuffed bunnies?

For amigurumi-style bunnies, you want a smooth, plied yarn that shows your stitches clearly… cotton or acrylic in worsted or DK weight works great. Avoid fuzzy or textured yarns because they hide the stitch definition and make it harder to see where to insert your hook. For baby-safe bunnies, go with a machine-washable acrylic or cotton so parents can toss it in the wash without worrying.

Are bunny patterns good for beginner crocheters?

So many of them are! Simple bunny amigurumi patterns use basic stitches like single crochet worked in the round… and once you get the hang of increasing and decreasing to shape the body, you're golden. Start with a bunny that's made from simple shapes (a round body, round head, tube-shaped ears) and work your way up to more detailed designs. The simpler patterns in this roundup are totally doable for an advanced beginner.

Can I use these bunny patterns for Easter basket gifts?

Absolutely… that's one of the most popular reasons people make them! A handmade crocheted or knitted bunny tucked into an Easter basket with some chocolate eggs is just the sweetest gift. You could also pair a bunny with a handmade baby blanket for a spring baby shower. Start early though because amigurumi pieces have a lot of small parts to assemble and you don't want to be sewing on ears at midnight before Easter!

How do I make my crocheted bunny's eyes safe for babies?

Great question… safety first! For babies and toddlers, skip the plastic safety eyes and embroider the eyes instead using yarn or embroidery floss. Safety eyes can technically be pulled out by a determined little one, even with the washers. Embroidered eyes are completely secure and honestly they give your bunny a really sweet, handmade look. For older kids and adults, safety eyes are fine and they do add a cute sparkle.

Do these patterns work for both knitting and crochet?

Yes! This collection includes patterns for both crafts. You'll find crocheted amigurumi bunnies, knitted stuffed toys, bunny-themed blankets and dishcloths in both knit and crochet, and even some bunny-inspired wearables. So no matter which craft you love (or if you love both… hey BiCrafty Bestie!), there's something in here for you.

Filed Under: Crochet, Free Patterns, Knitting, Round Ups Tagged With: crochet amigurumi bunny free, crochet bunny rabbit pattern, crochet easter bunny free pattern, crochet rabbit pillow pattern, crochet stuffed bunny, free bunny toy pattern, free crochet and knit bunny rabbit patterns, free crochet bunny patterns, free knit bunny patterns, free spring crochet patterns, free spring knit patterns, knit bunny rabbit pattern, knit easter bunny free pattern, knit rabbit pillow pattern, knit stuffed bunny

Free Crochet Crossbody Bag Pattern – Ramble and Rue Belt Bag

September 5, 2025 By Marly Bird 4 Comments

The Ramble and Rue Crochet Bag is a boho-style crossbody bag pattern that combines vintage granny square charm with modern function, featuring a sturdy zipper, fabric lining, and detachable strap. Designed by Marly Bird for advanced beginners and experienced crocheters alike, this free pattern is available here on the blog, with ad-free PDF versions for purchase in Marly's shops.

⚡ Quick Answer:

The Ramble and Rue is a hands-free, practical crochet crossbody bag using granny squares with modern construction techniques — perfect for stash-busting, gift-giving, and everyday wear. Worsted weight yarn, adjustable strap, optional fabric lining and zipper.

Looking for the perfect hands-free, stylish, and practical crochet project? The Ramble and Rue Crochet Bag is your new favorite accessory! This boho style bag (also called a crossbody bag, bum bag, fanny pack, or belt bag) combines vintage granny square charm with modern function. With a sturdy zipper, a fabric lining, and a detachable strap, it’s as functional as it is fun to make.

And yes—this is a free crochet crossbody bag pattern, available right here on the blog. If you’d like a printable version, you can also grab the ad-free PDF in my shops.

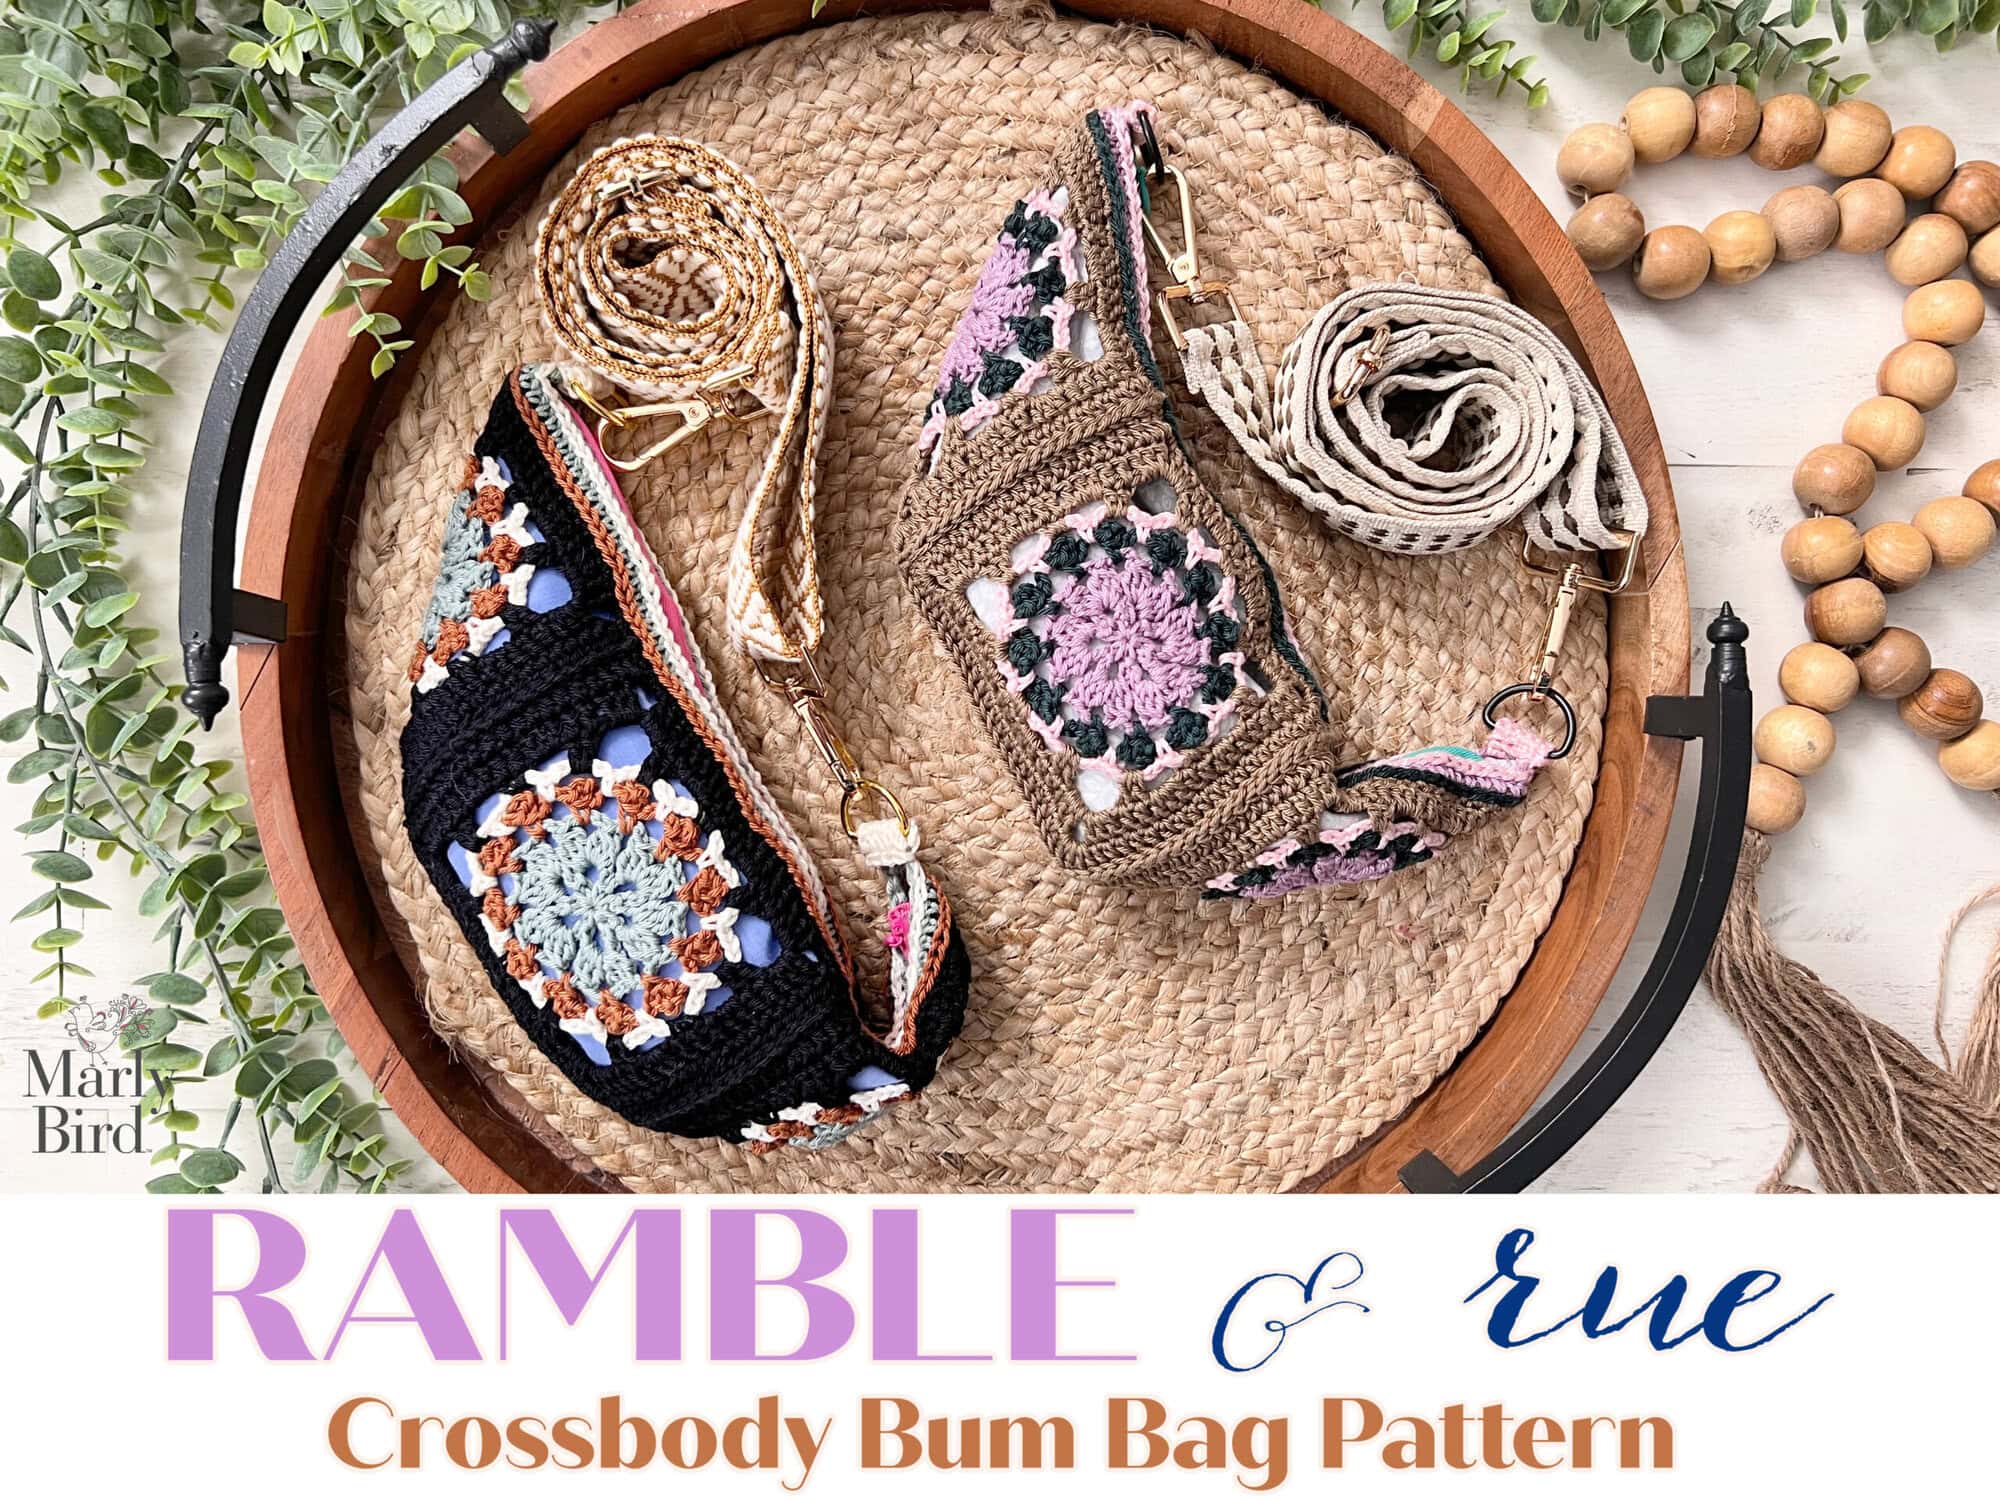
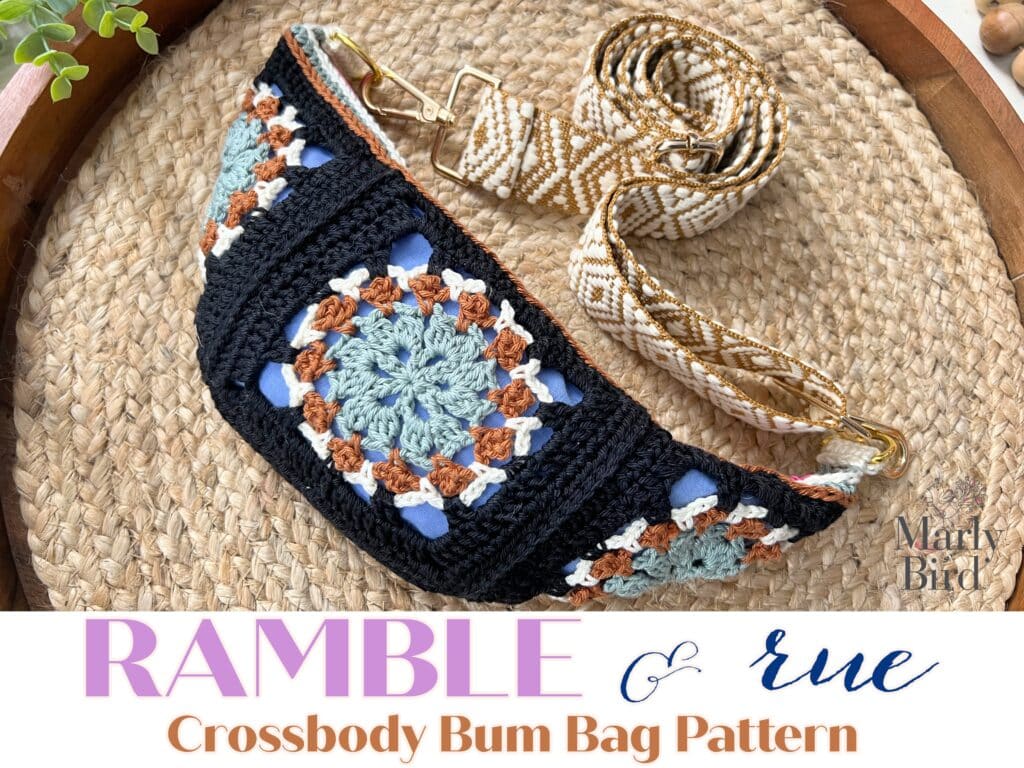
Two crocheted crossbody bum bags with colorful granny square designs rest on a round woven tray, surrounded by green vines and wooden beads. Text below reads “Ramble & Rue Crossbody Bum Bag Pattern.”. -Marly Bird

Affiliate Disclosure: This post contains affiliate links. To learn more please visit my privacy policy here💖


Why You’ll Love the Ramble and Rue Crochet Bag

The best crochet projects are the ones you’ll actually use every day, and this one checks all the boxes:

  • Hands-Free Convenience – Wear it crossbody, around your waist, or even slung over the shoulder.
  • Stash-Busting Friendly – Perfect for mixing and matching yarn colors from your collection.
  • Beginner Friendly with a Twist – Uses classic granny squares but adds shaping, joining, and bag construction for a fun challenge.
  • Practical Details – The lining keeps your essentials secure, while the zipper ensures nothing slips out.

💡 Pro tip: This bag makes a fantastic handmade gift. Just pick your recipient’s favorite colors and customize the strap length to fit their style.


Crochet Bag Terminology: Crossbody, Bum Bag, Fanny Pack, or Belt Bag?

If you’re searching online, you’ll find a lot of different names for this style of bag. Here’s the quick breakdown:

  • Fanny Pack – Common in the U.S., typically worn around the waist.
  • Bum Bag – Popular in the U.K., essentially the same as a fanny pack.
  • Belt Bag – Fashion-forward term, often referring to sleeker designs.
  • Crossbody Bag – The most versatile, worn across the chest or back.

The Ramble and Rue Crochet Bag works beautifully in all these styles. Thanks to the adjustable strap, you can wear it however you like.

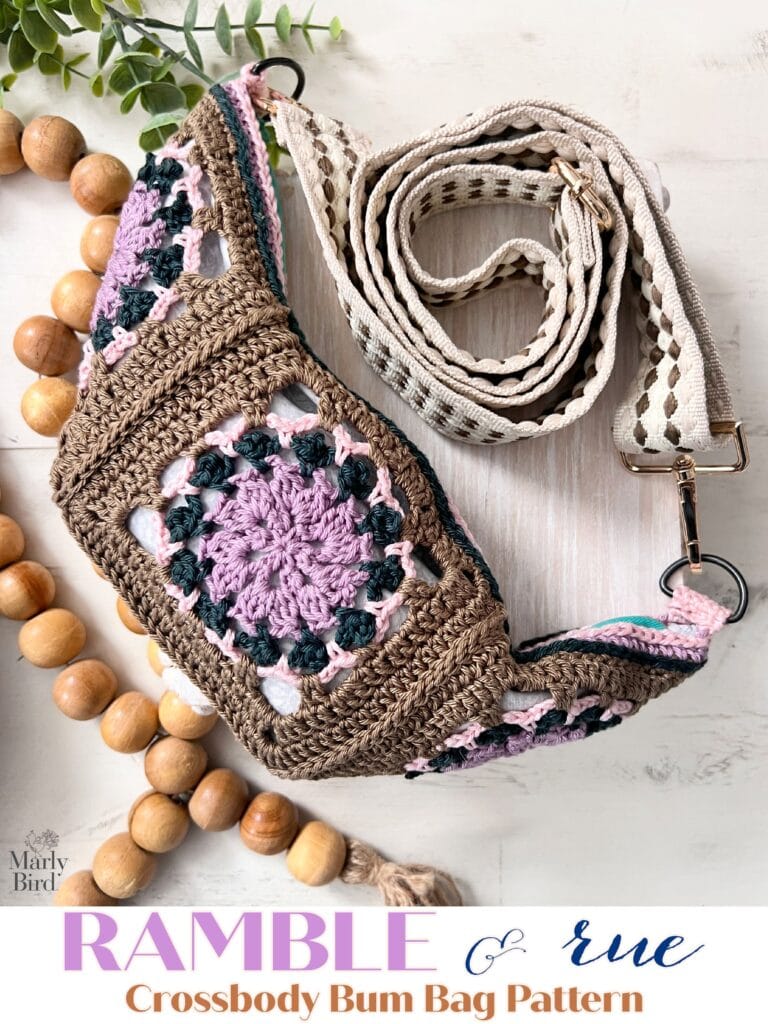
A crocheted crossbody bum bag with a granny square design in brown, purple, pink, and green yarn, displayed with its woven strap and wooden bead accent on a light surface. Text: "Ramble & Rue Crossbody Bum Bag Pattern. -Marly Bird

Supplies You’ll Need for Crossbody Bag

Yarn

Choose a worsted weight yarn for a sturdy, structured bag. Cotton yarns are ideal since they hold shape well, but acrylic also works beautifully. Great options include:

  • Comfy (budget-friendly & durable)
  • Lion Brand 24/7 Cotton (smooth and sturdy)
  • Dishie (vibrant colors and strong stitch definition)

Hook

Use the hook size that gives you gauge and produces a dense fabric. A smaller hook than usual may help prevent gaps.

Notions & Hardware

  • Tapestry needle for weaving in ends
  • Scissors
  • Stitch markers
  • Zipper (7–9 inches)
  • Swivel hooks or D-rings
  • Optional adjustable strap or make your own crochet strap

Bag Lining & Zipper

Adding a fabric lining will prevent stretching and give your bag a professional look. Choose a lightweight cotton fabric in a fun print or neutral shade. The zipper should match your chosen length and can be installed by hand or machine.

👉 Need help with bag lining? Check out my How to Add a Lining to a Crochet Bag tutorial with ErinLane Bags — This video is exclusive to the First Fall Weekender Bag VIP available here.

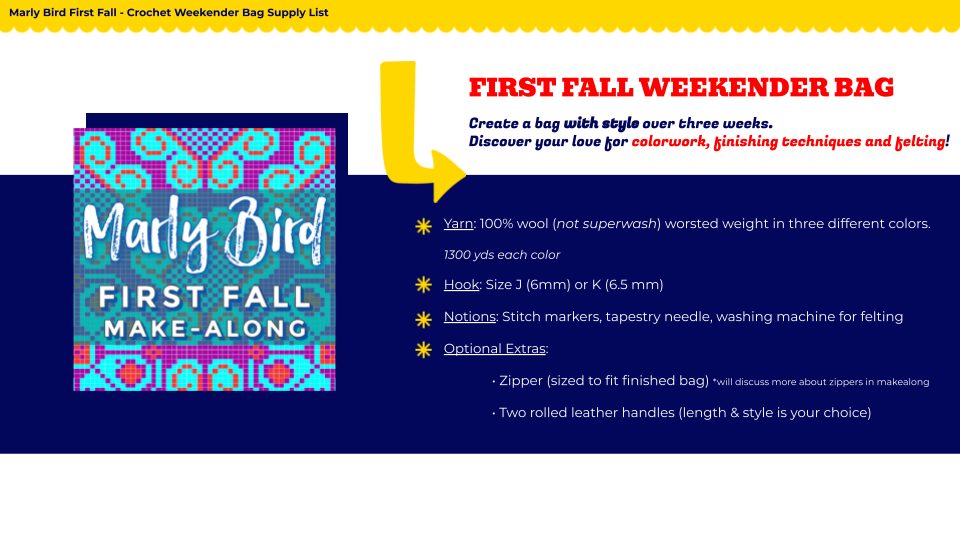
The image displays a vibrant graphic for "mary bird first fall make-along - crochet weekender bag supply list," featuring yarn, hook sizes, and other crochet essentials listed next to a colorful text design. -Marly Bird

Special Construction Features of the Crochet Crossbody Bag

Granny Squares with a Twist

At its heart, this is a granny square crochet bag pattern, but instead of a blanket or tote, we’re transforming those squares into a practical crossbody design. The squares are joined with a solid base, giving structure while showing off the retro motif.

Adding the Lining

While optional, lining your crochet belt bag ensures that small items (like lip balm, earbuds, or keys) don’t slip through the stitches. It also helps the bag hold its shape over time. If you’re new to linings, don’t worry—I’ve included step-by-step instructions that even a sewing beginner can follow.

Installing the Zipper

A zipper might feel intimidating, but it’s easier than you think. With some simple pinning and stitching, you’ll have a secure closure that looks store-bought. Plus, you can choose a zipper color that blends in or contrasts for extra flair.

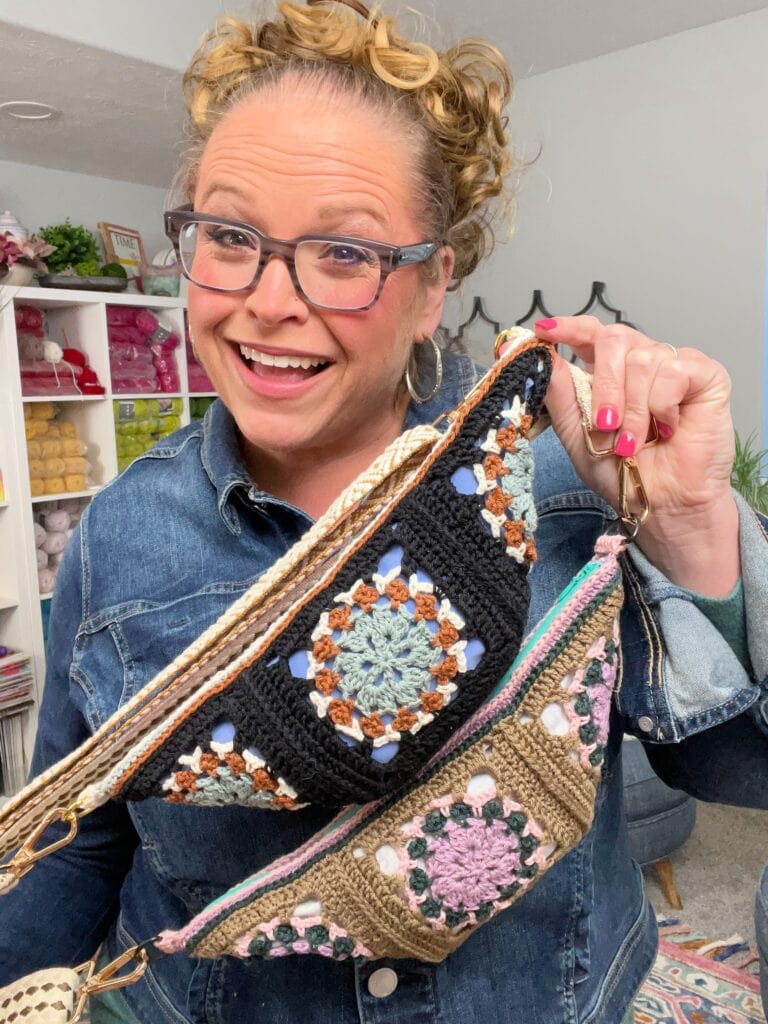
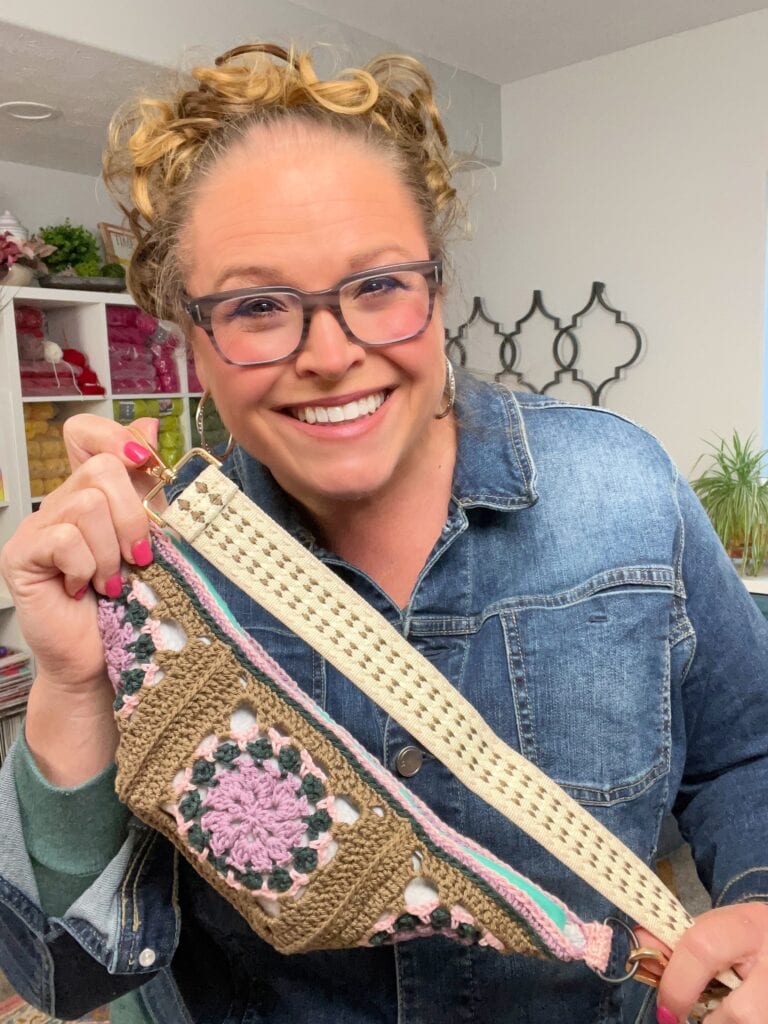
A smiling woman with glasses and curly hair in a denim jacket holds up two colorful crocheted bags, showing their detailed patterns. Shelves with yarn and craft supplies are visible in the background. -Marly Bird

Get More Crochet You’ll Love: The Fireside Fable Crochet Collection

If you’re in the mood for even more cozy makes, you won’t want to miss the Fireside Fable Crochet Collection. This special collection features six motif-based projects designed by me and Robyn Chachula, blending texture, warmth, and modern style.

Inside the collection, you’ll find:

  • 🧶 Rosewood Cowl – an elegant motif accessory for layering
  • 🧶 Marigold Morning Cardigan – puff sleeves + vintage romance in sizes XS–5X
  • 🧶 Hazel & Honey Baby Blanket – heirloom-worthy with popcorns, lace, and texture
  • 🧶 Cover Story Cozy – part iPad cover, part clutch, all charm
  • 🧶 Ramble & Rue Bum Bag – yes, this bag is part of the collection!
  • 🧶 Lilac & Leather Bag – chic and versatile for everyday wear

The Fireside Fable collection is available as a bundle so you can grab all six patterns at once and stitch your way through projects that are as fun to make as they are to gift.

👉 Click here to explore the Fireside Fable Crochet Collection.

A collage featuring a smiling woman showcasing her crochet projects, including vibrant blankets and shawls, with a central logo reading "Fireside Fable Crochet Collection" adorned with flowers. -Marly Bird

🎁 Upgrade to just the Ad-Free PDF Pattern

Want to skip the other patterns and all the ads on the free pattern here…you can enjoy a beautifully formatted pattern? The ad-free PDF includes:

  • Instructions in easy-to-read layout
  • Easy-to-follow written instructions
  • Exclusive Access to stitch diagram

📌 Get the Ramble and Rue Crossbody Bum Bag Ad Free PDF

Etsy
Shopify
Ravelry
A crochet bag with a colorful granny square rests on a woven surface. To the left, several pages of an ad-free PDF pattern are fanned out. Text reads "Ramble & Rue Crochet Bag" and "BUY NOW" with an arrow. -Marly Bird

Free Ramble and Rue Crochet Bag Pattern

CROCHET MOTIF SLING/ BUM BAG/ CROSSBODY Designed by Robyn Chachula for MarlyBird.com

Meet the Ramble and Rue Crossbody Sling Bag, your new go-to for days that never seem to slow down. Designed with busy moms in mind, it’s the perfect size to toss in your phone, keys, and wallet before heading out the door. The playful crochet motif gives it a handcrafted charm, while the crossbody sling keeps your hands free for all of life’s little adventures. Worked up in just a small amount of cotton yarn and four cheerful colors, it’s as fun to make as it is to wear. Equal parts practical and pretty, this bag is a stylish reminder that handmade can keep up with even the busiest of days.

SKILL LEVEL

Intermediate 

MEASUREMENTS

Finished Measurements

Bag is 13” [33 cm] wide by 5” [12.5 cm] deep. 

Gauge 

1 motif = 4” [10 cm] by 4” [10 cm]; use any size hook to obtain the gauge. 

MATERIALS

Crochet Yarn 

WeCrochet, Animation (100% Mercerized Cotton, 139 yds / 127 m, 1.75 oz/ 50 g, CYCA# 3 DK)

Colorway #1, 1 ball each:

Color A: #2688 Inlet

Color B: #2699 Sunbaked

Color C: #2700 Swan

Color D: #2675 Black

Colorway #2, 1 ball each:

Color A: #2692 Lilac Mist

Color B: #2685 Douglas Fir

Color C: #2677 Blush

Color D: #2695 Mushroom

Crochet Hook

Size E/4 [3.5 mm]

Notions 

  • Tapestry Needle
  • Scissors
  • Tape Measure
  • (2) 1” [25.5 cm] wide D rings
  • Purse Strap
  • 16” x 16” [40.5 x 40.5 cm] coordinating fabric for lining
  • 14” [35.5 cm] long Invisible Zipper
  • Sewing thread and needle

ABBREVIATIONS

Ch – Chain(s) 

Dc – Double Crochet 

Hdc – Half Double Crochet

RS – Right Side 

Sc – Single Crochet

Sl st – Slip Stitch

Sp(s) – Space(s) 

St(s) – Stitch(es)

Stacked Dc – Stacked Double Crochet 

Tch – Turning Chain

WS – Wrong Side

SPECIAL STITCHES 

⭐️2 Double Crochet Cluster (2dc-cl): *Yarn over hook, insert hook into indicated st, yarn over and pull up a loop, yarn over and draw through 2 loops on hook; repeat from * once more in same st, yarn over and draw through all 3 loops on hook. 

⭐️3 Double Crochet Cluster (3dc-cl): *Yarn over hook, insert hook into indicated st, yarn over and pull up a loop, yarn over and draw through 2 loops on hook; repeat from * twice more in same st, yarn over and draw through all 4 loops on hook. 

⭐️ Stacked Double Crochet (Stacked Dc): (Do not ch 1 prior to making the first sc) Sc in first stitch, insert hook in between two legs of the base, yarn over and pull up a loop, yarn over and draw through 2 loops on hook.

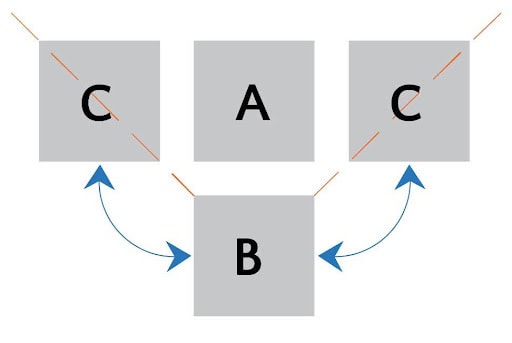
LAYOUT

A diagram with four gray squares labeled A, B, and two C's. B is at the bottom center, with blue arrows pointing up to C on the left and right—ideal for illustrating a Crochet Crossbody Bag Pattern. Orange diagonal lines cross through the C squares. -Marly Bird

STITCH DIAGRAM

Stitch diagram for joining round is only available in the ad-free PDF.

Etsy
Shopify
Ravelry

NOTES

  • Motifs are joined as you crochet the joining row.  You can use any method to join the motifs using the placement in the layout.
  • There are multiple options for the lining.  If you want a more professional look, make two linings to have the seams hidden from the inside and outside of the bag. If you choose to do that, you will need more fabric. 

VIDEO TUTORIALS

  • How to Bury Ends >> Click Here for Video Help <<
  • Stacked Double Crochet >> Click Here for Video Help <<
  • Standing Double Crochet >> Click Here for Video Help <<
  • Lining and Inserting Zipper >> COMING SOON <<

A crocheted crossbody bum bag with a colorful granny square design and a woven beige strap sits on a woven tray. Text below reads, "RAMBLE & rue Crossbody Bum Bag Pattern" and "Marly Bird. -Marly Bird

RAMBLE AND RUE CROCHET MOTIF SLING BAG PATTERN

Make 4.

Make an adjustable ring with color A. 

Round 1 (RS): Ch 1, [sc in ring, ch 6] 5 times, sc in ring, ch 3, dc in first sc (counts as ch-6 sp), close ring, do not turn – 6 ch-6 sps. 

Round 2: Ch 2, 2 dc-cl around post of dc, *ch 3, (3 dc-cl, ch 3, 3 dc-cl) in next ch-6 sp; repeat from * around, ch 3, 3 dc-cl in first ch-sp, ch 3, sl st to first dc-cl, fasten off color A, do not turn – 12 dc-cl + 12 ch-3 sps. 

Round 3: Join color B with a sc in any ch-3 sp, ch 4, sl st to prev sc (counts as picot), *ch 4, sc in next ch-3 sp, ch 4, sl st to prev sc; repeat from * around, ch 4, sl st to first sc, fasten off color B, do not turn – 12 picots + 12 ch-4 sps. 

GROW

To Unlock Exclusive Subscriber Content click the Box below and join for free by simply adding your email and creating a password! If you are having troubles, clear your cache or reset your password or login to the Grow Publisher Portal.

>> Learn More About Grow Here <<

I'm thrilled to share this amazing pattern with you, many patterns on my blog are absolutely free! I kindly request that you don't copy and paste or distribute this pattern. Prefer an ad-free experience? Buy a digital PDF pattern for a small fee from one of my online stores for a seamless crafting journey. 

I appreciate your support and readership. You are the reason I can keep doing what I love and sharing it with others. So, thank you from the bottom of my yarn-loving heart! Disclosure: This post contains affiliate links, meaning I get a commission if you decide to make a purchase through my links at no cost to you.

Round 4: Join color C with a sc in any ch-4 sp, *ch 5, skip picot, sc in next ch-4 sp; repeat from * around, ch 4, sl st to first sc, fasten off color C, do not turn – 12 ch-5 sps.

Round 5: Join color D with a sc in any ch-5 sp, sc in same ch-5 sp, *ch 3, 2 dc in next ch-5 sp, ch 5, 2 dc in next ch-5 sp, ch 3**, 2 sc in next ch-5 sp; repeat from * around ending at **, sl st to first sc, do not turn – 8 sc + 16 dc + 4 ch-5 sps + 8 ch-3 sps. 

Round 6: Stacked dc in first sc, dc in next sc, *3 dc in next ch-3 sp, dc in next 2 dc, (3 dc, ch 3, 3 dc) in next ch-5 sp, dc in next 2 dc, 3 dc in next ch-3 sp**, dc in next 2 sc; repeat from * around ending at **, sl st to first dc, fasten off – 72 dc + 4 ch-4 sps. 

JOINING

Stitch diagram for joining round is only available in the ad-free PDF.

📌 Get the Ramble and Rue Crossbody Bum Bag Ad Free PDF

Etsy
Shopify
Ravelry

See layout for assistance on placement of motifs. 

Motif A

Joining Round: Join color D with a standing dc in any ch-3 sp corner, dc in same ch-3 sp, [dc in each dc to next ch-3 sp, 5 dc in next ch-3 sp, place marker in middle dc] twice, dc in each dc to last ch-3 sp, 2 dc in last ch-3 sp, fasten off. 

Motif B

Joining Round:  Join color D with a standing dc in any ch-3 sp corner, dc in same ch-3 sp, dc in each dc to next ch-3 sp, 2 dc in next ch-3 sp, dc join to marked dc on Motif A in same ch-3 sp on Motif B, place marker, hdc join to next 2 sts on Motif A in same ch-3 sp on Motif B, [hdc join to next st on Motif A in next dc on Motif B] repeat across until next ch-3 sp on Motif B, hdc join to next 2 sts on Motif A in next ch-3 sp on Motif B, dc join to next st (marked stitch) on Motif A in same ch-3 sp on Motif B, place marker, 2 dc in same ch-3 sp, dc in each dc to last ch-3 sp, 2 dc in last ch-3 sp, fasten off. 

Motif C

Joining Round:  Join color D with a hdc join to first st on adjoining motif in any ch-3 sp corner, hdc join to next st on adjoining motif in same ch-3 sp, [hdc join to next st on adjoining motif in next dc on Motif C] repeat across until next ch-3 sp on Motif C, hdc join to next 2 sts on adjoining motif in next ch-3 sp on Motif C, dc join to next st (marked stitch) on adjoining motif in same ch-3 sp on Motif C, hdc join to next 2 sts on adjoining motif in same ch-3 sp on Motif C, [hdc join to next st on adjoining motif in next dc on Motif C] repeat across until next ch-3 sp on Motif C, hdc join to next 2 sts on adjoining motif in next ch-3 sp on Motif C, fasten off. 

FINISHING

Edging

Round 1: Join color D with a sc in any st along the top edge, sc evenly around top edge of bag, sl st to first sc, fasten off and weave in ends. 

Round 2: Join color B with sl st in any sc of Round 1, sl st in each sc around, sl st to first sl st, fasten off and weave in ends. 

Round 3: Join color A with a hdc in any sc of Round 1, hdc in each sc around, sl st to first hdc, fasten off and weave in ends.

Round 4: Join color C with a sl st in any hdc of Round 3, sl st in each hdc around, sl st to first st, fasten off and weave in ends. 

Tabs

Note: Tabs are located on each long edge to attach D-rings and the purse handle.  Locate the center stitch of the bag along the long edge (will be above the corner of the motif), mark off 2 sts from the center stitch. 

Row 1: Join color C with a sc in the marked stitch, sc in next 4 sts, turn- 5 sc.

Rows 2-5: Ch 1, sc in each sc, turn.

Fasten off with long tail for seaming. Thread on a D ring. Fold tab over and with tail, seam last row to first row. 

Lining and Zipper

  1. Fold fabric in half with right side on the inside. 
  2. Trace outline of bag onto fabric with washable or disappearing fabric marker (or make the outline with painters tape, if you do not have a fabric marker).
  3. Mark off ⅜” [1 cm] side and bottom edges.
  4. Mark off 1” [2.5 cm] top edge.
  5. Cut out fabric on Marked edges. 
  6. Using sewing needle and thread backstitch a ⅜” [1 cm] seam on the sides and bottom edge. 
  7. Iron side and bottom seam open.  
  8. (optional): Fold seam over again and iron, seam to lining or using fusible webbing iron in place. 
  9. Fold and iron top edge ½” [1.3 cm] down.
  10. Fold and iron top edge down again.
  11. (optional) Make a second lining and place seams on the inside.
  12. Place lining in the crochet bag, pin in place.
  13. Using sewing needle and thread, whip stitch lining to bag.
  14. Pin one side of the zipper into the bag.
  15. Backstitch zipper with sewing needle and thread through the top edging.
  16. Open the zipper and pin other side of zipper into bag.
  17. Backstitch zipper with sewing needle and thread through the top edging.
  18. Tack the top and bottom of the zipper in place to the lining.
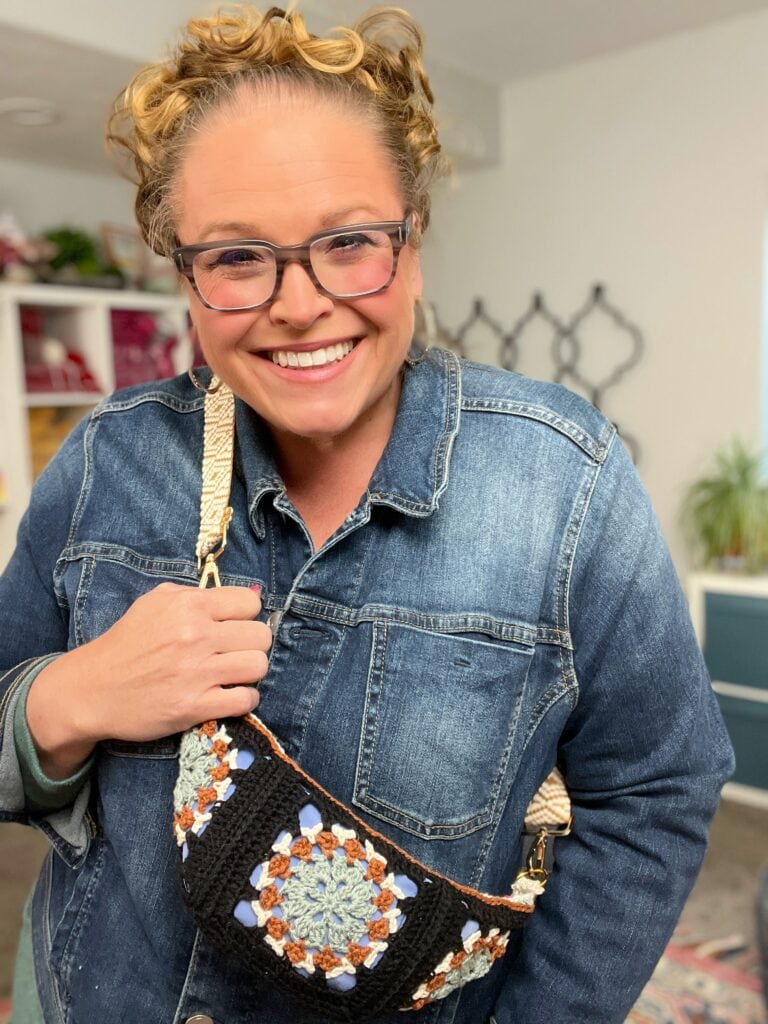
A smiling person with curly blonde hair, wearing glasses and a denim jacket, holds a crochet crossbody bag pattern featuring colorful granny squares in a cozy, well-lit room. -Marly Bird

Tips for Customizing Your Bag

The beauty of handmade accessories is making them your own!

  • Color Combos – Try earth tones for a neutral everyday bag, or bold brights for a playful statement piece.
  • Strap Length – Adjust the strap to make it a crossbody, waist bag, or even a shoulder bag.
  • Zipper Contrast – A brightly colored zipper can add a fun design element.
  • Personal Touches – Add a tassel, patch, or even embroidery to make your bag unique.

For more ways to use your leftover yarn, check out my Stash-Busting Crochet Patterns.

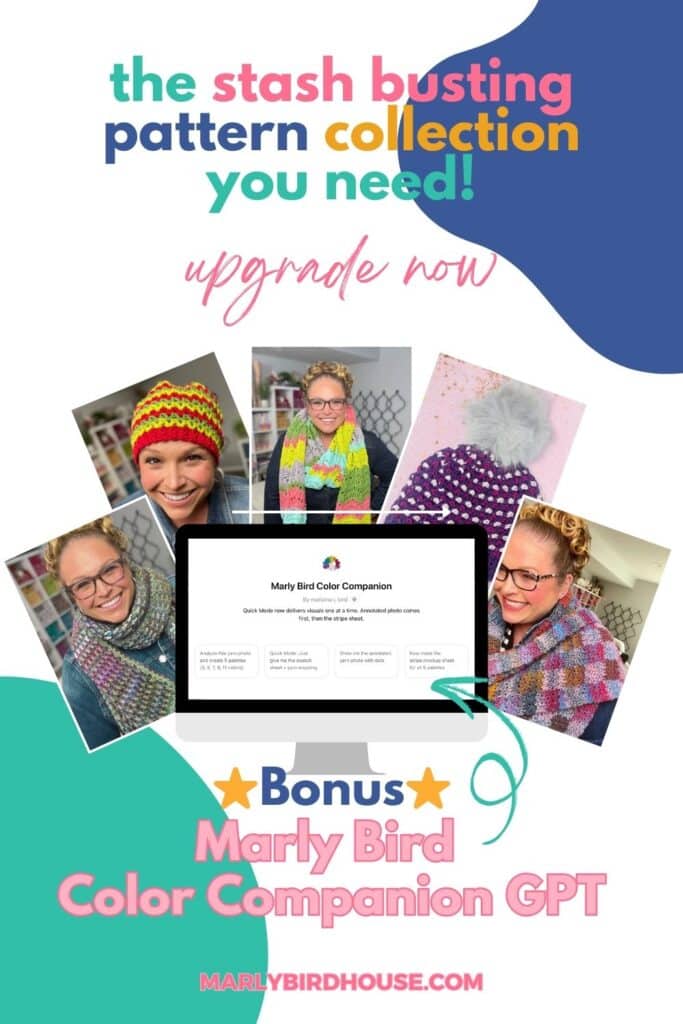
A promotional poster for "the stash busting pattern collection," featuring photos of a smiling woman wearing colorful knit items, a website screenshot, and text about a bonus Marly Bird Color Companion GPT and the This or That Make-Along 2025. -Marly Bird
Crochet Collection

FAQ About Crochet Crossbody Bags

Can I make this bag bigger?

Yes! Add more granny squares or use a larger hook and thicker yarn to increase the size.

Do I have to add a lining?

Technically no, but without a lining the bag may stretch and smaller items could poke through. For durability, lining is highly recommended.

Can I use chunky yarn instead of worsted?

Yes, but keep in mind the finished bag will be larger and may require a longer zipper.

Can beginners make this?

If you’re comfortable with basic crochet stitches and joining granny squares, you can definitely tackle this project. The zipper and lining are broken down step by step.

A smiling woman with curly hair and glasses holds up a colorful crochet crossbody bag pattern. She is wearing a denim jacket and standing in a bright, craft-filled room. -Marly Bird

More Crochet Bag Patterns You’ll Love

Looking for more trendy crochet bag ideas? Try these:

  • Crochet Tote Bag Patterns
  • Crochet Market Bag Patterns
  • Free ⭐️ Granny Square Crochet Patterns

Get the Ad-Free PDF

Want to crochet without scrolling past ads? Grab the beautifully formatted, easy-to-print ad-free PDF pattern of the Ramble and Rue Crochet Bag.

📌 Get the Ramble and Rue Crossbody Bum Bag Ad Free PDF

Etsy
Shopify
Ravelry

Final Thoughts

The Ramble and Rue Crochet Bag is the perfect blend of style and function—an accessory you’ll use every day. Whether you call it a fanny pack, bum bag, or belt bag, this crochet crossbody bag pattern is sure to become one of your favorites.

Be sure to share your finished bags with me on social media using #MarlyBird and #MMMDI (Marly Made Me Do It)—I can’t wait to see your creations!

❤️ Your BiCrafty Bestie,
Marly Bird
A cartoon avatar of a person with glasses and a brown bun smiles warmly. Their green shirt and black jacket add a stylish touch, while colorful hearts surround them like loving temperature blankets, stitching together an aura of love and positivity. -Marly Bird

Filed Under: Crochet, Free Patterns, Marly Bird Premium Patterns, Our Free Patterns, Pattern, Uncategorized

Flicker and Flash Crochet Hat – Free Crochet Pattern

August 29, 2025 By Marly Bird 11 Comments

A Stash-Busting Crochet Hat You’ll Love

Got leftover yarn from past projects (or maybe a few too many skeins in your stash 🤭)? The Flicker and Flash Crochet Hat is here to turn those scraps into something bright, fun, and wearable for the whole family.

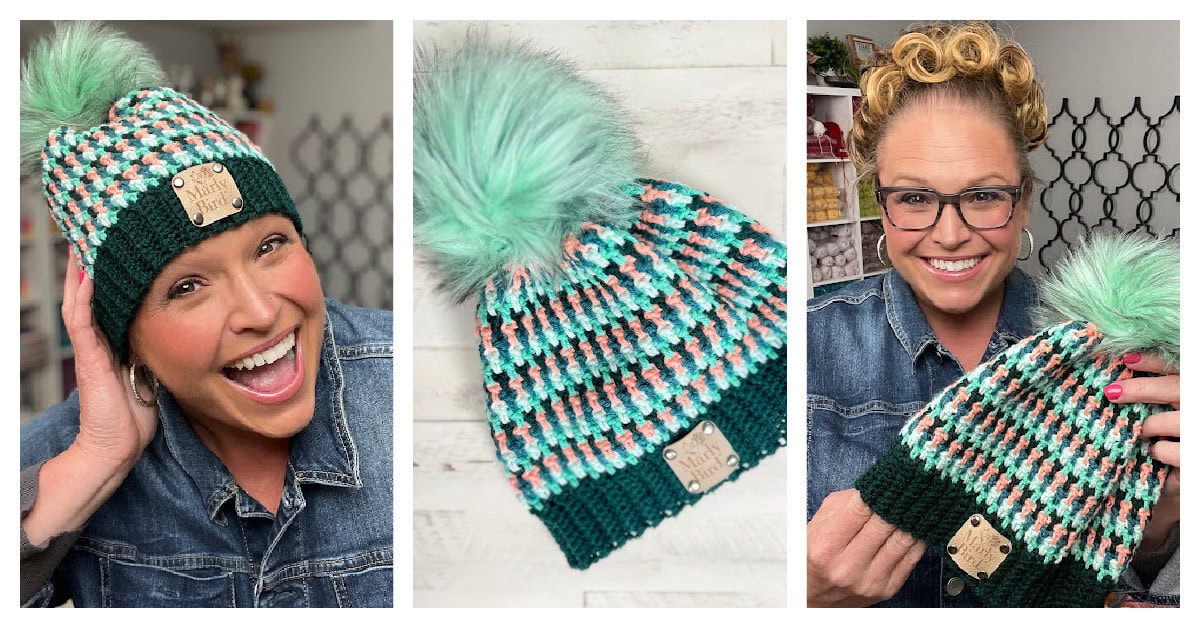
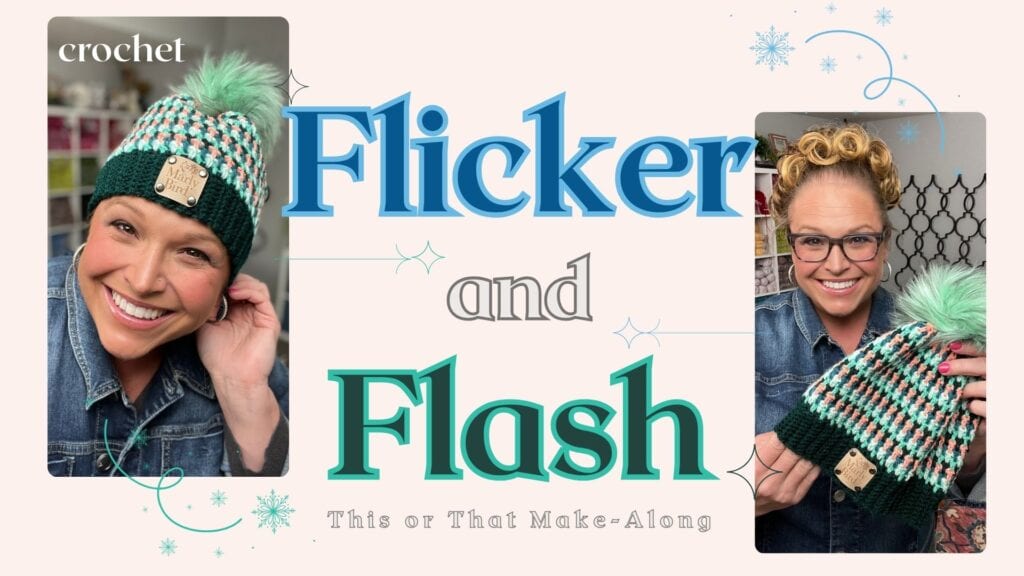
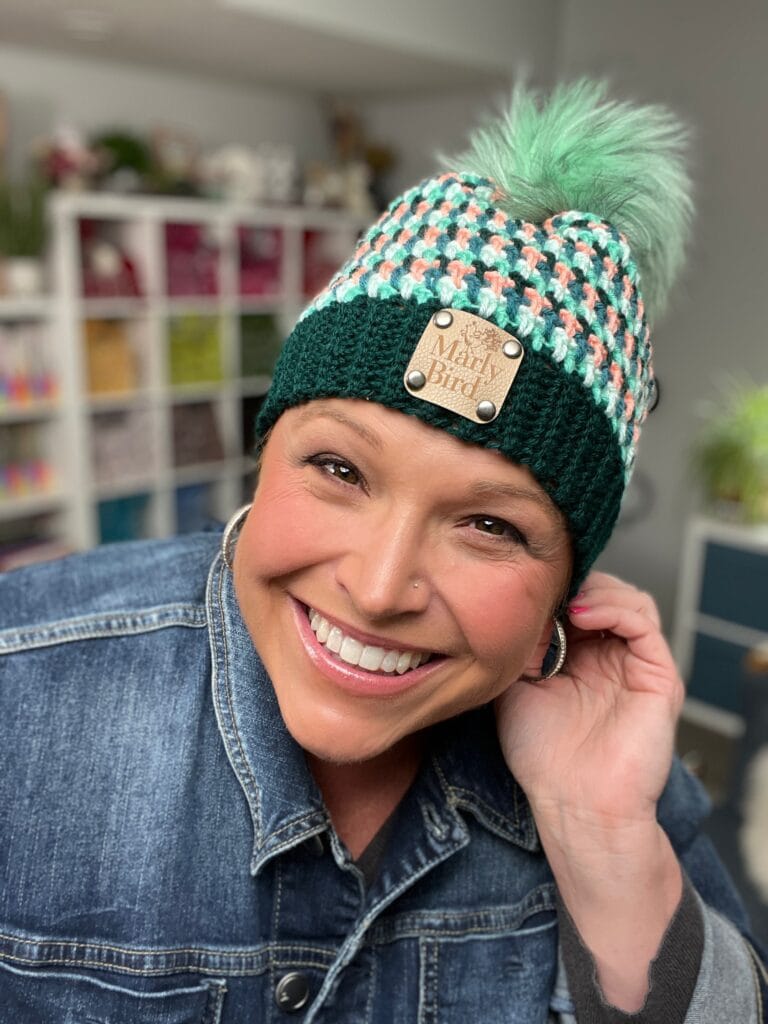
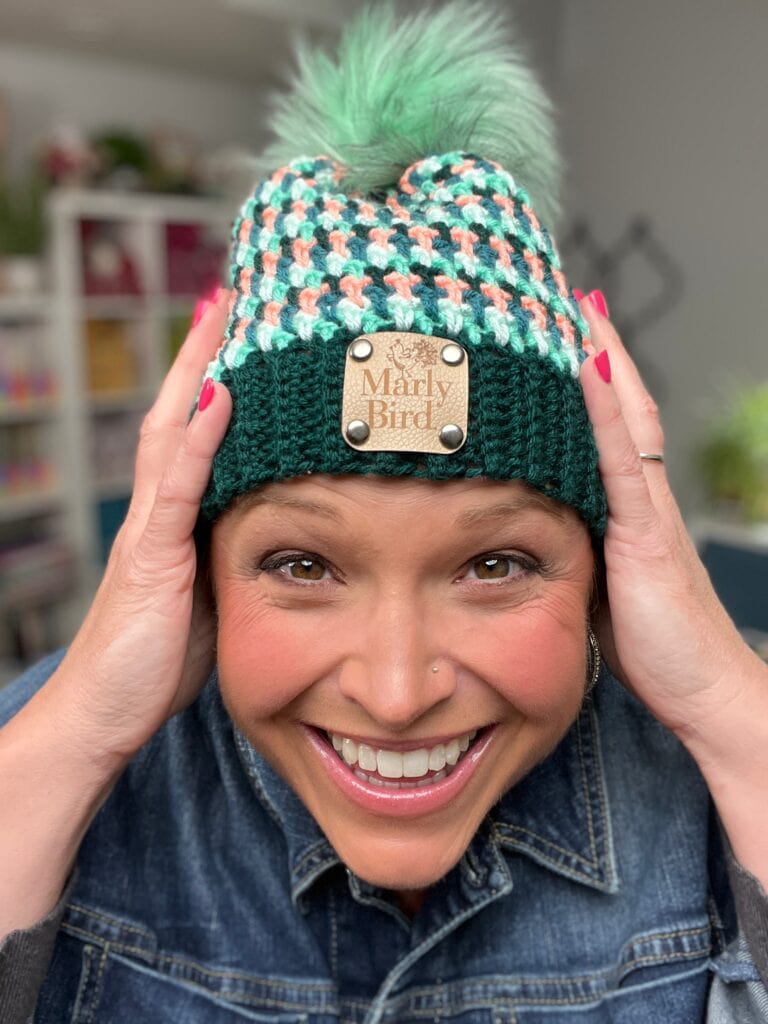
A smiling woman in a denim jacket models and holds a colorful Crochet Hat with a green pom-pom from the Flicker and Flash Free Crochet Pattern, shown in two portraits and one close-up of the hat on a white background. -Marly Bird

This free crochet hat pattern uses sport weight yarn and colorful striping with long double crochet stitches that create a bold, flickering effect. The textured body stitch is paired with ribbing worked in single crochet back loop only for the brim—so you get plenty of stretch and comfort.

With nine sizes included (from baby through adult large), you can make one for everyone. It’s a quick, stash-friendly project you’ll come back to whenever you want color, texture, and instant gratification.

👉 If you’re looking for a stash-busting crochet project that’s beginner-friendly but still looks impressive, this one is for you.

Affiliate Disclosure: This post contains affiliate links. To learn more please visit my privacy policy here💖


Why You’ll Love the Flicker and Flash Crochet Hat

✔️ Perfect stash-busting crochet pattern – uses partial skeins and scraps
✔️ Adventurous beginner friendly – simple stitches worked in fun ways
✔️ Nine sizes included – from newborn to adult large
✔️ Choose between a single brim or cozy double brim
✔️ Add optional pom poms and leather tags for a store-bought look
✔️ Works in any sport weight yarn

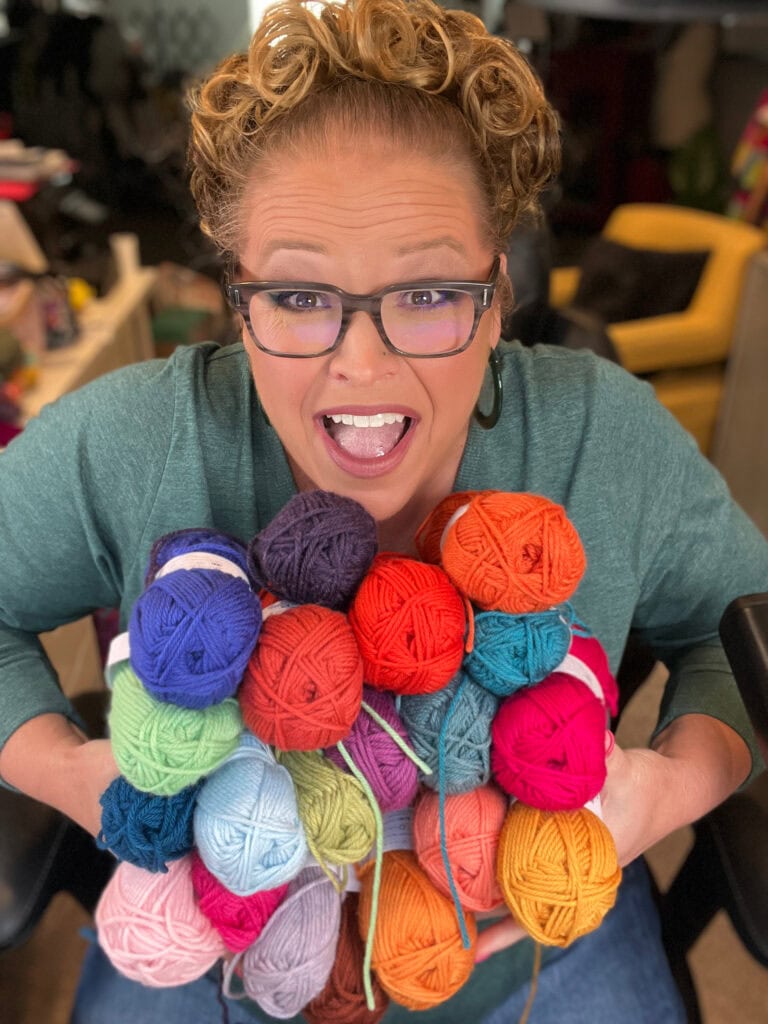
A smiling person with curly hair and glasses holds a large bundle of colorful yarn balls, wearing a green top—ready for the This or That Make-Along 2025—while sitting indoors with blurred background furniture. -Marly Bird

What Makes This Crochet Hat Special

The Flicker and Flash uses long double crochet stitches (ldc) to “flash” a color from one round into the next, giving the fabric a woven, pixelated look. By changing colors every round, you get incredible movement and texture while keeping the stitch repeat simple and easy to memorize.

It’s the perfect hat if you:

  • Want a beginner-friendly crochet hat with texture
  • Love playing with color striping
  • Need a stash buster crochet pattern that uses sport weight yarn

Yarn Choice & Substitutions

The sample uses Knit Picks Brava Sport (a durable, budget-friendly acrylic with tons of colors). But the Flicker and Flash works in just about any sport weight yarn.

Great substitutions:

  • Wool of the Andes Sport – 100% Peruvian Highland Wool
  • Heatherly Sport – smooth and lightweight – acrylic and Merino wool blend
  • Wool Ease DK – budget-friendly with great stitch definition
  • Bernat Softee Cotton – cotton with excellent drape (if using cotton, make the brim extra tight by using smaller hook)

💡 Pro Tip: Acrylic is durable and machine-washable, great for kids’ hats. Cotton gives you beautiful stitch definition but less stretch.


Sizing Details

This free baby-to-adult crochet hat pattern is written in nine sizes:

  • 0–3 mo
  • 3–6 mo
  • 6–12 mo
  • 1–3 yr
  • 3–5 yr
  • 6–10 yr
  • Teen/Adult Small
  • Adult Medium
  • Adult Large

Each size is written with about 1″ (2.5 cm) of negative ease so the hats fit comfortably without being too tight.


Split image with two smiling women wearing glasses and crocheted hats in green, cream, and pink; text reads "Flicker and Flash," "Free Crochet Pattern," "This or That Make-Along," with snowflake decorations. -Marly Bird

✨ Upgrade to the Ad-Free PDF Pattern

Want to skip the ads and enjoy a beautifully formatted pattern? The ad-free PDF includes:

  • Instructions for Sport weight yarn
  • Easy-to-follow written instructions
  • Exclusive Access to videos instructions
  • Stitch diagram (crochet)

📌 Get the Flicker and Flash Crochet Hat PDF
(Access inside the Marly Bird House with unlimited viewing and bonus material)

Etsy
Shopify
Ravelry
Marly Bird House
A promotional image for the flicker and flash crochet hat pattern PDF. It features the cozy hat with a pom-pom, sample pattern pages, and a “Buy Now” button. Text reads “Ad-Free PDF!” and “Flicker & Flash Crochet Hat.”. -Marly Bird

More Crochet Hat Patterns You’ll Love

If you loved Flicker and Flash, you’ll also enjoy these free crochet hat patterns on MarlyBird.com:

  • Moonlit Path Crochet Hat
  • Textured Crochet Beanie with Faux Fur Pom
  • Cinnamon Hearts Hat

Are You BiCrafty? 🧶✨

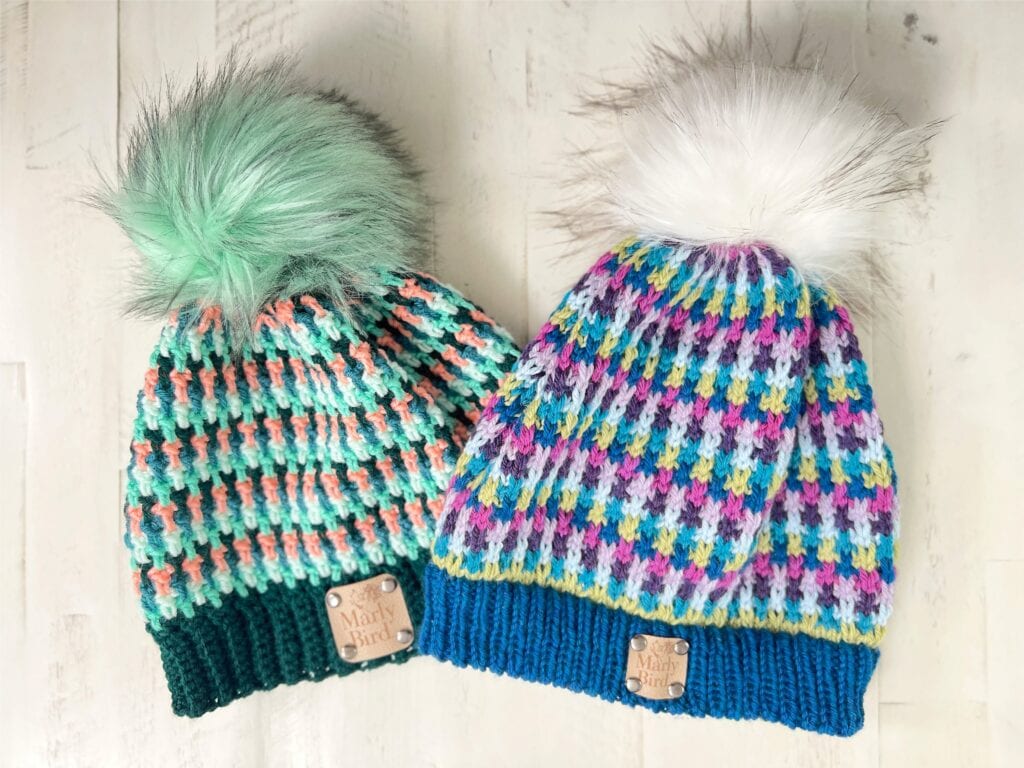
If you knit and crochet, don’t miss the sister pattern: the Pixel Pop Knit Hat. Both hats are designed with stash-busting in mind, and they’re part of the same This or That Make-Along. Choose your craft…or make both!

Two colorful knit beanies with large faux fur pom-poms on top. Inspired by the Flicker and Flash crochet hat, each features ribbed brims, leather tags, and vibrant hues—perfect for those seeking a fun accessory or a free crochet pattern idea. -Marly Bird

✨ Flicker and Flash Crochet Hat Pattern Details

by Marly Bird

Crochet hats are the ultimate “go-to” project: quick, fun, and the perfect stash buster for leftover yarn. The Easy Peasy Beanie is written for 9 sizes (from newborn all the way to Adult Large), so you can make one for everyone in the family. This beginner-friendly design uses a single crochet in the back loop only ribbing and a simple textured body stitch, making it a great first hat project or a relaxing repeat for experienced crocheters.

A size-inclusive, beginner-friendly crochet hat that’s scrap-yarn approved and fun to stripe. Built on single crochet ribbing with a textured long double crochet body. Written in nine sizes: 0–3 mo, 3–6 mo, 6–12 mo, 1–3 yr, 3–5 yr, 6–10 yr, Teen/Adult S, Adult M, Adult L.

A smiling person wears a green and white patterned knit hat with a pom-pom and “Marly Bird” label—perfect for stash-busting or finding free knit hat patterns—plus a denim jacket and hoop earrings, sitting indoors with shelves and plants behind them. -Marly Bird

Skill Level

Adventurous Beginner

Measurements and Sizing

Sizes

0–3 mo (3–6 mo, 6–12 mo, 1–3 yr, 3–5 yr, 6–10 yr, Teen/Adult S, Adult M, Adult L)

Fit note: Hats are written with 1″ (2.5 cm) negative ease, so they fit comfortably without being too tight. All measurements are given in both inches and centimeters for convenience. Choose the size closest to your head circumference, allowing about 1″ (2.5 cm) of negative ease for best fit.

Sizing Charts

Sport Weight – Circumference Table

SizeTo-Fit Head Circ (in)Finished Hat Circ (in)To-Fit Head Circ (cm)Finished Hat Circ (cm)
0–3 mo14″12.75″35.5 cm32.5 cm
3–6 mo16″15″40.5 cm38 cm
6–12 mo17.5″16″44.5 cm40.5 cm
1–3 yr19″18″48.5 cm46 cm
3–5 yr20″19.25″51 cm49 cm
6–10 yr21″20.25″53.5 cm51.5 cm
Teen/Adult S22″20.25″56 cm51.5 cm
Adult M23″22.5″58.5 cm57 cm
Adult L24″23.5″61 cm59.5 cm

Gauge

8 [ldc + ch-1 sps] x 16 rounds = 4.25” [11 cm] x 4” [10 cm]; use any size hook to obtain the gauge. 

Note: For ease of measuring, we grouped the long double crochet and ch-1 sps together into a stitch repeat.  Measure 8 stitch repeats, which is 16 total stitches, for gauge. 

Materials

Yarn

Sport weight yarn in 3, 5, or 7 colors, approximately 100–250 yds [91.5-228.5 m] depending on size and number of colors used

  • Colors A (Brim): 100g
  • Colors B, C, D, and E, (Body Colors): 25g – 50g each

Note: The pattern will still work with even more colors, but will lose the repeating effect. It can also work with an even rather than odd number of colors; this will make each color look more vertically stacked, rather than alternating and woven.

Suggested Yarn: Knit Picks Brava Sport (100% Premium Acrylic, 340 yds / 311 m, 3½ oz / 100g, CYCA #3 sport)

Hook

G/7 (4.5 mm) and H/8 (5.0 mm), or size to meet gauge

Notions

Faux Fur Pom (optional)

Removable stitch markers

Tapestry needle 

Leather tag (optional)


Abbreviations

Ch — Chain(s)

Sc — Single Crochet

Dc — Double Crochet

Sl st — Slip Stitch

Sp(s) — Space(s)

RS — Right Side

St(s) — Stitch(es)

WS — Wrong Side

Yo — Yarn Over


Special Stitches

⭐️ Back Loop Only (BLO): Work into the furthest of the top two loops of the stitch indicated, regardless of right side or wrong side.

⭐️ Long Double Crochet (Ldc): Work a double crochet into the stitch indicated one round below the previous round worked. This stitch will be worked around the previous round worked, encasing the ch-sp on the previous round.

⭐️ Long Double Crochet 2 Together (Ldc2tog): * Yo, insert hook in stitch one round below, yo and pull up a loop, yo and draw through 2 loops, repeat from * once more in the next indicated stitch, yo and draw through all 3 loops on hook.

⭐️ Stacked Double Crochet (Stacked Dc): (Do not ch 1 prior to making the first sc) Sc in first stitch, insert hook in between two legs of the base, yarn over and pull up a loop, yarn over and draw through 2 loops on hook.

⭐️ Single Crochet 2 Together (sc2tog): * Insert hook into indicated stitch, yarn over and pull up a loop; repeat from * in next stitch indicated, yarn over and draw through all 3 loops on hook. (1 decrease)


Notes

  • Work bottom up: ribbing, then body, then crown.
  • Change color at the end of every round of the body. You can cut the old color and have tails to weave in or drop the old color to the inside and float it up when needed. 
  • Change color in any order desired.  If you use an odd number of colors, you will have a tweed (offset) look to the stitch pattern.  If you use an even number of colors, you will have a vertical (stacked) look to the stitch pattern. 
  • Do not turn at the end of rounds unless stated.
  • Use a smaller hook for the brim and a larger hook for the body of the hat.  If you have a very tight tension, you can use the larger hook for the brim as well.
  • Sizes are written as: 0–3 mo (3–6 mo, 6–12 mo, 1–3 yr, 3–5 yr, 6–10 yr, Teen/Adult S, Adult M, Adult L).

VIDEO TUTORIAL

  • Slip Stitch Crochet Ribbing >> Click Here for Video Help << 
  • Long Double Crochet Tips >> Click Here for Video Help <<
  • How to Bury Ends >> Click Here for Video Help <<
  • How to add a Removable Faux Fur pom >> Click Here for Video Help <<
  • How to Crochet Flicker and Flash Crochet >> Click Here for Video Help <<
A woman wearing glasses holds a crocheted beanie with a green pom-pom. Another photo shows her smiling in the same Crochet Hat. Text reads: "How to Crochet Flicker and Flash Free Crochet Pattern," with snowflake graphics decorating the image. -Marly Bird

🎉 Flicker and Flash Crochet Hat Pattern (Sport Weight)

Ribbed Brim 

Option 1: Single Brim

With color A and smaller hook, ch 7 (7, 8, 8, 9, 9, 10, 10, 10).

Row 1 (RS): Sc in 2nd ch from hook and in each ch across, turn — 6 (6, 7, 7, 8, 8, 9, 9, 9) sts.

Row 2: Ch 1, sc-blo in each sc across, turn.

Repeat Row 2 46 (54, 58, 66, 70, 74, 74, 82, 86) times more — 48 (56, 60, 68, 72, 76, 76, 84, 88) rows total.

Joining Row: With WS facing, bring short ends together and sl st through both layers across to form a loop. Do not fasten off.

Option 2: Double Brim

With color A and smaller hook, ch 13 (13, 15, 15, 17, 17, 19, 19, 19).

Row 1 (RS): Sc in 2nd ch from hook and in each ch across, turn — 12 (12, 14, 14, 16, 16, 18, 18, 18) sts.

Row 2: Ch 1, sc-blo in each sc across, turn.

Repeat Row 2 46 (54, 58, 66, 70, 74, 74, 82, 86) times more — 48 (56, 60, 68, 72, 76, 76, 84, 88) rows total.

Joining Row: With WS facing, bring short ends together and sl st through both layers across to form a loop. Do not fasten off.

A smiling woman in a denim jacket models and holds a colorful Crochet Hat with a green pom-pom from the Flicker and Flash Free Crochet Pattern, shown in two portraits and one close-up of the hat on a white background. -Marly Bird
Etsy
Shopify
Ravelry

GROW

To Unlock Exclusive Subscriber Content click the Box below and join for free by simply adding your email and creating a password! If you are having troubles, clear your cache or reset your password or login to the Grow Publisher Portal.

>> Learn More About Grow Here <<

I'm thrilled to share this amazing pattern with you, many patterns on my blog are absolutely free! I kindly request that you don't copy and paste or distribute this pattern. Prefer an ad-free experience? Buy a digital PDF pattern for a small fee from one of my online stores for a seamless crafting journey. 

I appreciate your support and readership. You are the reason I can keep doing what I love and sharing it with others. So, thank you from the bottom of my yarn-loving heart! Disclosure: This post contains affiliate links, meaning I get a commission if you decide to make a purchase through my links at no cost to you.

Body

Working around the long edge of the brim, continue with color A  and larger hook as follows:

Set-Up Round 1: Stacked dc into the end of the first row of ribbing, *ch 1, skip next row of ribbing, dc into the end of next row of ribbing; repeat from * around to last row of ribbing, ch 1, skip last row, join with sl st to first dc. Fasten off— 24 (28, 30, 34, 36, 38, 38, 42, 44) groups of ldc + ch-1 sps.

Set-Up Round 2: Join next color to next ch-1 sp, ch 1, *ldc in skipped row of brim below the next ch-sp, ch 1, skip next ldc; repeat from * around, join round with sl st to first dc. Fasten off.

Round 1: Join next color to the last ch-1 sp from previous round, ch 1, *ldc in dc below next ch-sp, ch 1, skip next st; repeat from * around, join round with sl st to first dc. Fasten off.

Round 2: Join next color to next ch-1 sp, ch 1, *ldc in dc below the next ch-sp, ch 1, skip next st; repeat from * around, join round with sl st to first dc. Fasten off.

🔁 Repeat Rounds 1 & 2 changing colors each round, always fastening off and rejoining the new color in a different ch-1 space until hat measures from brim:
4 (4.5, 5, 6, 6.5, 7, 7.5, 8, 8.5)″ [10 (11.5, 12.5, 15, 16.5, 18, 19, 20.5, 21.5) cm] and after a round 1.

Crown

Sizes 6-12 mo (1-3 yr, 6-10 yr, Teen/ Adult S, Adult M) Only

Set-up Round: Join next color to the last ch-1 sp from previous round, ch 1, *[ldc in dc below next ch-sp, ch 1, skip next st] 13 (15, 17, 17, 19] times, ldc2tog in next 2 dc below the next 2 ch-1 sps, ch 1; repeat from * around, join round with sl st to first dc. Fasten off. – – (-, 28, 32, -, 36, 36, 40, -) groups of ldc + ch-1 sps.

Sizes 0-3 mo (3-6 mo, 3-5 yr, Adult L) Only

Set-up Round: Join next color to the last ch-1 sp from previous round, ch 1, *ldc in dc below next ch-sp, ch 1, skip next st; repeat from * around, join round with sl st to first dc. Fasten off. – 24 (28, -, -, 36, -, -, -, 44) groups of ldc + ch-1 sps.

All Sizes

Round 1: Join next color to the last ch-1 sp from previous round, ch 1, *ldc in dc below next ch-sp, ch 1, skip next st, ldc2tog in the next 2 dc below the ch-1 sps, ch 1, skip next st, ldc in dc below next ch-1 sp, ch 1, skip next st; repeat from * around, join round with sl st to first dc. Fasten off—18 (21, 21, 24, 27, 27, 27, 30, 33) groups of ldc + ch-1 sps.

Round 2: Join next color to next ch-1 sp from previous round, ch 1, *ldc2tog in the next 2 dc below the next 2 ch-1 sps, ch 1, skip next st, ldc in dc below next ch-sp, ch 1, skip next st; repeat from * around, join with sl st to first dc. Fasten off—12 (14, 14, 16, 18, 18, 18, 20, 22) groups of ldc + ch-1 sps.

Round 3: Join next color to the last ch-1 sp from previous round, ch 1, *ldc2tog in the next 2 dc below the next two ch-1 sps, ch 1, skip next st; repeat from * around, join with sl st to first dc. Fasten off—6 (7, 7, 8, 9, 9, 9, 10, 11) groups of ldc + ch-1 sps.

Round 4: Join next color to the next ch-1 sp from previous round, ch 1, *ldc in dc below the next ch-1 sps, sc in next dc; repeat form * around, join with sl st to first dc—12 (14, 14, 16, 18, 18, 18, 20, 22) sts. 

Round 5: Sc2tog in next two sts; repeat from * around, join with a sl st to first sc—6 (7, 7, 8, 9, 9, 9, 10, 11) sts.  

Finish:
For stitches remaining, weave tail through the front loop of each stitch, pull tight, secure on wrong side. 


Finishing

Weave in all ends on the inside. Add a pom-pom if you like. Light steam to relax the crown only, keep the ribbing snappy and elastic.

Etsy
Shopify
Ravelry
A smiling person in a denim jacket holds a colorful, stash-busting crocheted hat with a pom-pom and a label that says "Marly Bird." The softly blurred background reveals shelves and plants. -Marly Bird

Final Thoughts on the Flicker and Flash Crochet Hat

The Flicker and Flash Crochet Hat is a playful reminder that yarn doesn’t need to sit in your stash forever. With simple stitches, bold color play, and nine sizes to choose from, it’s a pattern you’ll return to again and again—whether you’re making gifts, prepping for markets, or just treating yourself.

I can’t wait to see your hats in action! Be sure to tag me @themarlybird with hashtags #MarlyBird and #MMMDI (Marly Made Me Do It) so I can share your makes.

And if you’re hooked (pun intended 😘) on this one, don’t forget to check out my other free crochet patterns for even more inspiration.


Pin the Flicker and Flash Crochet Hat for Later 📌

Not ready to start? Save this to Pinterest and keep it handy for when your hook and stash are calling!

❤️ Your BiCrafty Bestie,
Marly Bird
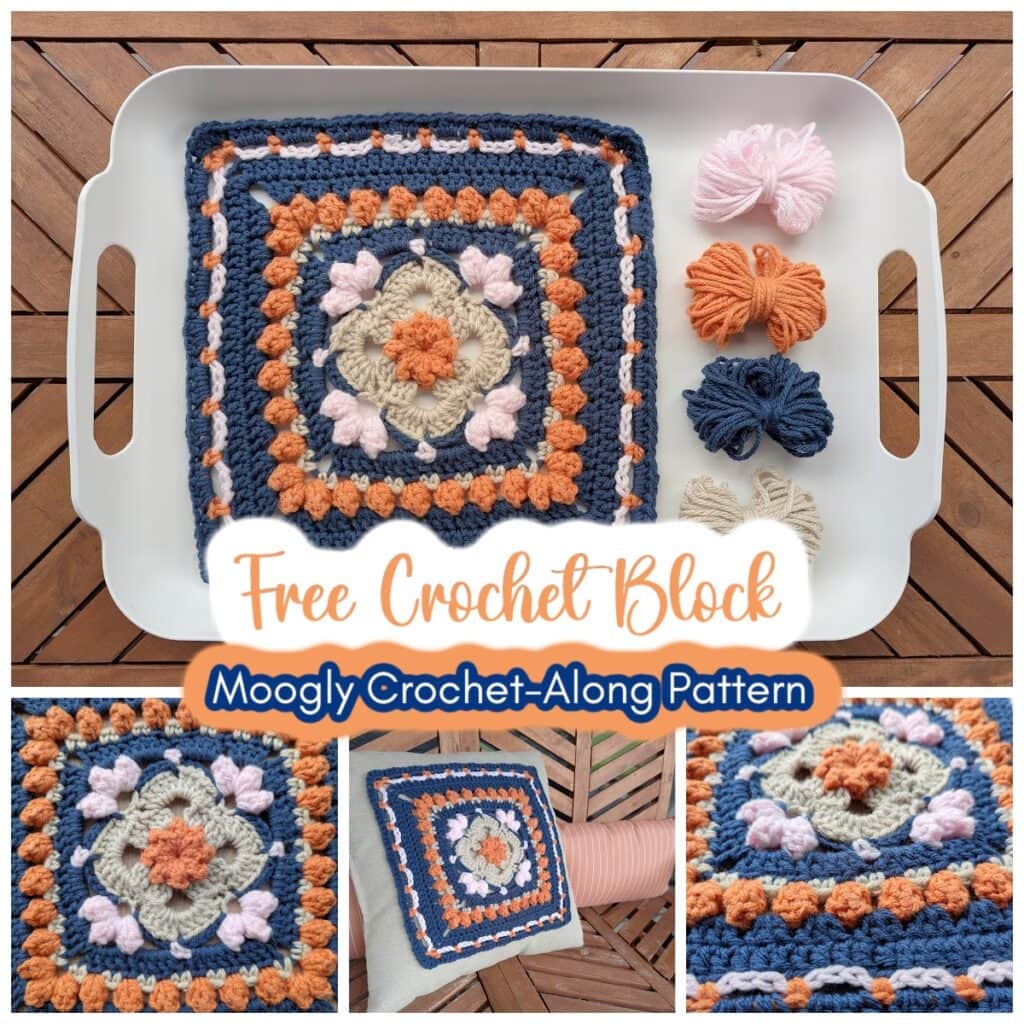
A cartoon avatar of a person with glasses and a brown bun smiles warmly. Their green shirt and black jacket add a stylish touch, while colorful hearts surround them like loving temperature blankets, stitching together an aura of love and positivity. -Marly Bird

Frequently Asked Questions

What is the Flicker and Flash Crochet Hat?

The Flicker and Flash is a free colorwork crochet hat pattern by Marly Bird, designed for the “This or That Make-Along 2025” as the crochet counterpart to the Pixel Pop Knit Hat. It uses mosaic slip stitch colorwork to create a bold, modern geometric design in two colors. Like all mosaic crochet, you only work with one color at a time per row… so it's much more approachable than traditional stranded colorwork. It works up quickly and the finished hat is genuinely eye-catching.

What skill level is this hat?

Advanced beginner to intermediate. You should be comfortable crocheting in the round and following a simple chart. Mosaic slip stitch crochet (working one color per row and slipping stitches from the previous round to create the pattern) is beginner-friendly once you understand the concept… you're just slipping certain stitches instead of working into them. The chart guides you through which stitches to work and which to slip. If you've made basic crochet hats and want to try your first colorwork… this is a great starting point.

What yarn should I use for the Flicker and Flash Hat?

Worsted weight in two colors with strong contrast… a light and dark combination gives you the crispest geometric pattern. Smooth yarn with good stitch definition helps the mosaic pattern read clearly. Wool or wool blend is ideal for a warm hat that blocks beautifully. Smooth acrylic in two high-contrast colors also works great and gives you a machine-washable hat. This pattern is specifically designed to use up leftover worsted weight stash yarn from make-alongs and other projects… perfect for stash busting!

How is mosaic crochet different from regular colorwork?

In regular stranded colorwork you carry both yarns across every row. In mosaic crochet, you work one color per row or round… stitches from the other color are simply slipped (passed without working). The slipped stitches from the previous round create the pattern by bringing that color up into the new row. No floats, no tangled yarns, no managing two strands at once. It's genuinely the most approachable way to do colorwork in crochet… the result looks complex but the technique is very manageable.

Can I make the Flicker and Flash Hat in any color combination?

Yes! Any two colors with good contrast work. The pattern doesn't specify colors… that's part of the fun. Classic combinations like cream and charcoal, navy and white, or black and a bright pop color all look stunning. The geometric pattern shows up best when you have clear contrast between your two colors. If you're not sure about contrast, take a photo of your two yarns and view it in black and white… if they look different shades of grey, the contrast is enough. If they look the same shade, they're too similar.

Filed Under: Crochet, Free Patterns, Marly Bird Premium Patterns, Our Free Patterns, Pattern, YouTube Video Tutorial

Pixel Pop Knit Hat – Free Mosaic Slip Stitch Knitting…

August 29, 2025 By Marly Bird 4 Comments

A Colorful Stash-Busting Knit Hat You’ll Love

Got leftover yarn piling up in your bins, baskets, and tote bags? 🎨 The Pixel Pop Knit Hat is the perfect stash-busting knitting pattern to transform scraps into something fun, wearable, and oh-so-stylish.

Two photos of a smiling woman in glasses and a denim jacket holding a colorful knit hat with a white pom-pom. Text: "Pixel Pop" and "This or That Make-Along" highlight this free knitting pattern featuring mosaic slip stitch. Winter-themed decorations included. -Marly Bird

This free mosaic knit hat pattern uses slip-stitch colorwork—which means you only work with one color per round. No juggling multiple strands or stressing over floats like stranded colorwork.

Just knit, slip,
switch colors, and
watch the pixelated magic appear.

Whether you stick to three colors or go all in with seven (or more!), every version turns out unique. Plus, the folded double brim adds extra warmth and coziness—perfect for chilly days or holiday gifting.

👉 If you love quick, colorful, and customizable projects, this is one you’ll come back to again and again.

A woman in a blue denim jacket smiles joyfully while wearing a colorful knit beanie with a white pom-pom—perfect inspiration for stash-busting knit hat patterns. She stands in a cozy, well-lit room with books and plants in the background. -Marly Bird

Affiliate Disclosure: This post contains affiliate links. To learn more please visit my privacy policy here💖


Why You’ll Love the Pixel Pop Knit Hat

✔️ Perfect stash-busting knitting pattern – use small amounts of leftover yarn
✔️ Advanced beginner friendly mosaic knitting pattern – no complicated floats
✔️ Nine sizes included – from baby to adult large
✔️ Cozy knit hat pattern with folded brim
✔️ Works beautifully in any worsted weight yarn
✔️ Optional pom pom + leather tag for a polished finish

A smiling person with curly hair and glasses holds a large bundle of colorful yarn balls, wearing a green top—ready for the This or That Make-Along 2025—while sitting indoors with blurred background furniture. -Marly Bird

What is Mosaic Knitting?

If you’ve never tried mosaic knitting before, this hat is a great place to start. Mosaic colorwork uses slipped stitches to create bold geometric patterns while only working with one color per round.

  • No tangling yarns behind your work
  • Crisp, pixel-like designs with minimal fuss
  • A fantastic way to explore color without the intimidation of stranded knitting

Want to see it in action? I’ve got a full step-by-step video tutorial: How to Knit the Pixel Pop Hat.

Two smiling women display a colorful knit hat with a pom-pom, showcasing a fun mosaic slip stitch design. Text reads: "How to Knit Pixel Pop - Free Knitting Pattern." Winter-themed graphics decorate the background. -Marly Bird

Yarn Choice & Substitutions

The sample uses KnitPicks Swish Worsted (a soft superwash merino), but this pattern works beautifully with almost any worsted weight yarn.

Try these stash-friendly and accessible alternatives:

  • Herrschners Worsted Heathers – affordable wool blend
  • Herrschners Worsted 8 Neon Lights Yarn – bright and colorful (especially for kids’ hats)
  • Brava Tweed – easy-care premium acrylic
  • Berroco Vintage– budget-friendly wool blend
  • Twill – Splurge on fantastic yarn that you will absolutely LOVE knitting with!

💡 Pro Tip: Acrylic yarns are great for durability and easy care, while wool and blends add warmth and stretch.

Stash Yarn From Previous Events and Projects?

Did you participate in any of these recent Marly Bird Events?

  • ​Turkey Trot​
  • ​Sleigh the Holidays​
  • ​First Fall​
  • ​Game Day Make-Along

If you answered YES to any of those, chances are you've got a little yarn left in your stash. Maybe a lot of yarn. 😅 Don’t worry—The Pixel Pop Knit Hat is the perfect way to put it to good use!


Sizing Details

This free baby to adult knit hat pattern comes in nine sizes:

  • 0–3 mo
  • 3–6 mo
  • 6–12 mo
  • 1–3 yr
  • 3–5 yr
  • 6–10 yr
  • Teen/Adult Small
  • Adult Medium
  • Adult Large

That makes it perfect for:
🎁 Holiday gifts
👨‍👩‍👧 Matching family hats
🛍 Market prep (unique, colorful hats are always crowd-pleasers!)

Smiling woman in a denim jacket holds the brim of a colorful, knitted beanie with a fluffy white pom-pom—perfect for stash-busting—standing in a cozy room with shelves of yarn in the background. -Marly Bird

🎁 Upgrade to the Ad-Free PDF Pattern

Want to skip the ads and enjoy a beautifully formatted pattern? The ad-free PDF includes:

  • Instructions for Worsted weight yarn
  • Easy-to-follow written instructions
  • Exclusive Access to videos instructions
  • Charts

📌 Get the Pixel Pop Knit Hat Ad Free PDF
(Access inside the Marly Bird House with unlimited viewing and bonus material)

Etsy
Shopify
Ravelry
Marly Bird House
A colorful pixel pop knit hat with a pom-pom is displayed on a woven mat. The image advertises an ad-free PDF pattern called “Pixel Pop,” alongside printed pattern pages and a "Buy Now" button on a blue background. -Marly Bird

Looking for Matching Mittens?

🧤✨ The Pixel Pop Knit Mittens are HERE ✨🧤

If you loved the Pixel Pop Hat, you’re going to flip your stitch markers over the matching mittens! These mosaic colorwork mittens are:

🧶 Written for 6 sizes (baby to adult XL)
🎨 Made with worsted weight yarn scraps
🧵 Easier than they look thanks to slip-stitch mosaic knitting!

Whether you want to make a matching set or just love a good stash buster, now’s the perfect time to grab the pattern.

🛒 Grab it on your favorite platform:
💻 Shopify: https://shop.marlybird.com/products/pixel-pop-knit-mitten-pattern
🧶 Ravelry: https://www.ravelry.com/patterns/library/pixel-pop-knit-mittens
🧵 Etsy: https://click.linksynergy.com/deeplink?id=vMRXoG90hiM&mid=4231730&murl=https%3A%2F%2Fwww.etsy.com%2Flisting%2F1826692551%2Fknitting-pattern-video-fingerless%3Fref%3Dlistings_manager_grid

Colorful Pixel Pop knit hat with a white pom-pom and matching mittens in a blue, purple, green, and white pattern are displayed on a light wood surface next to balls of yarn in coordinating colors. -Marly Bird

More Mosaic & Colorwork Hat Patterns

If you enjoy the Pixel Pop Knit Hat, you’ll also love these free patterns here on MarlyBird.com:

  • Twilight Trails Knit Mosaic Hat
  • Falling Leaves Mosaic Knit Hat
  • Northern Gleam Hat
  • Roy G. Biv Hat
  • Harmony Hues Knit Hat

And if you’re in the mood for even more projects: Explore 100+ Free Knitting Patterns.

A knitted beanie, perfect for KNIT GAME DAY, features a grey and green textured pattern with a fluffy pom-pom on top. It has a ribbed brim adorned with a leather patch that reads "Marly Bird." The backdrop is a light wooden surface. -Marly Bird
Twilight Trails Knit Mosaic Hat Pattern – A Stylish & Textured DesignTwilight Trails
A person wearing glasses smiles while holding two knitted hats with pom-poms, showcasing a free pattern. One hat is blue and green, and the other is red and white. The cozy indoor setting adds warmth with its furnishings and decorations. -Marly Bird
Falling Leaves Mosaic Hat
A smiling woman wearing glasses and a colorful knit hat—made from a one-day colorwork knit hat pattern with a blue pom-pom—poses indoors. Shelves of vibrant yarn line the background. She touches her hat’s edge and wears a dark jacket. -Marly Bird
Northern Lights
A smiling person wearing glasses and a denim jacket holds up a colorful knit hat pattern with a pom-pom, standing indoors in a bright, cozy room. -Marly Bird
Roy G Biv
A smiling person wearing a denim jacket and a colorful knit hat with a blue pom-pom stands indoors, surrounded by shelves of yarn—a perfect setting to showcase their mosaic slip stitch knitting pattern. -Marly Bird
Harmony Hues

✨ Pixel Pop Knit Hat – Free Pattern Details

Designed by: Marly Bird

Skill Level: Advanced Beginner

Sizes: 0–3 mo (3–6 mo, 6–12 mo, 1–3 yr, 3–5 yr, 6–10 yr, Teen/Adult S, Adult M, Adult L)

Finished Measurements
Brim Circumference (stretchable):
12 (14¼, 16, 17½, 18½, 19, 20, 21, 22¼)”
[30.5 (36, 40.5, 44.5, 47, 48.5, 51, 53.5, 56.5) cm]

Gauge
20 sts = 4” [10 cm] in Mosaic Slip Stitch pattern


Materials

Yarn

Worsted weight yarn in 3, 5, or 7 colors, approximately 100–250 yds [91.5-228.5 m] depending on size and number of colors used

  • Colors A & B (Brim Colors): 50g each
  • Colors C, D, E, F, and G (Body Colors): 25g – 50g each 

Note: The pattern will still work with even more colors, but will lose the repeating effect. It can also work with an even rather than odd number of colors; this will make each color look more vertically stacked, rather than alternating and woven.

Yarn used on Sample:

KnitPicks Swish Worsted (100% Superwash Merino Wool, 110 yds / 100 m, 1 ¾ oz/ 50 g, CYCA# 4 worsted) – 1 ball each

  • Color A  #26070 Green Tea
  • Color B  #24094 Marine Heather
  • Color C  #C28646 Voyage Heather
  • Color D  #C28656 Arctic
  • Color E  #C24097 Indigo Heather
  • Color F  #C28647 Haze Heather
  • Color G #C28650 Karma Heather

Needles

U.S. 8 [5 mm] 16” circular needles and set of 5 double-pointed needles, or size to obtain gauge.

Notions

Faux Fur Pom (optional)

Removable stitch markers

Tapestry needle Leather tag (optional)


ABBREVIATIONS

  • K – Knit
  • KFB – Knit into the front and back of the same stitch (see Special Stitches)
  • P – Purl
  • Pm – Place Marker
  • RS – Right Side
  • Sl – Slip
  • Slm – Slip Marker
  • Ssk – Slip, Slip, Knit (see Special Stitches)
  • WS – Wrong Side
  • Wyib – With Yarn in Back
  • Wyif – With Yarn in Front

SPECIAL STITCHES

⭐️ Kfb (Knit Front & Back): Knit through front and back of next stitch – 1 stitch increased.

⭐️ Ssk (Slip, Slip, Knit): Slip 2 stitches, one at a time, as if to knit. Insert left hand needle into the front of these two stitches and knit them together from this position (1 stitch decreased)

PATTERN STITCHES

1 x 1 Rib

Worked circularly over an even number of sts.
Every Round: * K1, p1; repeat from * around.

Mosaic Slip Stitch Color pattern (circular)

Worked circularly over a multiple of 4 sts.Setup Round: Knit.

Change to next color.

Rounds 1–2: * K3, sl 1 wyib; repeat from * around.

Change to next color.

Rounds 3–4 (next color): * K1, sl 1 wyib, k2; repeat from * around. 

Repeat Rounds 1-4 for Mosaic Slip Stitch Color pattern, being sure ro change to the next color every 2 rounds.

Mosaic Slip Stitch Color pattern (flat)

Worked flat over a multiple of 4 sts plus 2.

Note: Hat is worked entirely in the round. The flat version of Mosaic Slip Stitch Color pattern is given here for purposes of measuring gauge.

Setup Row (WS): Purl.

Change to next color.

Row 1 (RS): K1, * k3, sl 1 wyib; repeat from * to last st, k1.

Row 2: P1, * sl 1 wyif, p3; repeat from * to last st, p1.

Change to next color.

Row 3: K1, * k1, sl 1 wyib, k2; repeat from * to last st, k1.

Row 4: P1, * p2, sl 1 wyif, p1; repeat from * to last st, p1.

Repeat Rows 1-4 for Mosaic Slip Stitch Color pattern, being sure ro change to the next color every 2 rows.


CHARTS

Mosaic Slip Stitch Color pattern, circular, 3 colors: https://www.stitchfiddle.com/en/c/sh9tcf-6n4a90

Mosaic Slip Stitch Color pattern, circular, 7 colors: https://www.stitchfiddle.com/en/c/sh9tgi-dydamq

Mosaic Slip Stitch Color pattern, flat, 3 colors: https://www.stitchfiddle.com/en/c/sh9tea-97wfuo


NOTES

  • Directions are for the smallest size; changes for larger sizes are in parentheses. When only one number is given then that number applies to all sizes.
  • Hat is worked in the round from the Brim up.
  • The Brim is worked in 1×1 Rib, then folded for a double layer.
  • A setup round increases the stitch count before the colorwork section begins.
  • Mosaic colorwork uses slip stitches, and only one color is used per round.
  • Crown shaping is fast and maintains visual rhythm.

VIDEO TUTORIALS

  • Long-Tail Cast-On >> https://www.youtube.com/watch?v=vEGwt4cedLM <<
  • Knit Stitch (continental style) >> https://www.youtube.com/watch?v=M3brKFKg5Yc  <<
  • Purl Stitch (continental style) >> https://www.youtube.com/watch?v=LuDt-8jqh4g <<
  • KFB (Knit Front & Back) >> https://youtu.be/k9rWymMDxgM <<
  • How to Add Lifeline >> https://youtu.be/FiqYUE_aHAw  <<
  • How to Add Faux Pom Pom >> https://youtu.be/tl0sa3A_v38 <<
  • How to Tink >> https://youtu.be/c7Gud7k4Y8k  <<
  • How to Bury Ends >> https://youtu.be/8_NBGUKjO-E <<
  • How to Knit the Pixel Pop Hat >> https://youtu.be/3MK9DUkZxQQ <<

A woman excitedly holds colorful yarn balls on the left; on the right, a finished multicolored knit hat made with a mosaic knitting pattern. Text reads "Turn This Into This" with an arrow connecting the yarn to the hat. -Marly Bird

Pixel Pop Hat Pattern Instructions – Worsted Weight

BRIM

With Color A and circular needles, cast on 72 (84, 96, 104, 112, 116, 120, 128, 132) sts.

Place marker and join round, being careful to not twist cast-on edge.

Work in 1 x 1 Rib for 1¼ (1¼, 1½, 1½, 1½, 1¾, 2, 2, 2)” [3 (3, 4, 4, 4, 4.5, 5, 5, 5) cm].

Change to B.

Next Round: Knit.

Work in 1 x 1 Rib for the same number of rounds as in the first ribbed section, then work 2 additional rounds.

Choose which brim you want for your hat and follow those instructions

✨ Optional Single Brim

Change to A.

Next Round: Knit

Continue to the Body.

A smiling person with glasses and curly hair holds up a colorful knit hat, featuring a green brim and Mosaic Slip Stitch, wearing a denim jacket and showing off bright pink nail polish in a cozy, yarn-filled room. -Marly Bird

✨ Optional Double Brim

Fold Brim to the wrong side so the cast on row is next to the row on the needles, and join the cast on edge to the working round as follows:

Change to A.

Next Round: * Insert right needle into next st on left needle and into the corresponding cast-on st at the same time and knit these two sts together; repeat from * for each st around. 

Continue to the Body.

Etsy
Shopify
Ravelry

GROW

To Unlock Exclusive Subscriber Content click the Box below and join for free by simply adding your email and creating a password! If you are having troubles, clear your cache or reset your password or login to the Grow Publisher Portal.

>> Learn More About Grow Here <<

I'm thrilled to share this amazing pattern with you, many patterns on my blog are absolutely free! I kindly request that you don't copy and paste or distribute this pattern. Prefer an ad-free experience? Buy a digital PDF pattern for a small fee from one of my online stores for a seamless crafting journey. 

I appreciate your support and readership. You are the reason I can keep doing what I love and sharing it with others. So, thank you from the bottom of my yarn-loving heart! Disclosure: This post contains affiliate links, meaning I get a commission if you decide to make a purchase through my links at no cost to you.

BODY

Place 11 increase markers spaced as evenly as possible around needle, being sure to distinguish them from beginning-of-round marker. 

Set-Up Round: With A, * k to marker, kfb, slip marker, repeat from * to last st before beginning-of-round marker, kfb. 

Count: ​​84 (96, 108, 116, 124, 128, 132, 140, 144) sts.

Remove increase markers.

Change to next color and work in Mosaic Slip-Stitch Colorwork pattern starting with Round 1, until Hat measures 5¼ (5¾, 6¼, 7¼, 7¾, 8¼, 8¼, 8¾, 8¾)” [13.5 (14.5, 16, 18.5, 19.5, 21, 21, 22, 22) cm] from fold of Brim.

End after a Mosaic Slip-Stitch Colorwork pattern Round 4.

A colorful knit hat featuring a mosaic slip stitch geometric pattern is displayed on a woven mat, surrounded by skeins of yarn in purple, teal, green, blue, and white. -Marly Bird

CROWN SHAPING

Note: Change to double pointed needles when sts become too snug to fit around the circular.

Change to next color.

Round 1: * K3, sl 1 wyib; repeat from * around.

Round 2: * K1, ssk, sl 1 wyib; repeat from * around.

Count: 21 (24, 27, 29, 31, 32, 33, 35, 36) sts decreased

Count: 63 (72, 81, 87, 93, 96, 99, 105, 108) sts remain

Change to next color.

Round 3: * K1, sl 1 wyib, K1; repeat from * around.

Shift Marker: Remove start-of-round marker, slip 1 st, replace marker.

Round 4 (decrease round): * Sl 1 wyib, ssk; repeat from * around.

Count: 21 (24, 27, 29, 31, 32, 33, 35, 36) sts decreased

Count: 42 (48, 54, 58, 62, 64, 66, 70, 72) sts remain

Change to next color.

Round 5: * K1, sl 1 wyib; repeat from * around.

Round 6 (decrease round): * Ssk; repeat from * around.

Count: 21 (24, 27, 29, 31, 32, 33, 35, 36) sts decreased

Count: 21 (24, 27, 29, 31, 32, 33, 35, 36) sts remain

Change to next color.

Round 7: Knit.

Round 8 (decrease round): * Ssk; repeat from * to last 1 (0, 1, 1, 1, 0, 1, 1, 0) sts, k1 (0, 1, 1, 1, 0, 1, 1, 0).

Count:  10 (12, 13, 14, 15, 16, 16, 17, 18) sts decreased

Count: 11 (12, 14, 15, 16, 16, 17, 18, 18) sts remain

FINISHING

Break yarn, thread tail on tapestry needle, and draw through all remaining sts knitwise.

Pull tight like a drawstring to close.

Weave in all loose ends on WS.

Sew on optional pom pom and/or tag.

Etsy
Shopify
Ravelry
A person wearing a colorful knit hat with a blue brim and mosaic slip stitch pattern touches the side of the hat. The person has pink nail polish and is dressed in a denim jacket. Shelves are visible in the blurred background. -Marly Bird

Are You BiCrafty? 🧶✨

If you’re both a knitter and a crocheter (what I like to call BiCrafty), you’ll be excited to know there’s also a crochet version of this hat! The Flicker and Flash Crochet Hat uses the same playful, stash-busting idea but is designed with easy crochet colorwork. So whether you knit, crochet, or do both, you can make a Pixel Pop for every head in the family.

A smiling person with glasses and curly hair holds up two colorful stash-busting knit hats with pom-poms, one green and pastel, the other blue and multicolored, each showcasing a "Marly Bird" tag. -Marly Bird

The Pixel Pop Knit Hat is proof that a little yarn can go a long way. Whether you’re pulling from your leftovers to create a one-of-a-kind stash-busting knitting project, or planning a perfectly coordinated color palette, this hat is equal parts practical and playful. With its folded brim, bold mosaic design, and easy slip-stitch technique, it’s the kind of project that looks advanced but is totally achievable—even if this is your first colorwork hat.

I can’t wait to see the color combos you choose! Be sure to share your Pixel Pop Knit Hat on social media and tag me @themarlybird with hashtags #MarlyBird and #MMMDI (Marly Made Me Do It) so we can cheer each other on.

And don’t stop here—if you loved this design, be sure to check out my other free knitting patterns for even more stash-busting inspiration. After all, the best projects are the ones that bring joy to your needles, your wardrobe, and your yarn shelves. 💕

❤️ Your BiCrafty Bestie,
Marly Bird
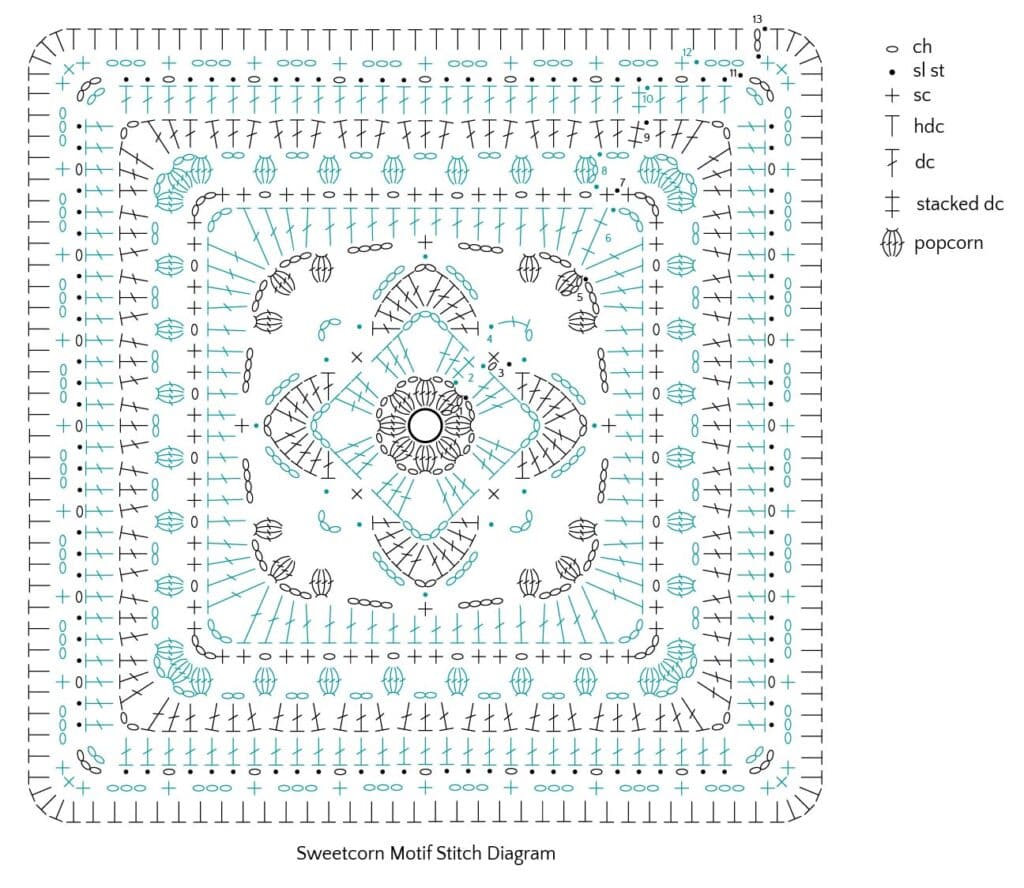
A cartoon avatar of a person with glasses and a brown bun smiles warmly. Their green shirt and black jacket add a stylish touch, while colorful hearts surround them like loving temperature blankets, stitching together an aura of love and positivity. -Marly Bird

Frequently Asked Questions

What is the Pixel Pop Knit Hat?

The Pixel Pop is a free mosaic slip stitch colorwork knit hat pattern by Marly Bird. It uses a bold, modern pixel-inspired geometric design worked in two colors using simple slip stitch techniques… so you only ever work with one color per row, making it way more approachable than traditional stranded colorwork. It was the featured knitting pattern in Marly's “This or That Make-Along 2025” stash-busting event.

What skill level is the Pixel Pop Hat?

It's designed for advanced beginners and beyond… if you're comfortable knitting in the round and reading a simple chart, you're ready. Mosaic/slip stitch colorwork is genuinely one of the most beginner-friendly ways to do colorwork knitting because you're only working one yarn at a time. No carrying floats, no managing two strands simultaneously. Just knit and slip. The geometric pattern is clear and satisfying to work through.

What makes mosaic slip stitch colorwork different from Fair Isle?

In Fair Isle (stranded colorwork), you carry both colors across every row and knit with each as needed. Mosaic or slip stitch colorwork uses just ONE color per row… stitches from the other color are slipped (passed without knitting) to create the pattern. This makes it significantly simpler to manage. No floats, no tangled yarns, no tension issues from carrying yarn across the back. Same beautiful geometric effect, much simpler execution. It's a fantastic gateway to colorwork knitting.

What yarn should I use for the Pixel Pop Hat?

Worsted weight yarn in two colors with good contrast is the way to go. The pixel pattern needs a clear light-dark distinction for the design to read crisply. A smooth, plied yarn gives you the best stitch definition so those geometric shapes pop. Wool or a wool blend is ideal for a hat… it's warm, blocks nicely, and has good elasticity. But a smooth acrylic works too and gives you a machine-washable finished hat.

Can I make the Pixel Pop Hat in any colors?

Yes! The pattern is flexible with color choices as long as you maintain good contrast between your two colors. Classic combinations like cream and navy, black and white, or a neutral with a bold pop color all look stunning. The pixel-inspired design means almost any two-color combo with sufficient contrast works… the geometric pattern does the work. This is a great opportunity to use up leftover worsted weight from your stash.

Filed Under: Free Patterns, Knitting, Marly Bird Premium Patterns, Our Free Patterns, Pattern, YouTube Video Tutorial
  • « Previous Page
  • 1
  • …
  • 7
  • 8
  • 9
  • 10
  • 11
  • …
  • 96
  • Next Page »

Let's Be Social

Join the Marly's Minions Facebook group to share, ask questions, or chat about all of your yarn related crafts!

Join the group(opens in new tab)
Cartoon of a smiling woman with brown hair in a bun, glasses, black jacket and green shirt, waving next to large "hi" text.

Quick Links

The Pattern Shop

Our Free Patterns

Blog

Marly Bird House
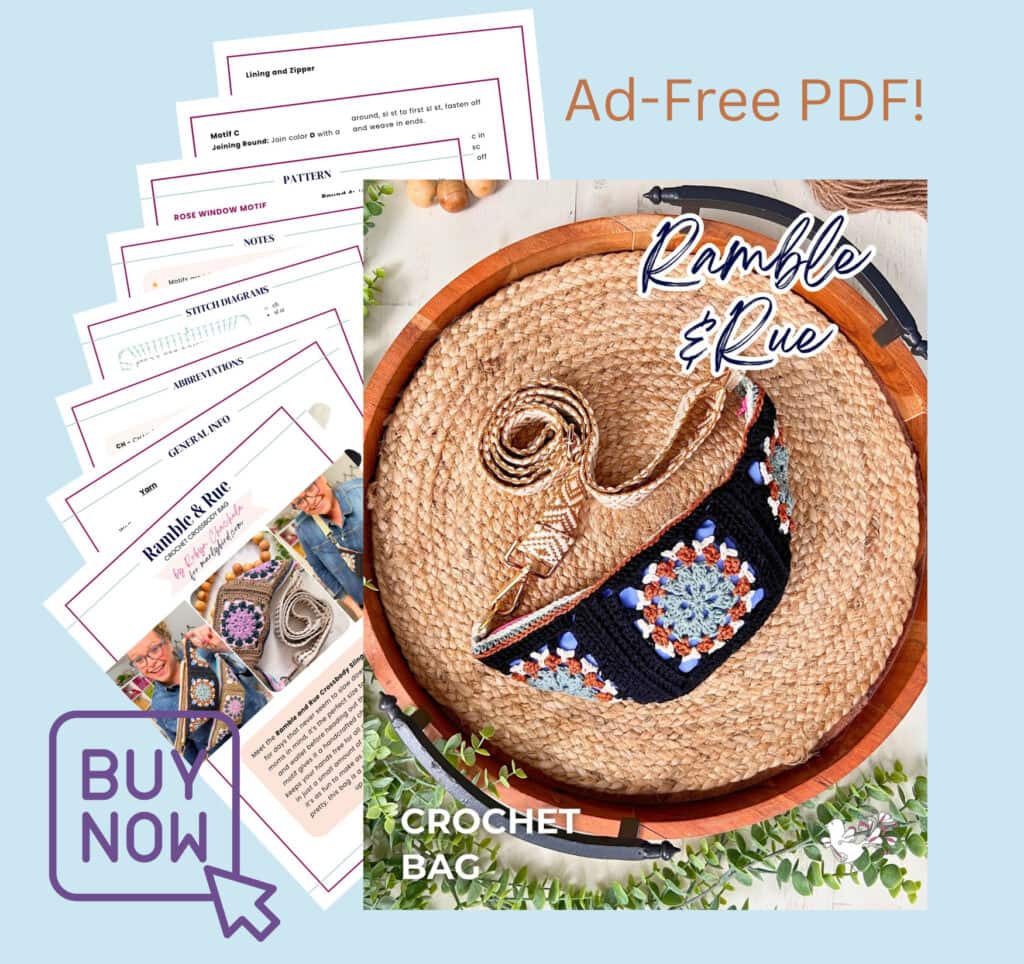
Learn to Knit & Crochet

About

Giveaway Terms and Privacy Notice

Find Us Everywhere

Join the Newsletter

YouTube Channel

Marly's Minions FB Group

Etsy Store

Ravelry Store


AN ELITE CAFEMEDIA HOME/DIY PUBLISHER

Information from your device can be used to personalize your ad experience. Do not sell or share my personal information.

Privacy Policy   Terms   Marly Bird Legal Documents Copyright © 2026