Search
Close
  • The Pattern Shop
  • Our Free Patterns
    • Browse All Our Free Patterns
    • Our Free Knitting Patterns
    • Our Free Crochet Patterns
    • The Big List of Free Knitting Patterns from Marly Bird
    • The Big List of Free Crochet Patterns from Marly Bird
  • Blog
    • All Blog Posts
    • All Free Patterns
    • Dibble Dabble Inspiration
    • Giveaways
    • Make-Alongs
    • Product Reviews
    • Roundups
    • Tips, Tricks, Techniques for Knitting and Crochet
Logo of "Marly Bird" featuring stylized text alongside a graphic of a bird perched on a branch, executed in gray and pink tones. The header design is elegant, emphasizing the brand's unique identity. -Marly Bird
  • Marly Bird House
  • Learn to Knit & Crochet
    • Newbie? Start Here
    • Video Tutorials
    • Knitting Definitions
    • Crochet Definitions
    • Common Techniques
    • Size Charts for Knitting and Crochet Projects
  • About
×
  • The Pattern Shop
  • Free Patterns
  • Blog
  • Marly Bird House
  • Learn to Knit & Crochet
    • Newbie? Start Here
    • Video Tutorials
    • Knitting Definitions
    • Crochet Definitions
    • Common Techniques
    • Size Charts for Knitting and Crochet Projects
  • About
Logo of "Marly Bird" featuring stylized text alongside a graphic of a bird perched on a branch, executed in gray and pink tones. The header design is elegant, emphasizing the brand's unique identity. -Marly Bird
Search
Close

New Patterns NOW Available in Ad-Free PDF! Check out The Pattern Shop

Knitting and Crochet Patterns for Cinco de Mayo

May 1, 2024 By Marly Bird 3 Comments

Celebrate Cinco de Mayo in style this year with your very own festive crochet and knitting creations! Whether you’re prepping for a fiesta, throwing a party, or just want to show off your skills, these fun knitting and crochet patterns for Cinco de Mayo are sure to shake things up.

Over 35 patterns curated just for you – from sombrero beanies and bright cardigans to free-flowing scarves and creative crochet amigurumi, use your yarny magic to whip up something special that’s truly fit for the occasion. Plus… with our easy-to-follow directions, it’ll be easy as piñata – we mean pie – so grab some mariachi music (and margaritas!) and get ready for some crafty fiesta fun!

If you like patterns for events like Cinco de Mayo you will love the blog post about St. Patricks Day, Mother’s Day, Father’s Day and Christmas in July!

25 plus knitting and crochet patterns to celebrate Mexican heritage and Cinco de Mayo - Marly Bird

What is Cinco de Mayo?

Cinco de Mayo, which means “Fifth of May” in Spanish, commemorates the Mexican army’s victory over the French army at the Battle of Puebla on May 5, 1862. The battle was an important victory for Mexico, as the French army was considered one of the strongest armies in the world at that time. The victory was a morale booster for the Mexican army and people, who were fighting against a larger and better-equipped army. Today, Cinco de Mayo is celebrated in Mexico and by people of Mexican heritage in the United States as a symbol of Mexican pride and unity.

Is Cinco de Mayo the same as Day of the Dead?

The short answer is no. Día de Muertos, or Day of the Dead, is a three-day holiday in which families across Mexico gather to remember deceased friends and family members. It’s usually held from Oct. 31 to Nov. 2.

How do you celebrate the 5th of May?

Growing up in a family of mixed heritage, we celebrated many holidays. Some more so than others. But what I remember as a teenager, growing up in the suburbs of Denver, Colorado, was learning about the significance of Cinco de Mayo for the Mexican people. I was told it is a minor holiday in Mexico, but here in America, millions attend celebrations across the nation.

As Denver has a sizable Hispanic population, it was common knowledge that to celebrate Mexico’s independence day from the French, the best place to be was either the Cinco de Mayo Festival or down on Federal Street in Denver.

It Can Get Noisy!

You would fly your Mexican flag on the car, honk your horn, and drive up and down the street to properly mark the day. Watching the news every year, I became envious of those who could participate in this vibrant celebration of culture and heritage.

I didn’t get to celebrate May 5th until I married into the Bird/Cordova family. My husband, who is a quarter Hispanic on his mom’s side, used to celebrate every year with his friends. Listening to him reminisce about the Mariachi music, drinking Tequila and Cerveza, and the mouthwatering cuisine such as smothered burritos, guacamole, port green chile, mole poblano (it has hints of chocolate), and homemade tamales made me realize what I had been missing out on all these years. Lord knows Mexican food is one of my favorites!

Marly Bitmoji

What Colors are Most Associated with Cinco de Mayo?

You know how much I love color, so I just had to look into this. Since the Cinco de Mayo celebrations are to commemorate the independence of Puebla (the 4th largest city in Mexico after Mexico City, Monterrey, and Guadalajara), it is only fitting that the colors most associated with it are red, white, and green – the colors of the Mexican flag. 

The Mexican flag has an emblematic meaning. Red represents the blood of the heroes that have died fighting. White stands for unity and purity. Green is for hope. The Mexican coat of arms sits in the center of the flag and features a golden eagle consuming a snake from Aztec mythology. The golden eagle stands for divine guidance and protection and is perched on a prickly pear cactus, which symbolizes Mexico’s diverse landscape. 

What Does Yummy Food Have To Do With It?

Chiles en Nogada (Chiles in Walnut Sauce) is a popular Mexican dish in Mexican cuisine made of white sauce, red pomegranates, and green chiles to represent the national colors!

Did you know Guacamole – Guacamole is another dish that represents the colors of the Mexican national flag. The green is represented by the avocado and the chile serrano, white with the onion, and red with the tomato. Am I making you hungry? Check out this website for some fantastic Mexican Food Recipes.

Draped from left top corner to right top corner is a purple, orange, teal, yellow, and green bunting banner with filet type art inside. Underneath is the phrase cinco de mayo and under that is inspired knit & crochet patterns - Marly Bird

Connecting Mexican Celebration Day with Knitting and Crochet Patterns.

Okay, now that we know more about the reason for Cinco de Mayo and the fun holiday full of amazing Mexican cuisine, let’s talk more about how we can add our BiCrafty touches to this holiday fiesta!

Because Cinco de Mayo is a celebration of Mexican culture and heritage, what better way to celebrate than by creating festive knitting and crochet projects that also celebrate it?

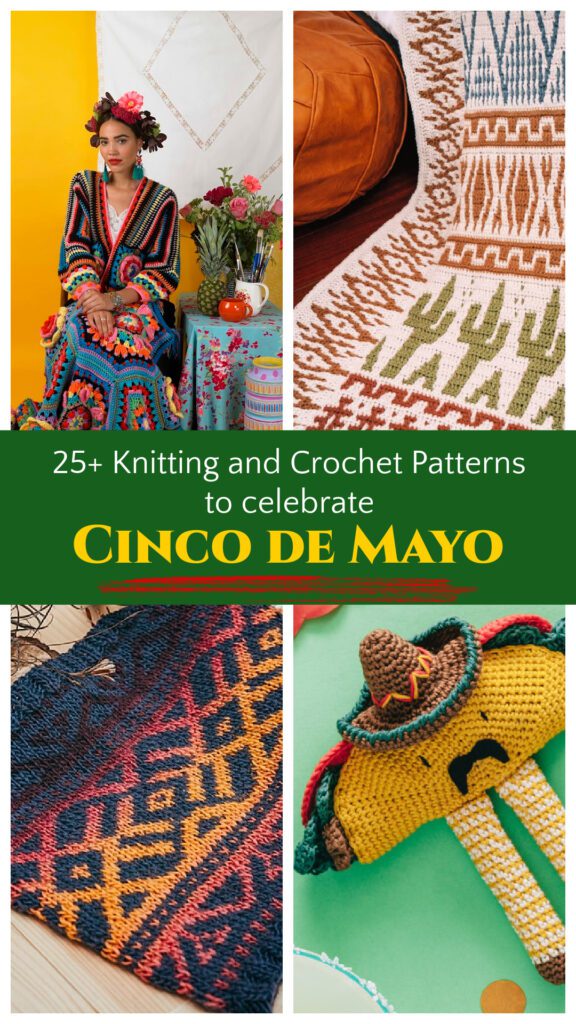
Knitting and Crochet Patterns for Cinco De Mayo -They’re Right Here!

Are you ready to show off some festive flair this Cinco de Mayo? Look no further! We’ve curated the ultimate selection of knitting and crochet patterns that can spruce up your home decor, your wardrobe, and even your handmade gifts for loved ones. Plus, we’ve got both free and paid patterns to fit every budget!

Cinco de Mayo banner with quadrant of 4 images, top left is a image of mexican family finger puppets, top right is an image of a sombrero wearing hombre stuffie, bottom left is a colorful desert cowl, bottom right is a colorful southwestern sarape style ruana on a woman - Marly Bird

More than 15+ Fiesta Knitting Patterns for Cinco de Mayo

Get ready to fiesta like there’s no mañana with these caliente knitting patterns! Add some Mexican flair to your wardrobe, or create fabulous handmade gifts for your amigos and amigas. Use these Knitting and Crochet Patterns for Cinco de Mayo to brighten up your wardrobe!

Knit colorful cacti, chili peppers, traditional sombrero hats, and more! These vibrant projects will make any Cinco de Mayo celebration delicioso. So grab your needles, slide on your sombrero, and let’s get down to some serious knitting business!

The Knit Patterns Are Here!

  • Easy and Fast Cacti Dishcloth – Free Knitting Pattern: https://daisyandstorm.com/2020/12/12/free-cactus-dishcloth-or-afghan-square-knitting-pattern/
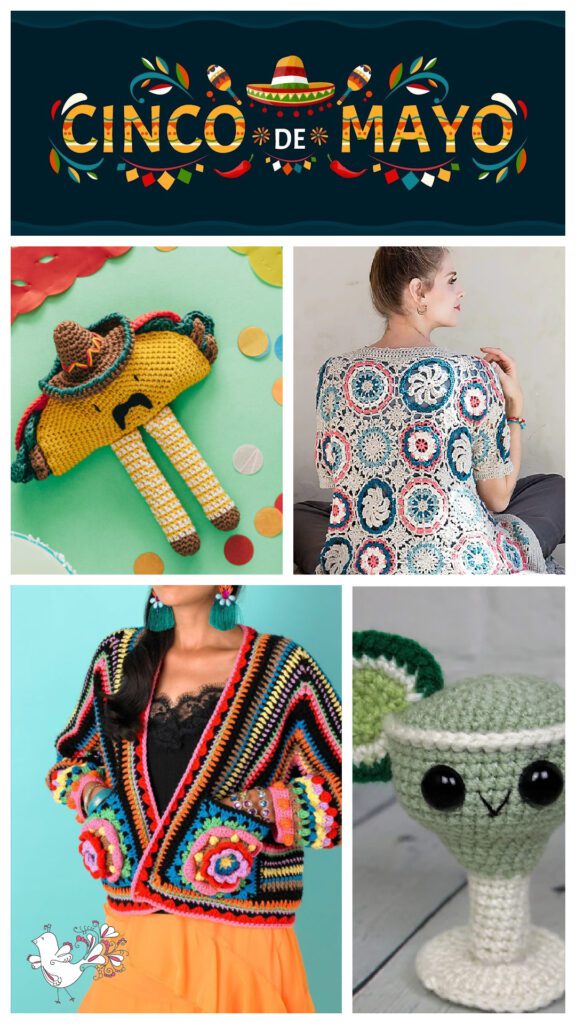
  • SEÑOR TACO Amigurumi has arrived! – Great way to have fun at a taco eating contest: https://knithacker.com/2016/05/senor-taco-amigurumi-has-arrived-just-in-time-for-cinco-de-mayo/
  • Boho Desert Cowl – This is a stunner of a pattern from Briana K – Free Knitting Pattern: https://brianakdesigns.com/boho-desert-knit-cowl-pattern/
  • Prickly Hat Knitting Pattern – Might be a little too warm for May, but how can you resist a fun cacti knit Beanie pattern: https://eweewe.com/collections/hats/products/prickly-pdf-hat-knitting-pattern?ref=olmBp
  • Fiesta Scallop Knit Shawl Pattern – This is just sooo beautiful for a breezy summer evening: https://www.ravelry.com/patterns/library/fiesta-scallop-shawl
  • Chili Pepper Pattern – Amigurumi Free Knitting Pattern: https://www.ravelry.com/patterns/library/chilli-pepper-5
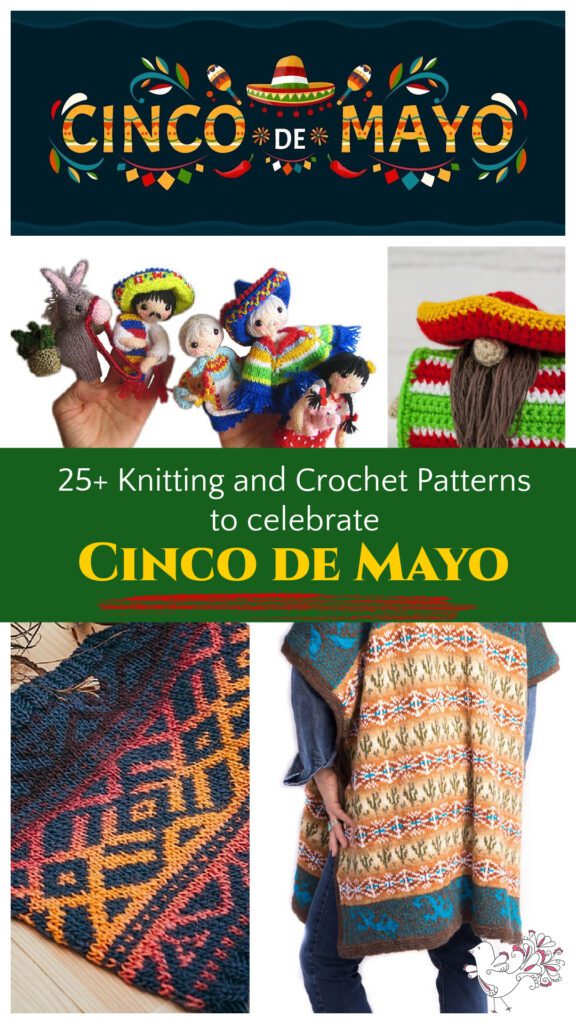
  • Mexican Family finger puppets – Quick easy and fun for the whole family found these on etsy: http://shrsl.com/41u7i
  • Chili Pepper Socks – Free Knitting Sock Pattern: https://www.knitting-and.com/crafts-and-needlework/knitting/patterns/socks/chillisox/
  • Cuddly Cactus Hat for KIDS – OMG, how adorable is this? Free Knitting Pattern: https://littleredwindow.com/cuddly-cactus-hat-knitting-pattern/
  • Fiesta Felted Wool Party Hats – Scrap yarn project that is too cute! Free Knitting Pattern: https://www.ravelry.com/patterns/library/fiesta-party-hat
  • Mexican Girly Doll – This one is for the kids and so much fun: https://www.ravelry.com/patterns/library/mexican-girly-doll
  • Serape Shawl – Southwestern Favorite. I found this one on Ravelry: https://www.ravelry.com/patterns/library/serape-shawl-2
  • Sonoran Sarape Stranded Knit Colorwork – Lost City Knits always designs beautiful items, and this is not lacking in any way: https://lostcityknits.com/product/pattern-sonoran-sarape/
  • Southwestern Felted Shopping Bag – Get the feel of the American-Mexican Southwest with this Free Knitting Bag Pattern: http://rb.gy/rofjx
  • Party Bones – Okay, yes these are too warm for this time of year but they are too cute to not add them to the list of fun patterns: https://www.ravelry.com/patterns/library/party-bones

But There’s More…

Don’t let the inspiration stop here. Use this knit bunting banner pattern in the colors of Cinco de Mayo and use the duplicate stitch to spell out “Fiesta!” or “Viva Mexico!” It’s a fun and easy way to add some festive flair to your home. Or don’t knit at all and just make this cute tassel bunting to celebrate. Use bright colors and chunky yarn for maximum impact.

4 images, top left is a image of taco stuffie with legs and wearing a hat, top right is an image of a model wearing a colorful crochet motif cardigan, bottom left is a colorful crochet bomber jacket, bottom right is a margarita stuffie amigurumi with a lime - Marly Bird

20+ Crochet Patterns for Cinco de Mayo

Crocheters! Looking to liven things up? Get your hookin’ on with our caliente crochet patterns and start living la vida loca! Spice up your wardrobe or wow amigos and amigas with fabulous handmade gifts that bring Mexican flavor to their life.

From cute crochet cacti to hot chili peppers and more, these vibrant patterns will make any Cinco de Mayo fiesta delicioso. So slap on that sombrero, grab a margarita, and let’s get down to some serious crochet business! Ole!

And, Now For Crochet!

  • Boho Desert Cowl – This is a stunner of a pattern from Briana K – Free Crochet Pattern: https://brianakdesigns.com/boho-desert-crochet-cowl-pattern/
  • Fiesta Bundle Amigurumi – stuffie margarita, taco, chips and salsa, and more! https://www.ravelry.com/patterns/sources/fiesta-bundle
  • Crochet Mexican Gnome – Fun and Easy Amigurumi on Etsy: http://shrsl.com/41ova
  • Chili Pepper Crochet Pattern – I found this one on Etsy: https://shrsl.com/41ozj
  • Fiesta Shawl – A favorite pattern of many by Carolyn of the Purple Poncho – Free Crochet Pattern: https://www.thepurpleponcho.com/fiesta-crochet-shawl/
  • Mexican Diamonds Crochet Afghan – must see this! https://www.ravelry.com/patterns/library/mexican-diamonds
  • Crochet Cacti – a plant you can’t kill! Free Crochet Pattern: http://rb.gy/41xka
  • Modern Bohemian Blanket – Part of a book called Crochet Southwest Spirit and it is beautiful!
  • Flower Patch Poncho – You’re really going to THANK ME for this pattern! Free colorful crochet poncho pattern: https://www.lovecrafts.com/en-us/p/flower-patch-poncho-free-crochet-pattern-in-paintbox-yarns-wool-mix-chunky
  • Blooming Bomber Jacket – And this one… Free Crochet Motif Cardigan Pattern: https://www.lovecrafts.com/en-us/p/blooming-bomber-jacket-free-crochet-pattern-for-women-in-paintbox-yarns-simply-aran
  • Cinco De Mayo Crochet Gnome Pattern – this reminds me so much of my youth. I love everything about this Amigurumi Free Crochet Pattern: https://www.windingroadcrochet.com/cinco-de-mayo-crochet-gnome-pattern/
  • The Loopy Stitch Mexican-Inspired Crochet Blanket – So easy and fun. Beginner crochet friendly Free Crochet Afghan Pattern: https://theloopystitch.com/2016/03/21/crochet-mexican-blanket/comment-page-1/
  • Fiesta Series Blanket – This pattern has squares that are so darn cute; check out the maracas! https://www.ravelry.com/patterns/sources/fiesta-series
  • Mexican Boy And Girl Keychain – I have friends who would go nuts over these super cute patterns on Etsy: http://shrsl.com/41ove
  • Desert Cactus Mosaic Crochet Blanket – Free Crochet Blanket Pattern: https://brianakdesigns.com/desert-cactus-mosaic-crochet-free-blanket-pattern/
  • Clint Serape felted crochet ruana – This one is from an older book by Vickie Howell, but it is PERFECT! Get the book here.
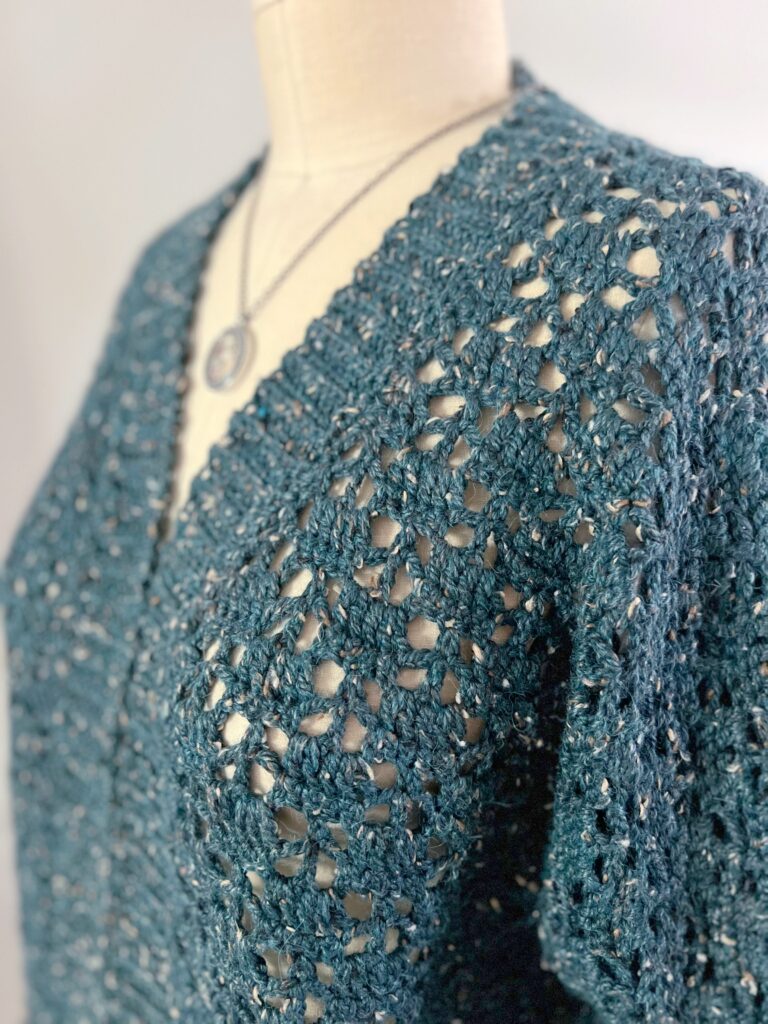
  • Not just for a Fiesta…I would wear this anytime! – I found this on Ravelry: https://www.ravelry.com/patterns/library/labyrinths-cardigan
  • Colorful Flowers Coasters – Let’s be honest. We could use these year-round! Free Crochet Pattern: https://www.ravelry.com/patterns/library/colorful-flower-coaster
  • Mini Ball Crochet Garland (great for trim on a sombrero or skirt, or poncho!) Free Crochet Pattern: https://megmadewithlove.com/blog-2/2017/4/24/mini-crochet-ball-garland-pattern
  • Cute Donkey Amigurumi Crochet Pattern – okay, I found this while looking for patterns, and it is so darn cute. I wish I could figure out where to find the crocheted man with the sombrero too – Free Donkey Amigurumi Crochet Pattern: https://amigurumiallfreepatterns.com/cute-donkey-amigurumi-crochet-free-pattern/
  • Fiesta Bunting – Boho Crochet Garland so many color options: https://www.ravelry.com/patterns/library/boho-party-garland-bunting
  • Shoulders in the Sun Top – Free Crochet Pattern: https://www.lovecrafts.com/en-us/p/shoulders-in-the-sun-top-free-crochet-pattern-in-paintbox-yarns-cotton-dk-metallic-dk-free-downloadable-pdf
  • Fiesta Ruffled Crochet Shawl – Free Crochet Shawl Pattern: http://rb.gy/75hel
  • Anything from this designer – Fun and flirty designs are just too cha-cha for words. Make any of these wonderful crochet cardigans, crochet skirts, and crochet tops in the holiday colors and you have a stunner outfit: https://www.ravelry.com/designers/caroline-murphy

Awesome Knit And Crochet Patterns For Cinco De Mayo, Huh?

Chicos and Chicas, I could keep going, but I’m ready to go have some chips and salsa while I start making my own party hat! Listen, you could keep going and make a crochet blanket or table runner with a serape-inspired design is a great way to add some color to your Cinco de Mayo celebrations. Opt for traditional serape colors like pink, turquoise, and yellow, or mix it up with your own color scheme. There are no crochet police!

Are You A Multicrafter?

Maybe you’re a multi-crafter and want to try your hand at paper mache maracas or piñata decorations. Those are a fun and easy way to add some whimsy to your Cinco de Mayo décor. Choose a variety of colors and sizes to create a playful display.

No matter what you choose to make, it is certain that with these festive knitting and crochet patterns, you’ll be able to create a fun and colorful Cinco de Mayo celebration that is sure to impress. So grab your needles and hooks, and get ready to create some amazing handmade décor and accessories that will help you celebrate in style!

More Colorful Knit And Crochet Patterns

Kaleidoscope Harmony Knit Hat

Gingham Plaid Poncho

Kaleidoscope Poncho

Filed Under: Crochet, Designer Premium Patterns, Free Patterns, Knitting, Round Ups

Discover Cozy Crafting with Marly Bird’s “You Are Valued” Crochet Cocoon Cardigan

April 23, 2024 By Marly Bird Leave a Comment

Get ready to cozy up and get crocheting with Marly Bird’s oversized crochet sweater design and video tutorial on making a “You Are Valued” Crochet Cocoon Cardigan. If you’re just starting out or looking for a relaxing project, this pattern is a great pick.

In a world where it’s easy to feel overlooked or undervalued, this oversized crochet cardigan is a gentle reminder that you are cherished, appreciated, and worthy of all the love and recognition in the world. 💖 Inspired by personal experiences, I’ve created this pattern as a symbol of self-affirmation and empowerment. Because, let’s face it, we all have those moments where we need a little extra reminder of our own worth.

💫 Just like the “Know Your Worth” cardigan, this piece is more than just clothing – it’s a wearable hug from the special people in our lives who lift us up when we need it most. 🤗 So, wrap yourself in the warmth and comfort of this beautifully crafted cardigan, and remember that you are valued beyond measure. 🌸✨

A collage of four images showing a woman with curly hair wearing glasses and a blue oversized crochet cocoon cardigan. the photos display her from different angles and with varying expressions, smiling in a warmly lit room. You Are Valued Cocoon Cardigan Pattern by Marly Bird

Psst: here are a couple other beginner crochet cardigan patterns you might like. I love the Lyvia Crochet Ruana Cardigan, the Coldwater Creek Crochet Ruana, the Amimono Cardigan, the Hamilton Crochet Cardigan, the Garden Party Sweater, the Granny Square Cardigan (crochet-along sweater) and the Midnight in Paris Crochet Cardigan.

Disclosure: This post contains affiliate links, meaning I get a commission if you decide to make a purchase through my links, at no cost to you.

What You’ll Love About This Crochet Cocoon Cardigan Pattern

  • Beginner Friendly – Even if you’re still new to crochet, you got this! I’ve got a video tutorial to walk you through each step.
  • Flat Construction –  No tricky seams or complicated shaping, just smooth sailing!
  • Versatile – Pair it with jeans, leggings, or your comfiest PJs for that cozy-chic vibe!

Easy Beginner Crochet Cocoon Cardigan – Great Sweater Pattern for All Skill Levels

This pattern is made up of a large rectangle that is strategically folded to create a cozy crochet cocoon cardigan. The skills needed to make this piece are the basic crochet skills of any adventurous beginner crocheter. These crochet stitches include:

⭐ Back Loop Only: This is the furthest loop to you of the top 2 loops of the stitch indicated, regardless if you are on the RS or WS.

⭐️ Chain (Ch): With slip knot or free loop on hook, yarn over hook and pull through loop on hook.

⭐️ Half Double Crochet (Hdc): Yarn over hook, insert hook into indicated stitch, yarn over and pull up a loop, yarn over and draw through 3 loops on hook.

⭐️ Double Crochet (Dc): Yarn over hook, Insert hook into indicated stitch, yarn over and pull up a loop, * yarn over and draw through 2 loops on hook; repeat from * once more..

⭐️ Foundation Single Crochet (fsc): 

First fsc: Ch 2, insert hook into 2nd ch from hook, yarn over and pull up a loop, yarn over and draw through 1 loop on hook (forming a chain), yarn over and draw through 2 loops on hook (forming the single crochet)

Next fsc: Insert hook into base of previous stitch (in the “chain” space), yarn over and pull up a loop, yarn over and draw through 1 loop on hook (forming a chain), yarn over and draw through 2 loops on hook (forming the next single crochet).  Repeat directions for desired amount of sts.

⭐️ Single Crochet (Sc): Insert hook into indicated stitch, yarn over and pull up a loop, yarn over and draw through 2 loops on hook.

⭐️ Slip Stitch (Sl st): Insert hook into indicated stitch, yarn over and pull up a loop and draw through loop on hook. ⭐️ Stacked Double Crochet (Stacked Dc): (Do not ch 1 prior to making the first sc) Sc in first stitch, insert hook in between two legs of the base, yarn over and pull up a loop, yarn over and draw through 2 loops on hook.

⭐️ Stacked Double Crochet (Stacked Dc): (Do not ch 1 prior to making the first sc) Sc in first stitch, insert hook in between two legs of the base, yarn over and pull up a loop, yarn over and draw through 2 loops on hook.

Looking for more crochet stitch instructions? How to videos for each of these beginner skills can be found in the crochet definitions area on the website.

An image collage featuring a close-up of a blue crochet cocoon cardigan with a pattern guide and a crochet hook, and a smaller photo of a smiling woman wearing a similar cardigan with text "easy crochet cardigan pattern. You Are Valued Crochet Cocoon Cardigan Pattern by Marly Bird

Oversized Crochet Cocoon Cardigan – A Must-Have For Every Closet

Embrace the trend of comfort-meets-style with the “You Are Valued” Crochet Cocoon Cardigan. This oversized delight is the epitome of coziness, crafted to enfold you in a warm and stylish hug.

Designed with an artful touch, it features a size-inclusive pattern that drapes elegantly across all body types, ensuring everyone can revel in its comfort. Sized for xs – 5xl size.

The cardigans thoughtful construction minimizes seaming, leaving only two small seams that are cleverly placed to maintain the fluidity and seamless appearance of the piece. This design choice not only simplifies the making process but also enhances the overall comfort, allowing the cardigan to become an extension of your warmth.

Perfect for a chilly evening in or a casual day out, this cocoon cardigan is a versatile staple that promises to keep you snug and fashionable throughout the seasons. With its mix of practicality and chic allure, it’s the wardrobe essential you didn’t know you needed, until now.

A smiling woman with curly blonde hair, wearing glasses and a colorful oversized crocheted sweater, posing indoors with a soft focus background. You Are Valued Crochet Cocoon Cardigan pattern by Marly Bird

Fold Over Ribbed Collar on Crochet Cardigan – Dramatic Look

In the video, I show you how to create the crochet ribbed collar using the join-as-you-go method. It makes putting the cardigan together super easy, while still keeping it trendy. The end product is a cute and cozy cardigan that you’ll enjoy making as much as wearing it.

The collar can easily be made larger simply by adding to the chain amount at the start; same goes for the cuffs.

The Star of the Show: Jewelspun Long Color Changing Yarn

The show-stopping Sirdar Jewelspun Yarn, which brings a kaleidoscope of color to your crochet work. The self-striping Aran acrylic yarn elevates the crochet cardigan, ensuring each piece is as unique as the crafter behind it.

Mind the fact that although the label reads Aran, I would classify this closer to a worsted weight yarn.

For this project, we estimate you will need 4 or 5 balls of yarn for the cocoon cardigan. That is a generous amount and allows you to have enough for a gauge swatch or two.

Our friends over at Jimmy Beans Wool has put together a kit just for this project! You can select how much yarn you want for the size you plan to make and remember, there is more than enough there for you!

Get the Kit Here (pattern sold separately)
Purchase Pattern on Etsy
Purchase Pattern on Ravelry
Purchase Pattern on Shopify

In the video tutorial I do showcase various hues, inspiring viewers to imagine their personal cardigan in the colorway of their dreams. Here is a snap shot of the beautiful yarn (available at Jimmy Beans Wool)

Jewelspun Yarn colorways available at Jimmy Beans Wool

Best Crochet Hook Size for the Crochet Cocoon Cardigan – Do a Gauge Swatch!

The perfect crochet hook size for your cardigan is the one that gives you the right gauge. The easiest way to figure this out is by doing a gauge swatch. It’s much simpler to work a swatch over 14 stitches and a couple row repeats than to just get started on your sweater only to realize your project is too big or small after crocheting a long way. I used a size J or 6mm hook for the gauge of 14 sc = 4″.

Just remember, if you’re getting too many stitches in 4 inches, your stitches are too small and you should switch to a larger hook; if you’re getting too few stitches, your stitches are too big and you should try a smaller hook.

When it comes to this oversized crochet cardigan pattern, it’s better to go too big than too small. I’ve seen one that was way wider (like ten inches) than it should be and still looked good. But when it’s too narrow (again, ten inches), it looks silly. So, when you’re not sure, use a bigger hook!

Don’t bother ripping out your gauge swatch, you’ll have enough yarn for your project and a few extra swatches. Plus, you can practice working on crochet ribbing on the edge of your swatch. It’s a great way to get the hang of the stitches before starting on your project. And you can also test out different sizes for the collar or cuffs if you want to make adjustments.

gauge swatch in progress for the You Are Valued Crochet Cocoon Cardigan by Marly Bird

Get the full PDF with links to full-color PDF stitch diagrams for each pattern size. Click the button below to purchase the pattern.

Purchase Pattern on Etsy
Purchase Pattern on Ravelry
Purchase Pattern on Shopify
advertisement for the PDF pattern of the You Are Valued Crochet Cocoon Cardigan by Marly Bird

If you use Ravelry, please take a minute and favorite and queue up the pattern to show some love.

Favorite This Pattern on Ravelry - Marly Bird

How to Crochet the You Are Valued Crochet Cocoon Cardigan Video Tutorial

My tutorial is more than just a guide to make a cardigan; it’s filled with encouragement and motivation throughout. “Her enthusiasm and expertise shine through, encouraging viewers to take their skills to the next level. By following along, you’ll not only learn to create a gorgeous garment but will become a confident crocheter! ” ~ fellow Marly’s Minion.

By the end of the how to crochet a sweater video tutorial, you’ll be ready to craft a “You Are Valued” Crochet Cocoon Cardigan of your own, and you too will believe that every crafter is capable of creating something beautiful. So, grab your hooks and yarn, and let me, Marly Bird, guide you through each cozy stitch on the path to crafting your new favorite cardigan.

YouTube Video Tutorial Transcript

We know that there are crocheters out there that love to have a transcript of the videos on YouTube. So we’ve added the transcript for the How to Crochet the You Are Valued Crochet Cocoon Cardigan video here.

Easy Beginner Crochet Cardigan – Learn How to Crochet the You Are Valued Crochet Cocoon Cardigan 💕 – YouTube

Transcript:

(00:00) are you ready to crochet your new favorite cardigan I’m Marley bird you’re by crafty bestie and I’m here to show you how let’s go show me show [Music] me hello my friends and welcome to the Marley bird YouTube channel your One-Stop shop for everything knitting and crochet to help you become a better crafter in this this video I am showing you how to make this lovely crochet cocoon cardigan this is the you valued crochet cardigan I designed this piece after everybody fell in love with the know your worth knit cardigan because my

(00:48) my crocheters needed to have something too so what you will find here is the exact same construction similar stitch pattern and a nice big Shaw collar that you can choose to close with a Shaw pin or you can absolutely remove that and just have a nice open cardigan to wear this pattern is so much fun and it’s super duper beginner friendly so whether you are a brand new crochet you’re ready to venture into garments that are just a little bit beyond a blanket or you’re an experienced crocheter ready to make your

(01:24) next favorite cardigan I have the pattern for you you can find this pattern over at Marley bird.com I’ve put a link in the video description box right down there below in that pattern you will find the written instructions a chart links to a whole bunch of videos that you might need and of course you’ll have all of the materials speaking of materials I’m sure you noticed that the colorway on this cardigan is absolutely stunning and that is because the jewel spun yarn by Sardar is absolutely gorgeous and it lends

(01:59) itself to a beautiful colorway with this stitch pattern this color here is called turquoise sky but there are so many other Jewel spun colors you could choose from let me show you a few the SAR company was nice enough to send me a bunch of their Yarns so that way I could show you guys all of the color possibilities with this beautiful yarn and this is only some of them you guys I mean look at these colors they are absolutely stunning I’m going to point out this one first because this is what I made the know your worth cardigan in

(02:35) this color here is called Golden green and it’s not to be confused with this color here called evening Jade this one here has more purples and turquoises in it but it is absolutely gorgeous of course if you wanted to have something a little bit more mild and Browns and blacks and Grays this is your go-to colorway it’s called crystal quartz this would be absolutely stunning in this pattern I telling you it’d be great all right for all of my pink fans out there come on this is glowing Garnet this color is absolutely to die for oh my

(03:16) gosh it’s so darn pretty this one here this just screams jewel tones to me it is called Midnight Fords and it is like I I have have no words you guys absolutely beautiful I mean use this yarn to make this cardigan wear it with a black top and some black slacks and you have an outfit for the night out on the town I mean it would be absolutely stunning then of course we have this beautiful oranges and pinks and reds this colorway is called Sunstone Amber and it is equally just as as pretty if you are a fan of orange Yarns and you

(03:58) really like gravitate to this this color this this Hue this would be just great and then last but not least obviously the turquoise Sky those are only a few of the jewel spun Yarns you could choose to make this cardigan out of and you will have a beautiful cardigan no matter which one you choose besides the yarn you will also need a size J or a 6 mm crochet hook or whatever size you need to get gauge you will need some Stitch markers of course a bent tip tapestry needle to weave in your ends and to seam together the minimal seaming that is on

(04:34) this piece and then we have a good pair of scissors and last but not least like I mentioned if you wanted to use a Shaw pin you absolutely could do this um I love these Shaw pins I think they’re absolutely beautiful I’ll be sure to put a link in the video description box below in case you want to check these out they are from Indian Lake Artisans they’re absolutely gorgeous if you’re ready to get started grab that pattern grab your yarn grab your hook and all of the little extras that you could

(05:04) possibly need for this pattern join me back here and I will get you started on the stitch pattern how you’re going to construct this cocoon cardigan we’ll talk about the collar and the join as you go method and you will be Off to the Races making your very own hugable [Music] wearable we begin with the foundation single crochet for this project because we want the elasticity of our beginning row to match that of our ending row so it’s important that we begin with the foundation single crochet if you’ve

(05:42) never done it before let me show you how to do it we will begin with a slip knot on our hook so begin with a slip knot and then you will chain two stitches one 2 in that first chain you did or the second chain from Hook however you want to think about it insert your hook right into that chain okay and then yarn over and pull up a loop that Loop you just pulled up is going to become a chain okay even though this looks like you’re on your way to making a single crochet we want to create a chain right here into that

(06:23) first Loop so what you will do is you will yarn over and draw through one it’s at this point you will take a stitch marker and put it right into that chain you just created that’s going to help you know exactly where your next Stitch is going to have to be completed okay now we have two loops on our hook and this is where we will complete our single crochet so you yarn over and draw through two so to start the next one we’re going to come over here to that Stitch I had you mark you’re going to go

(06:53) into the chain and try and get through two Loops okay It’s tricky at the start but then you’ll get used to it you want to go underneath two Loops of your chain okay it just makes the edge a lot easier to seam yarn over pull up a loop again that first Loop is going to become a chain so you will yarn over and draw through one take your marker and move it up into that chain you just created so that way you know where you’re going to create your next Stitch yarn over draw through two so here we go into our

(07:29) marked Stitch which is a chain I went under so I have two Loops yarn over draw through one uh draw through those yarn over draw through one move the marker up yarn over draw through two let’s do that one more time together go into your marked chain make sure you have two two of those uh legs yarn over pull up a loop yarn over draw through one move your marker up yarn over draw through two you’ll see here you’re getting a nice stretchy start right here go ahead and complete the number of foundation single crochets

(08:16) you need to make for the size you are [Music] needing once you reach the number of foundation single crochets you need go ahead and leave that marker down there at the bottom so that way you can quickly identify what is the bottom of your row here to begin with because it’s really easy to get disoriented we will go ahead and we will turn our work and chain one you can chain one and turn as well it doesn’t really matter and it’s at this point we want to work half double crochets into each of the stitches that we just

(08:54) created all the way down so we’re just going to work half double crochet into each single crochet all the way down if you don’t know how to do a half double you yarn over your hook to begin with just like so go into the Stitch yarn over pull up a loop so you have three loops on your hook yarn over draw through all three when you get to the end of your row take a second go back and count all of your stitches make sure you have the correct Stitch count then you will go ahead and chain one in turn or turn in chain one whichever one you

(09:31) want to do and it’s at this point we will be doing single crochets into the back Loop of those stitches we just did so if you’re looking at your work just like so you can see it kind of looks like you have a loop right here a loop right there and then one in the very back we want the one all the way back here and we will work a single crochet so come to the all the way in the back and work a single crochet all the way and back working that single crochet what that’s doing is it’s leaving this front Loop the front Loop

(10:08) right there and the one down here it’s leaving them open and it gives the illusion of a v right there that is the very nice subtle line that you get in this fabric it’s created by working single crochets in the back Loop of these half doubles and it just looks really great okay at the end of the row your your work should look just a little something like this and it’s at this point we will turn our work and complete a stacked double crochet so you turn your work you do not chain go into the top of that first single crochet yarn

(10:45) over pull up a loop yarn over draw through two and then just right here that that Stitch that you just created just pierce your hook right through the middle of it yarn over pull up a loop yarn over and draw through two that is a step double crochet it’s at this point we’re going to continue with the V stitch so we’re going to skip one stitch and we’re going to work two double crochets in the next Stitch okay so you Skip One and work two double crochets in the next do not put a chain between them

(11:19) just work two double crochets skip one two double crochets in the next skip one two double crochets in the next and you will do this all the way down until you get to the very last single crochet and you will work a double crochet in the very last Stitch of the row once you’ve reached the end of that row we will turn our work and again we start off with a stacked double crochet so you complete one single crochet and then you work right through the middle of that one and work another one and it’s at this point you won’t

(12:06) skip right here in the beginning you’re going to go between these two double crochets of the V stitch go between them and you will create two doubles so there’s one and two you do not work a chain or anything else you will skip this space right there between that double and that one and right here these two doubles that were the V stitch the next one over go right between them and complete another V stitch so two doubles okay we’re going to do this all the way across and be very careful make sure you don’t accidentally put a V

(12:48) stitch in the wrong place meaning let me get myself some more yarn here do not accidentally put it like right here it always goes in the middle of the V stitches okay we’re working in the middle of those V stitches all the way down when you get to the end of the row you will end with a double crochet into that very first double crochet and you have some work that looks like this pretty nice right okay let’s move on to the next row we will turn our work and chain one or chain one and turn it doesn’t matter and now we want to work

(13:24) half double crochets all the way down this row okay so we’ll work half double crochets all the way down so into each of these stitches just work your half doubles when you get to the end of this row you should have the exact same number of stitches that you had when you started and now you will turn and chain one or chain one and turn and we are back to row two where we did the single crochets through the back Loop only so we turn go to the back Loop of those half doubles right and work our single crochets all the way down and that’s it

(14:07) you guys that’s the pattern for the entire cardigan you just continue working this four row repeat and you get this really beautiful stitch pattern once you finish that single crochet row you can set it down and it’s here you can begin to see where your pattern is beginning to take shape and it’s just those four rows that you continue repeating for the entire cardigan it’s really that easy I was not lying when I said this is a very crochet beginner friendly pattern now as you’re working on this you do want to make sure

(14:45) you’re not accidentally getting tighter as you create your stitches so make sure you pause every now and again and measure your work in progress to make sure that it’s still on track to be the same measurement as it is in the schematic and I will will’ll give you a little tip it’s okay to be a little bit bigger than the schematic but I would not go any smaller than the schematic okay if you have a fabric that’s smaller when you go to wear your cardigan it’s not going to really like fit over your

(15:15) bust and feel like it’s it’s it’s kind of snuggly it’s going to feel like it’s it’s more of a shrug than a cocoon so it’s better to have it a little bit bigger I mean you could go as big as like 10 in wider if you if you wanted to um but the measurements that we have chosen for this cardigan they they tend to be the most perfect sizing I’ve made so many Cardigans with these measurements and they tend to be the most perfect size um that we’ve experienced but I just wanted to give

(15:42) you a heads up on that it’s better to be a little bit bigger versus a little bit smaller once you have crocheted the fabric to the correct length not just the width it’s at that point you would work one more row of single crochets across the top of your project once you get the full rectangle of your cardigan complete it’s at that point you will work the seaming which is just some whip stitches together so let’s take a peek at how you would do [Music] that once you’ve completed that final

(16:17) row of single crochets I highly recommend giving your piece a little bit of a block so Pin It Out On A blocking board sprit it with some water and let it dry or maybe lightly steam it it will make the joint as you go process for the collar and the Cuffs a lot easier if you do that once that is all done you’ll have a piece of fabric that looks similar to this obviously much much larger and it’s at that point we’re ready to seam now what we want to seam together are actually the short edges so you’re going to take your Fabric and you

(16:52) will fold it with the wrong sides facing and you’ll know what the wrong side is because you want to be able to see that nice line of V’s right there that you created with the um single crochet in the back Loop only and once you do that what will happen is you want to whip stitch together starting down here at the The Edge this is the foundation single crochet Edge and your last Edge and you want to just whip Stitch this Edge together but you want to leave an opening for the cuff right there okay and to whip Stitch it’s really just as

(17:27) easy as grabbing your tapestry needle and some yarn and we’re just going to whip these two pieces together I like to get as close to the corner as I can to start to match up the two corners and then we really are just going to whip them together okay we don’t have to do anything super special about it um if you wanted to do a more decorative like single crochet join or a slip stitch join you could and that could be a really great design feature but it is is not necessary okay I’m just going once you get it all seam together

(18:03) go ahead and weave in your tail I’m just going to snip mine off because I can we’re just doing a little Swatch here and I’m going to seam together the opposite side as well so I’ll go to the opposite side make sure the two ends meet up and then let’s just whip these together quickly once the two ends are seam together you have a piece that looks like this right but as you open up the center you’re GNA see that this is your cocoon right so these openings here that you left here and here that’s where your cuff goes and

(18:44) then this right here that’s where your your body fits in right so it’s at this point this is where you’re going to create your [Music] collar let’s talk about the collar it is made in a join as you go technique so you work the ribed collar and you join it to the fabric at the same time you absolutely could make the collar separate and then seam it to the Cocoon cardigan or if you’re by crafty like me and want to do a knitted collar you could pick up and knit stitches all the way around this opening here and work

(19:22) like a 2 x two collar if you wanted to but for the join as you go collar that I created for this piece we are going to join our yarn right here at the corner we will chain some stitches and then as we work back every time we work back towards the piece here we will join it to these stitches that we have either on the foundation single crochet Edge or our final single crochet Edge that’s why we have those nice stitches there we get to work into and it’s going to turn out really great so let’s go ahead and see

(19:55) how this is done for the collar you will begin at your seam here and you want to join with a slip stitch so put your hook in and just join your yarn with a slip stitch now the pattern tells you to chain X number of chains and I will let you know if you want a larger more dynamic or drastic collar chain more than written in the pattern it’s totally up to you but go ahead and chain however many stitches is written in the pattern I’m just going to do a few stitches here and once you’ve reach that we want to

(20:30) then work back in a row of single crochets but when we get to the end of the row here we’re going to join two times to our fabric one join is going to be to represent the row we were on and the next join which will be one stitch up will represent our turning chain so let’s go ahead in the single crochet from or in the second hook the second chain from Hook let’s single crochet and and we will do this all the way down get into that last one there and then once you’ve worked all of those single crochets you’re going to go to the so if

(21:21) I joined right here I’m going to go to the next stitch up and I’m going to put my hook in and do a slip stitch and then I go to the next stitch up from there and I do another slip stitch so this second slip stitch here takes the place of my my turning chain okay so now I’m going to turn my work I do not want to work into that slip stitch or that slip stitch I want to come down here to the single crochet and I want to work into the back Loop only and I will work single crochets all the way back when you get to the end of the row chain

(22:15) one and turn or turn and chain one doesn’t matter and then you’re going to work single crochets in the back Loop only all the way back and when you you get to the edge of your fabric again you will join with that slip stitch once again going to get all the way back here when you go to join this time make sure you don’t join where you already have a slip stitch kind of A good rule of thumb is any of the stitches along the actual body if there has already been a stitch worked into it don’t go into it again go into the next stitch up

(23:01) so I go to the next stitch up and do a slip stitch that’s the first one that joins the ribbing I just did to the body and then I go to the following stitch up and that takes the place of my turning chain so I will turn my work don’t work into either one of those slip stitches go down to the single crochet and work back Loop only and just go back and forth and this is how you make the collar this is how you do the cuff it’s this very simple ribbing okay can you see how that works up see how that works up real nice and neat now the

(23:39) difference between the collar ribbing and the cuff ribbing is the collar ribbing you know we have these nice stitches right here that we can easily work into and here at the cuff it’s at the edge of our work so there are no stitches there so you’ll notice that on the cuff I have you do one round of single crochet to begin with and then create your cuff and just like the collar if you want your cuff to be longer you want to chain more stitches than what is written in the pattern so for my sample let me grab it right

(24:13) here the cuff on the sample is just this nice little cuff right here but if you wanted this to be double the size you would double the chain amount and then you could have a folding cuff so like this one folds right but it’s just like this little dainty little fold if I wanted it to be a full fold then I would double this up and you absolutely could do that um you just want to make sure you have enough yarn to do that once your collar and cuffs are complete weave in any tail that you have and your cardigan is all done next thing you know

(24:44) you’re going to throw it on and look like this isn’t this cardigan amazing I love it so much the minute I got it back from my contractor Tammy I put it on and I have been in love ever since I know you’re going to love your C again as well be sure to share with me on social media as you work on yours snap a picture and send it my way use #m marlybird and I’ll be sure to smash your like button and give you all the encouragement you need all right everybody that’s it for me you’re by crafty bestie I’ll see you in the next

(25:19) video bye [Music] guys this is show me love this is all we got show me show me love show me

Enjoy your crochet time!

xoxo Marly Bird

Filed Under: Crochet, Designer Premium Patterns, Marly Bird Premium Patterns, Pattern, Uncategorized, YouTube Video Tutorial

Cutest Crochet Easter Bunny Amigurumi Ever!

March 22, 2024 By Marly Bird 2 Comments

Hey there, friends! I am absolutely bursting with excitement to share with you all the bunny rabbit joy I can bring into your homes this Easter (or any time of year)! Let’s talk about crochet Easter bunny stuffies – I mean, come on, how cute are they? Isn’t this the most gorgeous crochet Easter bunny amigurumi ever? These little bunnies are adorable, and they make for the perfect spring project that you can snuggle up with, gift to loved ones, and even use as festive decor around your home.

Plus, we have a new free crochet Easter bunny amigurumi pattern for you right here on this blog! The cute crochet bunny rabbit stuffed animal is easy and quick to make for beginner crocheters or more seasoned crocheters! Or, if you are looking for something quick to knit (for all my BiCrafty friends), check out the simple booboo bunny pattern.

Marly Bird showcasing her adorable handmade crochet bunny rabbit stuffed animal, with a link to a free pattern available on her website.

It’s time to grab your hooks, get those creative juices flowing, and let’s hop right into making some crochet Easter bunny magic together! Trust me, you won’t be able to resist the charm of these charming little bunnies. So, what are you waiting for? Let’s get crafting and spread some handmade happiness this Easter season!

Disclosure: This post contains affiliate links, meaning I get a commission if you decide to purchase through my links at no cost to you.

Picking the Perfect Yarn for Your Crochet Easter Bunny Amigurumi

Choosing the right yarn is super important for your bunny stuffies, but it can be varied as well. You could choose a soft fuzzy yarn, a plush blanket yarn, a smooth worsted weight yarn, a velvet yarn, wool yarn, cotton or cotton blend yarn, or acrylic yarn…the sky’s the limit! I will say that most people want their bunny to be cuddly and soft. So, look for yarns that will work with the pattern you choose. That’s the easiest way.

But pay attention to the care instructions on the yarn as well, as you want it to be easy to wash.

Oh, and as for colors, you could go with more traditional Easter bunny colors of spring. Think pastel pinks, greens, yellows, and of course, bunny white! Or, nobody is stopping you from choosing bold colors or even speckles. I certainly won’t stop you from crocheting a hot pink bunny. Choose colors you love 💕.

pink crochet bunny rabbit stuffed animal sitting on a hand in front of green background. Also has a crocheted carrot. Marly Bird logo in bottom right corner - pattern available on Marly Bird Website

Easy-to-Follow Patterns for Crocheters of All Levels

Whether you’re a crochet newbie or a pro with the hook, there’s a crochet Easter bunny amigurumi pattern out there for you. I’ve got a list of my favorite patterns that are clear, simple, and so much fun to make. You’ll find yourself creating a whole family of bunnies before you know it!

Make Your Bunnies Special with Accessories

Okay, let’s talk more about how to set your Easter bunny apart from the rest. Sure, you chose an awesome pattern, but maybe you want to give your crochet bunny its own personality with cute accessories! Think tiny crochet carrots, sweet little bow ties, crochet hearts, or even a mini Easter egg. These small details make your bunnies one-of-a-kind and super special.

Some of the little things I’ve seen that make the bunny rabbit a little extra are an extra fuzzy tail, long ears, whiskers, eyelashes, or moveable limbs. One of my friends even added magnets to the inside of a crochet heart and the paws of the hands on her bunny so the bunny could hold the heart! It’s so darn cute and super clever!

Just a note of caution ⚠️ : if you are making this stuffie for a baby shower or a kit, be sure to use caution. When making stuffed toy accessories, you don’t want to accidentally make something that can be a hazard to small kids, so make sure you follow laws for toy products and, of course, use your common sense.

Warm smiles by Marly Bird as she holds a handmade bunny —small crochet bunny rabbit stuffed animal fits in the palm of her hand. Great for Easter baskets.

Sharing Your Adorable Creations

Once you’ve made your adorable bunny stuffies, you’ve GOT to show them off! Share your creations on social media and use hashtags #mmmdi or #marlybird. It’s the perfect way to connect with fellow crocheters and get inspired by each other’s work.

Let’s Make This Easter Extra Special – Free Little Crochet Bunny Stuffie

Several years ago, I paid a designer friend to design some simple animal amigurumi patterns I could use on my website. Over the years, we’ve published some of the designs, but I still have maybe 10 more to publish. So today, I’m offering a free crochet Easter bunny amigurumi pattern by Michele Wilcox just for all of you.

This adorable little bunny rabbit crochet pattern is a super fast project. If you need to crochet bunnies for one or several Easter baskets, this is the crochet rabbit pattern for you, as you can make one in less than 2 hours. Plus, it has a mini crochet carrot accessory to go with it! Trust me, this will work up quickly. It is a fast crochet bunny project, even for a beginner crocheter.

Unleash your creativity with this adorable crochet rabbit! Free pattern at marlybird.com

Designed by Michele Wilcox for MarlyBird.com

Skill Level

Adventurous Beginner

Measurements

Finished Measurements

Bunny is 8” [20.5 cm] in head circumference by 5.5” [14 cm] tall.

Gauge 

 15 sc x 16 rounds = 4” [10 cm] x 4” [10 cm]; use any size hook to obtain the gauge. 

Materials

Yarn 

WeCrochet, Brava Worsted Mini Ball (100% acrylic, 54 yds / 49 m, 0.9 oz/ 25 g, CYCA# 4 worsted) 

Color A: #28423 Cotton Candy, 1 ball

Color B: #28455 White, small amount

Color C: #28440 Orange, small amount

Color D: #28409 Alfalfa, small amount

Color E: #28413 Black, small amount

Crochet Hook

Size G/6 [4.0 mm], or size to obtain gauge (but gauge is not super important for this stuffed animal pattern)

Notions 

Stitch Markers, Scissors, Tapestry needle, Polyester Fiberfill

Crochet Abbreviations

Ch – Chain(s) 

PM – Place Marker

RS – Right Side 

Sc – Single Crochet

Sl st – Slip Stitch

Sp(s) – Space(s) 

St(s) – Stitch(es)

WS – Wrong Side

Special Crochet Stitches

⭐️ Single Crochet 2 Together (sc2tog): *Insert hook into indicated stitch, yarn over and pull up a loop; repeat from * in next stitch indicated, yarn over and draw through all 3 loops on hook. (1 decrease)

⭐️ Double Magic loop or Double Adjustable Ring: Wrap yarn around your fingers twice, pull up a loop through the ring created, chain 1.  Follow directions for number of stitches for round 1.  Pull on yarn end to determine which strand will be closed with yarn end.  Pull on that strand to close 2nd strand of ring.  Pull on yarn end to close first strand of ring. 

Notes

  • Bunny Rabbit is worked in pieces and seamed together. Details are added last. 
  • Body parts are worked in continuous spiral rounds that are not joined at the end of the round. 
  • Body parts start with a double adjustable ring.  You can substitute a chain 2 and sc in the 2nd chain if you wish for the double adjustable ring. 
  • Using a stitch marker to mark the first stitch of each new round throughout all stuffed animal patterns is helpful, and we suggest doing it for this bunny too. 
A joyous Marly Bird in a denim jacket and colorful scarf, beaming with delight as she presents a cute pink crocheted bunny rabbit with carrot. Free crochet bunny rabbit pattern on marlybird.com website

Crochet Easter Bunny Amigurumi Pattern

Bunny Head

Note: Head is worked from the top of the head at the increasing rounds through the bottom of the head while decreasing. 

With A, make a double adjustable ring. 

Round 1 (RS): 6 sc in ring, pull ring closed, do not turn–6 sc.

Round 2: 2 sc in each sc around, do not turn– 12 sc. 

Round 3: *Sc in next sc, 2 sc in next sc; repeat from * around, do not turn– 18 sc. 

Round 4: *2 sc in next sc, sc in next 2 sc; repeat from * around, do not turn– 24 sc

Round 5: Sc in each sc around, do not turn.

Round 6: *Sc in next 3 sc, 2 sc in next sc; repeat from * around, do not turn– 30 sc

Rounds 7-11: Sc in each st around, do not turn. 

Round 12: *Sc2tog in front loops only over next 2 sc, sc in next 3 sc; repeat from * around, do not turn– 24 sc.

Round 13: *Sc in next 2 sc, sc2tog in front loops only over next 2 sc; repeat from * around, do not turn– 18 sc.

Round 14: *Sc2tog in front loops only over next 2 sc, sc in next sc; repeat from * around, sl st to first sc, fasten off leaving long tail for seaming– 12 sc.

Stuff head with fiberfill, do not close opening.

Bunny Body

Note: Body is worked from the bottom at the increasing rounds through the top of the body while decreasing. 

With A, make a double adjustable ring. 

Round 1 (RS): 6 sc in ring, pull ring closed, do not turn–6 sc.

Round 2: 2 sc in each sc around, do not turn– 12 sc. 

Round 3: *Sc in next sc, 2 sc in next sc; repeat from * around, do not turn– 18 sc. 

Round 4: *2 sc in next sc, sc in next 2 sc; repeat from * around, do not turn– 24 sc

Rounds 5-10: Sc in each sc around, do not turn.

Round 11: *Sc2tog in front loops only over next 2 sc; repeat from * around, sl st to first sc, fasten off leave long tail for seaming– 12 sc.

Stuff body with fiberfill, do not close opening.

Sew head to the body, working through the last rounds of head and body.  Seam a second time to make it more sturdy.  Using color E, satin stitch eyes and nose on Round X of head.  Embroider with a long straight stitch for a mouth line.  

Bunny Ears

Make 2

With A, make a double adjustable ring. 

Round 1 (RS): 6 sc in ring, pull ring closed, do not turn–6 sc.

Round 2: *Sc in next sc, 2 sc in next sc; repeat from * around, do not turn– 9 sc

Rounds 3-8: Sc in each sc around, do not turn.

Round 9: *Sc2tog in front loops only over next 2 sc, sc in next sc; repeat from * around, sl st to first sc, fasten off leaving long tail for seaming– 6 sc.

Stuff ears lightly with fiberfill.  Using the photos as a guide sew the ears to the body.

Arms

Make 2

With A, make a double adjustable ring. 

Round 1 (RS): 6 sc in ring, pull ring closed, do not turn–6 sc.

Rounds 2-6: Sc in each sc around, do not turn.

Fasten off leaving a long tail for seaming.  Using the photos as a guide and sew the arms to the body.

Bunny Tail

With B, make a double adjustable ring. 

Round 1 (RS): 6 sc in ring, pull ring closed, do not turn–6 sc.

Round 2: 2 sc in each sc around, do not turn– 12 sc

Rounds 3-4: Sc in each sc around, do not turn.

Fasten off leaving a long tail for seaming. Stuff tail lightly with fiberfill. Gather stitches in the last round together. Sew tail to body.

A beaming Marly Bird with curly hair and glasses showcasing a handmade pink rabbit. She is pointing at the white bunny tail.

Carrot Pattern

With C, make a double adjustable ring. 

Round 1 (RS): 6 sc in ring, pull ring closed, do not turn–6 sc.

Round 2: *Sc in next sc, 2 sc in next sc; repeat from * around, do not turn– 9 sc

Rounds 3-7: Sc2tog in front loops only over next 2 sc, sc in each remaining sc around— 4 sc.

Fasten off, leaving a long tail for seaming. Gather stitches in the last round together. 

Carrot Top

Join D with sl st to top of carrot, [ch 6, sl st to first sl st] 3 times. Fasten off and weave in ends. 

Crocheting these bunnies is not just about making something cute; it’s about creating memories and spreading joy. Whether you’re making them for your kids, as gifts for friends, or just for fun, these bunnies will surely add an extra dose of cuteness to your Easter.

And remember, I’m here to cheer you on every step of the way! Let’s make this Easter one to remember with the sweetest crochet bunny stuffies. They’re soft, they’re cuddly, and they’re waiting for you to bring them to life!

Final Thoughts

We think about making these bunny rabbit amigurumi patterns near Easter, but there’s no law saying we can’t make one any time of year. Use this cute crochet bunny rabbit stuffed animal pattern and make a bunny for yourself or anyone in your life. Again, this crochet pattern is perfect for all skill levels, and these bunnies will definitely add a pop of spring joy to your home. Don’t forget to share your finished bunnies with #mmmdi or #marlybird!

Filed Under: Uncategorized

Create a Stunning Aurora Lace Crochet Cardigan With This Easy One-Piece Pattern

March 19, 2024 By Marly Bird Leave a Comment

A simple crochet cardigan you are going to LOVE! Introducing the Aurora Lace Crochet Cardigan, a garment that promises to elevate your wardrobe with intricate patterns and delicate textures. Time to take a step beyond that granny square and create a sweater everybody will want.

Perfect for chilly offices, breezy evenings, or as a chic overlay for your favorite dress or T-shirt. This cardigan seamlessly blends style with comfort.

With easy-to-follow written instructions and crochet stitch diagrams, this one-piece crochet cardigan pattern is for crocheters of all skill levels. It promises an amazing crafting experience; it’s a perfect project for Netflix and Chill Crocheter.

A four-panel collage of Marly Bird beaming with joy in a cobalt blue crochet lace cardigan, showing different angles including front, back, and side views, with close-ups highlighting the cardigan's intricate lace pattern and cozy fit. One piece sweater.

Disclosure: This post contains affiliate links, meaning I get a commission if you decide to purchase through my links at no cost to you.

Made from the amazing yarn from WeCrochet, City Tweed Aran, this cardigan adds a touch of luxury to your clothing collection. It offers the joy of creating a truly unique piece.

Learn more about this piece of clothing that’s more than a rectangle with sleeves. It’s a sweater you’ll never want to take off. Yes, it’s time to make your very own Aurora Lace Crochet Cardigan.

Get the full PDF with links to full-color PDF stitch diagrams for each pattern size. Click the button below to purchase the pattern.

Purchase Pattern on Etsy
Purchase Pattern on Ravelry
Purchase Pattern on Shopify

If you use Ravelry, please take a minute and favorite and queue up the pattern to show some love.

Favorite This Pattern on Ravelry - Marly Bird

Discover the Beauty of the Aurora Lace Crochet Cardigan

Leggings are everywhere, indeed. Personally, I absolutely love and live in them. You can dress them up with a cotton flare dress from Old Navy, a tunic from Torrid, or a new cardigan *wink. This crochet heavy worsted-weight cardigan was designed by the BiCrafty duo! Marly Bird and Robyn Chachula think this is the perfect accessory to wear with your favorite leggings. This must-have layering piece is great for anyone ready to try crocheting their own clothes.

The pattern is easy to follow. So, if you’re new to crocheting sweaters or you’ve been doing it for a while, you’ll find it fun. As long as you know a few basic crochet skills (and even if you don’t, we have help for that) –

  1. slip stitch,
  2. foundation single crochet,
  3. chain,
  4. single crochet,
  5. single crochet back loop ribbing,
  6. double crochet,
  7. stacked double crochet, and
  8. treble crochet.

If you can work these stitches, we’re telling you, you can do this! We use those basic crochet stitches in the stitch pattern we call the Aurora Lace stitch pattern. Once you get that 4-row stitch pattern sequence down, you will have a sweater in no time! Plus, Marly filmed a video tutorial to help you with these stitches, so you don’t have to flounder!

A collage of Marly Bird showcasing the cobalt blue Aurora Lace Crochet Cardigan with different poses, including a heartwarming one holding a black cat, against a bright blue background with text highlighting the pattern and video tutorial. One piece sweater.

Understanding the Design Inspiration Behind this One Piece Sweater Pattern

The structure of the Aurora Lace Crochet Cardigan is one both Marly and Robyn love to use when designing crochet. Neither enjoys seaming lots of little pieces to make a full garment. Even when they design motif-style sweaters, they always join as you go. So whenever they can design a piece to be made all in one, that is their go-to design.

Marly thought this cardigan should complement the 2023 Turkey Trot crochet pullover sweater (the Trifle Crochet Pullover free pattern on the blog). She doesn’t always like wearing a big pullover and prefers an easy-to-wear layering piece, hence the Aurora Lace.

Named for the city in Colorado where Marly used to live, Aurora. It is a beautiful name for a beautiful stitch pattern. So, as much as you’d like to think this sweater is named after the Aurora Borealis, it isn’t.

Simple One-Piece Construction Technique

As mentioned, the simple one-piece construction technique makes the crochet process of making a sweater a little easier. The Aurora Lace Crochet Cardigan has minimal seaming. Even the rib is joined as you go and stitched directly onto the body of the garment.

This design approach eliminates the need for sewing or seaming multiple parts together, presenting a streamlined process from start to finish.

“It just makes sense to me to design this way. Crochet is so plyable, flexible and forgiving. Usually any extra waist or shoulder shaping just isn’t necessary to get a good fit. So, making a sweater in one piece with little shaping on the sleeve and neck just works.”

– Marly Bird; Your BiCrafty Bestie
Aurora Lace Crochet Cardigan lays flat on a white wood table with blue and white flowers around it at either corner. Showing off the lace stitch pattern and the front single crochet ribbed collar and cuffs - Marly Bird

It’s been widely mentioned in the Marly’s Minions Facebook group that they appreciate the ease and beauty of working their sweater as a continuous piece. Favorite designs include the Amimono Kimono, Creekside Ruana, Lyvia Ruana, Garden Party Sweater, Goldenrod Crochet Sweater, Ashley Sweater, Hydroponic Tunic.

With a helpful schematic, stitch diagrams, and thoughtful video guidance, understanding crocheting in one piece becomes simple for even a beginner sweater crocheter.

Visual Aids to Assist in Piece Construction

Visual aids are indispensable in demystifying the one-piece construction technique for the Aurora Lace Crochet Cardigan. The 26-page pattern is more than just the written crochet instructions; it offers detailed charts and diagrams. These resources become an invaluable guide for crocheters, helping them visualize the layout and progression of their project with clarity and precision.

Video tutorials with clear step-by-step demonstrations further help the crocheter understand the one-piece construction. As visual learners, Marly and Robyn always give as many visual guidance tools as possible. So, even those new to any concept, especially one-piece crochet, can confidently tackle the project.

Here’s the stitch diagram for the Aurora Lace crochet stitch pattern. This chart is also used in the video tutorial. Full stitch diagrams for each size are only available in the pattern.

Aurora Lace Stitch Diagram - Marly Bird

Size Matters. And this Pattern is Size-Inclusive

Since the beginning of their design careers, Marly and Robyn have designed for multiple sizes. They always pushed for more size inclusivity in the yarn fashion industry. Try searching a site like Ravelry for a sweater pattern available in a larger size (bigger than a 49 inch bust). Seeing the design shown on a larger model is also important. That was not often something they saw more than 20 years ago. For them, it is important to design garments for everybody, especially ones they can wear. So, you’ll find many (if not all) of their designs are sized up to three extra large. Lots of their newer patterns are sized up to five extra large.

The size range of this particular pattern is impressive. The entire pattern includes written instructions, and the added value of the stitch diagrams provided for each size is immeasurable. Whether you’re looking for a size extra small to a 5XL, this pattern will work for you.

The exact Measurements of this pattern are as follows –

To Fit Size: XS (S-L, XL/2X, 3-5X) with 4-15” [10-38 cm] of positive ease.  Sample shown has 7” of positive ease. 

Finished Cardigan Measurements: Sweater is 35 (46, 57.5, 69)” [89, 117, 146, 175.5 cm] bust circumference and 23 (25, 27, 29)” [58.5, 63.5, 68.5, 73.5 cm] in length.  

Here is the schematic for this pattern to help you choose your correct size.

Aurora Lace Crochet Cardigan Pattern. One piece sweater schematic with measurements for sizes XS (S-L, XL-2XL, 3XL-5XL) - Marly Bird

Does My Gauge Matter for a Crochet Sweater?

Yes, gauge does matter when you are crocheting a sweater. You must match the same gauge as the crochet pattern is written. Change your crochet hook size to get the stitches of the correct size (gauge) with the yarn you choose.

We did write a blog post about getting crochet gauge if you’re interested in reading it. Remember, you MUST use the same hook and yarn for your gauge swatch as you plan for your project. Even changing the color of the yarn can alter the gauge, so be aware!

The gauge for this sweater pattern is: 2 Stitch Repeats (10 dc + 4 ch-sps) by 8 Rows = 5.75” [15 cm] by 4” [10 cm]; use any size hook to obtain the gauge. 

Aurora Lace Crochet Cardigan pattern and video tutorial in text at the top, Marly Bird models the crochet pattern in cobalt blue color with her hands held in front of her.

Gather Your Materials for the Aurora Lace Cardigan

Marly and Robyn wanted to keep the material list light for this crochet pattern. Still, they also wanted to use a semi-luxury yarn readily available at a very affordable price. City Tweed is one of their favorite yarns. But this is the first time using the aran/heavy worsted weight version.

The blend of merino, superfine alpaca, and Donegal tweed makes for an amazing crocheting experience. This yarn glides on your crochet hook, and the finished look is rustic and super cozy.

Here are the yarn details for this pattern: WeCrochet, City Tweed Aran, (55% merino wool/ 25% superfine alpaca/ 20% Donegal tweed, 164 yds / 150 m, 3.5 oz/ 100 g, CYCA #4 heavy worsted) –  5 (6, 8, 10) balls. Sample color on pattern – Jacquard; sample color on Marly – Cobalt.

Best Crochet Hooks for Aurora Lace

The lace crochet in this pattern is a bit of a misnomer. It’s an aran weight yarn with big lace stitches, so there’s no need to select a small hook. A crochet hook with a nice pointed tip does help get into the foundation stitches, but it’s not a must-have. Marly used a Susan Bates inline hook with a large ergonomic handle, as she loves to use this when she crochets. It prevents her hand from cramping.

For this pattern, the suggested crochet hook size is a J/10 or a 6mm crochet hook.

Additional Tools You’ll Need For This One-Piece Sweater Pattern

As with any pattern, it takes more than just yarn and hooks to crochet an item. A simple set of supportive tools plays a role in a successful project. These are the tools you need to make this sweater:

  • A tape measure – to measure your gauge in the pattern and the ribbing. This is very important for making sure your cardigan matches the desired measurements.
  • Pair of scissors – to cut the yarn. Always leave 4 – 6 inches of tail to weave in later.
  • Speaking of weaving in, you need a darning needle. Don’t just crochet over your ends. You’ll be very disappointed in the results after you wash and wear your garment. Weaving in ends is crucial for finishing touches.
  • As always, a set of stitch markers will come in handy. Use these markers to keep the edges of your sweater straight. Section off the edges for the back-loop single crochet ribbing added to the sleeve cuff, bottom hem, and neckline collar. These Clover locking stitch markers are Marly’s favorites.
  • Blocking Materials: Blocking your sweater is very important to get the full effect of crochet lace. It also makes the seaming process easier. This blog post is full of information about blocking supplies that are Marly’s favorites.
  • This is not listed on the pattern but may be useful for those who want a more closed-front cardigan without buttonholes: these pedestal buttons by Jul.

Step-by-Step Video Instructions for Crocheting Your Cardigan

Marly Bird created a YouTube video tutorial for this pattern. She walks you through stitch by stitch to create the stunning Aurora Lace Crochet Cardigan. It’s an in-depth tutorial perfect for crocheters ready to expand their skills. Anyone longing to wrap themselves in a handcrafted layer of warmth and style will love it.

🧶 What You’ll Learn:

  • Foundation Single Crochet: Kick off your cardigan with a sturdy and stretchy base.
  • Aurora Lace Stitch Pattern: Master the heart of this pattern with its captivating lace details. Learn all the crochet stitches in this pattern so you don’t crochet without a clue.
  • Sleeves: Learn to add, shape, and tailor sleeves with ease, including increasing and decreasing techniques.
  • Neck Opening: Plan and execute the perfect V-neck opening that frames your face beautifully.
  • Crocheting in One Piece: Simplify construction and reduce seaming as you work the entire sweater in a single piece.
  • Join As You Go Ribbing: Finish with a flourish by adding ribbing that’s worked directly onto the cardigan for a polished look.

🌟 Whether an adventurous beginner eager to dive into your first crochet sweater or an experienced crocheter looking for a relaxing project with enough challenge, this crochet cardigan will become a cherished piece in your wardrobe.

Purchase the pattern to follow along with the video tutorial.

Get the full PDF with links to full-color PDF stitch diagrams for each pattern size. Click the button below to purchase the pattern.

Purchase Pattern on Etsy
Purchase Pattern on Ravelry
Purchase Pattern on Shopify

Crocheting the Cuffs, Hem, and Collar for a Polished Look

The garment has been made, washed, and blocked to the schematic measurements and then seamed. The final step is to add the cuff to each sleeve, the bottom hem, and the comfy rib collar around the neckline and front of the cardigan. This task might seem daunting after all that crochet is done. But it’s the final piece that gives your garment a polished look turning it into a masterpiece.

Don’t worry—you don’t have to make the ribbing separate and then use your sewing skills. No, no, no, haven’t you learned yet? These two designers like to make things fairly easy and seamless. Therefore, these ribbed pieces are worked with the join-as-you-go technique, using slip stitches into the fabric to join the ribbing.

It’s quite easy, and Marly goes over this in detail in the video, so be sure to watch it.

Caring for Your Crochet Clothing

Taking good care of your crochet clothing is important to keep it looking great. After wearing this piece, wash it gently in cool water with a mild soap. Don’t twist or wring it; gently press the extra water. Then, lay it flat on a clean towel to dry, shaping it to keep its original form. Don’t hang it up – this could stretch out the lovely lace. If you need to store it away, fold it softly and place it in a drawer or a box where it won’t get squished. Looking after it this way, your handmade sweater will stay as pretty and comfy as the day you finished crocheting.

Aurora Lace Crochet Cardigan on a mannequin showing the side view of the left front and partial sleeve of the crochet sweater by Marly Bird. One piece sweater.

Showcase Your Work: Share Your Aurora Lace Cardigan

We all want to see your work when you finish your Aurora Lace Crochet Cardigan! Take pictures of yourself wearing your sweater on a date or Sunday morning to church! Snap that picture and share it with us on social media!

Our BiCrafty Facebook community is here to show you love and support and give you big CONGRATULATIONS 🥳 as you work on your project!

script text that reads Marly's Minions

Final Thoughts

Let me wrap up: crocheting the Aurora Lace Crochet Cardigan is much more than a crochet hook and yarn. It’s like you’re stitching a cozy hug. This pattern is your golden ticket to making a one-piece construction and a snuggly comfort sweater uniquely yours. Anyone can whip up this beauty with just the right yarn and some nifty stitch skills. Whether you’re dipping your toes into the crochet waters or the seasoned stitcher who’s seen it all.

And let’s not forget—when you rock your Aurora Lace, you’re rocking a piece you crocheted with your own hands! After you’ve worn it a few times, it’s time for a wash. Give it some tender loving care by hand washing it gently so it stays as perfect as the day you finished it.

Sharing your work with the world or our tight-knit crochet crew is the cherry on top. It’s about showing off your skills, sure. But it’s also about sparking that ‘Hey, I can make that too!’ moment in someone else.

So, there you have it! Making this cardigan is a journey full of heart, craft, and a touch of magic. Let’s get our hooks flying and hearts singing and make magic with this pattern!

Happy Stitching, everybody!

Smiling Marly Bird wearing glasses and a cobalt blue crochet cardigan with intricate lace detailing, embracing herself with one hand while standing against a home background with bookshelves.

Filed Under: Crochet, Designer Premium Patterns, Marly Bird Premium Patterns, Pattern, Uncategorized, YouTube Video Tutorial

Simple Crochet Frog – Your New Frogging Friend!

February 29, 2024 By Marly Bird 1 Comment

Introducing the Frogging Friend, a delightful crochet creation designed by your BiCrafty Bestie, Marly Bird! This charming amigurumi frog is not just a cute addition to your collection but also a heartwarming companion for all your crocheting escapades. Made with snuggly worsted weight yarn and crafted with love, the Frogging Friend is the perfect size to perch beside you as you stitch your latest project.

Whether you’re breezing through stitches or unraveling a few “oops” moments (we all have them!), this little buddy is there with a reassuring smile. With its friendly eyes and comforting texture, the Frogging Friend is more than just a stuffed toy; it’s a companion that celebrates every part of your crochet journey – the triumphs, the challenges, and everything in between.

Perfect for crocheters looking for a project with personality and charm, the Frogging Friend comes with a clear, easy-to-follow pattern and a supportive video tutorial led by Marly Bird herself. So, gather your yarn and hook, and get ready to crochet a friend who will stick by you, through thick and thin yarns alike!

Marly Bird holding the Frogging Friend Crochet Stuffie in one had as she smiles to the camera. The stuffed frog is green with big and bold cartoon eyes.

Designed by Marly Bird

SKILL LEVEL

Advanced Beginner

MEASUREMENTS

Finished Measurements

Frog is 12” [30.5 cm] circumference around widest part of body by 7” [18 cm] tall from bottom to top of eyeballs. . 

Gauge 

16 sc by 16 rounds = 4” [10 cm] x 4” [10 cm]; use any size hook to obtain the gauge. 

MATERIALS

Crochet Yarn 

Red Heart Super Saver (100% acrylic, 364 yds / 333 m, 7 oz/ 198 g, CYCA# 4 worsted): 

Color A: Kelly Green, 1 skein

Color B: Spring Green, 1 skein

Color C: Black, 1 skein

Color D: White, 1 skein

Crochet Hook

Size E/5 (3.5 mm)

Notions 

Tapestry needle, Fiberfil stuffing, stitch markers

Favorite This Pattern on Ravelry - Marly Bird

ABBREVIATIONS

Ch – Chain(s) 

RS – Right Side 

Sc – Single Crochet

Sc2tog – Single Crochet Two Together 

Sl st – Slip Stitch 

Sp(s) – Space(s) 

St(s) – Stitch(es)

WS – Wrong Side

SPECIAL STITCHES 

Slip st (slip stitch): Insert crochet hook in the indicated stitch, yarn over and draw through both the stitch and the loop on the hook.

Single Crochet 2 Together (sc2tog): *Insert hook into indicated stitch, yarn over and pull up a loop; repeat from * in next stitch indicated, yarn over and draw through all 3 loops on hook. (1 decrease)

SPECIAL TECHNIQUES

Adjustable Ring (also known as the Magic Loop): 

Start your adjustable ring exactly as you start a slip knot by pulling 6 to 8 inches of yarn from the yarn skein.  The working end of yarn comes from the skein, and the tail end of yarn is on the other side.  Loop the tail end of the yarn under the working end to form a loop.. Pick up the loop and pinch the working end, moving it through the loop. Place a new loop on the hook. Chain 1 to lock in the ring.  Once finished crocheting around the ring, pull the tail end to close the ring.

VIDEO TUTORIALS

  • Full Step By Step Video Tutorial for crocheting Frogging Friend https://youtu.be/TZ14SPtAD9Y 
  • How to make an adjustable ring https://youtu.be/76hW8yT4HlU 
  • How to secure an adjustable ring https://youtu.be/emHjFVFrzl0 
  • How to single crochet https://youtu.be/W6dsC-IwIGg  

NOTES

  • Frog  is worked in pieces and seamed together. Details are added last. 
  • Body, head and eyes are worked in joined rounds. 
  • The arms and legs are worked in continuous spiral rounds that are not joined at the end of the round. 
  • Use a stitch marker to mark the first stitch of each new round throughout project. 
  • Stuff Frog’s body, head, and eyes firmly with fiberfil. The arms and legs only have about an inch of fiberfil at the bottom of the limbs. 
  • When changing color, pull new color through last pull through of the previous stitch or join.
  • Leave a long tail on final finishing to use for seaming. 
Marly Bird holding the Frogging Friend Crochet Stuffie in one had as she smiles to the camera. The stuffed frog is green with big and bold cartoon eyes.

FROGGING FRIEND FROG STUFFIE PATTERN

FROG HEAD

Note: Head is worked from the top at the increasing rounds through the bottom of the head while decreasing. 

Round 1: With color A and using the Adjustable Ring, 6 sc in ring, join with a slip st to first sc, pull ring closed, ch 1–6sc.

Round 2: 2 sc in each sc around, join with a slip st to first sc, ch 1– 12 sc. 

Round 3: *Sc in next sc, 2 sc in next sc; repeat from * around, join with a slip st to first sc, ch 1– 18 sc. 

Round 4: *2 sc in next sc, sc in next 2 sc; repeat from * around, join with a slip st to first sc, ch 1– 24 sc.

Round 5: Sc in next 2 sc, *2 sc in next sc, sc in next 3 sc; repeat from * to last 2 sc, 2 sc in next sc, sc in last sc, join with a slip st to first sc, ch 1—30 sc.

Round 6: *Sc in next 4 sc, 2 sc in next sc; repeat from * around; join with a slip stitch to first sc, ch 1—36 sc.

Round 7: Sc in next 3 sc, *2 sc in next sc, sc in next 5 sc; repeat from * to last 3 sc, 2 sc in next sc, sc in next 2 sc; join with a slip st to first sc, ch 1—42 sc. 

Take a moment and weave closed the magic loop opening on the wrong side. 

Rounds 8-16: Sc in each sc around, join with a slip st to first sc, ch 1.

Round 17: *Sc in next 5 sc, sc2tog over next 2 sc; repeat from * around, join with a slip st to first sc, ch 1—36 sc.

Round 18: Sc in next 2 sc, *sc2tog over next 2 sc, sc in next 4 sc; repeat from * around to last 4 sc, sc2tog over next 2 sc, sc in last 2 sc, join with a slip st to first sc, ch 1—30 sc.

Stuff frog’s head with fiberfil.

Round 19: *Sc in next 3 sc, sc2tog over next 2 sc; repeat from * around, join with a slip st to first sc, ch 1—24 sc.

Round 20: Sc in next sc, *sc2tog over next 2 sc, sc in next 2 sc; repeat from * around to last 3 sc, sc2tog over next 2 sc, sc in last sc, join with a slip st to first sc, ch 1—18 sc.

Round 21: *Sc in next sc, sc2tog over next 2 sc; repeat from * around, join with a slip st to first sc, ch 1—12 sc.

Stuff frog’s head with more fiberfil if necessary.

Round 22: *Sc2tog over next 2 sc; repeat from * around, join with a slip stitch to first sc, fasten off with long tail—6 sc.

Weave tail through the stitches on the last round, pull tight to close hole like a drawstring.  Weave in ends but do not cut the tail yet. It will be used to seam the head to the body. 

FROG BODY

Note: Body is worked from the top at the increasing rounds through the bottom of the head while decreasing. 

Round 1: With color A and using the Adjustable Ring, 6 sc in ring, join with a slip st to first sc, pull ring closed, ch 1–6sc.

Round 2: 2 sc in each sc around, join with a slip st to first sc, ch 1– 12 sc. 

Round 3: *Sc in next sc, 2 sc in next sc; repeat from * around, join with a slip st to first sc, ch 1– 18 sc. 

Round 4: *2 sc in next sc, sc in next 2 sc; repeat from * around, join with a slip st to first sc, ch 1– 24 sc.

Round 5: Sc in next 2 sc, *2 sc in next sc, sc in next 3 sc; repeat from * to last 2 sc, 2 sc in next sc, sc in last sc, join with a slip st to first sc, ch 1—30 sc.

Round 6: *Sc in next 4 sc, 2 sc in next sc; repeat from * around; join with a slip stitch to first sc, ch 1—36 sc.

Round 7: Sc in next 3 sc, *2 sc in next sc, sc in next 5 sc; repeat from * to last 3 sc, 2 sc in next sc, sc in next 2 sc; join with a slip st to first sc, ch 1—42 sc. 

Take a moment and weave closed the magic loop opening on the wrong side. 

Rounds 8-11: Sc in each sc around, join with a slip st to first sc, ch 1.

Round 12: Sc in next 4 sc, *2 sc in next sc, sc in next 6 sc; repeat from * to last 3 sc, 2 sc in next sc, sc in last 2 sc, join with a slip st to first sc, ch 1—48 sc. 

Round 13: Sc in each sc around, join with a slip st to first sc, ch 1. 

Round 14: Sc in next 3 sc, *2 sc in next sc, sc in next 7 sc; repeat from * to last 5 sc, 2 sc in next sc, sc in last 4 sc, join with a slip st to first sc, ch 1—54 sc. 

Round 15: Sc in each sc around, join with a slip stitch to first sc, ch 1. 

Round 16: *Sc in next 8 sc, 2 sc in next sc; repeat from * around, join with a slip st to first sc, ch 1—60 sc. 

Rounds 17-21: Sc in each sc around, join with a slip st to first sc, ch 1. 

Round 22: *Sc in next 8 sc, sc2tog over next 2 sc; repeat from * around, join with a slip stitch to first sc, ch 1—54 sc.

Round 23: Sc in next 4 sc, *sc2tog over next 2 sc, sc in next 7 sc; repeat from * to last 5 sc, sc2tog over next 2 sc,  sc in last 3 sc, join with a slip st to first sc, ch 1—48 sc.

Round 24: *Sc in next 6 sc, sc2tog over next 2 sc; repeat from * around, join with a slip st to first sc, ch 1—42 sc.

Round 25: Sc in next 3 sc, *sc2tog over next 2 sc, sc in next 5 sc; repeat from * to last 4 sc, sc2tog over next 2 sc, sc in last 2 sc, join with a slip st to first sc, ch 1—36 sc

Round 26: *Sc in next 4 sc, sc2tog over next 2 sc; repeat from * around, join with a slip st to first sc, ch 1—30 sc.

Round 27: Sc in next 2 sc, *sc2tog over next 2 sc, sc in next 3 sc; repeat from * to last 3 sc, sc2tog over next 2 sc, sc in last sc, join with a slip st to first sc, ch 1—24 sc.

Stuff frog’s body with fiberfil.

Round 28: *Sc in next 2 sc, sc2tog over next 2 sc; repeat from * around, join with a slip st to first sc, ch 1—18 sc.

Round 29: *Sc in next sc, sc2tog over next 2 sc; repeat from * around, join with a slip st to first sc, ch 1—12 sc.

Stuff frog’s body with more fiberfil if necessary.

Round 30: *Sc2tog over next 2 sc; repeat from * around, join with a slip st to first sc, fasten off—6 sc.

Weave tail through the stitch on the last round, pull tight to close the hole like a drawstring.  Weave in ends.

Frogging Friend, the amigurumi crochet frog by Marly Bird

FROG AMIGURUMI CARTOON EYES

I used the cartoon eyes by Repeat Crafter Me and added my own little tweak to them I hope you love them.

Eyeball – Make 2

Round 1: With color C and using the Adjustable Ring, 10 sc in ring, change to  color B, join with a slip st to first sc, ch 1–10 sc.

Round 2: 2 sc in each sc around, change to color D, join with a slip st to first sc, ch 1– 20 sc.

Round 3: Sc in each sc around, join with a slip st to first sc.

Round 4: Slip st in each sc around, join with a slip st to first slip st. Fasten off. 

Round 5: With color A, insert hook into any back loop of sc from Round 3, yarn over and pull up a loop (one loop on hook), proceed to work a slip st in the back loop of the next sc from Round 3, and in all the remaining sc  around, join with a slip st to first slip st. Fasten off.

Using the tail of color D, embroider a sparkle to the edge between the pupil and the iris. Use photo as guide. Weave in all ends.

Outer Eye – Make 2

Round 1: With color A and using the Adjustable Ring, 10 sc in ring, join with a slip st to first sc, pull ring closed, ch 1–10 sc.

Round 2: 2 sc in each sc around, join with a slip st to first sc, ch 1– 20 sc.

Round 3: *Sc in next sc, 2 sc in next sc; repeat from * around, join with a slip st to first sc, ch 1– 30 sc. 

Rounds 4-6: Sc in each sc around, join with a slip st to first sc.

Round 7: *Sc in next sc, sc2tog over next 2 sc; repeat from * around, join with a slip st to first sc, ch 1—20 sc.

Stuff frog’s eye with fiberfil.Have the eyeball placed with the right side out on the open space of the outer eye (see image below), slip st in next sc of outer eye and through the back leg of the corresponding slip st of the eyeball of Round 5 of the eyeball, join with a slip st to first slip st. Fasten off.

step out photo tutorial for how to add the crochet eyeball to the outer eye of the cartoon eyes used on the Frogging Friend Crochet Stuffie by Marly Bird

FROG ARMS

Note: Arms are worked from the bottom at the increasing rounds through the length of the arm in a spiral. Do not join rounds with a slip stitch. 

Make 2

Round 1: With color A and using the Adjustable Ring, 6 sc in ring, pull ring closed–6sc.

Round 2: 2 sc in each sc around– 12 sc

Rounds 3 – 22: Sc in each sc around.

Stuff lower portion of the frog’s arm with fiberfil. Sample only has about 1” [2.5 cm] filled with stuffing.

Fasten off. 

FROG LEGS

Note: Legs are worked from the bottom at the increasing rounds through the length of the leg in a spiral. Do not join rounds with a slip stitch. 

Make 2

Round 1: With color B and using the Adjustable Ring, 6 sc in ring, pull ring closed–6sc.

Round 2: 2 sc in each sc around, change to color A— 12 sc

Rounds 3 – 24: Sc in each sc around, do not turn.

Stuff lower portion of the frog’s legs with fiberfil. Sample only has about 1” [2.5 cm] filled with stuffing..

Fasten off. 

FINISHING

Using the images as your guide, sew the eyes onto the head. Then sew the head onto the top of the body. Then pinch the legs and arms closed and whip stitch them into place on the body.  Again, using the photo as a guide or watch the video tutorial.

With color C, embroider a smile to the front of the frogs face.  

Frogging Friend laying flat on a white surface with the unattached limbs strategically placed along the body. This image demonstrates how the pieces of the stuffed crochet crog should be assembled. This crochet frog pattern is by Marly Bird

Filed Under: Apricot Lane Amigurumi, Crochet, Free Patterns, Our Free Patterns, Pattern Tagged With: badge-new-pattern

Discover the Charm of the Bamberg Bandana Cowl: Your Next Favorite Project!

February 16, 2024 By Marly Bird 1 Comment

Are you ready to add a touch of elegance to your wardrobe with a versatile piece that’s both a cowl and a shawl? Look no further than the knit Bamberg Bandana Cowl pattern! This delightful project is perfect for those who love a bit of a challenge mixed with a whole lot of fun. In this blog post we will guide you through all you need to know about this modern knit project and how you can get the pattern. Use the table of contents to jump to any section of the article you desire.

Promotional image for the Bamberg Bandana Knit Cowl featuring Marly Bird. Three photos display Marly smiling and modeling the cowl, which showcases rich textures and colorwork in shades of yellow, purple, and pink. She stands outdoors with tall grass in the background. The image includes text overlays that read 'Bamberg Bandana Knit Cowl,' 'video tutorials,' 'easy to wear,' 'pdf pattern,' and 'www.marlybird.com.

What’s a Bandana Cowl?

A bandana cowl, also known as a bandana shawl, is a fashionable accessory that drapes beautifully around your neck and shoulders. It’s like a scarf but even cooler because it combines the style of a bandana with the warmth of a cowl. And the best part? You can wear it in lots of different ways! This neck and chest warmer is a multifunctional piece that is modern, unisex, and utilitarian. This piece is an attention grabber and a conversation starter for sure!

What Skills Do I Need To Know to Knit a Simple Cowl?

The Bamberg Bandana Cowl is designed with the adventurous beginner in mind, providing a delightful challenge for those who are comfortable with knit and purl stitches and have general knitting knowledge. This pattern is a stepping stone towards more complex projects, allowing knitters to grow their skills while working on a practical and stylish accessory. The textured design, while simple to follow, results in a sophisticated piece that looks more complicated than it is, making it perfect for those looking to expand their knitting repertoire in a fun and engaging way.

The Bamberg Bandana Cowl Knitting Pattern

The Bamberg Bandana Cowl pattern is not just any ordinary pattern. It’s filled with textures that are sure to keep your fingers dancing and your mind engaged. Imagine creating something that looks super fancy but is actually quite simple once you get the hang of it. That’s the magic of the Bamberg Bandana Cowl!

Learn how to combine knits and purls to create the Seersucker stitch pattern. And also learn how to combine garter stitch and slip stitches to create a beautiful and easy knit mosaic pattern. These are wonderful stitches for any knitter to learn but perfect for Adventurous Beginners!

But the texture doesn’t stop there! Learn a seaming technique that creates a eye catching 3D seam. You can work this seam with knitting needles or a crochet hook.

Promotional graphic for the Bamberg Bandana Knit Cowl PDF pattern. The image features an iPad displaying Marly Bird holding the cowl, with text reading 'Ad-Free PDF Pattern.' Beside it, another tablet screen shows full-color charts for the cowl pattern. Arrows point to the key features 'PDF Pattern' and 'Full Color Charts' to highlight the content of the purchase.

This knitting pattern is available as an ad-free pdf instant download. The instructions include both written and charted instructions, as well as video tutorials to help along the way. We understand that we all have different learning styles, that is why Marly Bird patterns provide as many ways to get the instructions as possibly available. Oh, did I mention this pattern is large font and expands over 22 pages?

Promotional collage for the Bamberg Bandana Cowl knitting pattern available at www.marlybird.com. The image features the text 'BAMBERG BANDANA COWL' prominently displayed at the top, followed by '22 PAGE PDF + CHART & VIDEO TUTORIALS.' Below, there are multiple snapshots of the PDF pattern pages, showcasing detailed instructions, charts, and photos of Marly Bird wearing the completed cowl. The layout is designed to highlight the comprehensive nature of the pattern and the resources provided for knitters.

Information about the Kerchief Style Shawl

This kerchief style cowl was knit in one day and it only requires one hank of worsted yarn in 3 different colors. The piece is knit flat in sections of slip stitch mosaic and seersucker stitch. The sizing is very customizable and gauge is not super important, you can follow the instructions as written or repeat the pattern to get a scarf length instead of the size given.

MEASUREMENTS

To Fit Size: One Size

Finished Measurements: 10 inches x 42 inches [25.4 x 108.7 cm] blocked & before fold

Gauge: 18.66 sts 31 rows = 4″ [10 cm] in Slip Stitch pattern unblocked.

MATERIALS / TOOLS

Yarn: KnitPicks, Twill  (100% Superwash Merino Wool, 149 yards / 136 meters, 3.53 oz / 100 g CYCA #4 worsted yarn weight) 

  • 1 ball each color: Rose Water Heather – Color A, Serpent Heather – Color B, Black Cherry Heather – Color C

Knitting Needle

U.S. 9 [5.5 mm] 24” [61 cm], or size required for gauge

Crochet Hook (ever wonder what the best crochet hook is for you?)

U.S. H/8 [5 mm] used for seaming

Notions 

  • Removable stitch markers to help with seaming
  • Tapestry needle.
  • Blocking Supplies

Video Tutorials Included!

Sometimes reading a pattern isn’t enough for those of us who are visual learners, and that’s totally okay! The Bamberg Bandana Cowl comes with closed-captioned video tutorials to help you every step of the way. This pattern was the prototype for what became The Archer pattern for the Game Day 2024 knitting project. The same stitches are used in both projects so the videos for the Game Day will help you with the Bamberg. And as mentioned, the unique finishing technique used to seam this project has its own video. These videos make it like having a teacher right there with you, showing you exactly what to do. How awesome is that?

Promotional Pinterest graphic for the 'Bamberg Bandana Cowl' knitting pattern by Marly Bird. The image features three separate pictures of Marly modeling the cowl in yellow and purple hues, alongside a close-up of the cowl's textured stitch patterns. The central pink banner states 'Knitting Pattern - Bamberg Bandana Cowl' with the website 'www.marlybird.com' at the bottom.

Choosing the Right Yarn for Your Bandana Cowl

Knitting the perfect Bamberg Bandana Cowl starts with selecting the right yarn. If you’re wondering what type of yarn will make your cowl both comfortable and chic, consider a soft, medium-weight yarn. Wool, acrylic, or a blend can offer warmth and versatility, while a splash of color can bring the textured patterns to life.

Using mohair or polyester or silk or bamboo or yak yarn will definitely give the project a different look but if you swatch with it and like the overall look, then go for it. Let creativity be your guide.

Remember, the yarn weight and fiber you choose will transform your cowl from a simple accessory to a statement piece!

For the sample, Marly used a lovely superwash yarn from KnitPicks called Twill. But any worsted weight yarn can be used for this lovely piece.

Flat lay image showcasing the Bamberg Bandana Cowl in progress with rich textures in pink, yellow, and purple yarns. The knitting project is laid out on a white surface, displaying its intricate patterns and a Marly Bird branded label. Beside the cowl, there are three skeins of Twill yarn from WeCrochet in coordinating colors, indicating the high-quality materials used in the creation of this piece.

Why You’ll Love Knitting This Project

  • It’s Unique: Stand out from the crowd with a cowl that’s also a shawl!
  • It’s Fun: Enjoy a project that’s full of texture and exciting new stitches.
  • It’s Educational: Learn new techniques with helpful video tutorials.
  • It’s Stylish: Add a fashionable twist to any outfit with your very own handcrafted accessory.How to Block Your Handmade Cowl or Shawl?

I Want the Bamberg Pattern – Where Do I Get It?

This pattern is available as part of the 2024 Game Day MVP Package or in the Marly Bird Etsy shop

Don’t wait any longer! Grab your yarn and needles (or hook!) and get ready to make something beautiful. The Bamberg Bandana Cowl is perfect for cozying up on cool days or adding a stylish layer on an evening out.

>> Get the Ad-Free Pdf on Etsy Here <<

So, are you team cowl or team shawl? Why choose when you can have both with the Bamberg Bandana Cowl! Get your pattern today and join the crafting fun. If you are making this project, don’t forget to favorite and queue it up on Ravelry.

Remember, with the Bamberg Bandana Cowl, you’re not just making a piece of clothing; you’re creating a work of art to wear and love. Happy crafting!

Filed Under: Designer Premium Patterns, Knitting, Marly Bird Premium Patterns Tagged With: badge-new-pattern

  • « Previous Page
  • 1
  • …
  • 5
  • 6
  • 7
  • 8
  • 9
  • …
  • 17
  • Next Page »

Let's Be Social

Join the Marly's Minions Facebook group to share, ask questions, or chat about all of your yarn related crafts!

Join the group
Digital avatar of a woman with brown hair in a bun, glasses, and a black jacket, waving and saying "hi" with a word bubble above her hand in the website footer. -Marly Bird

Quick Links

The Pattern Shop

Our Free Patterns

Blog

Marly Bird House

Learn to Knit & Crochet

About

Giveaway Terms and Privacy Notice

Find Us Everywhere

Join the Newsletter

YouTube Channel

Marly's Minions FB Group

Etsy Store

Ravelry Store


AN ELITE CAFEMEDIA HOME/DIY PUBLISHER

Information from your device can be used to personalize your ad experience. Do not sell or share my personal information.

Privacy Policy   Terms   Copyright © 2025