Search
Close
  • The Pattern Shop
  • Our Free Patterns
    • Browse All Our Free Patterns
    • Our Free Knitting Patterns
    • Our Free Crochet Patterns
  • Blog
    • All Blog Posts
    • All Free Patterns
    • Dibble Dabble Inspiration
    • Giveaways
    • Make-Alongs
    • Product Reviews
    • Roundups
    • Tips, Tricks, Techniques for Knitting and Crochet
Stylized bird with pink and gray swirling tail above elegant “Marly” text, logo for crochet accessories and home decor.
  • Marly Bird House
  • Learn to Knit & Crochet
    • Newbie? Start Here
    • Video Tutorials
    • Knitting Definitions
    • Crochet Definitions
    • Common Techniques
    • Size Charts for Knitting and Crochet Projects
  • About
×
  • The Pattern Shop
  • Free Patterns
  • Blog
  • Marly Bird House
  • Learn to Knit & Crochet
    • Newbie? Start Here
    • Video Tutorials
    • Knitting Definitions
    • Crochet Definitions
    • Common Techniques
    • Size Charts for Knitting and Crochet Projects
  • About
Stylized bird with pink and gray swirling tail above elegant “Marly” text, logo for crochet accessories and home decor.
Search
Close

New Patterns NOW Available in Ad-Free PDF! Check out The Pattern Shop

Sandwellen Free Textured Crochet Blanket Pattern with Caron Blossom Cakes 🧶✨

January 20, 2026 By Marly Bird 6 Comments

If you’re searching for a textured crochet blanket pattern that feels fresh, looks impressive, and doesn’t rely on complicated color changes — this one’s for you. 💕
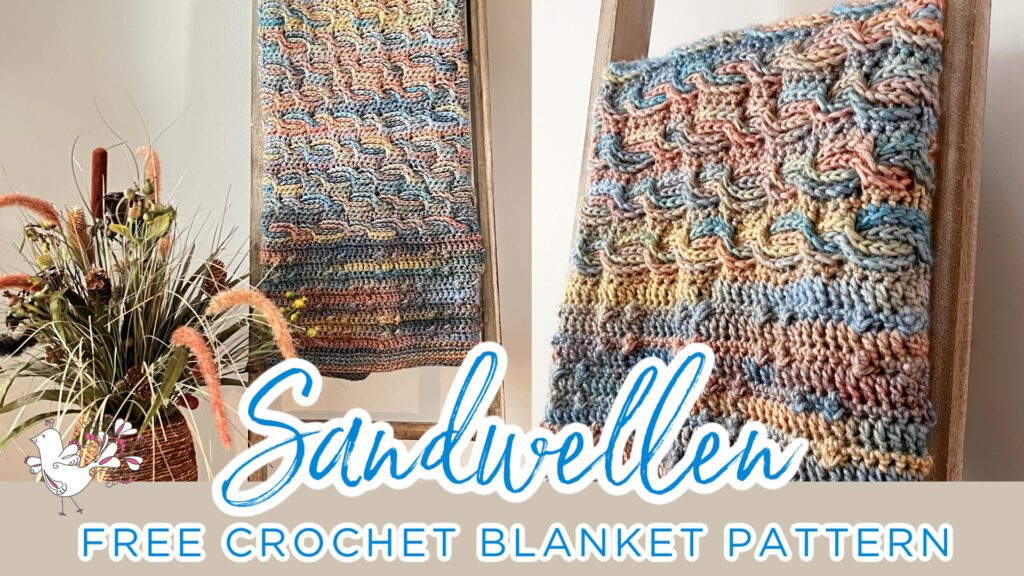
Sandwellen free crochet blanket pattern - Textured Crochet Blanket Pattern with Caron Blossom Cakes. Marly Bird

Affiliate Disclosure: This post contains affiliate links. To learn more please visit my privacy policy here💖

This free crochet blanket pattern combines rich texture, clear stitch definition, and the subtle color shifts of Caron Blossom Cakes yarn to create a blanket that looks intricate without being overwhelming to make.

It’s the kind of project that keeps your hands interested while still letting you relax — and the finished blanket has that “how did you do that?” energy we all secretly love. 😄
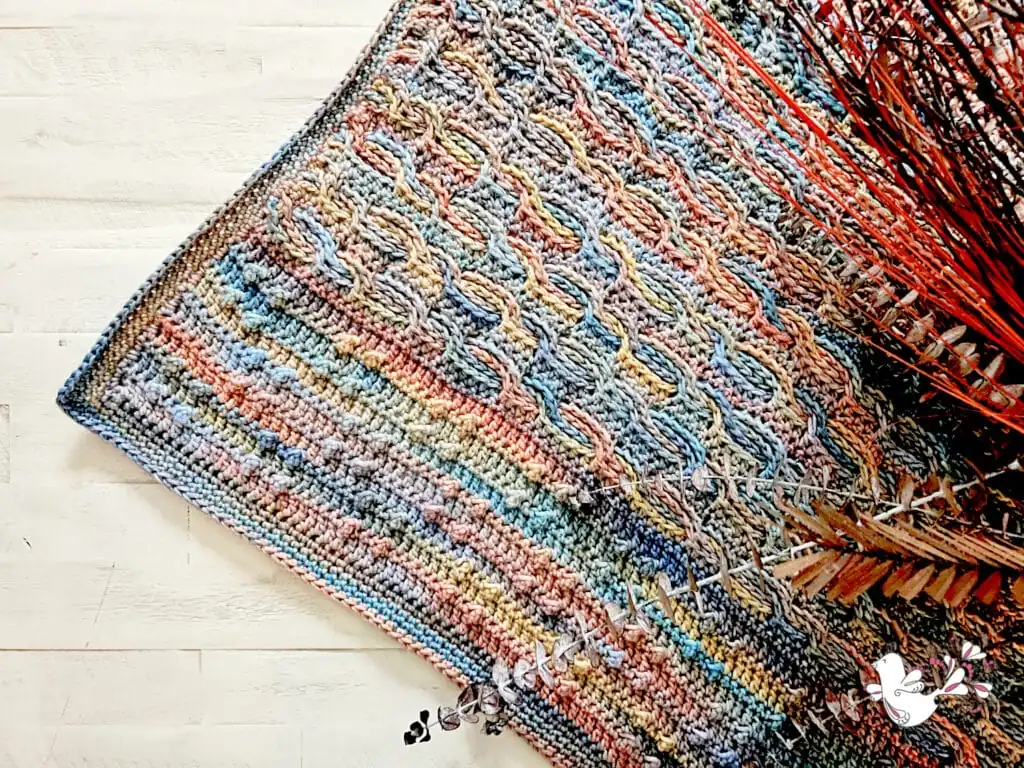

A colorful crocheted blanket with a textured, wavy pattern lies partially folded on a light wooden surface, next to dried branches and a small white dove graphic in the bottom right corner. -Marly Bird
Etsy
Shopify
Ravelry

What You Will Love About This Textured Crochet Blanket 💖

This textured crochet blanket pattern is designed for makers who love stitch definition, cozy fabric, and projects that feel engaging without being overwhelming.

You’ll love this pattern if you’re looking for:

  • A unique crochet blanket stitch pattern with beautiful texture
  • A blanket that looks intricate but follows a repeatable stitch pattern
  • A design that works well with solid or softly variegated yarns
  • An easy way to customize your blanket size
  • A relaxing crochet project you can pick up and put down

✨ Designer Tip: Texture-forward blanket patterns shine when the stitches do the talking. You don’t need complicated color changes to make a blanket feel special.


Unique Crochet Blanket Stitch & Technique ✨

What makes this blanket stand out is the texture technique. Instead of relying on colorwork or striping, the interest comes from stitch placement and raised elements that create depth and dimension across the fabric.

This style of textured crochet blanket is perfect if you:

  • Love stitch-focused patterns
  • Want something that looks complex but works up logically
  • Enjoy learning new techniques without frustration

The stitch pattern repeats consistently, making it ideal for longer projects like blankets where rhythm really matters.
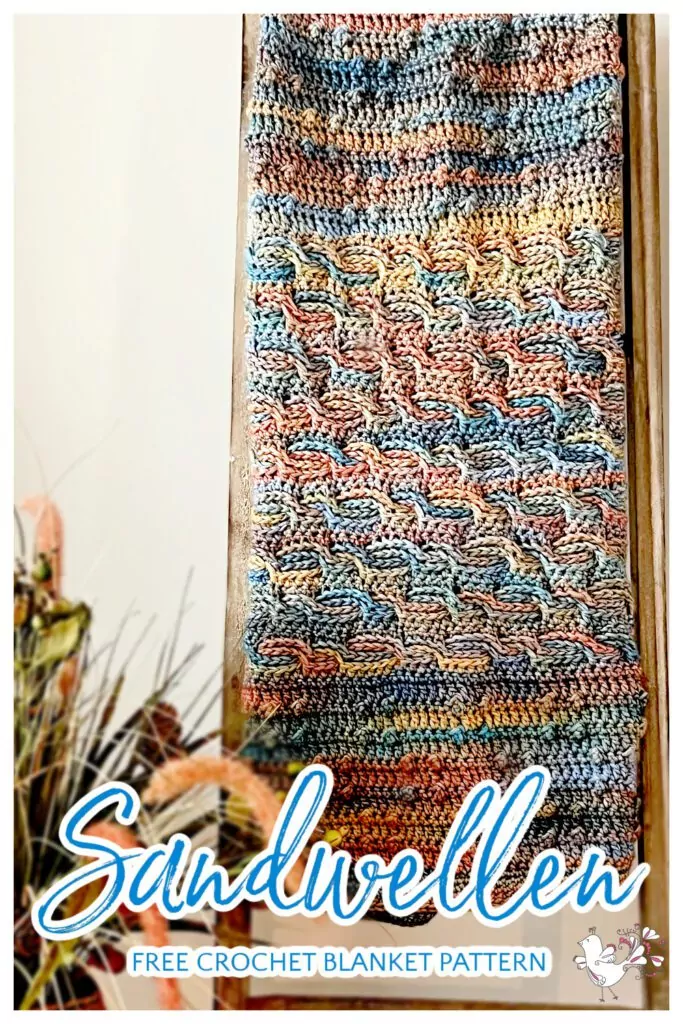

Sandwellen Free Crochet Blanket Pattern with crochet bobbles and horizontal crochet cables - Marly Bird

Crochet Blanket Gauge: Why It Matters for Texture 📏🧶

Gauge plays a big role in textured crochet blankets. It affects not only the final size of your blanket, but also how clearly the stitch pattern shows up.

For this pattern, consistent gauge helps ensure:

  • The texture looks defined, not squished
  • The blanket drapes nicely instead of feeling stiff
  • Your finished size matches your expectations

If your stitches feel tight or the texture looks compressed, adjusting your hook size slightly can make a big difference.

Need help tracking gauge and planning blanket size?

If gauge math or stitch repeats make your brain freeze, I’ve got you covered. Grab my free Crochet Gauge & Blanket Size Worksheet, designed to help you track gauge, choose blanket sizes, and calculate starting chains with confidence.


Yarn Choice: Why Caron Blossom Cakes Works So Well 🧶

At the heart of the Sandwellen Crochet Blanket lies the luxurious Caron Blossom Cakes Yarn. It's a dreamy, soft yarn that will delight your crochet experience. Its gentle, blooming shades and smooth texture effortlessly blend creating a harmony of colors that will capture your heart. With Caron Blossom Cakes, you'll feel the yarn glide through your fingers, making each stitch an absolute pleasure.

Caron Blossom Cakes is a fantastic choice for textured crochet blankets because it offers:

  • Smooth stitch definition
  • Gentle color transitions that don’t distract from texture
  • A soft feel that works well for blankets used every day

In the Sandwellen project, we opted to use a single shade of yarn. But you have the creative freedom to experiment with different colorways. Create your truly unique crochet afghan.

Our love for this yarn is no secret, as the Caron Cake Shop yarns boast exceptional beauty. In fact, we have a blog post featuring more than 50 crochet patterns showing the versatility of this yarn. Be sure to check it out here or click on the image below!
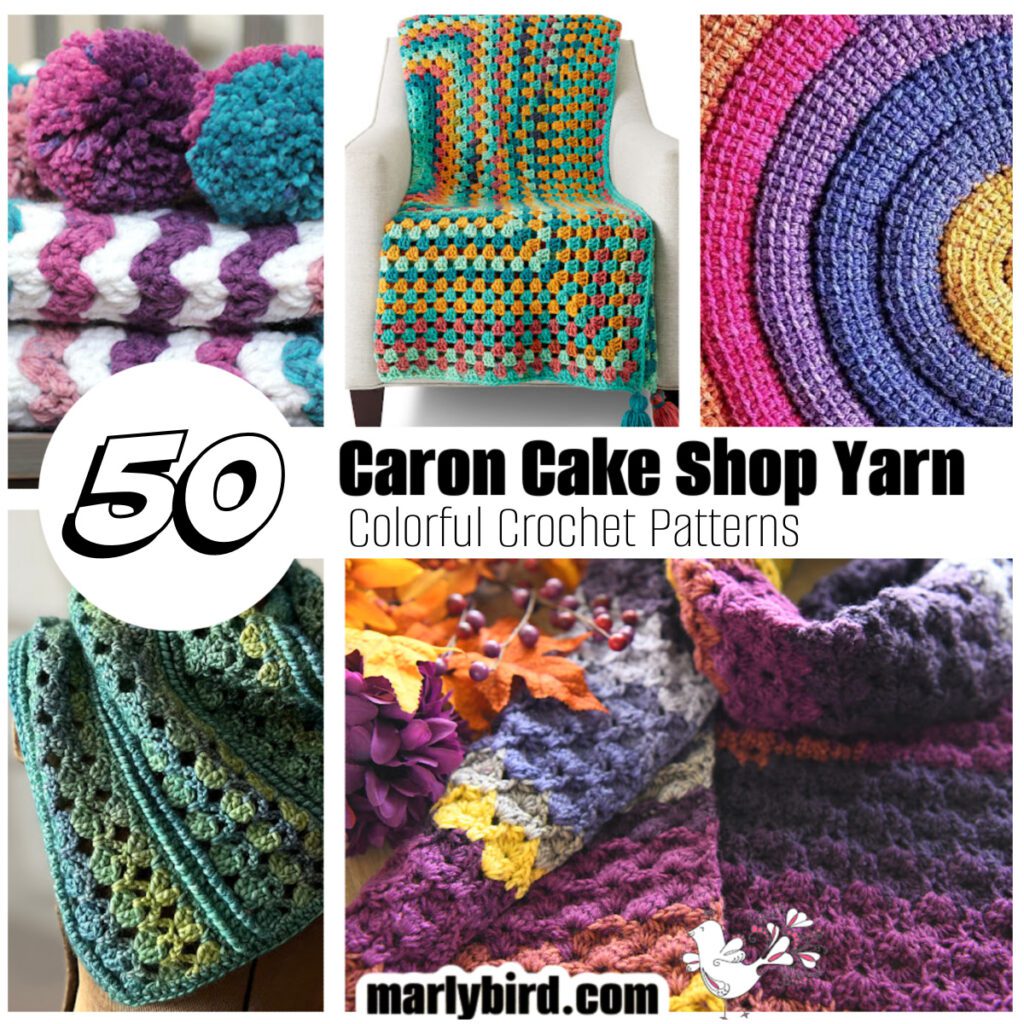
At Marly Bird we've curated a whole collection of crochet patterns using Caron Cake Shop Yarns to help you create the perfect project - from easy crochet shawls to intricate crochet scarves, from simple triangle shawls to luxurious prayer shawls! Many of these patterns are made with basic stitches, so even beginners can feel creative when making crocheted scarves, crochet hats, and rectangle shawls. Visit the blog to get these modern, paid for and free crochet patterns - Marly Bird

Yarn Substitution Guidelines

If you want to use a different yarn, look for:

  • Worsted-weight yarn
  • Smooth plies (avoid overly fuzzy textures)
  • Fiber blends that balance softness and durability

Matching gauge is far more important than matching fiber content exactly.

Here are some yarns we love and think would be great with this pattern!

  • Everyday Worsted Gradient – Love the idea of a long color change gradient
  • RHSS Bitty Stripes – This has a lot of color but might look really cool
  • Caron Cakes – Long color changes and soft yarn
  • Bernat Lattice – This is a bit of a novelty yarn but I really do like it
  • Mandala Gradient Yarn – This yarn is a little thin but with adjustments you could make it work
  • RHSS Granny Square – Although this is designed to make easy granny squares, it would be a fun color blocking yarn
  • Herrschners Worsted Stripes – This could be super cool with the striping
  • Everyday Worsted Gradient Glitter – Who doesn't like a little sparkle AND a gradient?
  • Herrschners Worsted Sparkle – This yarn is so popular at Herrschners, for a good reason

Crochet Blanket Sizing & How to Make It Larger 📐

The beauty of the Sandwellen Crochet Blanket lies in its versatility. The pattern includes instructions for multiple sizes, allowing you to create a blanket that perfectly fits your needs. ✨ That means you don't have to do any extra math!

You can make a cozy throw for your favorite reading nook or an exquisite bedspread to adorn your bedroom. The Sandwellen Blanket is a versatile project that promises to be cherished.

This makes the pattern incredibly flexible and stash-friendly.
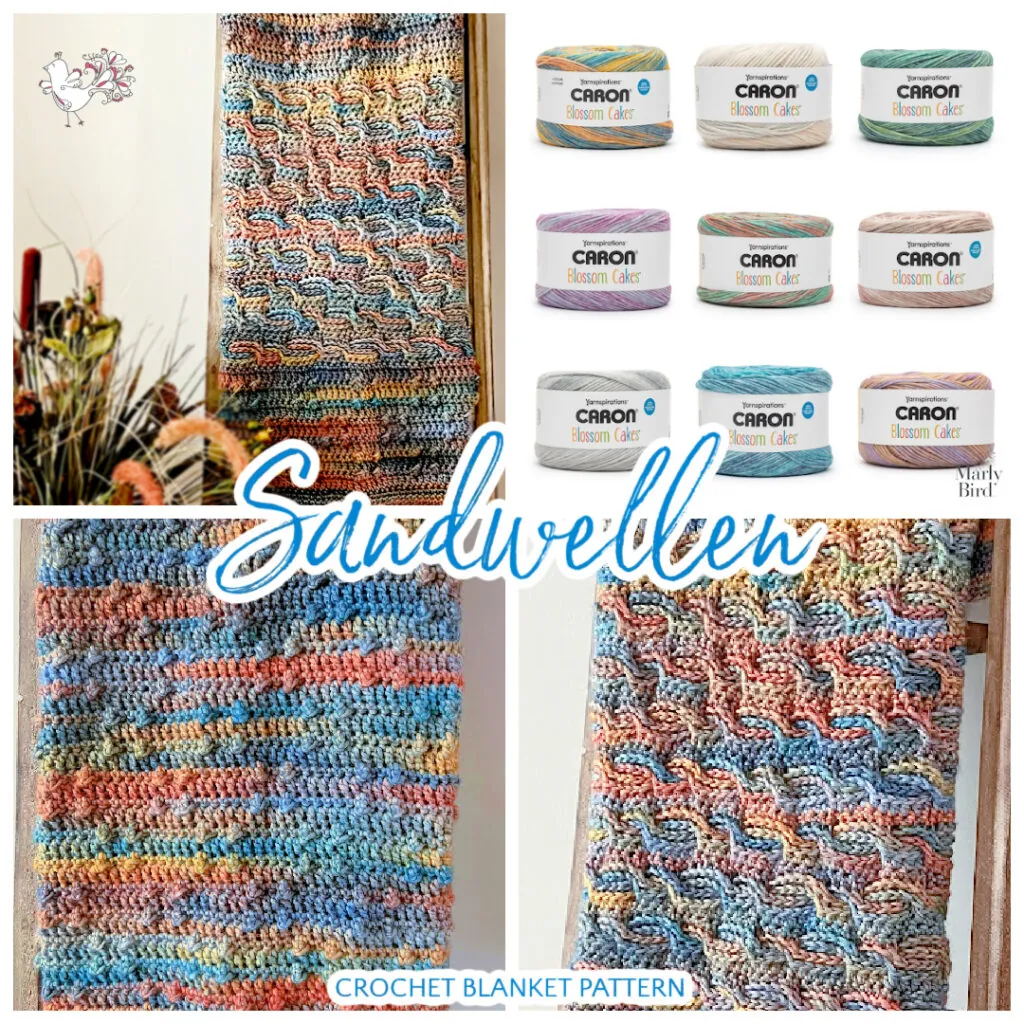
A multicolored crochet blanket hangs over a rail. Nine skeins of Caron Blossom Cakes yarn in different colors are shown. The text reads "Sandweller Crochet Blanket Pattern. -Marly Bird

Why This Crochet Blanket Makes a Great Gift 🎁

Textured crochet blankets are some of the most searched-for handmade gifts, and this pattern works beautifully for many occasions, including:

  • Baby shower or new baby gift
  • Wedding or housewarming present
  • Graduation or college send-off
  • Holiday or Christmas crochet gift
  • Comfort or sympathy gift
  • Anniversary or milestone birthday

Because the texture is timeless and the design is neutral-friendly, you can tailor the yarn color to suit the occasion without changing the stitch pattern.


Texture Magic: Crochet Bobbles and Horizontal Cables

One of the defining features of the Sandwellen Blanket is the mesmerizing texture it boasts. Crochet bobbles add a playful dimension to the fabric, creating delightful pops of depth and interest.
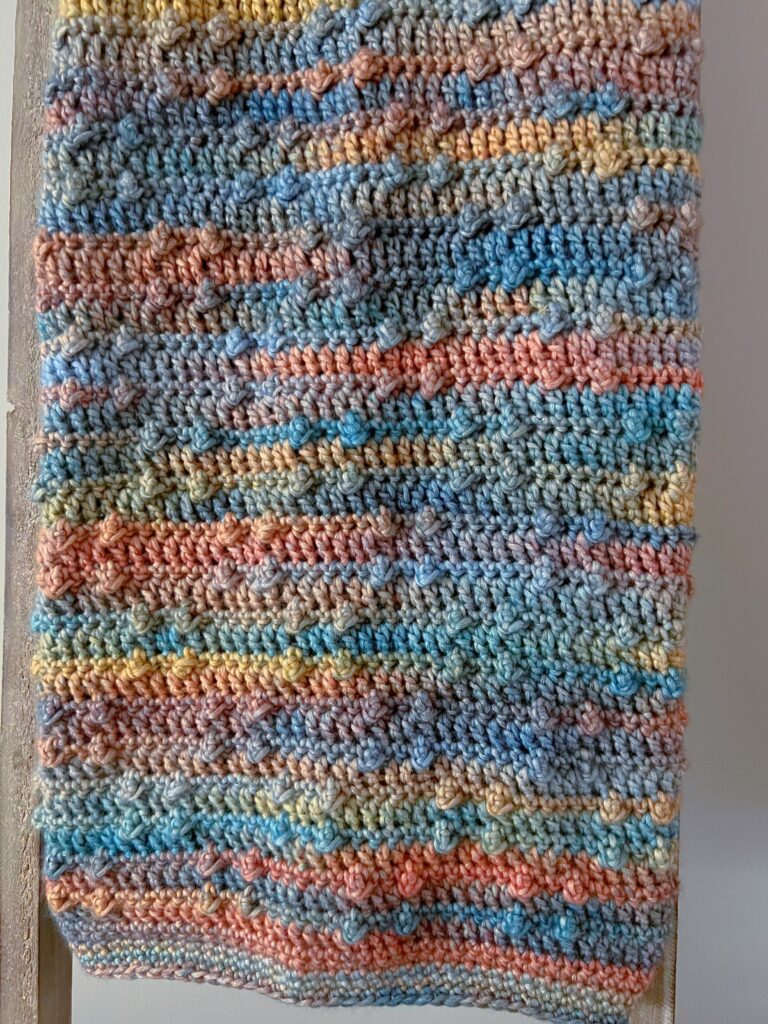
Crochet bobbles on the Sandwellen Textured Crochet Blanket Pattern with Caron Blossom Cakes yarn - Marly Bird

But that's not all – the showstopper is the horizontal cables (also known as segmented cables). These unique stitches create a captivating pattern! It seems to dance across the blanket, leaving you in awe of your own crochet skills.
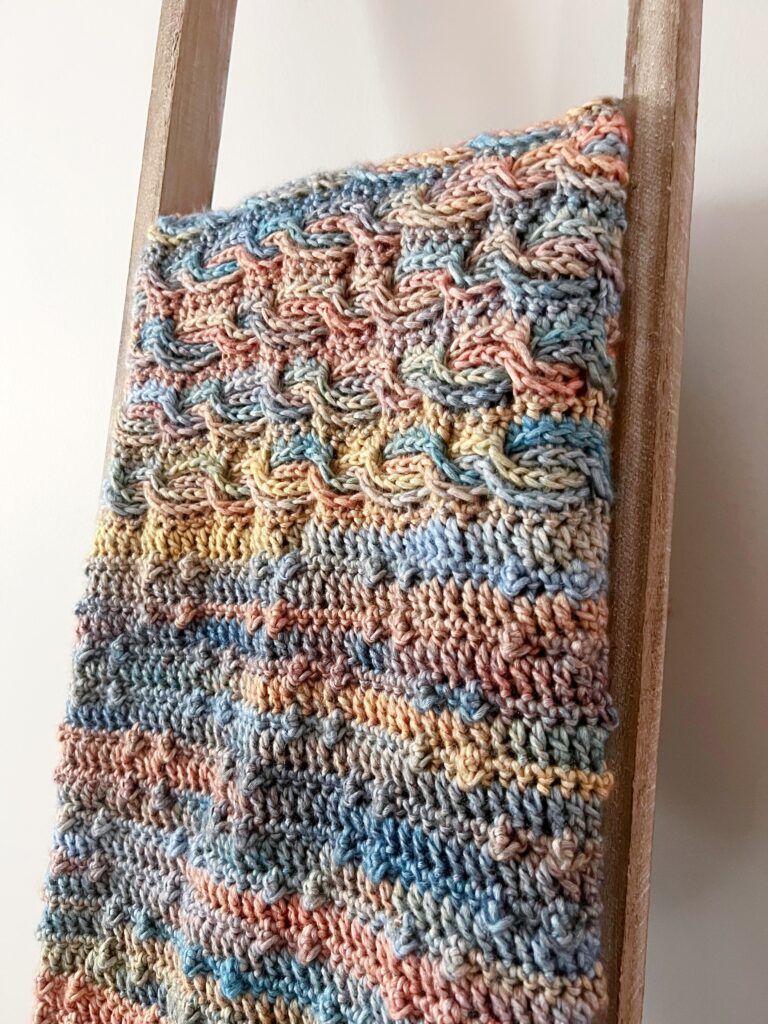
Horizontal crochet cables on the Sandwellen free crochet cable blanket pattern - Marly Bird

Mastering the Art of Horizontal Cables

Worried about tackling the horizontal cables? Fear not! The Sandwellen Crochet Blanket pattern includes a detailed stitch diagram. We also made a helpful video tutorial to guide you through the process step-by-step. With practice, and yarn management tips from expert Robyn Chachula, you'll soon become a pro at this captivating technique.
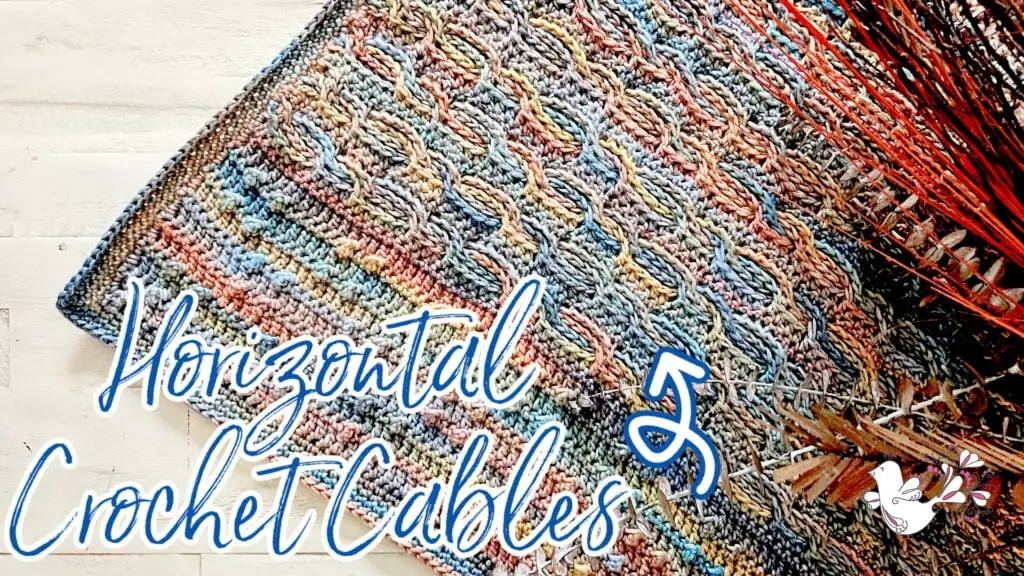
A multicolored crocheted fabric with horizontal cable patterns is displayed on a white wooden surface. Decorative dried plants are in the corner. Text reads "Horizontal Crochet Cables" with a yarn and hook graphic. -Marly Bird
Etsy
Shopify
Ravelry

Ready to Start?

Indulge in the magic of crochet and embrace the allure of this textured crochet blanket pattern. With Caron Blossom Cakes Yarn, crochet bobbles, and captivating horizontal cables, this masterpiece will become a cherished heirloom. Elevate your crochet skills and immerse yourself in the joy of creation. Let the Sandwellen crochet afghan warm your heart for years to come.

Are you ready to get started? Get your hands on the Sandwellen Crochet Blanket pattern for free below.
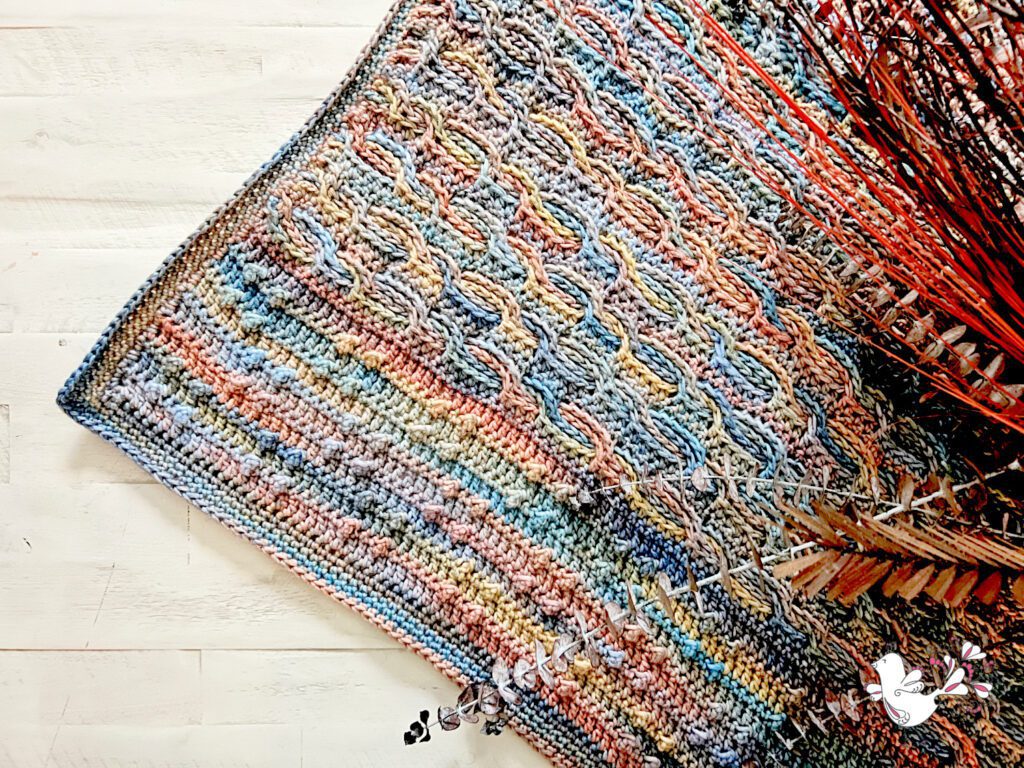
Sandwellen Free Crochet Cable Blanket - Flat on a table - Marly Bird. Textured Crochet Blanket Pattern with Caron Blossom Cakes

Textured Crochet Blanket Pattern with Caron Blossom Cakes Details

⭐️Add this pattern to your Ravelry Queue and Favorites🔥

SKILL LEVEL

Intermediate

MEASUREMENTS

Finished Measurements

Blanket is 36” (42, 52, 61)”  [91.5, 106.5, 132, 155 cm] wide by 36 (54, 64, 90)” [91.5, 137, 162.5, 228.5 cm] long. 

Gauge 

13 sts x 12 rows in stitch pattern of first section= 4” [10 cm] x 4.5” [11.5 cm]; use any size hook to obtain the gauge. 

MATERIALS

Yarn 

Caron, Blossom Cakes (61% Cotton/ 39% Acrylic, 481 yds / 440 m, 8 oz/ 227 g, CYCA# 4 worsted): Island Time, 4 (7, 9, 16) cakes

Hook

Size I/9 [5.5  mm]

Notions 

Tapestry needle, Stitch Markers


ABBREVIATIONS

(Get details about each stitch in our Crochet Definition Library)

Ch – Chain(s) 

Dc – Double Crochet 

Fsc – Foundation Single Crochet (see special stitches)

Hdc – Half Double Crochet

PM – Place Marker

RS – Right Side 

Sc – Single Crochet

Sl st – Slip Stitch

Sp(s) – Space(s) 

St(s) – Stitch(es)

Stacked Dc – Stacked Double Crochet 

Tch – Turning Chain

Tr – Treble Crochet

WS – Wrong Side


SPECIAL STITCHES 

⭐️ Stacked Double Crochet (Stacked Dc): (Do not ch 1 prior to making the first sc) Sc in first stitch, insert hook in between two legs of the base, yarn over and pull up a loop, yarn over and draw through 2 loops on hook.

⭐️ Foundation Single Crochet (fsc): 

First fsc: Ch 2, insert hook into 2nd ch from hook, yarn over and pull up a loop, yarn over and draw through 1 loop on hook (forming a chain), yarn over and draw through 2 loops on hook (forming the single crochet)

Next fsc: Insert hook into base of previous stitch (in the “chain” space), yarn over and pull up a loop, yarn over and draw through 1 loop on hook (forming a chain), yarn over and draw through 2 loops on hook (forming the next single crochet).  Repeat directions for desired amount of sts.

⭐️Third Loop: Also known as middle or back bar. Horizontal strand located under the top 2 loops, created by the yarn over when making the hdc. When working in non-turned rows the third bar is on the back side of the fabric facing away from you.


STITCH DIAGRAMS

✨ Stitch Diagrams are only available in the ad-free PDF

Etsy
Shopify
Ravelry

NOTES

  • Directions are for baby blanket (36” wide); changes for lapghan (42” wide), throw (51.5” wide), and twin bed (60.75” wide)  are in parentheses. When only one number is given, that number applies to all sizes.
  • In the first and last section, push the trebles to the RS of the fabric (away from you while you are stitching) to form a bump.
  • Start of double crochet rows can use a ch 3 turning chain or a stacked double crochet as written. 
  • Before the CABLE SECTION, divide the yarn into 4 separate balls.
  • In the cable section, watch when to turn.  Most of the work is done on the RS

VIDEO TUTORIAL

  • How to Read Crochet Diagrams >> Click Here for Video Help <<
  • Weave in Ends Watch on YouTube >> Click Here for Video Help <<
  • Stacked Double Crochet Watch on YouTube>> Click Here for Video Help <<
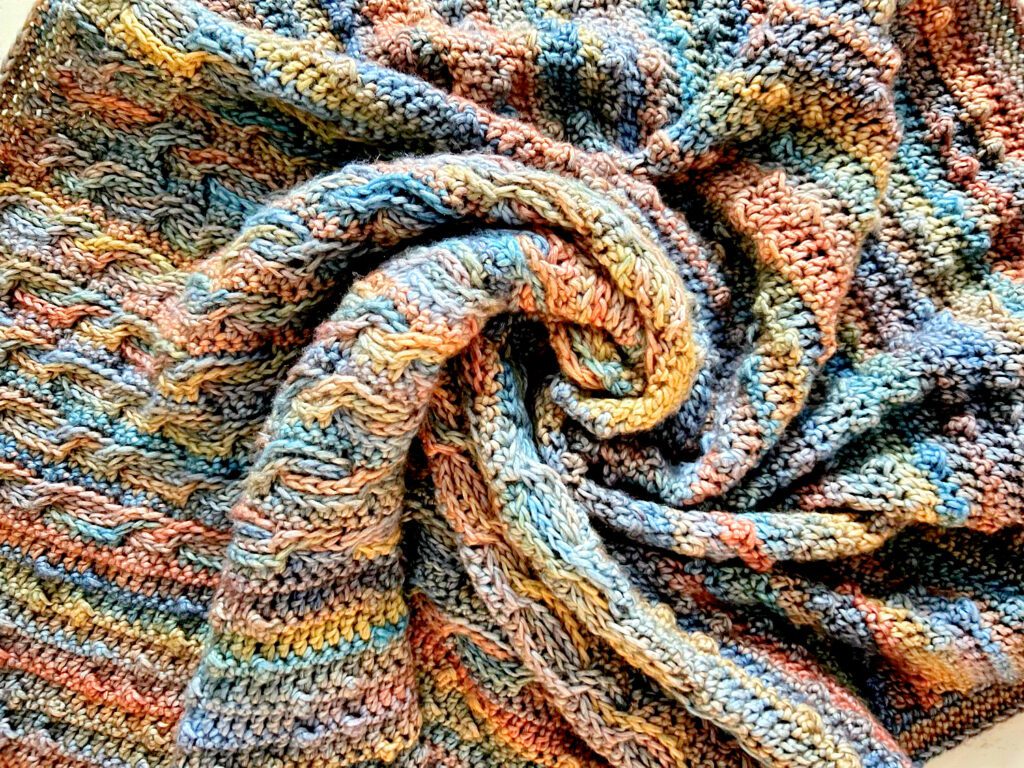
  • Segmented Cable / Horizontal Cable Watch on YouTube>> Click Here for Video Help <<

Textured Crochet Blanket Pattern with Caron Blossom Cakes - Sandwellen by Marly Bird

GROW

To Unlock Exclusive Subscriber Content click the Box below and join for free by simply adding your email and creating a password! If you are having troubles, clear your cache or reset your password or login to the Grow Publisher Portal.

>> Learn More About Grow Here <<

I'm thrilled to share this amazing pattern with you, many patterns on my blog are absolutely free! I kindly request that you don't copy and paste or distribute this pattern. Prefer an ad-free experience? Buy a digital PDF pattern for a small fee from one of my online stores for a seamless crafting journey. 

I appreciate your support and readership. You are the reason I can keep doing what I love and sharing it with others. So, thank you from the bottom of my yarn-loving heart! Disclosure: This post contains affiliate links, meaning I get a commission if you decide to make a purchase through my links at no cost to you.

SANDWELLEN CROCHET BLANKET PATTERN

FIRST SECTION

Row 1 (WS): 111 (131, 161, 191) fsc, turn.

Row 2: Stacked dc in first st, dc in each st across, turn. 

Row 3: Ch 1, sc in next 3 dc, *tr in next dc, sc in next 2 dc, tr in next dc, sc in next 6 dc; repeat from * across to last 8 dc, tr in next dc, sc in next 2 dc, tr in next dc, sc in last 4 dc, turn.

Rows 4-5: Repeat Rows 2-3

Row 6: Repeat Row 2

Row 7: Ch 1, sc in next 8 dc, *tr in next dc, sc in next 2 dc, tr in next dc, sc in next 6 dc; repeat from * across to last 13 dc, tr in next dc, sc in next 2 dc, tr in next dc, sc in last 9 dc, turn.

Rows 8-9: Repeat Rows 6-7

Rows 10-13: Repeat Rows 2-3

Row 14: Repeat Row 2

Row 15: Ch 1, sc in each dc across, turn. 

CABLE SECTION

Make 3 additional balls of yarn for this section.  Keep first section ball of yarn attached, which means using 4 balls of yarn at once. 

Row 1a (RS): Ch 2 (counts as hdc), hdc in next 2 sts, lay first ball down with working tail in front of fabric, place stitch marker in free loop, do not turn.
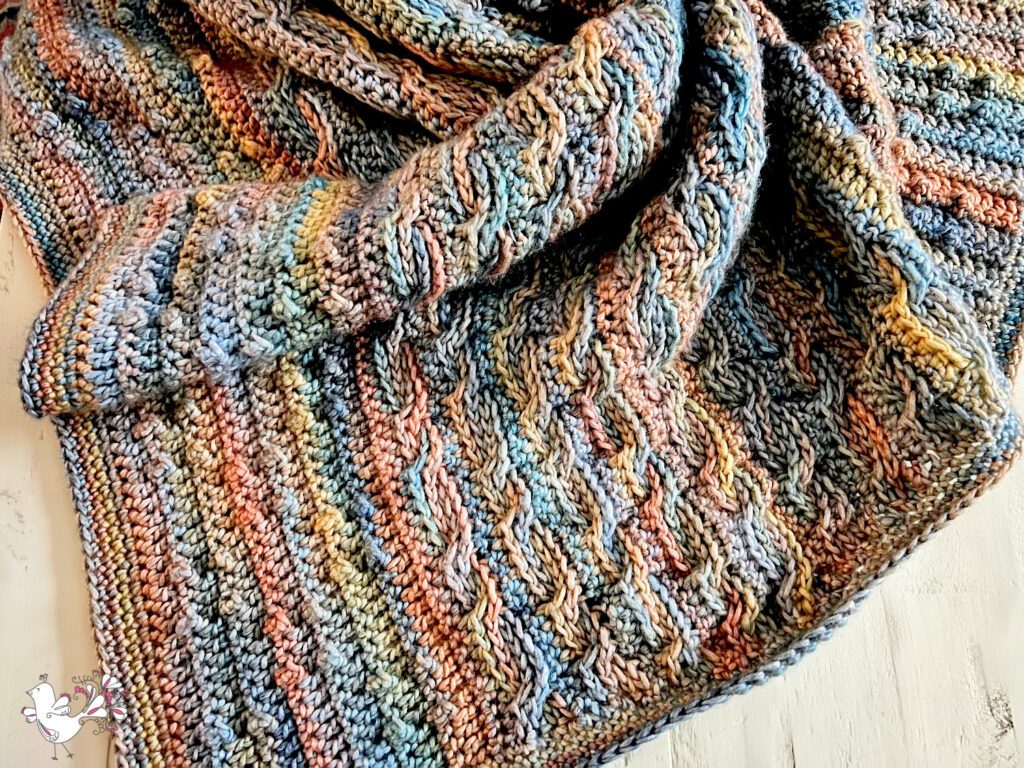
Row 2a: Join second ball with sl st to top of Row 1a tch, ch 2 (counts as hdc), hdc in 3rd loop of next 2 hdc, lay second ball down with working tail in front of fabric, place stitch marker in free loop, do not turn.

Row 3a: Join third ball with sl st to top of Row 2a tch, ch 2 (counts as hdc), hdc in 3rd loop of next 2 hdc, make sure previous 2 balls are in front of work, hdc in next 6 sts 2 rows below, lay down third ball with working tail in front of fabric, place stitch marker in free loop, do not turn.

Row 4a: Join fourth ball with sl st to top of Row 3a tch, ch 2 (counts as hdc), hdc in 3rd loop of next 8 hdc, lay down fourth ball with working tail in front of fabric, place stitch marker in free loop, do not turn

Row 1b: Pick up row 1 ball, make sure ball 2 yarn is to the right side (so it won't get tangled), hdc in 3rd loop of next 6 hdc just made, make sure previous 2 balls are in front of work, hdc in next 4 sts 2 rows below, lay first ball down with working tail in front of fabric, place stitch marker in free loop, do not turn.

Row 2b: Pick up row 2 ball, hdc in 3rd loop of next 10 hdc just made, lay second ball down with working tail in front of fabric, place stitch marker in free loop, do not turn.

Row 3b: Pick up row 3 ball, make sure ball 4 yarn is to the right side (so it won't get tangled), hdc in 3rd loop of next 4 hdc just made, make sure previous 2 balls are in front of work, hdc in next 6 sts 2 rows below, lay down third ball with working tail in front of fabric, place stitch marker in free loop, do not turn.

Row 4b: Pick up row 4 ball, hdc in 3rd loop of next 10 hdc just made, lay down fourth ball with working tail in front of fabric, place stitch marker in free loop, do not turn

Repeat Rows 1b-4b across until there are 2 sts left on first section

Row 1c: Pick up row 1 ball, hdc in 3rd loop of next 6 hdc just made, make sure previous 2 balls are in front of work, hdc in last 2 sts 2 rows below, fasten off first ball, do not turn.

Row 2c: Pick up row 2 ball, hdc in 3rd loop of next 8 hdc just made, fasten off second ball, do not turn.

Row 3c: Pick up row 3 ball, hdc in 3rd loop of next 2 hdc just made, fasten off third ball, do not turn.

Row 4c: Pick up row 4 ball, hdc in 3rd loop of next 2 hdc just made, DO NOT FASTEN OFF, turn.

Row 5 (WS): Ch 1, sc in 3rd loop of each hdc across to tch, sc in top of tch, turn. Note: place stitch marker every 10/ 20 stitches to watch stitch count.  It is easy to lose stitches on this row.  Make sure you have 111 (131, 161, 191) sts at the end of the row. 

Row 6a (RS): Ch 2 (counts as hdc), hdc in next 3 sts, lay first ball down with working tail in front of fabric, place stitch marker in free loop, do not turn.

Row 7a: Join second ball with sl st to top of Row 6a tch, ch 2 (counts as hdc), hdc in 3rd loop of next 3 hdc, lay second ball down with working tail in front of fabric, place stitch marker in free loop, do not turn.

Row 8a: Join third ball with sl st to top of Row 7a tch, ch 2 (counts as hdc), hdc in 3rd loop of next 3 hdc, make sure previous 2 balls are in front of work, hdc in next 4 sts 2 rows below, lay down third ball with working tail in front of fabric, place stitch marker in free loop, do not turn.

Row 9a: Join fourth ball with sl st to top of Row 8a tch, ch 2 (counts as hdc), hdc in 3rd loop of next 7 hdc, lay down fourth ball with working tail in front of fabric, place stitch marker in free loop, do not turn

Row 6b: Pick up row 6 ball, hdc in 3rd loop of next 4 hdc just made, make sure previous 2 balls are in front of work, hdc in next 6 sts 2 rows below, lay first ball down with working tail in front of fabric, place stitch marker in free loop, do not turn.

Sandwellen Textured Crochet Blanket Pattern with Caron Blossom Cakes - by Marly Bird

Row 7b: Pick up row 7 ball, hdc in 3rd loop of next 10 hdc just made, lay second ball down with working tail in front of fabric, place stitch marker in free loop, do not turn.

Row 8b: Pick up row 8 ball, hdc in 3rd loop of next 6 hdc just made, make sure previous 2 balls are in front of work, hdc in next 4 sts 2 rows below, lay down third ball with working tail in front of fabric, place stitch marker in free loop, do not turn.

Row 9b: Pick up row 9 ball, hdc in 3rd loop of next 10 hdc just made, lay down fourth ball with working tail in front of fabric, place stitch marker in free loop, do not turn

Repeat Rows 6b-9b across until there are 3 sts left on Row 5

Row 6c: Pick up row 6 ball, hdc in 3rd loop of next 4 hdc just made, make sure previous 2 balls are in front of work, hdc in last 3 sts 2 rows below, fasten off first ball, do not turn.

Row 7c: Pick up row 7 ball, hdc in 3rd loop of next 7 hdc just made, fasten off second ball, do not turn.

Row 8c: Pick up row 8 ball, hdc in 3rd loop of next 3 hdc just made, fasten off third ball, do not turn.

Row 9c: Pick up row 9 ball, hdc in 3rd loop of next 3 hdc just made, DO NOT FASTEN OFF, turn.

Row 10: Ch 1, sc in 3rd loop of each hdc across to tch, sc in top of tch, turn.

Repeat Rows 1-10 three times

Repeat Rows 1-4 once more

LAST SECTION

Row 1 (WS): Ch 1, sc in 3rd loop of each hdc across to tch, sc in top of tch, turn- 111 (131, 161, 191) sc.

Row 2: Stacked dc in first st, dc in each st across, turn. 

Row 3: Ch 1, sc in next 3 dc, *tr in next dc, sc in next 2 dc, tr in next dc, sc in next 6 dc; repeat from * across to last 8 dc, tr in next dc, sc in next 2 dc, tr in next dc, sc in last 4 dc, turn.

Rows 4-5: Repeat Rows 2-3

Row 6: Repeat Row 2

Row 7: Ch 1, sc in next 8 dc, *tr in next dc, sc in next 2 dc, tr in next dc, sc in next 6 dc; repeat from * across to last 13 dc, tr in next dc, sc in next 2 dc, tr in next dc, sc in last 9 dc, turn.

Rows 8-9: Repeat Rows 6-7

Repeat Rows 2-9 [8 (10, 13, 22)] more times or to desired length.

Repeat Rows 2-3 once more

Repeat Row 2 once more

Last Row: Ch 1, sc in each dc across, fasten off.  Weave in all ends. 

FINISHING

Edging

Round 1: Join yarn to any corner with sl st, ch 1, 2 sc in corner, *sc evenly across edge of blanket, 3 sc in next corner, place stitch marker in middle sc just made; repeat from * around to beginning corner, sc in same corner as join, sl st to first sc, do not turn.

Round 2: Ch 1, 2 sc in first sc, *sc in each sc across to marker, 3 sc in marked sc, move marker to middle sc just made; repeat from * around, sc in first sc of previous round, sl st to first st of current round, do not turn. 

Repeat Round 2 until edging measures 1” or to desired width. Fasten off and weave in ends.

Marly Bird YouTube channel banner

We hope you love making this Textured Crochet Blanket Pattern with Caron Blossom Cakes!
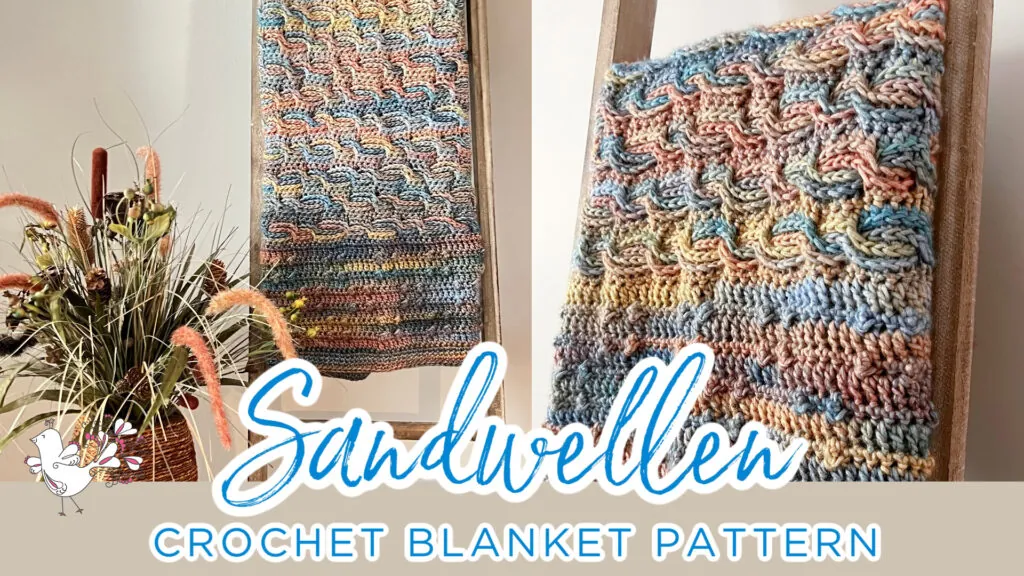

A multicolored crochet blanket with a textured wave pattern hangs on a wooden ladder, next to a vase of dried flowers. Text reads: "Sandwellen Crochet Blanket Pattern" with a small bird illustration. -Marly Bird
Etsy
Shopify
Ravelry

FAQs ❓

Is this textured crochet blanket pattern beginner-friendly?
Confident beginners can absolutely make this blanket. The stitch pattern is repeat-based and becomes easier once you find your rhythm. Video support is available to help with the textured stitches.

Does this crochet blanket stitch use a lot of yarn?
Textured stitches do use slightly more yarn than basic stitches, but the result is a thicker, cozier fabric that many makers feel is well worth it.

Can I make this crochet blanket larger or smaller?
Yes! The stitch pattern is based on a repeat, which makes it easy to adjust the width and length for different blanket sizes.

Will the texture show up in solid yarn?
Yes — solid and lightly variegated yarns actually highlight the texture beautifully.

Is this a good crochet blanket pattern for gifts?
Absolutely. This pattern is often used for baby gifts, holidays, weddings, and comfort blankets because it’s both beautiful and practical.

Can I use this stitch pattern for other projects?
Many crocheters enjoy using textured blanket stitches for pillows, scarves, or smaller home décor projects once they’re comfortable with the repeat.


Final Thoughts

If you’re looking for a textured crochet blanket pattern that feels engaging to make and results in a truly special finished piece, Sandwellen checks all the boxes. The stitch repeat keeps things approachable, the texture adds visual interest, and the flexibility to customize size makes it a pattern you can use again and again.

Whether you’re crocheting a cozy throw for your own home or creating a meaningful handmade gift, this blanket is designed to be both practical and beautiful — the kind of project that reminds you why you love crochet in the first place.

If you give Sandwellen a try, don’t forget to share your finished blanket on Ravelry or tag me on social media. I love seeing how you make each version your own 🧶✨

❤️ Your BiCrafty Bestie,
Marly Bird

A cartoon avatar of a person with glasses and a brown bun smiles warmly. Their green shirt and black jacket add a stylish touch, while colorful hearts surround them like loving temperature blankets, stitching together an aura of love and positivity. -Marly Bird

Filed Under: Crochet, Free Patterns, Our Free Patterns, Pattern, Uncategorized

Chic Sheep Dream Intarsia Knit Blanket – Free Modern Colorwork Blanket Pattern

January 15, 2026 By admin 5 Comments

If you’ve ever wanted to knit a bold, modern colorwork blanket that looks like a stained-glass window made of yarn, the Chic Sheep Dream Intarsia Knit Blanket is calling your name.

Designed by my brilliant friend Anne Berk (aka Annetarsia), this blanket uses all 24 original colors of Chic Sheep by Marly Bird™ in a geometric, triangle-based intarsia design. Every row becomes a little color adventure, and the finished blanket is a true heirloom piece.

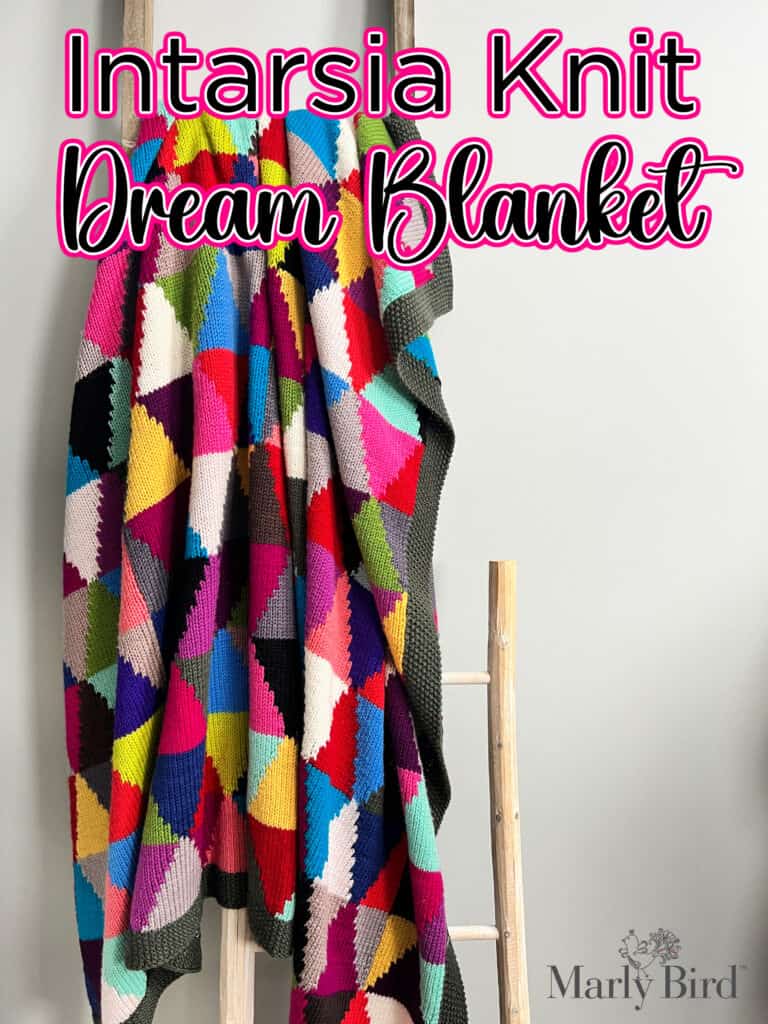
A chic intarsia knit blanket with vibrant geometric patterns is elegantly draped over a wooden ladder. The text "Chic Sheep Dream Intarsia Blanket" graces the top, while a logo featuring "Marly Bird" sits in the bottom right corner. -Marly Bird

In this post, you’ll find:

  • And the full free pattern right here on the blog
  • The story behind the design
  • Tips for intarsia knitting, yarn choices, and prep
  • A link to an ad-free, printable PDF pattern

Affiliate Disclosure: This post contains affiliate links. To learn more please visit my privacy policy here💖

The Story Behind the Dream Intarsia Knit Blanket

This blanket literally started as a dream.

I told Anne I imagined a blanket that:

  • Used all my Chic Sheep colors
  • Looked like stained glass
  • Featured strong geometric shapes, especially triangles

I knew if anyone could take that chaotic, colorful dream and turn it into a real, knittable design, it was Anne.

She:

  • Designed the triangle-based intarsia chart
  • Worked out how much yarn each “butterfly” needed
  • Knit the sample
  • Loved it so much… she knit a second one from the leftover yarn!

It’s one of those projects that perfectly blends math, color, and creativity—and somehow still feels totally snuggly and approachable.

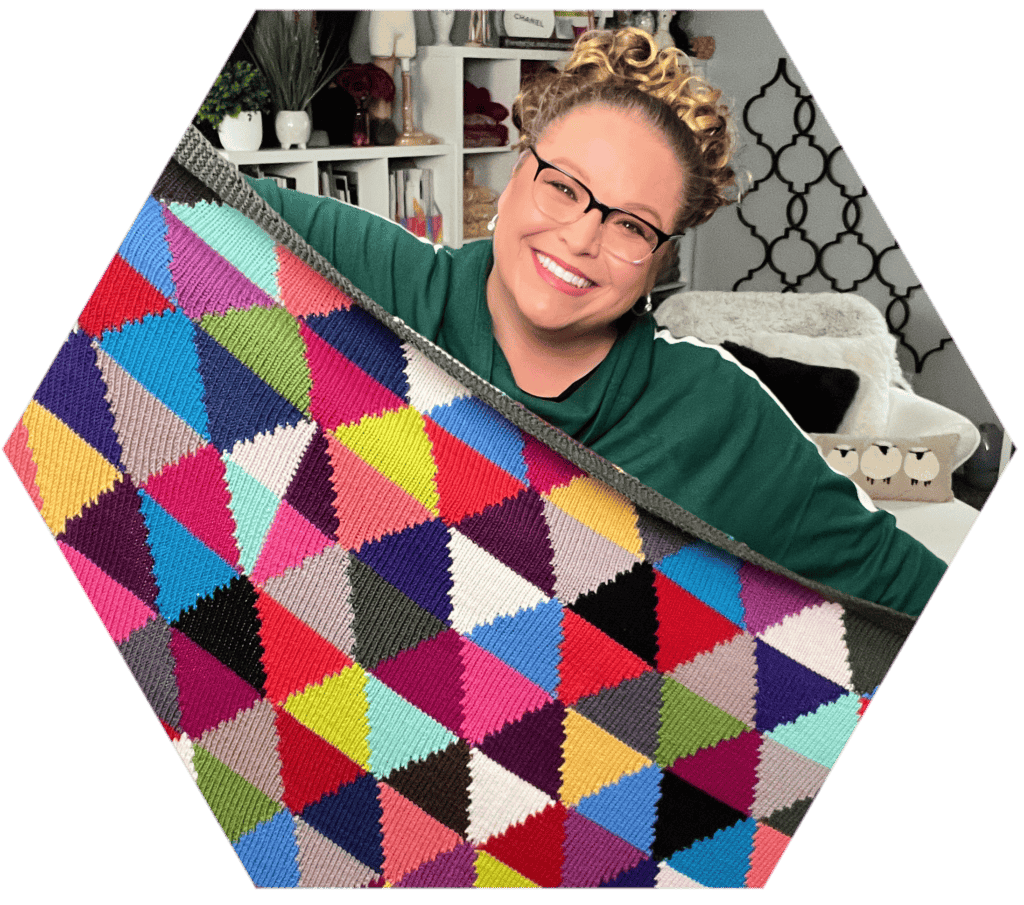
A person with glasses smiles while holding up a vibrant, multicolored quilt reminiscent of the Chic Sheep Dream Intarsia Knit Blanket. The background features shelves adorned with books and decor. -Marly Bird

What You’ll Love About the Dream Intarsia Knit Blanket

A chic intarsia knit blanket with vibrant geometric patterns is elegantly draped over a wooden ladder. The text "Chic Sheep Dream Intarsia Blanket" graces the top, while a logo featuring "Marly Bird" sits in the bottom right corner. -Marly Bird

Relax & Knit
Upgrade to the Printable PDF

Beautifully formatted to print and relax while knitting. The paid pattern includes:

  • Stunning Colorwork Design
  • Perfect for Relaxing and Learning
  • Customizable Colors
  • A Show-Stopping Statement Piece:
  • Generous Size and Soft Drape
  • A Rewarding Finish
Get The Ad-Free PDF

Stunning Colorwork Design: This blanket features beautiful intarsia knitting, allowing you to create bold, colorful blocks of design without the bulk of stranded colorwork. The result? A smooth, polished finish that looks as good on the back as it does on the front.

Perfect for Relaxing and Learning: Whether you’re an experienced knitter or new to intarsia, this project offers the perfect mix of relaxation and skill-building. The color changes keep things interesting, while the larger sections of stockinette stitch provide a soothing, meditative rhythm.

Customizable Colors: Choose a palette that reflects your personal style or home decor. Go bold with vibrant, modern shades, or opt for neutrals and pastels for a timeless, cozy look.

A Show-Stopping Statement Piece: This blanket is more than just a knit—it’s a work of art. Drape it over a couch, fold it at the foot of your bed, or gift it to someone special. The clean lines and modern style make it a statement piece in any room.

Generous Size and Soft Drape: Designed for comfort, the Dream Intarsia Knit Blanket has a generous size that’s perfect for snuggling up on chilly nights. Combined with soft, luxurious yarn, it’s as cozy to use as it is beautiful to look at.

A Rewarding Finish: There’s nothing quite like watching the colorful blocks of this pattern come together as you knit. By the end, you’ll have a stunning, handmade heirloom that you’ll cherish for years to come.

If you’ve been dreaming of a colorwork project that’s approachable, rewarding, and modern, the Dream Intarsia Knit Blanket is the perfect choice for your needles. 🧶✨


Prefer a Printable Version? Get the Ad-Free PDF

If you’re a “paper pattern and highlighter” knitter, the ad-free PDF is going to be your best friend.

The paid PDF pattern includes:

  • Beautifully formatted, printer-friendly layout
  • Full written instructions, charts, and layout references in one place
  • Easy-to-read type and structure for sofa knitting sessions
  • Everything you need, without ads or scrolling

You can grab the Dream Knit Intarsia Blanket ad-free PDF here:

  • Marly Bird Store (Shopify):
    https://shop.marlybird.com/products/dream-knit-intarsia-blanket-pattern-modern-colorwork-knit-blanket
  • Etsy (affiliate):
    https://click.linksynergy.com/deeplink?id=vMRXoG90hiM&mid=4231730&murl=https%3A%2F%2Fwww.etsy.com%2Flisting%2F1845564373%2Fknitting-blanket-pattern-dream-knit

Use the free blog version to get started, then upgrade to the PDF if you want to keep this pattern in your forever library. 💕

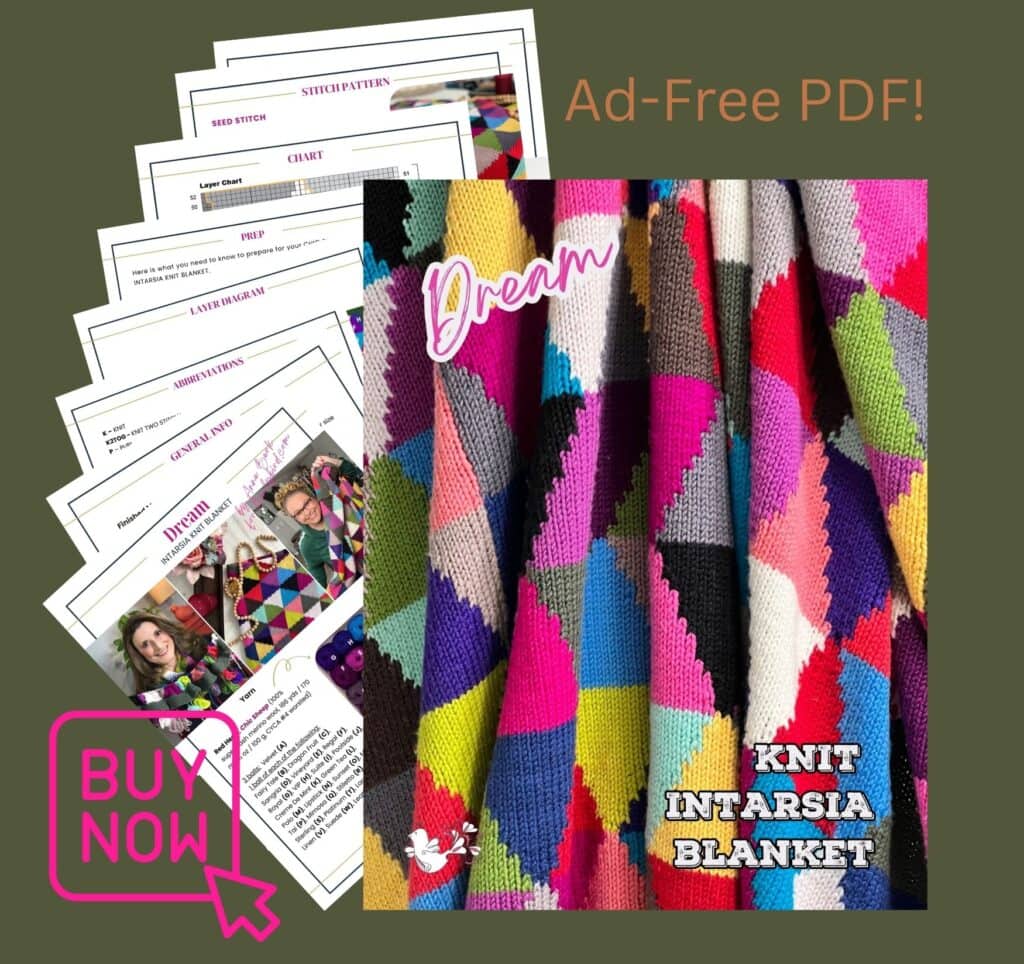
Image promoting an ad-free PDF knitting pattern for the Dream Intarsia Knit Blanket. A close-up of the colorful geometric blanket is shown, with preview pages and “BUY NOW” text highlighted by a pink arrow. -Marly Bird
Etsy
Shopify

Yarn for the Dream Knit Intarsia Blanket

The original blanket was knit in Chic Sheep by Marly Bird, a 100% merino worsted-weight yarn that had all my heart. That yarn line has since been discontinued (I know. I’m still emotional about it. 😭).

The good news?

You can knit this blanket in almost any worsted-weight (#4) yarn.

If you’re looking for a yarn that behaves similarly to Chic Sheep, try:

  • Knit Picks Swish Worsted – soft superwash wool with great stitch definition, a very nice stand-in for Chic Sheep.
    👉 https://tidd.ly/4qL6Zxt

Other great options:

  • Wools like Universal Deluxe Worsted or Knit Picks Wool of the Andes Superwash
    👉 https://tidd.ly/3JGXmPK
    👉 https://tidd.ly/4qmTEux
  • Wool blends like Berroco Vintage or Caron Simply Me
    👉 https://tidd.ly/46D6pd5
    👉 https://tidd.ly/4qV238y
  • Acrylics like Brava, Brava Tweed, Worsted 8 Heathers, or Lion Brand Color Theory
    👉 https://tidd.ly/3Jj67zn
    👉 https://tidd.ly/3X6lWMS
    👉 https://tidd.ly/4oXxtuD
    👉 https://tidd.ly/4bvWmJx

As long as it’s worsted weight and you have enough yardage, you’re good to go.

Important:
For a blanket, gauge matters more for yarn usage and finished size than for fit. If your gauge is looser than Anne’s, you might need more yarn. If it’s tighter, your blanket will be smaller. Swatching helps you plan.


How Much Yarn Do I Really Need?

Originally, this blanket used:

  • 3 balls of the border color
  • 1 ball each of 23 additional colors

Here’s the fun part:

Anne knit the entire blanket and had enough yarn left over from each ball to knit a second blanket, only needing extra border yarn.

So:

  • If you want the full “24-color experience,” one ball of each is plenty generous.
  • If you prefer a stash-busting version, you can absolutely use leftovers and scraps in any color story you like.

If you love stash-busting projects, don’t miss:
👉 20 Stash Busting Knitting Patterns: https://marlybird.com/20-stash-busting-knitting-patterns/

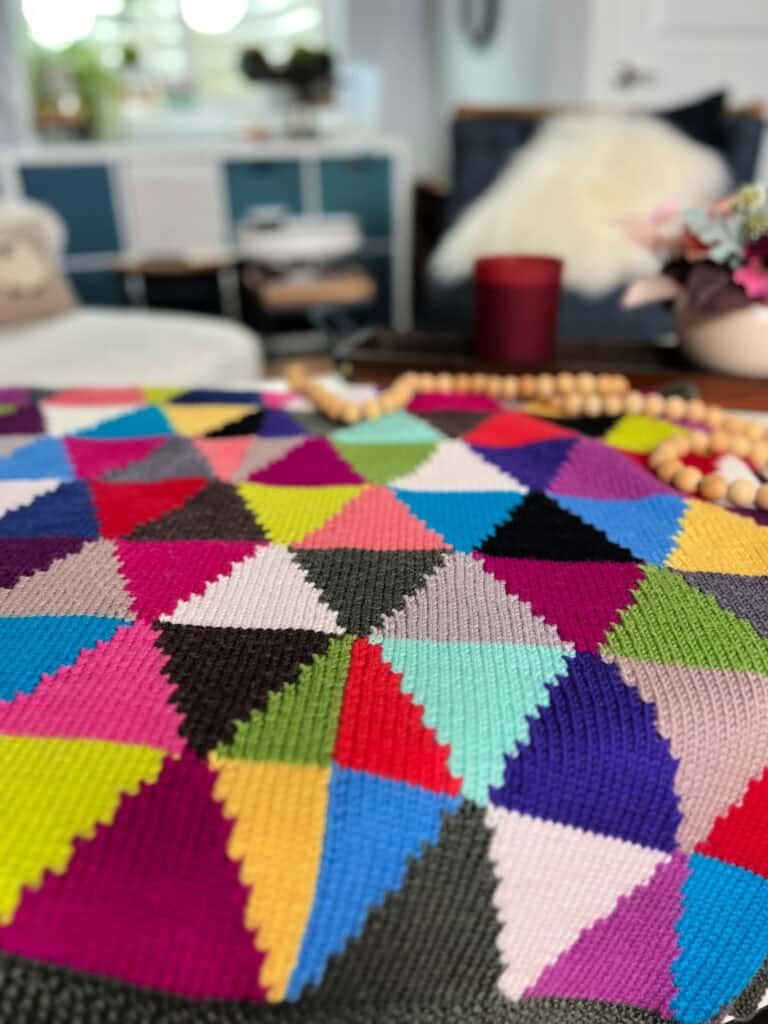
A colorful quilt featuring a chic pattern of multicolored triangles is displayed on a table. In the blurred background, there are shelves, a fluffy cushion, and some decorative items. The overall setting is cozy and dream-like, perfect for showcasing an intarsia knit blanket. -Marly Bird

Is This a Good First Intarsia Project?

This pattern is a fantastic intarsia project if:

  • You’re comfortable with knit, purl, and basic chart reading
  • You’re ready to manage multiple yarn sources (butterflies/bobbins)
  • You’re excited by color and don’t mind a little bit of organized chaos at your feet

You’ll practice:

  • Intarsia links: wrapping old and new colors to avoid holes
  • Managing multiple color butterflies without panicking
  • Reading a layer chart and a color placement schematic

For a deeper dive into intarsia techniques, I highly recommend:

  • Annetarsia Knits: A New Link to Intarsia by Anne Berk
    👉 https://amzn.to/4gx3TY3
    👉 https://bit.ly/Annetarsia-Book

It’s way more than “just” an intarsia book—it’s packed with tips that level up your general knitting skills, too.


Helpful Intarsia Videos from Anne Berk

If you’re a visual learner, these videos are gold:

  • Determining yarn amounts for butterflies:
    https://youtu.be/swsoUuKQOes
  • Winding butterflies:
    https://youtu.be/P-i2T5IxL3Q
  • How to finish perfect intarsia:
    https://youtu.be/hxYe0gNIUww
  • How to knit straight intarsia:
    https://youtu.be/hLbfjLV1PIc
  • How to bury in ends:
    https://youtu.be/8_NBGUKjO-E

You can work through these before you start, or keep them handy as “campfire support” while you knit.

A woman smiles as she holds up a colorful Intarsia knit blanket with multiple strands of yarn hanging from it, standing in a room with soft lighting. -Marly Bird

Dream Intarsia Blanket – Key Measurements & Gauge

Finished Measurement
Blanket measures approximately 55.5″ (141 cm) wide x 52.5″ (133.5 cm) long.

Gauge
20 sts = 4″ (10 cm); 28 rows = 4″ (10 cm) in Layer Chart, after blocking.
CHECK YOUR GAUGE. Use any size needles to obtain the gauge.

Even though this isn’t a garment, gauge still matters:

  • If your gauge is much larger than Anne’s, you may run out of yarn early.
  • If your gauge is much smaller, your blanket will be smaller than the sample.

If you’re using a different yarn and need to calculate yardage, watch Anne’s video on determining yarn amounts:
👉 https://youtu.be/swsoUuKQOes


Materials At a Glance

Yarn (original sample):
Red Heart Chic Sheep by Marly Bird – 100% washable merino, 186 yds per ball.

  • 3 balls: Velvet (A) – border color
  • 1 ball each: Fairy Tale (B), Dragon Fruit (C), Sangria (D), Vineyard (E), Regal (F), Royal (G), VIP (H), Suite (I), Poolside (J), Crème de Mint (K), Green Tea (L), Polo (M), Lipstick (N), Sunset (O), Mai Tai (P), Mimosa (Q), Stiletto (R), Sterling (S), Platinum (T), Lace (U), Linen (V), Suede (W), Leather (X)
    or approximately 87 yards (79.5 meters) of 23 other colors.

Needles

  • US 7 (4.5 mm) 32″ (81 cm) circular needle

Notions

  • Stitch markers
  • Plastic bags for organizing yarn butterflies
  • Yarn needle
⭐️ Marly Bird Amazon Storefront ⭐️

Special Techniques & Pattern Notes (Overview)

You’ll find full details further down in the post, but here’s a quick overview:

  • Intarsia:
    Each block of color has its own strand. When changing colors, you wrap the old yarn over the new yarn to prevent holes.
  • Reading the chart:
    • RS rows are worked right to left
    • WS rows are worked left to right
    • Each row begins and ends with 1 selvedge stitch in the main color.
  • Avoiding holes:
    When changing colors:
    • Lay the old color over the new
    • Bring the new color up from below
    • Work the next stitch with the new color
      This “links” the yarns without pulling too tight.
  • Managing butterflies:
    • Each full triangle uses about 6 yards (5.5 m)
    • Each half triangle uses about 3 yards (2.75 m)
    • You’ll prepare 312 butterflies at 6 yards and 72 butterflies at 3 yards.
    • Keep butterflies in bags by “layer” so you don’t get overwhelmed.

All of the detailed notes and numbers are already in your existing content—just keep those sections intact below the pattern heading.


Chic Sheep Dream Intarsia Knit Blanket – Free Pattern

Now for the good part—the free pattern!

Use this blog version if you’re happy scrolling, or snag the ad-free PDF if you want everything in a tidy, printable format.

SPECIAL TECHNIQUES

INTARSIA

Intarsia is a method of color knitting that uses a new strand of yarn for each block of color. When changing colors, the yarn strands must be wrapped in a way to prevent a gap.

Knit Row: Knit to the color change, behind the work, bring old color yarn (the color you just finished using) over the new yarn to the left and bring the new yarn up from below on the right, then continue to knit with the new color.

Purl Row: Purl to the color change, in front of the work, bring old color yarn over the new yarn to the left and bring the new yarn up from below on the right, then continue to purl with the new color.

Knitting project featuring a colorful, intarsia design with intricate lace trim, set against a beach backdrop.

GET THE BOOK! Hey, it's Marly. I want to highly recommend that you grab the Annetarsia book by Anne Berk. It is an amazing book and you will not be disappointed in it at all. It is so much more than a book about intarsia knitting. There are lessons in there that will really improve your general knitting as well. Order if from Amazon or directly from Anne. Simply click the links.

For more information and patterns, check out  “Annetarsia Knits: A New Link to Intarsia (available at www.annetarsia.com)


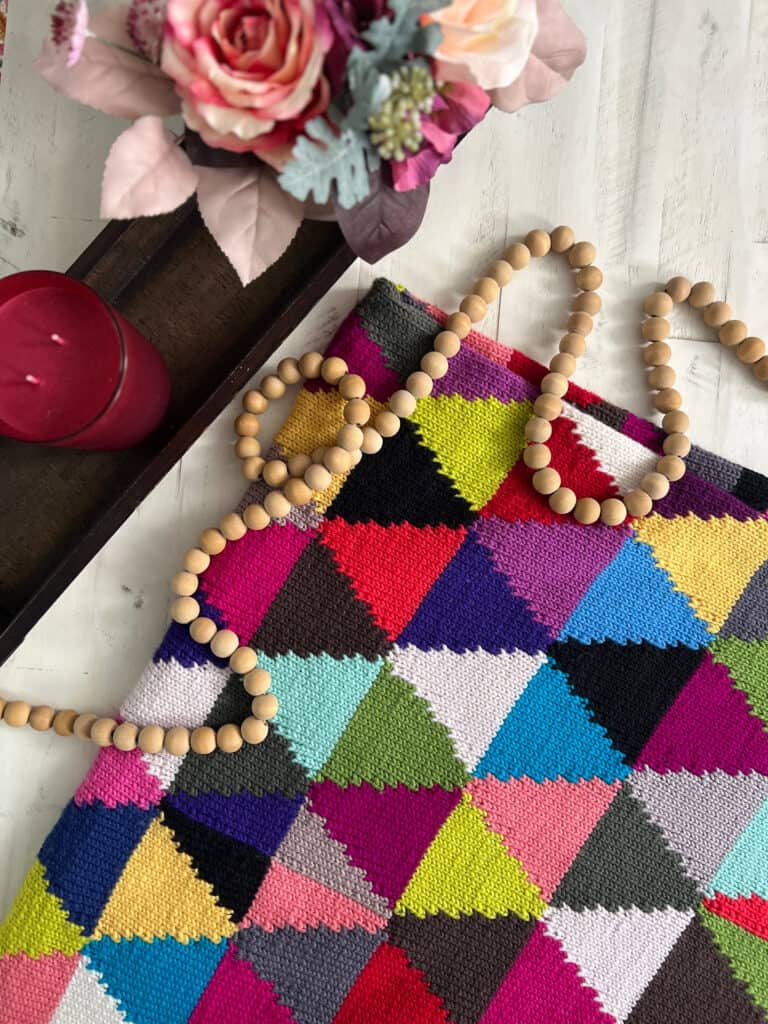
A colorful quilt reminiscent of a chic sheep dream features triangles in various hues, adorned with a wooden bead string. A dark wooden tray holds a red candle and a floral arrangement with pink roses and greenery, all set on a light wooden surface. -Marly Bird

PATTERN NOTES

When adding any new yarn: always leave a 5” end, which will anchor the stitch and give you enough yarn to adjust tension and bury the end, in finishing. Add yarn within 1 st from the link, for ease in finishing.

How to read the chart: Chart rows are worked from right to left on RS rows and left to right on WS rows. Each row begins and ends with 1 st MC selvedge.

Avoid holes when knitting intarsia: To link between motifs, lay the old color over the new color, then work the next stitch with the new color to link the old yarn gently with the new color yarn. Do not overtighten, as the link and stitches need room to breathe.

When 3 colors come together and one will not be used lay both the old and the unused color over the new piece of yarn, then make the stitch with the new color, locking in the other 2 colors, which will be in position to be worked on the next row.

Keep control of the butterflies: When yarn supplies tangle, first pull the loose strands of AC away. As you knit, the yarn butterflies will get smaller and can also be converted to loose strands. ALL yarn supplies can be converted to loose strands if you choose, you will just need to add new yarn more often. As you practice, you will gain confidence and the butterflies will become faster and easier to use. Using smaller lengths of yarn in the beginning might be less stressful, and your fabric will be just fine, so don’t hesitate to try that method.

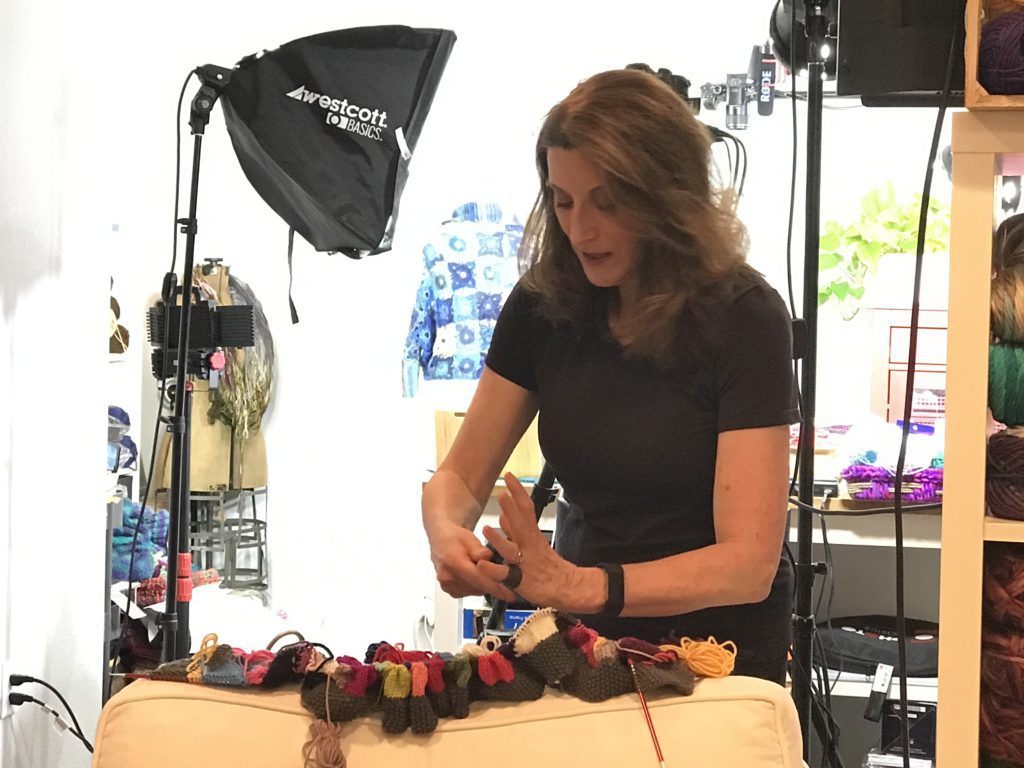
Woman demonstrating knitting technique with colorful yarn and stitches, surrounded by crafting supplies and studio equipment.
Anne Berk winding butterflies of yarn for the Chic Dream Blanket
  • Each full triangle uses 6 yards (5.5 meters), and each half triangle uses 3 yards (2.75 meters).
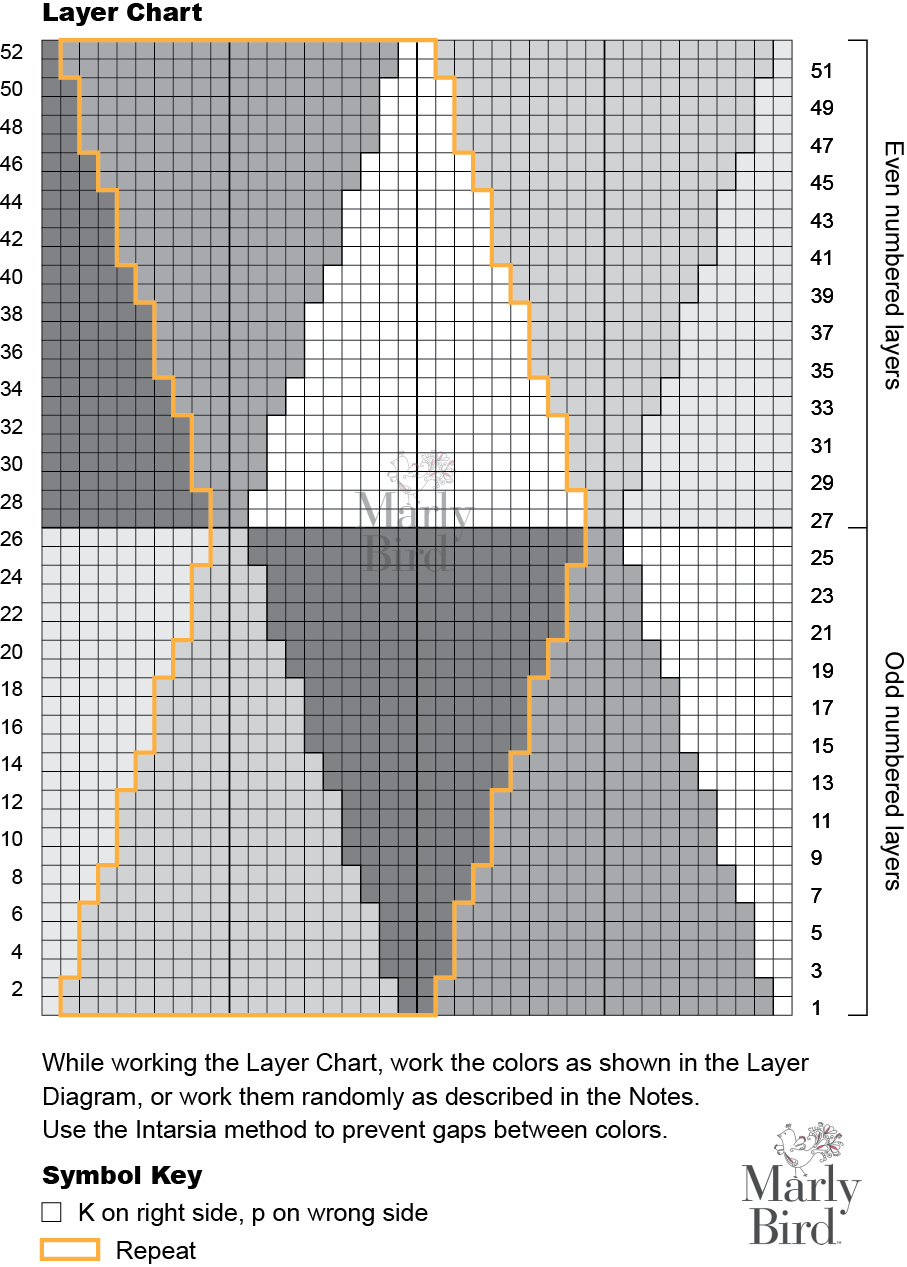
  • While working the Layer Chart, choose the color bobbins in the order as shown in the Layer Diagram, or choose them randomly as follows: There are 25 full triangles and 2 half triangles per layer. On each layer, work each of the 24 colors once, then choose random colored bobbins for the extra full triangle and the 2 half triangles. Arrange the colors in order so they are randomly dispersed in relation to the colors on the previous layers. There will be a few bobbins of color leftover when the blanket is finished.
  • On each row, as each color is changed, use the intarsia method to prevent any gaps from forming between colors.
  • 312 yarn bobbins (butterflies) 6 yd lengths
  • 72 yarn bobbins (butterflies) 3 yd lengths

STITCH PATTERNS

SEED STITCH

(Worked over a multiple of 2 sts + 1)

Row 1: K1, *p1, k1; repeat from * to end.

Repeat row 1 for Seed st.


CHIC SHEEP DREAM INTARSIA KNIT BLANKET PREPARATION

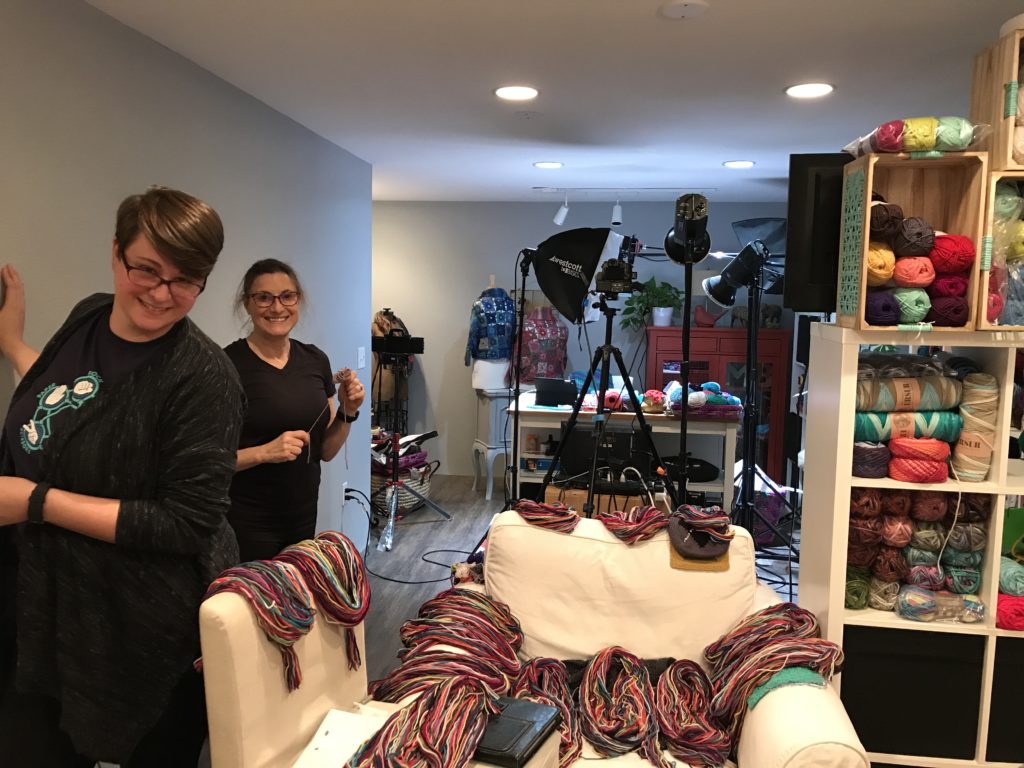
Full disclosure, when Anne was prepping for this blanket she had the help of Lindsey from Erin.Lane Bags and myself. It was so much fun learning from the master how to make these butterfly bobbins in the absolute perfect amounts. Then bundle them up.

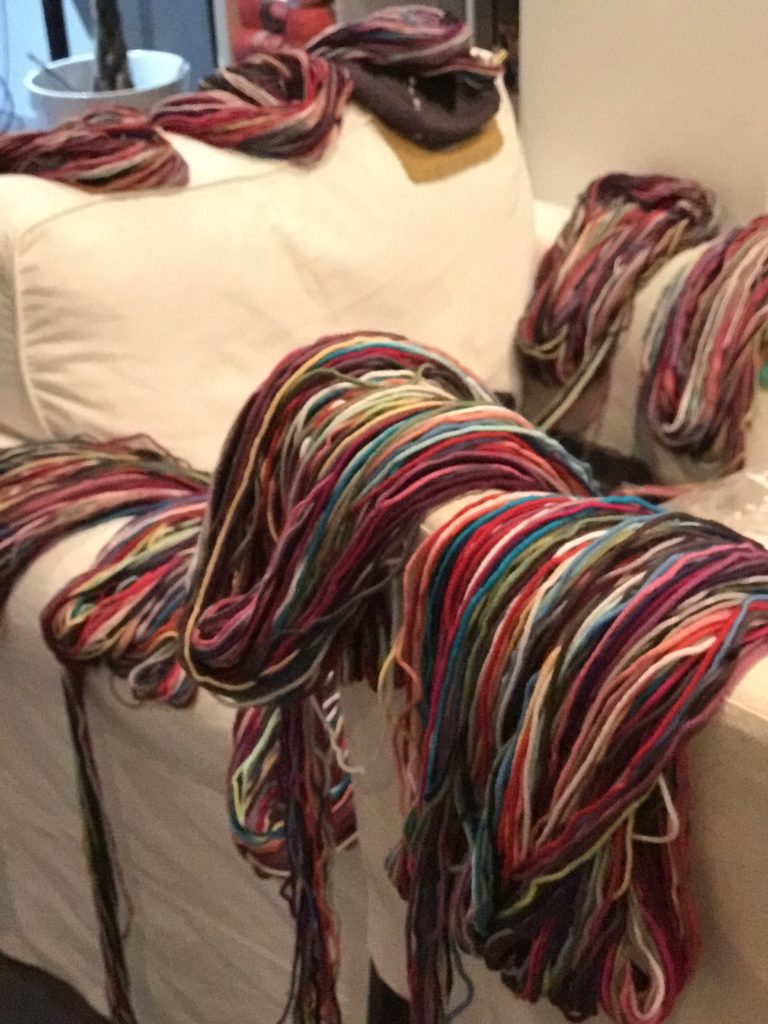
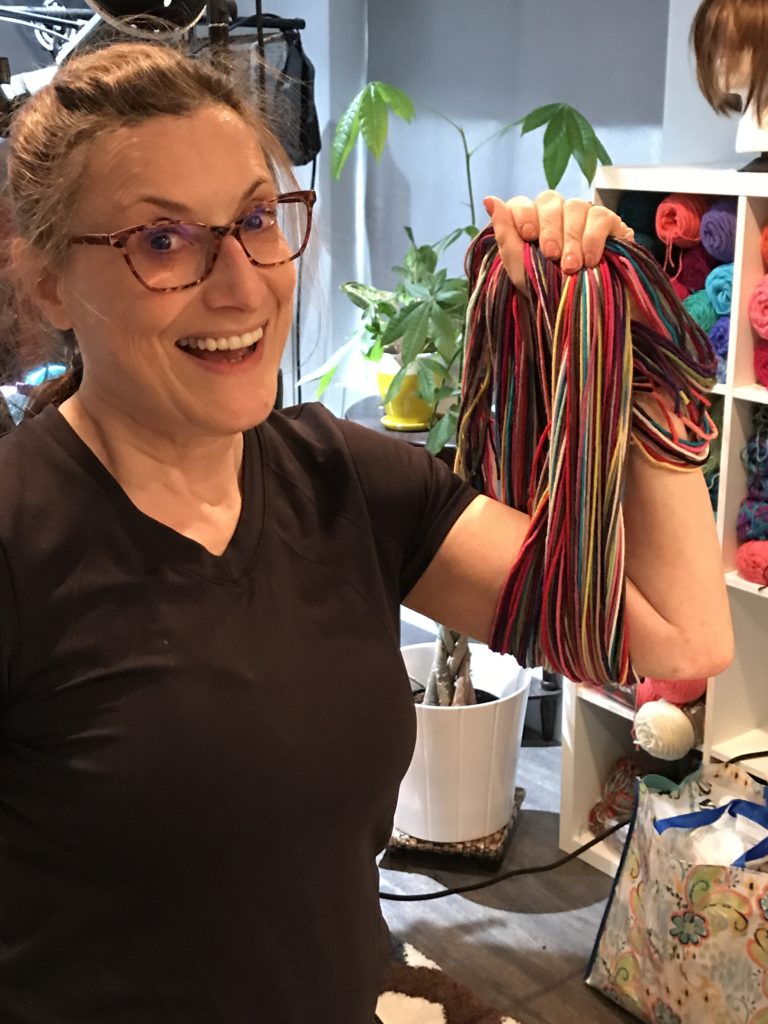
Seeing all the colors of yarn in my collection in one bundle was really awesome. Look at these pictures!

Two women smile in a cozy knitting studio filled with colorful yarns, surrounded by equipment and finished projects.
yarn prep for the intarsia chic dream blanket
Anne Berk showing the yarn prep for the blanket

Here is what you need to know to prepare for your CHIC SHEEP DREAM INTARSIA KNIT BLANKET.

FULL TRIANGLES: Hold the 24 colors together and measure and cut as a unit to save time. Be careful to maintain a relaxed tension when measuring, or they may be cut too short.

Cut all 24 colors into 6 yard (5.5 meter) lengths and wind each separate length into a yarn bobbin (SEE MARLY’S VIDEO ON YARN BOBBINS). Place each set of 24 yarn bobbins into a separate bag. Make 13 sets, one for each layer of triangles

HALF TRIANGLES: Cut all 24 colors into 3 yard (2.75 meter) lengths and wind onto bobbins. Make 3 sets and place all together into a bag.  Use randomly next to each side edging, and to create one or more divided triangle on each layer.

GROW

To Unlock Exclusive Subscriber Content click the Box below and join for free by simply adding your email and creating a password! If you are having troubles, clear your cache or reset your password or login to the Grow Publisher Portal.

>> Learn More About Grow Here <<

I'm thrilled to share this amazing pattern with you, many patterns on my blog are absolutely free! I kindly request that you don't copy and paste or distribute this pattern. Prefer an ad-free experience? Buy a digital PDF pattern for a small fee from one of my online stores for a seamless crafting journey. 

I appreciate your support and readership. You are the reason I can keep doing what I love and sharing it with others. So, thank you from the bottom of my yarn-loving heart! Disclosure: This post contains affiliate links, meaning I get a commission if you decide to make a purchase through my links at no cost to you.


CHART

This intarsia chart is worked over a multiple of 20 sts. Once all rows of the chart are complete, 1 set is complete.

Anne Berk Chic Dream Blanket Pattern Chart on MarlyBird.com
Click on Chart to Print Larger Image

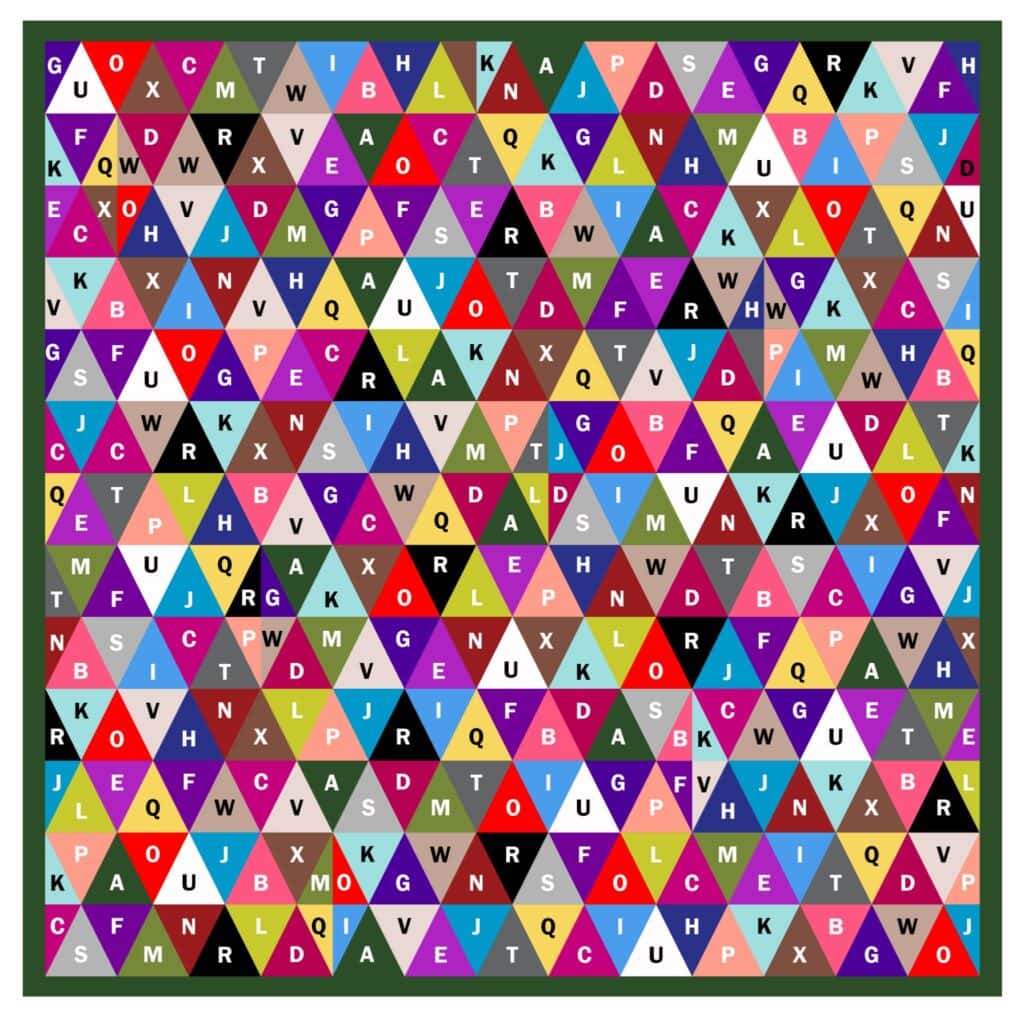
SCHEMATIC FOR COLOR PLACEMENT

A grid of colorful triangles, each containing a single capital letter, forms a tessellated pattern reminiscent of a Dream Intarsia Knit Blanket, with vibrant colors like red, blue, green, pink, yellow, and brown. -Marly Bird
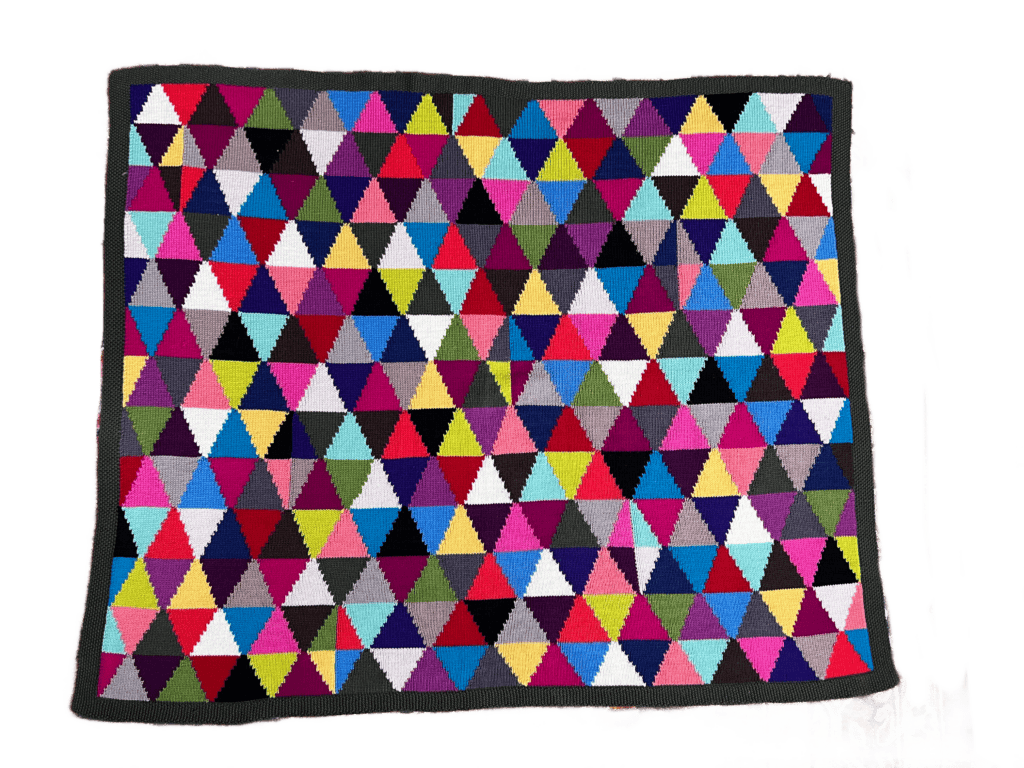
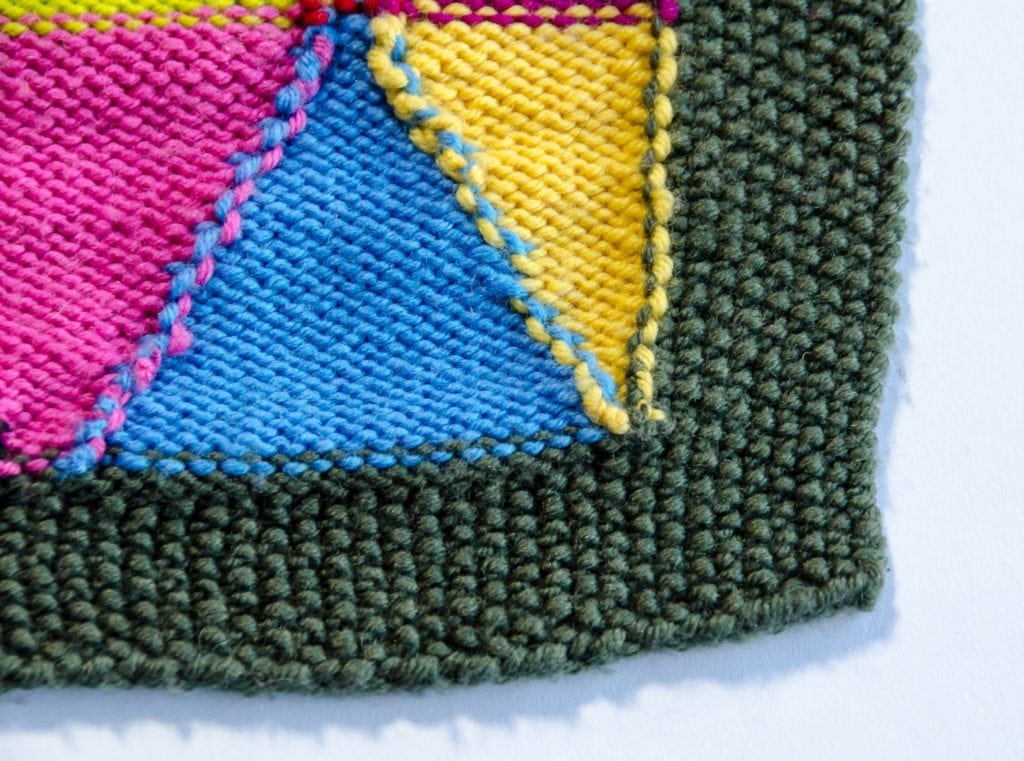
Colorful patchwork blanket made of triangles in vibrant shades, showcasing various yarn textures and a dark border.

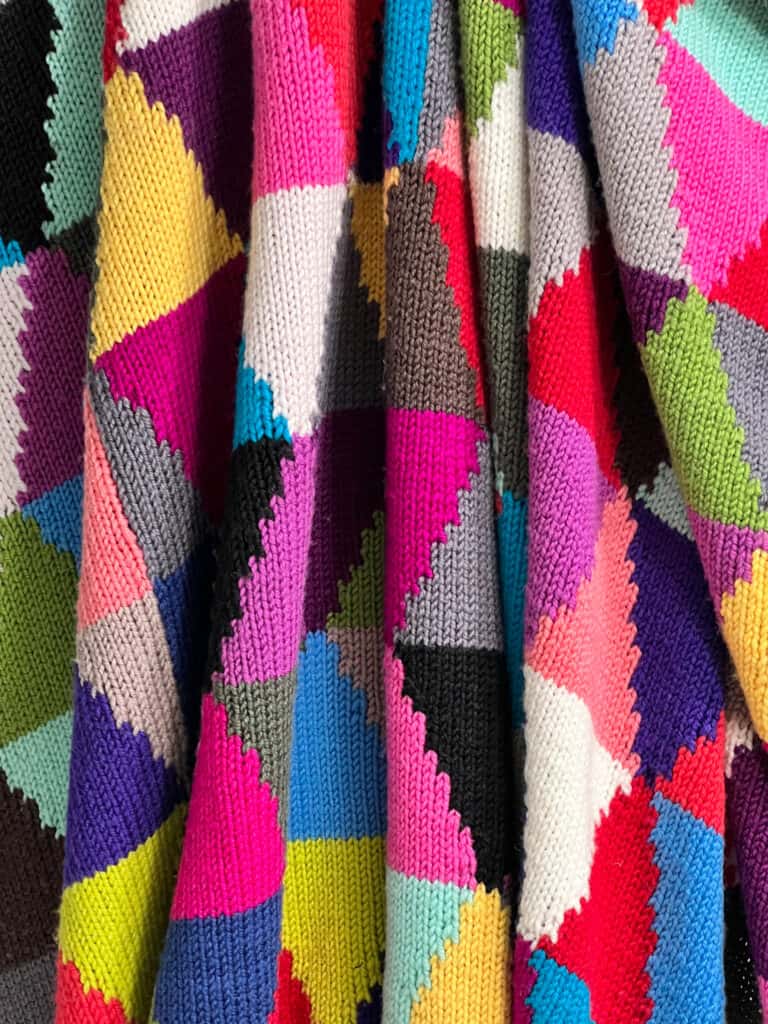
A colorful knitted fabric reminiscent of the Chic Sheep Dream Intarsia Knit Blanket, with a patchwork pattern featuring vibrant colors like red, blue, yellow, pink, and purple in a geometric zigzag design. The texture and folds of the fabric are beautifully visible. -Marly Bird

CHIC SHEEP DREAM ARGYLE KNIT BLANKET PATTERN

With long tail method, cast on 277 with Color A, then work 14 rows in Seed stitch, ending after a right side row.

Increase Row (wrong side): Work 9 sts in Seed stitch, place a marker, kfb, purl to the last 9 sts, place another marker, work Seed stitch to end – 278 sts.

Next Row (right side): Work Seed stitch to marker as established, slip the marker, work Row 1 of the Layer Chart (see chart above) using desired colors (see Notes) to the next marker, slip the marker, work to the end in Seed stitch as established.

Work in established Layer pattern, keeping 9 edge sts in Seed stitch until Rows 1–52 of the Layer pattern have been completed 6 times, then work Rows 1–26 once more.

Decrease Row: (right side): Change to Color A only and work in Seed st to marker, remove marker, p2tog, purl to marker, remove marker, work in Seed st to end – 277 sts remain.

Work 14 rows in Seed st. Bind off all sts in Seed st.

FINISHING

Weave in all loose ends.

Block blanket to measurements.

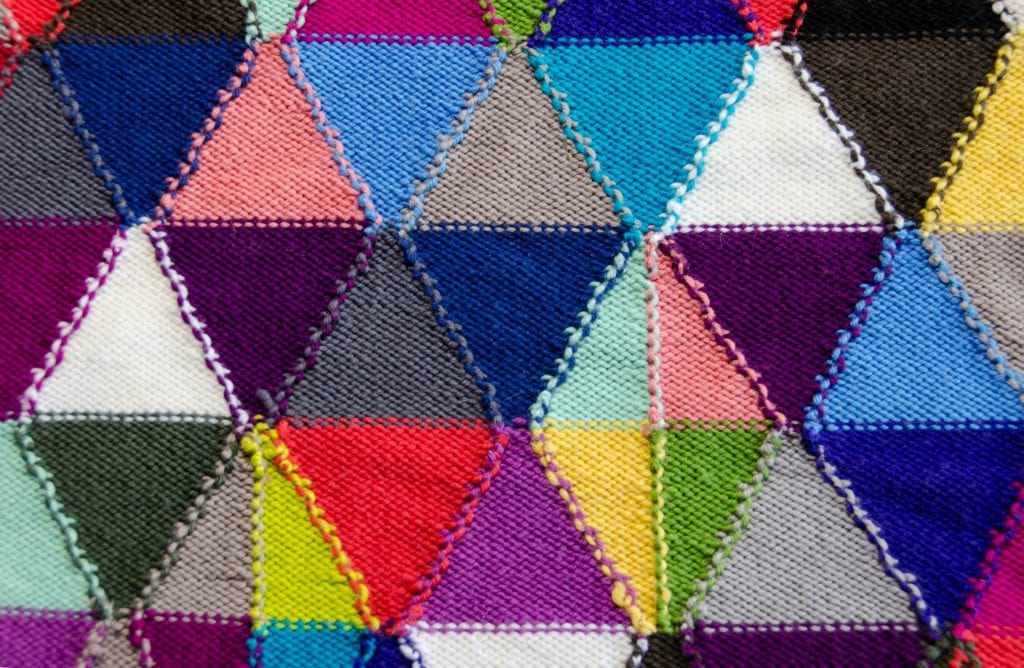
Colorful patchwork of triangles in various shades, featuring a mix of knit and crochet stitches.
Colorful crochet project featuring vibrant pink, blue, yellow, and green stitches in a patchwork design.

More Intarsia Patterns from Marly Bird

Loved this blanket and want more intarsia in your life? You’ll also like:

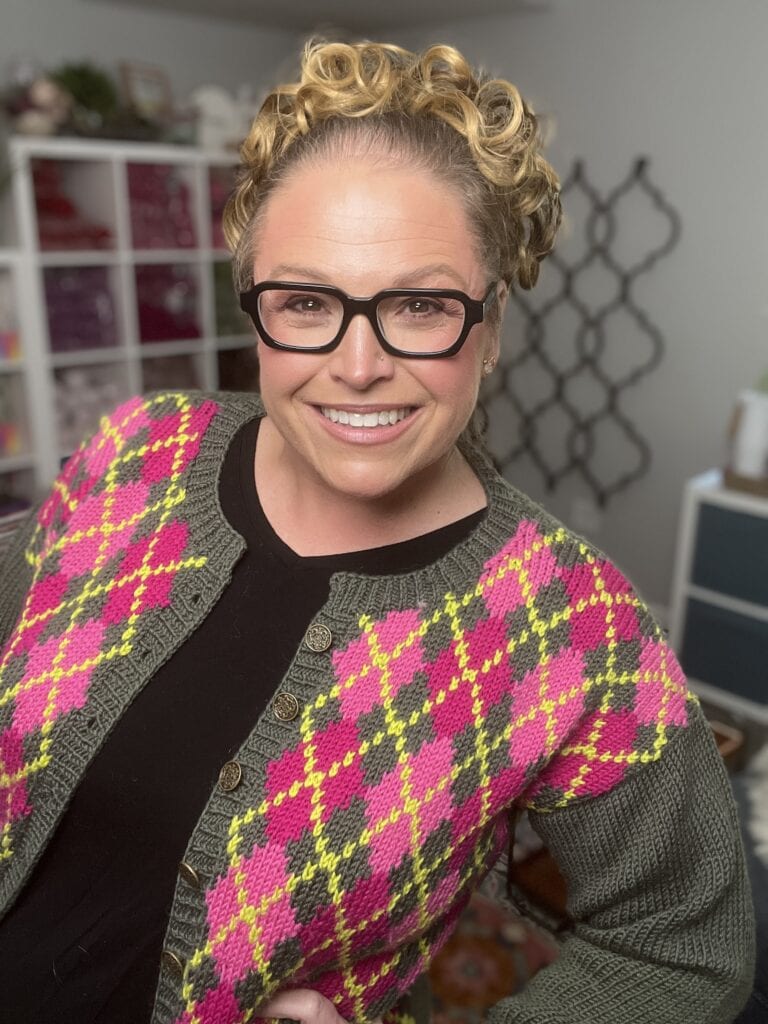
  • Chic Highland Argyle Cardigan – a stunning argyle cardigan designed by Anne Berk, using intarsia in sweater form.
    👉 https://marlybird.com/free-knitting-patterns/perfect-argyle-knit-cardigan-pattern-chic-highland-argyle/
A smiling woman with curly blonde hair and black glasses wears a green cardigan with a pink and yellow argyle pattern, standing in a cozy room with shelves, patterned decor, and a Dream Intarsia Knit Blanket in the background. -Marly Bird

Keep an eye on MarlyBird.com for more intarsia-friendly designs and colorwork fun.


Crochet Sister Pattern – Day Dream C2C Crochet Blanket

If you’re BiCrafty (or intarsia feels like too big of a leap right now), check out the crochet sister to this blanket:

  • Day Dream C2C Crochet Blanket – Free Crochet Chic Sheep Blanket
    This version also uses all 24 colors of Chic Sheep and is worked in corner-to-corner crochet.
    👉 https://marlybird.com/blog/day-dream-c2c-crochet-blanket-free-colorful-throw-pattern/

It’s a great way to play with the same color palette using a completely different technique.

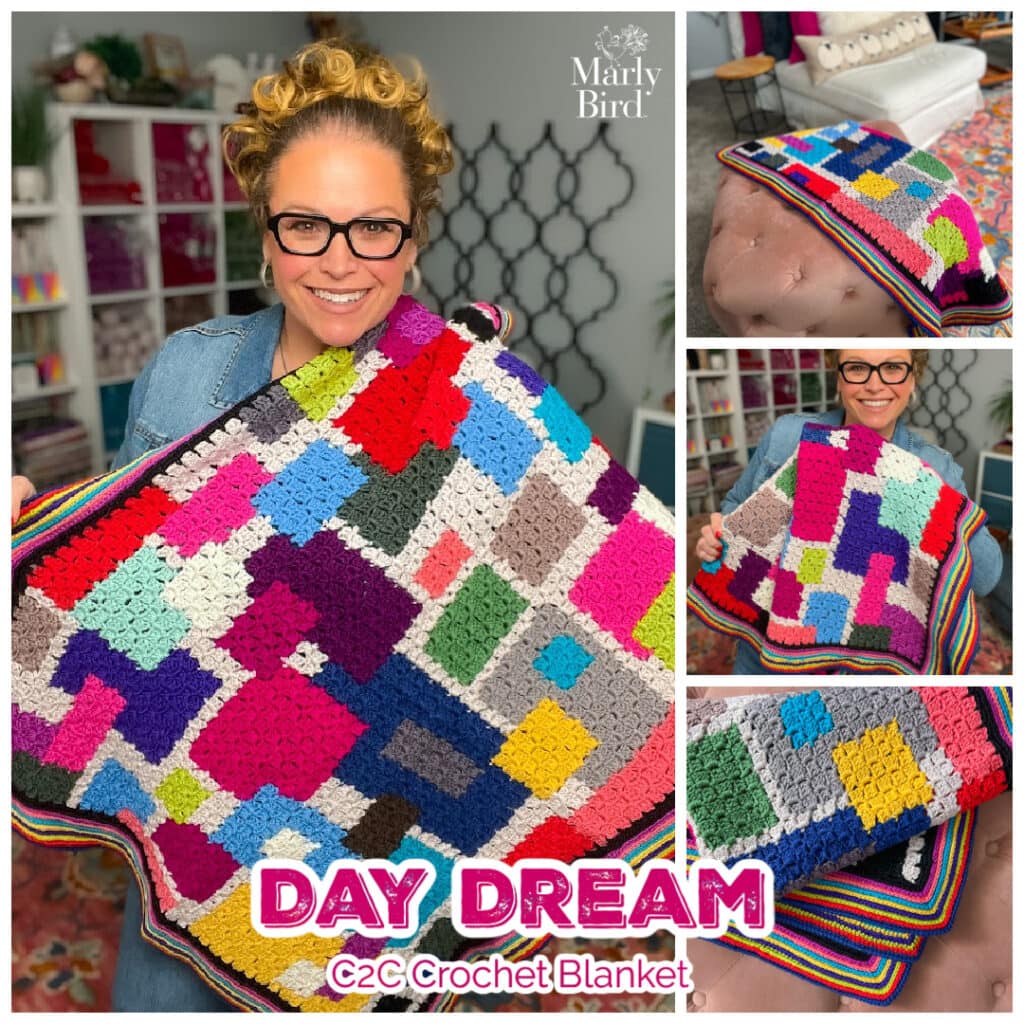
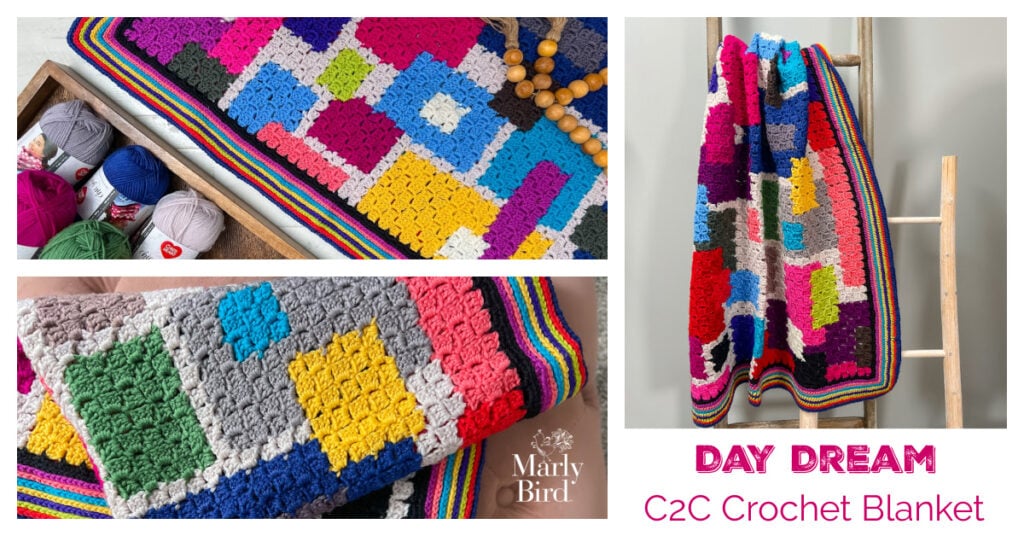
A smiling woman holds up a colorful, geometric-patterned crochet blanket. The collage includes close-ups of its vibrant squares and stripes, featuring the text "Day Dream C2C Crochet Blanket - FREE Crochet Chic Sheep Blanket" at the bottom. -Marly Bird

FAQ – Chic Sheep Dream Intarsia Knit Blanket

Do I need prior intarsia experience to knit this blanket?
Not necessarily, but it helps to be a confident knitter first. If you’re comfortable with knit/purl and ready to learn, the combination of the chart, notes, and videos makes this a solid intarsia “first big project.”


Can I use fewer colors or just stash yarn?
Absolutely. You can:

  • Use fewer colors and repeat them across the triangles
  • Combine leftover worsted-weight yarns for a scrappy version
  • Stick to a limited palette (like neutrals with one bright accent)

Just remember to match the yarn weight (worsted) and aim for a usable gauge so your triangle shapes and overall size stay pleasing.


How important is gauge for this blanket?
Gauge is important for:

  • Yardage – looser gauge = more yarn used
  • Finished size – tighter gauge = smaller blanket

It doesn’t have to be exact down to the last stitch, but getting close means your result will be similar to the sample, and you’re less likely to run out of yarn.


Is this blanket portable? Can I work on it in sections?
It’s a full-size blanket, so it’s not the most portable project once you’ve got a lot of fabric on your needles. You can, however, work on shorter sessions, one “layer” of triangles at a time, and keep your butterflies organized in project bags.


Image promoting an ad-free PDF knitting pattern for the Dream Intarsia Knit Blanket. A close-up of the colorful geometric blanket is shown, with preview pages and “BUY NOW” text highlighted by a pink arrow. -Marly Bird

Final Thoughts

The Chic Sheep Dream Intarsia Knit Blanket is one of those projects that really lives up to its name—it started as a dream, turned into a design challenge, and became a beloved, modern heirloom.

It’s:

  • A color lover’s playground
  • A huge confidence booster if you’re new to intarsia
  • A perfect excuse to dive into your stash or treat yourself to new yarn

However you choose to knit it—faithfully following Anne’s color layout or creating a completely custom palette—I hope this blanket brings you as much joy as it’s brought to us.

Now grab your yarn, wind those butterflies, and let’s knit something unforgettable. 🧶💗

❤️ Your BiCrafty Bestie,
Marly Bird
A cartoon avatar of a person with glasses and a brown bun smiles warmly. Their green shirt and black jacket add a stylish touch, while colorful hearts surround them like loving temperature blankets, stitching together an aura of love and positivity. -Marly Bird

Filed Under: Chic Sheep by Marly Bird Patterns, Free Patterns, Knitting, Marly Bird Premium Patterns, Our Free Patterns, Pattern, Tips, Tricks, Techniques for Knitting and Crochet

Day Dream C2C Crochet Blanket – Free Colorful Throw Pattern

January 14, 2026 By Marly Bird Leave a Comment

If you love corner-to-corner crochet and you’re obsessed with color, the Day Dream C2C Crochet Blanket is totally your vibe.

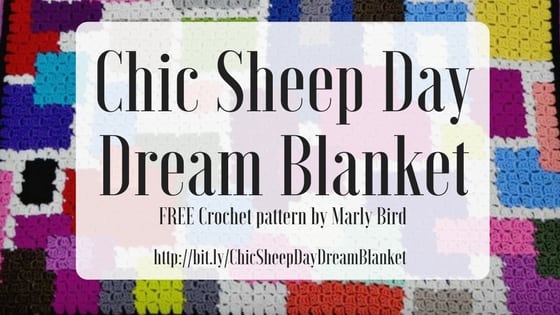
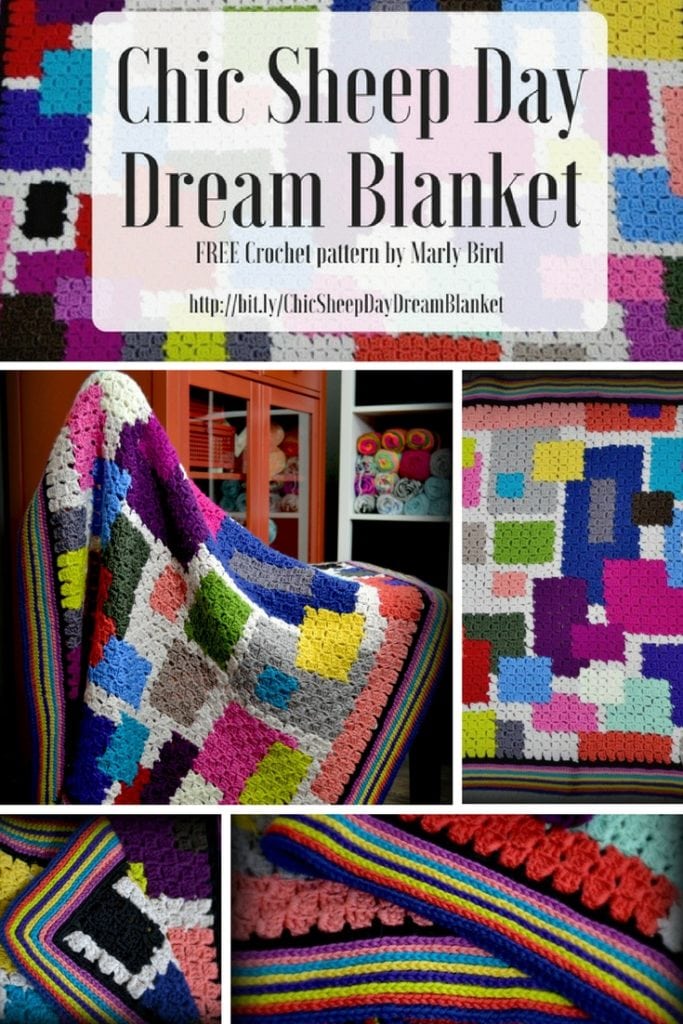
This is the updated version of my original Chic Sheep Day Dream Blanket – same bold, modern blocks of color, refreshed to reflect that the original yarn has been discontinued and that you can absolutely make this with your favorite worsted-weight yarn.

Collage of a colorful, geometric C2C crochet blanket draped on a ladder and close-ups of its vibrant squares. Yarn balls, a crochet hook, and "FREE Crochet Chic Sheep Blanket" text complete this Day Dream design. -Marly Bird

You’ll find:

  • The full free C2C crochet blanket pattern at the bottom of this post
  • Info on yarn substitutions now that Chic Sheep is no longer available
  • Tips for working C2C more confidently
  • An option to purchase the ad-free PDF if you like to print or store patterns offline

As always, thank you for crocheting with me. 💕


Affiliate Disclosure: This post contains affiliate links. To learn more please visit my privacy policy here💖


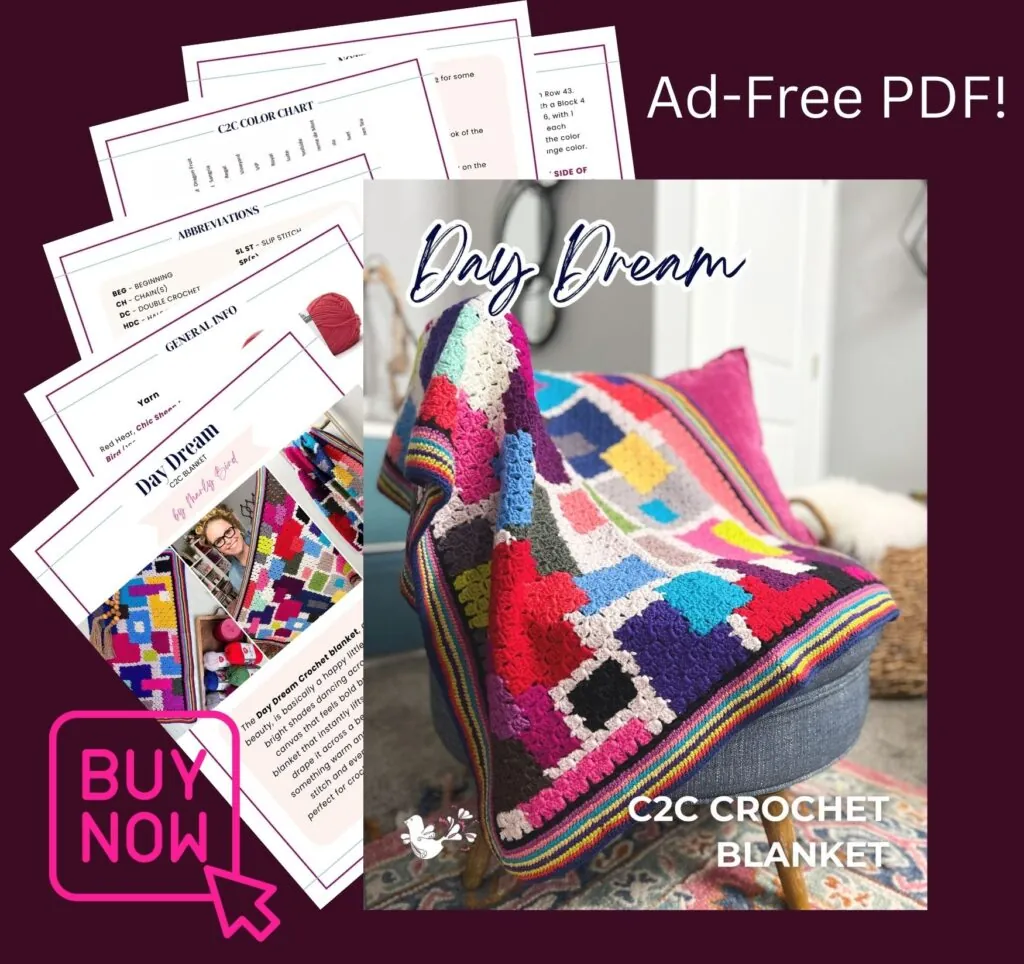
A colorful quilted crochet blanket draped over a chair, with pages of a FREE Crochet Chic Sheep Blanket pattern PDF displayed in the background. Text reads "Day Dream," "C2C Crochet Blanket," and "Ad-Free PDF! BUY NOW. -Marly Bird
Etsy
Shopify
Ravelry

Why You’ll Love the Day Dream C2C Crochet Blanket

The Day Dream Crochet Blanket is basically a colorful daydream you can actually snuggle under:

  • Modern, scrappy look: Blocks of color create a fun, geometric patchwork effect that looks way more complicated than it is.
  • Perfect for stashbusting: Use a planned palette… or dive into your worsted-weight scraps and let the blanket design itself.
  • Corner-to-corner construction: Worked on the diagonal, so you’re never wrangling huge rows of stitches at once.
  • Portable and addictive: Just “one more diagonal row” is the crochet equivalent of “one more episode.”
  • Timeless heirloom potential: Make it wild and bright, or go sophisticated and tonal for a throw that will live on your sofa for years.

This is a great confident beginner to intermediate project. If you’ve worked C2C before, you’ll feel right at home; if you’re newer, this is a fun way to level up your skills while still doing something very rhythmic and repeatable. Day Dream C2C Crochet Blanket-M…

A smiling woman with glasses holds up a colorful, geometric-patterned FREE Crochet Chic Sheep Blanket with a striped border, standing in a craft room filled with yarn and supplies. -Marly Bird

Yarn for the Day Dream C2C Crochet Blanket

The original blanket was made with Chic Sheep by Marly Bird, a 100% merino worsted-weight yarn that I absolutely loved. That yarn line has been discontinued (I know… I’m sad too).

The good news? You can make this blanket with almost any worsted-weight (#4) yarn.

If you’re looking for something similar to Chic Sheep, I recommend:

  • Knit Picks Swish Worsted – soft superwash wool with beautiful stitch definition, a great stand-in for Chic Sheep.
    Link: https://tidd.ly/4qL6Zxt

But honestly, this blanket is very forgiving. You can use:

  • Wool like Universal Deluxe Worsted or Wool of the Andes Superwash
  • Wool blends like Caron Simply Me or Berroco Vintage (I absolutely Love this yarn)
  • Acrylic like Brava or Brava Tweed or Worsted 8 Heathers or Lion Brand Color Theory

As long as it’s a worsted-weight yarn and you have enough yardage, you’re good. The pattern includes a gauge, but for a blanket, gauge affects size and yarn usage more than “fit.” If your blanket ends up a little bigger or smaller, that’s totally fine—just make sure you’ve got enough yarn to finish your color layout.

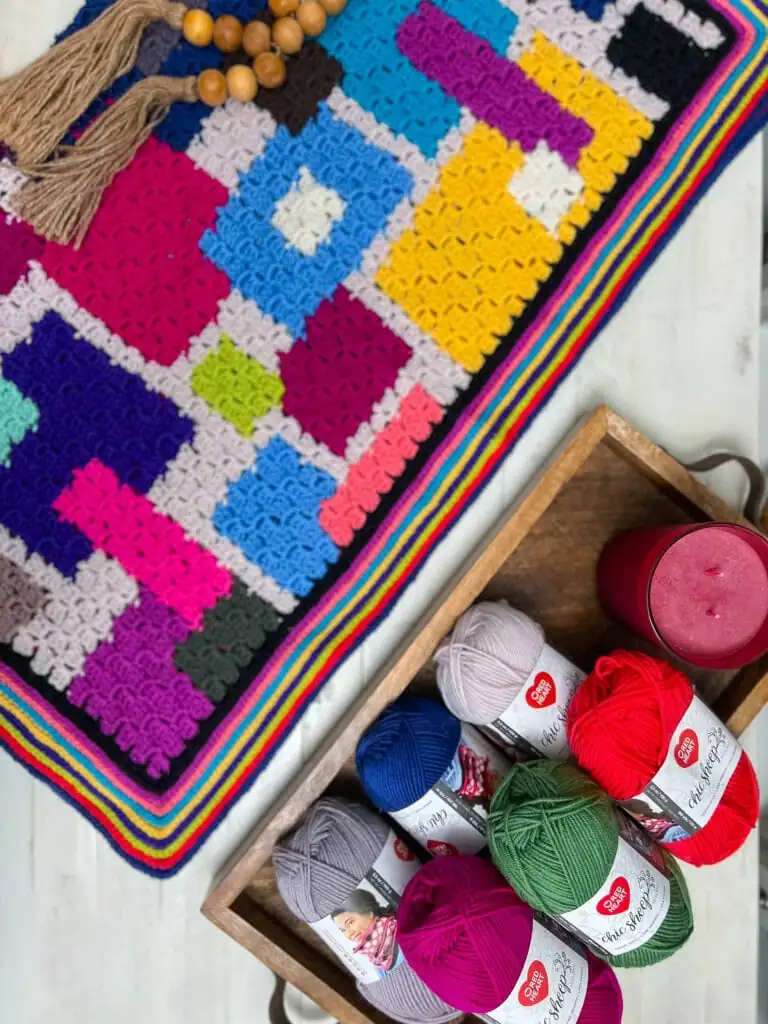
A colorful crocheted blanket with geometric patterns, inspired by the FREE Crochet Chic Sheep Blanket, lies next to a wooden tray holding six skeins of yarn in various colors and a red candle, all on a white surface. -Marly Bird
Etsy
Shopify
Ravelry

About Corner-to-Corner (C2C) Crochet

If you’re new to C2C, here’s the quick overview:

  • C2C blankets are worked on the diagonal, starting in one corner and increasing until you hit the desired width, then decreasing back down to the opposite corner.
  • Each “square” or C2C block is typically made of a chain-3 plus 3 double crochet, and each square on the chart represents one of those blocks. Day Dream C2C Crochet Blanket-M…
  • You’ll be joining new blocks to previous rows as you go, creating a textured grid that’s super satisfying.

This pattern uses a color chart to show where each block color goes, so you can either:

  • Follow my exact color placement, or
  • Use the chart as a guide and plug in your own colors for a totally custom look.

Designer Tip: If you’ve never worked from a C2C color chart before, think of each diagonal line as a “row.” You’ll read right-to-left on right-side rows and left-to-right on wrong-side rows.


C2C Crochet Tips for the Day Dream Blanket

Here are a few tips to make this project smoother and more enjoyable:

Managing All Those Colors

This blanket uses lots of shades, which is part of what makes it so fun.

  • Wind smaller balls or cakes so you’re not dragging full skeins around.
  • Keep colors in a project bag or bin and label them if that helps you track which is which.
  • Weave in some ends as you go so you’re not staring down a mountain of tails at the end.

Designer Tip: Treat this like a “temperature blanket” for your stash—if you’re subbing yarns, choose a range of lights, mediums, and darks so all the blocks stand out against each other.

Reading the Color Chart

Each square on the chart = 1 C2C block (ch 3 + 3 dc).

  • Right-side “rows” go from right to left on the chart.
  • Wrong-side “rows” go from left to right. Day Dream C2C Crochet Blanket-M…

If you lose your place easily, a sticky note, magnetic board, or digital markup tool (like a tablet + stylus) is your best friend.

Changing Colors Cleanly

Change colors when there are 2 loops left on your hook of the old color, or when you slip stitch into the next block—this gives you a nice clean transition. Day Dream C2C Crochet Blanket-M…

Carry yarns short distances when it makes sense, but because this design hops around color-wise, you’ll often just drop the old color and pick it up again later.

A colorful FREE Crochet Chic Sheep Blanket with various textured squares and a multicolored striped border, draped over a tufted, light pink cushion. -Marly Bird

Dealing with All the Ends

There will be a lot of ends. That’s part of the C2C charm.

  • Weave in a few ends at the end of every session.
  • Use a sharp-tipped tapestry needle to really snug tails into the stitches.
  • My “how to bury ends” tutorials on MarlyBird.com and YouTube will help if you’re nervous about them popping out later.

Blocking Your C2C Blanket

A quick block:

  • Helps open up the stitches
  • Squares up your corners
  • Makes that border look extra crisp

For more on blocking (especially if you’re using wool or superwash wool), check out my post:
Steam Blocking vs Wet Blocking Superwash Yarn
https://marlybird.com/blog/steam-blocking-vs-wet-blocking-superwash-yarn-prism-make-along-part-10/

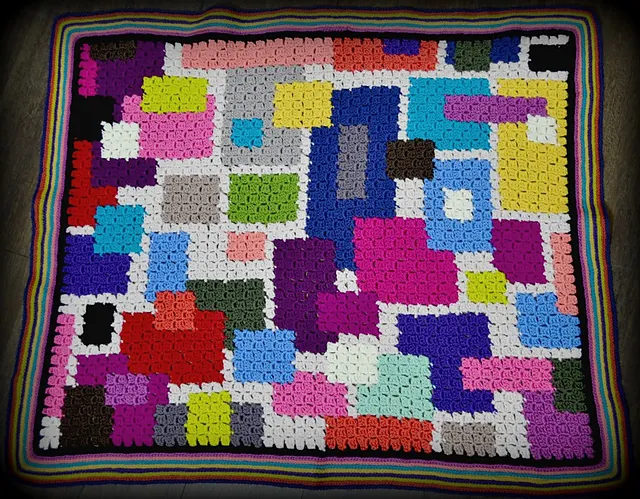
A colorful FREE Crochet Chic Sheep Blanket featuring irregular, blocky patches in vibrant pink, blue, white, yellow, green, and purple hues, all finished with a striking striped multicolor border. -Marly Bird

Prefer a Printable Version? Get the Ad-Free PDF

If you like having your patterns:

  • In a clean, ad-free layout
  • Easy to print and mark up
  • Saved in your digital pattern library for quick access

You can purchase the Day Dream C2C Crochet Blanket ad-free PDF.

A colorful quilted crochet blanket draped over a chair, with pages of a FREE Crochet Chic Sheep Blanket pattern PDF displayed in the background. Text reads "Day Dream," "C2C Crochet Blanket," and "Ad-Free PDF! BUY NOW. -Marly Bird

The PDF includes:

  • Full written pattern
  • Color chart
  • Abbreviations and notes
  • Materials and gauge in one place
Etsy
Shopify
Ravelry

Use the free blog version to get started, and grab the PDF if you decide this blanket belongs in your “forever” pattern collection. 💗


More Corner-to-Corner (C2C) Crochet Patterns from Marly Bird

If you’ve fallen in love with the Chic Sheep Day Dream Blanket and the corner-to-corner technique, I’ve got plenty more C2C crochet patterns and tutorials you can play with next. Think of this as your little C2C library on MarlyBird.com. 💛

Free C2C Blanket & Project Patterns

Here are some other corner-to-corner crochet blanket patterns and projects you can try:

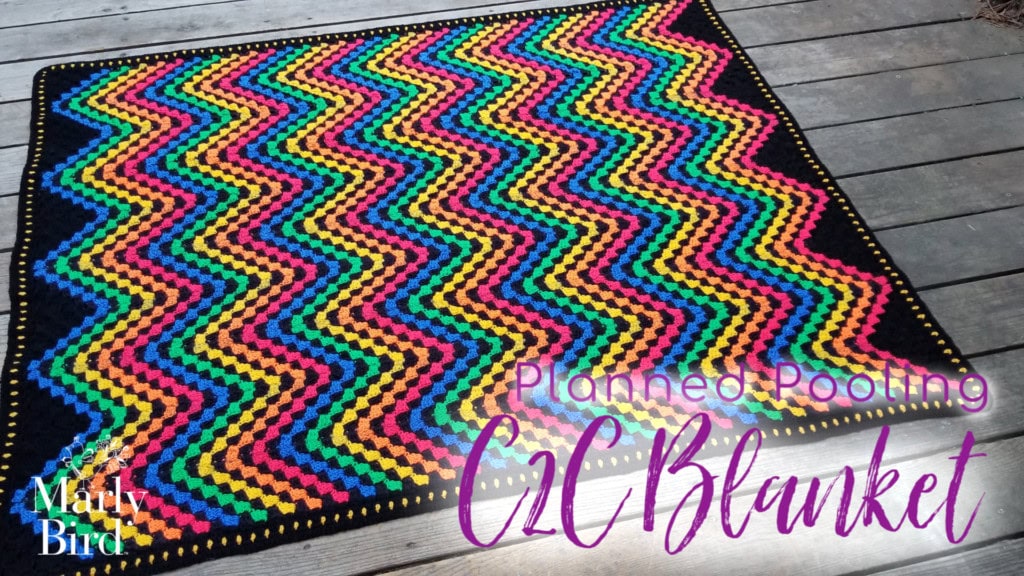
  • Corner-to-Corner Planned Pooling Chevron Throw Blanket
    If you love planned pooling and bold color, this C2C chevron throw is a super fun challenge.
    👉 https://marlybird.com/blog/corner-to-corner-planned-pooling-crochet-chevron-throw-blanket/
  • Corner-to-Corner Single Crochet Entrelac 12″ Square
    A great “bite-sized” C2C project that lets you explore entrelac-style construction in a manageable square. Perfect for skill building or joining into a larger blanket.
    👉 https://marlybird.com/blog/corner-to-corner-single-crochet-entrelac-12-square/
  • Learn Corner-to-Corner Crochet with the Guest Throw
    This cozy throw is a wonderful next project if you’re ready to practice C2C on a full-size blanket.
    👉 https://marlybird.com/blog/learn-corner-to-corner-crochet-with-the-guest-throw/
  • Free Corner-to-Corner Crochet Baby Blanket Pattern – Ballet Slippers
    A sweet and simple C2C crochet baby blanket pattern that makes an adorable gift or charity project.
    👉 https://marlybird.com/blog/free-corner-to-corner-crochet-baby-blanket-pattern-ballet-slippers/
  • Holiday Snowflake Corner-to-Corner Blanket
    Want a festive, seasonal project? This snowflake C2C crochet blanket is perfect for winter decorating or gifting.
    👉 https://marlybird.com/blog/holiday-snowflake-corner-to-corner-blanket/

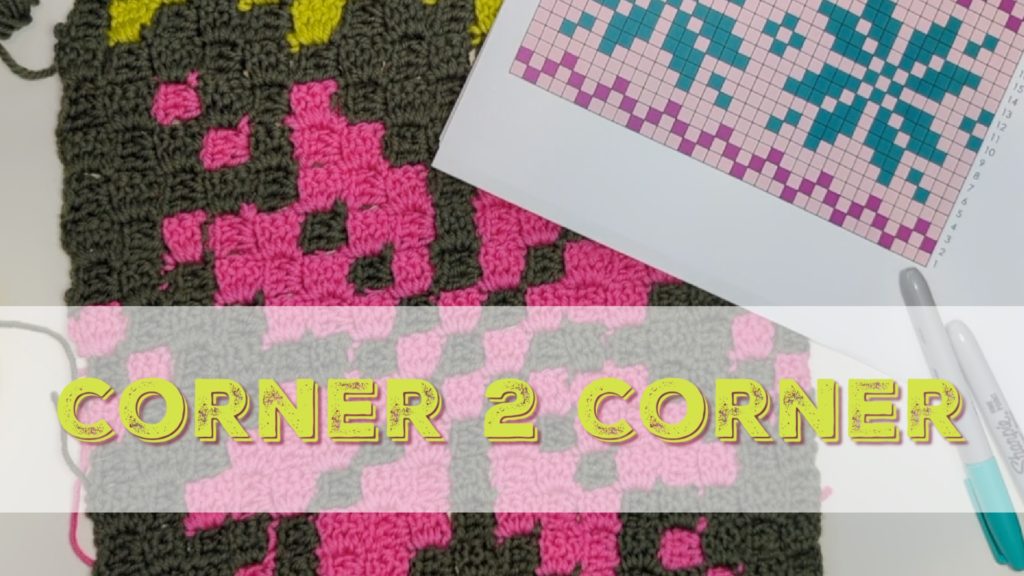
Image showing crochet techniques using the corner-to-corner method, with a partial view of an associated pattern grid and a crochet hook. The text "corner 2 corner" is prominently displayed. -Marly Bird

Corner-to-Corner Crochet Skill-Building Tutorials

If you’re still getting comfortable with C2C crochet (or want to refine your technique), these tutorials will help:

  • How to Corner-to-Corner Crochet (BiCrafty Bootcamp Lesson)
    A step-by-step lesson for learning the basics of C2C crochet – great for adventurous beginners or knitters crossing over.
    👉 https://marlybird.com/blog/how-to-corner-to-corner-crochet-bicrafty-bootcamp-beginner-crochet-lessons-for-knitters-lesson-13/
  • Corner-to-Corner Blanket in Half Double Crochet
    Learn how to work a C2C blanket using half double crochet instead of double crochet for a slightly denser, squishier fabric.
    👉 https://marlybird.com/blog/corner-to-corner-blanket-in-half-double-crochet/
  • Corner-to-Corner Rectangle Using Half Double Crochet
    Ready to move beyond squares? This tutorial shows you how to work a C2C rectangle so you can better control your finished size and proportions.
    👉 https://marlybird.com/blog/corner-corner-rectangle-using-half-double-crochet/

Illustration of "camp colorwork," featuring a whimsical scene with yarn-themed elements, including trees, a tent, and a unicorn performing Tunisian crochet to create colorful designs under a banner of flags. -Marly Bird

Want to Go Deeper with Colorwork? Check Out Camp Colorwork

Corner-to-corner crochet is just one way to play with color and texture in your projects. If you love the idea of building your confidence with colorwork in both knit and crochet, you’ll feel right at home inside Camp Colorwork in the Marly Bird House.

Inside Camp Colorwork, you’ll get:

  • In-depth, step-by-step modules on different colorwork techniques
  • Video lessons you can pause, rewind, and rewatch as often as you like
  • Supportive instruction designed to help you feel confident, not overwhelmed
  • Access to patterns and projects that let you practice what you’re learning
  • A welcoming community of fellow yarn-loving campers
Camp Colorwork crochet and knitting course by Marly Bird and Robyn Chachula

And yes, Camp Colorwork also covers skills that pair beautifully with projects like this C2C blanket and other colorwork designs you’ll see on MarlyBird.com and inside the Marly Bird House.

If you’re ready to level up your color skills, you can learn more here:
👉 https://campcolorwork.com

Or jump straight into the course with this special discount link:
👉 https://marlybird.thrivecart.com/camp-colorwork/?coupon=HEART

Use coupon code HEART at checkout to get 25% off the entire Camp Colorwork course. 💖


Love This Blanket? Try the Knit Version Too

If you’re BiCrafty (hi, friend 👋), you might also love the Knit Dream Blanket — the knit cousin to this colorful crochet throw.

Check it out here: https://marlybird.com/chic-sheep-dream-blanket-story-behind-blanket/

It’s a fantastic way to explore Intarsia knitting (the “Annetarsia” method) in a modern, color-packed blanket.

A woman holds up a colorful, geometric knit blanket featuring bright triangular patterns; she smiles in one photo and looks surprised in another. Text reads: "DREAM Knit Intarsia Blanket" and "FREE Crochet Chic Sheep Blanket. -Marly Bird

Day Dream C2C Crochet Blanket – Free Pattern Details

Designed by: Marly Bird

Skill Level: Intermediate (C2C experience helpful)

Construction: Corner-to-corner crochet blanket worked on the diagonal, then finished with a textured border.

Finished Measurements

Blanket is approximately 34″ [86.5 cm] wide by 42″ [106.5 cm] long, not including border.

Gauge

  • 5 C2C blocks = 4″ [10 cm] after blocking.
  • Use any size hook needed to obtain this gauge.

(Remember: for a blanket, gauge affects size and yarn usage. Don’t stress if you’re a bit off—but have extra yarn on hand if your gauge is looser.)

Favorite This Pattern on Ravelry - Marly Bird

Yarn

Originally worked in Red Heart Chic Sheep by Marly Bird (100% Merino Wool, 200 yds / 183 m, 3.5 oz / 100 g, CYCA #4 worsted), 1 ball each in the following 24 colors: Day Dream C2C Crochet Blanket-M…

A: Linen
B: Stiletto
C: Platinum
D: Sterling
E: Lace
F: Suede
G: Leather
H: Mimosa
I: Sunset
J: Lipstick
K: Mai Tai
L: Fairy Tale
M: Dragon Fruit
N: Sangria
O: Regal
P: Vineyard
Q: VIP
R: Royal
S: Suite
T: Poolside
U: Crème de Mint
V: Polo
W: Velvet
X: Green Tea

Substitute any similar worsted-weight yarn in a range of colors.

Hook

  • H/8 (5.0 mm) crochet hook, or size needed to obtain gauge. Day Dream C2C Crochet Blanket-M…

Notions

  • Stitch markers
  • Tapestry needle
  • Blocking supplies
⭐️ Marly Bird Amazon Storefront ⭐️

Abbreviations

BEG – beginning
CH – chain(s)
DC – double crochet
HDC – half double crochet
RS – right side
SC – single crochet
SL ST – slip stitch
SP(S) – space(s)
ST(S) – stitch(es)
TCH – turning chain
WS – wrong side Day Dream C2C Crochet Blanket-M…


Notes

  • Sample yarn has been discontinued. Feel free to substitute any worsted-weight yarn; see above for suggestions.
  • Each box on the color chart counts as 1 C2C block (ch 3 + 3 dc).
  • Change color when there are 2 loops left on the hook of the previous color, or when slip stitching to the next block.
  • The chart is worked from the bottom corner to the upper corner on the diagonal.
  • RS “rows” are worked from right to left on the chart; WS “rows” are worked from left to right.
  • There will be many yarn ends to weave in; weave some in as you go to avoid overwhelm. Day Dream C2C Crochet Blanket-M…

GROW

To Unlock Exclusive Subscriber Content click the Box below and join for free by simply adding your email and creating a password! If you are having troubles, clear your cache or reset your password or login to the Grow Publisher Portal.

>> Learn More About Grow Here <<

I'm thrilled to share this amazing pattern with you, many patterns on my blog are absolutely free! I kindly request that you don't copy and paste or distribute this pattern. Prefer an ad-free experience? Buy a digital PDF pattern for a small fee from one of my online stores for a seamless crafting journey. 

I appreciate your support and readership. You are the reason I can keep doing what I love and sharing it with others. So, thank you from the bottom of my yarn-loving heart! Disclosure: This post contains affiliate links, meaning I get a commission if you decide to make a purchase through my links at no cost to you.


C2C Color Chart

Use the Day Dream C2C color chart provided to follow the color layout. Each square = one C2C block worked in the color indicated.

Chic Sheep Day Dream Blanket by Marly Bird - Corner to Corner chart

Day Dream C2C Crochet Blanket – Written Pattern

Follow the color chart above for when to change colors throughout the blanket.

A smiling woman holds up a colorful, geometric-patterned crochet blanket. The collage includes close-ups of its vibrant squares and stripes, featuring the text "Day Dream C2C Crochet Blanket - FREE Crochet Chic Sheep Blanket" at the bottom. -Marly Bird
Etsy
Shopify
Ravelry

Increasing Rows of Blanket

Row 1 (Block 1, RS):
With A, ch 6, dc in 4th ch from hook, dc in last 2 ch.

Row 2 (Block 2, WS):
Ch 6, turn, dc in 4th ch from hook, dc in last 2 ch, sl st to top of beg ch of Block 1.

Row 2 (Block 3, WS):
Ch 3, 2 dc in ch-3 sp, dc in last ch.

Row 3 (Block 4, RS):
Ch 6, turn, dc in 4th ch from hook, dc in last 2 ch, sl st to top of beg ch of Block 3.

Row 3 (Block 5, RS):
Ch 3, 3 dc in ch-3 sp, sl st to top of beg ch of Block 2.

Row 3 (Block 6, RS):
Ch 3, 2 dc in ch-3 sp, dc in last ch. Day Dream C2C Crochet Blanket-M…

Repeat Row 3 through Row 43. Each row will start with a Block 4 and end with a Block 6, with 1 additional Block 5 for each subsequent row. Continue to use the color chart to determine where to change colors.


Decreasing West Side of Blanket While Increasing East Side

Row 43 (Starting Increase Block, RS):
Ch 6, turn, dc in 4th ch from hook, dc in last 2 ch, sl st to top of next block.

Row 43 (Middle Blocks and Ending Decrease Block, RS):
Ch 3, 3 dc in ch-3 sp, sl st to top of next block. Repeat across the row, using the color chart for when to change color.

Row 44 (Starting Decreasing Block, WS):
Fasten off from previous block and turn. Join yarn to top of beg ch of previous block with sl st (you can also turn and sl st in each dc of previous block to beg ch), ch 3, 3 dc in ch-3 sp, sl st to top of next block.

Row 44 (Middle Blocks, WS):
Ch 3, 3 dc in ch-3 sp, sl st to top of next block. Repeat across the row, using the color chart for when to change color.

Row 44 (Ending Increase Block, WS):
Ch 3, 2 dc in ch-3 sp, dc in last ch. Day Dream C2C Crochet Blanket-M…

Repeat Rows 43–44 four more times, continuing to follow the color chart.


Decreasing Rows of Blanket

Row 53 (Starting Block, RS):
Fasten off from previous block and turn. Join yarn to top of beg ch of previous block with sl st (you can also turn and sl st in each dc of previous block to beg ch), ch 3, 3 dc in ch-3 sp, sl st to top of next block.

Row 53 (Middle Blocks and Ending Block, RS):
Ch 3, 3 dc in ch-3 sp, sl st to top of next block. Repeat across the row, using the color chart for when to change color. Day Dream C2C Crochet Blanket-M…

Repeat Row 53 through Row 93. Row 93 only has a Starting Block. Fasten off and weave in ends.


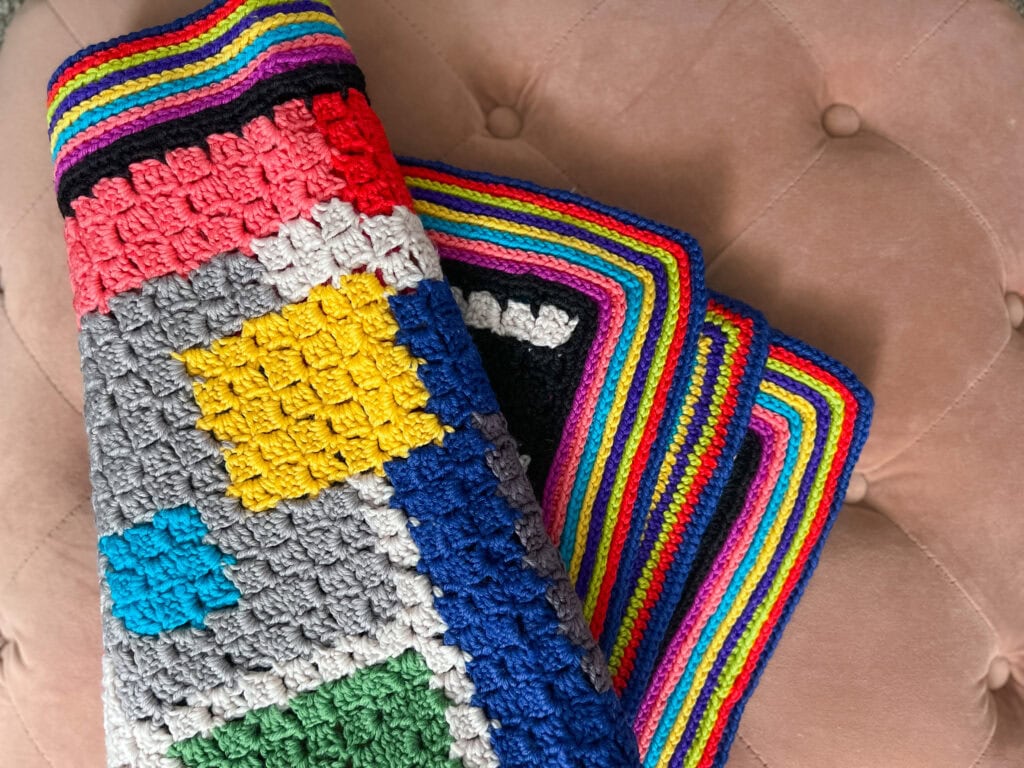
A FREE Crochet Chic Sheep Blanket with colorful blocks and stripes in blue, green, yellow, red, pink, and gray is folded neatly on a soft pink, tufted cushion. -Marly Bird

Edging

Using yarn leftovers and changing colors as desired, work the border as follows:

With RS facing, join yarn with sl st anywhere along the perimeter.

Round 1:
Ch 1 (does not count as a stitch), hdc evenly around, working 3 hdc in each corner st or sp, join with sl st in first hdc.

Rounds 2–9:
Ch 1, hdc in the third loop (horizontal strand just below the back loop) of each st around, working 3 hdc in the third loop of each corner st, join with sl st in first hdc.

Fasten off. Day Dream C2C Crochet Blanket-M…


Finishing

Weave in remaining loose ends.
Lightly block to measurements and enjoy your new blanket! Day Dream C2C Crochet Blanket-M…


A colorful, geometric corner-to-corner crochet blanket is displayed finished, draped, and held up by a smiling woman in glasses. The bold squares and rectangles evoke the style of the FREE Crochet Chic Sheep Blanket. Text: "DAY DREAM C2C Crochet Blanket. -Marly Bird

Day Dream C2C Blanket – FAQ

Do I have to use 24 different colors?

Nope! You can absolutely simplify.

  • Use a limited palette (for example, 5–8 colors) and repeat them throughout the chart.
  • Work the background in one color and just change colors for the “pops” of contrast.
  • Go full scrap-busting and let your stash decide which color shows up next.

The chart is a roadmap, not a rulebook.


How much does gauge matter for this blanket?

Gauge matters mainly for:

  • Finished size
  • How much yarn you use

If your gauge is a little looser, your blanket will be bigger and use more yarn. If it’s tighter, it’ll be smaller and use less. For a blanket, that’s usually no big deal—just be sure to have a bit of extra yarn on hand if you know you crochet on the loose side.


Is this a good first C2C project?

If you’re brand new to C2C, I’d call this a “next step” project rather than a very first. The techniques themselves are straightforward, but:

  • You’re working from a color chart
  • There are lots of color changes and ends

If you’ve done at least one simple C2C project already, you’re ready. If not, you might want to warm up with a smaller, single-color C2C project first and then come back to this when you’re feeling more confident.


Can I make this blanket larger or smaller?

Yes!

  • To make it larger, keep increasing for more diagonal rows before you start the decrease section, adding rows in the same C2C manner.
  • To make it smaller, stop increasing sooner and start your decrease rows earlier.

You’ll need to adjust the color layout if you change the size significantly, but the basic corner-to-corner structure stays the same.


What’s the best way to deal with all those ends?

Two main strategies:

  1. Weave as you go – At the end of each session, pause to weave in 4–6 tails. Future-you will be very grateful.
  2. Batch weave – If you’re someone who likes to zone out with a show or podcast, save a chunk of weaving for then.

Use a sharp tapestry needle and weave tails back and forth in different directions to really lock them in. My “burying ends” tutorials on MarlyBird.com and YouTube show exactly how I do it.


A colorful quilted crochet blanket draped over a chair, with pages of a FREE Crochet Chic Sheep Blanket pattern PDF displayed in the background. Text reads "Day Dream," "C2C Crochet Blanket," and "Ad-Free PDF! BUY NOW. -Marly Bird
Etsy
Shopify
Ravelry

Final Thoughts

The Day Dream C2C Crochet Blanket is one of those projects that looks dramatic and designer, but is built on approachable, repeatable stitches. It’s colorful, cozy, and endlessly customizable—exactly the kind of crochet that makes you say, “Just one more row,” long after you meant to go to bed.

Whether you stick to my original rainbow palette or reinvent it with your own colors, I hope this blanket earns a permanent spot on your couch, your bed, or your favorite reading chair.

If you make the Day Dream Blanket, please share it with me:

  • Instagram: @themarlybird
  • Facebook group: Marly’s Minions: Marly Bird BiCrafty Community

Use hashtags #mmmdi and #marlybird so I can find and cheer you on.

Happy crocheting, friend. 💖🧶

❤️ Your BiCrafty Bestie,
Marly Bird
A cartoon avatar of a person with glasses and a brown bun smiles warmly. Their green shirt and black jacket add a stylish touch, while colorful hearts surround them like loving temperature blankets, stitching together an aura of love and positivity. -Marly Bird

Filed Under: Chic Sheep by Marly Bird Patterns, Crochet, Free Patterns, Marly Bird Premium Patterns, Our Free Patterns, Pattern, Uncategorized

Moogly CAL 2025 || Sweetcorn Motif Crochet Block

October 2, 2025 By Marly Bird Leave a Comment

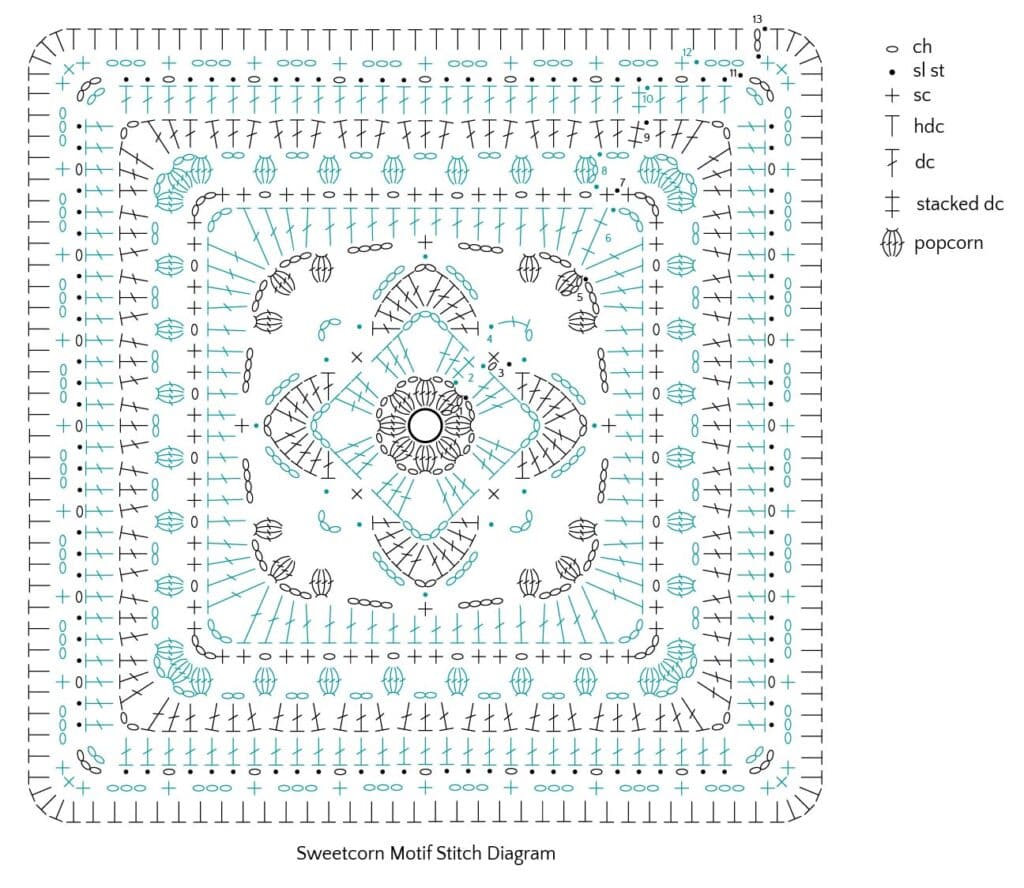
Sweetcorn Motif – Moogly CAL 2025 || Crochet Block by Marly Bird & Robyn Chachula

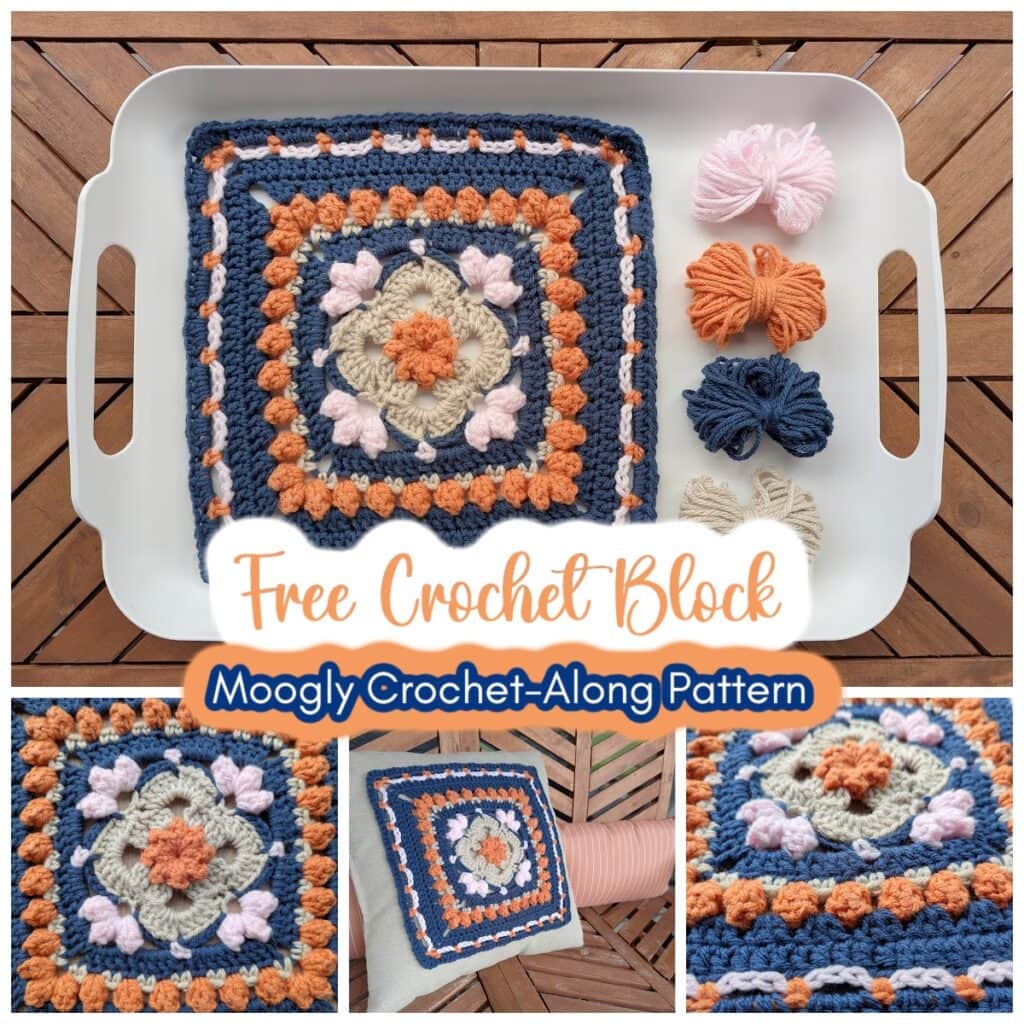
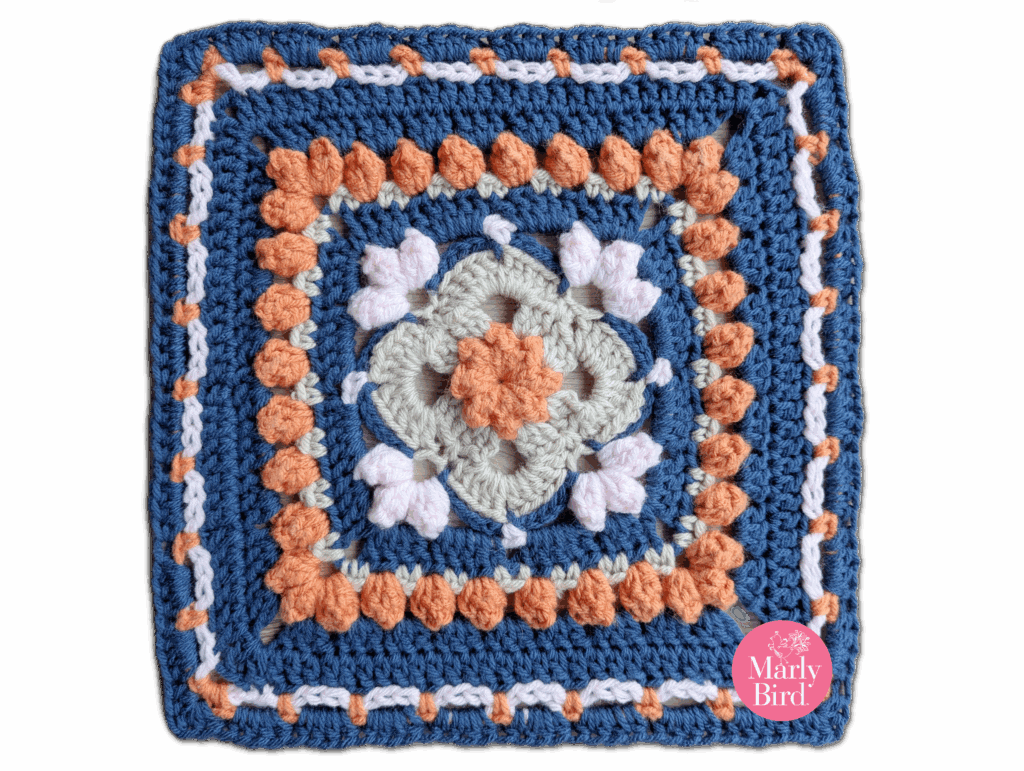
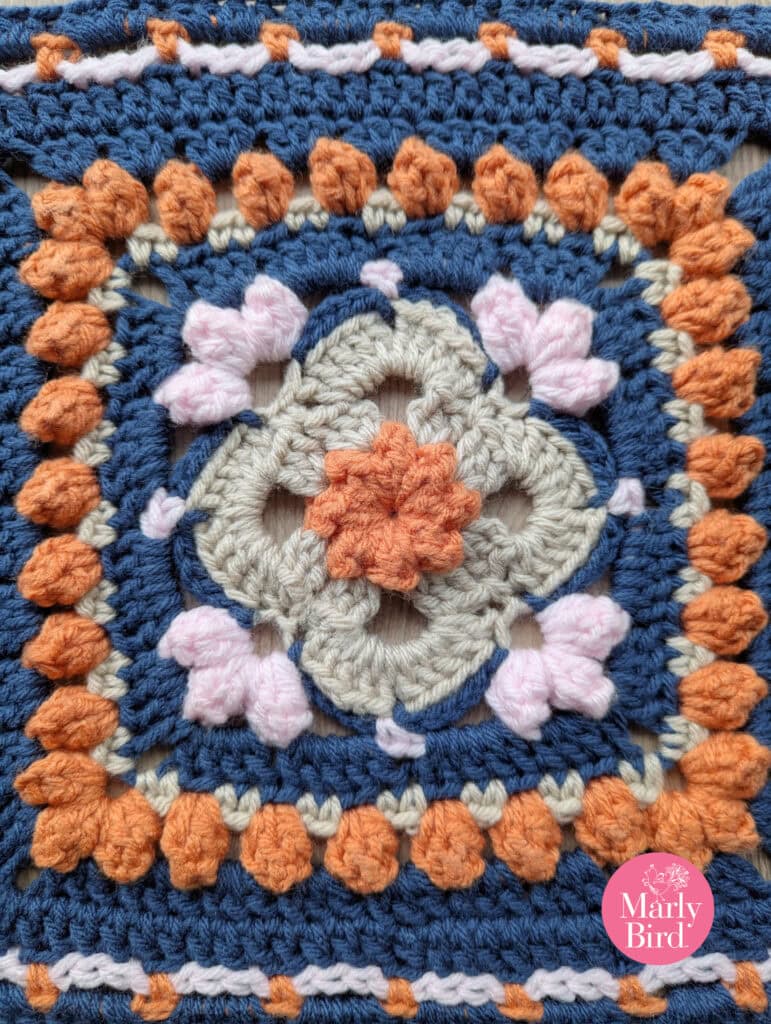
It’s time for another gorgeous square in the Moogly 2025 Crochet-Along (CAL), and this one is extra special! The Sweetcorn Motif was co-designed by me, Marly Bird, and my dear friend (and incredible designer) Robyn Chachula. Together we created a block that blends bold texture, playful pops of color, and timeless crochet structure—all wrapped up in a 12” square.

Whether you’re making the full Moogly blanket or just looking for a stand-alone motif to play with, this block is sure to shine in your crochet collection.

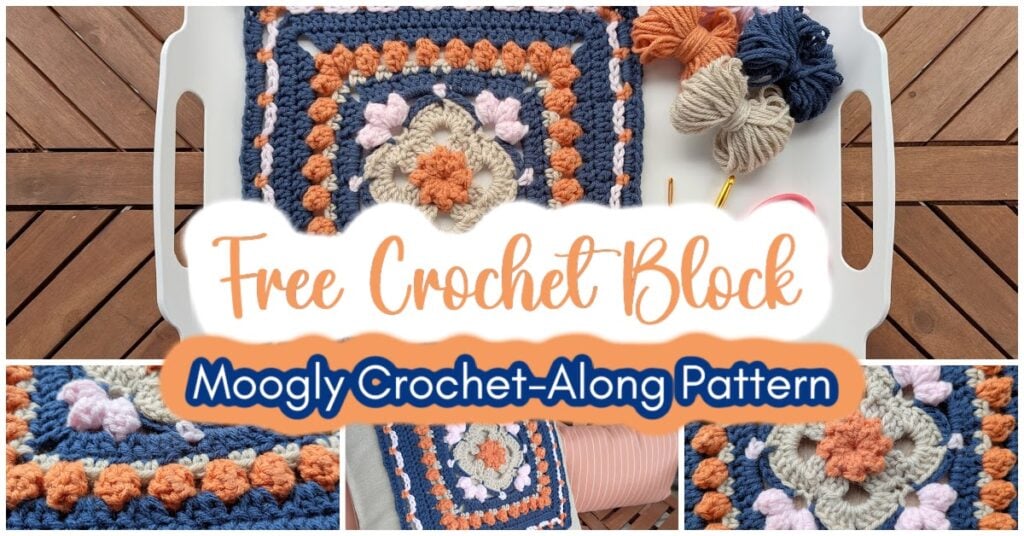
A crocheted Sweetcorn Motif crochet block in blue, orange, beige, and pink is displayed on a pillow and tray. Three small yarn skeins are beside it. Text reads: “Sweetcorn Moogly Crochet-Along Pattern.”. -Marly Bird

Affiliate Disclosure: This post contains affiliate links. To learn more please visit my privacy policy here💖

👉 Learn about the Year Long Crochet-Along on Moogly Blog here


About the Moogly CAL History

Every year, Tamara of Moogly hosts her beloved Crochet-Along (CAL) featuring free crochet block patterns from a variety of designers. Each block measures 12” x 12” and is released on a schedule, so by the end of the year you have a complete blanket made from squares designed by some of your favorite crochet pros.

✨ Free Patterns – Every block, including this one, is available as a free pattern.
✨ Annual Series – The CAL runs all year long with new blocks added regularly. (Started in 2015)
✨ Designer Variety – Each square is unique, offering lots of fun techniques and stitch combos.
✨ Standard Size – Blocks are designed to measure 12” square so they’re easy to join together.

You can always find the current and past blocks on Moogly’s Blog.

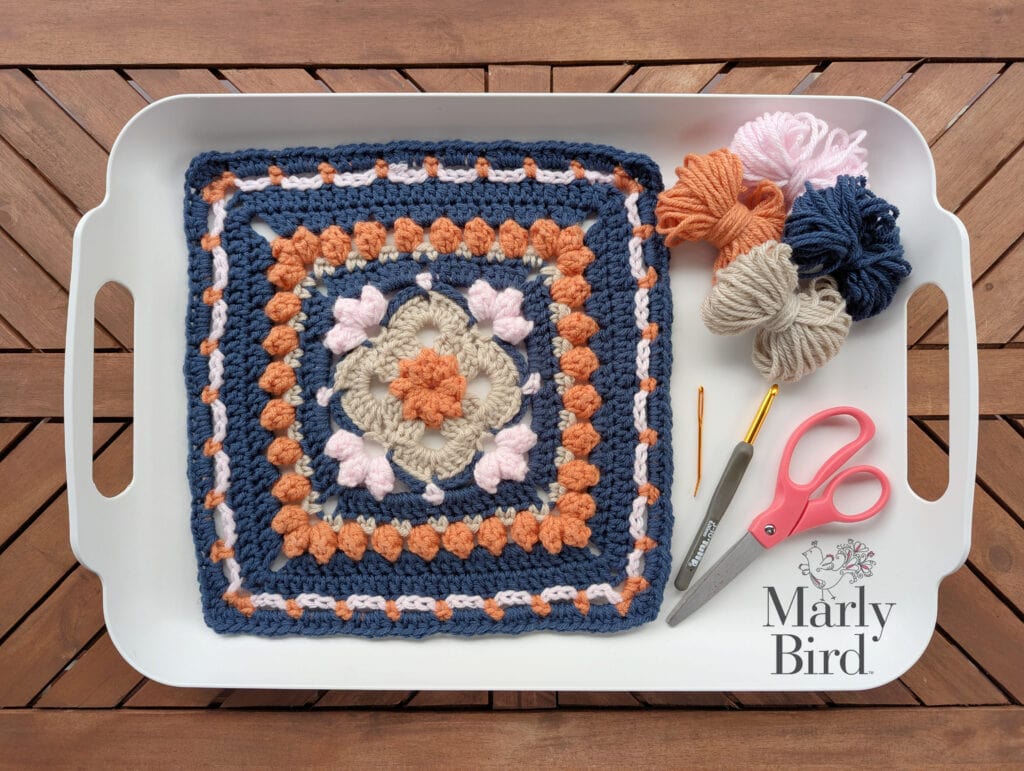
A Sweetcorn Motif crochet block in blue, orange, beige, and pink lies on a white tray beside yarn, crochet hooks, and pink scissors. The Marly Bird logo is in the bottom right corner. -Marly Bird

The Sweetcorn Motif – 12 inch crochet square block

This crochet square block was a joy to design with Robyn. We wanted something that balanced structured rounds of stitches with playful bursts of popcorns for texture. The final square almost looks like little kernels of color bursting out from the center—hence the name Sweetcorn!

  • Skill Level: Intermediate
  • Finished Size: 12” x 12”
  • Special Stitches: Popcorn, stacked dc, standing dc
  • Yarn Used: Caron One Pound (Faded Brick, Cape Cod Blue, Pink, and Dove)
  • Hook Size: J/10 (6.0 mm)

Robyn created a stitch diagram and we both made samples to show off how versatile this block can be with color. You can follow the written instructions, use the diagram, or even join along with the video tutorial.

A YouTube video thumbnail featuring text that reads "Free Crochet Block" and "Moogly Crochet-Along Pattern," with images of colorful Sweetcorn Motif crochet block squares in blue, peach, and cream tones in the background. -Marly Bird

Past Moogly Blocks by Marly Bird

Over the years I’ve had so much fun contributing squares to the Moogly CAL. If you’d like to stitch more of my designs, check out these past blocks:

  • Crochet Mosaic Tile Block (Moogly CAL 2023)
  • Larkwood Crochet Block (Moogly CAL 2024)
  • Marly Bird Crochet Mosaic Block (Moogly CAL 2022)
  • Marly Bird Crochet Block (Moogly CAL 2021)
  • Mosaic Crochet Block (Moogly CAL 2020)
  • Diamond Mosaic Crochet Square (Block #15 — 2019 CAL)
  • Faux Cable Square (Block #17 — 2018 CAL)

Two women smiling at the camera, one with curly hair and the other wearing glasses, both sporting festive headbands with glittery designs from quickie patterns. -Marly Bird

Moogly x Marly Bird: A Longtime Collaboration

This isn’t my first time teaming up with Tamara of Moogly—and it certainly won’t be the last! We’ve worked together on multiple crochet events, including:

  • Past Moogly CAL blocks (see the list above).
  • Stash Busting Quickies Vol. 1, 2, and 3 – fun round-ups of quick and practical crochet patterns.
  • Collaborations from our days at RedHeart.com, where we both created patterns and tutorials for yarn lovers everywhere.

I always love working with Tamara, and adding Robyn into the mix makes this collaboration extra sweet.


Join our Newsletter

Get Free Crochet & Knitting
Pattern Links & Coupons!

Hand-drawn bird with curling, detailed feathers and pink accents; cheerful pose showcases fine line and texture work.
>> Become An Insider <<
A woman with glasses and curly hair models a colorful crocheted scarf, showing textured stitches and vibrant yarn.

Why You’ll Love This Block

The Sweetcorn Motif is perfect for adventurous crocheters who want to:

  • Practice popcorn stitches for dimensional texture.
  • Add bold pops of color to a blanket project.
  • Explore different techniques like stacked and standing double crochets.
  • Create a statement piece that can stand alone as a pillow cover, wall hanging, or centerpiece square.

If you’ve been following along with the CAL, this block will fit seamlessly into your blanket. And if you’re new—don’t worry! You can jump in at any point.


Two crochet pillows with colorful, geometric granny square and Sweetcorn Motif crochet block patterns rest on a blue sofa in a cozy living room with a red rug and blurred shelves in the background. -Marly Bird

Ad-Free PDF

Looking for the Ad-Free PDF of the Sweetcorn Pillows? You can find that here in our shop.


Ready to Crochet The Square?

🧶 Below you will find the full pattern for the crochet square
📺 Watch the video tutorial to follow step by step.
✨ Then come back here to share your progress with me on social media using #MarlyBird and #MooglyCAL.


A Sweetcorn Motif crochet block in blue, orange, beige, and pink is displayed on a white tray with matching yarn bundles. Close-up shots and a pillow featuring the block are shown. Text reads: "Free Crochet Block Moogly Crochet-Along Pattern. -Marly Bird

Sweetcorn Motif – MOOGLY 2025 CROCHET BLOCK

Designed by Robyn Chachula

SKILL LEVEL

Intermediate

MEASUREMENTS

Finished Measurements

Block is 12” [30.5 cm] wide by 12” [30.5 cm] long. 

Gauge 

Motif = 12” [30.5 cm] x 12” [30.5 cm]; use any size hook to obtain the gauge. 

MATERIALS

Yarn 

Caron, One Pound (100% acrylic, 812 yds / 742 m, 16 oz/ 454 g, CYCA# 4 worsted)  Best place to get this yarn is directly from Yarnspirations.

Color A: Faded Brick

Color B: Dove

Color C: Cape Cod Blue

Color D: Pink

Crochet Hook

Size J/10 [6.0 mm]

Notions 

Tapestry needle

ABBREVIATIONS

  • Ch – Chain(s) 
  • Dc – Double Crochet 
  • Hdc – Half Double Crochet
  • MC – Main Color
  • RS – Right Side 
  • Sc – Single Crochet
  • Sl st – Slip Stitch
  • Sp(s) – Space(s) 
  • St(s) – Stitch(es)
  • WS – Wrong Side

SPECIAL STITCHES 

⭐️ Magic loop or Adjustable Ring: Wrap yarn around your fingers, pull up a loop through the ring created, chain 1.  Follow directions for the number of stitches for round 1.  Pull on the yarn end to close the ring. 

⭐️Popcorn: Work 4 dc in st indicated, drop loop from hook, insert hook from front to back in top of first dc worked, insert hook in dropped lp and draw through.

⭐️Beginning Popcorn: Ch 3, work 3 dc in st indicated, drop loop from hook, insert hook from front to back in top of beginning ch, insert hook in dropped lp and draw through.

⭐️ Stacked Double Crochet (Stacked Dc): (Do not ch 1 prior to making the first sc) Sc in first stitch, insert hook in between two legs of the base, yarn over and pull up a loop, yarn over and draw through 2 loops on hook.

⭐️ Standing Double Crochet (Standing Dc):With slip knot on hook, yarn over hook, insert hook into stitch or space, yarn over hook and pull up a loop, [yarn over hook, draw through two loops on hook] twice.

CROCHET STITCH DIAGRAM

Crochet stitch diagram for a Sweetcorn Motif crochet block with popcorn and stacked dc stitches, showing rounds of various crochet symbols and a legend for ch, sl st, sc, hdc, dc, stacked dc, and popcorn stitches. -Marly Bird

NOTES

  • Weave in ends as you crochet each round.  It will be very overwhelming if you wait until you are ready to block the motifs.
  • When changing color in a new round, you can change your color with 2 loops left on your hook of your previous color then start the first stitch of the round.  Or you can join the new color with a standing sc or dc. 

VIDEO TUTORIAL

  • How to Read Crochet Diagrams >> Click Here for Video Help <<
  • Weave in Ends >> Click Here for Video Help <<
  • Stacked Double Crochet >> Click Here for Video Help <<
  • Standing Double Crochet >> Click Here for Video Help <<
  • Sweetcorn Motif Video Tutorial >> Click Here for Video Help <<

Crocheted square with a floral motif, featuring navy, peach, gray, and white colors, in textured stitches.

Moogly CAL 2025 || Sweetcorn Motif Crochet Block Instructions

Make an adjustable ring with color A, 

Round 1 (RS): Beginning popcorn in ring, ch 2, *popcorn in ring, ch 2; repeat from * 6 more times, sl st to first st, close ring, change color to B, fasten off previous color, do not turn- 8 popcorn + 8 ch-2 sps. 

Round 2: (Stacked dc, 2 dc) in first ch-2 sp, *ch 5, [3 dc in next ch-2 sp] twice; repeat from * twice more, ch 5, 3 dc in last ch-2 sp, sl st to first st, do not turn – 24 dc + 4 ch-5 sps. 

Round 3: Ch 1, sc between first and last st, *(5 dc, ch 2, 5 dc) in next ch-5 sp, skip 3 dc**, sc in space before next dc; repeat from * around ending at **, sl st to first sc, change color to C, fasten off previous color, do not turn- 40 dc + 4 sc + 4 ch-2 sps. 

Round 4: *Sl st to next dc, ch 4, sl st to next ch-2 sp, ch 4, skip next 4 dc, sl st to next dc**, ch 3, skip next sc; repeat from * around ending at **, ch 1, dc in first st (counts as ch-3 sp) , change color to D, fasten off previous color, , do not turn – 8 ch-4 sps + 4 ch-3 sps. 

Round 5: (Beginning popcorn, ch 3, popcorn) around post of dc, *ch 4, sc in next sl st, ch 4**, ([popcorn, ch 3] twice, popcorn) in next ch-3 sp; repeat from * around ending at **, popcorn in first ch-sp, ch 3, sl st to first st, change color to C, fasten off previous color, do not turn – 12 popcorn + 8 ch-3 sps + 8 ch-4 sps. 

A crocheted square featuring blue, orange, beige, and light pink yarn in a geometric floral pattern, inspired by the Sweetcorn Motif crochet block, with the "Marly Bird" logo in the bottom right corner. -Marly Bird

Round 6: Stacked dc in first popcorn, *3 dc in next ch-3 sp, 5 dc in next 2 ch-4 sps, 3 dc in next ch-3 sp**, (dc, ch 3, dc) in next popcorn; repeat from * around ending at **, dc in first popcorn, ch 3, sl st to first st, fasten off- 72 dc + 4 ch-3 sps.

Round 7: Join color B with a sc in the first st of previous round (same st as join), *[ch 1, skip next dc, sc in next 2 dc] 5 times, ch 1, skip next dc, sc in next dc, (sc, ch 3, sc) in corner ch-3 sp**, sc in next dc; repeat from * around ending at **, fasten off – 56 sc + 24 ch-1 sps + 4 ch-3 sps. 

Round 8: Join color A with sl st to first ch-1 sp, beginning popcorn in same ch-1 sp, *[ch 2, popcorn in next ch-1 sp] repeat to corner ch-3 sp, ch 2, ([popcorn, ch 2] twice, popcorn) in corner ch-3 sp; repeat from * around, ch 2, sl st to top of beginning popcorn, fasten off- 36 popcorn + 36 ch-2 sps.

Round 9: Join color C with stacked dc (or standing dc) in first ch-2 sp on side of motif, 2 dc in same ch-2 sp, *3 dc in each ch-2 sp to corner center popcorn, ch 2; repeat from * around to last ch-2 sp, 3 dc in last ch-2 sp, sl st to first dc – 108 dc + 4 ch-2 sps. 

Round 10: Stacked dc in first dc, *dc in each dc to corner, (dc, ch 2 dc) in corner ch-2 sp; repeat from * around to last 3 dc, dc in last 3 dc, sl st to first dc to join, fasten off – 116 dc + 4 ch-2 sps. 

Round 11: Join color D to first dc after corner ch-sp on previous round with sl st, sl st in next dc, *[ch 1, skip next dc, sl st in next 3 dc] repeat across to last 3 dc before corner ch-2 sp, ch 1, skip next dc, sl st in next 2 dc, ch 3, skip corner ch-2 sp**, sl st in next 2 dc; repeat from * around ending at **, sl st to first sl st, fasten off- 28 ch-1 sps + 4 ch-3 sps + 88 sl st (not including join).

Round 12: Join color A with sc in first ch-1 sp, *[ch 3, skip sl sts, sc in next ch-1 sp] repeat across to corner ch-sp, ch 3, 3 sc in corner ch-3 sp; repeat from * around, ch 3, sl st to first sc to join, fasten off – 24 ch-3 sps + 40 sc. 

Round 13: Join color C with sl st in first ch-3 sp of previous round, ch 2 (counts as hdc), 3 hdc in same ch-3 sp, *4 hdc in each ch-3 sp across to corner, 5 hdc in center sc of corner; repeat from * around, sl st to top of beginning ch to join, fasten off and weave in all ends- 148 hdc. 

A multicolored crocheted square in blue, orange, beige, and pink—featuring the Sweetcorn Motif crochet block—with yarn balls and hooks nearby. Text reads: "Free Crochet Block – Moogly Crochet-Along Pattern." Wooden surface background. -Marly Bird

The Moogly CAL is one of my favorite annual traditions because it brings the crochet community together through creativity, learning, and sharing. Every square is a chance to try something new, and I hope the Sweetcorn Motif inspires you to play with color and texture in a fun, approachable way. Whether you make one block or a whole blanket, you’re adding a little piece of handmade beauty to the world—and that’s always worth celebrating.


Two crocheted throw pillows, including a Sweetcorn Motif crochet block design in orange, blue, and cream, rest on a teal chair. A small wooden table with a dark floral arrangement adds charm to this cozy, well-decorated living space. -Marly Bird

SWEETCORN MOTIF PILLOWS

SKILL LEVEL

Intermediate

MEASUREMENTS

Finished Measurements

Pillow is 14” [350.5 cm] wide by 14” [35.5 cm] long. 

Gauge 

Front Panel = 14” [35.5 cm] x 14” [35.5 cm]; use any size hook to obtain the gauge. 

MATERIALS

Yarn 

Caron, One Pound (100% acrylic, 812 yds / 742 m, 16 oz/ 454 g, CYCA# 4 worsted), 1 skein each: 

Color A: Faded Brick

Color B: Dove

Color C: Cape Cod Blue

Color D: Pink

Hook

Size J/10 [6.0 mm]

Notions 

Tapestry needle

1.5” [3.8 cm] long wooden toggle

14” [35.5 cm] square pillow form

ABBREVIATIONS

Ch – Chain(s) 

Dc – Double Crochet 

Hdc – Half Double Crochet

MC – Main Color

RS – Right Side 

Sc – Single Crochet

Sl st – Slip Stitch

Sp(s) – Space(s) 

St(s) – Stitch(es)

WS – Wrong Side

SPECIAL STITCHES 

⭐️ Magic loop or Adjustable Ring: Wrap yarn around your fingers, pull up a loop through the ring created, chain 1.  Follow directions for the number of stitches for round 1.  Pull on the yarn end to close the ring. 

⭐️Popcorn: Work 4 dc in st indicated, drop loop from hook, insert hook from front to back in top of first dc worked, insert hook in dropped lp and draw through.

⭐️Beginning Popcorn: Ch 3, work 3 dc in st indicated, drop loop from hook, insert hook from front to back in top of beginning ch, insert hook in dropped lp and draw through.

⭐️Reverse Single Crochet (reverse sc): Also known as a Crab Stitch; working from left to right, insert hook from front to back in next stitch to the right,  yarn over and pull up a loop, yarn over and draw through 2 loops on hook.

⭐️ Stacked Double Crochet (Stacked Dc): (Do not ch 1 prior to making the first sc) Sc in first stitch, insert hook in between two legs of the base, yarn over and pull up a loop, yarn over and draw through 2 loops on hook.

⭐️ Standing Double Crochet (Standing Dc):With slip knot on hook, yarn over hook, insert hook into stitch or space, yarn over hook and pull up a loop, [yarn over hook, draw through two loops on hook] twice.

NOTES

  • Weave in ends as you crochet each round.  It will be very overwhelming if you wait until you are ready to block the motifs.
  • When changing color in a new round, you can change your color with 2 loops left on your hook of your previous color then start the first stitch of the round.  Or you can join the new color with a standing sc or dc. 
  • Second Colorway uses the following order of colors:
    • Color A: Cape Cod Blue
    • Color B: Pink
    • Color C: Dove
    • Color D: Faded Brick

VIDEO TUTORIAL

  • How to Read Crochet Diagrams >> Click Here for Video Help <<
  • Weave in Ends >> Click Here for Video Help <<
  • Stacked Double Crochet >> Click Here for Video Help <<
  • Standing Double Crochet >> Click Here for Video Help <<
  • Sweetcorn Motif Video Tutorial >> Click Here for Video Help <<

STITCH DIAGRAM

SWEETCORN CROCHET PILLOWS PATTERN

A smiling person with glasses holds two colorful crocheted pillows featuring floral and Sweetcorn Motif crochet block patterns in blue, orange, cream, and pink tones, standing in a cozy, well-lit room. -Marly Bird

FRONT PANEL 

Make an adjustable ring with color A, 

Round 1 (RS): Beginning popcorn in ring, ch 2, *popcorn in ring, ch 2; repeat from * 6 more times, sl st to first st, close ring, change color to B, fasten off previous color, do not turn- 8 popcorn + 8 ch-2 sps. 

Round 2: (Stacked dc, 2 dc) in first ch-2 sp, *ch 5, [3 dc in next ch-2 sp] twice; repeat from * twice more, ch 5, 3 dc in last ch-2 sp, sl st to first st, do not turn – 24 dc + 4 ch-5 sps. 

Round 3: Ch 1, sc between first and last st, *(5 dc, ch 2, 5 dc) in next ch-5 sp, skip 3 dc**, sc in space before next dc; repeat from * around ending at **, sl st to first sc, change color to C, fasten off previous color, do not turn- 40 dc + 4 sc + 4 ch-2 sps. 

Round 4: *Sl st to next dc, ch 4, sl st to next ch-2 sp, ch 4, skip next 4 dc, sl st to next dc**, ch 3, skip next sc; repeat from * around ending at **, ch 1, dc in first st (counts as ch-3 sp) , change color to D, fasten off previous color, , do not turn – 8 ch-4 sps + 4 ch-3 sps. 

Round 5: (Beginning popcorn, ch 3, popcorn) around post of dc, *ch 4, sc in next sl st, ch 4**, ([popcorn, ch 3] twice, popcorn) in next ch-3 sp; repeat from * around ending at **, popcorn in first ch-sp, ch 3, sl st to first st, change color to C, fasten off previous color, do not turn – 12 popcorn + 8 ch-3 sps + 8 ch-4 sps. 

Round 6: Stacked dc in first popcorn, *3 dc in next ch-3 sp, 5 dc in next 2 ch-4 sps, 3 dc in next ch-3 sp**, (dc, ch 3, dc) in next popcorn; repeat from * around ending at **, dc in first popcorn, ch 3, sl st to first st, fasten off- 72 dc + 4 ch-3 sps.

Round 7: Join color B with a sc in the first st of previous round (same st as join), *[ch 1, skip next dc, sc in next 2 dc] 5 times, ch 1, skip next dc, sc in next dc, (sc, ch 3, sc) in corner ch-3 sp**, sc in next dc; repeat from * around ending at **, fasten off – 56 sc + 24 ch-1 sps + 4 ch-3 sps. 

Round 8: Join color A with sl st to first ch-1 sp, beginning popcorn in same ch-1 sp, *[ch 2, popcorn in next ch-1 sp] repeat to corner ch-3 sp, ch 2, ([popcorn, ch 2] twice, popcorn) in corner ch-3 sp; repeat from * around, ch 2, sl st to top of beginning popcorn, fasten off- 36 popcorn + 36 ch-2 sps.

Round 9: Join color C with stacked dc (or standing dc) in first ch-2 sp on side of motif, 2 dc in same ch-2 sp, *3 dc in each ch-2 sp to corner center popcorn, ch 2; repeat from * around to last ch-2 sp, 3 dc in last ch-2 sp, sl st to first dc – 108 dc + 4 ch-2 sps. 

Round 10: Stacked dc in first dc, *dc in each dc to corner, (dc, ch 2 dc) in corner ch-2 sp; repeat from * around to last 3 dc, dc in last 3 dc, sl st to first dc to join, fasten off – 116 dc + 4 ch-2 sps. 

Round 11: Join color D to first dc after corner ch-sp on previous round with sl st, sl st in next dc, *[ch 1, skip next dc, sl st in next 3 dc] repeat across to last 3 dc before corner ch-2 sp, ch 1, skip next dc, sl st in next 2 dc, ch 3, skip corner ch-2 sp**, sl st in next 2 dc; repeat from * around ending at **, sl st to first sl st, fasten off- 28 ch-1 sps + 4 ch-3 sps + 88 sl st (not including join).

Round 12: Join color A with sc in first ch-1 sp, *[ch 3, skip sl sts, sc in next ch-1 sp] repeat across to corner ch-sp, ch 3, 3 sc in corner ch-3 sp; repeat from * around, ch 3, sl st to first sc to join, fasten off – 24 ch-3 sps + 40 sc. 

Round 13: Join color C with sl st in first ch-3 sp of previous round, ch 3 (counts as dc), 3 dc in same ch-3 sp, *4 dc in each ch-3 sp across to corner, 5 dc in center sc of corner, place marker in center dc; repeat from * around, sl st to top of beginning ch to join – 148 dc. 

Round 14: Stacked dc in top of beginning ch, *dc in each dc to marker, 5 dc in marked dc; repeat from * around to last dc, dc in last dc, sl st to stacked dc, fasten off and weave in ends – 164 dc. 

BACK PANEL 

Make 2

Ch 42 with color C. 

Row 1: Dc in 4th ch from hook (first 3 ch count as a dc), dc in each ch across, turn – 40 dc. 

Row 2: Ch 1, sc in each dc across to tch, sc in top of tch, turn.

Row 3: Stacked dc in first sc, dc in each sc across, turn. 

Row 4: Ch 1, sc in each dc across, turn. 

Repeat Rows 3-4 seven more times

Round 19: Ch 1, sc in each sc across to last, 3 sc in last sc, sc evenly down side of panel, 3 sc in first ch of foundation, sc in each ch across to last, 3 sc in last ch, sc evenly up side of panel, 2 sc in first sc, sl st to first sc, fasten off, weave in ends. 

FINISHING

Pin front and one back panel together with WS facing matching 2 corners.  Pin second back panel to front panel matching opposite 2 corners.  

Join color C with sc in any sc along the side of the pillow working through both the front and back panel at the same time. 

Seaming Round 1: *Sc in each st across side of pillow (working through all the panels at once) to corner, 2 sc in corner st; repeat from * around, sc in each st to beginning, sl st to first sc, do not turn.

Seaming Round 2: Ch 1, reverse sc in each sc around, fasten off, weave in ends. 

Sew toggle to the inside back panel in the center.  Place pillow form in pillow.  Button toggle through center sts of the outside back panel.

A teal chair displays three pillows: one pink, one teal with a wooden button, and one crocheted in a Sweetcorn Motif crochet block with cream, orange, pink, and teal. A cozy living room setup is visible in the background. -Marly Bird

❤️ Your BiCrafty Bestie,
Marly Bird
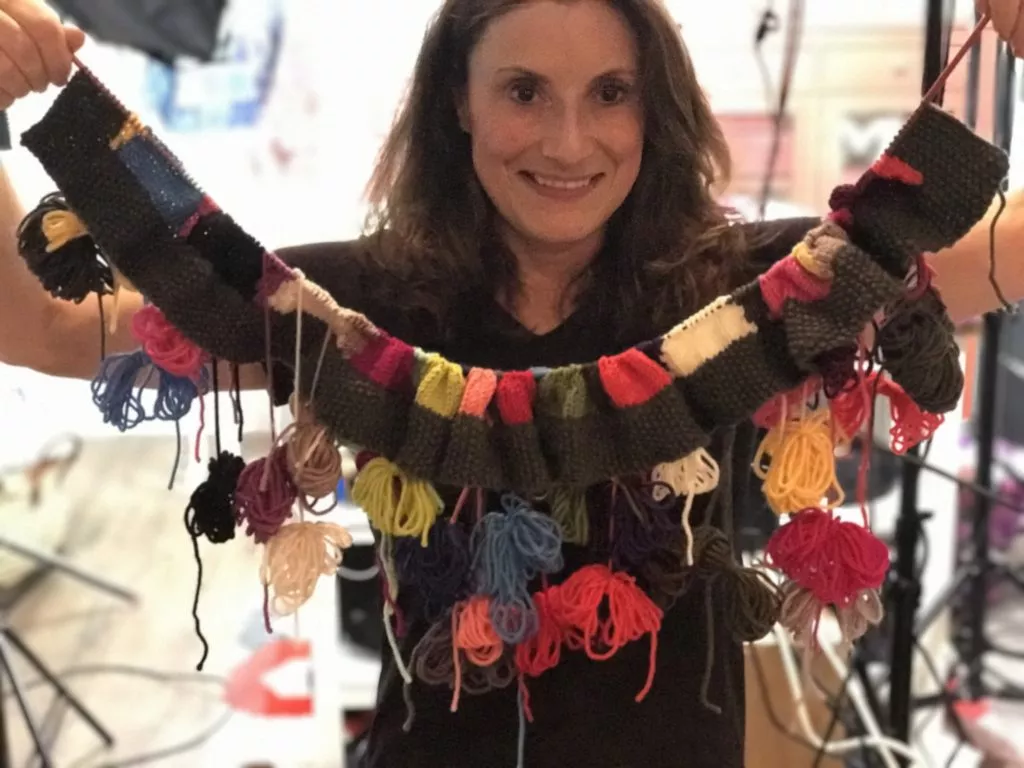
A cartoon avatar of a person with glasses and a brown bun smiles warmly. Their green shirt and black jacket add a stylish touch, while colorful hearts surround them like loving temperature blankets, stitching together an aura of love and positivity. -Marly Bird

Frequently Asked Questions

What is the Moogly CAL?

Oh, the Moogly CAL is such a fun annual event hosted by Tamara over at Moogly's Blog! Every year, designers create gorgeous 12″ square crochet block patterns that are all free. It's a whole year of new projects and by the end, you can have a beautiful blanket made from all these unique squares!

What makes the Sweetcorn Motif block special?

Honestly, this one is extra special because Robyn Chachula and I designed it together! We wanted to blend bold texture with fun pops of color, and the popcorn stitches really make it look like little kernels bursting out… hence the name Sweetcorn! It's a 12″ square and looks amazing in a blanket or even as a standalone pillow.

What skill level is this Sweetcorn Motif block?

Yes! This block is listed as Intermediate. It uses some special stitches like popcorn, stacked dc, and standing dc, which add some lovely texture and structure to the piece. But don't worry, there's a video tutorial to help you through!

What yarn and hook size are needed for the Sweetcorn Motif?

For this project, you'll want to grab some Caron One Pound yarn in four colors: Faded Brick, Dove, Cape Cod Blue, and Pink. And the hook size we used is a J/10, which is 6.0 mm. It works up into a lovely 12″ square!

Can I make just one Sweetcorn Motif block, or do I need to make a whole blanket?

Absolutely, you can make just one! While it's designed as part of the Moogly CAL to create a big blanket, it's also perfect as a stand-alone motif. You could easily turn it into a cute pillow cover, a wall hanging, or a centerpiece square. Have fun with it!

Filed Under: Crochet, Free Patterns, Make-Alongs, Our Free Patterns, Pattern

Free Corner-to-Corner Crochet Baby Blanket Pattern…

July 2, 2025 By Marly Bird 1 Comment

Looking for a corner-to-corner crochet baby blanket pattern that’s as charming as it is cuddly? You’re going to love the Ballet Slippers C2C Blanket—a graceful and cozy creation designed to celebrate the elegance of dance while keeping your loved ones warm and snuggly. 💕

Whether you're a seasoned crocheter or just diving into your first graphgan project, this C2C crochet blanket is sure to become a cherished favorite.

Looking for more C2C blanket patterns? You might like these: Day Dream Blanket, 51 Corner to Corner Patterns,

A crochet blanket featuring a corner to corner crochet design of pink and red golf clubs and a golf bag, displayed on a table with a tray of wooden beads and a vase of pink and beige flowers nearby. Free pattern available. -Marly Bird

Affiliate Disclosure: This post contains affiliate links. To learn more please visit my privacy policy here💖


Ballet Slippers C2C Blanket: A Whimsical and Elegant Crochet Design

This beautifully designed blanket features a stunning pair of ballet slippers at its heart—an ode to the timeless beauty of ballet. Made using the corner-to-corner crochet technique, the blanket has clean lines, a visually captivating texture, and a soft drape that’s perfect for babies, toddlers, or even the grown-up ballet lovers in your life!

🎀 Why You'll Love This Blanket Pattern:

  • Features a charming ballet slippers motif
  • Made with C2C crochet for a modern, pixel-style look
  • Plush texture perfect for snuggling
  • Versatile size makes it great as a play mat, stroller blanket, or bed topper

What is Corner-to-Corner Crochet (C2C)?

If you’ve never tried corner-to-corner crochet, you're in for a treat! This popular technique works diagonally from one corner of the project to the opposite corner, creating a graph-like canvas perfect for image-based designs like this one.

🧶 With C2C:

  • Each “pixel” is a little block of stitches
  • It’s easy to follow a chart and watch your image come to life
  • You can create stunning visuals with minimal fuss
  • The final fabric has a lovely weight and squish factor ✅

👉 New to C2C? No worries! I’ve got you covered with a step-by-step tutorial:
Learn How to Corner-to-Corner Crochet (C2C) in this beginner-friendly BiCrafty Bootcamp lesson!
This lesson breaks it all down with clear instructions and a video to help you master the basics quickly.

Colorful planned pooling C2C blanket featuring zigzag patterns with bright hues on a black background.

✨ Want to level up your C2C skills?

Did you know you can use corner-to-corner crochet for planned pooling? That’s right! You can create gorgeous colorwork effects like chevrons just by using variegated yarn strategically.

Check out my free pattern and tutorial here:
Corner-to-Corner Planned Pooling Chevron Crochet Throw Blanket – Free Pattern

Whether you're new to C2C or ready to explore advanced tricks, there’s so much creative potential in this technique!


Yarn Details and Suggested Substitutes

The original sample uses Blanket yarn by Yarnspirations—a super bulky, ultra-soft polyester yarn that’s machine washable and perfect for babies.

🧵 Yarn Used:

  • Brand: Bernat Blanket
  • Weight: Super Bulky (6)
  • Fiber: 100% Polyester
  • Care: Machine wash and dry

🧶 Suggested Yarn Substitutes:
If you want to mix things up or shop your stash, here are a few great alternatives:

  • Premier Yarns Parfait Chunky
  • Sweet Snuggles™ Yarn by Loops & Threads
  • Hobbii Honey Bunny Big

When substituting, make sure to check your gauge so your final blanket still lands at a snuggly, usable size!


Tips for Success with Your Ballet Slippers C2C Blanket

👶 Choose Your Color Palette Wisely – Soft pinks and pastels enhance the ballet theme, but don’t be afraid to go bold with jewel tones or neutrals for a more modern twist.

📐 Use a row counter or printable C2C chart to stay on track. This is especially helpful for image-based projects like this one!

🧼 Don’t forget to block it! Light steam blocking will help even out your stitches and make the slipper motif pop.

Join our Newsletter

Get Free Crochet & Knitting
Pattern Links & Coupons!

Hand-drawn bird with curling, detailed feathers and pink accents; cheerful pose showcases fine line and texture work.
>> Become An Insider <<
A woman with glasses and curly hair models a colorful crocheted scarf, showing textured stitches and vibrant yarn.

Get the Pattern + PDF Options

🧾 This free C2C crochet baby blanket pattern is available right here on the blog! Simply scroll down to start crocheting today.

💾 Want to skip the ads and take your pattern on the go? You can purchase the ad-free, printable PDF version right here on Ravelry: https://www.ravelry.com/patterns/library/ballet-slippers-c2c-blanket

Ravelry
A crochet blanket featuring a corner to corner design with ballet slippers in shades of burgundy, pink, and gray. The text reads "Ballet Slippers" and "Corner to Corner Blanket." A small yarn and hook logo is at the bottom left. -Marly Bird

Free Corner to Corner Crochet Baby Blanket Pattern with Ballet Slippers – Details

Designed by Marly Bird and Robyn Chachula

SKILL LEVEL

Adventurous Beginner

MEASUREMENTS

Finished Measurements

Blanket is 52” [132 cm] wide by 62” [157.5 cm] long. 

Gauge 

4 blocks = 5.5” [14 cm]; use any size hook to obtain the gauge. 

MATERIALS

Yarn 

Bernat, Blanket Yarn (100% Polyester, 220 yds / 201 m, 10.5 oz/ 300 g, CYCA# 6 super bulky) 

Color MC: Blush Pink, 6 balls

Color A: Crimson, 2 balls

Color B: Terra Cotta, 2 balls

Color C: Vapor Gray, 2 balls

Hook

Size L/11 (8.0 mm)

Notions 

Tapestry needle, stitch markers

ABBREVIATIONS

Beg – Beginning 

Ch – Chain(s) 

Dc – Double Crochet 

PM – Place Marker

RS – Right Side 

Sl St – Slip Stitch

Sp(s) – Space(s) 

St(s) – Stitch(es)

Tch – Turning Chain

WS – Wrong Side

NOTES

  1. Each box counts as 1 block (ch 3 + 3 dc).
  2. Change color when there are 2 loops left on the hook of the

previous color or when sl st to the next block.

  1. Chart is worked from bottom corner to upper corner on the

diagonal.

  1. Right side “rows” are worked from the right to the left side on

the chart. Wrong side “rows” are worked from the left to right

side on the chart.

VIDEO TUTORIAL

  • Bury Ends >> Click Here for Video Help <<
  • Corner to Corner Tips >> https://youtu.be/rAVwGIoOoXI <<

GROW

To Unlock Exclusive Subscriber Content click the Box below and join for free by simply adding your email and creating a password! If you are having troubles, clear your cache or reset your password or login to the Grow Publisher Portal.

>> Learn More About Grow Here <<

I'm thrilled to share this amazing pattern with you, many patterns on my blog are absolutely free! I kindly request that you don't copy and paste or distribute this pattern. Prefer an ad-free experience? Buy a digital PDF pattern for a small fee from one of my online stores for a seamless crafting journey. 

I appreciate your support and readership. You are the reason I can keep doing what I love and sharing it with others. So, thank you from the bottom of my yarn-loving heart! Disclosure: This post contains affiliate links, meaning I get a commission if you decide to make a purchase through my links at no cost to you.

A smiling woman with glasses and curly hair holds up a handmade quilt featuring pink ballet slippers, made using the Corner to Corner Crochet technique, with ribbons on a white and burgundy background. -Marly Bird

BALLET SLIPPERS CORNER TO CORNER BABY BLANKET FREE PATTERN

DIAGRAMS

⭐️ Crochet Stitch Diagram — Only Available in the ad-free PDF

Pixel art grid of a pink jump rope, ideal as a free pattern for a corner to corner crochet blanket. Handles are shaded in light and dark pink and gray, with a color key at the bottom right labeling shades A, B, C, and MC. Numbered axes included. -Marly Bird
A diamond-shaped grid with labeled blocks, numbered 1 to 6 and color-coded yellow and blue. Arrows show directions for rows: Row 1 (bottom), Row 2 (middle), Row 3 (top), Decreasing Row 1 (left). Perfect for a Ballet Slippers Crochet Blanket free pattern. -Marly Bird

INCREASING ROWS OF BLANKET

Note: Follow the color chart for when to change color. See stitch diagram and basic layout for more information. 

Row 1 (Block 1, RS): With MC, ch 6, dc in 4th ch from hook, dc in last 2 ch.

Row 2 (Block 2, WS): Ch 6, turn, dc in 4th ch from hook, dc in last 2 ch, sl st to top

of beg ch of Block 1.

Row 2 (Block 3, WS): Ch 3, 2 dc in ch-3 sp, dc in last ch.

Row 3 (Block 4, RS): Ch 6, turn, dc in 4th ch from hook, dc in last 2 ch, sl st to top

of beg ch of Block 3.

Row 3 (Block 5, RS): Ch 3, 3 dc in ch-3 sp, sl st to top of beg ch of Block 2.

Row 3 (Block 6, RS): Ch 3, 2 dc in ch-3 sp, dc in last ch.

Repeat Row 3 through Row 34.  Each row will start with a Block 4 and end with a Block 6, with 1 additional Block 5 for each subsequent row.  Use the color chart for when to change color. 

DECREASING EAST SIDE OF BLANKET WHILE INCREASING WEST SIDE

Row 35 (Starting Decrease Block, RS) : Fasten off from previous block and turn, join yarn to top of beg ch of previous block with sl st (also can turn and sl st in each dc of previous block to beg ch), ch 3, 3 dc in ch-3 sp, sl st to top of next block.

Row 35 (Middle Blocks, RS): Ch 3, 3 dc in ch-3 sp, sl st to top of next block. Repeat across the row using the color chart for when to change color until the last block. 

Row 35 (Ending Increase Block, RS): Ch 3, 2 dc in ch-3 sp, dc in last ch.

Row 36 (Starting Increase Block, WS): Ch 6, turn, dc in 4th ch from hook, dc in last 2 ch, sl st to top of next block.

Row 36 (Middle Blocks and Ending Decrease Block, WS): Ch 3, 3 dc in ch-3 sp, sl st to top of next block. Repeat across the row using the color chart for when to change color.

Repeat Rows 35-36 twice and Repeat Row 35 once more

DECREASING ROWS OF BLANKET  

Row 42 (Starting Block, WS) : Fasten off from previous block and turn, join yarn to top of beg ch of previous block with sl st (also can turn and sl st in each dc of previous block to beg ch), ch 3, 3 dc in ch-3 sp, sl st to top of next block.

Row 42 (Middle Blocks and Ending Block, WS): Ch 3, 3 dc in ch-3 sp, sl st to top of next block. Repeat across the row using the color chart for when to change color.

Repeat Row 42 through Row 73.  Row 74 only has a Starting block. 

Fasten off, weave in ends.

A close-up of a crocheted blanket with chunky yarn, featuring a corner to corner crochet pattern in white, burgundy, pink, and gray colors, laid out on a light wooden surface. -Marly Bird

EDGING

Round 1: Join color C to any block on the RS of the blanket with a sl st, ch 3 (counts as dc), 2 dc in same block, * 3 dc (dc group made) in each block to corner, 3 dc in corner; repeat from * around, 3 dc in each block to beginning, sl st to top of beginning ch, fasten off, do not turn – 154 dc groups. 

Round 2: Join color MC with a sc in space between any dc group, *ch 3, sc in space between next  and previous dc group; repeat from * around to beginning, ch 3, sl st to first sc, fasten off, do not turn, place marker in each corner ch-3 sp. 

Round 3: Join color A to any ch-3 sp with sl st, ch 3 (counts as dc), 2 dc in same ch-3 sp, * 3 dc in each ch-3 sp across to corner ch-3 sp, 5 dc in corner ch-3 sp; repeat from * around, 3 dc in each ch-3 sp across to beginning, sl st to top of beginning ch, fasten off. 

Final Thoughts: Let Your Stitches Dance ✨

There’s something truly magical about combining handmade love with a touch of ballet charm. Whether you’re making this for a baby shower, a nursery centerpiece, or a sweet snuggle blanket for your little one, the Ballet Slippers Corner-to-Corner Crochet Blanket is sure to delight.

🩰 So grab your hook, pick your colors, and let your stitches twirl like a prima ballerina—this is one project you’ll be proud to show off and gift with love.

❤️ Your BiCrafty Bestie,
Marly Bird
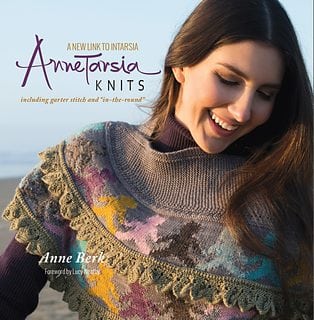
A cartoon avatar of a person with glasses and a brown bun smiles warmly. Their green shirt and black jacket add a stylish touch, while colorful hearts surround them like loving temperature blankets, stitching together an aura of love and positivity. -Marly Bird

Frequently Asked Questions

What makes the Ballet Slippers baby blanket special?

This is a C2C (corner-to-corner) baby blanket with a charming ballet slipper motif worked into the graphghan design! The corner-to-corner construction creates that distinctive diagonal pixel art look, and the ballet slipper design makes it a beautiful, unique gift for dance-loving families or anyone who wants something more distinctive than a plain blanket. It's a heartfelt handmade piece that combines the satisfying C2C technique with a sweet, recognizable motif.

Do I need to know how to read a C2C chart to make this blanket?

Yes! This blanket is worked from a color chart where each square represents one C2C block. You'll need to understand basic C2C construction (increasing to the center, then decreasing) and how to follow the color chart to place the ballet slipper motif correctly. Marly has a BiCrafty Bootcamp lesson on C2C crochet on the blog if you need to learn the technique first. The pattern itself will walk you through the specific row-by-row instructions for the blanket, but having basic C2C familiarity first makes the experience much smoother.

What colors are used for the Ballet Slippers blanket?

Check the pattern for the specific color recommendations! Classic ballet slippers come in soft pink, blush, or champagne tones… so the motif likely uses those shades against a contrasting background. You can absolutely substitute colors to match a nursery theme, team colors, or personal preference. The slipper motif will be most recognizable if you choose a good contrast between the slipper color and the background color. Soft pastel combinations work beautifully for baby gifts.

What size does this blanket come in?

C2C blankets are naturally adjustable based on how many blocks you work! The standard baby blanket size (around 36 to 40 inches square) is typically the target for these patterns. The graphghan motif is designed to fit within a specific block count that creates the right proportions… check the pattern for the recommended final dimensions and block count. To make the blanket larger, you'd need to adjust the borders or add plain blocks around the motif, and potentially adjust the motif placement on the chart.

What yarn is best for a C2C baby blanket?

Machine washable is essential for anything going to a baby! Worsted weight acrylic in the colors you want is the most practical choice… soft, durable, affordable, and perfectly suited to C2C construction. Caron Simply Soft, Red Heart Soft, or Lion Brand Baby Soft are popular choices for soft, washable baby blankets. Make sure your two (or more) colors are from the same weight category so all blocks are the same size. Buying from the same dye lot for each color ensures color consistency throughout the blanket.

Filed Under: Crochet, Free Patterns, Marly Bird Premium Patterns, Our Free Patterns, Pattern, Uncategorized
Day Dream Blanket – Beginner Corner to Corner Crochet…

December 11, 2024 By Marly Bird 1 Comment
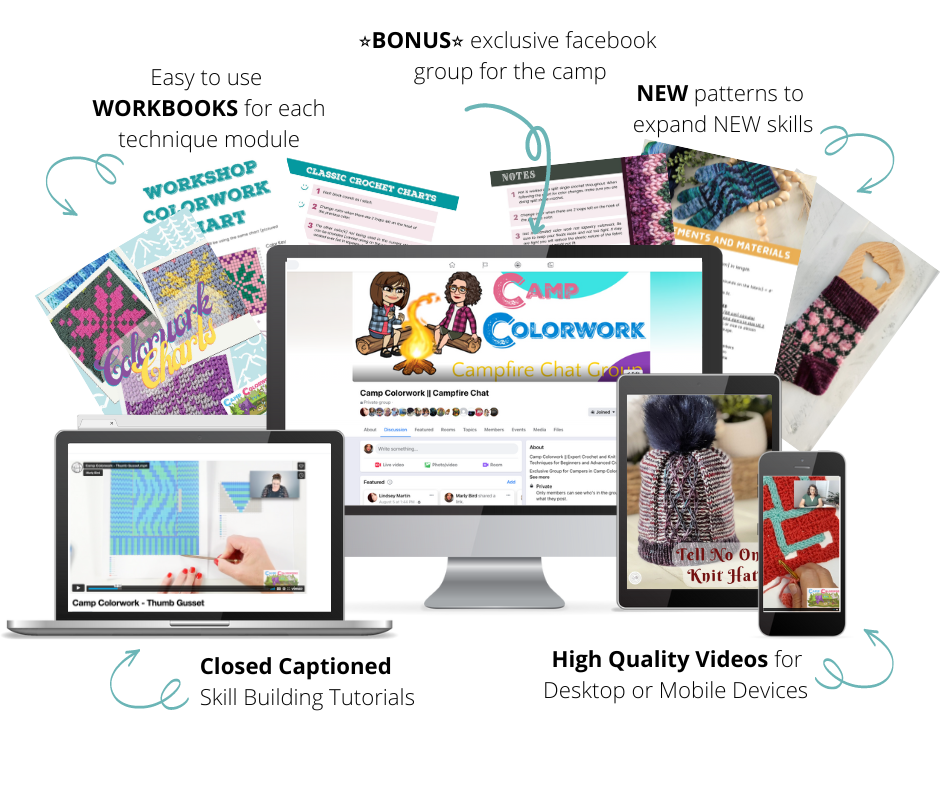

We're talking all things color here at Marly Bird right now. After all, it's been a year since we launched Camp Colorwork, and it's STILL the most comprehensive master course you'll find online for knit and crochet colorwork education. One thing (among MANY others) we cover is how to use grid color charts for both knitting and crocheting. An awesome and addictive technique we teach is C2C crochet. This reminded me of my Chic Sheep Day Dream Blanket. It's a free pattern for a Beginner Corner to Corner Crochet Blanket.
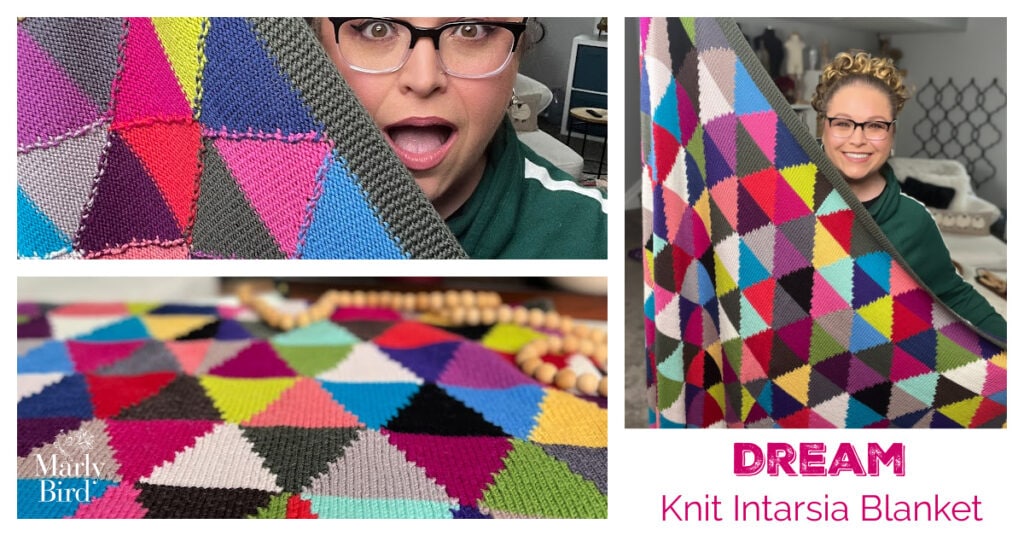
Give it a try now – let's play with colorful yarns, hooks, charts, and C2C!

Chic Sheep Day Dream Blanket in a rainbow of colors | C2C Crochet blanket | FREE Beginner Corner To Corner Crochet Blanket - Marly Bird

*This post contains affiliate links. By clicking on one of these links and making a purchase a portion will go to the blog. The price you pay will not change and the small commission I receive helps me to keep brining you free content and giveaways on the blog. Thank you for your continued support.*

Chic Sheep by Marly Bird™ and Other Yarn Options

Having my own yarn line was one of my biggest dreams come true. I was more than elated when that dream became a reality. Of course, I wanted to make your crochet dreams come true too with this beautiful beginner corner-to-corner crochet blanket. What I loved most was that you could use all two dozen colors of Chic Sheep in this blanket if you wanted to!

Chic Sheep Yarn by Marly Bird. Model wearing crochet sweater and floppy hat in front of blue house. 4 colors of Chic Sheep Yarn light grey, red, turquoise, cerise.

Chic Sheep by Marly Bird™ is 100% Merino Wool. This means that it is machine washable and dryer safe! Not only is it easy to maintain but it is an absolute dream to use in accessories and garments. Having this yearn snuggled up against your skin feels so good. Using this yarn to make a blanket was a no-brainer.

Unfortunately, Chic Sheep was discontinued. So, if you can't get your hands on any, then you might need an alternative. Some perfect yarn substitutions we recommend include:

  • Swish Worsted
  • Heatherly Worsted
  • Muse Hand Painted
  • Twill

Heatherly Worsted is an acrylic/wool blend. The rest are all superwash merino wool. Any of these are great options for the blanket below.

Note: You can use as many or as few colors as you'd like with this pattern. However, the more the better, in our opinion!

FREE Beginner Corner to Corner Crochet Blanket (C2C) Pattern

This free beginner corner-to-corner crochet blanket pattern is worked on the diagonal – hence the corner-to-corner technique. If you haven't worked on a corner-to-corner crochet blanket before, I have the crochet video tutorials to help you get started. And, of course, you can join Camp Colorwork for in-depth, lifelong learning along with many other crochet and knit color techniques.

Many of the corner-to-corner crochet patterns that you find will be done with double crochet. While this is a fine way of working the technique, I always prefer to work in a half double crochet. I feel that this tightens up the stitch and keeps a solid block. The video tutorials below will show you how to work the C2C technique using half double crochet stitches BUT the technique is EXACTLY the same if you are using double crochet stitches.

Learn C2C Crochet

You can learn the basics of the corner-to-corner technique with my FREE Snowflake Blanket C2C tutorials and the following video tutorials:

  • Crochet Corner to Corner Square in Half Double Crochet
  • How to Crochet Half Double Crochet Corner to Corner Rectangle
  • Crochet Corner to Corner Snowflake Blanket

Warning! Using 24 different colors there will be MANY yarn ends to weave in; you may want to weave some in as you go. I promise this stunning crochet blanket as a reward will be worth it!

Chic Sheep Day Dream Blanket  - 5 images showing a rainbow of colored patches and trim | FREE Beginner Corner To Corner Crochet Blanket Pattern | C2C - Marly Bird
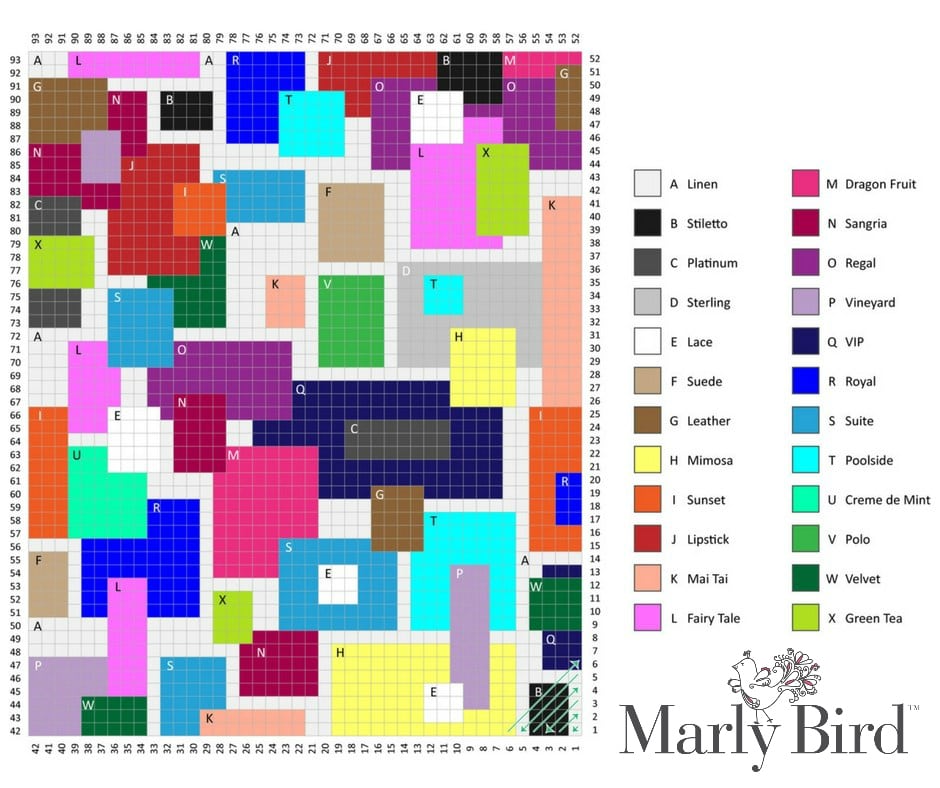
Get the FREE Crochet Blanket Pattern

Grab the crochet pattern for FREE on my website or download an Ad Free version through Ravelry. Use the links below to get your pattern.

FREE pattern on website: https://marlybird.com/chic-sheep-day-dream-blanket-free-crochet-pattern-using-chic-sheep-marly-bird/

Ad Free Download (from Ravelry): https://www.ravelry.com/patterns/library/chic-sheep-day-dream-blanket

If you make this crochet blanket pattern I'd LOVE to see your color choices!

Add it to your Ravelry patterns so I can see it!

Add this pattern to your Ravelry projects

QUEUE IT UP NOW AND LIKE THE PATTERN ON RAVELRY

Perfect Corner-to-Corner Crochet Blanket Patterns

  • Guest Throw (with Video Tutorial)
  • Snowflake Blanket
  • Corner to Corner Afghan
  • Happy Snowflake C2C Blanket
  • Corner to Corner Motif Blanket
  • Geometric C2C Blanket
  • Cactus Blanket in Corner to Corner
  • C2C Dino Blanket
  • Geo Folk C2C Blanket
  • C2C Dreamy Clouds Baby Blanket
  • Corner to Corner School Bus Blanket
  • C2C Blast Off Crochet Baby Blanket
  • How Bout Them Apples Crochet Blanket
  • Crochet Menorah Blanket
  • Crochet Lattice Blanket
  • Daisy C2C Crochet Blanket
  • Digital Snowflake C2C Blanket
  • Graduation 2023 Crochet Blanket
  • Argyle C2C Crochet Baby Blanket

And…don't forget…if you LOVE colorwork and want to learn even more crochet techniques for working with color, the ultimate colorwork course, Camp Colorwork, is RIGHT HERE! Sign up right now!

Frequently Asked Questions

What's this C2C blanket all about?

So here's the thing… this Day Dream Blanket is a free pattern for a beginner Corner to Corner Crochet Blanket. It's worked on the diagonal, which is super fun and addictive, and we teach you all about using color charts with it!

I can't find Chic Sheep yarn anymore, what should I do?

Oh, darn, I know! Chic Sheep was discontinued… but honestly, you can totally use some awesome alternatives! Swish Worsted, Heatherly Worsted, Muse Hand Painted, or Twill would all be perfect substitutions for this blanket.

Is the video tutorial for this blanket using double crochet?

Yes! The video tutorials I have show you how to work the C2C technique using half double crochet stitches. But don't worry, the technique is exactly the same if you prefer to use double crochet stitches.

Will I have a ton of ends to weave in if I use lots of colors?

Honestly… yes! Using 24 different colors means there will be many yarn ends to weave in. I promise though, this stunning crochet blanket as a reward will be totally worth it… maybe weave some in as you go!

Where can I get the free pattern?

You can grab the crochet pattern for FREE right on my website! Or, if you prefer, you can download an ad-free version through Ravelry. Just click the links provided in the post!

Filed Under: Chic Sheep by Marly Bird Patterns, Crochet, Free Patterns, Marly Bird Premium Patterns, Our Free Patterns, Pattern, Tips, Tricks, Techniques for Knitting and Crochet
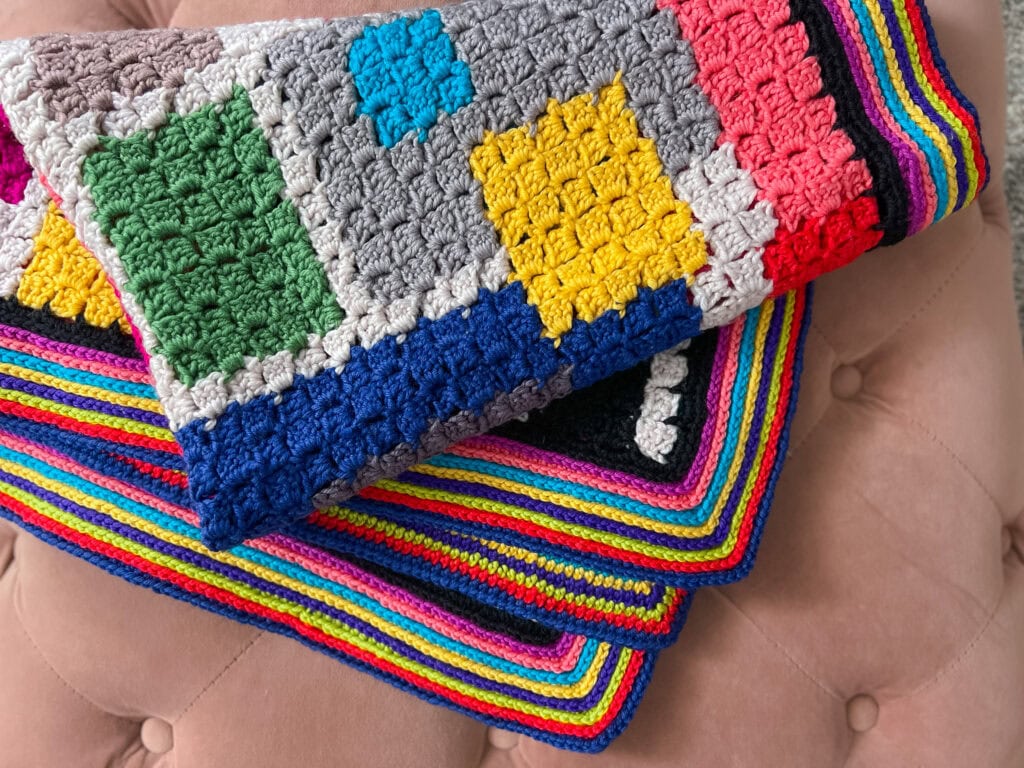
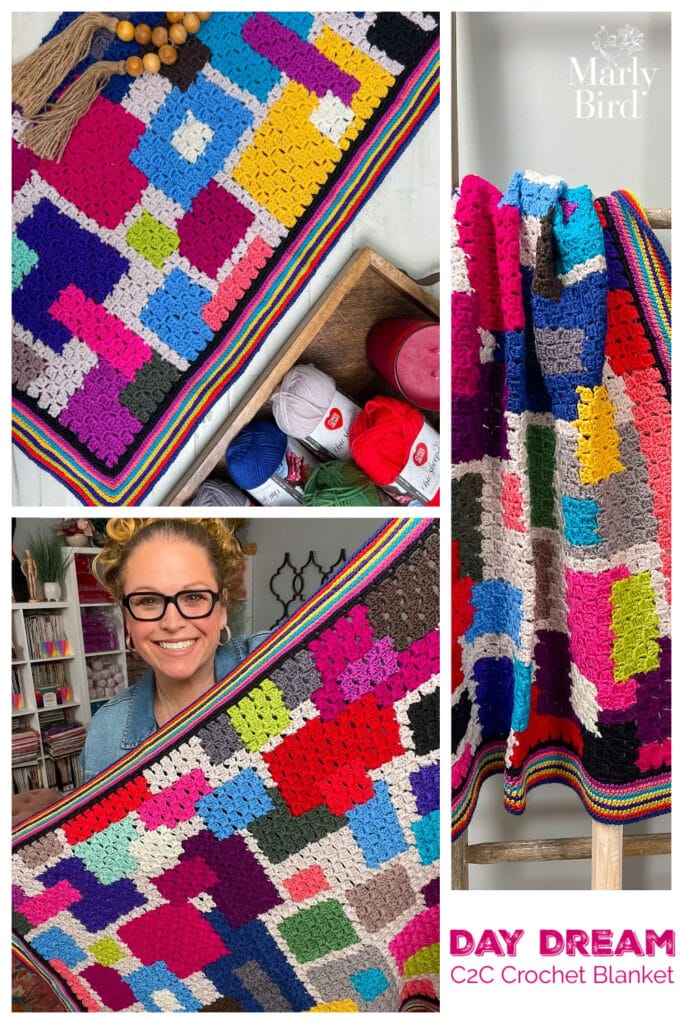
  • « Previous Page
  • 1
  • 2
  • 3
  • Next Page »

Let's Be Social

Join the Marly's Minions Facebook group to share, ask questions, or chat about all of your yarn related crafts!

Join the group
Cartoon of a smiling woman with brown hair in a bun, glasses, black jacket and green shirt, waving next to large "hi" text.

Quick Links

The Pattern Shop

Our Free Patterns

Blog

Marly Bird House
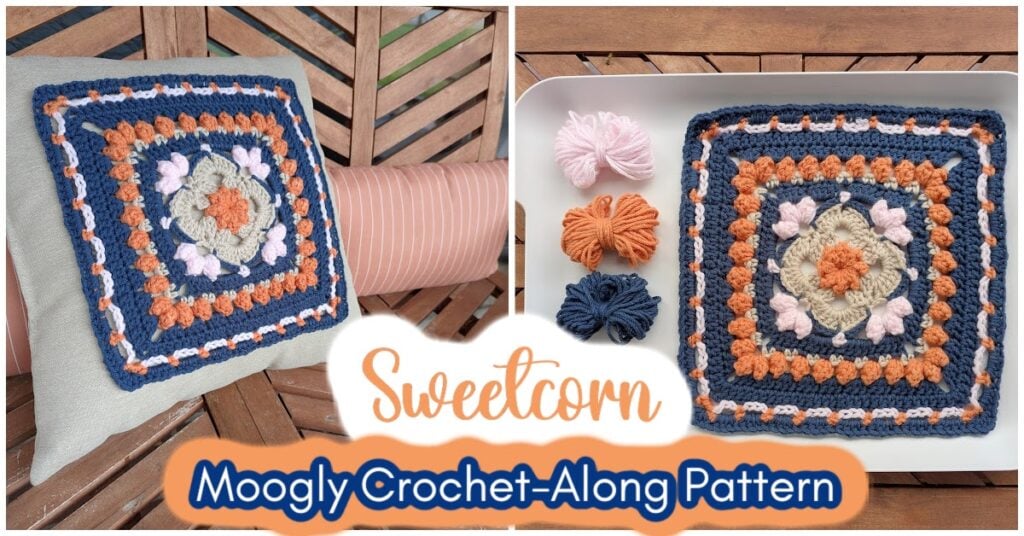
Learn to Knit & Crochet

About

Giveaway Terms and Privacy Notice

Find Us Everywhere

Join the Newsletter

YouTube Channel

Marly's Minions FB Group

Etsy Store

Ravelry Store


AN ELITE CAFEMEDIA HOME/DIY PUBLISHER

Information from your device can be used to personalize your ad experience. Do not sell or share my personal information.

Privacy Policy   Terms   Marly Bird Legal Documents Copyright © 2026