Search
Close
  • The Pattern Shop
  • Our Free Patterns
    • Browse All Our Free Patterns
    • Our Free Knitting Patterns
    • Our Free Crochet Patterns
  • Blog
    • All Blog Posts
    • All Free Patterns
    • Dibble Dabble Inspiration
    • Giveaways
    • Make-Alongs
    • Product Reviews
    • Roundups
    • Tips, Tricks, Techniques for Knitting and Crochet
Stylized bird with pink and gray swirling tail above elegant โ€œMarlyโ€ text, logo for crochet accessories and home decor.
  • Marly Bird House
  • Learn to Knit & Crochet
    • Newbie? Start Here
    • Video Tutorials
    • Knitting Definitions
    • Crochet Definitions
    • Common Techniques
    • Size Charts for Knitting and Crochet Projects
  • About
ร—
  • The Pattern Shop
  • Free Patterns
  • Blog
  • Marly Bird House
  • Learn to Knit & Crochet
    • Newbie? Start Here
    • Video Tutorials
    • Knitting Definitions
    • Crochet Definitions
    • Common Techniques
    • Size Charts for Knitting and Crochet Projects
  • About
Stylized bird with pink and gray swirling tail above elegant โ€œMarlyโ€ text, logo for crochet accessories and home decor.
Search
Close

New Patterns NOW Available in Ad-Free PDF! Check out The Pattern Shop

18 Free Witch and Black Cat Patterns to Crochet and Knit

September 13, 2021 By Marly Bird Leave a Comment

Witches and black cats go together like peanut butter and jelly! Make costumes for yourself or your little ones, or home decorations, with these fun projects.
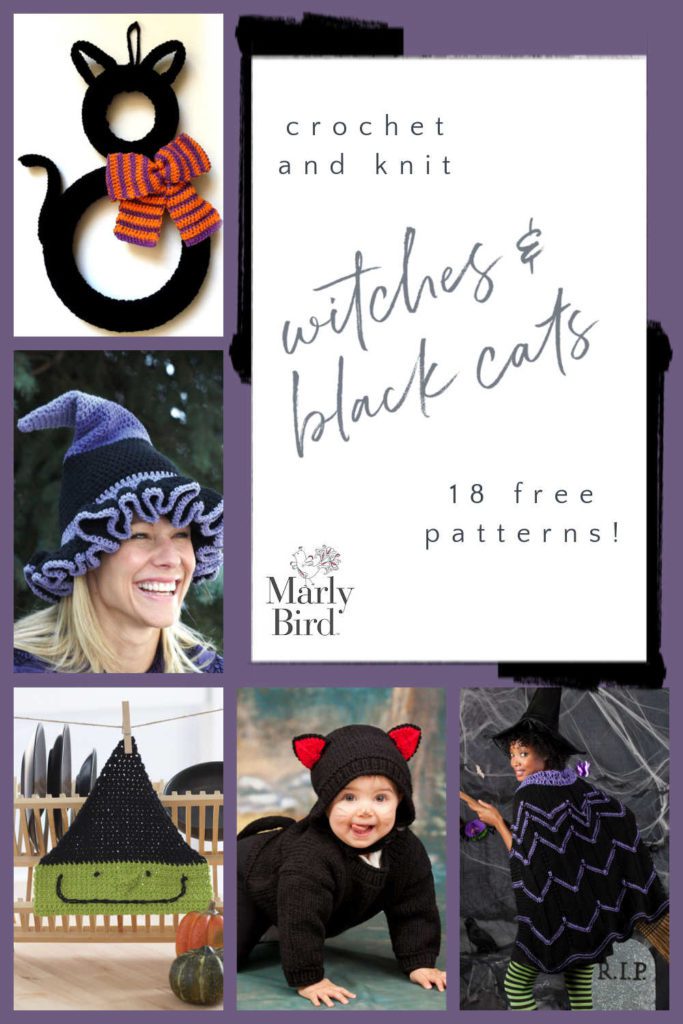
18 Free Witch and Black Cat Patterns to Crochet and Knit

Witches

From witches hats decorations to entire costumes, there's something here for everyone to wear — baby to adult to dog to doll!

  • Baby Witch Dress & Hat
  • Witch or Wizard Hats
  • Witch Dishcloth
  • Doll Witch Costume
  • Lil' Witch Leg Warmers
  • Crochet Witch Costume
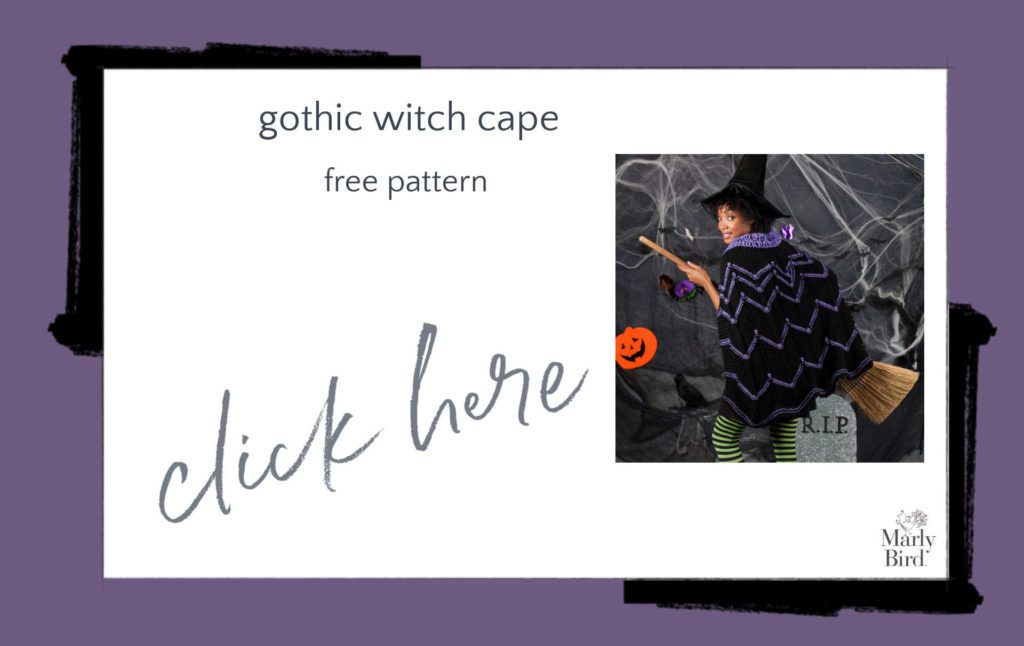
  • Gothic Witch Cape
  • Little Witch Hat & Shawl
  • Witch Hat Drink Cozy
  • Thigh High Leg Warmers
  • Knit Halloween Scrubby
  • Dog's Crochet Witch Costume
  • Bewitching Hat
Gothic Witch Cape Free Crochet Pattern

Black Cats

Show off your love for cats with these spooky home decorations and costumes!

  • Crafty Cat Wreath
  • Superstitious Black Cat Wreath
  • Glam Black Cat
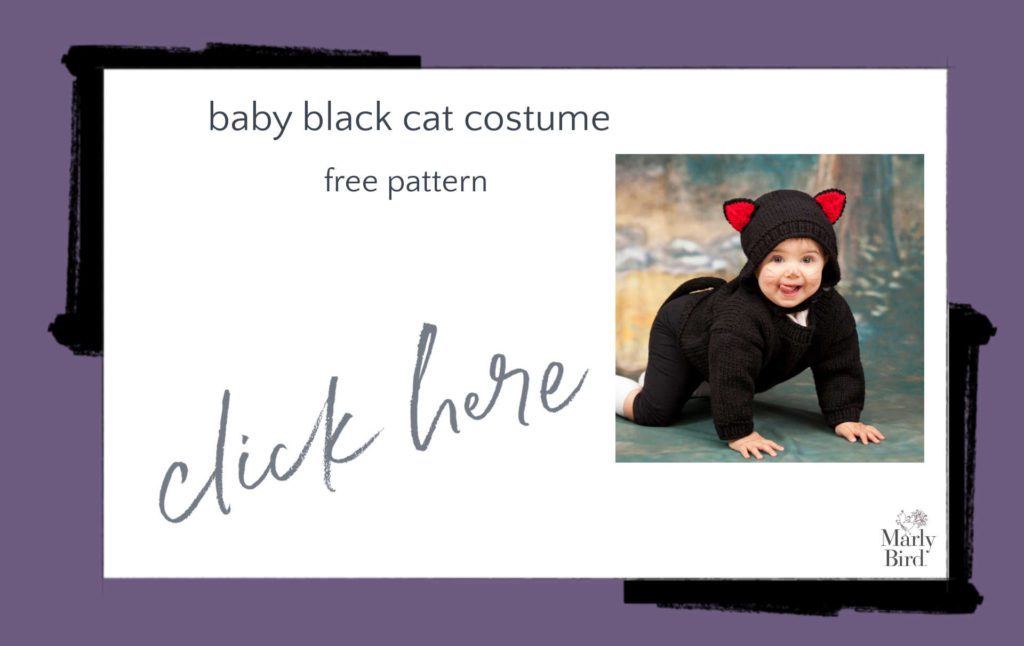
  • Baby Black Cat Costume
  • Boo Kitty Applique
  • Witchy Cat Hat
  • Scaredy Cat Dishcloth
Baby Black Cat Costume Free Knitting Pattern

Also on the Blog

  • 10 Free Bats and Vampire Knit and Crochet Projects
  • 29 Free Knit and Crochet Pumpkin and Jack oโ€™ Lantern Projects
  • 8 FREE Knit and Crochet Pumpkin Pattern

Frequently Asked Questions

Are these patterns just for crochet?

Oh goodness no! Honestly, this list has both crochet and knitting patterns… you get the best of both worlds here! Weโ€™ve got something for everyone wanting to stitch up something spooky.

Can I make these for my pets?

Yes! So here's the thing… there are a couple of cute witch costume patterns specifically for dogs. Perfect for getting your furry friends in on the Halloween fun!

What kind of witch projects are there?

You'll find all sorts of fun witchy things! There are costumes for babies and even dolls, plus hats, leg warmers, and even a cute dishcloth pattern.

What about black cat projects?

Yes! There are some super fun black cat projects too… like wreaths, a glam hat, a baby costume, and even an adorable applique. So many cute things!

Is there anything else besides witch and cat patterns on your blog?

Oh, you bet! Honestly… this post is all about the witches and cats, but I have other posts with free bat and vampire patterns, and tons of pumpkin and Jack o'lantern projects too!
Filed Under: Free Patterns

10 Free Bats and Vampire Knit and Crochet Projects

September 11, 2021 By Marly Bird Leave a Comment

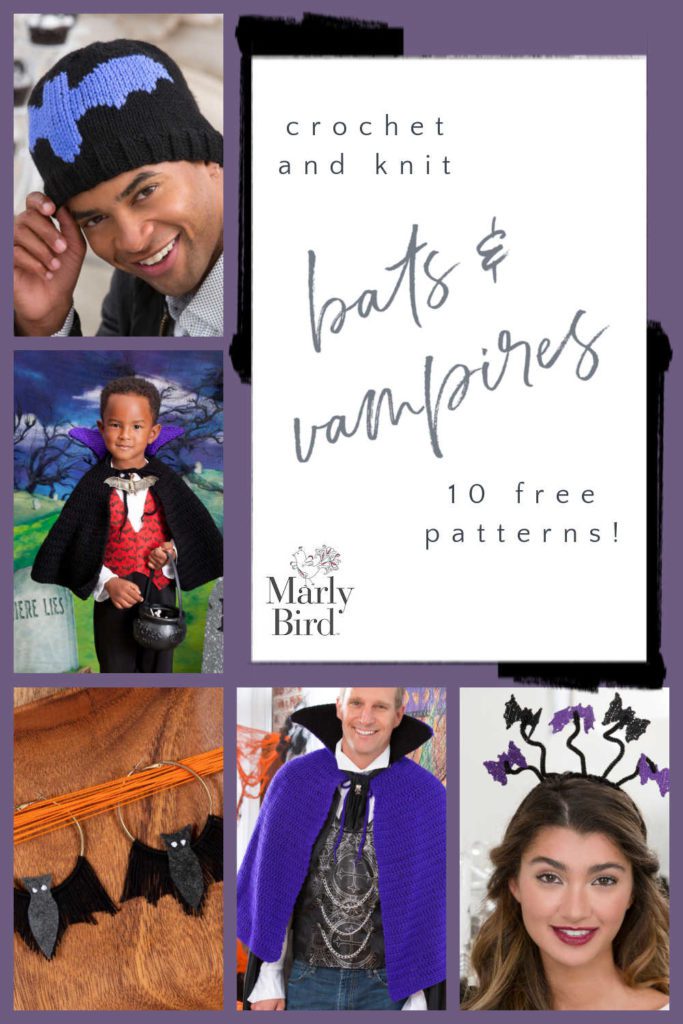
Bats and vampires naturally go together, ever since Dracula turned into a bat in the original novel. Here are 10 spooky bat and vampire patterns from Yarnspirations to decorate with and wear this Halloween!

10 Free Bats and Vampire Knit and Crochet Projects
  • Floating Bats Headband
  • Happy Bat Bag
  • Bat Mobile
  • Bat on a Hat
  • Bat Dishcloth
  • Crafty Spiders and Bats
  • Halloween Bat Earrings
  • Vampire Cape
  • Young Vampire Cape
  • Vampire Ascot

Also on the Blog

  • 29 Free Knit and Crochet Pumpkin and Jack oโ€™ Lantern Projects
  • 25 Fall and Thanksgiving Projects
  • 8 FREE Knit and Crochet Pumpkin Pattern

Frequently Asked Questions

Are these projects just crochet?

Oh, goodness no! While there are a lot of crochet patterns here, Yarnspirations has some super fun knit patterns too… you just have to look a little harder sometimes!

I'm not sure about making something bat-themed… are there any vampire things?

Yes, totally! Honestly, the vampire ones are super cute. There's a couple of vampire capes for different ages and even a dapper vampire ascot.

How hard are these projects?

So here's the thing… most of these are listed as advanced beginner or easier, but that can vary a bit. The bat dishcloth, for example, is pretty straightforward!

Can I really get all these patterns for free?

Yes! All of these awesome bat and vampire patterns are totally free and linked right in the post. Just click on the one you like!

Do these projects take a long time?

Honestly… it depends on the project and your skill level. The Halloween Bat Earrings would be a super quick make, but a whole vampire cape might take a bit longer.

Filed Under: Free Patterns

Beginner Crochet Facecloth Pattern (BiCrafty Bootcamp:…

September 8, 2021 By Marly Bird 1 Comment

Welcome back BiCrafty Bootcampers! If you joined us last week for Lesson One of BiCrafty Bootcamp Crochet Edition then you've already learned a lot. We talked about different crochet hooks and how to hold them. You learned the single crochet stitch and even how to decrease in single crochet for some basic shaping. Plus you learned about the turning chain, an important feature that differs from knitting. So, now you're ready for even more! We'll build on last week's skills this week with a beginner crochet facecloth pattern.

โฃ๏ธ If you haven't signed up for BiCrafty Bootcamp yet – join here now!โฃ๏ธ It's how we know to send you information on new lessons, Live Videos, schedule changes and more.

Note: this post may contain affiliate links. I receive a small percentage of sales from clicks on those links. This is one way I'm able to keep offering free patterns. Your price doesn't change. Thanks for the support.

beginner crochet facecloth pattern

The Basic Crochet Stitches We're Going To Learn This Week

One of the primary differences between knitting and crochet is that in crochet there are stitches of varying heights. One of the reasons that many people can crochet a piece quickly as compared to knitting the same size piece is because you can use taller stitches to grow the work quickly. What's great, though, is that all of the basic crochet stitches use the same essential steps.

So, last week, you learned how to single crochet. This week, you'll learn the next three heights of basic crochet stitches: half double crochet, double crochet, and treble crochet. They all use the same basic steps as single crochet, so you're just practicing the same motions over and over. That's great because it builds your muscle memory and helps you learn.

You'll also get to learn more about the turning chain this week. You learned how to chain one last week for a single crochet turning chain. However, when you have a stitch of a different height, you need to chain more on the turning chain to come up to that same height. Don't worry; it'll make more sense as you begin working with it.

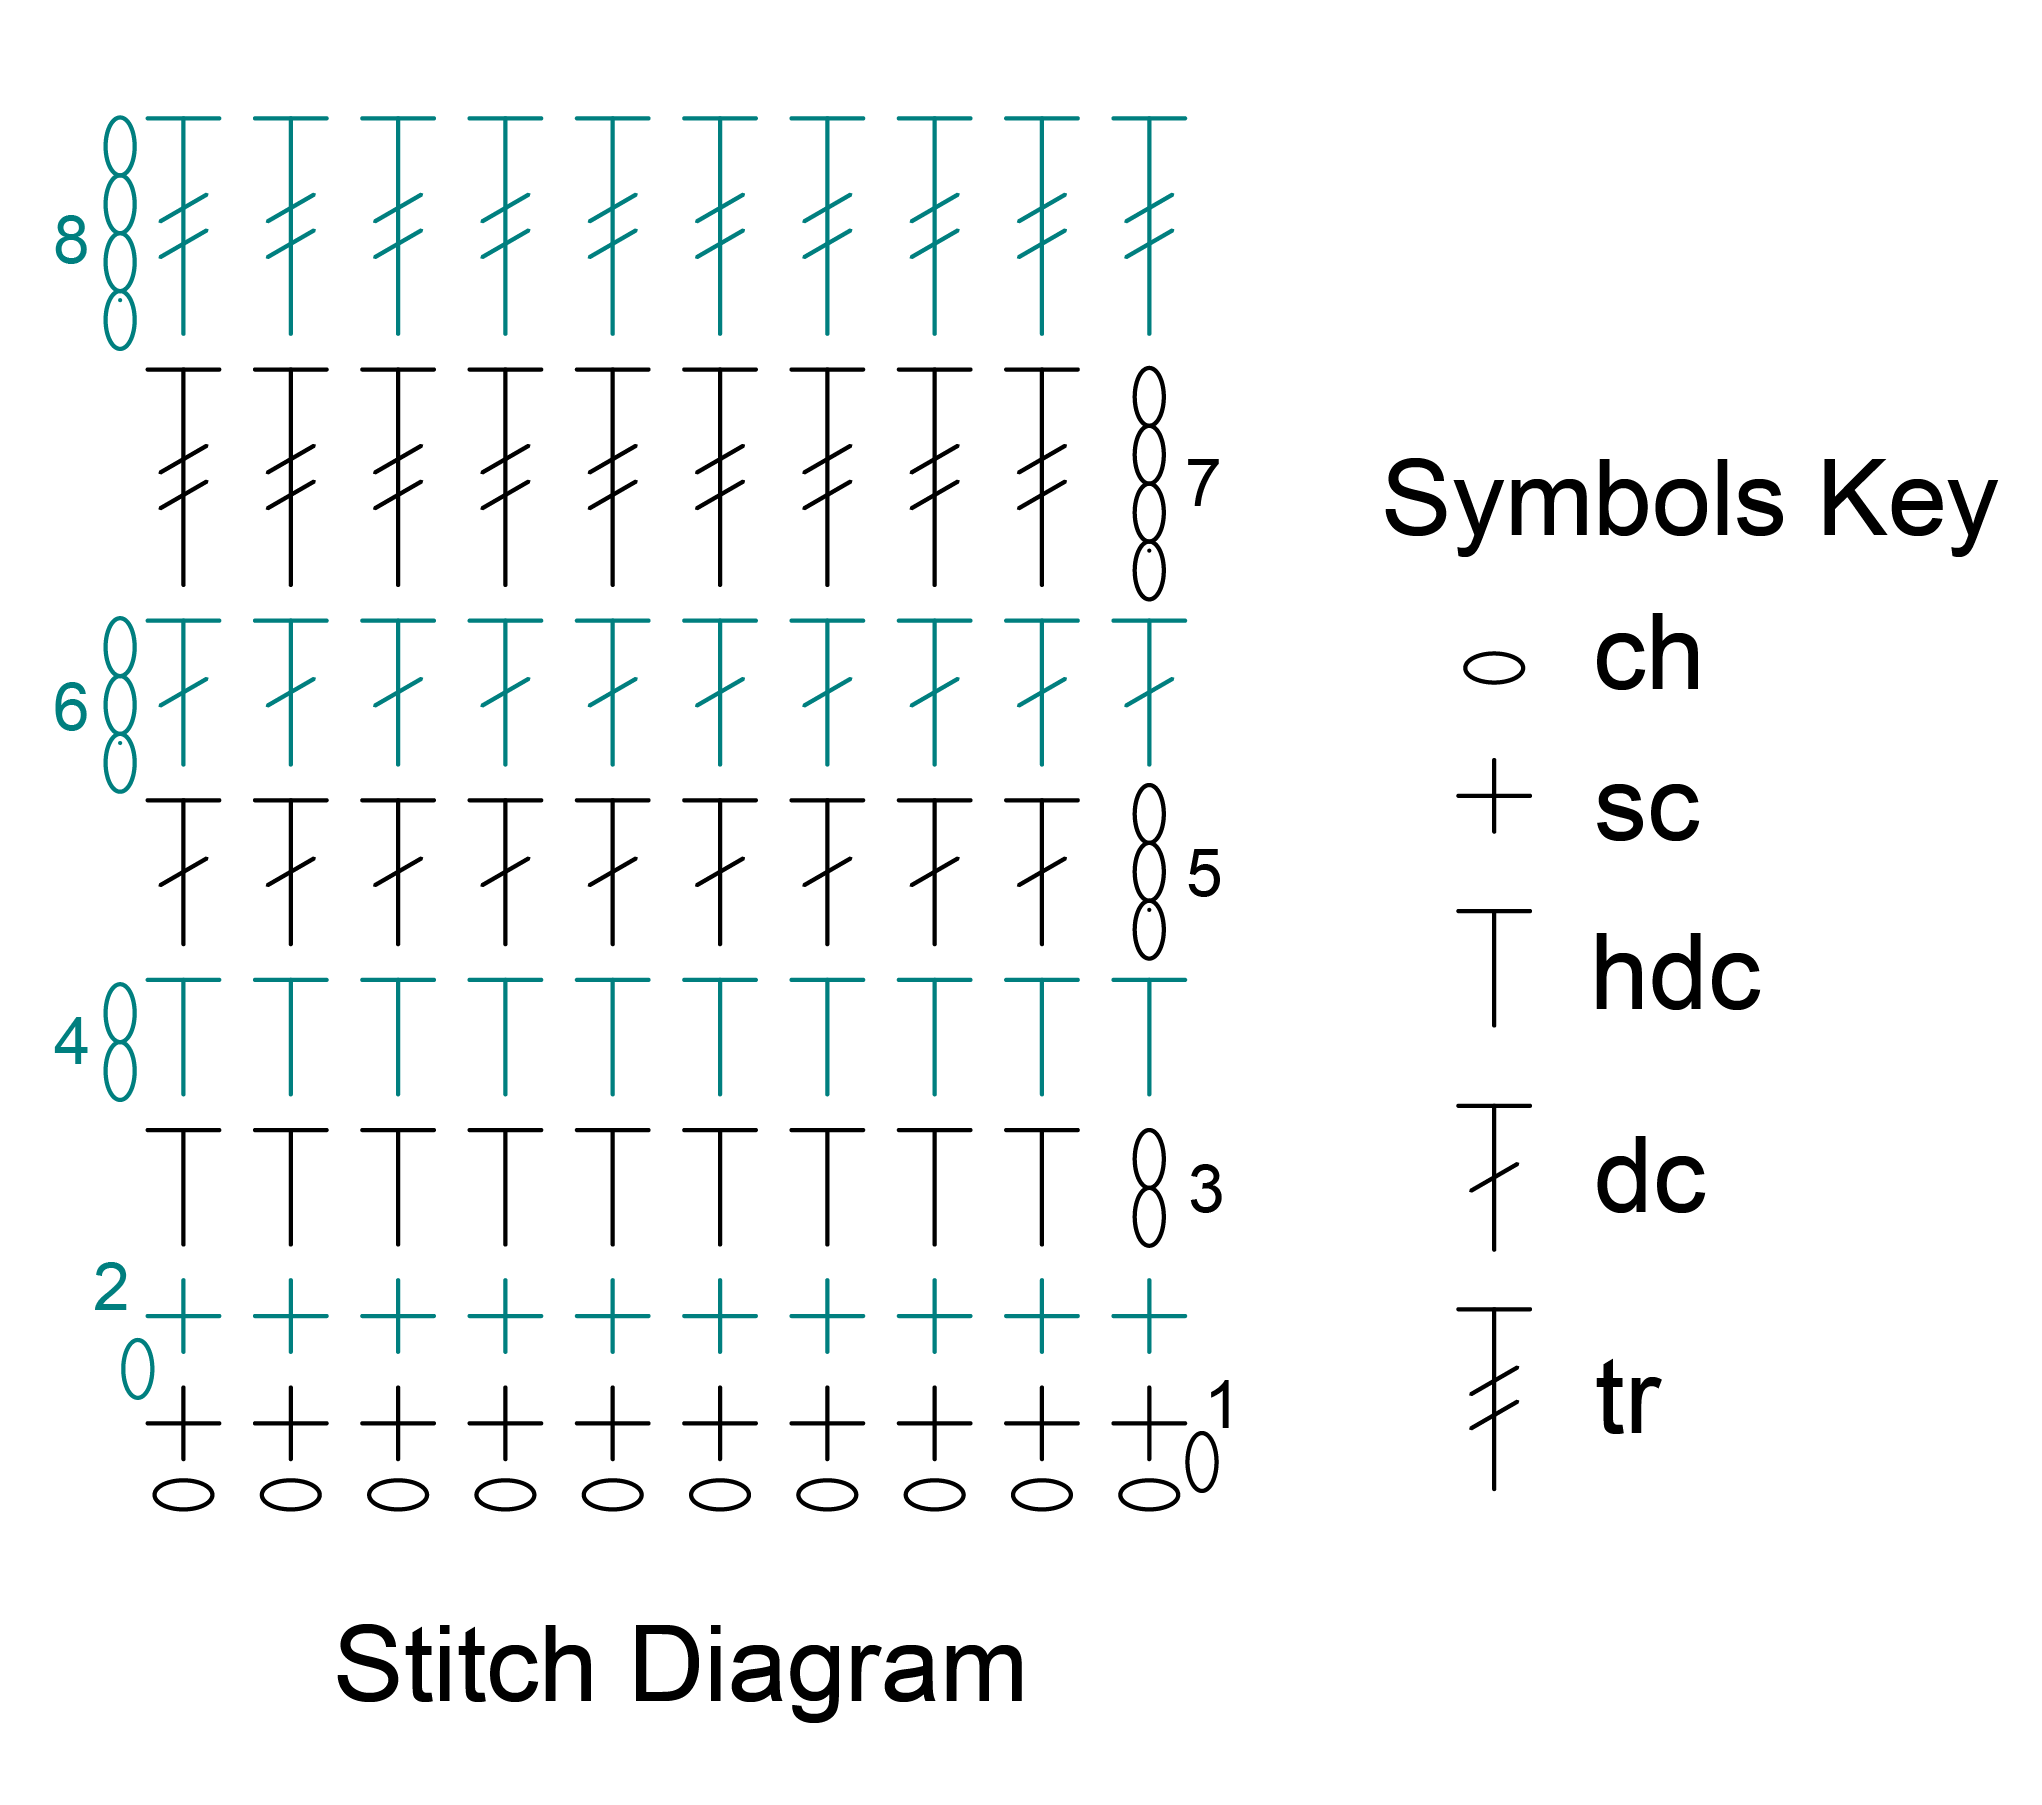
Crochet Chart or Diagram for BiCrafty Bootcamp Lesson 2

Crochet Chart or Diagram for BiCrafty Bootcamp Lesson 2

Video Help for Stitches Used in the Beginner Crochet Facecloth Pattern

Click on the stitch below If you need a quick refresher on how to do it.

  • Slip Knot: Insert crochet hook in the indicated stitch, yarn over and draw through both the stitch and the loop on the hook.
  • Chain Stitch:  Wrap the yarn around the crochet hook (yarn over) and draw it through the loop on the hook to form the first chain. Rep this step as many times as instructed. (The loop on the hook is never included when counting the number of chains).
  • Single Crochet: Insert crochet hook in indicated stitch, yarn over and pull up a loop; yarn over and draw through both loops on hook.
  • Half Double Crochet: Yarn over hook, insert hook into indicated stitch, yarn over and pull up a loop; yarn over and draw through all three loops on hook.
  • Double Crochet: Yarn over hook, insert hook into indicated st, yarn over and pull up a loop; [yarn over and draw through 2 loops on hook] 2 times.
  • Treble Crochet: Yarn over hook two times, insert hook in indicated stitch, yarn over and pull up a loop; (yarn over and draw through two loops) three times.

Learning About Crochet Charts or Diagrams and Reading Patterns

During last week's live video, I started showing you some super basic chart drawings to help you better understand the rows and turning chains. Many of you said this was really helpful. This week we're going to learn more about crochet symbol charts and diagrams.

We'll also start talking more about reading written crochet patterns. When you first started knitting, knit patterns probably looked like another language. Then eventually that language became second nature to you. Although you might not yet know the crochet abbreviations, you do basically know the concept of how to read a crochet pattern. It's similar to reading a knitting pattern. You just need to learn some new vocabulary.

Changing Colors in Crochet

Finally, this week you're going to learn how to change colors in crochet. For the most part, this is similar to changing colors in knitting. However, there are some slight differences in terms of exactly where you make the color change. This directly relates to the turning chain. Once you see it, it should make sense. You'll get all the details specific to this pattern towards the end of the long live video below. But here's a shorter video for reference, too.

How to Count Rows

In the video lesson below, you'll also find information about how to count your rows in crochet. There are some tricks and tips to help you identify the right side and wrong side of the work. Then you can effectively count by twos on either side.

As a Knitter, You're Ahead in the Crochet Game

Have confidence in your skills. You already know so much of this as a knitter. It might not yet feel natural to translate it to crochet. We know a few of you threw your hooks across the room this week. Or put your work in timeout. That's okay. You can take breaks and come back to it. But honestly, you've got this. It takes time to make your hands adjust to the slightly different motions of crochet, but they can do it. The more you work the steps, the more muscle memory you'll build. It gets easier and easier each time.

Useful Crochet Skill for Knitters

In this lesson you learn about working into the back bump or butt of the foundation chain. Yes, there are more ways to begin a project. Crochet has many different ways you can start, just wait and see. But regarding working into the back bump or butt of the chain, this is something you can do when working a provisional cast on for knitting.

Some of you are most likely familiar with using the crochet hook to actually crochet over a knitting needle. Yes, you can do this. But that you know more about crochet, watch yourself work the provisional technique in that way. Notice that as you do that you are essentially putting the back bump or butt of the stitch around the knitting needle. Can you see it?

Well, if you find that method of crocheting around a knitting needle cumbersome, you can just work a chain first, then, pick up and knit stitches into the back bump or butt of the chain.

How To Use A Crochet Chain for a Provisional Cast On

To do so, Using scrap yarn that is the same weight as your working yarn, chain more than the number of stitches you plan on picking up and knitting for your provisional cast on (I like to do 10 chains more) then fasten off.

It is important you know which tail of the chain is the one you just fastened off so I like to put a couple knots in the tail so I know that is the end I will start to unravel when it is time.

Now, with your working yarn, skip a couple chains, then begin to pick up and knit through the back bump or butt of the chain for each stitch you need to cast on. the “and knit” is important because there are some patterns that will just tell you to pick up stitches then work a row of knitting to get with the pattern. But when you pick up and knit you are already doing the row of knitting.

Once you have picked up and knit along the back bump or butt of the chain, you continue with your work.

When it is time to remove the provisional cast on chain, start at the end with the knots in the tail. Undo the fasten off, then essentially unzip the crochet chain thus revealing the exposed loops of the knitting.

Put those loops on a needle as they become available.

Like that technique? Here are a variety of ways you can do a provisional cast on. Have a look! Don't forget to smash the like button and if you haven't yet, SUBSCRIBE TO THE YOUTUBE CHANNEL!


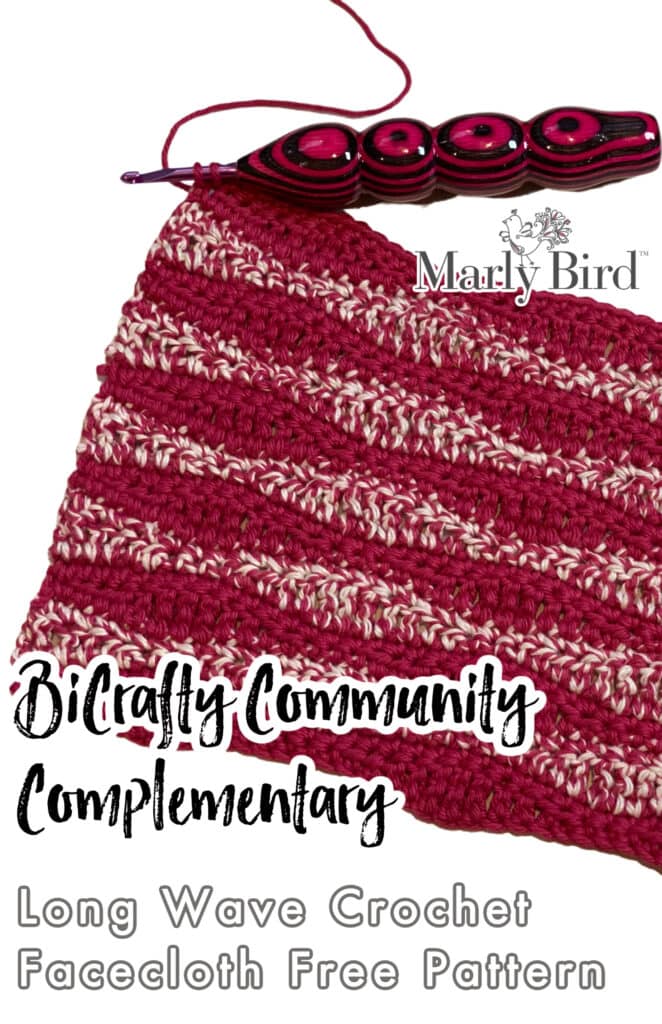
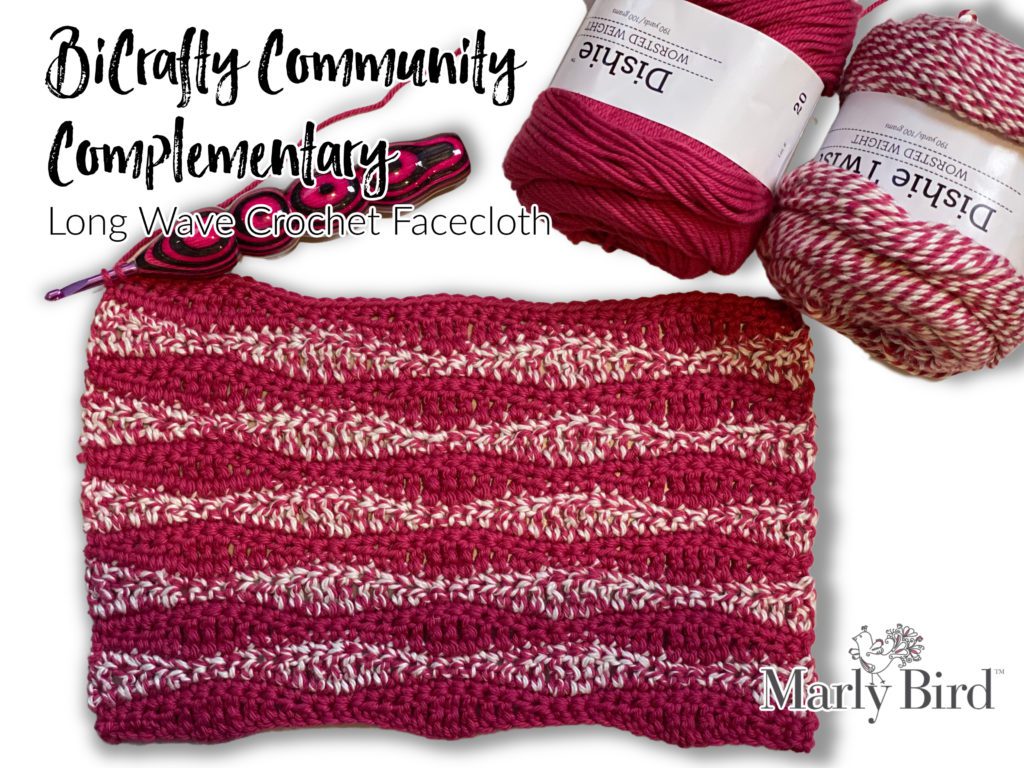
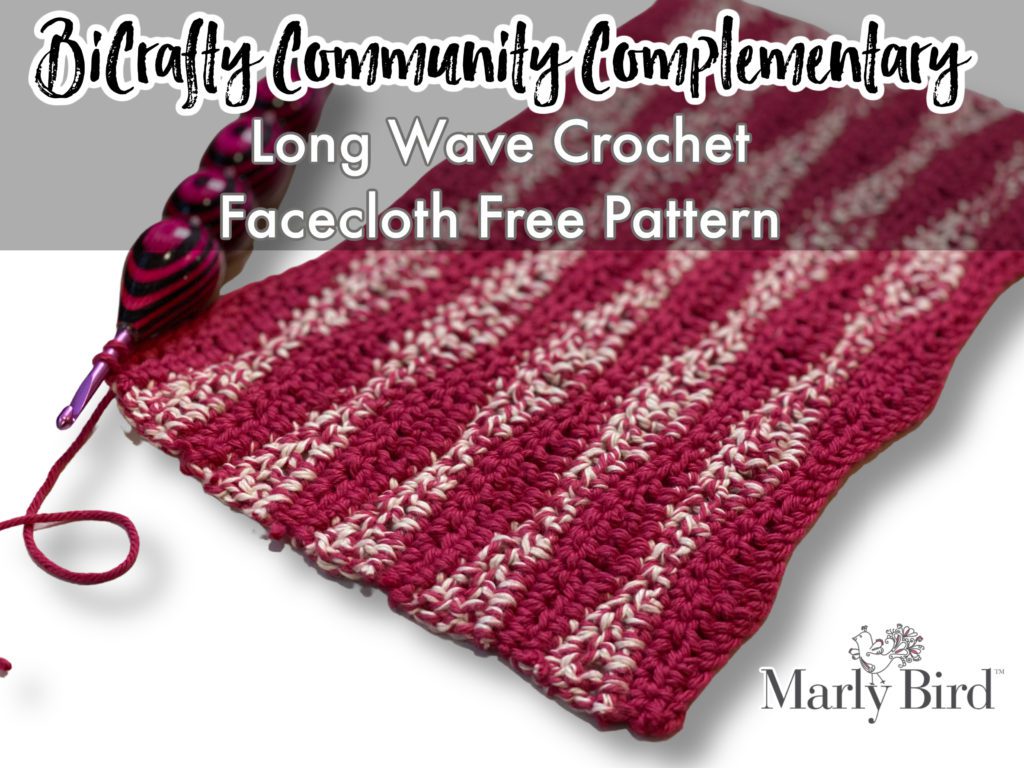
BiCrafty Community Complementary Long Wave Crochet Facecloth for Self-Care Pattern-IMG_2592-1

Lesson 2: Beginner Crochet Facecloth Pattern

We think it's really important to give you the opportunity to put your new skills to use right away. We want you to make something that you can use. If you did last week's lesson, then you already have a single crochet spa headband. This week, our second pattern is a beginner crochet facecloth pattern. It's designed as a complementary pattern to go with the headband.

???? New Stitch: Long Wave Crochet Stitch

I chose the Long Wave Crochet Stitch for our complementary facecloth to last week's headband. I like the crazy colors and the way this stitch pattern uses all the new stitches in lesson 2 of BiCrafty Bootcamp. 

This facecloth is created by using the different heights of the stitches to their full advantage. The height of each of the stitches makes the wave without having to do any increases or decreases. It's a really cool feature of crochet that I think you knitters are going to enjoy learning.

If you enjoy the project, make a bunch of them. After all, these are great gifts for many different people in your life. One of the great things about out BiCrafty Bootcamp Crochet patterns is that they're all terrific for you but also great to give as gifts. So even though this is a self-care beginner crochet facecloth pattern, it's also something you can wrap up with a bar of soap and give as a Christmas gift this season.

BONUS PATTERN: The Long Wave Crochet Stitch is actually one of the stitches used in the 2015 Stitch Sampler Blanket CAL. This is a great pattern for you to start working on to grow your crochet skills alongside Bootcamp lessons. You can find the links to the each part of the CAL here. Or get the whole pattern in one place on Ravelry.

BiCrafty Community Complementary Long Wave Beginner Crochet Facecloth Pattern for Self-Care: Details

Measurements

Finished Size: 

  • 10โ€ x 10″ [25.4 X 25.4 cm]

Gauge:

  • 17.2 stitches = 4โ€
  • 16 rows = 4โ€ 

Materials

Yarn: 

WeCrochet Dishie Yarn, 1 ball in color of your choosing. This is a worsted weight cotton yarn.

WeCrochet Dishie Twist Yarn, 1 ball in color of your choosing. This is a worsted weight cotton yarn.

Hook: 

Size G (4.0mm)

Don't forget to check out our Ultimate Guide to Crochet Hooks if you're ready to learn more about them.

Notions: 

Locking stitch markers, Chenille and tapestry needles for weaving in ends.

Crochet Abbreviations

That's right, you're ready to start learning crochet abbreviations. After you, you already understand the concept from your knitting abbreviations. This is how you'll learn to read crochet patterns!

beg โ€“ begin(ning)

ch โ€“ chain

dc โ€“ double crochet

hdc โ€“ half double crochet

rep โ€“ repeat

RS โ€“ right side

sc โ€“ single crochet

sk โ€“ skip

sl st โ€“ slip stitch

sp โ€“ space

st โ€“ stitch

tch โ€“ turning chain

tr โ€“ treble crochet

WS โ€“ wrong side

yo โ€“ yarn over

Long Wave Stitch Diagram

Long wave stitch diagram in black and blue with a yellow highlight for stitch repeats and symbols for crochet stitches.

For this chart you will notice that the numbers on the outside count the rows of the stitch pattern. Also notice these numbers let you know from which side you will begin reading that row of the chart. For example: Row 1 will be read from the left to right.

To use the chart, simply repeat the stitches and rows as indicated in red on the chart to desired size.

Beginner Crochet Facecloth Pattern Notes

Get a clean edge on the foundation chain by working into the back bump or butt of the chain on row 1. 

Turning chains count as a stitch in this pattern. Use stitch markers to easily identify them at the end of each row. 

When working the stitches with cotton yarn, keep the tension between stitches in a row very consistent or the later rows will end up wider than the earlier ones. Do this by keeping the loops on the hook the same size as the hook throughout.

Change colors in the last draw through two on the last stitch of the row. 

Cut yarn each time.

Bury the ends on the wrong side of the facecloth at the end. 

beginner crochet facecloth pattern for bicrafty bootcamp

PATTERN: BiCrafty Community Complementary Long Wave Beginner Crochet Facecloth for Self-Care

For the Long Wave Crochet Stitch–Foundation chain is a multiple of 14+2.

Ch 44

NOTE: USE stitch markers to help you keep your place!

Row 1 (RS): Sk 2 ch (counts as 1 ch and 1 sc), *sc in next ch, hdc in each of the next 2 ch, dc in each of the next 2 ch, tr in each of the next 3 ch, dc in each of the next 2 ch, hdc in each of the next 2 ch, sc in each of the next 2 ch; rep from * to end — 43 sts.

Row 2 (WS): Ch 1 (counts as 1 sc), sk 1st st, sc in next st and each st to end, working last sc in tch.

Row 3: Change to B, ch 4 (counts as 1 tr), sk 1st sc, * tr in next sc, dc in each of the next 2 sc, hdc in each of the next 2 sc, sc in each of the next 3 sc, hdc in each of the next 2 sc, dc in each of the next 2 sc, tr in each of the next 2 sc; rep from * to end working last tr in tch.

Row 4: As row 2.

Row 5: Change to A, ch 1 (counts as 1 sc), sk 1st sc, * sc in next sc, hdc in each of the next 2 sc, dc in each of the next 2 sc, tr in each of the next 3 sc, dc in each of the next 2 sc, hdc in each of the next 2 sc, sc in each of the next 2 sc; rep from * to end working last sc in tch.

Rep rows 2-5 nine times more, then row 2 once for pattern.

Designer NOTE: Are you having a little trouble? Check out the HD Video and let me help.

Finishing

Weave in or bury the ends on the wrong side of the fabric. 

Watch the Live Video Instructions

Additional Videos and Patterns You Might Like

You can actually make so many different things now that you've learned these major basic crochet stitches. Honestly, if you can work these first first five basic crochet stitches, you can make such a range of different items from scarves to blankets and more. But here are some good places to start:

  • Absolute Beginner Crochet Throw. Practice your double crochet stitches. Video help included.
  • Modern Color Block Scarf. Here's another double crochet pattern. However, with this one you'll also get to practice your color changes.
  • Cuddles Baby Blanket. This uses the single-double or “lemon peel” crochet stitch pattern discussed in the video above.
  • And here's the Game Day Scarf we mentioned. It also uses the single double crochet stitch.
  • Caron Let's Begin Crochet Scarf. This unisex crochet scarf is just half double crochet stitches.
  • Easy Crochet Shell Stitch Blanket Pattern. This is one of my most popular free crochet patterns. If you can crochet a wave stitch, then you can crochet shell stitches. You can make this blanket in varied sizes.
  • Beginner Crochet Poncho Pattern. Once you figure out shells, you can make this poncho! I've offered a video tutorial for support.
  • Red Heart Uniquely You Crochet Cowl Patterns. You might be able to work several of these cowl patterns now. Check them out and see what you think.

Frequently Asked Questions

What new stitches will I learn in this lesson?

Honestly…, this week you'll learn the half double crochet, double crochet, and treble crochet stitches. We'll also talk more about the turning chain and how it changes with taller stitches… it all makes sense as you work with it!

Can you explain crochet charts a bit more?

So here's the thing… crochet charts can look like a secret code at first, but they're super helpful once you get the hang of them. We'll go over how to read them, and you'll see they're not too different from reading a knitting pattern you already know. You've got this!

Is it really possible to change colors in crochet?

Yes! Changing colors in crochet is totally doable, and it's pretty similar to how you do it in knitting. The exact spot where you make the change is a little different, especially with the turning chain… but you'll totally get it once you see it!

I'm a knitter… am I going to be totally lost learning to crochet?

Oh no, honey, you're actually way ahead of the game as a knitter! You already understand so much of this concept… it just takes a little time for your hands to adjust to the new motions. Don't get discouraged if you need to take a break, you can totally do this!

What yarn and hook size do I need for the facecloth?

For this cute facecloth, you'll want to grab some WeCrochet Dishie Yarn or Dishie Twist Yarn… they're both worsted weight cotton. And you'll need a size G (4.0mm) crochet hook. Happy hooking!

Filed Under: BiCrafty Bootcamp Learn to Crochet, Crochet, Tips, Tricks, Techniques for Knitting and Crochet

31 Free Knit and Crochet Pumpkin and Jack o’ Lantern…

September 6, 2021 By Marly Bird 1 Comment

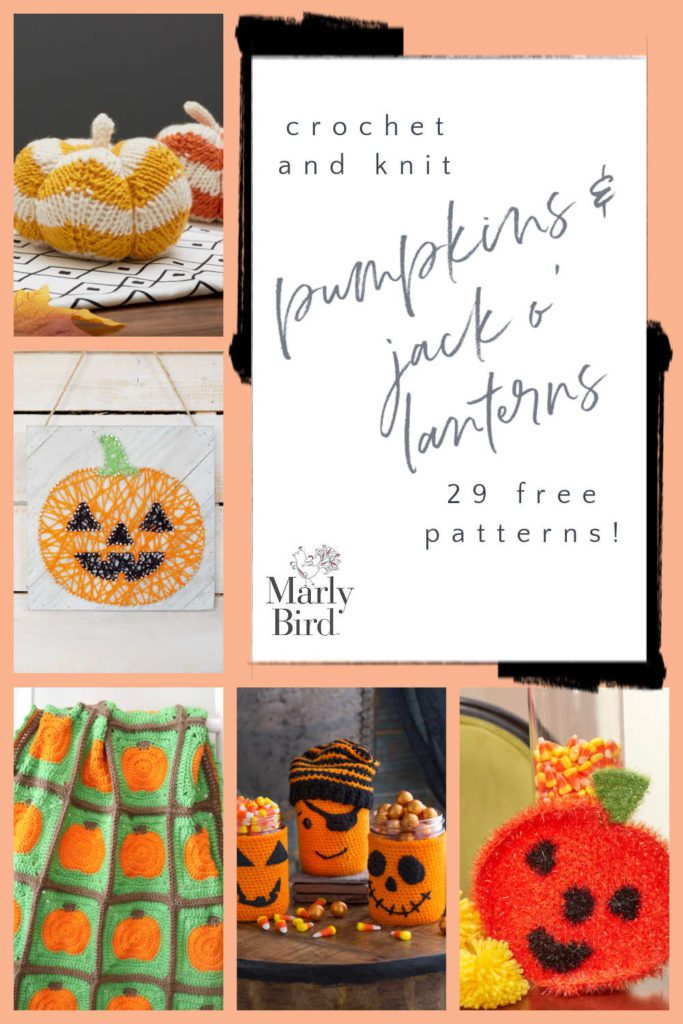
Pumpkins are a classic sign of fall. And, of course, jack o' lanterns are the most iconic Halloween decoration! Whether you want your home to have a cozy autumn vibe or you like to go big for the holiday, you'll find projects in here that are perfect to decorate your home. You'll also fund fun Halloween accessories! Crafting for autumn is cozy and fun. We hope you really enjoy these 29 free knit and crochet pumpkin patterns.

Colorful knitted and crocheted pumpkins, a spooky pumpkin wall art, and festive jars, showcasing fall patterns and decoration

Knit and Crochet Pumpkin Patterns

Many people like to make knit and crochet pumpkins in the classic orange color. However, it's also fun to experiment with complimentary colors like blue! Have fun making lots of great pumpkins to match your home's decor. And if you're back in the office, a small knit or crochet pumpkin can be a terrific addition to your desktop for autumn vibes.

  • Stacked Pumpkin Table Runner
  • Spicy Crochet Pumpkins
  • Crochet Pumpkin Hat
  • Spicy Knit Pumpkins
  • Lil' Pumpkin Hat
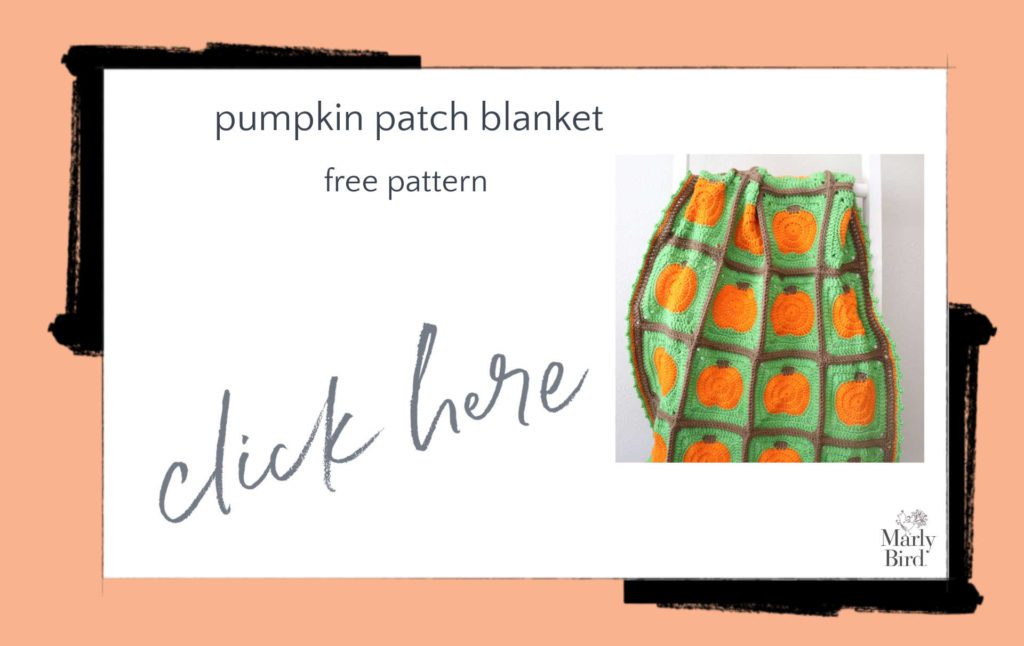
  • Crochet Pumpkin Patch Blanket
  • Harvest Crochet Pumpkins
  • Knit Pumpkin Hat
  • Pumpkins
  • Haunting Lace Pumpkins
  • Hand-Woven Yarn Wrapped Pumpkin
  • Pumpkin Pouf Scrubby
  • Pumpkin Napkin Rings
  • Crochet Argyle Pumpkin
  • Jonah's Pumpkin
  • Braided Crochet Pumpkins
Crochet Pumpkin Patch Blanket Free Crochet Pattern

Knit and Crochet Jack o' Lanterns

Of course, Jack 0′ Lanterns are a little bit like knit and crochet pumpkin patterns. However, they have faces on them. That's what gives them the the true Halloween feeling. Otherwise a pumpkin is just an autumnal decor item. Change up the faces on a jack o' lantern to make it more scary or more silly to fit your Halloween theme. These make great Halloween decor. Plus they're fun to give to kids for the season.

  • Jack o Lantern Hat
  • Jack o Lantern Pin
  • Jack o Lantern Appliques
  • Jack o Lantern Nail Art
  • Jack o Lantern Scrubby
  • Jack o Lantern Crochet Blanket
  • Pumpkin Bowl Cozy
  • Jack o Lantern Dishcloth
  • Three Little Pumpkins
  • Halloween Pumpkin Cuff
  • Pumpkin Face Bag
  • Pumpkin Bag
  • Spooky Pumpkin Jar Cozy
  • Pumpkin Face Throw
  • Spooky Cat Pumpkin
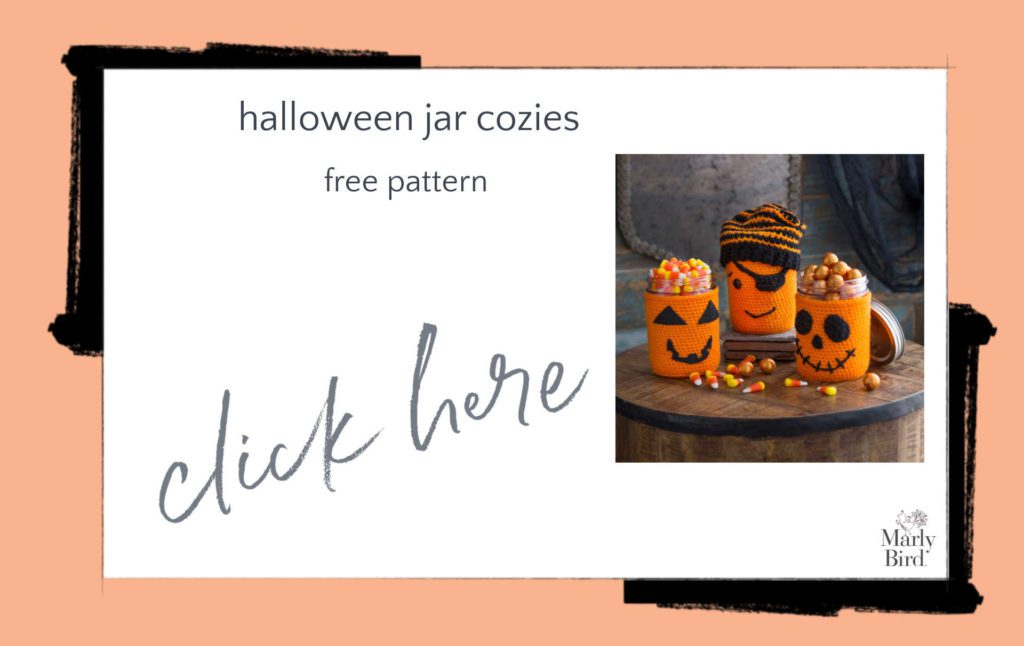
  • Halloween Jar Cozies
  • Lacy Jack o Lantern Dishcloth
Halloween Jar Cozies Free Crochet Pattern

Also on the Blog

  • 8 FREE Knit and Crochet Pumpkin Pattern
  • 10 FREE Pumpkin Patterns to Knit or Crochet
  • Your Own Knit Pumpkin Patch
  • Pumpkin Spice Cropped Crochet Sweater

Frequently Asked Questions

How many free patterns are on this page?

Honestly… there are 31 free knit and crochet pumpkin and jack oโ€™ lantern projects listed here! Thatโ€™s a whole lot of fall and Halloween fun to get you crafting.

Can I make these pumpkins in colors other than orange?

Yes! So here's the thing… while orange is classic, the post suggests itโ€™s super fun to experiment with complimentary colors like blue to match your home's decor. Get creative with it!

Are these patterns only for crochet?

Nope! You'll find a great mix of both knit and crochet patterns. The list is broken down into general pumpkins and then specifically into jack o' lanterns, so you can choose what you're looking for.

What kind of projects can I make besides just pumpkins?

Oh, you can make all sorts of fun things! There are hats, blankets, table runners, scrubbies, dishcloths, bags, and even nail art… and so much more!

Are the jack o' lantern patterns just regular pumpkins with faces?

Well, that's mostly right! The post says jack o' lanterns are similar to pumpkin patterns but have faces, giving them that true Halloween vibe. You can change up the faces to make them scary or silly!

Filed Under: Free Patterns

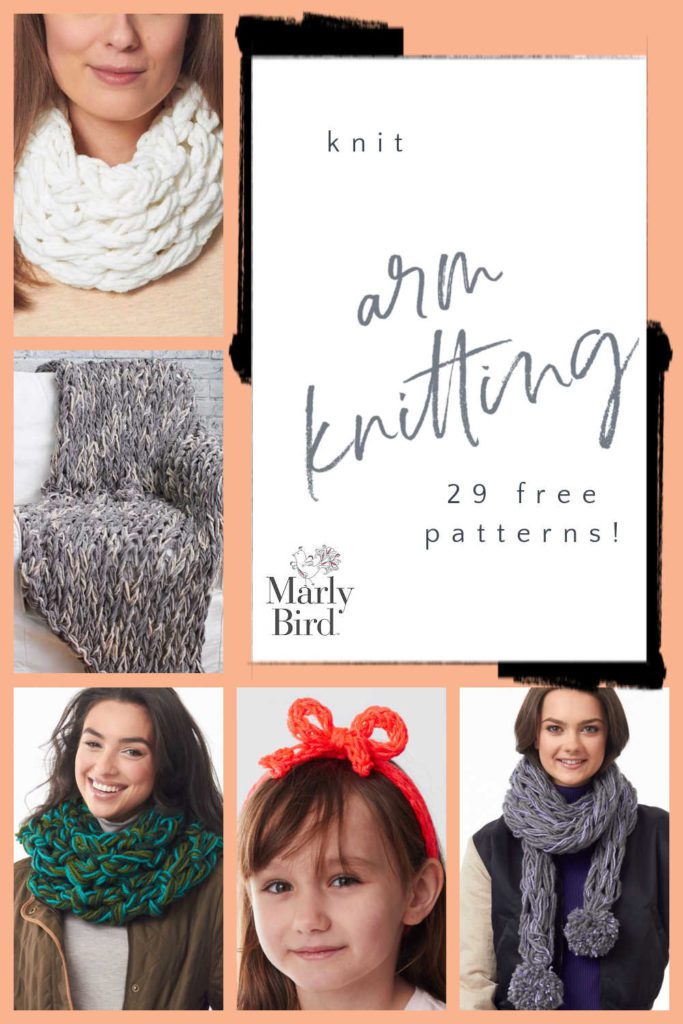
29 Free Arm Knitting Projects

September 5, 2021 By Marly Bird Leave a Comment

Are you familiar with arm knitting? It's the same as knitting, except that you don't need the needles! All you need is your arms and a ball (or more!) of yarn! Use your arms like needles to knit blankets, a bag, and all the cowls and scarves you want! We've rounded up 29 free arm knitting projects for you to explore this fun niche fo the craft. Bonus: finger crochet and finger knitting patterns too!

Yarn Suggestions for Arm Knitting

Typically, you'll want to work with thick and bulky yarns when you're arm knitting., You can hold several thinner yarns together. However, for the best look, use super bulky or jumbo yarns for your arm knitting project. Of course, the free patterns listed below will indicate the recommended yarn.

29 Free Arm Knitting Projects

Arm Knitting Patterns: Blankets and Bag

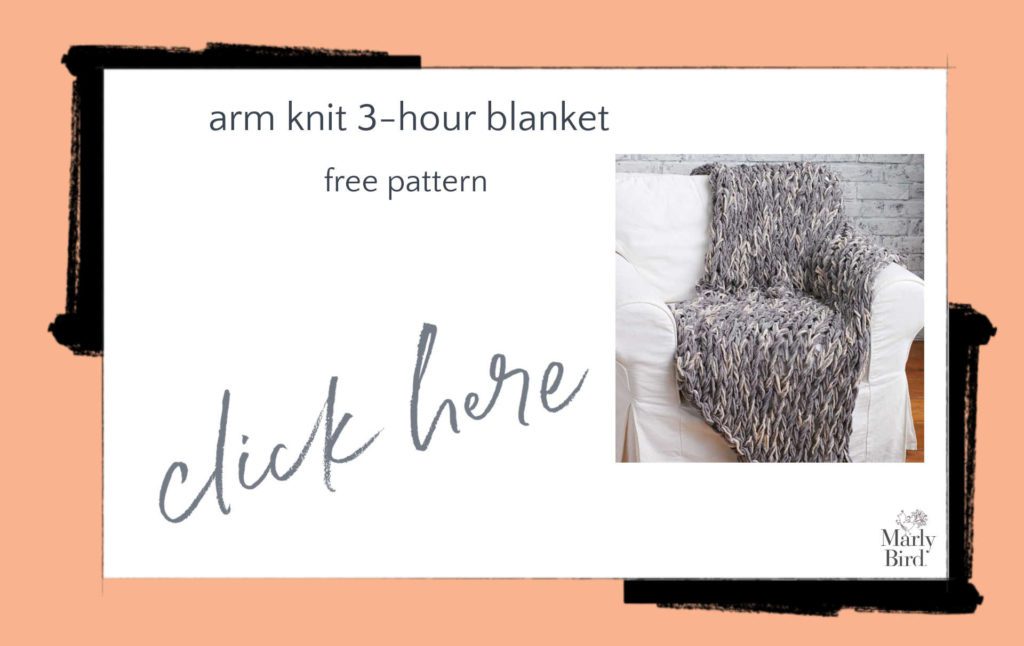
It doesn't take long at all to knit a blanket or bag when you use your arms as needles! Honestly, you'll discover that once you get used to the process, it goes really fast. Mostly this has to do with the fact that you're using big, thick yarn of course. However, it's also because you're able to move your fingers and arms a lot more quickly than your needles. As you'll see, there are three-hour arm knit blanket patterns available. Great for quick gift making!

  • Arm Knit 3 Hour Blanket
  • Arm Knit 3 Hour Holiday Blanket
  • Arm Knit Super Quick Blanket
  • Arm Knit Market Bag
Arm Knit 3-Hour Blanket Free Knitting Pattern

Arm Knit Cowls and Scarves

Cowls are a great first project to make while arm knitting! They work up quickly and you can be done before you know it. Plus, of course, you're able to see right away whether or not you're doing the steps correctly. And if you're not, you can easily frog back and start over. If you're just learning how to knit with your arms, these truly are great projects to start with.

  • Arm Knit Cowl
  • Arm Knit Cowl
  • Arm Knit Cowl
  • Arm Knit Cowl
  • Totally Tubular Arm Knit Cowl
  • I-Cord Arm Knit Cowl
  • Arm Knit Cowl
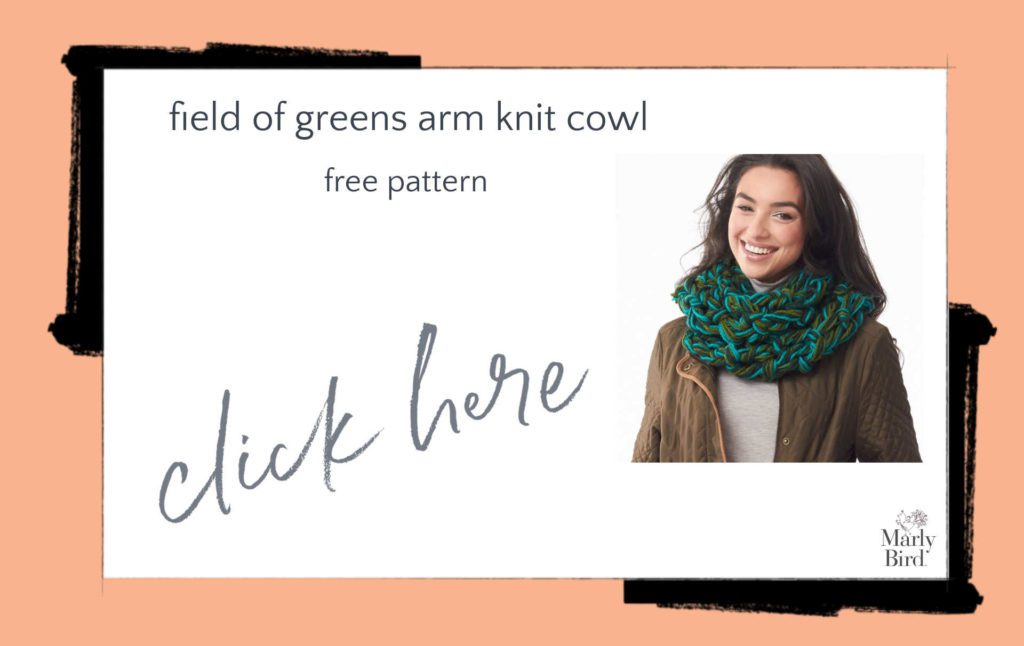
  • Field of Greens Arm Knit Cowl
  • Arm Knit Cowl
  • Arm Knit School Spirit Scarf
  • Comfy Arm Knit Cowl
  • Post Haste Pompom Arm Knit Scarf
  • Alluring Arm Knit Cowl
  • Cozy Arm-Knit Cowl
  • Super Style Arm Knit Cowl
  • Warm Wool Arm Knit Cowl
  • Arm Knit Sashay Cowl
  • Arm Knit Vivid Cowl
  • Arm Knit Stellar Cowl
  • Arm Knit Cozy Cowl
  • Arm Knit Chic Cowl
  • Amy's Arm Knit Cowl
  • Quick & Easy Arm Knit Cowl
Field of Greens Arm Knit Cowl Free Knitting Pattern

Bonus: Finger Knitting and Finger Crochet

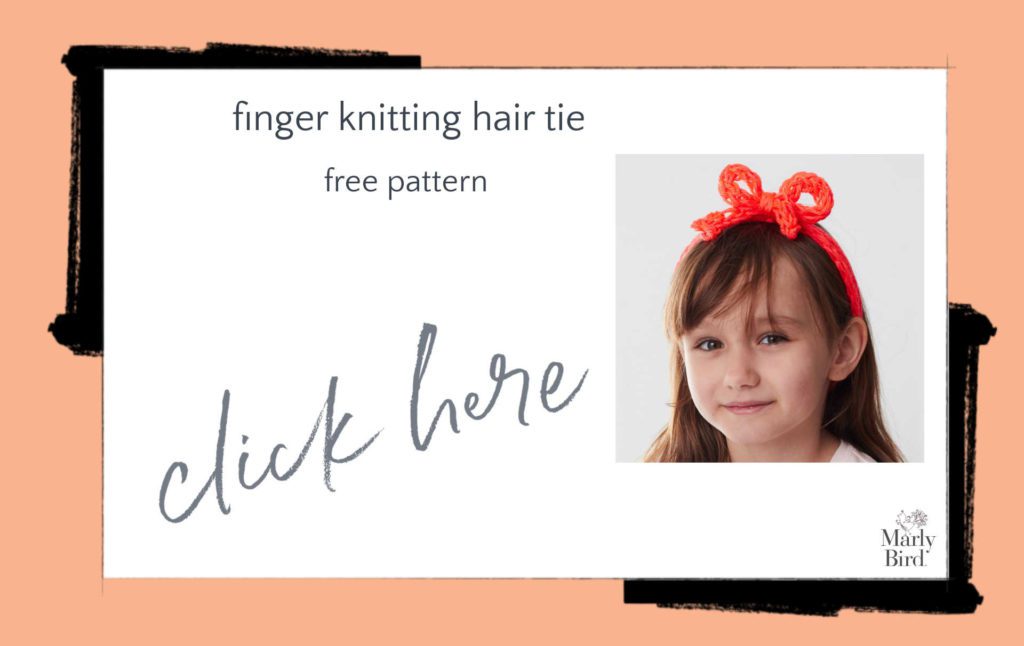
Get your fingers going with these projects that don't require your entire arm — just your hands and yarn! You can do finger knitting. However, did you know that you can also do finger crochet? That's right; skip the hook and just use your fingers. It's actually a lot of fun.

  • Finger Crochet Cowl
  • Finger Knitting Hair Tie
Finger Knitting Hair Tie Free Knitting Pattern

Also on the Blog

  • Get Thick With It: 20 Best Super Bulky and Jumbo Yarns
  • Texture and Warmth: Cable Knit Hat Free Pattern with Pom
  • Butterfly Crochet Cowl Free Pattern with Video Tutorial
  • Colorful One Ball Knit Scarf Cowl Free Pattern

Frequently Asked Questions

What is arm knitting and how does it work?

Arm knitting uses your forearms as giant “needles”… you loop super chunky yarn over your arms and work the stitches by transferring loops from one arm to the other. You need no tools at all except yarn (and arms!). It works specifically with jumbo or extra jumbo weight yarn because the loops need to be big enough to fit over your hands and stay on your forearms. The resulting fabric is very open and loose… that gorgeous, cozy mesh look you see in chunky blankets and scarves.

What projects are best for arm knitting?

Blankets are the most popular arm knitting project… that's what really went viral and introduced millions of people to the technique. A simple rectangular throw can be completed in an hour or two! Infinity scarves and cowls are another quick favorite. Headbands and ear warmers work up in minutes. Very simple bags can be arm knitted. The limitation is that arm knitting creates a loose, open fabric that's not sturdy enough for very structured items… it's best for cozy, draped pieces where the open texture is part of the appeal.

How much yarn do I need for an arm knitted blanket?

More than you'd think given how fast it goes! A lap blanket needs about 4 to 6 pounds of jumbo roving or arm knitting yarn. A full throw uses 8 to 14+ pounds. Arm knitting yarn is typically sold by weight in ounces or pounds rather than by yardage… check product listings for the specific blanket size recommendations. The yarn is the main cost in arm knitting since no tools are needed… budget accordingly for the size you want to make.

What yarn do I need for arm knitting?

Super bulky (#6) or jumbo (#7) weight yarn is required. Merino wool roving is the traditional choice for that gorgeous fluffy look… it's expensive but beautiful. Acrylic “arm knitting yarn” is a budget-friendly alternative that's machine washable and looks similar. Chunky jersey t-shirt yarn (recycled cotton fabric strips) creates a different aesthetic… more structured and striped. Look specifically for yarn sold FOR arm knitting… regular chunky yarn is too small to work with on your arms. The loops won't form properly with anything that isn't truly jumbo weight.

Is arm knitting good for people who can't use regular needles?

It can be! Arm knitting doesn't require fine motor hand skills like regular knitting does… the movements are broader and involve the whole arm. For some people with arthritis, hand injuries, or other fine motor limitations that make needle knitting difficult, arm knitting offers a way to still create beautiful knitted fabric. That said, holding very heavy yarn for the length of a blanket can be tiring on arms and shoulders. Short sessions with breaks are smart regardless of ability level. Always listen to your body!

Filed Under: Free Patterns

Learn to Crochet Basics (BiCrafty Bootcamp: Beginner…

September 1, 2021 By Marly Bird 5 Comments

We are so excited to kick off our next series in BiCrafty Bootcamp. This one is Beginner Crochet Lessons for Knitters. Any knitters out there who have thought about learning to crochet should join right now. It's a free set of weekly lessons over the course of the next few months. They're designed specifically to help knitters use their existing skills to make crocheting easier. With written instructions, video tutorials, and patterns selected specifically for each stage of crochet growth, you can learn to crochet easily. Beginning today, you'll learn to crochet basics. You'll be surprised by how much you have already learned by the end of this first lesson.

BiCrafty-Bootcamp-Crochet-landing-copy

Learn to Crochet Basics

Just like with knitting, you'll start to learn to crochet basics by learning about your materials. Luckily your work as a knitter already has you well primed for this. You know about yarn fibers, weights, etc. So mostly it's just about learning the difference between knitting needles and crochet hooks.

Obviously, you work with two needles (or more if you're using DPNs) whereas you only work with one crochet hook. As far as the hook itself, though, there are a lot of similarities. The hook head can be pointier or blunter, depending on your preference. The material of the hook might be aluminum, wood, or plastic. As a knitter, much of this should sound familiar.

However, head to our Ultimate Guide to Crochet Hooks to learn everything you need to know as a beginner crochet.It will teach you tons of stuff including crochet hook sizes. Also, when you watch the YouTube video embedded at the end of the post, Marly starts off by showing you a whole bunch of different hook options.

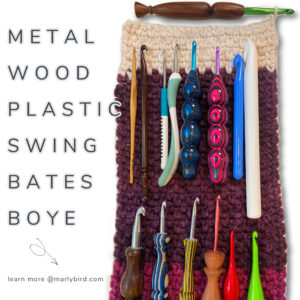
Colorful crochet hooks displayed on a textured background, showcasing various materials and designs.

How to Hold Your Hook and Yarn

As a knitter, you had to figure out the most comfortable way to hold your hook and yarn. It took some time and felt awkward at first. Therefore, don't feel bad if it feels a little awkward adjusting to a crochet hook and yarn. It's a little bit different. But you'll get there with practice.

Many people find that they hold their crochet hook similarly to the way that they hold their dominant hand knitting needle. Try that and see if it works for you. We'll also give you some more options in this lesson for ways to hold your hook and yarn.

Most people hold their hooks either similar to how they grip a knife or how they grip a pencil. Marly covers this in the video below as well to help you figure out what's comfortable.

LEFTIES: Marly is doing her best to show some left-handed crochet in the live videos even though we're all righties. And then we're going to try to get some left-handed crochet tutorial videos up on the site soon.

Learn to Crochet Basics: Foundation Chain

You'll start off your crochet with a slip knot. Yep, that's exactly the same as it is in knitting.

Then you're going to work your first chain. This is comparable in knitting to “casting on.” The major difference between knitting and crochet is that in knitting you pull a bunch of live loops up onto the hook at once whereas in crochet you pull up one loop at a time then bind off the loop you pulled up to complete the stitch. So you'll create a chain that's not going to sit on your hook; otherwise it's very similar to the cast on. It's your starting row.

NOTE: When counting your chains, do not ever count the chain that is on your loop.

Learn to Crochet Basics: Turning Chains

In knitting, you complete your cast-on row. Then you turn the work and you start immediately working the next row, right? Well, it's a little bit different in crochet.

You see, in knitting, the basic stitches are all the same heights. Whether you knit or purl, you're adding the same amount of height to the fabric in that row. Crochet is different because you can build stitches in varying heights. As a result, you need to do something a little bit different in crochet than in knitting when you turn your work: you need to start with a turning chain. (Sometimes these are also called beginning chains.)

I like to think of the crochet turning chain or beginning chain as a stair step to the next row or round. *Side Note: this turning chain or beginning chain sometimes counts as a stitch and sometimes doesnโ€™t. We will go over that more later.

This is a chain that you make, exactly like you began your foundation chain. You create it at a height that matches the stitches for that row. If you check out this post then you'll see that the most common basic crochet stitches are a single crochet, a double crochet, and a treble (or triple) crochet. Each one is taller than the other. So, if you wanted to make a row of single crochet stitches, you would begin with a turning chain of height one. Then you would work single crochet across the row.

We'll give you more info on how to calculate the turning chain height in future lessons. For now, you're going to learn single crochet stitch, so you just need to know that the turning chain is a chain one. (And in the video below Marly explains this a little bit further, with drawings as visuals, so you can understanding varied turning chain heights and why we use them.)

How to Single Crochet Stitch

The single crochet stitch gives you the basic foundation of almost everything that you're going to do in crochet. Each crochet stitch is made with a combination of “yarn over”, “pull through loop(s)”, and insert your hook into the correct next stitch. Different stitch heights and techniques are just variations on this. Therefore, once you master the single crochet, you're ready to move forward.

In this lesson, you're also going to learn how to decrease in single crochet! Yep, already! Follow the live video at the bottom of this post (or over on YouTube) and you'll see when we work the sides of the pattern below, we're doing the decrease. It's easier than you think! (And you know the concept from knitting.)

Knitterโ€™s Tip: The single crochet is completed just like a stretchy bind off wherein you knit 2 stitches, then put the left hand needle in the front leg of those two stitches on the right hand needle and knit them together. Donโ€™t believe me? Try it, watch the formation of the bind offโ€ฆthen try to do it with a crochet hook. Notice it is the same stitch ๐Ÿ™‚ So, a stretchy bind off is really jut a single crochet bind off.

Find diagram instructions for single crochet here.

Learn to Crochet Basics: Final Lesson One Tips

There are a few more things we want to cover in this first lesson for BiCrafty Bootcamp: Beginner Crochet Lessons for Knitters.

Stitch Markers for Straight Edges

Get yourself a set of locking stitch markers. You'll use them often in crochet for the same reasons that you use them in knitting. For example, you might use them to count off sets of stitches in a long row. Alternatively, you might use them to mark the beginning of a round.

Right now, though, we're going to teach you how to use stitch markers to get straight edges when you're first learning how to crochet. You'll see in the pattern instructions as well as the video that we put it in the top of the final stitch of a row so we can easily identify the last stitch of a row and keep those edges straight.

Weaving In / Burying Ends

A lot of crocheters simply crochet over their ends as they go. While that's certainly one method, it's not the most effective. Ends come loose too easily over time. Therefore, you want to learn to properly weave in or bury your ends in crochet. Luckily, as a knitter, you probably already have a good sense of how to do this. Marly goes over this towards the end of the live video embedded at the bottom of this post. And we'll give you this info in future lessons as well.

Using an I-Cord Maker

As a knitter, you might know how to knit I-Cords. But did you know that there are handy I-cord makers out there that make the job so much easier? It's similar to how you can make pom poms by hand or use a pom pom maker instead. We're going to use an I-Cord maker here in BiCrafty Bootcamp, although it's optional for you.

BiCrafty Bootcamp: Our First Crochet Pattern!

We want you to see your new crochet skills put to work immediately. Those instant gratification projects are so good for your self-esteem as you learn a new craft. Moreover, you'll have a lot of items at the end of Bootcamp that you can use or gift! We'll start today with:

Pattern: Single Crochet Headband/ Head Wrap for Self-Care

That's right, you're ready to make your first single crochet project. And why not make it for yourself. If you enjoy the practice, make a bunch of them. After all, these are great gifts for many different people in your life.

Materials:

  • Yarn: WeCrochet Dishie Yarn, 1 ball in color of your choosing. This is a worsted weight cotton yarn.
  • Hook: Size H (5 mm) or I (5.5 mm) crochet hook
  • Notions: Locking stitch markers, Chenille and tapestry needles for weaving in ends.

Gauge:

Yes, just like in knitting, gauge matters in crochet. Learn how to calculate crochet gauge here.

  • 5 rows wide = 1 inch

Finished size:

  • Finished length (without straps) = 16.5 inches

Pattern Instructions

Body

Chain 51

Row 1 (RS): Single crochet in second chain from hook and in each chain to end. Chain one more, turn work — 50 single crochet *REMEMBER: when we say “second chain from hook – DO NOT COUNT THE LOOP ON YOUR HOOK! Start with the next one for your count.*

Row 2 (WS): Single crochet in first single crochet (put a stitch marker in the top of the single crochet just completed, this will help you identify the last stitch of the next row thus keeping your edges straight). Single crochet in each single crochet to end, chain one and turn — 50 single crochet (Don't forget to count your stitches each row!!)

Row 3: Single crochet in first single crochet (put a stitch marker in the top of the single crochet just completed). Single crochet in each single crochet to end (the last stitch of the row will be the one you put the stitch marker in on the previous row) chain one and turn — 50 single crochet

NOTE: We will keep one marker at either end of the piece to help keep the edges straight. Move these markers up each row into the new single crochet competed.

Row 4: Single crochet in first single crochet (move the stitch marker up to the top of the single crochet just completed). Single crochet in each single crochet to end (the last stitch of the row will be the one you put the stitch marker in on the previous row) chain one and turn — 50 single crochet

Row 5; Single crochet in first single crochet (move the stitch marker up to the top of the single crochet just completed). Single crochet in each single crochet to end (the last stitch of the row will be the one you put the stitch marker in on the previous row) chain one and do not turn, rotate the work 90 degrees to work along short edge– 50 single crochet

1st Side Edge

Working into the short edge,

Row 1 (RS): Single crochet once into the edge of each row. Chain one, turn — 5 single crochet

Row 2 (WS): Single crochet 2 together, single crochet one, single crochet 2 together. Chain one, turn — 3 single crochet

Row 3: Single crochet 3 together — 1 single crochet

1st Finishing ties or no ties (see both options)

Option 1: After the single crochet 3 together, chain 50. Fasten off.

Option 2: Fasten off. Make I-cord 15″ (38 cm) long. Seam to edging.

2nd Side Edging

Turn 180 degrees to other short edge.

Row 1 (RS): Join yarn with slip stitch at right corner. Chain one. Single crochet once into the edge of each row. Chain one, turn — 5 single crochet stitches

Row 2 (WS): Single crochet 2 together, single crochet one, single crochet 2 together. Chain one, turn — 3 single crochet

Row 3: Single crochet 3 together — 1 single crochet

2nd Finishing ties or no ties (see both options)

Choose same option as you did for the 1st side edging.

Option 1: After the single crochet 3 together, chain 50. Fasten off.

Option 2: Fasten off. Make I-cord 15″ (38 cm) long. Seam to edging.

Video Tutorial for Lesson One:

Additional Videos and Patterns You Might Want to Check Out

You've already mastered a lot of learn to crochet basics. If you keep practicing with that headband pattern, you'll be well set for next week's lesson. However, if you want to branch out, here are some additional videos and patterns you're ready for at this point.

  • Videos for the first five basic crochet stitches
  • Video for more info on turning chains
  • Lily Sugar' n Cream Dishcloth – a single crochet pattern; your Dishie yarn will work for this project as well

Frequently Asked Questions

Is this lesson really for knitters who want to learn crochet?

Yes! It's called BiCrafty Bootcamp and it's a whole series of free lessons designed specifically for knitters… Marly says she uses your existing knitting skills to make crocheting easier for you.

How do I start crocheting? What's the first step?

Honestly… you start with a slip knot, just like in knitting! Then you'll make a foundation chain, which is like casting on. The big difference is you pull up one loop at a time and finish it off, rather than having a bunch of loops on your hook all at once.

I'm struggling with holding the hook and yarn… is that normal?

Oh, absolutely! It's totally okay if it feels a little awkward at first… just like when you first learned to knit. Lots of people hold their crochet hook like they hold a pencil or a knife, so try that and see what feels comfy for you.

What's a turning chain and why do I need it?

So here's the thing… unlike knitting where stitches are all the same height, crochet stitches can vary. The turning chain is like a little stair step you make before starting a new row, and its height depends on the type of stitch you'll be using… it helps build the fabric correctly!

How can I make sure my crochet edges are straight?

Yes! Marly suggests using locking stitch markers… you can put one in the very last stitch of your row to easily identify it and keep those edges nice and straight. She mentions this was a big help for her when she was first learning too!

Filed Under: BiCrafty Bootcamp Learn to Crochet, Crochet, Tips, Tricks, Techniques for Knitting and Crochet

  • « Previous Page
  • 1
  • …
  • 61
  • 62
  • 63
  • 64
  • 65
  • …
  • 96
  • Next Page »

Let's Be Social

Join the Marly's Minions Facebook group to share, ask questions, or chat about all of your yarn related crafts!

Join the group
Cartoon of a smiling woman with brown hair in a bun, glasses, black jacket and green shirt, waving next to large "hi" text.

Quick Links

The Pattern Shop

Our Free Patterns

Blog

Marly Bird House

Learn to Knit & Crochet

About

Giveaway Terms and Privacy Notice

Find Us Everywhere

Join the Newsletter

YouTube Channel

Marly's Minions FB Group

Etsy Store

Ravelry Store


AN ELITE CAFEMEDIA HOME/DIY PUBLISHER

Information from your device can be used to personalize your ad experience. Do not sell or share my personal information.

Privacy Policyย  ย Termsย  ย Marly Bird Legal Documents Copyright © 2026