
Learn to Crochet Basics (BiCrafty Bootcamp: Beginner…
We are so excited to kick off our next series in BiCrafty Bootcamp. This one is Beginner Crochet Lessons for Knitters. Any knitters out there who have thought about learning to crochet should join right now. It's a free set of weekly lessons over the course of the next few months. They're designed specifically to help knitters use their existing skills to make crocheting easier. With written instructions, video tutorials, and patterns selected specifically for each stage of crochet growth, you can learn to crochet easily. Beginning today, you'll learn to crochet basics. You'll be surprised by how much you have already learned by the end of this first lesson.
Learn to Crochet Basics
Just like with knitting, you'll start to learn to crochet basics by learning about your materials. Luckily your work as a knitter already has you well primed for this. You know about yarn fibers, weights, etc. So mostly it's just about learning the difference between knitting needles and crochet hooks.
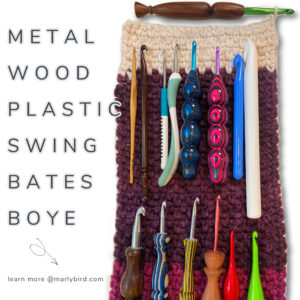
Obviously, you work with two needles (or more if you're using DPNs) whereas you only work with one crochet hook. As far as the hook itself, though, there are a lot of similarities. The hook head can be pointier or blunter, depending on your preference. The material of the hook might be aluminum, wood, or plastic. As a knitter, much of this should sound familiar.
However, head to our Ultimate Guide to Crochet Hooks to learn everything you need to know as a beginner crochet.It will teach you tons of stuff including crochet hook sizes. Also, when you watch the YouTube video embedded at the end of the post, Marly starts off by showing you a whole bunch of different hook options.
How to Hold Your Hook and Yarn
As a knitter, you had to figure out the most comfortable way to hold your hook and yarn. It took some time and felt awkward at first. Therefore, don't feel bad if it feels a little awkward adjusting to a crochet hook and yarn. It's a little bit different. But you'll get there with practice.
Many people find that they hold their crochet hook similarly to the way that they hold their dominant hand knitting needle. Try that and see if it works for you. We'll also give you some more options in this lesson for ways to hold your hook and yarn.
Most people hold their hooks either similar to how they grip a knife or how they grip a pencil. Marly covers this in the video below as well to help you figure out what's comfortable.
LEFTIES: Marly is doing her best to show some left-handed crochet in the live videos even though we're all righties. And then we're going to try to get some left-handed crochet tutorial videos up on the site soon.
Learn to Crochet Basics: Foundation Chain
You'll start off your crochet with a slip knot. Yep, that's exactly the same as it is in knitting.
Then you're going to work your first chain. This is comparable in knitting to “casting on.” The major difference between knitting and crochet is that in knitting you pull a bunch of live loops up onto the hook at once whereas in crochet you pull up one loop at a time then bind off the loop you pulled up to complete the stitch. So you'll create a chain that's not going to sit on your hook; otherwise it's very similar to the cast on. It's your starting row.
NOTE: When counting your chains, do not ever count the chain that is on your loop.
Learn to Crochet Basics: Turning Chains
In knitting, you complete your cast-on row. Then you turn the work and you start immediately working the next row, right? Well, it's a little bit different in crochet.
You see, in knitting, the basic stitches are all the same heights. Whether you knit or purl, you're adding the same amount of height to the fabric in that row. Crochet is different because you can build stitches in varying heights. As a result, you need to do something a little bit different in crochet than in knitting when you turn your work: you need to start with a turning chain. (Sometimes these are also called beginning chains.)
I like to think of the crochet turning chain or beginning chain as a stair step to the next row or round. *Side Note: this turning chain or beginning chain sometimes counts as a stitch and sometimes doesn’t. We will go over that more later.
This is a chain that you make, exactly like you began your foundation chain. You create it at a height that matches the stitches for that row. If you check out this post then you'll see that the most common basic crochet stitches are a single crochet, a double crochet, and a treble (or triple) crochet. Each one is taller than the other. So, if you wanted to make a row of single crochet stitches, you would begin with a turning chain of height one. Then you would work single crochet across the row.
We'll give you more info on how to calculate the turning chain height in future lessons. For now, you're going to learn single crochet stitch, so you just need to know that the turning chain is a chain one. (And in the video below Marly explains this a little bit further, with drawings as visuals, so you can understanding varied turning chain heights and why we use them.)
How to Single Crochet Stitch
The single crochet stitch gives you the basic foundation of almost everything that you're going to do in crochet. Each crochet stitch is made with a combination of “yarn over”, “pull through loop(s)”, and insert your hook into the correct next stitch. Different stitch heights and techniques are just variations on this. Therefore, once you master the single crochet, you're ready to move forward.
In this lesson, you're also going to learn how to decrease in single crochet! Yep, already! Follow the live video at the bottom of this post (or over on YouTube) and you'll see when we work the sides of the pattern below, we're doing the decrease. It's easier than you think! (And you know the concept from knitting.)
Knitter’s Tip: The single crochet is completed just like a stretchy bind off wherein you knit 2 stitches, then put the left hand needle in the front leg of those two stitches on the right hand needle and knit them together. Don’t believe me? Try it, watch the formation of the bind off…then try to do it with a crochet hook. Notice it is the same stitch 🙂 So, a stretchy bind off is really jut a single crochet bind off.
Find diagram instructions for single crochet here.
Learn to Crochet Basics: Final Lesson One Tips
There are a few more things we want to cover in this first lesson for BiCrafty Bootcamp: Beginner Crochet Lessons for Knitters.
Stitch Markers for Straight Edges
Get yourself a set of locking stitch markers. You'll use them often in crochet for the same reasons that you use them in knitting. For example, you might use them to count off sets of stitches in a long row. Alternatively, you might use them to mark the beginning of a round.
Right now, though, we're going to teach you how to use stitch markers to get straight edges when you're first learning how to crochet. You'll see in the pattern instructions as well as the video that we put it in the top of the final stitch of a row so we can easily identify the last stitch of a row and keep those edges straight.
Weaving In / Burying Ends
A lot of crocheters simply crochet over their ends as they go. While that's certainly one method, it's not the most effective. Ends come loose too easily over time. Therefore, you want to learn to properly weave in or bury your ends in crochet. Luckily, as a knitter, you probably already have a good sense of how to do this. Marly goes over this towards the end of the live video embedded at the bottom of this post. And we'll give you this info in future lessons as well.
Using an I-Cord Maker
As a knitter, you might know how to knit I-Cords. But did you know that there are handy I-cord makers out there that make the job so much easier? It's similar to how you can make pom poms by hand or use a pom pom maker instead. We're going to use an I-Cord maker here in BiCrafty Bootcamp, although it's optional for you.
BiCrafty Bootcamp: Our First Crochet Pattern!
We want you to see your new crochet skills put to work immediately. Those instant gratification projects are so good for your self-esteem as you learn a new craft. Moreover, you'll have a lot of items at the end of Bootcamp that you can use or gift! We'll start today with:
Pattern: Single Crochet Headband/ Head Wrap for Self-Care
That's right, you're ready to make your first single crochet project. And why not make it for yourself. If you enjoy the practice, make a bunch of them. After all, these are great gifts for many different people in your life.
Materials:
- Yarn: WeCrochet Dishie Yarn, 1 ball in color of your choosing. This is a worsted weight cotton yarn.
- Hook: Size H (5 mm) or I (5.5 mm) crochet hook
- Notions: Locking stitch markers, Chenille and tapestry needles for weaving in ends.
Gauge:
Yes, just like in knitting, gauge matters in crochet. Learn how to calculate crochet gauge here.
- 5 rows wide = 1 inch
Finished size:
- Finished length (without straps) = 16.5 inches
Pattern Instructions
Body
Chain 51
Row 1 (RS): Single crochet in second chain from hook and in each chain to end. Chain one more, turn work — 50 single crochet *REMEMBER: when we say “second chain from hook – DO NOT COUNT THE LOOP ON YOUR HOOK! Start with the next one for your count.*
Row 2 (WS): Single crochet in first single crochet (put a stitch marker in the top of the single crochet just completed, this will help you identify the last stitch of the next row thus keeping your edges straight). Single crochet in each single crochet to end, chain one and turn — 50 single crochet (Don't forget to count your stitches each row!!)
Row 3: Single crochet in first single crochet (put a stitch marker in the top of the single crochet just completed). Single crochet in each single crochet to end (the last stitch of the row will be the one you put the stitch marker in on the previous row) chain one and turn — 50 single crochet
NOTE: We will keep one marker at either end of the piece to help keep the edges straight. Move these markers up each row into the new single crochet competed.
Row 4: Single crochet in first single crochet (move the stitch marker up to the top of the single crochet just completed). Single crochet in each single crochet to end (the last stitch of the row will be the one you put the stitch marker in on the previous row) chain one and turn — 50 single crochet
Row 5; Single crochet in first single crochet (move the stitch marker up to the top of the single crochet just completed). Single crochet in each single crochet to end (the last stitch of the row will be the one you put the stitch marker in on the previous row) chain one and do not turn, rotate the work 90 degrees to work along short edge– 50 single crochet
1st Side Edge
Working into the short edge,
Row 1 (RS): Single crochet once into the edge of each row. Chain one, turn — 5 single crochet
Row 2 (WS): Single crochet 2 together, single crochet one, single crochet 2 together. Chain one, turn — 3 single crochet
Row 3: Single crochet 3 together — 1 single crochet
1st Finishing ties or no ties (see both options)
Option 1: After the single crochet 3 together, chain 50. Fasten off.
Option 2: Fasten off. Make I-cord 15″ (38 cm) long. Seam to edging.
2nd Side Edging
Turn 180 degrees to other short edge.
Row 1 (RS): Join yarn with slip stitch at right corner. Chain one. Single crochet once into the edge of each row. Chain one, turn — 5 single crochet stitches
Row 2 (WS): Single crochet 2 together, single crochet one, single crochet 2 together. Chain one, turn — 3 single crochet
Row 3: Single crochet 3 together — 1 single crochet
2nd Finishing ties or no ties (see both options)
Choose same option as you did for the 1st side edging.
Option 1: After the single crochet 3 together, chain 50. Fasten off.
Option 2: Fasten off. Make I-cord 15″ (38 cm) long. Seam to edging.
Video Tutorial for Lesson One:
Additional Videos and Patterns You Might Want to Check Out
You've already mastered a lot of learn to crochet basics. If you keep practicing with that headband pattern, you'll be well set for next week's lesson. However, if you want to branch out, here are some additional videos and patterns you're ready for at this point.
- Videos for the first five basic crochet stitches
- Video for more info on turning chains
- Lily Sugar' n Cream Dishcloth – a single crochet pattern; your Dishie yarn will work for this project as well
Frequently Asked Questions
Is this lesson really for knitters who want to learn crochet?
Yes! It's called BiCrafty Bootcamp and it's a whole series of free lessons designed specifically for knitters… Marly says she uses your existing knitting skills to make crocheting easier for you.
How do I start crocheting? What's the first step?
Honestly… you start with a slip knot, just like in knitting! Then you'll make a foundation chain, which is like casting on. The big difference is you pull up one loop at a time and finish it off, rather than having a bunch of loops on your hook all at once.
I'm struggling with holding the hook and yarn… is that normal?
Oh, absolutely! It's totally okay if it feels a little awkward at first… just like when you first learned to knit. Lots of people hold their crochet hook like they hold a pencil or a knife, so try that and see what feels comfy for you.
What's a turning chain and why do I need it?
So here's the thing… unlike knitting where stitches are all the same height, crochet stitches can vary. The turning chain is like a little stair step you make before starting a new row, and its height depends on the type of stitch you'll be using… it helps build the fabric correctly!
How can I make sure my crochet edges are straight?
Yes! Marly suggests using locking stitch markers… you can put one in the very last stitch of your row to easily identify it and keep those edges nice and straight. She mentions this was a big help for her when she was first learning too!


I was late for the first lesson, but love the stitch marker to mark the first stitch and also loved the chart!
You thought me to make a professional starting chaind I am a crocheter for 11 years now. I have never liked my beginning chain, and wondered why the designers always looked better then mine. You taught me to make a professional chain! Thank you
This seems so simple, but I loved the idea of stitch markers for keeping the sides straight. In the past, that has been my biggest downfall when I poorly made an afghan for my husband. I NEVER had straight sides to anything I every attempted in crochet. So simple, BUT huge for me. 🙂 Thanks Marly.
I ha e 2 favorite things I learned. First is getting straight edges by using markers and second is chart reading.
I’m happy to have found this, even if I’m super late to the party, lol! For years I’ve been promising myself that I’d learn to crochet, and this course looks to be the catalyst. Thank you Marly (and Chryssy & Kathryn – hope I spelled those right) for putting this together. Happy Holidays!