Search
Close
  • The Pattern Shop
  • Our Free Patterns
    • Browse All Our Free Patterns
    • Our Free Knitting Patterns
    • Our Free Crochet Patterns
  • Blog
    • All Blog Posts
    • All Free Patterns
    • Dibble Dabble Inspiration
    • Giveaways
    • Make-Alongs
    • Product Reviews
    • Roundups
    • Tips, Tricks, Techniques for Knitting and Crochet
Stylized bird with pink and gray swirling tail above elegant โ€œMarlyโ€ text, logo for crochet accessories and home decor.
  • Marly Bird House
  • Learn to Knit & Crochet
    • Newbie? Start Here
    • Video Tutorials
    • Knitting Definitions
    • Crochet Definitions
    • Common Techniques
    • Size Charts for Knitting and Crochet Projects
  • About
ร—
  • The Pattern Shop
  • Free Patterns
  • Blog
  • Marly Bird House
  • Learn to Knit & Crochet
    • Newbie? Start Here
    • Video Tutorials
    • Knitting Definitions
    • Crochet Definitions
    • Common Techniques
    • Size Charts for Knitting and Crochet Projects
  • About
Stylized bird with pink and gray swirling tail above elegant โ€œMarlyโ€ text, logo for crochet accessories and home decor.
Search
Close

New Patterns NOW Available in Ad-Free PDF! Check out The Pattern Shop

#MARLYMADEMEDOIT Binary Code Knit Super Scarf

November 10, 2021 By Marly Bird Leave a Comment

I have something so special to share with you all today. If you're in the Marly's Minion's Facebook group then you might have already seen a sneak peek of this. It's a super scarf knitted in binary code to read #MARLYMADEMEDOIT. I can't tell you how excited I am about this. Today, I've got the pattern for you. Additionally, I have a way for you to get free access to the binary code for ALL letters, numbers, and some symbols, so that you can actually create the binary knit super scarf with any message you'd like. But first, let me tell you the story behind this pattern.
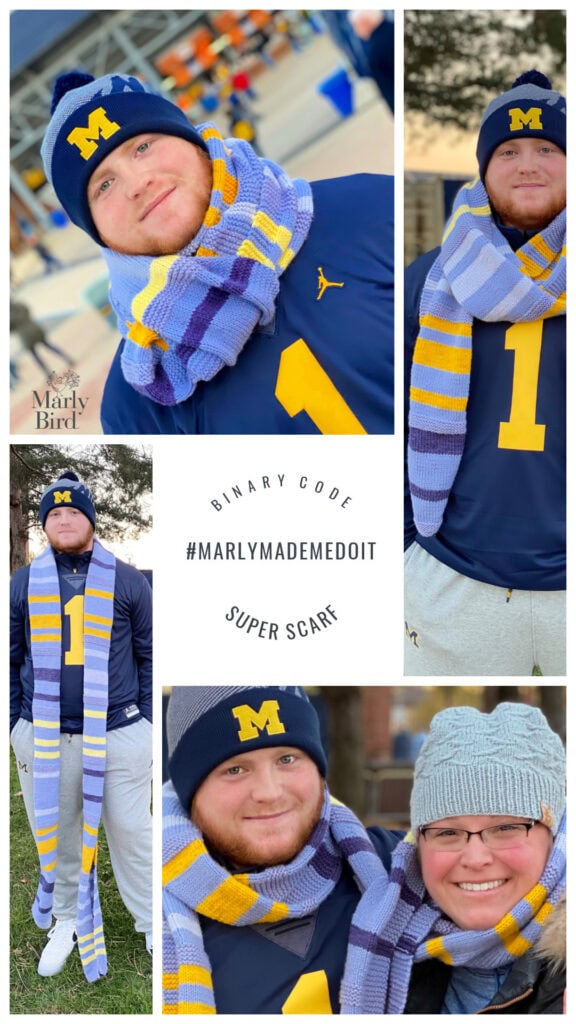
MARLYMADEMEDOIT binary code knit super scar

The Story of the #MARLYMADEMEDOIT Binary Code Knit Super Scarf

Earlier this year, I was having a really, really rough time. I tried to keep it all together and on track but things were rough, and I shared some of that in Marly's Minions at the time. Well, an amazing woman I know named Stephanie Menefee, who is also a tester and contractor, went out of her way to design a stunning blanket for me in binary code. Which, as you have guessed, reads #MARLYMADEMEDOIT.

Community Coming Together to Make a Blanket

The blanket is huge and cozy and beautiful. And, of course, each letter requires its own section. So a group of BiCrafty people came together to work on different parts of the blanket using Stephanie's pattern. They completed the design as a really amazing gift for me. I can't even describe how much this means to me. Even those of us who know how to knit or crochet can be awed and have our hearts warmed when people knit something just for us.

Turning It Into a Binary Knit Super Scarf

I absolutely love the blanket. As time went on, I got to thinking that a binary knit scarf would be a really cool idea as well. So, I contacted Stephanie to find out if it would be possible to create a binary code #MARLYMADEMEDOIT knit super scarf. And when I say SUPER, I mean SUPER. It's about 12 feet long and when you wrap it around yourself it is the coziest thing ever. It's like my very own Dr. Who scarf but made uniquely for me and my interests. Plus, it's made in the cozy O'Go Blanket Yarn. Received as a gift, this would truly be a hug in yarn.
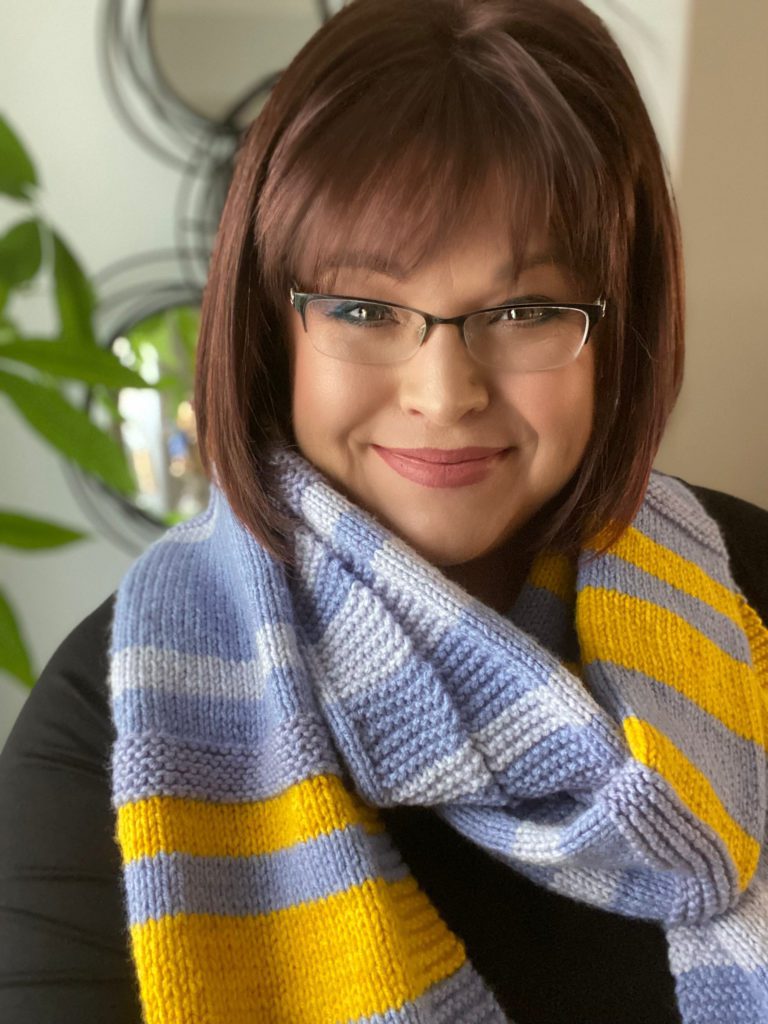
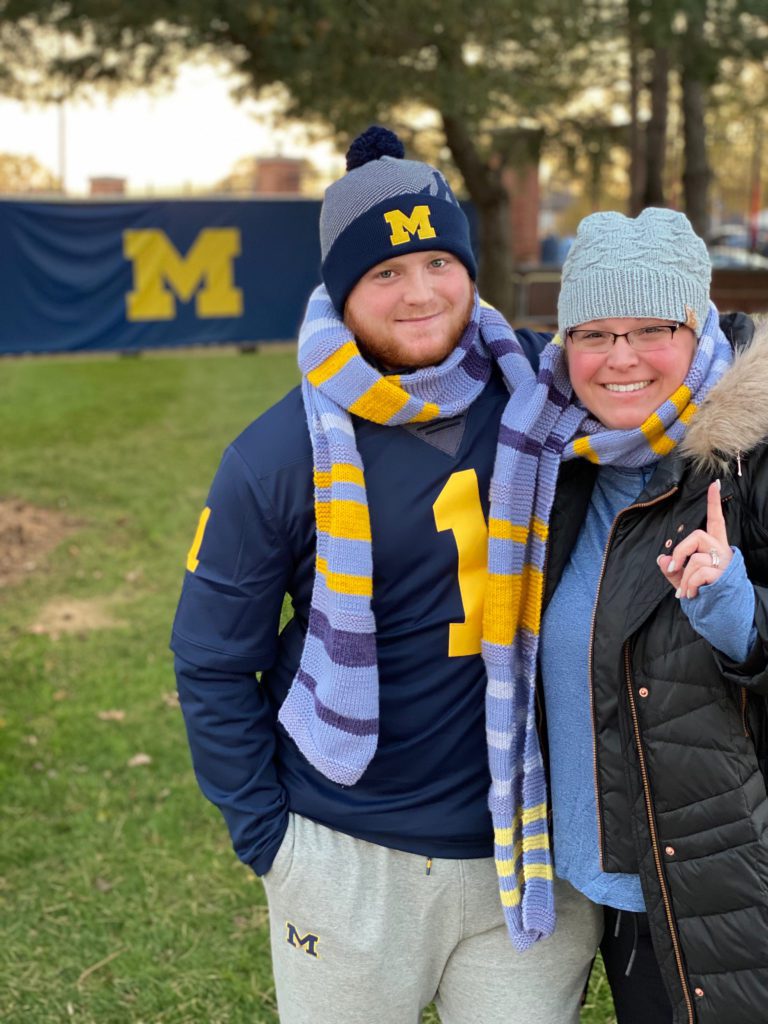
Cozy knit scarf featuring light blue and yellow stripes, modeled by a smiling woman with medium-length hair and glasses.

Wait, What Is Binary Code?

Are you a little lost at all about what it means to knit in binary code? Stephanie explains:

Binary code is a system used in computer programming that utilizes only 0 and 1, effectively turning signals off and on.  Each letter has a specific code for its binary designation.  For example, โ€œAโ€ is the first letter, so the binary code is 01000001, B is 01000010, C is 01000011.  In February of 2021, the Perseverance Rover landed on Mars and part of its landing gear was a parachute which read โ€œDare Mighty Thingsโ€ in binary code.  This parachute was part of the inspiration for this pattern.  I hope you enjoy making this scarf with a โ€œsecret codeโ€!

In other words, this is a really cool way to spell out messages without being overt. Only you and the recipient and perhaps some really observant nerdy types will know what that scarf really says.

Knitting and Crochet in Mathematics

This scarf actually continues an amazing tradition of how often knitting and crochet are used in mathematics and science. There are many mathematical principles that are so abstract that it's hard to understand them even with computer modeling. Therefore, knitters and crocheters have created 3d models that help people better understand them.

The most well-known example of this is the hyperbolic crochet figured out by Daina Taimina. This was then used by the Wertheim sister to create the huge crochet coral reef project that's gone around the globe. But you'll find that knitting and crochet have also been used to explain / demonstrate the Lorenz Manifold, the Torus, H-fractals, and hexaflexagons.

So, if you or someone you know are into nerdy things, then you can continue this tradition of knitting math with the binary code super scarf pattern. But you don't have to know anything about math or binary code to make the pattern because Stephanie has done all of that work for you.
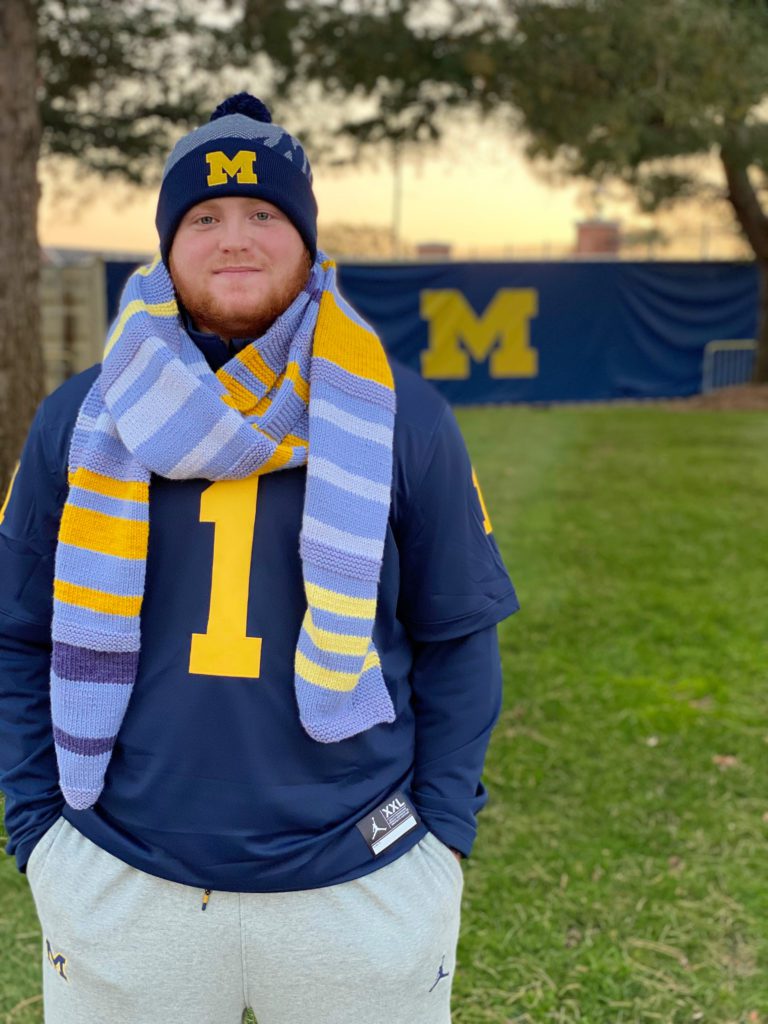
binary code knit scarf pattern

Make The Binary Knit Super Scarf In Any Color You Want

When Stephanie made this amazing super scarf for me, I asked her to do it in colors that were close to Michigan. You all might know that my husband is a Michigan fan, and I'm an Ohio State fan, so I thought it would be a treat to wear the Michigan colors at the game … and yet it has this secret message #MARLYMADEMEDOIT. My son Caden modeled this scarf brilliantly.

That said, you can make the scarf in any colors that you want. This scarf pattern calls for the Caron Oโ€™Go Big Donut. There are five different colors in each O'Go Big Donut. It's super easy to separate out those colors thanks to the O'Go design. Therefore, you just assign a color to each letter. And with so many colorways to choose from, you really can make this in any color design that you want.


#MARLYMADEMEDOIT Binary Code Knit Super Scarf Pattern

>> Get the free PDF here <<

Thanks again to Stephanie Menefee for this terrific pattern:

SKILL LEVEL

Easy

MEASUREMENTS

Scarf measures 9โ€ (23 cm) across and 129โ€ (328 cm) in length.

Note: For a shorter scarf, work 4 rows instead of 6 for each โ€œbitโ€ of each letter.

Gauge

20 sts = 4โ€ (10 cm) in Stockinette st.

MATERIALS

Yarn

Caron Oโ€™Go Big Donut (100% acrylic, 502 yds / 459 m, 9.9 oz/280 g CYCA #4 worsted) 

1 donut: Frostberry (A)

2 donuts: Blue Moon (B and C).

Note: Use the medium blue hue of this yarn for the color C Garter st dividers, and the remaining hues for color B.

Needles

Size US 8 (5mm), or size required for gauge

Notions

Stitch markers, tapestry needle

ABBREVIATIONS

K – Knit

P – Purl

PM – Place marker

RS – Right side

SLM – Slip marker

WS – Wrong side

NOTES

Each one-letter section of the Scarf is made up of 48 rows of Stockinette st with a Garter st edge. All binary-letter sections are worked the same, except that the color order of A and B will differ from section to section as indicated in the pattern. The sections are separated by 10-row Garter st dividers worked in a third color. When colors are switched, the first color is cut and the second color is joined. Tip: It might help you to see the visuals for each letter. We have created a PDF of mini-graphics for that. Find out how to get that at the end of this post.

BINARY LETTER SECTION PATTERN

Row 1 (RS):  K9, PM, k27, PM, k9

Row 2 (WS):  K9, SLM, p to marker, SLM, k9

Row 3 (RS):  K9, SLM, k to marker, SLM, k9

Row 4 (WS):  K9, SLM, p to marker, SLM, k9

Repeat Rows 3 and 4 (21) more times, changing colors as indicated in 6 row increments – 48 total rows per binary-letter color section.
how to knit a scarf in binary code

SCARF

Beginning Garter Stitch Border

With C, cast on 45 sts, and knit 10 rows.

Section 1 (# symbol) Color Sequence:

A: 12 rows                     

B: 6 rows

A: 18 rows

B: 12 rows

Garter Stitch Divider

With C, knit 10 rows. 

Section 2 (letter M) Color Sequence:

A: 6 rows

B: 6 rows

A: 12 rows

B: 12 rows

A: 6 rows

B: 6 rows

Garter Stitch Divider

With C, knit 10 rows. 

Section 3 (letter A) Color Sequence:

A: 6 rows      

B: 6 rows

A: 30 rows

B: 6 rows

Garter Stitch Divider

With C, knit 10 rows. 

Section 4  (letter R) Color Sequence:

A: 6 rows           

B: 6 rows

A: 6 rows

B: 6 rows

A: 12 rows

B: 6 rows

A: 6 rows

Garter Stitch Divider

With C, knit 10 rows. 

Section 5  (letter L) Color Sequence: 

A: 6 rows          

B: 6 rows

A: 12 rows

B: 12 rows

A: 12 rows

Garter Stitch Divider

With C, knit 10 rows. 

Section 6 (letter Y) Color Sequence:

A: 6 rows       

B: 6 rows

A: 6 rows

B: 12 rows

A: 12 rows

B: 6 rows

Garter Stitch Divider

With C, knit 10 rows. 

Section 7 (letter M) Color Sequence:

Repeat Section 2.
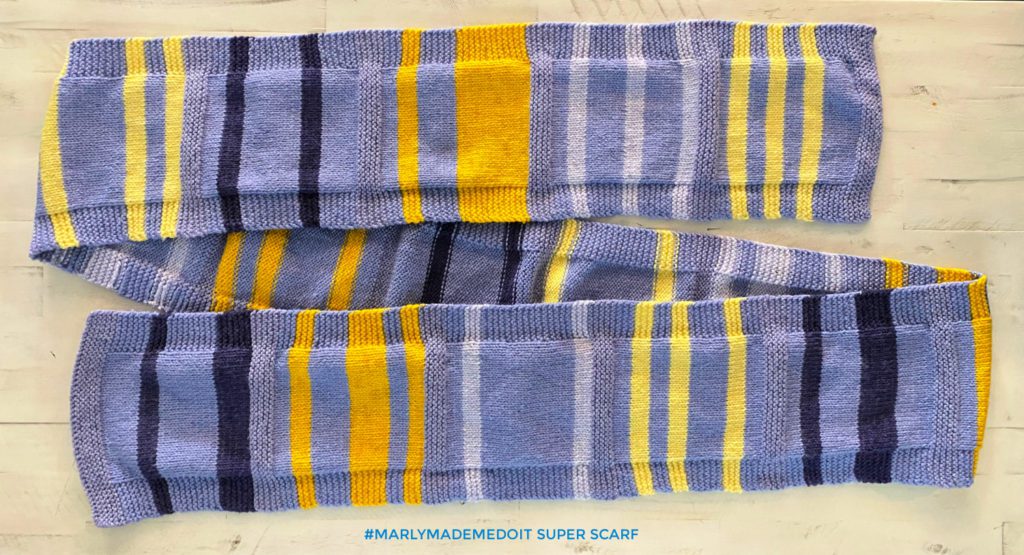
Marly Made Me Do It Super Scarf on a flat surface to see all the stripes and sections.

Garter Stitch Divider

With C, knit 10 rows. 

Section 8 (letter A) Color Sequence: A

Repeat Section 3.

Garter Stitch Divider

With C, knit 10 rows. 

Section 9  (letter D) Color Sequence: D

A: 6 rows          

B: 6 rows

A: 18 rows

B: 6 rows

A: 12 rows

Garter Stitch Divider

With C, knit 10 rows. 

Section 10 (letter E) Color Sequence: E

A: 6 rows

B: 6 rows

A: 18 rows

B: 6 rows

A: 6 rows

B: 6 rows

Garter Stitch Divider

With C, knit 10 rows. 

Section 11 (letter M) Color Sequence:

Repeat Section 2.

Garter Stitch Divider

With C, knit 10 rows. 

Section 12 (letter E) Color Sequence:

Repeat Section 10.

Garter Stitch Divider

With C, knit 10 rows. 

Section 13 (letter D) Color Sequence:

Repeat Section 9.

Garter Stitch Divider

With C, knit 10 rows. 

Section 14 (letter O) Color Sequence:

A: 6 rows

B: 6 rows

A: 12 rows

B: 24 rows

Garter Stitch Divider

With C, knit 10 rows. 
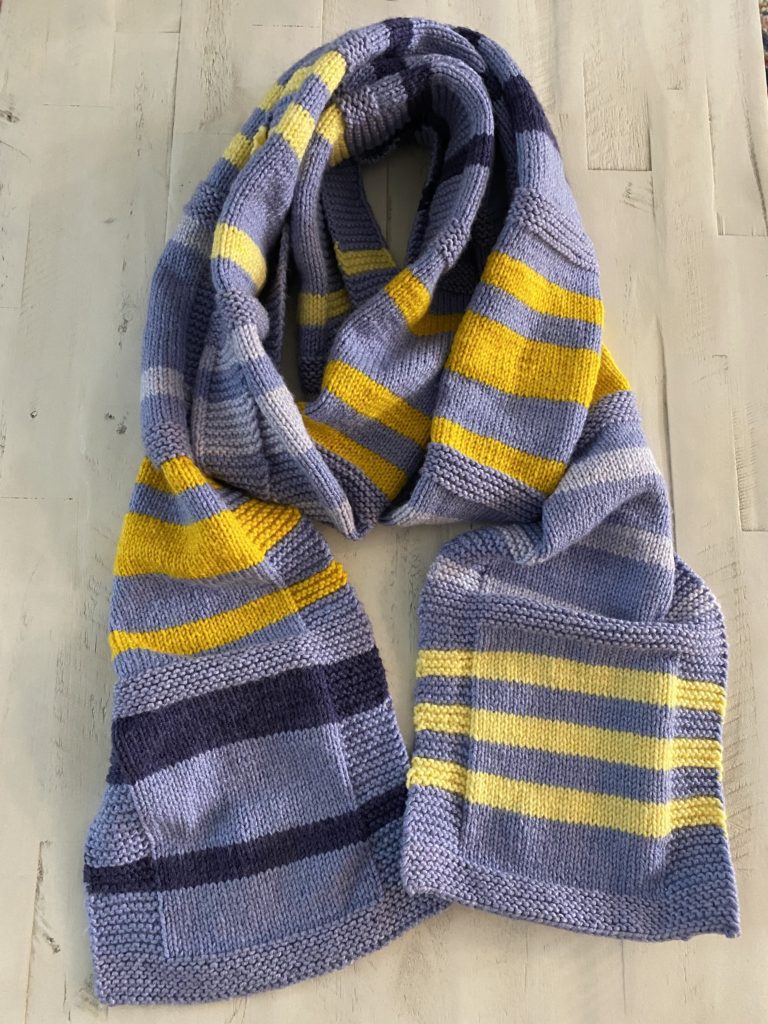
binary code super scarf sample curled up on a table top

Section 15 (letter I)  Color Sequence:

A: 6 rows

B: 6 rows

A: 12 rows

B: 6 rows

A: 12 rows

B: 6 rows

Garter Stitch Divider

With C, knit 10 rows. 

Section 16 (letter T) Color Sequence: 

A: 6 rows         

B: 6 rows

A: 6 rows

B: 6 rows

A: 6 rows

B: 6 rows

A: 12 rows

Ending Garter Stitch Border

With C, knit 10 rows.

Bind off all sts.

FINISHING

Block Scarf flat.

Weave in all loose ends.

Add Your Project to Ravelry!

If you are making this pattern or plan on making one, why not favorite this pattern and queue it up on Ravelry ๐Ÿ™‚

Green circular patch with a stitched outline featuring a lowercase letter "r" in the center.
Add your Binary Knit Super Scarf to Ravelry

Create Any Message That You Want on a Binary Knit Super Scarf!

While I'll be thrilled if all of you are walking around out there this winter with a #MARLYMADEMEDOIT binary code knit super scarf, you can actually make the scarf say anything that you want. And, as aforementioned, the array of colors available with the Caron Oโ€™Go Big Donut allows you to personalize your piece through color as well.

Super Special Secret Messages For Others

This makes for a super cool gift. Maybe it's for someone you know who is into coding. But also maybe it's just to send a secret message to someone. For example, if you have a child that could really use a scarf that says “Mom Loves You” but would be embarrassed to wear that at school, then you could create it in binary code and explain that only you and they know what the message is.

You could also give a secret message to your sweetheart. Or a meaningful message to someone who is having a hard time – think of it as a version of a prayer scarf, for example. Or it could be simpler than that – one scarf for each of your kids with their own names on it. There are so many ways to use binary code to create a OOAK knit super scarf for people you care about.

Affirmations and Messages for Yourself

And don't forget about yourself! Do you start the year off with an intention or “word of the year?” Knit that right into a super scarf for yourself in binary code. Any affirmation or even any cheeky thought that would make you smile during the day and yet no one else would know why is a great choice for a binary knit super scarf.

How to Create Your Own Phrase for a Binary Knit Super Scarf

All you need to know in order to create your own message is what the code is for each letter of the alphabet. And guess what? We've created that for you! We have a PDF that shows you the binary code for all of the letters of the alphabet in both uppercase and lowercase versions. It also includes numbers, more than half a dozen symbols, and how to create a space between words.

Gift for you – Get the PDF Download FREE!
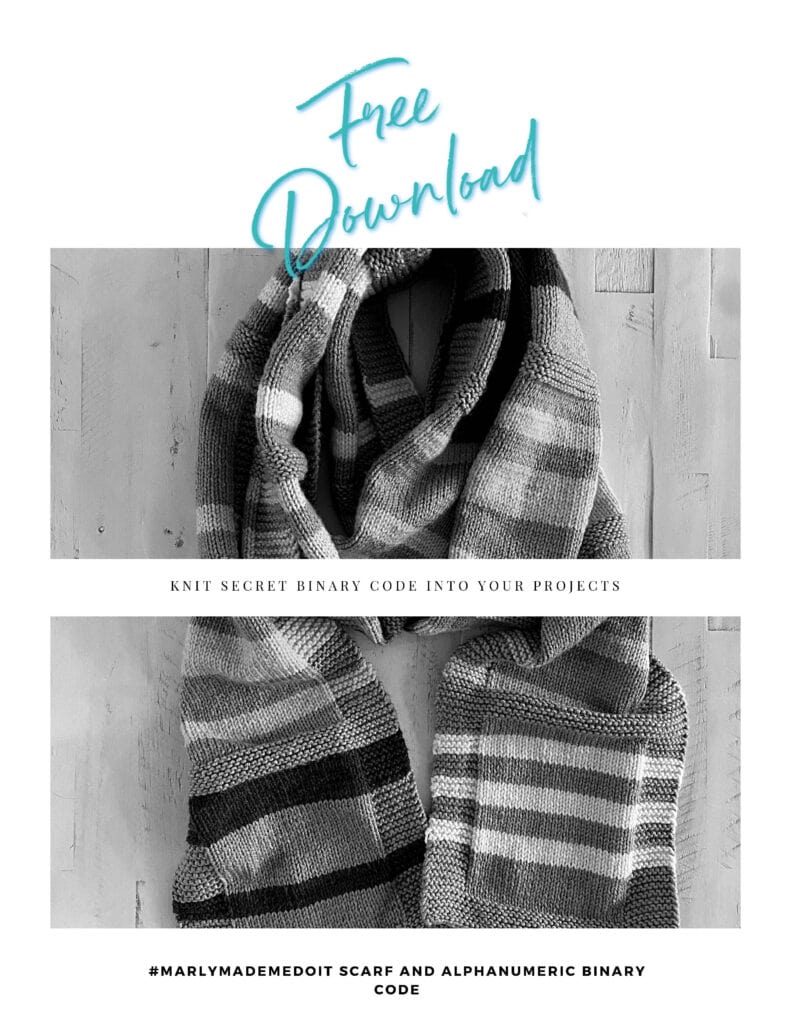
???? Click here to get the free Knit Binary Code Knit Super Scarf pattern and alphanumeric code or click on the image below. ????

Knit Secret Binary Code Scarf Pattern and Alphanumeric Binary Code Instructions. Free PDF Download.
Click the Image to Get the FREE PDF

You Might Also Like:

  • 26 Free Super Bulky Projects to Knit and Crochet
  • Denver Football Free Crochet Scarf Pattern
  • 10 Free Knit and Crochet Winter Fun Patterns

Frequently Asked Questions

What is the Binary Code Knit Super Scarf?

This is one of Marly Bird's most creative and community-driven projects! The Binary Code Super Scarf is a very long knitted scarf that encodes a message in binary (the 1s and 0s of computer language) using different stitch patterns to represent 1s and 0s. The project was a community challenge (#marlymademedoit) where participants knitted their own version of the message. It's a beautiful collision of technology, language, and craft… a knitted scarf that carries a hidden text message only visible to people who can read binary code.

How does binary code work in a knitting pattern?

Binary code uses sequences of 1s and 0s to represent letters and numbers… each letter of the alphabet has an 8-bit binary representation. In the knit super scarf, two different stitch patterns represent 1 and 0… switching between them according to the binary sequence spells out a message that's invisible to most viewers but readable to anyone who knows binary. It's a beautiful concept for making something with a “secret language” embedded in the fabric. Very clever and very nerdy in the best possible way!

Is this pattern accessible to non-technical knitters?

Yes! You don't need to understand binary code to knit the pattern… you just follow the sequence as written, alternating between two stitch patterns as instructed. The binary encoding is done for you in the pattern. That said, the project is a lot more fun if you know what message you're encoding. You could even use an online binary translator to encode your own custom message and create a personalized version! The knitting itself uses basic stitches… the technical cleverness is in the concept, not the execution.

Why is it called a “super” scarf?

Because it's very long! Encoding a meaningful message in binary requires a lot of bits… which means a lot of rows of knitting. A binary code scarf that encodes a full sentence is genuinely quite long. “Super scarf” is an apt description for a scarf that wraps multiple times, creates dramatic visual stripes from the stitch pattern changes, and carries a secret message in every row. It's a commitment project… but the conversation it starts when you tell people “there's a hidden message in this scarf” is absolutely priceless.

Can I adapt this concept to crochet?

Absolutely! The binary encoding concept works in any craft where you can create two distinct visual “states” that alternate according to a sequence. In crochet, alternating between two stitch textures (like single crochet for 0 and half double crochet for 1), two colors, or front loop vs. back loop would all work. The visual appearance would be different from the knitted version, but the hidden message concept translates perfectly. This is actually a fantastic BiCrafty project… make a matching binary code knit and crochet pair!
Filed Under: Knitting, Our Free Patterns, Pattern

Marly Birdโ€™s Top 20 YouTube Knitting Videos

November 8, 2021 By Marly Bird Leave a Comment

Earlier today I published a roundup of my top 20 YouTube crochet videos. As you know, though, I'm BiCrafty. And I love to create content for both knitters and crocheters. So, of course, I had to comb through my YouTube knitting videos stats to find what's most popular with the knitters. Just like with crochet, some of you like my knitting videos for beginners (such as “how to” videos) whereas others really love my step-by-step knitting pattern video tutorials. Here are the Top 20.

Want to learn more about knitting? Check out the video lessons in BiCrafty Bootcamp: Beginner Knitting Lessons for Crocheters. You don't have to be a crocheter to enjoy them!

Marly Bird's Top 20 YouTube Knitting Videos

1. My First Big Comfy Sweater

I'm not at all surprised that this is the most popular of my YouTube knitting videos. After all, who doesn't love a big comfy sweater? All of the “My First” series are knitting videos for beginners to learn how to make specific items with ease. Learn more about this knit sweater pattern here.

2. Big Stitch Throw With Marly's Mom

One of my most popular knitting videos for beginners series was when I taught my mom how to knit. You got to learn with her from the ground up. Lots of people enjoyed watching her learn. There are videos from the very beginning but in this one we learn how to knit the Big Stitch Throw. It's comfy, cozy, and perfect for anyone. Find out more about this knit blanket pattern here.

3. YouTube Knitting Videos: Crescent Shawl

Learn how to knit this crescent shawl with my detailed video instructions. I love teaching and enjoy making it easy for knitters and crocheters to complete lots of different types of projects. Get the free knit shawl pattern here.

4. My First Knit Socks on DPN's

There are so many reasons that this is one of my most popular YouTube knitting videos. First of all, most people who want to learn to knit want to learn how to knit socks. Secondly, double pointed needles can feel intimidating, so a detailed video tutorial is really helpful. And finally, you'll notice this is also part of the “My First” series of knitting videos for beginners. Therefore it's very detailed and helpful. This is a six-part video series; learn more here. Fun fact: Part 4 has also cracked the Top 20 of my most popular YouTube knitting videos, but I won't make a separate post about it in this list.

5. How to Kniw One Skein Simple Lace Triangle Shawl

One skein knit projects are very popular. After all, they're affordable and work up quickly. They're often great for gifting. Plus they give you the opportunity to use up those lovely single skeins of yarn you've had hanging around just looking pretty for way too long. Learn more about this shawl here.

6. Knitting Videos for Beginners: M1 Invisible Increase

Many of my most popular YouTube knitting videos are for patterns. However, some of you also really like basic knitting how to videos. In this one, you can learn the M1 increase, which is a virtually invisible knit increase.

7. How to Knit Fantastic Brioche Scarf

Some knitters get nervous about trying brioche. However, my knitting videos make it easy for you to learn this beautiful technique. This is part one of three videos so make sure you watch them all! Get the free brioche knit scarf pattern here.

8. My First Knit KAL Sweater

You all love my CALs and KALs. And I love them, too! I do a lot of different ones throughout the year. Many are BiCrafty. But each spring I do a knit-along, and this was one of those. This is a six-part series of knitting videos for beginners who want to make their first sweater. Learn more here.

9. How to Do The Knitted Cast On

This YouTube knitting video obviously falls into the category of beginner tutorials. There are many different cast-ons in knitting. The knitted cast on is one of my go-to options. Learn it with this video.

10. Marly and Marly's Mom Knitting Videos for Beginners

Were you curious before when I mentioned the Marly and Marly Mom's videos? Well, they start right here. And in terms of number of views, video #1 in this series ranks in at number ten out of all of the Marly Bird channel knitting videos. Take a chance on watching it. You might have a lot of fun.

11. Knitting Videos: Textured Shawl How-To

I love texture in both knitting and crochet. This is part one of a four-part video series that shows you exactly how to knit this beautiful textured shawl. Get the free knit triangle shawl pattern here.

12. Marly Bird Garter Stitch Shawl KAL

Remember how I said I do a spring KAL each year? Well this was one of my first ones. And it's still a favorite. It's a simple knit garter stitch shawl. And yet you learn the long tail cast on, color changes, and more as you work through the videos for this project. Learn more here.

13. Unique Knitting Videos: Loop It!

Loop It is a particular type of yarn that's designed for finger knitting. You can quickly work up a blanket without using knitting needles. If you have trouble finding that yarn, a good alternative is Bernat Alize Blanket EZ Yarn.

14. Knitting Videos: Road to Success Chic Hat

I love making knit hats. I also love showing you how to make knit hats. Therefore, I hope that you'll enjoy the detailed video for the Road to Success chic hat. Learn more here.

15. How to Knit Easy Exquisite Cabled Throw

The name of this pattern says it all. This is one of those knitting videos for beginners where I show you how to do cables in an easy way that works up into a quick, but exquisite, blanket. It's a surprisingly easy pattern. Get that free knit cable blanket pattern here.

16. YouTube Knitting Patterns: Stylish Dog Sweater

We love pets here at Marly Bird. You can meet our favorite crafter's pets here. And find 80+ knit and crochet pet patterns here. But specifically in this video I'll show you how to knit the stylish dog sweater that every dog needs. It's great for holiday photos and pup-friendly events. Get the free knit dog sweater pattern here.

17. Knitting Videos for Beginners: Chunky Knit Hat

If you're new to crochet and want an instant gratification project to prove to yourself that you can do this, then you just found what you're looking for. This chunky knit hat free pattern is easy. Plus the video shows you anything you might have doubts about. Get the free beginner knit hat pattern here.

18. Any Day Beret YouTube Knitting Video

There are so many different types of hats that you can knit. A beret is a sophisticated choice. So I'm happy to have this knitting video to show you how to make one. Get the free knit beret pattern here.

19. Beginner Knitting Patterns: Cityscape Shawl

Knit shawls are a great way to practice stitches and build knitting muscle memory. Get all the pattern details here.

20. How to Knit the Shifting Stripes Shawl

Here's another great knit shawl pattern video. You'll work garter stitch and knit short rows to make a beautiful design. Get the free knit pattern here.

You Might Also Enjoy:

  • Subscribe to my YouTube channel
  • Marly Bird YouTube Playlists
  • Beginner Knitting: How to Knit Video Tutorials

Frequently Asked Questions

What topics do Marly Bird's top knitting videos cover?

The most popular videos cover the foundational techniques every knitter needs… cast-ons, binding off, increasing and decreasing, cables, colorwork basics, fixing mistakes, and more. Marly's teaching style is clear, warm, and accessible… she explains the WHY behind techniques, not just the HOW, which helps things really stick. Whether you're a complete beginner looking for your first cast-on lesson or an intermediate knitter wanting to tackle cables or colorwork, these videos have you covered.

Are Marly's YouTube knitting videos free to watch?

Yes! All of Marly's YouTube videos are free to watch on her channel. Many of her blog pattern posts also link directly to video tutorials for the specific techniques used in that pattern… so you get both written and visual instruction together. For even more in-depth video learning with no ads and bonus content, the Marly Bird House is a subscription option, but the free YouTube videos are genuinely comprehensive and accessible to everyone.

What's the best Marly Bird video for absolute beginner knitters?

Start with the cast-on video! The long tail cast-on is the foundation of most knitting and Marly teaches it clearly and patiently. After that, the knit stitch and purl stitch videos are your next stops. These three techniques are all you need to get started with actual knitting projects. Marly also teaches both Continental style (yarn held in left hand) and English style (yarn in right hand) for both knit and purl, so you can find the method that feels most natural to you.

Can I learn to knit from YouTube videos alone?

Absolutely! Many knitters today are entirely self-taught through YouTube. Video tutorials are actually fantastic for learning crafts because you can watch someone do the technique in real time, pause to try it yourself, and rewind as many times as you need. Marly's videos are especially good for self-teaching because she explains technique in detail and shows close-ups of the actual hand movements. Supplement videos with written pattern practice and you'll be knitting confidently in no time.

What should I watch after the beginner videos?

Depends on what you want to make! For garments: increases, decreases, and seaming techniques. For lace: yarn overs, various decrease types, and lifelines. For cables: how to hold stitches on a cable needle. For colorwork: managing two yarns, reading charts, float tension. Marly has videos covering all of these and more… look through her YouTube channel by topic or check the related video links in her blog pattern posts to find exactly what you need for your next project challenge.

Filed Under: Knitting, Tips, Tricks, Techniques for Knitting and Crochet, YouTube Video Tutorial

Marly Bird’s Top 20 YouTube Crochet Videos

November 8, 2021 By Marly Bird Leave a Comment

Recently I've had the chance to look back at all of the content that I have created for my YouTube channel over the years. If you haven't browsed it much, then you might be surprised to see the variety of content there. You'll find YouTube crochet stitches with video tutorials and beginner basics. On the other hand, you'll also find YouTube crochet patterns with step-by-step instructions for every step of the design. Here are my top twenty YouTube Crochet Videos.

Remember to subscribe to the channel. Also hit that like button on any videos you enjoy. It helps show me what content you see more of. Plus it helps me get more attention on YouTube. Win win.

marly bird's top 20 crochet videos

1. How to Crochet the Absolute Beginner Throw

This is one of the best crochet blanket patterns for beginners. Learn exactly how to crochet it, step-by-step, in this YouTube crochet video tutorial. Get the free crochet blanket pattern here.

2. YouTube Crochet Video for Kaleidoscope Shawl

It's easy to make this crochet shaw thanks to the right yarn choice. The yarn does all of the colorwork. You just enjoy a meditative crochet shawl project. Learn more about this shawl here.

3. How to Crochet Lacy Pineapple Shawl

Based on views to my YouTube channel, some of my most popular crochet videos are for shaw patterns. For example, this lacy pineapple shawl that I designed is a top video. This is a comprehensive step-by-step YouTube crochet tutorial. Note that this is a two-part video; part two is linked in the part 1's description. Get the free crochet shawl pattern here.

4. The Best Crochet Planned Pooling Tutorial

Crocheters often think that planned pooling is much more difficult than it really is. This video shows you what you need to know to simplify this beautiful technique. I also have lots more planned pooling YouTube crochet videos, so explore the channel for more. You can also learn more here on the blog.

5. YouTube Crochet Patterns: The Perfect Poncho

Some of you really love my YouTube crochet stitches videos. However, a lot more of you love my YouTube crochet patterns tutorials. Ponchos are super comfy, especially at this time of year. Therefore, I'm not at all surprised that this is one of my most popular crochet videos. Learn more about this project here. Get the free pattern here. The pattern is sized from small through 3x.

6. YouTube Crochet Patterns: Sidewalk Shawl

I wasn't kidding when I said that some of my most popular YouTube crochet videos are for shawls. They're comfy, cozy, and fun to make. Plus you can make them really simple or really complex. This is a different pineapple stitch shawl, with fun fringe. Again, I take you step-by-step through all you need to know just like I do in my other YouTube crochet patterns videos. Get the free pattern here.

7. YouTube Crochet Stitches: Stretchy Slip Stitch Ribbing

Learn how to use crochet slip stitch strategically to make stretchy fabric. It's perfect for hat brings, cuff sleeves, etc. This tutorial is a good foundation for crocheters to keep in their back pockets.

8. Perfect Crochet Slip Stitch Brim

In the video above, you see how to make that great stretchy ribbing. In this video, another of my most popular YouTube crochet videos, you apply it to making a terrific crochet hat brim. Turn a beanie into a brimmed hat easily! This technique works well with my messy bun free crochet hat pattern.

9. YouTube Crochet Hat Tutorial: Snowboarder Chunky Hat

Speaking of crochet hats, my chunky snowboarder hats are among my most popular hat patterns. The pattern is actually available for both knitters and crocheters. It's perfect at this time of year because it works up quickly and is super cozy. This one is great for gifting.

10. YouTube Crochet Patterns: Hygge Color Block Baskets

Use simple crochet color blocking to create sophisticated blankets in any size. This YouTube crochet video tutorial shows you how to make the smaller of the two sizes. Free crochet basket pattern here. You can use these for yarn storage, magazine storage, toy storage, and more. Additionally, fill them up with wrapped goodies for an adorable gift.

11. How to Crochet Perfectly Panache Poncho

There are truly so many great crochet poncho patterns available. However there aren't nearly as many YouTube crochet videos to go with them. So I'm happy that this one is another of my most popular step-by-step pattern videos. Learn more about it here on the blog.

12. YouTube Crochet Videos: Wavy Ridge Super Scarf

Super scarves, sometimes caed blanket scarves, are so perfect for the winter. Wrap yourself up in one to stay warm. And learn exactly how to make this specific design from the video above. Get the free pattern here. If you're thinking ahead to next year's Temperature Blanket, this also makes a good temperature blanket crochet pattern.

13. YouTube Crochet Patterns: Baby Owl Hat

My friend Salena Baca designed this adorable crochet baby owl hat. I've had the honor of doing a lot of crochet videos for great designs like this. I'm thrilled to share this one with you. It's great for any baby, don't you think? Get the free pattern here.

14. How to Crochet Charming Slouchy Hat

I want to make it easy for beginner crocheters to learn how to make a wide variety of different projects. Slouchy hats are comfy, unisex designs that are timeless and ageless. Get the free pattern here.

15. Crochet Videos: Cowl Neck Poncho

Talk about cozy! A poncho is always cozy. Add a crochet cowl neck and it's even cozier. This is a great pattern, and I'm excited to show you how to make it through this YouTube crochet tutorial. Get the free pattern here.

16. Beginner Crochet Shawl Video Tutorial

This is a one ball crochet shawl pattern. Moreover, it's designed to never fall off of your shoulders, which is a complaint some people have about shawls. Learn more about my Super Simple Crochet Shawl pattern right here.

17. Planned Pooling Made Easy With Moss Stitch

I told you that I had more planned pooling crochet videos. This is another that cracks the top twenty of my all-time most-watched YouTube crochet videos. Moss stitch is a very simple, but beautiful, crochet stitch pattern. It also happens to be very effective for planned pooling crochet.

18. How to Crochet the Athleisure Striping Throw

This crochet blanket pattern is written three different ways. Why? To make sure that anyone can make it. But a lot of people are visual learners. That's why we have crochet videos! Learn more about this here.

19. YouTube Crochet Tutorial: Reading Crochet Symbol Charts

As I was saying, there are different styles of learning. You open yourself up to a whole new world when you learn how to read crochet symbol charts. And this video gets you started learning how to do it. We also cover this topic in great depth in the longform YouTube crochet videos for BiCrafty Bootcamp.

20. Crochet Videos: How to C2C in HDC

Corner-to-corner crochet (C2C) is a really fun technique. It's usually taught in double crochet. However, in this youTube crochet video tutorial, I show you how to do it in half double crochet instead. Have fun expanding your crochet skills!

You Might Also Enjoy:

  • Subscribe to my YouTube channel
  • Marly Bird YouTube Playlists
  • Left Hand Crochet Videos on YouTube
  • How to Magic Circle Crochet

Frequently Asked Questions

I'm new to crochet, what's a good beginner project from your videos?

Oh, hey there! Honestly, the “How to Crochet the Absolute Beginner Throw” video is a fantastic place to start. It's designed just for beginners and walks you through making a cozy blanket, step-by-step. You'll build confidence in no time!

Are there any videos for making hats?

Yes! You're in luck… I have a couple of great hat videos that are super popular. There's the “Snowboarder Chunky Hat” which is quick and cozy, and also a video on how to make the “Perfect Crochet Slip Stitch Brim” which you can use on all sorts of hats.

I love shawls… do you have any crochet shawl tutorials?

You know it… shawls are one of my favorites too! There are a few on the list, like the “Kaleidoscope Shawl” where the yarn does all the work, and the “Lacy Pineapple Shawl” which is really popular. Plus, the “Sidewalk Shawl” has fun fringe!

I'm interested in planned pooling, is there a video for that?

Absolutely! Planned pooling can look tricky, but it's totally doable. I've got a video called “The Best Crochet Planned Pooling Tutorial” that breaks it all down, and another one called “Planned Pooling Made Easy With Moss Stitch.” Explore those and you'll be pooling like a pro!

What kind of projects can I make with your YouTube videos?

So many things… honestly, there's a huge variety! You'll find tutorials for blankets, shawls, hats, ponchos, scarves, and even baskets for organizing your yarn stash. It's all about making beautiful crochet projects accessible to everyone!

Filed Under: Crochet, Tips, Tricks, Techniques for Knitting and Crochet, YouTube Video Tutorial

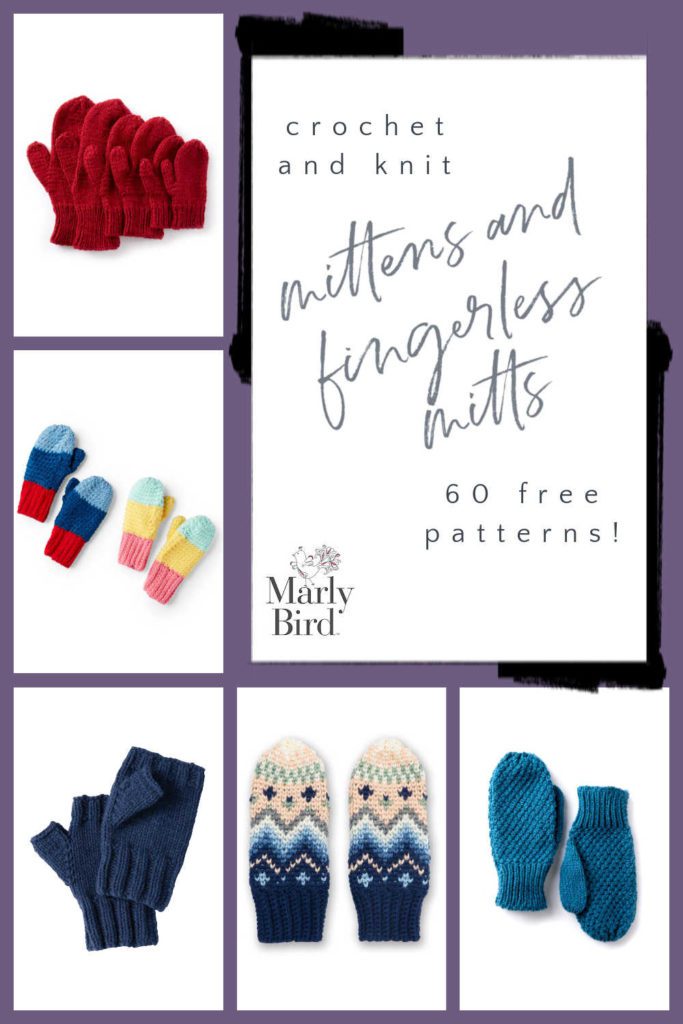
60 Mittens and Fingerless Mitts Free Crochet and Knit…

November 7, 2021 By Marly Bird Leave a Comment

It's chilly out, and you need to keep your hands warm! Whether you're shoveling snow, in a snowball fight, or just need to cozy on a walk, mittens and fingerless mitts are here for you. Yarnspirations has dozens of patterns that are just what you need to keep your hands warm this winter.

60 Mittens and Fingerless Mitts Free Crochet and Knit Patterns

If you're not sure how to knit mittens, we did a series in BiCrafty Bootcamp on knitting mittens! Get step-by-step instructions and videos.

13 Pairs of Fingerless Mitts and Gloves

These patterns all leave your fingertips free. Wear them when it's chilly inside but still type or knit, or use them when you know you'll be outside but need to use your phone or just need a little extra warmth. A few patterns are even convertible, with flaps that let your fingers be free or covered.

  1. Fingerless Gloves (textured)
  2. Fingerless Gloves (smooth)
  3. Crochet Lace Fingerless Mitts
  4. Fair Isle Fingerless Mitts
  5. Cosy Pozy Fingerless Gloves
  6. Simple Knit Fingerless Mitts
  7. Road Trip Mitts
  8. Flip Top Mittens
  9. Fingerless Knit Gloves (worsted weight yarn)
  10. Fingerless Knit Gloves (sock weight yarn)
  11. Flip-Top Kids' Mittens
  12. Convertible Family Knit Mittens
  13. Texting Gloves
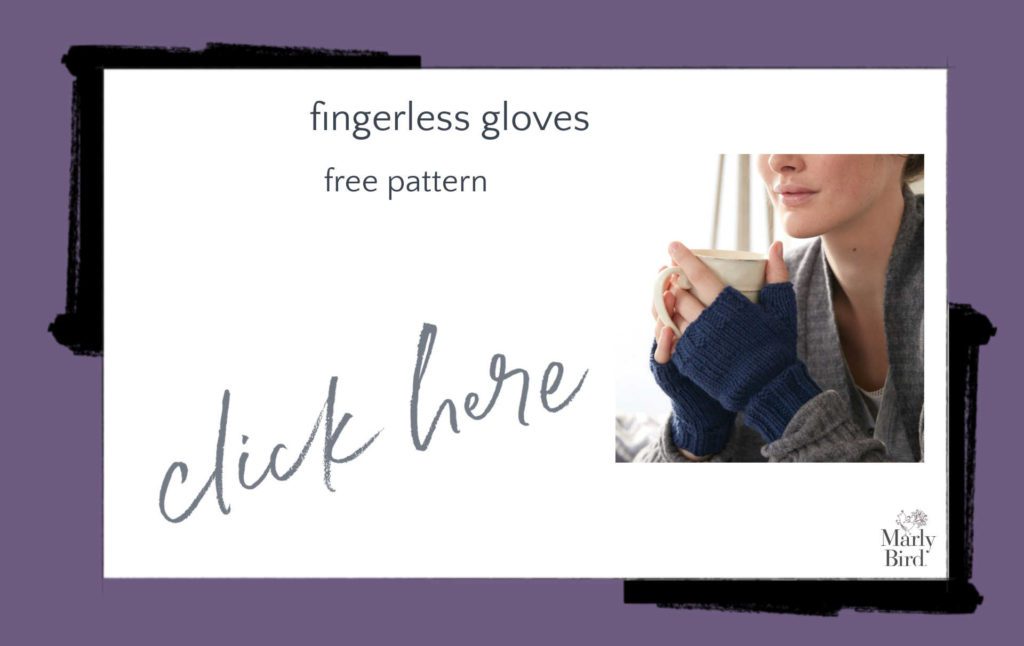
Fingerless Gloves Free Knitting Pattern

6 Pairs of Single Color Mittens

These mittens are made with one color of yarn for a classic look. Whether plain or textured, pick your favorite color and you know they'll coordinate nicely with your coat.

  1. Hands Full Crochet Mittens
  2. Crochet Faux Cables Mittens
  3. Chill Chaser Mittens
  4. Travelling Lines Knit Mittens
  5. Textured Family Knit Mittens
  6. Crochet Textured Ribbing Mittens
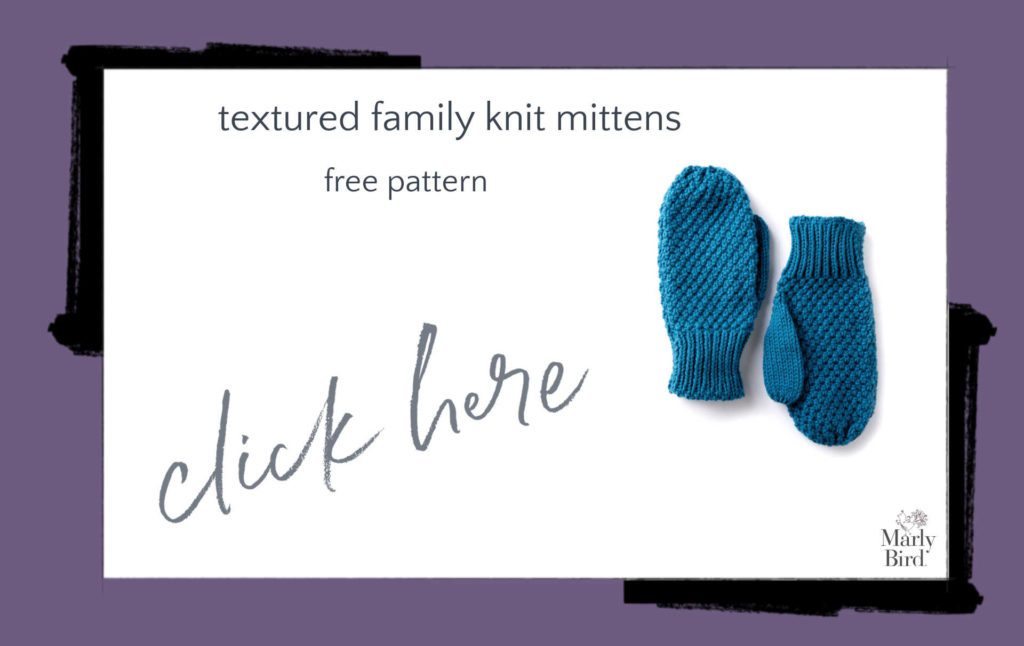
Textured Family Knit Mittens Free Knitting Pattern

9 Pairs of Colorblock Mittens

Blocks of color are fun way to add color to mittens without as many ends to weave in. Plus, they make great mix-and-match patterns, especially for kids!

  1. Kids Tri-Color Mittens
  2. Cozy Crochet Mittens
  3. Let It Snow Mittens
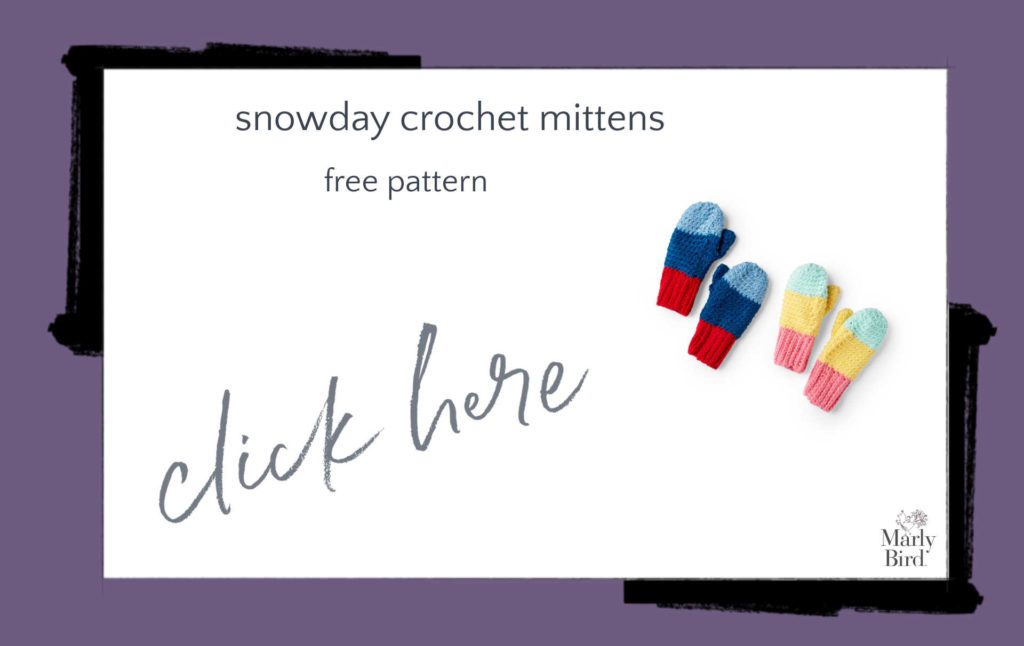
  4. Snowday Crochet Mittens
  5. Off-Set Cable Mittens
  6. State Your Nation Knit Mittens
  7. Double Cuffed Knit Mittens
  8. Find a Match Knit Mittens
  9. Textured Knit Mittens
Snowday Crochet Mittens Free Crochet Pattern

18 Pairs of Patterned and Colorful Mittens

These mittens all have design or a pattern on them. Whether you're doing Fair Isle, intarsia, stripes, or making animal mitts, they're a great way to add a statement that won't be missed to your outfit.

  1. Fox in the Snow Mittens
  2. Frozen Mittens
  3. Fox Mittens
  4. Tunisian In the Round Mittens
  5. Skeleton Mittens
  6. Strawberry Mittens
  7. Crochet Striped Mittens
  8. Maple Leaf Mittens
  9. Kiss and Tell Mittens
  10. Warm Brioche Knit Mittens
  11. Stripey Knit Mittens
  12. Heartland Knit Mittens
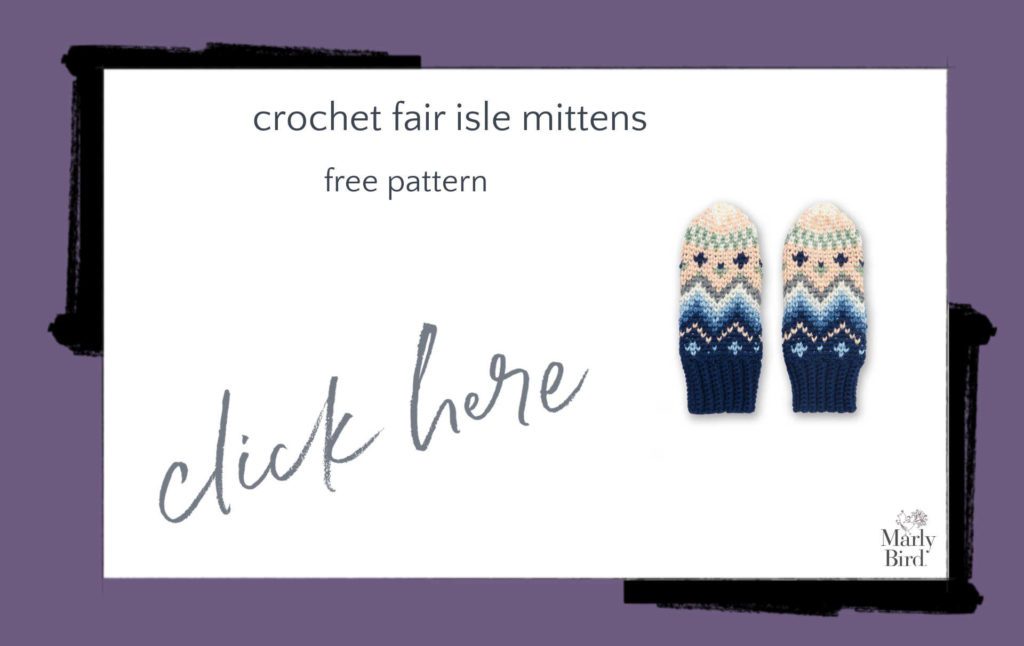
  13. Crochet Fair Isle Mittens
  14. Fair Isle Knit Mittens
  15. Let's Stripe Crochet Mittens
  16. Knit Neo Geo Mittens
  17. Spiral Up Knit Mittens
  18. Happy Hands Child Mittens
Crochet Fair Isle Mittens Free Crochet Pattern

11 Family Mitten Sets

When it's cold out, everyone's hands need protecting. Crochet or knit matching mittens for everyone in your family with these mitten patterns that come in all sizes. Plus, there's a special set that lets you hold hands!

  1. Family Mittens (knit)
  2. Family Mittens (crochet)
  3. Valentine Mittens
  4. Mittens for All
  5. Family Heart Mittens
  6. Crochet Mittens for All
  7. Colorblock Family Knit Mittens
  8. Broken Rib Knit Mittens
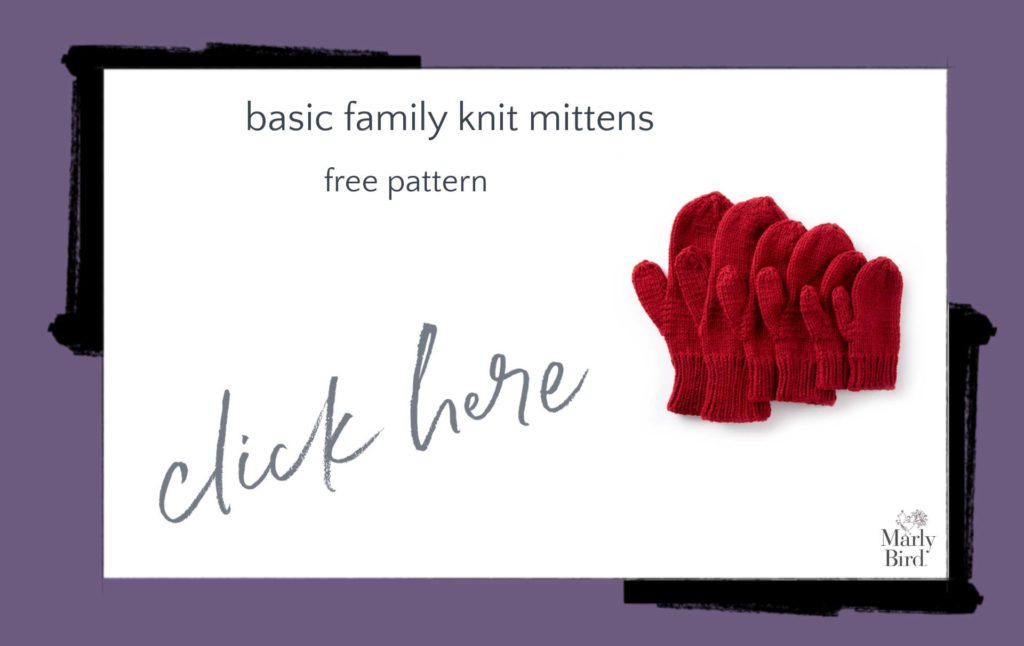
  9. Basic Family Knit Mittens
  10. Family Size Crochet Mittens
  11. Rita's Family Knit Mitts
Basic Family Knit Mittens Free Knitting Pattern

Bonus: 3 Mitten Decorations

Mini mittens make a great winter decoration as well! Hang them on a tree or from a mantel, or add them to a centerpiece.

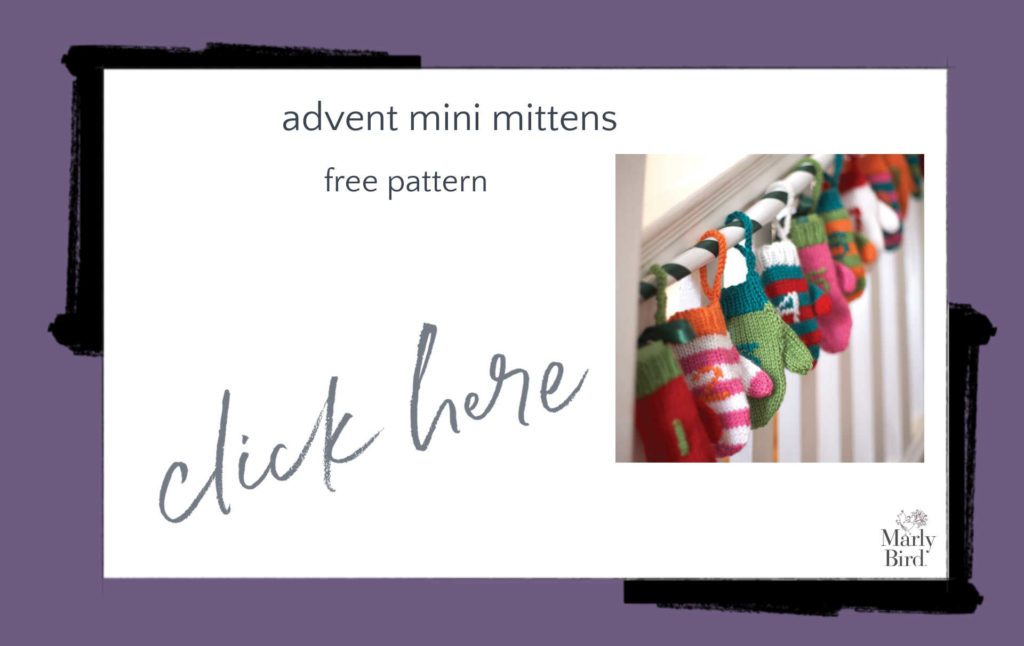
  1. Advent Mini Mittens
  2. Mitten Ornaments
  3. Crochet Snowflake Mitten Ornaments
Advent Mini Mittens Free Crochet Pattern

Also on the Blog

  • 12 Free Crochet Hand Warmer Patterns
  • Dual Cable Fingerless Gloves
  • Video Tutorial: Kids Snowday Crochet Mittens
  • Easy โ€œBernie Sandersโ€ Mittens โ€“ Knit and Crochet Versions
  • BiCrafty Bootcamp Knitting Mittens

Frequently Asked Questions

What's the difference between mittens and fingerless mitts?

Mittens cover all your fingers together in one enclosed space (the warmest hand covering you can make, since your fingers heat each other). Fingerless mitts leave the fingers free for dexterity while still warming the palm, wrist, and back of hand. Convertible mittens (flip-top mittens) give you the best of both worlds… they're fingerless with a hinged mitten flap you can fold down for full coverage when needed. For everyday use, fingerless mitts are more practical. For maximum cold-weather warmth, traditional mittens win.

Are mittens or fingerless mitts easier to knit or crochet?

Fingerless mitts are generally quicker and simpler! They require a tube (the hand), a thumb gusset, and a thumb tube… but no mitten flap or tip shaping. Full mittens need all that plus the finger-enclosing section and decreases to close the top. Both are great projects for intermediate crafters who've done hats. Fingerless mitts are probably the most popular “second project” after hats for both knitters and crocheters… they're quick enough for a weekend, small enough to be manageable, and incredibly useful and giftable.

How do I make the thumb fit correctly?

The thumb is where most people struggle! The thumb gusset (increases worked over several rows to accommodate thumb width) is critical to a comfortable fit. For an accurate fit, measure from the base of your thumb to the desired thumb length, and measure thumb circumference. Work the gusset slowly and try on as you go if possible. Place the thumb opening approximately where your thumb actually emerges from your hand… this varies between people, so measuring rather than just following a pattern's row count gives the best personalized fit. A thumb that's properly placed and sized makes all the difference in wearability.

What yarn is best for mittens and fingerless mitts?

Wool is the classic choice for mittens because it's incredibly warm, and wool mittens can be lightly felted after knitting to close up the gaps in the fabric and make them wind-resistant. Superwash wool is machine washable and popular for everyday wear. For fingerless mitts that need to be practical (typing at a computer, for example), a softer wool blend or acrylic provides both warmth and comfort against the back of the hand. Avoid anything scratchy near the wrists and palms… those areas get a lot of skin contact.

Can I make matching mittens and hat?

Absolutely! A coordinating hat and mitten set is one of the most beloved winter gift combinations in all of yarn crafting. Many patterns are specifically designed as hat-and-mitten sets. Even when patterns aren't explicitly paired, you can use the same yarn and same stitch pattern from a hat pattern to create matching mitts. A beautiful matching set is especially wonderful for children… parents love the coordinated look, and when one mitten inevitably gets lost, at least there's still a matching hat. Make sets whenever you can… they're wonderful gifts.

Filed Under: Free Patterns

Magic Circle Crochet: Best Way to Start a Project in the Round

November 6, 2021 By Marly Bird Leave a Comment

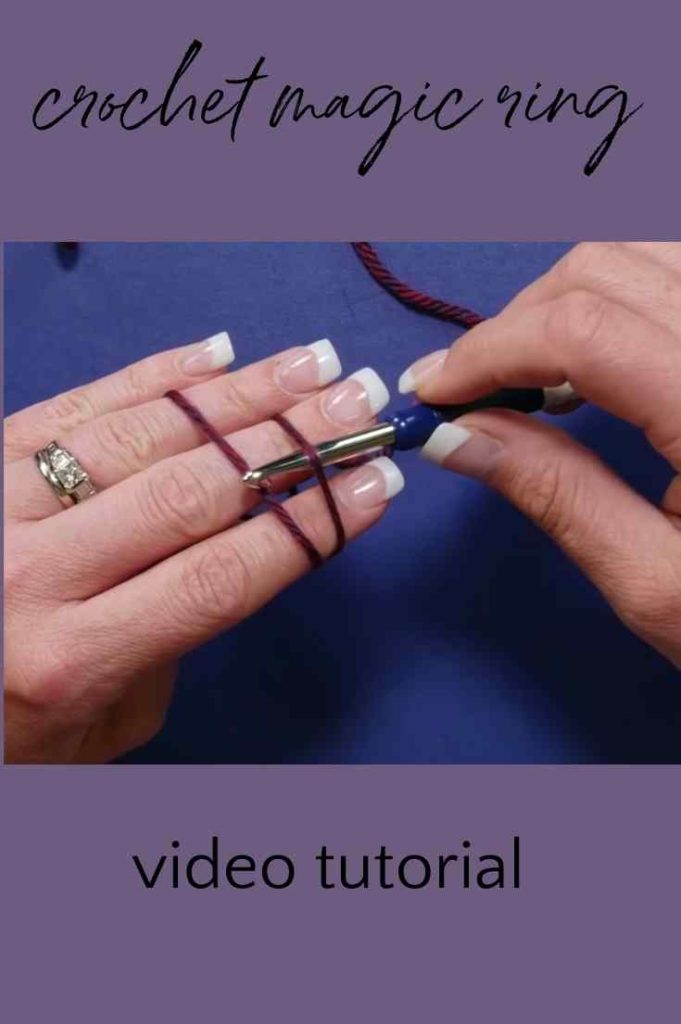
You've almost certainly heard of the crochet magic ring. It's also known as magic circle crochet, magic loop crochet, and adjustable ring crochet. Whatever you call it, it's a simple method for starting a crochet project in the round. Of course, you can start crochet projects in the round in other ways, as well. However, the crochet magic ring has advantages, especially for certain types of projects. Therefore, let me show you how to do in this magic ring tutorial video.

Want to learn more crochet basics? We cover so many of them in the lessons in BiCrafty Bootcamp: Beginner Crochet Lessons for Knitters. Non-knitters also welcome. Join anytime.

how to crochet magic ring video tutorial

Benefits of Learning Crochet Magic Ring

If you already know how to crochet in the round, then you might wonder why you would even need to learn the magic circle crochet technique. Fair enough. If what you're doing is working for you, then that's cool. But what's even cooler is having a wide range of tools in your crafty toolbox. This allows you to choose the right one for the job. And starting a project with magic loop crochet has its benefits.

Leave No Hole In Your Work with Magic Loop Crochet

The main reason that people use the adjustable ring crochet technique is that it allows you to crochet in the round without leaving a hole in the center of the work. Think, for example, when you crochet a classic granny square. You often begin with a short, joined together with a slip stitch, and then you work your first round into the circle. This leaves a small hole in the center of the square.

Of course, there are times that won't bother you at all. Many crochet motifs look great with that hole in the center. However, what if you're making an amigurumi project? Or perhaps you're starting a top-down crochet hat in the round? In those instances, you don't necessarily want a hole in the center of the work, right? Therefore, you can learn the crochet magic ring technique. The rest of your crochet project will proceed the same as normal, but you won't have that hole in the center.

Magic Circle Crochet Replaces Starting with a Slip Knot

Almost every crochet project that you've ever done has started with a slip knot right? Well, that's about to change. The magic circle crochet technique does not use a slip knot. Instead, you create the crochet magic ring to begin the project. Effectively, it works in place of the slip knot. The difference is that as you begin your work, you can tighten this ring. Therefore, you close up the circle.

Magic Ring Tutorial

Okay, so how do we make the crochet magic ring? Well, here's my step-by-step video tutorial to show you exactly that:

As you can see, this video is shorter than five minutes long. And yet, it gives you the tools that you need to completely change the way that you start crochet projects in the round. You can use it for pretty much any crochet in the round project. But, as aforementioned, it's ideal for crochet hats, toys, amigurumi, and other projects where you really don't want to see a hole that shows you where you started the work.

How to Weave in Tail on Adjustable Ring Crochet

When you use the crochet magic ring technique, you do end up with a starting tail. As you can see in the video above, the tail helps you pull that circle closed so you don't have a gaping hole in your work. However, what are you supposed to do with that tail? Well here's what I think is the best way to weave in the yarn tail on adjustable ring crochet:

You Might Also Like:

  • Crochet and Knitting Techniques That Make Life Easier and More Fun
  • How to Join As You Go Crochet Motifs
  • Crochet Amigurumi Unicorn Video Tutorial

Frequently Asked Questions

What is the magic circle in crochet?

The magic circle (also called the adjustable ring or magic loop) is a technique for starting projects worked in the round… instead of chaining and joining into a ring (which leaves a small hole in the center), the magic circle creates an adjustable loop that you can pull tightly closed after the first round, leaving no hole. It's the standard starting technique for amigurumi, hats worked in the round, granny squares, and any project that starts from a center point. Once mastered, it's the superior way to begin round work.

Why is the magic circle better than a chain ring?

The magic circle closes completely… you pull the tail to cinch the center shut with no gap. A chain ring (chaining 4 and joining to form a ring) always has a small hole in the center that can't be fully closed. For most projects that start in the round, especially amigurumi and anything where a hole would look unfinished, the magic circle produces a much cleaner result. It also allows you to adjust the tightness before setting the ring, which gives you more control over the center size.

How do I make a magic circle?

Here are the basic steps. Make a loop by wrapping the yarn around your fingers (usually two fingers or one… find what works for you). Insert your hook through the loop, catch the working yarn, and pull it through. Chain the required number (usually 1-3 for the height of your first round). Work your first round of stitches into the loop itself. Pull the tail to close the center. Join the round and continue. It sounds complicated in text… Marly's video makes it very clear. Most people get it in their first 5 minute practice session.

Is the magic circle difficult to learn?

It can feel tricky at first… holding the loop open while working into it requires a bit of coordination. But most crafters master it within one short practice session, especially with video instruction. The key is watching someone do it and mimicking exactly where they're placing their fingers and hook. Written instructions for the magic circle are famously hard to follow; video is how this technique actually clicks. Practice on a scrap piece of yarn 3-4 times before using it in an actual project. It's worth learning properly because you'll use it constantly.

Can I use the magic circle in knitting too?

There's no direct equivalent in knitting (knitting doesn't work the same way for round starts), but knitting has its own solutions for starting from a center point! Judy's Magic Cast On and other provisional cast ons achieve a closed center for top-down circular knitting. The magic loop technique in knitting (different from magic circle!) is for knitting small circumferences on a long circular needle. If you're coming from crochet and learning to knit in the round, Marly's BiCrafty Bootcamp covers the knitting equivalent techniques that serve the same purpose.

Filed Under: Crochet, Tips, Tricks, Techniques for Knitting and Crochet, YouTube Video Tutorial

How to Join As You Go Crochet Motifs (BiCrafty Bootcamp:…

November 2, 2021 By Marly Bird Leave a Comment

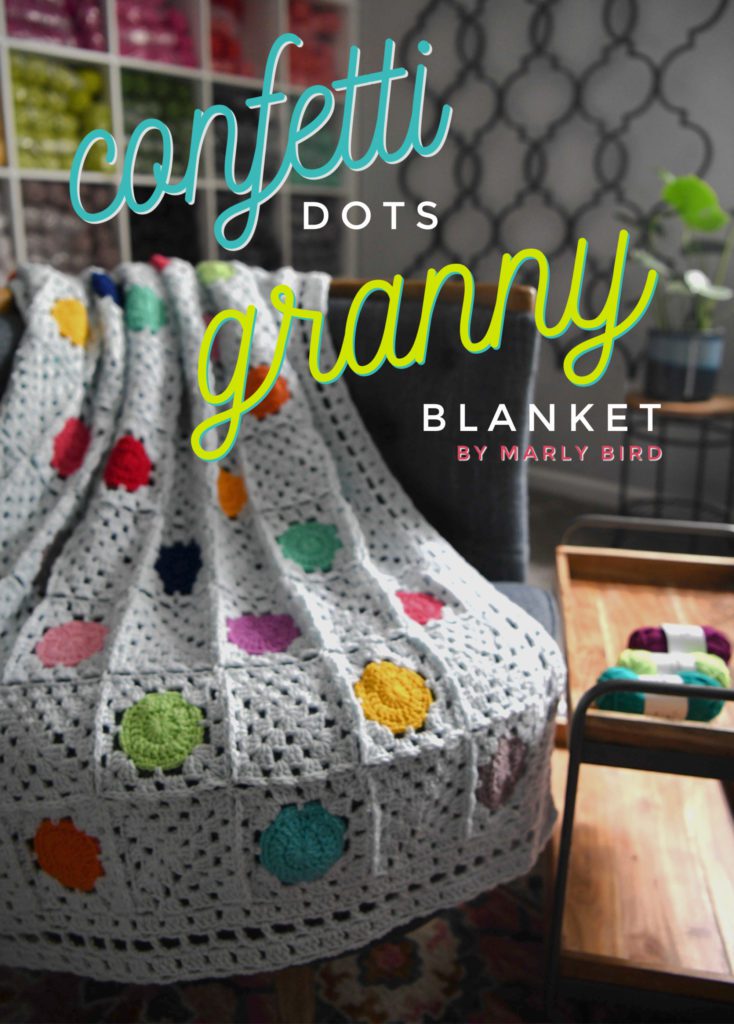
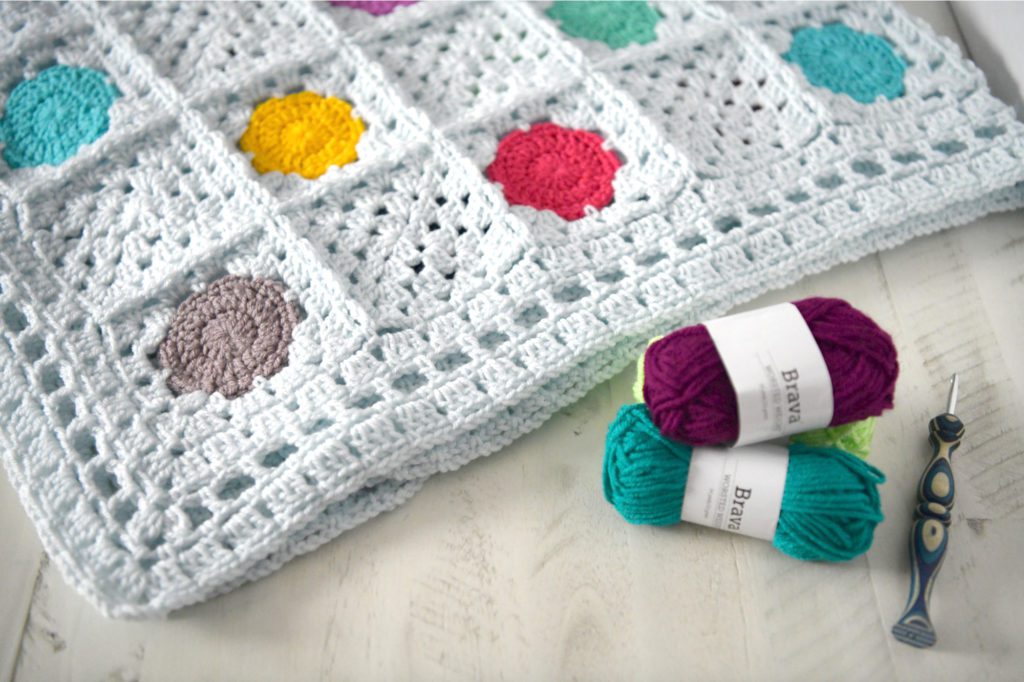
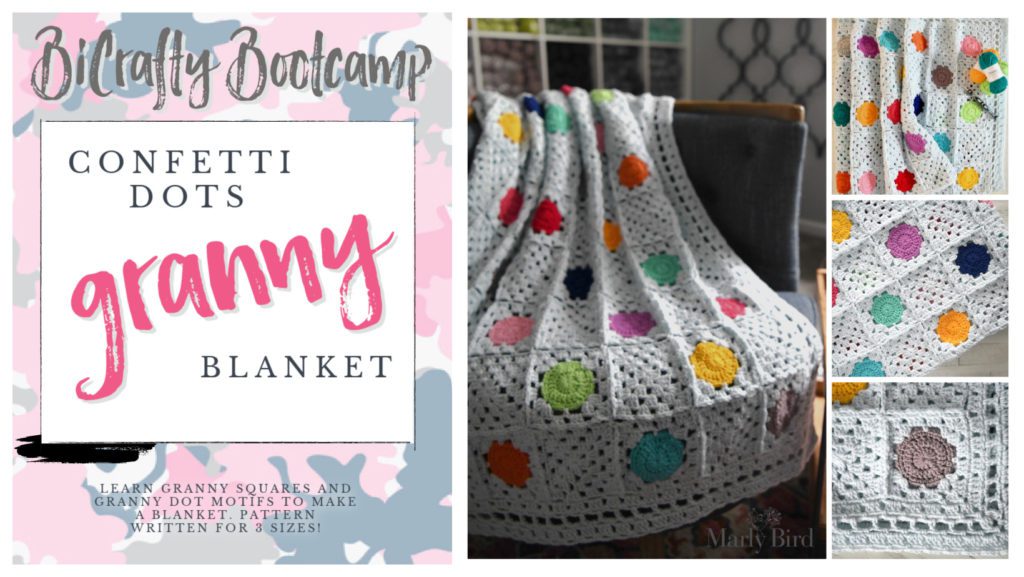
In our previous lesson, you learned how to crochet motifs in the round. Specifically, you learned the granny square. Next, we're going to work on a crochet motif blanket. It uses a variation on the granny square which begins with a circle in the center. We're calling it the Confetti Dots Granny Blanket. In addition to learning a new crochet motif; you're going to learn a new joining technique. You'll learn how to join as you go crochet motifs.

confetti dots granny blanket-4-DSC_2410

What Are Join As You Go Crochet Motifs?

As you've already seen, there are different ways to seam crochet or to join motifs together. In most methods, you crochet all of the motifs first. Then you use needles or crochet hooks to stitch them together in some form or fashion.

However, a lot of people don't enjoy this last part of the process. They like making the motifs but then they're left at the end with all of the joining and weaving in those ends. Therefore, some people prefer join as you go crochet.

As the name suggests, this is a method of starting one crochet motif in such a way that it joins to the motif you've already created. You join them as you go. It's particularly easy to do these with crochet granny squares. So, this is a great time for you to learn this technique. You might be surprised by how easy it is to pick it up once you get the gist of it.

Join As You Go Crochet Diagrams or Charts

You BiCrafty Bootcampers have been doing great with charts. So, we don't want to stop here. For this lesson, you'll learn how to see what JAYGO looks like on a chart. Moreover, you'll learn how to make adjustments to other crochet motif charts so you can adapt them to “join as you go” if they're not designed this way.

We are going to look at the follow motif which as a basic chain and single crochet final round border or edging. I chose this because it is one you can literally modify any motif and make work. Plus, it is easy to see how these joins work.

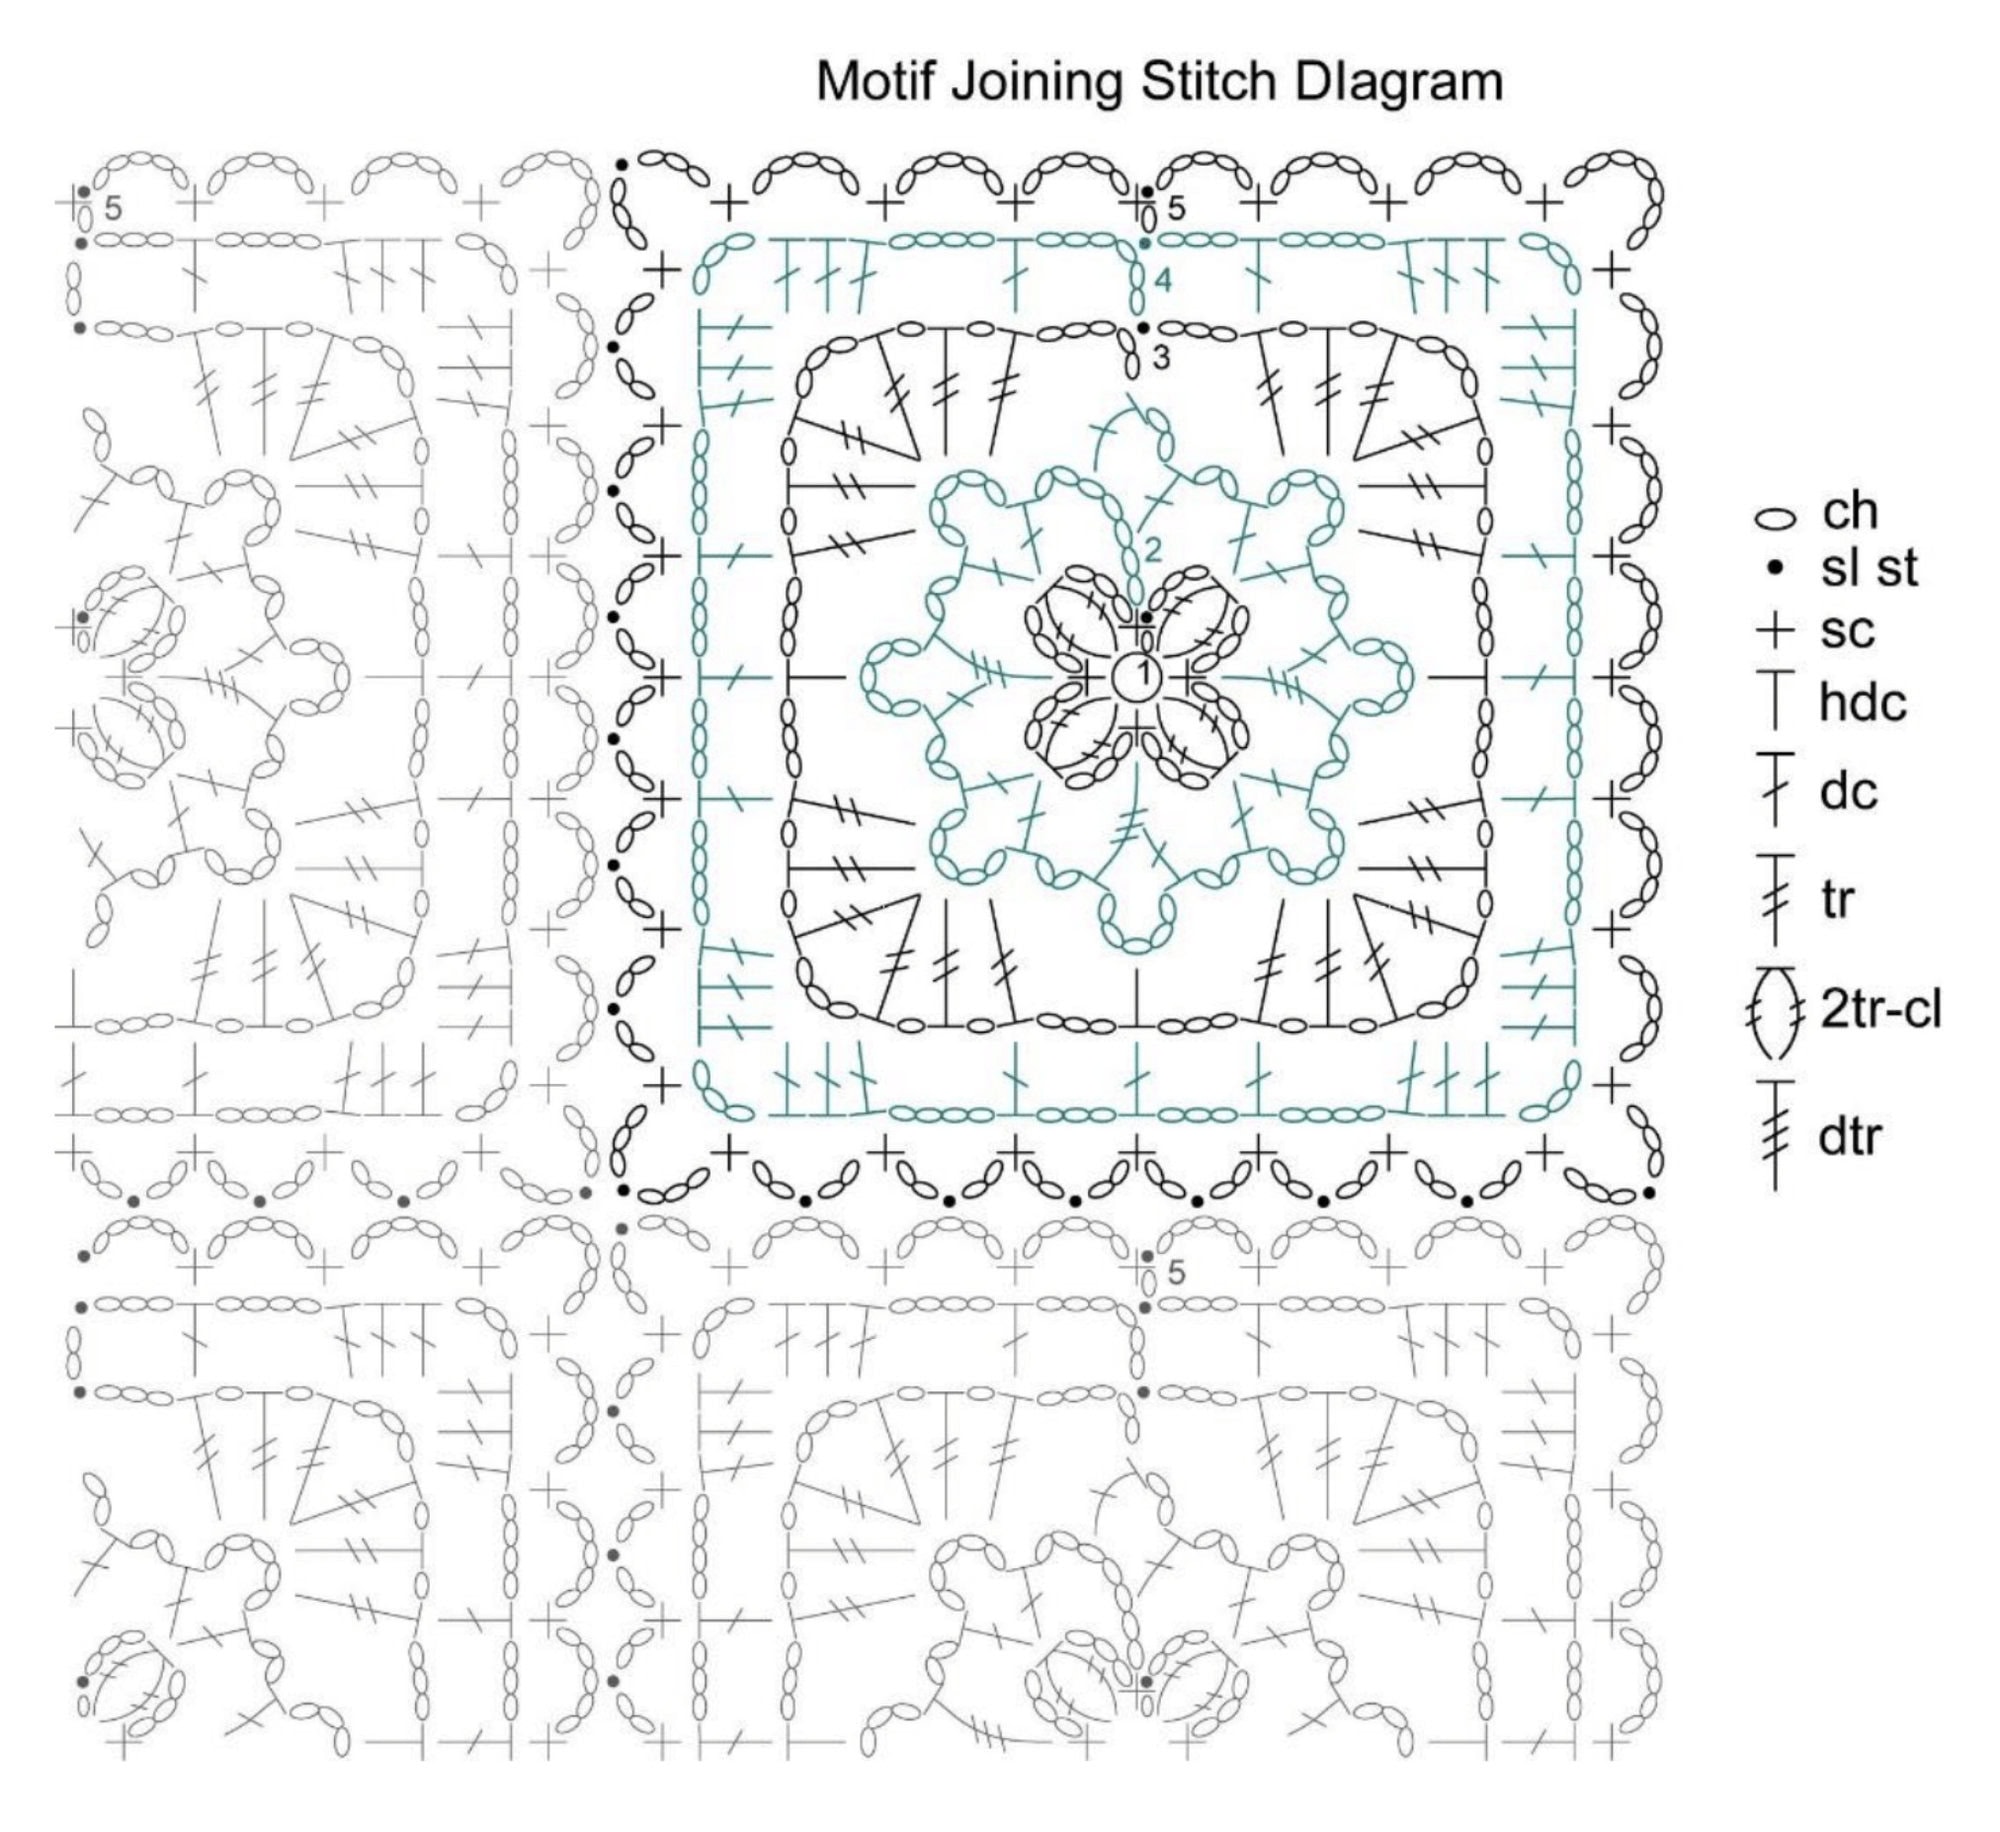
Slip Stitch Join

Use a crochet slip stitch to join motifs together. It is very simple, to crochet motifs together as you go, replace a chain with a slip stitch and literally crocheting one motif onto another. Do this by following the directions for the last round of the motif. When you get to a chain space, remove the middle chain and replace it with a slip stitch to the same space on an adjoining motif.

In the first example, you would chain 2, slip stitch to the adjoining motif, chain 2, and then continue crocheting the working motif. See image below

Crochet motif joining stitch diagram featuring flower motifs, chains, and various stitches in blue and gray.

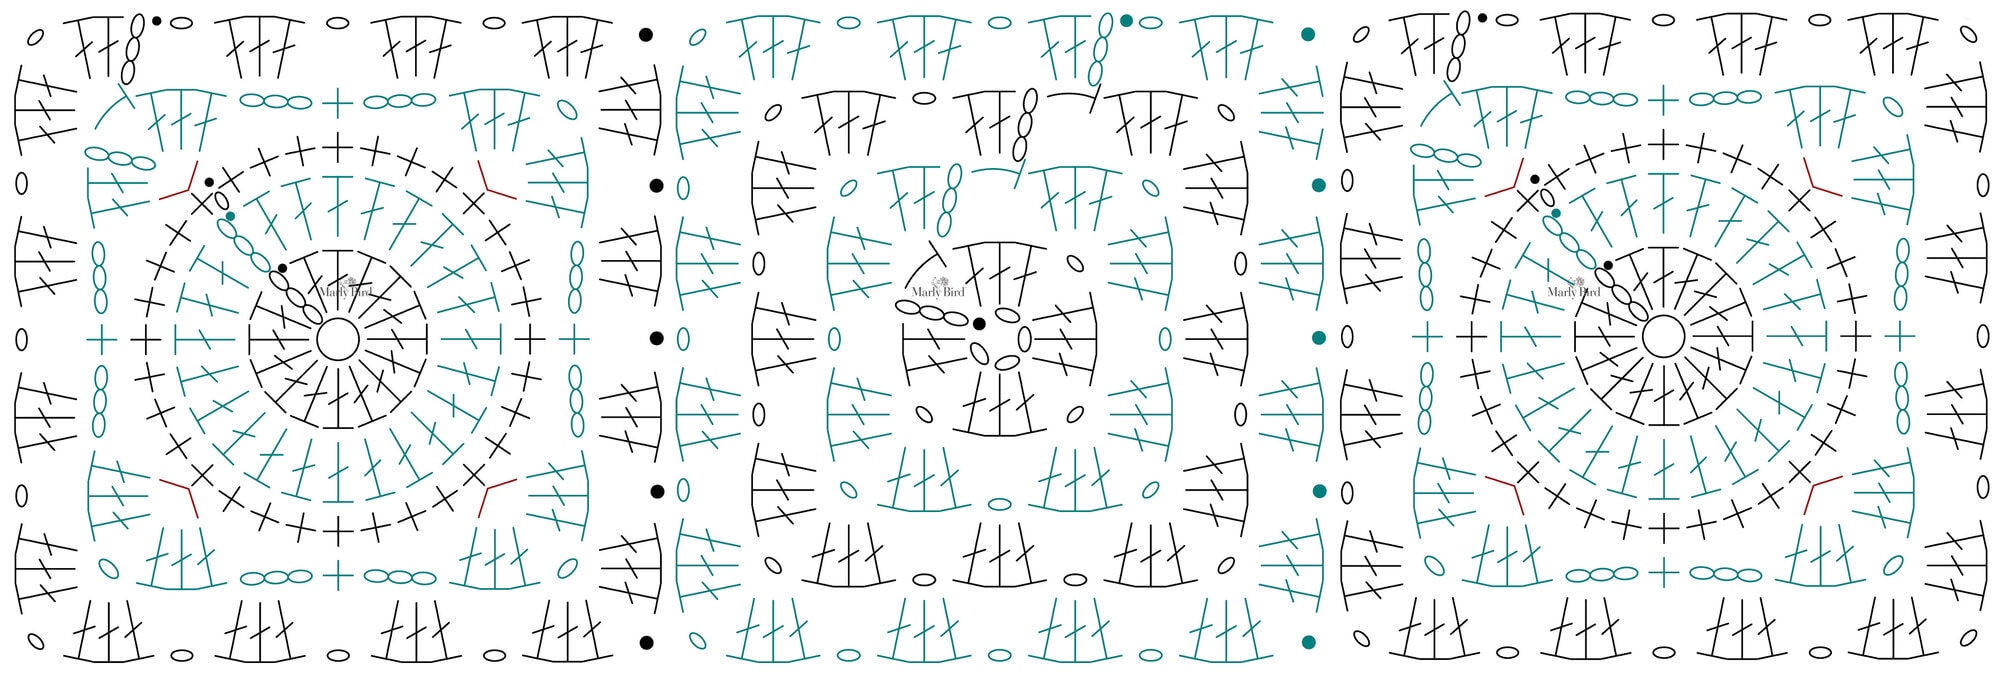
In the second example, you would complete the 3dc granny set, then instead of ch 1, slip stitch to the adjoining motif in the ch-1 space. Do this along each side that needs to be joined. Then continue crocheting the working motif. See image below

Crochet pattern diagram featuring circular motifs, with black, teal, and red stitch symbols on a white background.
Diagrams for a circle in the square stitch and a granny square, showcasing stitch symbols and patterns in blue ink.

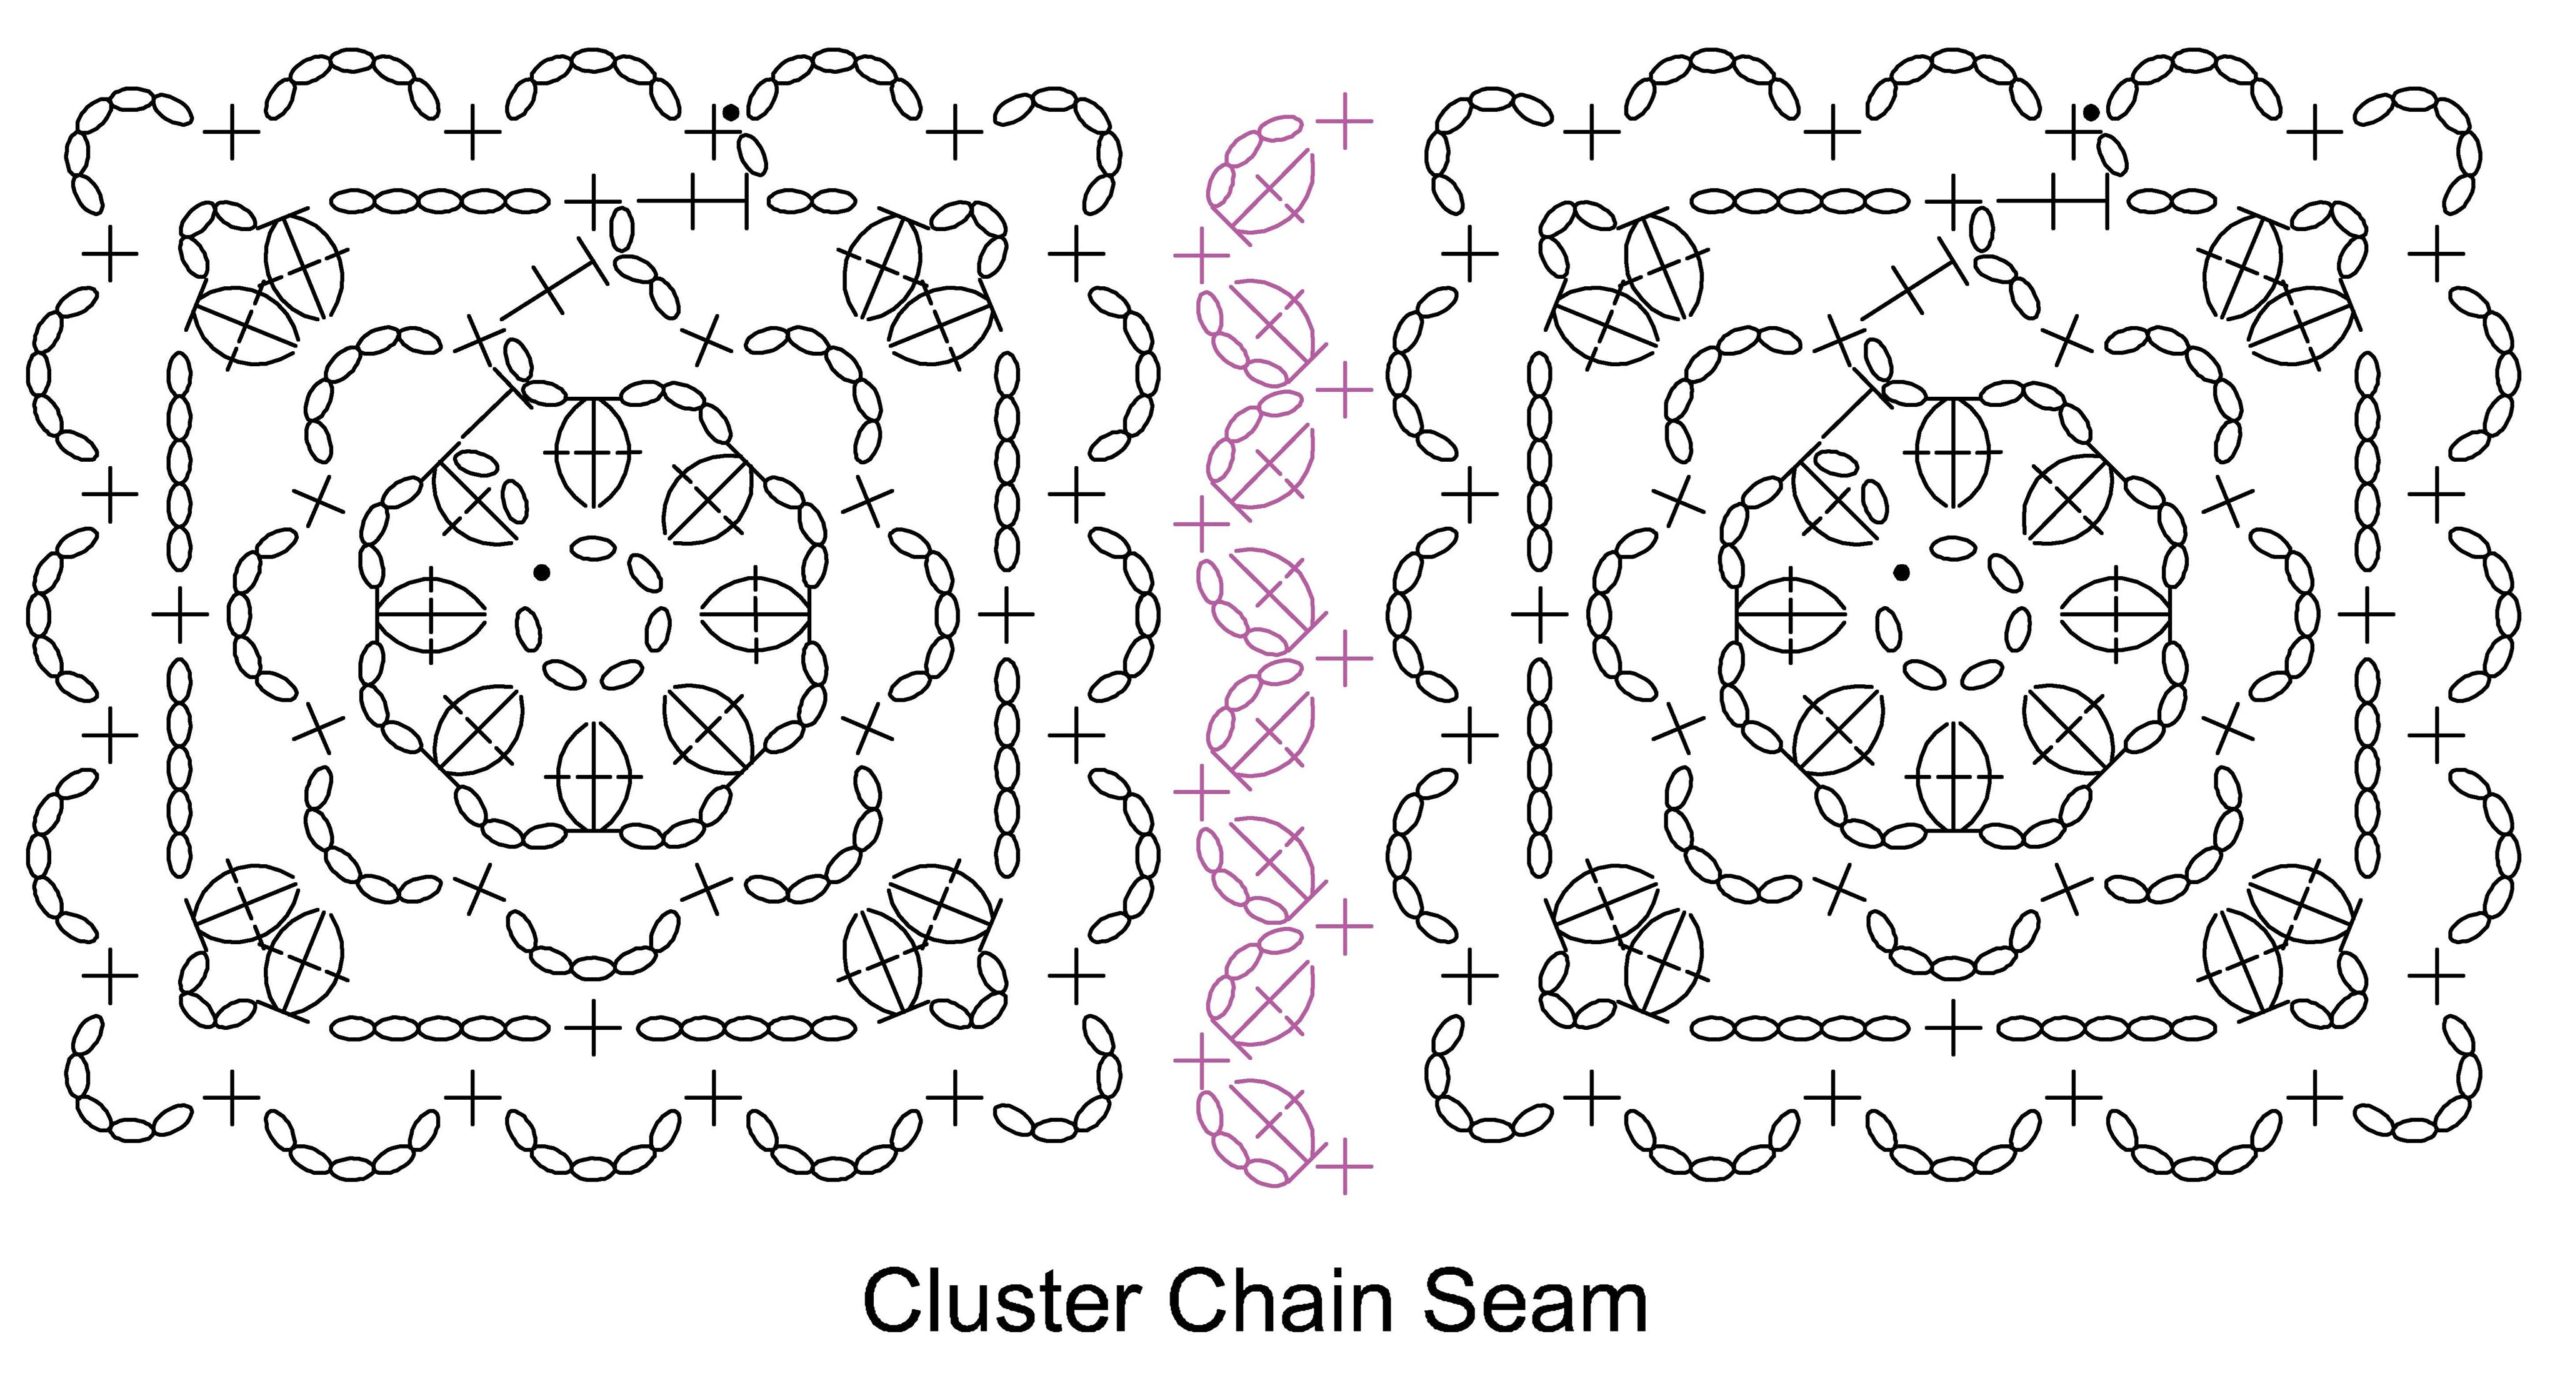
Cluster Chain Seam

To crochet a cluster chain seam it takes a little more than the simple slip stitch join but it is not hard and ads something a little different to a motif.

Align the edges of the motifs side-by-side, and join the yarn to the edge of the motif on the right. Ch 1, sc in same sp as join, *ch 3, 2 dc-cl in 1st ch, sc in next ch-sp (or sk 3 sts and sc in next st) on motif on left, ch 3, 2 dc-cl in 1st ch, sc in next ch-sp (or sk 3 sts and sc in next st) on motifon right; rep from * across, fasten off. See image below.

Diagram illustrating a Cluster Chain Seam with floral motifs and detailed stitch instructions in black and pink.

Join As You Go Crochet Motifs Video

Find the video for this weeks lesson on join as you go motifs here

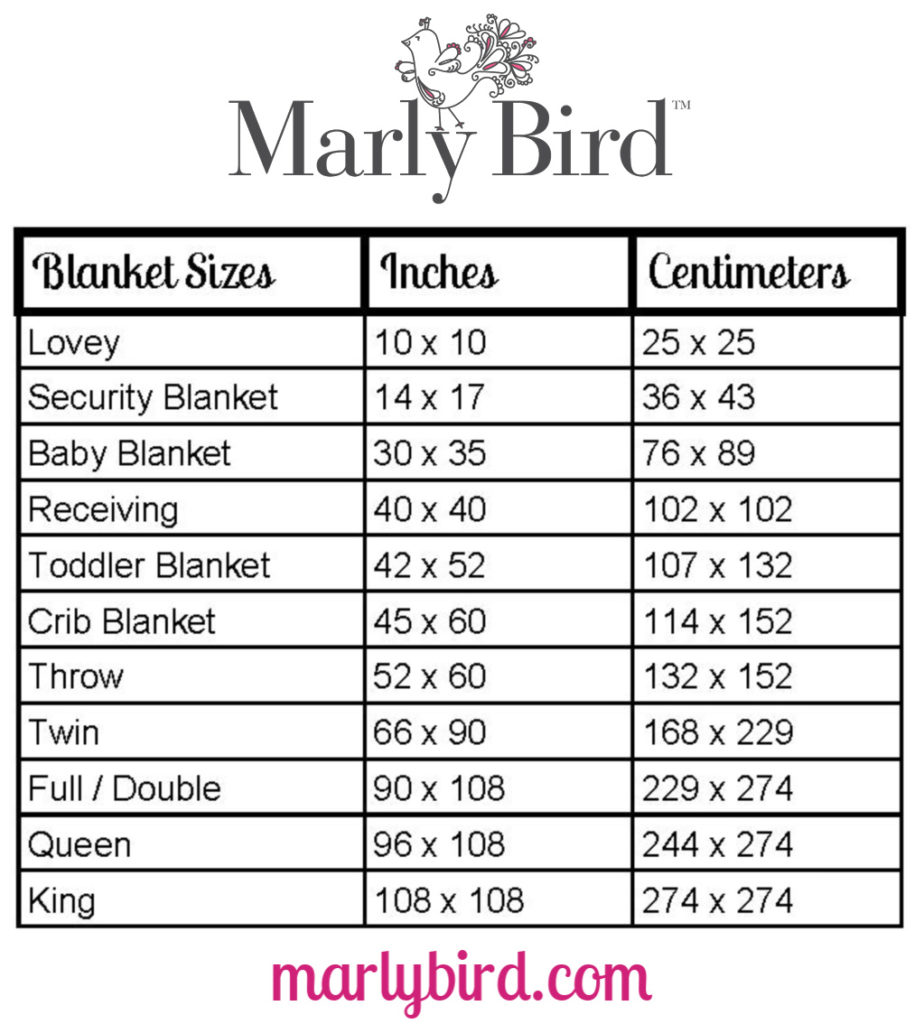
Crochet Blanket Sizes

The great thing about crochet motif blankets is that you can grow them to any size that you want. You can make a baby blanket. Or you can crochet more motifs and make a blanket that fits a king sized bed. Check out this post for a chart of common blanket sizes. The Confetti Dots Granny Blanket is written for three common blanket sizes: baby, throw size, and full size.

crochet blanket size chart

Confetti Dots Granny Blanket: Materials

Obviously, the materials you'll need will vary depending upon the blanket size that you choose for this join as you go crochet blanket project. You'll work with worsted weight yarn and can use scraps of yarn for the different colors if you so desire. However, we recommend working with the Brava Worsted Yarn and Brava Mini Packs.

join as you go crochet blanket

Yarn Amounts for Join As You Go Crochet Motif Blanket

  • Baby Blanket (40.5โ€ณ square): 8 balls of Brava Worsted in the same color and 1 Brava Mini Packs
  • Throw Blanket (78.5โ€ณ x 40.5โ€ณ): 10 balls of Brava Worsted in the same color and 2 Brava Mini Packs
  • Regular Blanket (67.9โ€ณ x 49.5โ€ณ): 14 balls of Brava Worsted in the same color and 2 Brava Mini Packs

Other Materials

Hook: Size H (5 mm) or any size hook to obtain the gauge. (WeCrochet Hook, TooShay Crochet Hook)

Notions: Locking stitch markers from WeCrochet (optional), Chenille and tapestry needles for weaving in ends

Confetti Dots Blanket Crochet Pattern

join as you go crochet blanket pattern

The Confetti Dots Granny Blanket ad-free pdf pattern is available on Ravelry. The ad-free pdf pattern includes full diagram for the joins and the border.

????Special Notice ONLY for BiCrafty Bootcampers???? use code CONFETTI and get 50% off the ad-free pdf. This coupon is good until March 15, 2022.

SPECIAL STITCHES 

Adjustable Ring: Make a large loop with the yarn leaving a 4โ€ tail. With the hook, draw the working yarn through the loop; Ch 1, follow the pattern instructions from here. Once the first rnd of sts is complete, pull the tail snugly to close the ring.  

NOTES

  • See stitch diagram for assistance with pattern
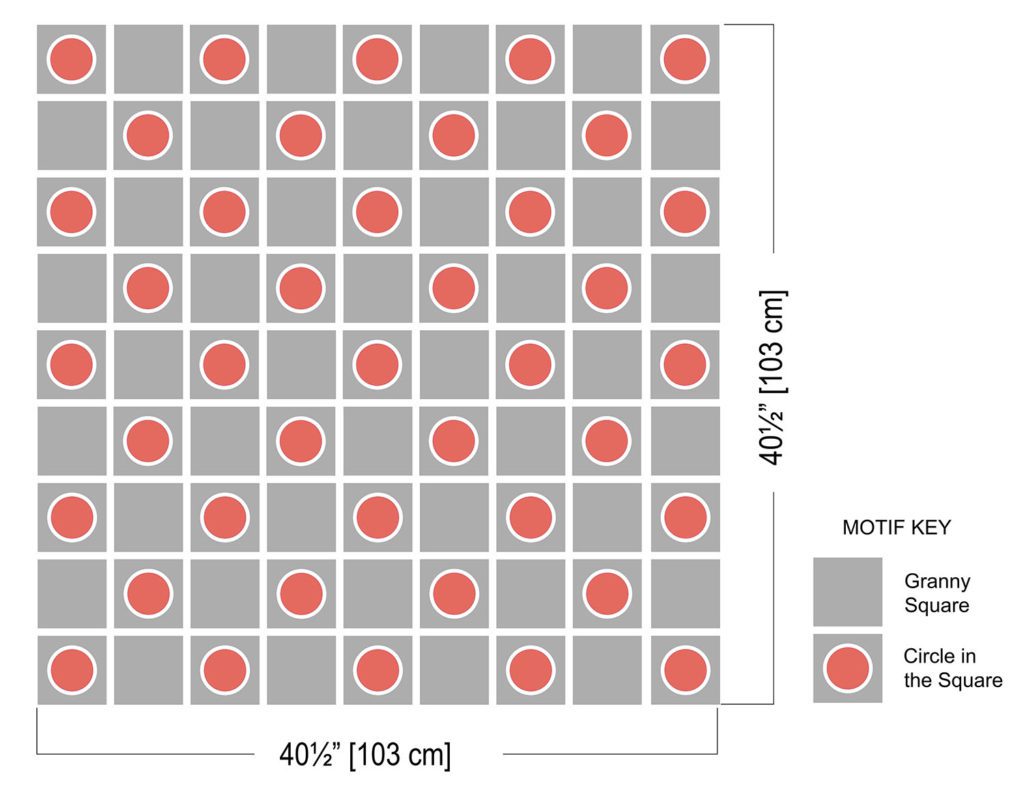
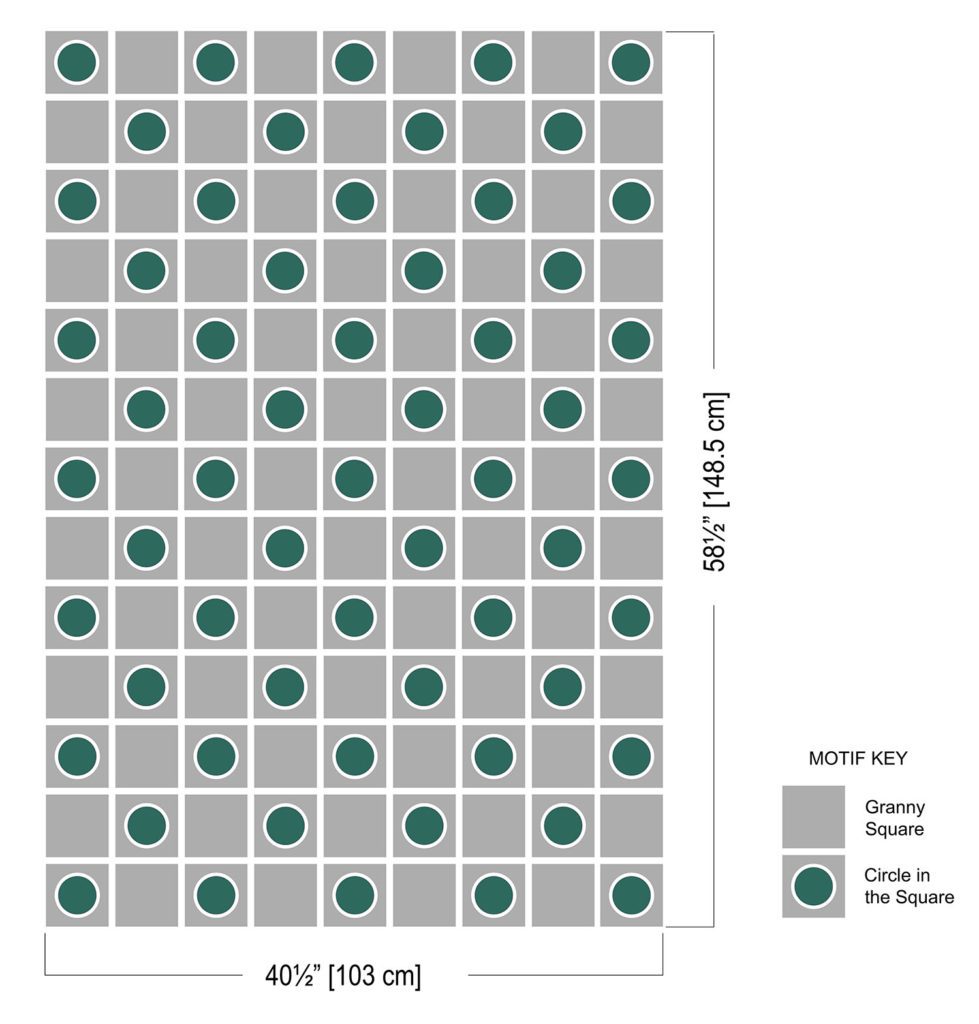
  • See Layout for placement of squares
  • Choose colors for the dots at random from the mini pack
  • Change colors on last pull through on stitch before new color
  • Squares are made in a join as you go (JAYGO)
  • Border is worked in the round around the entire blanket
  • HIGHLY RECOMMEND that you bury your ends as you complete each square Get Rid of Ends in 2 steps- Learn to Bury in Ends for Knitting and Crochet

HELPFUL VIDEO TUTORIALS

  • Adjustable Ring: Learn How to Make an Adjustable Ring for Crochet AKA Magic Ring or Magic Loop
  • Weave in tail on adjustable ring: Best Way to Weave in Tail for Adjustable Ring Crochet
  • Changing Color: Learn How to Change Colors and Crochet Stripes with Marly Bird
Colorful granny dot blanket featuring a white background, showcasing vibrant dots in various colors and granny square stitche
Get the Ad-Free PDF in the Marly Bird Ravelry Store Here!

CONFETTI DOTS GRANNY BLANKET PATTERN

Crochet pattern diagram featuring circular motifs, with black, teal, and red stitch symbols on a white background.
STITCH DIAGRAM FOR THE CONFETTI DOTS GRANNY BLANKET PATTERN BY MARLY BIRD

The pattern was originally made to have the granny squares at the corners but was changed last minute to have the dots at the corners. Either way works, the only difference is this, whichever one is in the corner is the one you will start with then build the rest of the squares on that with the JAYGO method.

CIRCLE IN THE SQUARE

Make 1, Join 82 for blanket, 58 for throw, 40 for baby blanket

With CC1, make an adjustable ring

Round 1 (RS): Ch 3 (counts as dc), 15 dc in ring, sl st to top of beginning ch-3, pull ring closed, do not turn. (16 dc)

Round 2: Ch 3 (counts as dc), *2 dc in next dc, dc in next dc; repeat from * around to last dc, 2 dc in last dc, sl st to top of beginning ch-3, change color to CC2, fasten off CC1, do not turn. (24 dc)

Round 3: Ch 1, sc in top of tch, sc in next dc, *2 sc in next dc, sc in next 2 dc; repeat around to last dc, 2 sc in last dc, sl st to first sc, change color to MC, do not turn. (32 sc)

Round 4: Ch 3 (counts as dc), 2 dc in first sc, *ch 3, skip 3 sc, sc in next sc, ch 3, skip 3 sc, (3 dc, ch 1, 3 dc) in next sc; repeat from * around to last 7 sc, ch 3, skip 3 sc, sc in next sc, ch 3, skip 3 sc, 3 dc in first sc, hdc in top of beginning ch-3 (counts as ch-sp), do not turn. (24 dc, 8 ch-3 sps, 4 sc)

Round 5: Ch 3 (counts as dc), (2 dc, ch 1, 3 dc) in sp made by hdc, *[ch 1, 3 dc in next ch-3 sp] twice, ch 1, (3 dc, ch 1, 3 dc) in next ch-1 sp; repeat from * around to last 2 ch-3 sps, [ch 1, 3 dc in next ch-3 sp] twice, ch 1, sl st to top of beginning ch-3, fasten off, weave in ends. (48 dc + 16 ch-sps)

When making these motifs to join other motifs already made, you will make adjustments to the final round. To join to an adjacent motif, do not ch-1 but sl st to adjoining ch-1 sp on the adjacent motif on the final round. For more of a visual guide, look at the diagram for the border. It shows the motifs with the slip stitch in place of the chains on the final rounds of both the granny squares and the dots square. 

GRANNY SQUARE

Join 82 for blanket, 58 for throw, 40 for baby blanket.  Mix and match any contrasting color

With MC, ch 4, sl st to first ch to form a ring. 

Round 1 (RS): Ch 3 (counts as dc), (2 dc, ch 1, [3 dc, ch 1] twice, 3 dc) in ring, hdc in top of beginning ch-3 (counts as a ch-sp), do not turn. (12 dc)

Round 2: Ch 3 (counts as dc), (2 dc, ch 1, 3 dc) in sp made by hdc, *ch 1, (3 dc, ch 1, 3 dc) in next ch-1 sp; repeat from * around, hdc in top of beginning ch-3 (counts as a ch-sp), do not turn. (24 dc + 8 ch-sps)

Round 3: Ch 3 (counts as dc), 2 dc in sp made by hdc, *ch 1, (3 dc, ch 1, 3 dc) in next ch-1 sp, ch 1, 3 dc in next ch-1 sp; repeat from * around to last ch-1 sp, ch 1, (3 dc, ch 1, 3 dc) in last ch-1 sp, hdc in top of beginning ch-3 (counts as ch-sp), do not turn. (36 dc + 12 ch-sps)

Round 4: Ch 3 (counts as dc), 2 dc in sp made by hdc, ch 1, 3 dc in ch-1 sp, *ch 1, (3 dc, ch 1, 3 dc) in next ch-1 sp, [ch 1, 3 dc in next ch-1 sp] twice; repeat from * around to last ch-1 sp, ch 1, (3 dc, ch 1, 3 dc) in last ch-1 sp, ch 1, sl st to top of beginning ch-3, fasten off, weave in ends. (48 dc + 16 ch-sps)

Make 1 motif as written in full. When making the other motifs, you will be joining on the 4th round. To join to an adjacent motif, do not ch-1 but sl st to adjoining ch-1 sp on the adjacent motif on round 4. For more of a visual guide, look at the diagram for the border. It shows the motifs with the slip stitch in place of the chains on the final rounds of both the granny squares and the circle in the square. 

FINISHING

Weave in all ends. 

Pin to schematic size, lightly spray with water and allow to dry. 

Colorful brochure for a granny dot blanket project featuring pink, blue, and gray colors with text about learning techniques.
Get the Ad-Free PDF with Full Crochet Diagrams of Motifs and Border

BORDER

*stitch diagram for border is available in the ad-free pdf*

Round 1: Join MC with sl st to any corner, ch 1, sc in same corner, *[ch 3, sc in next ch-1 sp] 3 times, ch 3**, sl st in corner join between granny squares; repeat from * across edge to corner ending at **, (sc, ch 3, sc) in corner ch-1 sp; repeat from * around blanket ending at **, sc in first corner ch-1 sp, ch 1, hdc in first sc (counts as ch-3 sp), do not turn. (148, 180, 212 ch-3 sps)

Round 2: Ch 3 (counts as dc), 2 dc around post of hdc, *ch 1, 3 dc in next ch-3 sp; repeat from * across to corner, ch 1**, (3 dc, ch 3, 3 dc) in corner ch-3 sp; repeat from * around blanket ending at **, 3 dc in first corner-sp, ch 1, hdc to top of beginning ch-3, do not turn.  (152, 184, 216 dc groups)

Round 3: Ch 1, sc around post of hdc, *ch 3, sc in next ch-1 sp; repeat from * across to corner, ch 3 **, (sc, ch 3, sc) in corner ch-sp; repeat from * around blanket ending at **, ch 1, hdc in first sc (counts as ch-sp), do not turn. (156, 188, 220 ch-3 sps)

Round 4: Ch 2, 2dc-cl around post of hdc, *ch 3, dc in next ch-3 sp; repeat from * to corner, ch 3**, (3 dc-cl, ch 5, 3 dc-cl) in corner ch-sp; repeat from * around blanket ending at **, 3 dc-cl in first corner sp, ch 3, dc in top of 2 dc-cl (counts as ch-5 sp), do not turn. (160, 192, 224 ch-sps)

Round 5: Ch 1, sc around post of dc, *ch 3, sc in next ch-3 sp; repeat from * across to corner, ch 3 **, (sc, ch 3, sc) in corner ch-sp; repeat from * around blanket ending at **, ch 1, hdc in first sc (counts as ch-sp), do not turn. (164, 196, 228 ch-3 sps) 

Round 6: Ch 3 (counts as dc), 2 dc around post of hdc, *ch 1, 3 dc in next ch-3 sp; repeat from * across to corner, ch 1**, (3 dc, ch 3, 3 dc) in corner ch-3 sp; repeat from * around blanket ending at **, 3 dc in first corner-sp, ch 1, hdc to top of beginning ch-3, do not turn.  (168, 200, 232 dc groups)

Round 7: Ch 1, sc around post of hdc, *ch 5, sc in next ch-1 sp; repeat from * across to corner, ch 5**, (sc, ch 7, sc) in corner ch-sp; repeat from * around blanket ending at **, sc in first corner ch-sp, ch 7, sl st to first sc, fasten off.  (172, 204, 236 ch-3 sps)

Pattern layout for a crochet project featuring gray granny squares with red circles in the center, measuring 40.5 inches.
Granny square motif layout with grey squares and green circles, dimensions provided for a knitting or crochet project.
A crochet layout featuring alternating gray granny squares and purple circles, arranged in a grid pattern.

Additional Posts and Patterns You Might Like:

Be sure to check out our new roundup of Granny Square Books. These are great resources for growing your skills.

  • Two Color Crochet Square Motif – an advanced granny square I taught in the Tournament of Stitches
  • Byars Baby Blanket, another join as you go crochet blanket pattern; here's a video for it
  • Red Heart Colorful Squares JAYGO Throw free pattern
  • Ivy's Poppy Baby Blanket, another JAYGO crochet pattern; this is more advanced but you can bookmark them now and use them soon
  • Paton's Fall Colors Granny Blanket
  • Marly Bird Granny Square Motif Cardigan can be done JAYGO, which I show in this video

Frequently Asked Questions

What exactly is “Join As You Go” crochet?

Honestly… it's a way to connect your crochet pieces as you make them, instead of sewing them all together at the very end! You start one motif in a way that it attaches to another one you've already made. It's super handy if you're not a fan of all that finishing work.

Can you really adapt any crochet motif to be “Join As You Go”?

Yes! The cool thing is you can totally modify charts and patterns. The page shows how you can adjust the last round of a motif with a single crochet border to make it work for joining. Itโ€™s all about replacing a chain stitch with a slip stitch to connect your pieces!

What's the difference between a Slip Stitch Join and a Cluster Chain Seam?

So here's the thing… a slip stitch join is the simplest way to connect motifs by basically swapping a chain for a slip stitch. The cluster chain seam is a bit more involved, using a special cluster stitch, but it adds a really neat decorative touch between your pieces!

How big can I make the Confetti Dots Granny Blanket?

Oh, the possibilities are endless! You can make it any size you dream of, from a sweet baby blanket to a king-sized snuggle for your bed. The pattern specifically gives you measurements and yarn amounts for baby, throw, and full-size blankets.

Do I have to use the exact yarn mentioned for the blanket?

Not at all! While Brava Worsted yarn and the mini packs are recommended, you can totally use up your scrap yarn stash for those colorful “dots.” The most important thing is to make sure you're using a worsted weight yarn so your gauge works out!

Filed Under: BiCrafty Bootcamp Learn to Crochet, Crochet, Our Free Patterns, Tips, Tricks, Techniques for Knitting and Crochet

  • « Previous Page
  • 1
  • …
  • 54
  • 55
  • 56
  • 57
  • 58
  • …
  • 96
  • Next Page »

Let's Be Social

Join the Marly's Minions Facebook group to share, ask questions, or chat about all of your yarn related crafts!

Join the group(opens in new tab)
Cartoon of a smiling woman with brown hair in a bun, glasses, black jacket and green shirt, waving next to large "hi" text.

Quick Links

The Pattern Shop

Our Free Patterns

Blog

Marly Bird House

Learn to Knit & Crochet

About

Giveaway Terms and Privacy Notice

Find Us Everywhere

Join the Newsletter

YouTube Channel

Marly's Minions FB Group

Etsy Store

Ravelry Store


AN ELITE CAFEMEDIA HOME/DIY PUBLISHER

Information from your device can be used to personalize your ad experience. Do not sell or share my personal information.

Privacy Policyย  ย Termsย  ย Marly Bird Legal Documents Copyright © 2026