Search
Close
  • The Pattern Shop
  • Our Free Patterns
    • Browse All Our Free Patterns
    • Our Free Knitting Patterns
    • Our Free Crochet Patterns
  • Blog
    • All Blog Posts
    • All Free Patterns
    • Dibble Dabble Inspiration
    • Giveaways
    • Make-Alongs
    • Product Reviews
    • Roundups
    • Tips, Tricks, Techniques for Knitting and Crochet
Stylized bird with pink and gray swirling tail above elegant โ€œMarlyโ€ text, logo for crochet accessories and home decor.
  • Marly Bird House
  • Learn to Knit & Crochet
    • Newbie? Start Here
    • Video Tutorials
    • Knitting Definitions
    • Crochet Definitions
    • Common Techniques
    • Size Charts for Knitting and Crochet Projects
  • About
ร—
  • The Pattern Shop
  • Free Patterns
  • Blog
  • Marly Bird House
  • Learn to Knit & Crochet
    • Newbie? Start Here
    • Video Tutorials
    • Knitting Definitions
    • Crochet Definitions
    • Common Techniques
    • Size Charts for Knitting and Crochet Projects
  • About
Stylized bird with pink and gray swirling tail above elegant โ€œMarlyโ€ text, logo for crochet accessories and home decor.
Search
Close

New Patterns NOW Available in Ad-Free PDF! Check out The Pattern Shop

The Perfect Crochet Beach Skirt Pattern

June 10, 2021 By Marly Bird Leave a Comment

It's always fun to crochet something that you can wear immediately. You get that instant gratification joy. With summer coming up, there are a lot of great quick makes. For example, we recently rounded up over 40 free knit and crochet beach patterns. It includes beach bags, beach balls, and more. It also includes the perfect crochet beach skirt pattern. I thought I'd tell you more about that today.

crochet beach skirt free pattern

Red Heart Caribbean Skirt Free Crochet Pattern

I'm talking about the Red Heart Caribbean Skirt. This is a terrific openwork crochet skirt that you can wear at the beach. It works perfectly over a swimsuit to keep you a little bit (but not too much!) covered when you're not in the water. It's definitely the kind of cute skirt that you can put on to head to a beach bar. Plus, it layers well, so you could wear it with a tunic or tank dress. It has a terrific slit up one leg that makes it a stylish, fashionable choice.

Easy, Free Crochet Beach Skirt Pattern

The Double Stitch Twins designed this free crochet beach skirt pattern. Yarnspirations offers the pattern along with the yarn to make it. This is a free, easy pattern that beginners should easily be able to tackle. It uses simple crochet stitches like the double crochet stitch. You use easy skips to create the openwork pattern. There's some shaping, but overall, this drawstring crochet beach skirt is easy to make.

Versatile, Flattering Crochet Skirt

This is a versatile crochet beach skirt pattern. There are instructions for five sizes, from small through 2X. This skirt has an easy drape that flatters many different figures. It closes with a drawstring tie. Therefore, you can wear it tighter or looser as you see fit. Of course, if you're an experienced crocheter, you can also adapt the design slightly to flatter your body even more. However, that shouldn't be necessary.

Red Heart Soft Yarn

This crochet pattern calls for Red Heart Soft Yarn. This is a classic, worsted weight acrylic yarn. However, they spin it uniquely to create a really silky feeling. If you've never touched it, reach out the next time you spot a ball because it really does feel, well…SOFT. That makes for a really comfy beach skirt.

And just as importantly, this yarn has an excellent drape. You don't always get great weight with acrylic yarn. It really depends on a lot of factors. Good drape means you get a more flattering fit for your crochet clothing. You can create a drape with both stitches and yarn, and the skirt design definitely adds to that. However, it helps a lot if you start with silky soft yarn. So, although you don't have to use the recommended yarn to make this crochet skirt, you'll likely be glad if you do.

Get This Free Crochet Skirt Pattern

You can make this crochet skirt quickly and easily. It's versatile to wear in many different settings. Moreover, it's definitely the perfect addition to your summer beach wardrobe. So what are you waiting for? Get this crochet skirt pattern right here or click the image below:

free crochet skirt pattern

You Might Also Like:

  • 50 Free Crochet Summer Tops Patterns
  • 10 Free Lightweight Crochet Summer Shawls
  • Summer Lace Sweater Free Crochet Pattern

Frequently Asked Questions

Can I wear this skirt right after I crochet it?

Yes! That's honestly one of the best parts about this pattern… you get that instant gratification joy. It's perfect for a quick summer make and you can totally wear it right away.

What yarn do you recommend for this skirt?

So here's the thing… the pattern calls for Red Heart Soft Yarn, and it really is lovely! It's a worsted weight acrylic with a silky feel and a beautiful drape, which is just perfect for a comfy beach skirt.

Is this skirt pattern really beginner-friendly?

Honestly, yes! The Double Stitch Twins designed this as a free, easy pattern that beginners should be able to tackle. It uses simple stitches like double crochet and easy skips to create that pretty openwork design.

What if I need a different size?

Don't you worry… this skirt pattern is super versatile! It includes instructions for five different sizes, from small up to 2X, and the drawstring tie means you can adjust the fit perfectly.

Can I wear this skirt for more than just the beach?

Absolutely! It's designed to be a terrific openwork crochet skirt that's perfect over a swimsuit, but it also layers really well. You could totally pop it on over a tunic or tank dress to head to a beach bar or even just for a cute, fashionable look.

Filed Under: Crochet, Free Patterns

Itโ€™s Time To Start Your BiCrafty Bootcamp First Knit…

June 9, 2021 By Marly Bird 1 Comment

We just wrapped up a full month of working on our first knit cowl. (See our Month Two BiCrafty Bootcamp Thoughts here!) How is everyone feeling?! You're doing an awesome job. Now we're ready to begin our next multi-week project: our first knit hat in the round.

First Knit Hat in the Round

How to Knit a Hat That Matches Your First Knit Cowl

We're going to knit a hat that complements your first knit cowl. However, if you wanted to make a more matchy-matchy set, then you could also start your first knit hat right now.

Basically, here is what you do. You'd just need to calculate your gauge (how many stitches per inch is more important than rows per inch in this case).

Once you know how many stitches per inch you get, calculate a number closest to 20″ [51 cm] for average adult or 22″ [56 cm] for large adult. The biggest thing to remember is that your cast on number should be a multiple of both four and five. If you can only get one or the other, in the sections where the multiple changes you can either increase or decrease to get to the number you need.

Once you've cast on a good number of stitches, follow the stitch patterns for the knit cowl to start your hat. Because you don't want your hat too long or too slouchy (is there such a thing?), I recommend only working each section util they measure about 1″ or 1.5″ [2.5 or 3.8 cm].

As a reminder those lessons were:

  • How to Knit 1ร—1 Ribbing in the Round
  • How to Knit Seed Stitch in the Round
  • Double Moss Stitch Plus Extra Credit: Sl1pyb
  • Seersucker Stitch and Long Slip Texture Stitch

So you would basically create a knit hat that begins with 1×1 ribbing, continues with seed stitch, etc. Then you would wrap up with some crown shaping. And that is where things get a bit different.

For the crown, I think I would go back to seed stitch and work decreases back down to as few stitches as possible and finish off the hat.

Matchy-Matchy BiCrafty Community Hat Pattern

Let me make this easy for you and give you numbers and a specific decrease.

MATERIALS

Yarn: Red Heart Chic Sheep by Marly Birdโ„ข [Art. R170 100% Merino Wool available 3.5 oz (100 g),186 yd (170 m) balls]

Needles: 4.5mm [US 7] and 5mm [US 8] 16″ (40.5 cm); Set of 5 double pointed needles 5mm [US 8]

SPONSOR SHOUTOUT: JIMMY BEANS WOOL

Of course, you can use any brand of knitting needles that you want. This month, we're going to showcase Jimmy Beans Wool knitting needles. We'll start off working with the brand's SmartStix Interchangeables. We're excited to let you know what we think.

MEASUREMENTS

Gauge: 18 sts = 4″ (10 cm) in Seed Stitch pattern with larger needles, after blocking. CHECK YOUR GAUGE. Use any size needles to obtain the gauge

One size to fit average Adult.

NOTIONS

Stitch Marker (make your own), Tapestry needle to bury the ends (learn how here)

SPECIAL STITCHES / ABBREVIATIONS

Make 1 (inc): Insert lhn under horizontal strand between st just worked and next st, from the front to the back, knit through the back loop (1 st increased).  (video help)

NOTES 

I recommend adding a lifeline to your project at the pattern changes. Just to make sure you have a point to rip back to if something goes wrong. (video help)

PATTERN

Brim

With smaller needle, cast on 90 sts. Place marker on right hand needle to indicate the start of round, join round being careful to not twist cast on edge. 

Round 1: Knit

Rounds 2-7: *K1, p1; repeat from * around. 

Round 8: *(k1, p1) 4 times, make 1; repeat from * 10 times total, k1, p1 to end — 100 sts. 

Body

Change to larger needles.

Follow along with the instructions for each of these sections BUT make each section only measure about 1″ or 1.5″ [2.5 or 3.8 cm] each.

  • How to Knit Seed Stitch in the Round (multiple of 2)
  • Double Moss Stitch (multiple of 4)
  • Plus Extra Credit: Brick Stitch (Sl1pyb) (multiple of 5)
  • Seersucker Stitch (multiple of 4 stitches)
  • Long Slip Texture Stitch (multiple of 2)

Crown

Shape crown as follows, changing to double-pointed needles when work no longer fits comfortably on circular needle.

Round 1: *(p1, k1) 4 times, p2tog, k2tog, (p1, k1) 4 times; repeat from * 4 times more โ€“ 90 sts.

Rounds 2, 4, 6, 8, 10, 12, 14, 16: Continue in established seed stitch pattern

Round 3: *(p1, k1) 3 times, p1, k2tog, p2tog, k1, (p1, k1) 3 times; repeat from * 4 times more โ€“ 80 sts.

Round 5: *(p1, k1) 3 times, p2tog, k2tog, (p1, k1) 3 times; repeat from * 4 times more โ€“ 70 sts.

Round 7: *(p1, k1) 2 times, p1, k2tog, p2tog, k1, (p1, k1) 2 times; repeat from * 4 times more โ€“ 60 sts.

Round 9: *(p1, k1) 2 times, p2tog, k2tog, (p1, k1) 2 times; repeat from * 4 times more โ€“ 50 sts.

Round 11: *p1, k1, p1, k2tog, p2tog, k1, p1, k1; repeat from * 4 times more โ€“ 40 sts.

Round 13: *p1, k1, p2tog, k2tog, p1, k1; repeat from * 4 times more โ€“ 30 sts.

Round 15: *p1, k2tog, p2tog, k1; repeat from * 4 times more โ€“ 20 sts.

Round 17: *p2tog, k2tog; repeat from * around โ€“ 10 sts.

Finishing

Cut yarn leaving at least 6โ€ (15.24 cm) of tail and use yarn needle to thread tail through each remaining st knitwise. Pull tail tight to close top (like a drawstring). Weave tail in on wrong side of hat to secure.


What's Different With the First Knit Hat vs Knit Cowl

Here are the things that we'll be doing a little bit differently with our first knit hat:

  • We're working with both circulars and DPNs. We'll start the knit hat form the bottom up working on circular needles. Then we're going to switch to DPNs when we get closer to the top of the hat. Learning to knit on DPNs is going to be the biggest new lesson in Month 3 of BiCrafty Bootcamp.
  • We'll work with needles in different sizes. Therefore you'll learn how to move from a Size 7 to a Size 8 in the same project.
  • We're learning shaping. We'll start at the bottom of the hat. Then, in order to get that beautiful hat shape, we'll learn decreasing towards the top of the hat. This is Month 3's other big skill.

Materials for First Knit Hat in the Round

As aforementioned, we'll be using multiple knitting needles in this project. Therefore, you'll want to get:

  • Size 7 16โ€ณ circular needles
  • Size 8 16โ€ณ circular needles
  • Size 8 DPNs

When you purchase your DPNs, try to find a set of five. They come in sets of four or five, depending on the brand. If you can only find sets of four, then you should get a second set in each size. Alternatively, some companies sell the extra ones individually.

We're going to continue working with worsted weight yarn for this project. You might want to use the same yarn that you did for your cowl. Ideally, you'll have several colors of yarn. That's because we're going to practice some colorwork techniques on this first knit hat. However, we'll have options, so if you're limited to a single color, it's okay.

Crocheter's Edge

Crocheters Tips to Learn Knitting

As a crocheter, you're going to have an edge up on other newbie knitters because you'll understand the basic concept of decreasing to shape a hat. For example, you know how to stitch two together in crochet to begin decreasing. More importantly, you know WHY you're doing that. As a result, learning decreasing for your first knit hat should make a lot of sense.

Knitters Tips for Crocheters

knitters tip for crocheters

The biggest tip from the knitters right now is not to be scared of those DPNs. Hopefully you've watched all of the BiCrafty Bootcamp videos. If so, then a few weeks ago you saw us showing what DPNs are and how to use them. Although you're working with four or five needles, you're actually only using two at a time. You already know how to do this! So don't get scared; this is going to be easier to learn than you think!

BiCrafty Community Complementary Hat Pattern

MATERIALS

Yarn: Red Heart Chic Sheep by Marly Birdโ„ข [Art. R170 100% Merino Wool available 3.5 oz (100 g),186 yd (170 m) balls]

Needles: 4.5mm [US 7] and 5mm [US 8] 16″ (40.5 cm); Set of 5 double pointed needles 5mm [US 8]

MEASUREMENTS

Gauge: 18 sts = 4″ (10 cm) in Seed Stitch pattern with larger needles, after blocking. CHECK YOUR GAUGE. Use any size needles to obtain the gauge

One size to fit average Adult.

NOTIONS

Stitch Marker (make your own), Tapestry needle to bury the ends (learn how here)

PATTERN

Brim

With smaller needle, cast on 90 sts. Place marker on right hand needle to indicate the start of round, join round being careful to not twist cast on edge. 

Round 1: Knit

Rounds 2-7: *K1, p1; repeat from * around. 

Round 8: *(k1, p1) 4 times, make 1; repeat from * 10 times total, k1, p1 to end — 100 sts. 

Body

Change to larger needles.

Knit 1 round.

Over the next few weeks we will be adding different stitch patterns in this section for you to add to your hat.

Additional Videos and Patterns to Try

At this stage of BiCrafty Bootcamp, you might want to check out these videos:

  • No Cuss Cast on for Double Pointed Needles. Although you don't need this to start the hat, watching the video might help make DPNs a bit less intimidating.
  • Absolute Beginner Chunky Knit Hat
  • How to knit Honeycomb Cable and Fair Isle Capriciously Chic Hat

And these patterns:

  • 30 Marly Bird Knit Hat Patterns
  • Bernat Winter Weather Set
  • Bernat Cowl and Hat

Frequently Asked Questions

Can I make this hat match my cowl exactly?

Honestly… yes! You totally can make a super matchy-matchy set. You'll just need to figure out your gauge and make sure your cast on number is a multiple of both four and five. Then, just work each stitch pattern section for about 1″ to 1.5″ before moving to the next.

What needles do I need for this hat project?

So here's the thing… you'll need a few different sizes! Grab your 4.5mm (US 7) and 5mm (US 8) circular needles in a 16″ length, and then a set of five 5mm (US 8) double-pointed needles. It sounds like a lot, but we're learning some new skills here!

I'm a crocheter… is knitting a hat going to be super hard?

Yes! Actually, you've got a bit of an edge because you already understand how decreasing works to shape things like hats. Learning to knit decreases for your hat should feel pretty familiar, and way easier than you might think!

What's the biggest new skill I'll learn with this hat pattern?

Well… there are a couple of big ones! We'll be working with both circular needles and double-pointed needles (DPNs), which is a new technique. Plus, we're going to learn how to shape the hat by decreasing stitches towards the top, which is a super useful skill to master!

Can I use a different yarn than the Red Heart Chic Sheep?

You know… you absolutely can use any worsted weight yarn you like! The Red Heart Chic Sheep is just what's recommended for this pattern. If you have some other yarn in your stash, go for it!

Filed Under: BiCrafty Bootcamp Learn to Knit, Knitting, Tips, Tricks, Techniques for Knitting and Crochet

Marly Birdโ€™s BiCrafty Bootcamp: Team Thoughts on…

June 8, 2021 By Marly Bird Leave a Comment

Can you believe that we've completed more than two full months of Marly Bird's BiCrafty Bootcamp: Knitting Lessons for Crocheters? On one hand, we can't believe it at all. It seems like we just started and didn't even know what types of knitting needles were out there. On the other hand, we can see so much progress and growth that it definitely makes sense that two months have passed. We have learned so much since our Month One Update. So here's our Month Two Marly Bird Team Update.

Marly Bird's BiCrafty Bootcamp Team Thoughts

Marly Bird's BiCrafty Bootcamp Month Two Summary

This second month of Marly Bird's BiCrafty Bootcamp has been all about knitting a sampler stitch cowl in the round. Therefore, we started off learning how to work in the round. We discussed different types of circular needles. Here on the Marly Bird team, we worked with sponsor Prym's 24″ circular knitting needles. Read our Prym knitting needles review here.

Here were our lessons:

  • How to Knit 1×1 Ribbing in the Round
  • How to Knit Seed Stitch in the Round
  • Double Moss Stitch Plus Extra Credit: Sl1pyb
  • Seersucker Stitch and Long Slip Texture Stitch
  • Completing our First Knit Cowl with Knitwise Bind Off

Kathryn's Progress and Thoughts

Kathryn has had a lot of highs and lows throughout Month Two of Marly Bird's BiCrafty Boot Camp. She started off finding it challenging to begin working with circular needles again. She really likes those straights! Her first attempts at starting the cowl ribbing were a big mess because she kept twisting her needles while she worked. However, she eventually figured it out. The more she's worked with the circulars, the easier it's gotten.

Knitting Growing Pains

That said, she's WAYYYYY behind on the sampler stitch cowl. She had to start over about two weeks in because that first part was just such a mess. In Week Two of this month (which was Marly Bird's BiCrafty Bootcamp Lesson 7, she made some adjustments. She shared in that week's newsletter: “I took Marly's advice from last week's live and re-cast on and started with quite a few rounds of knit stitch first. Of course, working knit stitch in the round means the first part of my cowl is stockinette stitch. (The video from our lesson on working in the round explains why repeating knit stitch in rows is garter stitch but in rounds is stockinette.) In any case, once I got enough rounds of stockinette going, I started back on the K1, P1 ribbing. It's easier now and I'm getting the hang of it. I'm still making some mistakes. I can't always read my knits and purls on the ribbing so I think sometimes I'm accidentally making seed stitch when I mean to make ribbing, but I'm getting there.

At that point, Kathryn had also decided to cast on to larger knitting needles. The group is work with size 8 but she went all the way up to size 10. She said, “I know from crochet that when something is hard for me it helps to go up a few hook sizes so I can see the stitches better (they aren't as tight). I figured it would work for knitting as well, and it has.” So, she expected to get caught up with the group.

Switching Gears

However, a series of things (travel, family stuff, a personal loss) happened that made life hard. As a result, she reverted back to soothing stitching rather than working on learning something new. She really believes in the power of yarn to heal. She was happy to discover that she's at least comfortable enough with the basic knit stitch that she can now practice that in a soothing, meditative healing way.

Therefore, she cast on a wide merino wool scarf. She used big Prym needles (size 10). Then she just knit garter stitch. She knit on the on the plane, in airports and lines and waiting rooms and long car rides. She knit with others and alone. So, she's loving that she's able to do that and didn't have to revery back to crochet for that comfort.

Prym knitting needles

That said, she's loved seeing everyone's completed cowls. (Remember to share on Facebook and Instagram with #marlybird #bicraftybootcamp.) This isn't a race and she's not too jelly of everyone's advancing skills. She's definitely going to get back to this cowl at some point to learn these stitch patterns. However, she's eager to rejoin the group where we're all at this month as we begin to make our first knit hat in the round starting this week.

Cryssi's Progress and Thoughts

Cryssi also found that it took a little bit of adjusting to learn how to work in the round after our first month of knitting in rows. In the first week of this cowl pattern, she had to frog and re-start three times. She, too, found it challenging to keep her work from twisting. However, she said, “once I was really diligent about it and make sure to double check that I could see my purl bumps, things went smoothly!”

Cryssi's Knit Cowl

By Week Two of this new month, she was really in the swing of things. That was Lesson 7 of Marly Bird's BiCrafty Bootcamp. In that week's BiCrafty newsletter, Cryssi shared: “I am so tickled with this week's homework! I mean, for the first time, I feel like I can do anything! No, seriously! For some reason as I was sitting working on this week's homework, I literally thought to myself, “I feel like I could make anything I wanted now.” And really, isn't that the confidence we deserve in life?! In all sincerity, we know both of the stitches in knitting now, we can knit flat, we can knit in the round, everything else is just some combination of all that. As Marly always says, it's just sticks and yarn. I hope you left this week feeling as confident as I have!

Cryssi's First Knit Cowl

One of the things that Cryssi was really happy about was her decision to work each new stitch pattern in a different color. The result is beautiful. She enjoyed staying caught up with the group. Of course, she incorporated the extra credit. After all, we want to learn as many of these knit stitch patterns as we can! She did fall behind one week due to life events. That's going to happen to all of us at some point during Marly Bird's BiCrafty Bootcamp. And that's totally okay!

Cryssi's Summary of Thoughts on Month Two

She loved having a multi-week project. At first, it felt intimidating. After all, it's a bigger task than the quick mug rugs we learned in Month One. However, when it was all said and done, she ended up feeling so accomplished. Cryssi loves that she was able to learn so much. She's excited to have a finished knit accessory that she can wear this fall and winter. Plus, she's looking forward to incorporating all of these skills into our future projects.

Month Three Goals for Marly Bird's BiCrafty Bootcamp

Here we are in June. We're about to begin Month Three. In this section, we're going to continue working in the round. However, this time, we'll be making a hat to complement our first knit cowl. You know what that means – by the end of the month we'll learn how to knit with DPNs! We are thrilled to start a new project, build upon our new knitting knowledge, and advance in our skills.

Frequently Asked Questions

What did we learn in the second month of Marly Bird's BiCrafty Bootcamp?

So here's the thing… the second month was all about knitting a sampler stitch cowl in the round! We learned how to work in the round, discussed different types of circular needles, and tackled lessons on 1×1 ribbing, seed stitch, double moss stitch, seersucker stitch, and completing our first knit cowl with a knitwise bind off.

Did everyone find working in the round easy right away?

Honestly… not everyone did! Both Kathryn and Cryssi mentioned it took a little adjusting to work in the round after knitting in rows. Cryssi even had to frog and restart a few times because keeping the work from twisting was a challenge at first.

What was Kathryn's biggest challenge in Month Two?

Yes! Kathryn had a lot of highs and lows. She found starting with circular needles tricky and her first attempts at the cowl ribbing were a mess. Life events also set her back, but she found comfort in knitting garter stitch scarves with larger needles.

How did Cryssi feel after completing the Month Two cowl?

Cryssi felt so accomplished! Even though the cowl project felt intimidating at first compared to the mug rugs from Month One, she ended up feeling like she could do anything. She was excited to have a finished knit accessory to wear!

What's coming up in Month Three of the BiCrafty Bootcamp?

Oh, you'll be excited about this! We're going to keep working in the round, but this time we'll be making a hat to go with our cowl. That means… we'll be learning how to knit with DPNs!

Filed Under: BiCrafty Bootcamp Learn to Knit, Dibble Dabble Inspiration, Knitting

Prym Knitting Needles Review

June 8, 2021 By Marly Bird 1 Comment

We have been so lucky to get the opportunity to work with some terrific sponsors for BiCrafty Boot Camp; Knitting Lessons for Crocheters. This month, as we've been working on our first knit cowl pattern, we here on The Marly Bird team have been trying out the Prym circular needles. These ergonomic Prym knitting needles have teardrop-shaped tips that make them perfect for the crocheter who is learning how to knit.

Types of Prym Knitting Needles

Like with most other knitting tool supplies, Prym offers single point, double point, and circular knitting needles. They do not currently offer interchangeable circular knitting needles.

Prym single point knitting needles

Prym's straight, or single point, knitting needles are 14″ needles. These come in 9 sizes from a size 2 (3 mm) to a size 15 (10 mm). In addition to the signature teardrop tip, the straight needles also have a unique end on the other side of the needle (to prevent stitches from falling off the back side.) The shape is such that the two needles can be pressed to lock together when not in use which is terrific for keeping the pairs organized in storage.

Prym dpns

Prym's double pointed needles, or DPNs, are 8″ sets of 5 needles. These range in size from 1 (2.5 mm) to 11 (8 mm).

Prym cable knitting needles

Prym sells two sizes of cable knitting needles: Size 6 (4 mm) 8″ cable knitting needles and Size 10.75 (7 mm) 10″ cable stitch needles. We haven't gotten to cable stitches or knitting needles for cables, yet, in BiCrafty Boot Camp. However, stay tuned, because those lessons are coming soon.

Four Prym knitting needles arranged in a circular layout on a textured gray surface.

We worked with Prym's circular knitting needles. Prym has both 24″ and 32″ circular knitting needles. The 24″ Prym knitting needles range in size from 2 (3 mm) to 10.75 (7 mm). In contrast, the 32″ circular Prym knitting needles range in size from 2 (3 mm) to 17 (12 mm). We worked with the size 8 (5 mm) 24″ circular needles for our first knit cowl in BiCrafty Boot Camp.

What Makes Prym Knitting Needles Unique

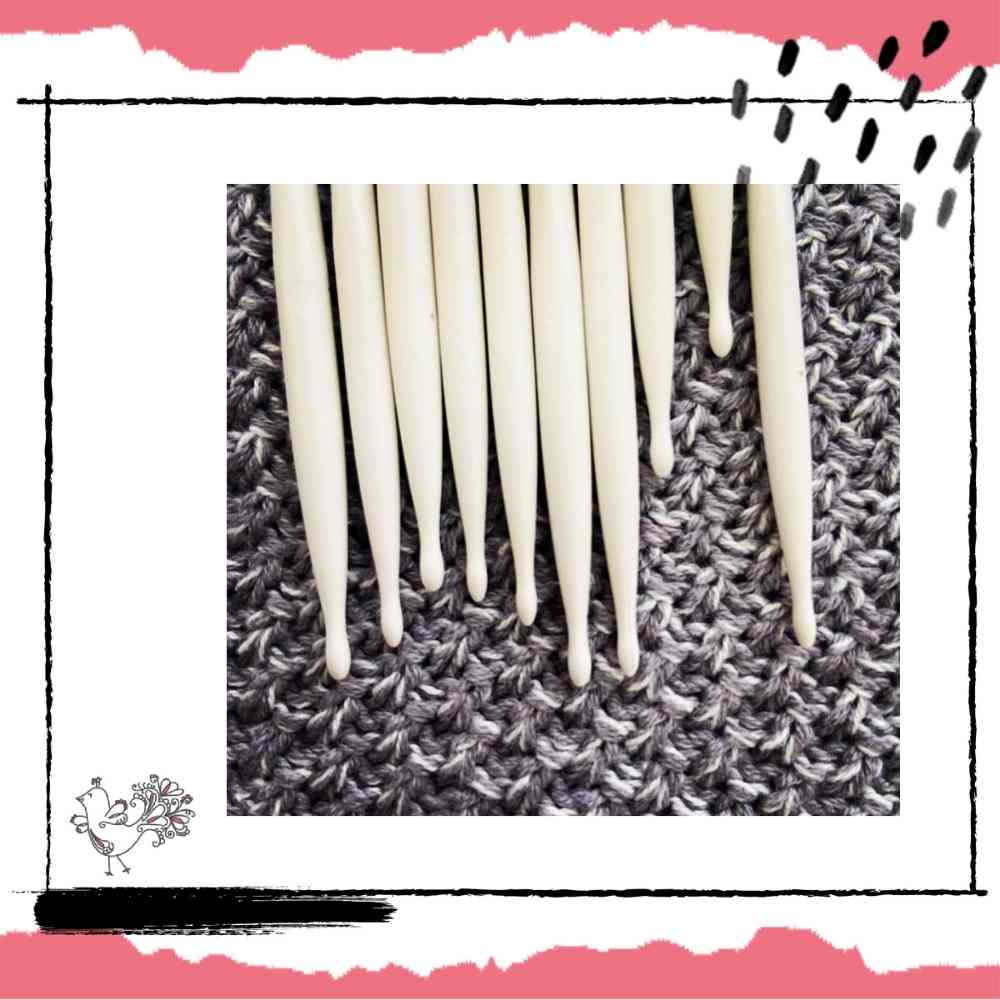
Prym knitting needles are designed as ergonomic knitting needles. They have a unique shape compared to other needles. The body of the knitting needle is triangular whereas the shaft is round. This makes the body easy to grip and the shaft, which has slight flexibility that follows the curve of the hand, adds to the ergonomic comfort of the design.

Prym knitting needles

Prym knitting needles also have those unique teardrop-shaped tips. That's actually a patented design. It's really helpful for picking up the stitches as well as keeping the stitches from dropping off the needle.

Kathryn's Thoughts on Prym Knitting Needles

As you know, Marly Bird team members Kathryn and Cryssi are learning to knit right alongside the bootcampers. They're trying out as many different products from the sponsors as they can. Therefore, they can give you their honest feedback about the products.

Both Kathryn and Cryssi are enjoying working with the Prym knitting needles. Kathryn struggled to get adjusted to circulars again after realizing that she really likes working with straight needles. In fact, although she's using the Prym 24″ circulars for the cowl (which she's behind on at the moment), she's also simultaneously working on a simple garter stitch knit scarf on some of the Prym straights. She's loving those.

Prym knitting needles

In particular, she likes the unique teardrop-shaped tip that is Prym's signature. The tip easily grabs the yarn, acting almost like a little crochet hook. While she can now knit without that aid, she finds it makes for a really great transition as a crocheter new to the craft of knitting. Compared with the sharper needles, it doesn't split the yarn as much.

She also likes the Prym's plastic material. It's a little bit slicker than the bamboo needles she had worked with before, so she can knit a little bit faster. However, it's not as slick as the metal needles she tried previously that were just too fast for her. In one of the live videos, Marly agreed: bamboo is just way too slow for her experienced knitting hands but she didn't feel like the Prym knitting needles were too slow even though she usually uses metal.

knitting needles by Prym

Cryssi's Thoughts on the Prym's

Cryssi also liked the Prym knitting needles. If you've been reading your BiCrafty Boot Camp weekly newsletters then you know that the first thing she said was:

“I really didn't know how I would feel about the Prym needles after developing a love for my bamboo circulars. However, HOLY GUACAMOLE, I LOVE THESE NEEDLES! I was intimidated by that little bump at the tip but Marly was right, the way that bump grips the yarn both when I'm picking it and also when I'm stretching too far, keeps the open stitches from popping off the end of my needle! I mentioned before about my arthritis in my hands, and I have to say that I did notice less hand cramping this week than in previous weeks! I think a mixture of the lightness of the needles and their amazing ergonomic shape has worked wonders for me! I'm definitely a fan!”

Elaborating on that in another newsletter, Cryssi shared that she thinks the lightness of the needles really helps to eliminate the wrist pain that can come about from knitting. Moreover, she said that the ergonomic shape of the knitting needle's shaft is what really helps prevent the hand cramping of arthritis. Additionally, Cryssi mentioned that she wasn't sure before trying them whether that ergonomic shaft design would make any real difference on needles that are so thin but was surprised to discover that they really do help.

Cryssi has the arthritis and Kathryn has had hand injury issues. Both have been able to use these ergonomic knitting needles with relative ease, especially for beginners.

Prym single and double point knitting needles

Other Items Available from Prym

Prym also sells ergonomic crochet hooks. These range in size from C (3 mm) to O (12 mm). Furthermore, they sell two sizes off pom pom makers and three sizes of knitting mills. If you're looking for some fun new craft toys to try out then you might enjoy those.

If We Could Have One Wish

If we could change anything about the Prym knitting needles, we would just want more of them! Specifically, we hope that in the future Prym can offer greater variation in their sizes. For example, we would love 16″ circulars to begin the hat that we're going to start making next week in BiCrafty Boot Camp. Overall, though, we're happy with this product. If you're trying to figure out the right knitting needles for you, then these are definitely a contender worth trying. Everyone's preferences are different and you have to try various options to see what you like but these should make the short list.

You Might Also Like:

  • ChiaoGoo Knitting Needles Review
  • Ultimate Guide to Knitting Needles
  • I'm New To Knitting. What Are The Best Knitting Needles for Beginners?
  • How to Store Knitting Needles

Frequently Asked Questions

Who makes Prym knitting needles?

Prym is a German company with a long history in sewing notions and craft tools. They make a wide range of craft accessories including knitting needles, crochet hooks, sewing notions, and more. Prym needles are widely available in craft stores in Europe and increasingly in the US market. They offer several different lines including their standard aluminum needles and the ergonomic Softgrip line. Prym is a respected industry brand known for functional, quality tools at accessible price points.

Are Prym knitting needles good quality?

Marly's review on the blog gives her honest assessment of specific Prym products she tested… check the full post for her verdict on the specific needles reviewed. Generally, Prym occupies the mid-range in the needle quality spectrum… not as premium as ChiaoGoo, Addi, or Signature, but a step up from basic aluminum options. Their Softgrip ergonomic line has been appreciated by crafters who need comfort features. For occasional knitters or those building a first needle collection, Prym represents reasonable quality at a fair price point.

What types of Prym knitting needles are available?

Prym offers straight needles in aluminum and wood materials. Circular needles in both fixed and potentially interchangeable options. Double-pointed needle sets. Their color-coded system makes identifying sizes easy at a glance… each needle size has its own color, which is genuinely helpful when you're digging through a needle case. The ergonomic Softgrip line adds cushioned handles for comfort during long sessions. Check the Prym website or your local craft store for their current lineup… product availability varies by region.

How do Prym needles compare to other brands at similar price points?

In the mid-range category, Prym competes with brands like Knitter's Pride, Clover, and Tulip (depending on your region). Each has its devotees. Prym's color-coding system is distinctive and practical. Their needle surfaces are smooth enough for most yarns. The joins on their circular needles are typically good, which matters for keeping yarn from catching. For the price, they're a solid choice. Many experienced knitters have used Prym tools happily for years. Marly's specific comparison in the review post gives you the most useful information for your specific decision.

Where can I buy Prym knitting needles?

Prym products are available online through major retailers including Amazon. Many independent yarn shops carry Prym tools. In Europe, they're widely available in fabric and craft stores. In the US, availability varies more by region… online shopping is often the most reliable way to access the full Prym range. Joann stores carry some Prym products in the US. Always compare prices across retailers and watch for sales… craft tools, like yarn, go on sale regularly if you're patient.

Filed Under: BiCrafty Bootcamp Learn to Knit, Knitting, Product Reviews

Seaside Knit Beach Bag

June 7, 2021 By Marly Bird 7 Comments

With summer right around the corner, a beach bag is the perfect next project. The Seaside Beach Bag is a terrific knit beach bag for this summer and beyond. Of course, you can use it on vacation at the beach as intended. However, it also doubles as a terrific market bag, tote bag, etc. Therefore, you'll get a lot of mileage out of this knit pattern.

This bag can stretch and hold a TON! I simply love it.

*This post contains affiliate links. By clicking one of these links and making a purchase a small portion will go back to the blog. The price you page will not change. Thank you for your support of the blog.*

beach bag knit pattern

A felted bottom creates a sturdy foundation for this fun knit bag. At the same time, the mesh sides will leave the sand at the beach while keeping your toys and snacks secure inside. It truly is perfect for your next outing at the pool or the beach.

When making a bag you want it to be study so that it can hold your belongings. Worked holding two strands of yarn together for base and trim gives more structure to be able to hold all of our necessities. Felting is done after the entire bag is complete. This gives you that stronger, sturdier base.

Felting the Seaside Knit Beach Bag

Felting can be one of those scary knitting techniques that people are hesitant to try for the first time. However, it truly helps make your knit bag sturdier and more secure. And it's not nearly as challenging as you might think it would be.I

My biggest piece of advice when it comes to felting is TEST! Knit a swatch using the same yarn in the same colors shown and test felt it before proceeding with your project. Just as I recommend doing a gauge swatch before every project, I recommend testing a felted swatch as well. By doing a test swatch you will know exactly how your yarn will react. Therefore, you won't have surprises as you work your project.

The effects of all washing machines, detergents and local water conditions cannot be predicted. You are felting at your own risk. Felting is irreversible. Please proceed cautiously with the felting process. It is easy to felt โ€œjust a little moreโ€, but impossible to undo the effects of over-felting. Even with that in mind, though, you shouldn't be afraid to give it a try. Take it slowly. You'll do fine.

Using Double Point Needles (DPNs)

Using double point needles (DPNs) is another “scary” knitting technique for some people. For example, I often hear that knitters don't want to make socks because they will have to use DPNs to complete the project. The Seaside Knit Beach Bag is a great project to start using DPNs. DPNs are used to start the project at the base. This section will be felted so any inconsistencies will be hidden in the felting. Therefore, you're going to hide any mistakes.

And really, if you're new to DPNs, these aren't that scary. Although you're working with multiple knitting needles, you're still only knitting with two at a time. The rest are just holding your stitches like circular cables would. You've got this.

Get the Seaside Knit Beach Bag Pattern

Are you ready to knit this great bag? If so, then head over to Ravelry to purchase the pattern.Teal knitted beach bag with colorful towels and beach items inside, placed on a sandy surface.

You Might Also Like

  • 44 Free Crochet and Knit Beach Projects
  • Marly Bird Crochet Purse Patterns
  • 8 Free Beach Cover Up Crochet Patterns

Frequently Asked Questions

Can I really use this for more than just the beach?

Yes! Honestly… while it's perfect for the beach or pool, it's also a fantastic market bag or everyday tote. You'll get so much use out of it!

I'm a little nervous about felting… any tips?

So here's the thing… the biggest tip I can give you is to TEST! Knit a swatch with your yarn and colors and felt that first. It helps you see exactly how your yarn will react… no surprises that way!

Is felting permanent?

Yes! Felting is irreversible, so you'll want to be careful and take it slow. It's easy to felt a little more, but impossible to undo if you felt too much… just proceed with caution!

I've never used double-pointed needles before… is this a good project to try?

Absolutely! This bag is a great place to start with DPNs… they're used for the base, which gets felted. So if you make any little mistakes… poof… they'll be hidden in the felting!

How do I get the pattern?

Easy peasy… if you're ready to knit this bag, just head over to Ravelry to purchase the pattern. You'll love it!

Filed Under: Knitting, Pattern

7 Free Doughnut Projects Round-Up

June 4, 2021 By Marly Bird Leave a Comment

Get free doughnuts everyday — when you make them yourself using Yarnspirations free patterns! Celebrate National Doughnut Day with these crochet and knit doughnut (or donut) patterns.
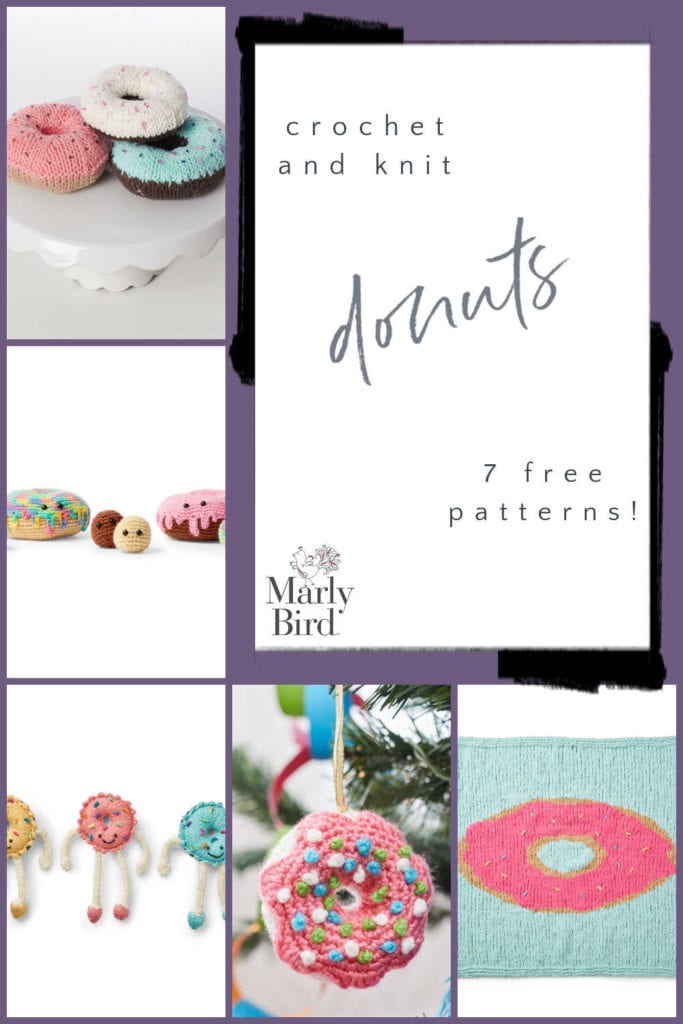
7 Free Doughnut Patterns
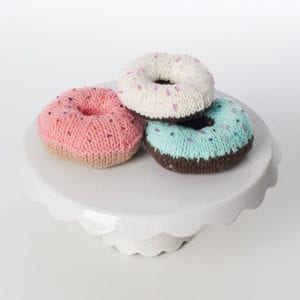
Donuts! Free Knitting Pattern

Donuts!

Knit these classic donuts to make lovely pieces for a play kitchen.

Yarn: Lily Sugar n' Cream

Download the Donuts! free knitting pattern
Crochet Donut Free Crochet Pattern

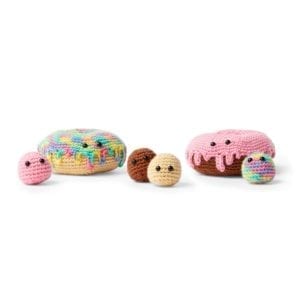
Crochet Donut

Crochet donuts and matching donut holes, and add eyes for amigurumi cuteness.

Yarn: Red Heart Amigurumi
Download the Crochet Donut free crochet pattern

Doughnut Ornament Free Crochet Pattern

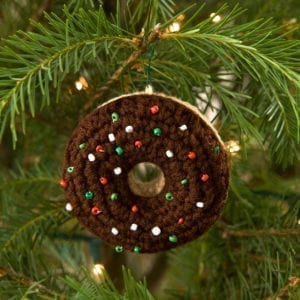
Doughnut Ornament

Chocolate makes the best topping for a sweet holiday treat!

Yarn: Red Heart Super Saver
Download the Doughnut Ornament free crochet pattern

Dangling Donut Ornament Free Crochet Pattern

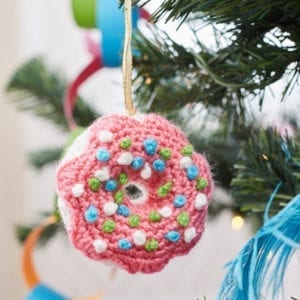
Dangling Donut Ornament

Add embroidery instead of beads on this other take of a donut ornament! Both work equally well in a play kitchen if you make them without the loop.

Yarn: Red Heart Super Saver
Download the Dangling Donut Ornament free crochet pattern

Sweet Knit Donut Toy Free Knitting Pattern

Sweet Knit Donut Toy

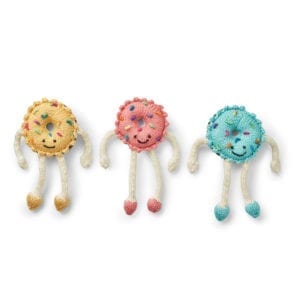
Doughnuts come to life with this toy that has arms and legs!

Yarn: Caron Simply Soft
Download the Sweet Knit Donut Toy free knitting pattern

Donut Dishcloth Free Knitting Pattern

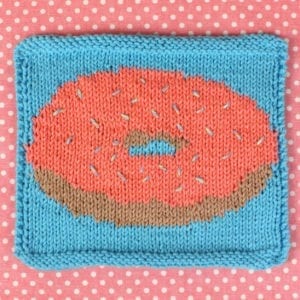
Donut Dishcloth

Clean your sticky plates off with a matching dishcloth!
Yarn: Bernat Handicrafter Cotton

Download the Donut Dishcloth free knitting pattern

Knit Donut Blanket Free Knitting Pattern

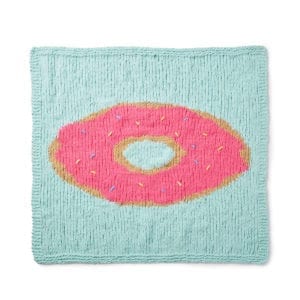
Donut Blanket

Kids and parents with a sweet tooth will appreciate this fun baby blanket.

Yarn: Bernat Baby Blanket

Download the Donut Blanket free knitting pattern

More Food-Related Blogs

  • 18 FREE Cupcake Patterns to Crochet and Knit
  • Fast Food Crochet and Knit Pattern Round-Up
  • Free Ice Cream Patterns to Crochet

Frequently Asked Questions

Are these patterns only for crochet?

Honestly… no! While many of these adorable doughnut patterns are for crochet, there are also some super fun knit options too. It's a nice mix to get everyone involved!

Can I really make these for my kids?

Yes! The “Donuts!” knitting pattern and the “Crochet Donut” pattern are perfect for play kitchens or little amigurumi friends. Just imagine their happy faces…

What kind of yarn should I use for these?

So here's the thing… the patterns suggest specific yarns like Lily Sugar nโ€™ Cream, Red Heart Amigurumi, and Bernat Handicrafter Cotton, which are all great choices for these projects. But you can totally experiment with what you have!

I'm new to crochet, can I do this?

Some of these patterns are listed as advanced beginner, like the “Crochet Donut” and “Doughnut Ornament” patterns. That means you should have a little experience, but you can totally tackle them with a bit of patience. You got this!

Are these patterns really free?

You bet! All of the doughnut projects featured in this round-up are completely free patterns from Yarnspirations. Just click the links to download them and get started!
Filed Under: Free Patterns

  • « Previous Page
  • 1
  • …
  • 73
  • 74
  • 75
  • 76
  • 77
  • …
  • 97
  • Next Page »

Let's Be Social

Join the Marly's Minions Facebook group to share, ask questions, or chat about all of your yarn related crafts!

Join the group
Cartoon of a smiling woman with brown hair in a bun, glasses, black jacket and green shirt, waving next to large "hi" text.

Quick Links

The Pattern Shop

Our Free Patterns

Blog

Marly Bird House

Learn to Knit & Crochet

About

Giveaway Terms and Privacy Notice

Find Us Everywhere

Join the Newsletter

YouTube Channel

Marly's Minions FB Group

Etsy Store

Ravelry Store


AN ELITE CAFEMEDIA HOME/DIY PUBLISHER

Information from your device can be used to personalize your ad experience. Do not sell or share my personal information.

Privacy Policyย  ย Termsย  ย Marly Bird Legal Documents Copyright © 2026