Knitting Basics: Knit, Garter, and Cast Off (BiCrafty Boot Camp: Knitting Lessons for Crocheters, Lesson 2)
Thanks for joining us for our BiCrafty Boot Camp series of Knitting Lessons for Crocheters. In our first lesson, we learned how to slip knot, cast on and begin knit stitch. We’ll continue our knitting basics here in lesson two, where we’ll learn how to knit garter stitch. We’ll also learn the basics of casting off in knitting. WATCH ON YOUTUBE – A VIDEO CLASS SHOWING YOU ALL ABOUT HOW TO KNIT GARTER STITCH AND COMPLETE OUR FIRST PROJECT. Of course the video will remain up on YouTube for you to watch if you miss the live. In fact, here it is:
Don’t forget to sign up for the BiCrafty Boot Camp newsletters. This is how we know that you’re participating in BiCrafty Boot Camp. And you’ll get weekly newsletters reminding you about the lessons, the lives, and the tips for crocheters who are just learning how to knit. Speaking of the lives, they happen every other Thursday at 5 pm PT / 8 pm ET and you can watch the first one from last week right here on YouTube.
Find all lessons and related materials linked to in this post as soon as they become available.
Crocheter’s Edge
You’ll have a good sense of how to work on this knitting basics lesson thanks to some of your crochet knowledge. We’ll be using one stitch over and over again to create a piece of fabric. You know how to do that.
For example, you know what it’s like working a square entirely in single crochet or double crochet stitches. That’s what we’re going to do here using knit stitch to create a garter stitch fabric.
You also already know about how tension affects gauge in crochet. Keep working with that this week as you continue to learn knit stitch. The more practice your hands get, the more they build up that muscle memory. We’re starting this series off slow so that you have time to get used to the feel of knitting.
Knitter’s Tip for Crocheters
Now that you’re working with your knitting needles, how is it going? Sometimes you might find that your stitches slip off the ends of your needles. Obviously, you don’t want that. It’s time to learn about point protectors! Point protectors are inexpensive little tools that you slip onto your needle tip to prevent the stitches from falling off. There are small point protectors (for needle size 0 – 8), bulky point protectors (for needle size 9 – 15) and also some that come in fun designs and shapes (like socks!) We received some from our sponsors and will be showing you those in our next live on Facebook which takes place 4/15/21 at 5 pm PT / 8 pm ET.
(Bonus tip: rubber bands make great DIY point protectors. Wrap one around the tip of the needle a few times and your stitches won’t be able to fall off while you’re knitting or even when you have to put your work down.)
Knitting Lesson 2: Garter Stitch and Cast Off
We are adding two new skills to the foundation of knitting basics that we started in Lesson One: how to knit garter stitch and how to cast off in knitting. But you might be surprised to learn that if you kept up with last week’s homework then you actually already know how to knit garter stitch!
How to Knit Garter Stitch
Garter stitch is simply the name for the fabric you create when you work knit stitch across every row. That’s why we’re starting with garter stitch. For crocheters, it would be comparable to making a square piece of fabric entirely in single crochet stitches. In other words, once you learn single crochet, you can make a single crochet square; once you learn knit stitch, you can make a garter stitch knit square.
The great thing about this knitting basics lesson is that you already know most of what you need to know for these knitting basics. You learned how to work knit stitch on a long tail cast on in lesson one. Now you will keep repeating rows of knit stitch.
Here is how to knit garter stitch:
Thanks to Lesson One, you’ve already cast on using the long-tail cast on that created the first knit row. Then you also knit another row.
Tip: As I work knit stitches, I like to repeat the following steps:
- Go in the front door (meaning insert the right-hand needle from left to right into the first stitch)
- Around the corner; (yarn over the needle with the working yarn, from left around to the right of the needle.)
- Out the window; (bring the needle down, coming out of that stitch)
- And off the porch (let the stitch fall off the left needle)
So we’re going to repeat that across the row. But what do you do once you have your first knit row? At the end of knitting that row, you’ve let the stitches all come off of the left needle and now they’re on the right hand needle. Your left needle doesn’t have any needles on it after you’ve completed the last stitch of the row.
Straighten out the work on the needle so all of the knit stitches are even at the bottom of the needle. Now move that needle to your left hand. The needle with the work on it becomes the left hand needle. Put your other needle in your right hand and begin again. That’s it. You’re knitting each row, which means that you’re knitting garter stitch.
Knitters Tip for Crocheters
Garter stitch can also be made by working only purl stitches. Since we’ve just learned the knit stitch, we’ve practiced it this way. But in Lesson 3 you’ll learn the purl stitch. Then if you want to practice your knits and purls you can take turns making swatches of garter stitch using each method.
How to Cast Off in Knitting
Casting off is what you do to finish a pattern. It’s similar to the “finish off and weave in ends” part of crochet but also more complex because of the nature of knitting. In fact, you have to plan ahead for the cast off. In crochet, you simply stop what you’re doing, cut the yarn, bring it through the loop, and you’re done. However, in knitting, you need to think ahead to make sure that you have enough yarn for the cast off.
There are many different ways to cast on and there are many different ways to cast off in knitting, We’ll be showing you one option for a common cast off in the video that goes live today on YouTube at 1 pm. (We’ll add the link here when it’s available.)
Lesson 2: First Project
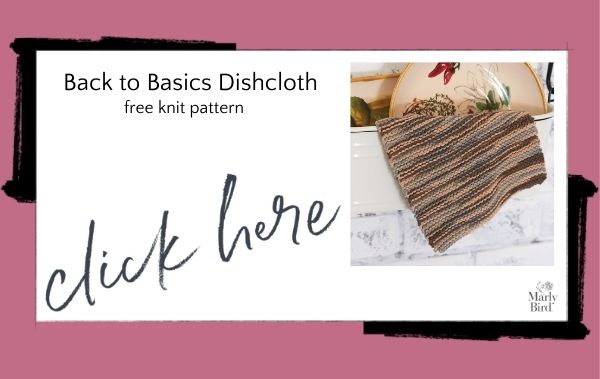
We originally thought we might do. a sampler scarf with all of the knit stitches that we learned. However, I really believe that instant gratification is the key to feeling like you’re getting somewhere with a new craft. As an experienced crocheter, you might get frustrated that knitting has challenges that you’ve forgotten as a beginner. Therefore, being able to create a project right away will help remind you that yes, you really can do this.
So, here’s our first project: a basic garter stitch dishcloth. NOTE: The pattern says that it calls for #7 needles. However, we started you off on #8 needles and we are going to stick with those for now. The project will turn out perfectly fine using the #8 needles. The video shows you step-by-step how to complete this free knit pattern.
Need to learn more about knitting needles? Check. out our beginner’s guide.
Additional Patterns and Video Tutorials For Garter Stitch and Cast Off
If you want to take your skills a little bit further, then you may be interested in these video tutorials:
- Learn How to Knit the Beginner Garter Drop Stitch Scarf which goes over the cast on and knitting again
- Loop It Garter Stitch – learn to knit garter stitch without needles using special yarn; watching this short video might also give you a difference set of how to knit stitch
- And the Marly and Mom Learn to Knit video 1 and video 2.
Or these patterns:
- The Perfect Bulky Knit Hat Pattern for Beginners: it uses just knit stitch! You’re ready to make this one right now! It comes with a full video tutorial.
- Bernat Knit Garter Stitch Cowl Free Pattern
- Beginner Garter Stitch Bias Shawl Free Pattern
- Caron Cakes Basic Knit Scarf – a free garter stitch scarf pattern
Categories: BiCrafty Bootcamp Learn to Knit, Knitting