Search
Close
  • The Pattern Shop
  • Our Free Patterns
    • Browse All Our Free Patterns
    • Our Free Knitting Patterns
    • Our Free Crochet Patterns
  • Blog
    • All Blog Posts
    • All Free Patterns
    • Dibble Dabble Inspiration
    • Giveaways
    • Make-Alongs
    • Product Reviews
    • Roundups
    • Tips, Tricks, Techniques for Knitting and Crochet
Stylized bird with pink and gray swirling tail above elegant “Marly” text, logo for crochet accessories and home decor.
  • Marly Bird House
  • Learn to Knit & Crochet
    • Newbie? Start Here
    • Video Tutorials
    • Knitting Definitions
    • Crochet Definitions
    • Common Techniques
    • Size Charts for Knitting and Crochet Projects
  • About
×
  • The Pattern Shop
  • Free Patterns
  • Blog
  • Marly Bird House
  • Learn to Knit & Crochet
    • Newbie? Start Here
    • Video Tutorials
    • Knitting Definitions
    • Crochet Definitions
    • Common Techniques
    • Size Charts for Knitting and Crochet Projects
  • About
Stylized bird with pink and gray swirling tail above elegant “Marly” text, logo for crochet accessories and home decor.
Search
Close

New Patterns NOW Available in Ad-Free PDF! Check out The Pattern Shop

Crochet Patriotic Party Purse: Felted Eyelash Yarn!

May 26, 2023 By Marly Bird Leave a Comment

Are you looking to make a super fun patriotic project? Then you have to check out my Firecracker Felted Bag. This is a free pattern for a crochet patriotic party purse. It's red, white and blue. It's made with yarn that you can have fun felting. But it's the eyelash yarn that really makes it pop. This is a one-of-a-kind crochet handbag pattern that is a must-take to Memorial Day, Fourth of July, and other spring and summer parties.

Firecracker felted crochet purse - free pattern - red, white and blue eyelash yarn is worked together with 100% wool and felted to make a sizeable handbag - decorated with a beaded handle for a little something extra - Marly Bird

Red, White, and Blue Crochet Patterns

If you love patriotic crochet then you definitely need to add this crochet patriotic party purse free pattern to your must-make-it-now list. It's specifically designed with red, white, and blue stripes to make it the ideal party purse for patriotic holidays. Of course, you could always change up the colors if you wanted a more muted design – or a design for different occasions. But if you're looking for a summer party purse, then this is the one that you want!

Red, white and blue eyelash yarn is worked together with 100% wool and felted to make a sizeable handbag - decorated with a beaded handle for a little something extra - Marly Bird

Have Fun With Felting

Some people are intimidated by felting crochet. Don't be! It's a great way to add a new twist to your traditional crochet work. This crochet patriotic party purse pattern is specifically designed for easy felting. It's super smart to felt crochet purses.

Why?

Because felting makes the purse stitches stick together better, closing up any gaps. Therefore you can stick your lipstick, pens, or other small items in your purse without having to worry about them popping out. Of course, you could line a crochet purse instead. But felting a purse is a fun way to avoid lining while doing something new.

Simple Stitches, Unique Texture

You'll use really simple crochet stitches to make this striped purse. You'll basically just work half double crochet stitches. Sometimes you'll work in one loop only. And yet, you'll get really unique texture. This texture comes from three features:

  • Holding two strands of wool yarn together as you crochet
  • Adding eyelash yarn to some parts of the purse as you crochet
  • Felting the purse after the fact

Combined, the result is a purse that you're going to love to touch. Speaking of which, young girls will also enjoy receiving the crochet patriotic party purse. If you have a tween in your life, then it's a great make for them. It also makes a good mommy-and-me gift.

Crochet purse - free pattern - red, white and blue eyelash yarn is worked together with 100% wool and felted to make a sizeable handbag - decorated with a beaded handle for a little something extra - Marly Bird

Get The Crochet Patriotic Party Purse Free Pattern

Are you ready to make this sizzling crochet purse? Get the crochet patriotic party purse free pattern here or click on the image below:

Free crochet purse pattern - Marly Bird

You can also find this pattern on Ravelry.

You Might Also Like:

  • 50 Free Patriotic Knit and Crochet Patterns
  • Wooden Handled Crochet Purse Free Pattern

Frequently Asked Questions

Can I really felt this purse?

Yes! Honestly, felting a crochet purse is a super smart idea. It makes the stitches stick together better and closes up any gaps, so you don't have to worry about small things falling out. Plus, it's a fun way to try something new!

What stitches do I need to know for this pattern?

So here's the thing… you'll mostly just use half double crochet stitches for this purse! Sometimes you'll work in one loop only, but the unique texture really comes from holding yarn together, adding that fun eyelash yarn, and of course, the felting.

Is this a difficult pattern?

Nope! It's listed as an Advanced Beginner pattern. You'll use really simple crochet stitches, and the unique texture comes from the yarn and felting process, not complicated stitches.

Who would like this purse pattern?

Oh gosh, anyone who loves a fun patriotic project! It's especially great for Memorial Day or Fourth of July parties. And if you have a tween in your life, they would totally love receiving this purse, or it makes a sweet mommy-and-me gift!

Where can I get the free pattern?

You can get the crochet patriotic party purse free pattern right on the blog! Just click the link that says “Get the crochet patriotic party purse free pattern here” or click on the image below that link. You can also find it on Ravelry!

Filed Under: Crochet, Our Free Patterns

Fiber And Yarn: Learn With Marly Bird!

May 24, 2023 By Marly Bird Leave a Comment

Today begins an in-depth series of blog posts all about fiber and yarn. Over the course of the next several weeks, you'll be learning all about fibers, processing, yarns, spinning, dyeing, and all kinds of things you didn't know you didn't know. After all, you all do know what to do with yarn, but I think it's also really useful to have some background knowledge about where all our delicious yarns actually come from.

Fiber and yarn shown in the form of a thrummed mitten in dark brown yarn and thrummed fiber in cream. pair of mittens one right side out, one showing inside - Marly Bird.

You do know that all yarn is not created equal. We all know that some yarns shed while some don't; some yarns are slippery while some are more ‘sticky,' and the big elephant in the room…some are WAY more expensive than others. WHY is that? So I think it's about time I shed some light on these things for you.

Let's start the ball rolling by answering this burning question…

What Is Fiber And Yarn?

We all know that clothes are made of different materials, but have you ever wondered what those materials are? The key to understanding the whole process and why it works is to learn about the two major components involved: fiber and yarn.

We're going to take a closer look at what fiber and yarn are, their types, and their importance in the textile and crafting industries. Keep reading to enhance your knowledge of fibers and yarns in the knit and crochet world.

The Difference Between Fiber And Yarn

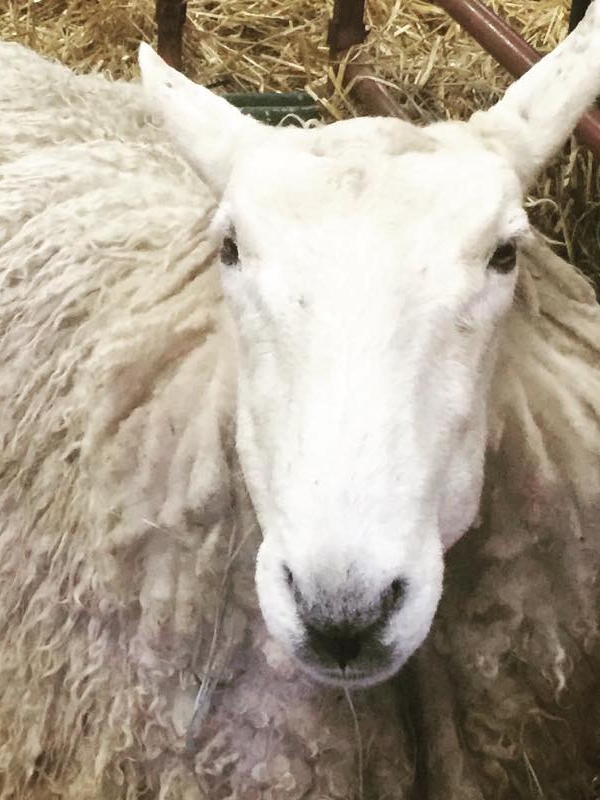
Fiber and yarn are not the same thing, even though they are often used interchangeably in conversation. Fiber is the raw material that yarn is made from, and it can come from a variety of sources, including animals, plants, and synthetic materials.

Yarn, on the other hand, is the final product created from spinning fibers together into a continuous strand. Therefore, fiber comes first, and the yarn-making process comes after. Yarn is usually stronger than the individual fibers it is made up of because the twist of the yarn keeps the fibers tightly bound together. While the two are related, there are key differences between fiber and yarn. Fiber can come in different forms, like roving, meaning the fibers are still loose and have not been spun into yarn yet. Yarn, on the other hand, typically comes in skeins, balls, or hanks.

If you'd like to try spinning your own yarn, brands like Ashford and Schacht offer various types of spinning wheels and tools to create your very own handmade yarn. I think most of us prefer our yarn ready to use, but maybe you'd like to branch out and learn more fiber skills.

Ultimately, fiber and yarn are an essential part of the world of knitting, crochet, and other crafts and offer endless possibilities for creativity.

Now that we know what fibers and yarns are, how do you decide which yarn weight to use?

Yarn Weights…In Brief

Yarn weights are an important aspect of the knitting world, as they determine the thickness of a given yarn. Choosing the right weight is crucial for achieving the desired outcome of the project. But first, it's important to understand that yarn is created by combining fibers. More fibers mean a thicker yarn; combining fewer fibers produces a finer yarn.

But what do yarn weights really mean?

Yarn weights help distinguish between the various thicknesses of yarn. Each weight has its own range of suggested needle or hook sizes for optimal use. For example, worsted-weight yarn is thicker than sock yarn and requires larger needles or hooks to achieve the correct tension or gauge.

So, what are all the yarn weights?

The yarn weights range from lace to super bulky, with each weight named after its thickness. The CYCA (Craft Yarn Council of America) has also classified yarn weights by number and definition (0-7). These are guidelines, and you should always swatch to ensure your sizing will be correct.

The most common yarn weights
  • 0 – Lace – Fingering, Size 10 crochet thread
  • 1 – Superfine – Fingering, Sock yarn, or Baby yarn
  • 2 – Fine – Sport or Baby yarn
  • 3 – Light – DK or Light Worsted
  • 4 – Medium – Worsted, Afghan, or Aran
  • 5 – Chunky – Bulky, Craft, or Rug
  • 6 – Super Bulky – Super Bulky or Roving
  • 7 – Jumbo – Jumbo or Roving

Now that you know a little about yarn weights, let's take a closer look at fibers again.

Natural Or Man-made Fibers

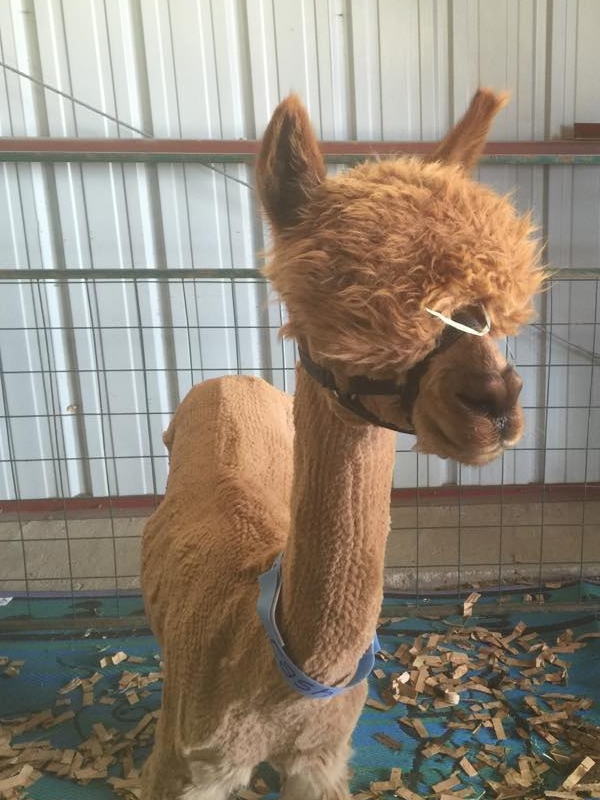
Fiber and yarn are essential materials used in many types of textiles. Fibers can be categorized into two types: natural and man-made. Natural fibers are produced by plants or animals, and they have been used for centuries. Examples of natural fibers include alpaca, angora, and merino, which are commonly used in the production of high-quality yarn. These fibers are known for their softness, warmth, and durability, making them ideal for a wide range of clothing and accessories.

On the other hand, man-made fibers are created using synthetic materials such as polyester, nylon, and acrylic. These fibers are manufactured using chemical processes and are often less expensive than natural fibers. They are also known for their strength, and they are often used in the production of sturdy, durable textiles. Some man-made fibers are even designed to mimic the properties and appearance of natural fibers.

The Three Types Of Fibers For Yarn

Additionally, there are three different types of yarn that are commonly used in knitting and crocheting. Each type has its own unique qualities that make it suitable for specific projects or purposes. Understanding the differences between these types of yarn is important for any crafter or knitting enthusiast.

Animal-based Yarn

The first type of yarn is known as animal-based yarn. It is made from the fibers of animals such as sheep, goats, alpacas, or rabbits. This type of yarn is often warm, soft, and durable. It is perfect for knitting or crocheting winter accessories, such as scarves and hats, as well as cozy blankets and sweaters.

Plant-based Yarn

The second type of yarn is plant-based yarn, which is made from fibers that come from plants like cotton, bamboo, or linen. This yarn can be lightweight, breathable, and ideal for summer projects such as tops, shawls, and light scarves. It is also less likely to irritate sensitive skin, making it a great choice for baby clothes or anyone with allergies.

Synthetic Yarn

The final type of yarn is synthetic-based yarn, which is made from man-made materials such as acrylic, nylon, or polyester. This type of yarn is often more affordable than other types and can be great for beginners or anyone on a budget. It is also versatile and can be used for a variety of projects, from blankets to toys to clothing items.

Understanding the different types of yarn and their unique qualities can help you choose the perfect yarn for your next project. We'll cover more about each of these different fibers over the coming blog posts.

The Three Types Of Yarn

Staple Fiber Yarn

‘Staple length' is the term used when stating the length of fibers. Some wools, as well as cotton fibers, have a short staple length (around 1 inch or 2.5cm) which makes them harder to spin and more likely to shed tiny fibers. Yarns made from short fibers tend to be thicker and more tightly spun to try to keep the short fibers together.

Plied Yarn

Fibers are spun into yarn which can be ‘plied' together to make thicker yarns. A 1-ply or single-ply yarn is one strand twisted and used as is. 2-ply yarn is 2 strands of yarn twisted together, 3-ply is 3 strands twisted together, and so on. Plying multiple strands results in smoother yarns and gives knit and crochet stitches better definition.

Filament Yarn

The vast majority of filament yarns are synthetic since synthetic fiber production makes an endless strand of a single fiber. These endless fibers are cut and plied together to form yarn of various thicknesses.

However, there is one naturally occurring filament fiber: silk. Silkworms produce one single fiber, which they form into a cocoon. We'll talk more about this in another article.

Wrapping Up Fiber And Yarn

Overall, the materials chosen for knitting and crocheting, the fibers themselves, and the way they're made have a huge impact on the final product. This makes it important to choose the right type of fiber and yarn for each of your projects.

Overall, understanding fiber and yarn is beneficial for anyone interested in textiles and crafts in general. It helps you choose the appropriate tools and supplies for each project. Also, knowing the composition and characteristics of various fibers and yarns can help you make sustainable and eco-friendly choices.

Ultimately, having an understanding of fiber and yarn is very useful for any knitters and crocheters interested in creating magnificent pieces with needles or hooks.

Coming next week…

Look out for tons of detailed information on wool yarn in next week's post: “All About Wool Yarn.” Everything you need to know!

Stay tuned…

But if you just can't wait to get your hands on some fabulous yarns…check out these posts for some fabulous choices.

Caron Cakes Top 3

WeCrochet Hawthorne Yarn

17 Super Bulky and Jumbo Yarns

Frequently Asked Questions

What's the difference between fiber and yarn?

Fiber is the raw material… the animal fleece, plant fibers, or synthetic materials before they're spun into yarn. Yarn is what you get after those fibers have been processed, combed, and spun (or extruded, in the case of synthetics) into the continuous strand you work with your hooks and needles. Understanding fiber types helps you make smarter yarn choices… because the fiber content determines the finished fabric's warmth, drape, durability, care requirements, and feel against skin. “Fiber” is the foundation; yarn is the end product.

What are the main types of natural fiber yarn?

Animal fibers: wool (from sheep), alpaca, mohair (from angora goats), cashmere (from cashmere goats), angora (from angora rabbits), silk, and various luxury fibers. Plant fibers: cotton, linen, bamboo, hemp, jute, and Tencel/lyocell (from wood pulp). Each has distinct properties… wool is elastic and warm, silk is smooth and lustrous, cotton is breathable and washable, linen gets softer with use. Blends combine properties… a merino/bamboo blend has wool's warmth with bamboo's drape and sheen.

How does fiber content affect how a yarn behaves in knitting or crochet?

Enormously! Wool has memory and springs back after stretching… great for ribbing and cables. Cotton lies flat and shows stitches clearly but doesn't stretch. Silk is slippery and creates gorgeous drape. Bamboo has incredible softness and flow. Acrylic is consistent and forgiving but doesn't breathe as well. Blocking response varies completely by fiber… wool blocks beautifully with wet blocking, acrylic responds to steam, cotton lies flat when wet-blocked. Understanding fiber helps you predict how your finished object will look and behave.

How do I read a yarn label for fiber content information?

The fiber content (like “100% Merino Wool” or “75% Acrylic, 25% Nylon”) is listed as a percentage breakdown. Natural fibers come first by percentage in many labeling conventions. You'll also find: yarn weight category (with the skein symbol), recommended hook and needle sizes, yardage and weight, care symbols, and dye lot number. The care symbols (a little bucket for washing, an iron symbol, a circle for dry cleaning) tell you how to care for the finished item. Getting familiar with these symbols saves a lot of accidentally felted sweaters!

Which fiber is best for a beginner crafter?

Smooth worsted weight acrylic is the traditional recommendation for beginners… it's forgiving on tension variations, affordable, machine washable, and comes in a huge color range. The consistency of acrylic means each skein behaves predictably. That said, once you're comfortable with basic technique, experimenting with natural fibers is incredibly rewarding. Wool teaches you what good yarn behavior feels like. Cotton helps you understand plant fiber drape. Exploring different fibers as you grow is part of the joy of the craft… your yarn preferences become very personal over time.

Filed Under: Tips, Tricks, Techniques for Knitting and Crochet

Crochet Amigurumi Tips & Tricks for Beginners Plus!

May 18, 2023 By Marly Bird 1 Comment

Earlier this month, we revealed some crochet amigurumi from Apricot Lane Amigurumi, kicking it off with Felix the Fox. 

Amigurumi is something that hasn’t been regular around here, but we're excited to feature it more over the coming year! After comments and questions in the Marly’s Minions: Marly Bird BiCrafty Community Facebook group, we decided to bring you some tips and tricks to make it the best experience! 

Getting Started With Crochet Amigurumi

Two small crochet amigurumi foxes sitting on green leaves with green leafy background - Marly Bird.

Hook Size

Just like any project, you want to start off by making sure you’re using the right hook for your yarn. For amigurumi, typically, you want to use a smaller hook size than is on the yarn label. You want a denser fabric so that when you stuff your creature you don't see stuffing poking through. 

Stitch Markers

Stitch markers are great for a lot of projects but are vital for crochet amigurumi. Typically you’re working in continuous rounds and you need to know where the rounds begin. Being off in your count in amigurumi is frustrating and often leaves you frustrated and ripping out your work. Stitch markers alleviate the need to count each stitch. 

Magic Ring

Magic ring is the best method to use when starting amigurumi.

Using a ch3 or ch4 and joining to make a circle often leaves a gap. The magic ring closes tightly. This looks much cleaner, especially for the top of a head or the end of a limb. 

Off and Running

Crochet Amigurumi Invisible Increase & Decrease

Sometimes, our increases and decreases can cause a gap or hole. Remember, those are the enemy when it comes to crochet amigurumi! Any hole will allow for the stuffing to show through, and we absolutely don’t want that! Using an invisible increase or invisible decrease can eliminate that issue. 

How do you make an invisible increase?

I’m so glad you asked! Typically, an increase is done by making two stitches in the same stitch. To make an invisible increase, you make two stitches in the same stitch. But in this instance, the first stitch you make is in the front loop only of the stitch you’re working into. The second stitch is worked under both loops as normal. 

How do you make an invisible decrease?

In a typical decrease, you’re working one stitch over two stitches by pulling up a loop in each stitch and crocheting them together. In the invisible decrease, you follow the same process but work in the front loops only. This gives you a nice neat stitch and no gaps! 

Yarn Under vs. Yarn Over

This is a technique that you really only use in crochet amigurumi, so you may not be familiar with it! When crocheting regularly, you are likely very familiar with the yarn over. So much so that it's just habit and you don’t even think about what you’re doing. But by working yarn under stitches, you make slightly neater, tighter stitches (using less yarn!) and create a denser fabric! It takes a little intentionality and retraining your brain. But you just may be pleasantly surprised by how it looks!

Jogless Color Changing In Crochet Amigurumi 

When you work in continuous rounds, color changes can often look sloppy. The best way to fix this is to use the jogless stripe method. Essentially, before you finish the last stitch before your color change, you’ll yarn over/under the new color and pull through to finish the stitch. You’ll slip stitch into the next stitch and then carry on with your sc through the remainder of the round. When you get back to the slip stitch, you’ll sc into that stitch as if it were a regular stitch. This will give you a nice clean line!

Finishing Tips

Stuffing Crochet Amigurumi

Don’t OVERSTUFF! This is the most common mistake that people make when making amigurumi. Overstuffing stretches the fabric and causes gapping. This means you'll see the stuffing through the fabric, but it can also alter the shape of the item itself. You can always add more stuffing, but once you stretch it out, it’s hard to get the shape back. So start stuffing lightly and increase slowly! Think of it more as sculpting your work than stuffing it.

You can use pantyhose to keep your stuffing from poking out! Fill knee highs with your stuffing and use that to fill your item. 

Pin Your Limbs

Nothing's more frustrating than spending hours making each piece of crochet amigurumi, putting it all together, and finding things that are crooked and wonky. One of the best ways to make sure this doesn’t happen to you is to use pins. Straight pins, safety pins, whatever you’ve got on hand will work. Pin each limb to the body and make sure everything is lined up correctly. Use your fabric to help you by counting how many rows or how many stitches apart they need to be. 

At the end of the day, as I always say, it’s just sticks and string! You can do this, and this is just another fun skill set to add to your toolbox!

Got any other crochet amigurumi tips & tricks that have helped you over the years? Share them with us!

Check out these recent additions to our Apricot Lane Amigurumi collection:

Felix the Fox

Alden the Owl

Frequently Asked Questions

What hook size should I use for amigurumi?

So here's the thing… for amigurumi, you usually want to go with a smaller hook than what the yarn label suggests. This helps create a tighter, denser fabric so no stuffing peeks through your cute little creations!

How do I keep my amigurumi from having holes?

Honestly… the best way is to use an invisible increase and decrease! These methods help prevent those pesky gaps that let the stuffing show through. It makes such a difference in the finished look!

Is the magic ring really that important for amigurumi?

Yes! Using a magic ring is the best way to start amigurumi projects. It creates a super tight center, unlike a chain circle which can leave a noticeable gap, especially on heads or limbs.

I'm having trouble with stuffing showing through… any tips?

Oh, don't OVERSTUFF! That's the biggest mistake, and it can stretch out your fabric and make gaps. Start light and build up your stuffing slowly… think of it like sculpting your project!

My color changes in amigurumi look so messy! What can I do?

Ugh, I know! When you work in continuous rounds, color changes can be a pain. Try the jogless stripe method before you finish your last stitch… it really helps create a nice, clean line!

Filed Under: Tips, Tricks, Techniques for Knitting and Crochet

WeCrochet Hawthorne Yarn – Dream in a Hank

May 16, 2023 By Marly Bird Leave a Comment

As a crochet enthusiast, you know that choosing the right yarn is crucial for ensuring a successful project. If you're looking for a versatile yarn that's both soft and durable, WeCrochet Hawthorne Yarn (we think it's a dream in a hank) might just be the perfect choice for you.

Shades of WeCrochet Hawthorne yarn - bottom row: shades of blues from royal on left to pale sky on right, middle row: pale green speckle on left to dark teal on right, top row: left reds, through speckle with red dots, to mustard and vibrant yellow - Marly Bird.

This yarn has quickly become a favorite among crochet lovers and for good reason. It comes in a variety of beautiful colors, each with a unique depth and richness that can enhance any crochet project. This yarn review tells more about Hawthorne Yarn. Learn why you should add it to your crafting supplies!

[Read more…]

Filed Under: Product Reviews, Yarn Review

Kimono-Inspired Crochet Cardi Free Pattern

May 5, 2023 By Marly Bird Leave a Comment

The Amimono Kimono was one of my very first published crochet patterns. Inspired by a kimono, it's a great open crochet cardi free pattern. Although you can layer it for lots of different styles, it's a light and breezy piece that's perfect as a summer layer. If you're looking for something unique to make that's not too hard but is still interesting, then check this one out.

Amimono Kimono Crochet Cardi Free Pattern - Marly Bird

What Is a Kimono?

A kimono is a traditional Japanese garment, although it's inspired a lot of Western fashion over the years. The kimono is a robe-like garment with wide sleeves. The kimono is traditionally a form of outerwear. In other words, you layer the kimono over other clothing. Traditionally, you tie it with a sash.

How the Kimono Inspired This Crochet Cardi Free Pattern

Like many people, I love the shape and loose flowy style of the kimono. The basic design of the kimono inspired me to create this free crochet cardi pattern. Like the kimono, the design is to layer it over other clothes. It has wide arms that add to that feeling of flow. However, instead of a sash closure, I've edited it to close with a simple crochet button closure at the top. Therefore, this isn't a kimono. However, you can see how it was inspired by that design.

Suggested Yarn for This Crochet Cardi

I originally designed this kimono-inspired crocheted cardigan for the Classic Elite Yarns newsletter. At the time, they had a cotton bamboo yarn that I recommended for the cardigan. Unfortunately that yarn has since been discontinued ????. You might still want to use bamboo blend yarns for this piece. They have great drape. Moreover, bamboo is a natural fiber that's cooling for summer. For example, check out:

  • WeCrochet Galileo Yarn
  • WeCrochet Gloss DK Yarn
  • WeCrochet Heatherly Sport Yarn (not a bamboo blend but would make a lovely Amimono)

Additional Summer Cardigan Details

Here are some of the other things you might want to know about this crochet cardi free pattern:

  • This design fits six different sizes from small – 3x. Size inclusive crochet patterns are important to me.
  • You'll work with a size F/4 (3.75 mm) crochet hook. This is one of the smaller mid-sized crochet hooks. You get a fine stitch pattern as a result.
  • The closure is a unique one that's almost like a shawl pin that you create yourself. You'll use two buttons attached with grosgrain ribbon to close the kimono-inspired design.
  • This crochet pattern has written instructions, symbol charts, and schematics. You should have all of the information that you need to complete this free pattern.
  • You'll use basic crochet stitches (single and double crochet) in unique combinations to create the original texture.
  • I recommend blocking this crochet cardigan in order to get the best look for it.
  • You can wear this over everything from a swimsuit to a cocktail dress. It's a versatile piece to add to your wardrobe.

Get The Crochet Cardi Free Pattern

Are you ready to add this beautiful piece to your summer wardrobe? Get the free pattern here. Or click the image below:

Close-up -Amimono Kimono Style Crochet Cardi Free Pattern- Marly Bird

You Might Also Like:

Here are some other great summer crochet patterns:

  • 50 Free Summer Crochet Tops Patterns
  • 44 Free Crochet and Knit Beach Projects
  • 35 Summer Crochet Blanket Patterns

Frequently Asked Questions

What exactly is a kimono?

Honestly… a kimono is a traditional Japanese garment, kind of like a robe with wide sleeves. It's usually worn as outerwear and tied with a sash. This crochet pattern was inspired by that flowy shape!

Is this pattern really a kimono, or just inspired by one?

So here's the thing… it's inspired by a kimono! It has that lovely loose, flowy style and wide sleeves, but instead of a sash, it has a simple button closure at the top. It's not a true kimono, but you can totally see the inspiration!

What kind of yarn do you suggest for this cardigan?

Yes! For this cardi, I originally used a cotton bamboo blend yarn because it has such a great drape and is nice and cool for summer. While that specific yarn is discontinued, you might like WeCrochet Galileo, Gloss DK, or even Heatherly Sport yarn for a similar feel.

Can you tell me more about the button closure?

It's a pretty neat closure! It's kind of like a shawl pin that you create yourself. You'll use two buttons attached with grosgrain ribbon to close the cardigan… super unique!

What sizes does this pattern come in?

Good news! This design is size inclusive, which is super important to me. It fits six different sizes, ranging from small all the way up to 3x!

Filed Under: Crochet, Free Patterns, Our Free Patterns, Pattern

Knit Vest Patterns for Spring and Summer

May 1, 2023 By Marly Bird Leave a Comment

Over 10 Knit Vest Patterns for spring and summer. Includes Mens and Womens patterns by Marly Bird.

Recently, we rounded up some of the best spring crochet vest patterns. But, of course, we are bicrafty here at Marly Bird. Therefore, we wanted to make sure that we didn't leave out the knitters. After all, vests are great for everyone. So, we collected some of our favorite knit vest patterns for spring and summer.

They come in an array of different garment designs, stitch techniques, and color palettes. You can wear them over long-sleeved shirts or dresses. Some of them even work on their own as tops on hot days. Although most of these designs are for the ladies, we didn't leave out the guys.

1. My First Knit Vest Pattern

My First Knit Vest - Marly Bird

Each spring, I host a Yarnspirations KAL. In 2020, we created a vest. In fact, it's one of my favorite knit vest patterns for spring and summer. It's made with two different colorways of It's a Wrap Yarn, which is a lightweight cotton yarn that's perfect for crafting spring and summer accessories. Free Knit Vest Pattern for spring or summer.

2. Cabled Cormo Knit Vest Pattern

Cabled Cormo Knit Vest Pattern - Marly Bird

This vest uses a double seed stitch texture in combination with knit cables for a richly textured design. There are cables in the front on the lapels. Moreover, there is a detailed thick cable running vertically along the spine. And yet, because this is a cropped vest designed with a low-cut front, it's perfect for warmer weather. Wear it over a variety of different tops and dresses.

3. Simona Knit Vest Pattern

Simona Vest - Marly Bird

This is a classic knit vest design, almost like a sleeveless cardigan. As a result, it's highly versatile for wear over a variety of different outfits. Dress it up or dress it down. Worked in red, as designed, it's bold and rich. However, the almost leaf-like design running vertically down the back also looks wonderful in earthy and organic colors.

4. Going Coastal Knit Vest Pattern

I created this step-by-step video tutorial for Lisa Gentry's Going Coastal Knit Vest. This is a long knit vest with a beautiful color-changing pattern that looks a lot like waves. Obviously, that's where the name comes from. Belt it or leave it loose and flowing for different looks.

5. Violet Duster Knit Pattern

Violet duster knit vest pattern by Marly Bird

If you're looking for a really long vest, then consider making a duster instead. For example, this loose open duster pattern has the perfect flow for wearing in a spring breeze. This is a lace knit vest worked seamlessly from the bottom up. Despite the length, it's a lightweight vest. Therefore, it works well for warmer weather.

6. Totally Vested Knit Pattern

Totally Vested Knit Vest pattern - Marly Bird

Get ready to look and feel amazing with the Totally Vested Knit Vest from Marly Bird. This full-figure sweater vest pattern is designed for comfort, style, and versatility. With its deep v-neckline, i-cord belted wrap design, cable knit stitches, and delicate lace detail – you’re sure to make a statement

7. Shortcake Knit Vest Pattern

Ruffled cropped knit vest pattern - Shortcake by Marly Bird

Get the look you’ve been wanting with the Shortcake Knit Vest pattern from Marly Bird. This modern take on a denim jacket adds color and flair to your wardrobe. With ruffles, this knit vest is perfect for spring and summer weather.

8. Ivy League Knit Vest Pattern

Ivy League unisex knit vest pattern - Marly Bird

Knit vest patterns aren't just for the ladies. Men look stylish in them as well. In fact, this particular vest is a great unisex design that can be worn on its own or with a shirt underneath.

9. JB Knit V-Neck Vest Pattern

JB Men's Knit Vest Pattern - Marly Bird

A stylish and classic piece designed for those who enjoy a cozy yet fashionable look. This knit vest features beginner 6-stitch cable patterns in subtle ribbing on the body for instant chic. The v-neck shaping means this vest is perfect for layering over any outfit, for work, or an after-work soirée. For maximum comfort and style, make this vest with yarn in a wool and silk or bamboo blend yarn to get a beautiful shine. What’s more, it comes in inclusive sizes for everyone! With the JB Knit Vest, you can be sure your look will always be stylish and comfortable!

10. Sweetheart Knit A-Line Tunic Pattern

Sweetheart knit a-line tunic free pattern click here-Marly Bird

I designed this stunning knit A-line vest in classic stockinette and lace. I wanted to celebrate curves without compromising style. With a fit flattering to all beauty types, this statement piece will be sure to leave everyone taking notice. Knitting pattern perfect for plus size or petite.

11. Belo Casamento Pattern

Belo Casamento Lace Knit Shrug Pattern Click Here Image. The back of the shawl displayed on the model.

We had to sneak this one in…even though it's not quite a vest, it's close! This knit shrug is worked from side to side in a leaf lace pattern. It's perfect for spring and summer weather. Free Pattern or purchase the ad-free pdf.

You Might Also Like:

  • 10 Free Knit and Crochet Spring Sweater Patterns
  • 83 Free Springtime Knit and Crochet Patterns
  • Ultimate Guide to Summer Knitting Patterns

Frequently Asked Questions

What makes a knit vest work for spring and summer wear?

A few things transform a vest from winter layering to warm-weather chic! Lighter yarn weights (DK or sport in cotton or linen). Open or lace stitch patterns that allow airflow. A classic silhouette that layers beautifully over summer tops and dresses. The sleeveless construction naturally makes a vest more seasonally versatile than a sweater… same cozy, interesting knitted texture but without the extra warmth of sleeves. A spring/summer vest in a breathable fiber is one of the most wearable handknit garments you can make.

What's the easiest knit vest style for beginners?

A simple, unfitted vest in garter or stockinette stitch with a V-neck or wide boat-neck is the most beginner-friendly approach. Vests without complex shaping at the shoulders, armholes, or neckline are much simpler than structured tailored vests. The lack of sleeves means you avoid set-in sleeve construction entirely! A good first vest might be two identical rectangles (front and back) seamed at the shoulders and sides with armhole shaping cut in… minimally fitted, easy to execute, and still genuinely wearable and lovely.

What yarn should I use for a spring or summer knit vest?

Cotton and cotton blends are the classic choice for warm-weather vests… breathable, washable, and they look crisply polished. Linen and linen-cotton blends have a wonderful natural texture that gets softer with washing and drapes beautifully. Bamboo adds silky drape and sheen. If you prefer something with more structure than pure plant fiber, a cotton-acrylic blend or wool-cotton blend in a lighter weight can work beautifully. DK weight strikes a great balance for a vest that's substantial enough to look like a “real” garment but light enough for warm weather.

Should a knit vest have positive or negative ease?

It depends on the style! A very fitted vest might have zero ease or slight negative ease for a sleek look. A more relaxed, layering vest works well with 2 to 4 inches of positive ease so it sits comfortably over a shirt or top without pulling. A very oversized vest can have dramatically more ease. The patterns in this collection will specify the intended ease… choose based on how you like to wear vests. When in doubt, check the finished measurements against your actual measurements and visualize how those numbers translate to the look you want.

Can I make a knit vest as a first garment project?

Vests are excellent first garment projects! The lack of sleeves removes one of the most challenging aspects of sweater construction (setting in sleeves and shaping sleeve caps). You're essentially making just the body of a sweater. Gauge still matters for fit, and picking up stitches for armhole and neck edgings introduces useful skills. For a true first garment, look for a vest pattern specifically labeled beginner or one with straight-forward construction and minimal shaping. The confidence you build finishing a vest is a wonderful foundation for tackling a full sweater next.

Filed Under: Knitting, Marly Bird Premium Patterns, Our Free Patterns, Round Ups

  • « Previous Page
  • 1
  • …
  • 16
  • 17
  • 18
  • 19
  • 20
  • …
  • 97
  • Next Page »

Let's Be Social

Join the Marly's Minions Facebook group to share, ask questions, or chat about all of your yarn related crafts!

Join the group
Cartoon of a smiling woman with brown hair in a bun, glasses, black jacket and green shirt, waving next to large "hi" text.

Quick Links

The Pattern Shop

Our Free Patterns

Blog

Marly Bird House

Learn to Knit & Crochet

About

Giveaway Terms and Privacy Notice

Find Us Everywhere

Join the Newsletter

YouTube Channel

Marly's Minions FB Group

Etsy Store

Ravelry Store


AN ELITE CAFEMEDIA HOME/DIY PUBLISHER

Information from your device can be used to personalize your ad experience. Do not sell or share my personal information.

Privacy Policy   Terms   Marly Bird Legal Documents Copyright © 2026