Search
Close
  • The Pattern Shop
  • Our Free Patterns
    • Browse All Our Free Patterns
    • Our Free Knitting Patterns
    • Our Free Crochet Patterns
  • Blog
    • All Blog Posts
    • All Free Patterns
    • Dibble Dabble Inspiration
    • Giveaways
    • Make-Alongs
    • Product Reviews
    • Roundups
    • Tips, Tricks, Techniques for Knitting and Crochet
Stylized bird with pink and gray swirling tail above elegant “Marly” text, logo for crochet accessories and home decor.
  • Marly Bird House
  • Learn to Knit & Crochet
    • Newbie? Start Here
    • Video Tutorials
    • Knitting Definitions
    • Crochet Definitions
    • Common Techniques
    • Size Charts for Knitting and Crochet Projects
  • About
×
  • The Pattern Shop
  • Free Patterns
  • Blog
  • Marly Bird House
  • Learn to Knit & Crochet
    • Newbie? Start Here
    • Video Tutorials
    • Knitting Definitions
    • Crochet Definitions
    • Common Techniques
    • Size Charts for Knitting and Crochet Projects
  • About
Stylized bird with pink and gray swirling tail above elegant “Marly” text, logo for crochet accessories and home decor.
Search
Close

New Patterns NOW Available in Ad-Free PDF! Check out The Pattern Shop

Knitting Basics: Knit, Garter, and Cast Off (BiCrafty…

April 7, 2021 By Marly Bird Leave a Comment

Thanks for joining us for our BiCrafty Boot Camp series of Knitting Lessons for Crocheters. In our first lesson, we learned how to slip knot, cast on and begin knit stitch. We'll continue our knitting basics here in lesson two, where we'll learn how to knit garter stitch. We'll also learn the basics of casting off in knitting. WATCH ON YOUTUBE – A VIDEO CLASS SHOWING YOU ALL ABOUT HOW TO KNIT GARTER STITCH AND COMPLETE OUR FIRST PROJECT. Of course the video will remain up on YouTube for you to watch if you miss the live. In fact, here it is:

Don't forget to sign up for the BiCrafty Boot Camp newsletters. This is how we know that you're participating in BiCrafty Boot Camp. And you'll get weekly newsletters reminding you about the lessons, the lives, and the tips for crocheters who are just learning how to knit. Speaking of the lives, they happen every other Thursday at 5 pm PT / 8 pm ET and you can watch the first one from last week right here on YouTube.

Find all lessons and related materials linked to in this post as soon as they become available.
Lesson Two BiCrafty Boot Camp knit garter stitch and cast off

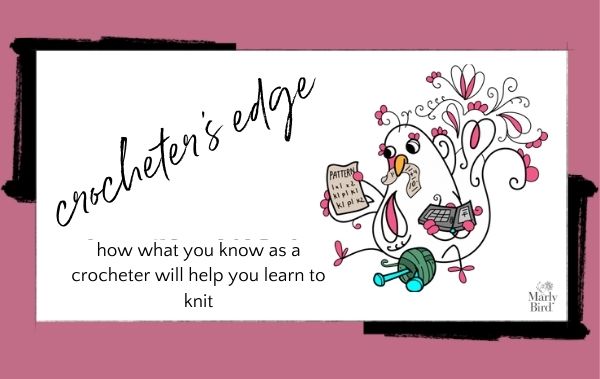
Crocheter's Edge

Crocheters Tips to Learn Knitting

You'll have a good sense of how to work on this knitting basics lesson thanks to some of your crochet knowledge. We'll be using one stitch over and over again to create a piece of fabric. You know how to do that.

For example, you know what it's like working a square entirely in single crochet or double crochet stitches. That's what we're going to do here using knit stitch to create a garter stitch fabric.

You also already know about how tension affects gauge in crochet. Keep working with that this week as you continue to learn knit stitch. The more practice your hands get, the more they build up that muscle memory. We're starting this series off slow so that you have time to get used to the feel of knitting.

Knitter's Tip for Crocheters
knitting basics for crocheters

Now that you're working with your knitting needles, how is it going? Sometimes you might find that your stitches slip off the ends of your needles. Obviously, you don't want that. It's time to learn about point protectors! Point protectors are inexpensive little tools that you slip onto your needle tip to prevent the stitches from falling off. There are small point protectors (for needle size 0 – 8), bulky point protectors (for needle size 9 – 15) and also some that come in fun designs and shapes (like socks!) We received some from our sponsors and will be showing you those in our next live on Facebook which takes place 4/15/21 at 5 pm PT / 8 pm ET.

(Bonus tip: rubber bands make great DIY point protectors. Wrap one around the tip of the needle a few times and your stitches won't be able to fall off while you're knitting or even when you have to put your work down.)

Knitting Lesson 2: Garter Stitch and Cast Off

We are adding two new skills to the foundation of knitting basics that we started in Lesson One: how to knit garter stitch and how to cast off in knitting. But you might be surprised to learn that if you kept up with last week's homework then you actually already know how to knit garter stitch!

How to Knit Garter Stitch
how to knit garter stitch

Garter stitch is simply the name for the fabric you create when you work knit stitch across every row. That's why we're starting with garter stitch. For crocheters, it would be comparable to making a square piece of fabric entirely in single crochet stitches. In other words, once you learn single crochet, you can make a single crochet square; once you learn knit stitch, you can make a garter stitch knit square.

The great thing about this knitting basics lesson is that you already know most of what you need to know for these knitting basics. You learned how to work knit stitch on a long tail cast on in lesson one. Now you will keep repeating rows of knit stitch.

Here is how to knit garter stitch:

Thanks to Lesson One, you've already cast on using the long-tail cast on that created the first knit row. Then you also knit another row.

Tip: As I work knit stitches, I like to repeat the following steps:

  • Go in the front door (meaning insert the right-hand needle from left to right into the first stitch)
  • Around the corner; (yarn over the needle with the working yarn, from left around to the right of the needle.)
  • Out the window; (bring the needle down, coming out of that stitch)
  • And off the porch (let the stitch fall off the left needle)

So we're going to repeat that across the row. But what do you do once you have your first knit row? At the end of knitting that row, you've let the stitches all come off of the left needle and now they're on the right hand needle. Your left needle doesn't have any needles on it after you've completed the last stitch of the row.

Straighten out the work on the needle so all of the knit stitches are even at the bottom of the needle. Now move that needle to your left hand. The needle with the work on it becomes the left hand needle. Put your other needle in your right hand and begin again. That's it. You're knitting each row, which means that you're knitting garter stitch.

Knitters Tip for Crocheters

knitters tip for crocheters

Garter stitch can also be made by working only purl stitches. Since we've just learned the knit stitch, we've practiced it this way. But in Lesson 3 you'll learn the purl stitch. Then if you want to practice your knits and purls you can take turns making swatches of garter stitch using each method.

How to Cast Off in Knitting

Casting off is what you do to finish a pattern. It's similar to the “finish off and weave in ends” part of crochet but also more complex because of the nature of knitting. In fact, you have to plan ahead for the cast off. In crochet, you simply stop what you're doing, cut the yarn, bring it through the loop, and you're done. However, in knitting, you need to think ahead to make sure that you have enough yarn for the cast off.

There are many different ways to cast on and there are many different ways to cast off in knitting, We'll be showing you one option for a common cast off in the video that goes live today on YouTube at 1 pm. (We'll add the link here when it's available.)

Lesson 2: First Project
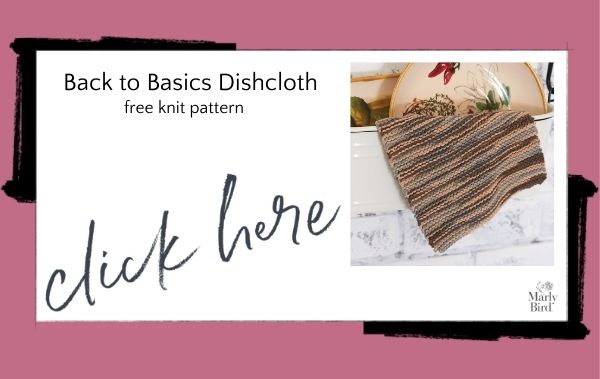
knit garter stitch dishcloth

We originally thought we might do. a sampler scarf with all of the knit stitches that we learned. However, I really believe that instant gratification is the key to feeling like you're getting somewhere with a new craft. As an experienced crocheter, you might get frustrated that knitting has challenges that you've forgotten as a beginner. Therefore, being able to create a project right away will help remind you that yes, you really can do this.

So, here's our first project: a basic garter stitch dishcloth. NOTE: The pattern says that it calls for #7 needles. However, we started you off on #8 needles and we are going to stick with those for now. The project will turn out perfectly fine using the #8 needles. The video shows you step-by-step how to complete this free knit pattern.

Need to learn more about knitting needles? Check. out our beginner's guide.
BiCrafty Bootcamp

Additional Patterns and Video Tutorials For Garter Stitch and Cast Off

If you want to take your skills a little bit further, then you may be interested in these video tutorials:

  • Learn How to Knit the Beginner Garter Drop Stitch Scarf which goes over the cast on and knitting again
  • Loop It Garter Stitch – learn to knit garter stitch without needles using special yarn; watching this short video might also give you a difference set of how to knit stitch
  • And the Marly and Mom Learn to Knit video 1 and video 2.

Or these patterns:

  • The Perfect Bulky Knit Hat Pattern for Beginners: it uses just knit stitch! You're ready to make this one right now! It comes with a full video tutorial.
  • Bernat Knit Garter Stitch Cowl Free Pattern
  • Beginner Garter Stitch Bias Shawl Free Pattern
  • Caron Cakes Basic Knit Scarf – a free garter stitch scarf pattern

Frequently Asked Questions

What is garter stitch?

Honestly… garter stitch is simply the fabric you make when you knit every single row. Think of it like making a whole square out of single crochet stitches… if you know crochet, you already get this! It’s a super beginner-friendly way to start knitting.

I keep dropping stitches off my needles… help!

Oh no!… that can be so frustrating when you’re just starting out. You should totally check out point protectors! They just slip onto the end of your needles and keep those stitches from sliding off while you’re working or even when you need to take a break. A rubber band can even work in a pinch!

How do I finish my knitting project?

So here's the thing… finishing your knitting is called casting off, and it’s a little different than in crochet. You really have to plan ahead to make sure you have enough yarn! There are lots of ways to do it, and the video on this page shows you one common method.

Can I really make a whole project in Lesson 2?

Yes!… you absolutely can! We’re making a basic garter stitch dishcloth, and it’s perfect for that instant gratification boost. It really helps you feel like you're accomplishing something right away when you're learning a new craft like knitting.

I'm a crocheter learning to knit… what's the biggest difference I should know?

Well, honestly… knitting does require a bit more planning ahead than crochet, especially when it comes to finishing your work. Also, sometimes stitches can slip off your needles easily at first, so point protectors are a lifesaver! But don't worry… we’re going slow, and you’ve got this!
Filed Under: BiCrafty Bootcamp Learn to Knit, Knitting

Marly Bird’s BiCrafty Boot Camp: Team Thoughts on…

April 7, 2021 By Marly Bird Leave a Comment

Hello! Have you signed up for Marly Bird's BiCrafty Boot Camp: Knitting Lessons for Crocheters? This is a FREE weekly series that teaches you how to knit from the ground up. Anyone can join. However, it's particularly geared towards crocheters who are ready to put the skills they already know to use to make learning to knit easier.

  • Find all the details here. Each week's lesson will be linked to at the bottom of that post when it's live.
  • You can also find all BiCrafty Boot Camp posts here.
  • Enlist here. (This just means that we know you're participating and you'll get weekly newsletters sharing the latest from the project.)
bicrafty boot camp

The Team's First Facebook Live Chat

BiCrafty Boot Camp started off on 3/31/21. We launched slowly so that you have a chance to get into the swing of things. So far, we've learned a bit about knitting needles, how to cast on, and how to knit stitch.

Every other week, we'll do a Facebook Live where you can watch the team chat about their own challenges as they learn to knit alongside you. You'll also get a chance to see all of the amazing knitting tools and notions that our sponsors have sent us from Signature Needle Arts, ChiaoGoo, Prym, Jimmy Beans Wool, and Erin.Lane Bags. (There will be giveaways to come!) And we'll answer any questions that have come up in the preceding weeks.

Since we're starting off slow, the first video is an introduction to the project. Plus you get to meet some of my team. Kathryn and Cryssi both joined the team about six months ago and you might have interacted with them online but now you get a chance to see them live. So, in case you missed it – or you just want to watch again – here's that video:

Some Thoughts From Lesson One

Kathryn and Cryssi are both newbie knitters but experienced crocheters. They are both thrilled to learn to knit from Marly Bird using some of the best knitting tools in the industry thanks to those sponsors. In the video, you'll see some of those supplies.

BiCrafty Boot Camp knitting lessons for crocheters

Choosing Knitting Needles

See our beginner's guide to knitting needles and also check out our recommended knitting needles for beginners.

It's easy to get overwhelmed by how many options there are for knitting needles out there, but don't let that distract you. You can easily start with whatever materials you can afford right now, and you can scale up to different needles in the future as you get used to knitting. That said, we specifically reached out to these sponsors because theirs are the needles that I love to work with. In the video you can see a terrific Erin.Lane bags roll-up DPN case that I love along with the Signature Needle Arts needles that are among my favorites.

Each month we'll be showcasing the needles from a different sponsor. Right now we're working with ChiaoGoo. We are all working with size 8 knitting needles for this project. (That said, depending on your tension – something you know about from crochet – you may find yourself going up or down a size to 7 or 9.) We are working with circular needles. Cryssi is working with the 24″ patina bamboo circulars while Kathryn is working with their 24″ steel circulars.

Both women have tried both a little bit, though, and agree that the material of the needle makes a lot of difference in the ease of knitting. As we discussed in the video, it might be easier to start out on bamboo / wooden knitting needles that grip the yarn better so that your stitches don't slide off as easily. As an experienced knitter, I use metal and want the slickest, fastest stitching possible. But it takes time to get there, so don't worry if you're still adjusting. That's normal.

Signature Needle Arts Promo Code

We also discuss that there are different types of needle points – some are blunter and some are pointier. Signature Needle Arts is well-known for their stiletto points, which are as pointy as it gets. If you can afford to get a set of needles from this sponsor, they're well worth it. They're the Ferrari of knitting needles. Oh and by the way, they're offering discounts to members of BiCrafty Boot Camp! Get 10% off at Signature Needle Arts when you use promo code MARLYKNITS. Make sure it's all caps. You can only use this code once per customer, during the length of BiCrafty Boot Camp. And it can't be combined with other deals.

BiCrafty Bootcamp landing page

Being a Beginner Again

Cryssi is a little bit further along than Kathryn is with learning how to knit but both women are finding similar challenges. It's a little bit frustrating to be a beginner again. But at the same time, it's so helpful to remember that there was a time neither knew how to crochet. The video emphasizes a lot of things we already know as crocheters that do make this process easier. For example, although you might not know what every abbreviation means, you basically know what you're looking at when you see a knitting pattern. Remember before you could read a crochet pattern and it was all gibberish? But now you've got it, and you'll get this too.

So, some reminders about being a beginner:

  • It can be a great feeling. You're learning something new and when you get it, it feels great.
  • It can also be frustrating. And that's okay. Take ten mintues a day to work on your knit stitch. And if it gets too frustrating, take a break.
  • You can do this! You will build up muscle memory. Skills will develop. Maybe you'll love it or maybe you'll make a few projects here and there and still mostly crochet. Either way, it's nice to develop that bicrafty handiness. And I absolutely believe in you. I love teaching and I can't wait to have you join the knitting world.

So join us. Sign up for boot camp. Check out the first lessons. Watch the YouTube Live above. Tag @themarlybird on Instagram. Share your progress there or on Facebook. We're all in this together!

Frequently Asked Questions

Is this boot camp really free?

Yes! This is a FREE weekly series that teaches you how to knit from the ground up. Anyone can join, and it's especially great for crocheters ready to use their existing skills to learn knitting.

What have we learned so far in BiCrafty Boot Camp?

So far, we’ve learned a bit about knitting needles, how to cast on, and how to knit stitch. We're starting off slow to let everyone get into the swing of things.

What kind of needles are we using for the boot camp?

Honestly… we're working with size 8 knitting needles for this project, and the team is using circular needles. Cryssi is using the 24″ patina bamboo circulars while Kathryn is using their 24″ steel circulars.

I'm a crocheter, will learning to knit be super hard?

It can be a little bit frustrating to be a beginner again… but remember how you felt learning to crochet? You've got this! You'll build up muscle memory and skills will develop.
Can I get a discount on knitting needles?

Yes! Signature Needle Arts is offering discounts to members of BiCrafty Boot Camp. Get 10% off at Signature Needle Arts when you use promo code MARLYKNITS. Make sure it’s all caps, and remember it can only be used once per customer and can’t be combined with other deals.

Filed Under: BiCrafty Bootcamp Learn to Knit, Knitting

38 Free Plaid Patterns to Crochet and Knit

April 5, 2021 By Marly Bird Leave a Comment

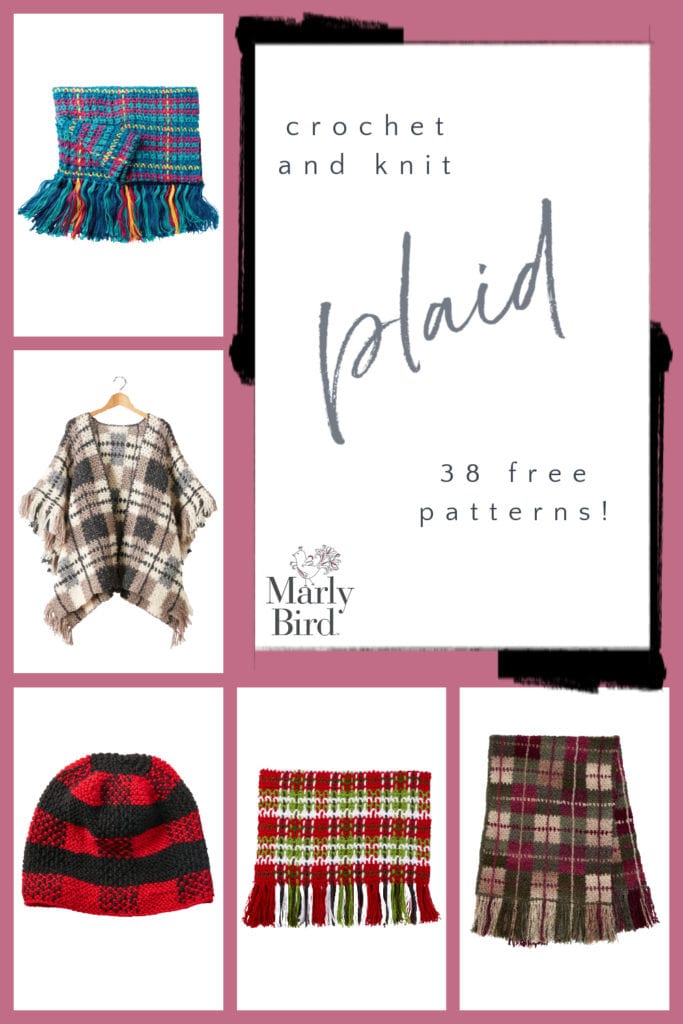
The differences between plaids, checks, and tartans can be confusing, but all the slight variations of this style are classics and have been well-loved for generations. Whether you're going with the tartan of a Scottish clan, or just making up a cute plaid pattern for a new afghan, plaids stand the test of time. Here we have 38 plaid patterns from Yarnspirations for you to choose from.

38 Free Plaid Patterns to Crochet and Knit

If you want to dig a little deeper, a plaid design is made up of two or more colors criss-crossing each other at right angles. You see plaids in fabric every day, and they're a classic look. Tartans are plaids that have a specific name and are associated with a Scottish clan or another group. Checks can be a special type of plaid, but not all plaids are checks.

Bonus: Plaid Yarn

Bernat Color-Pooling Yarn has a buffalo plaid color to easily make buffalo plaid patterns.

Colorful Plaid

Colorful plaids can bring a touch of whimsy to your life and brighten up your home.

  • Plaid-y Hook Caddy
  • Plaid Picnic Throw
  • Stripes and Checks Crochet Scarf
  • Boldly Colored Plaid Set
  • Fabulous Planned Pooling Wrap
  • Crochet Plaid Blanket
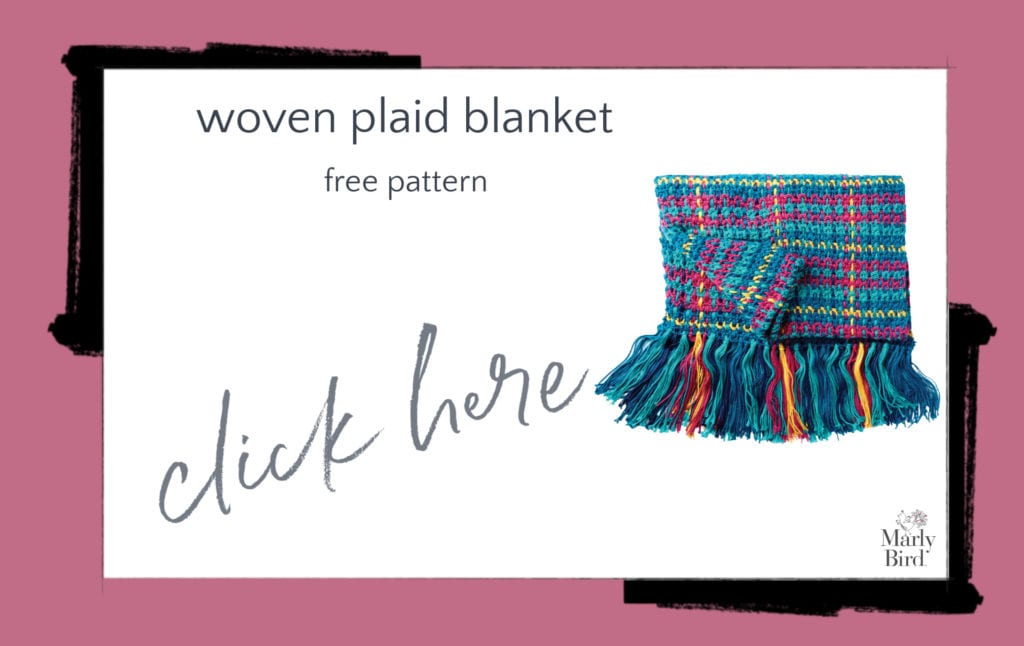
  • Woven Plaid Crochet Blanket
  • Plaid Christmas Blanket
  • Planned Pooling Pompom Scarf
  • Argyle and Plaid Jacket
  • Plaid Christmas Blanket
Woven Plaid Crochet Blanket Free Crochet Pattern

Neutral Plaid

Neutral plaids will go with anything and everything!

  • Check Mate Fair Isle Hat
  • Crochet Blanket Ruana
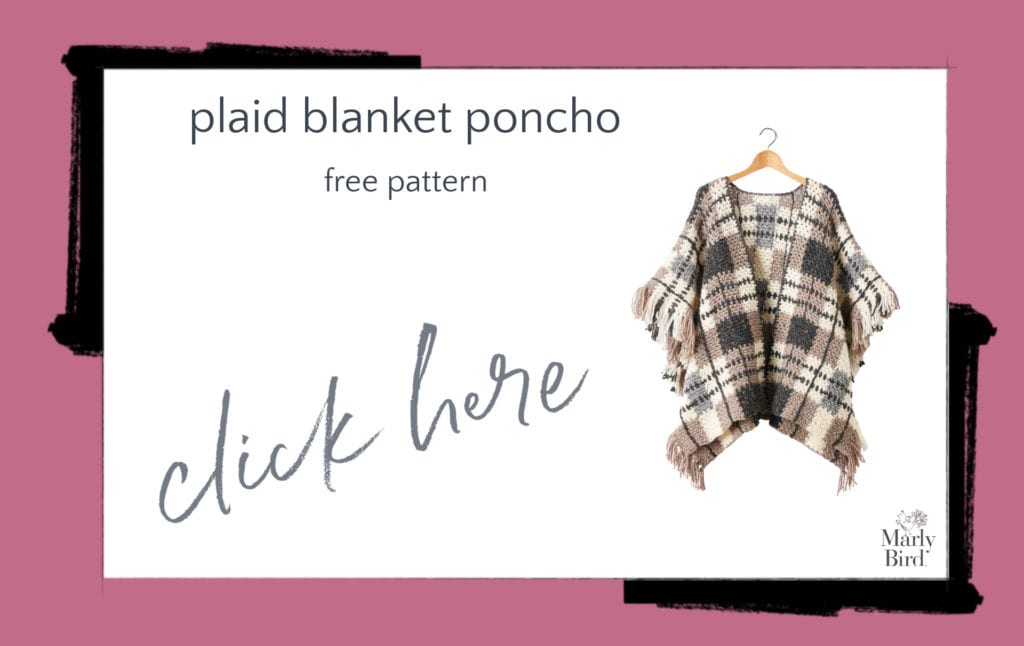
  • Plaid Blanket Crochet Poncho
  • Alize EZ Mad for Plaid Blanket
  • Crochet Gingham Plaid Afghan
  • Gray Shades Tartan Scarf
  • Planned Pooling Argyle Poncho
Plaid Blanket Crochet Poncho Free Crochet Pattern

Buffalo Plaid

This classic red and black design, often associated with lumberjacks and the woods, is perfect for warm winter items.

  • Canine Checks
  • Buffalo Plaid Crochet Hat for Him
  • Buffalo Babes Blanket
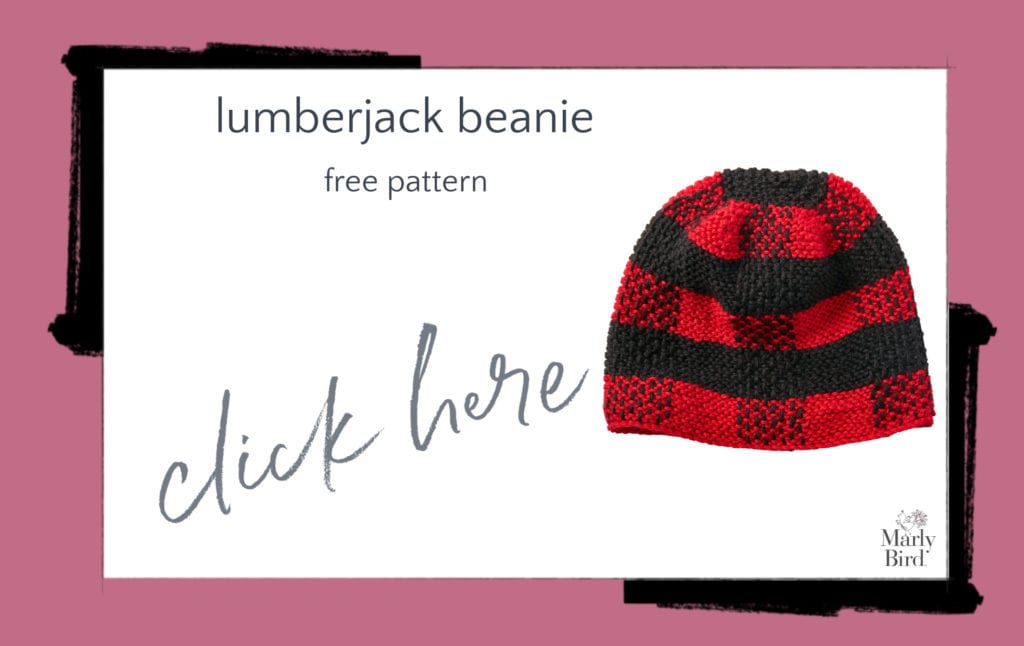
  • Lumberjack Beanie
  • Plaid Pillow
  • Felted Buffalo Plaid Roll Bag
  • Buffalo Plaid Crochet Stadium Blanket
  • Buffalo Plaid Bottle Cozy
  • Crochet Buffalo Plaid Afghan
Lumberjack Beanie Free Knitting Pattern

Everyday Plaids

These plaids will work well no matter your decorating style.

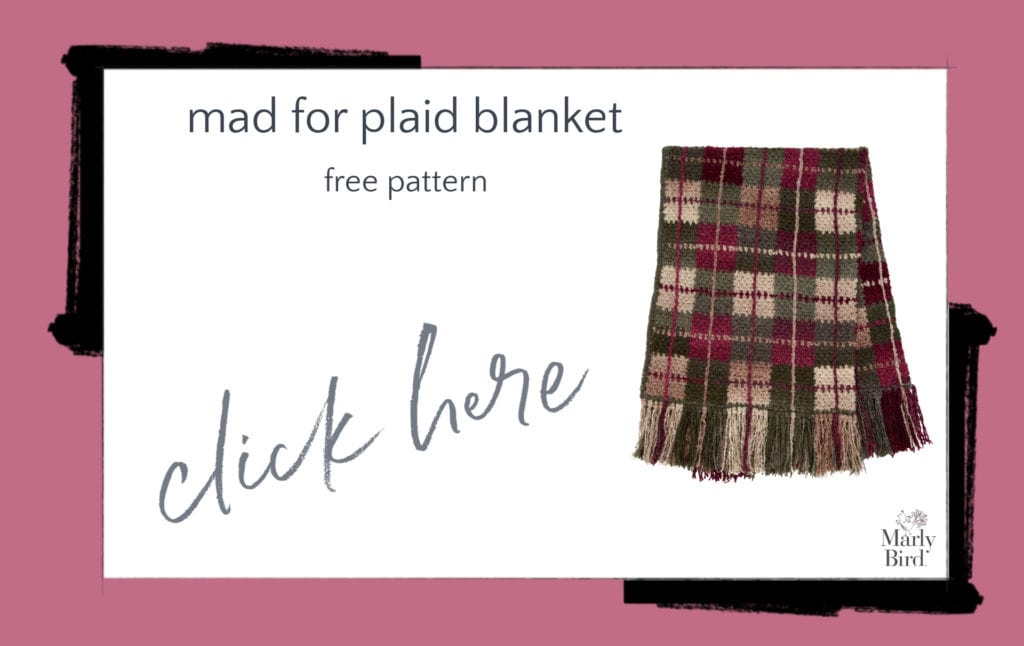
  • Mad for Plaid Crochet Blanket
  • Plaid Afghan
  • Plaid Look Crochet Blanket
  • Check Please Blanket
  • Plaid Slouchy Beanie
  • Buffalo Plaid Crochet Cardigan
  • Big Plaid Crochet Blanket
  • Mad for Plaid Crochet Placemat
  • Scotch On the Rocks Crochet Plaid Scarf
  • Planned Pooling Hat and Cowl Set
  • Check Please Blanket
Mad for Plaid Blanket Free Crochet Pattern

You may also like

  • Crochet Tartan Scarf in Shades of Gray
  • Free Argyle Patterns to Crochet and Knit
  • 51 Free Checks and Blocks Crochet and Knitting Patterns
  • Plaid Crochet Christmas Afghan Free Pattern

Frequently Asked Questions

How do you get a plaid pattern in crochet or knitting?

There are a few different techniques! Planned pooling with self-striping yarn can create an argyle or plaid-like effect. Intarsia or stranded colorwork can recreate plaid motifs stitch by stitch. Some patterns use slip stitches or textural techniques to create the intersecting line effect of plaid. And Marly's DIY plaid crochet method uses a base stitch pattern with surface slip stitch lines added after… giving you real gingham and plaid looks. Each technique gives a slightly different result.

Is crocheting or knitting plaid fabric difficult?

It depends on the method! Planned pooling plaid requires upfront math and swatching but then the crocheting itself is straightforward. Surface crochet plaid (adding lines on top of a finished fabric) is accessible for confident beginners. Intarsia plaid is more advanced and requires managing multiple yarn bobbins. Start with the method that matches your current skill level… there's a plaid technique for everyone from intermediate beginner to experienced colorwork crafter.

What's the difference between plaid and gingham in yarn crafts?

Gingham is a simple two-color check pattern… equal sized squares in one color against a white or neutral background. Plaid is more complex with multiple colors, varying stripe widths, and overlapping horizontal and vertical lines. Gingham is generally easier to recreate in yarn because it's just a regular repeat. Plaid requires more color management and careful stitch placement to get those characteristic overlapping stripe effects. Both look amazing in handmade projects!

What projects work best for plaid patterns?

Blankets, scarves, and flat-worked accessories show off plaid patterns beautifully because you can see the full geometric effect. Marly has designed check and plaid scarves that look incredible. Home decor items like pillow covers and placemats are great for plaid. Bags and totes are fun because the graphic pattern is visible and eye-catching. Garments can absolutely use plaid but require more planning to get the motif placement right across shaping and seams.

What yarns create the best plaid effect?

Smooth yarn with good stitch definition in strongly contrasting colors creates the crispest plaid patterns. Classic plaid colors are earthy and rich… burgundy and green, navy and red, black and tan. But there are no rules… a pastel plaid is adorable for baby items. For the clearest plaid look, avoid variegated yarns and stick with solid colors so the geometric structure reads cleanly. The contrast between your colors is the key to a plaid that looks intentional and graphic rather than muddy.

Filed Under: Crochet, Free Patterns, Knitting

Learn How to Knit For Crocheters (BiCrafty Boot Camp,…

March 31, 2021 By Marly Bird Leave a Comment

Welcome to Lesson 1 here at BiCrafty Boot Camp: Knitting Lessons for Crocheters. As you'll see below, anyone can use these weekly step-by-step lessons to learn how to knit. However, the lessons are especially geared towards crocheters who are ready to become bicrafty. In this first lesson, we'll look at what crocheters already know that will help them get started, including the slip knot. Plus, we'll learn one way to cast on and how to do the knit stitch continental style.

BiCrafty Boot Camp is FREE. Enlist here today. We'll have lessons, tips, social media lives and giveaways.

bicrafty boot camp

These posts may include affiliate links. If you click one and make a purchase, I get a percentage of the sale. Your price never changes. Thank you for your support.

Crocheters' Edge: Getting Started

crocheter's edge: how what you know as a crocheter will help you learn to knit

Here are some of the things that make it easier to learn how to knit for crocheters as opposed to brand-new beginners to either craft:

  • Crocheters already know the slip knot.
  • Most crocheters already understand what gauge is, why it's important, and how to figure it out.
  • Additionally, crocheters understand that tension affects your work.
  • Knowledge of yarn will help in choosing yarn for knitting projects. You already know about yarn weight and fiber. Do note, however, that yarn behaves differently on needles than on hooks. Therefore, just because something works for you in crochet doesn't always mean it'll be the top choice for knitting. Don't worry; you'll figure it out!
  • Although knitting needles are different from crochet hooks, you might have some familiarity with the feel of the tools in your hand.
  • You know how to count stitches. It's really easy to count your stitches in knitting but it is very crucial to do so, just like in crochet, so you can make sure you're keeping the sides even if you're doing plain knitting or that you're following the pattern you're making. So you'll definitely put this crochet skill to use as a knitter.
  • You have some familiarity with the language. Remember when you first looked at a crochet pattern and it was all gibberish to you? While you might not be familiar with knitting abbreviations, yet, you do have a basic working knowledge of how a pattern reads.

If you're not a crocheter, don't worry. We'll cover these things for you. But if you are a crocheter, then take a moment to appreciate how much you already know!

Knitting for Beginners: Yarn and Needles

knitting for beginners

There are a few things that beginners need to learn about materials. Luckily, crocheters already know a lot of this stuff.

Learn About Yarn

If you're brand new to yarn crafts, then you're going to need to learn about yarn. Don't worry; although there is a lot to learn, you can get started with a little bit of basic knowledge.

All you really need to know to start is that you can start this series by working with our chosen yarn: Chic Sheep, which is a 100% Merino Wool worsted weight yarn. Yarn weights range from 0 (lace weight) to 7 (jumbo) which just refers to how thick yarn is. Find a lot more info, along with recommended yarns, in our yarn weight chart.

As you continue with BiCrafty Boot Camp, you might want to learn more about fiber types, plies, twists and other yarn details. And we'll be sharing more info as we go along. But for now, know that yarn has a label on it and if you look at the label, it has a number, and the number will be from 0 – 7. Right now you want a #4.

Learn About Knitting Needles

And whether you're new to yarn crafts entirely or you are learning how to knit for crocheters, you'll need to learn a little bit about knitting needles.

There are different types of knitting needles: straight, circular, and double-point. And they come in different sizes, different lengths, and different materials. We are excited to work with sponsors including Signature Needle Arts, ChiaoGoo, Prym, and Jimmy Beans Wool to share a variety of different knitting needles with you throughout the course of BiCrafty Boot Camp: Knitting Lessons for Crocheters.

All of the options can be a little bit overwhelming. Just remember that, similar to with crochet hooks, you only need to try a few to get started. Over time you might discover you like different styles, materials, sizes, etc. But don't let the myriad of options overwhelm you. Just begin! We've created an ultimate guide to knitting needles for crocheters to get you started.

As you begin, we recommend that you choose 24″ circular knitting needles. If you're working with Chic Sheep yarn, then choose size 5 mm US 8 knitting needles. If you are using different yarn, check the label for recommended needle size.

Knitting for Beginners: Additional Information

If you're a crocheter, then you already know about things like tension and gauge. You'll learn to adjust to how they work in knitting as contrasted with crochet. Over time, you might want to learn more about reading a knitting pattern and other information. But for now, the main beginner information you'll need to know is that you'll probably want to try continental knitting first.

Continental Knitting for Right-Handed Crocheters

continental vs English knitting styles

It's important to note that there are different approaches to knitting. In other words, there are different ways to knit. The two most popular styles are continental knitting and English knitting, although there are other options as well.

The primary difference between the two is where the yarn is held. In continental knitting, the left hand holds the yarn. In contrast, the right hand holds the yarn in English knitting.

Since both of our team's crocheters are right-handed, they're already used to holding their yarn in the left hand. Therefore, they both opted to start their lessons in learning how to knit for crocheters by learning continental style knitting.

That's what we'll start with here. Further along in the series, we'll discuss English knitting.

Pickers and Throwers

Learning knitting means learning a whole new language. Of course, you already know a lot of it from crochet. However, you'll have to pick up other terminology on the way. Therefore, let's introduce you to the slang terms “picker” and “thrower.” These are just another way of saying continental and English knitting. In continental knitting, which we'll be doing, you kind of “pick” the yarn with the tip of your needle. In contrast, you kind of “throw” the yarn around the needle in English knitting. So, we'll start off by being pickers, using continental knitting.

Knitting Lesson One: Slip Knot, Cast On, and Knit Stitch

knitting lessons step one

The very first lesson in learning how to knit for crocheters is a three-part lesson: reviewing the slip knot, learning the cast on, and finally, the knit stitch. Although these are three distinct parts, they are also all the first part of learning how to knit. In crochet, you would make a slip knot then chain a foundation, and then start working single crochet or whatever stitch you are using. In knitting, you'll slip knot, cast on, and then begin to knit stitch.

How to Make a Slip Knot

how to make a slip knot

As a crocheter, you already know how to make a slip knot. You start the same way in knitting. Note that we're going to learn a long-tail cast on, which means that you need to leave a longer tail than usual at the beginning when you make your slip knot. So as you make this slip knot, be sure to leave a long tail before you create the slip knot.

Here are the written instructions for how to make a slip knot:

  • Hold your left hand palm up with your forefinger and middle finger extended.
  • Rest the tail of the yarn in the palm of your left hand. Note that for the long tail cast on your tail should be at least three times the width of the finished product.
  • Wrap the working yarn around both your forefinger and middle finger. Bring it all the way around and cross the yarn over itself.
  • Turn your hand palm down. You should see two yarn pieces crossing your middle and forefinger.
  • Using your right hand, go underneath the top yarn piece and pinch the yarn piece that's closer to your wrist.
  • Pull it all the way through, pulling all of the yarn off of your hand. You have a slip knot! The knot is adjustable.

How to Cast On for Knitting

how to long tail cast on

Now you're ready to cast on stitches to the knitting needle. Casting on simply refers to putting stitches on the needles to begin knitting. Think of it as your starting chain…only it isn't a chain.

See, the big difference between crochet and knitting (besides the one hook, two needles thing) is that in crochet you build stitches on a row of chains (for most patterns) and you will finish off or “bind off” each stitch as you create it. In knitting you build stitches on a cast on row and as you work along the row of stitches with a knit or purl the result is a loop on your needle. These loops are not finished off, yet, that happens at the bind off. But they are considered “live”.

So in just as you learn to chain in crochet to start a project, for knitting you have to learn how to cast on.

There are many different ways to cast on in knitting. My favorite cast on method is the long-tail cast on. It's a good choice for beginners, and it's what we'll use in this first lesson of how to knit for crocheters.

Here are the written instructions for how to do the long-tail cast on:

  • Leave a yarn tail that's at least three times the width of your finished project.
  • Make a slip knot at that point as shown above.
  • Place the slip knot onto your needle. Hold your needle in your right hand, pointing to the left. Your yarn tail will be towards the left side of your needle and the working yarn towards the right side.
  • Position your left hand with your fingers together, pinching closed with your thumb. (I call this the “quacker” because it looks like a duck bill.) Place the quacker under the needle between the two strands of yarn.
  • Open your hand, creating an L shape with thumb and forefinger.
  • When you look at the yarn strands now, you should see a sort of M shape with the yarn, where the slip knot on the needle is the center of the M. Pull the two legs of the M in towards each other, holding them in the palm of your hand using your three fingers. So you have the tail wrapped around your thumb, the working yarn wrapped around your forefinger, and the legs of the yarn “M” held beneath your three fingers on your palm.
  • You're holding the yarn in your left hand and the needle in your right hand. Grab the needle with your right index finger atop the slip stitch. If you pull it back a little, it looks like you have a slingshot.
  • Take your needle and place it at the base of your thumb on the palm of your left hand. Move the needle up your thumb, underneath that first yarn strand.
  • Going across the next part of the yarn, move your needle over to the tip of the index finger on your left hand.
  • Go down your finger to go underneath the yarn on that side, bringing the needle back through the yarn and back to the base of the thumb at the palm.
  • Let the yarn fall off your thumb.
  • Pull the yarn tail to pull the stitch tight onto the needle.

That's the start of your cast on. Repeat it again and again to keep adding stitches onto the first row, or the cast on row.

If you are struggling with this cast on, another great beginner cast on is the knitted cast on. Here is a video demonstrating how to do the knitted cast on.

How to Knit Stitch

Once you've cast on, you're ready to begin knitting. Actually, you've already begun knitting. That's because the long tail cast on creates the first knit row! That's one of the great things about that cast on. So, now we begin with knit stitch:

Here are the written instructions for how to knit stitch.

  • You'll have your first row of knit stitches on the needle from your cast on. Hold that needle and the yarn in your left hand.
  • Place the tip of the needle that is in your right hand just to the left of the first knit stitch that's on the left hand needle.
  • Insert the needle from that left side towards the right side, through the stitch.
  • Yarn over the needle with the working yarn, from left around to the right of the needle.
  • Bring the needle down, coming out of that stitch, and slipping that first stitch off the left needle onto the right side.

Keep repeating that all the way across the row. You're knitting!!

Knitter's Tip for Crocheters

knitters tips for crocheters learning how to knit

When you pick up your work, the needle with the stitches on it should be in the left hand and when you knit the new stitches will be on the right hand needle. Which means, as you work along the row, the working yarn will be attached to the stitch closest to the tip of the right hand needle.

This is important to remember incase you must put your work down mid row, then pick is up and can't remember where you are. First thing you should do if you find yourself in that situation is to make sure the needle with the working yarn attached to it is in the right hand.

Which leads me to my next tip. Do not stop in the middle of the row! Always finish the row before putting your work down. Crocheters who become knitters sometimes forget about this in the beginning. After all, with crocheting you can put your work down at any point and easily pick it back up again. With knitting, though, you could accidentally start to work in the wrong direction or the live stitches could fall off the needles and you will have a mess. Therefore, you should always work to the end of the row before pausing, especially to put away your work.

Lastly, give yourself some patience and grace. It is NOT going to be perfect the first time. It will take practice to develop muscle memory. But I KNOW YOU CAN DO THIS!

Homework!!

Each week, we'll apply what we learned in the lessons to make a sampler pattern. This week, we want you to focus on practicing your slip knot, cast on, and knit stitch. This will help you to feel a little more confident, begin to adjust to the feel of the needles in your hands, and hopefully help you with your tension. Next week we will begin working on our pattern!

Additional Information For Learning How to Knit for Crocheters

If you want to watch additional videos for how to work on these beginner skills, then check out Beginner Knitting With Marly Bird and Marly's Mom.

We will learn about how to knit English style later on, but if you're curious about it, then check out this video.

Frequently Asked Questions

As a crocheter, what advantages do I have when learning to knit?

So many! You already understand yarn tension, fiber properties, gauge, how patterns are written, stitch anatomy, and how to read and follow instructions. You have a yarn stash and know what different weights feel like. You understand the concept of working from a written or charted pattern. What you're learning is just a new set of hand movements and a different tool… the foundational knowledge transfers completely. Most experienced crocheters are surprised by how quickly knitting clicks once they accept that it's a genuinely different physical technique rather than a harder version of crochet.

What's the hardest part of learning to knit if you already crochet?

Keeping stitches on the needles! Crochet keeps one active stitch on your hook… all other stitches are locked in the fabric. Knitting keeps ALL current row stitches on the needle simultaneously, and they can slide off if you're not careful. This feels precarious at first. Also: the yarn position is different (held in your non-dominant hand or at the back vs. front depending on the stitch), and purl stitches require a specific hand movement that many people find awkward at first. These challenges all resolve with a few hours of practice.

Should I learn Continental or English style knitting?

Try both and see which feels natural! Continental style (yarn in left hand) is very similar to how many crocheters hold yarn… which means many crocheters find Continental knitting clicks faster. English style (yarn in right hand) is the traditional “throwing” method many Americans learned. There's no wrong choice… both produce identical fabric. Marly's BiCrafty Bootcamp teaches both so you can experiment. Some BiCrafty crafters use one style for knit stitches and another for purl stitches… whatever combination gives you the smoothest rhythm.

What's the best first project for a crocheter learning to knit?

A simple dishcloth or small swatch in garter stitch (all knit stitches)! Garter stitch only uses one stitch type, creates a flat non-rolling fabric, and shows clear visible progress quickly. The first project should be small (finish quickly and feel accomplished), simple (minimal technique), and functional (making something useful is motivating). After a successful garter stitch swatch, a basic ribbed hat or simple scarf gives you practice with both knit and purl. Marly's BiCrafty Bootcamp series is specifically structured for this learning path.

Will learning to knit make me a better crocheter?

Many people say yes! Understanding both crafts deepens your appreciation for fiber construction and expands your vocabulary of techniques. You develop more nuanced understanding of tension and gauge. You can follow patterns and references from both traditions. You can choose the best tool for each specific project rather than being limited to one approach. And you become part of the full yarn crafting community rather than just one side of it. BiCrafty is genuinely more satisfying than mastery of one craft alone… Marly has built her whole brand on this truth.

Filed Under: BiCrafty Bootcamp Learn to Knit, Knitting, Tips, Tricks, Techniques for Knitting and Crochet

12 Free Pencil Patterns for National Pencil Day

March 30, 2021 By Marly Bird Leave a Comment

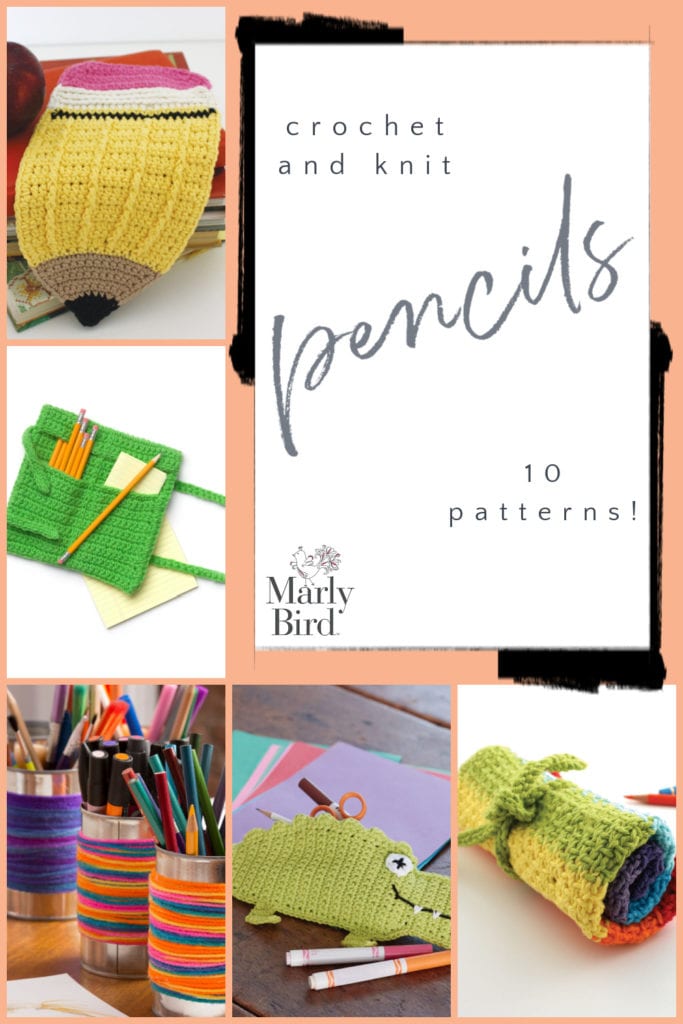
March 30 is National Pencil Day! Celebrate this classic school and office supply with these pencil-related patterns from Yarnspirations.

Kids of all ages can DIY can holders for their pencils, markers, colored pencils, and crayons, and everyone who needs to leave their desk can use a pouch or a case. Or bring the school day to all day with pencil-themed patterns!

10 Free Pencil Patterns for National Pencil Day
  • Crochet Pencil Pouch
  • Roll-Up Pencil Case
  • Bright Pencil Case
  • Alligator Pencil Case
  • Pencil Holder
  • Pencil Dishcloth
  • Pencil Holders
  • Wrapped Storage Can
  • Kitty Cat Pompom Pencil Topper
  • Pencil Can Holder
  • Tasseled Pencil Holders
  • Animal Friends Knit Pencil Case

You May Also Like

  • 10 FREE Crochet Pencil Patterns
  • BiCrafty Boot Camp: Beginner Knitting Lessons for Crocheters
  • Get Ready for Back to School with FREE Patterns

Frequently Asked Questions

What kind of projects can I make with these pencil patterns?

So here's the thing… you can make a bunch of fun stuff! There are pouches and cases for your pencils, markers, and crayons. Plus, you can even make pencil holders and a cute pencil dishcloth.

Are these patterns only for crochet?

Honestly… not all of them! While many of the patterns listed are for crochet, there's also an “Animal Friends Knit Pencil Case” so knitters can join in the fun too!

Can I make these pencil projects for kids?

Yes! The page mentions that kids of all ages can DIY can holders for their pencils and art supplies. So these are definitely great for the little ones, or even for yourself!

Where do these free pencil patterns come from?

These super cute pencil patterns are from Yarnspirations… they have so many great freebies!

Is there a way to get these patterns without ads?

You bet! The page mentions that there are new patterns available now in an ad-free PDF format over in The Pattern Shop. So if you like to have them all in one place without distractions, that's the way to go!

Filed Under: Crochet, Free Patterns, Knitting

Tweed Yarns and 30 Tweed Projects to Knit and Crochet

March 29, 2021 By Marly Bird Leave a Comment

Tweed fabric is normally made from wool yarn. It's a warm wool cloth, usually with a main color and flecks of other colors. Tweed yarns mimic the colors of the cloth.

How is it made? The fibers are dyed after the washing process and before spinning. The spinners blend several colors together, then card them to mix all the shades together before spinning.

Donegal tweed is the name of the yarn that has rainbow flecks and a slightly nobby surface. It was first produced in Donegal, Ireland.

Traditionally, tweed was produced in muted and natural shades and only in wool. But more recently, these wonderful tweed yarns have become much brighter and more colorful and include a greater variety of fibers.

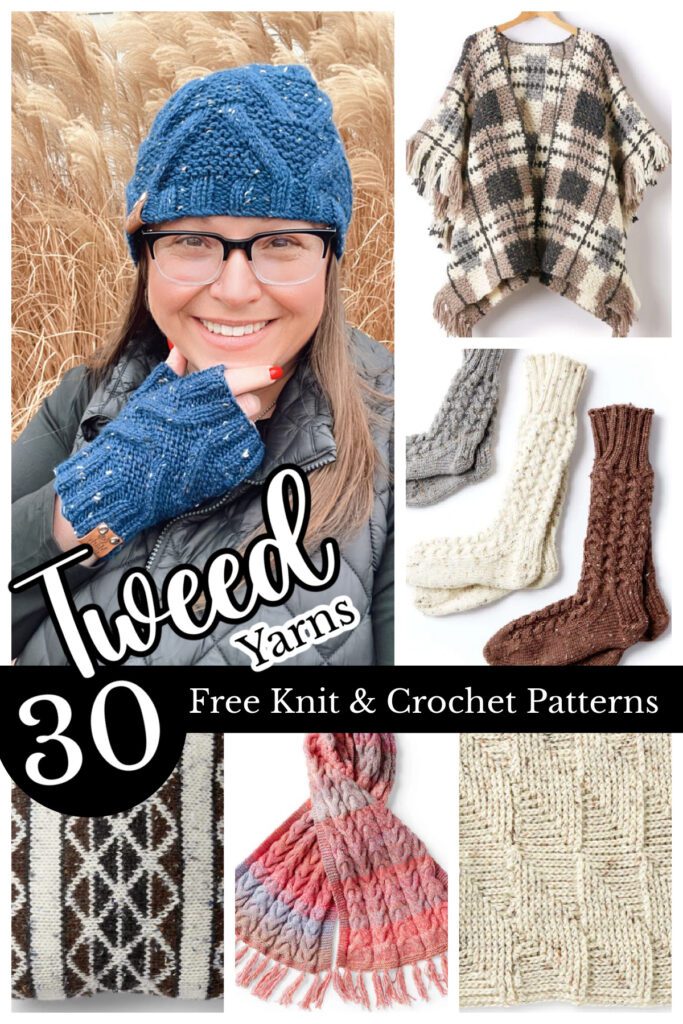
A collage featuring a smiling woman in glasses wearing a blue knitted hat and gloves, alongside images of various tweed yarn knit and crochet products, including a poncho and socks, with text "tweed yarns 30 free knit & crochet patterns". Marly Bird

Tweed Yarns from Yarnspirations, KnitPicks, Rowan, and More…

You could easily use a tweed yarn of the same weight instead of a regular yarn for a unique look for your project. Click on the links below to check out more options.

  • Bernat Premium Tweeds Yarn – 97% Acrylic, 3% viscose
  • Caron Simply Soft Tweeds Yarn – 97% Acrylic, 3% viscose
  • KnitPicks Wool of the Andes Tweed Worsted – 80% Peruvian Highland Wool, 20% Donegal Tweed
  • Plymouth Encore Tweed – 75% Acrylic, 22% Wool, 3% Rayon
  • Rowan Felted Tweed – 50% Merino Wool, 25% Alpaca, 25% Viscose/Rayon
  • Blue Sky Fibers Woolstok Tweed Aran – 85% Fine Highland Wool / 15% Donegal
  • Scheepjes Terrazzo DK – 70% Recycled Mulesing Free Wool x 30% Recycled Viscose
  • Rowan Fine Tweed Haze DK – 37% Alpaca, 37% Wool, 13% Polyamide, 9% Cotton, 4% Polyester
  • High Desert Tweed – 89% American Wool, 6% Acrylic, 5% Rayon
  • KnitPicks Woodland Tweed – 80% Merino, 15% Baby Alpaca, 5% Viscose
  • KnitPicks Brava Tweed – 97% Premium Acrylic, 3% Viscose
  • KnitPicks Provincial Tweed – 80% Fine Superwash Highland Wool, 20% Donegal Tweed (made of 70% acrylic, 30% viscose)
  • Red Heart Roll With It Tweed – 100% Acrylic, #4 Worsted Weight — self-striping with gorgeous tweed texture; great for shawls, scarves, and ponchos
  • KnitPicks Stroll Tweed – 65% Fine Superwash Merino Wool, 25% Nylon, 10% Donegal Tweed (made of 70% Acrylic, 30% Viscose)

Sweater Patterns

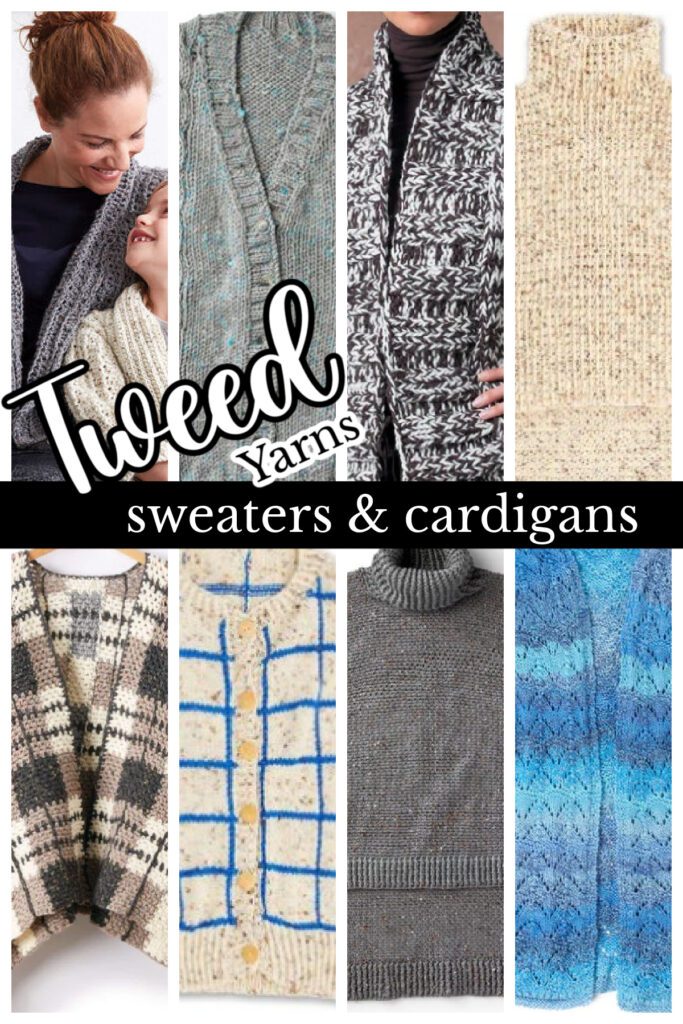
A collage showcasing various styles of sweaters and cardigans made from tweed yarns, featuring different patterns and textures in subdued colors. the text "tweed yarns sweaters & cardigans" overlays the image. - Marly Bird

Woven tweed fabric is traditionally used for outerwear like jackets, so sweaters are a natural fit for projects with this gorgeous yarn. These patterns mix the old and the new, with the colored flecks adding interest. You'll find the odd cardigan in this mix, too! And even a vest.

  • Chill Time Adult Cardigan
  • Chill Time Child Cardigan
  • Great Curves Knit Poncho
  • Tweed Jacket
  • Simple Cable Knit Cardigan
  • Stepping Stones Crochet Pullover
  • Textured Shifts Knit Sweater
  • Hi-Low Crochet Poncho
  • Plaid Blanket Crochet Poncho
  • Textured Kids Cardigan
  • Tweedy Crochet Pullover
  • Knit Windowpane Cardigan
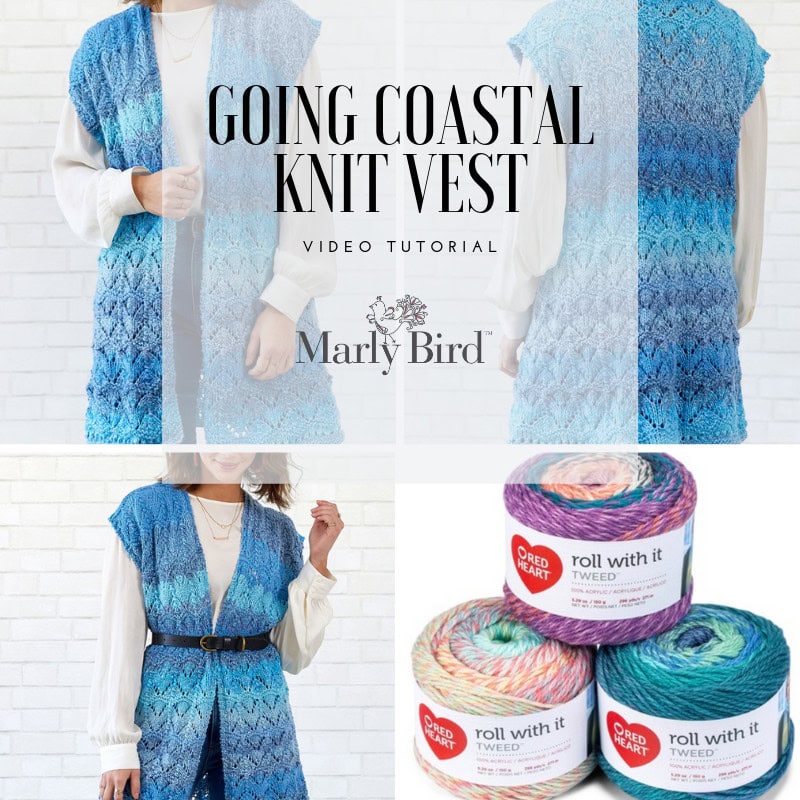
  • Going Coastal Vest
  • Aurora Lace Crochet Cardigan (paid for pattern but it is a Best Seller)

Accessories To Knit And Crochet

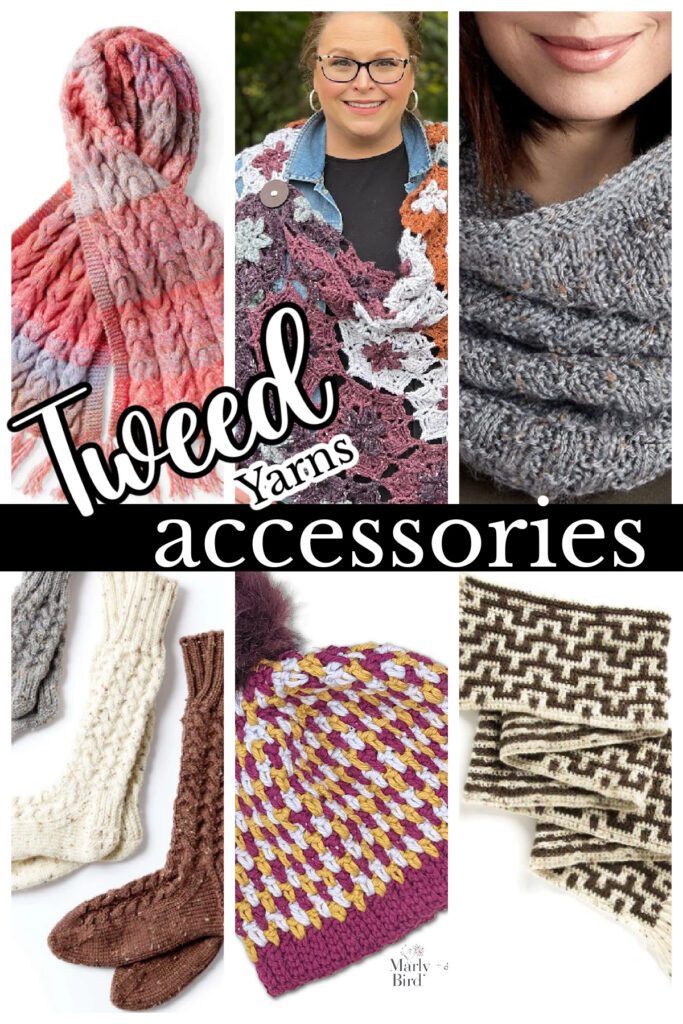
A collage of tweed yarn accessories including scarves, socks, and a cowl in various patterns and colors, with a middle section labelled "tweed yarns accessories" and glimpses of women modeling the items. Marly Bird

Scarves and socks continue this rugged outerwear trend. You won't miss any fun with these cozy items on your feet and around your neck. There's a beautiful knit cabled wrap for your shoulders. I guess you could call it a long, straight shawl…

  • Twist n Shout Crochet Cowl
  • Knit Cozy Cowl
  • Two by Two Knit Scarf
  • Mosaic Stitch Crochet Scarf
  • Knit Cabled Wrap
  • Cozy Knit Cabin Socks
  • Slouchy Socks
  • Basic Chunky Slippers
  • Take a Look Fingerless Mitts Pattern (get a matching hat pattern from Marly store)
  • Pelargonium Shawl (paid for pattern but uses beautiful tweed yarn)
  • Giovanni Tweed Crochet Hat

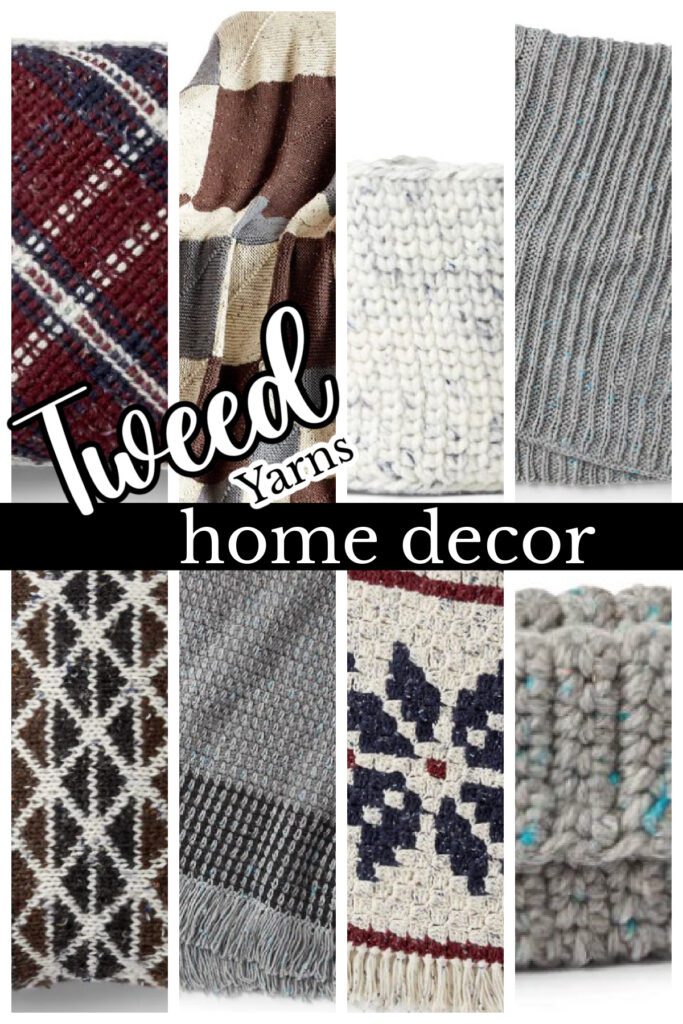
Tweed Home Decor

A collage of various tweed fabric and yarn patterns used in home decor, showcasing different colors and designs, with the words "tweed yarns home decor" in the center. Marly Bird

Let's finish this extravaganza by adding these cozy home decor items, such as throws and baskets. The muted shades fit in with any style and are instant classics. We have blankets and pillows galore to keep you cozy as you craft.

  • Crochet Moss Stitch Blanket
  • Cable Edged Knit Blanket
  • Crochet C2C Nordic Motif Blanket
  • Fair Isle Knit Pillow
  • Stash Basket
  • Argyle Plaid Crochet Pillow
  • Crochet Round Basket
  • Argyle Texture Knit Blanket
  • Building Blocks Knit Blanket
  • Scamper Knit Stocking (ad free pdf available + online course)
  • Love Light Gleams Knit Stocking (ad free pdf available too)

Marly Bird Patterns Using Roll With It Tweed

Red Heart Roll With It Tweed is one of my all-time favorite yarns for color-changing magic. Here are patterns I have designed specifically with it — and most of them work beautifully with any long color-changing worsted yarn like Lion Brand Ferris Wheel too!

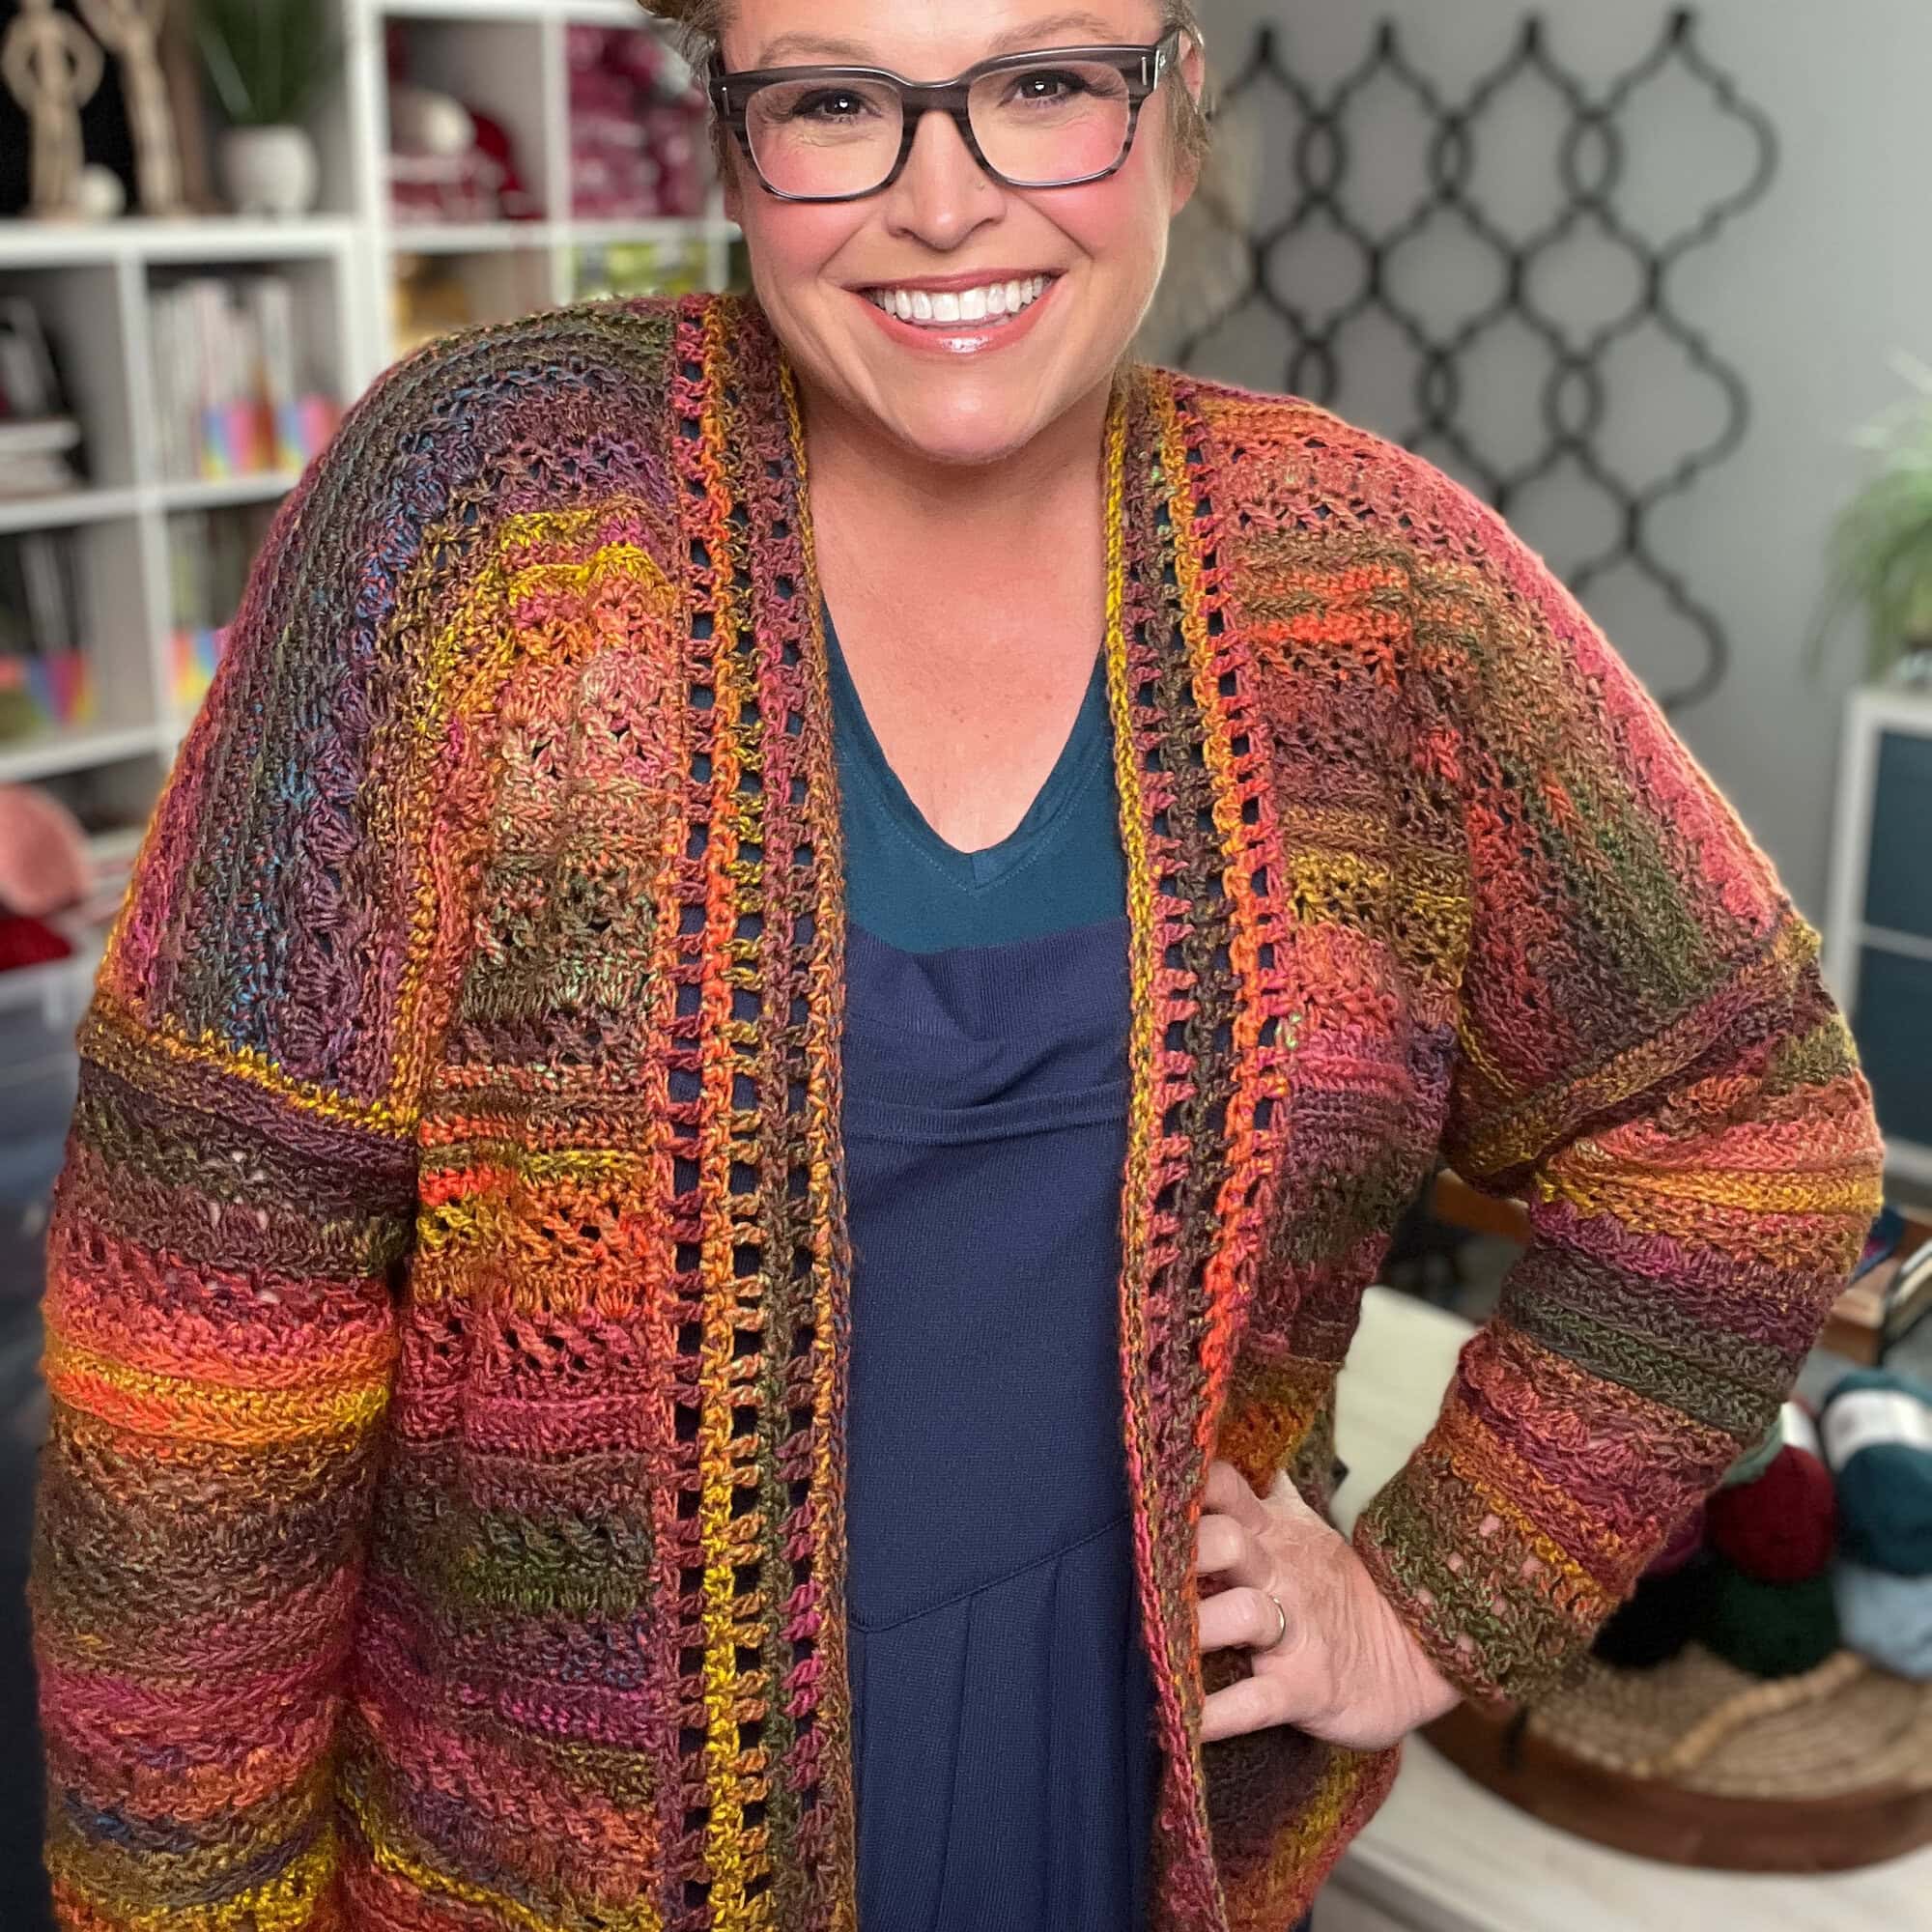
Person wears a vibrant, hand-crocheted Sookie cardigan
Sookie Crochet Cardigan
Woman models a hand-knit purple sweater vest over a white blouse
Lorelai Knit Vest
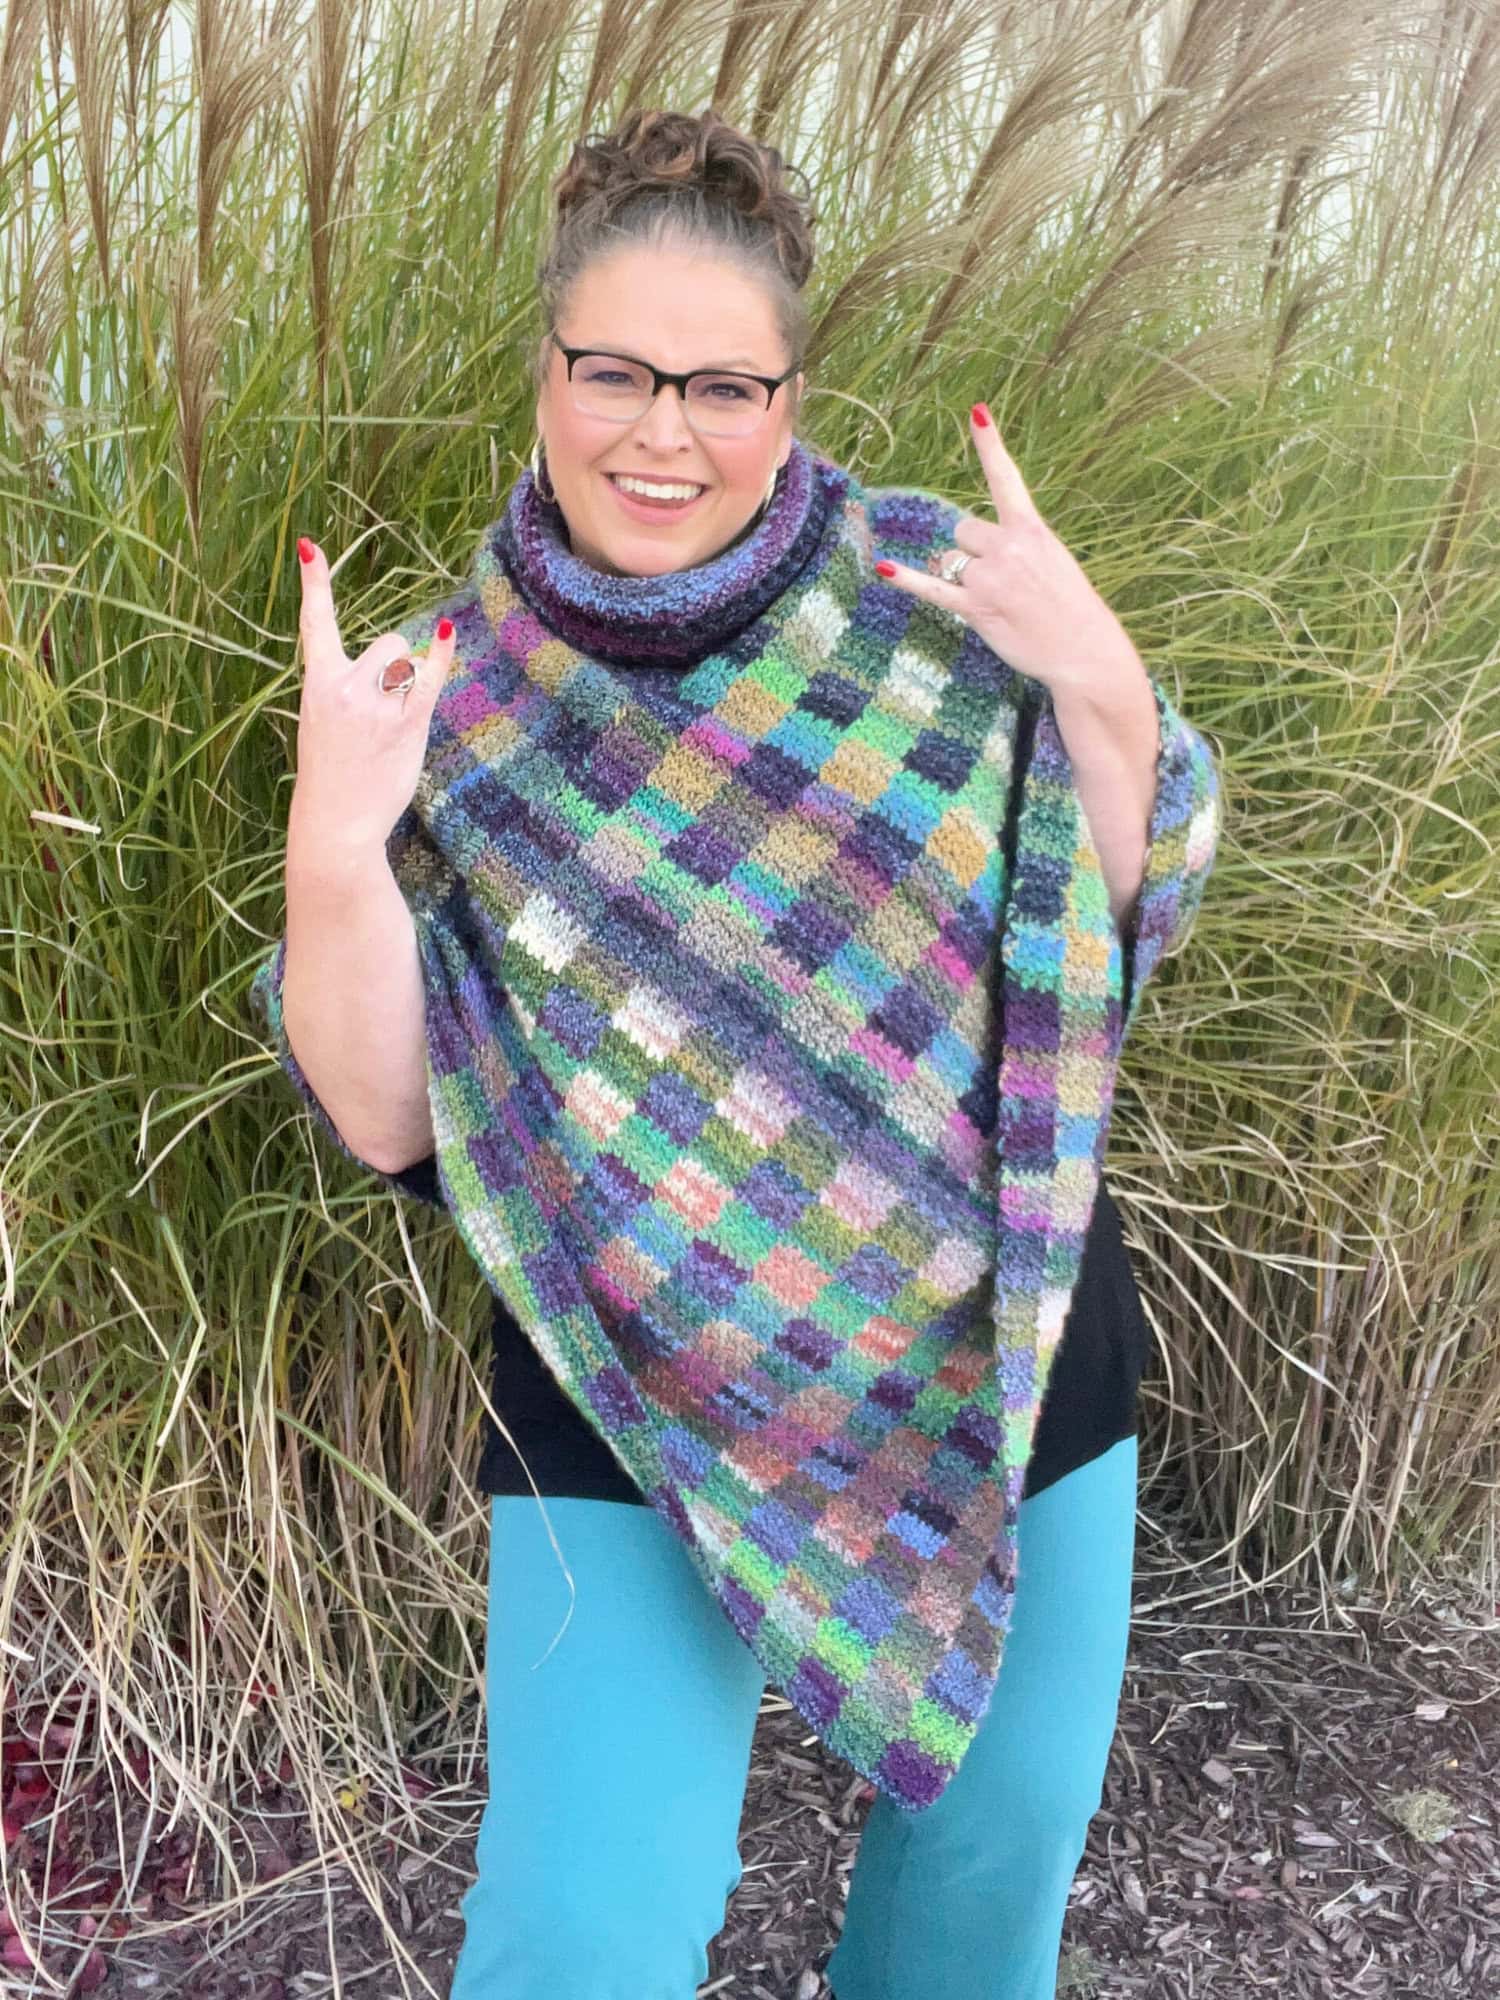
A woman models a colorful crochet checkered poncho
Check Me Out Gingham Plaid Poncho
A smiling person wearing the Check It Out Gingham Plaid Crochet Scarf
Check It Out Gingham Plaid Scarf
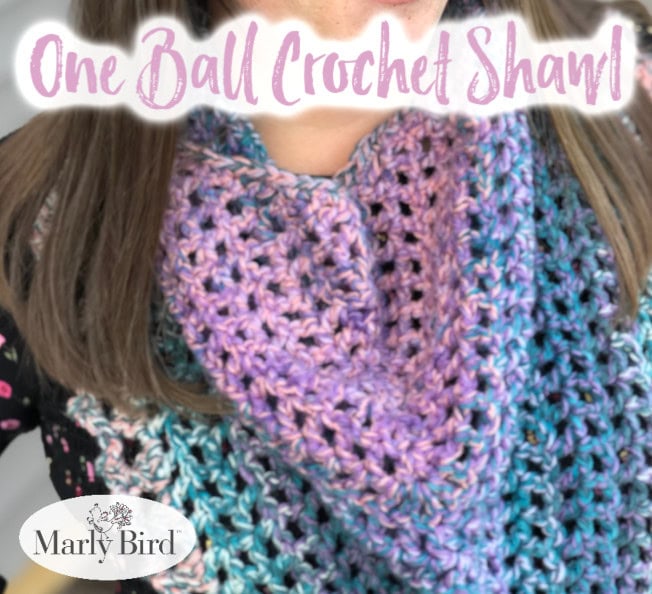
Model showcases a crochet shawl in variegated purple and blue tones
One Ball Roll With It Shawl
Woman models a vibrant crochet scarf with textured stitches
Giovanni Crochet Tweed Scarf
A blue ombre knit vest layered over a white blouse alongside Red Heart tweed yarn cakes
Knit Lace Vest
A woman models a vibrant Tunisian crochet sweater
Cozy Stylish Crochet Swancho
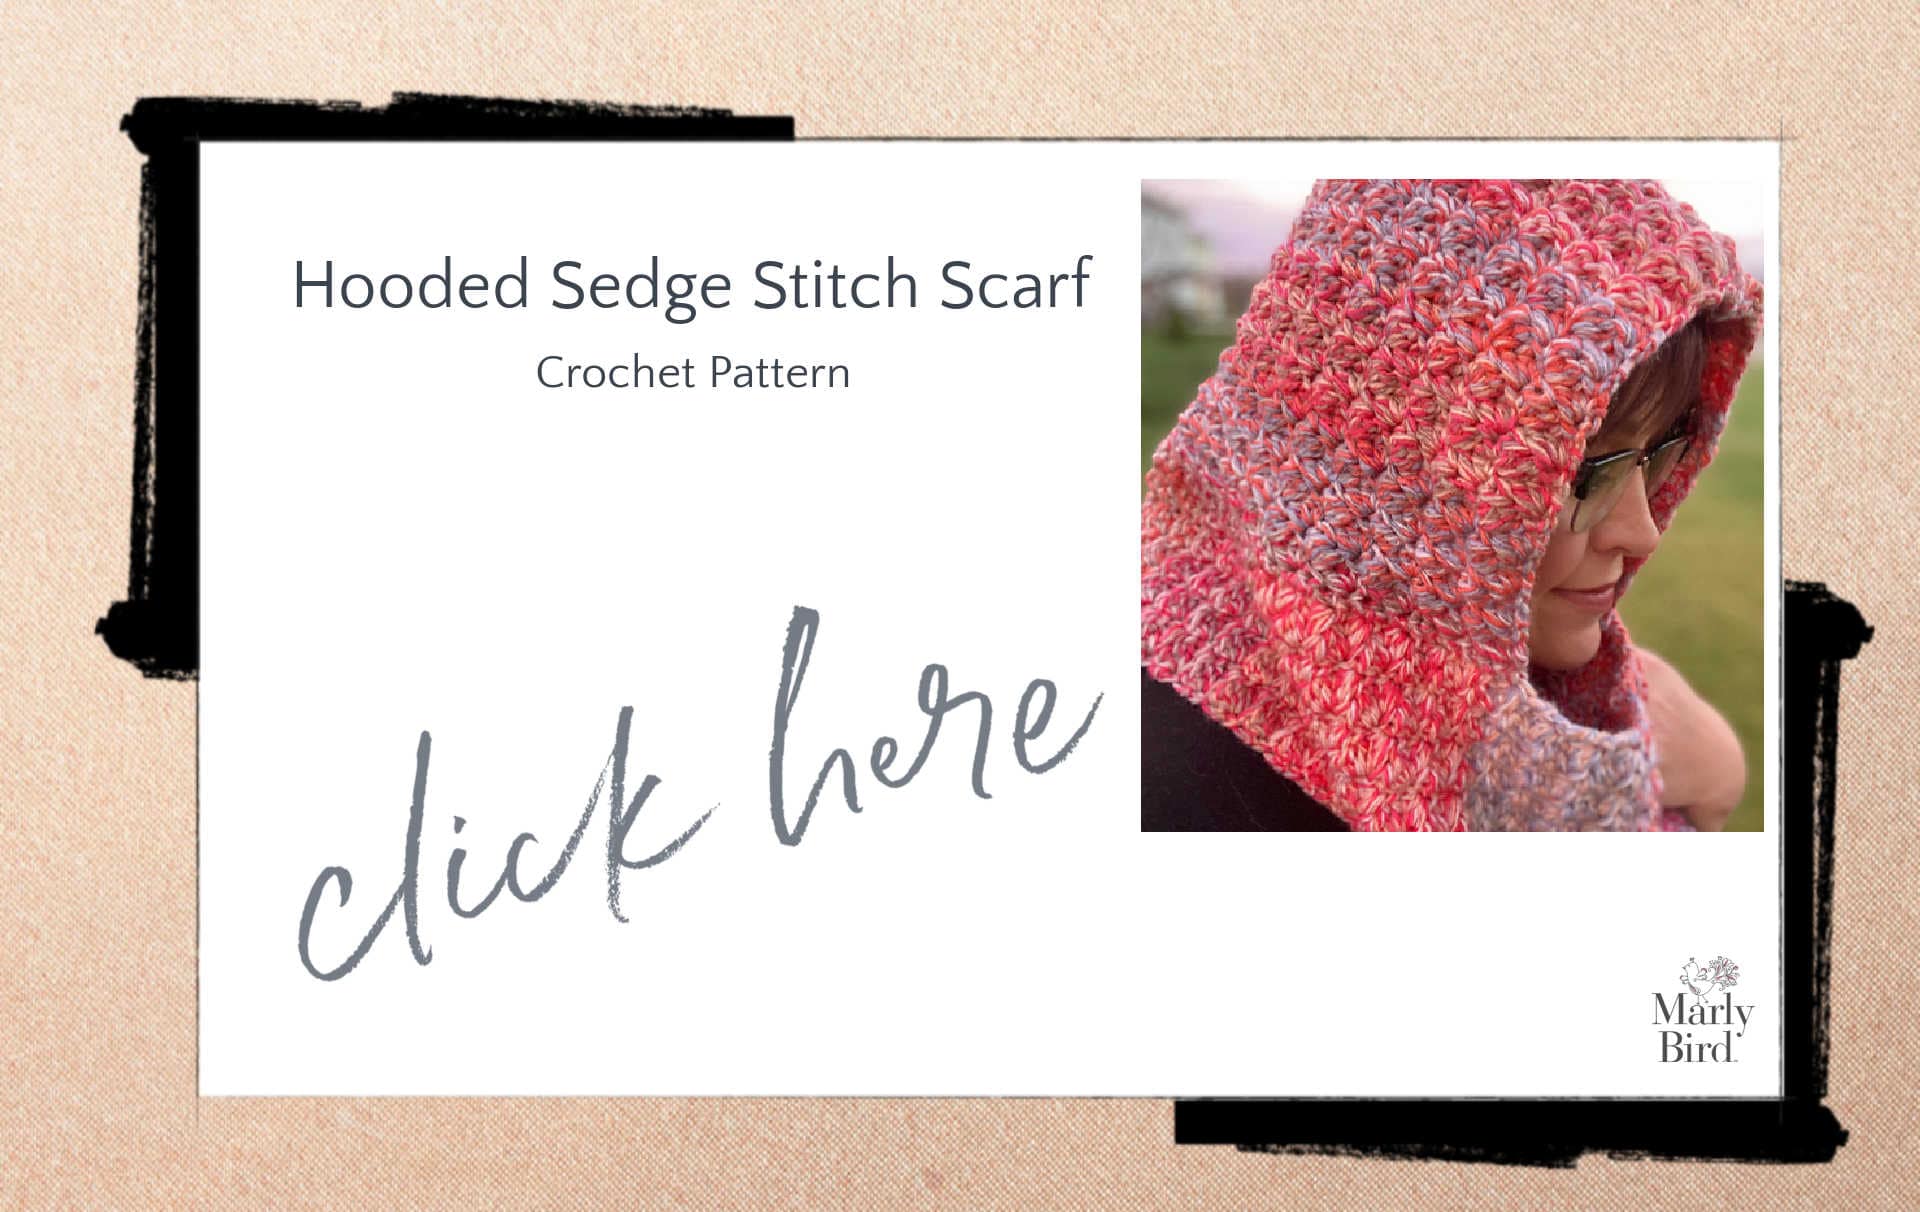
Person models a pink crocheted hooded scarf with sedge stitch texture
Hooded Sedge Stitch Scarf
A crocheted cowl in pink, orange, and green variegated yarn
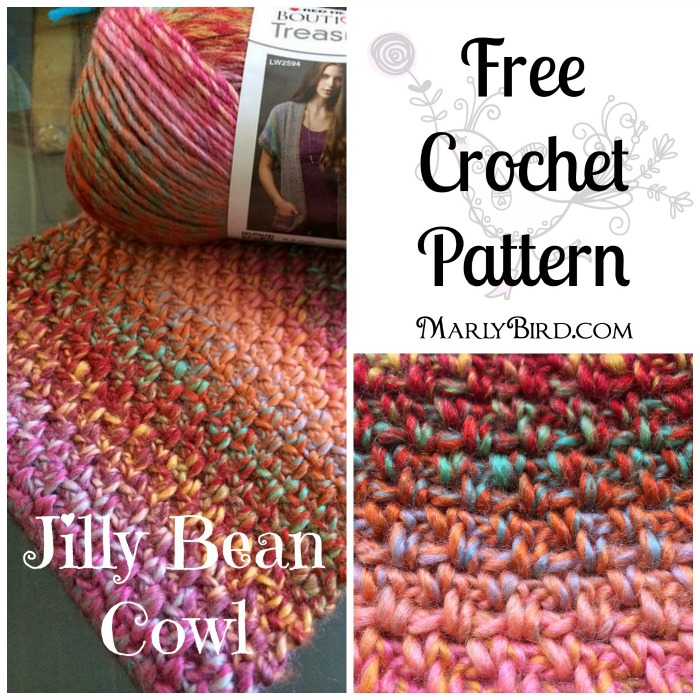
Jilly Bean Cowl
Pink and purple Tunisian crochet shawl with visible stitch detail
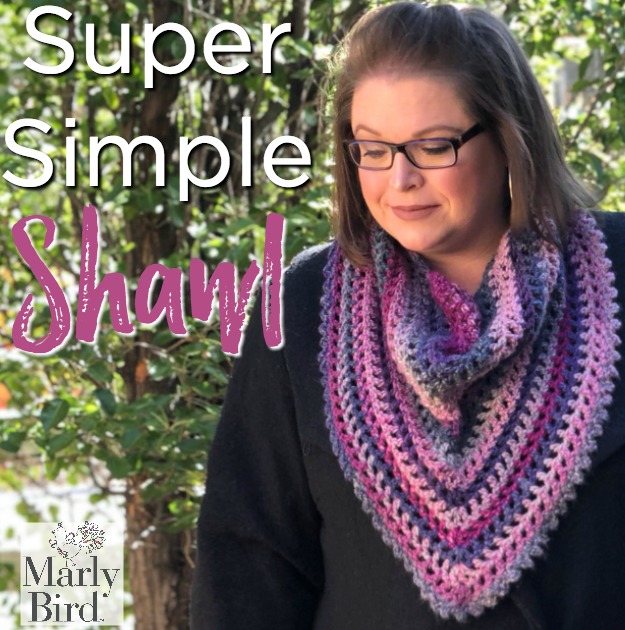
Super Simple Shawl
A woman outdoors wears a colorful striped shawl
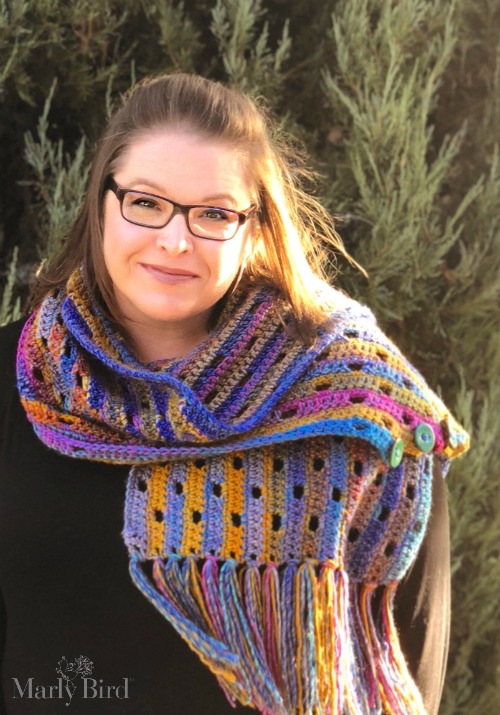
Super Simple Lucky Stripes
Cozy Sideline Knit Balaclava pattern by Marly Bird
Cozy Sideline Knit Balaclava

You May Also Like

  • One Ball Crochet Shawl
  • How to Crochet Pocket Shawls + 9 Pocket Shawl Patterns
  • 74 Free Happy at Home Patterns to Crochet and Knit
  • 14 Seed Stitch Patterns: Texture in Both Knitting and Crochet
  • What Is Colorwork?

Frequently Asked Questions

What is tweed yarn?

Tweed yarn is yarn that contains flecks or specks of contrasting colored fiber mixed in with the main color… creating that classic heathered, textured look you see in traditional Irish and British tweed fabric. The effect can be subtle (just a hint of color variation) or quite pronounced with visible bits of contrasting fiber. It gives a warm, earthy, artisanal quality to finished projects that plain yarns can't quite replicate. It's absolutely gorgeous in classic knitwear.

What projects look best in tweed yarn?

Classic knitwear is where tweed yarn really shines! Cardigans, sweaters, vests, and coats in tweed yarn have that timeless, heritage quality that never goes out of style. Accessories like hats, scarves, and mittens also look wonderful in tweed. For crochet, tweed yarn works beautifully in textural stitch patterns like moss stitch or seed stitch where the flecks add to the overall texture. Tweed is less ideal for very fine stitch patterns where the specks can obscure the detail work.

Is tweed yarn scratchy?

It depends on the fiber content! Traditional wool tweed can be a bit rustic… wonderful for outerwear and structured pieces but sometimes irritating next to bare skin for sensitive people. Many modern tweed yarns blend wool with softer fibers (merino, alpaca, nylon) to balance the traditional look with modern wearability. If you're making something worn next to the skin, look specifically for soft merino-based tweeds. If it's for an outer layer… a more rustic tweed is totally appropriate.

Can I substitute tweed yarn for plain yarn in any pattern?

Usually yes, as long as you match the weight and gauge. The main consideration is how the tweed texture interacts with the stitch pattern. Highly textured stitches (cables, bobbles, intricate lace) can get visually “busy” with tweed because the yarn texture competes with the stitch texture. Simple, clean stitches (stockinette, garter, basic mesh) let the tweed shine. For colorwork, the flecks can soften the color contrast… so check that your colorwork motifs still read clearly before committing to a full project.

What's the difference between tweed yarn and heather yarn?

Both create a mottled, multi-toned effect, but through different means! Heather yarn is made by blending different colored fibers together before spinning… the result is an even, integrated multi-toned color throughout the yarn. Tweed yarn has distinct visible flecks of contrasting fiber added to the yarn… you can actually see the little bits of color as separate elements. Heather is subtler and more blended. Tweed has more character and texture. Both are beautiful… it just depends on the look you're going for.

Filed Under: Crochet, Free Patterns, Knitting

  • « Previous Page
  • 1
  • …
  • 81
  • 82
  • 83
  • 84
  • 85
  • …
  • 96
  • Next Page »

Let's Be Social

Join the Marly's Minions Facebook group to share, ask questions, or chat about all of your yarn related crafts!

Join the group
Cartoon of a smiling woman with brown hair in a bun, glasses, black jacket and green shirt, waving next to large "hi" text.

Quick Links

The Pattern Shop

Our Free Patterns

Blog

Marly Bird House

Learn to Knit & Crochet

About

Giveaway Terms and Privacy Notice

Find Us Everywhere

Join the Newsletter

YouTube Channel

Marly's Minions FB Group

Etsy Store

Ravelry Store


AN ELITE CAFEMEDIA HOME/DIY PUBLISHER

Information from your device can be used to personalize your ad experience. Do not sell or share my personal information.

Privacy Policy   Terms   Marly Bird Legal Documents Copyright © 2026