Search
Close
  • The Pattern Shop
  • Our Free Patterns
    • Browse All Our Free Patterns
    • Our Free Knitting Patterns
    • Our Free Crochet Patterns
  • Blog
    • All Blog Posts
    • All Free Patterns
    • Dibble Dabble Inspiration
    • Giveaways
    • Make-Alongs
    • Product Reviews
    • Roundups
    • Tips, Tricks, Techniques for Knitting and Crochet
Stylized bird with pink and gray swirling tail above elegant โ€œMarlyโ€ text, logo for crochet accessories and home decor.
  • Marly Bird House
  • Learn to Knit & Crochet
    • Newbie? Start Here
    • Video Tutorials
    • Knitting Definitions
    • Crochet Definitions
    • Common Techniques
    • Size Charts for Knitting and Crochet Projects
  • About
ร—
  • The Pattern Shop
  • Free Patterns
  • Blog
  • Marly Bird House
  • Learn to Knit & Crochet
    • Newbie? Start Here
    • Video Tutorials
    • Knitting Definitions
    • Crochet Definitions
    • Common Techniques
    • Size Charts for Knitting and Crochet Projects
  • About
Stylized bird with pink and gray swirling tail above elegant โ€œMarlyโ€ text, logo for crochet accessories and home decor.
Search
Close

New Patterns NOW Available in Ad-Free PDF! Check out The Pattern Shop

Colorful Granny Square Scarf Free Crochet Pattern With…

October 12, 2021 By Marly Bird Leave a Comment

I'm really excited because this week my BiCrafty Bootcampers are going to learn how to crochet granny squares. It's the beginning of learning how to crochet in the round. And it's obviously one of the quintessential crochet motifs that eventually almost everyone learns. Some people love them and some people hate them. But there's no denying either way that you can do a lot with them. You can make them tiny or larger. You can stitch together just a few or a whole bunch of them. This granny square scarf free crochet pattern is a terrific example of how they work. And I've done a full video tutorial to make it easy for you to learn how to crochet this scarf.

granny square crochet scarf free pattern
Also pictured: Granny Sweater Coat Free Pattern

Colorful Crochet Granny Squares

The crochet granny square is a really simple motif. Once you learn the classic crochet square, you can learn lots of different variations on it. If you want a simple project, then you can make each square in the same solid color. However, many of us love how great it looks when you use a lot of colors on your granny squares. In this granny square scarf free crochet pattern, you'll work seven rounds per square, using four colors in each square. You'll vary the placement of the colors so that some squares match while others look different from one another. The end result, all stitched together, is a cohesive but very colorful crochet scarf.

The Yarn For This Scarf

This granny square crochet scarf free pattern uses two different yarns. Colors A, B, and C are Red Heart Soft Yarn. The final yarn is Red Heart Unforgettable. The later has a mixture of colors in each ball. Therefore, you actually work with more than four colors because every time the pattern calls for color D you're working with a multicolored yarn. The effect is eye-catching. All of the colors mingle together at the edges of the scarf because you'll add fringe to this design.

Of course, you can change up the yarn color choices. You don't have to go with the four recommended colors. Just make sure that you choose three colors that also go with all of the hues in the multi-color Unforgettable that you pick. Obviously, autumn colors would be a great choice at this time of year. The original is worked in jewel tones.

Granny Square Scarf Video Tutorial

This granny square scarf free crochet pattern was originally designed by Heather Lodinsky. I created a full video tutorial showing beginner crocheters exactly how to work through the pattern. If you already know how to crochet granny squares, then you might not need this information. However, if you're a beginner, then this video will show you step by step how to create the squares, join them together, and add the fringe. In the end, you'll have a stylish scarf to wear all fall and into winter.

Get The Free Crochet Pattern

You can find this free crochet pattern on Yarnspirations.

Granny Square Scarf Free Crochet Pattern

You Might Also Like:

  • Roundup of Granny Square Books
  • How to Crochet a Granny Square Two Ways
  • Over 90 Free Granny Square Projects
  • Blooming Granny Square Baby Afghan

Frequently Asked Questions

Can I really make this scarf if I'm new to crochet?

Yes! This pattern is perfect for beginners… I even made a full video tutorial to show you exactly how to make the squares, join them, and add the fringe. You'll totally get the hang of it!

How many colors are used in this scarf pattern?

Honestly… you'll use four colors per square, but it feels like even more! Colors A, B, and C are solid yarns, but Color D is a multicolored yarn that really makes everything pop. So pretty!

What kind of yarn do I need for this scarf?

So here's the thing… you'll need Red Heart Soft yarn for three colors, and Red Heart Unforgettable for the fourth color. Unforgettable has those beautiful color blends that just make the scarf sing!

What if I don't like the recommended yarn colors?

You can totally switch up the yarn colors… just make sure your chosen solid colors work well with the multicolored yarn you pick. Think about what colors make you happy!

Where can I find the free crochet pattern?

You can snag this free crochet pattern right over on Yarnspirations… I've linked it up for you in the post so you can easily find it. Happy crocheting!

Filed Under: Crochet, Free Patterns, Tips, Tricks, Techniques for Knitting and Crochet

Unisex Crochet Hat with Brim Free Pattern: One-Ball Hat…

October 12, 2021 By Marly Bird Leave a Comment

You're looking for an interesting crochet hat project. Perhaps you want a go-to crochet hat pattern for gifts, to give to charity, or to work up in different colors for yourself. This one has so many features that make it a smart go-to hat. First of all, it's a unisex crochet pattern. Second, it's got an easy-to-make brim, which is unique for a crochet hat. Third, it's a one-ball crochet project. And finally, you have the option to make it a typical closed hat or an open messy bun hat. So, it's very versatile, interesting, and works well for those balls of yarn that you already have at home to work with. Here's more information about this crochet hat with brim free pattern.

how to crochet the brim of a hat

Unisex Crochet Hat Pattern

Of course, people of any gender can wear any hat that they choose. But, certainly, some hats are designed with women in mind. On the other hand, some hats are designed for a typical men's style. This crochet hat with brim free pattern is specifically designed as a gender-neutral option for any adult. It's basically like a baseball cap … except a whole lot cozier and cuter.

Can We Talk About That Brim?

The brim of this crochet hat is the reason that people are drawn to this design. Of course, the hat itself has terrific texture and fit. Without the brim, it would still make a cute beanie. However, the brim sets it apart from other crochet hat patterns. Even those patterns that have a brim usually require some extra work to stiffen it and get the shape right. Not so with this crochet hat with brim free pattern. Strategic use of smart, but easy, stitches makes it super simple to create this brim right on the beanie. Learn more:

One-Ball Crochet Hat Pattern

It's always smart to bookmark a selection of your favorite one ball projects. We all have an extra ball of yarn here and there. (Some of us have them everywhere.) So, it's nice to just be able to grab that ball, pull up a pattern, and quickly work up a satisfying project. This crochet hat with brim free pattern calls for just one ball of yarn.

Specifically, you'll use one ball of Red Heart With Love. This is a super soft worsted weight acrylic yarn that you can machine wash and dry. It comes in a huge range of different solid colors. Therefore, you can easily make this hat to match any part of your wardrobe. Worked in the blue, it truly works for almost anyone.

Messy Bun Hat Option

Both men and women like to throw their hair up in a bun these days. Therefore, I've created this pattern with a messy bun option. In other words, if you want to, you can leave a strategic hole at the top of the crochet hat. This gives you the look of the baseball cap but with a hole to easily pull that bun through. On the other hand, if you prefer a closed hat, then you'll find instructions for that option as well. This really is a pattern that you can adjust to meet your own style desires.

Crochet Hat With Brim Free Pattern: More Details

Here are a few more things you might want to know about this crochet pattern:

  • You'll use a size H crochet hook.
  • The hat's texture comes from working through one loop only as well as from working with post stitches.
  • The detailed instructions along with video tutorial support should make it easy for you to work this hat pattern.

Get The Crochet Hat With Brim Free Pattern

You can find the pattern right here on the site. It's also available to add to your Ravelry library.

how to crochet a hat with a brim

You Might Also Like:

  • How to Crochet Stretchy Slip Stitch Ribbing
  • Marly Bird's Crochet Hat Patterns
  • 8 Free Crochet Sun Hats Patterns

Frequently Asked Questions

What makes this crochet hat unisex?

The design is clean and classic without leaning heavily masculine or feminine. Simple, structured brim construction, a round crown without embellishments, and a color palette that works across genders. The pattern notes also include a messy bun hat option… created by leaving an opening at the crown… which is a popular style for any hair type or length. Making it in a versatile neutral color (grey, navy, camel, olive) gives you maximum flexibility for gifting or wearing yourself.

Is this pattern good for beginner crocheters?

Yes! The hat body is worked in rounds using basic crochet stitches. The brim is the part that needs attention… Marly uses her signature slip stitch technique for the brim which creates a firm, structured bill. That technique takes a bit of practice to get right (keeping slip stitches loose enough to work into) but is very learnable with the video support included in the pattern. If you've made basic crochet projects before and want to try a hat with a brim, this is a great starting point.

What yarn do I need for this hat?

This is a one-ball hat… which means one skein of worsted weight yarn is all you need. Worsted weight acrylic or wool blend both work beautifully. The one-ball format makes it very stash-friendly and a great project for that single skein you bought because it was beautiful but didn't have a plan for. The pattern specifies the exact yardage needed so you can check your stash skein before starting. Smooth yarn shows off the brim construction the most crisply.

How do I make the messy bun opening work?

The messy bun version of this hat has an opening at the crown… worked in rounds but stopping before you close the top, or with a modification to leave an opening of the right size for a hair bun to pull through. The pattern will walk you through the specific modification. The opening size needs to accommodate a comfortable bun… not too tight that it hurts, not so big that the hat slides down. If making for yourself, try on and adjust as you go. If making as a gift, ask the recipient about their bun size!

What size is the finished hat?

The pattern includes measurements for the finished hat… check the pattern details for specific numbers. Most adult-sized hats fit heads in the 21 to 23 inch circumference range. The slip stitch brim creates a somewhat structured fit rather than a very stretchy one, so sizing more precisely matters for this style than a simple ribbed beanie. Measure the head you're making for when possible, or work to the larger measurement if you're unsure.

Filed Under: Crochet, Our Free Patterns, Tips, Tricks, Techniques for Knitting and Crochet

35 Free Knit and Crochet Christmas Afghans

October 11, 2021 By Marly Bird Leave a Comment

Prepare for the holidays with these beautiful holiday throws! With stripes, snowflakes, gingerbread, trees and more, there's a blanket for everyone from Yarnspirations! Get started today so the afghans are ready for the holidays!

35 Free Knit and Crochet Christmas Afghans

Knit and Craft Christmas Blankets

Knit cables, plaid and more with these projects! Plus, make a tree-themed blanket with just your fingers!

  • Reversible Wave Throw
  • Christmas Eve Knit Afghan
  • Christmas is Coming Throw
  • Mitered Christmas Blanket
  • EZ Graph It Holiday Tree Blanket
Mitered Christmas Blanket Free Knitting Pattern

Crochet Christmas Blankets

Every type of crochet throw is here — stripes, ripples, motifs, and more! Whether you want to have snowflakes or stars, trees or pompoms, find your perfect blanket pattern.

  • Holly Jolly Mosaic Crochet Holiday Blanket
  • Plaid Christmas Blanket
  • Christmas Morning Striped Throw
  • Christmas Wreath Throw
  • Plaid Christmas Blanket
  • Christmas Star Throw
  • Ripples of Joy Throw
  • Christmas Star Throw and Pillow
  • Snowflake Throw
  • Christmas Tree Throw
  • Dashing Holiday Throw
  • Poinsettia Throw
  • Joyous Throw
  • Crochet Christmas Reindeer Blanket
  • Holiday Cables Throw
  • Holiday Chevron Throw
  • Happy Holiday Throw
  • Holiday Throw
  • Holiday Hearts Throw
  • Holiday Stripes Throw
  • Holiday Edged Fleece Throw
  • Holiday Striped Throw
  • Holiday Balls Throw
  • Victorian Ornaments Afghan
  • Poinsettia Throw
  • Scandinavian Snowflake Throw
  • Retro Ornament Throw
  • Star Throw
  • Gingerbread House Throw
  • Dusty Snowflake Throw
  • Evergreen Mosaic Crochet Blanket
Happy Holiday Throw Free Crochet Pattern

Also on the Blog

  • Merry Holidays: Plaid Crochet Christmas Afghan Free Pattern
  • Christmas Tree Crochet Throw
  • FREE Christmas Patterns with Video Tutorials

Frequently Asked Questions

What makes a blanket a “Christmas afghan”?

Either the colors, the motifs, or both! Classic Christmas afghans use red, green, and white in various combinations. Holiday motifs like snowflakes, Christmas trees, candy canes, reindeers, stars, and Nordic patterns identify a blanket as Christmas-themed. Some Christmas afghans are purely colorwork… bold red and white stripes feel festive. Others have elaborate holiday graphic designs worked into the fabric. And some use Christmas colors so beautifully that they read as festive without a specific holiday motif. With 35 patterns, this collection covers all approaches.

How far in advance should I start a Christmas afghan?

July! No, really… a full-sized Christmas throw requires 20-40+ hours of work depending on yarn weight and complexity. Chunky yarn holiday blankets work faster, but complex colorwork or lace Christmas afghans are substantial time commitments. Starting in the summer gives you breathing room, zero holiday deadline stress, and the satisfaction of a completed gift ready to wrap rather than frantically finishing by Christmas Eve. Start your Christmas knitting in summer and your December will be dramatically more peaceful.

What yarn is best for a Christmas afghan?

Machine washable is practical for a blanket that will be used throughout the holiday season and stored each year. Red Heart in classic Christmas colors is affordable, durable, and widely available. Lion Brand's worsted weight acrylics in holiday colors are excellent. For a more luxurious feel, a soft acrylic blend or washable wool in Christmas colors creates a gift-worthy blanket. Color accuracy matters for Christmas themes… a true red (not orange-red) and a clear green (not yellow-green) read as most Christmas-authentic alongside crisp white.

Are Christmas afghans good beginner projects?

Some are! Simple striped Christmas afghans in worsted weight acrylic are very beginner-friendly. A basic granny stripe in holiday colors is a great first afghan. The challenge increases with motifs and colorwork… a Christmas graphghan with a complex Santa face requires intermediate C2C skills. For beginners wanting a Christmas blanket, look for patterns that use simple stitch patterns and color changes at row beginnings rather than complex mid-row colorwork. The holiday colors do a lot of the visual work even in simple constructions.

Can I make a Christmas afghan that's usable year-round?

Absolutely! A Nordic-inspired geometric design in cream and forest green looks like a classic Scandinavian textile that's beautiful any time of year. A red and white striped blanket can feel festive in December and farmhouse-chic in July. Snowflake motifs in pale blue and white read as winter-general rather than specifically Christmas. Cable blankets in natural wool tones with subtle holiday coloring are year-round staples. If you want maximum use from your time investment, lean toward timeless aesthetics over explicitly Santa-and-reindeer designs.

“`html

Quick Tips for Christmas Afghan Success

Here's the thing… starting a blanket project now means you'll actually finish before December 25th! I'm speaking from experience, friends. Here are my go-to tips for making these patterns work beautifully:

  • Yarn weight matters: Most of these patterns use worsted weight yarn (like Red Heart Super Saver or Caron Simply Soft), which works up quickly. Stick to the recommended weight so your finished blanket drapes beautifully without puckering.
  • Tension check: Seriously… do a gauge swatch! A few minutes now saves hours of frogging later. Even if you think you know your tension, holiday patterns with color work or texture need that consistency.
  • Color changes: If you're tackling a striped or mosaic pattern, weave in ends as you go rather than saving it for the end. Your future self will thank you.
  • Storage prep: Keep your project in a clear plastic bag between sessions. No lint, no cat hair, no mystery snags.

Pattern Recommendation by Skill Level

Want a confidence boost? Check out my guide on easiest crochet stitches if you're newer to blanket-making. And if you're ready to level up your colorwork skills, the mosaic patterns are absolutely forgiving… that's literally why they're so popular!

“`

Filed Under: Free Patterns

Crochet Edgings for Beginners

October 6, 2021 By Marly Bird 1 Comment

BiCrafty Bootcamp Beginner Crochet Lessons for Knitters: Lesson 5

Welcome back to BiCrafty Bootcamp: Beginner Crochet Lessons for Knitters. Did you enjoy your week off? Did you use it to make the crochet baby blanket pattern that we suggested for extra credit practice? If so, then your crochet muscle memory should be getting pretty good by now. Either way, you're ready to put some stitch patterns you already know together with some new skills as we advance further with lesson five. You'll learn how to crochet edgings for beginners. Additionally, you'll begin to learn about working in the round. This week's pattern is a bandana-style triangle shawl.

Itโ€™s not too late to join BiCrafty Bootcamp. Sign up free here.

Click Here to Join BiCrafty Bootcamp with Marly Bird

Skill-Building: Granny Stitch and Shell Stitch

In this week's pattern, you'll have the opportunity to continue working with some of the crochet stitches that you've already learned and learn a few new ones to add to your growing dictionary of stitches.

In this lesson, we will learn key tips for crochet edgings, how to read an edging chart and plan for the multiples, how to work the shell stitch crochet edging (which is ideal for beginners), moss stitch crochet edging, and

We're going to create a granny stitch triangle shawl. Then we're going to add crochet shell stitch edging to it. You learned these stitches in Lesson 3.

This pattern lets you practice what you've learned while adding new skills. Your comfort with the stitches themselves provides a solid platform for the skill-building part.

Crochet Edgings for Beginners

There are many, many, many crochet edgings out there for crocheters, and most are easy enough to apply to just about any item. The trick is understanding how it all works with the math and how it relates to your fabric.

Ideally, you'll always have a pattern where the stitch count math has already been done for you by the designer. However, there are so many great crochet edgings for beginners, and you might want to choose a different one than the designer intended. Therefore, we have listed 11 key tips for adding crochet edgings to crochet below.

11 Key Tips for Adding Crochet Edgings to Crochet

When working edgings on crochet, there are some key points to consider:

  1. Working an edging is easier when you have a solid base of stitches to begin. For that reason, you will find that many patterns will have you begin with a row or round of single crochet or half double crochet evenly spaced out along the stitch edge or row edge. This is not absolutely necessary (as you will see in the project for this week), but it does make for an easier transition to the edging, and it also makes for a cleaner look. Note: You can crochet more than one row or round of these base stitches.
  2. Work the first row or round of base edging on an item in the main color for a cleaner look. This helps hide any unsightly stitches you might have along the fabric. It will also help hide any floats you might have along the edge when changing colors.
  3. These base edge rows or rounds should be made with the right side of the fabric facing.
  4. When working along the crochet stitch edge, it is necessary to work under both loops of the crochet stitch.
  5. When working along the crochet row edge, you can work around the post or tch of the first/last stitch of the row OR work into the post or tch like you do when working into a foundation chain. Choose what looks best for the piece you are crocheting.
  6. When working along the crochet row edge, it is necessary to space the stitches evenly as best you can to prevent the fabric from pulling in too much due to too few stitches or rippling because there are too many stitches. Use stitch markers to divide each side into sections or quadrants to help with this.
  7. General rule of thumb for stitch spacing ratio, 1 single crochet edge stitch for each single crochet row, 3 single crochet edge stitch worked around every 2 rows of double crochet. But remember, these rules are meant to be broken, and you should adjust them as necessary for the item you are making.
  8. When working around a corner, you must make room for the turn in the fabric by adding a stitch or chain at each corner. This is why you will often see corner stitches written as 3 stitches in a corner or (stitch, ch 1, stitch) in a corner.
  9. Remember to maintain the stitch count multiple when making stitch count adjustments to fit your fabric.
  10. Crochet edgings can be made flat in back-and-forth rows, in the round with joined rounds that do not turn, or in the round with joined rounds that turn. Make sure you know what is best for your project.
  11. Last but not least, a little tweak or fudge here and there to make an edging stitch count work for your fabric will blend right into the fabric. For example, if you are supposed to skip a stitch to make the stitch count work and for some reason you get to the end, and you have 1 extra stitch…then skip 2 stitches instead…or work a -2tog over the extra stitch and the one you are supposed to work into to close any possible hole and get to the right stitch count. DON'T STRESS TOO MUCH OVER THE SMALL STUFF!

Don't be scared! You've actually already learned a little bit of this if you've been following along with all of the BiCrafty Bootcamp crochet lessons. Remember when we added the ties to both of our headbands? As part of that lesson, we showed you how to crochet evenly along the short edges. However, now you'll have the opportunity to go in-depth with this important lesson in crochet edgings for beginners.

What About Working in the Round with Edgings?

As mentioned already, you can do edgings in rows or rounds. For this lesson, we will be focusing on rows. In lesson 6, we'll work with motifs created in the round and, thus, crochet edging in the round. This week's lesson teaches you what you need to know.

???? Do put a pin in that one for right now.

Crochet Edgings on Knitted Fabric

You read that correctly; adding crochet edgings to knit fabric is possible. Mostly, the tips for doing that are the same as for crocheters with a few specific changes because you are working into knit stitches and rows, not crochet.

12 Key Tips for Adding Crochet Edgings to Knitting

When working crochet edgings on knitting, there are some key points to consider:

  1. Working a crochet edging around knitted stockinette stitch helps prevent curling.
  2. Although it is possible to work the crochet edging stitch pattern directly into the knit stitches or knit rows, it is easier when you have a solid base of crochet stitches to work into first. For that reason, you will find that many patterns will have you begin with a row or round of single crochet or half double crochet evenly spaced out along the stitch edge or row edge. This is not absolutely necessary, but it does make for an easier transition to the edging, and it also makes for a cleaner look. Note: You can crochet more than one row or round of these base stitches.
  3. Work the first row or round of base edging on an item on the right side and in the main color for a cleaner look. This helps hide any unsightly stitches you might have along the fabric. It will also help hide any floats you might have along the edge when changing colors.
  4. When working along the knit bind off edge, work under both loops or legs of the V.
  5. Work into each cast on stitch when working along the knit cast on edge.
  6. Staying in one column of stitches is essential to keep a consistent distance from the edge when working along the knit row edge.
  7. When working along the knit row edge, evenly space the stitches as best you can to prevent the fabric from pulling in too much due to too few stitches or rippling because there are too many stitches. Use stitch markers to divide each side into sections or quadrants to help with this.
  8. A general rule of thumb for stitch spacing ratio: 2 sc for every 3 rows of knitting, or 3 sc for every 4 rows of knitting.ย  It is important to note that knitting is not square like single crochet; thus, it takes more rows of knitting per inch than it takes for crochet stitches per inch. Therefore, you will do fewer crochet stitches when working along rows of knitting. But the overall takeaway is this: do what works best for your fabric. These rules are meant to be broken. And remember, crochet is easy to rip out and start over if you don't like the spacing.
  9. When working around a corner, you must make room for the turn in the fabric by adding a stitch or chain at each corner. This is why you will often see corner stitches written as 3 stitches in a corner or (stitch, ch 1, stitch) in a corner. Think of this like what you do when you work the center point on a knit shawl. It has to have the increase to allow the fabric to lay flat and not cup.
  10. Remember to maintain the stitch count multiple when making stitch count adjustments to fit your fabric.
  11. Crochet edgings can be made flat in back-and-forth rows, in the round with joined rounds that do not turn, or in the round with joined rounds that turn. Make sure you know what is best for your project.
  12. Last but not least, a little tweak or fudge here and there to make an edging stitch count work for your fabric will blend right into the fabric. For example, if you are supposed to skip a stitch to make the stitch count work and for some reason you get to the end, and you have 1 extra stitch…then skip 2 stitches instead…or work a -2tog over the extra stitch and the one you are supposed to work into to close any possible hole and get to the right stitch count. DON'T STRESS TOO MUCH OVER THE SMALL STUFF!

Must-Have Crochet Edgings for Beginners Books

Most of you are knitters and understand the importance of filling your library with great instructional books like โœ… Elizabeth Zimmermann's “The Knitter's Almanac“, โœ… Ann Budd's collection of books “The Knitter's Handy Book of Patterns”, “The Knitter's Handy Book of Top Down Sweater”, “The Knitter's Handy Book of Sweaters”, and โœ… Clara Parks' “Knitter's Book of Yarn”, “Knitter's Book of Wool”, “Knitter's Book of Socks” (I have a pattern in the sock book).

Well, in crochet, there are those must-have books as well. Since we are focusing on crochet edgings this week, I feel as if I absolutely MUST tell you about my favorite edging books. And when I tell you I love these, I am not lying. I own 2 copies of each one in hardback, and I have a Kindle version of all of them. They are my go-to edging books!

All these books are by the amazing Edie Eckman. โœ… Crochet Borders โœ… Every Which Way Crochet Borders. You can not go wrong with ANY of Edie's books, so take a look and begin to stock your crochet library.

Other Things We'll Learn and Practice This Week

Here are some of the other things we'll go over as we work on this week's pattern and our lesson on crochet edgings for beginners:

  • Continue reading charts as well as written patterns. Keep building both skills.
  • Joining yarn for edging with slip stitch, standing stitch (or chainless stitch), and stacked stitches. Let's get clear on the difference and when to use each. Remember we learned stacked double crochet in Lesson 4.
  • Working with new yarn. This week, we're working withย Chroma Worstedย yarn, which means we're working with a roving type wool. To date, we've only worked with cotton unless you did last week's extra credit project, which was acrylic yarn. What are some things to consider when working with a yarn like this?

When possible, we have provided affiliate links for items. Using these links does not cost you anything more, but it does let the company know you came there from us, and we get a portion of the sale.

????TIP: If you haven't bought the yarn you need for the next few lessons yet, check out the WeCrochet / KnitPicks sale for I Love Yarn Day. They have 20% off all yarn October 7 – 11, 2021.????

LESSON 5: BEGINNER BANDANA-STYLE TRIANGLE SHAWL

Designed by Marly Bird

SKILL LEVEL

Adventurous Beginner

MEASUREMENTS

Finished Measurements

Completely Customizableย 

Gauge 

4 st pattern repeats (ch 1, dc) and 7 rows = 4โ€ [10 cm]; use any size hook to obtain the gauge. 

MATERIALS

Yarn 

WeCrochet Chroma  (70% Superwash Wool, 30% Nylon, 198 yds / 100 g, CYCA 4, worsted) 

#28050, Pixie, 2 balls (sample color)

Hook

Size H (5 mm) or any size hook to obtain the gauge. (WeCrochet Hook, TooShay Crochet Hook)

Notions 

Locking stitch markers from WeCrochet (optional), Chenille and tapestry needles for weaving in ends

ABBREVIATIONS

Ch – Chain(s) 

Dc – Double Crochet 

RS – Right Side 

Sc – Single Crochet

Sp(s) – Space(s) 

St(s) – Stitch(es) 

Tc – Treble Crochet

Tch – Turning Chain

WS – Wrong Side

DIAGRAM

crochet diagram for the bandana-style triangle shawl by Marly Bird -- uses granny square stitches and shells for the crochet edgings for beginners.

NOTES

  • The bandana-style triangle shawl begins with a ring but is not made in the round. 
  • When changing to new balls of yarn, start where you left off to continue the color flow.
  • This shawl size is completely customizable. Make it as large as you want; just be aware of how much yarn you have available.ย 

VIDEO TUTORIAL

  • Coming Soon

BEGINNER BANDANA-STYLE TRIANGLE SHAWL PATTERN

SHAWL BODY

Chain 4, sl st into first chain to form a ring, turn.

Row 1 (WS): Ch 5 (counts as tc, ch 1 now and throughout), (3 dc, ch 3, 3 dc, ch 1,tc) into ring, turn. 

Row 2 (RS): Ch 5, 3 dc in first ch-1 sp, ch 1, (3 dc, ch 3, 3 dc) in ch-3 space, ch 1, 3 dc in next ch-1 sp, ch 1, tc in 4th ch of tch, turn. 

Row 3 (WS): Ch 5, 3 dc in first ch-1 sp, * ch 1, 3 dc in next ch-1 sp; repeat from * to center ch-3 sp, ch 1, (3 dc, ch 3, 3 dc) in ch-3 sp, ** ch 1, 3 dc in next ch-1 sp; repeat from ** to last ch-1 sp, ch 1, 3 dc in last ch-1 sp, ch 1, tc in 4th ch of tch, turn.ย 

Row 4 (RS): Ch 5, 3 dc in first ch-1 sp, * ch 1, 3 dc in next ch-1 sp; repeat from * to center ch-3 sp, ch 1, (3 dc, ch 3, 3 dc) in ch-3 sp, ** ch 1, 3 dc in next ch-1 sp; repeat from ** to last ch-1 sp, ch 1, 3 dc in last ch-1 sp, ch 1, tc in 4th ch of tch, turn.  

Repeat rows 3 and 4 to desired size or until about 1 โ…“ of the yarn has been used, ending after a row 3.

BORDER

Row 1 (RS): Ch 1, sc in tc, skip first ch-1 sp, * ch 1, 7 dc in next ch-1 sp, ch 1, sc in next ch-1 sp; repeat from * to center ch-3 sp, ch 1, 11 dc in ch-3 sp, ch 1, sc in next ch-1 sp, ** ch 1, 7 dc in next ch-1 sp, ch 1, sc in next ch-1 sp; repeat from ** to end placing the last sc in 4th ch of tch. Fasten off. 

FINISHING

Fasten off. Weave in all ends.ย 

Lesson 5 Video Instruction

Great Patterns and Classes from My Friends!

The Classic Colorwork Collection - Fair Isle, Corner to Corner, Mosaic crochet hats. Three images with each of the hat patterns demonstrated.

Three of my friends have collaborated together on an amazing e-book! These hats are the perfect addition to any pattern collection and accessory closet.

The patterns come with video tutorials, and I tell you this honestly. These three women are very good at teaching, and I know you can work on these projects with their help.

If you are looking for something unique and fun, be sure to check these out before they are gone.

Additional Videos and Patterns You Might Like:

  • Beginner Lace Border Crochet Shawl Pattern. This is another beginner crochet shawl pattern with a simple edging.
  • Paton's Grace Stocking Edging. Free pattern to add a simple border to a premade stocking.
  • Granny Square Cardigan Edging Video. Although you're not quite ready for the full cardigan pattern yet, watching this 9-minute video can give you more tips about crochet edgings for beginners.
  • Crochet Stitch Sampler Blanket Edging Video. We've recommended this pattern as a good one to work as you develop your skills. The video will teach you more about crochet edgings.
  • Scalloped Edge Crochet Washcloth Pattern. This free pattern teaches you the cluster stitch. Moreover, it shows you how to work an easy edging.

You might also consider purchasing a book like The New Crochet Stitch Dictionary. This has many different stitch techniques, including crochet edgings for beginners and advanced crocheters. It's a terrific resource.

Frequently Asked Questions

Why add an edging to a crochet project?

Edgings do several important things! They stabilize and neaten the edges of your work… especially helpful for projects that might curl or have slightly uneven sides. They add a decorative finishing touch that elevates the whole piece. They can add a contrasting color for visual definition. They create a unified border that ties all the elements together. A project with a thoughtfully applied edging looks finished and intentional rather than like something was just cut off. Learning to add edgings is one of those finishing skills that transforms “good” projects into “great” ones.

What are the most beginner-friendly crochet edgings?

The reverse single crochet (also called crab stitch) creates a beautiful rope-like edging and is probably the most popular finishing stitch. Regular single crochet worked evenly around the edge creates a clean, simple border. A single round of slip stitch gives a subtle, firm edge. Picot edging (ch3, sl st) adds delicate points. Shell stitch edging creates a beautiful scalloped border. For absolute beginners, start with a single round of single crochet to get comfortable picking up stitches along an edge, then experiment with more decorative options as your confidence grows.

How do I know how many stitches to pick up along an edge?

This is the trickiest part of edging for beginners! The goal is even, flat coverage without gaps (too few stitches) or ruffling (too many stitches). A general rule: for worked-in-rows fabric, try picking up one stitch in every row end. For fabric with a different row ratio, adjust until the edging lies flat. The best approach is to pick up a section, check how it lies flat, and adjust your density before continuing. “Evenly” in pattern instructions means distributed consistently around the edge, not necessarily literally mathematical… use your eye to judge if it's lying flat.

Can I add an edging to a project I already finished?

Yes! That's actually how most edgings are done. You finish your main project, then add the edging as a final step by picking up stitches around the perimeter. The working yarn joins at any corner or edge point with a slip stitch or starting chain. You work completely around the finished piece and either fasten off or join at the beginning for a seamless round. This means if you made a blanket without an edging and later decide it needs one, you can absolutely add it. Edgings are always worked as separate post-project additions… they're not integral to the main construction.

What's the most impressive-looking edging that's still beginner-accessible?

The reverse single crochet (crab stitch) looks incredibly professional and polished but is just a regular single crochet worked backwards (right to left instead of left to right). The backward movement creates a spiral rope effect that looks like a twisted cord and gives any project a crisp, finished quality. It feels awkward at first but takes only about 10 minutes to learn! Once you've got it, you'll use it constantly. Single round of crab stitch transforms dishcloths, blankets, and garment edges from ordinary to polished in one pass.

Filed Under: BiCrafty Bootcamp Learn to Crochet, Crochet, Our Free Patterns, Tips, Tricks, Techniques for Knitting and Crochet

How to Front Post Double Crochet (And More About Crochet…

October 6, 2021 By Marly Bird Leave a Comment

Once you have learned how to work basic crochet stitches, there are so many different things that you can do with them. For example, you can learn how to crochet in the front loop or back loop of a stitch, rather than working through both stitches. And, if you want to really change up the texture of a piece, you can also learn how to crochet post stitches. In other words, you crochet around the stitch from the row below rather than working into the top of the stitch. Front post double crochet is one of the most popular choices for post stitches.

fpdc tutorial

What Are Crochet Post Stitches?

As aforementioned, crochet post stitches are worked around the stitch from the row below. Usually, you work into the loops at the top of the stitch, right? Or sometimes you crochet into spaces. However, you can also crochet around the stitch from the row below.

Front post double crochet is popular because the double crochet stitch is tall enough to easily find and work around the stitch. You can work single crochet post stitches, too, but it's harder to figure out exactly where to insert the hook. The height of the double crochet makes it much easier.

Front and Back Post Stitches

Just like you can work into the front loop or back loop of the top of stitch, you can work front or back post stitches. The difference is in where and how you insert the hook.

In front post crochet stitches, you'll insert the hook from the front of the stitch to the back and then back to the front. In contrast, back post stitches require inserting the hook from the back to the front of the post first, then going back to the back of the post. The videos below will make all of this clearer.

How to Create Texture With Crochet Post Stitches

Post stitches add texture to your work by pushing the stitch either forward or backward. Alternating front and back post stitches is a great way to create crochet ribbing. This can be used to get the right fit on hat brims or glove cuffs, for example.

You can also use a combination of front and back post stitches in groupings to do basketweave crochet. Moreover, crochet cables are usually made with post stitches. Therefore, learning these techniques opens up a lot of opportunities for you to turn basic crochet stitches into something special.

How to Front Post Double Crochet

Front post double crochet is easier than you might think. All that you're doing is working a regular double crochet stitch. However, you're working it around the post of the stitch below it. The post is the vertical body of the stitch.

For front post double crochet, abbreviated FPDC, you will:

  • Yarn over.
  • Insert the hook from the front of the work to the back. Then you'll bring it back through to the front on the other side of the stitch.
  • Then you'll complete your double crochet stitch.

Here's the video instruction:

How to Back Post Double Crochet

Oftentimes, if you're working front post double crochet, then you're also going to want to learn back post double crochet. As aforementioned, you can combine the two to create ribbing, basketweave, and other textures. Here's how to back post double crochet:

You Might Also Like:

  • Fan Trellis Crochet Stitch
  • Crochet Cables and Lace Shell Stitch Pattern
  • 10 Free Knit and Crochet Basketweave Patterns
  • 11 Free Crochet Cables Patterns to Make
  • How to Crochet Cable Rib Hat – free pattern and video tutorial

Frequently Asked Questions

What exactly *are* crochet post stitches?

Honestly… they're stitches you crochet *around* the stitch from the row below, instead of into the top loops. It's a super cool way to add texture to your projects!

How do front post and back post stitches differ?

So here's the thing… it's all about where you insert your hook! For front post, you go around the front of the stitch, and for back post, you go around the back. Easy peasy!

Why is front post double crochet so popular?

Yes! Double crochet is nice and tall, so it's much easier to find and work around the post compared to smaller stitches. It makes adding that lovely texture so much simpler.

Can post stitches really change up my crochet fabric?

Oh, absolutely! They push the stitch forward or backward, creating amazing texture. Think ribbed edges, basketweave, and even cables… it really takes your basic stitches to a whole new level!

How do I actually *do* a front post double crochet stitch?

It's not as tricky as it sounds! You basically just work a regular double crochet, but instead of going into the top loops, you insert your hook from front to back around the post of the stitch below… then complete your DC. You got this!

Filed Under: Crochet, Tips, Tricks, Techniques for Knitting and Crochet

8 Ways to Celebrate I Love Yarn Day

October 5, 2021 By Marly Bird 1 Comment

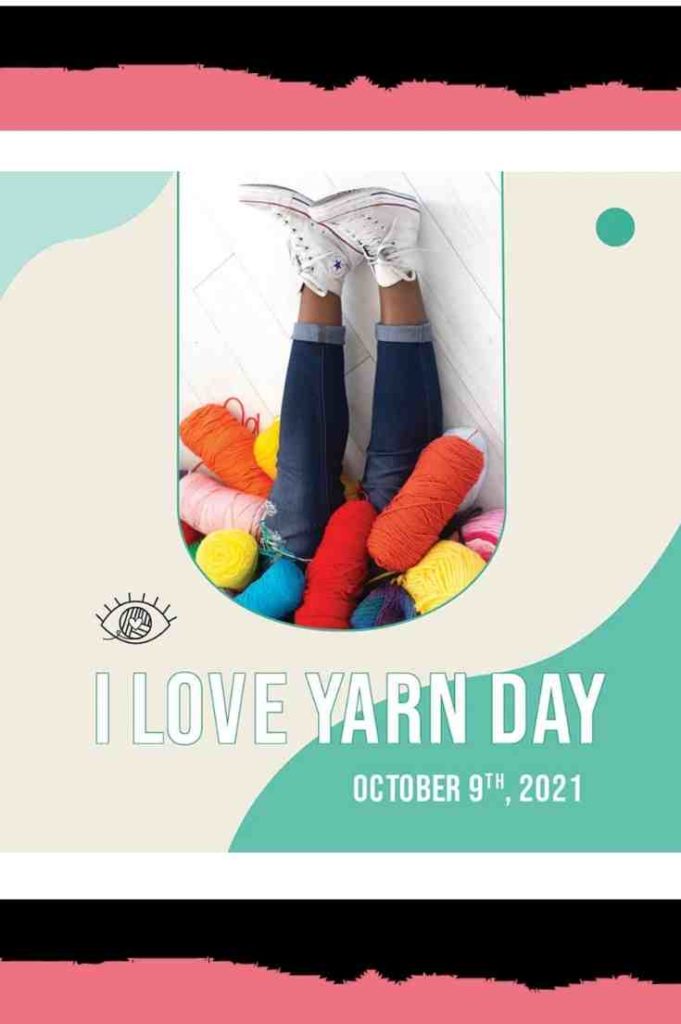
I Love Yarn Day is the second Saturday of October every year. Therefore, it's coming up on October 9, 2021. If you aren't entirely sure what this holiday is, or how to celebrate it, then this post is for you. And even if you already know all about I Love Yarn Day, here are some extra thoughts about what to do to share your love of yarn with others.

Note: This post includes affiliate links. I receive a percentage of sales from those links. Your price doesn't increase. You still get the best sales deal! Thanks for the support.
yarn day 2021

What Is I Love Yarn Day?

The Craft Yarn Council created this holiday in 2010 as a way to celebrate all yarn crafts. It's hard to believe that this is already the eleventh year of this annual event.

You know that I'm all about being BiCrafty. As both a knitter and crocheter, I love bringing the community together. Whether you do one craft or both, this is something that we can all celebrate together. After all, I Love Yarn Day celebrates the joy of yarn regardless of how you work with it.

8 Ways to Celebrate I Love Yarn Day

Anything that you do or share related to yarn celebrates this international holiday. In particular, it's just a way to announce to the world that fiber has made your life better in small or big ways. However, there are certain things that you can do to more fully celebrate this holiday. If yarn makes you feel good, then make your weekend better than usual with one (or more) of the following options:

1. Buy Yarn
wecrochet yarn sale for I love yarn Day

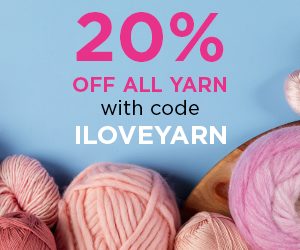
If you want an excuse to buy yarn, then this holiday provides a great excuse. And it's not just because we're all celebrating yarn. It's also because there are some great sales in honor of I Love Yarn Day. For example, both KnitPicks and WeCrochet offer 20% off yarn in honor of the celebration. This sale begins October 7, 2021. It ends at midnight on October 11, 2021. During the sale, both sites have 20% off all yarn using promo code ILOVEYARN.

2. Share How Yarn Helps You

The Craft Yarn Council has done a great job over the years of raising awareness about the health benefits of crochet and knitting. In particularly, they've emphasized how yarn crafts help relieved stress. In fact, one year, the entire theme of the event was “Stitch Away Stress.” Yarn helps.

โ€œResearch we conducted in April at the height of the pandemic shows that 84% of fiber artists are currently creating with yarn to relieve stress.” – Jenny Bessonette, executive director of the Craft Yarn Council

Have you used yarn to relieve stress? Has it helped you in other ways? Knitting and crochet have been shown to reduce symptoms of depression, anxiety, and even physical pain. Share in the comments on this post how yarn has helped you! Let others know how yarn has helped you by posting about it on your own blog, on social media, or just mentioning it in conversation with a friend. Hashtags #craftastherapy #crochetismytherapy and #knittingistherapy are great places to find similar posts on social media.

Alternatively, do some research into the health benefits of yarn. Or take an hour to yourself to de-stress with yarn. That's a smart way to celebrate I Love Yarn Day!

3. Share #ILoveYarnDay on Social Media

Use the “#ILoveYarnDay hashtag on Facebook, Instagram, or your other favorite social media site. Share your works in progress, finished pieces, your favorite ever make, or just a photo of your yarn stash. Don't forget to browse what other people are sharing with the tag. This is a great way to draw attention to the wonders of yarn. Plus, even just browsing the images can feel relaxing!

BONUS: MAKE YOURSELF A YARN SCREENSAVER OVER ON MY INSTAGRAM.

Go to @themarlybird. Underneath my bio, you'll see my saved highlights. The first one is “wallpapers.” All of those are images from my yarn stash. Screenshot one or more to add to your phone. Let it delight you!

4. Try a New Knit or Crochet Pattern

Set aside some time this weekend to make something with yarn. After all, isn't that what loving yarn is all about? Try a new technique. Or try a new pattern.

In fact, consider joining BiCrafty Bootcamp Crochet Edition. It's not too late to join. And we're making lots of fun crochet patterns together. The group just worked on my new double-stranded baby blanket crochet pattern.

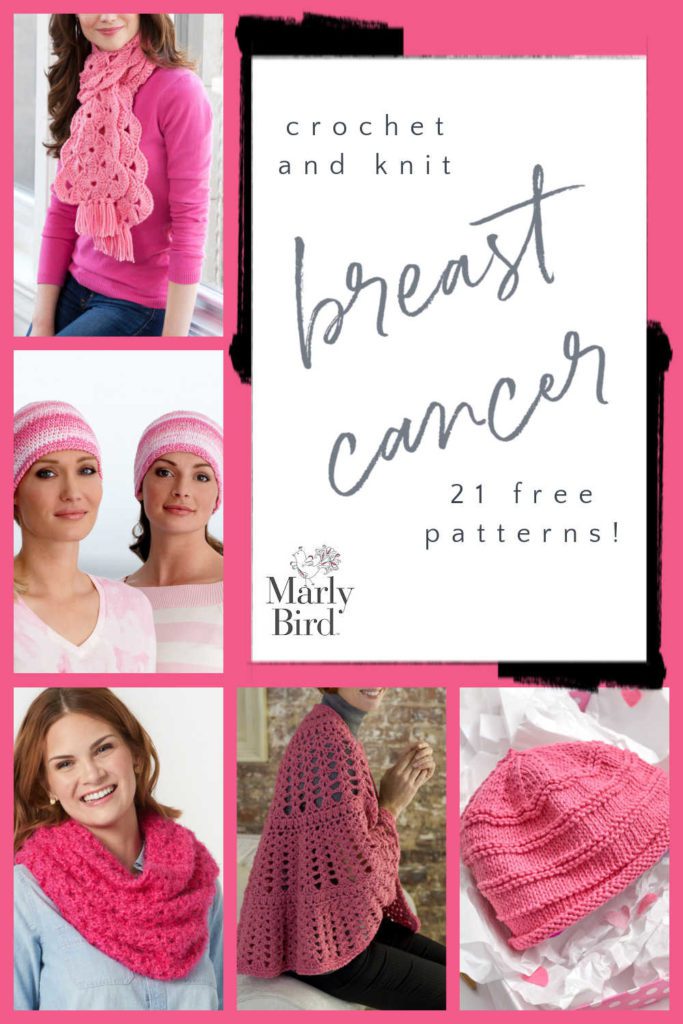
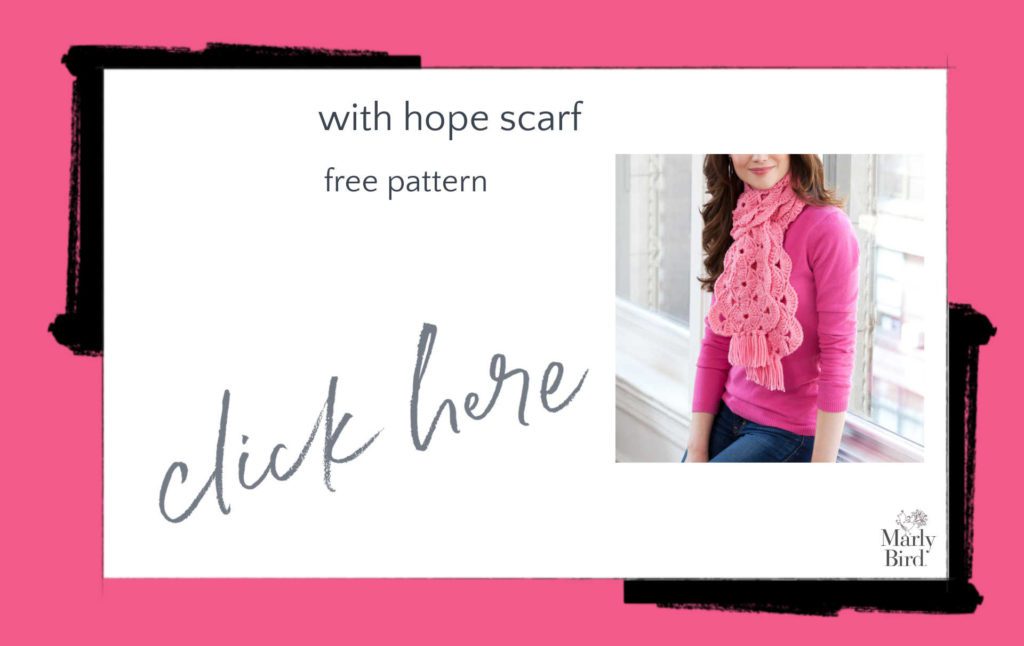
Of course, I also have hundreds of other knit and crochet patterns for you to choose from, including many that are free patterns. If you haven't finished crocheting for Halloween, yet, then check out our roundup of 150+ Halloween knit and crochet patterns. Also, remember that October is breast cancer awareness month, so you might want to check out these 21 free knit and crochet breast cancer patterns, which include my free knit chemo cap pattern. Or, if you're ahead of the game and getting ready for the holidays, you might want to start this weekend with my free crochet granny square stocking pattern.

5. Take a Yarn Class!

Knit and crochet classes are a great way to learn new things, make something fun, and connect with other people in the community. There are online and in person yarn classes. And there are some classes you can do at your own pace. For example, check out the latest deals on Creativebug online craft class memberships.

6. Teach Someone Else to Knit or Crochet

I Love Yarn Day is all about spreading the love of yarn. What better way to do that than to teach a yarn craft to someone who doesn't know how to knit or crochet yet? If you only do one of those crafts, perhaps you'll want to trade lessons with someone who knows the other craft.

Or schedule some time, in person or online, to pass along your love of the craft to the next generation. Many of us learned to knit or crochet from a mother, grandmother, or aunt. Even if we didn't stick with it at the time, that memory lingered and we came back to yarn later. Sharing that is special.

7. Check Out Craft Giveaways

There are usually a variety of sites offering craft giveaways for I Love Yarn Day. For example, check out this year's Interweave Giveaway. My friend Tamara of Moogly blog always has some good giveaways going on as well. Check her blog for the latest ones.

8. Knit or Crochet Something for Charity

Crafting for others is such a great way to spread the love of yarn. It's also good for you. When we do something to help others, it warms our own hearts. The Craft Yarn Council supports Warm Up America as their charity of choice for I Love Yarn Day. However, you can also choose the cause you most care about and donate locally or globally. Alternatively, knit or crochet a gift for someone that you know is need.

What are you going to do to celebrate I Love Yarn Day? What is the number one reason that you love yarn? Share your thoughts in the comments!

Read More:

  • Meet Craft Yarn Councilโ€™s Mary Colucci and Jenny Bessonette
  • 18 Free Crochet Charity Patterns
  • Knitting for Charity
  • 20 Reasons I Am Thankful for Crochet (And Knitting Too!)

Frequently Asked Questions

When is I Love Yarn Day?

So here's the thing… I Love Yarn Day is celebrated every year on the second Saturday of October. In 2021, it fell on October 9th! It's a whole day dedicated to celebrating yarn and all the amazing things we create with it.

How did I Love Yarn Day start?

Honestly… The Craft Yarn Council created this fun holiday back in 2010. It's all about celebrating every kind of yarn craft out there, whether you're a knitter, a crocheter, or both! It's pretty neat that it's already been going for over a decade.

Can I buy yarn to celebrate?

Yes! This holiday is the perfect excuse to snag some new yarn. Plus, there are often some really great sales happening. For example, in 2021, KnitPicks and WeCrochet offered 20% off yarn with a special promo code for the occasion!

How can I share my love of yarn on social media?

Oh, that's easy! Just use the hashtag #ILoveYarnDay on platforms like Instagram or Facebook. You can share your works in progress, finished projects, or even just a picture of your yarn stash. It's a great way to connect with other yarn lovers!

What if I don't have any new patterns to try?

Don't worry, friend! The page mentions that there are hundreds of knit and crochet patterns available, many of them free. You can explore patterns for holidays, charity projects, or just something fun to try a new technique with.
Filed Under: Dibble Dabble Inspiration

  • « Previous Page
  • 1
  • …
  • 57
  • 58
  • 59
  • 60
  • 61
  • …
  • 98
  • Next Page »

Let's Be Social

Join the Marly's Minions Facebook group to share, ask questions, or chat about all of your yarn related crafts!

Join the group
Cartoon of a smiling woman with brown hair in a bun, glasses, black jacket and green shirt, waving next to large "hi" text.

Quick Links

The Pattern Shop

Our Free Patterns

Blog

Marly Bird House

Learn to Knit & Crochet

About

Giveaway Terms and Privacy Notice

Find Us Everywhere

Join the Newsletter

YouTube Channel

Marly's Minions FB Group

Etsy Store

Ravelry Store


AN ELITE CAFEMEDIA HOME/DIY PUBLISHER

Information from your device can be used to personalize your ad experience. Do not sell or share my personal information.

Privacy Policyย  ย Termsย  ย Marly Bird Legal Documents Copyright © 2026