Search
Close
  • The Pattern Shop
  • Our Free Patterns
    • Browse All Our Free Patterns
    • Our Free Knitting Patterns
    • Our Free Crochet Patterns
  • Blog
    • All Blog Posts
    • All Free Patterns
    • Dibble Dabble Inspiration
    • Giveaways
    • Make-Alongs
    • Product Reviews
    • Roundups
    • Tips, Tricks, Techniques for Knitting and Crochet
Stylized bird with pink and gray swirling tail above elegant “Marly” text, logo for crochet accessories and home decor.
  • Marly Bird House
  • Learn to Knit & Crochet
    • Newbie? Start Here
    • Video Tutorials
    • Knitting Definitions
    • Crochet Definitions
    • Common Techniques
    • Size Charts for Knitting and Crochet Projects
  • About
×
  • The Pattern Shop
  • Free Patterns
  • Blog
  • Marly Bird House
  • Learn to Knit & Crochet
    • Newbie? Start Here
    • Video Tutorials
    • Knitting Definitions
    • Crochet Definitions
    • Common Techniques
    • Size Charts for Knitting and Crochet Projects
  • About
Stylized bird with pink and gray swirling tail above elegant “Marly” text, logo for crochet accessories and home decor.
Search
Close

New Patterns NOW Available in Ad-Free PDF! Check out The Pattern Shop

Shaping Knits – German Short Rows Or W&T? 

September 27, 2023 By Marly Bird Leave a Comment

What does this even mean? Short rows? You may wonder what I'm talking about if you haven’t come across having to knit short rows yet on your knitting journey. Short rows are a useful tool for your knitter’s arsenal to help shape knit fabric. They come in handy in many situations, which we’ll cover in just a bit. But before we discuss whether to use German short rows or W&T, let’s talk about what they are.

Image showing German short rows or W&T knitting techniques - Marly Bird
German Short Rows and Wrap & Turn samples.

What Are Knit Short Rows?

Short rows in knitting are partially completed rows. You don’t work all the way across. You turn your work mid-row. If you do turn your work mid-row without using certain techniques, you end up with holes or larger-than-usual spaces where you turn. This is usually not what we want, so several short-row techniques have been developed over the years. Probably the most commonly used are German short rows and W&T (‘wrap and turn’).

Why Use Short Rows In Knitting?

The easy answer is that short rows are used for shaping. Likely the most common and historical use of short rows is when turning a heel during the sock-knitting process. 

But designers now use short rows to create incredible shawls and other knitwear. They use these shaping techniques to change how and where colors appear in wedges, curves, or feather-like panels. They can make shawls look like wings!

Where Can You Put Short Rows In A Sweater?

There are many places you can use knitted short rows to make garments fit the wearer better than working a straight pattern with no shaping. We’re all made to look different, and shaping in various places can benefit different body types.

Some common places short rows can really help with shaping are:

  • Shoulder slope – instead of a stepped bind-off, get a smooth single-row bind-off by working short rows and then binding off all shoulder stitches together.
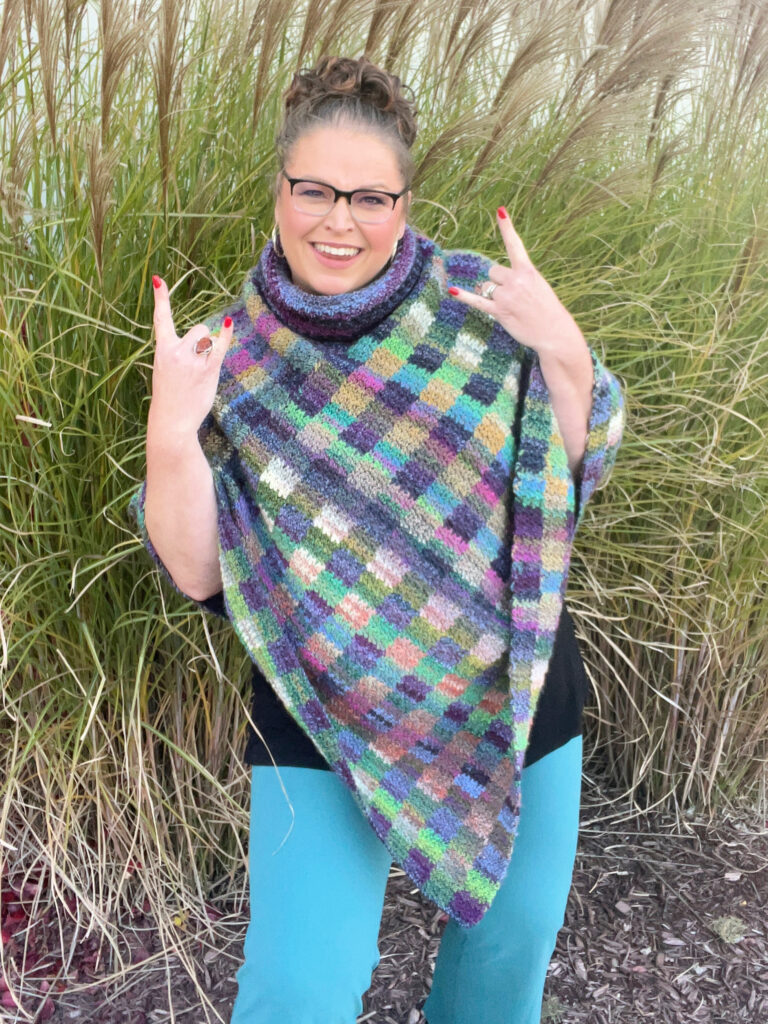
  • Back neck – working top down, knitting short rows across a back neck builds height and makes the garment sit better around the front neck. You’ll see this shaping technique used in the Color Kaleidoscope Poncho Pattern.
  • Bust darts – a larger bust sometimes causes the front hemline of a sweater to hang higher than the back. Fix this problem by adding bust darts and working a wedge of extra rows at the bustline, bringing the front and back hems level.
  • Curved hem – a popular style right now is the curved hem. Short-row shaping produces curved hems the easy way.

So, How Do You Knit W&T (Wrap and Turn)?

W&T short rows involve using the short row techniques before turning your work. You’ll work to your turning point, move the working yarn forward, slip the next stitch from the left to right needle, return the yarn to the back, then replace the slipped stitch onto the left needle all before turning your work.

Once you reach the W&T on the next row, you’ll need to align the wrap with the slipped stitch and work them together. Check the video to see how this is done on both knit and purl rows.

I demonstrate W&T short rows in this first KAL video for the Color Kaleidoscope Poncho. It’s so much easier to watch than read instructions on how to do it. So, check out the video around 17:40 to see my demonstration and learn about this technique's nuances.

How Do You Knit German Short Rows?

When you knit German short rows, you work to the turning point. Turn your work first, then bring your working yarn forward between the needles. Pull the working yarn up over the right-hand needle (like you’re always told not to when you first learn to knit), and hold the yarn tightly in place while working the next stitch. 

Don’t let this tight stitch drop. It pulls up both legs of the stitch below to form a double stitch (often abbreviated to DS). You’ll work both legs together on the return pass, like a k2tog.

To better understand this technique, watch this video showing a heel turn for My First Toe-Up Knit Socks. Whether you’re using German short rows in socks or sweaters, they’re worked the same way. At 11:40 in this video, you’ll see how to work German short rows. Don’t forget to watch the return pass so you’ll see how to deal with the double stitches.

German Short Rows

Which Is Better – German Short Rows Or W&T?

The simple answer here is…whichever you find easiest to work and gives you the best result. There’s no point in sticking with a harder technique just because someone tells you it’s the best. Work with the one that YOU find the best for you.

There are other short-row techniques. I demonstrate another short-row method here in the Shifting Stripes Shawl video. This one is really pretty simple in garter stitch. It’s a simple row turn with no extras. But because the rows on one side stack up, that fills up any hole that might be left. Also, the short row technique I used here results in an awesome ‘how did you do that?’ stripe effect. 

Check it out – I think you’ll like it!

And don’t forget to join the Color Kaleidoscope Poncho KAL for all the instructions for this fabulous poncho. That’ll be another…” how did you do that?” moment!

And if you just can’t get enough colorwork…

Check out our colorwork roundup. 65 patterns for your color pleasure.

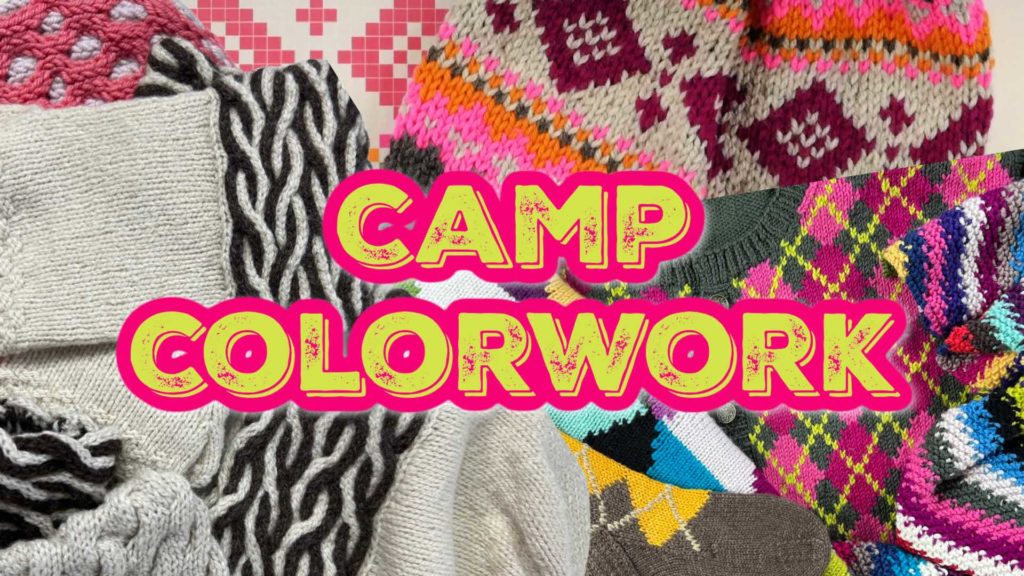
And if you don’t feel like you can manage those patterns (yet), build your skills with Camp Colorwork. 

You’ll find tutorials for several colorwork techniques in BOTH knit and crochet, and they’re all yours FOREVER!

Frequently Asked Questions

What are short rows in knitting and why are they used?

Short rows are partial rows… you knit partway across and then turn before reaching the end of the row. This creates extra length or shaping in a specific section of your knitting without adding extra stitches. Short rows are used for curved hems, bust darts, shoulder shaping, sock heels, turning collar directions, and creating three-dimensional shapes in flat fabric. They're an essential technique for any garment knitter… the shaping possibilities are genuinely remarkable once you understand them.

What's the difference between German short rows and wrap and turn?

Both methods achieve the same goal (turning partway through a row without leaving a hole) but they do it differently. Wrap and Turn (W&T) involves wrapping the yarn around the next stitch before turning, then picking up the wrap on return rows to hide it. German short rows use a “double stitch”… when you turn, you slip the first stitch and pull the yarn over to create a doubled stitch that closes the gap. Many knitters find German short rows faster and the results cleaner and easier to read in the fabric than W&T.

Which method is easier for beginners?

Most knitters who've tried both say German short rows are actually easier once you see them demonstrated! The double stitch is visually clear on the needle (you can see it easily while working the return row), there's no wrap to pick up or lose track of, and the finished result tends to be neater. Wrap and turn is the older, more traditional method that many older patterns still use. If you're learning short rows for the first time, try German short rows first… then learn W&T so you can execute patterns that call for it specifically.

When should I use German short rows vs. wrap and turn?

In practice, German short rows work beautifully in most situations where short rows are called for… sock heels, shoulder shaping, bust darts, curved hems. Some knitters use them as a direct substitute for W&T in any pattern. However, if a pattern specifically calls for W&T and you substitute German short rows, check that the stitch counts work out… the mechanics are similar but not always directly interchangeable. When designing your own short row shaping, use whichever method gives you the cleanest results in your specific yarn and stitch pattern.

How do I fix short row mistakes?

Catching mistakes in short rows immediately is key because they're hard to fix retroactively. If you forgot to pick up a wrap (W&T) or misidentified a double stitch (German), tinking back to that spot is the most reliable fix. Occasionally a very clean mistake can be disguised with a bit of duplicate stitch or by tightening a loose stitch with a tapestry needle, but true mistakes in short row shaping usually need to be ripped back. Adding a lifeline before starting a short row section is great insurance… you can rip back to the lifeline if things go wrong.

Filed Under: Knitting, Tips, Tricks, Techniques for Knitting and Crochet, YouTube Video Tutorial

What Is Knit Colorwork? Plus 65 Patterns!

September 22, 2023 By Marly Bird Leave a Comment

When it comes to knit colorwork, you have a ton of choices. If you’re a color lover, you’ll have noticed a huge trend over the past few years of yarns with short, long, ombre, multicolor, stripe, or even knotted yarn color changes. These yarns can produce beautiful textiles, but your yarn choices are many, as are the patterns created for these yarns (some of which you’ll see farther down the page).

5 knit colorwork designs: knit stripes, Intarsia, Stranded, Mosaic, and Brioche. Marly Bird

But what if YOU want to be the master of changing colors? What if YOU want to choose your own colors different from those chosen by the color-changing yarn designers? What options do you have to experiment and be the owner of your color choices, patterning, and resulting knitted fabric?

I’m so glad you asked! Let’s dive in!

First of all, I’ll answer a few important questions.

What is colorwork in knitting?

Colorwork in knitting is any knit patterning that uses more than one color.

Simple? Yes…and no, since there are many types of knit colorwork.

Usually, knit colorwork involves using two or more colors in one row, but it doesn’t have to be that way. We’ll look at patterns with stripes, intarsia, stranded colorwork (or Fair Isle), mosaic knitting, and brioche knitting.

But first, let's answer a few questions for you.

How hard is colorwork in knitting?

It depends on the type of colorwork you choose to knit, how simple or difficult the technique is, and your knitting skill level.

For example, stripes are probably considered the easiest of all colorwork. You simply choose two or more colors you like and work one or more rows in each color.

Note: If you work single rows of stripes, you’ll have LOTS of ends to weave in. If that doesn’t bother you, go right ahead. Pairs of rows and multiples of two are usually the way to go. If the stripes are narrow, you can often carry the yarn up the side of your knitting. If you do this, be sure not to pull your yarn too tight, as you'll make one knit edge shorter than the other.

But if you want something a little more pleasing to the eye, let me tell you about the Fibonacci sequence.

Fabulous Fibonacci Striping Sequence

The Fibonacci striping sequence is based on mathematics. It's a sequence of numbers in which the next number is the sum of the two previous numbers. Here's how it looks…

0, 1, 1, 2, 3, 5, 8, 13, 21… and so on.

You can use this number sequence in many different ways in knitting. It's often used to transition gradually from one solid color to another solid color when knitting a sweater, cardigan, or scarf. Using Fibonacci in this way allows the colors to merge or flow into one another rather than having an abrupt change.

Check out this Roomy Purse Pattern to see how the sequence looks in this felted purse pattern.

What is the difference between Fair Isle and colorwork?

Fair Isle is a form of stranded colorwork where at least two yarn colors are used along the same row. Stranded colorwork would be the main type of knitting, and Fair Isle falls under that umbrella.

Fair Isle knitting comes from a specific location—a small island off northern Scotland. Fair Isle knitters used multiple colors to form elaborately patterned sweaters, vests, etc.

Certain specific colorwork designs originate from this small island, and the technique is now very popular.

What's the best way to knit stranded colowork?

If you're a more experienced knitter looking for speed as you knit, try a combination of English and Continental knitting. Holding one color in each hand definitely increases your knitting speed since you're not dropping one color to pick up another but rather alternating knitting styles.

Another alternative, if you prefer to hold two colors in one hand, is to simply separate the colors on your finger or use one color on your index finger or middle finger and one on your thumb. Work in the way that feels most comfortable or easiest to you. There are no knitting police!

For more information on knit colorwork basics, choosing colors for colorwork and color dominance, and how to knit Fair Isle or stranded colorwork, look at the Color Kaleidoscope Poncho! It's just gorgeous!

What is the best yarn for colorwork knitting?

The best yarn for colorwork knitting is wool or a wool blend. Wool fibers have scales that allow the yarn to cling to itself and help prevent a dropped stitch from running quickly down your work.

Can you imagine picking up a single stitch through several colors and intricate patterning? Getting it right is a bit stressful and takes time and patience, but wool helps you keep your sanity. Not to mention, when you're weaving in ends, the scales on wool will help hold those ends in place.

Don't be tempted to use smooth acrylic or slippery fibers. Trust me—ask me how I know!

How do you keep knit colorwork stretchy?

Ah…keeping knit colorwork stretchy—that’s a really good question. You don’t want your finished piece to pucker up, as you won’t see the pretty patterns you’ve spent days (or weeks) creating.

Here’s a couple of tricks…

  • Carry the non-working yarn no more than three stitches behind your work, then catch it up with the next stitch if there’s still more to work before the next color.
  • After you’ve worked three or so stitches, spread the work down your right-hand needle. This separates the stitches a little, so you add extra length to the float before your next stitch in the carried yarn. 
  • Knit more loosely than you’re used to. If you wrap the yarn twice around a finger to tension it, try wrapping it once so it flows more loosely.
  • If you’re a tight knitter, go up a needle size or two as long as you still meet the gauge.

And because there's a lot of work in knit colorwork, PLEASE don't skimp to save time. It's crucial you knit a gauge swatch to be certain your finished piece, especially if you're knitting a garment, will fit! It's also the best way to practice making your knitted fabric the way you want it to look: no puckers, pulled floats, extra-tight, or big stitches. Be a pro from the start for great results.

And now for the knit colorwork patterns!

We’ve collected 65 knit colorwork patterns! Yay!

Some are more difficult than others, but we have something for all levels, from beginners to advanced. You’ll know when you see them which ones are in your league.

If you’d love to try knit colorwork, but are a bit intimidated, don’t be.

I have a course that’s absolutely perfect for you: Camp Colorwork!

Camp Colorwork isn’t just for knitters. It's for crocheters too. I walk you through many colorwork techniques so you can tackle ANY of these patterns. No problem!

Simple Knit Colorwork – Stripes

Knit colorwork - stripes. Various knit striped projects.

Stripes are by far the simplest knit colorwork technique out there. It’s simply a matter of choosing colors you like, and off you go. Here’s a few stripe patterns to get you going.

Vibrations Knit Pullover

Change Your Stripes Knit Vest

Big Stripes Beginner Knit Blanket

Striped Top Down Sweater

Rainbow Connection Knit Panel Blanket

Knit Bias Panels Blanket

Sunset Knit Blanket

Tailgate Cozies

Knit Dog Sweater

Bottle Cozy

Spicy Knit Pumpkins

Rocking Waves Knit Blanket

Radiance Knit Throw

Ombre Knit Baskets

Intarsia Knitting Patterns – Changing Colors Within A Row

Intarsia knitting involves blocks of color. These patterns are usually charted and pretty simple to follow. The difficulty with these projects is when you’re working them flat and must remember which direction you’re reading the pattern. Once you get used to it, you’ll be fine.

The trick to not leaving holes in knit intarsia is to twist the yarns together as you change colors. Here's a fantastic tutorial about knitting flat intarsia. Check it out, and you can tackle any one of these amazing patterns.

Knit intarsia designs from hats to pillows nad blankets.

Knit Landscape Sweater

Knit Donut Blanket

Mod Flower Pillow

Tropical Leaf Knit Pillow

Bold Angles Knit Pullover

Check Knit Vest

Leopard Print Knit Wrap

Star Knit Baby Pullover

Kid’s Knit Panda Hat

Pantone Monochrome Swatch Knit Sweater

Union Jack Pillow

Stranded Colorwork Knitting Patterns

This is where your knitting gets a bit more complex because you’re changing colors several times within each row. But we have all kinds of choices for you, from scarves to sweaters and some stuff in between.

14 stranded colorwork knitting patterns available in this blog post.

Knit Go Around Fair Isle Hat

Geometry Knit Pillow

Color Kaleidoscope Poncho If you haven’t already, YOU MUST SEE THIS!!! KAL right now!

Stranded Steeked Knit Cardigan

Fair Isle Stranded Cowl

Leslieville Knit Swoncho

High Park Knit Vest

Knit Fair Isle Pullover

Stories Of Ice Sweater

Aeshna Mitts

Hello Autumn Hat

Fairy Ring Cardigan

Fair Isle Scarf

Spooky Earwarmers

Knit Colorwork – Mosaic Knitting Patterns

Mosaic knitting is a technique where you only use one color per row, but you use slipped stitches to get the patterning. It’s not as hard as it sounds. Check it out! It produces some fabulous looks!

Mosaic knitting patterns - links to patterns included within blog post.

Mosaic Stitch Knit Baby Blanket

Knit Mosaic Tunic

Mosaic Knit Placemat

Geometric Knit Mosaic Pillow

Shifting Shades Mosaic Knit Blanket

Men’s Mosaic Vest

Swirls & Stripes Mosaic Bag

Check Please Knit Ruana

Mosaic Squares Throw

Tweedle Doo Knit Blanket

Fringe Festival Knit Scarf

Blackwater Pullover

Hyben Cowl

Textured Mosaic Shawl

2-Color Knit Brioche Patterns

Brioche is one of my favorite techniques. It’s so squishy and extra cozy since you have two colors in a rib pattern.

So, instead of regular horizontal stripes, your stripes are columns of vertical stitches. Fantastic!! It’s fascinating how this works, but don’t think too hard about it; just give it a try and add this technique to your arsenal.

Beautiful brioche knitting patterns

Warm Brioche Knit Mittens

Knit Brioche Scarf

Knit Brioche Shawlette

Brioche Knit ZigZag Cowl

Brioche Cables Knit Hat

Allan Gardens Knit Brioche Shawl

Double-Sided Brioche Knit Kerchief

Beginner Brioche Scarf

Advancing Lines Brioche Hat

Beginner Brioche Beanie

Brioche Pointe Cowl

Chrysalis Brioche Blanket

I know you’ll have found something here that piques your interest!

And don’t forget…whether you want to try knitting some charming colorwork socks or something much larger, there’s no need to be intimidated when you can learn all about it at Camp Colorwork!  Whether you use your fingers and thumbs or a little color separator tool, the keys to knit colorwork are at your fingertips from Continental knitting alone or a combination knitting style!

Camp Colorwork Course for knitters and crocheters to learn more color work techniques from professionals - Marly Bird

Camp Colorwork is open all year round!

All the lessons are yours FOR LIFE! 

Here’s a few more options that may interest you:

Slipped Stitches Striped Scarf

Dynamic Wave Hat

Crazy Stripes Shawl – LOVE THIS ONE!!!

Frequently Asked Questions

What is knit colorwork?

Knit colorwork is any technique that uses more than one color of yarn to create patterns in knitted fabric. The most well-known type is stranded colorwork (also called Fair Isle), where you carry two or more yarns across a row and knit with each as needed. But colorwork also includes intarsia (where each section of color has its own yarn ball, no carrying), slip stitch colorwork, mosaic knitting, and double knitting. Each technique gives a different look and has different requirements for managing your yarns.

Which colorwork technique is best for beginners?

Mosaic knitting is the most beginner-friendly because you only work with one color at a time… you slip stitches to create the pattern rather than carrying two yarns simultaneously. Stranded colorwork with just two colors is the classic beginner entry point into true colorwork… start with something small like a hat or mitten and practice managing two yarns before tackling a full sweater. Intarsia is more advanced due to the yarn management required. Start with mosaic if you want the easiest on-ramp.

How do I prevent my knitting from puckering in colorwork?

Puckering in colorwork is almost always a tension problem with floats… those strands carried behind your work when you're not using a color. Floats need to be loose enough that the fabric can stretch without pulling. Spreading the stitches on your right needle before carrying the unused yarn is a game changer. Some knitters also work colorwork on needles a size larger than their body gauge to compensate. Practice, practice, practice… tension gets better the more colorwork you do.

What's the difference between stranded colorwork and intarsia?

In stranded colorwork (Fair Isle), both yarns travel all the way across the row whether you're using them or not… the unused yarn creates floats on the wrong side. This works great for patterns where the same colors repeat across the row. Intarsia uses separate yarn “bobbins” for each color section and the yarns don't travel… they only cover their section. This is the right choice for large blocks of color or isolated motifs (like a single picture on a sweater front) where carrying the yarn would create very long floats.

Can crocheters learn colorwork techniques too?

Oh, this is where being BiCrafty is SO exciting! Crochet has its own amazing colorwork traditions… mosaic crochet, tapestry crochet, planned pooling, and the waistcoat stitch for stranded effects. Some techniques translate beautifully between the two crafts, and some are unique to each. Marly teaches both knit and crochet colorwork techniques, and Camp Colorwork dives deep into colorwork for both crafts. Whether you knit, crochet, or both… colorwork opens up an incredible world of design possibilities.

Filed Under: Free Patterns, Knitting, Round Ups

Seaming And Joining Knit And Crochet

September 19, 2023 By Marly Bird Leave a Comment

If you craft with yarn long enough, you’re bound to have to get into seaming and joining knit and crochet. However, you can construct many accessories and garments in such a way that you don't need to seam at all. But certain fibers absolutely beg for seams. They don’t lend themselves to seamless construction. Let’s take a look at a few different situations, garments, and techniques related to seaming and joining.

3 images of seaming and joining knitting and crochet - Marly Bird

What Is The Difference Between Seaming And Joining?

Merriam-Webster dictionary definition of ‘seam’: “the fold, line, or groove made by sewing together or joining two edges or two pieces.” When machine or hand sewing a regular seam: hold or pin the right sides of the fabric together and sew on the wrong sides of the fabric. When this is turned right side out, the sewing is invisible, but there is a visible groove. Several types of seams are used in sewing, but let’s deal with knit and crochet.

Let’s face it: when you seam something, you’re joining 2 pieces together, which can also be called joining. But joining in knit and crochet is usually what you do as you create your piece. Joining normally refers to attaching two pieces together as you work one of them. Working this way means there's no need for seaming.

Joining

So, joining in knitting might mean picking up stitches from the edge of one piece to begin to working the next. This is called modular knitting – knitting a larger item piece by piece and joining each new piece to a previous piece.)

When you join in crochet, it usually means connecting two or more motifs together. You usually achieve this by slip-stitching at strategic points during the final round of the second and future motifs. This gives a more open or lacy look to the joins. Sometimes it makes the joins completely invisible since other patterns seem to emerge.

Seaming

No matter which seaming method you use, you always will:

  1. Thread a tapestry needle with usually the same color yarn that matches the pieces you’re joining together. 
  2. Hold the two pieces to be joined, right sides together. 
  3. Secure seaming yarn by bringing needle from back to front through both pieces at right-hand end of work.
  4. Leave a 1” tail.
  5. Hold yarn tail behind seam, and bring needle from back to front in same place as before twice more. This secures the yarn so you can release the tail and trim later.

Whipstitch

Whipstitch is a go-to option for many knitters and crocheters. It’s very simple and probably the first seaming method everyone learns for knitwear or crochet home decor.

To work whipstitch:

  • After securing tail of yarn in first stitch on the right, *move left to next stitch,
  • Bring needle and yarn from back to front, pulling yarn all the way through, being careful to avoid knots. Pull yarn so it’s secure but not tight enough to gather the seam.
  • Make sure your seam is flat.
  • Repeat from * across to the end of the seam, and secure the yarn as at the beginning.
  • Run yarn back through few stitches of whipstitched seam from left to right to hide end.
  • Trim close.

This is probably the easiest of the seams, but it’s NOT invisible. These stitches form a diagonal line across the seam on the wrong side. When you open up the seam, you may see straight lines across the seam line. You don’t have to work into every single stitch. Every other stitch may work depending on what kind of item you’re seaming and the thickness of the yarn.

Mattress Stitch

Mattress stitch is a fantastic option, especially for garments. It gives a sturdy seam which helps support some of the more slippery yarns such as alpaca, bamboo, viscose, and silk. When worked correctly, this seam can be virtually invisible. You may find it a little more bulky on the inside of the garment. You’ll find detailed instructions and a helpful video tutorial in my how to seam crochet post. 

Crochet Slip Stitch Seams And Single Crochet Seams

Crochet slip stitch is a great and simple option for seaming crochet garments quickly and easily. You can use single crochet seams for decorative joins on the right side of blankets. If you can work both seams neatly enough, they’ll look great in a contrasting color for seaming granny squares. 

You’ll also find instructions for these seams on my how to seam crochet post.

What is the JAYGO method For Seaming And Joining Knit And Crochet?

JAYGO is a shortened version of Join-As-You-Go. You can join as you go in knitting, crochet, and Tunisian crochet.  Here you’ll find a great selection of all 3 types of JAYGO blanket patterns.

How Do You Join Granny Squares As You Go?

In simple terms, wherever there is a ch-1 space on the outside round of a granny square, you can replace that ch on the next square with a slip stitch during the final round. You’ll work that replacement slip stitch into the corresponding ch-1 space on the already completed granny square. Check out his video for a very useful tutorial about joining granny squares (and more) as you go.

What Is The Most Secure Way To Join Granny Squares?

You’ll find the most secure (and fun) way to join granny squares is the join-as-you-go method above. It means you’ll have no pile of squares to join or seam at the end. All you’ll have to do when you’re done with your squares is weave in ends and work a border. Borders are a great way to finish blankets as they help prevent curling edges.

You could choose to seam granny squares with crochet slip stitch or single crochet. This gives a more textured look on the right side,

Should You Block Granny Squares Before Joining?

If you’re planning on seaming your squares when you have them all complete, then yes, block your squares. On the other hand, if you’re joining as you go, don’t block until the end. Joining as you go causes each new square to fit in with the previous squares anyway.

What Is The Difference Between Seaming And Sewing?

Seaming is joining two pieces of fabric together. Sewing is one of the processes which can be used to join these two pieces of fabric. Check out the whip stitch and mattress stitch sections above.

There are more options for seaming and joining knit and crochet, but those mentioned in this post are probably the most commonly used and useful. Anyone can be successful using these joining methods. 

Be sure to check out the links above for in-depth videos and more information.

If you're brand new to knitting and crochet, then you need to head here and see what amazing info we have for beginners!

Check out these beginner patterns to get you on the road to success!

And, here's my YouTube channel where I have all kinds of knitting, crochet and Tunisian crochet tutorials.

Frequently Asked Questions

What's the difference between seaming and joining in knit and crochet?

Seaming typically refers to sewing two finished pieces together using a tapestry needle and yarn… like sewing together the front and back of a sweater. Joining is more often used in crochet and refers to connecting pieces as you work (join-as-you-go on granny squares, for example) or attaching a new ball of yarn. The distinction is sometimes blurry in casual use, but generally seaming is a finishing technique with a needle, while joining can happen at any point in the making process. Both skills are essential for crafters who make anything in pieces.

What's the most invisible seaming technique for knitting?

Mattress stitch is the gold standard for invisible seaming! You work from the right side of the fabric, weaving the tapestry needle between the edge stitches or row edges of both pieces. When pulled up snugly and done at the right tension, the seam becomes virtually invisible… the stitches from each piece nestle together and look continuous. It works beautifully for stockinette fabric on sweater side seams, shoulder seams, and sleeve seams. The technique is a bit fiddly to learn but the results are worth every bit of effort.

How do I choose which seaming method to use?

Consider three things: what type of edges you're joining (side seams vs. shoulder seams vs. cast-on edges work differently), how visible the seam will be in the finished piece, and how much structure you need. Mattress stitch for side and sleeve seams where you want invisible joins. Three-needle bind-off for joining live stitches at shoulders (fast and neat). Whipstitch for casual seaming where visibility isn't critical. Slip stitch join in crochet for a decorative visible seam or invisible seam depending on which direction you work. The right technique for the situation creates a better finished piece.

How do I keep my seams from being too tight or too loose?

Practice and tension awareness! The most common mistake is pulling seaming yarn too tightly… this puckers the fabric and creates a visible ridge. Match your seaming tension to the natural tension of the knit or crochet fabric. The seam should hold the pieces together firmly without stretching or gathering the fabric. Working a few stitches, then gently tugging the seam to check tension, then adjusting helps develop awareness. Blocking the finished garment evens out minor tension variations in seaming and helps everything settle naturally.

Can I use a sewing machine to seam handknit or crochet items?

You can for some applications… but it's generally not recommended for most handknit/crochet seaming. Sewing machines can easily distort or damage the yarn fibers, create too stiff a seam, and don't accommodate the stretchy nature of knit and crochet fabric well. A serger or overlock machine is occasionally used for high-production knitting but requires expertise. For most crafters and most projects, hand seaming with a tapestry needle gives you the most control, the best results, and the most flexibility to adjust tension as you go. The hand-seaming skills are worth learning!

Filed Under: Crochet, Tips, Tricks, Techniques for Knitting and Crochet, Uncategorized

Join-As-You-Go Blanket Patterns: Crochet, Knit, And Tunisian

September 15, 2023 By Marly Bird Leave a Comment

You'll love what you're about to hear if you haven’t heard of join-as-you-go blanket patterns (also known as JAYGO). Do you have a love/hate relationship with making blankets using motifs? You love to make knit or crochet motifs because they’re small, quick, and easy. Yes? But you hate sewing them together because it’s boring and repetitive, and you want to be done already.

That’s why join-as-you-go patterns are such a fabulous option! They drastically reduce your finishing time so you can move on more quickly to your next project. 

We all know that’s what you want to do, right?

You may not have fewer ends to weave in, but you will have less time spent with a blunt-end tapestry needle in your hand trying to decide which stitches to join together.

Join-as-you-go blanket patterns - Marly Bird

Crochet Join-As-You-Go Blanket Patterns

Here’s a great selection of JAYGO crochet blanket patterns we think you’ll love. From baby blankets to throws and blankets, there has to be something here you’ll want to try. We’ve found granny squares, C2C (corner to corner), hexagons, diamonds, regular squares, and even leaves for you to check out. 

Join-as-you-go crochet blankets in rainbow colors - Marly Bird

Yes, leaves! No, they’re not knit. Click on the Leafy Knit-look Blanket link below and see for yourself!

Once you find a pattern you like, gather your crochet tools: crochet hooks, scissors, tapestry needle (just for weaving in ends because you’re joining as you go, remember), and just the right amount of cozy yarn. Let’s get crocheting!

Gotta Love Granny Throw

Chevron C2C Blanket

Building Blocks Crochet Baby Blanket

Hexagon Blanket

Hexi Quilt Blanket

Colorful Squares Throw

Pinwheel Crochet Baby Blanket

Leafy Knit-look Blanket

Rail Fence Throw

Let The Sun Shine Throw

Desert Star Throw

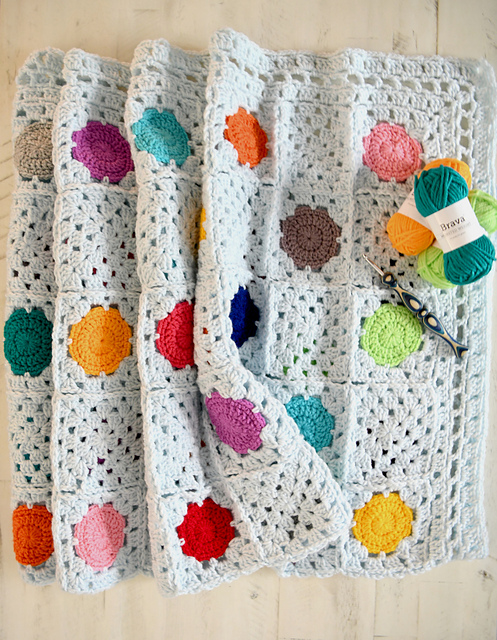
Confetti Dots Blanket by Marly Bird

Knit JAYGO Blanket Patterns

Knitting join-as-you-go doesn’t seem nearly as popular as crochet, but we managed to dig up a few options for you here. Your knit options include squares, strips, hexagons, chevrons, and balloons! Balloons – how cool! A great choice for a baby or kid’s knit blanket. 

Knit blankets in strips, squares, and hexagons. No sewing required - Marly Bird

Check out the links below, then gather your knitting needles, yarn, and your favorite knitting tools, and let’s get creative.

Jaygo Checkerboard Knit Blanket

Balloon Baby Blanket

Fading Blocks Mitered Knit Blanket

Safe Space Blanket

Broken Crayons Blanket

North Easterly Blanket

Fair Haven Picnic Blanket

Tunisian Join-As-You-Go Blanket Patterns

I know some of you out there can’t get enough of Tunisian crochet, so we managed to find these awesome patterns for you! You’ll find squares, strips, and even a spiral. This one’s a bit of a cheat, but you could make it bigger and use it as a blanket – it’s just such a cool design it had to be included.

7 Tunisian crochet blankets in various colors and designs - Marly Bird

 If you know of any more fabulous Tunisian crochet join-as-you-go blanket patterns, please be sure to share them with us in the Facebook Group.

Tunisian Entrelac Crochet Baby Blanket

Auntie Bees Entrelac Tunisian Blanket

Tunisian Strips Blanket

Only A Tunisian Quilt

Tunisian Spiral Rug/Blanket

Lake Pepin Blanket

Easy Tunisian Baby Blanket

Video Tutorials

There’s nothing better than watching how to do something when you’re just not sure. That’s why I make these videos – so you can look over my shoulder and see exactly what I’m talking about. I explain every little thing step-by-step, working join-as-you-go, where to put your hook, and how to keep your work even. 

Though here I’m working on specific patterns, these instructions can be applied to any JAYGO piece you’re working on.

Confetti Dots Join-As-You-Go-Video tutorial 

Byars Baby Blanket Join-As-You-Go-Video Tutorial

Frequently Asked Questions

What is join-as-you-go (JAYG) construction?

Join-as-you-go means you attach each new motif to existing motifs AS you finish it… rather than making all your squares first and then seaming them together in a separate step at the end. On the final round of each motif, you join to neighboring motifs by crocheting into their edge instead of working a free-standing stitch. The blanket assembles itself as you go… by the time you've made all your motifs, they're already joined. No marathon seaming session at the end!

Is JAYG easier than making all squares then seaming?

Many crafters find it easier, yes! There are no separate seaming sessions, no risk of losing a square, and you see the blanket taking shape incrementally as you work. The learning curve is understanding the join on that last round (where to insert your hook, how to work into neighboring motifs), but once you've done it a few times it becomes second nature. The main thing to manage is keeping track of which edge connects to which motif as your blanket grows.

What types of motifs work with JAYG construction?

Any motif that's worked in rounds and has a definable edge! Granny squares are the classic JAYG motif. Solid squares, hexagons, pentagons, triangles, circles within squares… all can be joined as you go. The edge of the motif provides the stitches you work into for the join. Even more unusual shapes like octagons and mixed-motif arrangements can use JAYG principles. The collection covers crochet, knit, and Tunisian versions, showing how the concept works across different craft techniques.

What do I need to know before starting a JAYG blanket?

Plan your layout before you start! Sketch out which motifs connect to which neighbors so you know the joining order. The order matters because you can only join to motifs that are already completed and positioned correctly. Most patterns specify a joining sequence. Also: make sure all your motifs are the same finished size before joining… uneven motifs create a lumpy, distorted blanket. Blocking individual motifs before joining helps ensure consistency. Start with a corner or edge motif and work in a logical direction.

Can JAYG construction work for Tunisian crochet blankets?

Yes! The collection specifically includes Tunisian JAYG options, which is wonderful because Tunisian blankets worked in panels can be joined as you go using similar principles to standard crochet JAYG. Tunisian JAYG allows you to create Tunisian-fabric blankets without having to work the full width in one unwieldy piece… you work narrower panels and join them as you progress. If you love Tunisian crochet but find the large blanket scale daunting, a Tunisian JAYG approach makes large projects much more manageable.

Filed Under: Crochet, Free Patterns, Knitting, Round Ups

Crochet FLO BLO And 3rd Loop FAQs

September 9, 2023 By Marly Bird Leave a Comment

This might seem like a new crochet language, but truly, it’s not. Acronyms or abbreviations make patterns so much quicker and easier to write. If you don’t know what they mean, it takes a little learning, but it’s really not that hard. Basically, crochet FLO BLO and 3rd loop are all slightly different locations where you can place your hook to form a stitch. Each one gives a different look to your crochet fabric as it pushes the stitches already worked to one or the other side of the fabric.

Crochet FLO BLO and 3rd Loop. Images marking which is which loop in crochet. Front loop only, and back loop only. Marly Bird

Because abbreviations are the way to go in pattern writing, there’s always a list of those terms used within each pattern (or there should be). If you come across a pattern that doesn’t have an abbreviations list, it’s likely not been written by a professional crocheter. So, let’s take a look at a few common questions about FLO and BLO. We’ll tackle 3rd loop in a little bit.

What is FLO in crochet?

FLO in crochet means Front Loop Only. This might not be immediately useful to you, but it will become clearer once you see this in the picture below. 

What does BLO mean in crochet?

BLO in crochet means Back Loop Only. See the image below for the positions of FLO and BLO.

Arrows pointing to back loop and front loop looking down at the top row of stacked Vs in crochet. Crochet FLO BLO and 3rd loop. Marly Bird

Which loops are the front loops?

The front loop is the leg of the top V that is closest to you as you work. This means that the back loop is the leg of the top V that is farthest away from you as you work along the row. The front loops and back loops switch names once you turn to work along the next row. What was the front becomes the back, and vice versa.

What's the difference between back and front loop crochet?

Working into the back loop along a row means that the front loop of the row you’re working into stands out as a line along the side of the work facing you. Working into the front loops makes the back loop line along the row you’re working into stand out away from you. You’ll often find that this technique of alternating rows of FLO and BLO is used as ribbing or cuffs. It’s another way to create lines and texture in crochet.

How do you crochet front and back loops?

Instead of working under both loops of the top V, you can work into one or the other (front or back loop of each V) along the row or alternate your hook placement. Just follow the instructions of whatever is called for in the pattern.

Here’s a video of crocheting FLO. You’ll see that you insert your hook under only the front loop from the bottom upward so your hook comes out between the front and back loops, splitting the top V. 

This video shows how to crochet BLO. Here, your hook goes from the center of the top V downward and out behind your work catching only the back loop.

Does the loop on your crochet hook count as a stitch?

No – the loop already on your crochet hook (the working loop) is NEVER counted as a stitch, no matter which crochet stitch you’re working.

Do you crochet through both loops or just one?

Unless stated otherwise in the pattern (e.g., FLO, BLO, post, 3rd loop, between), all crochet stitches call for you to work under both loops of the top V. It’s only when the pattern tells you specifically to work into, between, or around some other part of the stitch that you change where you place your hook to begin your stitch.

What is the front loop on a crochet chain?

Since there are always stacked Vs along the top of your crochet piece, you can assume that the V should sit on the top of the crochet chain with the bump sitting underneath. As above, this would make the leg of the V nearest to you the front loop.

But, in order to get a nice neat line of Vs on the beginning edge of your work, I like to flip the chain over and work my first row of stitches into the back bumps of the crochet chain.

But what’s the 3rd loop?

The 3rd loop only appears in half double crochet stitches. Once you complete a half double crochet stitch, flip your work around and check out the back side of the stitch. Just below the top V, you’ll see a bar or 3rd loop. Half double crochet is the only crochet stitch that has this obvious horizontal bar directly below the top V.

For more information on these interesting crochet stitch techniques, check out this post on crochet stitch anatomy. In addition to BLO, FLO, and 3rd loop, you’ll also find information about crochet post stitches which you need for working crochet cables.

I hope you’ve found this crochet FLO BLO and 3rd Loop FAQ post useful!

If you need more information about crochet stitches or terminology, check out our page of crochet definitions.

Scroll a little way down this page for common crochet techniques.

And, if you want to search for a specific video, then try my Marly Bird YouTube channel.

Happy Crocheting!

Filed Under: Crochet, Tips, Tricks, Techniques for Knitting and Crochet

5 Must-Have Fall Crochet Wardrobe Staples

September 7, 2023 By Marly Bird Leave a Comment

When it comes to fall, the nighttime temperatures drop, and you begin to see your breath in the air. When you step out the door in the morning, there’s a chill, and you zipper up that jacket just a little higher. You wish you’d grabbed that scarf you love so much. That’s when you realize there’s no better time to make yourself some new fall crochet wardrobe staples. 

So we decided to gather a few pieces we love and feel that you might need for a fall crochet capsule collection.

Fall Crochet Wardrobe Staples. Roundup of cardigans, cowls, sweaters, jackets, and shawls. Marly Bird

Whether you’re a beginner crocheter or more experienced, there’s something here for everyone. There are hoods, zippers, buttons, fringe, granny squares, cables, and colors galore, so there’s bound to be something that catches your eye and spurs you to grab that hook and get crocheting.

So What Are Wardrobe Staples?

Wardrobe staples are basically standard items of clothing, usually classic pieces that don’t generally go out of style and that you can dress up or dress down. They’re usually easy to mix and match, too. 

But honestly, how many of us stick with a half dozen carefully curated pieces of clothing we wear all the time? Probably not many. We tend to go through phases of trying different styles to find what suits us best.

Well, I’d say everyone needs at least 5 pieces for a fall wardrobe: a cardigan, a sweater, a shawl, a cowl, and a jacket.

If you have all of these, you can layer them up as the temperature dips or peel them off as needed (if we get an Indian summer). Of course…one of each is only a starter. You’re welcome to add more to your collection, but one of each piece will be a great place to start!

So, let’s get to the good stuff! 

Check out these patterns and let us know in the Facebook group which are your faves and what you’re adding to your must-do list!

Crochet Cardigan Patterns

5 curated crochet cardigan patterns for fall.

We all love crochet cardigans, right? They’re so great to snuggle in, especially if they’re so roomy you can actually curl up in them. We wanted to give you a choice, so here’s a few selections with hoods, pockets, buttons, and no buttons. 

Which will you make next?

Granny Pop Cardigan– A cardigan worked just like a granny square! Anyone can do this!

Boho Granny Cardigan – This one’s long and colorful – could even be called a coat. Get cozy in this colorful creation!
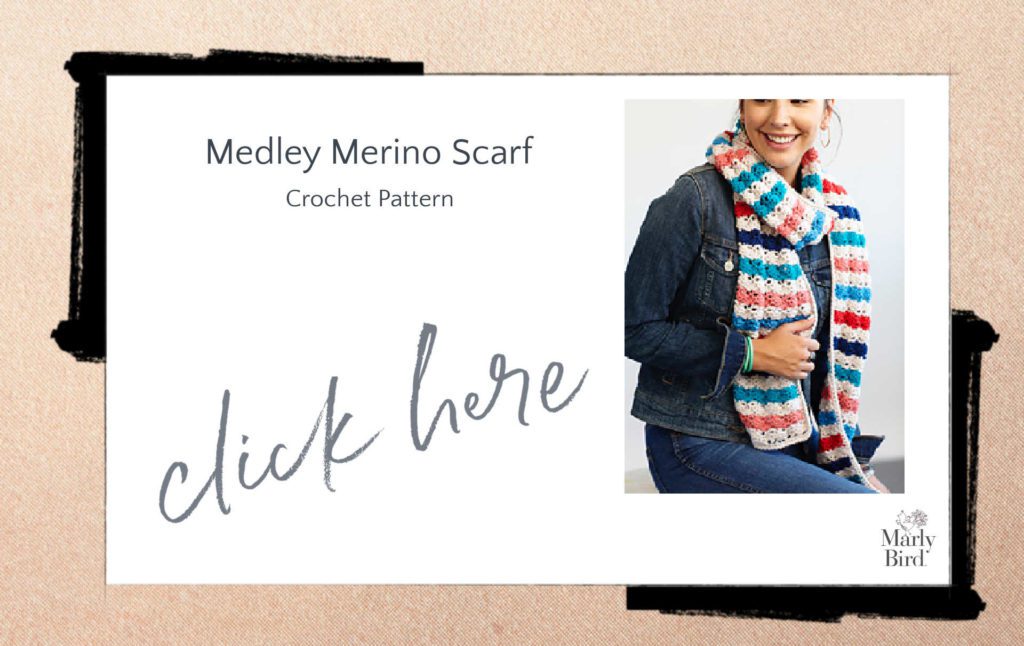
Patchwork Cardi – A classic style with colors of your choosing!

Habitat Cardigan – A single-color slouchy cardigan you can really snuggle into.

Green Groves Cardigan – It has cables and a hood! But don’t worry…find out how to work crochet cables here!

Fall Crochet Wardrobe Staples: Crochet Sweater Patterns

5 crochet sweater patterns suitable for a fall crochet wardrobe. Marly Bird

Crochet sweaters are an awesome choice for fall. Sometimes you need something that doesn’t have a closure in front that you don’t have to think about keeping closed. Some here are a little lacy, but that just means you can layer up. Choose a complementary color for the top you wear underneath for a cohesive layered look.

Granny Stitch Crochet Sweater – If you can crochet a granny square, you can make this sweater!

Crochet Ribbed Sweater – Many crocheters want the knit look without learning to knit. THIS is that sweater!

Mint To V Sweater – A perfect transitional sweater to layer or not.

Crochet Hoodie – Fall isn’t fall without a crochet hoodie!

Wavy Crochet Sweater – Though this is a cropped sweater, nothing is stopping you from making it longer or wearing it over a tunic-length tee.

Crochet Shawl Patterns

5 crochet shawls with hoods, pockets and various stitch types. Marly Bird.

Fall isn’t fall without a shawl (or two, or three!) Seriously! You need a whole closet (or wardrobe) full of shawls to match every outfit. Don’t you agree? 

Not to mention, shawls are fun and reasonably quick to make. They’re great for a gift, but you should definitely save some for yourself!

Take your pick of these!

Nova Hooded Triangle Shawl – This could take the place of a cardi – so cozy and fun!
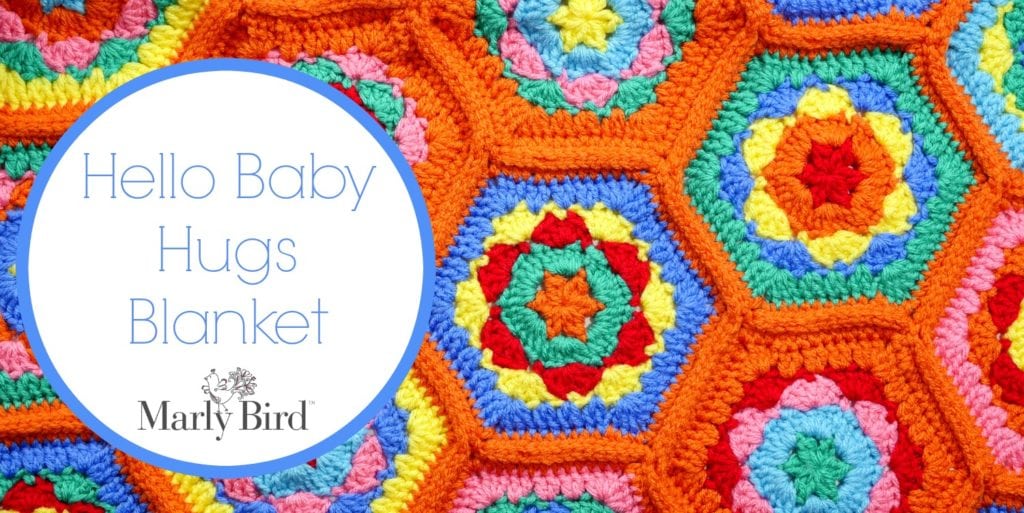
Boho Shawl With Pockets – It has fringe and pockets! What more could you want?
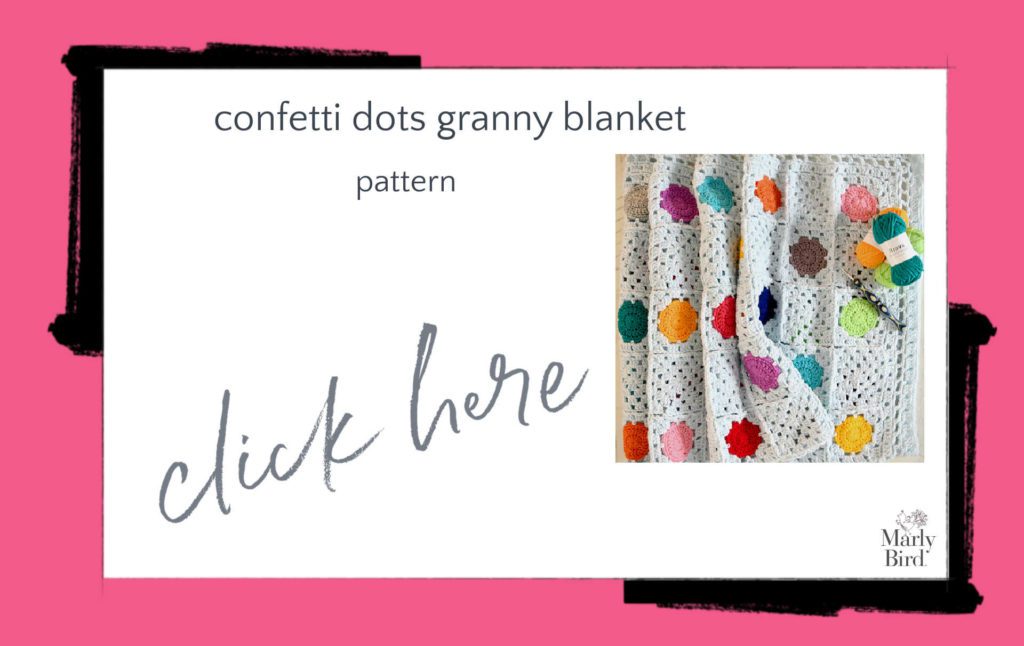
Better Together Hooded Shawl – Check out the colors in this one! Glorious fall at its finest!

Defiti Shawl – Texture, colors, stitch patterns…this one has it all!

Beginner Button Wrap – Super-simple but really cute for fall. You can do this!

Fall Crochet Wardrobe Staples: Crochet Cowl Patterns 

Cozy crochet cowls for fall. Marly Bird

Who wouldn’t want to make a crochet cowl? Like shawls, they’re a fabulous gift, and there are so many styles out there, there’s enough choices to satisfy even the pickiest of crocheters or recipients.

Larger hoods seem popular and oh-so cozy when the nights draw in quickly, so check these out. Hoods rock!

Bohemian Hooded Cowl – This is so cute and easy enough for beginners!

Keyhole Cowl – This is an unusual design, but still very simple and has a great look!

The Braids Cowl – Super-easy cable look, but it doesn’t look easy!

Simple Crochet Cowl– Longer length cowl that doubles as a capelet.

Esmerelda Cowl/Hood – Wear piled up around your neck or pull up over your head as a hood.

Crochet Jacket Patterns

Crochet jackets for fall crochet wardrobe staples. Malry Bird

Whether you call them jackets or cardigans, no matter, they both fasten up the front somehow and can really pull a look together. We’ve chosen a few stand-out designs here for your crochet pleasure.

Visual Illusion Jacket – Check this out!! It’s worked in squares and has a fascinating visual appeal!

Easy Hexagon Jacket With Hood – It’s granny stitch again, and it’s awesome!

Hooded Festival Jacket – Looks so long and cozy!

Hooded Puffer Jacket – This is so awesome – I’ve not seen a crocheted puffer jacket before!

Suit Jacket – Here’s one I’ve not seen before either. For a more formal look!

And…

One More Fall Wardrobe Staple You Can’t Live Without!

A knit poncho pattern for good luck!

I know I said crochet staples, but I’m so excited I just can’t resist telling you about my newest knit poncho pattern. 

Yeah, I know…but if you can’t knit (yet,) just wait ‘til you see…

If you sign up for this Knit Along (KAL), you’ll get portions of the pattern and helpful videos sent to you every week for four weeks, so you’ll not need to leave your couch!

Have someone else cook while you knit, and let them serve you at your seat!

Ok…you can leave your couch if you REALLY want to…but you’re truly going to love this so much you just won’t want to stop!

There’s a blog post up right now explaining how you choose the colors for this fantastical Color Kaleidoscope Poncho. Really – it’s STUNNING! Right?!

KAL Kaleidoscope Poncho -  your knit rainbow!

Check it out now, and make sure you sign up to join in the fun!

And if you need more crochet goodies…check out these bonus links to crochet poncho patterns.

Perfectly Panache Crochet Poncho Great for beginners – comes with videos.

Popular Poncho Another one with videos and great for beginners – this was a crochet along, so you’ll see how they work.

67+ Ponchos And Capes I swear, with this selection, you’ll never run out of patterns!

Frequently Asked Questions

What exactly are wardrobe staples for fall?

So here's the thing… wardrobe staples are basically those classic clothing pieces that don't really go out of style and can be dressed up or down. They're super easy to mix and match, which is always a win in my book!

I'm new to crochet… can I still make these fall pieces?

Yes! Honestly, there's something here for everyone, whether you're just starting out or you've been crocheting for ages. The post mentions things like hoods, zippers, buttons, fringe, granny squares, and cables, so there's definitely something that'll spark your creativity!

What are the 5 must-have crochet items for fall?

Well, I think everyone needs at least these 5 pieces for a great fall wardrobe: a cardigan, a sweater, a shawl, a cowl, and a jacket. Having one of each means you can layer them up when it's chilly or take them off if we get a warm spell!

Can I really use a crochet shawl as a cardigan?

Absolutely! Some of the shawl patterns mentioned, like the Nova Hooded Triangle Shawl, are so cozy and fun that they can totally take the place of a cardigan. It's like getting two pieces in one!

What's this about a knit poncho… I thought this was a crochet post?

Oh, you noticed! Honestly… I just couldn't resist sharing my newest knit poncho pattern because I'm so excited about it! It's for a KAL, and even if you don't knit (yet!), you'll want to check out the stunning color options for the Color Kaleidoscope Poncho.

Filed Under: Crochet, Free Patterns, Pattern, Round Ups

  • « Previous Page
  • 1
  • …
  • 13
  • 14
  • 15
  • 16
  • 17
  • …
  • 97
  • Next Page »

Let's Be Social

Join the Marly's Minions Facebook group to share, ask questions, or chat about all of your yarn related crafts!

Join the group
Cartoon of a smiling woman with brown hair in a bun, glasses, black jacket and green shirt, waving next to large "hi" text.

Quick Links

The Pattern Shop

Our Free Patterns

Blog

Marly Bird House

Learn to Knit & Crochet

About

Giveaway Terms and Privacy Notice

Find Us Everywhere

Join the Newsletter

YouTube Channel

Marly's Minions FB Group

Etsy Store

Ravelry Store


AN ELITE CAFEMEDIA HOME/DIY PUBLISHER

Information from your device can be used to personalize your ad experience. Do not sell or share my personal information.

Privacy Policy   Terms   Marly Bird Legal Documents Copyright © 2026