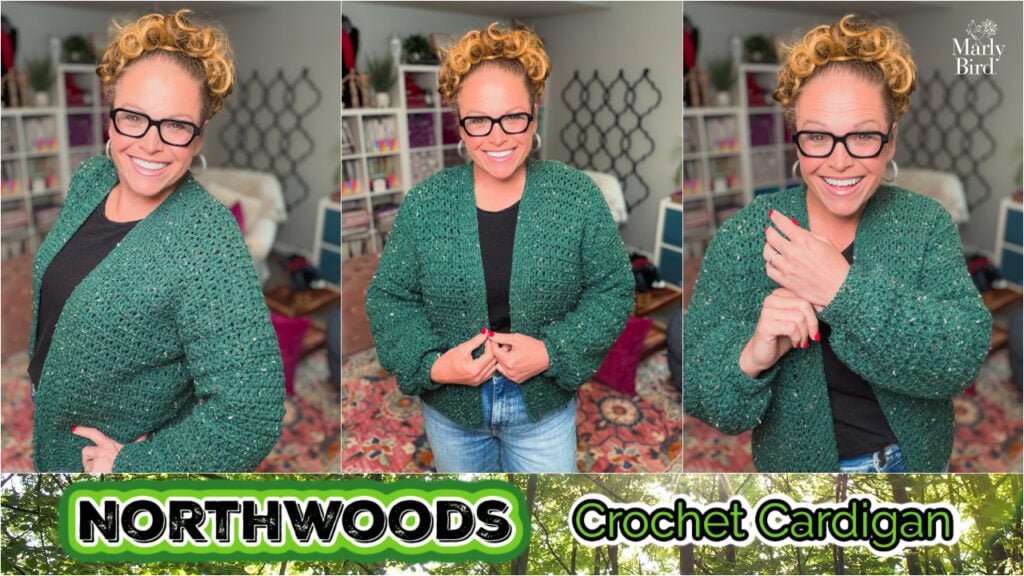
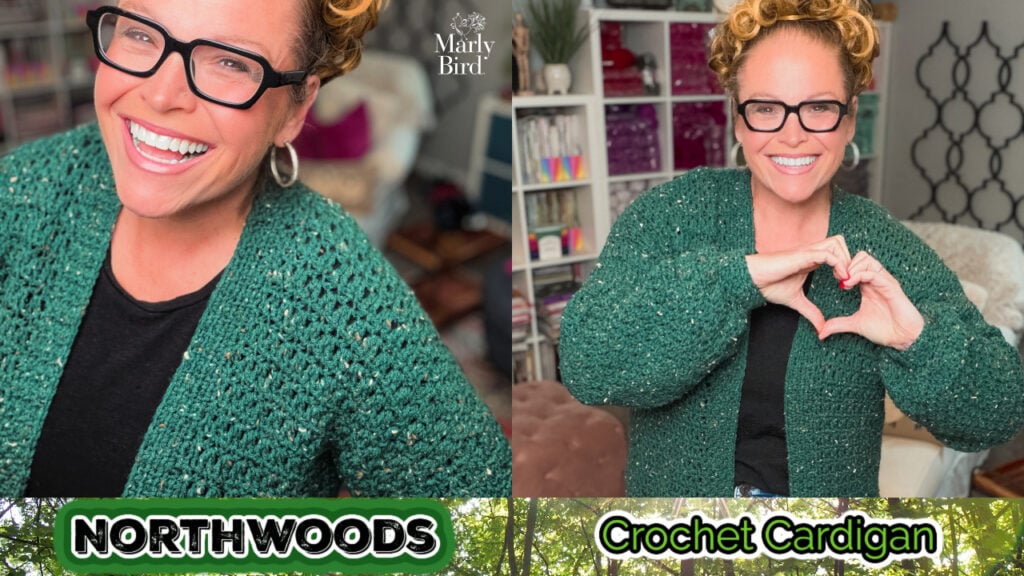
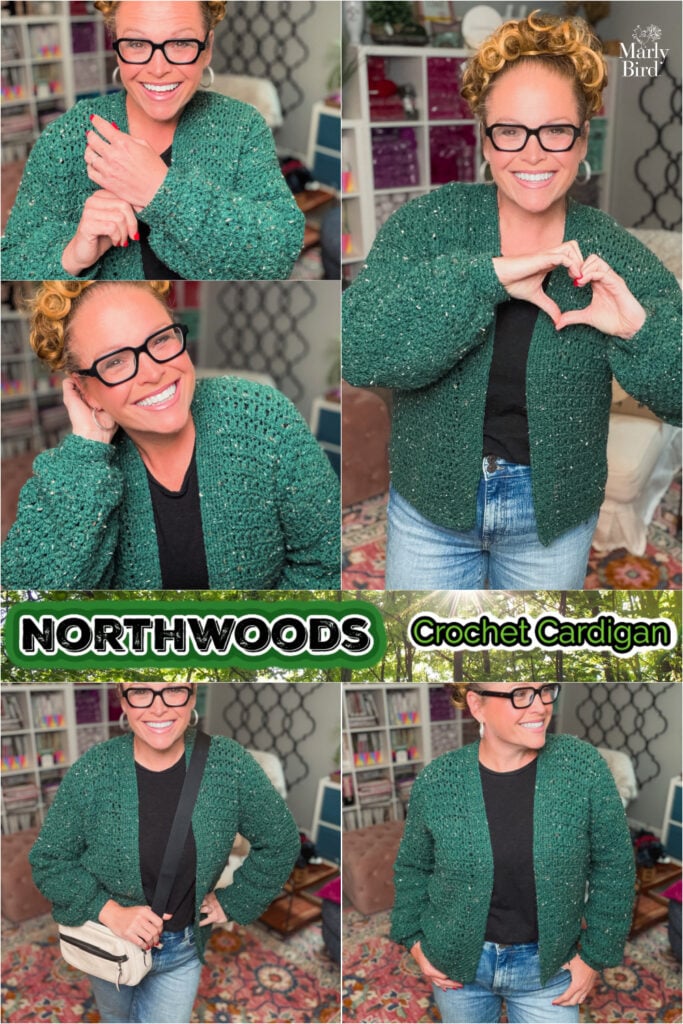
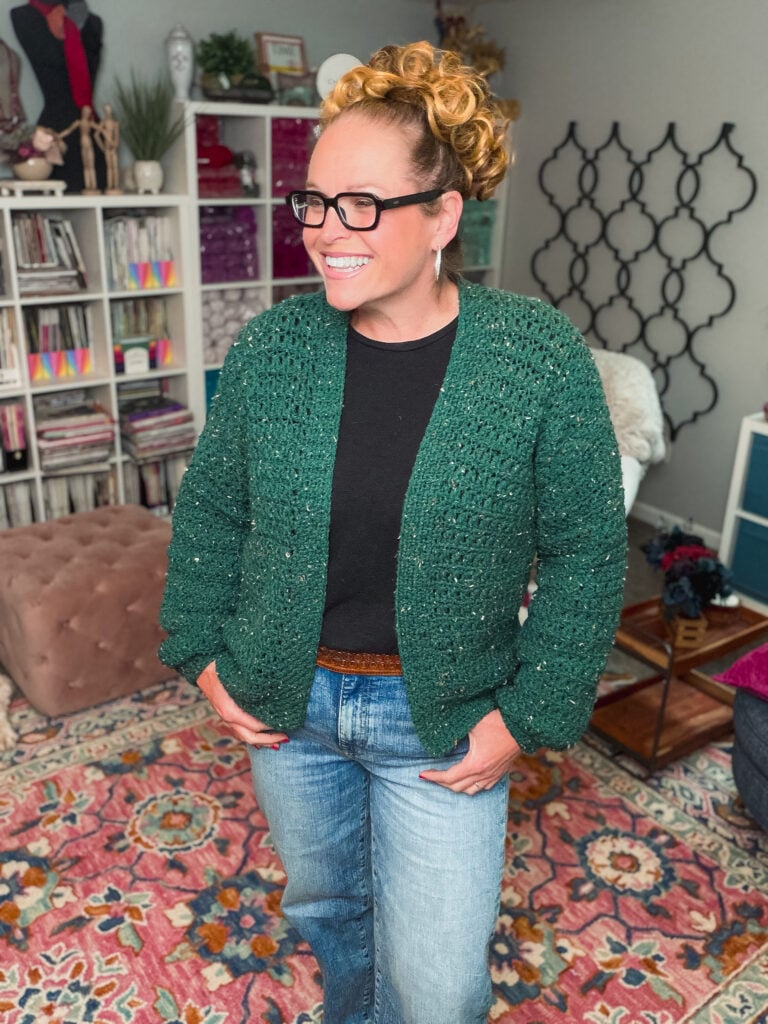
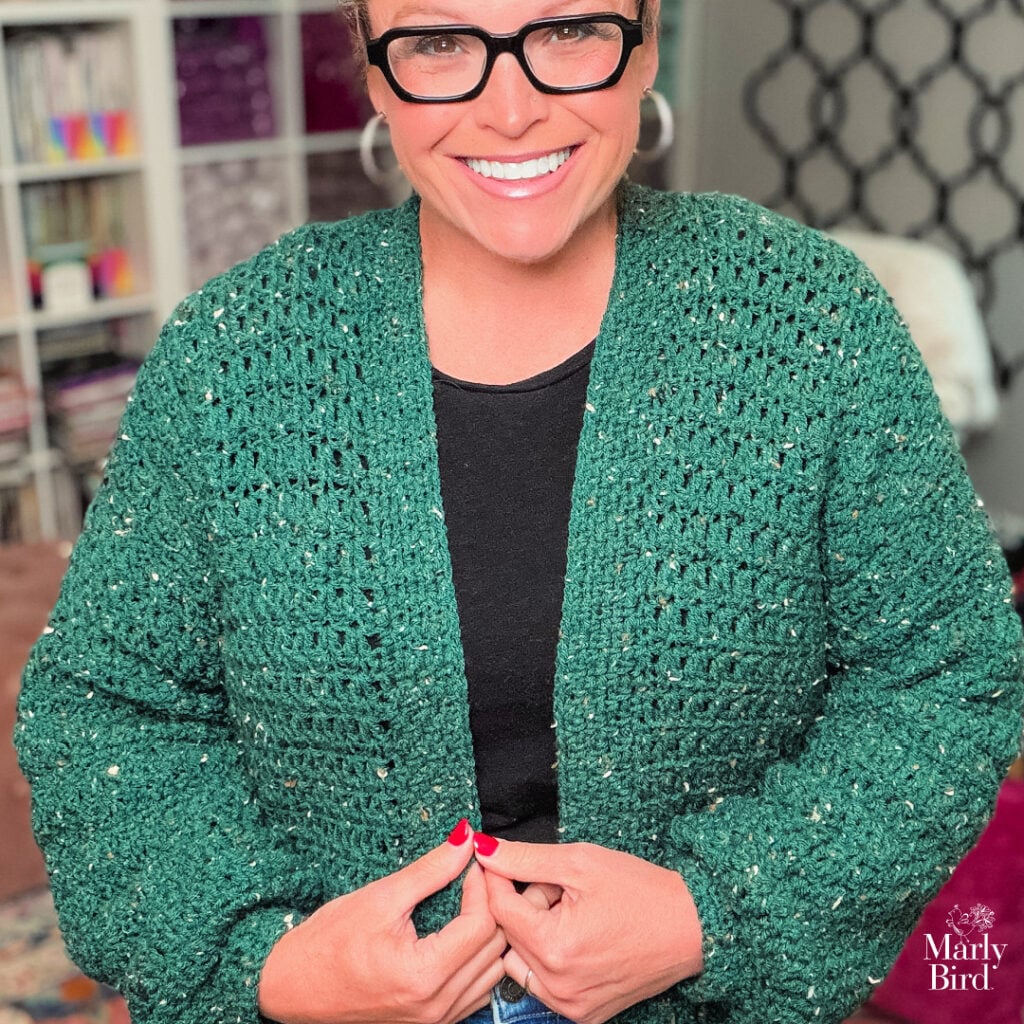
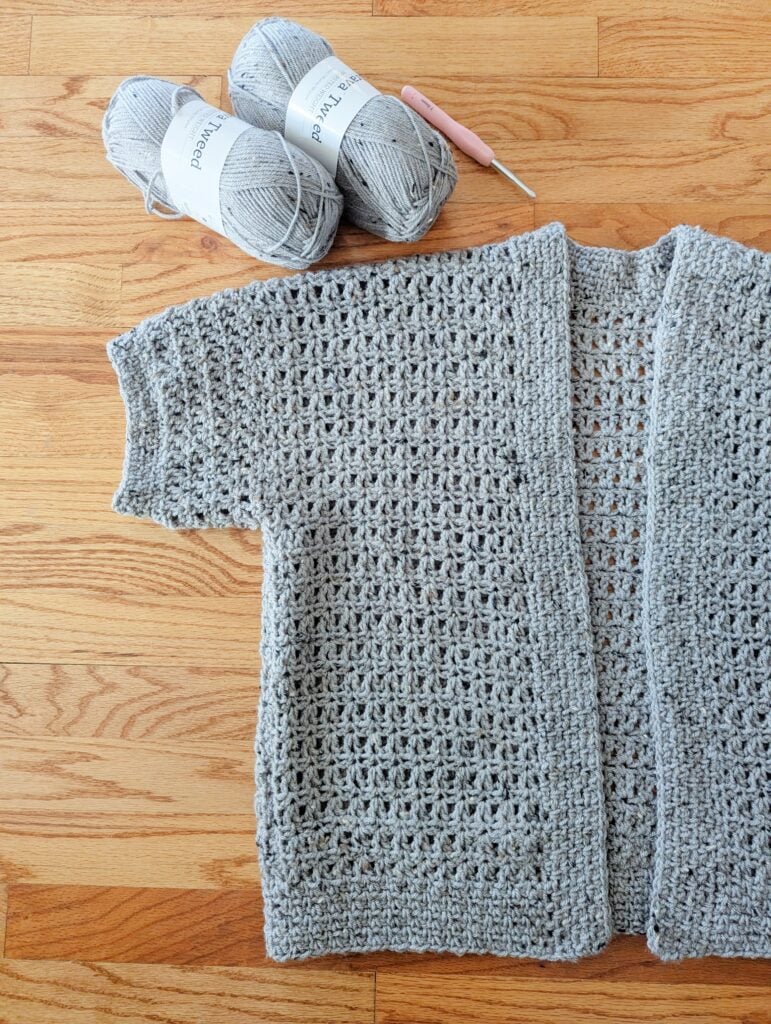
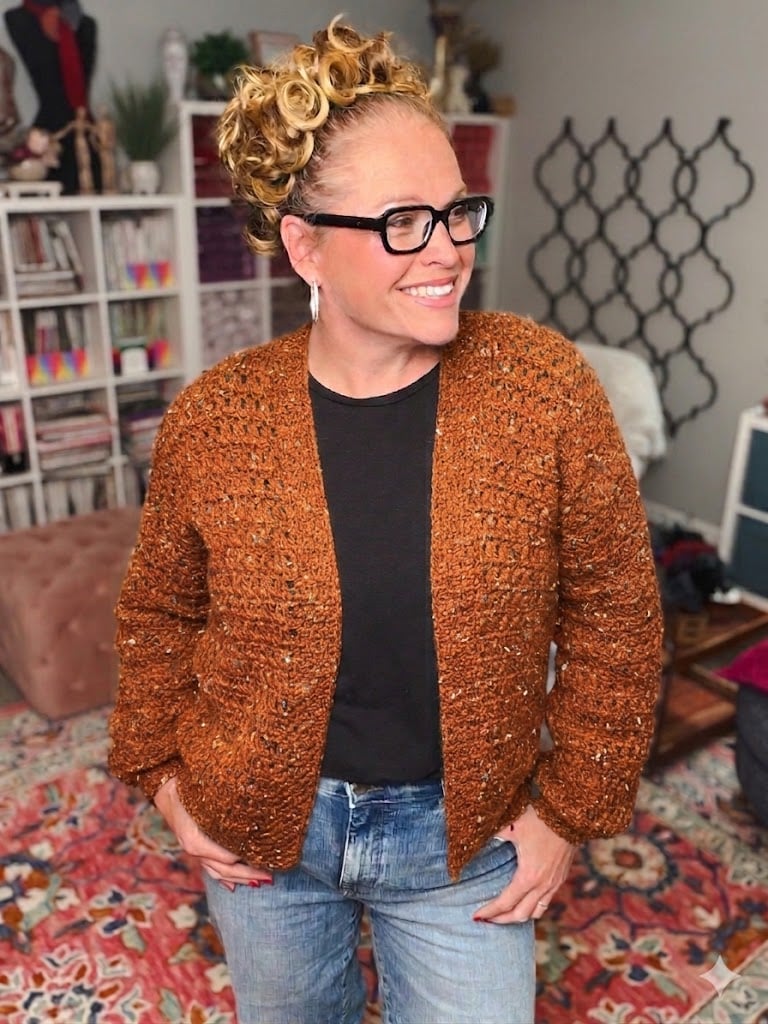
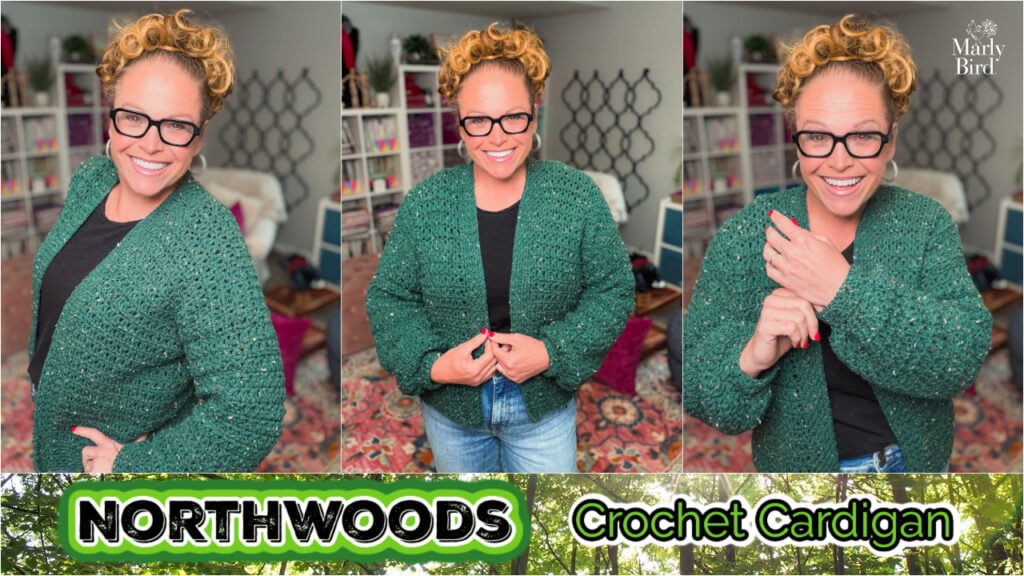
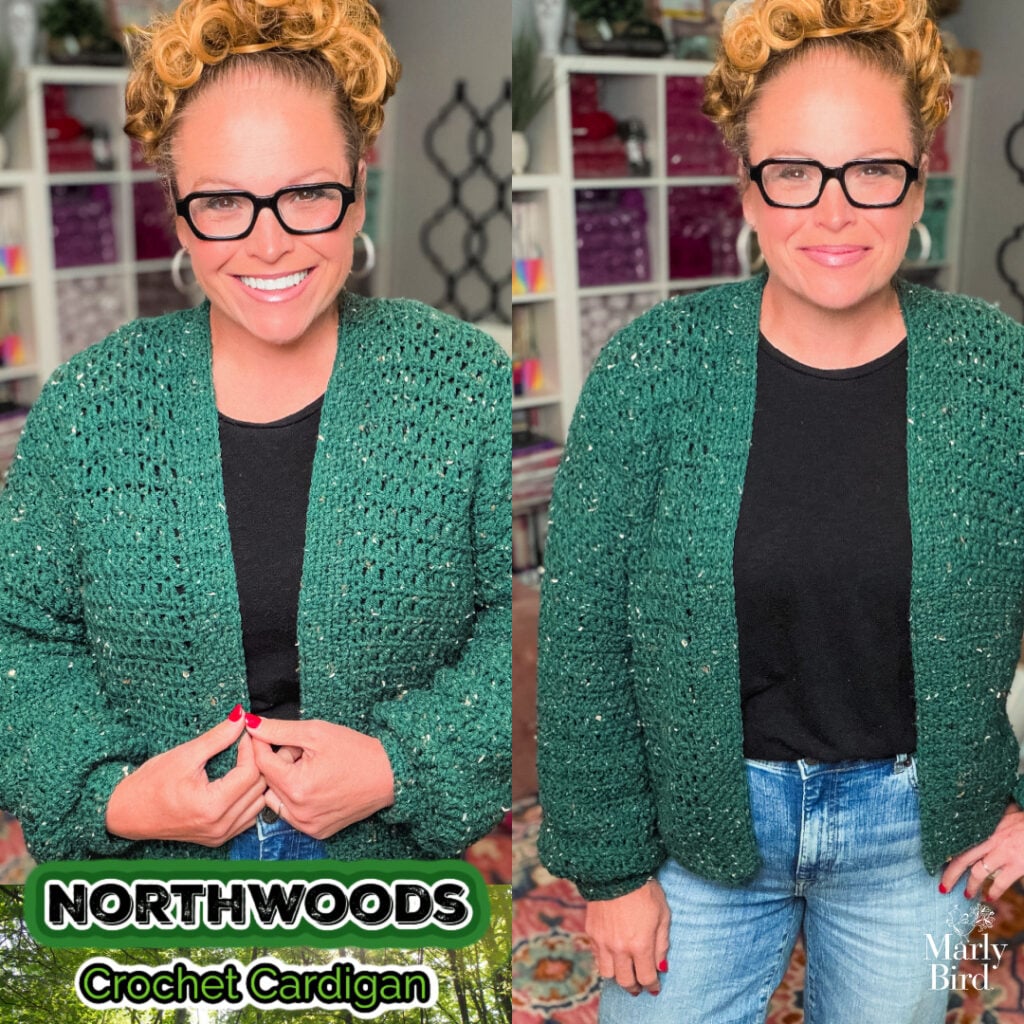
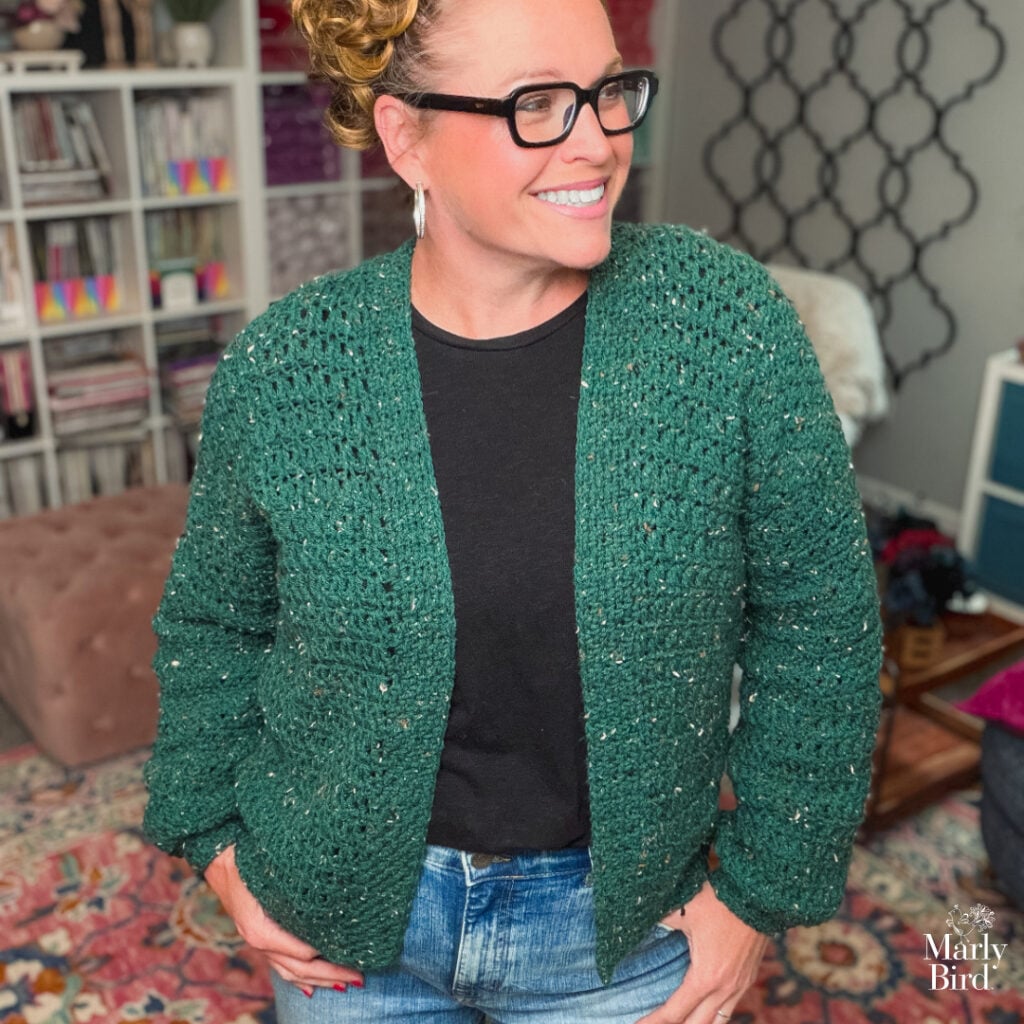
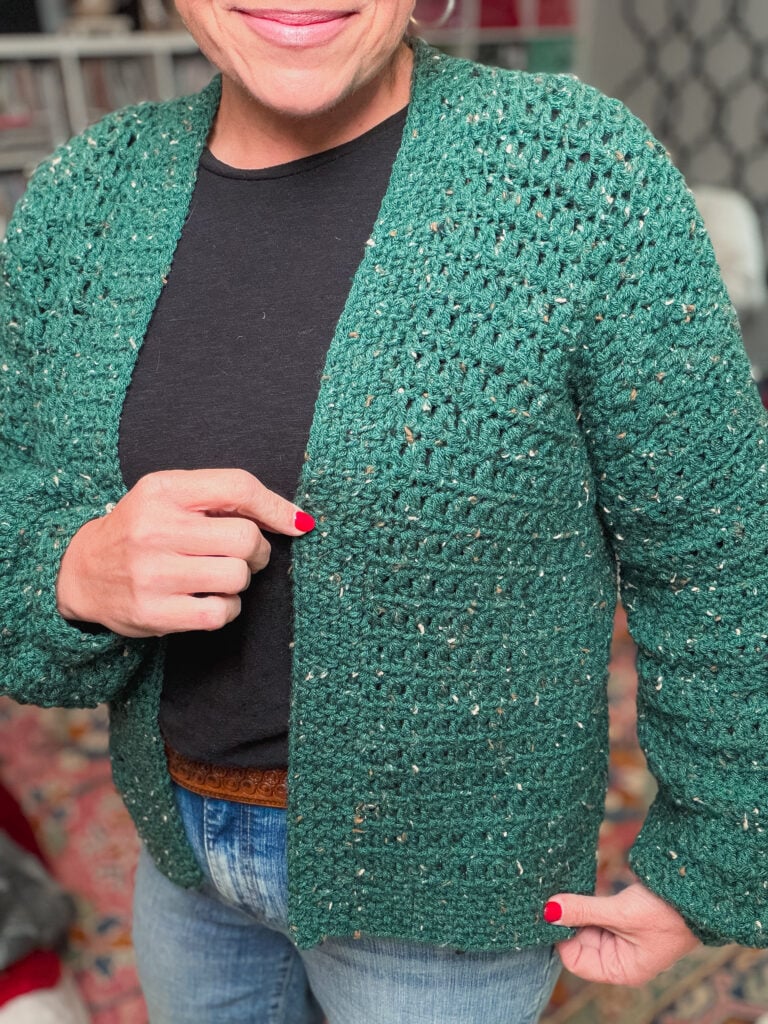
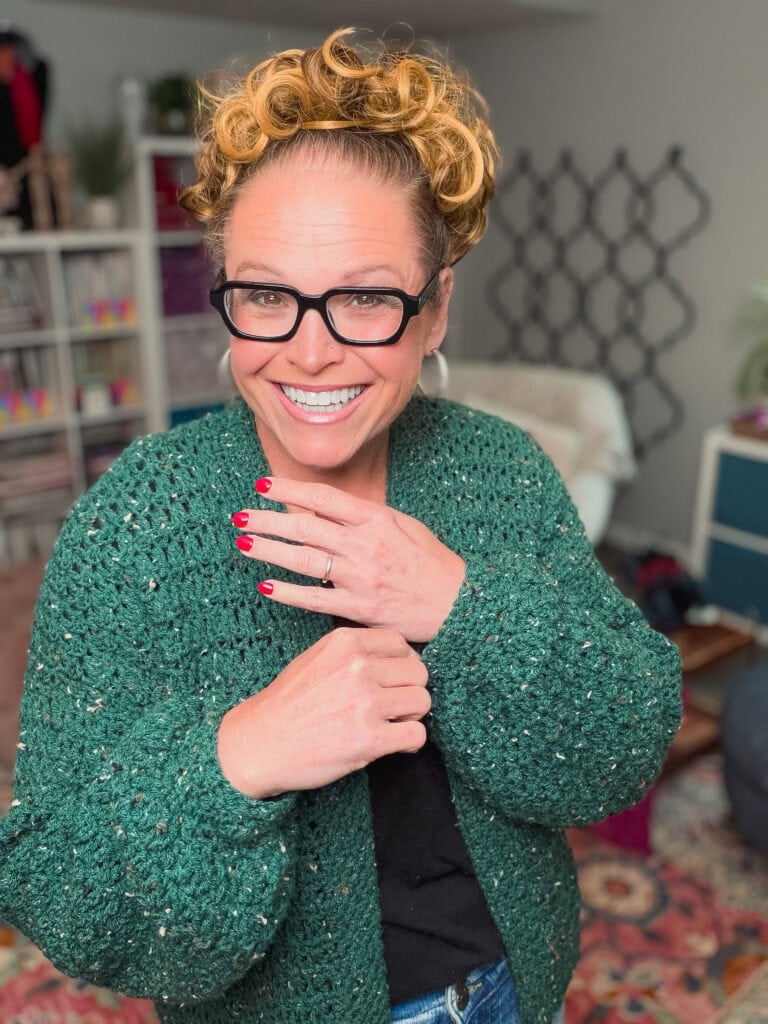
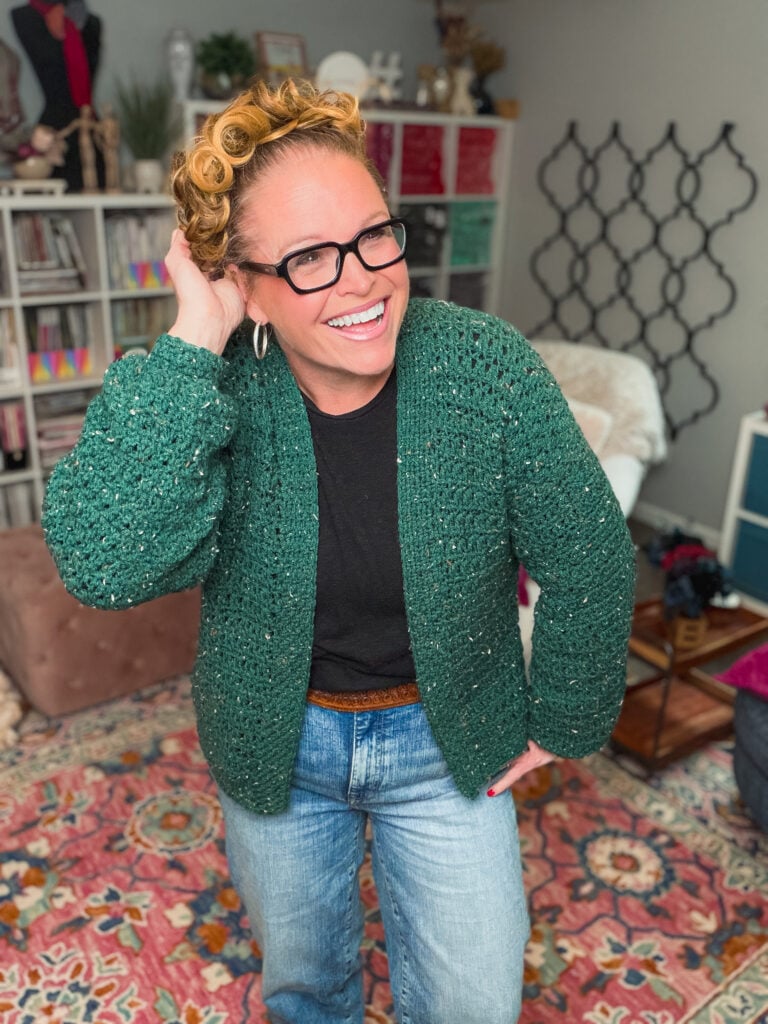
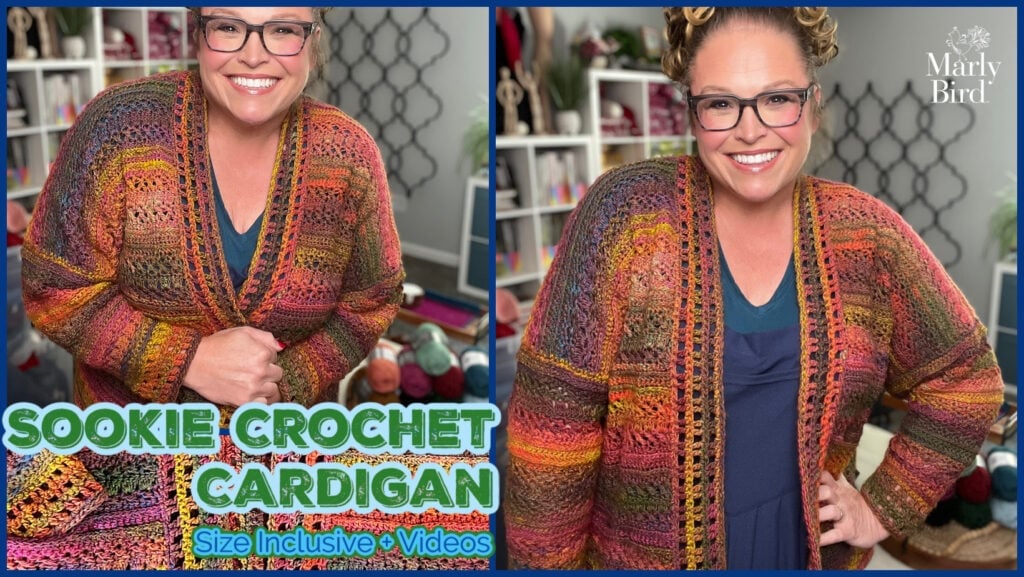
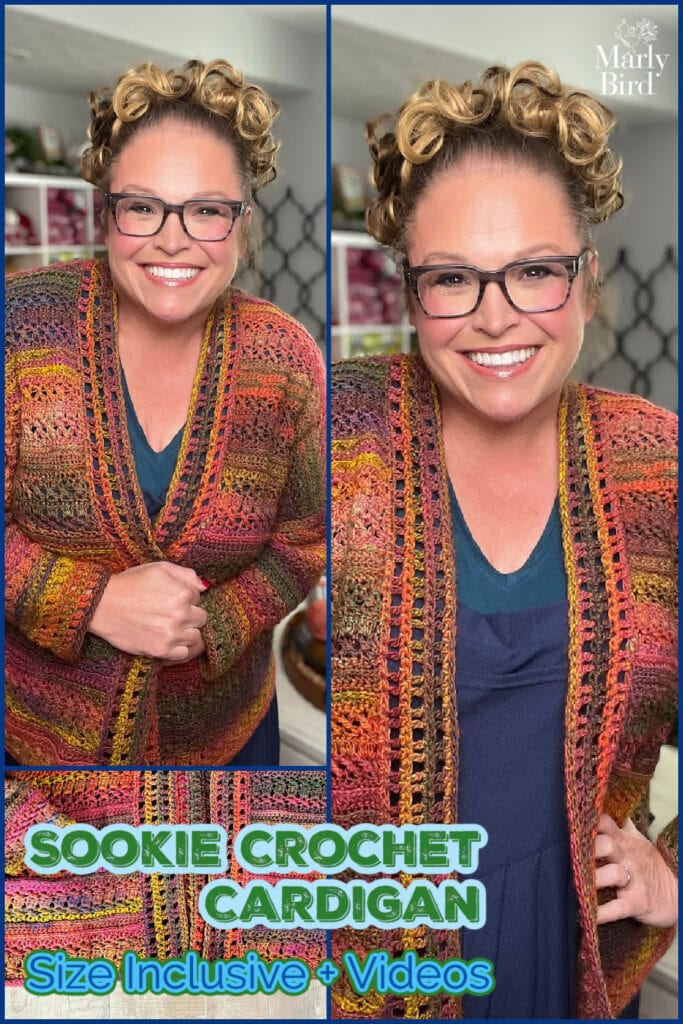
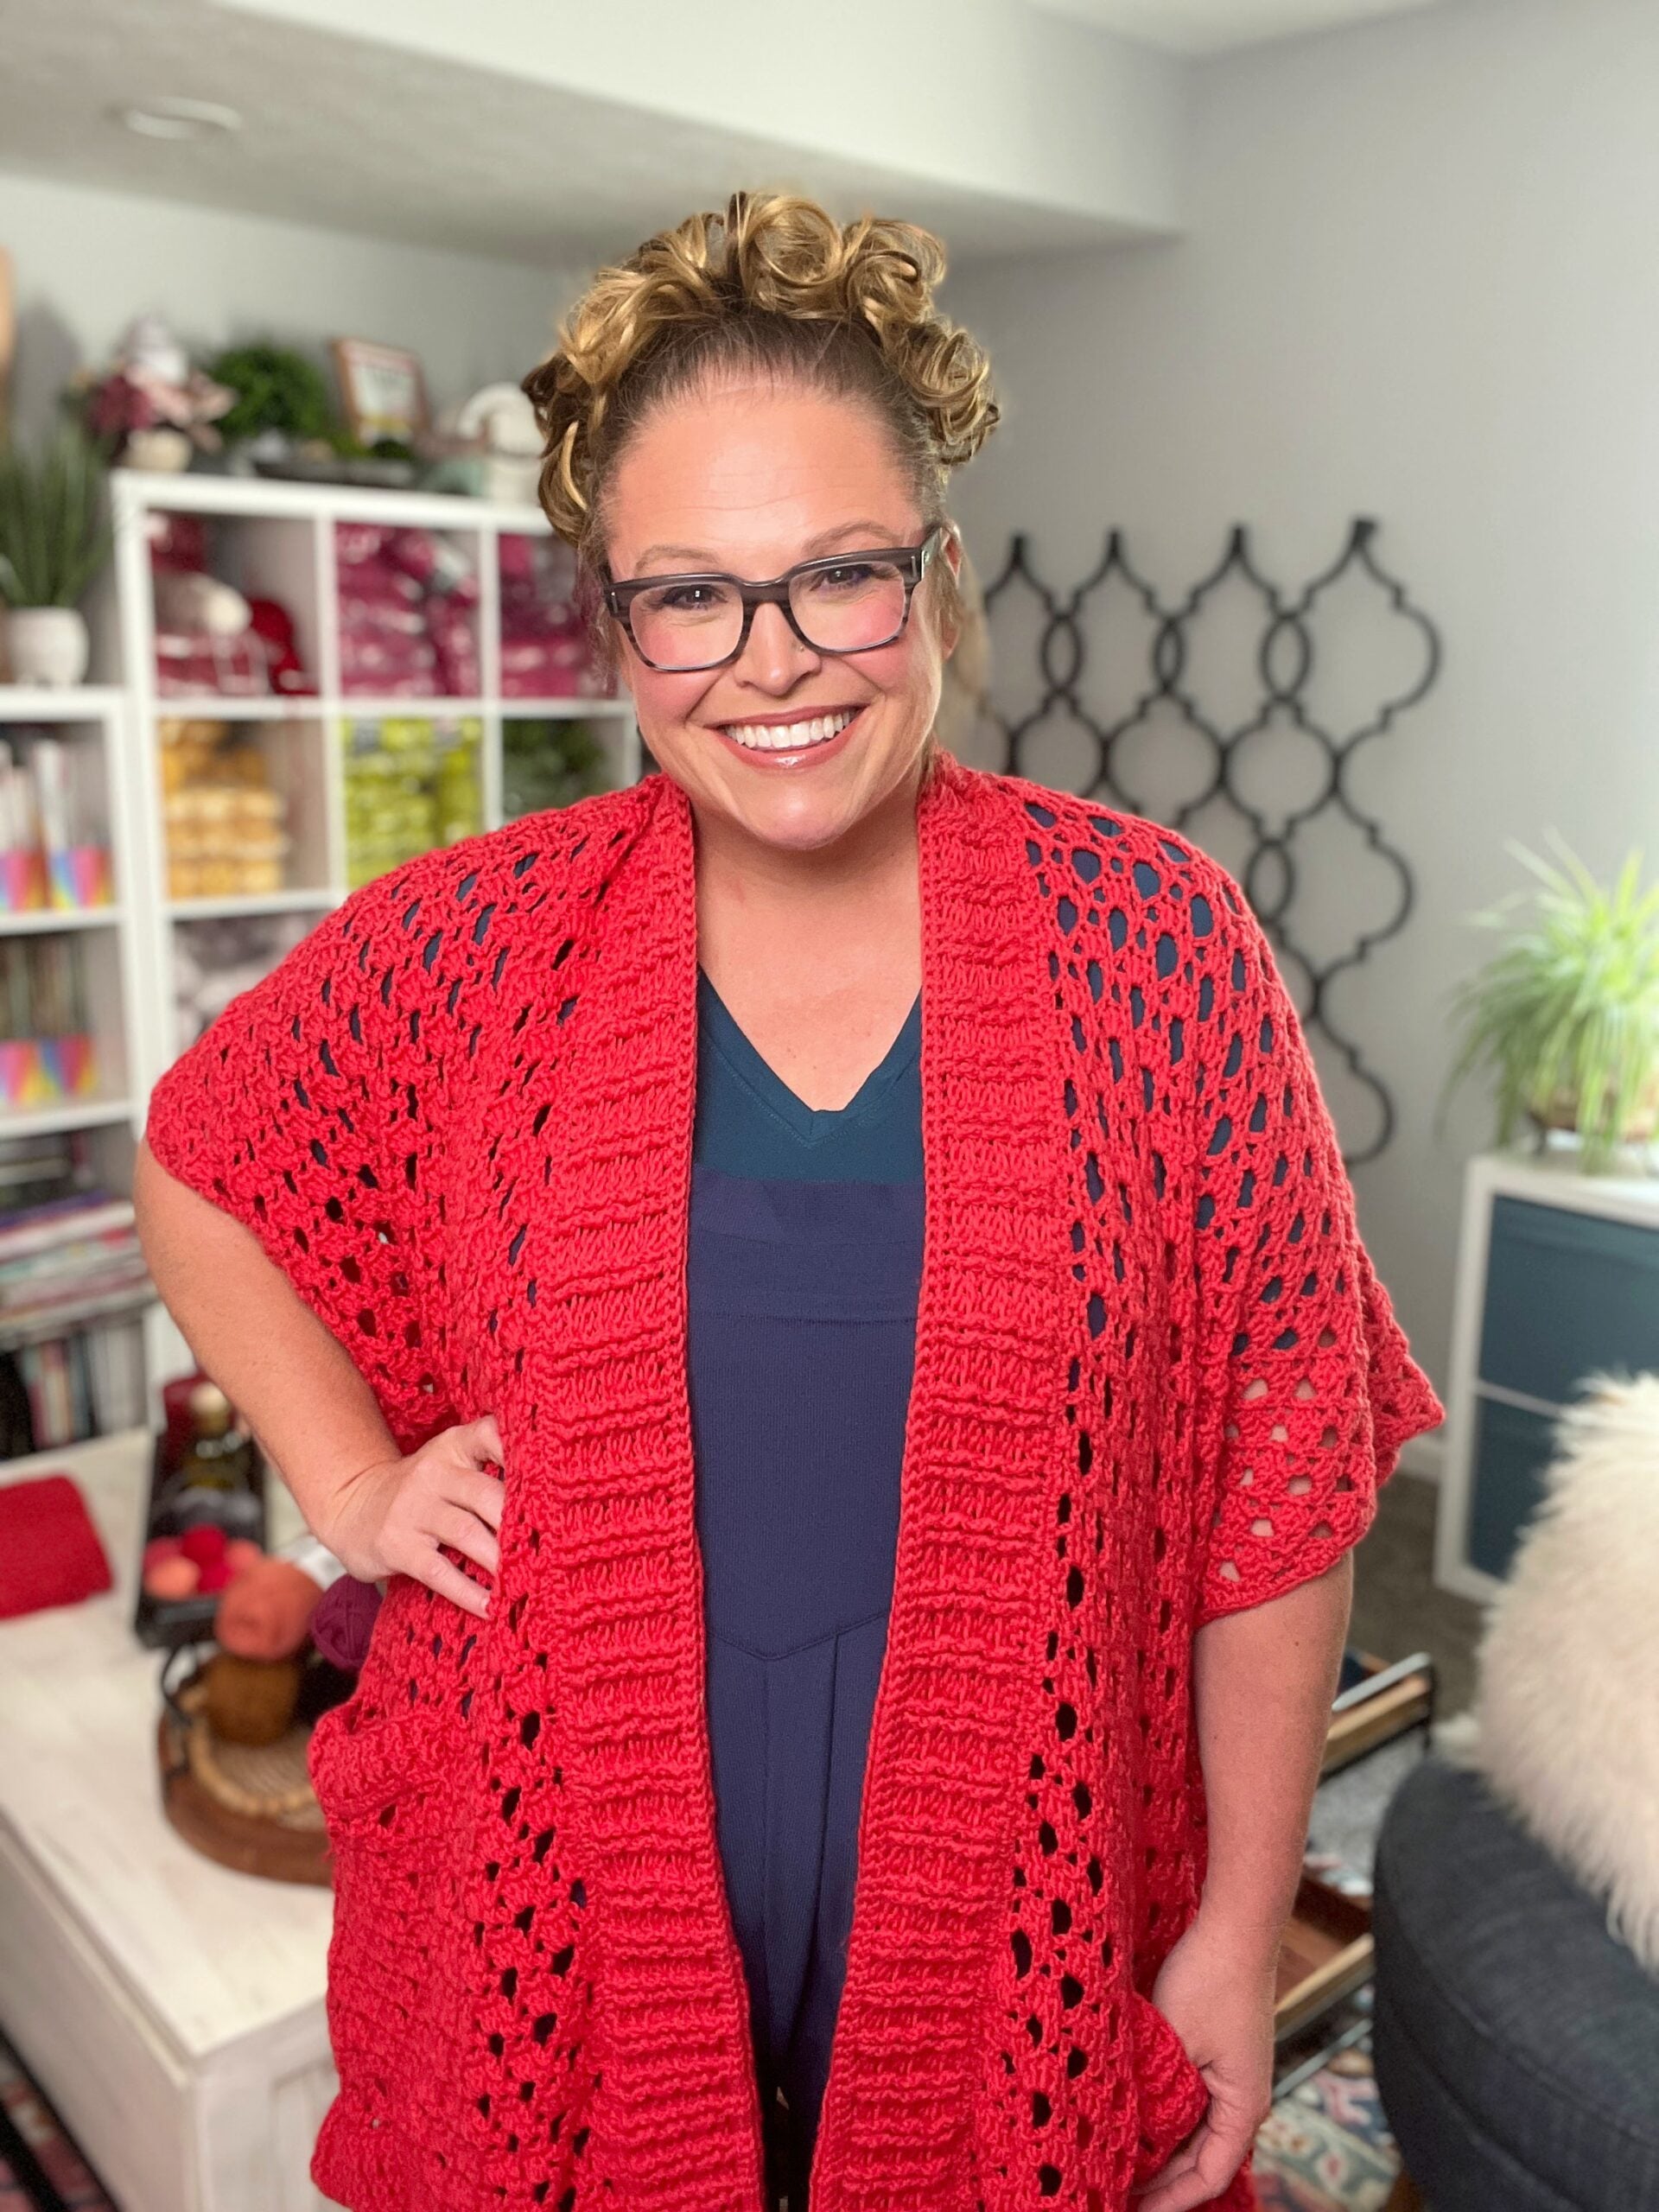
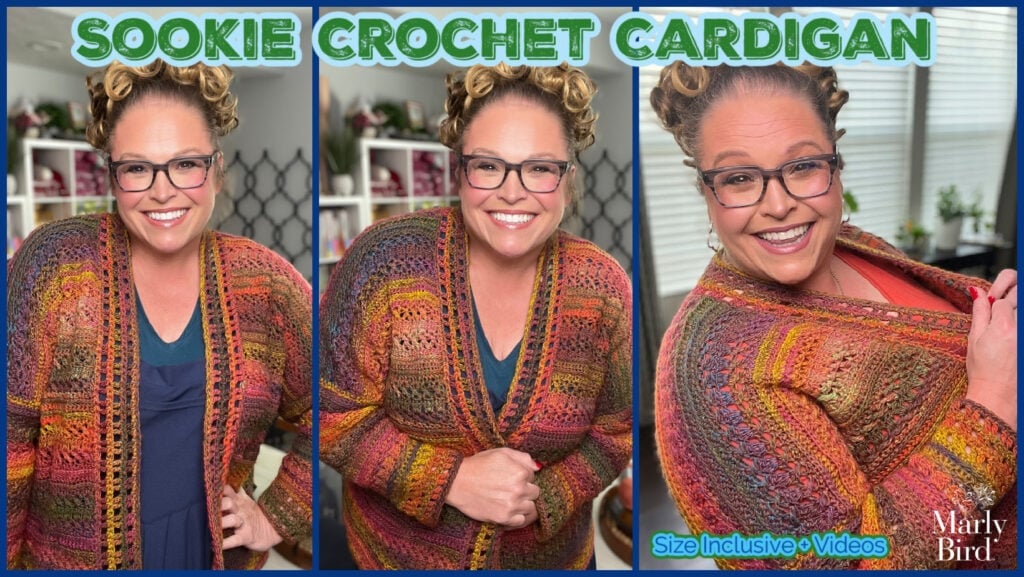
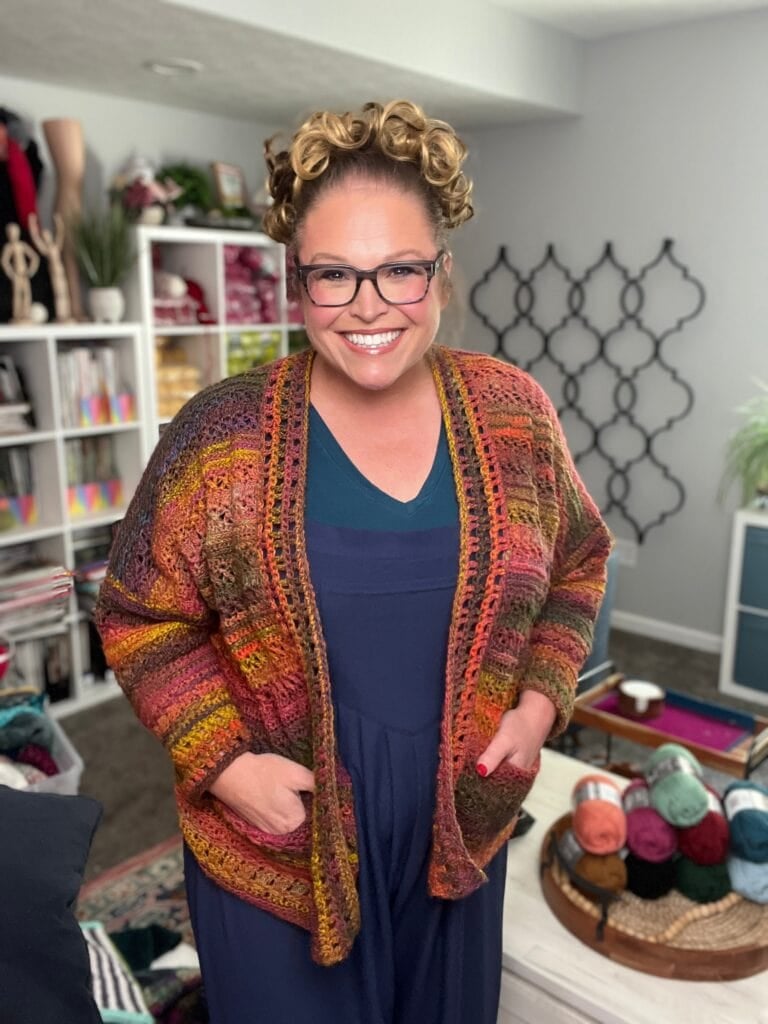
This is a free oversized crochet cardigan pattern. The Sookie Crochet Cardigan is a free crochet cardigan pattern designed by Marly Bird and Robyn Chachula, available in sizes XS through 5X (9 sizes total). Crocheted in panels and seamed together, this oversized cardigan features a gorgeous textured panel stitch pattern with optional side pockets, worked in affordable worsted weight Red Heart Roll With It Mélange. Skill level: adventurous beginner. Originally released during Marly's 2024 Turkey Trot Make-Along and now available as a complete standalone free pattern.
If you have been waiting for a free crochet cardigan pattern that actually fits your body, that you can start without buying anything specialty, and that comes out looking like something you'd buy at a boutique… meet the Sookie.
Hey, bestie 💛
This cardigan is one of my most loved patterns ever, and it was designed in collaboration with the brilliant Robyn Chachula during my 2024 Turkey Trot Mystery Make-Along.
We built it as a gift for our crochet community… oversized, cozy, perfect-for-fall, and sized from XS all the way through 5X so every single body gets to wear one. The pattern has been living as a multi-part event series on the blog since November 2024, and I am so glad to finally bring it home as one complete, standalone free pattern you can crochet start to finish without hunting across six different lesson pages.
This post contains affiliate links. If you purchase through them, I may earn a small commission at no extra cost to you… and it helps keep these free patterns coming straight from my yarn-loving heart to yours. 💛
What Makes this Sookie Crochet Cardigan Special?
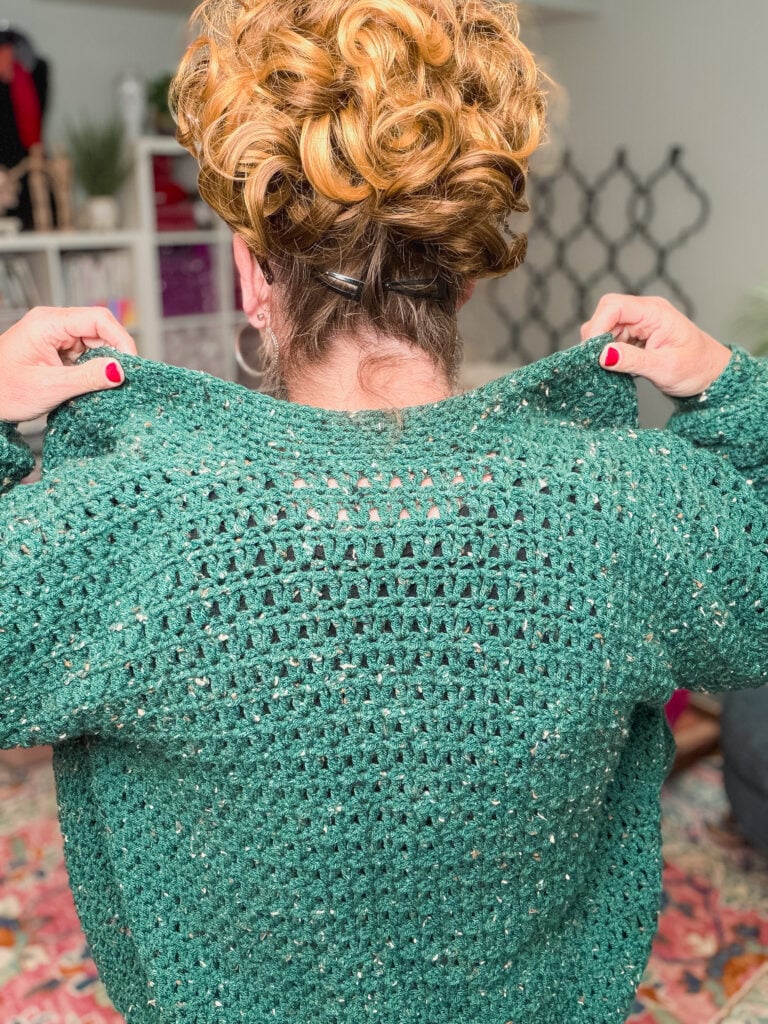
It is crocheted in two panels that get seamed together, with sleeves worked separately and joined at the armholes. That panel construction means the project travels with you, no big awkward heavy fabric in your lap, and each panel finishes in a satisfying burst. The stitch pattern is an elegant textured combination of double crochet, single crochet third-loop work, and a beautiful “x” cross-stitch effect that looks way more complicated than it actually is.
If you have been nervous about garment crochet… start here.
Sookie is genuinely approachable for an adventurous beginner, and I am walking you through every step.
Looking for the Original Turkey Trot 2024 Lesson Pages?
The Sookie Crochet Cardigan was originally released in six lesson pages during the Turkey Trot 2024 Mystery Make-Along event. Those original lesson pages are still live here on the blog for anyone who wants to revisit the event-paced walkthrough:
- Lesson 1: Gauge Swatch + Starting Your First Panel
- Lesson 2: Customizing Length
- Lesson 3: Color Management
- Lesson 4: All About Blocking
- Lesson 5: Sleeve Shaping
- Lesson 6: Finishing Touches & Seams
THIS post is the complete standalone version...
one blog post,
one pattern,
start to finish.
No hunting across six lesson pages. If you're new to Sookie, this is the easiest way to read the whole pattern. If you participated in the 2024 Turkey Trot and want to revisit the lesson-by-lesson experience, those pages are still here for you.
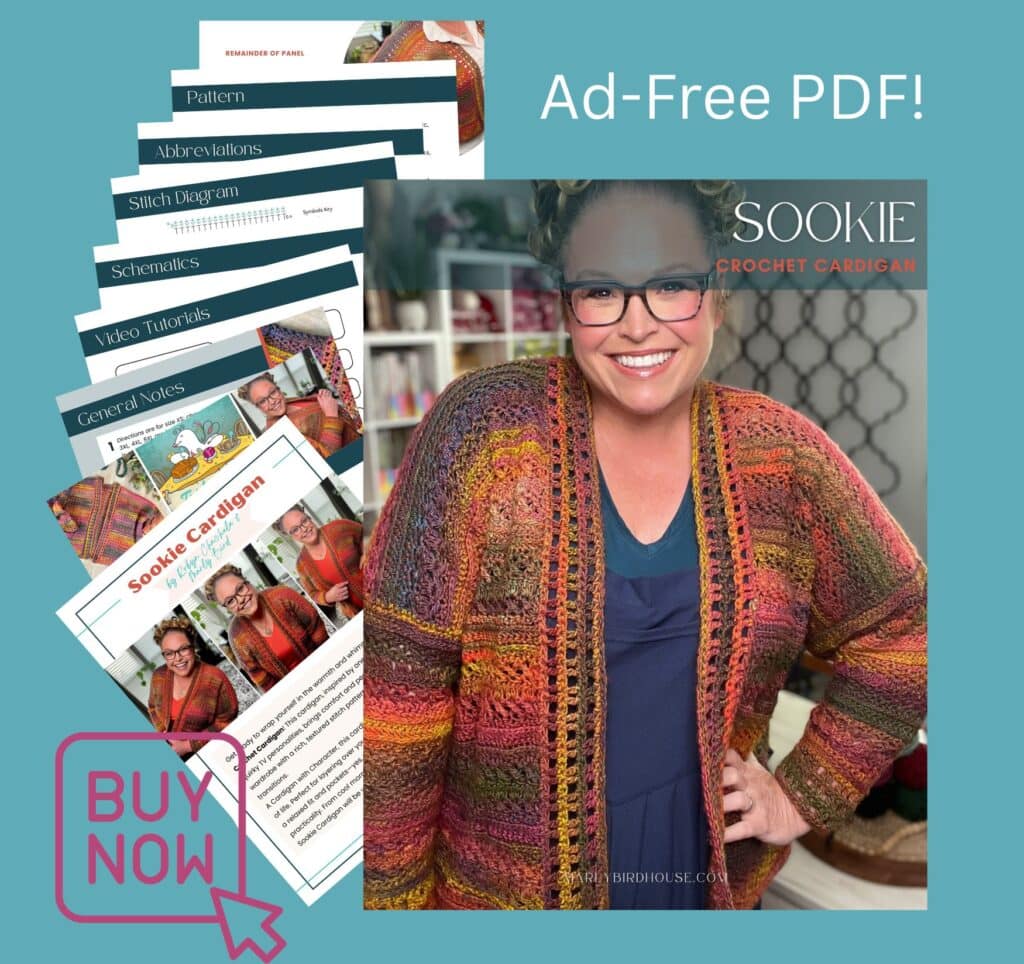
Looking for an uninterrupted crochet experience? We have that available as well. The ad-free pdf is available on Etsy, Ravelry, and our Shopify Store.
What You Will Love About This Pattern 💖
📏 Sizes XS through 5X. Nine sizes with 9-10 inches of positive ease. The Sookie is built for every body, which is something I care deeply about as a designer.
🧶 Panel construction. Two panels + two sleeves + a collar. This is how garment crochet SHOULD feel… manageable pieces that come together at the end, not one giant fabric lump fighting you at every row.
🎨 A gorgeous textured stitch pattern. The Panel Stitch Pattern combines hdc, sc third-loop, and “crossed dc” stitches to create a subtly layered fabric that looks custom-made. Fancy-looking, approachable actual skill requirement.
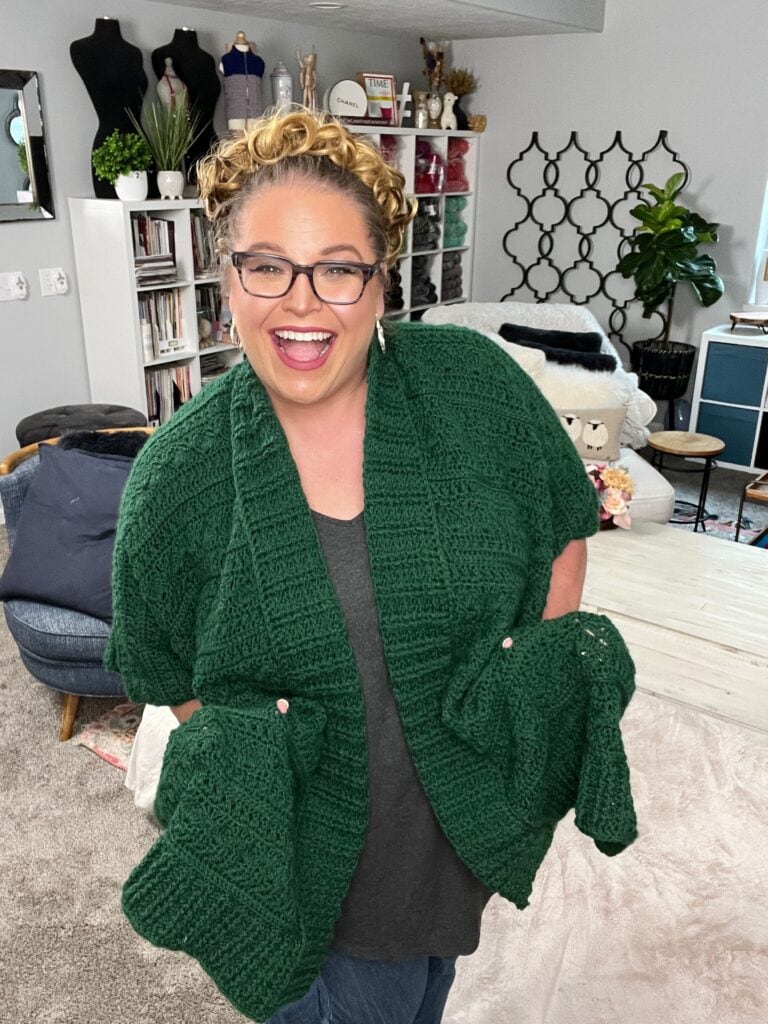
🎒 Optional pockets. Yes, please. Add them or skip them, the pattern works either way.
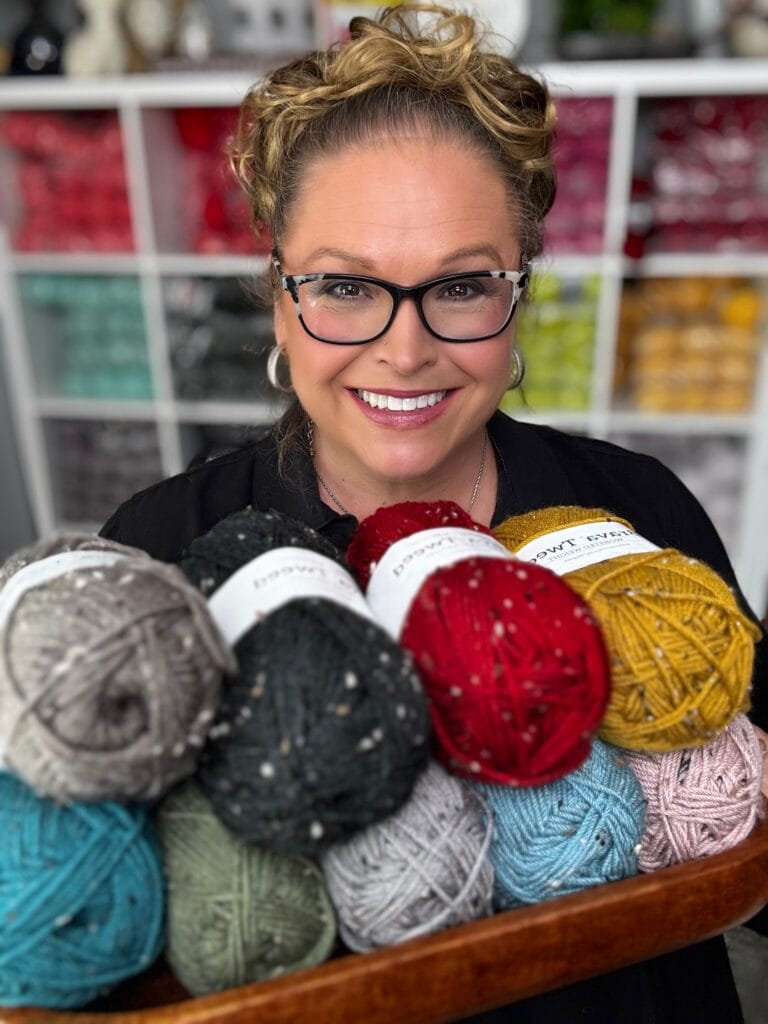
💰 Affordable yarn. Red Heart Roll With It Mélange and Lion Brand Ferris Wheel are both budget-friendly acrylics available at Joann, Michaels, and online. A full cardigan costs less than a single boutique cardigan would.
🧺 Machine washable. Throw it in the wash. Done. Perfect for everyday wear, a gift you'll actually use, or a piece you travel with.
👯 Co-designed with Robyn Chachula. If you know Robyn, you know her patterns are known for clarity, smart construction, and thoughtful sizing. This is the kind of craft collaboration you only get from two designers who've been at this for decades.
Quick Pattern Overview
🎯 Skill Level: Adventurous Beginner
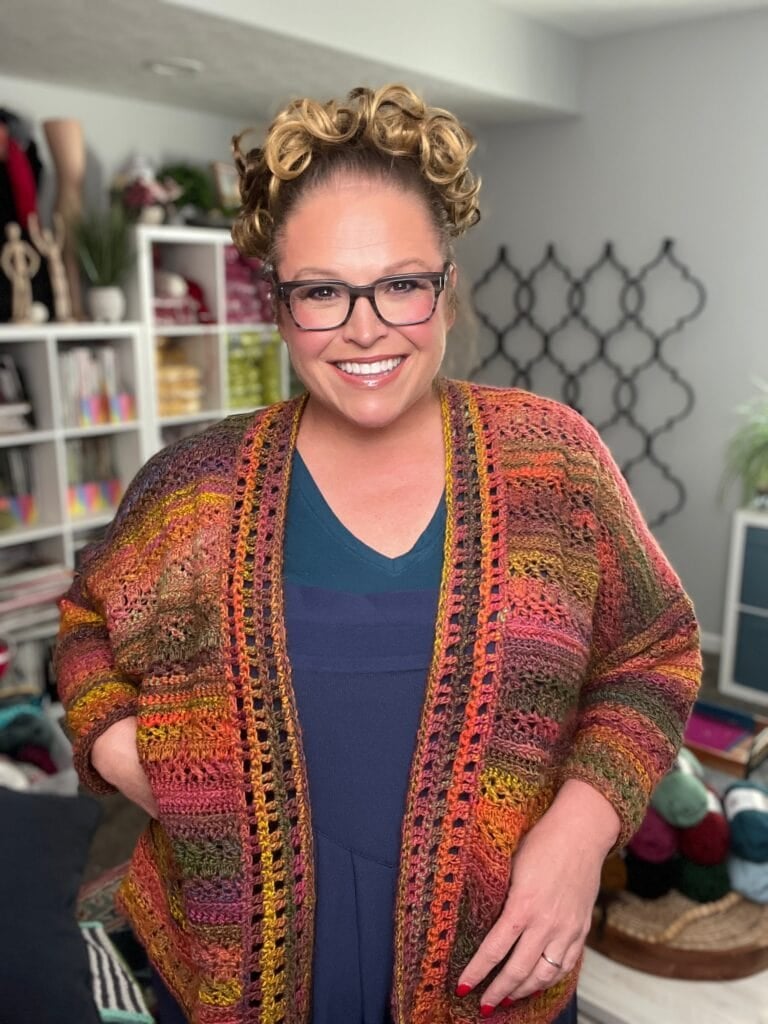
📏 Finished Size: XS (S, M, L, XL, 2X, 3X, 4X, 5X). Bust circumference 41-69 inches. Length 21-24.5 inches. Designed with 9-10 inches of positive ease for an oversized fit.
🧶 Yarn: Red Heart Roll With It Mélange (100% acrylic, worsted weight, 389 yds/150g) in Curtain Call. Size-dependent: 3-5 balls. Alternate yarn: Lion Brand Ferris Wheel.
🪡 Hook: Size J/10 (6.0 mm) or size needed to obtain gauge.
📐 Gauge (blocked): 18 dc (6 stitch repeats) by 16 rows in Panel Stitch Pattern = 5″ by 7″ [12.5 cm by 18 cm].
⏱️ Estimated time: 40-60 hours depending on size and speed. A 4-6 week project for most crocheters… perfect for finishing before sweater weather really hits.
Is This Crochet Cardigan Right for You?
This pattern is a perfect match if you're ready for your first (or second, or tenth) crochet garment and you want something you'll actually wear. You will be right at home if you can:
- Chain, single crochet, half double crochet, and double crochet
- Read and follow a written pattern
- Seam two pieces of crochet fabric together (video tutorial linked below if you haven't before)
- Block a finished piece (steam blocking for this project)
If any of those feel unfamiliar, start with my BiCrafty Bootcamp: Learn to Crochet. It's where my beginners build their foundation before tackling their first garment.
If you've already crocheted a scarf, hat, or small accessory and you're ready to level up, Sookie is a fantastic first cardigan. The panel construction breaks the project into 4 manageable pieces (2 body panels + 2 sleeves) instead of one giant piece fighting gravity in your lap.
Explore More Free Crochet Cardigan Patterns
If you love crochet cardigans, you are in good company. Here on the blog I've shared several free cardigan patterns over the years… browse the full collection or pick your next project:
- Easy One-Piece Crochet Cardigan (Amimono Kimono Pattern)… a one-piece kimono-style design if you want something simpler than Sookie
- Goldenrod Crochet Cardigan… another reader-favorite cardigan
- Garden Party Crochet Cardigan…absolute fan favorite crochet cardigan for all seasons
- Lyvia Ruana…longer than a cardigan but same comfort, style and POCKETS!
- Creekside Ruana…another Turkey Trot favorite pattern you will love
- Spectrum Stitch Swoncho…not a cardigan but colorful, cozy and stylish
- Full Library of Free Knit & Crochet Patterns… every free pattern on the blog
What Does “Panel Construction” Mean in Crochet?
Great question, and the answer is the best-kept secret of intermediate crochet garment design.
Panel construction is when a garment is crocheted as separate rectangular pieces (in Sookie's case, two body panels and two sleeves) and seamed together at the end. This is in contrast to “one-piece” or “top-down seamless” construction, where the entire garment is worked as one continuous piece.
Panel construction has real advantages for crocheters:
- Portability. One rectangular panel fits in a project bag. A full garment halfway through construction does not.
- Gauge correction. If your gauge shifts during the project, you notice it when you finish panel one, and you can adjust hook size on panel two. You cannot do this with a one-piece garment without ripping out hours of work.
- Customization. Length, sleeve depth, and ease are easier to adjust per-panel. Sookie's pattern even tells you exactly how to adjust row counts for a custom length.
- Stitch pattern showcase. Rectangular panels let textured or lace stitch patterns show off without being interrupted by shaping math.
- Faster perceived progress. Finishing a panel feels like a win. And you get two of those wins before the sleeves.
The one thing panel construction requires is seaming, which is a skill that intimidates some crocheters. Honestly, seaming is easier than most people fear… and I've got a video linked below that walks you through the whip-stitch seam we use in Sookie. If you can sew on a button, you can seam a crochet panel.
Join our Newsletter
Get Free Crochet & Knitting
Pattern Links & Coupons!


Build Your Skills with This Cardigan
The Sookie is a genuinely skill-building project. By the time you finish, you will have practiced:
- Foundation half double crochet (fhdc)… a stretchy foundation edge that beats a traditional chain foundation for garment starts
- Third-loop crochet… the middle bar that creates the horizontal ridge in half double crochet rows, a beautiful textural element
- Stacked double crochet… a stacked double crochet edge stitch that replaces the ch-3 turning chain for a cleaner finish
- Crossed double crochet (“x” stitch)… the signature panel stitch that gives Sookie its texture
- Pocket openings… adding a pocket in-line to an already-worked fabric
- Panel seaming with whip stitch… joining two finished panels invisibly
- Sleeve shaping… working decreases at the edges to create a tapered sleeve
- Collar pickup… adding a finishing collar by picking up stitches around the neckline
- Steam blocking acrylic… the right way to block an acrylic garment (and why you should never skip it for this pattern)
If any of those techniques are new to you, don't worry. Every one of them has a video tutorial below, and the pattern walks you through step-by-step. This is the kind of project where you come out on the other side a genuinely more confident crocheter.
Need a refresher on the abbreviations? My How to Read Crochet Chart Symbols guide covers the basics. Brand new to crochet? BiCrafty Bootcamp: Learn to Crochet is your starting point.
Want Robyn Walking You Through Every Step? Join the Sookie VIP Workshop
If you want a hands-on, step-by-step walk-through with me coaching you through every part of the Sookie Crochet Cardigan, the full Sookie Crochet Cardigan VIP Workshop is available at Marly Bird House. You get:
- The complete pattern as a printable PDF
- Full video walkthroughs for every section
- Answers to common pattern questions
- Lifetime access to the workshop inside Marly Bird House
If you are the kind of crafter who learns best by watching, or you're nervous about your first garment and want a designer in your ear while you work… this workshop was made for you. 👉 Get the Sookie Crochet Cardigan VIP Workshop at Marly Bird House
What Is the Marly Bird Turkey Trot (and Other Marly Bird House Events)?
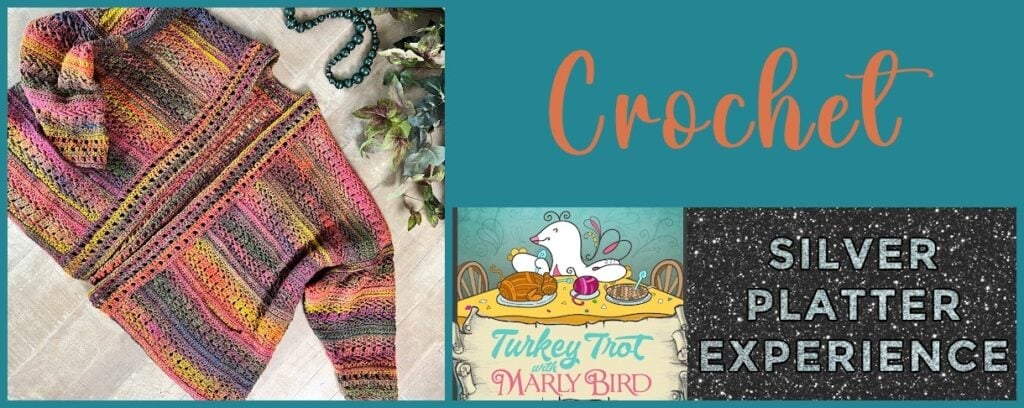
The Sookie Crochet Cardigan was originally released during my Turkey Trot 2024 Mystery Make-Along, which is one of four seasonal make-along events I run throughout the year at Marly Bird House. These events are the BEST way to experience my community in action… everyone working on the same project, getting real-time support, and celebrating finished projects together.
My four annual Marly Bird House make-along events:
- 🏈 Game Day Mystery Make-Along (winter)… a cozy pattern released in pieces during football season
- 🌸 First Fall (late summer/early fall)… a transitional-weather piece to carry you into layering season
- 🦃 Turkey Trot Mystery Make-Along (November)… the big Thanksgiving-season release, where Sookie was born
- 🏆 Tournament of Stitches (TOS) (every 2-3 years in the spring)… four mystery shawls released over 4 weeks, the longest-running Marly event
Each event is a LIVE experience… I'm teaching, answering questions, and celebrating with everyone as the pattern unfolds. After the event wraps, the full pattern becomes available as a workshop PDF with videos inside Marly Bird House, so you can work through it anytime, at your own pace. The Sookie VIP Workshop linked above is the “graduated” version of the 2024 Turkey Trot event (same content, available anytime).
Want to join the next one live? The newsletter always has the first invite.
Join our Newsletter
Get Free Crochet & Knitting
Pattern Links & Coupons!
Yarn & Materials
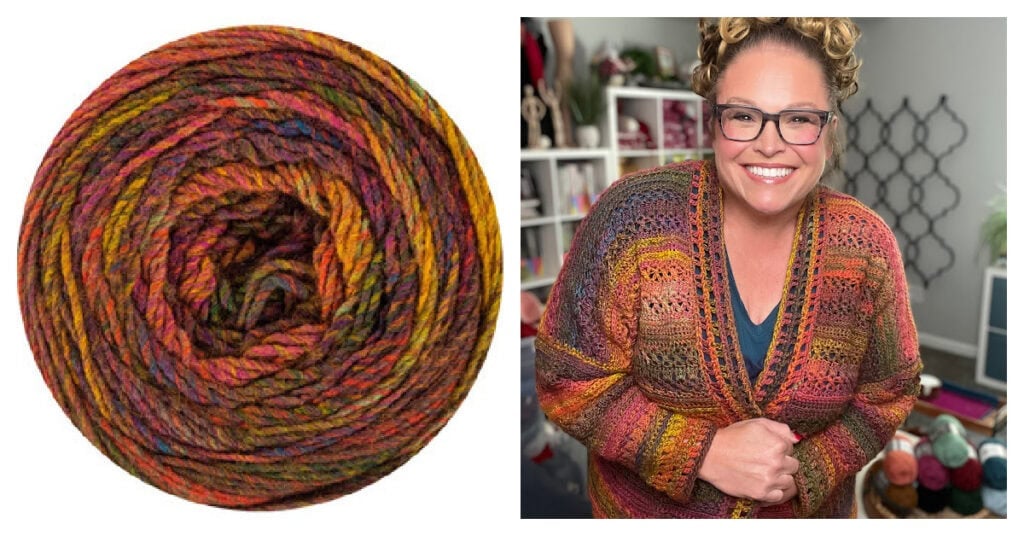
The Sookie is designed for Red Heart Roll With It Mélange, a 100% acrylic worsted weight yarn with 389 yards per 150-gram ball. The sample uses the colorway Curtain Call, a warm heathered red that photographs beautifully. Size-dependent yardage: 3 balls (XS-M), 4 balls (L-3X), 5 balls (4X-5X).
Alternate yarn: Lion Brand Ferris Wheel (100% acrylic, worsted weight, 270 yds/85g). Size-dependent: 4-8 balls. Also a lovely heathered acrylic in a wide color range.
What to look for in a yarn substitute: a worsted weight (CYCA #4) yarn, any fiber, with good stitch definition. Acrylic or acrylic blend is ideal for this pattern because the garment is machine washable and the stitch pattern needs light structure to show off. Avoid slippery super-soft yarns (like pure silk or 100% mercerized cotton) as they may lose stitch definition.
Yarn Alternatives for the Sookie Crochet Cardigan
Can't find Red Heart Roll With It Mélange? No problem. Sookie was designed in a worsted weight (CYCA #4) acrylic, so you have LOTS of options. Below are my favorite affiliate-linked alternatives, sorted by the vibe you want for your finished cardigan. As always… swatch and block before you commit to the full project. 💛
Self-Striping / Cake Yarn Alternatives (closest to the original Roll With It look)
These give you the same gradient stripey magic as Roll With It Mélange. The colors do the work… you just keep crocheting and watch the cardigan shift through a palette on its own.
| Yarn | Fiber | Yardage / Ball | Why it works |
|---|---|---|---|
| Red Heart Roll With It Mélange (original) | 100% acrylic | 389 yds / 150 g | The sample yarn. Long color shifts, machine washable, budget-friendly. Color shown: Curtain Call. |
| Lion Brand Ferris Wheel (original alt) | 100% acrylic | 270 yds / 85 g | The pattern's printed alternate yarn. Heathered self-striping look. Need 4-8 balls depending on size. Color shown: Morning Java. |
| Caron Cinnamon Swirl Cakes | 100% acrylic | ~360 yds / 170 g | Self-striping cake. Soft, washable, beautiful color shifts. Easy to find at Michaels. |
Solid-Color Worsted Acrylic Alternatives
If you want one solid color (or you want to stripe your own custom palette by hand), these are clean worsted acrylics with great stitch definition. All machine washable, all budget-friendly.
| Yarn | Fiber | Yardage / Ball | Why it works |
|---|---|---|---|
| KnitPicks Brava Worsted | 100% premium acrylic | 218 yds / 100 g | Beginner-friendly, budget-friendly, gorgeous color range. Soft and machine washable. My go-to solid worsted acrylic. |
| Loops & Threads Impeccable | 100% acrylic | 277 yds / 113 g | Affordable Michaels store-brand acrylic. Great structure for garments that need to hold their shape. Wide color range. |
| Lion Brand Heartland | 100% acrylic | 251 yds / 142 g | Soft, heathered solid colors named after U.S. National Parks. Beautiful drape, machine washable. A reader favorite for cardigans. |
Wool and Wool-Blend Options (for natural fiber lovers)
If you'd rather stitch in wool, these are my favorite worsted-weight wool and wool-blend picks. Wool gives you more warmth, more stitch memory, and a slightly different drape than acrylic. Important blocking note: wool and wool blends usually respond better to WET blocking than steam blocking… check your yarn label. (The pattern as written is steam-blocked because the sample is acrylic.)
| Yarn | Fiber | Yardage / Ball | Why it works |
|---|---|---|---|
| WeCrochet Mighty Stitch Worsted | 80% acrylic / 20% superwash wool | 208 yds / 100 g | The best of both worlds: machine washable like an acrylic, with the warmth and bloom of wool. Great middle-ground yarn for first-time wool crocheters. |
| Berroco Vintage Worsted | 52% acrylic / 40% wool / 8% nylon | 218 yds / 100 g | Wool/acrylic blend with nylon for added durability. Machine washable. Slightly more rustic look than pure acrylic. Drapes beautifully. |
| Lion Brand Wool-Ease | 80% acrylic / 20% wool | 197 yds / 85 g | The classic workhorse wool-blend acrylic. Reliable structure, easy to find at Michaels, great for everyday wear. |
| KnitPicks Wool of the Andes Worsted | 100% Peruvian Highland wool | 110 yds / 50 g | For natural-fiber purists. 100% wool, gorgeous stitch definition, traditional handfeel. Need 2 balls per “Roll With It” ball. Hand-wash recommended. |
| Cascade 220 Superwash | 100% superwash wool | 220 yds / 100 g | Premium superwash wool, machine washable. Excellent stitch memory and structure. A splurge yarn for a cardigan you'll keep for years. |
Hook: Size J/10 (6.0 mm) or size needed to obtain gauge. I love KnitPicks hooks for projects like this because the ergonomic handle makes 40+ hours of crochet much easier on your hands.
Notions: these are items that are needed to make your crochet cardigan amazing and the experience even better!
- Stitch Markers
- Tapestry Needle
- Scissors
- Tape Measure
- Notions Bag for Supplies (Optional)
- Leather tags (Optional)
- Leather rivets (Optional)
- Blocking Squares
- Blocking Pins
- Soaking Basin
- Eucalan Wool Wash
- Steamer
Video Tutorials
Every technique you need is covered in my video library:
- Foundation Single Crochet >> Click Here for Video Help <<
- Seaming Crochet >> Click Here for Video Help <<
- How to Read Crochet Diagrams >> Click Here for Video Help <<
- Weave in Ends >> Click Here for Video Help <<
- Stacked Double Crochet >> Click Here for Video Help <<
- Videos for each section are available in the Marly Bird House VIP Silver Platter Workshop
📌 Get the Sookie Crochet Cardigan PDF
(Access inside the Marly Bird House with unlimited viewing and bonus material)
Love the Pattern but Want an Ad-Free PDF?
The full pattern below is 100% free here on the blog… thank you for supporting the site by reading through the ads! If you'd rather have a clean, printable, ad-free PDF, or you want the full VIP workshop experience with video walkthroughs, here are your options:
- 🛒 Shop on Etsy
- 🛒 Shop on Marly Bird Shopify Store
- 🛒 Shop on Ravelry
- 🌟 Sookie VIP Workshop (Marly Bird House)… the full workshop experience with video walkthroughs + pattern PDF
Sookie Crochet Cardigan — Pattern Details
Designers
Designed by Robyn Chachula and Marly Bird
Skill Level
Adventurous Beginner
Measurements
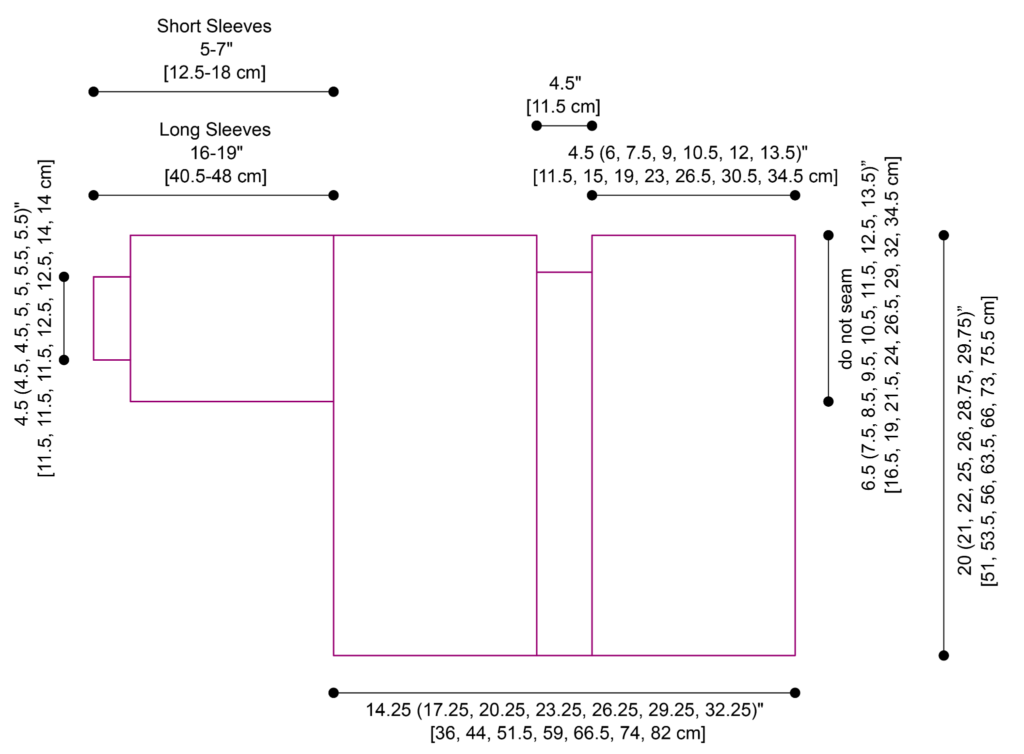
To Fit Size: XS (S, M, L, XL, 2X, 3X, 4X, 5X) with 9-10″ [23-25.5 cm] of positive ease. Sample shown has 9″ of positive ease in size 3X.
Finished Measurements:
Bust circumference: 41 (44, 47, 51, 56, 59, 63, 66, 69)” [104, 112, 119.5, 129.5, 142, 150, 160, 167.5, 175 cm]
Length (shoulder to edge): 21 (21, 21, 22.75, 22.75, 22.75, 24.5, 24.5, 24.5)” [53.5, 53.5, 53.5, 58, 58, 58, 62, 62, 62 cm]
Gauge
BLOCKED: 18 dc (6 stitch repeats) by 16 rows in Panel Stitch Pattern = 5″ [12.5 cm] by 7″ [18 cm]. Use any size hook to obtain the gauge.
Materials
Crochet Yarn: Red Heart Roll With It Mélange (100% Acrylic, 389 yds / 356 m, 5.29 oz / 150 g, CYCA #4 worsted)
Curtain Call: 3 (3, 3, 4, 4, 4, 4, 5, 5) balls
Alternate Yarn: Lion Brand Ferris Wheel (100% Acrylic, 270 yds / 247 m, 3 oz / 85 g, CYCA #4 worsted)
Morning Java: 4 (5, 5, 6, 7, 7, 7, 8, 8) balls
Crochet Hook: Size J/10 [6.0 mm] or size needed to obtain gauge.
Notions: Stitch markers, tapestry needle, basic blocking supplies, steamer or steam iron.
Abbreviations
- Ch – Chain(s)
- Dc – Double Crochet
- Dc2tog – Double Crochet Two Together
- Fhdc – Foundation Half Double Crochet (see special stitches)
- Fsc – Foundation Single Crochet (see special stitches)
- Hdc – Half Double Crochet
- Hdc2tog – Half Double Crochet Two Together
- PM – Place Marker
- RS – Right Side
- Sc – Single Crochet
- Sc2tog – Single Crochet Two Together
- Sl st – Slip Stitch
- Sp(s) – Space(s)
- St(s) – Stitch(es)
- Stacked Dc – Stacked Double Crochet (see special stitches)
- Tch – Turning Chain
- WS – Wrong Side
Special Stitches
⭐️ Double Crochet 2 Together (Dc2tog): *Yarn over hook, insert hook into indicated st, yarn over and pull up a loop, yarn over and draw through 2 loops on hook; repeat from * in next st indicated, yarn over and draw through all 3 loops on hook. (1 decrease)
⭐️ Foundation Half Double Crochet (fhdc):
First fhdc: Ch 2 (does not count as a st), yarn over hook, insert hook into 2nd ch from hook, yarn over and pull up a loop, yarn over and draw through 1 loop on hook (forming a chain, place marker in chain just made), yarn over and draw through 3 loops on hook (forming the half double crochet).
Next fhdc: Yarn over hook, insert hook into base of previous stitch (in the “chain” space), yarn over and pull up a loop, yarn over and draw through 1 loop on hook (forming a chain), yarn over and draw through 3 loops on hook (forming the next half double crochet). Repeat directions for desired amount of sts.
⭐️ Foundation Single Crochet (fsc):
First fsc: Ch 2, insert hook into 2nd ch from hook, yarn over and pull up a loop, yarn over and draw through 1 loop on hook (forming a chain), yarn over and draw through 2 loops on hook (forming the single crochet).
Next fsc: Insert hook into base of previous stitch (in the “chain” space), yarn over and pull up a loop, yarn over and draw through 1 loop on hook (forming a chain), yarn over and draw through 2 loops on hook (forming the next single crochet). Repeat directions for desired amount of sts.
⭐️ Half Double Crochet 2 Together (Hdc2tog): Yarn over hook, insert hook into indicated st, yarn over and pull up a loop, insert hook into next st indicated, yarn over and pull up a loop, yarn over and draw through all 4 loops on hook. (1 decrease)
⭐️ Single Crochet 2 Together (sc2tog): *Insert hook into indicated stitch, yarn over and pull up a loop; repeat from * in next stitch indicated, yarn over and draw through all 3 loops on hook. (1 decrease)
⭐️ Third Loop: Also known as middle or back bar. Horizontal strand located under the top 2 loops. When working in turned rows the third loop is on the front side of the fabric facing you.
⭐️ Stacked Double Crochet (Stacked Dc): (Do not ch 1 prior to making the first sc) Sc in first stitch, insert hook in between two legs of the base, yarn over and pull up a loop, yarn over and draw through 2 loops on hook.
Crochet Stitch Diagrams
✨ Following along with the free pattern on MarlyBird.com? You’ll have everything you need to make this cardigan… but if you want the exclusive stitch diagram charts, those are only available in the ad-free PDF version.
You’ll enjoy a clean, printable, ad-free experience while supporting Marly Bird’s free tutorials and patterns 💖
Schematic
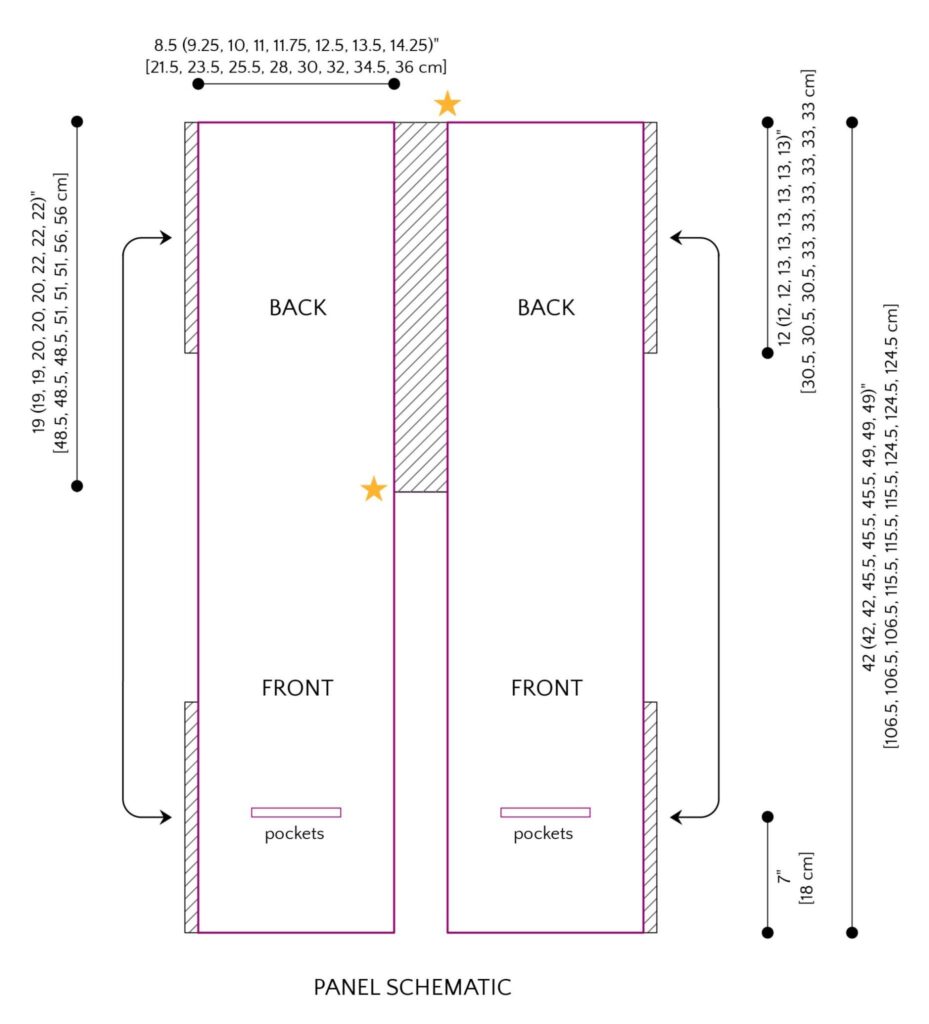
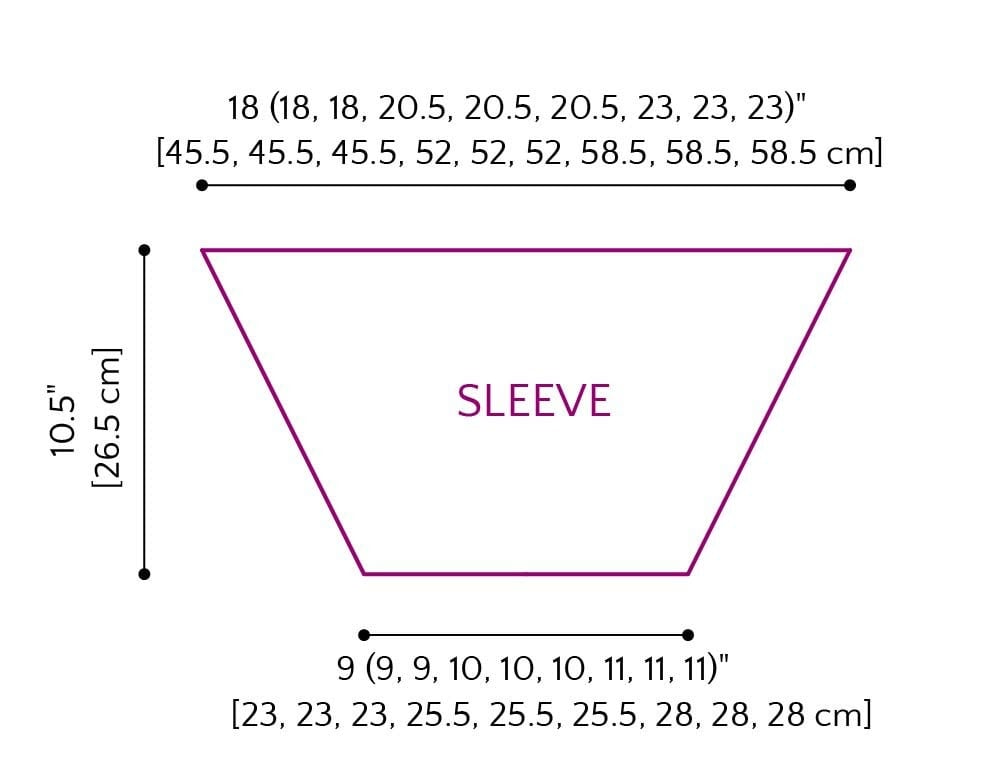
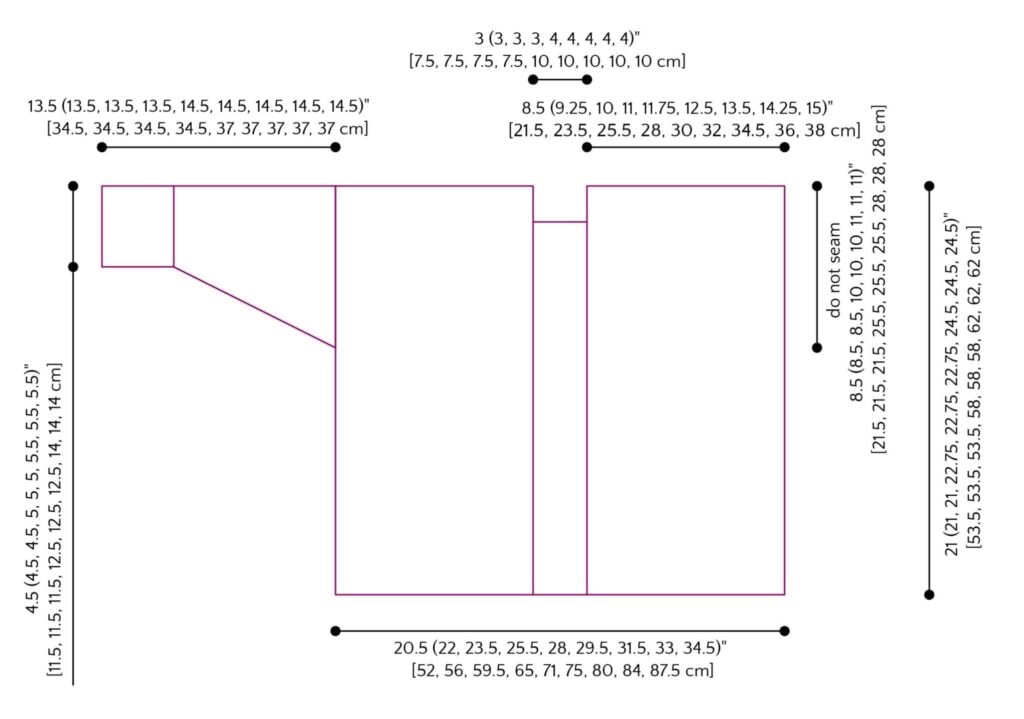
Notes
- Directions are for size XS; changes for sizes S, M, L, XL, 2XL, 3XL, 4XL, 5XL are in parentheses. When only one number is given, that number applies to all sizes.
- Sweater is oversized. If you prefer a tighter fit, pick a size closer to your bust circumference. The sample shown is the 3X size with 9″ of positive ease.
- Gauge listed is BLOCKED. The stitch pattern unblocked is much shorter compared to when it is blocked. Make sure you are choosing your hook size based on a blocked swatch.
- Make a gauge swatch by making 20 fhdc then following the panel directions for Rows 2-16 without a hole for the pockets.
- Sweater is worked in panels and seamed. The collar is crocheted onto the project at the end.
- If you do not want to start your panel with foundation hdc, you can chain and hdc instead. Make sure you have the same number of hdc as Row 1 calls for fhdc.
- We recommend steam blocking with both yarns listed. We do NOT recommend “pin and spray” blocking or wet blocking for the yarn used. If you substitute another yarn, spray or wet blocking might work. Blocking is required and not optional for this project.
Gauge Swatch
To make a gauge swatch, start with 20 fhdc. Continue with Rows 2-9 of the Panel Instructions below twice. Fasten off. Pin to a blocking board (or other surface), opening up the lace portion of the swatch. Measure 18 sts across and compare to gauge listed of 5″ [10 cm]. Measure 16 rows and compare to gauge listed of 7″ [18 cm]. If your swatch is measuring larger than the listed gauge, make another swatch with a smaller hook. If your swatch is measuring smaller than the listed gauge, make another swatch with a larger hook.

GROW
To Unlock Exclusive Subscriber Content click the Box below and join for free by simply adding your email and creating a password! If you are having troubles, clear your cache or reset your password or login to the Grow Publisher Portal.
>> Learn More About Grow Here <<
I'm thrilled to share this amazing pattern with you, many patterns on my blog are absolutely free! I kindly request that you don't copy and paste or distribute this pattern. Prefer an ad-free experience? Buy a digital PDF pattern for a small fee from one of my online stores for a seamless crafting journey.
I appreciate your support and readership. You are the reason I can keep doing what I love and sharing it with others. So, thank you from the bottom of my yarn-loving heart! Disclosure: This post contains affiliate links, meaning I get a commission if you decide to make a purchase through my links at no cost to you.
Sookie Crochet Cardigan — Pattern Instructions
Panels (Make 2)
Row 1 (RS): 32 (35, 38, 41, 44, 47, 50, 53, 56) fhdc, turn.
Row 2: Ch 1, sc in the third loop of each hdc across, turn.
Row 3: Stacked dc in first sc, *skip 2 sc, dc in next sc, ch 2, dc in front of previous dc in 3rd sc back from previous dc (same st as 2nd previous dc, creates a “x”); repeat from * across to last sc, dc in last sc, turn.
Row 4: Stacked dc in first dc, 3 dc in each ch-2 sp across, dc in last dc, turn.
Row 5: Stacked dc in first dc, *skip 2 dc, dc in next dc, ch 2, dc in front of previous dc made in 3rd dc back from previous dc made (same st as 2nd previous dc, creates a “x”); repeat from * across to last dc, dc in last dc, turn.
Block Panels
Pin panels to schematic size. Using either the lowest heat setting on your steam iron or a steamer, steam panels to block and allow to dry.
Sleeves (Make 2) — XS, S, M Size
Row 1 (RS): 65 fhdc, turn.
Row 2: Ch 1, sc in the third loop of each hdc across, turn.
Row 3: Ch 2 (does not count as a st), skip first sc, dc in next 3 sc, *skip 2 sc, dc in next sc, ch 2, dc in front of previous dc in 3rd sc back from previous dc (same st as 2nd previous dc, creates a “x”); repeat from * across to last 4 sc, dc in next 2 sc, dc2tog over last 2 sc, turn — 19 ch-2 sps + 3 sts each end.
Row 4: Ch 2 (does not count as a st), skip first st, dc in next 2 sts, 3 dc in each ch-2 sp across to last 3 sts, dc in next st, dc2tog over last 2 sts, turn — 61 dc.
Row 5: Ch 2 (does not count as a st), skip first dc, dc in next dc, *skip 2 dc, dc in next dc, ch 2, dc in front of previous dc made in 3rd dc back from previous dc made (same st as 2nd previous dc, creates a “x”); repeat from * across to last 2 dc, dc2tog over last 2 dc, turn — 19 ch-2 sps + 1 st each end.
Row 6: Ch 1, sc2tog over first dc and ch-2 sp, 2 sc in same ch-2 sp, 3 sc in each ch-2 sp across to last ch-2 sp, 2 sc in last ch-2 sp, sc2tog over last ch-2 sp and dc, turn — 57 sc.
Row 7: Ch 1, hdc2tog over first 2 sc, hdc in each sc across to last 2 sc, hdc2tog over last 2 sc, turn — 55 hdc.
Row 8: Ch 1, sc in the third loop of each hdc across, turn.
Row 9: Ch 1, hdc2tog over first 2 sc, hdc in each sc across to last 2 sc, hdc2tog over last 2 sc, turn — 53 hdc.
Repeat Rows 2-9 once, Repeat Rows 2-8 once more — 31 sc. Fasten off, weave in ends.
Sleeves (Make 2) — L, XL, 2X Size
Row 1 (RS): 74 fhdc, turn.
Row 2: Ch 1, sc in the third loop of each hdc across, turn.
Row 3: Ch 2 (does not count as a st), skip first sc, dc in next 3 sc, *skip 2 sc, dc in next sc, ch 2, dc in front of previous dc in 3rd sc back from previous dc (same st as 2nd previous dc, creates a “x”); repeat from * across to last 4 sc, dc in next 2 sc, dc2tog over last 2 sc, turn — 22 ch-2 sps + 3 sts each end.
Row 4: Ch 2 (does not count as a st), skip first st, dc in next 2 sts, 3 dc in each ch-2 sp across to last 3 sts, dc in next st, dc2tog over last 2 sts, turn — 70 dc.
Row 5: Ch 2 (does not count as a st), skip first st, dc in next dc, *skip 2 dc, dc in next dc, ch 2, dc in front of previous dc made in 3rd dc back from previous dc made (same st as 2nd previous dc, creates a “x”); repeat from * across to last 2 dc, dc2tog over last 2 dc, turn — 22 ch-2 sps + 1 st each end.
Row 6: Ch 1, sc2tog over first dc and ch-2 sp, 2 sc in same ch-2 sp, 3 sc in each ch-2 sp across to last ch-2 sp, 2 sc in last ch-2 sp, sc2tog over last ch-2 sp and dc, turn — 66 sc.
Row 7: Ch 1, hdc2tog over first 2 sc, hdc in each sc across to last 2 sc, hdc2tog over last 2 sc, turn — 64 hdc.
Row 8: Ch 1, sc2tog in the third loop over the first 2 hdc, sc in the third loop of each hdc across to last 2 hdc, sc2tog in the third loop over the last 2 hdc, turn — 62 sc.
Row 9: Ch 1, hdc2tog over first 2 sc, hdc in each sc across to last 2 sc, hdc2tog over last 2 sc, turn — 60 hdc.
Row 10: Ch 1, sc in the third loop of each hdc across, turn.
Row 11: Ch 2 (does not count as a st), skip first sc, dc in next 2 sc, *skip 2 sc, dc in next sc, ch 2, dc in front of previous dc in 3rd sc back from previous dc (same st as 2nd previous dc, creates a “x”); repeat from * across to last 3 sc, dc in next sc, dc2tog over last 2 sc, turn — 18 ch-2 sps + 2 sts each end.
Row 12: Ch 2 (does not count as a st), skip first st, dc in next st, 3 dc in each ch-2 sp across to last 2 sts, dc2tog over last 2 sts, turn — 56 dc.
Row 13: Ch 2 (does not count as a st), skip first dc, dc in next 3 dc, *skip 2 dc, dc in next dc, ch 2, dc in front of previous dc made in 3rd dc back from previous dc made (same st as 2nd previous dc, creates a “x”); repeat from * across to last 4 dc, dc in next 2 dc, dc2tog over last 2 dc, turn — 16 ch-2 sps + 3 sts each end.
Row 14: Ch 1, sc2tog over first 2 dc, sc in next sc, 3 sc in each ch-2 sp across to last 3 dc, sc in next dc, sc2tog over last 2 dc, turn — 52 sc.
Row 15: Ch 1, hdc2tog over first 2 sc, hdc in each sc across to last 2 sc, hdc2tog over last 2 sc, turn — 50 hdc.
Row 16: Ch 1, sc2tog in the third loop over the first 2 hdc, sc in the third loop of each hdc across to last 2 hdc, sc2tog in the third loop over the last 2 hdc, turn — 48 sc.
Row 17: Ch 1, hdc2tog over first 2 sc, hdc in each sc across to last 2 sc, hdc2tog over last 2 sc, turn — 46 hdc.
Row 18: Ch 1, sc in the third loop of each hdc across, turn.
Row 19: Ch 2 (does not count as a st), skip first sc, dc in next sc, *skip 2 sc, dc in next sc, ch 2, dc in front of previous dc in 3rd sc back from previous dc (same st as 2nd previous dc, creates a “x”); repeat from * across to last 2 sc, dc2tog over last 2 sc, turn — 14 ch-2 sps + 1 st each end.
Row 20: Ch 2 (does not count as a st), skip first st, 3 dc in each ch-2 sp across to last ch-2 sp, 2 dc in last ch-2 sp, dc2tog over last ch-2 sp and dc, turn — 42 dc.
Row 21: Ch 2 (does not count as a st), skip first dc, dc in next 2 dc, *skip 2 dc, dc in next dc, ch 2, dc in front of previous dc made in 3rd dc back from previous dc made (same st as 2nd previous dc, creates a “x”); repeat from * across to last 3 dc, dc in next dc, dc2tog over last 2 dc, turn — 12 ch-2 sps + 2 sts each end.
Row 22: Ch 1, sc2tog over first 2 dc, 3 sc in each ch-2 sp across to last 2 dc, sc2tog over last 2 dc, turn — 38 sc.
Row 23: Ch 1, hdc2tog over first 2 sc, hdc in each sc across to last 2 sc, hdc2tog over last 2 sc, turn — 36 hdc.
Row 24: Ch 1, sc in the third loop of each hdc across. Fasten off, weave in ends.
Sleeves (Make 2) — 3X, 4X, 5X Size
Row 1 (RS): 83 fhdc, turn.
Row 2: Ch 1, sc2tog in the third loop over the first 2 hdc, sc in the third loop of each hdc across to last 2 hdc, sc2tog in the third loop over the last 2 hdc, turn — 81 sc.
Row 3: Ch 2 (does not count as a st), skip first sc, dc in next 2 sc, *skip 2 sc, dc in next sc, ch 2, dc in front of previous dc in 3rd sc back from previous dc (same st as 2nd previous dc, creates a “x”); repeat from * across to last 3 sc, dc in next sc, dc2tog over last 2 sc, turn — 25 ch-2 sps + 2 sts each end.
Row 4: Ch 2 (does not count as a st), skip first st, dc in next st, 3 dc in each ch-2 sp across to last 2 sts, dc2tog over last 2 sts, turn — 77 dc.
Row 5: Ch 2 (does not count as a st), skip first st, dc in next 3 dc, *skip 2 dc, dc in next dc, ch 2, dc in front of previous dc made in 3rd dc back from previous dc made (same st as 2nd previous dc, creates a “x”); repeat from * across to last 4 dc, dc in next 2 dc, dc2tog over last 2 dc, turn — 23 ch-2 sps + 3 sts each end.
Row 6: Ch 1, sc2tog over first 2 dc, sc in next dc, 3 sc in each ch-2 sp across to last 3 dc, sc in next dc, sc2tog over last 2 dc, turn — 73 sc.
Row 7: Ch 1, hdc2tog over first 2 sc, hdc in each sc across to last 2 sc, hdc2tog over last 2 sc, turn — 71 hdc.
Row 8: Ch 1, sc2tog in the third loop over the first 2 hdc, sc in the third loop of each hdc across to last 2 hdc, sc2tog in the third loop over the last 2 hdc, turn — 69 sc.
Row 9: Ch 1, hdc2tog over first 2 sc, hdc in each sc across to last 2 sc, hdc2tog over last 2 sc, turn — 67 hdc.
Row 10: Ch 1, sc2tog in the third loop over the first 2 hdc, sc in the third loop of each hdc across to last 2 hdc, sc2tog in the third loop over the last 2 hdc, turn — 65 sc.
Row 11: Ch 2 (does not count as a st), skip first sc, dc in next 3 sc, *skip 2 sc, dc in next sc, ch 2, dc in front of previous dc in 3rd sc back from previous dc (same st as 2nd previous dc, creates a “x”); repeat from * across to last 4 sc, dc in next 2 sc, dc2tog over last 2 sc, turn — 19 ch-2 sps + 3 sts each end.
Row 12: Ch 2 (does not count as a st), skip first st, dc in next 2 sts, 3 dc in each ch-2 sp across to last 3 dc, dc in next dc, dc2tog over last 2 dc, turn — 61 dc.
Row 13: Ch 2 (does not count as a st), skip first dc, dc in next dc, *skip 2 dc, dc in next dc, ch 2, dc in front of previous dc made in 3rd dc back from previous dc made (same st as 2nd previous dc, creates a “x”); repeat from * across to last 2 dc, dc2tog over last 2 dc, turn — 19 ch-2 sps + 1 st each end.
Row 14: Ch 1, sc2tog over first dc and ch-2 sp, 2 sc in same ch-2 sp, 3 sc in each ch-2 sp across to last ch-2 sp, 2 sc in last ch-2 sp, sc2tog over last ch-2 sp and dc, turn — 57 sc.
Row 15: Ch 1, hdc2tog over first 2 sc, hdc in each sc across to last 2 sc, hdc2tog over last 2 sc, turn — 55 hdc.
Row 16: Ch 1, sc2tog in the third loop over the first 2 hdc, sc in the third loop of each hdc across to last 2 hdc, sc2tog in the third loop over the last 2 hdc, turn — 53 sc.
Row 17: Ch 1, hdc2tog over first 2 sc, hdc in each sc across to last 2 sc, hdc2tog over last 2 sc, turn — 51 hdc.
Row 18: Ch 1, sc2tog in the third loop over the first 2 hdc, sc in the third loop of each hdc across to last 2 hdc, sc2tog in the third loop over the last 2 hdc, turn — 49 sc.
Row 19: Ch 2 (does not count as a st), skip first sc, dc in next sc, *skip 2 sc, dc in next sc, ch 2, dc in front of previous dc in 3rd sc back from previous dc (same st as 2nd previous dc, creates a “x”); repeat from * across to last 2 sc, dc2tog over last 2 sc, turn — 15 ch-2 sps + 1 st each end.
Row 20: Ch 2 (does not count as a st), skip first st, 3 dc in each ch-2 sp across to last ch-2 sp, 2 dc in last ch-2 sp, dc2tog over last ch-2 sp and dc, turn — 45 dc.
Row 21: Ch 2 (does not count as a st), skip first dc, dc in next 2 dc, *skip 2 dc, dc in next dc, ch 2, dc in front of previous dc made in 3rd dc back from previous dc made (same st as 2nd previous dc, creates a “x”); repeat from * across to last 3 dc, dc in next dc, dc2tog over last 2 dc, turn — 13 ch-2 sps + 2 sts each end.
Row 22: Ch 1, sc2tog over first 2 dc, 3 sc in each ch-2 sp across to last 2 dc, sc2tog over last 2 dc, turn — 41 sc.
Row 23: Ch 1, hdc2tog over first 2 sc, hdc in each sc across to last 2 sc, hdc2tog over last 2 sc, turn — 39 hdc.
Row 24: Ch 1, sc in the third loop of each hdc across. Fasten off, weave in ends.
Block Sleeves
Pin sleeves to schematic size. Using either the lowest heat setting on your steam iron or a steamer, steam sleeves to block and allow to dry.
Back Seam
Join yarn to the Left Panel on the long edge in the marked corner (marked with a star on the panel schematic) with a sl st.
Row 1 (RS): Ch 3 (counts as dc), dc in next sc, *ch 1, skip next sc, dc in next 2 sc; repeat from * 20 (20, 20, 21, 21, 21, 23, 23, 23) times total, turn — 42 (42, 42, 44, 44, 44, 48, 48, 48) dc + 20 (20, 20, 21, 21, 21, 23, 23, 23) ch-1 sps.
Note: If you have customized the length of your project, you will need to adjust the amount of sts you have on Row 1. You will want the finished Row 1 to be 2″ [5 cm] less than half the total length (2″ less than the length of the shoulder to the bottom edge). This means you will either need to crochet more or less of Row 1 across the panel.
Row 2: Ch 1, *sc between next 2 dc, 2 sc in next ch-1 sp; repeat from * across to last 2 dc, sc between last 2 dc, sc in last dc, turn.
Row 3: Stacked dc in first sc, dc in next sc, *ch 1, skip next sc, dc in next 2 sc; repeat from * across, turn.
Row 4: Ch 1, *sc between next 2 dc, 2 sc in next ch-1 sp; repeat from * across to last 2 dc, sc between last 2 dc, sc in last dc. Fasten off, weave in ends.
Join yarn to the Right Panel on the long edge 62 (62, 62, 65, 65, 65, 71, 71, 71) sts across from the corner (including the marked corner st) with a sl st.
Note: If you have customized the length of your project, you will need to adjust the amount of sts you have on Row 1. You will want the finished Row 1 to be 2″ [5 cm] less than half the total length. This means you will need to adjust where you join your yarn. Count the number of stitches on the opposite side and join there for this side.
Row 1 (RS): Ch 3 (counts as dc), dc in next sc, *ch 1, skip next sc, dc in next 2 sc; repeat from * across to corner, turn — 42 (42, 42, 44, 44, 44, 48, 48, 48) dc + 20 (20, 20, 21, 21, 21, 23, 23, 23) ch-1 sps.
Row 2: Ch 1, *sc between next 2 dc, 2 sc in next ch-1 sp; repeat from * across to last 2 dc, sc between last 2 dc, sc in last dc, turn.
Row 3: Stacked dc in first sc, dc in next sc, *ch 1, skip next sc, dc in next 2 sc; repeat from * across, turn.
XS, S, M, L Size — Fasten off with long tail for seaming.
XL, 2X, 3X, 4X, 5X — Repeat Rows 2-3 once, fasten off with long tail for seaming.
Holding right sides together of each panel, whip stitch back seam.
Side Seam
Join yarn to the Left Panel on the long edge in the marked corner with a sl st.
Row 1 (RS): Ch 3 (counts as dc), dc in next sc, *ch 1, skip next sc, dc in next 2 sc; repeat from * 13 (13, 13, 14, 14, 14, 14, 14, 14) times total, fasten off — 28 (28, 28, 30, 30, 30, 30, 30, 30) dc + 13 (13, 13, 14, 14, 14, 14, 14, 14) ch-1 sps.
Holding right sides together of each panel, whip stitch side seam. Repeat on other side.
Note: If you have customized the length of your project, you will need to adjust the amount of sts you have on Row 1. The side seam is the distance from the bottom edge to the start of the sleeve. The easiest way to do this is to fold your panel and sleeve panel in half. Line the fold line of the sleeve and panel up at the shoulder. With a stitch marker, mark off the underside of the sleeve on the panel. Then crochet Row 1 to as close to that marker as you can.
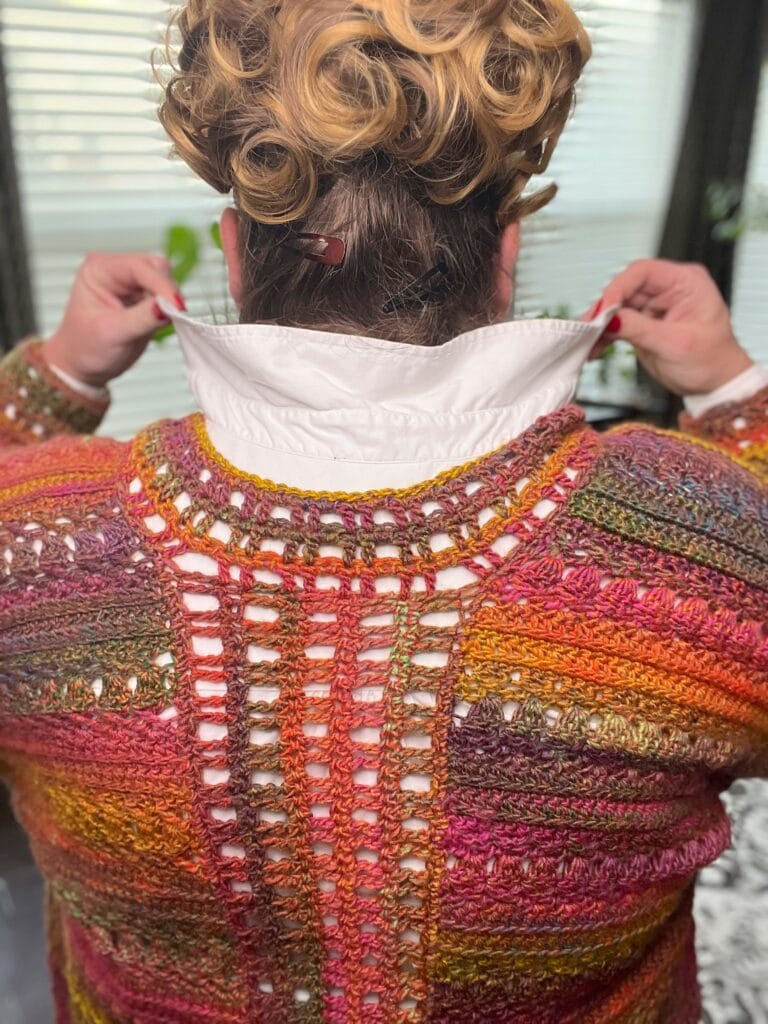
Collar
Join yarn to the Right Panel on the long edge in the marked corner with a sl st.
Row 1 (RS): Ch 3 (counts as dc), dc in next sc, *ch 1, skip next sc, dc in next 2 sc*; repeat from * across panel to back seam (see Note 1 below), [ch 1, 2 dc in edge of sc row] 3 (3, 3, 3, 4, 4, 4, 4, 4) times, ch 1, dc in next 2 sc on next panel, repeat from * to * across panel to next corner (see Note 2 below), turn.
Note 1: We on purpose did not force you to count the number of stitches you have on the panel edging, so you might not end perfectly at your back seam.
If you end with 2 additional stitches before the back seam: ch 1, skip 1, 2 dc in last st before the back seam. Crochet across the back seam as written. In hopes you crocheted the same number of sts on the second panel edging, repeat directions in reverse. 2 dc in first st after back seam, ch 1, skip 1 st, then continue with pattern.
If you end with 1 additional stitch before the back seam: dc in that extra st. Crochet across the back seam as written. In hopes you crocheted the same number of sts on the second panel edging, dc in first 3 sts after back seam, then continue with pattern.
Note 2: If you did not end perfectly at the corner, you can rip out back to the back seam and follow directions above or try the options below.
If you ended 1 st short: rip out the previous 3 sts. Ch 1, do not skip 1, dc in next 2 sc, ch 1, do not skip 1, dc in next sc, dc in corner sc.
If you ended 2 sts short: ch 1, skip 1 st, 2 dc in corner sc.
Row 2: Ch 1, *sc between next 2 dc, 2 sc in next ch-1 sp; repeat from * across to last 2 dc, sc between last 2 dc, sc in last dc, turn.
Row 3: Stacked dc in first sc, dc in next sc, *ch 1, skip next sc, dc in next 2 sc; repeat from * across, turn.
Repeat Rows 2-3 once (or desired amount), Repeat Row 2 once more.
Row 7: Sl st in each sc across, fasten off, weave in ends.
Sleeve Seaming
Pin sleeve to armhole opening with right sides facing. Whip stitch sleeve to armhole opening. Whip stitch under arm seam.
Cuff
Join yarn to the underarm Sleeve with sl st.
Round 1 (RS): Ch 3 (counts as dc), dc in next sc, ch 1, *skip next sc, dc in next 2 sc, ch 1; repeat from * around (see Note below), sl st to top of tch, turn.
Note: If you did not end perfectly back at the beginning, here are a few things you can try:
If you ended without a st between your beginning ch-3 and the last dc: ch 1 and join with a sl st. Essentially do not worry about having a st to skip or not when you get back around.
If you ended with 2 sts between the last dc and beginning ch: rip out the last ch 1 and dc. Dc2tog over the next 2 sts, ch 1, skip the last st and join to the beginning ch with a sl st.
Round 2: Ch 1, *sc between next 2 dc, 2 sc in next ch-1 sp; repeat from * around, sl st to first sc, turn.
Round 3: Stacked dc in first sc, dc in next sc, ch 1, *skip next sc, dc in next 2 sc, ch 1; repeat from * around, sl st to first dc, turn.
Repeat Rounds 2-3 for desired length, Repeat Round 2 once more.
Last Round: Sl st in each sc around, fasten off, weave in ends.
Pocket Square (Make 2)
Chain 24.
Row 1 (RS): Dc in 4th ch from hook (skipped chains count as a dc), dc in each ch across, turn — 24 dc.
Row 2: Ch 1, sc in each dc across including the top of the t-ch, turn.
Row 3: Stacked dc in first sc, dc in each sc across, turn.
Repeat Rows 2-3 six more times (or to desired length). Fasten off leaving a long tail for seaming.
Center pocket square on inside of cardigan at pocket opening. Whip stitch top of pocket square to bottom of foundation stitches in the opening. Stitch remaining sides of the square to the inside fabric of the cardigan.
Finishing
Weave in all remaining loose ends. Give the whole cardigan one final light steam block if needed to even out any areas where stitches settled during seaming.
Blocking Tips
Blocking is NOT optional for the Sookie. I mean it. The Panel Stitch Pattern looks shorter unblocked than it does post-block, and the whole cardigan's finished dimensions are measured with a blocked swatch. Steam blocking is the method for both Red Heart Roll With It Mélange and Lion Brand Ferris Wheel… do NOT wet block or “pin and spray” block either of these acrylics, it can damage the fabric.
Pin each piece to its schematic dimensions on a blocking board (or a clean towel on any flat surface). Use the lowest heat setting on your steam iron or a steamer, held 2-3 inches above the fabric, and steam the full surface gently. Do NOT press the iron directly on the fabric… acrylic melts at high heat, and even medium heat can create shiny spots.
Let each piece dry completely (usually 4-8 hours) before unpinning. For best results, block your panels BEFORE starting the sleeves, and re-block the full cardigan lightly after seaming to smooth out any settling.
If you substitute a different yarn (wool, cotton, etc.), check the yarn label for blocking instructions. Many non-acrylic fibers respond to wet blocking and may benefit from it. For this pattern written as designed with acrylic, steam is the way.
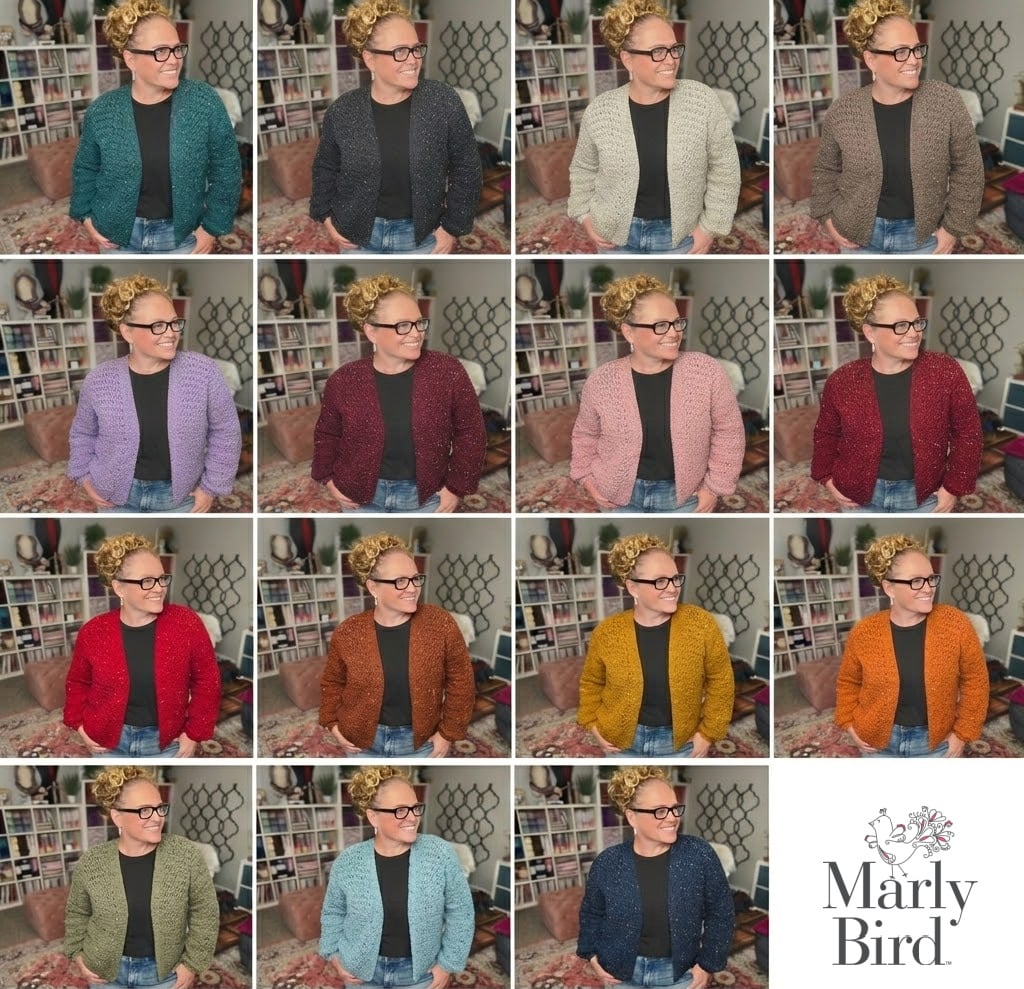
Make This Sookie Cardigan in Any Color You Love 🎨
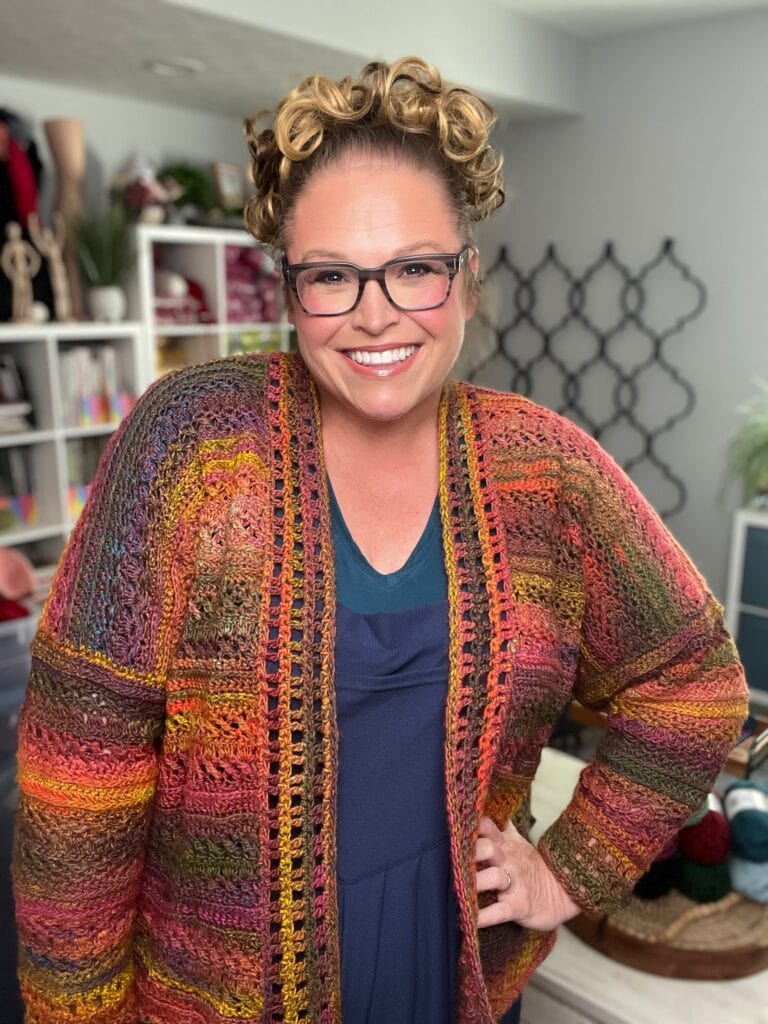
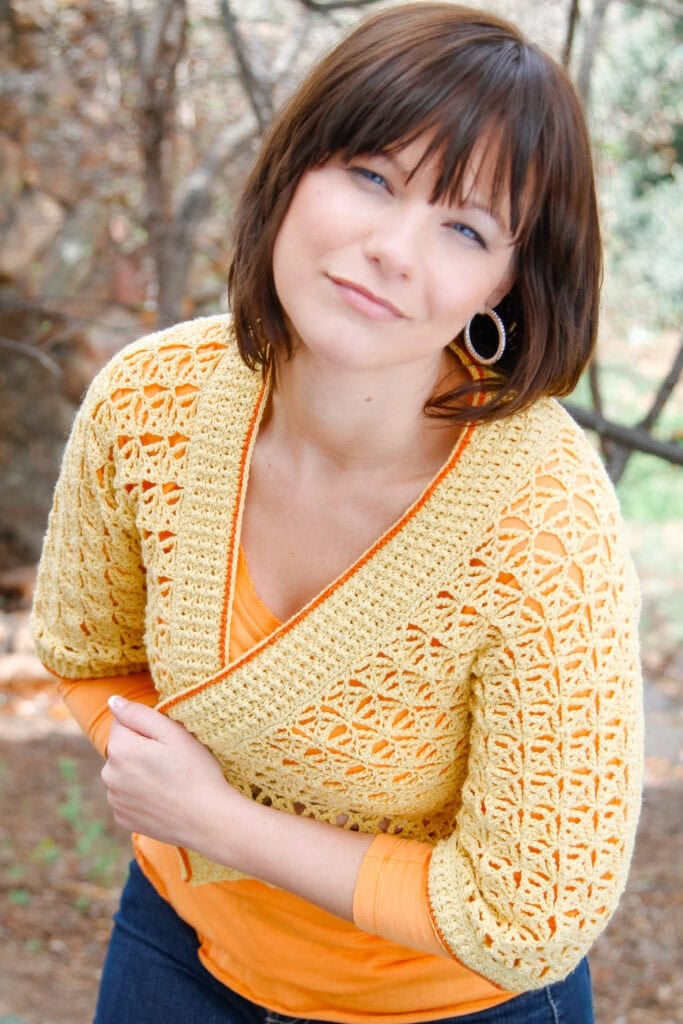
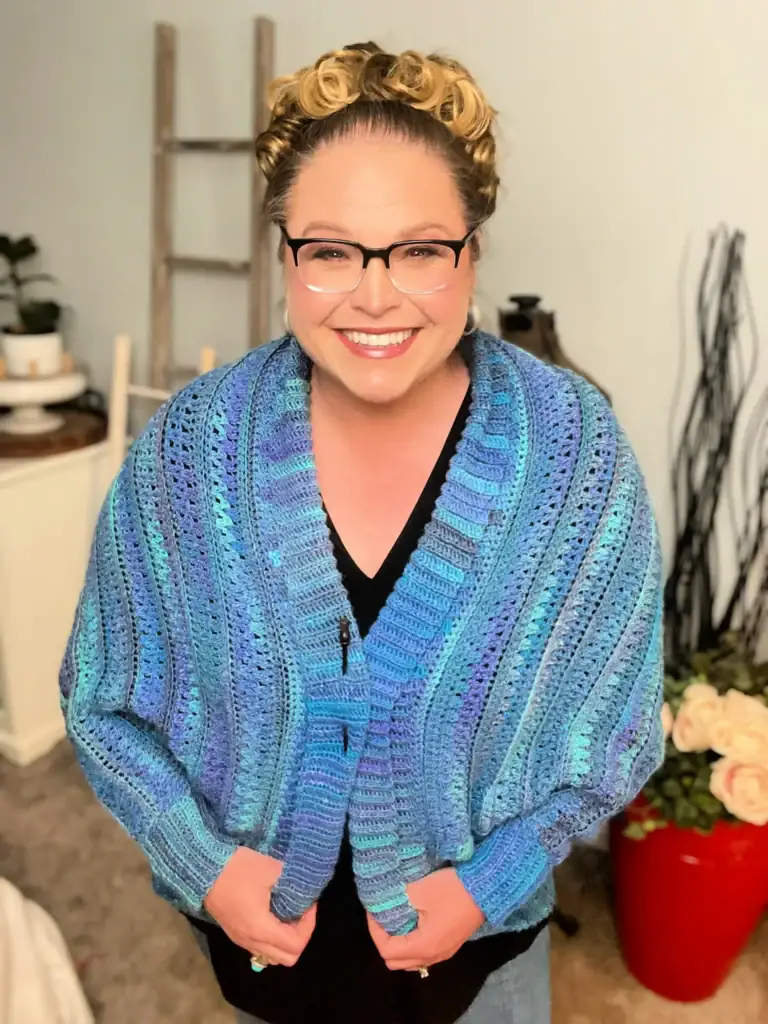
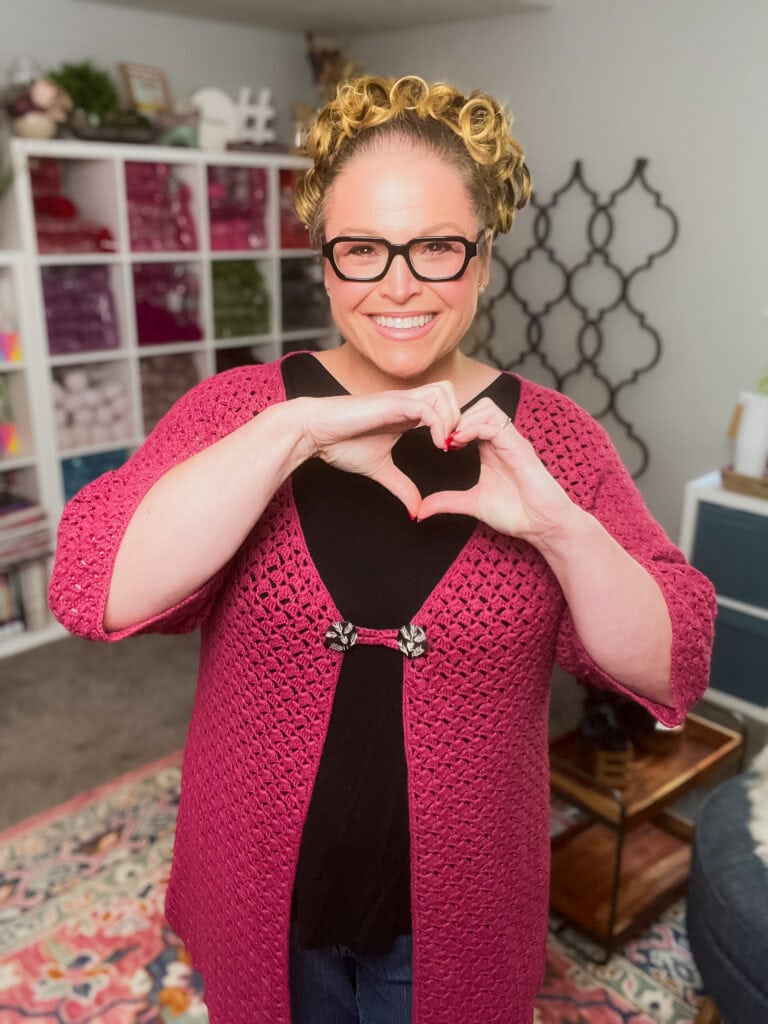
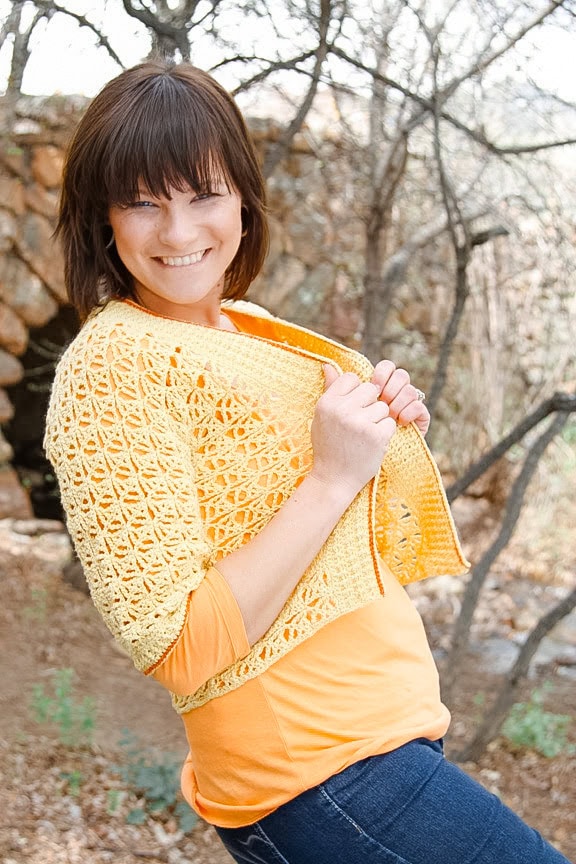
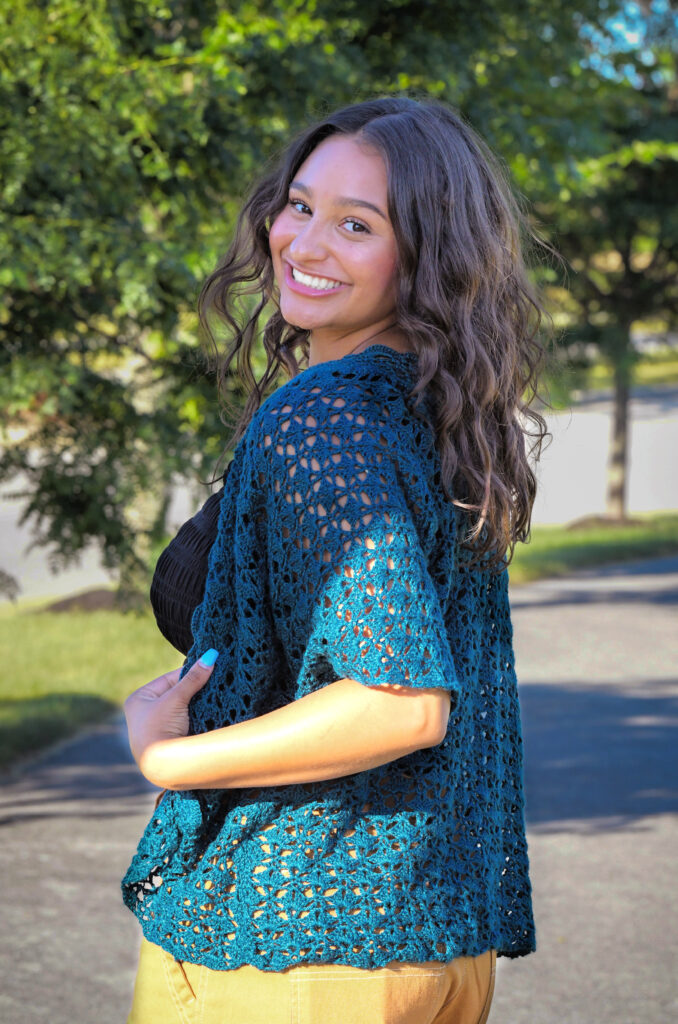
One of the things I love most about the Sookie is how dramatically it changes personality based on the color you choose. The sample is stitched in Red Heart Roll With It Mélange in Curtain Call (a warm heathered red), but our test-knitters and community crocheters have made this cardigan in every color you can imagine… and EVERY single one is gorgeous.
Solid, variegated, neutral, bold, dark academia, beachy pastel, holiday-festive… it all works. The Panel Stitch Pattern has so much built-in texture that solid colors pop just as beautifully as multicolor cakes do. Below are a few of my favorite color iterations to get your imagination going.
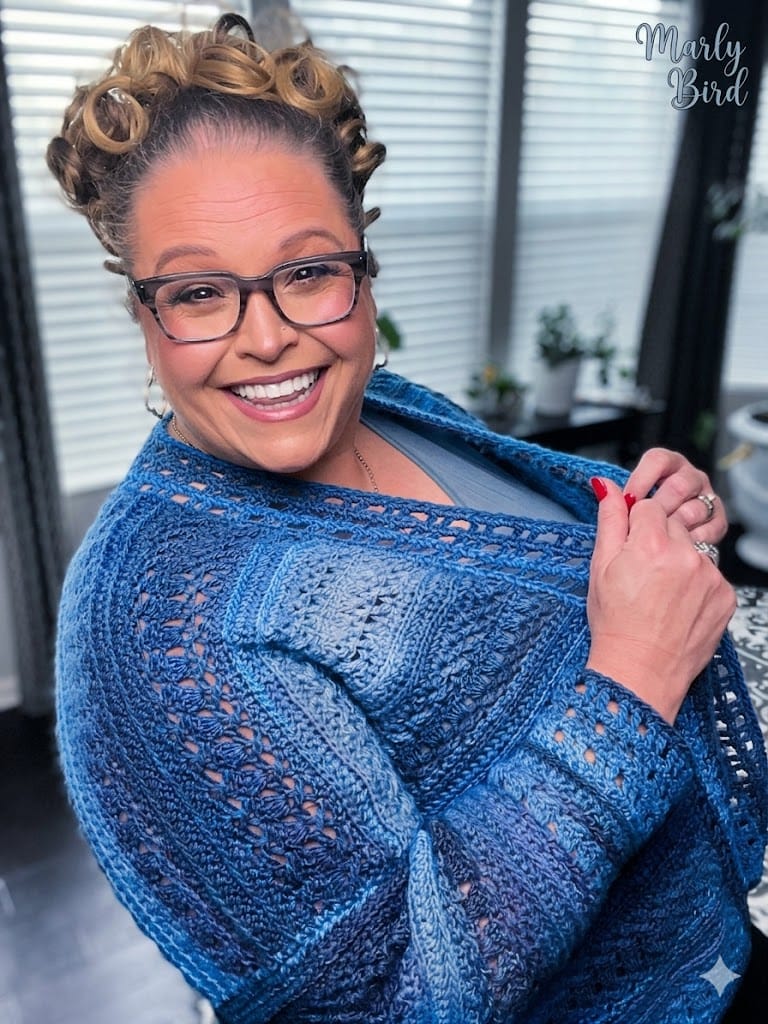
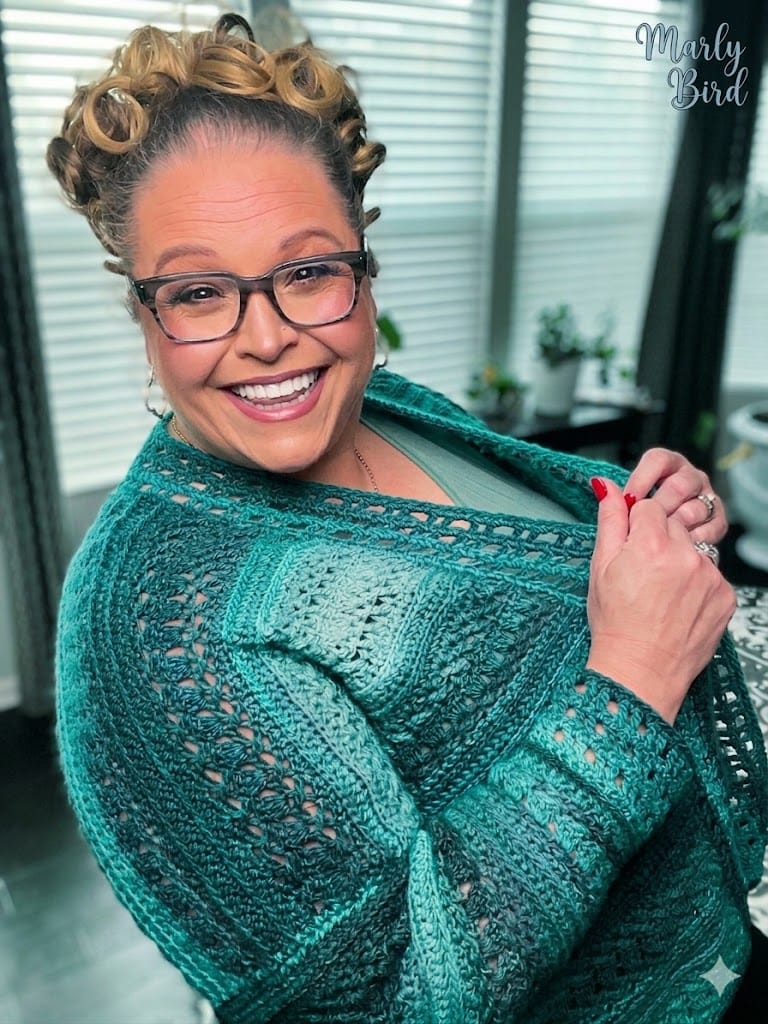
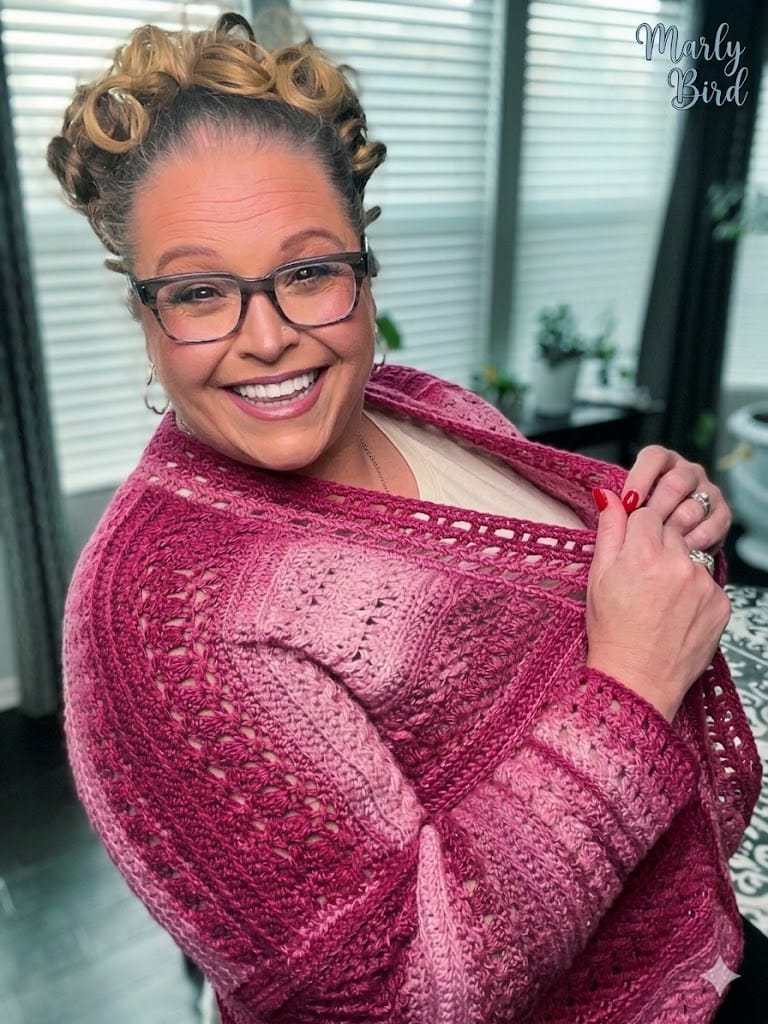
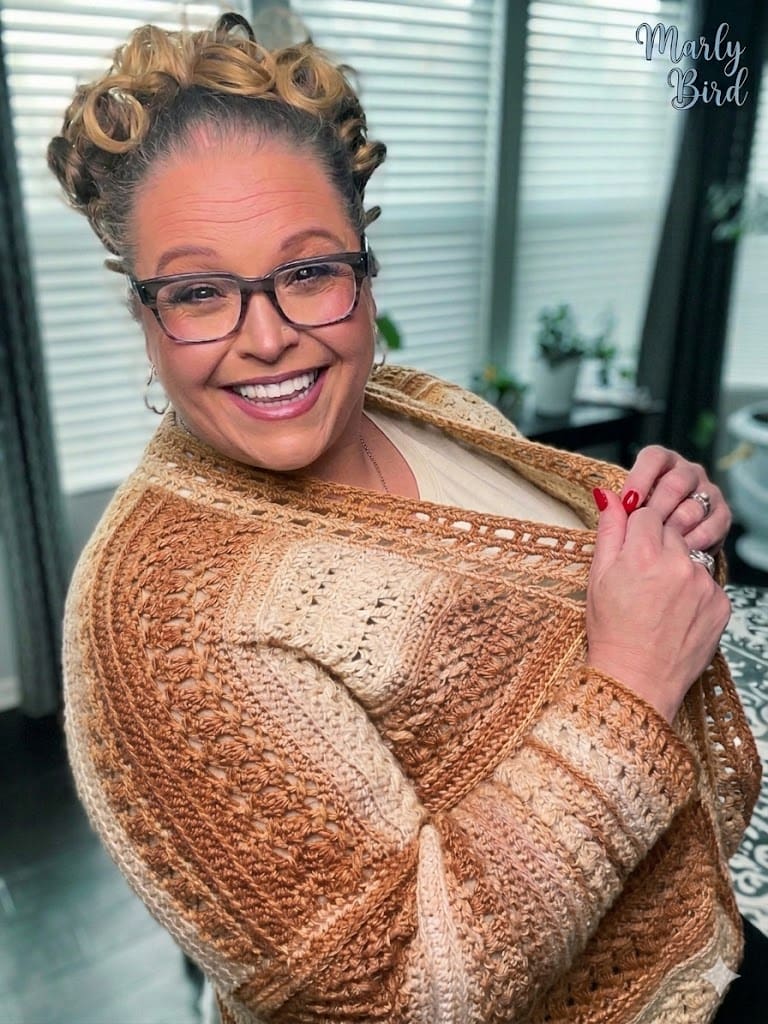
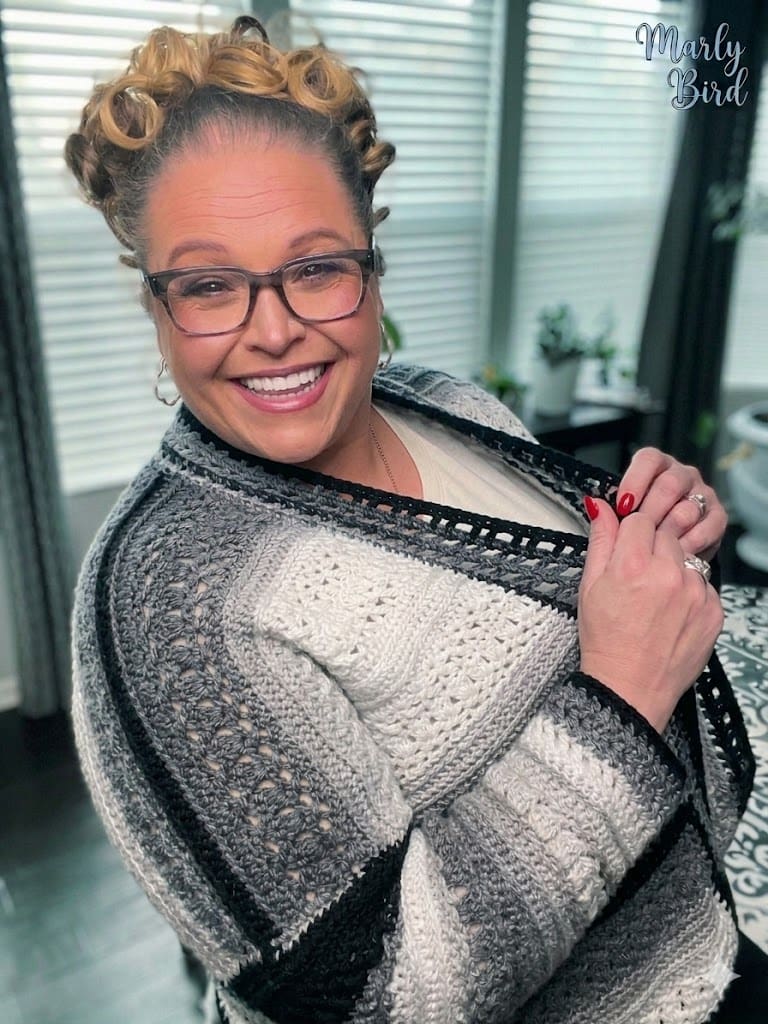
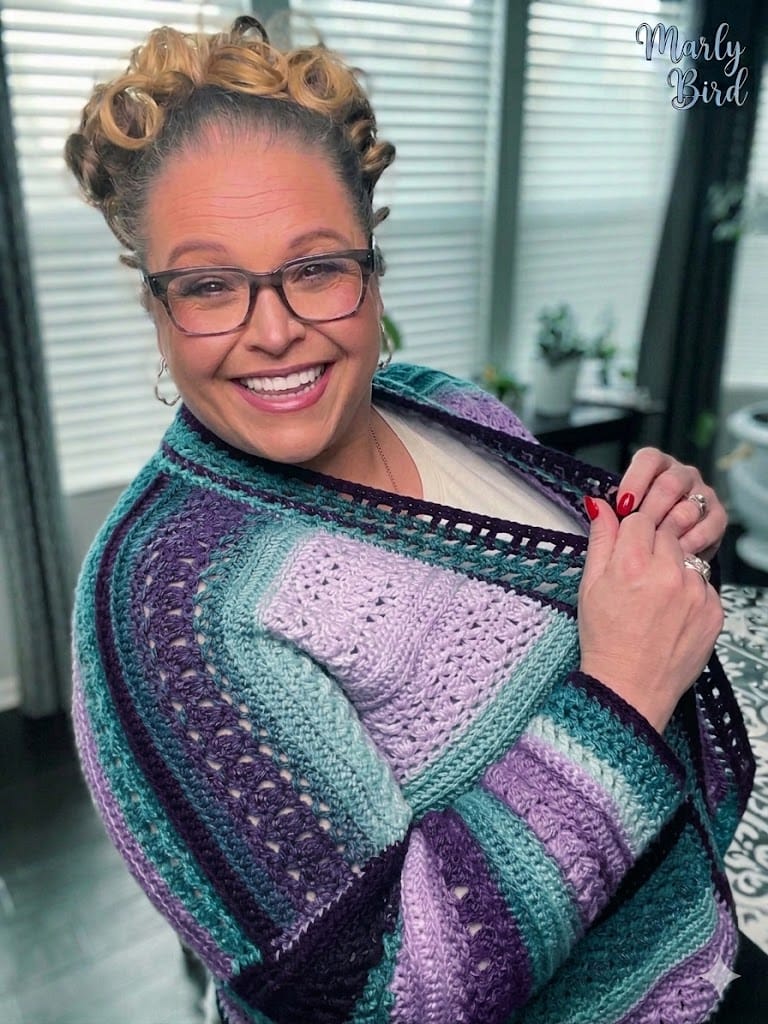
Drop a comment below and tell me which colorway you'd pick for YOUR Sookie… cool blue, teal green, soft pink, tan and cream, classic gray and black, or that gorgeous purple/teal mix? Or are you going somewhere totally different… a rich burgundy, a buttery mustard, a sage neutral, a bright coral? I love seeing what colors my community gravitates toward, and I'm always inspired by what you all come up with.
And if you make the Sookie in your dream color, please tag @marlybird on social media or use #SookieCrochetCardigan so I can share your finished project. ✨
Favorite & Queue on Ravelry
Please favorite and queue the Sookie Crochet Cardigan on Ravelry and tag your finished projects #SookieCrochetCardigan so I can see them. Every color, every body, every finished photo… absolutely made my week.
More Crochet Patterns You'll Love
- Goldenrod Crochet Cardigan… another reader favorite
- Trifle Crochet Pullover... Turkey Trot project with Marly Bird House workshop too!
- Stonington Crochet Gradient Shawl… got mini hanks? Here is your project!
- Bellini Crochet Cropped Pullover… everybody loves this pattern
- Tatiana Crochet Sweater… another size-inclusive crochet garment
- Solomon's Knot Crochet Summer Tee… must make crochet pullover for summer
- Turkey Trot 2024 Event Recap… see the full event this pattern was born in
Or browse my full library of free knit and crochet patterns for every free pattern on the blog.
Meet the Designers
Marly Bird is a professional yarn artist, designer, and teacher who has been designing in the knit and crochet industry since 2007. She's the creator of the BiCrafty method… the only approach that teaches both knitting AND crochet together… and the host of one of the longest-running fiber arts podcasts and YouTube channels in the business. Marly's free patterns, video tutorials, and beginner-friendly teaching style have helped hundreds of thousands of crafters fall in love with the hook and needles. Find her work, free patterns, and online courses at marlybird.com and at Marly Bird House.
Robyn Chachula is a structural engineer turned full-time crochet designer, author, and teacher. She's published multiple bestselling crochet books (including Crochet Stitches VISUAL Encyclopedia, Unexpected Afghans, and Blueprint Crochet), has been designing for major yarn companies and magazines since 2006, and is celebrated in the crochet community for her clear charts, smart construction, and gorgeous modern takes on traditional techniques. Robyn and Marly have been designing together for years… the Sookie Crochet Cardigan is one of their most-loved collaborations. You can find more of Robyn's work at crochetbyfaye.com.
Frequently Asked Questions
Is the Sookie Crochet Cardigan really beginner friendly?
Honestly, yes… for an adventurous beginner. If you're comfortable with chain, single crochet, half double crochet, double crochet, and a few decreases (dc2tog, hdc2tog, sc2tog), you can absolutely do this. The panel construction makes it easier than a one-piece cardigan because you get to finish smaller pieces at a time. The pattern walks you through every special technique (foundation hdc, third loop, stacked dc, crossed dc) and all of them have video tutorials.
Can I make this cardigan in a different yarn?
Absolutely. Use any worsted weight (CYCA #4) yarn that gets the right gauge on a J/10 hook. Acrylic is ideal for this pattern because it's machine washable and the stitch pattern needs a little structure. If you use wool or another natural fiber, check blocking instructions… many natural fibers respond better to wet blocking than steam blocking. Always swatch and block your swatch before committing to the full project.
How long does this cardigan take to crochet?
Most crocheters finish in 40-60 hours, depending on size and speed. A realistic timeline for most crafters is 4-6 weeks of regular crochet time. The Turkey Trot 2024 mystery version was paced over 11 days as a make-along… so if you have an existing crochet rhythm, you can absolutely finish it in that same timeframe.
Are the pockets required?
Nope, completely optional. The pattern notes specifically tell you what to do if you want to skip them (repeat Rows 8-9 instead of the pocket opening rows). Many crocheters add them because pockets are ALWAYS a welcome feature on a cardigan, but if you prefer a cleaner silhouette, skipping them is fine.
What's the difference between the Sookie and other Marly Bird crochet cardigans?
Great question. The Sookie is a panel-construction oversized cardigan with a textured stitch pattern, pockets, and a collar, designed for 9-10 inches of positive ease. My Easy One-Piece Kimono Cardigan is a simpler, unshaped one-piece design for a more beginner-friendly experience. My Goldenrod Cardigan is a different textural stitch with a different fit. Different cardigans for different moods.
Can I customize the length?
Yes! The pattern includes specific notes on how to adjust the back seam, side seams, and overall body length if you want your cardigan shorter or longer. Sweater Row 1 in the Back Seam section notes exactly how to recalculate… you'll want the finished Row 1 to be 2 inches less than half the total desired length. Side seams adjust with a stitch marker method also explained in the pattern. Customization is genuinely supported here.
Where can I get the ad-free PDF or the full VIP workshop?
The full Sookie VIP Workshop at Marly Bird House includes the printable PDF + video walkthroughs for every section. If you're the kind of crafter who learns best by watching, or you want me coaching you through every step of your first garment, the workshop is the premium experience. Standalone ad-free PDF options on Etsy and Ravelry are coming soon.
What is the Marly Bird Turkey Trot? How can I join the next one?
Turkey Trot is my annual November mystery make-along event inside Marly Bird House, where a full pattern is released in pieces over about 11 days. I host it live, participants work the pattern together, and we celebrate finished projects as a community. It's one of four annual events (alongside Game Day in winter, First Fall in late summer, and Tournament of Stitches in spring). Join the newsletter to get first access when the next event opens for registration.
💬 Final Thoughts
The Sookie Crochet Cardigan has been one of my community's most-loved designs since the moment we released it. I've seen hundreds of finished projects in every color imaginable, on every body, in homes all over the world. It's the kind of pattern that earns its place in your wardrobe… you'll wear it every fall, reach for it on chilly summer evenings, and pull it out when someone asks “can you recommend a crochet cardigan I could actually finish?”
Thank you for being here, for letting me design for you, and for being the reason I get to keep sharing free patterns. If you make the Sookie, please share your finished project with me. Tag @marlybird on social media or use #SookieCrochetCardigan. Seeing your versions is my favorite thing in the whole wide world.
Love, Your BiCrafty Bestie, Marly Bird
(and co-designer Robyn Chachula 💛)