Search
Close
  • The Pattern Shop
  • Our Free Patterns
    • Browse All Our Free Patterns
    • Our Free Knitting Patterns
    • Our Free Crochet Patterns
  • Blog
    • All Blog Posts
    • All Free Patterns
    • Dibble Dabble Inspiration
    • Giveaways
    • Make-Alongs
    • Product Reviews
    • Roundups
    • Tips, Tricks, Techniques for Knitting and Crochet
Stylized bird with pink and gray swirling tail above elegant “Marly” text, logo for crochet accessories and home decor.
  • Marly Bird House
  • Learn to Knit & Crochet
    • Newbie? Start Here
    • Video Tutorials
    • Knitting Definitions
    • Crochet Definitions
    • Common Techniques
    • Size Charts for Knitting and Crochet Projects
  • About
×
  • The Pattern Shop
  • Free Patterns
  • Blog
  • Marly Bird House
  • Learn to Knit & Crochet
    • Newbie? Start Here
    • Video Tutorials
    • Knitting Definitions
    • Crochet Definitions
    • Common Techniques
    • Size Charts for Knitting and Crochet Projects
  • About
Stylized bird with pink and gray swirling tail above elegant “Marly” text, logo for crochet accessories and home decor.
Search
Close

New Patterns NOW Available in Ad-Free PDF! Check out The Pattern Shop

What Is the Tournament of Stitches? | Marly Bird Mystery Make-Along Guide

March 5, 2026 By Marly Bird 3 Comments

The Tournament of Stitches mystery make-along is one of our most beloved Marly Bird community events. Held during the excitement of March Madness, this knit and crochet mystery make-along brings makers together to create something that is the same… but different.

Sound confusing?

Stick with me. It’s actually the most fun part. 😉

Yarn balls and knitting tools sit on a basketball court under "Tournament of Stitches," beside a cartoon bird in a sweater.

Affiliate Disclosure: This post contains affiliate links. To learn more please visit my privacy policy here💖


What Is the Tournament of Stitches Mystery Make-Along?

The Tournament of Stitches is a community-driven mystery make-along where knitters and crocheters create a project over several weeks without knowing exactly how the final piece will look.

Think “choose your own adventure” — but with yarn.

At the start of the event, you choose your project type. Depending on the year, that may be:

  • A shawl
  • A cowl
  • A pillow or throw
  • Or another creative format

Each week, new plays (also called clues or sections) are released. Every play includes multiple concentration levels, and you choose which one you want to work.

Yes. You get to choose your difficulty level every single week.

After several weeks, you’ll have a finished project that unfolded like a mystery right alongside the rest of the community.


A logo with a blue yarn ball, crochet and knit motifs, two pink hearts, green zigzags, and a yellow 2026 banner.

🎉 Tournament of Stitches 2026 Is Now Open!

The Tournament of Stitches 2026 is officially open, and this year’s event begins March 17th!

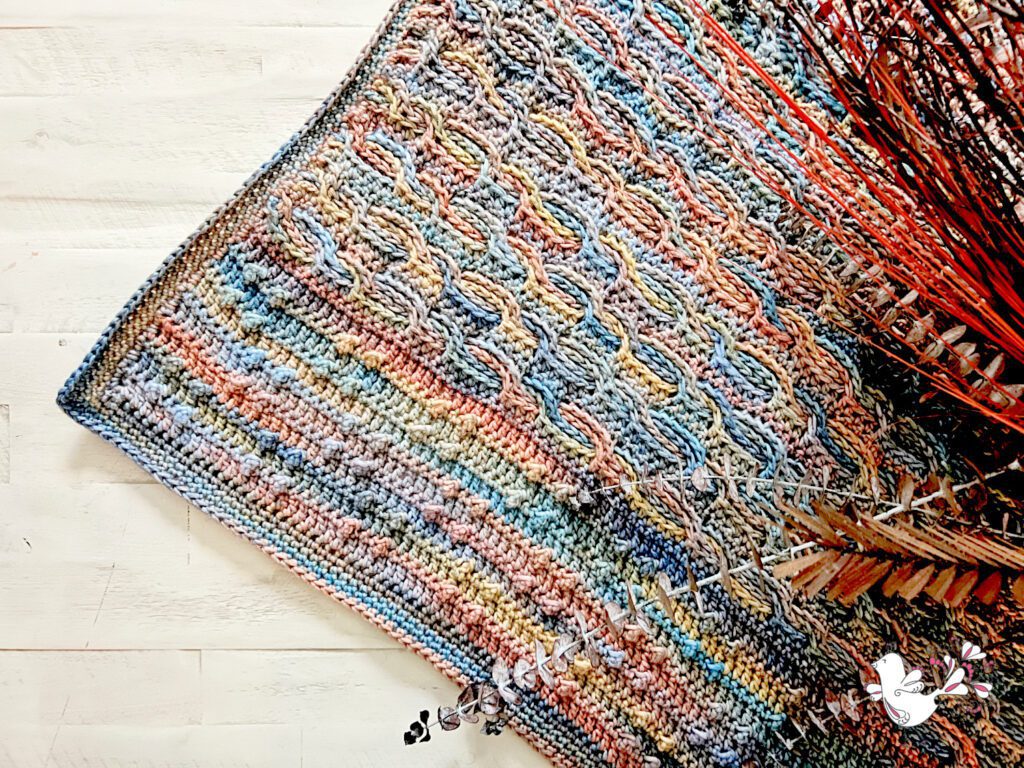
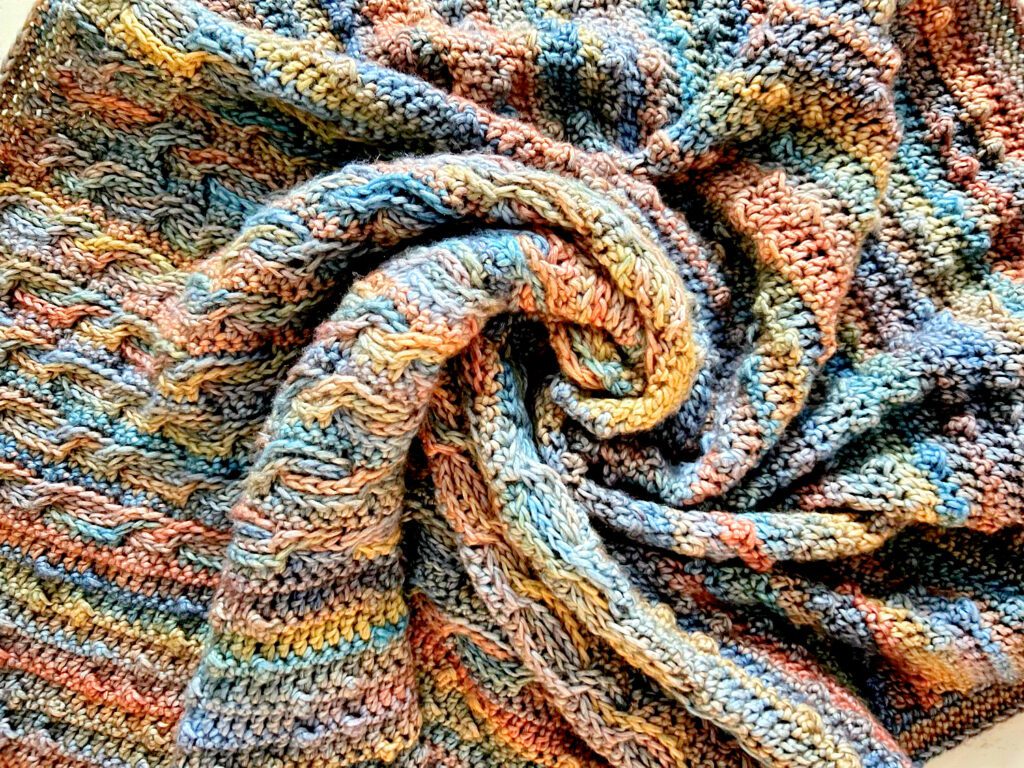
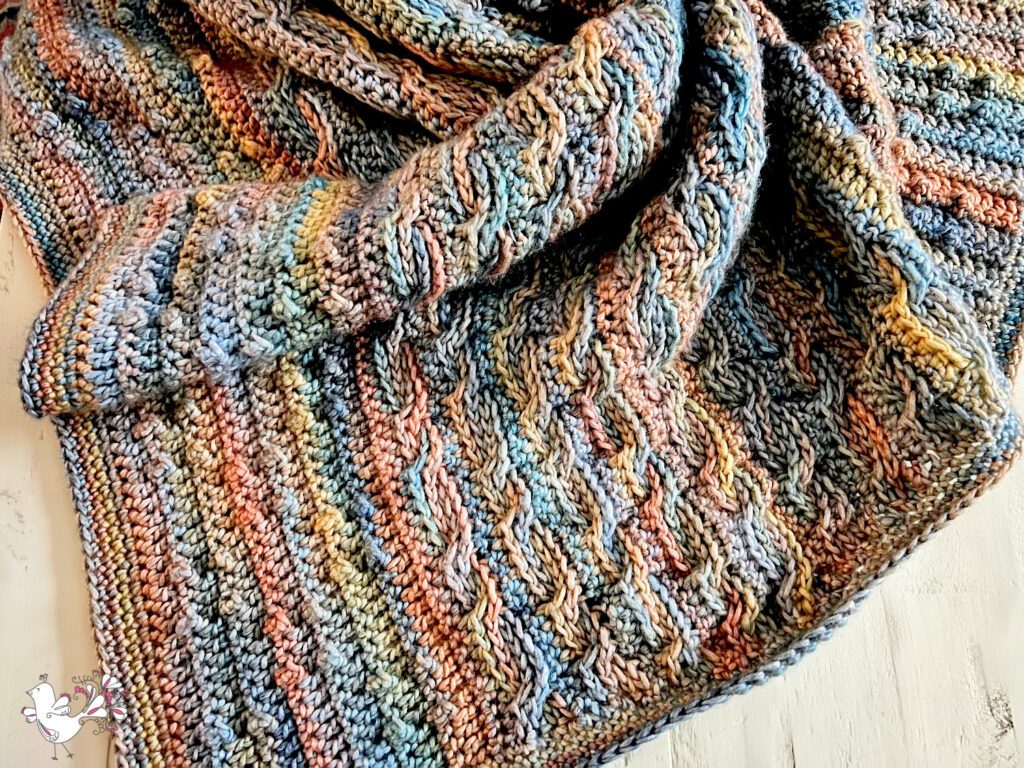
This year we’ll be knitting a beautiful mystery shawl designed by Marly Bird. Just like previous tournaments, the fun comes from working through clues, learning techniques, and knitting alongside makers from around the world.

We’re keeping most of the project details under wraps for now, but you can get all the current information about registration, supplies, and event updates here:

👉 Get the full Tournament of Stitches 2026 details here


How the Tournament of Stitches Works

Here’s the structure in simple terms:

  1. Choose your project type.
  2. Each week, new plays are released.
  3. Each play includes multiple concentration levels.
  4. Pick the level that fits your mood that week.
  5. Knit or crochet your section.
  6. Wait for the next clue.
  7. Repeat until the project is complete.

The coolest part?

The math is written so you can mix and match concentration levels as you go. You are not locked into one track. You can go full “Be Quiet, I’m Knitting” one week and “Netflix and Chill” the next.

After about five weeks, you have a finished project that was a mystery to all of us at the beginning.

And that shared discovery is where the magic happens. ✨

The 2026 Tournament of Stitches event begins March 17th and features a mystery knit shawl project. You can see the full event details and registration information here:
https://marlybird.com/blog/tournament-of-stitches-2026/


Tournament of Stitches Concentration Levels

Instead of labeling projects “beginner” or “advanced,” we categorize each play by how much focus it requires.

Because let’s be honest — sometimes you want a challenge, and sometimes you want to watch basketball.

🎬 “Netflix and Chill” Knitter or Crocheter

These plays feature stitch patterns that allow you to:

  • Watch a light show
  • Chat with a friend
  • Keep some background noise on

There is pattern detail, but it doesn’t require constant counting.


🎷 “Smooth Jazz” Knitter or Crocheter

This is moderate concentration.

You can have music or light background noise, but you’ll need to think a bit more.

These plays include more involved stitch patterns and require some attention, but they are still approachable.


🤫 “Be Quiet, I’m Knitting” Knitter or Crocheting

These are the most focused plays.

  • More complex stitch patterns
  • More counting
  • More technical engagement

These are for the weeks when you want to really dig in and stretch your skills.


A Look at Past Tournament of Stitches Events

The Tournament of Stitches began in 2018 during March Madness. It started as an annual event and has evolved into a bi-yearly event, with a longer break from 2022–2026 to recharge and refine the experience.

Each year has brought something new.

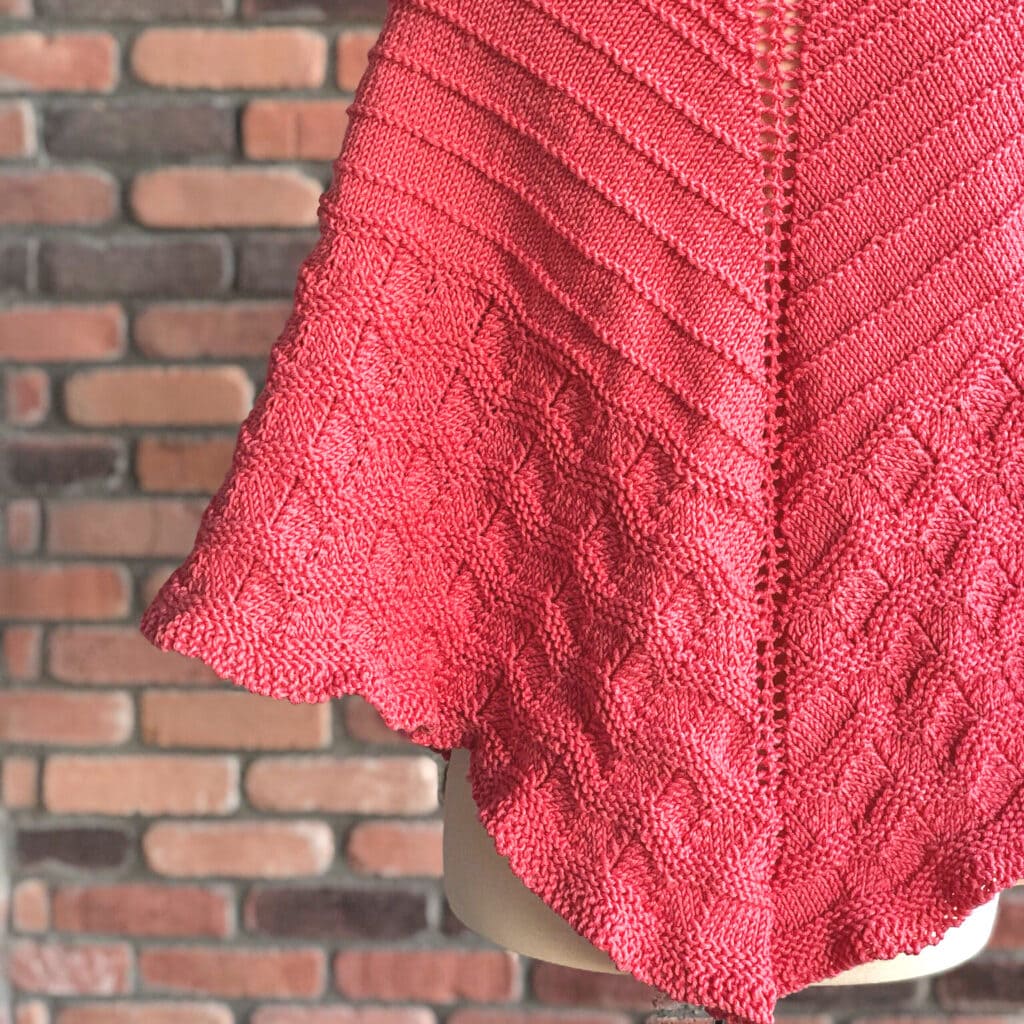
🏀 2018 – The Original

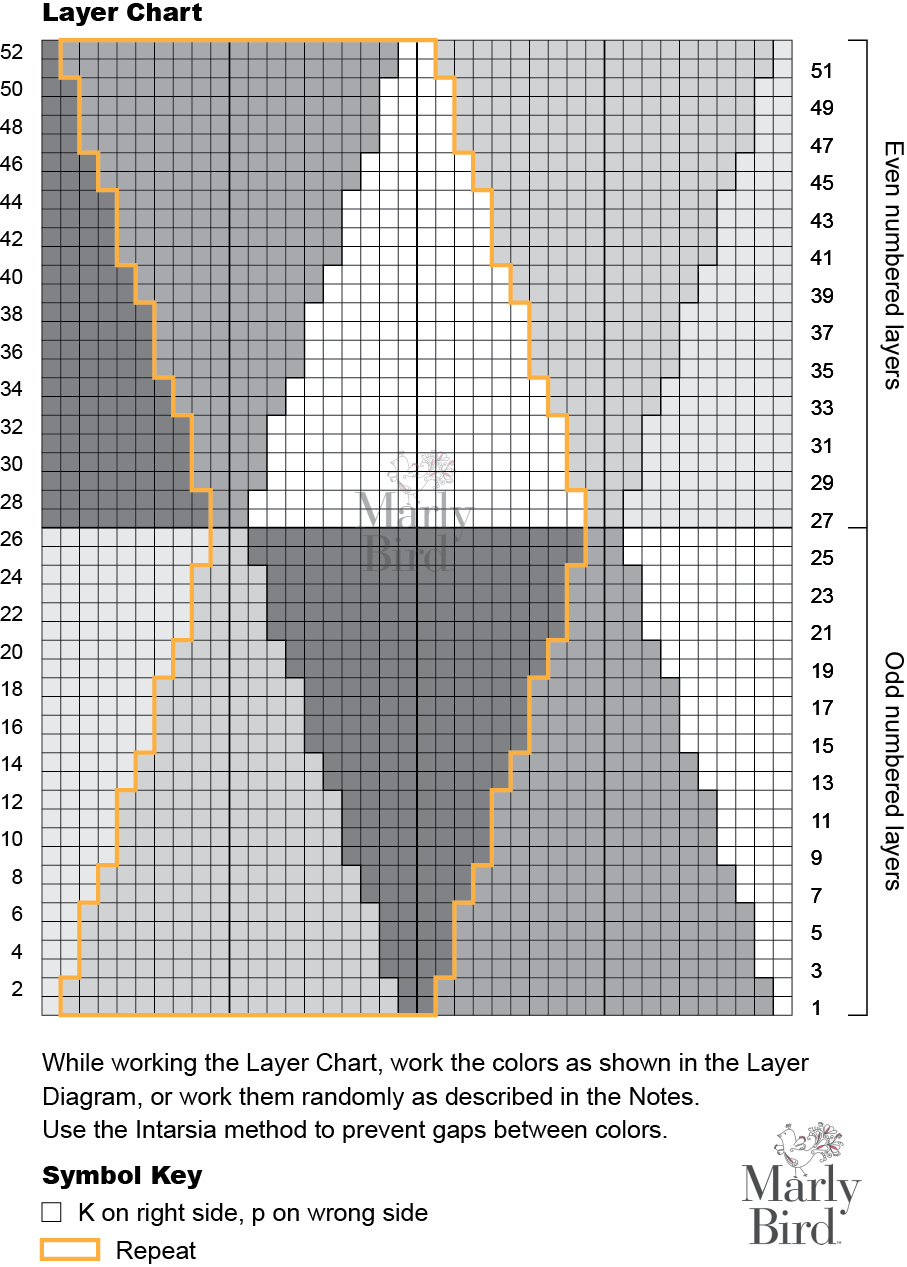
The very first Tournament of Stitches featured a top-down triangle shawl with four concentration levels. It set the foundation for everything that followed.

Red knitted shawl featuring textured diamond patterns and diagonal ribbing, shown on a mannequin before a brick wall.
Woman models a vibrant purple crochet shawl with textured stitch detail, seated outdoors against tall green grass.
A woman models a bright pink knit shawl with ruffled edges and textured stitches, worn over a green top; yarn shelves behind her.
Woman models a bright pink, green, and gray knit shawl, showing textured worsted stitches in a cozy craft room.

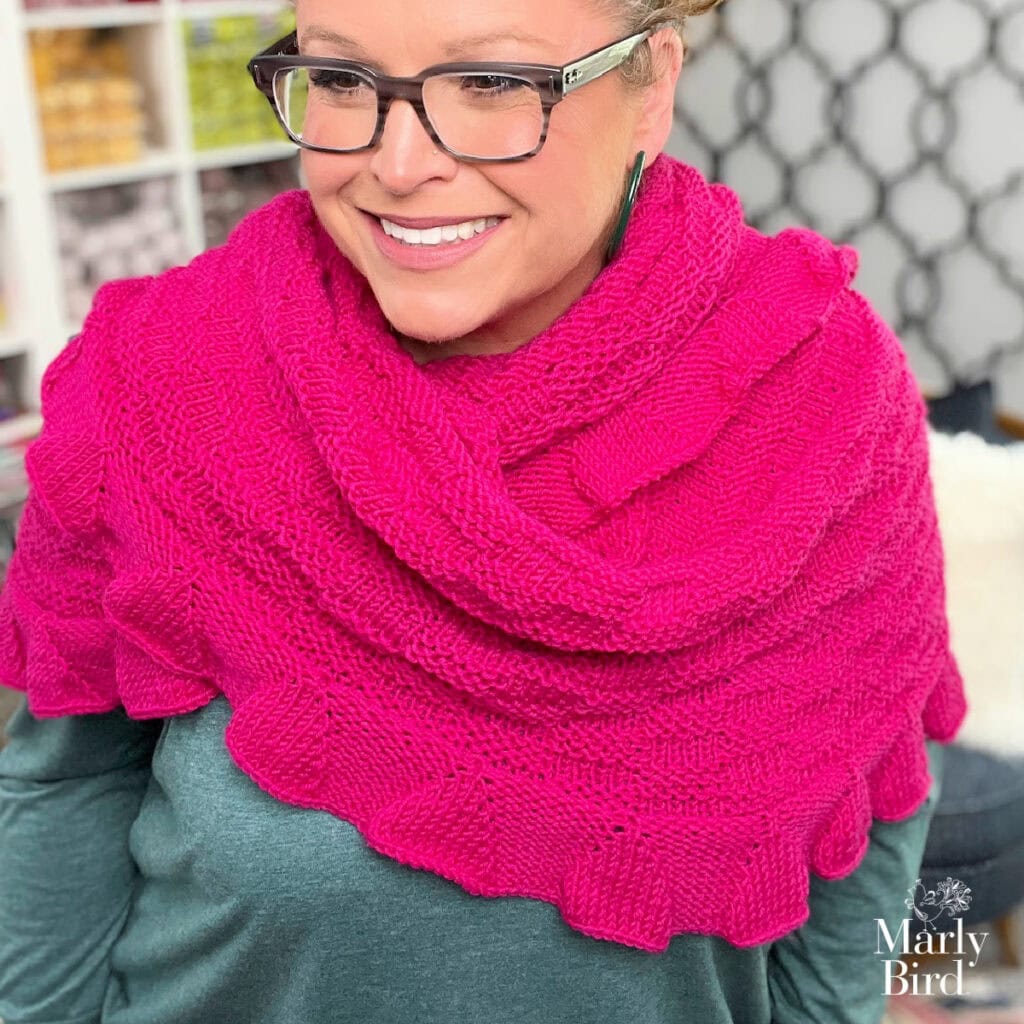
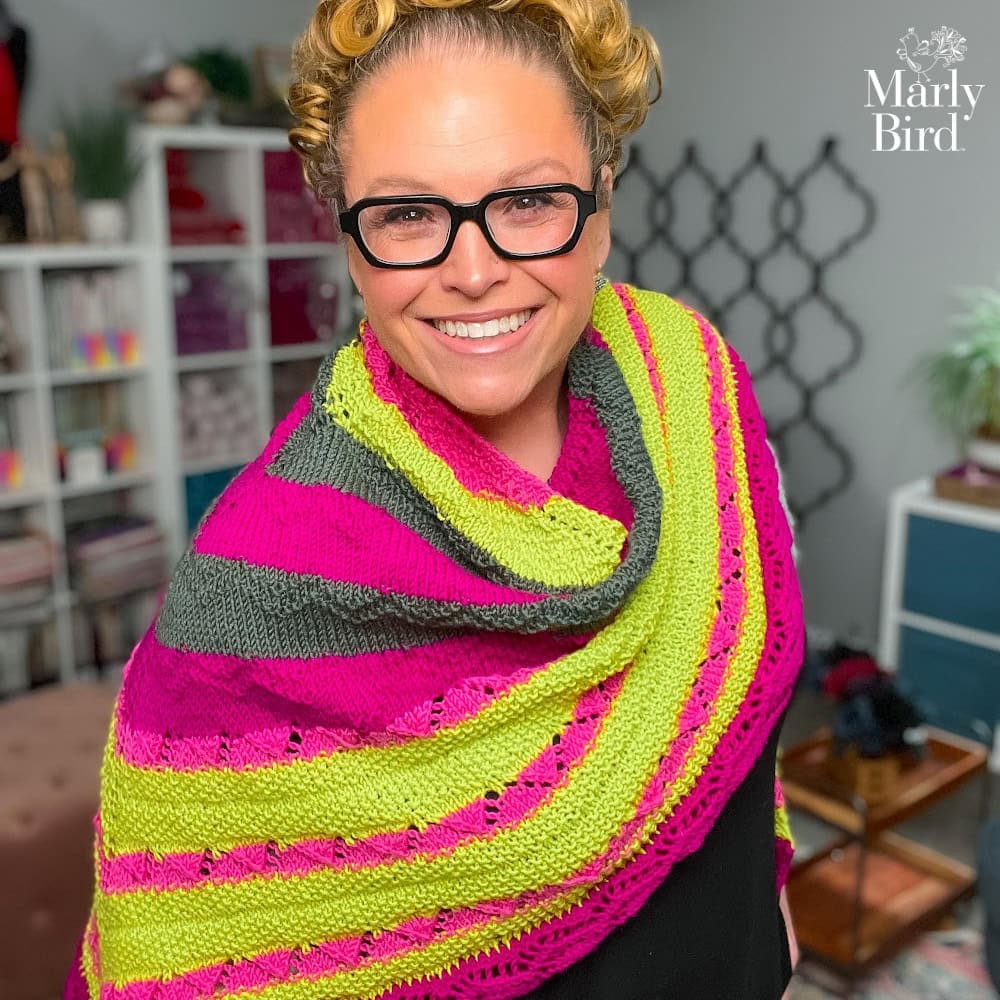
🏀 2019 – The Experimental Year

This year featured:

  • A unique knit boomerang/crescent shawl
  • An asymmetrical crochet shawl

While this year was a bit of an anomaly in popularity, it gave birth to the wildly popular Crazy Stripes Knit Crescent Shawl, which many of you still love today.


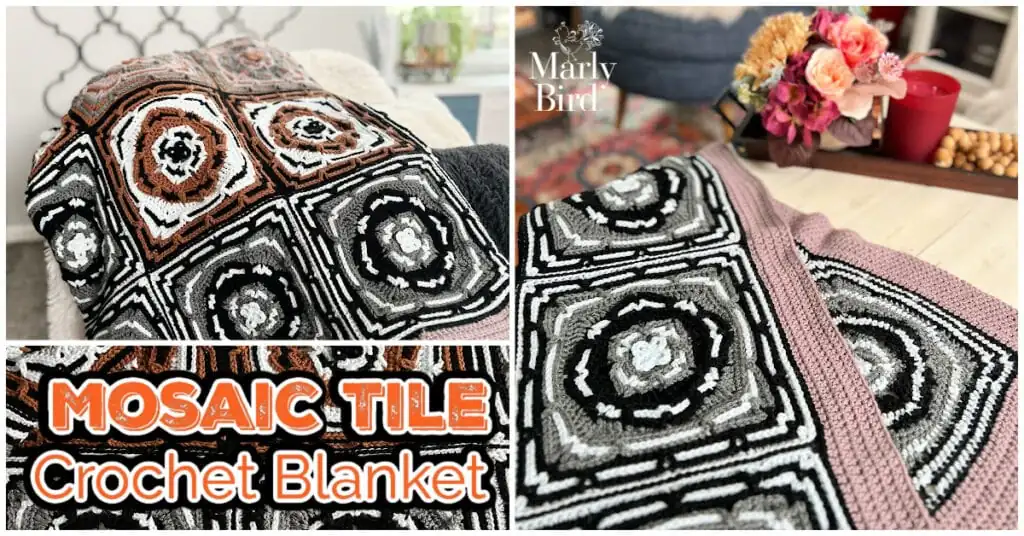
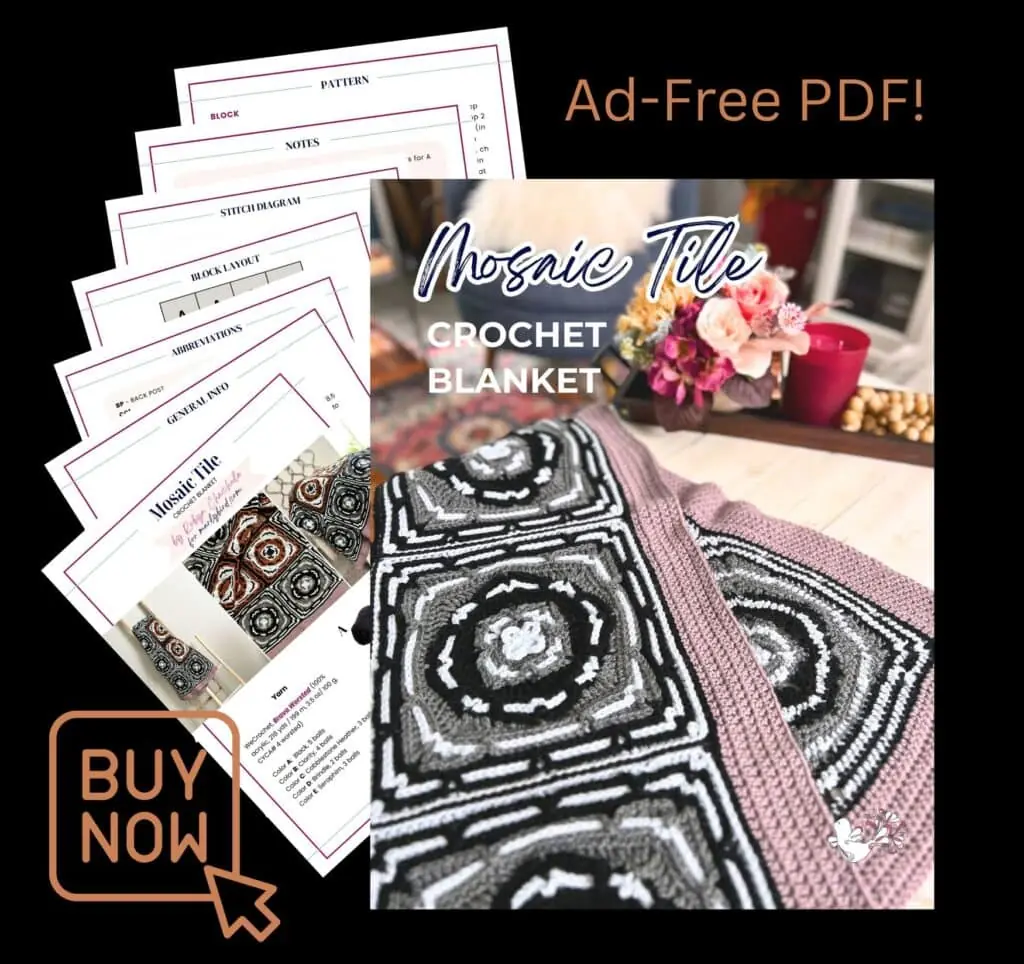
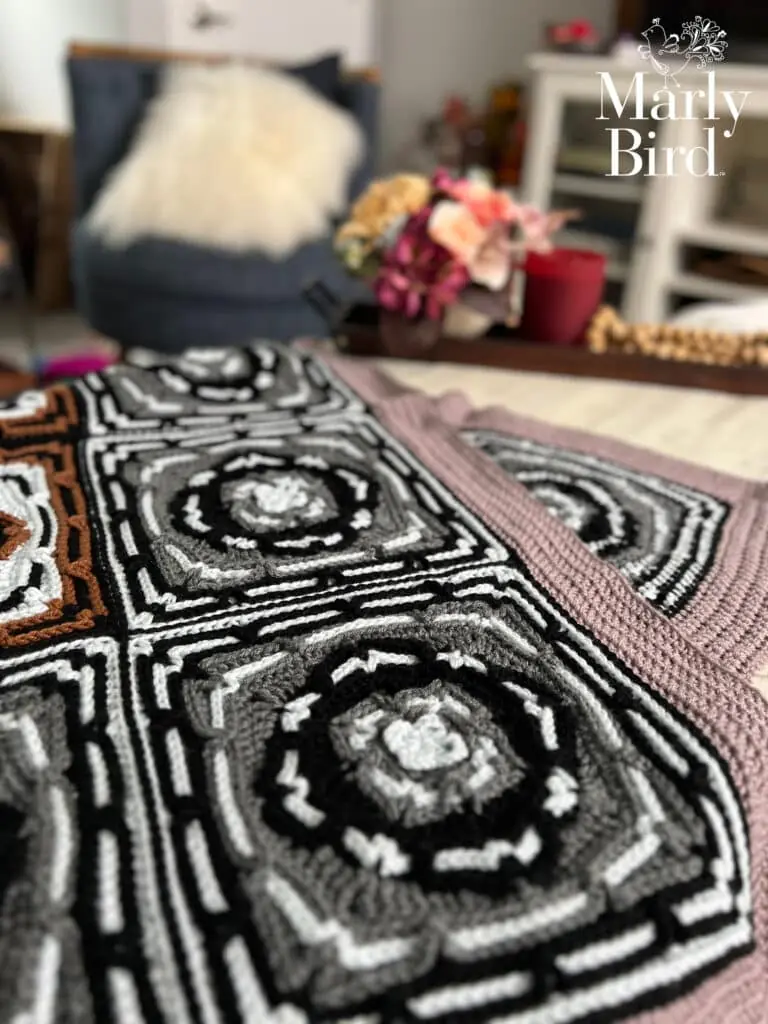
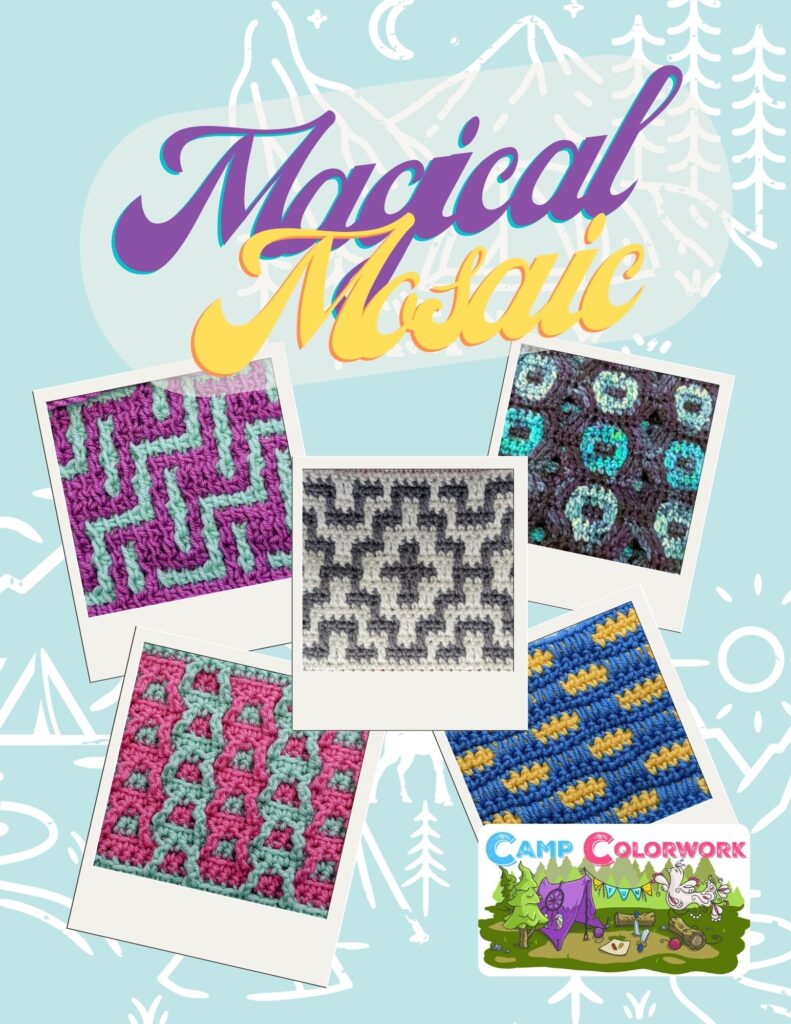
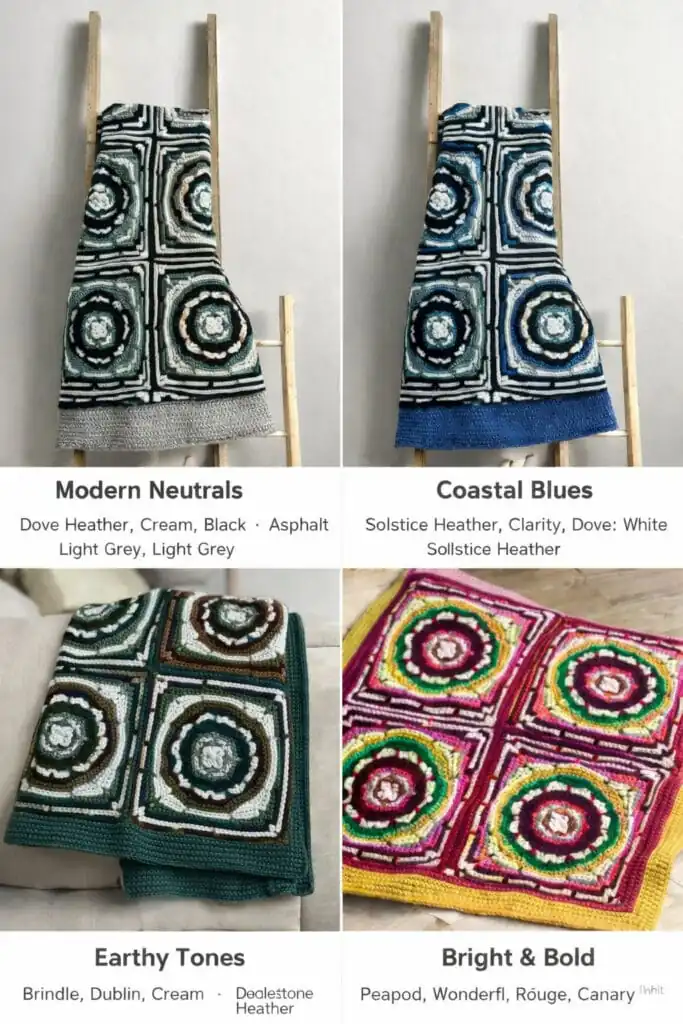
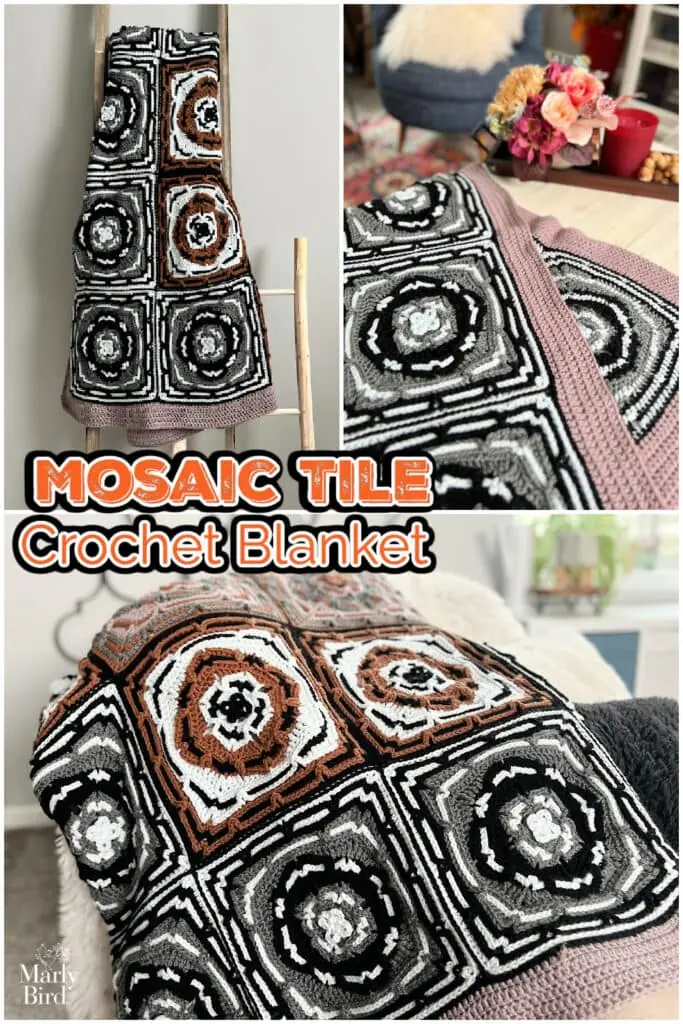
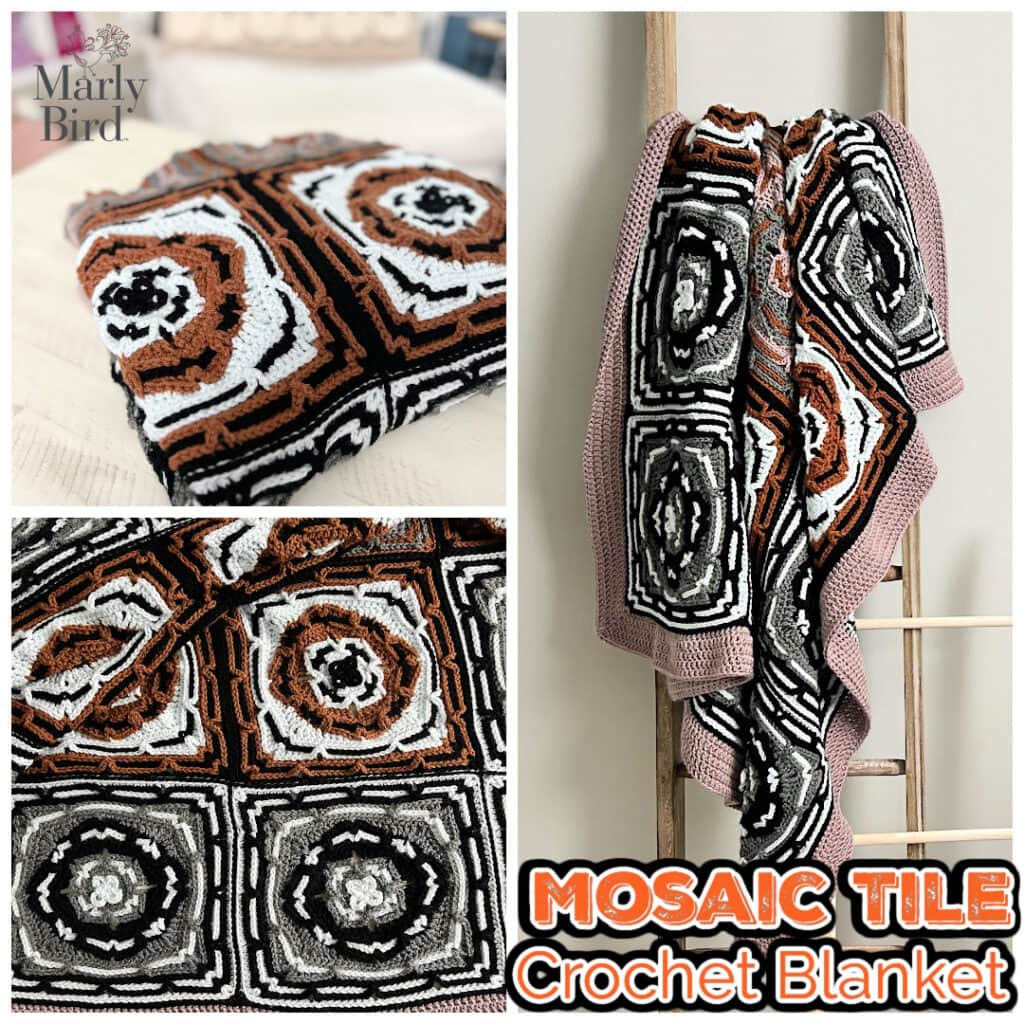
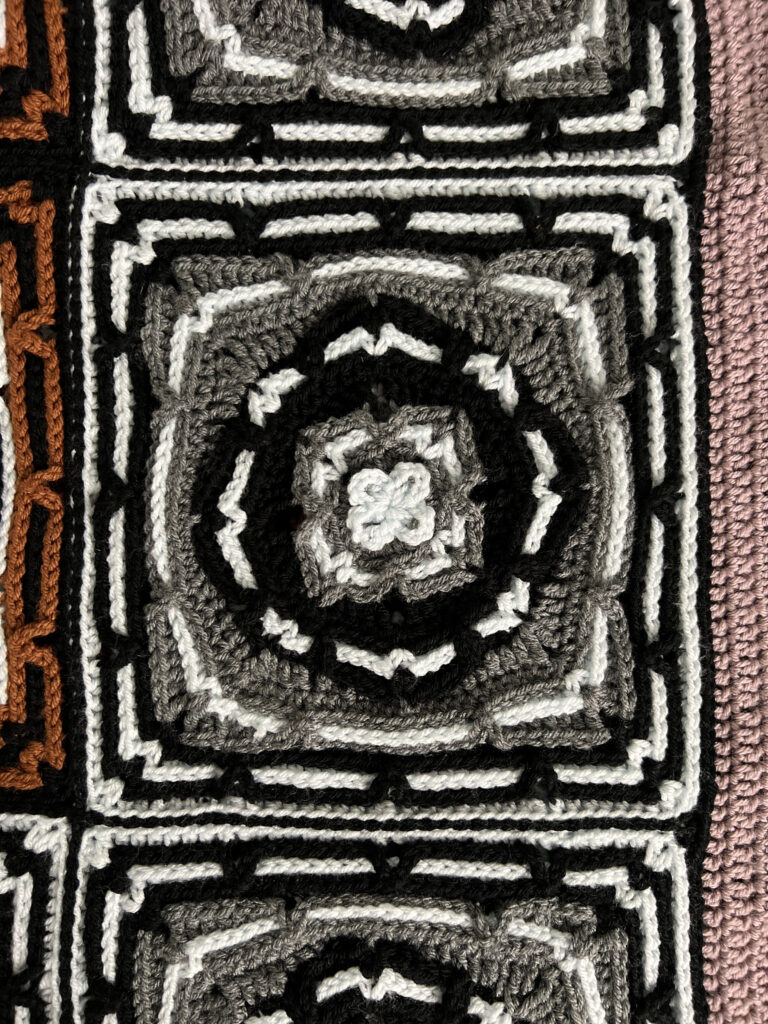
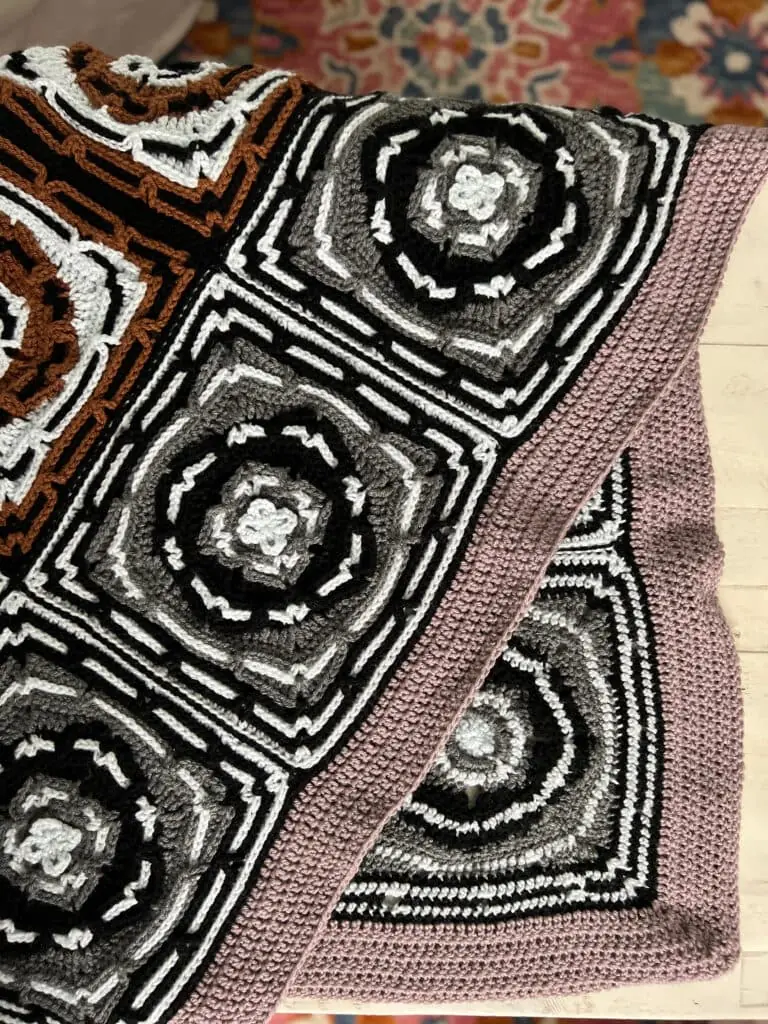
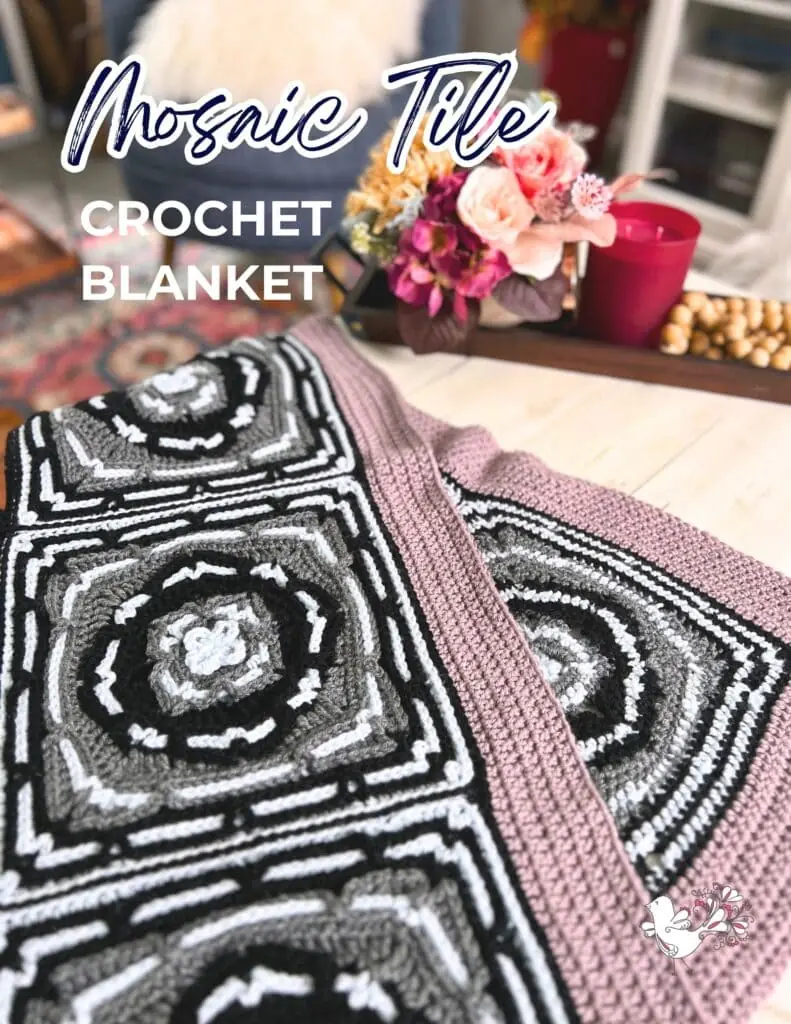
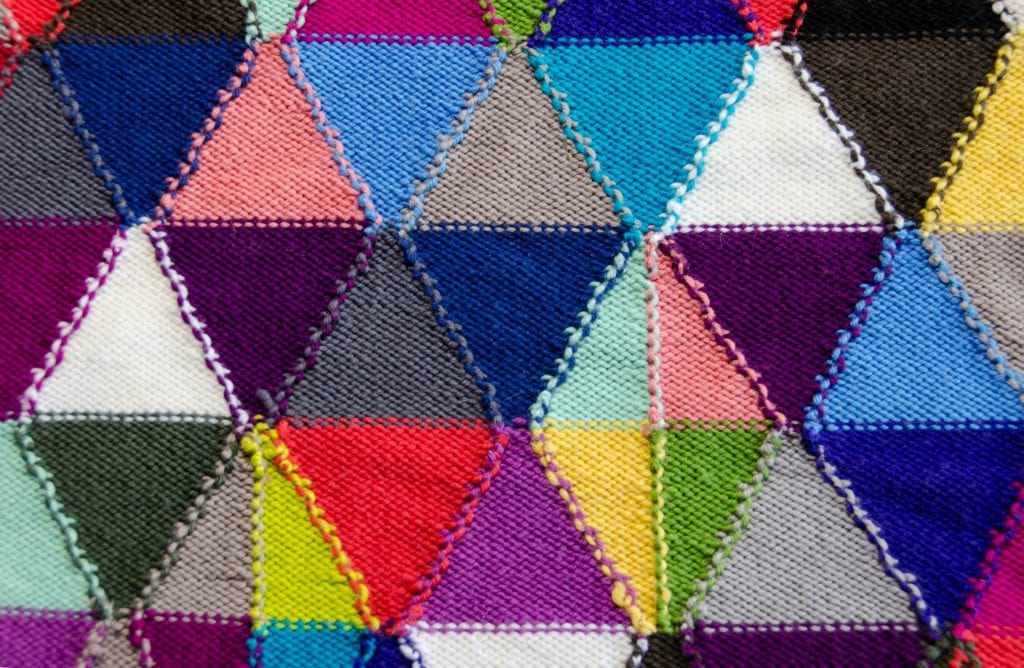
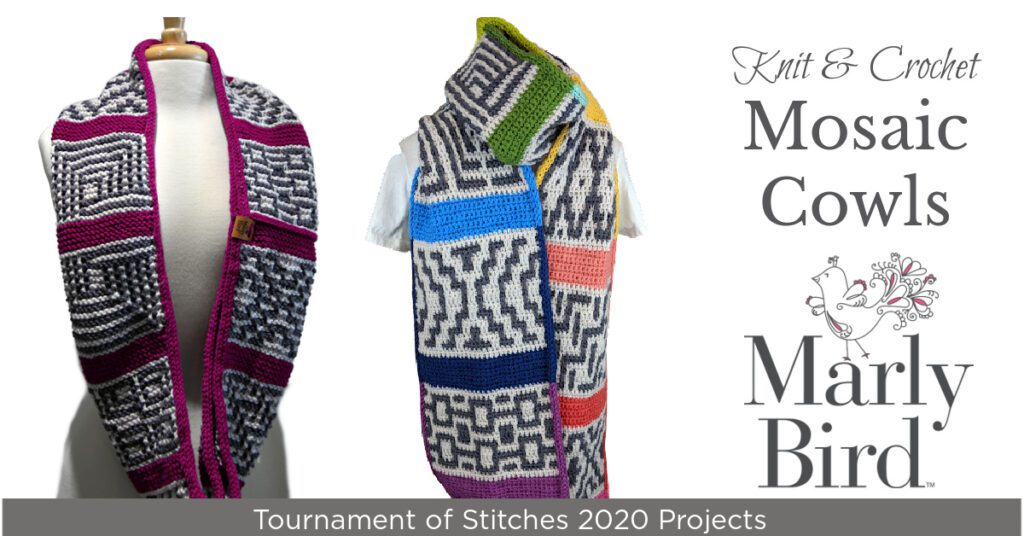
🏀 2020 – The Mosaic Year

This was the year of mosaic stitches — both knit and crochet.

These projects became some of the most popular patterns on MarlyBird.com and helped many makers build colorwork confidence. Mosaic Madness Knit Cowl and the Mosaic Madness Crochet Cowl.

Two crocheted cowls on mannequins: one with purple edging and gray-white mosaic, one with multicolor stripes and geometric motifs.

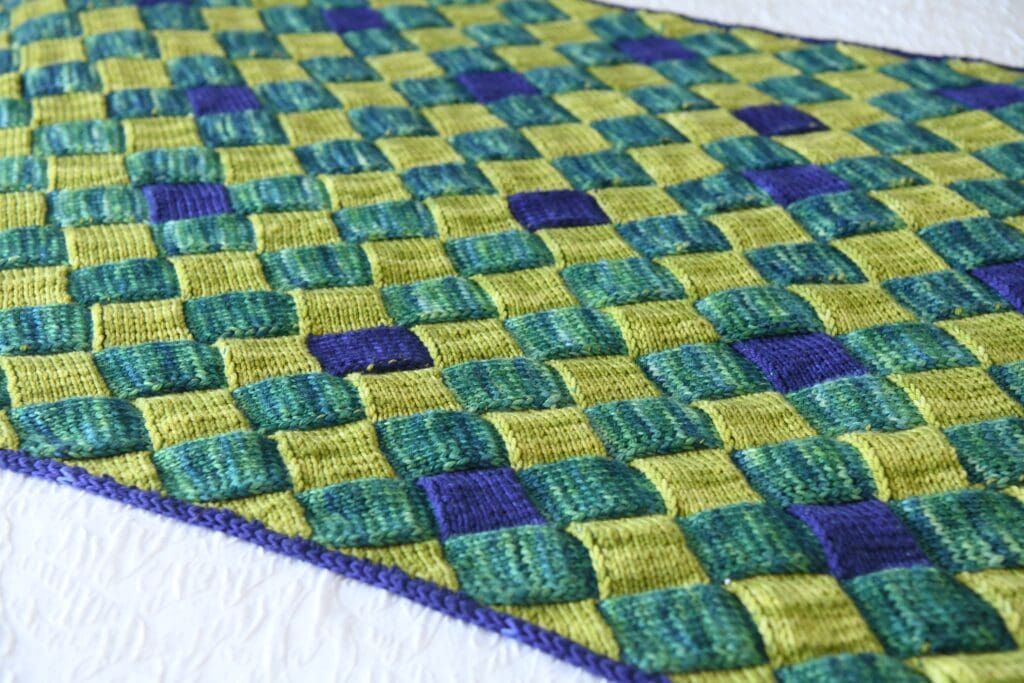
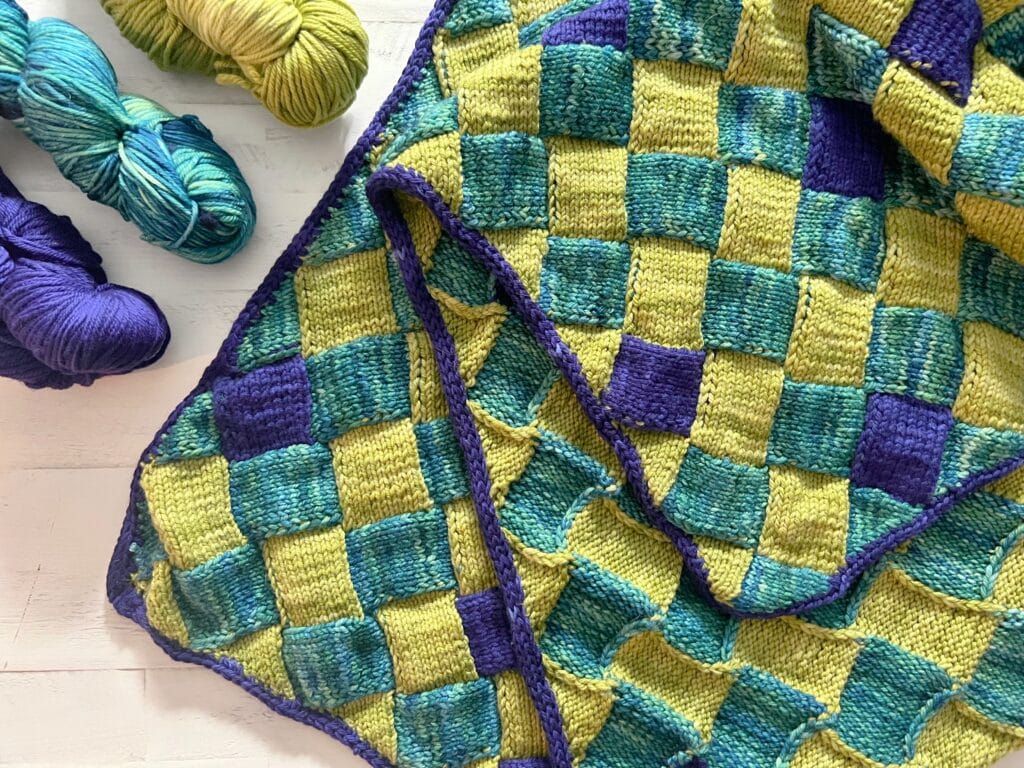
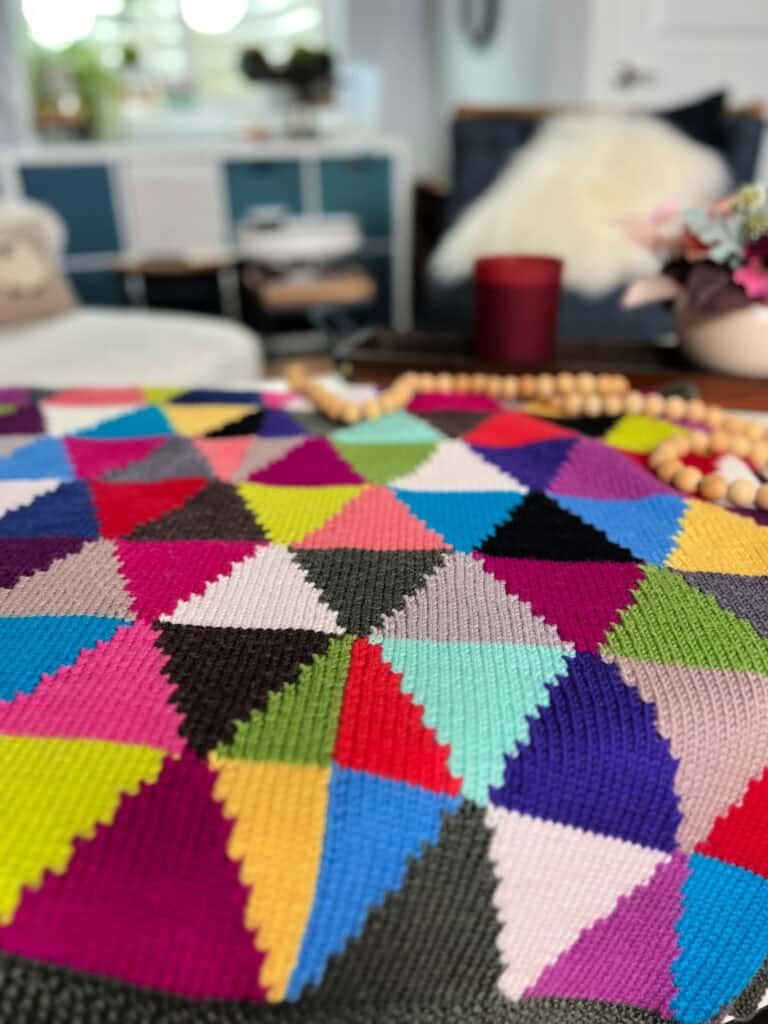
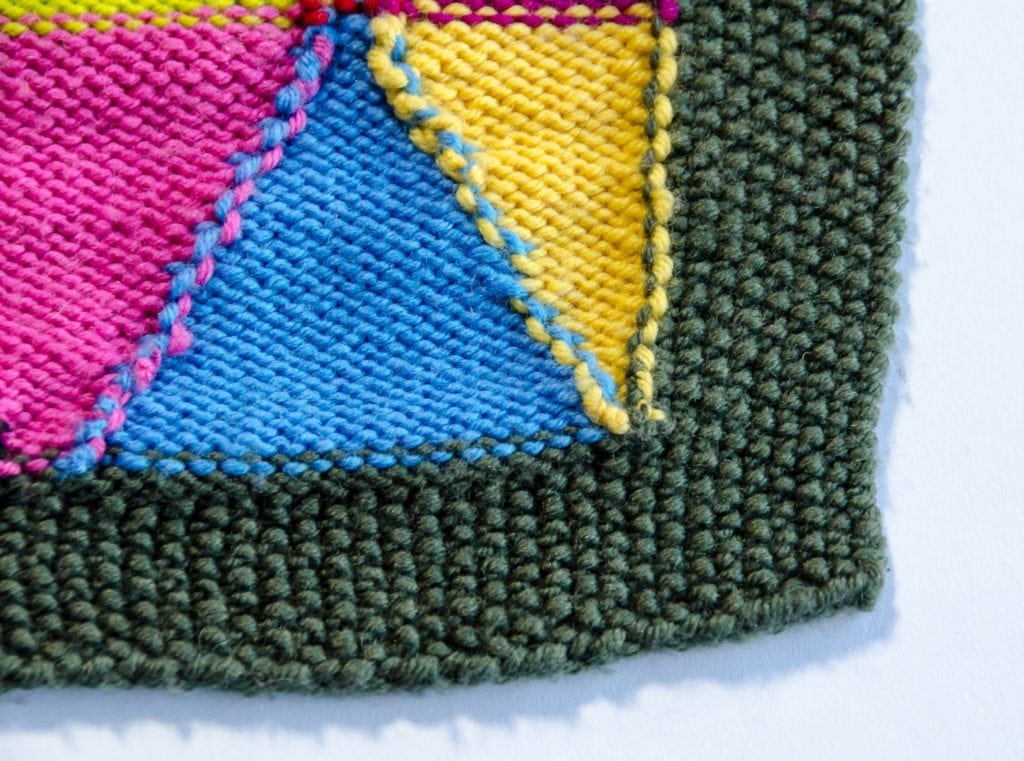
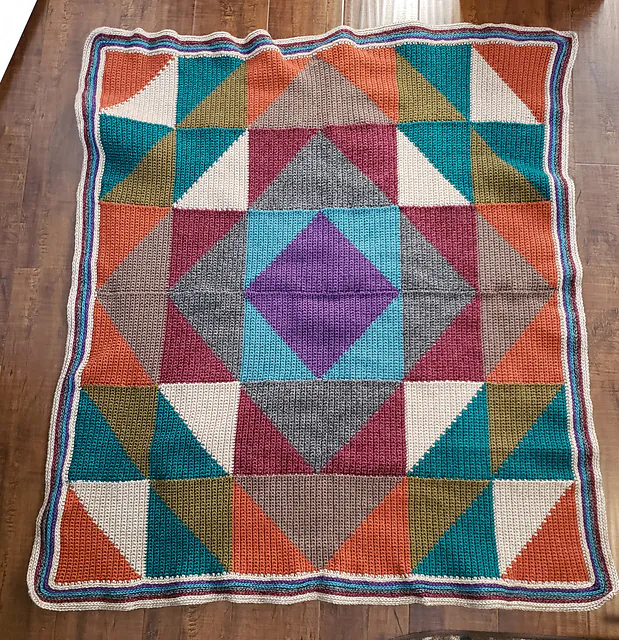
🏀 2021 – The Pillow and Throw

The 2021 Tournament of Stitches focused on crochet miter stitches in a pillow and throw format. You learned multiple ways to create miters and explore construction techniques in depth.

Crocheted blanket with triangles and squares in teal, orange, purple, beige, brown, olive; wavy striped edge on wood floor.
By Haldis1 on Ravelry
Colorful quilt with triangles and diamonds in teal, navy, lime, yellow, white, and blue; finished with a solid navy border.
By Mistylouknits on Ravelry

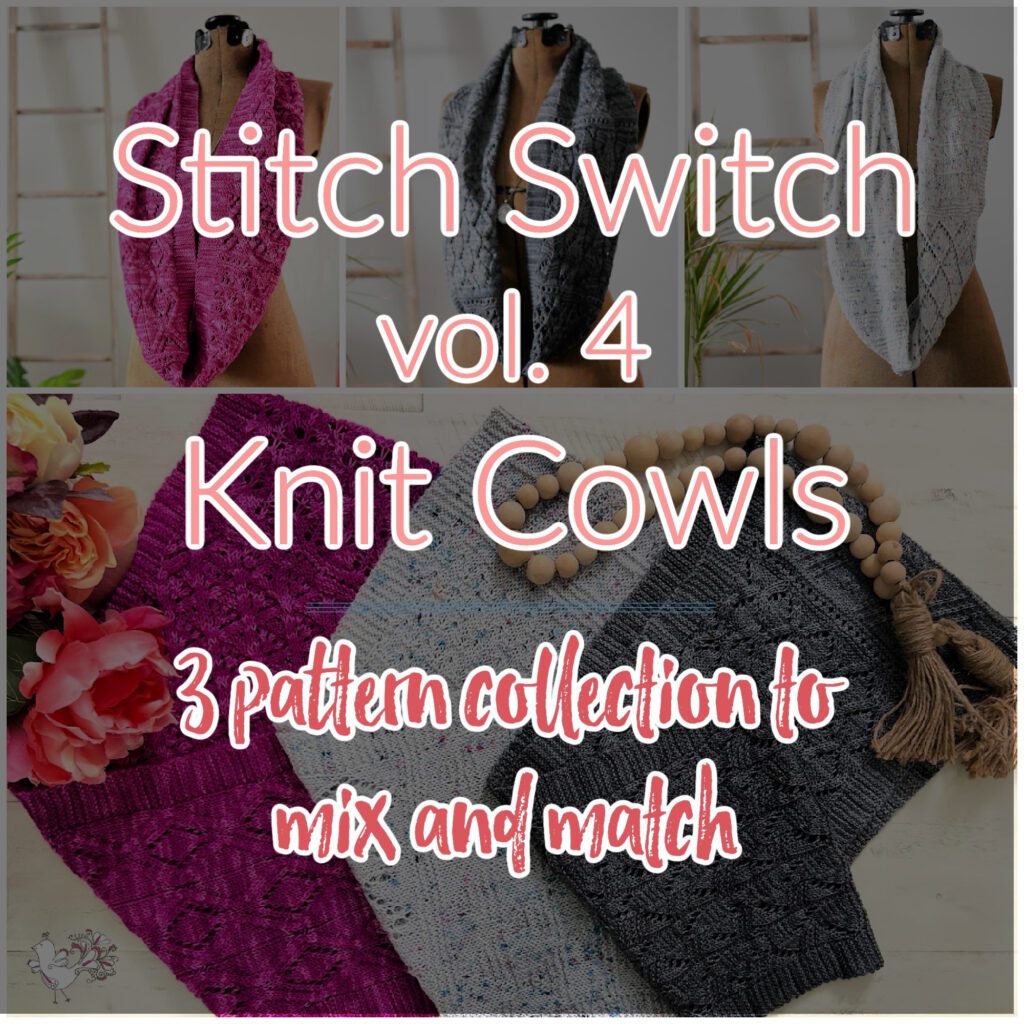
🏀 2022 – Mix and Match Returns

We brought back the mix-and-match style of the original event for 2022 Tournament of Stitches.

  • Upgrade version: Shawl
  • Upgrade version: Cowls
  • Three concentration levels
  • First and only year with a Tunisian crochet option

This year refined the system and streamlined the experience.

Magenta, gray, and light gray knit cowls shown on dress forms and table; visible stitch detail and cozy texture.
Four colorful shawls, knit and Tunisian crochet, displayed on mannequins and hangers; visible stitch texture and drape.
Gray and yellow crochet and Tunisian shawls on a woman, with visible stitch textures, yarn balls, and shawl close-ups.

Ready to Join the 2026 Tournament of Stitches?

The 2026 Tournament of Stitches kicks off on March 17th, and this year’s mystery project is a knit shawl. If you want to join the fun, see the official event page for all the latest updates and details.

👉 Click here for the Tournament of Stitches 2026 event details

We continue to improve the process every time — clearer instructions, more creative designs, better organization, and stronger community support.

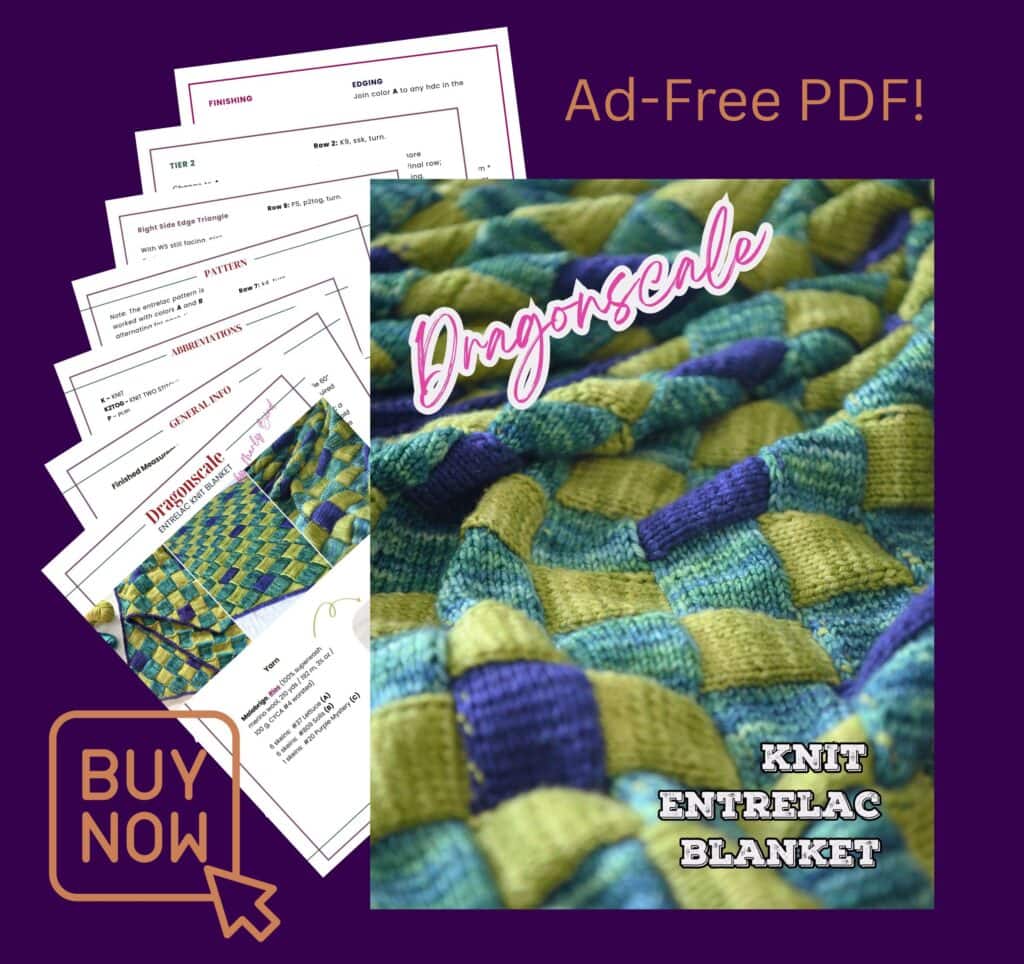
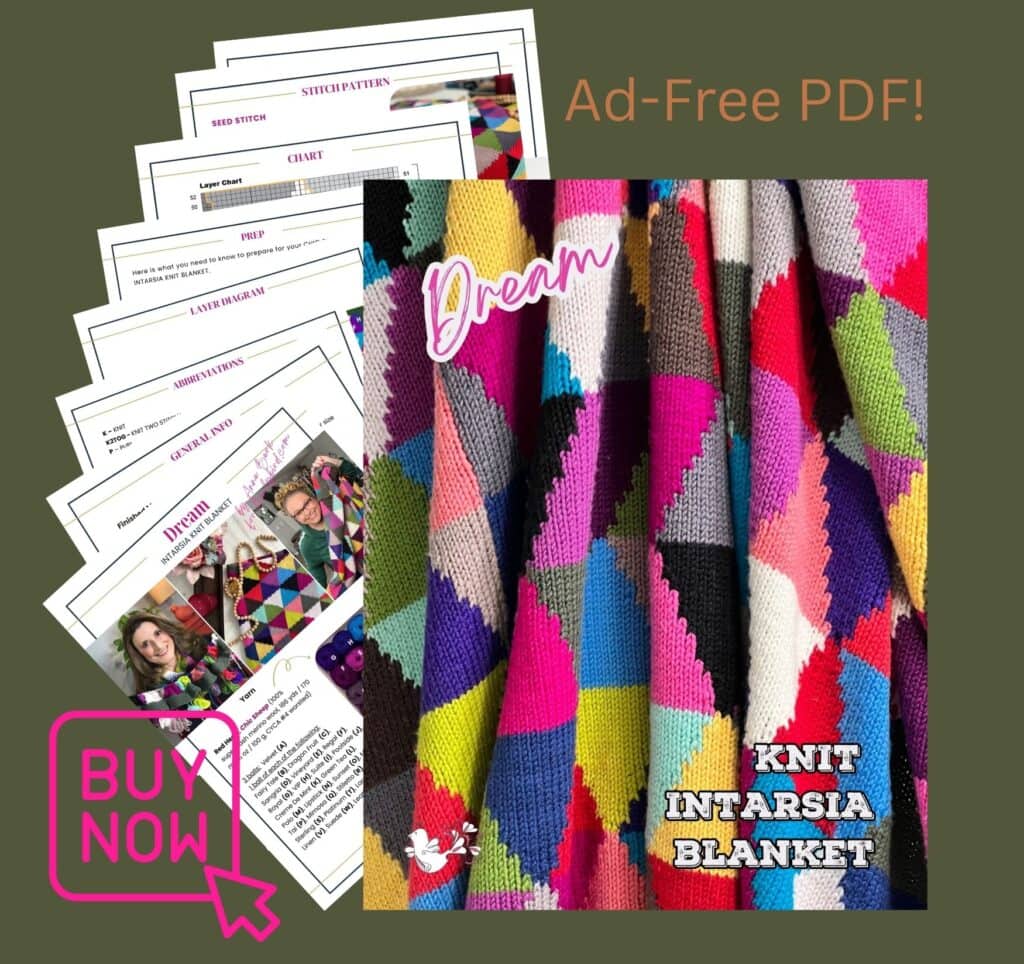
Many past Tournament of Stitches projects have ad-free PDF versions available. We are working to make all past versions available, so if your favorite isn’t live yet, keep checking back. 💖


When Is the Tournament of Stitches?

The Tournament of Stitches mystery make-along is traditionally held during the NCAA March Madness basketball tournament in March.

It brings together the excitement of competition with the calm joy of making.

And yes… we absolutely lean into the basketball theme. 🏀🧶


How Do I Participate?

Participation is simple.

Each year, there is a dedicated Tournament of Stitches blog post with a sign-up form.

Here’s what to do:

  • ⭐️ Sign up through the event blog post
  • Join the Marly’s Minions: Marly Bird BiCrafty Community on Facebook
  • Receive your materials list via email
  • Gather supplies (we always offer yarn suggestions and alternatives)
  • Add your project to Ravelry
  • Mark your calendar
  • Return weekly for the plays

You can follow along for free via the blog.

Or you can upgrade for the ultimate experience, where everything is organized in one place inside the Marly Bird House.

During the event, share your progress on Facebook and Instagram using:

#tournamentofstitches
#tosMarlyBird
#MMMDI

You’ll even have chances to win surprise mystery prizes.


Why People Love the Tournament of Stitches

It’s not just about the pattern.

It’s about:

  • Community
  • Skill growth
  • Creative choice
  • Friendly accountability
  • Shared excitement

You’re making the same project as hundreds of others… but your version is uniquely yours.

And there’s something incredibly motivating about that.


Frequently Asked Questions

Is the Tournament of Stitches beginner friendly?

Yes. Because you choose your concentration level each week, you can adjust the difficulty to match your skill and comfort level.

Do I have to participate live?

No. While it’s most fun live, many past patterns are available afterward as individual purchases.

Can I mix concentration levels?

Yes. The math is designed so you can mix and match without breaking the pattern.

Is it knit or crochet?

Both. Each year typically includes knit and crochet options.

How long does the make-along last?

Approximately five weeks.

Is it free?

There is always a free blog-follow option. An upgraded experience may be available for additional organization and bonuses.

Where do I find past Tournament of Stitches patterns?

Check the individual yearly posts and the Marly Bird shop for available ad-free PDFs.


Final Thoughts

The Tournament of Stitches is more than a mystery make-along.

It’s a celebration of creativity, growth, and community. It’s structured enough to challenge you, flexible enough to fit your life, and fun enough to make you look forward to every clue release.

If you’ve never joined us before, I hope this is the year you jump in.

Trust me… it’s way more fun than filling out a basketball bracket. 🏀💖🧶

❤️ Your BiCrafty Bestie,
Marly Bird

A cartoon avatar of a person with glasses and a brown bun smiles warmly. Their green shirt and black jacket add a stylish touch, while colorful hearts surround them like loving temperature blankets, stitching together an aura of love and positivity. -Marly Bird

Filed Under: Make-Alongs, Tournament of Stitches, Uncategorized

Racecar Entrelac Knit Baby Blanket Pattern – A Perfect Handmade Baby Gift

January 20, 2026 By Marly Bird Leave a Comment

If you’re looking for a knit baby blanket pattern that feels special, looks impressive, and still fits into real life… this entrelac baby blanket checks all the boxes.

A black, red, white, and gray knit blanket with a textured entrelac pattern is shown folded and flat. The text reads "Racecar Entrelac Knit Blanket," perfect as an entrelac knit baby blanket or a unique baby blanket knitting pattern. -Marly Bird

Affiliate Disclosure: This post contains affiliate links. To learn more please visit my privacy policy here💖

This design uses the beautiful woven look of entrelac knitting in a baby-friendly size, making it perfect for baby showers, new arrivals, and thoughtful handmade gifts. Once you get through the first few tiers, the rhythm really settles in — which makes this an ideal project to bring along for travel, waiting rooms, or quiet evenings.

Pretty, practical, and portable? Yes please.


What You Will Love About This Baby Blanket 💙

  • A classic entrelac knit baby blanket with eye-catching texture
  • A manageable size that won’t overwhelm you
  • Repeating sections that become wonderfully intuitive
  • A project you can pause and resume without stress
  • A finished blanket that feels truly gift-worthy

✨ Designer Tip: After the first few tiers, you’ll barely need to glance at the pattern — your hands take over.

Cover of a "Raecca Knit Entrelac Blanket" pattern featuring a vibrant entrelac knit baby blanket, stack of instruction sheets, and text: "Ad-Free PDF!” and “Buy Now" with a green button and mouse cursor. -Marly Bird
Etsy
Shopify
Ravelry

Why Entrelac Works So Well for Baby Blankets 🧩

Entrelac knitting creates a soft, flexible fabric made from interlocking blocks. For baby blankets, that’s a big win.

Why?

  • The texture adds interest without holes little fingers can get stuck in
  • The fabric has gentle stretch and movement
  • The woven look photographs beautifully (hello milestone photos!)

Entrelac also gives you natural stopping points — which is a gift when knitting around naps, travel, or busy schedules.

A smiling baby is wrapped in a thick, textured knit blanket with a bold red, black, gray, and white entrelac pattern—an ideal knit baby blanket gift. The bottom of the image shows a close-up of the blanket’s woven texture. -Marly Bird
*Disclosure: This is an Ai image of the baby wrapped in a sample blanket

A Great Knit Baby Blanket for Travel & On-the-Go Knitting ✈️🧶

One of my favorite things about this pattern is how portable it is. Especially if you use an awesome Erin.Lane Bag to carry it! I love this one.

Once you complete about three tiers:

  • You’re working the same steps again and again
  • There’s no complicated chart to track
  • You can knit a block, set it down, and pick it right back up

That makes this an excellent project for:

  • Travel knitting
  • Waiting rooms
  • Knitting between errands
  • Any time you want a low-stress, satisfying knit
Knitting Entrelac on a plane - Marly Bird
Marly on a plane knitting entrelac hat

Choosing Yarn for a Knit Baby Blanket 🍼🧶

When knitting for babies, comfort and care are key.

Look for yarn that is:

  • Soft against sensitive skin
  • Easy to wash
  • Smooth enough to show stitch definition

Many knitters prefer machine-washable yarns for baby blankets, especially for gifts. Entrelac shows color changes beautifully, so this is also a great place to play with palettes — from sweet pastels to bold modern combos.

✨ Designer Tip: Simple, high-contrast colors make the entrelac blocks really pop in photos.

A handmade, rectangular quilt with a diagonal checkerboard pattern in black, red, and white rests on a white textured bedspread—perfect as inspiration for an entrelac knit baby blanket or a unique knit baby blanket gift. -Marly Bird

Baby Blanket Sizes & Customization 📏

This entrelac baby blanket is sized perfectly for:

  • Crib snuggles
  • Stroller use
  • Tummy time
  • Milestone photos

Because the blanket is built from repeating tiers, it’s easy to adjust:

  • Add width by working more blocks across
  • Add length by adding additional tiers

If you like planning ahead, a gauge and blanket worksheet can make resizing simple and stress-free.

Join our Newsletter

Get Free Pattern Links & Coupons!

>> Become An Insider <<
A smiling person with curly hair and glasses forms a heart shape with their hands. Behind them, the text reads "Marly Bird," "Weekly Newsletter," and "Your BigCrafty Bestie." Sporting a light cardigan, they share the joy of an amigurumi free crochet animal pattern. -Marly Bird

A Thoughtful Gift for Baby Showers & New Arrivals 🎁

Handmade baby blankets are some of the most cherished gifts — and this one fits beautifully into many gifting moments:

  • Baby showers
  • New baby arrivals
  • Gender-neutral gifts
  • First birthdays
  • Keepsake blankets

The texture, structure, and care put into an entrelac blanket are immediately noticeable — even to non-knitters.

Two women smile at a baby shower with a "Baby Girl" banner and pink decorations behind them. One holds up an entrelac knit baby blanket from a gift box lined with pink tissue paper, showcasing the thoughtful knit baby blanket gift. -Marly Bird
*Disclaimer: This image is Ai generated to demonstrate a gift giving opprotunity.

A blanket with a textured entrelac knit pattern in red, black, white, and gray is shown folded, laid flat, and rolled up. Text reads: "RACECAR Entrelac Knit Blanket." Perfect as an entrelac knit baby blanket or for entrelac knitting for babies. -Marly Bird

Racecar Entrelac Knit Blanket Details

SKILL LEVEL

Intermediate

MEASUREMENTS

Blanket measures 38 x 38 [96.5 x 96.5 cm] 

Gauge
16 sts and 24 rows = 4″ [10 cm] x 4″ [10 cm] in Stockinette st.

MATERIALS

Yarn

Sample was made with a discontinued Yarn: Stitch Nation, Washable Ewe (100% superwash merino wool, 183yds / 167 m, 3½ oz / 100 g, CYCA #4 worsted) 

Color MC: Licorice, 5 balls

Color CC1: Kitten, 4 balls

Color CC2: Strawberry, 4 balls

Color CC3: Cottontail, 4 balls

Alternate Yarn

⭐️ Knit Picks, Swish Worsted (100% Superwash Merino Wool, 231 yds / 211 m, 3½ oz/ 100 g, CYCA# 4 worsted) 

⭐️ Knit Picks, Brava (100% acrylic, 218 yds / 199 m, 3.5 oz/ 100 g, CYCA# 4 worsted) 

Needles

Size US 8 (5 mm) 32″ circular and set of 2 double-pointed (dpns), or size to obtain correct gauge.

Note: Blanket is worked straight; a long circular needle is used to hold the full width of the sts, as well as picked up border sts.

Notions

  • Stitch Markers
  • Tapestry Needle
  • Scissors
  • Tape Measure
  • Leather tags (Optional)
  • Leather rivets (Optional)
⭐️ Marly Bird Amazon Storefront ⭐️

Cover of a "Raecca Knit Entrelac Blanket" pattern featuring a vibrant entrelac knit baby blanket, stack of instruction sheets, and text: "Ad-Free PDF!” and “Buy Now" with a green button and mouse cursor. -Marly Bird
Etsy
Shopify
Ravelry

ABBREVIATIONS

  • K – Knit
  • K2tog – Knit Two Stitches Together
  • LHN – Left Hand Needle
  • P – Purl
  • P2tog – Purl Two Stitches Together
  • RHN –  Right Hand Needle
  • RS – Right Side
  • St(s) – Stitches
  • WS – Wrong Side

SPECIAL STITCHES 

⭐️ Kfb (knit front and Back): Knit next stitch but do not drop off the left needle, knit into back loop of same stitch, then drop from left needle. 

⭐️ Ssk (Slip, Slip, Knit): Slip 2 stitches, one at a time, as if to knit. Insert left hand needle into the front of these two stitches and knit them together from this position (1 stitch decreased)


Close-up of two overlapping pieces of knitted fabric featuring a repeating diamond pattern in red, black, gray, and white. The texture and stitches are clearly visible, ideal inspiration for an entrelac knitting for babies project. -Marly Bird

STRIPE SEQUENCE

The entrelac pattern is worked with colors changing for each tier in following order:  CC3, CC1, MC, CC2 


VIDEO TUTORIALS

  • Long-Tail Cast-On >> Click Here for Video Help <<
  • Knit Stitch (continental style) >> Click Here for Video Help <<
  • Purl Stitch (continental style) >> Click Here for Video Help <<
  • How to Add Lifeline Watch on YouTube >> Click Here for Video Help <<
  • How to Tink >> Click Here for Video Help <<
  • How to Bury Ends Watch on YouTube >> Click Here for Video Help <<
  • Basic Enterlac >> https://youtu.be/EKMo9BF23Dc <<
  • How to Knit Backwards Watch on YouTube: https://youtu.be/OuosqrqHEy0 
  • Attached i-cord: https://youtu.be/miMbWk3FW4s 

CHARTS

Quilt diagram showing labeled triangle pieces and a large grid with diagonal striped rows in red, white, blue, light blue, and black—perfect inspiration for a knit baby blanket gift or baby blanket knitting pattern. Color and triangle key at bottom left. -Marly Bird

GROW

To Unlock Exclusive Subscriber Content click the Box below and join for free by simply adding your email and creating a password! If you are having troubles, clear your cache or reset your password or login to the Grow Publisher Portal.

>> Learn More About Grow Here <<

I’m thrilled to share this amazing pattern with you, many patterns on my blog are absolutely free! I kindly request that you don’t copy and paste or distribute this pattern. Prefer an ad-free experience? Buy a digital PDF pattern for a small fee from one of my online stores for a seamless crafting journey. 

I appreciate your support and readership. You are the reason I can keep doing what I love and sharing it with others. So, thank you from the bottom of my yarn-loving heart! Disclosure: This post contains affiliate links, meaning I get a commission if you decide to make a purchase through my links at no cost to you.


A knit blanket with a red, black, gray, and white checked entrelac pattern is shown folded and partially unrolled. Text reads: "RACECAR Entrelac Knit Baby Blanket"—a perfect knit baby blanket gift or baby blanket knitting pattern. -Marly Bird

RACECAR ENTRELAC KNIT BLANKET PATTERN

BASE TRIANGLES

This Tier has all triangles and is worked from left to right of Blanket. The sts lean to the right. NOTE: to make it easier to pick up sts later I recommend slipping the first st of each row now and throughout.

With CC3, cast on 150 stitches.
Row 1 (WS): P2, turn.

Row 2 (RS): K2, turn.

Row 3: P3, turn.

Row 4: K3, turn.

Row 5: P4, turn.

Row 6: K4, turn.

Row 7: P5, turn.

Row 8: K5, turn.

Row 9: P6, turn.

One triangle complete, repeat from Row 1 beginning with next 2 sts on LHN.  Work triangles in this manner to end of row—20 triangles. Turn work so RS is facing.

TIER 1

Change to CC1.

This Tier of blocks has side-edge triangles and is worked from right to left of Blanket. The sts lean to the left.

Right Side Edge Triangle

Row 1 (RS): K2, turn.

Row 2: P2, turn.

Row 3: Kfb, ssk, turn—3 sts.

Row 4: P3, turn.

Row 5: Kfb, k1, ssk, turn—4 sts.

Row 6: P4, turn.

Row 7: Kfb, k2, ssk, turn—5 sts.

Row 8: P5, turn.

Row 9: Kfb, k3, ssk, do NOT turn—6 sts.

Square Blocks

With RS still facing, pick up and knit 6 sts along side edge of next base triangle (or block) from Tier below. Turn and work as follows:

Row 1 (WS): P6, turn.

Row 2: K5, ssk (1 st from the first rectangle and 1 st from last base triangle), turn.

Repeat Rows 1 and 2 5 more times.

Do not turn after final row; continue with WS still facing.

Work 18 more Square Blocks the same way.

Left Side Edge Triangle

With RS still facing, pick up and purl 6 sts along edge of last base triangle (or block) from Tier below. Turn and work as follows:

Row 1 (WS): P2tog, p4, turn—5 sts rem.

Row 2 (RS): K5, turn.

Row 3: P2tog, p3, turn—4 sts rem.

Row 4: K4, turn.

Row 5: P2tog, p2, turn—3 sts rem.

Row 6: K3, turn.

Row 7: P2tog, p1, turn—2 sts rem.

Row 8: K2, turn.

Row 9: P2tog, do NOT turn—1 st remains on RHN; 2 triangles, 19 rectangles.


Cover of a "Raecca Knit Entrelac Blanket" pattern featuring a vibrant entrelac knit baby blanket, stack of instruction sheets, and text: "Ad-Free PDF!” and “Buy Now" with a green button and mouse cursor. -Marly Bird
Etsy
Shopify
Ravelry

TIER 2

Change to MC.

This Tier of blocks has no side triangles and is worked from left to right of Blanket. The sts lean to the right

First Square Block

With WS facing, pick up and purl 5 sts along side edge of Triangle from Tier below. Turn and work as follows:

Row 1 (RS): K6, turn.

Row 2 (WS): P5, p2tog (1 st from the rectangle and 1 st from tier 1 rectangle), turn.

Repeat Rows 1 and 2 five times, do NOT turn on last Row 2.  

All Remaining Square Blocks

With WS facing, pick up and purl 6 sts along side edge of the next Block from Tier below.

Turn and work as follows:

Row 1 (RS): K6, turn.

Row 2 (WS): P5, p2tog (1 st from the rectangle and 1 st from tier 1 rectangle), turn.

Repeat Rows 1 and 2 five times, do NOT turn on last Row 2.  

Work 18 more Square Blocks the same way.

Repeat Tiers 1 and 2 for the body of the blanket, changing colors as indicated in Stripe Sequence, and ending after a tier 1 row. 

TOP TRIANGLES

Change to CC3.

Pick up and purl 5 sts along triangle or rectangle, turn.

Row 1(RS): K6, turn.

Row 2: P2tog, p3, p2tog (1 st from triangle and 1 st from last tier triangle/rectangle), turn—5 sts rem.

Row 3: K5, turn.

Row 4: P2tog, p2, p2tog, turn—4 sts rem.

Row 5: K4, turn.

Row 6: P2tog, p1, p2tog, turn—3 sts rem.

Row 7: K3, turn.

Row 8: P2tog, p2tog, turn—2 sts rem.

Row 9: K2, turn.

Row 10: P2tog, p2tog, pass 1st st over 2nd st—1 st on RHN.

Do NOT turn.

Repeat top triangle directions across blanket. Fasten off remaining sts.  


A knitted blanket with a checkerboard pattern in red, black, gray, and white squares is spread over a textured white surface. This cozy entrelac knit baby blanket appears soft and has a striking black border. -Marly Bird

FINISHING

I-Cord Edging

Using dpn and MC, cast on 3 sts. Pick up and knit 1 st along edge of blanket—4 sts. *Without turning the work, slip all sts to the RH end of dpn. Pull yarn tightly from the end of the row, k2 sts, k2tog-tbl—3 sts rem. Pick up and knit 1 st along bind off edge—4 sts; repeat from * around the blanket. Bind off all sts. Sew cast on edge to bind off edge.

Weave in all loose ends.


Love This Pattern on Ravelry 💖

If you’re a Ravelry user, I’d love for you to:

  • Favorite the pattern
  • Add it to your queue
  • Share photos of your finished baby blanket
Favorite This Pattern on Ravelry - Marly Bird

Your color choices always make my day!


Do You Like Entrelac and Want More Patterns?

If you’re nodding along thinking, “Okay… I might be a little obsessed with entrelac now,” you’re in very good company — because same.

I’ve loved entrelac knitting (and crocheting!) for years. There’s just something magical about watching those blocks build on each other and turn into a woven-looking fabric. Once it clicks, it’s hard not to keep exploring what else you can make with the technique.

If you’re ready for more entrelac goodness, here are some of my favorite designs to keep the fun going:


More Knit Entrelac Patterns

🐉 Dragonscale Entrelac Knit Blanket
https://marlybird.com/blog/dragonscale-entrelac-knit-blanket-pattern/

A bold, textured blanket that really lets the entrelac structure shine.

🤪 Double The Fun Entrelac Knit Hat
https://www.ravelry.com/patterns/library/double-the-fun-4

A great way to practice entrelac on a smaller, wearable project.

🥳 Skeeter Beanie
https://www.ravelry.com/patterns/library/skeeter-beanie

Another fun knit hat that uses entrelac for eye-catching texture.

📚 I Can’t Believe I’m Knitting (Book)
https://amzn.to/4r1YHjZ

Yes, I loved entrelac so much I wrote a whole book that includes it — along with other techniques to help build confidence and skills.


Crochet Entrelac Patterns (For My BiCrafty Friends!)

If you love both knitting and crochet, entrelac translates beautifully between the two crafts.

🧩 Pieces of You Entrelac Crochet Shawl
https://www.ravelry.com/patterns/library/pieces-of-you

A stunning shawl that shows off crochet entrelac in a flowing, wearable way.

🫐 Boysenberry Entrelac Crochet Cowl
https://marlybird.com/free-crochet-patterns/boysenberry-bramble-single-crochet-entrelac-cowl/

A free crochet pattern that’s perfect for learning or revisiting the technique.

🍇 Wildberry Wrap Entrelac Crochet
https://www.ravelry.com/patterns/library/wildberry-wrap

A cozy wrap that highlights how versatile crochet entrelac can be.

➡️ Corner to Corner Crochet 12” Square (Worked Like Entrelac)
https://marlybird.com/blog/corner-to-corner-single-crochet-entrelac-12-square/

If you love modular construction, this square is a fun crossover technique to explore.


✨ Designer Tip: Once you understand entrelac in one project, you’ll start seeing opportunities for it everywhere — blankets, accessories, wraps, and beyond.

If you dive into any of these patterns, be sure to share your makes. I never get tired of seeing how you bring entrelac to life


A notebook page titled "FAQs About Knitting & Crochet" with colorful text and checklists. Yarn balls, knitting needles, a crochet hook, heart-shaped buttons, and the Marly Bird logo hint at knit baby blanket gift ideas on a wooden surface. -Marly Bird

FAQs About Knit Baby Blanket Patterns ❓

Are knit baby blanket patterns suitable for beginners?
This pattern is best for adventurous beginners or intermediate knitters who are comfortable following instructions step by step.


Which baby blanket patterns are most time efficient?
Patterns with repeating sections — like entrelac — are great because once the rhythm clicks, progress feels steady and satisfying.


Do baby blanket patterns include baby-safe elements?
This pattern focuses on texture without open holes, making it well-suited for baby use.


Are there unisex baby blanket pattern options?
Absolutely. Color choice plays a huge role here, and entrelac works beautifully with neutral or modern palettes.


What baby blanket patterns work well for milestone photos?
Textured blankets like entrelac photograph wonderfully and add visual interest without distracting from baby.


Cover of a "Raecca Knit Entrelac Blanket" pattern featuring a vibrant entrelac knit baby blanket, stack of instruction sheets, and text: "Ad-Free PDF!” and “Buy Now" with a green button and mouse cursor. -Marly Bird
Etsy
Shopify
Ravelry

Final Thoughts 💕

This entrelac knit baby blanket is one of those projects that quietly becomes a favorite — to knit and to give. It’s engaging without being stressful, portable without being boring, and beautiful without being fussy.

If you’re looking for a knit baby blanket pattern that balances skill-building with real-life knitting, this one is a lovely choice.

When you share your finished blanket, tag @themarlybird and use #mmmdi and #marlybird so I can admire your work right along with you 🥰🧶

❤️ Your BiCrafty Bestie,
Marly Bird

A cartoon avatar of a person with glasses and a brown bun smiles warmly. Their green shirt and black jacket add a stylish touch, while colorful hearts surround them like loving temperature blankets, stitching together an aura of love and positivity. -Marly Bird

Filed Under: Free Patterns, Knitting, Marly Bird Premium Patterns, Our Free Patterns, Pattern, Uncategorized

Mosaic Tile Crochet Blanket Pattern – Learn Mosaic Crochet with Bold Color 🧶🧩

January 20, 2026 By Marly Bird Leave a Comment

If you love bold stitches, strong geometry, and colorwork that looks complicated (but totally isn’t), this Mosaic Tile Crochet Blanket is about to become one of your favorite projects.

A black, white, and brown geometric mosaic tile crochet blanket is draped over furniture. Text reads "MOSAIC TILE Crochet Blanket." The blanket features square and circular patterns. A flower arrangement sits nearby. -Marly Bird

Affiliate Disclosure: This post contains affiliate links. To learn more please visit my privacy policy here💖

This pattern is all about mosaic crochet stitches — clean lines, graphic shapes, and eye-catching contrast — all worked using a method that keeps things organized and approachable. One color at a time, no tangled mess, just beautiful results.

Whether you’re brand new to mosaic crochet or ready to sharpen your skills, this blanket is a fantastic way to learn while creating something truly striking.


What You Will Love About This Mosaic Crochet Blanket 💙

  • A bold mosaic crochet blanket pattern with strong geometric design
  • Eye-catching mosaic crochet stitches worked one color at a time
  • No carrying yarn across rows
  • Clean, modern look with endless color options
  • A satisfying project that builds confidence as you go

✨ Designer Tip: Mosaic crochet is one of those techniques that looks advanced, but once it clicks, it feels incredibly logical and fun.

Image promoting an ad-free PDF crochet pattern for a mosaic tile blanket. It shows detailed pattern pages and a finished black, white, and gray blanket, with "BUY NOW" and a mouse cursor icon in the corner. -Marly Bird
Etsy
Shopify
Ravelry

What Is Mosaic Crochet? (And Why Makers Love It)

Mosaic crochet is a colorwork technique that creates dramatic patterns using simple stitches and strategic placement, rather than juggling multiple yarns at once.

Instead of carrying floats or switching colors constantly, mosaic crochet typically uses:

  • One color per row or round
  • Basic stitches like single crochet and double crochet
  • Color changes that happen because of where stitches are worked, not how many colors you hold

The result? High-impact crochet colorwork that feels manageable and methodical.

A close-up of a crocheted afghan with intricate black, white, gray, and brown geometric patterns, laid on a table. In the background, a chair, a bouquet, and shelves are visible. "Marly Bird" logo is in the top right corner. -Marly Bird

Mosaic Crochet Stitches You’ll Practice 🧶

This mosaic tile blanket introduces you to classic mosaic crochet stitch techniques, including:

  • Overlay-style mosaic stitches
  • Structured stitch placement that creates crisp lines
  • Repeating motifs that build visual rhythm

Because the pattern relies on repetition, it’s a great way to let your hands learn the technique while your confidence grows with every section.

✨ Designer Tip: Mosaic crochet rewards consistency. Once your tension settles in, the stitches practically guide you.


Want to Learn Mosaic Crochet Even Faster? 🎓

This blanket teaches you how mosaic crochet works — but if you want to truly understand the why behind the stitches, I highly recommend my Camp Colorwork course.

Inside Camp Colorwork, you’ll learn:

  • Mosaic crochet fundamentals step by step
  • How to read and follow mosaic charts
  • How to choose colors that pop
  • Tips to avoid common colorwork mistakes

You can get 25% off Camp Colorwork using this link:
https://marlybird.thrivecart.com/camp-colorwork/?coupon=HEART

Promotional poster for "magical mosaic" featuring various colorful Mosaic Knitting and Mosaic Crochet patterns arranged on a snowflake background, with the event title and logo "camp colorwork" at the bottom. -Marly Bird

Choosing Colors for a Mosaic Crochet Blanket 🎨

Color choice is where mosaic crochet really shines. Because the stitch pattern relies on contrast, your colors play a huge role in the final look.

How Color Contrast Affects Mosaic Crochet

High contrast = bold, graphic results
Low contrast = softer, more subtle designs

For best results, pair:

  • One lighter color with one darker color
  • Avoid mid-tone pairs that blend together
  • Let one color “lead” while the other supports

Four crocheted blankets, each with a geometric square pattern in different color palettes: neutrals, blues, earthy greens, and bold brights. Each blanket is displayed on a chair or flat surface. -Marly Bird

Color Palette Ideas to Inspire You 🌈

Here are a few color themes that work beautifully for mosaic crochet blankets:

Modern Neutrals
Black, cream, charcoal, soft gray
Perfect for minimalist homes and timeless décor

Coastal Blues
Navy, denim, soft white, slate
Fresh, calming, and great for living spaces

Earthy Tones
Deep green, warm brown, oatmeal, stone
Grounded and cozy with an organic feel

Bright & Bold
Golden yellow, berry, teal, poppy red
Playful, energetic, and perfect for statement blankets

(Insert colorway mockup images here)

✨ Designer Tip: If you’re unsure, start with high contrast. You can always soften future versions once you’re comfortable with the technique.


Join our Newsletter

Get Free Pattern Links & Coupons!

>> Become An Insider <<
A smiling person with curly hair and glasses forms a heart shape with their hands. Behind them, the text reads "Marly Bird," "Weekly Newsletter," and "Your BigCrafty Bestie." Sporting a light cardigan, they share the joy of an amigurumi free crochet animal pattern. -Marly Bird

Mosaic Crochet Blanket Size & Layout Notes 📏

This mosaic tile crochet blanket is built from full square motifs, creating a clean, balanced layout with no half-squares needed.

That means:

  • Strong symmetry
  • Easy planning
  • A polished, finished look

Because mosaic crochet is very structured, planning your layout and colors before you begin will help everything come together smoothly.


A Statement Crochet Blanket That Makes an Incredible Gift 🎁

Mosaic crochet blankets make unforgettable gifts because they feel artful and intentional.

This blanket is a wonderful choice for:

  • Housewarming gifts
  • Wedding or anniversary presents
  • Graduation gifts
  • Holiday or Christmas crochet gifts
  • Statement throws for modern homes

It’s the kind of blanket people notice — and ask about.

Collage showing a black, white, gray, and brown crochet blanket with a geometric mosaic tile pattern, draped over a ladder, folded on a table, and spread on a bed. Text reads: "Mosaic Tile Crochet Blanket. -Marly Bird

MOSAIC TILE BLANKET PATTERN DETAILS

Designed by Marly Bird

SKILL LEVEL

Intermediate

MEASUREMENTS

Finished Measurements

Blanket is 54” [137 cm] wide by 66” [167.5 cm] long, including the edging. 

One block is 12” [30.5 cm] wide by 12” [30.5 cm] long. 

Gauge 

Rounds 1-4 of Block = 3.25” [8.5 cm] wide by 3.25” [8.5 cm] long; use any size hook to obtain the gauge. 

MATERIALS

Yarn 

WeCrochet, Brava Worsted Mini Ball (100% acrylic, 54 yds / 49 m, 0.9 oz/ 25 g, CYCA# 4 worsted) 

Color A: #28413 Black, 5 balls

Color B: #28419 Clarity, 4 balls

Color C: #28420 Cobblestone Heather, 3 balls

Color D: #28415 Brindle, 2 balls

Color E: #28448 Seraphim, 3 balls

Hook

Size I/9 [5.5 mm]

Notions 

  • Stitch Markers
  • Tapestry Needle
  • Scissors
  • Tape Measure
  • Leather tags (Optional)
  • Leather rivets (Optional)
⭐️ Marly Bird Amazon Storefront ⭐️


Image promoting an ad-free PDF crochet pattern for a mosaic tile blanket. It shows detailed pattern pages and a finished black, white, and gray blanket, with "BUY NOW" and a mouse cursor icon in the corner. -Marly Bird
Etsy
Shopify
Ravelry

ABBREVIATIONS

BP – Back Post

CC1 – First Contrasting Color

CC2 – Second Contrasting Color

Ch – Chain(s) 

Dc – Double Crochet 

Hdc – Half Double Crochet

MC – Main Color

RS – Right Side 

Sc – Single Crochet

Sl st – Slip Stitch

Sp(s) – Space(s) 

St(s) – Stitch(es)

Tch – Turning Chain

Tr – Treble Crochet

WS – Wrong Side

SPECIAL STITCHES 

⭐️ Back Post Single Crochet (bpsc): Insert hook from back to front to back around the post of the stitch indicated, yarn over and pull up a loop, yarn over and pull through both loops on hook.

⭐️ Third Loop: Middle bar located on wrong side of st under the top two loops (created by the yarn over)


BLANKET LAYOUT

AAAA
ABBA
BCCB
ABBA
AAAA

STITCH DIAGRAM

✨ Stitch Diagram for the Mosaic Tile Crochet Blanket is only available in the Ad-Free PDF.

Etsy
Shopify
Ravelry

NOTES

  • Block uses 3 colors, but feel free to substitute more colors for A and B. 
  • To join your round, you can use a sl st to the indicated stitch or thread the free loop of your last stitch through the indicated stitch from the RS to the WS.
  • Change color by folding in a new color after joining and ch the amount needed for the next round.
  • Do not turn at the end of each round.

VIDEO TUTORIAL

  • How to Read a Stitch Diagram >> Click Here for Video Help <<
  • Mosaic Tile Crochet Block >> Click Here for Video Help <<
  • Crochet Seam (@ 36 min mark)>> Click Here for Video Tutorial <<
  • Weaving in Ends >> Click Here for Video Help <<

GROW

To Unlock Exclusive Subscriber Content click the Box below and join for free by simply adding your email and creating a password! If you are having troubles, clear your cache or reset your password or login to the Grow Publisher Portal.

>> Learn More About Grow Here <<

I’m thrilled to share this amazing pattern with you, many patterns on my blog are absolutely free! I kindly request that you don’t copy and paste or distribute this pattern. Prefer an ad-free experience? Buy a digital PDF pattern for a small fee from one of my online stores for a seamless crafting journey. 

I appreciate your support and readership. You are the reason I can keep doing what I love and sharing it with others. So, thank you from the bottom of my yarn-loving heart! Disclosure: This post contains affiliate links, meaning I get a commission if you decide to make a purchase through my links at no cost to you.


Collage showing a folded and draped crochet blanket with a mosaic tile pattern in black, white, gray, and rust tones. Text reads “MOSAIC TILE Crochet Blanket” and “Marly Bird” appears in the upper left corner. -Marly Bird

MOSAIC TILE BLANKET PATTERN

BLOCK 

Make 12 of Block A, 6 of Block B, 2 of Block C

Color Changes are the following for each block:

BLOCK ABLOCK BBLOCK C
MCBAD
CC1CBE
CC2ADC

With MC, ch 4, sl st to first ch to form a ring.  

Round 1 (RS): Ch 6 (counts as dc + ch-3 sp), [sl st in ring, ch 3, dc in ring, ch 3] 3 times, sl st in ring, ch 3, join to 3rd ch of beginning ch, change to color CC1 .  (8 ch-3 sps + 4 dc) 

Round 2: Ch 1, bpsc around beginning ch (that counts as dc in Round 1). [ch 3, bpsc around next dc] 3 times, ch 3, join to first sc, do not change color.  (4 ch-3 sps + 4 sc)

Round 3: Ch 1, *5 hdc in next ch-3 sp, ch 1, skip next sc; repeat from * around, join to first hdc, change color to MC. (20 hdc + 4 ch-1 sps)

Round 4: Ch 1, *hdc in third loop of next 5 hdc, (hdc, ch 1, hdc) in next ch-1 sp; repeat from * around, join to first hdc, change color to CC1, fasten off color MC. (28 hdc + 4 ch-1 sps)

Round 5: Ch 1, hdc in third loop of next 2 hdc, *ch 3, sl st to top 2 loops of next hdc on Round 3 (in front of Round 4), ch 3, hdc in third loop of next 3 hdc, (hdc, ch 1, hdc) in next ch-1 sp**, hdc in third loop of next 3 hdc; repeat from * around ending at **, hdc in third loop of next hdc, join to first hdc, fasten off color CC1. (32 hdc + 8 ch-3 sps + 4 ch-1 sps)

Round 6: Join color CC2 with sl st to any ch-1 sp, *sc in third loop of next hdc, hdc in third loop of next hdc, dc in third loop of next hdc, 2 dc in third loop of next hdc, ch 1, 2 dc in third loop of next hdc, dc in third loop of next hdc, hdc in third loop of next hdc, sc in third loop of next hdc**, sl st in next ch-1 sp; repeat from * around ending at **, sl st to first sl st, do not change color. (24 dc + 8 hdc + 8 sc + 4 sl sts)

Close-up of a crocheted square pattern with layered geometric shapes in shades of black, grey, and white, bordered by two other crocheted sections in brown and pink. -Marly Bird

Round 7: Ch 1, hdc in same sl st as join, *hdc in next 5 sts, (hdc, ch 1, hdc) in next ch-1 sp, hdc in next 5 sts**, (hdc, ch 1, hdc) in next sl st; repeat from * around ending at **, hdc in first sl st as join, ch 1, join to first hdc, change color to MC, fasten off color CC2. (56 hdc + 8 ch-sps)

Round 8: Ch 1, hdc in ch-1 sp, *hdc in third loop of each hdc to ch-1 sp**, (hdc, ch 1, hdc) in next ch-1 sp; repeat from * around ending at **, hdc in first ch-1 sp, ch 1, join to first hdc, fasten off color MC. (72 hdc + 8 ch-sps)

Round 9: Join color CC2 with sl st to first ch-1 sp, *sc in third loop of next hdc, hdc in third loop of next 2 hdc, ch 3, sl st to top 2 loops of next hdc on Round 7 (in front of Round 8), ch 3, hdc in third loop of next hdc, dc in third loop of next 4 hdc, (dc, ch 1, dc) in next ch-1 sp, dc in third loop of next 4 hdc, hdc in third loop of next hdc, ch 3, sl st to top 2 loops of next hdc on Round 7 (in front of Round 8), ch 3, hdc in third loop of next 2 hdc, sc in third loop of next hdc**, sl st in next ch-1 sp; repeat from * around ending at **, sl st to first sl st, change color to CC1, fasten off CC2. (40 dc + 24 hdc + 8 sc + 4 ch-1 sps)

Round 10: Ch 3, tr in first sl st, *dc in next 3 sts, skip next 2 ch-3 sps, hdc in third loop of next 3 sts, sc in third loop of next 2 sts, sl st in third loop of next st, sl st in next ch-1 sp, sl st in third loop of next st, sc in third loop of next 2 sts, hdc in third loop of next 3 sts, skip next 2 ch-3 sps, dc in next 3 sts**, (tr, ch 1, tr) in next sl st; repeat from * around ending at **, tr in first sl st, ch 1, join to first tr, do not change color. (8 tr + 24 dc + 24 hdc + 16 sc + 12 sl sts)

Round 11: Ch 1, hdc in first tr, *hdc in each st to ch-sp, (hdc, ch 1, hdc) in next ch-1 sp; repeat from * around, join to first hdc, change color to MC. (92 hdc + 4 ch-1 sps)

Round 12: Ch 1, *hdc in third loop of each hdc to ch-1 sp, (hdc, ch 1, hdc); repeat from * around, hdc in third loop of last hdc, join to first hdc, change color to CC1, fasten off color MC. (100 hdc + 4 ch-1 sps)

Round 13: Ch 2, dc in third loop of next 2 hdc, hdc in third loop of next 2 hdc, *ch 3, sl st to top 2 loops of next hdc on Round 11 (in front of Round 12), ch 2, sl st in third loop of next 11 hdc, ch 2, sl st to top 2 loops of next hdc on Round 11 (in front of Round 12), ch 3, hdc in third loop of next 2 hdc, dc in third loop of next 3 hdc, tr in third loop of next hdc, (tr, ch 1, tr) in next ch-1 sp, tr in third loop of next hdc**, dc in third loop of next 3 hdc, hdc in third loop of next 2 hdc; repeat from * around ending at **, dc in third loop of last hdc, join to first dc, change to color CC2, fasten off color CC1. (16 tr +24 dc + 16 hdc + 44 sl sts + 4 ch-1 sps)

Round 14: Ch 1, *hdc in third loop of each st to sl sts, 2 hdc in third loop of next hdc on Round 12 (behind sl st on Round 13), hdc in third loop of next 9 hdc on Round 12, 2 hdc in third loop of next hdc on Round 12, hdc in third loop of each sts to ch-1 sps, (dc, ch 1, dc) in next ch-1 sps; repeat from * around, hdc in third loop of last 3 sts, join to first hdc, change color to MC. (108 hdc + 8 dc + 4 ch-1 sps) 

Round 15: Ch 1, *hdc in third loop of each hdc to ch-1 sp, (dc, ch 1, dc); repeat from * around, hdc in third loop of last 4 sts, join to first hdc, change color to CC2. (116 hdc + 8 dc+ 4 ch-1 sps)

Round 16: Ch 1, hdc in third loop of same hdc as join, *[ch 3, sl st to top 2 loops of next hdc on Round 14 (in front of Round 15), ch 3, hdc in third loop of next 8 hdc] twice, ch 3, sl st to top 2 loops of next hdc on Round 14 (in front of Round 15), ch 3, hdc in third loop of next 6 sts, (dc, ch 1, dc) in next ch-1 sps**, hdc in third loop of next 6 sts; repeat from * around ending at **, hdc in third loop of last 5 sts, join to first hdc, change color MC, fasten off color CC2. (112 hdc + 8 dc+ 4 ch-1 sps + 12 ch-3 sps)

Round 17: Ch 1, *2 hdc in third loop of next hdc, [hdc in third loop of next 7 hdc, 2 hdc in third loop of next hdc] twice, hdc in third loop of next 7 hdc, (dc, ch 1, dc) in next ch-1 sp, hdc in third loop of next 6 hdc; repeat from * around, join to first hdc, fasten off color MC. (132 hdc + 8 dc+ 4 ch-1 sps)

Weave in all ends. 

A folded crocheted blanket with geometric patterns in black, white, and brown rests on a wooden table. A blurred living room with a sofa and pillows is in the background. The Marly Bird logo appears in the corner. -Marly Bird

FINISHING

Pin blocks to finished size, spray with water or steam to block. 

SEAMING

Using the blanket layout as a guide, arrange blocks as shown.  Seam blocks together by working a sl st through the back loop of each motif.  Hold one motif on top of the other.  Join color A to the back loop of the first st on each motif working through both adjoining motifs at the same time. Holding your working yarn to the back, insert your hook from the front to the back and sl st in each st through the back loop.  Do not fasten off until you have joined all pairs together in column.  Repeat on the blocks.  When working the perpendicular seam (in the rows), repeat directions until at the previous seam, sl st over the seam and continue joining blocks.  See video tutorial for more tips. 

A crocheted blanket with intricate square patterns in black, white, gray, and brown, bordered by a light purple edge. The blanket rests on a light surface with a colorful, floral rug in the background. -Marly Bird

EDGING

Join color A to any hdc in the third loop of the center of one block along the edge of the blanket with a sl st.

Round 1: Ch 1, *hdc in the third loop of each st to the ch-sp before the seam**,hdc in the center of the seam; repeat from * across ending at ** in the corner ch-1 sp, (dc, ch 1, dc) in the corner ch-1 sp. Repeat around all sides of the blanket, join to the first hdc, change color to E, do not turn, do not fasten off color A.

Round 2: Ch 2 (does not count as a st), *dc in the third loop of each hdc to ch-1 sp, (dc, ch 1, dc) in next ch-1 sp: repeat from * around, dc in the third loop of each hdc to beginning, join to first st. 

Round 3: Ch 2, *dc in each dc to ch-1 sp, (tr, ch 1, tr) in ch-1 sp; repeat from * around, dc in each dc to beginning, join to first st. 

Repeat Round 3 until edging is 3” total. Fasten off and weave in ends, 


A black, white, and gray mosaic tile crochet blanket with geometric patterns is draped over a table. In the background, a pink tray with a flower arrangement sits on the table. Text reads: "Mosaic Tile Crochet Blanket. -Marly Bird

Love This Pattern on Ravelry 💙

If you’re on Ravelry, don’t forget to:

  • Favorite the pattern
  • Add it to your queue
  • Share photos of your finished blanket
Favorite This Pattern on Ravelry - Marly Bird

Seeing your mosaic tile blankets come to life in different colorways is always a joy 🥰


Image promoting an ad-free PDF crochet pattern for a mosaic tile blanket. It shows detailed pattern pages and a finished black, white, and gray blanket, with "BUY NOW" and a mouse cursor icon in the corner. -Marly Bird
Etsy
Shopify
Ravelry

FAQs About Mosaic Crochet Blankets ❓

Is mosaic crochet difficult to learn?
Not at all. Mosaic crochet uses simple stitches and one color at a time, making it very approachable with practice.

Is mosaic crochet the same as tapestry crochet?
No. Mosaic crochet relies on stitch placement rather than carrying yarn across rows.

Does mosaic crochet use more yarn?
Yes, textured and overlay stitches can use slightly more yarn, but the bold results are worth it.

Can I change the colors in this blanket?
Absolutely. Color customization is one of the best parts of mosaic crochet.

Is this a good first mosaic crochet project?
Yes! This blanket is an excellent introduction to mosaic crochet stitches and structure.


Image promoting an ad-free PDF crochet pattern for a mosaic tile blanket. It shows detailed pattern pages and a finished black, white, and gray blanket, with "BUY NOW" and a mouse cursor icon in the corner. -Marly Bird
Etsy
Shopify
Ravelry

Final Thoughts 💙

If you’ve been curious about mosaic crochet, this Mosaic Tile Crochet Blanket is a fantastic place to start. It’s bold, graphic, and incredibly satisfying to make — and it builds skills you can carry into future colorwork projects.

Whether you choose earthy neutrals or go full bright and bold, this blanket is proof that crochet can be both creative and confident.

If you make one, be sure to tag @themarlybird and use #mmmdi and #marlybird so I can admire your beautiful work 🧶✨

❤️ Your BiCrafty Bestie,
Marly Bird

A cartoon avatar of a person with glasses and a brown bun smiles warmly. Their green shirt and black jacket add a stylish touch, while colorful hearts surround them like loving temperature blankets, stitching together an aura of love and positivity. -Marly Bird

Filed Under: Crochet, Free Patterns, Marly Bird Premium Patterns, Our Free Patterns, Pattern

Dragonscale Entrelac Knit Blanket Pattern 🐉🧶

January 20, 2026 By Marly Bird Leave a Comment

If you’ve ever admired entrelac knitting from afar and thought, “That looks amazing… but also a little intimidating,” let me introduce you to Dragonscale.

A collage shows a purple, green, and yellow entrelac knit blanket titled "Dragonscale Entrelac Knit Blanket" with close-up and full views of the textured, checkerboard pattern. -Marly Bird

Affiliate Disclosure: This post contains affiliate links. To learn more please visit my privacy policy here💖

This entrelac knit blanket pattern is designed to help you understand how entrelac works, not just follow steps blindly. The repeating blocks, directional stitching, and rich texture make this blanket a standout — and a confidence booster once you get into the rhythm.

Entrelac looks complex, but I promise: once it clicks, it’s downright addictive.


What You Will Love About This Entrelac Knit Blanket 💙

  • A bold entrelac knit blanket pattern with dramatic texture
  • A structured layout that helps you see how entrelac is built
  • One block at a time construction that feels surprisingly manageable
  • A finished blanket that looks advanced and impressive
  • A fantastic skill-building project for adventurous knitters

✨ Designer Tip: Entrelac is all about trust. Trust the process, trust the structure, and suddenly the fabric makes sense.

A promotional image for a “Dragonscale Knit Entrelac Blanket” ad-free PDF pattern, showing colorful sample pages, a close-up of the entrelac knit blanket pattern, and a “Buy Now” button on a purple background. -Marly Bird
Etsy
Shopify
Ravelry

What Is Entrelac Knitting? 🧩

Entrelac knitting is a technique that creates a woven, basket-like fabric made from interconnected blocks worked in different directions.

Instead of knitting row after row across the entire width, entrelac is worked in:

  • Triangles
  • Rectangular blocks
  • Alternating directions

This creates the illusion of woven strips — even though everything is knit on a single needle.

A close-up of a green, yellow, and purple checkerboard-patterned blanket with the text "DRAGONSCALE Entrelac Knit Blanket" at the top and "Marly Bird" at the bottom. -Marly Bird

Why I Love Entrelac Knitting (and Keep Coming Back to It) 💙🧩

Entrelac knitting has had my heart for a long time — and honestly, it never gets old.

There’s something incredibly satisfying about watching individual blocks come together to form a woven-looking fabric. Every square builds on the last, and before you know it, you’ve created something that looks complex, textured, and almost architectural… all from simple steps repeated with intention.

I love entrelac because:

  • It looks advanced, but is built from manageable pieces
  • It teaches you to think about knitting in blocks instead of rows
  • It rewards patience and consistency
  • It makes even simple stitches feel special

I’ve explored entrelac in all kinds of projects over the years — from blankets and wraps to accessories — and it’s a technique I never get tired of teaching or knitting.


Explore My Entrelac Knitting Designs 🧶

If you enjoy the Dragonscale Entrelac Knit Blanket, you might be surprised how versatile entrelac knitting can be. I’ve designed a wide range of entrelac patterns that show just how adaptable this technique really is.

My entrelac designs include:

  • Blankets and throws – Like the Racecar Entrelac Knit Blanket
  • Scarves and cowls
  • Hats and accessories
  • Smaller projects that let you practice the technique without a big commitment

Entrelac works beautifully across different project sizes, making it a great skill to learn once and use again and again.

I also wrote a full book dedicated to entrelac knitting, where I dive deeper into the technique, patterns, and creative possibilities:

👉 https://amzn.to/4sLLUnH

If entrelac sparks your curiosity, the book is a wonderful resource to keep exploring.


Why Entrelac Is Perfect for Blankets 🧶

Entrelac shines in blankets because:

  • The repeating blocks make it easy to settle into a rhythm
  • The texture adds visual interest without complicated stitch patterns
  • The fabric is flexible, cozy, and substantial
  • Color changes highlight the structure beautifully

Blankets give you the space to truly learn entrelac knitting without rushing.


Understanding the Structure of Entrelac (Before You Begin) 📐

One of the keys to enjoying entrelac is understanding how the fabric is built.

This blanket includes:

  • Base triangles to establish the foundation
  • Alternating tiers of square blocks worked in opposite directions
  • Top triangles to finish the fabric cleanly

Once you recognize these sections, entrelac becomes far less mysterious — and much more enjoyable.

✨ Designer Tip: If you ever feel lost, zoom out. Look at the blocks, not the rows.

A close-up of a knitted blanket with a checkerboard pattern in green, yellow, and blue squares. The blanket is partially folded, showing the textured, raised design and neat edging. The background is a light wooden surface. -Marly Bird

Join our Newsletter

Get Free Pattern Links & Coupons!

>> Become An Insider <<
A smiling person with curly hair and glasses forms a heart shape with their hands. Behind them, the text reads "Marly Bird," "Weekly Newsletter," and "Your BigCrafty Bestie." Sporting a light cardigan, they share the joy of an amigurumi free crochet animal pattern. -Marly Bird

Gauge Matters in Entrelac Knitting 📏

Gauge is especially important in entrelac knitting because each block relies on consistent sizing to line up cleanly.

For this blanket:

  • Gauge is measured by block size, not just stitches per inch
  • Even tension keeps the woven effect crisp
  • Blocking enhances the structure and definition

If your blocks grow or shrink, the overall proportions of the blanket will change — which leads us perfectly into sizing.


Blanket Size & How to Make It Larger 🧵

The Dragonscale blanket is built from repeating entrelac blocks, which makes resizing very approachable.

To make the blanket larger:

  • Add more blocks across for additional width
  • Add more tiers for additional length

Because entrelac is modular, you’re working in clear units — not guessing or recalculating rows endlessly.

✨ Designer Tip: Want help planning your size? A gauge-and-math worksheet makes this so much easier.


Yarn Choice for the Dragonscale Entrelac Knit Blanket 🧶

Entrelac knitting is one of those techniques where yarn choice really shines. Because the fabric is built from interlocking blocks worked in different directions, the yarn you choose affects everything from stitch definition to drape to overall visual impact.

This pattern was originally knit using Malabrigo Rios, a washable wool yarn that is absolutely decadent to work with. It’s soft, springy, and has a subtle hand-dyed variation that adds depth to each entrelac block without overpowering the woven structure.

Rios is the kind of yarn that makes you pause mid-row and think, “Oh wow… this feels really nice.” It’s a wonderful choice if you’re looking for:

  • A luxurious knitting experience
  • Beautiful stitch definition
  • A finished blanket that feels special and heirloom-worthy

That said — let’s be real for a moment. Blankets use a lot of yarn, and Malabrigo Rios is a higher-end option that may not fit every budget. The good news? This pattern works beautifully with more affordable yarns too.


Budget-Friendly Yarn Options That Work Well for Entrelac

If you’re looking for a more economical option (or planning a larger blanket), here are some great alternatives that still show off the entrelac structure nicely:

Knit Picks Brava Worsted
A smooth, durable acrylic yarn that offers excellent stitch definition and easy care. This is a solid choice for:

  • Everyday use blankets
  • Gifts for kids or pets
  • Knitters who want machine-washable convenience

Knit Picks Wool of the Andes Worsted Superwash
A classic wool option with great structure and warmth. It blocks well and highlights the geometric nature of entrelac beautifully.

Herrschners Worsted-Weight Yarns Heathers
Herrschners offers a variety of budget-friendly yarns in wide color ranges, making it easier to experiment with color combinations without breaking the bank.

Four photos of the same entrelac knit blanket in different color schemes, each draped on a ladder or hung, with matching sets of yarn displayed beside them. The text reads "Dragonscale Entrelac Knit Blanket. -Marly Bird
I asked ChatGPT to work up some other color options

What to Look for When Substituting Yarn

No matter which yarn you choose, look for:

  • Worsted-weight yarn
  • Good stitch definition
  • Consistent thickness
  • A fiber that holds its shape after blocking

✨ Designer Tip: Entrelac relies on clean block edges. Avoid overly fuzzy or haloed yarns, which can blur the crisp woven effect., depending on your choices.

A promotional image for a “Dragonscale Knit Entrelac Blanket” ad-free PDF pattern, showing colorful sample pages, a close-up of the entrelac knit blanket pattern, and a “Buy Now” button on a purple background. -Marly Bird
Etsy
Shopify
Ravelry

Why This Entrelac Blanket Makes a Meaningful Gift 🎁

Hand-knit entrelac blankets are heirloom-level gifts. This pattern is a wonderful option for:

  • Wedding or anniversary gifts
  • Graduation presents
  • Housewarming gifts
  • Milestone birthdays
  • A statement throw for your own home

The texture alone tells a story — and knitters know how much love went into every block.

A collage shows a green, blue, and yellow entrelac knit blanket with a dragon scale-like pattern. Yarn balls and knitting needles are displayed. Text reads: "DRAGONSCALE Entrelac Knit Blanket." Marly Bird logo is at the bottom. -Marly Bird

Dragonscale Entrelac Blanket Details

SKILL LEVEL

Intermediate

MEASUREMENTS

Blanket measures 59½ x 36¾ [151 x 93.5 cm] including I-Cord Edging.

Gauge
1 block = 3¼” [8.5 cm] diagonally from corner to corner in Entrelac Pattern.

18 sts = 4″ [10 cm] in Stockinette st.

MATERIALS

Yarn Malabrigo, Rios (100% superwash merino wool, 210 yds / 192 m, 3½ oz / 100 g, CYCA #4 worsted) 

6 skeins: #37 Lettuce (A)

6 skeins: #809 Solis (B)

1 skeins: #20 Purple Mystery (C)

Three skeins of yarn in purple, green-blue, and yellow are arranged vertically on a white wood surface. “Marly Bird” is in the top left corner, and “DRAGONSCALE Entrelac Knit Blanket” highlights this textured knit blanket project. -Marly Bird

Needles

Size US 8 (5 mm) circular needle 60” [152.5 cm] or longer, or size required for gauge.

Note: Blanket is worked straight; a long circular needle is used to hold the full width of the sts, as well as picked up border sts.

Notions

  • Stitch Markers
  • Tapestry Needle
  • Scissors
  • Tape Measure
  • Leather tags (Optional)
  • Leather rivets (Optional)
⭐️ Marly Bird Amazon Storefront ⭐️

ABBREVIATIONS

K – Knit

K2tog – Knit Two Stitches Together

P – Purl

P2tog – Purl Two Stitches Together

RS – Right Side

St(s) – Stitches

WS – Wrong Side


SPECIAL STITCHES 

Ssk (Slip, Slip, Knit): Slip 2 stitches, one at a time, as if to knit. Insert left hand needle into the front of these two stitches and knit them together from this position (1 stitch decreased)


SPECIAL TECHNIQUE

Backwards Loop Cast-on Method: * Wrap yarn around left thumb from front to back and secure in palm with other fingers. Insert needle upward through strand on thumb. Slip loop from thumb onto needle, pulling yarn to tighten. Repeat from * for desired number of sts.


CHART AND SCHEMATIC

Entrelac diagram showing diamond grids divided into tiers and triangles, with labeled arrows for picking up stitches, cast on, and decreases; side labels mark Top, Tier 1, Tier 2, and Base Triangles. -Marly Bird
Colorful geometric pattern of alternating diamond shapes in teal, yellow, blue, and green, creating a checkered lattice effect. Text below reads “COLOR LAYOUT”. -Marly Bird

NOTE

The enterlac pattern is worked with colors A and B alternating for each tier, with C being used an occasional accent for an individual block. You may place C blocks randomly as you wish, or follow the color scheme in the sample. Two color charts are given; one showing only the A and B arrangement, and the other showing the color C placement as well.


VIDEO TUTORIALS

  • Long-Tail Cast-On >> Click Here for Video Help <<
  • Knit Stitch (continental style) >> Click Here for Video Help <<
  • Purl Stitch (continental style) >> Click Here for Video Help <<
  • How to Add Lifeline >> Click Here for Video Help <<
  • How to Tink >> Click Here for Video Help <<
  • How to Bury Ends >> Click Here for Video Help <<
  • Enterlac https://youtu.be/EKMo9BF23Dc 
  • How to Knit Backwards: https://youtu.be/OuosqrqHEy0 
  • Attached i-cord: https://youtu.be/miMbWk3FW4s 

GROW

To Unlock Exclusive Subscriber Content click the Box below and join for free by simply adding your email and creating a password! If you are having troubles, clear your cache or reset your password or login to the Grow Publisher Portal.

>> Learn More About Grow Here <<

I’m thrilled to share this amazing pattern with you, many patterns on my blog are absolutely free! I kindly request that you don’t copy and paste or distribute this pattern. Prefer an ad-free experience? Buy a digital PDF pattern for a small fee from one of my online stores for a seamless crafting journey. 

I appreciate your support and readership. You are the reason I can keep doing what I love and sharing it with others. So, thank you from the bottom of my yarn-loving heart! Disclosure: This post contains affiliate links, meaning I get a commission if you decide to make a purchase through my links at no cost to you.


A knit blanket with an entrelac pattern in yellow, green, turquoise, and purple squares is displayed. Text reads “DRAGONSCALE Entrelac Knit Blanket.” The Marly Bird logo appears in the top right corner. -Marly Bird

DRAGONSCALE ENTRELAC BLANKET PATTERN

BASE TRIANGLES

This Tier has all triangles and is worked from right to left of Blanket. The sts lean to the left.

With A, cast on 180 stitches.
Row 1 (RS): K1, turn.

Row 2: P1, turn.

Row 3: K2, turn.

Row 4: P2, turn.

Row 5: K3, turn.

Row 6: P3, turn.

Row 7: k4, turn.

Row 8: P4, turn.

Row 9: K5, turn.

Row 10: P5, turn.

Row 11: K6, turn.

Row 12: P6, turn.

Row 13: K7, turn.

Row 14: P7, turn.

Row 15: K8, turn.

Row 16: P8, turn.

Row 17: K9, turn.

Row 18: P9, turn.

Row 19: K10, DO NOT TURN.

One triangle complete.

Repeat from Rows 1-19 17 more times – 18 Base Triangles.

Turn work so WS is facing. 


TIER 1

Change to B.

This Tier of blocks has side-edge triangles and is worked from left to right of Blanket. The sts lean to the right.

Left Side Edge Triangle

Row 1 (WS): P1, turn.

Row 2: Kfb, turn – 2 sts for Left Side Triangle.

Row 3: P1, p2tog, turn.

Row 4: K1, kfb, turn – 3 sts.

Row 5: P2, p2tog, turn.

Row 6: K2, kfb, turn – 4 sts.

Row 7: P3, p2tog, turn.

Row 8: K3, kfb, turn – 5 sts.

Row 9: P4, p2tog, turn.

Row 10: K4, kfb, turn – 6 sts.

Row 11: P5, p2tog, turn.

Row 12: K5, kfb, turn – 7 sts.

Row 13: P6, p2tog, turn.

Row 14: K6, kfb, turn – 8 sts.

Row 15: P7, p2tog, turn.

Row 16: K7, kfb, turn – 9 sts.

Row 17: P8, p2tog, turn.

Row 18: K8, kfb, turn – 10 sts.

Row 19: P9, p2tog, DO NOT TURN.


A close-up of a handwoven fabric featuring a checkerboard pattern in shades of green, yellow, and blue with a purple border, displayed on a textured white surface. -Marly Bird

Square Blocks

With WS still facing, pick up and purl 10 sts along side edge of next base triangle (or block) from Tier below.

Turn work so RS is facing. 

Row 1 (RS): K10, turn.

Row 2: P9, p2tog, turn.

Repeat Rows 1 and 2 9 more times.

Do not turn after final row; continue with WS still facing.

Work 16 more Square Blocks the same way.


Right Side Edge Triangle

With WS still facing, pick up and purl 10 sts along edge of last base triangle (or block) from Tier below.

Turn work so RS is facing. 

Row 1 (RS): K10, turn.

Row 2: P8, p2tog, turn.

Row 3: K9, turn.

Row 4: P7, p2tog, turn.

Row 5: K8, turn.

Row 6: P6, p2tog, turn.

Row 7: K7, turn.

Row 8: P5, p2tog, turn.

Row 9: K6, turn.

Row 10: P4, p2tog, turn.

Row 11: K5, turn.

Row 12: P3, p2tog, turn.

Row 13: K4, turn.

Row 14: P2, p2tog, turn.

Row 15: K3, turn.

Row 16: P1, p2tog, turn.

Row 17: K2, turn.

Row 18: P2tog, turn.

Slip last st from left needle to right needle.


TIER 2

Change to A.

This Tier of blocks has no side triangles and is worked from right to left of Blanket. The sts lean to the left.

First Square Block

With RS facing, pick up and knit 9 sts along side edge of Triangle from Tier below.

Turn work so WS is facing. 

Row 1 (WS): P10, turn.

Row 2: K9, ssk, turn.

Repeat Rows 1 and 2 9 more times.

Do not turn after final row; continue with RS still facing.


All Remaining Square Blocks

With RS facing, pick up and knit 10 sts along side edge of the next Block from Tier below.

Turn work so WS is facing. 

Row 1 (WS): P10, turn.

Row 2: K9, ssk, turn.

Repeat Rows 1 and 2 9 more times.

Do not turn after final row; continue with RS still facing.

Work 17 more Square Blocks the same way.

Repeat Tiers 1 and 2 9 more times, then repeat Tier 1 only once more.


TOP TRIANGLES

Change to A.

This Tier has all triangles and is worked from right to left of Blanket. The sts lean to the left.

With RS facing, pick up and knit 9 sts along side edge of Triangle from Tier below.

Turn work so WS is facing. 

Row 1 (WS): P10, turn.

Row 2: Ssk, k7, ssk, turn.

Row 3: P9, turn.

Row 4: Ssk, k6, ssk, turn.

Row 5: P8, turn.

Row 6: Ssk, k5, ssk, turn.

Row 7: P7, turn.

Row 8: Ssk, k4, ssk, turn.

Row 9: P6, turn.

Row 10: Ssk, k3, ssk, turn.

Row 11: P5, turn.

Row 12: Ssk, k2, ssk, turn.

Row 13: P4, turn.

Row 14: Ssk, k1, ssk, turn.

Row 15: P3, turn.

Row 16: Ssk, ssk, turn.

Row 17: P2, turn.

Row 18: Sl 1 knitwise with yarn in back, ssk, pass slipped st over st remaining from ssk.

First top triangle completed, 1 st remains on right needle.

Do not turn after final row; continue with RS still facing.

Work 17 more Top Triangles the same way – 1 st remains.

Break yarn and fasten off last st.

A knitted blanket with a checkerboard pattern in yellow, teal, and purple, is displayed on a white surface beside three skeins of yarn in coordinating colors. -Marly Bird

FINISHING

I-Cord Edging

With RS facing and beginning anywhere along a straight edge, pick up border sts around entire blanket, picking up 15 sts along each half-triangle edge, plus 1 st at each corner – 270 sts at each long edge, 165 sts at each short edge, 4 corner sts, 874 sts total.

Cast on 3 additional sts – 877 sts.

Row 1 (RS): K2, ssk, slip 3 sts just worked back onto the right needle.

Repeat this row until I-Cord Edging has been worked all the way around the blanket and only 3 sts remain.

Bind off remaining 3 sts.

Sew cast-on edge and bound-off edge of I-Cord together.

Weave in all loose ends. 

A collage shows a purple, green, and yellow entrelac knit blanket titled "Dragonscale Entrelac Knit Blanket" with close-up and full views of the textured, checkerboard pattern. -Marly Bird

Love This Pattern on Ravelry 💙

If you’re on Ravelry, I’d love for you to:

  • Favorite the Dragonscale Entrelac Knit Blanket
  • Add it to your queue
  • Share photos of your finished blanket
Favorite This Pattern on Ravelry - Marly Bird

Seeing your color choices and finished entrelac blocks is always a treat 🥰


FAQs About Entrelac Knitting ❓

What knitting techniques does entrelac teach?

Entrelac teaches you how to work short rows, pick up stitches, change knitting direction, and think about fabric construction in modular sections instead of long rows.


Can you make a scarf with entrelac knitting?

Absolutely. Entrelac is fantastic for scarves, cowls, and wraps. Narrower projects are a great way to practice the technique without committing to a full blanket.


Is entrelac knitting suitable for beginners?

Entrelac is best for adventurous beginners or intermediate knitters. If you’re comfortable knitting, purling, and following instructions step by step, you can absolutely learn entrelac.


Does this pattern include written instructions?

Yes. Entrelac patterns include detailed written instructions that walk you through each section so you understand how the blocks are formed and connected.


What do knitters like most about entrelac?

Many knitters love that entrelac:

  • Looks impressive
  • Is built from simple stitches
  • Feels rhythmic once you get into it
  • Creates a fabric that’s both flexible and structured

Why might you enjoy learning entrelac knitting?

If you enjoy techniques that:

  • Teach new ways to think about knitting
  • Create bold texture
  • Turn heads when finished

Entrelac is incredibly rewarding.


Does entrelac knitting include video tutorials?

Some entrelac patterns and resources include video support to help visualize the construction. Many knitters also benefit from seeing the block structure as they work.


Can entrelac knitting be used for projects other than blankets?

Yes! Entrelac works beautifully for accessories, garments, home décor, and small projects. Once you understand the structure, the possibilities open up quickly.

A promotional image for a “Dragonscale Knit Entrelac Blanket” ad-free PDF pattern, showing colorful sample pages, a close-up of the entrelac knit blanket pattern, and a “Buy Now” button on a purple background. -Marly Bird
Etsy
Shopify
Ravelry

Final Thoughts 💙

The Dragonscale Entrelac Knit Blanket is the kind of project that builds confidence with every tier. What starts as curiosity quickly turns into understanding — and before you know it, you’re thinking in blocks instead of rows.

If entrelac knitting has been on your “someday” list, this is your sign. You’ve got this 🧶🐉

When you share your blanket, tag @themarlybird and use #mmmdi and #marlybird so I can cheer you on!

❤️ Your BiCrafty Bestie,
Marly Bird

A cartoon avatar of a person with glasses and a brown bun smiles warmly. Their green shirt and black jacket add a stylish touch, while colorful hearts surround them like loving temperature blankets, stitching together an aura of love and positivity. -Marly Bird

Filed Under: Free Patterns, Knitting, Marly Bird Premium Patterns, Our Free Patterns, Pattern, Uncategorized

Sandwellen Free Textured Crochet Blanket Pattern with Caron Blossom Cakes 🧶✨

January 20, 2026 By Marly Bird 6 Comments

If you’re searching for a textured crochet blanket pattern that feels fresh, looks impressive, and doesn’t rely on complicated color changes — this one’s for you. 💕

Sandwellen free crochet blanket pattern - Textured Crochet Blanket Pattern with Caron Blossom Cakes. Marly Bird

Affiliate Disclosure: This post contains affiliate links. To learn more please visit my privacy policy here💖

This free crochet blanket pattern combines rich texture, clear stitch definition, and the subtle color shifts of Caron Blossom Cakes yarn to create a blanket that looks intricate without being overwhelming to make.

It’s the kind of project that keeps your hands interested while still letting you relax — and the finished blanket has that “how did you do that?” energy we all secretly love. 😄


A colorful crocheted blanket with a textured, wavy pattern lies partially folded on a light wooden surface, next to dried branches and a small white dove graphic in the bottom right corner. -Marly Bird
Etsy
Shopify
Ravelry

What You Will Love About This Textured Crochet Blanket 💖

This textured crochet blanket pattern is designed for makers who love stitch definition, cozy fabric, and projects that feel engaging without being overwhelming.

You’ll love this pattern if you’re looking for:

  • A unique crochet blanket stitch pattern with beautiful texture
  • A blanket that looks intricate but follows a repeatable stitch pattern
  • A design that works well with solid or softly variegated yarns
  • An easy way to customize your blanket size
  • A relaxing crochet project you can pick up and put down

✨ Designer Tip: Texture-forward blanket patterns shine when the stitches do the talking. You don’t need complicated color changes to make a blanket feel special.


Unique Crochet Blanket Stitch & Technique ✨

What makes this blanket stand out is the texture technique. Instead of relying on colorwork or striping, the interest comes from stitch placement and raised elements that create depth and dimension across the fabric.

This style of textured crochet blanket is perfect if you:

  • Love stitch-focused patterns
  • Want something that looks complex but works up logically
  • Enjoy learning new techniques without frustration

The stitch pattern repeats consistently, making it ideal for longer projects like blankets where rhythm really matters.


Sandwellen Free Crochet Blanket Pattern with crochet bobbles and horizontal crochet cables - Marly Bird

Crochet Blanket Gauge: Why It Matters for Texture 📏🧶

Gauge plays a big role in textured crochet blankets. It affects not only the final size of your blanket, but also how clearly the stitch pattern shows up.

For this pattern, consistent gauge helps ensure:

  • The texture looks defined, not squished
  • The blanket drapes nicely instead of feeling stiff
  • Your finished size matches your expectations

If your stitches feel tight or the texture looks compressed, adjusting your hook size slightly can make a big difference.

Need help tracking gauge and planning blanket size?

If gauge math or stitch repeats make your brain freeze, I’ve got you covered. Grab my free Crochet Gauge & Blanket Size Worksheet, designed to help you track gauge, choose blanket sizes, and calculate starting chains with confidence.


Yarn Choice: Why Caron Blossom Cakes Works So Well 🧶

At the heart of the Sandwellen Crochet Blanket lies the luxurious Caron Blossom Cakes Yarn. It’s a dreamy, soft yarn that will delight your crochet experience. Its gentle, blooming shades and smooth texture effortlessly blend creating a harmony of colors that will capture your heart. With Caron Blossom Cakes, you’ll feel the yarn glide through your fingers, making each stitch an absolute pleasure.

Caron Blossom Cakes is a fantastic choice for textured crochet blankets because it offers:

  • Smooth stitch definition
  • Gentle color transitions that don’t distract from texture
  • A soft feel that works well for blankets used every day

In the Sandwellen project, we opted to use a single shade of yarn. But you have the creative freedom to experiment with different colorways. Create your truly unique crochet afghan.

Our love for this yarn is no secret, as the Caron Cake Shop yarns boast exceptional beauty. In fact, we have a blog post featuring more than 50 crochet patterns showing the versatility of this yarn. Be sure to check it out here or click on the image below!

At Marly Bird we've curated a whole collection of crochet patterns using Caron Cake Shop Yarns to help you create the perfect project - from easy crochet shawls to intricate crochet scarves, from simple triangle shawls to luxurious prayer shawls! Many of these patterns are made with basic stitches, so even beginners can feel creative when making crocheted scarves, crochet hats, and rectangle shawls. Visit the blog to get these modern, paid for and free crochet patterns - Marly Bird

Yarn Substitution Guidelines

If you want to use a different yarn, look for:

  • Worsted-weight yarn
  • Smooth plies (avoid overly fuzzy textures)
  • Fiber blends that balance softness and durability

Matching gauge is far more important than matching fiber content exactly.

Here are some yarns we love and think would be great with this pattern!

  • Everyday Worsted Gradient – Love the idea of a long color change gradient
  • RHSS Bitty Stripes – This has a lot of color but might look really cool
  • Caron Cakes – Long color changes and soft yarn
  • Bernat Lattice – This is a bit of a novelty yarn but I really do like it
  • Mandala Gradient Yarn – This yarn is a little thin but with adjustments you could make it work
  • RHSS Granny Square – Although this is designed to make easy granny squares, it would be a fun color blocking yarn
  • Herrschners Worsted Stripes – This could be super cool with the striping
  • Everyday Worsted Gradient Glitter – Who doesn’t like a little sparkle AND a gradient?
  • Herrschners Worsted Sparkle – This yarn is so popular at Herrschners, for a good reason

Crochet Blanket Sizing & How to Make It Larger 📐

The beauty of the Sandwellen Crochet Blanket lies in its versatility. The pattern includes instructions for multiple sizes, allowing you to create a blanket that perfectly fits your needs. ✨ That means you don’t have to do any extra math!

You can make a cozy throw for your favorite reading nook or an exquisite bedspread to adorn your bedroom. The Sandwellen Blanket is a versatile project that promises to be cherished.

This makes the pattern incredibly flexible and stash-friendly.

A multicolored crochet blanket hangs over a rail. Nine skeins of Caron Blossom Cakes yarn in different colors are shown. The text reads "Sandweller Crochet Blanket Pattern. -Marly Bird

Why This Crochet Blanket Makes a Great Gift 🎁

Textured crochet blankets are some of the most searched-for handmade gifts, and this pattern works beautifully for many occasions, including:

  • Baby shower or new baby gift
  • Wedding or housewarming present
  • Graduation or college send-off
  • Holiday or Christmas crochet gift
  • Comfort or sympathy gift
  • Anniversary or milestone birthday

Because the texture is timeless and the design is neutral-friendly, you can tailor the yarn color to suit the occasion without changing the stitch pattern.


Texture Magic: Crochet Bobbles and Horizontal Cables

One of the defining features of the Sandwellen Blanket is the mesmerizing texture it boasts. Crochet bobbles add a playful dimension to the fabric, creating delightful pops of depth and interest.

Crochet bobbles on the Sandwellen Textured Crochet Blanket Pattern with Caron Blossom Cakes yarn - Marly Bird

But that’s not all – the showstopper is the horizontal cables (also known as segmented cables). These unique stitches create a captivating pattern! It seems to dance across the blanket, leaving you in awe of your own crochet skills.

Horizontal crochet cables on the Sandwellen free crochet cable blanket pattern - Marly Bird

Mastering the Art of Horizontal Cables

Worried about tackling the horizontal cables? Fear not! The Sandwellen Crochet Blanket pattern includes a detailed stitch diagram. We also made a helpful video tutorial to guide you through the process step-by-step. With practice, and yarn management tips from expert Robyn Chachula, you’ll soon become a pro at this captivating technique.

A multicolored crocheted fabric with horizontal cable patterns is displayed on a white wooden surface. Decorative dried plants are in the corner. Text reads "Horizontal Crochet Cables" with a yarn and hook graphic. -Marly Bird
Etsy
Shopify
Ravelry

Ready to Start?

Indulge in the magic of crochet and embrace the allure of this textured crochet blanket pattern. With Caron Blossom Cakes Yarn, crochet bobbles, and captivating horizontal cables, this masterpiece will become a cherished heirloom. Elevate your crochet skills and immerse yourself in the joy of creation. Let the Sandwellen crochet afghan warm your heart for years to come.

Are you ready to get started? Get your hands on the Sandwellen Crochet Blanket pattern for free below.

Sandwellen Free Crochet Cable Blanket - Flat on a table - Marly Bird. Textured Crochet Blanket Pattern with Caron Blossom Cakes

Textured Crochet Blanket Pattern with Caron Blossom Cakes Details

⭐️Add this pattern to your Ravelry Queue and Favorites🔥

SKILL LEVEL

Intermediate

MEASUREMENTS

Finished Measurements

Blanket is 36” (42, 52, 61)”  [91.5, 106.5, 132, 155 cm] wide by 36 (54, 64, 90)” [91.5, 137, 162.5, 228.5 cm] long. 

Gauge 

13 sts x 12 rows in stitch pattern of first section= 4” [10 cm] x 4.5” [11.5 cm]; use any size hook to obtain the gauge. 

MATERIALS

Yarn 

Caron, Blossom Cakes (61% Cotton/ 39% Acrylic, 481 yds / 440 m, 8 oz/ 227 g, CYCA# 4 worsted): Island Time, 4 (7, 9, 16) cakes

Hook

Size I/9 [5.5  mm]

Notions 

Tapestry needle, Stitch Markers


ABBREVIATIONS

(Get details about each stitch in our Crochet Definition Library)

Ch – Chain(s) 

Dc – Double Crochet 

Fsc – Foundation Single Crochet (see special stitches)

Hdc – Half Double Crochet

PM – Place Marker

RS – Right Side 

Sc – Single Crochet

Sl st – Slip Stitch

Sp(s) – Space(s) 

St(s) – Stitch(es)

Stacked Dc – Stacked Double Crochet 

Tch – Turning Chain

Tr – Treble Crochet

WS – Wrong Side


SPECIAL STITCHES 

⭐️ Stacked Double Crochet (Stacked Dc): (Do not ch 1 prior to making the first sc) Sc in first stitch, insert hook in between two legs of the base, yarn over and pull up a loop, yarn over and draw through 2 loops on hook.

⭐️ Foundation Single Crochet (fsc): 

First fsc: Ch 2, insert hook into 2nd ch from hook, yarn over and pull up a loop, yarn over and draw through 1 loop on hook (forming a chain), yarn over and draw through 2 loops on hook (forming the single crochet)

Next fsc: Insert hook into base of previous stitch (in the “chain” space), yarn over and pull up a loop, yarn over and draw through 1 loop on hook (forming a chain), yarn over and draw through 2 loops on hook (forming the next single crochet).  Repeat directions for desired amount of sts.

⭐️Third Loop: Also known as middle or back bar. Horizontal strand located under the top 2 loops, created by the yarn over when making the hdc. When working in non-turned rows the third bar is on the back side of the fabric facing away from you.


STITCH DIAGRAMS

✨ Stitch Diagrams are only available in the ad-free PDF

Etsy
Shopify
Ravelry

NOTES

  • Directions are for baby blanket (36” wide); changes for lapghan (42” wide), throw (51.5” wide), and twin bed (60.75” wide)  are in parentheses. When only one number is given, that number applies to all sizes.
  • In the first and last section, push the trebles to the RS of the fabric (away from you while you are stitching) to form a bump.
  • Start of double crochet rows can use a ch 3 turning chain or a stacked double crochet as written. 
  • Before the CABLE SECTION, divide the yarn into 4 separate balls.
  • In the cable section, watch when to turn.  Most of the work is done on the RS

VIDEO TUTORIAL

  • How to Read Crochet Diagrams >> Click Here for Video Help <<
  • Weave in Ends Watch on YouTube >> Click Here for Video Help <<
  • Stacked Double Crochet Watch on YouTube>> Click Here for Video Help <<
  • Segmented Cable / Horizontal Cable Watch on YouTube>> Click Here for Video Help <<
Textured Crochet Blanket Pattern with Caron Blossom Cakes - Sandwellen by Marly Bird

GROW

To Unlock Exclusive Subscriber Content click the Box below and join for free by simply adding your email and creating a password! If you are having troubles, clear your cache or reset your password or login to the Grow Publisher Portal.

>> Learn More About Grow Here <<

I’m thrilled to share this amazing pattern with you, many patterns on my blog are absolutely free! I kindly request that you don’t copy and paste or distribute this pattern. Prefer an ad-free experience? Buy a digital PDF pattern for a small fee from one of my online stores for a seamless crafting journey. 

I appreciate your support and readership. You are the reason I can keep doing what I love and sharing it with others. So, thank you from the bottom of my yarn-loving heart! Disclosure: This post contains affiliate links, meaning I get a commission if you decide to make a purchase through my links at no cost to you.

SANDWELLEN CROCHET BLANKET PATTERN

FIRST SECTION

Row 1 (WS): 111 (131, 161, 191) fsc, turn.

Row 2: Stacked dc in first st, dc in each st across, turn. 

Row 3: Ch 1, sc in next 3 dc, *tr in next dc, sc in next 2 dc, tr in next dc, sc in next 6 dc; repeat from * across to last 8 dc, tr in next dc, sc in next 2 dc, tr in next dc, sc in last 4 dc, turn.

Rows 4-5: Repeat Rows 2-3

Row 6: Repeat Row 2

Row 7: Ch 1, sc in next 8 dc, *tr in next dc, sc in next 2 dc, tr in next dc, sc in next 6 dc; repeat from * across to last 13 dc, tr in next dc, sc in next 2 dc, tr in next dc, sc in last 9 dc, turn.

Rows 8-9: Repeat Rows 6-7

Rows 10-13: Repeat Rows 2-3

Row 14: Repeat Row 2

Row 15: Ch 1, sc in each dc across, turn. 

CABLE SECTION

Make 3 additional balls of yarn for this section.  Keep first section ball of yarn attached, which means using 4 balls of yarn at once. 

Row 1a (RS): Ch 2 (counts as hdc), hdc in next 2 sts, lay first ball down with working tail in front of fabric, place stitch marker in free loop, do not turn.

Row 2a: Join second ball with sl st to top of Row 1a tch, ch 2 (counts as hdc), hdc in 3rd loop of next 2 hdc, lay second ball down with working tail in front of fabric, place stitch marker in free loop, do not turn.

Row 3a: Join third ball with sl st to top of Row 2a tch, ch 2 (counts as hdc), hdc in 3rd loop of next 2 hdc, make sure previous 2 balls are in front of work, hdc in next 6 sts 2 rows below, lay down third ball with working tail in front of fabric, place stitch marker in free loop, do not turn.

Row 4a: Join fourth ball with sl st to top of Row 3a tch, ch 2 (counts as hdc), hdc in 3rd loop of next 8 hdc, lay down fourth ball with working tail in front of fabric, place stitch marker in free loop, do not turn

Row 1b: Pick up row 1 ball, make sure ball 2 yarn is to the right side (so it won’t get tangled), hdc in 3rd loop of next 6 hdc just made, make sure previous 2 balls are in front of work, hdc in next 4 sts 2 rows below, lay first ball down with working tail in front of fabric, place stitch marker in free loop, do not turn.

Row 2b: Pick up row 2 ball, hdc in 3rd loop of next 10 hdc just made, lay second ball down with working tail in front of fabric, place stitch marker in free loop, do not turn.

Row 3b: Pick up row 3 ball, make sure ball 4 yarn is to the right side (so it won’t get tangled), hdc in 3rd loop of next 4 hdc just made, make sure previous 2 balls are in front of work, hdc in next 6 sts 2 rows below, lay down third ball with working tail in front of fabric, place stitch marker in free loop, do not turn.

Row 4b: Pick up row 4 ball, hdc in 3rd loop of next 10 hdc just made, lay down fourth ball with working tail in front of fabric, place stitch marker in free loop, do not turn

Repeat Rows 1b-4b across until there are 2 sts left on first section

Row 1c: Pick up row 1 ball, hdc in 3rd loop of next 6 hdc just made, make sure previous 2 balls are in front of work, hdc in last 2 sts 2 rows below, fasten off first ball, do not turn.

Row 2c: Pick up row 2 ball, hdc in 3rd loop of next 8 hdc just made, fasten off second ball, do not turn.

Row 3c: Pick up row 3 ball, hdc in 3rd loop of next 2 hdc just made, fasten off third ball, do not turn.

Row 4c: Pick up row 4 ball, hdc in 3rd loop of next 2 hdc just made, DO NOT FASTEN OFF, turn.

Row 5 (WS): Ch 1, sc in 3rd loop of each hdc across to tch, sc in top of tch, turn. Note: place stitch marker every 10/ 20 stitches to watch stitch count.  It is easy to lose stitches on this row.  Make sure you have 111 (131, 161, 191) sts at the end of the row. 

Row 6a (RS): Ch 2 (counts as hdc), hdc in next 3 sts, lay first ball down with working tail in front of fabric, place stitch marker in free loop, do not turn.

Row 7a: Join second ball with sl st to top of Row 6a tch, ch 2 (counts as hdc), hdc in 3rd loop of next 3 hdc, lay second ball down with working tail in front of fabric, place stitch marker in free loop, do not turn.

Row 8a: Join third ball with sl st to top of Row 7a tch, ch 2 (counts as hdc), hdc in 3rd loop of next 3 hdc, make sure previous 2 balls are in front of work, hdc in next 4 sts 2 rows below, lay down third ball with working tail in front of fabric, place stitch marker in free loop, do not turn.

Row 9a: Join fourth ball with sl st to top of Row 8a tch, ch 2 (counts as hdc), hdc in 3rd loop of next 7 hdc, lay down fourth ball with working tail in front of fabric, place stitch marker in free loop, do not turn

Row 6b: Pick up row 6 ball, hdc in 3rd loop of next 4 hdc just made, make sure previous 2 balls are in front of work, hdc in next 6 sts 2 rows below, lay first ball down with working tail in front of fabric, place stitch marker in free loop, do not turn.

Sandwellen Textured Crochet Blanket Pattern with Caron Blossom Cakes - by Marly Bird

Row 7b: Pick up row 7 ball, hdc in 3rd loop of next 10 hdc just made, lay second ball down with working tail in front of fabric, place stitch marker in free loop, do not turn.

Row 8b: Pick up row 8 ball, hdc in 3rd loop of next 6 hdc just made, make sure previous 2 balls are in front of work, hdc in next 4 sts 2 rows below, lay down third ball with working tail in front of fabric, place stitch marker in free loop, do not turn.

Row 9b: Pick up row 9 ball, hdc in 3rd loop of next 10 hdc just made, lay down fourth ball with working tail in front of fabric, place stitch marker in free loop, do not turn

Repeat Rows 6b-9b across until there are 3 sts left on Row 5

Row 6c: Pick up row 6 ball, hdc in 3rd loop of next 4 hdc just made, make sure previous 2 balls are in front of work, hdc in last 3 sts 2 rows below, fasten off first ball, do not turn.

Row 7c: Pick up row 7 ball, hdc in 3rd loop of next 7 hdc just made, fasten off second ball, do not turn.

Row 8c: Pick up row 8 ball, hdc in 3rd loop of next 3 hdc just made, fasten off third ball, do not turn.

Row 9c: Pick up row 9 ball, hdc in 3rd loop of next 3 hdc just made, DO NOT FASTEN OFF, turn.

Row 10: Ch 1, sc in 3rd loop of each hdc across to tch, sc in top of tch, turn.

Repeat Rows 1-10 three times

Repeat Rows 1-4 once more

LAST SECTION

Row 1 (WS): Ch 1, sc in 3rd loop of each hdc across to tch, sc in top of tch, turn- 111 (131, 161, 191) sc.

Row 2: Stacked dc in first st, dc in each st across, turn. 

Row 3: Ch 1, sc in next 3 dc, *tr in next dc, sc in next 2 dc, tr in next dc, sc in next 6 dc; repeat from * across to last 8 dc, tr in next dc, sc in next 2 dc, tr in next dc, sc in last 4 dc, turn.

Rows 4-5: Repeat Rows 2-3

Row 6: Repeat Row 2

Row 7: Ch 1, sc in next 8 dc, *tr in next dc, sc in next 2 dc, tr in next dc, sc in next 6 dc; repeat from * across to last 13 dc, tr in next dc, sc in next 2 dc, tr in next dc, sc in last 9 dc, turn.

Rows 8-9: Repeat Rows 6-7

Repeat Rows 2-9 [8 (10, 13, 22)] more times or to desired length.

Repeat Rows 2-3 once more

Repeat Row 2 once more

Last Row: Ch 1, sc in each dc across, fasten off.  Weave in all ends. 

FINISHING

Edging

Round 1: Join yarn to any corner with sl st, ch 1, 2 sc in corner, *sc evenly across edge of blanket, 3 sc in next corner, place stitch marker in middle sc just made; repeat from * around to beginning corner, sc in same corner as join, sl st to first sc, do not turn.

Round 2: Ch 1, 2 sc in first sc, *sc in each sc across to marker, 3 sc in marked sc, move marker to middle sc just made; repeat from * around, sc in first sc of previous round, sl st to first st of current round, do not turn. 

Repeat Round 2 until edging measures 1” or to desired width. Fasten off and weave in ends.

Marly Bird YouTube channel banner

We hope you love making this Textured Crochet Blanket Pattern with Caron Blossom Cakes!


A multicolored crochet blanket with a textured wave pattern hangs on a wooden ladder, next to a vase of dried flowers. Text reads: "Sandwellen Crochet Blanket Pattern" with a small bird illustration. -Marly Bird
Etsy
Shopify
Ravelry

FAQs ❓

Is this textured crochet blanket pattern beginner-friendly?
Confident beginners can absolutely make this blanket. The stitch pattern is repeat-based and becomes easier once you find your rhythm. Video support is available to help with the textured stitches.

Does this crochet blanket stitch use a lot of yarn?
Textured stitches do use slightly more yarn than basic stitches, but the result is a thicker, cozier fabric that many makers feel is well worth it.

Can I make this crochet blanket larger or smaller?
Yes! The stitch pattern is based on a repeat, which makes it easy to adjust the width and length for different blanket sizes.

Will the texture show up in solid yarn?
Yes — solid and lightly variegated yarns actually highlight the texture beautifully.

Is this a good crochet blanket pattern for gifts?
Absolutely. This pattern is often used for baby gifts, holidays, weddings, and comfort blankets because it’s both beautiful and practical.

Can I use this stitch pattern for other projects?
Many crocheters enjoy using textured blanket stitches for pillows, scarves, or smaller home décor projects once they’re comfortable with the repeat.


Final Thoughts

If you’re looking for a textured crochet blanket pattern that feels engaging to make and results in a truly special finished piece, Sandwellen checks all the boxes. The stitch repeat keeps things approachable, the texture adds visual interest, and the flexibility to customize size makes it a pattern you can use again and again.

Whether you’re crocheting a cozy throw for your own home or creating a meaningful handmade gift, this blanket is designed to be both practical and beautiful — the kind of project that reminds you why you love crochet in the first place.

If you give Sandwellen a try, don’t forget to share your finished blanket on Ravelry or tag me on social media. I love seeing how you make each version your own 🧶✨

❤️ Your BiCrafty Bestie,
Marly Bird

A cartoon avatar of a person with glasses and a brown bun smiles warmly. Their green shirt and black jacket add a stylish touch, while colorful hearts surround them like loving temperature blankets, stitching together an aura of love and positivity. -Marly Bird

Filed Under: Crochet, Free Patterns, Our Free Patterns, Pattern, Uncategorized

Chic Sheep Dream Intarsia Knit Blanket – Free Modern Colorwork Blanket Pattern

January 15, 2026 By admin 5 Comments

If you’ve ever wanted to knit a bold, modern colorwork blanket that looks like a stained-glass window made of yarn, the Chic Sheep Dream Intarsia Knit Blanket is calling your name.

Designed by my brilliant friend Anne Berk (aka Annetarsia), this blanket uses all 24 original colors of Chic Sheep by Marly Bird™ in a geometric, triangle-based intarsia design. Every row becomes a little color adventure, and the finished blanket is a true heirloom piece.

A chic intarsia knit blanket with vibrant geometric patterns is elegantly draped over a wooden ladder. The text "Chic Sheep Dream Intarsia Blanket" graces the top, while a logo featuring "Marly Bird" sits in the bottom right corner. -Marly Bird

In this post, you’ll find:

  • And the full free pattern right here on the blog
  • The story behind the design
  • Tips for intarsia knitting, yarn choices, and prep
  • A link to an ad-free, printable PDF pattern

Affiliate Disclosure: This post contains affiliate links. To learn more please visit my privacy policy here💖

The Story Behind the Dream Intarsia Knit Blanket

This blanket literally started as a dream.

I told Anne I imagined a blanket that:

  • Used all my Chic Sheep colors
  • Looked like stained glass
  • Featured strong geometric shapes, especially triangles

I knew if anyone could take that chaotic, colorful dream and turn it into a real, knittable design, it was Anne.

She:

  • Designed the triangle-based intarsia chart
  • Worked out how much yarn each “butterfly” needed
  • Knit the sample
  • Loved it so much… she knit a second one from the leftover yarn!

It’s one of those projects that perfectly blends math, color, and creativity—and somehow still feels totally snuggly and approachable.

A person with glasses smiles while holding up a vibrant, multicolored quilt reminiscent of the Chic Sheep Dream Intarsia Knit Blanket. The background features shelves adorned with books and decor. -Marly Bird

What You’ll Love About the Dream Intarsia Knit Blanket

A chic intarsia knit blanket with vibrant geometric patterns is elegantly draped over a wooden ladder. The text "Chic Sheep Dream Intarsia Blanket" graces the top, while a logo featuring "Marly Bird" sits in the bottom right corner. -Marly Bird

Relax & Knit
Upgrade to the Printable PDF

Beautifully formatted to print and relax while knitting. The paid pattern includes:

  • Stunning Colorwork Design
  • Perfect for Relaxing and Learning
  • Customizable Colors
  • A Show-Stopping Statement Piece:
  • Generous Size and Soft Drape
  • A Rewarding Finish
Get The Ad-Free PDF

Stunning Colorwork Design: This blanket features beautiful intarsia knitting, allowing you to create bold, colorful blocks of design without the bulk of stranded colorwork. The result? A smooth, polished finish that looks as good on the back as it does on the front.

Perfect for Relaxing and Learning: Whether you’re an experienced knitter or new to intarsia, this project offers the perfect mix of relaxation and skill-building. The color changes keep things interesting, while the larger sections of stockinette stitch provide a soothing, meditative rhythm.

Customizable Colors: Choose a palette that reflects your personal style or home decor. Go bold with vibrant, modern shades, or opt for neutrals and pastels for a timeless, cozy look.

A Show-Stopping Statement Piece: This blanket is more than just a knit—it’s a work of art. Drape it over a couch, fold it at the foot of your bed, or gift it to someone special. The clean lines and modern style make it a statement piece in any room.

Generous Size and Soft Drape: Designed for comfort, the Dream Intarsia Knit Blanket has a generous size that’s perfect for snuggling up on chilly nights. Combined with soft, luxurious yarn, it’s as cozy to use as it is beautiful to look at.

A Rewarding Finish: There’s nothing quite like watching the colorful blocks of this pattern come together as you knit. By the end, you’ll have a stunning, handmade heirloom that you’ll cherish for years to come.

If you’ve been dreaming of a colorwork project that’s approachable, rewarding, and modern, the Dream Intarsia Knit Blanket is the perfect choice for your needles. 🧶✨


Prefer a Printable Version? Get the Ad-Free PDF

If you’re a “paper pattern and highlighter” knitter, the ad-free PDF is going to be your best friend.

The paid PDF pattern includes:

  • Beautifully formatted, printer-friendly layout
  • Full written instructions, charts, and layout references in one place
  • Easy-to-read type and structure for sofa knitting sessions
  • Everything you need, without ads or scrolling

You can grab the Dream Knit Intarsia Blanket ad-free PDF here:

  • Marly Bird Store (Shopify):
    https://shop.marlybird.com/products/dream-knit-intarsia-blanket-pattern-modern-colorwork-knit-blanket
  • Etsy (affiliate):
    https://tidd.ly/4jPLLLS

Use the free blog version to get started, then upgrade to the PDF if you want to keep this pattern in your forever library. 💕

Image promoting an ad-free PDF knitting pattern for the Dream Intarsia Knit Blanket. A close-up of the colorful geometric blanket is shown, with preview pages and “BUY NOW” text highlighted by a pink arrow. -Marly Bird
Etsy
Shopify

Yarn for the Dream Knit Intarsia Blanket

The original blanket was knit in Chic Sheep by Marly Bird, a 100% merino worsted-weight yarn that had all my heart. That yarn line has since been discontinued (I know. I’m still emotional about it. 😭).

The good news?

You can knit this blanket in almost any worsted-weight (#4) yarn.

If you’re looking for a yarn that behaves similarly to Chic Sheep, try:

  • Knit Picks Swish Worsted – soft superwash wool with great stitch definition, a very nice stand-in for Chic Sheep.
    👉 https://tidd.ly/4qL6Zxt

Other great options:

  • Wools like Universal Deluxe Worsted or Knit Picks Wool of the Andes Superwash
    👉 https://tidd.ly/3JGXmPK
    👉 https://tidd.ly/4qmTEux
  • Wool blends like Berroco Vintage or Caron Simply Me
    👉 https://tidd.ly/46D6pd5
    👉 https://tidd.ly/4qV238y
  • Acrylics like Brava, Brava Tweed, Worsted 8 Heathers, or Lion Brand Color Theory
    👉 https://tidd.ly/3Jj67zn
    👉 https://tidd.ly/3X6lWMS
    👉 https://tidd.ly/4oXxtuD
    👉 https://tidd.ly/4bvWmJx

As long as it’s worsted weight and you have enough yardage, you’re good to go.

Important:
For a blanket, gauge matters more for yarn usage and finished size than for fit. If your gauge is looser than Anne’s, you might need more yarn. If it’s tighter, your blanket will be smaller. Swatching helps you plan.


How Much Yarn Do I Really Need?

Originally, this blanket used:

  • 3 balls of the border color
  • 1 ball each of 23 additional colors

Here’s the fun part:

Anne knit the entire blanket and had enough yarn left over from each ball to knit a second blanket, only needing extra border yarn.

So:

  • If you want the full “24-color experience,” one ball of each is plenty generous.
  • If you prefer a stash-busting version, you can absolutely use leftovers and scraps in any color story you like.

If you love stash-busting projects, don’t miss:
👉 20 Stash Busting Knitting Patterns: https://marlybird.com/20-stash-busting-knitting-patterns/

A colorful quilt featuring a chic pattern of multicolored triangles is displayed on a table. In the blurred background, there are shelves, a fluffy cushion, and some decorative items. The overall setting is cozy and dream-like, perfect for showcasing an intarsia knit blanket. -Marly Bird

Is This a Good First Intarsia Project?

This pattern is a fantastic intarsia project if:

  • You’re comfortable with knit, purl, and basic chart reading
  • You’re ready to manage multiple yarn sources (butterflies/bobbins)
  • You’re excited by color and don’t mind a little bit of organized chaos at your feet

You’ll practice:

  • Intarsia links: wrapping old and new colors to avoid holes
  • Managing multiple color butterflies without panicking
  • Reading a layer chart and a color placement schematic

For a deeper dive into intarsia techniques, I highly recommend:

  • Annetarsia Knits: A New Link to Intarsia by Anne Berk
    👉 https://amzn.to/4gx3TY3
    👉 https://bit.ly/Annetarsia-Book

It’s way more than “just” an intarsia book—it’s packed with tips that level up your general knitting skills, too.


Helpful Intarsia Videos from Anne Berk

If you’re a visual learner, these videos are gold:

  • Determining yarn amounts for butterflies:
    https://youtu.be/swsoUuKQOes
  • Winding butterflies:
    https://youtu.be/P-i2T5IxL3Q
  • How to finish perfect intarsia:
    https://youtu.be/hxYe0gNIUww
  • How to knit straight intarsia:
    https://youtu.be/hLbfjLV1PIc
  • How to bury in ends:
    https://youtu.be/8_NBGUKjO-E

You can work through these before you start, or keep them handy as “campfire support” while you knit.

A woman smiles as she holds up a colorful Intarsia knit blanket with multiple strands of yarn hanging from it, standing in a room with soft lighting. -Marly Bird

Dream Intarsia Blanket – Key Measurements & Gauge

Finished Measurement
Blanket measures approximately 55.5″ (141 cm) wide x 52.5″ (133.5 cm) long.

Gauge
20 sts = 4″ (10 cm); 28 rows = 4″ (10 cm) in Layer Chart, after blocking.
CHECK YOUR GAUGE. Use any size needles to obtain the gauge.

Even though this isn’t a garment, gauge still matters:

  • If your gauge is much larger than Anne’s, you may run out of yarn early.
  • If your gauge is much smaller, your blanket will be smaller than the sample.

If you’re using a different yarn and need to calculate yardage, watch Anne’s video on determining yarn amounts:
👉 https://youtu.be/swsoUuKQOes


Materials At a Glance

Yarn (original sample):
Red Heart Chic Sheep by Marly Bird – 100% washable merino, 186 yds per ball.

  • 3 balls: Velvet (A) – border color
  • 1 ball each: Fairy Tale (B), Dragon Fruit (C), Sangria (D), Vineyard (E), Regal (F), Royal (G), VIP (H), Suite (I), Poolside (J), Crème de Mint (K), Green Tea (L), Polo (M), Lipstick (N), Sunset (O), Mai Tai (P), Mimosa (Q), Stiletto (R), Sterling (S), Platinum (T), Lace (U), Linen (V), Suede (W), Leather (X)
    or approximately 87 yards (79.5 meters) of 23 other colors.

Needles

  • US 7 (4.5 mm) 32″ (81 cm) circular needle

Notions

  • Stitch markers
  • Plastic bags for organizing yarn butterflies
  • Yarn needle
⭐️ Marly Bird Amazon Storefront ⭐️

Special Techniques & Pattern Notes (Overview)

You’ll find full details further down in the post, but here’s a quick overview:

  • Intarsia:
    Each block of color has its own strand. When changing colors, you wrap the old yarn over the new yarn to prevent holes.
  • Reading the chart:
    • RS rows are worked right to left
    • WS rows are worked left to right
    • Each row begins and ends with 1 selvedge stitch in the main color.
  • Avoiding holes:
    When changing colors:
    • Lay the old color over the new
    • Bring the new color up from below
    • Work the next stitch with the new color
      This “links” the yarns without pulling too tight.
  • Managing butterflies:
    • Each full triangle uses about 6 yards (5.5 m)
    • Each half triangle uses about 3 yards (2.75 m)
    • You’ll prepare 312 butterflies at 6 yards and 72 butterflies at 3 yards.
    • Keep butterflies in bags by “layer” so you don’t get overwhelmed.

All of the detailed notes and numbers are already in your existing content—just keep those sections intact below the pattern heading.


Chic Sheep Dream Intarsia Knit Blanket – Free Pattern

Now for the good part—the free pattern!

Use this blog version if you’re happy scrolling, or snag the ad-free PDF if you want everything in a tidy, printable format.

SPECIAL TECHNIQUES

INTARSIA

Intarsia is a method of color knitting that uses a new strand of yarn for each block of color. When changing colors, the yarn strands must be wrapped in a way to prevent a gap.

Knit Row: Knit to the color change, behind the work, bring old color yarn (the color you just finished using) over the new yarn to the left and bring the new yarn up from below on the right, then continue to knit with the new color.

Purl Row: Purl to the color change, in front of the work, bring old color yarn over the new yarn to the left and bring the new yarn up from below on the right, then continue to purl with the new color.

Knitting project featuring a colorful, intarsia design with intricate lace trim, set against a beach backdrop.

GET THE BOOK! Hey, it’s Marly. I want to highly recommend that you grab the Annetarsia book by Anne Berk. It is an amazing book and you will not be disappointed in it at all. It is so much more than a book about intarsia knitting. There are lessons in there that will really improve your general knitting as well. Order if from Amazon or directly from Anne. Simply click the links.

For more information and patterns, check out  “Annetarsia Knits: A New Link to Intarsia (available at www.annetarsia.com)


A colorful quilt reminiscent of a chic sheep dream features triangles in various hues, adorned with a wooden bead string. A dark wooden tray holds a red candle and a floral arrangement with pink roses and greenery, all set on a light wooden surface. -Marly Bird

PATTERN NOTES

When adding any new yarn: always leave a 5” end, which will anchor the stitch and give you enough yarn to adjust tension and bury the end, in finishing. Add yarn within 1 st from the link, for ease in finishing.

How to read the chart: Chart rows are worked from right to left on RS rows and left to right on WS rows. Each row begins and ends with 1 st MC selvedge.

Avoid holes when knitting intarsia: To link between motifs, lay the old color over the new color, then work the next stitch with the new color to link the old yarn gently with the new color yarn. Do not overtighten, as the link and stitches need room to breathe.

When 3 colors come together and one will not be used lay both the old and the unused color over the new piece of yarn, then make the stitch with the new color, locking in the other 2 colors, which will be in position to be worked on the next row.

Keep control of the butterflies: When yarn supplies tangle, first pull the loose strands of AC away. As you knit, the yarn butterflies will get smaller and can also be converted to loose strands. ALL yarn supplies can be converted to loose strands if you choose, you will just need to add new yarn more often. As you practice, you will gain confidence and the butterflies will become faster and easier to use. Using smaller lengths of yarn in the beginning might be less stressful, and your fabric will be just fine, so don’t hesitate to try that method.

Woman demonstrating knitting technique with colorful yarn and stitches, surrounded by crafting supplies and studio equipment.
Anne Berk winding butterflies of yarn for the Chic Dream Blanket
  • Each full triangle uses 6 yards (5.5 meters), and each half triangle uses 3 yards (2.75 meters).
  • While working the Layer Chart, choose the color bobbins in the order as shown in the Layer Diagram, or choose them randomly as follows: There are 25 full triangles and 2 half triangles per layer. On each layer, work each of the 24 colors once, then choose random colored bobbins for the extra full triangle and the 2 half triangles. Arrange the colors in order so they are randomly dispersed in relation to the colors on the previous layers. There will be a few bobbins of color leftover when the blanket is finished.
  • On each row, as each color is changed, use the intarsia method to prevent any gaps from forming between colors.
  • 312 yarn bobbins (butterflies) 6 yd lengths
  • 72 yarn bobbins (butterflies) 3 yd lengths

STITCH PATTERNS

SEED STITCH

(Worked over a multiple of 2 sts + 1)

Row 1: K1, *p1, k1; repeat from * to end.

Repeat row 1 for Seed st.


CHIC SHEEP DREAM INTARSIA KNIT BLANKET PREPARATION

Full disclosure, when Anne was prepping for this blanket she had the help of Lindsey from Erin.Lane Bags and myself. It was so much fun learning from the master how to make these butterfly bobbins in the absolute perfect amounts. Then bundle them up.

Seeing all the colors of yarn in my collection in one bundle was really awesome. Look at these pictures!

Two women smile in a cozy knitting studio filled with colorful yarns, surrounded by equipment and finished projects.
yarn prep for the intarsia chic dream blanket
Anne Berk showing the yarn prep for the blanket

Here is what you need to know to prepare for your CHIC SHEEP DREAM INTARSIA KNIT BLANKET.

FULL TRIANGLES: Hold the 24 colors together and measure and cut as a unit to save time. Be careful to maintain a relaxed tension when measuring, or they may be cut too short.

Cut all 24 colors into 6 yard (5.5 meter) lengths and wind each separate length into a yarn bobbin (SEE MARLY’S VIDEO ON YARN BOBBINS). Place each set of 24 yarn bobbins into a separate bag. Make 13 sets, one for each layer of triangles

HALF TRIANGLES: Cut all 24 colors into 3 yard (2.75 meter) lengths and wind onto bobbins. Make 3 sets and place all together into a bag.  Use randomly next to each side edging, and to create one or more divided triangle on each layer.

GROW

To Unlock Exclusive Subscriber Content click the Box below and join for free by simply adding your email and creating a password! If you are having troubles, clear your cache or reset your password or login to the Grow Publisher Portal.

>> Learn More About Grow Here <<

I’m thrilled to share this amazing pattern with you, many patterns on my blog are absolutely free! I kindly request that you don’t copy and paste or distribute this pattern. Prefer an ad-free experience? Buy a digital PDF pattern for a small fee from one of my online stores for a seamless crafting journey. 

I appreciate your support and readership. You are the reason I can keep doing what I love and sharing it with others. So, thank you from the bottom of my yarn-loving heart! Disclosure: This post contains affiliate links, meaning I get a commission if you decide to make a purchase through my links at no cost to you.


CHART

This intarsia chart is worked over a multiple of 20 sts. Once all rows of the chart are complete, 1 set is complete.

Anne Berk Chic Dream Blanket Pattern Chart on MarlyBird.com
Click on Chart to Print Larger Image

SCHEMATIC FOR COLOR PLACEMENT

A grid of colorful triangles, each containing a single capital letter, forms a tessellated pattern reminiscent of a Dream Intarsia Knit Blanket, with vibrant colors like red, blue, green, pink, yellow, and brown. -Marly Bird
Colorful patchwork blanket made of triangles in vibrant shades, showcasing various yarn textures and a dark border.

A colorful knitted fabric reminiscent of the Chic Sheep Dream Intarsia Knit Blanket, with a patchwork pattern featuring vibrant colors like red, blue, yellow, pink, and purple in a geometric zigzag design. The texture and folds of the fabric are beautifully visible. -Marly Bird

CHIC SHEEP DREAM ARGYLE KNIT BLANKET PATTERN

With long tail method, cast on 277 with Color A, then work 14 rows in Seed stitch, ending after a right side row.

Increase Row (wrong side): Work 9 sts in Seed stitch, place a marker, kfb, purl to the last 9 sts, place another marker, work Seed stitch to end – 278 sts.

Next Row (right side): Work Seed stitch to marker as established, slip the marker, work Row 1 of the Layer Chart (see chart above) using desired colors (see Notes) to the next marker, slip the marker, work to the end in Seed stitch as established.

Work in established Layer pattern, keeping 9 edge sts in Seed stitch until Rows 1–52 of the Layer pattern have been completed 6 times, then work Rows 1–26 once more.

Decrease Row: (right side): Change to Color A only and work in Seed st to marker, remove marker, p2tog, purl to marker, remove marker, work in Seed st to end – 277 sts remain.

Work 14 rows in Seed st. Bind off all sts in Seed st.

FINISHING

Weave in all loose ends.

Block blanket to measurements.

Colorful patchwork of triangles in various shades, featuring a mix of knit and crochet stitches.
Colorful crochet project featuring vibrant pink, blue, yellow, and green stitches in a patchwork design.

More Intarsia Patterns from Marly Bird

Loved this blanket and want more intarsia in your life? You’ll also like:

  • Chic Highland Argyle Cardigan – a stunning argyle cardigan designed by Anne Berk, using intarsia in sweater form.
    👉 https://marlybird.com/free-knitting-patterns/perfect-argyle-knit-cardigan-pattern-chic-highland-argyle/
A smiling woman with curly blonde hair and black glasses wears a green cardigan with a pink and yellow argyle pattern, standing in a cozy room with shelves, patterned decor, and a Dream Intarsia Knit Blanket in the background. -Marly Bird

Keep an eye on MarlyBird.com for more intarsia-friendly designs and colorwork fun.


Crochet Sister Pattern – Day Dream C2C Crochet Blanket

If you’re BiCrafty (or intarsia feels like too big of a leap right now), check out the crochet sister to this blanket:

  • Day Dream C2C Crochet Blanket – Free Crochet Chic Sheep Blanket
    This version also uses all 24 colors of Chic Sheep and is worked in corner-to-corner crochet.
    👉 https://marlybird.com/blog/day-dream-c2c-crochet-blanket-free-colorful-throw-pattern/

It’s a great way to play with the same color palette using a completely different technique.

A smiling woman holds up a colorful, geometric-patterned crochet blanket. The collage includes close-ups of its vibrant squares and stripes, featuring the text "Day Dream C2C Crochet Blanket - FREE Crochet Chic Sheep Blanket" at the bottom. -Marly Bird

FAQ – Chic Sheep Dream Intarsia Knit Blanket

Do I need prior intarsia experience to knit this blanket?
Not necessarily, but it helps to be a confident knitter first. If you’re comfortable with knit/purl and ready to learn, the combination of the chart, notes, and videos makes this a solid intarsia “first big project.”


Can I use fewer colors or just stash yarn?
Absolutely. You can:

  • Use fewer colors and repeat them across the triangles
  • Combine leftover worsted-weight yarns for a scrappy version
  • Stick to a limited palette (like neutrals with one bright accent)

Just remember to match the yarn weight (worsted) and aim for a usable gauge so your triangle shapes and overall size stay pleasing.


How important is gauge for this blanket?
Gauge is important for:

  • Yardage – looser gauge = more yarn used
  • Finished size – tighter gauge = smaller blanket

It doesn’t have to be exact down to the last stitch, but getting close means your result will be similar to the sample, and you’re less likely to run out of yarn.


Is this blanket portable? Can I work on it in sections?
It’s a full-size blanket, so it’s not the most portable project once you’ve got a lot of fabric on your needles. You can, however, work on shorter sessions, one “layer” of triangles at a time, and keep your butterflies organized in project bags.


Image promoting an ad-free PDF knitting pattern for the Dream Intarsia Knit Blanket. A close-up of the colorful geometric blanket is shown, with preview pages and “BUY NOW” text highlighted by a pink arrow. -Marly Bird

Final Thoughts

The Chic Sheep Dream Intarsia Knit Blanket is one of those projects that really lives up to its name—it started as a dream, turned into a design challenge, and became a beloved, modern heirloom.

It’s:

  • A color lover’s playground
  • A huge confidence booster if you’re new to intarsia
  • A perfect excuse to dive into your stash or treat yourself to new yarn

However you choose to knit it—faithfully following Anne’s color layout or creating a completely custom palette—I hope this blanket brings you as much joy as it’s brought to us.

Now grab your yarn, wind those butterflies, and let’s knit something unforgettable. 🧶💗

❤️ Your BiCrafty Bestie,
Marly Bird

A cartoon avatar of a person with glasses and a brown bun smiles warmly. Their green shirt and black jacket add a stylish touch, while colorful hearts surround them like loving temperature blankets, stitching together an aura of love and positivity. -Marly Bird

Filed Under: Chic Sheep by Marly Bird Patterns, Free Patterns, Knitting, Marly Bird Premium Patterns, Our Free Patterns, Pattern, Tips, Tricks, Techniques for Knitting and Crochet

  • 1
  • 2
  • Next Page »

Let's Be Social

Join the Marly's Minions Facebook group to share, ask questions, or chat about all of your yarn related crafts!

Join the group
Cartoon of a smiling woman with brown hair in a bun, glasses, black jacket and green shirt, waving next to large "hi" text.

Quick Links

The Pattern Shop

Our Free Patterns

Blog

Marly Bird House

Learn to Knit & Crochet

About

Giveaway Terms and Privacy Notice

Find Us Everywhere

Join the Newsletter

YouTube Channel

Marly's Minions FB Group

Etsy Store

Ravelry Store


AN ELITE CAFEMEDIA HOME/DIY PUBLISHER

Information from your device can be used to personalize your ad experience. Do not sell or share my personal information.

Privacy Policy   Terms   Marly Bird Legal Documents Copyright © 2026