Wildflower Hexagon Motif Crochet Blanket — Free Pattern
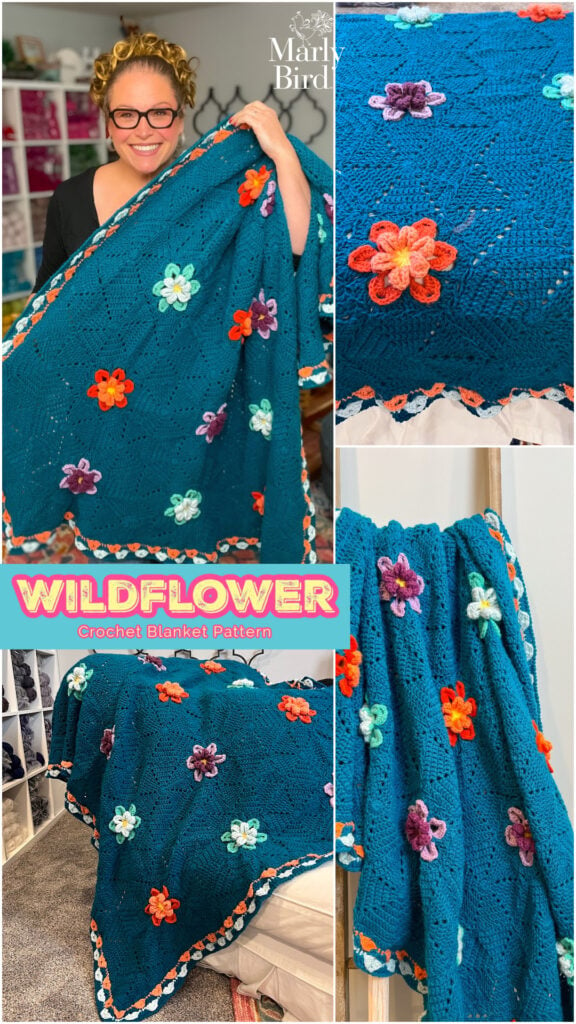
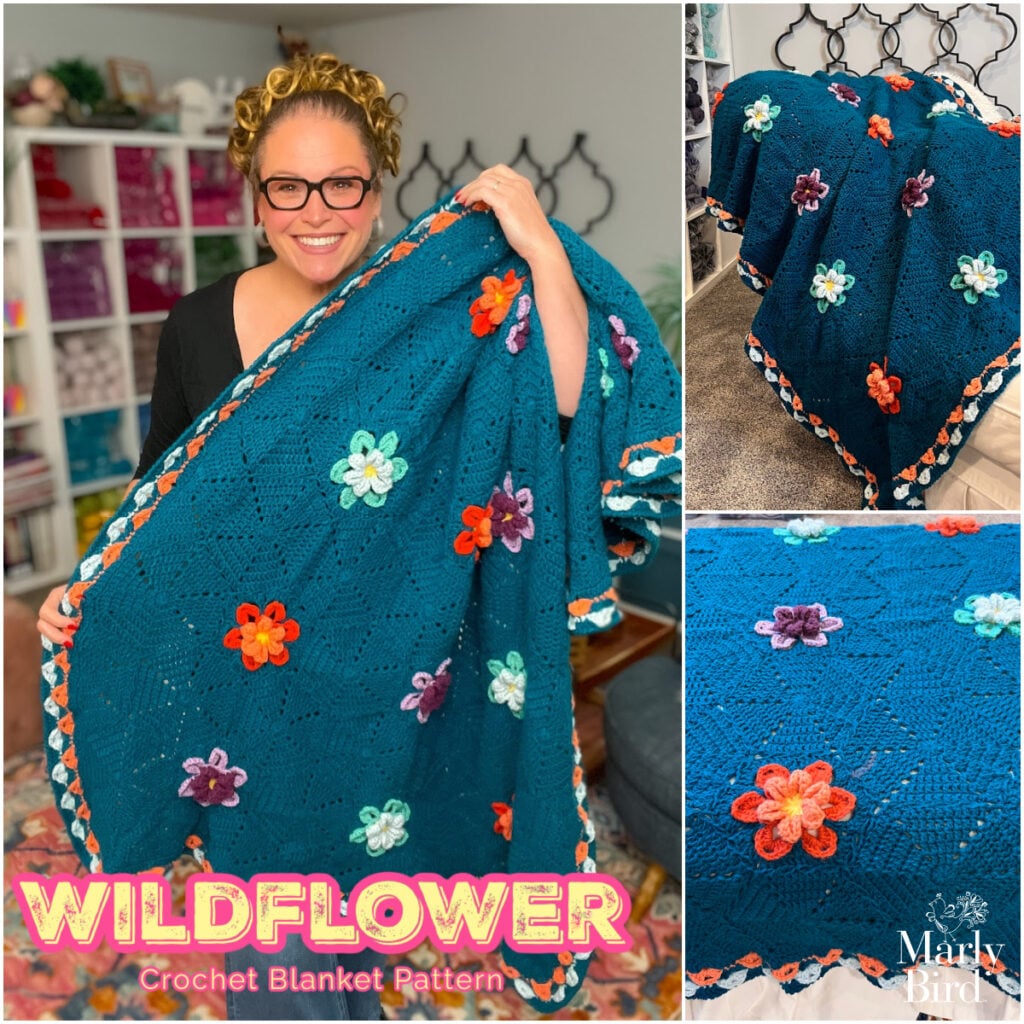
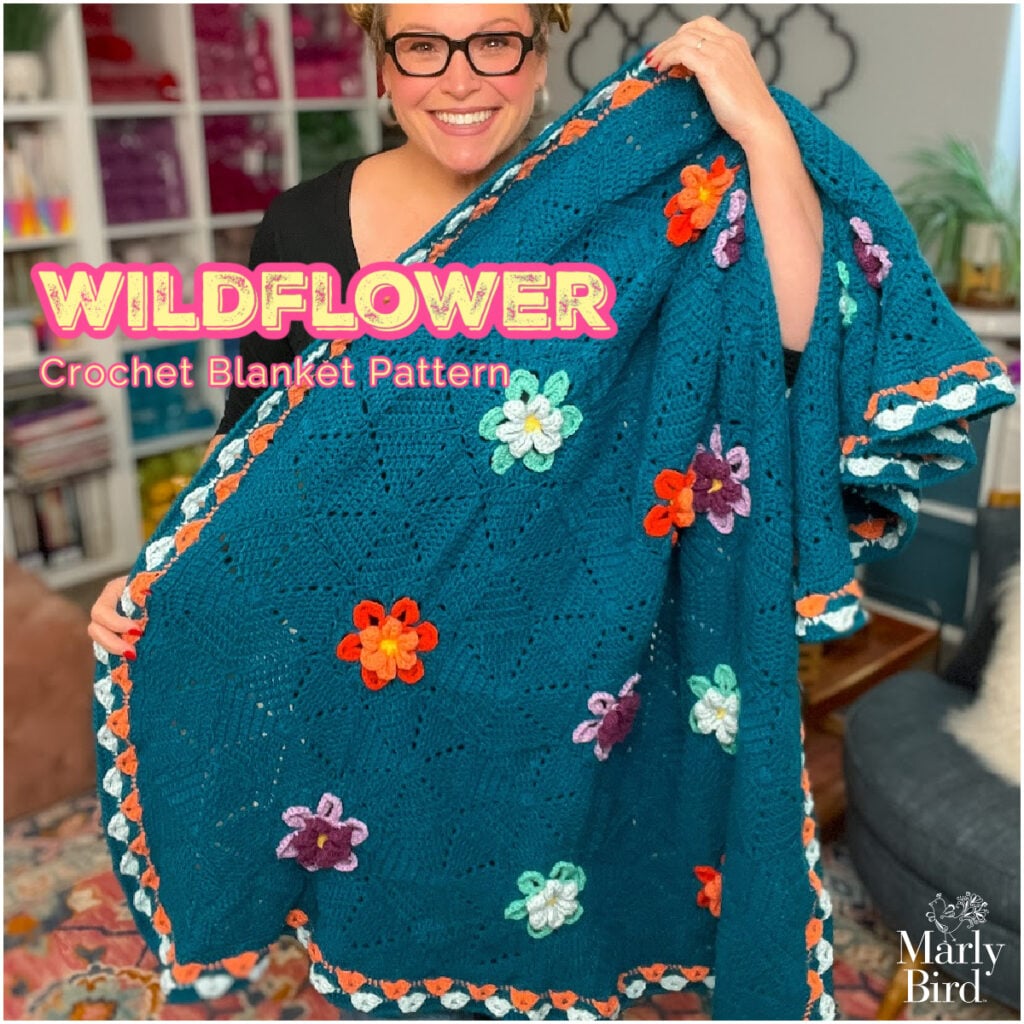
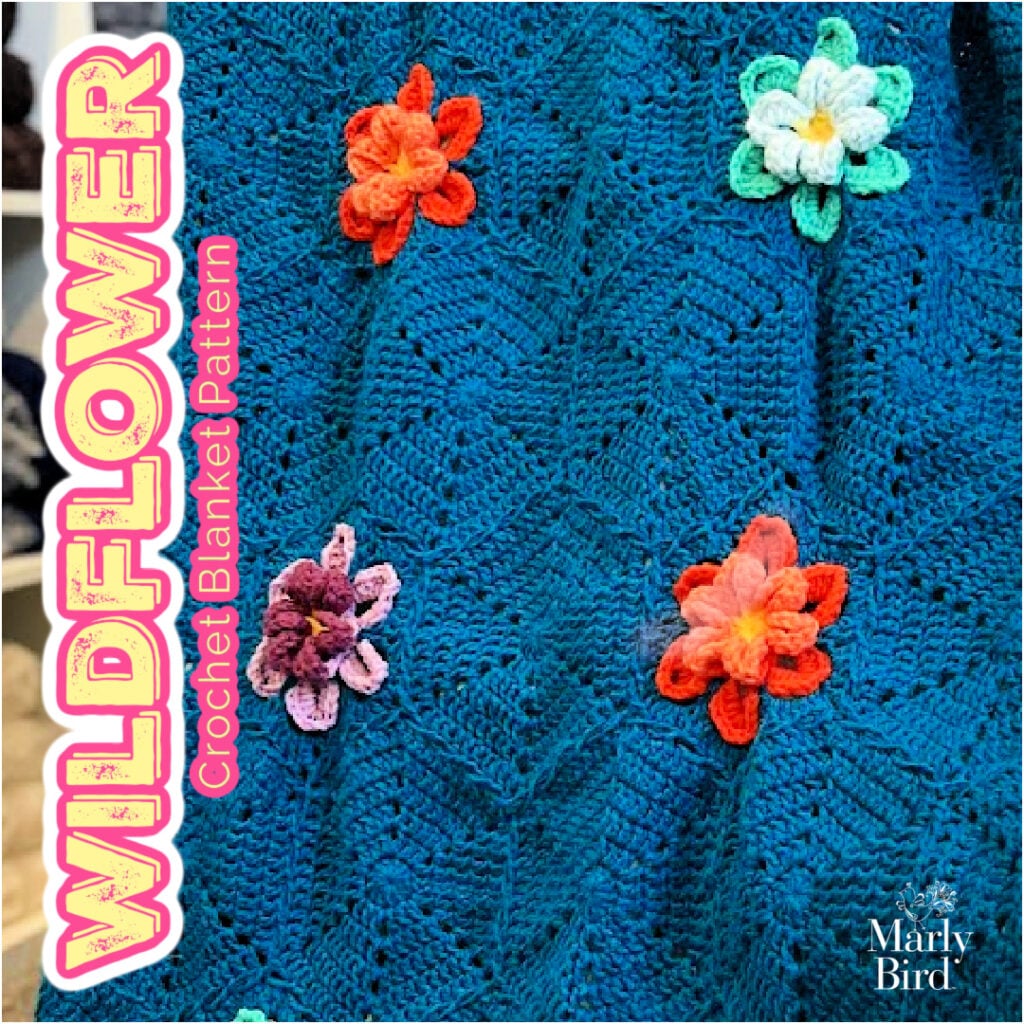
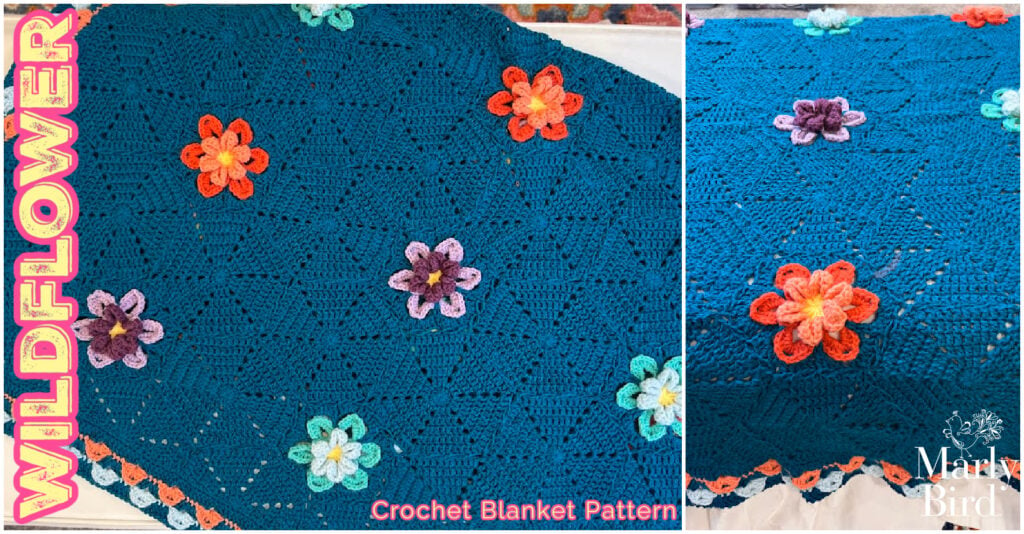
Crochet this stunning Wildflower Hexagon Motif Crochet Blanket — a free pattern designed by Robyn Chachula for Marly Bird and perfect for adventurous beginners. The 52″ × 59″ throw combines 44 hexagon motifs joined as you go with 15 colorful dimensional blossom appliqués. Full written instructions included here on the blog, plus an ad-free PDF available on Etsy, Shopify, and Ravelry.
Hey bestie 💛 If you've been looking for a blanket project that actually makes you want to keep going — motif after motif, color after color — this is the one. The Wildflower Hexagon Motif Blanket is one of those projects where the construction is smart, the flowers make you happy, and the finished blanket genuinely looks like it came from a boutique shop. I am SO excited to share this one with you.
This pattern was designed by the incredibly talented Robyn Chachula, my BiCrafty bestie and co-creator here at Marly Bird. Robyn is a master at making complex-looking designs feel totally doable… and this blanket is proof.
What You Will Love About This Blanket Pattern 💖
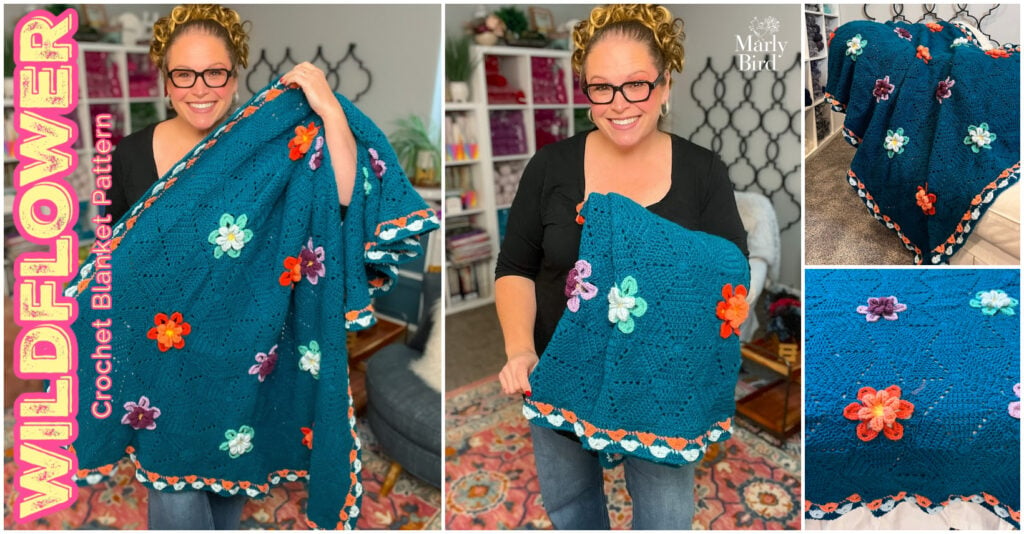
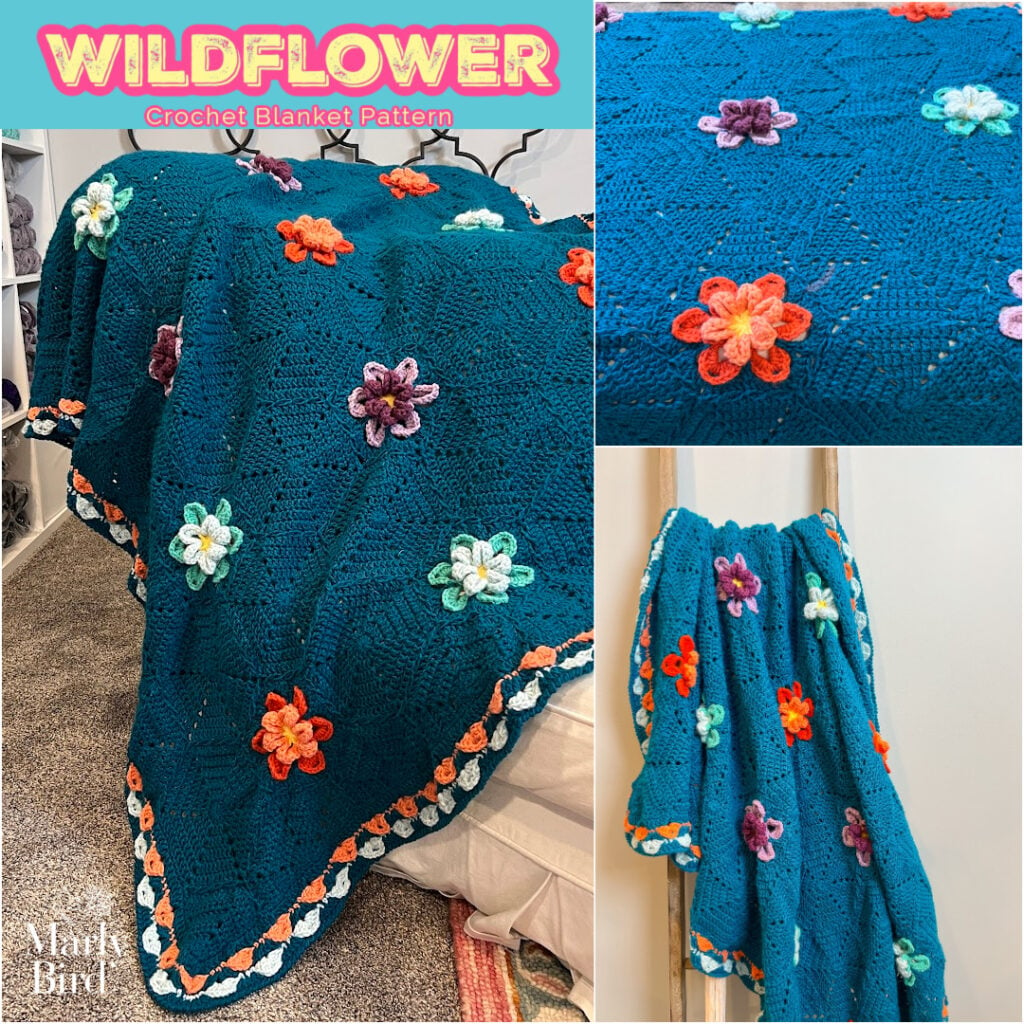
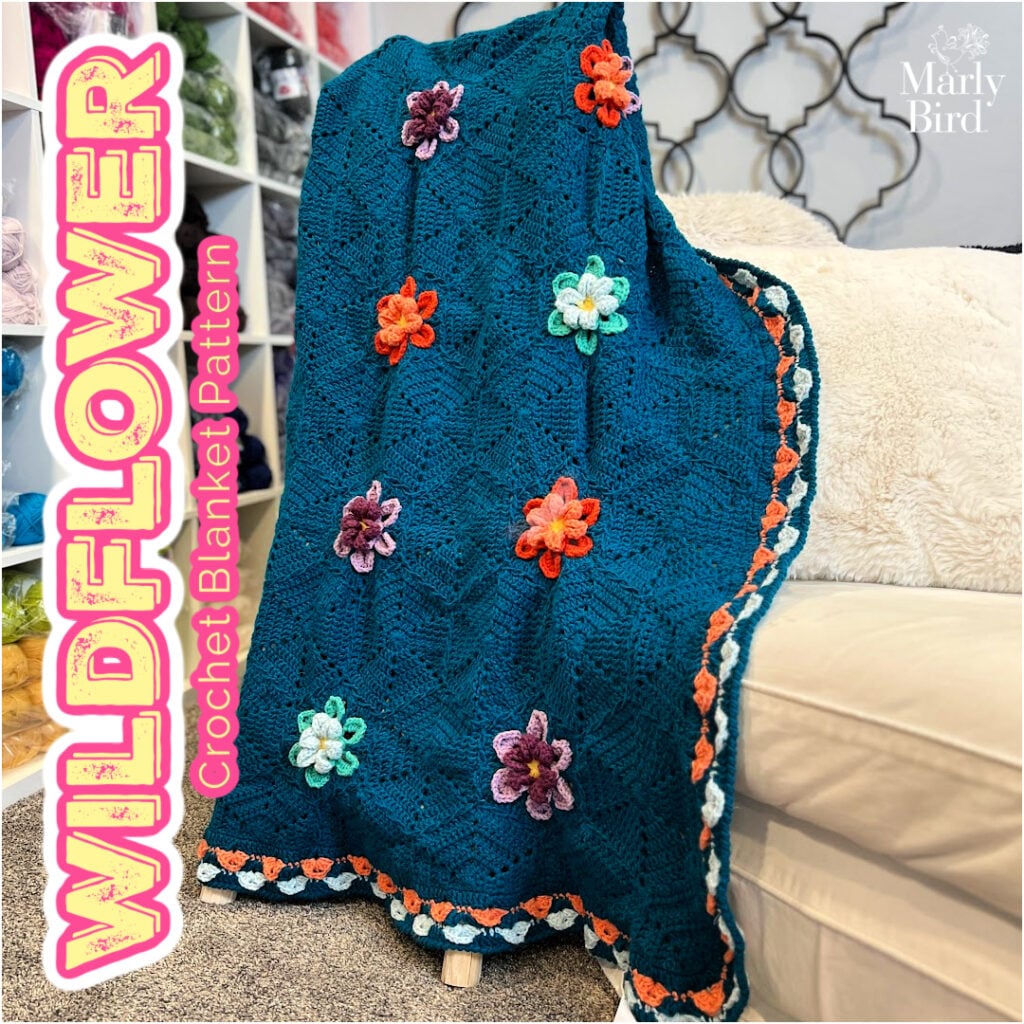
🌸 Dimensional blossom appliqués that pop off the blanket. These aren't flat granny-square flowers — they have real petal depth, and they make the whole project feel like a wearable art piece.
🧩 Join-as-you-go construction that eliminates seaming. You join each hexagon motif AS you work the final round. No sitting down afterward with a yarn needle trying to sew 44 hexagons together. The blanket comes together as you go.
🎨 An 8-color palette that's endlessly customizable. The original uses a beautiful combination of Blue Smoke, Soft Yellow, Salmon, Honeysuckle, Icy Teal, Sea Green, Boysenberry, and Pale Orchid. But you could do jewel tones, pastels, a monochromatic look… the options are gorgeous.
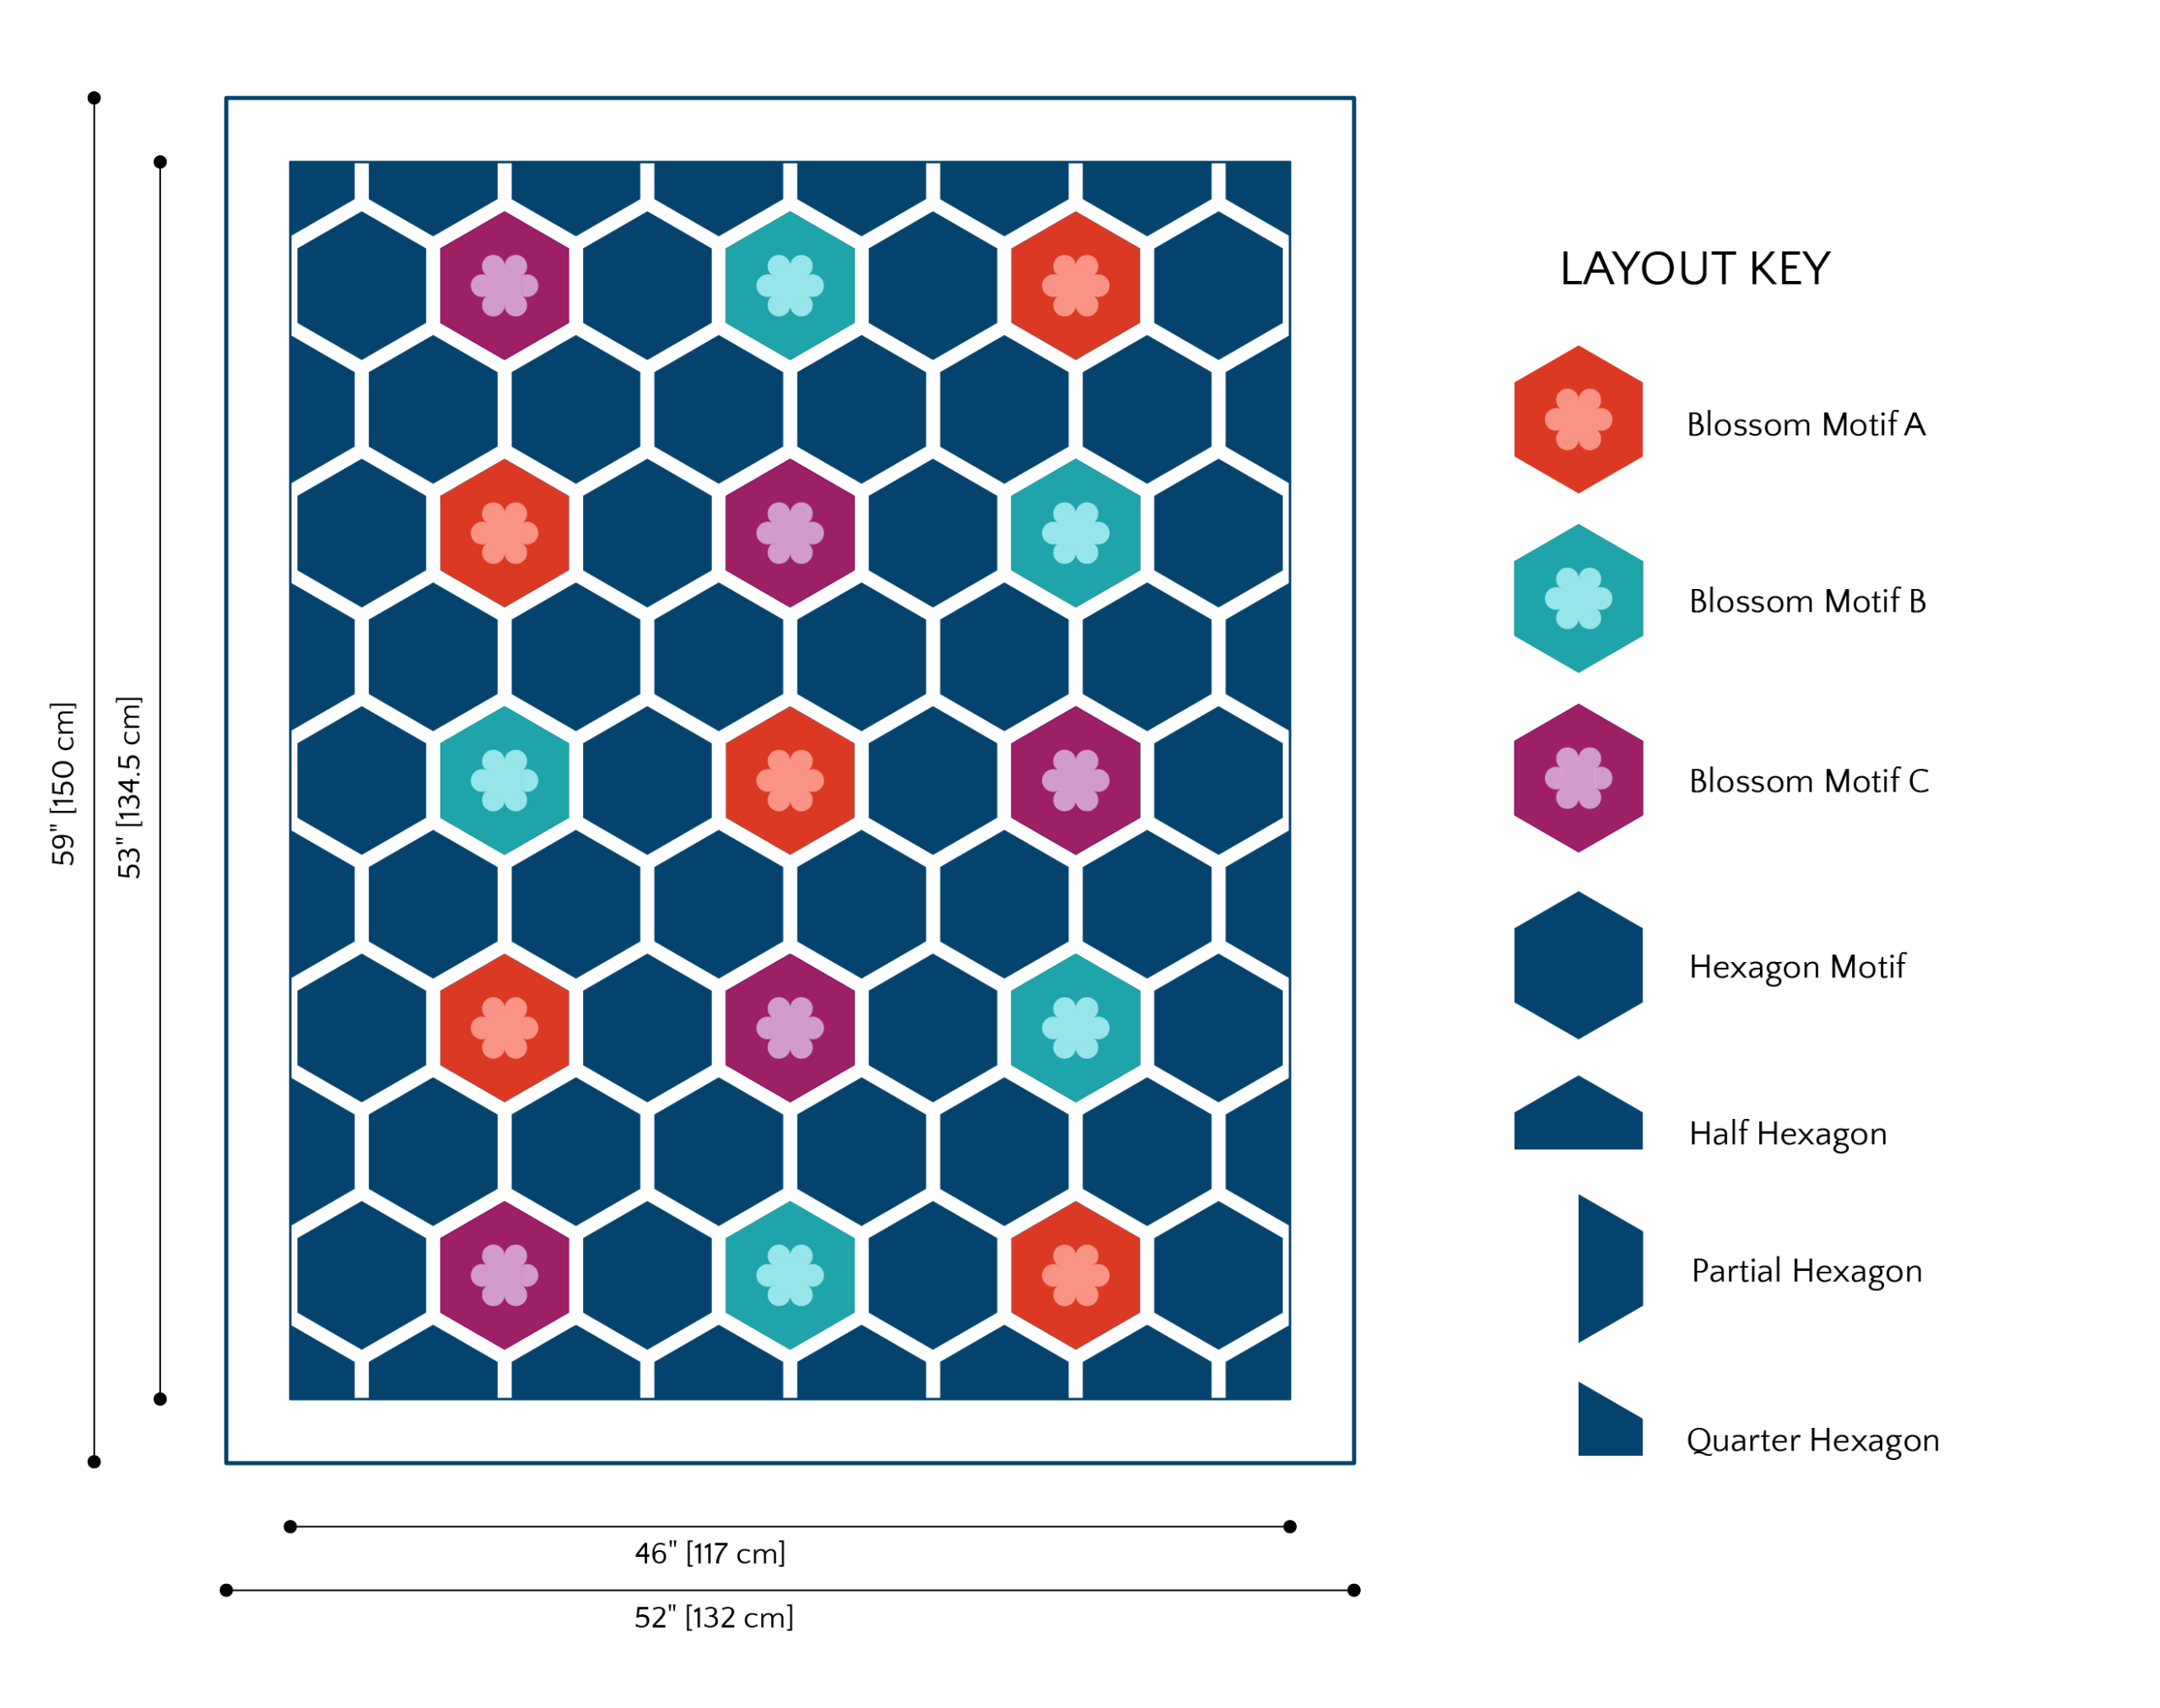
📐 Polished edges with no “chunky hexagon corners.” The pattern includes full hexagons PLUS half hexagons, quarter hexagons, and partial hexagons to fill in the edges. The finished blanket has clean, rectangular edges.
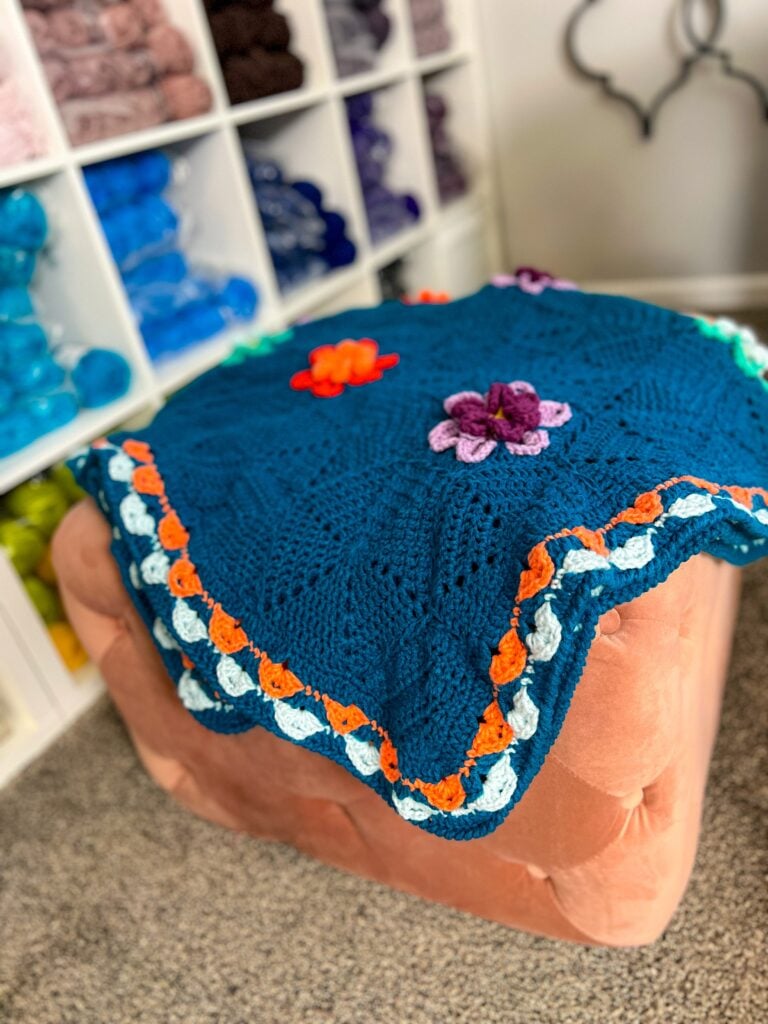
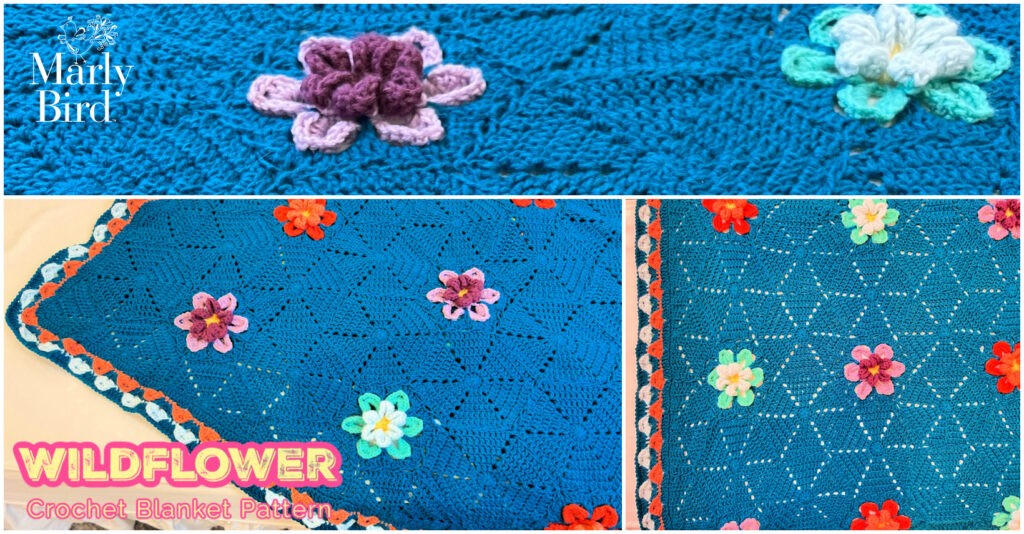
🌿 A decorative 7-round border that ties it all together. The border uses a mix of your blanket colors to frame the whole project beautifully. That finishing touch elevates this from “cozy blanket” to “heirloom piece.”
🧠 Skills you'll build that carry into EVERY future project. Back post stitches, reading crochet diagrams, working in multiple colors, dimensional flowers… this blanket is a skill sampler in the best possible way.
Quick Pattern Overview
| Skill Level | Adventurous Beginner |
| Designer | Robyn Chachula for Marly Bird |
| Finished Size | 52″ × 59″ (132 × 156 cm) |
| Yarn Weight | Worsted (#4) |
| Hook | US I/9 (5.5 mm), or size to obtain gauge |
| Gauge | Hexagon Motif = 6.5″ (16.5 cm) side to side |
| Motif Count | 44 full hexagons + 12 half + 4 quarter + 8 partial hexagons |
| Blossom Motifs | 15 total (5 each of Motif A, B, and C) |
| Colors Used | 8 colors (main + 7 contrasting) |
| Free or Paid? | Free here on the blog! Ad-free PDF available on Etsy, Shopify, and Ravelry. |
Love the Pattern? Grab the Ad-Free PDF ⭐
The full pattern is free right here on the blog… but if you want a clean, printable, ad-free PDF version to take to your favorite chair without distractions, we've got you covered. Grab it on your preferred platform:
Is This Pattern Right for You?
⚡ Quick Answer:
This blanket is rated Adventurous Beginner — meaning you should know basic crochet stitches (chain, single crochet, double crochet) before starting. The “adventurous” part is learning join-as-you-go construction, back post stitches, and color work. If you've made a few small projects and can follow a stitch pattern, you're ready!
If you've crocheted a granny square or two and want to try something with more wow factor, this is your blanket. The individual motifs are small and satisfying — you're never working on one huge piece for weeks without a sense of progress.
If you're completely new to crochet, I'd suggest starting with a simpler project first to get your gauge and tension consistent. Come back to this one once you've got a few completed projects under your belt… it'll be worth the wait!
Join our Newsletter
Get Free Crochet & Knitting
Pattern Links & Coupons!


Why Modular Motifs Win: The Power of Join-As-You-Go
One of the things that makes this blanket so clever is the join-as-you-go (JAYG) construction. Instead of crocheting all 44 hexagons separately and then seaming them together (which can take HOURS and creates a different look), you join each hexagon to its neighbors AS you work the final round.
The result? No seaming pile at the end. The joins are almost invisible. And you can see your blanket taking shape as you work, which is incredibly motivating.
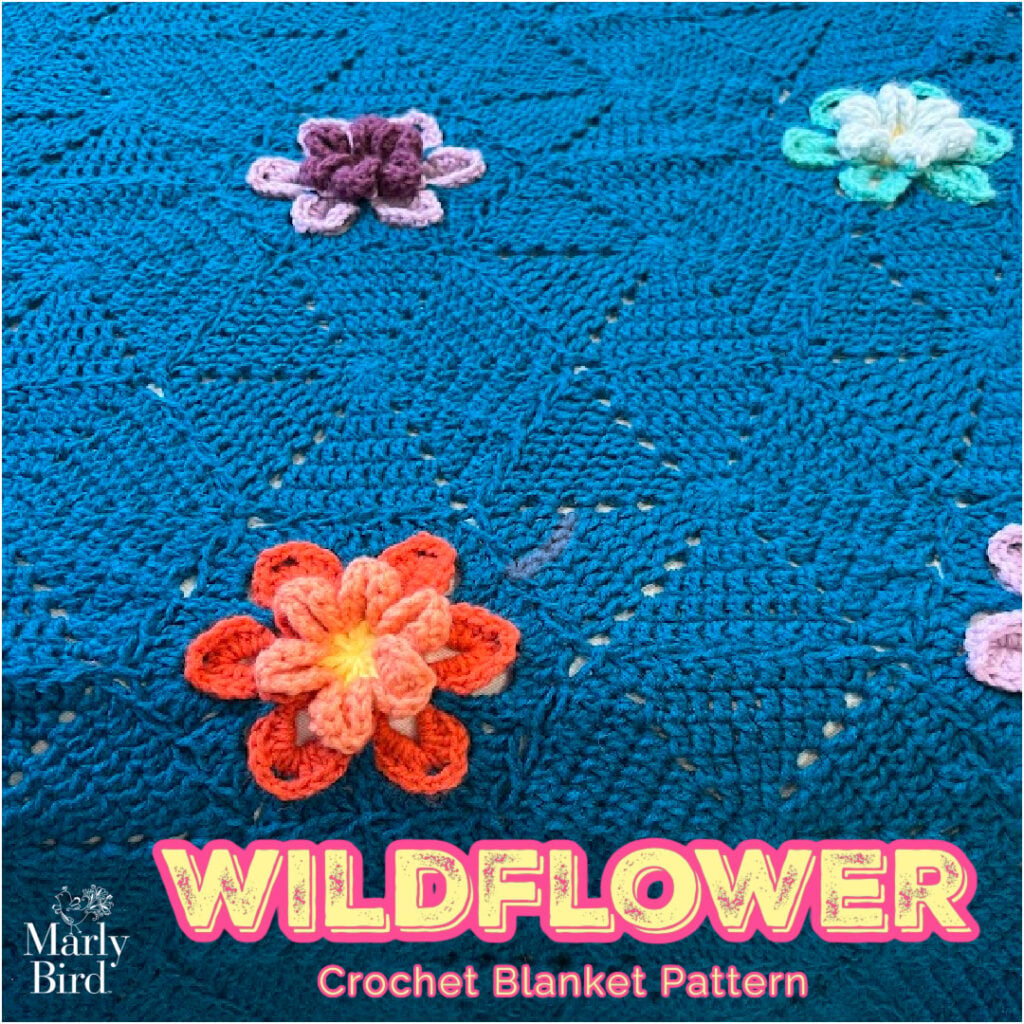
Understanding the Motif Shapes
To fill a rectangular blanket with hexagons, you need more than just full hexagons. This pattern uses FOUR types of motifs to create clean edges:
• Full Hexagons (the main body), • Half Hexagons (fill the long sides), • Quarter Hexagons (go in the corners), and • Partial Hexagons (fill the short sides). Each shape is worked to fit exactly where it needs to go, giving you those polished rectangular edges.
The Blossom Motifs — The Secret Sauce
The 15 blossom motifs are worked separately and applied to the surface of the finished hexagon background. They're dimensional flowers with two layers of petals that create a gorgeous 3D effect. Working the back post stitches to attach the outer layer of petals is the technique that gives these flowers their depth… and once you learn it, you'll want to add dimensional flowers to EVERYTHING.
Choosing Your Color Palette
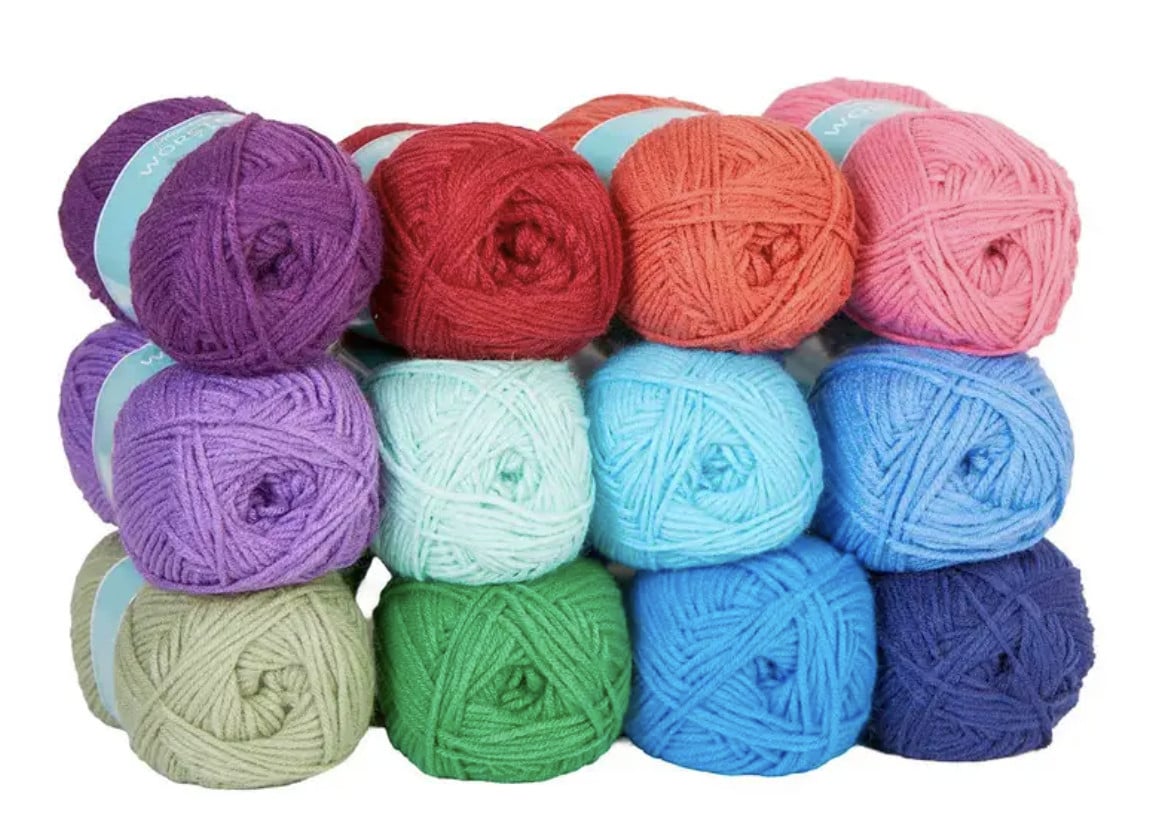
The original sample uses a gorgeous garden-inspired palette: Blue Smoke as the main color for all the hexagon backgrounds and border, with Soft Yellow, Salmon, Honeysuckle, Icy Teal, Sea Green, Boysenberry, and Pale Orchid for the blossom motifs. It's fresh, cheerful, and just a little bit dreamy.
The Original Sample Colors (Herrschners Worsted 8)
- Color A — Blue Smoke (#1016): 4 balls — main hexagon color + border
- Color B — Soft Yellow (#1041): 1 ball — blossom center
- Color C — Salmon (#1038): 1 ball — blossom accent + border Round 3
- Color D — Honeysuckle (#1039): 1 ball — blossom accent
- Color E — Icy Teal (#1072): 1 ball — blossom accent + border Round 5
- Color F — Sea Green (#1035): 1 ball — blossom accent
- Color G — Boysenberry (#1069): 1 ball — blossom accent
- Color H — Pale Orchid (#1028): 1 ball — blossom accent
Total yardage: approximately 5,390 yards (1,956 yards in Color A + 489 yards each of Colors B–H)
Make It Your Own — Color Alternatives
The beauty of this design is that the color story is entirely up to you. Want a soft, pastel nursery blanket? Use pale pinks, mint greens, and lavenders for the blossoms against a white or cream background. Going for a bold statement piece? Try deep jewel tones — navy, emerald, burgundy, mustard — against a charcoal gray background. A monochromatic look in varying shades of one color reads as incredibly sophisticated.
One tip: choose your Color A (the background) first, and then pick blossom colors that pop against it. High contrast between the hexagon background and the flowers is what makes the blossoms really sing.
What You'll Need
🧶 Yarn
Sample Yarn: Herrschners Worsted 8 (100% acrylic, 489 yards / 448 meters, 8 oz / 226 g per skein, CYCA #4 worsted)
- Color A (Blue Smoke #1016): 4 balls
- Colors B–H (one ball each): Soft Yellow, Salmon, Honeysuckle, Icy Teal, Sea Green, Boysenberry, Pale Orchid
Yarn Substitutes: Any worsted-weight (#4) yarn works. Match the yardage and make a gauge swatch. Acrylic yarns behave most like the original; natural fibers (wool, cotton) will give a different drape but are absolutely doable.
🪝 Hook
US I/9 (5.5 mm) — or size needed to obtain gauge (hexagon = 6.5″ side to side)
📦 Notions
- Stitch markers
- Tapestry needle (for weaving in ends and attaching blossom motifs)
- Scissors
- Tape measure
📊 Yarn Calculator
Total yardage needed: approximately 5,390 yards
- Color A: 489 × 4 balls = 1,956 yards
- Colors B–H: 489 × 7 balls = 3,423 yards
- Approximate total with some leftover: ~5,390 yards
If substituting yarn, match this total yardage and make sure each individual color has at least 489 yards (one full skein) available.
What You'll Learn
This project is a real skill-builder. By the time you finish this blanket, you'll have practiced:
- 🔗 Join-as-you-go motif construction — the thread join technique for seamless joining
- 📖 Reading crochet stitch diagrams — the pattern includes visual diagrams for every motif
- 🌈 Color changes — working cleanly with 8 different colors across a large project
- ↩️ Back post stitches (bpsc and bp slst) — the technique that creates dimensional texture
- 🌸 Working dimensional crochet flowers — layered petals with depth and shape
- 📐 Adapting motif shapes for polished edges — half, quarter, and partial hexagons
- 🪡 Decorative border techniques — a 7-round border using multiple colors
These are skills you'll carry into EVERY project after this. This blanket is genuinely a crochet education wrapped in a beautiful finished object.
Measurements
Finished Measurements
Blanket is 52” [132 cm] wide by 59” [156 cm] long.
Gauge
Hexagon Motif = 6.5” [16.5 cm] in diameter from side to side; use any size hook to obtain the gauge.
Schematic
The pattern includes a Blanket Layout Chart showing where each full hexagon, half hexagon, quarter hexagon, and partial hexagon is placed. This layout chart is included in the ad-free PDF. The schematic below shows the finished dimensions: 52″ wide × 59″ long.
Materials
Yarn
Herrschners, Worsted 8 (100% acrylic, 489 yd / 448 m, 8 oz/ 226 g, CYCA# 4 worsted)
Color A: #1016 Blue Smoke, 4 balls
Color B: #1041 Soft Yellow, 1 ball
Color C: #1038 Salmon, 1 ball
Color D: #1039 Honeysuckle, 1 ball
Color E: #1072 Icy Teal, 1 ball
Color F: #1035 Sea Green, 1 ball
Color G: #1069 Boysenberry, 1 ball
Color H: #1028 Pale Orchid, 1 ball
Crochet Hook
Size I/9 [5.5 mm]
Notions
Crochet Stitch Diagrams
✨ Following along with the free pattern on MarlyBird.com? You'll have everything you need to make this Wildflower Hexagon Motif Blanket… but if you want the exclusive stitch diagram charts, blossom motif diagrams, hexagon motif diagrams, border diagrams, and blanket layout chart, those are only available in the ad-free PDF version.
You'll enjoy a clean, printable, ad-free experience while supporting Marly Bird's free tutorials and patterns 💖
Abbreviations
BP — Back Post | CC — Contrasting Color | Ch — Chain(s) | Dc — Double Crochet | FP — Front Post | Hdc — Half Double Crochet | RS — Right Side | Sc — Single Crochet | Sl st — Slip Stitch | Sp(s) — Space(s) | St(s) — Stitch(es) | Tch — Turning Chain | Tr — Treble Crochet | WS — Wrong Side
Special Stitches
⭐️ Back Post Single Crochet (bpsc): Insert hook from back to front to back around the post of the stitch indicated, yarn over and pull up a loop, yarn over and draw through both loops on hook.
⭐️ Back Post Slip Stitch (bp slst): Insert hook from back to front to back around the post of the stitch indicated, yarn over and draw through both the stitch and loop on hook.
⭐️ Thread Join: Remove hook from free loop, thread hook from front to back in stitch indicated, place free loop back on hook and pull through stitch. This threads the 2 stitches together through their top 2 loops.
⭐️ Stacked Double Crochet (Stacked Dc): (Do not ch 1 prior to making the first sc) Sc in first stitch, insert hook in between two legs of the base, yarn over and pull up a loop, yarn over and draw through 2 loops on hook.
⭐️ Stacked Treble Crochet (Stacked Tr): (Do not ch 1 prior to making the first sc) Sc in first stitch, [insert hook in between two legs of the base, yarn over and pull up a loop, yarn over and draw through 2 loops on hook] twice.
Video Tutorials
- How to Bury Ends >> Click Here for Video Help <<
- Back Post Stitches >> Click Here for Video Help <<
- Blossom Crochet Flower>> Click Here for Video Help <<
Notes
- Change colors by working until the last 2 loops on the hook of the first color, draw new color through the last 2 loops, and proceed in the next color.
- Most rounds start with a stacked dc; if you prefer, you can ch 3 to start the round.
- Motifs are joined by threading the free loops through indicated stitches on the adjacent motifs. This join is not critical — feel free to use any join or seaming technique that you prefer.
- After completing all hexagon background motifs and joining them, apply the completed Blossom Motifs to the surface of the blanket using a tapestry needle and yarn tail.

GROW
To Unlock Exclusive Subscriber Content click the Box below and join for free by simply adding your email and creating a password! If you are having troubles, clear your cache or reset your password or login to the Grow Publisher Portal.
>> Learn More About Grow Here <<
I'm thrilled to share this amazing pattern with you, many patterns on my blog are absolutely free! I kindly request that you don't copy and paste or distribute this pattern. Prefer an ad-free experience? Buy a digital PDF pattern for a small fee from one of my online stores for a seamless crafting journey.
I appreciate your support and readership. You are the reason I can keep doing what I love and sharing it with others. So, thank you from the bottom of my yarn-loving heart! Disclosure: This post contains affiliate links, meaning I get a commission if you decide to make a purchase through my links at no cost to you.
Wildflower Hexagon Motif Crochet Blanket – Pattern Instructions
Blossom Motifs — Make 5 of Each (Motif A, B, and C)
Note: CC1 and CC2 vary by motif letter — see color assignment note above.
Round 1: With color B, make an adjustable ring. Stacked dc in ring, dc in ring, [ch 5, 3 dc in ring] 5 times, ch 5, dc in ring, change color to CC1, sl st to top of stacked dc, pull ring closed, do not turn. — 6 ch-5 sps + 6 groups of 3 dc.
Round 2: *(Sc, hdc, 7 dc, hdc, sc) in next ch-5 sp, skip next dc, sl st to next dc; repeat from * around, fasten off color, do not turn. — 6 petals.
Round 3: With color CC2, join yarn with a bpsc around any center dc in the groups of dc from Round 1, *ch 7, sl st to sc just made, ch 3, skip (sc, hdc, 3 dc), bp sl st around next dc, ch 3**, bpsc around next center dc from the groups of dc on Round 1; repeat from * around ending at **, sl st to first sc, do not turn. — 6 ch-7 sps + 12 ch-3 sps.
Round 4: Ch 1, (sc, hdc, 4 dc, ch 2, 4 dc, hdc, sc) in each ch-7 sp, sl st to first sc, fasten off, do not turn. — 6 petals.
Round 5: Join color A with bp sl st around the dc before any ch-2 sp, *ch 2, bp sl st around next dc, ch 3, 2 dc between next 2 sc (between next 2 petals), ch 3**, skip (sc, hdc, 3 dc) on next petal, bp sl st around next dc; repeat from * around ending at **, sl st to first sl st, do not turn. — 12 dc + 12 ch-3 sps + 6 ch-2 sps.
Round 6: (Stacked dc, ch 2, dc) in first ch-2 sp, *4 dc in next ch-3 sp, dc between next 2 dc, 4 dc in next ch-3 sp**, (dc, ch 2, dc) in next ch-2 sp; repeat from * around ending at **, sl st to top of stacked dc, fasten off, weave in ends. — 66 dc + 6 ch-2 sps.
Hexagon Motifs — Join 44
With color A, make an adjustable ring.
Round 1: Stacked dc in ring, 11 dc in ring, pull ring closed, sl st to top of stacked dc to join, do not turn. — 12 dc.
Round 2: Stacked dc in first dc, *(dc, ch 2, dc) in next dc, dc in next dc; repeat from * around to last dc, (dc, ch 2, dc) in last dc, sl st to top of stacked dc to join, do not turn. — 18 dc + 6 ch-2 sps.
Round 3: Stacked dc in first dc, dc in next dc, *(dc, ch 2, dc) in next ch-2 sp, dc in next 3 dc; repeat from * around to last ch-2 sp, (dc, ch 2, dc) in last ch-2 sp, dc in last dc, sl st to top of stacked dc to join, do not turn. — 30 dc + 6 ch-2 sps.
Round 4: Stacked dc in first dc, dc in next 2 dc, *(dc, ch 2, dc) in next ch-2 sp, dc in next 5 dc; repeat from * around to last ch-2 sp, (dc, ch 2, dc) in last ch-2 sp, dc in last 2 dc, sl st to top of stacked dc to join, do not turn. — 42 dc + 6 ch-2 sps.
Round 5: Stacked dc in first dc, dc in next 3 dc, *(dc, ch 2, dc) in next ch-2 sp, dc in next 7 dc; repeat from * around to last ch-2 sp, (dc, ch 2, dc) in last ch-2 sp, dc in last 3 dc, sl st to top of stacked dc to join, do not turn. — 54 dc + 6 ch-2 sps.
Round 6: Stacked dc in first dc, dc in next 4 dc, *(dc, ch 2, dc) in next ch-2 sp, dc in next 9 dc; repeat from * around to last ch-2 sp, (dc, ch 2, dc) in last ch-2 sp, dc in last 4 dc, sl st to top of stacked dc to join, fasten off, weave in ends. — 66 dc + 6 ch-2 sps.
Joining Motifs: Complete motif through Round 5. Follow directions through Round 6 to first adjoining corner ch-2 sp, *dc in ch-2 sp, ch 1, thread join to adjoining ch-2 sp on adjacent motif, dc in same ch-2 sp on motif, dc in next 2 dc on motif, [skip 2 dc on adjacent motif, thread join to next dc on adjacent motif, dc in next 3 dc on motif] twice, skip 2 dc on adjacent motif, thread join to next dc on adjacent motif, dc in next dc on motif; repeat from * across all sides of adjacent motifs, dc in next ch-2 sp on motif, thread join to next adjoining ch-2 sp on adjacent motif, ch 1, dc in same ch-2 sp on motif, continue with Round 6 directions to end.
Half Hexagon Motifs — Join 12
With color A, make an adjustable ring.
Row 1 (WS): Stacked dc in ring, 6 dc in ring, pull ring closed, turn. — 7 dc.
Row 2: Stacked dc in first dc, [(dc, ch 2, dc) in next dc, dc in next dc] 3 times, turn. — 10 dc + 3 ch-2 sps.
Row 3: Stacked dc in first dc, dc in next dc, [(dc, ch 2, dc) in next ch-2 sp, dc in next 3 dc] twice; (dc, ch 2, dc) in last ch-2 sp, dc in last 2 dc, turn. — 16 dc + 3 ch-2 sps.
Row 4: Stacked dc in first dc, dc in next 2 dc, [(dc, ch 2, dc) in next ch-2 sp, dc in next 5 dc] twice, (dc, ch 2, dc) in last ch-2 sp, dc in last 3 dc, turn. — 22 dc + 3 ch-2 sps.
Row 5: Stacked dc in first dc, dc in next 3 dc, [(dc, ch 2, dc) in next ch-2 sp, dc in next 7 dc] twice, (dc, ch 2, dc) in last ch-2 sp, dc in last 4 dc, turn. — 28 dc + 3 ch-2 sps.
Row 6: Stacked dc in first dc, dc in next 4 dc, [(dc, ch 2, dc) in next ch-2 sp, dc in next 9 dc] twice, (dc, ch 2, dc) in last ch-2 sp, dc in last 5 dc, fasten off, weave in ends. — 34 dc + 3 ch-2 sps.
Joining: Join Half Motifs in same manner as Hexagon Motifs. Connect all adjoining ch-2 sps and every 3rd dc along the sides. For the short beginning edge, connect the first and 4th dc. For the short ending edge, connect the 3rd and last dc.
Quarter Hexagon Motifs — Join 4
Note: The motif will be joined on the WS on 2 corners and on the RS on the other 2 corners; position the motif to fit the corner of the blanket.
With color A, make an adjustable ring.
Row 1 (WS): Stacked dc in ring, 3 dc in ring, pull ring closed, turn. — 4 dc.
Row 2: Stacked dc in first dc, (dc, ch 2, dc) in next dc, dc in next dc, (dc, tr) in last dc, turn. — 5 dc + 1 tr + 1 ch-2 sp.
Row 3: (Stacked tr, dc) in first tr, dc in next 3 dc, (dc, ch 2, dc) in next ch-2 sp, dc in last 2 dc, turn. — 8 dc + 1 tr + 1 ch-2 sp.
Row 4: Stacked dc in first dc, dc in next 2 dc, (dc, ch 2, dc) in next ch-2 sp, dc in next 5 dc, (dc, tr) in last st, turn. — 11 dc + 1 tr + 1 ch-2 sp.
Row 5: (Stacked tr, dc) in first tr, dc in next 7 dc, (dc, ch 2, dc) in next ch-2 sp, dc in last 4 dc, turn. — 14 dc + 1 tr + 1 ch-2 sp.
Row 6: Stacked dc in first dc, dc in next 4 dc, (dc, ch 2, dc) in next ch-2 sp, dc in next 9 dc, (dc, tr) in last st, fasten off, weave in ends. — 17 dc + 1 tr + 1 ch-2 sp.
Joining: Join Quarter Motifs in same manner as Hexagon Motifs. Connect all adjoining ch-2 sps and every 3rd dc. For the short beginning edge, connect the first and 4th dc. For the long ending edge, connect the last tr to the adjoining ch-2 sp.
Partial Hexagon Motifs — Join 8
With color A, make an adjustable ring.
Row 1 (WS): Stacked dc in ring, 6 dc in ring, pull ring closed, turn. — 7 dc.
Row 2: (Stacked tr, dc) in first dc, dc in next dc, [(dc, ch 2, dc) in next dc, dc in next dc] twice, (dc, tr) in last st, turn. — 9 dc + 2 tr + 2 ch-2 sps.
Row 3: (Stacked tr, dc) in first st, dc in next 3 dc, [(dc, ch 2, dc) in next ch-2 sp, dc in next 3 dc] twice; (dc, tr) in last st, turn. — 15 dc + 2 tr + 2 ch-2 sps.
Row 4: (Stacked tr, dc) in first st, dc in next 5 dc, [(dc, ch 2, dc) in next ch-2 sp, dc in next 5 dc] twice, (dc, tr) in last st, turn. — 21 dc + 2 tr + 2 ch-2 sps.
Row 5: (Stacked tr, dc) in first st, dc in next 7 dc, [(dc, ch 2, dc) in next ch-2 sp, dc in next 7 dc] twice, (dc, tr) in last st, turn. — 27 dc + 2 tr + 2 ch-2 sps.
Row 6: (Stacked tr, dc) in first st, dc in next 9 dc, [(dc, ch 2, dc) in next ch-2 sp, dc in next 9 dc] twice, (dc, tr) in last st, fasten off, weave in ends. — 33 dc + 2 tr + 2 ch-2 sps.
Joining: Join in same manner as Hexagon Motifs. Connect all adjoining ch-2 sps and every 3rd dc. Connect the first and last stitch to the adjoining ch-2 sps.
Finishing — Border (7 Rounds)
Round 1: With color A, join to corner before a long edge with a sc, *place 219 sc evenly across long edge to corner, 3 sc in corner (place marker in middle sc), place 171 sc evenly across short edge to corner**, 3 sc in corner (place marker in middle sc); repeat from * around ending at **, 2 sc in first corner, sl st to first sc to join, do not turn. — 792 sc.
Round 2: Stacked dc in first sc (same sc as join), dc in next 5 sc, *[(dc, ch 2, dc) in next sc, dc in next 7 sc] repeat across until 7 sts to marker, (dc, ch 2, dc) in next sc, dc in next 6 sc, (2 dc, ch 2, 2 dc) in marked sc (move marker to ch-2 sp)**, dc in next 6 sc; repeat from * around ending at **, sl st to top of stacked dc to join. Fasten off color A. — 96 ch-2 sps.
Round 3: Join color C to next dc (not stacked dc) with a sc, sc in next 2 sc, *skip 3 dc, (4 dc, ch 2, 4 dc) in next ch-2 sp**, skip 3 dc, sc in next 3 dc; repeat from * around ending at **, sl st to first sc to join. Fasten off color C.
Round 4: Locate any ch-2 sp on corner, join color A with bpsc to first dc after corner ch-2 sp, *[skip 3 dc, 2 dc in next sc, (dc, ch 2, dc) in next sc, 2 dc in next sc, skip 3 dc, bpsc in next dc**, ch 2, bpsc in next dc] repeat across to corner ending at **, ch 3 (move marker), bpsc in next dc; repeat from * around blanket ending at **, ch 3, sl st to first sc to join. Fasten off color A.
Round 5: Join color E (Icy Teal) to first sc with sc, *[skip next 3 dc, (4 dc, ch 2, 4 dc) in next ch-2 sp, skip next 3 dc, sc in next sc**, sc in next ch-2 sp, sc in next sc] repeat across to corner ending at **, 3 sc in corner ch-3 sp, sc in next sc; repeat from * around blanket ending at **, 3 sc in last corner ch-3 sp, sl st to first sc to join. Fasten off color E.
Round 6: Join color A with a standing dc (or stacked dc) in first sc, dc in same dc, *[skip 3 dc, bpsc in next dc, ch 2, bpsc in next dc, skip 3 dc**, 2 dc in next sc, dc in next sc, 2 dc in next sc] repeat across to corner ending at **, 2 dc in next 5 sc in corner; repeat from * around blanket ending at **, 2 dc in last 4 sc, sl st to first dc to join.
Round 7: Ch 1, reverse sc in each dc and sc around, 1 reverse sc in ch-2 sp, sl st to first st to join. Fasten off and weave in ends.
Pattern © Robyn Chachula for Marly Bird. Free here on the blog for personal use. Please do not sell or redistribute. marlybird.com
Enjoy the free pattern! If you'd like a clean, printable, ad-free PDF copy to keep in your project bag, it's available on three platforms:
🧶 Love Making Crochet Projects?
If you love a variety of crochet makes — accessories, home decor, quick projects — check out my Crochet Project Collection inside Marly Bird House. Curated crochet patterns, techniques, and project plans all in one place.
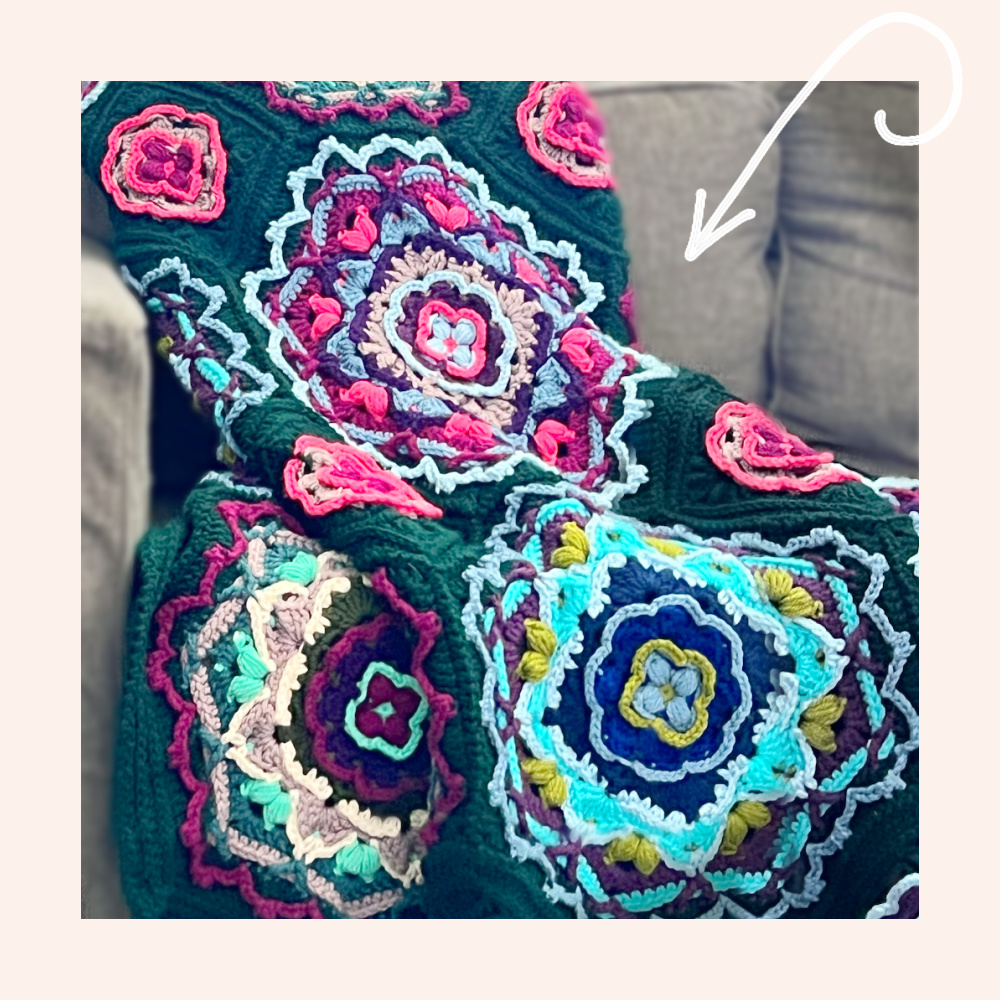
Take Your Blanket Skills Further — The Monet Crochet Blanket Course 🎨
Ready to go deeper with crochet blanket design?
If this Wildflower Blanket has you falling in love with motif-based blanket making, the Monet Crochet Blanket Course inside Marly Bird House is your natural next step.
The Monet course is a paint-by-color inspired crochet blanket project with full step-by-step video instruction. Think impressionist art meets cozy handmade — stunning color blending, beautiful stitch work, and a guided learning experience that takes your blanket skills to a whole new level.
It's a complete paid-for course, which means you get: full video walkthroughs, written pattern, instructor support, and everything you need to go from “I just finished the Wildflower!” to “I can't believe I made this.”

More Free Crochet Patterns You'll Love
If you're loving the motif-and-texture world, here are some other Marly Bird patterns worth bookmarking…
The Enchanted Crochet Motif Shawl brings the same love of motif work to a beautiful rectangular shawl — perfect if you want a wearable project after the blanket. And if dimensional crochet flowers have your heart, the Free Crochet Floral Motif Tee puts those petal-making skills to work in a gorgeous garment.
For more colorful inspiration, check out Color Is Back — Free Colorful Knit & Crochet Patterns. The Spring Fling 2026 pattern collection also has some wonderful floral and colorful crochet options to try next.
Love the Sookie Crochet Cardigan vibe? The Sookie Crochet Cardigan and the Farmer's Market Filet Crochet Bag are both free patterns with that same joyful, crafty energy this blanket has.
Frequently Asked Questions
Is this blanket beginner-friendly?
Honestly, it depends on your definition of beginner. If you know basic crochet stitches (chain, sc, dc) and can follow a pattern, you're ready to try. The “adventurous” in Adventurous Beginner means you'll be pushing into new territory — back post stitches, color changes, JAYG joins — but the fundamentals are all basic. Think of it as the best kind of stretch project.
What is join-as-you-go (JAYG) crochet?
JAYG means you join each motif to its neighbors as you work the final round, instead of crocheting everything separately and seaming later. You work through the last round of each hexagon normally, and at the join points, you do a “thread join” that locks the motifs together. No seaming pile at the end! The blanket comes together as you go, which is incredibly satisfying.
How do I work the thread join?
Remove your hook from the free loop, thread the hook from front to back through the indicated stitch on the adjacent motif, place the free loop back on the hook, and pull it through. This threads the two stitches together through their top loops for an almost invisible join. It feels tricky the first time… but you'll get it within a few motifs!
Can I use a different yarn?
Absolutely! Any worsted-weight (#4) yarn works. Just make sure your gauge matches (hexagon = 6.5″ from side to side) — adjust your hook size if needed. Acrylic yarn behaves most like the original Herrschners Worsted 8. Natural fiber yarns (wool, cotton, blends) will give a different drape and feel but are totally doable. Just make a swatch first!
How long does this blanket take to make?
Plan for approximately 25-35 hours of crocheting time, depending on your speed and experience. The individual motifs work up quickly once you get into the rhythm, and JAYG means no extra time spent seaming at the end. Many crafters find the repetitive motif work meditative and satisfying… just one more hexagon before bed!
Can I make the blanket smaller or larger?
Yes! To make it smaller, simply make fewer hexagons. To make it larger, add more hexagons in rows and columns (and adjust your half/quarter/partial hexagons for the edges accordingly). You'll need additional yarn beyond the listed amounts if you go larger. Plan for approximately 1,956 yards for the background color and about 489 yards for each contrasting color.
Do I need to block this blanket?
Light blocking can help even out your stitches and open up the hexagon shape nicely, but it's not strictly required since this is 100% acrylic yarn. Acrylic fibers don't respond to wet blocking the way wool does. You can do a light steam block or simply wash and lay flat to dry if you want to even things out. The blanket will settle nicely with a few washes.
What's the difference between the hexagon, half hexagon, quarter hexagon, and partial hexagon motifs?
Great question! The full hexagons make up the main body of the blanket. The half hexagons fill in the long side edges. The quarter hexagons go in the four corners. The partial hexagons fill the short side edges. Together, these four shapes create a clean, straight rectangular border around the hexagon grid — no jagged edges!
Can I use my own color palette?
100% yes — that's one of the most fun parts of this pattern! The original uses Blue Smoke as the background with 7 contrasting blossom colors. You could do a completely different palette: soft pastels, bold jewel tones, a rainbow gradient, or even a monochromatic look with tonal variations of one color. The pattern structure works with any color combination.
Is the PDF version worth buying?
The pattern is free right here on the blog with complete instructions! The PDF version is for people who prefer a clean, printable, ad-free format to take to their chair, take to a knit night, or save offline. It's the same pattern, just formatted for easy printing without blog ads or navigation. Totally your call!
Final Thoughts
The Wildflower Hexagon Motif Blanket is one of those projects that feels like a gift to yourself from the moment you cast on. Every motif is a little victory. Every blossom you attach is a moment of pure creative joy. And when you spread that finished blanket out and see all 44 hexagons and 15 flowers coming together into something this beautiful… it's genuinely one of the most rewarding crochet experiences you can have.
Robyn Chachula designed this with so much care and creativity, and I'm so proud to share it here on the blog for free. Whether you're making it for yourself, for a loved one, or for a future heirloom, I hope every stitch brings you joy.
I'd love to see your finished Wildflower Blanket! Share your photos in the comments below or tag me on Instagram — seeing your makes genuinely makes my day. 🧶🌸
❤️ Your BiCrafty Bestie,
Marly Bird

Categories: Uncategorized