Enter for a chance to win a full collection of the amazing Penny Reid Knitting in the City Collection.
✨Winner will be randomly chosen April 30, 2023 and will be notified by email.
????VOID WHERE PROHIBITED!
Enter for a chance to win a full collection of the amazing Penny Reid Knitting in the City Collection.
✨Winner will be randomly chosen April 30, 2023 and will be notified by email.
????VOID WHERE PROHIBITED!
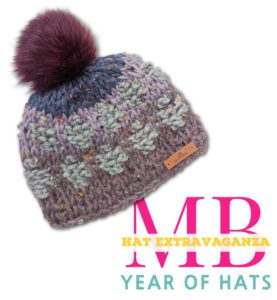
Welcome to the Marly Bird Year-Long Hat Extravaganza! This FREE Tunisian crochet hat pattern is the very first release! You only need one ball of yarn! This design is a classic beanie-style hat with a modern twist, and it includes colorwork (but more on that later). Of course, it’s perfect for both men and women and can be customized to suit your personal style. The pattern is designed with simple Tunisian stitches. The color changes make fun dots, creating a unique and eye-catching look.
You work this hat in the round using your favorite bulky weight yarn. This makes it a quick and easy project perfect for beginners and experienced crocheters alike. The video tutorial will guide you through every step of the process. You’ll have a beautiful and functional hat in no time.
Read more: Free Tunisian Crochet Hat || Hat ExtravaganzaAffiliate Disclosure: This post contains affiliate links. If you click on one of these links and make a purchase, I may earn a small commission at no additional cost to you. This helps support the content and free patterns I provide here on MarlyBird.com. Thank you for your support—it means the world to me! 💖
I’m thrilled to bring you this exciting new series of hat patterns. Over the next 12 months, we will release one new hat pattern each month. There’ll be video tutorials to guide you through the knitting or crochet process.
So, grab your crochet hook and your favorite yarn! Let’s start a year of hat-making fun with the Marly Bird Year-Long Hat Extravaganza!
Whether you’re a knitter or crocheter and you’re looking to add some new hat patterns to your repertoire, look no further! We’ll release one new hat pattern per month, completely free of charge, on the Marly Bird website.
(Or, hit this big pink oval below for AD-FREE!)
Each pattern will be accompanied by a video tutorial to help you along the way. If you’re a beginner – great! An experienced crafter? No problem! There’s something for everyone.
Add some fun and fashionable hats to your wardrobe, and challenge yourself to try out new techniques.
So, mark your calendars and get ready to join us on this hat-making journey. We can’t wait to see all the beautiful creations you come up with!
When it came to choosing the first hat for this extravaganza, it was definitely a tough decision. Should I choose a knit hat or a crochet hat? In the end, I decided to go with Tunisian crochet. It’s a unique and versatile crochet technique that creates a beautiful knit-like, textured fabric that’s perfect for hats.
For the first hat, I wanted something that works up quickly and is perfect for late winter and early spring. That’s why I chose to use a bulky-weight yarn. It creates a warm and cozy fabric that’s perfect for chilly weather.
The first hat in this year-long hat extravaganza is the Killington Bulky Tunisian Crochet Hat. It’s a fun and challenging project. Perfect for those who want to try their hand at Tunisian crochet in the round.
Seasoned crocheter or new to the craft, the Killington Bulky Tunisian Crochet Hat is a great starter project. Kick off the year-long hat extravaganza and get excited about all the amazing hats to come!
Tunisian crochet in the round is perfect for creating hats, bags, and even stuffed animals. If you’re new to Tunisian crochet, don’t worry! It’s a fun and easy technique that combines elements of crochet and knitting to create a unique look and texture.
In Tunisian crochet, you work with a long hook, similar to a knitting needle. Tunisian crochet in the round is worked using a circular Tunisian hook or a double-ended hook. It’s a great way to create seamless projects without having to sew or join any seams.
To begin, you’ll need to learn the basics of Tunisian crochet (click to follow along with BiCrafty Bootcamp: Triple Threat Tunisian Crochet). This includes the foundation row, the Tunisian simple stitch (TSS), and the Tunisian knit stitch (TKS). Once you have these basic stitches down, however, you can generally begin working in the round.
As you work in the round, you’ll notice that the fabric begins to grow and take shape. Now that I’ve whet your appetite, how about we move on to the Killington Bulky Free Tunisian Crochet Hat? It’s the very first hat in the Year-Long Hat Extravaganza.
If you’re looking for a great Tunisian crochet in the round project, the Killington Bulky Free Tunisian Crochet Hat is ideal. This cozy hat is worked using a bulky weight yarn, making it quick and easy to create.
Classic beanie style: ribbed brim and textured body created using the Tunisian knit stitch (TKS) and Tunisian reverse stitch (TRS). You’ll work simple color changes using colors in one ball of Caron Sprinkle Cake yarn (works with Chunky Cakes too).
You’ll need to know the basics of Tunisian crochet and Tunisian reverse stitch, as well as working in the round. The pattern includes detailed instructions and a video tutorial to guide you through the process.
The Killington Bulky Free Tunisian Crochet Hat is warm and cozy. It’s perfect for keeping you toasty on even the coldest winter days.
Try your hand at Tunisian crochet in the round; give the Killington Bulky Free Tunisian Crochet Hat a try. With a little practice and patience, you’ll have a beautiful and functional hat that anybody in the family can wear.
Designed by Robyn Chachula for MarlyBird.com
Adventurous Beginner
Hat is 22” [56 cm] in circumference and 8” [20.5 cm] in depth.
9 sts x 9 rows = 5” [12.5 cm] x 4” [10 cm]; use any size hook to obtain the gauge.
Purple Version:
Caron, Sprinkle Cakes (77% acrylic/ 20% wool/ 3% other fibers, 176m/ 193yds, 227g/ 8oz, CYCA# 4 worsted): #23013 Dewberry Plum, 1 ball (split into smaller balls)
Note: Caron Tea Cakes can be substituted for the Sprinkle Cakes
Yellow Version:
Bernat, Softee Chunky (100% acrylic, 99m/ 108yds, 100g/ 3.5oz, CYCA# 6 super bulky)
Color A: Brass, 1 ball (split into smaller balls)
Color B: Black, 1 ball
Size O (12 mm) Tunisian double-ended hook
Robyn recommends KnitPal Double Ended Bamboo Hooks for this project.
Tapestry needle, Stitch Marker, Optional: Pom Pom
Ch – Chain(s)
PM – Place Marker
RS – Right Side
Sl st – Slip Stitch
St(s) – Stitch(es)
Tch – Turning Chain
TSS- Tunisian Simple Stitch
TKS – Tunisian Knit Stitch
TPS – Tunisian Purl Stitch
TRS – Tunisian Reverse Stitch
WS – Wrong Side
⭐️ Tunisian Simple Stitch (TSS): Insert hook from right to left into front vertical bar of next st, yarn over and pull up a loop.
⭐️Tunisian Knit Stitch (TKS): Insert hook from front to back between the front and back vertical bars of the next st (under horizontal bars), yarn over and pull up a loop.
⭐️Tunisian Purl Stitch (TPS): Move yarn to front of work, insert hook from right to left into front vertical bar of next st, yarn over from front and pull up a loop.
⭐️Tunisian Reverse Stitch (TRS): Insert hook from right to left into back vertical bar of next st on the wrong side (or back of work), yarn over and pull up a loop. This pushes the return pass to the front of the work creating a purl-like look.
⭐️ “Work Loops off as normal” Yarn over and draw through 1 loop on hook, *yarn over, draw through 2 loops on hook; repeat from * to end of project. Note: The project is worked in a continuous spiral, so there is only 1 first stitch and all the remaining will be pulled through 2 loops.
Chain 40 with color A, sl st in first st to form ring. See notes for how to work fwd and rtn passes with double-ended hook.
Round 1: Fwd: Pull up loop in each st around (loop on hook counts as a st). Rtn: With color A, work loops off as normal. (40 sts)
Rounds 2-3: Fwd: *Tks in next st, tps in next st; repeat from * around. Rtn: With color A, work loops off as normal.
Round 4: Fwd: Tks in each st around. Rtn: With color B, work loops off as normal.
Start colorwork: see diagram for assistance.
Round 5: Fwd: Tks in next 2 sts, *trs in next st, tks in next 3 sts; repeat from * around to last 2 sts, trs in next st, tks in last st. Rtn: With color B, work loops off as normal.
Rounds 6-7: Fwd: *Tks in next st, trs in next 3 sts; repeat from * around. Rtn: With color B, work loops off as normal.
Round 8: Fwd: Tks in next 2 sts, *trs in next st, tks in next 3 sts; repeat from * around to last 2 sts, trs in next st, tks in last st. Rtn: With color B, work loops off as normal.
Round 9: Fwd: Tks in each st around. Rtn: With color B, work loops off as normal.
Round 10: Fwd: *Trs in next st, tks in next 3 sts; repeat from * around. Rtn: With color B, work loops off as normal.
Rounds 11-12: Fwd: Trs in next 2 sts, *tks in next st, trs in next 3 sts; repeat from * around to last 2 sts, tks in next st, trs in last st. Rtn: With color B, work loops off as normal.
Round 13: Fwd: *Trs in next st, tks in next 3 sts; repeat from * around. Rtn: With color A, work loops off as normal.
Decrease for the crown.
Round 14: Fwd: Tks in each st around. Rtn: With color A, [yarn over and draw through 2 loops on hook] twice, *yarn over and draw through 3 loops on hook, [yarn over and draw through 2 loops on hook] 3 times; repeat from * around to last 3 sts, yarn over and draw through 3 loops on hook, yarn over and draw through 2 loops on hook. – 32 sts.
Round 15: Fwd: Tks in each st around. Rtn: With color A, *yarn over and draw through 3 loops on hook, [yarn over and draw through 2 loops on hook] twice; repeat from * around – 24 sts.
Round 16: Fwd: Tks in each st around. Rtn: With color A, *yarn over and draw through 2 loops on hook, yarn over and draw through 3 loops on hook; repeat from * around. – 16 sts.
Round 17: Fwd: Tks in each st around. Rtn: With color A, *yarn over and draw through 3 loops on hook; repeat from * around. – 8 sts.
Bind Off Round: *Tks in next st, pull loop through loop on hook; repeat from * around, sl st in first st, fasten off leaving long tail. Weave the long tail through the last round to close hole in the top of the hat.
Fasten off, weave in ends. Add pompom to top of hat if desired.
There you have it. The first hat of the Marly Bird Hat Extravaganza Year of Hats. The Killington Bulky Free Tunisian Crochet Hat is the perfect project to start us off.
It’s a fun and challenging project that will introduce you to the world of Tunisian crochet in the round.
Thank you for taking the time to make the Killington Bulky Tunisian Crochet Hat! I’m so glad to see you want to explore more Tunisian crochet patterns!
At Marlybird.com, we offer a variety of patterns that feature Tunisian crochet, including hats, headbands, shawls/cowls, cowls, and sweaters. These patterns are designed to help you grow your skills and confidence with this unique and versatile technique.
Explore our collection of Tunisian crochet patterns on Marlybird.com and continue your journey with this fascinating and fun technique. Happy crocheting!
#hatextravaganza #yearofhats #mmmdi #marlybirdyoutubechannel #marlybird #knitting #crochet #tunisian
Welcome to Apricot Lane Amigurumi, a place where magic and friendship come to life through the art of crochet. Here, we create friendly amigurumi creatures that are cherished for their unique personalities and heartwarming stories. From the moment you set foot in Apricot Lane, you’ll enjoy a sense of wonder and delight as you explore the enchanting world of these handmade treasures. In a moment, I’ll introduce you to Felix the Fox.
The creatures of Apricot Lane Amigurumi are more than just crocheted toys; they embody the values of friendship, love, and creativity. Each special creature has a story to tell, woven into every stitch, and is designed to capture the hearts of all who meet them. Whether you’re a lover of amigurumi or simply appreciate the beauty of handmade crafts, Apricot Lane is a place that will inspire you to embrace your inner child and see the world through new eyes.
Read more: Apricot Lane Amigurumi || Felix the FoxAs you take your first steps down Apricot Lane, you might catch a glimpse of a curious and mischievous little creature peeking out from behind a tree. Meet Felix the Fox, the very first crochet amigurumi creature to be introduced in Apricot Lane. With his bright orange fur and inquisitive expression, Felix is impossible to resist.
Felix is more than just a toy, he’s a true friend who loves nothing more than going on adventures and exploring the world around him. He has a heart of gold and a kind spirit, making him the perfect companion for anyone in need of a little pick-me-up. And like all the creatures of Apricot Lane, Felix the Fox has his own unique story, filled with twists and turns that will capture your heart and have you cheering for his happiness.
But Felix isn’t the only amigurumi creature to call Apricot Lane home. As you continue your journey through this enchanting miniature world, you’ll meet a cast of characters that are just as lovable and endearing as he is. From Bella the Bunny to Teddy the Turtle, each creature has its own distinct personality and story to tell.
So whether you’re a seasoned amigurumi enthusiast or just discovering the magic of handmade crafts, Apricot Lane is a place that will fill you with wonder and delight. It’s a world where creativity and friendship flourish and where the impossible becomes possible. So come and meet Felix the Fox and all the other amigurumi creatures of Apricot Lane – we promise you won’t be disappointed!
This pattern is perfect for the adventurous beginner crocheter who is looking for a fun and challenging project. With a little bit of patience and a lot of love, you can create your very own Felix the Fox in a variety of sizes by changing the yarn weight and hook size. So grab your crochet hook, and your favorite yarn, and let’s get started!
Adventurous Beginner
Fox is 5.25 (6.5, 13.25)” [13.5, 16.5, 33.5 cm] in body circumference by 3.25 (4, 8)” [8.5, 10, 20.5 cm] tall (not including the ears).
Ornament/ Keychain/ Lovie Version: 18 sc x 18 rounds = 4” [10 cm] x 4” [10 cm]; use any size hook to obtain the gauge.
Small Stuffie Version: 15 sc x 16 rounds = 4” [10 cm] x 4” [10 cm]; use any size hook to obtain the gauge.
Large Stuffie Version: 7 sc x 8 rounds = 4” [10 cm] x 4” [10 cm]; use any size hook to obtain the gauge.
Ornament/ Keychain/ Lovie Version
WeCrochet, Brava Sport (100% acrylic, 340 yds / 311 m, 3.5 oz/ 100 g, CYCA# 2 sport)
Color A: #28393 Orange, 20 g
Color B: #28377 Cream, 15 g
Color C: #28366 Black, 5 g
Small Stuffie Version
WeCrochet, Brava Worsted Mini Ball (100% acrylic, 54 yds / 49 m, 0.9 oz/ 25 g, CYCA# 4 worsted)
Color A: #28441 Paprika, 20 g
Color B: #28424 Cream, 15 g
Color C: #28413 Black, 5 g
Large Stuffie Version
Bernat, Blanket (100% polyester, 220 yds / 201 m, 10.5 oz/ 300 g, CYCA# 6 super bulky)
Color A: #10963 Red Rust, 75 g
Color B: #10986 Birch, 40 g
Color C: #10040 Coal Black, 15 g
Size D/3 [3.25 mm], G/6 [4.0 mm], N/ [9.0 mm]
Tapestry needle, Polyester Fiberfill, Stitch Markers, (optional) (2) safety animal eyes
Ch – Chain(s)
PM – Place Marker
RS – Right Side
Sc – Single Crochet
Sl st – Slip Stitch
Sp(s) – Space(s)
St(s) – Stitch(es)
WS – Wrong Side
⭐️ Single Crochet 2 Together (sc2tog): *Insert hook into indicated stitch, yarn over and pull up a loop; repeat from * in next stitch indicated, yarn over and draw through all 3 loops on hook. (1 decrease)
⭐️ Double Magic loop or Double Adjustable Ring: Wrap yarn around your fingers twice, pull up a loop through the ring created, chain 1. Follow directions for number of stitches for round 1. Pull yarn end to determine which strand will be closed with yarn end. Gently tug the strand to close 2nd strand of ring. Pull on yarn end to close first strand of ring.
Note: Head is worked from the top of the head at the increasing rounds through the bottom of the head while decreasing.
With A, ch 2.
Round 1: 6 sc in 2nd ch from hook, do not turn–6sc.
Round 2: 2 sc in each sc around, do not turn– 12 sc.
Round 3: *Sc in next sc, 2 sc in next sc; repeat from * around, do not turn– 18 sc.
Round 4: *2 sc in next sc, sc in next 2 sc; repeat from * around, do not turn– 24 sc
Round 5: Sc in each sc around, do not turn.
Round 6: *Sc in next 3 sc, 2 sc in next sc; repeat from * around, do not turn– 30 sc
Rounds 7-8: Sc in each sc around, do not turn. If using safety eyes, insert between rounds 7-8. Change color to B at the end of Round 8.
Round 9: Sl st in next st, sc in each sc around, do not turn.
Rounds 10-11: Sc in each st around. Do not turn.
Round 12: *Sc2tog over next 2 sc; repeat from * around, do not turn– 15 sc.
Round 13: Sc in each sc around, do not turn.
Round 14: *Sc in next sc, sc2tog over next 2 sc; repeat from * around, sl st to first sc, fasten off leaving long tail for seaming– 10 sc.
Stuff head with fiberfill.
Note: Body is worked from the bottom at the increasing rounds through the top of the body while decreasing.
With A, ch 2.
Round 1: 6 sc in 2nd ch from hook, do not turn–6sc.
Round 2: 2 sc in each sc around, do not turn– 12 sc.
Round 3: *Sc in next sc, 2 sc in next sc; repeat from * around, do not turn– 18 sc.
Round 4: *2 sc in next sc, sc in next 2 sc; repeat from * around, do not turn– 24 sc
Rounds 5-10: Sc in each sc around, do not turn.
Round 11: *Sc2tog over next 2 sc; repeat from * around, sl st to first sc, fasten off leaving long tail for seaming– 12 sc.
Stuff body with fiberfill.
Sew head to body working through last rounds. Pull tightly and sew through last rounds a second time to make the seam more sturdy.
Make 2
With C, ch 2.
Round 1: 6 sc in 2nd ch from hook, do not turn–6sc.
Rounds 2-6: Sc in each sc around, do not turn. End of Round 6, sl st to first sc, fasten off with a long tail for seaming. Sew arms to body using the photo as a guide.
With B, ch 4.
Row 1: Sc in 2nd ch from hook, sc in next ch, 3 sc in last ch, turn to work on opposite side of chains, sc in next 2 ch, turn–7sc.
Row 2: Ch 1, sc in next 2 sc, 2 sc in next 3 sc, sc in last 2 sc, fasten off with long tail for seaming– 10 sc. Sew chest to body.
With B, ch 2.
Round 1: 6 sc in 2nd ch from hook, do not turn–6sc.
Round 2: 2 sc in next 3 sc, sc in next sc, change color to A, sc in same sc, 2 sc in last 2 sc, do not turn– 12 sc.
Round 3: Sc in next sc, change color to B, 2 sc in next sc, sc in next 3 sc, 2 sc in next sc, change color to A, sc in next 3 sc, 2 sc in next sc, sc in next 2 sc, sl st to first sc, fasten off with a long tail for seaming– 15 sc.
Stuff lightly and seam to head. Using color C, satin stitch a nose to the snout and straight stitch on a mouth. Satin stitch eyes and straight stitch on eyebrows using the photo as a guide.
Make 2
With B, ch 5.
Row 1 (RS): Sc in 2nd ch from hook, sc in next 2 ch, 3 sc in last ch, turn to work on opposite side of chains, sc in next 3 ch, turn–9sc.
Row 2: Ch 1, sc in next 4 sc, 3 sc in next sc, sc in last 4 sc, fasten off– 12 sc.
With A, ch 5.
Row 1 (WS): Sc in 2nd ch from hook, sc in next 2 ch, 3 sc in last ch, turn to work on opposite side of chains, sc in next 3 ch, turn–9sc.
Row 2: Ch 1, hdc in next 2 sc, sc in next 2 sc, 3 sc in next sc, sc in next 2 sc, hdc in last 2 sc, turn– 12 sts.
Row 3 (join inner and outer ears): Hold WS of Inner and Outer ears together. Ch 1, sc in first st of both fabrics at the same time, sc in each st across of both fabrics at the same time, sc across row ends, sl st to first sc, fasten off with long end for seaming.
Sew ears to head using the photo as a guide.
With B, ch 2.
Round 1: 5 sc in 2nd ch from hook, do not turn–5 sc.
Round 2: [2 sc in next sc, sc in next sc] twice, sc in next sc, do not turn– 7 sc.
Round 3: [Sc2tog over next 2 sc, sc in next sc] twice, sc in next sc, change color to A, do not turn– 5 sc.
Round 4: Sl st in next sc, sc in each sc around, do not turn – – 5 sts.
Rounds 5-8: Sc in each st around, do not turn. Fasten off, leave long tail for seaming.
Sew tail to back of body.
With Color A, chain 6. Fasten off, sew to top of head.
Stay tuned for more exciting stories, and get ready to meet new friends as we take you on a journey through the magical and enchanting world of Apricot Lane. You won’t want to miss the thrilling tales and endearing characters that we have in store for you.
So, grab your crochet hook and get ready to bring these lovable creatures to life. Join us on an adventure like no other.
The wonders of Apricot Lane are calling your name. See you soon!
Meet Alden The Owl from Apricot Lane Amigurumi!
Such a cute little sweater isn’t it? And, I love that you can choose the colorway for your wee one as well as add a name. Watch the free video of a recorded class I taught recently on this Baby Cakes Customized Sweater free pattern. I teach you how to knit it, then customize it with embroidery!
It’s a simple knit since it’s 1 x 1 rib and stockinette stitch. Check out the color changes too. But, it’s much easier than you might think!
The striped baby pullover is knit with Caron Baby Cakes yarn, available exclusively at Michaels. This worsted-weight yarn is self-striping, so there’s no changing colors as you knit the sweater. This cuts the end weaving you would have without color-changing self-striping yarn.
The sweater is knit from the top down and fits sizes 6 months to 24 months. The sleeve shaping is raglan, which is a great option for babies.
Once you’ve knit the sweater, use hand embroidery to customize it with the baby’s name.
You’ll also need:
Click the image below to download the free sweater pattern from Yarnspirations. Save it to your computer or print it out and you’re ready to go!
Get extra help in this in-depth video by Marly including step-by-step instructions, tips, and tricks. Now you have all you need for a successful project.
Grab your knitting gear, and pattern, and watch this video. You’ll be off and running in no time.
Happy knitting!
We hope you enjoy knitting up this cute little sweater. Show us how you did in the Facebook Group!
For more baby knitting patterns, try these links below:
Get ready for Game Day Mystery Make-Along 2023. Join us for a thrilling mystery make-along event for knitters and crocheters on Super Bowl Sunday! The event is COMPLETELY FREE and open to ALL SKILL LEVELS.
Kick-off the event early Sunday morning, participants will receive clues and instructions for a secret knitting or crocheting project that will be revealed just before the start of the game.
Whether you’re a die-hard football fan or just looking for something to do during the commercials, this event is the perfect way to mix crafting and athletic competition. Don’t miss out on the fun, register now!
⭐️ The free content for this event will remain up on the blog until Feb. 28, 2023
Read more: Game Day Mystery Make-Along 2023It is not uncommon for crafting communities to organize make-along events, where participants work on a project together, often over a period of time and with reveals or clues along the way. These events can be organized online through social media or in-person at crafting stores or groups. The idea of the Marly Bird Game Day Mystery Make-Along event on Super Bowl Sunday is a creative take on combining the enthusiasm of sport events with the hobby of crafting (and a little food and drink thrown in there for fun).
We started this annual event in 2018. Which makes 2023 the sixth annual event. We’re excited to keep growing this each year. More and more people participate each year. We get better at streamlining the whole process, design new creative projects, and keeping it all running smoothly.
Still not sure what this event is, read our Game Day Mystery Make-Along page. That has all of the details and links you to the patterns from past events.
Game Day is a free event (with a MVP Package paid upgrade) that happens on Super Bowl Sunday, February 12, 2023.
All the action begins that Sunday morning and goes just up to the start of the big football game.
One clue is given EVERY TWO HOURS: a link to each of the clues is added at the bottom of this post as they become available.
Which means, if you are participating in the free event held here on the blog, you’ll want to bookmark this page and come back to it every 2 hours.
Once again, I’ve teamed up with Robyn Chachula, my partner in yarny fun, to make this year our best year yet! Our goal with this years project is to make something that is a neck accessory with some flare. It is visually appealing, complex enough to keep both new and advanced crafters interested, and will not take as much time as say a Ruana *wink.
It should be a little challenging without you wanting to throw your hook or needles across the room. We think you will enjoy working on our project and have enough time to finish by the end of the game.
What is the MVP Package?
Similar to our Marly Bird First Fall MAL & the Silver Platter Experience, the MVP package is located in the Marly Bird House!
For the first time EVER, you can upgrade to the Knitting MVP Package or Crochet MVP Package each at the low price of $25 ????.
That is right, each craft is offered as its very own project workshop.
In each MVP Package you get:
Total Value of MVP Package = $450
Today’s Limited Time Offer Price = $25 *NO LONGER AVAILABLE!
When you joined the Game Day MVP Package you get to sit back, relax and let us serve you this SUITE event.
⭐️ The free content for this event will remain up on the blog until Feb. 28, 2023
⭐️The LINK to each play/clue is added below! Keep scrolling to get links!
Feel free to work on each section as it is released or wait until Monday to work the whole project in one shot.
It is best to bookmark this page as you will come back to it throughout the event if you are following along with the free pattern. If you don’t know how to bookmark on google, I did a fun video to show you a couple tricks that I find useful.
Also, be to register to get email notifications each time a play/clue is released the day of the event: Sign up here– https://marlybird.ck.page/d8393faaba
IT IS A MYSTERY! I can’t tell you!!! Okay, so I know what we are making as I designed it but I can’t tell you any more than it is a wearable accessory for the neck…my take on a VERY POPULAR wearable. This event is a MYSTERY make along so you won’t know what the final project will look like until you make all of the clues.
I can tell you this year, we are making a smaller project than the poncho, ruana, or a hat; and we are incorporating some new materials never before used in a Game Day Mystery Make-Along.
It is something that can be worn year round and in any climate.
You might have an idea what this project is but you won’t know the final look until the end.
We are doing videos for each section this year to help you along. The videos will be linked in the clue instructions and will be available on the Marly Bird YouTube Channel for a limited time!
*Note: the video content will be evergreen with the MVP Packages.
This years supplies are unique for this project. There are some additional tools needed this time around but they can be easily reused. Along with the tools you will find extra materials outside of the scope of a usual knit or crochet project.
We know it can be difficult to gather supplies for any event but especially a mystery make-along and even more so when the supplies are things you have never used before.
But don’t worry, we would not leave you hanging out to dry!
???? We’ve joined forces with Jill Wiseman Designs to put together bead kits just for this event to make the whole process easy for you!
Each kit includes all the beading supplies needed (except the tools and yarn) for the Knitting project or the Crochet project.
Please visit https://shop.jillwisemandesigns.com/marly-bird-game-day-kits/ and select one of these limited edition kits to get exactly what you need.
Please find the craft you will be following during Game Day and get the full list of supplies.
Yes, you read that right. We are using thread, not yarn for our special Game Day Mystery Make-Along 2023 project.
We have teamed up again with WeCrochet. You can’t go wrong with their great line of colors and a discount that makes this project very affordable!
Discount? Yes! For a limited time, WeCrochet has offered us a discount code just for this event!
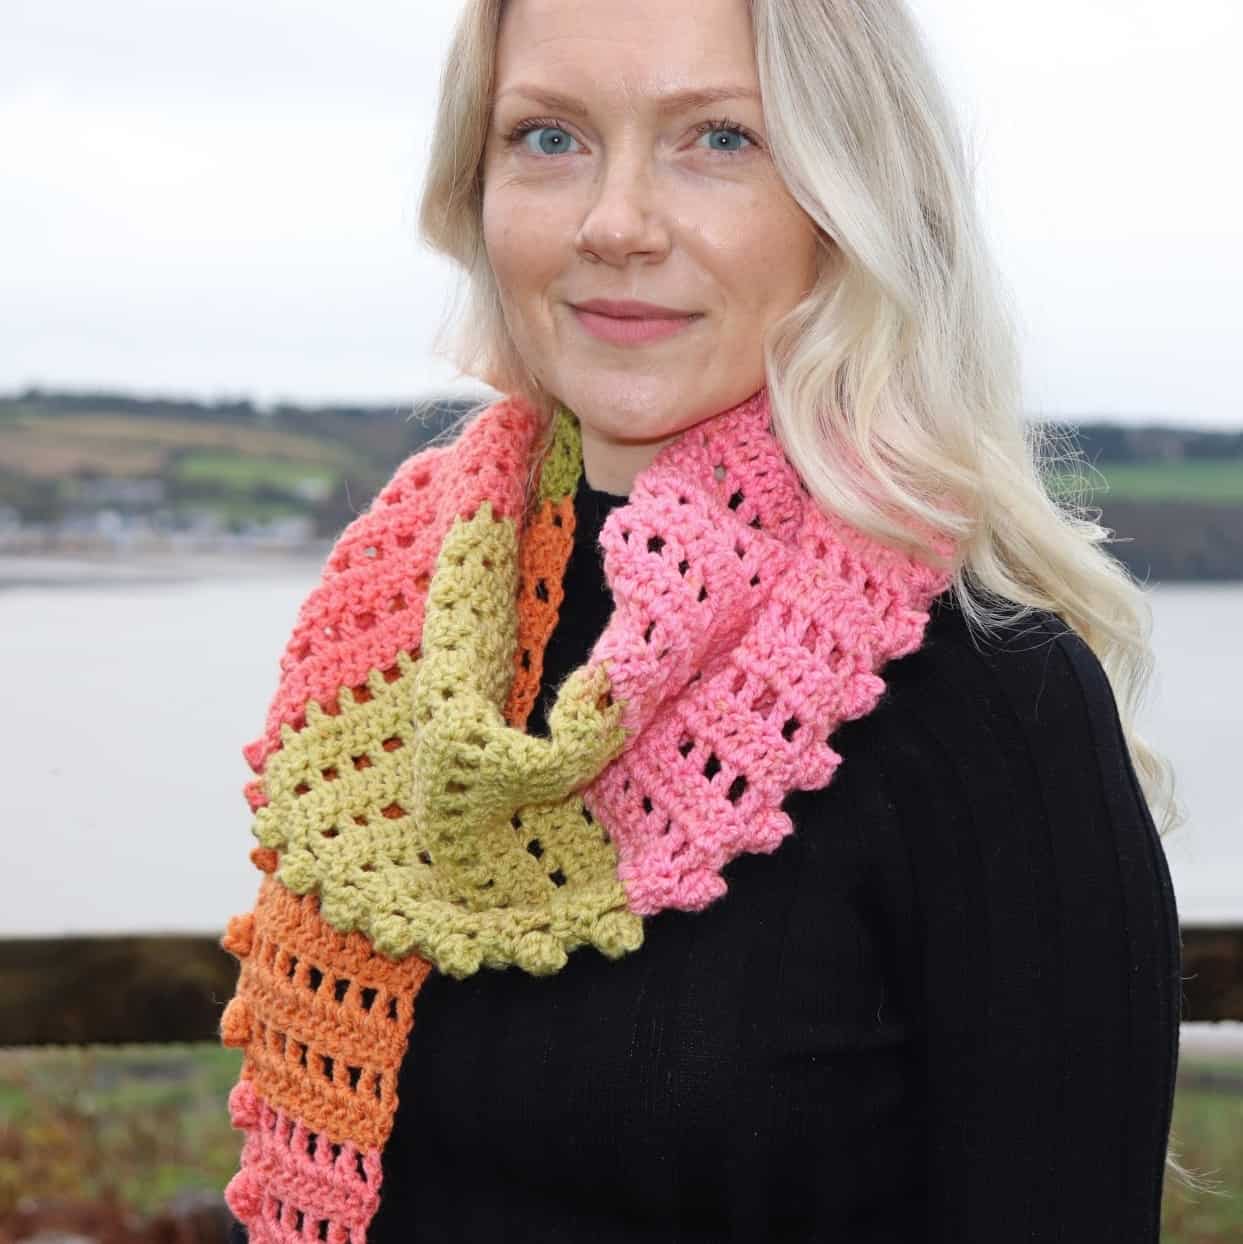
???? WeCrochet: bit.ly/WeCrochet-MBird
Get 20% off YOUR ENTIRE ORDER when you use code: Game2023
We know not everybody wants to purchase new yarn for a mystery project. But I will tell you this project was designed with a thread that will hold up to glass beads being added to it. If you choose an alternative thread, please choose one that is the same weight and similar fibers. When picking out colors, think about matching the thread with the intended beads and chain.
This project is worked on a very small steel hook. For your hand comfort, look for a hook with a nice grip, it will help keep your tension as well as your comfort. I know these hooks can look scary if you have not tried them before, but Game Day is all about trying something new. You can use any hook from 1.5mm-2.0mm and still achieve the same desired look.
This is a different project than any other mystery make-along from Marly Bird. Because of that, there are supplies you might not readily have on hand. I am also going to assume that some of you may not even be familiar with these supplies.
I’ve joined forces with Jill Wiseman Designs to put together bead kits just for this event to make the whole process easy for you! These kits include all the beading supplies needed (except the tools and yarn)!
Please visit https://shop.jillwisemandesigns.com/marly-bird-game-day-kits/ and select one of these limited edition kits to get exactly what you need.
However, if you prefer to get each item a la cart, I’ve linked each item to Michaels. These are affiliate links but I know they will help make it easier for you to find the necessary items.
This project is so much more than just crocheting which is why there is a larger supply list. We pared down the list as best we could to just the necessary items.
If purchasing your beading supplies a la carte, make sure to match the metal of your chain, jump rings, toggle clasp, and eye pins. Meaning make sure you choose all silver, gold, or bronze for each of those. ????Do not mix your metals.
We have chosen a yarn from the WeCrochet yarn collection.
Their yarn is very lovely and available to everybody. We really like the colors and the way it feels in our hands, plus the discount made this project very affordable!
Discount? Yes! For a limited time, WeCrochet has offered us a discount code just for this event!
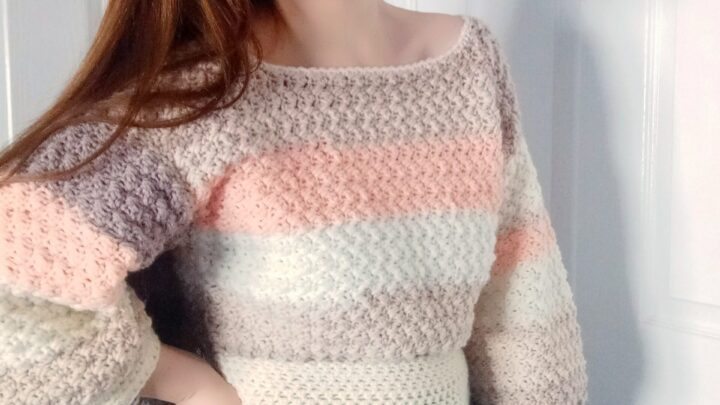
???? WeCrochet: bit.ly/WeCrochet-MBird
Get 20% off YOUR ENTIRE ORDER when you use code: Game2023
coupon code: Game2023
We know not everybody wants to purchase new yarn for a mystery project. But I will tell you this project was designed with a sport worsted weight yarn that will hold up to glass bead being added to it. If you choose an alternative yarn, please choose one that is the same weight and similar fibers.
No, this is not a colorwork project and BUT, you could use up to 3 colors if that is something you are interested in doing. Be sure to match the yarn with the intended beads.
This project is worked on very small needles to get a beautiful finished look. The needle size for this weight yarn is typically a size 3, 4, or 5. But for our project we need to have size 1 needles.
We will not be working in the round but working with either a couple of double pointed needles or longer circulars with a long tip made the process easier for me. Notice I did add straight needles as an option because they will work, but they are not my preference.
I also want to mention that the point on your needle is VERY important. If it is too dull or blunt you will have a difficult time with this project. I highly recommend precision point or stiletto point needles. The link below is to Signature Needle Arts as they are my favorite but choose a needle that is best for you.
This is a different project than any other mystery make-along from Marly Bird. Because of that, there are supplies you might not readily have on hand. I am also going to assume that some of you may not even be familiar with these supplies.
I’ve joined forces with Jill Wiseman Designs to put together a bead kit just for this event to make the whole process easy for you! These kits include all the beading supplies needed except the tools and yarn!
Please visit https://shop.jillwisemandesigns.com/marly-bird-game-day-kits/ and select one of these limited edition kits to get exactly what you need. (No Longer Available)
However, if you prefer to get each item a la cart, I’ve linked each item to Michaels. These are affiliate links but I know they will help make it easier for you to find the necessary items.
This project is so much more than just knitting which is why there is a larger supply list. We pared down the list as best we could to just the necessary items, and listed the optional items separately. But please know the optional items will make things easier.
We have teamed up with some awesome vendors to bring you HOURLY prizes for this year’s Game Day!!! Keep your eye out in the Marly’s Minions: A Marly Bird Bicrafty Community Facebook group to enter!!
Also, last year we introduced MVP giveaways and we are bringing it back this year!
Our “referees” (the Marly’s Minion Modmins) will nominate “players” (YOU!) for six specific categories listed below. Each of these players will get 1 free product of choice from the Marly Bird House!!
GRAND PRIZE – EVERY PRODUCT IN THE MARLY BIRD HOUSE!!!!
all players are eligible for this prize! Just post your finished item in the Facebook thread (or email to [email protected] if you do not have Facebook). The winner is chosen entirely at random from the finished item threads and emails!
Winners will be chosen and announced on February 15th in the Marly’s Minions Facebook group!
***This giveaway is VOID where prohibited and limited to the continental US***
“It’s not whether you win or lose, it’s how you play the game.”
― Grantland Rice
Be sure to come back EVERY TWO HOURS from 8 am to 6 pm on Sunday, February 12, 2023 to see the new play for that hour.
???? Knitting Pre Game Video:
⭐️8 am Crochet Play >>click here<<
⭐️8 am Knit Play >>click here<<
⭐️10 am Crochet Play >>click here<<
⭐️10 am Knit Play >>click here<<
Get the VIP MVP treatment inside the Marly Bird House! Upgrade to the MVP Package and get everything in one place + more project workshops & patterns!
⭐️12 pm Crochet Play >>click here<<
⭐️12 pm Knit Play >>click here<<
⭐️2 pm Crochet Play >>click here<<
⭐️2 pm Knit Play >>click here<<
⭐️4 pm Crochet Play >>click here<<
⭐️4 pm Knit Play >>click here<<
⭐️6 pm Crochet Play >>click here<<
⭐️6 pm Knit Play >>click here<<
The fun doesn’t stop once the game starts. Be sure to join us for a game of BINGO during the game. Just grab a card at the link below! You can start marking as soon as the game starts, and there will be an entry thread in the Marly’s Minions FB page for your finished cards. All you need is one regular, old-fashioned BINGO, so horizontal, vertical, or diagonal!
Are you excited? Share with us on social media what yarn you’re using and what colors you like 🙂 Be sure to use #gamedaymakealong #mmmdi #marlybird in your posts.
Go Team!
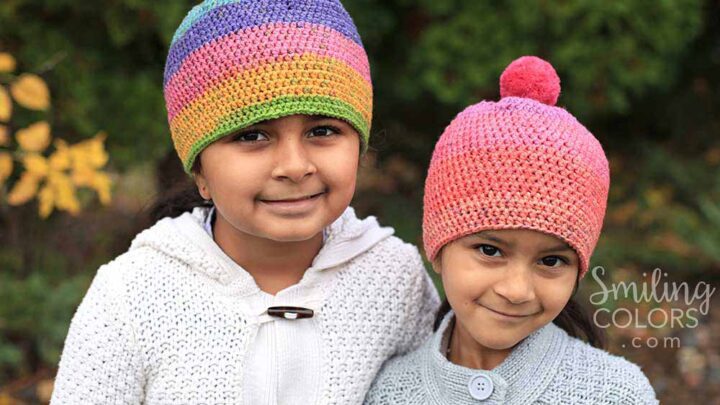
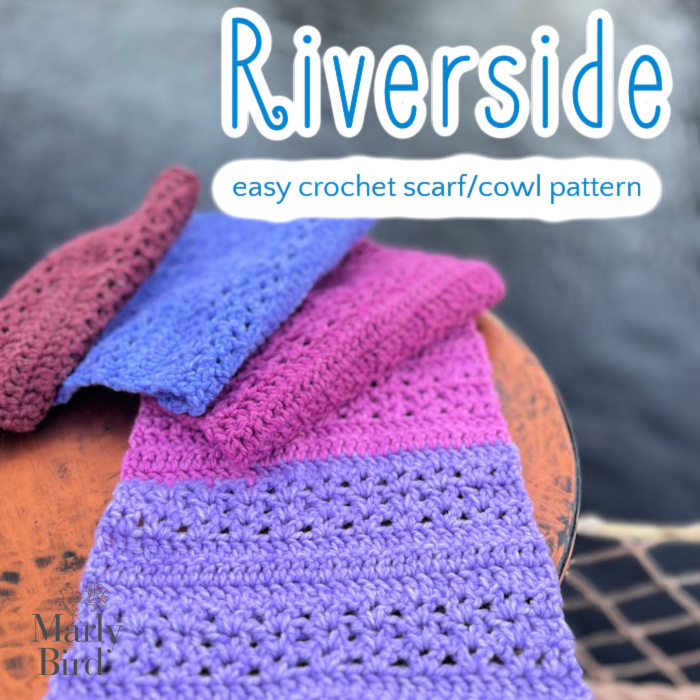
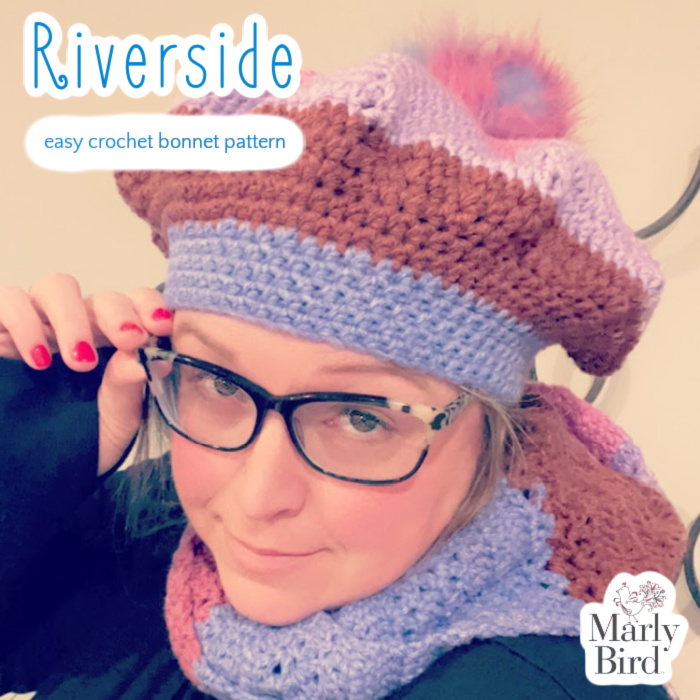
Looking for an easy crochet bonnet pattern you can wear and not worry about hat hair?? Seriously, you can wear this beret, tam, or bonnet over your updo and not have crushed hair! So, you can make this simple on-the-go pattern for beginner crocheters with less than one ball of Caron Cakes. It works up super quickly! Pair it with the easy crochet scarf/cowl pattern for a crochet accessory set!
Oombawka Design Crochet and The Stitchin Mommy asked me to be a part of the #ScarfofTheMonth. I quickly said, “SURE!” As I knew I could get a new crochet design completed in time.
Well, time is a funny thing, and it completely sneaks up on you. Before I knew it, my scarf was due in less than a week and I’d soon be leaving for a trip to Florida. You can read all about that here.
Though I did manage to get that pattern completed in time, I had to have a hat done for the #HatofTheMonth too! I knew I wanted the hat and scarf to look somewhat alike, so I chose the same yarn and colorway.
Well, to answer that, let’s have an understanding of the subtle differences between all of them. Sometimes, a crochet bonnet is a voluminous head covering that covers the top and sides of the head. It can have a brim that can be turned up or down.
A beret is typically a hat that’s a soft, visorless cap. It has a close-fitting headband and a wide, round top, often with a tab at its center.
A tam is a type of beret. It’s typically made with a more voluminous top. This gives it a slightly taller, rounder shape and a tighter fit around the head. But tams are often made with a thicker, more substantial fabric than traditional berets. They may have an additional band or ribbon around the base of the crown, helping keep it securely in place.
As you can see, you can call this headwear anything you want. But to me, it looks like a bonnet, so I am calling it the Riverside Bonnet.
The pattern is not hard to follow and is super simple to memorize. It uses mainly one stitch, the half double crochet. As long as you keep track of your stitch count while working each round, it’ll be smooth sailing.
This hat is made from the top to the bottom. Work increases through the entire crown and then decreases to bring the circumference of the piece to a wearable size.
The only finishing on this easy crochet bonnet is to weave in the beginning and ending tail. That’s it!
See, EASY!
The Riverside Crochet Bonnet is a free pattern here on the Marly Bird blog. Although you could easily refer to this as a beret or a tam, to me, it’s a bonnet.
As mentioned, this is part of the Hat of the Month Crochet-Along 2023.
For the entire year of 2023, on the 4th Sunday of every month, you will get FOUR new hat patterns. One from Amy, one from Rhondda, and one from a guest designer (this month, it’s ME).
As you are working on your hats, be sure to add them to your projects on Ravelry. I’ve already listed this pattern there for your convenience. https://www.ravelry.com/patterns/library/riverside-9
Easy
One Size to fit Adult
20” circumference
31 dc = 9” [23 cm]; use any size ho13.25 hdc sts and 10 hdc rounds = 4” [10 cm]; use any size hook to obtain the gauge.ok to obtain the gauge.
Blackberry Jelly 1 ball
Size H/8 [5.0 mm]
Tapestry needle
Ch – Chain(s)
Cont – Continue
Hdc – Half Double Crochet
Hdc2tog – Half Double Crochet Two Together (review modified stitch in special stitches)
RS – Right Side
Sc – Single Crochet
Sp(s) – Space(s)
St(s) – Stitch(es)
Stacked Dc – Stacked Double Crochet
Tch – Turning Chain
WS – Wrong Side
⭐️ Adjustable Ring: Make a large loop with the yarn leaving a 4” tail. With the hook, draw the working yarn through the loop; Ch 1, follow the pattern instructions from here. Once the first rnd of sts is complete, pull the tail snugly to close the ring.
⭐️ Half Double Crochet: Yarn over hook, insert hook into indicated stitch, yarn over and pull up a loop; yarn over and draw through all three loops on hook.
⭐️ Half Double Crochet Two Together: worked over two stitches total – [Yarn over, insert hook in next st or ch, yarn over and draw up a loop] twice, yarn over and draw through all 5 loops on hook.
⭐️ Half Double Crochet Two Together modified: worked over two stitches total – Yarn over hook, insert hook into next st or ch, yarn over and pull up a loop, do not yarn over hook before working into next stitch, insert hook into next st or ch, yarn over pull up a loop, yarn over and pull through all 4 loops on hook.
To Unlock Exclusive Subscriber Content click the Box below and join for free by simply adding your email and creating a password! If you are having troubles, clear your cache or reset your password or login to the Grow Publisher Portal.
I’m thrilled to share this amazing pattern with you, many patterns on my blog are absolutely free! I kindly request that you don’t copy and paste or distribute this pattern. Prefer an ad-free experience? Buy a digital PDF pattern for a small fee from one of my online stores for a seamless crafting journey.
I appreciate your support and readership. You are the reason I can keep doing what I love and sharing it with others. So, thank you from the bottom of my yarn-loving heart! Disclosure: This post contains affiliate links, meaning I get a commission if you decide to make a purchase through my links at no cost to you.
Make an adjustable ring
10 sc in ring, join with a slip stitch to first sc to begin working in the round. Ch 1. Do not turn now and throughout.
Round 1: *Hdc in sc, (starting chain does NOT count as st), ch 1; repeat from * round, join with a slip stitch in first hdc, ch 1 — 10 hdc, 10 ch-1 sp’s.
Round 2: *Hdc in hdc, hdc in ch-1 space, ch 1; repeat from * around, join with a slip stitch in first hdc, ch 1 — 20 hdc, 10 ch-1 sp’s.
Round 3: *Hdc in 2 hdc, hdc in ch-1 space, ch 1; repeat from * around, join with a slip stitch in first hdc, ch 1 — 30 hdc, 10 ch-1 sp’s.
Round 4: *Hdc in 3 hdc, hdc in ch-1 space, ch 2; repeat from * around, join with a slip stitch in first hdc, ch 1 — 40 hdc, 10 ch-2 sp’s.
Round 5: *Hdc in 4 hdc, hdc in ch-2 space, ch 2; repeat from * around, join with a slip stitch in first hdc, ch 1 — 50 hdc, 10 ch-2 sp’s.
Round 6: *Hdc in 5 hdc, hdc in ch-2 space, ch 2; repeat from * around, join with a slip stitch in first hdc, ch 1 — 60 hdc, 10 ch-2 sp’s.
Round 7: *Hdc in 6 hdc, hdc in ch-2 space, ch 2; repeat from * around, join with a slip stitch in first hdc, ch 1 — 70 hdc, 10 ch-2 sp’s.
Round 8: *Hdc in 7 hdc, hdc in ch-2 space, ch 2; repeat from * around, join with a slip stitch in first hdc, ch 1 — 80 hdc, 10 ch-2 sp’s.
Round 9: *Hdc in 8 hdc, hdc in ch-2 space, ch 2; repeat from * around, join with a slip stitch in first hdc, ch 1 — 90 hdc, 10 ch-2 sp’s.
Round 10: *Hdc in 9 hdc, hdc in ch-2 space, ch 2; repeat from * around, join with a slip stitch in first hdc, ch 1 — 100 hdc, 10 ch-2 sp’s.
Round 11: *Hdc in 10 hdc, hdc in ch-2 space, ch 2; repeat from * around, join with a slip stitch in first hdc, ch 1 — 110 hdc, 10 ch-2 sp’s.
Round 12: *Hdc in 11 hdc, hdc in ch-2 space, ch 2; repeat from * around, join with a slip stitch in first hdc, ch 1 — 120 hdc, 10 ch-2 sp’s.
Round 13: *Hdc in 12 hdc, hdc in ch-2 space, ch 2; repeat from * around, join with a slip stitch in first hdc, ch 1 — 130 hdc, 10 ch-2 sp’s.
Rounds 14 & 15: *Hdc in 13 hdc, ch 1; repeat from * around, join with a slip stitch in first hdc, ch 1 — 130 hdc, 10 ch-1 sp’s.
Treat all ch-1 spaces as a stitch to be worked with a hdc or part of the hdc2tog continue to round 16.
Round 16: *Hdc in 2 sts, hdc2tog next two sts; repeat from * around, join with a slip stitch in first hdc, ch 1 — 105 hdc.
Round 17: *Hdc in 3 sts, hdc2tog next two sts; repeat from * around, join with a slip stitch in first hdc, ch 1 — 84 hdc.
Rounds 18 & 19: Hdc in each st around, join with a slip stitch in first hdc, ch 1.
Round 20: *Hdc in 2 sts, hdc2tog next two sts; repeat from * around, join with a slip stitch in first hdc, ch 1 — 63 hdc.
Rounds 21- 23: Hdc in each st around, join with a slip stitch in first hdc, ch 1.
Round 24: Hdc in each st around, join with a slip stitch in first hdc.
Fasten off.
Fasten off, weave in ends.
Add optional Pom Pom