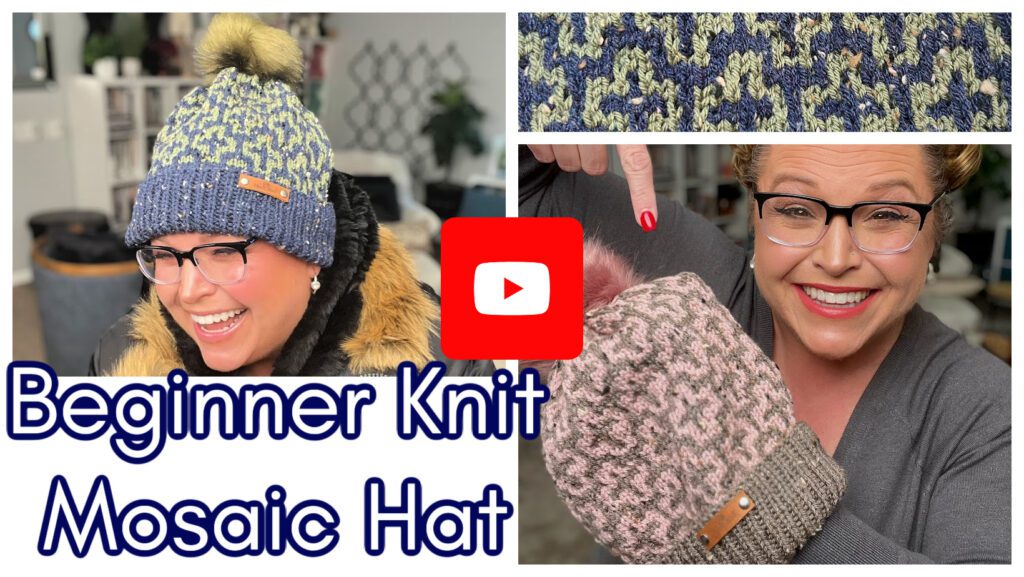
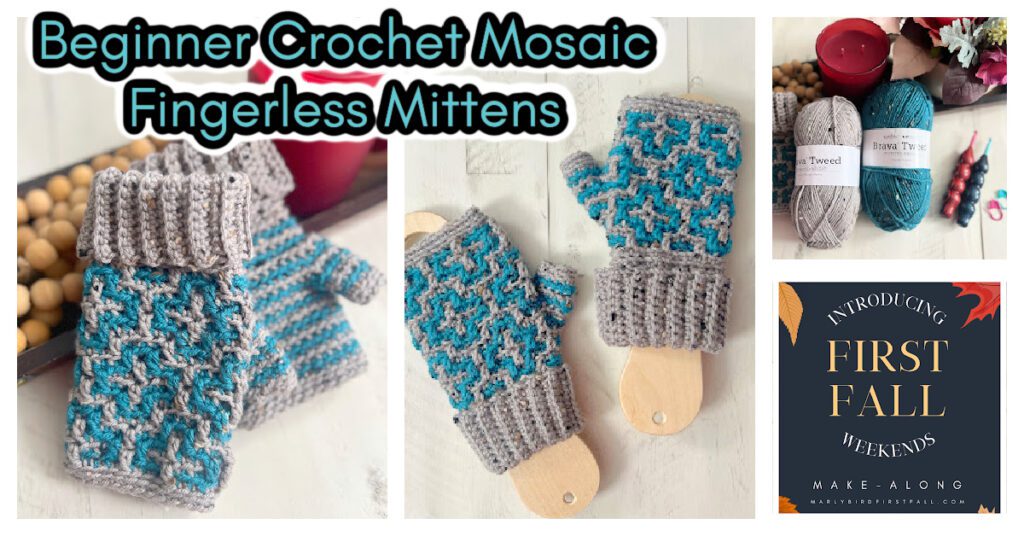
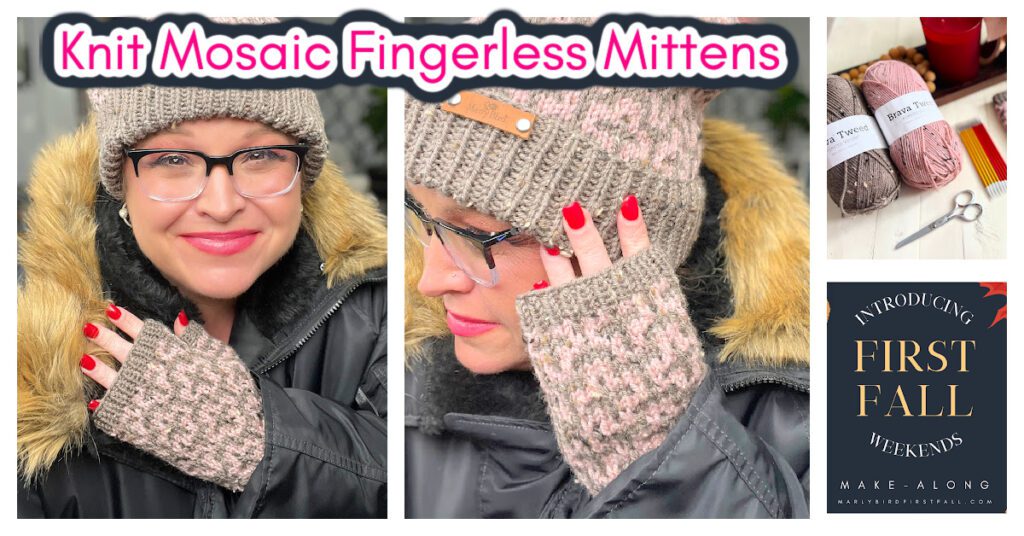
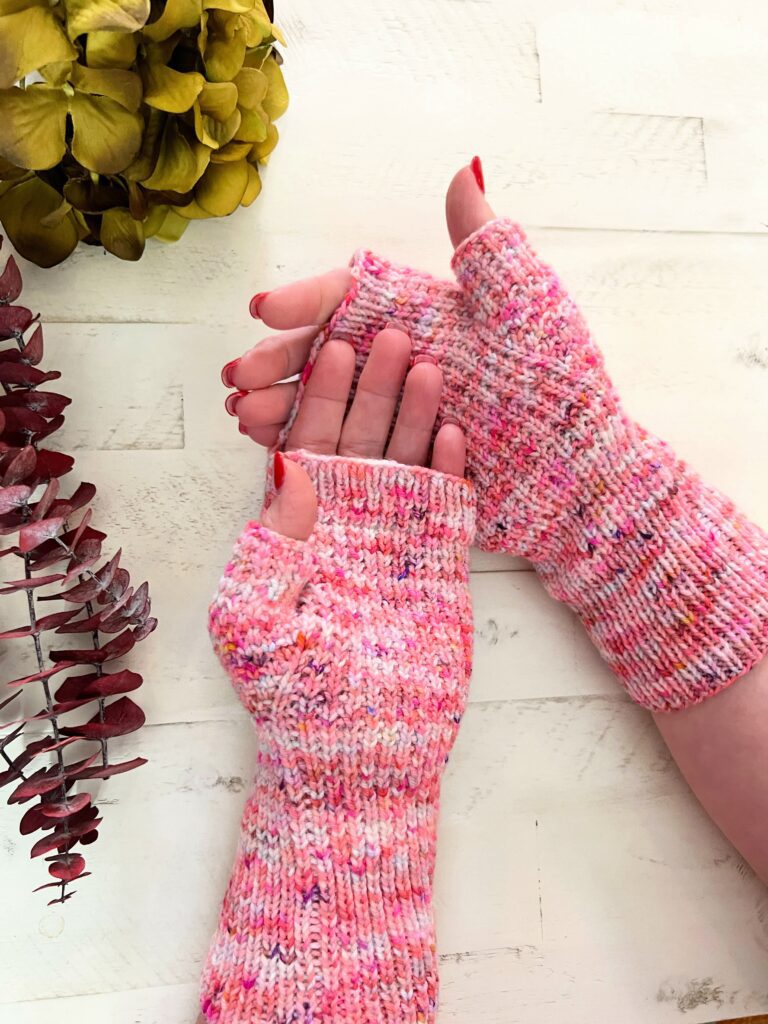
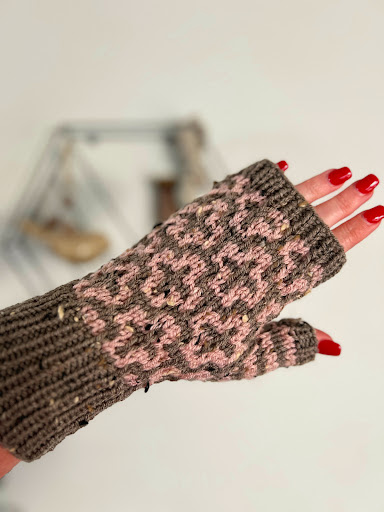
Looking for a quick project to keep your hands warm as the temperatures drop? The Cocoa Dreams Mosaic Knit Fingerless Mittens are the perfect blend of cozy, stylish, and functional. Whether you’re a mosaic knitting pro or looking to try out this colorwork technique for the first time, these fingerless mitts are a fantastic way to hone your skills.
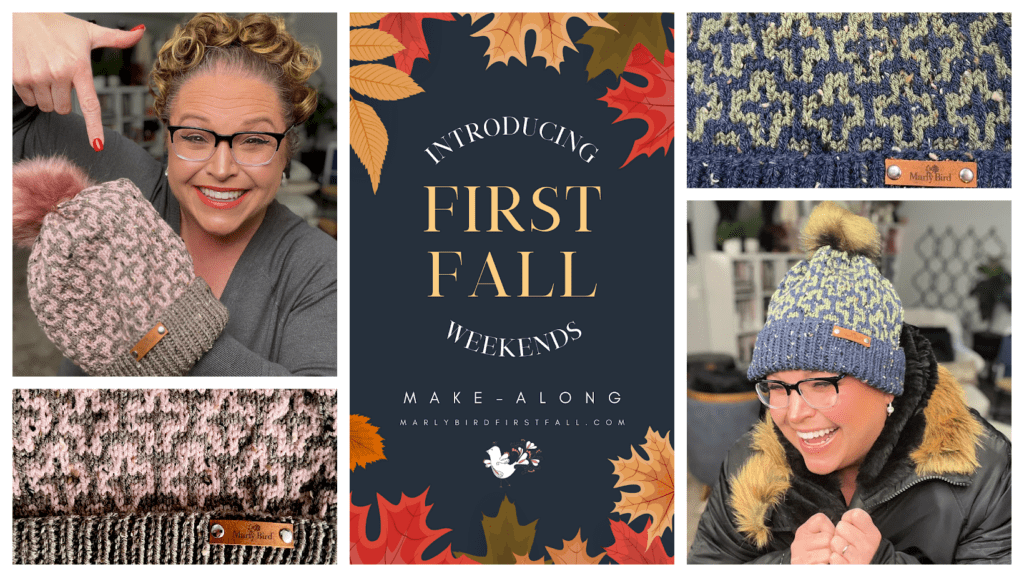
This project is free to access on the blog, and you’ll find it’s easy to follow with detailed instructions, video tutorials, and all the help you need! And don’t forget to check out more of my fall and winter patterns right here on the blog to keep your needles busy all season long.
Affiliate Disclosure: This post contains affiliate links. If you click on one of these links and make a purchase, I may earn a small commission at no additional cost to you. This helps support the content and free patterns I provide here on MarlyBird.com. Thank you for your support—it means the world to me! 💖
What Makes Mosaic Knitting Perfect for Fingerless Mittens?
Mosaic knitting is a wonderful way to introduce color into your knitting without the complexity of traditional stranded colorwork. The technique uses simple slip stitches to create intricate designs, while only working with one color per row. It’s a great introduction to colorwork because it avoids the tangled mess that often comes with using multiple yarn strands at once.
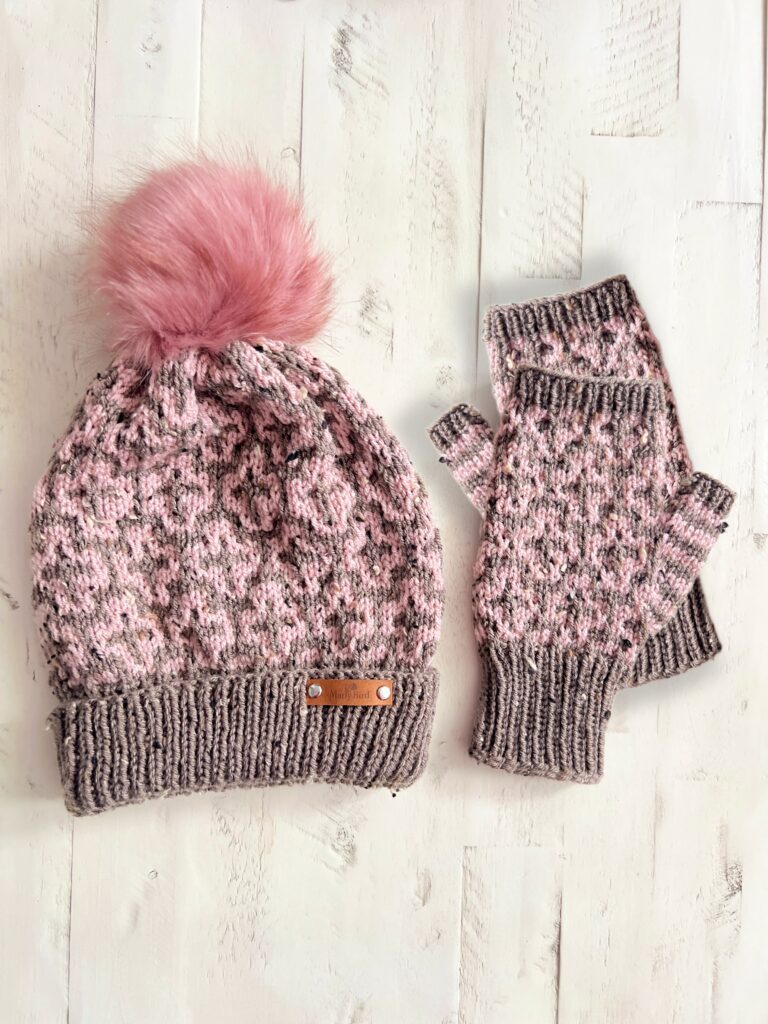
For the Cocoa Dreams knit fingerless mittens, the mosaic stitch pattern creates a cozy, textured look that’s both modern and classic—ideal for keeping your hands warm during those chilly fall days!
Why You’ll Love the Cocoa Dreams Fingerless Mittens 🧤
- Quick and Satisfying: You can knit these mittens over a weekend, making them the perfect grab-and-go project.
- Perfect for Layering: Wear them on their own during the fall or layer them over a thinner glove in the winter.
- Great Introduction to Mosaic Knitting: If you’ve never tried mosaic knitting before, this pattern will ease you in while giving you a beautiful finished result.
Yarn & Materials for the Cocoa Dreams Mittens
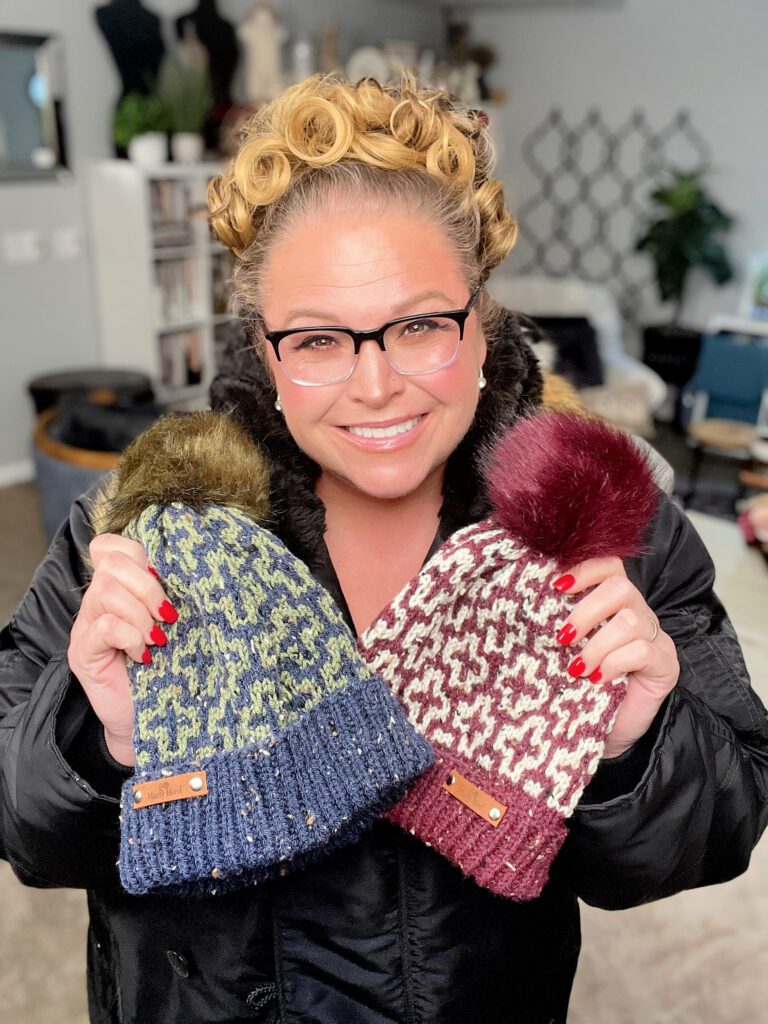
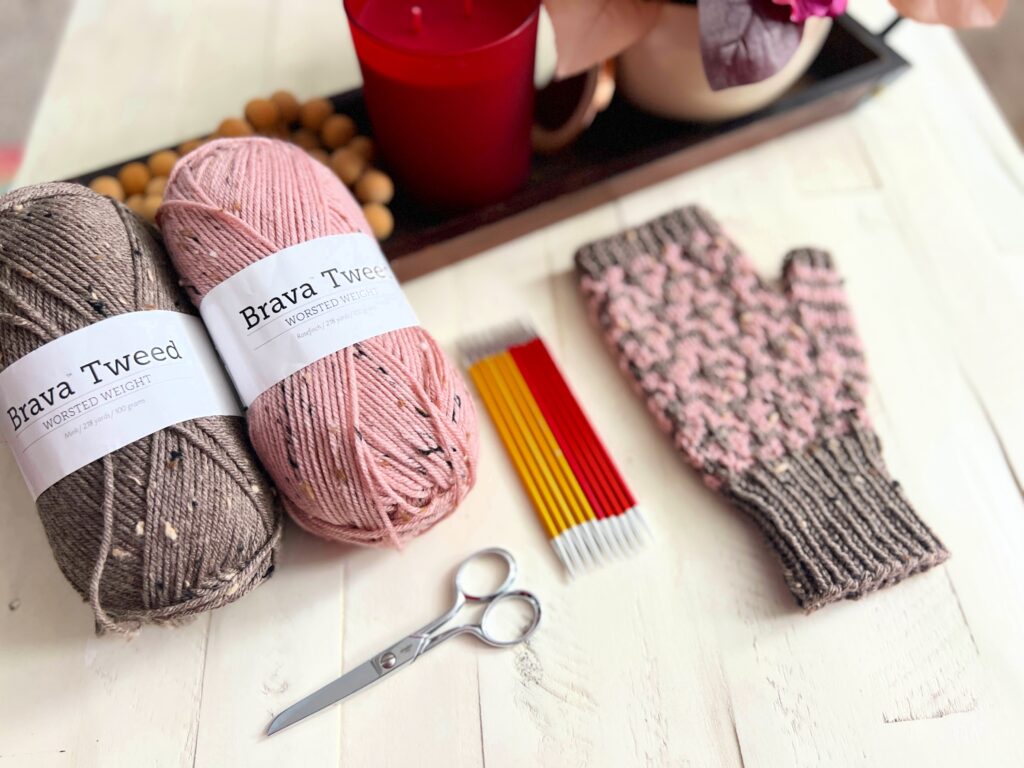
For these mittens, I suggest using worsted weight yarn in two contrasting colors—one dark and one light. The key to making mosaic patterns pop is the contrast between your main color and your accent color.
Suggested Yarn:
WeCrochet, Brava Tweed (97% Premium Acrylic/ 3% Viscose, 218 yds / 200 m, 3.5 oz/ 100 g, CYCA# 4 worsted)
- Yarn A (Main Color): A neutral or earthy tone like a deep brown or burgundy.
- Yarn B (Contrasting Color): A brighter or lighter color like mustard, cream, or heather gray for the perfect contrast.
Other Supplies:
- Knitting Needles: US Size 7 (4.5 mm) and size 8 (5 mm) set of 5 double pointed needles.
- Stitch Markers: To mark your rounds and pattern repeats.
- Tapestry Needle: For weaving in ends and finishing.
How to Knit Fingerless Mittens in Mosaic
When working mosaic knitting in the round for fingerless mittens, here are a few key tips to keep in mind:
- Slipping Stitches: This is the main technique. You’ll slip stitches purlwise from the left hand needle to the right hand needle without knitting them.
- Carrying Yarn: Only one color is used per round. You’ll alternate between the two colors on different rounds, which simplifies the colorwork process.
- Shaping: The mittens feature simple shaping for the thumb gusset to ensure a comfortable fit.
Need more help with mosaic knitting? Check out my step-by-step guide!

FAQs About Knitting Fingerless Mittens
Q: Can I use double-pointed needles (DPNs) to knit these mittens?
A: Absolutely! If you’re comfortable with DPNs, they’re a great option for knitting mittens in the round. However, you can also use the magic loop method if you prefer and are comfortable doing that technique.
Q: What’s the best yarn for fingerless mittens?
A: Worsted-weight yarn is ideal for these fingerless mittens, as it provides the right amount of warmth without being too bulky. Choose a yarn with good stitch definition to really make the mosaic pattern stand out.
Are you looking for a pair of mittens that use one hank of fingering weight yarn? Check out the More Than Just Socks Fingerless Mittens. They are some of my favorites!
Q: How do I measure for the best mitten fit?
A: Measure around the widest part of your hand (usually around the knuckles) and adjust the pattern to ensure your mittens will have a snug but comfortable fit.
Q: Can I make these mittens longer?
A: Yes! You can easily add length by knitting a few extra rounds before or after the thumb gusset to customize the fit.
Customizing Your Cocoa Dreams Mosaic Knit Fingerless Mittens
Want to make these mittens uniquely yours? Here are some fun ways to customize the pattern:
- Thumb Extensions: Extend the thumb section to make a full-finger mitten or even convert it into a mitt with a fold-over top. Here is another convertible mitten pattern
- Color Play: Switch up your colors to match your winter wardrobe. You could even make multiple pairs for different outfits.
- Add Embellishments: Add a small button, embroidery, or patch to the cuff to give your mittens a personal touch.
Get the Free Pattern for Cocoa Dreams Mosaic Knit Fingerless Mittens – Here!
You’ve learned the basics of mosaic knitting and fingerless mittens—now it’s time to grab your yarn and needles! For the Cocoa Dreams Mosaic Knit Fingerless Mittens, subscribe to the Marly Bird website through grow, login and the pattern will be visible to you.
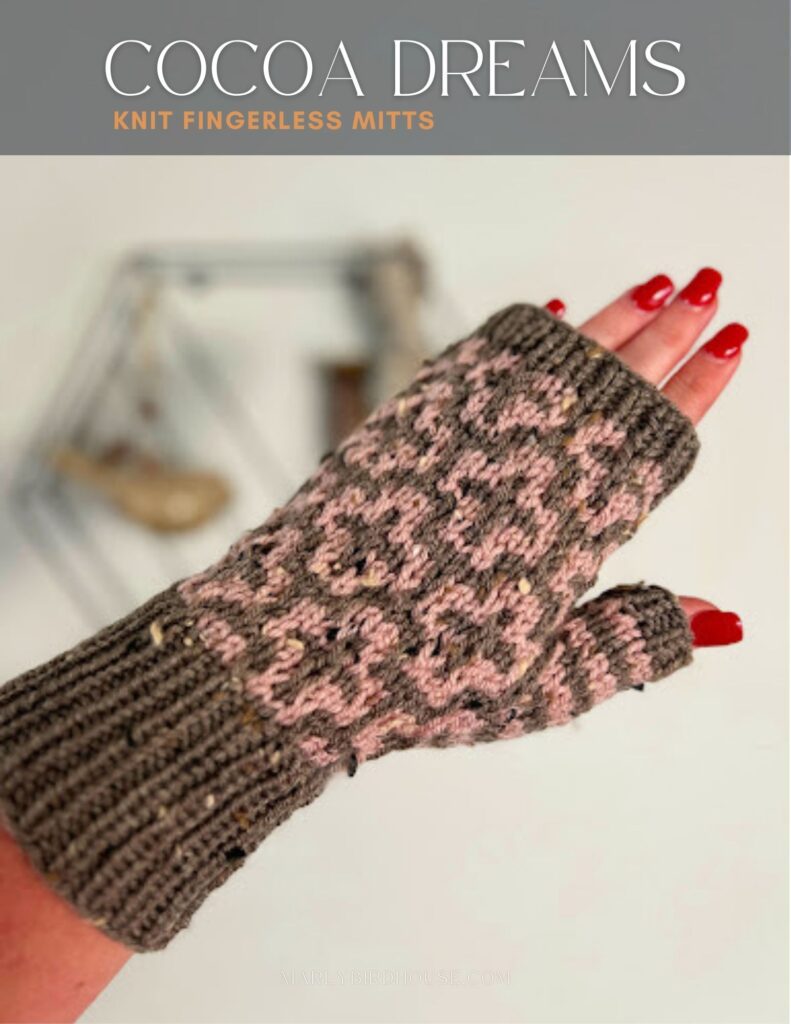
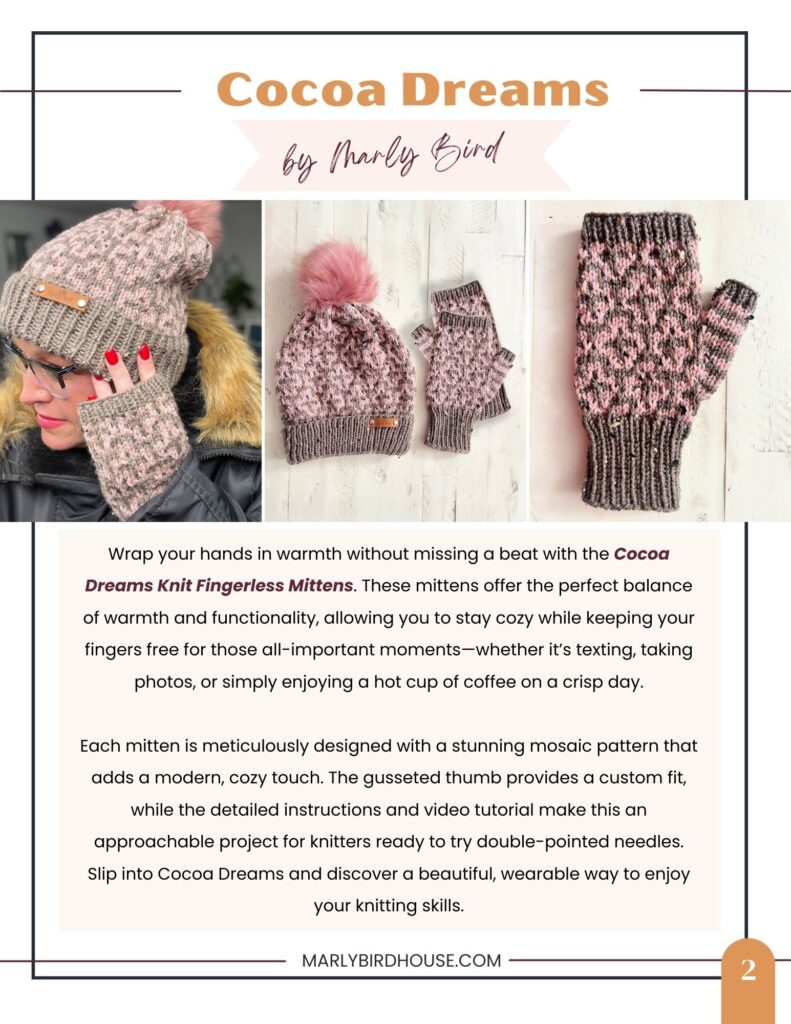
COCOA DREAMS KNIT MOSAIC FINGERLESS MITTENS
Designed by Marly Bird
SKILL LEVEL
Confident Beginner/Intermediate
MEASUREMENTS
To Fit Size
Child (Adult Small- Medium, Adult Large – XLarge)
Sample shown in Adult Small – Medium
Finished Measurements
| To Fit Size | Child | Adult Small – Medium | Adult Large – XLarge |
| Finished Hand Circumference (approx) Inches | 6.5 | 8 | 9.5 |
| Finished Hand Circumference cm | 16.5 | 20.5 | 24 |
| Finished Total Length + Cuff Inches | 6 | 9.5 | 10.5 |
| Finished Total Length + Cuff cm | 15 | 24 | 26.5 |
Gauge
20 stitches 35 rounds= 4″ [10 cm] in mosaic stitch pattern [10 cm] with larger needles; use any size needle to obtain the gauge.
MATERIALS
Yarn
WeCrochet, Brava Tweed (97% Premium Acrylic/ 3% Viscose, 218 yds / 200 m, 3.5 oz/ 100 g, CYCA# 4 worsted)
Color A, #61309 Elderberry, 1 ball
Color B, #61304 Wasabi, 1 ball
Knitting Needle
U.S. 7 [4.5 mm] and U.S. 8 [5 mm] set of 5 double pointed needles, or size required for gauge.
Notions
Stitch markers, tapestry needle, scrap yarn to hold stitches
ABBREVIATIONS
K – Knit
K2tog – Knit Two Together
M1 – Make One
P – Purl
PM – Place Marker
RS – Right Side
Sl – Slip
Sl-wyib – Slip With Yarn in Back
Sl M — Slip Marker
St(s) – Stitches
WS – Wrong Side
SPECIAL STITCHES
M1 (Make 1 Increase): With tip of left-hand needle, pick up the horizontal strand between stitches from front to back. Knit this strand through the back leg, twisting it into a loop in the process – 1 stitch increased.
SPECIAL TECHNIQUE
Backwards Loop Cast-on Method: * Wrap yarn around left thumb from front to back and secure in palm with other fingers. Insert needle upward through strand on thumb. Slip loop from thumb onto needle, pulling yarn to tighten. Repeat from * for desired number of sts.
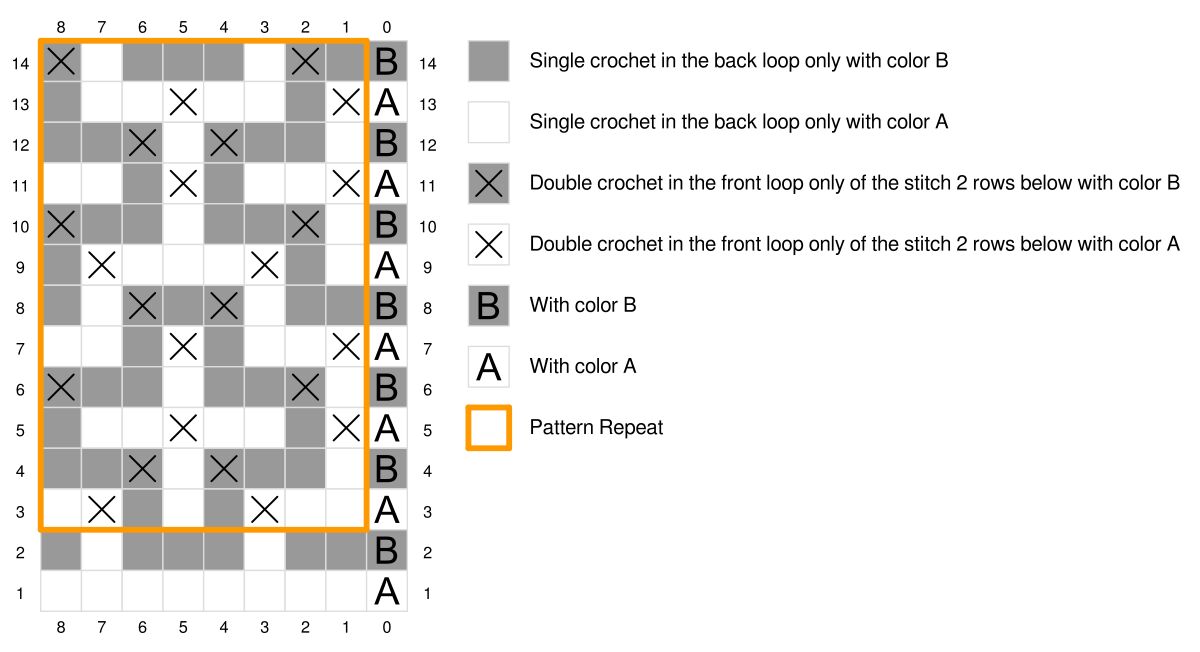
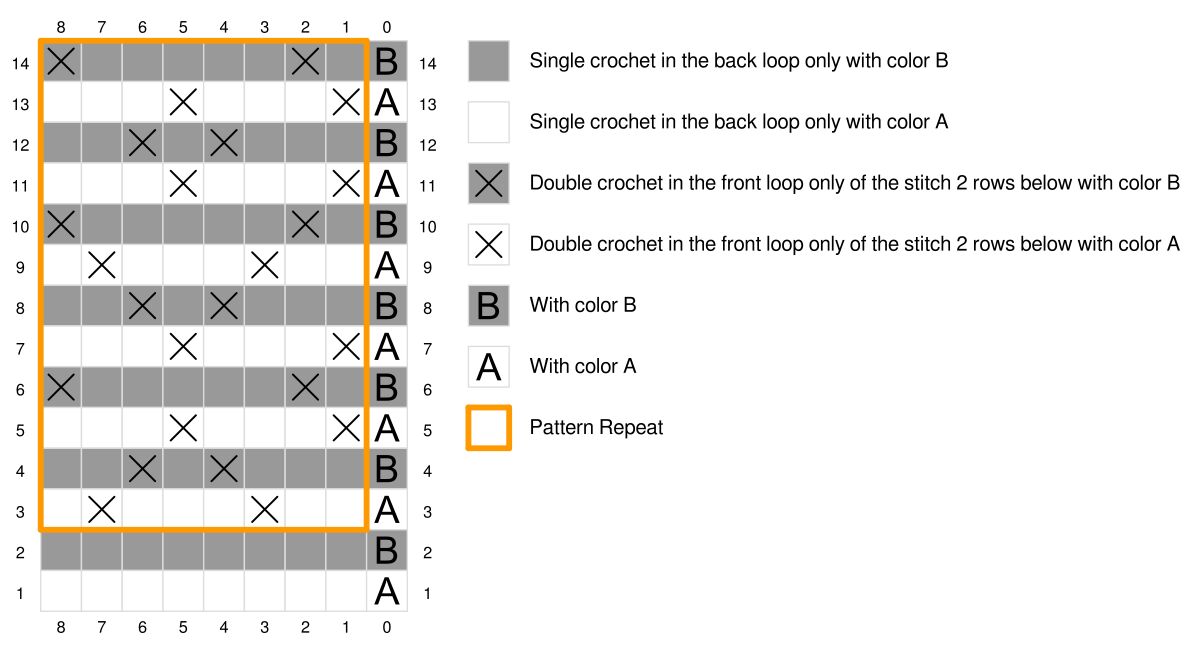
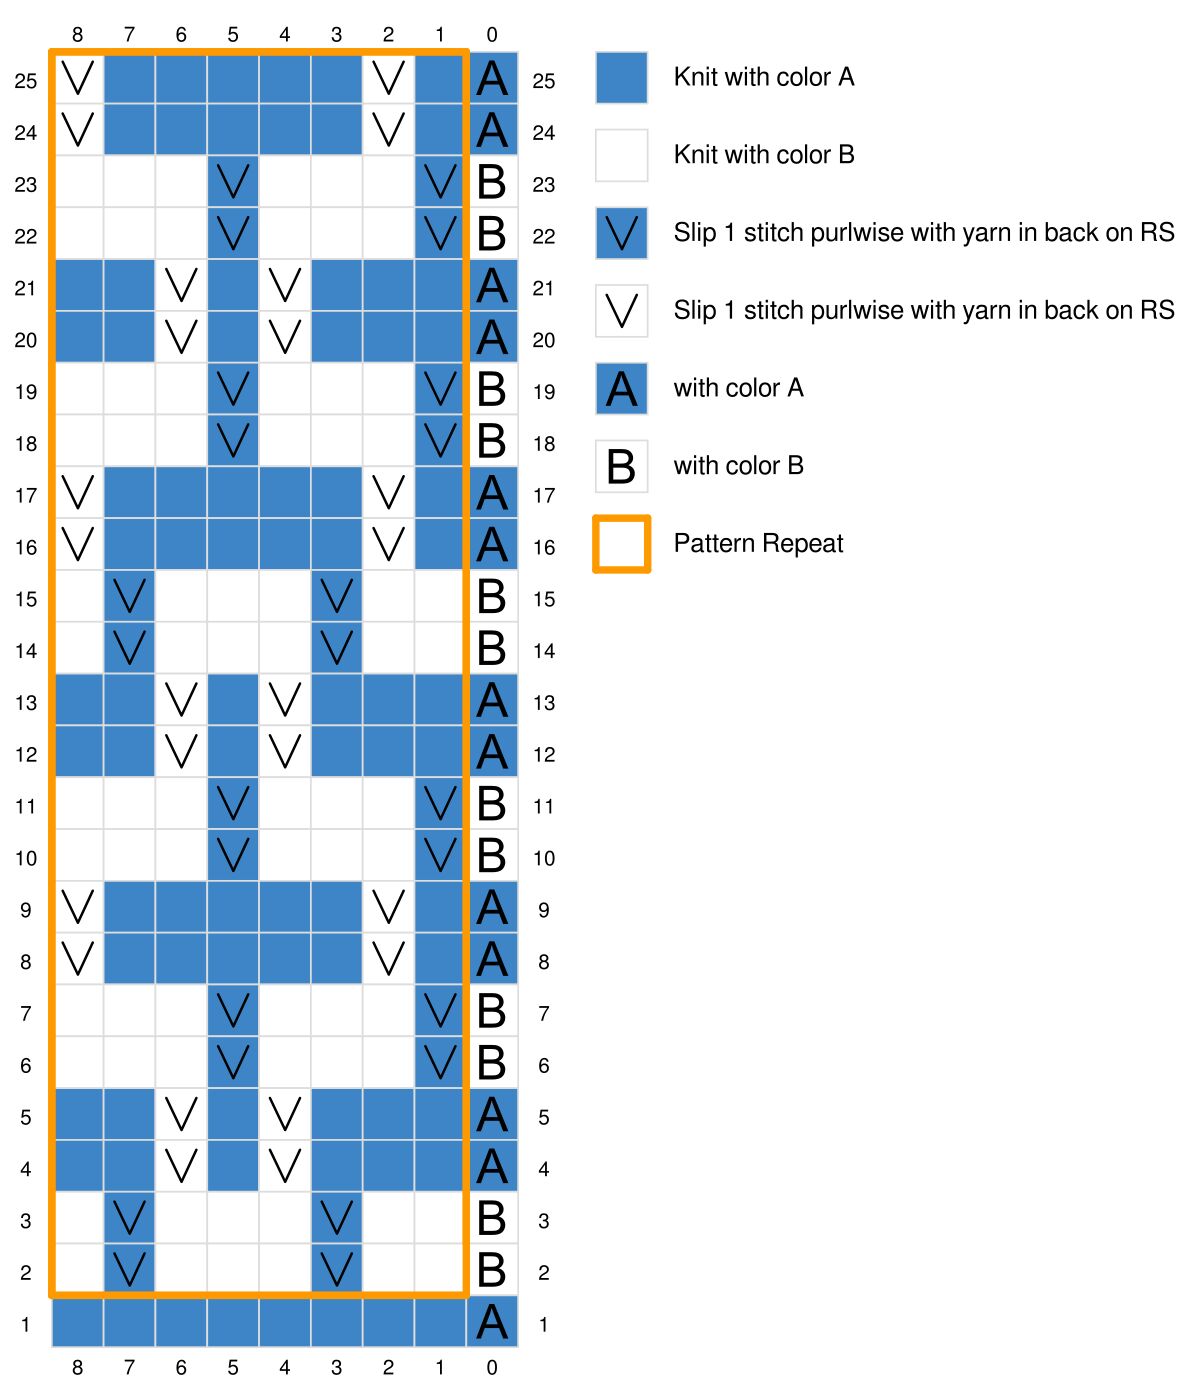
CHART
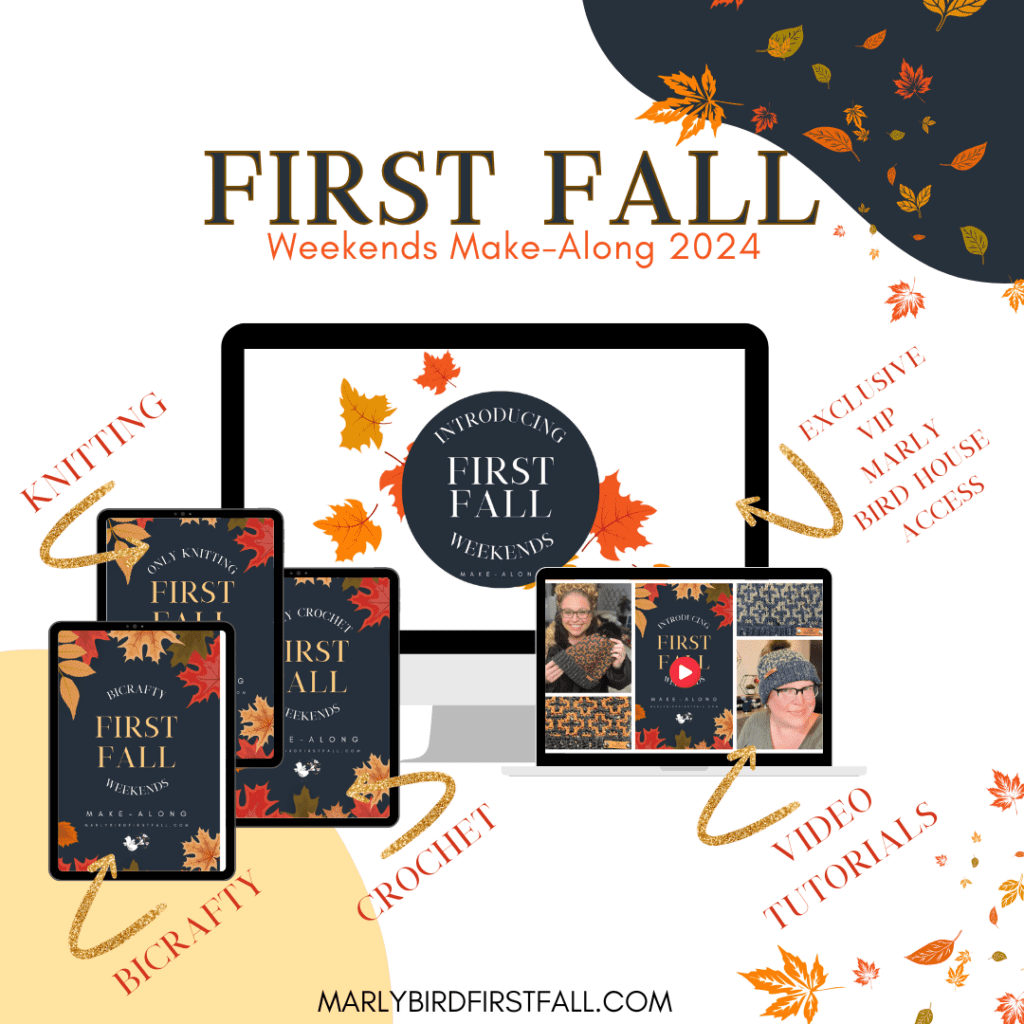
The Ad-Free PDF includes full charts with thumb gusset stitches indicated for each size. Upgrade to the First Fall Weekends VIP Experience and get the 21 page pdf for uninterrupted knitting experience.
NOTES
- Directions are for size Child; changes for sizes (S-M, L-XL) are in parentheses. When only one number is given then that number applies to all sizes.
- Project is made from the bottom cuff to finger cuff.
- When working on the body, place a marker every 8 stitches for the repeat (adding the marker to actual stitch might be necessary with the double pointed needles)
- Slip all stitches as if to purl with yarn in back.
- When slipping stitches be sure to not pull the float too tight or the gauge will get too small.
- Do not cut colors, carry the color up the side.
- Work thumb gusset stitches in two row stripes.
- If you want to be sure you have a safety net as you knit, adding a lifeline to your project every so often will be helpful. Just to make sure you have a point to rip back to if something goes wrong. (video help).

VIDEO TUTORIALS
Cocoa Dreams Knit Mosaic Fingerless Mittens Video >> Click Here for Video Help <<

No Cuss Cast On to Double Pointed Needles >> Click Here for Video Help <<
Knit Stitch (continental style) >> Click Here for Video Help <<
Purl Stitch (continental style) >> Click Here for Video Help <<
Perfect Ribbing >> Click Here for Video Help <<
Duplicate Stitch >> Click Here for Video Help <<
How to Add Lifeline >> Click Here for Video Help <<
How to Tink >> Click Here for Video Help <<
Bury Ends >> Click Here for Video Help <<

GROW
To Unlock Exclusive Subscriber Content click the Box below and join for free by simply adding your email and creating a password! If you are having troubles, clear your cache or reset your password or login to the Grow Publisher Portal.
>> Learn More About Grow Here <<
I’m thrilled to share this amazing pattern with you, many patterns on my blog are absolutely free! I kindly request that you don’t copy and paste or distribute this pattern. Prefer an ad-free experience? Buy a digital PDF pattern for a small fee from one of my online stores for a seamless crafting journey.
I appreciate your support and readership. You are the reason I can keep doing what I love and sharing it with others. So, thank you from the bottom of my yarn-loving heart! Disclosure: This post contains affiliate links, meaning I get a commission if you decide to make a purchase through my links at no cost to you.
COCOA DREAMS KNIT MOSAIC FINGERLESS MITTENS
CUFF
All Sizes
With smaller double pointed needles and color A, cast on 32, (40, 48) stitches. Join to work in the round.
Round 1: *K1, p1; repeat from * to end of round.
Work in 1×1 ribbing for 2 (3, 3)” [5 (7.5, 7.5) cm].
Mosaic Knit Fingerless Mittens – HAND
With larger double pointed needles, follow the instructions for the size you are making (also see chart for each size)
Child Size
Round 1: With color A, Knit 32.
Round 2: With color B, [K2, sl1wyib, K1] 2 times, K2, sl1wyib, place marker, K1, place marker, *K2, sl1wyib, K1; repeat from * 5 times — 1 thumb stitch between markers.
Round 3 (increase): With color B, [K2, sl1wyib, K1] 2 times, K2, sl1wyib, sl m, M1, knit to marker, M1, sl m, *K2, sl1wyib, K1; repeat from 5 times — 3 thumb stitches between markers.
Round 4: With color A, K2, [K1, sl1wyib] 2 times, K5, sl m, knit to marker, sl m, *K1, sl1wyib, K5, sl1wyib; repeat from* 2 times, K1, sl1wyib, K2.
Round 5 (increase): With color A, K2, [K1, sl1wyib] 2 times, K5, sl m, M1, knit to marker, M1, sl m, *K1, sl1wyib, K5, sl1wyib; repeat from *2 times, K1, sl1wyib, K2 — 5 thumb stitches between markers.
Round 6: With color B, [sl1wyib, K3] 2 times, sl1wyib, K2, sl m, knit to marker, sl m, *sl1wyib, K3; repeat from * 5 times.
Round 7 (increase): With color B, [sl1wyib, K3] 2 times, sl1wyib, K2, sl m, M1, knit to marker, M1, sl m, *sl1wyib, K3; repeat from * 5 times — 7 thumb stitches between markers.
Round 8: With color A, K1, sl1wyib, K4, [K1, sl1wyib] 2 times, K1, sl m, knit to marker, sl m, *K3, sl1wyib, K1, sl1wyib, K2; repeat from * 2 times, K3, sl1wyib.
Round 9 (increase): With color A, K1, sl1wyib, K4, [K1, sl1wyib] 2 times, K1, sl m, M1, knit to marker, M1, sl m, *K3, sl1wyib, K1, sl1wyib, K2; repeat from * 2 times, K3, sl1wyib — 9 thumb stitches between markers.
Round 10: With color B, [sl1wyib, K3] 2 times, sl1wyib, K2, sl m, knit to marker, sl m, *sl1wyib, K3; repeat from * 5 times.
Round 11: With color B, [sl1wyib, K3] 2 times, sl1wyib, K2, sl m, knit to marker, sl m, *sl1wyib, K3; repeat from * 5 times.
Round 12: With color A, K2, [K1, sl1wyib] 2 times, K5, sl m, knit to marker, sl m, *K1, sl1wyib, K5, sl1wyib; repeat from * 2 times, K1, sl1wyib, K2.
Round 13 (increase): With color A, K2, [K1, sl1wyib] 2 times, K5, sl m, M1, knit to marker, M1, sl m, *K1, sl1wyib, K5, sl1wyib; repeat from 2 times, K1, sl1wyib, K2 — 11 thumb stitches between markers.
Round 14: With color B, [K2, sl1wyib, K1] 2 times, K2, sl1wyib, sl m, knit to marker, sl m, *K2, sl1wyib, K1; repeat from * 5 times.
Round 15: With color B, [K2, sl1wyib, K1] 2 times, K2, sl1wyib, remove marker,thread a piece of scrap yarn onto a tapestry needle and thread through 11 stitches, remove marker, cast on 1, *K2, sl1wyib, K1; repeat from * 5 times — 32 stitches.
CONTINUE WITH HAND
Round 16: With color A, *K1, sl1wyib, K5, sl1wyib] 4 times.
Round 17: With color A, *K1, sl1wyib, K5, sl1wyib] 4 times.
Round 18: With color B, *sl1wyib, K3] 8 times.
Round 19: With color B, *sl1wyib, K3] 8 times.
Round 20: With color A, *K3, sl1wyib, K1, sl1wyib, K2] 4 times.
Round 21: With color A, *K3, sl1wyib, K1, sl1wyib, K2] 4 times.
Round 22: With color B, *sl1wyib, K3] 8 times.
Round 23: With color B, *sl1wyib, K3] 8 times.
Round 24: With color A, *K1, sl1wyib, K5, sl1wyib] 4 times.
Round 25: With color A, *K1, sl1wyib, K5, sl1wyib] 4 times.
Round 26: With color B, *K2, sl1wyib, K1] 8 times.
Round 27: With color B, *K2, sl1wyib, K1] 8 times.
Round 28: With color A, Knit around.
Cut color B
Proceed to Finger Cuff
Adult Small- Medium
Round 1: With color A, Knit 40.
Round 2: With color B, *K2, sl1wyib, K1; repeat from * 10 times.
Round 3: With color B, *K2, sl1wyib, K1; repeat from * 10 times.
Round 4: With color A, *K3, sl1wyib, K1, sl1wyib, K2; repeat from * 5 times.
Round 5: With color A, *K3, sl1wyib, K1, sl1wyib, K2; repeat from * 5 times.
Round 6: With color B, *sl1wyib, K3; repeat from * 10 times.
Round 7: With color B, *sl1wyib, K3; repeat from * 10 times.
THUMB GUSSET
Round 8: With color A, K1, sl1wyib, K4, [K1, sl1wyib] 2 times, K1, place marker, k1, place marker, *K3, sl1wyib, K1, sl1wyib, K2; repeat from * 3 times, K3, sl1wyib — 1 thumb stitch between markers.
Round 9 (increase): With color A, K1, sl1wyib, K4, [K1, sl1wyib] 2 times, K1, sl m, M1, knit to marker, M1, sl m, *K3, sl1wyib, K1, sl1wyib, K2; repeat from * 3 times, K3, sl1wyib — 3 thumb stitches between markers.
Round 10: With color B, [sl1wyib, K3] 2 times, sl1wyib, K2, sl m, knit to marker, sl m, *sl1wyib, K3; repeat from * 7 times.
Round 11 (increase): With color B, [sl1wyib, K3] 2 times, sl1wyib, K2, sl m, M1, knit to marker, M1, sl m, *sl1wyib, K3; repeat from * 7 times — 5 thumb stitches between markers.
Round 12: With color A, K2, [K1, sl1wyib] 2 times, K5, sl m, knit to marker, sl m, *K1, sl1wyib, K5, sl1wyib; repeat from * 3 times, K1, sl1wyib, K2.
Round 13 (increase): With color A, K2, [K1, sl1wyib] 2 times, K5, sl m, M1, knit to marker, M1, sl m, *K1, sl1wyib, K5, sl1wyib; repeat from * 3 times, K1, sl1wyib, K2 — 7 thumb stitches between markers.
Round 14: With color B, [K2, sl1wyib, K1] 2 times, K2, sl1wyib, sl m, knit to marker, sl m, *K2, sl1wyib, K1; repeat from * 7 times.
Round 15 (increase): With color B, [K2, sl1wyib, K1] 2 times, K2, sl1wyib, sl m, M1, knit to marker, M1, sl m, *K2, sl1wyib, K1; repeat from * 7 times — 9 thumb stitches between markers.
Round 16: With color A, K1, sl1wyib, K4, [K1, sl1wyib] 2 times, K1, sl m, knit to marker, sl m, *K3, sl1wyib, K1, sl1wyib, K2; repeat from * 3 times, K3, sl1wyib.
Round 17 (increase): With color A, K1, sl1wyib, K4, [K1, sl1wyib] 2 times, K1, sl m, M1, knit to marker, M1, sl m, *K3, sl1wyib, K1, sl1wyib, K2; repeat from * 3 times, K3, sl1wyib — 11 thumb stitches between markers.
Round 18: With color B, [sl1wyib, K3] 2 times, sl1wyib, K2, sl m, knit to marker, sl m, *sl1wyib, K3; repeat from * 7 times.
Round 19: With color B, [sl1wyib, K3] 2 times, sl1wyib, K2, sl m, knit to marker, sl m, *sl1wyib, K3; repeat from * 7 times.
Round 20: With color A, K2, [K1, sl1wyib] 2 times, K5, sl m, knit to marker, sl m, *K1, sl1wyib, K5, sl1wyib; repeat from * 3 times, K1, sl1wyib, K2.
Round 21 (increase): With color A, K2, [K1, sl1wyib] 2 times, K5, sl m, M1, knit to marker, M1, sl m, *K1, sl1wyib, K5, sl1wyib; repeat from * 3 times, K1, sl1wyib, K2 — 13 thumb stitches between markers.
Round 22: With color B, [sl1wyib, K3] 2 times, sl1wyib, K2, sl m, knit to marker, sl m, *sl1wyib, K3; repeat from * 7 times.
Round 23: With color B, [sl1wyib, K3] 2 times, sl1wyib, K2, sl m, knit to marker, sl m, *sl1wyib, K3; repeat from * 7 times.
Round 24: With color A, K1, sl1wyib, K4, [K1, sl1wyib] 2 times, K1, sl m, knit to marker, sl m, *K3, sl1wyib, K1, sl1wyib, K2; repeat from * 3 times, K3, sl1wyib.
Round 25: With color A, K1, sl1wyib, K4, [K1, sl1wyib] 2 times, K1, sl m, M1, knit to marker, M1, sl m, *K3, sl1wyib, K1, sl1wyib, K2; repeat from * 3 times, K3, sl1wyib — 15 thumb stitches between markers.
Round 26: With color B, [K2, sl1wyib, K1] 2 times, K2, sl1wyib, sl m, knit to marker, sl m, *K2, sl1wyib, K1; repeat from * 7 times.
Round 27 (cast on): With color B, [K2, sl1wyib, K1] 2 times, K2, sl1wyib, remove marker,thread a piece of scrap yarn onto a tapestry needle and thread through 15 stitches, remove marker, cast on 1, *K2, sl1wyib, K1; repeat from * 7 times — 40 sts.
CONTINUE WITH HAND
Round 28: With color A, *K3, sl1wyib, K1, sl1wyib, K2; repeat from * 5 times.
Round 29: With color A, *K3, sl1wyib, K1, sl1wyib, K2; repeat from * 5 times.
Round 30: With color B, *sl1wyib, K3; repeat from * 10 times.
Round 31: With color B, *sl1wyib, K3; repeat from * 10 times.
Round 32: With color A, *K1, sl1wyib, K5, sl1wyib; repeat from * 5 times.
Round 33: With color A, *K1, sl1wyib, K5, sl1wyib; repeat from * 5 times.
Round 34: With color B, *sl1wyib, K3; repeat from * 10 times.
Round 35: With color B, *sl1wyib, K3; repeat from * 10 times.
Round 36: With color A, *K3, sl1wyib, K1, sl1wyib, K2; repeat from * 5 times.
Round 37: With color A, *K3, sl1wyib, K1, sl1wyib, K2; repeat from * 5 times.
Round 38: With color B, *K2, sl1wyib, K1; repeat from * 10 times.
Round 39: With color B, *K2, sl1wyib, K1; repeat from * 10 times.
Round 40: With color A, *K1, sl1wyib, K5, sl1wyib; repeat from * 5 times.
Round 41: With color A, *K1, sl1wyib, K5, sl1wyib; repeat from * 5 times.
Round 42: With color B, *sl1wyib, K3; repeat from * 10 times.
Round 43: With color B, *sl1wyib, K3; repeat from * 10 times.
Round 44: With color A, *K3, sl1wyib, K1, sl1wyib, K2; repeat from * 5 times.
Round 45: With color A, *K3, sl1wyib, K1, sl1wyib, K2; repeat from * 5 times.
Round 46: With color B, *sl1wyib, K3; repeat from * 10 times.
Round 47: With color B, *sl1wyib, K3; repeat from * 10 times.
Round 48: With color A, Knit around.
Cut color B
Proceed to Finger Cuff
Adult Large-Extra Large
Round 1: With color A, K48.
Round 2: With color B, *K2, sl1wyib, K1; repeat from * 12 times.
Round 3: With color B, *K2, sl1wyib, K1; repeat from * 12 times.
Round 4: With color A, *K3, sl1wyib, K1, sl1wyib, K2; repeat from * 6 times.
Round 5: With color A, *K3, sl1wyib, K1, sl1wyib, K2; repeat from * 6 times.
Round 6: With color B, *sl1wyib, K3; repeat from * 12 times.
Round 7: With color B, *sl1wyib, K3; repeat from * 12 times.
THUMB GUSSET
Round 8: With color A, K1, sl1wyib, K4, [K1, sl1wyib] 2 times, K1, place marker, k1, place marker, *K3, sl1wyib, K1, sl1wyib, K2; repeat from * 4 times, K3, sl1wyib — 1 thumb stitch between markers.
Round 9 (increase): With color A, K1, sl1wyib, K4, [K1, sl1wyib] 2 times, K1, sl m, M1, knit to marker, M1, sl m, *K3, sl1wyib, K1, sl1wyib, K2; repeat from * 4 times, K3, sl1wyib — 3 thumb stitches between markers.
Round 10: With color B, [sl1wyib, K3] 2 times, sl1wyib, K2, sl m, knit to marker, sl m, *sl1wyib, K3; repeat from * 9 times.
Round 11 (increase): With color B, [sl1wyib, K3] 2 times, sl1wyib, K2, sl m, M1, knit to marker, M1, sl m, *sl1wyib, K3; repeat from * 7 times — 5 thumb stitches between markers.
Round 12: With color A, K2, [K1, sl1wyib] 2 times, K5, sl m, knit to marker, sl m, *K1, sl1wyib, K5, sl1wyib; repeat from * 4 times, K1, sl1wyib, K2.
Round 13 (increase): With color A, K2, [K1, sl1wyib] 2 times, K5, sl m, M1, knit to marker, M1, sl m, *K1, sl1wyib, K5, sl1wyib; repeat from * 4 times, K1, sl1wyib, K2 — 7 thumb stitches between markers.
Round 14: With color B, [K2, sl1wyib, K1] 2 times, K2, sl1wyib, sl m, knit to marker, sl m, *K2, sl1wyib, K1; repeat from * 9 times.
Round 15 (increase): With color B, [K2, sl1wyib, K1] 2 times, K2, sl1wyib, sl m, M1, knit to marker, M1, sl m, *K2, sl1wyib, K1; repeat from * 9 times — 9 thumb stitches between markers.
Round 16: With color A, K1, sl1wyib, K4, [K1, sl1wyib] 2 times, K1, sl m, knit to marker, sl m, *K3, sl1wyib, K1, sl1wyib, K2; repeat from * 4 times, K3, sl1wyib.
Round 17 (increase): With color A, K1, sl1wyib, K4, [K1, sl1wyib] 2 times, K1, sl m, M1, knit to marker, M1, sl m, *K3, sl1wyib, K1, sl1wyib, K2; repeat from * 4 times, K3, sl1wyib — 11 thumb stitches between markers.
Round 18: With color B, [sl1wyib, K3] 2 times, sl1wyib, K2, sl m, knit to marker, sl m, *sl1wyib, K3; repeat from * 9 times.
Round 19: With color B, [sl1wyib, K3] 2 times, sl1wyib, K2, sl m, knit to marker, sl m, *sl1wyib, K3; repeat from * 9 times.
Round 20: With color A, K2, [K1, sl1wyib] 2 times, K5, sl m, knit to marker, sl m, *K1, sl1wyib, K5, sl1wyib; repeat from * 4 times, K1, sl1wyib, K2.
Round 21 (increase): With color A, K2, [K1, sl1wyib] 2 times, K5, sl m, M1, knit to marker, M1, sl m, *K1, sl1wyib, K5, sl1wyib; repeat from * 4 times, K1, sl1wyib, K2 — 13 thumb stitches between markers.
Round 22: With color B, [sl1wyib, K3] 2 times, sl1wyib, K2, sl m, knit to marker, sl m, *sl1wyib, K3; repeat from * 9 times.
Round 23: With color B, [sl1wyib, K3] 2 times, sl1wyib, K2, sl m, knit to marker, sl m, *sl1wyib, K3; repeat from * 9 times.
Round 24: With color A, K1, sl1wyib, K4, [K1, sl1wyib] 2 times, K1, sl m, knit to marker, sl m, *K3, sl1wyib, K1, sl1wyib, K2; repeat from * 4 times, K3, sl1wyib.
Round 25 (increase): With color A, K1, sl1wyib, K4, [K1, sl1wyib] 2 times, K1, sl m, M1, knit to marker, M1, sl m, *K3, sl1wyib, K1, sl1wyib, K2; repeat from * 4 times, K3, sl1wyib — 15 thumb stitches between markers.
Round 26: With color B, [K2, sl1wyib, K1] 2 times, K2, sl1wyib, sl m, knit to marker, sl m, *K2, sl1wyib, K1; repeat from * 9 times.
Round 27: With color B, [K2, sl1wyib, K1] 2 times, K2, sl1wyib, sl m, knit to marker, sl m, *K2, sl1wyib, K1; repeat from * 9 times.
Round 28: With color A, K2, [K1, sl1wyib] 2 times, K5, sl m, knit to marker, sl m, *K1, sl1wyib, K5, sl1wyib; repeat from * 4 times, K1, sl1wyib, K2.
Round 29: With color A, K2, [K1, sl1wyib] 2 times, K5, sl m, M1, knit to marker, M1, sl m, *K1, sl1wyib, K5, sl1wyib; repeat from 4 times, K1, sl1wyib, K2 — 17 thumb stitches between markers.
Round 30: With color B, [sl1wyib, K3] 2 times, sl1wyib, K2, sl m, knit to marker, sl m, *sl1wyib, K3; repeat from * 9 times.
Thread a piece of scrap yarn onto a tapestry needle and thread through gusset stitches between markers — 11 (15, 17) thumb stitches.
Round 31: With color B, [sl1wyib, K3] 2 times, sl1wyib, K2, remove marker,thread a piece of scrap yarn onto a tapestry needle and thread through 17 stitches, remove marker, cast on 1, *sl1wyib, K3; repeat from * 9 times — 48 sts.
CONTINUE WITH HAND
Round 32: With color A, *K1, sl1wyib, K5, sl1wyib; repeat from * 6 times.
Round 33: With color A, *K1, sl1wyib, K5, sl1wyib; repeat from * 6 times.
Round 34: With color B, *sl1wyib, K3; repeat from * 12 times.
Round 35: With color B, *sl1wyib, K3; repeat from * 12 times.
Round 36: With color A, *K3, sl1wyib, K1, sl1wyib, K2; repeat from * 6 times.
Round 37: With color A, *K3, sl1wyib, K1, sl1wyib, K2; repeat from * 6 times.
Round 38: With color B, *K2, sl1wyib, K1; repeat from * 12 times.
Round 39: With color B, *K2, sl1wyib, K1; repeat from * 12 times.
Round 40: With color A, *K1, sl1wyib, K5, sl1wyib; repeat from * 6 times.
Round 41: With color A, *K1, sl1wyib, K5, sl1wyib; repeat from * 6 times.
Round 42: With color B, *sl1wyib, K3; repeat from * 12 times.
Round 43: With color B, *sl1wyib, K3; repeat from * 12 times.
Round 44: With color A, *K3, sl1wyib, K1, sl1wyib, K2; repeat from * 6 times.
Round 45: With color A, *K3, sl1wyib, K1, sl1wyib, K2; repeat from * 6 times.
Round 46: With color B, *sl1wyib, K3; repeat from * 12 times.
Round 47: With color B, *sl1wyib, K3; repeat from * 12 times.
Round 48: With color A, *K1, sl1wyib, K5, sl1wyib; repeat from * 6 times.
Round 49: With color A, *K1, sl1wyib, K5, sl1wyib; repeat from * 6 times.
Round 50: With color B, *K2, sl1wyib, K1; repeat from * 12 times.
Round 51: With color B, *K2, sl1wyib, K1; repeat from * 12 times.
Round 52: With color A, Knit around
Cut color B
Proceed to Finger Cuff
FINGER CUFF
With smaller double pointed needles
Rounds 1-4: With color A, *K1, P1; repeat from * around.
Bind off in pattern.
THUMB
All Sizes
With larger double pointed needles
Continue with the established two row color repeat for the thumb.
Set-up Round: With color B, place thumb stitches from scrap yarn onto 3 double pointed needles, pick up and knit 1 stitch at cast on. Join to work in the round.
Round 1: With color B, Knit around.
Round 2: With color A, Knit around.
Child size proceed to thumb cuff
Round 3: With color A, Knit around.
Round 4: With color B, Knit around.
Round 5: With color B, Knit around.
Round 6: With color A , Knit around.
THUMB CUFF
With smaller double pointed needles
Rounds 1-3: With color A, *K1, P1; repeat from * around.
Bind off in pattern.
FINISHING
Fasten tail securely to wrong side of mitten.
Use tail from Thumb to close any gap or hole at the join with the Duplicate Stitch technique.
Weave in all loose ends.
Don’t Forget to Share Your Project!
Once your Cocoa Dreams Mittens are finished, I’d love to see how they turned out! Share your project on Ravelry or tag me on social media with #MarlyMadeMeDoIt.
Meta Title:
“Cocoa Dreams Mosaic Knit Fingerless Mittens – Free Pattern & Beginner FAQs”
Meta Description:
“Learn how to knit the Cocoa Dreams Mosaic Fingerless Mittens with this free pattern! Easy mosaic knitting tips and FAQs included for knitters of all levels.”