Search
Close
  • The Pattern Shop
  • Our Free Patterns
    • Browse All Our Free Patterns
    • Our Free Knitting Patterns
    • Our Free Crochet Patterns
    • The Big List of Free Knitting Patterns from Marly Bird
    • The Big List of Free Crochet Patterns from Marly Bird
  • Blog
    • All Blog Posts
    • All Free Patterns
    • Dibble Dabble Inspiration
    • Giveaways
    • Make-Alongs
    • Product Reviews
    • Roundups
    • Tips, Tricks, Techniques for Knitting and Crochet
Logo of "Marly Bird" featuring stylized text alongside a graphic of a bird perched on a branch, executed in gray and pink tones. The header design is elegant, emphasizing the brand's unique identity. -Marly Bird
  • Marly Bird House
  • Learn to Knit & Crochet
    • Newbie? Start Here
    • Video Tutorials
    • Knitting Definitions
    • Crochet Definitions
    • Common Techniques
    • Size Charts for Knitting and Crochet Projects
  • About
×
  • The Pattern Shop
  • Free Patterns
  • Blog
  • Marly Bird House
  • Learn to Knit & Crochet
    • Newbie? Start Here
    • Video Tutorials
    • Knitting Definitions
    • Crochet Definitions
    • Common Techniques
    • Size Charts for Knitting and Crochet Projects
  • About
Logo of "Marly Bird" featuring stylized text alongside a graphic of a bird perched on a branch, executed in gray and pink tones. The header design is elegant, emphasizing the brand's unique identity. -Marly Bird
Search
Close

New Patterns NOW Available in Ad-Free PDF! Check out The Pattern Shop

Dinosaur Plush Crochet Pattern: Create Your Very Own Rori the Raptor

January 7, 2025 By Marly Bird Leave a Comment

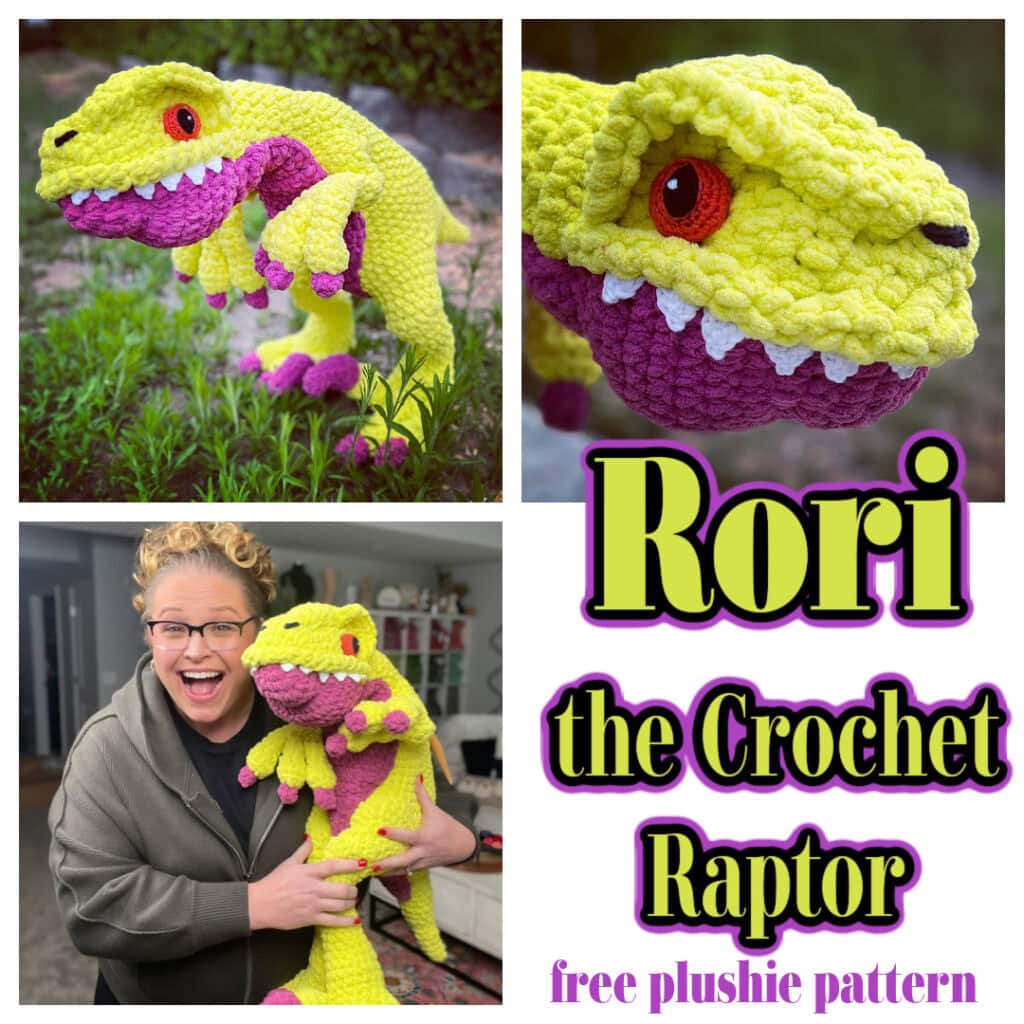
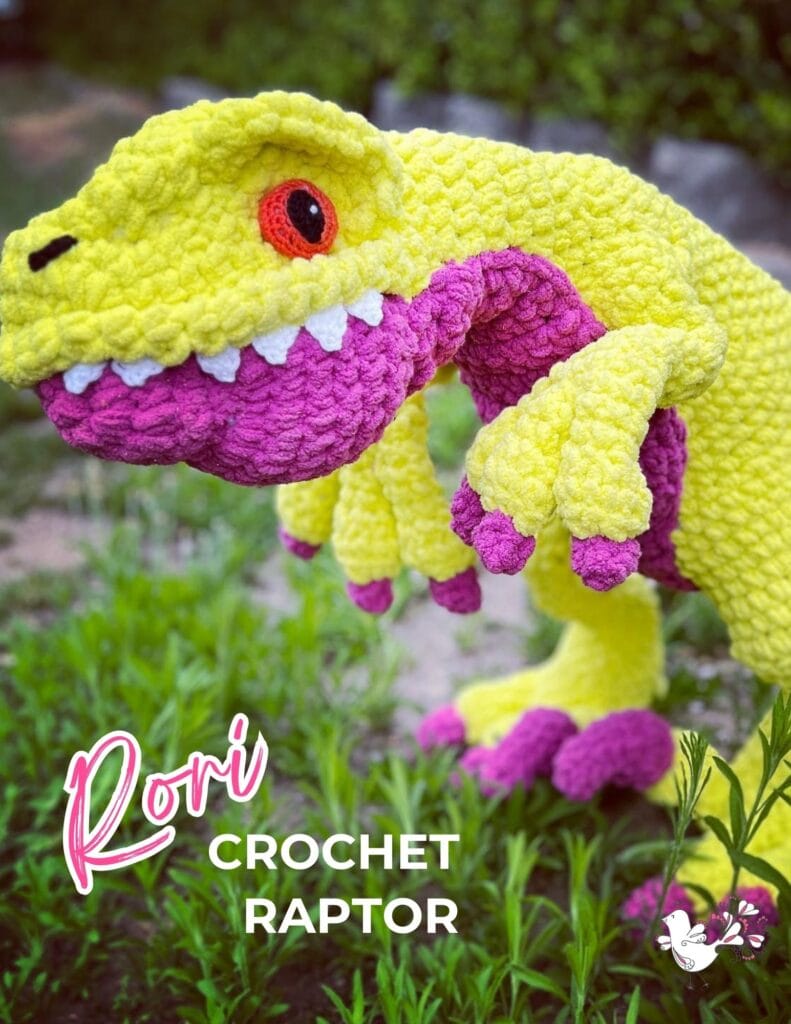
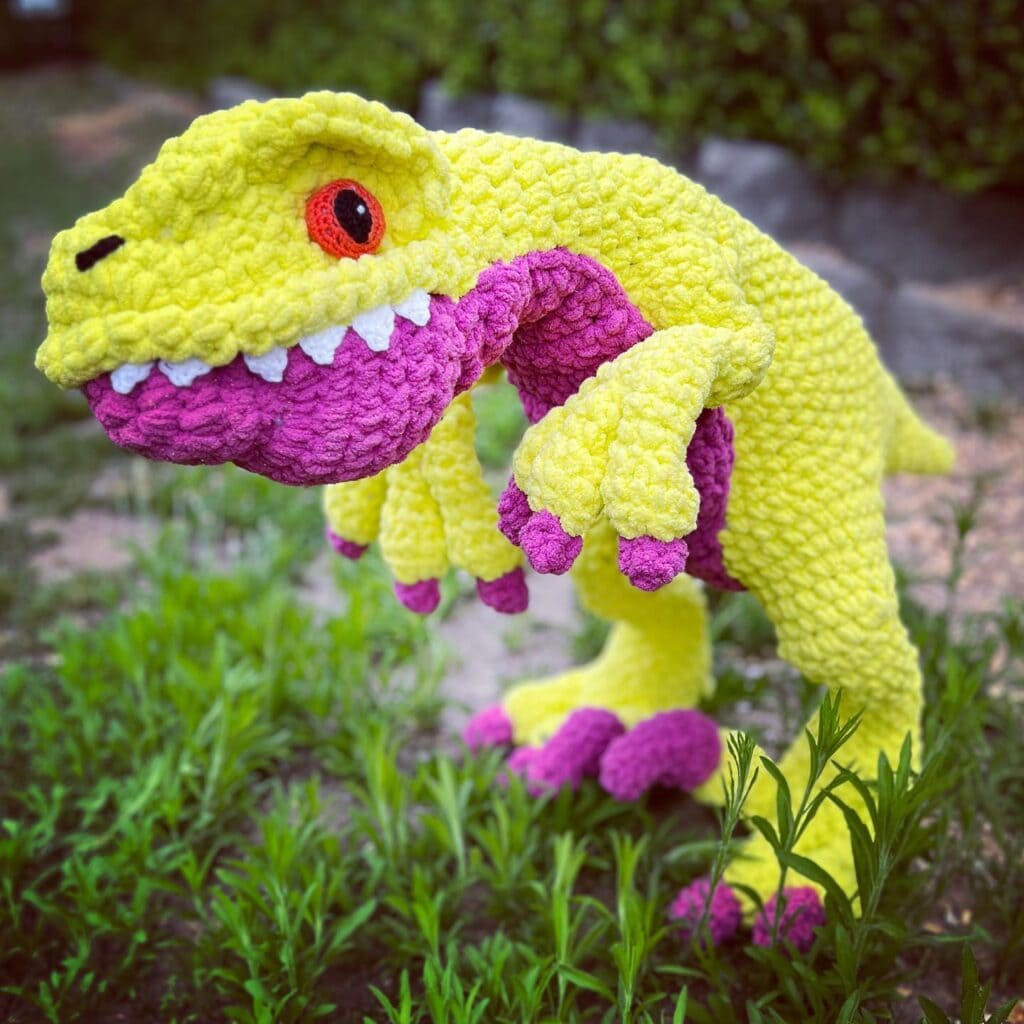
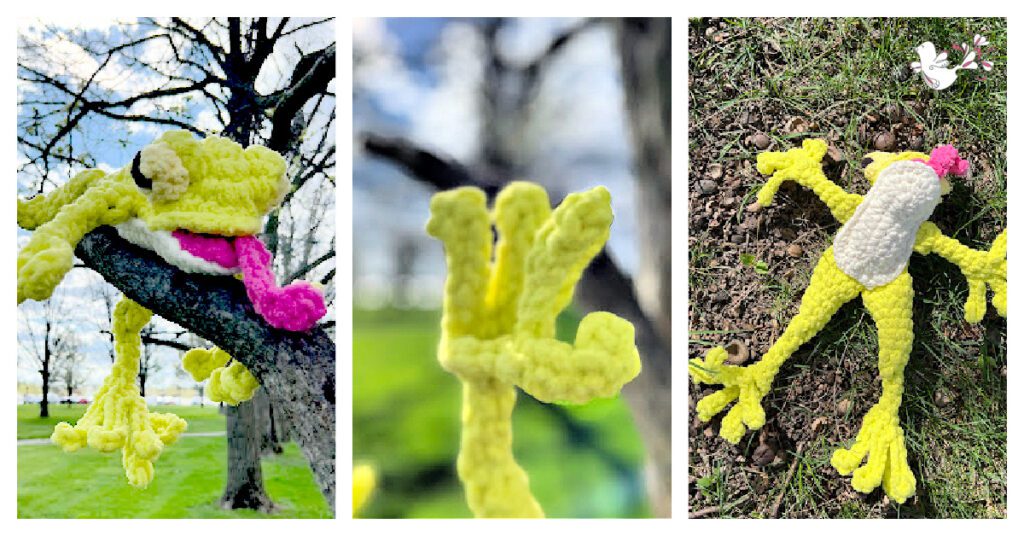
Ever wanted to create a lovable dinosaur plushie like Rori the Raptor? You’re in the right spot! In this guide, I’ll walk you through the dinosaur plush crochet pattern, list the materials you’ll need, and provide step-by-step instructions to bring Rori to life.

Whether you’re a fan of a free crochet pattern or exploring amigurumi popularity, this project is perfect for all skill levels. Let’s get stitching and make your very own Rori the Raptor!

A collage featuring a crocheted dinosaur plush. The top left image shows it outdoors, while the top right highlights its face. Below, a person holds the dinosaur and smiles. Text reads, "Rori the Raptor: Free Crochet Pattern. -Marly Bird

Affiliate Disclosure: This post contains affiliate links. If you click on one of these links and make a purchase, I may earn a small commission at no additional cost to you. This helps support the content and free patterns I provide here on MarlyBird.com. Thank you for your support—it means the world to me! 💖

Key Takeaways

  • Rori the Raptor is a new amigurumi project for all skill levels
  • use soft blanket yarn for a cuddly and adorable plushie
  • customize Rori with different colors and unique accessories
  • join our crafting community to share tips and celebrate progress
  • access free resources and patterns to start your crochet project
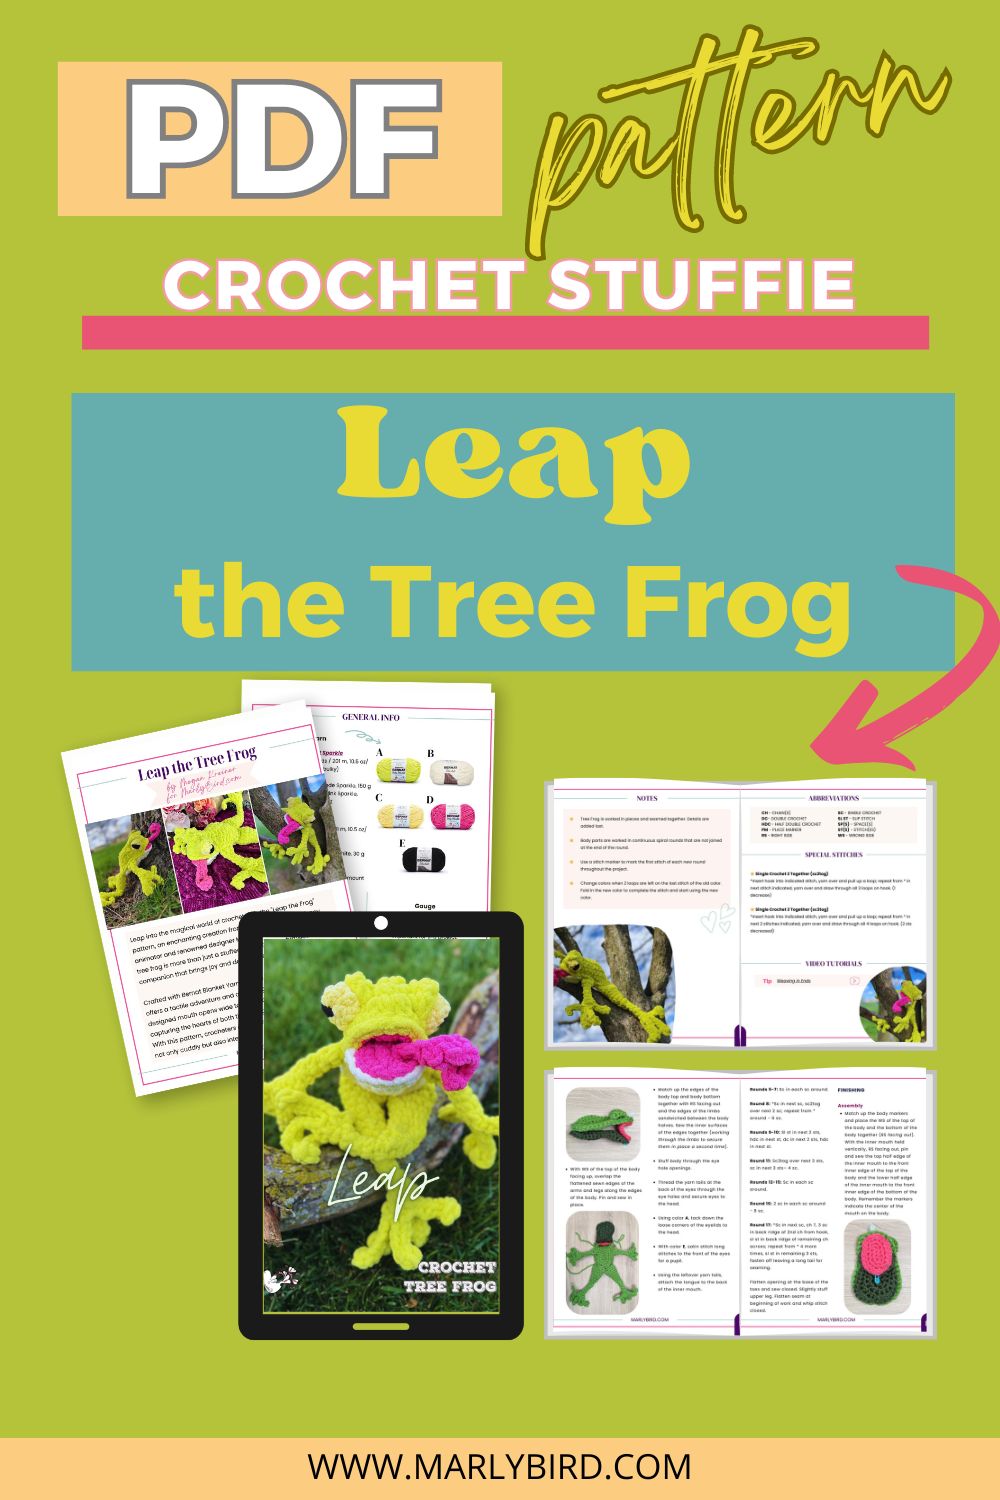
  • Ad-free pdf available from Etsy, Shopify or Ravelry
Etsy
Shopify
Ravelry

Introduction to Rori the Raptor as a Dinosaur Plush Crochet Pattern

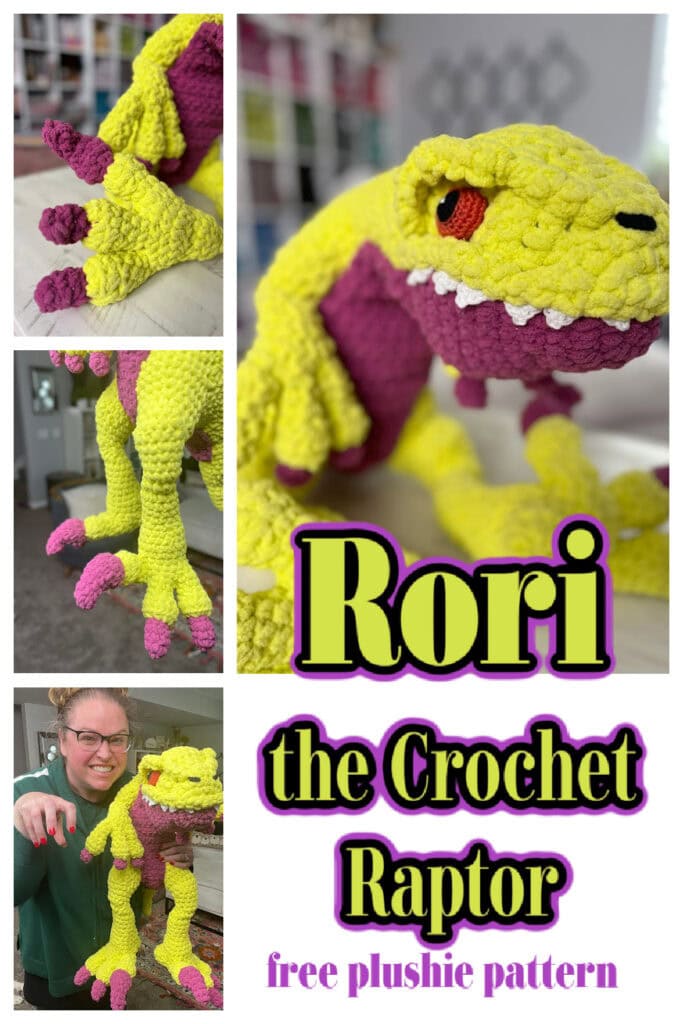
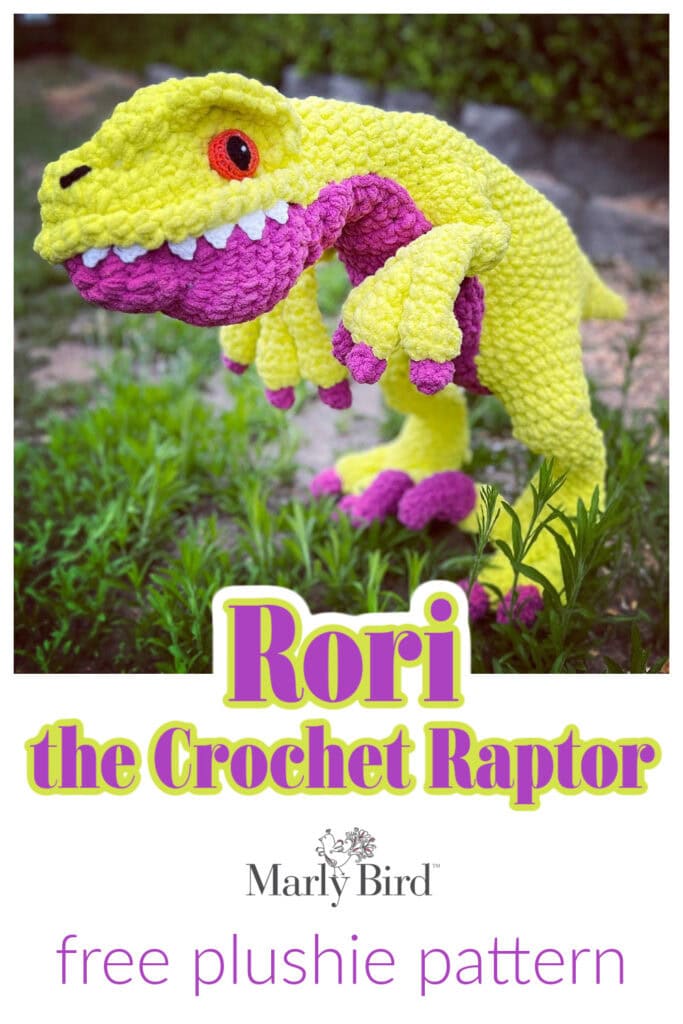
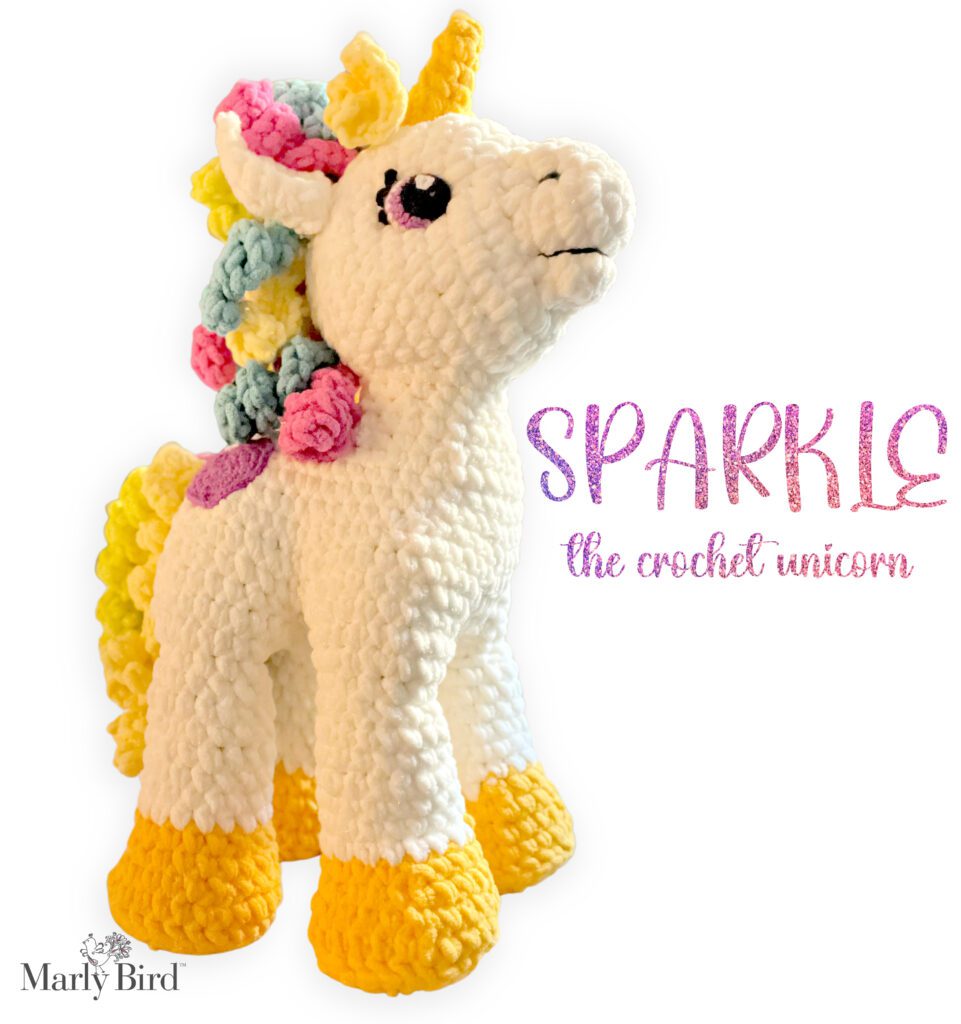
Hey there! I’m so excited to introduce you to Rori the Raptor by Megan Kreiner for MarlyBird.com, our newest easy amigurumi project, for those who have tried making stuffies before. Whether you’re a seasoned crocheter or just an adventurous beginner, this dinosaur plushie is perfect for honing your skills. With the rising amigurumi popularity, projects like Rori are gaining more attention. Be sure to check out our free crochet unicorn pattern for more creative ideas.

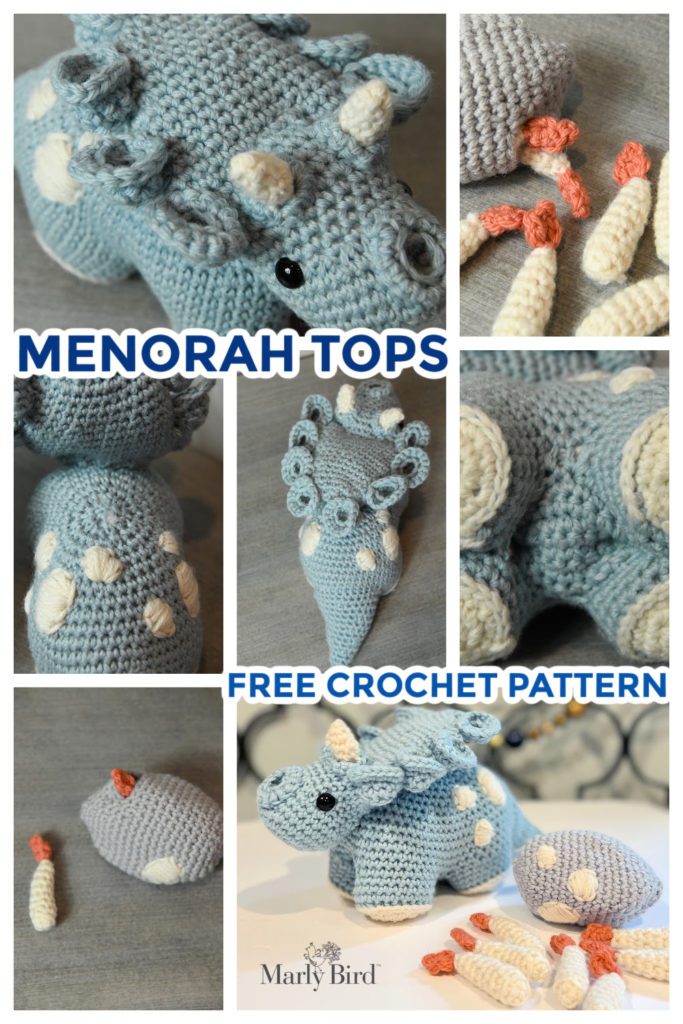
Creating Rori is a fun way to explore different techniques, similar to the crochet menorah pattern or a free crochet unicorn pattern. With the rising amigurumi popularity, you’ll find the pattern clearly written and straightforward, making the process enjoyable from start to finish with easy amigurumi. You will not find yourself lost in unrecognizable abbreviations like many other crochet stuffie patterns available by others.

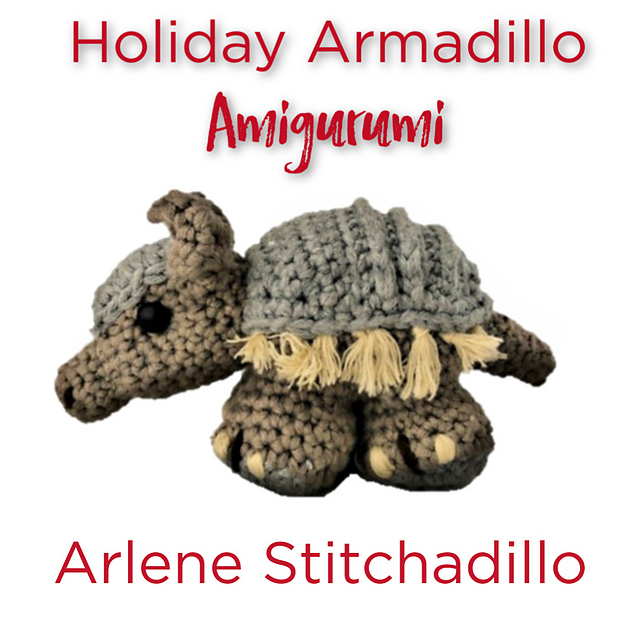
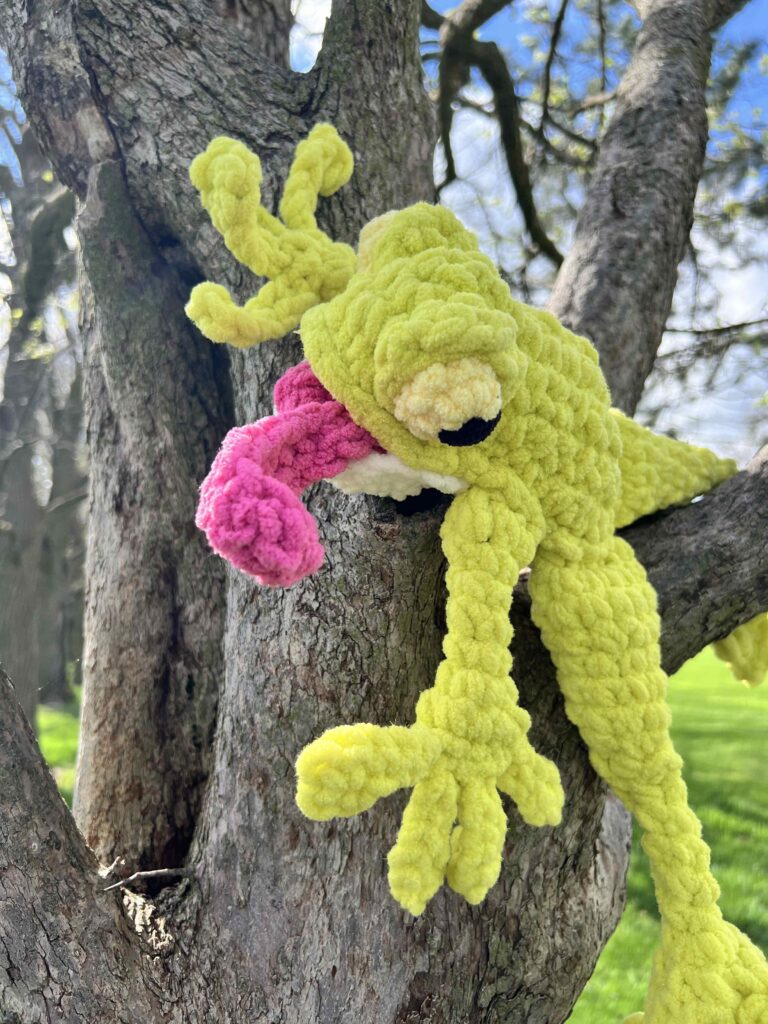
Using soft blanket yarn, Rori turns out cuddly and adorable, perfect for kids and adults alike. Plus, if you love unique designs, you’ll appreciate how this easy amigurumi stands out, much like a holiday armadillo amigurumi pattern or a free crochet unicorn pattern adds charm to your collection.

Five skeins of Bernat yarn are displayed in a row, perfect for crafting a dinosaur plush like Rori the Raptor. Featuring types like Blanket Stripes, Teal, Tweeds, Baby White, and Pink, each yarn's label showcases unique textures and colors ideal for your next crochet pattern. -Marly Bird

Join our crafting community and bring Rori the Raptor to life with others, sharing tips on easy amigurumi and celebrating each other’s progress along the way while discussing amigurumi popularity!

Materials Needed for Your Dino Crochet Stuffie

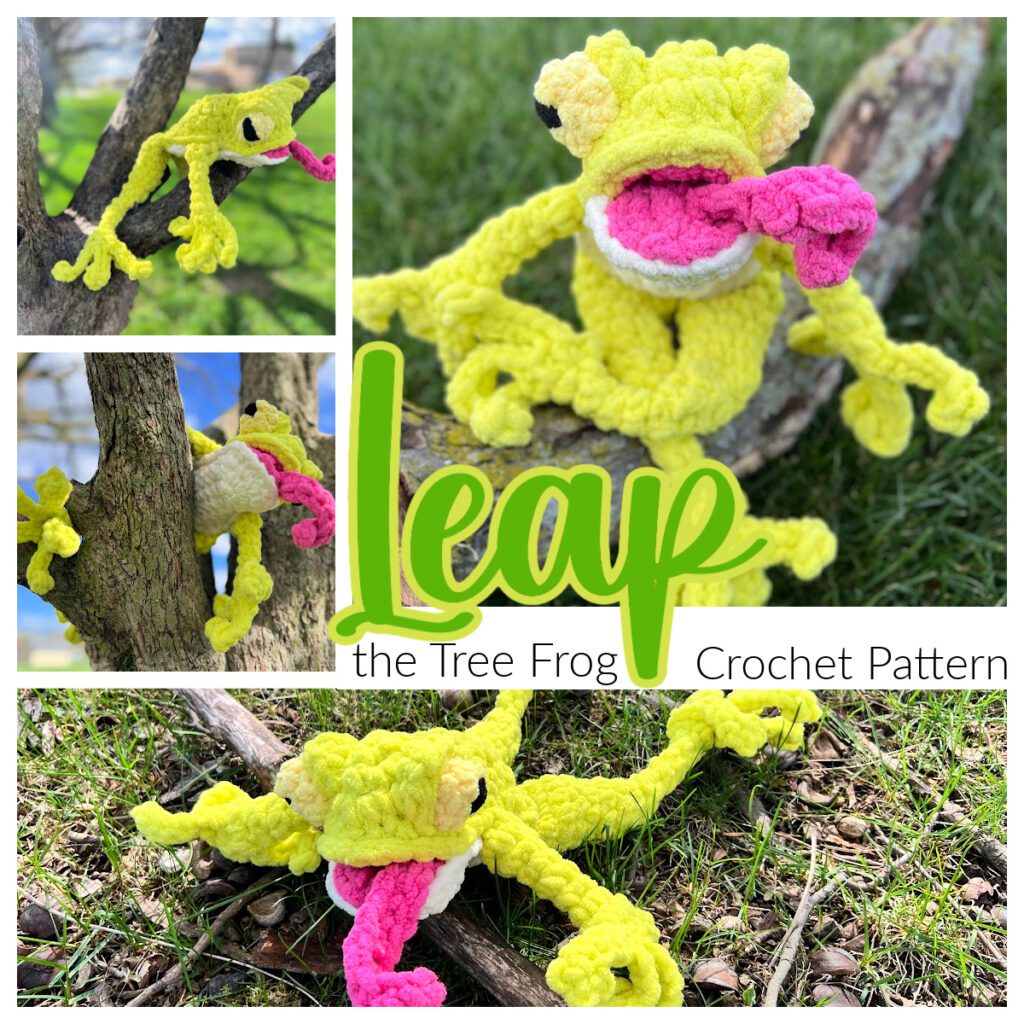
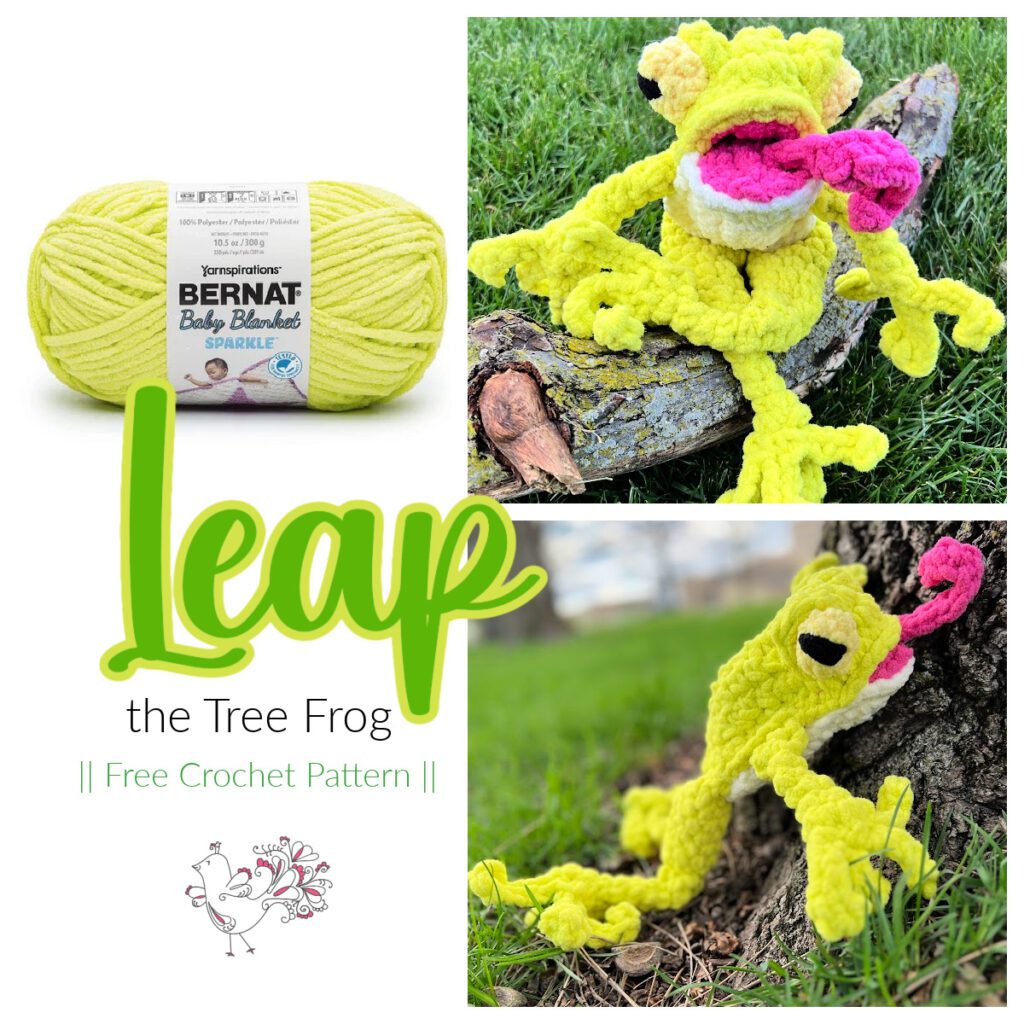
To create Rori the Raptor, you’ll need specific materials. I’ll outline the recommended yarn types for your dino toy, essential tools for crocheting a crochet boy stuffed animal using easy amigurumi techniques, and additional supplies like optional large safety eyes for crochet to customize your stuffed animal. Whether you’re inspired by “how to train your dragon” or just love dinos, these materials will ensure your plush turns out great. You might also explore other patterns like the free crochet unicorn pattern or the frog crochet pattern to expand your collection.

Recommended Yarn Types

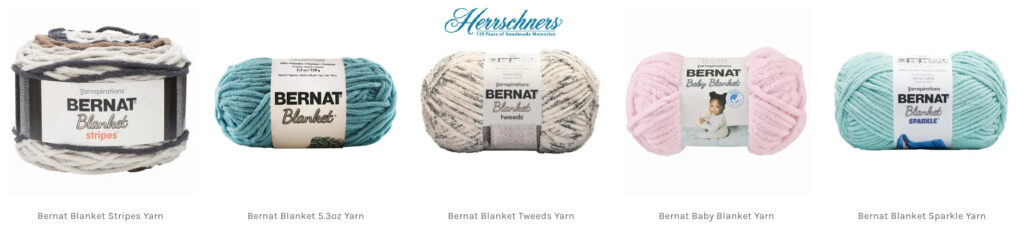
When selecting yarn for your Rori the Raptor plushie, I always recommend going for a soft blanket yarn. It gives your crochet dinosaur that perfect cuddly feel, making it an ideal large stuffed animal for both kids and adults. Plus, the texture works wonderfully for adding those charming details to your raptor’s features.

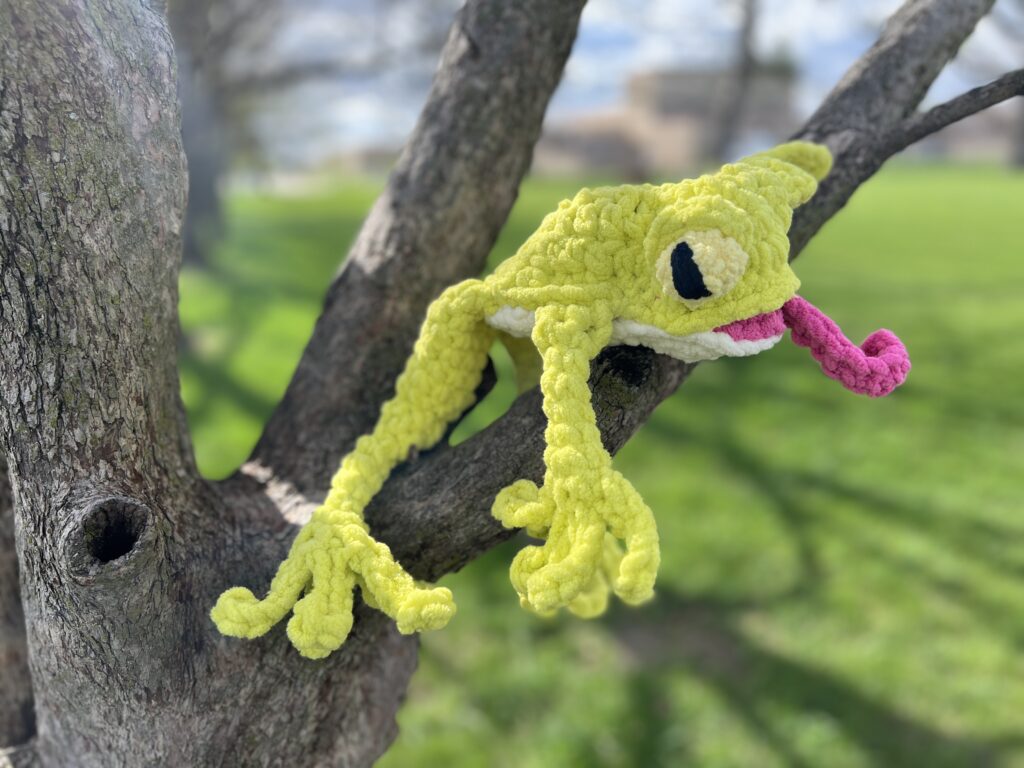
If you’re aiming to create a vibrant crochet dino, consider using yarns in varying colors. This approach not only brings your plushie to life but also makes the crochet dinosaur stand out in any collection. Trust me, experimenting with different shades can make your Rori truly unique and eye-catching!

Yarn used on the sample is Bernat, Baby Blanket Sparkle (100% polyester, 220 yds / 201 m, 10.5 oz/ 300 g, CYCA# 6 super bulky), Color A: #71011 Limeade Sparkle, 3 balls; Color B: #71009 Freesia Sparkle, 1 ball. Herrschners,  Worsted 8 Yarn (100% acrylic, 489 yds / 448 m, 8 ox/ 226g, CYCA #4 worsted); Color C: White, small amount. Patons, Kroy Socks Yarn (75% washable wool/ 25% nylon, 166 yds / 152 m, 1.75 oz / 50 g, CYCA# 1 super fine); Color D: Red, small amount Color E: Coal, small amount.

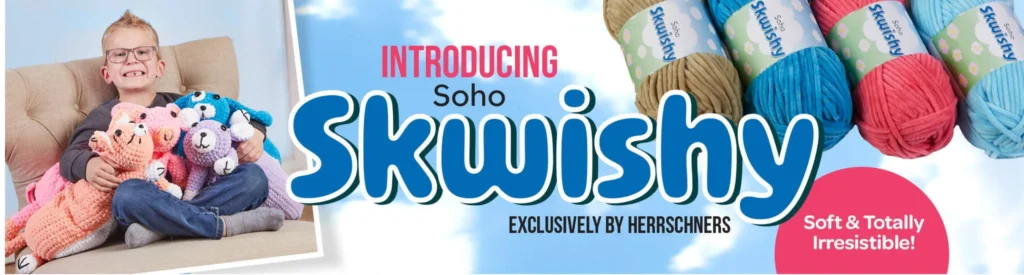
Other yarns that would be a great substitute include Skwishy from Herrschners.

A young child smiles on a couch, holding colorful plush bears and a delightful dinosaur plush. Text reads, "Introducing Rori the Raptor by Herrschners. Soft & Totally Irresistible!" Nearby, discover an array of yarn and crochet patterns. -Marly Bird

Essential Crochet Tools for Amigurumi

Having the right crochet tools makes crafting your Rori the Raptor stuffie an large amigurumi stuffed animal a breeze. A comfy crochet hook suitable for your chosen yarn is essential, as it ensures your stitches are even and your tail turns out just right. I am a fan of hooks with large handles like those from TooShay Crochet.

A crochet hook with a colorful, patterned handle stands before a large ball of white yarn, set against a plain background. Nearby, the cheerful Rori the Raptor crochet pattern invites creativity and fun into your crafting journey. -Marly Bird

I always keep a set of stitch markers handy to keep track of your rounds and shape your dinosaur accurately. Additionally, the crochet menorah pattern is a great option for festive projects. I like having markers in many colors like these, but I also love to make my own markers and have a fun video tutorial for that as well.

In addition to hooks and markers, a good pair of scissors and a yarn needle are must-haves for any amigurumi project. Whether you’re working on an amigurumi or a free crochet sweater pattern, these tools are essential:

ToolPurpose
Crochet HooksCreating consistent stitches for a smooth finish
Stitch MarkersTracking rounds and shaping the dinosaur’s tail
Yarn NeedleWeaving in ends and assembling your plushie
ScissorsCutting yarn cleanly without fraying

Additional Supplies for Custom Features

To give Rori the Raptor some personality, you’ll want to include custom features like large safety eyes for crochet or embroidered details. Choosing the right safety eyes not only makes your amigurumi stuffed toy safer for kids but also adds that adorable, lifelike expression that makes Rori stand out.

Here is a useful tool if you like to use safety eyes.

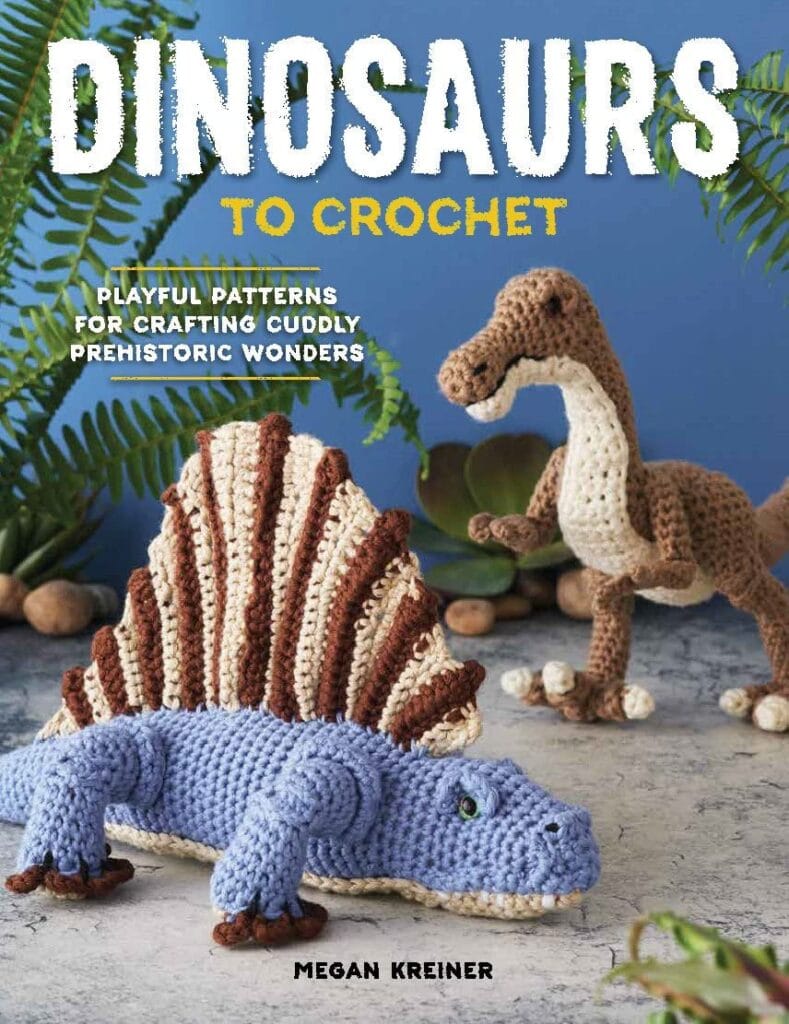
The eyes on Rori are very expressive and are made using yarn and a crochet hook. But I do love selecting eyes that capture the playful spirit of a triceratops or the fierce look of a tyrannosaurus to give each plushie its unique charm. You can make even more dinosaur crochet animals with Megan Kreiner’s book, Dinosaur to Crochet: Playful Patterns for Crafting Cuddly Prehistoric Wonders.

Cover of "Dinosaurs to Crochet" by Megan Kreiner features two crocheted dinosaurs: a blue Stegosaurus in the foreground and Rori the Raptor in the background, with leafy plants and rocks around them. Text reads, "Playful patterns for crafting cuddly prehistoric wonders. -Marly Bird

Another essential item you’ll need for your Rori the Raptor crochet project is fiberfill. This soft and lightweight stuffing material is perfect for giving your plushie its shape and a cuddly texture. Polyester fiberfill stuffing is easy to work with and helps ensure that Rori’s body, limbs, and tail hold their structure while remaining soft and huggable. Be sure to stuff evenly and firmly, especially in the head and tail, to maintain a balanced shape. You can find fiberfill at most craft stores or online, and a small bag typically goes a long way for amigurumi projects like this one.


A vibrant crochet dinosaur plush with a bright yellow body and purple details is posed in a garden setting. The text reads "Rori the Raptor" in bold letters, showcasing this delightful crochet pattern. -Marly Bird

Relax & Knit
Upgrade to the Printable PDF

Beautifully formatted to print and relax while knitting. The paid pattern includes:

  • Easy Access: Download and print your pattern instantly to keep it handy.
  • No Ads: Focus entirely on your crochet project without distractions.
  • Detailed Instructions: Includes step-by-step guidance for every part of Rori.
  • Portable: Take the PDF on the go with your tablet or phone.
  • Professional Layout: Clean formatting makes it easy to follow and reference.
  • A Rewarding Finish
Get The Ad-Free PDF
Etsy
Shopify
Ravelry
Collage of a crochet raptor plush in yellow and pink, showcasing close-ups of its claws and face. A person holds Rori the Raptor, smiling. The text reads: "Rori the Crochet Raptor, free Dinosaur Plush Crochet Pattern. -Marly Bird

Step-by-Step Instructions for Crocheting Rori the Raptor

In this section, you will find the full written instructions for crocheting Rori the Raptor. Let’s dive in and bring Rori to life step by step

SKILL LEVEL

Adventurous Beginner

MEASUREMENTS

Finished Measurements

Gauge 

7 sc x 8 rounds = 4” [10 cm] x 4” [10 cm]; use any size hook to obtain the gauge. 

MATERIALS

Yarn 

🧶 Bernat, Baby Blanket Sparkle (100% polyester, 220 yds / 201 m, 10.5 oz/ 300 g, CYCA# 6 super bulky) 

Color A: #71011 Limeade Sparkle, 3 balls

Color B: #71009 Freesia Sparkle, 1 ball

🧶 Herrschners,  Worsted 8 Yarn (100% acrylic, 489 yds / 448 m, 8 ox/ 226g, CYCA #4 worsted) 

            Color C: White, small amount

🧶 Patons, Kroy Socks Yarn (75% washable wool/ 25% nylon, 166 yds / 152 m, 1.75 oz / 50 g, CYCA# 1 super fine)

Color D: Red, small amount

Color E: Coal, small amount

Crochet Hook

N/13 [9.0 mm] use with super bulky yarn or hook needed for gauge 

G/6 [4.0 mm] use with worsted weight yarn

F/5 [3.75 mm] use with sock weight yarn

Notions 

Dinosaur is 25” [63.5 cm] body circumference by 34” [86.5 cm] long (nose to tail)

Fiberfill

Stitch Markers

Tapestry Needle

CROCHET ABBREVIATIONS

Blo – Back loop only

Ch – Chain(s) 

Dc – Double Crochet

Hdc – Half Double Crochet

PM – Place Marker

RS – Right Side 

Sc – Single Crochet (with yarn over not yarn under)

Sl st – Slip Stitch

Sp(s) – Space(s) 

St(s) – Stitch(es)

WS – Wrong Side

SPECIAL STITCHES 

⭐️ Single Crochet 2 Together (sc2tog): *Insert hook into indicated stitch, yarn over and pull up a loop; repeat from * in next stitch indicated, yarn over and draw through all 3 loops on hook. (1 decrease)

⭐️ Front Post Single Crochet (fpsc) : Insert hook from front to back to front around the post of the stitch indicated, yarn over and pull up a loop, yarn over and draw through the loops on hook.

⭐️ Running Stitch: Insert needle from front to back, *bring the needle up again from back to front one stitch length away, insert needle from front to back one stitch length away; repeat from * across work as indicated in pattern. 

NOTES

  • Dinosaur is worked in pieces and seamed together. Details are added last. 
  • Body parts are worked in continuous spiral rounds that are not joined at the end of the round. 
  • Use a stitch marker to mark the first stitch of each new round throughout the project. 
  • Change colors when 2 loops are left on the last stitch of the old color.  Fold in the new color to complete the stitch and start using the new color. 

VIDEO TUTORIAL

  • Weaving in ends >> Click Here for Video Help <<

GROW

To Unlock Exclusive Subscriber Content click the Box below and join for free by simply adding your email and creating a password! If you are having troubles, clear your cache or reset your password or login to the Grow Publisher Portal.

>> Learn More About Grow Here <<

I’m thrilled to share this amazing pattern with you, many patterns on my blog are absolutely free! I kindly request that you don’t copy and paste or distribute this pattern. Prefer an ad-free experience? Buy a digital PDF pattern for a small fee from one of my online stores for a seamless crafting journey. 

I appreciate your support and readership. You are the reason I can keep doing what I love and sharing it with others. So, thank you from the bottom of my yarn-loving heart! Disclosure: This post contains affiliate links, meaning I get a commission if you decide to make a purchase through my links at no cost to you.

Colorful crocheted dinosaur standing on grass. The text reads: "Rori the Crochet Raptor" and "Marly Bird free Dinosaur Plush pattern. -Marly Bird
Etsy
Shopify
Ravelry

RORI THE RAPTOR FULL WRITTEN FREE PATTERN

By Megan Kreiner for MarlyBird.com

FINGER

Make 4 

With color B, make an adjustable ring. 

Round 1: Ch 1, 4 sc in ring, place marker in first st (see notes), pull ring closed, do not join or turn (see notes)–4 sc.

Round 2: *Sc in next sc, 2 sc in next sc; repeat from * around–6 sc.

Round 3: Sc in each sc around, change to color A. fasten off color B.

Round 4: 2 Fpsc around each sc- 12 sc. 

Round 5: Sc blo in each sc around.

Round 6: *Sc2tog over next 2 sc; repeat from * around–6 sc.

Round 7-8: Sc in each sc around.

Fasten off color A, leaving long tail for seaming.

STARTING FINGER 

Make 2 

Work Finger to Round 7.

Round 8: Sc in next 3 sc, leaving remaining 3 sts unworked. Do not cut yarn. Continue to Hand and Arm

HAND and ARM

Make 2

{Note from Marly: Round 1 joins the starting finger to 2 more fingers and creates a new larger round that begins the hand.  We know this round sounds unusual, but trust us; go step by step and it will work out.}

Round 1 Continue with the starting finger’s yarn still attached, sc into the first st of any finger (this will become the center finger), sc in next 2 sts of same finger (leave remaining 3 sts unworked), sc into the first st of a second finger, sc in next 5 sts of second finger, sc in unworked 3 sts from center finger, sc in unworked 3 sts from starting finger – 18 sc (includes sts on starting finger’s last round). 

Round 2: *Sc in next 4 sts, sc2tog over next 2 sc; repeat from * around–15 sc.

Round 3: *Sc in next 3 sts, sc2tog over next 2 sc; repeat from * around–12 sc.

Round 4: Sc in each sc around.

Stuff hand and fingers 25% full.

Round 5: *Sc in next st, sc2tog over next 2 sc; repeat from * around–8 sc.

Rounds 6-8: Sc in each sc around.

Round 9: *Sc in next 2 sts, sc2tog over next 2 sc; repeat from * around–6 sc.

Round 10: *Sc in next st, 2 sc in next st: repeat from * around – 9 sc.

Round 11: *Sc in next 2 sts, 2 sc in next st: repeat from * around – 12 sc.

Round 12: Sc in each sc around.

Fasten off yarn and set arm aside.

Repeat for 2nd Arm.

Utilize the yarn tails between the fingers to patch up any holes in your work.

TOE 

Make 3 (two for the left foot, 1 for the right foot)

With color B, make an adjustable ring. 

Round 1: Ch 1, 4 sc in ring, place marker in first st (see notes), pull ring closed, do not join or turn (see notes)–4 sc.

Round 2: *Sc in next sc, 2 sc in next sc; repeat from * around–6 sc.

Round 3: Sc in each sc around.

Round 4: *Sc in next 2 sc, 2 sc in next sc; repeat from * around–8 sc.

Round 5: Sc in each sc around, change to color A. fasten off color B.

Round 6: 2 Fpsc around each sc- 16 sc. 

Round 7: *Sc blo in next 2 sc, sc2tog blo over next 2 sc; repeat from * around – 12 sc.

Round 8: *Sc in next sc, sc2tog over next 2 sc; repeat from * around–8 sc.

Round 9-10: Sc in each sc around.

Fasten off color A, leaving long tail for seaming.

RIGHT LEG TOE

Work toe to Round 9.

Round 10: Sc in next 4 sc, leaving the remaining 4 sts unworked. Do not cut yarn, Continue to Right Foot directions after making the Right Big Claw Toe. 

BIG CLAW TOE 

Make 2 (one for the left and one for the right foot)

With color B, make an adjustable ring. 

Round 1: Ch 1, 4 sc in ring, place marker in first st (see notes), pull ring closed, do not join or turn (see notes)–4 sc.

Round 2: *Sc in next sc, 2 sc in next sc; repeat from * around–6 sc.

Round 3: Sc in each sc around.

Round 4: *Sc in next 2 sc, 2 sc in next sc; repeat from * around–8 sc.

Round 5: Sc in each sc around.

Round 6: *Sc in next sc, 2 sc in next sc; repeat from * around–12 sc.

Round 7-8: Sc in each sc around.

Round 9: *Sc in next sc, sc2tog over next 2 sc; repeat from * around, change to color A. fasten off color B – 8 sc.

Round 10: 2 Fpsc around each sc- 16 sc. 

Round 11: *Sc blo in next 2 sc, sc2tog blo over next 2 sc; repeat from * around – 12 sc.

Round 12: *Sc in next sc, sc2tog over next 2 sc; repeat from * around–8 sc.

Round 13-14: Sc in each sc around.

RIGHT LEG BIG CLAW TOE

Fasten off Big Claw Toe and set aside

LEFT LEG BIG CLAW TOE

Round 14: Sc in next 4 st, leaving remaining 4 sts unworked. Do not cut yarn. Continue to Left Foot.

FOOT 

Make 2 (1 left foot and 1 right foot)

{Note: Round 1 joins the big claw to 2 more toes and creates a new larger round that begins the foot.}

FOR LEFT FOOT:

Round 1: Continue with the left big claw toe’s yarn still attached, sc into the first st of any toe (this will become the center toe), sc in next 3 sts of same toe (leave remaining 4 sts unworked), sc into the first st of a second toe, sc in next 7 sts of second toe, sc in unworked 4 sts from center toe, sc in unworked 4 sts from left big claw toe – 24 sc (includes sts on left big claw toe’s last round).

FOR RIGHT FOOT:

Round 1: Continue with the right foot toe’s yarn still attached, sc into the first st of the last toe (this will become the center toe), sc in next 3 sts of same toe (leave remaining 4 sts unworked), sc into the first st of the right big claw toe, sc in next 7 sts of big claw toe, sc in unworked 4 sts from center toe, sc in unworked 4 sts from right foot toe – 24 sc (includes sts on right foot toe’s last round).

Round 2: *Sc in next 2 sc, sc2tog over next 2 sc; repeat from * around–18 sc.

Round 3: Sc in each sc around.

Round 4: Sc in next 10 sc, ch 8, skip remaining sts (chain and unworked sts form the opening for the leg)

Round 5: [Sc in next sc, sc2tog over next 2 sc] 3 times, sc in next sc, [sc2tog in back ridge of next 2 ch, sc in back ridge of next ch] twice, sc2tog in back ridge of last 2 ch- 12 sc. 

Rounds 6-7: Sc in each sc around.

Round 8: *Sc2tog over next 2 sc; repeat from * around – 6 sc.

Fasten off yarn and close the hole in the back of the foot with the tail. Stuff toes and foot firmly. Utilize the yarn tails between the toes to patch up any holes in your work.

LEG 

Make 2

Round 1: With the ch-8 leg opening facing up and the toes pointed towards you, join color A with sl st into the right corner of the leg opening, ch 1, sc in each st around (both the unworked sts from the foot and unworked loops on the chain) – 16 sc.

Round 2: *2 sc in next sc, sc in next 7 sc; repeat from * around- 18 sc.

Round 3: Sc in each sc around.

Round 4: *Sc in next 4 sc, sc2tog over next 2 sc; repeat from * around – 15 sc.

Round 5: Sc in each sc around.

Round 6: *Sc in next 3 sc, sc2tog over next 2 sc; repeat from * around – 12 sc.

Rounds 7-10: Sc in each sc around.

Shaping Note:

Because stitches twist when worked in the round, check the location of your last stitch in Rnd 10 before cont to work the shaping in rounds 11-16. If this last stitch isn’t centered over the back heel of the foot, either add or pull back a stitch or two from the end of Rnd 10 to reset the placement of this last stitch. This will help keep the knee shaping centered over the foot.

Rounds 11-12: [Sc2tog in next 2 sts] twice, 2 hdc in next 4 sts, [sc2tog in next 2 sts] twice- 12 sts. (Note: Hdc should line up directly above the toes)

Round 13: Sc in each sc around.

Round 14: *Sc in next 2 sts, 2 sc in next st; repeat from * around – 16 sc.

Round 15: Sc in next 12 sc, ch 1 and turn. In front loop only, sc in next 6 sc, ch 1 and turn. Sc in next 6 sc. Insert hook into side edge of 6-st short row, yarn over and pull up a loop, insert hook into next st of Round 14, yarn over and pull up a loop, yarn over and draw through all loops on hook (counts as 1 sc), sc in last 3 sc- 16 sts.

Round 16: 2 sc in next 2 sts, sc in next 3 sc. Insert hook into next st, yarn over and pull up a loop, insert hook into side edge of  6-st short rows, yarn over and pull up a loop, yarn over and draw through all loops on hook (counts as 1 sc), sc in each remaining st around – 18 sts. 

(Note: the 6-st short rows should line up directly above the toes.)

Round 17: Sc in each sc around.

Round 18: *Sc in next 8 sc, 2 sc in next st; repeat from * around – 20 sc.

Round 19: *Sc in next 4 sc, 2 sc in next st; repeat from * around – 24 sc.

Round 20: *Sc in next 5 sc, 2 sc in next st; repeat from * around – 28 sc.

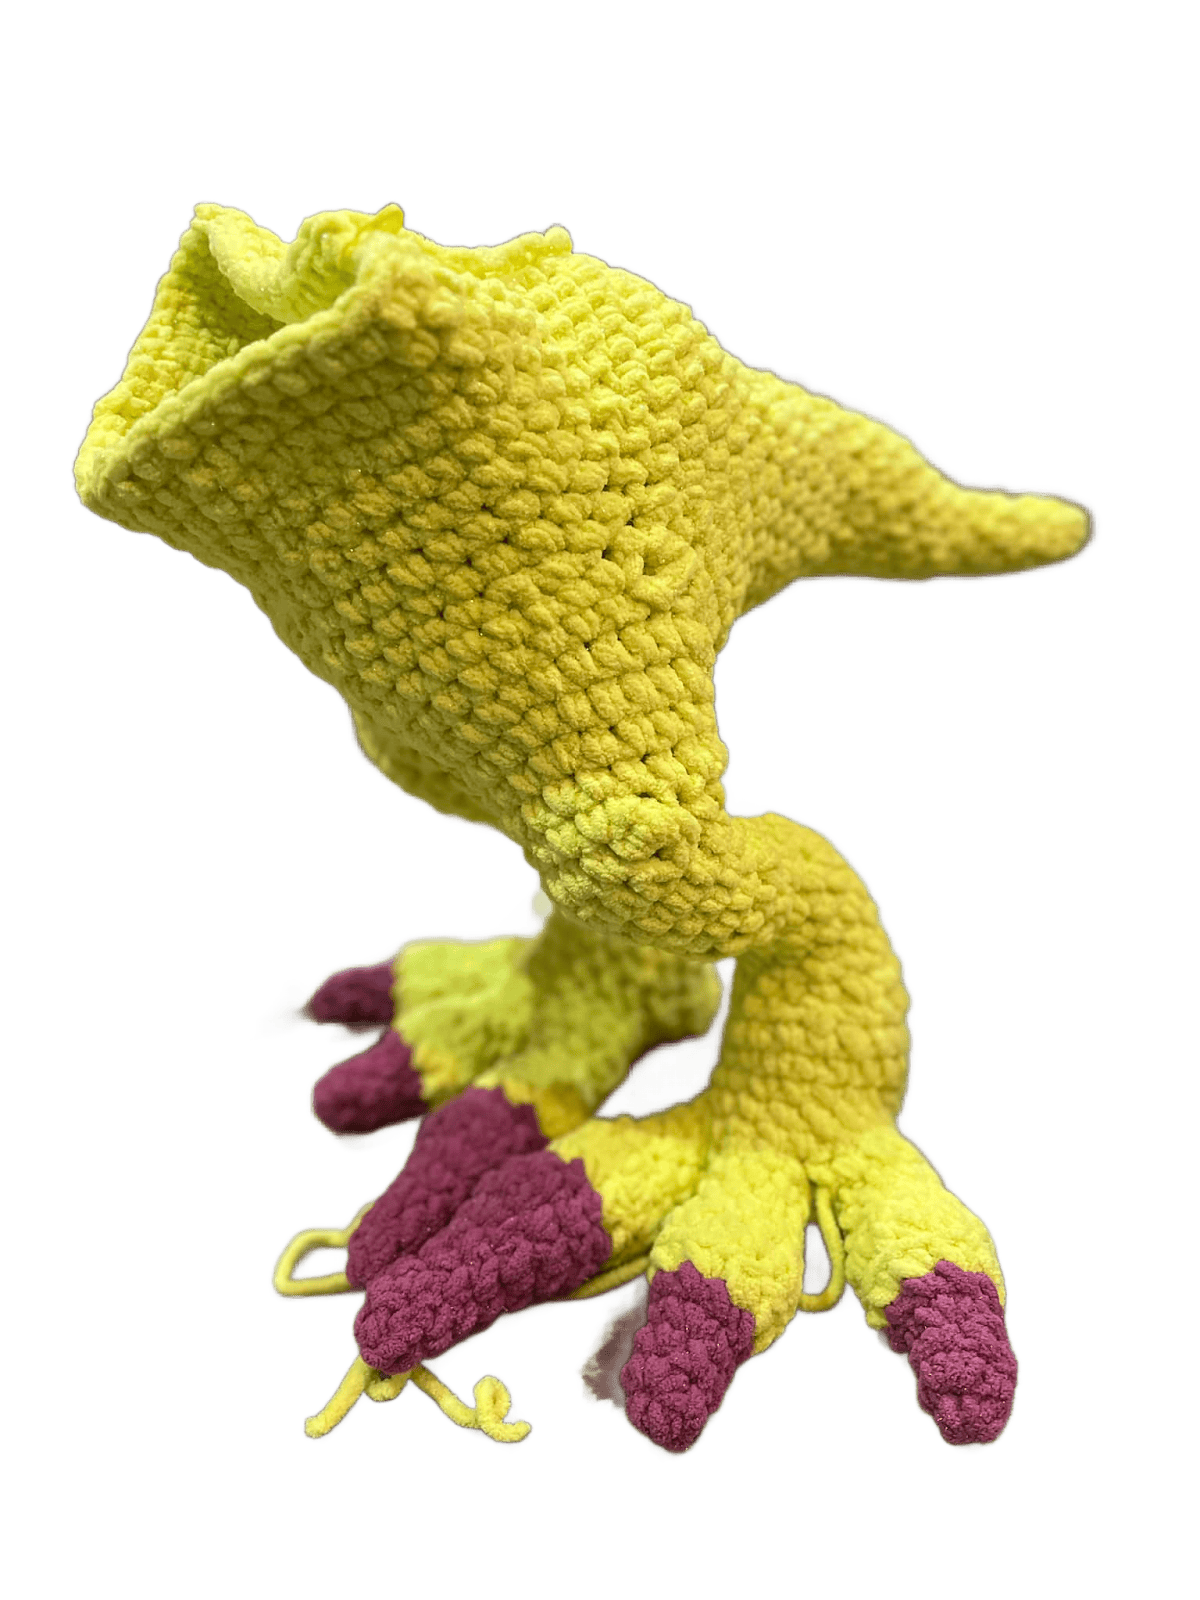
Fasten off. Stuff legs firmly. They should be able to stand up on their own. 

Join the Legs

Place the left and right leg next to each other with the toes facing forward (the big claw toes should be next to each other). Match up 4 sts along the inside edges of Round 20 of the left and right legs. Holding the edges together and working from front to back, rejoin yarn and sc through these 4 sts along both edges at the same time to hold them together, leaving the remaining 24 sts on each leg unworked.  Starting from the fasten-off point of these 4 sts, count 12 sts along each leg edge opening and place marker.   Set aside. 

TAIL & BODY

With color A, make an adjustable ring. 

Round 1: Ch 1, 4 sc in ring, place marker in first st (see notes), pull ring closed, do not join or turn (see notes)–4 sc.

Round 2: *Sc in next sc, 2 sc in next sc; repeat from * around – 6 sc.

Rounds 3-4: Sc in each sc around.

Round 5: *Sc in next 2 sc, 2 sc in next sc; repeat from * around – 8 sc. 

Rounds 6-7: Sc in each sc around.

Round 8: *Sc in next 3 sc, 2 sc in next sc; repeat from * around – 10 sc. 

Round 9: Sc in each sc around.

Round 10: *Sc in next 4 sc, 2 sc  in next sc; repeat from * around – 12 sc. 

Round 11: Sc in each sc around.

Round 12: *Sc in next 5 sc, 2 sc  in next sc; repeat from * around – 14 sc. 

Round 13: Sc in each sc around.

Round 14: *Sc in next 6 sc, 2 sc  in next sc; repeat from * around – 16 sc. 

Rounds 15-16: Sc in each sc around.

Round 17:*Sc in next 3 sc, 2 sc in next sc; repeat from * around – 20 sc. 

Rounds 18-19: Sc in each sc around.

Round 20: *Sc in next 4 sc, 2 sc in next sc; repeat from * around – 24 sc. 

Rounds 21-22: Sc in each sc around.

Round 23: *Sc in next 3 sc, 2 sc in next sc; repeat from * around- 30 sc. 

Round 24: *Sc in next 4 sc, 2 sc in next sc; repeat from * around- 36 sc. 

Round 25: *Sc in next 5 sc, 2 sc in next sc; repeat from * around- 42 sc. 

Round 26: *Sc in next 6 sc, 2 sc in next sc; repeat from * around- 48 sc. 

Fasten off.

Attach Legs: 

Take the joined legs and position them upright with the toes facing you.  Locate the marked stitches along the edge of each leg. With the Round 26 of the Body and Tail facing up, position the body and tail behind the joined legs so the front edge of Round 26 lines up along the back edge of the joined legs between the two markers. With color A, starting at the marker on the right side and working through the body and leg edges at the same time, sc the edges together along the 24 sts between the two leg edge markers. Fasten off leaving the remaining 24 sts on the body and tail and the remaining 12 sts along each leg edge unworked.  Stuff Tail firmly.

Rejoin yarn to body and tail edge and continue working along the remaining sts along the body and leg edges;

Rounds 27-28: Sc in each sc around – 48 sc.

Round 29: *Sc in next 4 sc, sc2tog in next 2 sc; repeat from * around- 40 sc. 

Rounds 30-38: Sc in each sc around

Fasten off. Stuff body firmly.

Attach Arms:

Note: The Raptor’s left arm is attached first, then the right arm.  

Round 39: Join color A with sc into the center stitch at the back of the body opening. Working clockwise, sc in next 5 sts. Pick up an arm and orient it so the palm of the hand is facing towards the back of the body. Line up the side edge of the arm opening against the edge of the body opening. Holding the edges together, sc in next 6 sts through both arm and body edges at the same time (leaving the remaining 6 sts of the arm unworked). [Sc2tog in next 2 sc] 8 times across the front edge of the Raptor’s chest. Pick up the 2nd arm and turn it so the palm of the hand is facing towards the back of the body. Line up the side edge of the 2nd arm opening against the edge of the body. Holding edges together, sc in next 6 sts through both edges at the same time (leaving remaining 6 sts of arm unworked). Sc in next 6 sts- 32 sts.

Round 40: Sc in next 6 sts, sc in next 6 unworked sts of the arm, sc in next 8 sts, sc in next 6 unworked sts of 2nd arm, sc in next 6 sts- 32 sc.

Stuff arms 25% full. 

Round 41: *Sc in next 2 sc, sc2tog in next 2 sc; repeat from * around- 24 sc. 

Round 42: Sc in each sc around.

Round 43: *Sc in next 4 sc, sc2tog in next 2 sc; repeat from * around- 20 sc. 

Round 44-49: Sc in each sc around.

Round 50: *Sc in next sc, 2 sc in next sc; repeat from * around- 30 sc. 

Round 51: *Sc in next 2 sc, 2 sc in next sc; repeat from * around- 40 sc. 

Fasten off yarn, leaving a long tail for seaming.

Stuff body firmly.

Curl the Arms: 

Bend the arm back at round 9 (the 6-st round) so the top of the forearm touches the front of the upper arm. Attach yarn at the back of the upper arm (between rounds 10-11). With a tapestry or doll needle, draw yarn through both the upper arm and forearm, catching the front of the forearm with a stitch before going back through the forearm and upper arm to the starting point.  Pull the yarn to tighten up the shaping and tie the yarn tails together to secure.  Repeat on other arm. 

If you would like the arms to stay closer to the body, sew the inside edges of the elbows to the sides of the body. 

Shape the Toenails and Fingernails:

Attach an 18” piece of color B to the underside of a nail at its base. Apply a running stitch along the rnd where the nail transitions to the finger/toe. Once you have reached the starting point, pull gently to cinch in the edge of the nail, then apply a 2nd set of running stitches to the same rnd (catching the stitches you missed the first time around). Pull again to cinch the shaping, secure yarn tails. Weave in ends.

Curl and Pose the toenails and big claw toes:

Attach an 18” piece of color B to the underside of a toenail at its base. Apply a running stitch along the surface of the toenail in a straight line from base to tip. Once you reach the tip, pull the yarn gently to curl the nail. Secure the yarn and weave in ends.  Bend the big claw toes back at their base so toe points nearly straight up. When you are happy with the pose, use color A to sew the top surface of the toe to where it makes contact with the leg to hold the shaping in place.

HEAD

With color A, make an adjustable ring. 

Round 1: Ch 1, 6 sc in ring, place marker in first st (see notes), pull ring closed, do not join or turn (see notes)–6 sc.

Round 2: 2 sc in each around – 12 sc.

Round 3: Sc in next sc, *3 sc in next sc, sc in next 2 sc; repeat from * around to last 2 sc, 3 sc in next sc, sc in last sc – 20 sc.

Round 4: Sc in next 2 sc, *3 sc in next sc, sc in next 4 sc; repeat from * around to last 3 sc, 3 sc in next sc, sc in last 2 sc – 28 sc.

Rounds 5-6: Sc in each around.

Round 7: *Sc in next sc, 2 sc in next sc; repeat from * around – 42 sc.

Rounds 8-10: Sc in each around.

Round 11: *Sc in next 5 st, sc2tog in next 2 sts; repeat from * around- 36 sts.

Rounds 12-13: Sc in each sc around.

Round 14: *Sc in next 4 sts, sc2tog in next 2 sts; repeat from * around – 30 sts.

Round 15: Sc in each sc around.

Round 16: *Sc in next st, sc2tog in next 2 sts; repeat from * around – 20 sts.

Round 17: *Sc2tog in next 2 sts; repeat from * around – 10 sts.

Cut yarn and fasten off. Stuff head 20% full. Leave a hole open to adjust the stuffing level if needed. 

JAW

With color B, make an adjustable ring. 

Round 1: Ch 1, 6 sc in ring, place marker in first st (see notes), pull ring closed, do not join or turn (see notes)–6 sc.

Round 2: 2 sc in each around – 12 sc.

Round 3: Sc in next sc, *3 sc in next sc, sc in next 2 sc; repeat from * around to last 2 sc, 3 sc in next sc, sc in last sc – 20 sc.

Round 4: Sc in next 2 sc, *3 sc in next sc, sc in next 4 sc; repeat from * around to last 3 sc, 3 sc in next sc, sc in last 2 sc – 28 sc.

Rounds 5-6: Sc in each around.

Round 7: *Sc in next 3 sts, 2 sc in next st; repeat from * around – 35 sts.

Rounds 8-10: Sc in each around.

Round 11: *Sc in next 5 sts, sc2tog in next 2 sts; repeat from * around – 30 sts. 

Round 12: Sc in each around.

Round 13: *Sc in next st, sc2tog in next 2 sts; repeat from * around – 20 sts. 

Round 14: Sc in each around.

Round 15: *Sc2tog in next 2 sts; repeat from * around – 10 sts.

Cut yarn and fasten off. Stuff jaw 75% full. Leave a hole open to adjust the stuffing level if needed. 

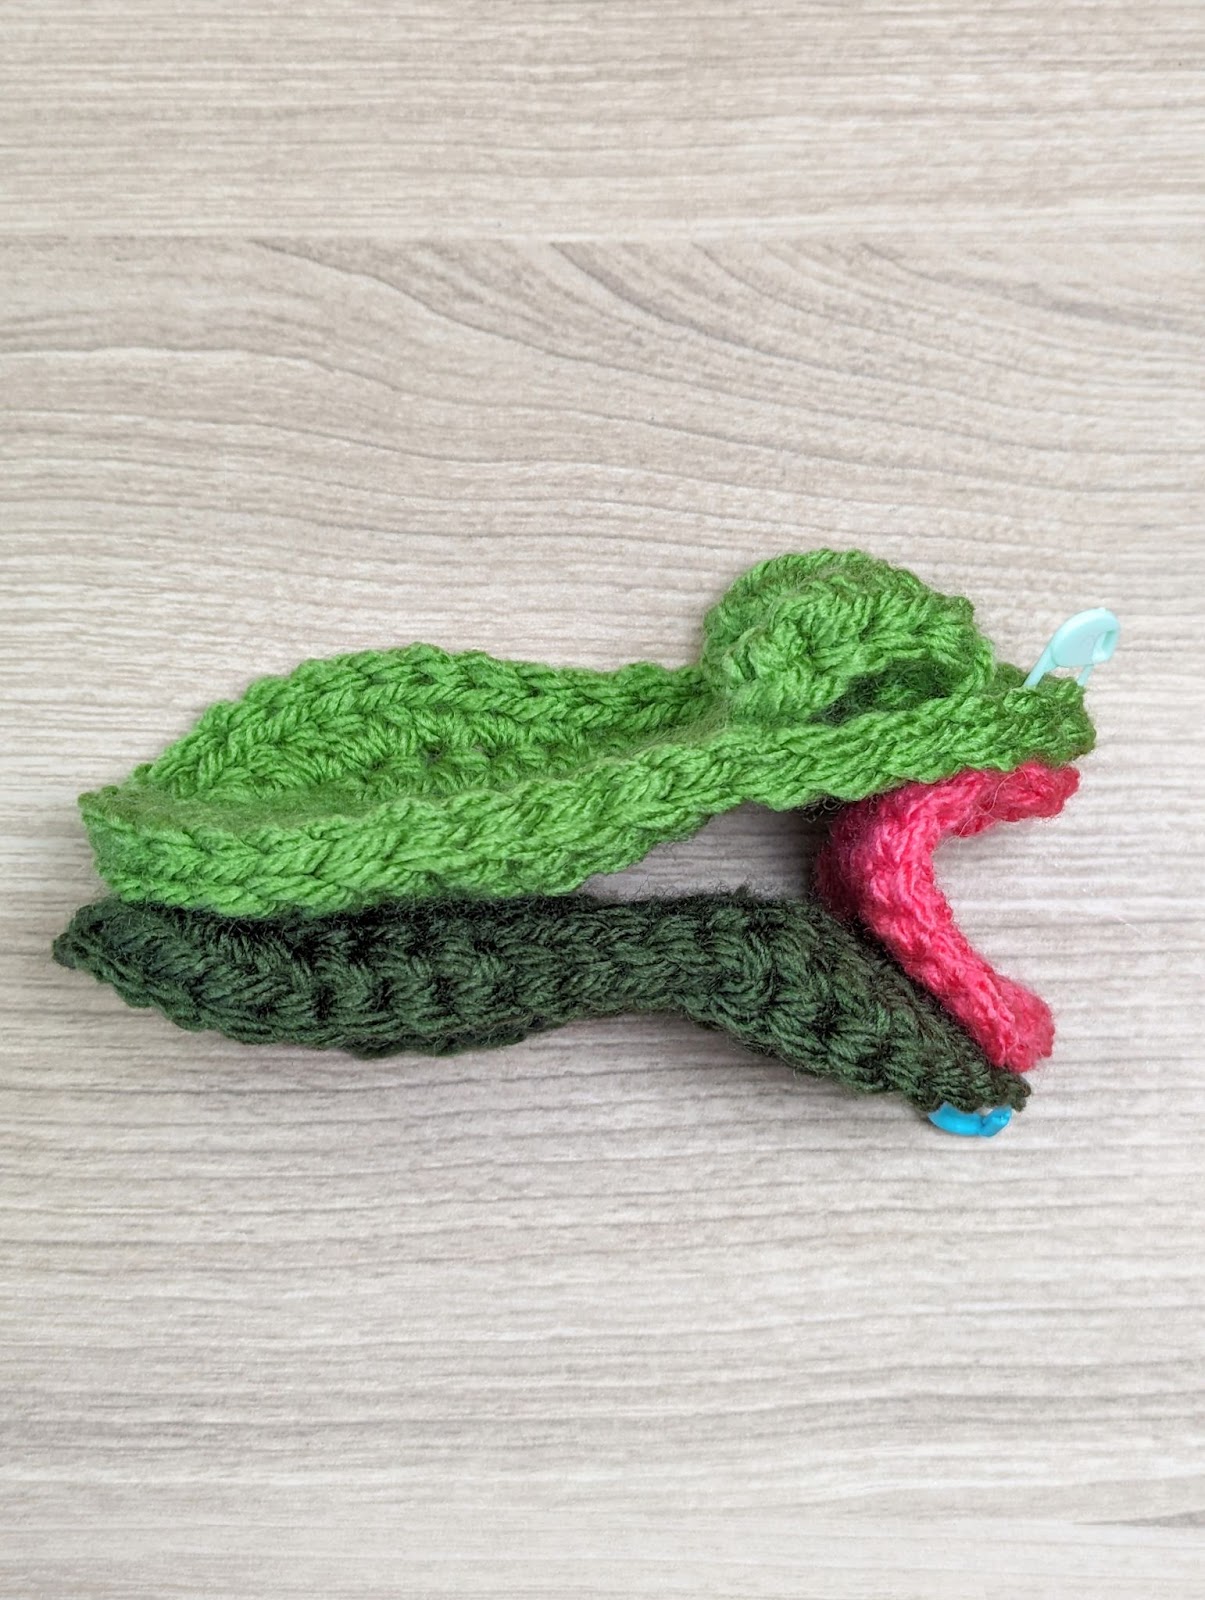
Attach head top to bottom jaw and shape the upper lip: 

Observe that rounds 3 & 4 at the front of the head and jaw are slightly square in their shaping. Try to keep the square shaping level and plumb (instead of tilted) when pinning the head to the jaw.

Line up the back of the head with the back of the jaw so the front of the head sits slightly forward of the front of the jaw.

Press and sink the top half of the jaw into the bottom half of head allowing the sides head to wrap over the sides of the jaw. Pin the folded overlapping edge of the head to the sides of the jaw . With color A and working 1”-1.5” [2.5-4 cm] above the folded-over edge of the head, apply a running stitch through the folded edge, catching the surface of the jaw as you work to shape the upper lip and secure the jaw to the head.

Shape lower jaw:

From the front of the head, count 5 rounds back on the jaw. With color B, attach a 24” [61 cm] piece of yarn to the 5th round of the jaw just under the lip shaping on the right side of the head. Apply a running stitch between the 5th and 6th round of the jaw until you reach the under the lip shaping on the left side of the head. Draw the yarn and needle through the jaw back to the starting point and pull to cinch the jaw shaping. Repeat one more time (switching up which running stitches are over vs under). Pull firmly to shape, fasten off and weave in ends.

Add more stuffing to fill out the head and/or jaw if needed. Close the hole in the back of the head and jaw and weave in ends.
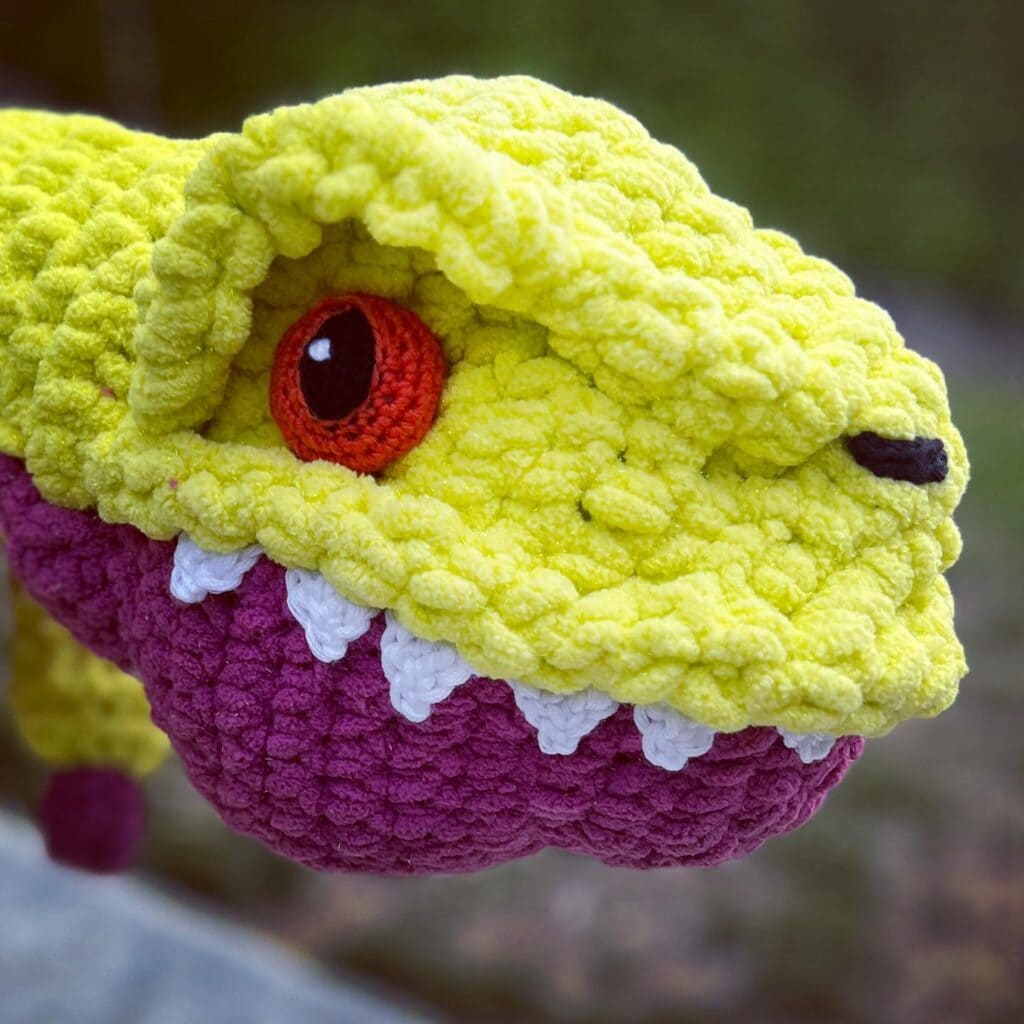
This close-up of Rori the Raptor highlights a crocheted dinosaur head with vibrant textures. Its bright yellow body features a striking orange eye, white teeth, and a purple underbelly. The detailed stitching of this dinosaur plush gives it a playful and lifelike appearance. -Marly Bird

EYES 

Make 2

With color E, ch 8 with smallest hook.

Round 1: Starting in 2nd ch from hook and working in back ridge loops, sl st in next ch, sc in next ch, hdc in next 3 ch, sc in next ch, sl st in next ch. Rotate chain so front loops are facing up, sl st in first ch (same ch as previous sl st), sc in next ch, hdc in next 3 ch, sc in next ch, sl st in last ch, change to color D, fasten off color E – 14 sts.

Round 2: Sl st blo of each st around.

Round 3: Sc blo in next 3 sts, 2 sc blo in next st, sc blo in next 6 sts, 2 sc blo in next st, sc blo in next 3 sts – 16 sts.

Round 4: *Sc in next st, 2 sc in next st; repeat from * around – 24 sts.

Round 5:  *Sc in next 2 sts, 2 sc in next st; repeat from * around – 32 sts.

Round 6: Sc in each sc around.

Round 7: *Sc in next 2 sts, sc2tog over next 2 sts; repeat from * around – 24 sts.

Round 8: *Sc in next st, sc2tog over next 2 sts; repeat from * around – 16 sts.

Round 9: *Sc2tog over next 2 sts; repeat from * around – 8 sts.

Cut and fasten off yarn. Stuff the eye firmly and close the hole.

Add catch light to eyes:

With color C yarn – apply a small grouping of short stitches to the center part of the eye for a catch light

Attach eyes and sink the eye sockets:

Attach eyes onto the sides head between rounds 11-12. 

With color A, draw a series of small stitches back and forth through the head around the edges of the eyes, pulling gently to sink the eyes into the head.

Eye Ridge 

Make 2

With color A, ch 10.

Row 1: Starting in 2nd ch from hook and working in back ridge loops, sc in each ch across, turn- 9 sts.

Row 2: Ch 1, sc in each sc across, turn.

Row 3: Fold work the long way to match up Row 2 with the Ch-10 row to form a skinny tube. Ch 1, working through both rows at the same time, sc in each st across, fasten off.

Attach Eye Ridge:

With row 3 of the eye ridge against the head, Position and curve the eye ridge around the top, side and bottom corner of the eye and pin in place. Whip stitch the bottom edge of the eye ridge to the head.

NOSTRILS 

Make 2

With color E yarn, ch 7. 

Starting in 2nd ch from hook and working in back ridge loops, sc in each ch across, fasten off. 

Attach nostrils: 

Pin the nostrils between rounds 3-4 of the head top with about 2 sts of space between them. Sew down and weave in yarn ends.

Add nose ridge details

Pinch the surface of your work to make a ridge of material between the front corner of the right eye brow ridge and just behind the right nostril. With color A, sew back and forth through the base of the ridge with a running stitch to hold the shaping. Repeat on the left side of the head.

TEETH 

Make 2

With color C yarn and medium size hook, Ch 2, [(sc, hdc, dc, ch 2, sl st) in back ridge loop of 2nd ch from hook, ch 4] 4 times, (sc, hdc, dc, ch 2, sl st) in back ridge loop of 2nd ch from hook, fasten off.

Attach teeth:

Tuck the ch edge of the teeth under the lip ridge on right side head. Line up the first tooth under the right nostril and the last tooth just behind the right eye and sew ch edge in place. Repeat on the left side of the head with the other teeth strip.

Rori the Raptor, a crocheted dinosaur plush in bright yellow and purple, stands on grass. With an orange eye and playful expression, its mouth is slightly open to reveal white teeth. The background features greenery and stone paving, creating a charming setting for this delightful crochet pattern design. -Marly Bird

Attach head to body:

Stretch and pin the open edges of the neck over the end of the head and jaw. With color A and a mattress stitch, sew the head to the body, adding more stuffing to neck as needed before closing seam. 

BELLY

With color B, loosely ch 9. 

Row 1: Starting in 2nd ch from hook and working in back ridge loops, sc in each ch across, ch 1 and turn- 8 sc.

Row 2: Sc in each sc across, ch 1 and turn.

Row 3: Sc2tog over first 2 sc, sc in next 4 sc, sc2tog over last 2 sc, ch 1 and turn – 6 sts.

Rows 4-9: Sc in each sc across, ch 1 and turn.

Row 10: 2 sc in next st, sc in next 4 sts, 2 sc in next st, ch 1 and turn – 8 sts.

Rows 11-12: Sc in each sc across, ch 1 and turn. 

Row 13: 2 sc in next st, sc in next 6 sts, 2 sc in next st, ch 1 and turn – 10 sts.

Row 14: Sc in each sc across, ch 1 and turn.

Row 15: 2 sc 2 in next st, sc in next 8 sts, 2 sc in next st, ch 1 and turn – 12 sts.

Rows 16-19: Sc in each sc across, ch 1 and turn. 

Row 20: Sc2tog in first 2 sc, sc in next 8 sc, sc2tog in last 2 sc, ch 1 and turn – 10 sts.

Row 21: Sc2tog in first 2 sc, sc in next 6 sc, sc2tog in last 2 sc, ch 1 and turn – 8 sts.

Row 22: Sc2tog in first 2 sc, sc in next 4 sc, sc2tog in last 2 sc, ch 1 and turn – 6 sts.

Row 23: Sc2tog in first 2 sc, sc in next 2 sc, sc2tog in last 2 sc, ch 1 and turn – 4 sts.

Rows 24-28: Sc in each sc across, ch 1 and turn. 

Row 29: 2 sc in first st, sc in next 2 sc, 2 sc in last st, ch 1 and turn – 6 sts.

Rows 30-31: Sc in each sc across, ch 1 and turn. 

Row 32: 2 sc in first st, sc in next 6 sc, 2 sc in last st, ch 1 and turn- 8 sts.

Rows 33-35: Sc in each sc across, ch 1 and turn. 

Row 36: Sc2tog in first 2 sc, sc in next 4 sc, sc2tog in last 2 sc, ch 1 and turn – 6 sts.

Rows 37: Sc in each sc across, ch 1 and turn. 

Row 38: Sc2tog in first 2 sc, sc in next 2 sc, sc2tog in last 2 sc, ch 1 and turn – 4 sts.

Row 39: Sc in each sc across, ch 1 and turn.  

Row 40: Sc in first sc, sc2tog in next 2 sc, sc in last sc, ch 1 and turn – 3 sts.

Row 41: Sc in each sc across, ch 1 and turn. 

Row 42: Sc in first sc, skip next sc, sc in last sc, ch 1 and turn – 2 sts.

Row 43: Sc in each sc across, ch 1 and turn. 

Row 44: Sc2tog in next 2 sc, ch 1 and turn – 1 st.

Sc around entire edge of belly piece, working 2-3 sts into the ends of row 1 as you turn the corner. Fasten off in first st of Row 44, leaving a long tail for sewing.

Attach Belly Patch:

Position Row 1 of the belly patch against the back edge of the jaw and pin in place. Stretch and flatten out the belly patch against the neck, belly, and lower tail, pinning the edges down as you place down the work. Once you are happy with patch’s location, sew the edges down with a back or running stitch. 


Tips for Making Your Easy Crochet Dino Plushie Unique

Want to make your Rori the Raptor truly one-of-a-kind? Experiment with color and fiber choices inspired by Jurassic World, adjust the size and shape to accommodate different stuffing levels, and add unique embellishments such as a free crochet unicorn pattern. Whether you’re crafting a special baby shower gift, or expanding your dino collection with easy amigurumi, these tips will help your plushie stand out!

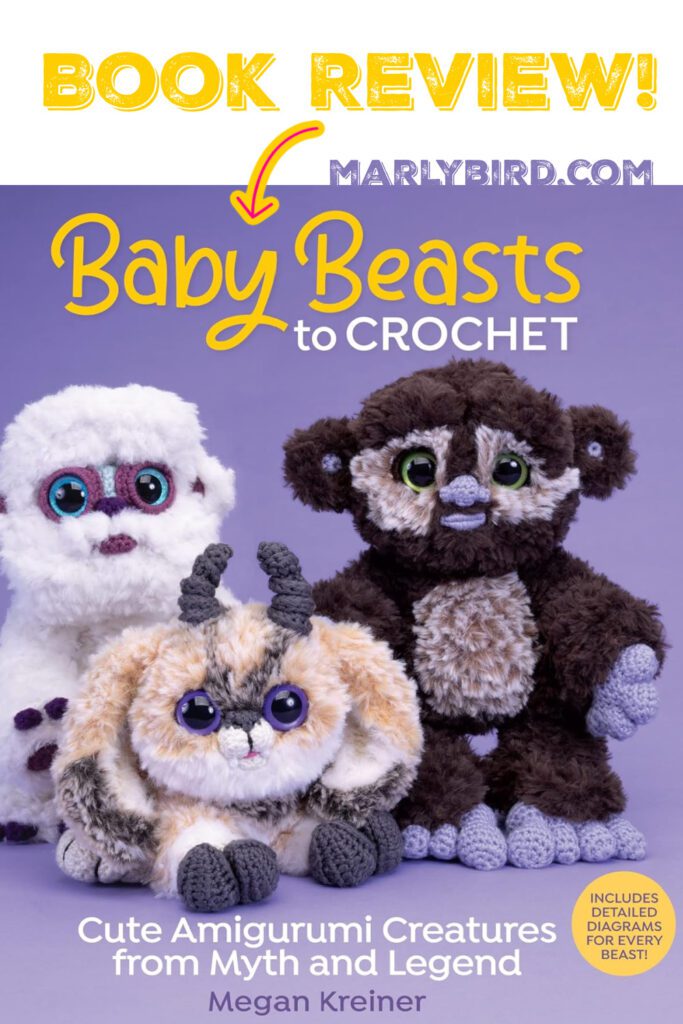
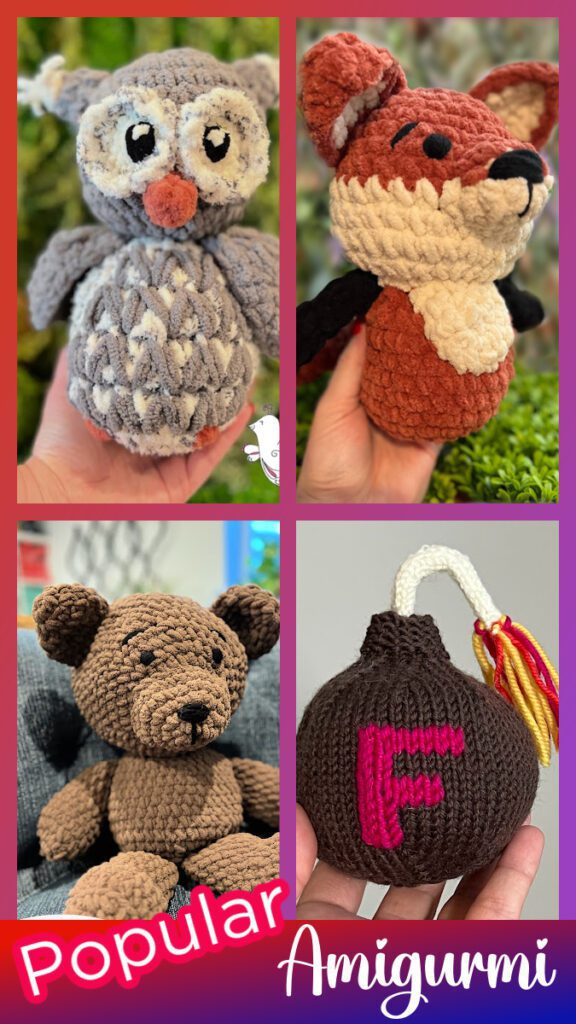
Want to try your hand and more fun plushie designs? Check out these little beasties.

Book Review Baby Beasts to Crochet by Megan Kreiner - Marly Bird

Color and Yarn Choice Variations

Choosing the right color and yarn can make your Rori the Raptor plushie truly stand out. I love using vibrant greens and earthy browns inspired by dinosaurs like the brontosaurus and pachycephalosaurus to bring Rori’s features to life.

Ideas for Embellishments

One fun way to embellish your Rori the Raptor is by adding a tiny crochet bag for it to carry. This not only enhances Rori’s charm but also adds an extra layer of creativity to your project, reflecting the crochet stuffed animal popularity and making it stand out among other dinosaur plushies.


Troubleshooting Common Crochet Issues

Sometimes, yarn tension can get tricky, or you might make a mistake while assembling your project. Whether you’re creating Rori the Raptor, a granny square, a free crochet unicorn pattern, or a crochet menorah, these issues can pop up.

In the following sections, I’ll share tips on managing yarn tension and fixing common mistakes to keep your crafting smooth and enjoyable.

Managing Yarn Tension

Keeping your yarn tension consistent is key to creating a smooth and evenly shaped Rori the Raptor. First, it is important to restate that this plushie is made using single crochets created with the yarn over NOT the yarn under. If you don’t know the difference you can check out this blog post.

Anyway, I usually start by holding the yarn a with even and consistent tension, then make sure each stitch is the size of my hook as I go to prevent any tight spots. This simple adjustment makes a big difference in the final look of your plushie.

If you find your tension fluctuating, try practicing with a few test swatches before diving into Rori.

Fixing Mistakes During Assembly

When you’re putting Rori the Raptor together, it’s easy to run into a few bumps along the way. Maybe a limb isn’t attaching right or a section isn’t shaping as it should. Here’s how I handle these common assembly hiccups:

  • Carefully examine where things went wrong and use a stitch marker to keep track.
  • Gently unravel the affected stitches back to the mistake.
  • Rework that area with consistent tension to ensure everything fits perfectly.

If a mistake feels too tricky to fix on your own, don’t hesitate to reach out to our crafting community. We’re all here to help each other create the best Rori possible!

The number one thing I’ve learned when it comes to a MK Crochet pattern is to Blindly Follow the instructions. Don’t overthink any of it, just do.


Sharing Your Finished Rori the Raptor

After completing Rori the Raptor, I love taking adorable photos to showcase your work using easy amigurumi projects and frog crochet pattern. It’s a fun way to highlight your creation and inspire others with amigurumi popularity. Joining crochet community groups lets you connect, share your progress with free crochet unicorn pattern and menorah pattern, and celebrate your finished plushies together. Let’s explore how to share Rori with the world!

A person with glasses playfully poses with a charming crocheted yellow and pink dinosaur plush, mimicking its claws like a raptor. They stand in a room with a gray carpet and light-colored furniture, embodying the fun spirit of the crochet pattern. -Marly Bird
Favorite This Pattern on Ravelry - Marly Bird

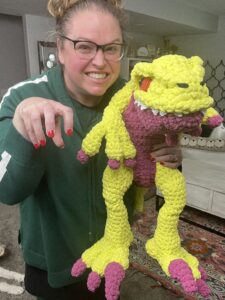
Taking Adorable Photos

I love capturing Rori the Raptor in different settings to showcase his adorable details. Whether he’s snuggled up on a cozy blanket or placed among your favorite crafting supplies such as a free crochet unicorn pattern, frog crochet pattern, menorah pattern, and easy amigurumi, taking photos of your finished plushie preserves the joy of your creation.

You don’t need fancy equipment—just use your smartphone and some natural light to highlight Rori’s soft textures and vibrant colors. Share your photos in our crafting community or on social media with #RoriTheRaptor to inspire and connect with fellow crochet enthusiasts! If you tag @themarlybird or @mkcrochet we would that.


Frequently Asked Questions

What materials do I need to crochet Rori the Raptor?

To crochet Rori the Raptor, I use:

  • Yarn in chosen colors
  • Suitable crochet hook
  • Polyester stuffing
  • Safety eyes or embroidery thread
  • Tapestry needle

How long does it take to complete the Rori plushie?

Depending on your familiarity with crochet, a custom crochet stuffed animal like Rori can be made in about 15 to 25 hours making the Rori plushie. It depends on your skill level and how detailed you want it to be. Whether you’re just starting out or have some crafting experience, you’ll find it a fun and rewarding project!

Can I customize the colors of my Rori the Raptor?

Absolutely! You can personalize Rori the Raptor with colors that match your style. Whether you want bright hues or subtle shades, customizing Rori is simple and fun. Let’s create a unique Rori just for you!

Where can I find free dinosaur crochet patterns?

You can find free dinosaur crochet patterns on sites like Ravelry, AllFreeCrochet, and Pinterest. Plus, our Marly’s Minions community regularly shares links to awesome free designs. Happy crocheting with your dino buddies!

Bringing Rori the Raptor to life offers a fun and rewarding way to enhance your crochet skills with a lovable dinosaur plushie. You’ll love experimenting with different colors and custom features to make Rori uniquely yours.

Your BiCrafty Bestie,
Marly Bird

A cartoon avatar of a person with glasses and a brown bun smiles warmly. Their green shirt and black jacket add a stylish touch, while colorful hearts surround them like loving temperature blankets, stitching together an aura of love and positivity. -Marly Bird

Filed Under: Crochet, Free Patterns, Our Free Patterns, Pattern, Uncategorized

Sparkle Up Your Fall with This Irresistible Crochet Pumpkin Pattern!

September 27, 2024 By Marly Bird

Hey there, fellow crafters! 🍁 As the leaves turn golden and the crisp autumn air settles in, it’s the perfect time to dive into some cozy crochet projects. Today, I’m beyond excited to share a charming FREE crochet pumpkin pattern that’s sure to add a touch of sparkle to your fall decor. Featuring the fabulous Herrschners Worsted Halloween Sparkle Yarn, this pumpkin is a true standout with its hint of metallic thread that glimmers with every stitch.

If you are a fan of holiday decor, you will love these patterns Crochet Holiday Barrett, Knit Pumpkin Patch, Crochet Mitten Garland, All Buttoned Up Wine Bottle Cozy, Crochet Mini Stocking Ornament or Gift Card Holder, and a variety of Christmas Stockings 1. Crochet 2. Knit 3. Knit and an entire course to design your own Merry Stitchmas (for crocheters AND knitters!)!

A vibrant crochet pumpkin featuring alternating stripes of bright red, orange, purple, and black yarn is showcased among autumn decorations. Text overlay reads "Sparkle Crochet Pumpkin Pattern" and "Free Crochet Pumpkin Pattern MarlyBird.com". -Marly Bird

Affiliate Disclosure: This post contains affiliate links. If you click on one of these links and make a purchase, I may earn a small commission at no additional cost to you. This helps support the content and free patterns I provide here on MarlyBird.com. Thank you for your support—it means the world to me! 💖

Why Crochet Pumpkins Are Perfect for Fall Decor

Crochet pumpkins are the quintessential fall accessory. Not only do they bring a warm, handcrafted touch to your seasonal decorations, but they also make for delightful gifts or festive accents around your home. Their versatility allows you to play with colors, sizes, and textures, making them a favorite among crochet enthusiasts.

Creative Ways to Use Your Crochet Pumpkins

Once your pumpkins are complete, there are so many fun ways to use them! Place them on your mantel, use them as table centerpieces, or even gift them to friends and family. They make wonderful, festive additions to any fall decor.

A split image showcases a vibrant crochet pumpkin pattern in autumn colors (red, orange, black, and pink) with a bow on top. It's artfully displayed among fall decor including artificial leaves, berries, and small gourds. Text reads "Sparkle Crochet Pumpkin Pattern" and "Free Pattern MarlyBird.com". -Marly Bird

How to Customize Your Crochet Pumpkin

Get creative with your pumpkins! Whether you want to use different colors or add unique embellishments, there’s no limit to how you can personalize your project. Try different yarn textures or add little fall-themed decorations to make each pumpkin your own.

✨ If you enjoy holiday smells, you can also add a little bit of scented oil or potpourri to the stuffing to have your pumpkin be a little aromatic.

Tips for Achieving the Perfect Pumpkin Shape

Creating a perfect pumpkin shape involves more than just following a pattern. Here are a few tips to ensure your pumpkin turns out just right:

  • Stuff Evenly: Make sure to stuff your pumpkin evenly to avoid lumps and bumps.
  • Adjust Shape: Use a yarn needle to adjust the shape as needed while you’re stuffing and closing.
  • Finishing Touches: Adding a little jute twine or a cinnamon stick as a stem can give your pumpkin a rustic, charming look.
Advertisement for the "Sparkle Crochet Pumpkin Pattern" featuring a multi-colored crocheted pumpkin. The image includes yarn balls, a candle, autumn leaves, and a person holding the crocheted pumpkin. Text highlights a free crochet pumpkin pattern available at MarlyBird.com. -Marly Bird

Common Mistakes to Avoid When Crocheting Pumpkins

Even the best of us make mistakes, so here are some common pitfalls to watch out for:

  • Overstuffing: Too much stuffing can distort the shape of your pumpkin.
  • Stitches Too Big: Using a hook that is too big for the yarn and making really loose stitches will cause your pumpkin fabric to have holes. Avoid this by using an appropriate sized hook.
  • Skipping Rows: Be sure to create a fabric that is long enough to maintain the correct proportional shape or your crochet pumpkin.
A round woven tray holds a crochet pumpkin in shades of pink, orange, and black, a pair of scissors, a crochet hook, and a skein of variegated yarn labeled "Worsted Show Your Shine Sparkle Yarn." Text on the image reads, "Sparkle Crochet Pumpkin Pattern," showcasing Marly Bird's free crochet pumpkin pattern. -Marly Bird

Quick List of Materials Needed for Your Sparkle Crochet Pumpkin Project

To get started on this sparkling autumn delight, here’s what you’ll need:

  • Yarn: Herrschners Worsted Halloween Sparkle Yarn – This yarn is perfect for adding a bit of sparkle to your pumpkin with its metallic thread.
  • Crochet Hook: Size J/10 (6mm), or as recommended for your yarn.
  • Fiberfill: For stuffing your pumpkin to give it that lovely plump shape.
  • Tapestry Needle: For weaving in those ends and making your project look polished.
  • Scissors: Essential for trimming yarn.
  • Optional: Cinnamon stick, tine, and leaf embellishments.

Add This Sparkling Pumpkin to Your Ravelry Queue!

We’d love to see your beautiful crochet pumpkins come to life! If you enjoyed this pattern, please take a moment to favorite it and add it to your Ravelry queue. Favoriting helps others discover this charming project and lets us know you’re excited about it. Plus, adding it to your queue keeps it easily accessible for when you’re ready to dive into your next fall crochet project.

Favorite This Pattern on Ravelry - Marly Bird
A crocheted pumpkin in vibrant shades of orange, pink, red, purple, and black with a cinnamon stick stem is on display. The pumpkin is accompanied by an orange candle and autumn leaves. Text overlay reads, "Sparkle Crochet Pumpkin Pattern. Free Crochet Pumpkin Pattern MarlyBird.com. -Marly Bird

Step-by-Step Guide to Crocheting a Pumpkin – Free Crochet Pumpkin Pattern

SPARKLE CROCHET PUMPKIN

Designed by Marly Bird

SKILL LEVEL

Easy

MEASUREMENTS

Finished Measurements

Pumpkin is 10” [25.5 cm] wide by 24” [609.5 cm] long, before shaping into a pumpkin. 

Gauge 

12 hdc by 8 rows = 4” [10 cm] x 4” [10 cm]; use any size hook to obtain the gauge. 

MATERIALS

Crochet Yarn 

Herrschners, Worsted Halloween Sparkle Yarn ( 92% acrylic/8% polyester, 489 yd / 448m, 8 oz / 226g, CYCA# 4 worsted) : Sorcerer, 1 ball

Crochet Hook

Size J/10 [6.0 mm]

Notions 

Tapestry needle, Fiber Fil Stuffing, Stitch Marker, Cinnamon Stick (optional), Twine (optional)

ABBREVIATIONS

Ch – Chain(s) 

Hdc – Half Double Crochet

RS – Right Side 

Sc – Single Crochet

Sl st – Slip Stitch

St(s) – Stitch(es)

WS – Wrong Side

SPECIAL STITCHES 

⭐️Third Loop: Also known as middle or back bar. Horizontal strand located under the top 2 loops.. When working in turned rows the third loop is on the front side of the fabric facing you.

NOTES

  • The crochet pumpkin is crocheted flat then seamed together to form a pumpkin shape.
  • Gauge is not critical for this project.

VIDEO TUTORIAL

  • Sparkle Crochet Pumpkin >> Click Here for Video Help <<

GROW

To Unlock Exclusive Subscriber Content click the Box below and join for free by simply adding your email and creating a password! If you are having troubles, clear your cache or reset your password or login to the Grow Publisher Portal.

>> Learn More About Grow Here <<

I’m thrilled to share this amazing pattern with you, many patterns on my blog are absolutely free! I kindly request that you don’t copy and paste or distribute this pattern. Prefer an ad-free experience? Buy a digital PDF pattern for a small fee from one of my online stores for a seamless crafting journey. 

I appreciate your support and readership. You are the reason I can keep doing what I love and sharing it with others. So, thank you from the bottom of my yarn-loving heart! Disclosure: This post contains affiliate links, meaning I get a commission if you decide to make a purchase through my links at no cost to you.

Image showing a crocheted pumpkin made with yarn in alternating stripes of orange, black, and pink, presented on a white surface. In the background, there is a skein of similarly colored yarn. The text on the image reads "Sparkle Crochet Pumpkin Pattern" and "Free Crochet Pumpkin Pattern by Marly Bird. -Marly Bird

SPARKLE CROCHET PUMPKIN PATTERN

Chain 31.

Row 1 (WS): Sc in 2nd ch from hook and in each ch across, turn — 30 sc.

Row 2 (RS): Ch 2 (does not count as a st), hdc in each sc across, turn.

Row 3: Ch 2 (does not count as a st), hdc in the third loop of each hdc across, turn.

Repeat row 3 until project measures 24″ [609.5 cm] long or to desired length. End on a RS row, turn.

Joining Row: Fold project so beginning foundation chains and last row are touching, sl st in the third loop of the first st on the last row and the first ch on the foundation at the same time, *sl st in the third loop of the next st on the last row and next ch on the foundation at the same time; repeat from * across, fasten off with extra long tail for weaving.

A colorful crochet project with stripes of orange, pink, purple, and black yarn lies partially completed on a white surface. Nearby, a skein of multicolored yarn, autumnal foliage, berries, crochet hooks, and a wooden dish with other crochet tools are arranged neatly next to a crochet pumpkin pattern. -Marly Bird

FINISHING

Weave tail along the edge of the project through the row ends. Pull tail tightly to cinch edge together. Weave in end to reinforce cinched edge.

Turn project inside out to form bowl. Fill pumpkin with fiber fill to desired feel.

Using the tapestry needle weave another strand of yarn through the opposite end along the row ends. Pull tightly to cinch edge together. Weave in to reinforced cinched edge. Pull needle from the top to the bottom and the bottom to the top of the pumpkin to create a slight indent. Weave in ends to secure and fasten off.

Optional: Insert Cinnamon stick into center of pumpkin, tie twine around stitch and tie a bow .

A person with glasses and curled hair, smiling and holding a crocheted pumpkin that features sections of red, orange, yellow, and black. The background includes geometric wall decor and various items on a shelf. -Marly Bird

How to Care for and Maintain Your Handmade Crochet Pumpkin

To keep your crochet pumpkin looking fresh:

  • Store Carefully: Keep it in a dry place away from direct sunlight. I prefer to store my items in a sealed plastic bin. And, a little tip, I add a dryer sheet or two to the bin to keep it smelling nice.
  • Spot Clean: If needed, spot clean gently to maintain its sparkle!

FAQs About Crochet Pumpkin Patterns

You have questions; we have answers!

What type of yarn is best for making crochet pumpkins?

  • Answer: For crochet pumpkins, worsted weight yarn is a great choice. You can use cotton for a sturdier texture or acrylic for a softer finish. Adding a metallic thread or sparkle yarn can give your pumpkin a festive touch.

How do I choose the right hook size for my crochet pumpkin?

  • Answer: The hook size should match the yarn weight you’re using. Check the yarn label for recommended hook sizes, and adjust if you want a tighter or looser fabric. For worsted weight yarn, a hook size ranging from H-8 (5 mm) to J-10 (6 mm) typically works well.

How can I make my crochet pumpkin more realistic?

  • Answer: To enhance realism, use a yarn with a bit of texture or shine, add ribbing for pumpkin ridges, and consider using a combination of colors for depth. Embellishing with a cinnamon stick or a green leaf can also add a natural touch.

What is the best way to stuff my crochet pumpkin?

  • Answer: Use fiberfill or polyester stuffing to give your pumpkin a plump shape. Be sure to stuff it evenly and firmly but not too tightly to maintain a natural, rounded appearance.

How can I prevent my pumpkin from losing its shape?

  • Answer: Ensure you stuff your pumpkin evenly and secure the top and bottom openings tightly. You can also use a bit of fabric stiffener if needed to help it keep its shape.

Can I use my crochet pumpkin outdoors?

  • Answer: Crochet pumpkins are best suited for indoor decor. If you want to use them outdoors, consider treating them with a water-resistant spray or using acrylic yarn that can withstand some exposure to the elements.

How do I care for my crochet pumpkin decor?

  • Answer: Keep your pumpkin in a dry, cool place away from direct sunlight. If it gets dirty, gently spot clean with a damp cloth. Avoid machine washing, as it may distort the shape and texture.

What can I do if my pumpkin pattern looks uneven or lumpy?

  • Answer: If your pumpkin looks uneven, check your stuffing and adjust as needed. You can also use a yarn needle to adjust the shape and smooth out any lumps. Blocking the pumpkin can also help it maintain a more uniform shape.

How can I add embellishments to my crochet pumpkin?

  • Answer: You can sew on or crochet additional elements like leaves, vines, or a stem. Use different yarn colors or textures to add contrast and detail. Small decorations like beads or buttons can also enhance the look.

Can I adjust the size of my crochet pumpkin?

  • Answer: Yes! To make a larger or smaller pumpkin, adjust the yarn weight, hook size, or the number of rounds in the pattern. Make sure to maintain the same shaping techniques to keep the proportions consistent.

What are some creative ways to use crochet pumpkins for holiday decor?

  • Answer: Crochet pumpkins can be used in a variety of ways, such as table centerpieces, mantel decorations, or part of a fall-themed wreath. They also make great gifts or can be used in festive displays around your home.
A vibrant crochet pumpkin featuring alternating stripes of bright red, orange, purple, and black yarn is showcased among autumn decorations. Text overlay reads "Sparkle Crochet Pumpkin Pattern" and "Free Crochet Pumpkin Pattern MarlyBird.com". -Marly Bird

Time to Make Your Own Crochet Pumpkin

I hope you’re as excited as I am to crochet this dazzling pumpkin! It’s a wonderful way to celebrate the season and add a personal touch to your home decor. Don’t forget to share your finished pumpkins with us—use #mmmdi or #MarlyBird to show off your creations!

Here are some more Holiday Decor Patterns for you to enjoy.

Make sure to subscribe to our blog for more fun and festive crochet projects!

Happy crocheting, everyone!

Marly Bird (Your BiCrafty Bestie) 🎃✨

Filed Under: Crochet, Free Patterns, Our Free Patterns, Pattern, Uncategorized

Leggy Frog Crochet Pattern – Leap the Tree Frog Stuffie

May 20, 2024 By Marly Bird Leave a Comment

Leap into the magical world of crochet with the “Leap the Frog” crochet plush pattern, an enchanting creation from the imagination of Disney animator and renowned designer Megan Kreiner. This charming leggy frog crochet pattern is more than just a stuffed animal; it’s a whimsical companion that brings joy and delight to every stitch.

Crafted with Bernat Blanket Yarn infused with subtle sparkle, Leap offers a tactile adventure and a dazzling visual appeal. His cleverly designed mouth opens wide to reveal a playful tongue, perfect for capturing the hearts of both the young and the young at heart. With this pattern, crocheters can enjoy bringing to life a frog that’s not only cuddly but also interactive.

Accessible for adventurous beginners but ideal for intermediate crocheters looking for a project that combines fun with function, the Leap the Frog pattern promises a rewarding crafting experience. Each component is thoughtfully designed to ensure a seamless assembly, resulting in a durable and adorable frog ready for adventures. Whether perched on a shelf or tagging along on daily errands, Leap is a testament to the joy of crochet and the endless possibilities it holds.

Looking for more crochet stuffed animal patterns? Look at the Frogging Friend Crochet Frog, Sparkle the Unicorn or Alden the Owl!

A collage of images features a crochet pattern for a yellow and green tree frog with a pink tongue. The frog is showcased hanging on branches and lying on grass. Text overlaid reads "Leap the Tree Frog Stuffie Crochet Pattern. -Marly Bird

Affiliate Disclosure: This post contains affiliate links. If you click on one of these links and make a purchase, I may earn a small commission at no additional cost to you. This helps support the content and free patterns I provide here on MarlyBird.com. Thank you for your support—it means the world to me! 💖

Meet “Leap the Frog” – Your Next Crochet Project

This isn’t just any crochet stuffed animal; it’s a super cuddly, bright lime yellow tree frog that’s sure to bring a smile to anyone’s face. Whether you’re a beginner or an expert, this pattern is designed to be fun and engaging, with detailed instructions available on my website at MarlyBird.com. So grab your hooks and let’s make something that hops right off your crochet table!

Who is Designer Megan Kreiner?

Now, let’s talk about the brilliant mind behind this delightful pattern. Megan Kreiner is not just any designer; she’s a Disney animator turned knit and crochet designer, which means she brings a touch of magic to everything she creates. With her experience in animation, Megan has a unique ability to bring characters to life through yarn. Her designs, including our friendly “Leap the Frog,” are not only fun to make but also full of personality and charm. You can find more of her enchanting patterns on my website, where we love to feature talented designers like Megan.

Check out these amazing free crochet pattern designs by Megan

Sparkle the Unicorn Stuffie - crochet unicorn pattern - Marly Bird
Sparkle The Crochet Unicorn PatternMeet Sparkle, the crochet unicorn you’ve dreamed of!
Image of a crocheted armadillo stuffed animal labeled "holiday armadillo amigurumi" by Arlene Stitchadillo, featuring a detailed gray and beige yarn texture and a small hat. -Marly Bird
Arlene the Holiday Armadillo
Collage of images featuring crochet menorah tops and a blue crocheted dinosaur with details highlighted, accompanied by text "crochet menorah tops" and "free crochet pattern by Marly Bird. -Marly Bird
Adorable Menorah Tops Crochet Pattern with dino egg to store the candles

Why You’ll Love Crocheting Leap the Tree Frog

One of the most charming aspects of “Leap the Frog” is his interactive design. Imagine a crochet frog whose mouth actually opens to reveal a playful, extendable tongue—perfect for pretending to snap up flies!

This feature not only adds an element of fun to the finished product but also engages children and adults alike, bringing the stuffed animal to life with every play session. It’s these thoughtful details that make the “Leap the Frog” pattern a fantastic project for gifts or educational toys, fostering imagination and interactive play.

But that is not where the fun stops!

Leap isn’t just any frog—he’s a leggy frog crochet stuffie pattern designed with flexibility in mind. Each of Leap’s limbs is crafted to be not only adorable but also incredibly flexible, allowing you to pose him in various fun ways.

Whether he’s sitting on a shelf or dangling from a child’s hand, these leggy limbs bring an added dimension of interactivity and fun to the toy. This flexibility makes Leap not only a delightful decorative piece but also enhances playtime, providing endless opportunities for creative storytelling and display.

Whether you’re looking to add a whimsical touch to your home decor or crafting a gift that stands out, Leap the Frog is the perfect pattern to bring joy and a bit of sparkle into your life.

Two images of a crocheted tree frog made from BERNAT Baby Blanket SPARKLE yarn. One frog is perched on a branch with its tongue out. Another lies on its back in the grass, showcasing this adorable Tree Frog Stuffie. Text reads "Leap the Tree Frog || Free Crochet Pattern ||". -Marly Bird

Plush Yarn for a Plush Crochet Stuffed Animal – Bernat Blanket Yarn with Sparkle

Now, let’s talk about the yarn that brings Leap to life. For this project, we use Bernat Blanket Yarn with a subtle sparkle, which not only enhances the visual appeal of our froggy friend but also offers several practical benefits. This yarn is known for its softness and durability, making Leap incredibly cuddly and resistant to wear and tear—ideal for lots of loving! Additionally, the sparkle in the yarn adds a magical touch that catches the light, bringing a delightful twinkle to Leap’s appearance. Plus, this yarn is easy to care for, which is perfect for toys that may need frequent washing.

Why is amigurumi so popular - Marly Bird
More Amigurumi Stuffie Patterns

Crochet Leap the Tree Frog – What You Need to Know

SKILL LEVEL

Intermediate

MEASUREMENTS

Finished Measurements

Frog is x” [x cm] wide by x” [x cm] long. 

Gauge 

7 sc x 8 rounds = 4” [10 cm] x 4” [10 cm]; use any size hook to obtain the gauge.


MATERIALS

Crochet Yarn 

Bernat, Baby Blanket Sparkle (100% polyester, 220 yds / 201 m, 10.5 oz/ 300 g, CYCA# 6 super bulky) 

Color A: #71011 Limeade Sparkle, 150 g

Color D: #71006 Hot Pink Sparkle, small amount

Bernat, Baby Blanket (100% polyester, 220 yds / 201 m, 10.5 oz/ 300 g, CYCA# 6 super bulky) 

Color B: #10006 Vintage White, 30 g

Color C: #33615 Yellow, small amount

Color E: #10040 Coal, small amount

Crochet Hook

N/13 [9.0 mm] or hook needed for gauge 

Notions 

Tapestry needle, Fiberfil Stuffing, Stitch Markers


ABBREVIATIONS

Theses are basic abbreviations for most crochet patterns but it is important to list the ones actually used in the pattern. Did you know we have a great list of crochet abbreviations and definitions here on the Marly Bird website. Check these out here.

Ch – Chain(s) 

Dc – Double Crochet

Hdc – Half Double Crochet

RS – Right Side 

Sc – Single Crochet

Sl st – Slip Stitch

Sp(s) – Space(s) 

St(s) – Stitch(es)

WS – Wrong Side


SPECIAL STITCHES 

⭐️ Single Crochet 2 Together (sc2tog): *Insert hook into indicated stitch, yarn over and pull up a loop; repeat from * in next stitch indicated, yarn over and draw through all 3 loops on hook. (1 st decreased)

⭐️ Single Crochet 3 Together (sc3tog): *Insert hook into indicated stitch, yarn over and pull up a loop; repeat from * in next 2 stitches indicated, yarn over and draw through all 4 loops on hook. (2 sts decreased)


NOTES

  • Tree Frog is worked in pieces and seamed together. Details are added last. 
  • Body parts are worked in continuous spiral rounds that are not joined at the end of the round. 
  • Use a stitch marker to mark the first stitch of each new round throughout the project. 
  • Change colors when 2 loops are left on the last stitch of the old color.  Fold in the new color to complete the stitch and start using the new color. 
Promotional image for a PDF pattern titled "Leap the Tree Frog." It features crochet instructions for creating a leggy frog. It includes a tablet displaying a picture of the crochet frog, printed pages of the pattern, and the text "Marly Bird" at the bottom. -Marly Bird

Upgrade to the Printable PDF

Beautifully formatted to print and relax while crocheting this adorable 🐸 leggy frog crochet pattern.

Get the Ad-Free PDF

The Ad-Free Crochet Pattern can be purchased on Etsy or Ravelry or Shopify.

Where to Find the Leggy Frog Crochet Pattern – Leap the Frog Pattern

Discovering Leap the Frog is a breeze for crafters of all skill levels. This leggy frog crochet stuffie pattern is available free exclusively to subscribers at MarlyBird.com. Joining is simple: just click the subscription box in the blog post, enter your email, and create a password to unlock a treasure trove of subscriber-only content, including the vibrant and playful Leap the Frog.

For those who prefer a seamless crafting session without interruptions, the ad-free PDF version of the pattern is available for purchase. You can find this version on Etsy, Ravelry, and my Shopify store. This option is perfect for enthusiasts who appreciate having a portable, print-friendly format at their fingertips, ensuring that Leap can come to life in your hands wherever you are. Whether you choose the free version or support us by purchasing the pattern, you’re in for a delightful crochet adventure with Leap the Frog!

Three images of Leap the Tree Frog outdoors. Left: Frog draped casually over a tree branch. Center: Close-up of one of the frog's hand crocheted details. Right: Frog laying flat on the ground among grass and leaves with a pink and white crochet bow on its head. -Marly Bird
Doing a photoshoot can be hard! LOL. Leap was balancing on a limb on second and the next he was falling to the ground. I found this sequence of photos hilarious!

GROW

To Unlock Exclusive Subscriber Content click the Box below and join for free by simply adding your email and creating a password! If you are having troubles, clear your cache or reset your password or login to the Grow Publisher Portal.

>> Learn More About Grow Here <<

I’m thrilled to share this amazing pattern with you, many patterns on my blog are absolutely free! I kindly request that you don’t copy and paste or distribute this pattern. Prefer an ad-free experience? Buy a digital PDF pattern for a small fee from one of my online stores for a seamless crafting journey. 

I appreciate your support and readership. You are the reason I can keep doing what I love and sharing it with others. So, thank you from the bottom of my yarn-loving heart! Disclosure: This post contains affiliate links, meaning I get a commission if you decide to make a purchase through my links at no cost to you.

Leap the Tree Frog Crochet Written Instructions

TOP OF BODY

Note: Body is worked from the center out, with eyelids created with short rows while working.

With color A, loosely chain 10.

Round 1: Sc in back ridge of 2nd ch from hook (place marker, see notes), sc in back ridge of next 7 ch, 3 sc in last ch, turn to work in front loops of foundation ch, sc in front loops of next 7 ch, 2 sc in next ch, do not join or turn (see notes)–20 sc.

Round 2: 2 hdc in next st, hdc in next 4 sts, sc in next 2 sts, hdc in next st, 2 sc in next 3 sts, hdc in next st, sc in next 2 sts, hdc in next 4 sts, 2 hdc in last 2 sts –26 sts.

Round 3: 2 hdc in next 2 sts, hdc in next 3 sts, sc in next 2 sts, sl st in next st, sc in next st, place marker, begin creating eyelid working in short rows as follows:

Row 3a: Ch 1, 2 hdc in next 2 sts on body, ch 1, turn.

Row 3b: Sc in first hdc, hdc in next 2 hdc, sc in last hdc, sl st in marked st on body, remove marker, turn.

Row 3c: Ch 2, position eyelid in front of work, skip eyelid and start working on body.

Round 3 cont: 2 sc in next 4 sts on body, place marker, begin creating next eyelid working in short rows as follows:

Row 3d: Ch 1, 2 hdc in next 2 sts on body, ch 1, turn.

Row 3e: Sc in first hdc, hdc in next 2 hdc, sc in last hdc, sl st in marked st on body, remove marker, turn.

Row 3f: Ch 2, position eyelid in front of work, skip eyelid and start working on body.

Round 3 cont: Sc in next st on body, sl st in next st, sc in next 2 sts, hdc in next 3 sts, 2 hdc in next 2 sts – 28 body sts + 2 ch-2 sps.

Round 4: 2 hdc in next 4 sts, sc in next 2 sts, sl st in next 4 sts, 2 sc in next ch-2 sp, sc in next 4 sts, place marker (this locates the front of the body and center of the upper mouth), sc in next 3 sts, 2 sc in next ch-2 sp, sl st in next 4 sts, sc in next 3 sts, 2 hdc in next 3 sts, 2 sc in next st – 40 sts. 

Round 5: Sl st in each st around, move markers up as you work, fasten off, weave in ends. 

BOTTOM OF BODY

Note: Body is worked from the center out.

With color B, loosely chain 10.

Round 1: Sc in back ridge of 2nd ch from hook (place marker, see notes), sc in back ridge of next 7 ch, 3 sc in last ch, turn to work in front loops of foundation ch, sc in front loops of next 7 ch, 2 sc in next ch, do not join or turn (see notes)–20 sc.

Round 2: 2 hdc in next st, hdc in next 4 sts, sc in next 2 sts, hdc in next st, 2 sc in next 3 sts, hdc in next st, sc in next 2 sts, hdc in next 4 sts, 2 hdc in last 2 sts –26 sts.

Round 3: 2 hdc in next 2 sts, sc in next 3 sts, sl st in next 3 sts, sc in next 3 sts, 2 sc in next 4 sts, sc in next 3 sts, sl st in next 3 sts, sc in next 3 sts, 2 hdc in next 2 sts- 34 sts. 

Round 4: 2 hdc in next 3 sts, sc in next 4 sts, sl st in next 4 sts, sc in next 6 sts, place marker (this locates the front of the body and center of the lower mouth), sc in next 6 sts, sl st in next 4 sts, sc in next 4 sts, 2 hdc in next 2 sts, sc in last st, sl st to first st, fasten off, weave in ends– 40 sts. 

A leggy plush yellow frog with a pink tongue and bulging eyes is draped over a tree branch in a sunlit outdoor setting, with grass and other trees visible in the background. The crochet pattern gives the handmade toy its textured fabric, enhancing its playful appearance. -Marly Bird

EYE

Note: Eye is worked from front to back.

Make 2

With color C, make an adjustable ring.

Round 1: 4 sc in ring, pull ring closed, do not turn or join. 

Round 2: 2 sc in each sc around – 8 sc.

Round 3: Sc in each sc around.

Round 4: *Sc2tog over next 2 sts, repeat from * around, sl st to first st, fasten off with long tail- 4 sts. 

Stuff eye with fiberfil. Weave tail through the last round and pull to close the hole. Keep a long tail for seaming.

INNER MOUTH

Note: Mouth is worked from the center out.

With color D, loosely chain 5.

Round 1: Sc in back ridge of 2nd ch from hook (place marker, see notes), sc in back ridge of next 2 ch, 3 sc in last ch, turn to work in front loops of foundation ch, sc in front loops of next 2 ch, 2 sc in next ch, do not join or turn (see notes)–10 sc.

Round 2: 2 sc in next st, sc in next 2 sts, 2 sc in next 3 sts, sc in next 2 sts, 2 sc in last 2 sts –16 sts.

Round 3: *Sc in next st, 2 sc in next st; repeat from * around, sl st to first st, fasten off, weave in ends –24 sts.

A bright green, crocheted frog with long limbs and big eyes hangs on a tree branch. This leggy frog, created from a delightful crochet pattern, has a pink protruding tongue and is set against a backdrop of a green grassy area with another tree, under a partly cloudy sky. -Marly Bird

TONGUE

With color D, loosely chain 12.

Row 1: Sc in back ridge of 2nd ch and each ch across, fasten off with long tail for seaming. 

ARMS

Note: Arms are worked from upper arm to fingers. 

Make 2

With color A, chain 6 and sl st to first ch. 

Round 1: Sc in next ch, place marker, sc in next 4 ch, sc in next sl st, do not join or turn- 6 sc. 

Round 2: *Sc in next sc, sc2tog over next 2 sc; repeat from * around – 4 sc. 

Rounds 3-6: Sc in each sc around – 4 sc. 

Round 7: *Sc in next sc, 2 sc in next sc; repeat from * around – 6 sc.

Round 8: *Sc in next 2 sc, 2 sc in next sc; repeat from * around – 8 sc. 

Round 9: *Sc in next sc, ch 6, 3 sc in back ridge of 2nd ch from hook, sl st in back ridge of remaining ch across; repeat from * 3 more times, sl st in remaining 4 sts, fasten off leaving a long tail for seaming. 

Flatten opening at the base of the fingers and sew closed. Do not stuff upper arm. Flatten seam at beginning of work and whip stitch closed.

LEGS

Note: Legs are worked from upper leg to toes. 

Make 2

With color A, chain 12 and sl st to first ch. 

Round 1: Sc in next ch, place marker, sc in next 10 ch, sc in next sl st, do not join or turn- 12 sc. 

Rounds 2-3: Sc in each sc around.

Round 4: *Sc in next 2 sc, sc2tog over next 2 sc; repeat from * around – 9 sc. 

Rounds 5-7: Sc in each sc around.

Round 8: *Sc in next sc, sc2tog over next 2 sc; repeat from * around – 6 sc. 

Rounds 9-10: Sl st in next 2 sts, hdc in next st, dc in next 2 sts, hdc in next st. 

Round 11: Sc3tog over next 3 sts, sc in next 3 sts– 4 sc. 

Rounds 12-15: Sc in each sc around. 

Round 16: 2 sc in each sc around – 8 sc.

Round 17: *Sc in next sc, ch 7, 3 sc in back ridge of 2nd ch from hook, sl st in back ridge of remaining ch across; repeat from * 4 more times, sl st in remaining 3 sts, fasten off leaving a long tail for seaming. 

Flatten opening at the base of the toes and sew closed. Slightly stuff upper leg. Flatten seam at beginning of work and whip stitch closed.

FINISHING

Assembly

  1. Match up the body markers and place the WS of the top of the body and the bottom of the body together (RS facing out). With the inner mouth held vertically, RS facing out, pin and sew the top half edge of the inner mouth to the front inner edge of the top of the body and the lower half edge of the inner mouth to the front inner edge of the bottom of the body. Remember the markers indicate the center of the mouth on the body.
A crochet avocado made with green and dark green yarn for the body and pink yarn for the seed, secured with blue and silver stitch markers, lies on a light wooden surface.
A hand-knit piece resembling the head of a frog with its mouth open, using green yarn for the head and upper jaw, darker green for the lower jaw, and pink for the mouth. The knitted object is placed on a wooden surface.
  1. With WS of the top of the body facing up, overlap the flattened sewn edges of the arms and legs along the edges of the body. Pin and sew in place.
A handmade, green crocheted frog is laid out flat on a wooden surface. The frog's limbs are spread out and it has a red mouth with some loose green yarn strands around its body. The texture of the crochet is clearly visible.
  1. Match up the edges of the body top and body bottom together with RS facing out and the edges of the limbs sandwiched between the body halves. Sew the inner surfaces of the edges together (working through the limbs to secure them in place a second time).
  1. Stuff body through the eye hole openings.
  1. Thread the yarn tails at the back of the eyes through the eye holes and secure eyes to the head.
  1. Using color A, tack down the loose corners of the eyelids to the head.
  1. With color E, satin stitch long stitches to the front of the eyes for a pupil.
  1. Using the leftover yarn tails, attach the tongue to the back of the inner mouth.

Hop Over and Share on Social – We Wanna See Your Leap!

We can’t wait to see your completed Leap the Frog! Don’t forget to share pictures of your adorable leggy frog on Ravelry. Need a bit more help or want to join a community of fellow crafters? Head over to the Marly Bird Facebook group where support and inspiration abound.

Happy crocheting!

Filed Under: Apricot Lane Amigurumi, Crochet, Designer Premium Patterns, Free Patterns, Our Free Patterns, Pattern Tagged With: badge-new-pattern

Let's Be Social

Join the Marly's Minions Facebook group to share, ask questions, or chat about all of your yarn related crafts!

Join the group
Digital avatar of a woman with brown hair in a bun, glasses, and a black jacket, waving and saying "hi" with a word bubble above her hand in the website footer. -Marly Bird

Quick Links

The Pattern Shop

Our Free Patterns

Blog

Marly Bird House

Learn to Knit & Crochet

About

Giveaway Terms and Privacy Notice

Find Us Everywhere

Join the Newsletter

YouTube Channel

Marly's Minions FB Group

Etsy Store

Ravelry Store


AN ELITE CAFEMEDIA HOME/DIY PUBLISHER

Information from your device can be used to personalize your ad experience. Do not sell or share my personal information.

Privacy Policy   Terms   Copyright © 2025