Search
Close
  • The Pattern Shop
  • Our Free Patterns
    • Browse All Our Free Patterns
    • Our Free Knitting Patterns
    • Our Free Crochet Patterns
  • Blog
    • All Blog Posts
    • All Free Patterns
    • Dibble Dabble Inspiration
    • Giveaways
    • Make-Alongs
    • Product Reviews
    • Roundups
    • Tips, Tricks, Techniques for Knitting and Crochet
Stylized bird with pink and gray swirling tail above elegant โ€œMarlyโ€ text, logo for crochet accessories and home decor.
  • Marly Bird House
  • Learn to Knit & Crochet
    • Newbie? Start Here
    • Video Tutorials
    • Knitting Definitions
    • Crochet Definitions
    • Common Techniques
    • Size Charts for Knitting and Crochet Projects
  • About
ร—
  • The Pattern Shop
  • Free Patterns
  • Blog
  • Marly Bird House
  • Learn to Knit & Crochet
    • Newbie? Start Here
    • Video Tutorials
    • Knitting Definitions
    • Crochet Definitions
    • Common Techniques
    • Size Charts for Knitting and Crochet Projects
  • About
Stylized bird with pink and gray swirling tail above elegant โ€œMarlyโ€ text, logo for crochet accessories and home decor.
Search
Close

New Patterns NOW Available in Ad-Free PDF! Check out The Pattern Shop

Miniature Winter Crochet Hat Ornament – So Cute!

December 16, 2022 By Marly Bird Leave a Comment

Introducing the Miniature Winter Crochet Hat Ornament by Marly Bird and Robyn Chachula. A quick and easy crochet ornament or gift card holder!

Are you looking for a cute and cozy addition to your holiday decor? This adorable crochet hat ornament is the perfect size for hanging on your tree. Use it as a gift card holder or even as a gift topper.

Miniature Winter Crochet Hat Ornament or Gift Card Holder by Marly Bird and Robyn Chachula
Read more: Miniature Winter Crochet Hat Ornament – So Cute!

This crochet hat ornament is quick and easy to make, making it an excellent project for beginners and experienced crocheters. You only need a small amount of sock-weight yarn and a 3.5mm crochet hook.

You'll need to create a brim using the slip-stitch ribbing technique, then continue in the long double crochet stitch pattern crocheting in the round through the body and the crown. Once finished, you can add a pom pom to the top of the hat for some extra flair. >> Use these simple and easy-to-use mini pom makers by clover <<

To finish the ornament, you will need to create a hanging loop by chaining a few stitches and attaching it to the top of the hat. You can add other embellishments, such as a crochet snowflake or ribbons.

This miniature winter crochet hat ornament is a fun and festive project that'll bring a smile to anyone's face. Hang it on your tree or give it to a teacher, friend, or loved one. It's sure to become a treasured part of your holiday traditions.

Green circular patch with a stitched outline featuring a lowercase letter "r" in the center.
Be sure to favorite and queue up this project on Ravelry.

Enjoy this free pattern or purchase the ad-free pdf.

Miniature Winter Crochet Hat Ornament or Gift Card Holder by Marly Bird and Robyn Chachula

🎄 Countdown to Christmas 🎄

—
Days
—
Hours
—
Mins
—
Secs

Until Christmas Morning! 🎄

🤴 Start your handmade gifts now — December comes faster than you think! 🎅

MINIATURE WINTER CROCHET HAT ORNAMENT PATTERN

Designed by Marly Bird and Robyn Chachula

SKILL LEVEL

Adventurous Beginner

MEASUREMENTS

To Fit Size

S (M) -- S: small ornament (M: gift card holder size) 

Finished Measurements

Hat is 4.5 (6.5)โ€ [11.5, 16.5 cm] in circumference by 2.25 (2.75)โ€ [5.5, 7 cm] tall (not including pompom). 

Gauge 

Small Ornament: 14 [ldc + ch-1 sps] x 22 rounds = 4โ€ [10 cm] x 4โ€ [10 cm]; use any size hook to obtain the gauge. 

Medium Ornament: 10 [ldc + ch-1 sps] x 16 rounds = 4โ€ [10 cm] x 4โ€ [10 cm]; use any size hook to obtain the gauge. 

MATERIALS

Small Ornament Yarn 

Stunning String Studio, Smashing Sock (75% Superwash Merino, 25% Nylon, 460 yds / 421 m, 3.5 oz/ 100 g, CYCA# 1 lace):

Color A: #Moroccan Blue, 4 g

Color B: #Galway Blue, 2 g

Color C: #Moody, 2 g

Medium Gift Card Holder Yarn 

We Crochet, Brava Sport (100% premium acrylic, 273 yds / 250 m, 3.5 oz/ 100 g, CYCA# 2 sport):

Color A: #28399 Seraphim:, 7 g

Color B: #28374 Coral, 2 g

Color C: #28404 Tidepool, 2, g

Color D: #28367 Blush, 2 g

Color E: #28384 Fairy Tale, 2, g

Hook

Size E/4 [3.5 mm] or G/7 [4.5 mm]

Notions 

  • Tapestry needle
  • Stitch Markers
  • Optional: Clover Pom Pom Maker
  • Optional: Waxed Cotton Cord, 3 ft

ABBREVIATIONS

Ch - Chain(s) 

Dc - Double Crochet 

PM - Place Marker

RS - Right Side 

Sc - Single Crochet

Sl st - Slip Stitch

Sp(s) - Space(s) 

St(s) - Stitch(es)

Tch - Turning Chain

WS - Wrong Side

Yo - yarn over

SPECIAL STITCHES 

โญ๏ธ Long Double Crochet (Ldc): Work a double crochet (dc) in the st indicated one round below the previous round worked. This stitch will be worked around the previous round worked.

โญ๏ธ Long Double Crochet 2 Together (Ldc2tog): *Yarn over, insert hook in st indicated one round below the previous round, yarn over and pull up a loop, yarn over and draw through 2 loops on hook; repeat from * once more in next st indicated. Yarn over and draw through all 3 loops on hook.  

โญ๏ธ Long Double Crochet Decrease (Ldc dec): Yarn over, insert hook in st indicated one round below the previous round, yarn over and pull up a loop, yarn over and draw through 2 loops on hook, insert hook in next st indicated, yarn over and pull up a loop. Yarn over and draw through all 3 loops on hook.  

NOTES

  • Use a small hook, smaller gauge, and thinner yarn for small ornament size.  Use larger hook, larger gauge, and thicker yarn for the gift card holder (medium size). 
  • Project is worked by changing colors at the end of every round in the body and crown.  Change colors in the following order: A, B, C for small ornament and A, B, C, D, E for medium ornament. 
  • Change color at join at end of round, leave the old color hanging out. When it is time to rejoin with a new color, float the old color up the side of the work to use it.  Insert hook into first st, fold in new color, pull through st and loop on hook.  This will join the round together and change the color. Then continue in pattern leaving the new old color just hanging out. This method will create a float at each color change up the inside of the hat. 

VIDEO TUTORIAL

  • Slip Stitch Ribbing >> Click Here for Video Help <<
  • Long Double Crochet Tips >> Click Here for Video Help <<
  • How to Make a Pom Pom >> Click Here for Video Help <<
Miniature Winter Crochet Hat Ornament or Gift Card Holder by Marly Bird and Robyn Chachula

MINIATURE WINTER CROCHET HAT ORNAMENT

โžธ GREAT FOR TEACHER GIFTS, CO-WORKER GIFTS, AND SECRET SANTA GIFT CARD HOLDERS!

SLIP STITCH RIBBING BRIM

With color A, ch 5 (5) 

Row 1: Sl st in back bump of each ch across, turn- 5 (5) sl sts.

Row 2: Sl st in back loop of each sl st across, turn. 

Repeat Row 2 until ribbing measures 4 (6)โ€ [10, 15 cm].

Joining Row: *Insert hook in back loop of next st on previous row and in back loop of next ch on foundation row, yarn over and draw through all sts and loop on hook; repeat from * across. 

MINIATURE WINTER CROCHET HAT ORNAMENT BODY

With color A.

Round 1:  Ch 1, evenly space 16 (16) [sc, ch-1] around ribbing by sc into the row ends of the ribbing, join with sl st to first sc, change color to B, do not turn throughout- 16 (16) ch-1 sps.

Round 2: Sl st to next ch-1 sp, ch 1, *ldc in ribbing edge below the next ch-sp, ch 1, skip next sc; repeat from * around, join with sl st to first sc, change color to C.

Round 3: Sl st to next ch-1 sp, ch 1, *ldc in dc below the next ch-sp, ch 1, skip next dc; repeat from * around, join with sl st to first dc, change color as directed in notes.

Repeat Round 3, changing colors at end of each round for 7 (7) rounds total. 

MINIATURE WINTER CROCHET HAT ORNAMENT CROWN

ALL SIZES:

Round 1: Sl st to next ch-1 sp, ch 1, ldc in dc below the next ch-sp, ch 1, skip next dc, *ldc2tog in dc below the next 2 ch-sps (skip dc between ch-sps), ch 1, skip next dc, [ldc in dc below the next ch-sp, ch 1, skip next dc] twice; repeat from * 3 times total, ldc2tog in dc below the next 2 ch-sps, ch 1, skip next dc, ldc in dc below the next ch-sp, ch 1, skip next dc, join with sl st to first dc, change color- 12 (12) ch-1 sp.

Round 2: Sl st to next ch-1 sp, ch 1, *ldc2tog in dc below the next 2 ch-sps (skip dc between ch-sps), ch 1, skip next dc, ldc in dc below the next ch-sp, ch 1, skip next dc; repeat from * around, join with sl st to first dc, change color- 8 (8) ch-1 sps.

Round 3: Sl st to next ch-1 sp, ch 1, *ldc2tog in dc below the next 2 ch-sps (skip dc between ch-sps), ch 1, skip next dc; repeat from * around, join with sl st to first dc, change color- 4 (4) ch-1 sps.

Round 4: Sl st to next ch-1 sp, ch 1, *ldc dc in dc below the next ch-sp and next dc in previous round; repeat from * around, join with sl st to first dc, fasten off- 4 (4) sts.

MINIATURE WINTER CROCHET HAT ORNAMENT FINISHING

Weave in all ends.  

Optional: Make Pom Pom and sew in place; see video tutorial for help.

Optional: With larger hook and waxed cotton cording, chain about 6โ€ (15 cm) in length.  Sew to each side of hat to hang on tree. 

Miniature Winter Crochet Hat Ornament or Gift Card Holder by Marly Bird and Robyn Chachula
Solid blue background with white stitching in the center, showcasing a knitting or crochet pattern design.

MORE FREE CROCHET HOLIDAY PATTERNS ON MARLYBIRD.COM

Here are a few holiday ornament patterns and more that you can use to add some festive cheer to your home:

Crochet miniature stocking ornament - Marly Bird
Crochet holiday barrette - Marly Bird
Gnome Advent calendar - Marly Bird
kids decor crochet menorah dinosaur triceratops - Marly Bird
Holiday Mini MIttens - Marly Bird
  1. Crochet Miniature Stocking ornament: This pattern uses basic crochet stitches to create a cute little stocking ornament you can hang on your tree or use as a gift topper. It has a video tutorial to go with it!
  2. Gnome Advent Calendar: This pattern uses easy stitches and a little construction to create a cute gnome advent calendar.
  3. Crocheted Holiday Barrette: This pattern uses basic crochet stitches to create a fun corkscrew barrette to add to any updo this holiday season. Or you can hang the corkscrews on your tree or use as a gift topper.
  4. Crochet Menorah Tops: Celebrate Hanukkah with this fun stuffed triceratops menorah designed by Disney animator Megan K Designs. This pattern is sure to be a hit!
  5. Quick Crochet Mini Mitten Garland: This free crochet pattern, Quick Mini Mitten Garland, is a great quick project for any crocheter! Using less than 100 yds of yarn in any color makes this project quick and cheap! It's a fun way to make a simple garland for your home and hearth.

I hope these patterns give you some inspiration for your holiday crafting! If you have any questions or need further assistance, don't hesitate to ask.

Frequently Asked Questions

Can I really make this tiny hat as a gift card holder?

Honestly... yes! The pattern gives you two sizes... a small one for an ornament and a medium size that's perfect for a gift card holder. So grab your yarn and make one for that special someone!

What kind of yarn do I need for this little hat ornament?

So here's the thing... you only need a small amount of sock-weight yarn for the small ornament or sport-weight yarn for the gift card holder size. It's a great way to use up those yarn scraps!

Is this pattern really easy enough for a beginner?

Yes! It's listed as an adventurous beginner project. You'll be using techniques like slip stitch ribbing and long double crochet... but don't worry, there are video tutorials to help you out!

What stitches do I need to know for this pattern?

You'll need to know slip stitch, single crochet, and double crochet. The pattern also uses a special stitch called Long Double Crochet (Ldc), and there are videos to show you exactly how to do that too!

How do I make the brim on this tiny hat?

You'll start by creating a brim using the slip-stitch ribbing technique. It's a pretty cool way to get that ribbed look on such a tiny piece... and there's a video tutorial to walk you through it!

Filed Under: Crochet, Free Patterns, Marly Bird Premium Patterns, Our Free Patterns, Pattern

A Stuffed Knit F-Bomb? Drop This Any Time!

December 15, 2022 By Marly Bird 1 Comment

Marly Bird's Stuffed Knit F-Bomb – the gift that keeps on giving!

Fishing for a fun and fabulous gift for that foul-mouthed friend? Fret no further! This Stuffed Knit F-Bomb toy by Marly Bird is perfect for anyone who loves to drop a few expletives every now and then.

STUFFED KNIT F-BOMB PATTERN by Marly Bird

The Stuffed Knit F-Bomb is sure to make someone smile!

Itโ€™s a great way to express your love of cussing in a fun and harmless way and a simple gift to knit up for any occasion. Think outside the box, or make a box full of f-bombs and give that as a gift!

This hand-knit toy measures 4.5″ tall and is 10.5″ around, making it perfect for sitting on a desk or putting on a Christmas tree as an ornament. Rather than dropping the dreaded f-word…you can drop the f-bomb toy instead.

Christmas image with stuffed knit f-bomb.

For something a little different, Marly made the sample in brown and pink instead of the traditional black and red to make it more fun and cheeky.

The Stuffed Knit F-Bomb Toy is a hilarious gift and will surely make any cussing enthusiast smile. Whether youโ€™re looking for a funny gag gift or a unique way to show your love of foul language, this toy is da bomb!

STUFFED KNIT F-BOMB PATTERN by Marly Bird. Free pattern at MarlyBird.com

STUFFED KNIT F-BOMB 

Designed by Marly Bird

SKILL LEVEL

Adventurous Beginner

MEASUREMENTS

Finished Measurements

4.5โ€ [11.43 cm] tall from base to top (not including i-cord).

10.5โ€ [26.67] circumference.

Gauge 

21 sts = 4″ [10 cm] in Stockinette stitch pattern in the round.

MATERIALS

Yarn 

WeCrochet/KnitPicks, Swish worsted  (100% Fine Superwash Merino Wool, 110 yds, 50 g CYCA #4 worsted). 

1 ball: Loam Heather #28648 โ€” color A

10 g:  White #24662 โ€” color B

2 g: Honey #26066 โ€” color C

2 g: Serrano #24663 โ€” color D

5 g: Throne #28662 โ€” color E

Needle

U.S. 5 [3.75 mm] set of 5 double-pointed needles, or size required for gauge. 

Hook

U.S. F/3.75mm to add tassels.

Notions 

Stitch markers, Poly Fiberfill, tapestry needle.

ABBREVIATIONS

CO – Cast On

DPN – Double Pointed Needle

K โ€“ Knit

KFB – Knit Front and Back

K2tog – Knit Two Stitches Together

P โ€“ Purl

Pm – Place Marker

St(s) โ€“ Stitches

PATTERN STITCHES 

โญ๏ธ Stockinette Stitch (St st): Circular โ€” Knit all sts, every rnd.

โญ๏ธ Knit Two Together (K2tog): Knit 2 sts together (1 st decreased).

โญ๏ธ Knit Front and Back (KFB): Knit into the front loop, then the back loop of st (1 st increased).

โญ๏ธ I-Cord: Using 2 dpnโ€™s, with 4 sts onto one needle with working yarn on the last stitch of the row, *without turning the work, slide the sts to right-hand end of needle, pull yarn tightly from the end of the row, (behind the sts), knit 1 row; rep from * until cord measures desired length.

โญ๏ธ Duplicate Stitch: The duplicate stitch is a way of embroidering a design into your work. 

Stuffed Knit F-Bomb CHART for Duplicate Stitch

Stitch Fiddle Chart Link: https://www.stitchfiddle.com/c/sjswm5-9y0m31 

STUFFED KNIT F-BOMB PATTERN by Marly Bird duplicate stitch chart.
Click on image to open in new tab and download.

NOTES

  • Made in the round from the bottom to the top. 
  • Duplicate stitch is used to embroider the F on the piece. 

VIDEO TUTORIALS

  • Long Tail Cast-On >> Click Here for Video Help <<
  • How to Add Lifeline >> Click Here for Video Help <<
  • Duplicate Stitch >> Click Here for Video Help <<
STUFFED KNIT F-BOMB PATTERN by Marly Bird

STUFFED KNIT F-BOMB PATTERN

BOTTOM

With color A, cast on 2 stitches on each of 4 double-pointed needles โ€” 8 sts. 

Round 1: *KFB; repeat from * around โ€” 16 sts. 

Round 2: Knit

Round 3: *K1, KFB; repeat from * around โ€” 24 sts. 

Round 4: Knit

Round 5: *K2, KFB; repeat from * around โ€” 32 sts. 

Round 6: Knit

Round 7: *K3, KFB; repeat from * around โ€” 40 sts. 

Round 8: Knit

Round 9: *K4, KFB; repeat from * around โ€” 48 sts. 

Round 10: Knit

Round 11: *K5, KFB; repeat from * around โ€” 56 sts. 

STUFFED KNIT F-BOMB PATTERN by Marly Bird. Bottom view.

BODY

Rounds 12-27: Knit 

TOP

Round 28: *K5, K2tog; repeat from * around โ€” 48 sts.

Round 29: Knit

Round 30: *K4, K2tog; repeat from * around โ€” 40 sts. 

Round 31: Knit

Round 32: *K3, K2tog; repeat from * around โ€” 32 sts.

Round 33: Knit

Begin to stuff the bomb with the Polyester Fiberfill until it is filled out. As continued rounds are complete, add more fiberfill to get shape. 

Round 34: *K2, K2tog; repeat from * around โ€” 24 sts.

Round 35: Knit

Round 36: *K1, K2tog; repeat from * around โ€” 16 sts.

STUFFED KNIT F-BOMB PATTERN by Marly Bird. Body View.

Round 37: Knit

Round 38: Purl

Round 39: Knit

Round 40: Purl

Round 41: Knit

Round 42: Purl

Round 43: Knit

Round 44:  Purl

Round 45: Knit

Last chance to add any extra fiberfill to the bomb. Ensure the garter stitch portion is filled with enough fiberfill to maintain the shape. 

Round 46: *K2tog; repeat from * around โ€” 8 sts. 

Cut color A leaving a long enough tail to weave in securely after the i-cord is complete.

STUFFED KNIT F-BOMB PATTERN by Marly Bird. Top view with I-cord.

I-CORD

With color B

Round 1: *K2tog; repeat from * around โ€” 4 sts. 

Begin I-Cord: using 2 dpnโ€™s, place the 4 sts onto one needle with working yarn on the last stitch of the row, *without turning the work, slide the sts to right-hand end of needle, pull yarn tightly from the end of the row, (behind the sts), knit 1 row; rep from * until cord measures desired length.

Do Not Fasten off. 

Cut color B leaving a long tail to secure later. 

STUFFED KNIT F-BOMB PATTERN by Marly Bird - ready to attach flame tassels.

FIRE TASSEL FOR F-BOMB

Cut 8 lengths of yarn 6โ€ [15.24 cm] long. 

4 of color C

2 of color D

2 of color E

โ€ข Use the crochet hook and insert into the first loop of i-cord sts. Add one length of color C & color D through the loop. 

STUFFED KNIT F-BOMB PATTERN by Marly Bird adding tassels to the loops of the i-cord.

โ€ข Use the crochet hook and insert into the second loop of i-cord sts. Add one length of color C & color E through the loop. 

Stuffed knit F-bomb: making the flames.

โ€ข Use the crochet hook and insert into the third loop of i-cord sts. Add one length of color C & color D through the loop. 

โ€ข Use the crochet hook and insert into the fourth loop of i-cord sts. Add one length of color C & color E through the loop.

F-Bomb with flames attached.

FIRST FINISHING

Thread the tail of the i-cord onto the tapestry needle. Weave it through the 4 loops of the i-cord and stitch the top of the i-cord and the fire tassels together. 

Weave in the tail to the inside of the body. 

STUFFED KNIT F-BOMB PATTERN by Marly Bird finishing the i-cord

Trim the tassels to preferred length.

KNIT F-BOMB DUPLICATE STITCH 

Plot out the placement of the letter F on the body of the bomb. 

Using color E and the chart above, use the duplicate stitch technique to apply the letter F to the bomb. 

Finishing the duplicate stitch 'F'. See chart for 'F' at beginning of pattern.

SECOND FINISHING

Weave in all loose ends.  

Frequently Asked Questions

What is the Stuffed Knit F-Bomb?

It's exactly what it sounds like… a small stuffed knitted bomb shape (like a cartoon bomb… round with a fuse sticking out the top) with the letter “F” on it. It's a humorous craft project that serves as a tactile way to “drop an F-bomb” in stressful situations… you pick it up, throw it, and voila. It's a funny, irreverent pattern that's been popular in the crafting community as a gift for people who need a stress outlet, have a sense of humor, or just appreciate the meta joke of a knitter making a knitted profanity bomb. Sometimes you just need to laugh at life.

What skill level is this pattern?

The F-bomb is actually a beginner project! It's essentially a small sphere (worked in the round with basic increases and decreases) with a simple fuse cord and a letter embroidered on. The shape is basic amigurumi-style construction. If you can knit in the round and do basic shaping, you can make this. It uses minimal yarn (a great use for scraps), works up quickly, and the result is guaranteed to make the recipient laugh. The comedic value is proportional to how small and simple the finished bomb looks.

What yarn and colors work for an F-bomb?

Classic black is the most traditional cartoon bomb color… instantly recognizable as “bomb” in that universal cartoon shorthand. Red or bright orange for the fuse cord adds contrast. The F can be embroidered in contrasting thread or yarn after finishing. For a slightly softer, funnier aesthetic, a pastel F-bomb in mint or blush pink has its own humor. A “surprise” F-bomb in someone's favorite color works well as a personalized gift. Use whatever you have in your stash… this is the perfect project for those random single-skein scraps with no other purpose.

Can I make F-bombs as gifts?

It depends on your audience! For people with a good sense of humor who appreciate the irreverence, this is a hilarious and memorable gift. It's particularly popular as an office gift when someone is leaving a stressful job, for people going through a rough patch, for anyone who's expressed frustration in colorful terms, or as a Secret Santa gift in the right workplace culture. You know your people… some will love it, some will appreciate the craft but not the profanity reference. Give it where the humor will be genuinely appreciated!

Are there similar “novelty profanity craft” patterns available?

The “craftanity” genre is a real and beloved subset of fiber arts! Beyond the F-bomb, there are knitted and crocheted middle fingers, profanity-themed dishcloths and blankets, and various other irreverent creations that combine excellent craftsmanship with colorful humor. Ravelry has an active “craftanity” collection if this is your jam. These patterns celebrate the fact that crafters are multi-dimensional humans with full adult lives and senses of humor… making something beautiful doesn't require being reverent about it. Craft joyfully, even when joy involves profanity.

Filed Under: Free Patterns, Knitting, Marly Bird Premium Patterns, Our Free Patterns, Pattern, YouTube Video Tutorial

Best Gifts for Crocheters || Online Gift Guide

December 8, 2022 By Marly Bird Leave a Comment

Want to get the crocheter in your life a gift they will love? GREAT! Here is a list of the BEST GIFTS for CROCHETERS in 2022. These crochet-related ideas are great for Christmas, anniversaries, birthdays, Motherโ€™s Day, or any other gift-giving occasion. If you are a crocheter, pass this along to your loved ones.
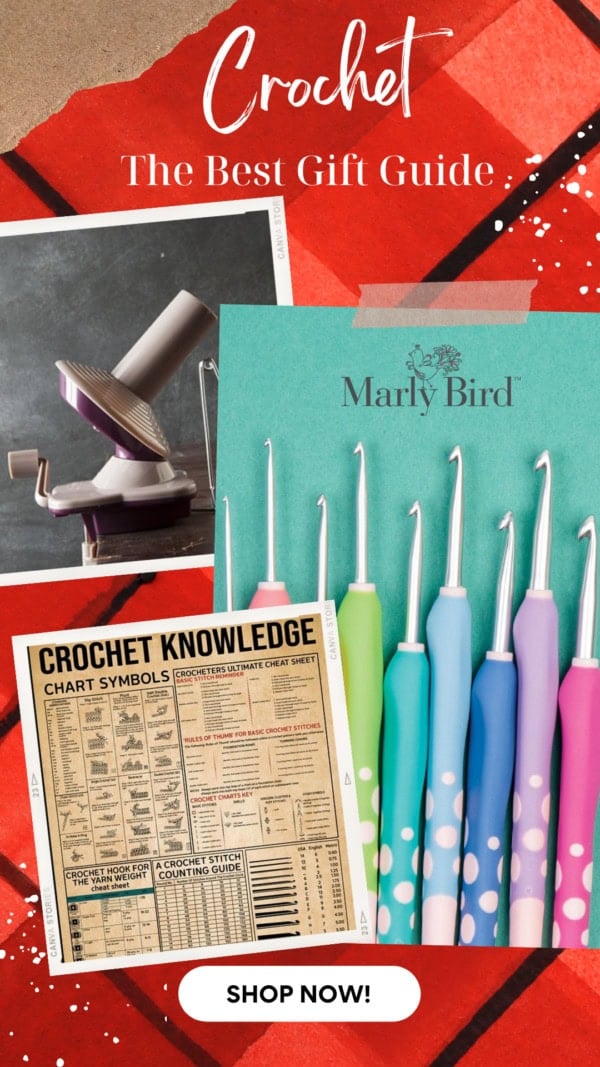
Gifts for crocheters -collage of yarn winder, ergonomic crochet hook set, and old crochet knowledge info sheet on red background. Marly Bird

*THIS POST CONTAINS AFFILIATE LINKS. BY CLICKING ONE OF THESE LINKS AND MAKING A PURCHASE A SMALL PORTION COMES BACK TO THE BLOG. THE PRICE YOU PAY WILL NOT CHANGE. THANK YOU FOR YOUR SUPPORT OF THE BLOG.*

Let's begin with one of the best sites to shop for crocheters. Of course, I'm talking about Crochet.com, home of WeCrochet! They are the sister company of KnitPicks (who you might have heard of if you are a knitter).

WeCrochet has everything a beginner or advanced crocheter could want in their crochet bag (yes, they have those, too!). They are a one-stop shop for the best crochet gifts in 2022.

But, if you know me, I also like to shop with small businesses. So, in the complete crochet gift guide list below, a variety of independent makers are included.

Grab a coffee, look at the list, and add to your cart.

This year will be the BEST year the crocheter in your life has ever had opening presents.

THE BEST!

Colorful crochet blanket with a diamond pattern, featuring shades of blue, pink, and yellow, displayed on a wooden table.

Yarn

Could anything else be #1? No, the answer is no. Yarn is one of the major draws to this craft crocheter's love. The fiber, the texture, the color, the possibilities. Because that, my friend, is what you are buying when you buy a crocheter the gift of yarn. You are giving them a hank (skein or ball) of possibilities!

Here is a list of my favorite yarns from WeCrochet (as I said, is a sister to KnitPicks). Click the yarn name to go directly to the website and add it to your cart!
  1. Upcycle Alpaca
  2. Brava Worsted
  3. Swish Worsted
  4. City Tweed DK
  5. Twill
  6. Chroma Twist
  7. Stroll Tweed
Multiple colors and weights, skeins and balls of yarn from WeCrochet. Yellows, blues, pinks, and corals.

Now, mind you, ALL the yarns on this website would be a winning gift for a crocheter. These are just some of my favorites because of the feel, the fiber, and the fantastic colors!

Hooks

A crocheter would be nothing without their hooks; after all, we are considered Hookers!

For years, crocheters only had a couple of hook types to choose from…and those were adequate. But we are in a new era of crochet, and we have CHOICES!

Listen, I am about to tell you about a brand-new hook on the market. One that is designed to be ONE HOOK TO RULE THEM ALL! Not only are these hooks wonderful to use and come in various sizes (yes, crocheters need a variety of sizes to get something called gauge), but they are ABSOLUTELY AFFORDABLE.

I'm talking about some major ????Bang for your Buck???? Grab these before they are gone.

The Dots Crochet Hooks from WeCrochet are great for knife holders and pencil holder crocheters. Wonderful for beginners learning to crochet. Perfect for the crocheter who has everything…because I can promise they don't have these as they were JUST PUT ON THE MARKET!
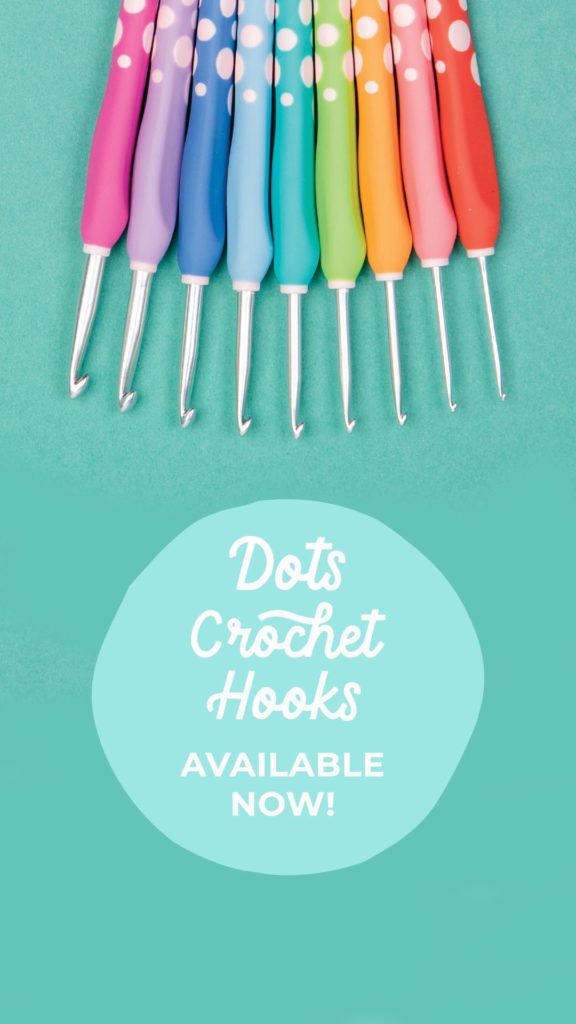
Set of Dots Crochet Hooks at top of image with hooks pointed down, on blue background. Gifts for crocheters. Marly Bird

Ball Winder

This might not be one of the obvious items for a crocheter, and honestly, one can absolutely crochet without a ball winder. But, once a crocheter has one, and they see the benefit of using it to wind leftover yarn into a cake or wind up a hank of yarn, their entire crochet world will shift, and they will see sunshine and rainbows and wonder where this magnificent tool has been their entire life.
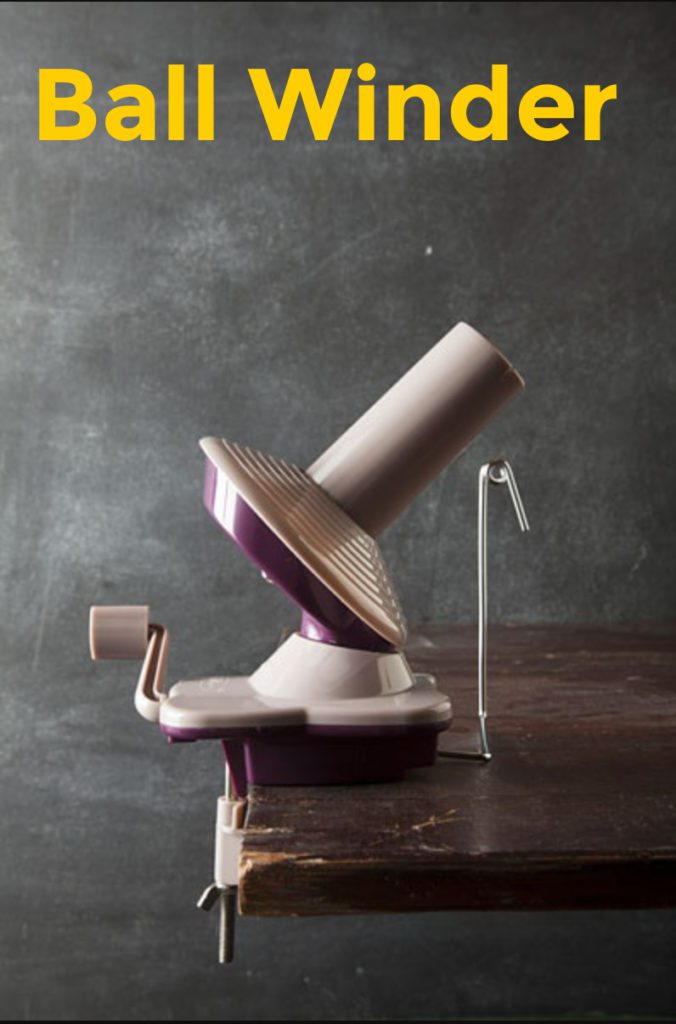
Yarn ball winder, clamped to dark colored wood table, on dark grey background. Gifts for crocheters. Marly Bird

Okay, maybe that is a bit of an overkill explanation, but seriously, a ball winder is in my top 5 items a knitter or crocheter should have. And I highly suggest it's partnered with #4 on my list.

Swift

This looks like an umbrella, doesn't it? Well, that is why it is called an Umbrella Swift. These are very helpful to hold the yarn for the crocheter (or knitter) in hank form as it is wound onto a ball winder. As the swift rotates around, the yarn unspools from it and is rewound onto the ball winder. The result is a yarn cake. These two gifts are really wonderful and go great together.
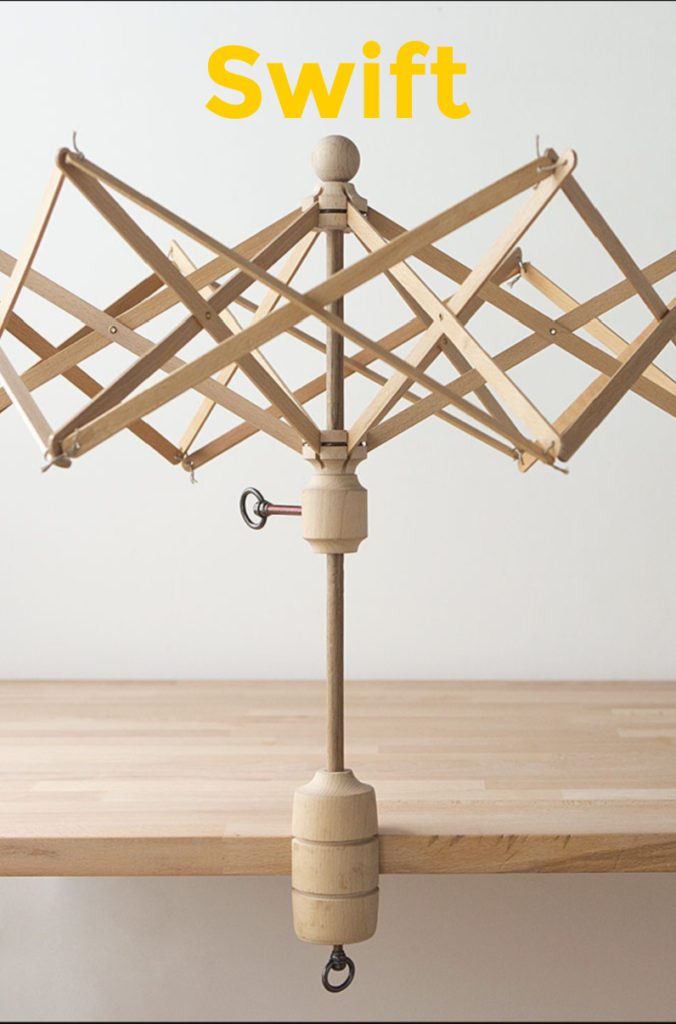
Wooden yarn swift clamped on light colored wood table against white wall. Gifts for crocheters - Marly Bird

Stitch Markers

Anybody who knows me and how I teach knows I would recommend stitch markers. They are an easy stocking stuffer for crocheters, as we can never have enough.

There are a variety of stitch markers on the market. I love them all, but the locking stitch markers are my favorite because they can be easily added and removed as needed.

If your crocheter has trouble keeping their edges nice and straight, stitch markers will help them cure that problem. Simply have them add a marker in the first stitch of every row, and they will then know where the last stitch is when they get back to that end of the project. Easy Peasy!

The next set of items aren't only part of the Best Gifts for Crocheters, but they make amazing stocking stuffers, easter egg fillers, or items to put in a goody bag.

Colorful crochet blanket with a diamond pattern, featuring shades of blue, pink, and yellow, displayed on a wooden table.

Tool and Accessory Gifts For Crocheters

9. Vintage Buttons. These are great to add for usefulness or decoration. Perfect for hats, mittens, gloves, cardigans and bags. Find that special item to make the project a WOW/1

10. Purse Handles. Does your crocheter like to make bags and purses? Why not gift a lovely set of leather handles for her next project?

11. Cute Scissors keep the process of crocheting fun. These are some cute choices from Etsy.

6. Cute Tape Measure. One thing for certain, every crocheter and knitter needs a reliable tape measure. We often have to measure our swatches to ensure the stitches are the right size for our projects. This will be a fun foxy gift for your crocheter!

7. Safety Eyes. Stuffies or Amigurumi patterns are HUGE for crocheters and CUTE Amigurumi eyes really make a project something special. These are some favs from Etsy.

8. Shawl Pins. These are great for scarves, cardigans, and shawls. Don't dismiss the usefulness of one of the wonderful accessory pieces.
BiCrafty Bootcamp banner
BiCrafty Bootcamp Beginner Knitting Lessons for Crocheters Logo with Marly Bird

Even More Gifts For Crocheters

12. Project Bag. NEVER dismiss the importance of a crocheter's perfect project bag. It's where we keep all the important items we need while working on a project (including items listed next). These are some of my FAVORITE Bags!

13. Chart Keeper. In a technical world, there are still crocheters who prefer to print their patterns and charts. This chart keeper is a great tool to keep the chart in place while the crocheter follows along (for example: on a corner-to-corner crochet chart)

14. Erasable Highlighters. These are VERY valuable and an unexpected hero in a crocheter's toolbox. Perfect to mark a spot in a pattern or on a chart. Add these to your project bag with stitch markers, hook, and yarn, and you're set!

15.Yarn Ball Holder. Does your crocheter like to sit in their chair and crochet but hate it when their yarn rolls around the floor? This is the tool I use to prevent that. Check out the Yarn Ball Holder and a Yarn Bowl. Both are great gifts for crocheters

16. Kitchen Scale. This might not seem obvious but once a crocheter uses one to weigh out remaining yarn when working on a project, this becomes a very useful tool. Especially when working with mini hanks or yarn scraps.

17. Yarn and Bag Box Subscription. There are a few out there but they're not all created equal. THIS subscription box will deliver amazing hits of dopamine when the crocheter gets a new item every month of the year.

Warning: this subscription service only opens ONCE a year! When it's full, you'll be on a waitlist!
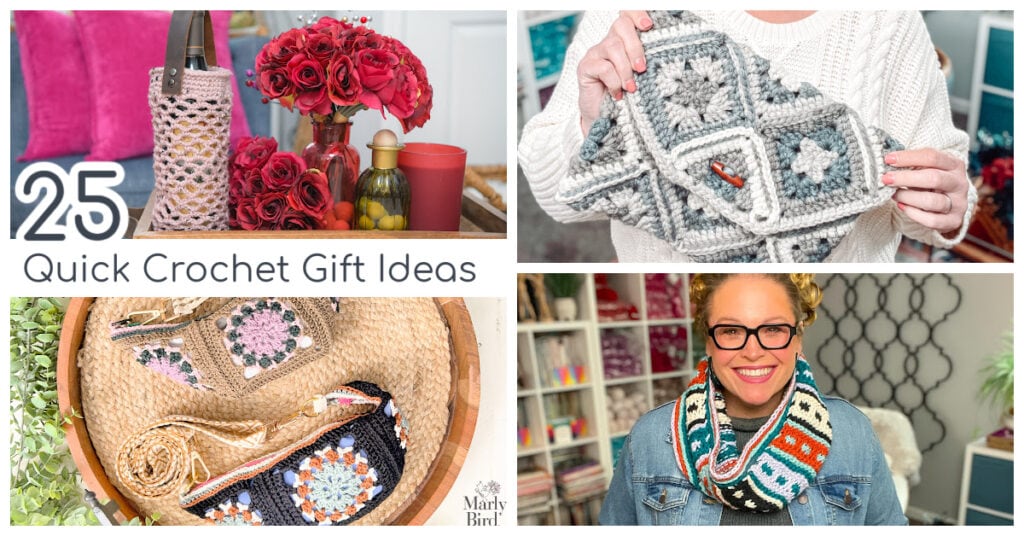
Collage of crochet gifts: textured pink drink holder, rose motifs, gray clutch, patchwork pouch, and colorful cowl.

Digital Gifts For Crocheters

18. Online Courses. Listen, the Marly Bird House is a place for learning and fun for knitters and crocheters (and tunisian). Anything you choose will be a great gift for a crocheter. I highly recommend the Classic and Colorful Crochet Socks Course!

19. Collection of 30 Stash Busting Patterns for Crocheters!

This is an exclusive collection of patterns by Marly Bird and Moogly Blog. They're only available for a limited time and are perfect gifts for crocheters needing patterns for all occasions.

20. AUDIBLE! Audiobooks are a staple in my crafting life. Having a story told to me as I knit and crochet allows me to work without noticing time passing. Trust me, audiobooks are favorites of crocheters.

+I use my Bose Earbuds to listen to the books. Pair up these gifts and you have a perfect crochet gift set.

Extra Interesting Gifts For Crocheters

21. Blocking Combs. These are a game changer in my blocking game and everybody I know who uses them agrees. I highly recommend getting 3-5 packs because your crocheter will use them! These replace blocking pins and are WONDERFUL!

22. Blocking Mats. Like the blocking combs, these mats are a game changer. They fit together like a puzzle and the lines line up to help make blocking easier. These are my favorite of all the blocks out there and I recommend getting 2-4 of them because I always use more than one!

23. Wool Wash. Yes, you can use a bunch of different soaps to wash and block pieces. But I'm going to be completely honest with you. Ever since my friend Kristin Omdahl gave me my first bottle of Eucalan Night Blooming Jasmine I've been hooked! Here's the smaller size to try!

24. Crochet Specific Kitschy Gifts. Come on, we all love a good crochet pun, after all, we are hookers! Here are some specific crochet-related gifts just for fun. Check out this list!

  • Project Log book
  • Crochet t-shirts
  • Crochet Knowledge Poster
  • Crochet and Knitting Fiction Books
  • Crochet Project Planner Sticky Notepad

25. Crochet Books. Not all crocheters learn on YouTube, and not all YouTube tutorials are correct. But a crochet book by a professional designer can really take a crocheter to another level. Here's a BUNCH of books you could choose, and know you'll have the perfect gifts for crocheters.

Colorful crochet blanket with a diamond pattern, featuring shades of blue, pink, and yellow, displayed on a wooden table.

These are just a few of the Best Gifts for Crocheters out there. As I think about more, I'll add them to this list. So please do yourself a favor…bookmark this post so you can come back to it and see what is new…or grab an item you thought looked nice for another gift-giving event.
A woman with glasses gestures happily under an "FAQs" banner, surrounded by icons related to beginner crochet shawl projects.

Frequently Asked Questions

What's the number one gift for a crocheter?

Honestly… yarn! It's the number one reason we love this craft, you know. When you gift yarn, you're giving a whole world of possibilities… the fiber, the texture, the colors… it's all about the potential!

I'm looking for a really practical gift, what do you suggest?

So here's the thing… a ball winder and a swift are amazing together! A ball winder helps you make yarn cakes from leftovers or hanks, and the swift holds the yarn while you wind it. It totally changes how you manage your yarn stash!

What's a good stocking stuffer for a crocheter?

Yes! Stitch markers are perfect stocking stuffers because we can *never* have enough. If your crocheter has trouble keeping edges straight, locking stitch markers are fantastic… just pop one in the first stitch of each row!

Are there any digital gift ideas?

Absolutely! Audiobooks are a crafting lifesaver… I listen while I crochet and time just flies by. Plus, there are some super cool online courses and pattern collections you can gift too!

What about gifts for someone who has *everything*?

Honestly… you can't go wrong with a new set of hooks! There are some amazing new ones out there designed for comfort and they're super affordable. Plus, I bet they don't have the brand new Dots Crochet Hooks from WeCrochet… they just came out!

Filed Under: Beading and Jewelry, Crochet, Dibble Dabble Inspiration, Fun Finds and Tools, Product Reviews, Round Ups, Yarn Review

Knit Menorah Tops || Free Knitting Pattern

November 16, 2022 By Marly Bird Leave a Comment

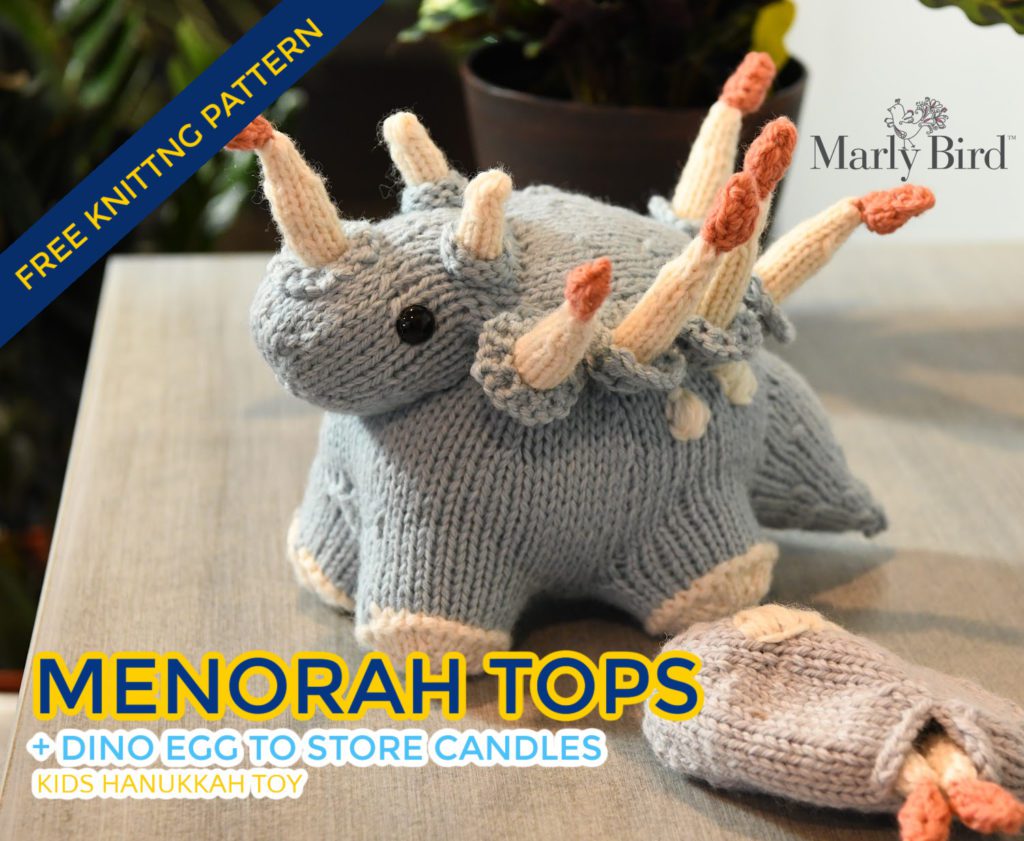
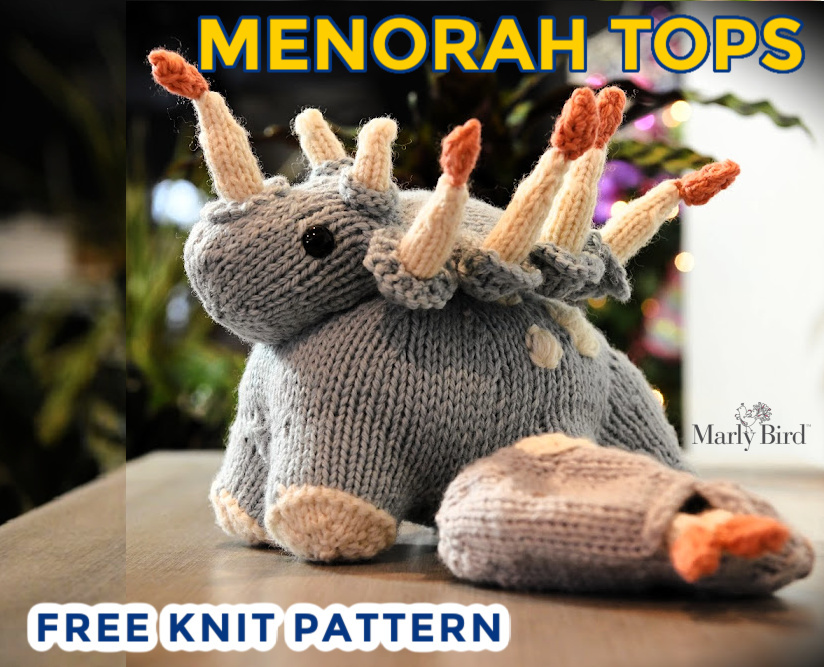
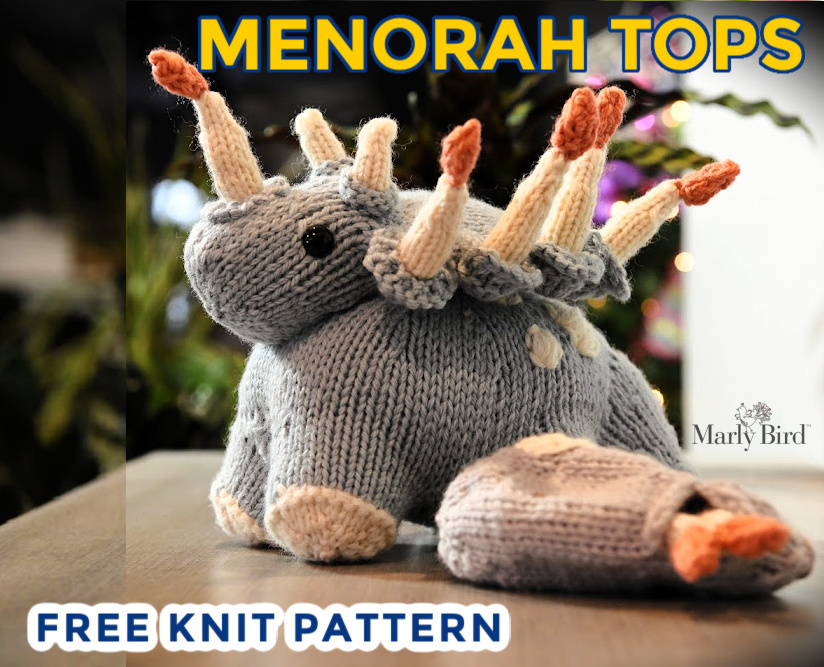
Have a dino-mite Hanukkah with Turquoise Knit Menorah Tops + dino egg to store the candles! This playful prehistoric triceratops friend is ready to celebrate the Festival of Lights. The adorable “Menorasaurus” is a free knitting pattern on marlybird.com and makes a unique gift for Hanukkah!

Knit Menorah Tops - Evie the Menorasaurus. Marly Bird

Great kid's Hanukkah decor that you can knit. The unique candles let you ‘light' the menorah with your kids safely. And, the best part is…you can store the candles in the dino egg so you won't lose them!

Read more: Knit Menorah Tops || Free Knitting Pattern

*THIS POST CONTAINS AFFILIATE LINKS. BY CLICKING ONE OF THESE LINKS AND MAKING A PURCHASE A SMALL PORTION COMES BACK TO THE BLOG. THE PRICE YOU PAY DOES NOT CHANGE. THANK YOU FOR YOUR SUPPORT OF THE BLOG.*

Grab your favorite yarn and knit Evie the Menorah Tops this holiday season. The perfect kids' Hanukkah toy.

Looking for an ad-free PDF? This free knit menorah pattern will be part of the Holiday Pattern Collection vol. 2 to be released on Nov. 17, 2022, on MarlyBird.com.

Join our newsletter to be the first to learn about this amazing Holiday Pattern Collection

<< Get Some Holiday Cheer >>
Solid blue background with white stitching in the center, showcasing a knitting or crochet pattern design.

Menorah Tops Knit Pattern || The NEW “Menorah-saurus” for Hanukkah

Designed by Megan Kreiner of MK Knitting for MarlyBird.com

SKILL LEVEL

Intermediate

MEASUREMENTS

Finished Measurements

Toy is 11.5โ€ [29.21 cm] from nose to tail

Gauge 

16 sts = 4″ [10 cm] in Stockinette Stitch  Note: Gauge is not critical in this project.

MATERIALS

Yarn 

Patons Classic Wool Worsted (100% wool, 194 yds / 177 m, 3.5 oz/ 100 g, CYCA #4 worsted) 

Color A: #77219 Seafoam, 2 skeins

Color B: #00201 Winter White, 1 skein

Color C: #77750 Coral Peach, 1 skein

Color D: #77791 Cool Gray, 1 skein

Needle

U.S. 8 [5 mm] 32โ€ circular needle (to use as magic loop) & set of 5 double pointed needles, or size required for gauge

Notions 

  • Large Steel Tapestry Needle
  • Polyester Fiberfill
  • Straight Pins
  • Stitch markers
  • 12mm plastic safety eyes with plastic backings (for children 3 and older)
  • Black embroidery thread, black felt, or black yarn (alternative eye options)

ABBREVIATIONS

  • BO – Bind Off
  • CO – Cast On
  • DPN – Double Pointed Needle
  • K โ€“ Knit
  • P โ€“ Purl
  • PM– Place Marker
  • Sl – Slip
  • st(s) โ€“ stitches
  • YO – Yarn Over

SPECIAL STITCHES 

Kfb – Knit front and back: Knit into the front loop, then the back loop of next st (1 st increased).

M1R – Make 1 right: Insert left hand needle under horizontal strand between st just worked and next st from the back to the front, knit through the front loop (1 st increased).

K2tog – Knit two together: Knit 2 sts together (1 st decreased).

SSK – Slip, slip, knit: Slip, slip, knit: Slip 2 sts, 1 at a time, knitwise to the right hand needle; return sts to left hand needle in turned position and knit them together through the back loops (1 st decreased).

P2tog – Purl two together: Purl 2 sts together (1 st decreased).

SSP – Slip, slip, purl: Slip 2 sts, 1 at a time, knitwise to the right hand needle; return sts to left hand needle in turned position and purl them together through the back loops (1 st decreased).

PSSO – Pass slip stitch over

NOTES

  • Hold 2 strands of yarn when working all pieces. 
Green circular patch with a stitched outline featuring a lowercase letter "r" in the center.
Queue and Favorite this pattern on Ravelry
Knit Menorah Tops - Evie the Menorasaurus. Marly Bird

GROW

To Unlockย Exclusive Subscriber Contentย click the Box below and join for free by simply adding your email and creating a password! If you are having troubles, clear your cache or reset your password or login to the Grow Publisher Portal.

>> Learn More About Grow Here <<

I'm thrilled to share this amazing pattern with you, many patterns on my blog are absolutely free! I kindly request that you don't copy and paste or distribute this pattern. Prefer an ad-free experience? Buy a digital PDF pattern for a small fee from one of my online stores for a seamless crafting journey. 

I appreciate your support and readership. You are the reason I can keep doing what I love and sharing it with others. So, thank you from the bottom of my yarn-loving heart! Disclosure: This post contains affiliate links, meaning I get a commission if you decide to make a purchase through my links at no cost to you.

KNITTING MENORAH-TOPS PATTERN

KNIT MENORAH-TOPS LEGS

Make 4

Round 1: Starting with color B and working with a magic loop or DPNs, CO 6. Place marker and work in the round. Distribute the stitches evenly over the magic loop or 2 DPNs.

Round 2: Kfb in each st around. (12 sts)

Round 3: K12.

Round 4: (K1, M1R, K1) 6 times. (18 sts)

Round 5:  K18.

Round 6: (K2, M1R, K1) 6 times. (24 sts)

Round 7: K24.

Round 8: P24.

Cut color B, change to color A. 

Rounds 9-16: K24.

Transfer stitches to holder. Make 3 more legs, transferring the 2nd and 3rd to stitch holders and leaving the last/4th leg on needles.

KNIT MENORAH-TOPS BELLY

Row 1: Cont to work the leg, K1, pm, and proceed to k in next 11 sts. Transfer the remaining 12 sts of the leg to stitch holders. Pick up a 2nd leg and knit into one of the leg edge stitches. Continue to knit around the top edge of the 2nd leg for 11 more sts, leaving 12 sts unworked. Turn. 

Row 2: P24.

Row 3: K2tog, K20, Ssk, turn (22 sts)

Row 4: P22.

Row 5: K2tog, K18, Ssk, turn (20 sts)

Row 6: P20.

Rows 7-10: Cont. in St st.

Row 11: K, M1R, K20, M1L, K1. (22 sts)

Row 12: P22.

Row 13: K1, M1R, K22, M1L, K1. (24 sts)

Row 14: P24.

Cut yarn leaving a 24โ€ tail.

Hold 3rd leg edge against the edge of belly row 14. Match up the edges and kitchener stitch 12 sts from the the belly row and 12 sts from the edge of the 3rd leg together (leave remaining 12 sts on stitch holder). Pick up the 4th leg,  line up the leg edge to the edge of belly row 14 and kitchener stitch the remaining 12 sts from the belly row and 12 sts from edge of the 4th leg leaving the remaining 12 sts of the 4th leg edge on stitch holder.  

Green circular patch with a stitched outline featuring a lowercase letter "r" in the center.
Queue and Favorite this pattern on Ravelry

KNIT MENORAH-TOPS BODY

Begin by transferring all unworked leg edges to circular needles or DPNs.

Round 1: Starting to the left of the pm stitch of belly row 1, join color A yarn, pull up and K8 along front belly edge, K12 along 1st leg edge, pull up and k2 along the belly side edge between the 1st and 2nd legs, K12 along 2nd leg edge, Turn work and CO 16 purlwise. Turn and skip over back belly edge (creating the tail opening), K12 along 3rd leg edge,  pull up and K2 along the belly side edge between the 3rd and 4th legs, K12 along 4th leg edge (ending in the pm stitch).  (76 sts)

Round 2: K76.

Round 3: K34, K2tog, K12, Ssk, K26. (74 sts)

Round 4: K74.

Round 5: K34, K2tog, K10, Ssk, K26. (72 sts)

Rounds 6-10: K72

Round 11: K8, (K6, K2tog) 4 times, (Ssk, K6) 4 times. (64 sts)

Rounds 12-14: K 64.

Round 15: K8, (K5, K2tog) 4 times, (Ssk, K5) 4 times. (56 sts)

Round 16: K56.

Round 17: K8, (K4, K2tog) 4 times, (Ssk, K4) 4 times. (48 sts)

Round 18: K48

Round 19: K8, (K3, K2tog) 4 times, (Ssk, K3) 4 times. (40 sts)

Round 20: K40.

Round 21: K8, (K2, K2tog) 4 times, (Ssk, K2) 4 times. (32 sts)

Round 22: K8, (K1, K2tog) 4 times, (Ssk, K1) 4 times. (24 sts)

Round 23 K8, K2tog 4 times, Ssk 4 times. (16 sts)

Cut and weave yarn through remaining stitches, pulling to close hole. Weave in yarn tails. 

Stuff legs of body.

KNIT MENORAH-TOPS TAIL

Round 1: With color A and working around tail opening, evenly pull up and k28. (28 sts)

Rounds 2-4: K28.

Round 5: (K5, K2tog) 4 times. (24 sts)

Rounds 6-8: K24.

Round 9: (K2, K2tog, K2) 4 times. (20 sts)

Rounds 10-11: K20.

Round 12: (K1, K2tog, K2) 4 times. (16 sts)

Rounds 13-14: K16.

Stuff body.

Round 15: (K2, k2tog) 4 times. (12 sts)

Round 16-18: K12.

Round 19: (K 1, K2tog) 4 times. (8 sts)

Rounds 20-21: K8.

Stuff tail.

Round 23: K2tog 4 times.  (4 sts)

Cut and weave yarn through remaining stitches, pulling to close hole. Weave in yarn tails. 

To reduce the splay of the legs, run a length of blue yarn back and forth between the inside surfaces of legs with a tapestry needle and pull gently to draw the inside surfaces of the legs towards each other.  Fasten off and use the leftover yarn tails to tidy up any remaining gaps along the belly and legs.

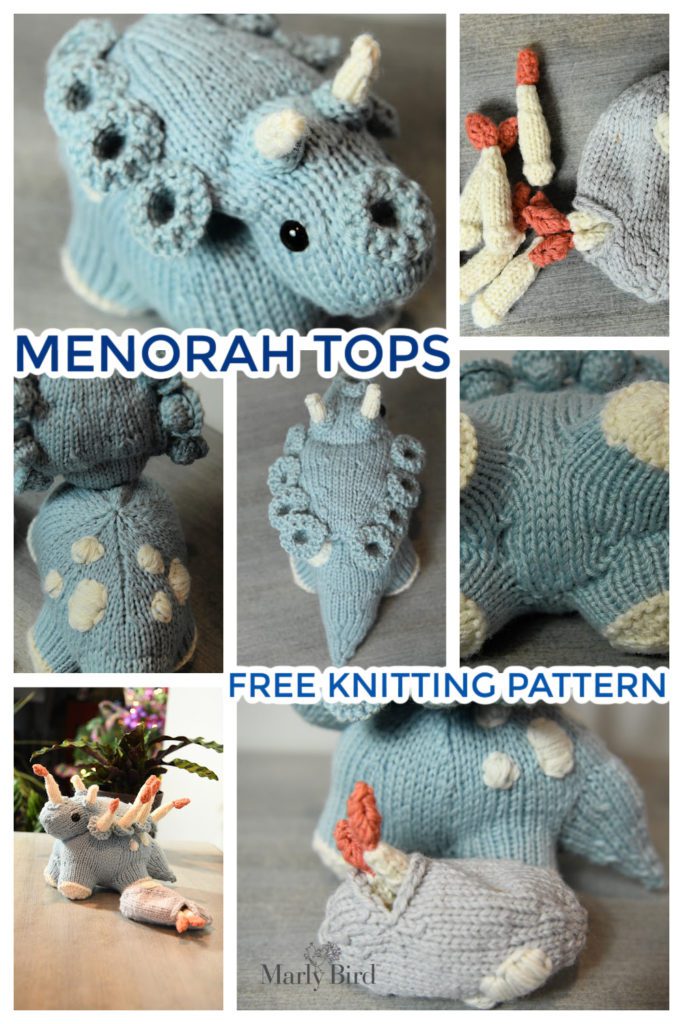
Collage of views of Menorah Tops Knitting pattern - Marly Bird

KNITTING MENORAH-TOPS HEAD

Round 1: With color A and working with a magic loop or DPNs, CO 6. Place marker (pm) and work in the round. Distribute the stitches evenly over the magic loop or 2 DPNs.

Round 2: K6.

Round 3: (K1, M1R) 6 times. (12 sts)

Round 4: K12.

Round 5: (K1, M1R) 12 times (24 sts)

Round 6: K24.

Round 7: (K5, M1R, K1) 2 times, (K1, M1L, K5) 2 times. (28 sts)

Round 8: K28.

Round 9: (K3, M1R, K4) 2 times, (K4, M1L, K3) 2 times. (32 sts)

Rounds 10-12: K32.

Round 13: K14, BO 4, K14. (28 sts)

Round 14: K14, turn work, CO 4 purlwise, turn work, skp over BO sts, K14 (32 sts)

Round 15: K32.

Round 16: K8, k2tog 4 times, Ssk 4 times, K8. (24 sts)

Rounds 17-20: K24.

If using 12 mm plastic safety eyes, install between Rounds 16-17 with 8 sts of sp between them and the horn opening facing up.

Round 21: (K5, M1R, K1) 2 times, (K1, M1L, K5) 2 times. (28 sts)

Round 22: K28.

Round 23: (K2, M1R, K1) 4 times, K4, (K1, M1L, K2) 4 times. (36 sts)

*Rounds 24-34: K36. 

(*on Round 30, pm in a stitch directly above the horn opening to mark the top of the head)

Round 35: (K2, K2tog, K2) 3 times, (K2, Ssk, K2) 3 times. (30 sts)

Rounds 36-41: K30

Round 42: (K1, K2tog, K2) 3 times, (K2, Ssk, K1) 3 times. (24 sts)

Rounds 43-46: K24.

Round 47: (K2, K2tog, K2) 2 times, (K2, Ssk, K2) 2 times. (20 sts)

Round 48: K20.

Stuff head firmly (between Rounds 1-30). If you have not installed plastic safety eyes, embroider on eyes with black yarn or cut 12 mm black felt circles and sew to the side of the head between Rounds 16-17 with 8 sts of sp between them. 

Define the top of the head by sewing a running stitch of blue yarn in an arch shape starting 7-8 Rounds behind the left eye, stitching in the curved line up to the center of Round 30 (marked with a pm), and stitching in a curved line down to 7-8 Rounds behind the right eye.

Round 49: (K1, K2tog, K2) 2 times, (K2, Ssk, K1) 2 times. (16 sts)

Round 50: K16.

BO remaining stitches. Cut yarn and weave in ends.

KNITTING MENORAH-TOPS SMALL HORNS

Make 2

Round 1: With color B and working with a magic loop or DPNs, CO 6. Place marker (pm) and work in the round. Distribute the stitches evenly over the magic loop or 2 DPNs.

Round 2-6: K6.

Lightly stuff small horn.

Round 7: K4, K2tog. (5 sts)

Round 8: K5.

Round 9: K2tog, K1, K2tog (3 sts)

Cut and weave yarn through remaining stitches, pulling to close hole. Weave in yarn tails. 

KNITTING MENORAH-TOPS SMALL HORN RINGS

Make 2

Round 1: With color A  and working with a magic loop or DPNs, CO 10. Place marker and work in the round. Distribute the stitches evenly over the magic loop or 2 DPNs.

Round 2: K10.

BO remaining stitches. Cut yarn and weave in ends.

Sew the small horn bases to the top of the head, 7 Rounds behind the eyes and with 6 sts of sp between them.  Slide the small horn rings over the horns with the WS (purl side) facing out.  Position rings at the base of the horns and sew in place.

KNITTING MENORAH-TOPS CANDLE BASE

Make 9 

Round 1: With color A and working with a magic loop or DPNs, CO10. Place marker (pm) and work in the round. Distribute the stitches evenly over the magic loop or 2 DPNs.

Round 2-3: K10

Round 4: P10.

Round 5-7: K10.

Round 8: Kfb in each st around. (20 sts)

BO remaining stitches. Cut yarn, clean up the ring with a few extra stitches as needed, and leave the remaining yarn tail for sewing.

Insert one horn base into the horn hole in the head and sew in place to secure. Position, pin, and sew the other 8 candle horn bases around the edge of the crown, taking care to angle the openings to face up.

KNIT MENORAH-TOPS CANDLE

Make 9

Make 9

Round 1: With color B  and working with a magic loop or DPNs, CO 8. Place marker and work in the round. Distribute the stitches evenly over the magic loop or 2 DPNs.
Round 2: K8.

Round 3: P8.

Rounds 4-14: K8.

Lightly stuff candle horn.

Round 15: K1, sl 1, K1, psso, K2, sl 1, K1, psso. K1. (6 sts)

Rounds 16-18: K6.

Cut and weave yarn through remaining stitches, pulling to close hole. Weave in yarn tails. 

FLAME

Make 9

Row 1: With color C, CO 4.

Row 2: K1, Kfb, Kfb, K1. (6 sts)

Row 3: P6.

Row 4: K1, k2tog, Ssk, K1 (4 sts)

Row 5: P2tog, Ssp. (2 sts)

Cut and weave yarn through remaining stitches. Sew side edges together. 

Attach base of flame to pointy ends of candles and weave in ends.

KNITT MENORAH-TOPS DINO EGG

Round 1: With color D and working with a magic loop or DPNs, CO 6. Place marker and work in the round. Distribute the stitches evenly over the magic loop or 2 DPNs.

Round 2: K6.

Round 3: Kfb in each st around (12 sts)

Round 4: K12.

Round 5: (K1, M1R, K1) 6 times. (18 sts)

Round 6: K18.

Round 7: (K2, M1R, K1) 6 times. (24 sts)

Round 8: K24.

Round 9: (K3, M1R, K3) 4 times. (28 sts)

Rounds 10-12: K28.

Round 13: (K2, M1R, K5) 4 times. (32 sts)

Rounds 14-16: K32.

Round 17: (K4, M1R, K4 ) 4 times. (36 sts)

Rounds 18-26: K36.

Round 27: (K3, K2tog, K4 ) 4 times. (32 sts)

Round 28: K32.

Round 29: K5, BO 6, K21. (32 sts)

Round 30: K5, turn, CO 6 purlwise, sk the 6 BO sts, K21. (32 sts)

Round 31: K32.

Round 32: (K2, K2tog, K4) 4 times. (28 sts)

Round 33: K28.

Round 34: (K4, K2tog, K1 ) 4 times. (24 sts)

Round 35: K24.

Round 36: (K2, K2tog, K2 ) 4 times. (20 sts)

Round 37: K20.

Round 38: (K3, K2tog ) 4 times. (16 sts)

Round 39: (K2tog, K2 ) 4 times. (12 sts)

Round 40: (K1, K2tog ) 4 times. (8 sts)

Cut and weave yarn through remaining stitches, pulling to close hole. 

KNIT MENORAH-TOPS FINISHING

Using color B, embroider spots on the sides of the body and egg.  Insert candle into egg for safekeeping when not being used.  Candles are easier to insert into the bases when twisted into place.  

BEA THE CROCHET MENORAH TOPS || FREE CROCHET PATTERN

Evie the Knit Menorah Tops Kids Hanukkah Toy has a crochet companion!

Get Bea the Crochet Menorah Tops Kids Hanukkah Toy here on MarlyBird.com

Crcohet Menorah Tops - Bea the Menorasaurus toy. Marly Bird

Check out more free holiday patterns on MarlyBird.com

Holiday Armadillo Amigurumi Pattern

Prancing Through The Holidays Knit And Crochet Stocking Course

Free Knit Christmas Stocking Patterns

Table Runner Free Crochet Pattern

Frequently Asked Questions

Is this pattern really free?

Yes! Honestly, this whole pattern is completely free for you to download right here on the blog. If you'd prefer an ad-free PDF experience though, you can grab it in my shop too!

What skill level is this pattern for?

So here's the thing… this pattern is listed as intermediate. It's a super fun project, but it does involve a few techniques that might be a little tricky if you're just starting out.

Can I store the candles in the dinosaur egg?

Yes! That's the super clever part of this design… you can totally store the little candles inside the dino egg so they don't get lost. It makes it a really fun toy for the kids!

What kind of yarn do I need for this project?

You'll need worsted weight yarn for this! The pattern calls for Patons Classic Wool Worsted, but you can totally use any worsted weight yarn you have in your stash that you love.

My knit dinosaur looks a little wobbly, what can I do?

Oh, that happens sometimes! You can try running a length of yarn back and forth between the inside surfaces of the legs with a tapestry needle and gently pulling to draw them towards each other. It should help with the splay!

Filed Under: Free Patterns, Knitting, Marly Bird Premium Patterns, Our Free Patterns, Pattern

Crochet Menorah Tops || Free Crochet Pattern

November 11, 2022 By Marly Bird Leave a Comment

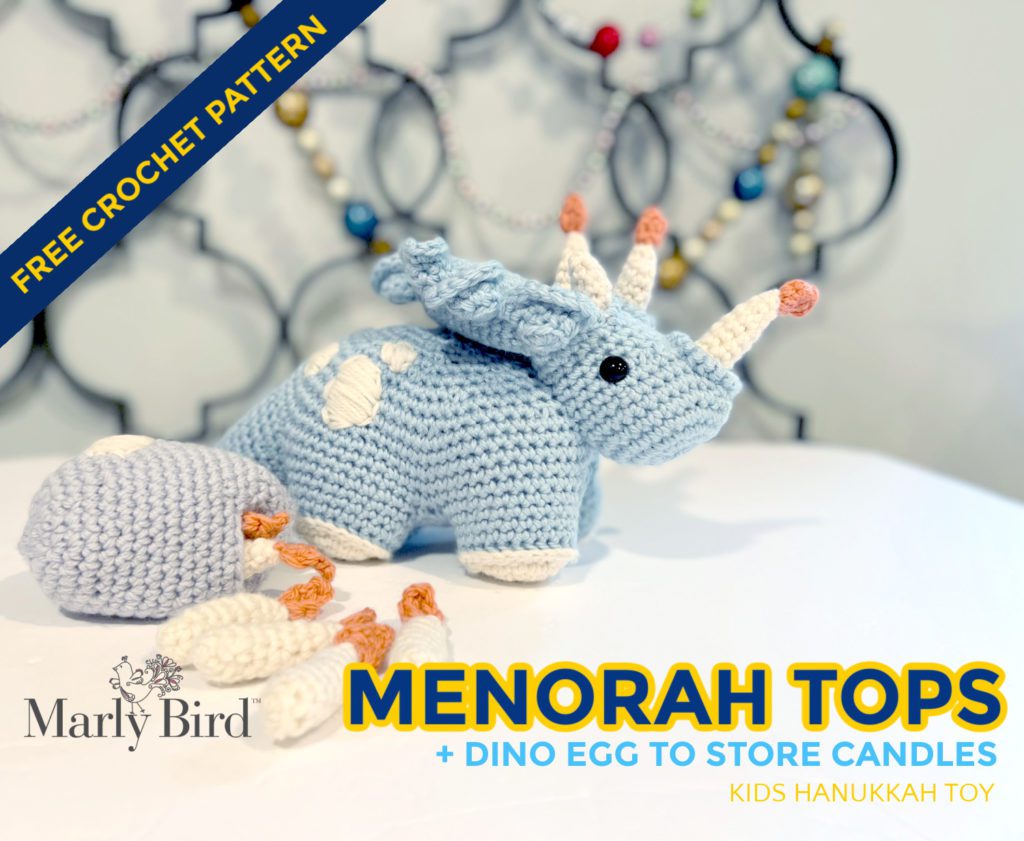
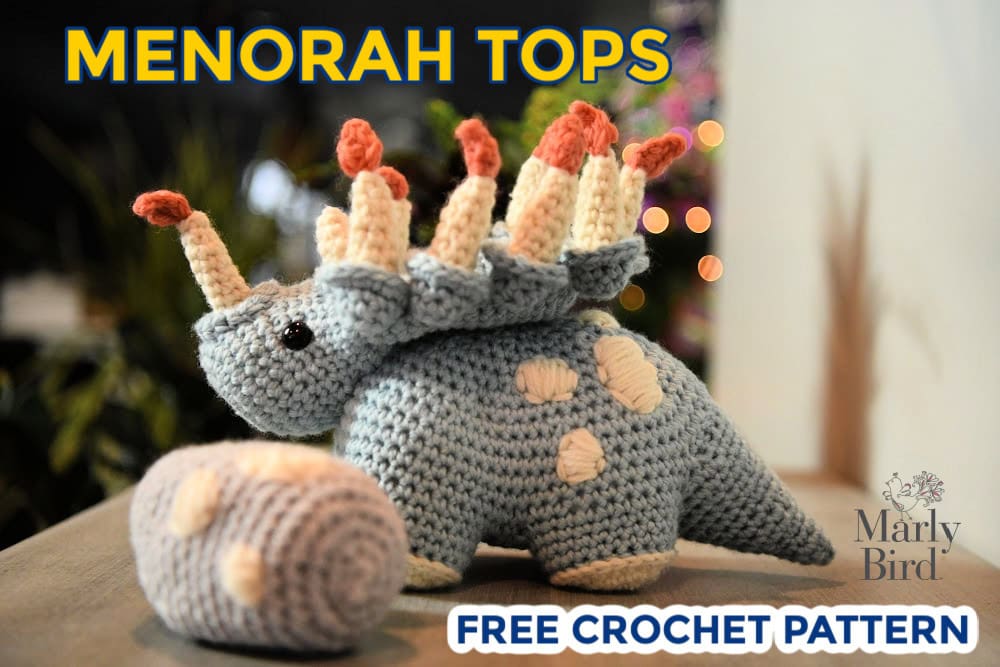
Have a dino-mite Hanukkah with Turquoise Crochet Menorah Tops + dino egg to store the candles! This playful prehistoric triceratops friend is ready to celebrate the Festival of Lights. The adorable “Menorasaurus” is a free crochet pattern on marlybird.com and makes a truly unique gift for Hanukkah!

kids decor crochet menorah dinosaur triceratops free crochet pattern.  Marly Bird

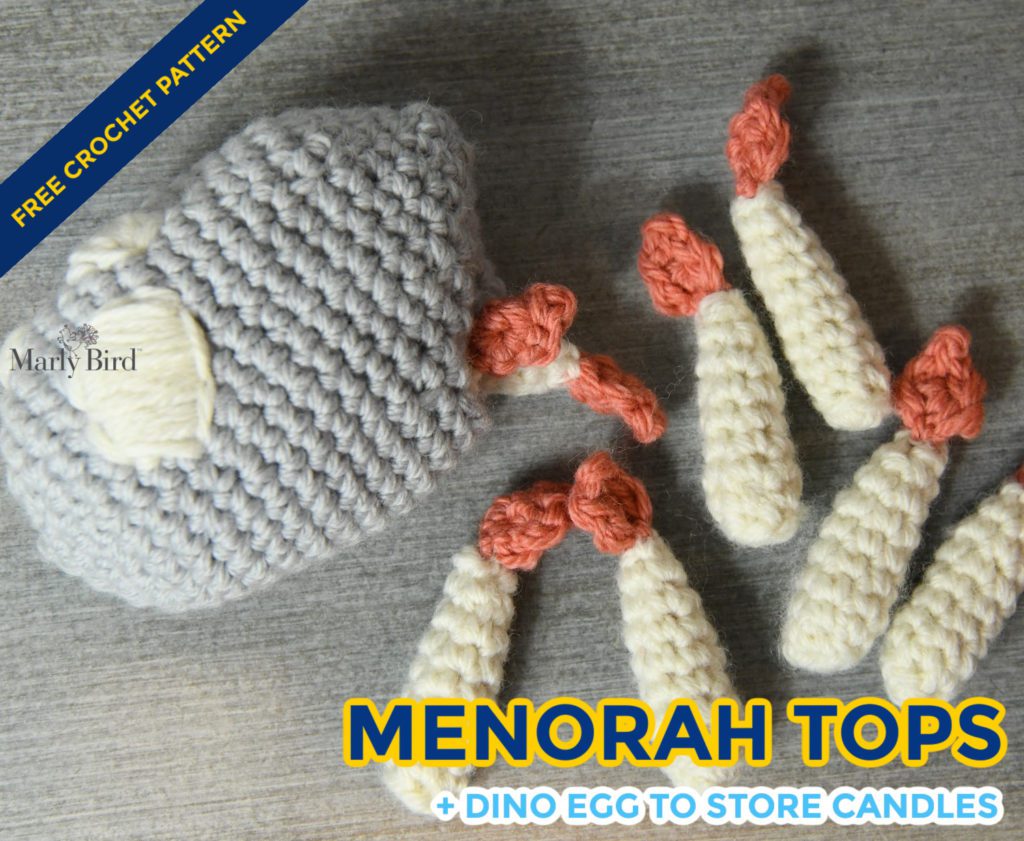
This is a great kid's Hanukkah decoration that you can crochet. The unique candles let you light the menorah safely with your kids. AND, the best part is you can store the candles in the dino egg so you won't lose them!

Read more: Crochet Menorah Tops || Free Crochet Pattern

*THIS POST CONTAINS AFFILIATE LINKS. BY CLICKING ONE OF THESE LINKS AND MAKING A PURCHASE A SMALL PORTION COMES BACK TO THE BLOG. THE PRICE YOU PAY WILL NOT CHANGE. THANK YOU FOR YOUR SUPPORT OF THE BLOG.*

Grab your favorite yarn and crochet Bea the Menorah Tops this holiday season. The perfect kids' Hanukkah toy.

Looking for an ad-free PDF? This free crochet menorah pattern will be part of the Holiday Pattern Collection vol. 2 to be released Nov. 17, 2022, on MarlyBird.com.

Join our newsletter to be the first to learn about this amazing Holiday Pattern Collection

<< Get Some Holiday Cheer >>
Solid blue background with white stitching in the center, showcasing a knitting or crochet pattern design.

Menorah Tops Crochet Pattern || The NEW “Menorah-saurus” for Hanukkah

Designed by Megan Kreiner of MK Crochet for MarlyBird.com

SKILL LEVEL

Intermediate

MEASUREMENTS

Finished Measurements

Toy is 11.5โ€ [29.21 cm] from nose to tail

Gauge 

7 sc by 7 rounds = 2โ€ [5 cm] by 2โ€ [5 cm]; use any size hook to obtain the gauge.  Note: Gauge is not critical in this project.

MATERIALS

Yarn 

Patons Classic Wool Worsted (100% wool, 194 yds / 177 m, 3.5 oz/ 100 g, CYCA #4 worsted) 

Color A: #77219 Seafoam, 2 skeins

Color B: #00201 Winter White, 1 skein

Color C: #77750 Coral Peach, 1 skein

Color D: #77791 Cool Gray, 1 skein

Hook

Size H/8 (5.0 mm)

Notions 

  • Large Steel Tapestry Needle
  • Polyester Fiberfill
  • Straight Pins
  • Stitch markers
  • 12mm plastic safety eyes with plastic backings (for children 3 and older)
  • Black embroidery thread, black felt, or black yarn (alternative eye options)

ABBREVIATIONS

  • BLO – Back Loop Only
  • BPsc- Back Post Single Crochet
  • Ch – Chain(s) 
  • FLO – Front Loop Only
  • RS – Right Side 
  • Sc – Single Crochet
  • Sc2tog – Single Crochet Two Together 
  • Sl st – Slip Stitch 
  • Sp(s) – Space(s) 
  • St(s) – Stitch(es)
  • WS – Wrong Side

SPECIAL STITCHES 

Back Post Single Crochet (bpsc): Insert hook from back to front to back around post of stitch indicated, yarn over and pull up a loop, yarn over and draw through 2 loops on hook. 

Single Crochet 2 Together (sc2tog): *Insert hook into indicated stitch, yarn over and pull up a loop; repeat from * in next stitch indicated, yarn over and draw through all 3 loops on hook. (1 decrease)

NOTES

  • Hold 2 strands of yarn when working all pieces. 
  • Rounds are not joined at the end, but worked in a spiral.  Place a marker in the first stitch throughout to keep track of the star of each round. Do not turn at the end of any round, unless otherwise noted.
Green circular patch with a stitched outline featuring a lowercase letter "r" in the center.
Queue and Favorite this pattern on Ravelry
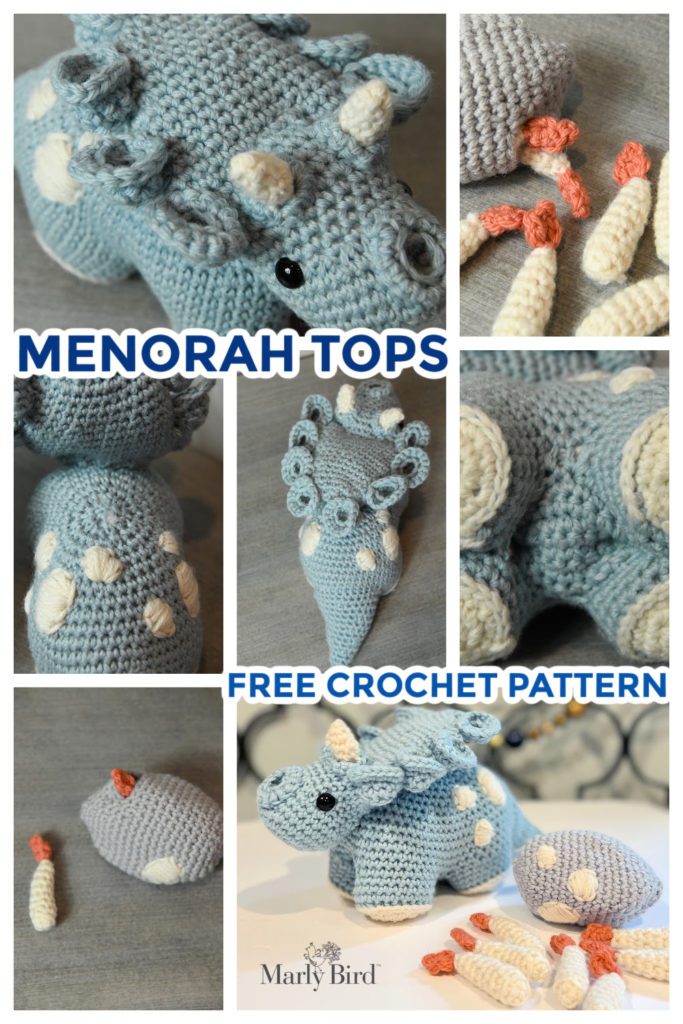
kids decor crochet menorah dinosaur triceratops free crochet pattern.  With dino egg to store crochet candles. Marly Bird

GROW

To Unlockย Exclusive Subscriber Contentย click the Box below and join for free by simply adding your email and creating a password! If you are having troubles, clear your cache or reset your password or login to the Grow Publisher Portal.

>> Learn More About Grow Here <<

I'm thrilled to share this amazing pattern with you, many patterns on my blog are absolutely free! I kindly request that you don't copy and paste or distribute this pattern. Prefer an ad-free experience? Buy a digital PDF pattern for a small fee from one of my online stores for a seamless crafting journey. 

I appreciate your support and readership. You are the reason I can keep doing what I love and sharing it with others. So, thank you from the bottom of my yarn-loving heart! Disclosure: This post contains affiliate links, meaning I get a commission if you decide to make a purchase through my links at no cost to you.

CROCHET MENORAH TOPS PATTERN

CROCHET MENORAH TOPS LEGS

Make 4

Make an adjustable ring with color B.

Round 1: Ch 1, 6 sc into ring, pull ring closed.

Round 2: 2 sc in each sc around–12 sts.

Round 3: *Sc in next sc, 2 sc in next sc; repeat from * around– 18 sts.

Round 4: Sc in first sc, *2 sc in next sc, sc in next 2 sc; repeat from * around to last 2 sc, 2 sc in next sc, sc in last sc, change color to A, fasten off B–24 sts.

Round 5: BPsc around the post of each sc around.

Round 6: Sc in each sc around, fasten off A. 

Note: On 4th leg, do not fasten off A and continue to belly directions. 

CROCHET MENORAH TOPS BELLY

Continue working with color A connected to the fourth leg.

Row 1: Sc in first sc of leg, place marker, sc in next 11 sts of leg (leave remaining 12 sts unworked), sc in next 12 sts on a 2nd leg (leave remaining 12 sts unworked), turn–24 sts. 

Row 2: Ch 1, sc2tog over first 2 sts, sc in each sc across to last 2 sts, sc2tog over last 2 sts– 22 sts.

Row 3: Ch 1, sc2tog over first 2 sts, sc in each sc across to last 2 sts, sc2tog over last 2 sts– 20 sts.

Row 4: Ch 1, sc in each sc across, turn.

Row 5: Ch 1, sc in each sc across, place marker in last st, turn. 

Row 6: Ch 1, sc in each sc across, turn.

Row 7: Ch 1, 2 sc in first sc, sc in each st across to last sc, 2 sc in last sc, turn– 22 sts.

Row 8: Ch 1, 2 sc in first sc, sc in each st across to last sc, 2 sc in last sc, turn– 24 sts.

Row 9: Ch 1, sc in each sc across, turn. 

Row 10: Hold 3rd leg edge against the edge of belly row 9. Match up the stitches and sc through both the belly row and the edge of the 3rd leg 12 times (leaving the remaining 12 sts of the leg edge unworked). Pick up the 4th leg, line up the leg edge to the edge of belly row 9, and sc through both the belly row and edge of the 4th leg 12 times (leaving the remaining 12 sts of the 4th leg edge unworked). Fasten off A.

Green circular patch with a stitched outline featuring a lowercase letter "r" in the center.
Queue and Favorite this pattern on Ravelry

CROCHET MENORAH TOPS BODY

Round 1: Holding legs and belly with the bottom of the feet facing up, locate marker from row 5 of belly.  Join A with sl st to marked st, ch 1, sc in same st, place marker (to mark the start of the round), (working along belly front edge) sc 3 times evenly along side edge until you reach the first unworked stitch of a leg, sc in each sc leg (12 sts), sc twice along belly side edge between the leg edges, sc in each sc of leg (12 sts), ch 16, skip over back belly edge (will create opening for tail), sc in each sc of next leg (12 sts), sc twice along belly side edge between the legs, sc in each sc of last leg (12 sts), sc 4 times evenly along front belly edge. (76 sts)

Round 2: Sc in each sc to ch-sp, 12 sc in ch-16 sp, sc in each sc to end– 72 sts. 

Round 3: Sc in next 30 sc, sc in blo of next 12 sc, place marker in front loop of last st, sc in each sc to end. 

Rounds 4-6: Sc in each sc around. 

Round 7: *Sc in next 7 sc, sc2tog over next 2 sts; repeat from * around–64 sts. 

Round 8: Sc in each sc around. 

Round 9:  *Sc in next 6 sc, sc2tog over next 2 sts; repeat from * around–56 sts. 

Round 10:  Sc in next 3 sc, sc2tog over next 2 sts, *sc in next 5 sc, sc2tog over next 2 sts; repeat from * around to last 2 sts, sc in last 2 sts–48 sts. 

Round 11: Sc in next 2 sc, sc2tog over next 2 sts, *sc in next 4 sc, sc2tog over next 2 sts; repeat from * around to last 2 sts, sc in last 2 sts–40 sts. 

Round 12: Sc in first sc, sc2tog over next 2 sts, *sc in next 3 sc, sc2tog over next 2 sts; repeat from * around to last 2 sts, sc in last 2 sts–32 sts. 

Round 13: *Sc in next 2 sc, sc2tog over next 2 sts; repeat from * around–24 sts. 

Round 14: *Sc2tog over next 2 sts, sc in next sc; repeat from * around–16 sts. 

Stuff legs and front of body.

Round 15: Sc2tog over next 2 sts around, fasten off A– 8 sts. 

CROCHET MENORAH TOPS TAIL

Round 1: Turn body so tail opening is facing you and the belly/legs are facing up. Join A with sl st to front loop of marked st from round 3 of body, ch 1, sc in same st, sc in the remaining 11 front loops, sc 16 times evenly along remaining back edge to form tail opening– 28 sc.

Round 2: Sc in each sc around. 

Round 3: *Sc in next 5 sc, sc2tog over next 2 sts; repeat from * around–24 sts.  

Round 4: Sc in each sc around. 

Round 5: Sc in next 2 sc, sc2tog over next 2 sts, *sc in next 4 sc, sc2tog over next 2 sts; repeat from * around to last 2 sts, sc in last 2 sts–20 sts. 

Round 6: Sc in each sc around. 

Round 7: Sc in first sc, sc2tog over next 2 sts, *sc in next 3 sc, sc2tog over next 2 sts; repeat from * around to last 2 sts, sc in last 2 sts–16 sts. 

Round 6: Sc in each sc around. 

Stuff back of body.

Round 7: *Sc in next 2 sc, sc2tog over next 2 sts; repeat from * around–12 sts.  

Round 8: Sc in each sc around. 

Round 9: *Sc in next sc, sc2tog over next 2 sts; repeat from * around–8 sts.  

Rounds 10-11: Sc in each sc around. 

Stuff tail.

Round 12: Sc2tog in next 2 sts around, fasten off and weave in ends– 4 sts.

To reduce the splay of the legs, run a length of color A yarn back and forth between the inside surfaces of legs with a tapestry needle and pull gently to draw the inside surfaces of the legs towards each other.  Fasten off and use the leftover yarn tails to tidy up any remaining gaps along the belly and legs.

kids decor crochet menorah dinosaur triceratops free crochet pattern.  With dino egg to store crochet candles. Collage of all the parts of the stuffie - Marly Bird

CROCHET MENORAH TOPS HEAD

With color A, make an adjustable ring.

Round 1: 6 sc into ring, pull ring closed. 

Round 2: 2 sc in each sc around– 12 sc. 

Round 3: 2 sc in each sc around– 24 sc. 

Round 4: *Sc in next 5 sc, 2 sc in next sc; repeat from * around– 28 sc. 

Round 5: Sc in first 3 sc, *2 sc in next sc, sc in next 6 sc; repeat around to last 4 sc, 2 sc in next sc, sc in last 3 sc– 32 sc. 

Round 6: Sc in each sc around. 

Round 7: Sc in next 14 sc, ch 4, skip 4 sc, sc in last 14 sc– 28 sc + ch-4 sp. 

Round 8: Sc in each sc to ch-4 sp, 4 sc in ch-4 sp, sc in each sc around– 32 sc. 

Round 9: Sc in next 8 sc, [sc2tog over next 2 sts] 8 times, sc in last 8 sc– 24 sc. 

Rounds 10-11: Sc in each sc around.

If using 12 mm plastic safety eyes, install between rnds 9-10 with 8 sts of sp between them and the horn opening facing up.

Round 12: *Sc in next 5 sc, 2 sc in next sc; repeat from * around– 28 sc. 

Round 13: *Sc in next 3 sc, 2 sc in next sc; repeat from * around– 35 sc. 

Rounds 14-18: Sc in each sc around.

Round 19: *Sc in next 5 sc, sc2tog over next 2 sc; repeat from * around– 30sc. 

Rounds 20-23: Sc in each sc around.

Round 24: *Sc in next 4 sc, sc2tog over next 2 sc; repeat from * around– 25sc. 

Rounds 25-28: Sc in each sc around.

Round 29: *Sc in next 3 sc, sc2tog over next 2 sc; repeat from * around– 20sc. 

Stuff head firmly (between rnds 1-17).

If you have not installed plastic safety eyes, embroider on eyes with black yarn or cut 12 mm black felt circles and sew to the side of the head between rnds 9-10 with 8 sts of sp between them. 

Define the top of the head by sewing a running stitch of color A in an arch shape starting 4-5 rnds behind the left eye, stitching in the curved line up to the center of rnd 17, and stitching in a curved line down to 4-5 rnds behind the right eye.

Round 30: *Sc2tog over next 2 sc, sc in next 2 sc; repeat from * around– 15sc. 

Round 31: *Sc in next sc, sc2tog over next 2 sc; repeat from * around, fasten off leave long tail for seaming– 10sc. 

Add some scant stuffing to crown area above the head. Flatten and sew opening shut at the top of the crown.

CROCHET MENORAH TOPS SMALL HORNS

Make 2

With color B, make an adjustable ring.  

Round 1: 6 sc into ring, pull ring closed. 

Round 2: Sc in blo of each sc around. 

Round 3: Sc in each sc around. 

Lightly stuff small horn.

Round 4: Sc in next 2 sc, sc2tog over next 2 sc, sc in next 2 sc– 5 sc..

Round 5: Sc in next sc, skip next sc, sc in next sc, skip next sc, sl st in last sc, fasten off, weave in ends– 3 sts. 

Hold horn so the pointy side is facing up and locate the exposed front loops on rnd 2. Insert hook into one of these front loops. Join A with sl st in any front loop st, ch 1, 2 sc in same st, 2 sc in each remaining front loop, sl st to first sc to join, fasten off leave long tail for seaming — 12 sc.   

Sew the small horn bases to the top of the head, 3 rnds behind the eyes and with 2 sts of sp between them.

kids decor crochet menorah dinosaur triceratops free crochet pattern.  With dino egg to store crochet candles. Marly Bird

CROCHET MENORAH TOPS CANDLE BASE

Make 9 

With color A, make an adjustable ring.  

Round 1: 8 sc into ring, pull ring closed. 

Round 2: Sc in blo of each sc around. 

Round 3: Sc in each sc around. 

Round 4: 2 sc in flo of each sc around, sl st to first sc to join, fasten off leave long tail for seaming–16 sc. 

Insert one horn base into the horn hole in head and sew in place to secure. Position, pin, and sew the other 8 candle horn bases around the edge of the crown, taking care to angle the openings to face up.

CROCHET MENORAH TOPS CANDLE

Make 9

With color B, make an adjustable ring.  

Round 1: 6 sc into ring, pull ring closed. 

Round 2: Sc in blo of each sc around. 

Rounds 3-7: Sc in each sc around. 

Lightly stuff candle horn.

Round 8: Sc in next 2 sc, sc2tog over next 2 sc, sc in next 2 sc– 5 sc..

Round 9: Sc in next sc, skip next sc, sc in next sc, skip next sc, sl st in last sc, fasten off, weave in ends– 3 sts. 

FLAME

Make 9

With color C, make an adjustable ring.  

Round 1: 5 sc into ring, pull ring closed. 

Round 2: (Sl st, ch 2, sl st) in next st, sl st in next st, fasten off, leaving a long tail for sewing.

Weave yarn down to the base of the flame. Secure flame to pointy side of candle yarn tails.

CROCHET MENORAH TOPS DINO EGG

With color D, make an adjustable ring.  

Round 1: 6 sc into ring, pull ring closed. 

Round 2: 2 sc in each st around– 12 sc. 

Round 3: *Sc in next sc, 2 sc in next st; repeat from * around– 18 sc. 

Round 4: *2 sc in next sc, sc in next 2 sc; repeat from * around– 24 sc. 

Round 5: Sc in first 3 sc, 2 sc in next sc, *sc in next 5 sc, 2 sc in next sc; repeat from * around to last 2 sc, sc in last 2 sc– 28 sc. 

Round 6: Sc in each sc around. 

Round 7: Sc in first sc, 2 sc in next sc, *sc in next 6 sc, 2 sc in next sc; repeat from * around to last 5 sc, sc in last 5 sc– 32 sc. 

Round 8: Sc in each sc around. 

Round 9: Sc in first 3 sc, 2 sc in next sc, *sc in next 7 sc, 2 sc in next sc; repeat from * around to last 4 sc, sc in last 4 sc– 36 sc. 

Rounds 10-14: Sc in each sc around. 

Round 15: Sc in first 3 sc, sc2tog over next 2 sc, *sc in next 7 sc, sc2tog over next 2 sc; repeat from * around to last 4 sc, sc in last 4 sc– 32 sc. 

Round 16: Sc in next 13 sc, ch 6, skip 6 sc, sc in last 13 sc– 26 sc + ch-6 sp. 

Round 17: Sc in first 3 sc, sc2tog over next 2 sc, sc in next 6 sc, sc2tog over next 2 sc, 6 sc in ch-6 sp, sc2tog over next 2 sc, sc in next 6 sc, sc2tog over next 2 sc, sc in last 3 sc– 28 sc. 

Round 18: Sc in first 4 sc, sc2tog over next 2 sc, *sc in next 5 sc, sc2tog over next 2 sc; repeat from * around to last sc, sc in last sc– 24 sc. 

Round 19: Sc in first 2 sc, sc2tog over next 2 sc, *sc in next 4 sc, sc2tog over next 2 sc; repeat from * around to last 2 sc, sc in last 2 sc– 20 sc. 

Round 20: *Sc in next 3 sc, sc2tog over next 2 sc; repeat from * around — 16 sc. 

Round 21: *Sc2tog over next 2 sc, sc in next 3 sc; repeat from * around — 12 sc. 

Round 22: *Sc in next sc, sc2tog over next 2 sc; repeat from * around — 8 sc. 

Fasten off, weave yarn through stitches and pull to close

CROCHET MENORAH TOPS FINISHING

Using color B, embroider white spots on the sides of the body and egg.  Insert candles into egg for safekeeping when not being used.  Candles are easier to insert into the bases when twisted into place. 

Solid blue background with white stitching in the center, showcasing a knitting or crochet pattern design.

EVIE THE KNIT MENORAH TOPS || FREE KNIT PATTERN

Bea the Crochet Menorah Tops Kids Hanukkah Toy has a knit companion!

Get Evie the Knit Menorah Tops Kids Hanukkah Toy here on MarlyBird.com

kids decor knit menorah dinosaur triceratops free knit pattern.  With dino egg to store knit candles. Marly Bird

Check out more free crochet holiday patterns on MarlyBird.com

Holiday Armadillo Amigurumi Pattern

Prancing Through The Holidays Knit And Crochet Stocking Course

Free Knit Christmas Stocking Patterns

Table Runner Free Crochet Pattern

Frequently Asked Questions

Can I make this crochet menorah top for really little kids?

Honestly… you totally can! Just be sure to use the black embroidery thread, felt, or yarn for the eyes if you're making this for a child younger than three. That way, there are no little pieces that could be a choking hazard. We want everyone to be safe and have fun!

How big is this adorable dinosaur once it's all crocheted?

So here's the thing… this little dino measures about 11.5 inches from his nose to his tail. He's the perfect size for a fun decoration or even a cuddle buddy!

My gauge isn't quite matching the pattern, is that a big deal?

Nope, not at all! The pattern says gauge isn't critical for this project. So, just keep crocheting and have fun with it… your menorah top will still turn out super cute!

Can I get an ad-free version of this pattern?

Yes! You can grab an ad-free PDF version of this pattern. It's going to be part of the Holiday Pattern Collection vol. 2, which was released on November 17, 2022. You can find it in the MarlyBird.com shop!

What kind of yarn do you suggest using for this project?

Well, the pattern specifically calls for Patons Classic Wool Worsted yarn. It's a #4 worsted weight yarn and is 100% wool, which makes for a really lovely finished toy!

Filed Under: Crochet, Free Patterns, Marly Bird Premium Patterns, Our Free Patterns, Pattern

Crochet Gnome Advent Calendar || Free Pattern

November 10, 2022 By Marly Bird Leave a Comment

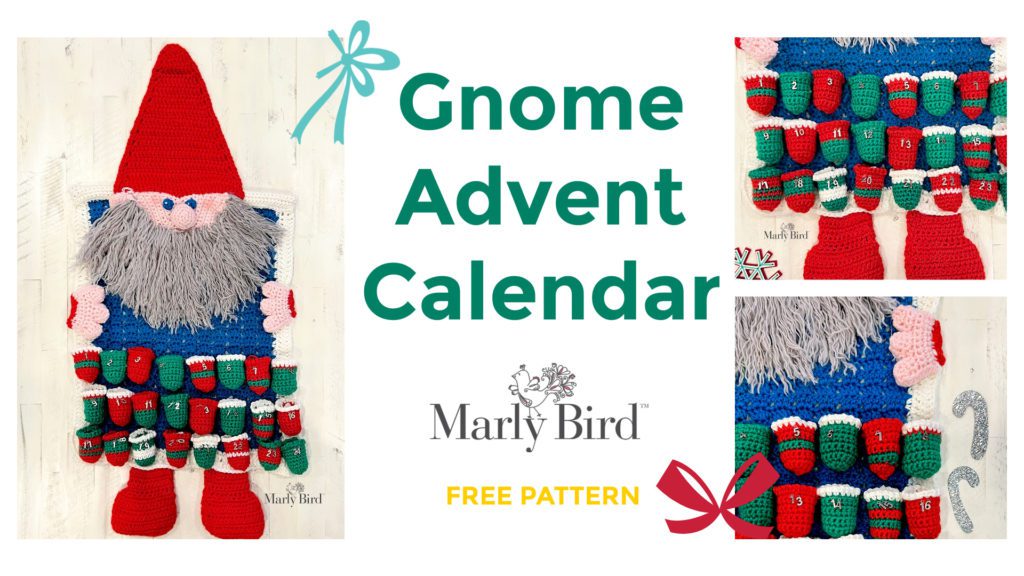
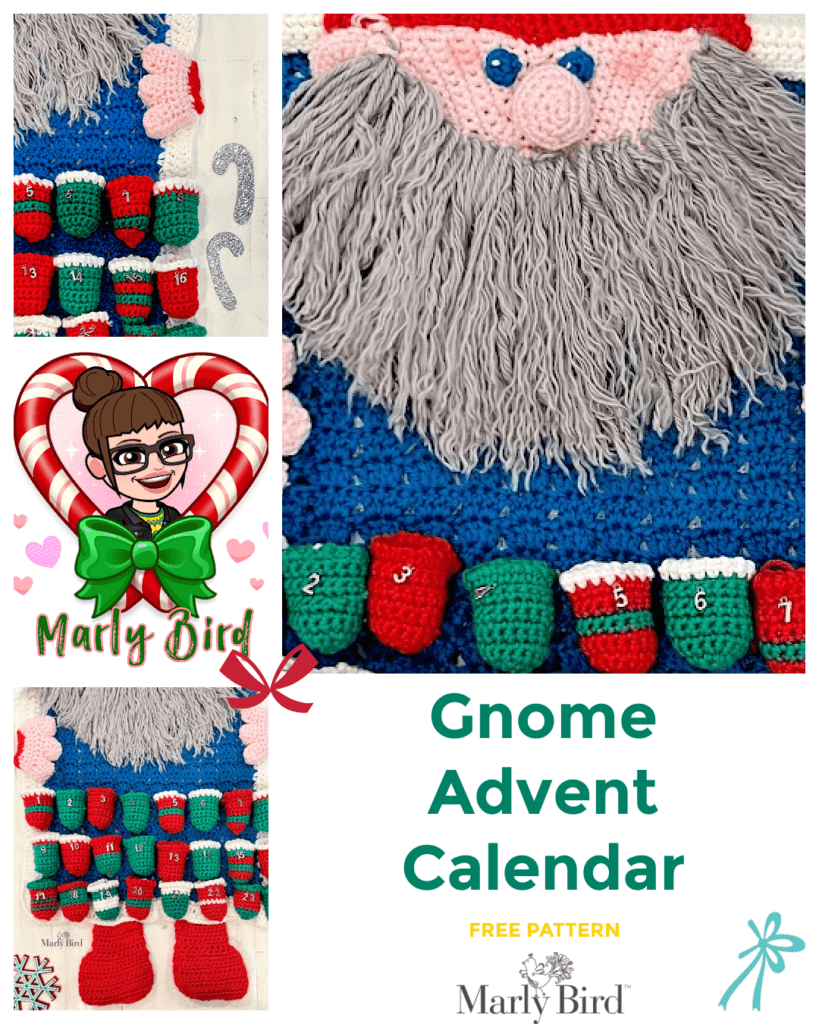
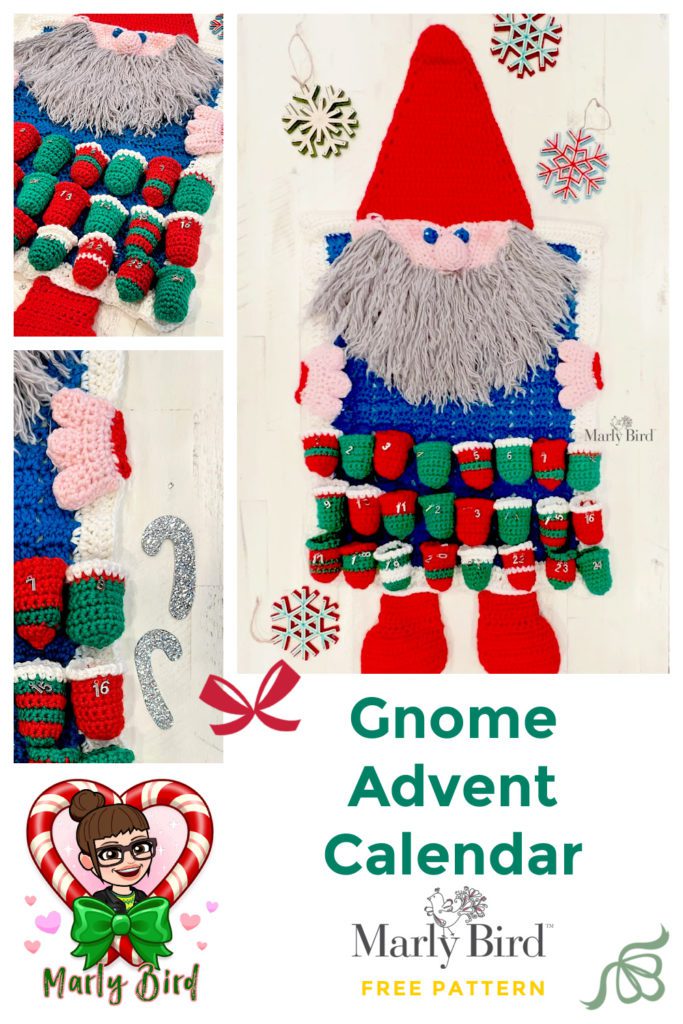
Everybody loves these mythical creatures and now you can make your own Crochet Gnome Advent Calendar designed by Michele Wilcox for MarlyBird.com.

Meet George the Gnome! He's a fun-loving guy with a lot of love to give. This is a free gnome pattern for crocheters who need a little George around the holidays.

Crochet Gnome Advent Calendar - Marly Bird
Read more: Crochet Gnome Advent Calendar || Free Pattern

*THIS POST CONTAINS AFFILIATE LINKS. BY CLICKING ONE OF THESE LINKS AND MAKING A PURCHASE A SMALL PORTION COMES BACK TO THE BLOG. THE PRICE YOU PAY WILL NOT CHANGE. THANK YOU FOR YOUR SUPPORT OF THE BLOG.*

The construction is rather simple but all the work is in the details.

He's there with his mini baskets to help celebrate the season, so why not pop a little treat in each day's basket? The kids will be so excited to see what they can find in there every day leading up to Christmas.

So, grab your favorite yarn and this Crochet Gnome Advent Calendar pattern (remember his name – George) this holiday season.

Looking for an ad-free PDF? This free gnome pattern will be part of the Holiday Pattern Collection vol. 2 released Nov. 17, 2022, on MarlyBird.com.

Join our newsletter to be the first to learn about everything Marly Bird!

<< Get Some Holiday Cheer >>
Holly and berries

🎄 Countdown to Christmas 🎄

—
Days
—
Hours
—
Mins
—
Secs

Until Christmas Morning! 🎄

🤴 Start your handmade gifts now — December comes faster than you think! 🎅

Crochet Gnome Advent Calendar || Free Pattern

Designed by Michele Wilcox for MarlyBird.com

SKILL LEVEL

Adventurous Beginner

MEASUREMENTS

Finished Measurements

Calendar is 18โ€ [45.5 cm] wide by 24โ€ [61 cm] long. 

Gauge 

13 sc x 14 rows = 4โ€ [10 cm] x 4โ€[10 cm]; use any size hook to obtain the gauge. 

MATERIALS

Yarn 

WeCrochet, Brava Bulky (100% acrylic, 136 yds / 124 m, 3.5 oz/ 100 g, CYCA# 5 bulky) 

Color A: #28338 Celestial, 2 skeins

Color B: #28361 White, 2 skeins

Color C: #28352 Red, 2 skeins

Color D: #28347 Hunter, 2 skeins

WeCrochet, Mighty Stitch Bulky (80% acrylic/ 20% superwash wool, 136 yds / 124 m, 3.5 oz/ 100 g, CYCA# 5 bulky) 

Color E: #26818 Blush, 1 skein

Color F: #26820 Silver, 1 skein

Hook

Size J/10 (6.0 mm)

Notions 

Stitch Markers, Tapestry needle, Polyester fiberfil,  1 stiff brush (like a cat brush) for fluffing beard. 1 dowel for hanging 18โ€œ [45.5 cm] long, charms or beads for each day of advent.

ABBREVIATIONS

  • Ch - Chain(s) 
  • Dc - Double Crochet 
  • FLO - Front Loop Only
  • Hdc - Half Double Crochet
  • PM - Place Marker
  • RS - Right Side 
  • Sc - Single Crochet
  • Sp(s) - Space(s) 
  • St(s) - Stitch(es)
  • Tch - Turning Chain
  • WS - Wrong Side

SPECIAL STITCHES 

โญ๏ธ Single Crochet 2 Together (sc2tog): *Insert hook into indicated stitch, yarn over and pull up a loop; repeat from * in next stitch indicated, yarn over and draw through all 3 loops on hook. (1 decrease)

โญ๏ธ Single Crochet 3 Together (sc3tog): *Insert hook into indicated stitch, yarn over and pull up a loop; repeat from * in next 2 stitches indicated, yarn over and draw through all 4 loops on hook. (2 decrease)

โญ๏ธDouble Crochet 2 Together (Dc2tog): *Yarn over hook, insert hook into indicated st, yarn over and pull up a loop, yarn over and draw through 2 loops on hook; repeat from * in next st, yarn over and draw through all 3 loops on hook. 

CROCHET GNOME ADVENT CALENDAR: NOTES

  • When working in the round for the nose and baskets, it can be helpful to place a marker at the beginning of each round to keep track of where you are in the round.
Crochet Gnome Advent Calendar - Marly Bird

CROCHET GNOME ADVENT CALENDAR PATTERN

BACKGROUND

With color A, chain 52.

Row 1: 2 dc in 5th ch from hook (counts as dc and skipped ch), 2 dc in next ch, *skip 2 ch, 2 dc in each of next 2 ch; repeat from * to last 2 ch, skip next ch, dc in last ch, turn.  -- 50 dc.

Rows 2-28: Ch 3 (counts as dc), *skip 2 sts. 2 dc in each of next 2 dc; repeat from * across to last 2 dc, skip next dc, dc in top of tch, turn. 

Fasten off, weave in ends. 

Border

With color B, join to top left corner with sl st on RS.

Round 1 (RS): Ch 1, 3 sc in corner, work 56 sc evenly down left side (2 sc in side of each row), pm, 3 sc in bottom corner, 52 sc evenly across bottom, pm, 3 sc in corner, 56 sc evenly up right side, pm, 3 sc in corner, 52 sc evenly across top, sl st in first sc. Do not turnโ€“ 228 sc.

Row 2 (RS): (working all sides except top) Sl st to next sc, ch 3 (counts as dc), [dc in each sc to marker, pm. 2 dc in each of next 3 sc] twice, dc in each sc to marker, dc in next 2 sc, leave top edge sts unworked, turn- 176 dc.

Row 3 (WS): Ch 3 (counts as dc) [dc in each dc to marker, 2 dc in each of next 6 dc] twice, dc in each dc to tch, dc in top of tch, turn to work on top edge- 188 dc.

Row 4 (RS): Ch 1, sc evenly across top edge (working over previous row 2-3  ends and sts from Round 1), turn.

Rows 5 โ€“ 9: Ch 1, sc in each sc across, turn.

Fasten off, leaving long tail for seaming. Fold top edge behind work and sew to first sc round to form slot for dowel for hanging. Weave in ends. 

CROCHET GNOME

Face

With color E, ch 2.

Row 1 (RS): 6 sc in 2nd ch from hook, turn, DO NOT JOIN- 6 sc.

Row 2: Ch 1, 2 sc in each sc across, turn- 12 sc.

Row 3: Ch 1, *sc in next 3 sc, 2 sc in next sc; repeat from * across, turn -15 sc.

Row 4: Ch 1, *sc in next 4 sc, 2 sc in next sc; repeat from * across, turn- 18 sc. 

Row 5: Ch 1, *sc in next 5 sc, 2 sc in next sc; repeat from * across, turn- 21 sc.

Row 6: Ch 1, *sc in next 6 sc, 2 sc in next sc; repeat from * across, turn- 24 sc.

Row 7: Ch 1, *sc in next 7 sc, 2 sc in next sc; repeat from * across, turn- 27 sc.

Row 8: Ch 1, *sc in next 8 sc, 2 sc in next sc; repeat from * across, turn- 30 sc.

Row 9: Ch 1, *sc in next 9 sc, 2 sc in next sc; repeat from * across, turn- 33 sc.

Row 10: Ch 1, *sc in next 10 sc, 2 sc in next sc; repeat from * across, turn- 36 sc.

Row 11: Ch 1, *sc in next 11 sc, 2 sc in next sc; repeat from * across, turn- 39 sc.

Row 12: Ch 1, *sc in next 12 sc, 2 sc in next sc; repeat from * across, turn- 42 sc.

Round 13: Ch 1, *sc in next 13 sc, 2 sc in next sc; repeat from * across, turn to work on top edge, sc evenly across top edge (working over previous row ends), sl st to first sc to join, fasten off, weave in ends.

Ears

Make 2

With color E, ch 2.

Row 1 (RS): 6 sc in 2nd ch from hook, turn, DO NOT JOIN- 6 sc.

Row 2: Ch 1, 2 sc in each sc across, turn- 12 sc.

Row 3: Ch 1, *sc in next sc, 2 sc in next sc; repeat from * across, turn -18 sc.

Row 4: Ch 1, sc in FLO in each sc across,  turn.

Row 5: Ch 1, *sc in next sc, sc2tog over next 2 sc; repeat from * across, turn- 12 sc.

Row 6: Ch 1, *sc2tog over next 2 sc; repeat from * across, fasten off with a long tail for seaming- 6 sc. 

Fold ear down at row 4 to shape, Sew in place at top edge of face

Nose

With color E, ch 2.

Round 1 (RS): 6 sc in 2nd ch from hook, do not turn, DO NOT JOIN, work in spiral- 6 sc.

Round 2: 2 sc in each sc around, do not turn- 12 sc.

Round 3: *Sc in next sc, 2 sc in next sc; repeat from * around, do not turn- 18 sc.

Rounds 4-5: Sc in each sc around, do not turn. 

Round 6: * Sc2tog over next 2 sc; repeat from * around, fasten off leaving long tail for seaming- 9 sc. 

Stuff lightly and sew in place. 

Optional: With red crayon, color rosy cheeks on either side of nose. 

Eyes

Make 2

With color A, ch 2.

Round 1 (RS): 6 sc in 2nd ch from hook, join with sl st to first sc, fasten off leaving long tail for seaming- 6 sc.

With color B embroider 1 small straight st for a twinkle in his eyes. Sew eyes slightly above nose but close to nose.

Sew face to top center of background, close to top edge, being careful not to sew dowel slot closed. Sew remainder of head in place.

Crochet Gnome Advent Calendar: Beard

With color F cut about 100 lengths of yarn about 20โ€ [51 cm]  long. 

Work 2 strands at a time, insert hook through st at edge of face near the ear, place center of strands on hook, pull strands lightly through face to form loop, tuck ends of strand through loop, pull closed.  Repeat 12 times total down edge of face to chin.  Repeat on opposite side from ear to chin.  Make another 2 rows below ears and nose working center of face (above chin) across. With stiff brush, brush beard until you like the way it looks. Trim bottom of beard to desired length. (Beard shown is about 7โ€ [18 cm] long).

Crochet Gnome Advent Calendar - Marly Bird

Hat

With color C, ch 2.

Row 1 (WS): 6 sc in 2nd ch from hook, turn, DO NOT JOIN- 6 sc.

Row 2: Ch 2 (does not count as a st), dc in each sc across, turn. 

Row 3: Ch 1, 2 sc in first dc, sc in each dc to last dc, 2 sc in last dc, turn- 8 sc.

Rows 4-29: Repeat Rows 2-3- 34sc.

Row 30: Repeat Row 2

Edging round: Ch 1, *sc evenly across edge to corner, 3 sc in corner; repeat from * around, al st to first sc to join, fasten off leave long tail for seaming. 

Sew hat to gnome just covering top of face.

Ravelry logo
Queue and Favorite this Project on Ravelry

Boots

Make 2

With color C, ch 25.

Row 1 (RS): Sc in 2nd ch from hook and each ch across, turn- 24 sc.

Row 2: Ch 2 (does not count as a st), dc in each sc across, turn.

Row 3: Ch 1, sc in each dc across, turn.

Rows 4- 5: Repeat Rows 2 and 3.

Row 6: Repeat Row 2.

Row 7: Ch 1, sc in next 6 dc, 2 sc in each of next 12 dc, sc in last 6 dc, turn- 36 sc.

Rows 8- 13: Repeat Rows 2 and 3.

Row 14: Ch 2, dc in first ss, [dc2tog over next 2 sc] 3 times, dc in next 7 sc, [dc2tog over next 2 sc] 4 times, dc in next 7 sc, [dc2tog over next 2 sc] 3 times, dc in last sc, turn- 26 dc.

Row 15: Ch 1, *sc2tog over next 2 dc; repeat from * across, fasten off leave long tail for seaming- 13 sc.

Fold boot in half lengthwise and sew back side, stuff lightly, and sew bottom seam.  Place boot behind bottom edge of background, with color A, sew boot to bottom edge of background. 

Hand

Make 4

With color E, ch 10.

Row 1 (RS): Sc in 2nd ch from hook and each ch across, turn- 9 sc.

Rows 2-4: Ch 1, sc in each sc across, turn.

Row 5 (begin fingers): Ch 1, sc in next 3 sc, leave remaining sts unworked, turn- 3 sc.

Rows 6-7: Ch 1, sc in each sc across, turn.

Row 8: Ch 1, sc3tog over all 3 sts, fasten off.

Join yarn to next unworked st on Row 4 and repeat Rows 5-8 for next 2 fingers. Do not fasten off.

Edging (gives dimension to hand):

Round 1: Ch 1, sc evenly around edge of hand including fingers, place a sl st between fingers, join to first sc with sl st, do not turn.

Round 2: Ch 1, sc in each sc around, skip sl sts, join with sl st to first sc, fasten off leaving long tail for seaming.

Seam 2 hands together leaving opening at wrist. Stuff lightly.

Cuff

With color C, join to wrist with sl st.

Round 1: Ch 1, sc in evenly around wrist opening, sl st to first sc to join, do not turn.

Round 2: Ch 1, sc in each sc around, join with sl st to first sc, fasten off leave long tail for seaming. 

Stuff lightly, sew wrist opening closed and sew hands in place, slightly wrapping cuff around edge of calendar.

CROCHET GNOME ADVENT CALENDAR BASKETS

Make 24

Note: You can make the baskets in solid colors or stripe them or any combination that you like.  Calendar shown uses colors B, C, and D for the baskets.

Round 1 (RS): 6 sc in 2nd ch from hook, do not turn or join (begin working in spiral)- 6 sc.

Round 2: 2 sc in each sc around- 12 sc.

Round 3: *Sc in next 3 sc, 2 sc in next sc; repeat from * around- 15 sc.

Rounds 4 โ€“ 10: Sc in each sc around.

Round 11: *Ch 1, sc in next sc; repeat from * around, fasten off leaving long tail for seaming.. Sew baskets in place in 3 rows of 8 baskets under hands.

FINISHING

Insert dowel into opening and sew side opening closed.

Sew charms or beads to each basket to label each day of advent. 

Optional:  Using Colorful Placemat, Foam Sheet, or Posterboard, trace and cut out candy cane as place marker for day of the week. 

Black and white candy cane
Click Image to print and resize for candy cane tracing

Check out more free crochet holiday patterns on MarlyBird.com

Prancing Through The Holidays Knit And Crochet Stocking Course

Free Knit Christmas Stocking Patterns

Table Runner Free Crochet Pattern

Holiday Armadillo Amigurumi Pattern

```html

Frequently Asked Questions

What exactly are the finished measurements of this Crochet Gnome Advent Calendar?

So here's the thing... the finished calendar itself is 18 inches wide by 24 inches long. That's a pretty good size to hang up for the holidays!

Can you tell me about the yarn needed for this project?

Honestly... you'll need WeCrochet Brava Bulky and Mighty Stitch Bulky yarns. The pattern lists specific colors and amounts, like Color A Celestial and Color B White, with 2 skeins of each needed for the background.

What skill level is this pattern for?

Yes! It's listed as Adventurous Beginner. So if you've got a little crochet experience under your belt, you should be all set to make this fun project.

How many little baskets does this calendar have?

You'll be making 24 baskets in total, one for each day leading up to Christmas! They're worked in the round, and you can use colors B, C, and D for them, or mix it up however you like.

Is there a way to get an ad-free version of this pattern?

Great question! This free gnome pattern is going to be part of the Holiday Pattern Collection vol. 2, which is available as an ad-free PDF. It was released on November 17, 2022.

```

Filed Under: Crochet, Free Patterns, Our Free Patterns, Pattern

  • « Previous Page
  • 1
  • …
  • 18
  • 19
  • 20
  • 21
  • 22
  • Next Page »

Let's Be Social

Join the Marly's Minions Facebook group to share, ask questions, or chat about all of your yarn related crafts!

Join the group
Cartoon of a smiling woman with brown hair in a bun, glasses, black jacket and green shirt, waving next to large "hi" text.

Quick Links

The Pattern Shop

Our Free Patterns

Blog

Marly Bird House

Learn to Knit & Crochet

About

Giveaway Terms and Privacy Notice

Find Us Everywhere

Join the Newsletter

YouTube Channel

Marly's Minions FB Group

Etsy Store

Ravelry Store


AN ELITE CAFEMEDIA HOME/DIY PUBLISHER

Information from your device can be used to personalize your ad experience. Do not sell or share my personal information.

Privacy Policyย  ย Termsย  ย Marly Bird Legal Documents Copyright © 2026