Search
Close
  • The Pattern Shop
  • Our Free Patterns
    • Browse All Our Free Patterns
    • Our Free Knitting Patterns
    • Our Free Crochet Patterns
  • Blog
    • All Blog Posts
    • All Free Patterns
    • Dibble Dabble Inspiration
    • Giveaways
    • Make-Alongs
    • Product Reviews
    • Roundups
    • Tips, Tricks, Techniques for Knitting and Crochet
Stylized bird with pink and gray swirling tail above elegant โ€œMarlyโ€ text, logo for crochet accessories and home decor.
  • Marly Bird House
  • Learn to Knit & Crochet
    • Newbie? Start Here
    • Video Tutorials
    • Knitting Definitions
    • Crochet Definitions
    • Common Techniques
    • Size Charts for Knitting and Crochet Projects
  • About
ร—
  • The Pattern Shop
  • Free Patterns
  • Blog
  • Marly Bird House
  • Learn to Knit & Crochet
    • Newbie? Start Here
    • Video Tutorials
    • Knitting Definitions
    • Crochet Definitions
    • Common Techniques
    • Size Charts for Knitting and Crochet Projects
  • About
Stylized bird with pink and gray swirling tail above elegant โ€œMarlyโ€ text, logo for crochet accessories and home decor.
Search
Close

New Patterns NOW Available in Ad-Free PDF! Check out The Pattern Shop

Baby Cakes Customized Sweater Free Pattern and Video

February 5, 2023 By Marly Bird Leave a Comment

Such a cute little sweater isn't it? And, I love that you can choose the colorway for your wee one as well as add a name. Watch the free video of a recorded class I taught recently on this Baby Cakes Customized Sweater free pattern. I teach you how to knit it, then customize it with embroidery!

It's a simple knit since it's 1 x 1 rib and stockinette stitch. Check out the color changes too. But, it's much easier than you might think!

Baby Cakes Customized Sweater free pattern - Marly Bird

Custom Baby Sweater

The striped baby pullover is knit with Caron Baby Cakes yarn, available exclusively at Michaels. This worsted-weight yarn is self-striping, so there's no changing colors as you knit the sweater. This cuts the end weaving you would have without color-changing self-striping yarn.

The sweater is knit from the top down and fits sizes 6 months to 24 months. The sleeve shaping is raglan, which is a great option for babies.

Once you've knit the sweater, use hand embroidery to customize it with the baby's name.

You'll also need:

  • size US 7 (4.5 mm) circular knitting needles, 16″ long
  • size US 8 (5.0 mm) circular knitting needles, 16″ long
  • size US 7 (4.5 mm) double point needles
  • size US 8 (5.0 mm) double point needles
  • 2 stitch holders
  • stitch marker
  • yarn needle

Download the Baby Cakes Customized Sweater Free Pattern

Click the image below to download the free sweater pattern from Yarnspirations. Save it to your computer or print it out and you're ready to go!

Free sweater pattern for babies - Marly Bird

Watch the video

Get extra help in this in-depth video by Marly including step-by-step instructions, tips, and tricks. Now you have all you need for a successful project.

Grab your knitting gear, and pattern, and watch this video. You'll be off and running in no time.

Happy knitting!

We hope you enjoy knitting up this cute little sweater. Show us how you did in the Facebook Group!

For more baby knitting patterns, try these links below:

13 Free Knit and Crochet Baby Projects

Knit Baby Cardigan

Knit Baby Booties

Crochet and Knit Unicorn Patterns

Frequently Asked Questions

What yarn do I need for this sweater?

Honestly… you'll want to grab some Caron Baby Cakes yarn for this one! It's a worsted-weight yarn that's exclusively at Michaels, and the best part is it self-stripes, so no fussing with color changes while you knit.

Is this sweater pattern difficult to knit?

So here's the thing… it's a pretty simple knit, mostly 1×1 rib and stockinette stitch. Don't let the color changes fool you, it's easier than it looks!

What sizes does the Baby Cakes sweater fit?

Yes! This cute little sweater is knit from the top down and is designed to fit sizes 6 months all the way up to 24 months, perfect for little ones growing so fast.

Can I really add a name to the sweater?

You bet! The pattern mentions that after you knit the sweater, you can use hand embroidery to add the baby's name. How sweet is that?

Where can I find the pattern?

You're in luck! You can download the free Baby Cakes Customized Sweater pattern by clicking the image in the blog post. It'll take you right over to Yarnspirations, and you can save it or print it out.

Filed Under: Free Patterns

Game Day Mystery Make-Along 2023

January 24, 2023 By Marly Bird Leave a Comment

Get ready for Game Day Mystery Make-Along 2023. Join us for a thrilling mystery make-along event for knitters and crocheters on Super Bowl Sunday! The event is COMPLETELY FREE and open to ALL SKILL LEVELS.

Kick-off the event early Sunday morning, participants will receive clues and instructions for a secret knitting or crocheting project that will be revealed just before the start of the game.

Whether you're a die-hard football fan or just looking for something to do during the commercials, this event is the perfect way to mix crafting and athletic competition. Don't miss out on the fun, register now!

โญ๏ธ The free content for this event will remain up on the blog until Feb. 28, 2023

Two colorful flyers promoting a 6th annual Game Day Mystery Make-Along, featuring cheerful graphics and event details.

Affiliate Disclosure: This post contains affiliate links. To learn more please visit my privacy policy here๐Ÿ’–

History of the Game Day Mystery Make-Along

It is not uncommon for crafting communities to organize make-along events, where participants work on a project together, often over a period of time and with reveals or clues along the way. These events can be organized online through social media or in-person at crafting stores or groups. The idea of the Marly Bird Game Day Mystery Make-Along event on Super Bowl Sunday is a creative take on combining the enthusiasm of sport events with the hobby of crafting (and a little food and drink thrown in there for fun).

We started this annual event in 2018. Which makes 2023 the sixth annual event. We're excited to keep growing this each year. More and more people participate each year. We get better at streamlining the whole process, design new creative projects, and keeping it all running smoothly.

Still not sure what this event is, read our Game Day Mystery Make-Along page. That has all of the details and links you to the patterns from past events.

Gradient yarn in shades of blue and teal, displayed for a knitting or crochet project. Soft, smooth texture.

When Is Game Day Mystery Make-Along 2023

Game Day is a free event (with a MVP Package paid upgrade) that happens on Super Bowl Sunday, February 12, 2023.

All the action begins that Sunday morning and goes just up to the start of the big football game.

One clue is given EVERY TWO HOURS: a link to each of the clues is added at the bottom of this post as they become available.

Which means, if you are participating in the free event held here on the blog, you'll want to bookmark this page and come back to it every 2 hours.

Gradient yarn in shades of blue and teal, displayed for a knitting or crochet project. Soft, smooth texture.
A cartoon character on a couch enjoying snacks like chips and a sandwich while cheerfully holding knitting supplies.

Once again, I've teamed up with Robyn Chachula, my partner in yarny fun, to make this year our best year yet! Our goal with this years project is to make something that is a neck accessory with some flare. It is visually appealing, complex enough to keep both new and advanced crafters interested, and will not take as much time as say a Ruana *wink.

It should be a little challenging without you wanting to throw your hook or needles across the room. We think you will enjoy working on our project and have enough time to finish by the end of the game.

Knitting and crochet blog featuring vibrant "Game Day" designs with playful characters and bold colors.
No longer available.
Gradient yarn in shades of blue and teal, displayed for a knitting or crochet project. Soft, smooth texture.

What is the MVP Package?

Similar to our Marly Bird First Fall MAL & the Silver Platter Experience, the MVP package is located in the Marly Bird House!

For the first time EVER, you can upgrade to theย Knitting MVP Packageย or Crochet MVP Package each at the low price of $25.

That is right, each craft is offered as its very own project workshop.

In each MVP Package you get:

  • Unlimited Access to Project Workshop Videos (Valued at $100)
  • Half-Time Live Q&A Event (Priceless)
  • Ad-Free PDF of each patterns clue during the event (Time Saver)
  • Full Ad-Free PDF of the patterns after the event (Valued at $10)
  • โญ๏ธBonusโญ๏ธ $10 coupon to the Marly Bird Ravelry Store (Valued at $10)
  • โญ๏ธBonusโญ๏ธ 3 additional Project Workshops with patterns and videos (Valued at $110 each)
  • โฐ and everything is available ONLINE to work with YOUR TIME โฐ

Total Value of MVP Package = $450 

Today's Limited Time Offer Price = $25 *NO LONGER AVAILABLE!

When you joined the Game Day MVP Package you get to sit back, relax and let us serve you this SUITE event.  


Colorful crochet project materials, including patterns and guides, displayed on various devices and printed sheets.
Crochet Only MVP Package
Colorful digital materials for knitting, featuring game day themes and patterns, displayed on various devices.
Knit Only MVP Package
NO LONGER AVAILABLE

โญ๏ธ The free content for this event will remain up on the blog until Feb. 28, 2023

Gradient yarn in shades of blue and teal, displayed for a knitting or crochet project. Soft, smooth texture.

โญ๏ธThe LINK to each play/clue is added below! Keep scrolling to get links!

Feel free to work on each section as it is released or wait until Monday to work the whole project in one shot.

It is best to bookmark this page as you will come back to it throughout the event if you are following along with the free pattern. If you don't know how to bookmark on google, I did a fun video to show you a couple tricks that I find useful.


Gradient yarn in shades of blue and teal, displayed for a knitting or crochet project. Soft, smooth texture.

What Are We Making for Game Day Mystery Make-Along 2023?

IT IS A MYSTERY! I can't tell you!!! Okay, so I know what we are making as I designed it but I can't tell you any more than it is a wearable accessory for the neck…my take on a VERY POPULAR wearable. This event is a MYSTERY make along so you won't know what the final project will look like until you make all of the clues.

I can tell you this year, we are making a smaller project than the poncho, ruana, or a hat; and we are incorporating some new materials never before used in a Game Day Mystery Make-Along.

It is something that can be worn year round and in any climate.

You might have an idea what this project is but you won't know the final look until the end.

We are doing videos for each section this year to help you along. The videos will be linked in the clue instructions and will be available on the Marly Bird YouTube Channel for a limited time!

*Note: the video content will be evergreen with the MVP Packages.

Banner promoting YouTube knitting tutorials by Marly Bird, featuring bold text and a playful logo design.

Gradient yarn in shades of blue and teal, displayed for a knitting or crochet project. Soft, smooth texture.

Supplies Needed for the Game Day Mystery Make-Along 2023

This years supplies are unique for this project. There are some additional tools needed this time around but they can be easily reused. Along with the tools you will find extra materials outside of the scope of a usual knit or crochet project.

We know it can be difficult to gather supplies for any event but especially a mystery make-along and even more so when the supplies are things you have never used before.

But don't worry, we would not leave you hanging out to dry!

Marly Bird and Birds of a Feather Game Day Kit featuring colorful yarn and playful design elements.

???? We've joined forces with Jill Wiseman Designs to put together bead kits just for this event to make the whole process easy for you!

Each kit includes all the beading supplies needed (except the tools and yarn) for the Knitting project or the Crochet project.

Please visit  https://shop.jillwisemandesigns.com/marly-bird-game-day-kits/ and select one of these limited edition kits to get exactly what you need.

Please find the craft you will be following during Game Day and get the full list of supplies.

Cartoon bird in a sports jersey holding yarn and crochet hook with football-themed elements for a game day project.

CROCHET
The Thread-

Yes, you read that right.  We are using thread, not yarn for our special Game Day Mystery Make-Along 2023 project.  

We have teamed up again with WeCrochet.ย  You canโ€™t go wrong with their great line of colors and a discount that makes this project very affordable!

We know not everybody wants to purchase new yarn for a mystery project. But I will tell you this project was designed with a thread that will hold up to glass beads being added to it. If you choose an alternative thread, please choose one that is the same weight and similar fibers. When picking out colors, think about matching the thread with the intended beads and chain.

  • Thread: size 10, 2 colors.
    • Sample made with WeCrochet, Curio Size 10,(100% Mercerized Cotton, 721 yds / 659 m, 3.5 oz/ 100 g, CYCA#0 lace):
      • 1 ball each of 2 colors

The Hook-

This project is worked on a very small steel hook.  For your hand comfort, look for a hook with a nice grip, it will help keep your tension as well as your comfort.  I know these hooks can look scary if you have not tried them before, but Game Day is all about trying something new.  You can use any hook from 1.5mm-2.0mm and still achieve the same desired look. 

  • Steel Hook 2.0mm 

Notions and Beading Supplies

This is a different project than any other mystery make-along from Marly Bird. Because of that, there are supplies you might not readily have on hand. I am also going to assume that some of you may not even be familiar with these supplies.

I've joined forces with Jill Wiseman Designs to put together bead kits just for this event to make the whole process easy for you! These kits include all the beading supplies needed (except the tools and yarn)!

Please visit  https://shop.jillwisemandesigns.com/marly-bird-game-day-kits/ and select one of these limited edition kits to get exactly what you need.

However, if you prefer to get each item a la cart, Iโ€™ve linked each item to Michaels. These are affiliate links but I know they will help make it easier for you to find the necessary items. 

This project is so much more than just crocheting which is why there is a larger supply list. We pared down the list as best we could to just the necessary items.

If purchasing your beading supplies a la carte, make sure to match the metal of your chain, jump rings, toggle clasp, and eye pins.  Meaning make sure you choose all silver, gold, or bronze for each of those.  ????Do not mix your metals. 

  • Tools:
    • Wire Cutters
    • Round Nose Pliers and Flat Nose Nose Pliers
    • Large Eye Beading Needle
    • Fabric Stiffener (Robyn likes Mod Podge Stiffy, but any will work.)
    • Rust-Proof Pins and Parchment Paper
    • Felt Square [or beading mat] (optional)
  • Beading Supplies (a la cart links) *these supplies are already in the kit*
    • (3) 14 mm glass beads
    • (130) Size 8/0 seed beads
    • 20″ [51 cm] chain
    • (26) 3mm jump rings
    • (6) eye pins
    • Toggle Clasp
Gradient yarn in shades of blue and teal, displayed for a knitting or crochet project. Soft, smooth texture.

Colorful illustration featuring a cartoon bird in a sports jersey holding knitting needles and yarn, set against a vibrant ba

KNITTING

The Yarn-

We have chosen a yarn from the WeCrochet yarn collection.ย 

Their yarn is very lovely and available to everybody. We really like the colors and the way it feels in our hands, plus the discount made this project very affordable!

We know not everybody wants to purchase new yarn for a mystery project. But I will tell you this project was designed with a sport worsted weight yarn that will hold up to glass bead being added to it. If you choose an alternative yarn, please choose one that is the same weight and similar fibers. 

No, this is not a colorwork project and BUT, you could use up to 3 colors if that is something you are interested in doing. Be sure to match the yarn with the intended beads.

  • Yarn: sport worsted weight yarn, 1 color.
    • Sample made with WeCrochet, Galileo Sport Weight,(50% Merino Wool, 50% Viscose from Bamboo, 131 yds / 120 m, 1.76 oz/ 50 g, CYCA#2 sport):
      • Any Color – 1 ball

The Needles-

This project is worked on very small needles to get a beautiful finished look. The needle size for this weight yarn is typically a size 3, 4, or 5. But for our project we need to have size 1 needles. 

We will not be working in the round but working with either a couple of double pointed needles or longer circulars with a long tip made the process easier for me. Notice I did add straight needles as an option because they will work, but they are not my preference. 

I also want to mention that the point on your needle is VERY important. If it is too dull or blunt you will have a difficult time with this project. I highly recommend precision point or stiletto point needles. The link below is to Signature Needle Arts as they are my favorite but choose a needle that is best for you.

  • Needles: Size 1 (2.25 mm) straights, set of 4 double pointed needles or 32″ circular. HIGHLY recommend using needles with a precision tip–Or any size to obtain gauge.

Notions and Beading Supplies

This is a different project than any other mystery make-along from Marly Bird. Because of that, there are supplies you might not readily have on hand. I am also going to assume that some of you may not even be familiar with these supplies.

I've joined forces with Jill Wiseman Designs to put together a bead kit just for this event to make the whole process easy for you! These kits include all the beading supplies needed except the tools and yarn!

Please visit  https://shop.jillwisemandesigns.com/marly-bird-game-day-kits/ and select one of these limited edition kits to get exactly what you need. (No Longer Available)

Colorful logo for a knitting and crochet Game Day Kit featuring Marly Bird and Birds of a Feather Productions.

However, if you prefer to get each item a la cart, Iโ€™ve linked each item to Michaels. These are affiliate links but I know they will help make it easier for you to find the necessary items. 

This project is so much more than just knitting which is why there is a larger supply list. We pared down the list as best we could to just the necessary items, and listed the optional items separately. But please know the optional items will make things easier. 

  • Notions:
    • Chenille needle (must have sharp needle for seaming)
    • Wire Cutters
    • Chain Nose Pliers
  • Optional Notions
    • Felt Square [or beading mat] (optional)
    • Crimping Pliers (optional)
    • Bead Stoppers (optional)
  • Beading Supplies (a la cart links) *these supplies are already in the kit*
    • 3 wooden beads, 25mm
    • Size 6 seed beads, 30 grams (one color or multicolor to go with the yarn)
    • Variety of mixed beads that are large and small. 
      • Recommend getting a couple strands of strung beads that have a complete blend of beads and components. Choose two strands that match if you are looking for symmetry. 
        • Jesse James Beads 
        • Focal Beads at Michaels
    • Beading wire (Medium)
    • 1 toggle clasp (any metal you wish)
    • 2mm Tube Crimps (two)
    • Big Eye Beading needle
Gradient yarn in shades of blue and teal, displayed for a knitting or crochet project. Soft, smooth texture.

How To Participate In Game Day Mystery Make-Along 2023?

  • Register for the event!
  • Join the Marlyโ€™s Minions Facebook Group where we chat about the event all day long.
  • Get your materials.
  • Mark you calendar! 
  • Return to this blog first thing in the morning on February 12, 2023 to get started!
  • Return EVERY TWO HOURS throughout the day for the clues, which you'll find linked below (or get the clues in the MVP Package in the Marly Bird House.
  • As you work on the project, post progress pictures on Facebook and Instagram with the tag #GameDayMakeAlong. When you do, youโ€™ll have the chance to win various surprise mystery prizes!
  • Grand Prize details are below so keep reading.
  • ETA: โญ๏ธ The free content for this event will remain up on the blog until Feb. 28, 2023
Gradient yarn in shades of blue and teal, displayed for a knitting or crochet project. Soft, smooth texture.

Game Day Mystery Make-Along 2023 Prizes

We have teamed up with some awesome vendors to bring you HOURLY prizes for this year's Game Day!!! Keep your eye out in the Marly's Minions: A Marly Bird Bicrafty Community Facebook group to enter!!

Also, last year we introduced MVP giveaways and we are bringing it back this year! 

Our โ€œrefereesโ€ (the Marlyโ€™s Minion Modmins) will nominate โ€œplayersโ€ (YOU!) for six specific categories listed below. Each of these players will get 1 free product of choice from the Marly Bird House!! 

  1. Sportsmanlike Conduct – answering othersโ€™ questions and generally being helpful
  2. The Cheerleader – someone who is going above and beyond to encourage other โ€œplayersโ€ and boost morale
  3. The Flash – someone who finishes so quickly they make MULTIPLE projects
  4. The Underdog – this person faces setbacks but continues to persevere
  5. The Rookie – someone who is new to the craft they chose (knit or crochet) and shows up and works hard to finish
  6. MVP – this is the player who essentially embodies it all – helpfulness, efficiency, kindness, and morale boosting

GRAND PRIZE – EVERY PRODUCT IN THE MARLY BIRD HOUSE!!!!

all players are eligible for this prize! Just post your finished item in the Facebook thread (or email to submissions@marlybird.com if you do not have Facebook). The winner is chosen entirely at random from the finished item threads and emails!

Winners will be chosen and announced on February 15th in the Marly's Minions Facebook group!

***This giveaway is VOID where prohibited and limited to the continental US***

โ€œIt's not whether you win or lose, it's how you play the game.โ€ 

โ€• Grantland Rice

Gradient yarn in shades of blue and teal, displayed for a knitting or crochet project. Soft, smooth texture.

Game Day Mystery Make-Along

Get the Game Day Make-Along โ€œPlaysโ€ Here

โญ๏ธ The free content for this event will remain up on the blog until Feb. 28, 2023

Be sure to come back EVERY TWO HOURS from 8 am to 6 pm on Sunday, February 12, 2023 to see the new play for that hour.

The link to the play will be added to the time below. Simply CLICK the time you want.

Colorful crochet project materials, including patterns and guides, displayed on various devices and printed sheets.
Crochet Only MVP Package >>Click the Image<<
Colorful digital materials for knitting, featuring game day themes and patterns, displayed on various devices.
Knit Only MVP Package >>Click the Image<<

Get the VIP MVP treatment inside the Marly Bird House! Upgrade to the MVP Package and get everything in one place + more project workshops & patterns!

Two cartoon characters celebrating with raised hands, surrounded by colorful text saying "YOU DID THE THING!!
Congratulations! Be sure to share your finished projects!
Gradient yarn in shades of blue and teal, displayed for a knitting or crochet project. Soft, smooth texture.

WAIT, there is more! During the Game:

The fun doesnโ€™t stop once the game starts. Be sure to join us for a game of BINGO during the game. Just grab a card at the link below! You can start marking as soon as the game starts, and there will be an entry thread in the Marlyโ€™s Minions FB page for your finished cards. All you need is one regular, old-fashioned BINGO, so horizontal, vertical, or diagonal!

Get the 2023 Bingo Card >>Click Here <<

Colorful illustration of a cartoon bird in a football jersey holding a yarn ball, with bingo cards and game dรฉcor.

Are you excited? Share with us on social media what yarn youโ€™re using and what colors you like ๐Ÿ™‚ Be sure to use #gamedaymakealong #mmmdi #marlybird in your posts.

Go Team!

Frequently Asked Questions

What exactly is the Game Day Mystery Make-Along?

Oh, it's such a fun event! We all get together on Super Bowl Sunday to crochet or knit a surprise project… It's totally free and open to everyone, no matter your skill level.

When does the free content from the Make-Along end?

So here's the thing… the free content for this Game Day event will be available on the blog until February 28, 2023. Make sure you grab everything you need before then!

What kind of project are we making this year?

Honestly… it's a MYSTERY! I can tell you it's a neck accessory with some flair, something visually appealing and a little challenging but not too much. You'll have to make all the clues to see the final project!

Do I need special supplies for this Make-Along?

Yes! This year's project is a bit different and uses some unique supplies, like thread instead of yarn for crochet, and some beading supplies. But don't worry, there are kits available, or you can gather them yourself!

How do I participate in the Game Day Mystery Make-Along?

It's easy! Just register for the event, grab your materials, and come back to the blog on Super Bowl Sunday. You'll get clues every two hours right up until the game starts!

Filed Under: Beading and Jewelry, Dibble Dabble Inspiration, Make-Alongs, Pattern

Easy Crochet Bonnet Pattern || Riverside

January 22, 2023 By Marly Bird 2 Comments

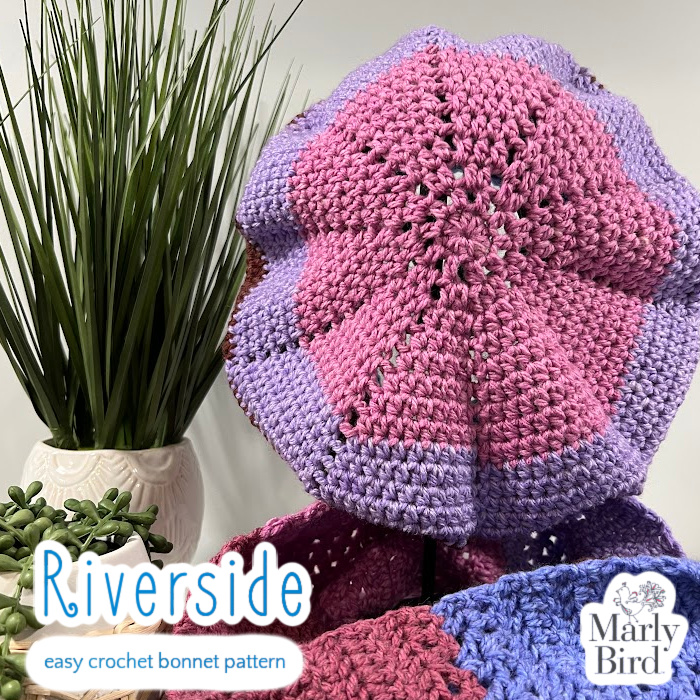
Looking for an easy crochet bonnet pattern you can wear and not worry about hat hair?? Seriously, you can wear this beret, tam, or bonnet over your updo and not have crushed hair! So, you can make this simple on-the-go pattern for beginner crocheters with less than one ball of Caron Cakes. It works up super quickly! Pair it with the easy crochet scarf/cowl pattern for a crochet accessory set!
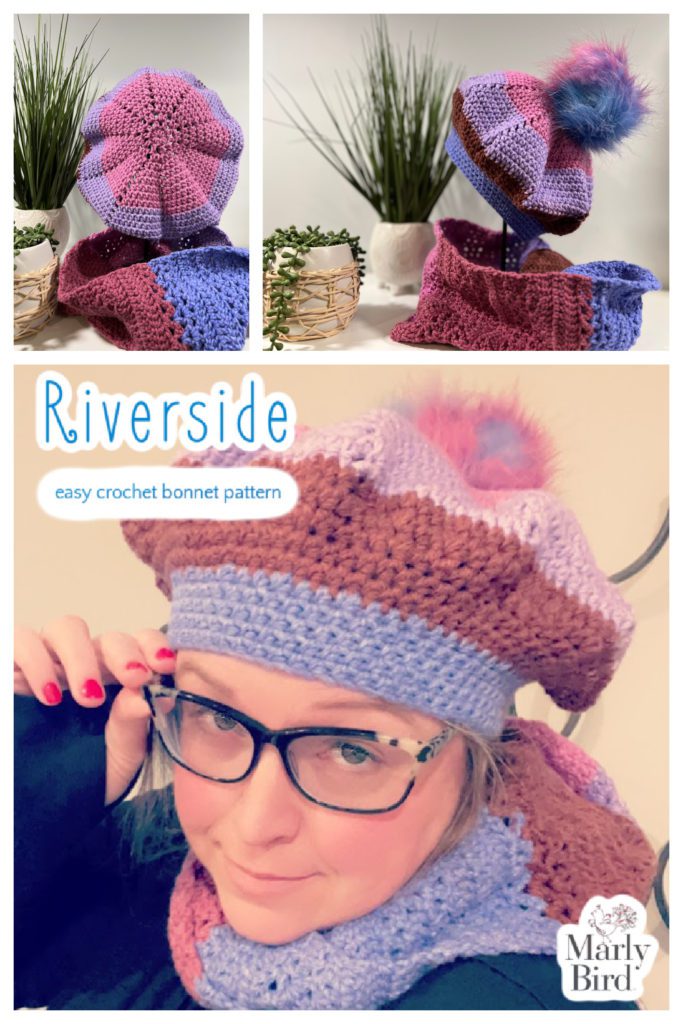
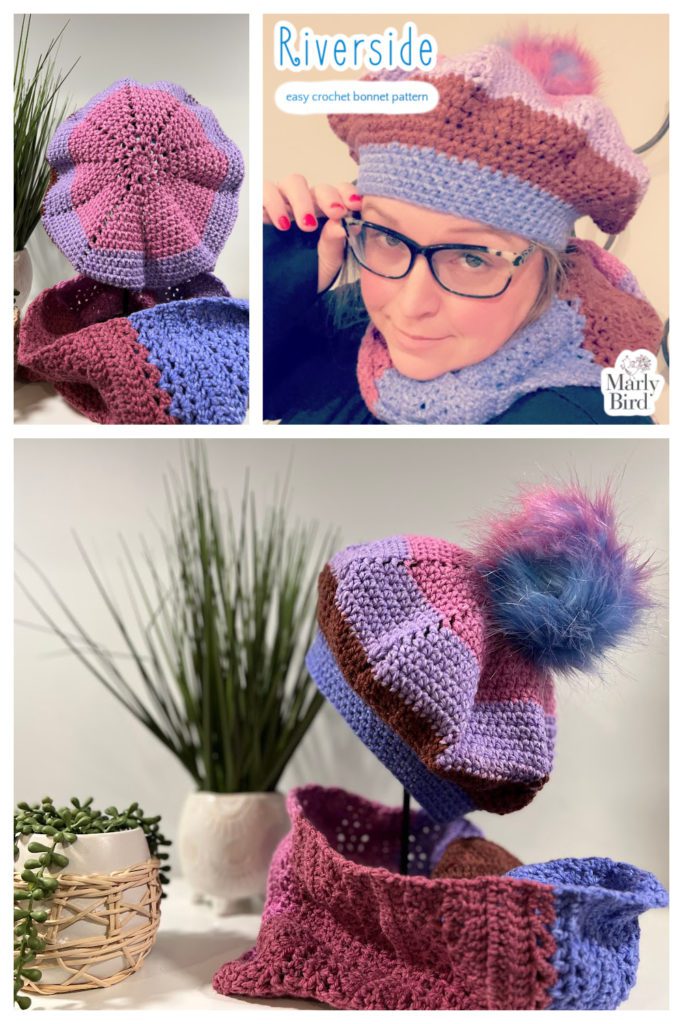
3-image collage: Riverside Easy Crochet Bonnet. 1. Top of bonnet shown in pink and lilac, with Riverside Crochet Cowl, beside 2 potted plants. 2. Side view of bonnet worked in pink, lilac, brown, and blue yarn, on stand with large fur pompom attached, cowl below, beside potted plants. 3. Marly Bird wearing bonnet looking up at camera.
Easy Crochet Bonnet Pattern (and matching scarf/cowl)|| Riverside
Read more: Easy Crochet Bonnet Pattern || Riverside

Oombawka Design Crochet and The Stitchin Mommy asked me to be a part of the #ScarfofTheMonth. I quickly said, “SURE!” As I knew I could get a new crochet design completed in time.

Well, time is a funny thing, and it completely sneaks up on you. Before I knew it, my scarf was due in less than a week and I'd soon be leaving for a trip to Florida. You can read all about that here.

Though I did manage to get that pattern completed in time, I had to have a hat done for the #HatofTheMonth too! I knew I wanted the hat and scarf to look somewhat alike, so I chose the same yarn and colorway.

Is this a Bonnet, a Beret, Or a Tam?

Well, to answer that, let's have an understanding of the subtle differences between all of them. Sometimes, a crochet bonnet is a voluminous head covering that covers the top and sides of the head. It can have a brim that can be turned up or down.

A beret is typically a hat that's a soft, visorless cap. It has a close-fitting headband and a wide, round top, often with a tab at its center.

A tam is a type of beret. It's typically made with a more voluminous top. This gives it a slightly taller, rounder shape and a tighter fit around the head. But tams are often made with a thicker, more substantial fabric than traditional berets. They may have an additional band or ribbon around the base of the crown, helping keep it securely in place.

As you can see, you can call this headwear anything you want. But to me, it looks like a bonnet, so I am calling it the Riverside Bonnet.

What Makes This Crochet Bonnet Easy?

The pattern is not hard to follow and is super simple to memorize. It uses mainly one stitch, the half double crochet. As long as you keep track of your stitch count while working each round, it'll be smooth sailing.

This hat is made from the top to the bottom. Work increases through the entire crown and then decreases to bring the circumference of the piece to a wearable size.

The only finishing on this easy crochet bonnet is to weave in the beginning and ending tail. That's it!

See, EASY!
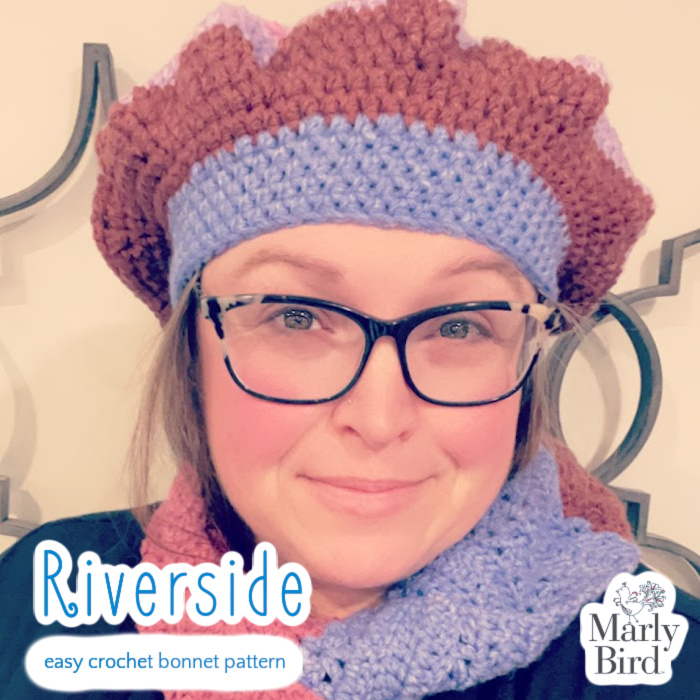
Marly Bird wearing Riverside Easy Crochet Bonnet and cowl, with pale pink and metalwork background.

Hat of the Month Crochet-Along 2023 || Guest Designer Easy Crochet Bonnet Pattern January

The Riverside Crochet Bonnet is a free pattern here on the Marly Bird blog. Although you could easily refer to this as a beret or a tam, to me, it's a bonnet.

As mentioned, this is part of the Hat of the Month Crochet-Along 2023.

For the entire year of 2023, on the 4th Sunday of every month, you will get FOUR new hat patterns. One from Amy, one from Rhondda, and one from a guest designer (this month, it's ME).
Hat of the Month CAL advertisement.

As you are working on your hats, be sure to add them to your projects on Ravelry. I've already listed this pattern there for your convenience. https://www.ravelry.com/patterns/library/riverside-9
Green circular patch with a stitched outline featuring a lowercase letter "r" in the center.
Psst: Favorite and Queue this pattern on Ravelry
3 image collage of Riverside Easy Crochet bonnet. Same 3 images as before  in different layout. Larger image is side view of bonnet and cowl.

Easy Crochet Bonnet Pattern || Riverside
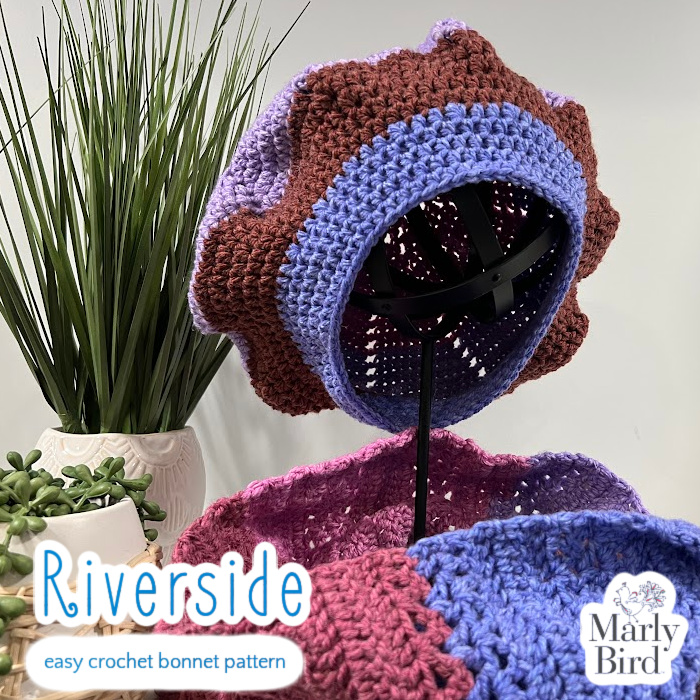
View of brim and inside of Riverside Bonnet on black metal stand, with Riverside Cowl around stand base, with potted plants. Marly Bird

RIVERSIDE EASY CROCHET BONNET

Designed by Marly Bird

SKILL LEVEL

Easy

MEASUREMENTS

To Fit

One Size to fit Adult

Finished Measurements

20โ€ circumference

Gauge 

31 dc = 9โ€ [23 cm]; use any size ho13.25 hdc sts and 10 hdc rounds = 4โ€ [10 cm]; use any size hook to obtain the gauge.ok to obtain the gauge. 

MATERIALS

Yarn 

Yarnspirations, Caron Cakes  (80% acrylic, 20% wool, 445 yds / 407 m, 8.5 oz/ 240 g, CYCA 4  worsted), Color Me Bold Collection #caroncakes 

Blackberry Jelly 1 ball

Hook

Size H/8 [5.0 mm]

Notions 

Tapestry needle

ABBREVIATIONS

Ch – Chain(s) 

Cont – Continue

Hdc – Half Double Crochet 

Hdc2tog – Half Double Crochet Two Together (review modified stitch in special stitches)

RS – Right Side 

Sc – Single Crochet

Sp(s) – Space(s) 

St(s) – Stitch(es)

Stacked Dc – Stacked Double Crochet 

Tch – Turning Chain

WS – Wrong Side

SPECIAL STITCHES 

โญ๏ธ Adjustable Ring: Make a large loop with the yarn leaving a 4โ€ tail. With the hook, draw the working yarn through the loop; Ch 1, follow the pattern instructions from here. Once the first rnd of sts is complete, pull the tail snugly to close the ring. 

โญ๏ธ Half Double Crochet: Yarn over hook, insert hook into indicated stitch, yarn over and pull up a loop; yarn over and draw through all three loops on hook.

โญ๏ธ Half Double Crochet Two Together: worked over two stitches total – [Yarn over, insert hook in next st or ch, yarn over and draw up a loop] twice, yarn over and draw through all 5 loops on hook.

โญ๏ธ Half Double Crochet Two Together modified: worked over two stitches total – Yarn over hook, insert hook into next st or ch, yarn over and pull up a loop, do not yarn over hook before working into next stitch, insert hook into next st or ch, yarn over pull up a loop, yarn over and pull through all 4 loops on hook.  

NOTES

  • Crocheted from top to bottom.
  • Crocheted in joined rounds throughout. 
  • Let the color change as it may.

VIDEO

  • How to Make an Adjustable Ring >> Click for Video  Help <<
  • How to Weave in Tail of Adjustable Ring >> Click for Video Help <<
  • How to Half Double Crochet >> Click for Video Help <<
  • How to Add Faux Fur Pom >> Click for Video Help <<
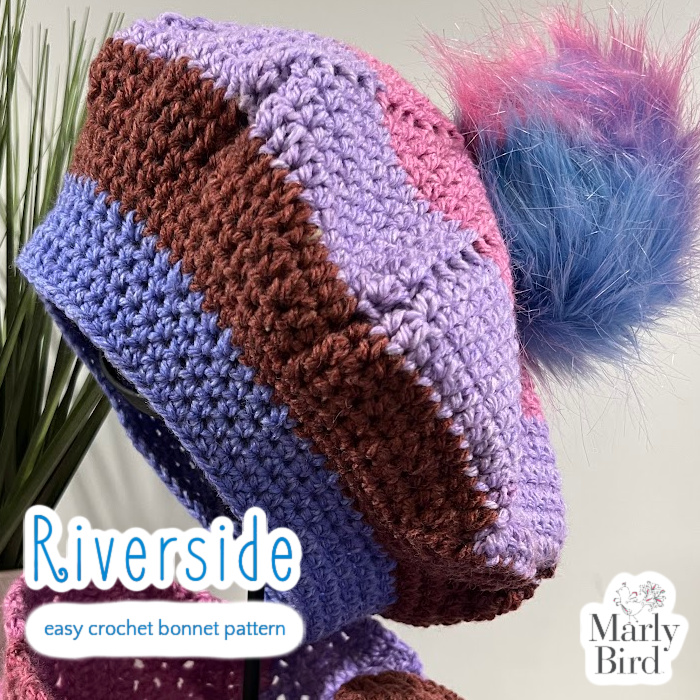
Close up side view of Riverside Bonnet with large blue, pink, purple fur pompom.

RIVERSIDE EASY CROCHET BONNET PATTERN

GROW

To Unlockย Exclusive Subscriber Contentย click the Box below and join for free by simply adding your email and creating a password! If you are having troubles, clear your cache or reset your password or login to the Grow Publisher Portal.

>> Learn More About Grow Here <<

I'm thrilled to share this amazing pattern with you, many patterns on my blog are absolutely free! I kindly request that you don't copy and paste or distribute this pattern. Prefer an ad-free experience? Buy a digital PDF pattern for a small fee from one of my online stores for a seamless crafting journey. 

I appreciate your support and readership. You are the reason I can keep doing what I love and sharing it with others. So, thank you from the bottom of my yarn-loving heart! Disclosure: This post contains affiliate links, meaning I get a commission if you decide to make a purchase through my links at no cost to you.

CROWN

Make an adjustable ring

10 sc in ring, join with a slip stitch to first sc to begin working in the round. Ch 1. Do not turn now and throughout.

Round 1: *Hdc in sc, (starting chain does NOT count as st), ch 1; repeat from * round, join with a slip stitch in first hdc, ch 1 — 10 hdc, 10 ch-1 spโ€™s.

Round 2: *Hdc in hdc, hdc in ch-1 space, ch 1; repeat from * around, join with a slip stitch in first hdc, ch 1 โ€” 20 hdc, 10 ch-1 spโ€™s. 

Round 3: *Hdc in 2 hdc, hdc in ch-1 space, ch 1; repeat from * around, join with a slip stitch in first hdc, ch 1 โ€” 30 hdc, 10 ch-1 spโ€™s. 

Round 4: *Hdc in 3 hdc, hdc in ch-1 space, ch 2; repeat from * around, join with a slip stitch in first hdc, ch 1 โ€” 40 hdc, 10 ch-2 spโ€™s.

Round 5: *Hdc in 4 hdc, hdc in ch-2 space, ch 2; repeat from * around, join with a slip stitch in first hdc, ch 1 โ€” 50 hdc, 10 ch-2 spโ€™s.

Round 6: *Hdc in 5 hdc, hdc in ch-2 space, ch 2; repeat from * around, join with a slip stitch in first hdc, ch 1 โ€” 60 hdc, 10 ch-2 spโ€™s.

Round 7: *Hdc in 6 hdc, hdc in ch-2 space, ch 2; repeat from * around, join with a slip stitch in first hdc, ch 1 โ€” 70 hdc, 10 ch-2 spโ€™s.

Round 8: *Hdc in 7 hdc, hdc in ch-2 space, ch 2; repeat from * around, join with a slip stitch in first hdc, ch 1 โ€” 80 hdc, 10 ch-2 spโ€™s.

Round 9: *Hdc in 8 hdc, hdc in ch-2 space, ch 2; repeat from * around, join with a slip stitch in first hdc, ch 1 โ€” 90 hdc, 10 ch-2 spโ€™s.

Round 10: *Hdc in 9 hdc, hdc in ch-2 space, ch 2; repeat from * around, join with a slip stitch in first hdc, ch 1 โ€” 100 hdc, 10 ch-2 spโ€™s.

Round 11: *Hdc in 10 hdc, hdc in ch-2 space, ch 2; repeat from * around, join with a slip stitch in first hdc, ch 1 โ€” 110 hdc, 10 ch-2 spโ€™s.

Round 12: *Hdc in 11 hdc, hdc in ch-2 space, ch 2; repeat from * around, join with a slip stitch in first hdc, ch 1 โ€” 120 hdc, 10 ch-2 spโ€™s.

Round 13: *Hdc in 12 hdc, hdc in ch-2 space, ch 2; repeat from * around, join with a slip stitch in first hdc, ch 1 โ€” 130 hdc, 10 ch-2 spโ€™s.

Close-up of crown of Riverside Bonnet showing shaping.

BODY

Rounds 14 & 15: *Hdc in 13 hdc, ch 1; repeat from * around, join with a slip stitch in first hdc, ch 1 โ€” 130 hdc, 10 ch-1 spโ€™s.

Treat all ch-1 spaces as a stitch to be worked with a hdc or part of the hdc2tog continue to round 16.

Round 16: *Hdc in 2 sts, hdc2tog next two sts; repeat from * around, join with a slip stitch in first hdc, ch 1 โ€” 105 hdc. 

Round 17: *Hdc in 3 sts, hdc2tog next two sts; repeat from * around, join with a slip stitch in first hdc, ch 1 โ€” 84 hdc.

Rounds 18 & 19: Hdc in each st around, join with a slip stitch in first hdc, ch 1.

BRIM

Round 20: *Hdc in 2 sts, hdc2tog next two sts; repeat from * around, join with a slip stitch in first hdc, ch 1 โ€” 63 hdc. 

Rounds 21- 23: Hdc in each st around, join with a slip stitch in first hdc, ch 1.

Round 24: Hdc in each st around, join with a slip stitch in first hdc.

Fasten off.

FINISHING

Fasten off, weave in ends. 

Add optional Pom Pom

Frequently Asked Questions

What is the Riverside Crochet Bonnet?

The Riverside is a free easy crochet bonnet pattern by Marly Bird… a baby bonnet with that beautiful tied-under-the-chin style that makes babies look impossibly adorable. It's designed for ease of construction and uses Caron Cakes yarn for its self-striping color magic. The bonnet is labeled “easy” which means if you can single crochet and follow basic shaping, you can make this. A perfectly sized handmade bonnet is one of the most beloved baby gifts in the yarn crafting world.

What yarn does the Riverside Bonnet use?

The pattern uses Caron Cakes… that beautiful self-striping yarn from Yarnspirations available at Michaels. The self-striping feature means the bonnet develops gorgeous color transitions automatically without any yarn changes. The worsted weight cotton-wool blend is soft against baby skin and the automatic color changes make an already charming project visually stunning. If you want to substitute, use a soft worsted weight yarn with around 383 yards… the self-striping effect won't replicate exactly but any soft worsted will work beautifully.

Is this bonnet safe for newborns?

Check the pattern and yarn materials for specifics, but a few general safety principles for baby bonnets: use machine washable yarn so the hat can be cleaned frequently. The ties need to be securely attached and not so long that they become a hazard. Weave in all ends very firmly so nothing pulls loose. Choose soft yarn that won't irritate a newborn's sensitive skin. The bonnet style (fitted cap with ties) works from newborn through several months as the baby grows. Always follow safe sleep guidelines for head coverings on sleeping babies.

What sizes does the Riverside Bonnet come in?

Check the pattern for the specific size range! Baby bonnets typically cover newborn through 12 months or so with different stitch counts for different head sizes. The bonnet shape naturally adjusts somewhat based on how tightly the ties are secured. For the most accurate fit, measure the baby's head circumference and compare to the pattern's finished measurements. If making a gift without knowing the exact baby's size, newborn to 3 months is a safe starting point for newborn gifts, or adjust up to 6 months if the baby is a bit older.

Can I make the Riverside Bonnet as a gift for a baby shower?

It's a wonderful baby shower gift! A handmade bonnet has a timeless, heirloom quality that mass-produced baby accessories can't match. The Caron Cakes coloring creates something visually beautiful that parents love displaying and photographing on their baby. Pair it with the matching Riverside Crochet Scarf/Cowl pattern for a complete parent-and-baby set. Bundle with a few other small handmade baby items… booties, a hat, a small blanket… for a complete gift that shows real thought and effort.
Filed Under: Crochet, Our Free Patterns, Pattern, Uncategorized

Easy Crochet Scarf Pattern || Riverside

January 15, 2023 By Marly Bird Leave a Comment

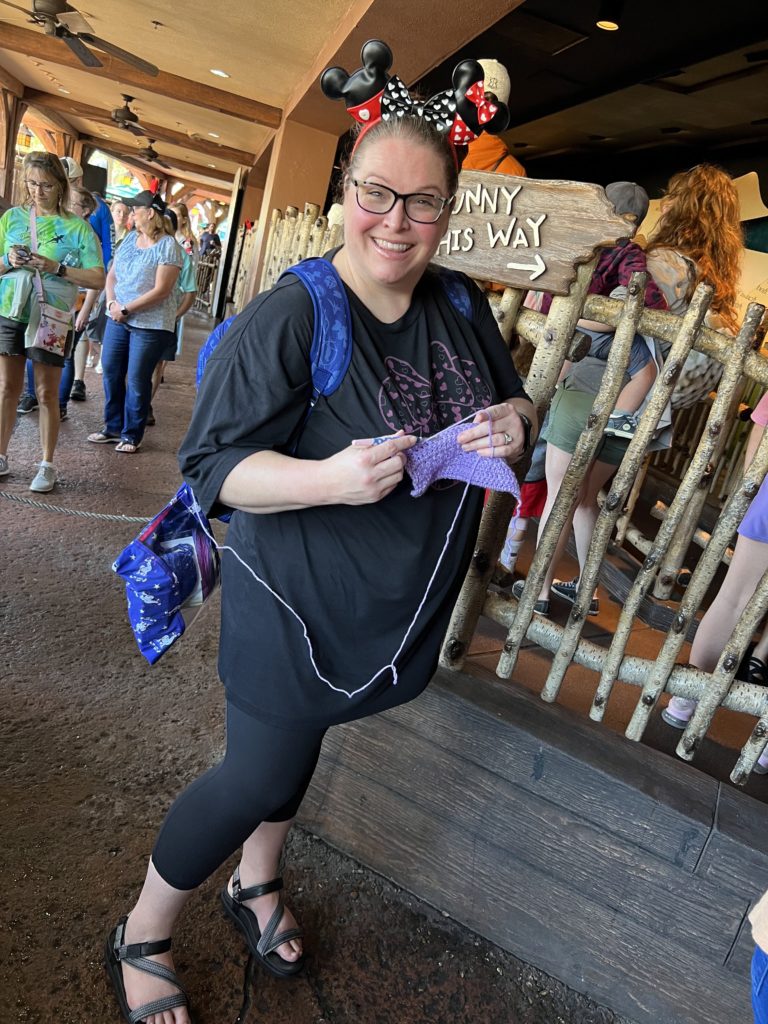
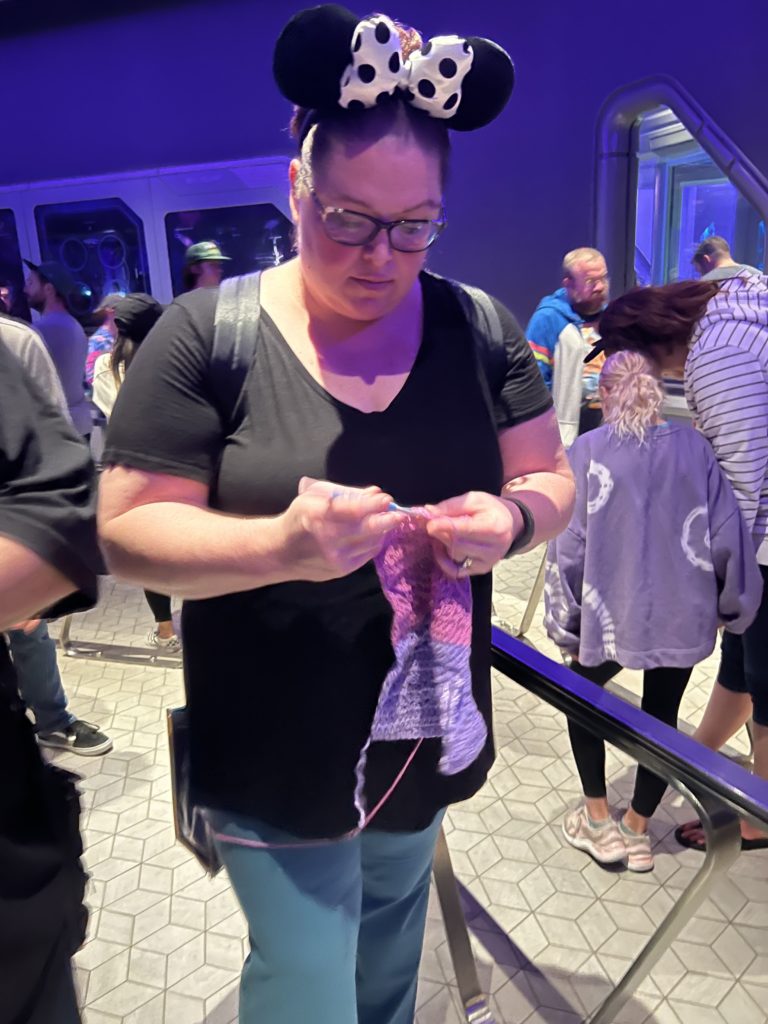
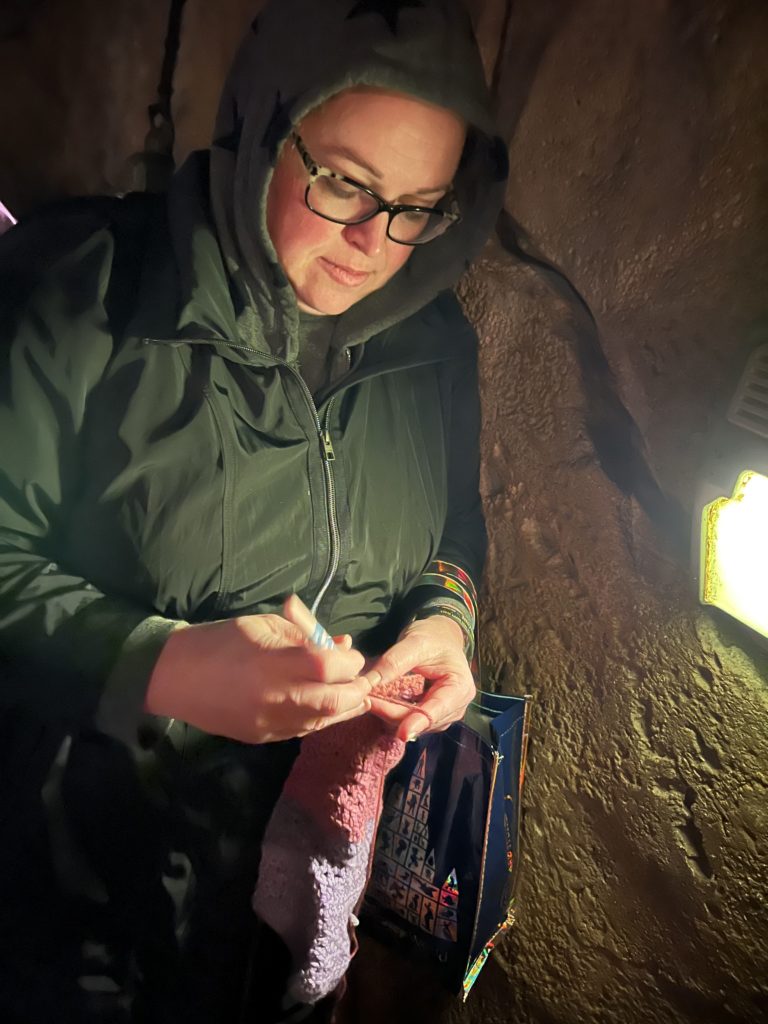
Looking for an easy crochet scarf pattern you can make anywhere? Seriously, this can be crocheted in a car, plane, or a line at Disney World! Simple on-the-go pattern for beginner crocheters (with a fun twist to make finishing a breeze).

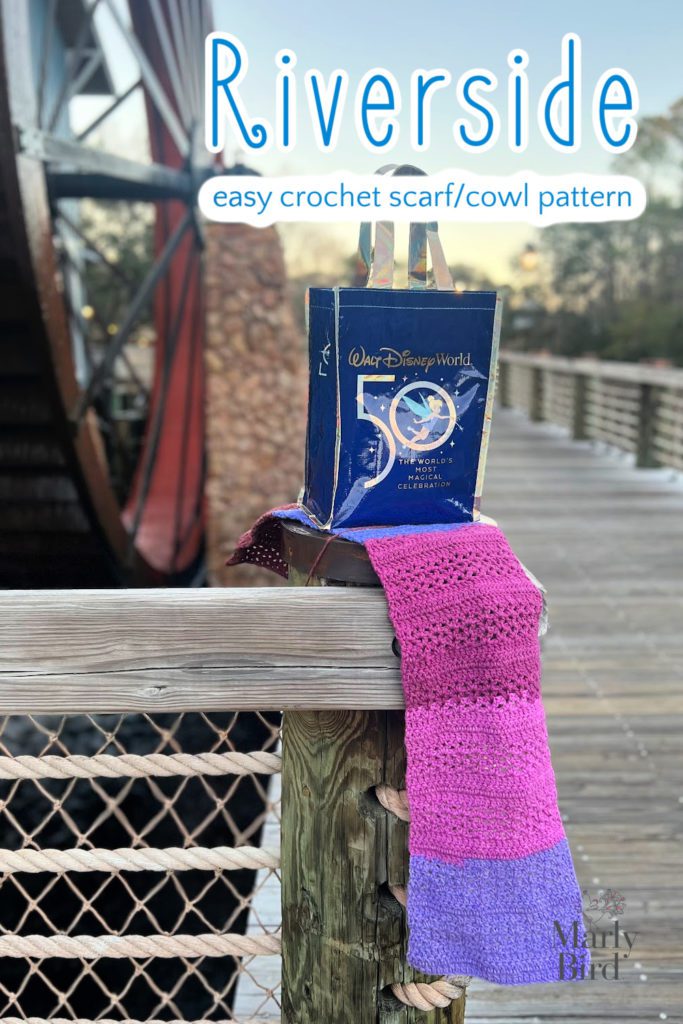
Riverside easy crochet scarf on wood background.
Easy Crochet Scarf Pattern || Riverside
Read more: Easy Crochet Scarf Pattern || Riverside

When I was asked to be a part of the #ScarfofTheMonth hosted by Oombawka Design Crochet and The Stitchin Mommy I quickly said SURE! I felt confident I could get a new crochet design complete in the time I had.

Well, time is a funny thing and it completely sneaks up on you. Before I knew it, my scarf was due in less than a week and I was getting ready to leave for a trip to Florida.

via GIPHY

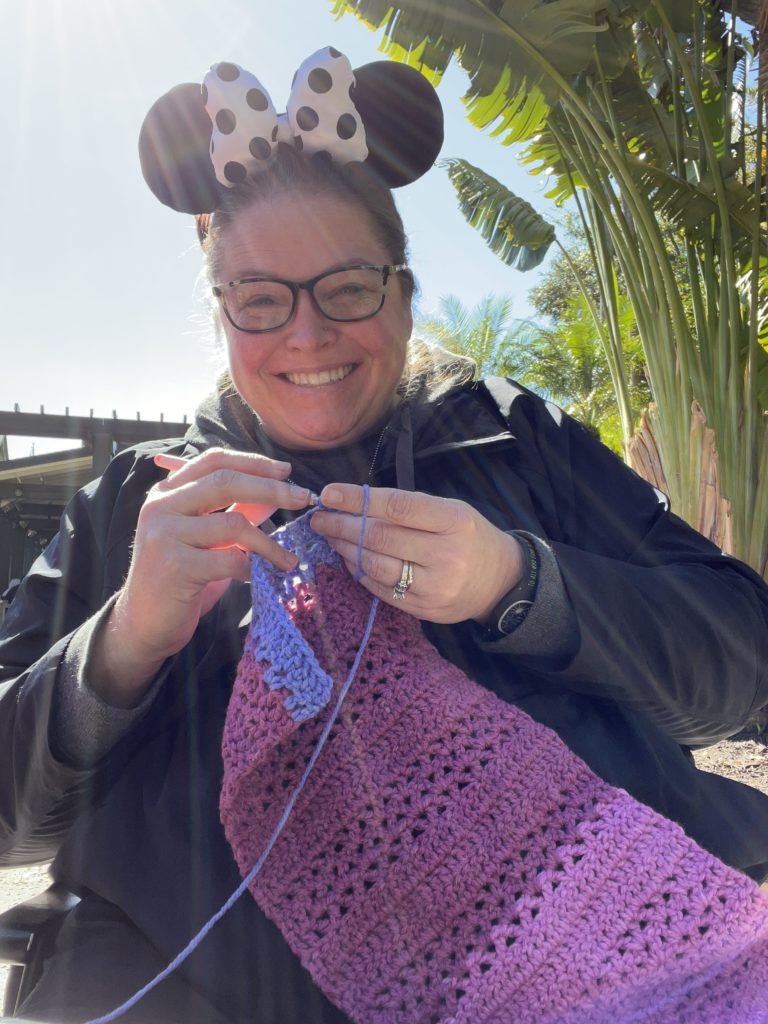
So I did what any crochet designer on a deadline would do, I brought the easy crochet scarf project with me and worked on it during my downtime.

Site Icon

Making of the Easy Crochet Scarf Pattern (Easy Crochet Cowl)

Now, you might be thinking, “Marly, there is no downtime when you're at Disney World.” But I would have to disagree. There's a LOT of downtime at Disney, particularly when waiting in long lines to ride the awesome rides.

As you can see, I worked on this scarf while waiting to see Pooh in Magic Kingdom, waiting to do the Guardians of the Galaxy Cosmic Rewind at Epcot, and waiting to Rise Against the Resistance at Hollywood Studios!

Crocheting at Disney World

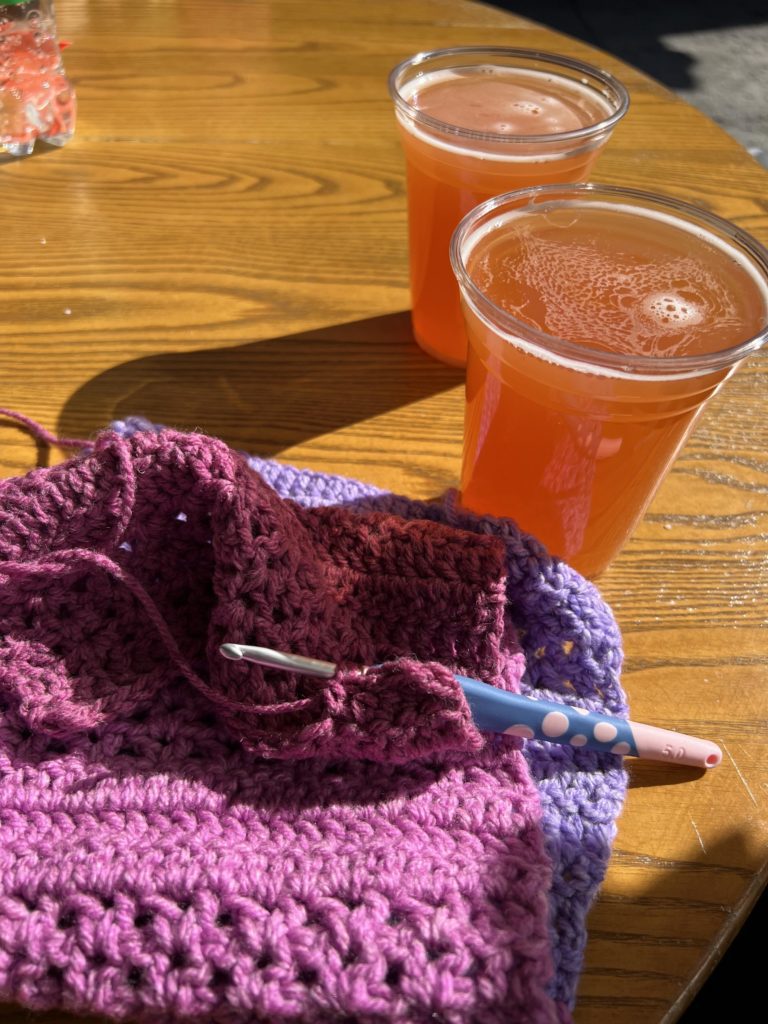
You can even sit at a table, in the sun, on a super cold day while your family rides a ride you don't want to go on and enjoy a nice beverage while you crochet!

Easy Crochet Scarf Pattern is coming together
Crochet and beer...

Anyway, you get the idea. You can make an easy crochet scarf pattern just about anywhere, but certainly at Disney World while on a trip with your family.

Easy Crochet Scarf Pattern || Riverside

While at Disney, we stayed at the Port Orleans Resort Riverside. I loved the resort and felt that naming this easy crochet scarf pattern Riverside was the right thing to do.

But here's the crux, I am not a real big fan of wearing scarves. They fall off too easily, so I prefer cowls!

Therefore, I did stop and take pictures of the scarf *almost complete, so you can see how it looks before I seam it to turn it into a cowl ๐Ÿ™‚

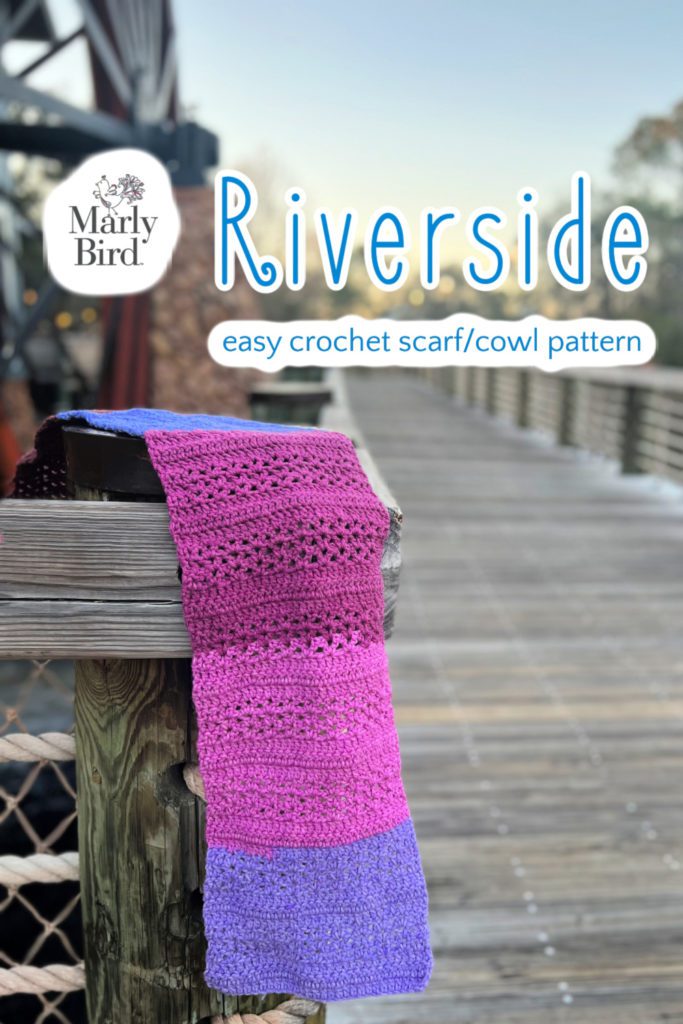
Riverside Easy Crochet Scarf Pattern - image on the walkway

I carried the yarn in that handy little Disney bag all weekend (initially, I was using my Erin Lane Bags project bag, but I accidentally pulled the clip off it). This little bag was super helpful as I could just carry it on my wrist and crochet away.

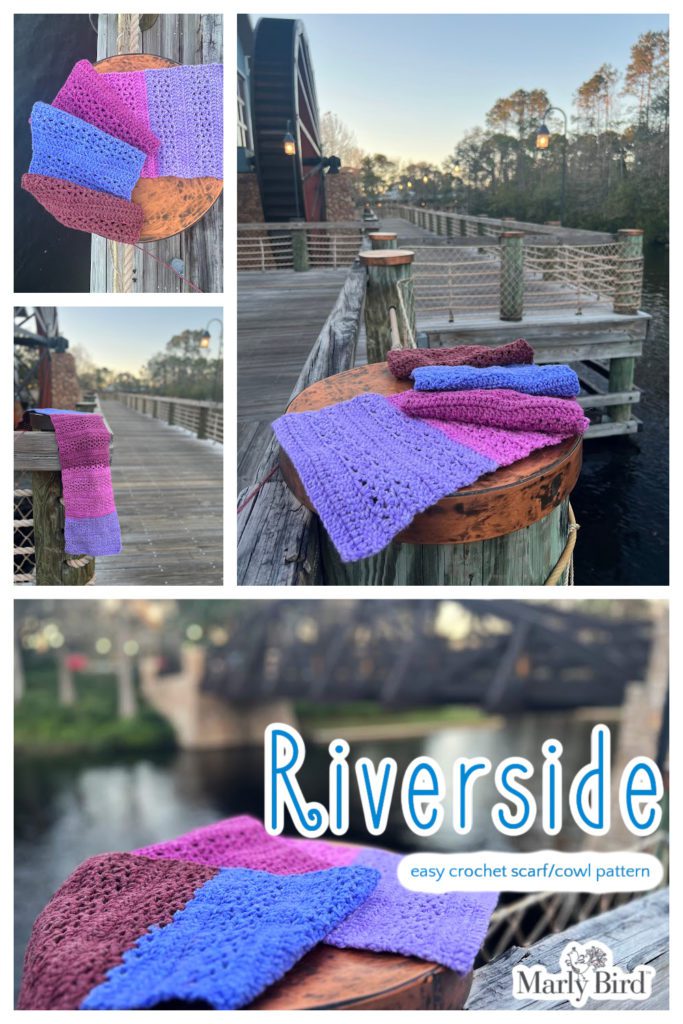
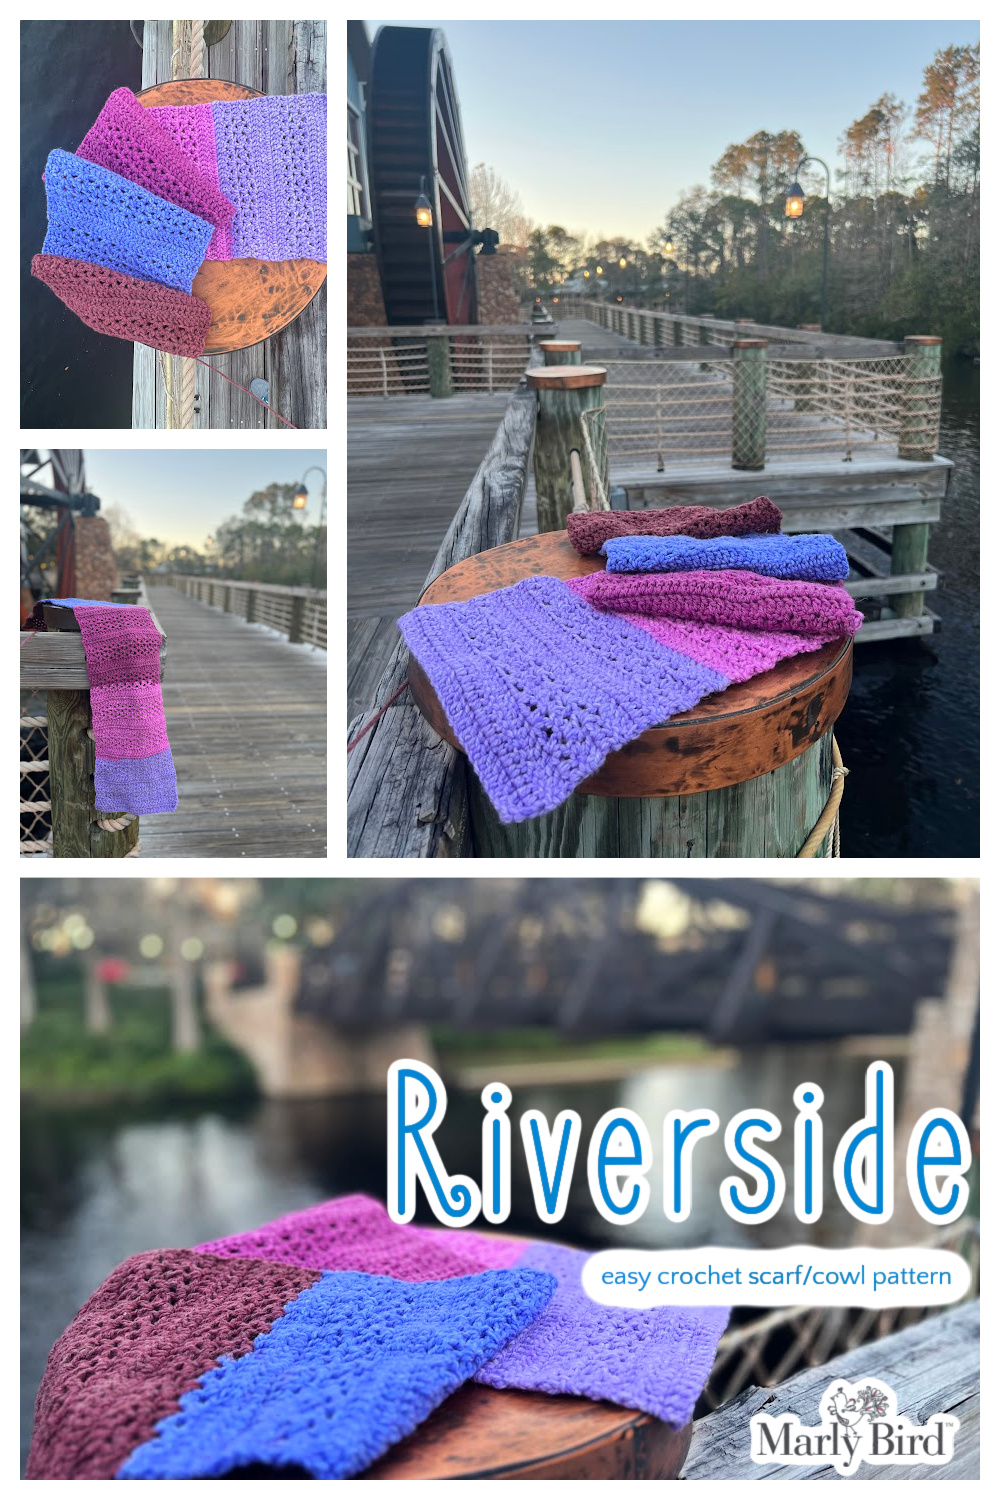
While at Port Orleans Resort Riverside, on my last night, I did a little photoshoot on the dock outside of the resort's main lobby. I loved the water wheel and the bridge as backdrops. And yes, I got a LOT of really weird looks as I positioned my crochet on a dock post and started to take pictures of it. I heard more than one snicker…but I don't care…these are cute.

Riverside easy crochet scarf photographed at Port Orleans Resort Riverside.

What Makes This Crochet Scarf Easy?

The pattern itself is not hard to follow, and it is super simple to memorize. As long as you keep track of the number of stitches you have when you are working the double crochet rows, it'll be smooth sailing on this Riverside crochet scarf.

Now, I like a nice little finish to a scarf or cowl, but there are times when I want to have the project done when I'm DONE! That was the case with this pattern. So, I used stacked double crochet stitches to start every row instead of a chain 3 that would count as a double crochet. Doing this makes for a clean edge and a better finish ๐Ÿ™‚

Another reason I chose not to work trim around this scarf/cowl is the yarn. Yarnspirations Caron Cakes have long color changes, and working around the project would make any trim very visible. I already have a hard time with the abrupt color changes (but I just went with it), and having those PLUS abrupt color changes around the trim was more than I wanted.

Having said that, can YOU add a simple crochet trim around the project when YOU are done? There are no crochet police.

The only finishing on this easy crochet scarf is to weave in the beginning and ending tail (or use the ending tail to seam the ends together to make a cowl). That's it!

See, EASY!

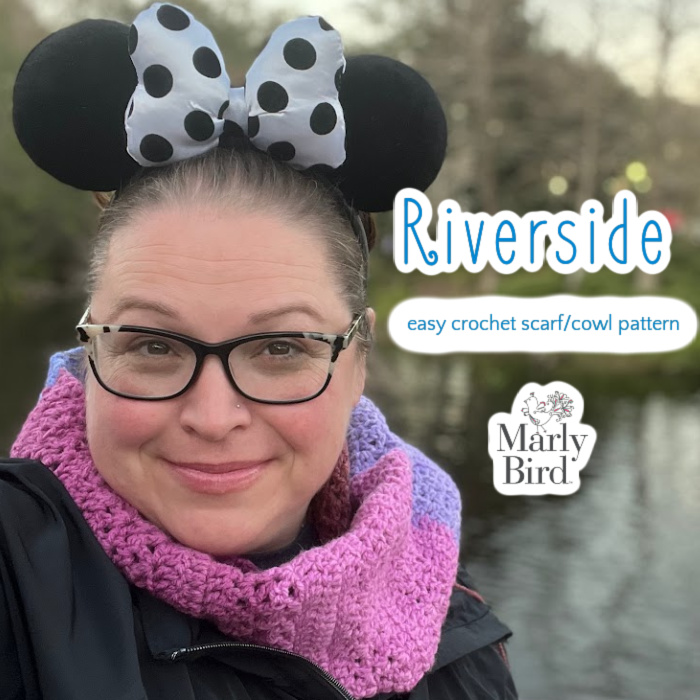
Marly at Disney modeling the Riverside easy crochet scarf.

Scarf of the Month Crochet-Along 2023 || Guest Designer Easy Crochet Scarf Pattern January

The Riverside Scarf/Cowl is a free pattern here on the Marly Bird blog. As mentioned, this is part of the Scarf of the Month Crochet-Along 2023.

For the entire year of 2023, on the 3rd Sunday of every month, you will get 3 new scarf patterns. One from Amy, one from Rhondda, and one from a guest designer (this month it's ME).

Scarf of the Month CAL 2023 promotion featuring a graphic of a scarf with fringe, encouraging monthly crochet projects.

As you are working on your scarves (or if you turn them into a cowl), be sure to add them to your projects on Ravelry. I've already listed this pattern there for your convenience. https://www.ravelry.com/patterns/library/riverside-8

Green circular patch with a stitched outline featuring a lowercase letter "r" in the center.
Psst: Favorite and Queue this pattern on Ravelry
Easy Crochet Scarf Pattern - Riverside

Easy Crochet Scarf Pattern || Riverside

Riverside easy crochet scarf on wooden walkway by a river.

RIVERSIDE CROCHET SCARF / COWL

Designed by Marly Bird

SKILL LEVEL

Easy

MEASUREMENTS

Finished Measurements (before blocking)

Scarf: 9″ x 62″ [23 x 157.5 cm], or desired length

Cowl: 9โ€ x 30โ€ [23 x 76 cm], or desired length

Gauge 

31 dc = 9โ€ [23 cm]; use any size hook to obtain the gauge. 

MATERIALS

Yarn 

Yarnspirations, Caron Cakes  (80% acrylic, 20% wool, 445 yds / 407 m, 8.5 oz/ 240 g, CYCA 4  worsted), Color Me Bold Collection #caroncakes 

Blackberry Jelly 1 ball

Hook

Size H/8 [5.0 mm]

Notions 

Tapestry needle

ABBREVIATIONS

Ch – Chain(s) 

Cont – Continue

Dc – Double Crochet 

RS – Right Side 

Sp(s) – Space(s) 

St(s) – Stitch(es)

Stacked Dc – Stacked Double Crochet 

Tch – Turning Chain

WS – Wrong Side

SPECIAL STITCHES 

โญ๏ธ Stacked Double Crochet (Stacked Dc): (Do not ch 1 prior to making the first sc) Sc in first stitch, insert hook in between two legs of the base, yarn over and pull up a loop, yarn over and draw through 2 loops on hook.

DIAGRAM

NOTES

  • Crocheted flat in turned rows throughout. 
  • Work the Stacked Double Crochet in place of a chain 3 turning chain at start of the row for a better finish
  • Let the color change as it may
  • Make the piece as long as desired. For cowl, stop between 30-45โ€ in length then seam ends together. 

VIDEO TUTORIAL

  • Stacked Double Crochet >> Click Here for Video Help <<

GROW

To Unlockย Exclusive Subscriber Contentย click the Box below and join for free by simply adding your email and creating a password! If you are having troubles, clear your cache or reset your password or login to the Grow Publisher Portal.

>> Learn More About Grow Here <<

I'm thrilled to share this amazing pattern with you, many patterns on my blog are absolutely free! I kindly request that you don't copy and paste or distribute this pattern. Prefer an ad-free experience? Buy a digital PDF pattern for a small fee from one of my online stores for a seamless crafting journey. 

I appreciate your support and readership. You are the reason I can keep doing what I love and sharing it with others. So, thank you from the bottom of my yarn-loving heart! Disclosure: This post contains affiliate links, meaning I get a commission if you decide to make a purchase through my links at no cost to you.

RIVERSIDE CROCHET SCARF / COWL

BODY

Chain 33.

Row 1: Dc in 4th ch from hook (skipped 3 chains count as dc) and in each ch across, turn — 31 dc.

Row 2: Stacked Dc in first st, dc in each st to end, turn. 

Row 3: Stacked Dc in first st, dc in each st to end, turn.

Row 4: Stacked Dc in first st, dc in next st, skip 1 st, *(dc, ch 1, dc) in next st, skip 2 sts; repeat from * to last 4 sts, (dc, ch 1, dc) in next st, skip 1 st, dc in last 2 sts, turn โ€” 22 dc, 9 ch-1 spaces.

Row 5: Stacked Dc in first st, dc in next st, skip 1 dc, *(dc, ch 1, dc) in next ch-1 sp, skip 2 dc; repeat from * to last ch-1 sp, (dc, ch 1, dc) in last ch-1 sp, skip 1 dc, dc in last 2 sts, turn. 

Row 6: Stacked Dc in first st, dc in next st, skip 1 dc, *(dc, ch 1, dc) in next ch-1 sp, skip 2 dc; repeat from * to last ch-1 sp, (dc, ch 1, dc) in last ch-1 sp, skip 1 dc, dc in last 2 sts, turn. 

Row 7: Stacked Dc in first st, dc in each st and ch-1 space to end, turn โ€” 31 dc. 

Repeat row 2-7 until piece measures desired amount, ending on a row 6 for the cowl, or a row 3 for the scarf. 

FINISHING

Scarf: Fasten off, weave in ends. 

Cowl: Fasten off, leaving a long tail for seaming. Fold the cowl together, and with RS facing each other, whip stitch the two short ends together. Weave in ends. 

</div>

Frequently Asked Questions

Can I really crochet this scarf anywhere?

Honestly… yes! Marly even crocheted this scarf while waiting in lines at Disney World. It's designed to be a super simple, on-the-go project, perfect for crafters who like to make things while traveling or just have a little bit of downtime.

What makes this scarf pattern so easy?

So here's the thing… the pattern itself is really simple and easy to memorize. Marly used stacked double crochet stitches at the beginning of each row, which makes for a super clean edge and a nicer finish without having to do a lot of extra work.

Can I add a border to this scarf?

Yes, you absolutely can add a border if you want to! Marly didn't add one to this specific pattern because the Caron Cakes yarn has long color changes and she felt a border might make things a bit too busy. But really, there are no crochet police… go for it if you love a border!

I'm not a big scarf person, can I still make this?

Absolutely! Marly mentions she actually prefers cowls herself because scarves can fall off. This pattern is designed so you can easily seam the ends together to turn it into a lovely cowl. Just stop crocheting when it's about 30-45 inches long and seam it up!

What yarn did Marly use for the Riverside scarf?

She used Yarnspirations Caron Cakes in the color Blackberry Jelly. It's a CYC 4 worsted weight yarn and she really liked how the long color changes worked up for this project, even if she found them a little challenging at times!

Filed Under: Crochet, Our Free Patterns, Pattern, Uncategorized

Gnome Crochet Blanket

December 19, 2022 By Marly Bird Leave a Comment

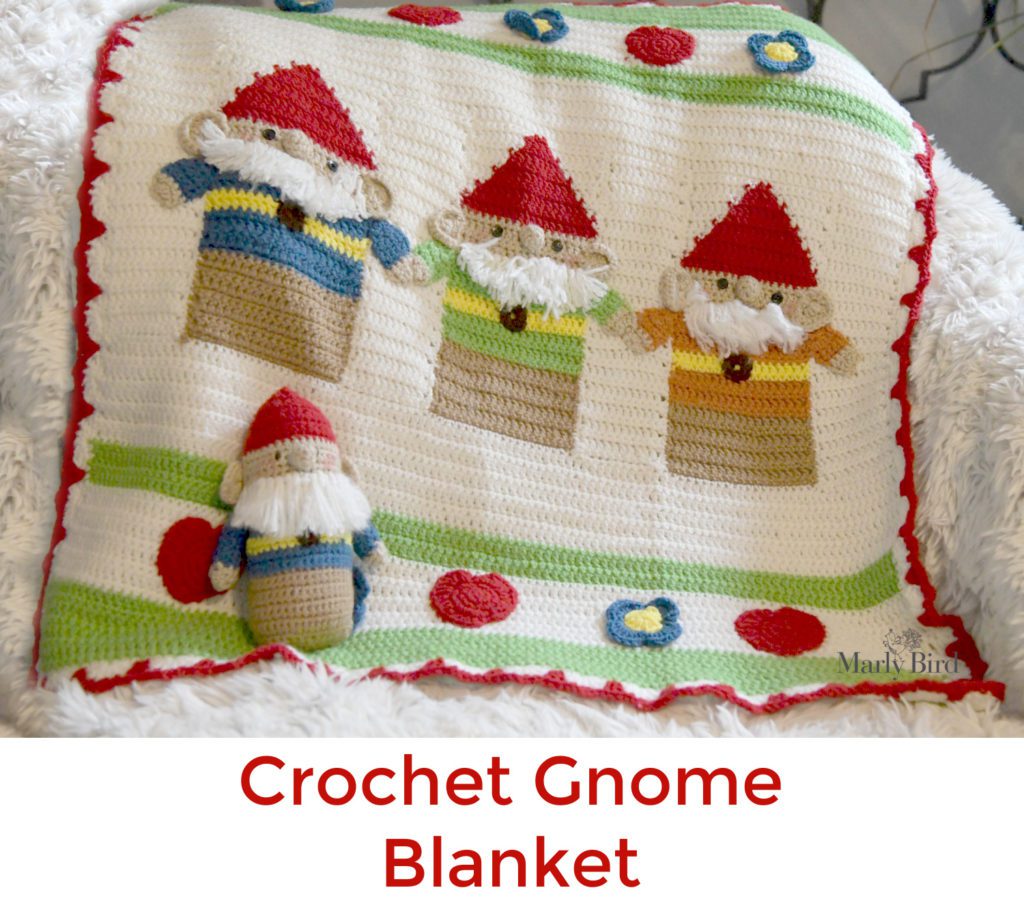
A gnome crochet blanket is a great project for experienced crocheters and those just learning the craft. Not only are they adorable and useful, but they also provide a satisfying sense of accomplishment once completed. Plus, as a crochet baby blanket, it makes for a thoughtful and heartfelt gift for a new parent or for a baby shower.

Make it a fun set with the cute crochet gnome doll to match!

Crochet gnome blanket with crochet gnome doll.
Read more: Gnome Crochet Blanket

🎄 Countdown to Christmas 🎄

—
Days
—
Hours
—
Mins
—
Secs

Until Christmas Morning! 🎄

🤴 Start your handmade gifts now — December comes faster than you think! 🎅

Why a Gnome Crochet Blanket?

Crochet gnomes, also known as 'tomtar' or 'nisse' in Scandinavian countries, have recently experienced a surge in popularity. These cute and charming creatures, with their distinctive pointy hats and long beards, have become popular for crocheters looking to create something unique and adorable.

But why are crochet gnomes suddenly so popular? One reason could be the increasing trend of hygge, the Danish concept of coziness and comfort. With their cozy and homely appearance, crochet gnomes fit perfectly into this trend. They are often used as decorations for the home, bringing a touch of warmth and cheer to any space.
Another reason for the popularity of crochet gnomes could be their versatility. They can be made in many sizes and styles, making them suitable for various projects. Crochet gnomes can be used as ornaments, advent calendars, gifts, or toys for children. They can also be customized with different colors and patterns, allowing crocheters to put their own spin on the classic design.

Are Crochet Gnomes Easy To Make?

Crochet gnomes are also relatively easy to make, making them accessible to crocheters of all skill levels. With just a few basic crochet stitches and yarn, anyone can create their unique gnome. Countless patterns are available online, ranging from beginner-friendly to more advanced designs. This means that anyone can join in on the fun of creating their own gnomes.

Here are a few I found on Etsy that are AMAZING!

  • Nordic Gnomes with peek-a-boo eyes
  • BEE-autiful Gnome pattern that is sweet as honey
  • Mini Gnome Ornaments - Variety Pack
  • Viking Gnome Pattern - OMG, SO CUTE!
  • Hot Chocolate Gnome Pattern

Overall, the popularity of crochet gnomes can be attributed to their cute and charming appearance, versatility, and accessibility. Whether you're an experienced crocheter or a beginner crocheter looking to try something new, crochet gnomes are a fun and rewarding project that is sure to bring a smile to your face.

Friendly Gnome Crochet Blanket

Michele Wilcox sent me a picture of this crochet baby blanket as she worked on it and asked if my audience would be interested in this whimsical pattern. Knowing how much all of you love crochet gnomes, I immediately told her YES!

She then let me know there was a crochet gnome doll to match (and we all know how much I love to have things that match or coordinate), so I purchased that too!

Now you can make this fun and festive gnome crochet baby blanket. Get the free crochet pattern below and follow along!
Ravelry logo linking to Ravelry.com.
Favorite and Queue this pattern up on Ravelry
Solid blue background with white stitching in the center, showcasing a knitting or crochet pattern design.
Friendly gnome crochet blanket.

Friendly Gnome Crochet Blanket

Designed by Michele Wilcox for MarlyBird.com

SKILL LEVEL

Intermediate

MEASUREMENTS

Finished Measurements

Throw is 34โ€ [85.5 cm] wide by 38โ€ [96.5 cm] long. 

Gauge 

14 dc by 12 rows = 4โ€ [10 cm] x 4 ยฝโ€[11.5 cm]; use any size hook to obtain the gauge. 

MATERIALS

Yarn 

Red Heart Super Saver (100% acrylic, 364 yds / 333 m, 7 oz/ 198 g, CYCA# 4 worsted) 

Color A: #0316 Soft White, 2 skeins

Color B: #0236 Warm Brown, 1.5 oz

Color C: #0672 Spring Green, 2.5 oz

Color D: #0324 Bright Yellow, 1 oz

Color E: #0254 Pumpkin, 1 oz

Color F: #0886 Blue, 1 oz

Color G: #0319 Cherry Red, 1.5 oz

Color H: #0334 Buff, 1.5 oz

Color I: #0365 Coffee, small amount

Hook

Size H/8 (5.0 mm)

Notions 

Tapestry needle, Black Yarn for embroidery, Red crayon for cheeks

ABBREVIATIONS

Ch - Chain(s) 

Dc - Double Crochet 

Hdc - Half Double Crochet

RS - Right Side 

Sc - Single Crochet

Sc2tog - Single Crochet Two Together 

Sl st - Slip Stitch 

Sp(s) - Space(s) 

St(s) - Stitch(es)

Stacked Dc - Stacked Double Crochet 

Tch - Turning Chain

WS - Wrong Side

Yo - yarn over

SPECIAL STITCHES 

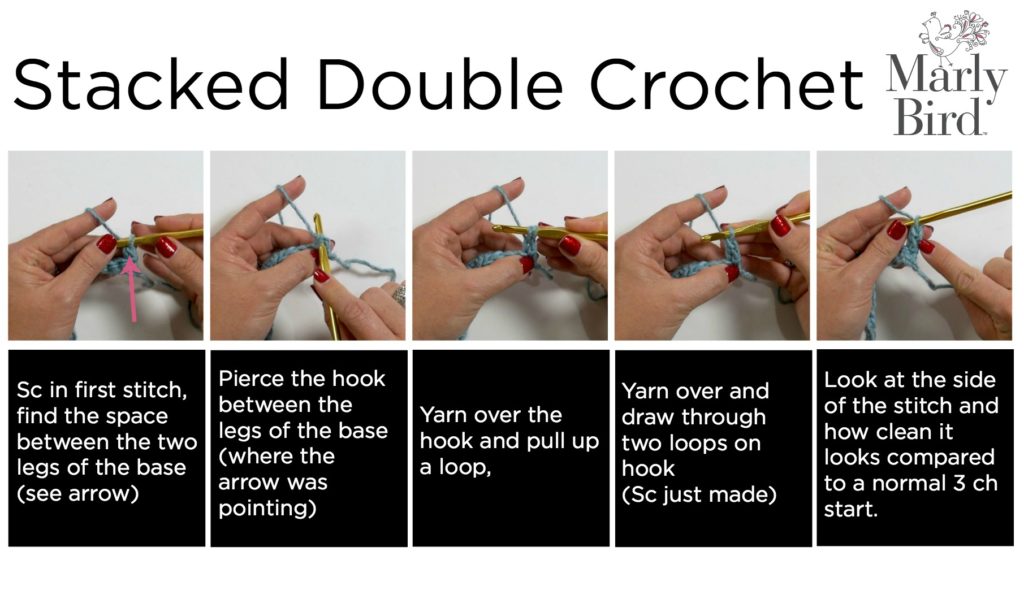
โญ๏ธ Stacked Double Crochet (stacked dc): (Do not ch 1 prior to making the first sc) Sc in first stitch, insert hook between two legs of the base, yarn over and pull up a loop, yarn over and draw through 2 loops on hook.

How to work stacked double crochet stitches.

โญ๏ธ Single Crochet 3 Together (sc3tog): *Insert hook into indicated stitch, yarn over and pull up a loop; repeat from * in next 2 stitches indicated, yarn over and draw through all 4 loops on hook. (1 decrease)

โญ๏ธ Double Crochet Spike  (dc spike): Yarn over hook, insert hook into stitch indicated 1 row below, yarn over and pull up a long loop, [yarn over and draw through 2 loops on hook] twice

GNOME CROCHET BLANKET SCHEMATIC 

NOTES

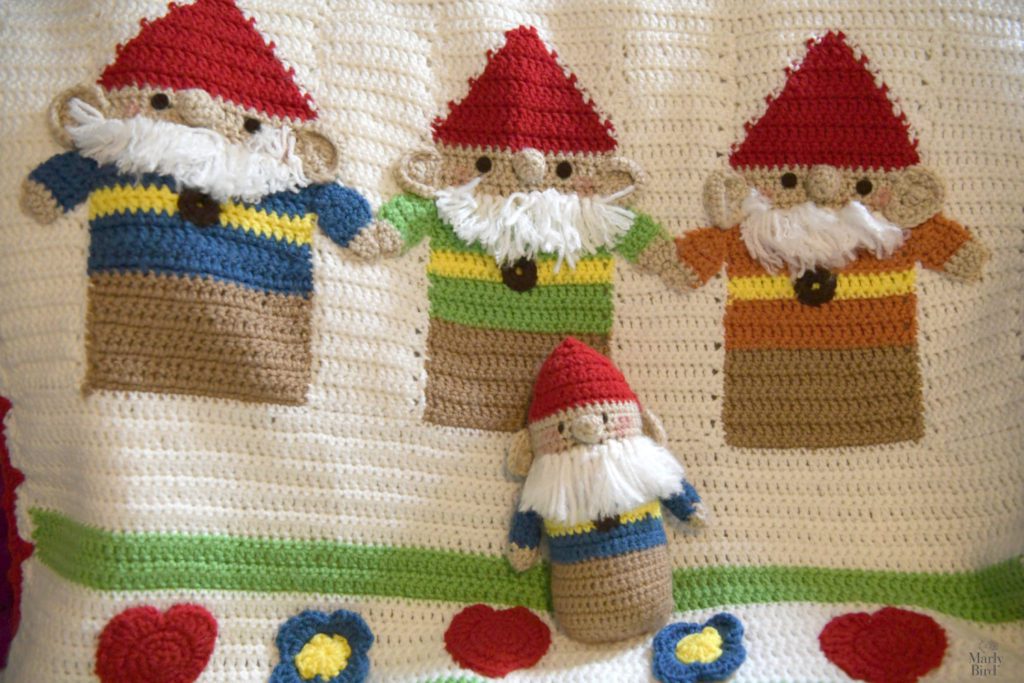
  • The throw is made in sections and seamed together. Work the Gnome Panels first, then the filler panels, and seam them together. Next, work on the decorations to fill out the features. Then crochet the bottom and top panels. Lastly, add the hearts, flowers, and border.
Gnome crochet blanket close-up with crochet gnome doll.

FRIENDLY GNOME CROCHET BLANKET PATTERN

GNOME PANELS

Make 3 total, 1 with F for the shirt, 1 with C for the shirt, and 1 with E for the shirt

With B, ch 21. 

Row 1: (WS) Sc in 2nd ch from hook and in each ch across, turn --20sc.

Row 2: Stacked dc (see special stitches) in first sc, dc in each sc across, turn. 

Row 3: Ch 1, sc in each dc across, turn. 

Rows 4โ€“7: Repeat Rows 2 and 3 

Row 8: Repeat Row 2, change to color F, fasten off B. 

Row 9: Repeat Row 3

Row 10-11: Repeat Rows 2-3, 

Row 12: Repeat Row 2, change to color D, fasten off F. 

Row 13: Repeat Row 3 

Row 14: Repeat Row 2, change to color F, fasten off D. 

Row 15: Repeat Row 3

Row 16-17: Repeat Rows 2-3.

Row 18: Repeat Row 2, change to color H, fasten off F.

Row 19: Repeat Row 3

Row 20-23: Repeat Rows 2-3, change to G, fasten off H. 

Row 24: Repeat Row 2, change to A, do not fasten off G. 

Row 25: Ch 1, sc in first dc, change to G, sc in each dc across to last dc, change to A with new ball (so you have one ball of white on each side of the hat), sc in last dc, turn. 

Row 26: Stacked dc in first sc, dc in next sc, change to G, dc in each sc across to last 2 sc, change to A, sc in last 2 dc, turn. 

Row 27: Ch 1, sc next 3 dc, change to G, sc in each dc across to last 3 dc, change to A, sc in last 3 dc, turn. 

Row 28: Stacked dc in first sc, dc in next 3 sc, change to G, dc in each sc across to last 4 sc, change to A, sc in last 4 dc, turn. 

Row 29: Ch 1, sc next 5 dc, change to G, sc in each dc across to last 5 dc, change to A, sc in last 5 dc, turn. 

Row 30: Stacked dc in first sc, dc in next 5 sc, change to G, dc in each sc across to last 6 sc, change to A, sc in last 6 dc, turn. 

Row 31: Ch 1, sc next 7 dc, change to G, sc in each dc across to last 7 dc, change to A, sc in last 7 dc, turn. 

Row 32: Stacked dc in first sc, dc in next 7 sc, change to G, dc in each sc across to last 8 sc, change to A, sc in last 8 dc, turn. 

Row 33: Ch 1, sc next 9 dc, change to G, sc in each dc across to last 9 dc, change to A, sc in last 9 dc, fasten off G, turn. 

Row 34: Ch 1, sc in each sc across, fasten off, weave in all ends. 

Repeat directions for gnome-panel once with C instead of F and once more with E instead of F. 

GNOME CROCHET BLANKET FILLER PANELS

Make 4 

With A, ch 13. 

Row 1: (WS) Sc in 2nd ch from hook and in each ch across, turn-- 12sc.

Row 2: Stacked dc in first sc, dc in each sc across, turn. 

Row 3: Ch 1, sc in each dc across, turn. 

Rows 4-33: Repeat Rows 2-3.

Row 34: Ch 1, sc in each sc across, fasten off, weave in ends. 

Whipstitch 1 Gnome Panel between 2 Filler Panels.  Repeat for all Gnome Panels. 

GNOME DETAILS

Nose

Make 3 

With H, ch 2. 

Round 1: 6 sc in 2nd ch from hook, do not turn--6sc.

Round 2: 2 sc in each sc around, do not turn-- 12 sc. 

Rounds 3-4: Sc in each sc around, fasten off with long tail. 

Stuff nose lightly. Gather stitches of Rnd 4. Sew in place on each gnome.

Ear

Make 6 

With H, ch 2. 

Row 1: 6 sc in 2nd ch from hook, turn--6sc.

Row 2: Ch 1, 2 sc first sc, sc in next 4 sc, 2 sc in last sc, turn-- 8 sc. 

Row 3: Ch 1, sc in first sc, 2 sc in next sc, sc in next 4 sc, 2 sc in next sc, sc in last sc, turn--10 sc. 

Row 4: Ch 1, sc in next 4 sc, 2 sc in next 2 sc, sc in last 4 sc, turn 90 degrees, 5 sc across edge (working in row ends), sl st to first sc, fasten off leaving long tail. 

Sew ears to Gnome Panels; see photo for location. 

Color cheeks with red crayon. Sew button eyes in place or embroider satin stitch eyes with color I.

Buckle

Make 3 

With I, ch 6, sl st to first ch to form ring. 

Round 1: Ch 1, 10 sc in ring, sl st to first sc, fasten off, leave long tail. 

Sew buckle in place. 

Arm

Make 2 in Color F, Make 2 in Color C, Make 2 in Color E 

With H, ch 2 

Row 1: 5 sc in 2nd ch from hook, turn.

Row 2: Ch 1, sc in each sc across, turn.

Row 3: Ch 1, sc in each sc across, change to F, fasten off H, turn. 

Rows 4-7: Ch 1, sc in each sc across, turn.

Row 8: Ch 1, sc in first sc, sc3tog over next 3 sc, sc in last sc, turn.

Row 9: Ch 1, sc3tog over next 3 sc, fasten off, leave long tail. 

Sew arm in place. 

Repeat for all Gnomes.

Beard

Wrap color A around a 4โ€ wide cardboard 40 times. Cut to have (40) 8โ€ pieces. Fold 2 strands in half, thread loop end through any stitch on Row 19 of Gnome. Tuck ends through loop and pull tight.  Repeat for each stitch on Row 19. Trim to desired length. Brush to fluff beard. 

TOP AND BOTTOM SECTION 

With WS facing join color A to first sc of Filler Panel with sc. 

Row 1: (WS) Sc in st across Filler and Gnome Panels, turn --108sc.

Row 2: Stacked dc in first sc, dc in each sc across, turn. 

Row 3: Ch 1, sc in each dc across, turn. 

Rows 4โ€“9: Repeat Rows 2 and 3 

Row 10: Repeat Row 2, change to color C, fasten off A. 

Row 11: Repeat Row 3

Row 12-13: Repeat Rows 2-3

Row 14: Repeat Row 2, change to color A, fasten off C. 

Row 15: Repeat Row 3 

Row 16-23: Repeat Rows 2-3, change to color C, fasten off A. 

Row 24-31: Repeat Rows 2-3, fasten off, weave in all ends.

Repeat on opposite side of throw.

FINISHING

Border

With RS facing, join color A to any corner with sl st. 

Round 1: (RS) Ch 1, 2 sc in corner, *sc evenly across side of throw in a multiple of 6 + 3**, 3 sc in corner, turn 90 degrees; repeat from * around ending at **, sc in first corner, sl st to first sc, do not turn. 

Round 2: (Stacked dc, 3 dc) in first sc, *[skip 2 sc, sc in next sc, skip 2 sc, 5 dc in next] repeat from * across edge to last 6 sc before corner, skip 2 sc, sc in next sc, skip 2 sc**, 7 sc in center sc of corner; repeat from * around ending at **, 3 dc in first sc, sl st to top of stacked dc, change to G, fasten off A, do not turn.

Round 3: Ch 1, (sc, ch 1, sc) in first dc, sc in next 2 dc, *[skip next dc, 3 dc spike over next sc in st 1 row below, skip next dc, sc in next dc, (sc, ch 1, sc) in next dc, sc in next dc] repeat across to last sc before corner, 3 dc spike over next sc in st 1 row below, skip next dc, sc in next 2 dc**, (sc, ch 1, sc) in next dc, sc in next 2 dc; repeat from * around ending at **, sl st to first sc, fasten off, weave in ends. 

Flower

Make 5

With color D, ch 4.

Round 1: (RS) 11 dc in 4th ch from hook (skipped ch count as dc), sl st to top of beginning ch, change to F, do not turn-- 12dc.

Round 2: *Ch 4, skip 2 dc, sl st to next dc; repeat from * around, sl st to same sl st as join, do not turn--4 ch-4 sps. 

Round 3: (Sc, hdc, 4 dc, hdc, sc) in each ch-4 sp around, sl st to first sc, fasten off leaving long tail for seaming.

Using photo, sew flower in place.  

Heart

Make 5

With color G, ch 2.

Round 1: (RS) 6sc in 2nd ch from hook, do not turn.

Round 2: 2 sc in each sc around, do not turn-- 12 sc. 

Round 3: *Sc in next sc, 2 sc in next sc; repeat from * around, do not turn-- 18 sc. 

Round 4: 3 sc in first sc, sc in next 2 sc, hdc in next 2 sc, 2 hdc in next sc, 2 dc in next sc, 3 dc in next sc, (dc, hdc, ch 1) in next sc, sl st in next sc, (ch 1, hdc, dc) in next sc, 3 dc in next sc, 2 dc in next sc, 2 hdc in next sc, hdc in each of next 2 sc, sc in last 2 sc, sl st to first sc, fasten off leave long tail for seaming. 

Using photo, sew heart in place.  

And that's it! With a little bit of patience and practice, you will have a beautiful crochet baby blanket that is sure to be treasured by the lucky recipient.

Frequently Asked Questions

What yarn and hook size do I need for the Gnome Crochet Blanket?

So here's the thing... you'll need Red Heart Super Saver yarn in several colors! For hooks, a Size H/8 (5.0 mm) is the one you'll use for this project. Make sure to check out the Materials section for all the specific color details!

Can you tell me about the special stitches for this blanket?

Honestly... there are a few fun ones! We've got Stacked Double Crochet, Single Crochet 3 Together, and Double Crochet Spike. Don't worry though, I've included explanations and even a little visual guide for the Stacked Double Crochet to help you out.

How is the Gnome Crochet Blanket constructed?

Yes! The throw is made in sections. You'll start with the Gnome Panels, then the Filler Panels, and seam them all together. After that, you'll add the decorative bits like the noses, ears, and beard, followed by the top and bottom sections, and finally the border.

What are the finished measurements of the blanket?

It's a pretty generous size! The finished measurements for the throw are 34 inches wide by 38 inches long. Itโ€™s a perfect size for a cozy baby blanket or even a small throw!

Can I make this blanket if I'm a beginner crocheter?

Well, this pattern is listed as Intermediate... but here's the thing: if you know your basic stitches and are eager to learn a few new techniques, you can totally do this! Crochet gnomes themselves are pretty beginner-friendly, and this blanket builds on that with a few extra steps.

Filed Under: Crochet, Free Patterns, Marly Bird Premium Patterns, Our Free Patterns, Pattern

Crochet Gnome Doll

December 19, 2022 By Marly Bird Leave a Comment

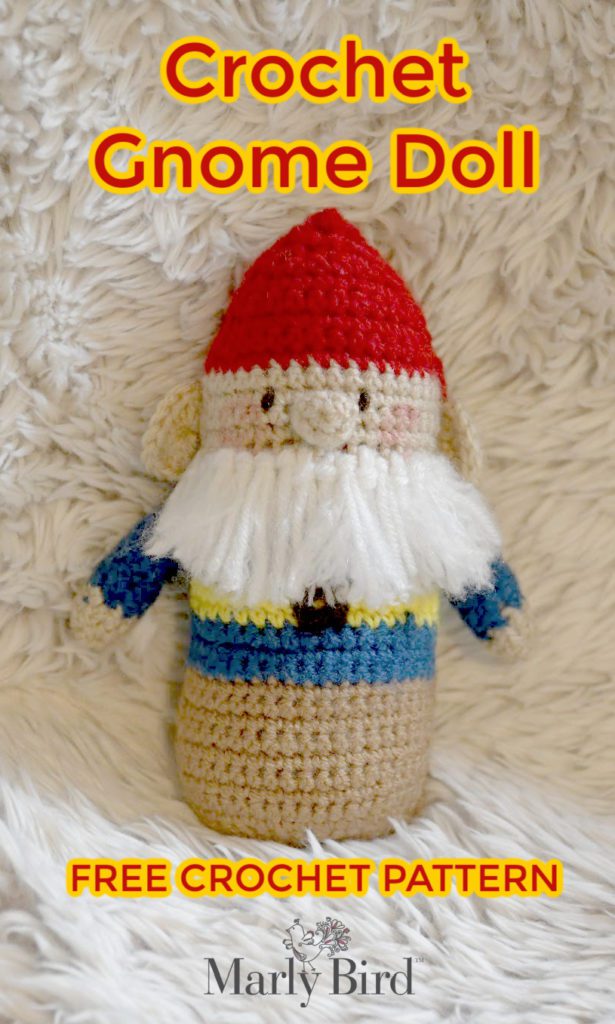
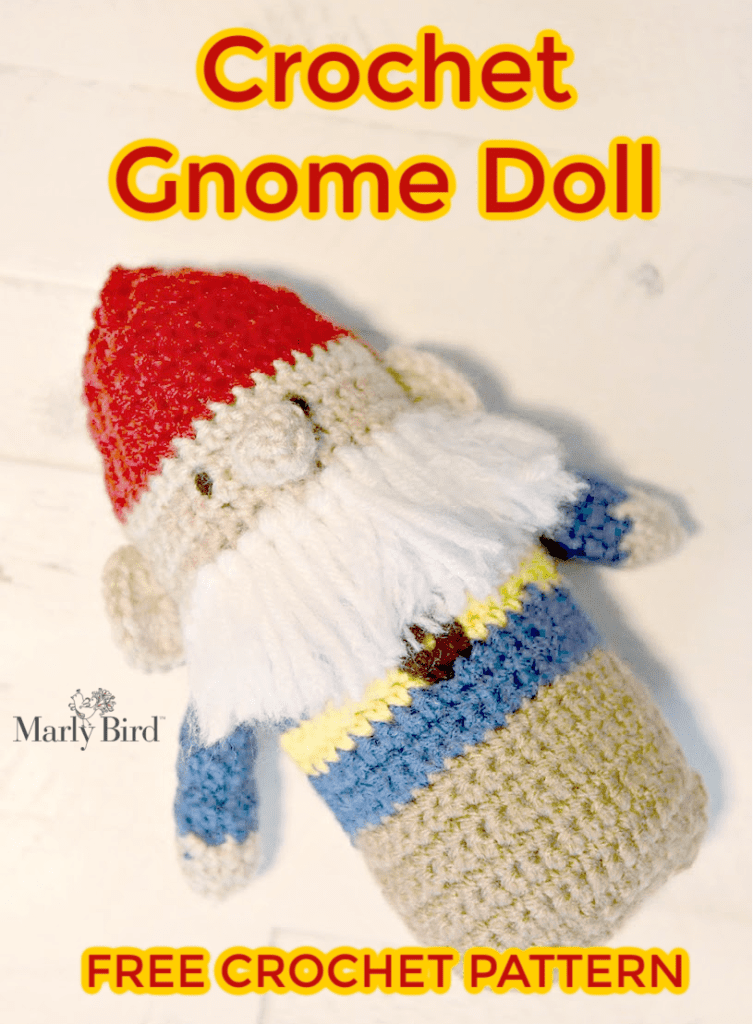
Make a crochet gnome doll and add a touch of whimsy to your home decor! These cute and quirky little creatures are not only adorable to look at, but they also make great gifts for any occasion. They're easy to make with just a few basic crochet skills.

Crochet gnome doll on fur background.
Read more: Crochet Gnome Doll

What is a Crochet Gnome Doll?

A crochet gnome doll is a small, handmade stuffed toy that is made to look like a traditional Scandinavian gnome. These dolls typically have a round head, a pointed hat, and a fluffy beard. They are usually made with soft, colorful yarn and filled with stuffing to give them a soft and cuddly texture.

Crochet gnome dolls can vary in size. They can be made in a variety of colors and styles to suit your personal preference.

How to Make a Crochet Gnome Doll:

Making a crochet gnome doll is a fun and rewarding project, even for beginner crocheters. Here's what you'll need to get started:

  • Yarn in the colors of your choice (for the body, hat, and beard)
  • A crochet hook
  • Scissors
  • A tapestry needle
  • Polyester stuffing

I've written the full crochet gnome doll pattern for you and made it a free pattern here on the blog. Follow the instructions below to crochet this cuddly creature.

Green circular patch with a stitched outline featuring a lowercase letter "r" in the center.
Favorite and Queue this pattern up on Ravelry
Solid blue background with white stitching in the center, showcasing a knitting or crochet pattern design.

CROCHET GNOME DOLL

Designed by Michele Wilcox for MarlyBird.com

SKILL LEVEL

Advanced Beginner

MEASUREMENTS

Finished Measurements

Gnome is 4โ€ [10 cm] wide by 9โ€ [23 cm] tall. 

Gauge 

17 sc by 18 rows = 4โ€ [10 cm] x 4โ€[10 cm]; use any size hook to obtain the gauge. 

MATERIALS

Yarn 

Red Heart Super Saver (100% acrylic, 364 yds / 333 m, 7 oz/ 198 g, CYCA# 4 worsted) 

Color A: #0236 Warm Brown, 0.5 oz

Color B: #0886 Blue, 0.5 oz

Color C: #0324 Bright Yellow, small amount

Color D: #0334 Buff, 0.5 oz

Color E: #0319 Cherry Red, 0.5 oz

Color F: #0316 Soft White, small amount

Color G: #0365 Coffee, small amount

Hook

Size F/5 (3.75 mm)

Notions 

Stitch markers, Poly Fiberfill, tapestry needle, red crayon for cheeks

ABBREVIATIONS

Ch – Chain(s) 

Dc – Double Crochet 

Hdc – Half Double Crochet

RS – Right Side 

Sc – Single Crochet

Sc2tog – Single Crochet Two Together 

Sl st – Slip Stitch 

Sp(s) – Space(s) 

St(s) – Stitch(es)

Stacked Dc – Stacked Double Crochet 

Tch – Turning Chain

WS – Wrong Side

Yo – yarn over

SPECIAL STITCHES 

Single Crochet 2 Together (sc2tog): *Insert hook into indicated stitch, yarn over and pull up a loop; repeat from * in next stitch indicated, yarn over and draw through all 3 loops on hook. (1 decrease)

NOTES

  • Gnome is worked in pieces and seamed together. Details are added last. 
Crochet gnome doll lying flat on hard surface.

CROCHET GNOME DOLL PATTERN

GNOME PANELS

Make 2

With A, ch 9. 

Row 1: (WS) Sc in 2nd ch from hook, *2 sc in next ch, sc in next ch; repeat from * across to last sc, 2 sc in last ch, turn –12 sc.

Rows 2-3: Ch 1, sc in each sc across, turn.

Row 4: Ch 1, *sc in next 2 sc, 2 sc in next sc; repeat from * across, turn–16 sc.  

Rows 5-12: Ch 1, sc in each sc across, change color to B, fasten off A, turn.

Rows 13-15: Ch 1, sc in each sc across, change color to C, fasten off B, turn.

Rows 16-17: Ch 1, sc in each sc across, change color to B, turn.

Rows 18-21: Ch 1, sc in each sc across, turn.

Row 22: Ch 1, *sc in next sc, sc2tog over next 2 sc; repeat from * across to last sc, 2 sc in last sc, change to D, fasten off B, turn– 12 sc. 

Row 23: Ch 1, sc in each sc across, turn.

Row 24: Ch 1, *sc in next sc, 2 sc in next sc; repeat from * across, turn– 18 sc. 

Rows 25-29: Ch 1, sc in each sc across, change color to E, fasten off D, turn.

Row 30: Ch 1, sc in each sc across, turn.

Row 31: Ch 1, sc in next sc, sc2tog over next 2 sc, sc in each sc to last 3 sc, sc2tog over next 2 sc, sc in last sc, turn– 16 sc. 

Rows 32-38: Repeat Row 31– 4 sc. 

Row 39: Ch 1, sc2tog over next 2 sc, sc2tog over last 2 sc, fasten off– 2 sc. 

Holding the RS together, whipstitch the two sides together (make sure to match the color), stuff the body and head, finish seaming. 

GNOME DETAILS

Nose

Make 1 

With D, ch 2. 

Round 1: 6 sc in 2nd ch from hook, do not turn–6sc.

Round 2: 2 sc in each sc around, do not turn– 12 sc. 

Rounds 3-4: Sc in each sc around, fasten off with long tail. 

Stuff nose lightly. Gather stitches of Rnd 4. Sew in place on gnome's face.

Buckle

Make 1 

With G, ch 6, sl st to first ch to form ring. 

Round 1: Ch 1, 10 sc in ring, sl st to first sc, fasten off leaving long tail. 

Sew buckle in place. 

Beard

Wrap color F around a 4โ€ wide cardboard 30 times. Cut to have (30) 8โ€ pieces. Fold 2 strands in half, thread loop end through any stitch on Row 25 of Gnome. Tuck ends through loop and pull tight.  Repeat for each stitch on Row 25. Trim to desired length. Brush to fluff beard. 

Color cheeks with red crayon. Embroider satin stitch eyes with color G.

Ear

Make 2 

With D, ch 4. 

Row 1: 12 dc in 4th ch from hook, fasten off with long tail for seaming.

Sew ears to gnome. 

Arm

Make 2 

With D, ch 2 

Row 1: 6 sc in 2nd ch from hook, turn.

Row 2: Ch 1, *sc in next 2 sc, 2 sc in next sc; repeat from * across, turn– 8 sc. 

Row 3: Ch 1, sc in each sc across, change to B, fasten off D, turn. 

Rows 4-10: Ch 1, sc in each sc across, turn.

Row 11: Ch 1, *sc2tog over next 2 sc; repeat from * across, fasten off, leave long tail for seaming. 

Fold arm in half lengthwise, stuff arm, sew arm in place. 

Crochet gnome doll with crochet gnome blanket.
Don't miss the matching crochet gnome blanket pattern, also free on MarlyBird.com

Crochet gnome dolls are a fun and easy project for crafters of all levels. Not only do they make for cute and quirky home decor, but they also make great gifts for any occasion. So why not try it and make your own adorable crochet gnome doll today?

Frequently Asked Questions

How big is the crochet gnome doll?

So here's the thing… the finished gnome doll is about 4 inches wide and 9 inches tall. Perfect for tucking onto a shelf or mantel!

What materials do I need to make this gnome?

Honestly… you'll need yarn in a few colors for the body, hat, and beard, plus a crochet hook, scissors, a tapestry needle, and some polyester stuffing. Oh, and a little red crayon for the cheeks!

Is this pattern difficult to make?

Yes! The pattern is designed for an advanced beginner crocheter. You'll need some basic crochet skills, but it's a really fun project to work on.

Can I make the gnome in different colors?

You betcha! The beauty of crochet is you can totally customize it. The pattern lists specific colors, but feel free to grab whatever yarn colors make your heart sing!

Where can I find the full pattern instructions?

The complete, free crochet gnome doll pattern is right here on the blog! Just scroll down past all the yummy details and you'll find the step-by-step instructions to get stitching.

Filed Under: Crochet, Free Patterns, Marly Bird Premium Patterns, Our Free Patterns, Pattern

  • « Previous Page
  • 1
  • …
  • 17
  • 18
  • 19
  • 20
  • 21
  • 22
  • Next Page »

Let's Be Social

Join the Marly's Minions Facebook group to share, ask questions, or chat about all of your yarn related crafts!

Join the group
Cartoon of a smiling woman with brown hair in a bun, glasses, black jacket and green shirt, waving next to large "hi" text.

Quick Links

The Pattern Shop

Our Free Patterns

Blog

Marly Bird House

Learn to Knit & Crochet

About

Giveaway Terms and Privacy Notice

Find Us Everywhere

Join the Newsletter

YouTube Channel

Marly's Minions FB Group

Etsy Store

Ravelry Store


AN ELITE CAFEMEDIA HOME/DIY PUBLISHER

Information from your device can be used to personalize your ad experience. Do not sell or share my personal information.

Privacy Policyย  ย Termsย  ย Marly Bird Legal Documents Copyright © 2026