Search
Close
  • The Pattern Shop
  • Our Free Patterns
    • Browse All Our Free Patterns
    • Our Free Knitting Patterns
    • Our Free Crochet Patterns
  • Blog
    • All Blog Posts
    • All Free Patterns
    • Dibble Dabble Inspiration
    • Giveaways
    • Make-Alongs
    • Product Reviews
    • Roundups
    • Tips, Tricks, Techniques for Knitting and Crochet
Stylized bird with pink and gray swirling tail above elegant “Marly” text, logo for crochet accessories and home decor.
  • Marly Bird House
  • Learn to Knit & Crochet
    • Newbie? Start Here
    • Video Tutorials
    • Knitting Definitions
    • Crochet Definitions
    • Common Techniques
    • Size Charts for Knitting and Crochet Projects
  • About
×
  • The Pattern Shop
  • Free Patterns
  • Blog
  • Marly Bird House
  • Learn to Knit & Crochet
    • Newbie? Start Here
    • Video Tutorials
    • Knitting Definitions
    • Crochet Definitions
    • Common Techniques
    • Size Charts for Knitting and Crochet Projects
  • About
Stylized bird with pink and gray swirling tail above elegant “Marly” text, logo for crochet accessories and home decor.
Search
Close

New Patterns NOW Available in Ad-Free PDF! Check out The Pattern Shop

How to Crochet the Linen Stitch

November 18, 2014 By admin 3 Comments

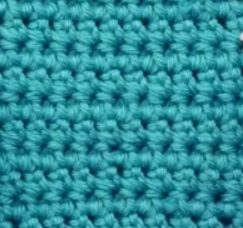
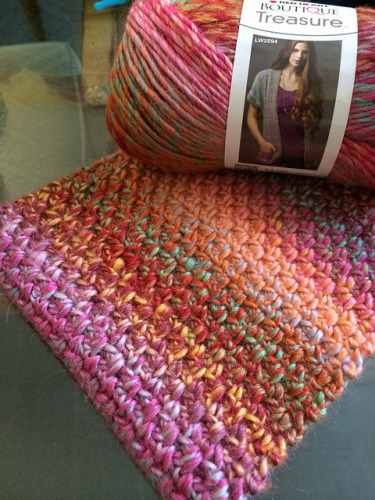
Learn how to crochet linen stitch is the newest Marly Bird YouTube video for Technique Tuesday. I find this stitch to be very relaxing to work and I think it is excellent to use for garments, accessories and home decor items. In the video I show you how to work up a simple swatch to get started and learn how to crochet the linen stitch using my tips and tricks.

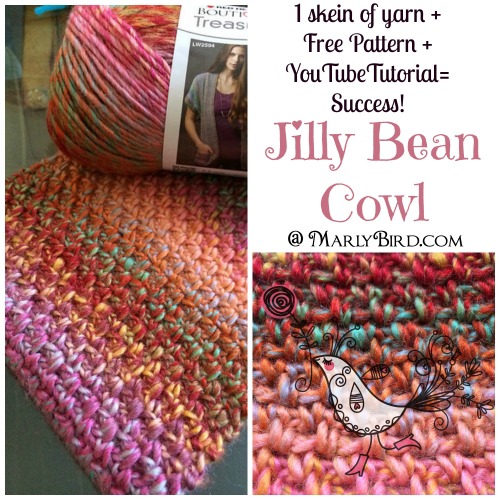
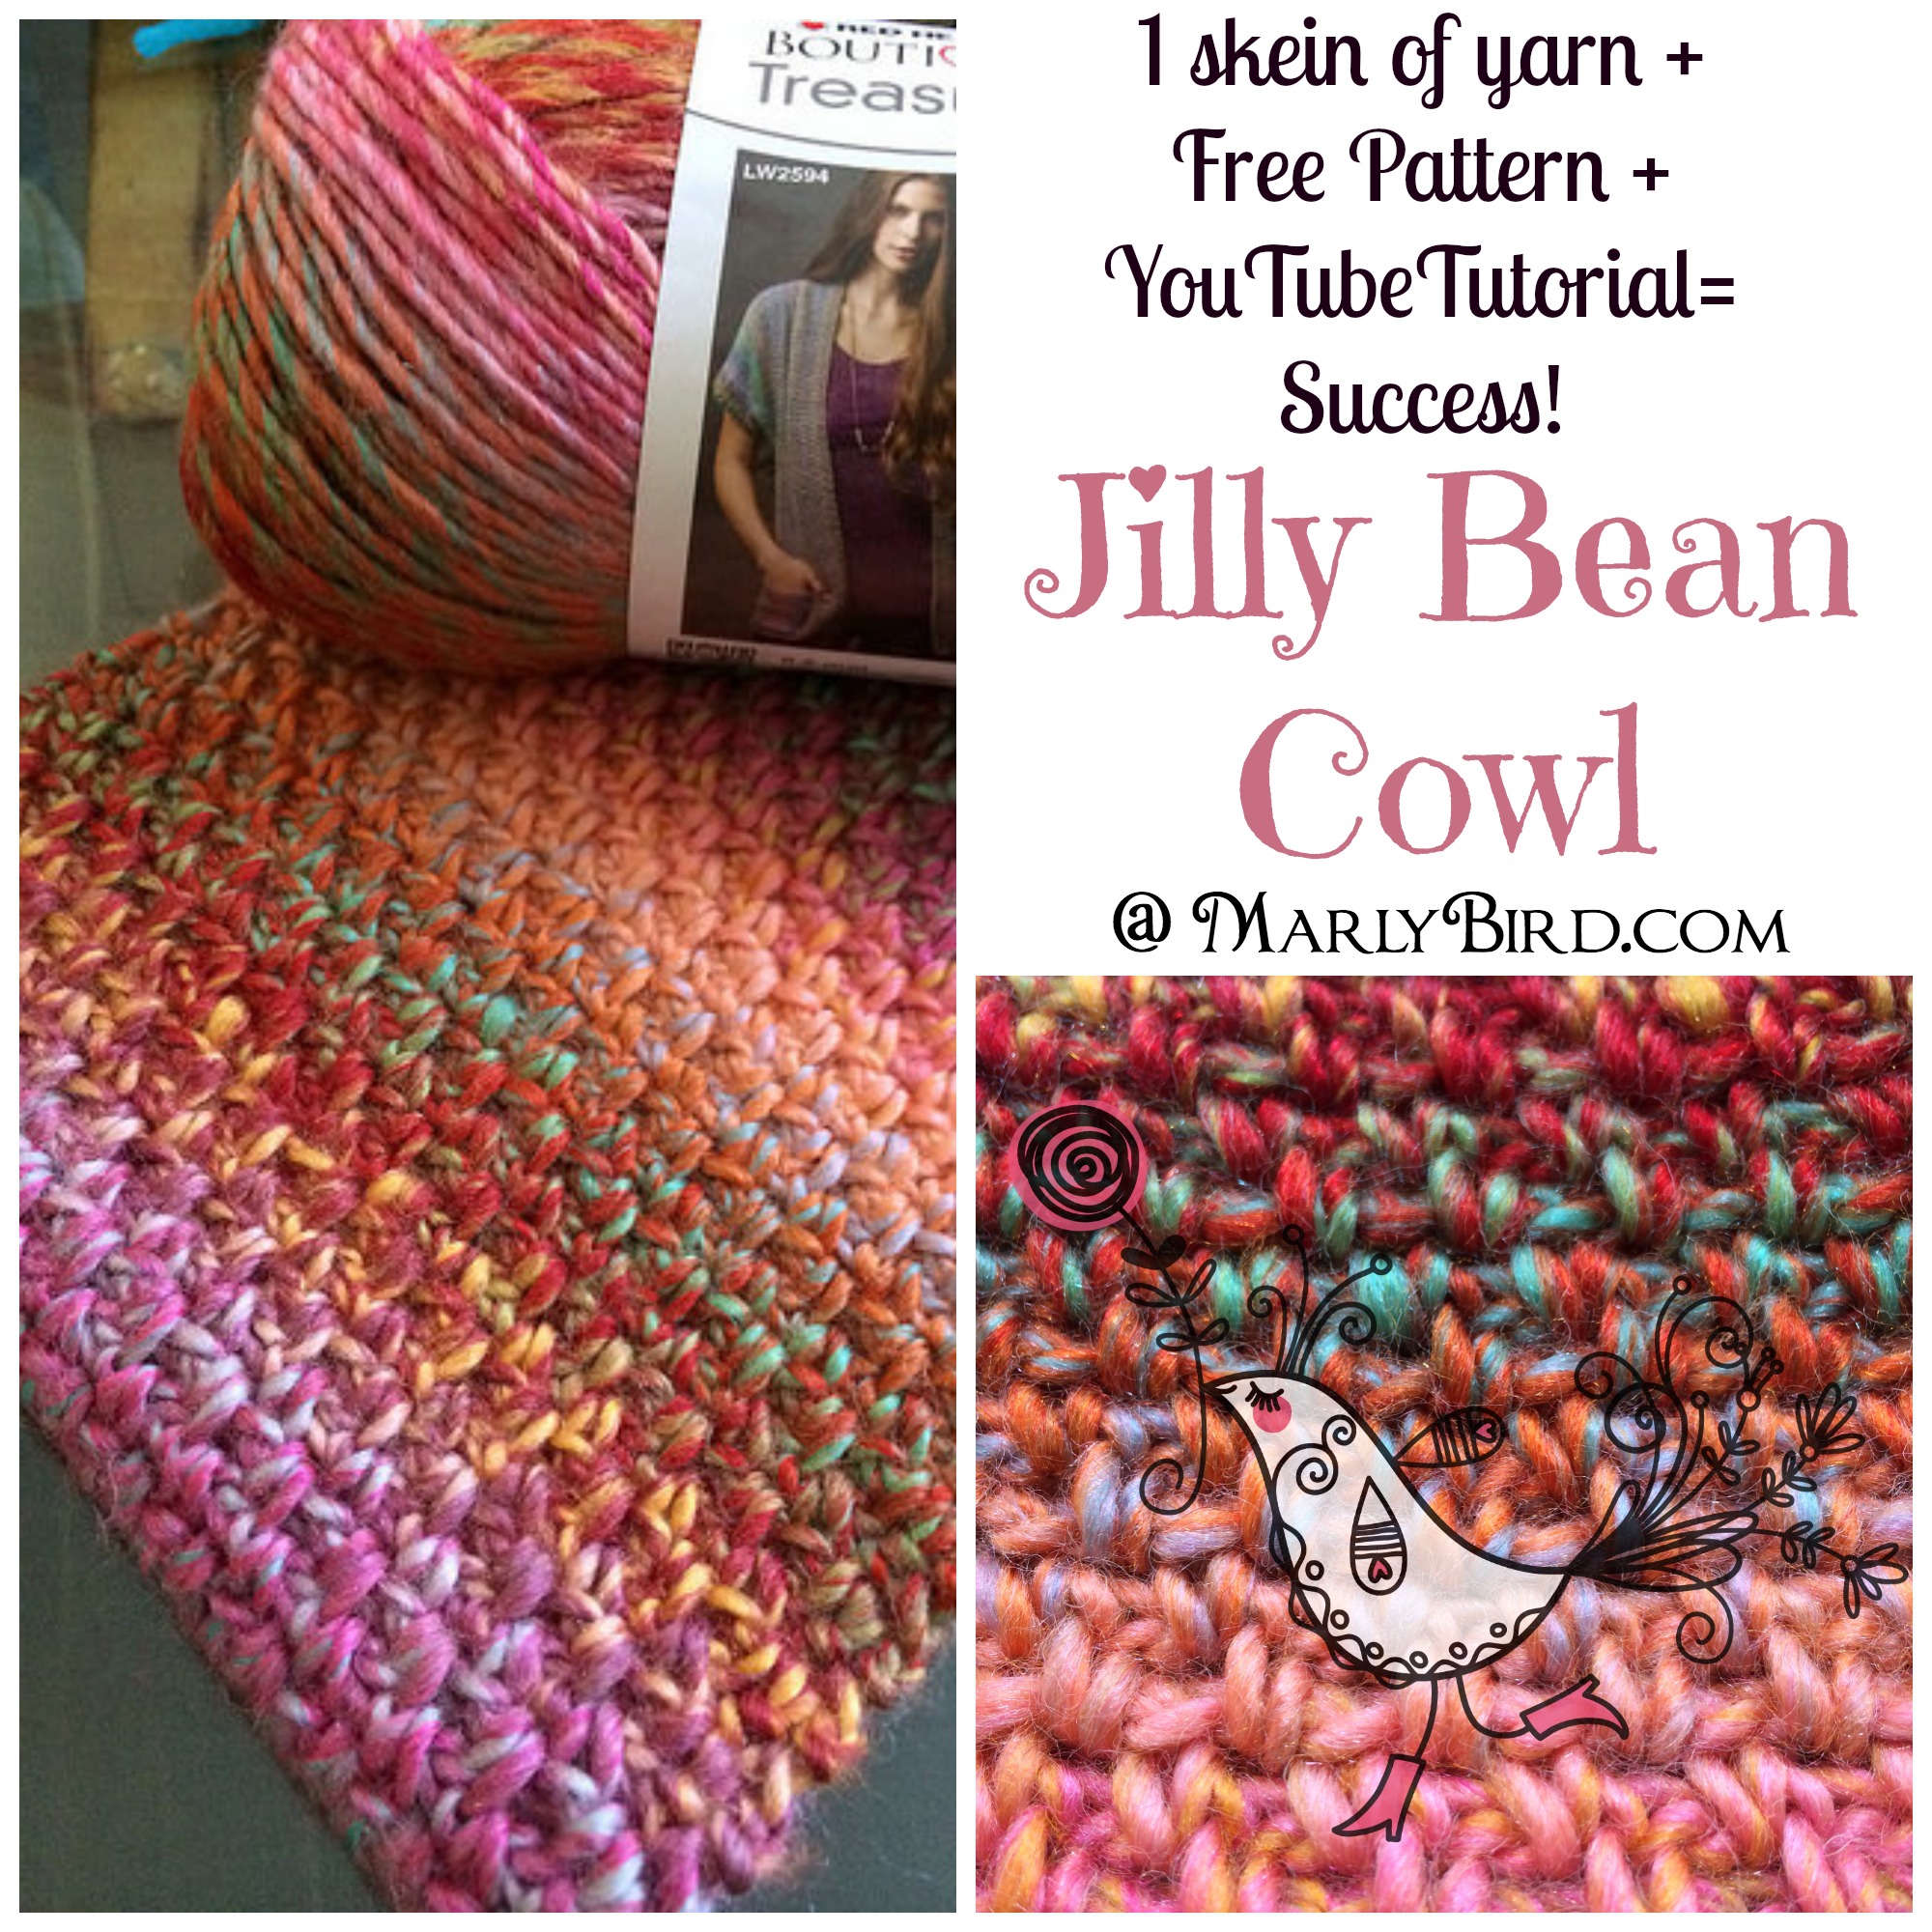
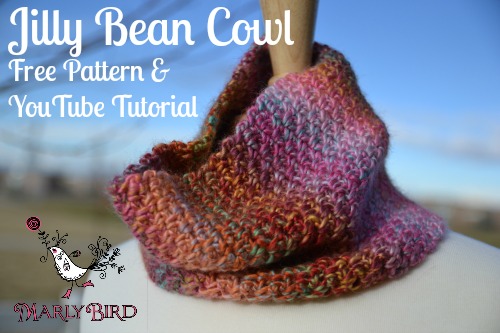
More than just the swatch there is a FREE PATTERN! Yes, the Jilly Bean Cowl is a free pattern! This quick project only uses one ball of yarn and can be made in about 2 hours. Click on the image below to get your free Jilly Bean Cowl Pattern.
Learn the Crochet Linen Stitch and get a FREE PATTERN at MarlyBird.com

*Disclaimer: this post contains affiliate links*

Linen Stitch Swatch

Yarn

Red Heart, “Boutique Treasures” (70% acrylic and 30% wool, 151 yds/100g), shown in color #68445 Abstract

Hook

6.5 mm/K (Marly uses Addi Crochet Hooks)

Notions

Removable Stitch Markers

Stitches Used (and YouTube Video links to help you learn)

  • Chain Stitch (ch)
  • Single Crochet (sc)

Pattern Stitch

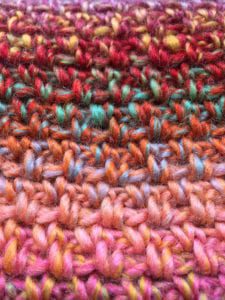
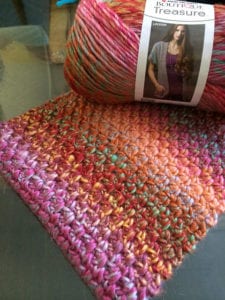
Boutique Treasures and Jilly Bean Cowl by Marly Bird. Free Pattern

Linen Stitch (flat): worked over an even number of chains

Row 1 (foundation row): Single crochet (sc) into 2nd chain from hook, *chain (ch) 1, skip 1 ch, sc in next ch; rep from * to last ch, turn.

Row 2: Ch 1, sc in first sc, sc in 1-ch space, *ch 1, sc in next 1-ch space; rep from * to last 1-ch sp, sc in last sc, turn.

Row 3: Ch 1, sc in first sc, ch 1, *sc in 1-ch space, ch 1; rep from * to last 1-ch sp, sc in last sc, turn.

Repeat rows 2 and 3 for pattern stitch.

 NOTE: Keep the chain one the same size as the shaft of the hook or your work will begin to pull and get out of shape.

That's it! Now, go and make something fun!

Frequently Asked Questions

What kind of projects is the linen stitch good for?

Honestly… this stitch is so lovely and relaxing to work up. I find it's excellent for all sorts of things… garments, accessories, and even home decor items! It really has a beautiful drape.

I saw you using a specific hook, what brand is that?

So here's the thing… I really love my Addi Crochet Hooks! They are my go-to for so many of my projects and I think you'll enjoy them too.

Is there a free pattern with this stitch tutorial?

Yes! You get a FREE PATTERN with this tutorial… the Jilly Bean Cowl! It's a super quick project and only uses one ball of yarn, perfect for a cozy afternoon.

What yarn and hook size do you recommend for the linen stitch?

For the swatch in the video, I used Red Heart “Boutique Treasures” yarn and a 6.5 mm/K hook. That yarn is a lovely blend of acrylic and wool, giving it a nice feel.

How do I keep my linen stitch from getting wonky?

Yes! The biggest tip I can give you is to keep your chain one stitches the same size as the shaft of your crochet hook. If they are too tight… your work can start to pull and get out of shape.
Filed Under: Crochet, Pattern, Tips, Tricks, Techniques for Knitting and Crochet, Uncategorized

Free Pattern Crochet Cowl: Jilly Bean

November 18, 2014 By admin 13 Comments


This free pattern crochet cowl: Jilly Bean Cowl is a great quick project for any crocheter! Using only 1 ball of  yarn this project is not only quick but cheap to make! And it’s a great addition to your winter wardrobe – an extra layer  around your neck when outside, alone once it warms up a bit, or around the house when it’s particularly chilly. Depending on the colors you use it works for both men and women. Perfect for a pre-teen or an adult.

There is even a YouTube video taught by Marly with a few tips an tricks to help you master the linen stitch!

Jilly Bean Cowl Pattern by Marly Bird. Available at www.MarlyBird.com
*this post includes affiliate links**


Jilly Bean Cowl Free Crochet Pattern and YouTube Tutorial from MarlyBird.com

Jilly Bean Cowl

Pattern Details

Measurements

Preteen, (adult)

5″ x 20″ [12.7 x 50.8 cm] , (7″ x 20″ [17.78 x 50.8 cm])

Gauge

4 1/4 sts and 4 rows = 1″ [2.54 cm]

 Yarn

Red Heart, “Boutique Treasures” (70% acrylic and 30% wool, 151 yds/100g), shown in color #68445 Abstract

Hook

6.5 mm/K (Marly uses Addi Crochet Hooks)

Notions

Removable Stitch Markers

Stitches Used (and YouTube Video links to help you learn)

  • Chain Stitch (ch)
  • Single Crochet (sc)


Pattern Stitch

15820787851_db14e38416_z

Linen Stitch (flat): worked over an even number of chains

Row 1 (foundation row): Single crochet (sc) into 2nd chain from hook, *chain (ch) 1, skip 1 ch, sc in next ch; rep from * to last ch, turn.

Row 2: Ch 1, sc in first sc, sc in 1-ch space, *ch 1, sc in next 1-ch space; rep from * to last 1-ch sp, sc in last sc, turn.

Row 3: Ch 1, sc in first sc, ch 1, *sc in 1-ch space, ch 1; rep from * to last 1-ch sp, sc in last sc, turn.

Repeat rows 2 and 3 for pattern stitch.


Notes

Instructions are given for all sizes in pattern with the larger size in parenthesis.

Jilly Bean Cowl Free Pattern from MarlyBird.com

Pattern

Body

Ch 22 (30) and follow the Linen Stitch (see pattern stitch) until piece measures approx 19 3/4″ [50.16 cm] ending with a row 3.

Finishing

Fold the cowl with right sides together, crochet a row 2 putting the hook through both the 1-ch space on the working row and the foundation row. The 1-ch spaces should line up perfectly if you ending with a row 3 before the fold. Fasten off the yarn. Weave in the ends.

And voila, your neck is warm and you are fashionable! This Jilly Bean Cowl is fun to make and whenever I wear it I get a LOT of compliments. I hope you enjoy making it – I can’t wait to see your photos!


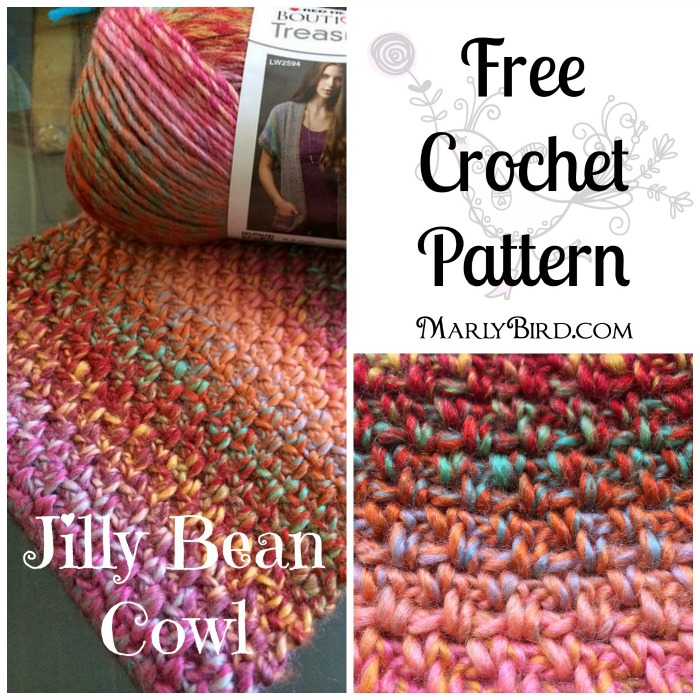
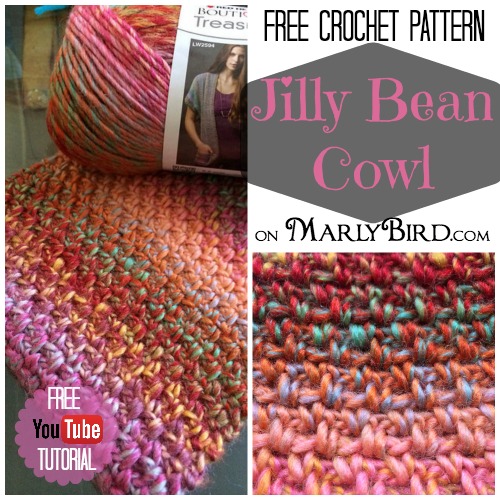
There you have it. A fun and Free CROCHET Pattern for you to use and to tell your friends about! Here are a couple more graphics for you to use either on your Ravelry Project Page, Facebook Post, Pinterest Link or your blog. Please feel free to use these images but please link back to this page 🙂 Thank you for your support and I hope you will share your finished projects with me on my facebook page.
Jilly Bean Cowl Free Pattern from MarlyBird.com Jilly Bean Cowl Free Pattern from MarlyBird.com Jilly Bean Cowl Free Pattern from MarlyBird.com
Ravelry Icon _2Like this pattern on Ravlery
MB_icon1_dropshadow_smLook at some other Marly Bird Designs
Written pattern copyright Marly Bird Designs, a division of Yarnsports LLC (c) 2014.
Please do not reprint or repost this pattern, but please do link to this page to share this pattern with others.
If you wish to make items for sale from this pattern that is not permitted at this time.

Crochet project with colorful yarn, showcasing a variety of stitches on a work surface and a banner for free classes.

Frequently Asked Questions

Can I really make this cowl with just one ball of yarn?

Yes! Honestly… this pattern is designed to be super economical. It uses just one ball of yarn, making it a quick and cheap project for anyone wanting to add a little warmth and style to their wardrobe.

What stitch is used for this cowl?

So here's the thing… this cowl features the linen stitch! It gives a beautiful texture and works up really nicely. There's even a YouTube video from me to help you master it if you're new to it!

Is this pattern suitable for beginners?

Yes! It's a great quick project for any crocheter. The linen stitch can take a tiny bit of getting used to, but the video tutorial really helps break it down… you'll be crocheting away in no time!

Can I make this cowl in different sizes?

Absolutely! The pattern gives instructions for both preteen and adult sizes. You just adjust your starting chain based on which size you're aiming for… easy peasy!

Can I sell cowls I make from this pattern?

Unfortunately… no, you cannot sell items made from this pattern at this time. You can definitely make them for yourself and to gift to friends and family, though! And please do share photos!

Filed Under: Crochet, Our Free Patterns, Pattern, Uncategorized

Extended Single Crochet Stitch

October 14, 2014 By admin Leave a Comment

Technique_Tuesday

Learn the Extended Single Crochet Stitch (Exsc) in today's Technique Tuesday!

This extended single crochet stitch is a great one to use when making a fabric that you want to have some drape or flexibility added to a simple single crochet. I've used it a lot when making crocheted socks (patterns coming soon). I first was introduced to it when I was taking a class with the amazing Robyn Chachula. She told me that by using the extended single crochet instead of just the single crochet when making socks the wearer has a more comfortable experience when walking in the socks.

The extended single crochet is made by adding a chain stitch to the single crochet to extend the stitch and make it a bit more flat and less bulky.

extended single crochet stitch

For the video example follow these instructions:

Chain any multiple of you wish for the example.

Foundation Row:

Insert your hook in the 2nd chain from hook (the chain stitched will NOT count as a stitch),

*Yarn over your hook and pull up a loop [2 loops on your hook],

Yarn over your hook and draw thru 1 loop on hook [2 loops on hook still…but you have now created a chain stitch],

Yarn over your hook and draw thru 2 loops on hook to complete the extended single crochet.

Now, repeat the instructions from * in each chain to the end of your row to complete a row of extended single crochet stitches.

Chain 1 and turn.

Next Row:

*Insert your hook in the stitch,

Yarn over your hook and pull up a loop [2 loops on your hook],

Yarn over your hook and draw thru 1 loop on hook [2 loops on hook still],

Yarn over your hook and draw thru 2 loops on hook to complete the extended single crochet.

Repeat from * in each stitch to the end of your row to complete the row.

Chain 1 and turn.

Repeat the last row until you have the desired length of your piece. Finish off.

See, SIMPLE!

I hope you enjoy the video and will click subscribe to be up to date whenever there is a new video released 🙂

xoxo

Marly Bird

Frequently Asked Questions

What's the deal with this extended single crochet stitch?

So here's the thing… this stitch is great when you want your crochet fabric to have a little more drape and flexibility than a regular single crochet. It's like a little bit more give, you know?

Why would I even use this stitch instead of a regular single crochet?

Honestly… it makes things more comfortable! I learned this from Robyn Chachula, and she said it makes socks way more comfortable for walking. It's a bit flatter and less bulky too!

How do you actually *make* the extended single crochet stitch?

Yes! So, you start with a chain and then you insert your hook, yarn over, pull up a loop… then you yarn over again and pull through *one* loop. That's the extended part! Then you yarn over one last time and pull through the remaining two loops to finish the stitch.

Does this stitch work for any crochet project?

Well… it's especially good for things that need a bit of give, like socks or maybe garments where you want a nice drape. You could totally try it on other things too to see how it looks!

Is this stitch hard to learn?

Oh, not at all! It's pretty simple once you get the hang of it. The video tutorial on the page is super helpful, and I break down the steps for both the foundation row and subsequent rows.

Filed Under: Crochet, Tips, Tricks, Techniques for Knitting and Crochet, Uncategorized

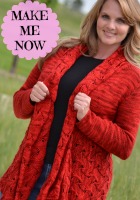
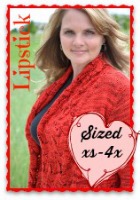
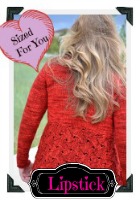
Lipstick KAL: Week 1–Choosing the RIGHT Size

October 1, 2014 By admin 1 Comment

Lipstick KAL: Choosing the Right Size for YOUR Lipstick

If you have taken my Curvy Knits class either at STITCHES or on CRAFTSY you know that choosing the right size all begins with what you already have in your closet!

To choose the correct size Lipstick for YOU we are going to take the measurements of a piece you have in your closet. Right now, go to your closet and choose a garment that you like the fit of and want the Lipstick Cardigan to fit like. For me, I chose a sweater that is a little snug around my body from my waist up (in all the Stockinette stitch portions of the sweater I am making) knowing that the band around the lower half of the Lipstick will have a good amount of ease. I think it is more important to have the body FIT correctly.

Here is mine:

I took a variety of measurements. If you are not sure what measurements to take I would take a look at the schematic and take those same measurements on your favorite garment. Once you have the favorite garment measurements you can compare them to the ones on the schematic and make any adjustments you might want to make.

I can hear you thinking, “Why would I make adjustments to this pattern? Is it not written correctly?” Well, of course it is written correctly. BUT, if you are going to take the time to make something for YOU why not make sure it is going to fit YOU the way YOU like it to fit? Now is the time to make any changes you might want so that when you are finished with YOUR Lipstick you are pleased with it. And, if you are like me and spent a pretty penny on the yarn I am sure you want your cardigan to fit GREAT!

You can see on my schematic I have highlighted all the measurements that pertain to the size I am making (2x) and a few notes for areas that I plan on making changes to have the cardigan better fit ME!

One of the changes I am making for mine is the front width. As written the fronts are 1/2 the back measurements which will work, but I know that for me if my fronts are less than half and the trim makes up for the area left open it looks better on me. SO, the schematic shows that the fronts for the 2x should be 12 1/2″ but I am changing mine to be 10 1/2″.

Making this change will change the number of stitches that I will need to cast on for the fronts and it will also change the rate of neck shaping but it will not change any of the side/row measurements so I will be able to follow the instructions for the 2x size whenever I am working to measurements. I've gone ahead and made the changes in the pattern before I begin to make sure that I don't get carried away and forget to make the changes.

Note: I have highlighted the cast on number I am using for the left front but I also highlighted the 2x measurements to remind me of which ones I am using … I love visual cues! 

Specifically, for my changes I am going to cast on for the 10 1/2 inches (44 sts) follow the pattern same as the back to the armhole, then work the same armhole instructions as for the back and evenly for 3 1/2″ which is what the instructions say to do for my size. Because I cast on fewer stitches than the 2x size suggested but still followed the armhole instructions for the 2x I will have fewer stitches on my needle after the armhole shaping than written for either the 2x or the large (28 sts remain).

So I will need to also adjust the number of times I decrease to shape the front neck so that my shoulder stitches will match up front to back. There are 18 sts at the back shoulder for the 2x so if I have 28 sts after my armhole shaping I need to eliminate 10 sts at the front neck edge so that my front shoulder will match my back shoulder. Which means I will only work my decreases 10 times total instead of the written number.

I am not too concerned about this making the shaping shorter than written (it will be done over a little less than 2″ instead of the written 3″) because after I do the shaping I just have to knit the front to match the armhole measurement of the back so the pieces will match up 🙂 If I wanted to do more math (which I DO NOT) I could totally adjust the shaping to fit over the 3″ but like I said, I am okay with it being shorter.

Okay, I've made all my changes that I wanted…time to cast on and begin.

What changes are you making?

GOAL FOR WEEK 1!

To maintain a schedule that will get all the pieces complete in time for us to wear this beautiful piece to Thanksgiving Dinner the goal for WEEK 1 is to complete the back of the cardigan. Find the correct cast on number for you and let's start. Join the Ravelry Group to keep us all up to date with your progress and to cheer each other along!

Lipstick_Rav_3


Frequently Asked Questions

How do I figure out the right size for the Lipstick Cardigan?

So here's the thing… you'll want to grab a sweater you already own that fits you perfectly. Then, measure that sweater and compare those measurements to the schematic in the pattern. You can even make adjustments before you start knitting to make sure it's just right for you!

Why would I change the pattern if it's already written correctly?

Honestly… you're putting in all this time and effort to make something beautiful for yourself, right? Why not tweak it just a little so it fits YOU and your style perfectly? It's all about making it your own special piece!

I noticed you changed the front width measurement. Does that mess up the whole pattern?

Yes! Well, sort of… Changing the front width does mean you'll need to adjust the cast-on number and how you shape the neck. But don't worry, it won't affect the side measurements, so you can still follow along with the stitch counts as written for the back and other sections!

What's the goal for Week 1 of this KAL?

Great question! The goal for Week 1 is to complete the back piece of the cardigan. This helps us stay on track so we can all have our beautiful Lipstick Cardigans ready to wear for Thanksgiving Dinner!

I'm not sure what measurements to take on my favorite sweater. What should I do?

Don't sweat it! Just take a peek at the schematic provided in the pattern and take those same measurements on your favorite garment. It's a super simple way to make sure you're comparing apples to apples and getting the fit you want.

Filed Under: Make-Alongs, Tips, Tricks, Techniques for Knitting and Crochet

Lipstick KAL: Week 1– GAUGE SWATCH

October 1, 2014 By admin Leave a Comment

Lipstick KAL: Week 1 — Gauge Swatch! Yes, I said the hated word, SWATCH.

Lipstick_Rav_3 Lipstick_Rav_1 LIpstick_Rav_2

Hi everybody, I am thrilled that you are all joining me for the Lipstick KAL. I must say that the Lipstick Cardigan (click here to purchase the pattern)  is one of my favorite designs. Ever since I got it back from my contractor I've wanted to have one of my own. Well, looks like I am going to get one…as long as I can keep up with all of you during this KAL!

My Lipstick is Blue. Specifically, I am using Malabrigo, “Rios” in Bobby Blue

Okay, let's get started shall we? By now I hope all of you have chosen the yarn you wish to use. Now it's important that you do a gauge swatch. Please make a gauge swatch now if you have not.

Things to remember:

1. The Lipstick Cardigan will be somewhat heavy for all the sizes so please be sure to take pre-block, post-block and hanging gauge swatch measurements. All three will be important for you to do all you can to make sure your piece will be finished the way you want.

FINISHED GAUGE

16 sts and 24 rows = 4″ [10 cm] in Stockinette st after blocking

2 reps = 5″ wide x 6″ long in Scroll pat after blocking

I can hear you groaning!

Here is why I am telling you to do more work than (most likely) you have done before for other sweaters, when the pattern says to work in pattern until the piece measures XX” you need to know that XX” pre-block will get a finished blocked gauge of XX”. To use real numbers (note:these are not actual numbers from the pattern): If 12″ pre-block knitting ends up 15″ blocked knitting and you go ahead and knit to the full 12″ pre-block then your sweater is already 3″ too long! See what I mean?

You want your blocked gauge to match the gauge measurement given in the pattern. For the Lipstick, the gauge is what I used to write the pattern and get all the correct finished measurements.

Now, let's talk a little about hanging gauge. Since the cardigan is heavy I think it is important to know just how much YOUR yarn will stretch after a full day of wearing it. Some yarns will not stretch much but others could stretch WAY MORE than you know. Therefore, to best guess-timate the effect gravity will have on your sweater you should do a hanging gauge swatch. You will then compare the blocked gauge to the hanging gauge to see if there is a difference.

If there is a HUGE difference then I would suggest using a different yarn for this project. You don't want your finished cardigan to end up looking like a duster coat by the end of the day, right? Since we are all in agreement on this let's all agree that the hanging gauge is important.

A hanging gauge is simple, after you have measured your blocked swatch clamp it in a pant hanger or anything that will allow the swatch to hang, then pin clothes pins to the bottom of the swatch to simulate gravity. Let it hang for approx. 8 hours (I use this number since most people will wear a piece for around an 8 hour work day). Remove the pins and lay the swatch flat to measure it.

Again, I want to say that if the blocked measurement and the hanging measurement are significantly different (like 2-3″ difference) the yarn you chose might not be the best choice and I would suggest using a different one.

2. Which is more important: Stitch Gauge or Row Gauge? Well, I think the information listed in #1 can tell you that the last thing you want is a larger than listed row gauge. If after doing your swatch you have a spot on stitch gauge but the row gauge is a little smaller I would say that is totally okay. IMHO, getting stitch gauge is more important for this piece.

3. Do you do a gauge swatch for both patterns? YES, you plan on using both in your cardigan, right? Then you must know the gauge measurements for both. Remember, you do this cardigan in pieces so if you get gauge in ST st with size 8/5mm needles but need to go to a larger or smaller needle for the Lace st that is Okay! But you need to know if you need to do that so DO YOUR GAUGE SWATCH! LOL.

Okay, once the gauge swatch is complete let's choose which size to make. I will put that information in the next post 🙂

I really want to see what you are working on so please be sure to join the Ravelry Group!  Let's help one another out and make a great sweater!

Frequently Asked Questions

Why do I have to do a gauge swatch for the Lipstick KAL?

Honestly… I know, I know, swatching isn't everyone's favorite part! But for the Lipstick Cardigan, it's super important because it's a heavier sweater. We need to make sure your finished cardigan will be the size you want it to be after blocking and even after a day of wearing it!

What's the big deal about blocking and hanging gauge?

So here's the thing… blocking and hanging gauge are crucial for this project because the cardigan is heavy. Your knitting might stretch more than you think under its own weight. Checking both pre- and post-block, plus a hanging swatch, helps you see how much your specific yarn might grow, so you don't end up with a cardigan that's way too long!

Is stitch gauge or row gauge more important for this cardigan?

Yes! While both are good to get right, I'd say stitch gauge is a little more critical for the Lipstick Cardigan. If your row gauge is a bit off but your stitch gauge is spot on, you'll likely be just fine. We want to make sure the width is correct, especially!

Do I really need to do a gauge swatch for both the Stockinette and Scroll patterns?

You bet! Since you're planning on using both patterns in your cardigan, you definitely need to know the gauge for each one. It's totally okay if you need different needle sizes for the different stitches… but you won't know unless you swatch!

My hanging gauge swatch stretched a LOT compared to my blocked gauge… what now?

Oh wow… if there's a huge difference, like 2-3 inches, I'd really suggest considering a different yarn. You don't want your beautiful finished cardigan to turn into a super long, droopy piece, right? Choosing a yarn that behaves well when hanging will make all the difference.

Filed Under: Make-Alongs, Tips, Tricks, Techniques for Knitting and Crochet

Crochet Scarf Pattern and Youtube Video: Game Day Scarf

September 16, 2014 By admin 1 Comment

NEW PATTERN RELEASE! This Crochet scarf pattern and Youtube video are the newest in a series of beginner projects designed to teach the new crocheter a fantastic skill and how to create a wonderful new project. Let me introduce you to the Game Day Scarf pattern and YouTube video on the Single Double Combination Stitch.

Textured crochet scarf in navy blue, white, and orange stripes, worn by a man in a black sweater against a metal gate.Game Day Scarf (crochet) 

Show your team spirit every day with this simple crocheted scarf. The pattern can easily be customized to the colors of your favorite team. Create the perfect crocheted scarf for someone you loved, or for yourself.

Cozy knitted blanket in shades of blue and gray featuring a textured stitch pattern, draped over a couch. *small print: this is for a .PDF download of the pattern, not the actual finished product*

Skill level: Easy

Sizes: one size fits most

Yarn: Red Heart, “With Love” (100% acrylic; 370 yds 338 m/198 g): MC Peacock, 1ball; CA White, 1 ball; CB Mango, 1 ball.

Hook: Size H/8 (5 mm) or size needed to obtain gauge


Need a little help? Here is a YouTube Video by me, Marly Bird, for the Single Double Combination Stitch.


Frequently Asked Questions

What kind of yarn do I need for this scarf?

So here's the thing… you'll need Red Heart “With Love” yarn, which is 100% acrylic. For the colors, it calls for Peacock, White, and Mango, and you'll need one ball of each.

Is this a difficult pattern to make?

Honestly… no! It's listed as an easy skill level, perfect for those new to crocheting or looking for a simple, fun project.

Can I make this scarf in different colors?

Yes! The pattern is super easy to customize, so you can totally use the colors of your favorite team or any colors you love.

Do I need a special hook for this?

You'll need a size H/8 (5 mm) crochet hook, or whatever size works best for you to get the right gauge. It's pretty standard!

Where can I get help if I get stuck?

You're in luck! I've made a YouTube video just for you that shows you how to do the Single Double Combination Stitch… it's the main stitch for this scarf!

Filed Under: Crochet, Our Free Patterns, Pattern

  • « Previous Page
  • 1
  • …
  • 96
  • 97
  • 98
  • 99
  • 100
  • Next Page »

Let's Be Social

Join the Marly's Minions Facebook group to share, ask questions, or chat about all of your yarn related crafts!

Join the group(opens in new tab)
Cartoon of a smiling woman with brown hair in a bun, glasses, black jacket and green shirt, waving next to large "hi" text.

Quick Links

The Pattern Shop

Our Free Patterns

Blog

Marly Bird House

Learn to Knit & Crochet

About

Giveaway Terms and Privacy Notice

Find Us Everywhere

Join the Newsletter

YouTube Channel

Marly's Minions FB Group

Etsy Store

Ravelry Store


AN ELITE CAFEMEDIA HOME/DIY PUBLISHER

Information from your device can be used to personalize your ad experience. Do not sell or share my personal information.

Privacy Policy   Terms   Marly Bird Legal Documents Copyright © 2026