Sweet Nothings Crochet Socks: Finally, a Free Pattern That Actually Fits in Your Shoes
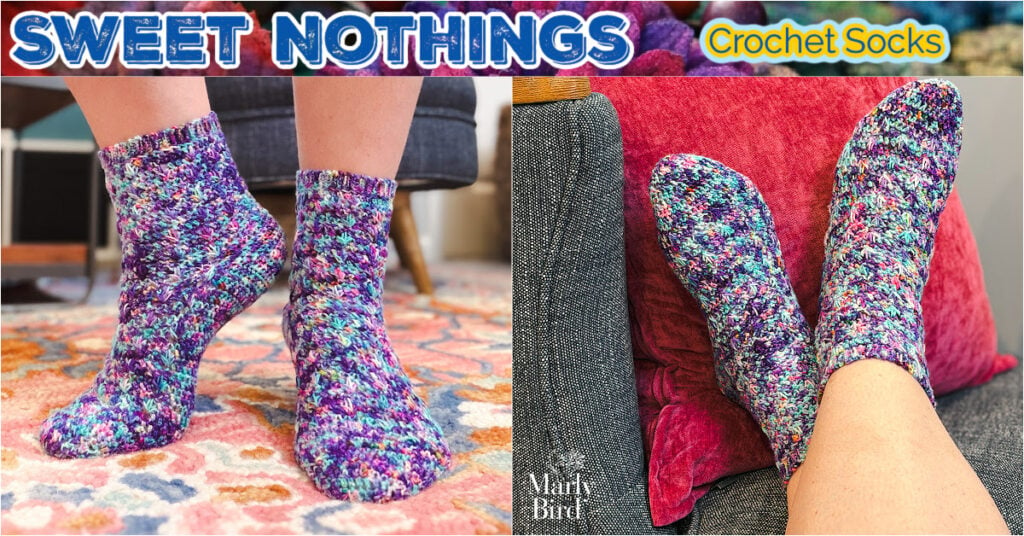
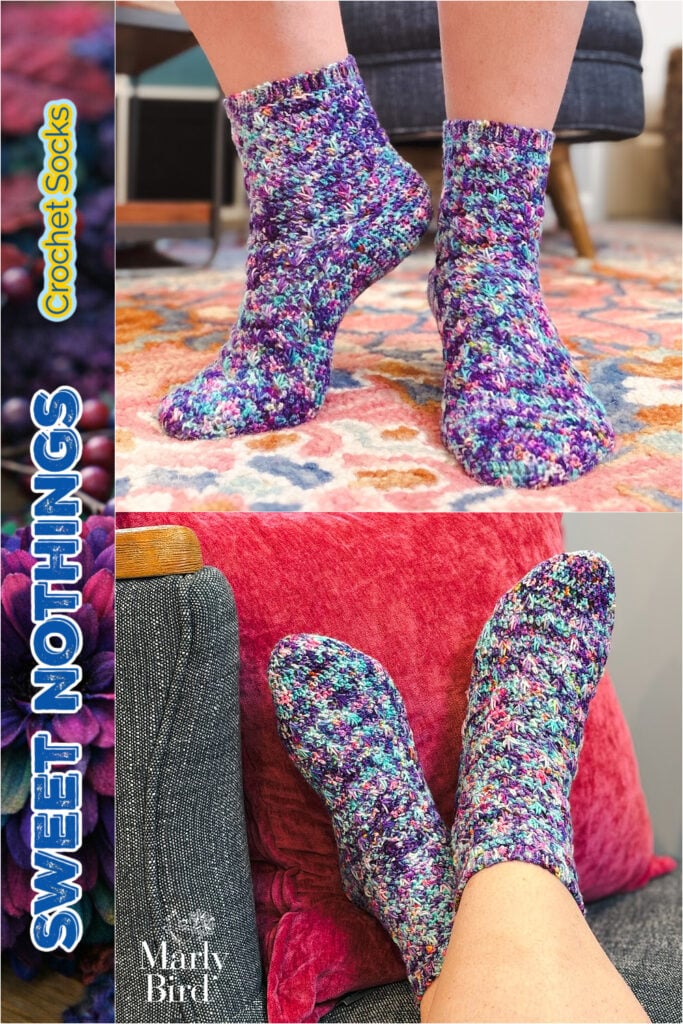
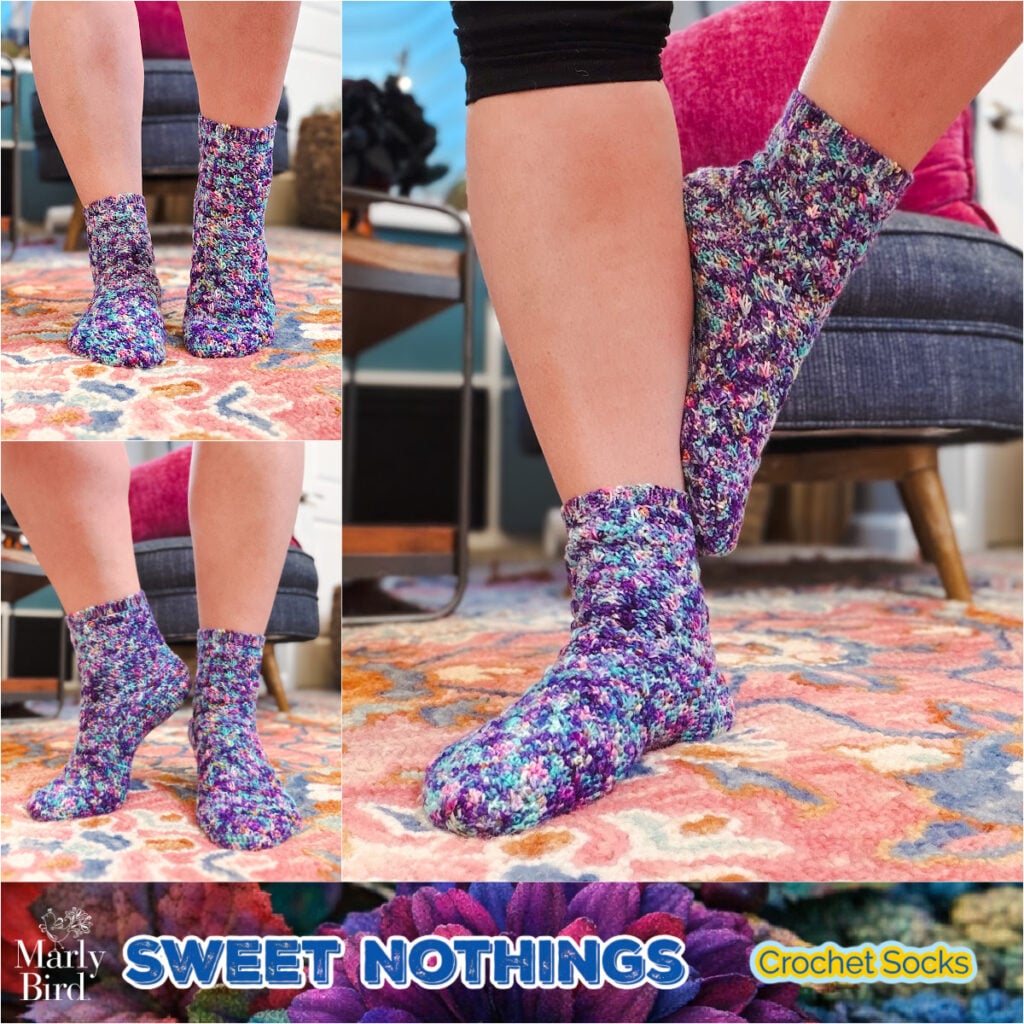
Sweet Nothings is a free intermediate crochet sock pattern designed by Marly Bird and Robyn Chachula, available in sizes S, M, L, and XL (7–10″ mid-foot circumference). Worked in fingering weight sock yarn on a D/3 hook, it uses the esc spike stitch to create a dimensional, shoe-fitting sock with the visual sophistication you've been waiting for in a crochet pattern.
⚡ Quick Answer: Can you crochet socks that actually fit in shoes?
Yes! Sweet Nothings Crochet Socks are designed specifically for that. Using fingering weight yarn (#1), a D/3 (3.0mm) hook, and a sole/instep construction that mirrors proper sock architecture, these socks slip effortlessly into your favorite shoes… no bulky fabric, no drooping toe. The full free pattern is right here on the blog.
Looking for a free crochet sock pattern that goes beyond simple stripes and slipper-thick fabric? You've found it. Sweet Nothings uses fingering weight sock yarn and a structured sole/instep construction to produce crochet socks in sizes S through XL that actually slip into your shoes… designed by two sock experts who know exactly what it takes to give crochet the visual sophistication knitters have always had.
Hey, bestie 💛
Can I tell you something I hear constantly in my DMs and over in our Facebook community? “Marly, I love crochet but I have serious sock envy. Every beautiful sock pattern I find is for knitters.”
If that sounds familiar… you are SO not alone. Crochet sock patterns have a reputation problem. Too thick. Too booty-shaped. Too simple. And almost never quite right for actual shoes.
Well, friend, consider this your official sock envy cure. My brilliant collaborator Robyn Chachula and I have been conspiring on a sock pattern that uses fingering weight yarn, proper sock construction, and a signature stitch that will make your knitting friends do a double take… and today I'm sharing it with you for free here on the blog. 🎉
Meet Sweet Nothings Crochet Socks.
This post contains affiliate links. If you purchase through my links, I earn a small commission at no extra cost to you — it helps me keep sharing free patterns and tutorials right here on the blog. Thank you for supporting my yarn-loving heart! ❤️
What You'll Love About These Socks 💖
No sign-up. No purchase. No catch. Scroll down for the full written pattern — it's all right here. 🆓
S, M, L, and XL cover 7″ through 10″ mid-foot circumference. No more squeezing into “one size fits most” and hoping for the best. 📐
This is the stitch that makes these socks look knit. It sounds fancy, but once you practice for a row or two? Pure rhythmic magic… and the texture is absolutely stunning. ✨
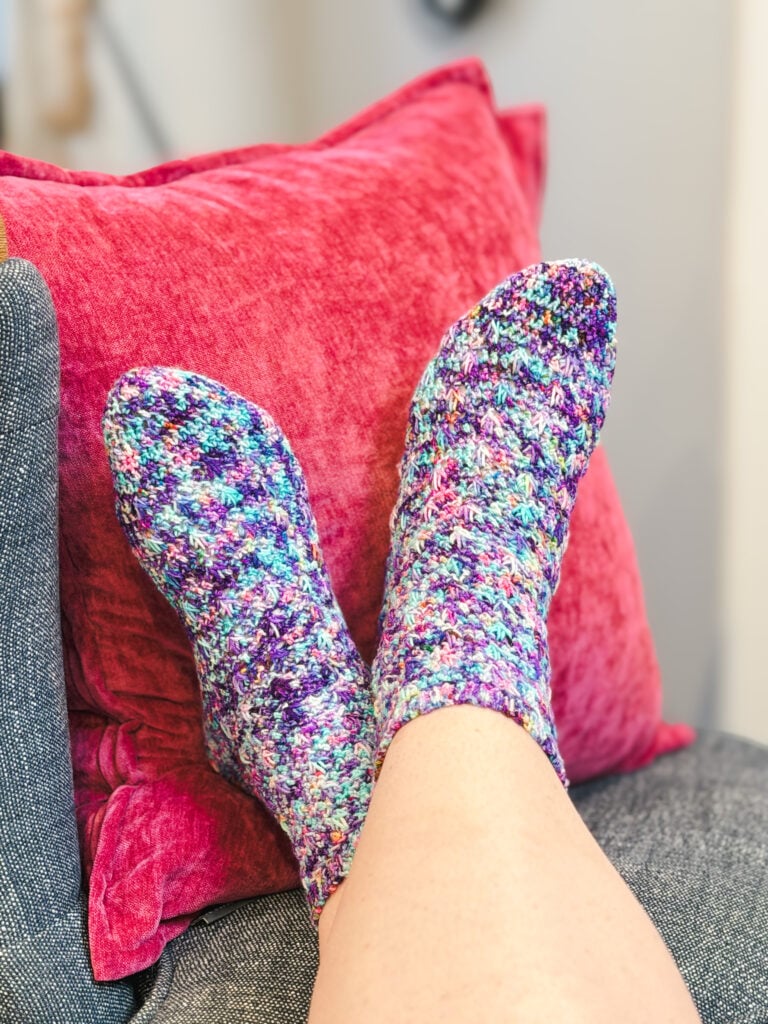
Fingering weight yarn + structured sole/instep construction = socks that slip right into boots, sneakers, and loafers. Zero bulk. Zero drooping. 👟
Robyn has been designing since 2006 and has published multiple bestselling books. When Robyn co-designs a sock, you know the construction is ENGINEERED, not guessed. 💛
Sweet Nothings was designed for Sock Obsession Yarns in the Sweet Nothings colorway (yes, named for this pattern! 😍). Any quality 75/25 merino/nylon sock yarn works beautifully.
Quick Pattern Overview
| Pattern Name | Sweet Nothings Crochet Socks |
| Designers | Marly Bird + Robyn Chachula |
| Skill Level | Intermediate |
| Sizes | S, M, L, XL — fits 7″, 8″, 9″, 10″ mid-foot |
| Yarn Weight | #1 Fingering / Sock Weight |
| Hook | D/3 (3.0mm) |
| Gauge | 23 sts × 18 rows = 4″ × 4″ |
| Construction | Separate sole and instep; heel worked after foot |
| Cost | Free here on the blog! |
Sweet Nothings is worked in two main sections… a separate sole and instep that come together to create a structured foot, followed by the heel (worked after the foot is complete) and then the leg with its cuff. This construction gives the sock its shoe-friendly shape and makes precision sizing possible across all four sizes.
The signature esc spike stitch runs through the instep and leg sections, creating that beautiful textured pattern that makes these socks look like they took twice as long to make as they actually did. The sole is worked in simple extended single crochet for a smooth, comfortable base against your foot.
Love the Pattern but Want an Ad-Free PDF? ⭐
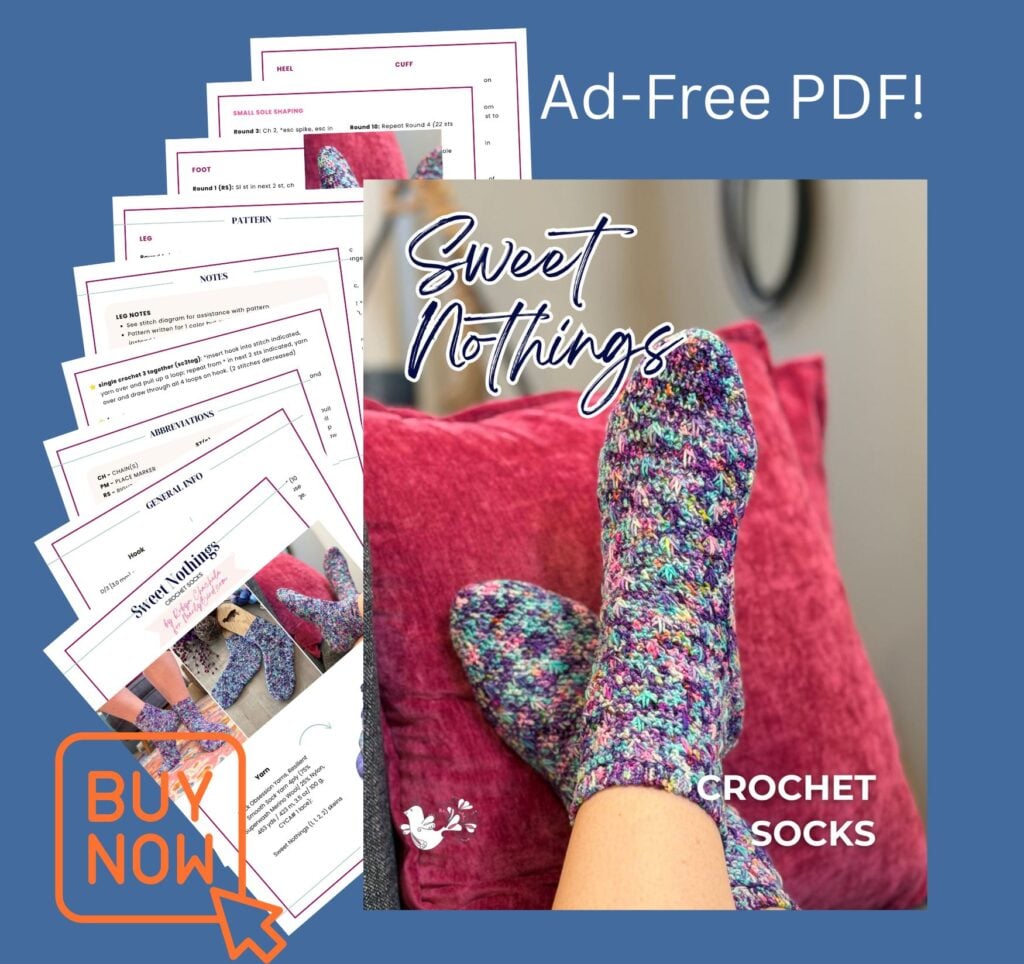
The full Sweet Nothings pattern is completely free right here on MarlyBird.com… but if you'd love a clean, printable, ad-free version to take to your crafting chair (or your favorite coffee shop), the ad-free PDF has you covered. Every purchase helps me keep sharing free patterns here on the blog 💖
What You’ll Learn
Is This Crochet Sock Pattern Right for You?
Sweet Nothings is rated Intermediate, which means you should be comfortable with extended single crochet (esc), working in rows, and basic shaping before you cast on. If you've made hats, cowls, or fingerless mitts and you're ready for a construction challenge with a big visual payoff… you're ready for these socks.
This pattern is a great fit for you if…
This pattern may not be the best starting point if…
And hey, if you're a knitter or a BiCrafty crafter who wants a toe-up knit sock to make alongside your crochet version… check out my My First Toe-Up Knit Socks Free Pattern too. One sock wardrobe, BiCrafty bestie style. 🧦🧶
Explore More Free Crochet Patterns on MarlyBird.com
Sweet Nothings is part of my growing library of free crochet and knitting patterns here on the blog — from beginner-friendly wraps to intermediate garments, there's something for every skill level and every stash skein waiting for its moment. And if Sweet Nothings leaves you wanting to go even deeper into crochet sock construction, keep reading — there's a whole workshop waiting for you at the end of this post (and you can get it half price!).
What Makes This Pattern Different: The Esc Spike Stitch
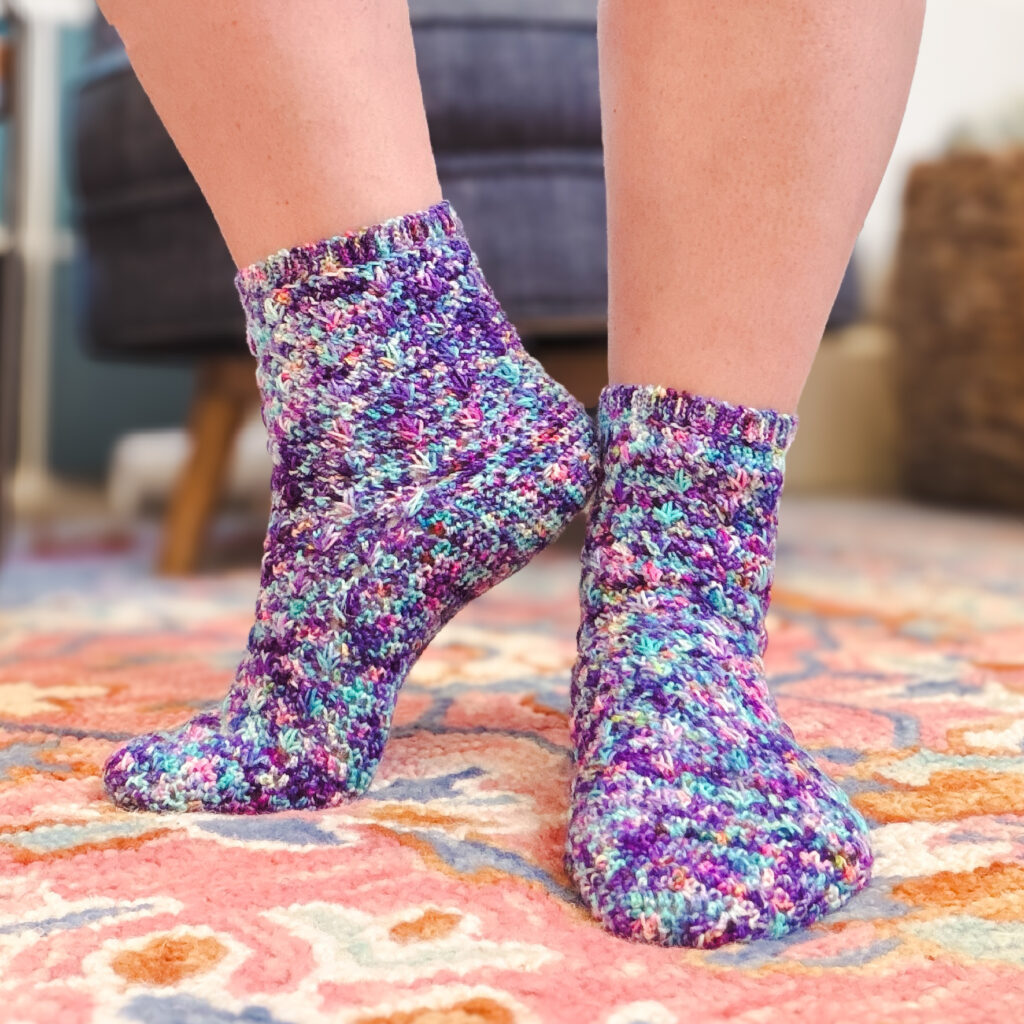
Most crochet fabric is built stitch by stitch in the current row. The esc spike stitch breaks that rule… and that's exactly what makes it special.
To work an esc spike, you insert your hook into a stitch from a previous row — one or more rows below where you're currently working — and pull up a long loop to the height of the current row before completing the stitch. The result is a stitch that physically spans multiple rows of fabric, creating a raised, dimensional effect that looks woven or almost knit-like when worked in sequence.
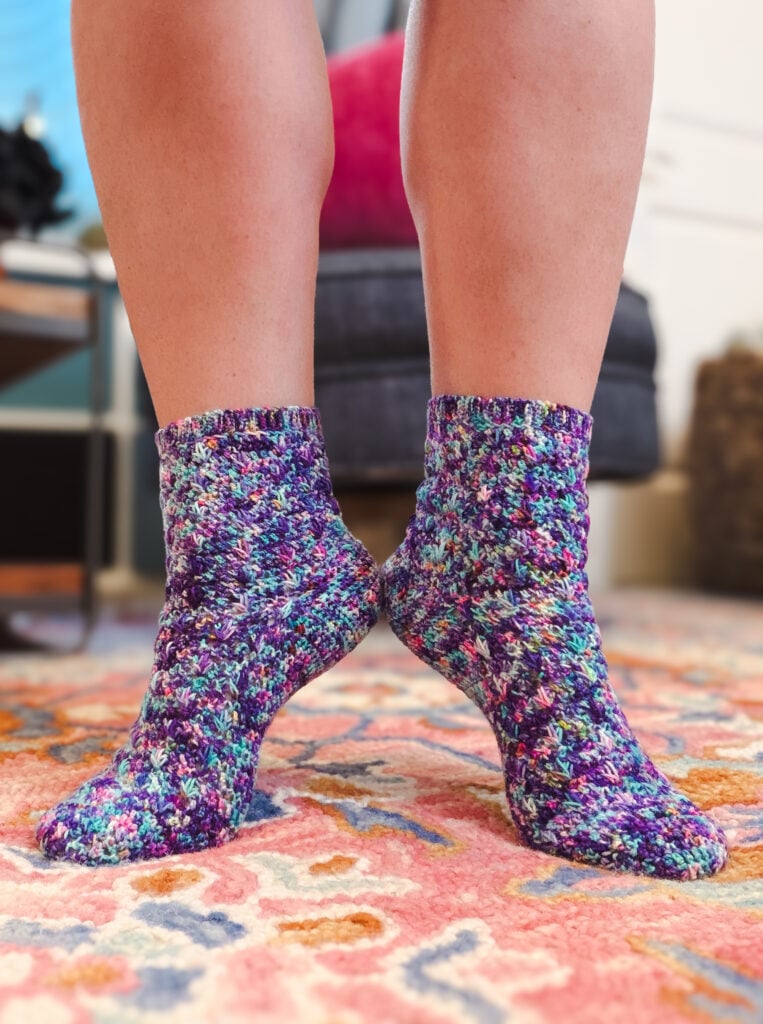
In Sweet Nothings, the esc spike creates the signature textured pattern on the instep and leg of the sock… the parts you actually see when you're wearing them. It's not a difficult stitch once you've practiced it for a row or two, but the effect it creates looks far more complex than the technique behind it. That's the best kind of magic in a pattern.
🪡 Designer Tip:
When you first work the esc spike, the loop will feel long and a little awkward as you pull it up to row height. That's completely normal. The key is keeping even tension so the stitch doesn't pull the rows below too tight. After a few stitches you'll find your rhythm… and the texture will start to bloom right in front of your eyes. ✨
Sweet Nothings also features stacked double crochet — a technique that creates clean, perfectly straight edges on double crochet rows and eliminates the ugly gap that traditional turning chains leave behind. I have a full tutorial for this technique on the blog: How to Crochet a Stacked Double Crochet. Worth a quick read before you cast on!
What You’ll Need 🧶
The Featured Yarn
Sweet Nothings was designed for Sock Obsession Yarns Sock Yarn in the Sweet Nothings colorway — and yes, the colorway was named for this pattern, which is just the most delightful thing. It's a 75% superwash merino / 25% nylon blend at CYCA #1 fingering weight, with 463 yards per 100g skein. You'll need 1 skein for sizes S and M, 2 skeins for sizes L and XL.
Alternative Yarns
Any CYCA #1 fingering or sock weight yarn will work beautifully for Sweet Nothings. The key is fiber content: look for a blend of 75–80% merino wool and 20–25% nylon. The nylon adds durability in high-wear areas (heel and toe), while the merino provides the stretch, breathability, and stitch definition that makes handmade socks so worth the effort.
A few readily available alternatives to explore:
- Cascade Heritage Sock Yarn — 75% superwash merino / 25% nylon, 437 yds/100g. Widely available at local yarn stores, reliable gauge, excellent color range.
- KnitPicks Hawthorne Sock — 75% superwash merino / 25% nylon, ~400 yds/100g. Great value, softens beautifully with washing, beautiful colorways. (Affiliate link — I earn a small commission at no cost to you.)
- Malabrigo Ultimate Sock — 100% superwash merino, 440 yds/100g. Gorgeous hand-dyed depth and color complexity. No nylon, so treat the heels gently with this one.
Whatever yarn you choose: please swatch. Gauge matters enormously in socks — even half a stitch per inch off can mean the difference between a sock that fits perfectly and one that doesn't slide into your shoe.
Hook & Notions
- Crochet hook: D/3 (3.0mm), or size needed to obtain gauge
- Tapestry needle for weaving in ends
- Stitch markers (2–4 locking markers recommended)
Sweet Nothings Crochet Socks || Pattern Details
Skill Level
Intermediate
Sizes
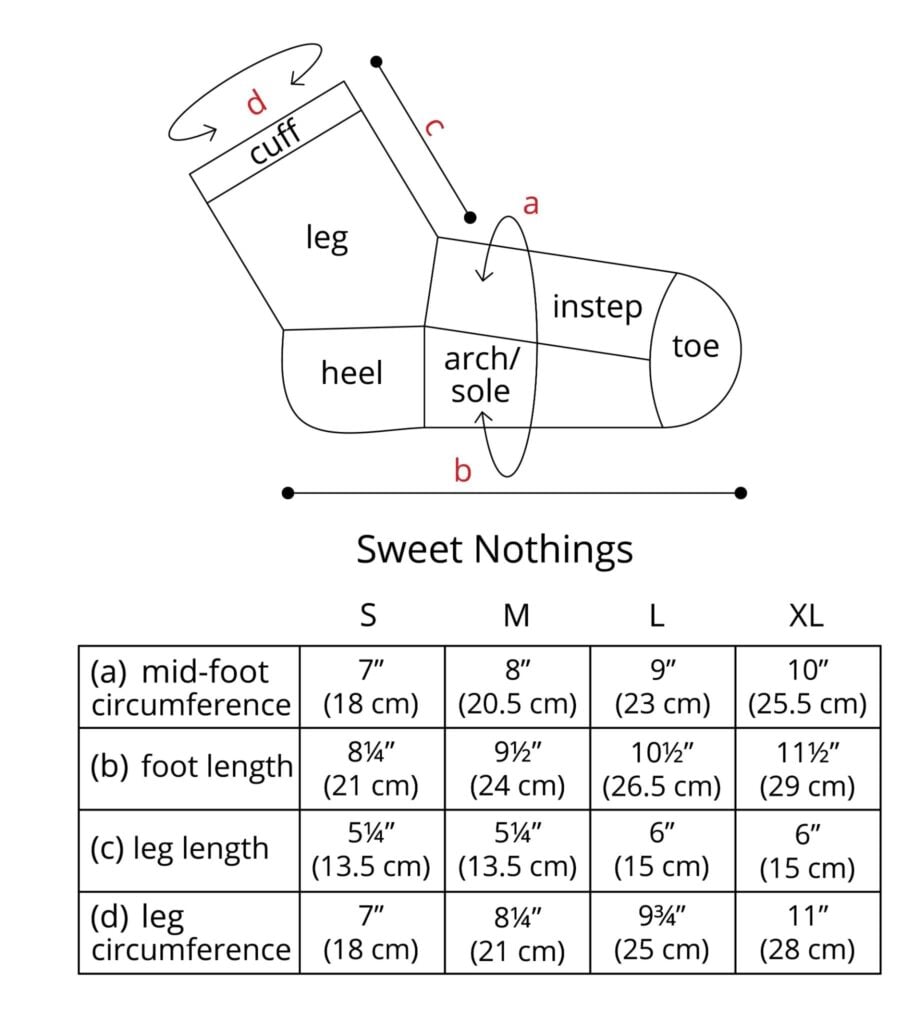
S (M, L, XL) — fits 7 (8, 9, 10)” mid-foot circumference
Gauge
23 sts × 18 rows = 4″ × 4″ in esc and stitch pattern with D/3 hook
Gauge is especially critical in socks. Please swatch before starting and adjust hook size as needed to match gauge.
Materials
- Yarn: Sock Obsession Yarns Sock Yarn (75% Superwash Merino / 25% Nylon, 463 yds/100g, CYCA #1 Fingering/Lace) — colorway: Sweet Nothings — 1 (1, 2, 2) skeins
- Hook: D/3 (3.0mm), or size needed to obtain gauge
- Tapestry needle
- Stitch markers
Abbreviations
ch — chain | dc — double crochet | esc — extended single crochet | esc spike — esc spike stitch (see Special Stitches below) | fsc — foundation single crochet | pm — place marker | rep — repeat | rnd — round | RS — right side | sc — single crochet | sk — skip | sl st — slip stitch | sm — slip marker | sp — space | st(s) — stitch(es) | tch — turning chain | stacked dc — stacked double crochet (see Special Stitches below) | WS — wrong side | yo — yarn over
Special Stitches
Extended Single Crochet (esc): Insert hook into stitch, pull up a loop — 2 loops on hook. Yarn over and pull through 1 loop only — 2 loops on hook. Yarn over and pull through both loops. This creates a slightly taller stitch than standard sc with a clean, smooth face ideal for the sock sole.
Foundation Single Crochet (fsc): Creates the foundation chain and first row of single crochet simultaneously. Produces a flexible, elastic starting edge — perfect for sock cuffs that need to stretch over the heel.
Stacked Double Crochet: A method of starting a double crochet row that replaces the traditional turning chain with a standing stitch, producing perfectly straight, gap-free edges on every row. Watch my full tutorial for this technique right here:
Extended Single Crochet 2 Together (esc2tog): Insert hook into first st, yarn over and pull up a loop, yarn over and draw through 1 loop. Insert hook into second st, yarn over and pull up a loop, yarn over and draw through 1 loop, yarn over and draw through all 3 loops on hook. (1 stitch decreased)
Extended Single Crochet 3 Together (esc3tog): Insert hook into first st, yarn over and pull up a loop, yarn over and draw through 1 loop. *Insert hook into next st, yarn over and pull up a loop, yarn over and draw through 1 loop; repeat from * once more, yarn over and draw through all 4 loops on hook. (2 stitches decreased)
Single Crochet 3 Together (sc3tog): *Insert hook into st, yarn over and pull up a loop; repeat from * in next 2 sts, yarn over and draw through all 4 loops on hook. (2 stitches decreased)
Esc Spike: Insert hook into the specified stitch from a previous row (as directed in the pattern instructions), yarn over and pull up a loop to the height of the current row. Yarn over and pull through first loop only. Yarn over and pull through both loops. Creates a raised, dimensional stitch that spans multiple rows of fabric for a woven, textural effect.
Crochet Stitch Diagrams
✨ Following along with the free pattern on MarlyBird.com? You'll have everything you need to make these Sweet Nothings Crochet Socks… but if you want the exclusive stitch diagram charts, those are only available in the ad-free PDF version.
You'll enjoy a clean, printable, ad-free experience while supporting Marly Bird's free tutorials and patterns 💖
Schematic
Notes

GROW
To Unlock Exclusive Subscriber Content click the Box below and join for free by simply adding your email and creating a password! If you are having troubles, clear your cache or reset your password or login to the Grow Publisher Portal.
>> Learn More About Grow Here <<
I'm thrilled to share this amazing pattern with you, many patterns on my blog are absolutely free! I kindly request that you don't copy and paste or distribute this pattern. Prefer an ad-free experience? Buy a digital PDF pattern for a small fee from one of my online stores for a seamless crafting journey.
I appreciate your support and readership. You are the reason I can keep doing what I love and sharing it with others. So, thank you from the bottom of my yarn-loving heart! Disclosure: This post contains affiliate links, meaning I get a commission if you decide to make a purchase through my links at no cost to you.
Sweet Nothings Crochet Socks || Free Pattern
Before You Begin — Pattern Notes
- See the stitch diagram above for assistance with the leg pattern.
- Pattern is written for one color, but multiple colors can easily be used — just change colors every 2 rounds.
- Wider leg, option 1: use a hook 1–2 sizes larger than your gauge hook.
- Wider leg, option 2: add stitches to the foundation in a multiple of 8. (If you do, skip those extra sts in Round 1 of the foot.)
- Foot tip: place markers between the sole and instep stitches and move them up each round to keep your place.
Leg
Round 1: (WS) With MC, 40 (48, 56, 64) fsc, sl st to first sc, do not turn.
Round 2: Ch 2 (counts as esc), esc in each fsc around, sl st to top of tch, turn. (40, 48, 56, 64 esc)
Round 3: Ch 2, esc in each esc around, sl st to top of tch, change color, turn.
Round 4: Ch 2, esc in next esc, *esc spike**, esc in next 7 esc, repeat from * around ending at **, esc in last 5 esc, sl st to top of tch, turn.
Round 5: Ch 2, esc in each esc around, sl st to top of tch, change color, turn.
Round 6: Ch 2, esc in next 5 esc, *esc spike**, esc in next 7 esc, repeat from * around ending at **, esc in last esc, sl st to top of tch, turn.
Repeat Rounds 3-6 four (four, five, five) times (or to desired length)
Repeat Rounds 3-5 once more, do not fasten off.
Foot
Round 1 (RS): Sl st in next 2 st, ch 2 (counts as esc), esc in next 3 esc, [esc spike, esc in next 7 esc] 1 (2, 2, 3) time(s), esc spike, esc in next 4, place marker, 28 (28, 32, 32) fsc, sl st to top of tch, turn. (28, 28, 32, 32 esc across sole + 2, 3, 3, 4 esc spike instep)
Round 2: Sl st in next st, ch 2 (counts as esc), esc in each fsc across sole, move marker, esc in each esc across instep, sl st to top of tch, change color, turn.
Small Sole Shaping
Round 3: Ch 2, *esc spike, esc in next 7 esc; repeat from * across instep to last st, esc spike, move marker, esc in each esc across the sole, move marker, sl st to top of tch, turn.
Round 4: Ch 2, esc in next 6 esc, esc2tog over next 2 sts, esc in each esc to last 8 esc of sole, esc2tog over next 2 sts, esc in last 6 esc, move marker, esc in each st across instep, sl st to top of tch, change color, turn. (26 sts for sole + 17 sts for instep)
Round 5: Ch 2, esc in next 4 esc, *esc spike**, esc in next 7 esc; repeat from * across instep to last 4 sts ending at **, esc in last 4 instep sts, move marker, esc in each esc across sole, sl st to top of tch, turn.
Round 6: Ch 2, esc in each esc across, move marker, esc in each st across instep, sl st to top of tch, change color, turn.
Rounds 7-9: Repeat Rounds 3-5 of sole shaping (24 sts for sole + 17 sts for instep)
Round 10: Repeat Round 4 (22 sts for sole + 17 sts for instep)
Round 11: Repeat Round 3 of sole shaping.
Round 12: Repeat Round 6
Round 13: Repeat Round 5 of sole shaping.
Round 14: Repeat Round 4 of sole shaping. (20 sts for sole + 17 sts for instep)
Rounds 15-22: Repeat Rounds 3-6 of sole shaping. (16 sts for sole + 17 sts for instep)
Rounds 23: Repeat Round 3
Round 24: Ch 2, esc in next 6 esc, esc3tog over next 3 sts, esc in each esc across sole, move marker, esc in each st across instep, sl st to top of tch, change color, turn. (14 sts for sole + 17 sts for instep)
Medium Sole Shaping
Round 3: Ch 2, *esc spike, esc in next 7 esc; repeat from * across instep to last st, esc spike, move marker, esc in each esc across the sole, move marker, sl st to top of tch, turn.
Round 4: Ch 2, esc in each esc across, move marker, esc in each st across instep, sl st to top of tch, change color, turn.
Round 5: Ch 2, esc in next 4 esc, *esc spike**, esc in next 7 esc; repeat from * across instep to last 4 sts ending at **, esc in last 4 instep sts, move marker, esc in each esc across sole, sl st to top of tch, turn.
Round 6: Ch 2, esc in next 6 esc, esc2tog over next 2 sts, esc in each esc to last 8 esc of sole, esc2tog over next 2 sts, esc in last 6 esc, move marker, esc in each st across instep, sl st to top of tch, change color, turn. (26 sts for sole + 25 sts for instep)
Rounds 7-11: Repeat Rounds 3-6 once, Repeat Round 3 once more (24 sts for sole + 25 sts for instep)
Round 12: Repeat Round 6 (22 sts for sole + 25 sts for instep)
Round 13: Repeat Round 5
Round 14: Repeat Round 4
Round 15: Repeat Round 3
Rounds 16-19: Repeat Rounds 12-15 of sole shaping (20 sts for sole + 25 sts for instep)
Round 20: Repeat Round 12 of sole shaping (18 sts for sole + 25 sts for instep)
Rounds 21-22: Repeat Rounds 5-6 of sole shaping (16 sts for sole + 25 sts for instep)
Rounds 23-25: Repeat Rounds 3-5 of sole shaping
Round 26-27: Repeat Rounds 14-15
Round 28: Ch 2, esc in next 6 esc, esc3tog over next 3 sts, esc in each esc across sole, move marker, esc in each st across instep, sl st to top of tch, change color, turn. (14 sts for sole + 25 sts for instep)
Large Sole Shaping
Round 3: Ch 2, *esc spike, esc in next 7 esc; repeat from * across instep to last st, esc spike, move marker, esc in each esc across the sole, move marker, sl st to top of tch, turn.
Round 4: Ch 2, esc in each esc across, move marker, esc in each st across instep, sl st to top of tch, change color, turn.
Round 5: Ch 2, esc in next 4 esc, *esc spike**, esc in next 7 esc; repeat from * across instep to last 4 sts ending at **, esc in last 4 instep sts, move marker, esc in each esc across sole, sl st to top of tch, turn.
Round 6: Ch 2, esc in next 8 esc, esc2tog over next 2 sts, esc in each esc to last 10 esc of sole, esc2tog over next 2 sts, esc in last 8 esc, move marker, esc in each st across instep, sl st to top of tch, change color, turn. (30 sts for sole + 25 sts for instep)
Rounds 7-26: Repeat Rounds 3-6 of sole shaping 5 times (20 sts for sole + 25 sts for instep)
Rounds 27-29: Repeat Rounds 3-5 once
Round 30: Repeat Round 4
Rounds 31: Repeat Round 3
Round 32: Ch 2, esc in next 8 esc, esc3tog over next 3 sts, esc in each esc across sole, move marker, esc in eac st across instep, sl st to top of tch, turn. (18 sts for sole + 25 sts for instep)
X-Large Sole Shaping
Round 3: Ch 2, *esc spike, esc in next 7 esc; repeat from * across instep to last st, esc spike, move marker, esc in each esc across the sole, move marker, sl st to top of tch, turn.
Round 4: Ch 2, esc in each esc across, move marker, esc in each st across instep, sl st to top of tch, change color, turn.
Round 5: Ch 2, esc in next 4 esc, *esc spike**, esc in next 7 esc; repeat from * across instep to last 4 sts ending at **, esc in last 4 instep sts, move marker, esc in each esc across sole, sl st to top of tch, turn.
Round 6: Repeat Round 4 of sole shaping
Round 7: Repeat Round 3 of sole shaping
Round 8: Ch 2, esc in next 8 esc, esc2tog over next 2 sts, esc in each esc to last 10 esc of sole, esc2tog over next 2 sts, esc in last 8 esc, move marker, esc in each st across instep, sl st to top of tch, change color, turn. (30 sts for sole + 33 sts for instep)
Rounds 9-16: Repeat Rounds 5-8 of sole shaping twice (26 sts for sole + 33 sts for instep)
Rounds 17-18: Repeat Rounds 5-6 of sole shaping
Rounds 19-21: Repeat Rounds 3-5 of sole shaping
Round 22: Repeat Round 8 (24 sts for sole + 33 sts for instep)
Rounds 23-30: Repeat Rounds 19-22 of sole shaping twice (20 sts for sole + 33 sts for instep)
Rounds 31-35: Repeat Rounds 3-6 and Round 3 once more of sole shaping
Round 36: Ch 2, esc in next 8 esc, esc3tog over next 3 sts, esc in each esc across sole, move marker, esc in eac st across instep, sl st to top of tch, turn. (18 sts for sole + 33 sts for instep)
Toe
Round 1: Ch 2, esc in each esc across sole, esc in each st across instep, sl st to top of tch, turn.
Round 2: Ch 2, esc in each st around, sl st to top of tch, turn.
Round 3: Sl st in next 1 (3, 2, 4) sts (this will place the decreases on the sides of your foot), ch 2 (counts as esc), esc2tog over next 2 sts, esc in next 11 (15, 17, 21) sts, esc2tog over next
2 sts, place marker, esc in next st, esc2og over next 2 sts, place marker, esc in each st
across to last 2 sts, esc2og over last 2 sts, sl st to top of tch, turn. (27, 35, 39, 47 esc)
Round 4: Ch 2, esc in next st, esc2tog over next 2 sts, esc in each st across to 2 sts before next marker, esc2tog over next 2 sts, move marker, esc in next 3 sts, esc2tog over next 2
sts, move marker, esc in each st across to last 3 sts, esc2tog over next 2 sts, esc in last
st, sl st to top of tch, turn. (23, 31, 35, 43 esc)
Round 5: Ch 2, esc2tog over next 2 sts, esc in each st to marker, esc2tog over next 2 sts, move marker, esc in next st, esc2tog over next 2 sts, move marker, esc in each st to last 2
sts, esc2tog over last 2 sts, sl st to top of tch, turn. (19, 27, 31, 39 esc)
Small: Repeat Round 4 (15 sts)
Medium: Repeat Rounds 4-5 and Round 4 once more (15 sts)
Large: Repeat Rounds 4-5 and Round 4 once more (19 sts)
X-Large: Repeat Rounds 4-5 twice and Round 4 once more (19 sts)
Turn sock inside out. Fold in half. Seam with sl st through both fabrics at once. Fasten off and weave in ends.
Heel
Join yarn with sl st to first fsc on foot. (located in the corner between the leg and foot sts)
Round 1 (RS): Ch 1, sc in same st, sc in each fsc across foot, sc in each st across leg, sl st to first sc, sl st to next sc, pm in opposite corner of heel (center st between arch and leg), turn.
Round 2: Ch 1, sc3tog over (2 sl st, sc), sc in each sc to 1 sc before marker, sc3tog over next 3 sc, place marker in sc3tog, sc in next sc and each across to end, sl st to first sc, sl st to next sc, turn.
Repeat Round 2 until there is between 10-14 sts left.
Turn sock inside out, sl st through both sides of fabric across heel, fasten off, weave in ends.
Cuff
Join yarn with sl st to any st on leg.
Row 1: Ch 6, sl st in 2nd ch from hook and each ch across, sl st to next st on leg, turn.
Row 2: Skip sl st on leg, sl st in back loop only of each sl st across, turn.
Row 3: Sl st in backloop only of each sl st across, sl st to leg, turn.
Repeat Rows 2-3 evenly attaching around leg opening.
Seam last and first rows together.
Fasten off and weave in ends.
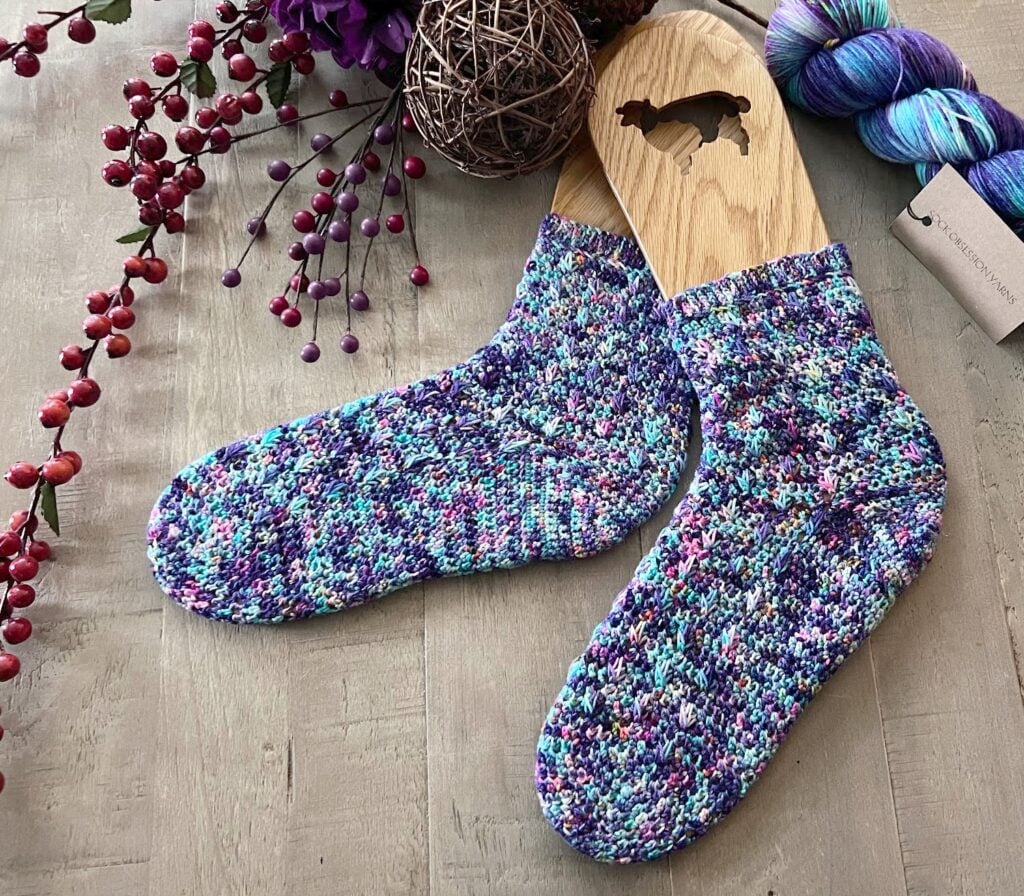
Blocking Tips
Blocking your handmade socks is worth every extra minute… it opens up the stitch pattern, evens out the fabric, and makes the esc spike texture bloom beautifully. Here's how to do it:
🪡 Designer Tip:
Superwash merino can relax and grow a bit when wet — this is completely normal and it recovers fully once dry. Don't be alarmed if the blocked sock looks slightly larger on the blocker than you expected. Once it dries and goes on the foot, it snaps right back to its intended size.
Favorite & Queue on Ravelry
Love what you see? Add Sweet Nothings to your Ravelry queue and favorite it so you can find it easily when it's time to cast on… or to inspire your next skein purchase. 😉

Want to Go Deeper? Learn the Full Crochet Sock System
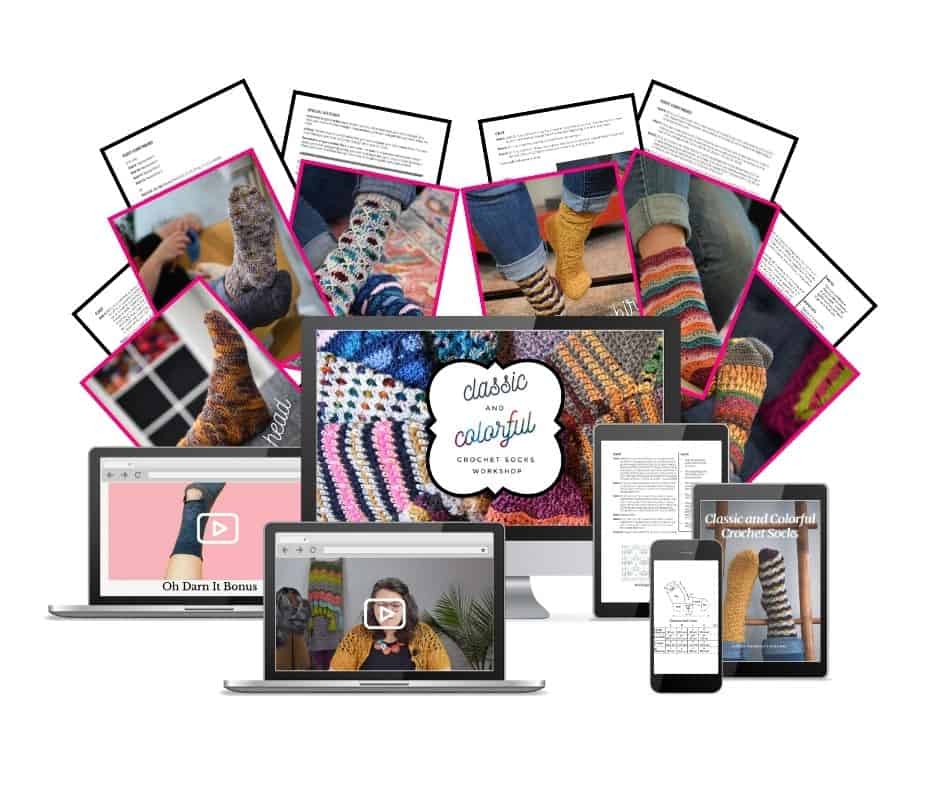
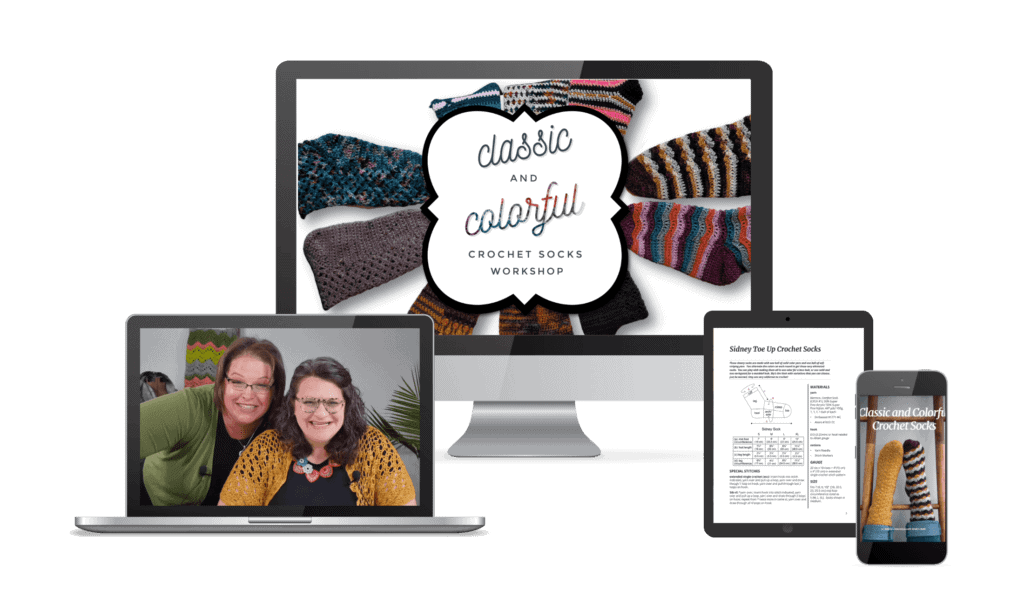
Sweet Nothings gives you a real taste of what's possible when crochet sock construction is done right. If you're hooked (pun very much intended) and want to master the full range of sock styles, techniques, and design principles… the Classic and Colorful Crochet Socks Workshop is exactly where to go next.
🎉 Sweet Nothings readers get the full workshop HALF OFF!
Loved making these socks? Go all-in on the complete Classic & Colorful Crochet Socks Workshop and get it half off with code CCCS-HALFOFF — it's already applied when you use the link below.
Robyn and I built this workshop as the most comprehensive crochet sock education we could create. Inside you'll find an 86-page e-book with 10 full sock patterns (six toe-up, four toe-down), 15+ video modules with over 25 hours of tutorials, and everything you need to become a confident, creative sock crocheter — from sock anatomy and yarn choice to heel construction, stitch patterns, sizing customization, and finishing. It's the course we wish had existed when we first wanted to learn.
Check out the Classic and Colorful Crochet Socks Workshop
Frequently Asked Questions
Can crochet socks fit in shoes?
Yes… with the right yarn weight and construction. Sweet Nothings uses fingering weight (#1) sock yarn and a structured sole/instep construction designed to produce a slim, shoe-fitting sock. The key is fingering weight yarn with a D/3 hook and proper sock construction… not the thick worsted-weight “slipper sock” approach that most crochet sock patterns rely on.
What yarn do you need for crochet socks?
Use fingering or sock weight yarn (CYCA #1), ideally a blend of 75–80% merino wool with 20–25% nylon. The nylon adds durability in the heel and toe areas. Avoid 100% wool (too fragile with frequent washing) or acrylic (lacks the stretch and moisture-wicking that make socks comfortable). For Sweet Nothings, we used Sock Obsession Yarns Sock Yarn in the Sweet Nothings colorway.
What hook size do I need for crochet socks?
For fingering weight sock yarn, a D/3 (3.0mm) hook is standard. Always check your gauge… 23 stitches × 18 rows = 4″ × 4″ in esc. Too loose and the sock won't hold its shape; too tight and it won't stretch over your foot. When in doubt, go down a hook size before going up.
How long does it take to crochet a pair of socks?
An intermediate crocheter can complete one sock in 4–6 hours. Budget 8–12 hours for a full pair, spread over a few sessions. The construction has multiple sections (sole, instep, heel, cuff) so it's a great take-along project… the kind of thing you work on at a craft night, over a weekend, or while watching your favorite show.
What's the difference between a crochet sock and a knit sock?
Crochet fabric is typically thicker and less stretchy than knit fabric. Well-designed crochet socks compensate with a lighter yarn weight (fingering/sock weight), a looser gauge than you might expect, and construction methods that mirror proper sock architecture. Sweet Nothings uses esc and esc spike stitches that create a visual texture similar to knit ribbing… close enough that your knitting friends will do a double take.
Is this crochet sock pattern good for beginners?
Sweet Nothings is rated Intermediate… you should be comfortable with extended single crochet, working in rows, and basic shaping decreases before you start. If you've made hats, cowls, or fingerless mitts and you're ready for a multi-section construction challenge, you're probably ready. Complete beginners may want to start with a simpler project first, then come back to these when you've built more confidence.
What sizes does this crochet sock pattern come in?
Sweet Nothings comes in S, M, L, and XL… fitting 7″, 8″, 9″, and 10″ mid-foot circumference respectively. This covers most adult sizes. Always measure your actual foot circumference before choosing a size rather than relying on shoe size — foot circumference is what determines sock fit.
Do I need to know the esc spike stitch before starting?
Not at all! The pattern includes full instructions for the esc spike stitch. It looks more complex than it is… once you practice it for a row or two, it becomes intuitive. If you want extra guided support, Marly and Robyn have in-depth video instruction inside the Classic and Colorful Crochet Socks Workshop.
Final Thoughts
If you've been watching knitters show off beautiful hand-knit socks and thinking “I want that… but for crochet” — Sweet Nothings is your answer. The esc spike stitch, the proper sole/instep construction, the four sizes that actually fit… it all adds up to a crochet sock that deserves to be worn out in the world, not just admired on a flat lay.
I cannot wait to see your Sweet Nothings socks! Share your WIPs and finished objects in the Marly Bird Community on Facebook and tag me on Instagram at @marlybird — I repost makes all the time and would absolutely love to see yours.
❤️ Your BiCrafty Bestie,
Marly Bird

Categories: Crochet, Free Patterns, Marly Bird Premium Patterns, Our Free Patterns, Pattern