
My First Knit Sweater: Free Beginner Knitting Pattern
Ready to knit your first sweater? My First Knit Sweater is a free beginner-friendly knitting pattern that breaks down the entire sweater-making process into six manageable sections, each with video tutorials. Sized from Small through 4X, this pattern features a relaxed silhouette with a slash neckline — flattering on every body and incredibly wearable, even on your very first try.
⚡ Quick Answer:
This free pattern teaches you to knit a complete sweater from cast-on through seaming, with video tutorials for every step. It covers sizing, gauge, all construction pieces, and seaming finish — perfect for knitters ready to level up from accessories.
Hey, bestie 💛! Watching others knit sweaters and wondering if you could pull it off? You absolutely can — and this pattern was built from the ground up for that moment. No prior sweater experience needed, just the willingness to take it one section at a time. Whether you're a newer knitter or someone who's been making scarves for years and is finally ready to tackle a garment, this structure meets you exactly where you are.
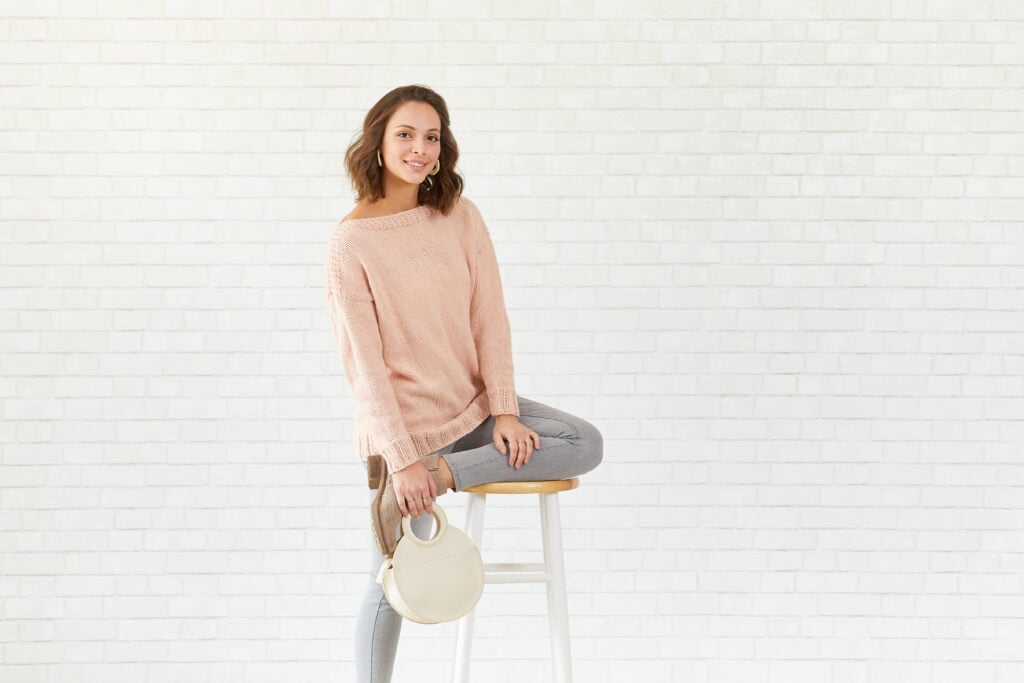
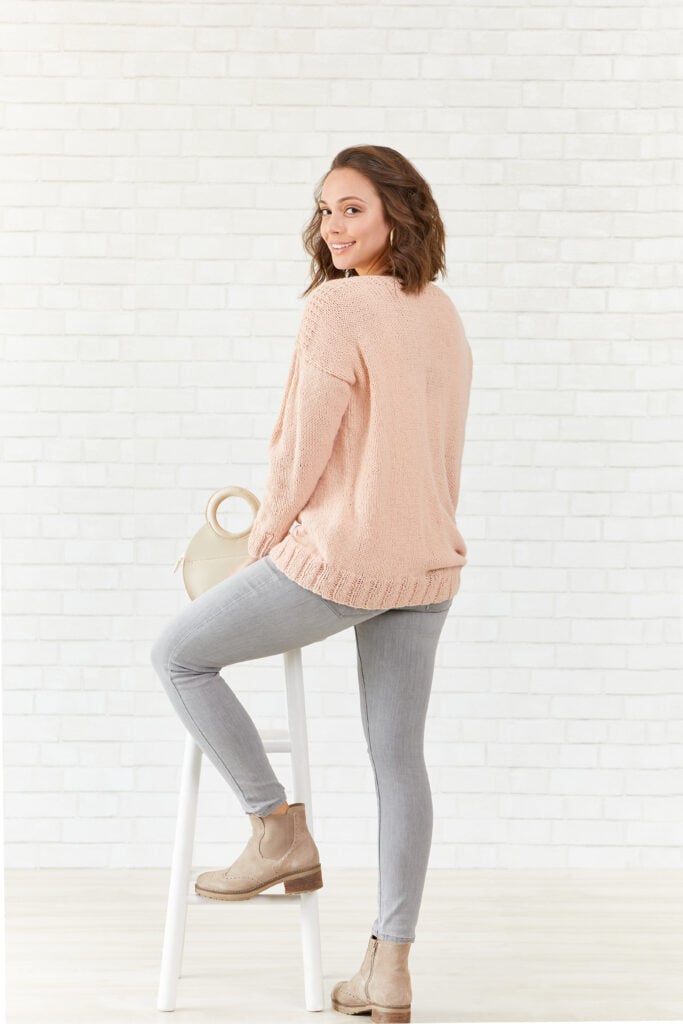
What You'll Learn 🧶
🎯 How to swatch and choose the right size: Gauge is the single most important element of sweater success — and I'll teach you exactly how to swatch, measure correctly, and pick the right finished bust size for your body.
🎯 How to construct a sweater in pieces: You'll make four separate panels (back, front, two sleeves) then seam them together. This method is way less intimidating than in-the-round sweaters because you're working flat on circular needles.
🎯 How to shape sleeves with increases: Sleeve shaping teaches you to work increases evenly across your piece — a skill that transfers to cardigans, garments with shaping, and almost any pattern you'll want to knit next.
🎯 How to seam like a professional: Clean seaming is the difference between a homemade-looking sweater and one that could have been store-bought. You'll learn the technique step by step.
After you finish this sweater, you'll have the foundation skills to knit almost any garment — and the confidence to modify patterns to fit your vision. This is the gateway to so much more.
Materials & Yarn 🧶
Needles & Tools
- US 9 (5.5mm) 24-inch circular needle, or size needed to obtain gauge
- Yarn needle for seaming
- Scissors
- Removable stitch markers (or make your own with scraps of yarn)
Yarn (Worsted Weight #4)
Yarn amounts by size: 2 (3, 3, 3, 3, 4, 4) skeins at approximately 432 yards (395 m) per skein. Total yardage needed: approximately 864-1728 yards depending on size.
Pattern Details 📏
Skill Level
Beginner–Intermediate. You'll need to know how to cast on, knit, purl, bind off, and seam. This pattern is NOT a beginner-knitting tutorial — it assumes you've completed a few projects already (scarves, hats, dishcloths). If you're brand new to knitting, start with a simpler project first, then come back.
Construction
Worked flat in four pieces (back panel, front panel, left sleeve, right sleeve), then seamed together. You'll use a 24-inch circular needle for working flat — the long needle makes it easier to hold wide panels without stitches falling off.
Sizes Available
Small (Medium, Large, 1X, 2X, 3X, 4X)
Finished Measurements
Finished Bust: 39 (44, 49, 54, 59, 64, 69)” / 99 (112, 124.5, 137, 150, 162.5, 175.5) cm
Finished Length: 24.75 (25.5, 26.25, 27, 27.75, 28.5, 29.25)” / 63 (64.5, 66.5, 68.5, 70.5, 72.5, 74.5) cm
Ease: 2-3 inches of positive ease for a relaxed, comfortable fit
Gauge
20 stitches + 26 rows = 4 inches in stockinette stitch (measured flat, not blocked)
Gauge is critical for sweaters. Even a small difference in tension compounds across a large fabric — being off by just one stitch per inch means a 4-inch difference on a 44-inch bust sweater. Make a swatch, wash it the same way you'll wash your finished sweater, and measure it accurately. If your gauge doesn't match, adjust your needle size before casting on the sweater.
Not sure how to swatch? My free gauge swatch guide and printable worksheet walks you through every step — including the three most common measuring mistakes that make people skip gauge.
Download the Free PDF Pattern
The complete written pattern with stitch-by-stitch instructions is available free here on the blog:
Step-by-Step Video Tutorials 🎬
Each section of this sweater has its own dedicated page and video walkthrough. Click through for the full written instructions plus a detailed video where I show you exactly what to do. Work at your own pace — there's no rush. You can complete this sweater over a week, a month, or however long feels right.
📍 Part 1: Sizing & Gauge — Full Tutorial + Video
Before you cast on a single stitch, we cover the two things that determine whether your sweater fits: gauge and size selection. I'll show you how to make a gauge swatch, how to measure it correctly (the right way!), and how to choose the right size for your body. This is the most important section — take your time here, swatch honestly, and don't skip ahead.
📍 Part 2: The Back Panel — Full Tutorial + Video
Time to cast on! In this section we work the back panel of the sweater from the hem to the shoulders. I'll explain why we're using circular needles even though we're knitting flat, walk you through the ribbed hem, and cover the stockinette body. Your goal: finish the back panel feeling confident in your tension and rhythm before moving to Part 3.
📍 Part 3: The Front Panel — Full Tutorial + Q&A Video
The front panel is worked exactly the same way as the back — so by this point, you're really starting to get the rhythm. This section includes a Q&A video where I answered the most common questions knitters had at this stage. If you've hit a snag, this is the place to look.
📍 Part 4: First Sleeve — Full Tutorial + Video
Sleeves! In this section I'll show you how to work the ribbed cuff, add increases up the sleeve cap (creating that essential shaping), and transition into the sleeve body. You'll be making two sleeves — we tackle them one at a time so it never feels overwhelming.
📍 Part 5: Second Sleeve — Full Tutorial + Q&A Video
Your second sleeve is a great opportunity to practice everything from Part 4 — and a good time to catch up if you need it. This section includes another Q&A video covering common trouble spots (Why are my increases uneven? How tight should I pull when I increase?) before we move to the final seaming step.
📍 Part 6: Seaming & Finishing — Full Tutorial + Video
You've made all four pieces — now we put it all together! Seaming can feel intimidating the first time, but I walk you through the mattress stitch (which creates an invisible seam) step by step. By the end of this section, you have a finished, wearable sweater. I'm incredibly proud of you for getting here.
Common Beginner Sweater Mistakes (& How to Fix Them)
Mistake 1: Skipping the Gauge Swatch
“Oh, I'll just wing it!” … and then the finished sweater is 6 inches too wide. Gauge is not optional for garments. The pattern is written for a specific gauge — if your gauge is different, your finished measurements will be different. No shortcuts here.
Mistake 2: Making Your Swatch Too Small
A tiny 4×4 swatch will lie to you. Tension changes over larger fabrics. Make a minimum 6-inch square swatch, wash it (the same way you'll wash the sweater), let it fully dry, then measure in the center away from the edges. Edges can be wonky.
Mistake 3: Not Blocking Before Measuring
Knit stitches look different before and after a gentle soak and block. Measure your swatch AFTER washing and drying it flat — this tells you the true gauge of your finished sweater (which will also be washed and worn).
Mistake 4: Uneven Sleeve Increases
If increases aren't spaced evenly, one sleeve will look different from the other. The pattern tells you exactly where to increase and how often — follow it exactly, especially on your first sweater. Pattern modifications come later.
Mistake 5: Seaming Too Tight or Too Loose
A seam that's too tight will pucker. Too loose will look loose and unfinished. Part 6's video shows the exact tension you're aiming for — watch closely and practice on a scrap before seaming your actual sweater if you're nervous.
Where to Go From Here 🚀
Once you've finished your first sweater, you have SO many options:
- Try a cardigan version: Sugar Frost Knit Cardigan uses the same construction with button bands added
- Go for a fitted garment: MMMDI Sweater teaches waist shaping for a more tailored silhouette
- Try colorwork: Wellington Stranded Pullover adds 2-color stranded work to garment construction
- Explore texture: Opening Night Swing Cardigan combines interesting stitch patterns with garment shaping
Check out 5 years of Marly Bird KAL patterns for even more sweater and garment inspiration.
Join our Newsletter
Get Free Crochet & Knitting
Pattern Links & Coupons!


Frequently Asked Questions
Is this pattern really beginner-friendly?
Yes — it was specifically designed as the first sweater you ever knit. That said, I recommend already knowing how to cast on, knit, purl, bind off, and seam before you start. If you're brand new to knitting, work through a few smaller projects first (a hat, a scarf, a dishcloth), then come back. You'll be ready faster than you think!
Do I really need to make a gauge swatch?
For a sweater — absolutely, yes. Even a tiny gauge difference compounds. Being off by just one stitch per inch on a 44-inch sweater means 4 extra inches — a full size difference. My free gauge swatch guide explains why and how to do it correctly.
Why circular needles if we're knitting flat?
Circular needles are used because the sweater panels are wide — a long circular needle holds all your stitches without them falling off the ends. You're still knitting back and forth (flat, not in the round). The circular needle is just a practical tool for wide pieces.
I can't find Hygge Charm — what substitute do you recommend?
Hygge Charm has been discontinued, but any smooth #4 worsted-weight yarn will work beautifully. Look for one with approximately 430 yards per 7 oz skein. A smooth acrylic or wool-blend gives great stitch definition and easy care. Crucially: make a gauge swatch with your substitute yarn and adjust needle size if needed before casting on.
How hard is seaming really?
Seaming feels tricky the very first time, but it gets much easier once you understand the stitch. Part 6 covers mattress stitch completely with step-by-step video. The technique creates a clean, nearly invisible seam. Practice on a scrap first if you're nervous — it's a skill worth learning.
Can I use a different yarn weight?
The pattern is written for #4 worsted. You could technically use a different weight, but you'd need to adjust needle size and recalculate stitch counts based on your gauge — an intermediate-level skill. For your first sweater, stick with worsted weight. Get one under your belt, then experiment!
What if my finished sweater doesn't fit?
The most common cause is a gauge mismatch (skipping the swatch, making it too small, or not blocking before measuring). Check Part 1 and my free gauge swatch guide for a thorough walkthrough.
More Beginner Knitting Patterns You'll Love
Love this pattern? Here are a few more to keep you inspired:
- My Favorite Knit Sweater — free pattern
- Marly Made Me Do It Sweater — free pattern with pockets
- Sugar Frost Knit Cardigan — free pattern
- Wellington Stranded Knit Pullover — free pattern with colorwork
- Opening Night Swing Knit Cardigan — free pattern
Final Thoughts 💖
You can do this. Seriously. Thousands of knitters have learned to make their first sweater with this pattern, and you can too. The moment you bind off that last stitch and pull the finished sweater over your head — that's the moment you become a sweater knitter. And there's nothing quite like the pride of wearing something you made with your own two hands.
If you make this sweater, please share it with me! Tag @marlybird on Instagram or Facebook and use #MMMDI (Marly Made Me Do It) or #MarlyBird so I can see your finished sweater. I'd love to celebrate this milestone with you! 💛
❤️ Your BiCrafty Bestie,
Marly Bird

Categories: Uncategorized


Oh, this looks interesting! Very pretty.
Have never attempted a sweater before so looking forward to this KAL….
I have to know before buying yarn, does this sweater involve seaming??? I cannot seam to save my life and have only made sweaters from the top down! Ty!
First kal and new to knitting. Excited but nervous
I’m so excited. Never know a sweater. Question…how do I know how much yarn to order. What are the size measurements? I’m not sure if I need to make a large or medium .
This sounds like a wonderful KAL! I love it.
WHERE DO WE GET THE FREE PATTERN
Awesome video, just one question, what did your Chic sheep gauge swatch block out to? I really love using this yarn!
Wwiting for yard to come in the mail. Finishing a sock from “my first sock” knit along,
A suggestion– beginner knitters may need more information about how to do the M1, or at least direct them to a video that provides that direction.
There is already a video in my YouTube channel about the make 1. Here is a link if you need it! https://www.youtube.com/watch?v=nT1e-WgynUc
In your pattern, I don’t know what m1 means, abbreviation for what?
M1 means to make 1. I have a video on my YouTube channel that will show you how to do this. Here is the link: https://www.youtube.com/watch?v=nT1e-WgynUc
I know this is way past your Knit Along post, but have just found your post & fairly new to knitting. I do have a question if you are able to answer for me. I’ve just gotten a little past the arm hole marker & have noticed that the side edges are rolling something terrible. Will this straighten out after seaming back to front? Or do I need to do something else? Thank you for any suggestions.
when you seam the pieces together they will no longer roll. You Don’t have to do anything more.
i am doing the 2x size on sweater. On my first sleeve I used the pdf file to do it. I had the right amt of sts. but it says to cont. in ssk st till 13 in from ribbing or 16 from beginning.Well after i complete the 66 rows on pdf file that is exactly what my sleeve measures so I cant cont in ssk st till i get to 13 or 18 inches already there. what did i do wrong or am i misunderstanding the pattern? my 1st sweater ever
Video quit a little less than half way. Checked out a number of other videos, not on the Marly Bird website / You
Tube channel, and all played perfectly. Any ideas? It is May 3rd, 6:30pm, central time, weather perfect for change. The differences in those swatches were incredible. Thanks for any help you can offer with the video.
That is the same question I was going to ask how much yarn will it take for a medium. My first sweater also
Is there a charge for pattern & tutorial? Thank you!❤️🙂
no
How can I get the free pattern for ‘ my first sweater’ without going through all the lessons?
I did this several years ago but lost the pattern.
the pattern link is in the blog post