Search
Close
  • The Pattern Shop
  • Our Free Patterns
    • Browse All Our Free Patterns
    • Our Free Knitting Patterns
    • Our Free Crochet Patterns
    • The Big List of Free Knitting Patterns from Marly Bird
    • The Big List of Free Crochet Patterns from Marly Bird
  • Blog
    • All Blog Posts
    • All Free Patterns
    • Dibble Dabble Inspiration
    • Giveaways
    • Make-Alongs
    • Product Reviews
    • Roundups
    • Tips, Tricks, Techniques for Knitting and Crochet
Logo of "Marly Bird" featuring stylized text alongside a graphic of a bird perched on a branch, executed in gray and pink tones. The header design is elegant, emphasizing the brand's unique identity. -Marly Bird
  • Marly Bird House
  • Learn to Knit & Crochet
    • Newbie? Start Here
    • Video Tutorials
    • Knitting Definitions
    • Crochet Definitions
    • Common Techniques
    • Size Charts for Knitting and Crochet Projects
  • About
×
  • The Pattern Shop
  • Free Patterns
  • Blog
  • Marly Bird House
  • Learn to Knit & Crochet
    • Newbie? Start Here
    • Video Tutorials
    • Knitting Definitions
    • Crochet Definitions
    • Common Techniques
    • Size Charts for Knitting and Crochet Projects
  • About
Logo of "Marly Bird" featuring stylized text alongside a graphic of a bird perched on a branch, executed in gray and pink tones. The header design is elegant, emphasizing the brand's unique identity. -Marly Bird
Search
Close

New Patterns NOW Available in Ad-Free PDF! Check out The Pattern Shop

Want To Be A Knit Or Crochet Contractor Or Tester?

September 7, 2023 By admin 6 Comments

Do you love to knit or crochet? Or, do you fill your spare time with crafting just because you love to make things? Do you need something to keep your hands busy while you watch tv? If you answered YES to any of these questions, then maybe you’re the perfect person to be a knit or crochet pattern tester or contractor. Let’s take some time to really understand what pattern testing and knit or crochet contracting means.

Sample projects worked by Cryssi - knit or crochet contractor to Marly Bird.
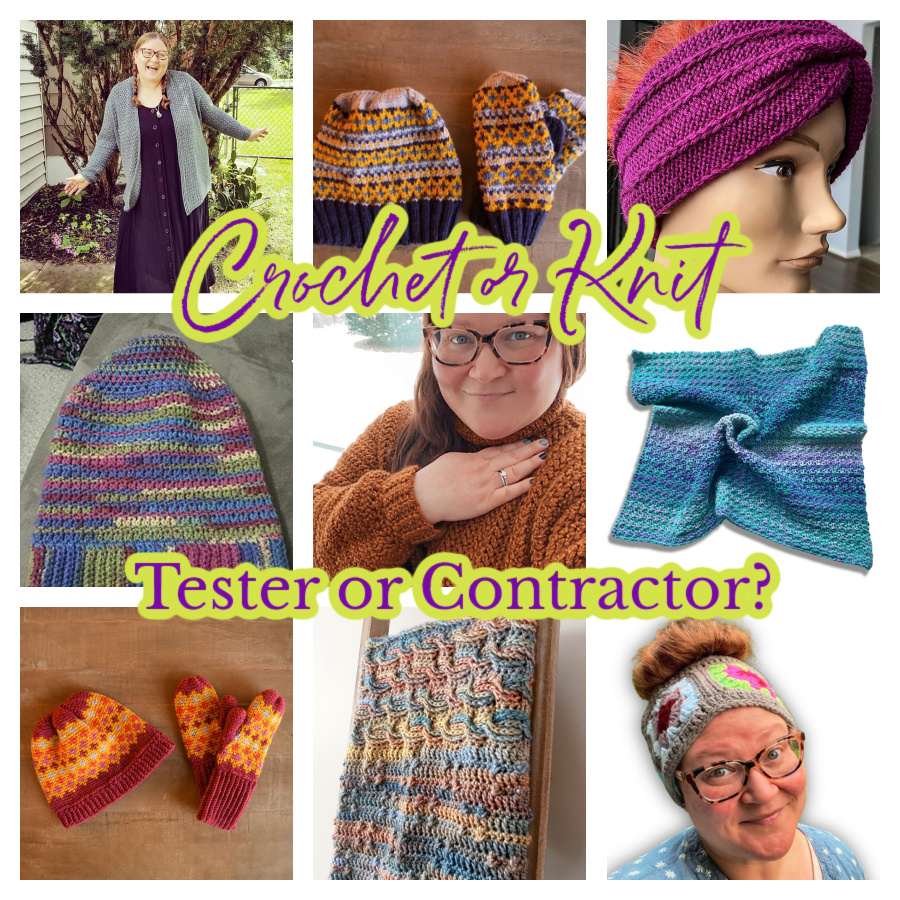
  • Sandwallen Crochet Blanket by Marly Bird
  • Go to Baby Shower Blanket by Marly Bird
  • Sharon Hat & Mittens by Marly Bird
  • Shannon Hat & Mittens by Marly Bird
  • Birch Headband by White Owl Crochet
  • Ava Cardigan by Herr Stitches
  • Wildwood Pullover by Baahumble
  • Heart & Sole Hat by Salena Baca
  • Lined Granny Earwarmer by Marly Bird

My Intro Into Pattern Testing And Contracting

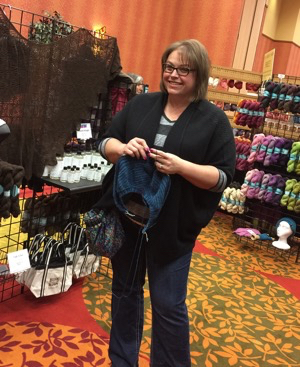
Hey friends, Cryssi here! You may know me as Marly’s Executive Assistant or the Joy Creator, but did you know it all started with an introduction from Salena Baca? I started as a pattern tester for Salena in 2015, and boy, have things evolved over the years! 

From tester, contractor, and tech editor, to designer, I’ve run the gamut of things that the fiber industry has to offer by way of careers. You may have even caught me on my soapbox during one of Marly’s lives. Pattern testers and contractors are an integral part of the pattern design process, but what do those roles really mean, what is expected of you, and how do you know if it is something you can do? 

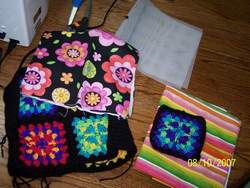
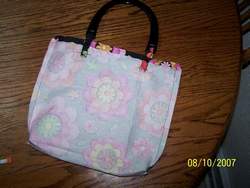
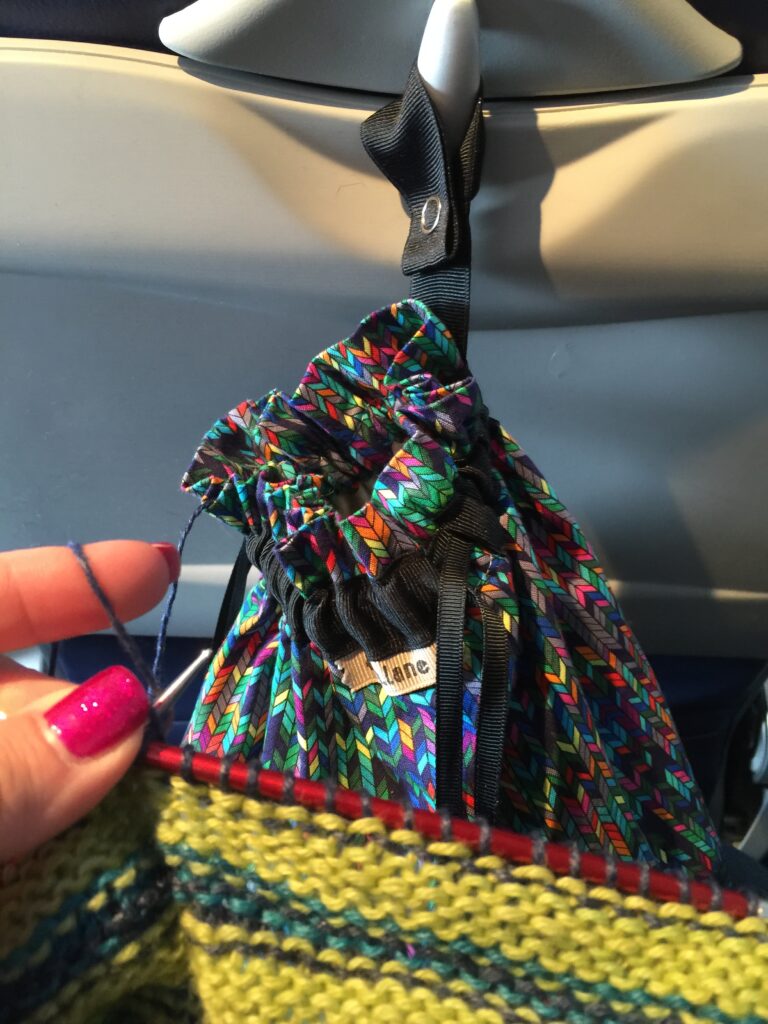
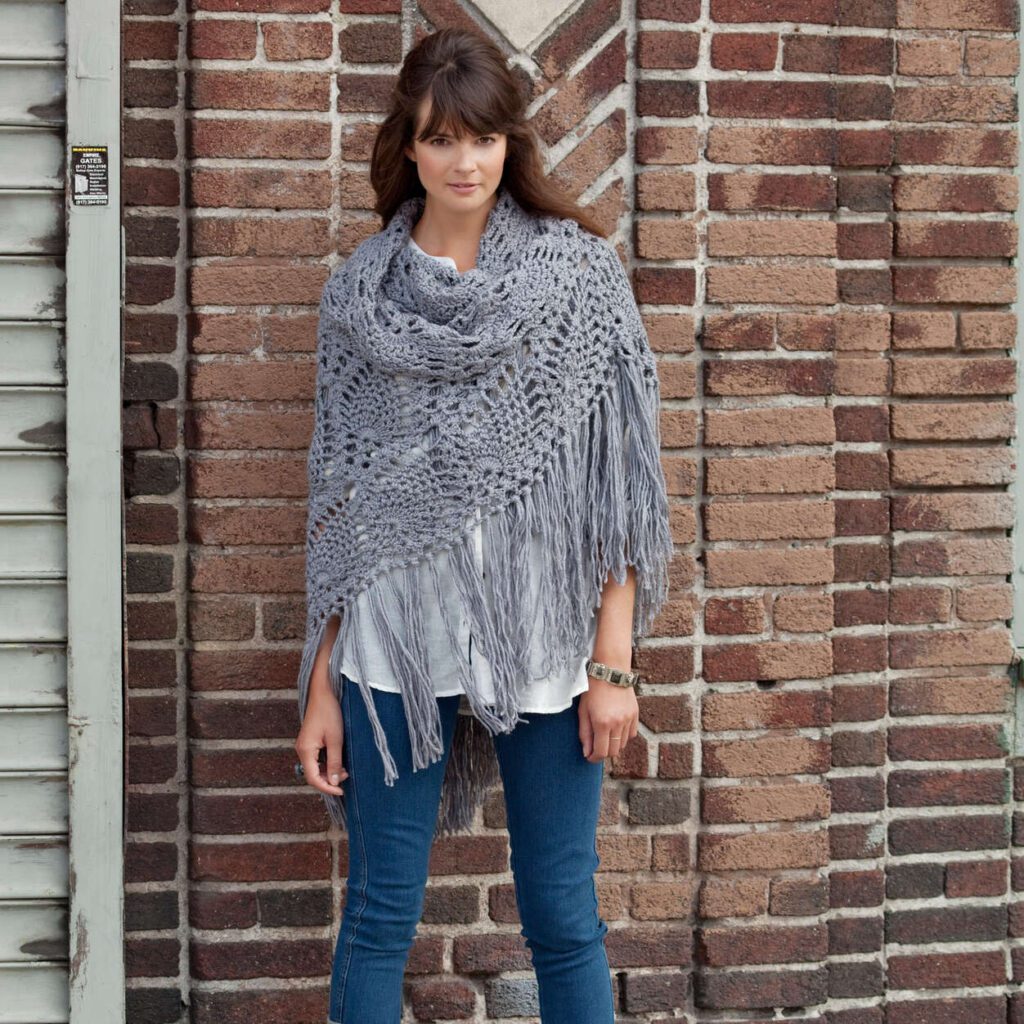
(NOTE: These opinions are my own and may vary from designer to designer, but are my experience as a tester and contractor for many designers in the industry. The photos in this post are tests/contract samples I’ve made over the years.)

Don’t Expect Perfection!

I’ll never forget the first time I tested a pattern. I had been following Salena Baca for a few years and always liked her work, and I saw her post a call about needing crochet pattern testers. I wasn’t even sure what it meant, but she posted a detailed explanation of what she was looking for and I thought, I think I can do that, so I volunteered. I’ll never forget the first hat I tested – it turned out ROUGH. 

The crown was pointed and wonky and did not look good. I was so upset and confused. I had followed the pattern; what the heck went wrong?! So, I went to Salena and showed her my hat, and I told her I’d followed the crown (as written) but that it looked like a cone rather than a rounded crown. I was mortified!

Salena came back and said that it was actually an error in the pattern, and of all the testers, I was the only one who caught that. (See wonky crown pictured below.) Note: The pattern has been fixed. Your crown won’t be wonky. LOL!

I needed This confidence boost to branch out and keep testing for others. The more you learn about knitting and crochet, the more confident you become with your skills. As you become more confident, you may consider what avenues to use your skills or even make money!

Let’s chat through some of those options…

Be sure to read to the end for my biggest tip for being a knit or crochet contractor.

First…Let’s Talk Pattern Testers

What is a pattern tester? A pattern tester does exactly what it sounds like….you take the pattern for a test drive! It’s such an important part of the design process! 

Why? 

Because designers often make something, then go back and write the pattern for that item. And in doing this, sometimes, things can get lost in translation. 

A pattern tester creates a sample from the pattern and provides notes and feedback to the designer on anything confusing, doesn’t work, or is incorrect. Pattern testers are typically unpaid volunteers who use their own yarn to make the project.

And if you’re going to give it a try, you MUST be honest about your skill level. If you are a brand-spanking new beginner, say so! 

Own it! 

Beginners really do make some of the best testers because they have to read everything so carefully! A more seasoned knitter or crocheter may intuitively fill in the blanks when something is missing. 

A pattern tester needs to be honest about their time and ability to complete the test in the time allotted. When a tester volunteers and bails, that’s one less set of eyes on a pattern (which has a big impact if something has multiple sizes). When a tester doesn’t finish the item on time, the designer must push back their timeline or move forward without the feedback. 

Both situations, quite frankly, stink. 

If you are going to volunteer, be sure that you have the time and ability to complete the task. Life happens, and everyone understands that, but it should be few and far between. But let’s talk about that for a minute…

 How To Back Out Of A Test Gracefully

Listen, sometimes, it’s going to happen. You either overestimated your ability, underestimated the timeline, or got completely sidelined by LIFE. Now, you must tell a designer who selected you (sometimes from dozens of applicants) that you can’t do what you said you would. 

Communication is KEY! 

The most important thing you MUST do is let them know as soon as you realize it. Avoidance is not a solution, sweet friends! You may be embarrassed, but you don’t need to be! You are not the first, and you won’t be the last. It is a part of the industry! But don’t be the person who waits until the last minute or never responds to messages. 

You can help support the designer in other ways, like purchasing the pattern once it is released or promoting it on social media. 

We LOVE when our friends promote with us on social media!!!

Now…What Is A Contractor? 

A contractor is hired (for pay) to make a sample item of a specific size from a pattern that has typically already been tested.

Skills Needed to be a Knit or Crochet Contractor:

Do you need to be the most experienced knitter or crocheter to be able to be a contractor? The answer is no, but you should be beyond the beginner stages and have tried a variety of projects. When a designer is looking for new contractors, they often ask to see your Ravelry page.

Your Ravelry page should be a collection of everything (or almost everything) you have worked on. This is like your portfolio as a tester & contractor! Designers can use this to see the quality of your work. 

Not only do you want your items to look amazing, but you should also work on your photography skills to highlight what designers can’t see in person.

To work as a knit or crochet contractor, you will need the following: 

  • To be organized
  • Self-motivated
  • Work well under pressure
  • A strong communicator
  • Have strong time management skills 
  • Be detail-oriented… to name a few. 

As we continue, you will see why these skills are so important.

Typical Payment Options

Typically, designers will pay you one of three ways.

  1. Some offer an agreed sum for the project. Each designer will have an amount paid for the design, and then they will budget an amount for the sample to be made. If the designer pays you with a lump sum, they will tell you that amount before you get started, and you can either accept the job or turn it down. You should always consider the amount of time you have available to make the project, the time frame to complete the project, and the complexity of the project before you agree to take on a job.
  2. Another other option for payment is to pay per yard. I have heard that designers will pay anywhere from $.15 to $.18 per yard that is used to make the project. Please note that each designer will approach this differently, and each project will be different. Be sure to weigh the pros and cons before taking on a job.
  3. Maybe the designer will offer to pay you with the finished sample. Once they have taken the photos that they need of the sample, they may offer to send it back to you as payment. Again, you must decide if you love the project enough to keep it or would prefer to be compensated monetarily.

Contractor Deadlines

Often, you have a very short turnaround time. This could mean two weeks to complete an adult sweater. Please remember, though, most times you will only need to make a size small, depending on the size of the model for the project.

You’ll need to stay on task since there’s such a short window. I like to plan out what I need to accomplish each day. If I can get more than that done, great, but I know my daily minimum. This helps keep me from feeling overwhelmed at the end of the project.

Remember you must include the time it takes to finish the project. This includes joining, weaving in ends, and blocking. Blocking can take some time if the item needs to be wet-blocked and dried.

You will also need to be able to communicate EXTREMELY well. 

Throughout the project, you should contact the designer in whichever method they prefer. I find it best to update them on my status so they know how things are going. Should I find something in the pattern that doesn’t make sense I always reach out immediately to get confirmation before continuing.

DON’T ask for an extension unless ABSOLUTELY necessary. If the designer is the cause of the delay, they should offer you an extension. You may not be asked to complete another project if you can’t meet the deadlines.

Remember that these deadlines are typically orchestrated by the magazine, publisher, or yarn company that the designer is working with. In most cases, but not all, the designer does not typically select deadlines.

Contractor Or Tester?

Becoming a contractor for a designer is not like becoming a tester. When you are a contractor, you will need to have all of the hooks that are used in the project, but the designer will send you the pattern and the yarn. Designers typically also pay for the shipping of the finished project to wherever they need it to go.

When you are a tester, you must purchase the yarn you would like to use for the project. With testing, most designers will require that you test a pattern every few months. 

When you are a contractor, there are times when you will have a lot of work and others where it will be months before there is another project.

Be patient with getting contractor work. Designers can’t afford to have samples made for every design that they do. Some designers thrive on making the sample themselves, and others prefer to write the pattern and have someone else make it so they can work on dreaming up their next project.

Other Things to Note…

Most designers will expect that you live in a smoke-free home. They don’t want the sample to smell of smoke when it is being sent off to a magazine or if they are publishing a book. Sometimes, the project will go directly to the magazine or publisher for photos rather than going back to the designer one last time.

Designers may ask you if you have pets. This is not always a deal breaker, but they may be interested to know what types of pets you have and how many. Designers may use this information in deciding which projects to send to you. If you have dogs, sending you a project requiring dark-colored yarn might not be best.

Prepare to be on a one-strike policy. If you miss a deadline or have poor quality work, you may not be asked to work for that designer again. 

Include the time to finish the project in your estimates. You don’t want to hand over a project that is not finished correctly. 

Make sure you read my final note!

Final Note on Being a Knit or Crochet Contractor

The item that you make not only reflects you and your skills but also the designer you are working for. Designers work very hard to make a living, producing new patterns to keep everyone excited. 

When they trust you to make a sample for them, they trust that you will put in the same time and energy, and LOVE that they would if they could make it themselves. 

You get one chance to impress. Seize it!

Want Another Opinion?:

Head over to the CGOA website to read their post from 2014 about “a day in the life of a contract crocheter“.

Also on the Blog:

  • Crochet Pom Pom Border Photo Tutorial
  • Fringed Eyelet Scarf Free Pattern and Video Tutorial

Filed Under: Crochet, Knitting, Tips, Tricks, Techniques for Knitting and Crochet

Textured Knit Mosaic Slip Stitches-Slipped Stripes Scarf

August 8, 2023 By admin Leave a Comment

Patterns using knit mosaic slip stitches are a great way to add texture to your project without knowing complicated stitch patterns. If you haven’t worked slipped stitches in knitting to create a pattern and texture, this is a great pattern to start with. This interesting stripe pattern will keep you pleasantly occupied.

Video Tutorial with Marly Bird-How to Knit the Slipped Stripes Scarf - knit mosaic slip stitches.
[Read more…]

Filed Under: Free Patterns, Knitting, Pattern, YouTube Video Tutorial

67 FREE Poncho Patterns To Knit Or Crochet + Capes

May 22, 2023 By admin 1 Comment

Get ready for an exhilarating journey into the realm of free knit and crochet poncho patterns, where a treasure trove of free patterns awaits! Whether you’re a seasoned crafter or just starting out, this guide is a must-read!

We’ve curated over 67+ amazing patterns that cater to all skill levels, ensuring there’s something for everyone. From classic designs to trendy variations, these free poncho patterns will ignite your creativity and keep you hooked.

So, don’t miss out! Dive in and discover the endless possibilities that await you on this exciting stitching adventure. Get ready to transform yarn into stunning ponchos that will make heads turn!

All of these FREE geometric patterns are from Yarnspirations. Check out Yarnspirations.com for even more free crochet and knitting patterns!

Cozy Knit Poncho Free Patterns - Easy Crochet Poncho Free patterns - Collage of patterns linked in blog post - Marly Bird
Read more: 67 FREE Poncho Patterns To Knit Or Crochet + Capes

Ponchos are great for Beginner Knitters and Beginner Crocheter

For novice crocheters and new knitters, crafting a poncho is an ideal project. The patterns usually feature uncomplicated stitches, and the construction is comparatively effortless.

As opposed to conventional fitted sweaters, ponchos necessitate less shaping, fewer pieces, and minimal seaming. Moreover, their loose and fluid nature makes it easy to personalize their length and width, and small variations in gauge are acceptable.

Therefore, if you can knit or crochet a square or rectangle, have a basic knowledge of crochet stitches, and can sew simple seams, you’ll find several easy-to-follow crochet poncho patterns in this compilation.

Level Up Your Crafting Skills with Knit and Crochet Poncho Patterns

As an experienced crafter who follows Marly Bird, you’re always seeking new opportunities to expand your knitting or crochet skills and embrace different techniques. As a seasoned knitter or an expert crocheter, the allure of a project that offers creativity and versatility without excessive shaping is undeniable. That’s where poncho patterns come in, offering you the perfect canvas to showcase your expertise and take your crafting to the next level.

Imagine working on the most elaborate cable stitch pattern in a generous-sized fabric, with the freedom to customize it according to your preferences. With a well-designed poncho pattern, you can delve into intricate stitch work, combining textures, colors, and techniques that truly showcase your craftsmanship. The beauty of a poncho lies in its versatility – it’s not just an accessory; it’s a statement piece that reflects your unique style and skills.

Simple Shapes For More Complex Stitch Choices

You’ll find an extensive collection of knit and crochet poncho patterns curated specifically for experienced crafters like yourself in our list. These patterns cater to your desire for more complex and challenging projects while still providing clear instructions and guidance along the way. From stunning cable designs to intricate lacework, you’ll discover a wide range of options to ignite your creativity and elevate your craftsmanship.

The benefit of working on a poncho pattern is not only the opportunity to explore new techniques but also the satisfaction of creating a truly remarkable garment. The resulting poncho will not only showcase your skills but also become a cherished addition to your wardrobe, garnering compliments and admiration wherever you go.

So, take the plunge and dive into the world of knit and crochet poncho patterns. Let your creativity flow and your skills shine as you embark on these captivating projects. It’s time to level up your crafting skills and create stunning ponchos that reflect your unique style and expertise.


6 Free Ponchos and Capes by Marly Bird

Marly has designed many ponchos and capes! Make a poncho with a planned pooling accent, make the neckline that works best for you on a poncho, or wear a little cape as the perfect accent over a dress.

  1. Planned Pooling Argyle Poncho
  2. Marly’s Perfect Crew Neck Poncho
  3. Marly’s Perfect Simple Cowl Poncho
  4. Marly’s Turtleneck Perfect Poncho
  5. Marly’s Perfect Dramatic Cowl Poncho
  6. Catskills Cape

9 Free Poncho Patterns to Knit or Crochet for Toddlers and Kids

Ponchos, with or without hoods, are a fantastic option for toddlers and kids when it’s not too cold. They’re easier to get on and off than coats are, but add the extra layer of warmth that little ones may need. These crochet and knit versions include stylish options and two that look like bears!

  1. Girls Crochet Poncho
  2. Bear Cub Poncho
  3. Sweet Baby Poncho
  4. Crochet Petal Poncho
  5. Toddler’s Perfect Poncho
  6. Simple Crochet Baby Poncho
  7. Teddy Bear Crochet Poncho
  8. Cozy Kiddo Poncho
  9. Reach for the Rainbow Knit Poncho

6 Free Poncho Pattern Sets

Sometimes ponchos come in sets! Whether for parent and child, child and dolly, or just knit and crochet versions of the same idea, you can make coordinating ponchos easily with these patterns.

  1. Poncho for You and Me
  2. Poncho Set
  3. Mom and Me Crochet Ponchos
  4. Just Me and Mom Ponchos
  5. Game Day Ready Knit Poncho and Sporty Crochet Poncho
  6. Lace Panel Crochet Poncho and Lace Panel Knit Poncho

5 Capes

Capes add warmth and interest to any outfit! Crochet or knit these capes to stun anyone who sees you. They’re ideal if you have trouble putting on a jacket or sweater but still want another layer.

  1. Asymmetrical Crochet Cape
  2. Cozy Cowl Cape
  3. Just Enough Cape
  4. Big Chocolate Cape
  5. Chevron Cape

17 Free Poncho Patterns to Knit or Crochet with Collars

Ponchos with collars let you skip the scarf, as your neck stays cozy with the collar from the poncho. Make it easier to run out of the door by having an all-in-one piece. Crochet or knit your new favorite piece today!

  1. Sand and Ocean Crochet Poncho
  2. Reverse Fair Isle Knit Poncho
  3. Hi-Low Crochet Poncho
  4. Aran Waves Poncho  
  5. Asymmetrical Striped Poncho
  6. Knit Wrapover Swancho
  7. Cable and Bobble Poncho  
  8. Roll Neck Poncho
  9. Transitions Cabled Poncho  
  10. Perfectly Panache Chic Poncho  
  11. Garter Lace Knit Poncho  
  12. Alize EZ Circular Poncho
  13. Cabled Crochet Poncho  
  14. Cozy Adult Turtleneck Crochet Poncho  
  15. Napa Rib Collar Poncho  
  16. Cozy Up Knit Poncho  
  17. Blanket Poncho and Bag  
Lace Panel Knit Poncho by Salena Baca - Free Knit Poncho Pattern from Yarnspirations - part of the collection of free knit ponchos on Marly Bird website - poncho is made in unforgettable yarn in purples, pinks and blues

24 Free Poncho Patterns to Knit or Crochet without Collars

Ponchos without collars are suitable for more seasons and more outfits. Show off your necklace or wear your favorite scarf along with your poncho. Knit or crochet a new piece of fashion now.

  1. Cool Crochet Poncho
  2. Plaid Blanket Crochet Poncho  
  3. 60s Squares Poncho
  4. Striped V-Neck Poncho  
  5. Granny Poncho  
  6. Canyon Ridge Fringed Poncho  
  7. Easy Rustic Stripes Poncho
  8. Fair Isle Poncho and Arm Warmers  
  9. Faux Fair Isle Knit Poncho  
  10. Valle Poncho  
  11. Perfect Patterned Poncho
  12. Tunisian Lace Poncho
  13. Crochet Poncho
  14. Let’s Party Poncho
  15. Poncho
  16. Fade to Grey Knit Poncho
  17. Serena Poncho  
  18. Reversible Ribbed Knit Poncho  
  19. Perfect Poncho  
  20. Mountain Breeze Poncho  
  21. Dubonnet Poncho  
  22. Bargello Knit Poncho  
  23. Fire and Ice Poncho  
  24. Cozy Shoulders Poncho  
Crochet and knit ponchos and capes - Marly Bird

A Few More Patterns for Knitters, Crocheters, & Tunisian Crochet

  1. Red Heart Lace Panel Knit Poncho << includes video tutorial >>
  2. Bernat Garter Lace Knit Poncho
  3. Tunisian Lace Poncho
  4. Crochet Swancho by Marly Bird << includes video tutorials >>
  5. Curvy Crochet Cowl Pullover Poncho/Swancho
  6. Sycamore Knit Ruana Pattern << free on blog or purchase ad-free pdf >>
  7. Check-Please Knit Ruana Pattern << includes video tutorials >>
crochet swancho pattern -free crochet pattern - Marly Bird

Also on the Blog

  • Knit Video Tutorial-Knit Beginner Lace Panel Poncho
  • Crochet Video Tutorial-The Perfectly Panache Crochet Poncho
  • Beginner Crochet Poncho

Filed Under: Crochet, Free Patterns, Knitting, Round Ups, Uncategorized

Free Pattern Granny Square Pucker Purse

May 21, 2023 By admin Leave a Comment

Ready to add a twist to your crochet game? Look no further than the Free Pattern Granny Square Pucker Purse, a Free Crochet Bag Pattern! With its vibrant colors and eye-catching design, this bag is sure to turn heads.

And the best part? Even if you’re new to crocheting, you’ll have no trouble whipping up this beauty.

A granny square crochet bag - free granny square bag pattern - Marly Bird

The secret to this purse’s unique texture? Long double crochet stitches worked into the row below. Such a brilliant way to have colors meld from one row into the next.

Crochet Texture…

For even more texture I joined or seamed the squares together on the public side of the work. Therefore, the seams are not hidden but part of the overall look of the purse. This makes the purse very look and feel great!

Finish off this purse with a fabric lining, plastic canvas, and some great handles. You’ll have a purse that’s as functional as it is fabulous. Best of all, you can find a free crochet purse pattern below. Trust us, you’ll be the envy of all your friends with your new granny square bag!

Granny Square motifs joined together to make colorful 4 motif panels for the Pucker Purse by Marly Bird - free Crochet pattern
Read more: Free Pattern Granny Square Pucker Purse

A Vintage Throwback: The Granny Square Pucker Purse

In the world of crochet, some patterns hold a special place in our hearts. Evoking memories of cherished moments and reminding us of the loved ones who first introduced us to this wonderful craft. Today, we dive into the past as we explore one of Marly Bird’s earliest patterns: the Granny Square Pucker Purse. With its captivating texture and a touch of nostalgia, this pattern pays homage to the hand-me-down scrap granny square blankets that adorned our lives. It’s like the iconic blanket on the back of Roseanne’s couch.

There’s something magical about revisiting the classics. The free pattern Granny Square Pucker Purse is one that Marly Bird created years ago. It reflects her deep connection to crochet traditions passed down through generations. It harkens back to a time when handmade treasures held a special place in our homes and hearts.

Crochet Heirlooms

Drawing inspiration from her Auntie’s cherished heirlooms, Marly recalls the vibrant scrap granny square blankets from childhood. These beautifully mismatched creations were crafted with love and care, pieced from leftover yarns, each square a story in itself. As Marly embarked on her crochet journey, those cherished blankets became her source of inspiration. They guided her to create something reminiscent of their undeniable charm.

Free Granny Square Bag Pattern with Texture that Tells a Tale

By adding a twist to the classic granny stitch pattern, Marly infuses this purse with an abundance of texture. The result is a visually captivating accessory that instantly grabs attention and sparks crochet heritage conversations.

As your hands work their magic, you’ll rediscover the joy of watching the granny squares come to life. Each color round overlaps with the next, forming a stunning mosaic of colors and stitches. The long double crochet adds depth and dimension, mirroring the warmth and character of the blankets from yesteryears.

Old Granny Square with A Modern Twist

The free pattern Granny Square Pucker Purse brings back nostalgic memories and captures the spirit of contemporary crochet fashion. Marly Bird’s design seamlessly blends old and new, allowing you to carry a piece of history while staying on-trend.

With its compact size and versatile handle, this purse is perfect for today’s busy lifestyles. Use it while running errands, or heading out for a night on the town. If you simply want a unique accessory to express your style, the Granny Square Pucker Purse fits the bill.

More Than Just A Bag…

You know, the Granny Square Pucker Purse is more than just a free crochet granny square bag pattern. It’s a journey back in time. It’s a tribute to the hand-me-down scrap granny square blankets that shaped Marly Bird’s crochet story. Through her design, Marly captures the essence of nostalgia and infuses it with a contemporary twist.

So grab your yarn and crochet hook! Let’s embark on this delightful adventure combining history, texture, and the timeless beauty of the granny square.

Ready to make your own Granny Square Bag?


Materials

This Yarn has been discontinued: Caron, “Simply Soft Brites” (100% acrylic, 315 yds/170g) But there are many alternative colors in the general Caron Simply Soft Yarns.

  • Color A One 6 oz skein Rubine Red
  • Color B One 6 oz skein Mango
  • Color C One 6 oz skein Lemonade
  • Color D One 6 oz skein Lime Light
  • Color E One 6 oz skein Blue Mint
  • Color F One 6 oz skein Purple
  • Color G One 6 oz skein Black

Gauge

Individual Granny Square Motif Square: 5.5″ x 5.5″ [14 cm x 14 cm] in Long Double Crochet Granny Stitch Motif

Set of 4 Granny Squares Panel: 11″ x 11″ [28 cm x 28 cm]

Sides and Bottom: 2.6″ wide x 33″ long [6.5 cm by 84 cm] in single crochet stitch

Hook

Size H-8 (5mm) crochet hook or size to obtain gauge

Notions

One pair of purse handles, one yard of cotton fabric, thread to match fabric, sewing needle, two 18-inch plastic canvas, tapestry needle


Crochet Abbreviations

  • ch – chain
  • dc – double crochet
  • Ldc- long double crochet
  • sc – single crochet,
  • sl st – slip stitch
  • st(s) – stitch(es)
  • ( ) – information in parenthesis is worked in one stitch
  • [ ] – information in brackets is worked the number of times after the bracket
  • * – indicates the start of a repeat in a pattern round or row

Special Stitches or Techniques (see also crochet definitions for more help)

⭐️ Long Double Crochet (LDC): YO once, insert hook in stitch or space or post indicated, YO and pull up a loop. Bring your hook (stretching the loop you just pulled through) back up to the row you started. YO and pull through 2 loops, YO pull through 2 loops. Just as you would a regular double crochet (DC).

⭐️ Stacked Double Crochet (optional to use in place of the ch 3 at start of round): (Do not ch 1 prior to making the first sc) Sc in first stitch, insert hook in between the two legs of the base of the sc, yarn over and pull up a loop, yarn over and draw through 2 loops on hook. >> Click to watch the video tutorial <<

⭐️ Seaming Crochet >> Click to watch video tutorial <<


Notes

  • Mix and match colors in any sequence you wish for the bag >> Get Inspired by Frida <<
  • Gauge isn’t super important. As long as each square is the same size and both panels are the same size the bag instructions will work.
  • Highly recommended that you weave or bury ends in as you go >> Click to see video tutorial <<
  • Granny Square motifs are made individually then seamed together in groups of 4 to create 2 panels
  • Two panels are joined together with a single crochet strip of fabric which forms the sides and base of the purse.
  • Fabric lining is not a must but it does add some stability to the hand-crocheted yarn bag.
  • Using interfacing instead of the plastic canvas is also possible. At the time of making this bag, Marly did not know of the existence of this magical stuff!

Color Sequence for Free Pattern Granny Square Bag

Make a total of 8 squares. Two each of the following:

  1. E,F,D,E,F,G
  2. B,C,A,B,C,G
  3. F,A,B,F,A,G
  4. D,E,C,D,E,G

Block Placement Diagram for Free Granny Square Bag

Block placement diagram for purse panel. Marly Bird

Free Pattern Granny Square Bag | Granny Square Pucker Purse

Long Double Crochet Granny Stitch Motif (make 8 total in various color sequences)

With first color Please refer to the color sequence

Set-up Round: Ch 4 and join to first ch with a slip stitch to form a ring.

Round 1: Ch 3 (counts as first double crochet now and throughout), 2 dc in ring, ch 1, [3 dc, ch 1] three times in ring. Join with a slip stitch to the top of the first ch-3. Fasten off.

With second color

Round 2: join yarn with a slip stitch to any ch-1 space, (ch 3, 2 dc, 1 Ldc in ring below, 3 dc, ch 1) in same ch-1 space, [(3 dc, 1 Ldc in ring below, 3 dc, ch 1) in next ch-1 space] 3 times, join with a SL ST to top of first ch-3. Fasten off.

With third color

Round 3: join yarn with a slip stitch to any Ldc stitch, (ch 3, 2 dc, ch 1, 3 dc, ch 1) in same Ldc stitch, * skip next 3 dc, (1 dc, 1 Ldc around the post of the center dc of the 3 dc set of round 1, 1 dc, ch 1) in next ch-1 space, (3 dc, ch 1, 3 dc, ch 1) in next Ldc; repeat from * two times more, skip next 3 dc, (1 dc 1 Ldc around the post of the center dc of the 3 dc set of round 1, 1 dc, ch 1) in next ch-1 space, join with a slip stitch to top of first ch-3. Fasten off.

With first color

Round 4: join with a slip stitch to any corner ch-1 space, (ch 3, 2 dc, Ldc around post of Ldc on round 2, 3 dc, ch 1) in same ch-1 space, * skip next 3 dc, [(3 dc, ch 1) in next ch-1 space] two times, (3 dc, 1 Ldc around post of LDC on round 2, 3 dc, ch 1) in next corner ch-1 space; repeat from * two times more, skip next 3 dc, [(3 dc, ch 1) in next ch-1 space] two times, join with a slip stitch to the top of first ch-3. Fasten off.

With second color

Round 5: join yarn with a slip stitch to any Ldc, (ch 3, 2 dc, ch 1, 3 dc, ch 1) in same Ldc stitch, * skip next 3 dc, (3 dc, ch 1) in next ch-1 space, (1 dc, Ldc around post of Ldc of round 3, 1 dc, ch 1) in next ch-1 space, skip next 3 dc, (3 dc, ch 1) in ch-1 space, (3 dc, ch 1, 3 dc, ch 1) in next LDC stitch; repeat from * two times more, skip next 3 dc, (3 dc, ch 1) in ch-1 space, (1 dc, Ldc around post of Ldc of round 3, 1 dc, ch 1) in next ch 1 space, skip next 3 dc, (3 dc, ch 1) in ch-1 space, join with a slip stitch to the top of first ch-3. Fasten off.

With main color (black in the sample)

Round 6: join yarn with a slip stitch to any corner ch-1 space, (ch 3, 2 dc, ch 1, 3 dc, ch 1) in same ch-1 space, * skip next 3 dc, [(3 dc, ch 1) in next ch-1 space] four times, (3 dc, ch 1, 3 dc, ch 1) in corner ch-1 space; repeat from * two times more, skip next 3 dc, [(3 dc, ch 1) in next ch-1 space] four times; join with a slip stitch to the top of first ch-3. Fasten off.

Granny Square motifs joined together to make colorful 4 motif panels for the Granny Square Pucker Purse by Marly Bird - free Crochet pattern

Sides and Bottom of the Granny Square Pucker Purse

The sides and bottom are worked in one long strip of SC. The amount of rows is dependent on your gauge. Make strip long enough to reach from top corner of one panel, down one side, along bottom, and up other side to other top corner of panel.

Set-up Row: Ch 11, sc in 2nd stitch from hook and in each stitch across, ch 1, turn — 10 sc.

Row 1: Sc in first sc and in each sc across, ch 1, turn.

Repeat row 1 until desired length. (Sample was approx. 33 inches)

First Finishing

Seaming the Granny Square Pucker Purse Panels

Make two panels of four granny squares each

Seam the granny square motifs into 4 motif panels. Instructions are as follows:

Hold two granny squares together with NON-PUBLIC sides together. Working through both loops, slip stitch join or seam the blocks together.

The suggested placement diagram for the blocks is listed at the top of this pattern after the color sequence.

❣️By seaming it up in this manner it WILL put your seams on the PUBLIC side of your purse. This is exactly what you want. This purse is meant to have a LOT of texture with the LDC and the seaming on the outside of the bag.

After the 4 motifs have been seamed together you now have a panel.

Make the second panel the same as the first.

Edging of Panels

Adding an edging to each panel will make for a better finish for the overall free granny square bag. Work the following instructions for each panel individually:

With main color yarn, join with a slip stitch into any corner of the panel, ch 1, * 3 sc in corner, sc evenly to next corner; repeat from * 3 time more, join with a slip stitch to first sc. Fasten off.

Second Finishing

Seam Panels to the Single Crochet Side Strip

When the panels are complete take the long strip you made for the sides and bottom and place the NON-PUBLIC side of both panel and the strip together.

Working with one panel at a time, match up the long edge of the strip to the side of the panel. Line up the strip with the center double crochet of the top corner and with the main color yarn. Join the long edge of the strip to the side edge of the panel with a slip stitch join (same as used to join the squares to form the panel).

Joining Tips…

As you join the single crochet side strip in place, don’t pull or over-stretch the fabric or it’ll bunch and pucker up. You want a nice, even join down the side of the panel, around the bottom of the panel, and up the opposite side ending at the center double crochet of the opposite top corner of the panel. Meaning, you are joining the strip to 3 sides of the panel leaving the top open.

Joining Panel 2 to the Gusset Strip

After joining one panel to the strip, take the other panel and line it up to the strip making sure that the sides of the granny squares are all lined up across it (you don’t want one square higher than another). Pin the pieces together at this point to make sure everything is where you want it to be before seaming.

Now that you have everything in place, let’s join the panels and complete the crochet portion of the bag. Begin by locating the center double crochet of the top corner on the second panel. From here, we’ll repeat the slip stitch joining to connect the second panel to the opposite long edge of the single crochet strip. This visible seam joining technique will create a beautiful crochet granny square bag, with an approximate base and side measurement of 2.5 inches.

Handle Suggestions

The crochet portion of the bag is finished, however you need a way to carry the bag. This is not a crochet clutch. You have a couple of options for the handle. You can hand stitch a handle directly to the bag as it is, or you can extend the single crochet side strip to make a longer cross-body purse strap. The choice is entirely up to you and your personal style.

Add A Lining?

As Marly created this crochet granny purse, she decided to add a fabric lining to give the bag a more polished look and add structure to help it stand. Now, Marly isn’t a seamstress by trade, but she gave it her best shot and documented the process with some helpful pictures. Perhaps you’d like to do the same and enhance your bag with a lining and insert?

Below, you’ll find detailed instructions to guide you through the process. Let’s take your crochet granny square purse to the next level!

Follow the instructions below:


How to add a Lining and Plastic Canvas and Handles to a Granny Square Crochet Bag

This is really the EXTRA finishing.

The Granny Square Pucker Purse wouldn’t be the GRANNY SQUARE PUCKER PURSE without the eye-catching lining! Take the time to do this little extra touch and your Granny Square Pucker Purse will be unforgettable!

Fabric lining, plastic canvas for shaping, and handles for a granny square crochet bag - Marly Bird

I wanted to make the bag sturdy enough to stand up on its own. Because a crochet bag all by itself can’t do this I added Plastic Canvas (see note about interfacing). It’s sealed on the inside of the bag between the lining and the granny squares.

Plastic canvas to give structure to a granny square pucker purse bag - free crochet pattern - marly bird

Lining Your Bag

The lining is just some fabric I got at my local fabric store. I thought it was really cool and made the inside of the bag pop. Even though it’s black the inside of the bag is not too dark because of the bright flowers on the fabric.

Lining…what I did…

  • For the lining, I just cut a piece of fabric 25″ long by 12.5 inches wide.
  • Pin the pieces together and stuff it inside your purse to see if it is a good fit. Adjust it if needed but it is okay to sew up the side seams. (I am trying to make this as easy as possible for those crocheters who don’t sew).
  • Again, put the lining inside the bag, fold the top edge of the fabric down just below the top inside edge of the bag, and use straight pins to hold the fabric in place (do not pin to the bag at this time).
  • Once everything is pinned in place, pull the lining out of the bag and sew the fold you just created. At this point, you can also add an interior pocket to the lining.
Fabric lining, plastic canvas for shaping, and handles - bag pattern - Marly Bird
Fabric lining, plastic canvas for shaping, and handles for crochet bag pattern - Marly Bird

Like Pockets?

❣️ Little Tip I had made one extra granny square and added it to the lining to use as a pocket. You could also use some contrasting fabric to make the pocket visually appealing. Just a thought.

  • At this point, you need to decide what kind of handles you want. Decide if you need to stitch them to the lining or the purse itself before stitching the lining in place. Or maybe you want the handles attached on the outside of the lining after it is stitched to the purse. LOTS of decisions 🙂 Have fun with it!
  • Mine are a pair of plastic handles I purchased at my local fabric store. I sewed them to the bag lining before stitching the lining to the panels and the side of the purse.
  • Put the plastic canvas in the purse (don’t forget to add it to the bottom and the sides). Then place the lining inside the bag and use a needle and thread to backstitch the lining to the purse.

Note: Don’t worry about doing anything more to the plastic canvas. It’ll stay in place with the lining and the purse.

Voila, you have completed the Granny Square Pucker Purse!

a granny square crochet bag - free granny square bag pattern - Marly Bird

I really hope you enjoy making the Free Pattern Granny Square Pucker Purse.
Let know if you have any questions and be sure to show me pictures of your Granny Square Pucker Purse!

MorePatterns_ClickHere

Check out other patterns by Marly Bird

Filed Under: Crochet, Our Free Patterns, Pattern, Uncategorized

Make it Mine Shawl | Easy Knit Triangle Shawl

May 18, 2023 By admin 10 Comments

Are you a beginner knitter looking for an easy project to get your creative muscles moving? Look no further – the Make It Mine Shawl is here! Whether you’re ready to try out an easy knit triangle shawl or have been knitting for years and need something new and exciting, this pattern has all the necessary tools.

Not only does it provide clear instructions on how to create a beautiful knit masterpiece that will keep you warm all winter long, but its stitch-level versatility also allows customization so that every “Make it Mine Shawl” can be as unique as its maker. So if you’re ready to take on some classic yet modern colorful striped knitting, let’s get started!

Make it Mine Shawl on a mannequin - easy knit triangle pattern - free pattern - Marly Bird

About ‘Make It Mine’…

The Make it Mine Easy Knit Triangle Shawl is a FREE PATTERN that I designed while traveling to various knitting and crochet shows over several months. I would work on this knit shawl on the plane, in the taxi, during breaks, or even in the booth while selling yarn!

Marly Knitting in the Bijou Basin Ranch Booth at Yarn Fest 2015 - Marly Bird
knitting needles on a plane working on a free knit shawl pattern with a chartreuse color yarn and the project bag hanging from the lap table clip on the back of the plane seat - Marly Bird

Many of you would stop me and ask about the yarn, about the needles (I used Signature Needles while knitting this), and about the pattern. You would be discouraged when I said I hadn’t written the pattern yet but no worries. Now you can get the Make it Mine Knit Shawl pattern for FREE!

[Read more…]

Filed Under: BiCrafty Bootcamp Learn to Knit, Free Patterns, Knitting, Our Free Patterns, Pattern

Crochet Pineapple Stitch Shawl: Sidewalk

May 12, 2023 By admin 7 Comments

Are you intimidated by the crochet pineapple stitch? Fear not! Marly to the rescue! The pineapple stitch is a quintessential crochet stitch, as is the granny square. But the crochet pineapple stitch shawl can seem a bit intimidating if you’ve never done it before. There’s nothing to worry about – it’s just simple stitches arranged in a complex-looking way. I’ll explain more in a little bit…

Now, I have to say, one of the most fun parts of making the videos for Red Heart is being able to look through their MANY FREE PATTERNS. I get to choose the ones I like best (and those I know you’d love to learn to crochet too.) Yet, the hard part is choosing only a few designs instead of the whole library!

Such A Beautiful Design

The Sidewalk Shawl by Kimberley McAlindin is one of those fantastic pieces that will stop you in your tracks and make you say, “WHOA! I gotta make that!” There’s no wonder that it’s one of the top patterns at RedHeart.com. Check it out right here – STUNNING!

Don’t miss the other patterns I’ve found for you down below…

Sidewalk Shawl Crochet Pineapple Stitch Pattern - Free Crochet Pattern and video tutorial - Also, get the free stitch diagram for the pineapple stitch - Marly Bird
Read more: Crochet Pineapple Stitch Shawl: Sidewalk

Need a Crochet Pineapple Stitch Shawl Video?

I just KNEW you’d love this shawl, so I had to make a video to show you how to begin this stylish accessory.

Download the Free Sidewalk Shawl Pattern below, and I’ll give you tips and tricks on how to crochet pineapple stitch while making this gorgeous shawl. You’ll want to watch my in-depth video by Marly Bird about crocheting the Sidewalk Shawl in crochet pineapple stitch.

In this video, I show you exactly how to get started with this stitch pattern (that looks difficult but really isn’t), and I help you work all the way through Row 10 too. I’ll show you how to use stitch markers to your advantage to help you recognize the last stitch of your row. I’ll also explain which stitches you’re using (and why you’re using them) to help you better understand the shawls’ overall construction.

Better yet…I’ve had a chart made for this pattern that you can download – FREE. Download the chart below. Also, check out this post, where I even have a video explaining how to work from this chart! https://marlybird.com/how-to-read-sidewalk-shawl-crochet-chart/

SidewalkShawlChDownload

Learn to Read Crochet Stitch Diagrams from the MASTER

If you struggle to read a crochet chart, but it’s something you really want to learn, we’ve got you covered. Check out this video Robyn Chachula made for BiCrafty Champions, demonstrating how to read charts. Seriously – don’t miss it! You’ll learn SO much.

It’ll make reading charts such a breeze you might not want to go back to written instructions!

This is a Marly Bird exclusive video!

[Read more…]

Filed Under: Crochet, Free Patterns, Tips, Tricks, Techniques for Knitting and Crochet, Uncategorized, YouTube Video Tutorial

  • « Previous Page
  • 1
  • 2
  • 3
  • 4
  • 5
  • …
  • 151
  • Next Page »

Let's Be Social

Join the Marly's Minions Facebook group to share, ask questions, or chat about all of your yarn related crafts!

Join the group
Digital avatar of a woman with brown hair in a bun, glasses, and a black jacket, waving and saying "hi" with a word bubble above her hand in the website footer. -Marly Bird

Quick Links

The Pattern Shop

Our Free Patterns

Blog

Marly Bird House

Learn to Knit & Crochet

About

Giveaway Terms and Privacy Notice

Find Us Everywhere

Join the Newsletter

YouTube Channel

Marly's Minions FB Group

Etsy Store

Ravelry Store


AN ELITE CAFEMEDIA HOME/DIY PUBLISHER

Information from your device can be used to personalize your ad experience. Do not sell or share my personal information.

Privacy Policy   Terms   Copyright © 2025